Anglia105E
-
Posts
3,487 -
Joined
-
Last visited
Content Type
Profiles
Forums
Events
Gallery
Everything posted by Anglia105E
-
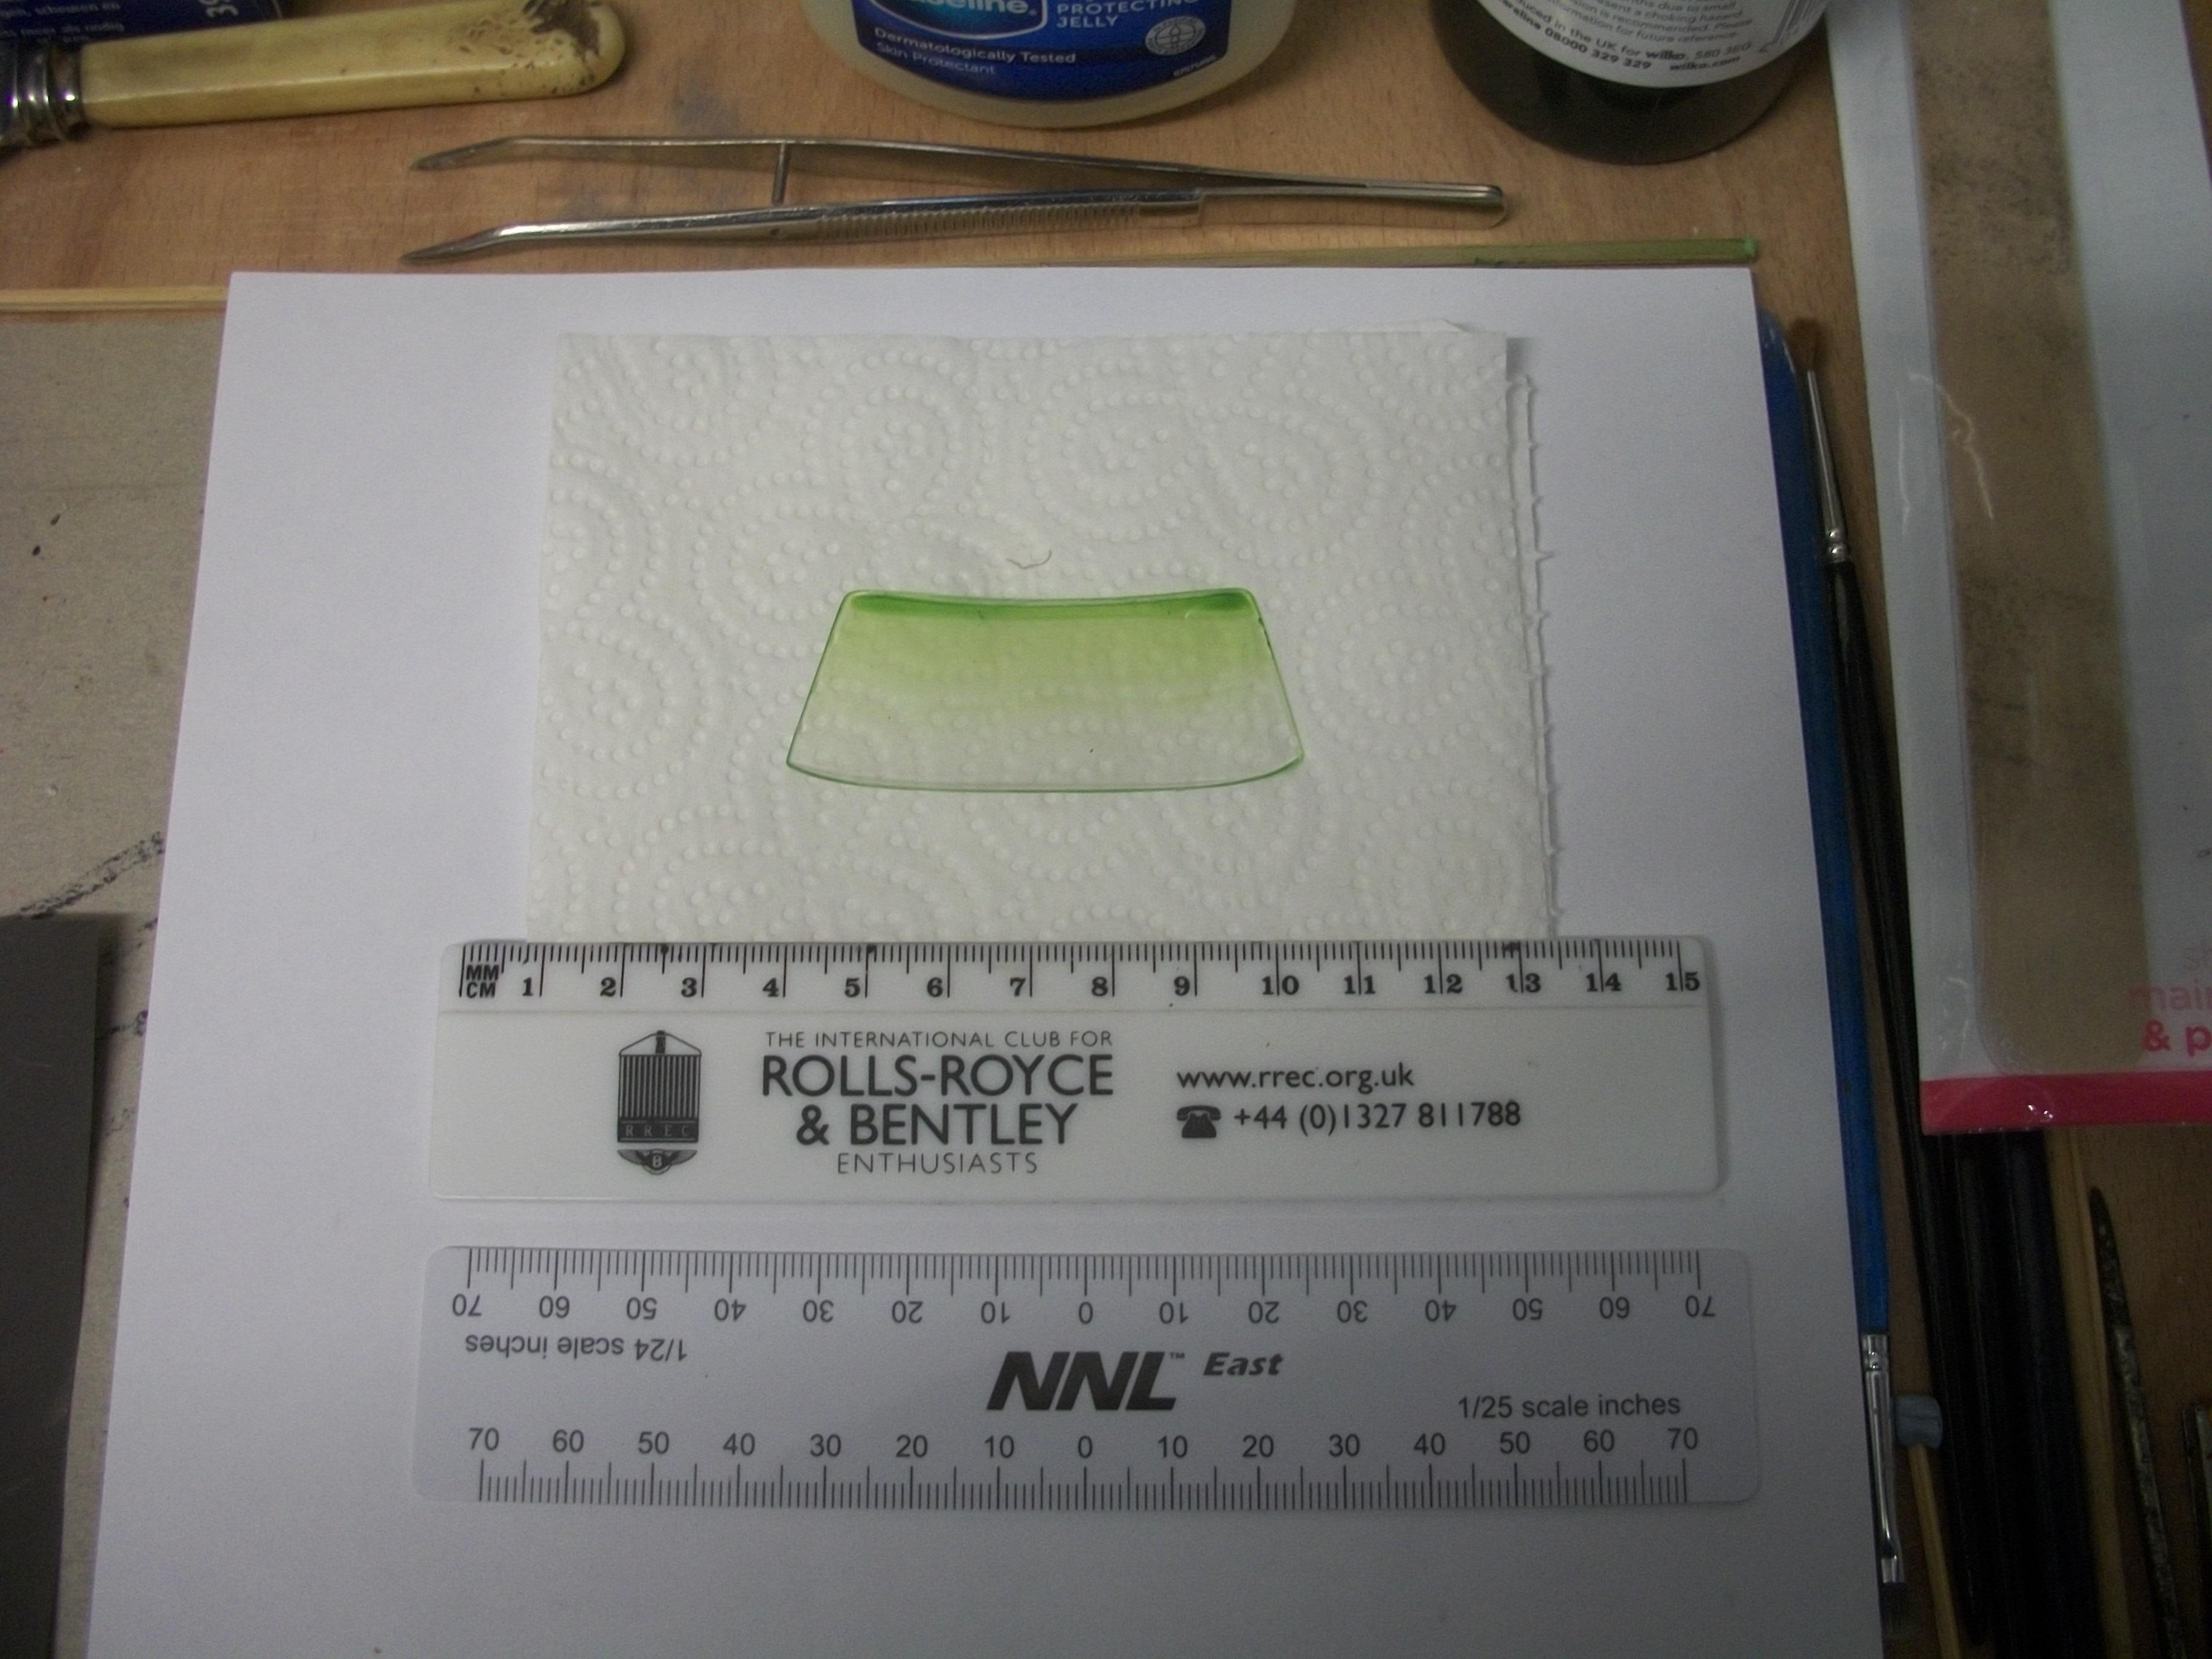
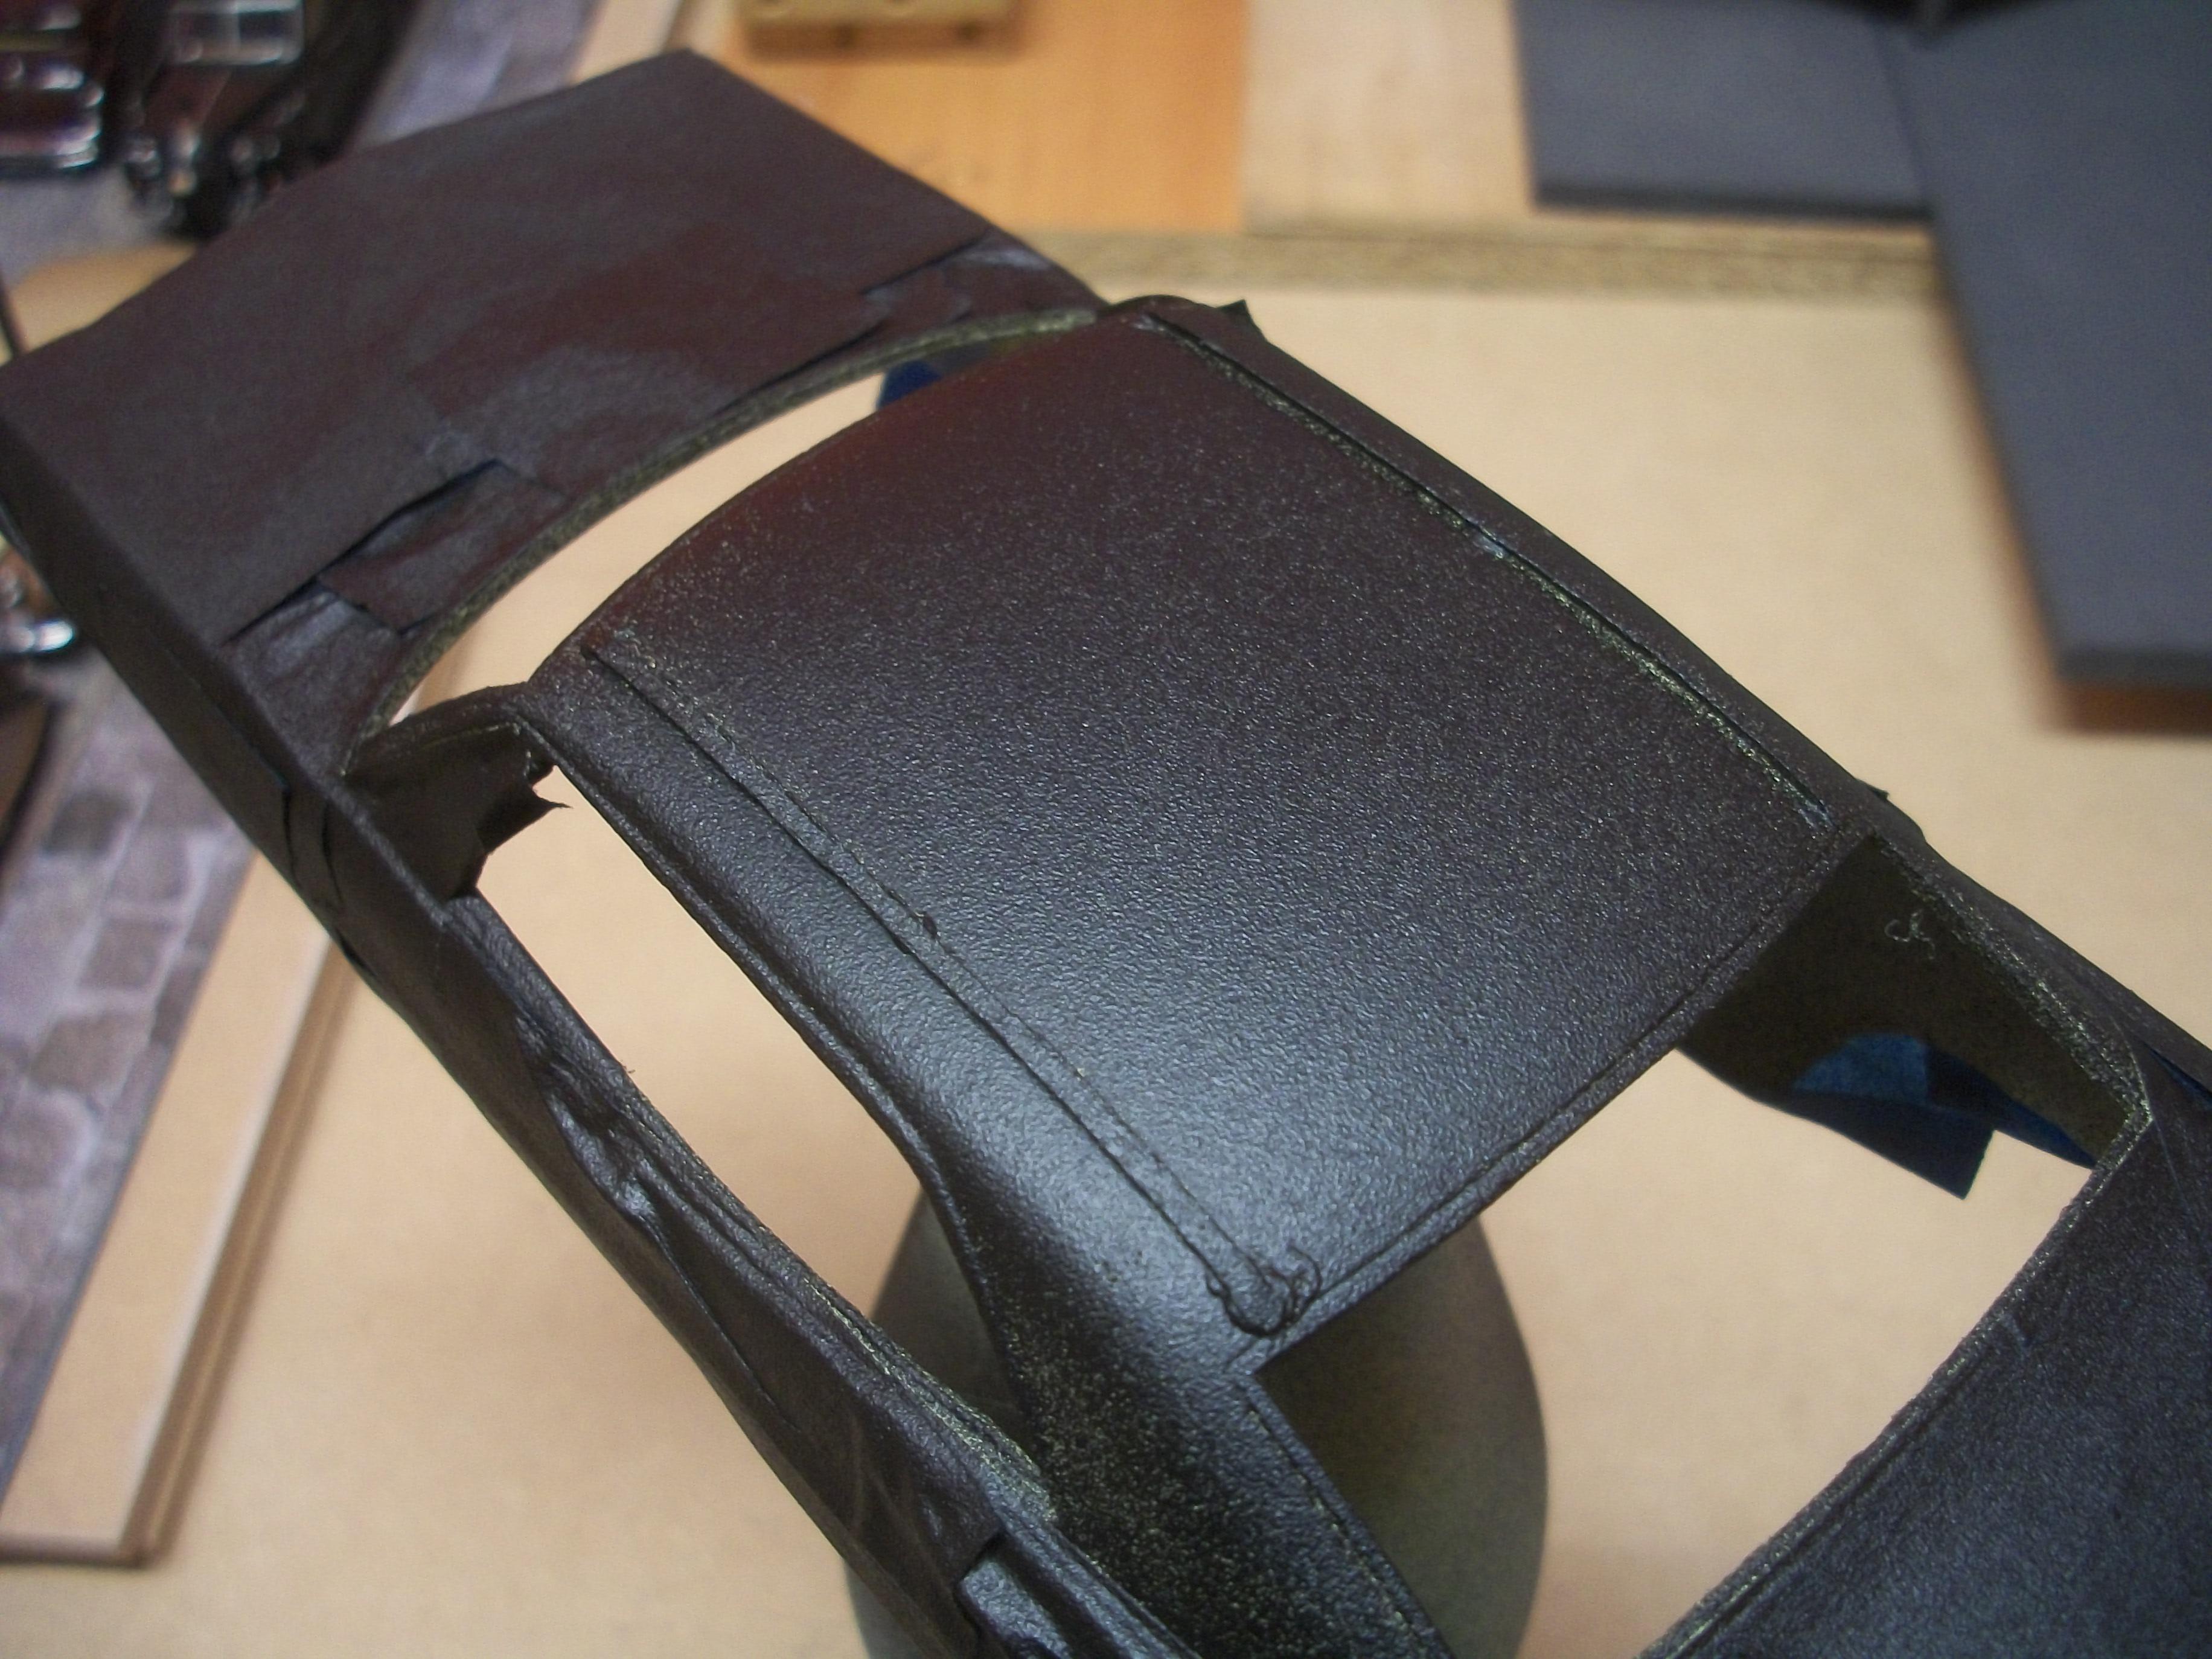
Thanks, Charlie..... I did try to get hold of a Hasegawa Graduated Windshield Tint in green, but there was only blue or smoke grey available on Ebay, so I decided to do it this way...... basically to place a card template at the top of the windshield ( upside down, so top of screen is at the bottom ) then airbrush the sap green acrylic over the edge of the card, moving the airbrush tip towards the centre of the windshield. This is only the first attempt, so I might do it again, not sure yet. The windshield was inclined at an angle, so the acrylic paint ran downwards and collected in a heavier green band along the edge. The vinyl roof is Halfords Rubberised Black enamel paint from rattle can, and then I have airbrushed Revell Aqua Color Mud Brown acrylic paint over the black..... here are some more up to date photos.... David

-
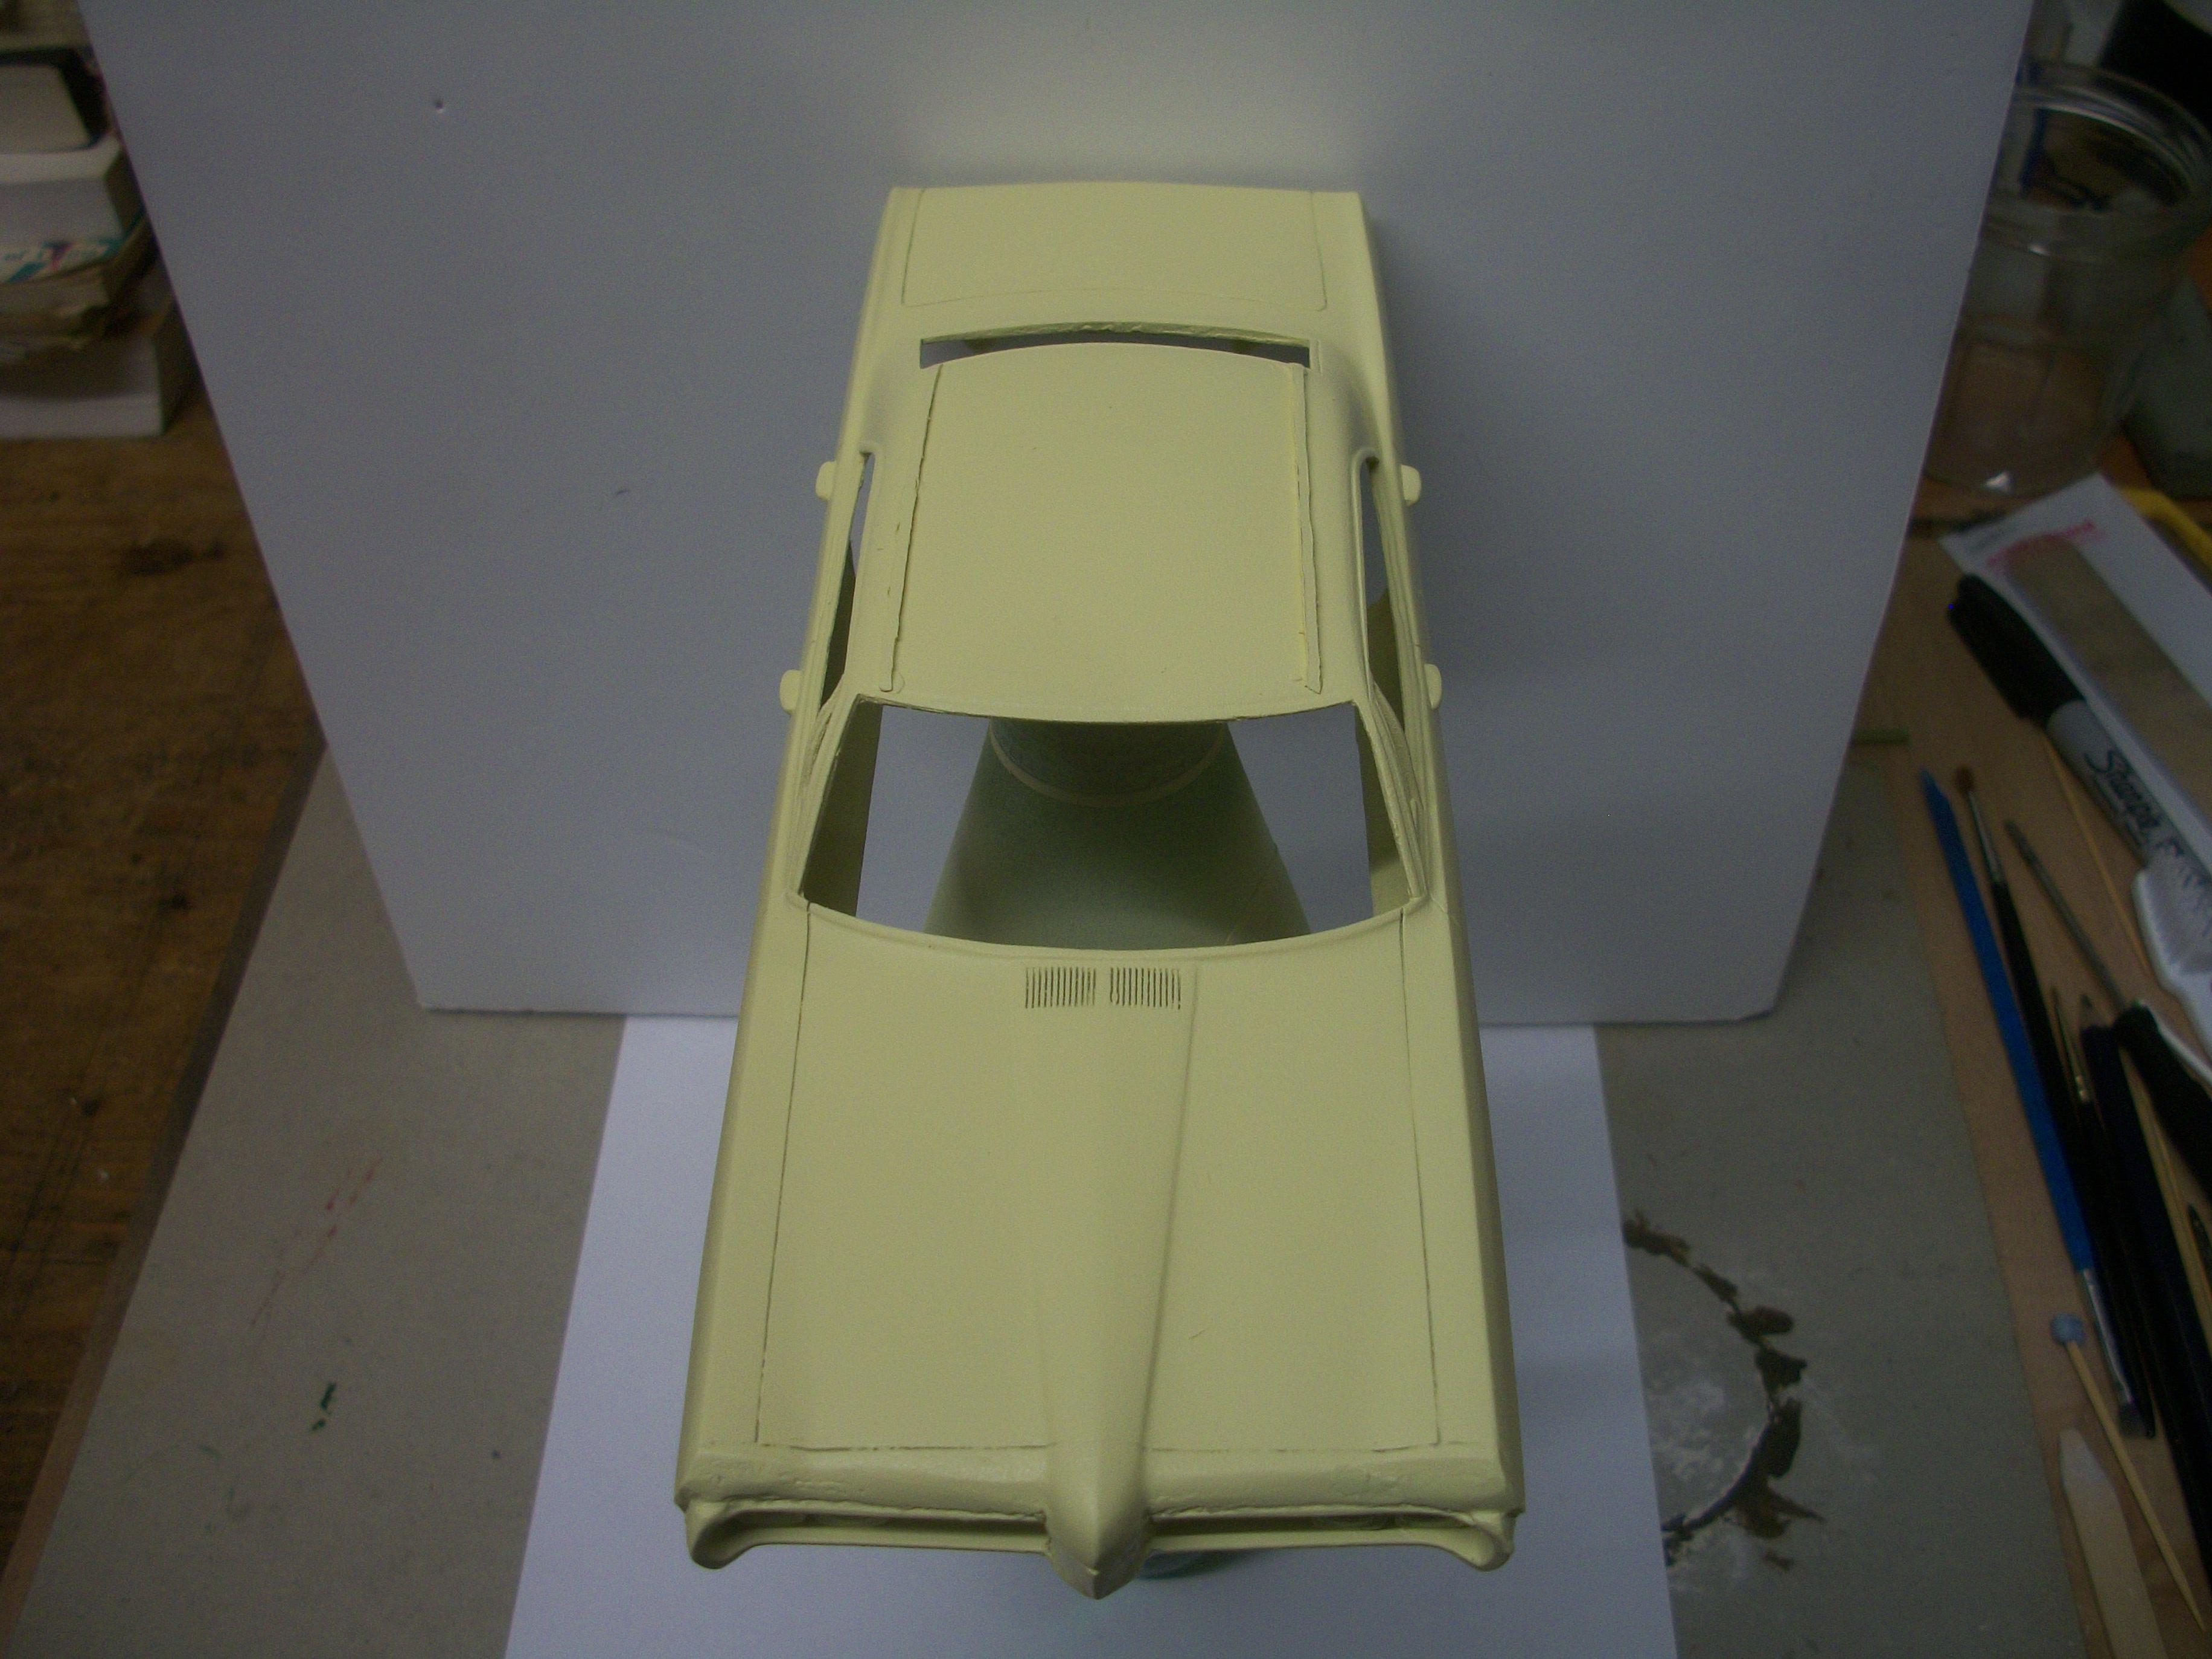
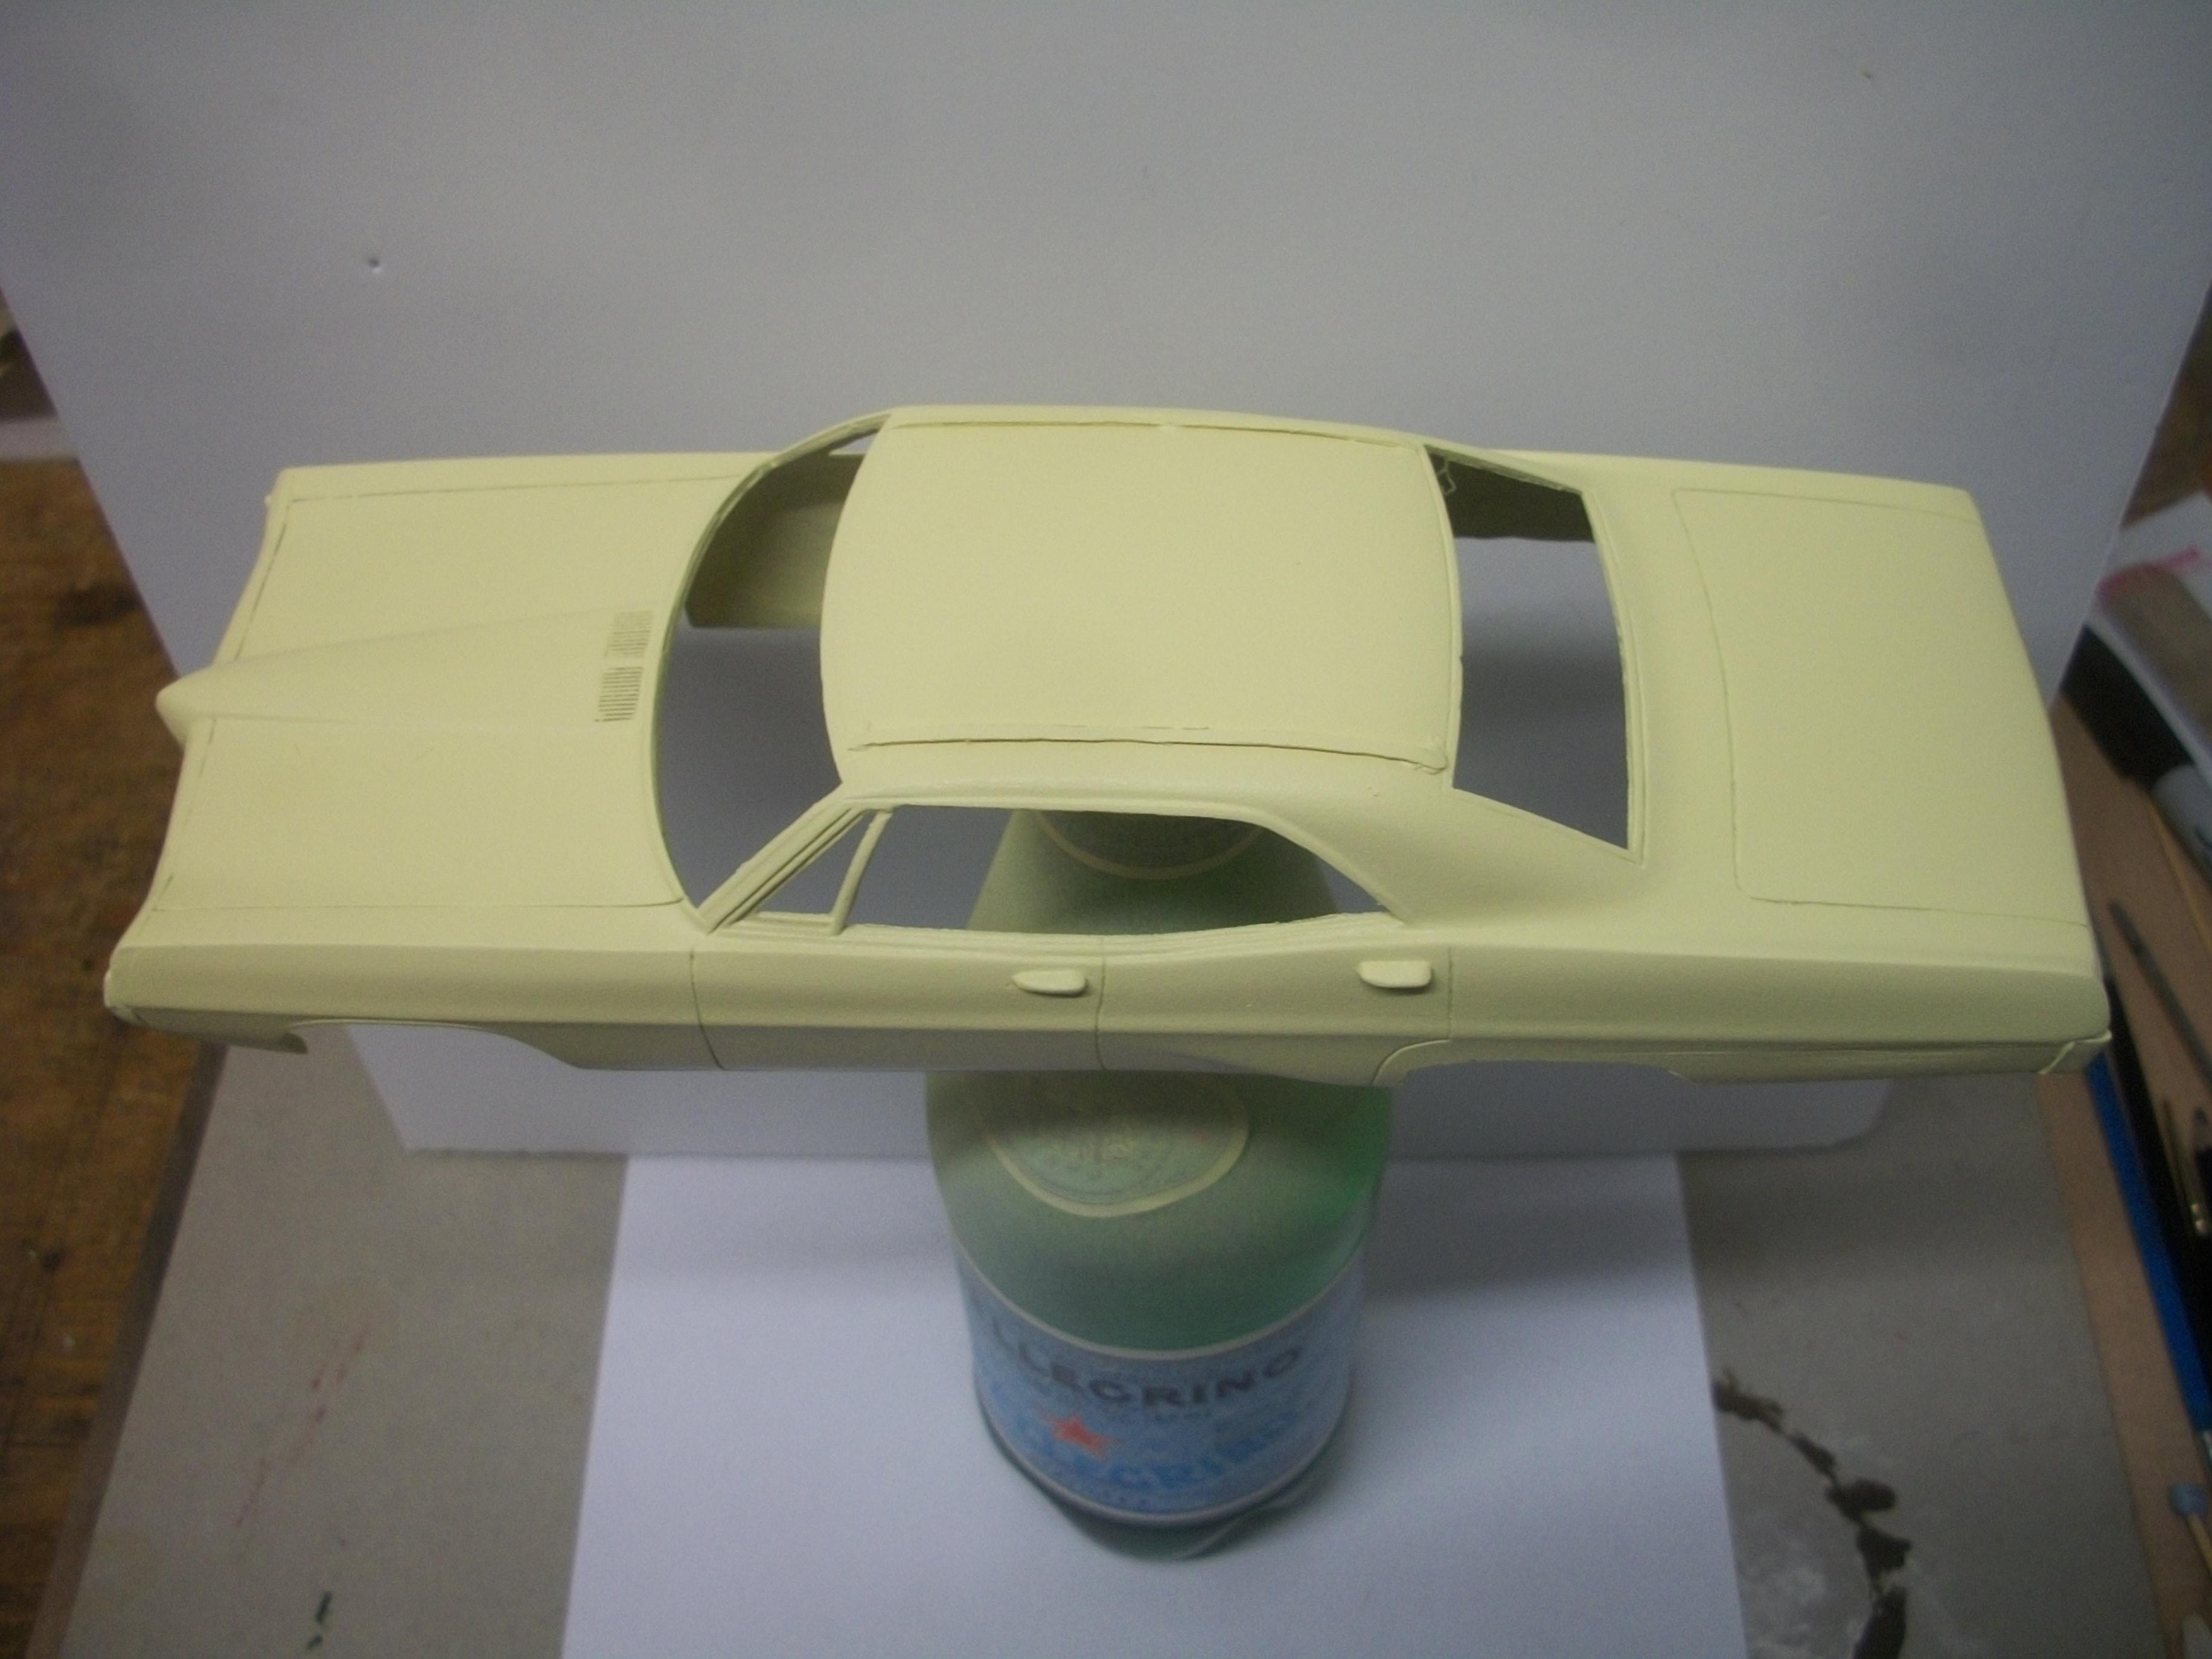
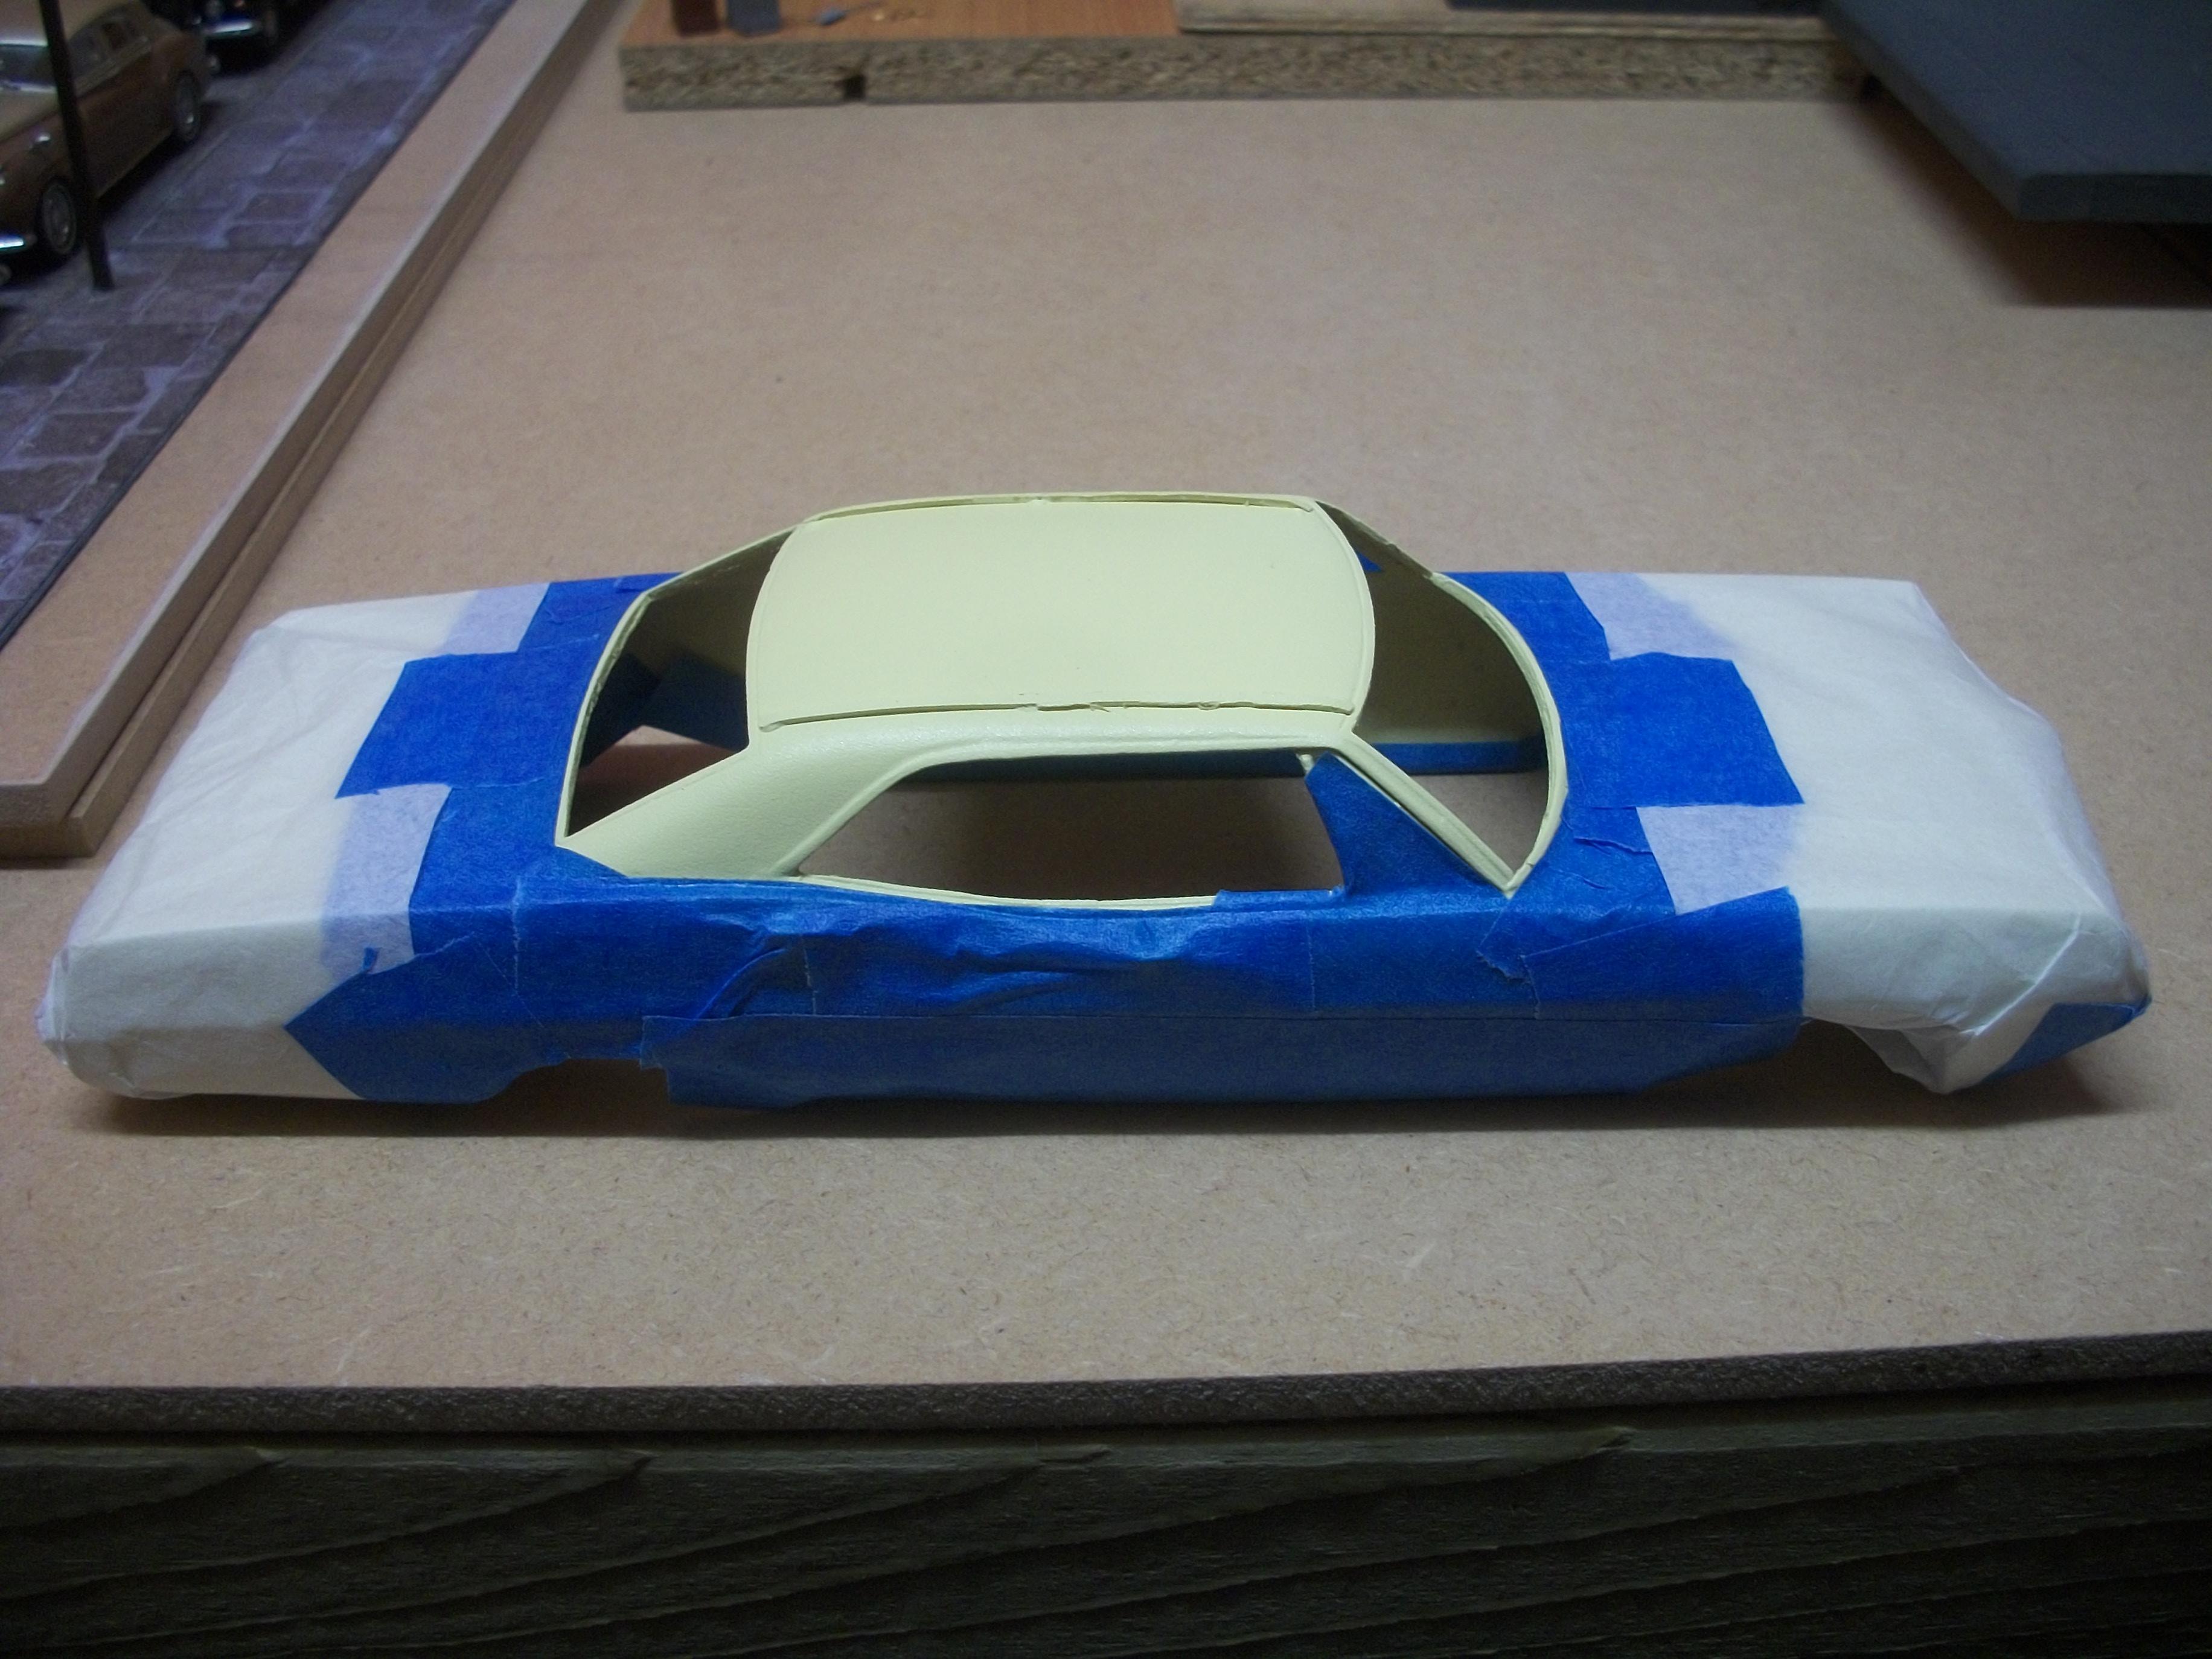
Here are a few further work in progress photos, showing the body of the Parisienne with four coats of Buick Cameo Cream paint applied. Also, there is my first attempt at creating a graduated green tinted windshield strip, using the airbrush and a card template, with Daler-Rowney Sap Green acrylic paint, which is thinned with tap water. This may need a second or third attempt! The entire body of the model car has been masked off with blue tape and tissue paper, before applying two coats of Halfords Rubberised Black enamel paint from rattle can. This is purely to lay down the textured surface, before applying several thin coats of Revell Aqua Color Mud Brown by airbrush, again thinned with tap water. This must be done carefully, because I don't want to lose the textured effect of the vinyl roof that I am trying to produce. I do need to achieve the correct brown colour, which is being applied over the black. David
-
 Ah.... a palette truck....... very useful detailed plan drawings, Pat. ( easy to scale down ) David
 -
Most realistic way of making autu glass??????????
Anglia105E replied to doorslammer68's topic in Tips, Tricks, and Tutorials
I agree with Tom's observation about the thickness of the resin body model cars, and one trick I learned when I started building the 1:24 Minicraft Rolls-Royce Silver Cloud cars, which was instead of mounting the kit supplied plastic glass INSIDE the body shell..... simply mount the thinner acetate sheet OUTSIDE the windscreen surround frame. This actually looks very realistic, rather than having the ' glass ' sunk into a deep hole as Tom described. David -
Oh yes...... that really works.... David
-
Most realistic way of making autu glass??????????
Anglia105E replied to doorslammer68's topic in Tips, Tricks, and Tutorials
I find that the clear acetate sheets that are to be found inside cake boxes can be very good, such as the good quality packaging from Marks & Spencer in England. Also, I have used 2 litre Coca Cola plastic bottles, that have a nice curve to them. There will be other MCM forum members coming along with better ideas, but those are my two suggestions. David -
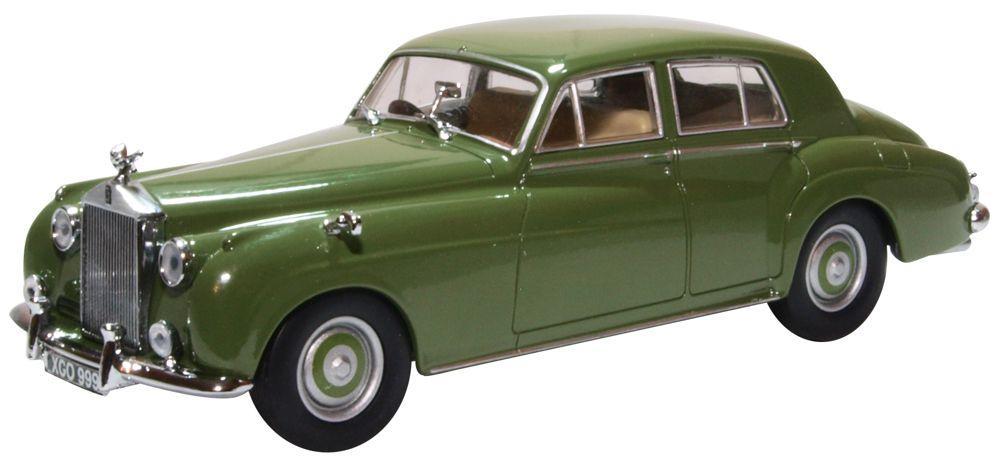
Placed an order for two Oxford Diecast Rolls-Royce Silver Cloud I models in 1:43 scale the other day, and today I ordered a Franklin Mint 1922 Rolls-Royce Phantom I, also in 1:43 scale..... the first two are direct from Oxford Diecast and the Franklin Mint was on Ebay. The Smoke Green Silver Cloud has only just been released, and it was the very last Silver Cloud I to be produced in 1959, registration number XGO 999, and the other Silver Cloud is all black....... 1922 Phantom I is blue, and these are not as easy to find as the larger 1:24 scale Phantom I cars. David
-
Perfect !...... Pat, you have matched the conversation to the scenario, to a tee...... the figures are really good by the way, and now it looks like a CATerpillar fork lift truck is about to join the shop's equipment. David
-
I totally understand your policy of building an actual car, Eric....... and I do try to follow the same principle. I am looking forward to seeing your progress with this 1930 Cord L-29, and also your paint colour choice! David
-
Thanks a lot, Bill......don't worry if you are busy, there's no rush......... here are my address details for you..... David Watson, Rain Cottage, 53 The Hill, Cromford, Matlock, Derbyshire DE4 3QR, - England, UK David
-
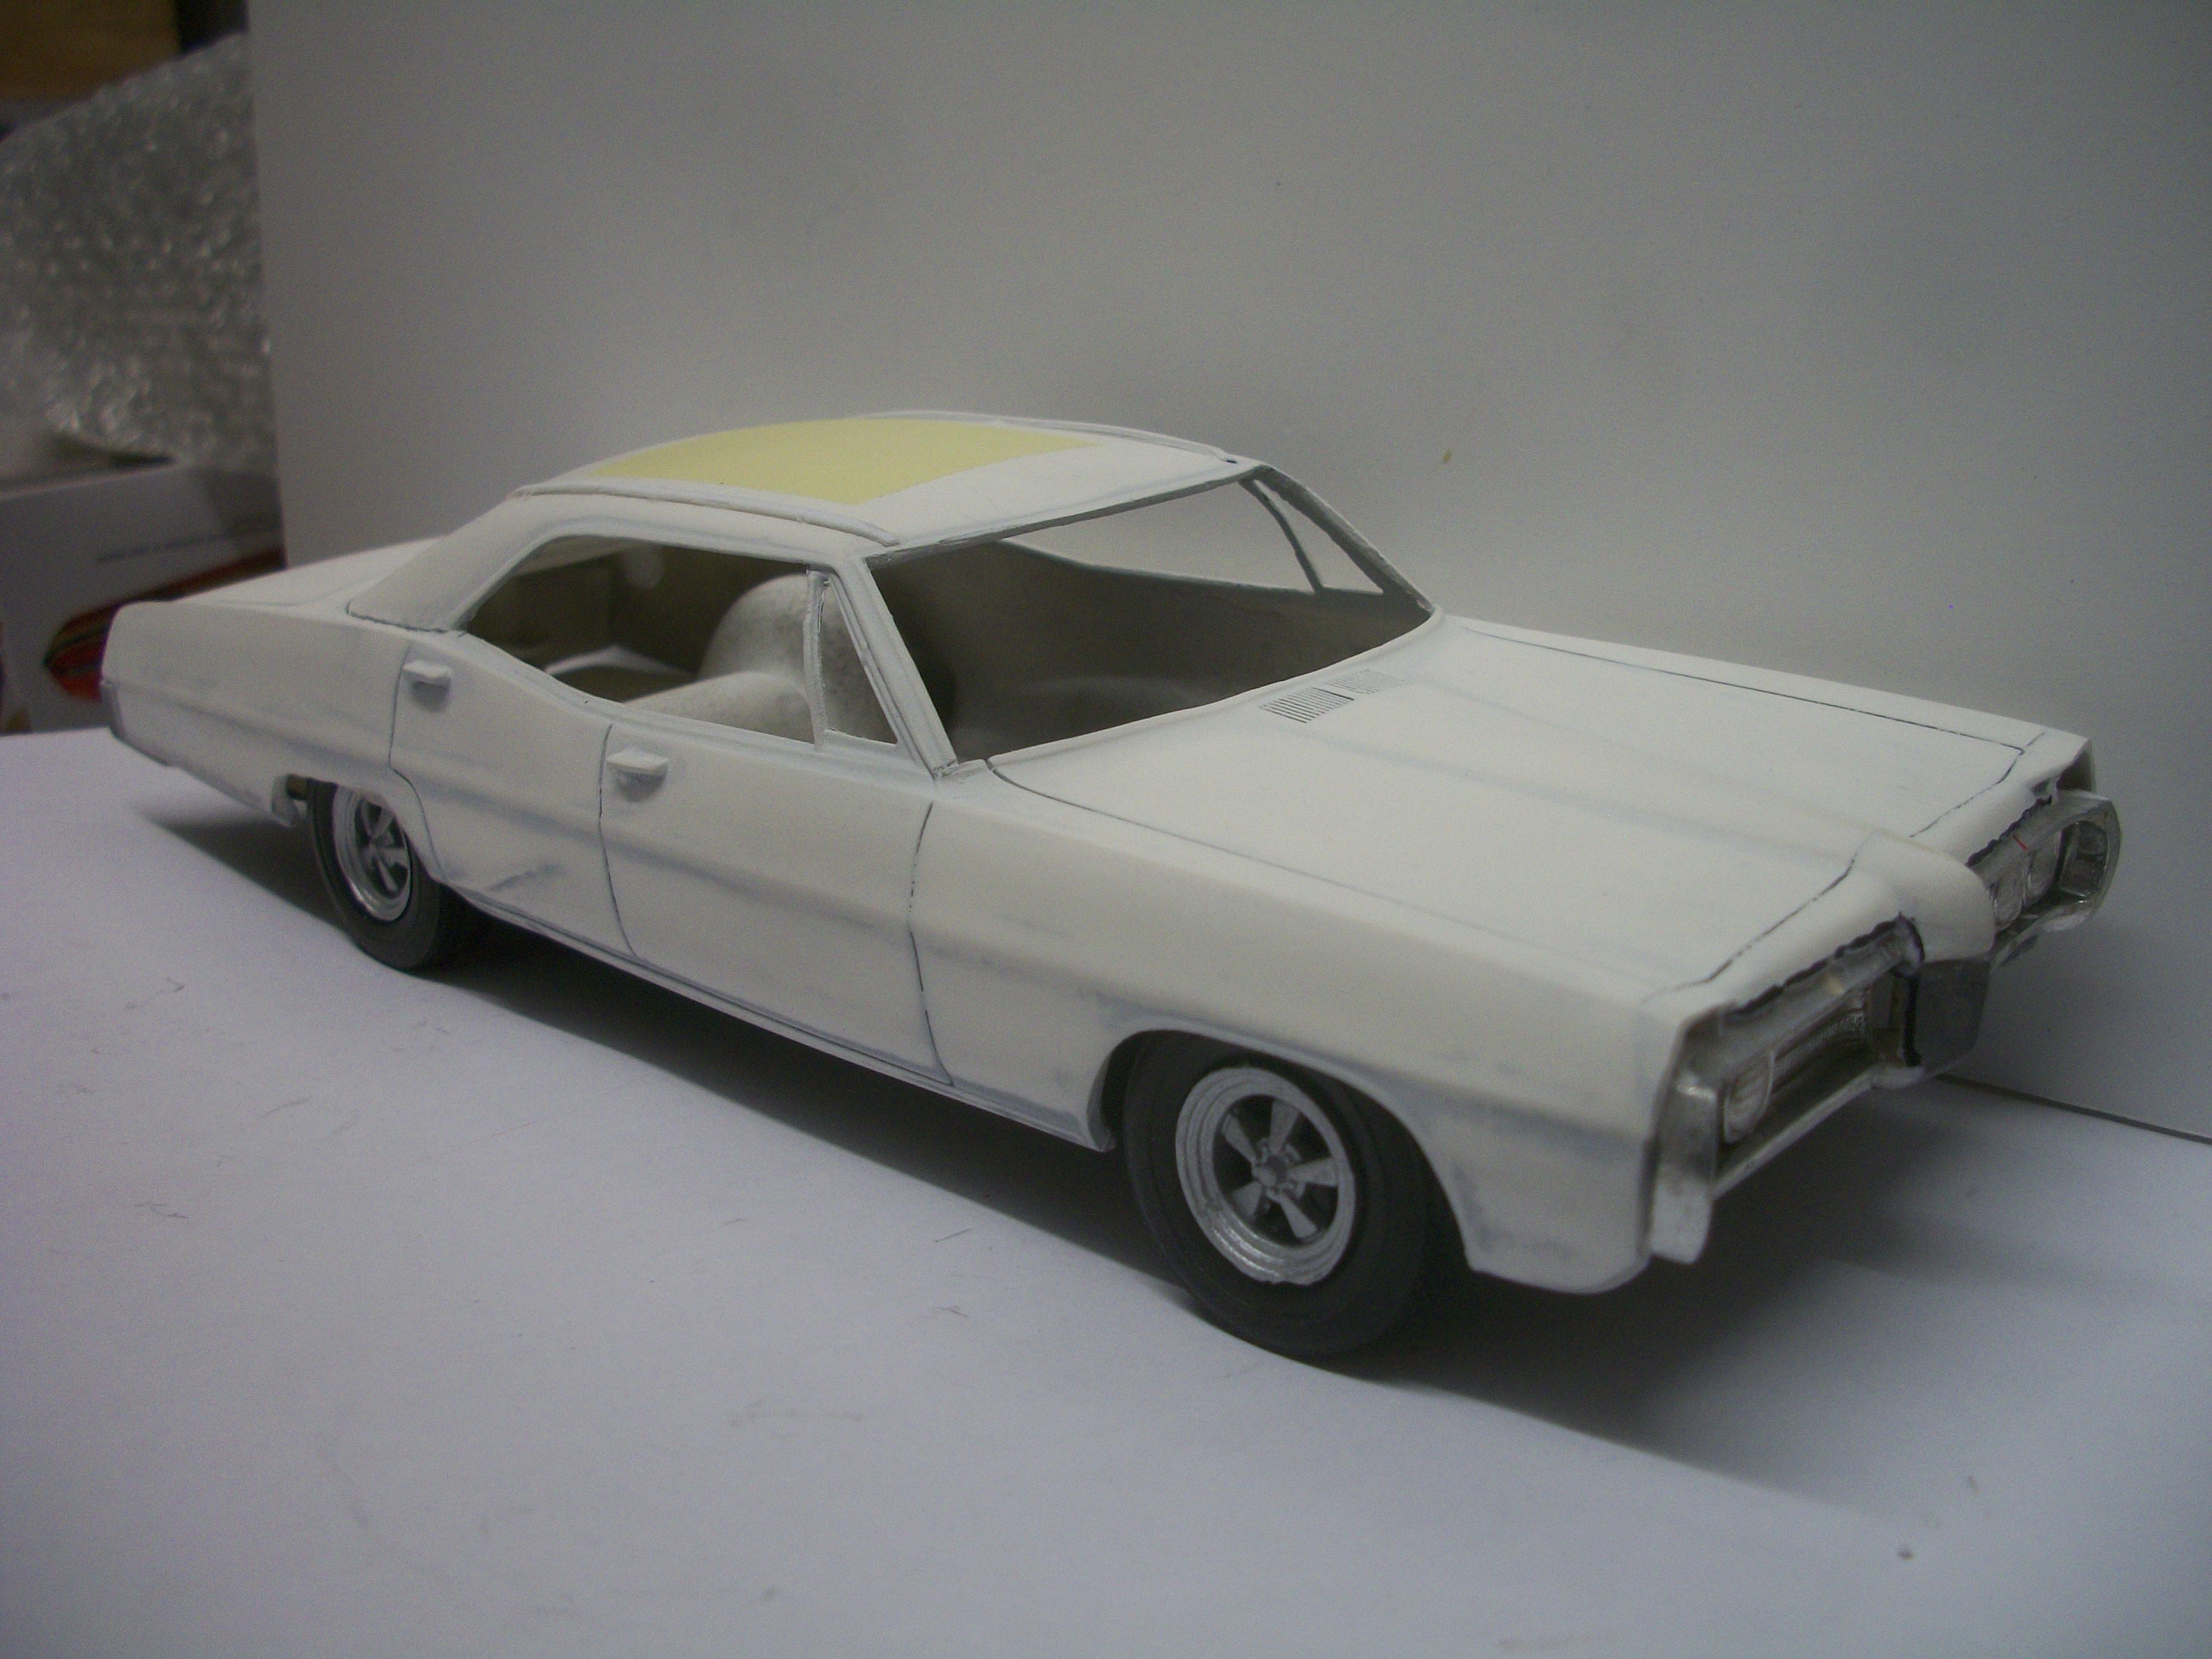
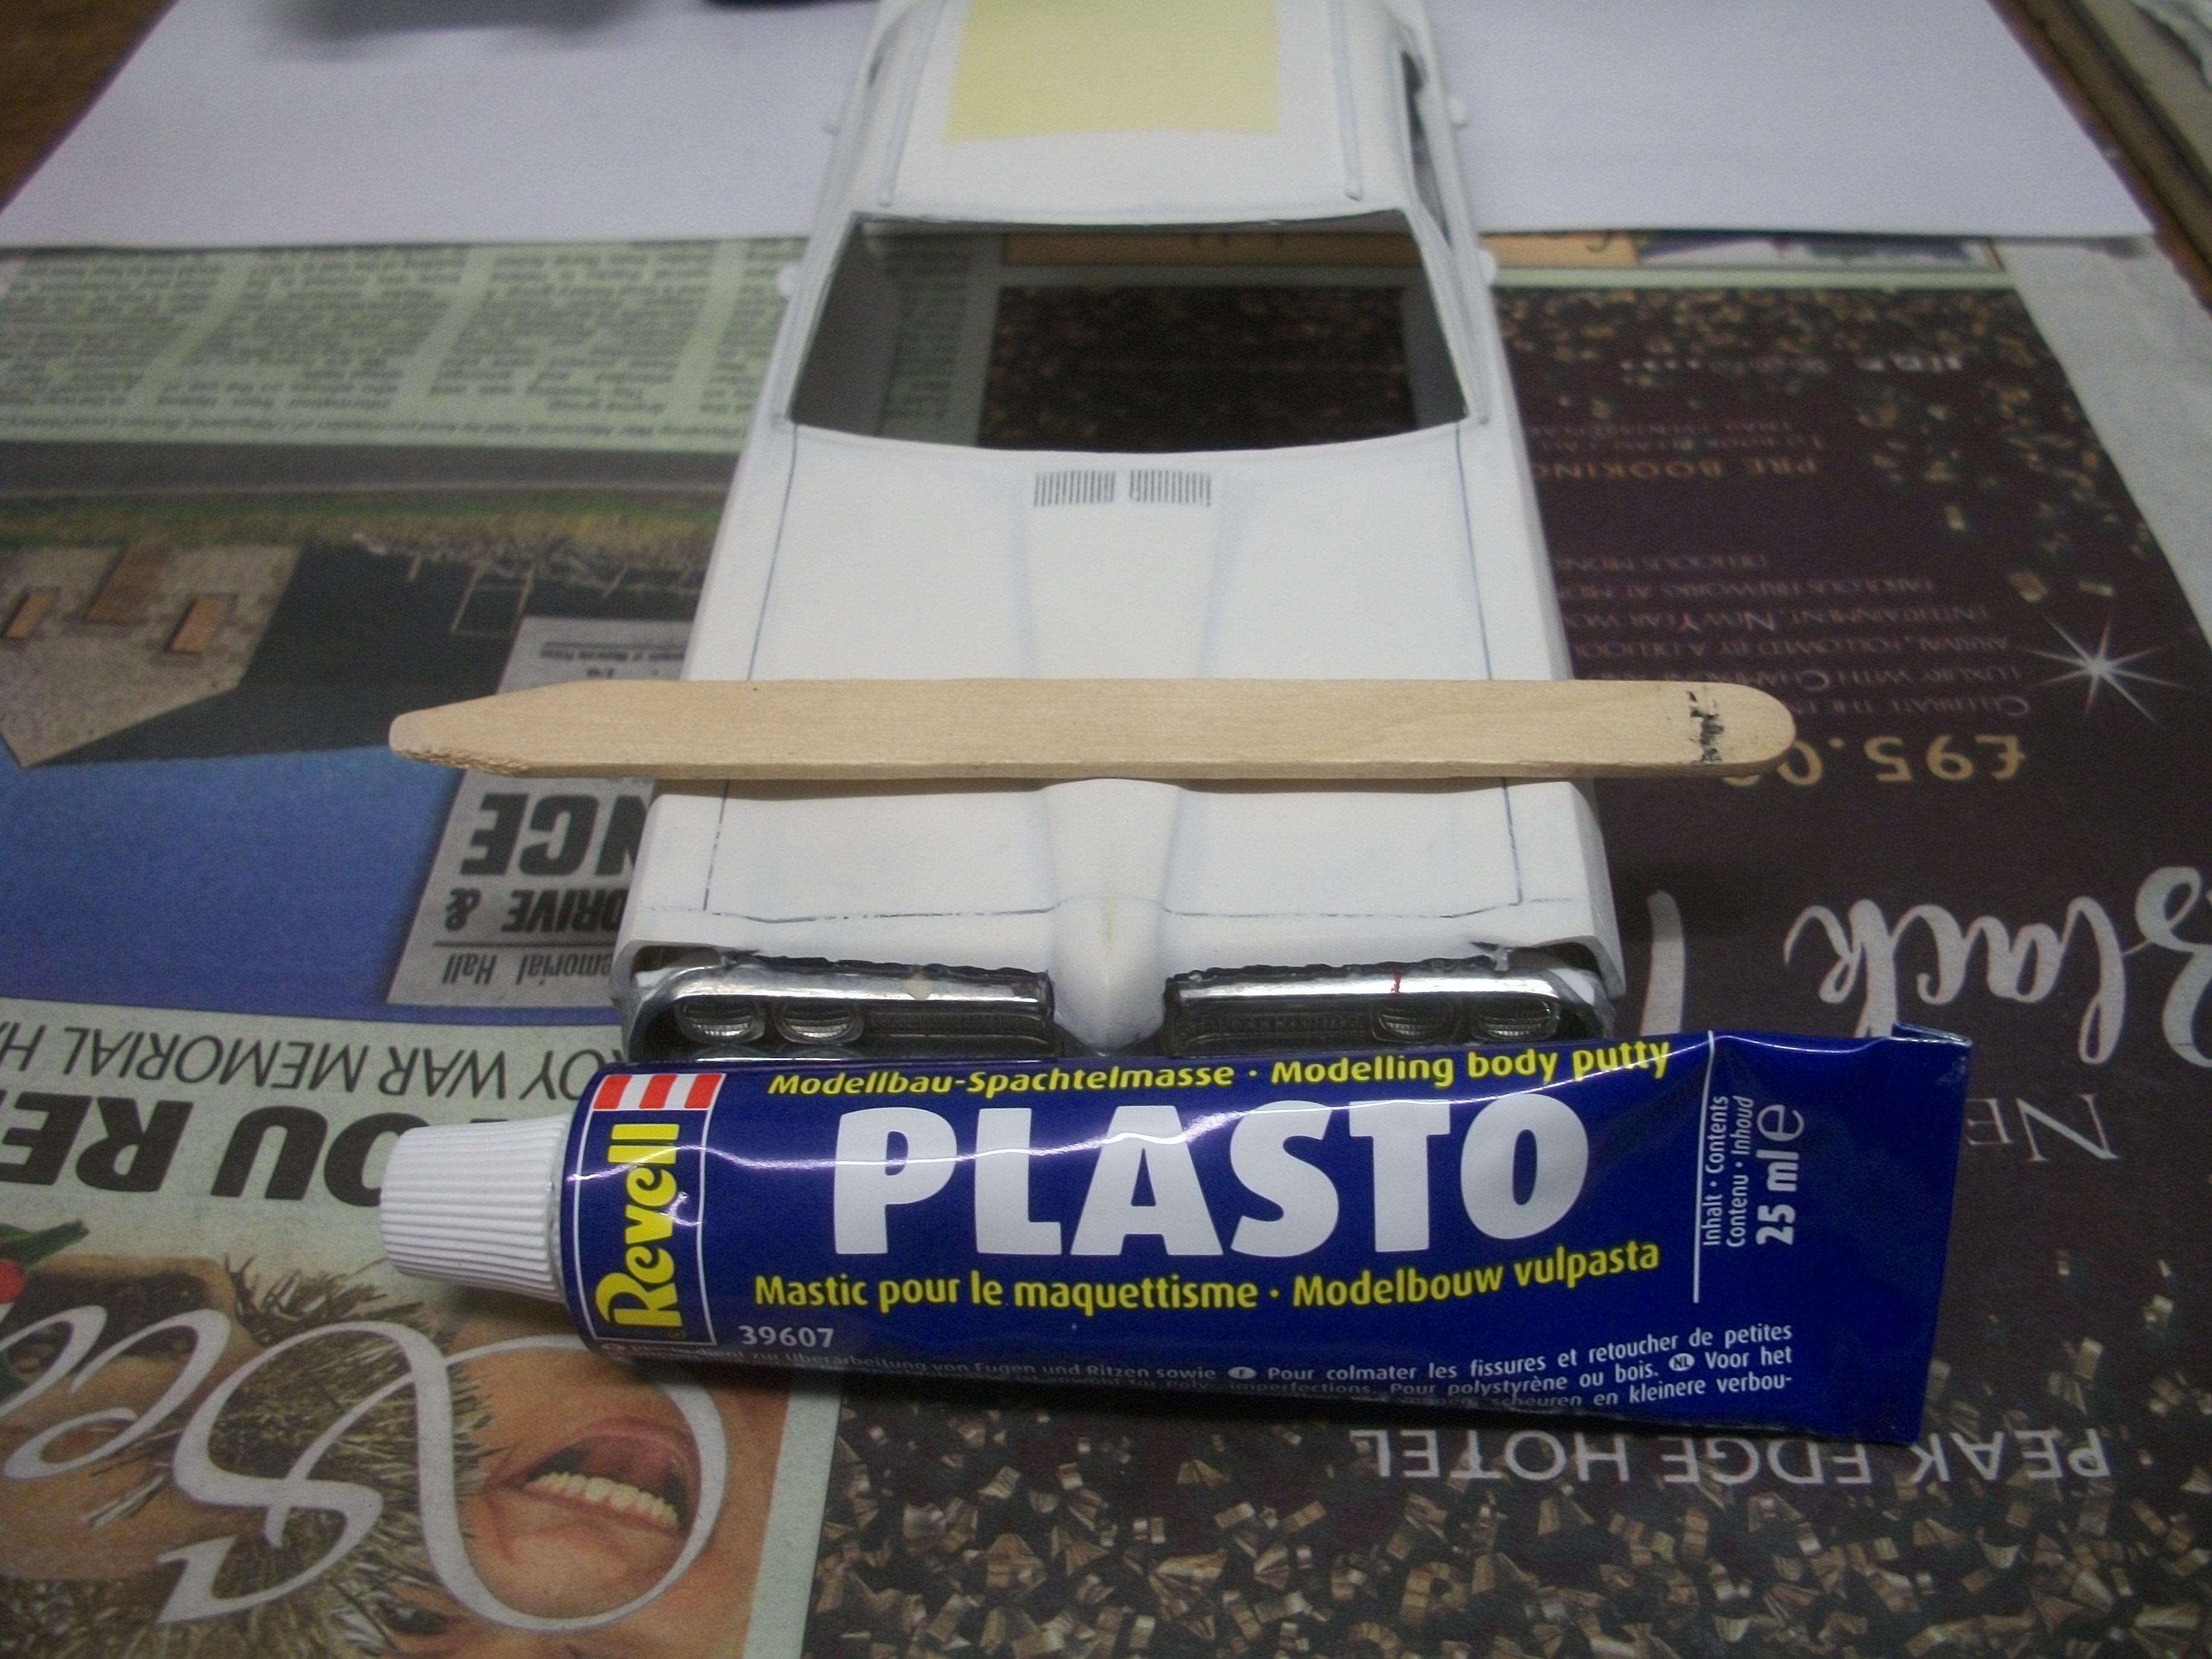
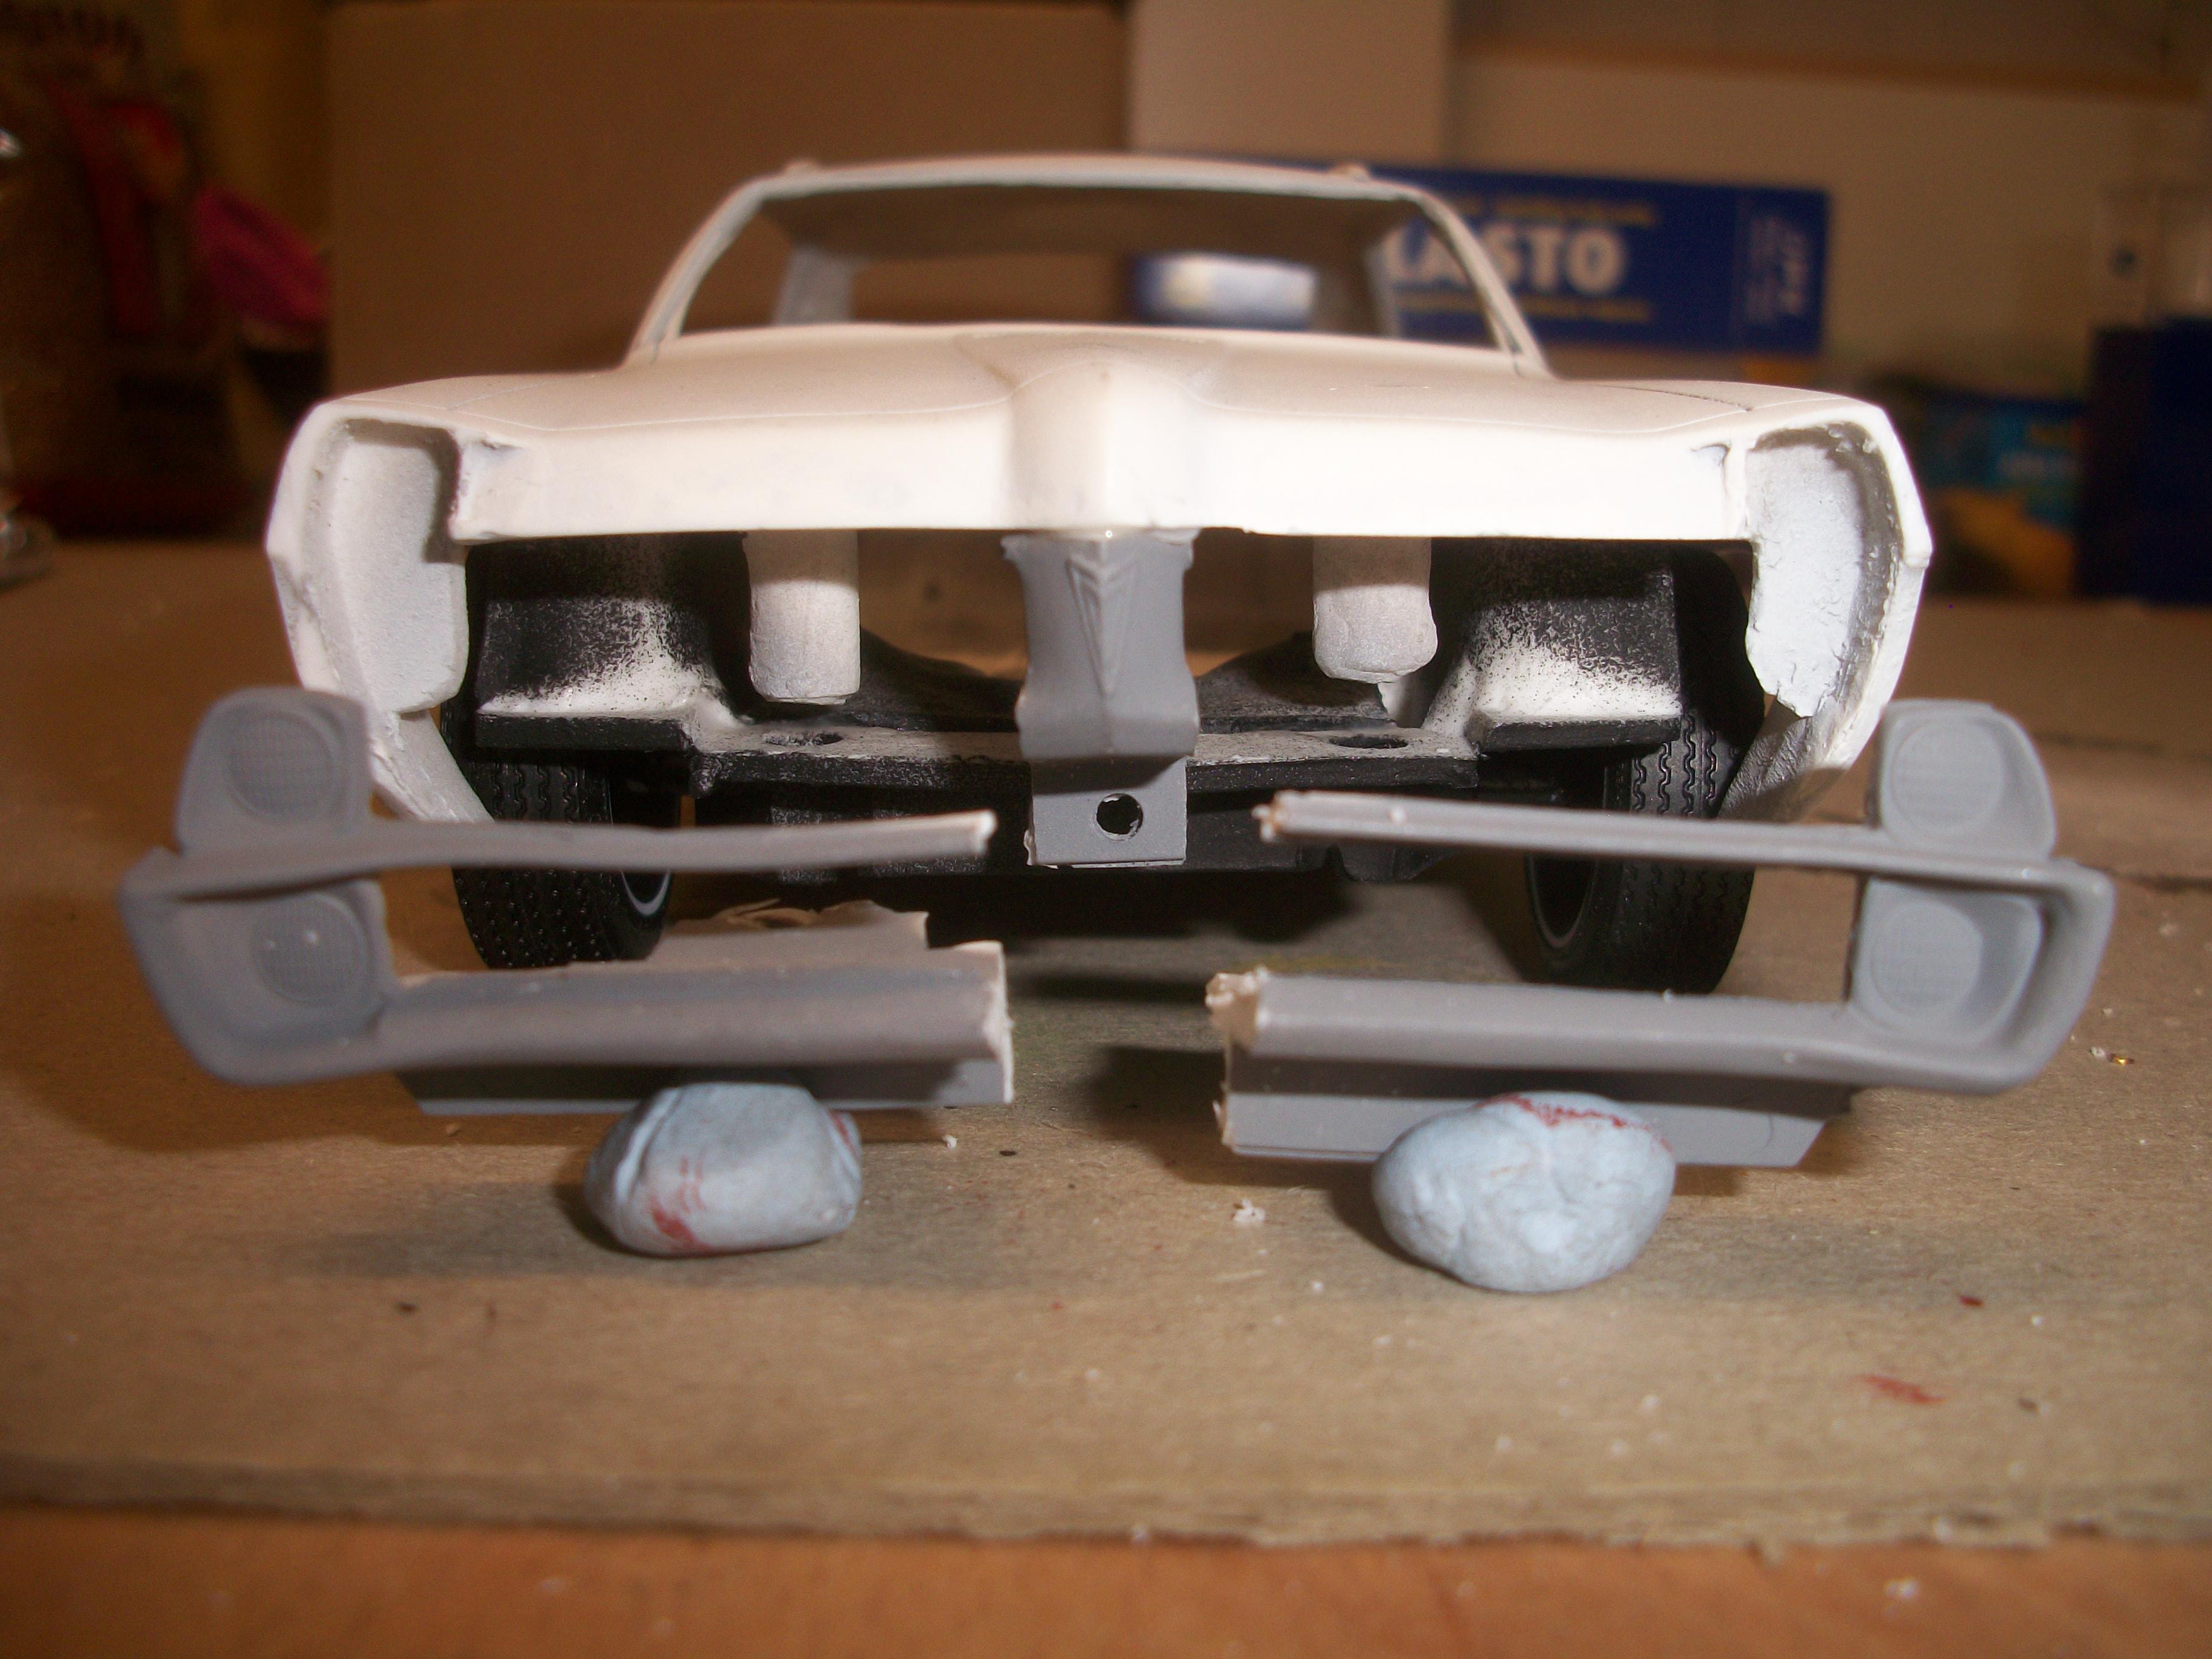
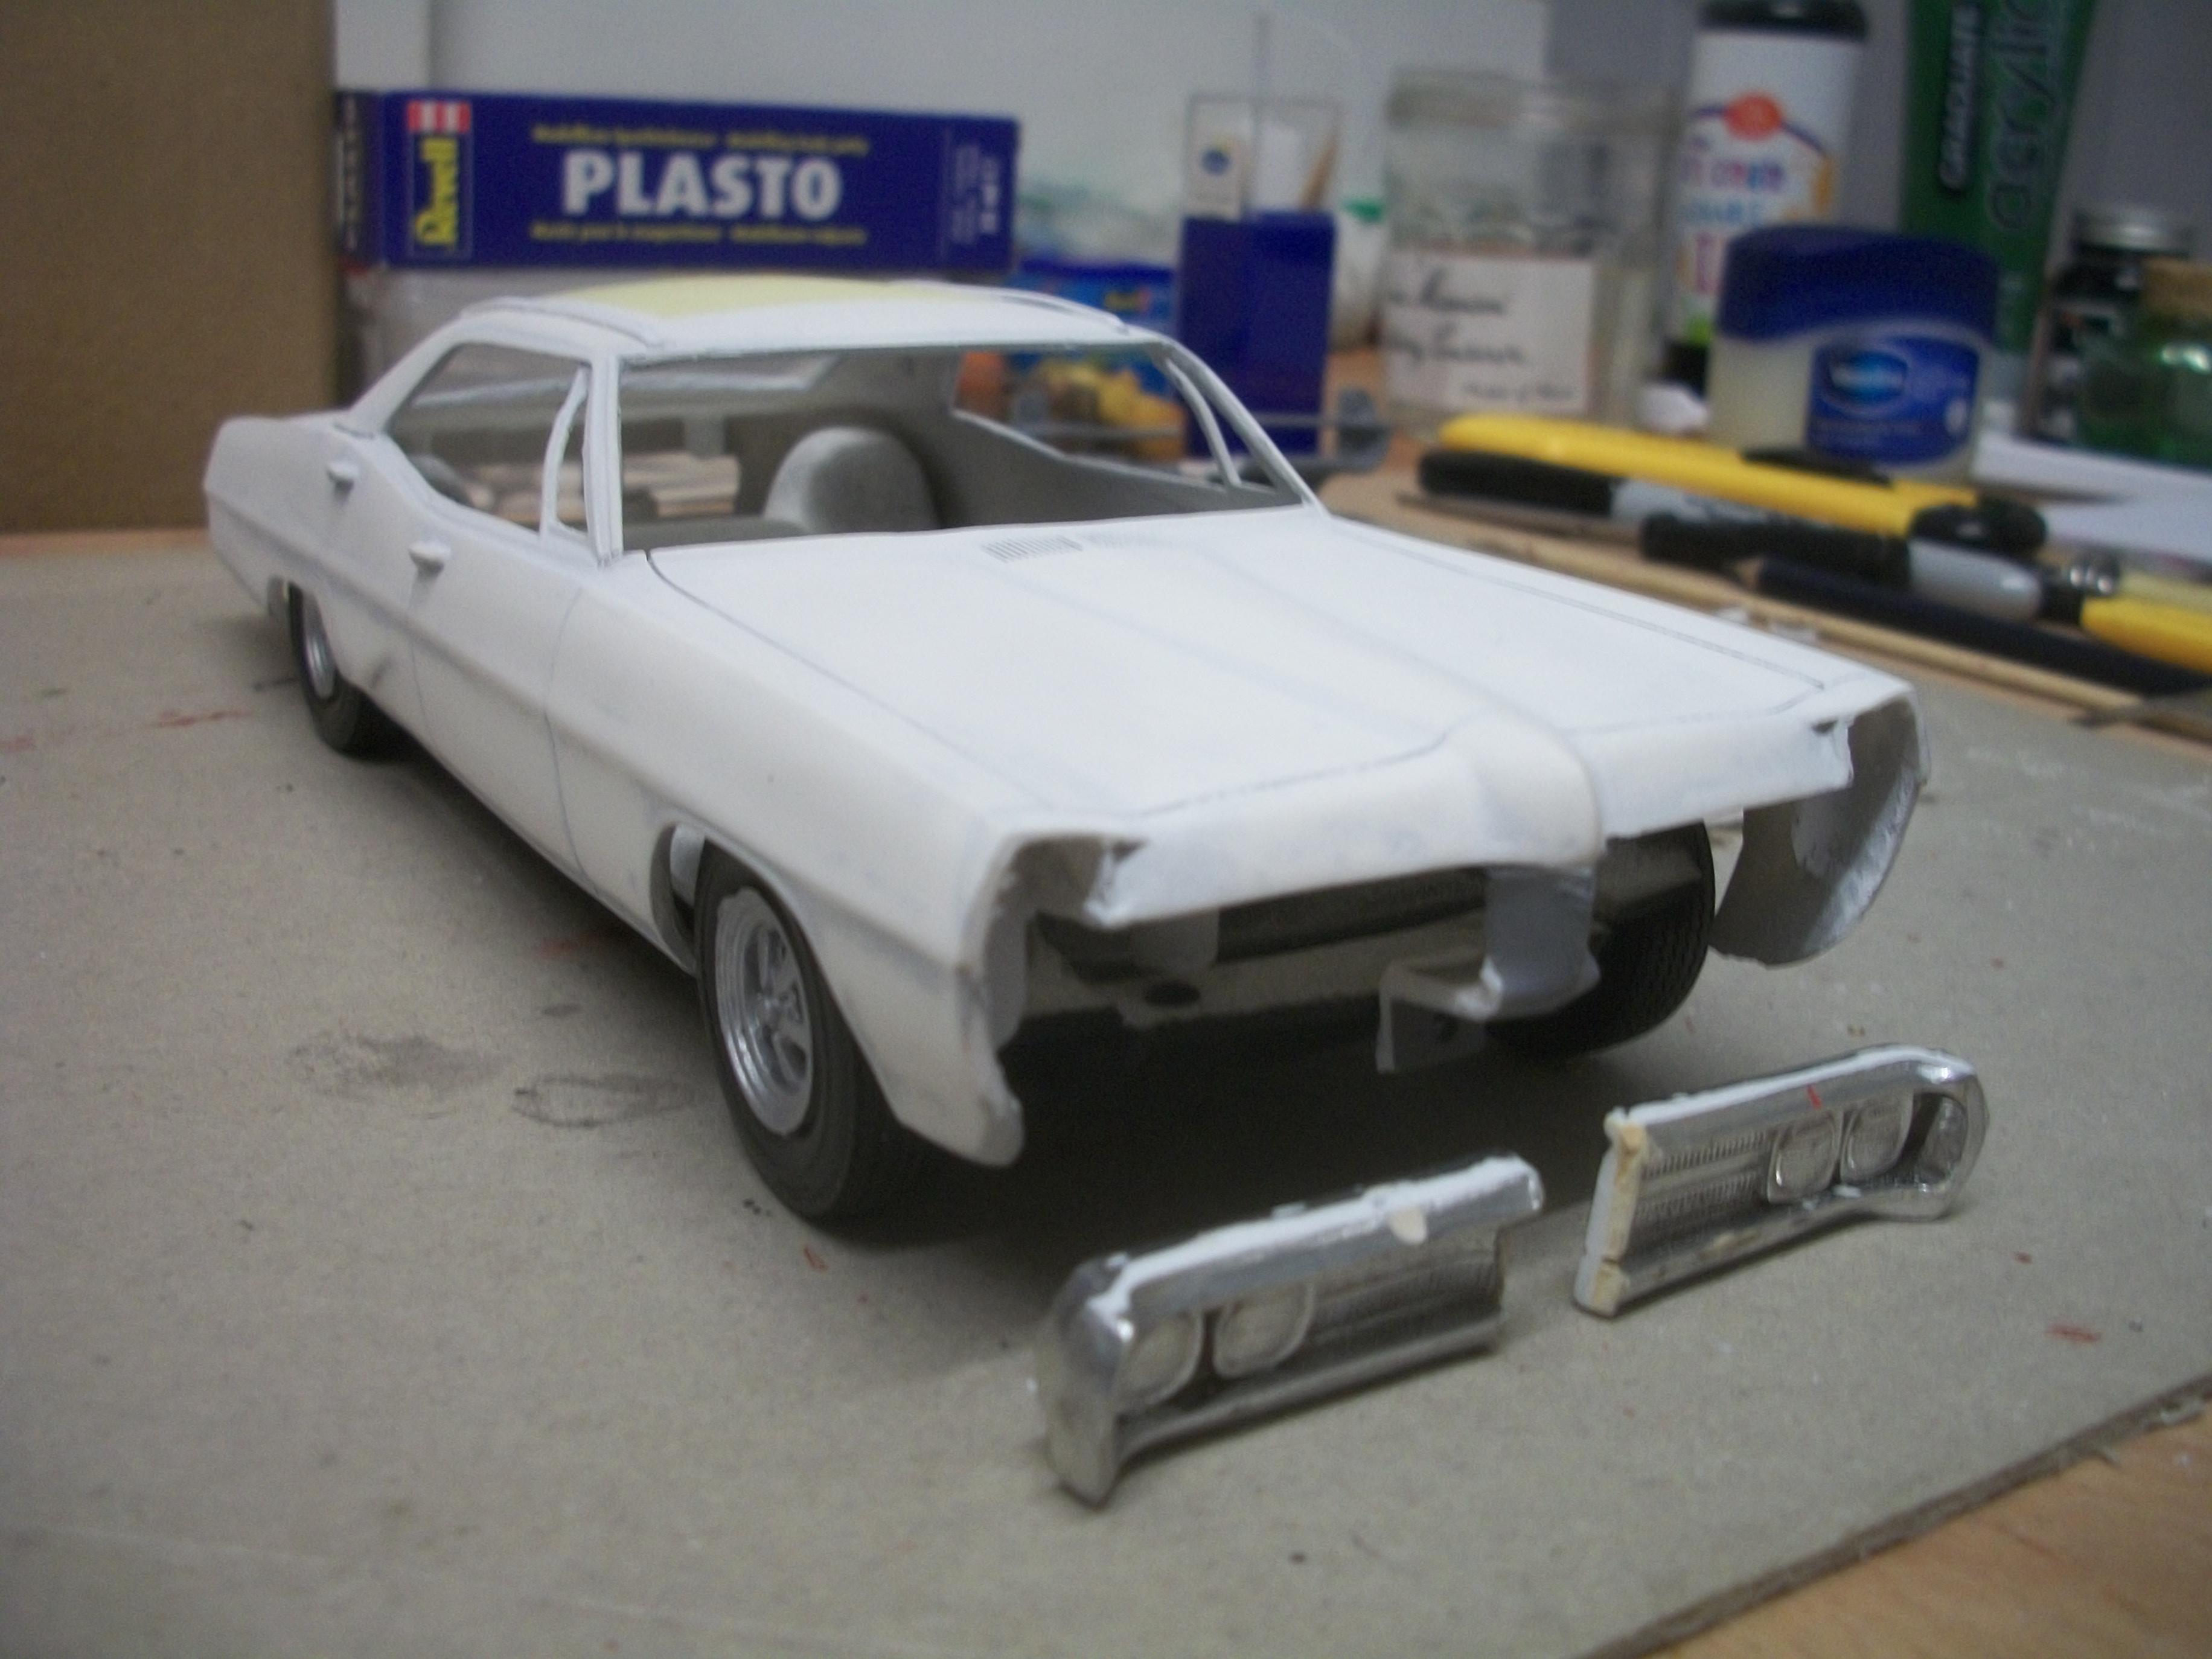
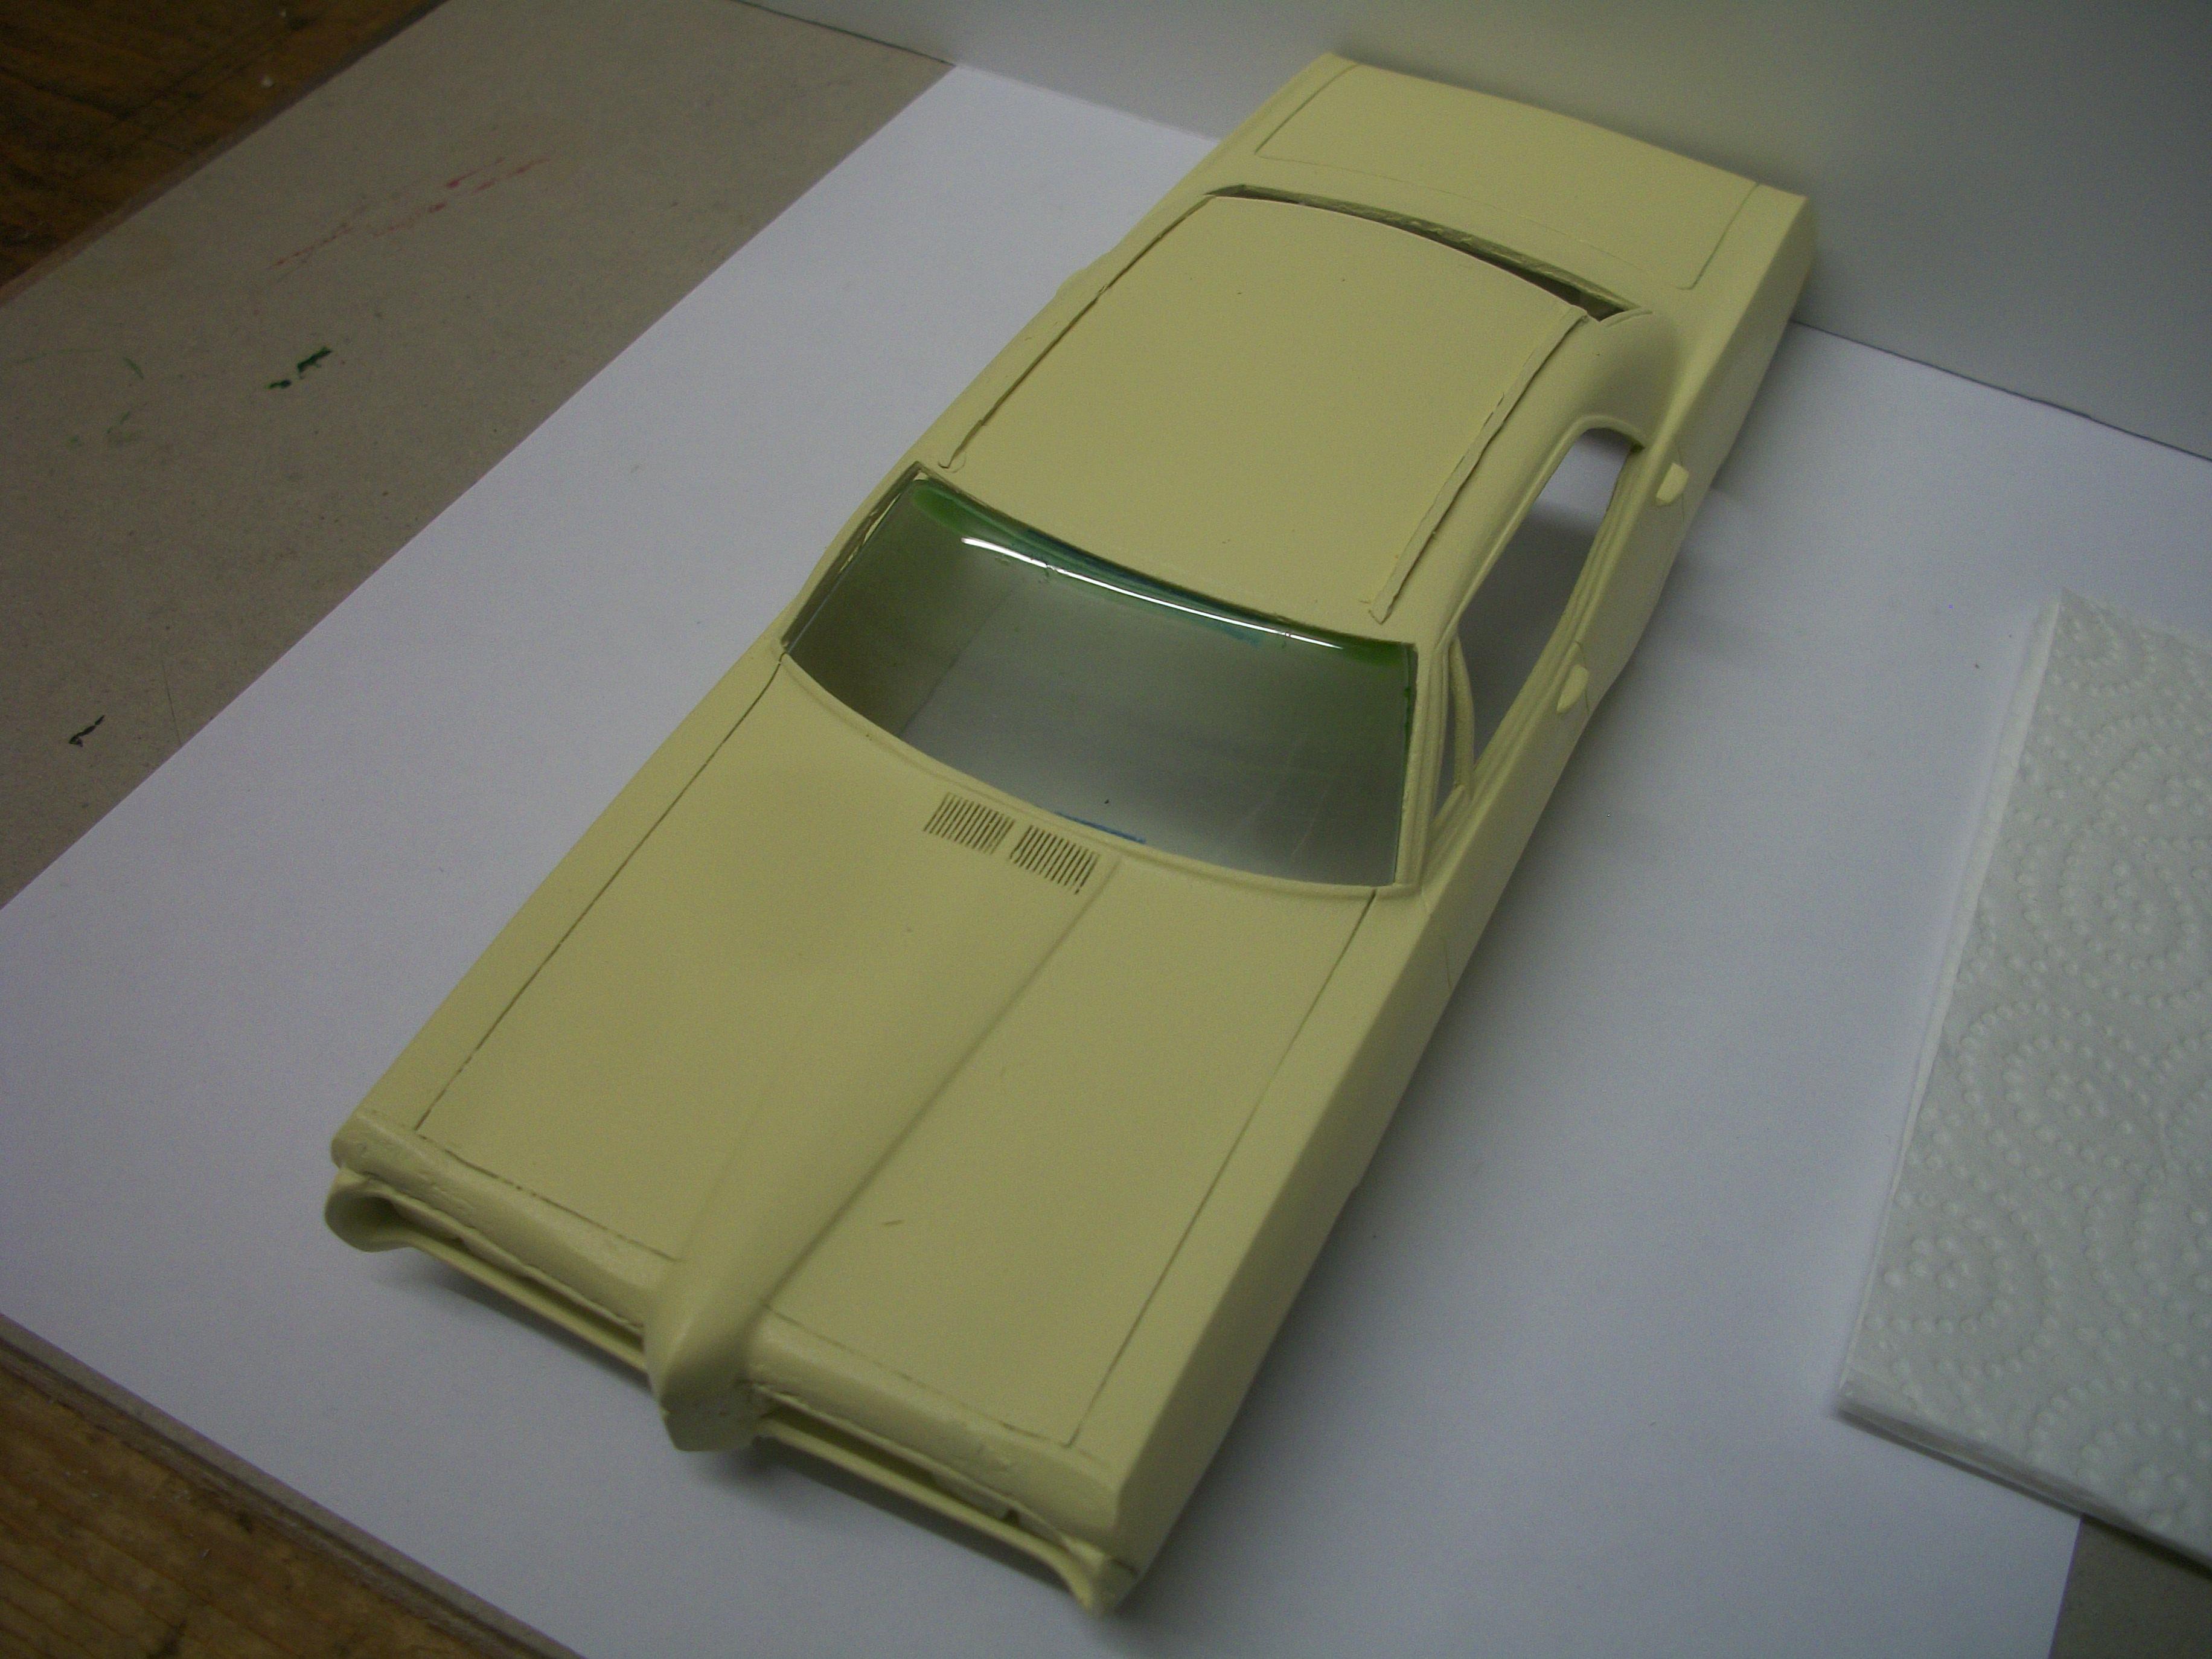
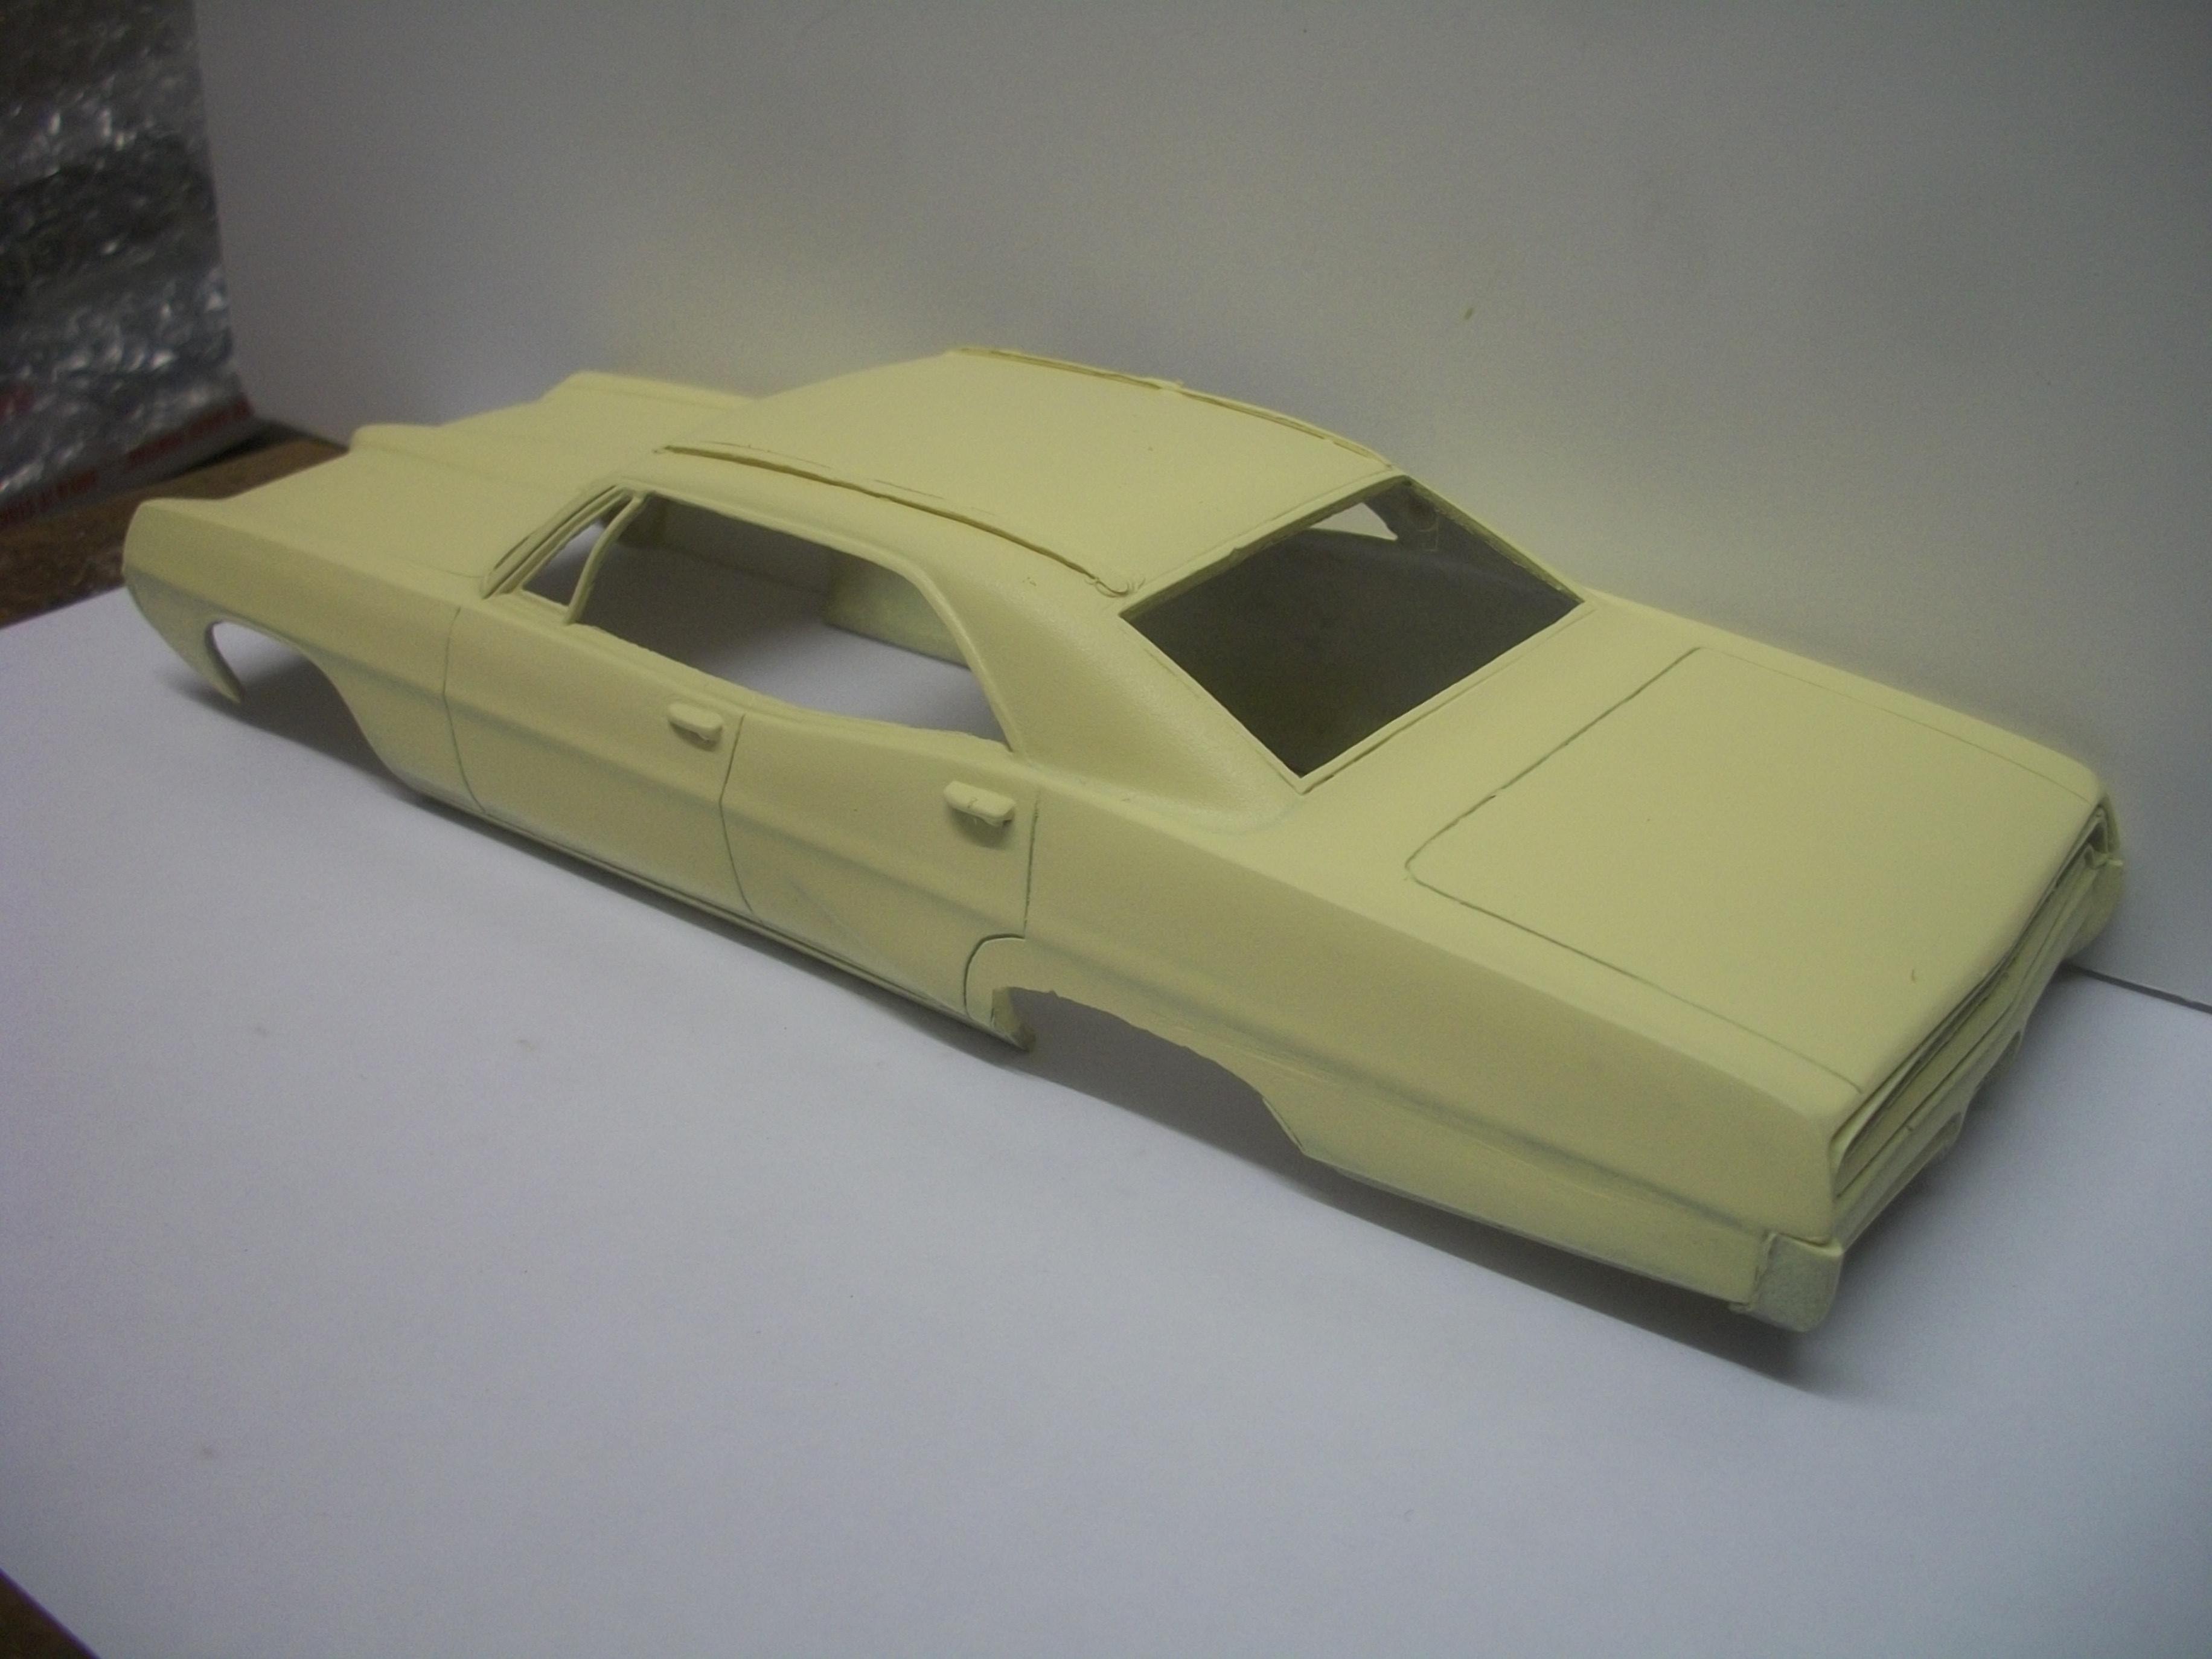
Two coats of Buick Cameo Cream paint have been applied today..... the following photos clearly show that the front end needs some further attention, in terms of filler. The jagged edges of the hood, where it meets the front grilles are saw cuts. I did file the lower edge of the hood before painting, but these saw cuts were hidden by a black Sharpie line that I had drawn ( that's my excuse, anyway ). Some small amounts of Plasto putty will be carefully applied this evening, and tomorrow there will be two further coats of body paint applied, making four coats altogether. Not sure yet if I should clearcoat the final topcoat, or maybe use Meguiars Carnauba Wax polish to produce a shine..... the polished finish doesn't have to be a Rolls-Royce level of perfection for this car. David
-
Thanks for the link, Luca David
-
Many thanks, Ismo..... most of the Pontiac scale model kits seem to be 2-door versions, so I was very pleased to find the 4-door resin kit available in the USA. I did look at the idea of converting a 2-door body to a 4-door body, but maybe I would not be able to do a good job on this ! Thanks for looking at my Parisienne build, and I will continue with progress updates. David
-
Thank you, Eric..... this is my first American car build in 1:25 / 1:24 scale, and I am really enjoying the whole process. Having applied two coats of paint to the body shell today, I shall be posting photos shortly. David
-
Oh, I see..... I wish my vinyl roof had already been moulded in ! Would you like me to PM you with my home address details for the Pontiac Rally II wheels, Bill ? David
-
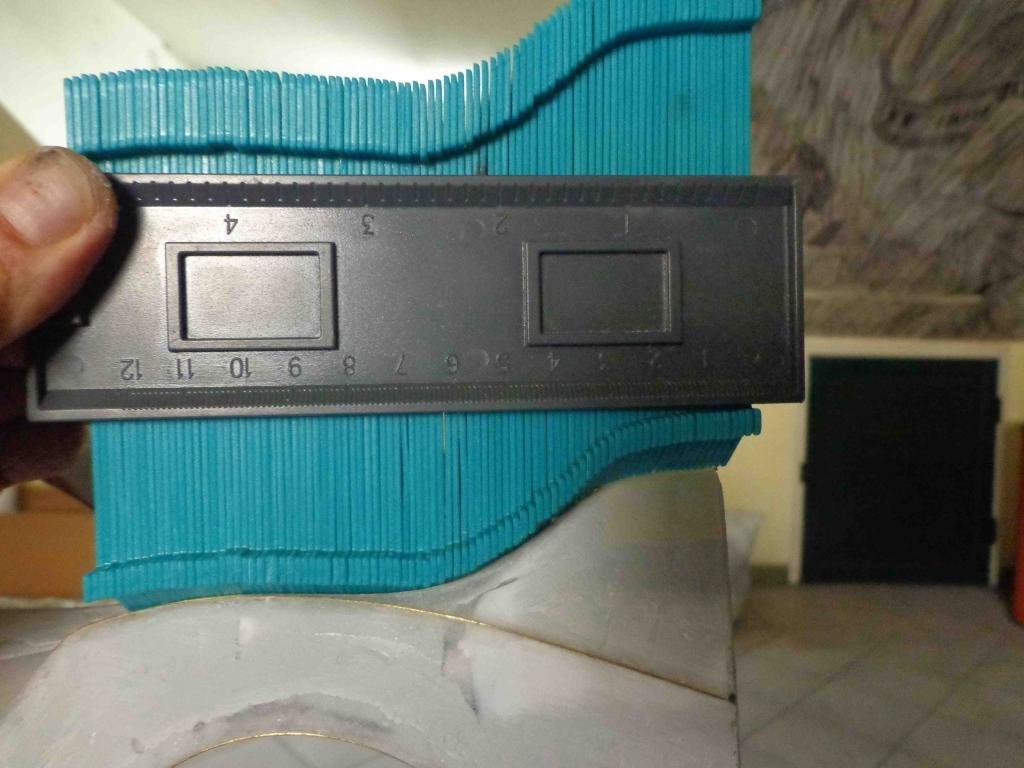
Absolutely mind blowing, Luca....... this is scale model car engineering at it's highest level........ precision, professional, quality, accurate and beautiful really. These 1:8 scale Pocher kits are wonderful pieces of automotive technology, and for someone like you to go one stage further and actually modify one of their model cars...... is marvellous, incredible, fantastic..... there you go, I have run out of BIG words !!! I must look through all of these photos of yours again, because I am sure I must have missed something from which I can learn..... One question, Luca....... I see that you have a special tool, which looks like a steel bar, or a plastic bar with blue vertical pieces, and you were using this tool to check that a complicated shape of the car body was the same on both sides...... what is this tool called, please? Would it be something that we can order, or is this tool only available in Italy ? David J. Watson ( England )
-
Thanks, Tom...... and I have to hold up my hands and admit to applying the putty before I saw your reply to my post. The Revell Plasto is a product that I haven't used previously, and I must say that I am impressed with this filler material. I did stuff it into the gaps ( no plastic beforehand ) and it seemed to fill nicely. The drying time is quoted as being one hour, but I allowed 6 hours before filing the filler down. It was easy to shape, and has a smooth surface for painting. Today I shall see how the body looks after applying one or two coats of Buick Cameo Cream topcoat, while paying particular attention to the front end of the car. David
-
Thank you, Bill....... and although the wheels were the best I could find, coming out of a '70 Bonneville kit box, I would really like to get my hands on some Pontiac Rally II's....... as long as it would be no trouble for you to mail me a set of these rims, I would appreciate your gesture very much, Bill....... several members here on MCM forums have kindly sent me small parts in the post for this build project, from as far away as Australia, USA and Canada. The resin kit that I am working with was shipped over to England from Chicago and it is a nicely cast body with everything fitting well. Glad you like the work in progress so far. Many thanks.......... David
-
You have done a great job with this restoration, Bill..... and I like your finished result. What method did you use to produce the black vinyl roof, if you don't mind me asking? As you may have noticed on this forum, I am currently converting a '67 Pontiac Bonneville 4-door to a '68 Pontiac Parisienne 4-door, so your '70 Pontiac Grand Prix restoration is particularly interesting. You must be very pleased with the paint finish on this build, and also the window glass has come up really nice. Well done! David
-
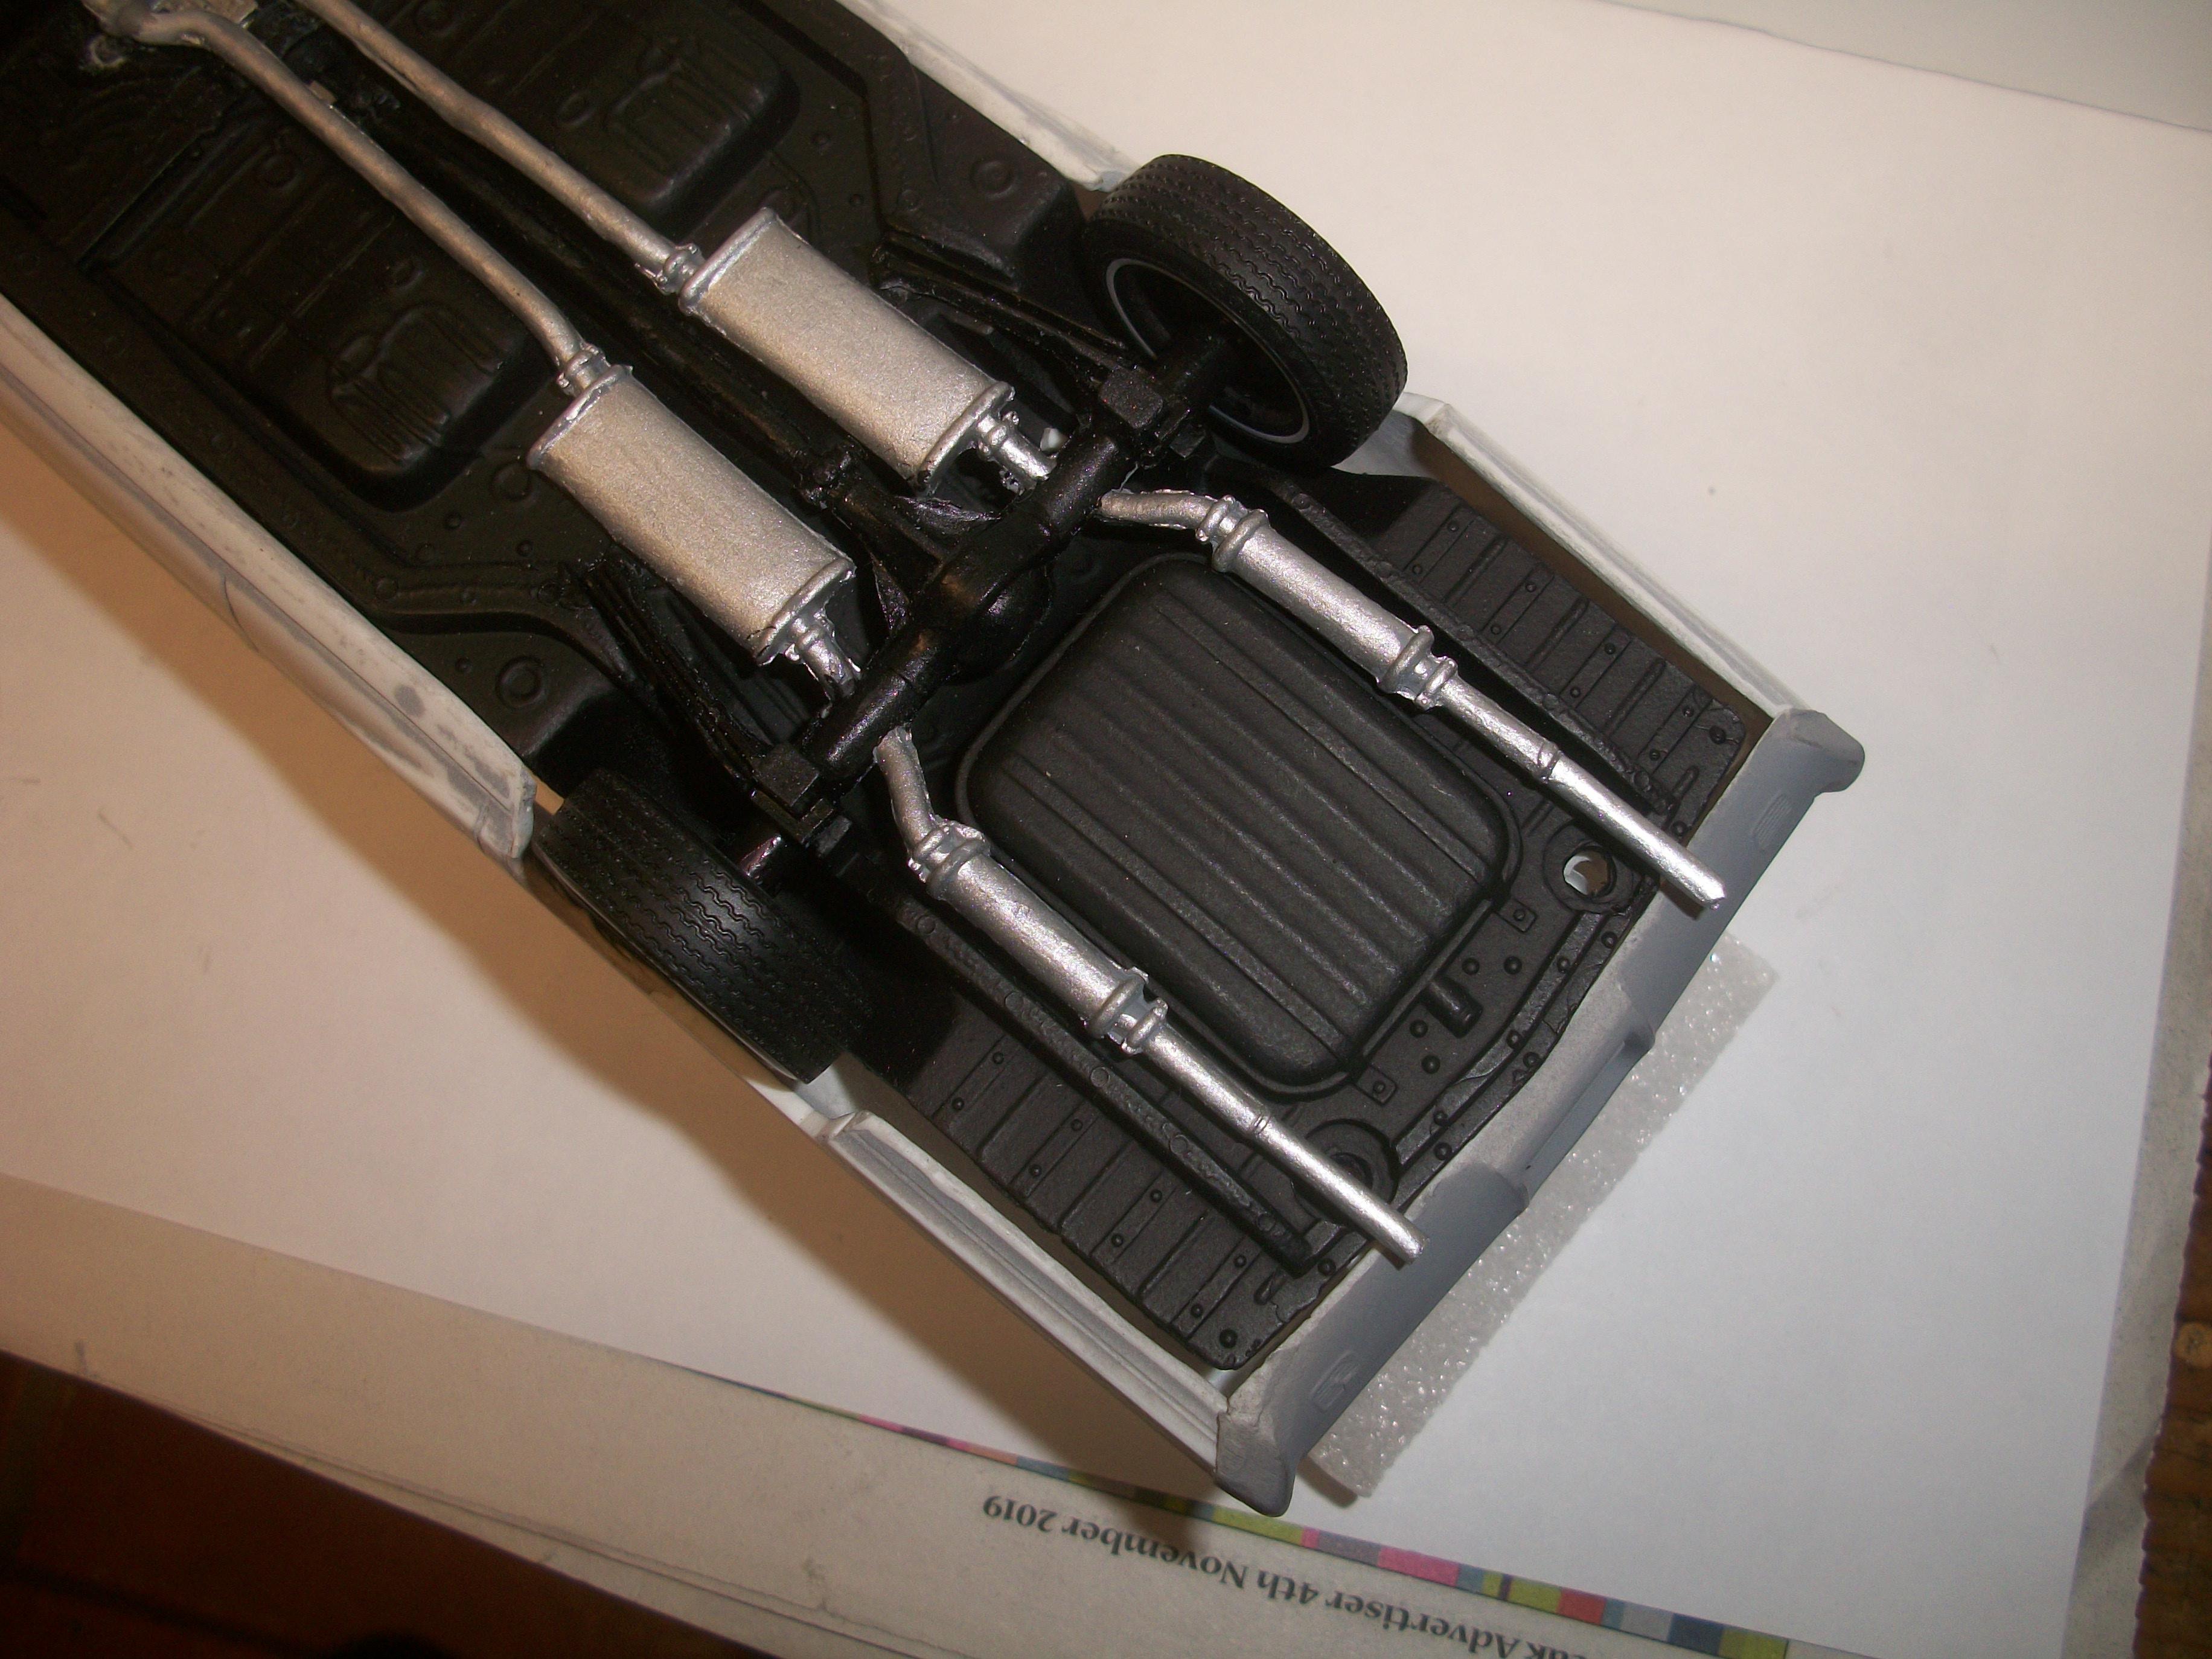
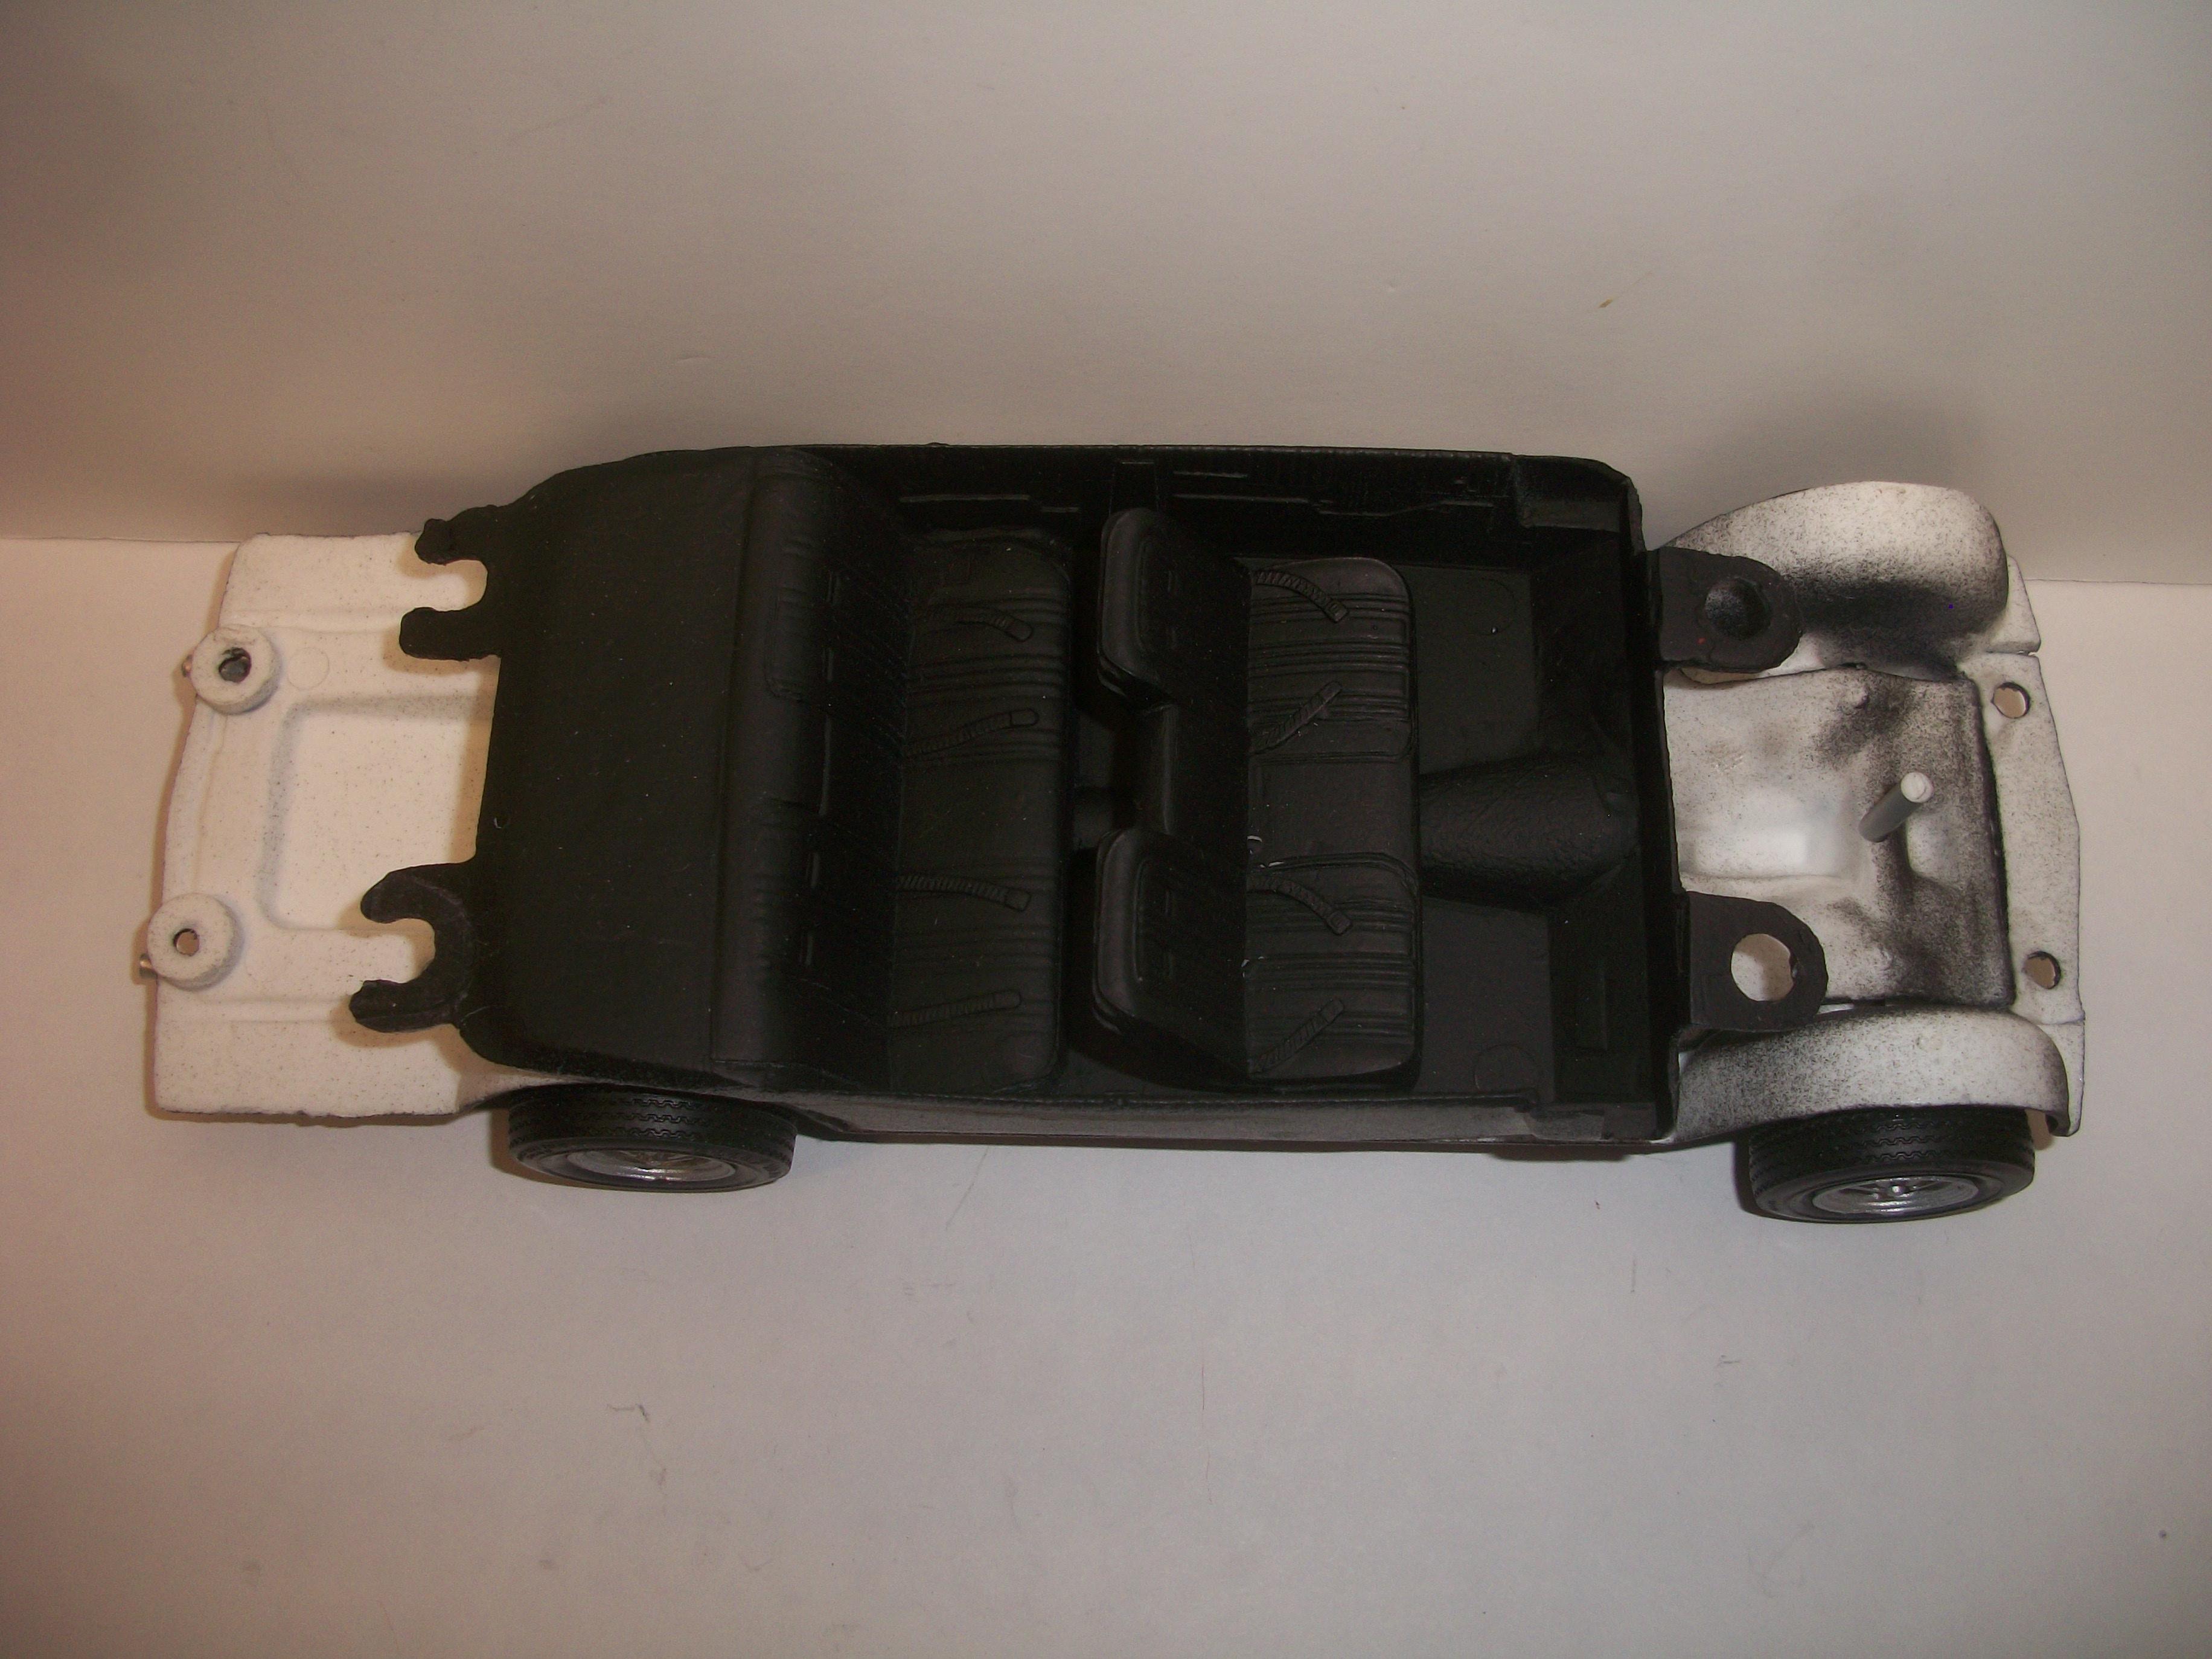
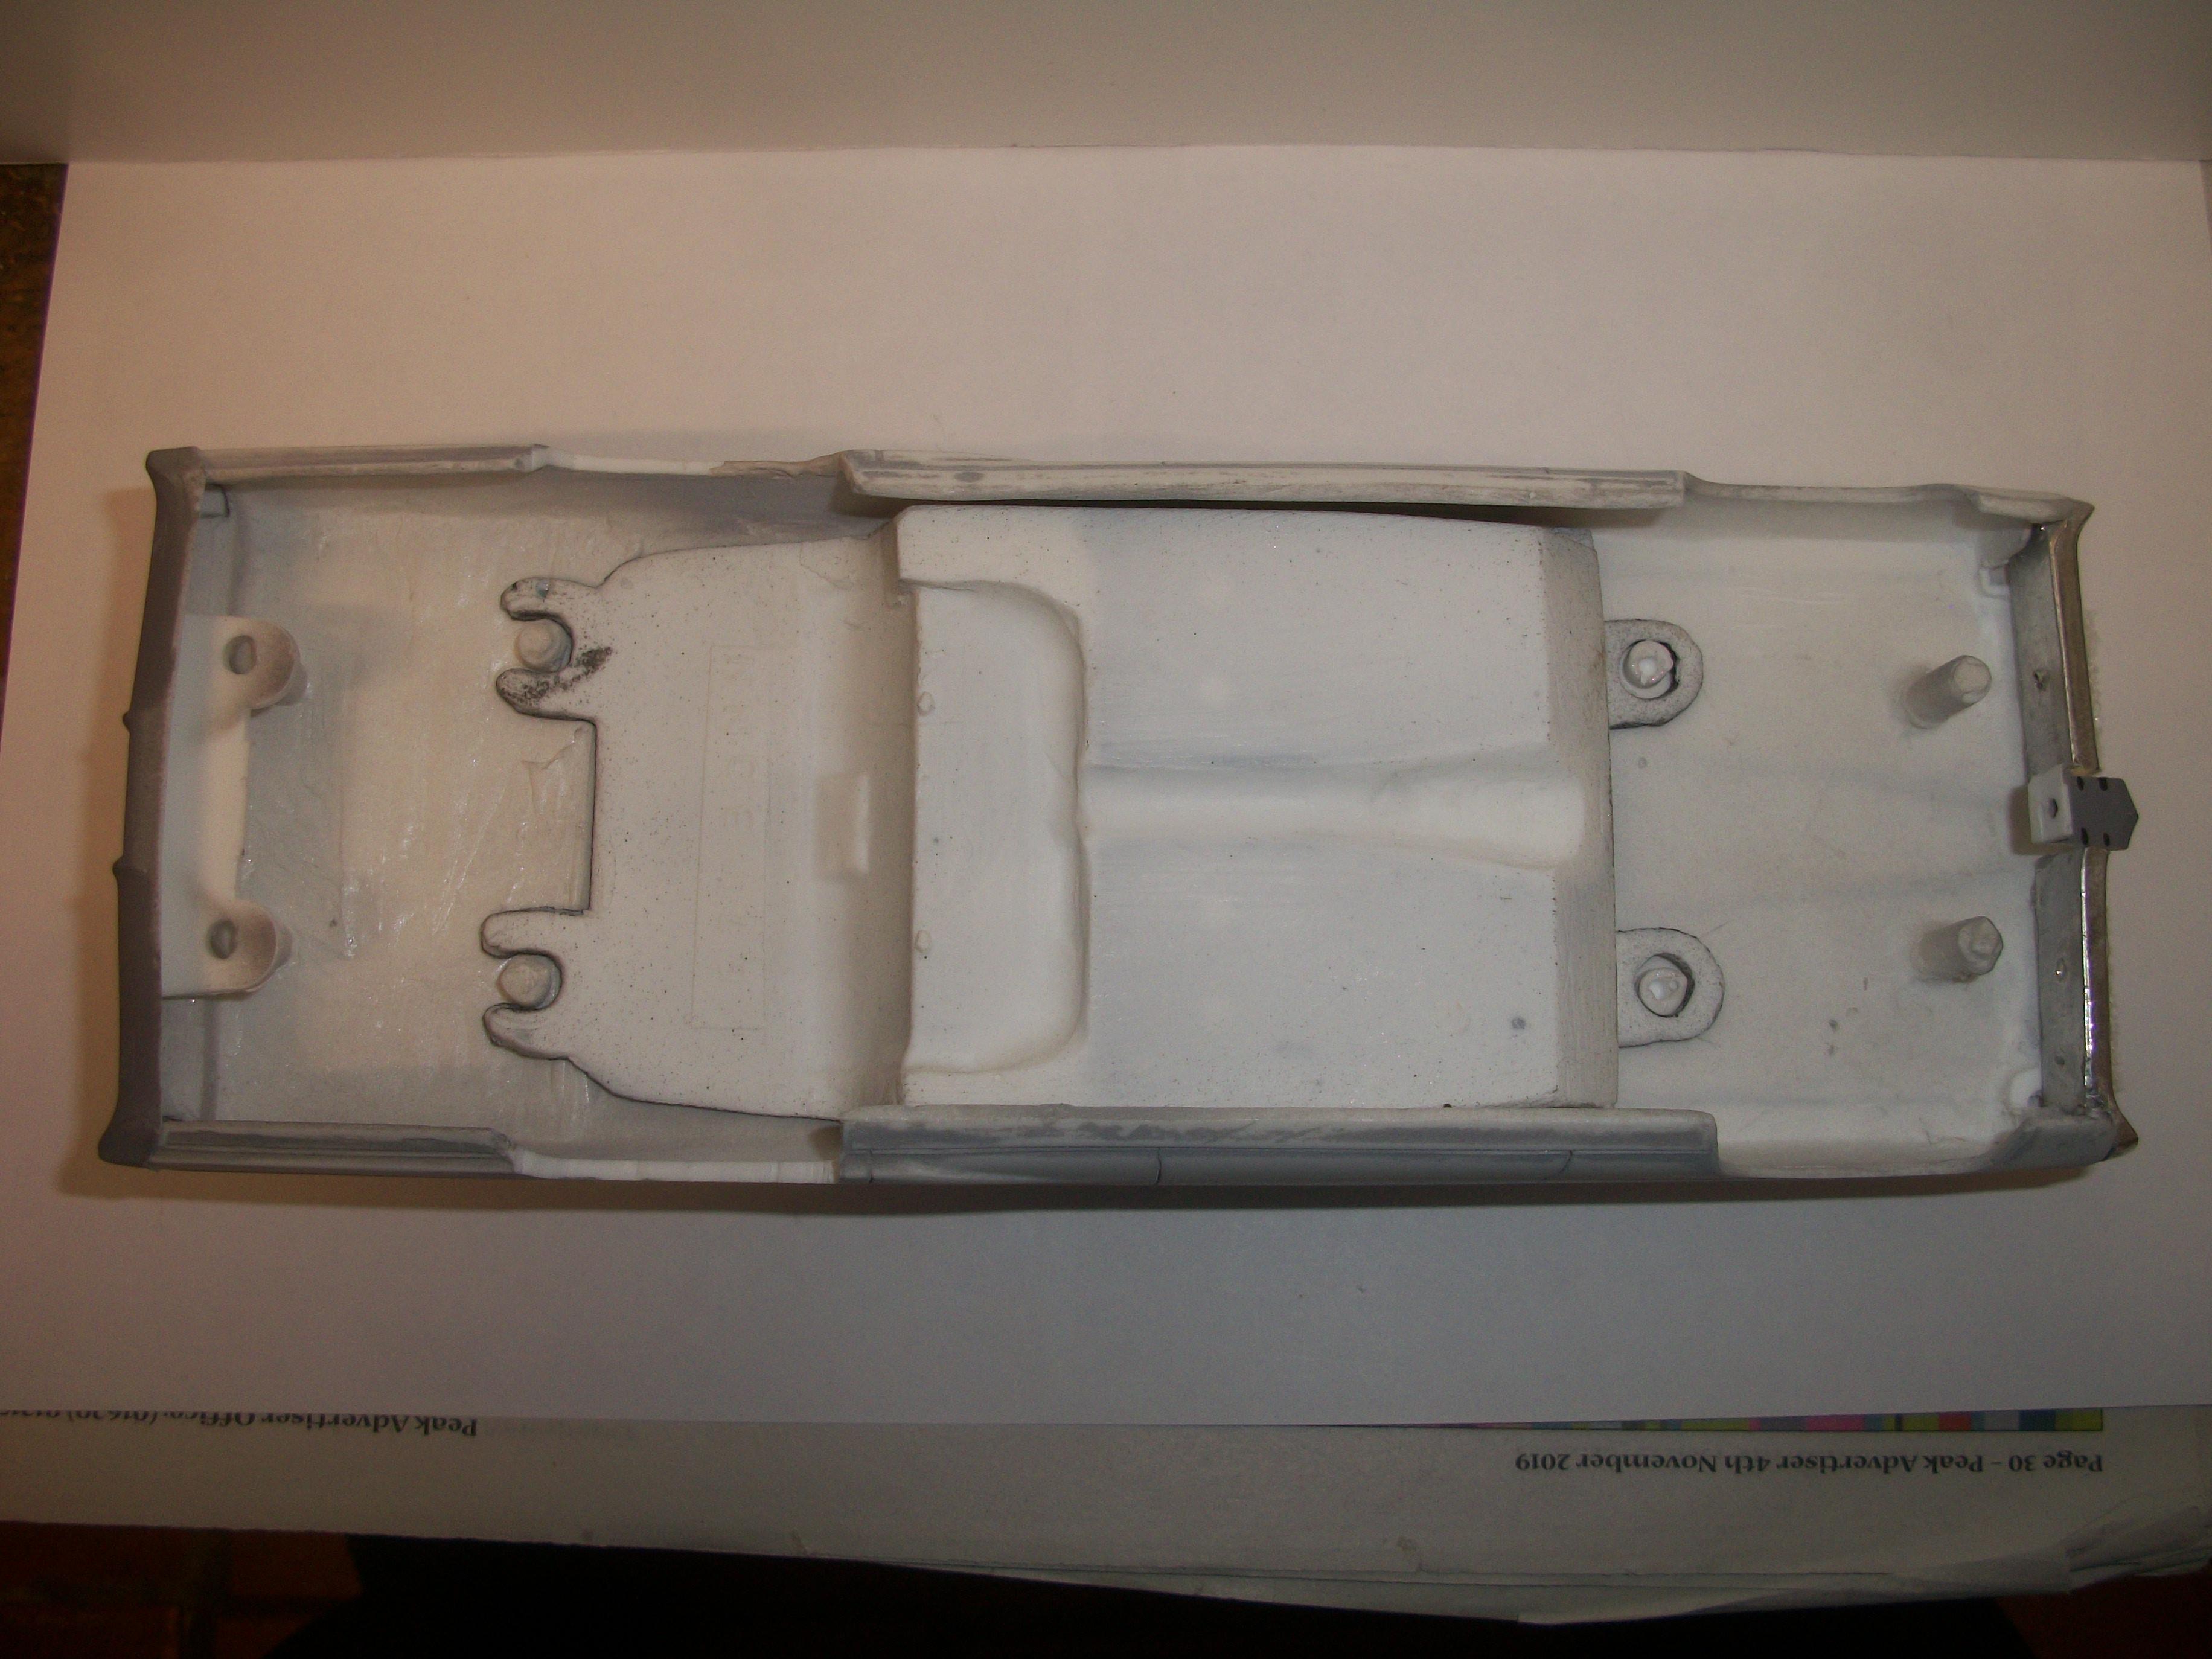
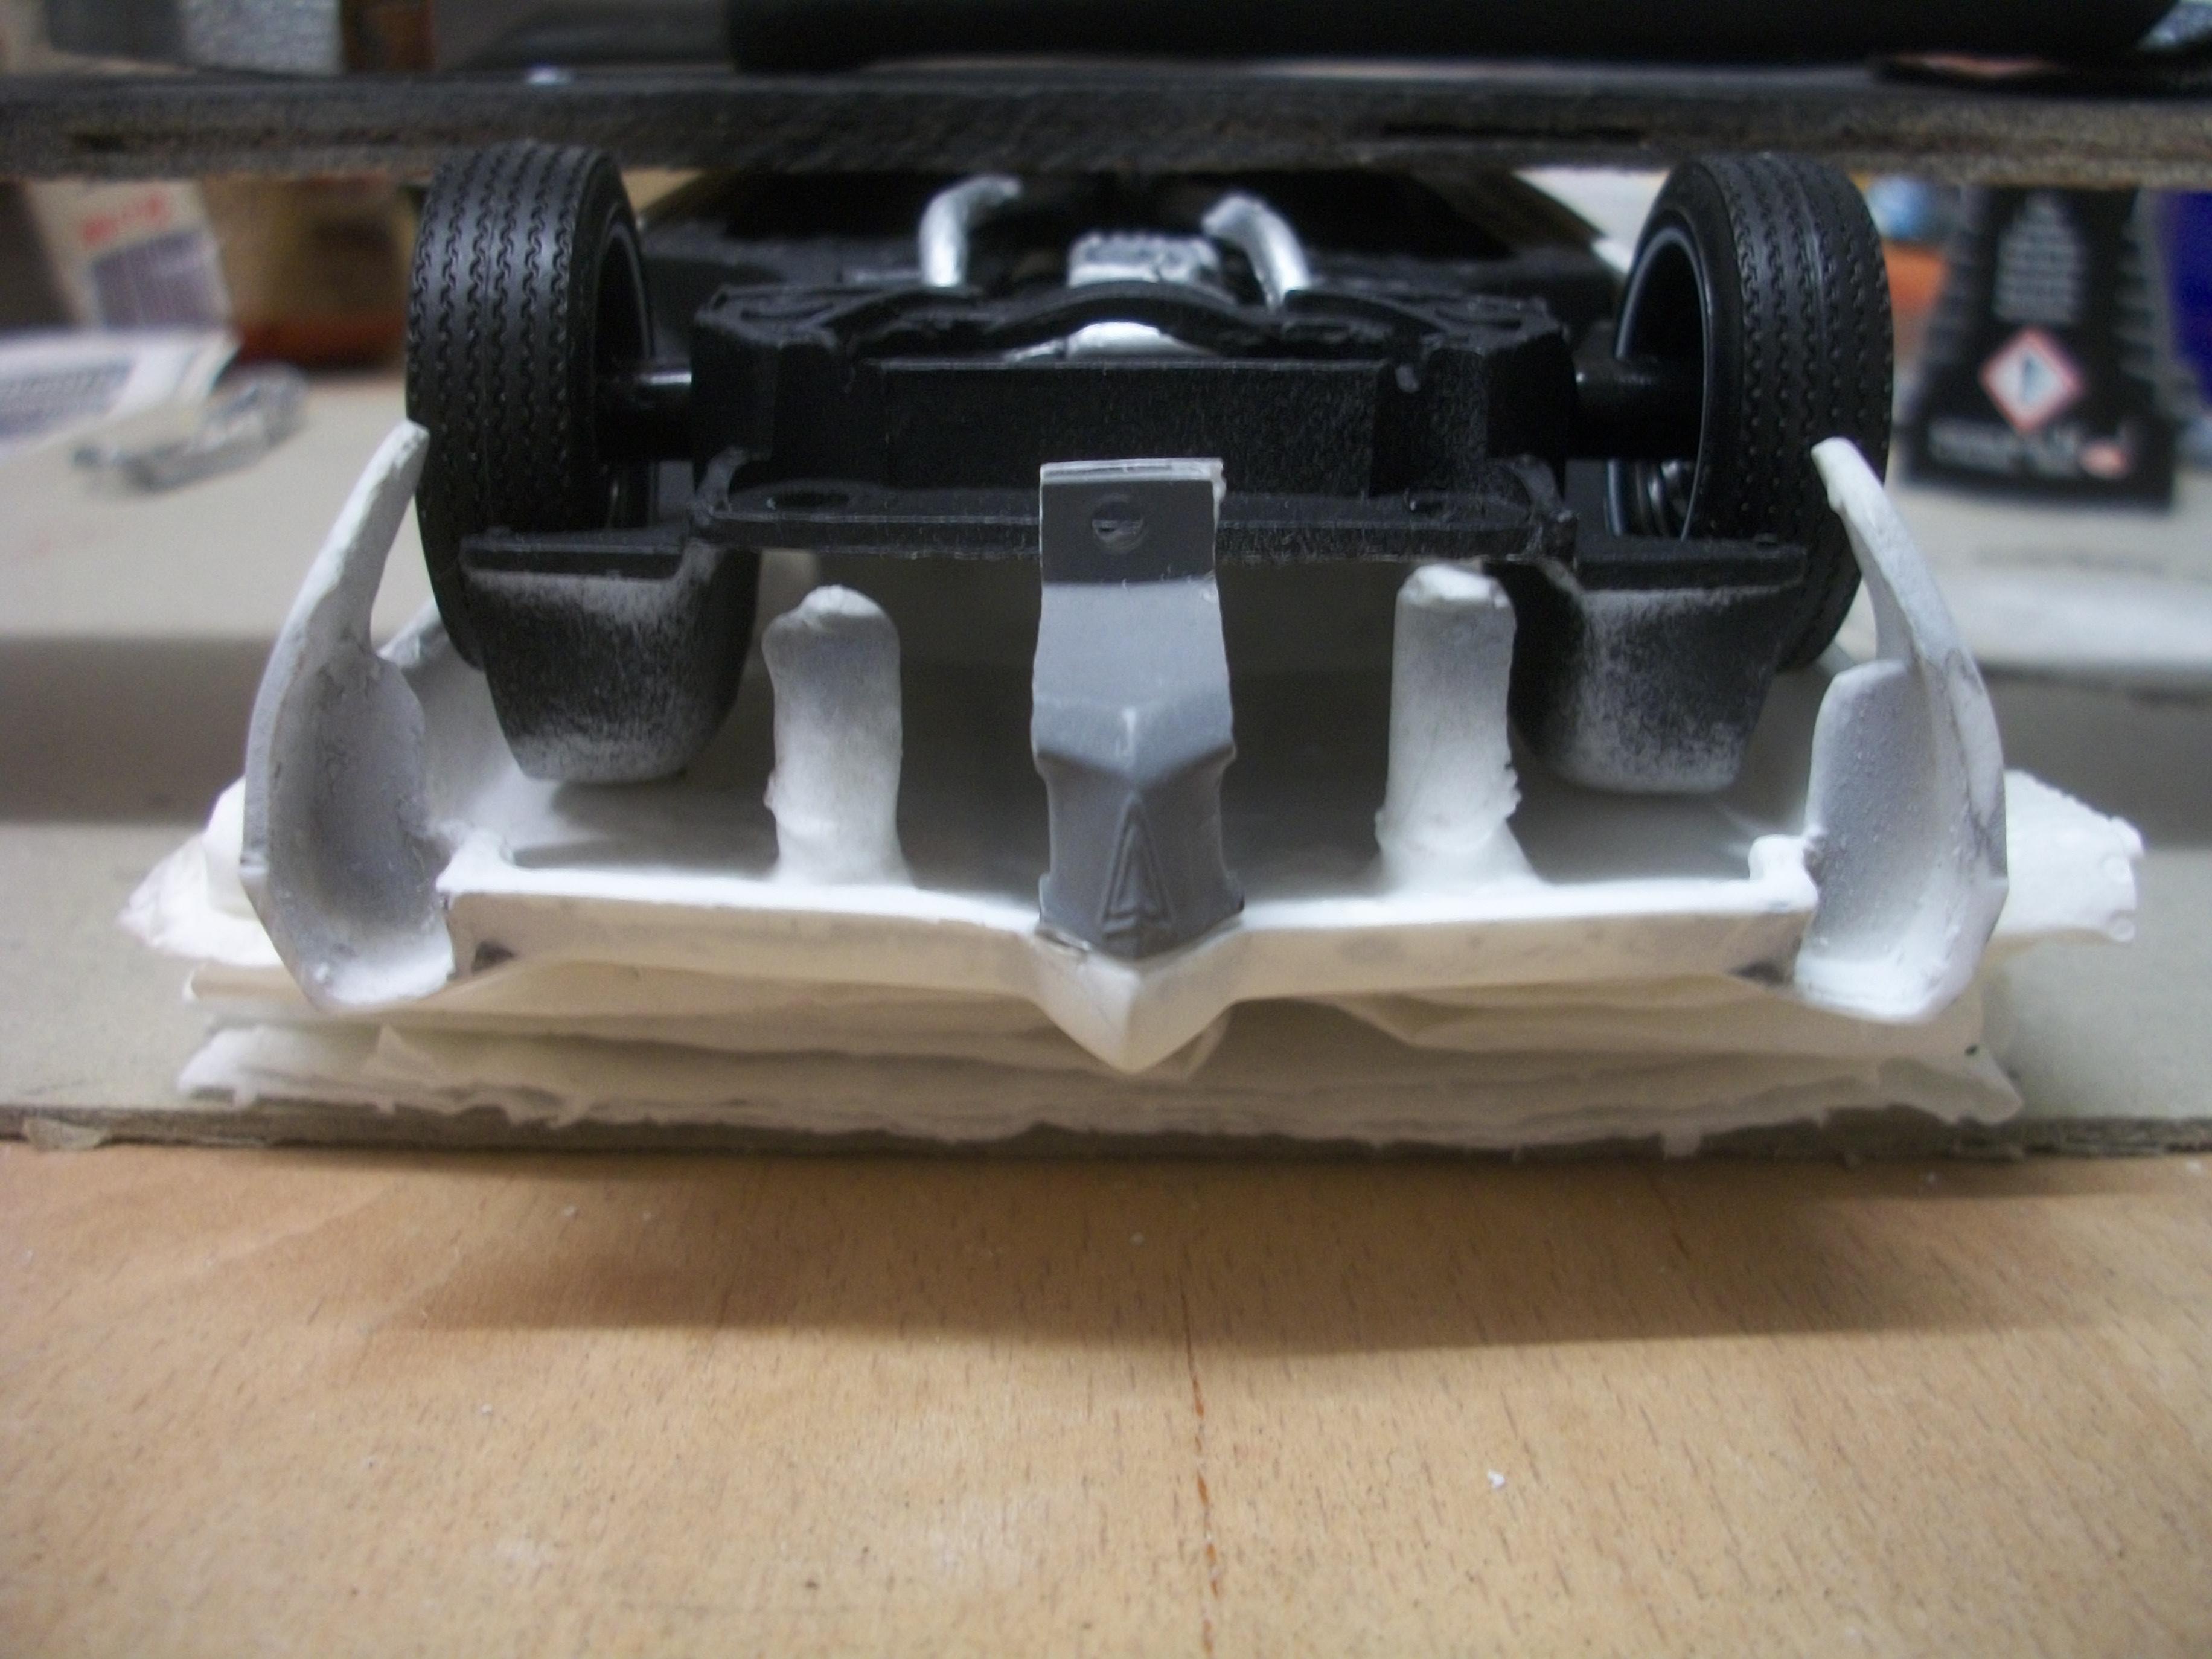
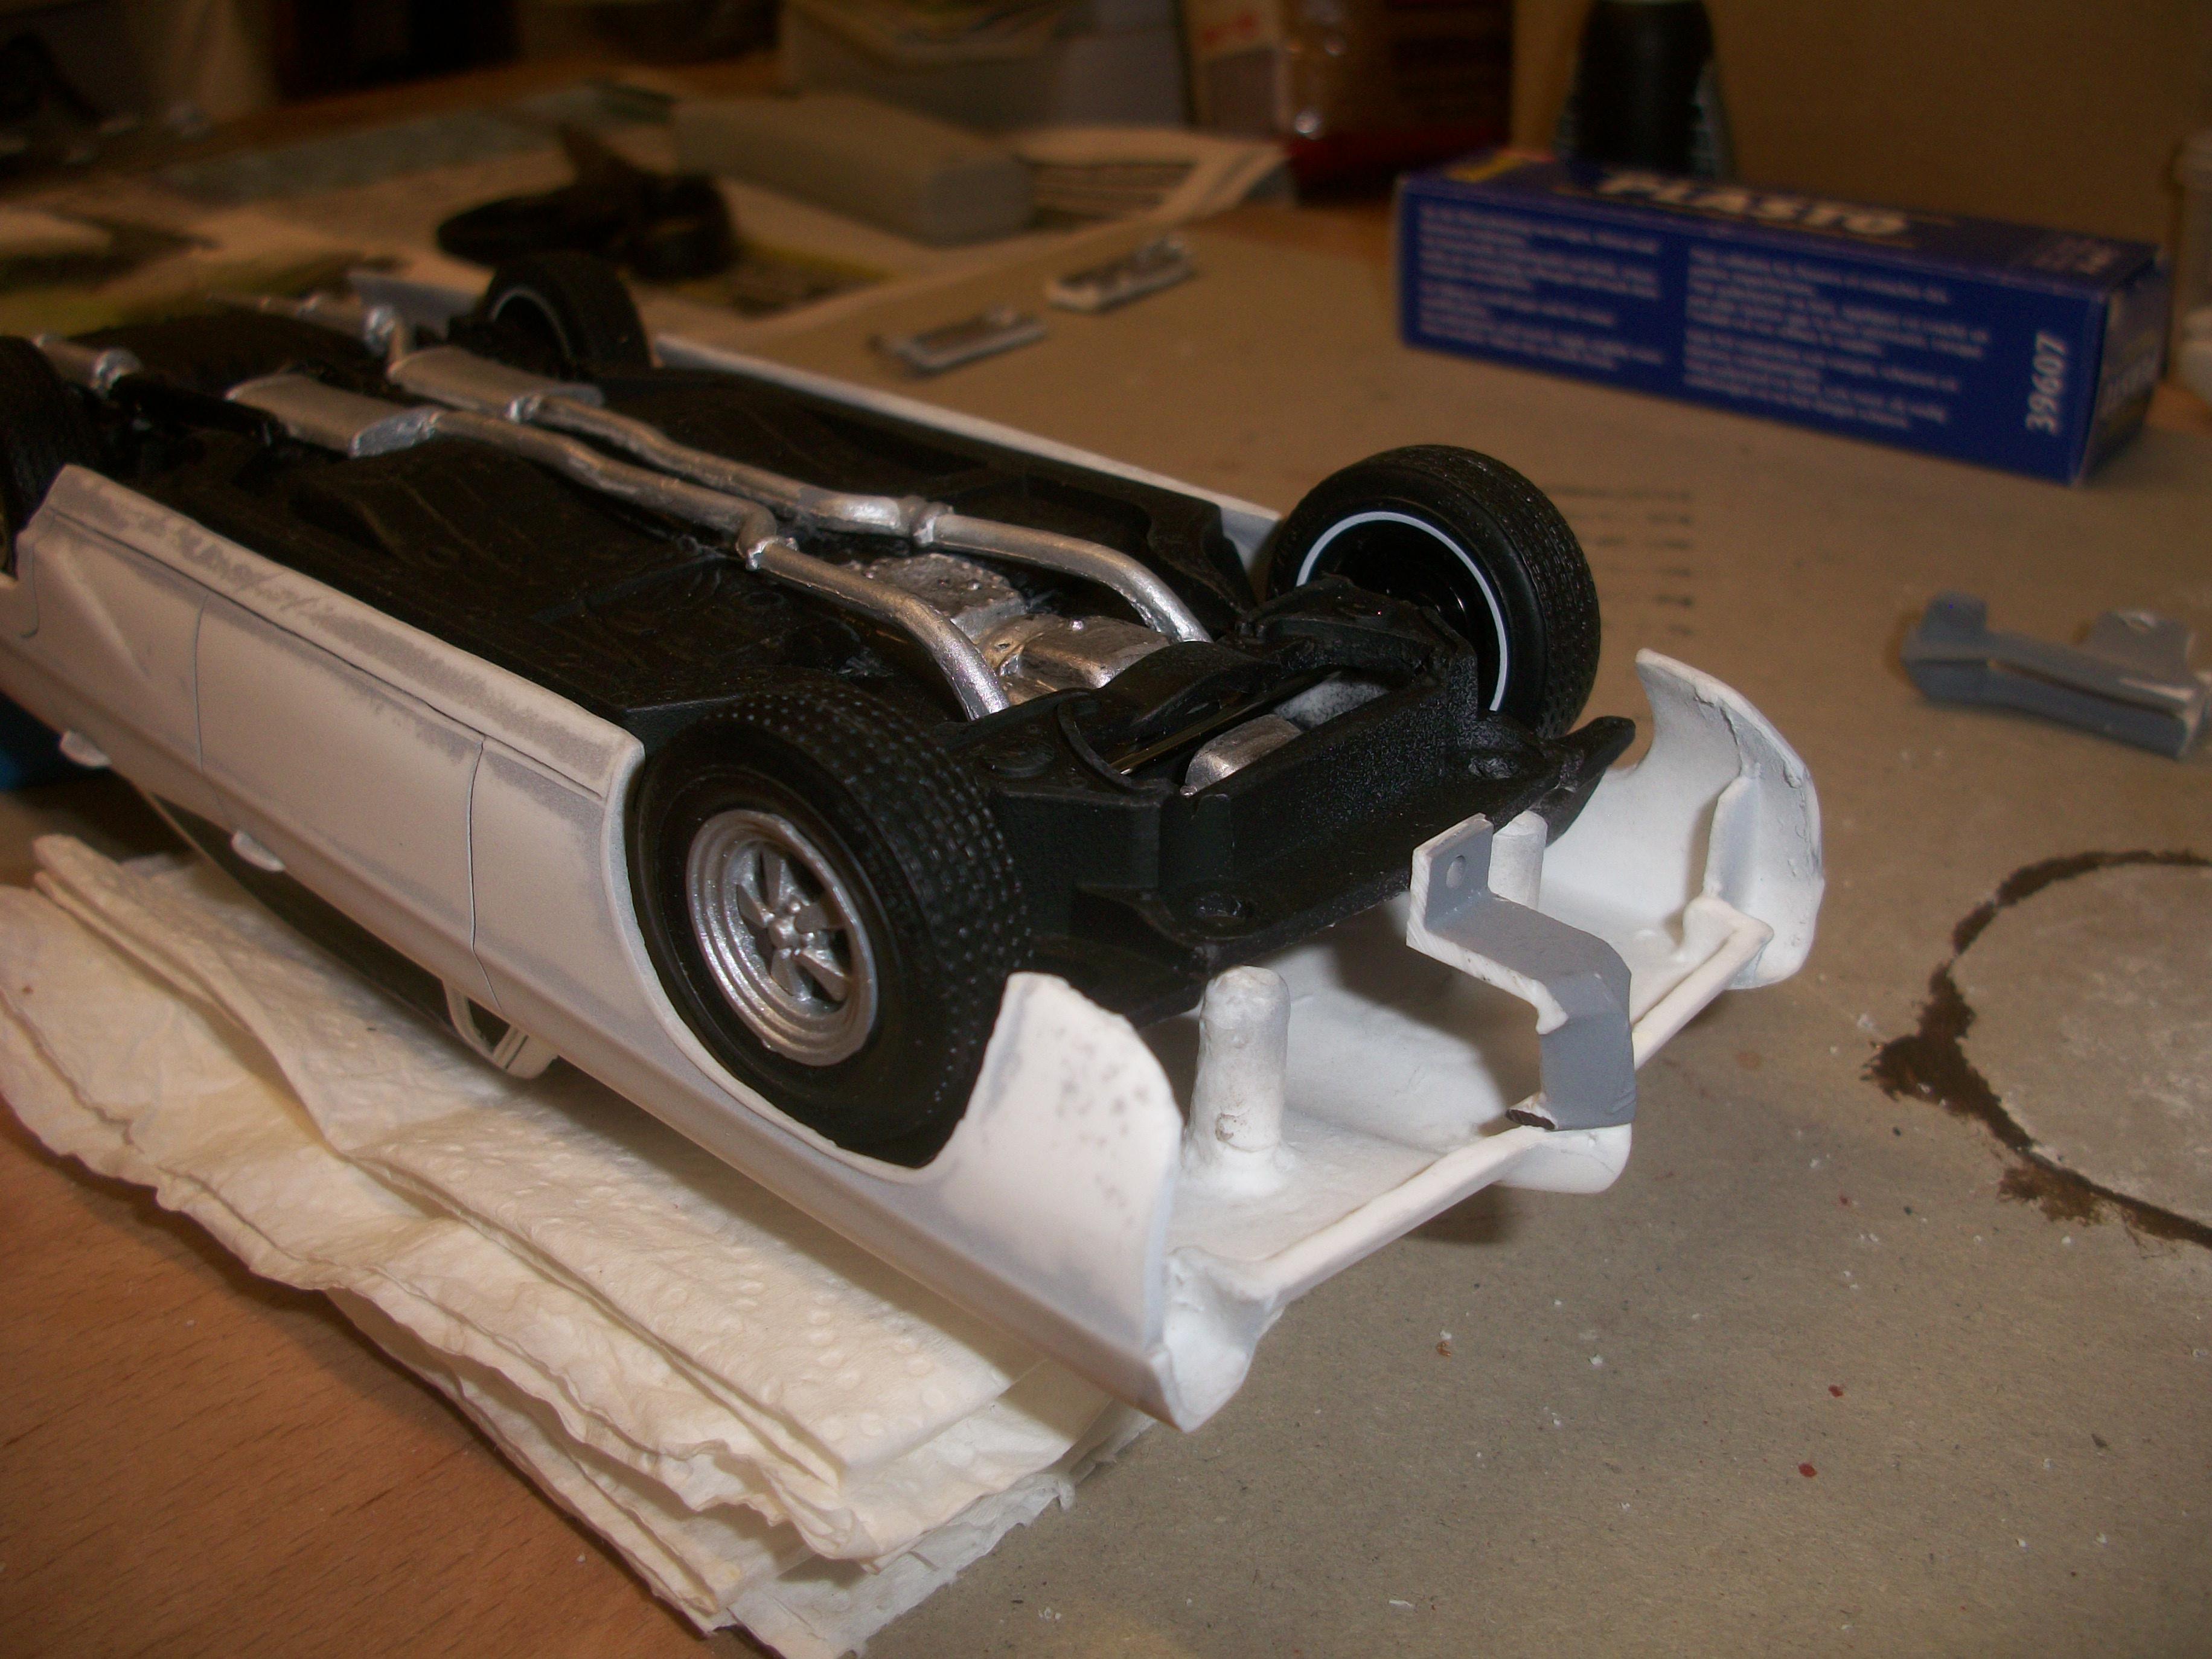
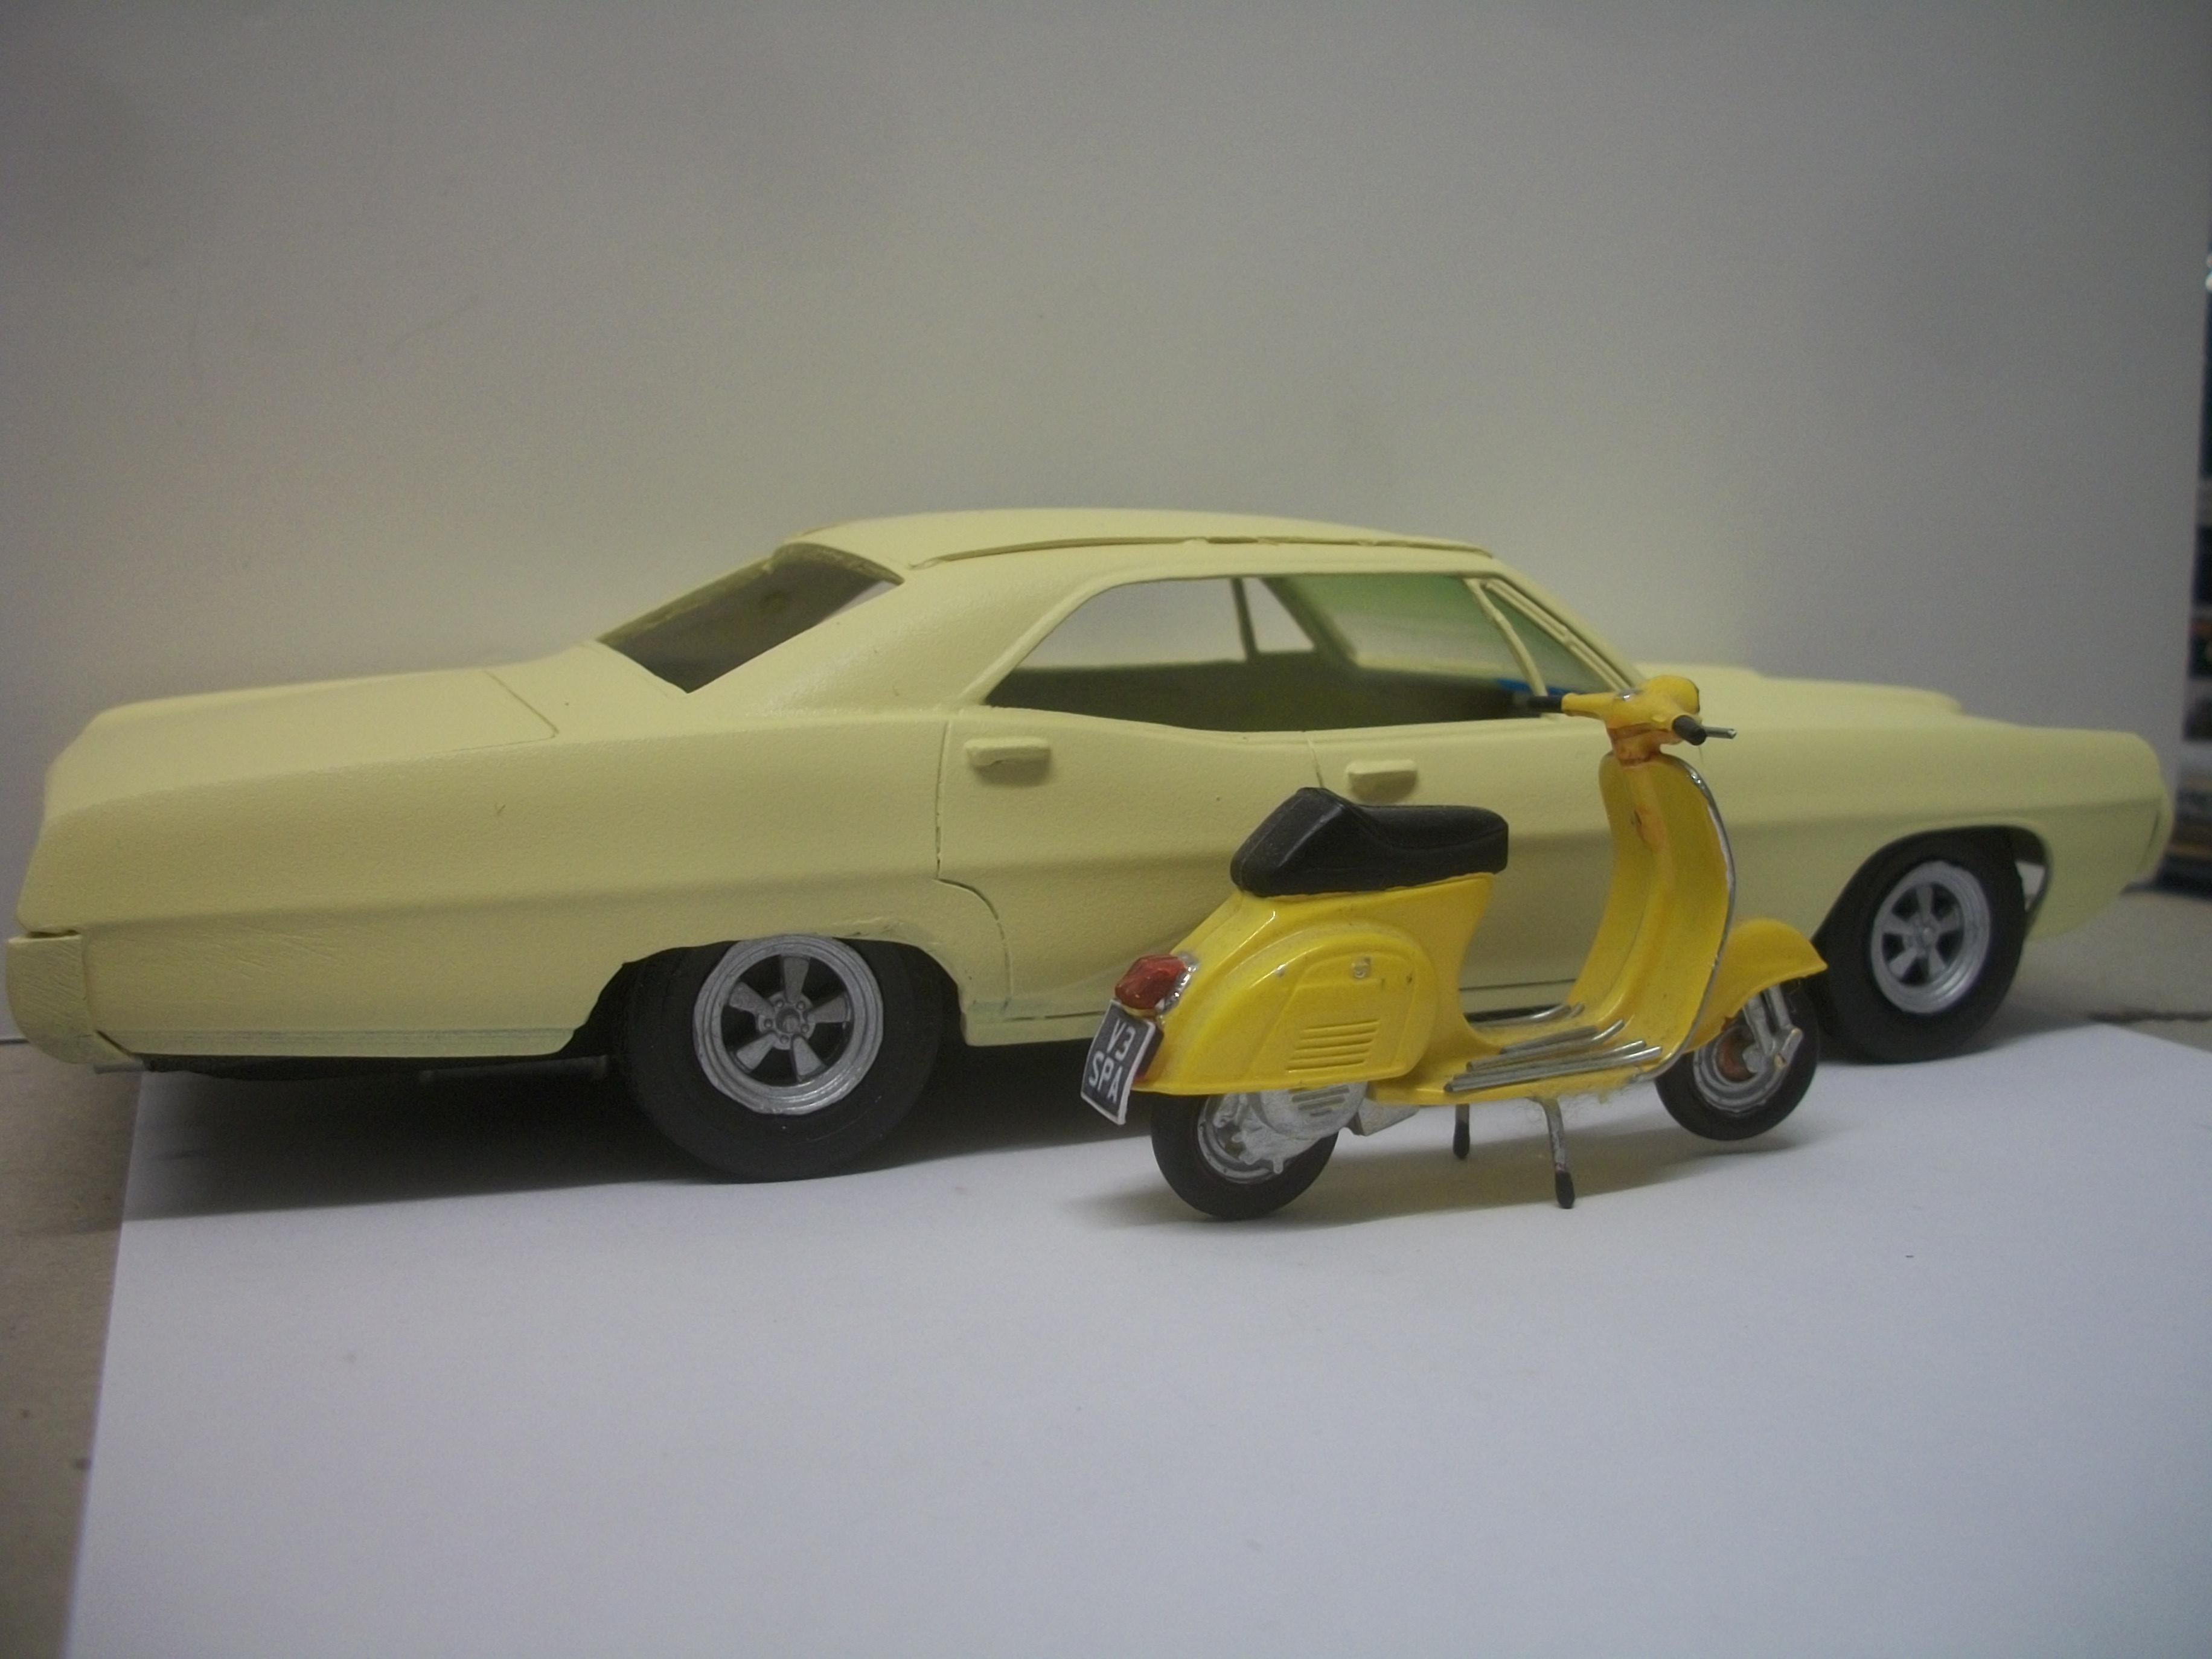
While test fitting the rolling chassis to the body of the Parisienne, and also test fitting the interior tub, I noticed what a good fit this is..... the front, rear and sides of the chassis sit nicely against the front panel, rear panel and sills. The road wheels and axles are positioned correctly and the car stands well on the tyres. With the interior tub mounted inside the body shell, the chassis lines up precisely with the body. I am using Revell Plasto model putty to fill in the front end of the model, which is intended for polystyrene and wood, but I am assuming it will be okay with resin. Some forum articles say that the Plasto eats plastic if applied in too large amounts, and they suggested Milliput as a safer alternative. Here are a few further photos of the test fitting ( sorry if there are too many, but got carried away! ) David
-
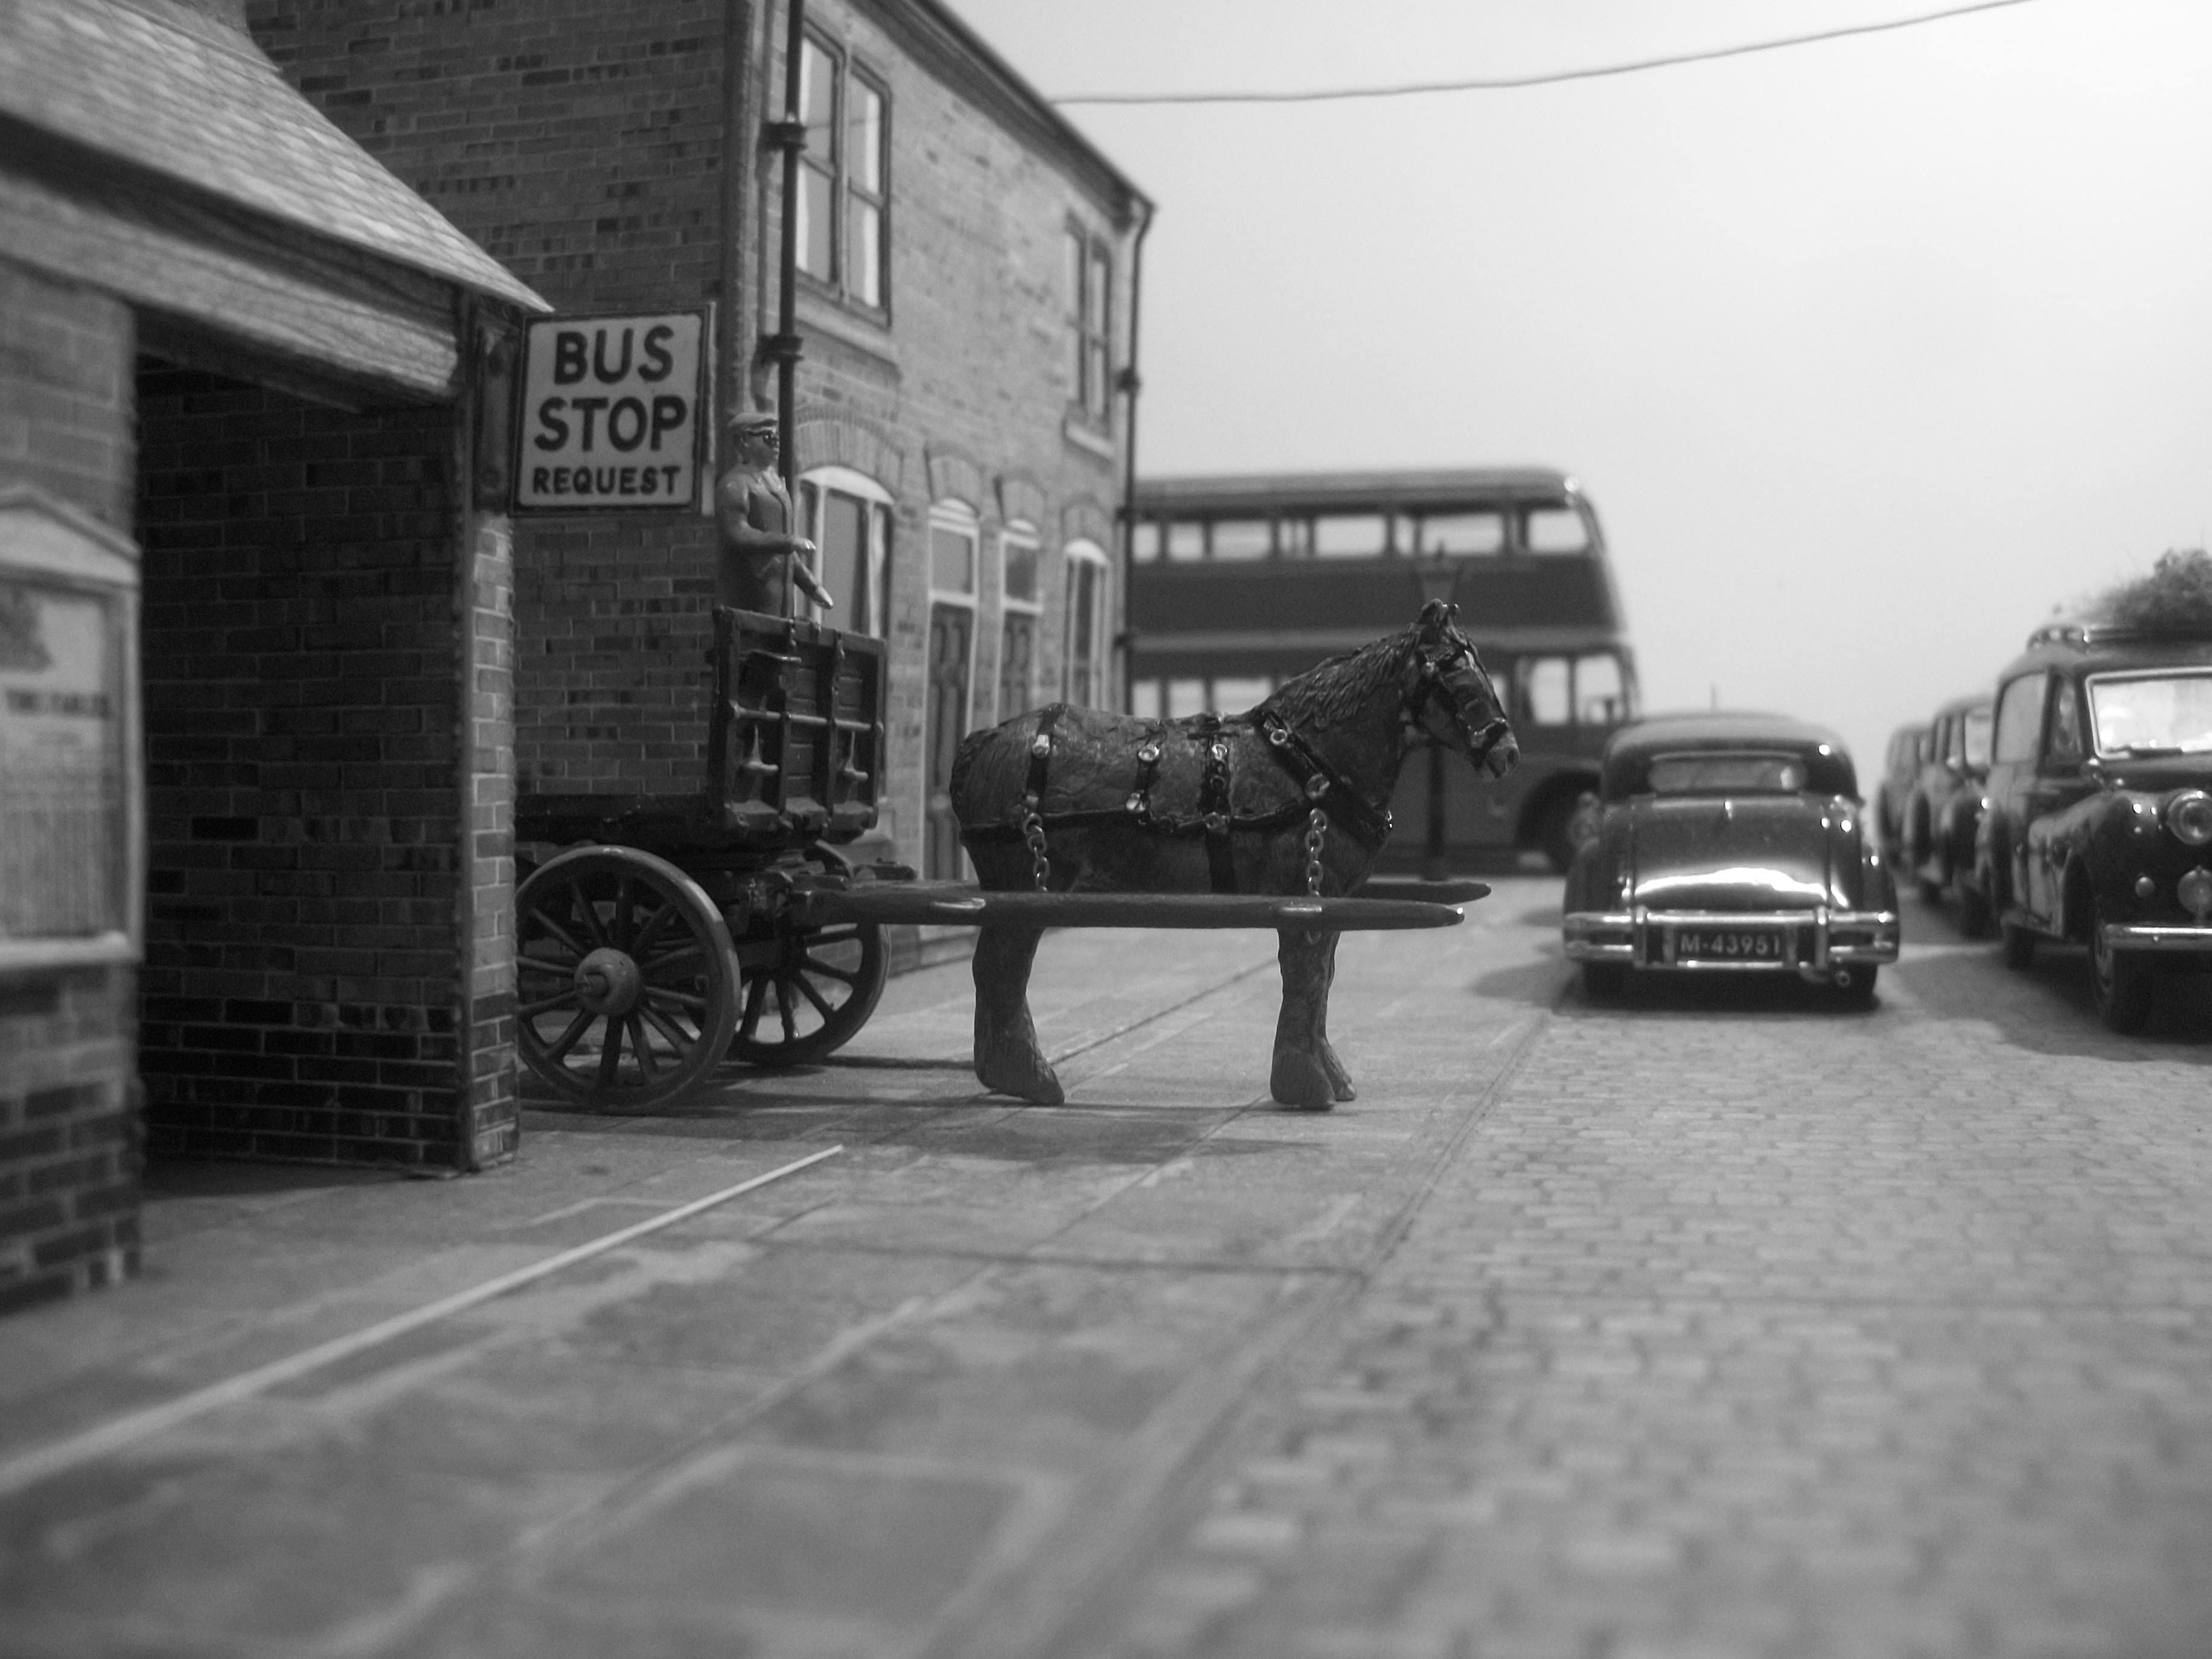
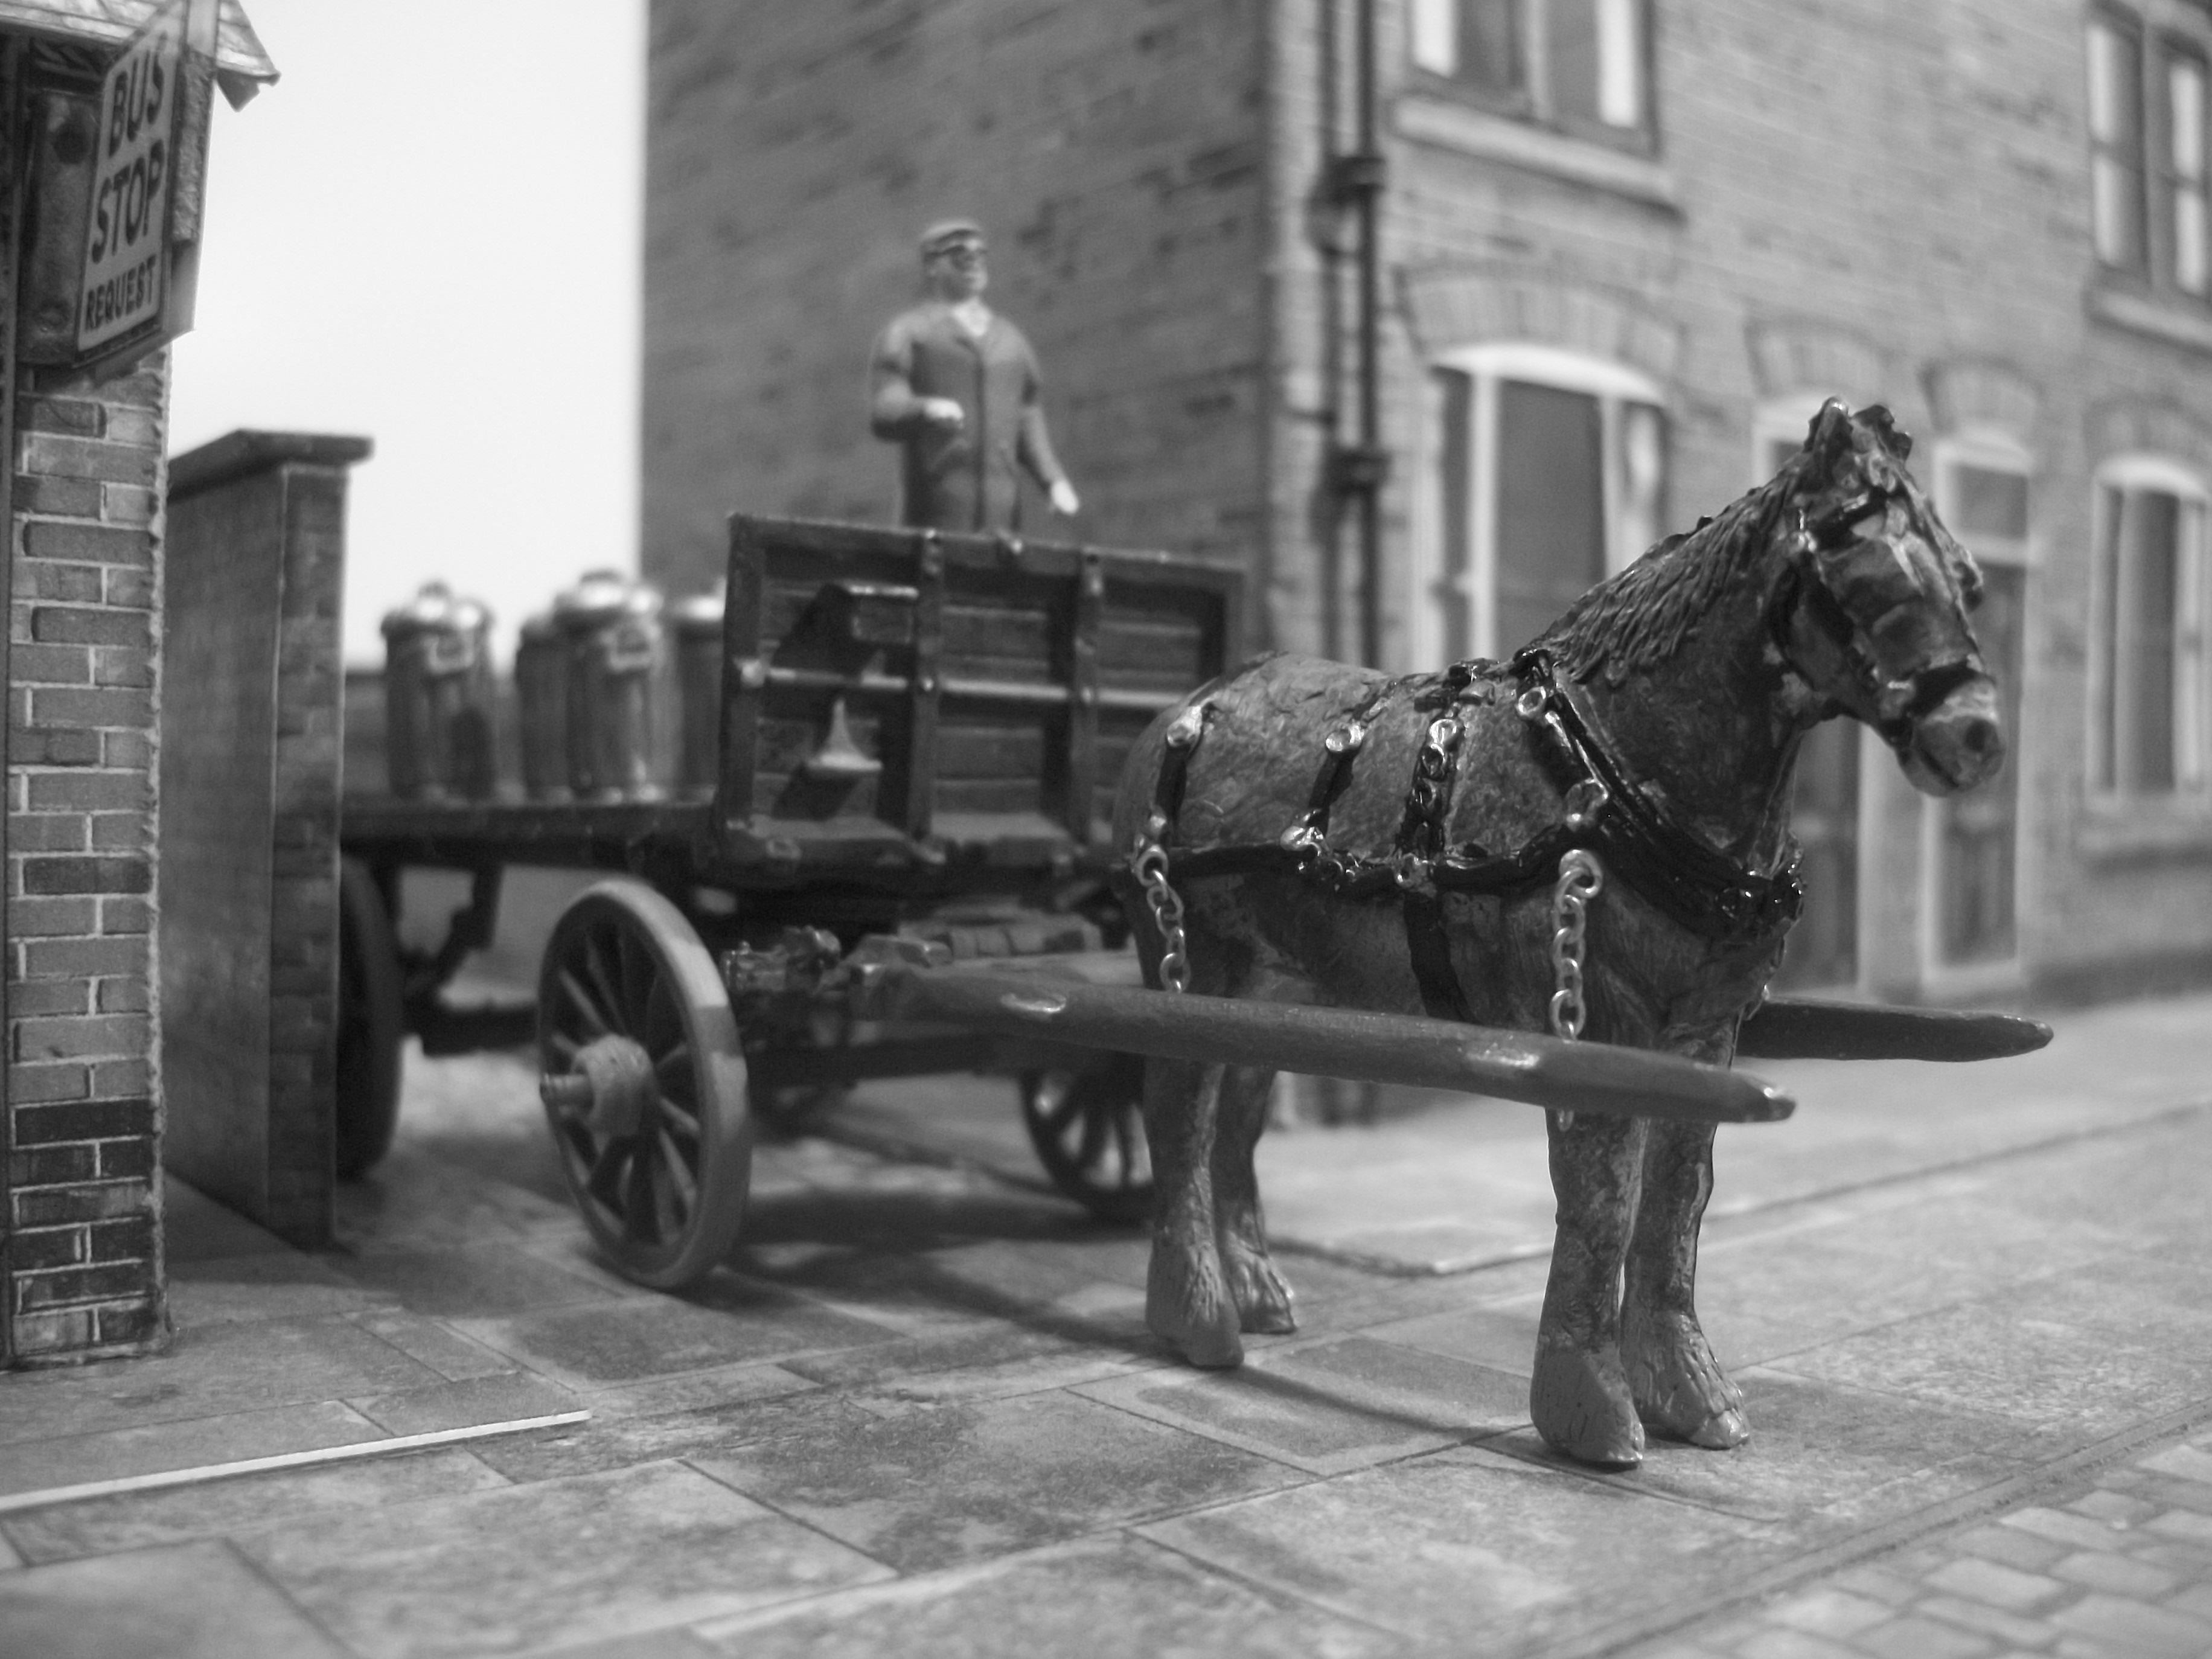
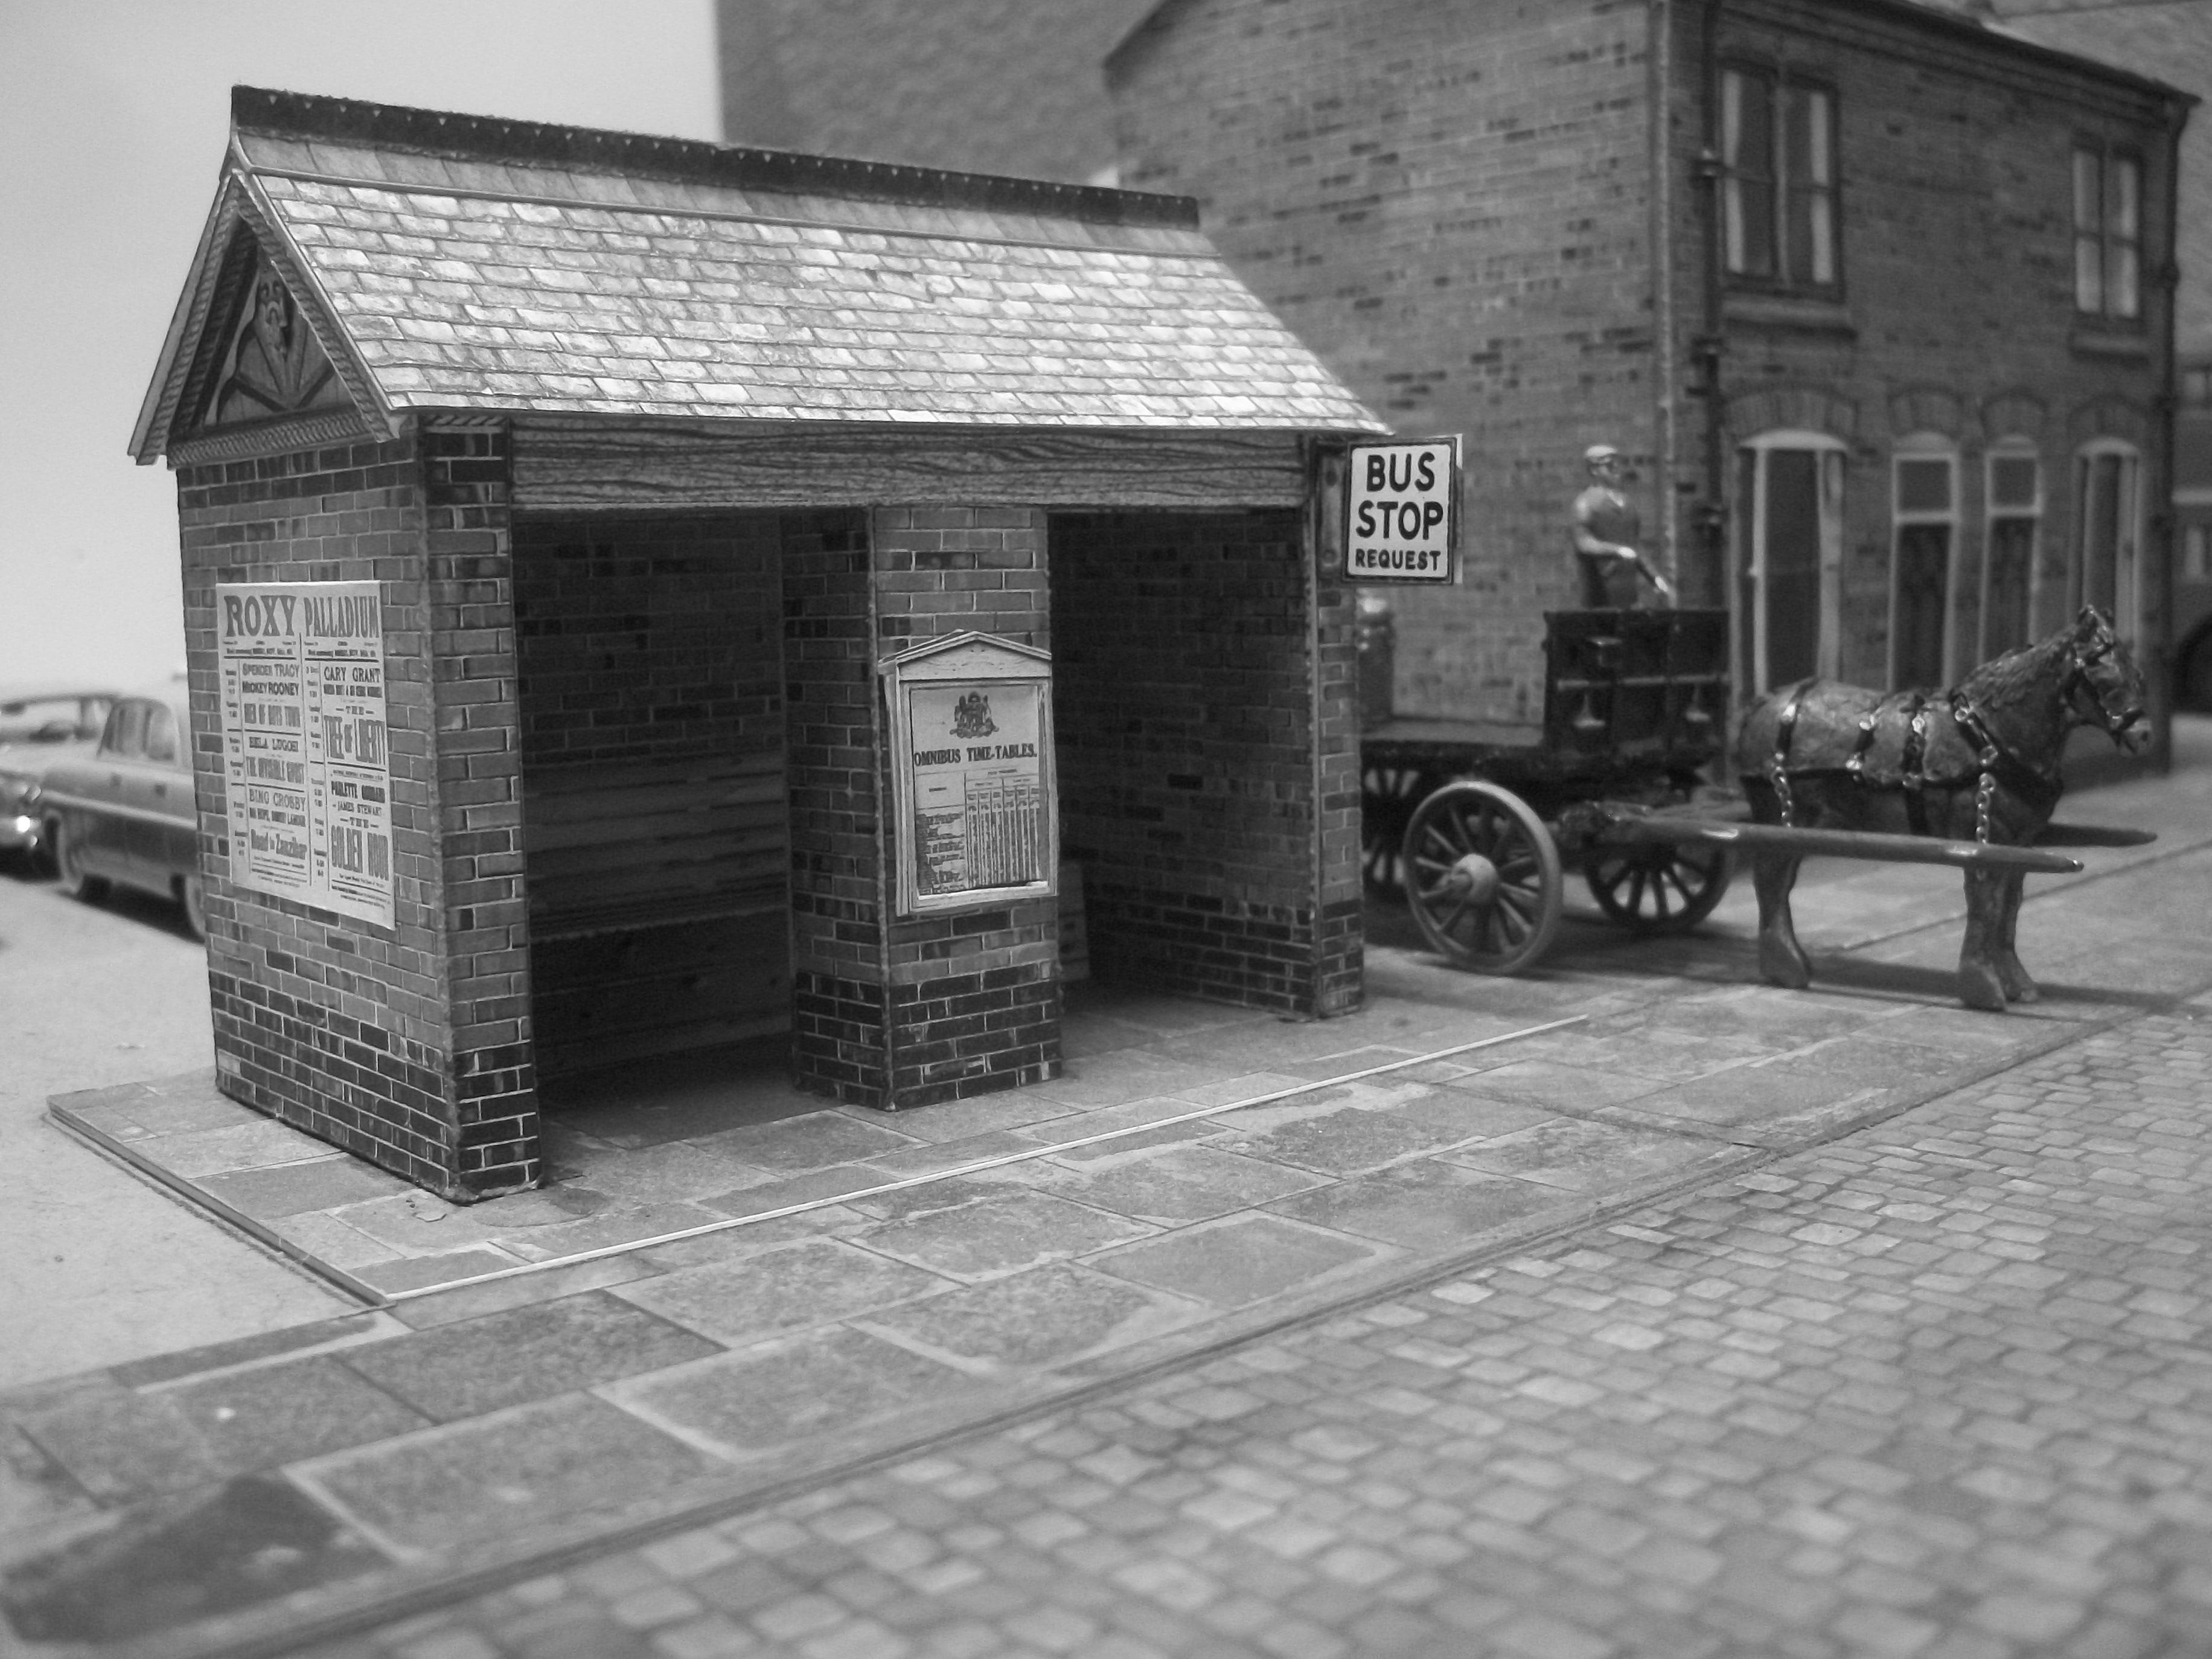
These photos are the results of a black & white photo shoot, to show the horse and cart, with a gentleman in a long coat and flat cap driving the cart. David
-
They are indeed, Scott..... and I noticed that the round headlamps have square-ish bezels to them..... Other than that minor difference, they are suitable for a '68 Parisienne. Certainly they are preferable to the '70 Bonneville, and definitely not '67 Bonneville. David
-
Great photo of the '67, '68 and '69 set, Tom..... I like all three of those model cars. Did you build and paint those three cars yourself? I can see the difference very clearly between the front edge of the hood on the '68 car and the '67 car in your photo..... this is helping me to understand what needs to be done. Few more photos of last night's build progress. David
-
Thanks, Tom....... and I am pleased to see that you are following the story, which continues! David
-
What an incredible trip these parts of yours have made, Alan...... twice around the World is some journey! I am determined to build this Parisienne as well as I possibly can, and I am really enjoying this stage of the build...... the front end conversion is probably the most important part of the process. This morning I am paying close attention to my reference photographs, before modifying the front edge of the bonnet ( hood ). Here's a few more photos of work that I carried out late last night..... burning the midnight oil..... and beyond. David


.jpg.ed9e1e38356e139d038db573fb3514a3.jpg)
.jpg.d2240197e38cf33d3d104e94e340c323.jpg)


.jpg.d5d750cfd27ef4235848fee2f242fbd1.jpg)