Anglia105E
-
Posts
3,487 -
Joined
-
Last visited
Content Type
Profiles
Forums
Events
Gallery
Everything posted by Anglia105E
-
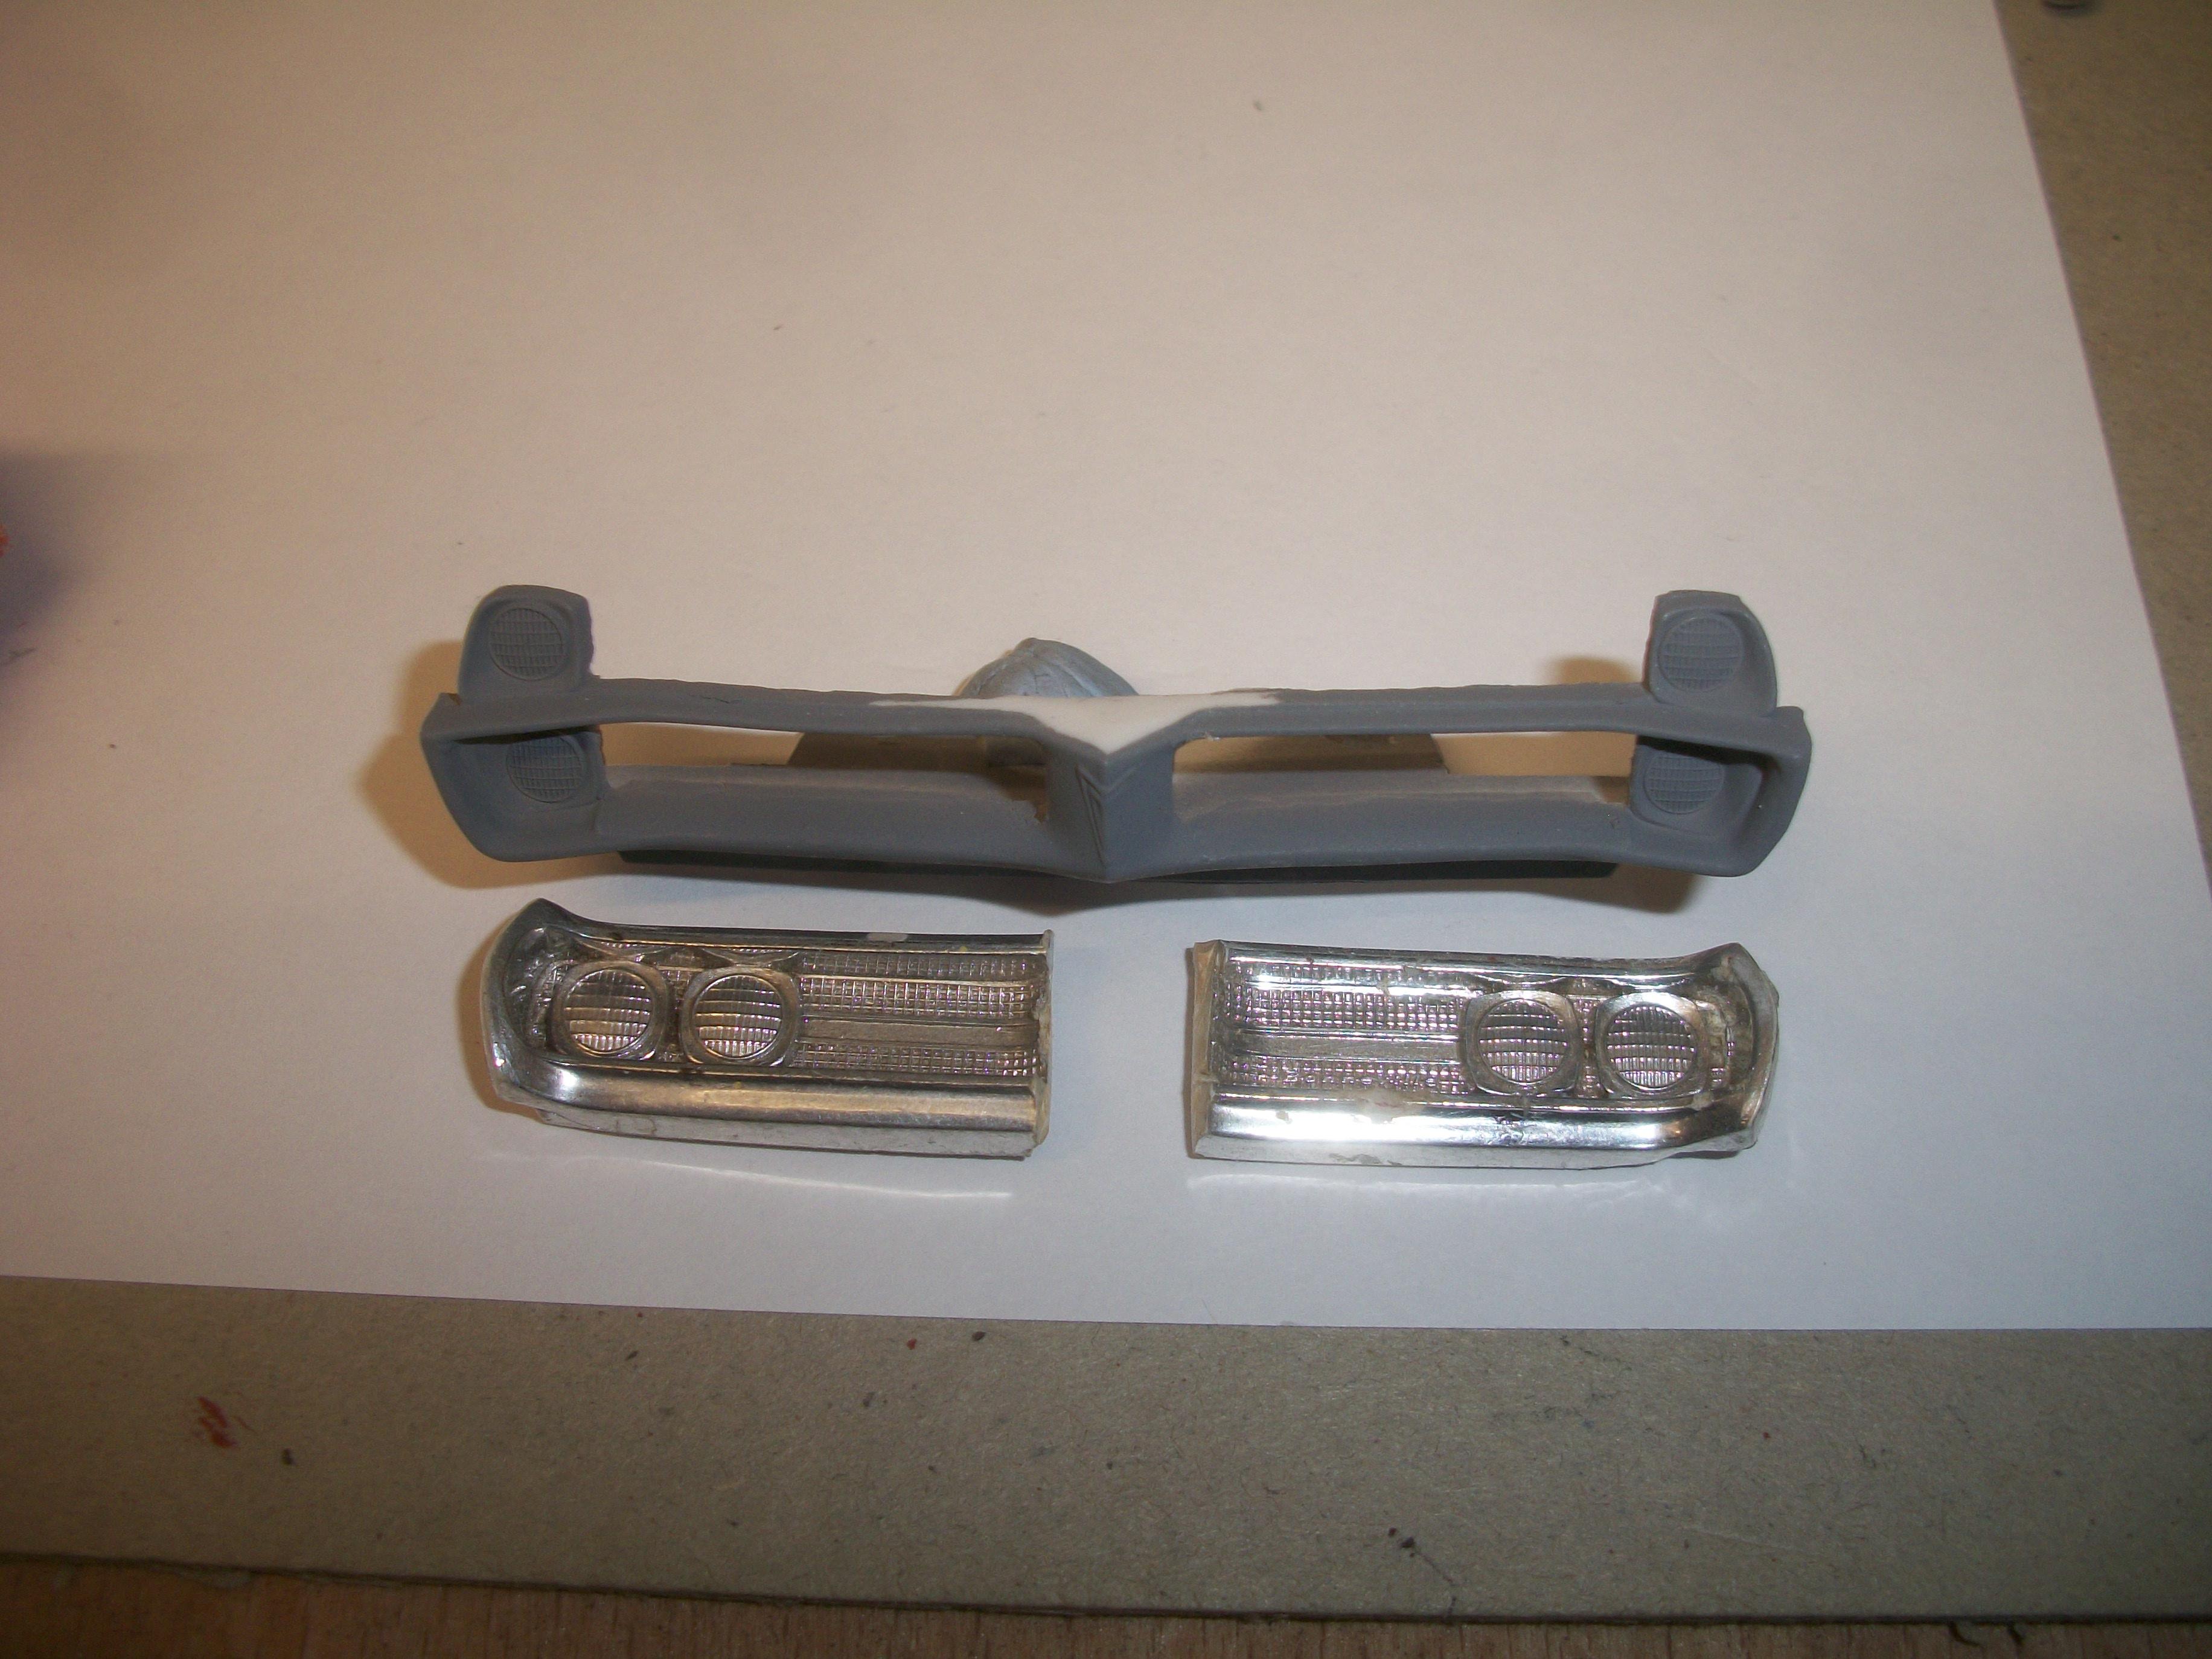
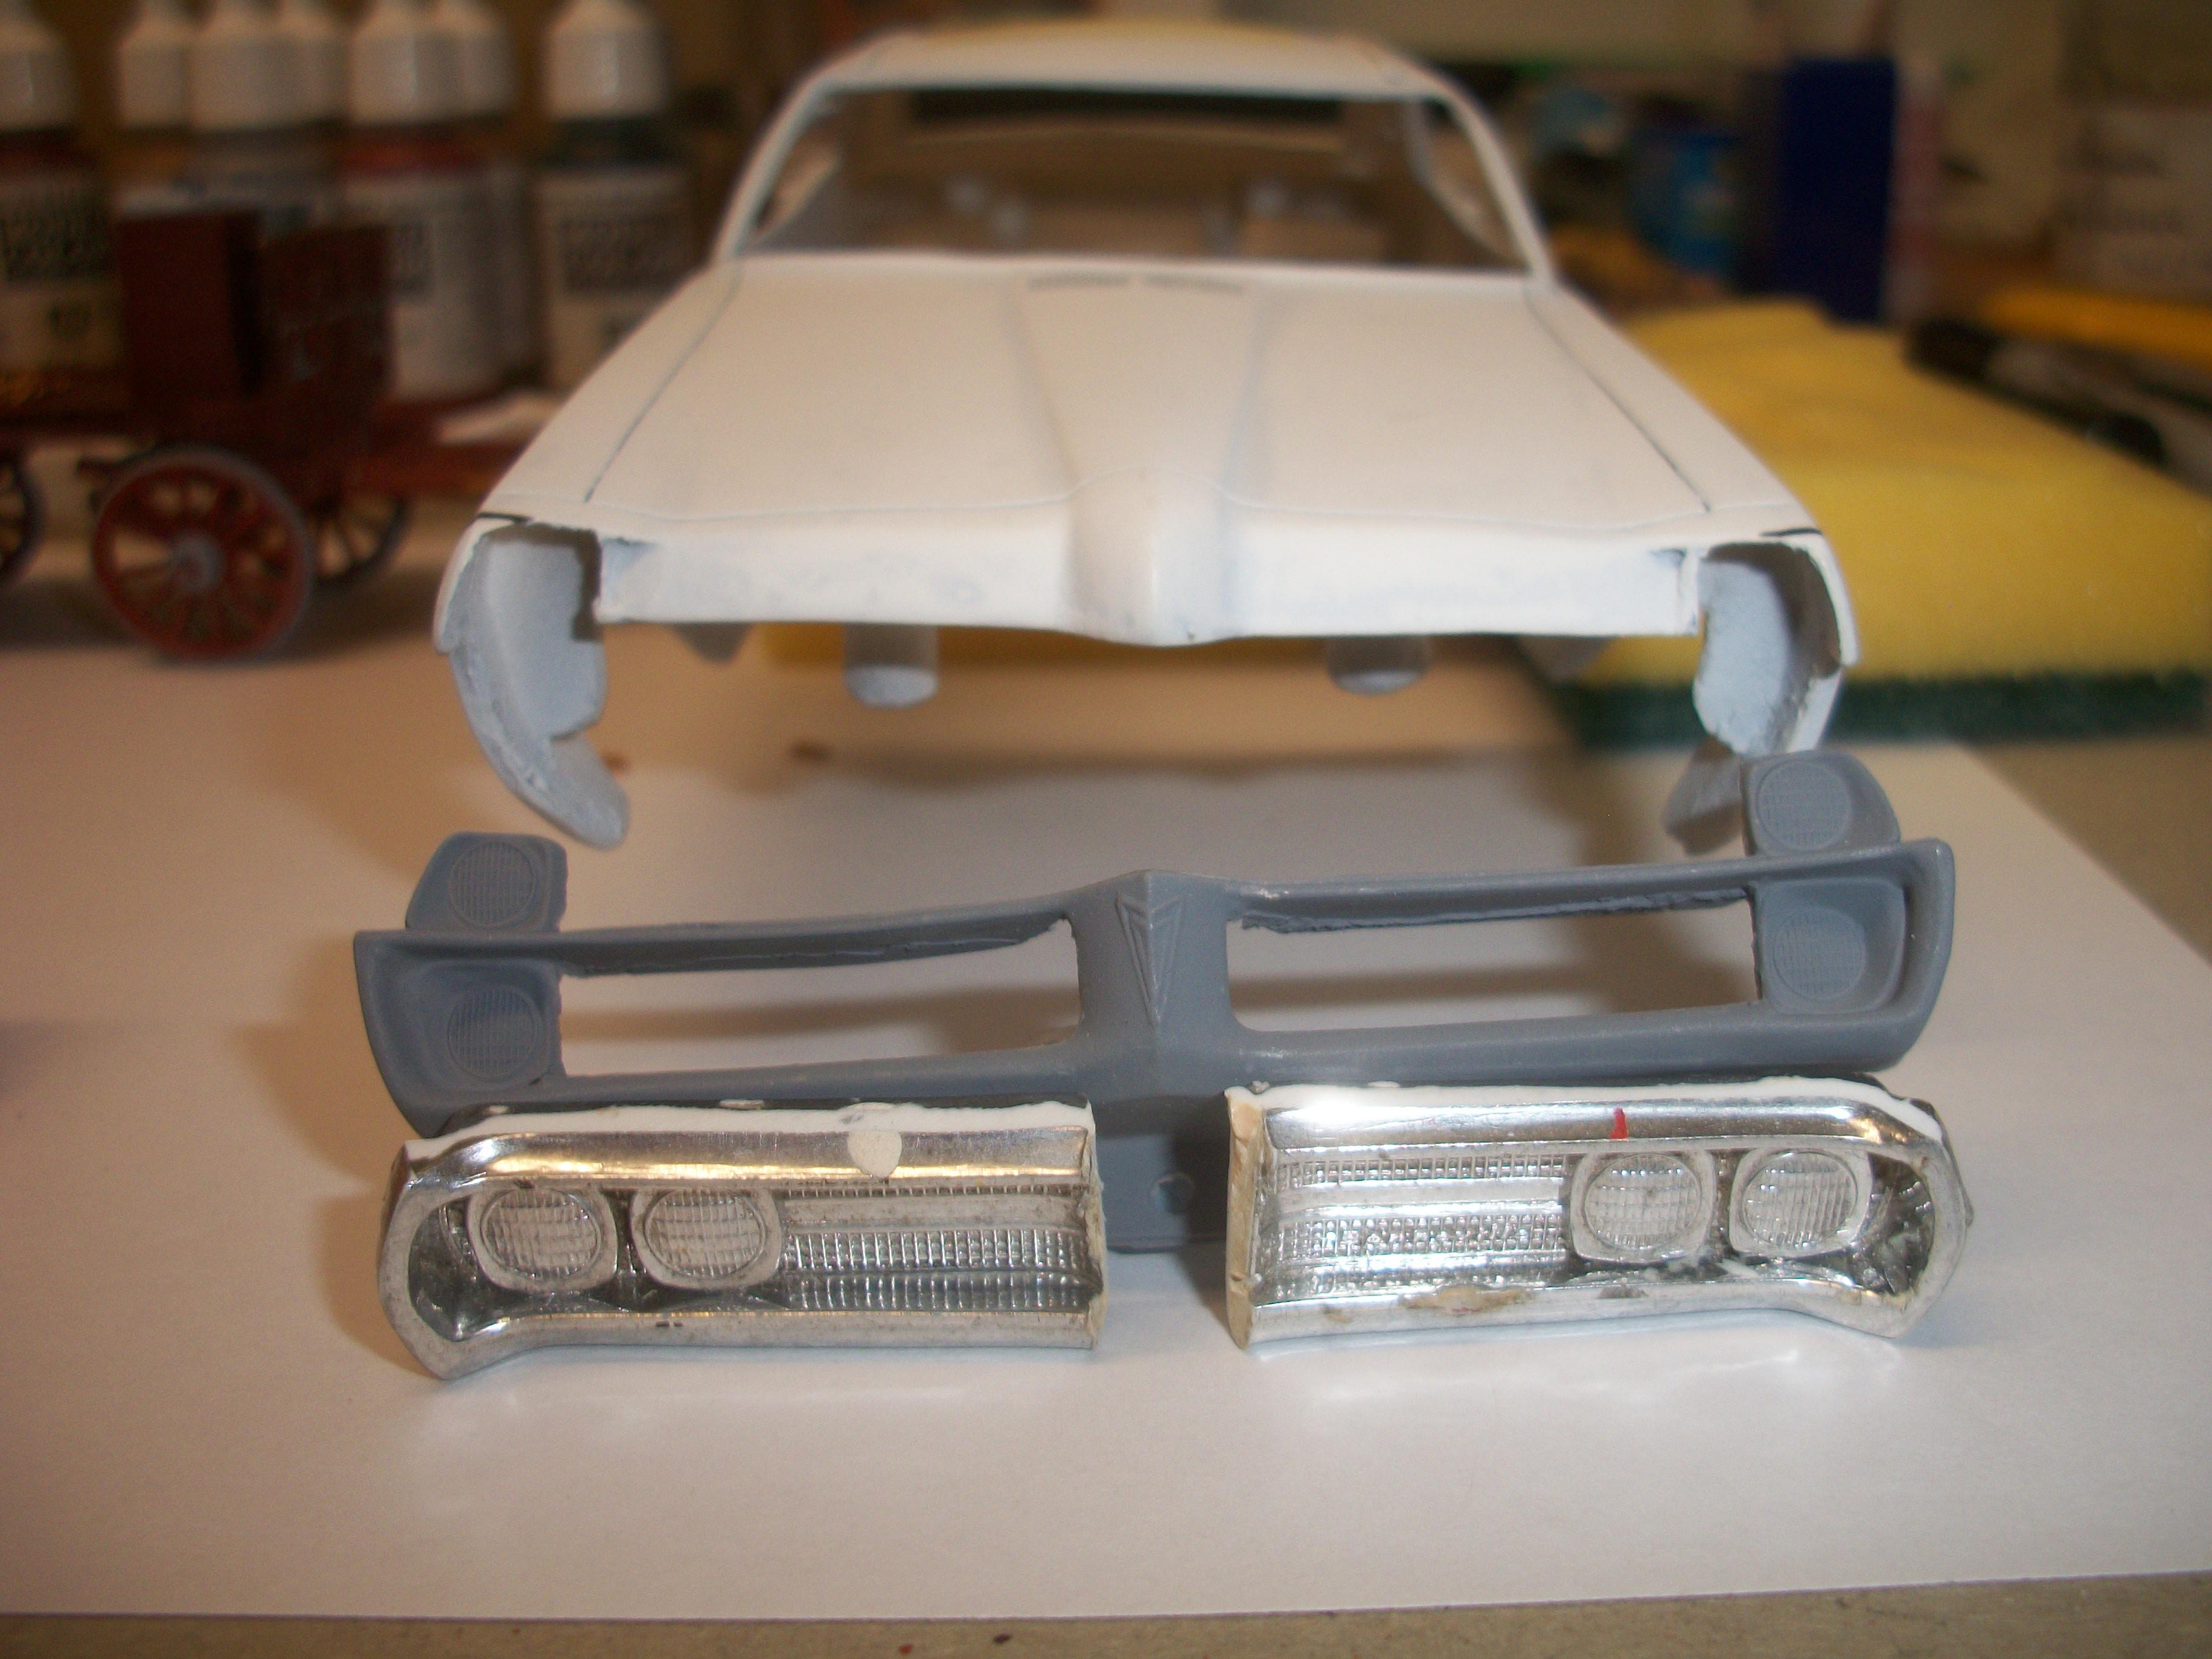
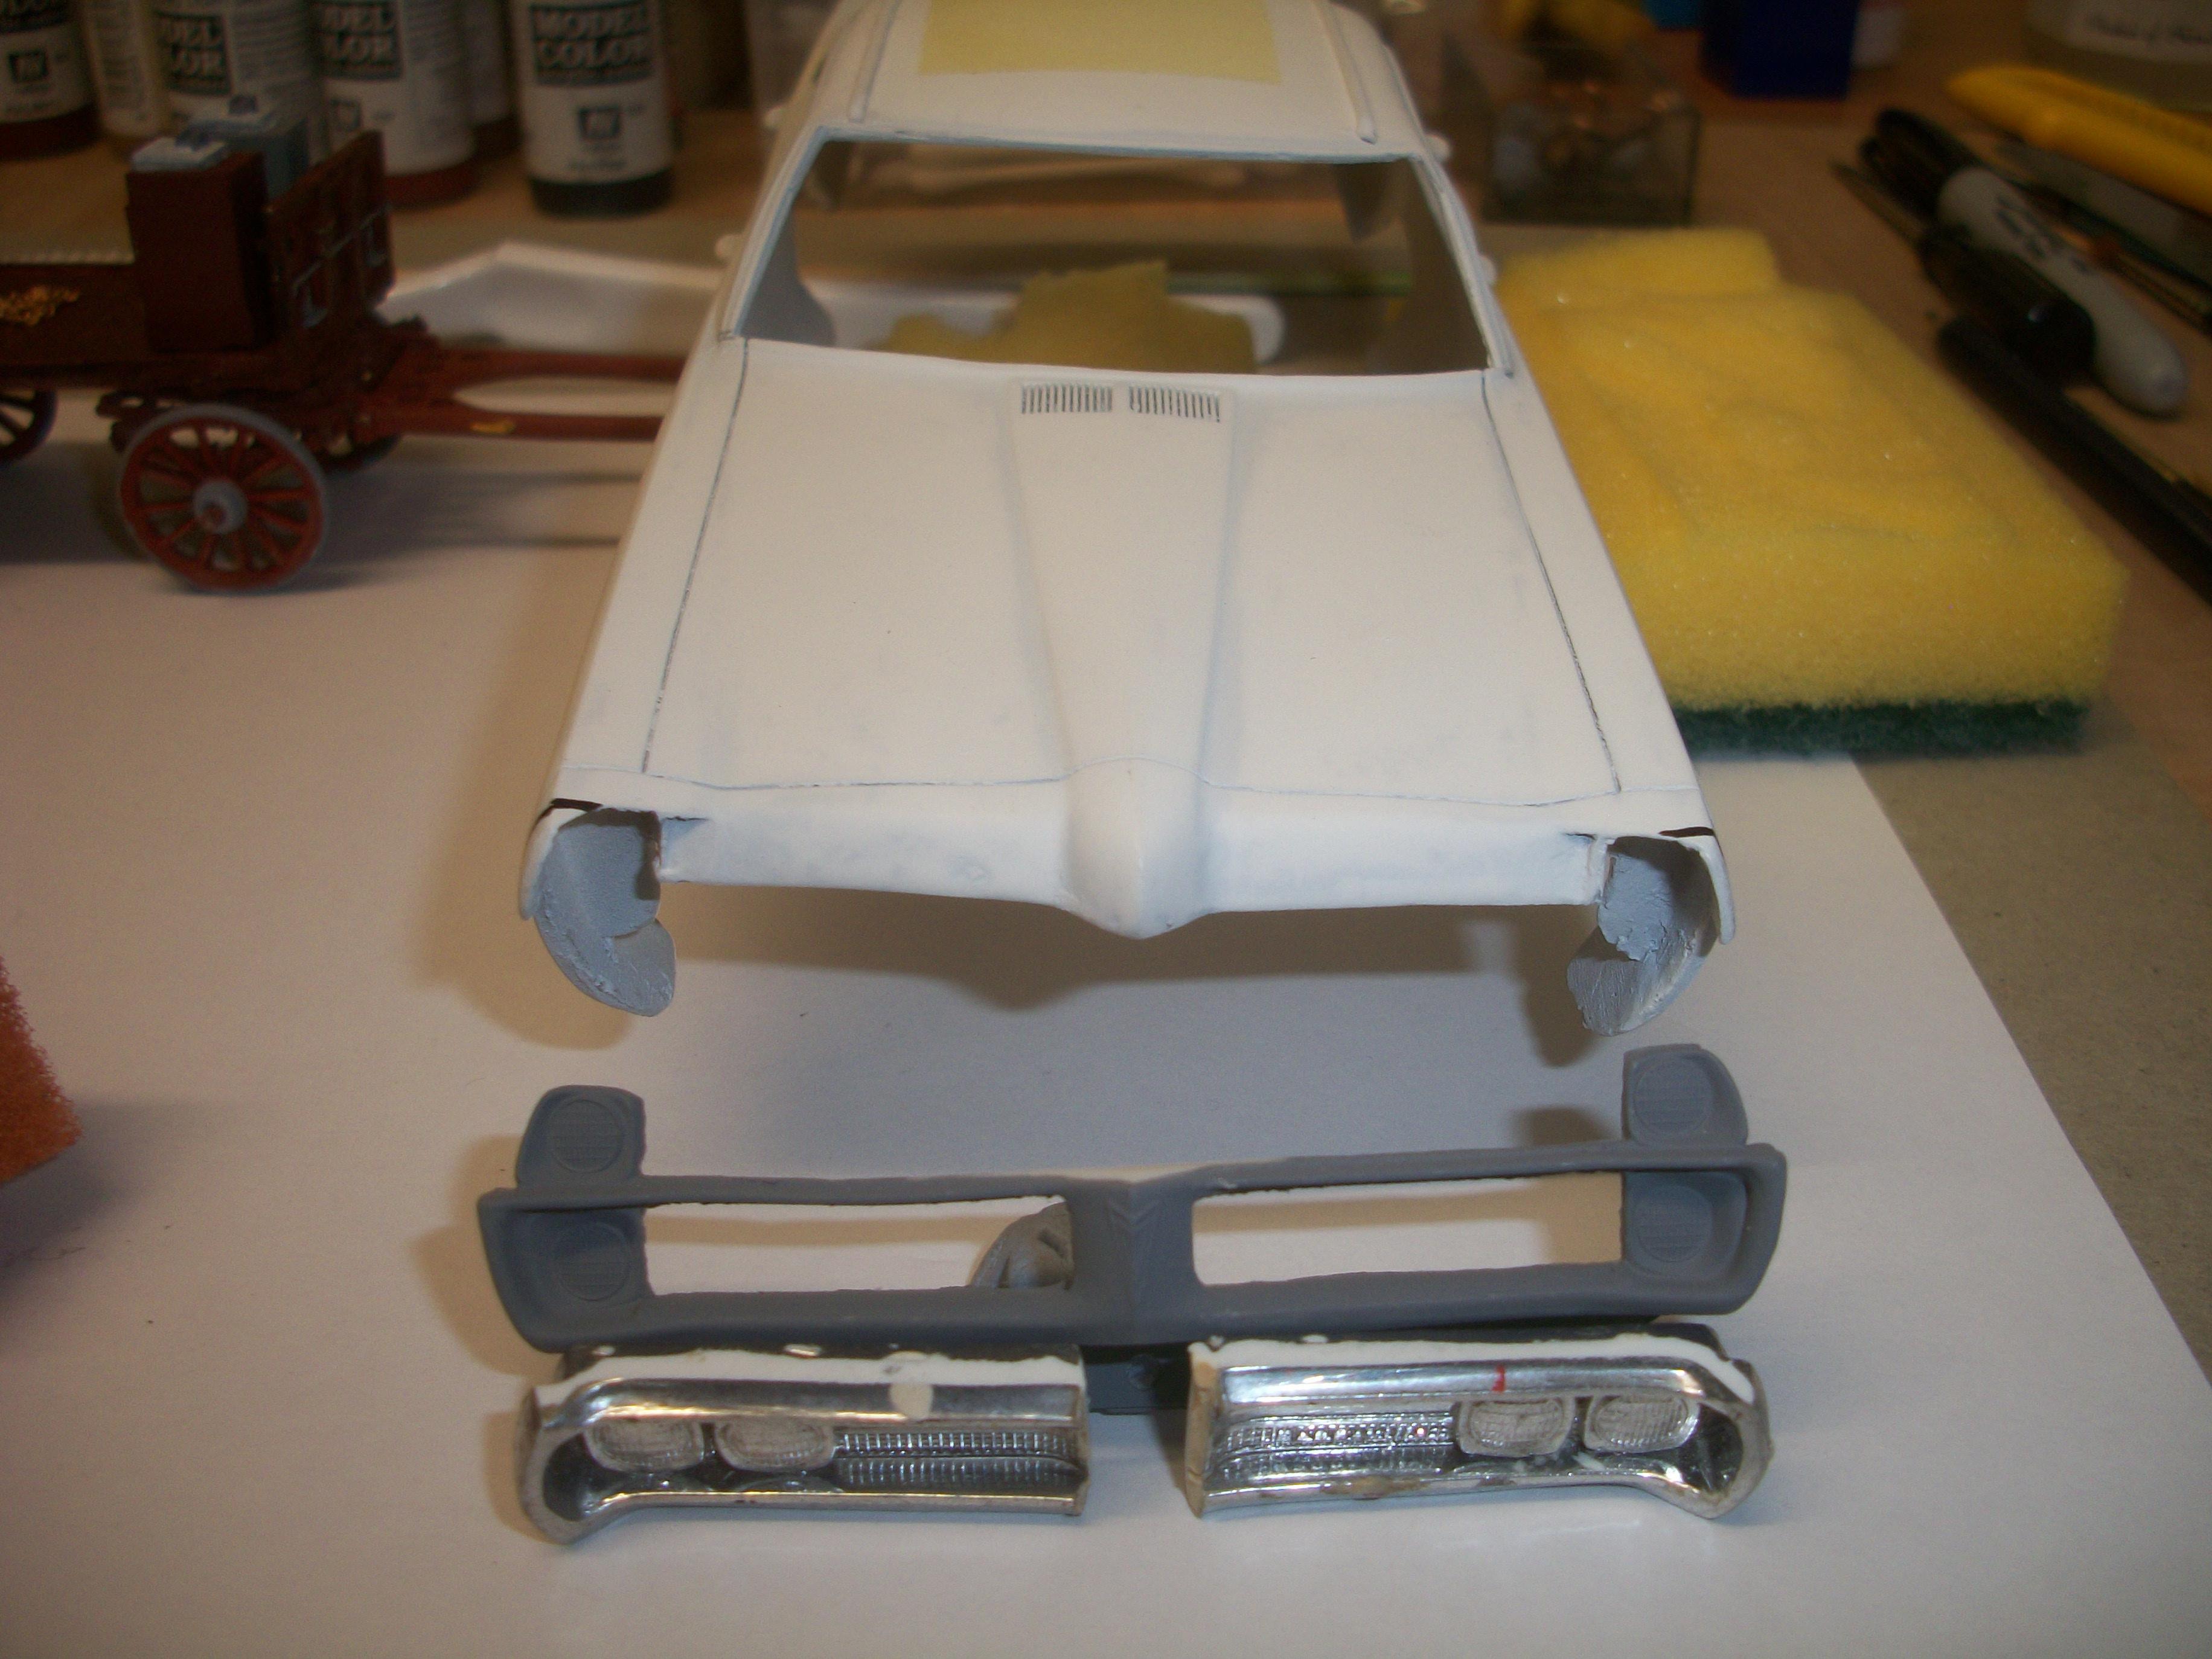
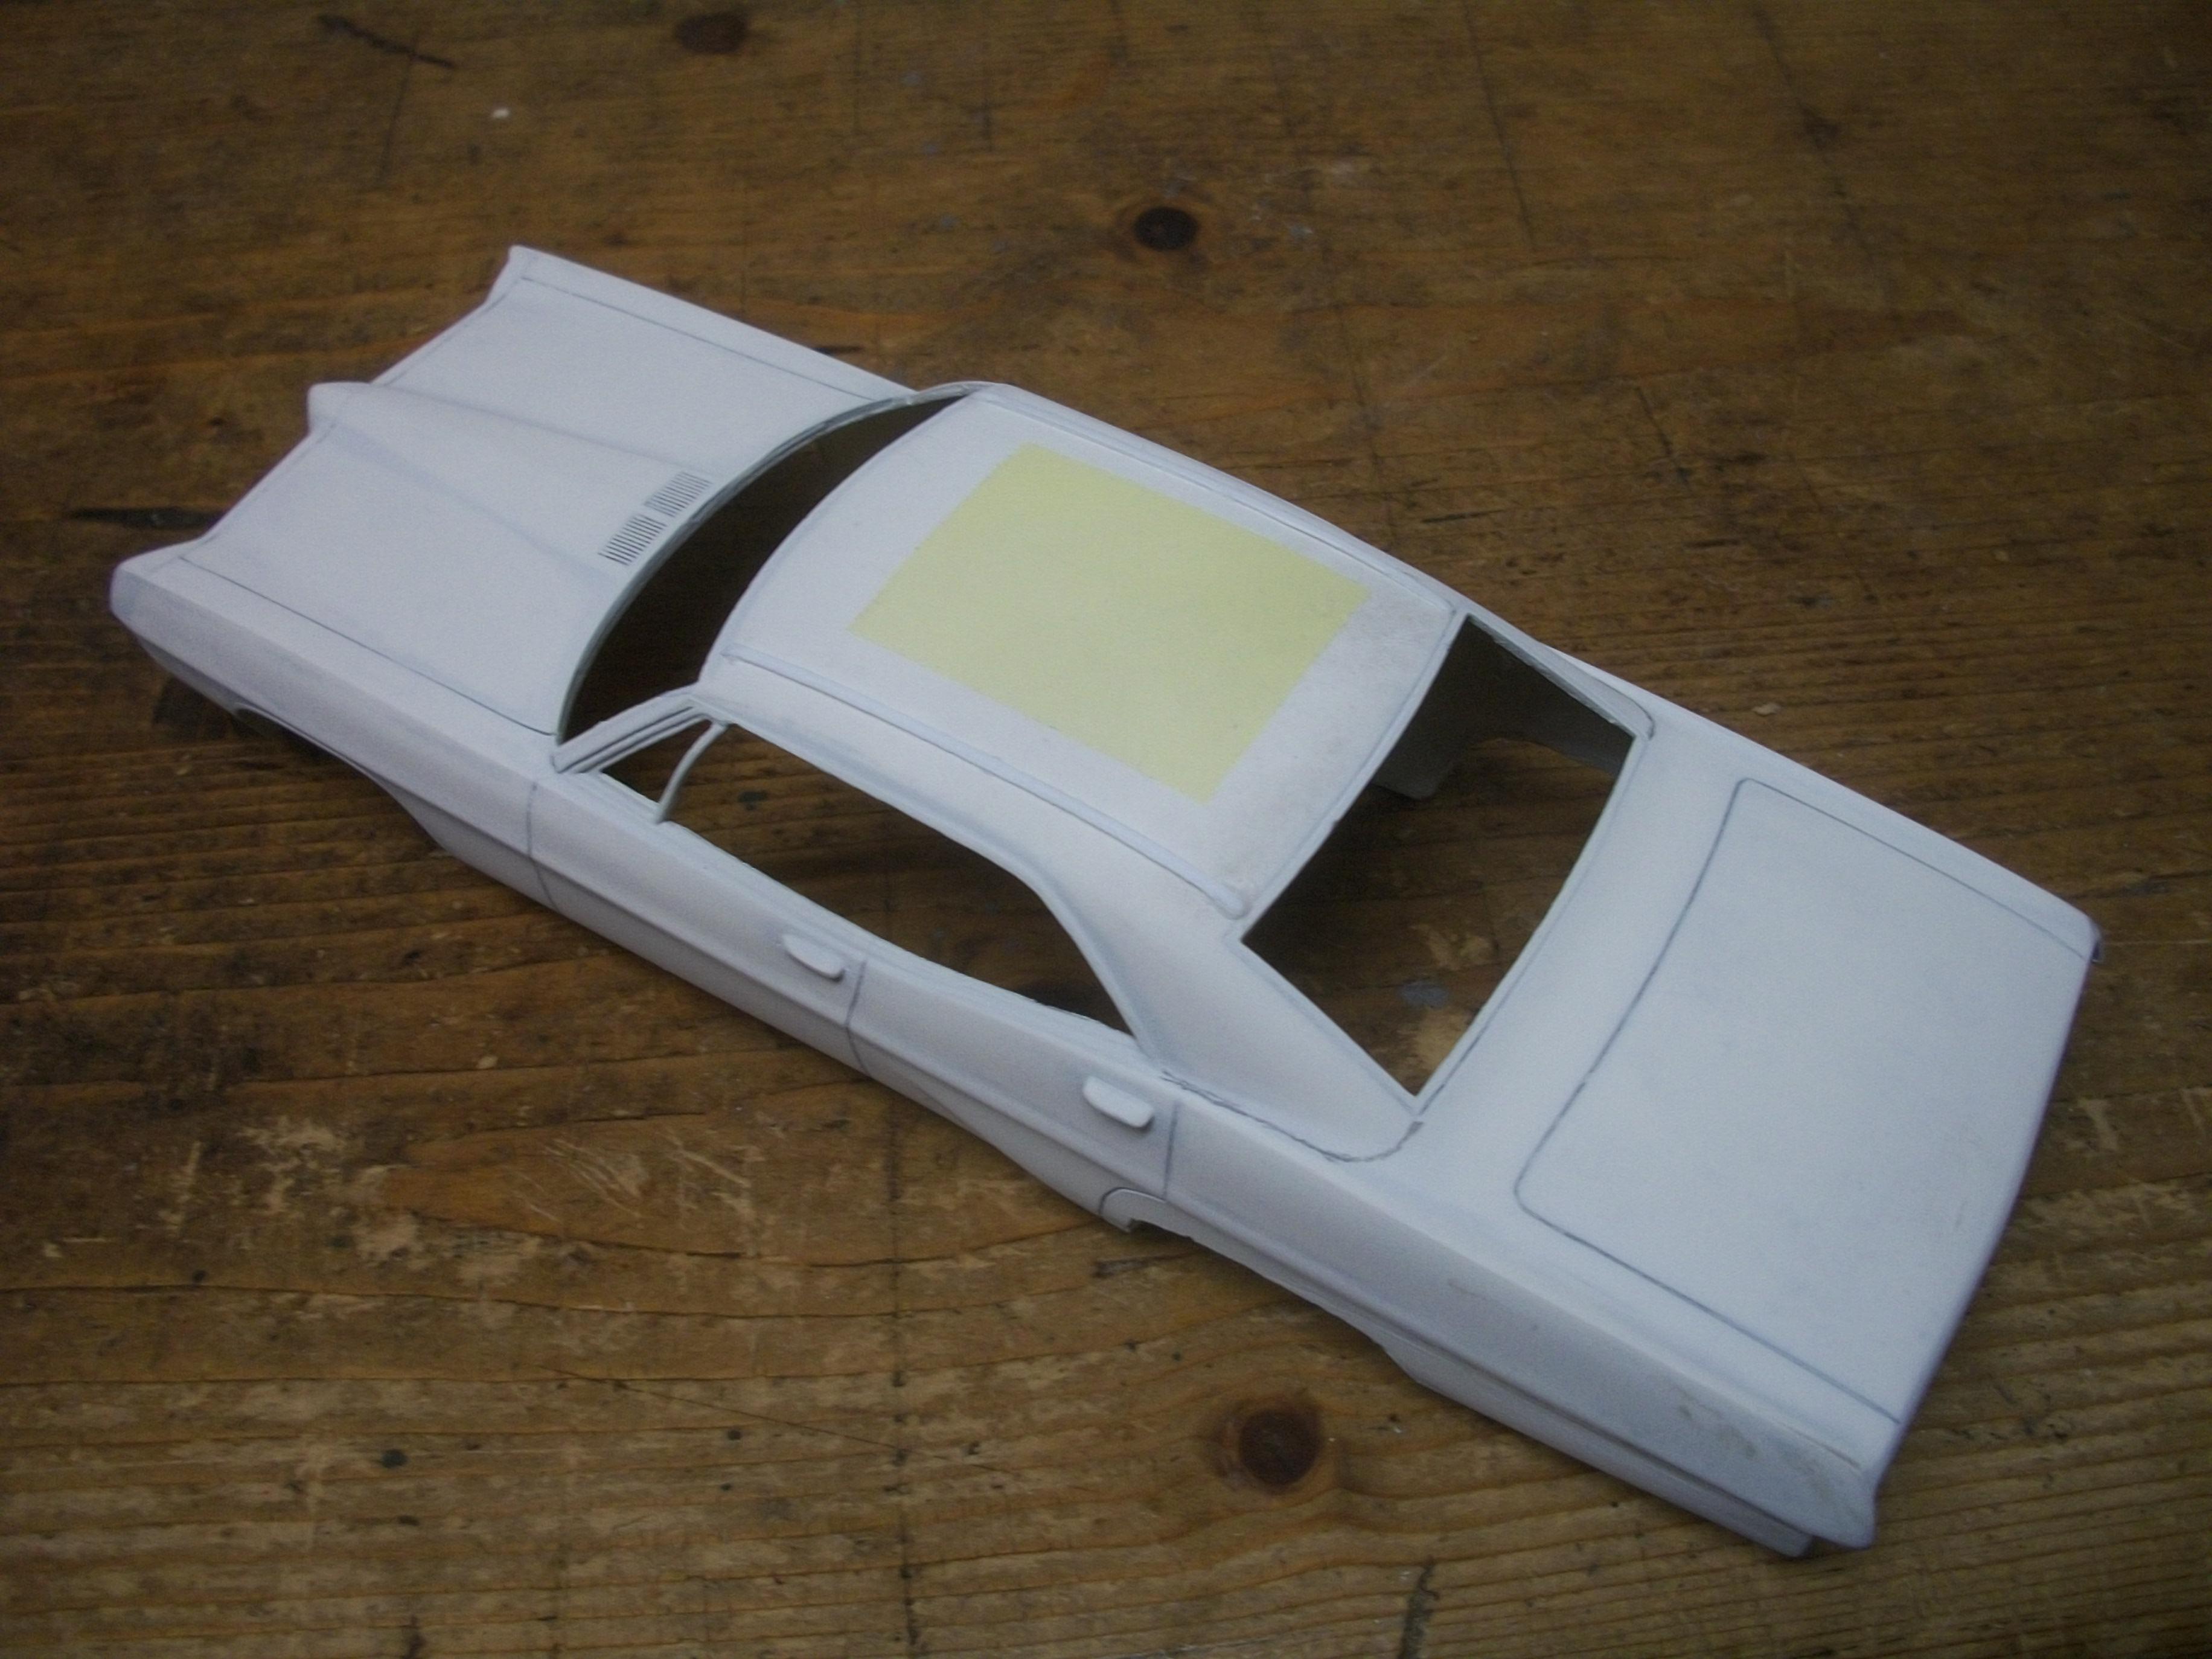
The front grille parts for the Parisienne arrived in the post from Australia this morning, thanks to a kind fellow MCM Forums member, Alan Barton..... With a certain amount of modification, I should be to convert the front end of the '67 Bonneville to the '68 Parisienne, and then body painting can begin at last! David

-
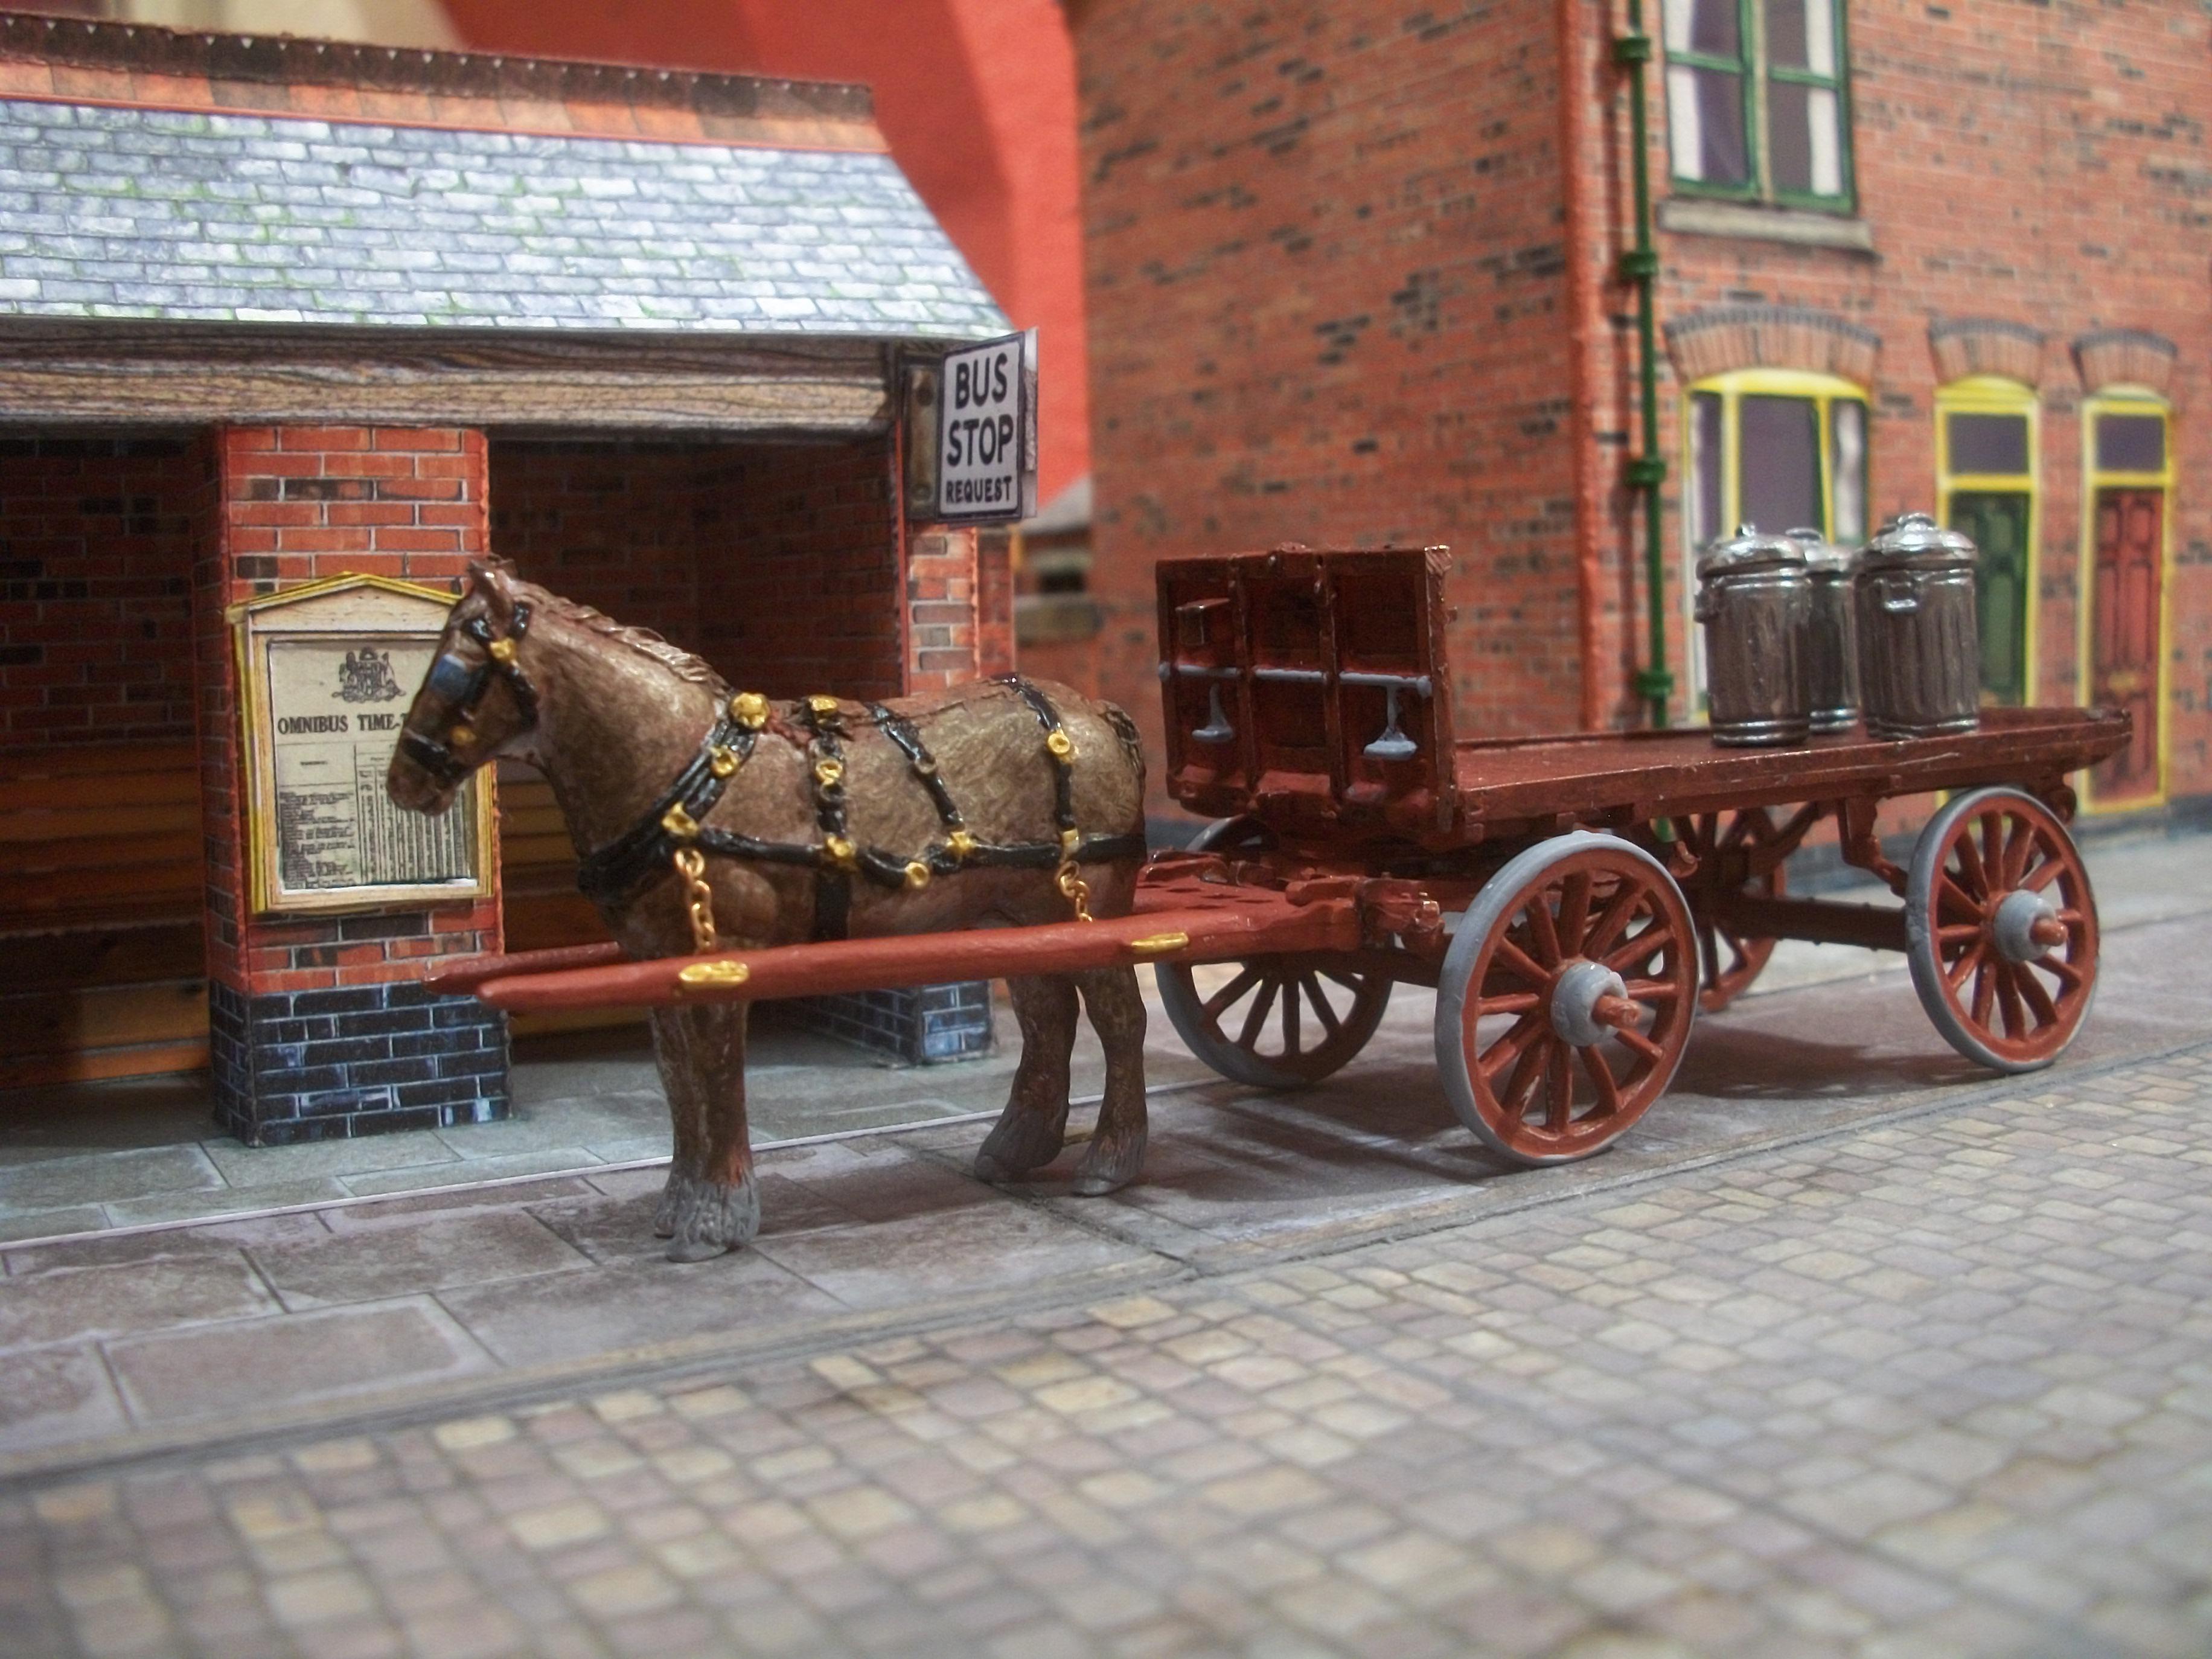
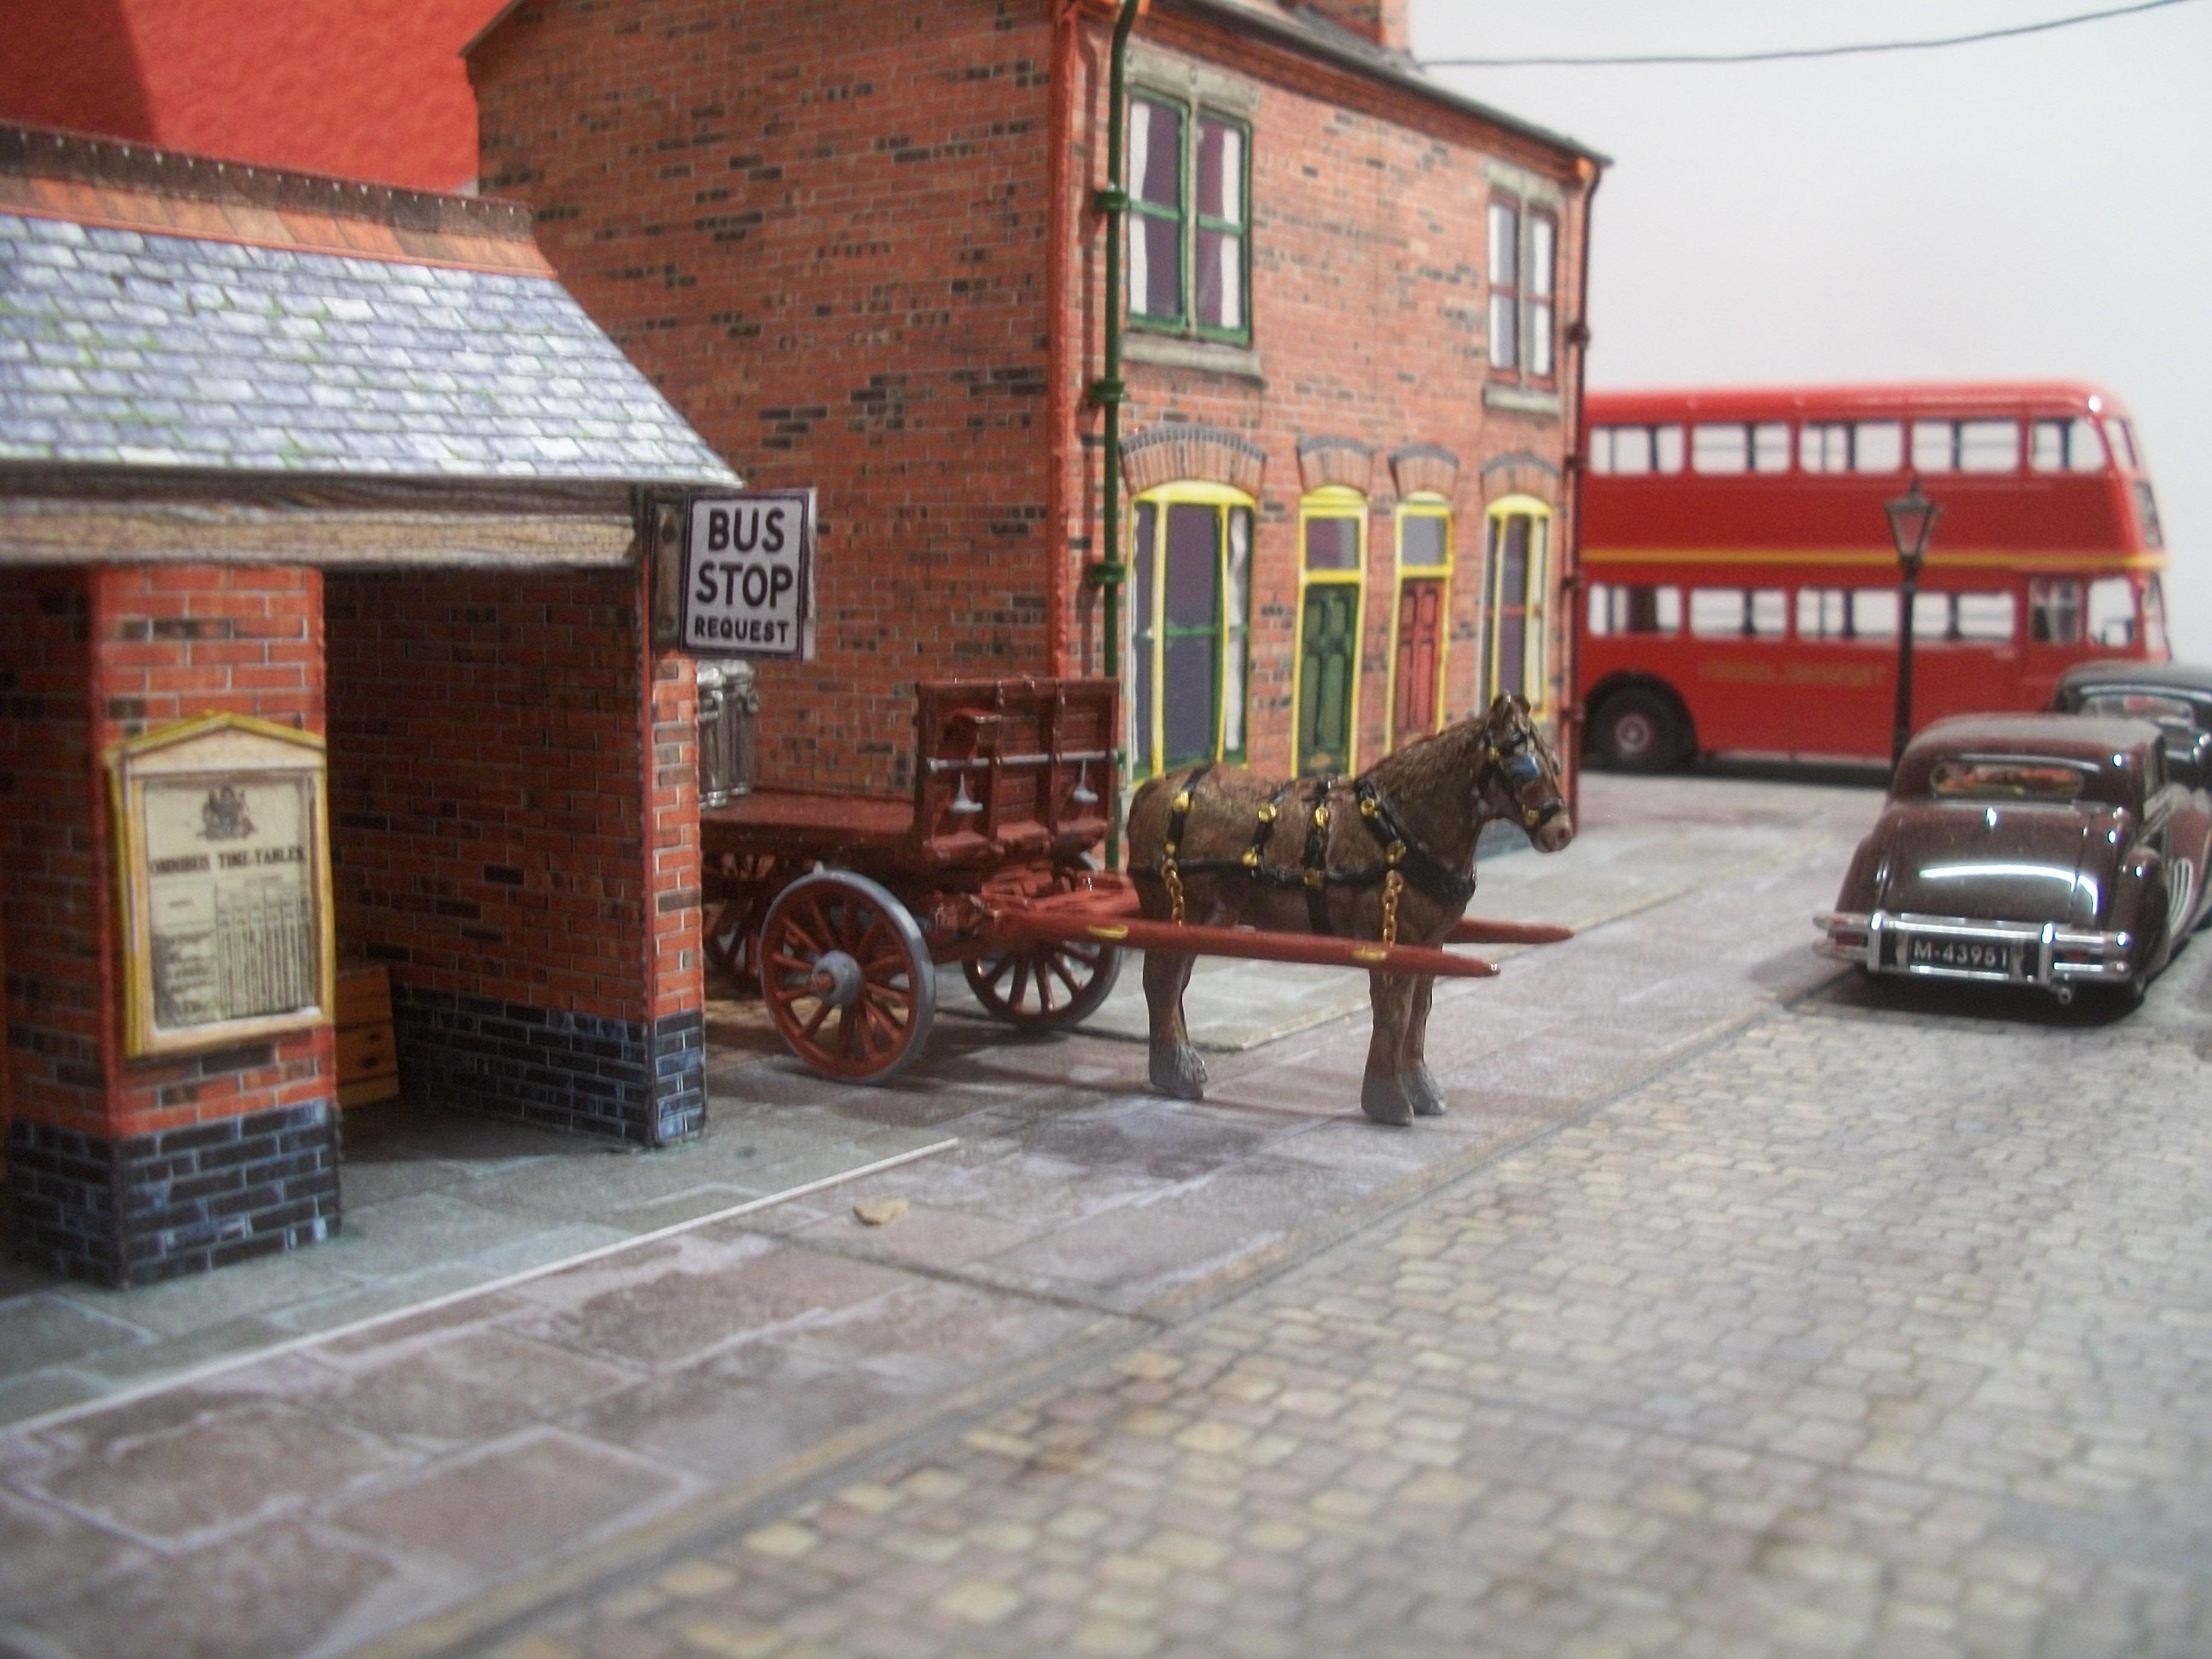
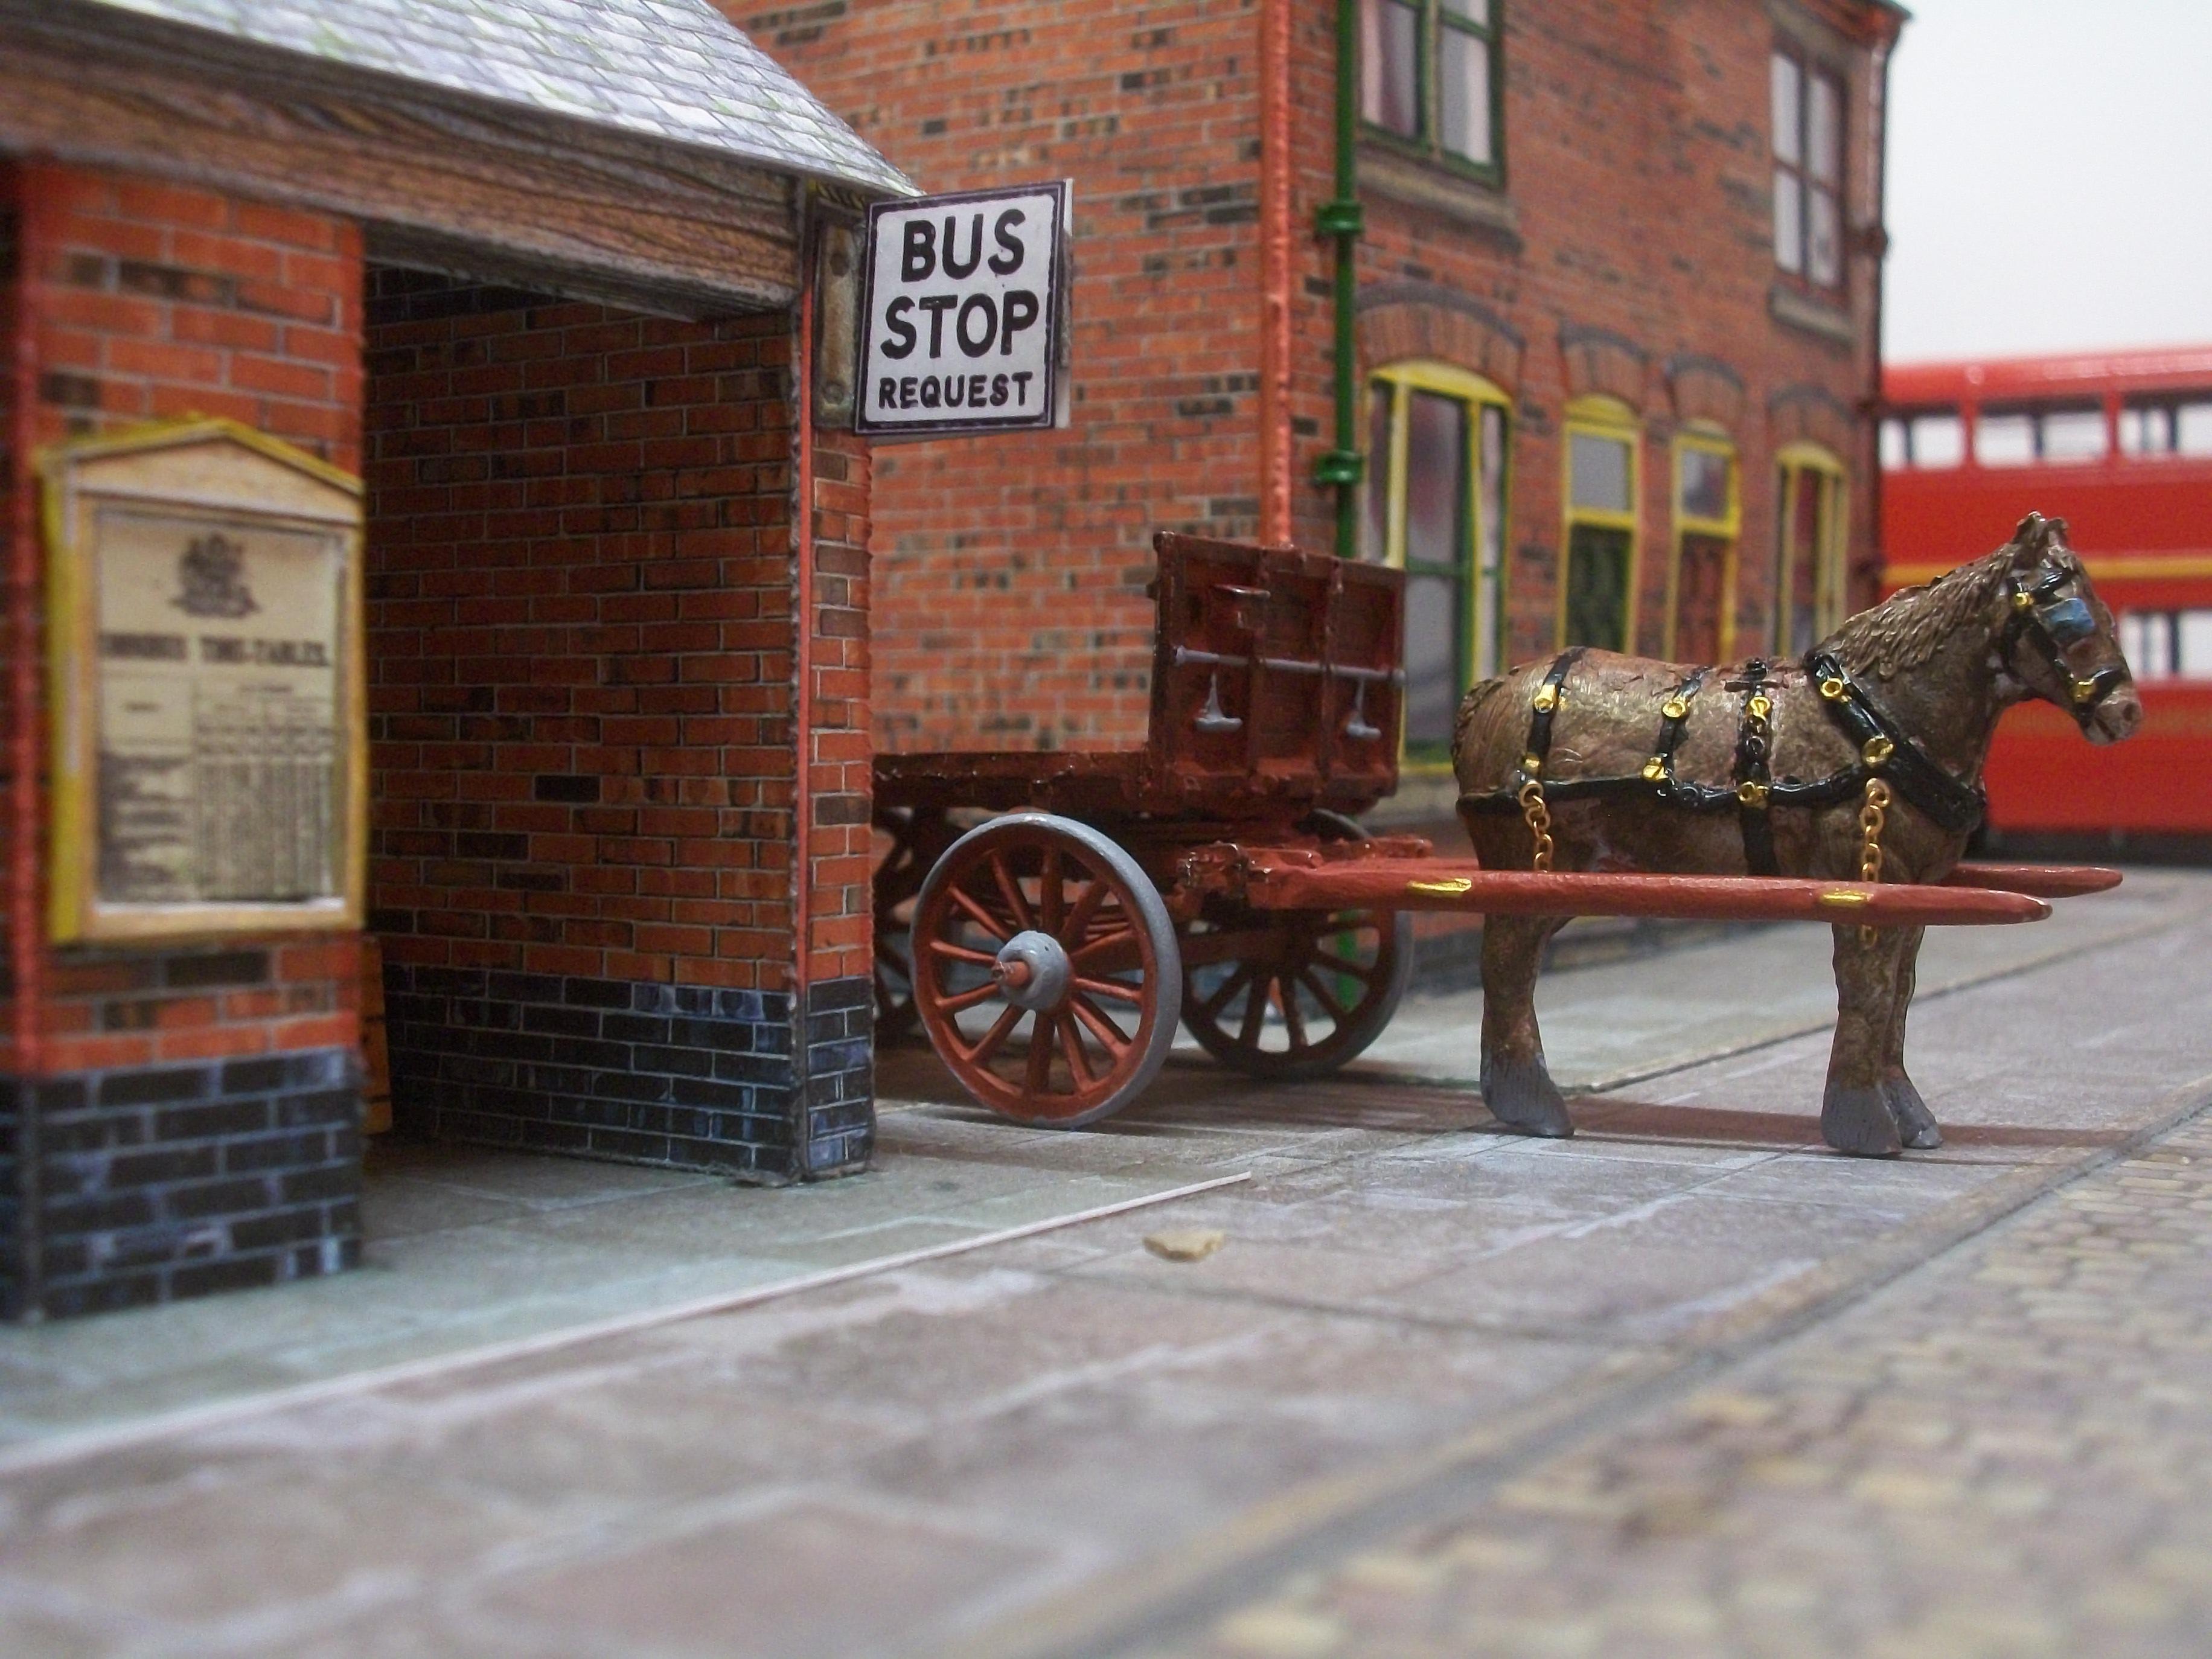
This is the latest addition to the 1:43 scale Victorian Houses diorama, and this diorama will extend to the Hooper & Co factory, Western Avenue, Park Royal, Acton, London later...... here we have a 1:43 scale Horse and Cart by Langley Models, which is a tin / lead alloy white metal kit ( unpainted ). The idea is for this cart to be a ' Rag and Bone ' man, as we say in England...... not sure what he would have been called in the USA ? The horse would pull the cart around the streets, with the man standing on the cart shouting ' Rag Bone, Rag Bone ' This was a common sight when I was a boy of 7 years of age, in the city of Nottingham ( as in Robin Hood ). The kit went together nicely, and painting is mostly brown, applied using Vallejo acrylics. As well as old cookers, fridges, TV's, washing machines, bicycles and anything that people were throwing out, I thought I would place some dustbins ( trash cans ) on the cart too. David
-

What Kits Were Molded in Green?
Anglia105E replied to Snake45's topic in General Automotive Talk (Trucks and Cars)
The 1:24 Revell Bentley 4.5L Blower was molded in green ( photo below ) and also the 1:24 Tamiya Morgan. David
-
Thanks, Pat...... and using figures carefully does indeed help tell the story, which then becomes yet another interesting aspect of diorama building. David
-
Now you have all these cars and realistic figures in the shop, the whole scene looks extremely life-like...... your lighting is absolutely spot on, Pat and I particularly like the blue Talbot Lago GP car with the front engine cover off. There is so much detail in each of these photos of yours, that I find myself looking around the internal space of the diorama, picking up all sorts of interesting objects....... brilliant ! You have a clever way of positioning each and every component of the scenario. David
-
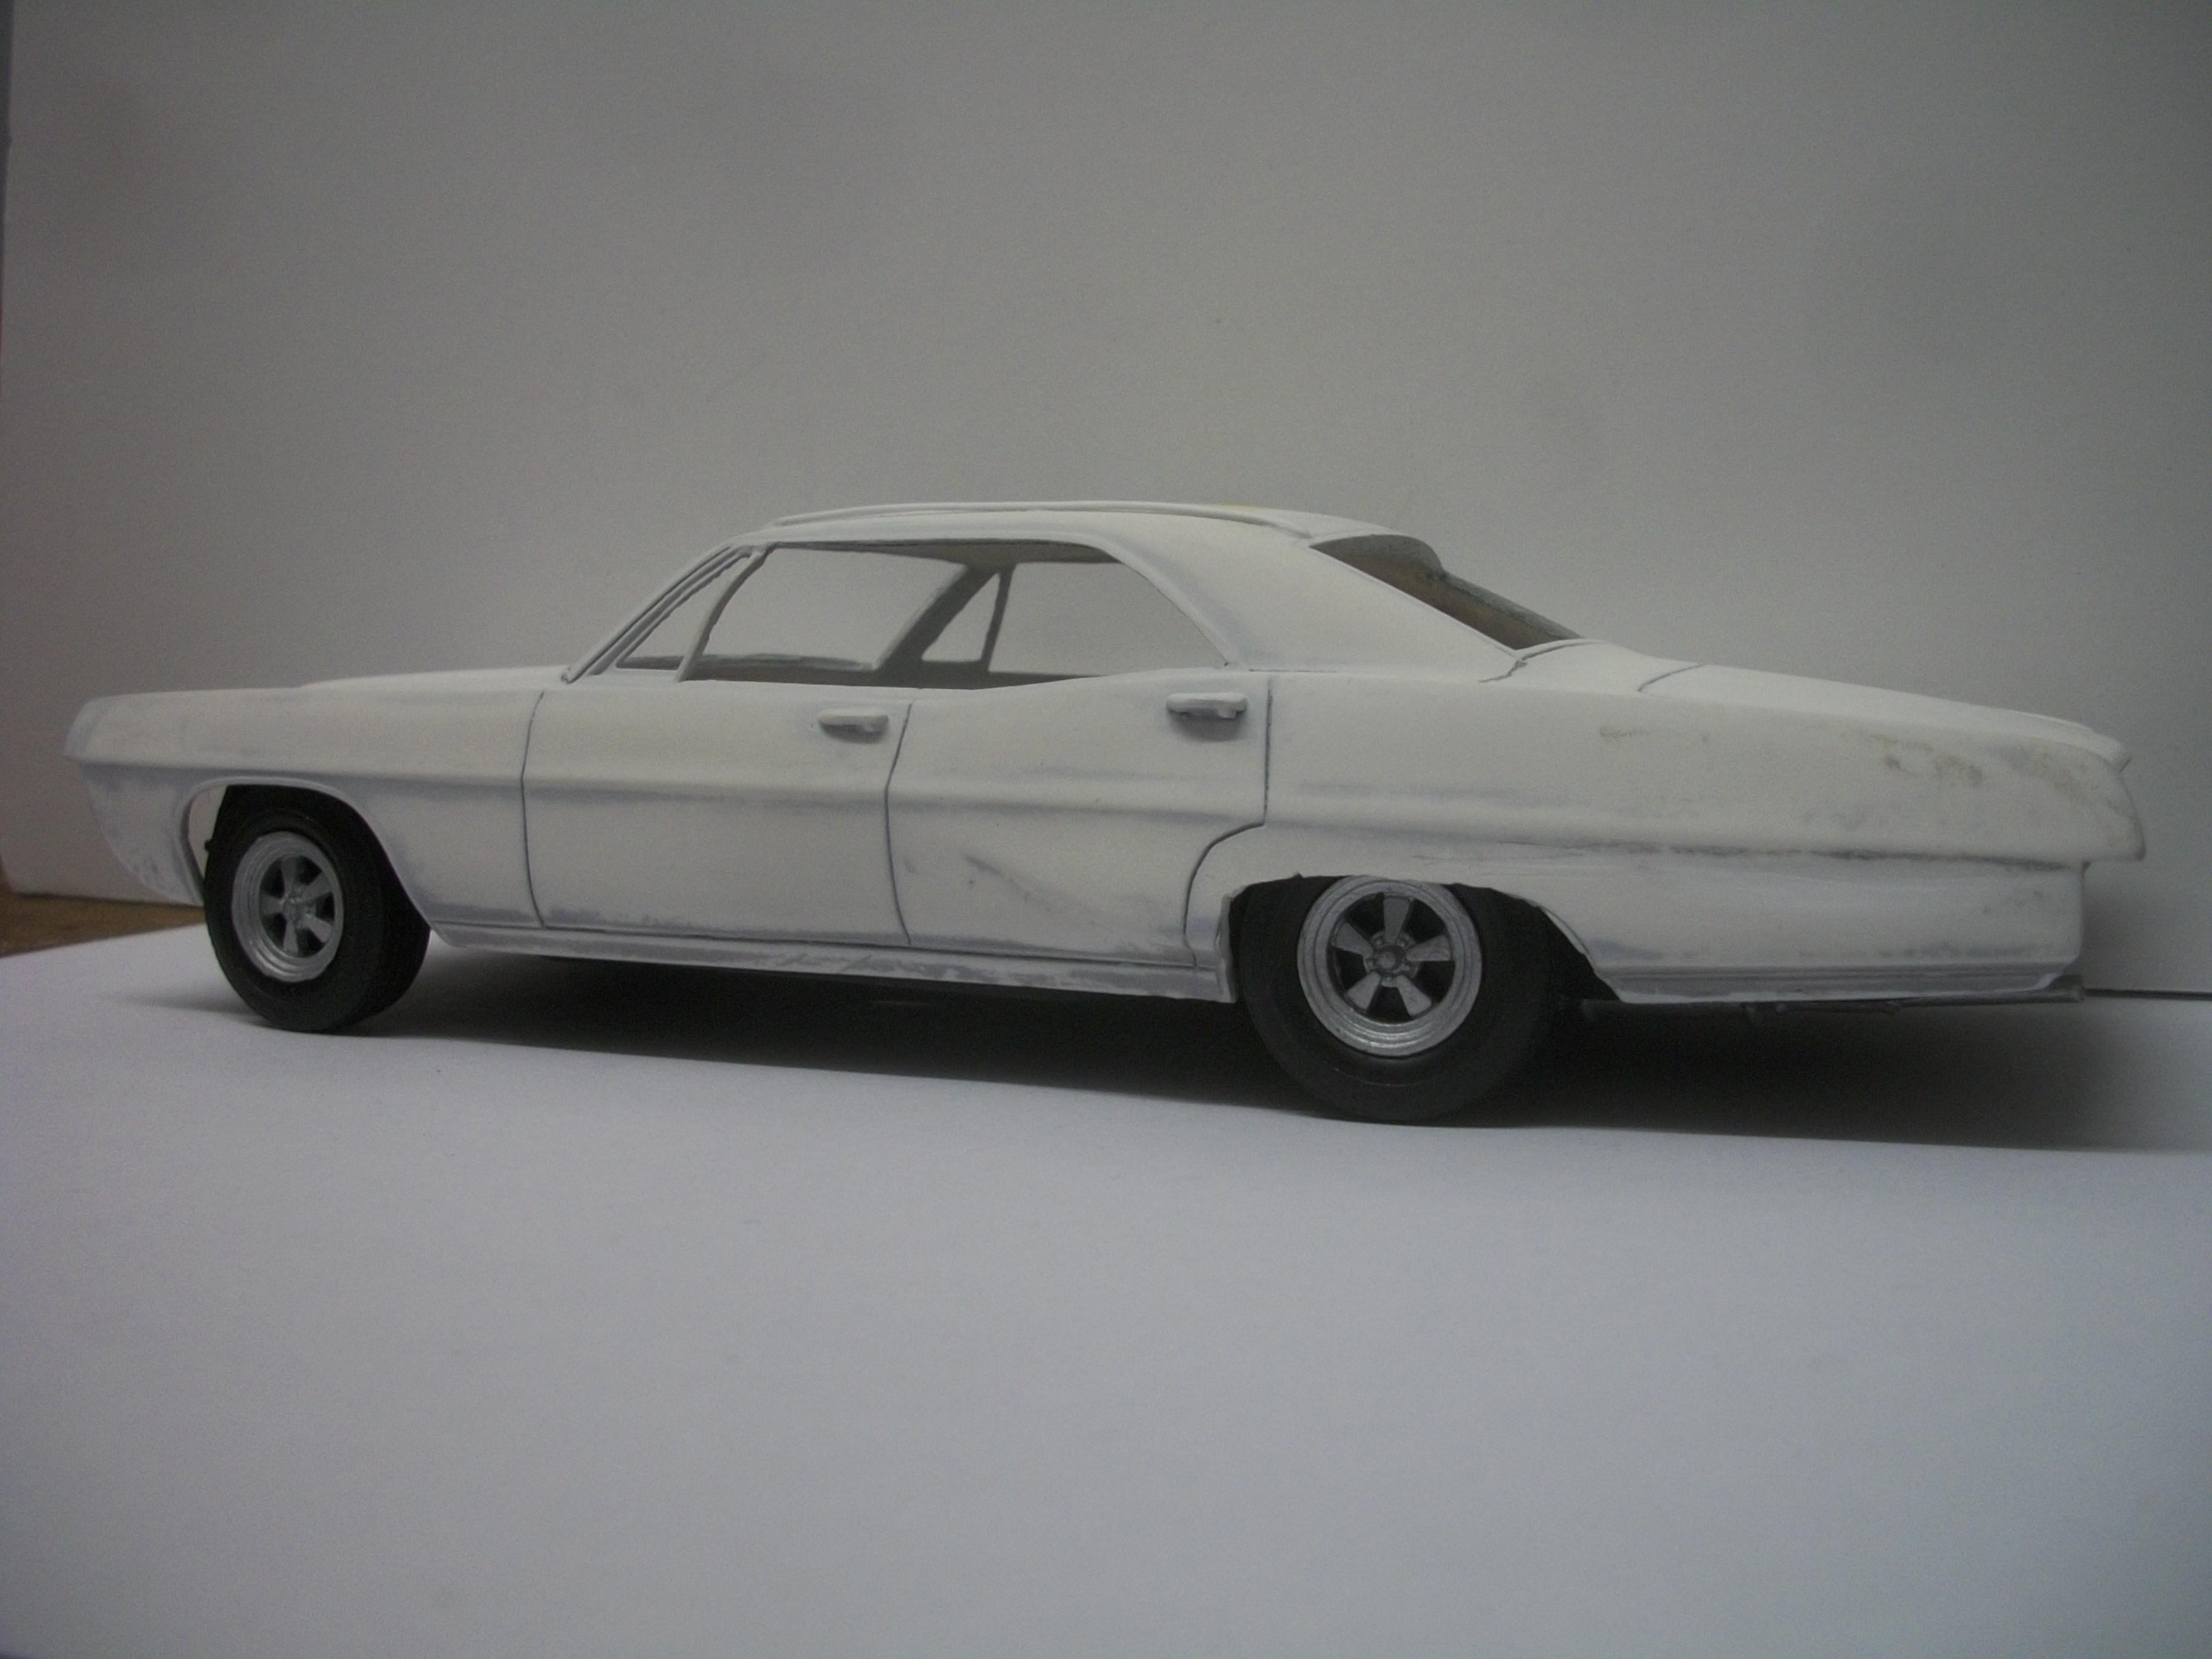
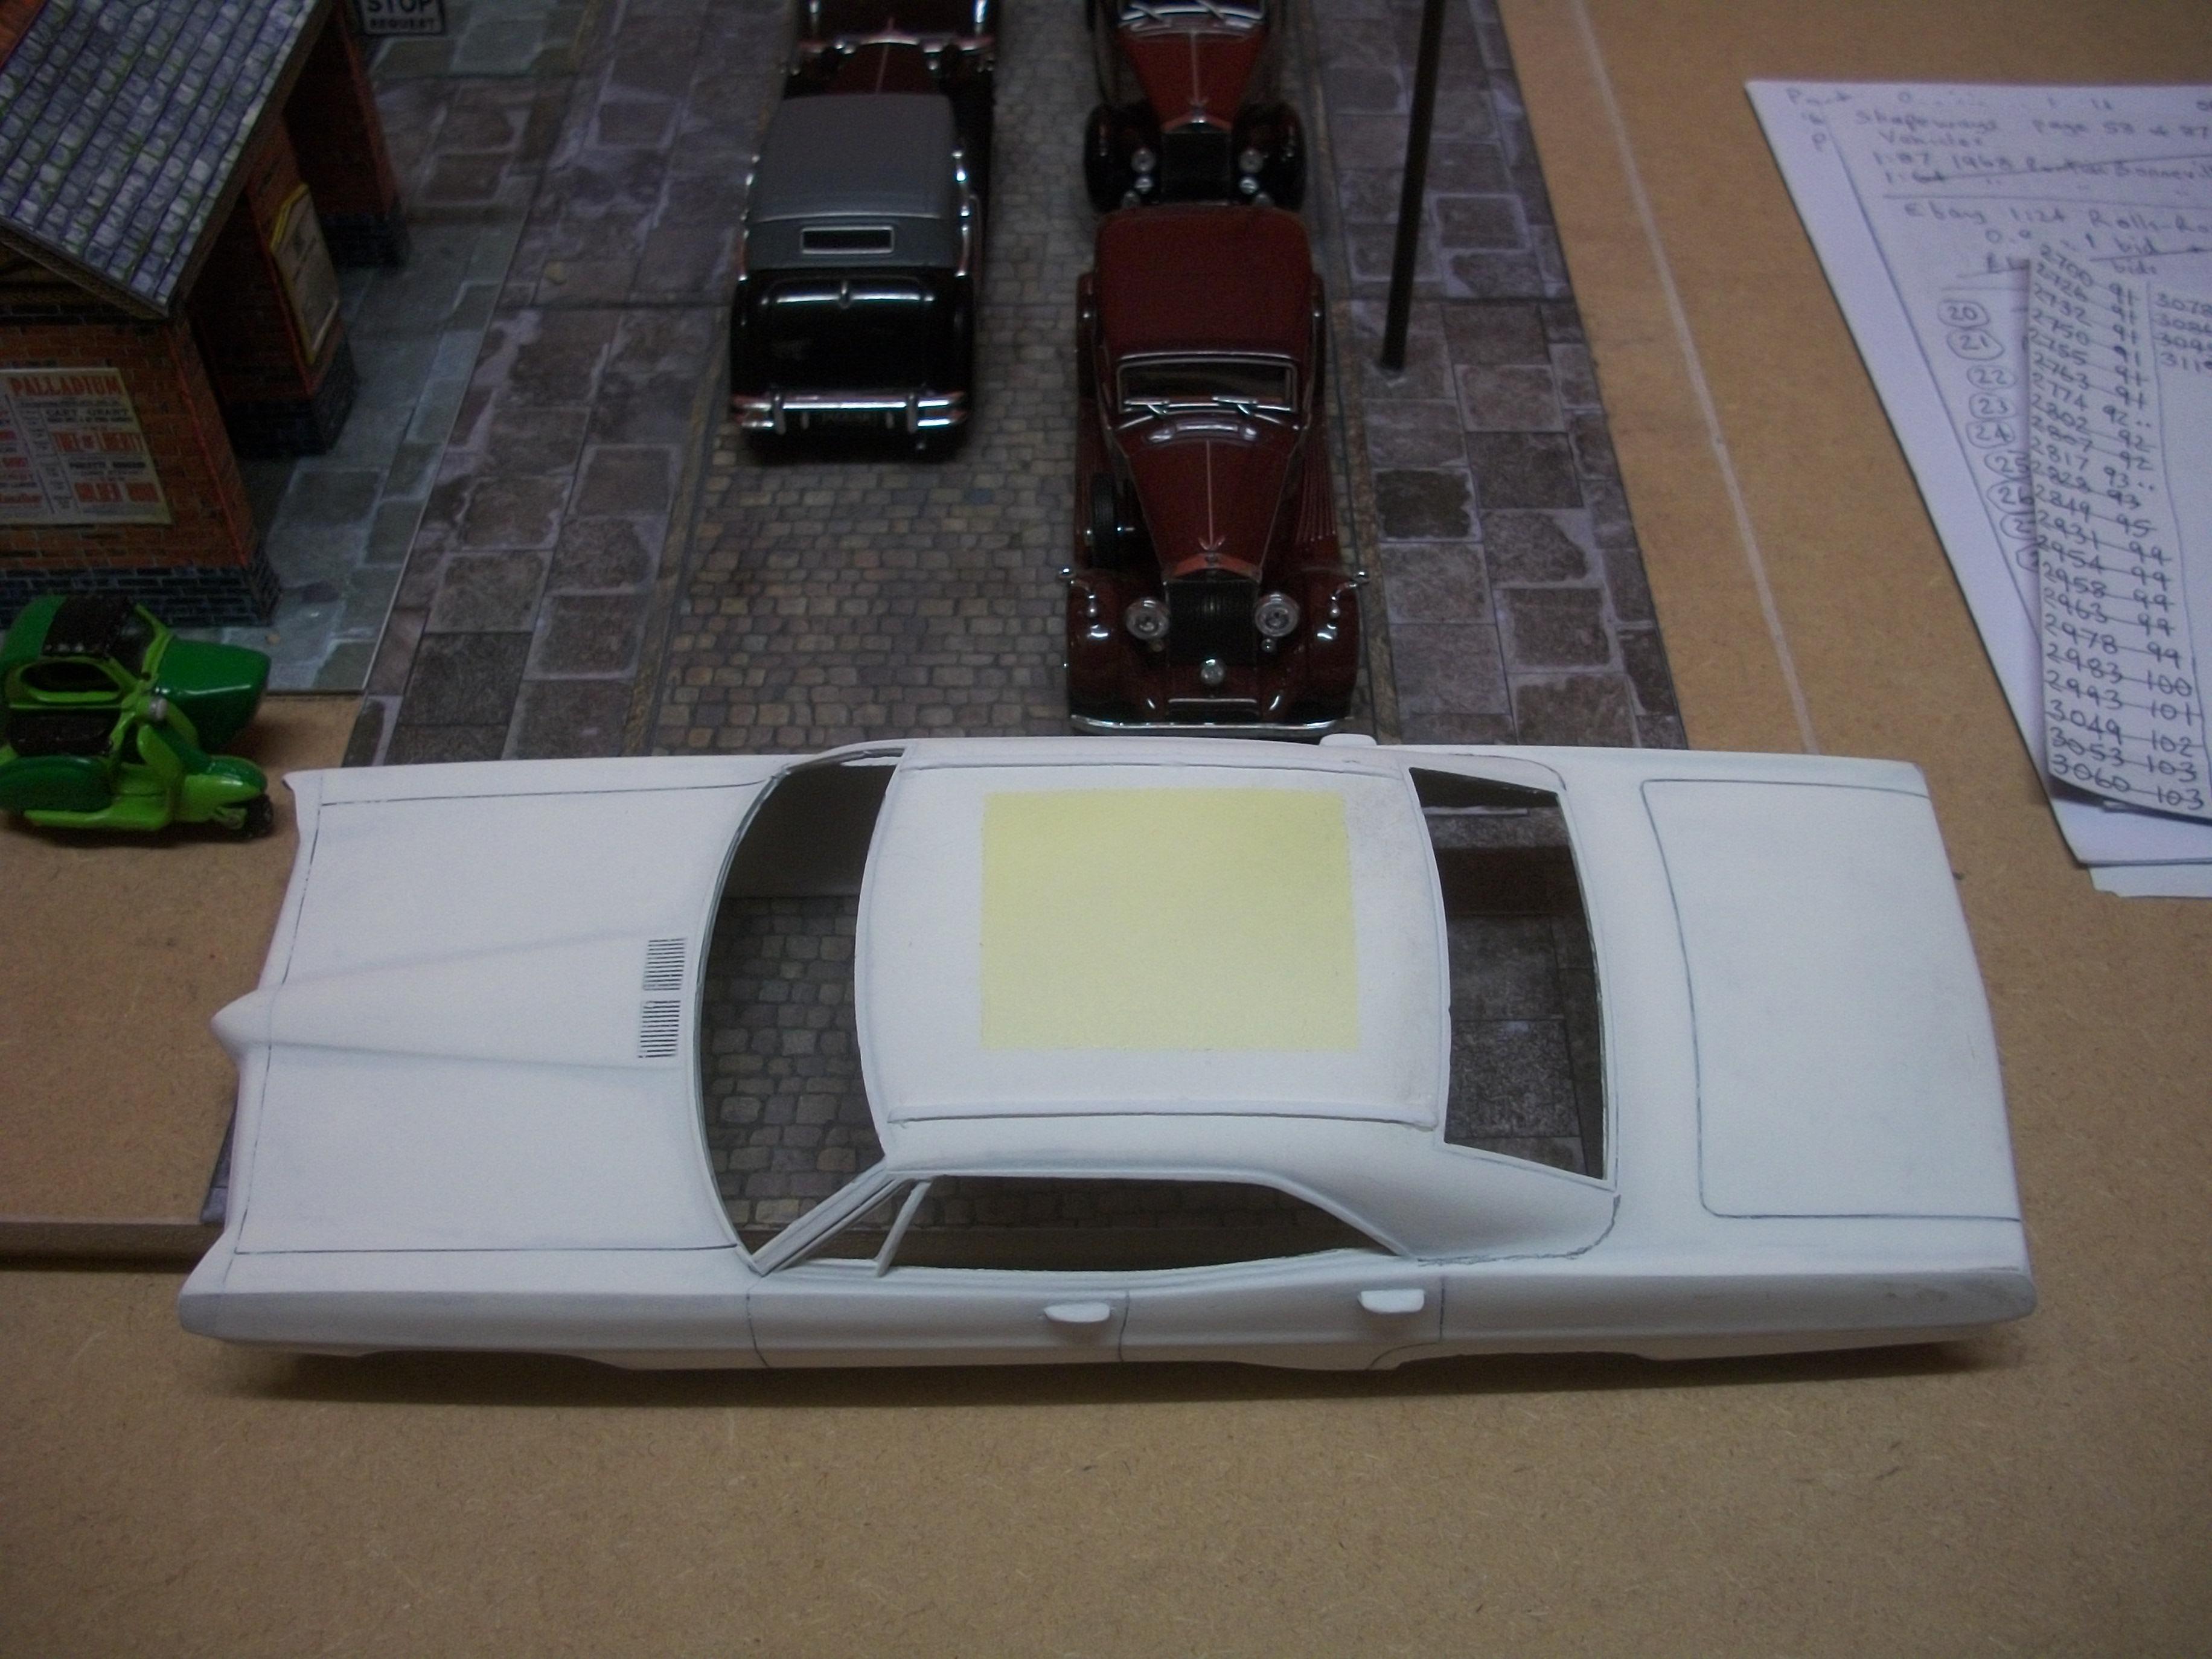
Oops, sorry, Charlie...... the last photo of the Parisienne body is taken directly in front of my 1:43 scale diorama, so the Rolls-Royce and Jaguar model cars are of the smaller scale. The Pontiac is 1:25 scale, as you know. The Parisienne that I enjoyed owning and driving was 18 feet in length, so you are correct, this was a BIG car. David
-
Happy 63rd Birthday, Harry........ many members on here are missing you, but your skills and wise words live on...... forever........ David
-
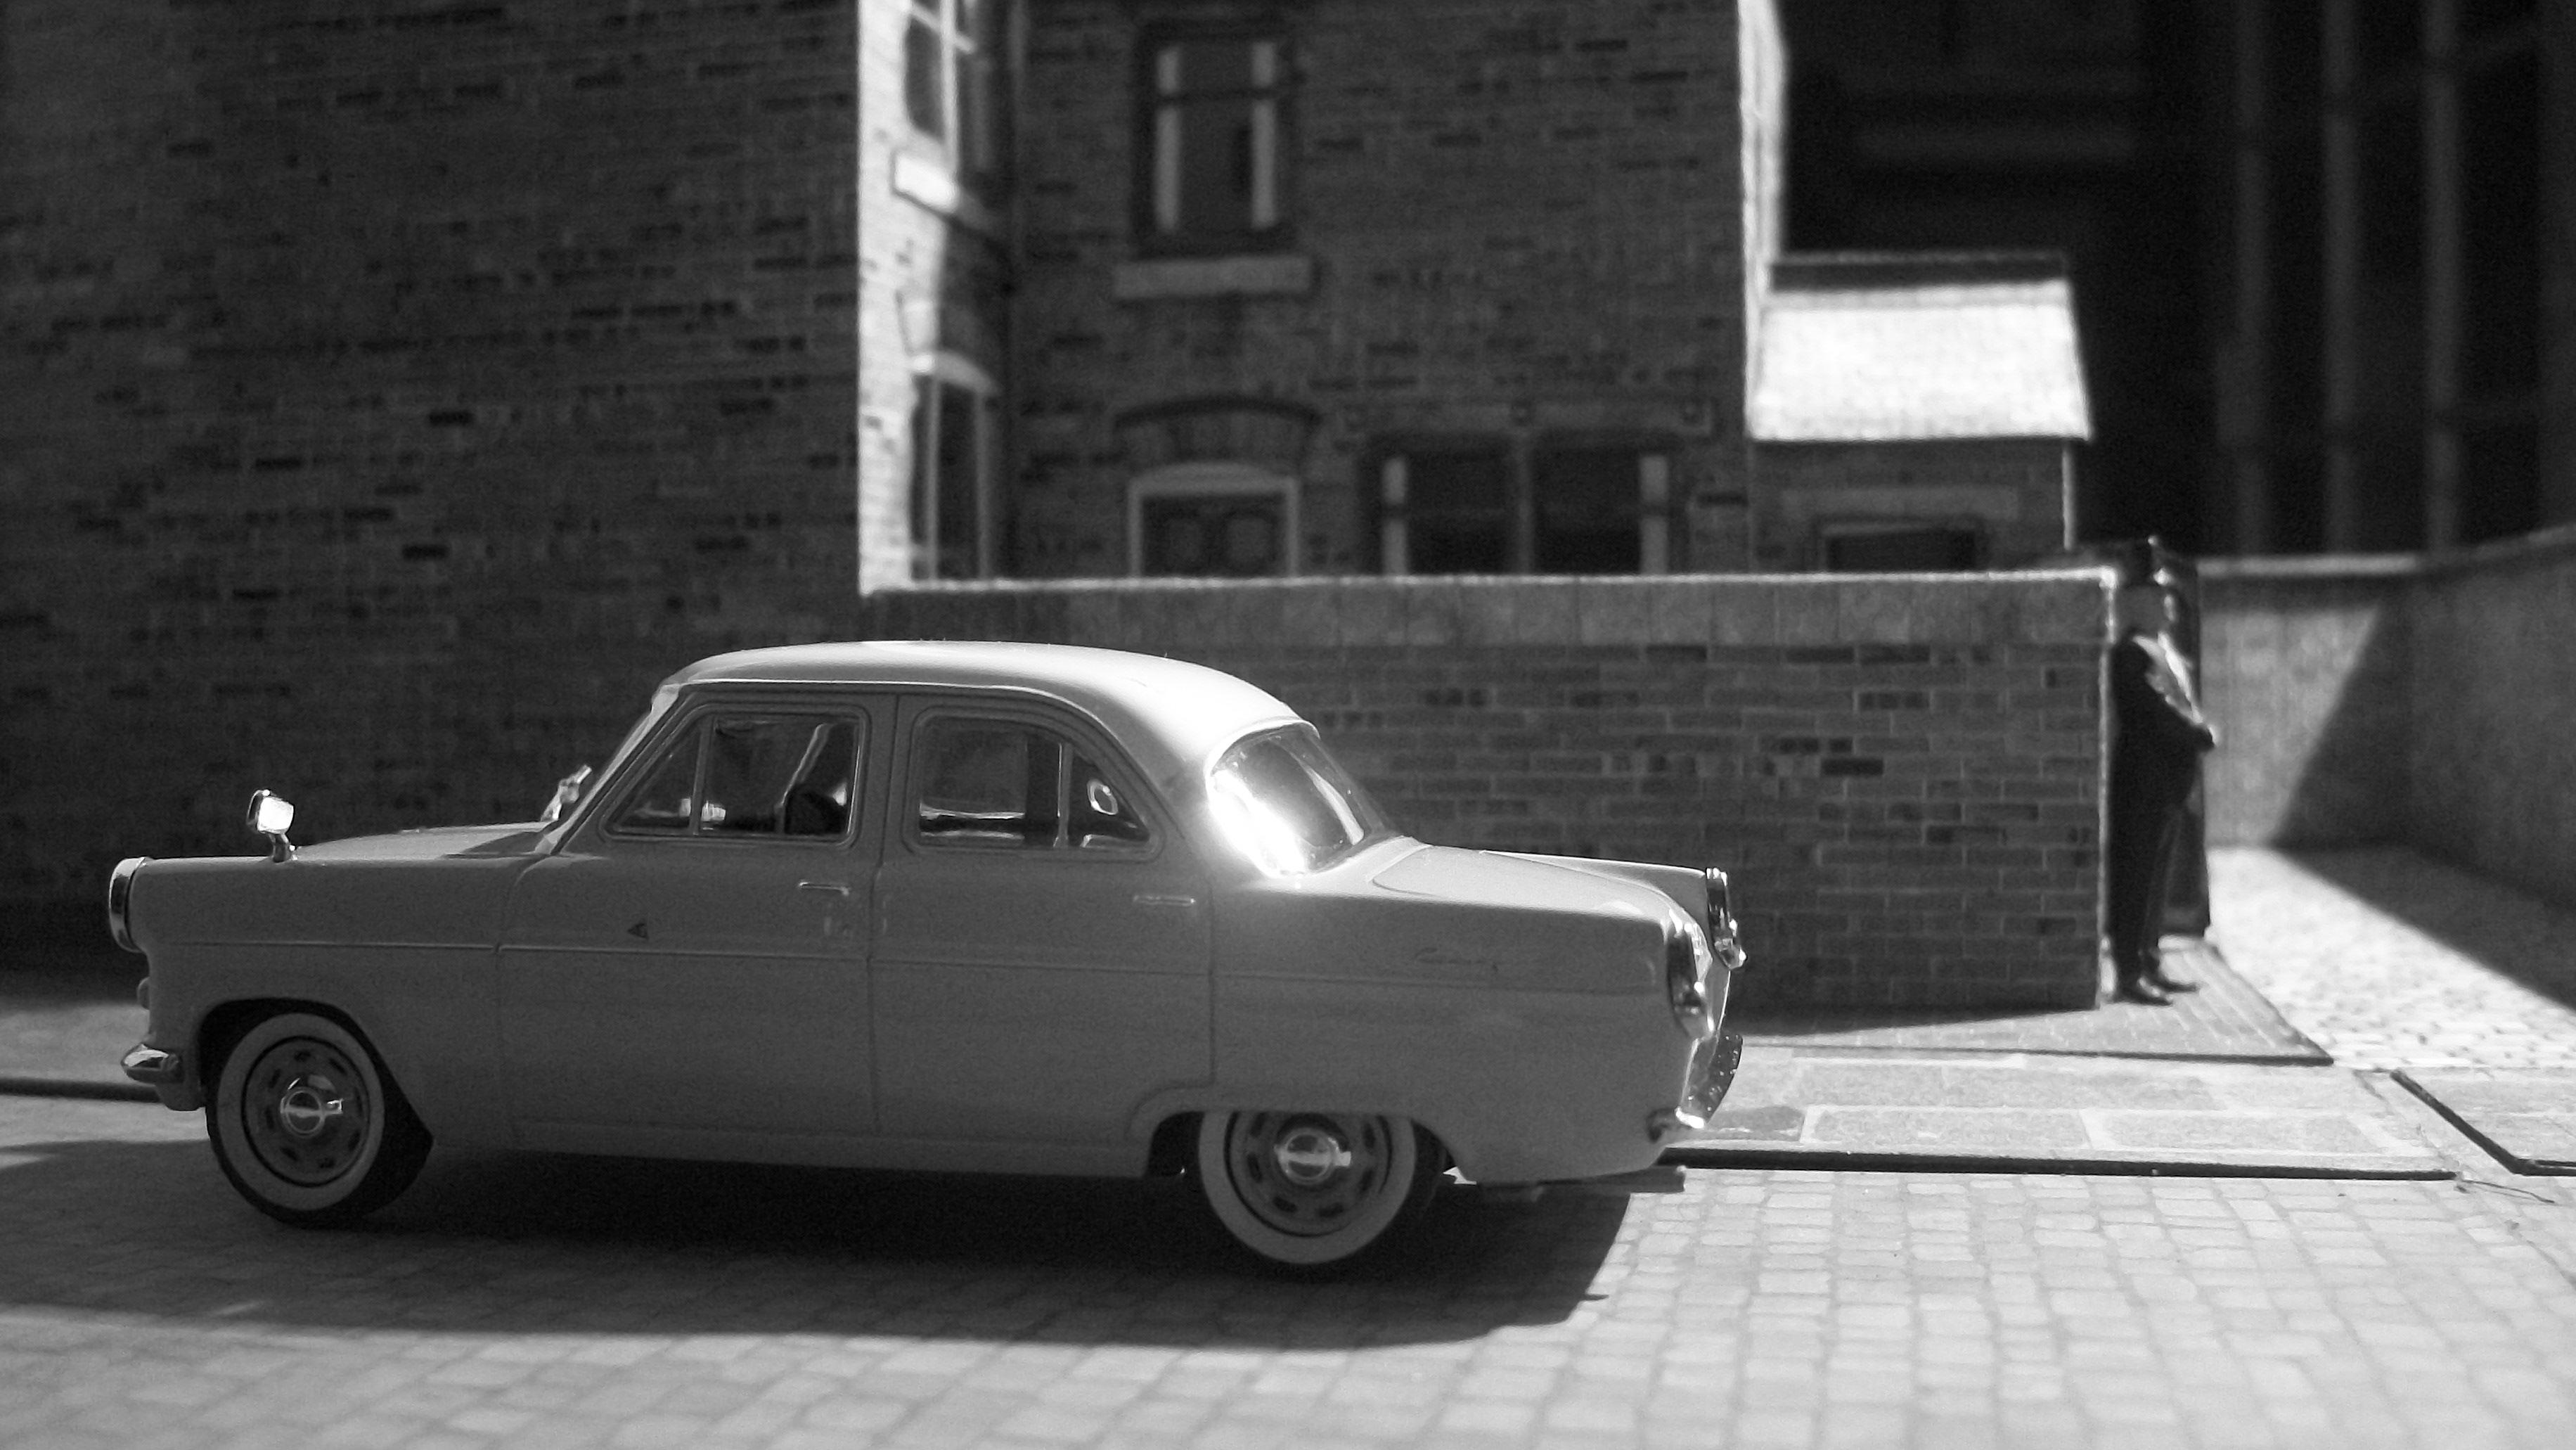
Well, Rodney..... you didn't expect to find a giant steel nut inside the model car, did you? Alongside my 1:24 collection of built kits and diecasts, I also have many 1:43 diecast model cars as well. The range of British cars in 1:43 scale for the 1950's period has more to choose from than in 1:24 scale. Here is the 1959 Ford Consul MK II, for example..... David
-
You are doing a really nice job here, Fabrizio...... and this Ferrari 250 GTO by Gunze Sangyo is a most unusual kit....... they don't make them like this anymore! Can't wait to see the finished model..... David
-
When the project dies. Or does it?
Anglia105E replied to Jantrix's topic in Model Building Questions and Answers
I do admit to having several unfinished builds, and they bother me, in the sense that I keep thinking about the kit in the box..... just waiting for me to address the problem whatever it may be. I really like to complete a model car build, and usually it is the process of building that I enjoy most, and then it leads onto the process of photographing the finished model, always in a diorama setting of course. The ones that I regard as ' failed ' projects are those builds that have stalled due to some difficult issue that I cannot seem to find a solution to. I must come back to these failed builds, or they will drive me crazy! Tom Geiger..... your idea to put a business card in each box, with missing parts noted is an excellent idea. I very often steal parts from a donor kit, or a kit that won't get started on for some time yet, and then forget why the kit is not complete when I come to it later..... so maybe I will use some of my business cards as you have done. David -
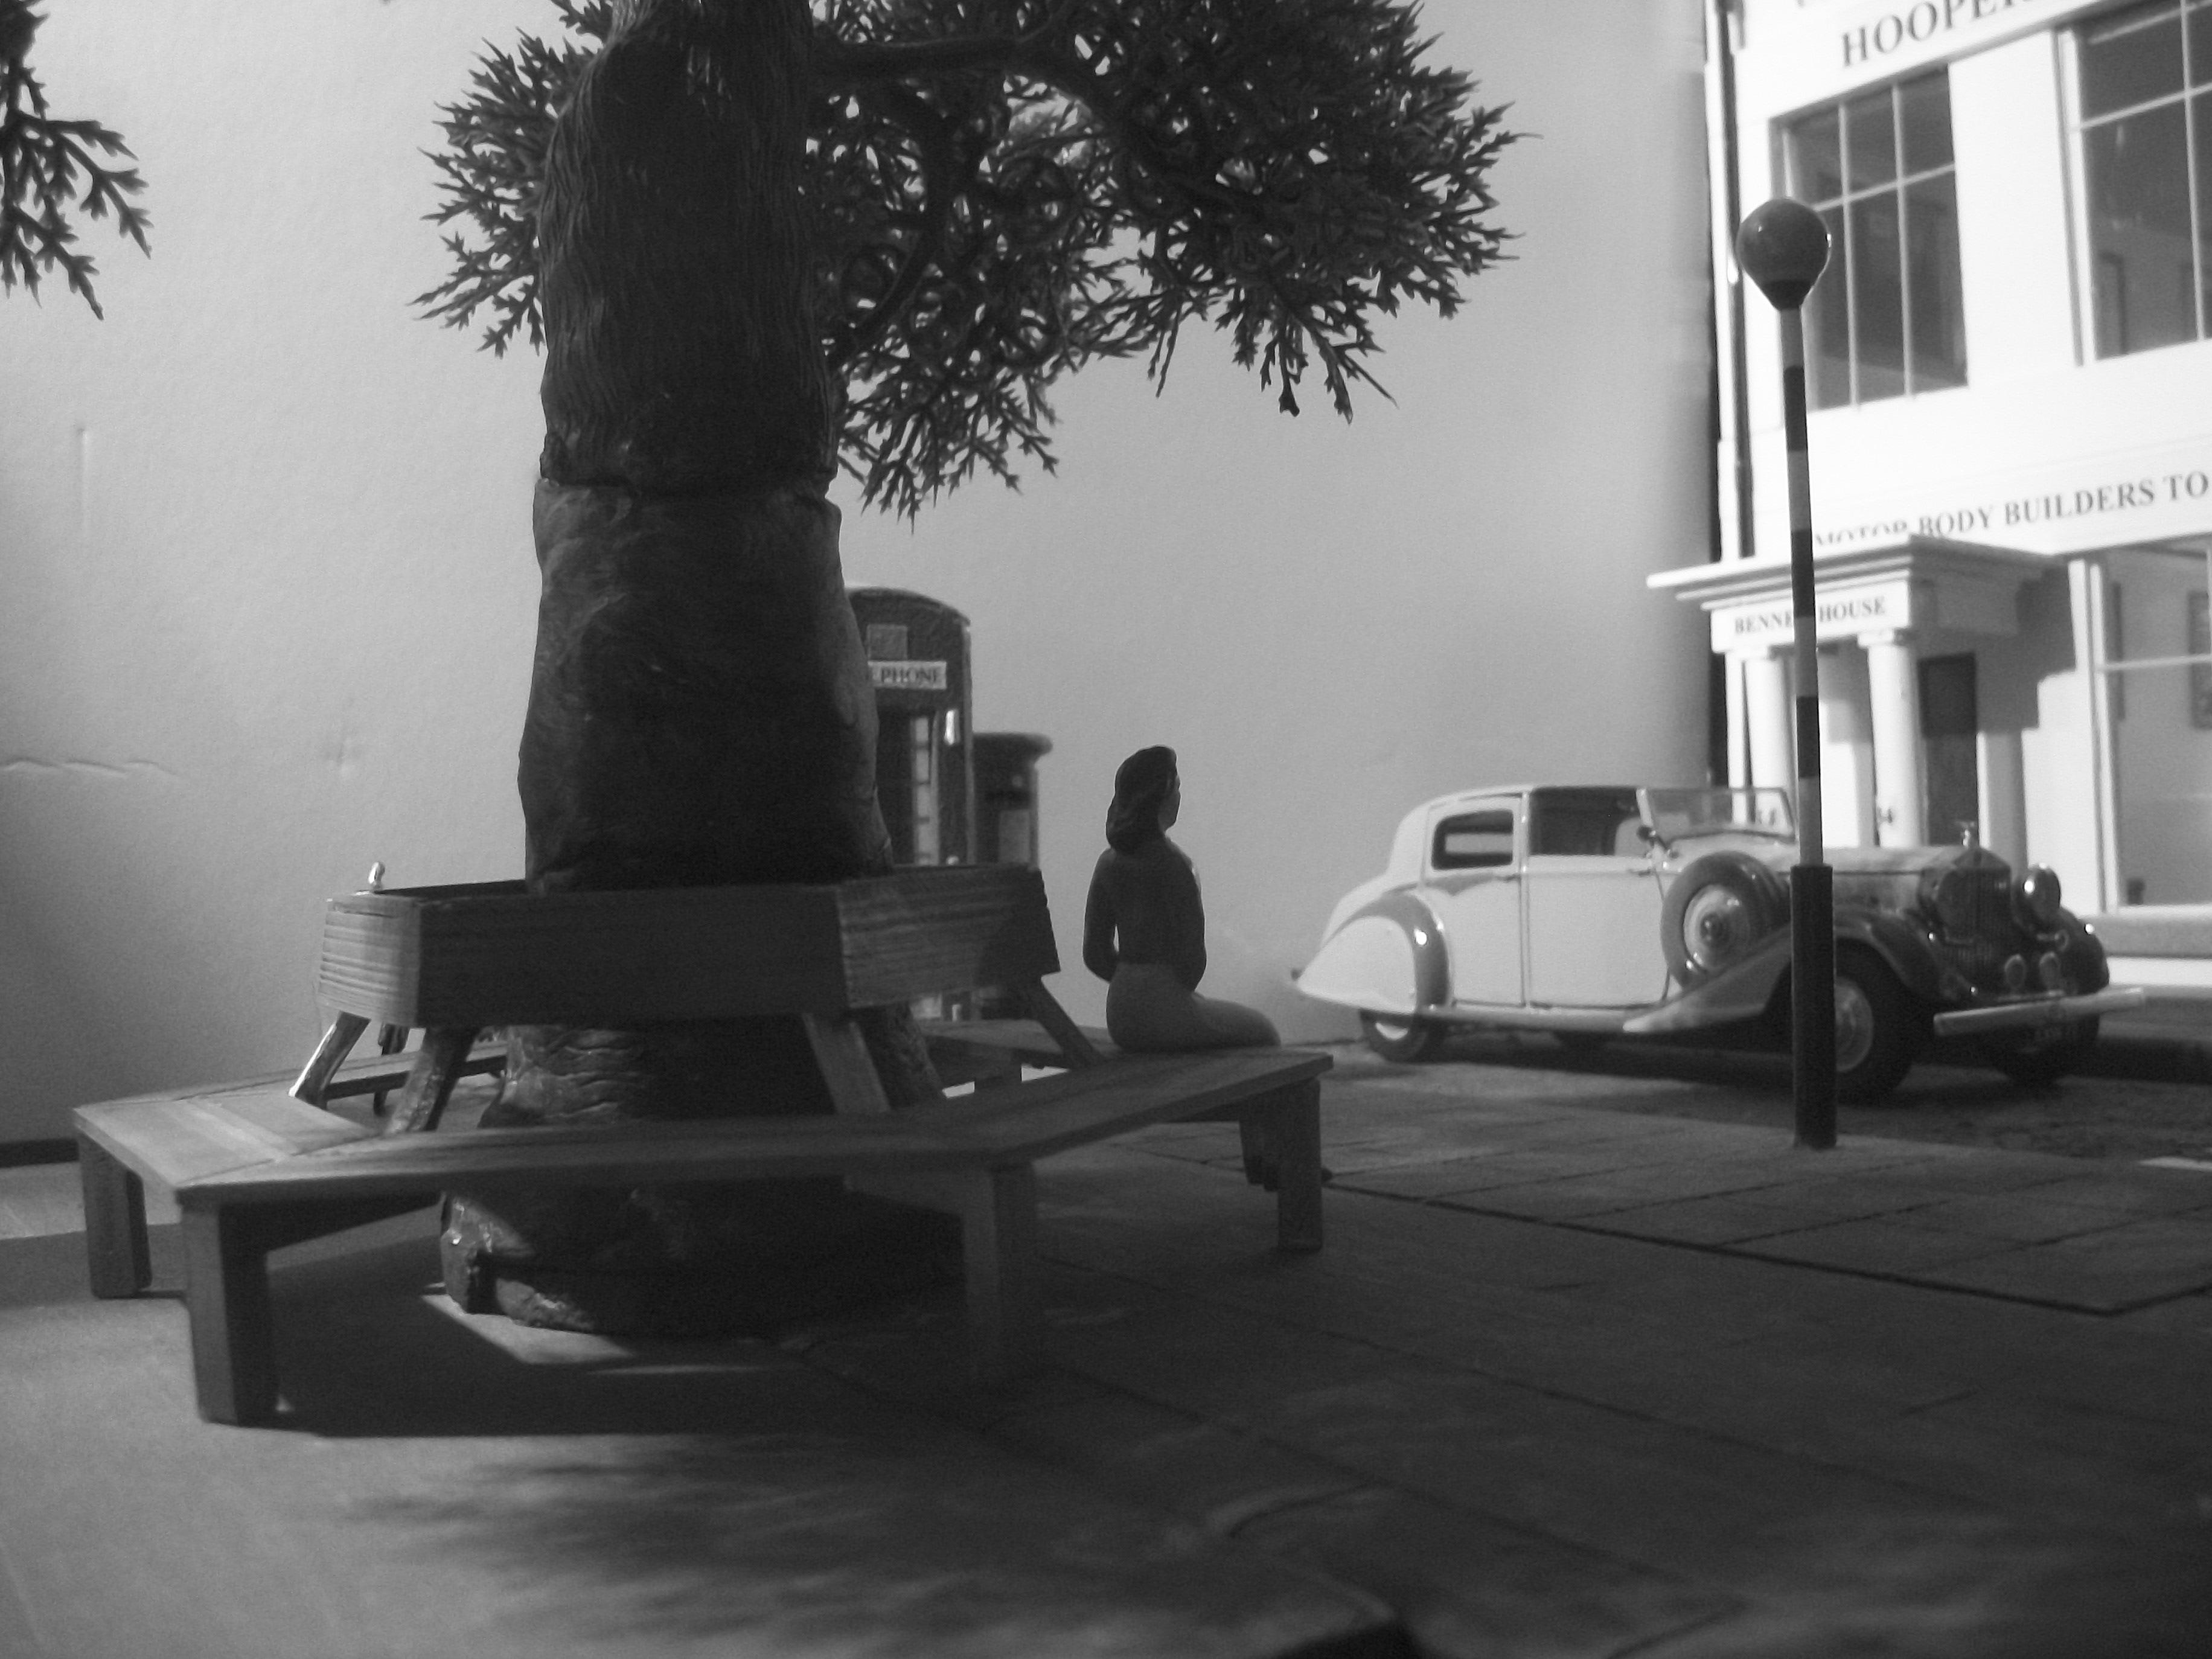
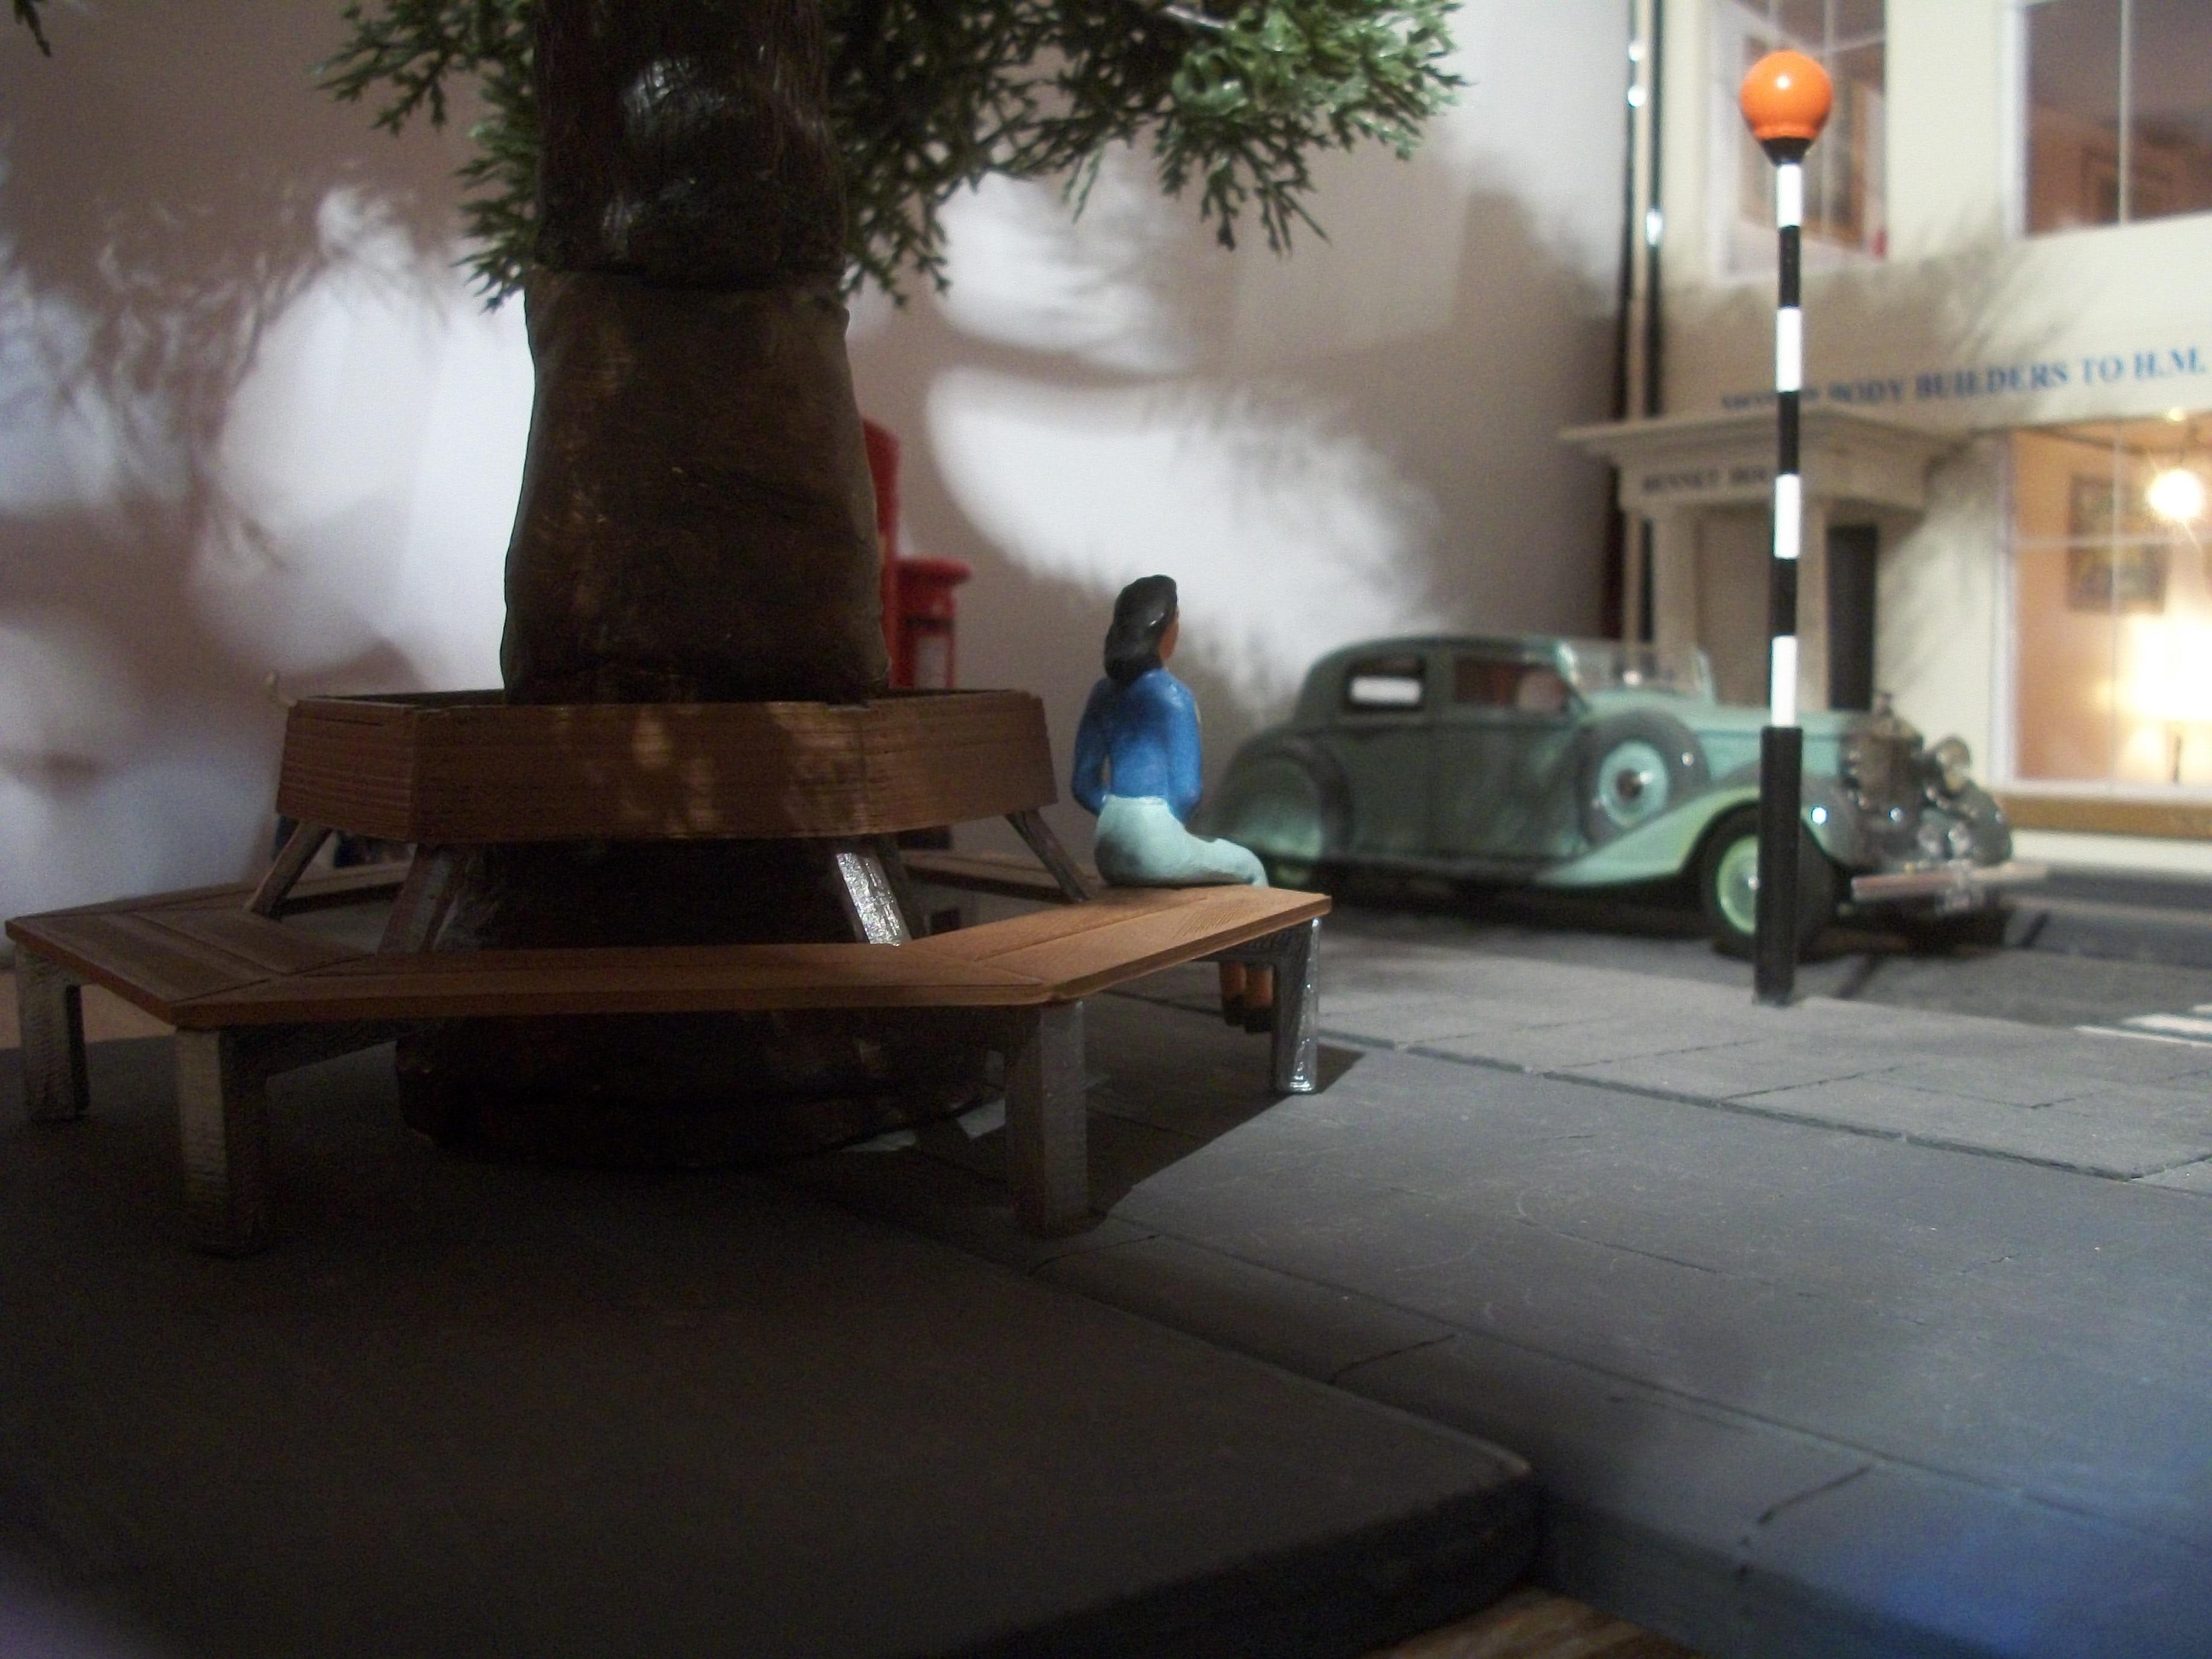
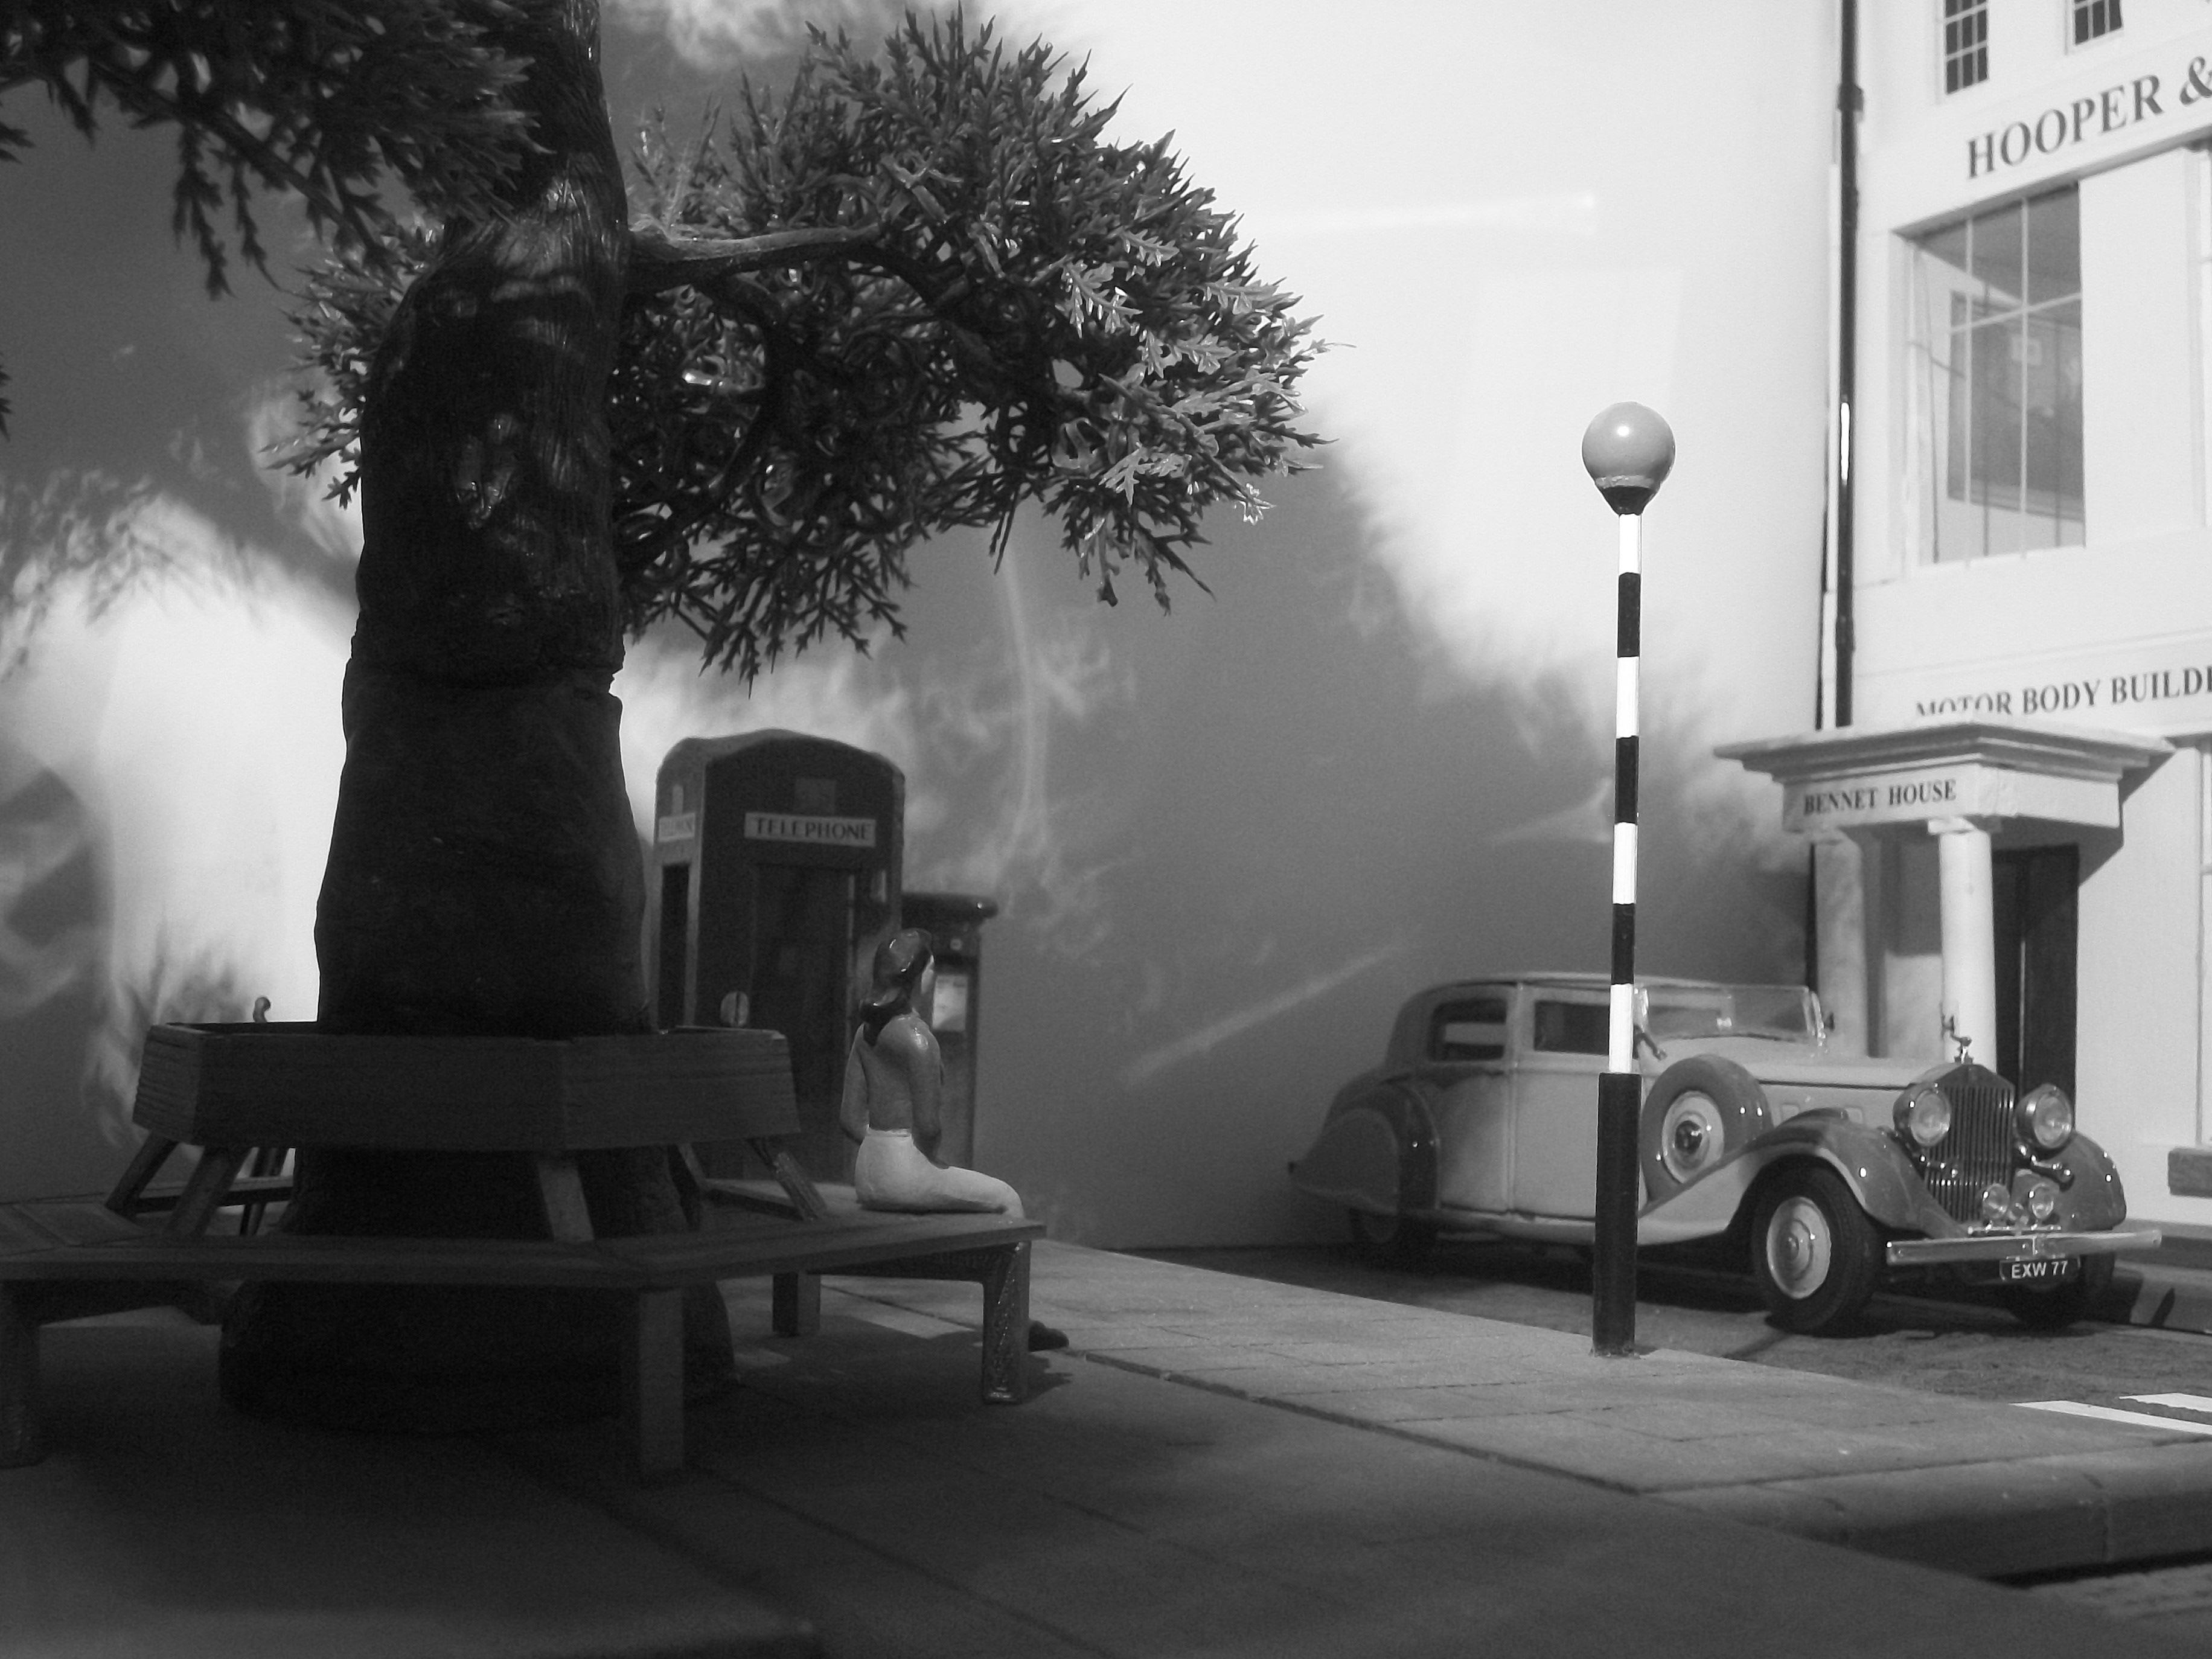
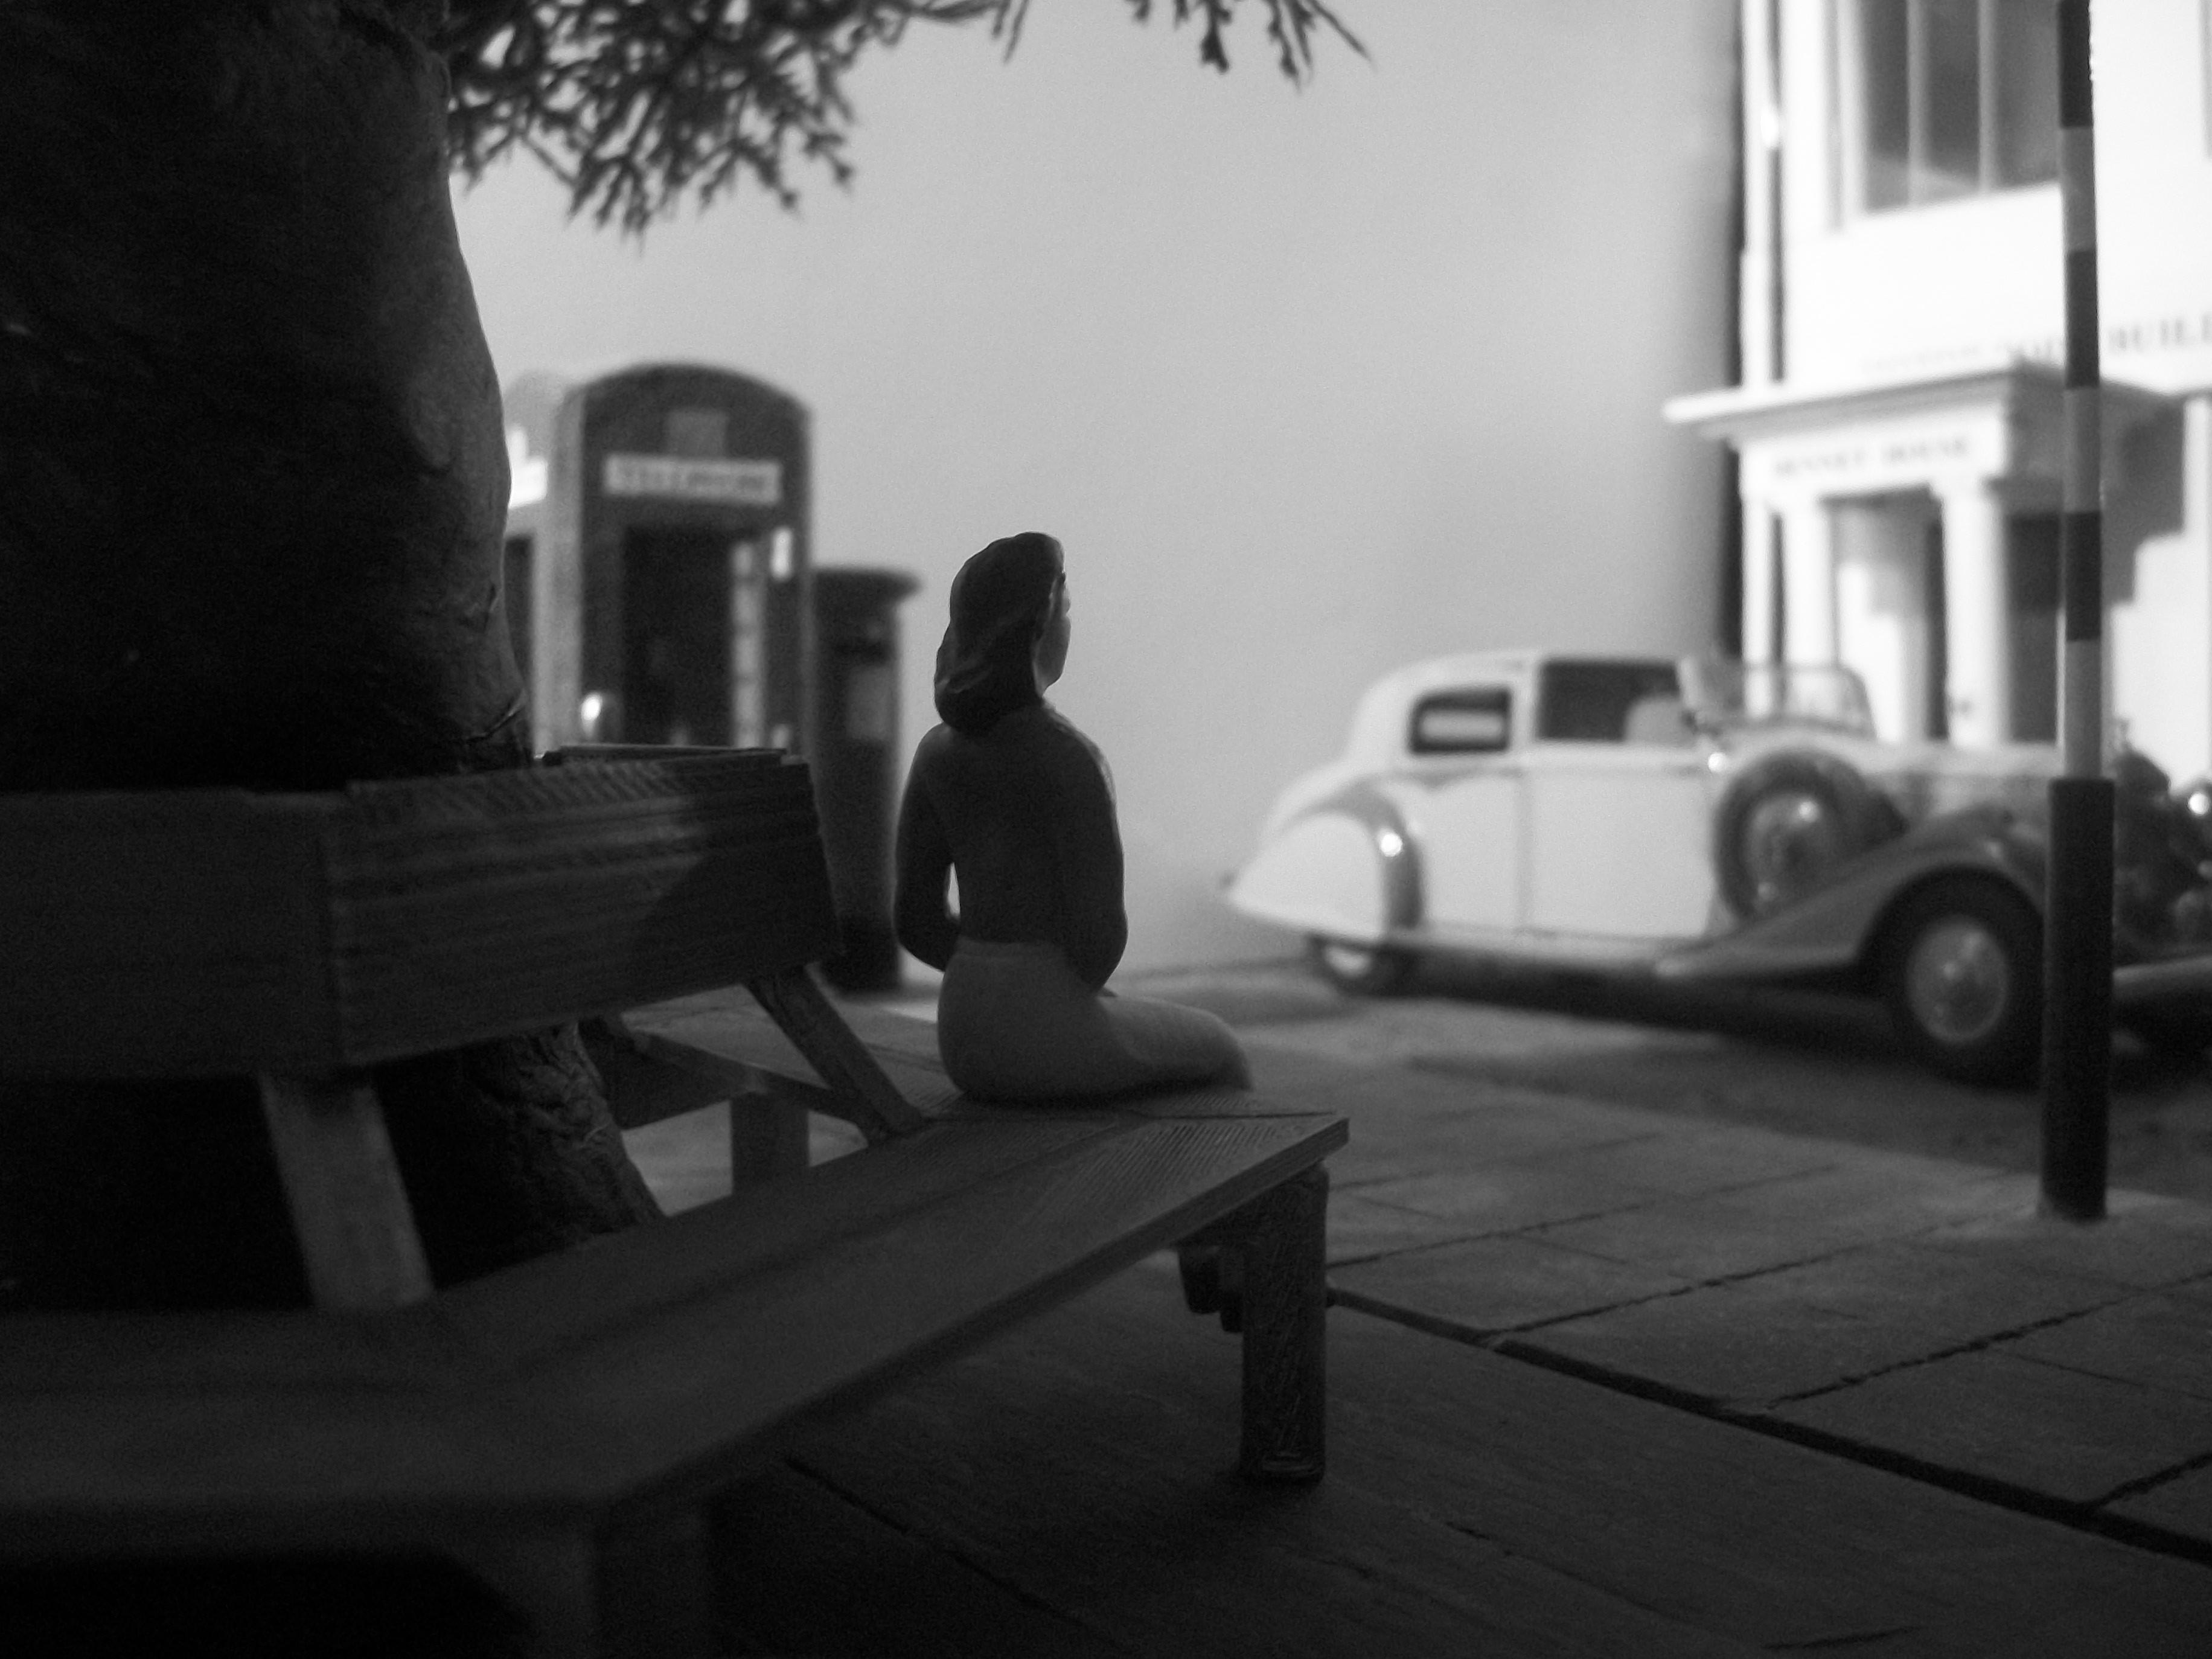
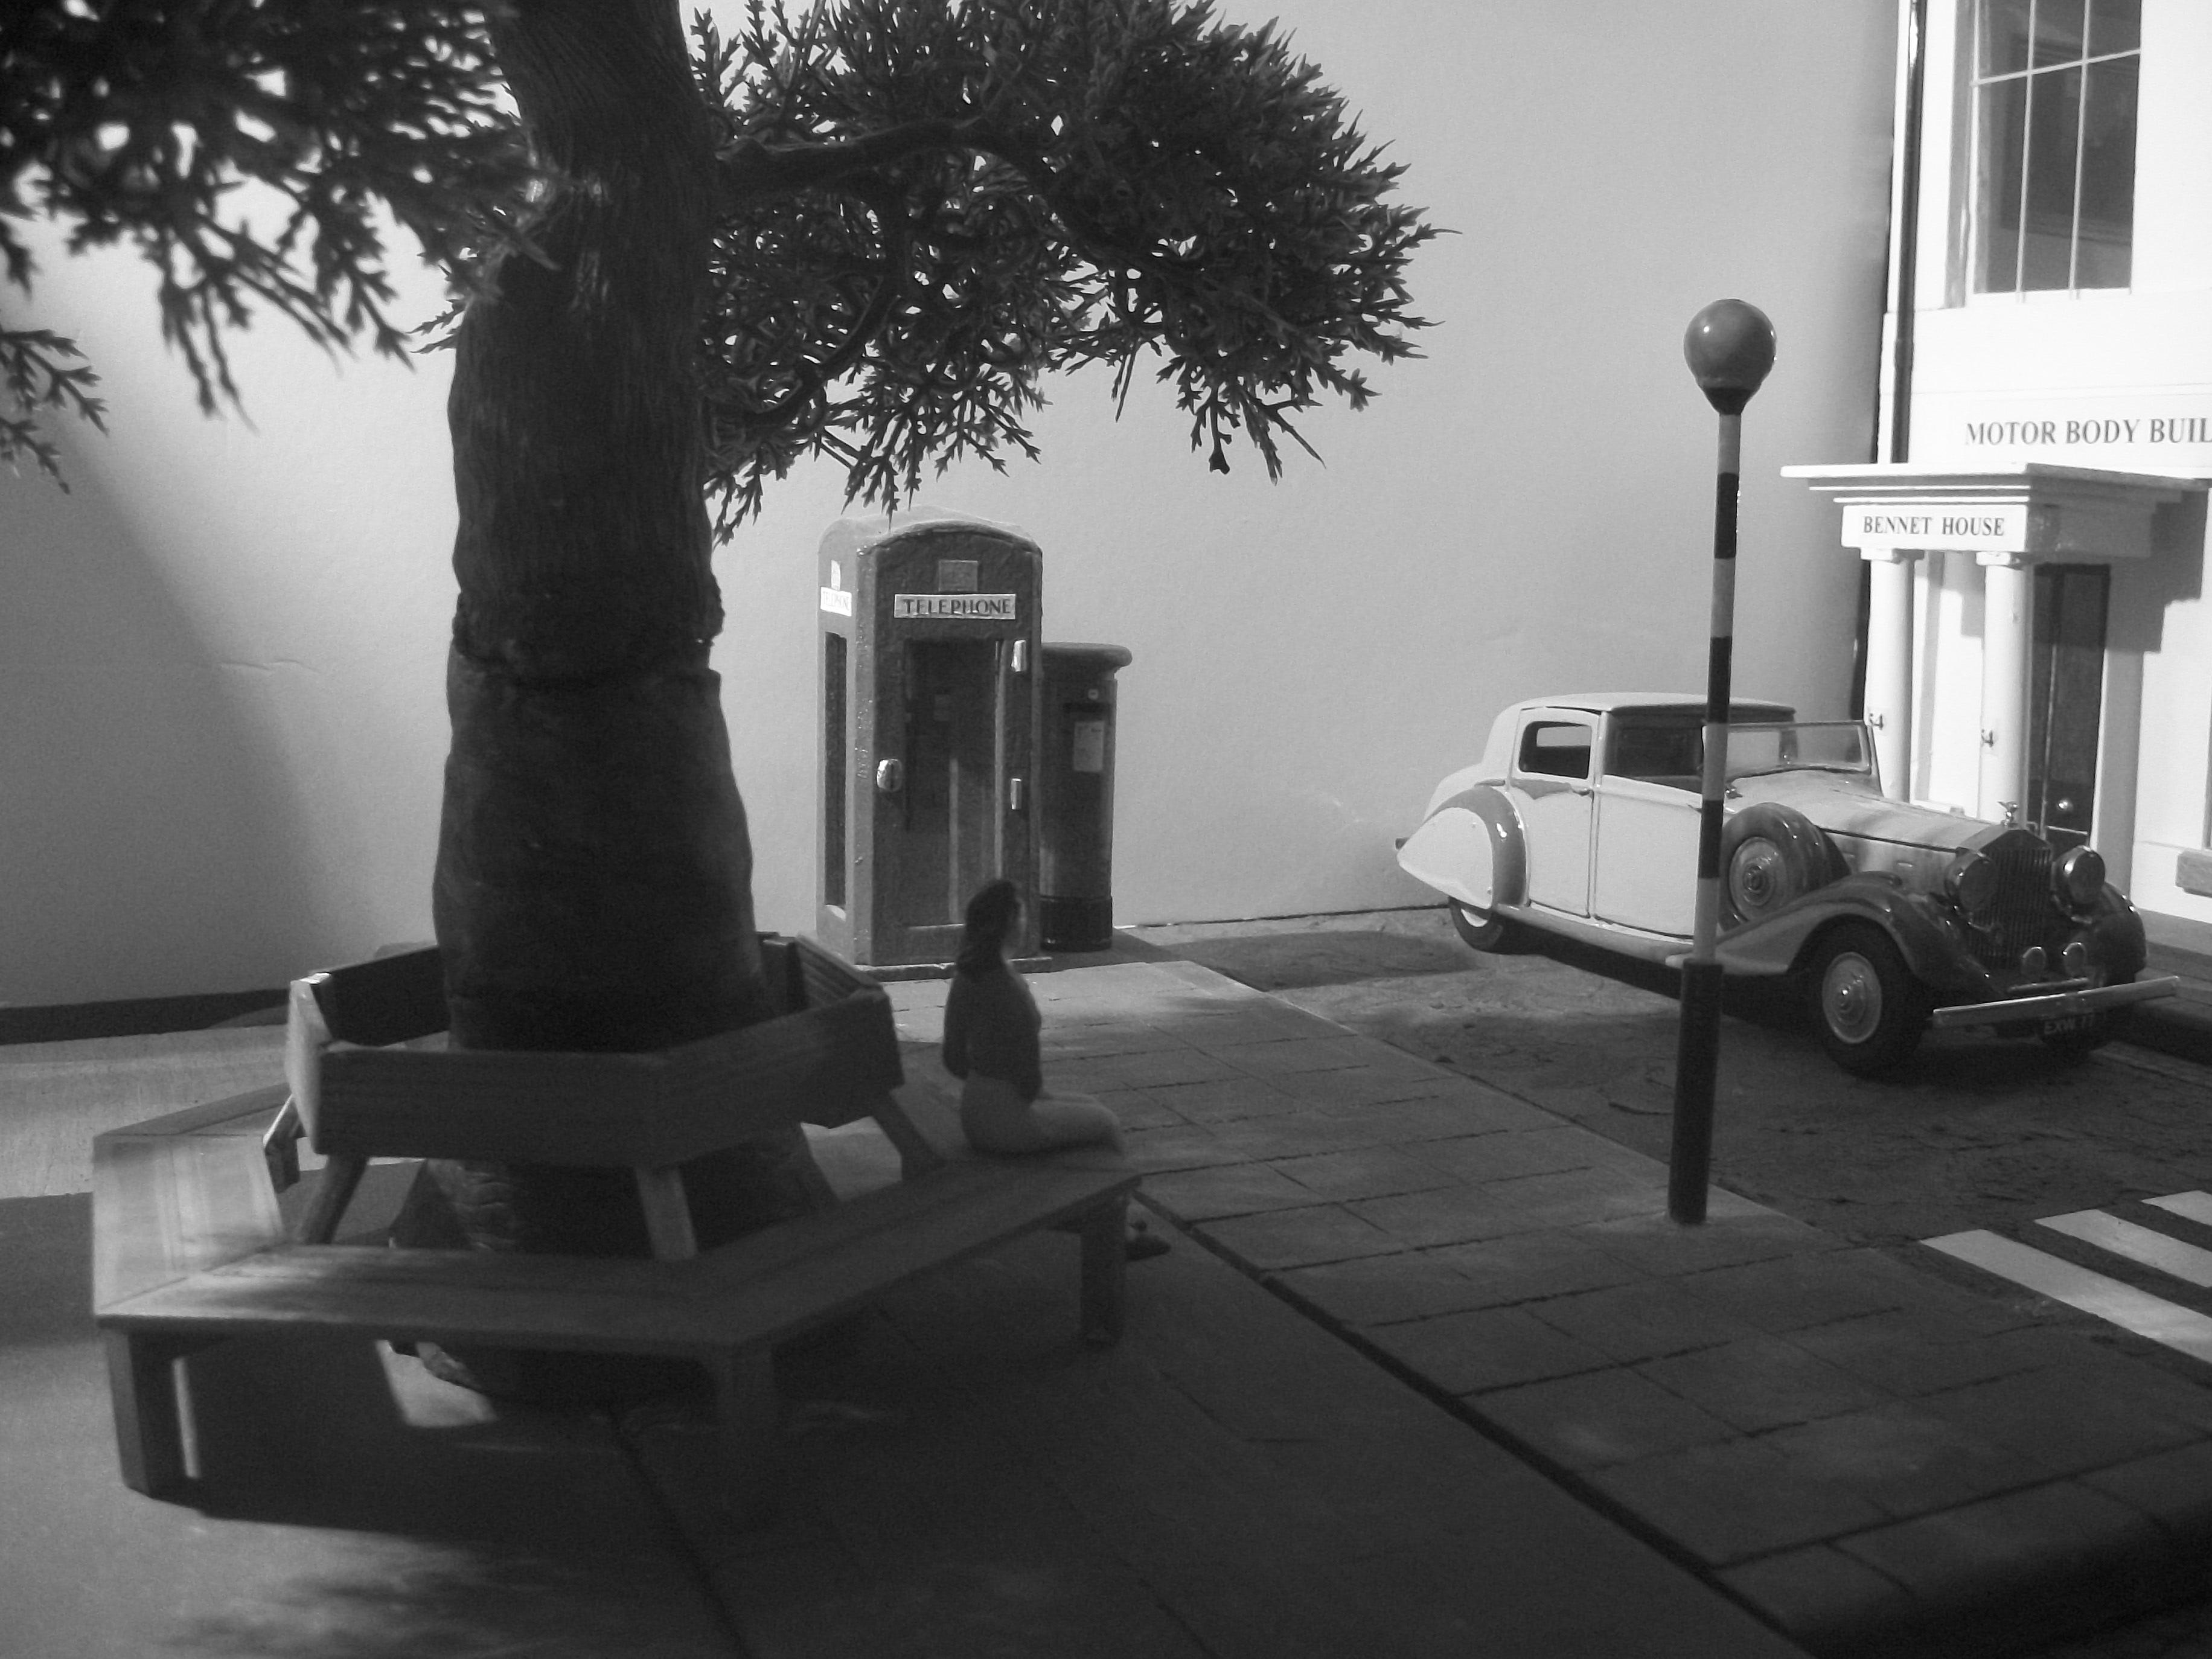
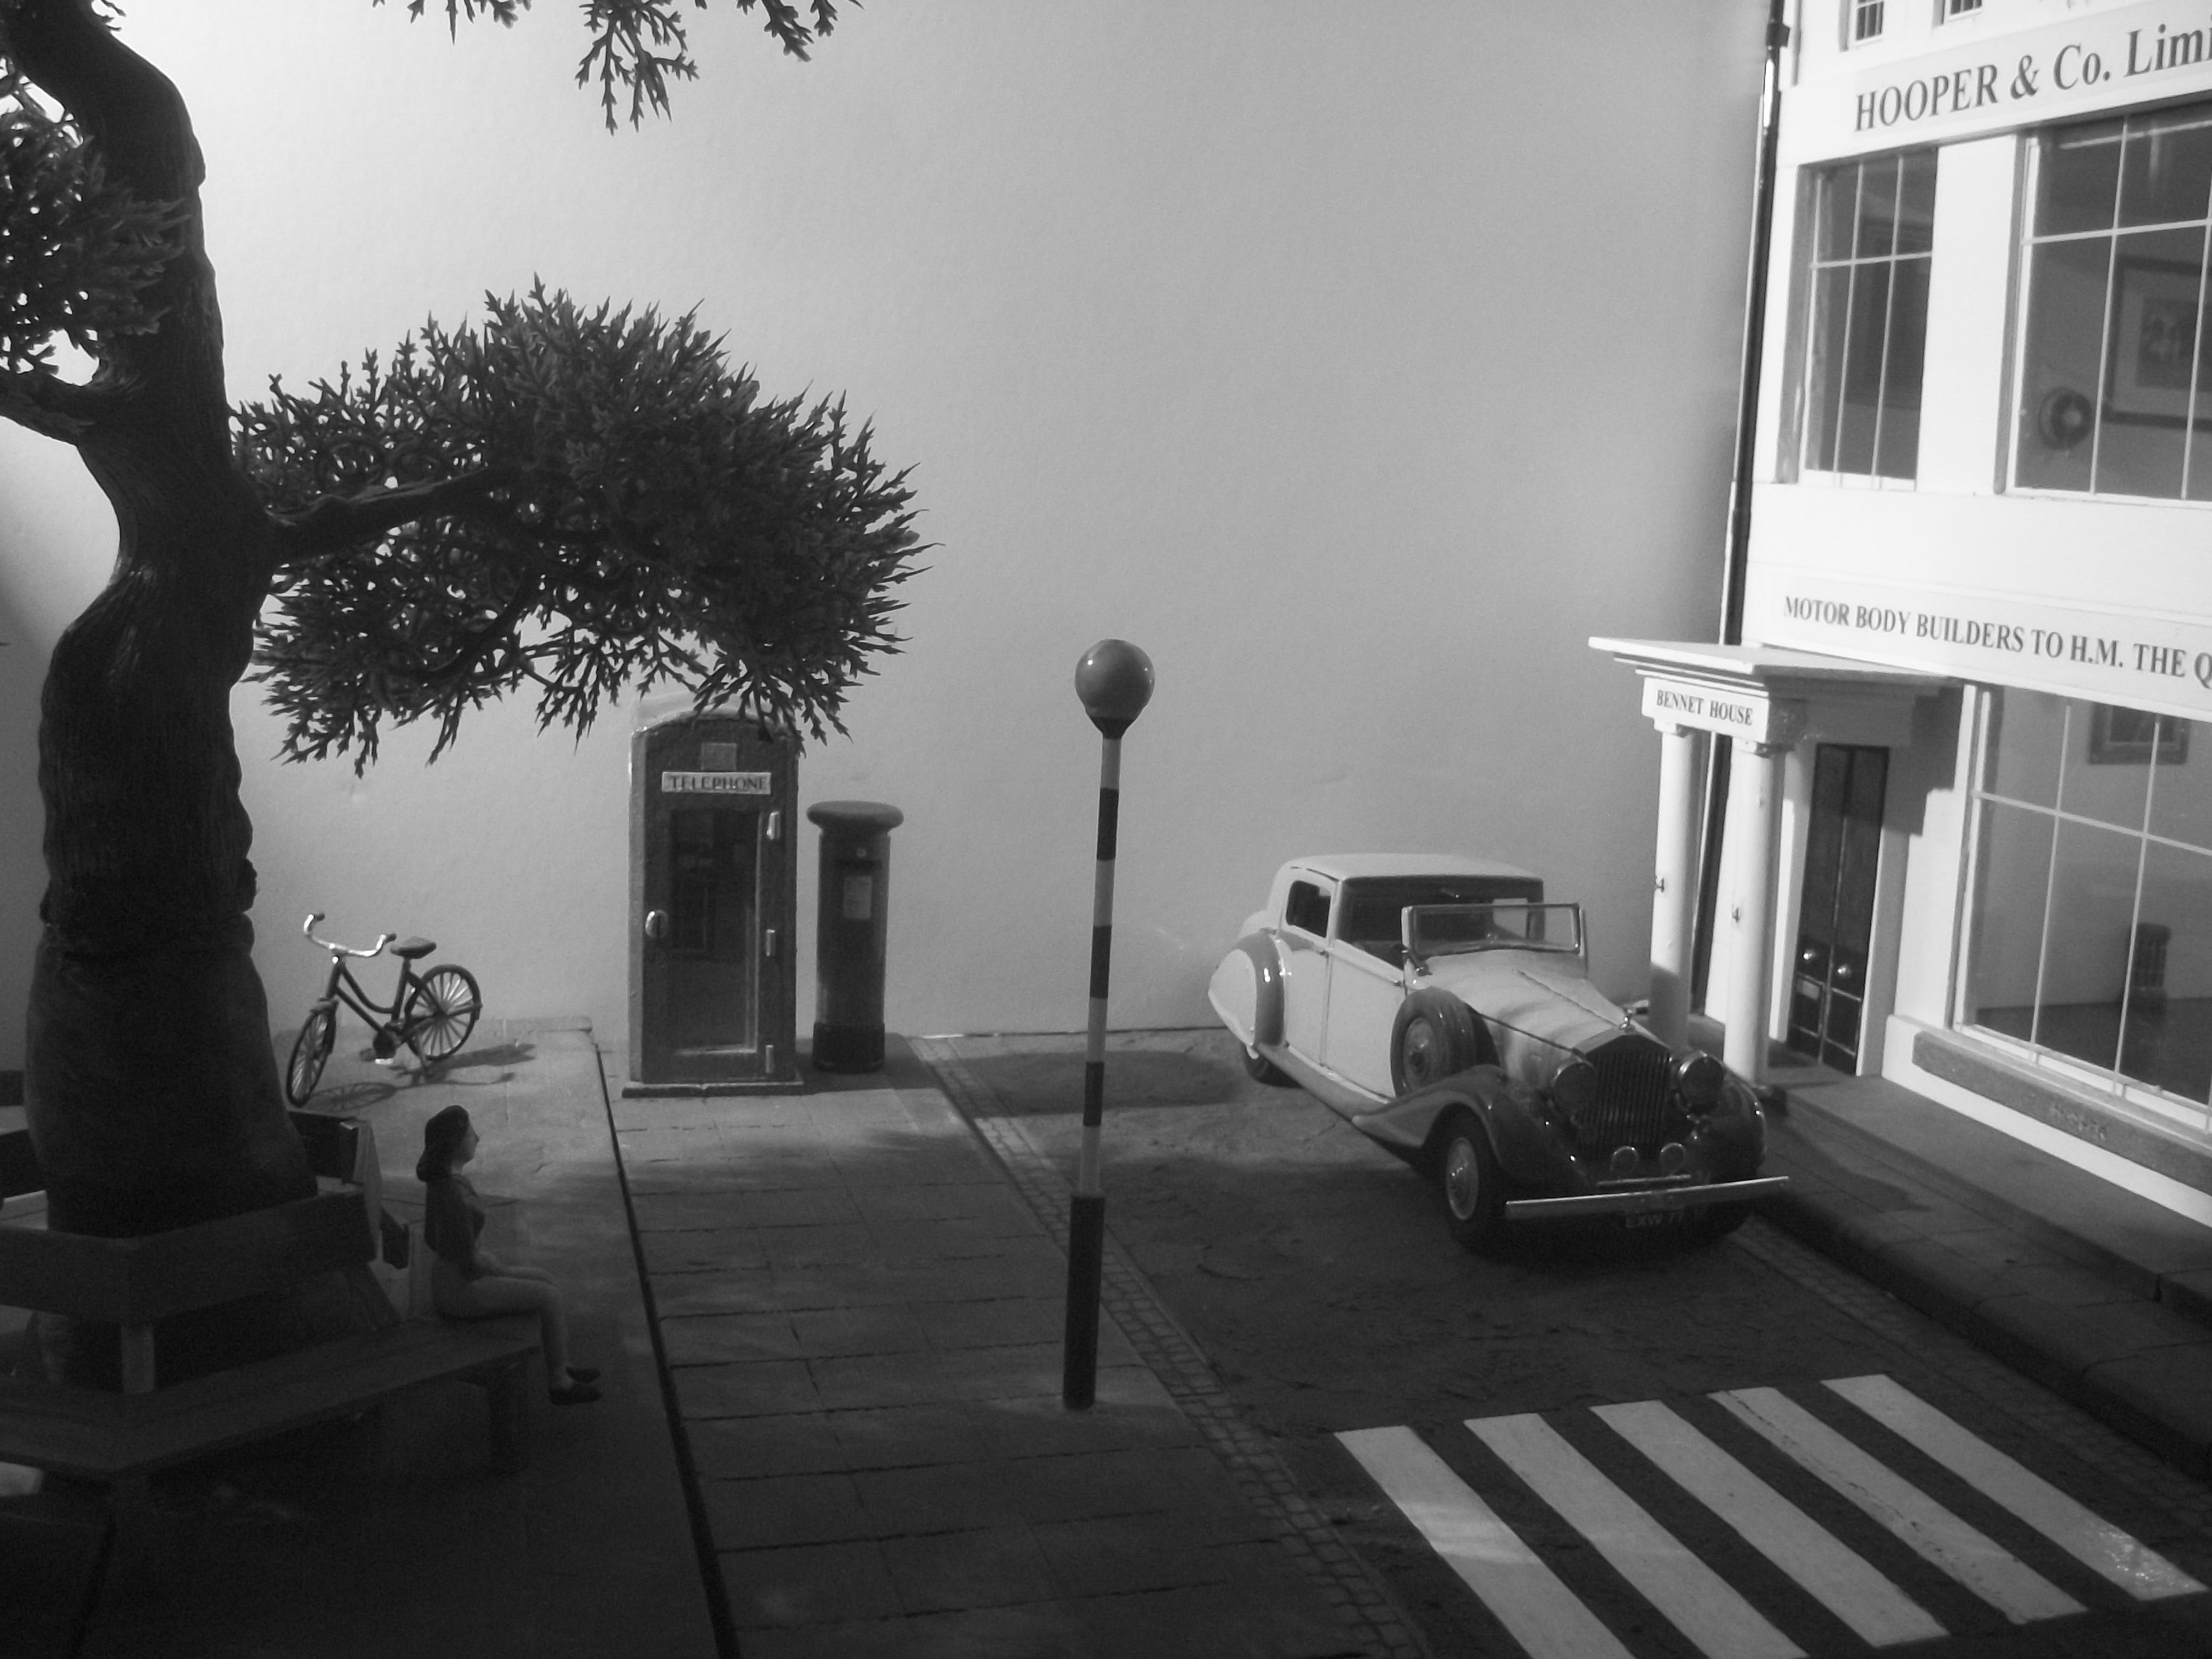
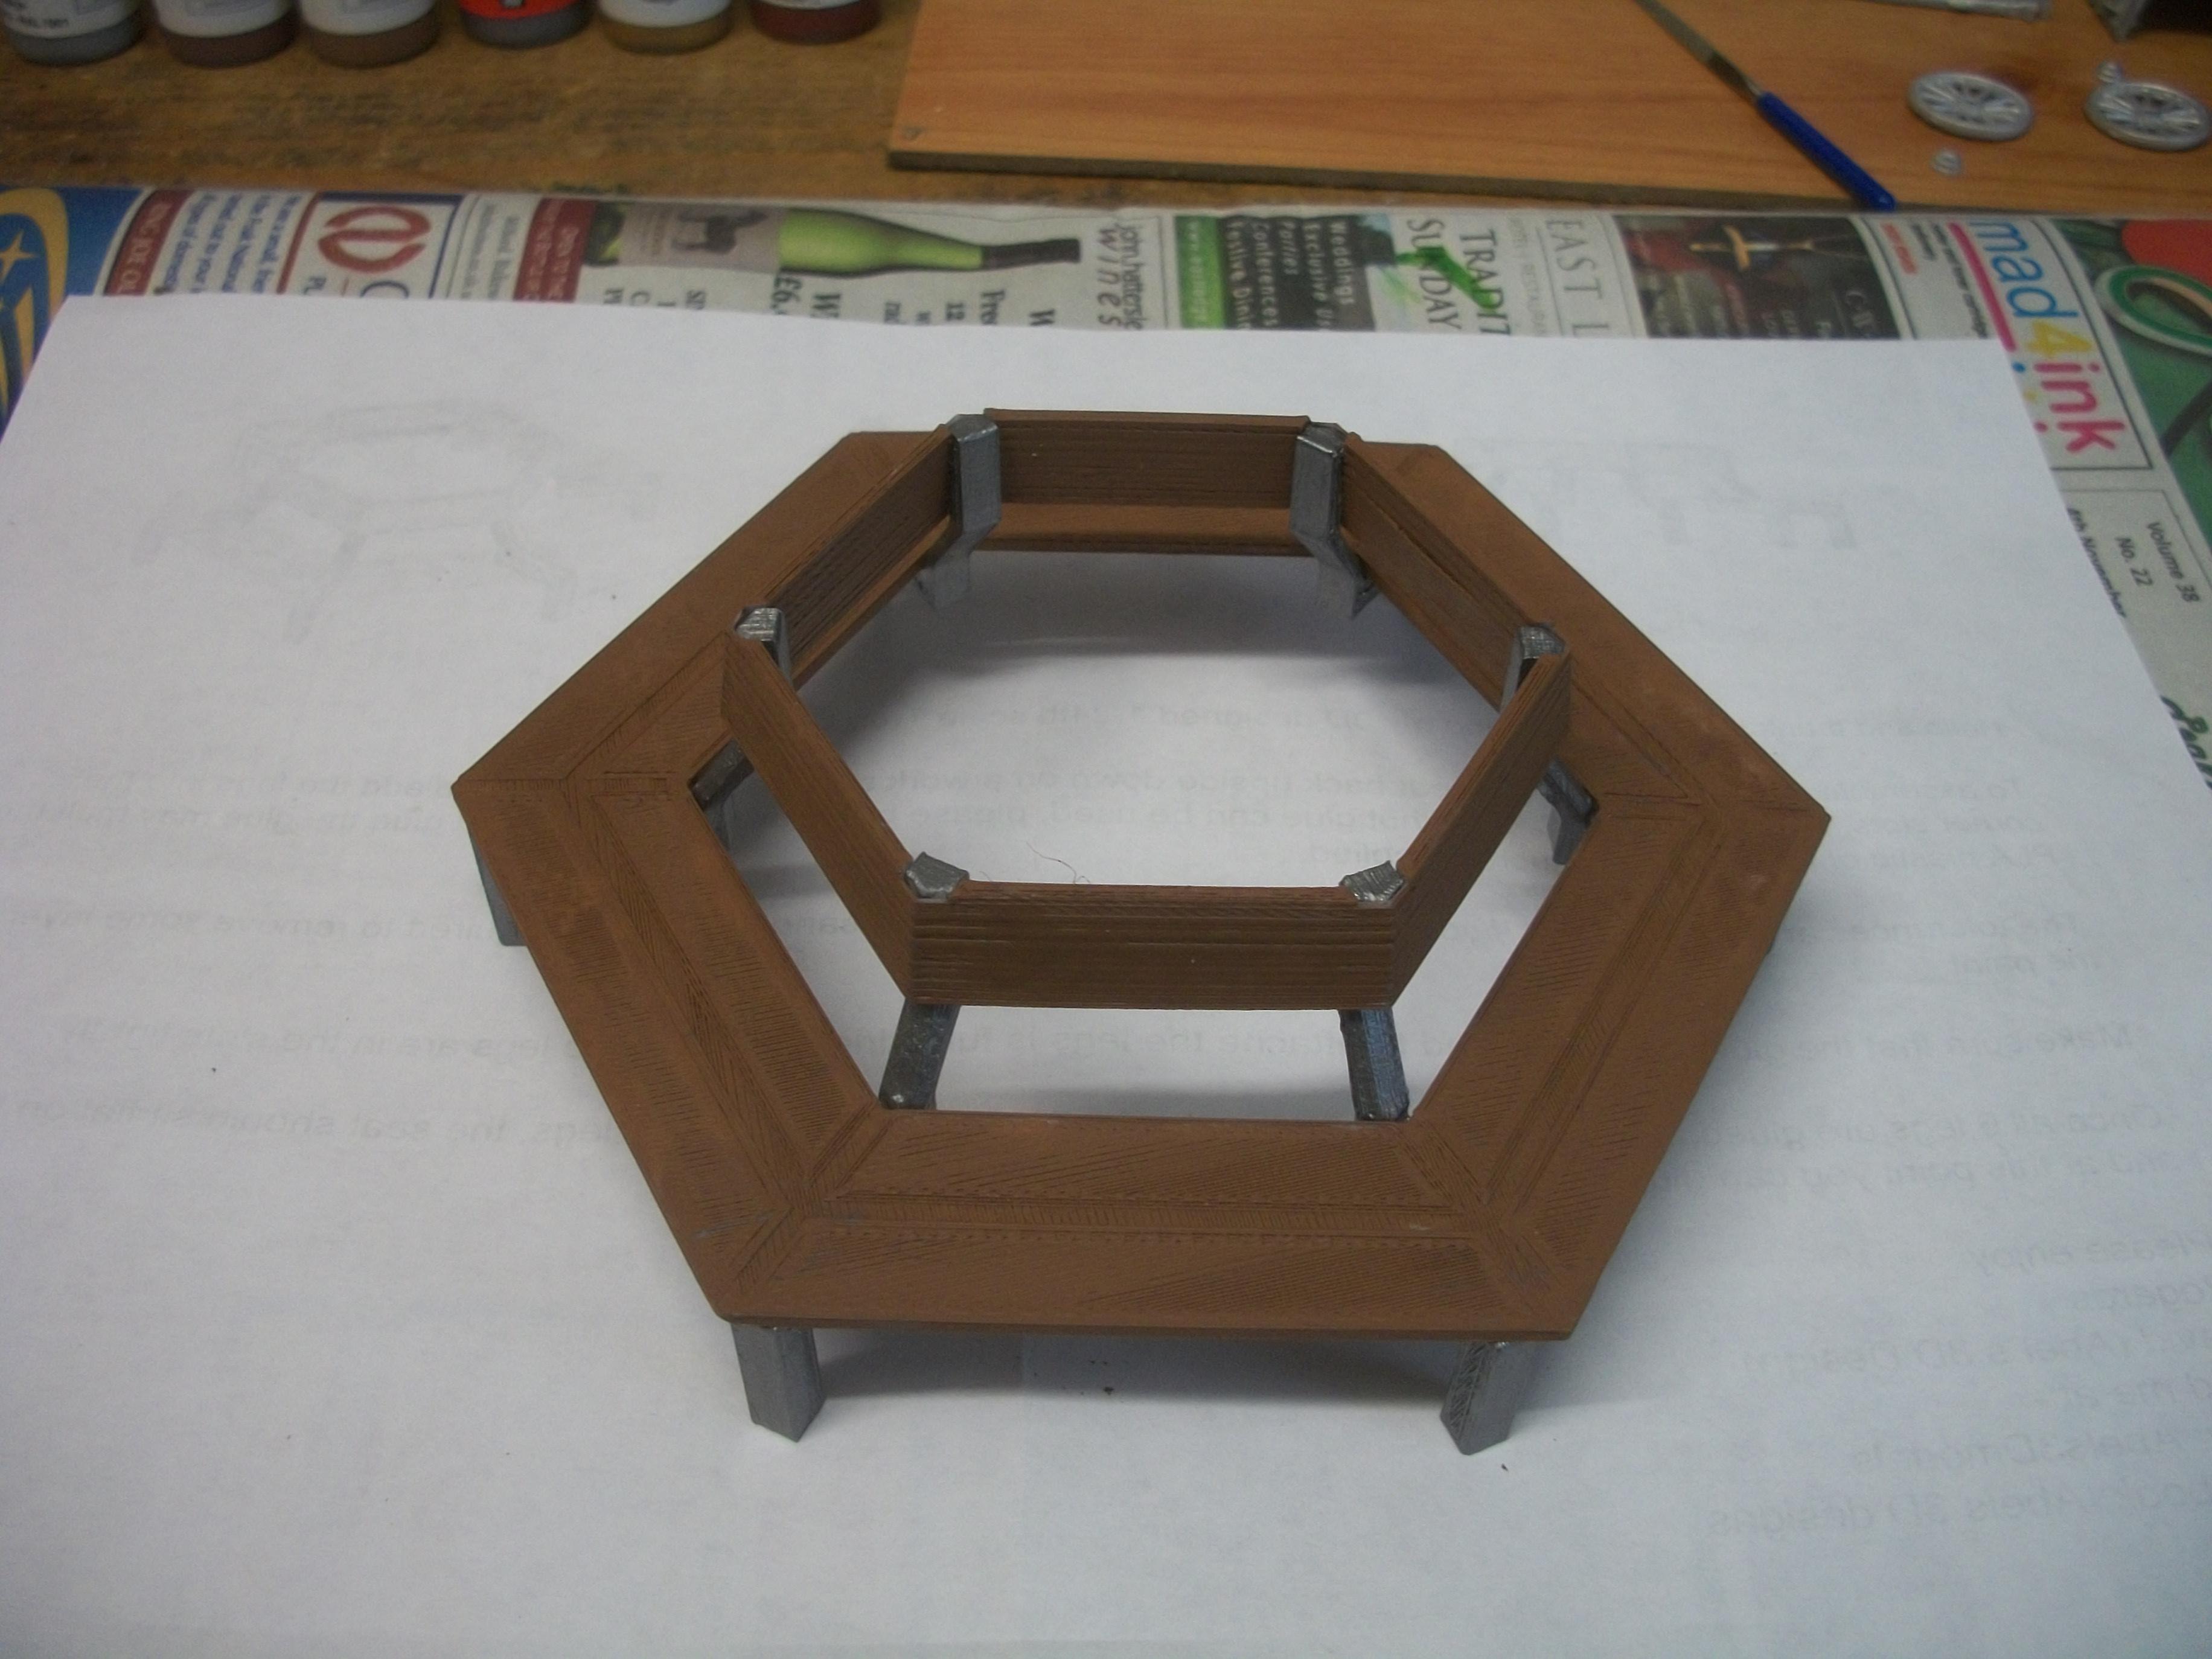
The lady is a cheap Chinese figure, of poor quality....... so not Printle, Pat..... I have only used this figure for the photo shoot because I don't have a seated figure of a man or woman that is 3D printed. Actually, I have to admit that the lady figure is not even particularly well painted ( by myself ). This situation clearly needs to be addressed. The photos are primarily about featuring the hexagonal tree bench in a diorama setting, so maybe I would have been better not to include a figure. As always, thanks for looking and how are your projects going? David
-
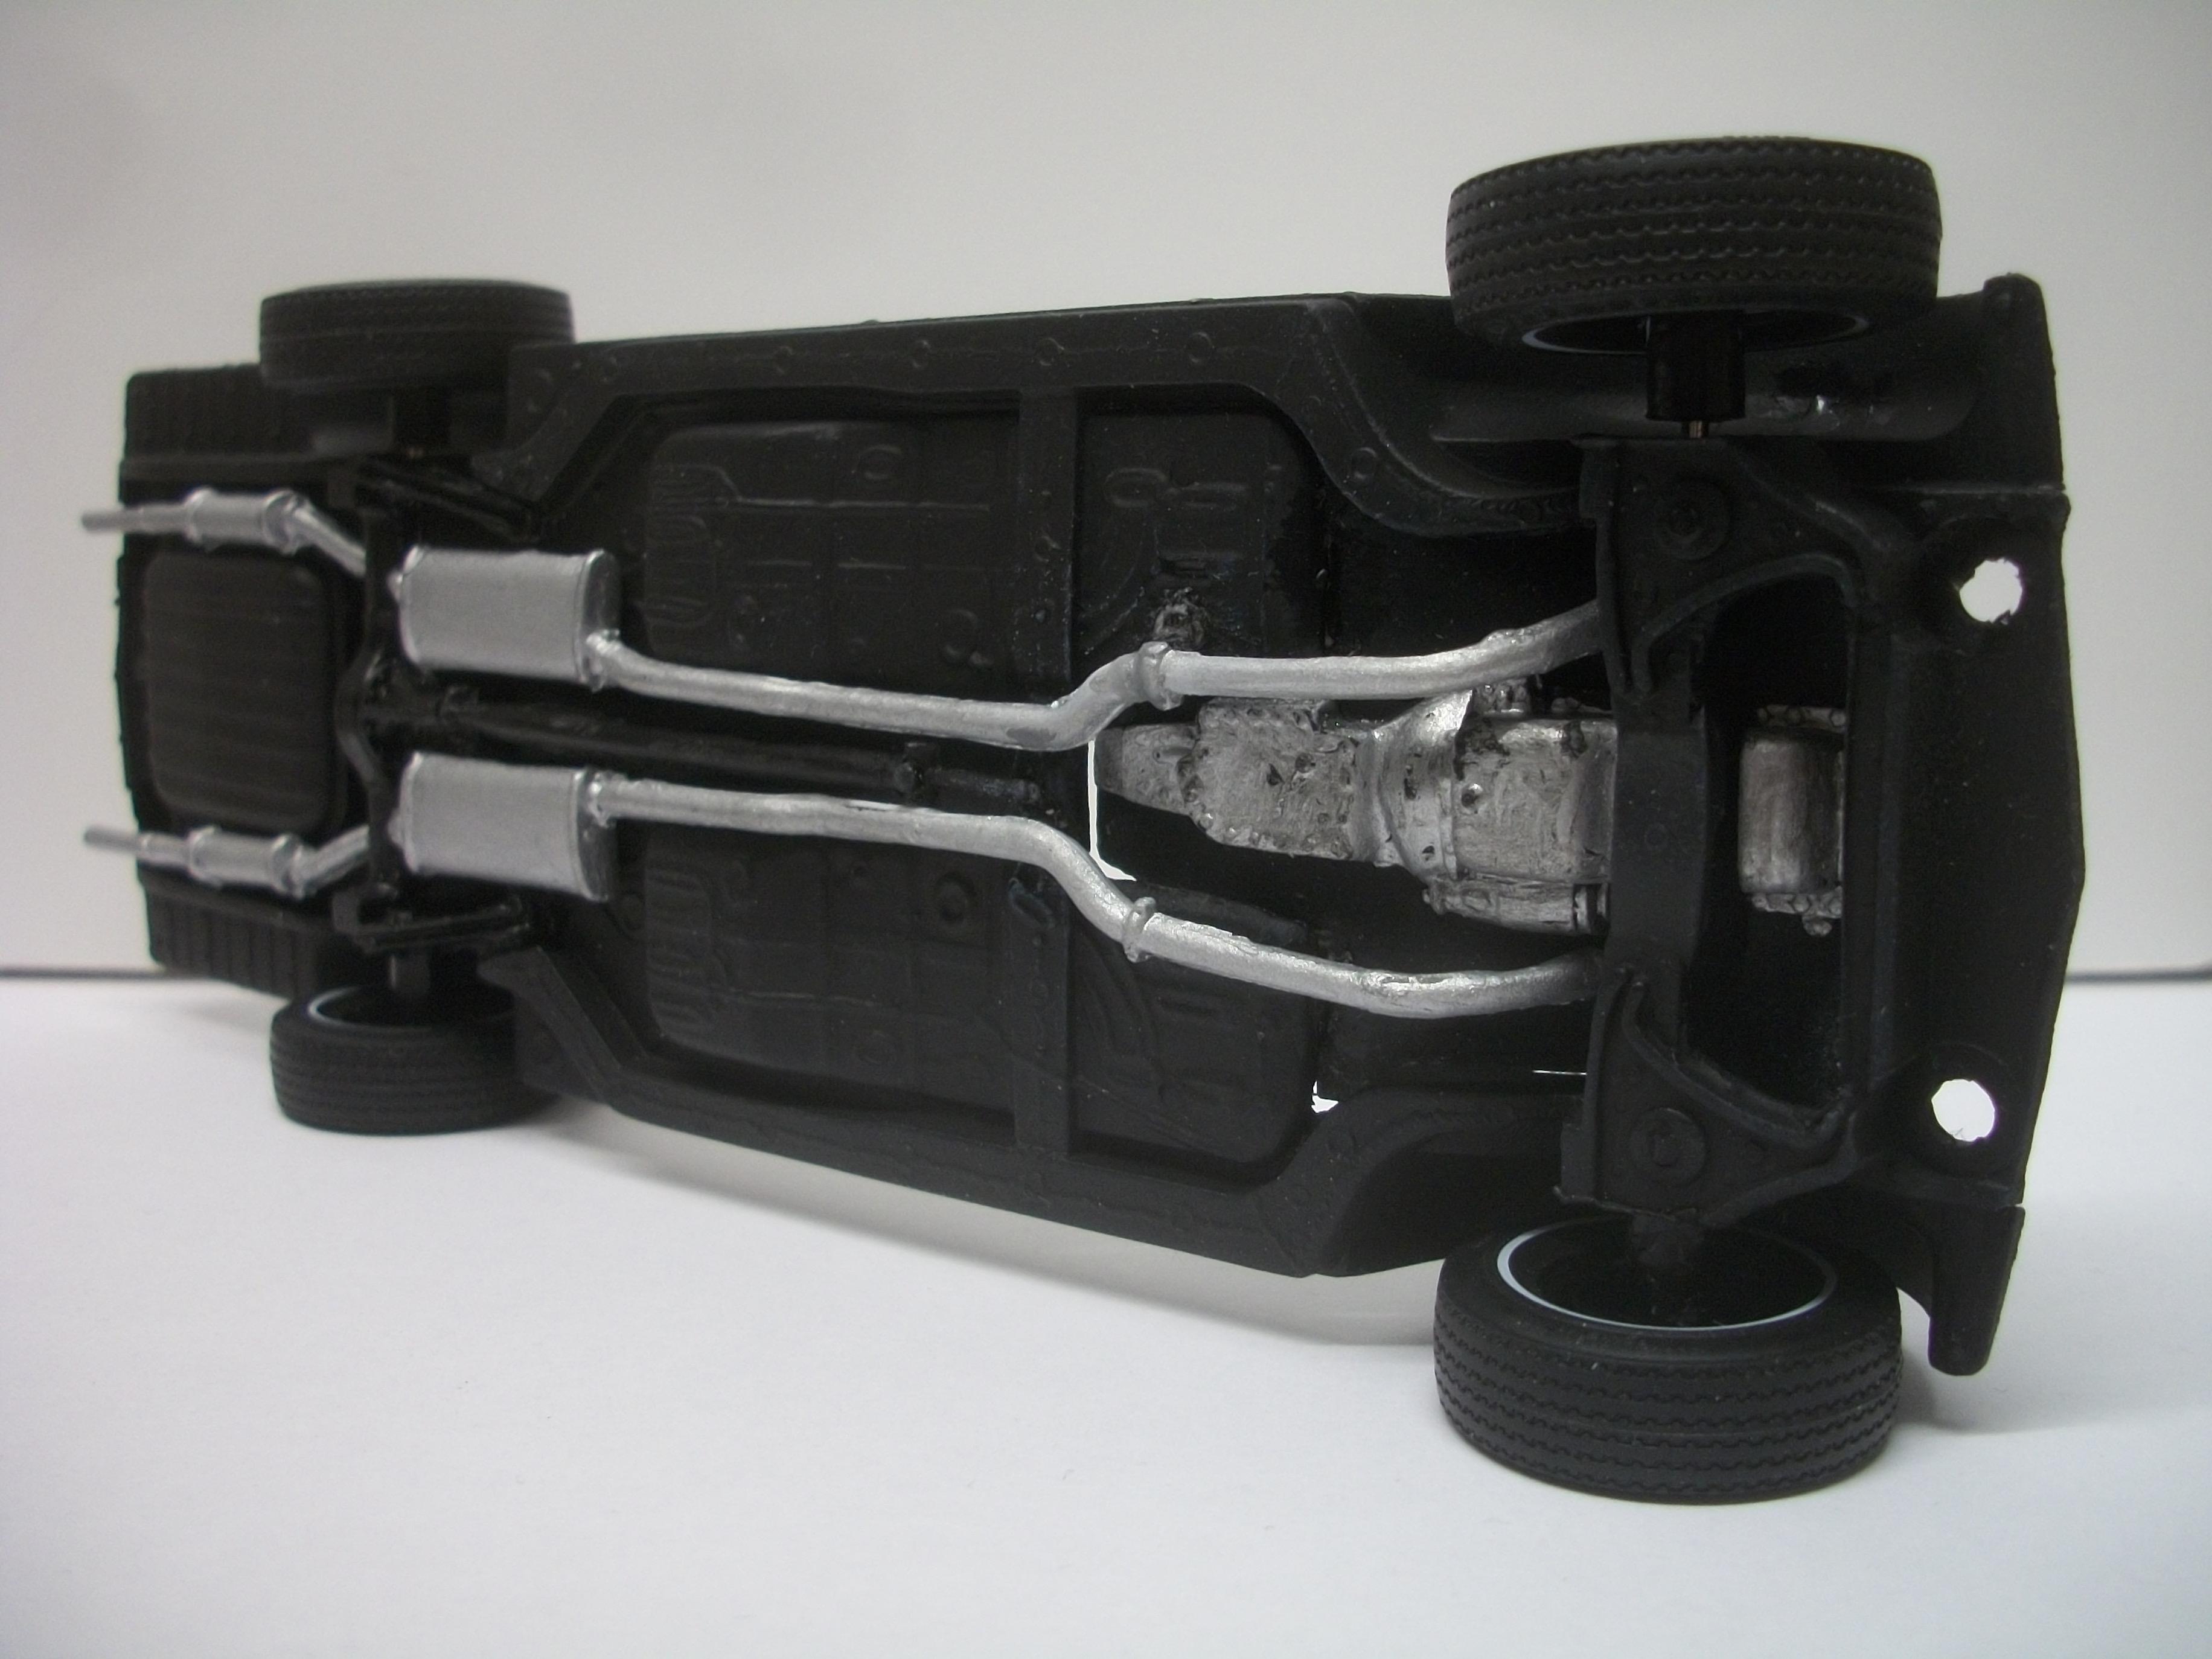
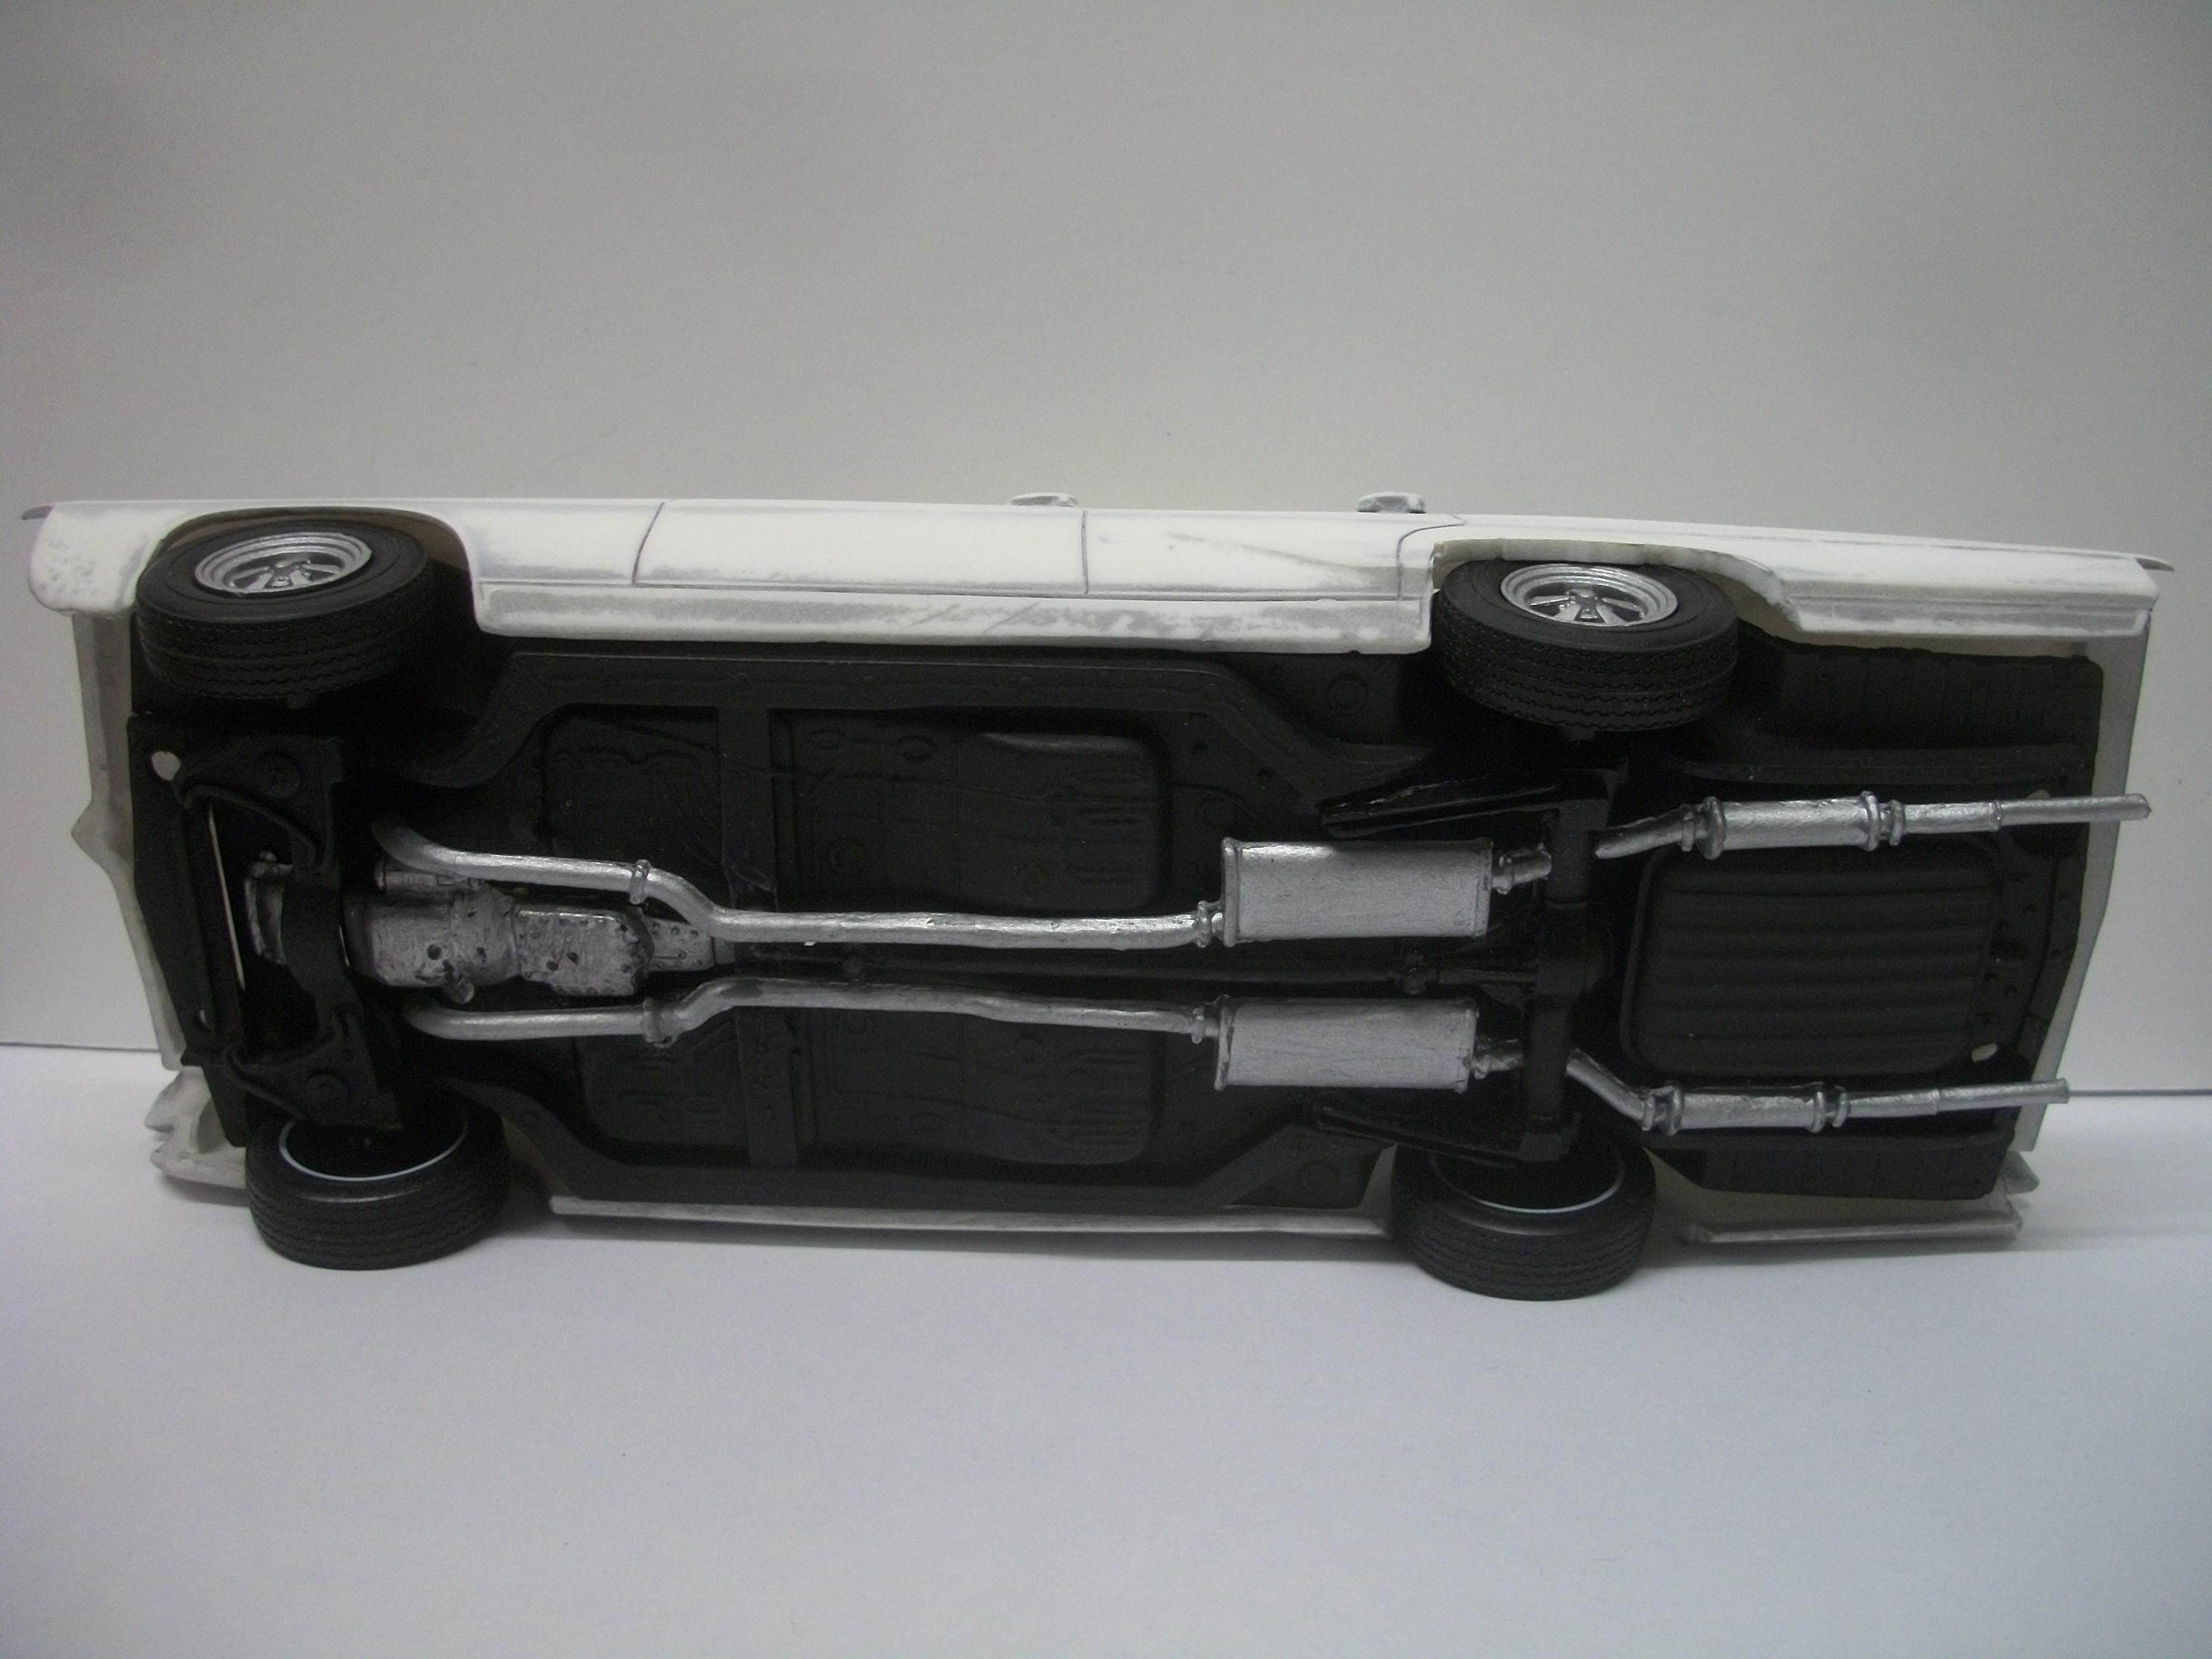
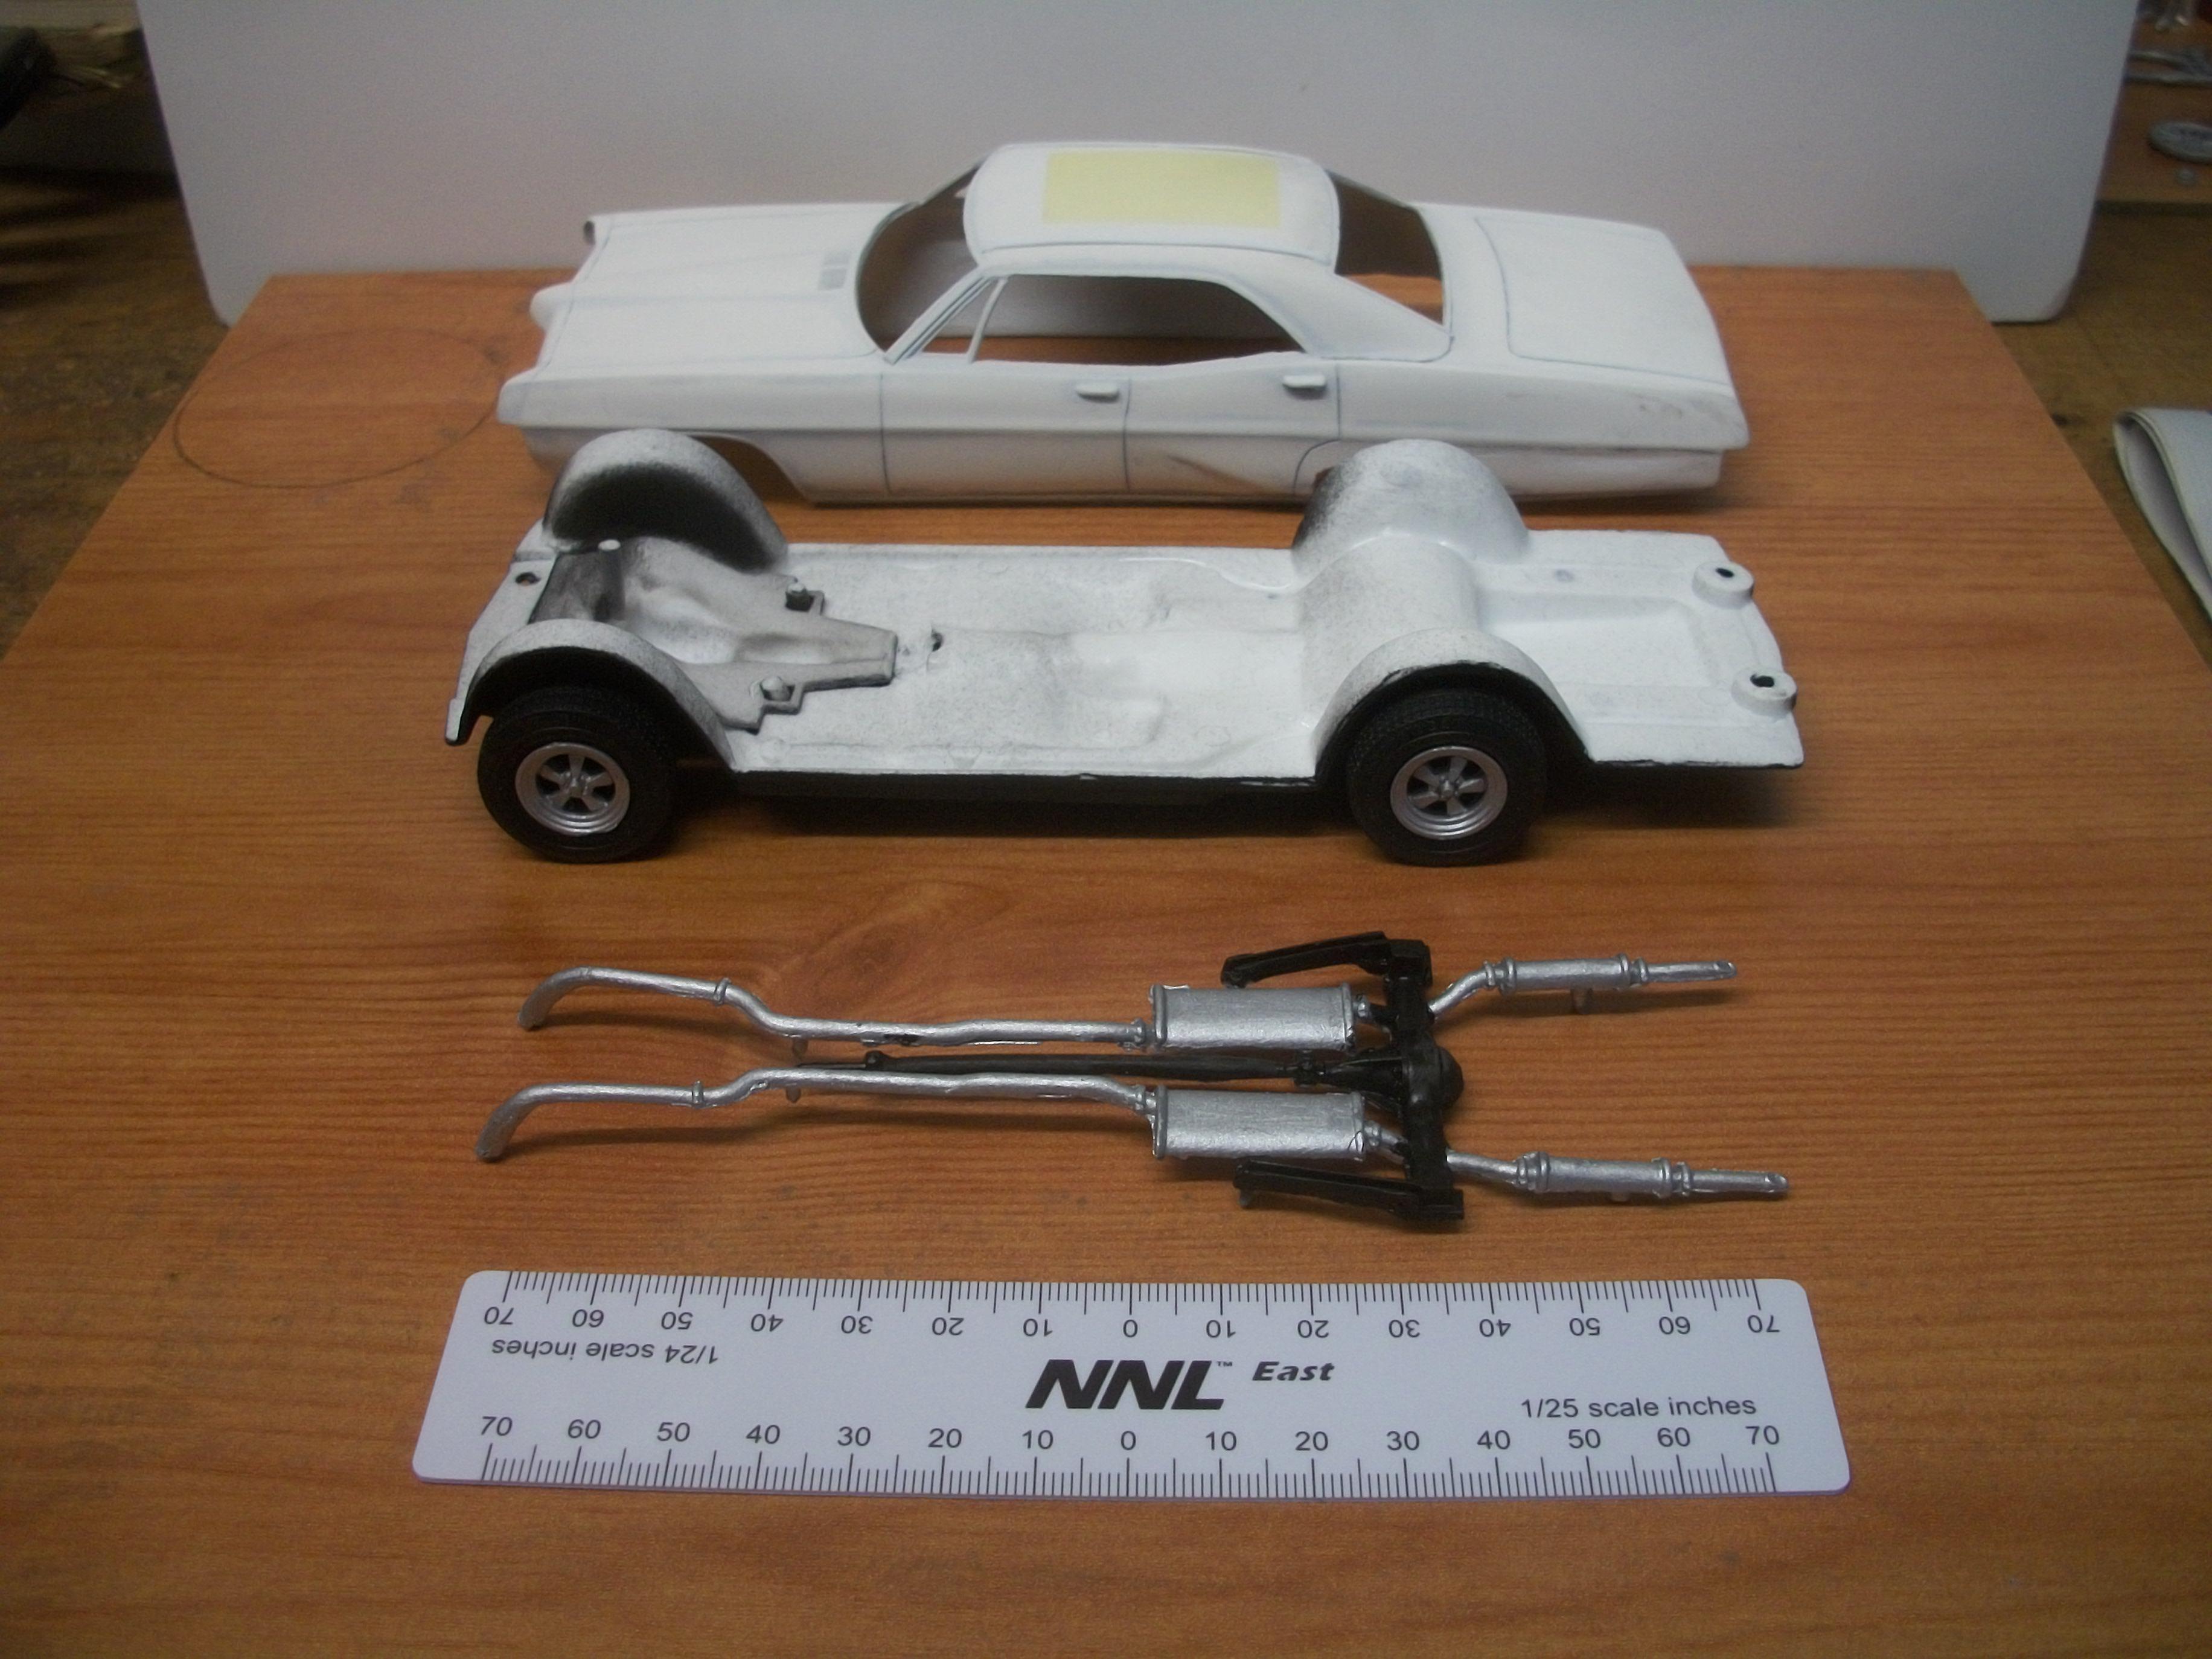
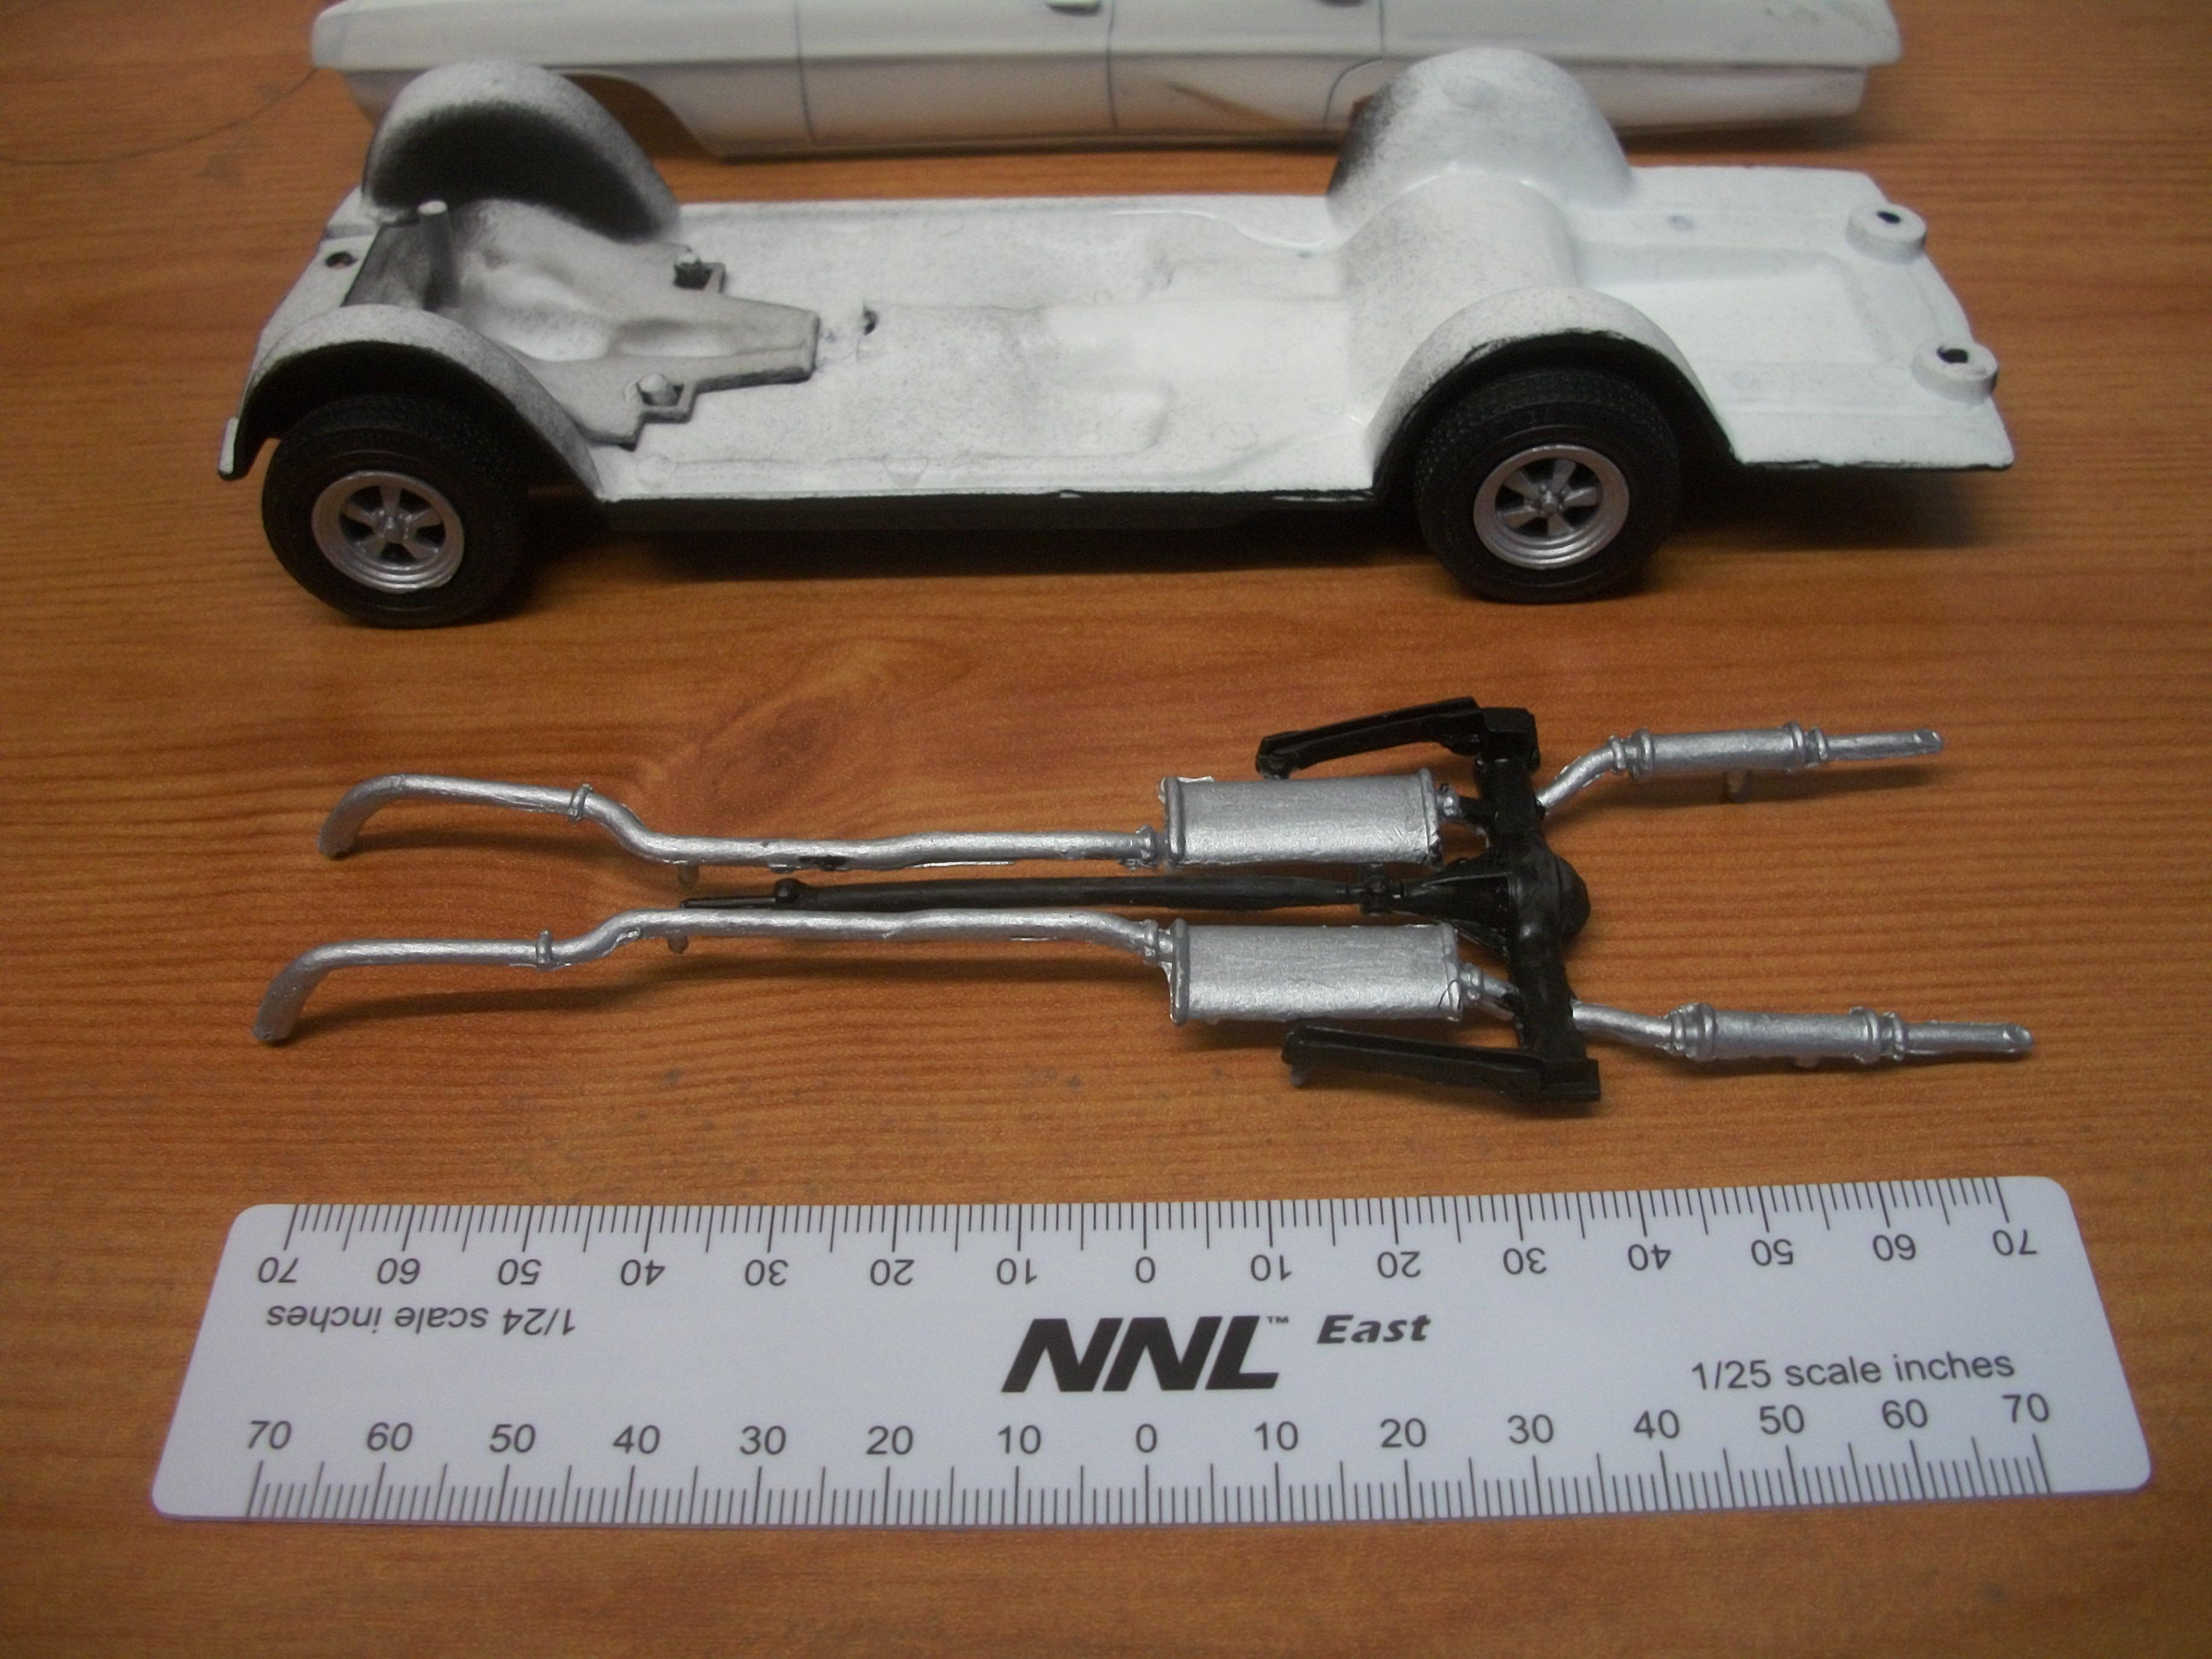
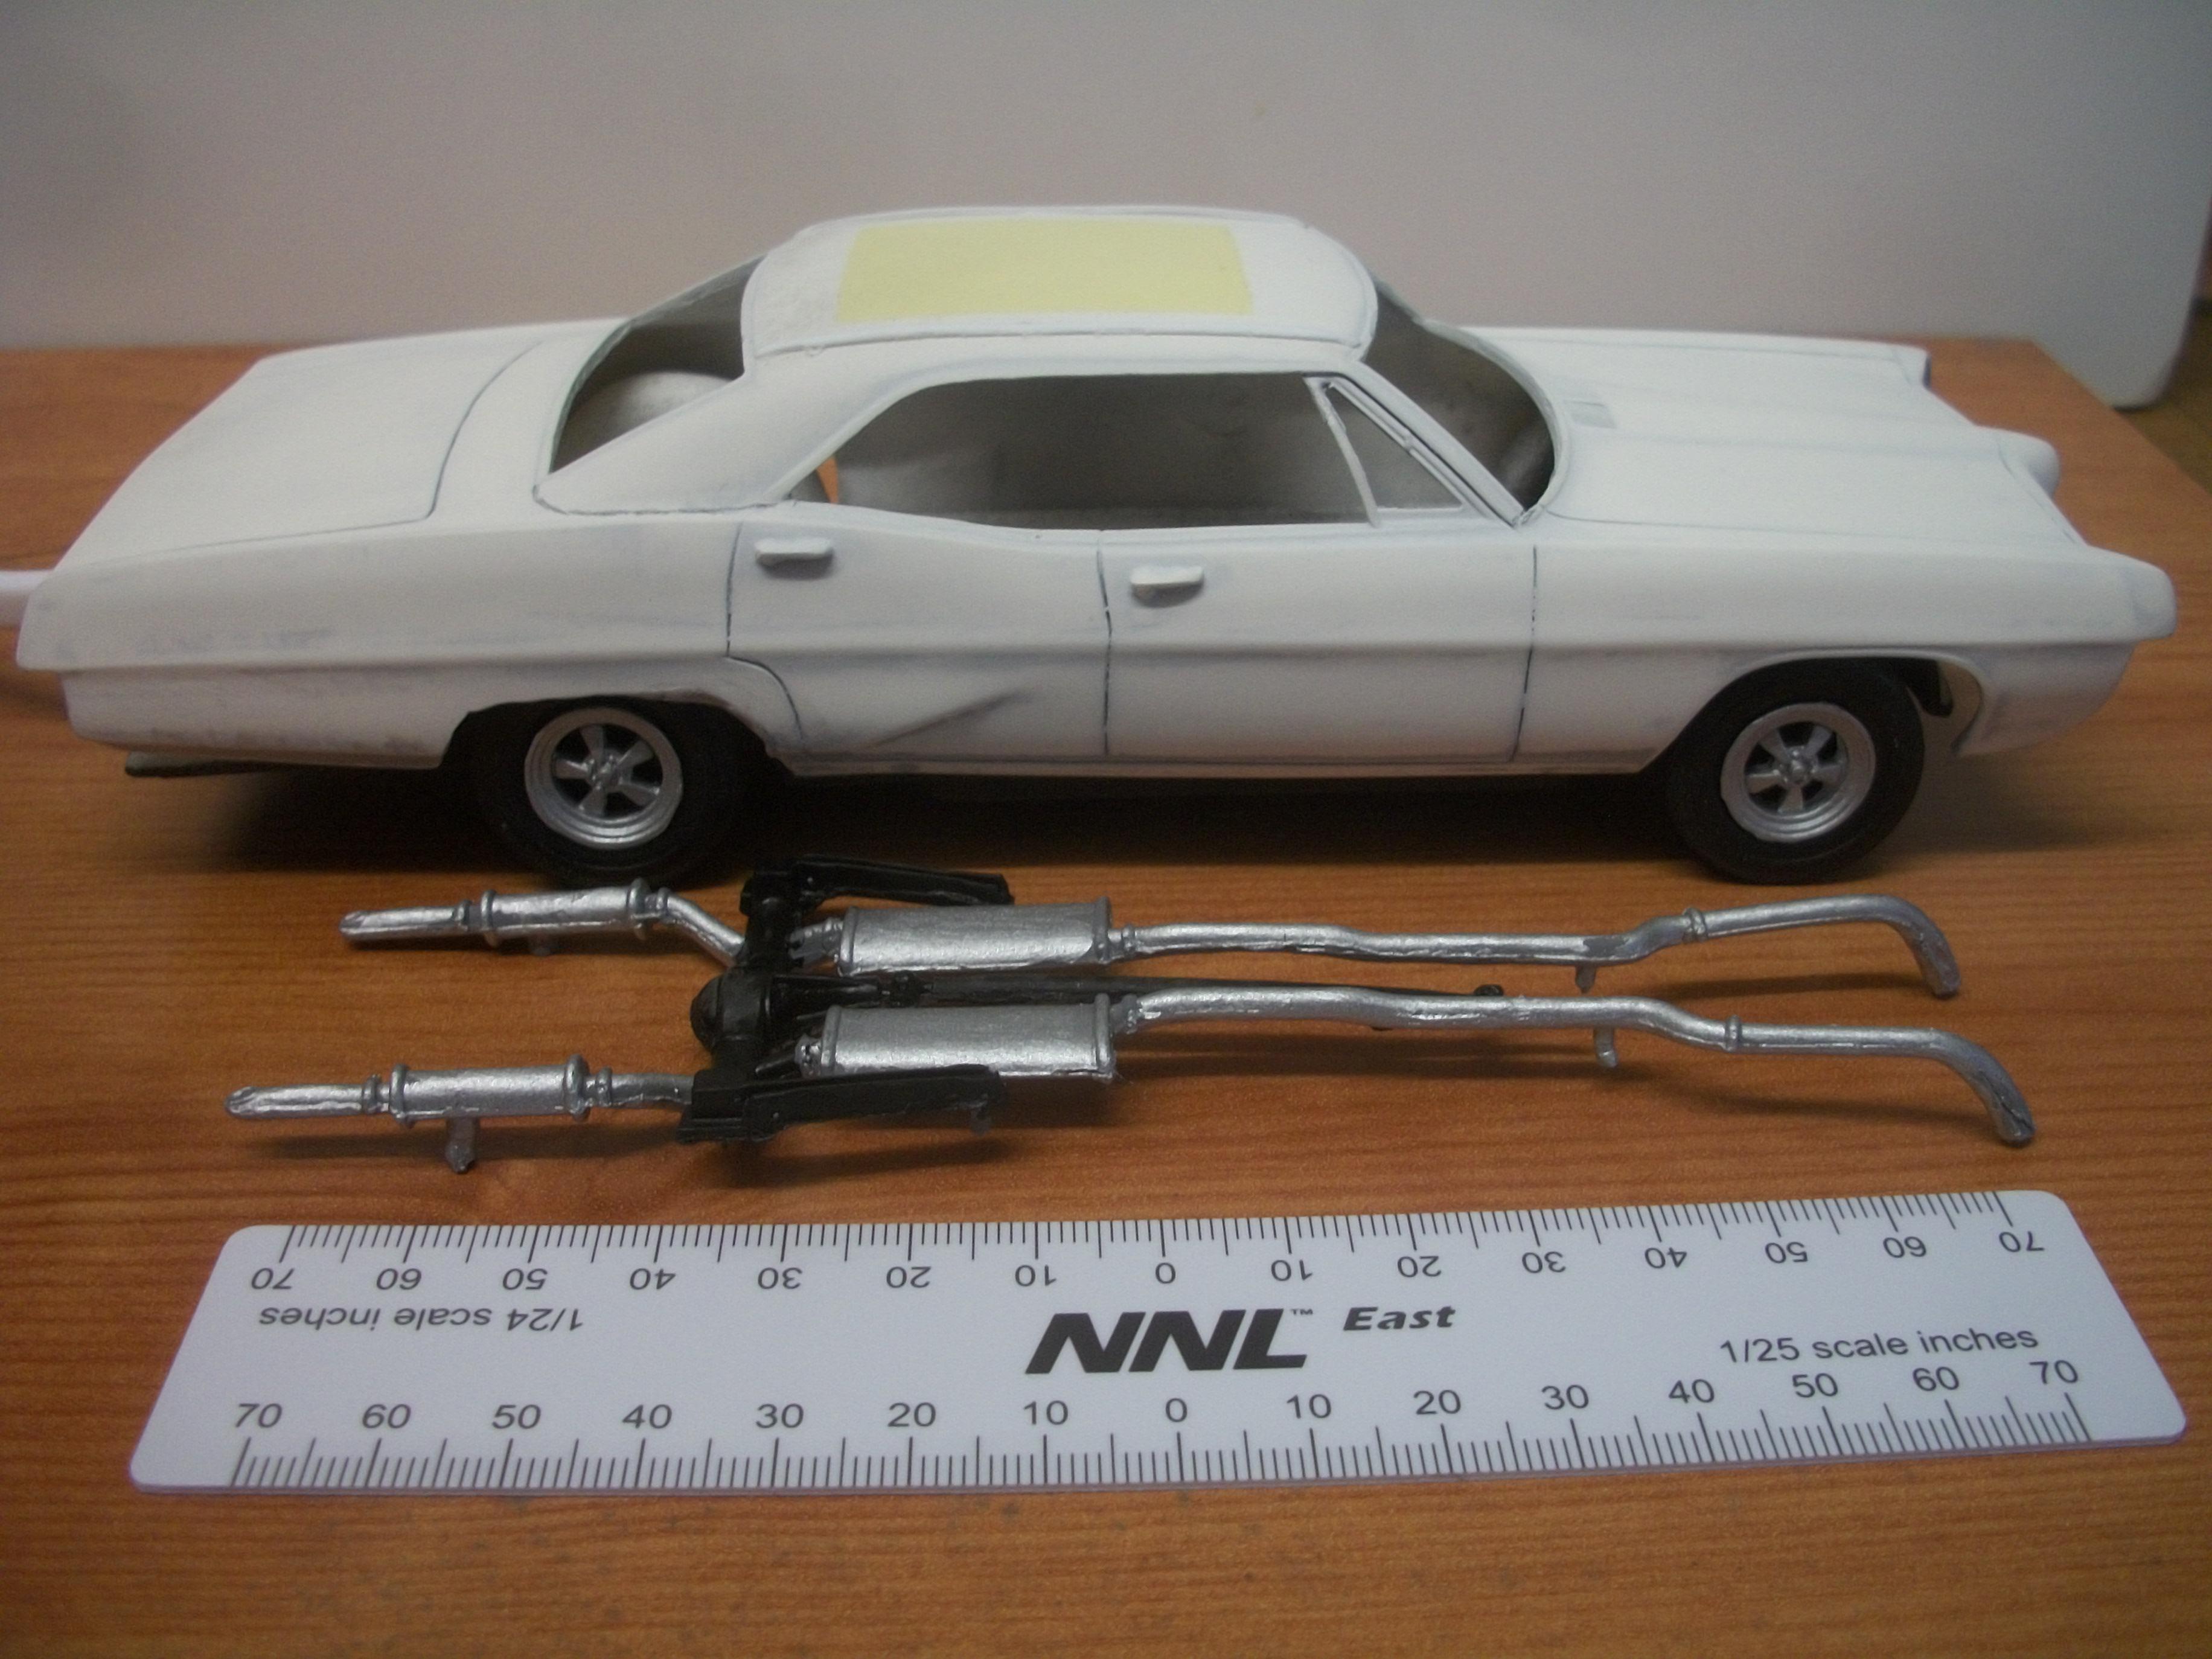
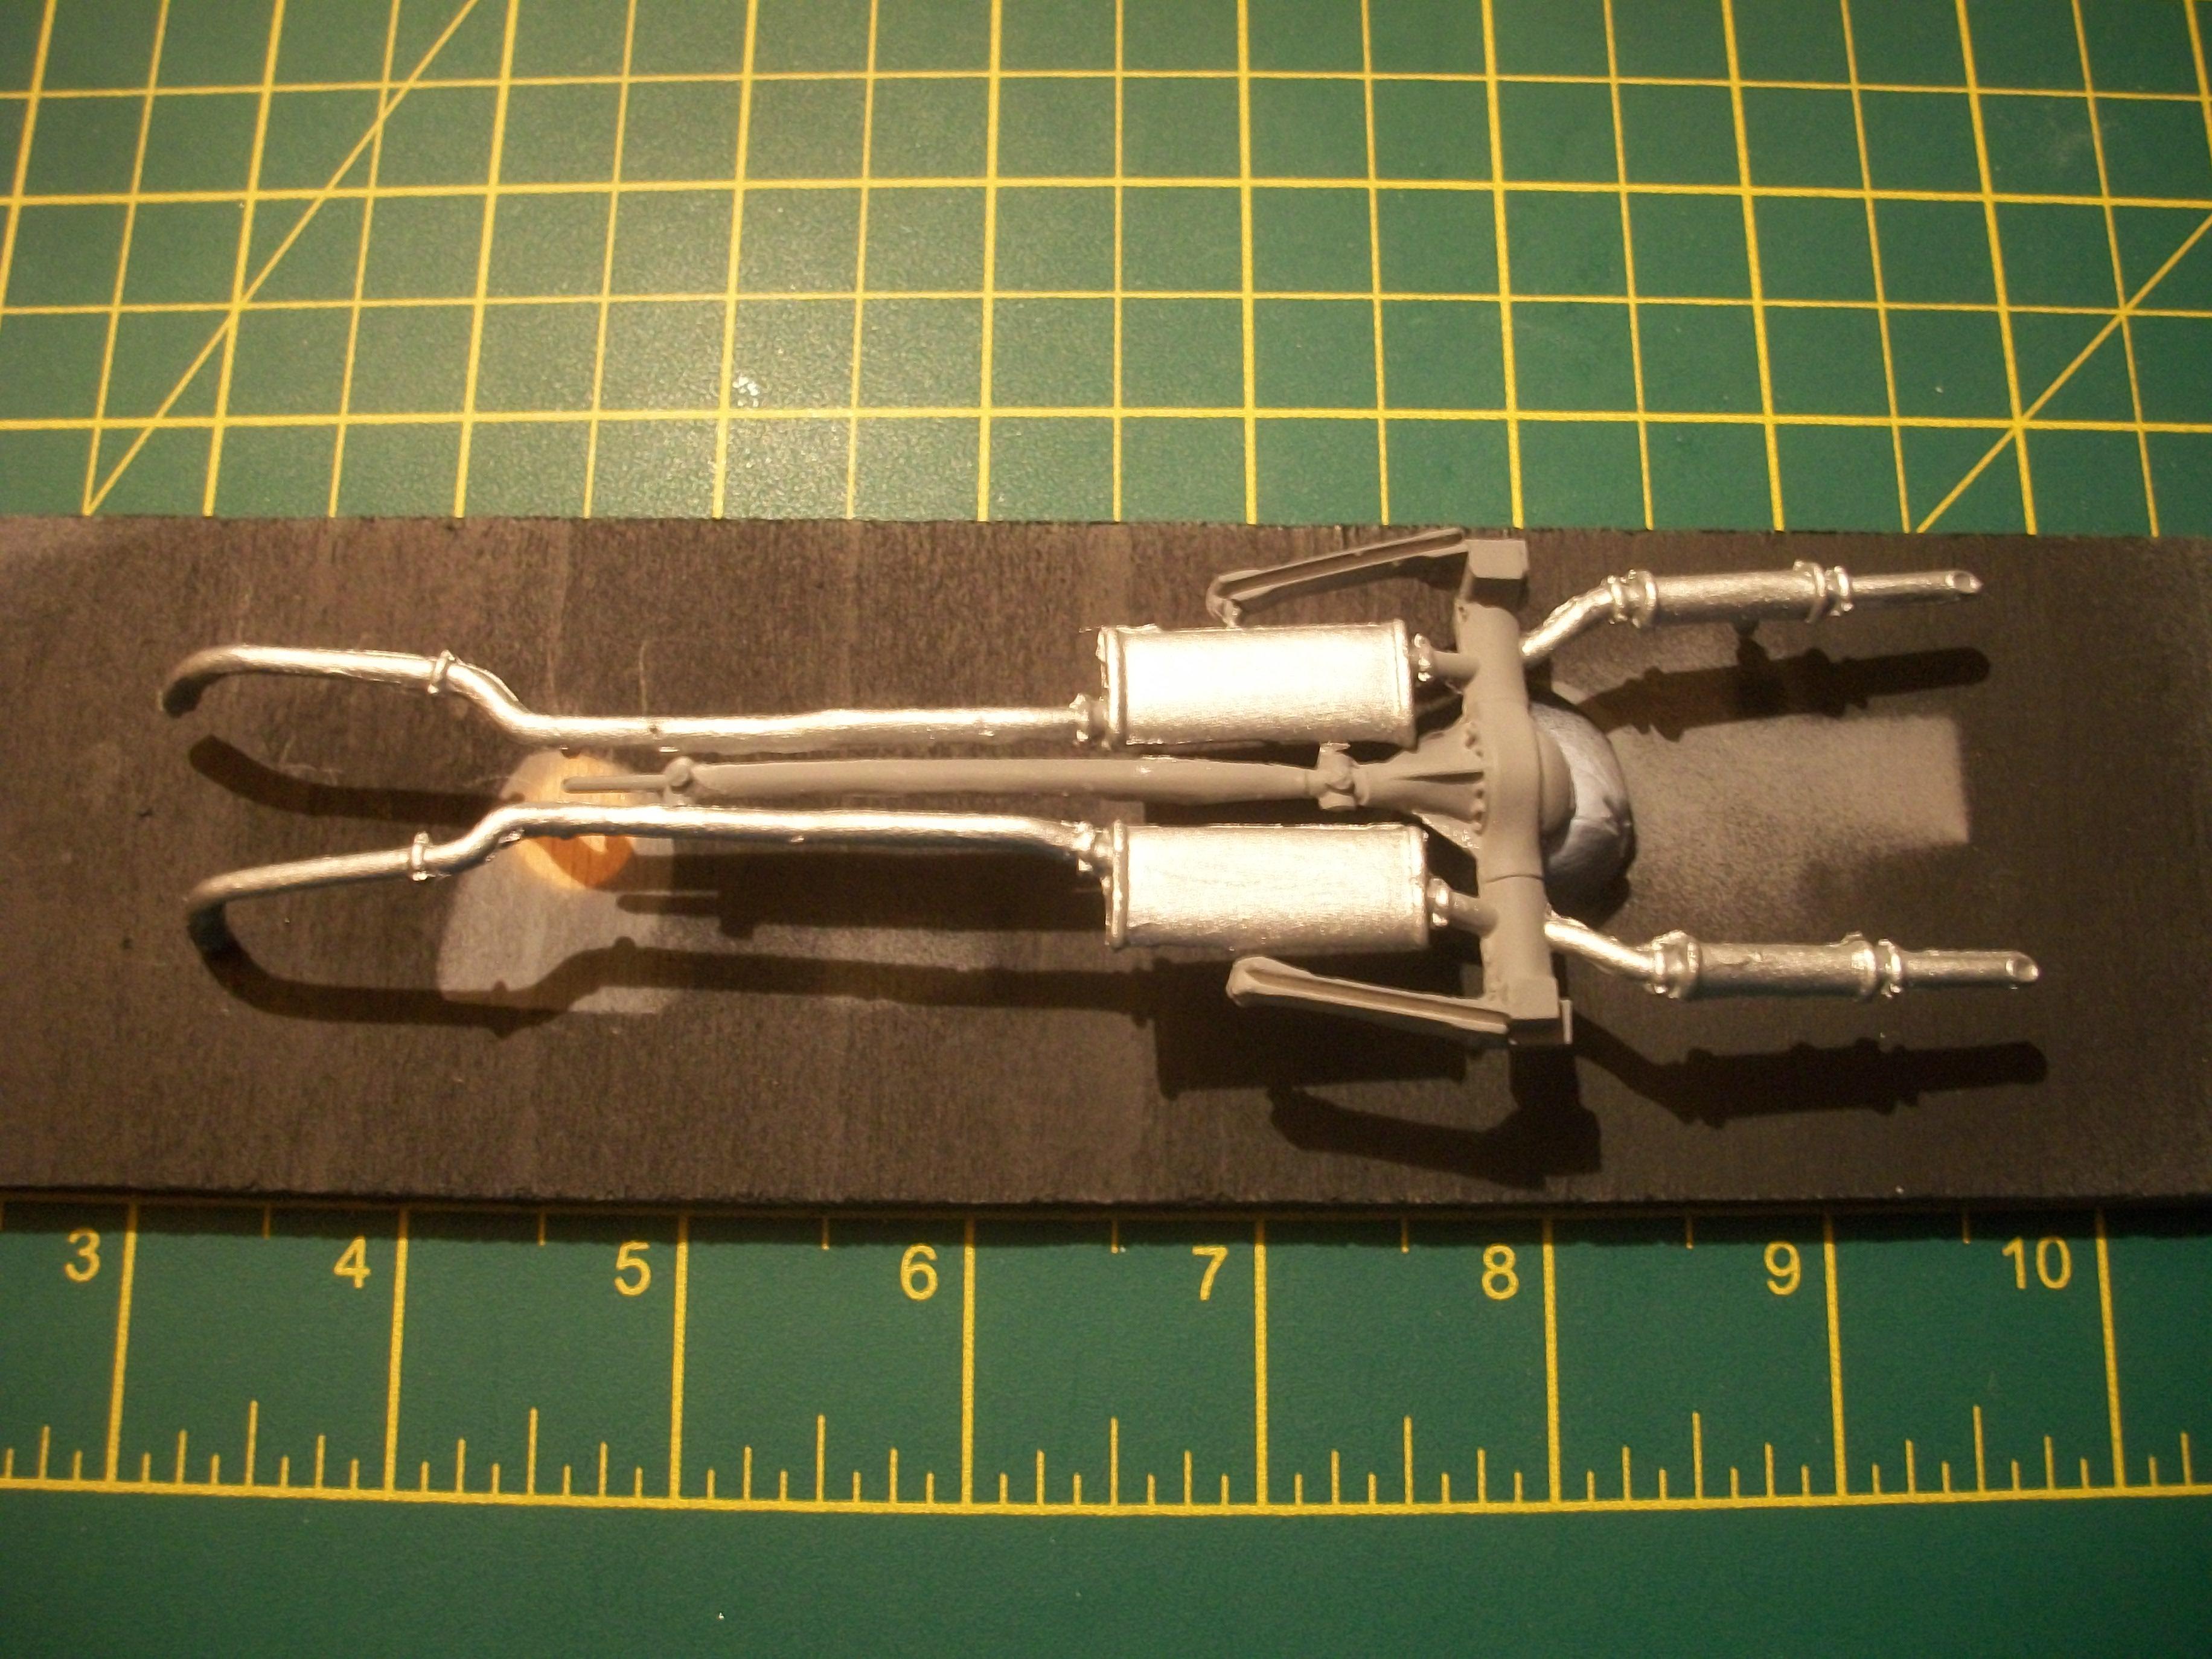
Exhaust system and rear axle assembly is fitted to the chassis, and generally seems to be positioned correctly, apart from one of the front pipes being slight out of line..... ? Not sure if this is something that needs correcting. The tailpipes for the exhaust finished well short of the rear end of the car, as supplied with the resin kit, so I have added 15 mm extensions to both tailpipes..... these are made from cotton bud stalks, which is the plastic material that I use when building Rolls-Royce Silver Cloud's. Parts of the chassis components and also the inner hubs are painted with Vallejo Glossy Black acrylic. The body fitting to the chassis is a mock up only. David
-
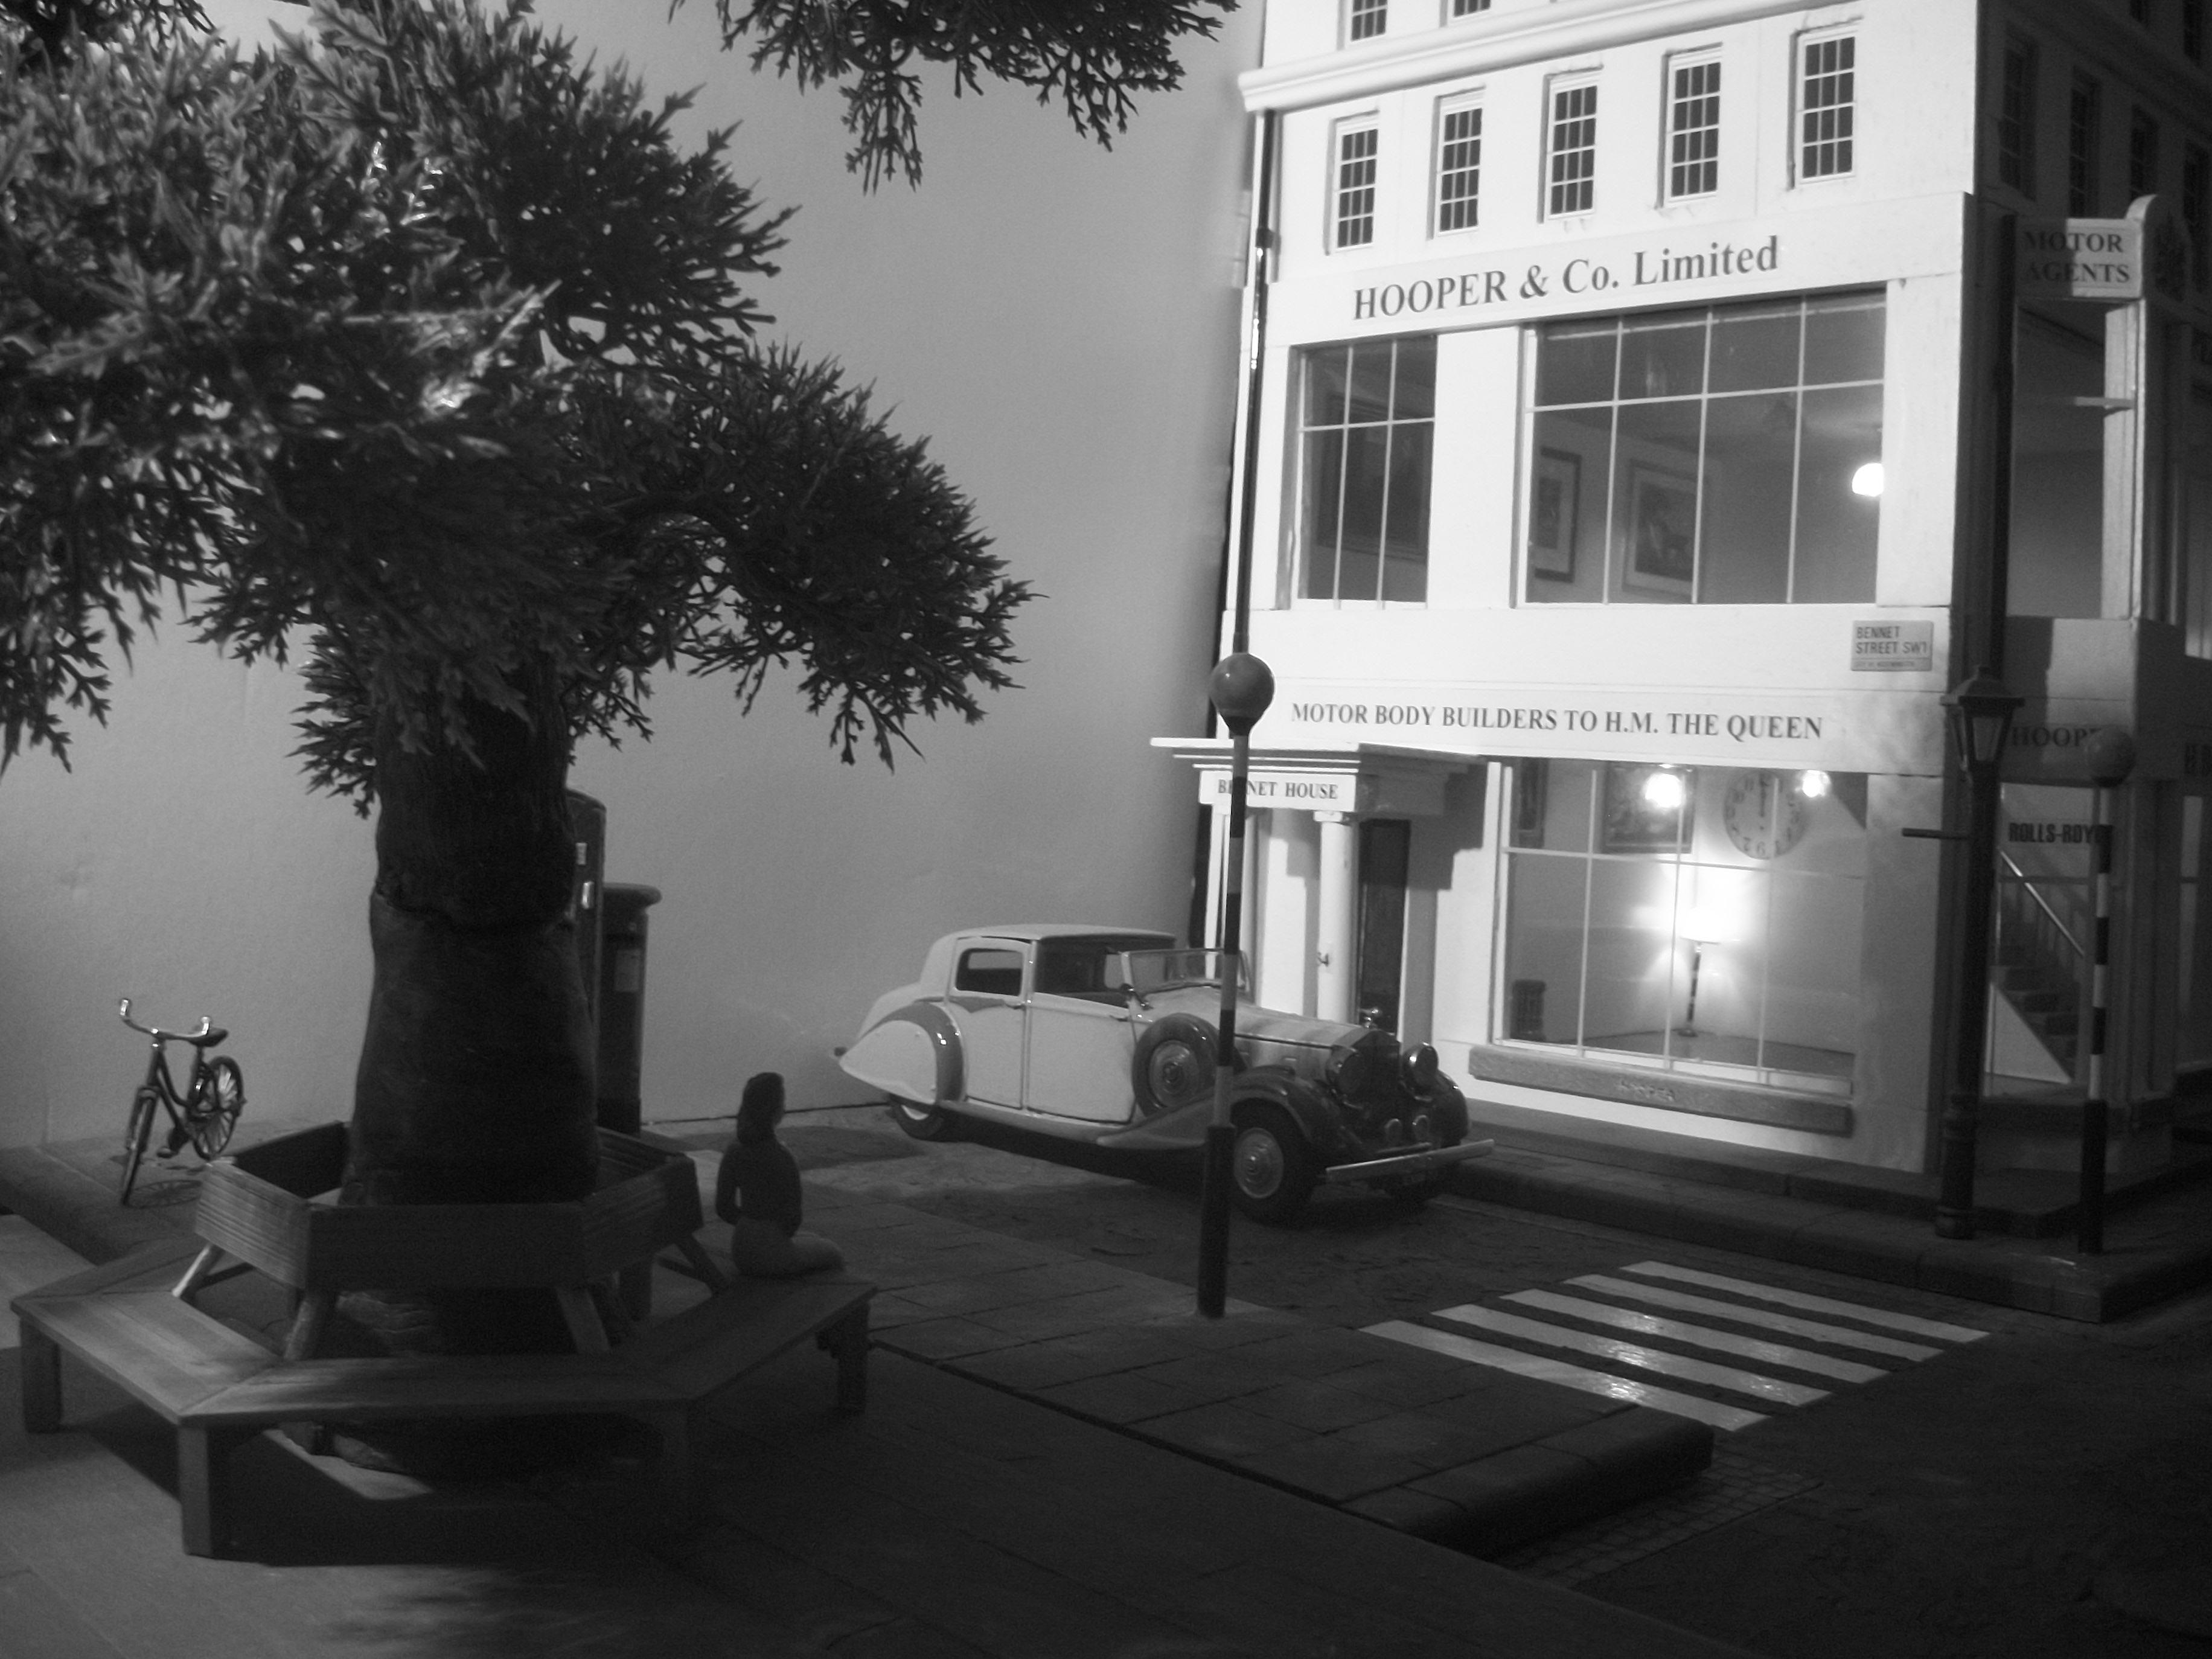
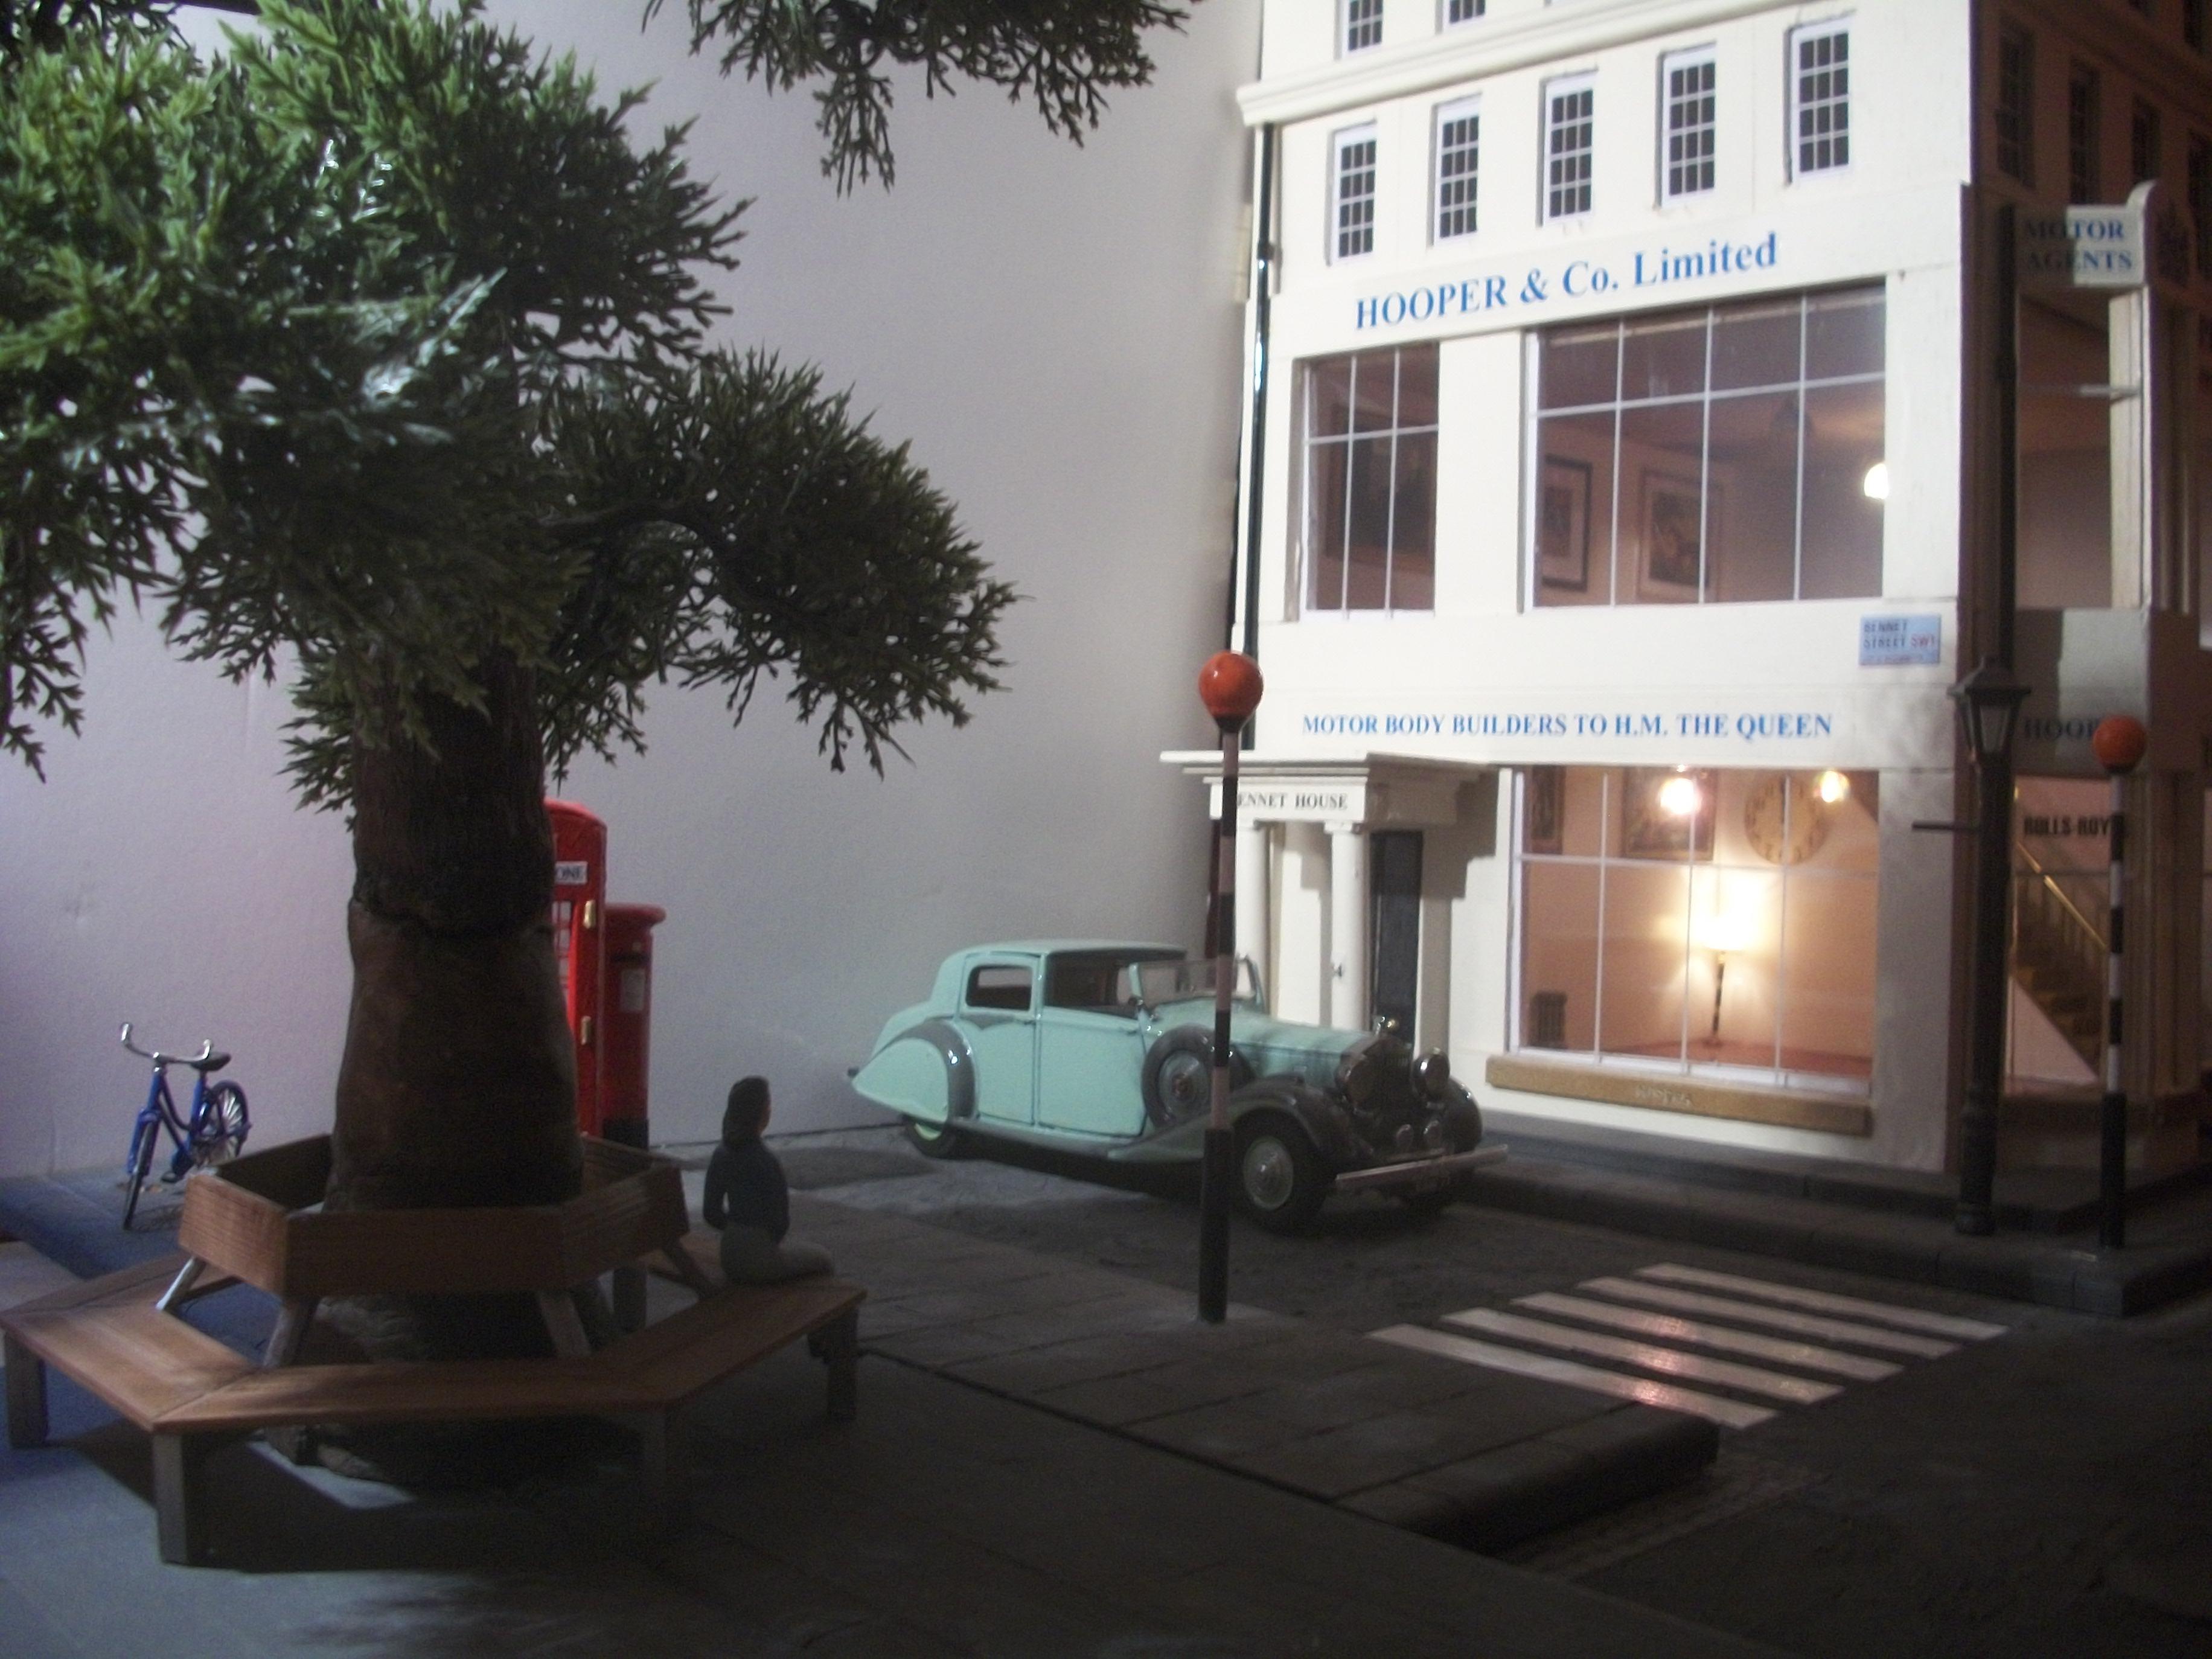
I have painted and assembled a 3D printed Hexagonal Tree Bench in 1:24 scale, which fits nicely around the base of the tree for the 1:24 Hooper & Co diorama. Here are a few photos to show the tree bench, just across the street from the Hooper & Co building, on Bennett Street. The motor car in these photos is a 1938 Rolls-Royce Phantom III, which is a diecast model by Danbury Mint and hand painted by myself in pale blue and light grey Revell Aqua Color acrylic. David
-
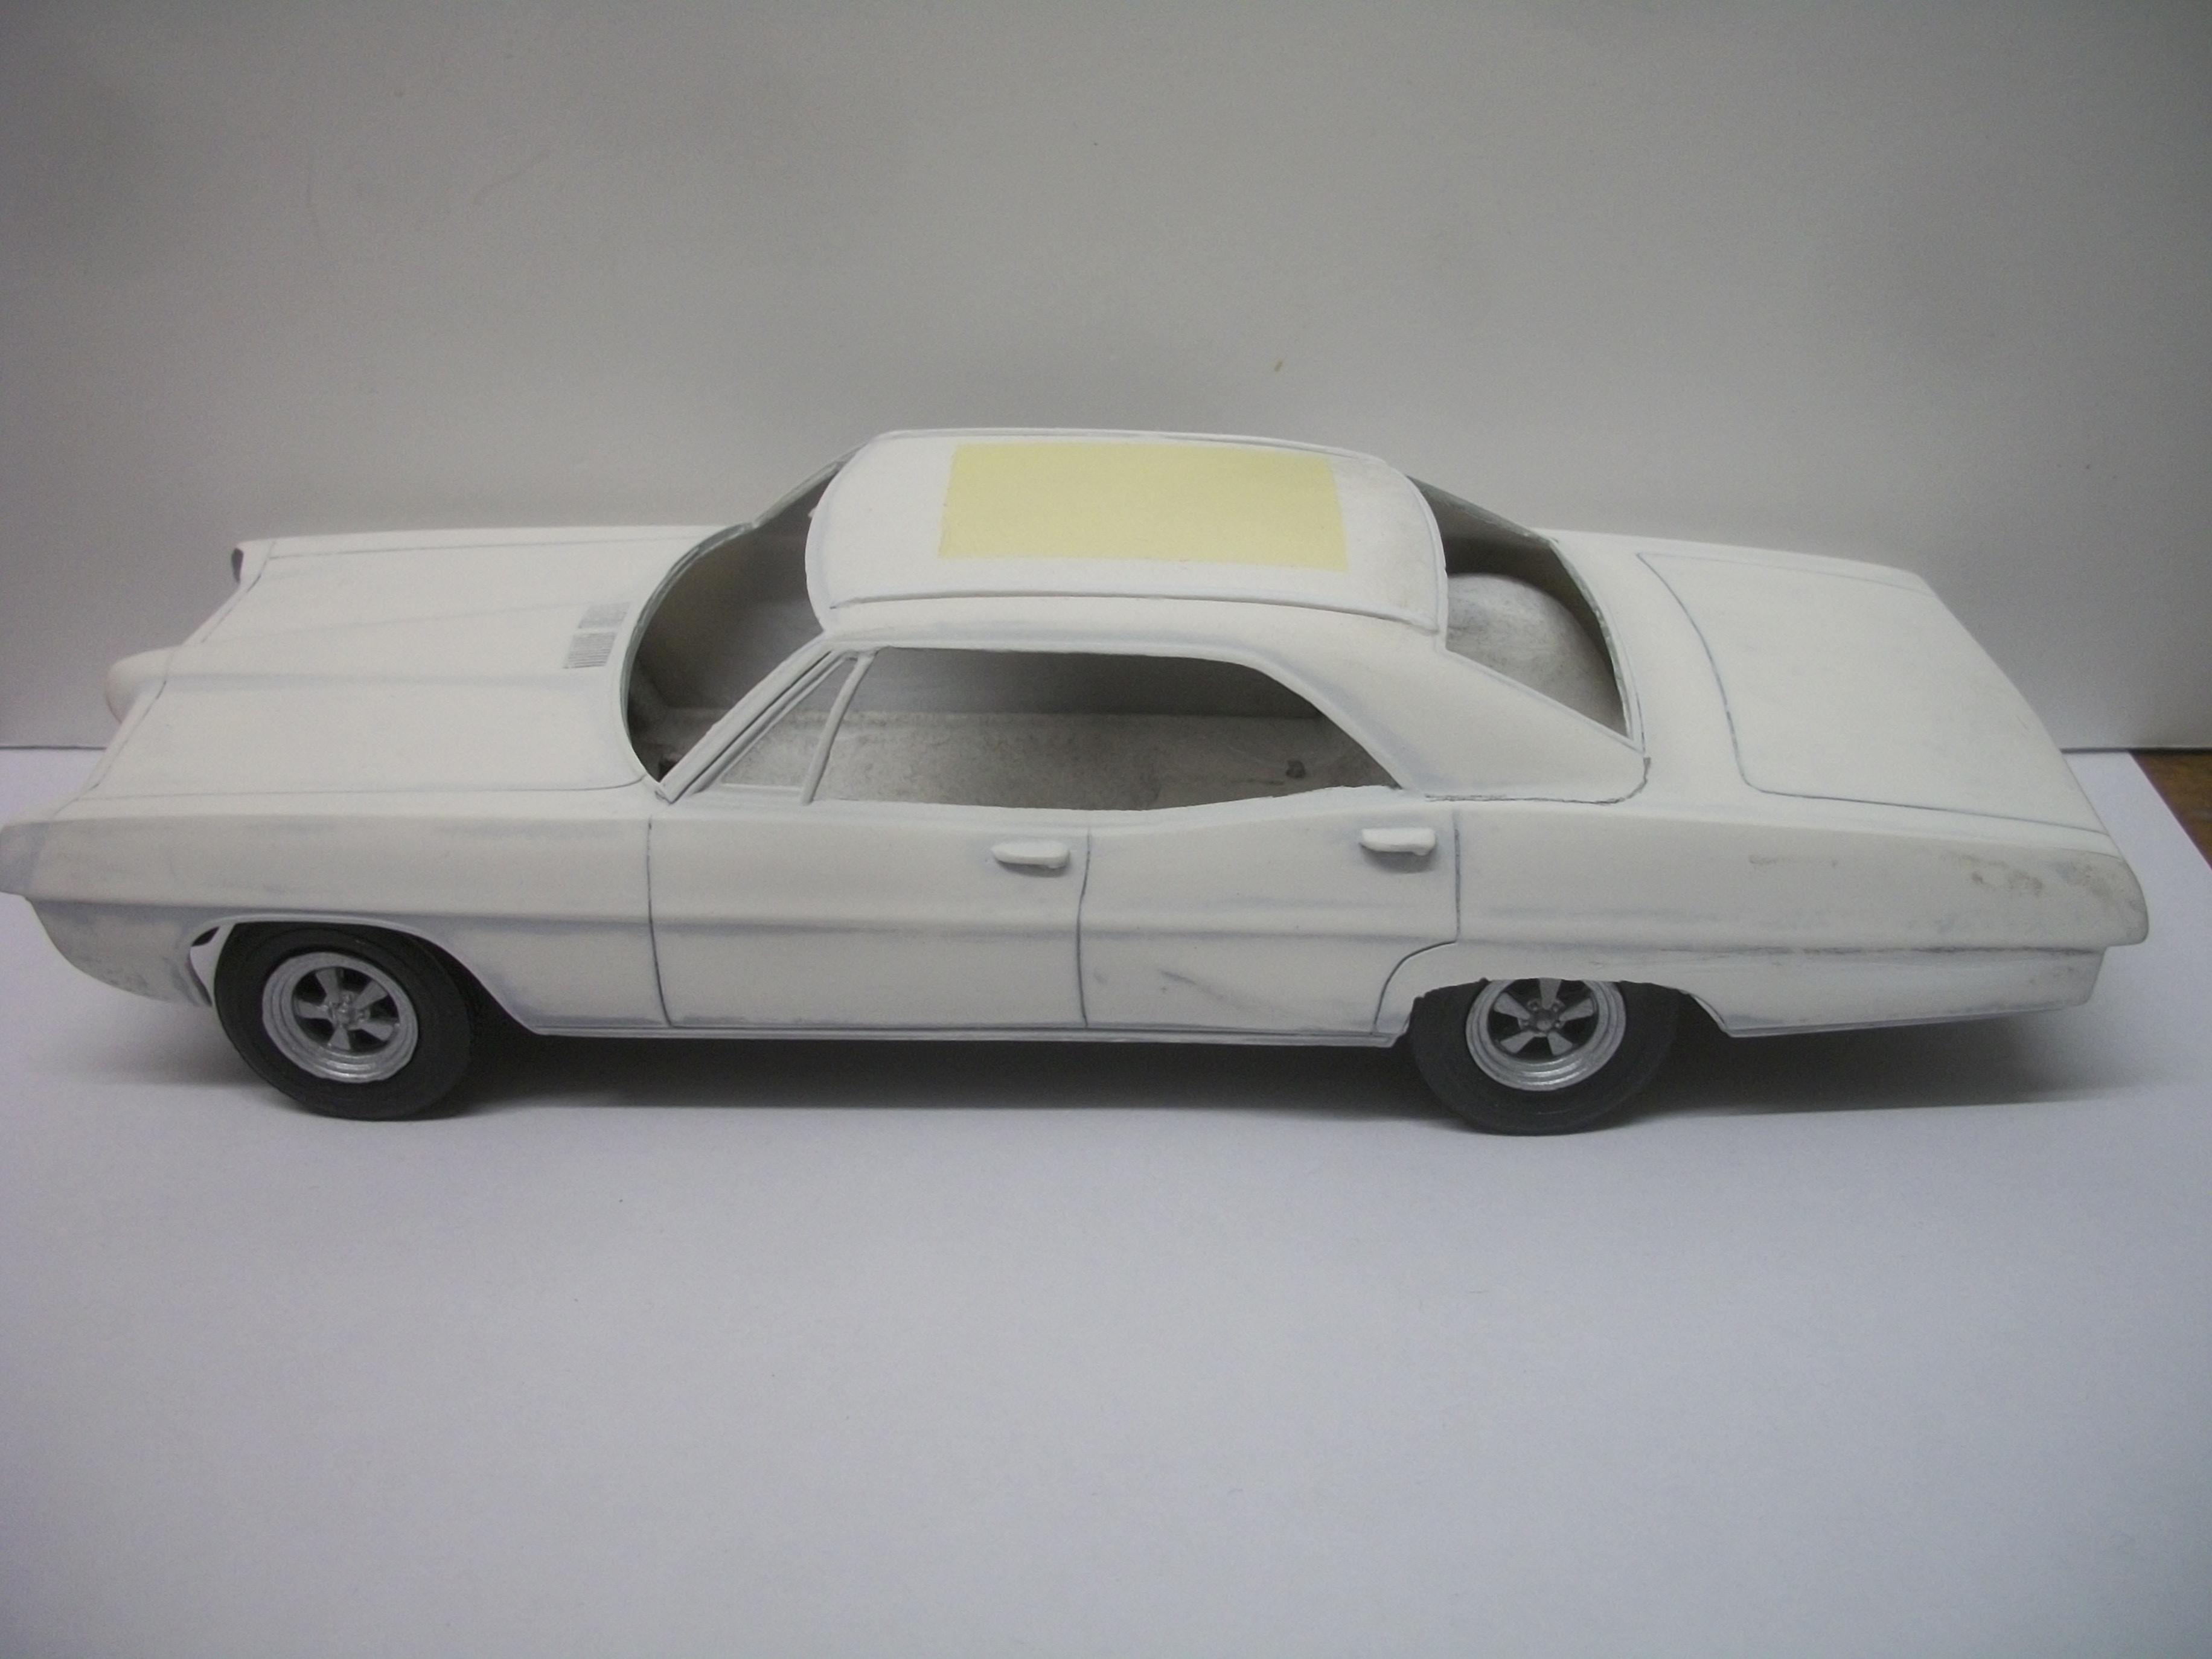
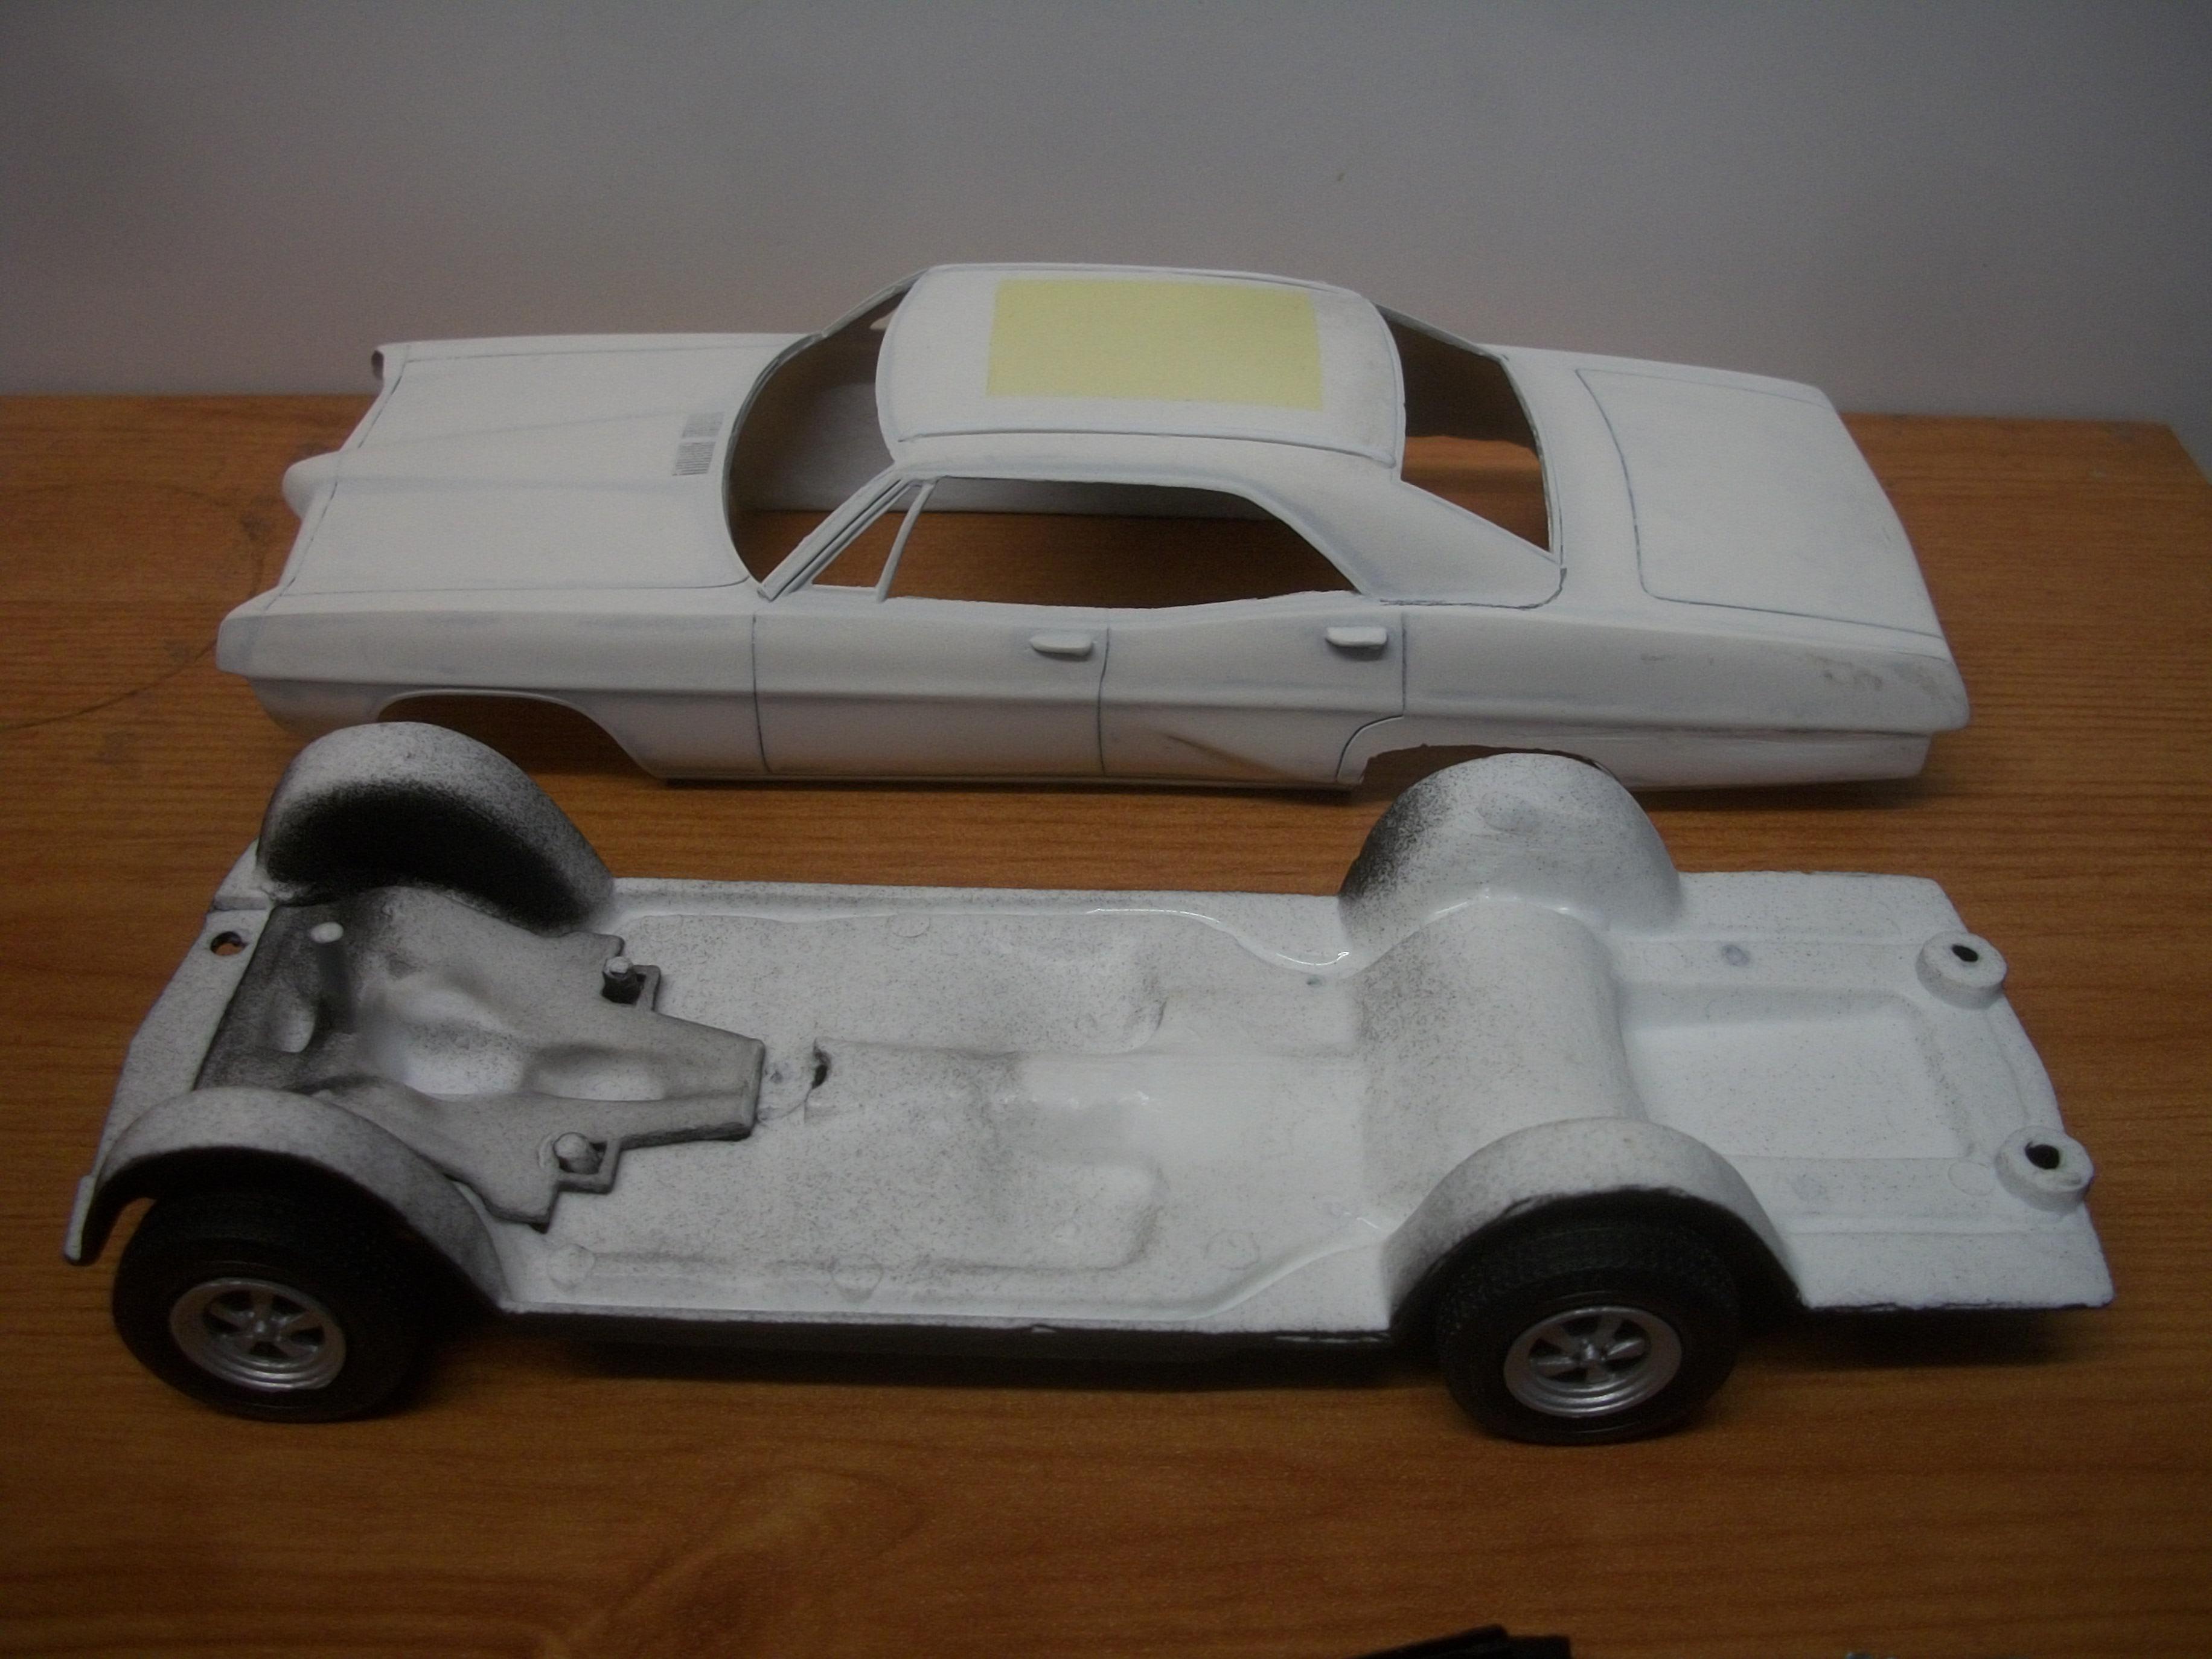
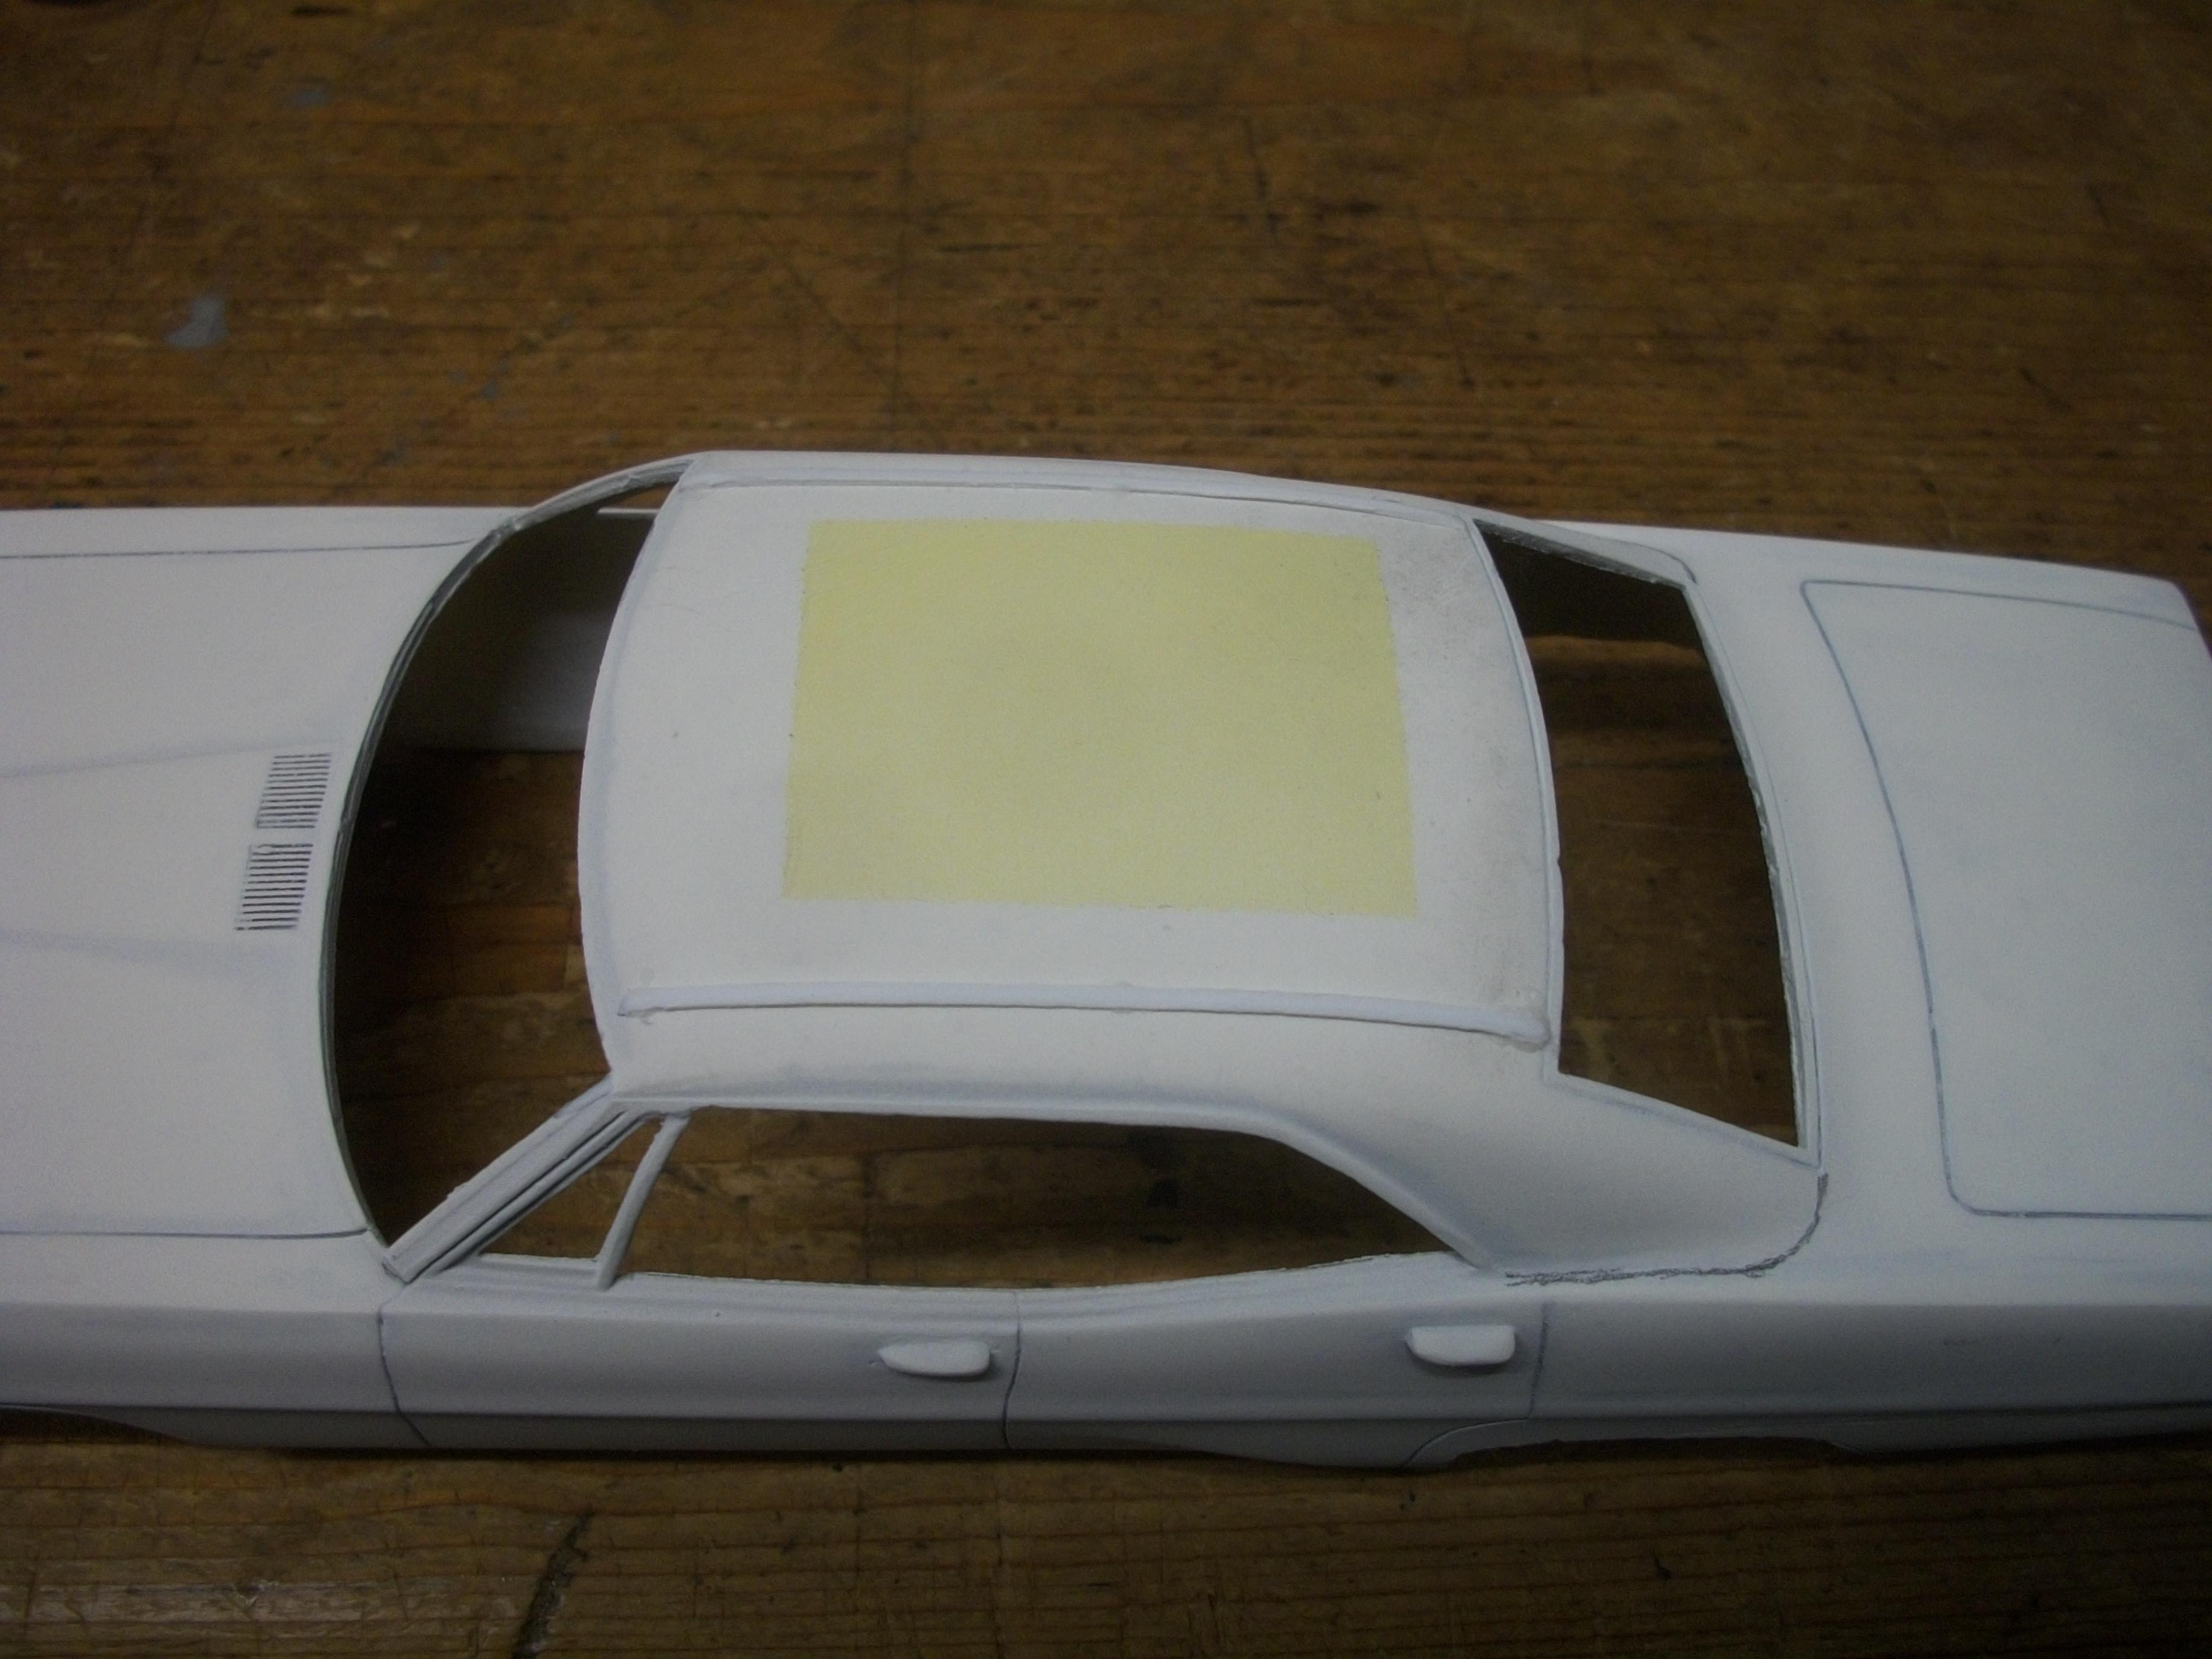
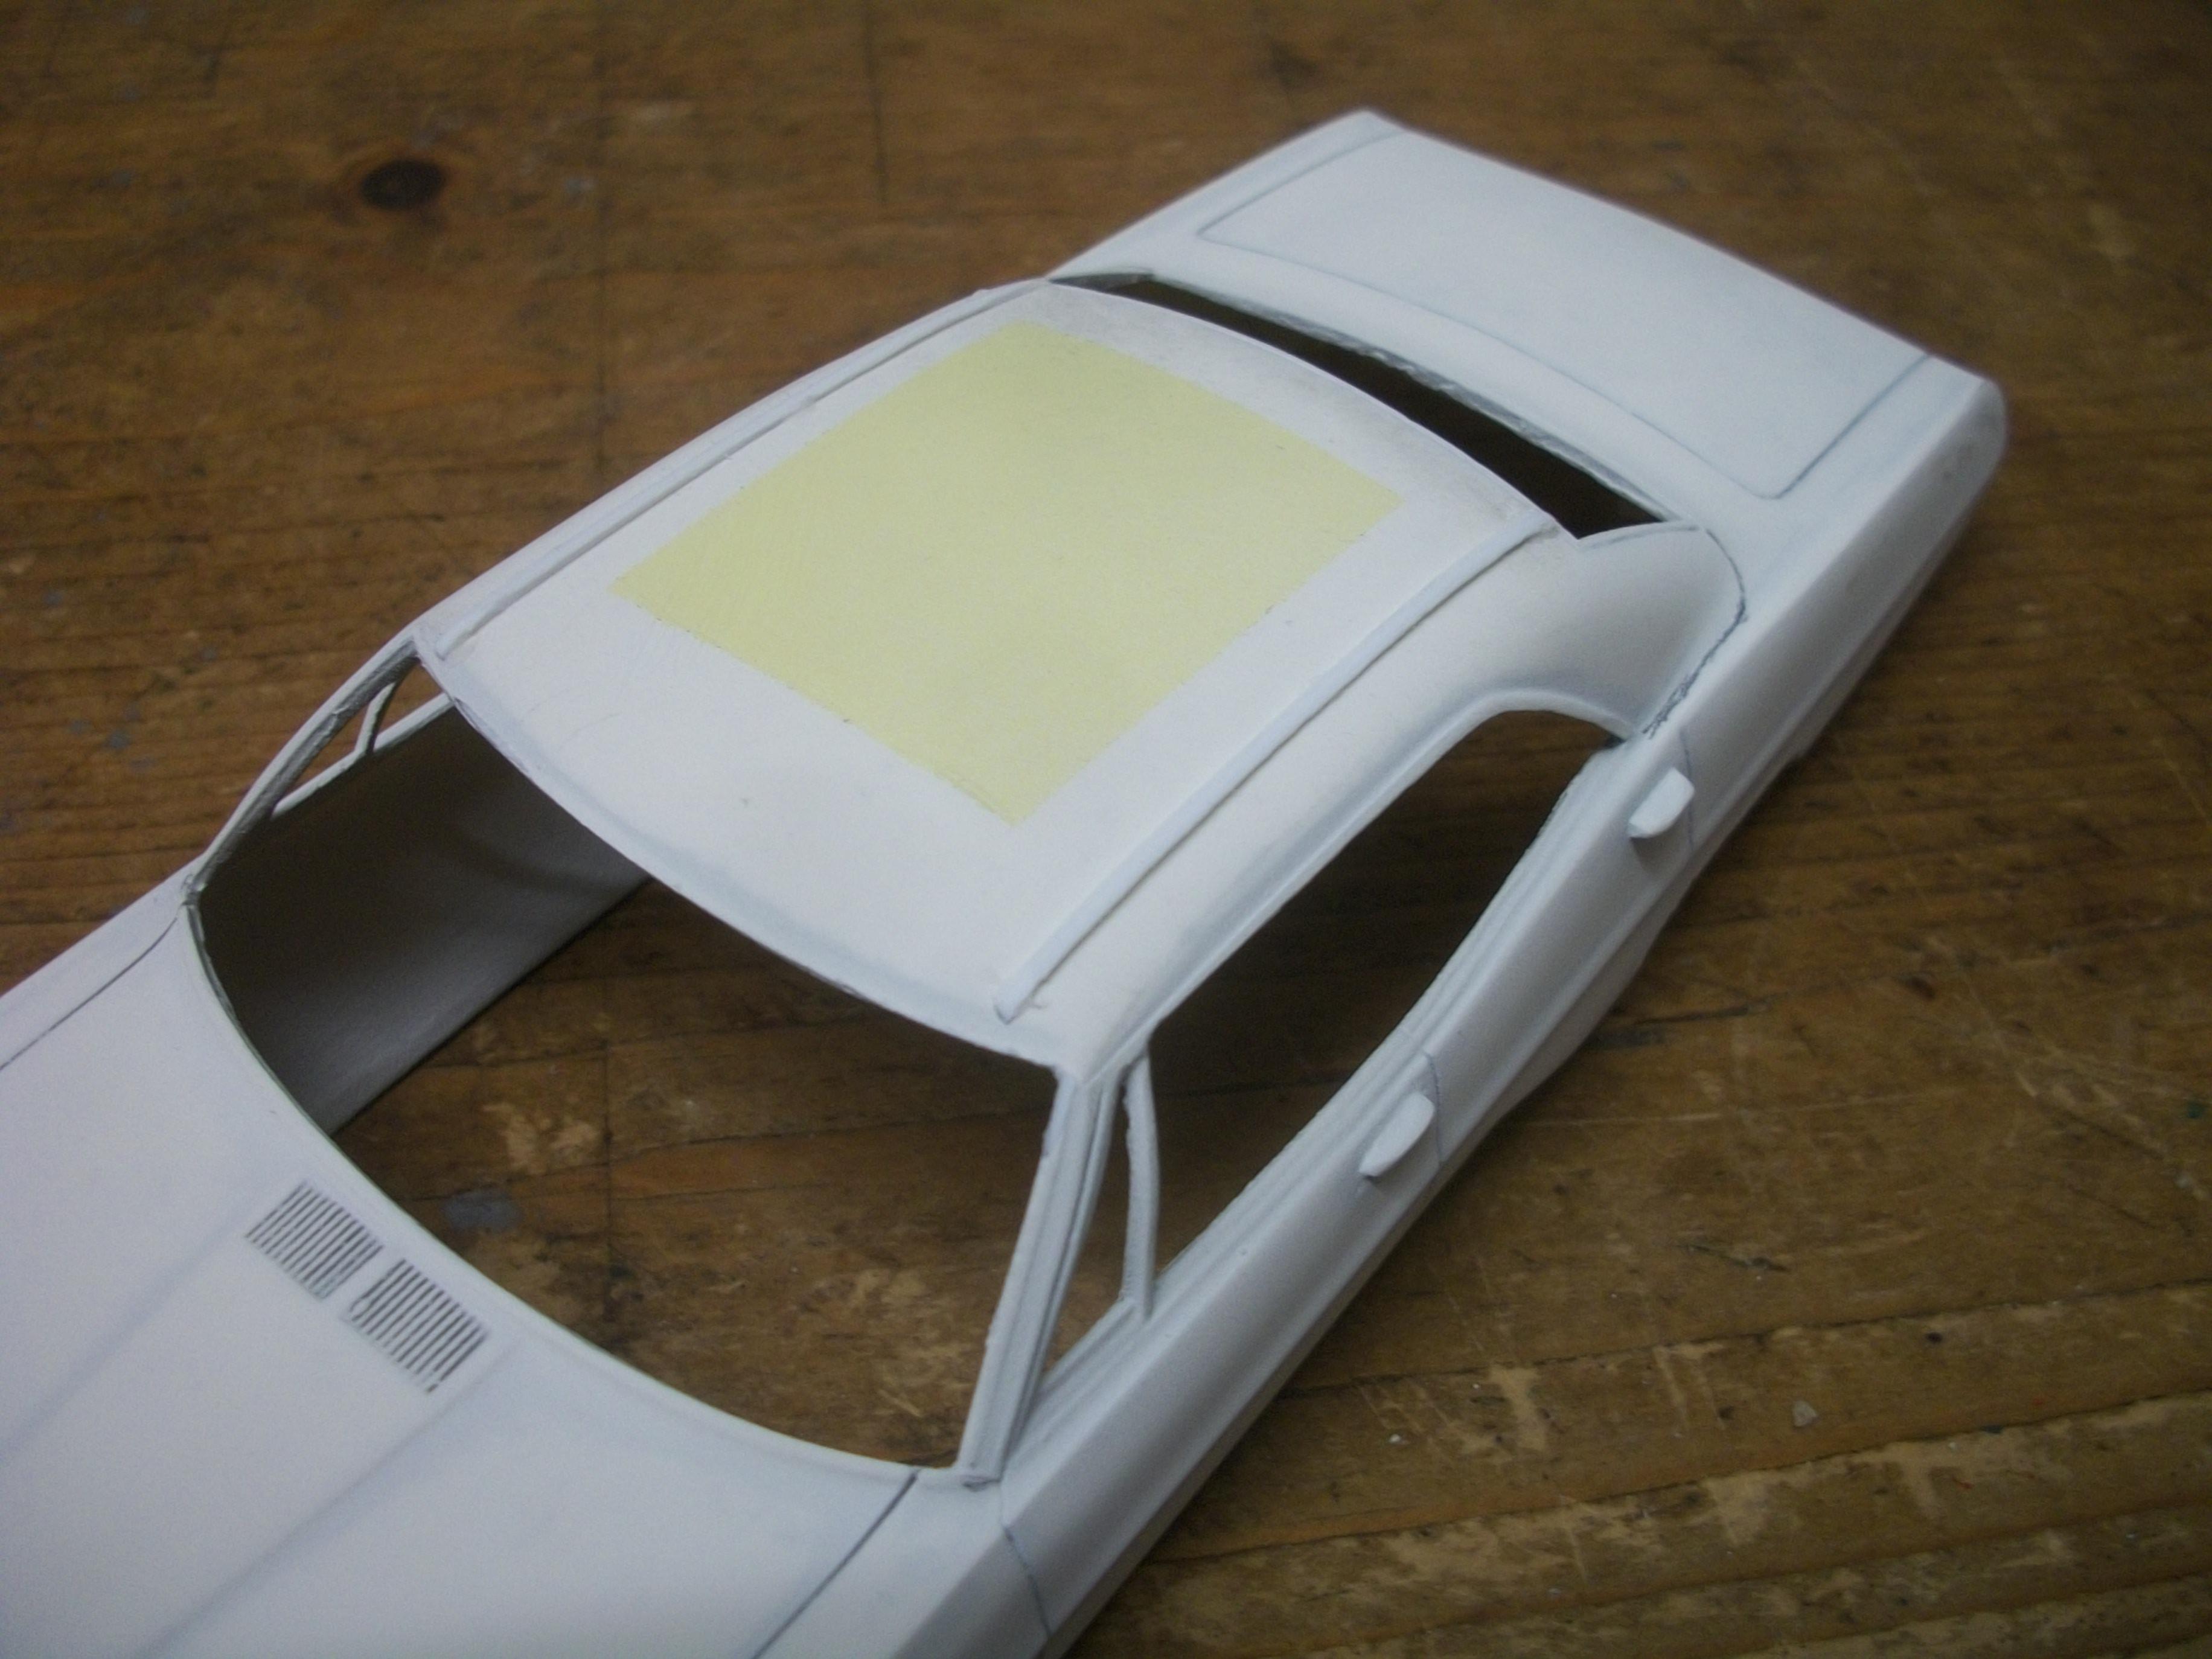
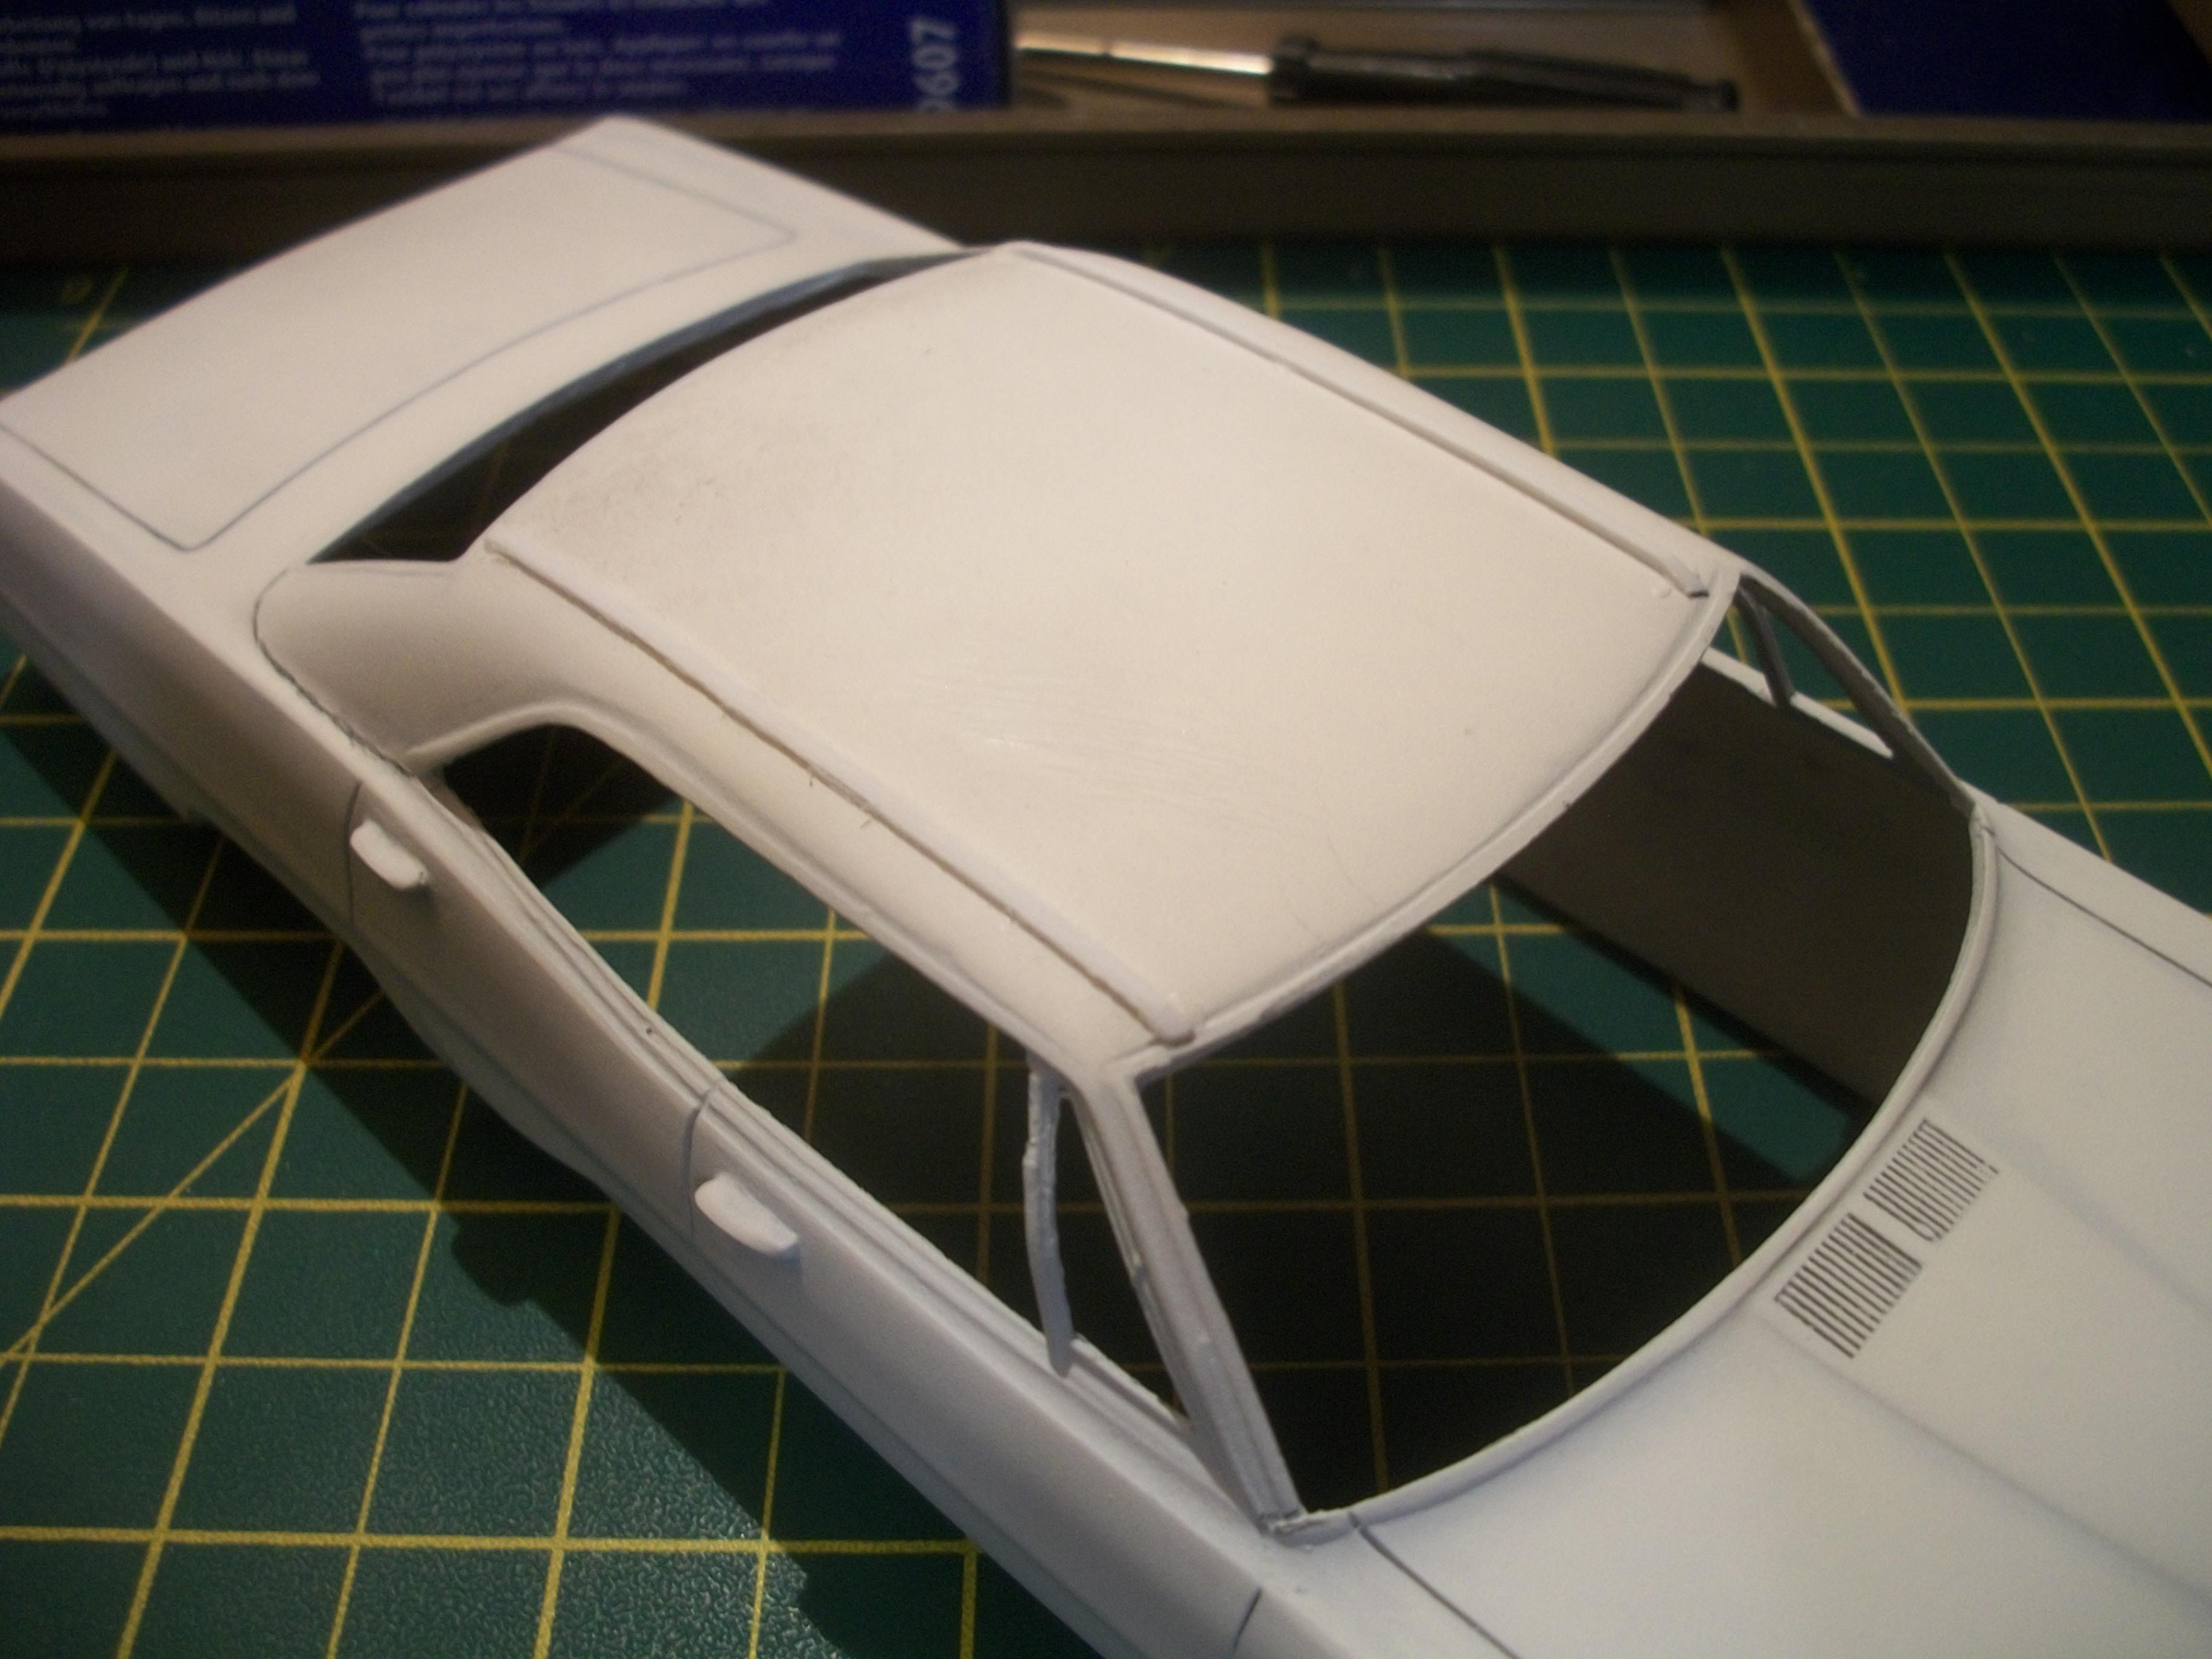
Here are a few photos to show the Parisienne body, the rolling chassis, the exhaust system with rear axle and propshaft, and also the graduated green windshield tint test......... as can be seen, I am taking my time over this build, so progress is ' steady ' ......... David
-
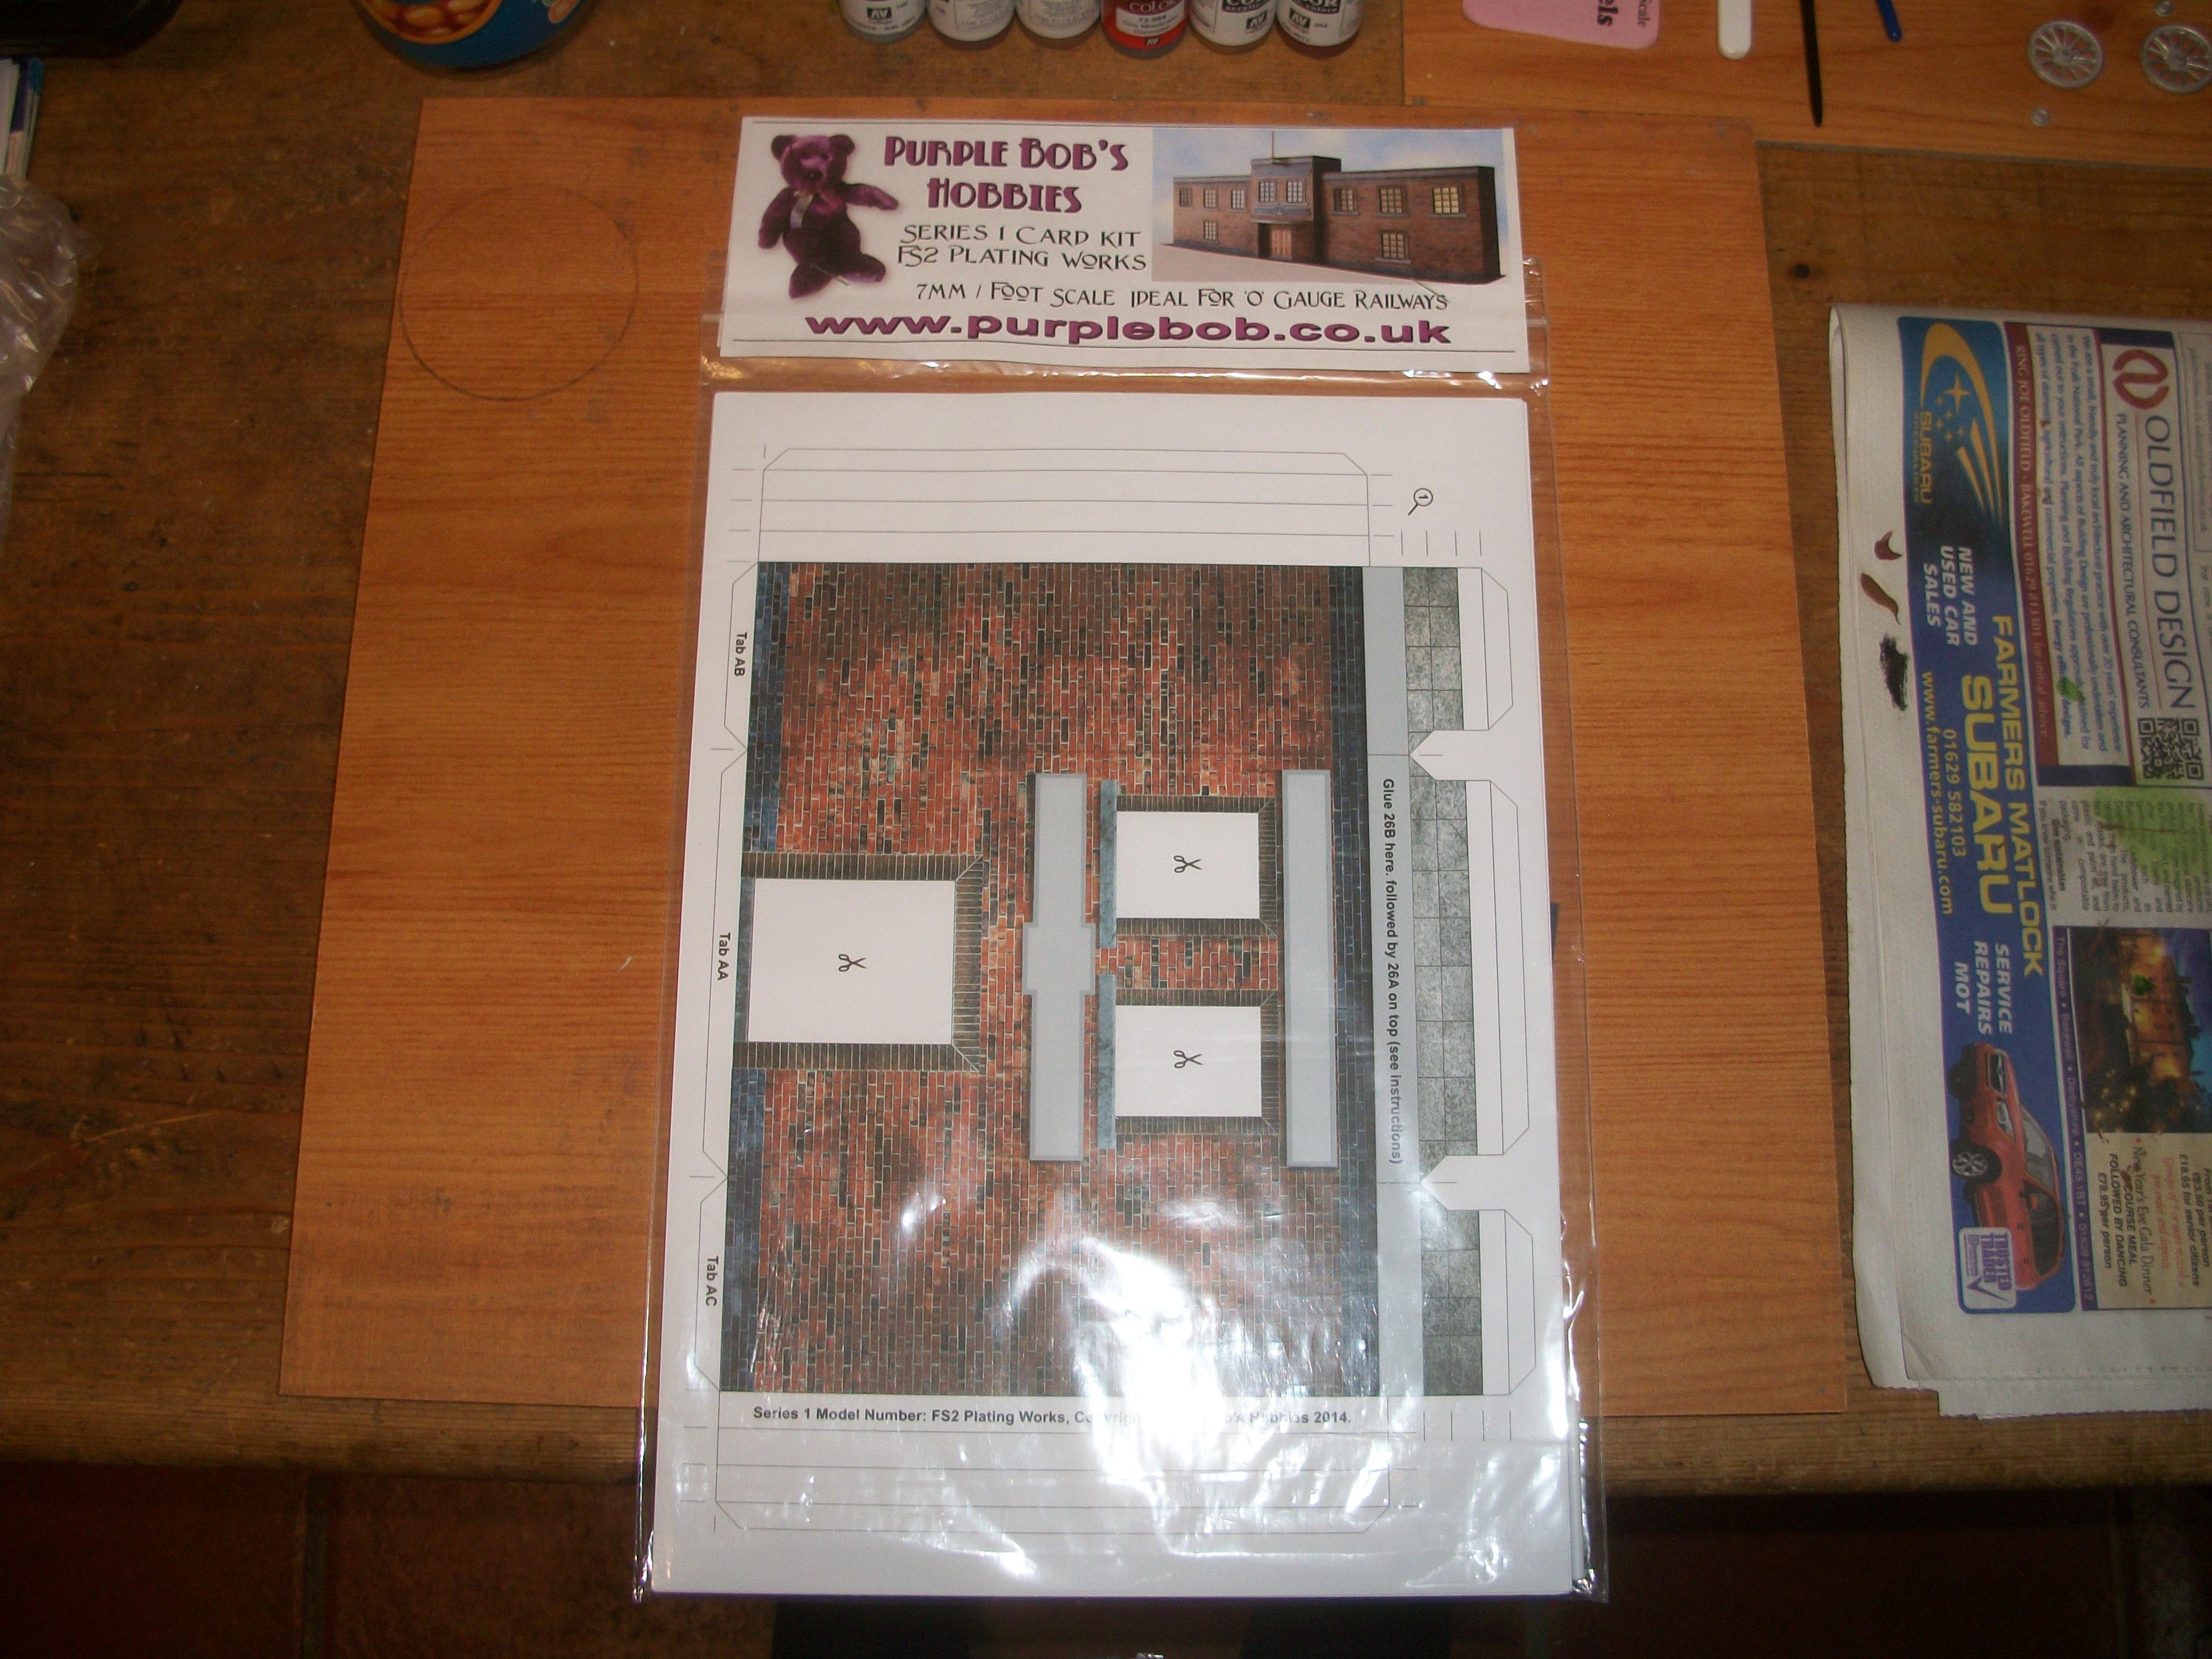
Few deliveries today....... 1:43 scale / O gauge Edwardian Factory card building kit, also Horse and Cart white metal kit in 1:43 scale, plus Zero Paints Crystal Clear adhesive, Zero Paints Bentley Blower 4.5 litre 1930 Green paint, and a 3D printed Hexagonal Tree Bench in 1:24 scale. David
-
Three photos here...... showing exhaust system painting, which will have further detailing added later of course, then a graduated windshield tint test and thirdly, an image file for the Parisienne script. The green windshield test is the very first attempt, using Sap Green acrylic paint thinned heavily with water. Due to the acetate windshield as included with the resin kit being badly distorted, the acrylic green wash hasn't formed an evenly proportioned band at the bottom, which then becomes the top of the windshield. This method could work, with a little more practice! The windscreen part that I shall be using for the actual build is from the '70 Bonneville kit. The ' Parisienne ' script when this file is resized to 8% comes out very small, at 10 mm in width by 2.6 mm in height. The option to scribe this out by hand from slow curing epoxy resin does not give me much optimism, so I was wondering if any fellow MCM Forum members that have an ALPS printer might consider printing half a dozen copies of the small ' Parisienne ' scripts in silver ink, for which I am happy to pay a mutually acceptable amount of dollars? Not sure if the blue background to my image would be a problem for the print process. The decal or script has to be 10 mm in width in order to fit nicely onto the rear fender ( wing ). David
-
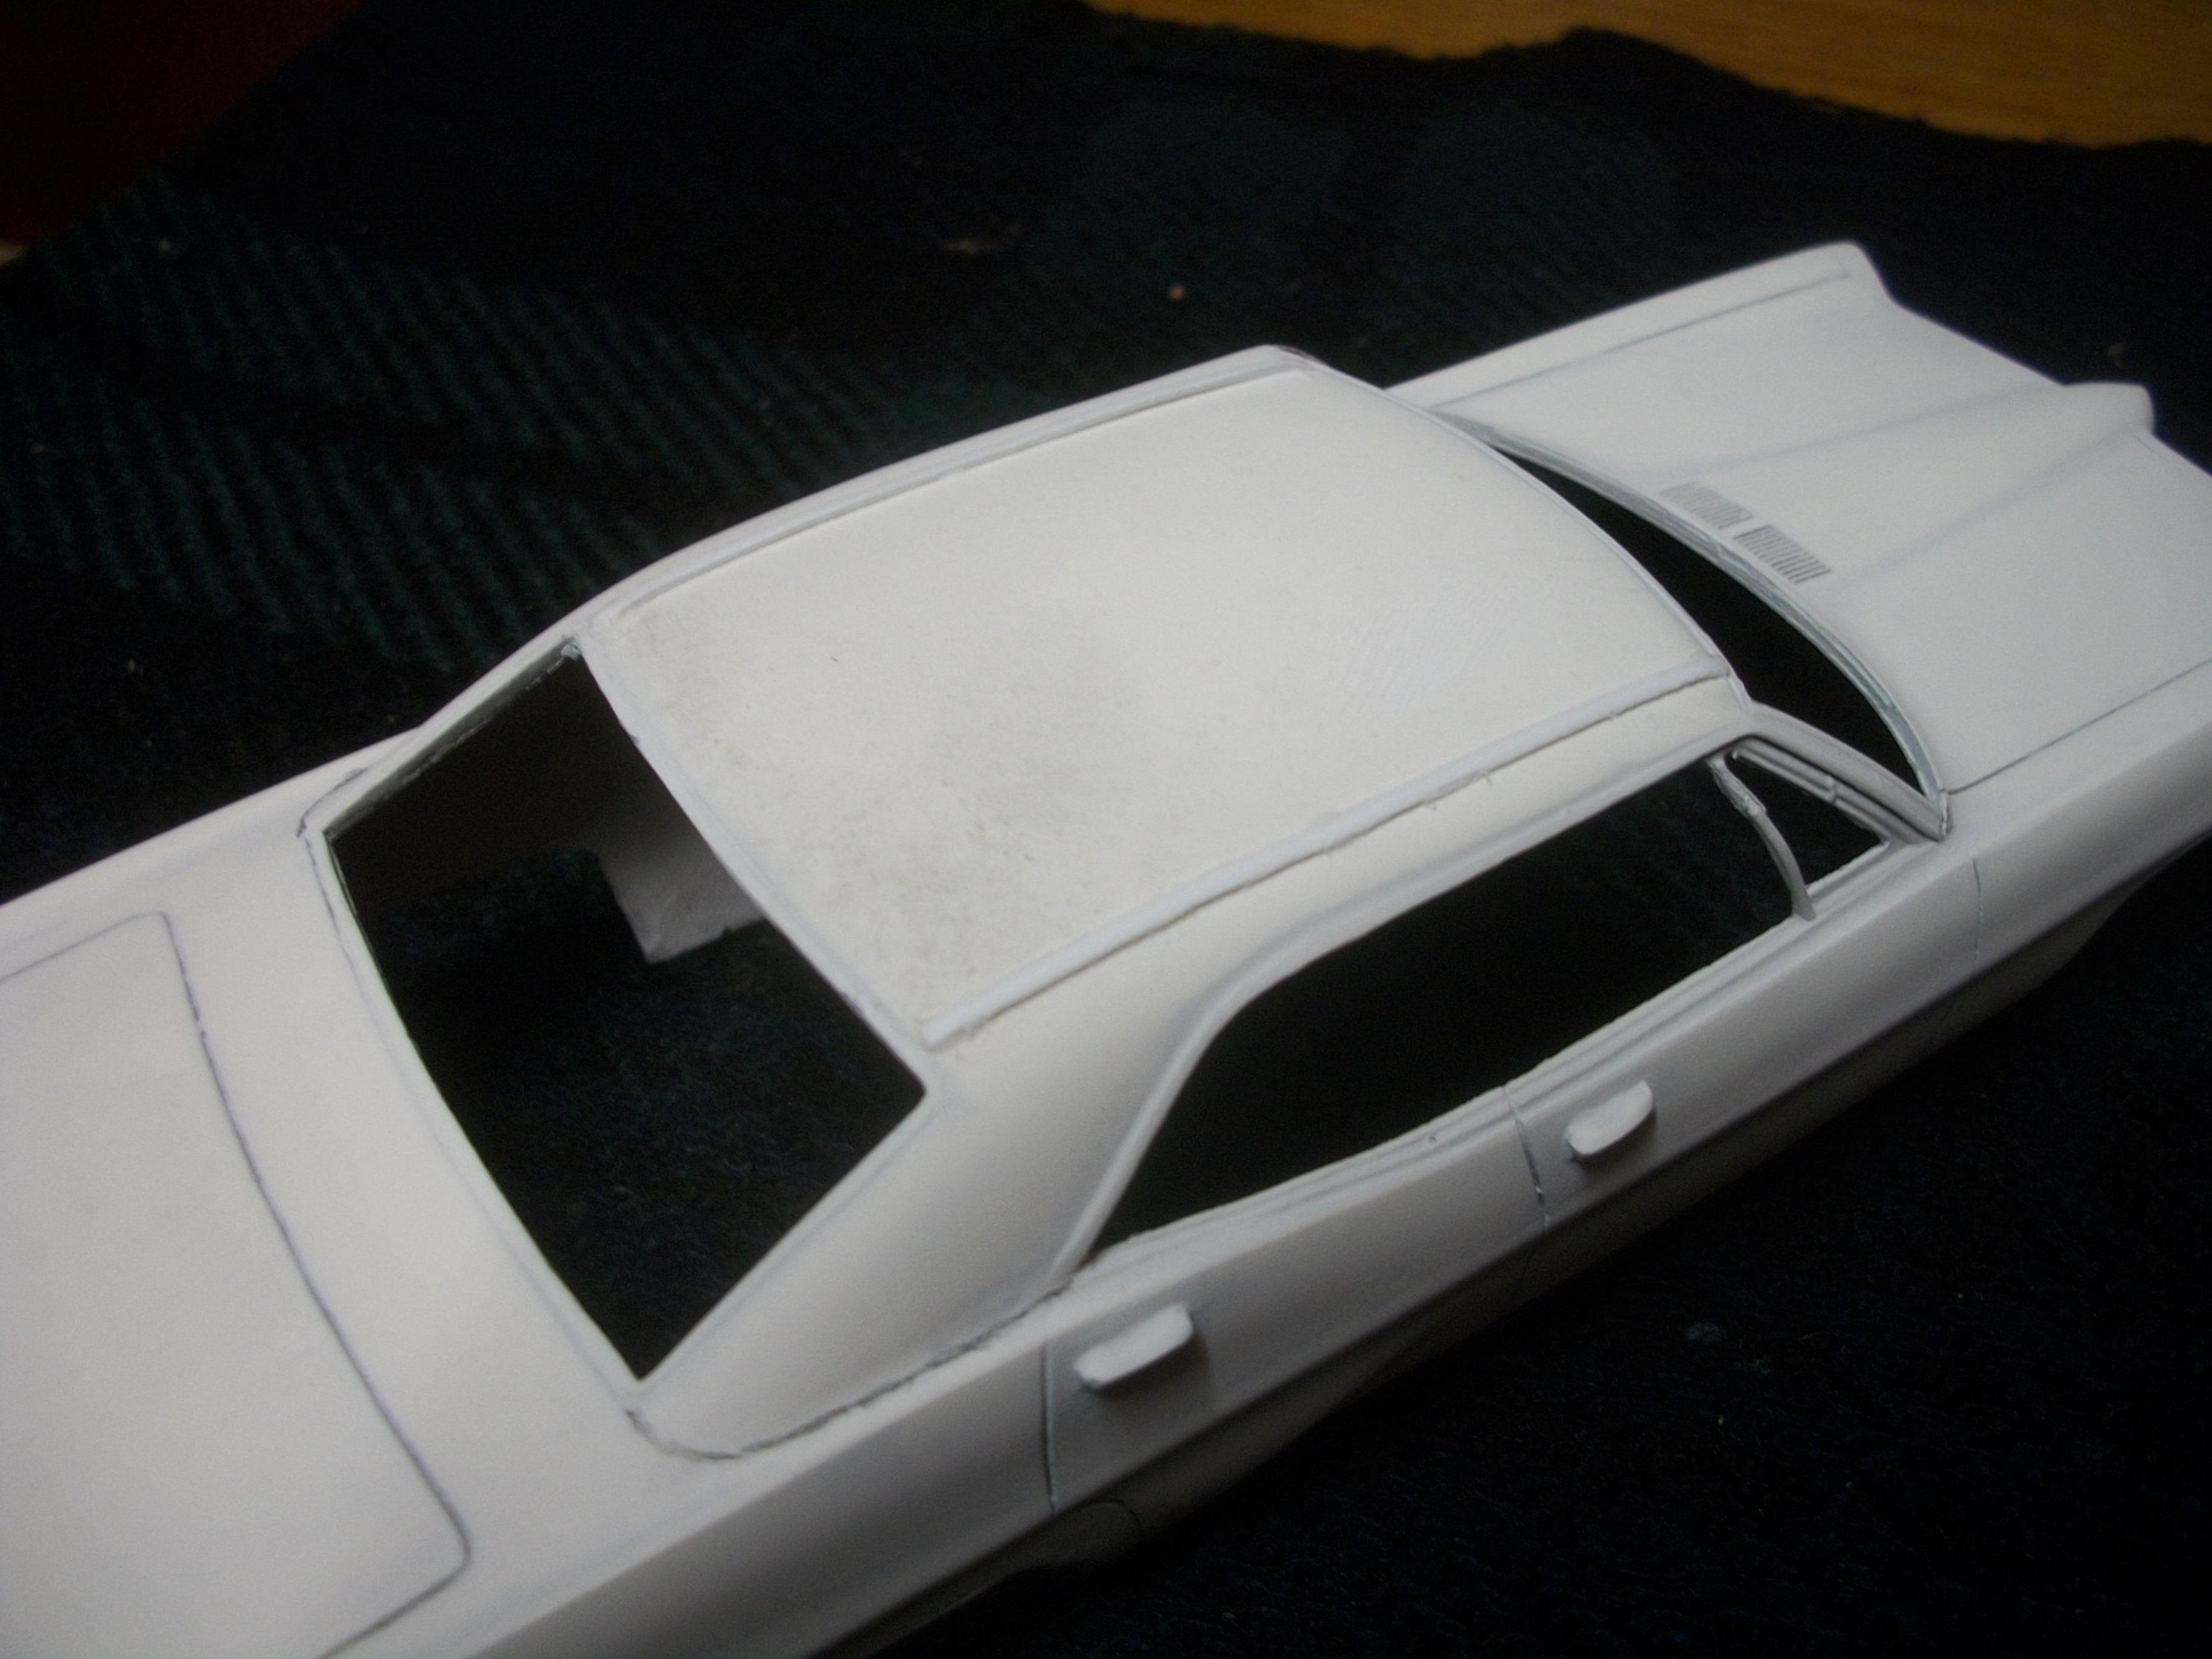
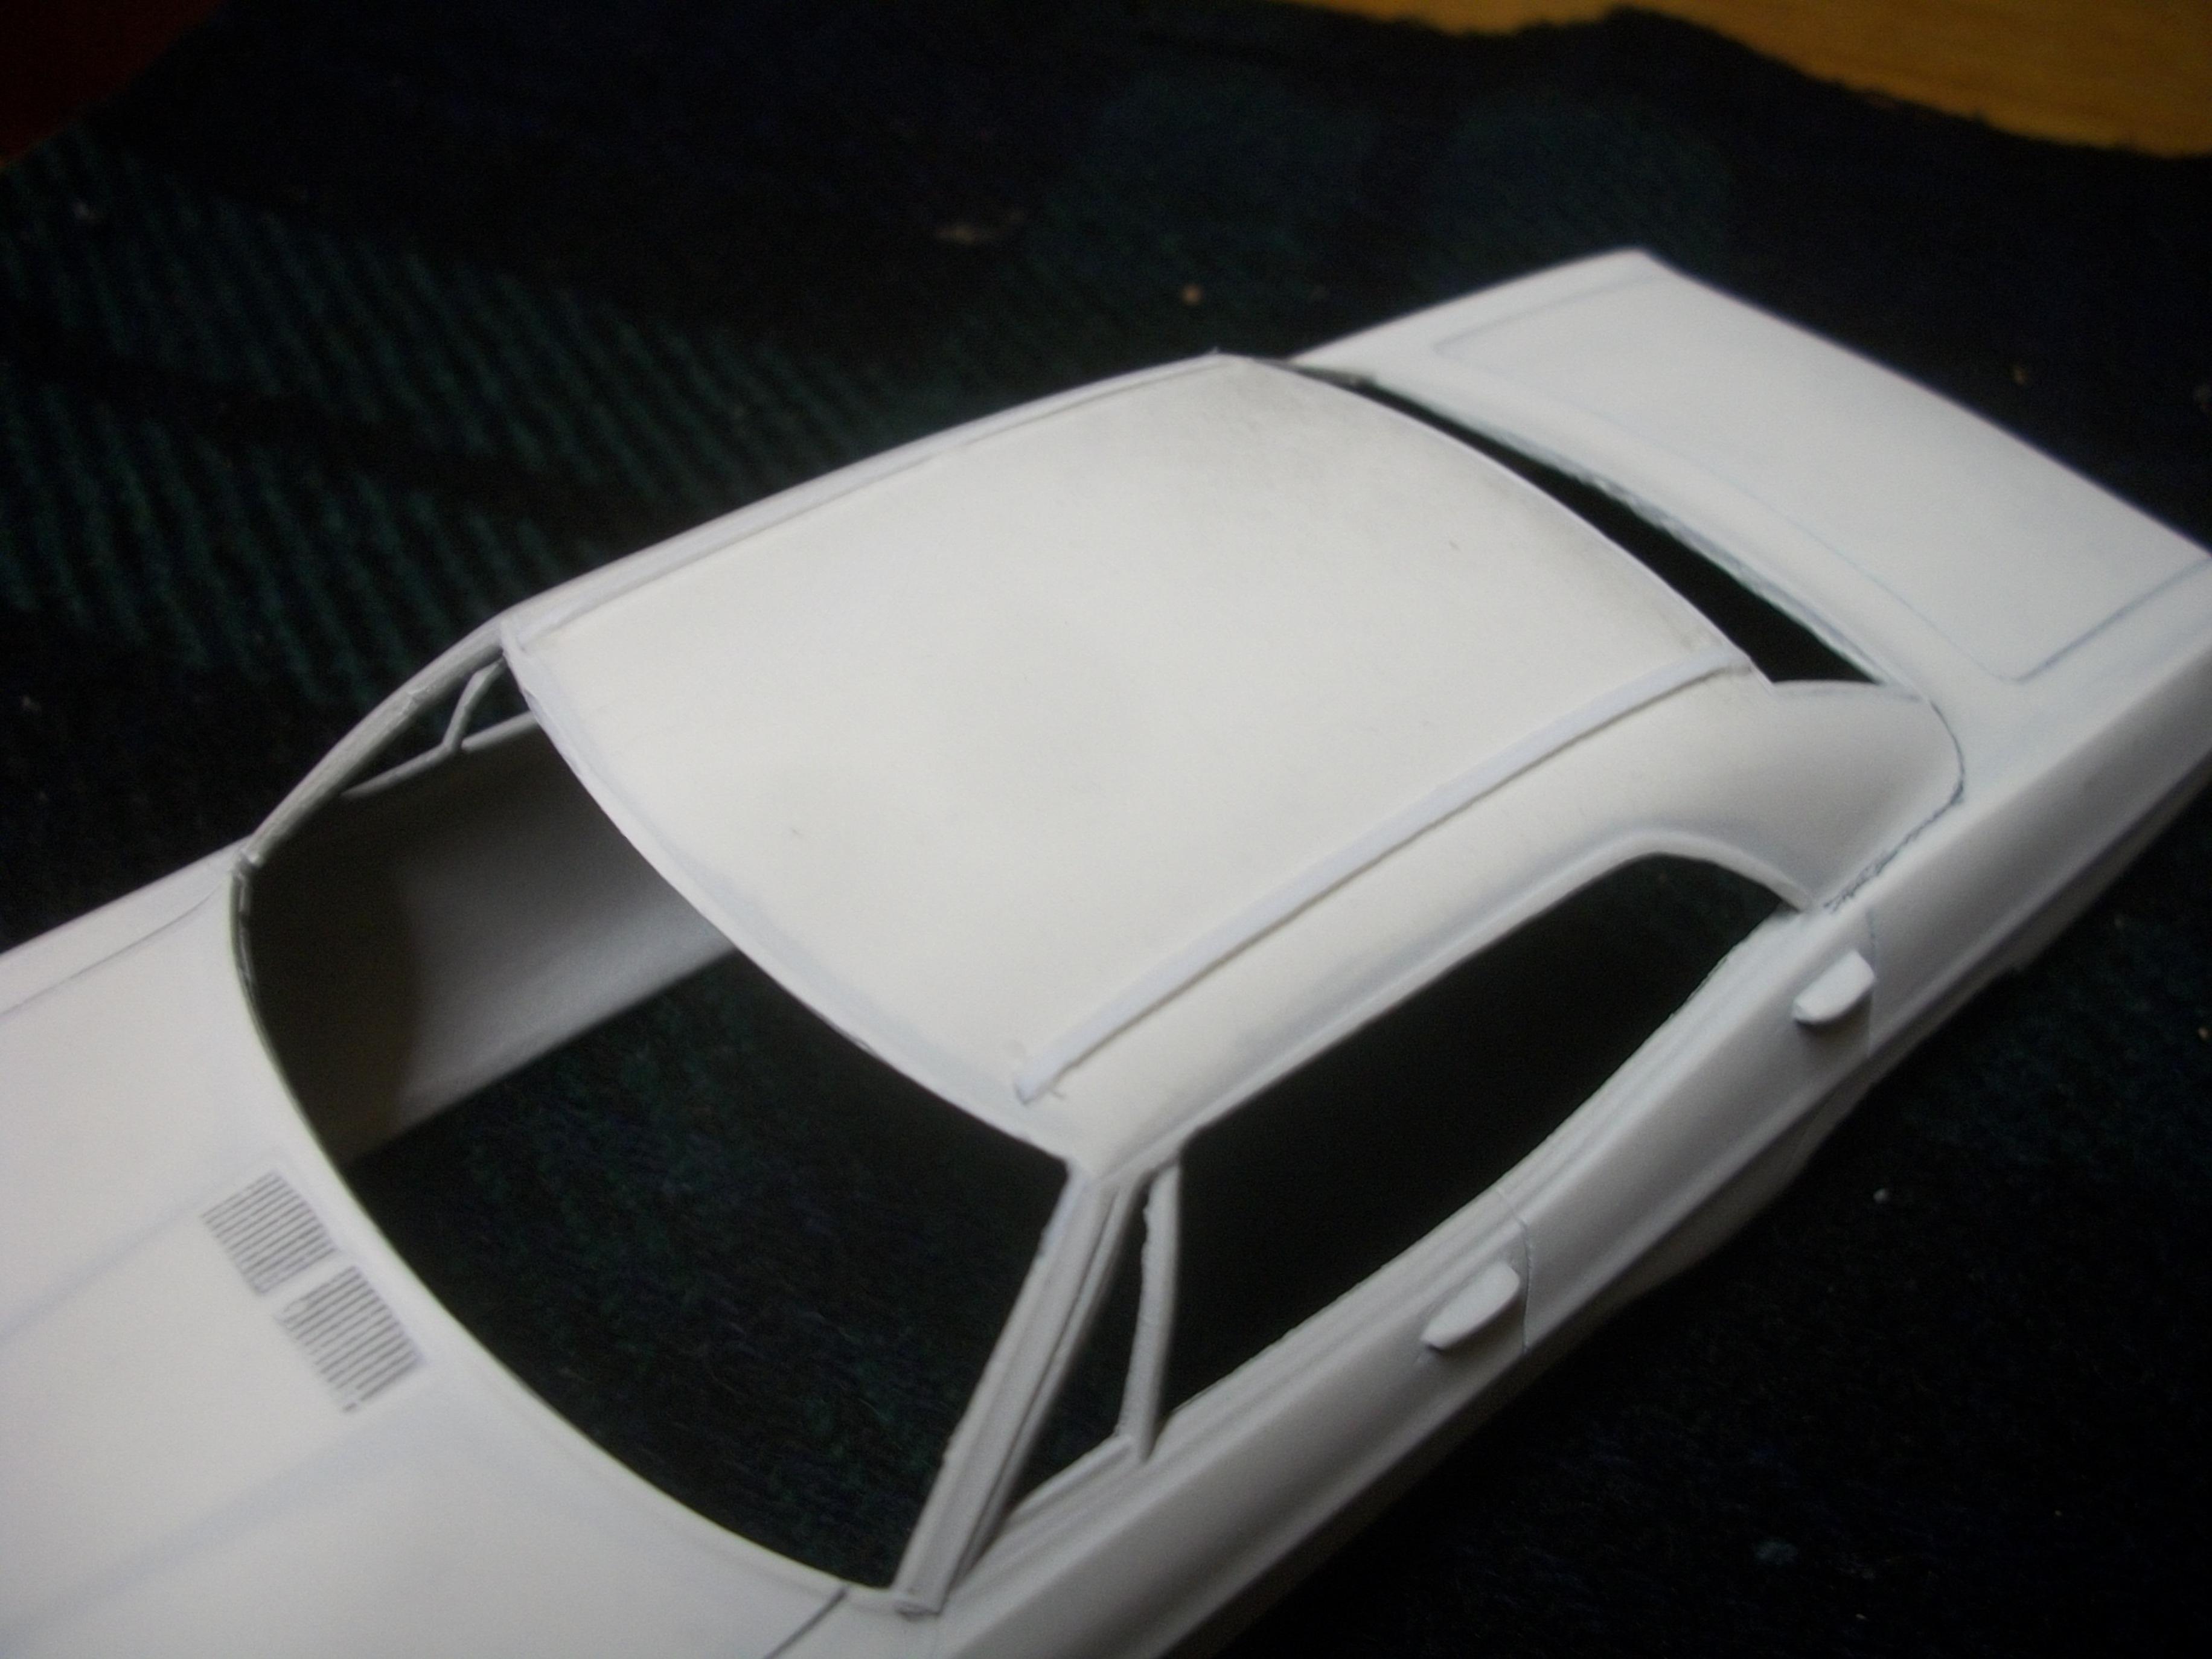
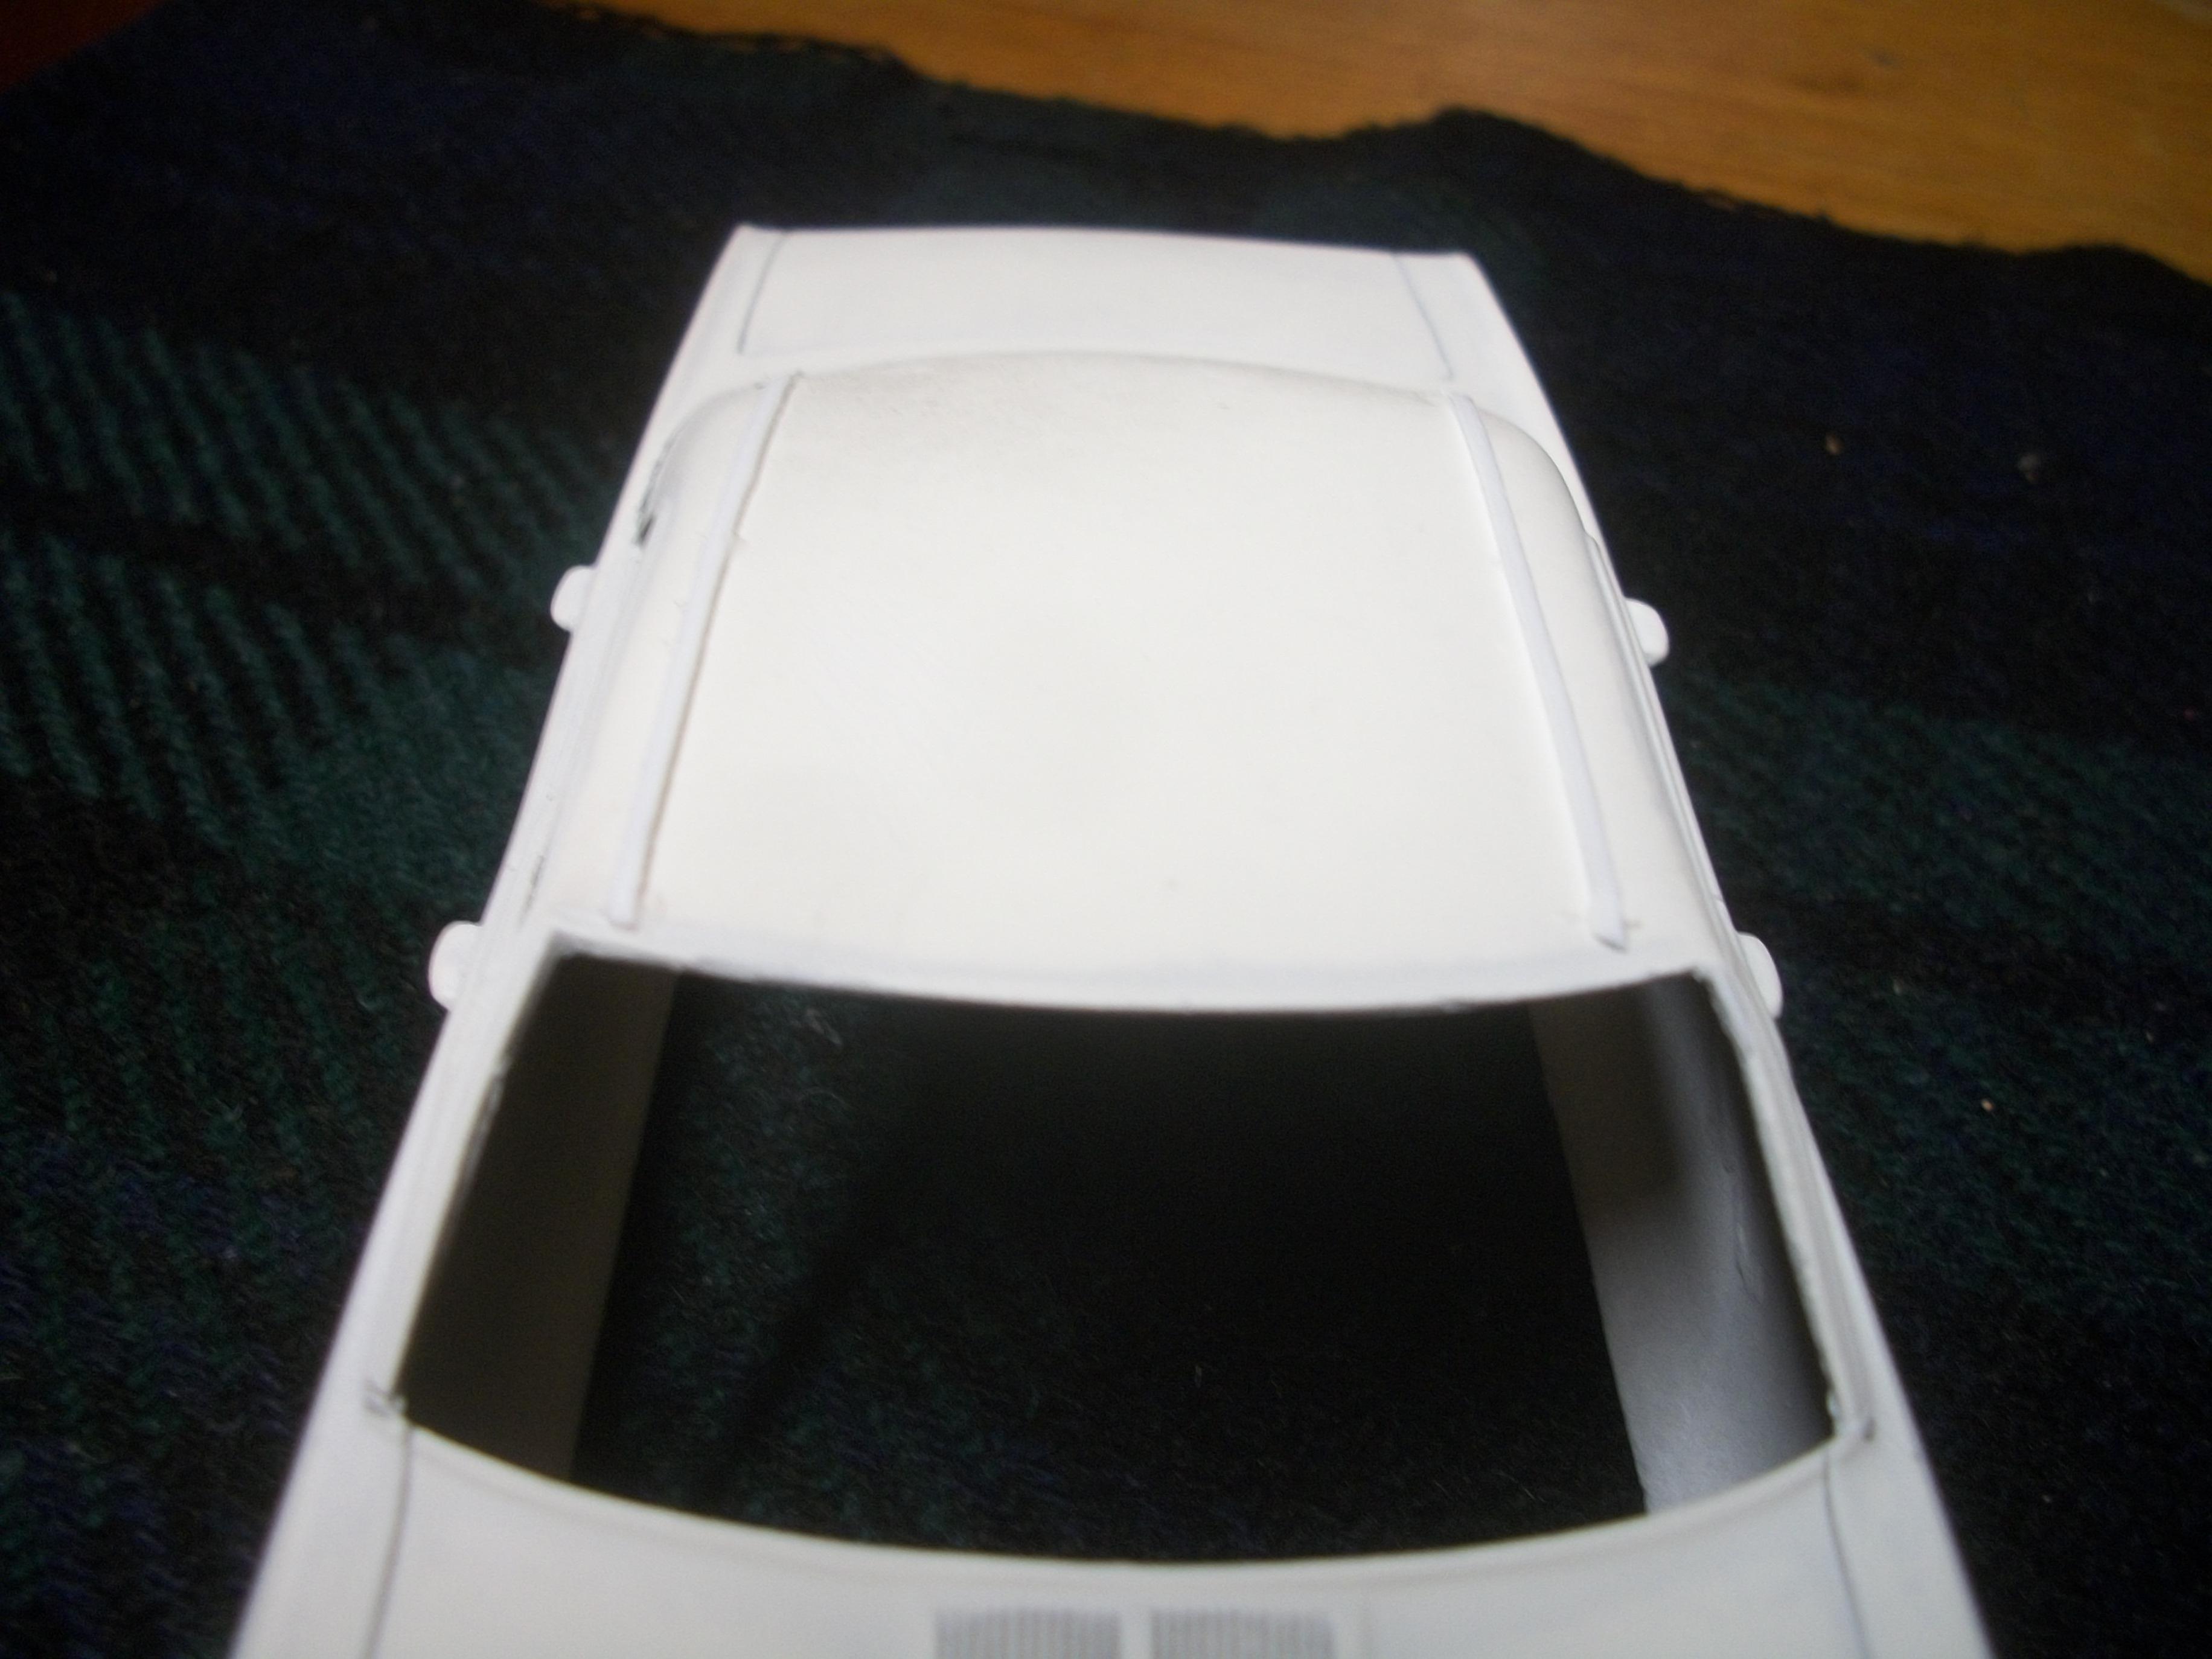
This is the paint test, using the Buick Cameo Cream from rattle can........ Having masked off the rest of the body, I then applied one coat of the Cameo Cream over the white primer base coat, and the result looks reasonably good. There will be two coats of this paint colour applied to the whole of the body, apart from the roof. The topcoat will need a gloss shine to finish, and polishing with Meguiars Carnauba Wax. The two seams of the vinyl roof show up more clearly in these photos. David
-
Well, Charles..... you have produced a diorama of sheer brilliance here. There is so much fine detail to see, we have to keep coming back and taking another look. From the second photo ( from the top ) I can see that vehicle is a LWB Mitsubishi Pajero or Shogun, and I recognise this as I own a SWB Pajero myself. I am just blown away by this latest creation of yours ! David
-
Okay, Tom...... I will keep the Alps printer option in mind, as well as the other options....... a local model builder suggested that I apply slow drying epoxy resin to the model car body, and then carefully produce each script by hand. The method suggested by Charlie Larkin appeals to me more than the epoxy resin approach, and your idea to print in silver ink with an Alps printer appeals to me even more, actually. The process of hand scripting worries me a bit, and I am not sure that I could make a half decent job of it. I like the Alps printer silver ink option the best. David
-
That is really useful, thanks for taking the time to suggest this method, Charlie....... and it could be the easiest way to produce the Parisienne scripts. I will certainly give it a go.... David
-
Thanks to Buz, Rusty, Mike........ as I understand it, the RHD dashboard for the UK version of the Parisienne is derived from the '65 Chevy Impala, as indeed is the chassis and engine. There are quite a few Parisienne's in Australia and presumably they must be very similar to the UK version of the car. Your link is interesting, Mike..... and I will study that when I get a moment, thank you. David
-
That is a particularly good photo of a RHD dashboard, Mike......and thanks for that one. This should be good enough for me to work from. David
-
1958 Pontiac Delivery conversion from convertible
Anglia105E replied to 59-Desoto's topic in WIP: Model Cars
Very interesting build, Gene.... and I am fascinated by the history, with you mentioning 1958 and Canada. Your nearly completed first build of three looks really nice, and you are doing a good job there. As you may have noticed, I am converting a '67 Pontiac Bonneville 4-door to a '68 Pontiac Parisienne 4-door....... which is most enjoyable and satisfying. David -
Having filed down the vinyl roof seams, they appear to be quite a lot better. I am happier with the roof now...... it will be important to get the texture right. David
-
Restoring My Dads 64 Fairlane For Christmas
Anglia105E replied to MININORTHFORDMAN's topic in WIP: Model Cars
That's a really nice idea, Charlie..... and it looks like you are off to a good start..... good luck with the restoration! David