.jpg.0c75d4af58bbe0dcf58c7140c68bb8a7.jpg)
Super28
-
Posts
830 -
Joined
-
Last visited
Content Type
Profiles
Forums
Events
Gallery
Everything posted by Super28
-
.jpg.0c75d4af58bbe0dcf58c7140c68bb8a7.thumb.jpg.c6d2fb89398aad96d0499ef8532bcefc.jpg)
" Foil Transfer " : What am I doing Wrong ?
Super28 replied to 1972coronet's topic in Tips, Tricks, and Tutorials
Didn't know it will stick that good. I will give it a try. SO, I will use bare metal foil, apply it before paint and clean it up between coats! I really appreciate all the help. The biggest thing to me when building a model, is the scripts. I've seen so many that were just amazing and wanted to know how to do it. You paint over them they become glops. This was the big thing for me. To be able to do it right. Will keep ya'll posted! -
1960 Chrysler Imperial. 12/4, Finished!!
Super28 replied to StevenGuthmiller's topic in WIP: Model Cars
How do you do the scripts? Am going to follow this one -
" Foil Transfer " : What am I doing Wrong ?
Super28 replied to 1972coronet's topic in Tips, Tricks, and Tutorials
Thanks for the reply. What do you use to glue the foil down? -
" Foil Transfer " : What am I doing Wrong ?
Super28 replied to 1972coronet's topic in Tips, Tricks, and Tutorials
Also read where one person glues the foil to the car , cuts out what he wants and cleans it after primer/ paint.?. Thoughts??? -
" Foil Transfer " : What am I doing Wrong ?
Super28 replied to 1972coronet's topic in Tips, Tricks, and Tutorials
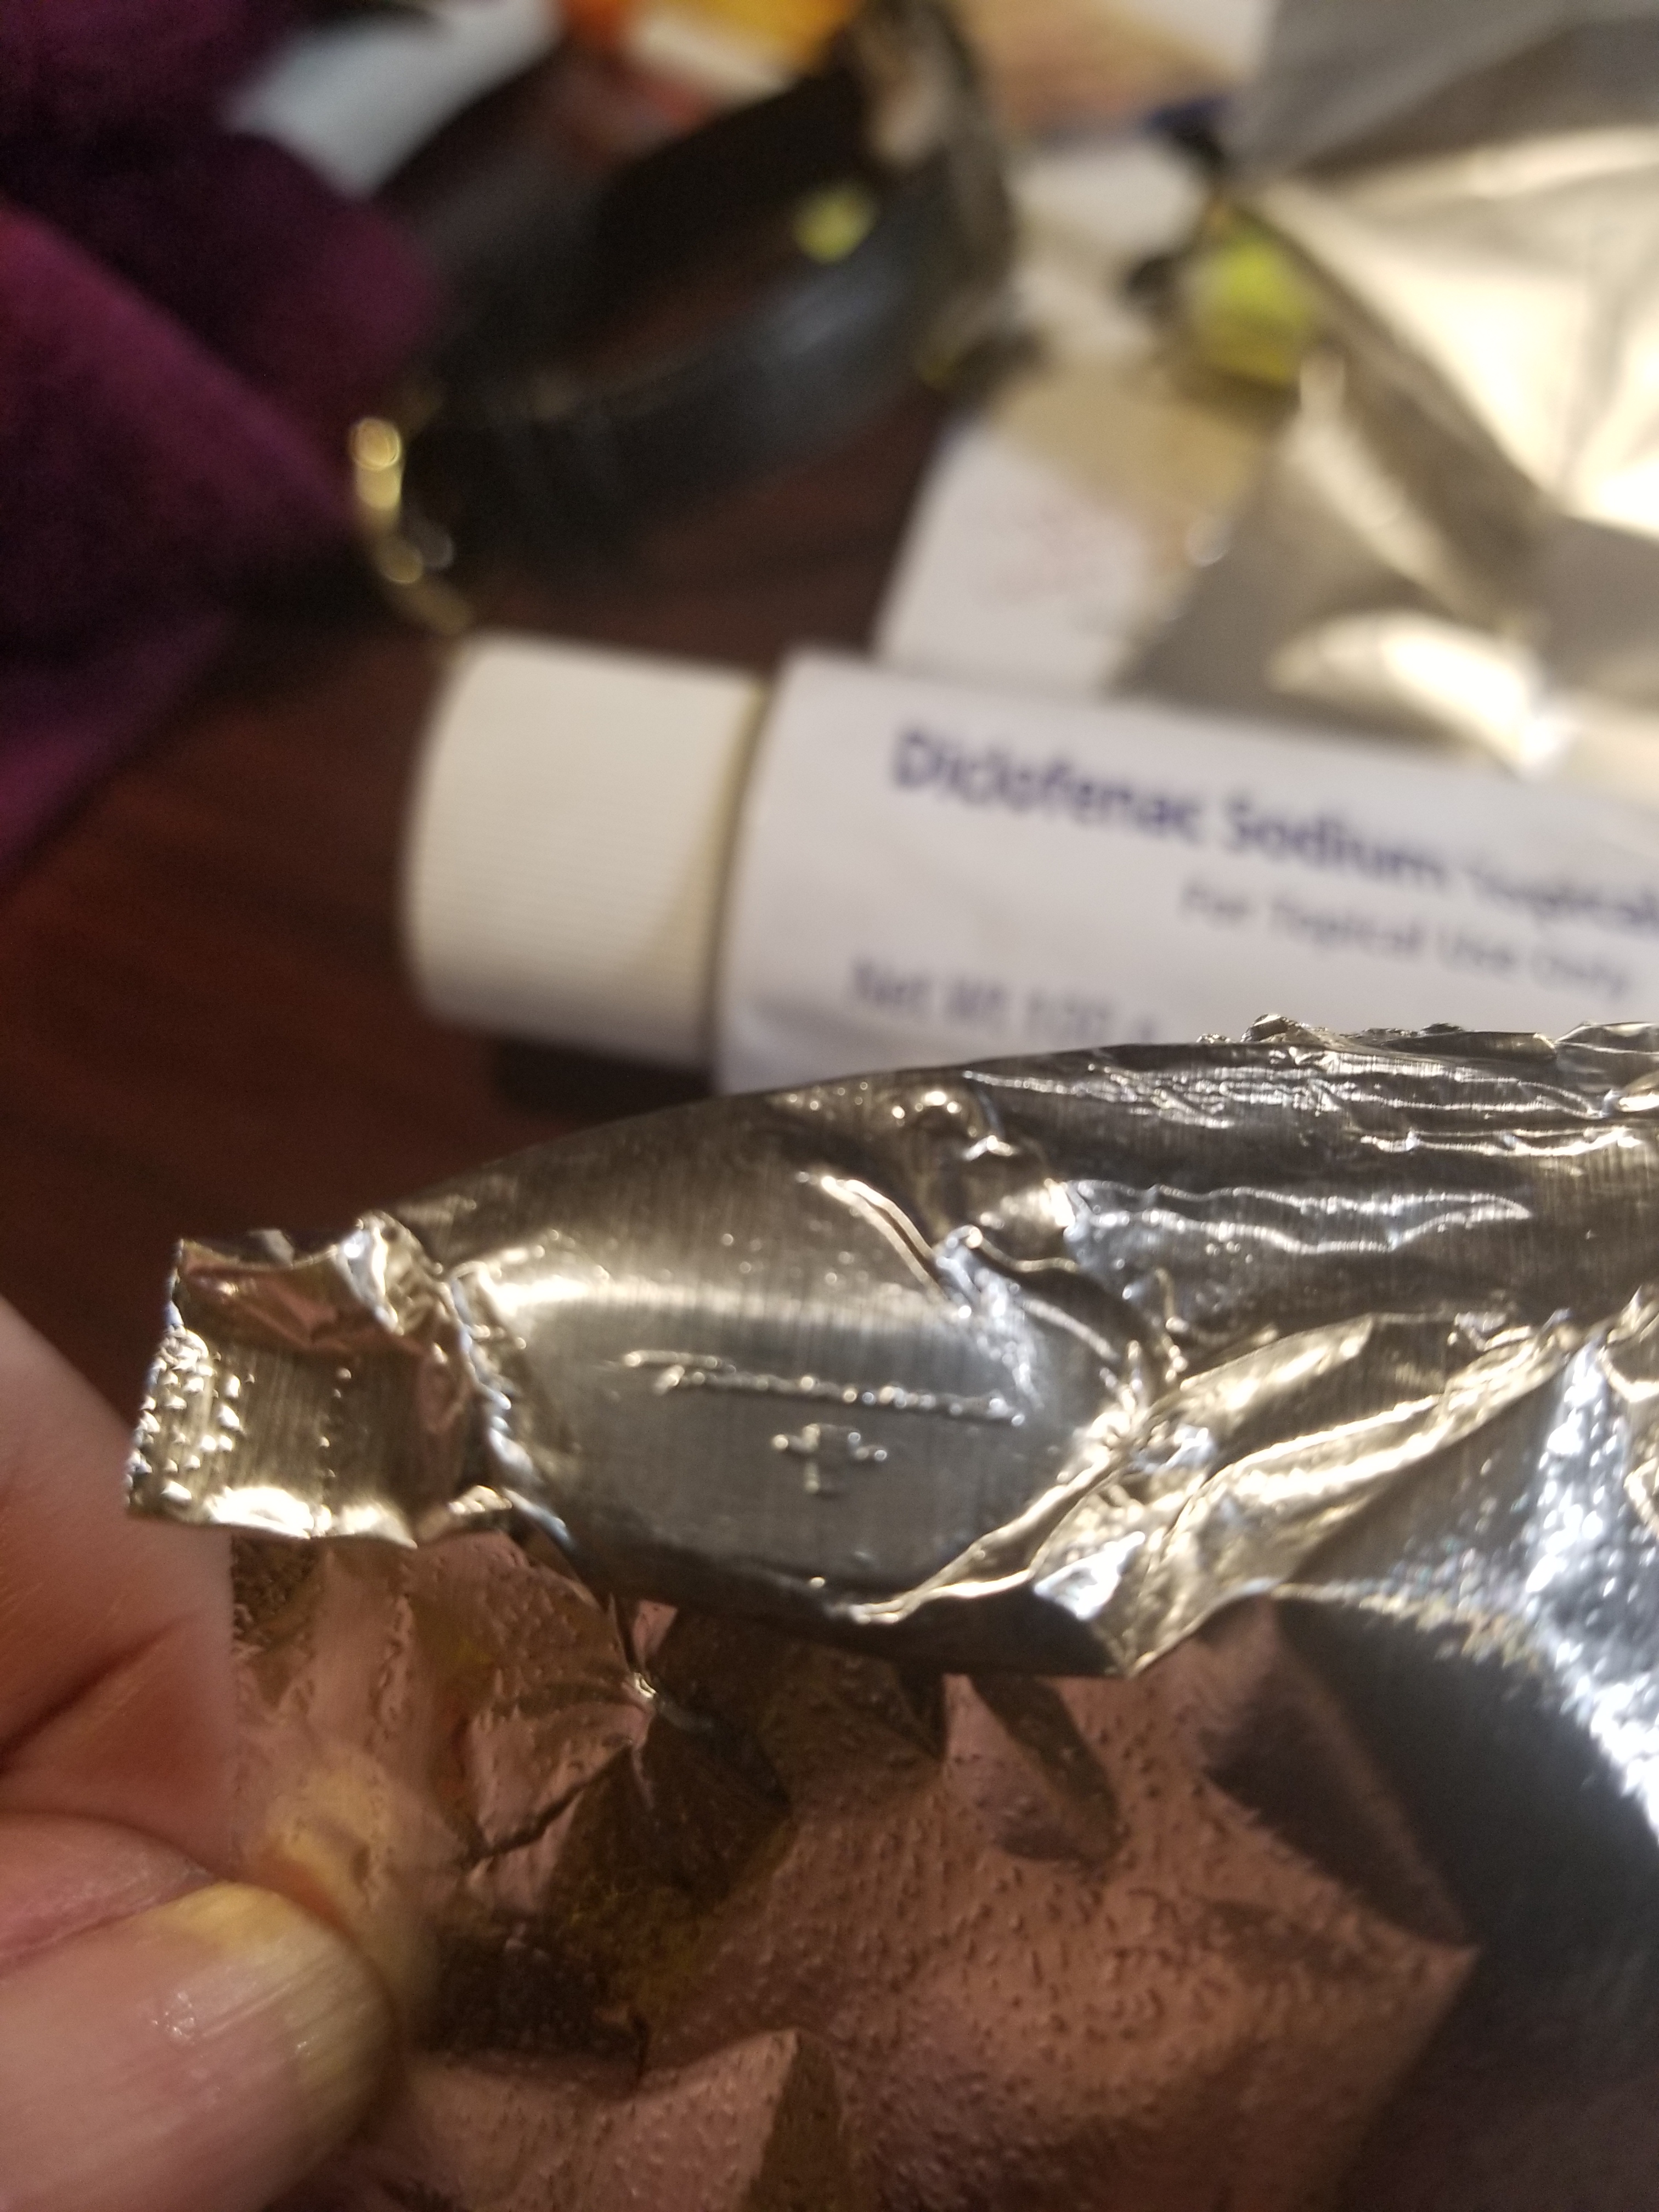
Ok, got this far. This is the "Thunderbird" and Thunderbird emblem on the front fender of a 1962 Thunderturd. What do I fill it in with? Then do I cut it out and glue it to the body after it is painted> What I "CA"? Help a fella out
-
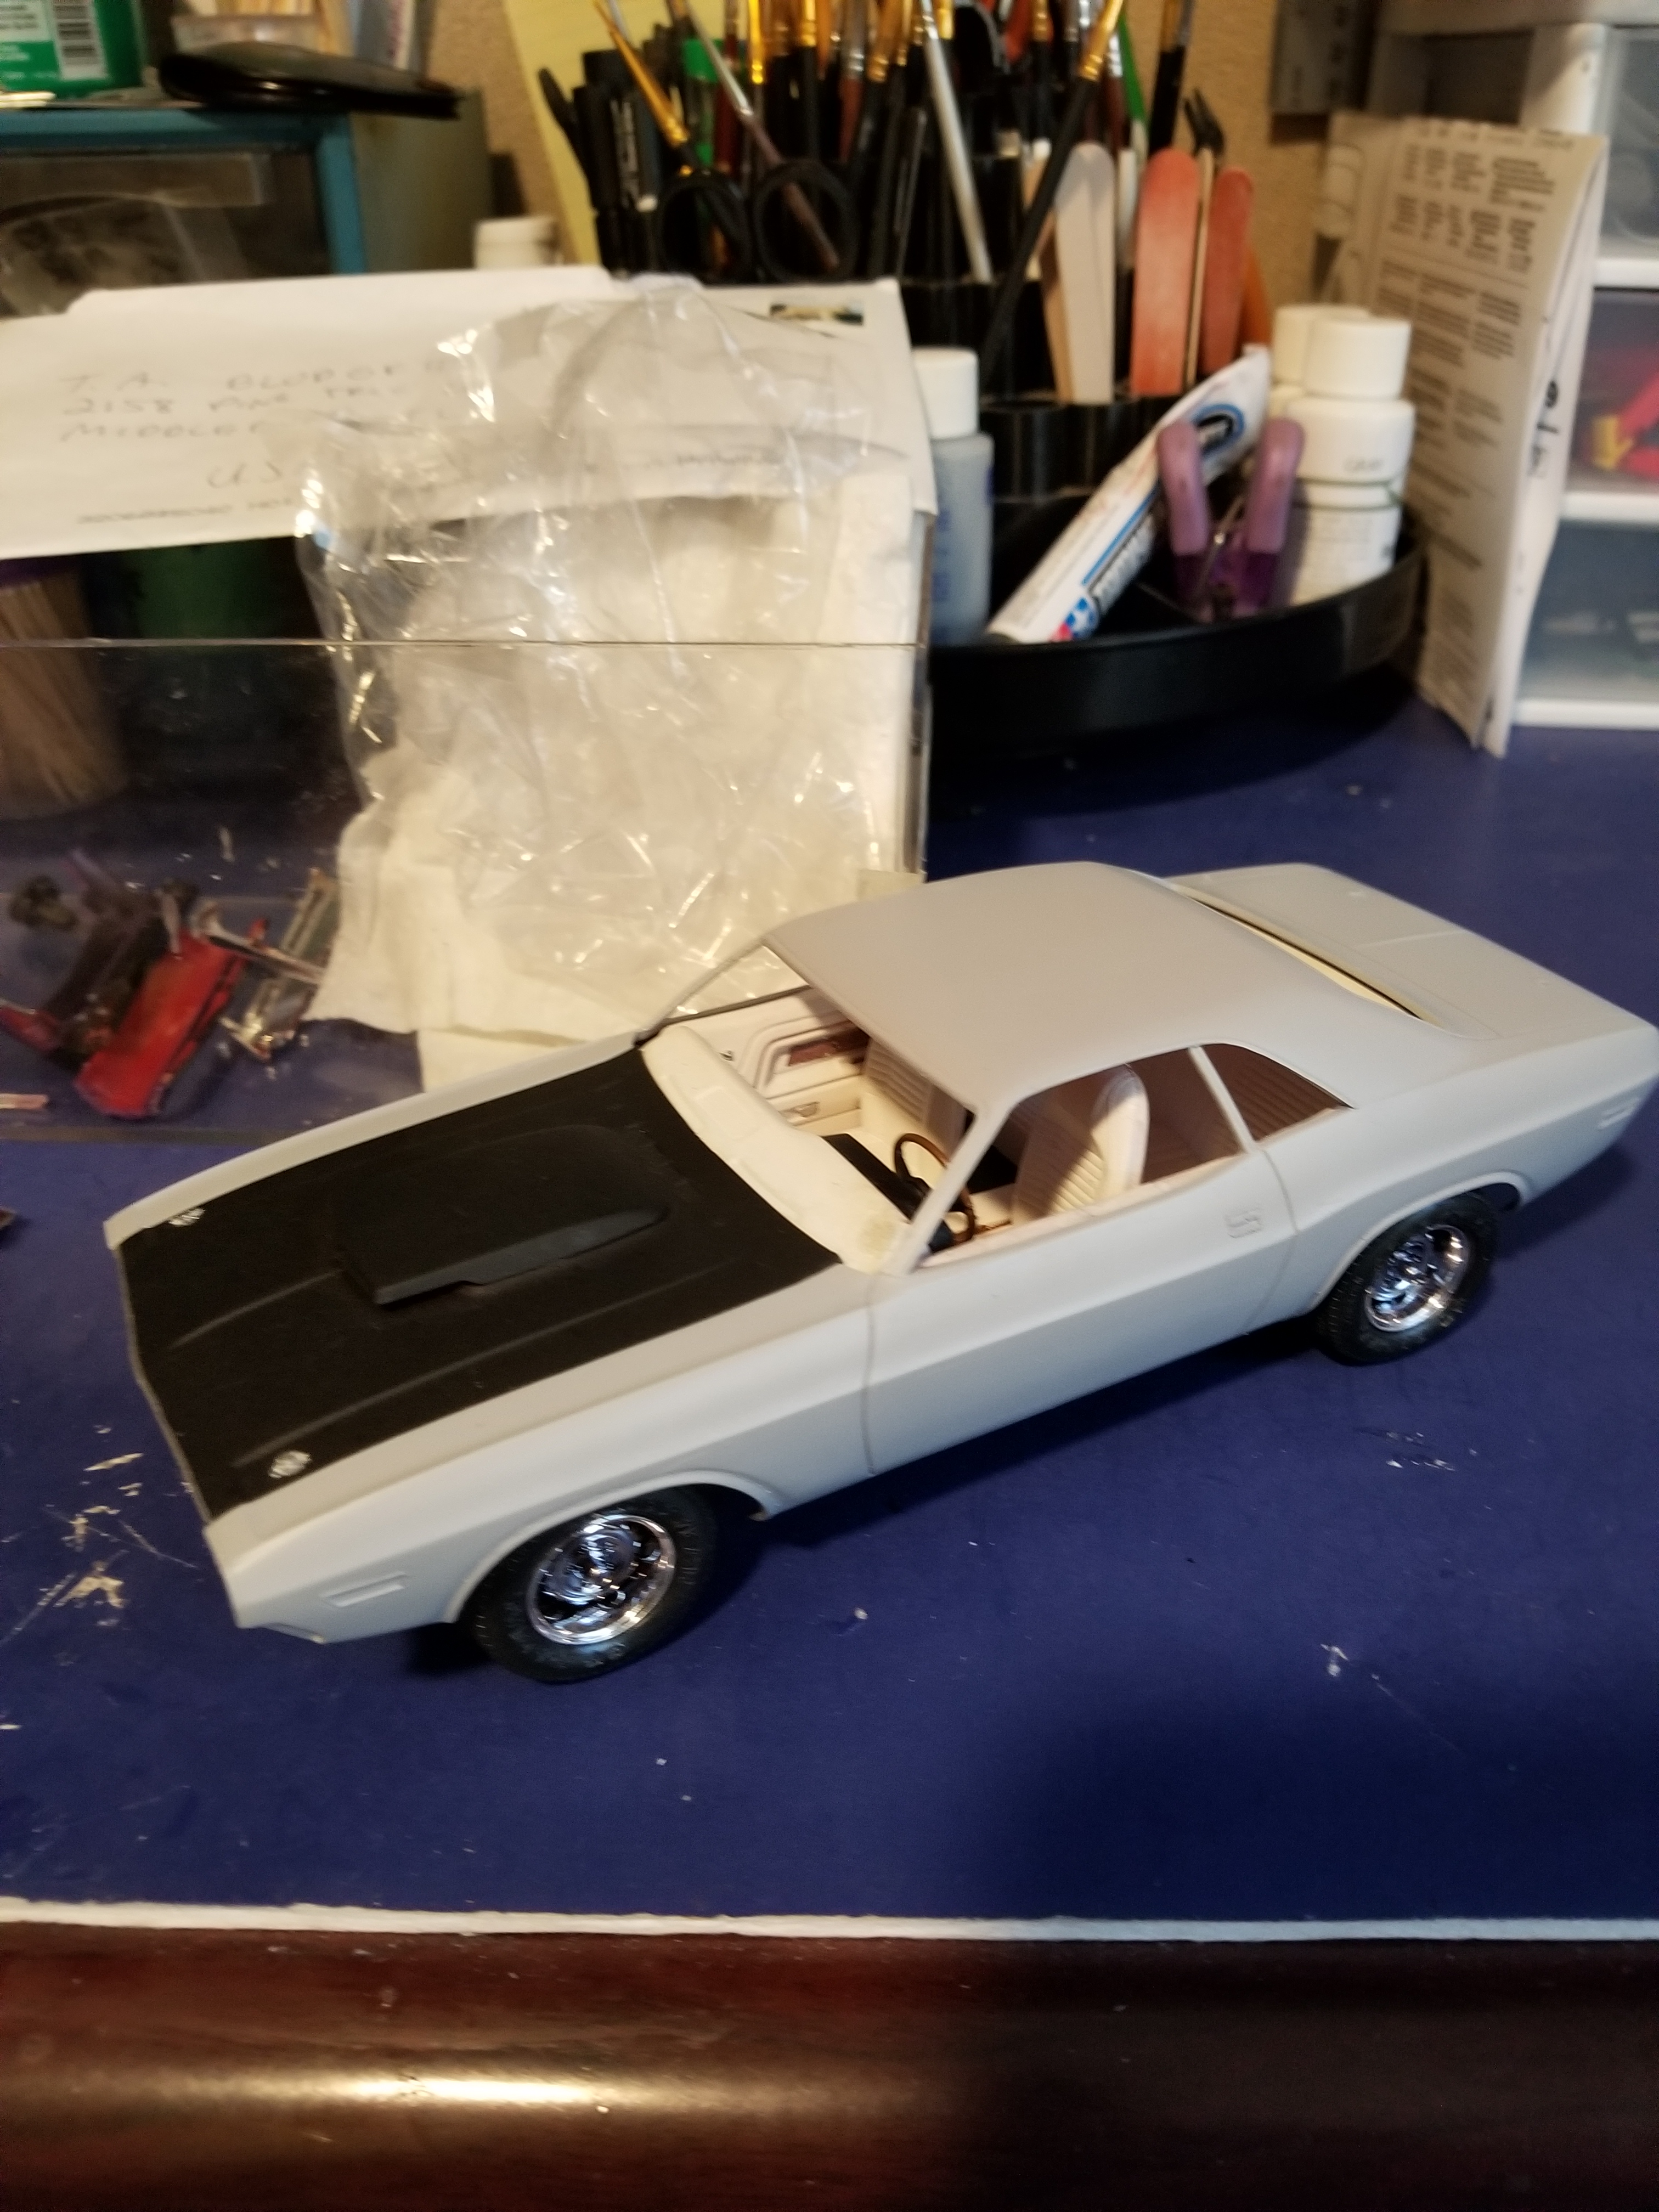
Don't remember, Bought it back in the 80s or 90s. If you got it, build it and enjoy it. You could die tomorrow and it will end up in a yard sale, lol. Really. I've got mine numbered and going to build them as I get to them. Actually, I'm building them in "steps" That's why this is #3. I'm actually working on 5 right now. Rotating them as I go. that way I work on a different one each time. There will be a bunch more by the time I finish #1, A re-build on a 1970 Dodge Challenger
-
INSPIRED THINKING- Cheap Tips for Frugal Modelers
Super28 replied to 62rebel's topic in Tips, Tricks, and Tutorials
thank you -
INSPIRED THINKING- Cheap Tips for Frugal Modelers
Super28 replied to 62rebel's topic in Tips, Tricks, and Tutorials
I already posted this somewhere on this site, but a "tea Leaf" ball is great for putting small parts in cleaner/stripper so you don't lose them. A tea leaf ball is used to put tea leafs in to make tea. It's a metal ball that opens and has a chain on it. You can find them in "Housewears" section of Wal-Mart for about $3.00. Just make sure you get a stainless one so the solvent doesn't eat your tea ball. You can buy Toothpick holders with round toothpicks , two for a dollar at a dollar store. Dollar Tree stores have nail polish for one dollar a bottle. Some nice colors. (I reduce mine , 1 to 1 with Lacquer thinner). They also have 24 emery boards for $1.00. They also carry all kinds of plastic storage containers , (get this), for a dollar ! Seems like everything in Dollar Tree is a dollar! Who'd thunk, right? -
Really like this one. Keep posting
-
-
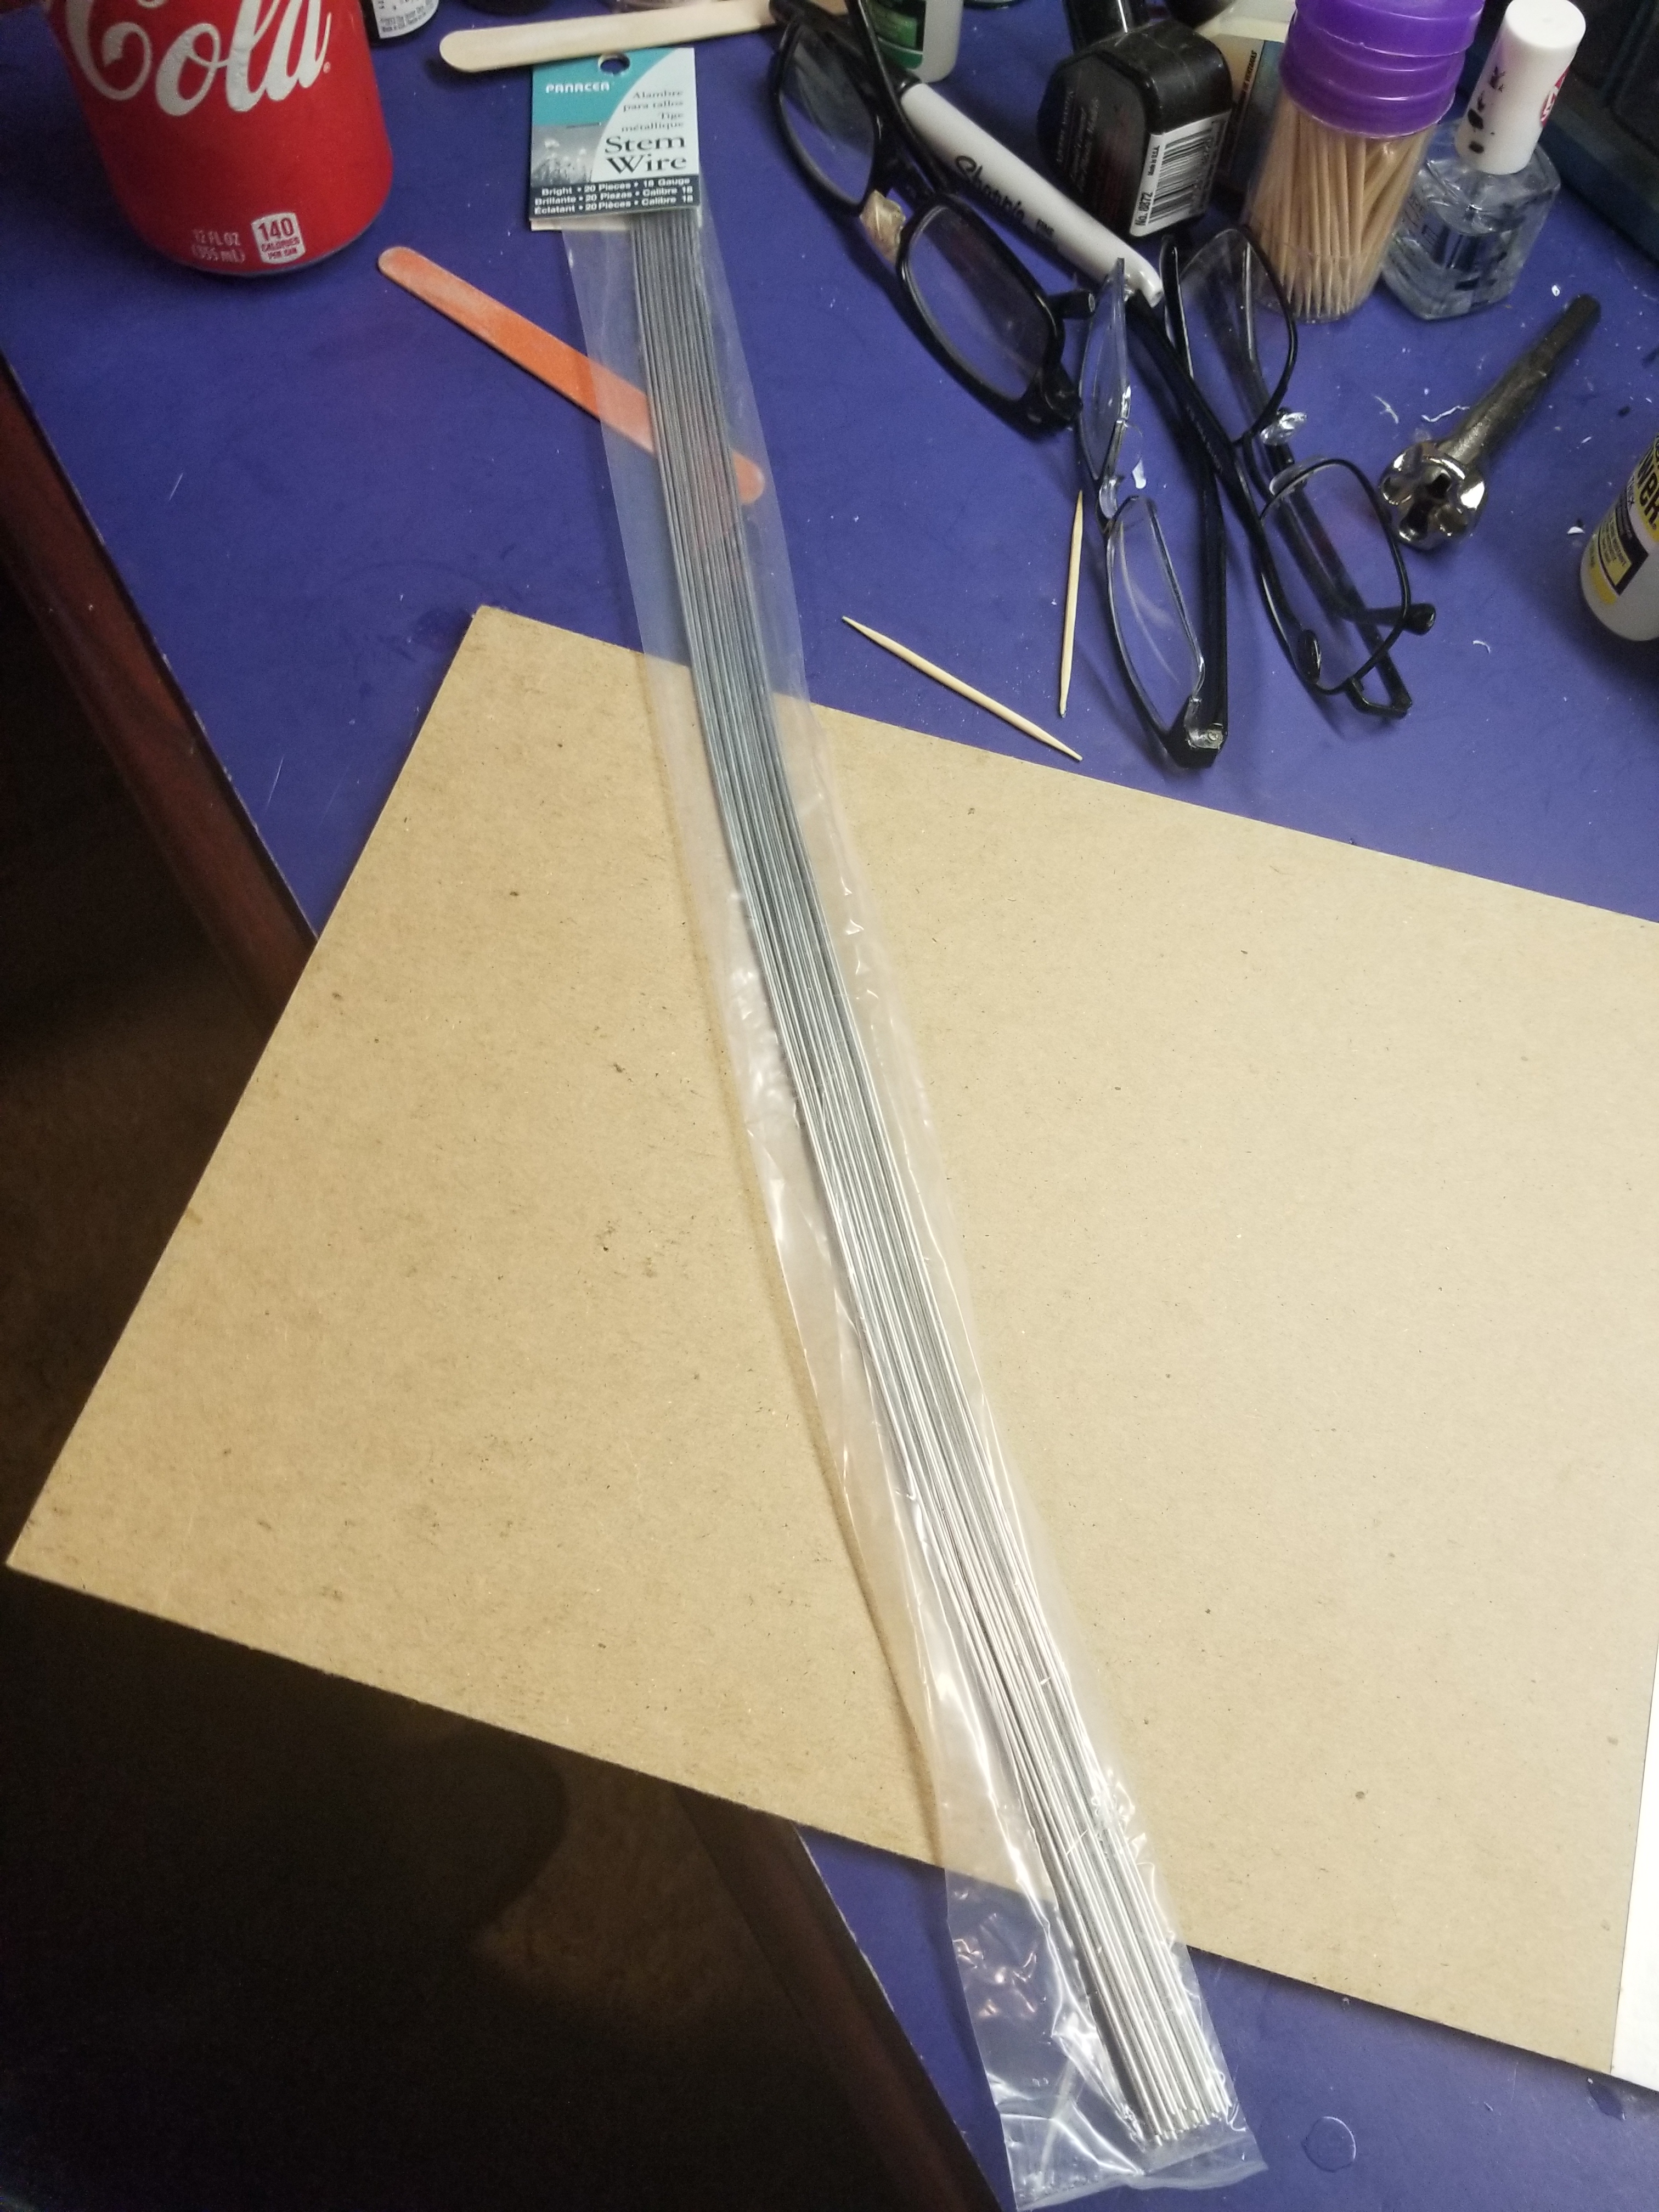
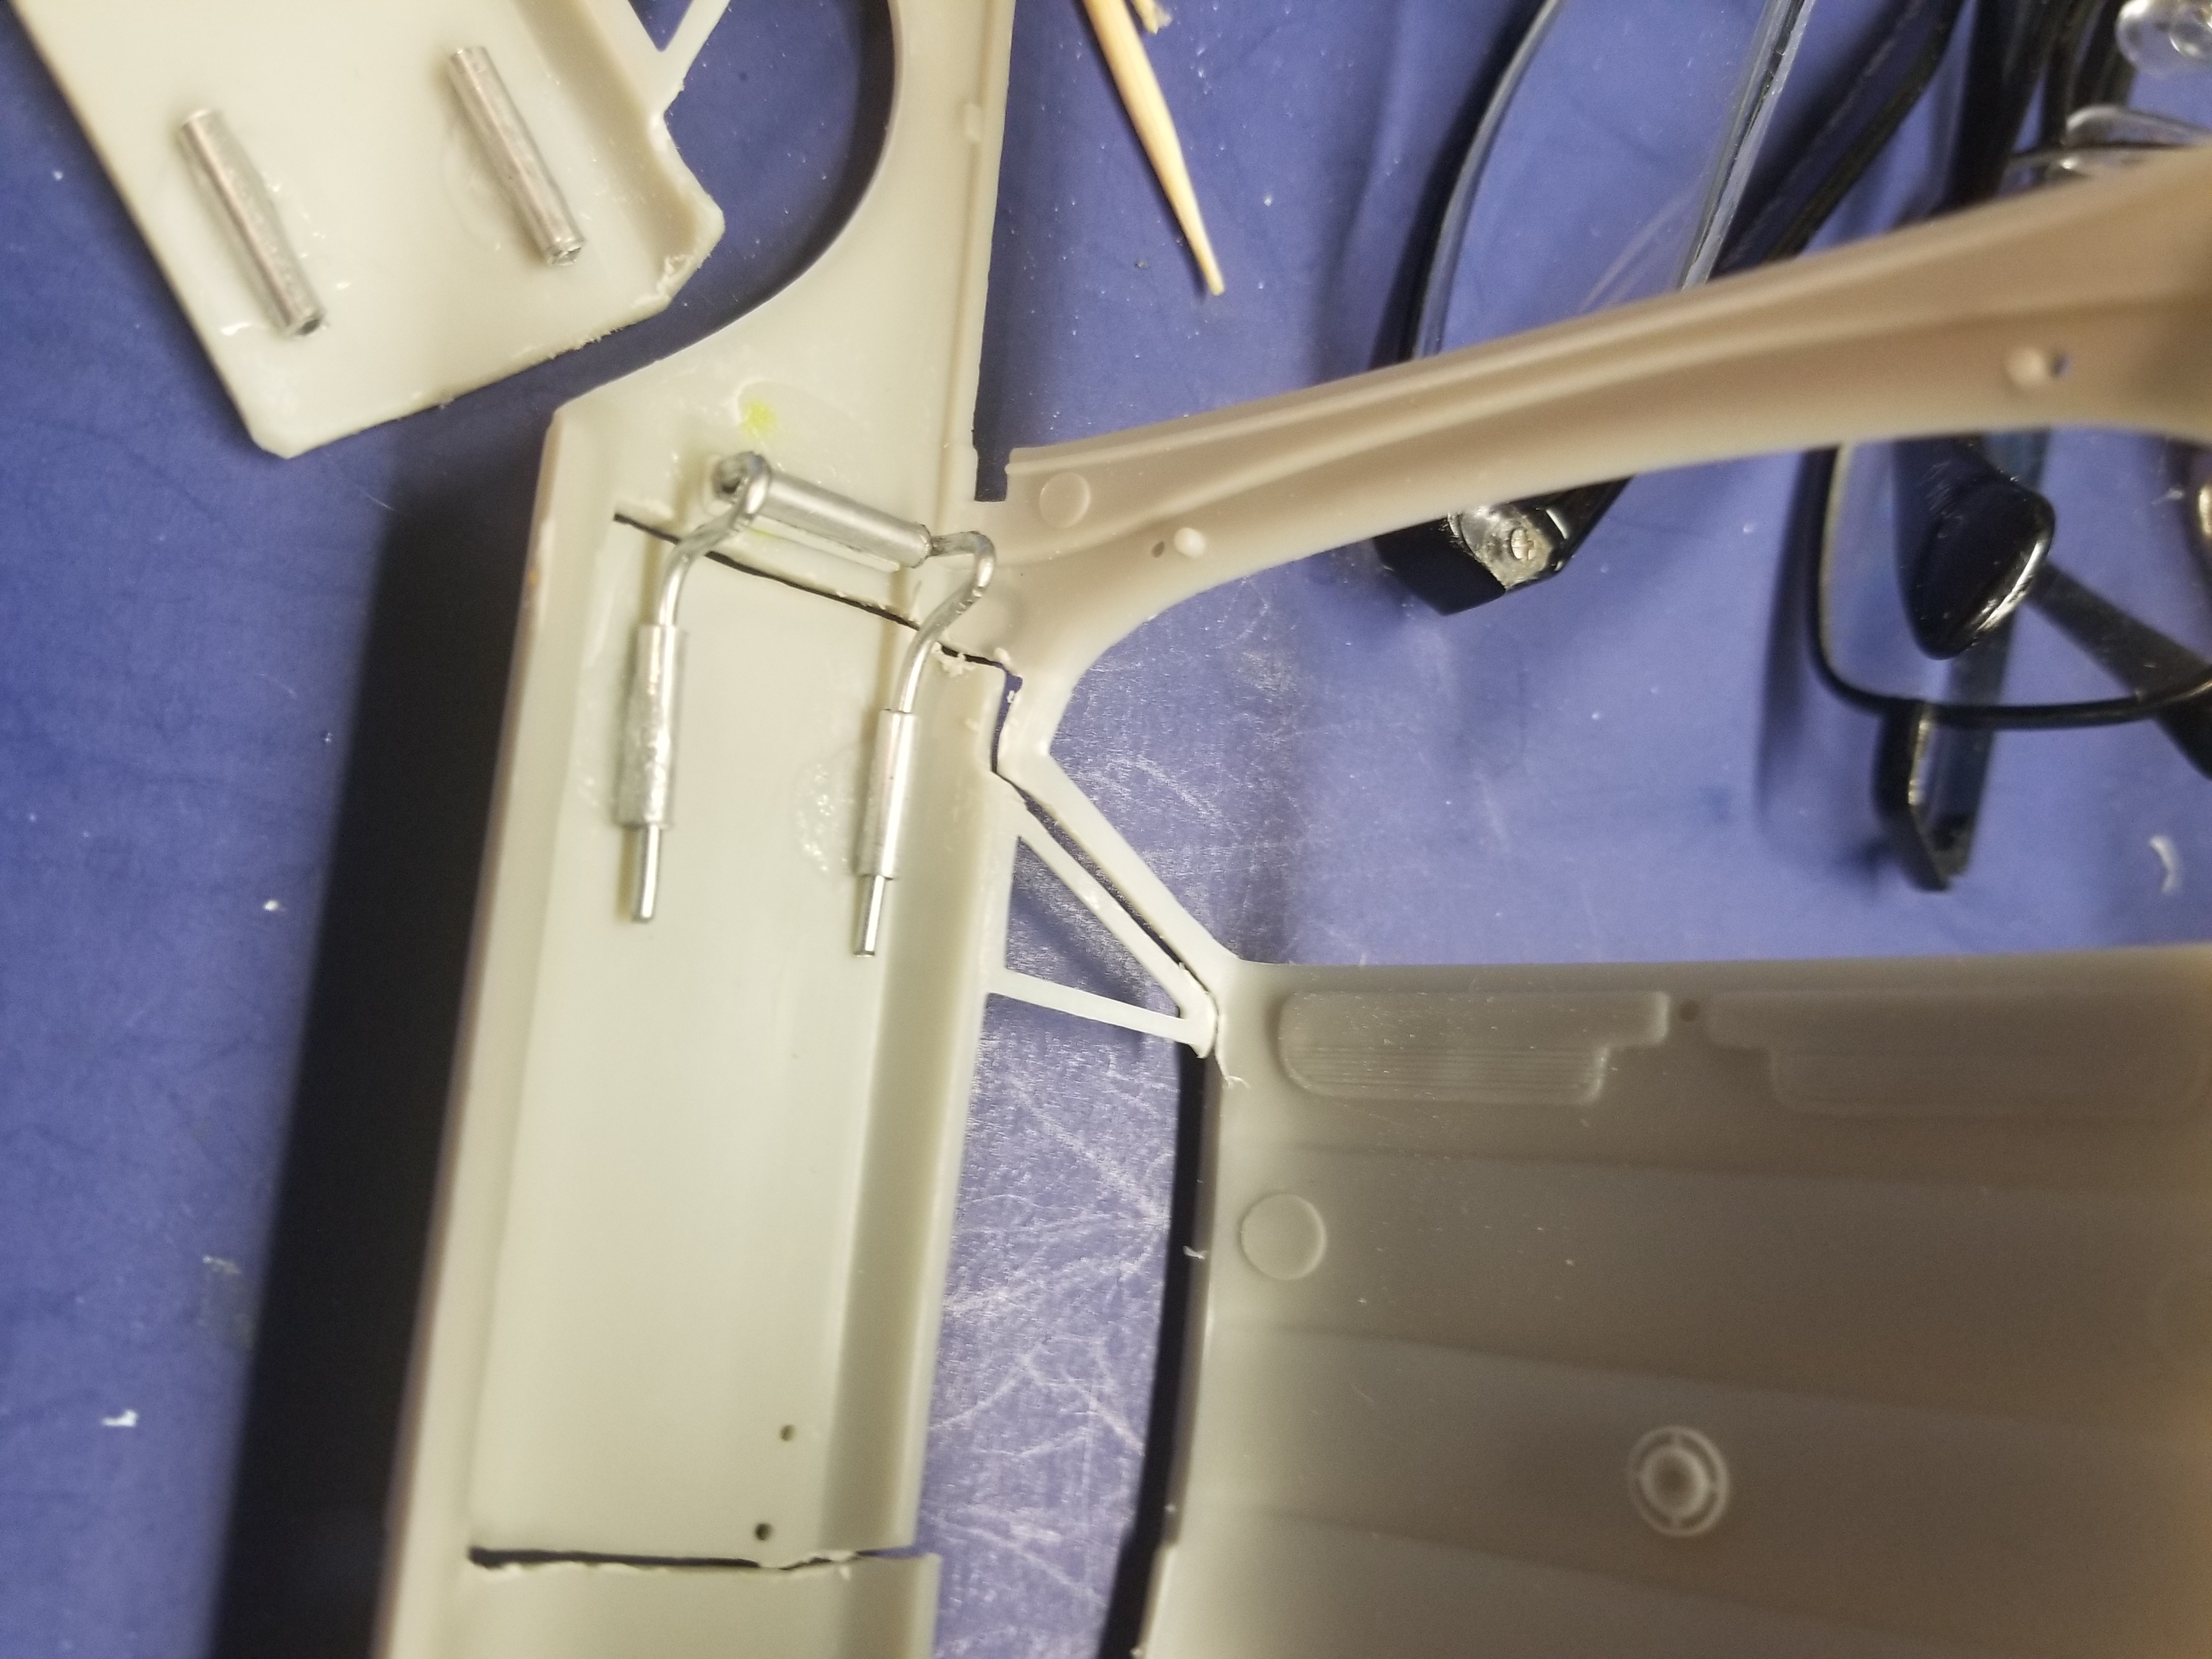
Been asked about the door , trunk, and sometimes hood hinges. Can't take credit for them. Go to "Dr. Cranky's" videos on model building. Gives step by step instructions. I use 3/32 aluminum tubing from local hobby shop. Can be cut with axacto knife. Wire is "stem wire" from a craft store, flower section. Glue is " Extreme Power", but super glue will work too. Loop pliers are from "Micro Mark". Mail order.
-
Please go down to Tips, Tricks, & Tutorials. Look under "door Hinge" post. I'll put info there
-
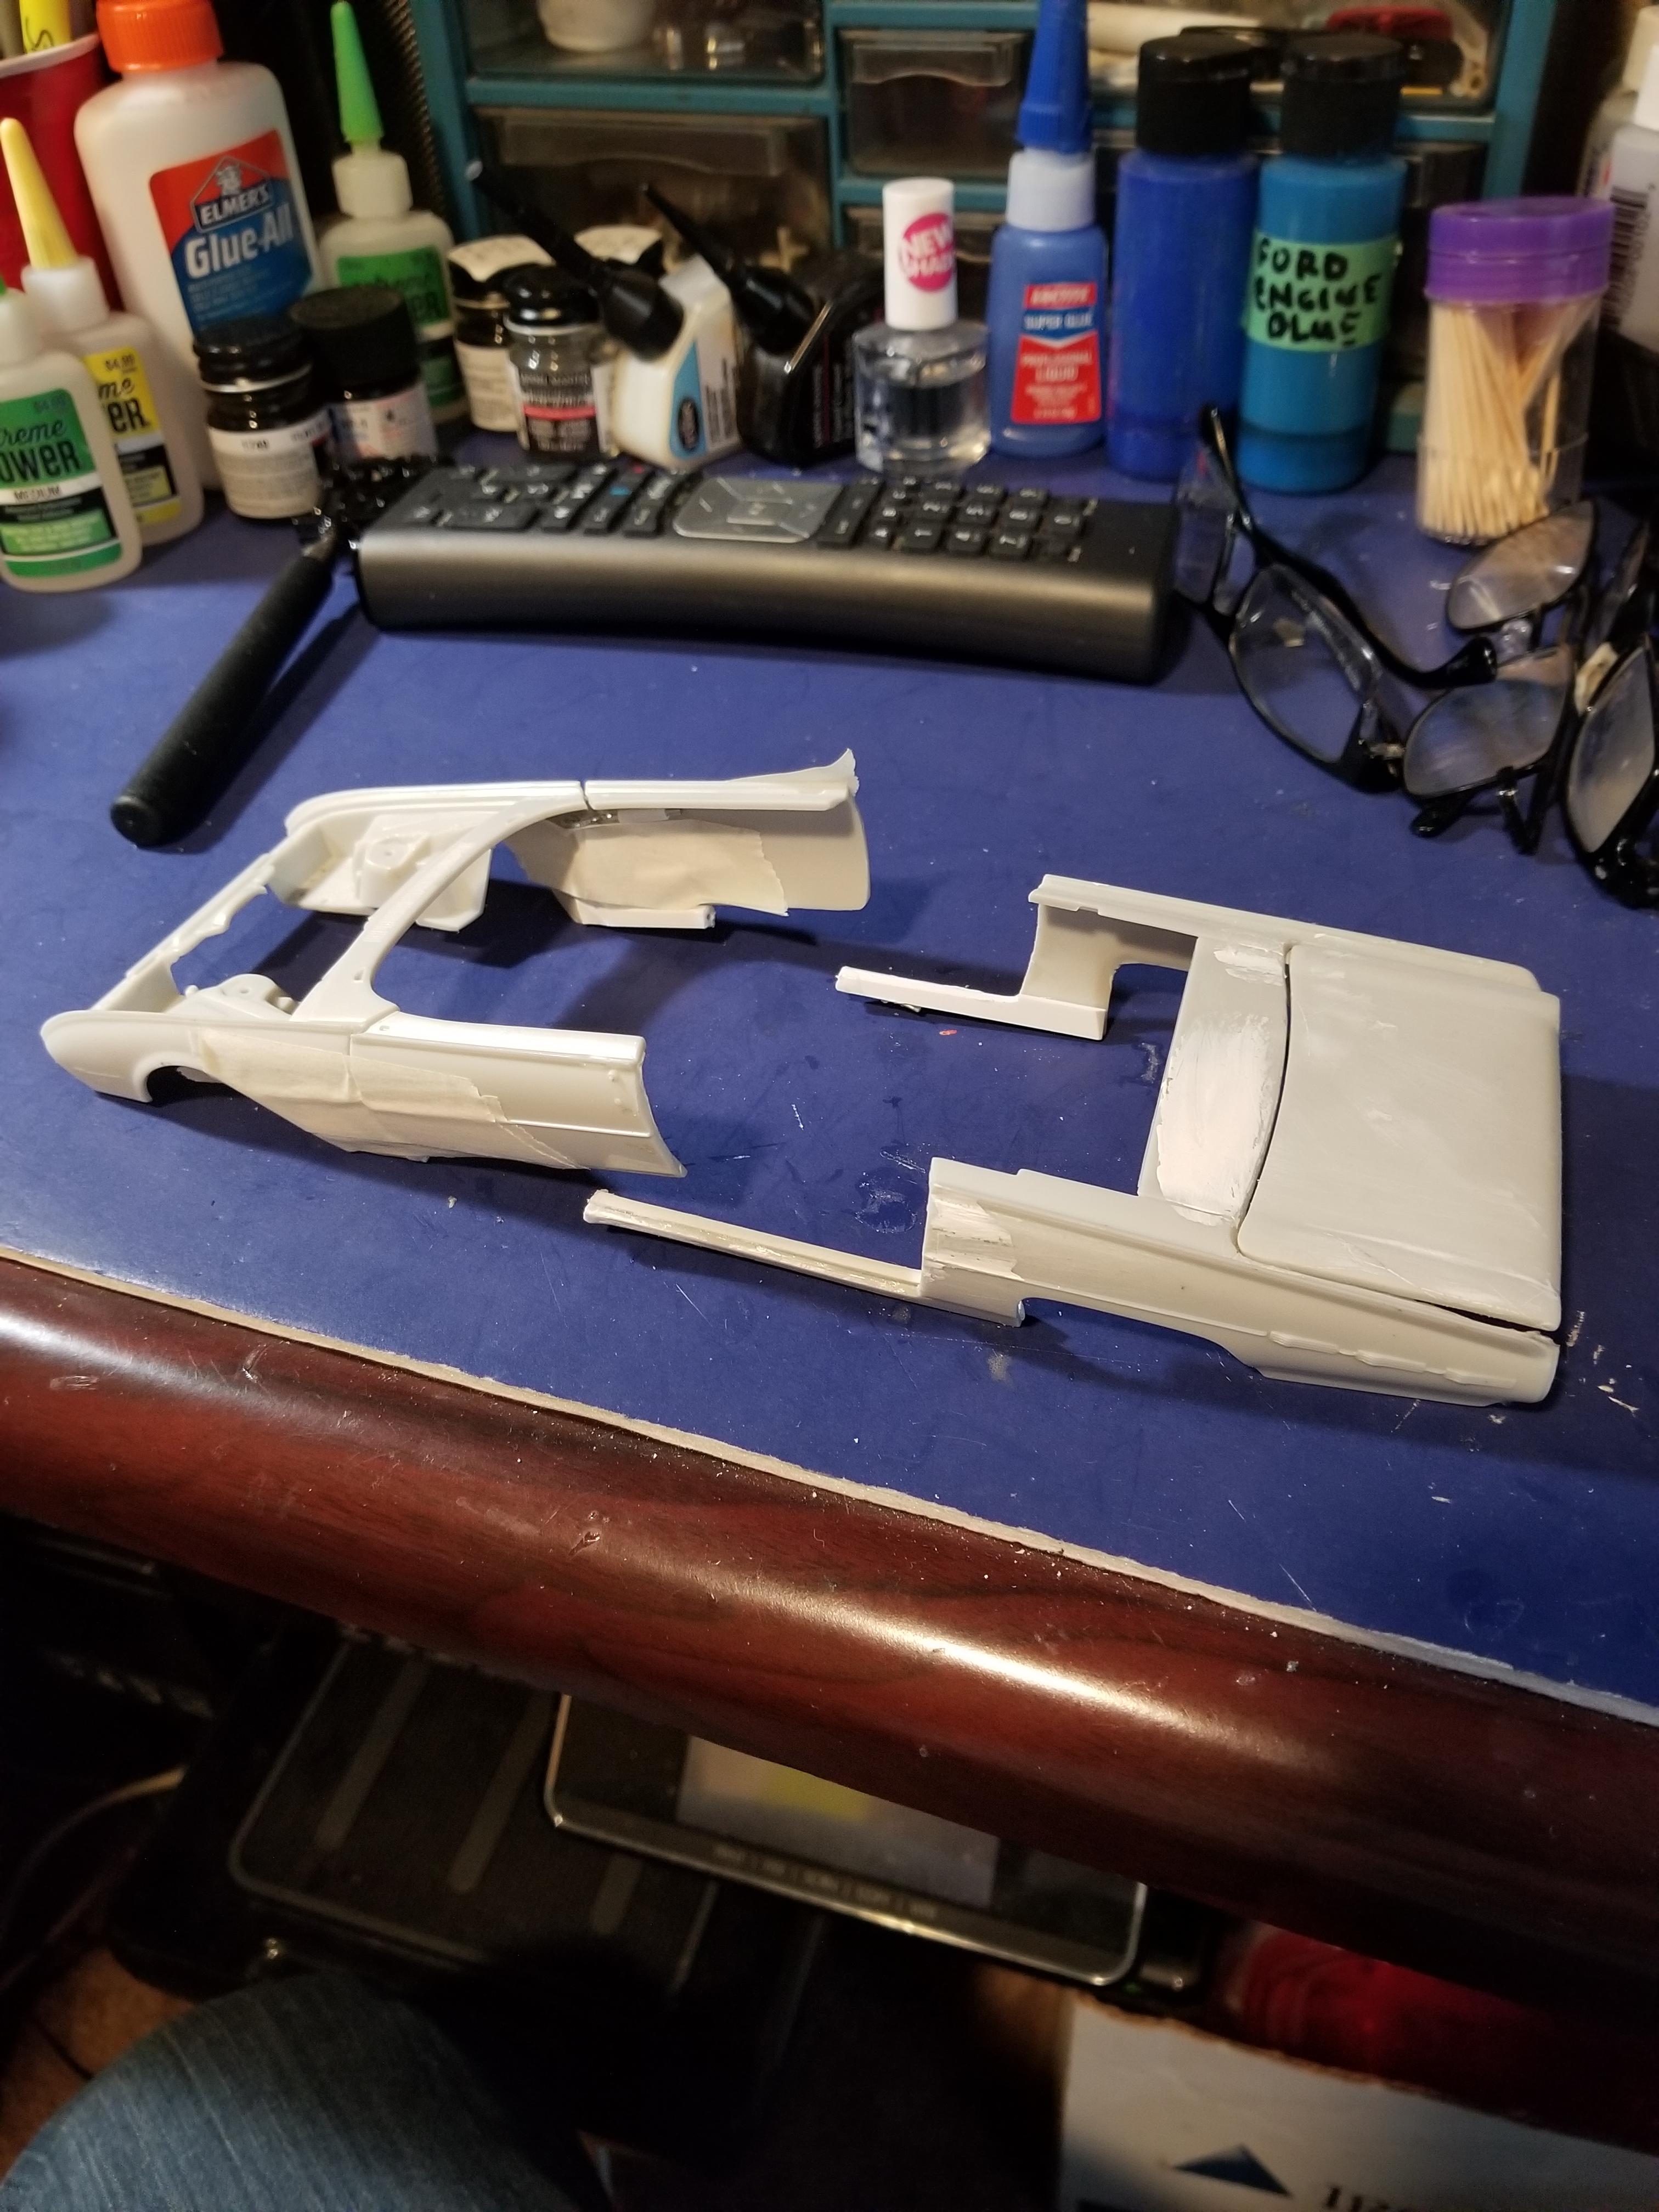
Doors and trunk cut out and hung. On to #5
-
U.S. Army, 1/502 101st Airborne, Phu Bai, Viet Nam, 11-Bravo, 1970-71
-
I believe the "Car of Tomorrow" were built around 2010? Anybody make models of these cars? Even resin? How 'bout recent trucks used in the Camping World Truck series??? Ant info would be appreciated. (I really like the "Car of Tomorrow" with their wings.)
-
Well, Hung the doors , trunk, hood. On to #4 , 1960 Ford Sunliner
-
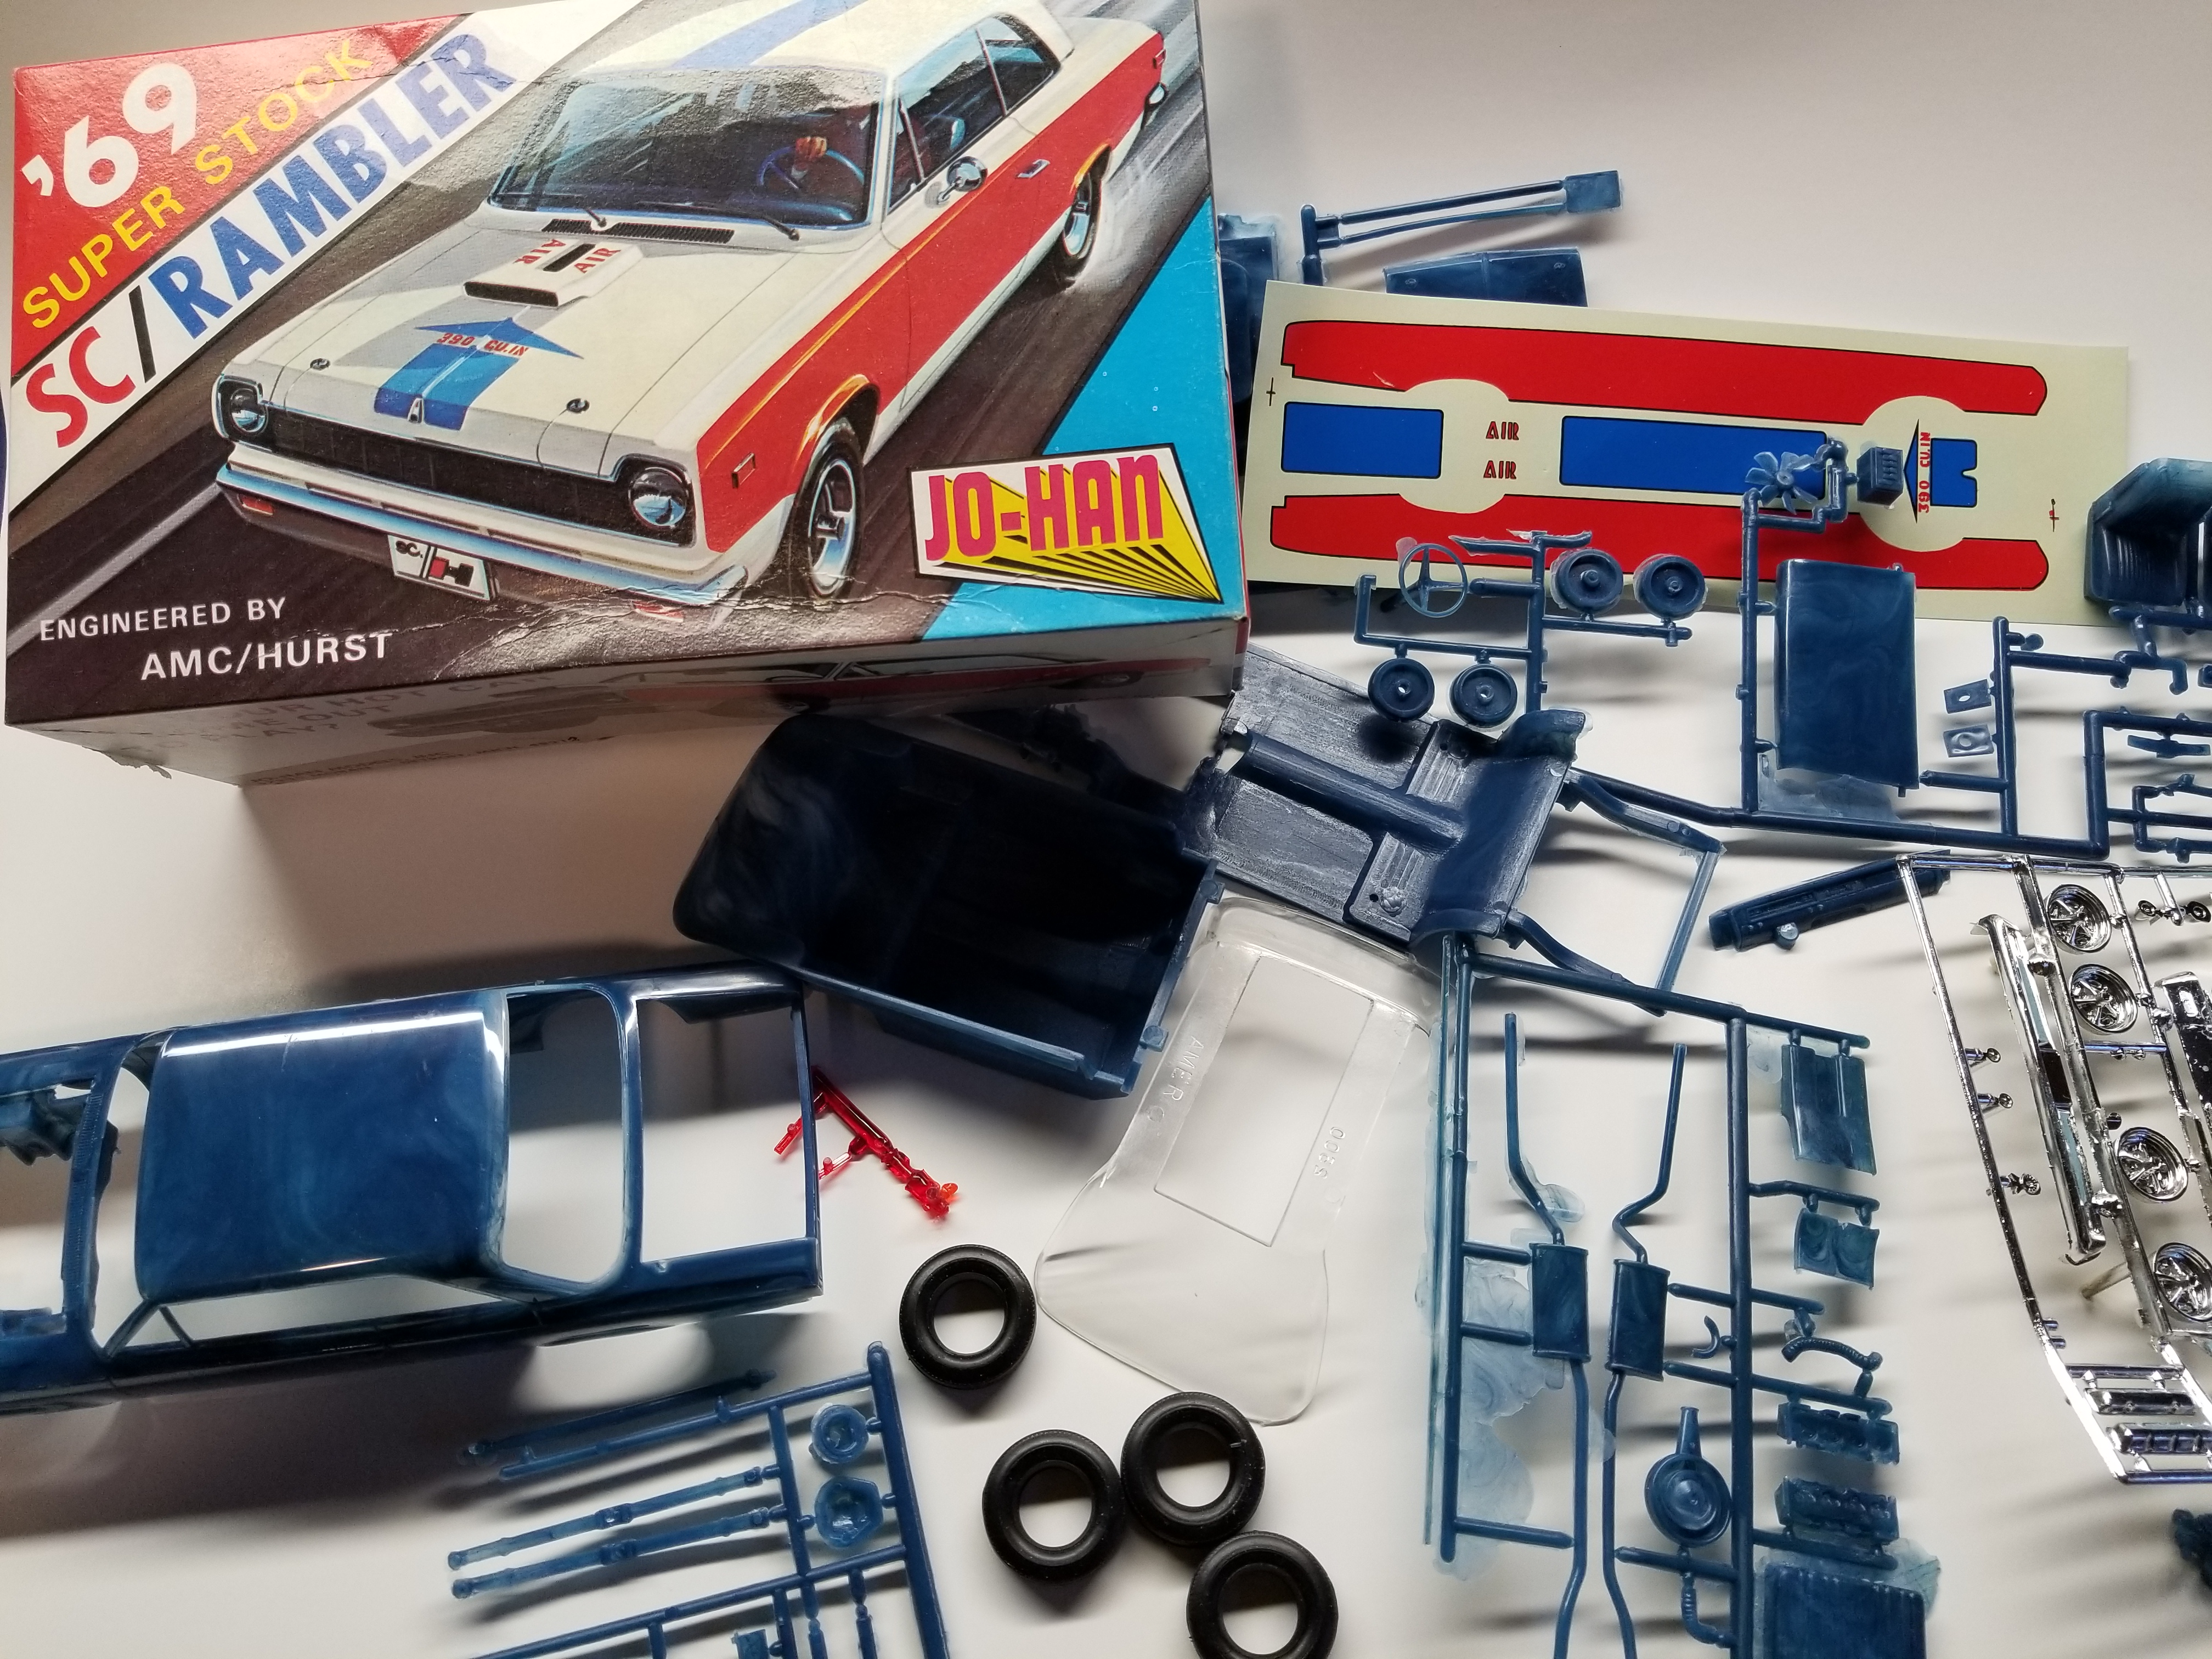
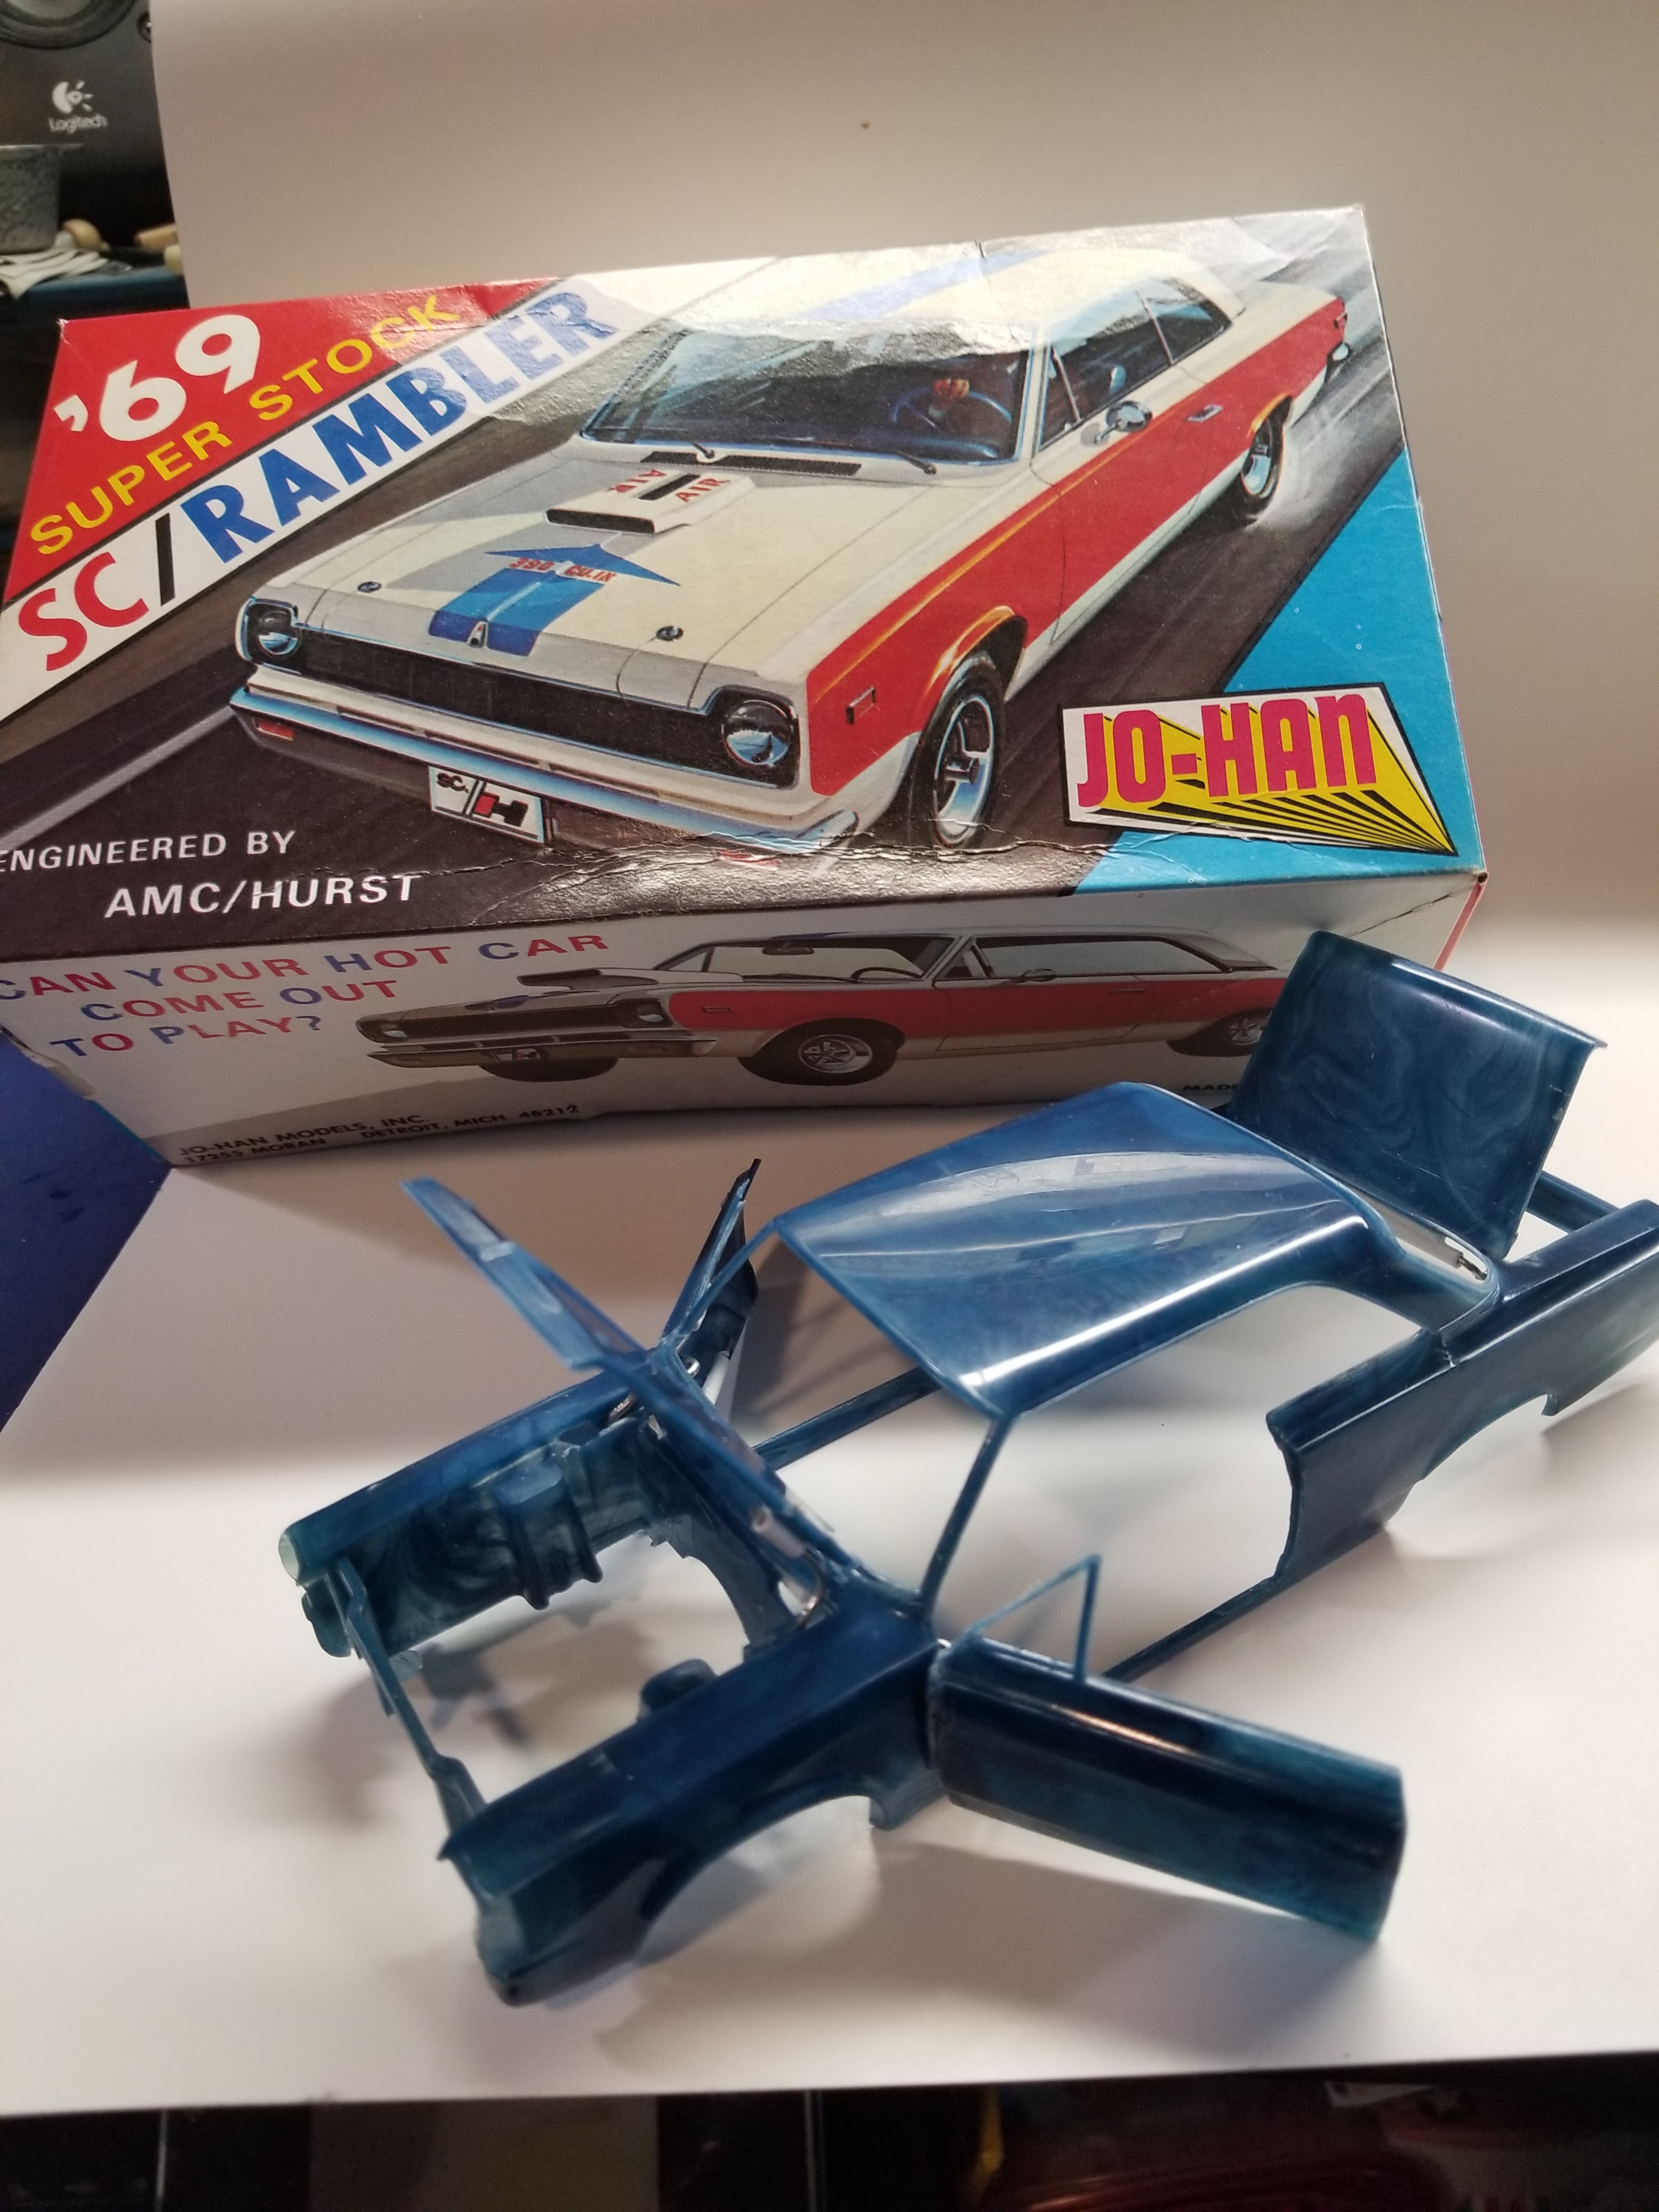
I'm doing them in steps so I don't get in a hurry and start taking short cuts and to hold my interest. #5 is top secret. #6 is going to be a "re-do ". #1 is a 1970 Challenger, a "re-do". #2 is a 1962 Thunderbird, I dropped and broke in half, #3 is a 1969 Rambler S/C. #4 is a 1960 Ford Sunliner
-
Well. Hinged the doors, trunk , and hood. Aggravated with it now. Move to #4, 1960 Ford Sunliner
-
LOL. That really is awesome. Great work!
-
looks more like turquoise
-
nice
-
Got this today off Ebay. Not cheap but worth it
-
On the rebuild, ready for new paint job
-
On the rebuild, ready for new paint job
-
Getting ready to hang some doors , trunk and hood!