Tommy Kortman
-
Posts
444 -
Joined
-
Last visited
Content Type
Profiles
Forums
Events
Gallery
Everything posted by Tommy Kortman
-
Amazing build. I know that a lot of work went into it. It looks completely correct. I am honored to have been able to contribute. WOW!!
-
Hey Folks, Just wanted to let everyone know that for the latest info and news on the upcoming NNL Philadelphia, head over to: https://www.facebook.com/PACMSimeone/ We've put up a list of Vendors who are attending, plus some other news you don't want to miss.
-
Just a reminder: 3/10/18 at the Simeone Museum in Philadelphia, Pa. THE INAUGURAL NNL PHILADELPHIA On that day there will also be a demonstration of 2 of the museum's cars. Our 1966 GT40 MKII, and our 1967 GT40 MKIV.
-
-
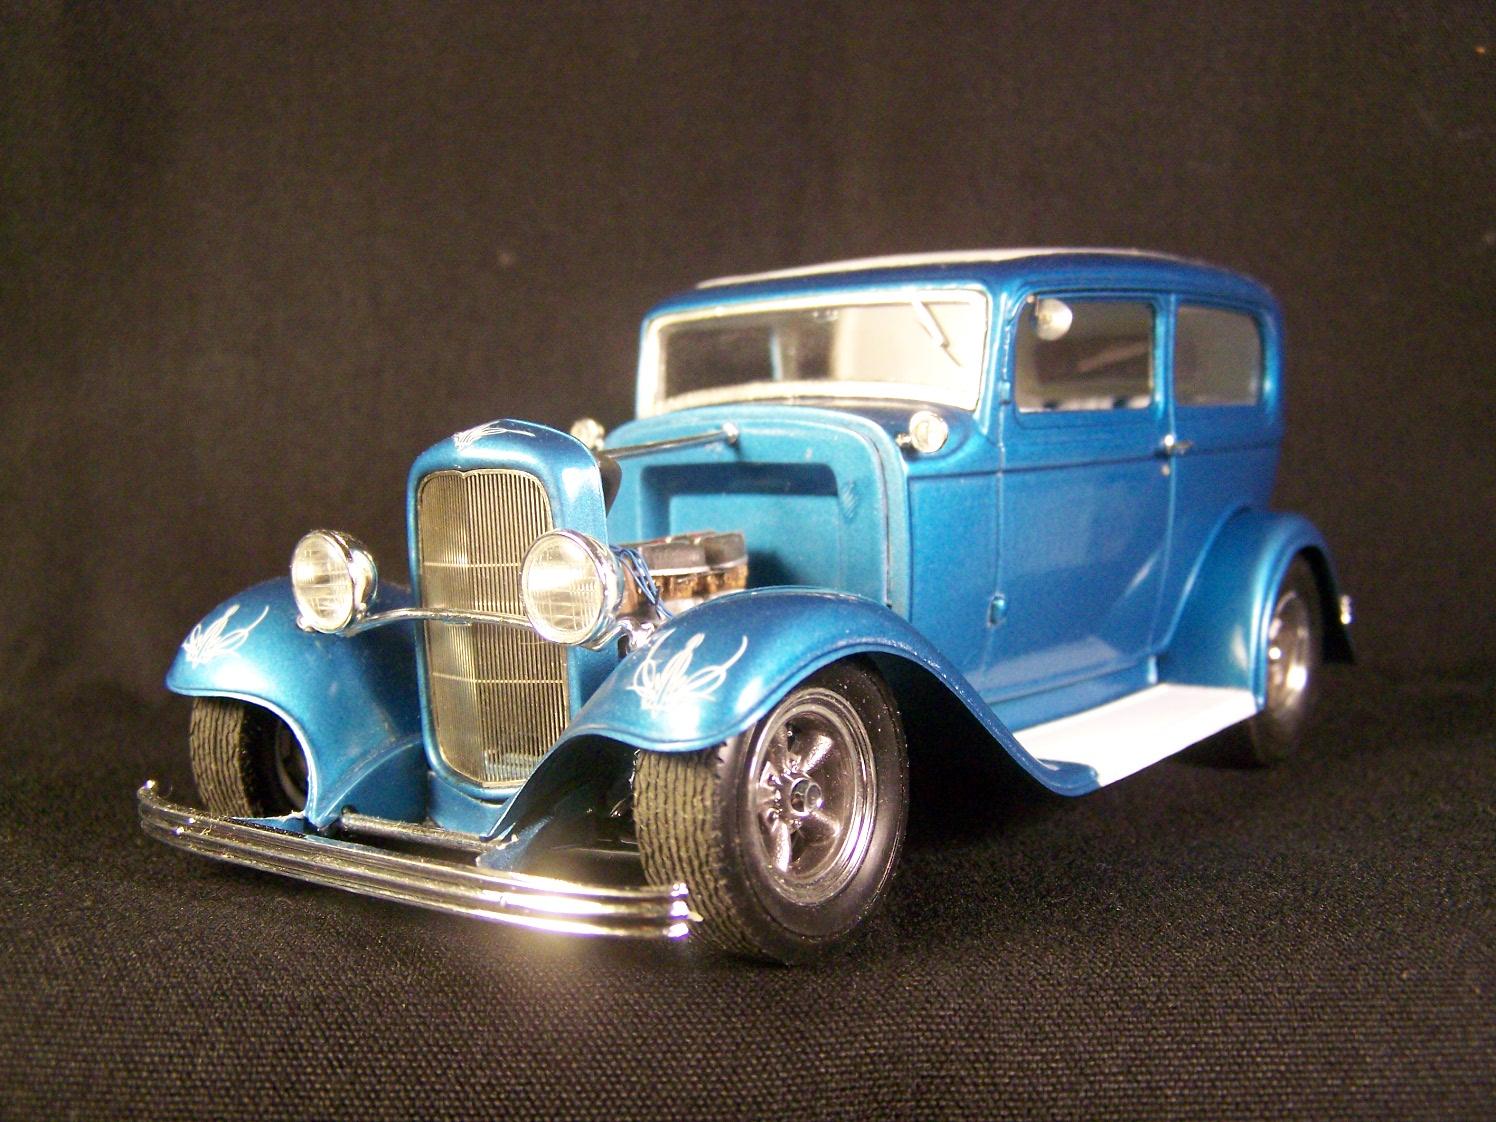
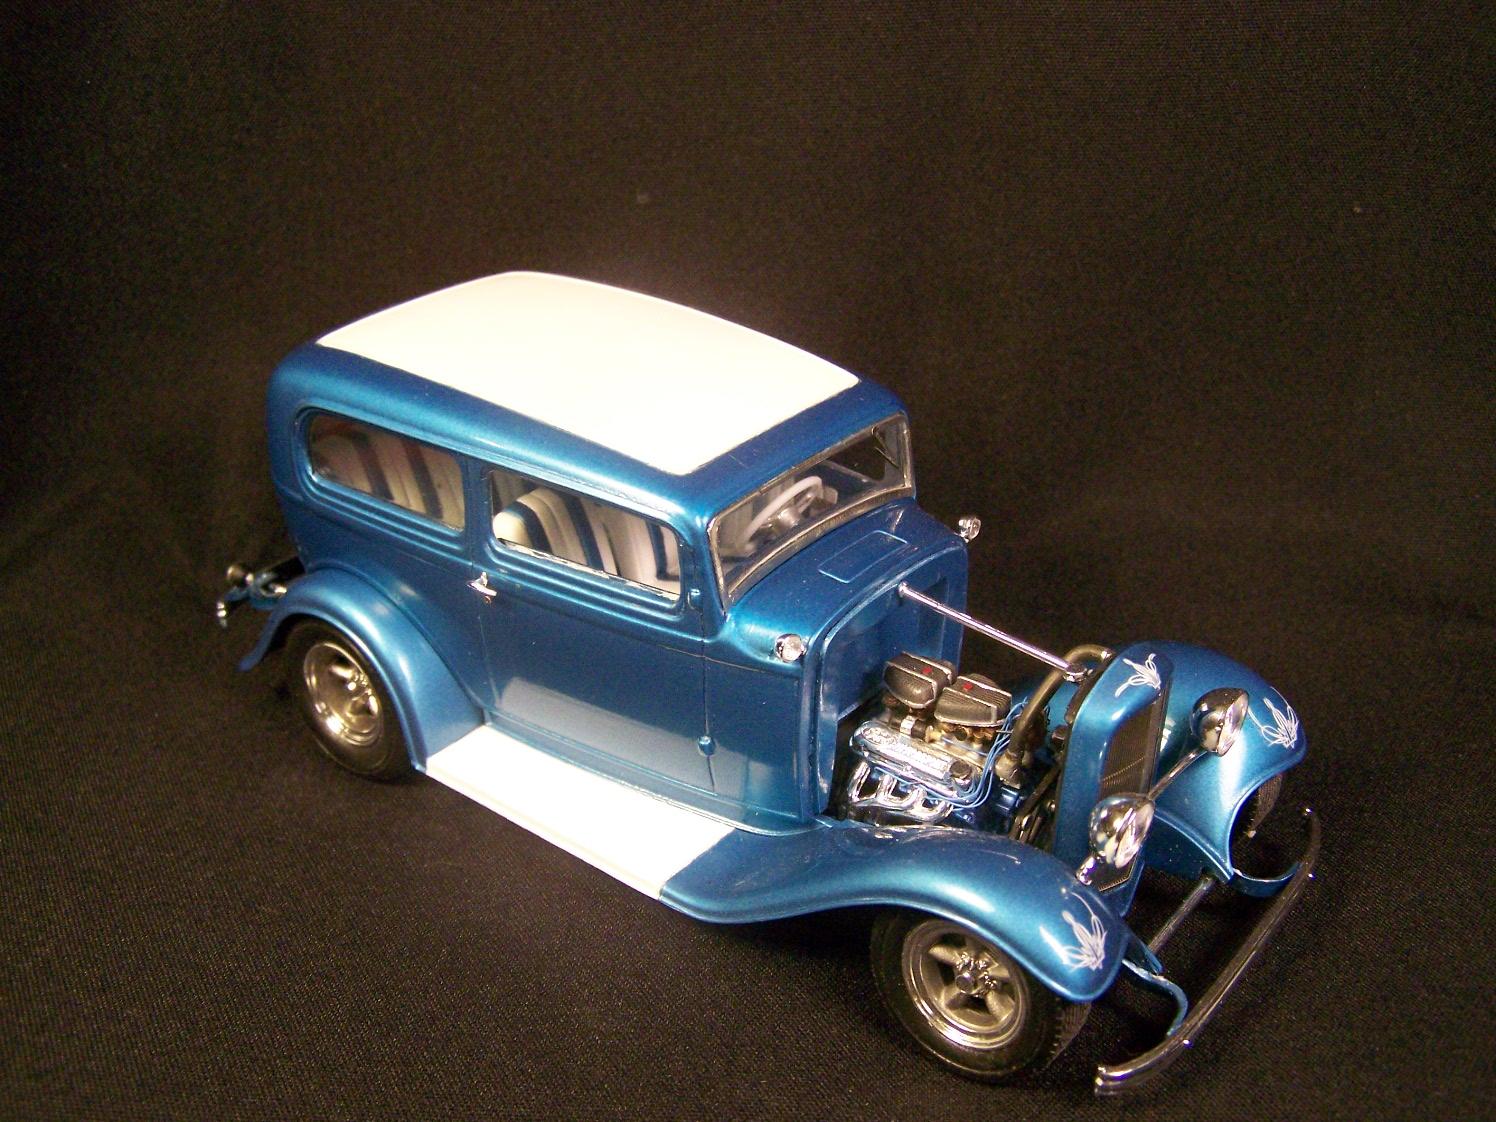
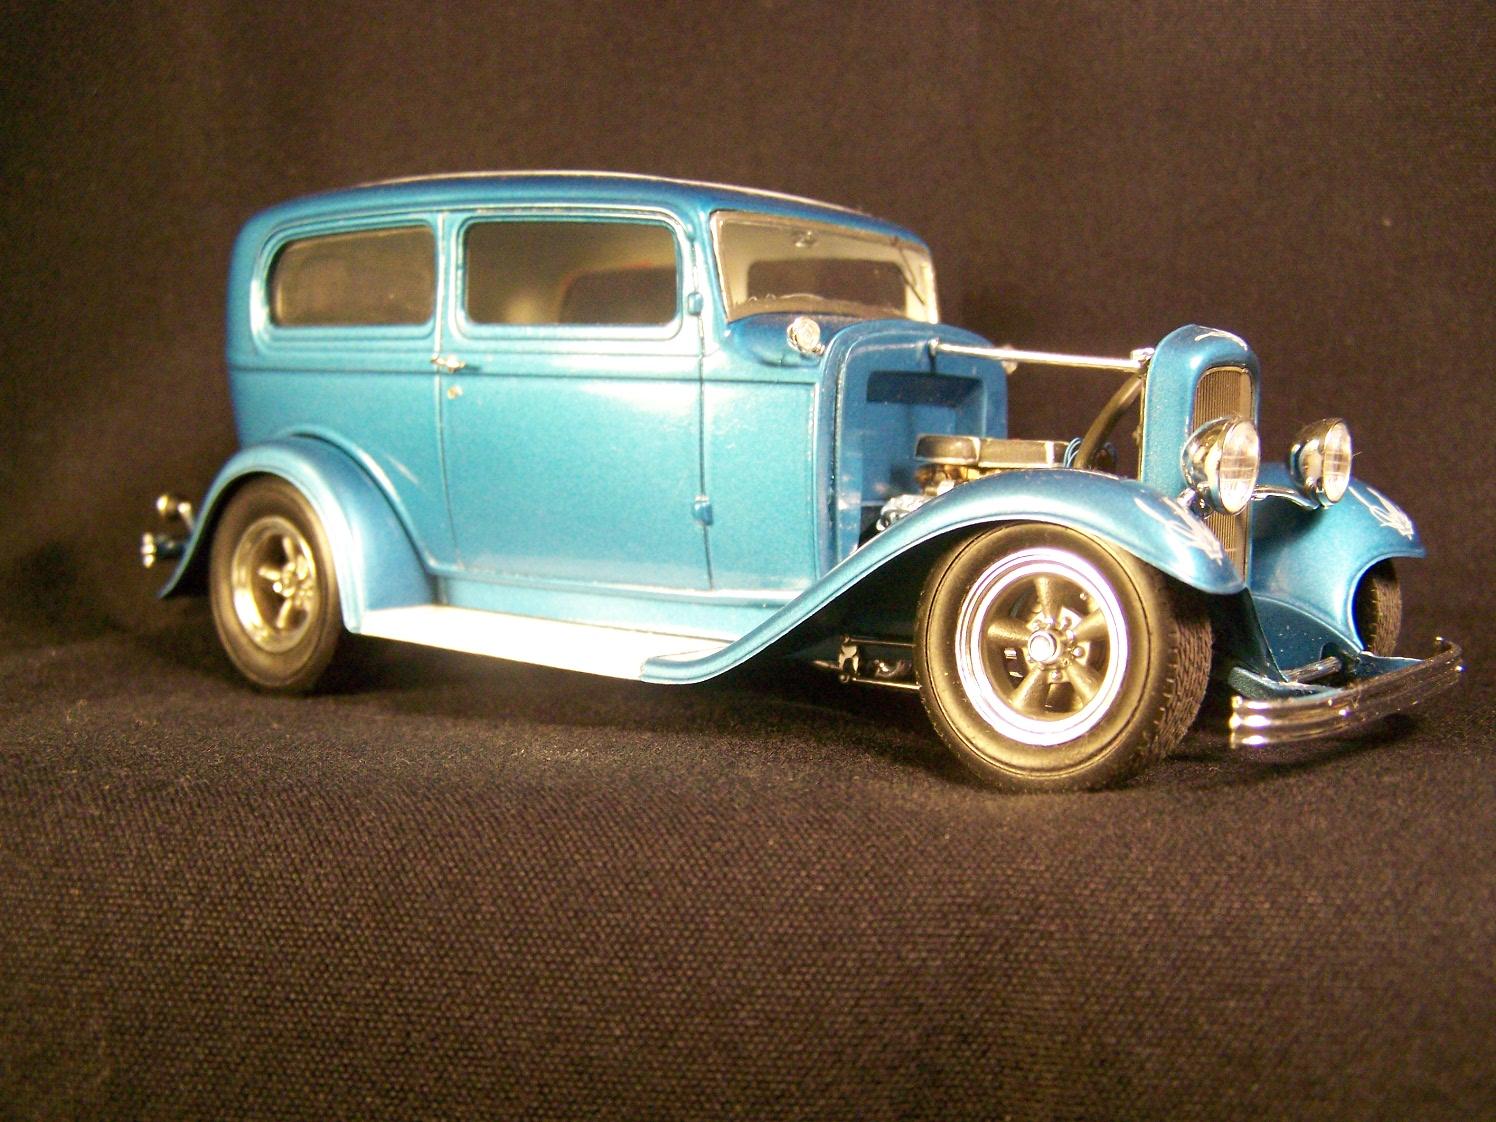
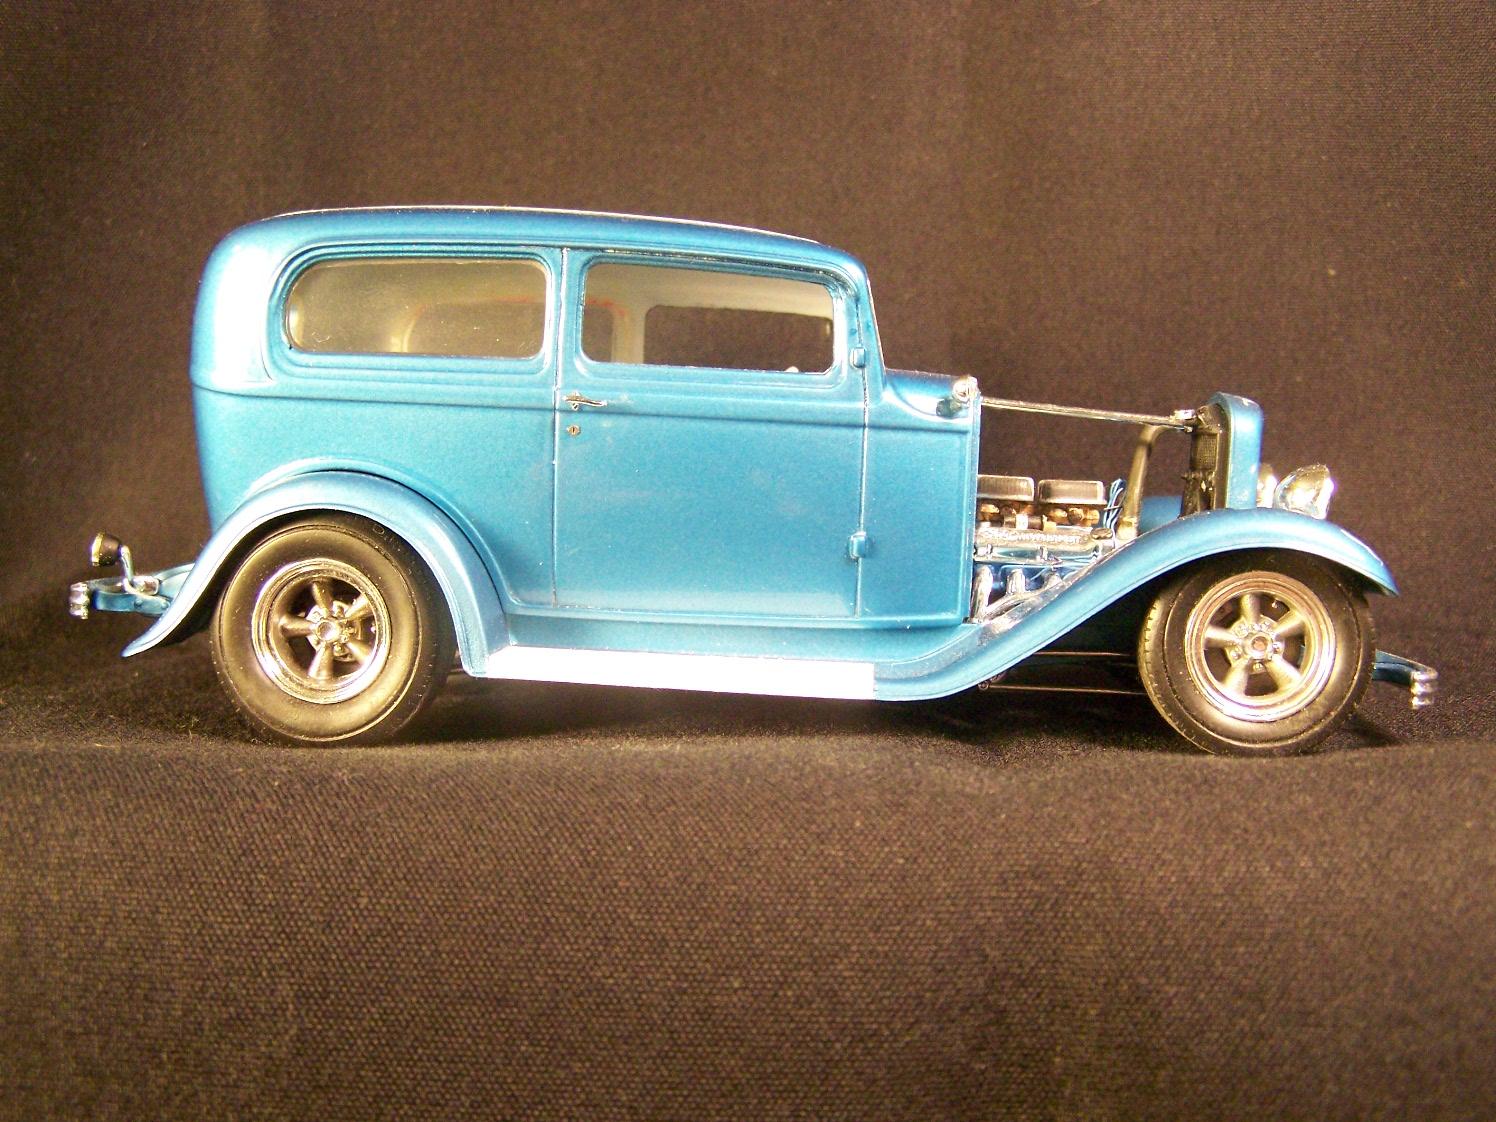
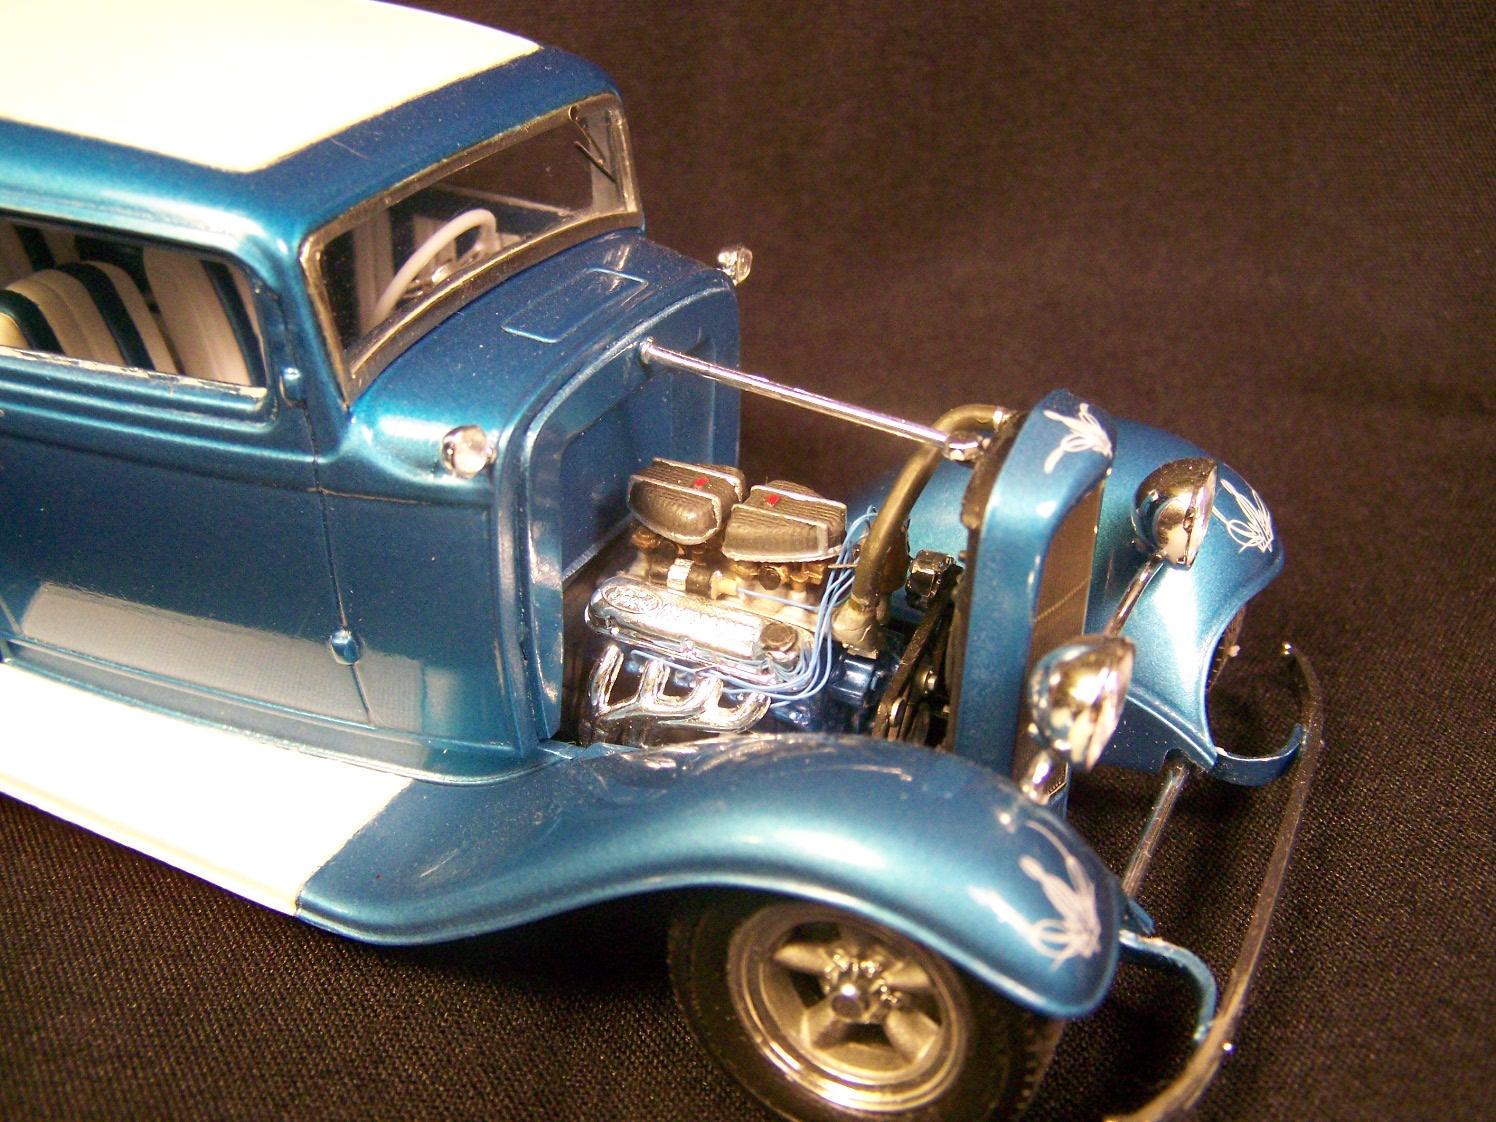
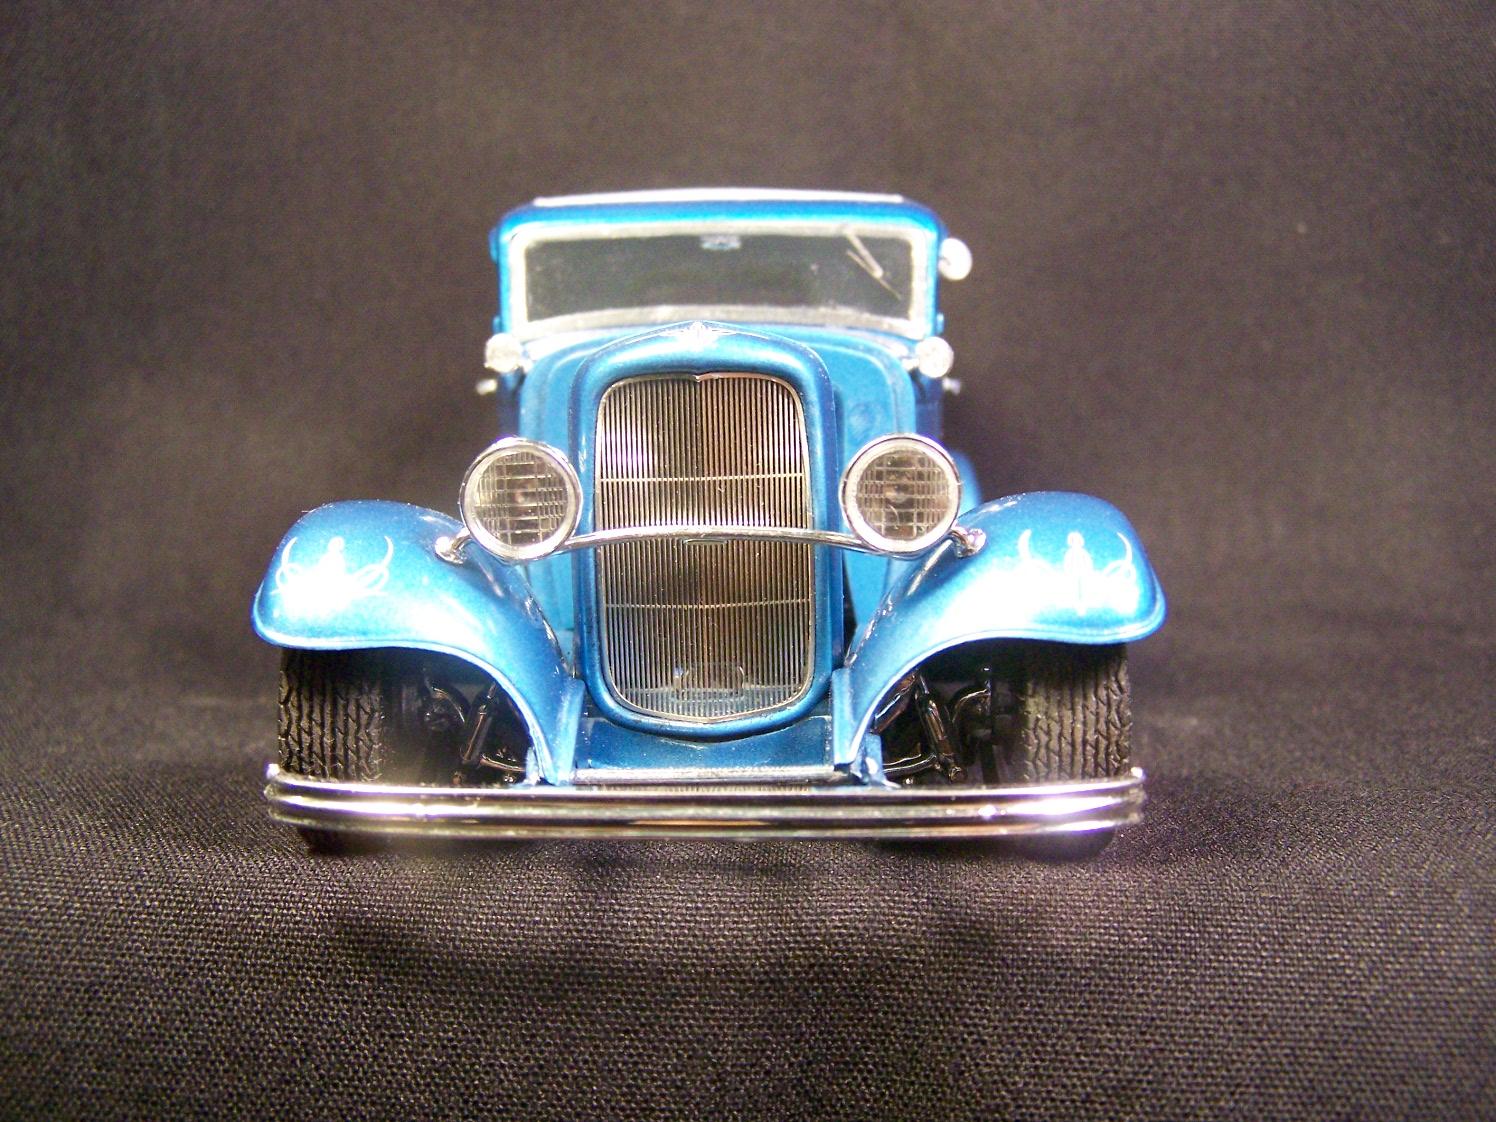
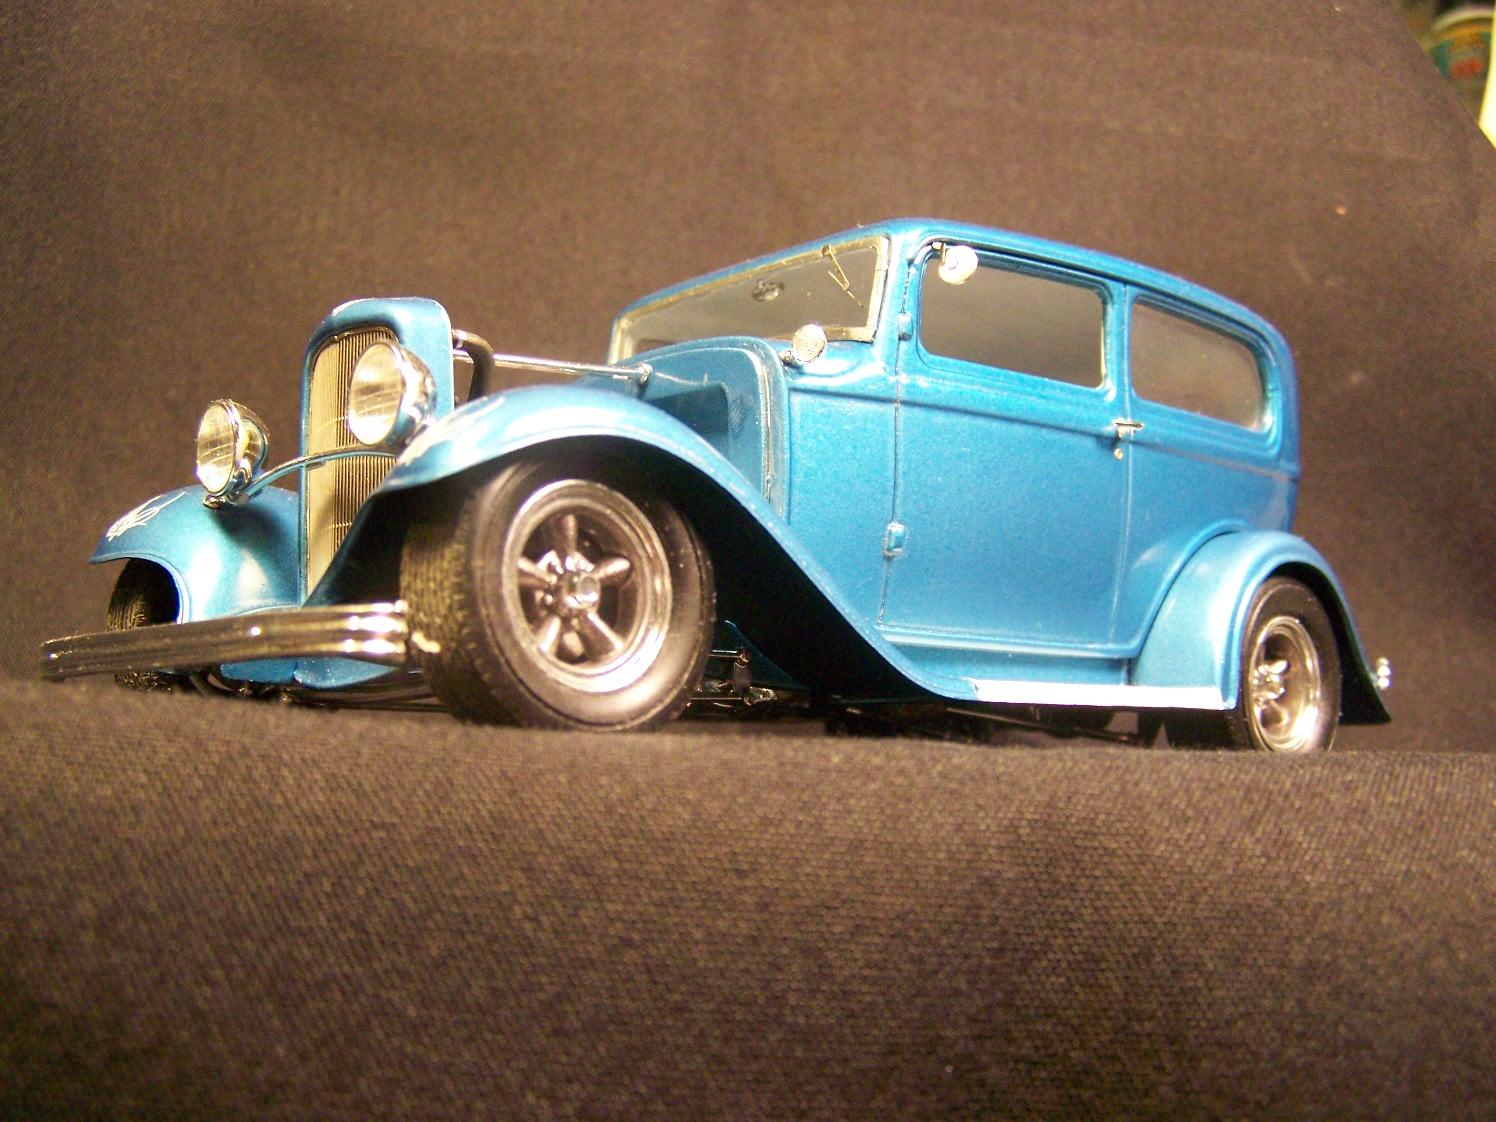
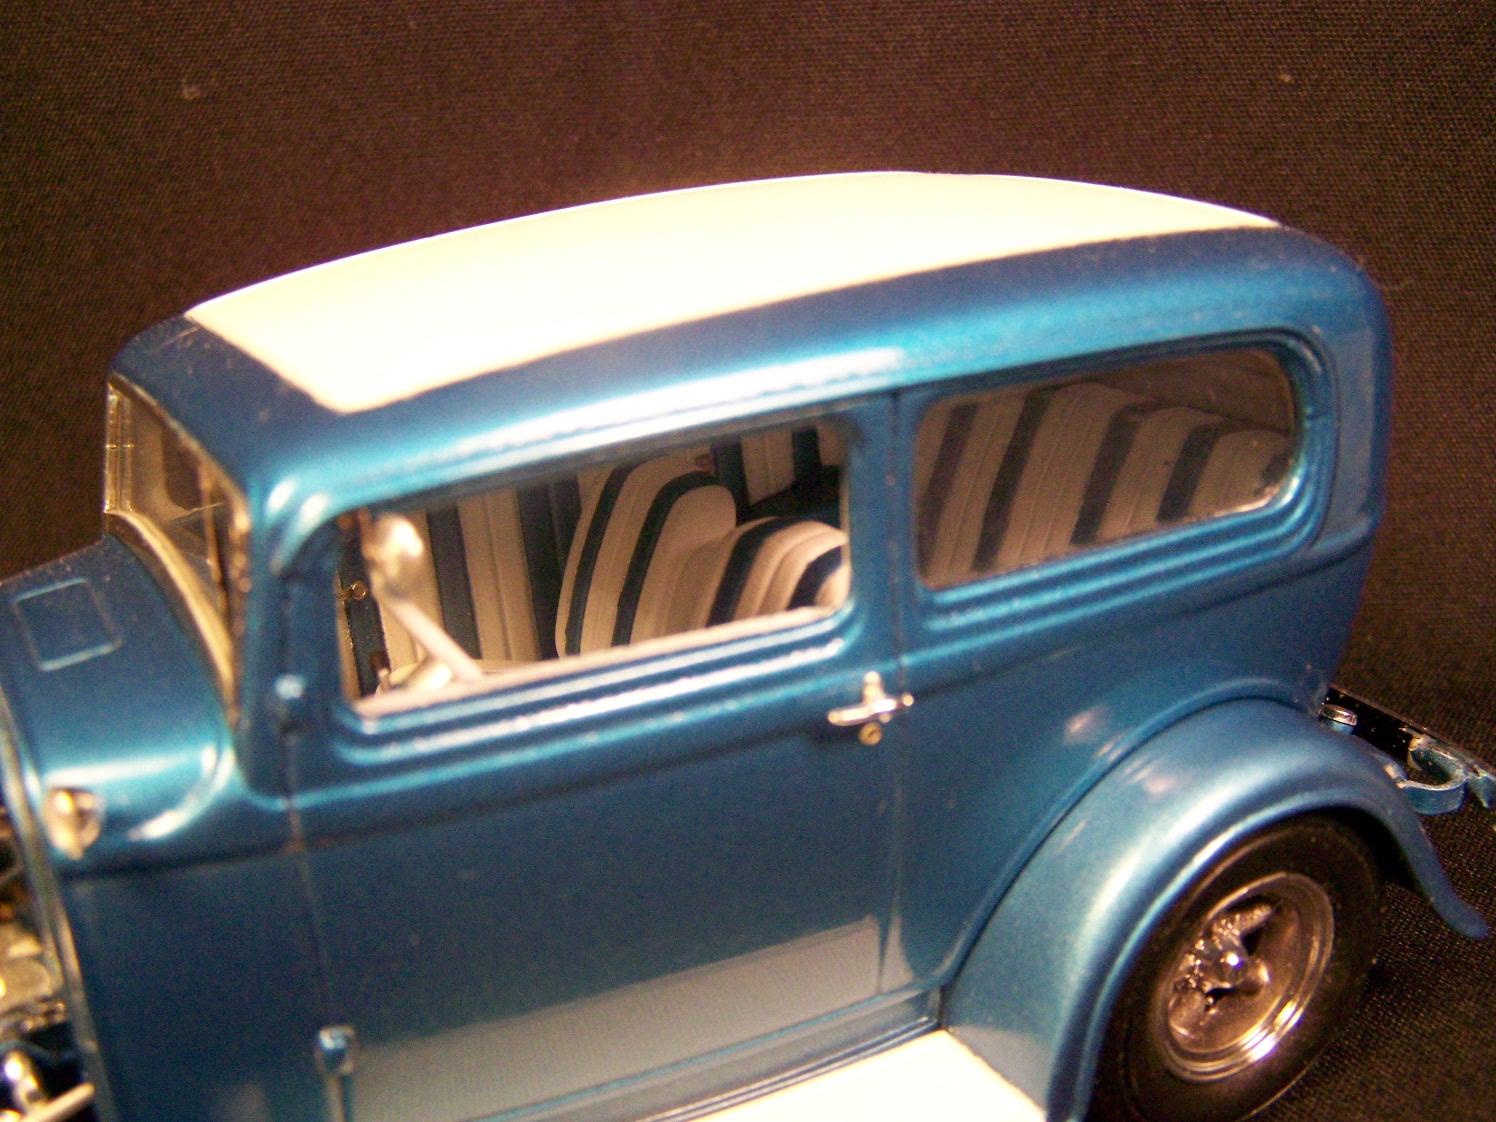
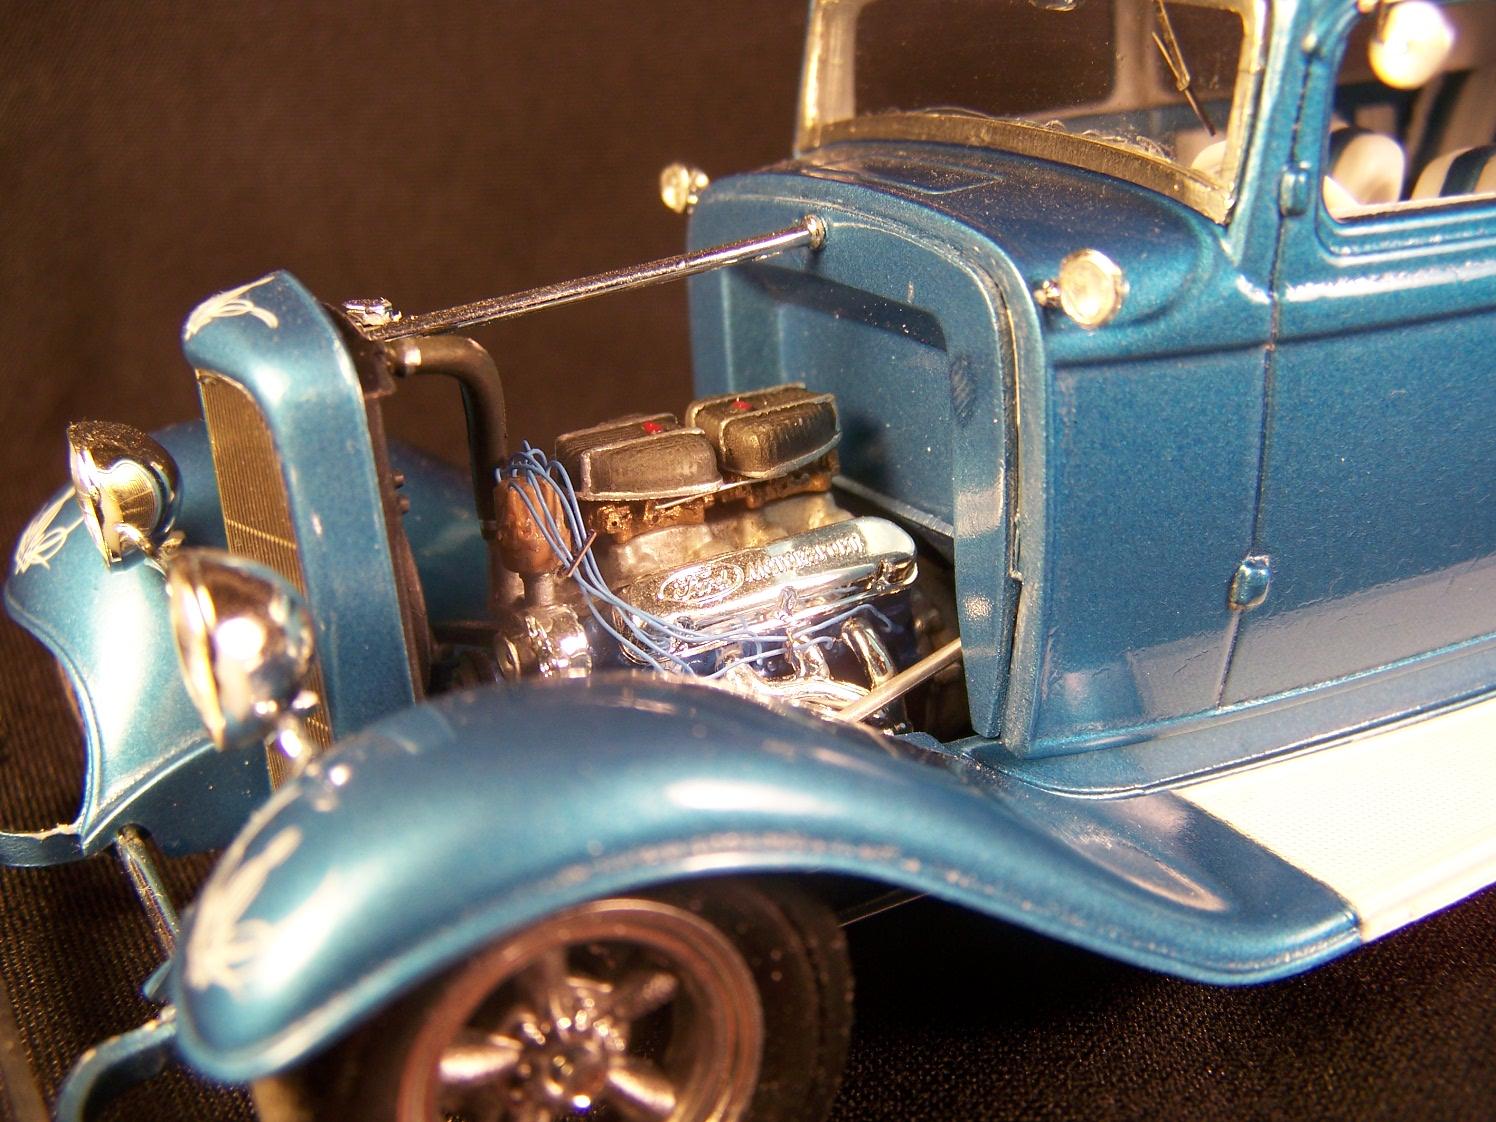
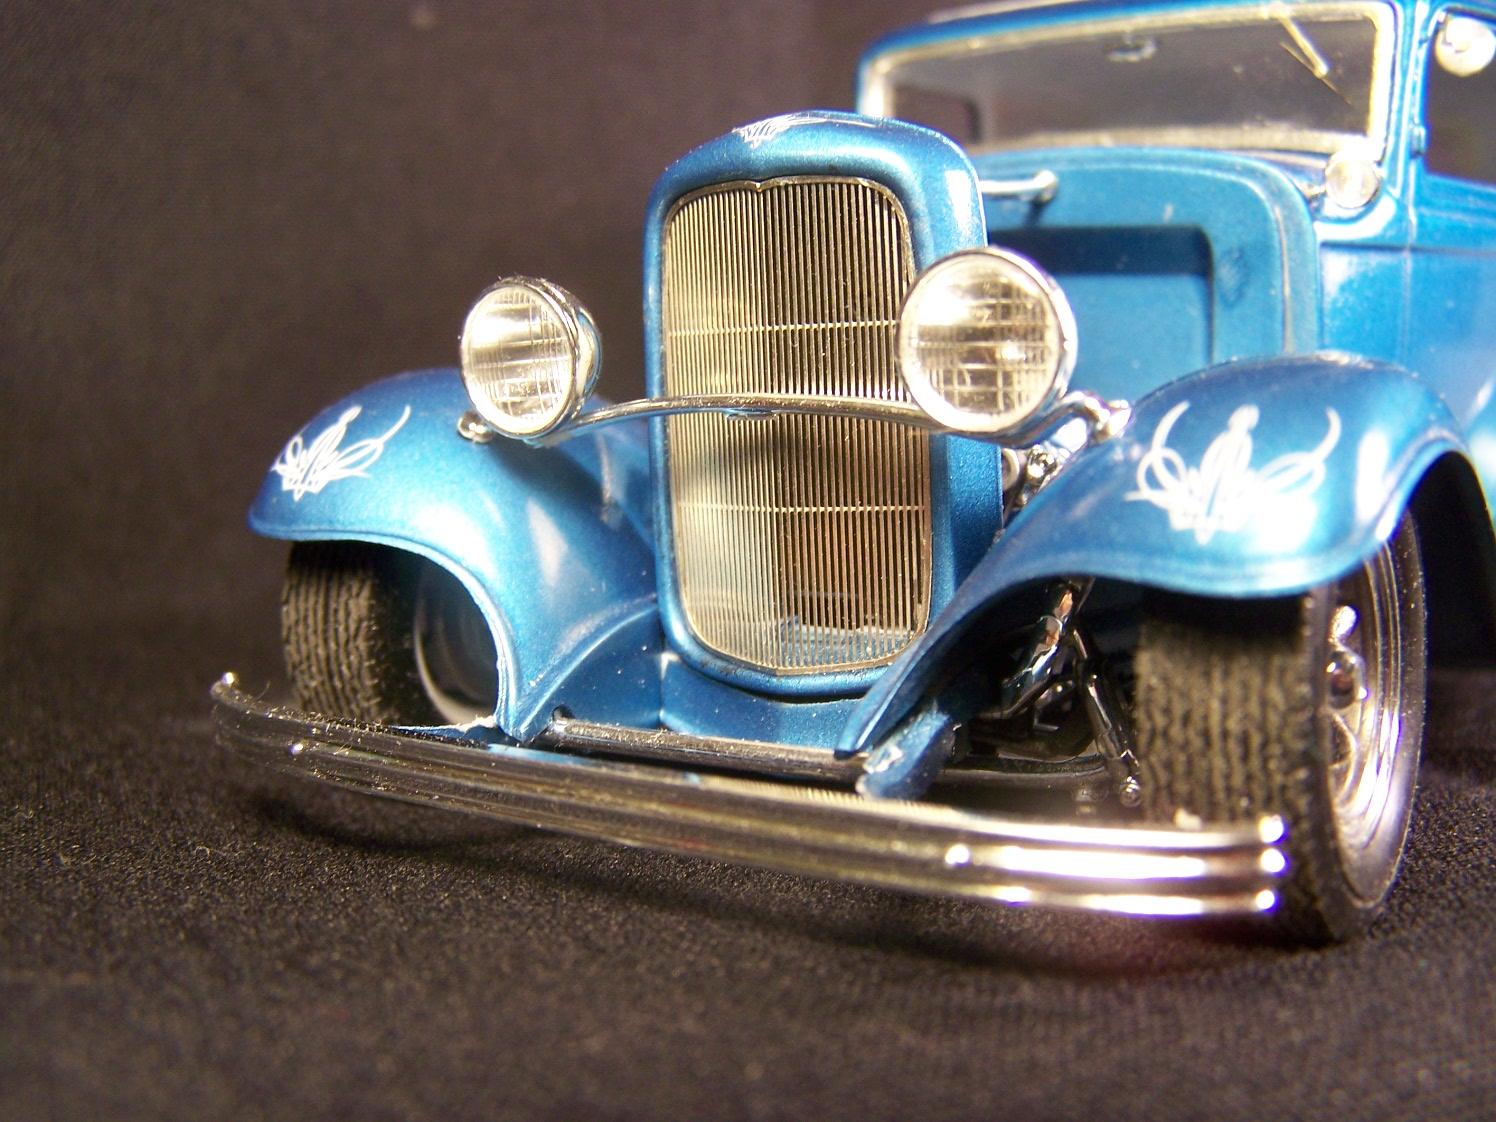
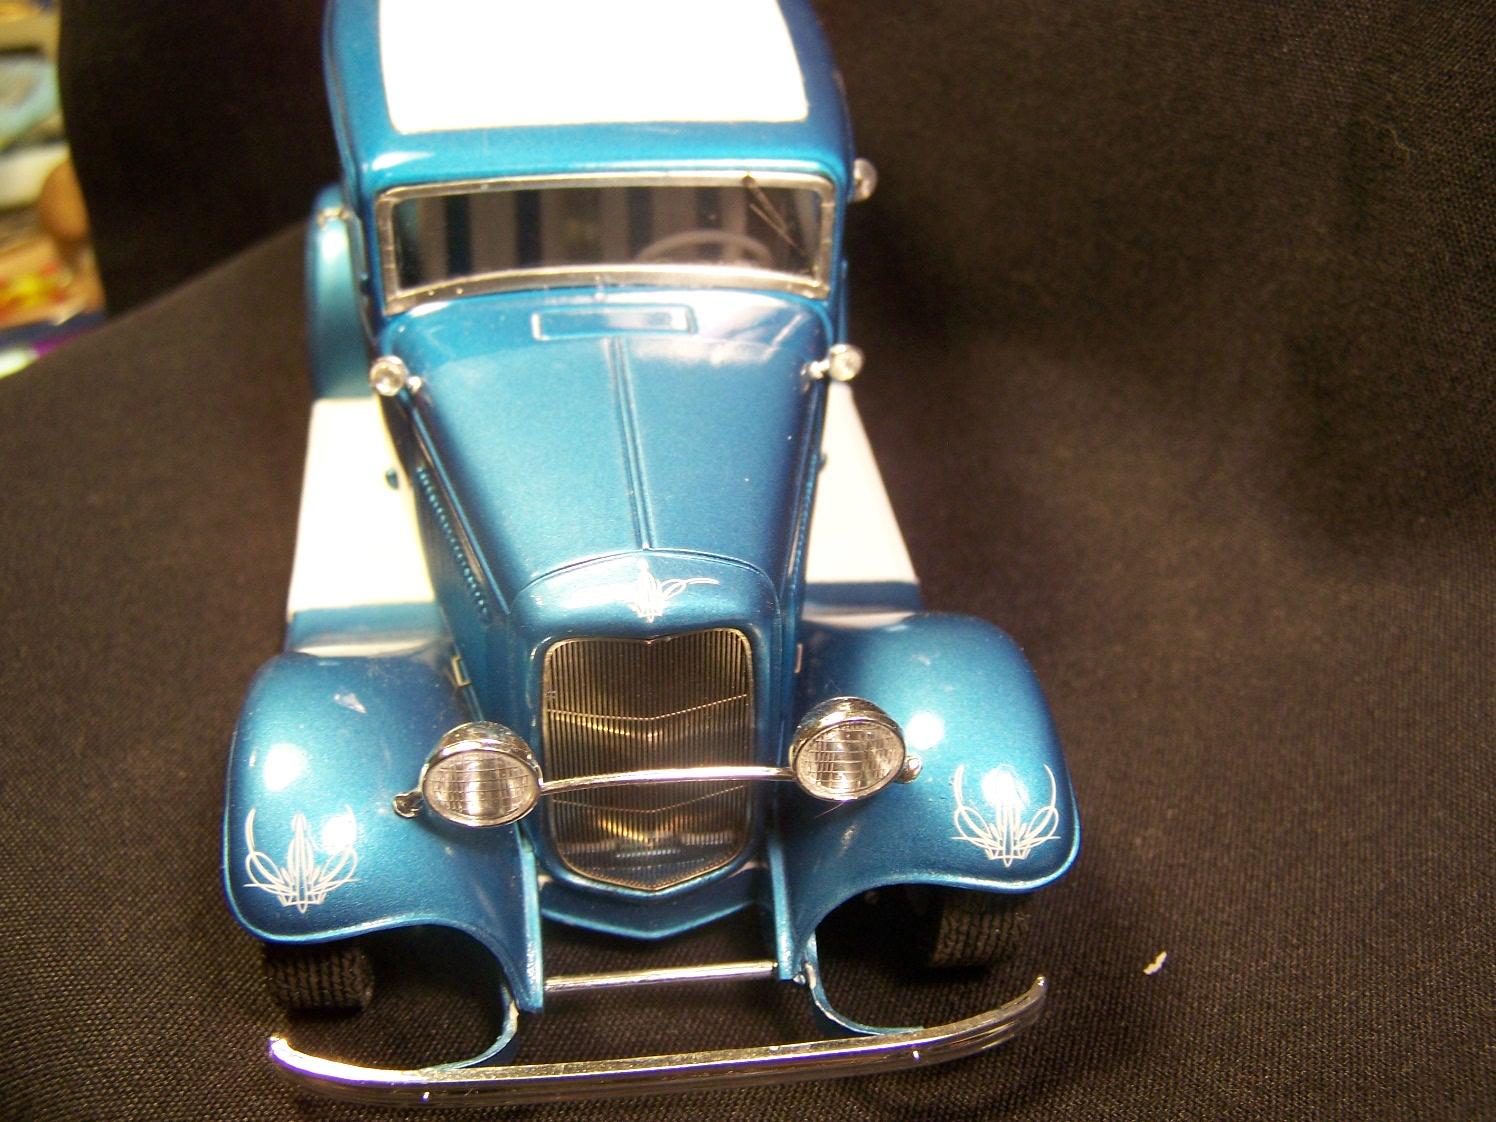
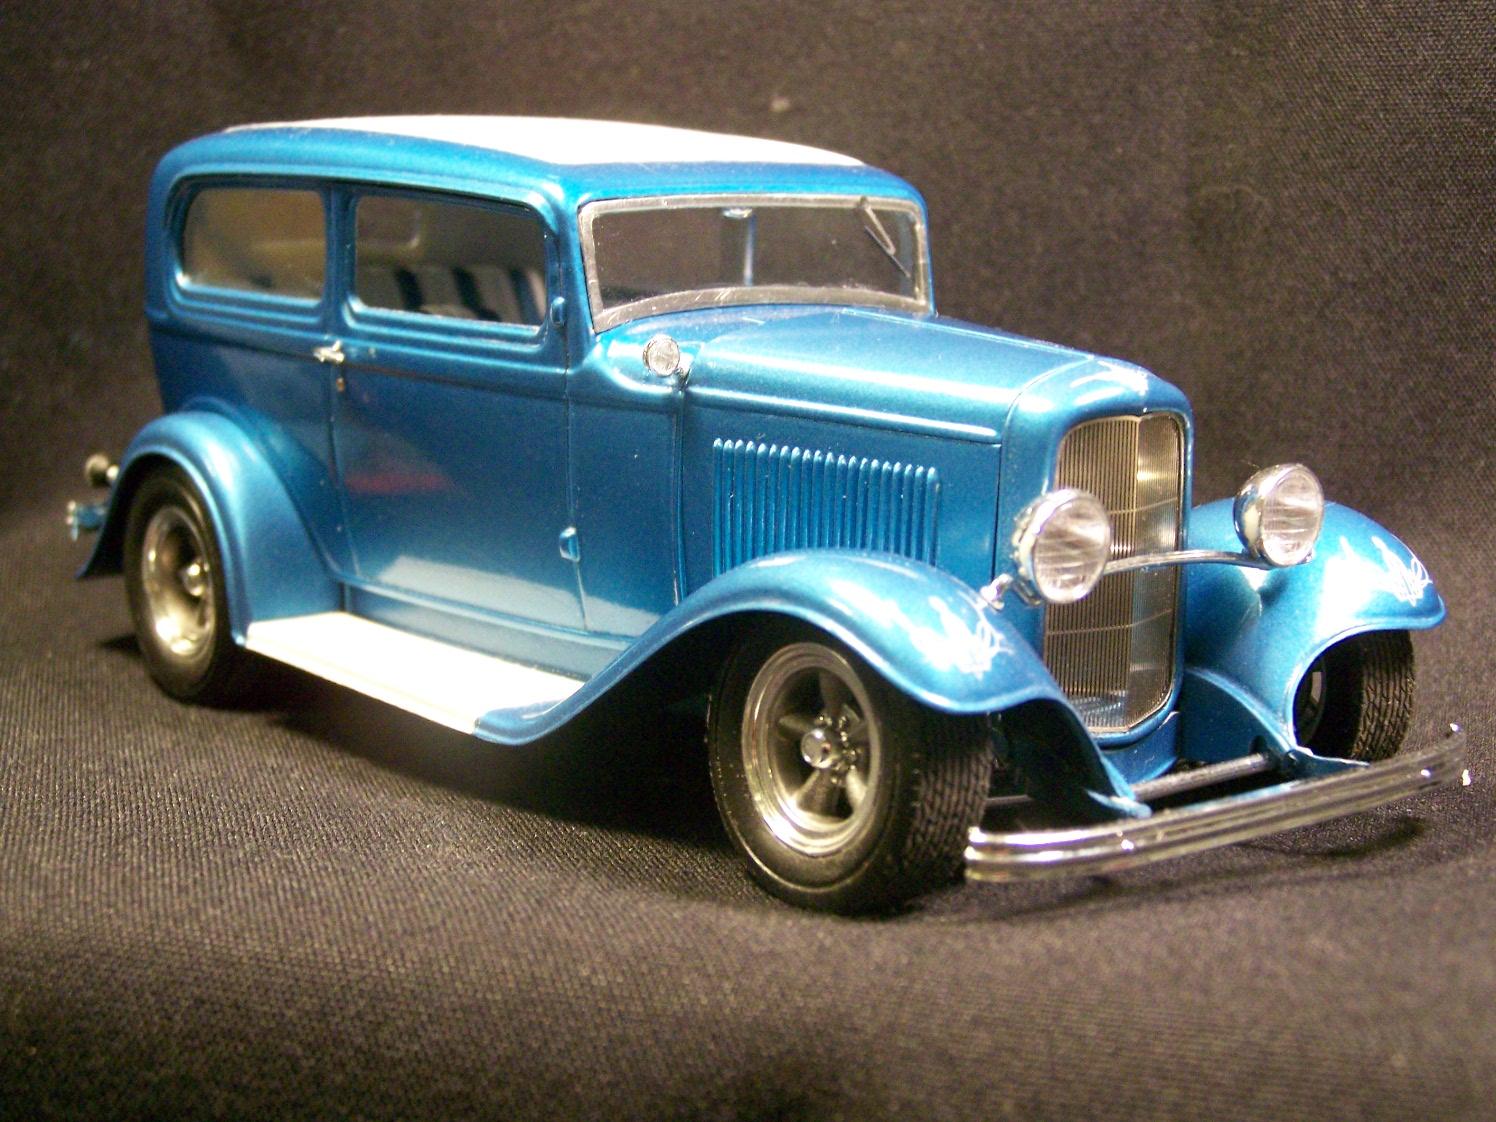
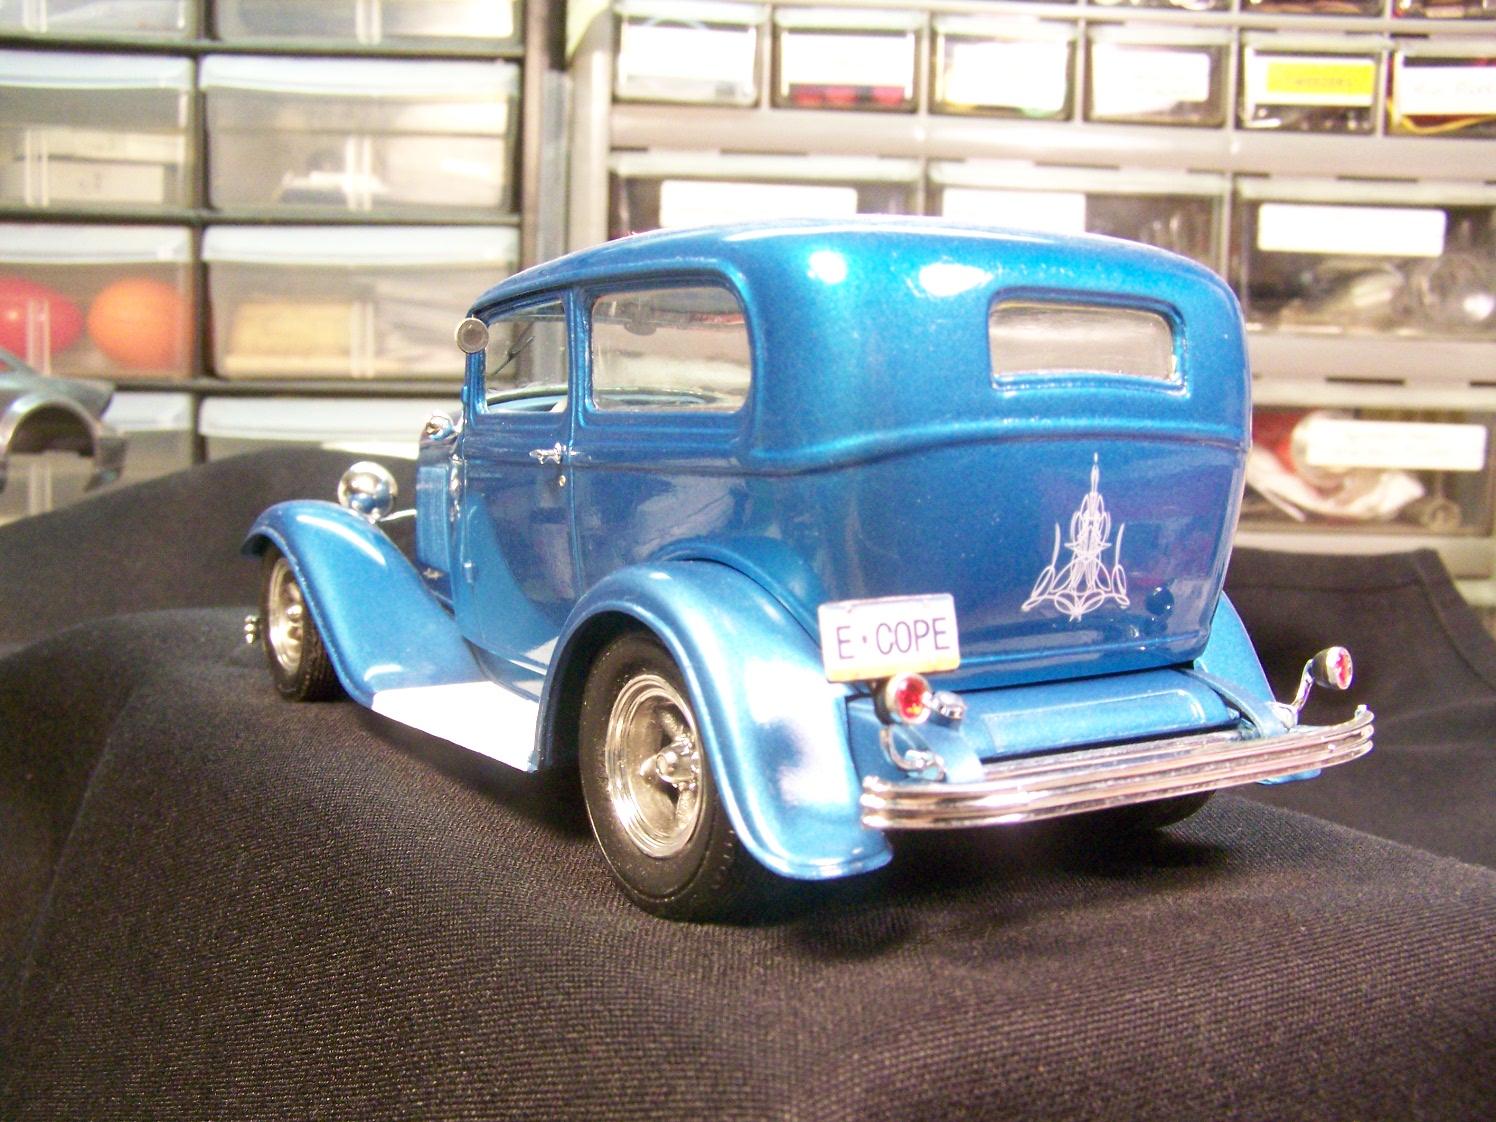
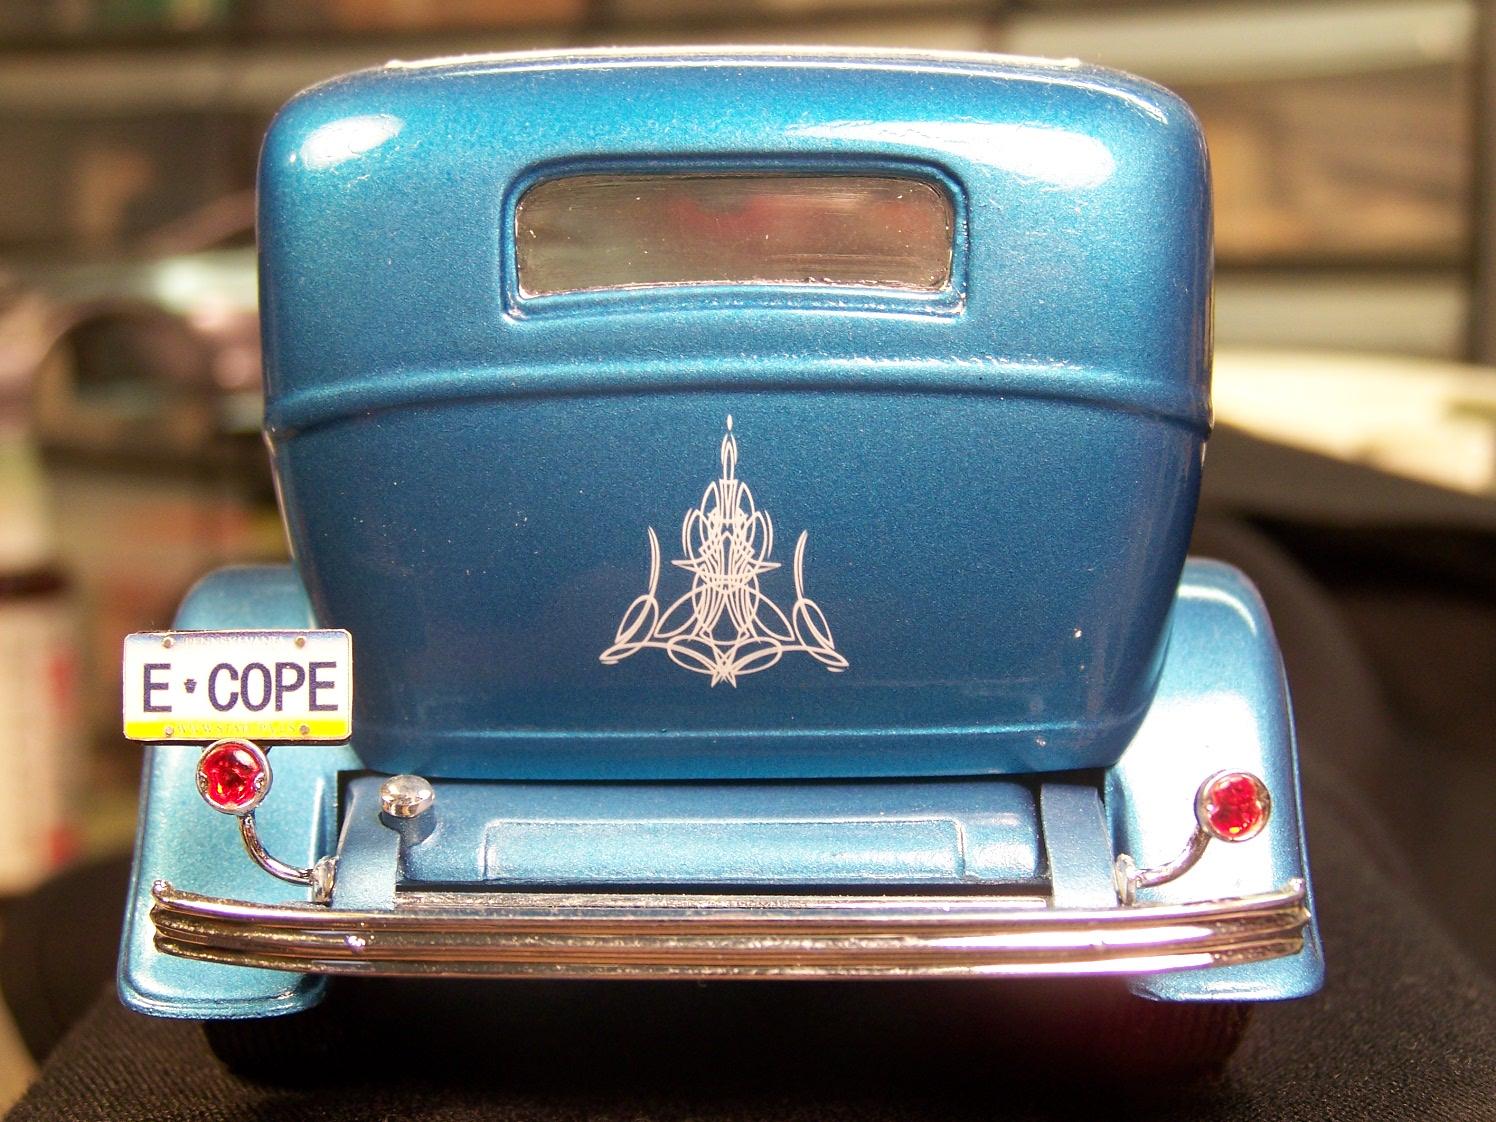
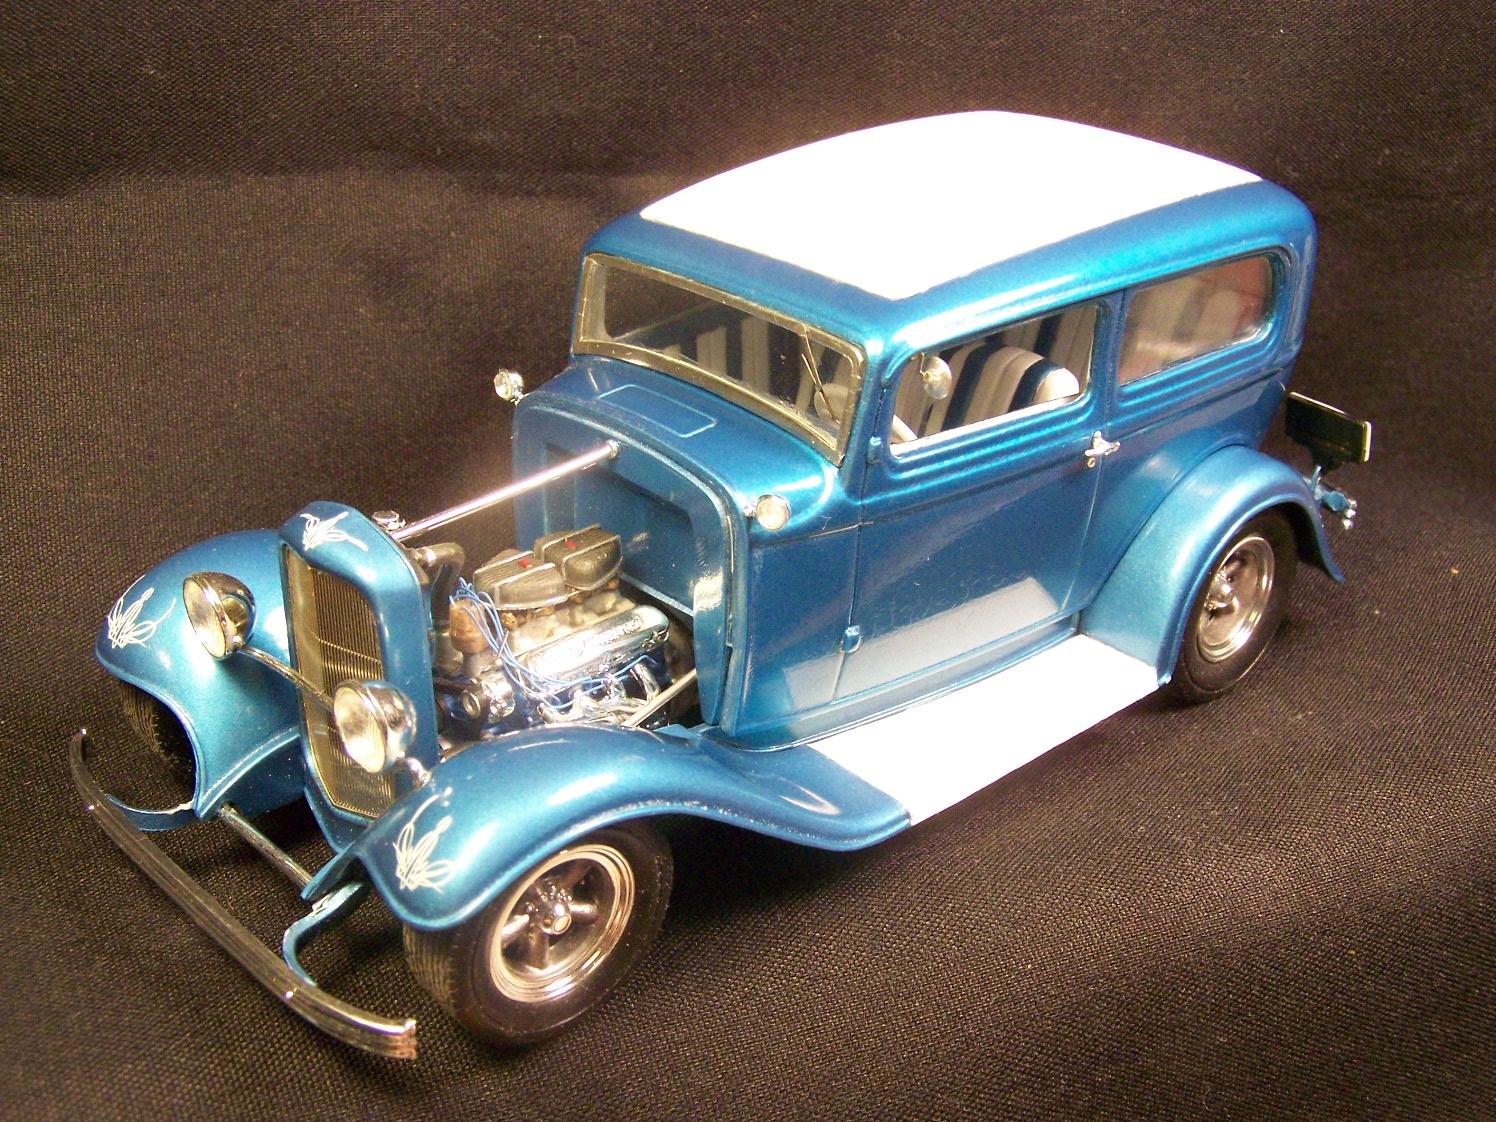
It's the Revell 32 Ford Tudor Sedan. That might not look too bad, but I wanted the make sure that since all of the pinstripe designs were similar in that there's a small point at the top of each one, I wouldn't want all but one to be oriented differently. Thanks for the kind words. It's appreciated, as is the constructive advice. I'm always looking for ways to improve the next build.
-
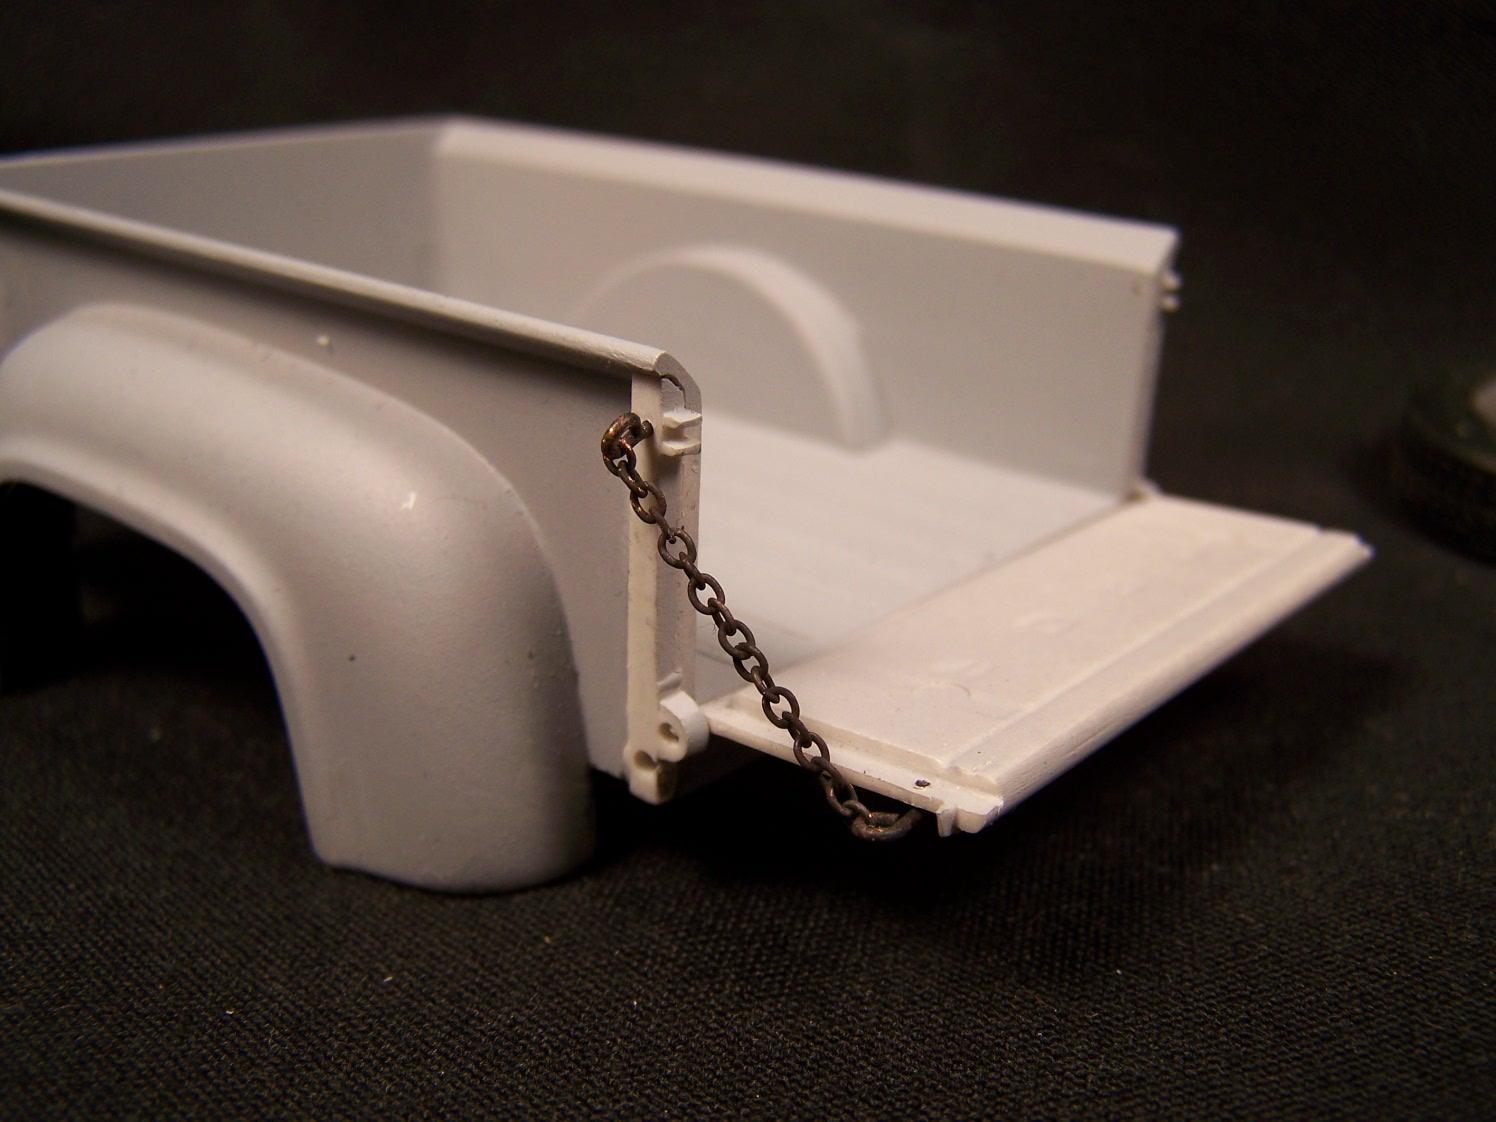
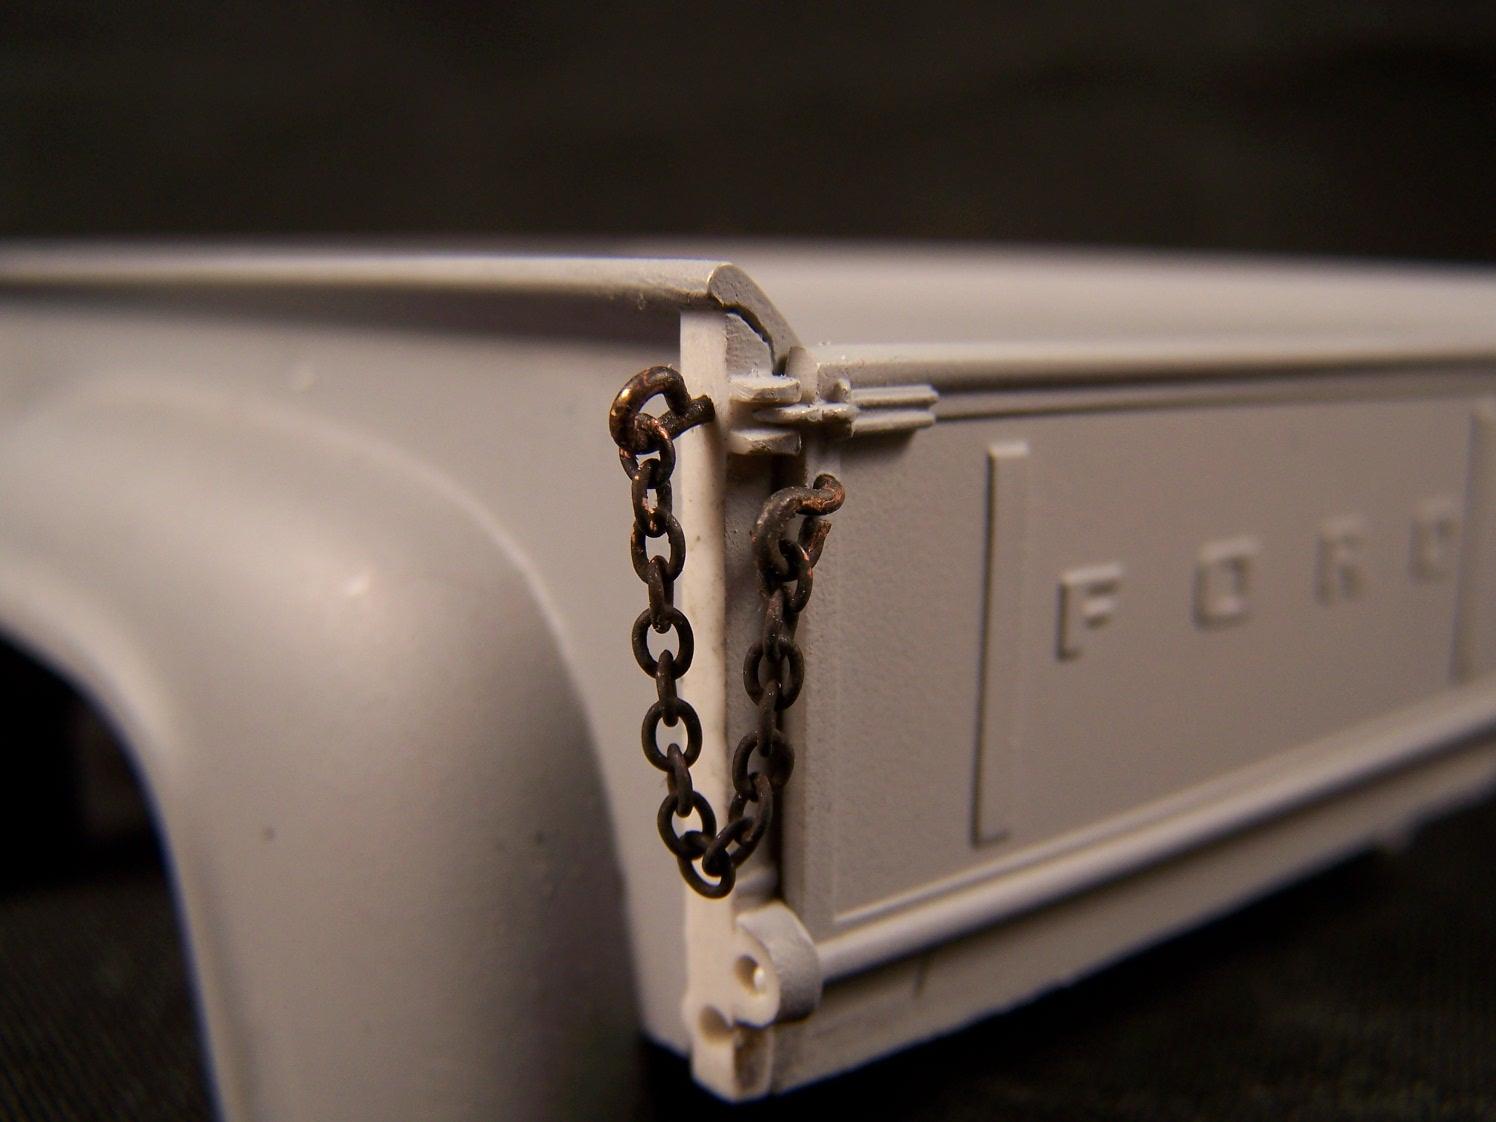
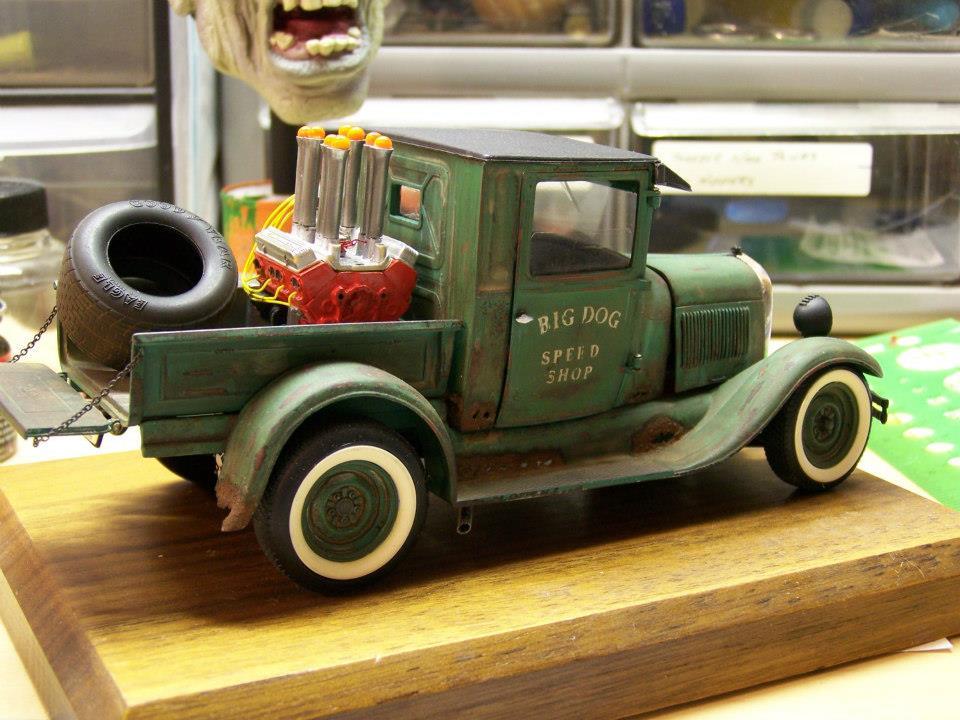
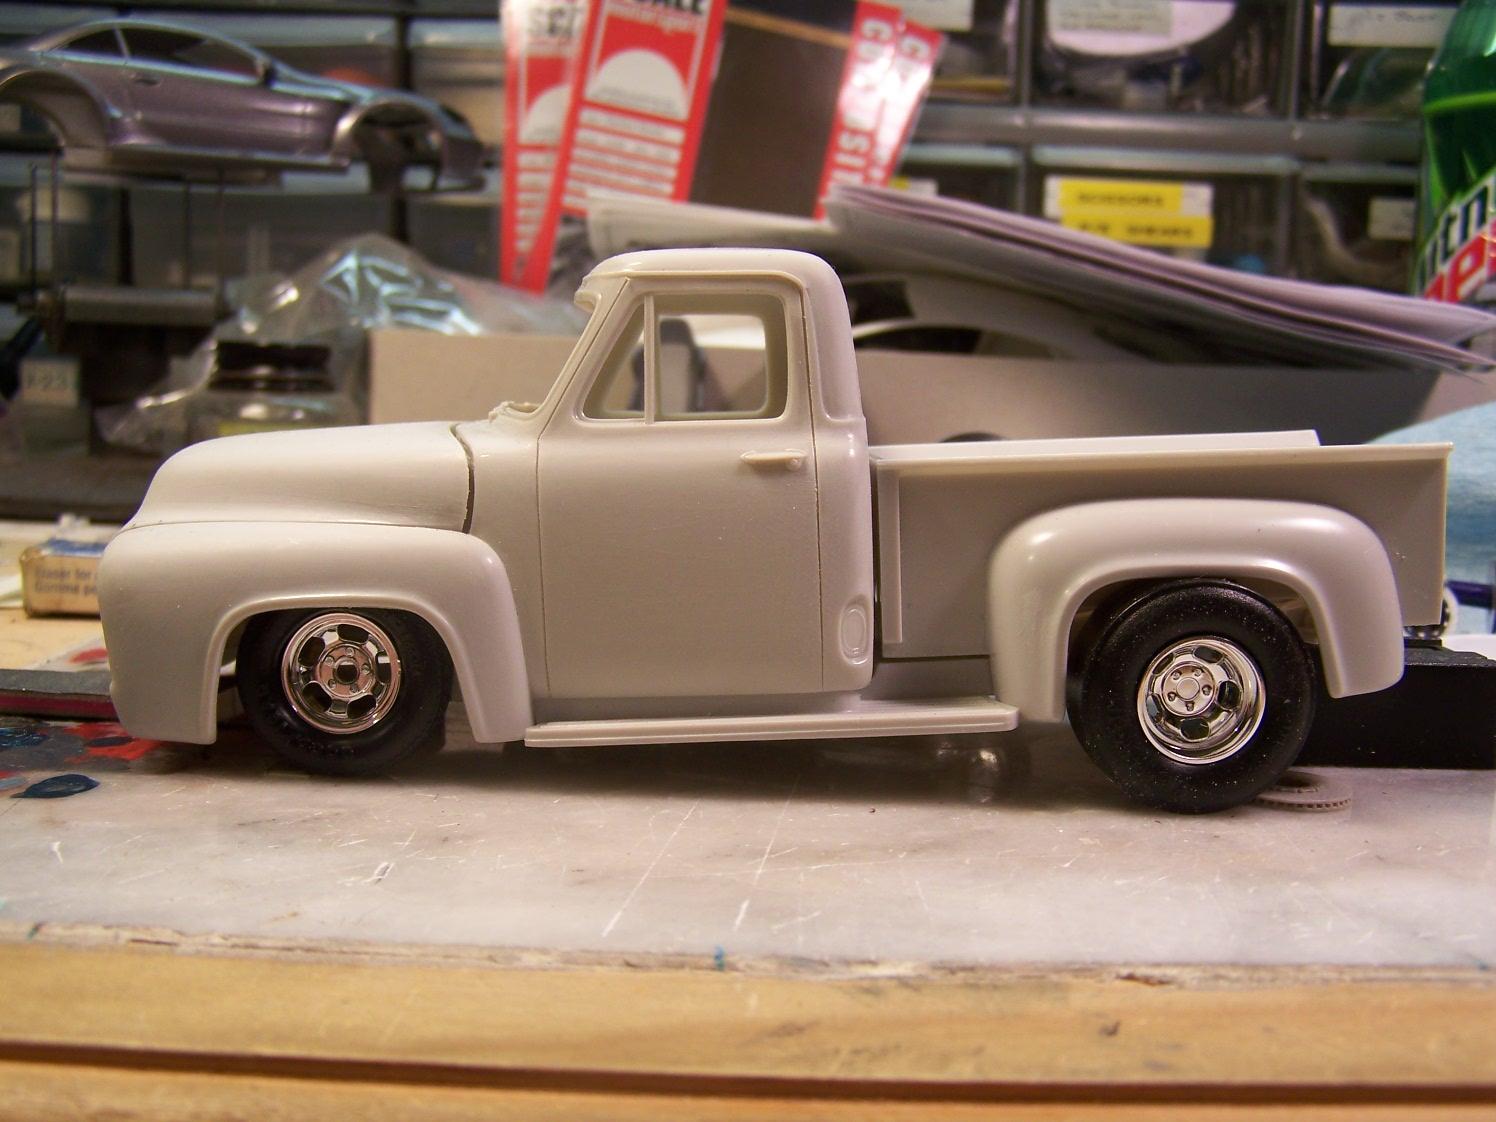
Thanks folks for the kind words. I am thinking about a white pinstripe to separate the colors. That would keep the colors from fading into one another. That's pretty much the idea. How the trucks have changed through the years. I'll also change what they are carrying in the bed. I'm thinking this one will be hauling a Ford 427.
-
Dennis, Thanks for the kind words. I was on a forum (can't remember which) and somebody had posted a link to a Fotki page. There the page owner showed step by step in photos how to do the chop. It really was simple. The toughest part is getting the back of the car correct and making sure that during clean up, I was sanding the top level at the "C" pillars. Thanks Phil. The "step" in the chop comes at the "A" and "B" pillars. Essentially you mark a line across the pillar. (Lets say you are taking 2" out) Then using the door opening as a break, instead of taking a straight 2" straight across, you take 1" below the line behind the door opening, and take 1" above the line in the door itself. This gives you your step. Using this method also allowed me to leave the rear window a little larger so it didn't look like a mail slot.
-
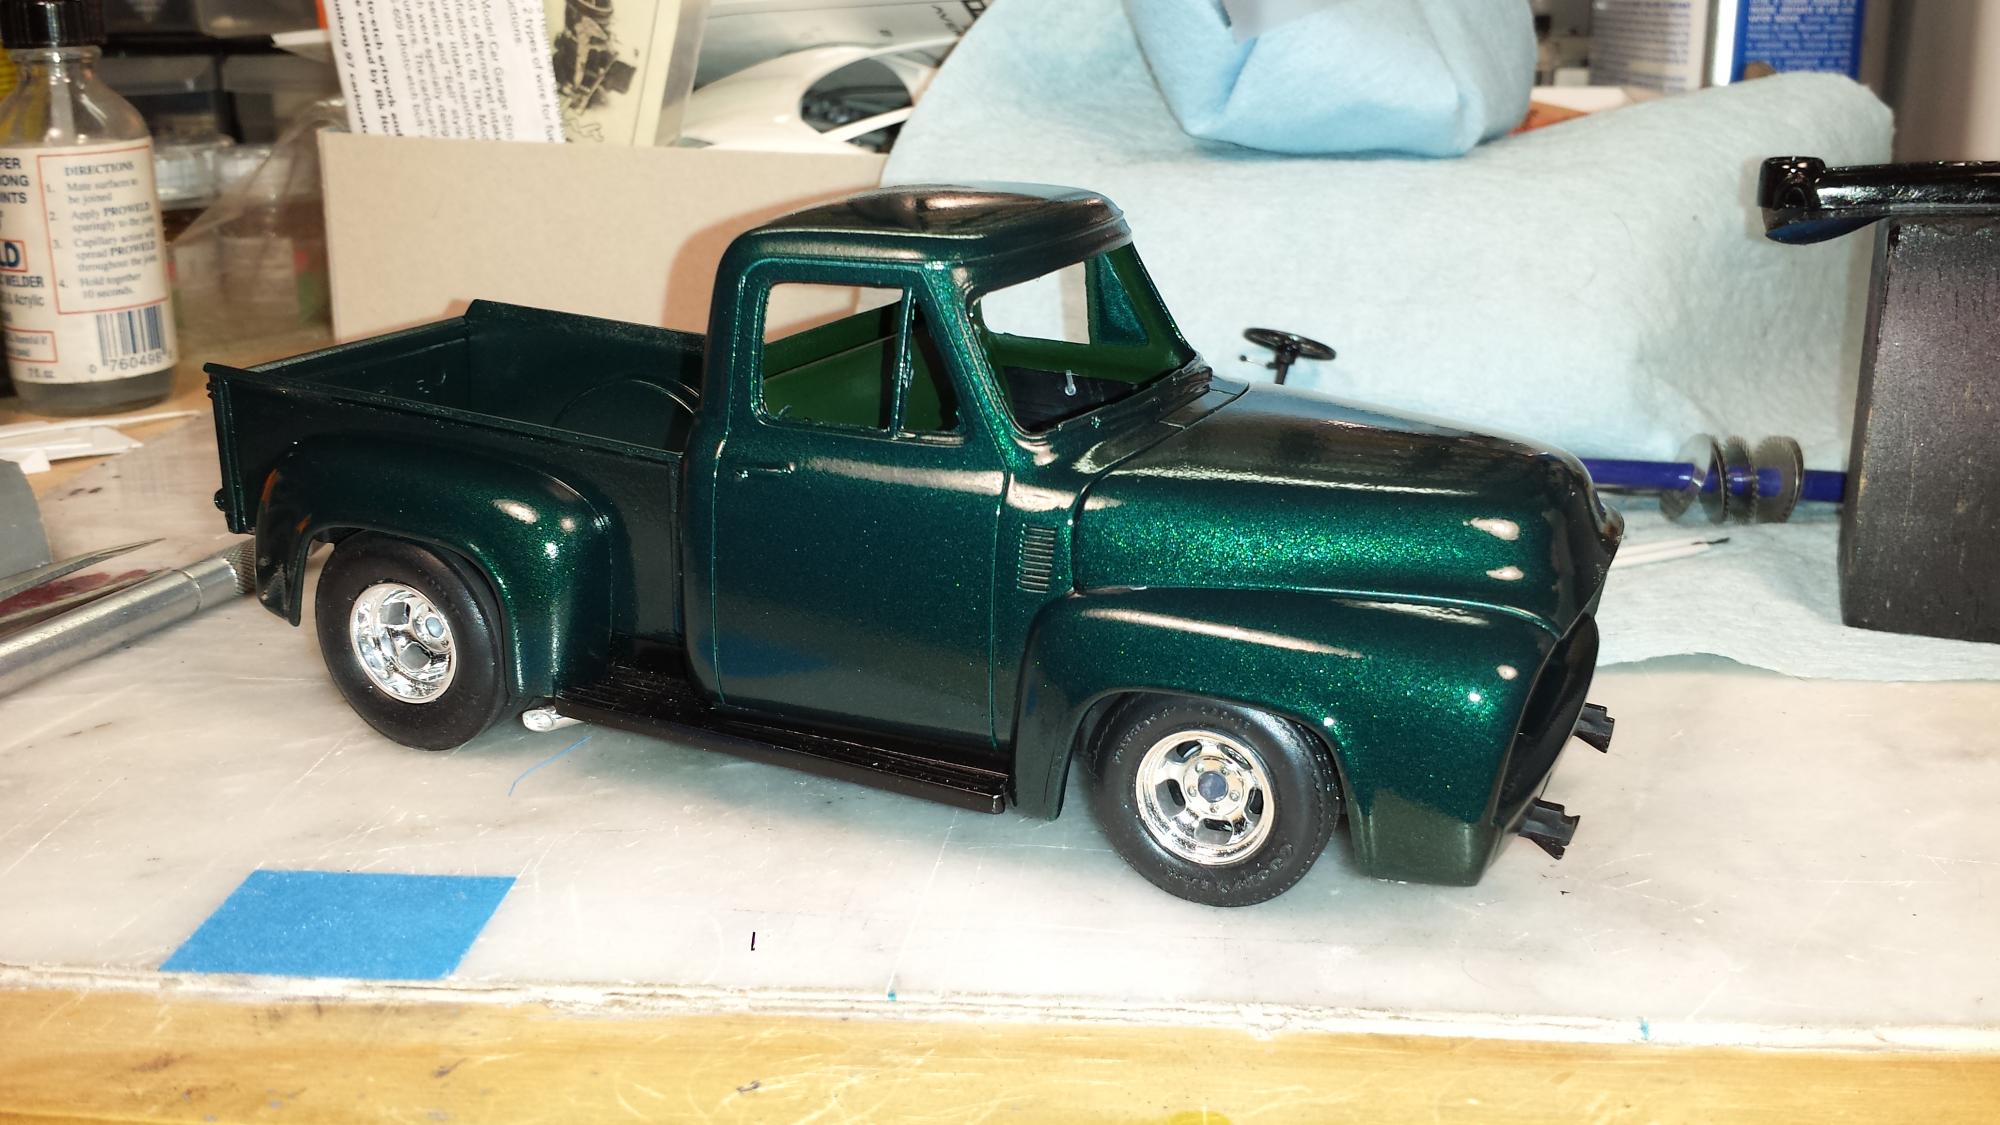
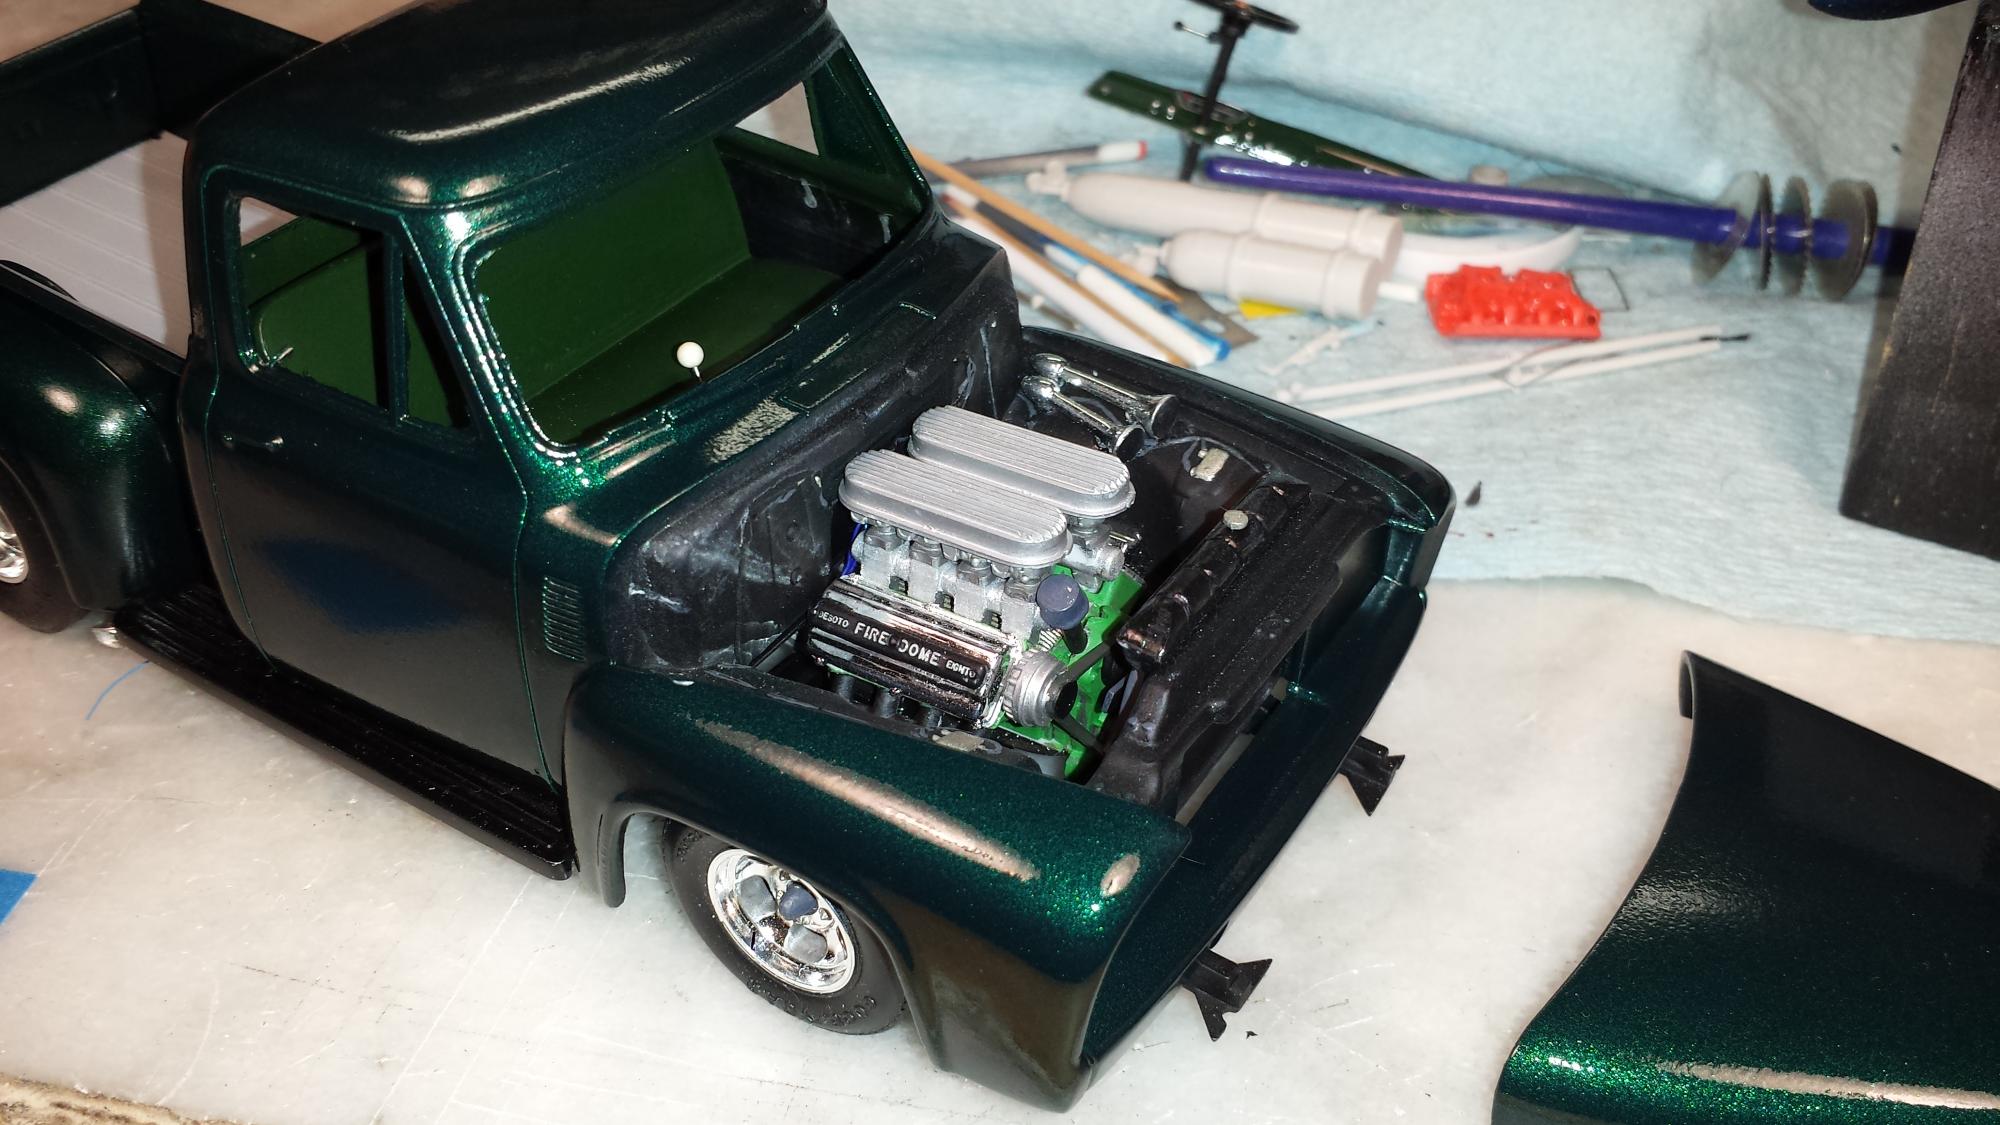
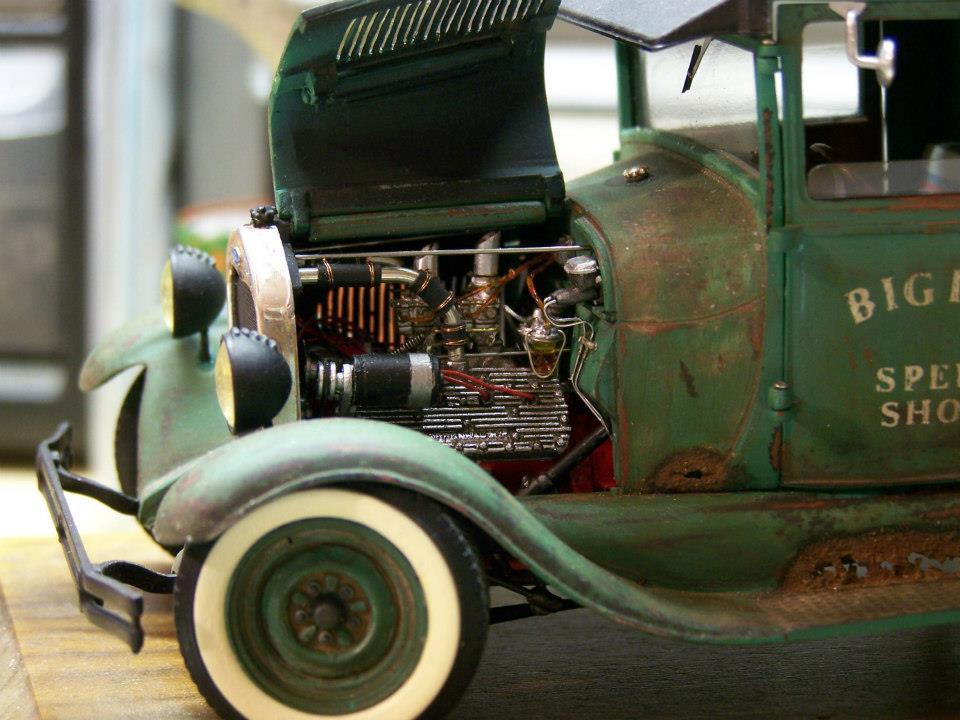
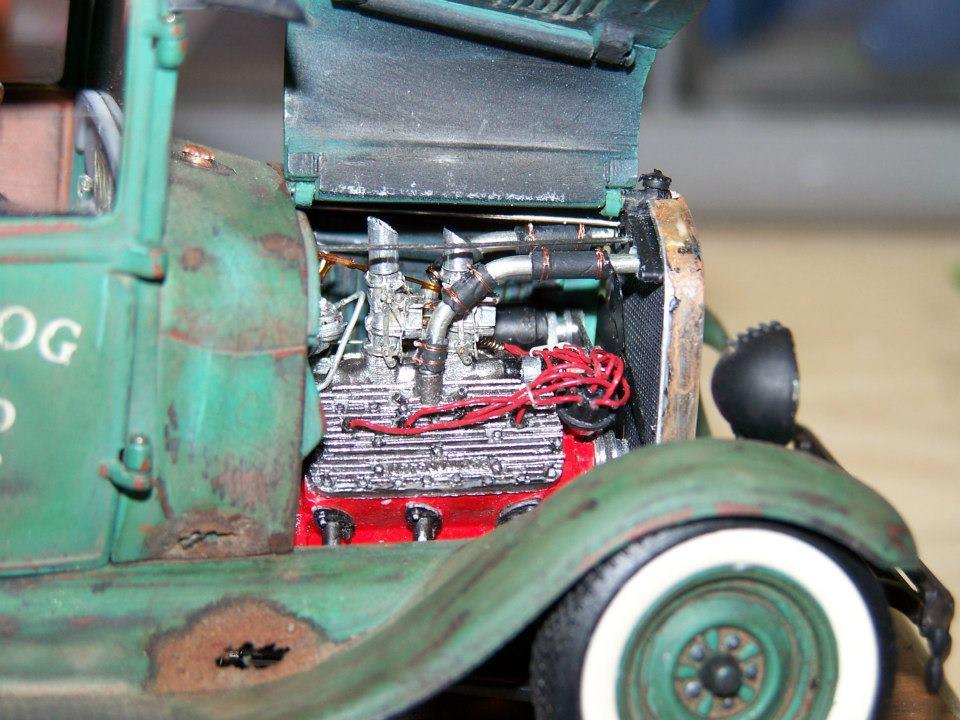
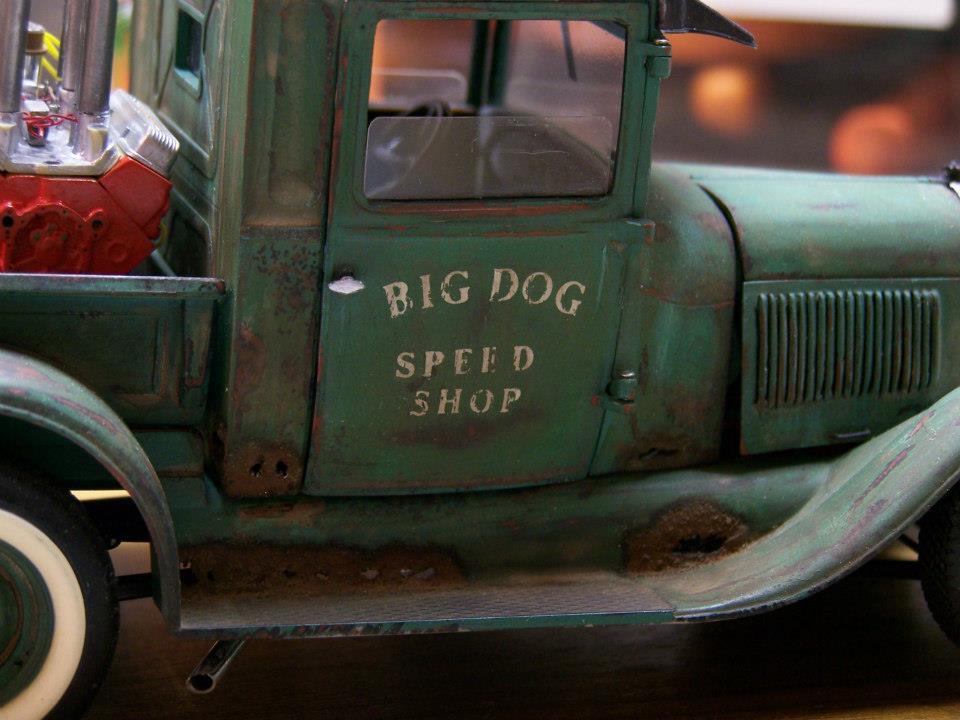
...and moved on to the body Finally got the body in paint. This is where I'm stalled. I want to do a black scallop on the nose like So-Cal but I'm afraid that since the green came out so dark, the black won't really show well. I also need to get decals made somewhere for the shop logos.

-
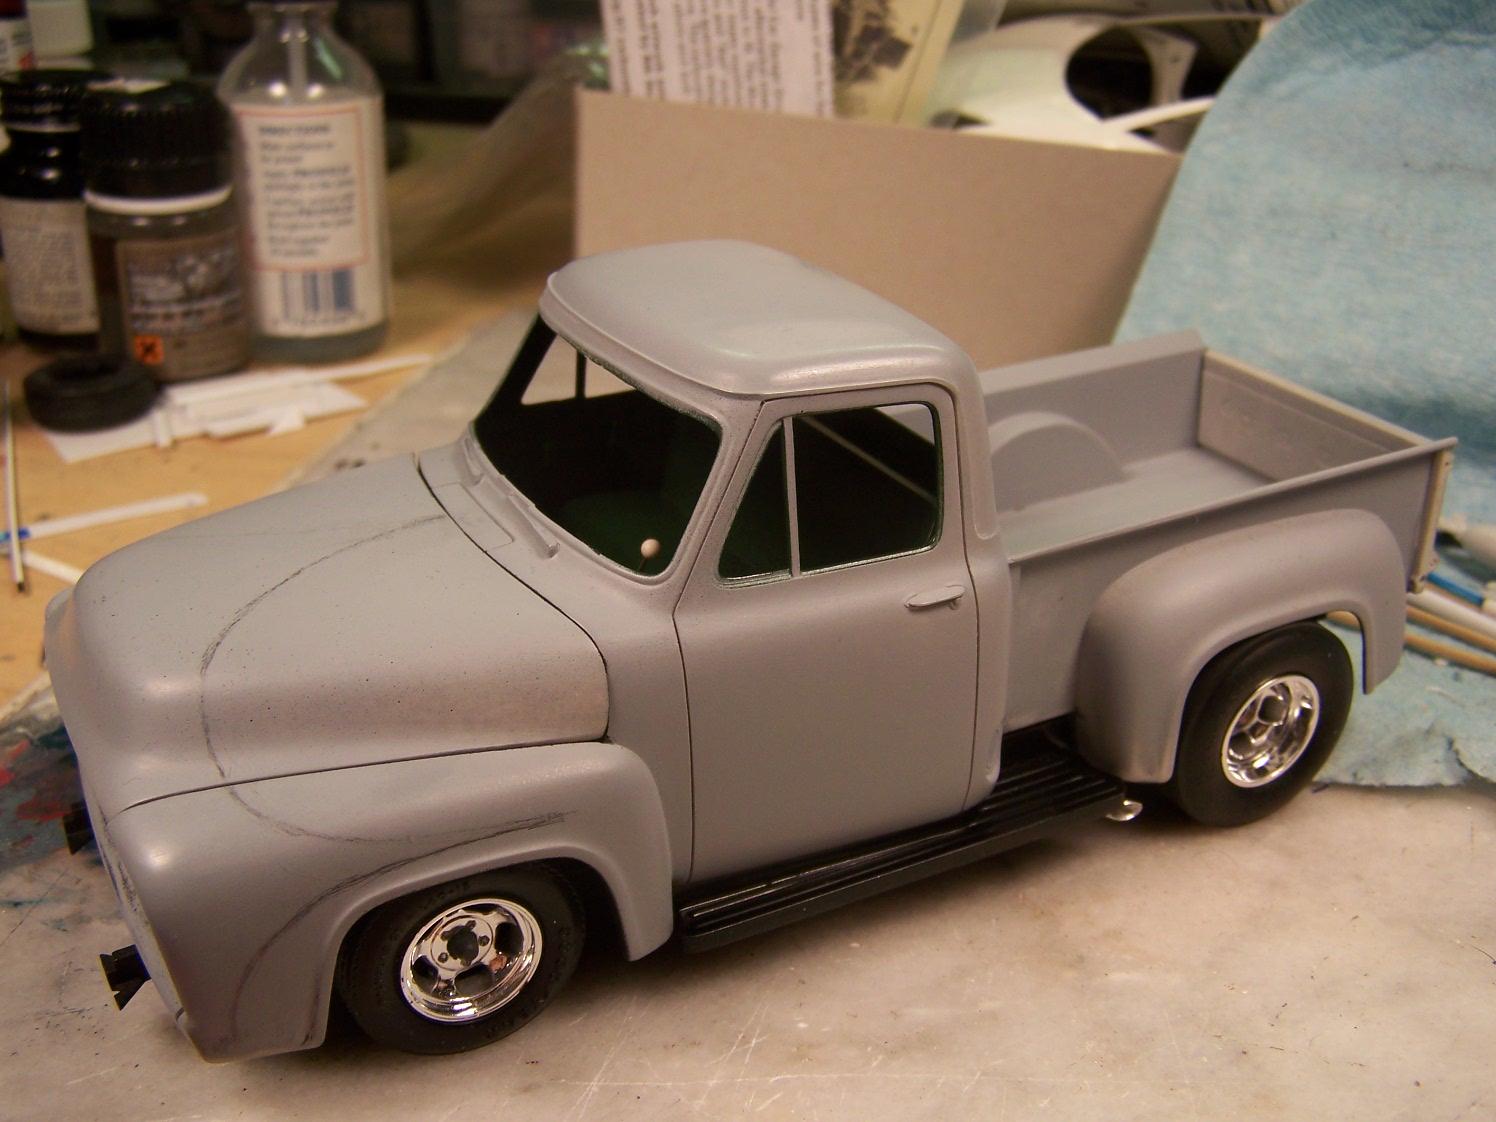
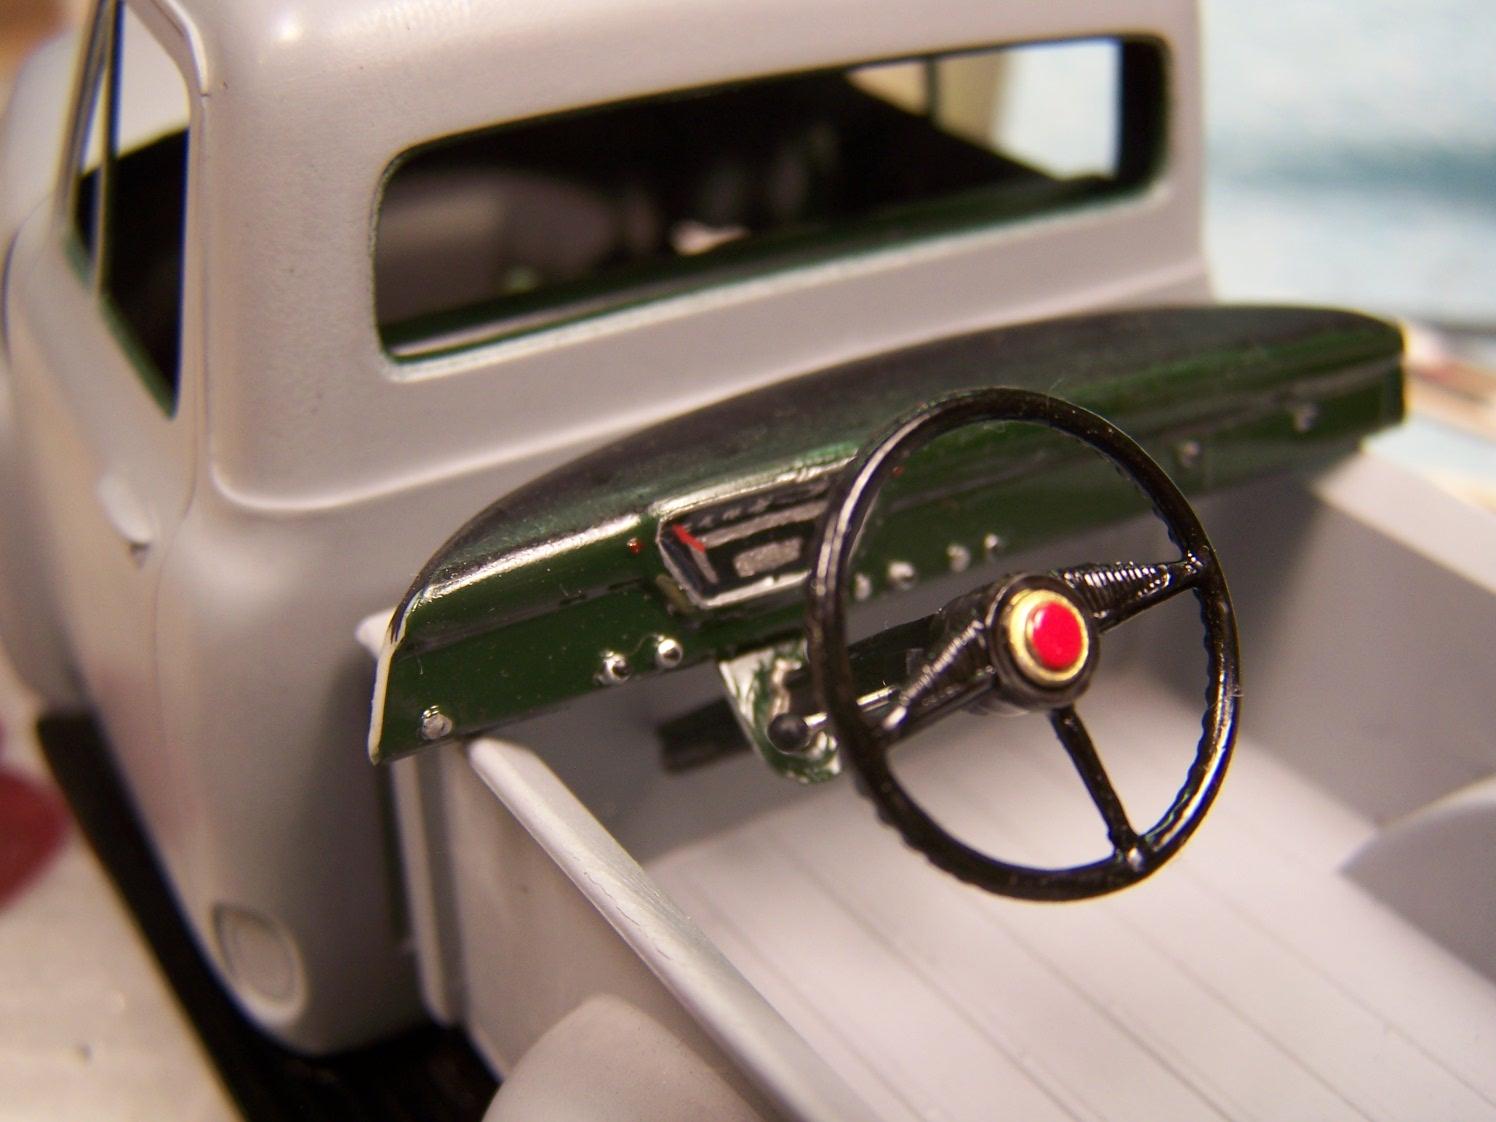
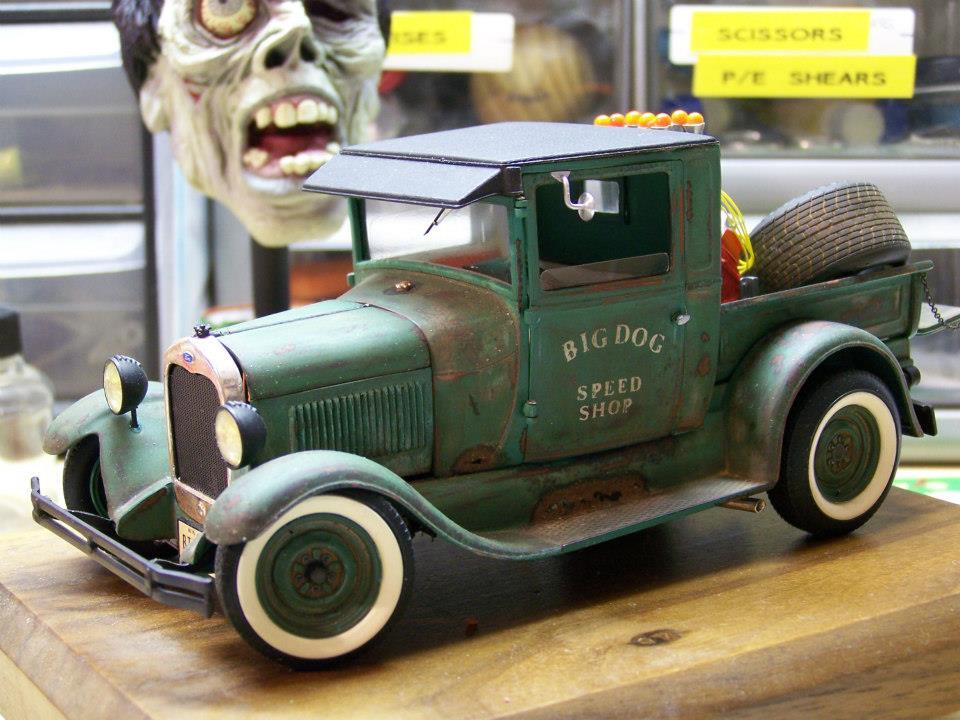
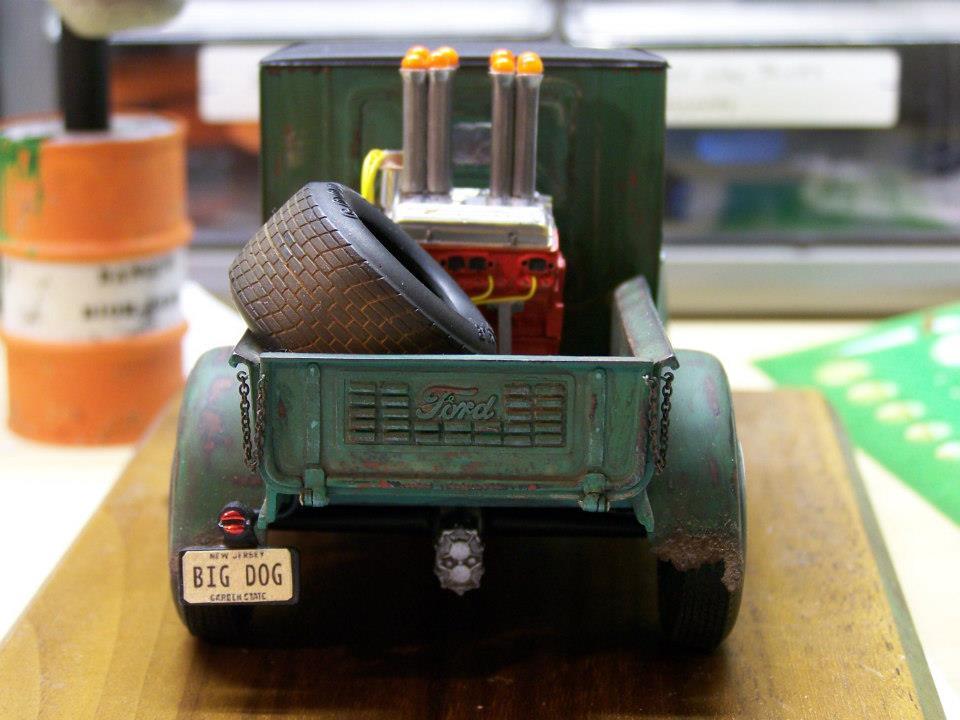
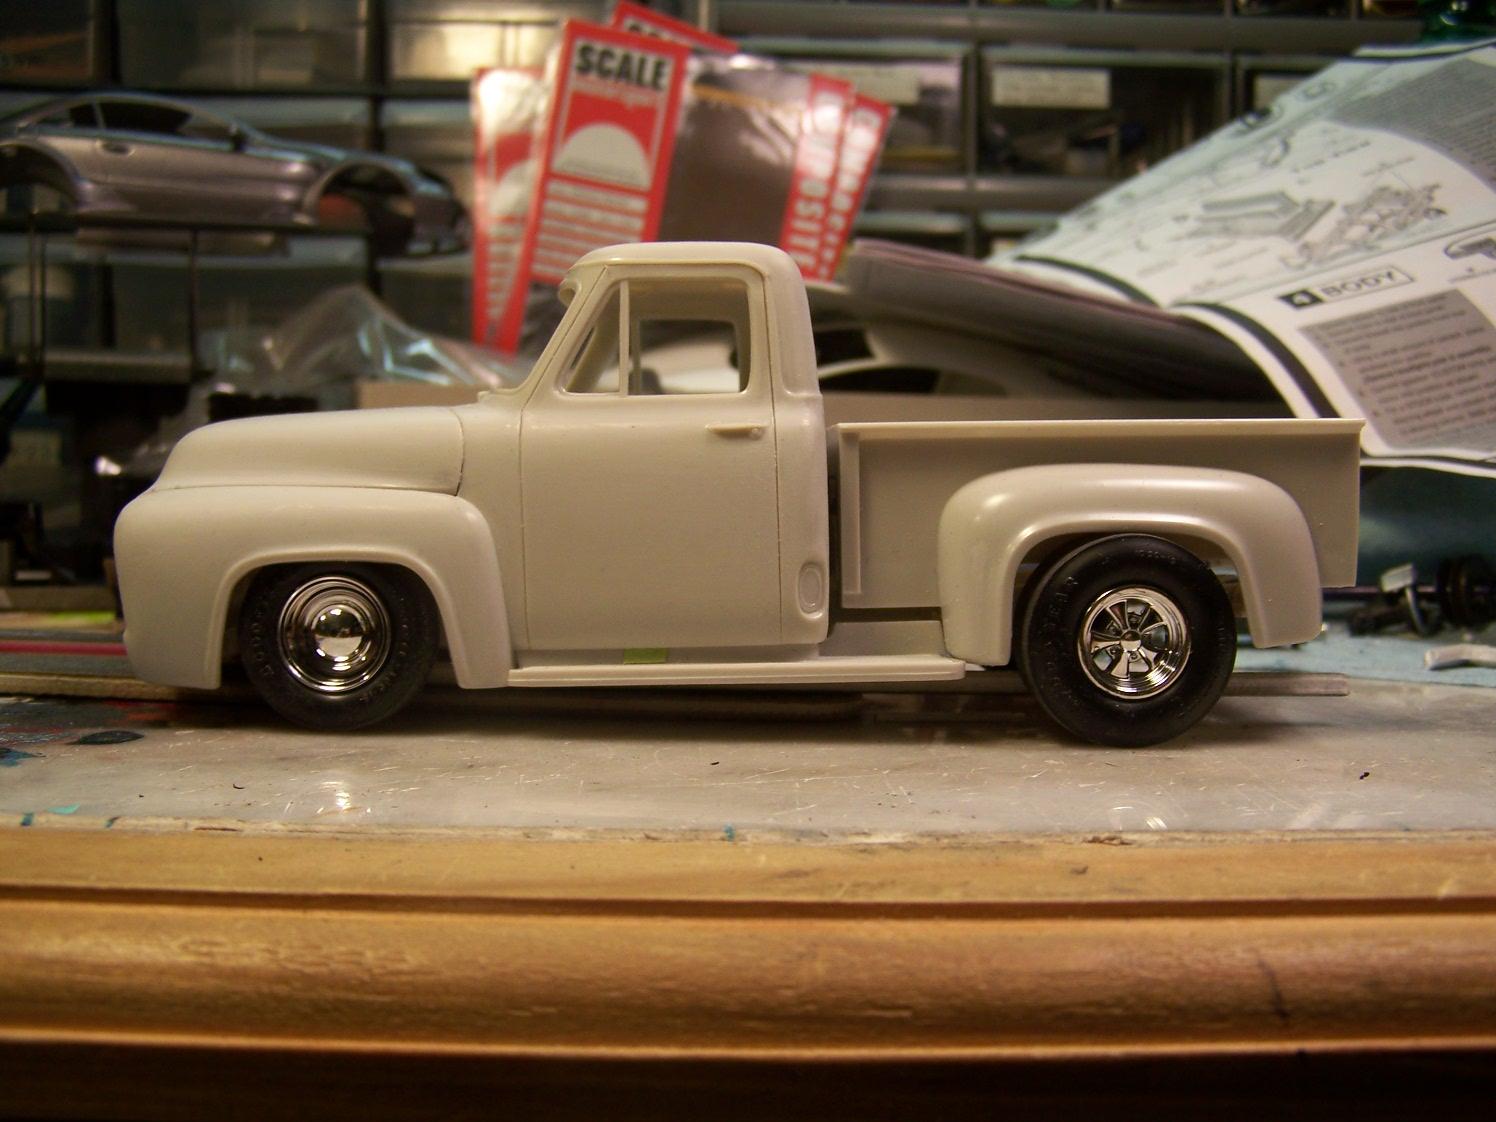
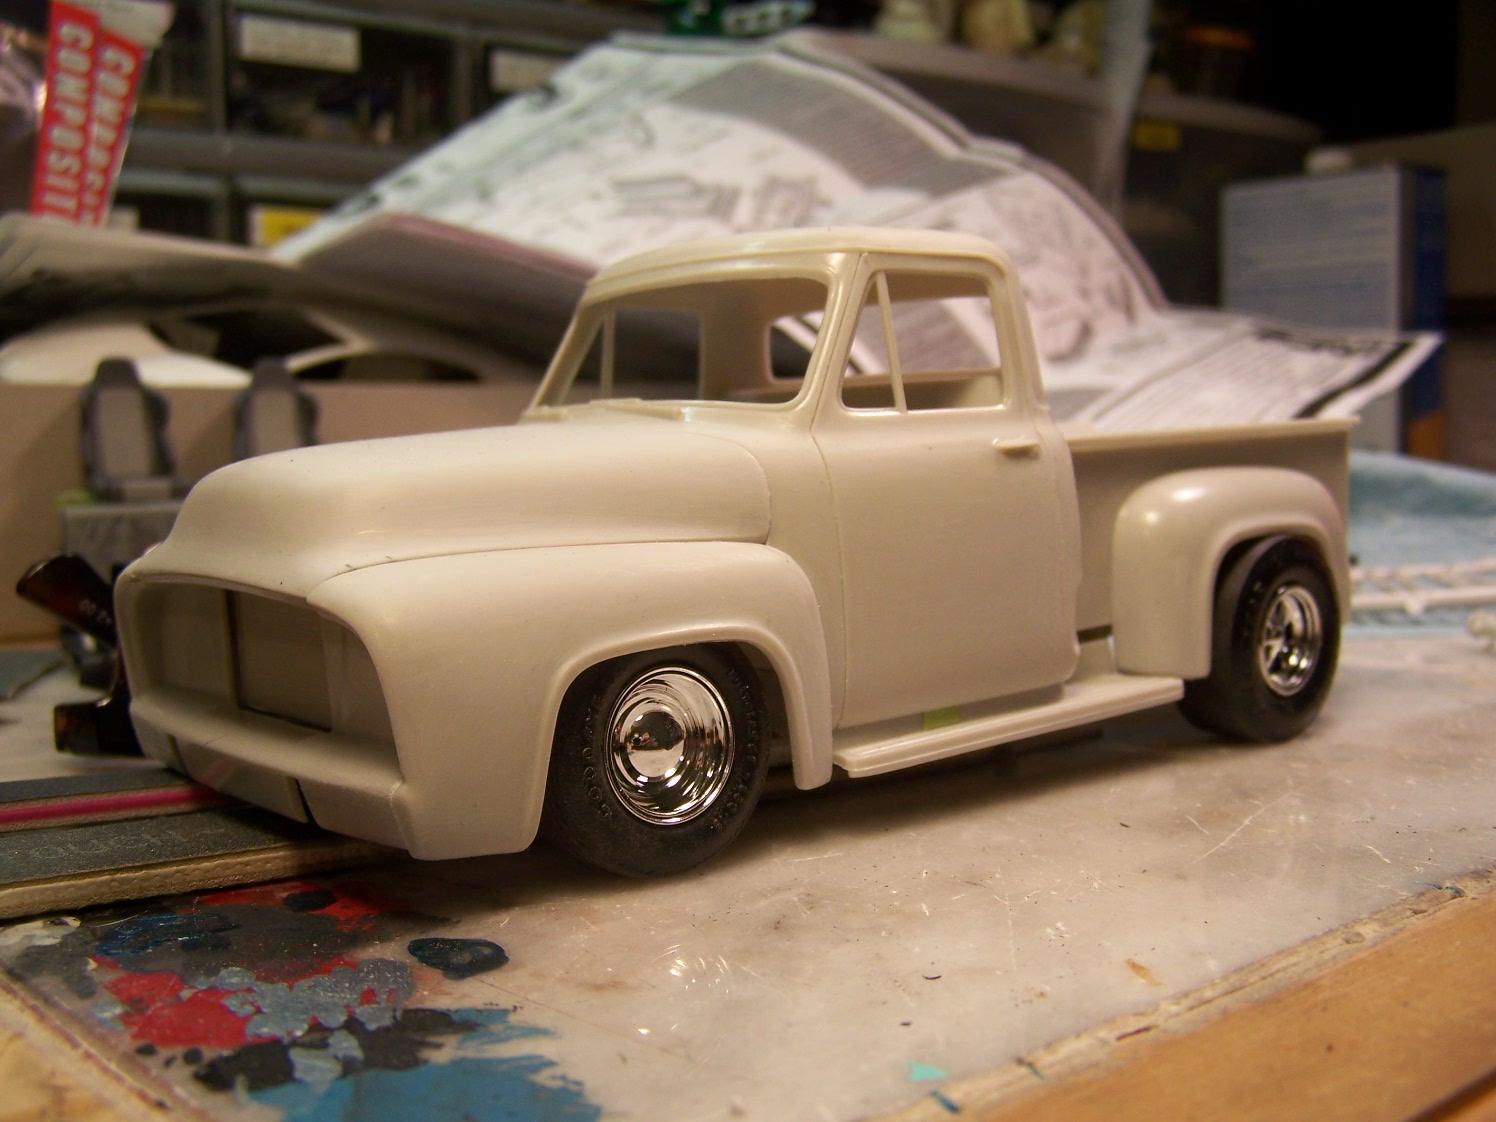
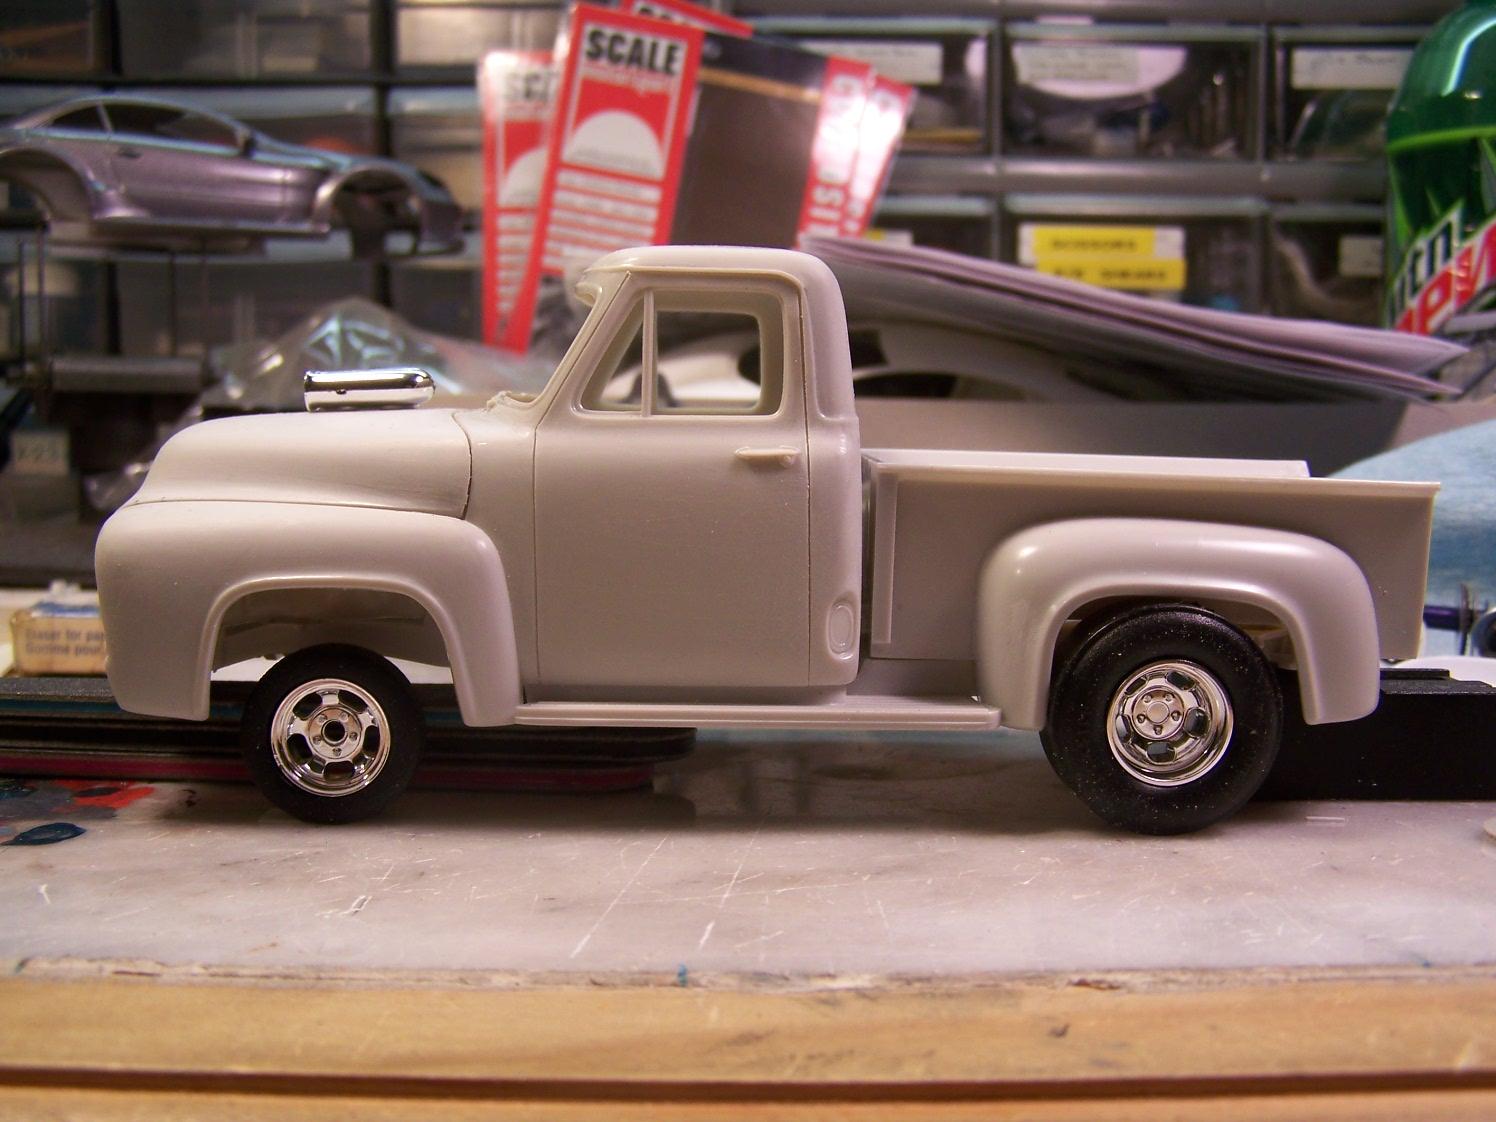
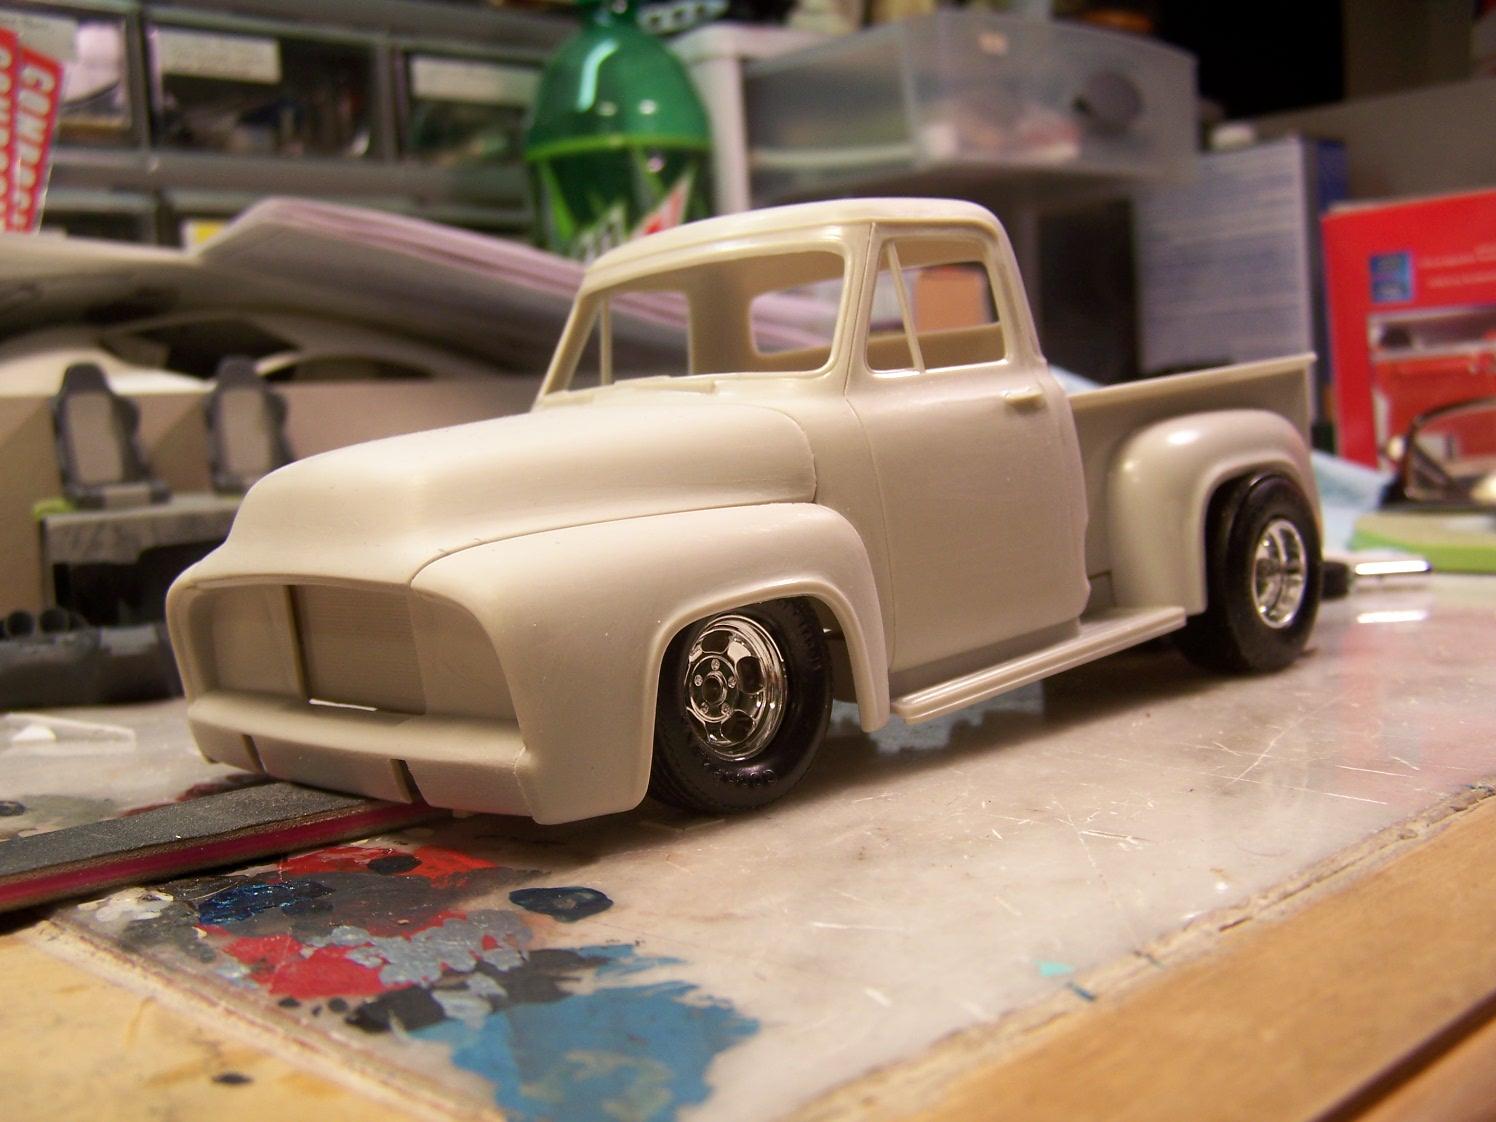
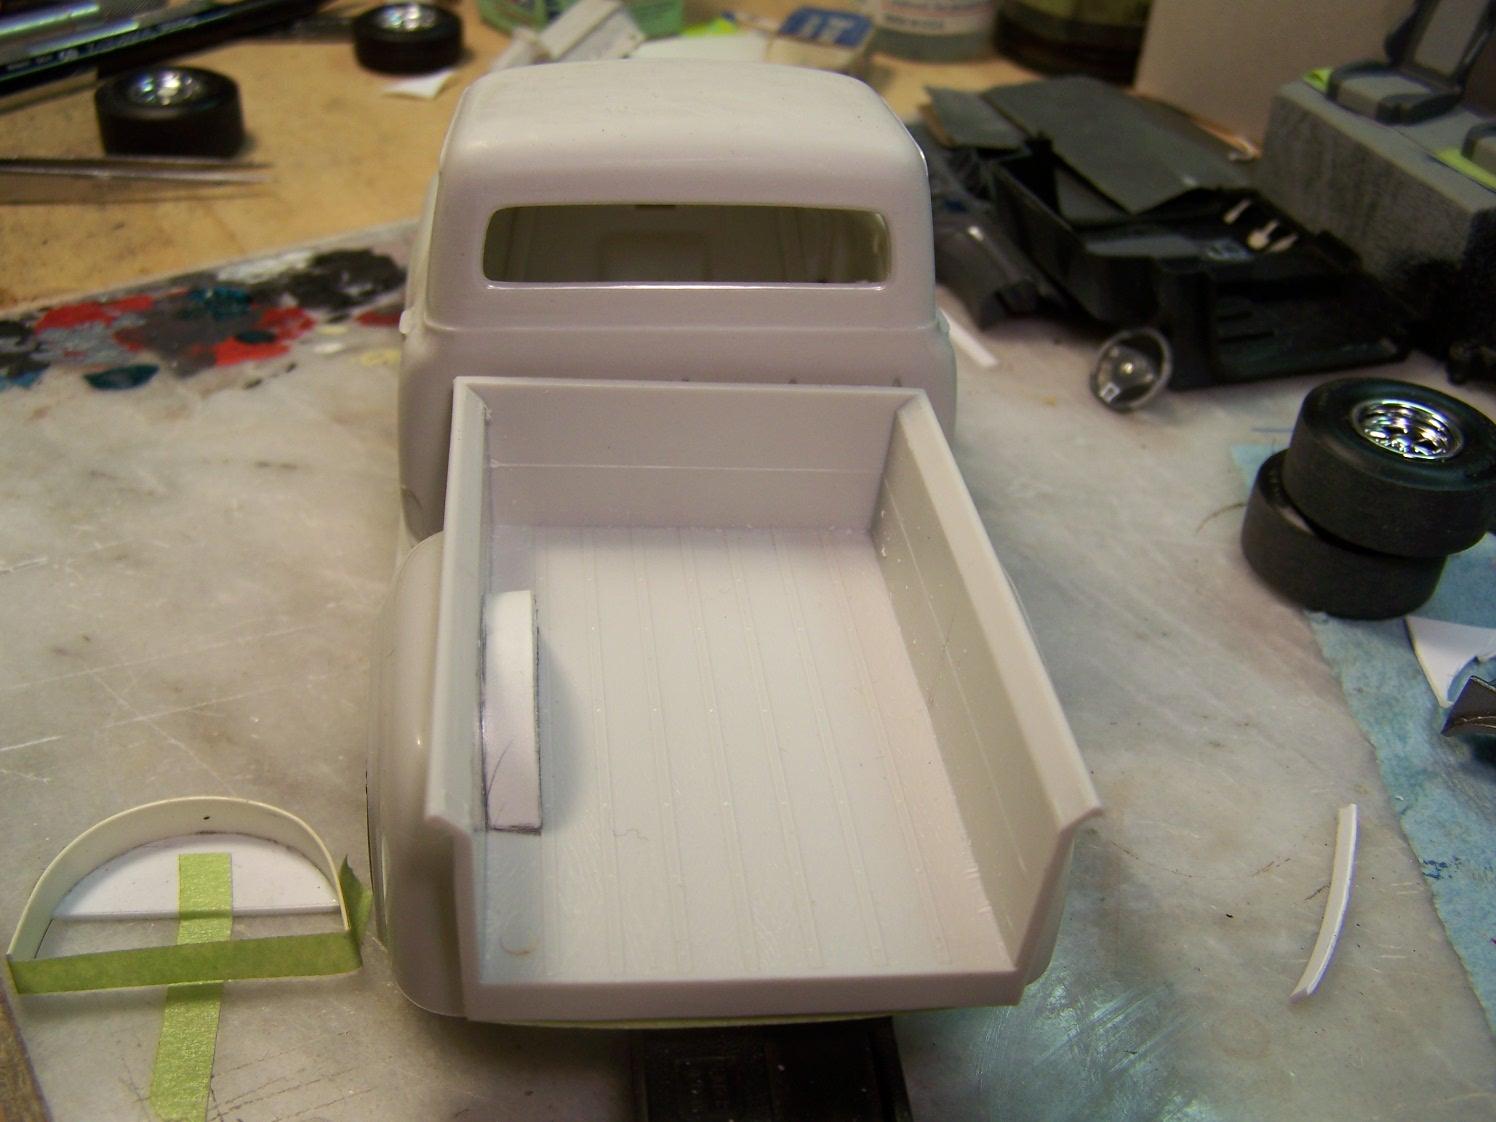
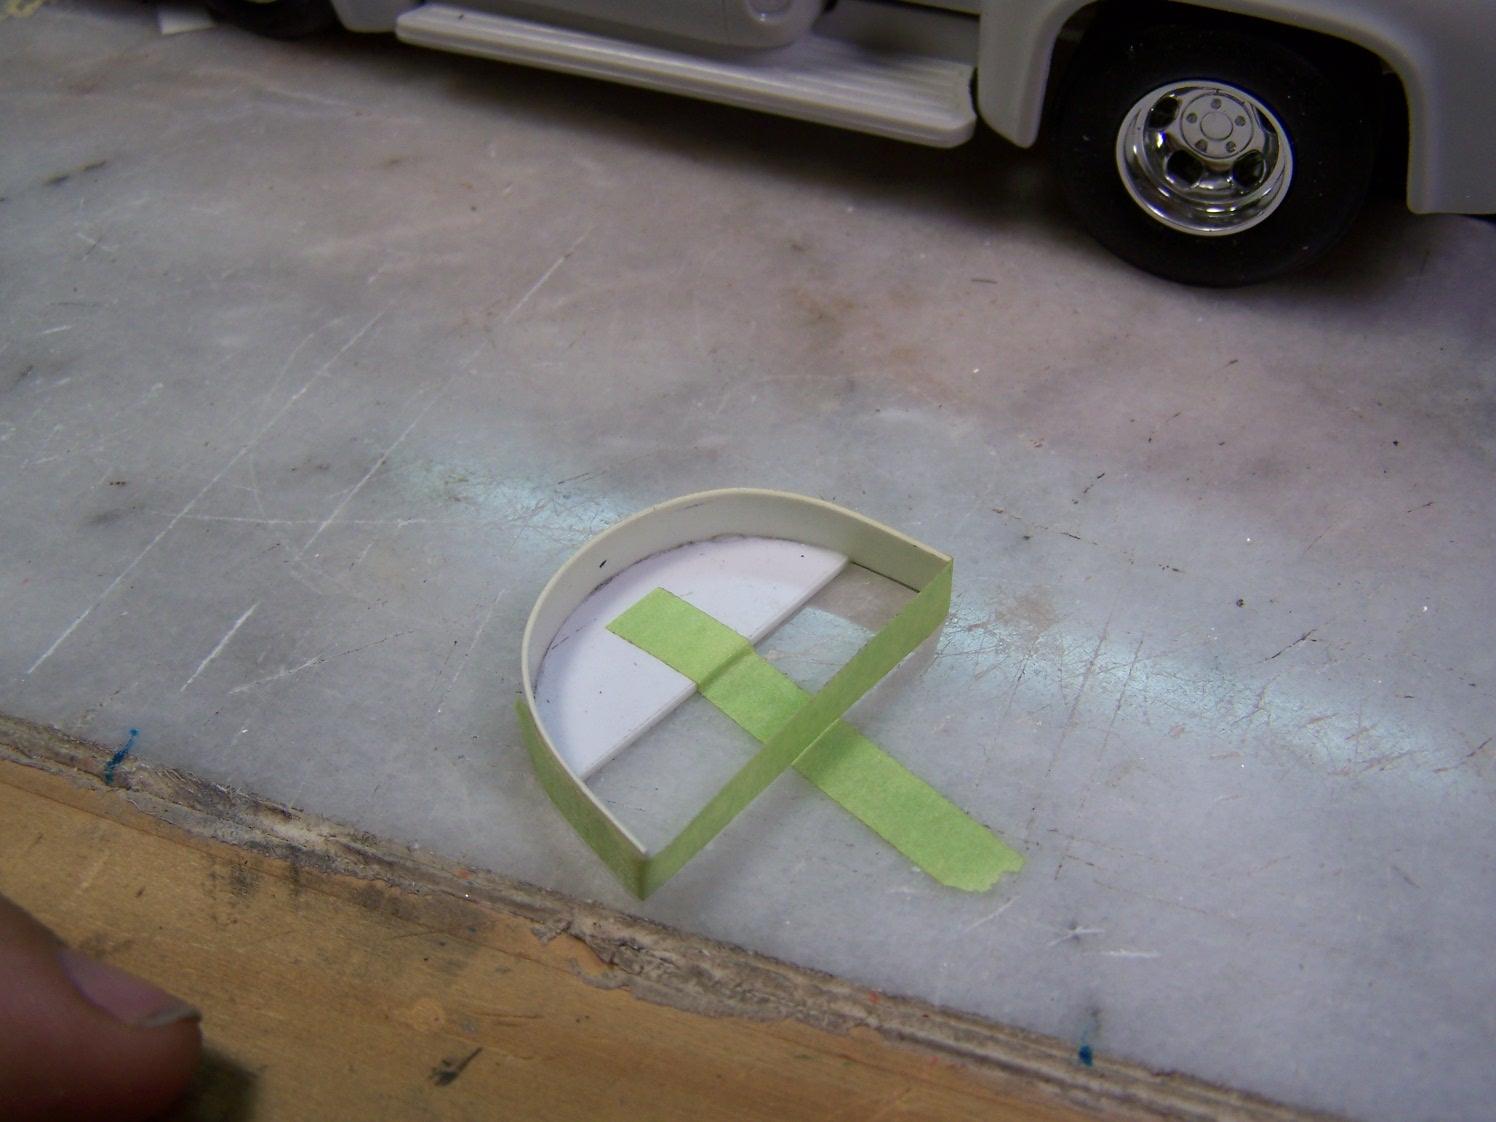
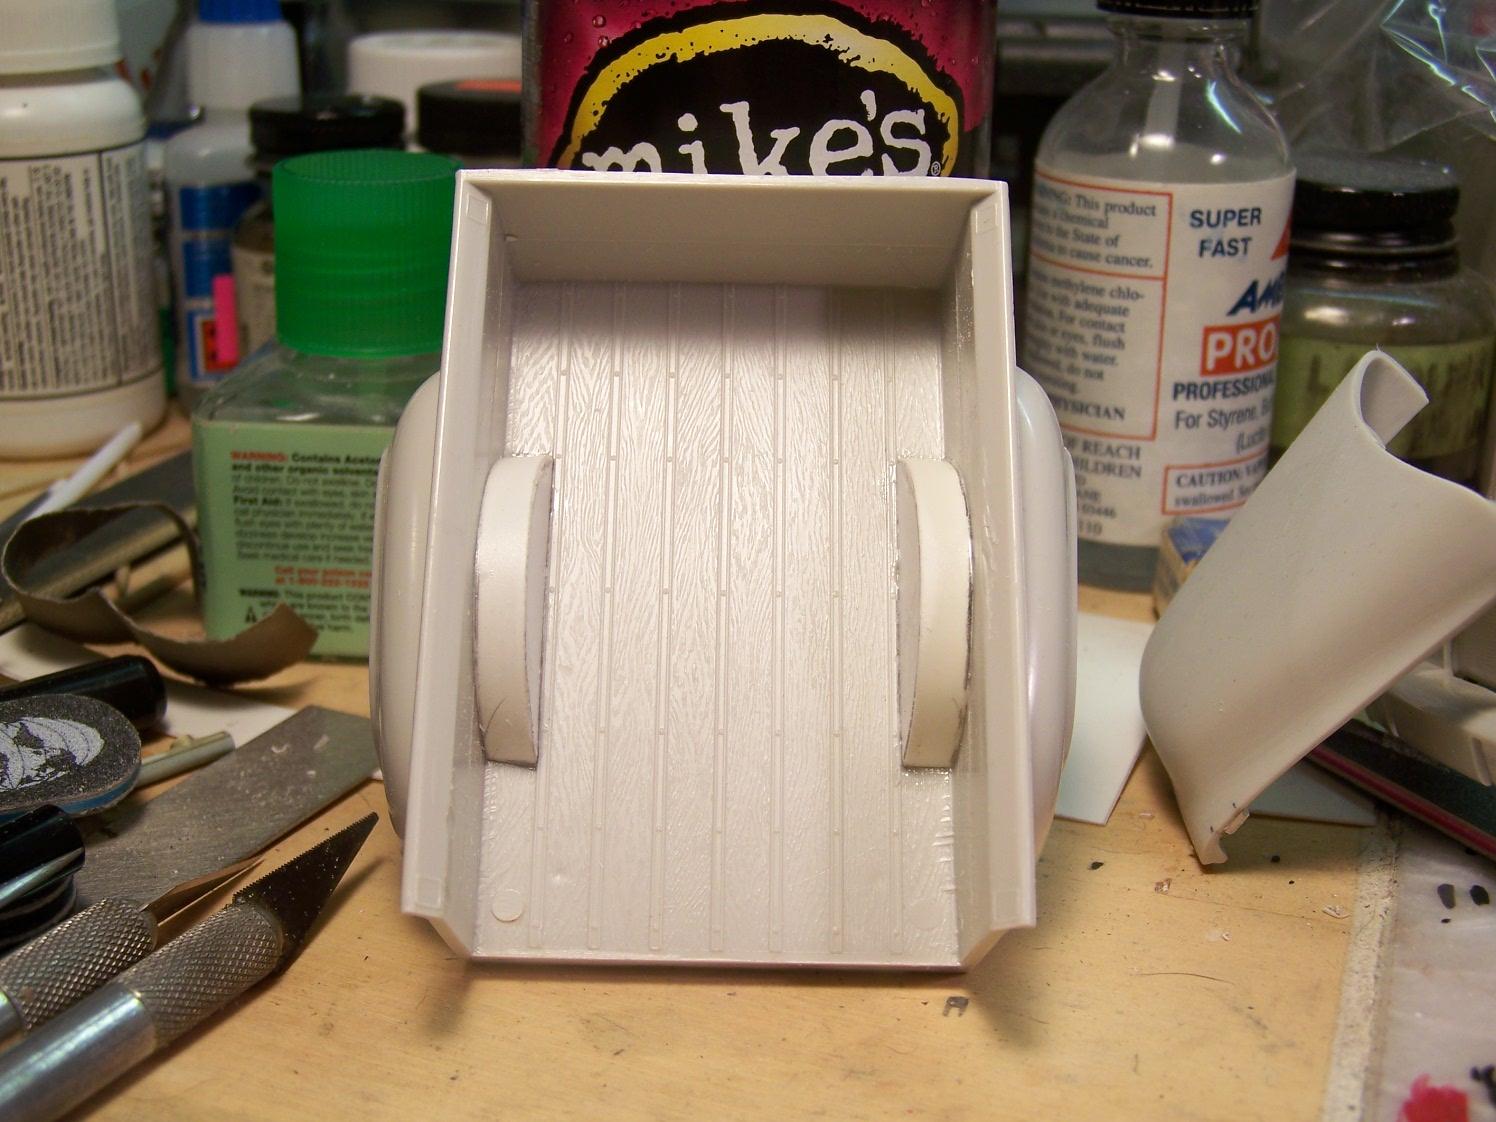
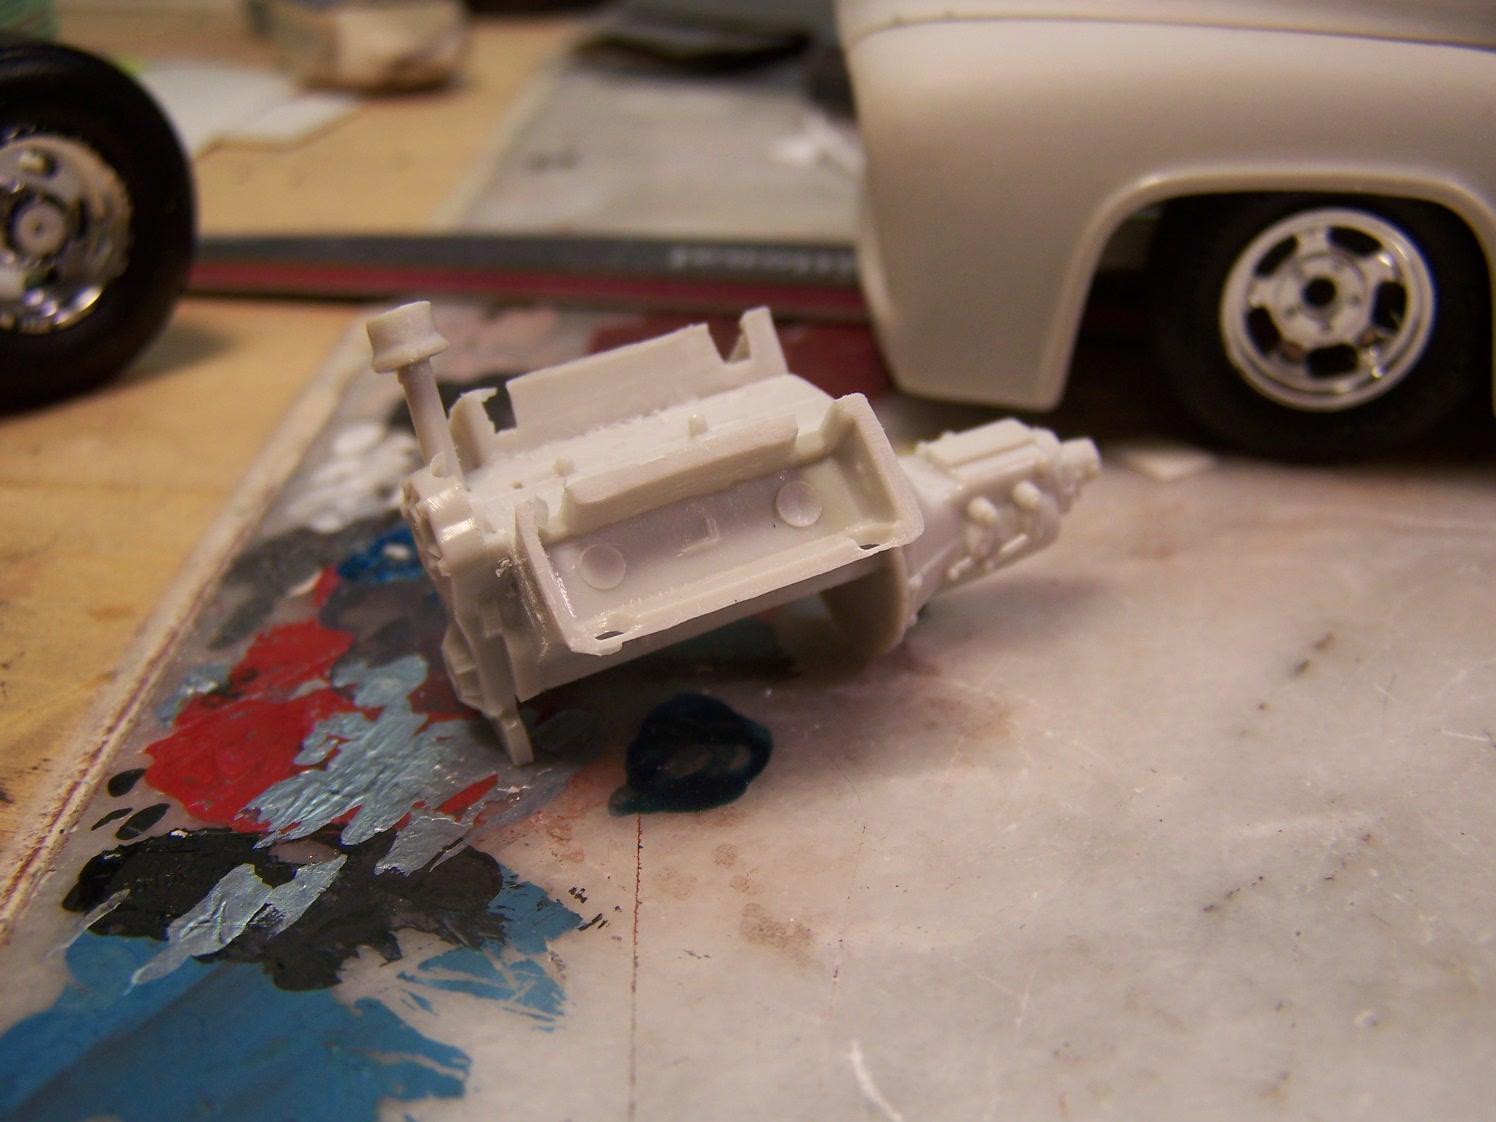
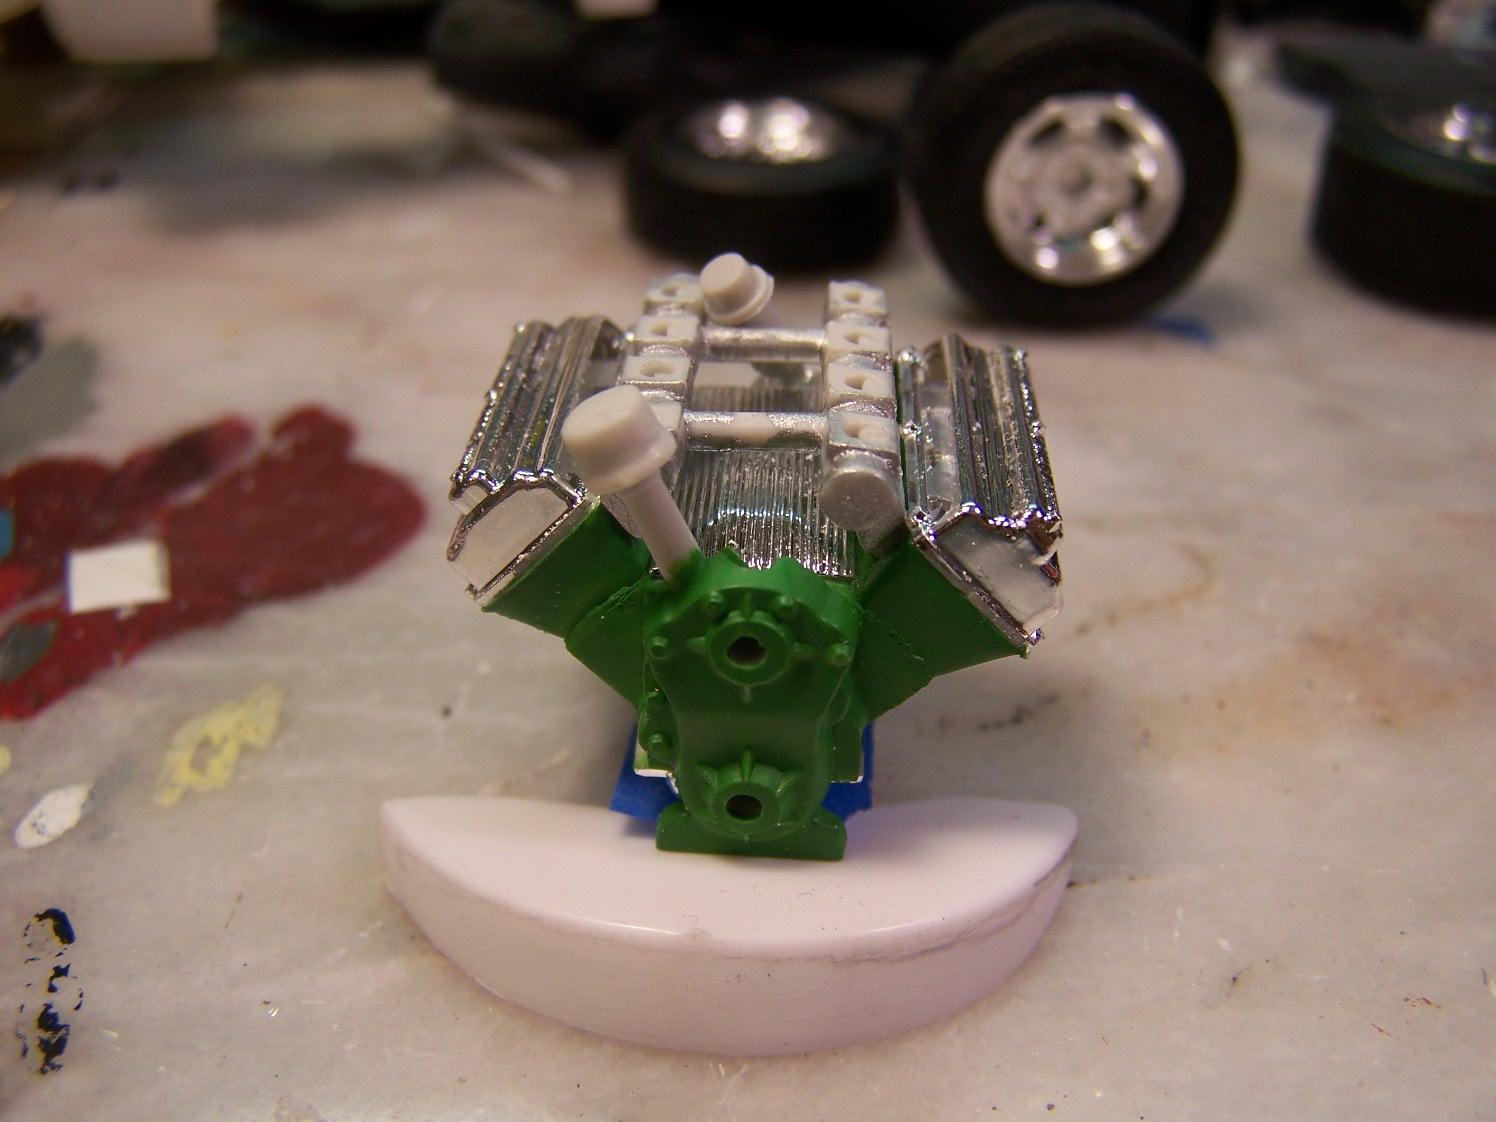
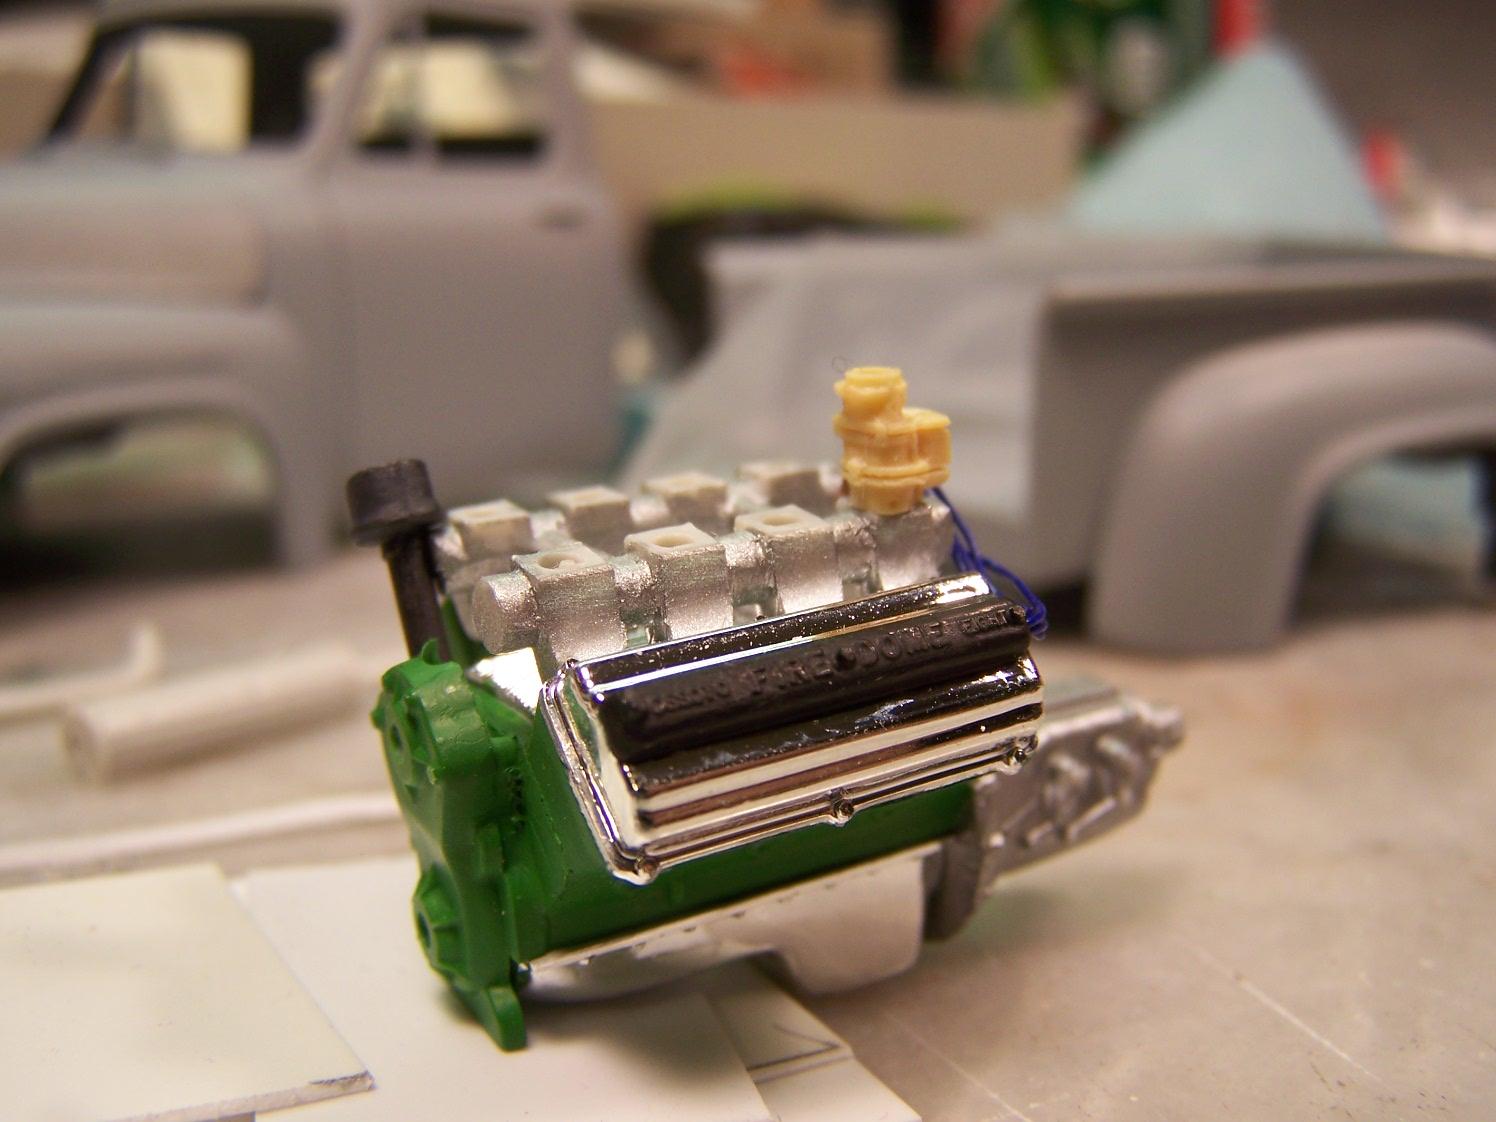
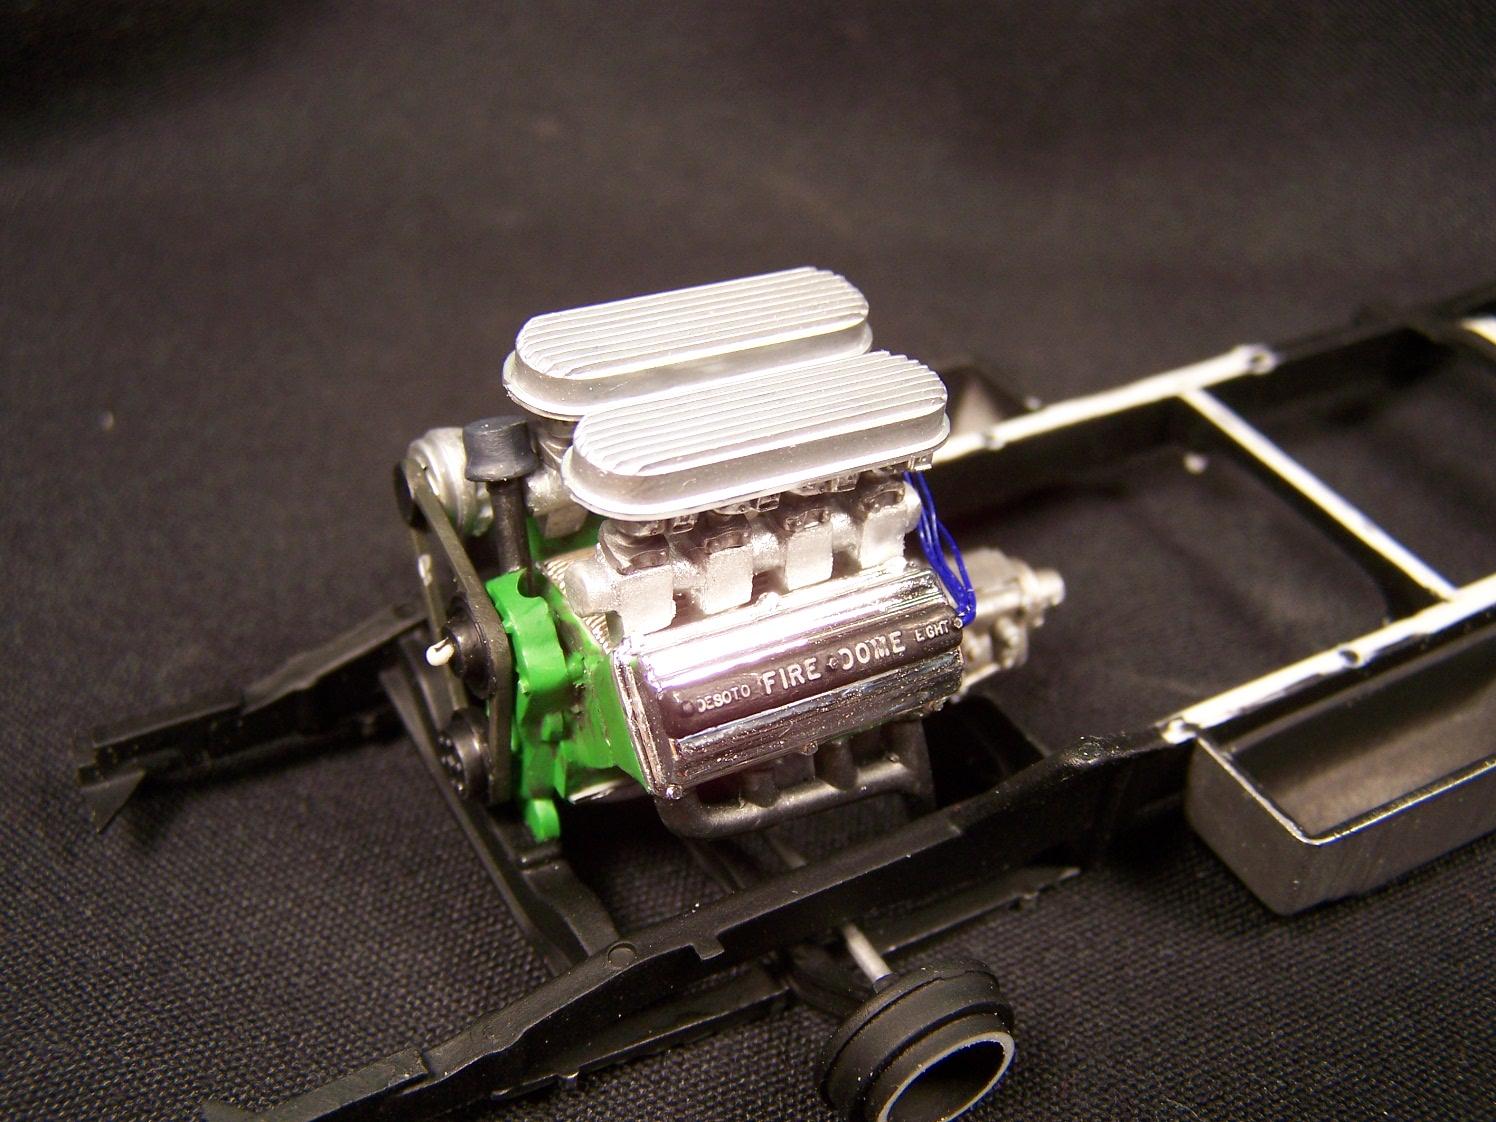
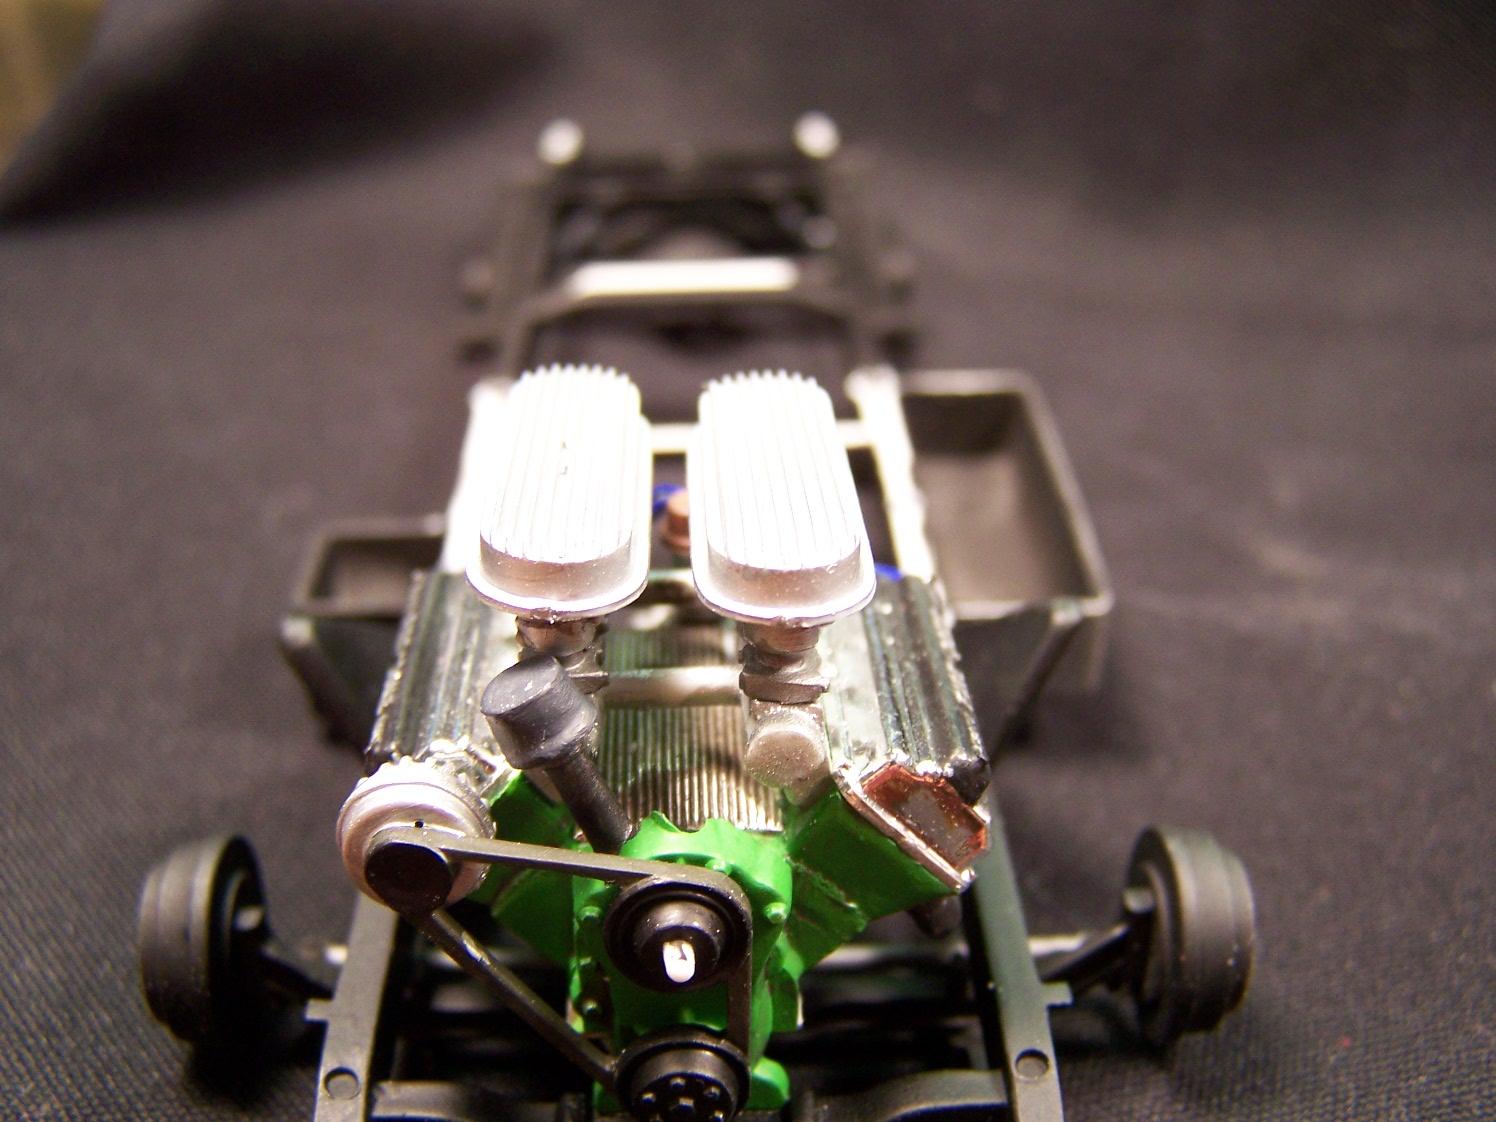
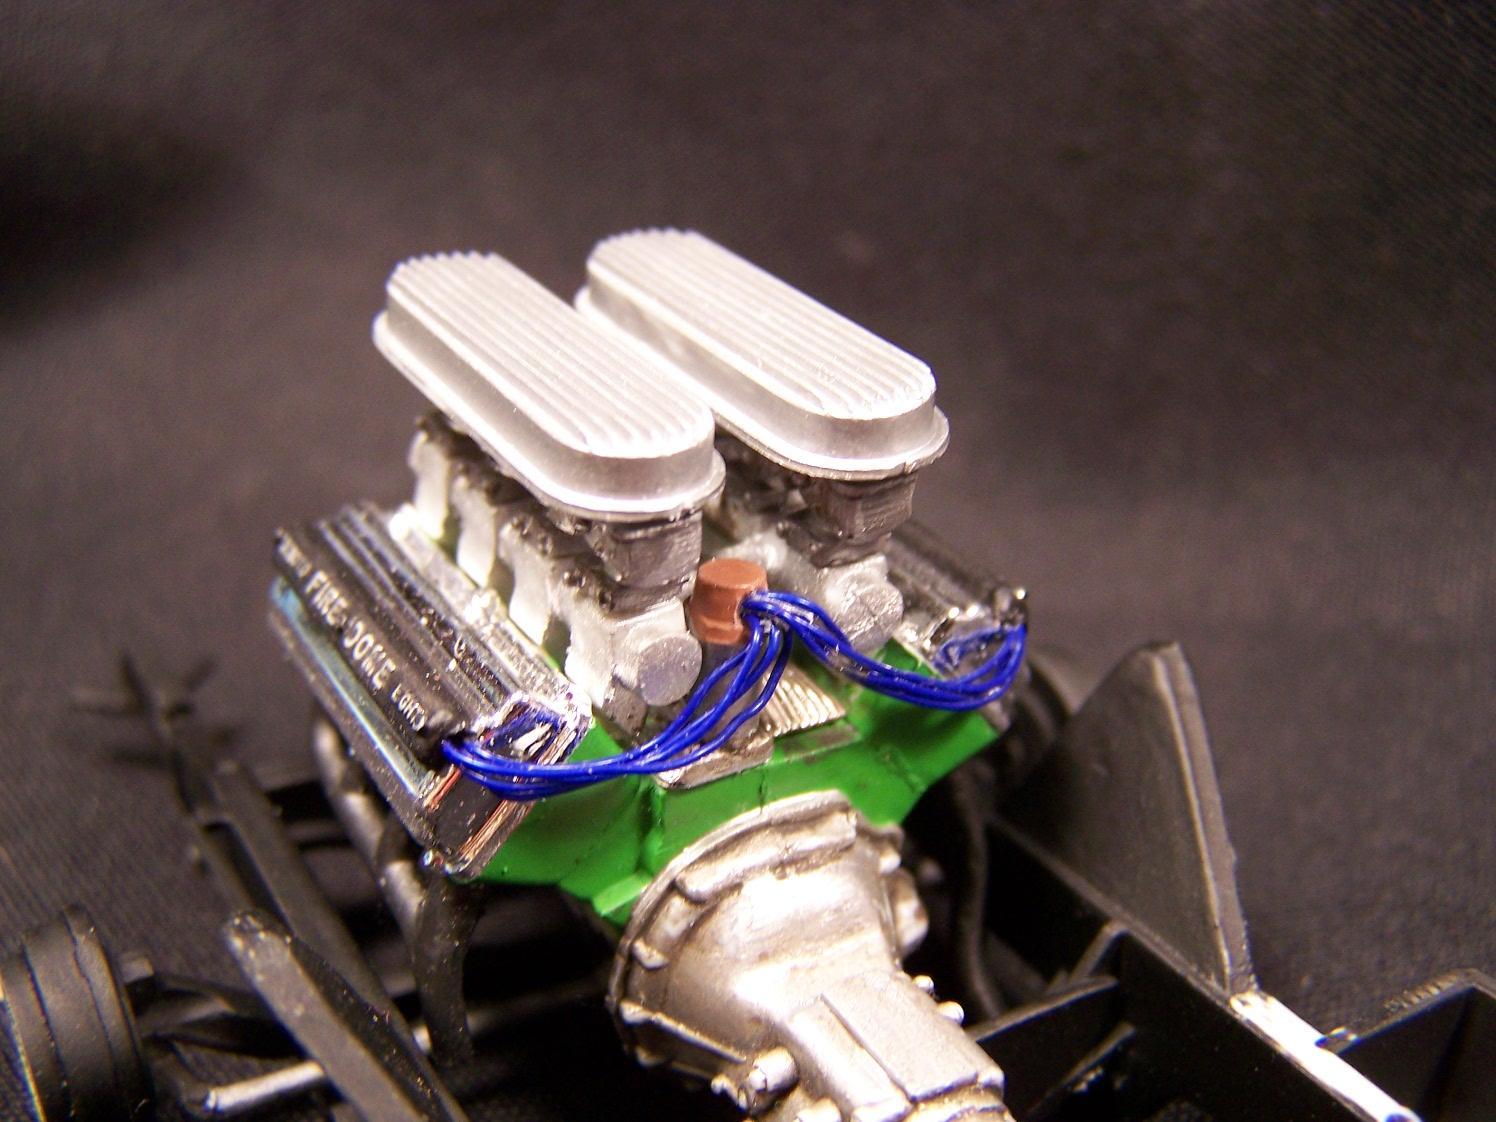
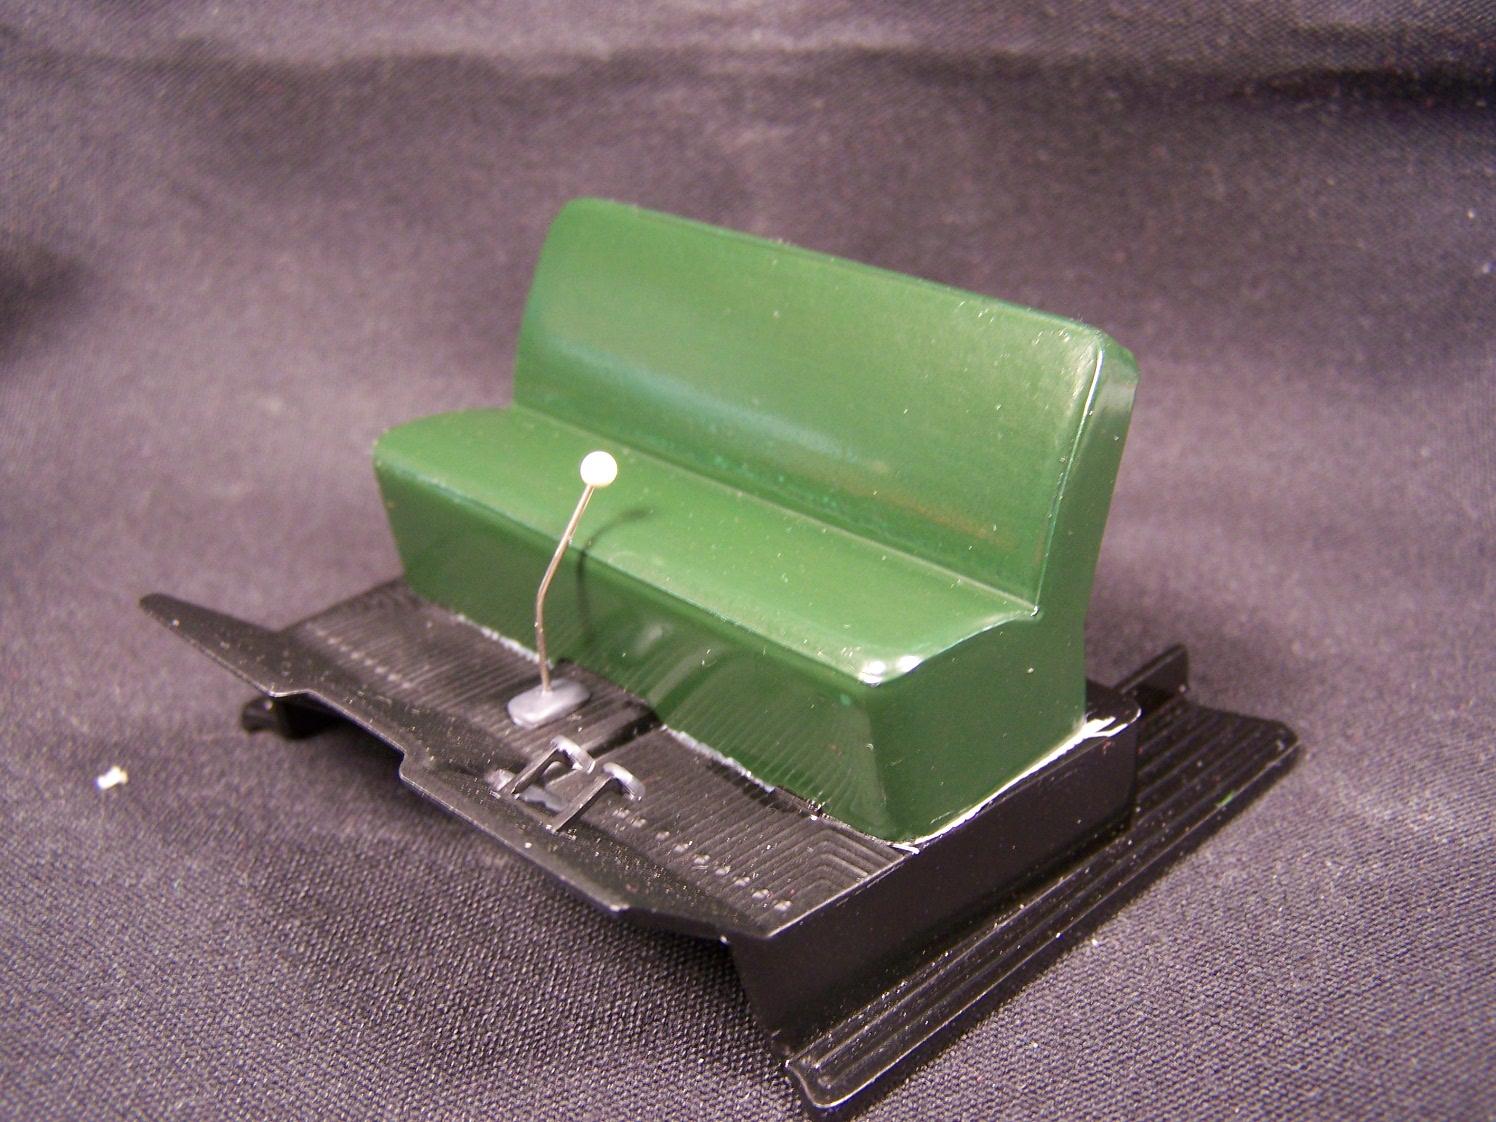
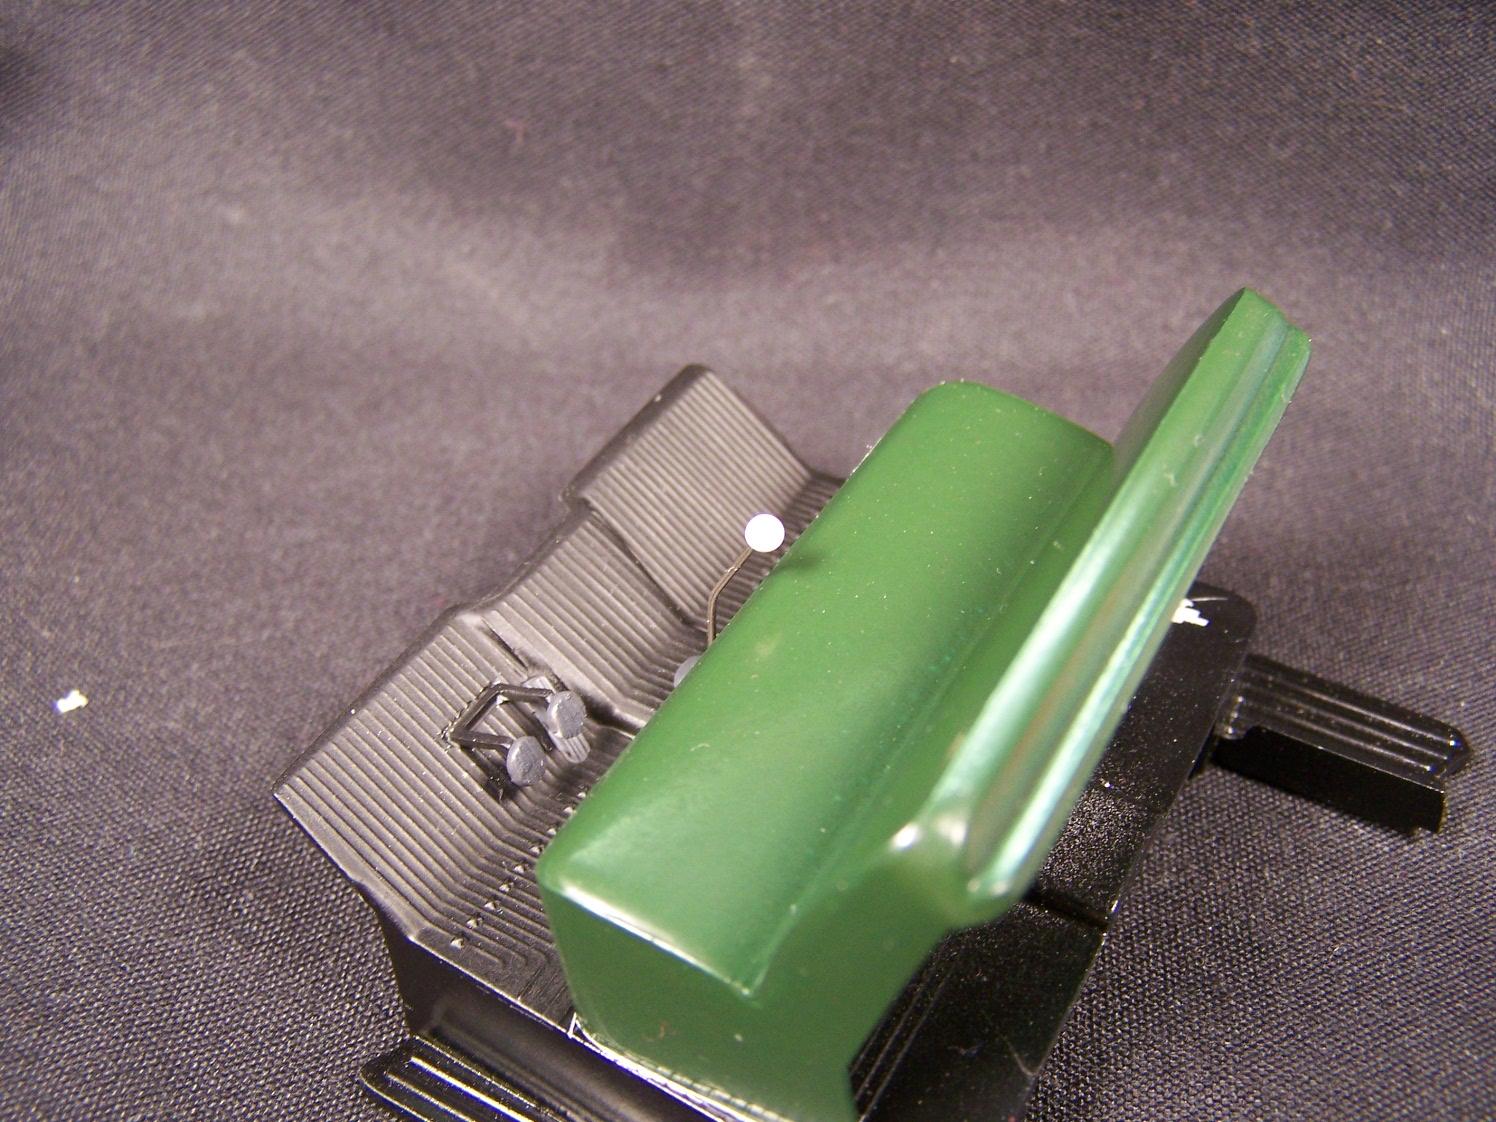
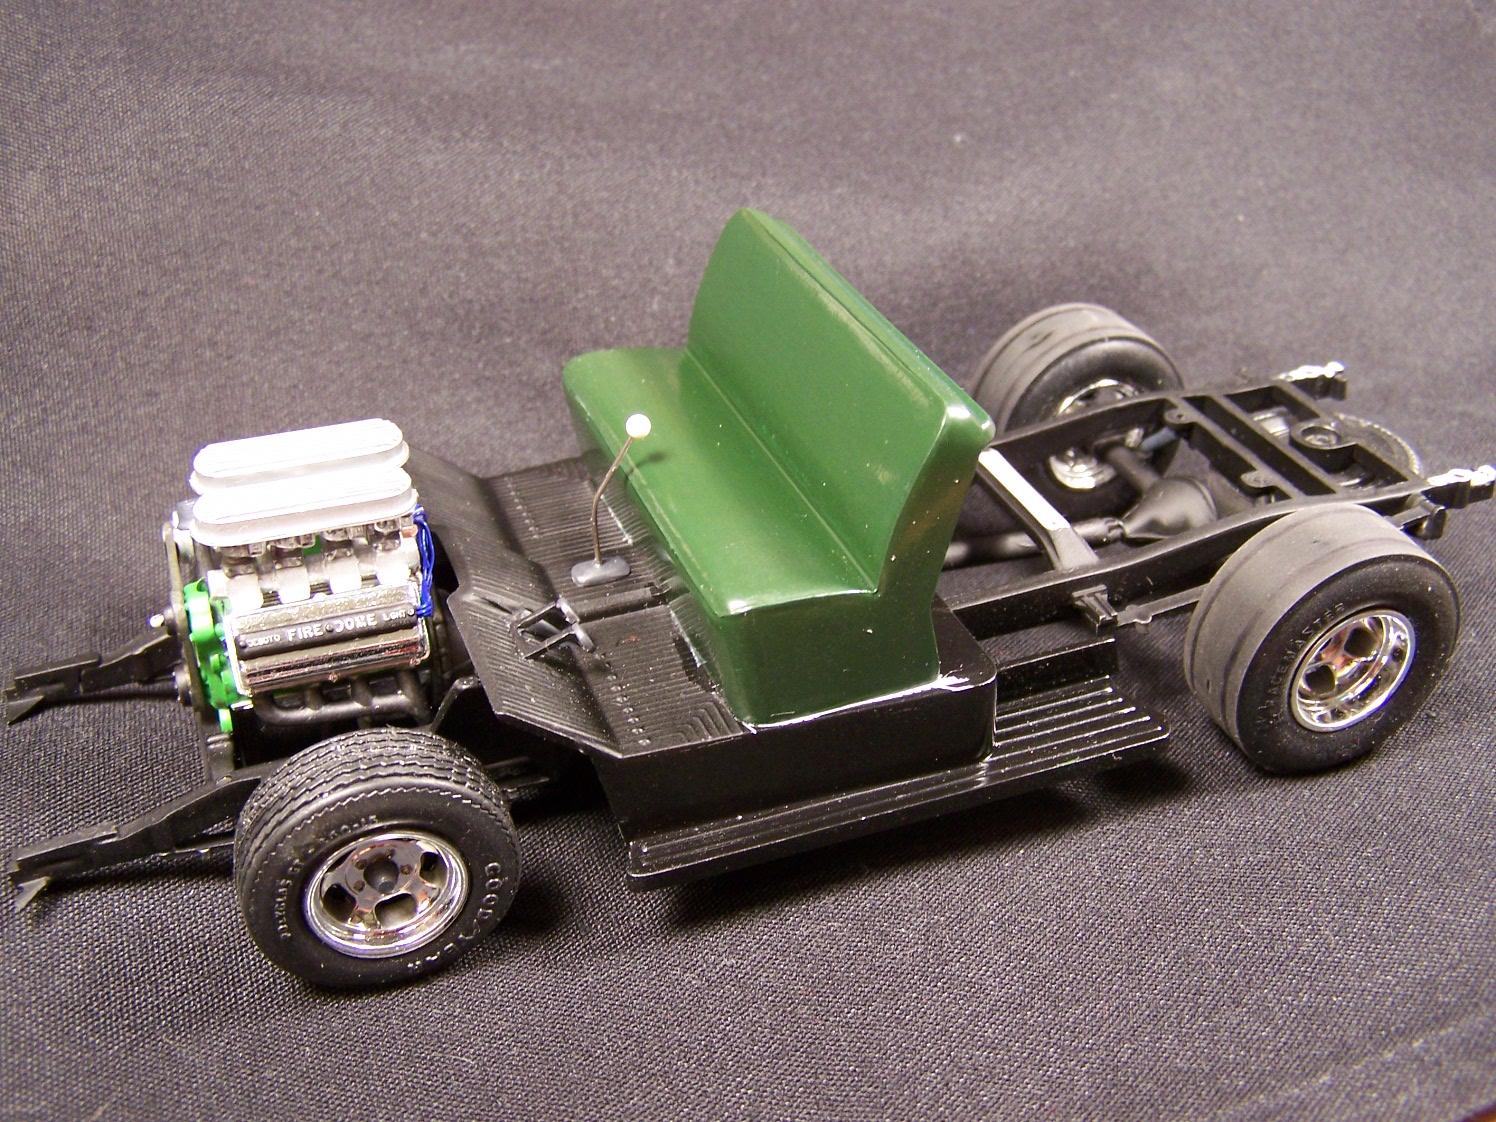
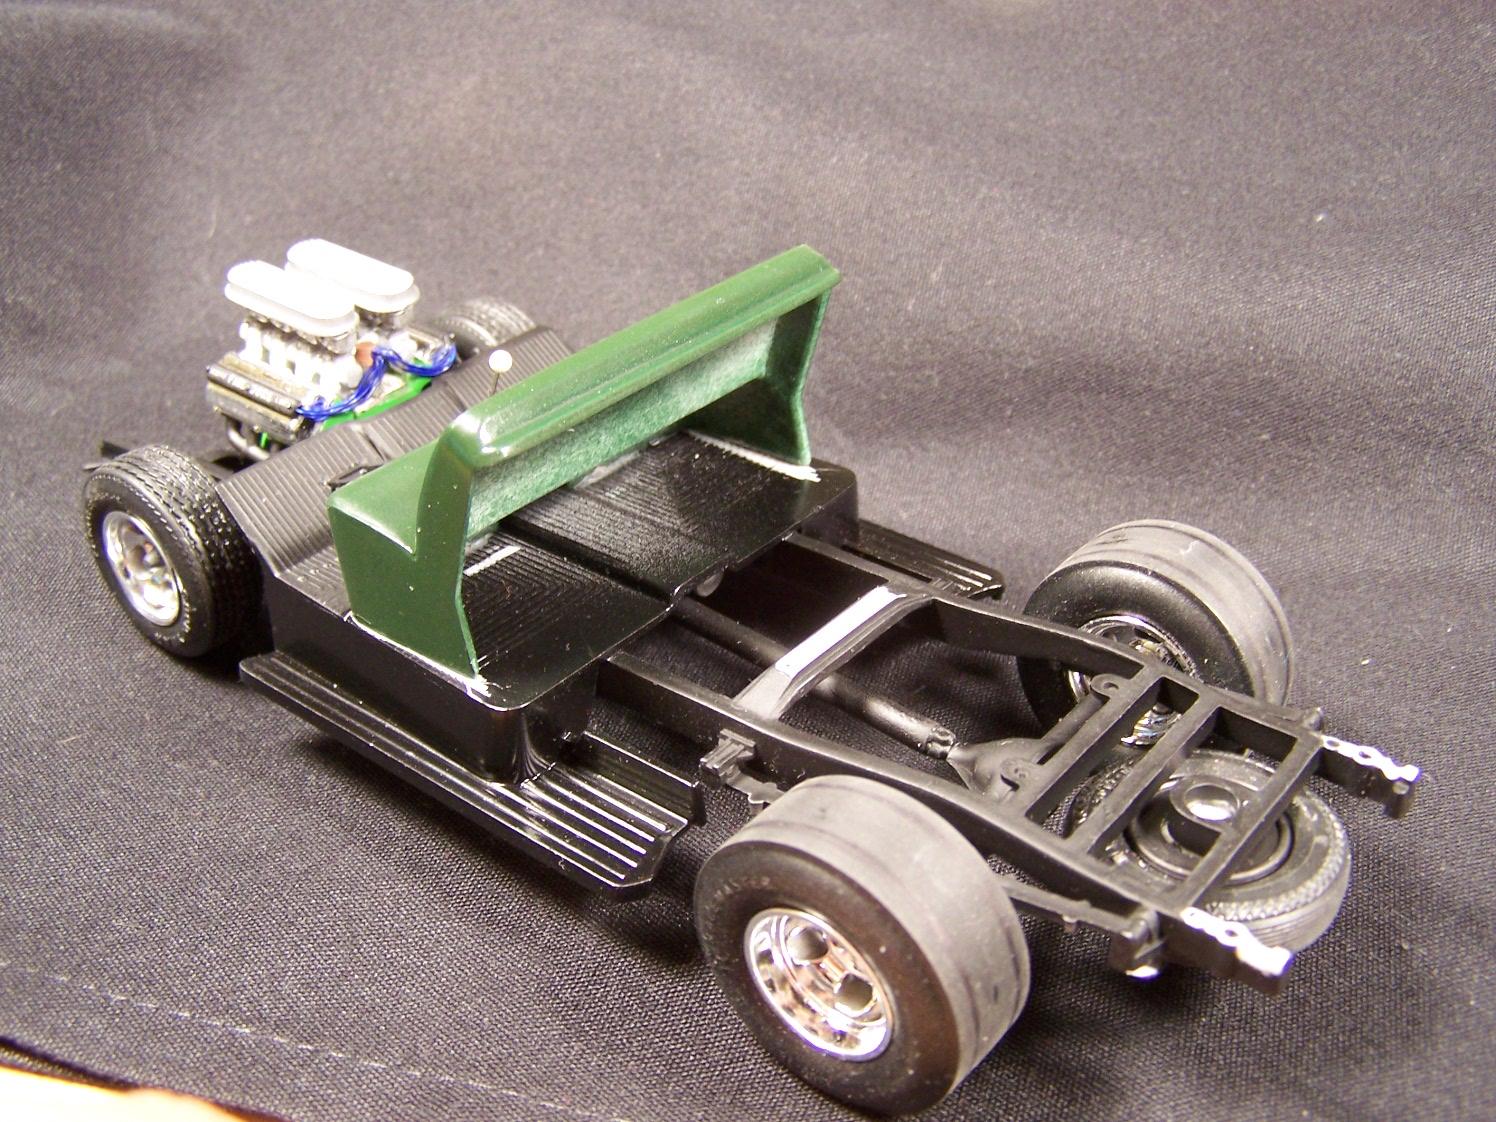
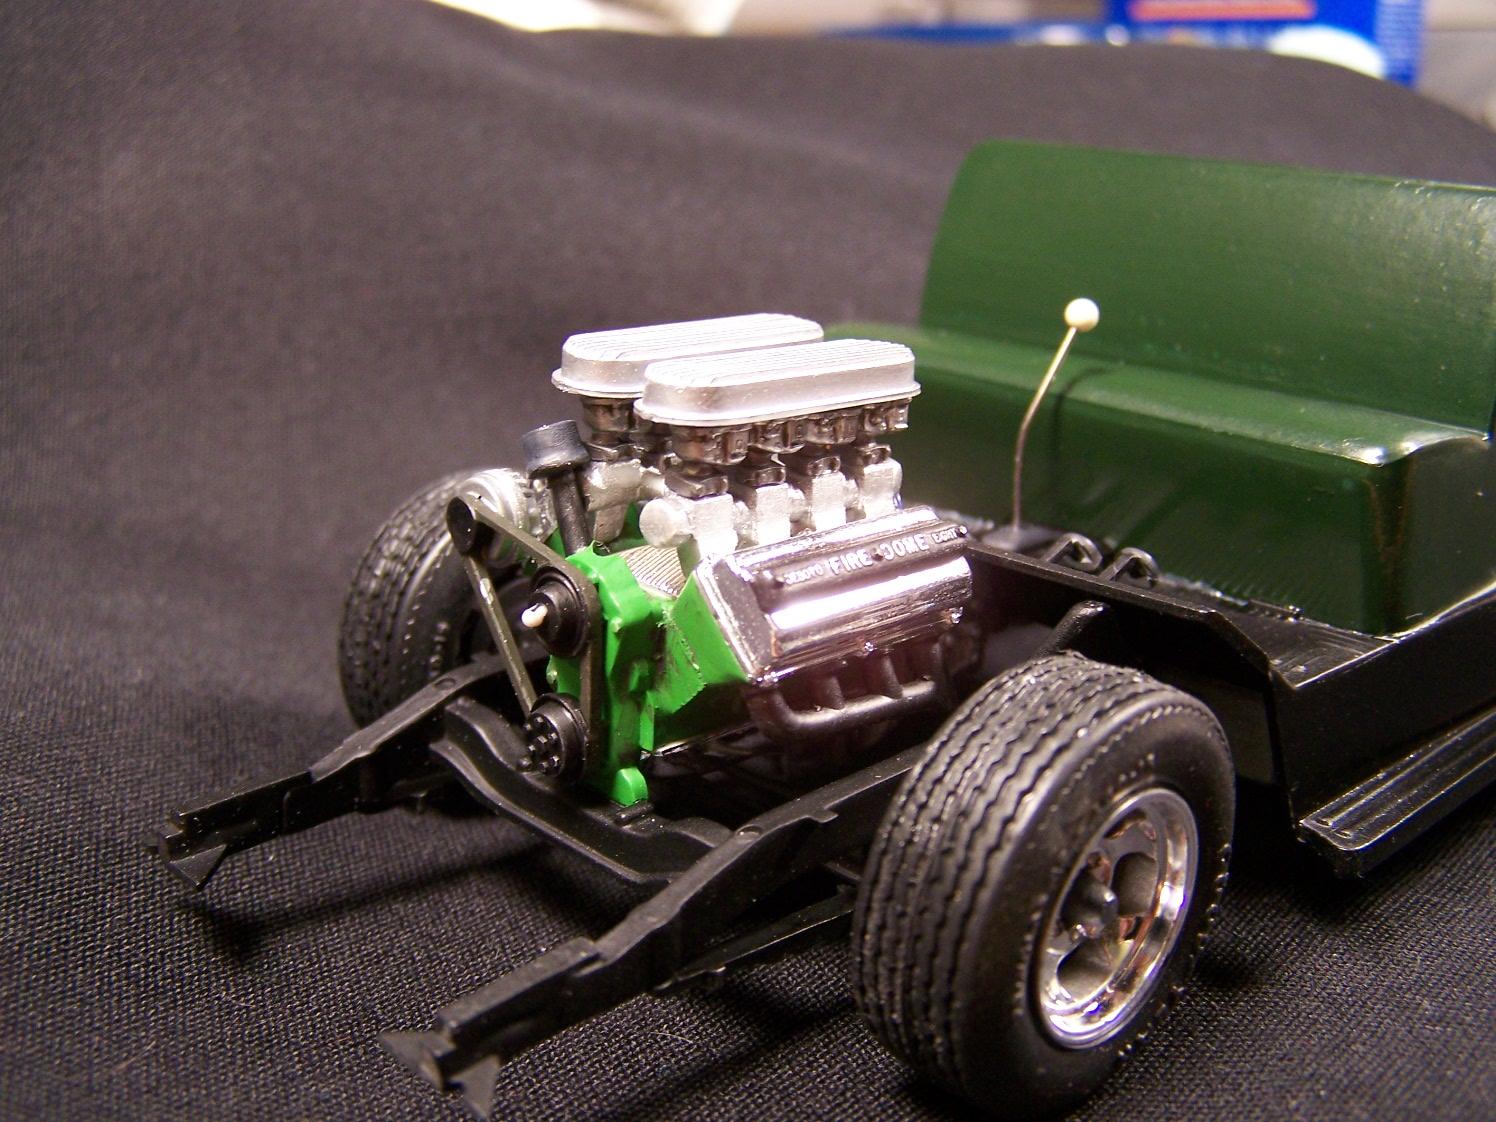
Some of you may remember the Big Dog I, a 29 Ford that I built as a shop truck for my fictitious speed shop, "Big Dog Speed Shop". Well, I decided to move forward a few years and create the next in line in a series of proposed vehicles that I hope will chronicle the life of the speed shop. Just to bring everyone up to speed, here is Big Dog I. Big Dog II is an AMT 53 Ford F100 that I was hoping to have finished for the web theme at this years NNL East. (maybe next year). I started by mocking up various wheel and tire combos. Looking for the right "look." After settling on a style, I started scratch-building rear wheel wells, and grinding down the wheel backs of the rear wheels. (from the John Mazmanian Willys) The engine was the next piece of the puzzle. I decided on an early Hemi. I initially wanted to really detail out the carbs, but I was in a time crunch, and after I stripped the kit chrome, the kit supplied carbs looked pretty good. Next came the interior. I finally got the chassis completed.
-
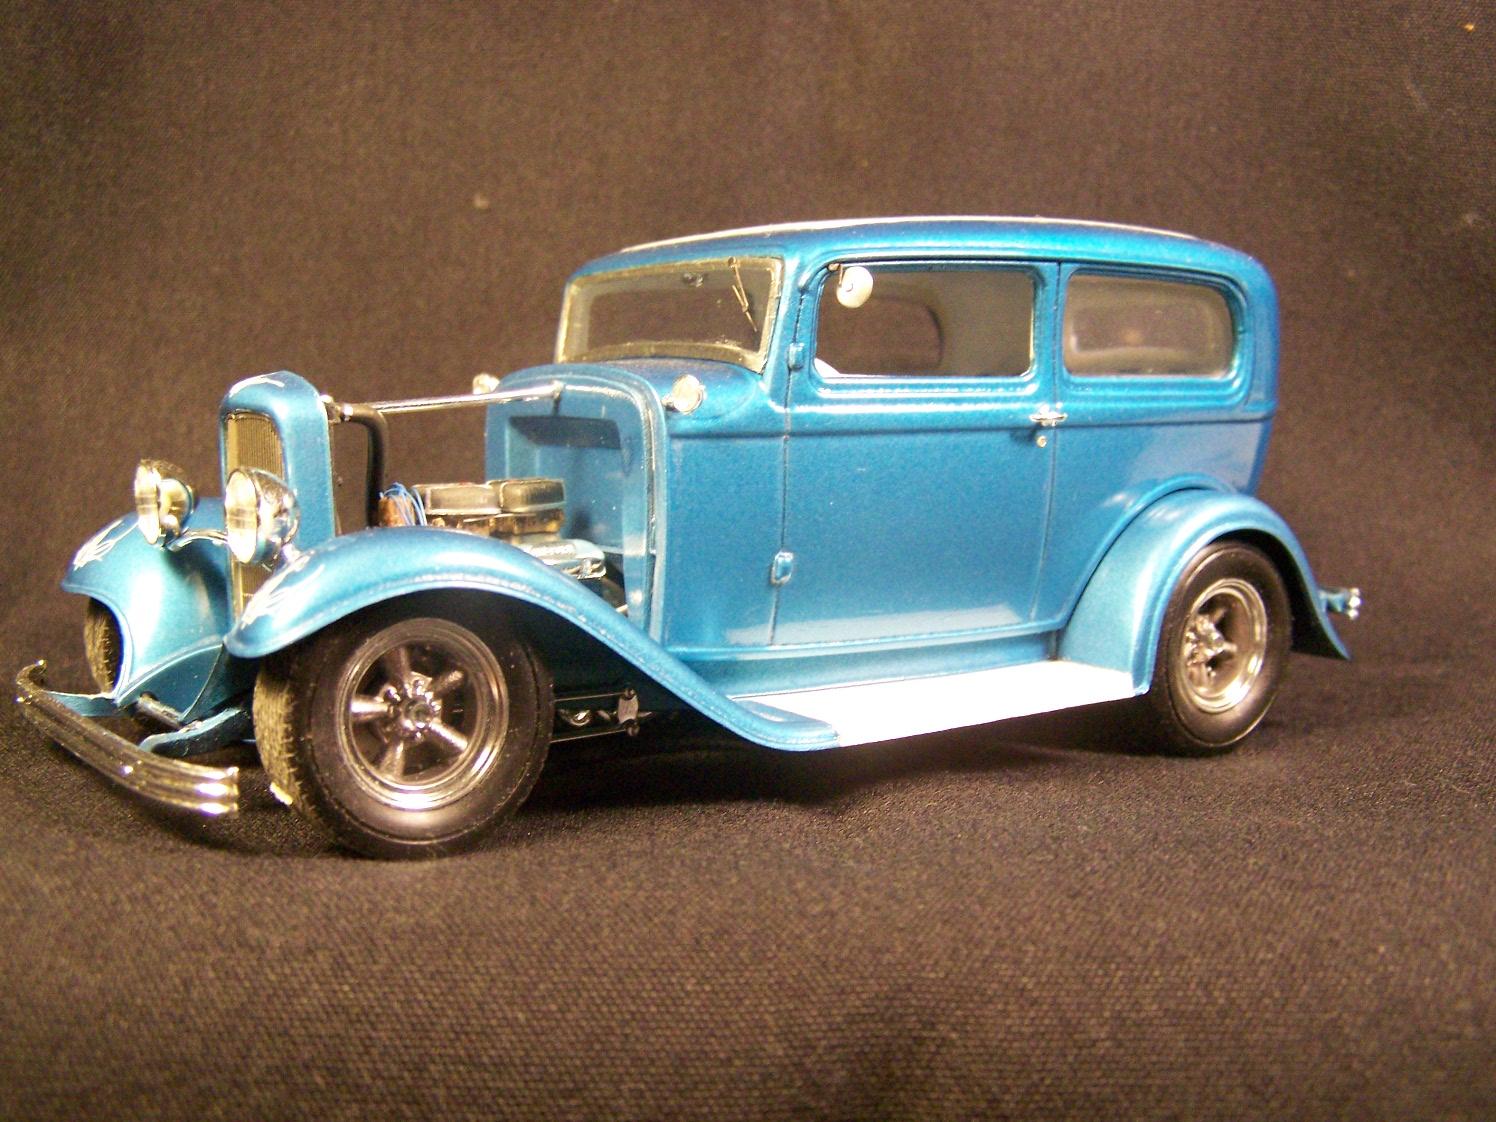
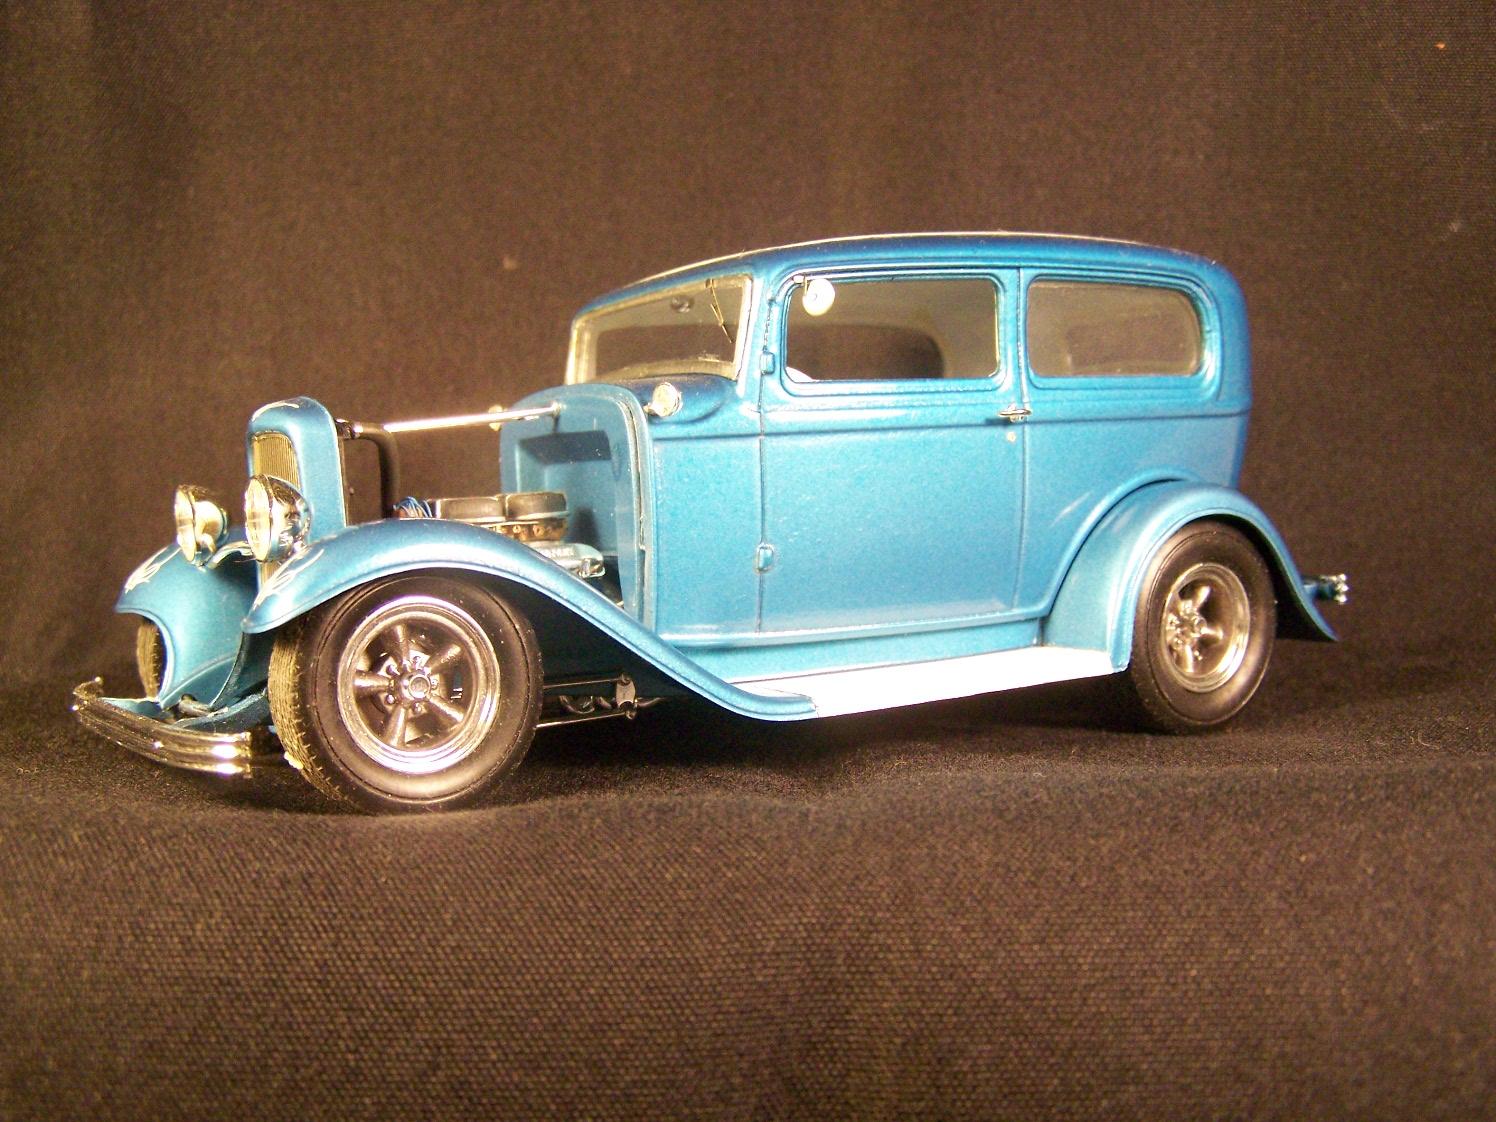
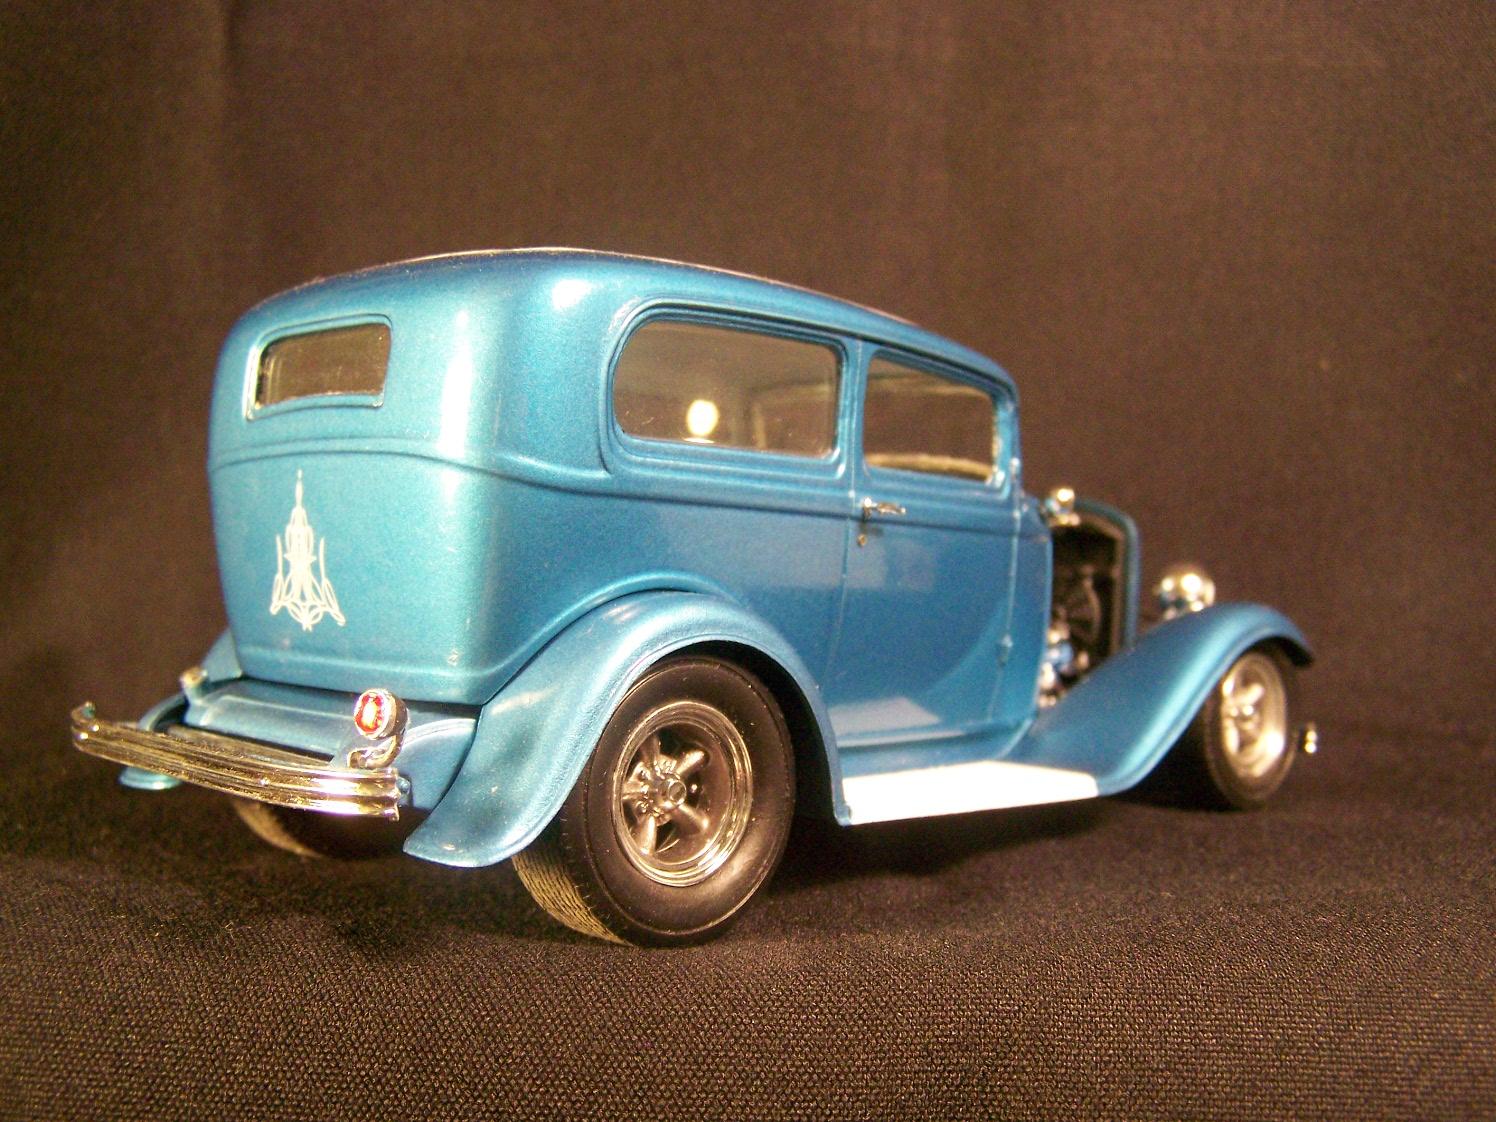
I built this for a friend. It is my first ever commission build. They just wanted something cool, and let me pick the subject and go to town. The top is chopped 2 scale inches (.080") using a step shop method. The front suspension is also dropped just a bit. I used a Model Car Garage P/E set for the grill and other details, and a Repl & Mini Co of Md. 2x4 intake, carbs , and air cleaners. Paint is Testors Nassau Blue. and Tamiya pure white.
-
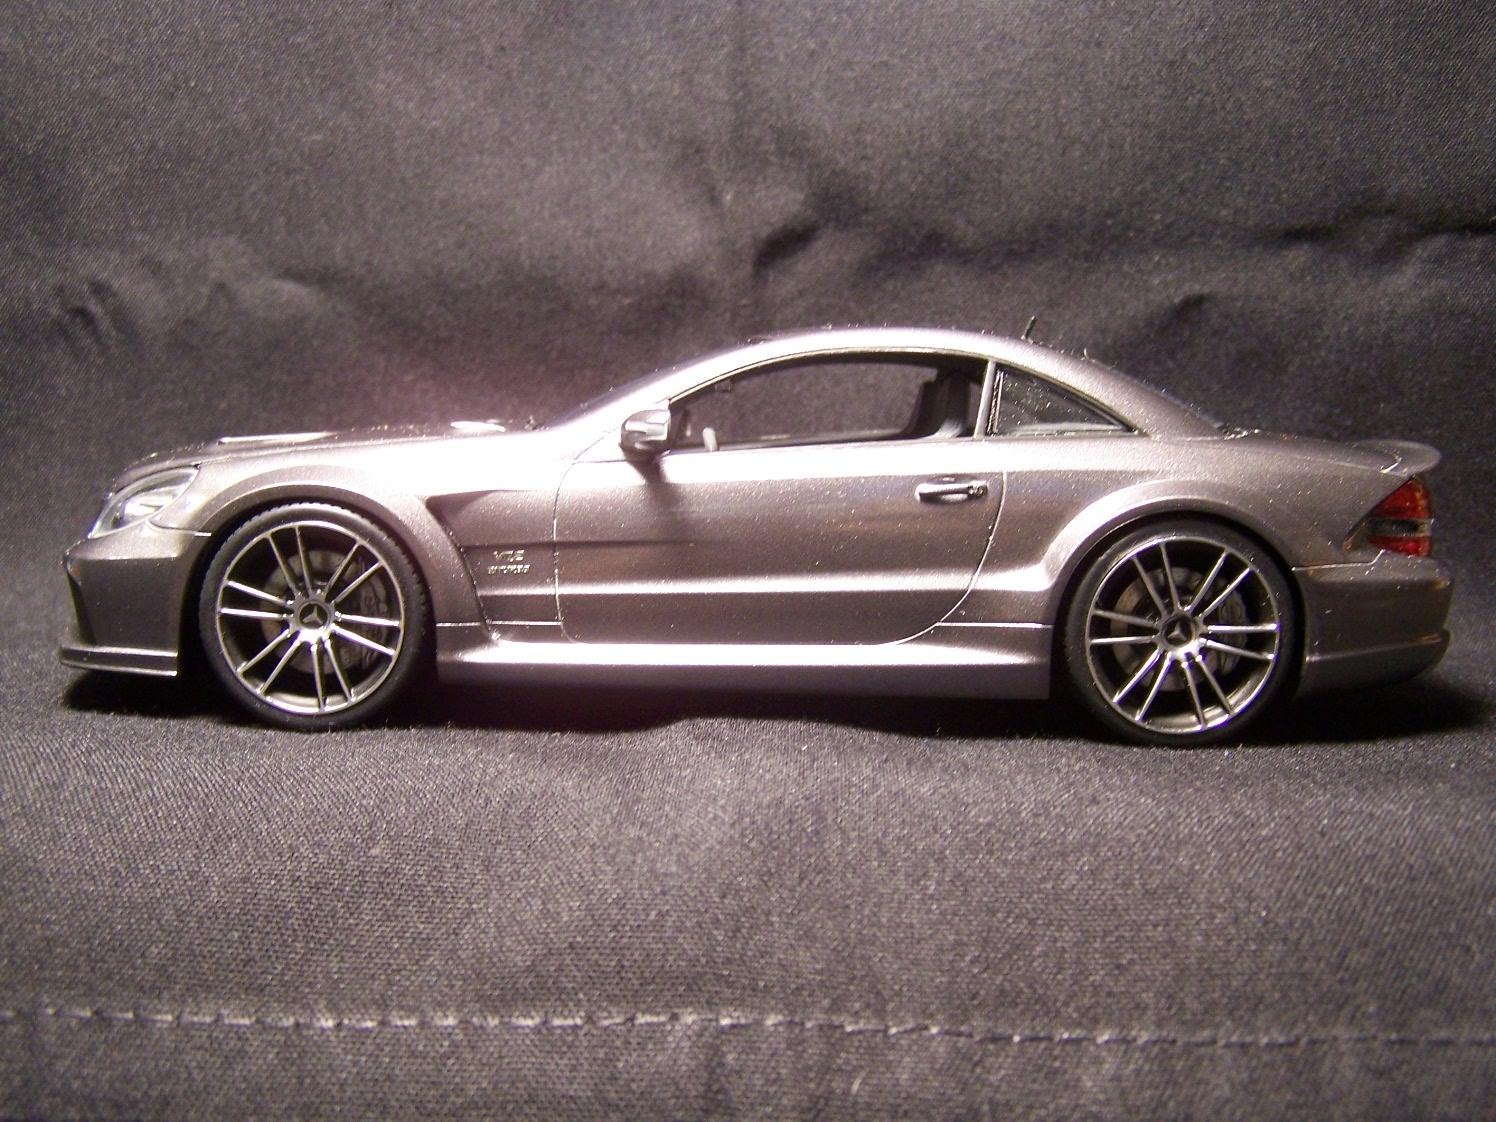
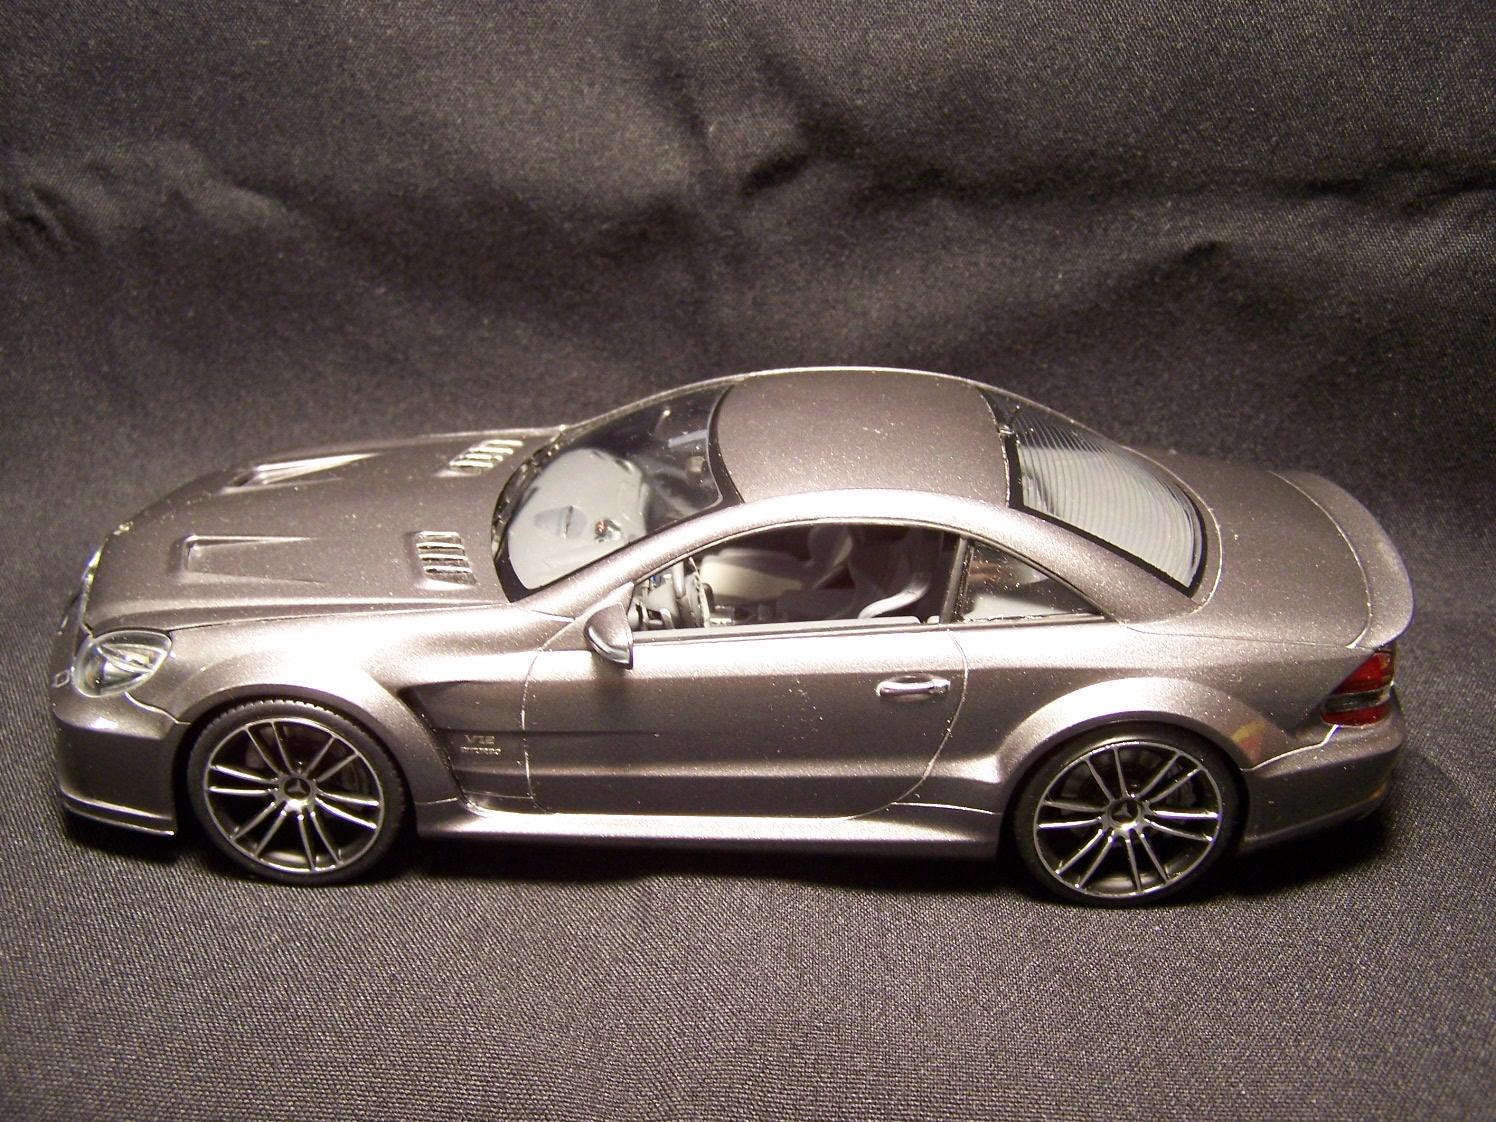
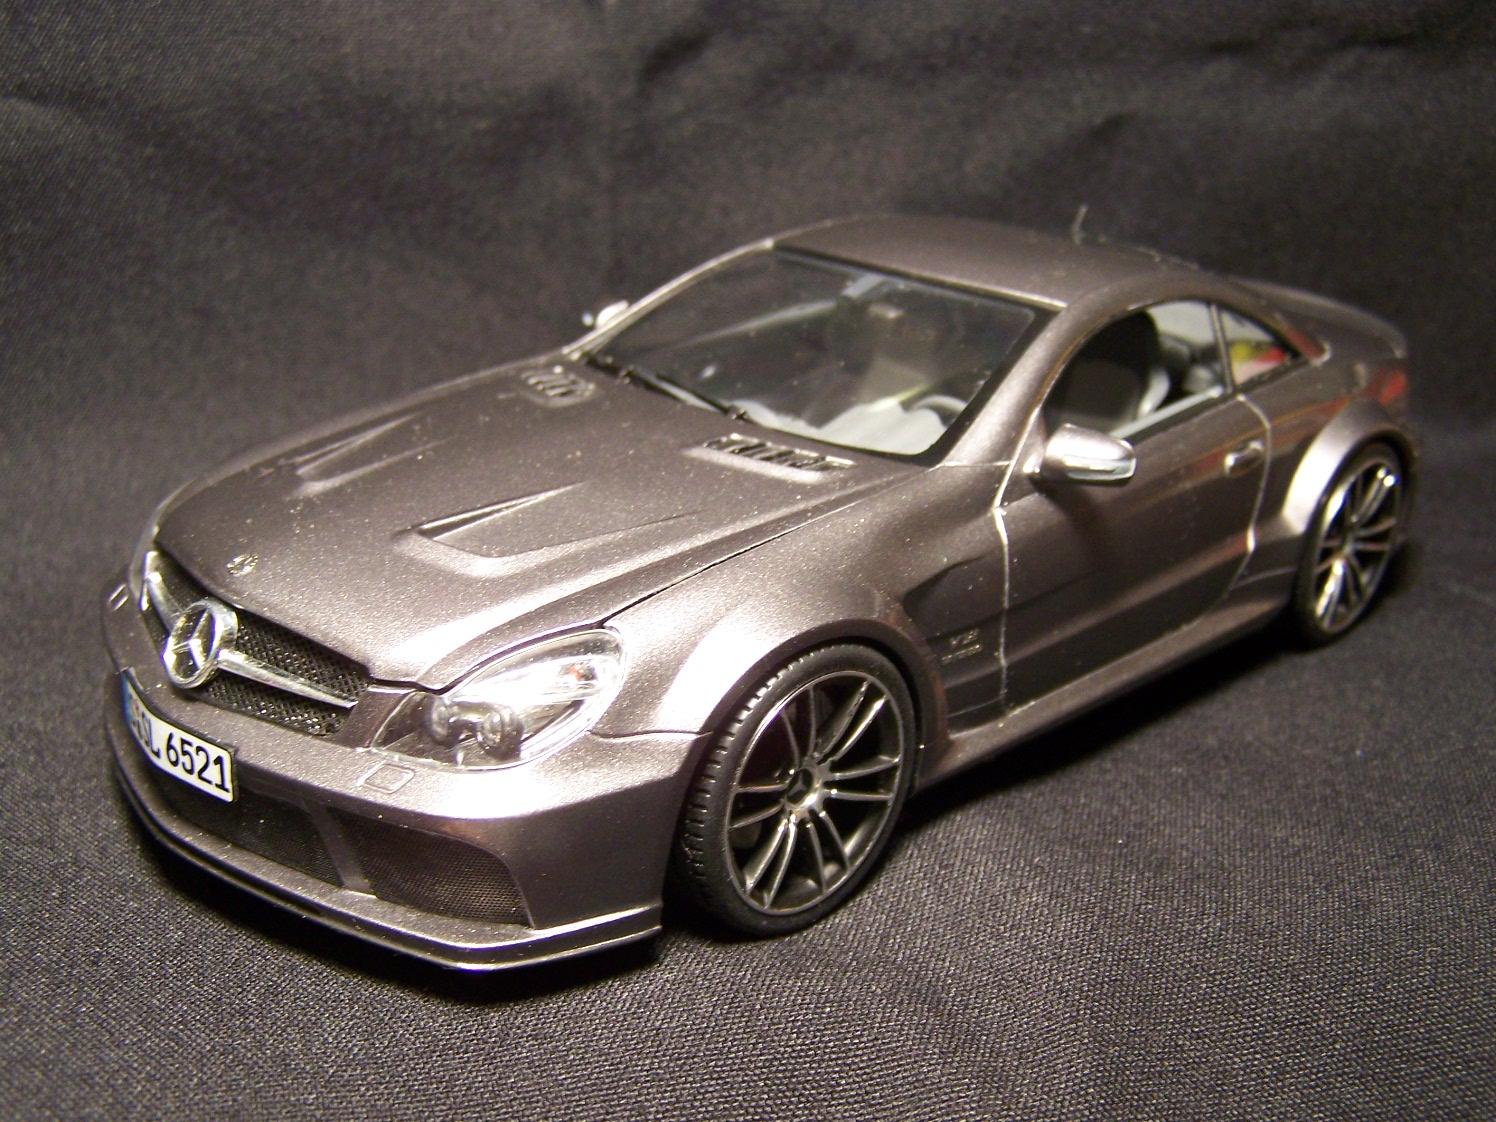
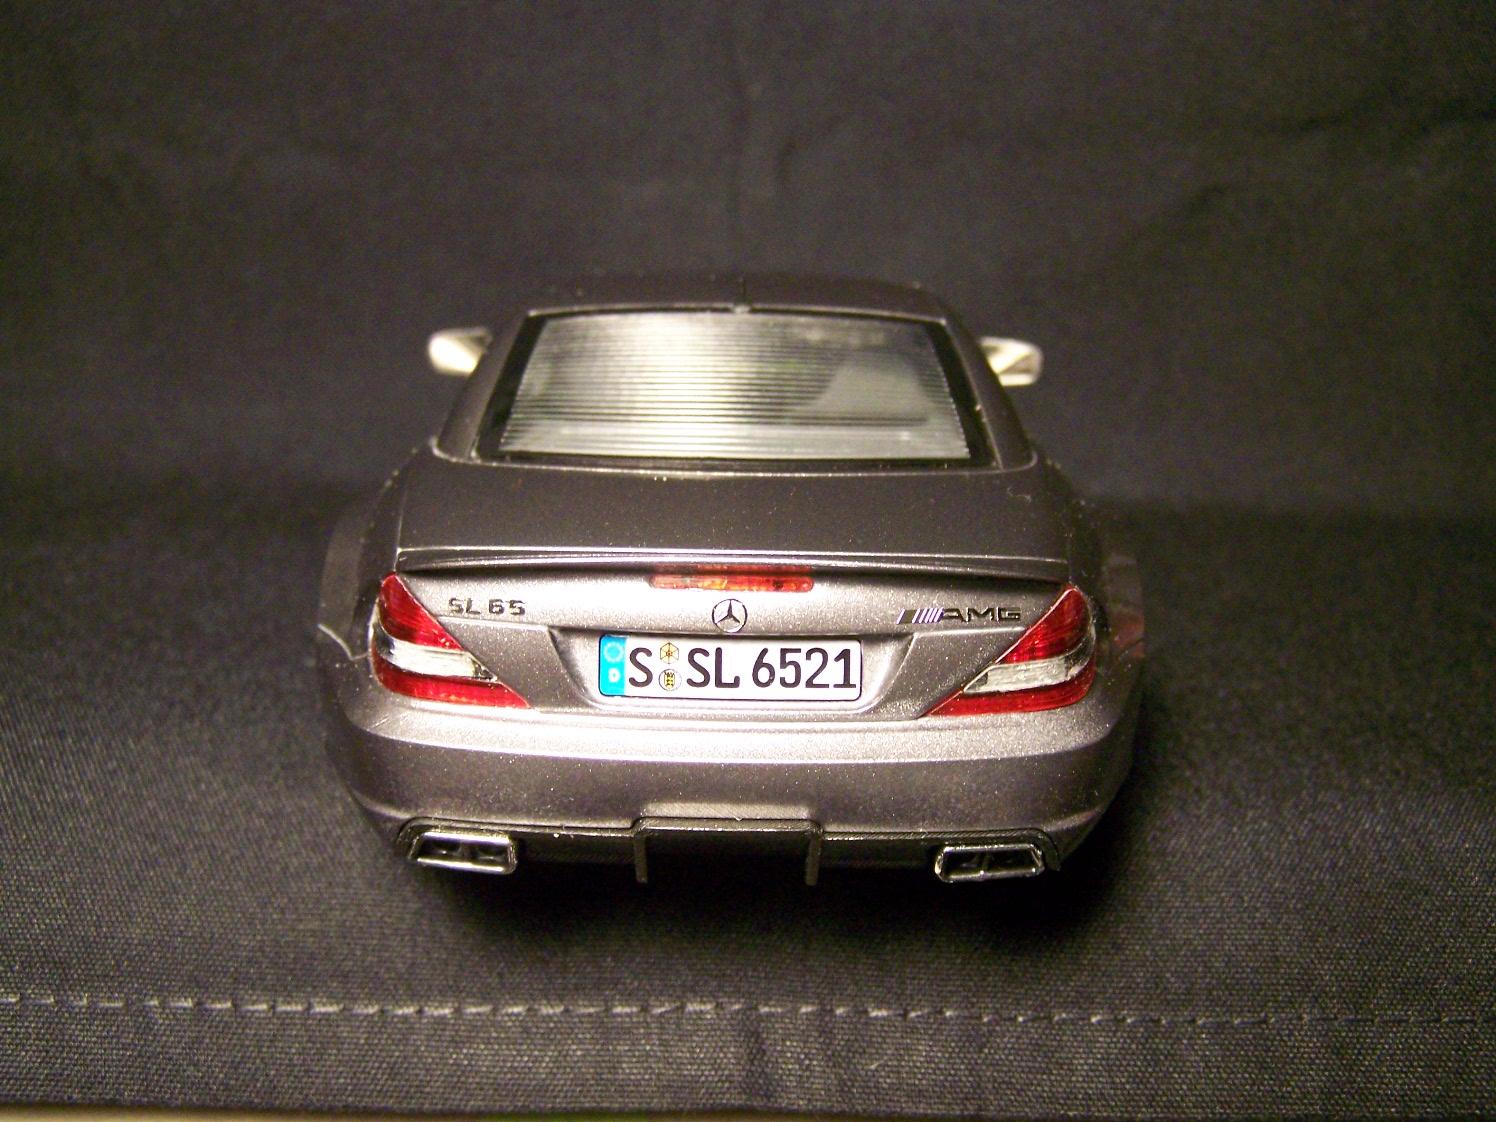
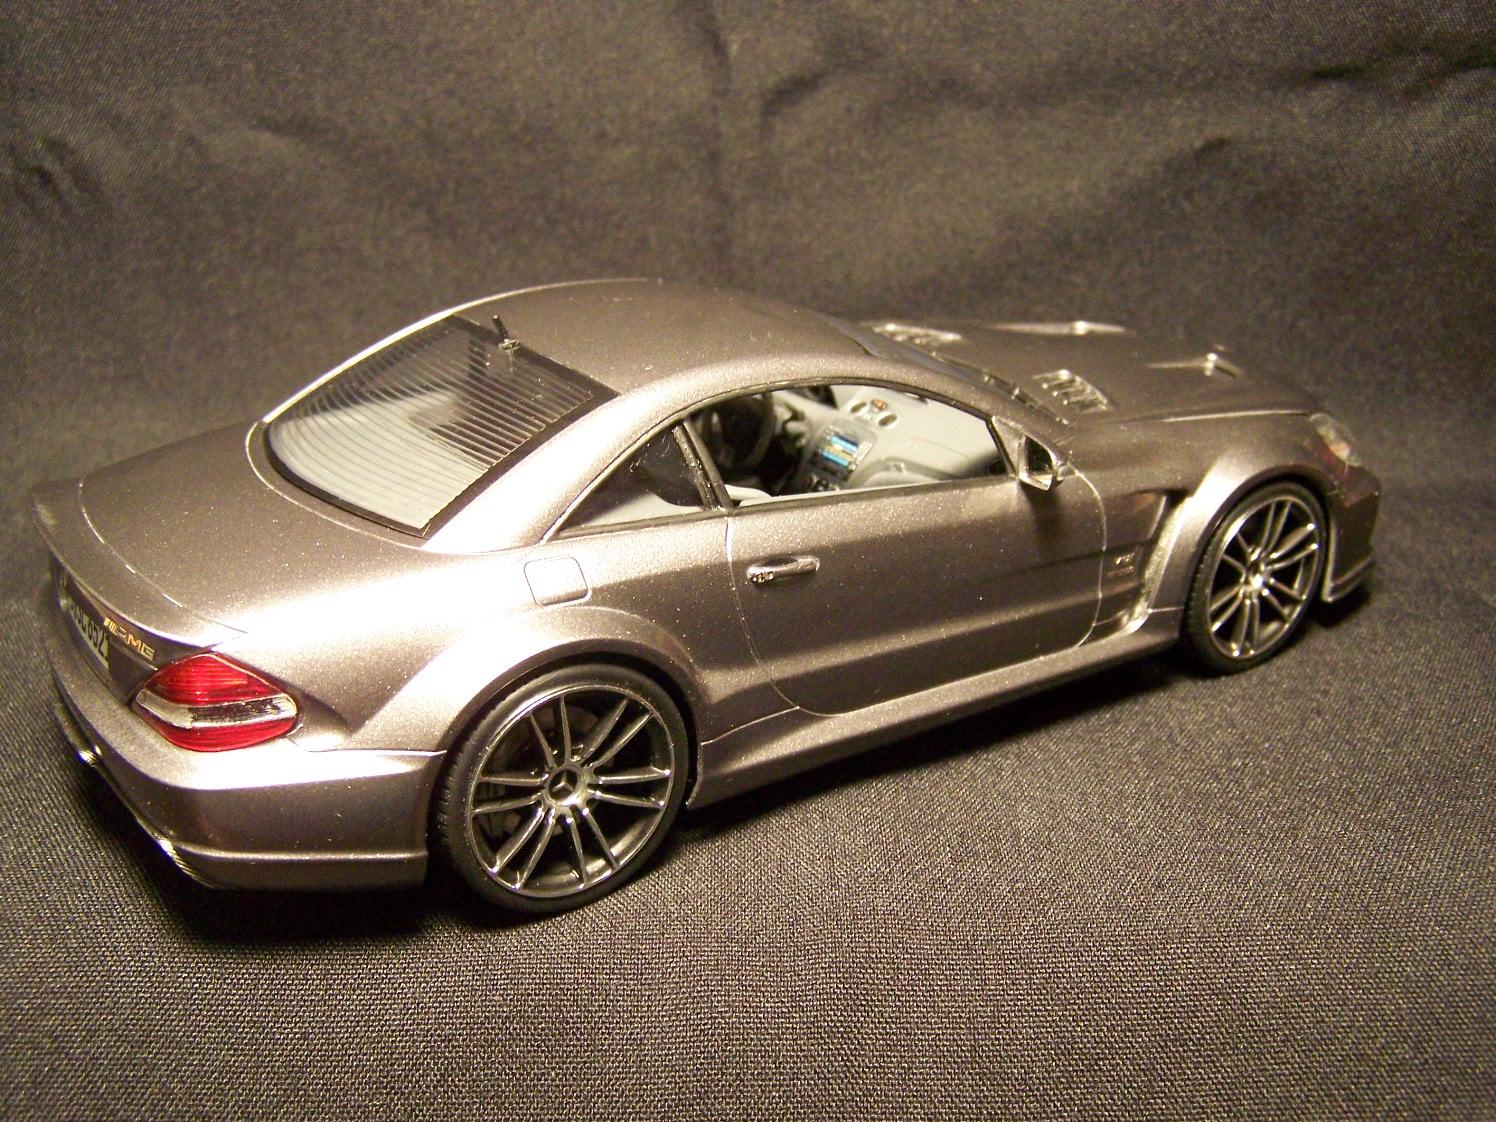
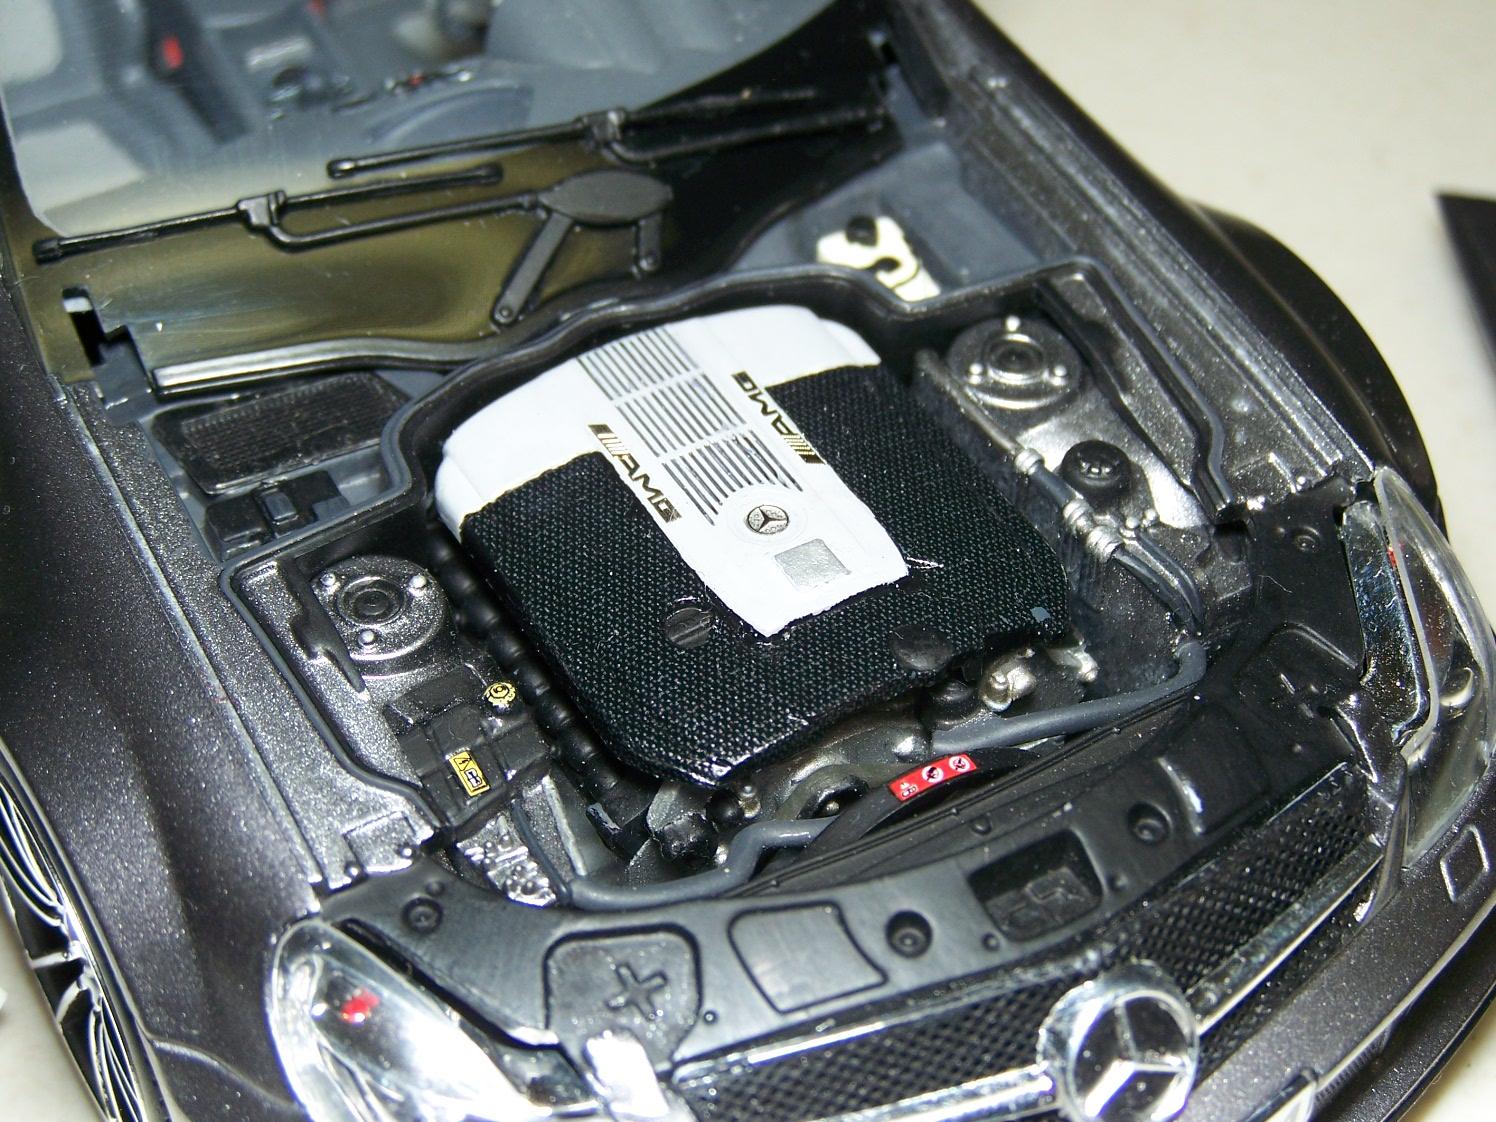
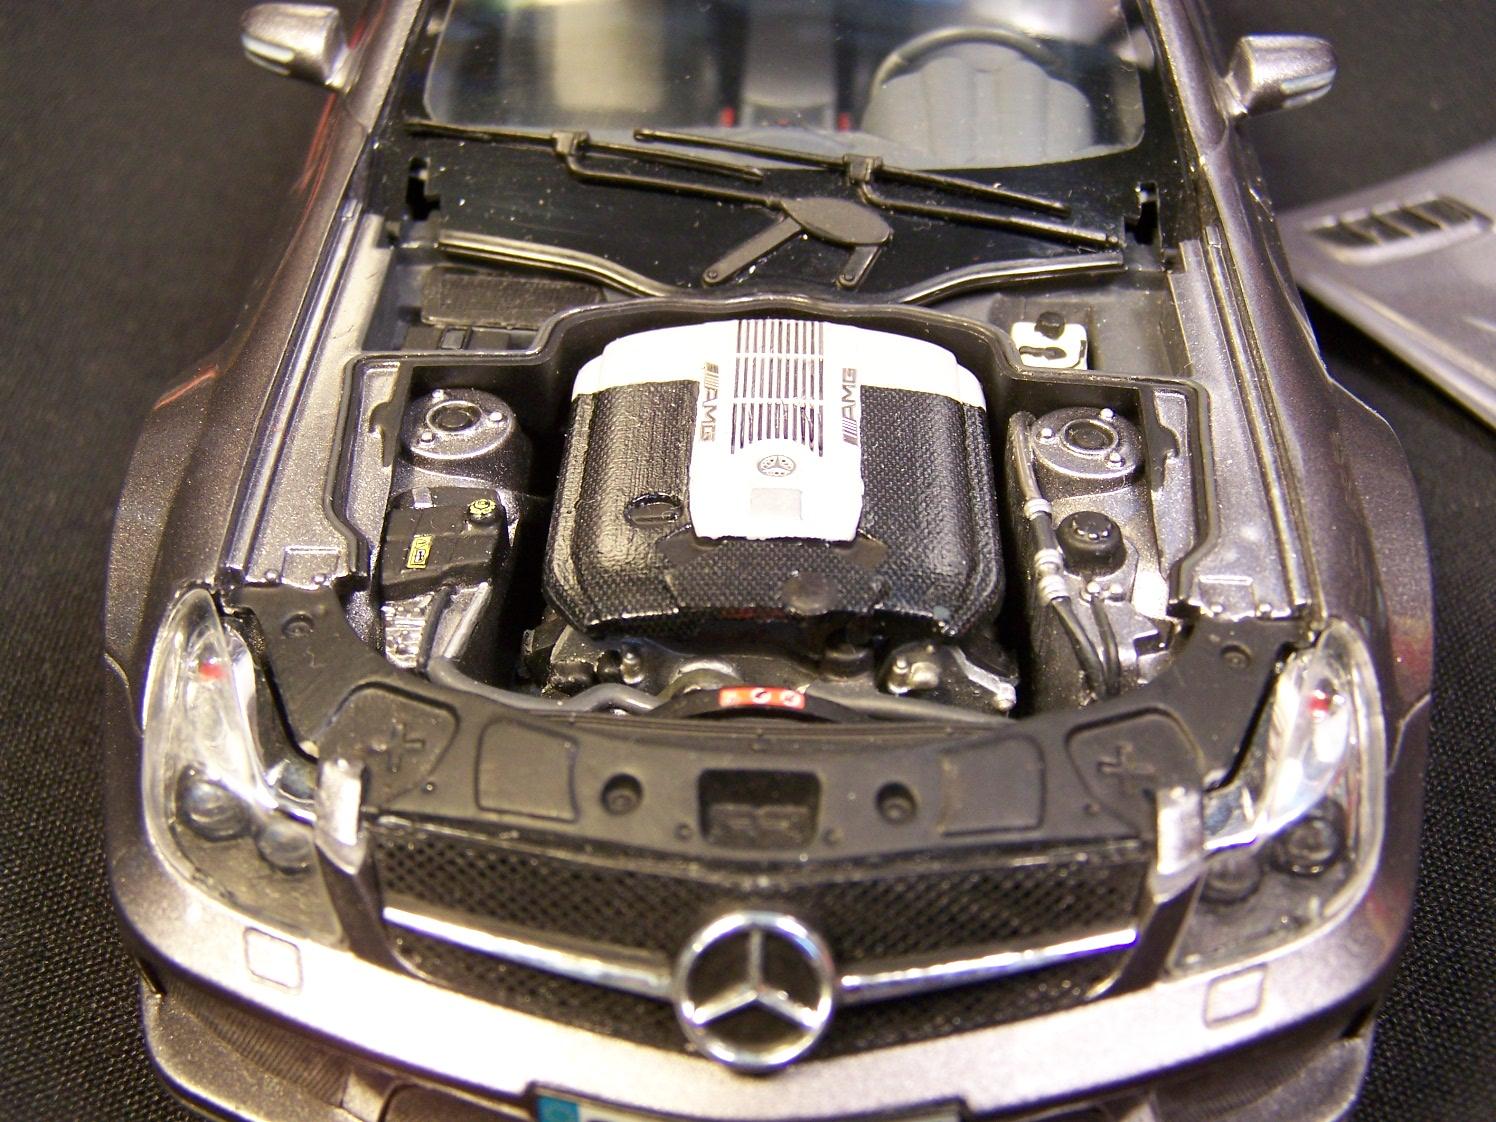
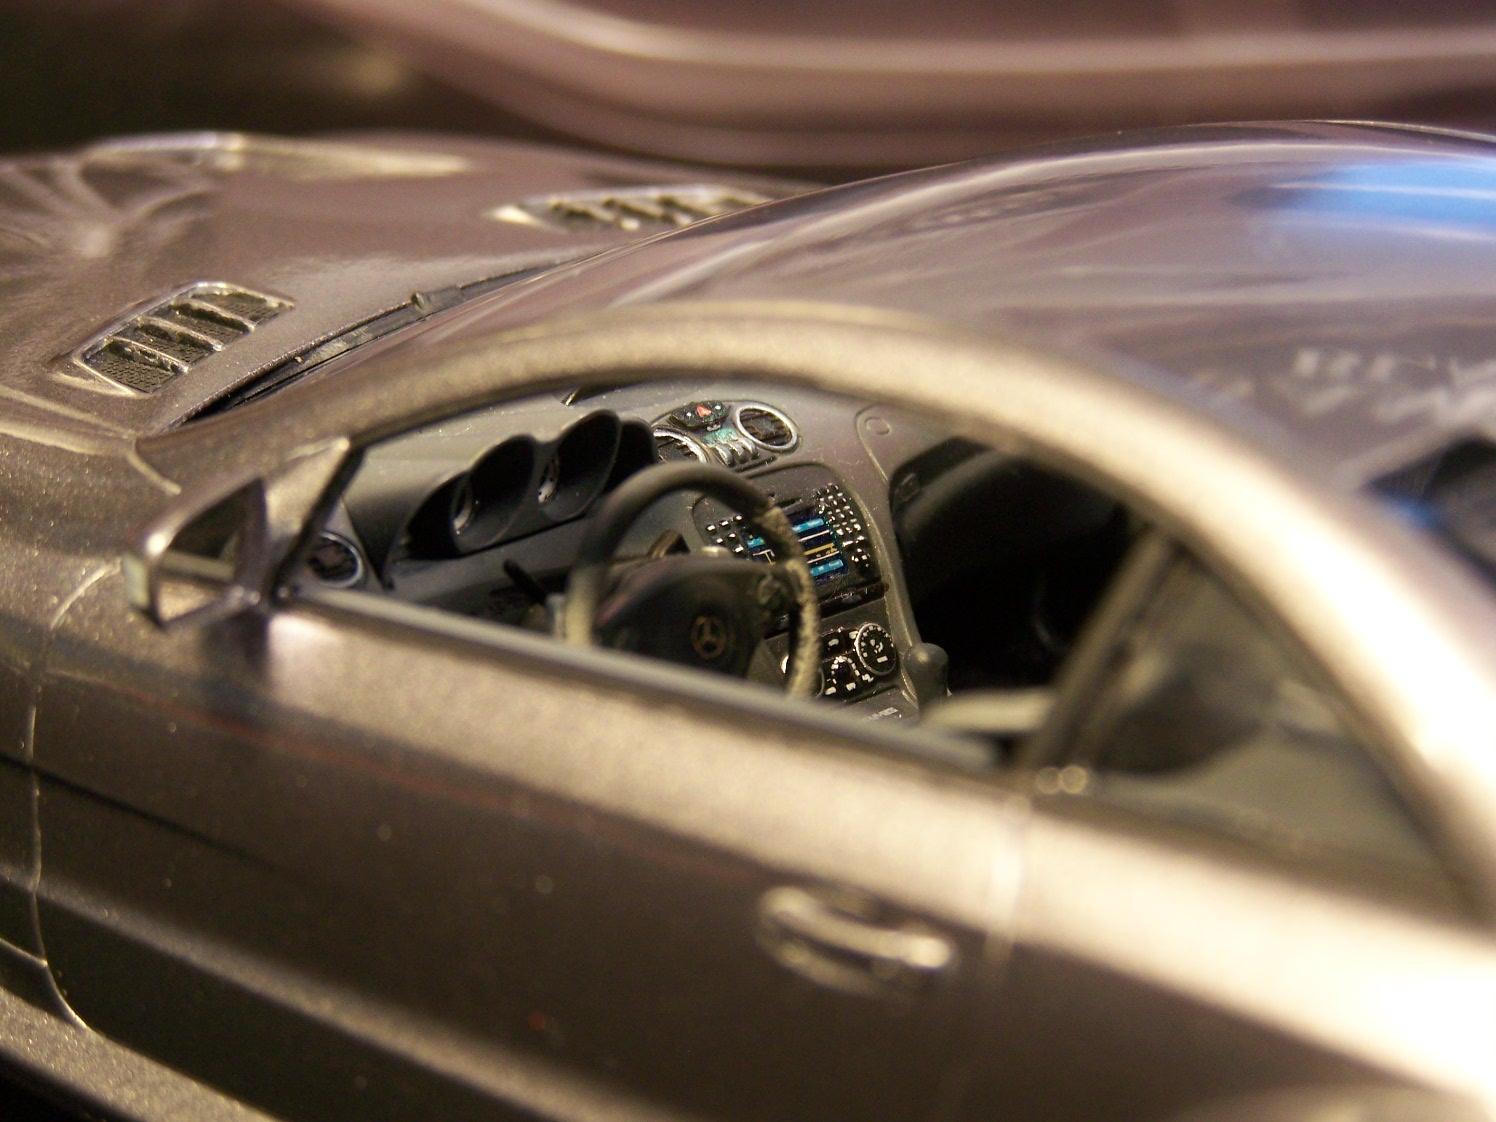
It's been quite a while since I last posted here, so I hope I'm doing this correctly. This is an Aoshima kit of an AMG Mercedes SL65 Black Edition. It's painted with Tamiya Light Gunmetal (rattle can) and is almost box stock. I added a few carbon fiber decals, and used the Aoshima P/E set for details and badges.
-
I need a bit of help here. I'm trying to get a hold of Ed Sexton, and I now can't seem to find his e-mail address. I know I have it somewhere in this stupid computer, but I can't find it for the life of me. NUTS. Any help is appreciated.
-
 It was a Great show. Here's a few photos from today, and a link to the rest. I hope you enjoy them. ...and here's the link: http://public.fotki.com/El-Tanque/model-shows/nnl-east-xxvii-04-20-13/
 -
Wonderful build, of a fantastic journeyman racer who should be in the NASCAR HoF! Nice Job!!
-
Bill, I'll see if I can find that information for you the next time I go down to the museum.
-
Nascar Craftsman Trucks - Eldora Speedway on DIRT 20132
Tommy Kortman replied to hooterville75's topic in WIP: NASCAR
When I heard about this a few weeks ago, I was skeptical, but hopeful. I think it's FANTASTIC!!! I can't wait to: "A" See heat races, and "B" watch some of these asphalt cry babies learn what it's like to race on a real surface. There are definitly a few of these guys who will have an advantage. Glad to see they are heading to Canada too, and back on a road course again. I hope Fellows runs the Mosport race. -
Chassis #002. Once owned by Roger Penske and George Wintersteen. Now owned by the Simeone Museum. The blue "car" is actually a spare body for the roadster. It was created so the car could be vintage raced without destroying the original body you see here. What is interesting is the small block hood w/ the louvers. I call it the sm. block hood because I can't find any evidence of the hood being used once a big block was installed in the car. Here is the aluminum 377 ci. small block. Complete with Webber carbs. ...and...once again, a link to the rest of the photos. Please enjoy and feel free to use the pics for refrence for your own builds. http://public.fotki.com/El-Tanque/reference-photos/corvette-grand-sport/
-
Yesterday I was down at the Simeone Museum in So. Phila. and I discovered that they recently were loaned a 62 Ferrari 250 GTO. It is #2 of the 39 that were built. This car won it's class at Sebring with Phil Hill driving. It is absolutely beautiful. This was a religious experience. I felt like I found the Holy Grail! Please enjoy. ...and here's the link to the rest of the photos. http://public.fotki.com/El-Tanque/reference-photos/ferrari-250-gto/
-
I was lucky enough to have been invited out to Mount Wolf Pa. on Saturday to attend the November meeting of the Central Pennsylvania Model Car Club or CPMCC for short. These are the guys that hold the Super September Showdown each year. They are a great group of guys, and they even let me in the building. They were holding their annual auction. It was a great time. They have got some wonderful modelers out there. Ilook forward to getting out there again sometime soon. Here are some pictures I took out there. Here's a link to the rest! http://public.fotki.com/El-Tanque/cpmcc-meetings/cpmcc-meeting-11-03-12/
-
...oh, I also learned that I need to try polishing with a Dremel...but only after using Urethane as a clear. "Where did Dan say he got those "mops" again?"
-
I've learned that I need anew chair in the work shop. I am currently using a small stool and it is killing my back. As a result, I do not have the enthusiasm to get in there and work on anything.
-
I was able to shoot these on my way home from work yesterday. The car is located @ FC Kerbeck on Rt. 73 in Palmyra NJ. Kerbeck is an Exoctic & Luxury car dealer. This car looks great in photos, but it is stunning up close. There are more photos on my Fotki site; including some detail shots. http://public.fotki.com/El-Tanque/reference-photos/lamborghini-aventador/ ENJOY!!
- 1 reply
-
- 1
-

-
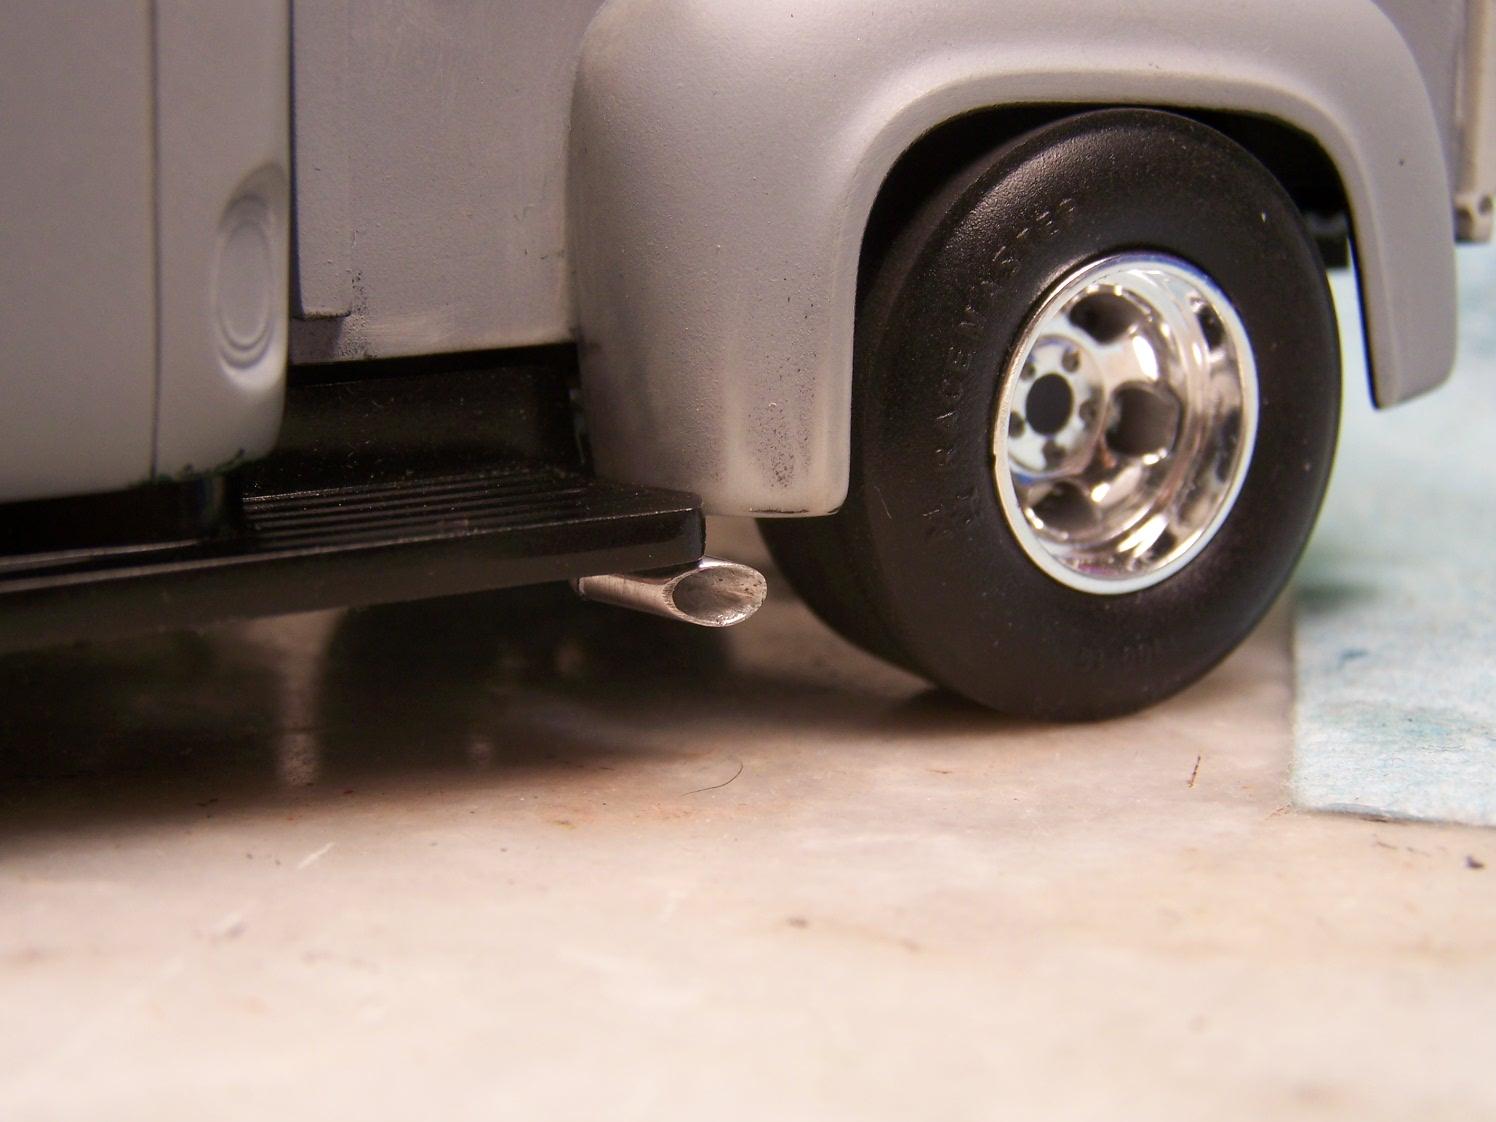
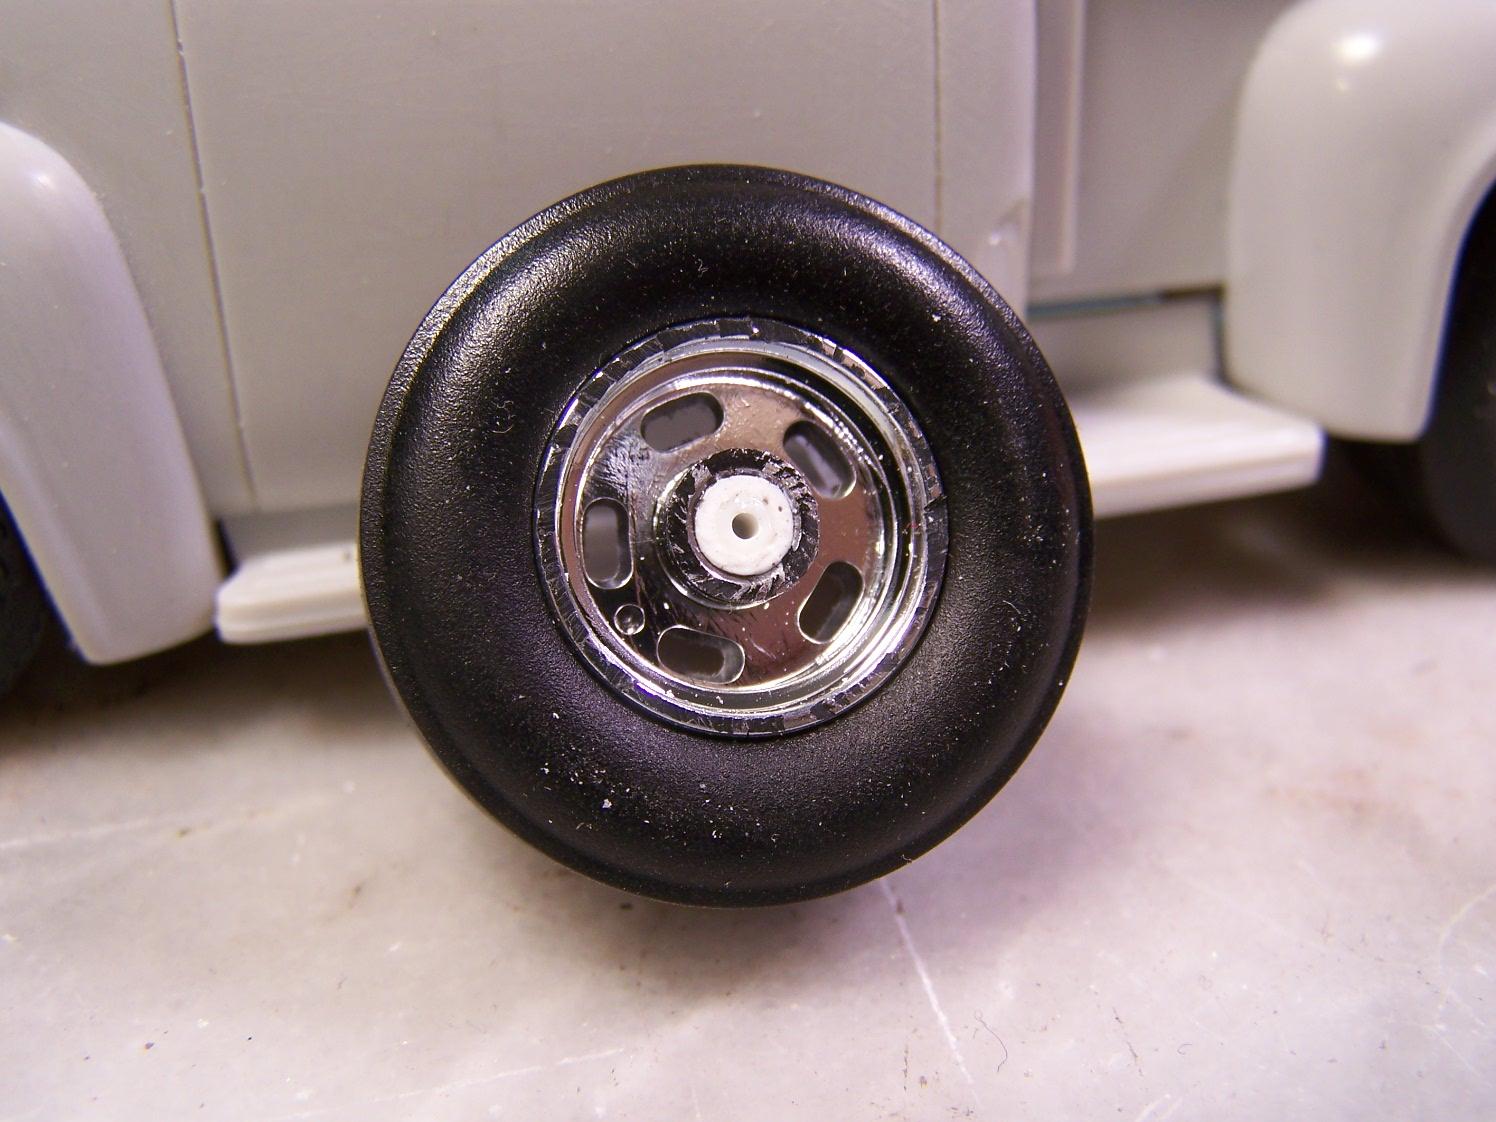
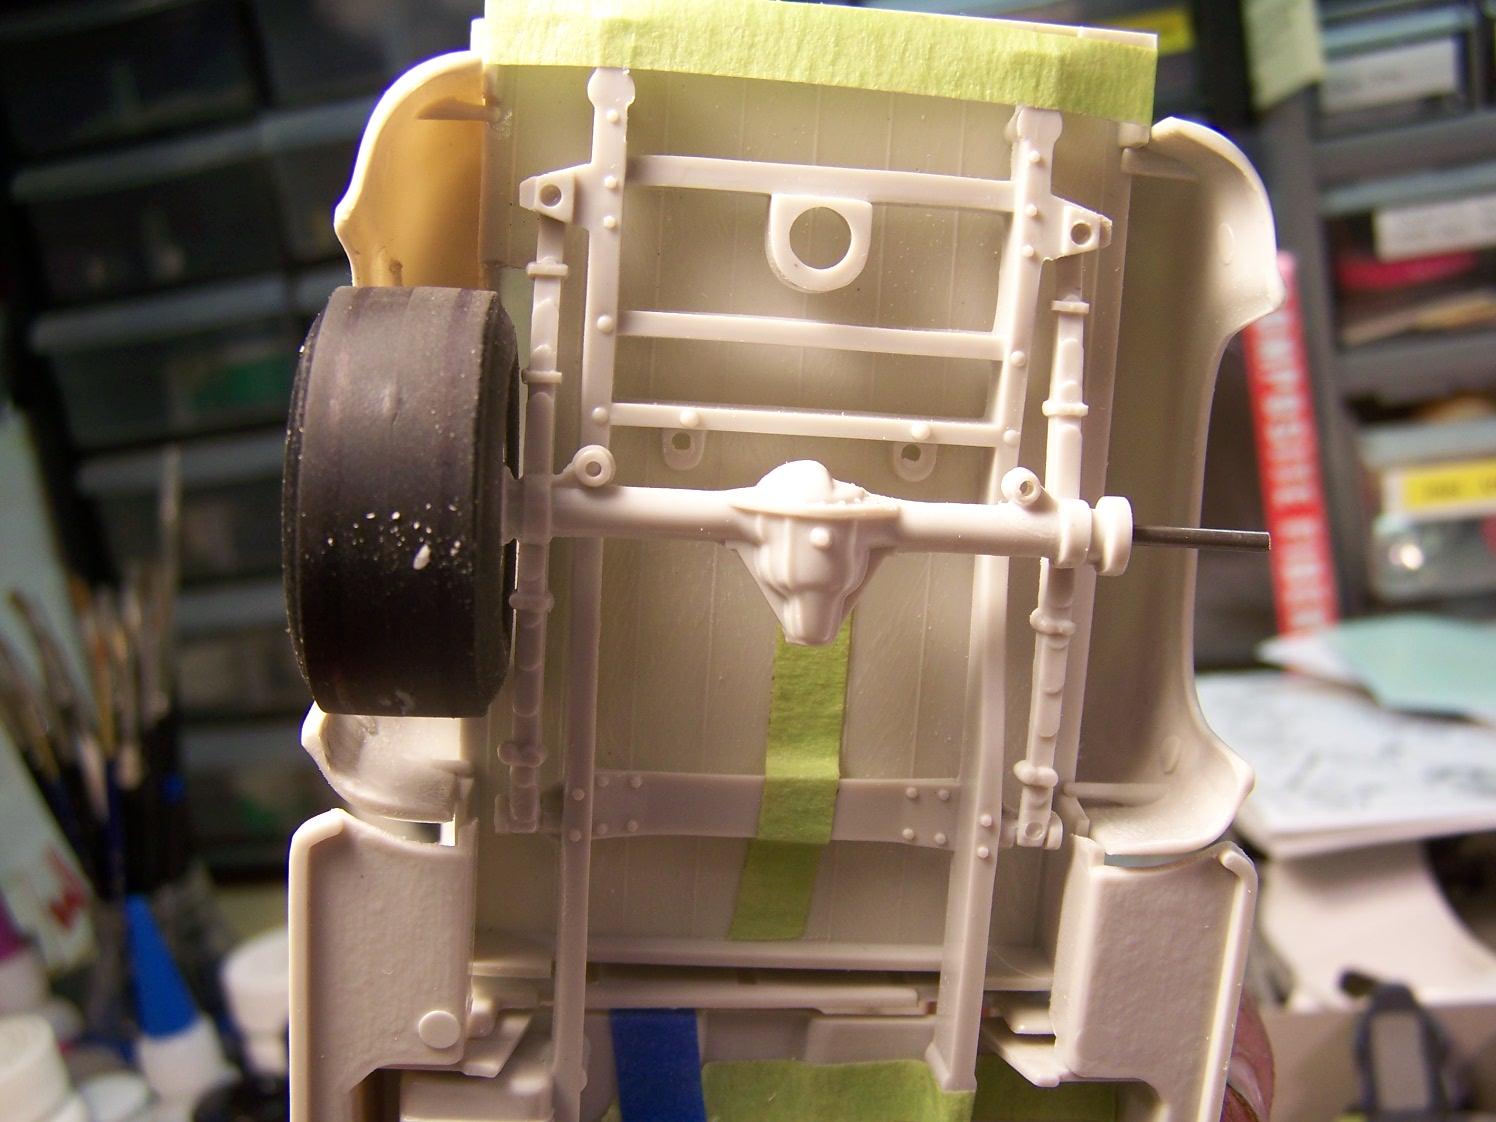
Thanks everybody. I was able to make some more progress this weekend. Working on the chassis: I still have to add some details like the extra straps on the gas tank, but it's getting there. Also started playing with some decals. Ok. now we get to the stance. First, if you use the Plasic Performance wheels and tires, you will have to make some modifications for tire clearance. I had to thin the inside of the rear wheelwells. (This was a little anxious because the body is just about finished.) Just go slow so as to not build up too much heat in the plastic. Used a Dermel with a sanding drum. I also shaved down the wheel backs, and clipped off the "stock" wheel mount pins. I opened up the wheels backs with a 5/32 drill bit and the wheels slid right over the larger bosses at the axles. Here's how she sits now. I am thinking about dropping the nose just a touch. 1/8" at the most. Should I drop it?
-
I think that's the first time I have ever heard the word "subtle" used to describe anything about the Aventador. To quote Mr. Jeremy Clarkson, "It's a daft orange dog, and blue stuff comes out of the exhaust!" NUFF SAID!!
-
Finally, for now, I have modified the front seat by removing the passenger side seat back and adding a bolster made from Evergreen Styrene. For more photos, please check out the link. http://public.fotki.com/El-Tanque/models/nascar-black-widow/ PLEASE ENJOY!!