PierreR89
-
Posts
532 -
Joined
-
Last visited
Content Type
Profiles
Forums
Events
Gallery
Everything posted by PierreR89
-
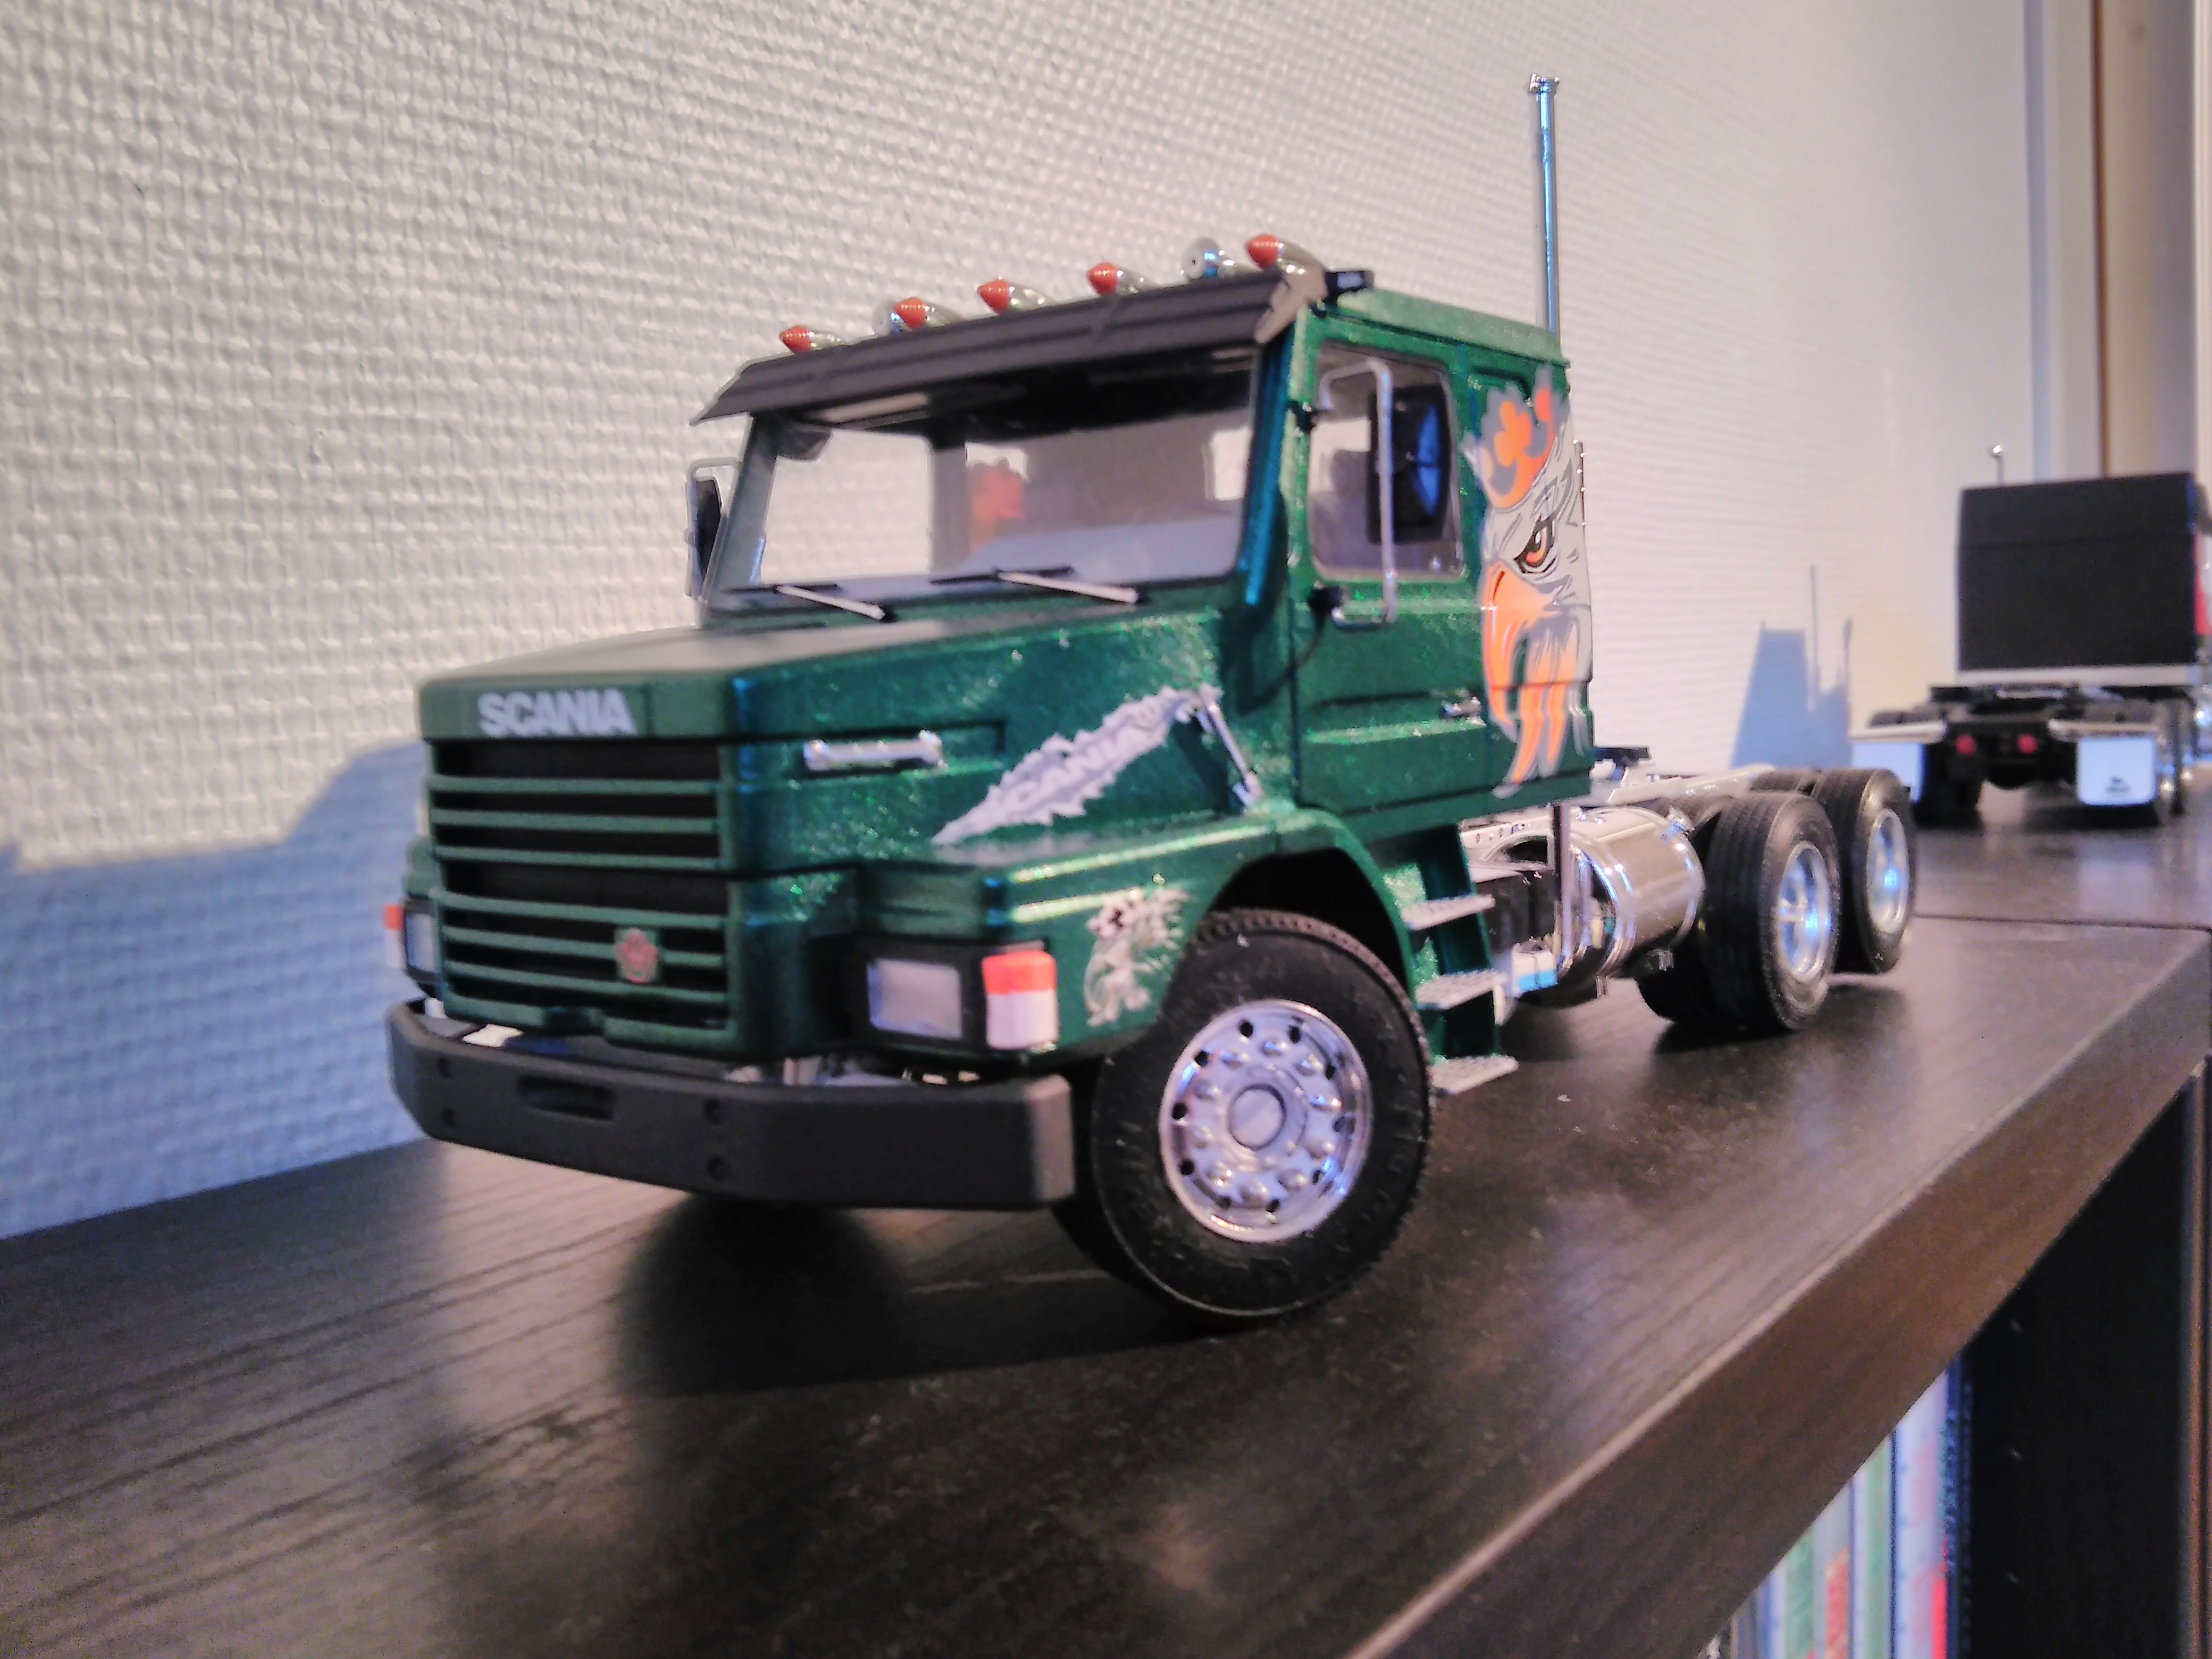
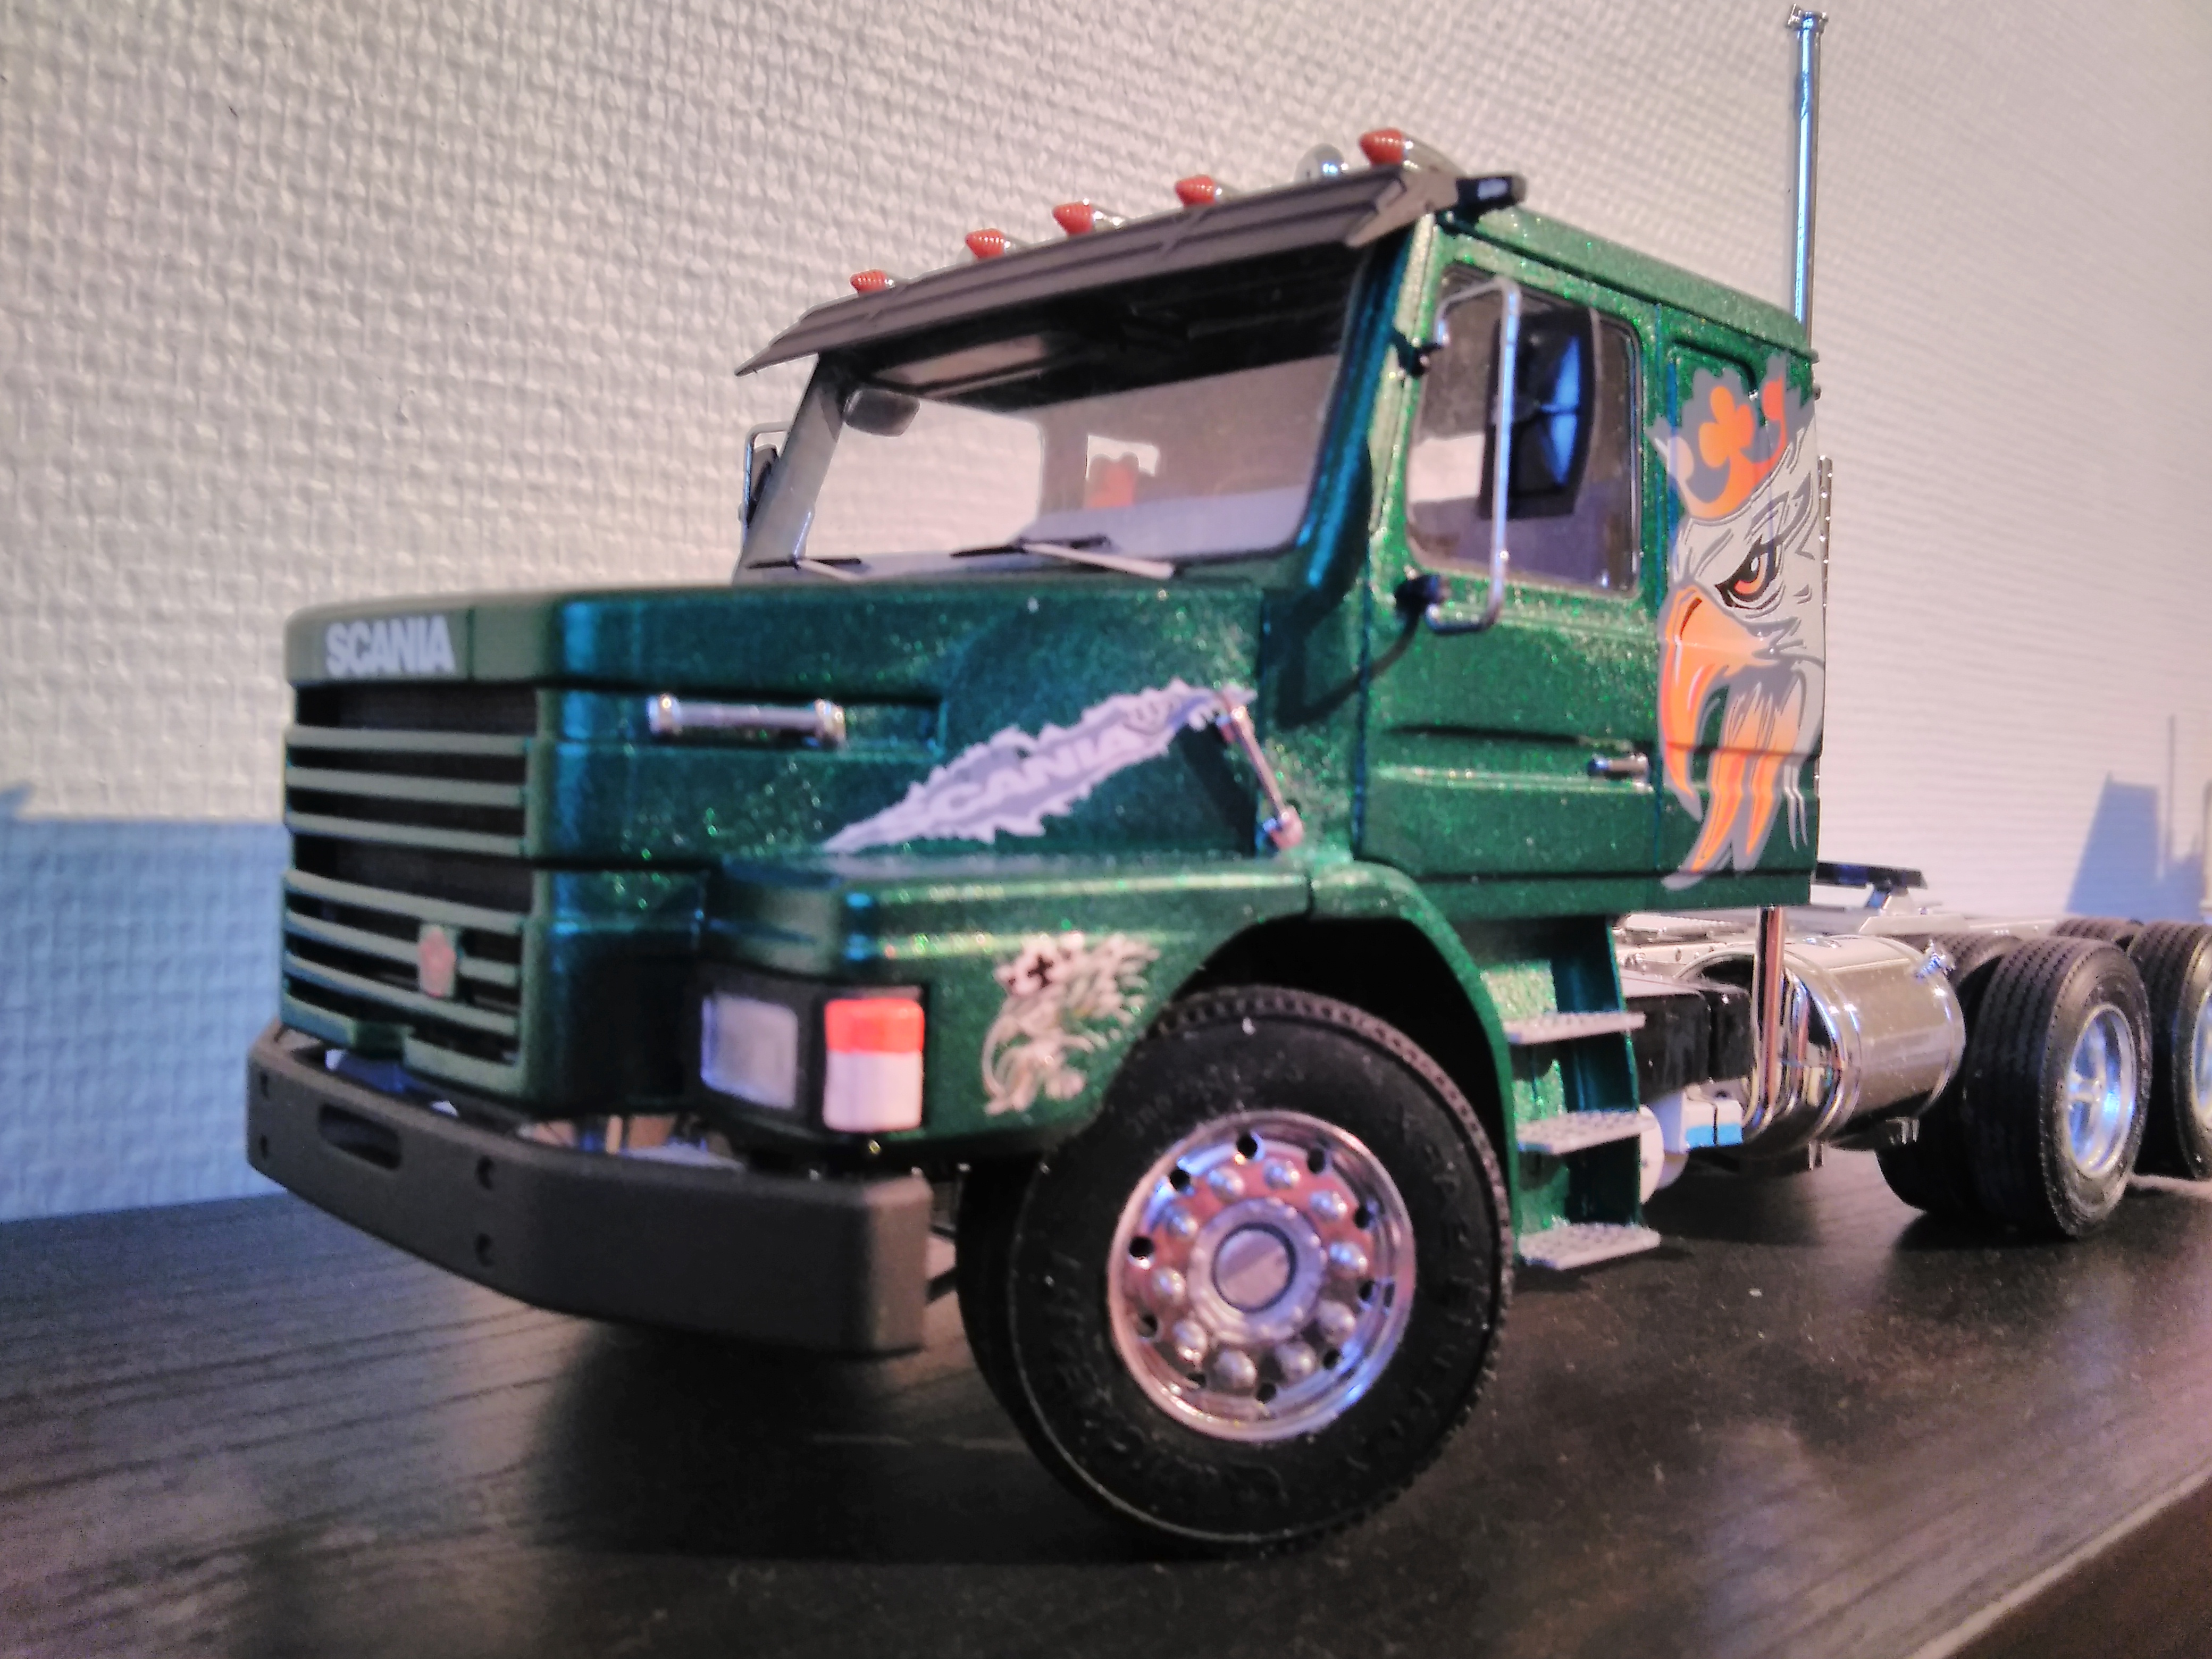
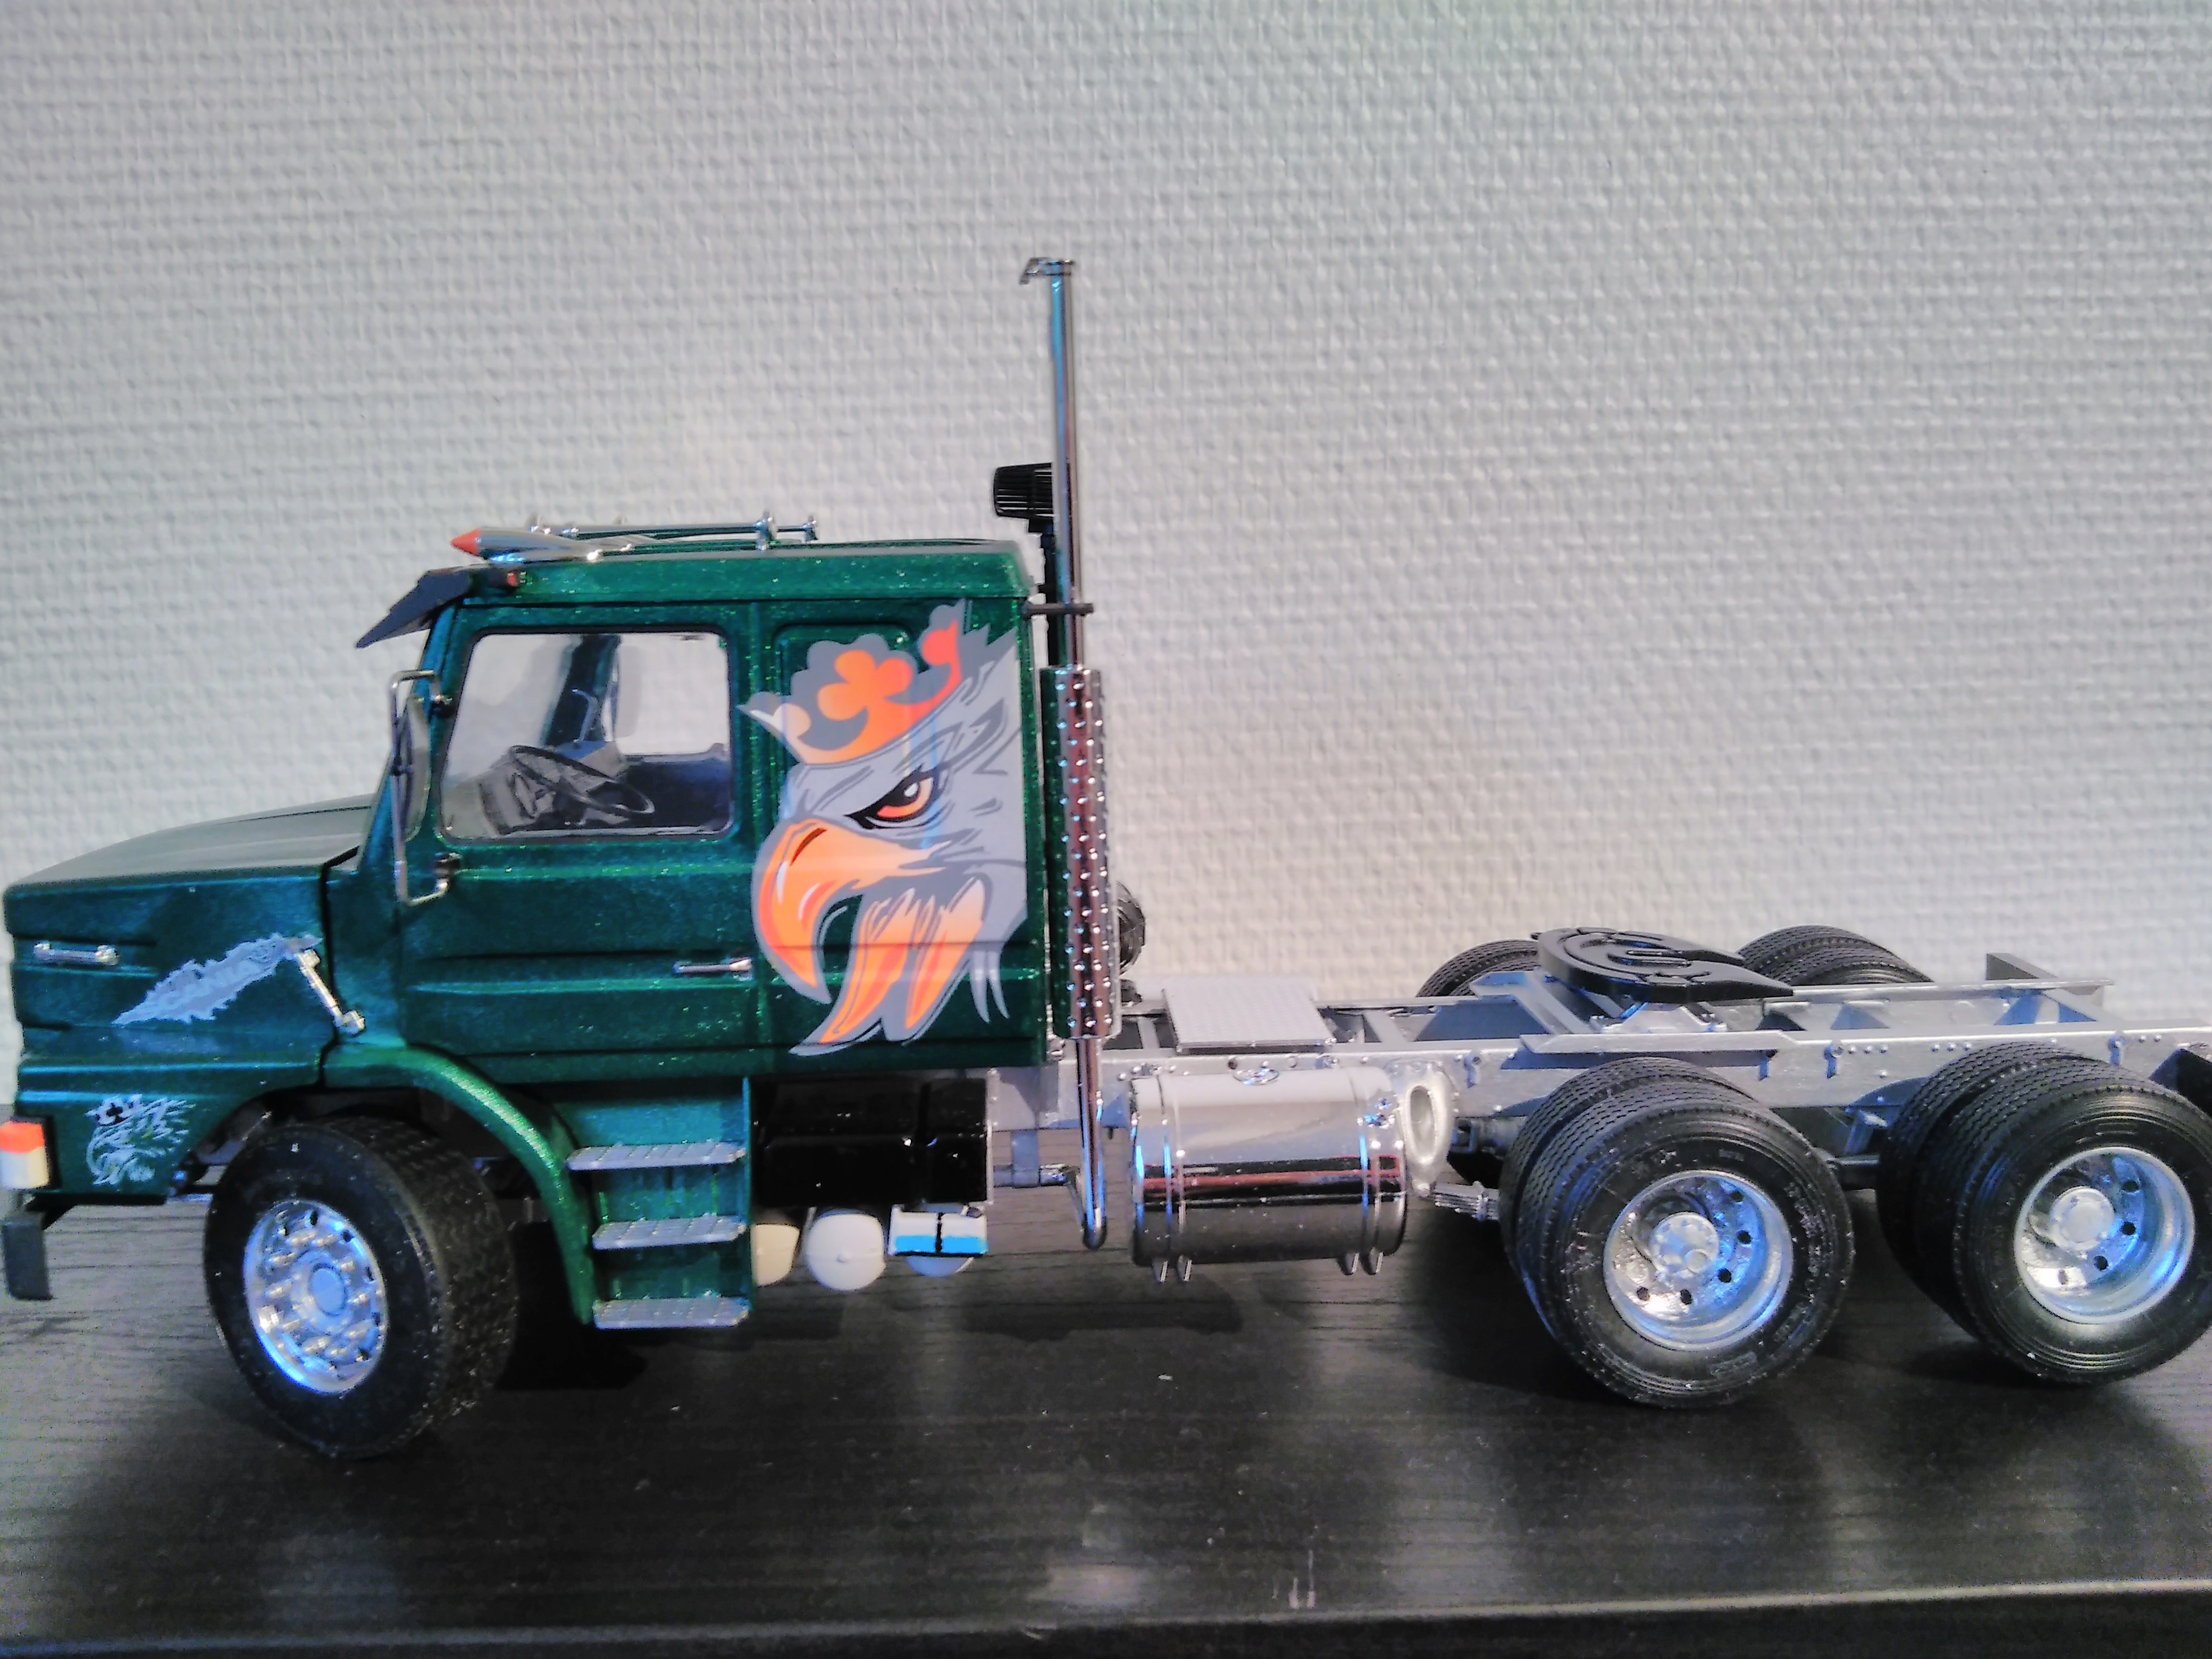
No, they are from the Italeri Scania silver griffin showtruck kit. The decals that came with the kit are destroyed so they are unusable.
-
Engine in Ford LTL 9000?
PierreR89 replied to PierreR89's topic in General Automotive Talk (Trucks and Cars)
Ok, so then i can use the trans from the kit and it would still be something that might have existed IRL. I am not going to start to build it for a while so i might change my mind about the engine and trans a few times untill then. -
Engine in Ford LTL 9000?
PierreR89 replied to PierreR89's topic in General Automotive Talk (Trucks and Cars)
Thanks. Cat 3406 it is then. I might use the roadranger trans from auslowe, its probably not right but the one in the kit is probably also wrong. Besides that, no one is going to look under it most of those who have looked at my models have only looked at the outside because they are afraid to break anything if they touch them. -
1/16 Peterbilt 359
PierreR89 replied to Ken Gilkeson's topic in Model Trucks: Big Rigs and Heavy Equipment
Looks awesome. Makes me want to rebuild mine that i built years ago as it is falling appart at the moment. -
I have the Ford LTL 9000 truck from italeri that i am going to build sometime. What engines were used in them? the one in the kit is the standard cummins 6cylinder that i think is a little boring (because every one of their us truck have them) I was thinking of replacing it with the auslowe cat 3406 engine or the revell cat 3408. Was any of those engines ever used in that truck? Did ford use the Detroit v8:s in the LTL trucks or they did use v8:s from someone else? If i go with the 3406 what trans did they use or i can take the one from the kit and use it?
-
My Scania T142 is done so here are some pic,s of it, but without a trailer as i am building it right now. If some of you wonder why the rear axle is off the ground here is why. When i flipped the liftbeam the right way around and not the wrong way as the instructions say i noticed that the rear wheels was slightly off the ground. With correct hubs for the lift and driveaxle i was able to move up the tires a bit more, its not as much up as the real trucks can. On the real trucks they can stop it anytime they want by just flipping the switch to the off position and the axle stops where it is, so they can have the liftaxle like this if the driver want to.

-
Scania T142
PierreR89 replied to PierreR89's topic in WIP: Model Trucks: Big Rigs and Heavy Equipment
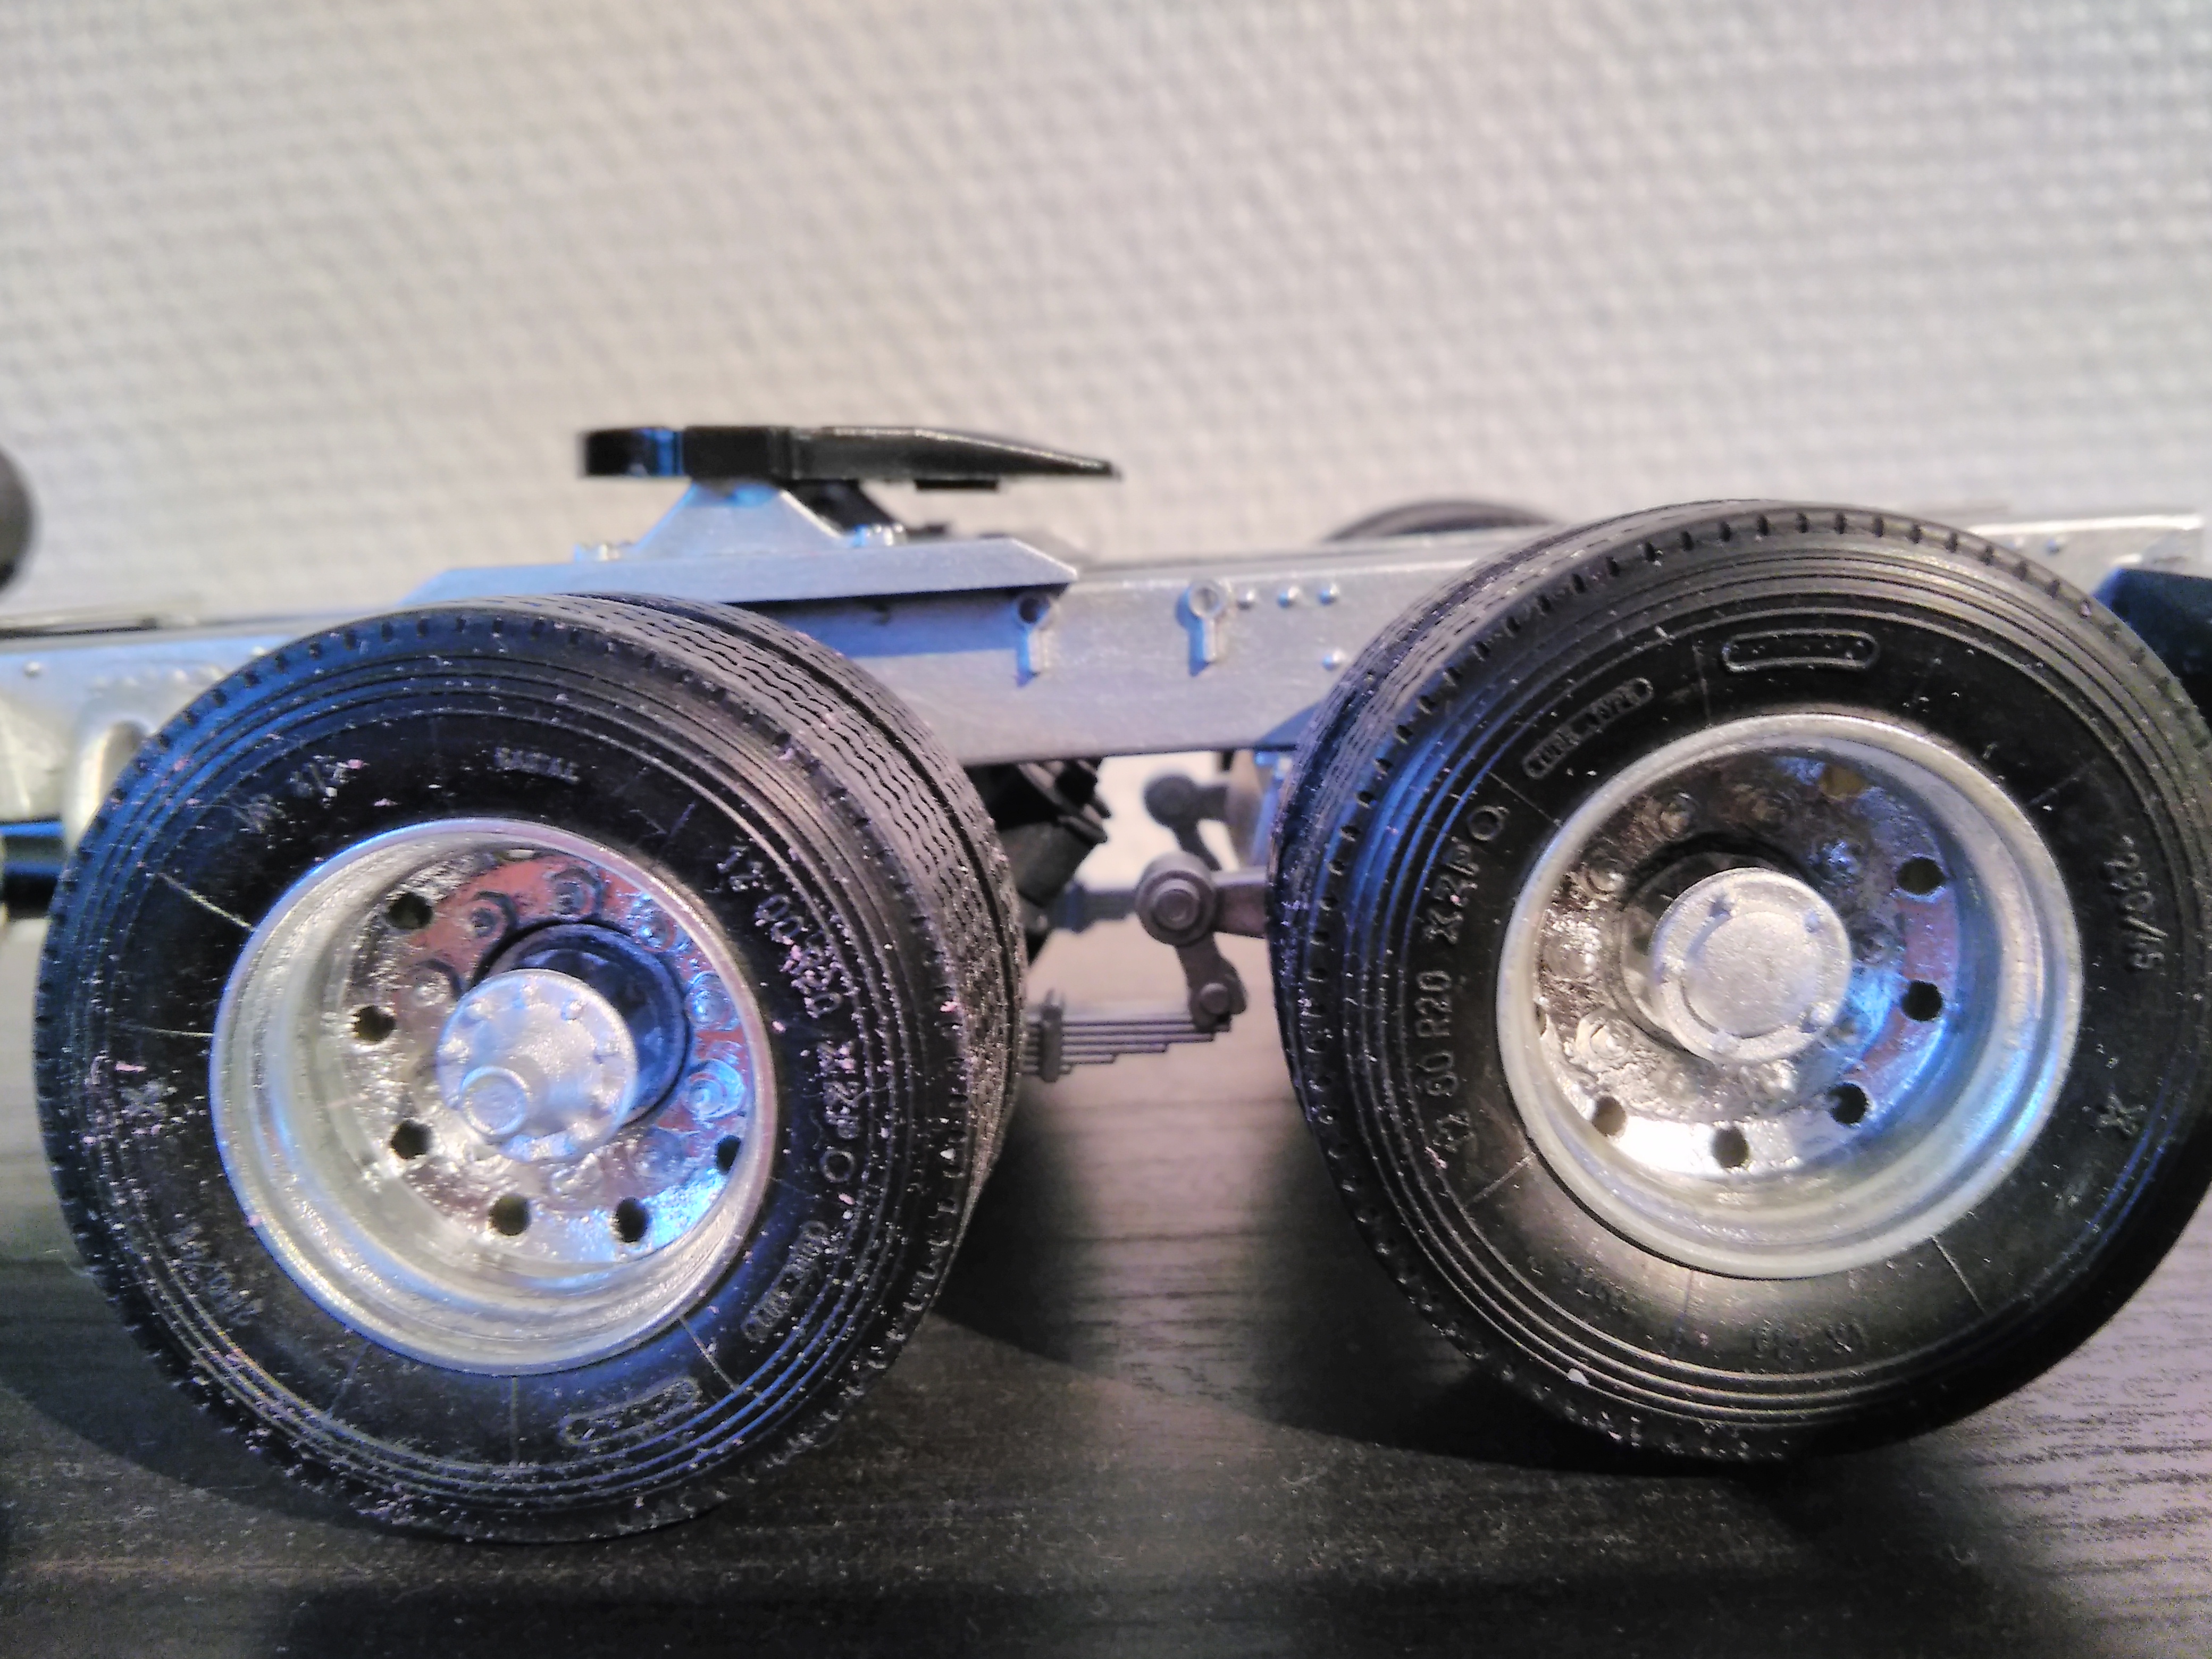
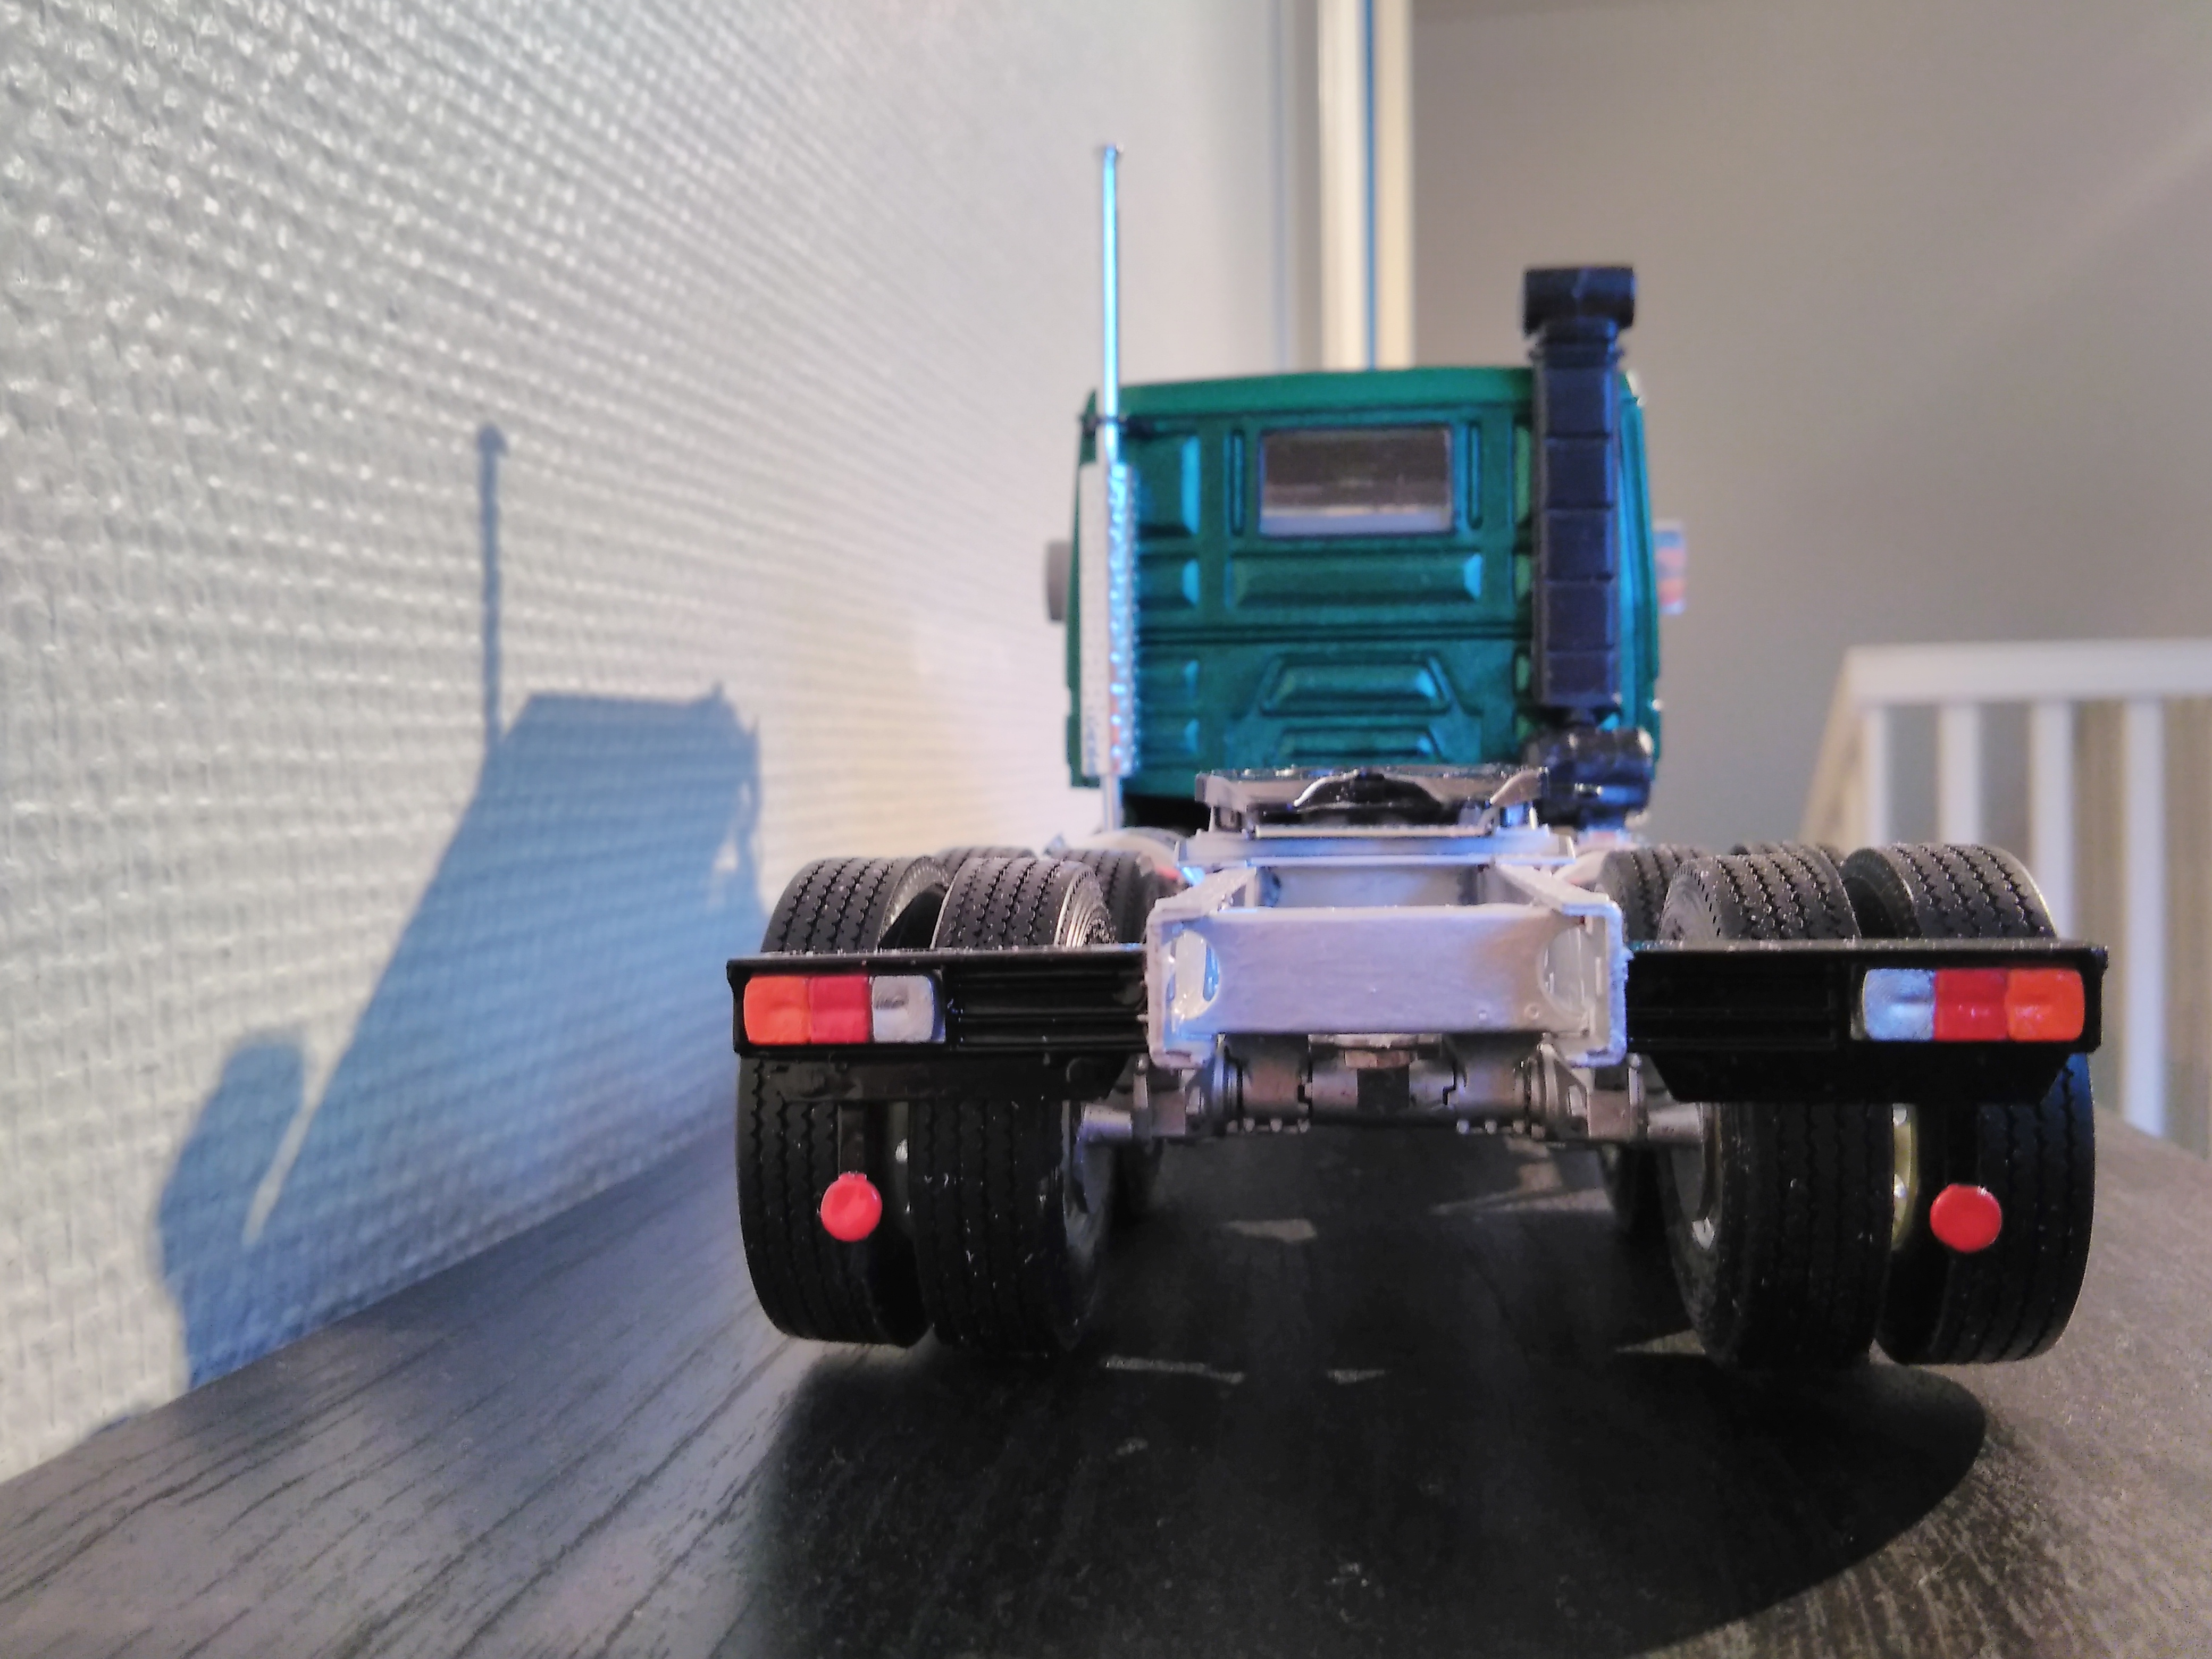
Here are the correct hubs for the rear axles, the 2 to the left is for the liftaxle, the 2 to the right is for the driveaxle Here are the supersingel front tires for Scania from Italeri: Testfitted the trailer to see if i had to move the fithwheel or not but it could stay where it is mounted on the truck. It will look something like this when everything is done: The Scania is completed now after i mounted those parts to it.
-
Scania T142
PierreR89 replied to PierreR89's topic in WIP: Model Trucks: Big Rigs and Heavy Equipment
Ordered som parts for it earlier. Decided to have super singles on the front axle, got new drive and tag/liftaxle hubs, new wheels and tires with drivepattern for both rear axles. Also decided what trailer it should have and i choose the triaxle gravel trailer from MPC as it looks like the old gravel/dump trailers did when this truck was used. Untill anything of that arrives it's not much more i can do to it. -
Scania T142
PierreR89 replied to PierreR89's topic in WIP: Model Trucks: Big Rigs and Heavy Equipment
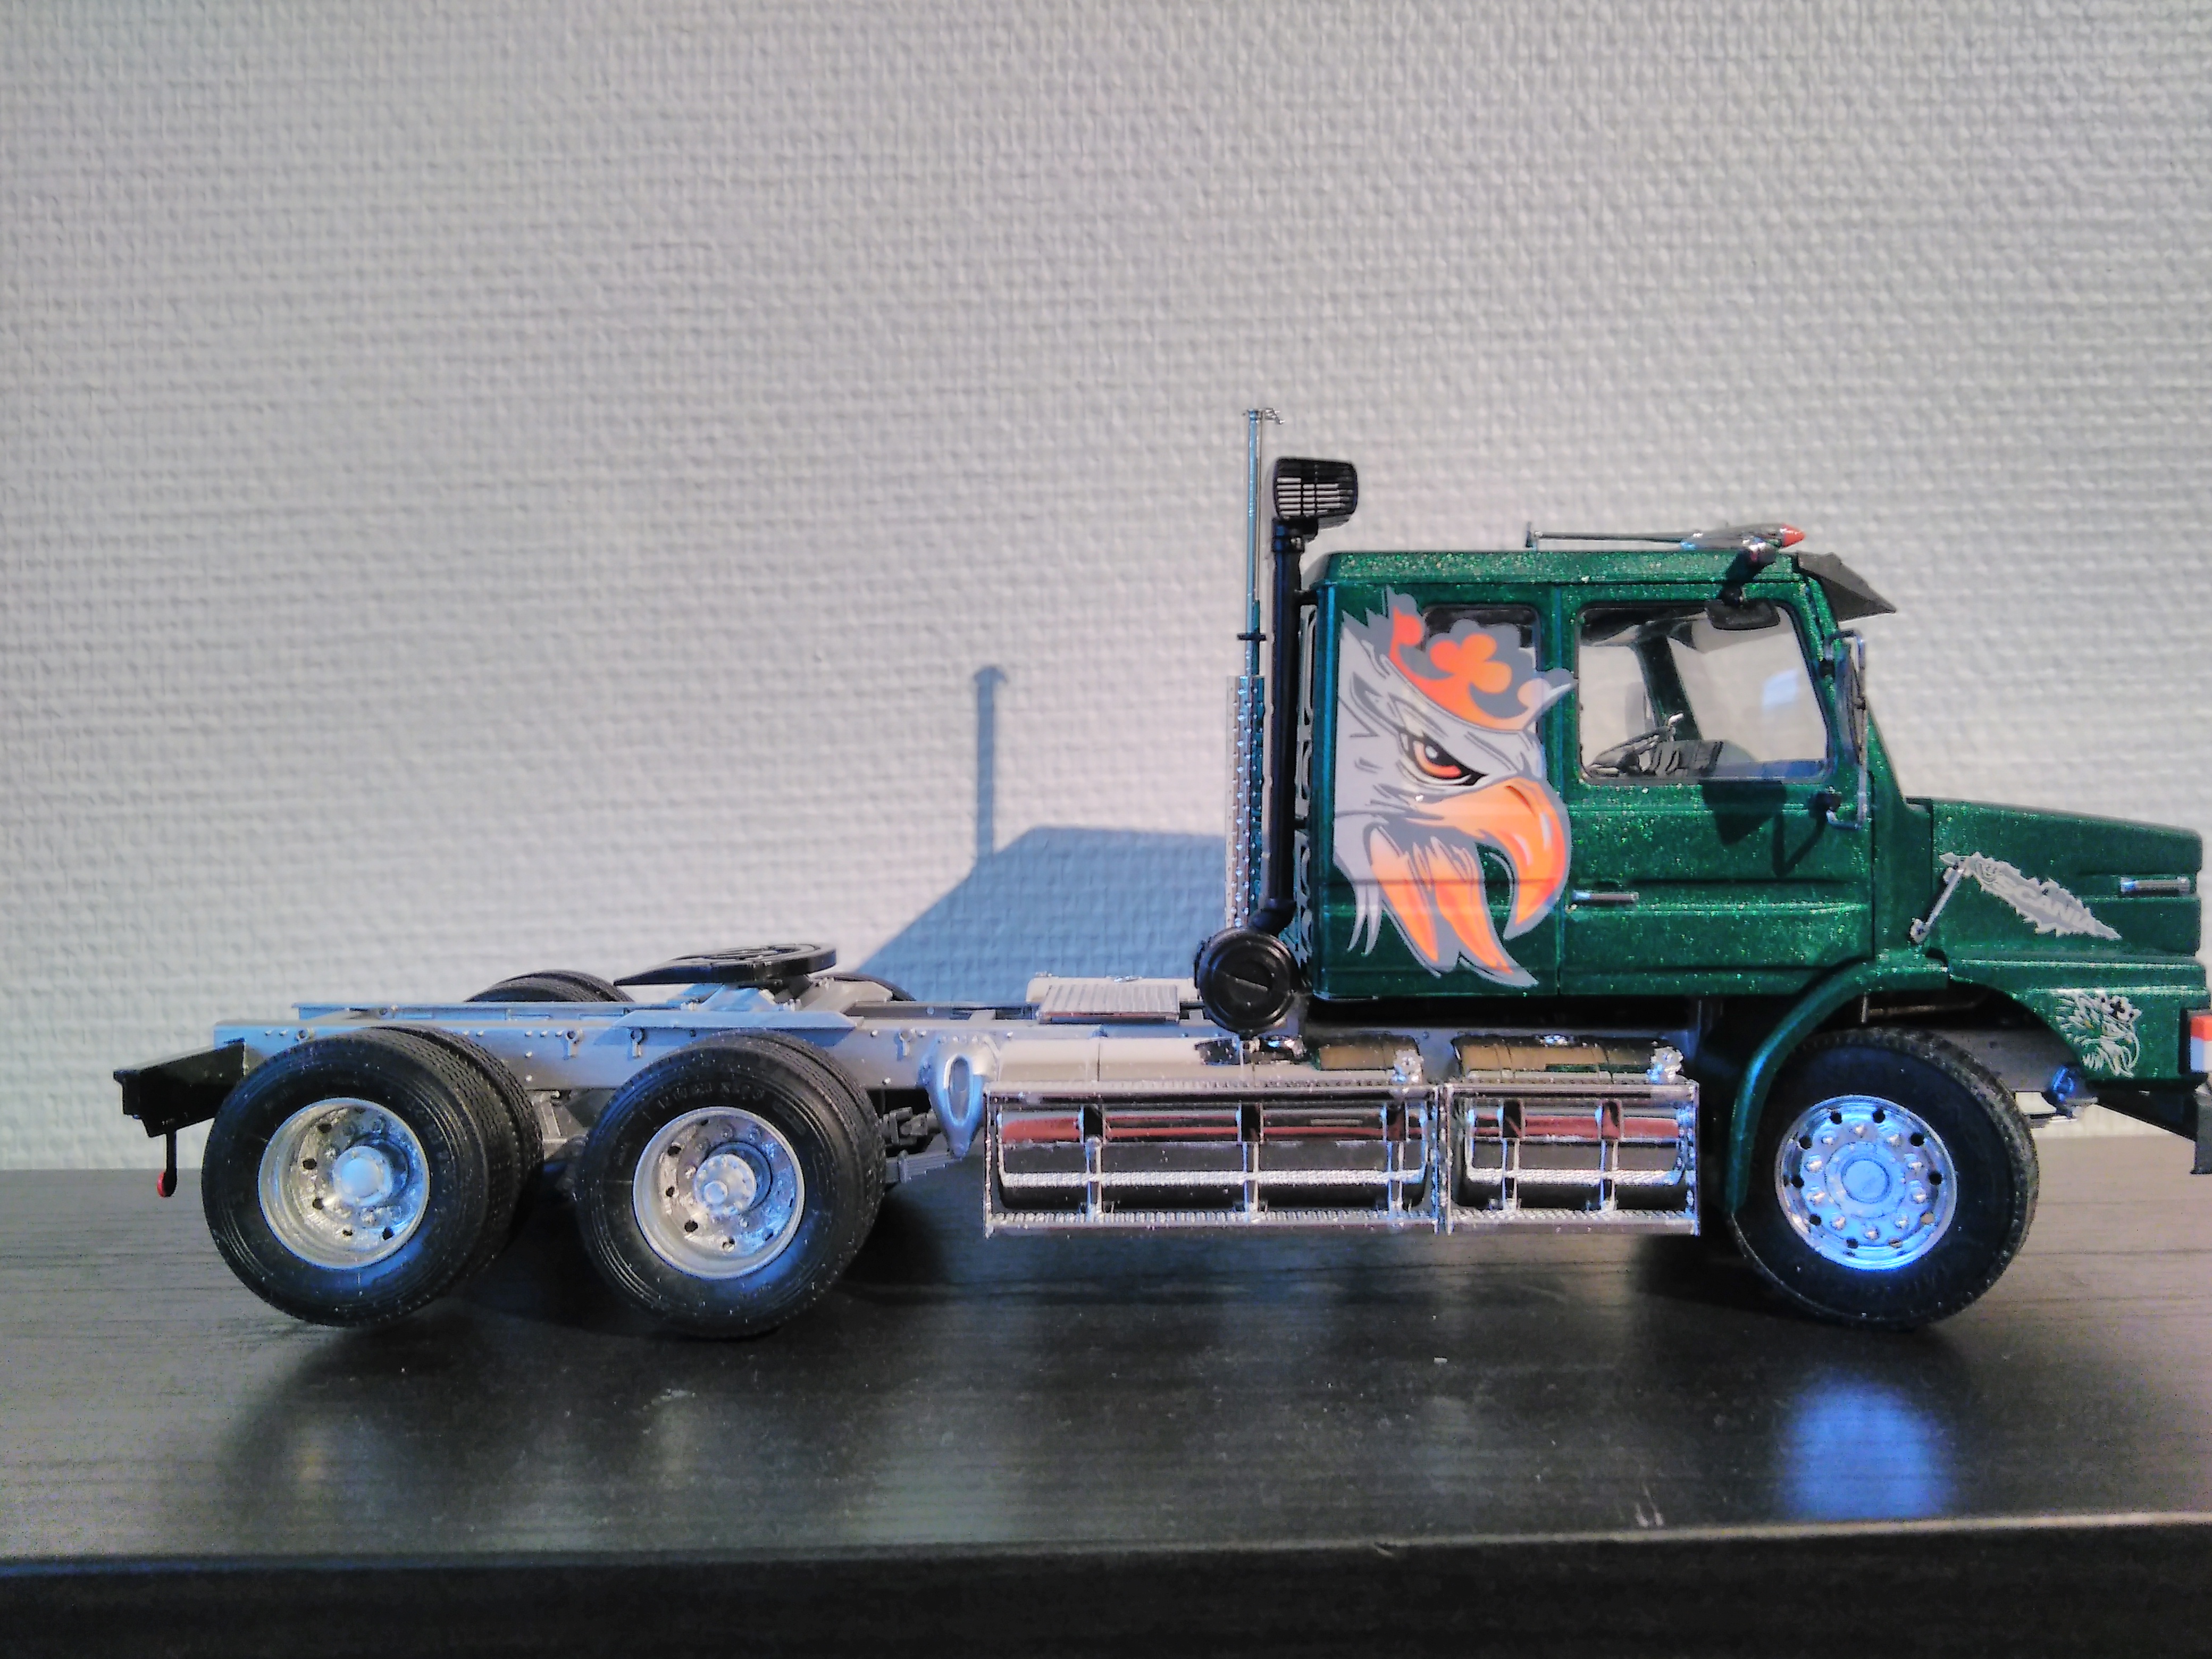
Did some small things to it during this week. Added the airhorns, exhauststack, sidemarkerlights on the front and on the cab and put some decals on it. Decided not to use the winddeflector, fairings and bullbar bumper, used the stock bumper that was in the kit instead. Here is how it looks now: I am also trying to figure out what trailer it should have hooked up to it. I have not decided if its going to be the timber trailer or schmitz dumper trailer that both revell and italeri have. Also going to buy new wheels and tires for it and new hubs for the tag axle so it looks like they do on the real trucks.
-
Scania T142
PierreR89 replied to PierreR89's topic in WIP: Model Trucks: Big Rigs and Heavy Equipment
Just added a few details to it since the last time. Still have the sidemarker lights on the front and above the doors to mount, airhorns on the roof, exhauststack and maybee the winddeflector and fairings if i can make them fit... Have to clean up the rear lights a bit more, they looked good on the partstree but did not turn out that good on the truck. Before anyone asks, no the gap between the black lighthousing and front fender should not be there. There are alot of fitment issues in this kit.. Compared to the revell's "50 years of revell" showtruck kit that have basically the same truck only theirs are a 143 and this 142 from Italeri, the revell kit fits much better but that is probably because it is a few years newer. I think i came up with a solution for the destroyed decals with this kit, I bought a set of decals for the Scania silver griffin and black amber from ebay. Some of those decals might fit somewhere on this truck.
-
Revell Kenworth K100 Aerodyne - 2017 release
PierreR89 replied to steve1970's topic in Truck Kit News & Reviews
Nice, will have to get one. -
Scania T142
PierreR89 replied to PierreR89's topic in WIP: Model Trucks: Big Rigs and Heavy Equipment
Its starting to look like a Scania now. Now its almost just the small details left, grabhandles,mirrors, lights and that stuff. Have not decided if i am going to use the winddeflector and cab fairings that comes with it I also must think of a way to make the front bumper and bullbar removable or so they go with the hood when opening it. Italeri wants you to glue the front bumper to the framerails and then glue the bullbar to it making them permanently attached there and the hood not being able to open.
-
Scania T142
PierreR89 replied to PierreR89's topic in WIP: Model Trucks: Big Rigs and Heavy Equipment
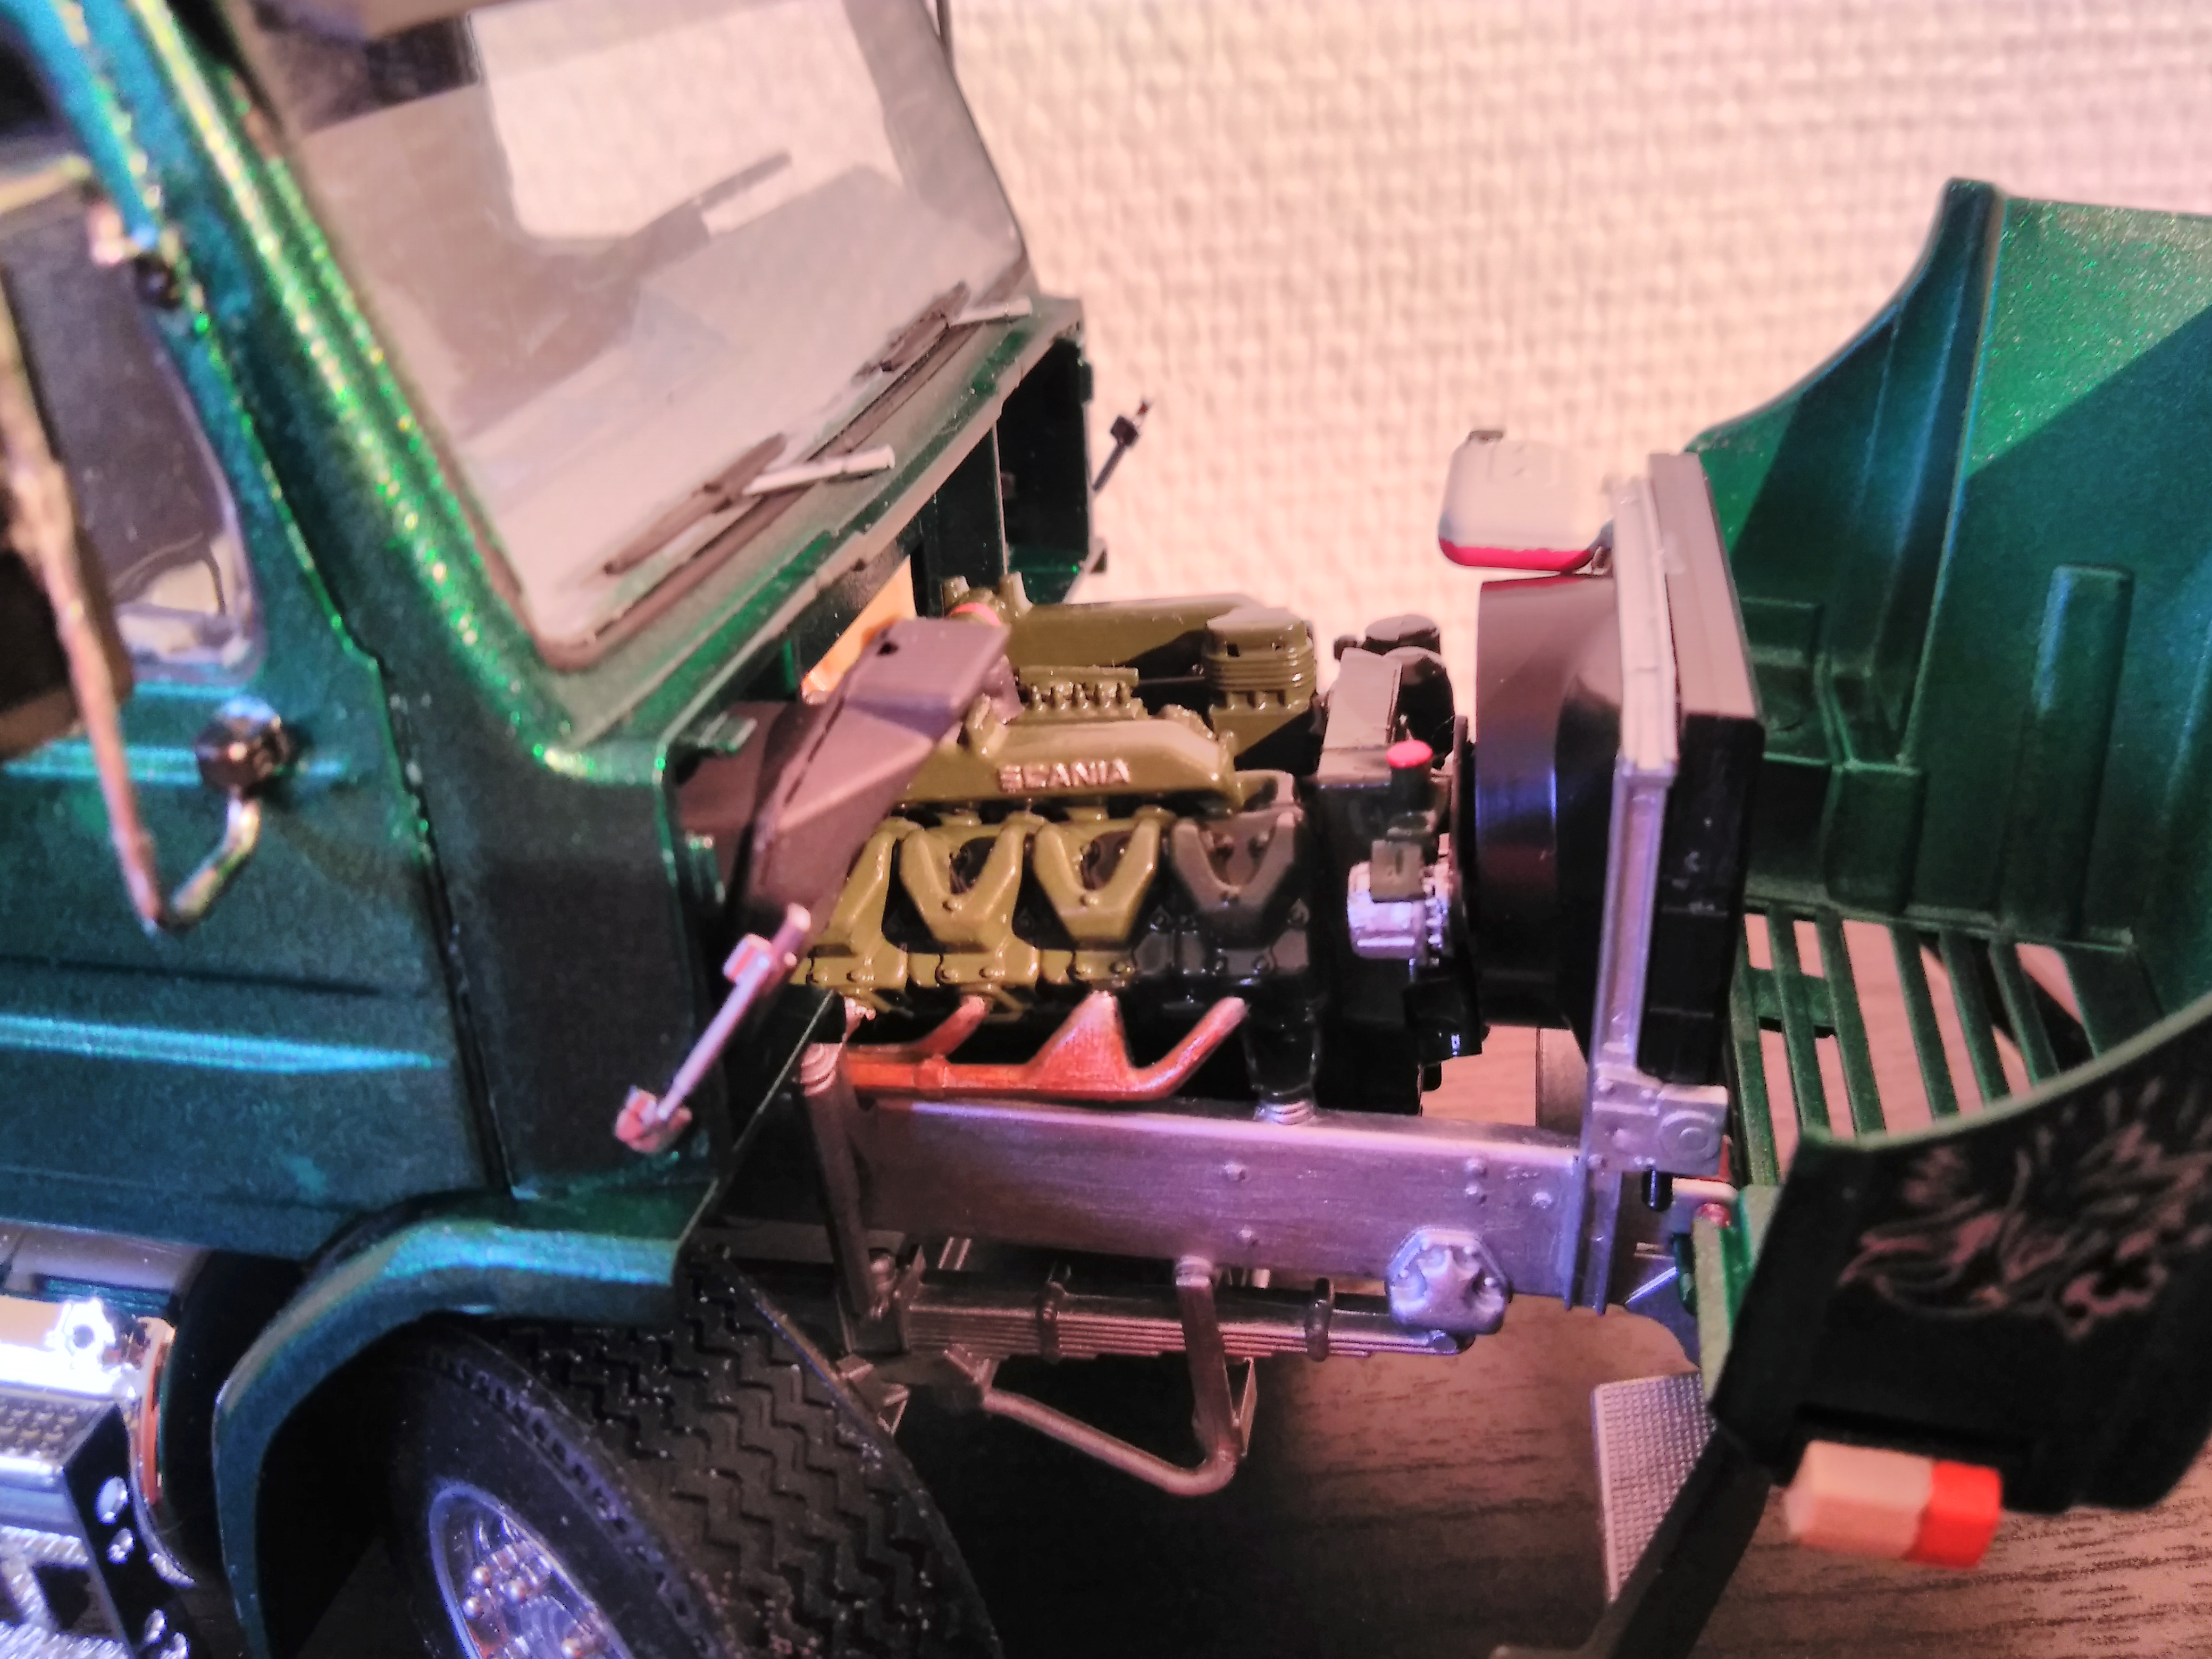
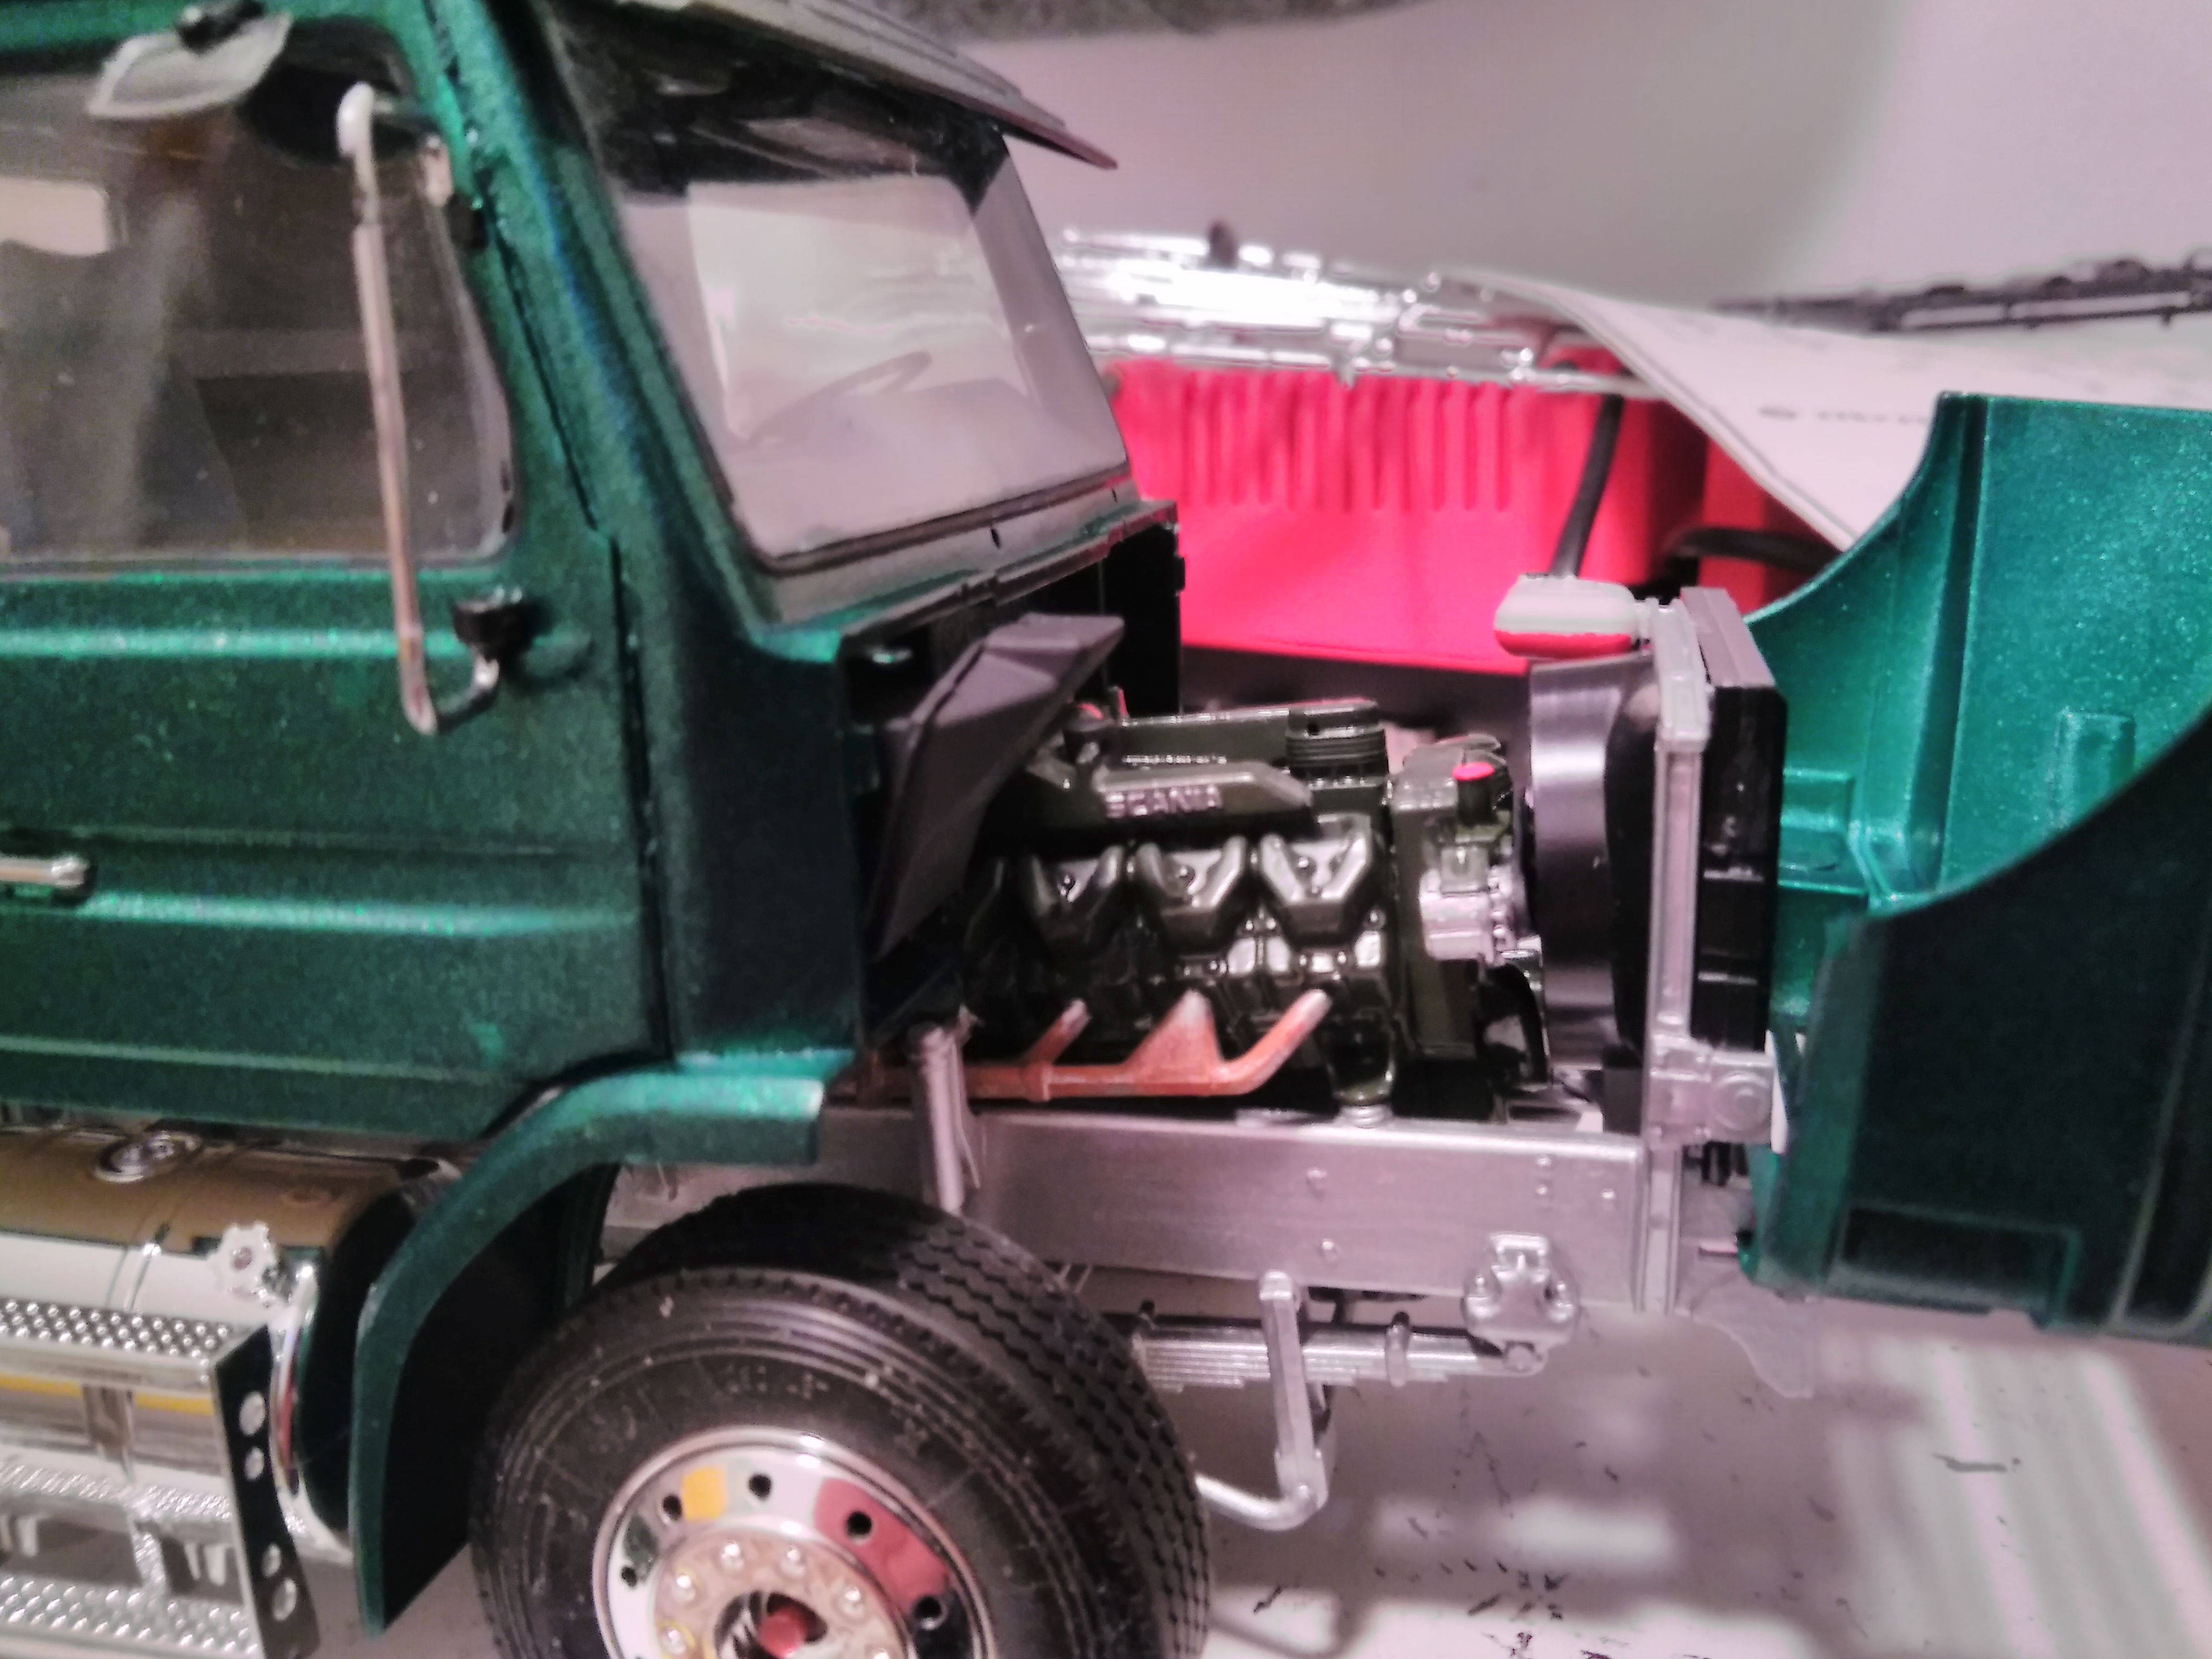
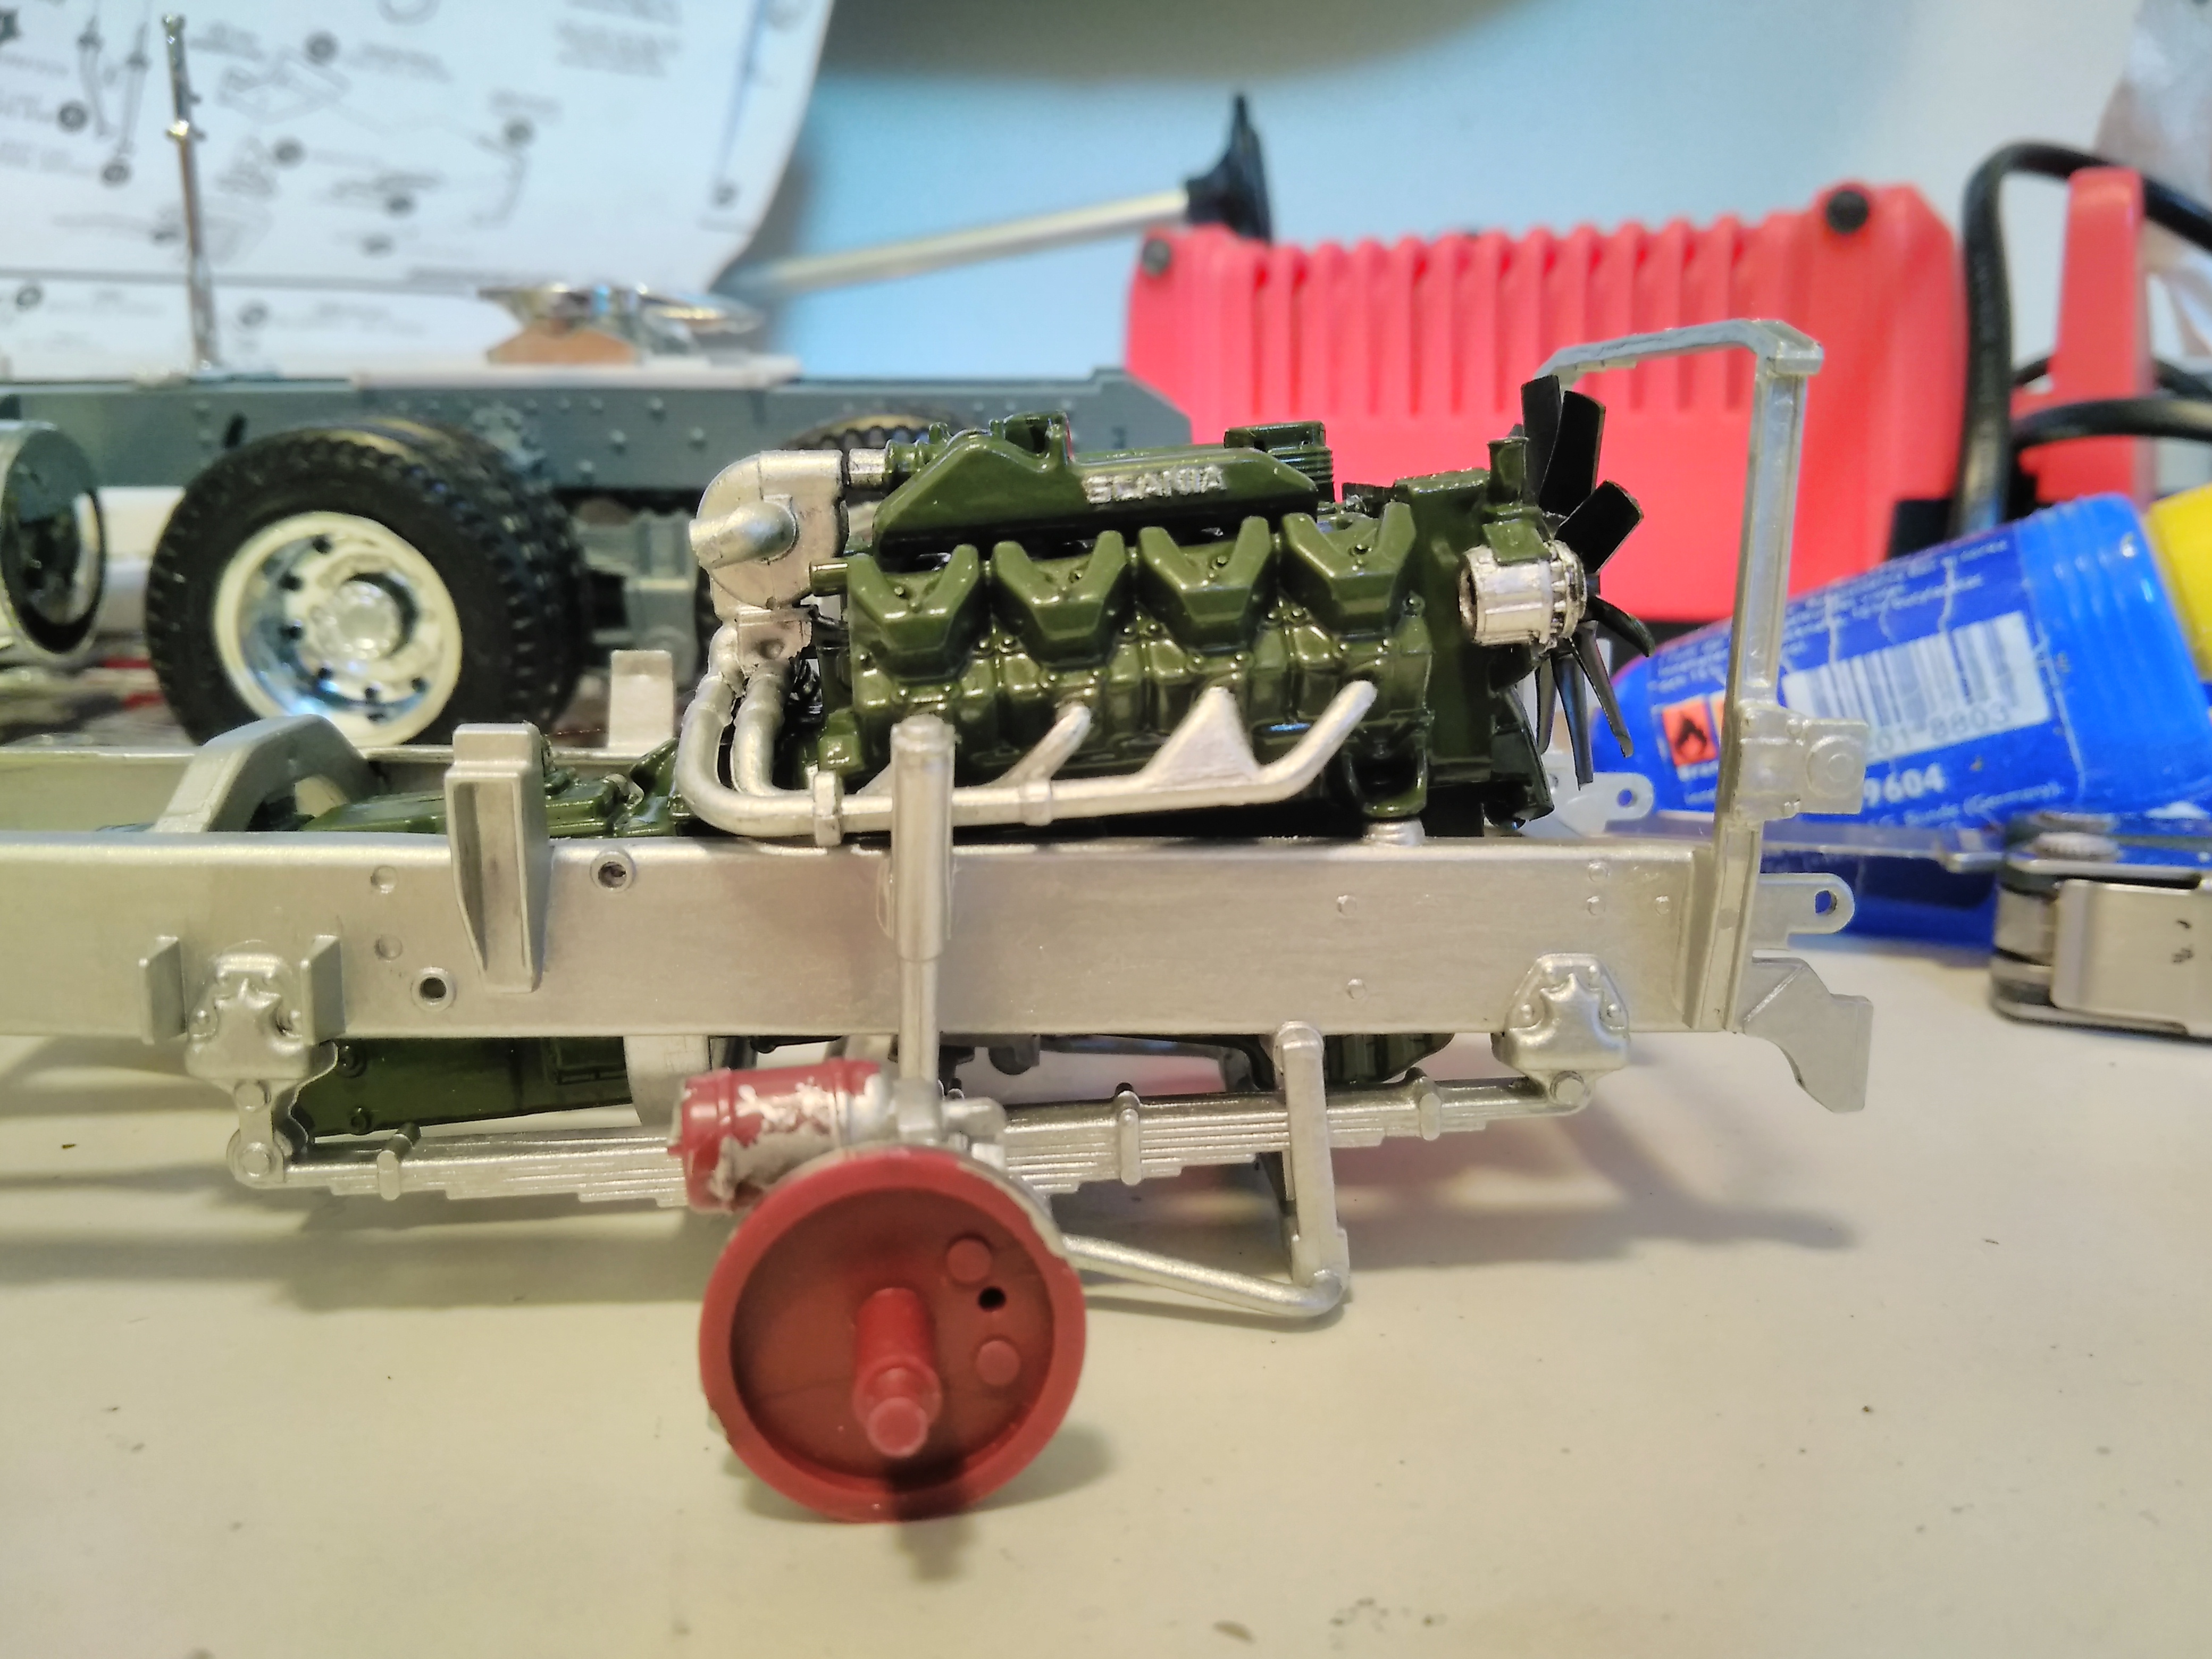
As it sits right now. Engine, radiator, batterybox and airtanks in place. Because i know Scania used red coolant for their trucks i painted the bottom of the coolanttank red, unfortunatley it turned out to red compared to the real coolant.. The real coolant is a mix of red/purple/pink, really weird color. The tank that is halfway painted blue is the alcohol container for the airdryer system ( 2series used alcohol to dry the air from the compressor, 3series started with spin on airdryer filters) On the real trucks the batterys for it are on the left under the batterybox cover and to the right is the airdrying system that the tank feeds. I painted it blue just because that was the color of the alcohol we used at work to top off the system when we serviced them. I have to clean it up a little more. On the real trucks if a regulator failed in the airdrying system it would allow the compressor to charge as much as it could and send the air stright in to the plastic tank that holds the alcohol where 2 things could happen. 1 the cap just flew off, #2 the whole tank exploded... Finding a new one of those tanks was not easy when we had to replace one at my old job..
-
TAT 2017 Kenworth K100 update 10/16
PierreR89 replied to k100's topic in WIP: Model Trucks: Big Rigs and Heavy Equipment
Looks good -
Scania T142
PierreR89 replied to PierreR89's topic in WIP: Model Trucks: Big Rigs and Heavy Equipment
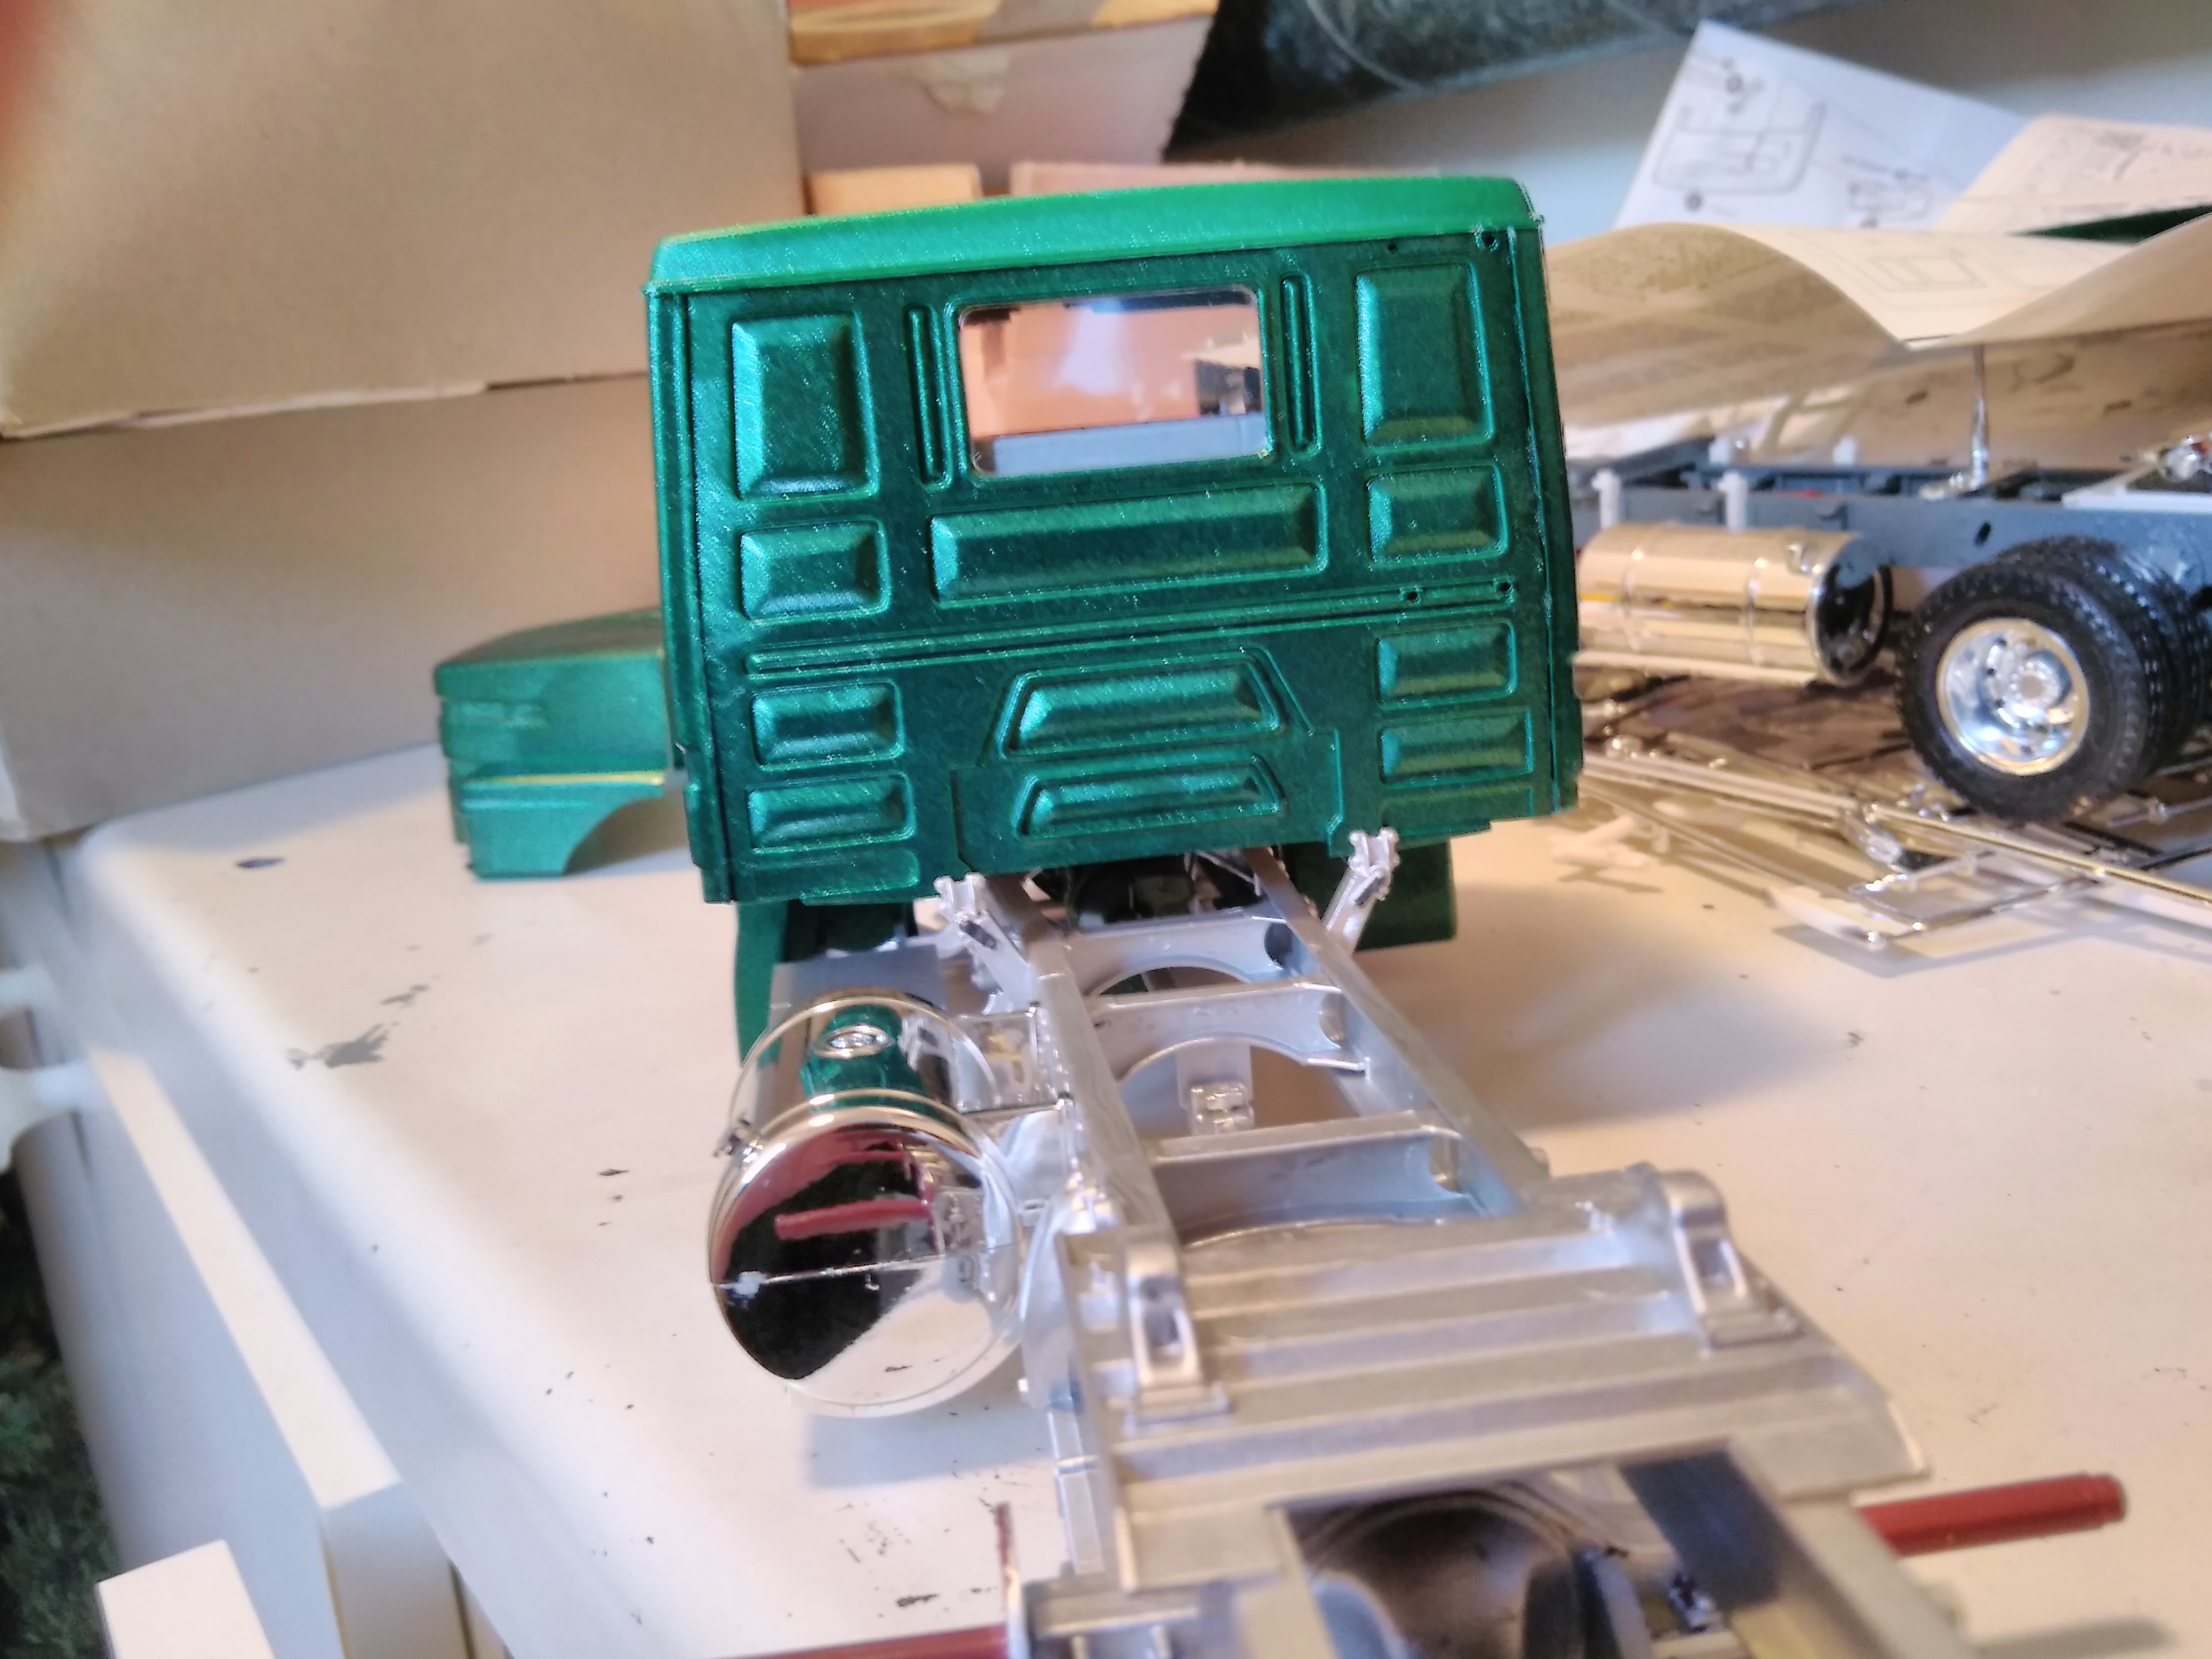
Assembled the main parts of the cab and testmounted it to the frame.
-
Scania T142
PierreR89 replied to PierreR89's topic in WIP: Model Trucks: Big Rigs and Heavy Equipment
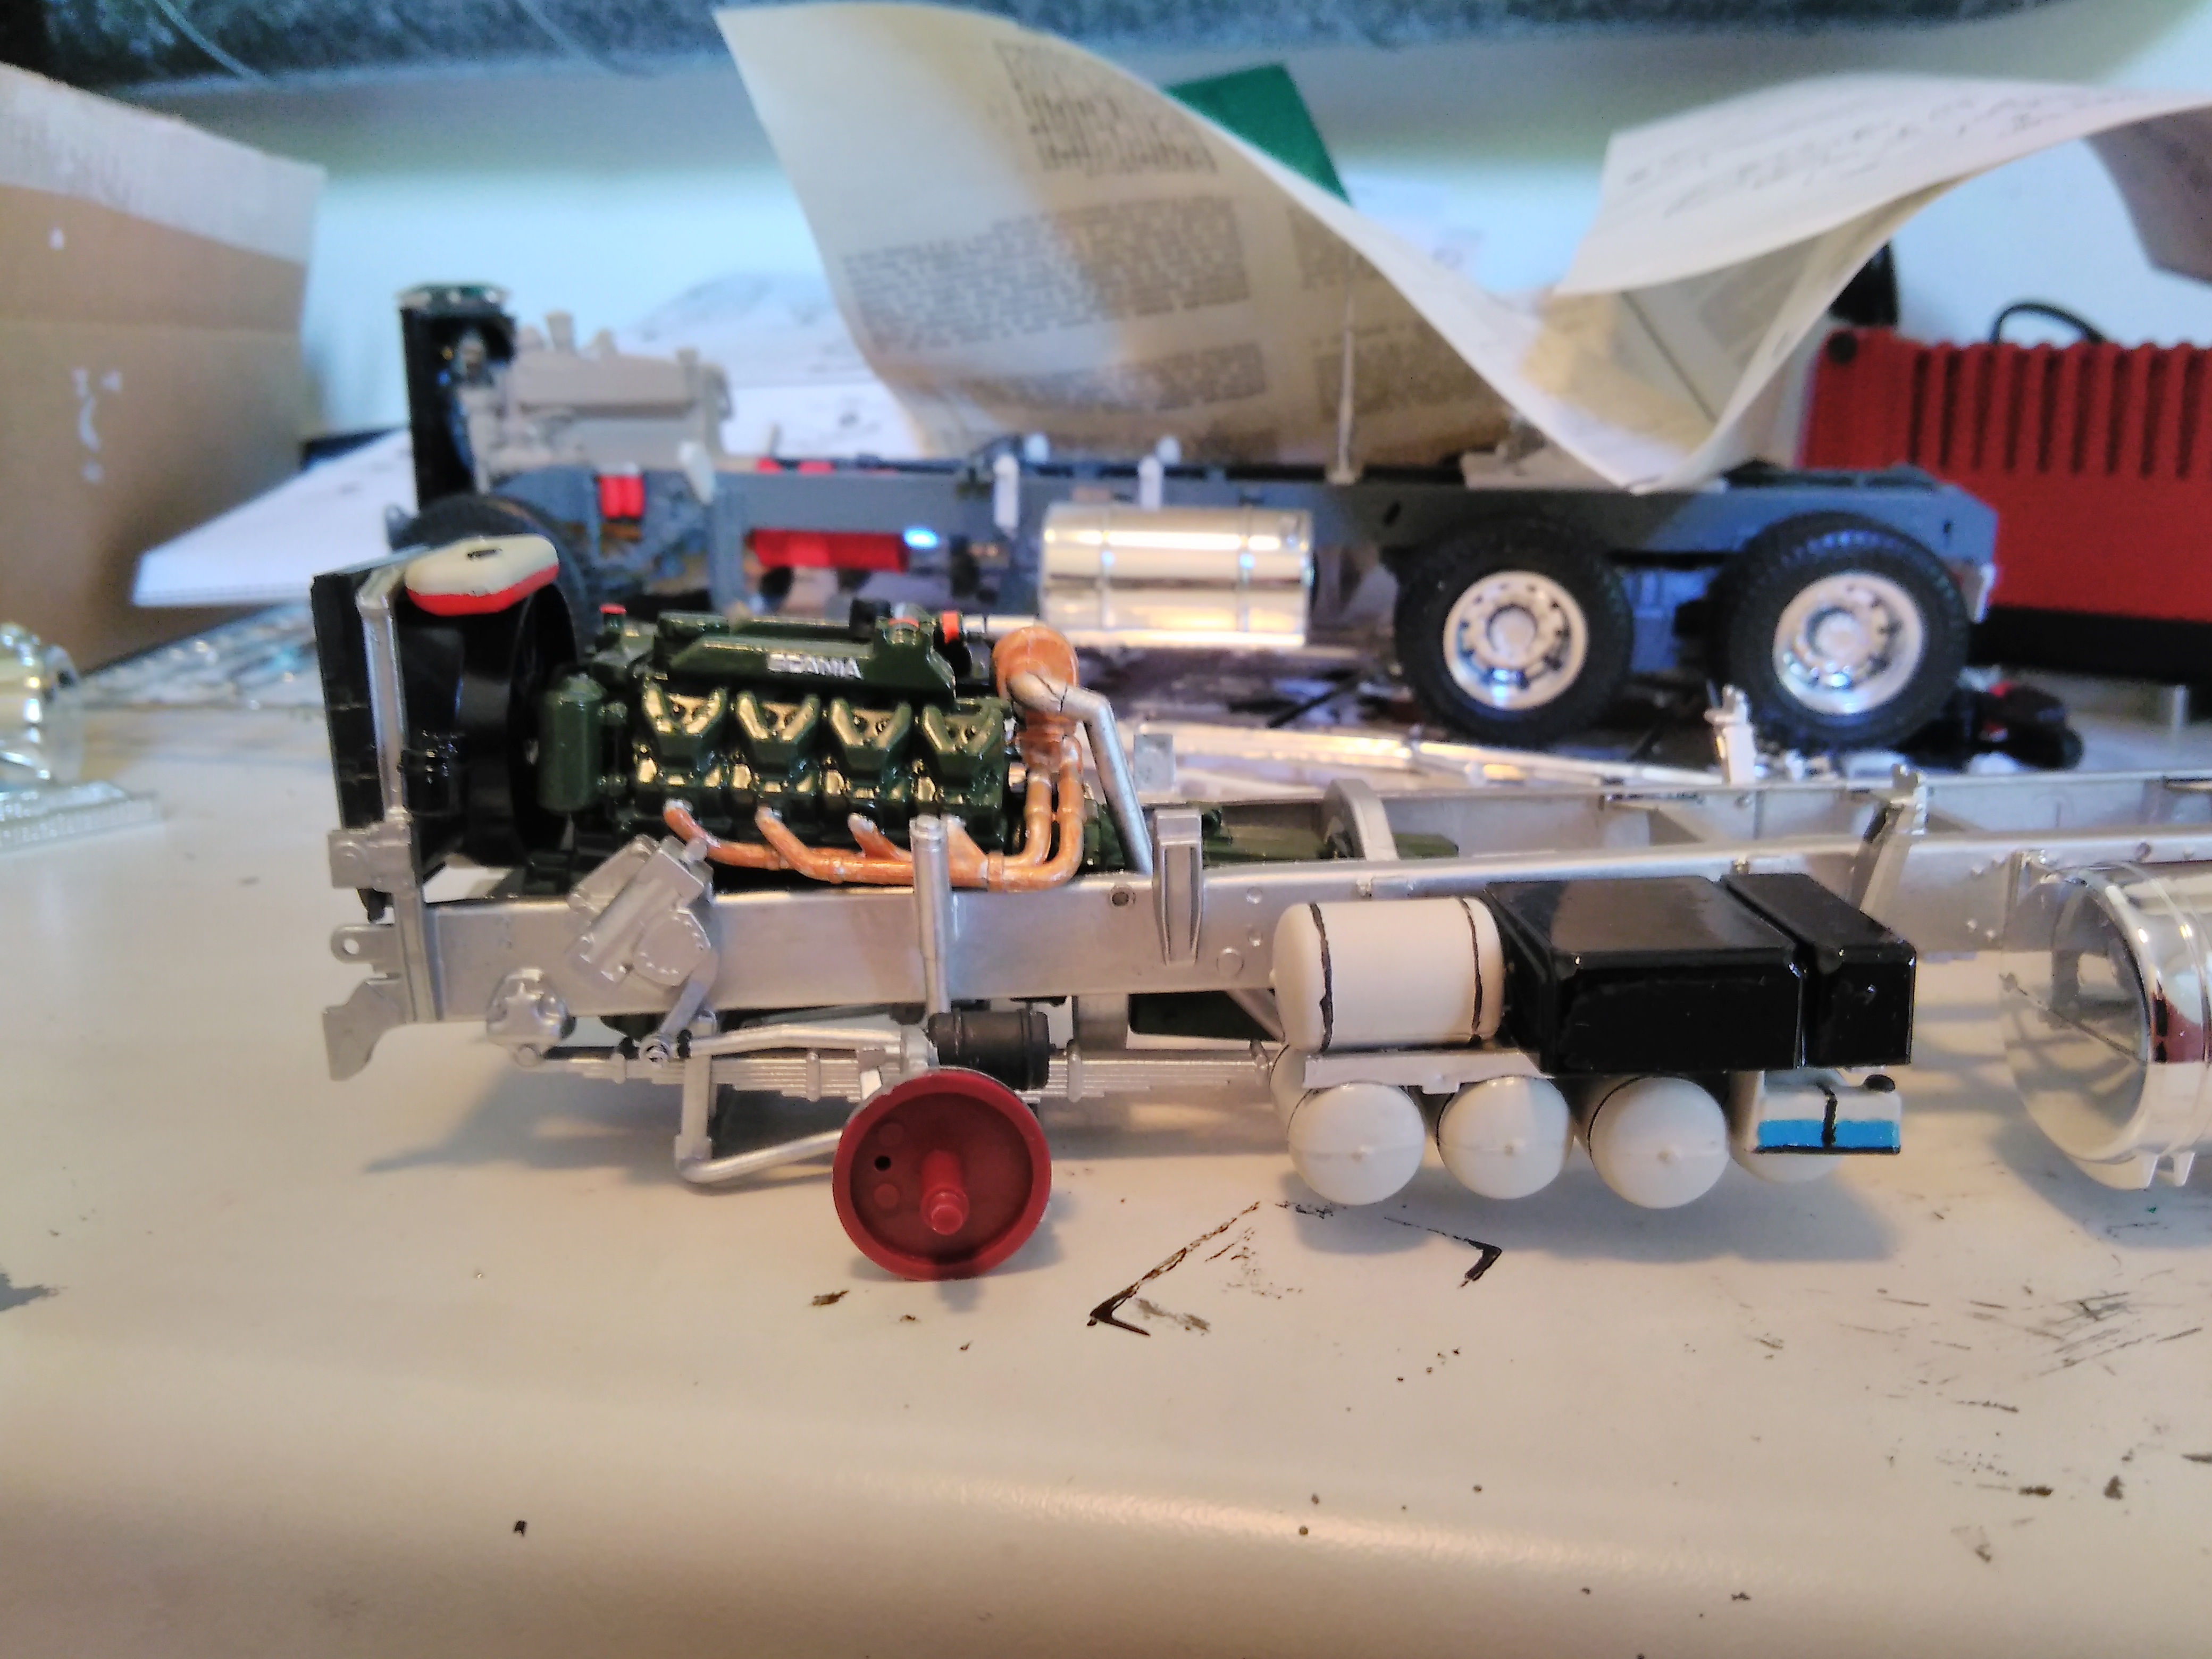
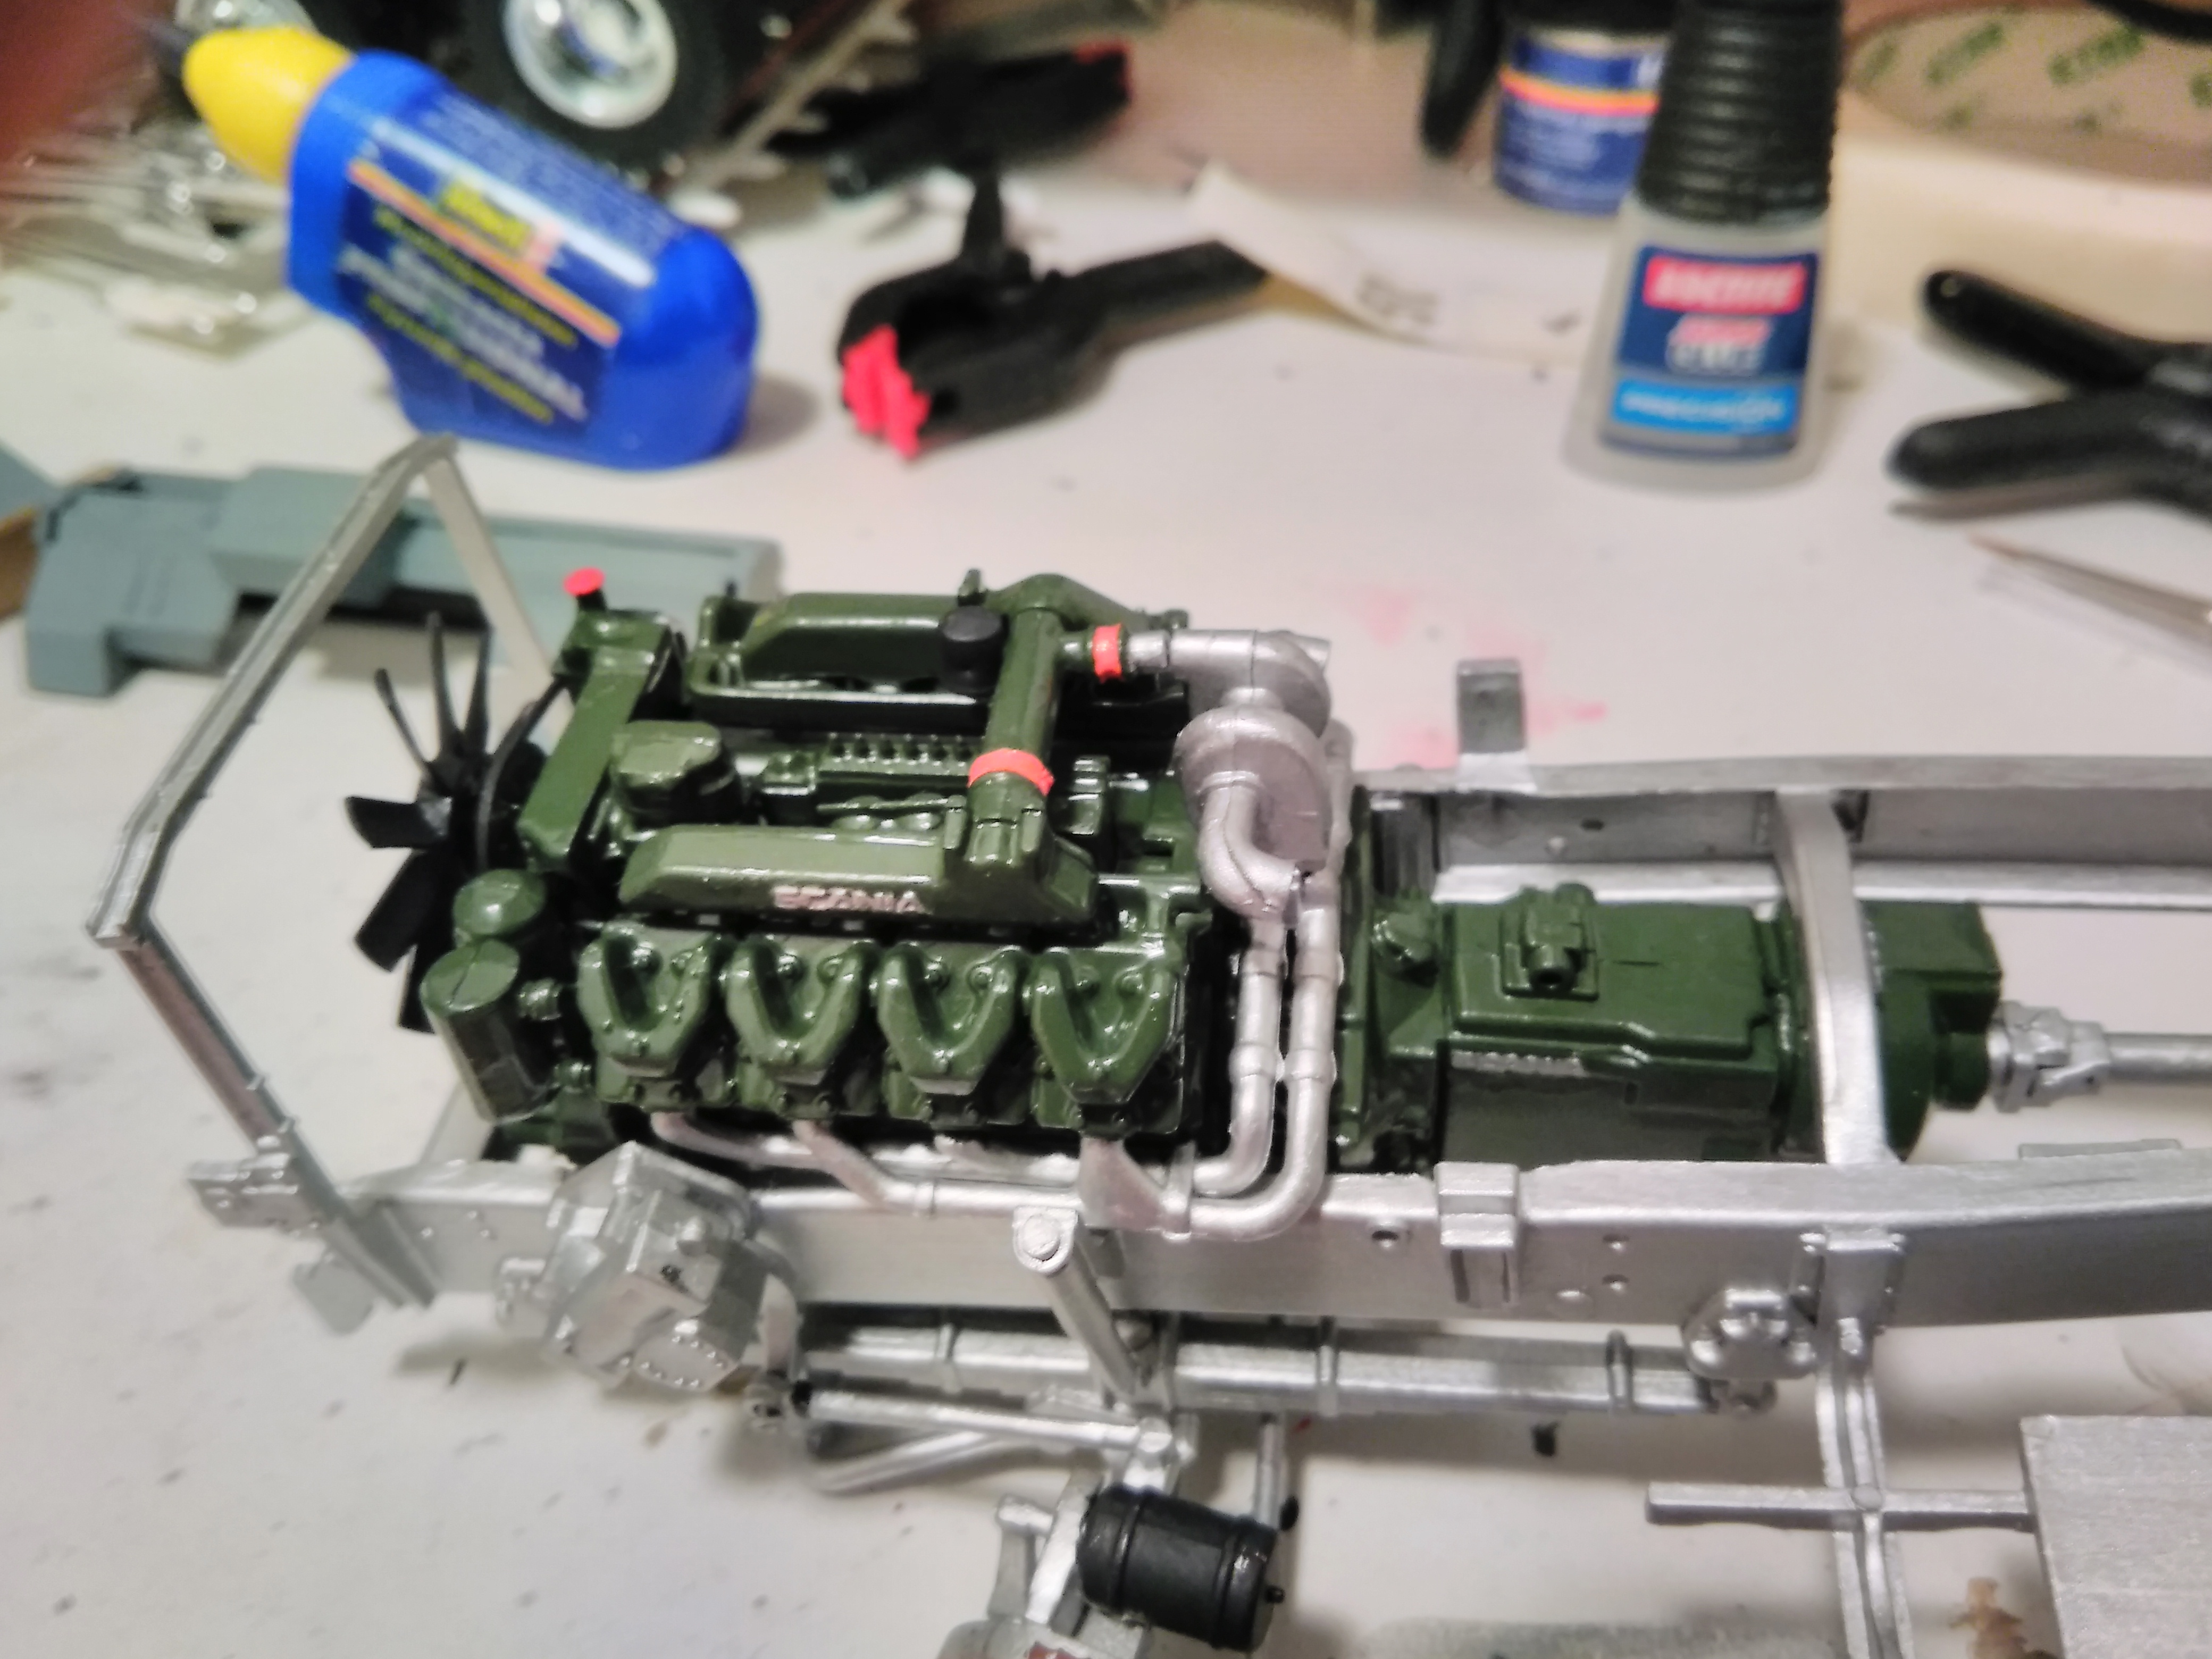
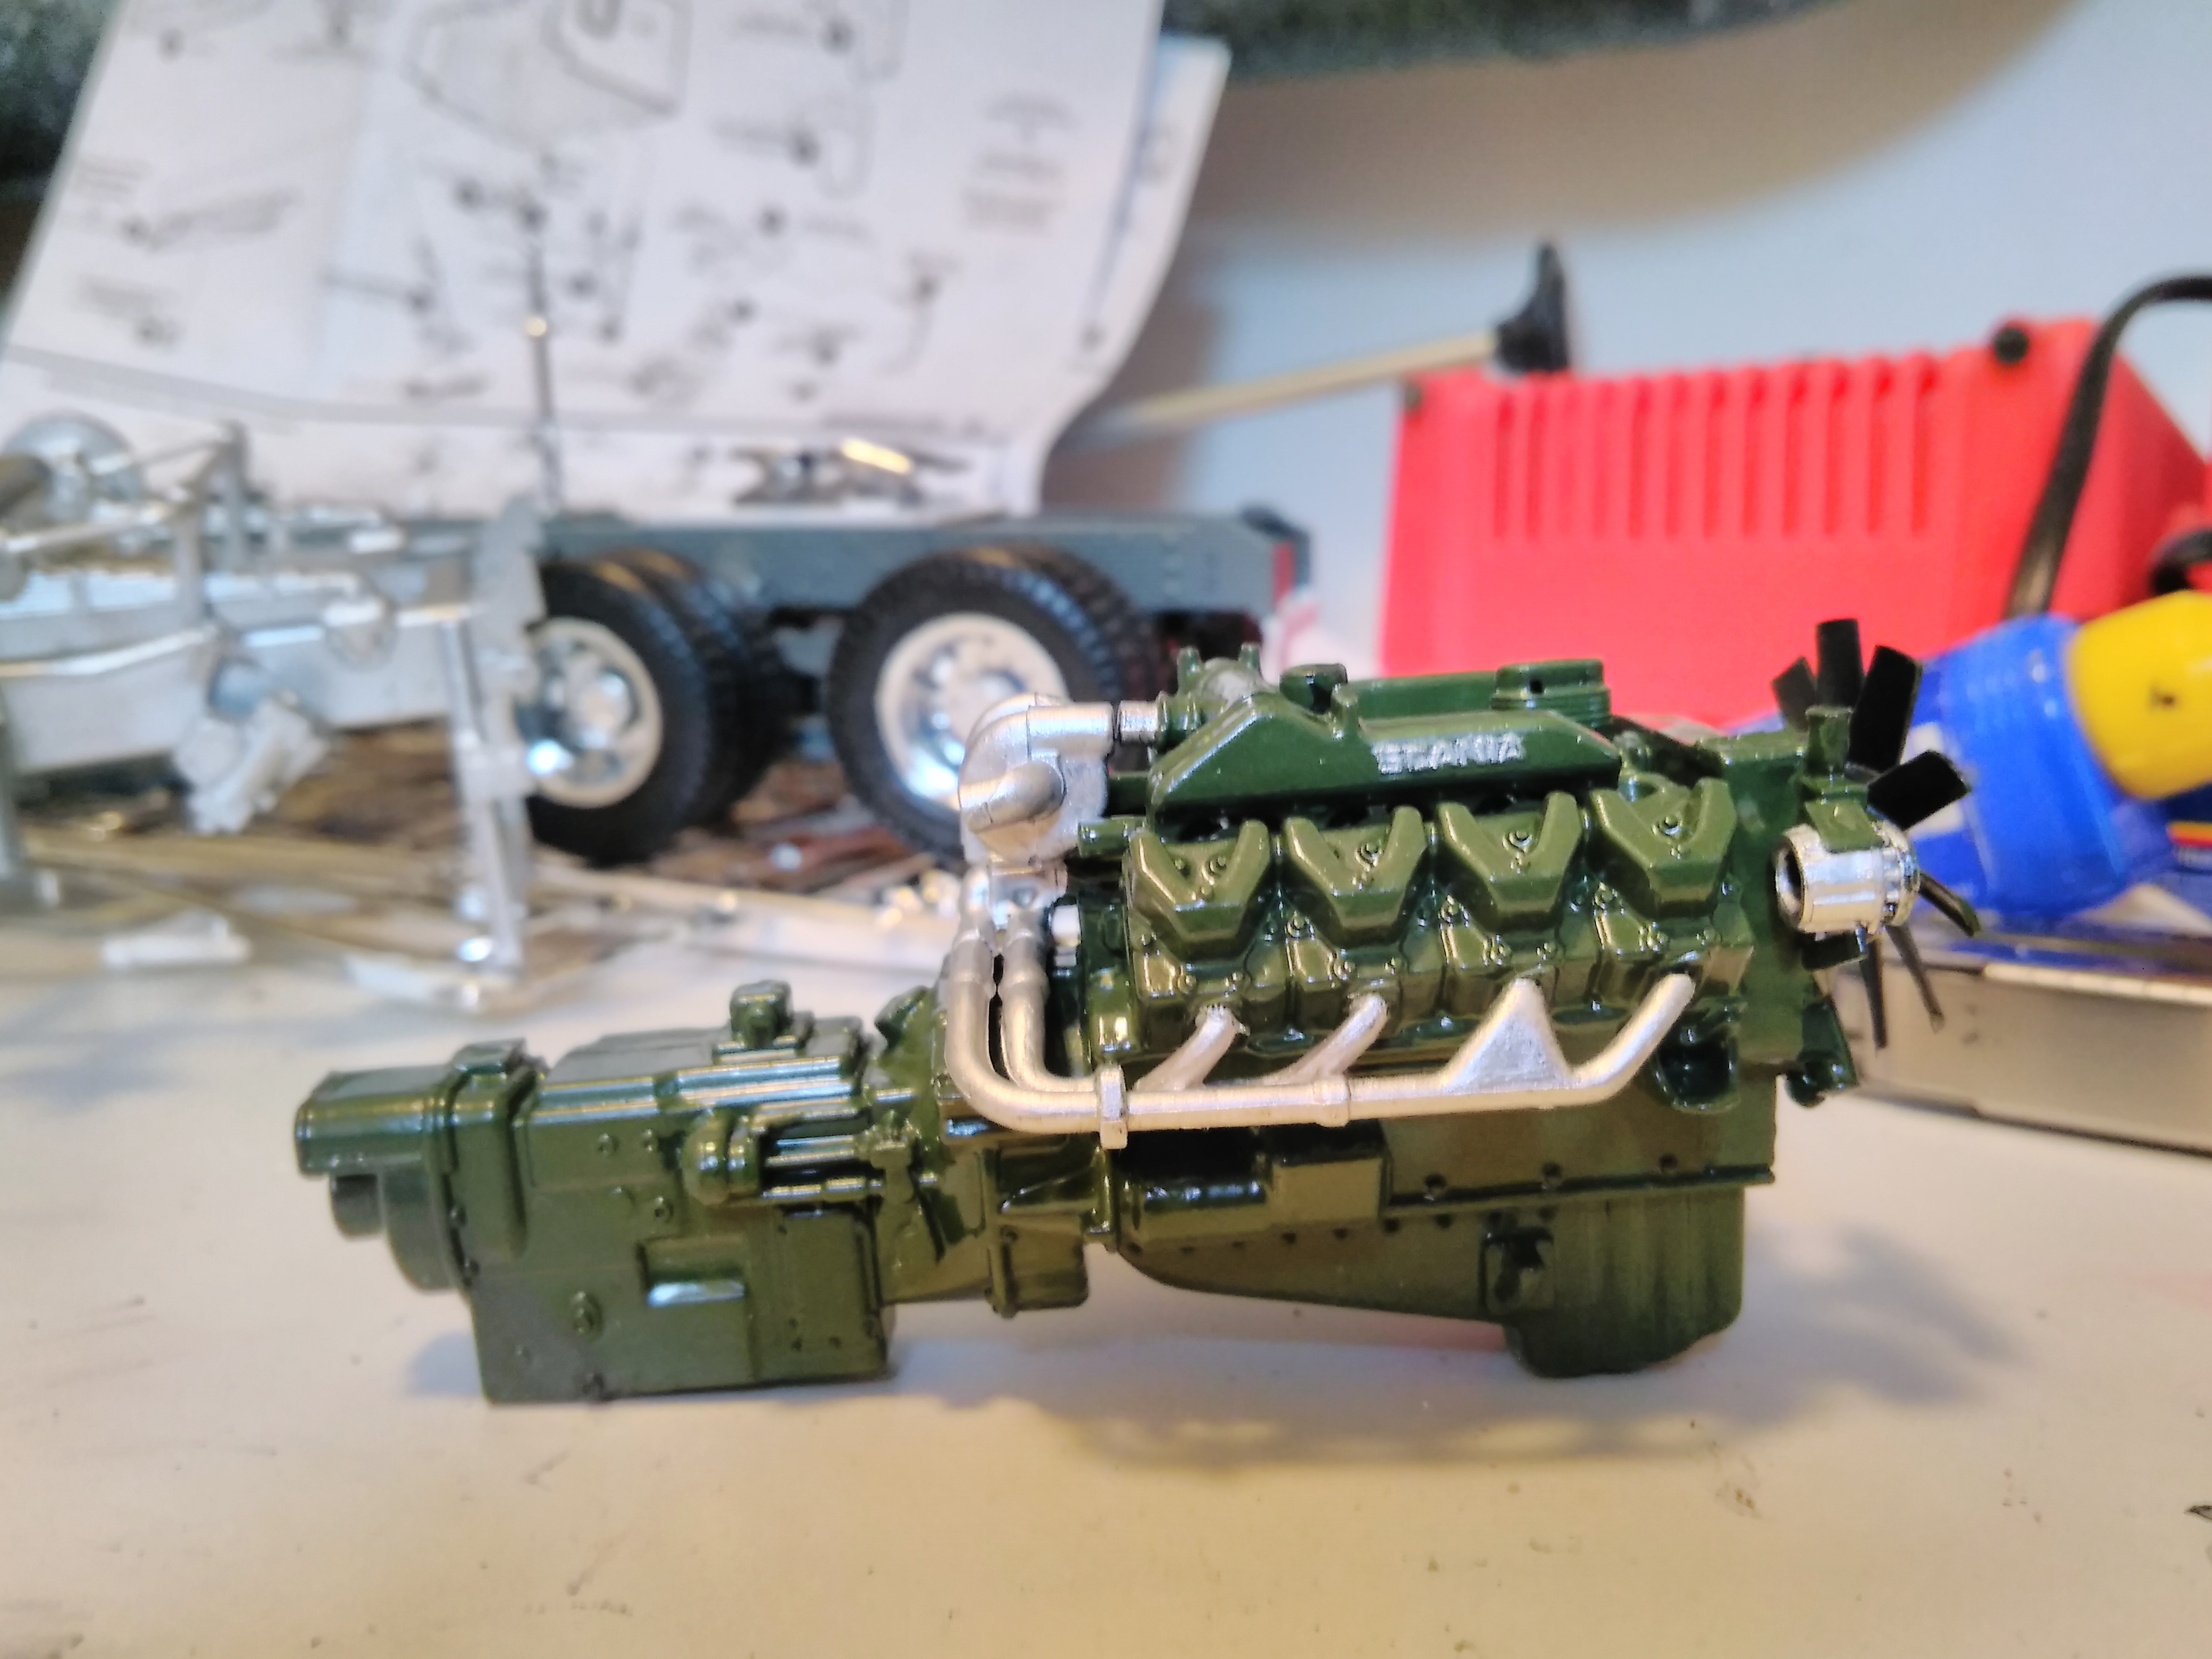
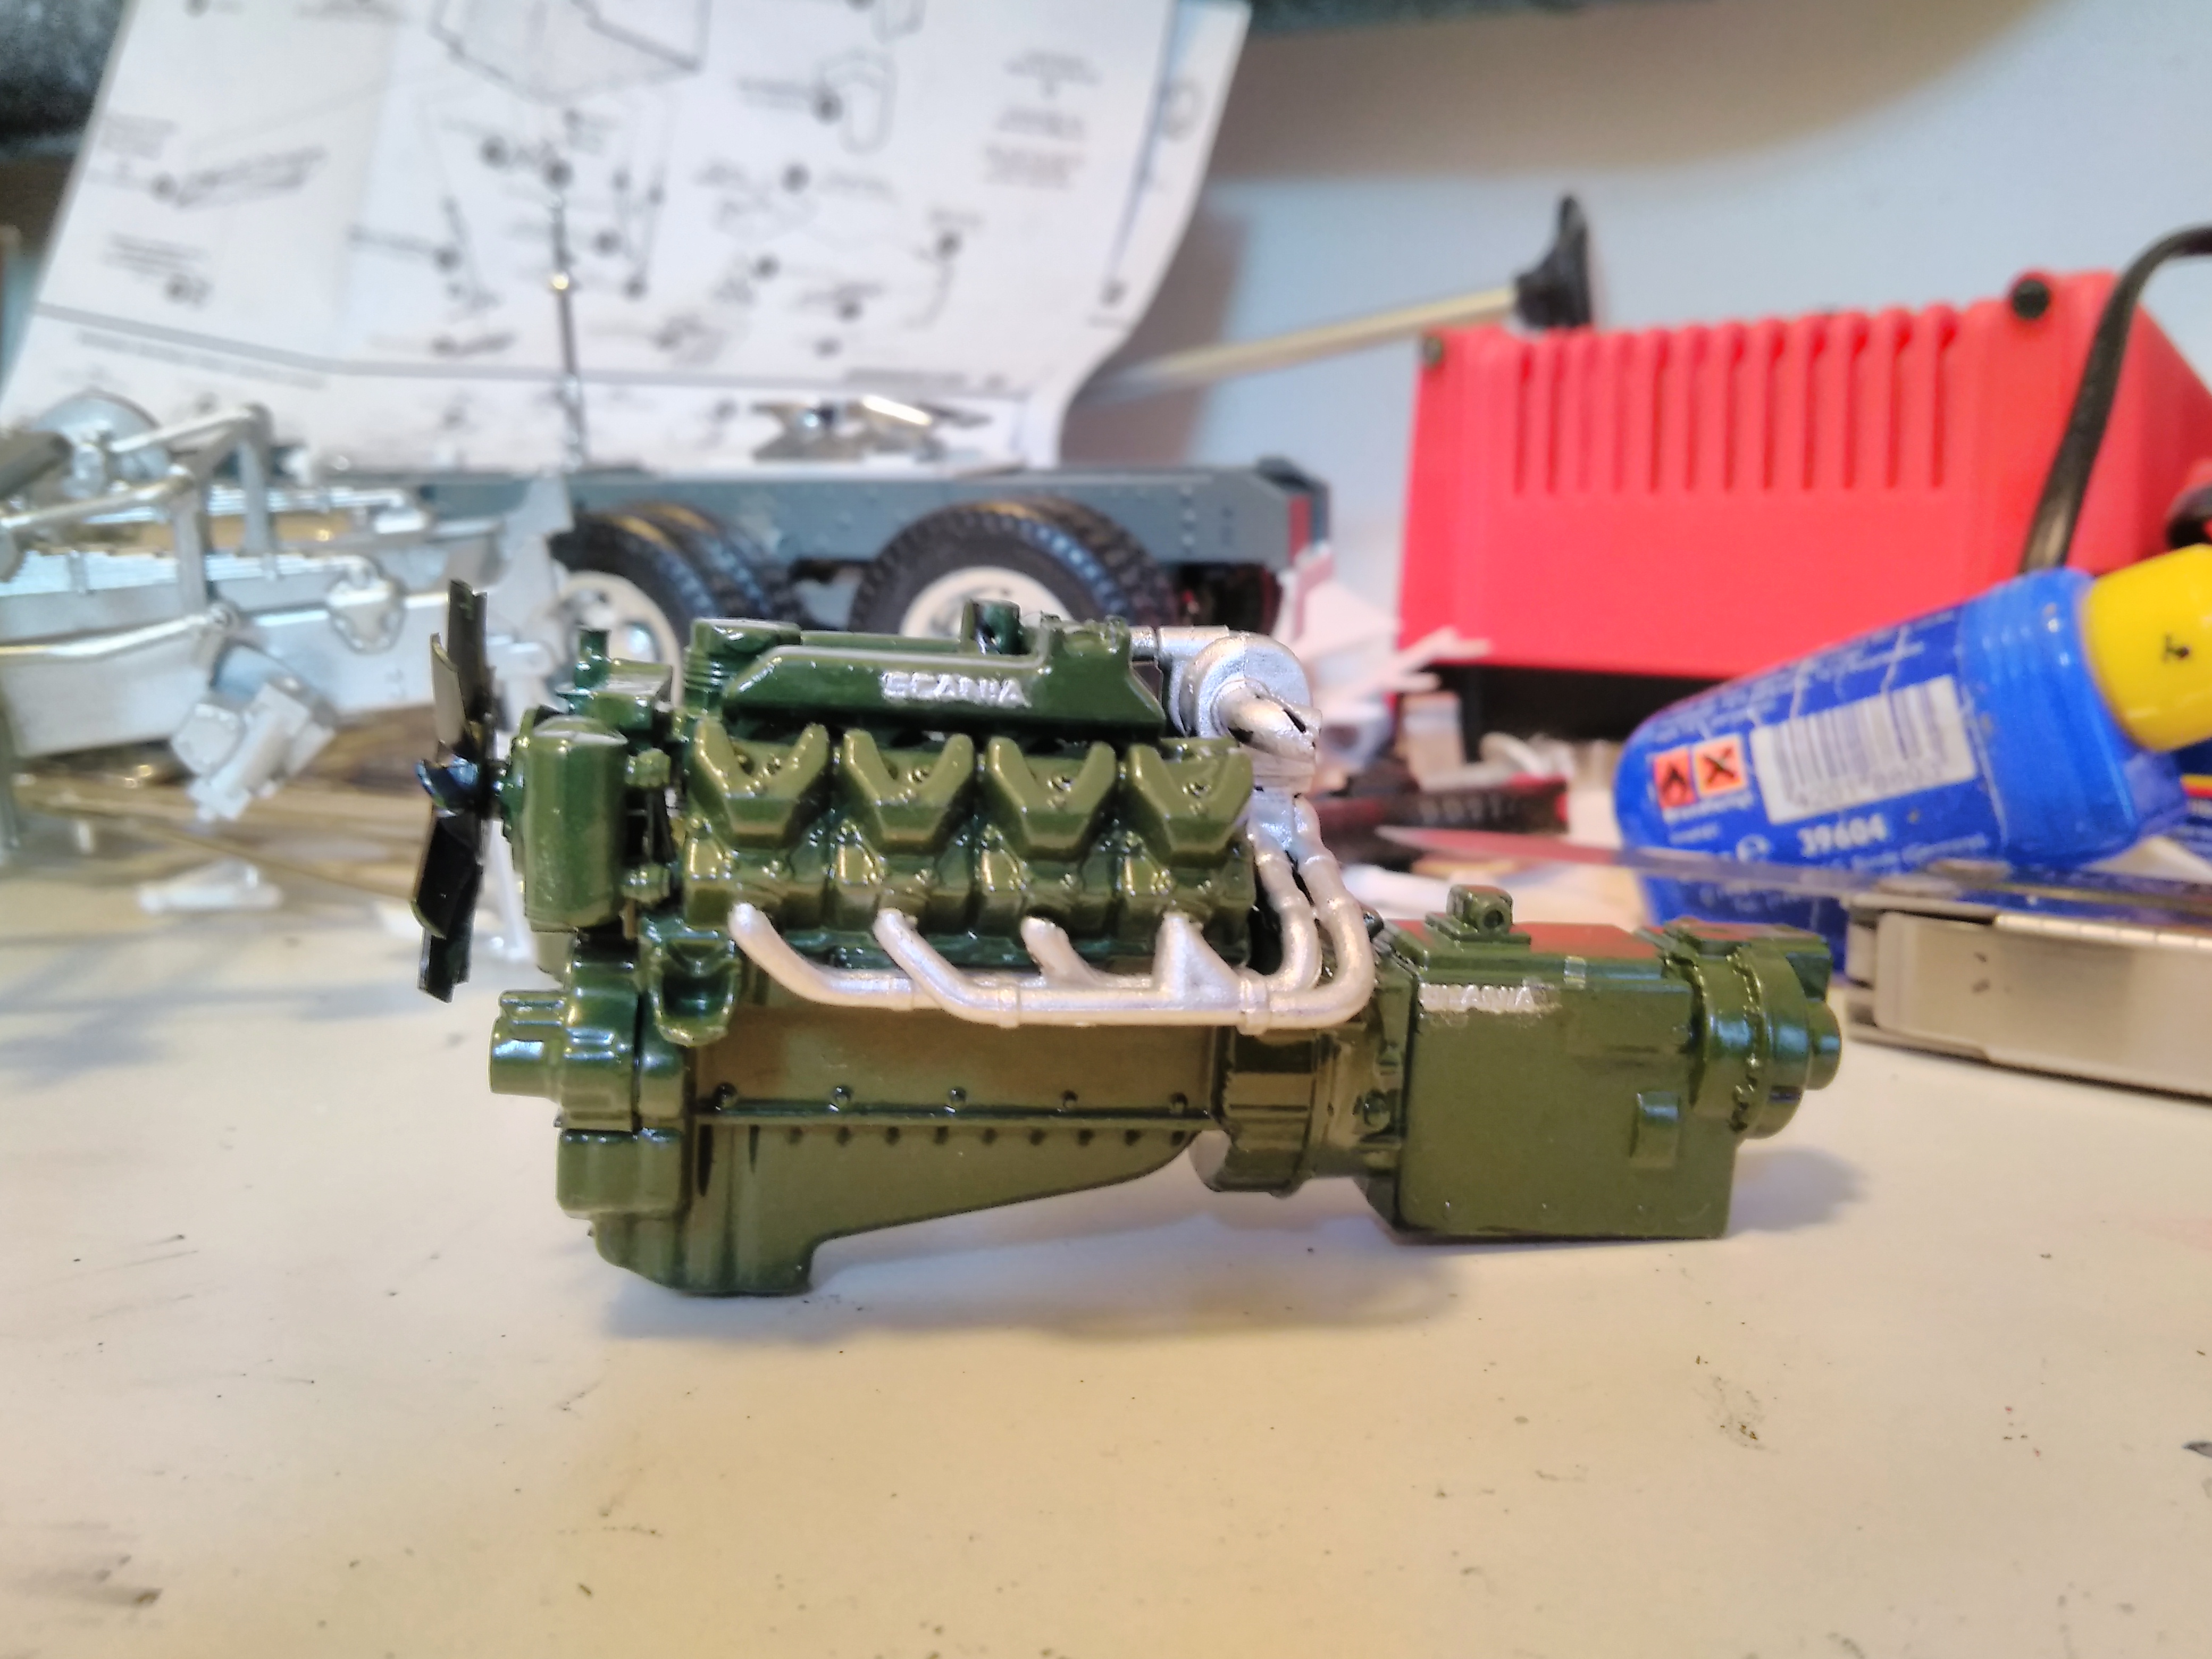
Thanks, i decided to do it this way because the decals was destroyed for it, there are maybe 2-3 that are usable the rest is cracked. Did the last on the engine today, now i only have to make the exhaust look used but that is easy so it can wait untill it is time to mount it in the frame for the last time. Also tried painting the airtanks in another color then black or grey so we will have to wait and see how that turns out, it might work or not. Also painted the brakecylinders black. Painted the oilcap red as it was on the Scanias i worked on, added the fuelfilter holder inside the V next to the injectorpump and painted the silicone hoses on the airintake orange. What are you using to replicate injectorlines on 1/24 engines? I am thinking of adding them to this one because those are almost the first thing you see when tilting the cab or open the hood on the 2 and 3 series Scanias.
-
Scania T142
PierreR89 replied to PierreR89's topic in WIP: Model Trucks: Big Rigs and Heavy Equipment
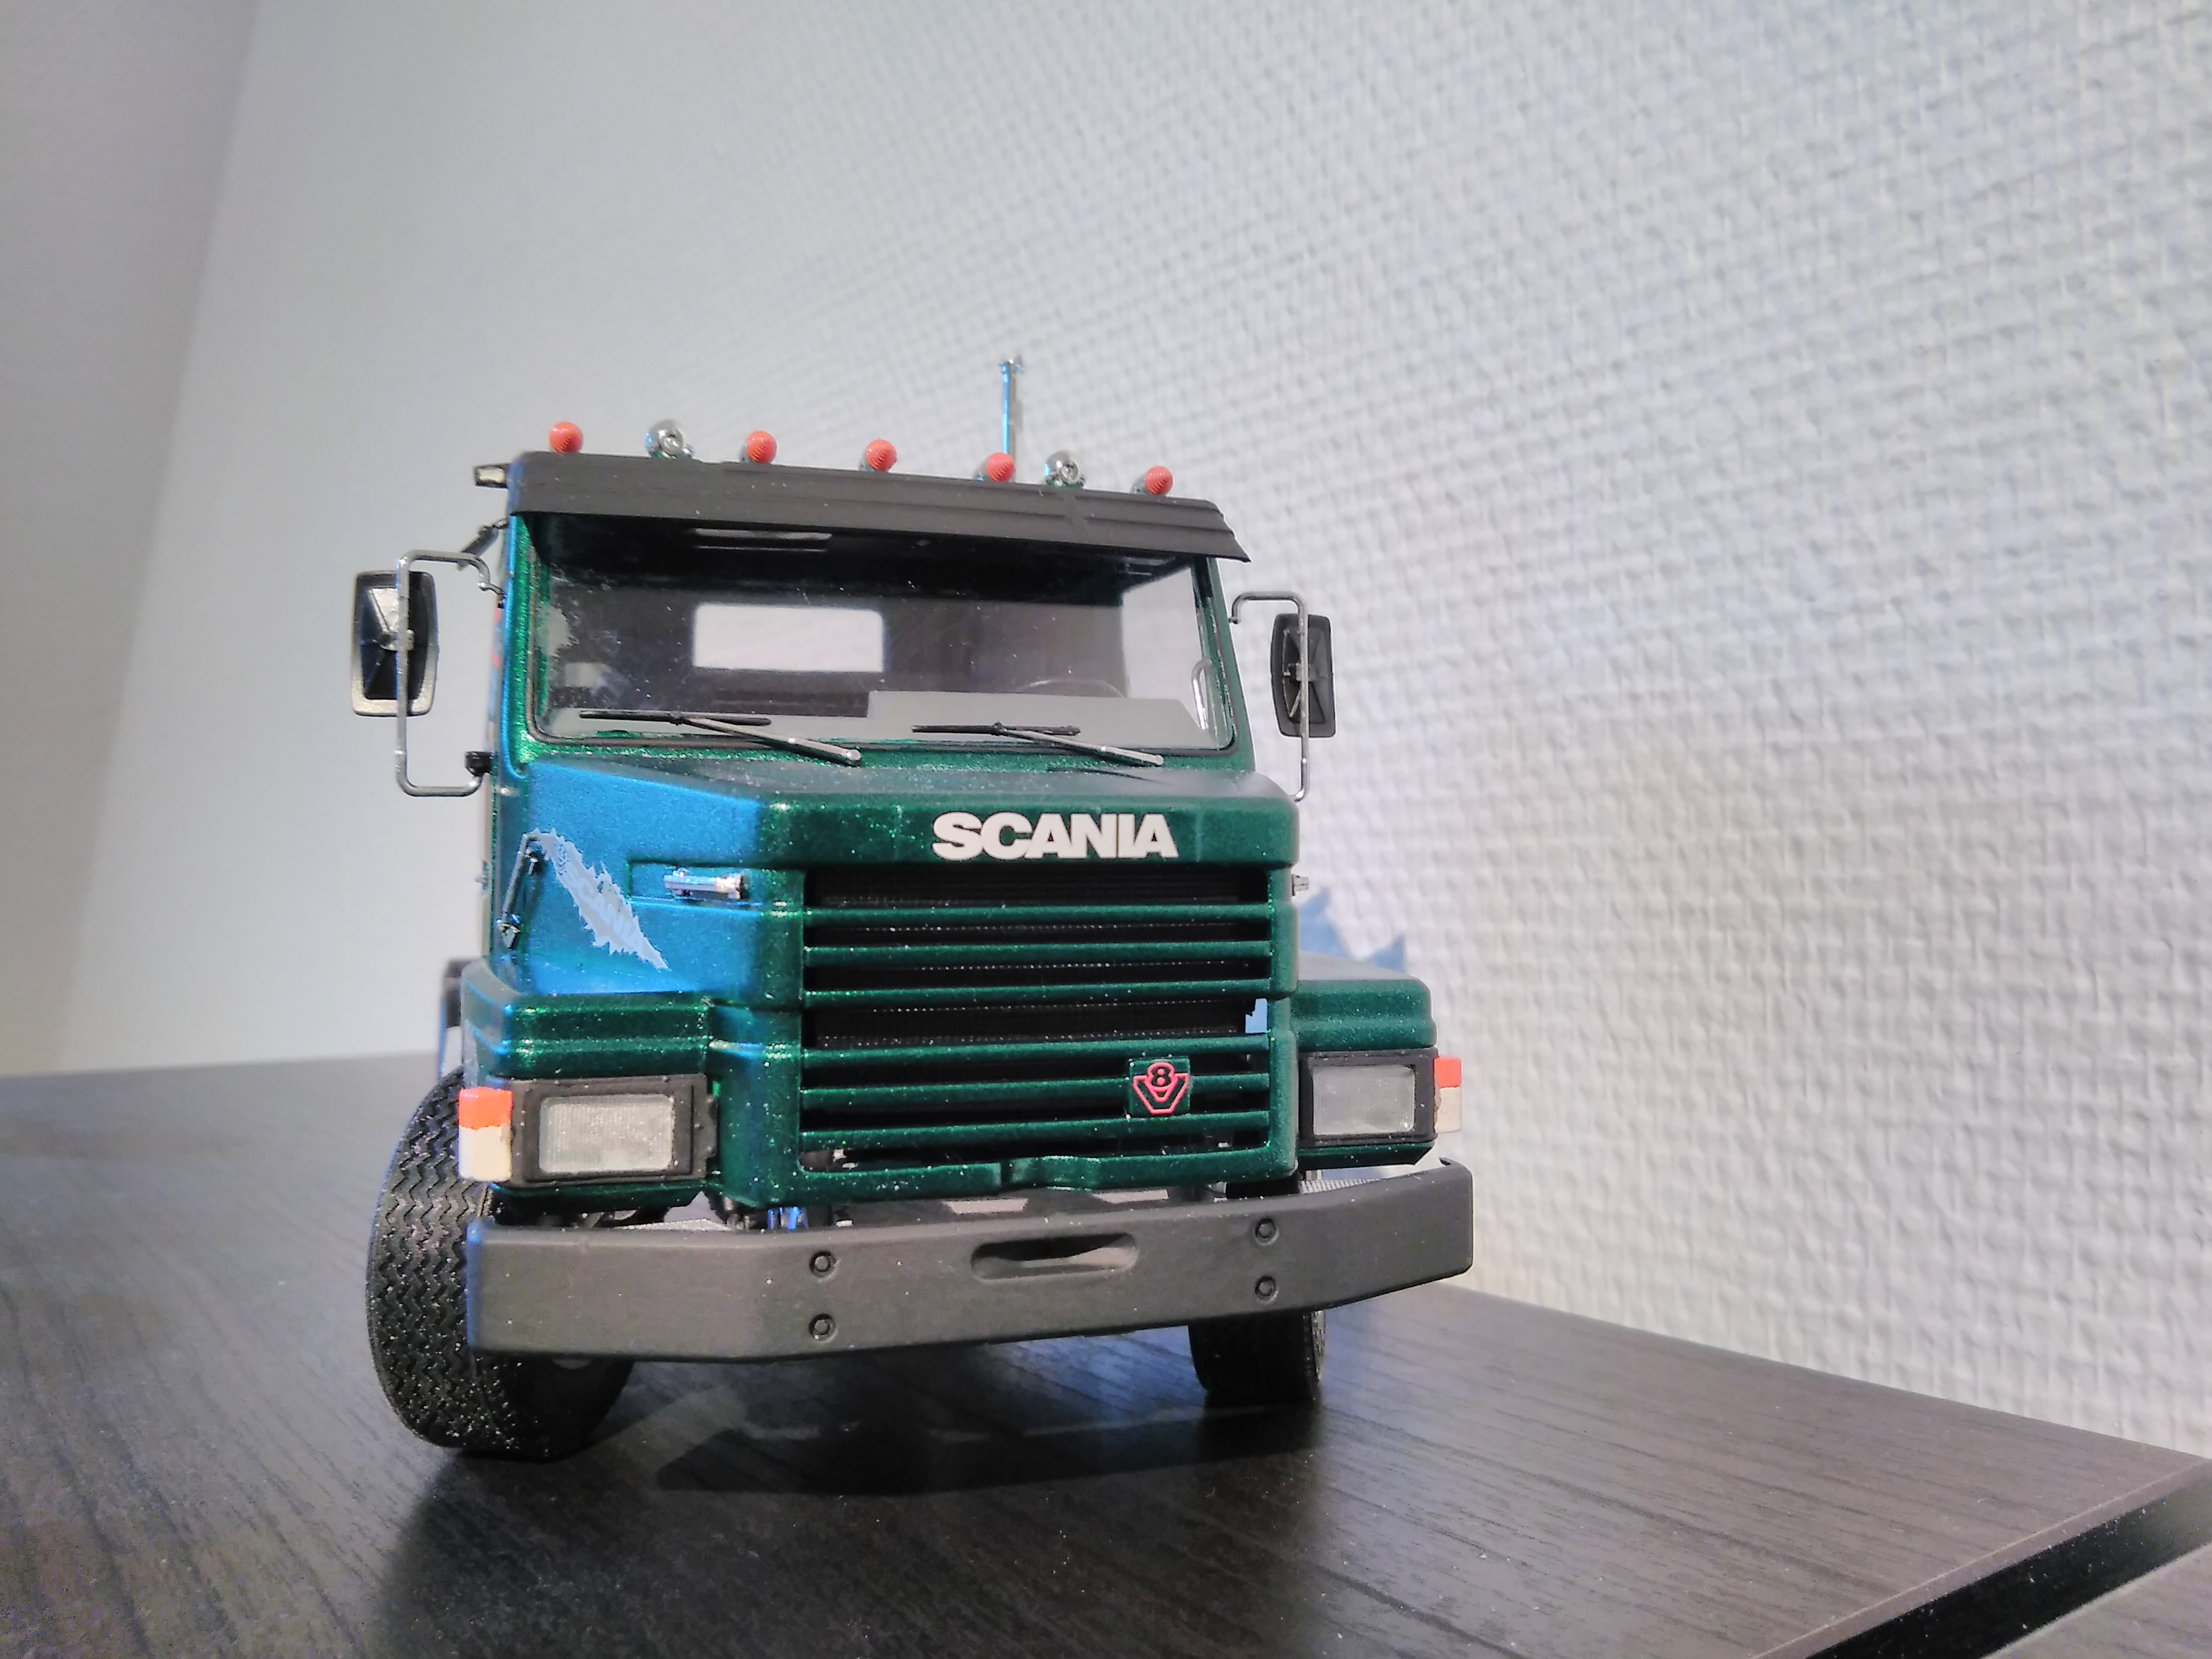
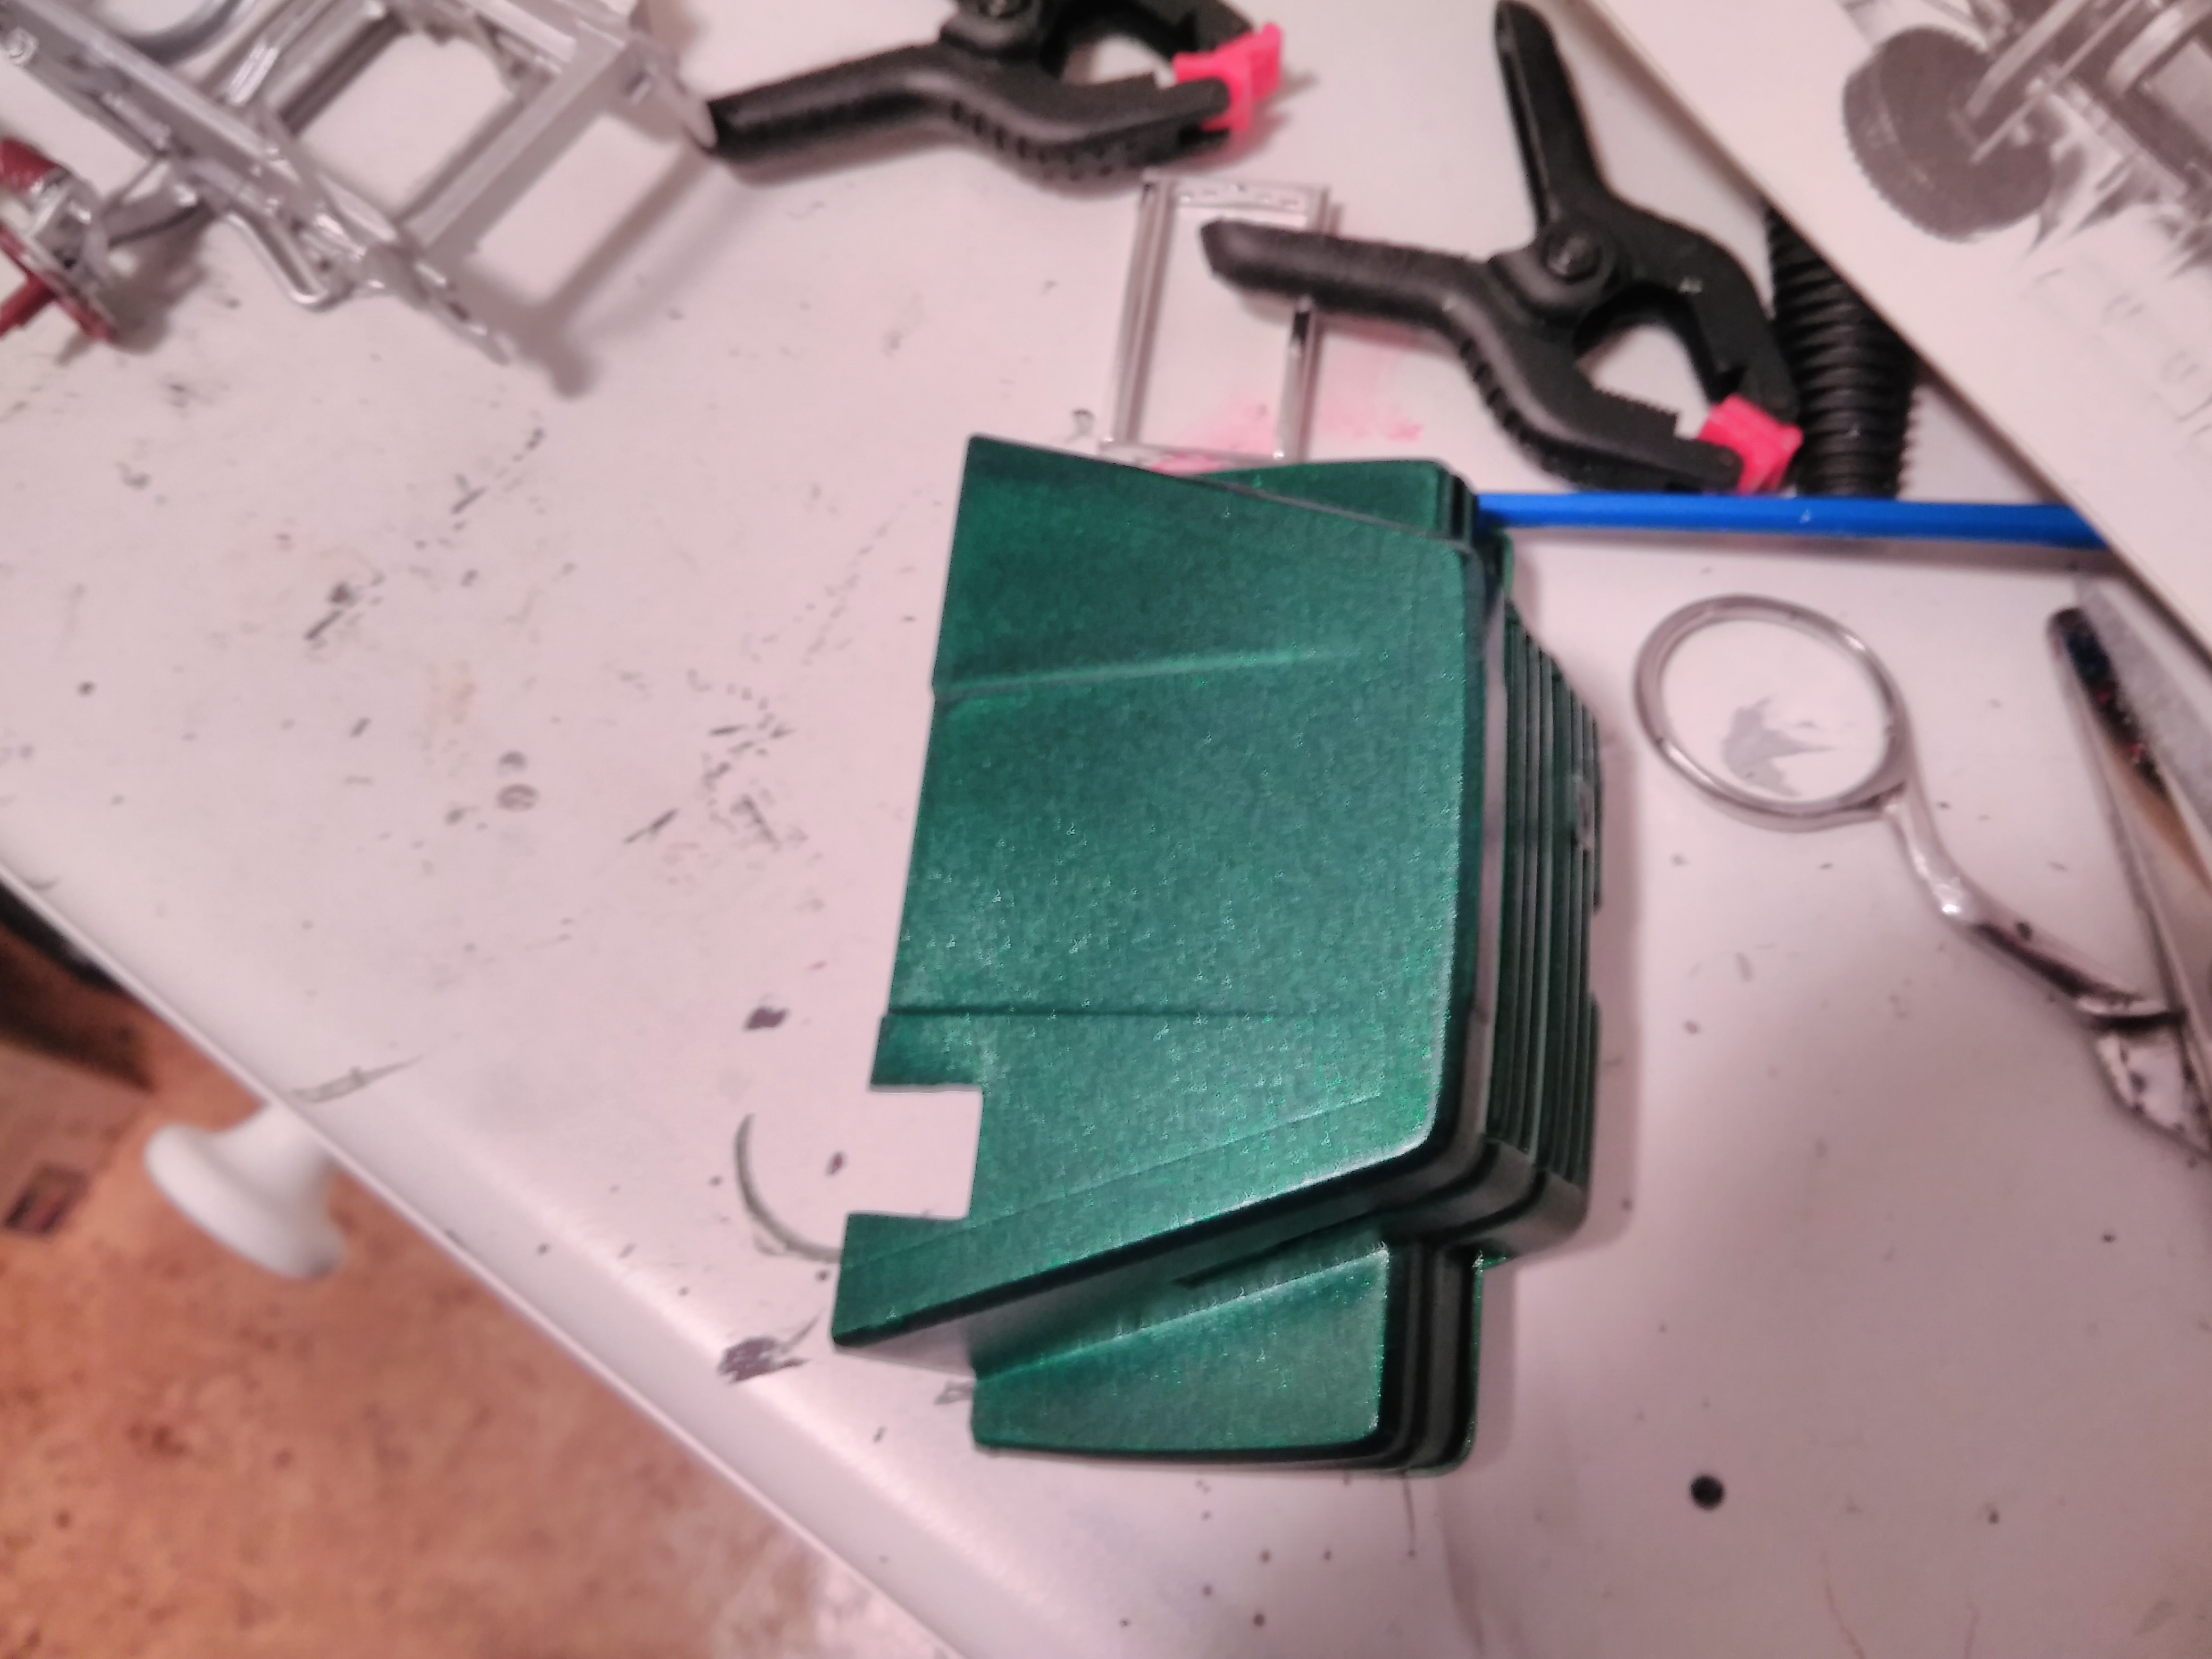
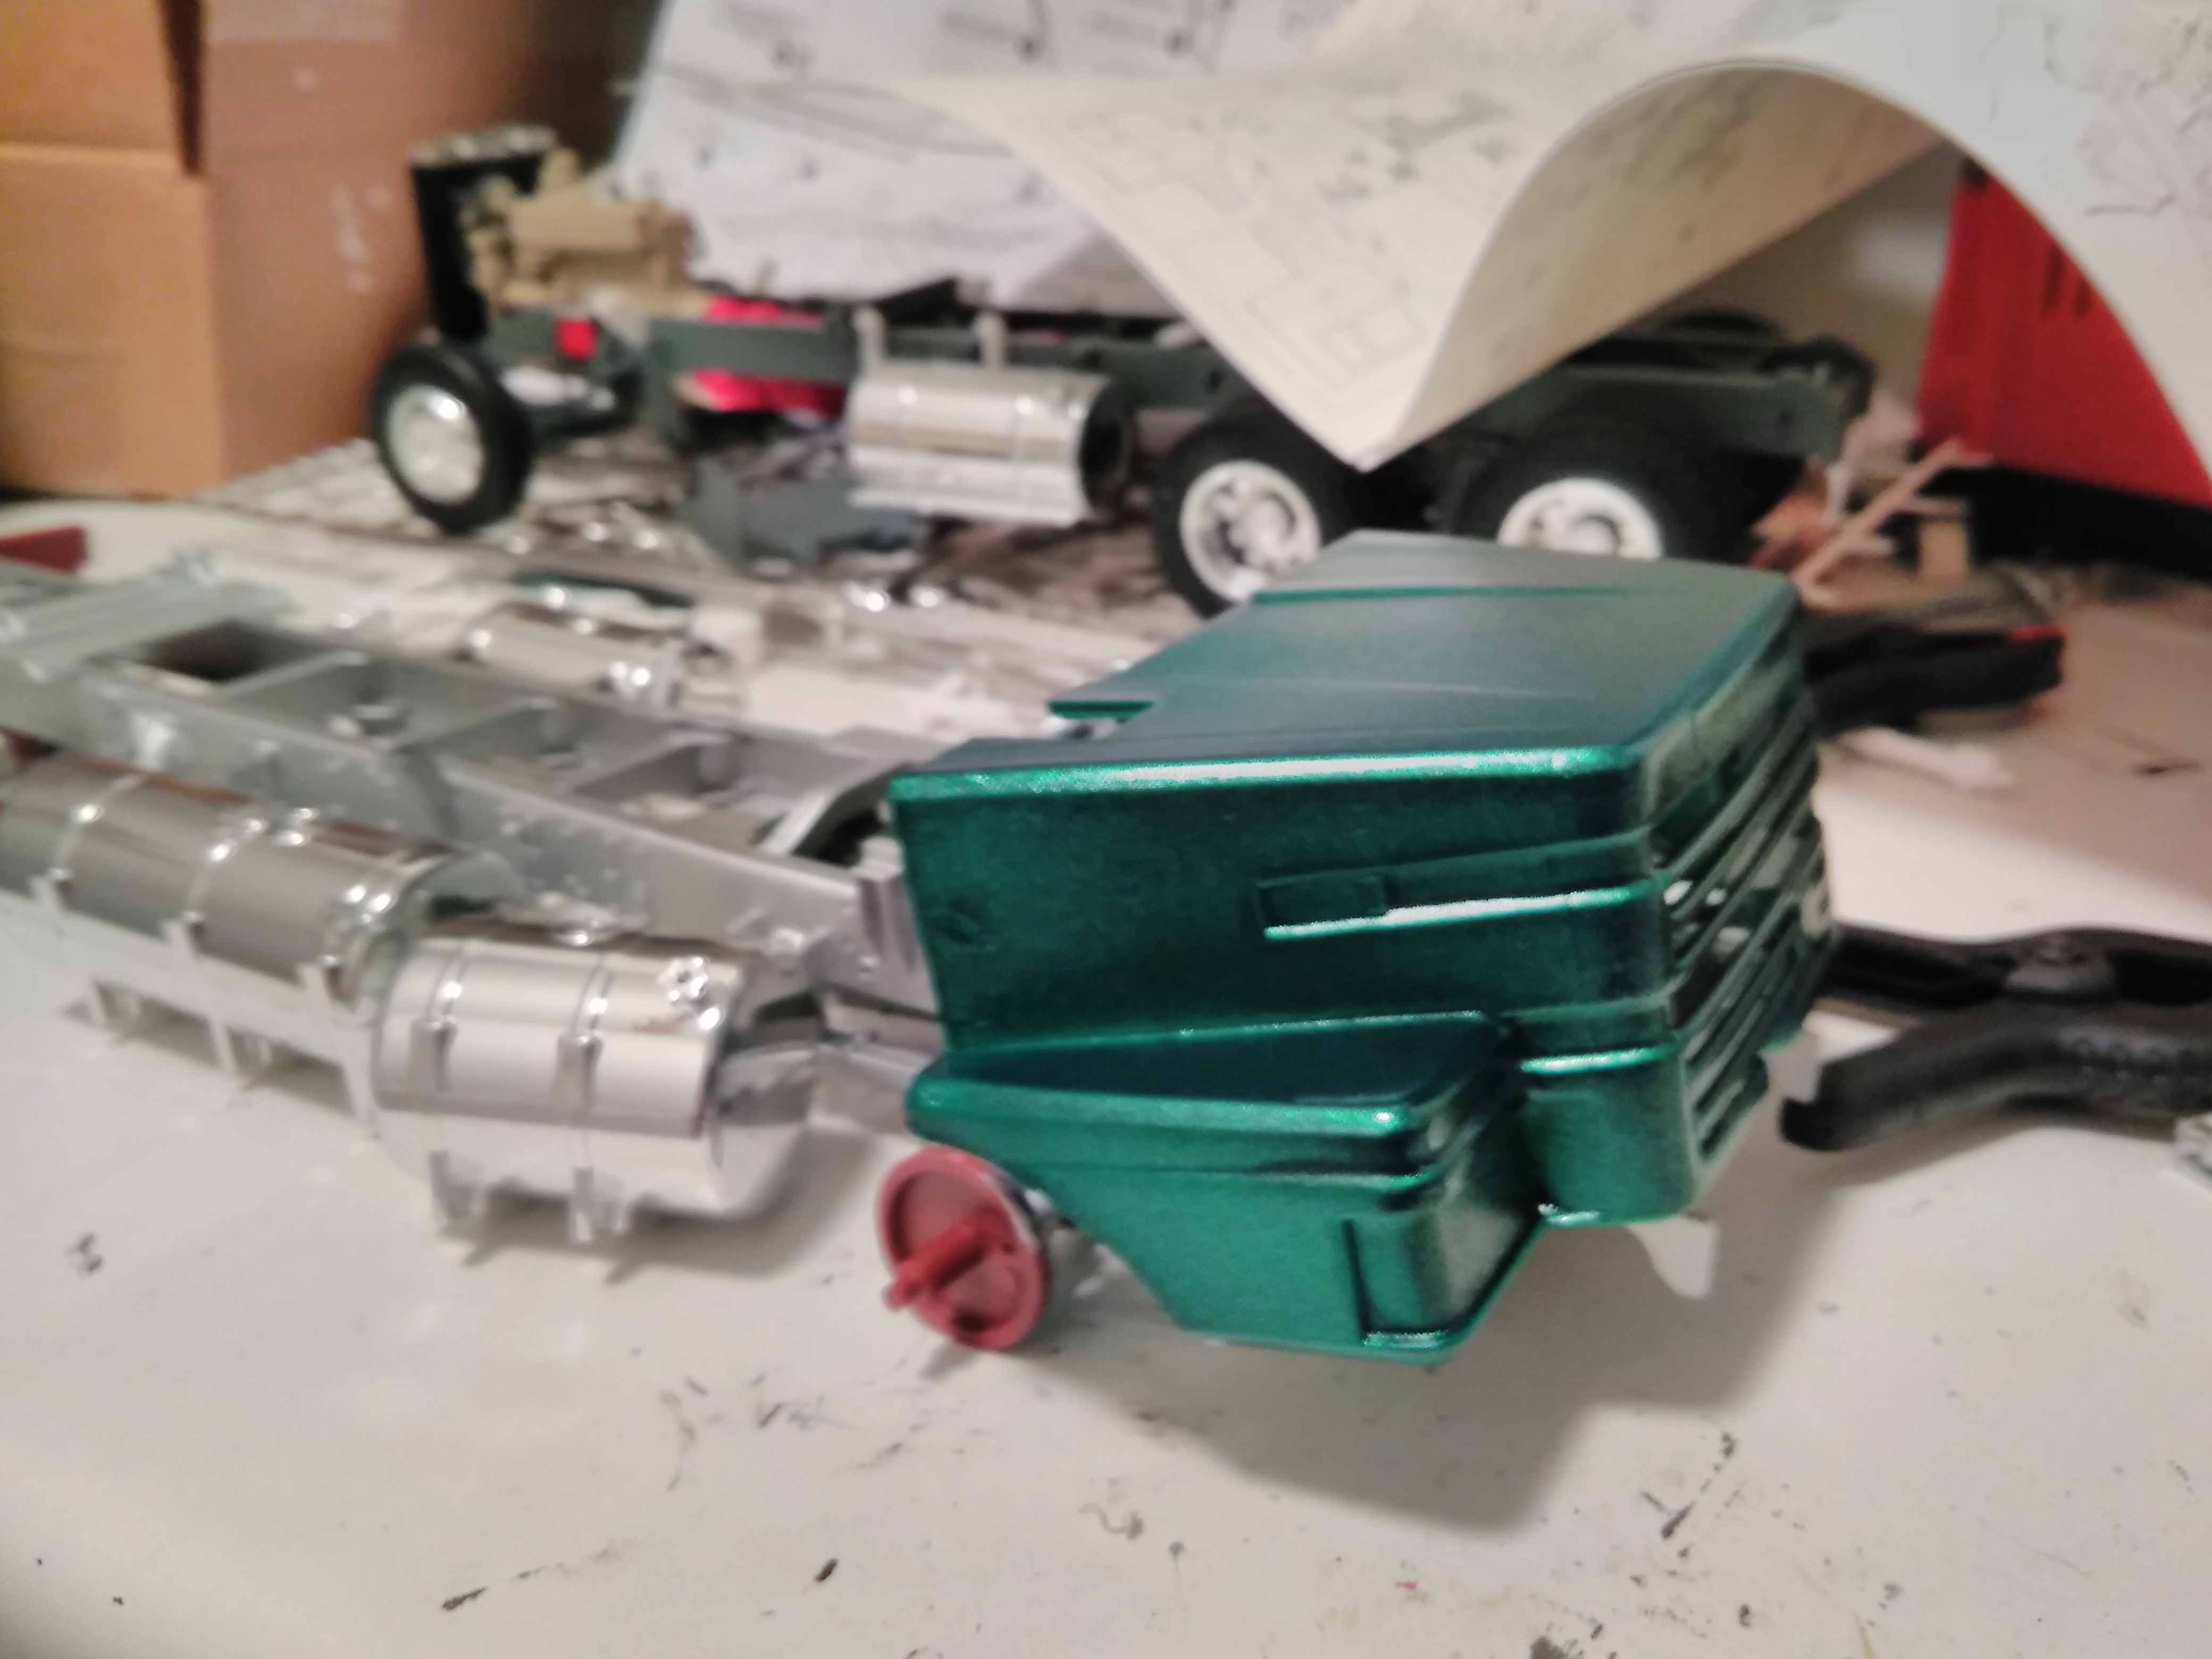
Painted the bodypanels and hood in a metalic green color. It is a bit more darker then what the pic's show. I think it will look good with the silver frame and the green cab when everything is done on it.
-
Scania T142
PierreR89 replied to PierreR89's topic in WIP: Model Trucks: Big Rigs and Heavy Equipment
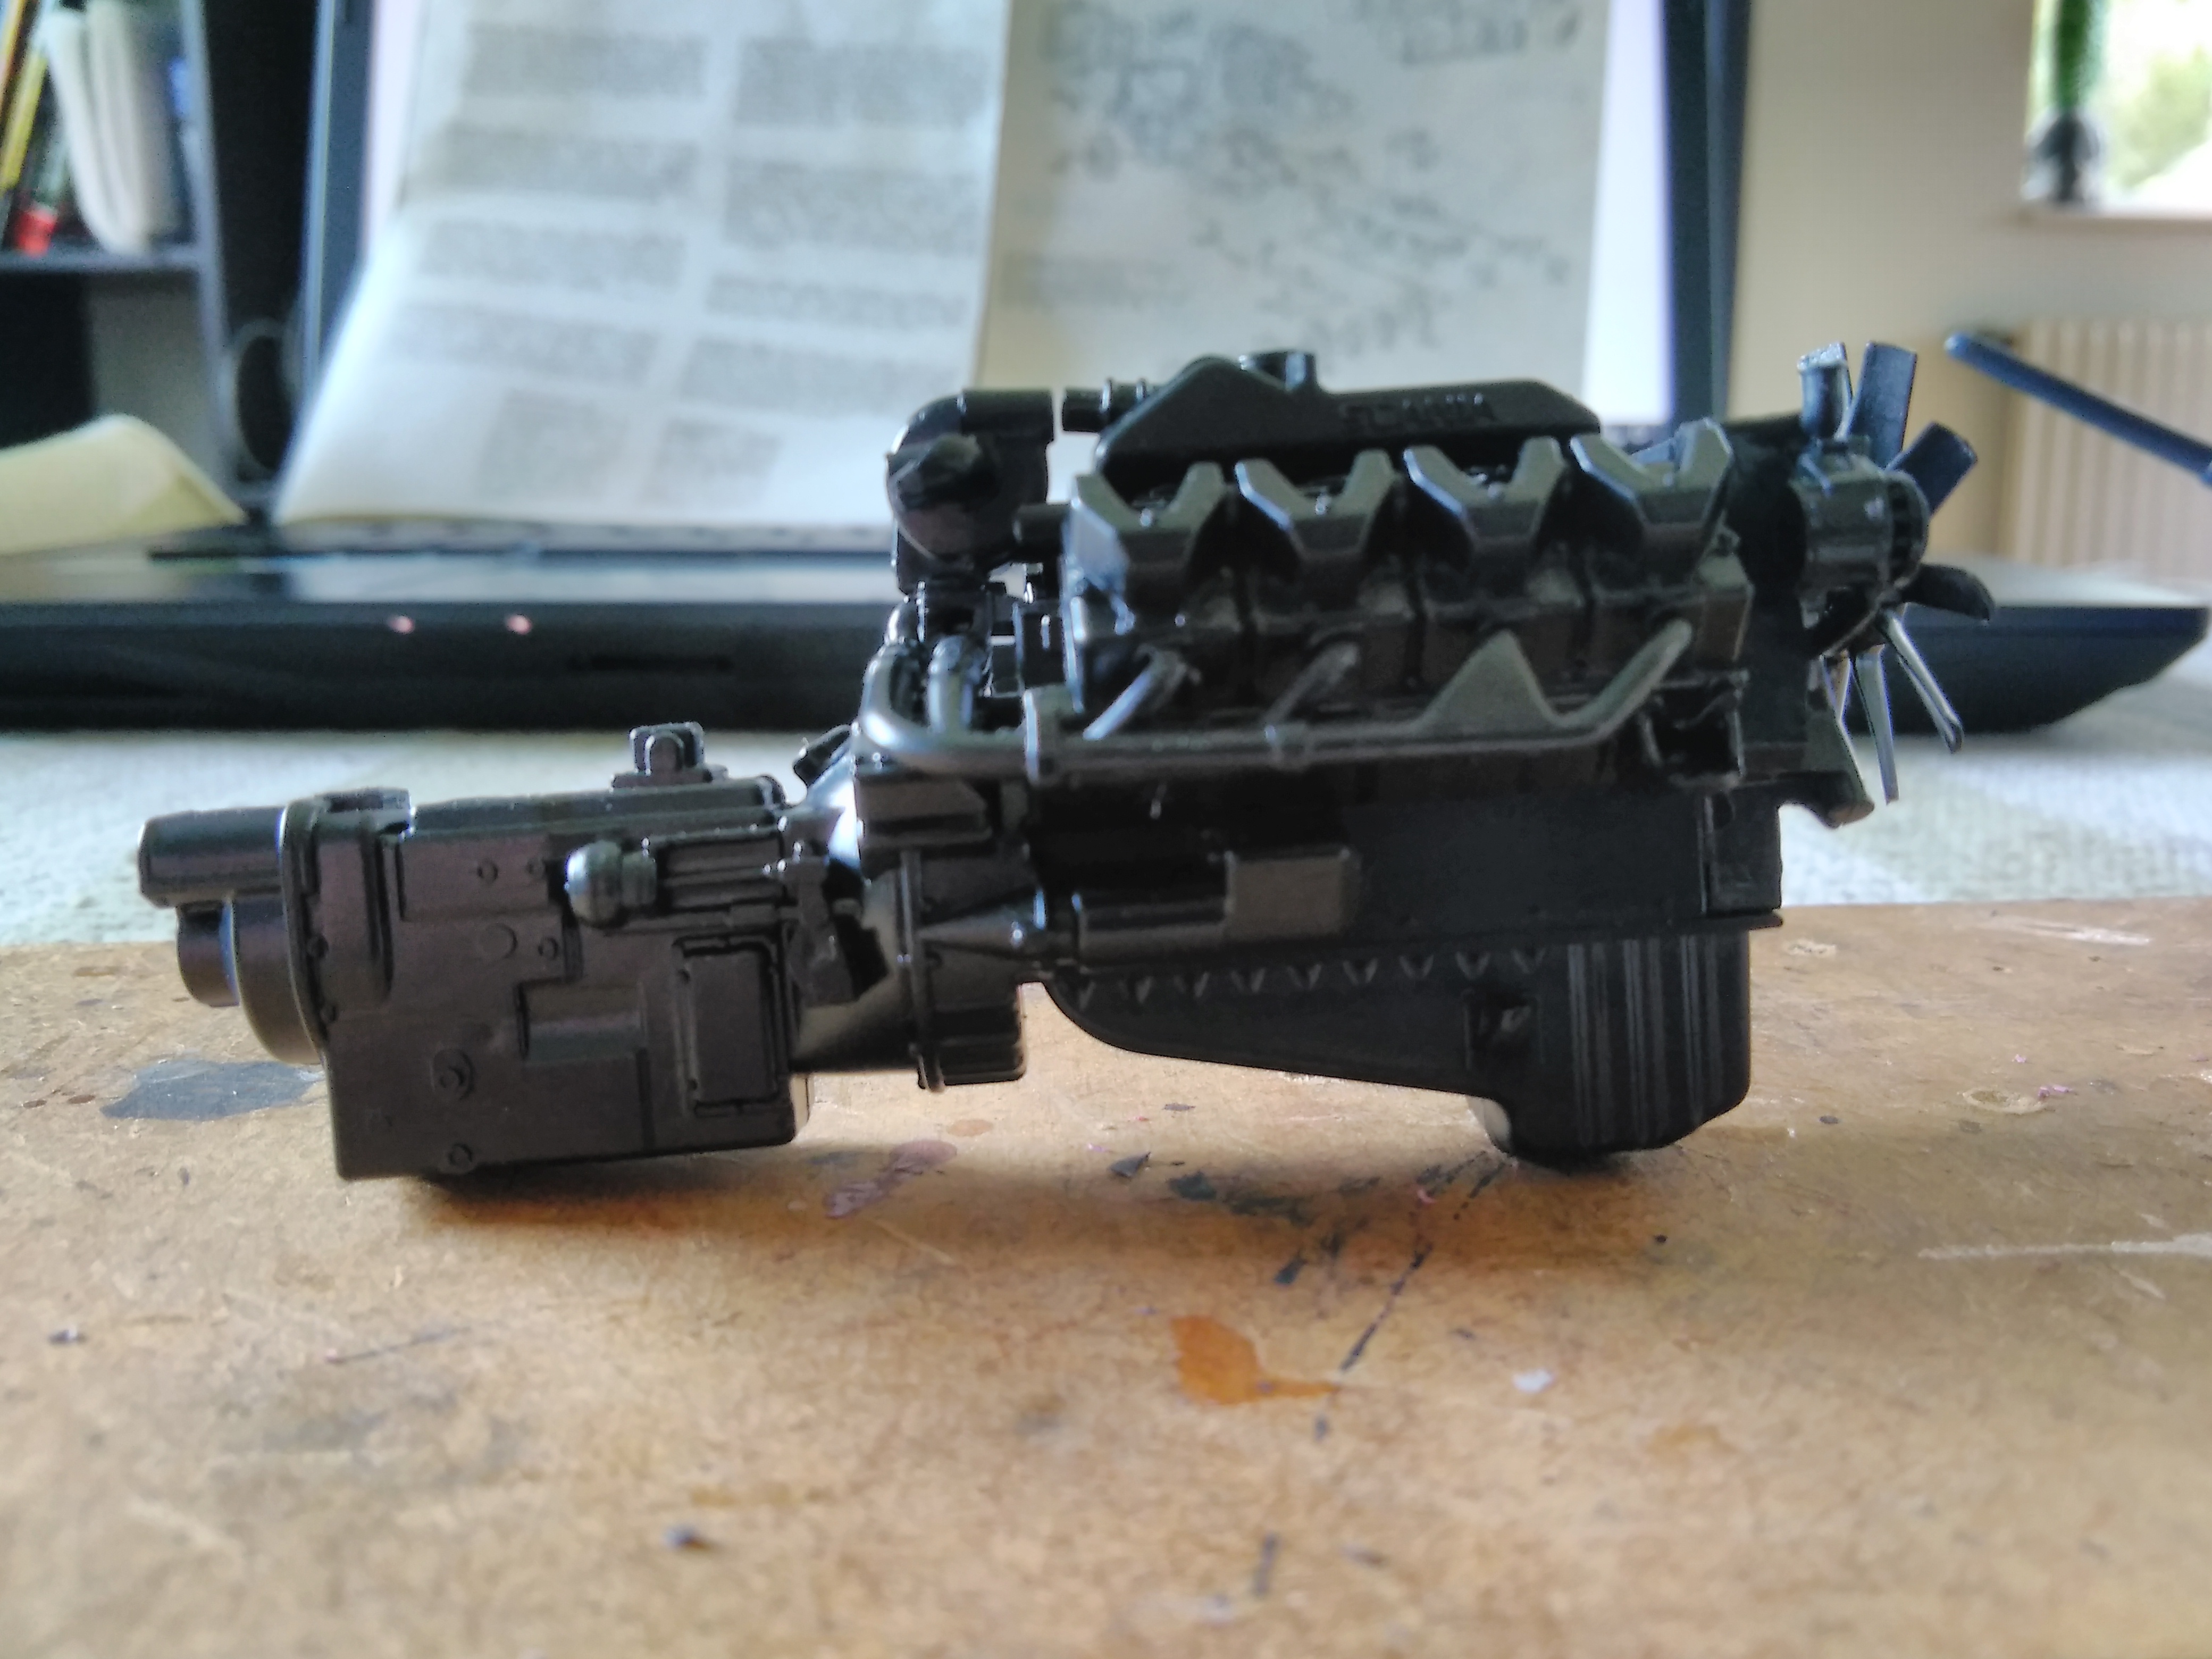
Almost done with painting the frame and engine, just some small details still to do on them. I also have to mount the fuelfilters on the engine as i realized that i forgot to put them on it... The engine is almost the right color its just a bit to dark. The silver on the scania logo's is the best i could get it because they are so small and my hands are a bit to shakey after an old workdamage i have. (For those younger folks/or older here that are using pneumatic tools daily, make sure you use good thick gloves if the tool vibrates alot... i didnt and now i am paying for that...) I am thinking of painting the taillight brackets and brakecylinders black. I have also changed the liftbeam so now it is correct and not upside down.
-
Scania T142
PierreR89 replied to PierreR89's topic in WIP: Model Trucks: Big Rigs and Heavy Equipment
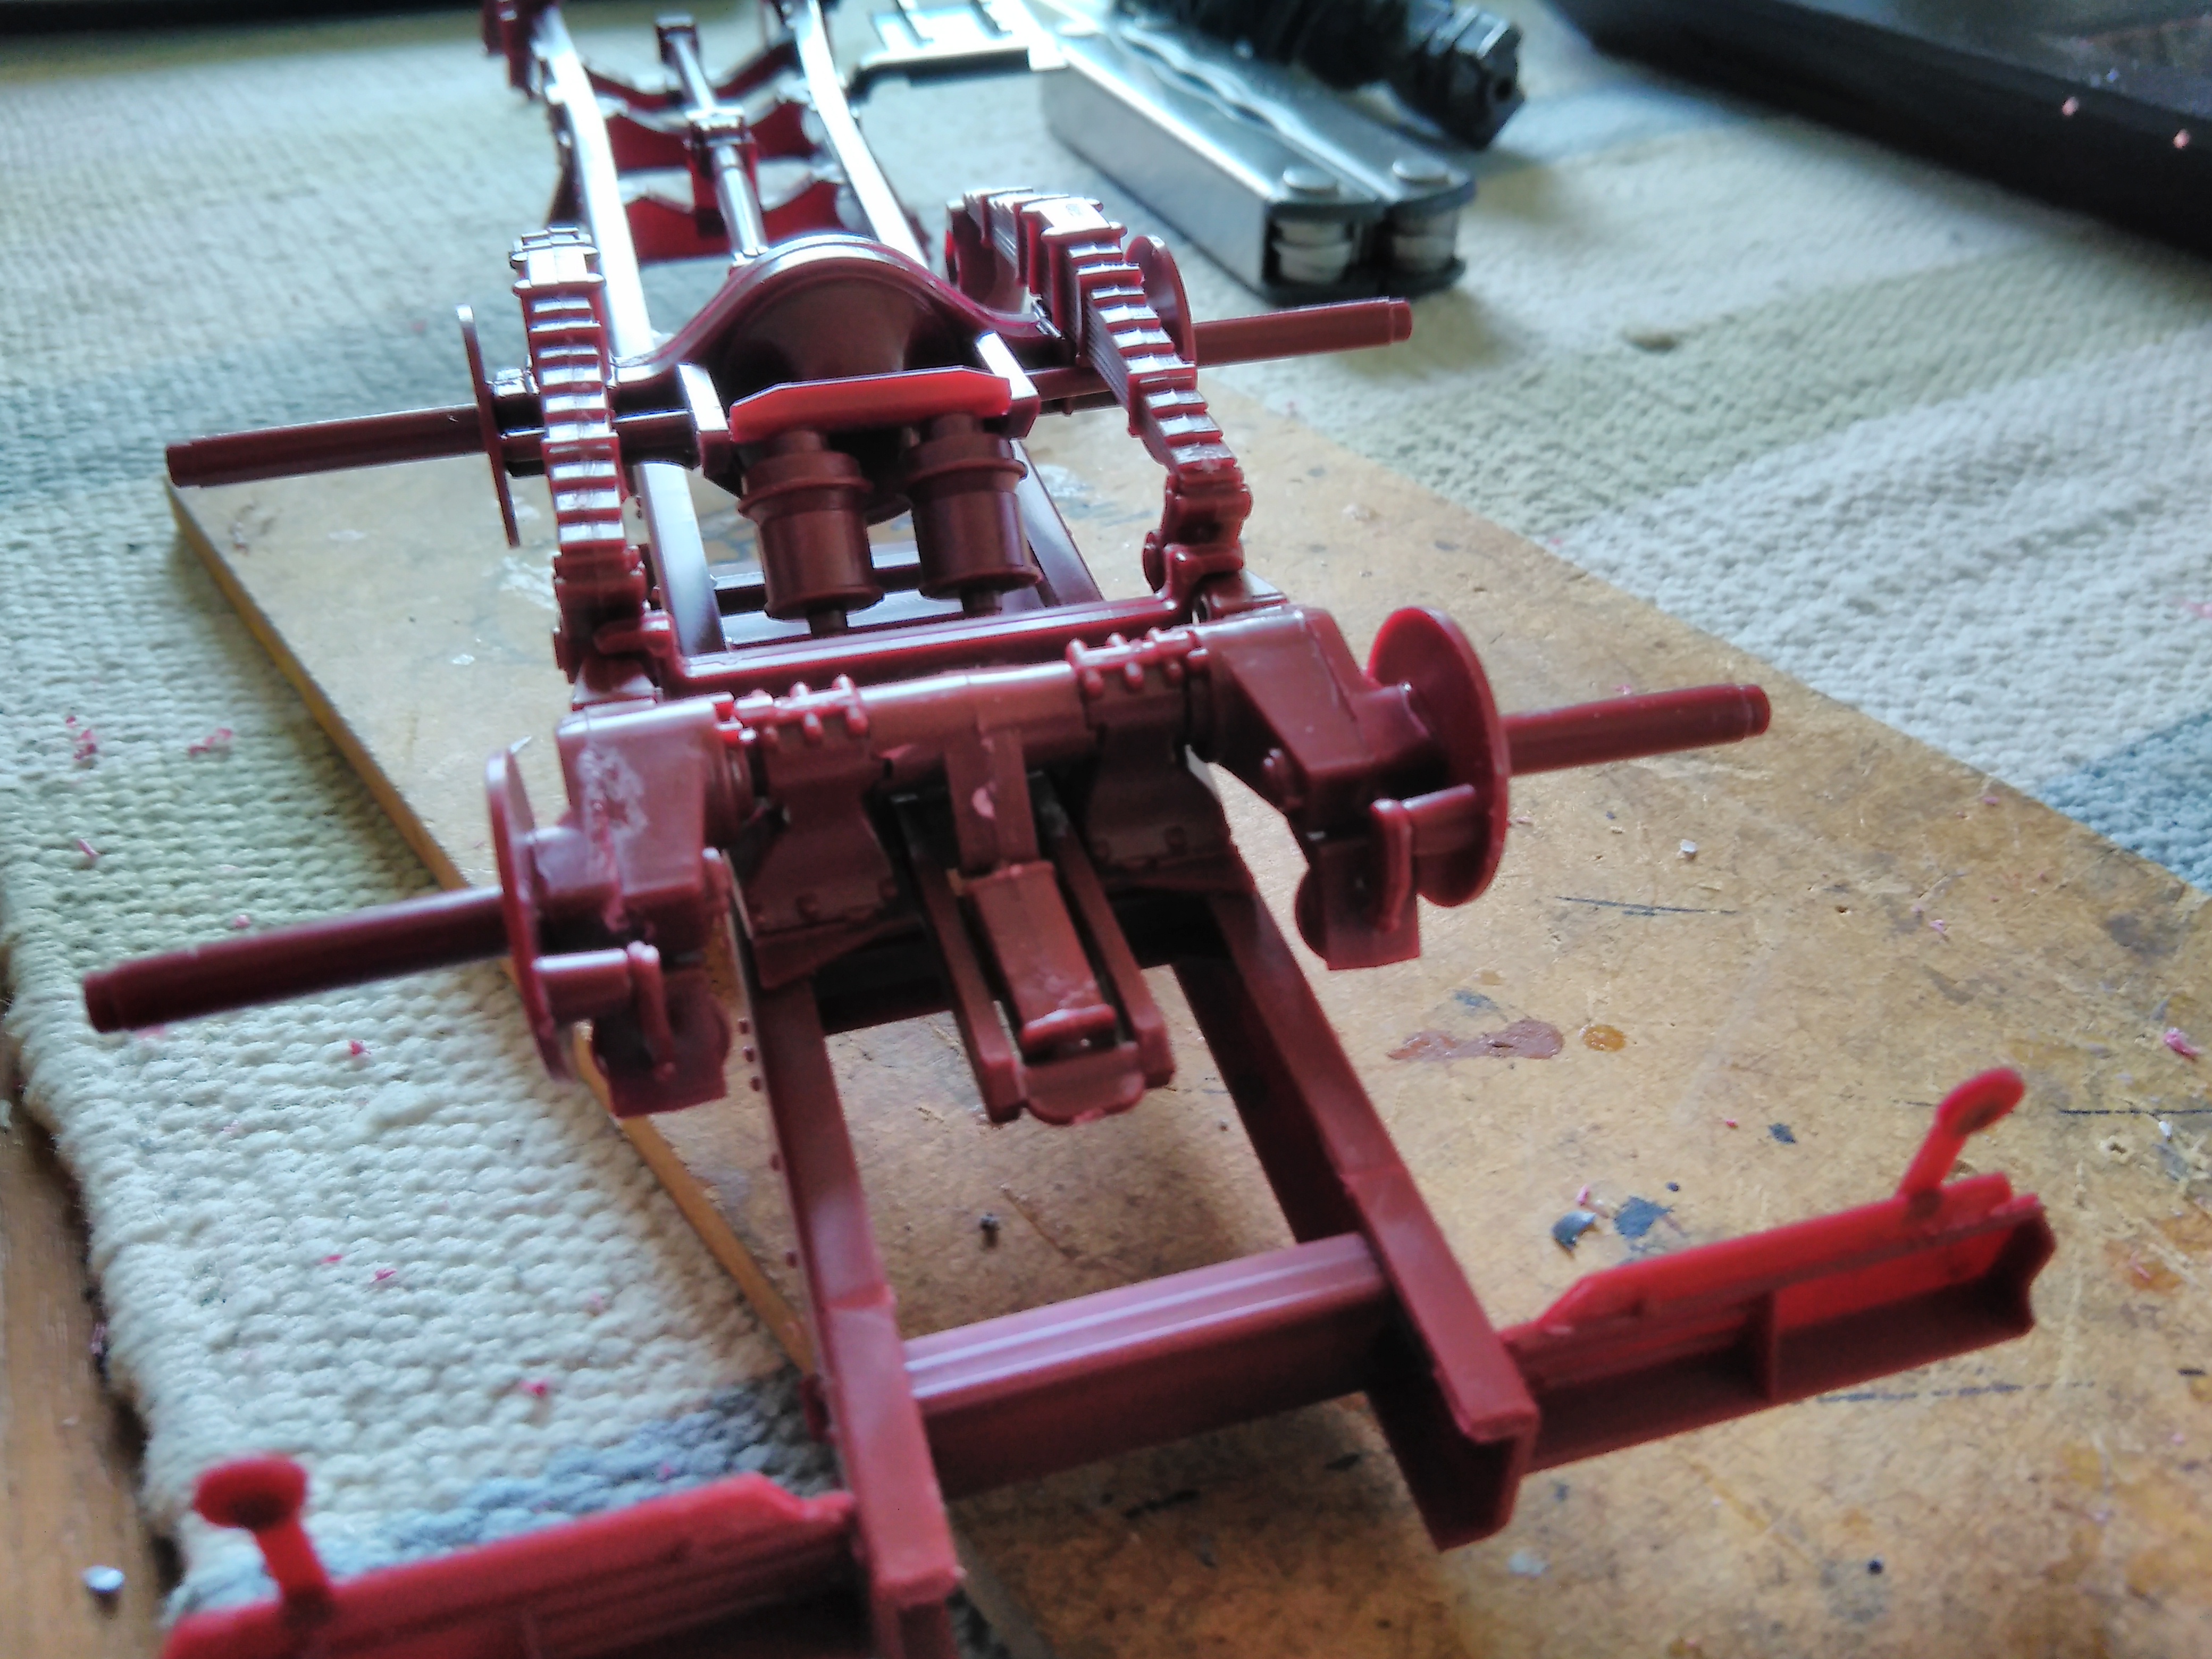
Thanks, i had a feeling something was wrong when i mounted it because it did not look like they did on the trucks i used to work on. Did you do anything else to the rear supension to be able to have the axle lifted? I also have to fix the wheelhubs on that axle because those that is in the kit are for a driveaxle and not a tagaxle. The hydraulic piston used for lifting and lowering is also wrong compared to T142 i once worked on, that was round and not square. The only Scania i have seen that had a square piston was an old 110 super. -
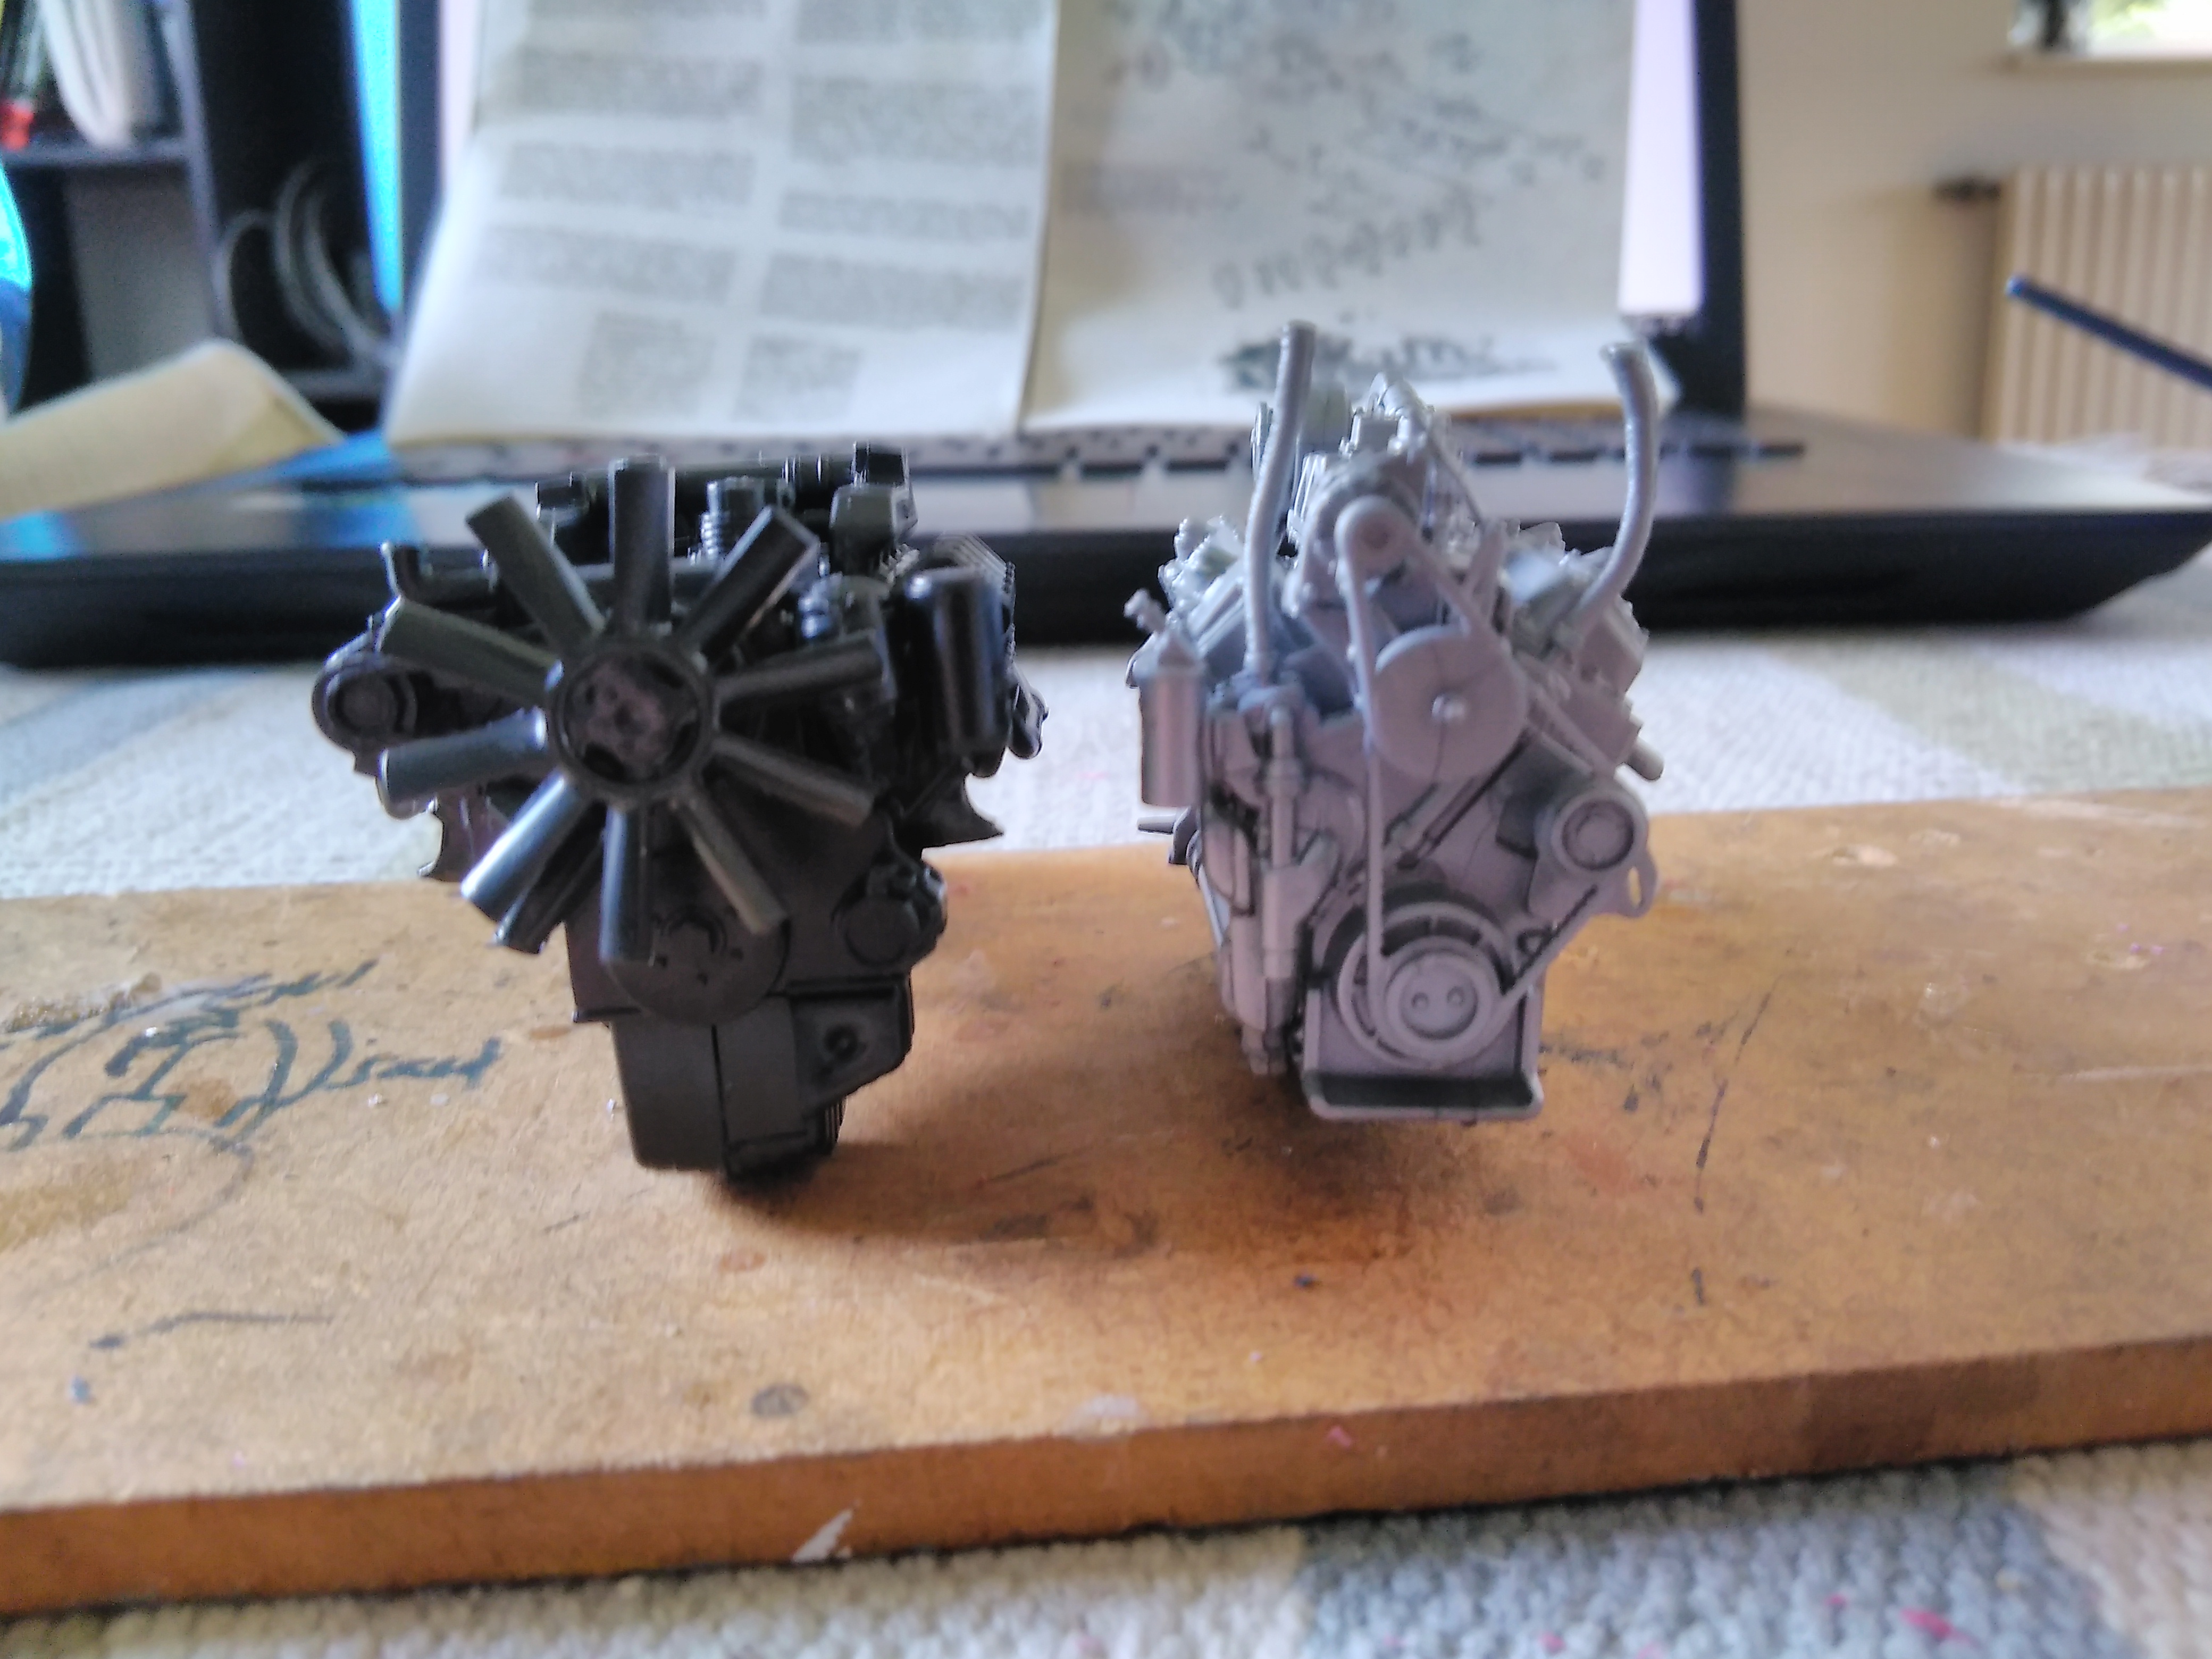
Started work on the Scania T143 "roadrunner" that i bought from ebay a few weeks ago. The frame and engine are done now, just have to paint them. I also have to find the right Scania green that they used on the engines for the 3 series trucks, the instructions say black/grey but that is what is used for the 4series that also have a new engine. Sorry about the blurry photos i dont know why my phone did that... Frame: It is not the wheels that is going to be on it when it is done Compared to the AMT Kenworth W925: Rear suspension: Those who drove Scanias with that suspension used to joke about them and call them for "flintstone suspension" because it did not work that good... They had about as much suspension as Fred Flintstone's car have... As a result of that the towers that hold the axle to the frame used to crack and in the worst case the axle could simply fall out from under the truck.. When i worked as a mechanic i had to drive out to one Scania with this setup and use straps to secure the axle to the truck again because those towers had broke in half so the truck could not move. When the driver drove forward the axle just dragged behind it, reverisng ended up with the drivewheels wanting to climb over the axle so the truck was stuck there untill we could get the axle tied up the the frame with straps... 14Liter Scania v8: Just for fun i compared the Scania v8 to the CAT3408: The CAT v8 looks small compared to it Engine testfitted in the frame: Also just for fun: The CAT engine was to short and not wide enough so it almost fell through the frame..
-
AMT Kenworth W925
PierreR89 replied to PierreR89's topic in WIP: Model Trucks: Big Rigs and Heavy Equipment
truckabilly: Thanks for that link, there was some helpfull pic's in there. gatorincebu: Thanks, I have not done much to it for a few days now, the only things new on it are that the drivetires are on it and the plate where the fifthwheel is mounted. -
AMT Kenworth W925
PierreR89 replied to PierreR89's topic in WIP: Model Trucks: Big Rigs and Heavy Equipment
Is there no one that can help with how the front engine support is supposed to be? I am kinda stuck there at the moment. -
I was at the doctor today to check if i still was in the risk for diabetes or not. All the values was in the normal range (no risk of getting it) and he was also impressed that i had managed to loose that much weight since the last time i was there. He also told me that if i kept doing what i was doing he would probably never have to see me again for that problem. He also asked how i had managed to do that and i told him that i had changed job and there are alot of walking each day. Then told me to stay at that place and never change. So i guess now i have a doctors order to not change my job
-
I sent Revell an question about those trucks and trailers just to see what they had to say. It sounded on them that the trucks was not impossible to have reissued sometime in the future, they had to check the molds and possibly repair them becuase they are from the 70's The trailers will probably not come back, the target group for them is to small.
-
Italieri Clasic Western Star
PierreR89 replied to norseman_652002's topic in General Automotive Talk (Trucks and Cars)
Its the same with their Volvo FH16 XL (#3867) Wrong engine, oilpan and valvecover gives it away as a mix of a D9 and D12 that never existed.. (9 and 12 liter) An FH 16 uses a D16 engine (16 liter) The exhaust manifold is also wrong Atleast the VN has the correct oilpan if it is supposed to have a Volvo engine in it.