MarcelT4
-
Posts
235 -
Joined
-
Last visited
Content Type
Profiles
Forums
Events
Gallery
Everything posted by MarcelT4
-
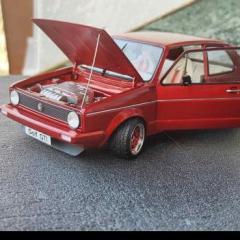
Hi, I've got something for you again today. I've been busy making and printing lots of little things. The “normal” engine was too tame for this car. So I googled it and found pictures of a bi-turbo with 1650 hp. So I adapted the necessary parts for the kit engine. Here they are loosely assembled. And now everything is painted. It fits, right?

-
Today, it's just a few small things again. I printed the mirrors. Created and printed suspension struts. And created a tuning exhaust.
-
Hello, nothing has happened here for a long time, but I haven't been idle. I tried to create the frame as best I could. Here are a few pictures. The interior tub and dashboard are separate parts. I just put them in for now. The wheel suspensions are also separate parts. I created and printed the rims and tires.
-
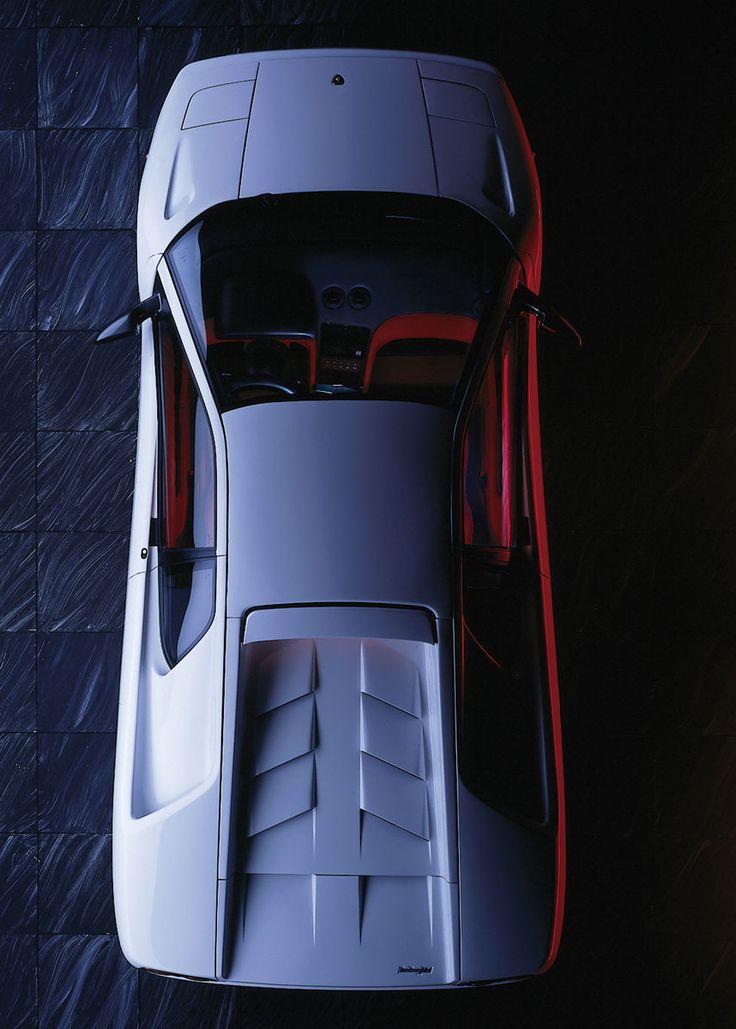
The Grigio Lynx is a really awesome color. Here it is on my Countach.
-
Hi, I think Revell simplified things a bit. I based my design on pictures I found on the internet. The printed body also has a wider front. In my opinion, it looks more harmonious.
-
Today, there are only printed parts again. None of the parts have been cleaned up or sanded yet. They have simply been removed from their supports. The rear diffuser and hood already fit very well. The front lip will simply be inserted at the front later. Now for some parts from the interior. And here they are put together. And together with the roof. So far, so good, but there is still a lot of work to be done on the computer. I didn't create the 3D model entirely myself, but it has been refined and now needs to be made print-ready. In addition, everything has to be adjusted and created in such a way that it can be put together easily without major reworking. Stay tuned.
-
Good evening, everyone. I'm starting a new build report. At first, I only wanted to modify the Revell kit with a widebody kit. However, since the base doesn't include many details and the body is very simple, I decided to use 3D printing for everything I could. Here are a few pictures of the original Revell kit and my optimized “fake.” I'm curious to see whether the original or the fake will be better received. Currently, the interior, dashboard, and various parts are still being printed.
-
Audi S1 Pikes Peak
MarcelT4 replied to MarcelT4's topic in WIP: Other Racing: Road Racing, Land Speed Racers
Hello everyone, I'm sharing the link to the print files. Maybe some of you would like to give it a try and build this beautiful model. https://cults3d.com/:3575837 -
Audi S1 Pikes Peak
MarcelT4 replied to MarcelT4's topic in WIP: Other Racing: Road Racing, Land Speed Racers
Thank you very much for purchasing the files. I think you will also build such a beautiful model and then you too can be the owner of a unique piece. -
Audi S1 Pikes Peak
MarcelT4 replied to MarcelT4's topic in WIP: Other Racing: Road Racing, Land Speed Racers
Hello, good evening, it's already over here. The Audi is finished.
-
Audi S1 Pikes Peak
MarcelT4 replied to MarcelT4's topic in WIP: Other Racing: Road Racing, Land Speed Racers
First time on own wheels.
-
Audi S1 Pikes Peak
MarcelT4 replied to MarcelT4's topic in WIP: Other Racing: Road Racing, Land Speed Racers
A few pictures today without many words.
-
Audi S1 Pikes Peak
MarcelT4 replied to MarcelT4's topic in WIP: Other Racing: Road Racing, Land Speed Racers
Hello, I know that KMP produced this model. I took a look at it, but unfortunately there are many errors and inconsistencies in the model. All of my add-on parts and extra parts are my own and printed by me. It has nothing to do with the KMP model. No parts from the kit are used. -
Audi S1 Pikes Peak
MarcelT4 replied to MarcelT4's topic in WIP: Other Racing: Road Racing, Land Speed Racers
Today, there are only “little things” to do, but they still need to be done. One part is a little bigger again. And a few impressions.
-
Audi S1 Pikes Peak
MarcelT4 replied to MarcelT4's topic in WIP: Other Racing: Road Racing, Land Speed Racers
Today, we did some more sponsorship work and put on the remaining decals. The start numbers are also on. I also made the windows. I placed one next to it so you can see it better. I made them from a 0.2 mm PLA sheet from Tamiya. It would be great if there was a printable figure of Walter somewhere, that would be perfect.
-
Audi S1 Pikes Peak
MarcelT4 replied to MarcelT4's topic in WIP: Other Racing: Road Racing, Land Speed Racers
Today, I finished painting the rear spoiler and laid both parts loosely on the body. But see for yourself. Then there were parts for the interior.
- 38 replies
-
- 10
-

-
Audi S1 Pikes Peak
MarcelT4 replied to MarcelT4's topic in WIP: Other Racing: Road Racing, Land Speed Racers
Small update today.
-
Audi S1 Pikes Peak
MarcelT4 replied to MarcelT4's topic in WIP: Other Racing: Road Racing, Land Speed Racers
I have something else for you. The stripes on part of the rear spoiler from above.... ...and below.... ...and in the rear view. Then I started with the side stripes. Masking takes longer than anything else. The second strip is now on too. And then the last strip.
-
Audi S1 Pikes Peak
MarcelT4 replied to MarcelT4's topic in WIP: Other Racing: Road Racing, Land Speed Racers
Hello everyone, it's been a while. Now I have a little update for you. I removed the windows. It had plastic panes without sliding hatches. Then I painted the stripes. Of course, I made a mistake. The stripes are interrupted on the hood, where the Audi logo will be placed later. But that was fixed and repainted with the base coat. Hopefully, the decal will cover it up later. I'm still looking for a reasonable solution for the stripes on the sides. The widening makes it almost impossible to mask everything off exactly. Here I created and printed a few decals. I hope you'll stick with me?
-
Audi S1 Pikes Peak
MarcelT4 replied to MarcelT4's topic in WIP: Other Racing: Road Racing, Land Speed Racers
Hello, it went a little further. Unfortunately, I didn't have that much time because I had to work all the time. I put on the front and inserted the radiator grille loosely. Etched parts were also inserted. Then everything was painted. Then I printed the tires. Walter wasn't on slicks at Pikes Peak, he had Michelin Pilot Sport Cup tires. Then it was time for the underbody... ...with brake disk from the etched parts set. Here I put the front spoiler on loosely. Unfortunately not too much, but I didn't manage more in 2 days.
-
Audi S1 Pikes Peak
MarcelT4 replied to MarcelT4's topic in WIP: Other Racing: Road Racing, Land Speed Racers
Hi, all resin parts were created printable by me and also printed by myself. -
Audi S1 Pikes Peak
MarcelT4 replied to MarcelT4's topic in WIP: Other Racing: Road Racing, Land Speed Racers
Hello everyone, I've been doing some rivet counting. Then I tried out the white primer. And then I painted the interior in Alpine White. In comparison with the primer, I find that the Alpine White has a slight yellow tint.
-
Audi S1 Pikes Peak
MarcelT4 replied to MarcelT4's topic in WIP: Other Racing: Road Racing, Land Speed Racers
Here is a small update. Since the kit steering wheel is wrong, the correct one was created and printed. And tried out how to make the grilles for the rear lights.
-
Hello everyone, I started this project some time ago. I just forgot to share it with you. I will now do so. I'll let the pictures do the talking. I hope I can inspire some of you with this.
- 38 replies
-
- 13
-
-
Hello, here's the final. I'll just let the pictures speak for themselves. It didn't quite turn out the way I wanted it to, but the many warped parts just threw a spanner in the works.
- 56 replies
-
- 7
-
-
- lamborghini
- countach
- (and 1 more)