Claude Thibodeau
-
Posts
5,927 -
Joined
-
Last visited
Content Type
Profiles
Forums
Events
Gallery
Everything posted by Claude Thibodeau
-
Hi! Good idea! I had one of those Fieros when the car came out. Fun car, but the anemic "iron duke" 4 cyl. was the weak link. Your swap gets rid of the problem! CT
-
38 ford van
Claude Thibodeau replied to kyleaustin81's topic in WIP: Model Trucks: Pickups, Vans, SUVs, Light Commercial
Hi Kyle! Hope you are dooing OK trough this pandemy? I was ondering if you finally shoehorned an engine in the delivery? I'm building a lowboy 36 Ford currently, and the chassis I'm using is the same as yours, with many modifications however. That's when I recalled your project. Just curious... CT -
Hi Paul! Hope all is well for you in California even with this lockdown caused by the virus... I was reading an old issue of SAE with a cup of joe at noon, and I saw a mention of one of your winning models in a report about the NNL West! The isue was from circa 99, and the model was referred to (no picture, alas) as a 57 Chevy if I remember well. Goes to show that your talent was already well recognized by your peers even at the turn of the century! Talk about lifelong dedication! All the best to you and your loved ones! CT
-
Vintage FED, 1:25, brass WIP, driveline
Claude Thibodeau replied to Mike Williams's topic in WIP: Drag Racing Models
Hi! A great MASTER at work. Thank you for the lesson! CT -
Hi! Thanks for the answer... I guess it means that even if there is a "JR" at the end of your name, you are not a young pup, and have been at it for a while... Like I suspect most of us old guys! Great to see that you still have the passion for fine modeling. Wish you many more years of fun with styrene! Regards, CT
-
Hi! Just curious... are you the Guy who had a great Keeling & Clayton T/F in an old ('94?) issue of SAE Contest car? The caption mentionned that if so, you were then a resident of the "east coast"... Regards, CT
-
Hi! Perfect blend... It looks like it came out of the Rodder's Journal! Even the colour "dates" it in an appropriate manner. Bravo! CT PS: I LOVE those American front "spoke" wheels. I'll dig out the copy of the AMT kit in my stash to verify if they are included. Thanks!
-
Hi Sir! Thanks for posting those pics. Very inspirational! It's been a while since I made it to the big Detroit show, but your report covered all the bases. Regards, CT
-
Vintage FED, 1:25, brass WIP, driveline
Claude Thibodeau replied to Mike Williams's topic in WIP: Drag Racing Models
Hi! Impressive work, for sure. Your welds are "blending" well with the parent metal. It shows great mastery of the technique. Mr. Fuller would be admirative, I'm certain. Keep up the great work. Bravo! CT -
64 Dodge D100 Pickup Pro Street
Claude Thibodeau replied to AmericanMuscleFan's topic in WIP: Drag Racing Models
Hi Francis! As you may know, the RAM on march 29th has been canceled until further notice. Hope we'll be able to attend it together with our friends as soon as the rules againts public meetings is released, and a new date is announced... As to your rad cap, I'm worried... Will this thing sustain the usual 16 pounds of pressure in your cooling system? Please reassure us... CT -
Hi! Nice built, lots of great ideas. Specially the paint theme. I built this kit a few years agao, and I too got rid of the belly pan, molding the lower section (roll-under) to the flanks. It makes for a smoother look. Bravo, well done! CT
-
1970 Don Nicholson Ford Maverick Pro Stock
Claude Thibodeau replied to Guy Beaudette's topic in WIP: Drag Racing Models
Hi Sir! Wow... World-class built. Bravo! Your gaps around the doors is ultra-precise, and you obviously have a PhD in headers. Not only is their nature complicated, but I can relate to the chore of shoehorning them in the chassis. Hours of fun, I guess... CT -
Hi Michelle! Great build, what a superb colour! Bravo! Your subjects become better and better with every built. Keep going. I wish I had such a growth curve back then. CT
-
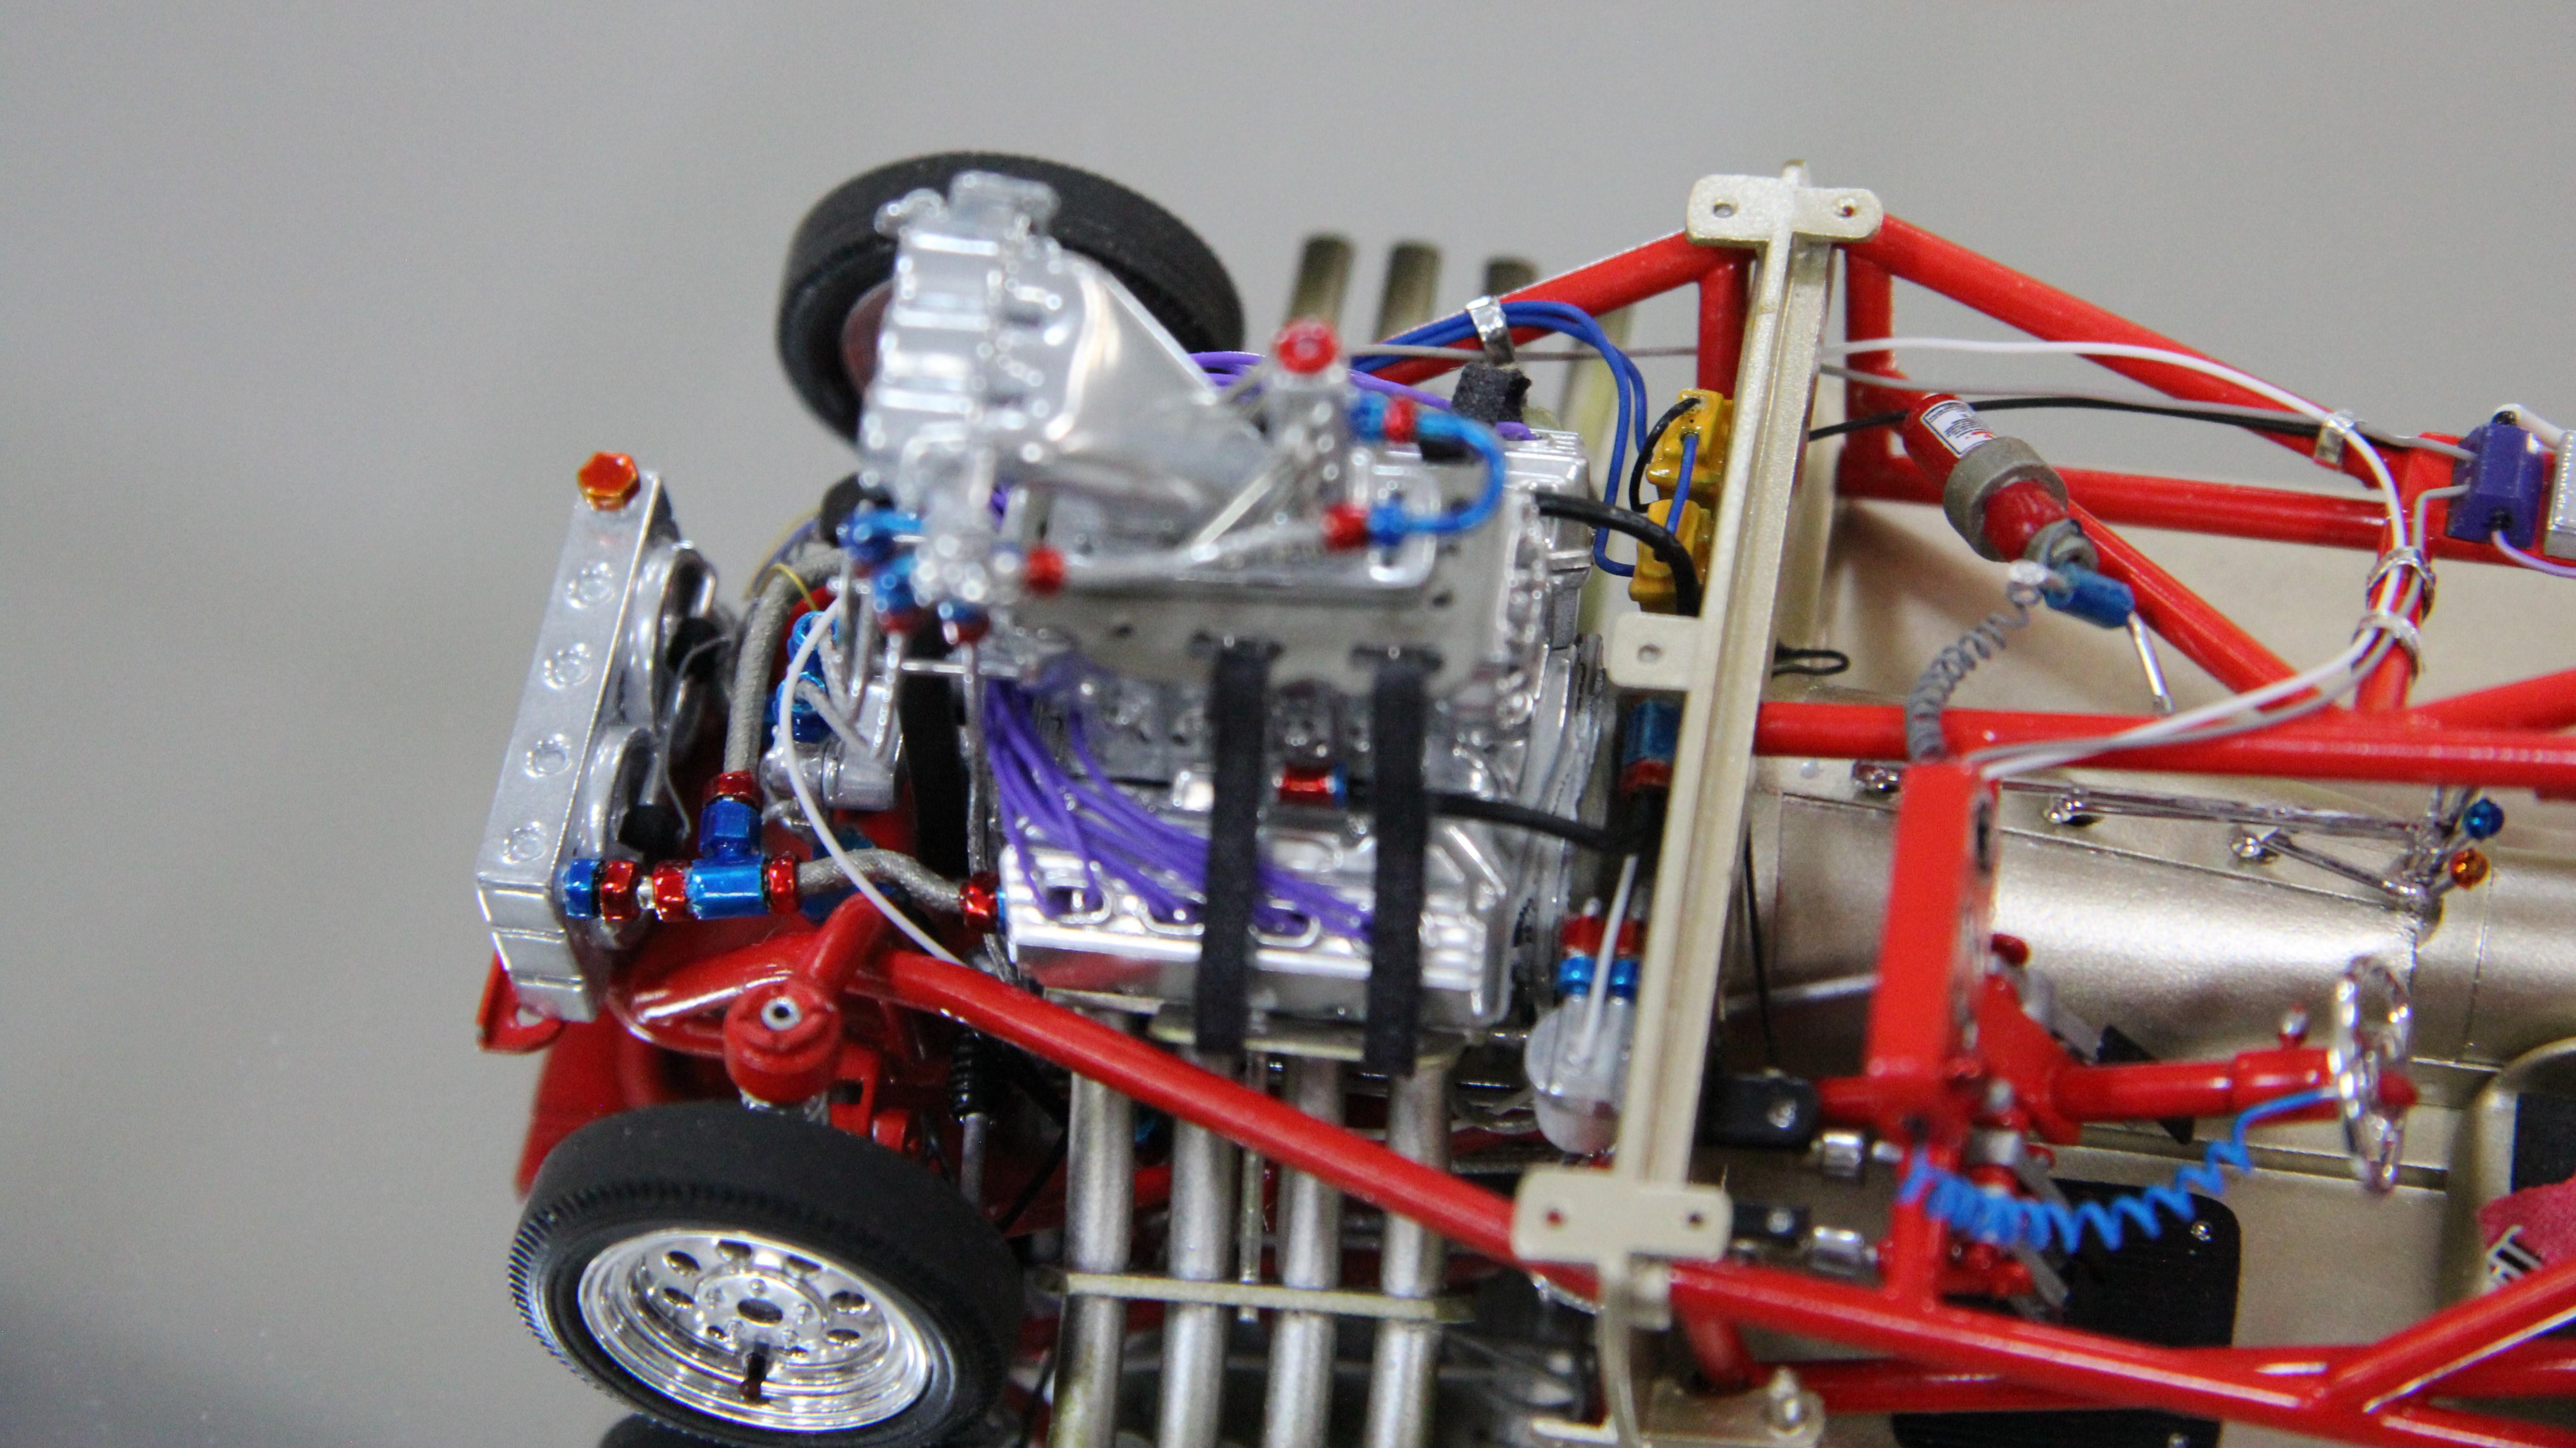
Hi! Thanks for sharing your technique. Much appreciated. I like to learn from the best! This show rod creation is mindblowing, truly. Imaginative, and perfectly executed. Bravo. I've never tried spraying the molotow chrome myself. Used mostly Alclad. However, I've started spraying it over gloss WHITE or LIGHT BLUE instead of the usual black. On the white, it creates a sheen akin to real polished aluminium. See the Duster ProMod engine below. I'll ultimately try your technique, however... CT

-
Hi Eric! Your method is great, and your twin engined beast is SO nice! Is-there a thread here where we can see the final result on this car? I'm specially impressed by the sheen of your engine parts. Is-this paint? Your chassis looks like the finish we can obtain from Krylon's Premium Classic Crhome spray can, but I might be wrong... Bravo! CT
-
Hi Steve! Well, you nailed it! The thickness is in scale with the engine. Bravo! CT
-
Hi! World class paint and details. Bravo! CT
-
Hi! Just to add to the vacuum cleanerbelt idea... The smallest cog belts I've seen came from VHS cart machines. But still a tad too big for 1/24, as indicated above. CT
-
Hi! One item that may do is a cheap latex party balloon, available in black at the Dollar store. You take sharp scissors, and cut a 1/16" wide section of the "neck" of said balloon. Since it is thin, rubbery, black, and stretchable, you can then wrap it around your upper and lower pulleys. Granted there is no cogs on the inner side of this "belt", but the very thin "rubber" is in scale to a 1/24 or 1/25 engine. For what it costs, you may try it... CT
-
64 Dodge D100 Pickup Pro Street
Claude Thibodeau replied to AmericanMuscleFan's topic in WIP: Drag Racing Models
Hi Francis! A great designer once said that upon modifying a classic, one has to show restraint... so that onlookers will KNOW something has been modified... but can't say WHAT... It would be the measure of success. Well, this scratch-build body will be so "credible", that many won't be able to see all the marvels it features. And THAT, my friend, is the signature of a Maestro. Keep on. I can.t wait to see the thing in "the flesh"... or should we say "in the styrene". CT PS: The RAM show is coming... Hope we can drive there again this year with a few friends like we did last year. We need to organize this! -
Hi! I'm impressed by your very classy interior, of all things. Bravo! CT
-
1932 Ford 'Mordor' sedan street rod
Claude Thibodeau replied to Rocking Rodney Rat's topic in Model Cars
Hi! Thank you for the clear infos. Much appreciated! Since you say this particular car was NOT polished, I can see the "natural" gloss of this clear is very good. It reminds me of what you get from House of Kolor Show Clear, a 2-part catalized urethane you may be familiar with. It flows superbly, but once dried hard, is difficult to polish on a styrene car body without causing some damage to the body. That is why I might try your Minwax. I wondered about the type and number of coats you apllied, since I could see a smidge of "peel" in the reflexion on the passenger side running borad. This usually happen when you obtain very high gloss at application from heavy wet coats. Super nice then... but once evaporated and dried, the clear then gets a fair share of orange peel. Nothing a good rubbing won't dispose of, but some work nonetheless! Regards, CT -
1932 Ford 'Mordor' sedan street rod
Claude Thibodeau replied to Rocking Rodney Rat's topic in Model Cars
Hi! Very nice result. Classy looking, and the detailing is great. About your Minwax clear: how many coats would you say you used? Medium or heavy? Via your air-brush, or is-it a spray-can? Just curious... CT -
Hi! Very kind of you. Please, keep us posted once it is available. Regards, CT
-
Hi! I built fantasy Bonneville cars (streamliners or modified), so your engine as-is would be perfect for a mid-ship mount on a looooong liner I'm building. The planned powertrain was Ferrari California's by Revell (with mods, of course). But I would gladly change course and install a copy of your Boss engine as-is... What do you say? CT