rob1957
-
Posts
151 -
Joined
-
Last visited
Content Type
Profiles
Forums
Events
Gallery
Everything posted by rob1957
-
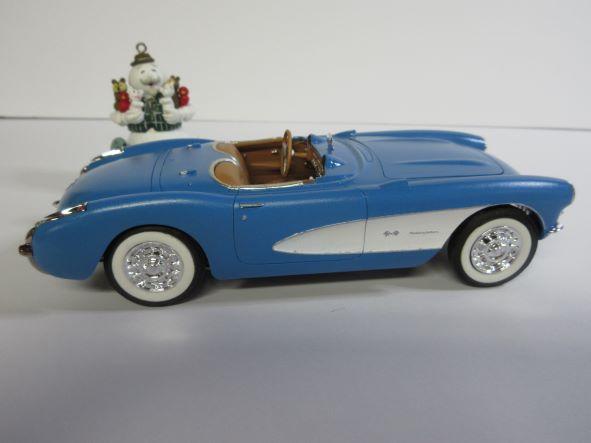
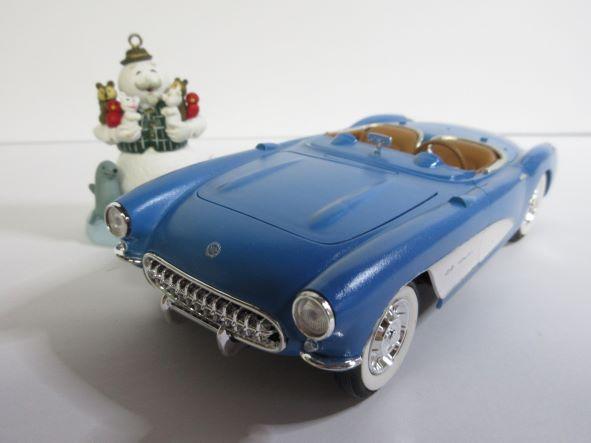
Well here we are with our modified windshield attached . Salvaged the original which had broken in two . After measuring width from side to side , removed pieces from top and bottom , re-glued and cleaned out all the old glue from inside . Next we used some clear plastic from a blueberry container , laid this out and trimmed to fit . Challenging operation. Then my wife held windshield in place while glue dried and there we have it .Voila ! Looks good . Thanks for looking . Merry Christmas !

-
Thanks for favourable feedback everybody . We are pleased with final results . Sometimes I get frustrated . Take a break , re-group and come back next day . I was most worried about how the coves would turn out with the taping req'd and the chrome strip between the blue and white . I don't think we could have done that with BMF so we used Molotow Chrome Stick . Windshield update: removed clear "glass" and chopped a piece from upper/lower frame , did a re-fit and got a better match up . Found some pliable clear and glued that in place . Fingers crossed we can get a nice finished appearance . Thanks again . Robert.
-
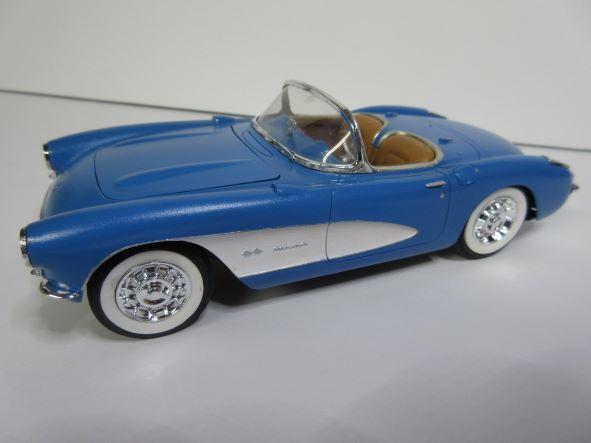
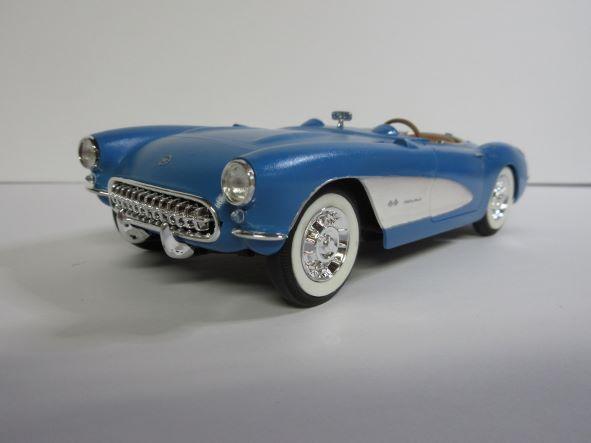
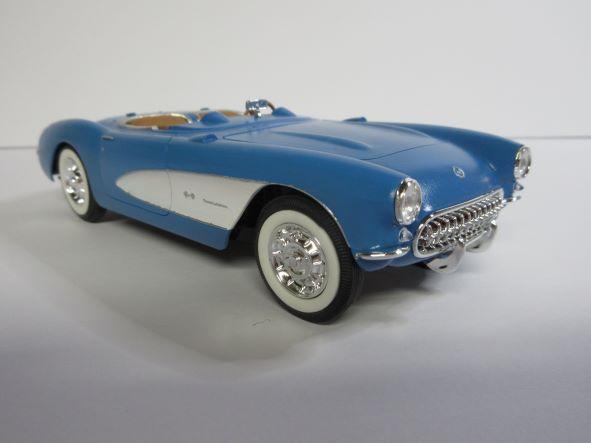
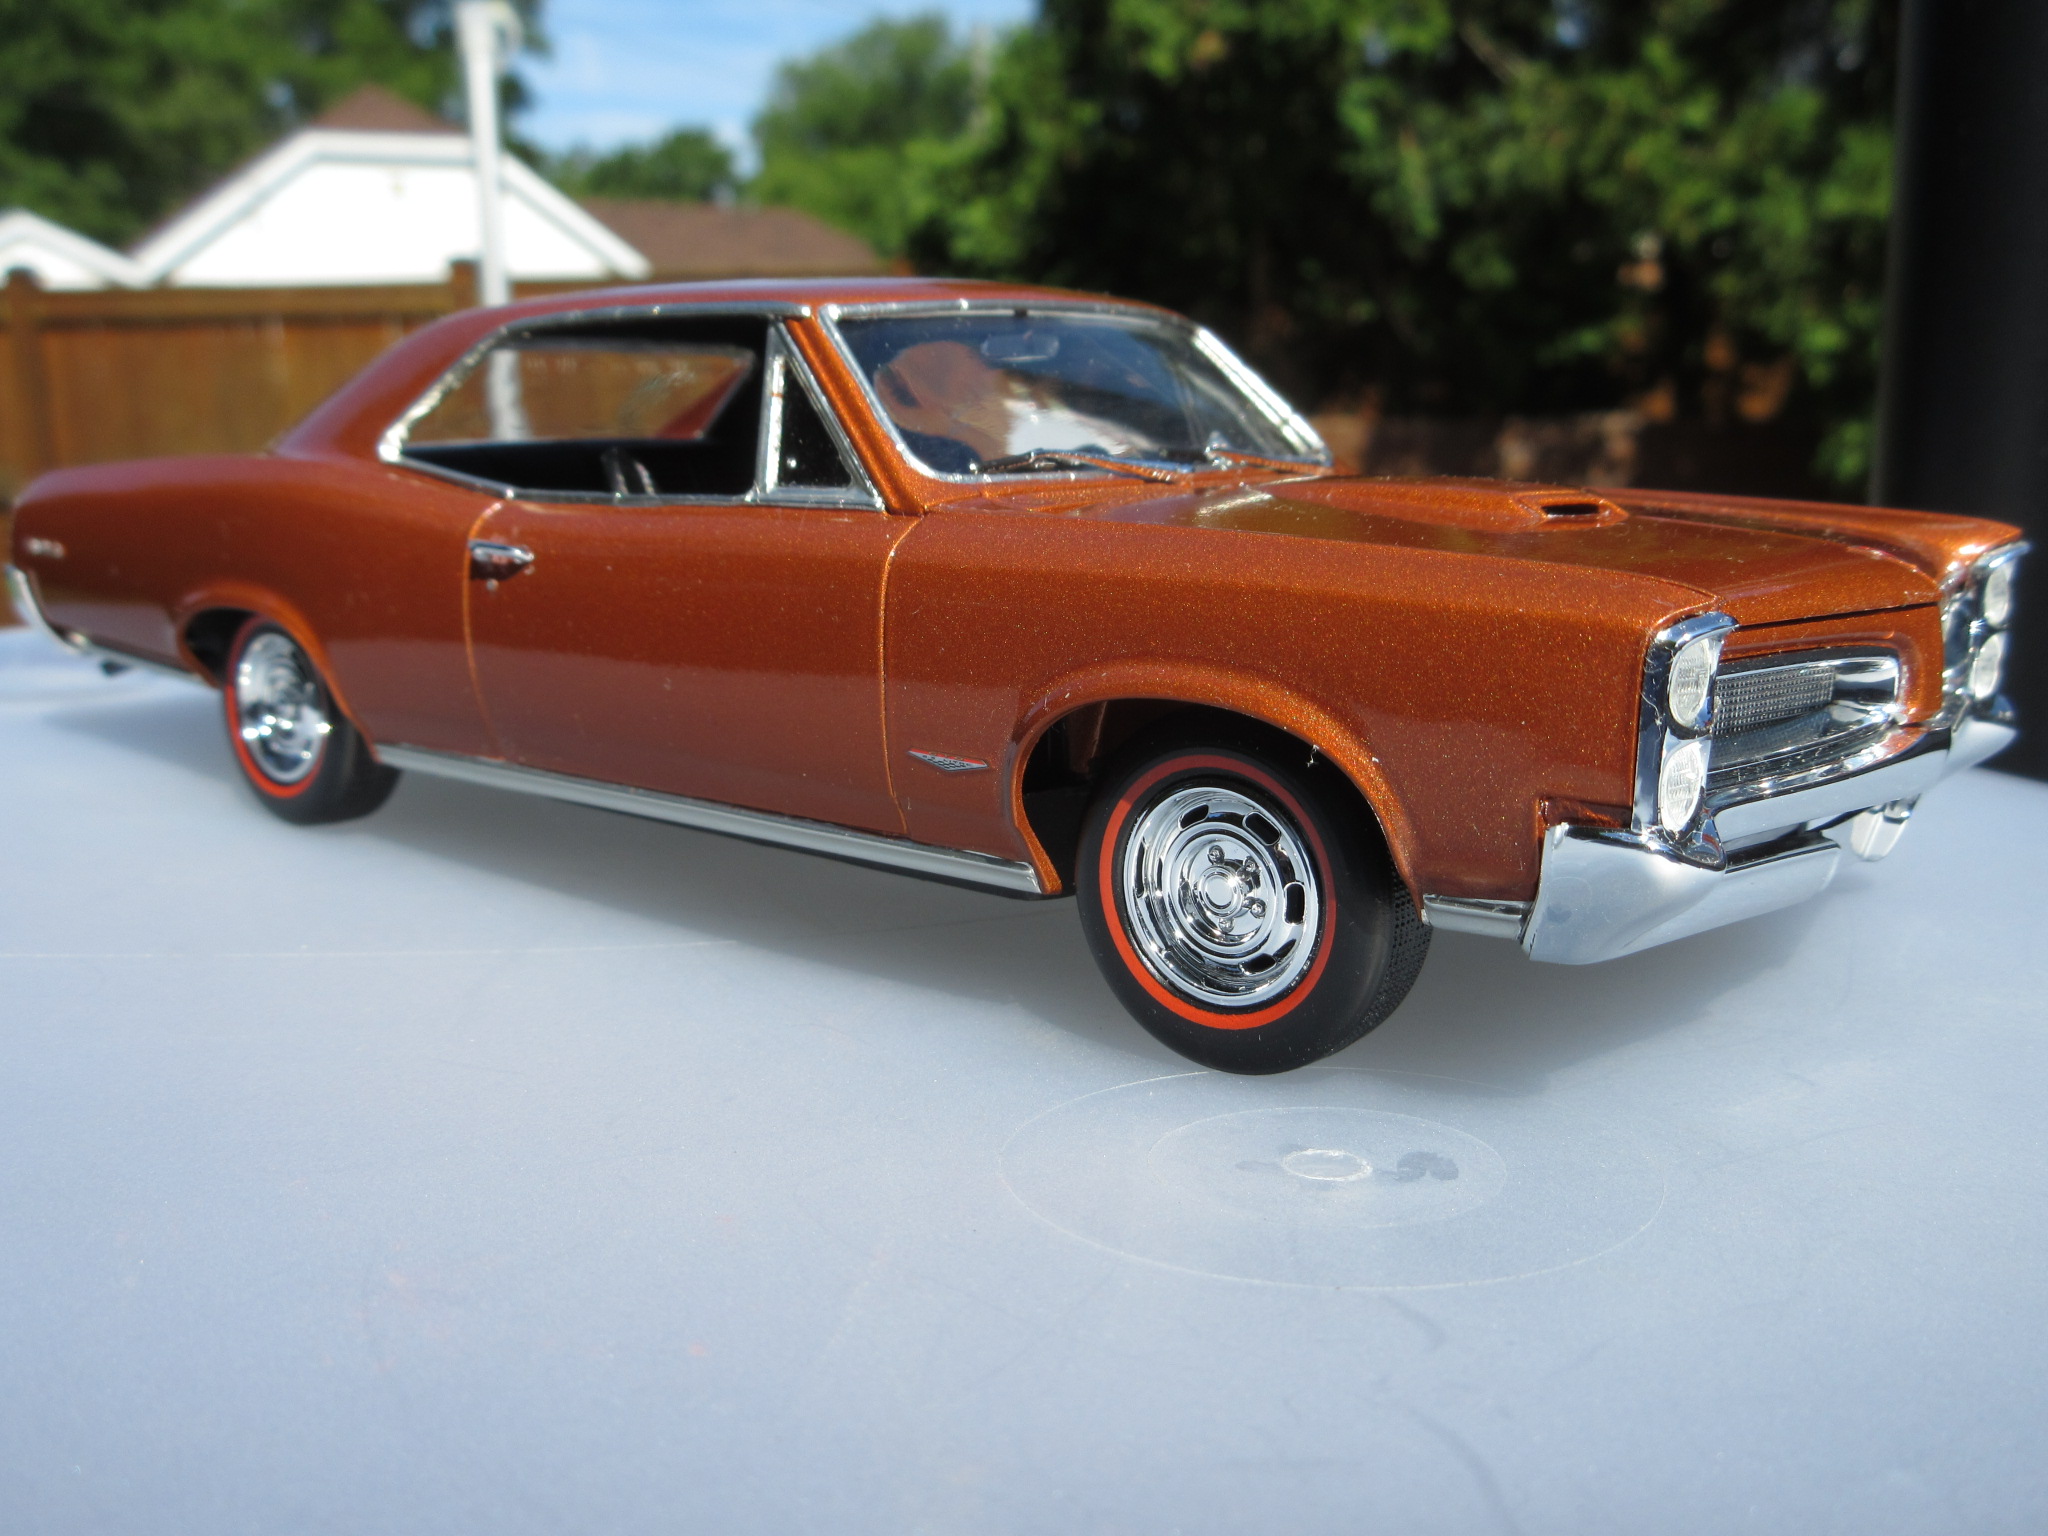
Interior colour is Zero Paints Leather Colour Cuoio. BMF for chrome moulding .Interior door panels were a bit of a challenge to get them to meet up with door at BMF. Body colour is Zero Paints Bugatti French Racing Blue .This paint goes on matte finish , something didn't quite work out the way we hoped with our paint . Frosty looks happy , all ready for a Christmas cruise . Better get him back on the tree before he's missed . To sum up : this might have been a kit beyond my skill level considering the issues encountered . Need practice on paint/finish department . Enjoy . Thanks for looking . Robert.
-
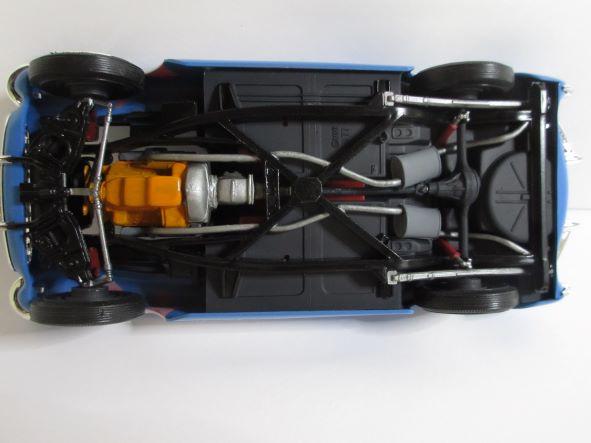
Molotow 1mm Chrome stick for moulding between coves and body . White walls were too large to fit into tires .We had to use a Dremel to open up the tire diameter . Tires were rather stiff material. Had difficulty with front bumper guards .
-
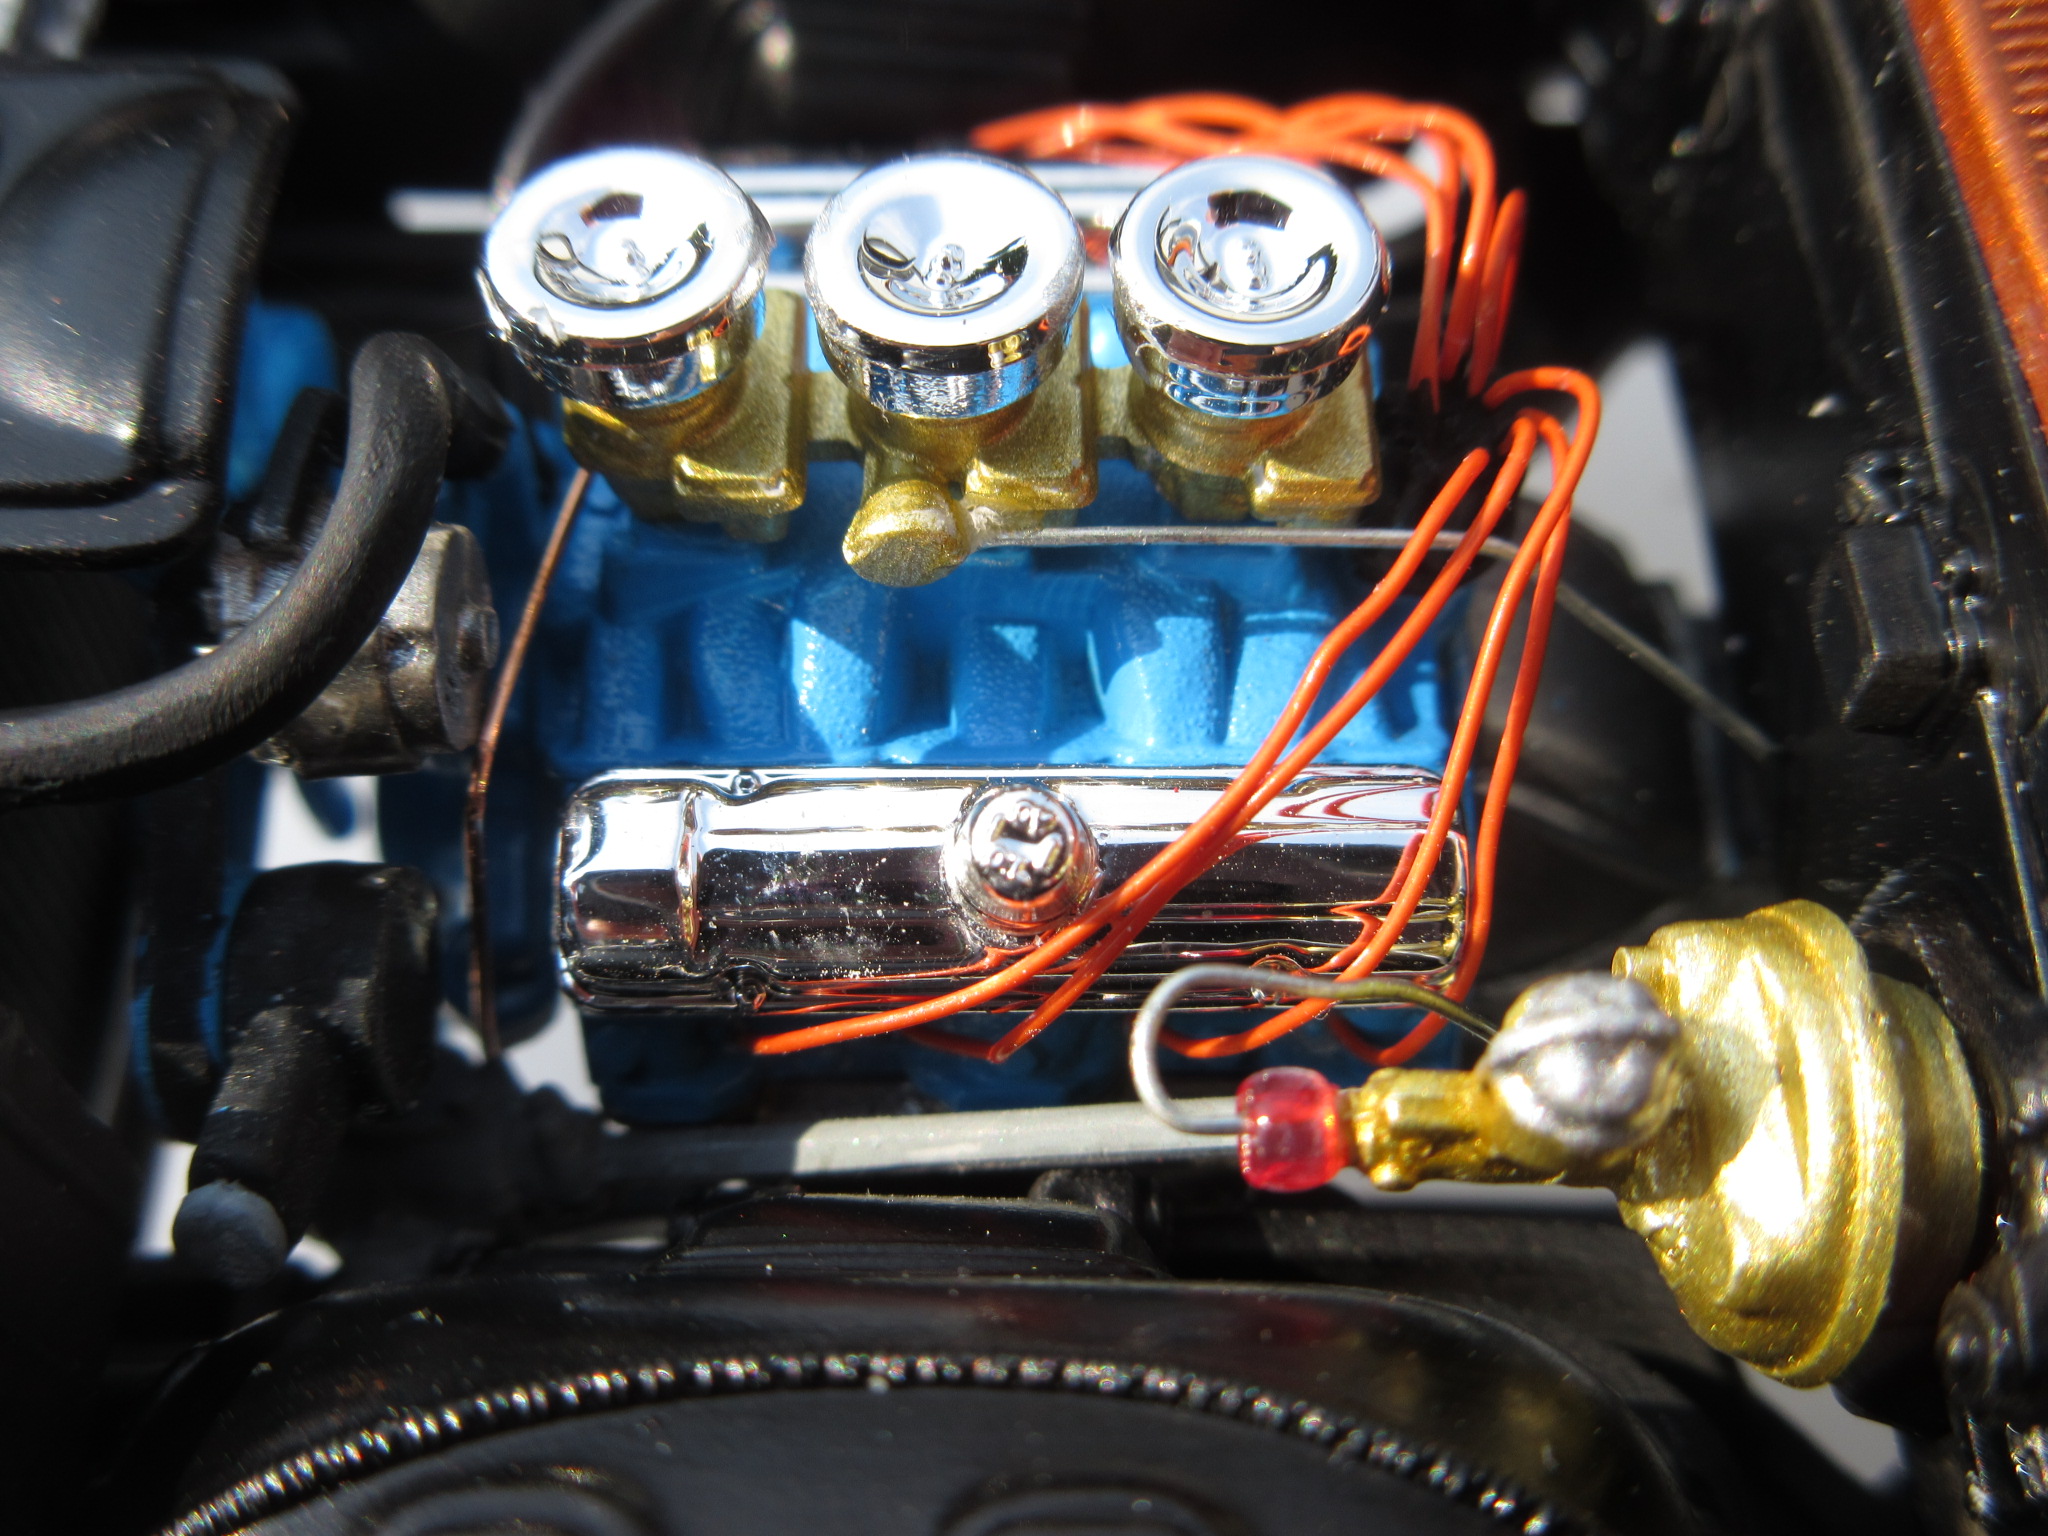
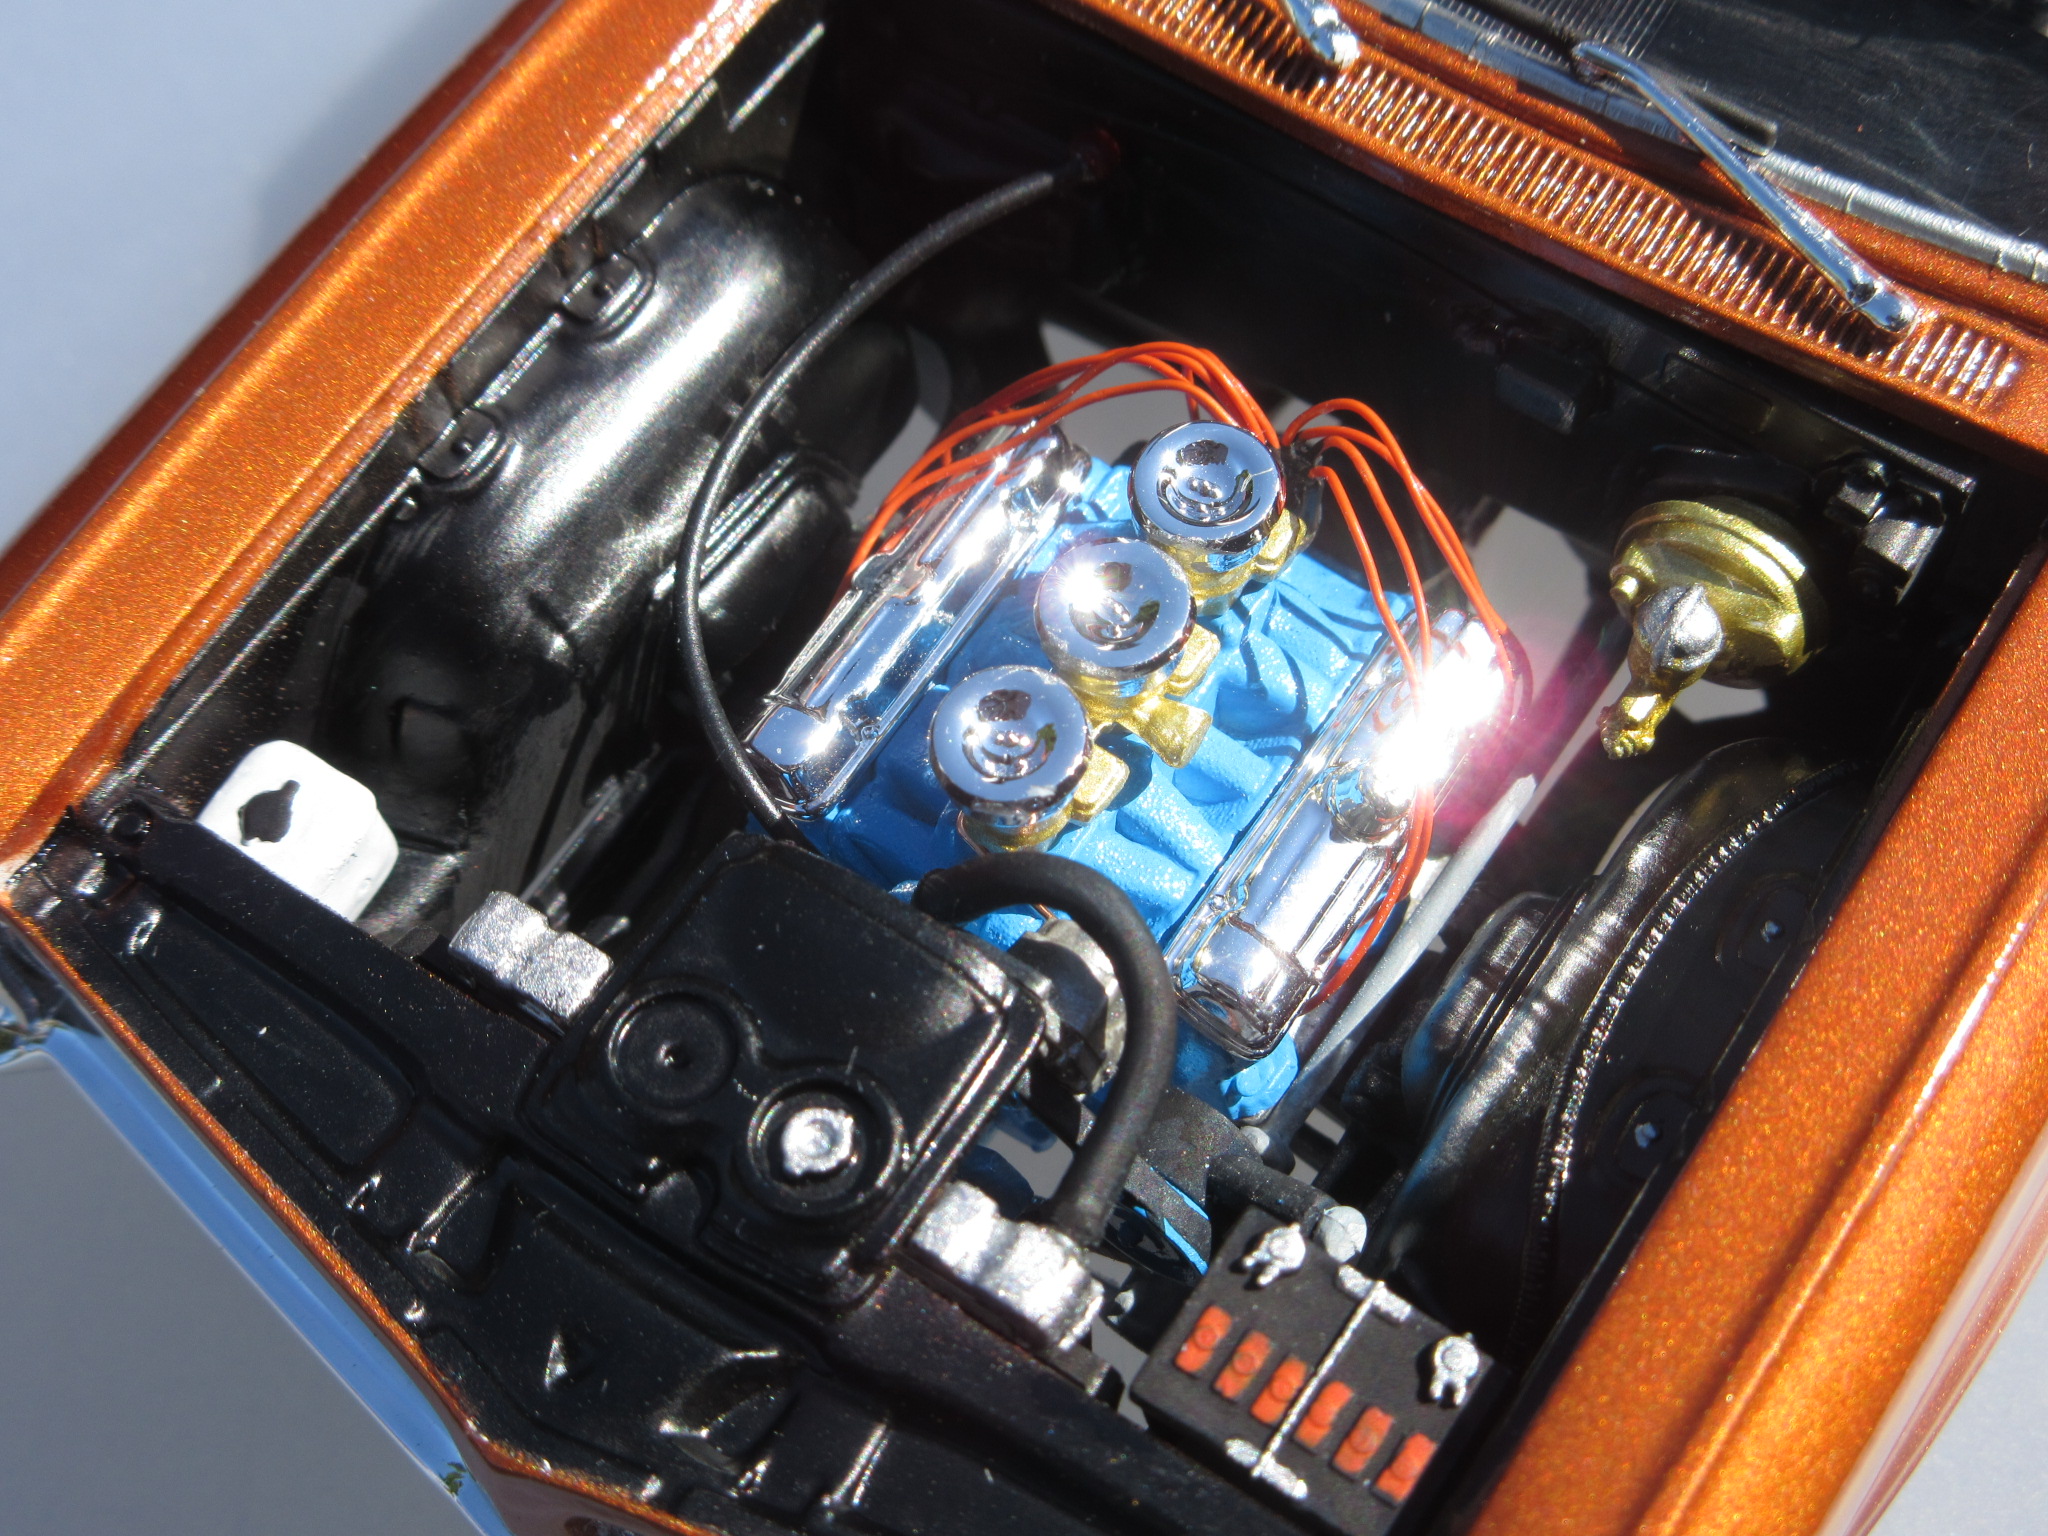
Added the rad hose . Removed factory chrome and applied our own paint to some engine parts . Undercarriage went together easily .
-
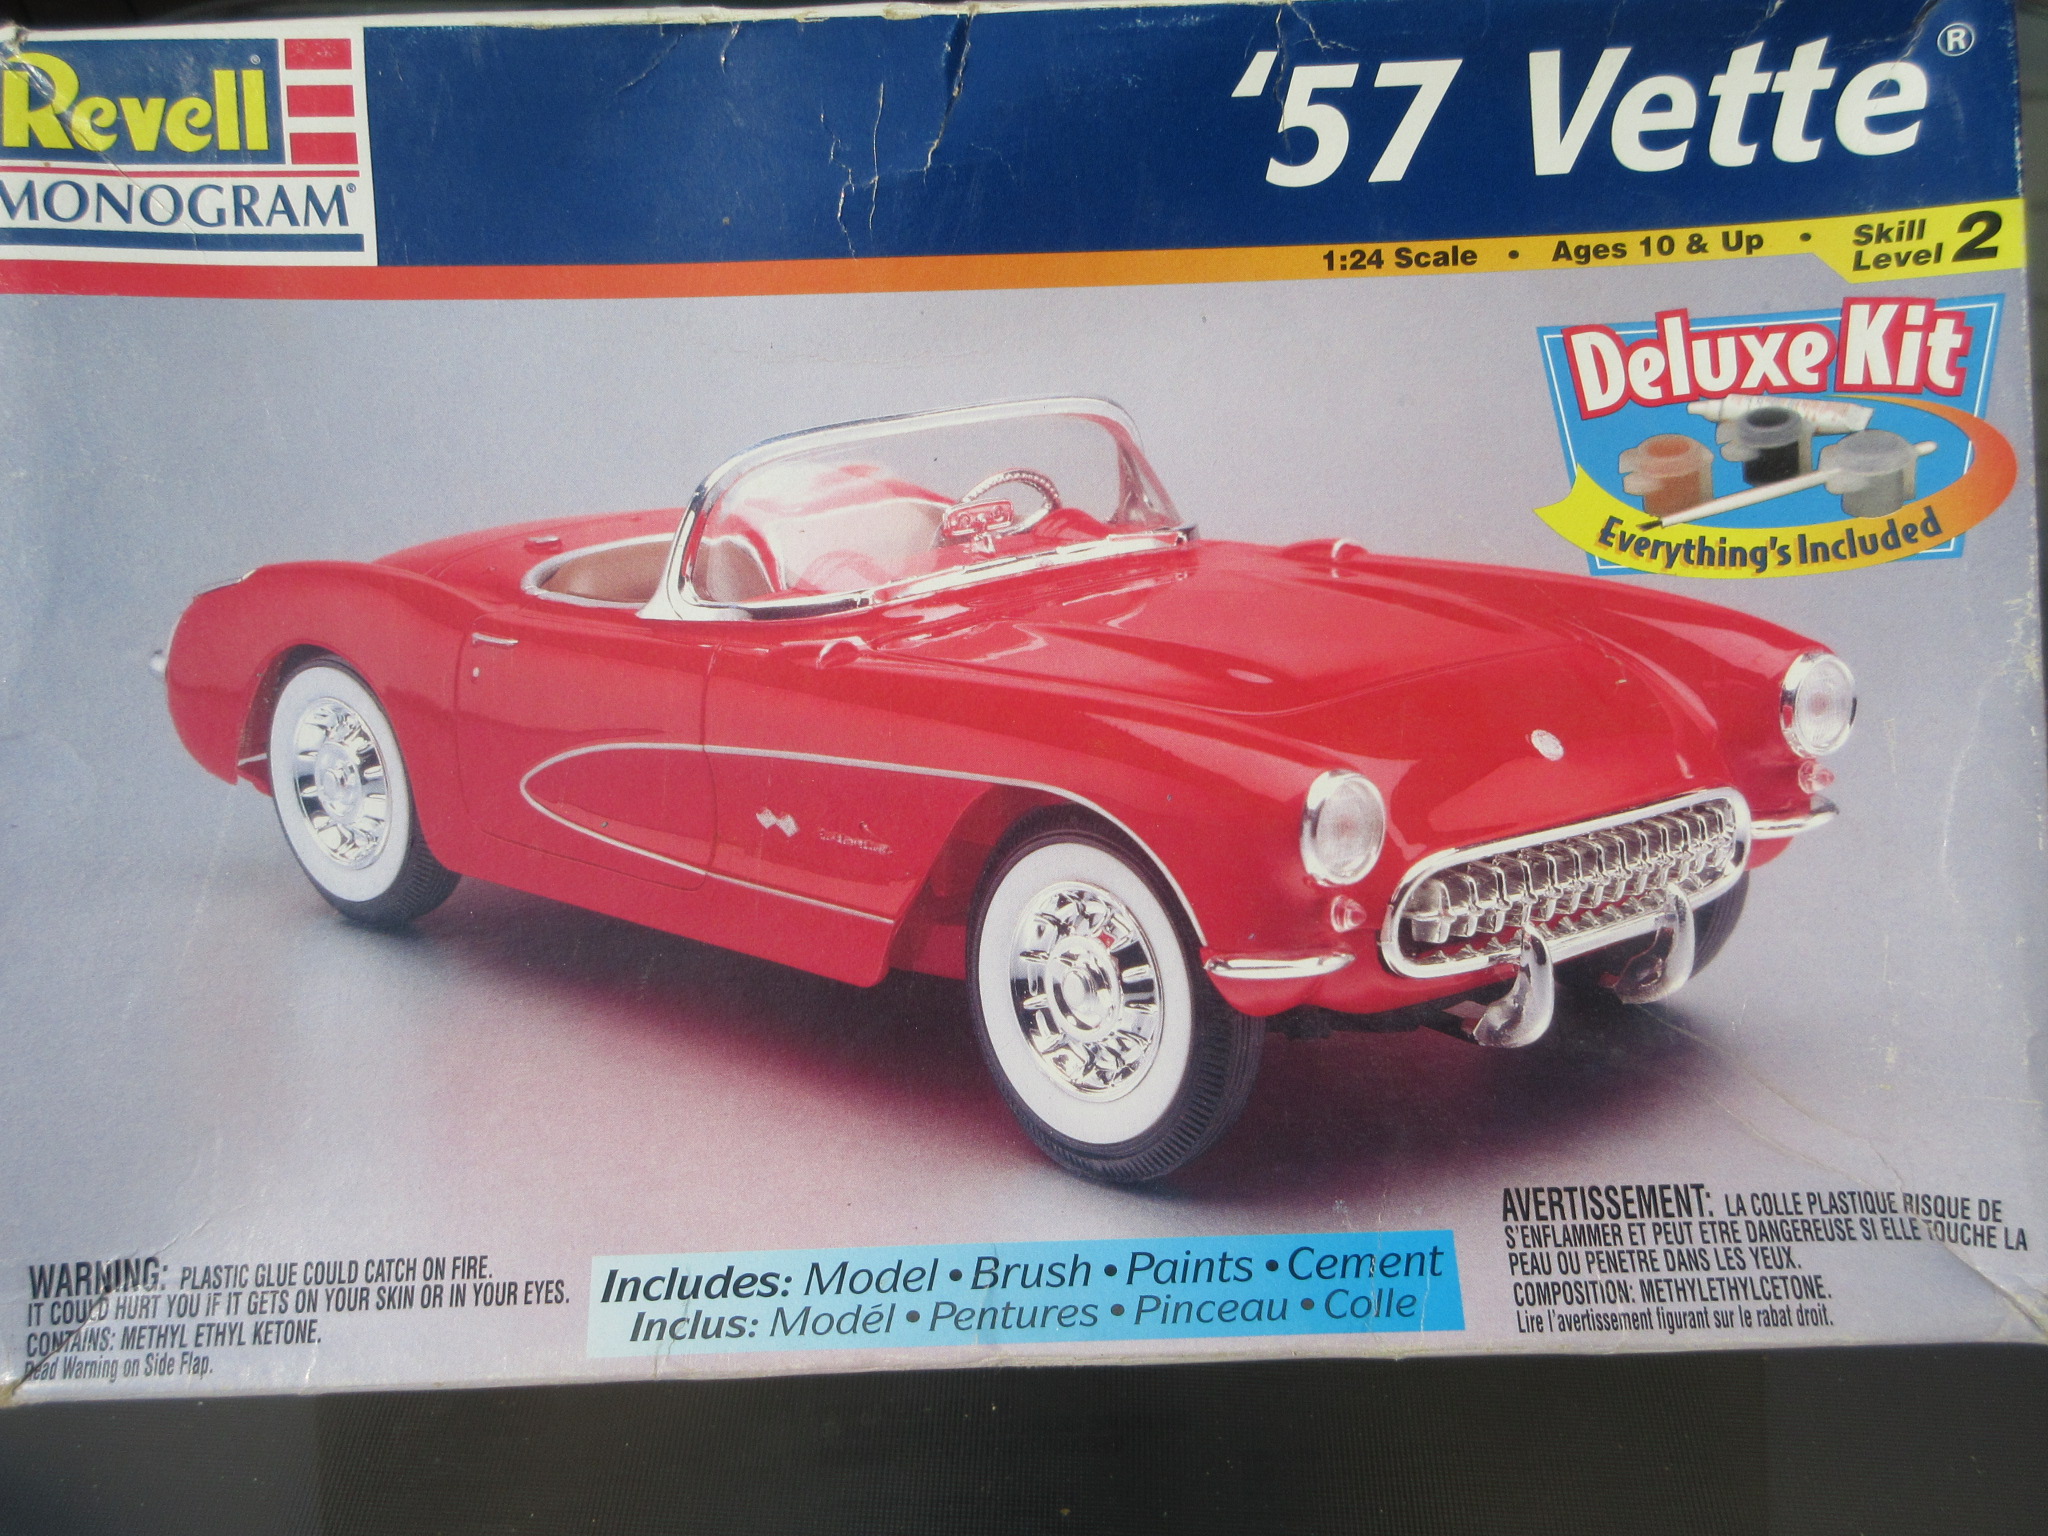
Here is our '57 Vette . To say this kit was a challenge for us would be an understatement . Issues we had : front and rear valance req'd extensive putty/sanding . Still couldn't get it to look right . Would have been easier if their were some pins/holes for front/rear bumper guards . Windshield was too wide , glass was too big for frame , broke both trying to get them to fit . This kit was beyond my skill level . I'll be the first to admit that .
-
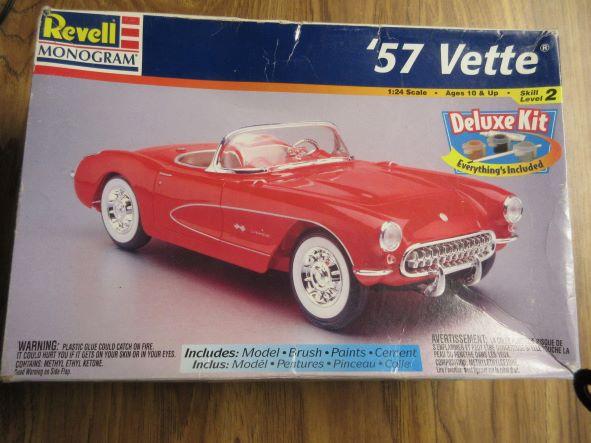
Revell Monogram '57 Vette .
rob1957 replied to rob1957's topic in Model Building Questions and Answers
I think you're correct with that one Snake . Having a closer look at what we've got here ie; molded battery , one piece frame and exhaust etc. We'll build what's here and let'er go at that . Kit cost us 15$ CDN in antique store but we'll have fun with it . Thanks everyone . And a Happy Thanksgiving to our American modeler friends . -
Revell Monogram '57 Vette .
rob1957 replied to rob1957's topic in Model Building Questions and Answers
Thanks Bill . We'll have a look at those . They look like just what we need . I forgot to re-size my photo before posting . My mistake . Thanks again . Robert . -
Hello Everyone . We purchased this kit second hand . Just getting started with the engine/trans assembly , some fit up issues . How old is this kit ? Bottom side panel has 1998 , distributed Revell AG , Germany . Unfortunately the windshield wipers are molded into bottom of the windshield frame and they're hardly noticeable . Any aftermarket sets available that you know of ? We had a brief look at the forums, " Aftermarket List ", and I was hoping to not have to go through it to find something . Thoughts , opinions or helpful tips with kit anyone ? Any pointers are appreciated . Thanks. Robert.
-
Hello . Bringing back to life this older thread . Here is the kit I'm starting . I picked this up 2nd hand . Fit up issue with engine/ transmission . Is this kit the later version mentioned here ? Dave , what shade of red is on your build in photos ? I'm attempting to match box art colour scheme . Thanks . Robert .
-
Outstanding build Lin . The inclusion of videos showing your techniques are really helpful , a pleasure to watch . When you push the side decal into the scribed channel between door and side panel are you pushing to achieve a cut so decal will adhere better to contour ? Is there a difference between sanding sponge and sanding paper ? Thank You. Robert.
-
Thanks for the comments on our GTO build . Gives us encouragement to keep on building . I would like to find a tool/instrument to properly bend tubing that I want to use for under-the-hood detailing. We're using a pair of not too sturdy tweezers and I can't achieve a nice 90 degree bend on tubing. Any suggestions or ideas ?
-
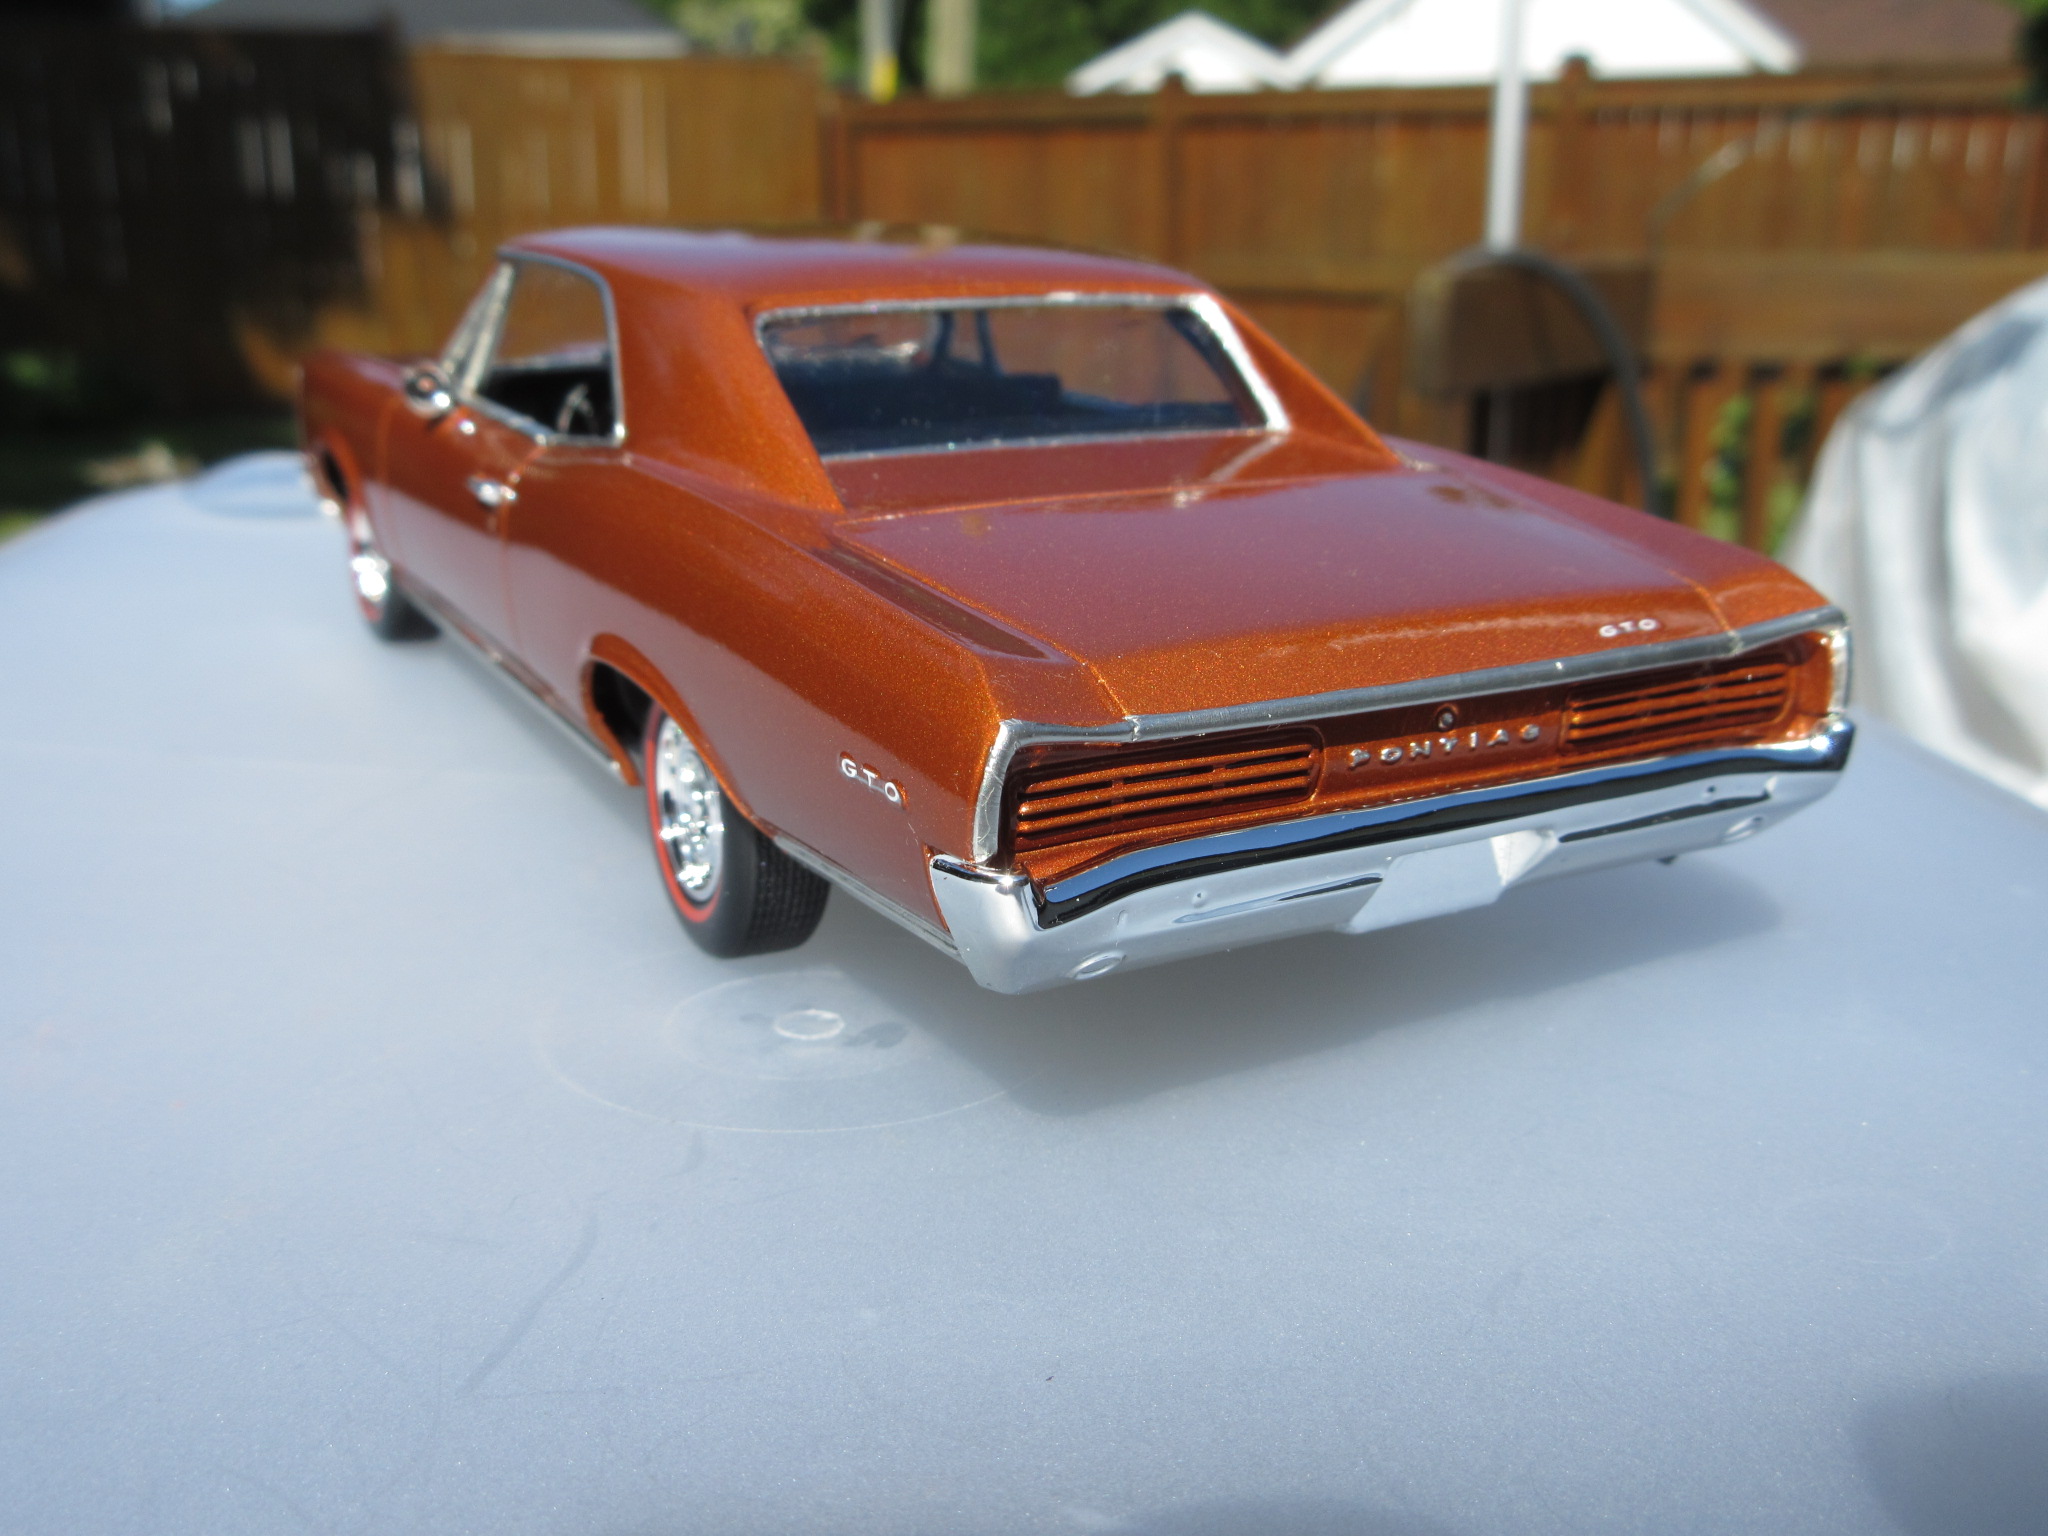
We added some Molotov chrome to rear tail lights , something I forgot to do originally .
-
Thanks for comments everyone , glad you enjoyed the posts . Did a bit more engine work under the hood , brake line and something running off the tri-barrel for added interest . Probably not 100% accurate but we like to fiddle around and see what happens under the hood . Always cover the finished paint job with Saran Wrap to avoid stray paint stringers from ruining things .
-
Hi Harry . Greetings from southwest Ontario . Thanks for link/info regarding flocking and the technique for Testors paint on the interior . That is a really sharp looking 'vette . Congratulations on a fine build. Cheers .
-
Hi Helmut . This is in our build line up . I'm sure this kit is the same as you mention , molded in red plastic. Very nice paint job on the red 'vette . Wish our builds came out that glossy.
-
Revell '57 Corvette Deluxe Kit 6669
rob1957 replied to rob1957's topic in Model Building Questions and Answers
Hi Helmut . I will have a look at that posting . We're just starting to determine what a nice colour for this build will be . Our first convertible kit. We're trying to determine a plan of attack for painting and taping the cove area on each side . This will be something new for us . Any suggestions as to how we may approach this paint scheme would be appreciated . The 'vette painted by member Harry Callahan was really nice , looks very crisp . Thanks. Robert. -
Revell '57 Corvette Deluxe Kit 6669
rob1957 replied to rob1957's topic in Model Building Questions and Answers
Hi Mark . I think we'll go with the wide white walls on these . Having a second look they should do us allright . This will be our 1st Corvette build , looking at paint jobs on these cars it appears as if we have some taping to do on each side for the white area and the " finish " colour . There seems to be a chrome strip between the 2 colours . Out of all the 'vettes we found on-line there were only a couple where the entire body was one solid colour , the box art also . Any idea as to how old this kit is ? -
Very nice build Harry . What is embossing powder that you used for carpet and is the testors paint on your interior airbrushed , if so did you go with Tamiya thinner to apply that ?
-
Hello everyone . I recently picked up this Revell 57 Corvette kit in a flea mkt , 15$ CDN . " Everything Included ". Tires have a separate white plastic ring that will insert to make white walls . Are there any aftermarket companies out there that would carry a tire I could use instead of these ? Thanks. Robert.
-
Thank You for comments and feedback everyone , we appreciate hearing from you . I think we'll keep the BMF upstairs now instead of in the basement where our workbench is . Sometimes in summer months basement can get humid so that might have had an effect on final application. I'm always trying to improve on my builds , learn from past mistakes and try new ideas . That's what makes the hobby fun and enjoyable .
-
Final verdict : great kit to build , ease of fit-up . Not a lot of clean up with flashing . Red wall tires set it off . An extra set of Crager rims for custom look , we went with stock rally rims . Not an original factory colour but lays down quite nice . I had a minor boo-boo near the trunk which was my error . Straight outta the box for this kit and finished build is very nice indeed . Thanks !
-
Some engine detail . We used Tamiya X-14 Sky Blue . Detail Masters dist kit . Did fuel line , it's on the other side. I'm going to do some more under the hood details but I wanted to post a couple pics as we have a sunny day here , good for outdoor pics . This would be the 389 Pontiac power plant .
-
This particular package of BMF gave us some grief as pieces would tear coming off the backing paper and we had a lot of wrinkles in our final application . This was a first and we'll continue to use their product in the future . Maybe it was having BMF stored in the basement , which was my fault . Nice decals with this kit .
-
Thanks Old School ! Guess I should have taken the Tack Cloth along to wipe off the dust b4 photo shoot .