
RCprofile.JPG.6b95b19b856bf00a3becd6aeaaa48f3b.JPG)
Ian McLaren
-
Posts
1,354 -
Joined
-
Last visited
Content Type
Profiles
Forums
Events
Gallery
Everything posted by Ian McLaren
-
RCprofile.thumb.JPG.1691ea753d0f0897fdc1b2510cf06775.JPG)
1/16 SCALE A/FC NITRO FUNNY CAR
Ian McLaren replied to Ian McLaren's topic in WIP: Drag Racing Models

-
How do the pages come to be in a thread? In my posts there is just a series of replies or is there a threshold number of replies before pages show up?
-
1/16 SCALE A/FC NITRO FUNNY CAR
Ian McLaren replied to Ian McLaren's topic in WIP: Drag Racing Models
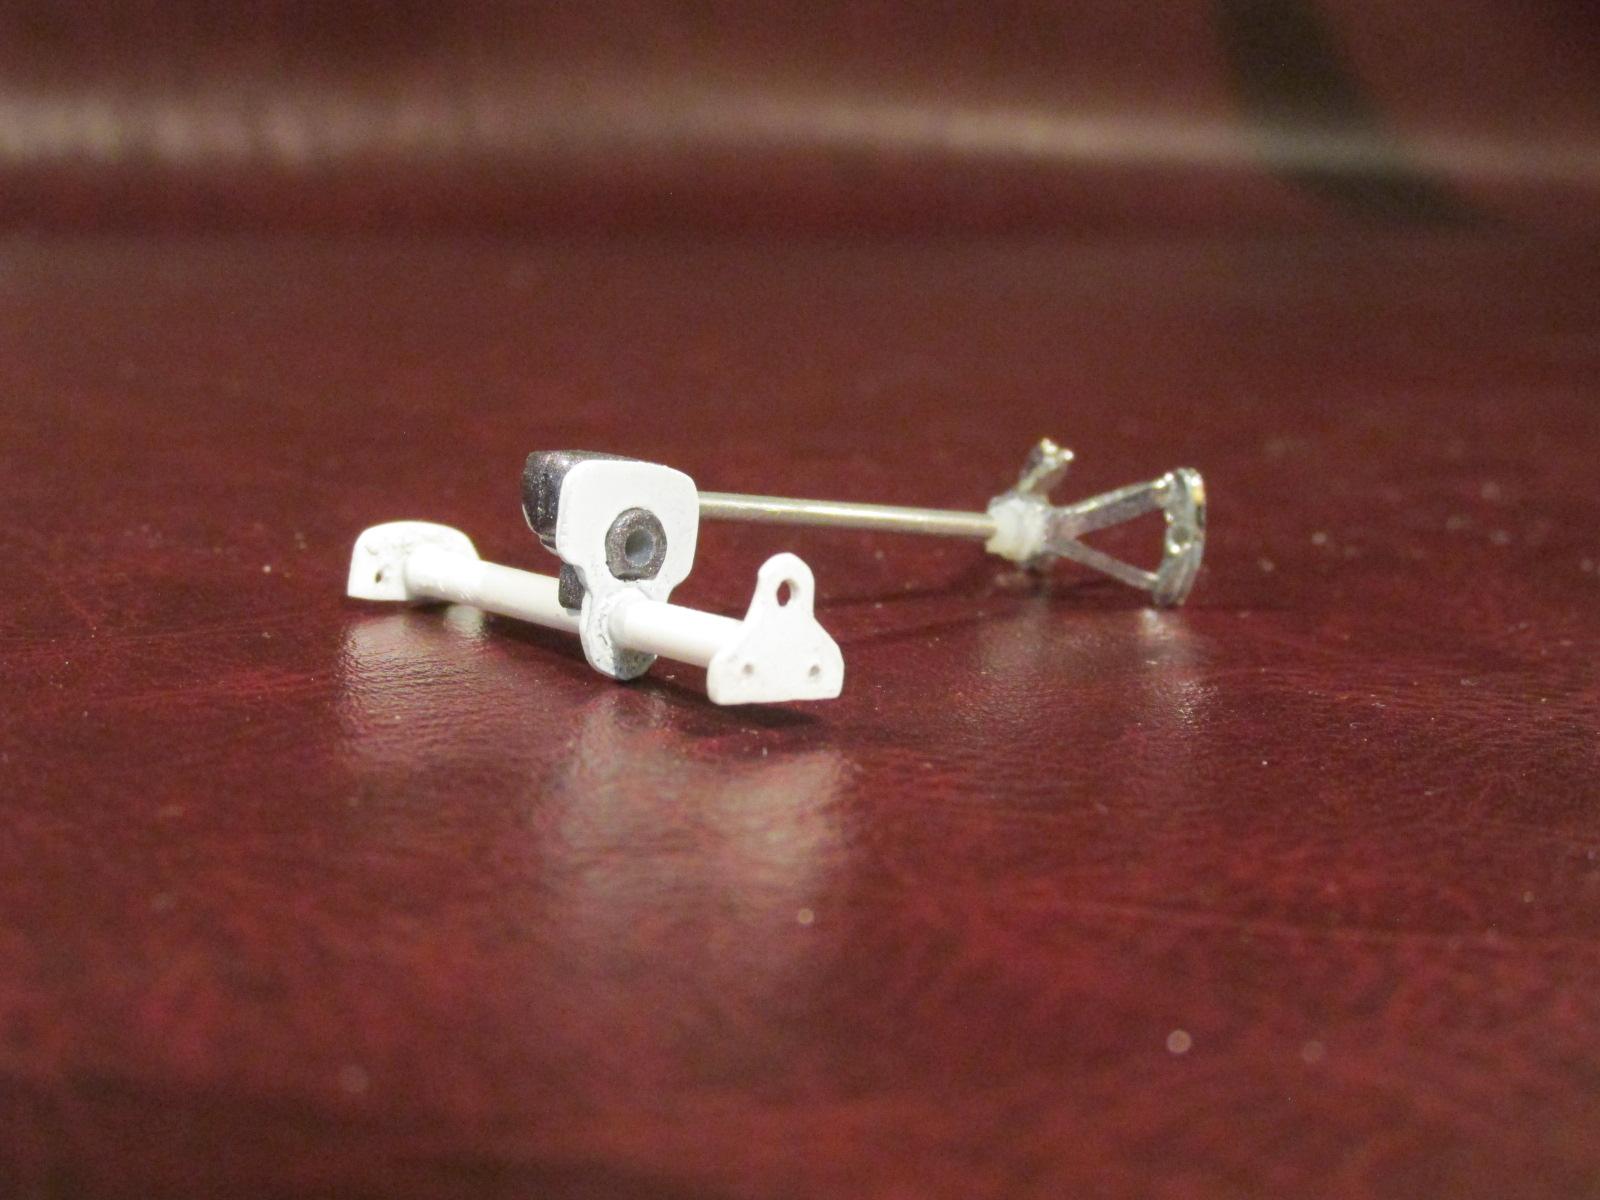
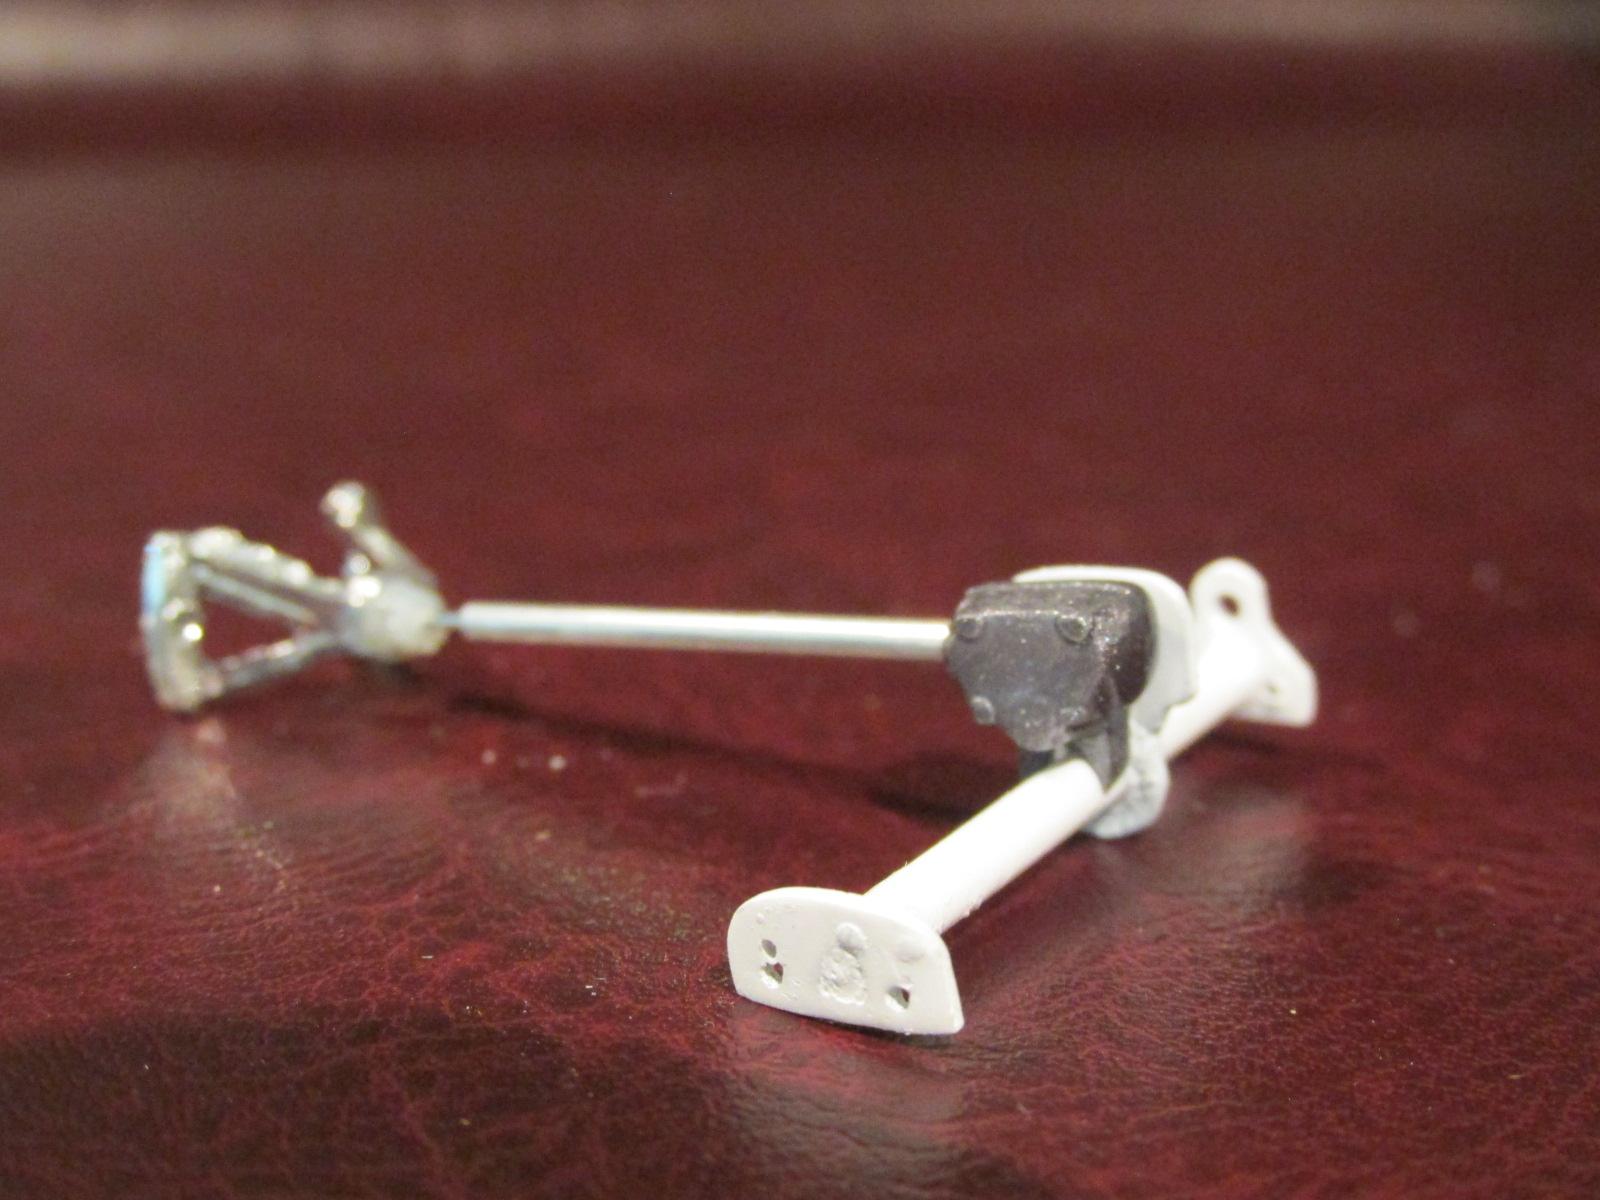
Been a while since I updated this build. Rear end mounted and parachute attachment pin and brackets installed, puke tank fabricated and installed, new steering box crossmember (bolt in) fabricated and steering gear mounting bracket fabricated. throttle pedal moved and bracket built. Brake lever moved inboard. New metal steering output shaft installed
-
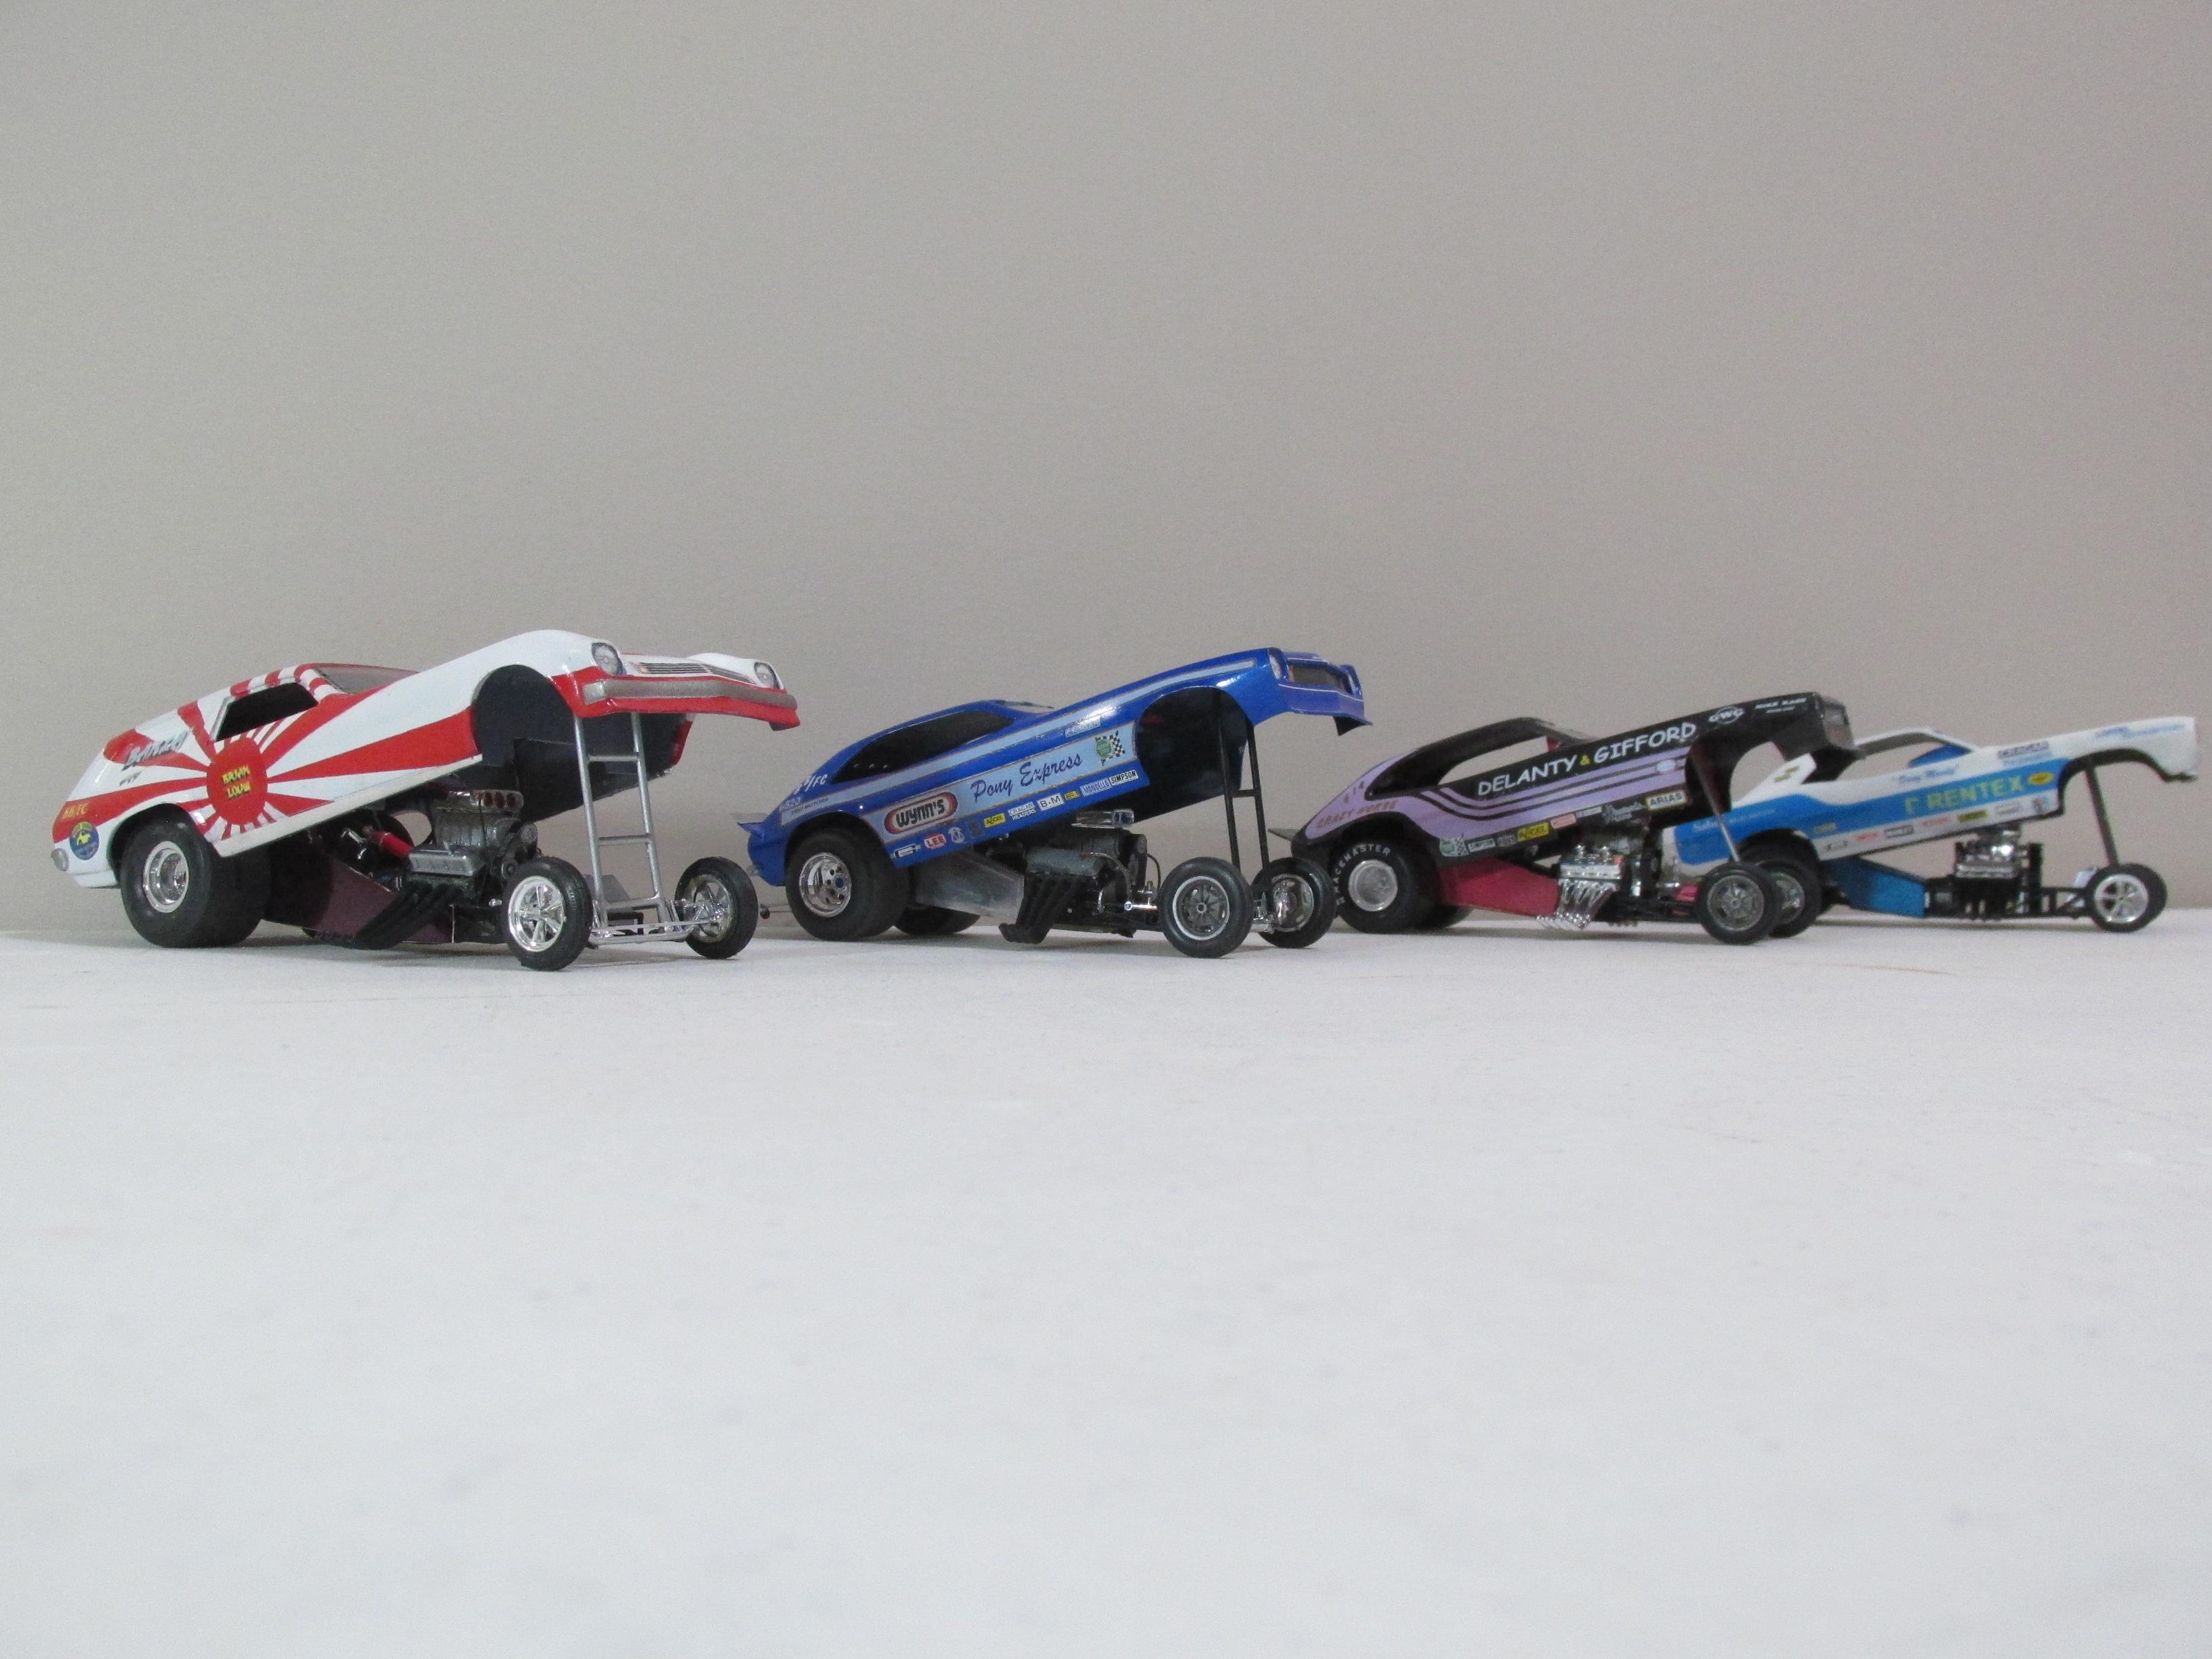
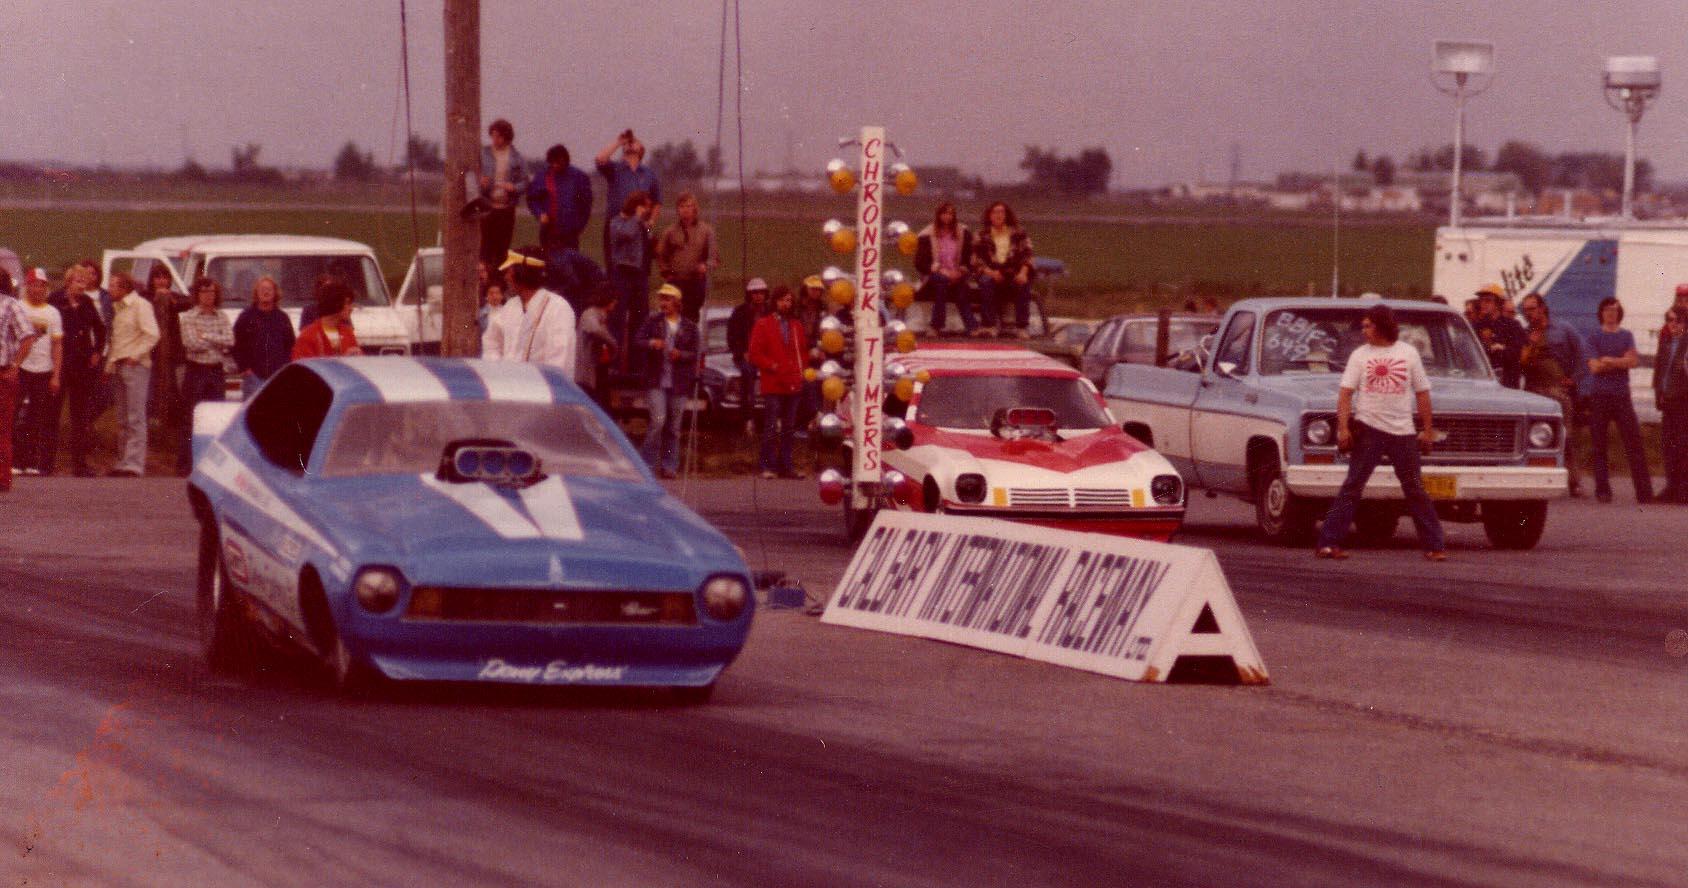
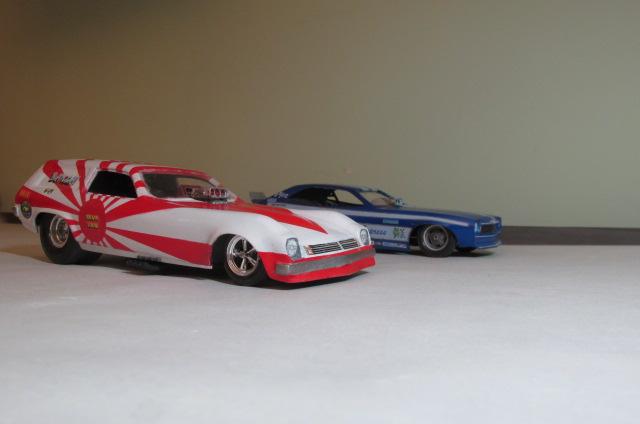
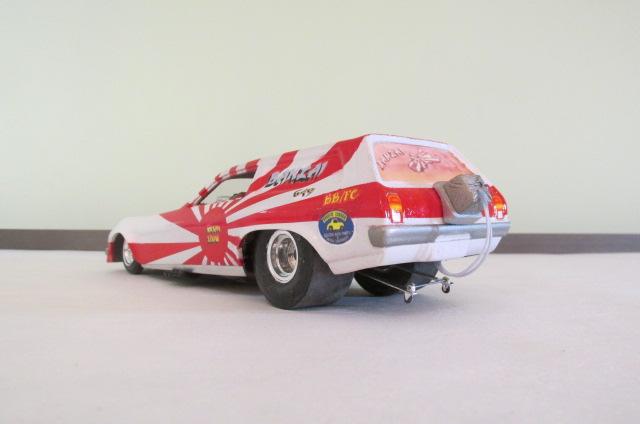
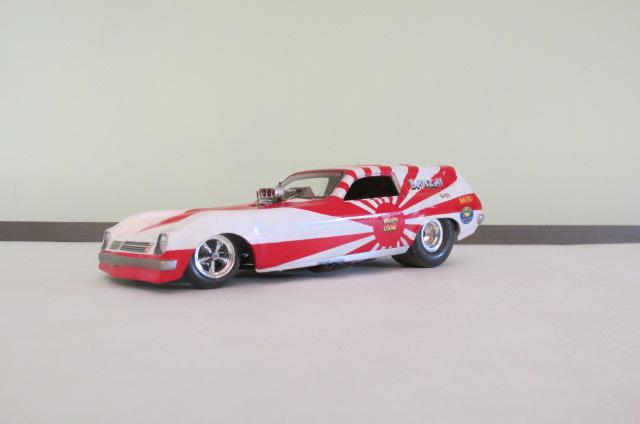
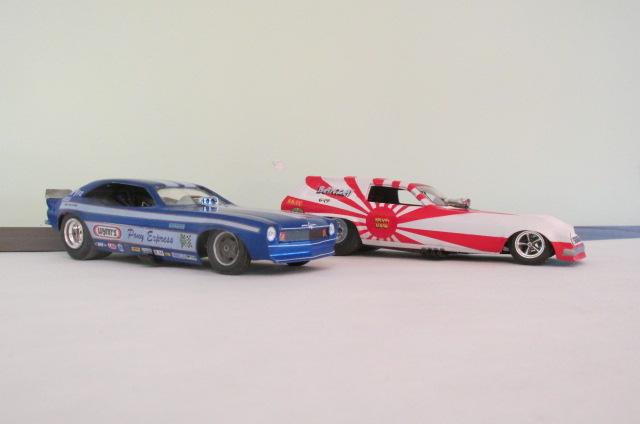
A year and a half of effort and here are the four cars together again after just over 40 years.
-
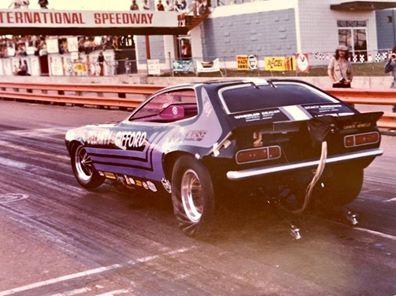
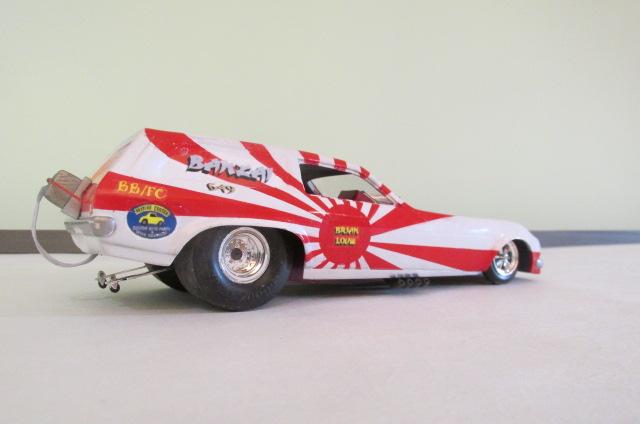
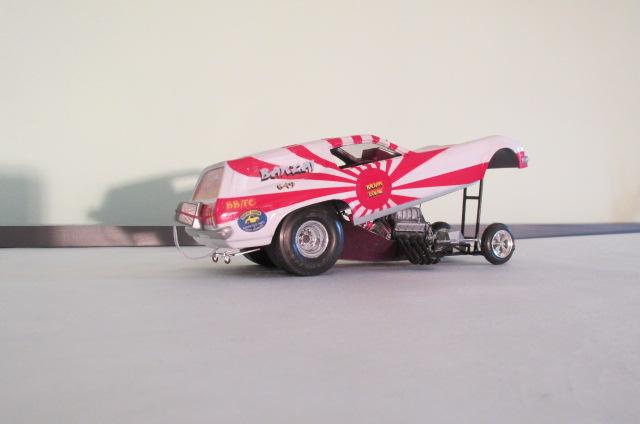
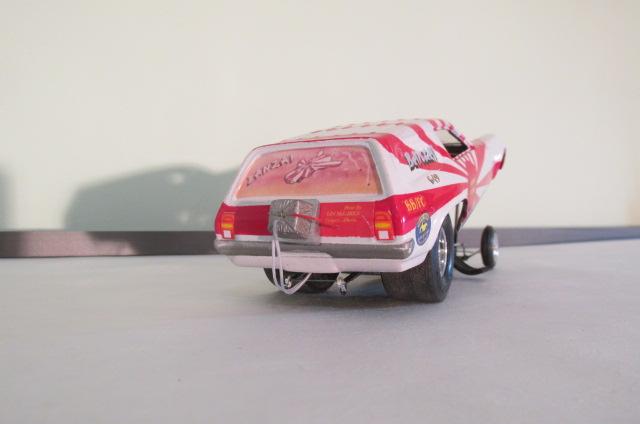
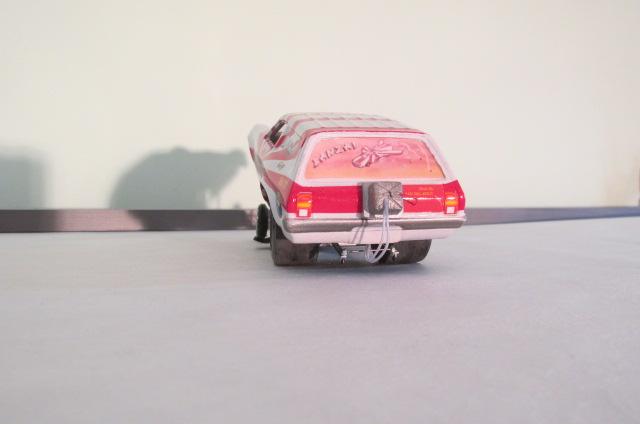
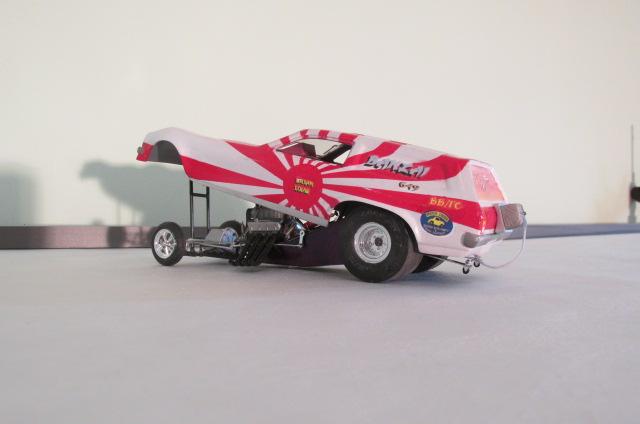
Latest addition to this set 70s BB/FC Donovan powered Pinto . Pacific NW tour car
-
The latest in the 4 car BB/FC series I'm building Donovan powered Pinto, pacific north west tour car .
-
1/16 SCALE A/FC NITRO FUNNY CAR
Ian McLaren replied to Ian McLaren's topic in WIP: Drag Racing Models
Hi Kevin I got both the 1/20 and the 1/16 from Shapeways Ron Olson's site I think -
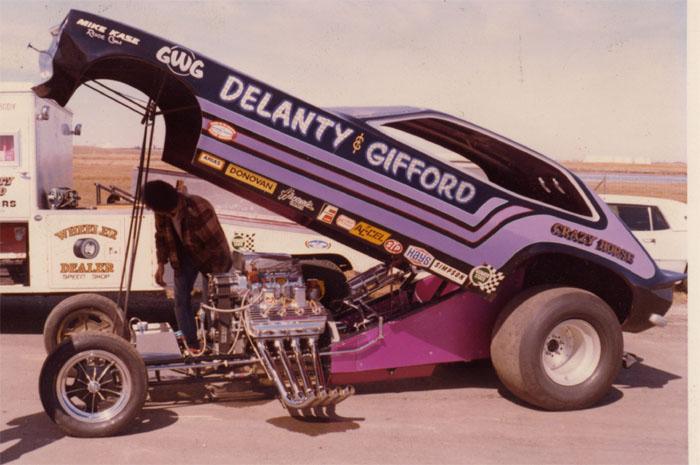
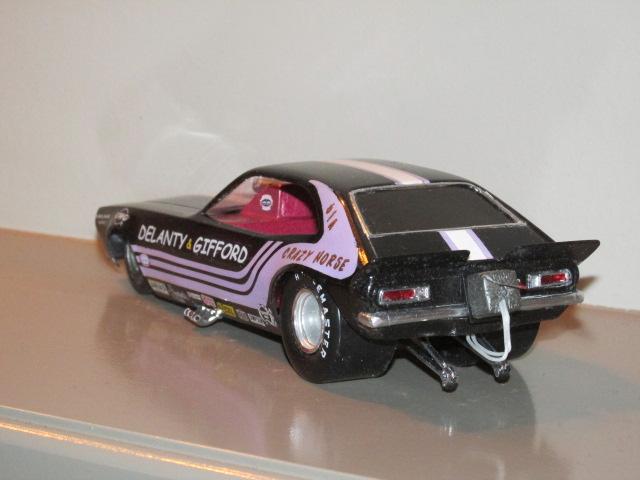
Part of a four car set of BB/FCs that ran in the Pacific NW in the 70s
-
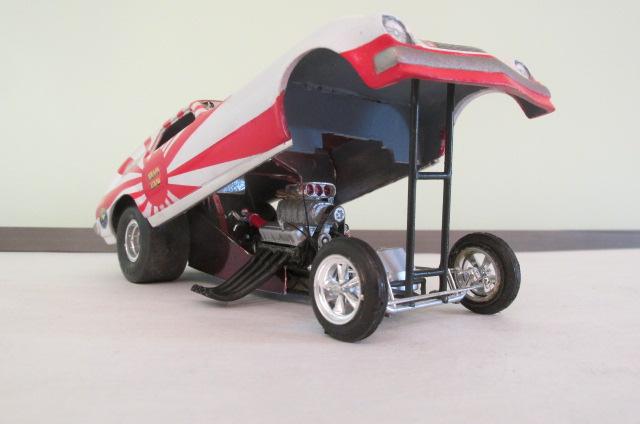
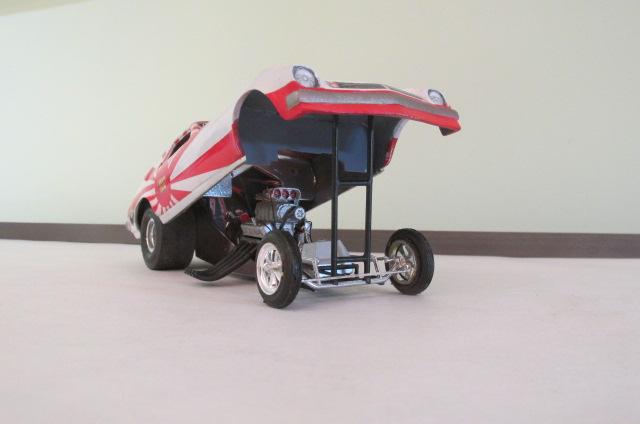
I'm calling Banzai completed, still two more cars to go in this set but I I am happy with the panel
-
1/16 SCALE A/FC NITRO FUNNY CAR
Ian McLaren replied to Ian McLaren's topic in WIP: Drag Racing Models
Thank you -
1/16 SCALE A/FC NITRO FUNNY CAR
Ian McLaren replied to Ian McLaren's topic in WIP: Drag Racing Models
Thank you very much, Coming from you it means a lot! I've been following your D100 and I am just amazed at the quality and precision you are displaying in this project. The machining is great but it's your basic modeling skills that I find exceptional and together the results are spectacular. -
1/16 SCALE A/FC NITRO FUNNY CAR
Ian McLaren replied to Ian McLaren's topic in WIP: Drag Racing Models
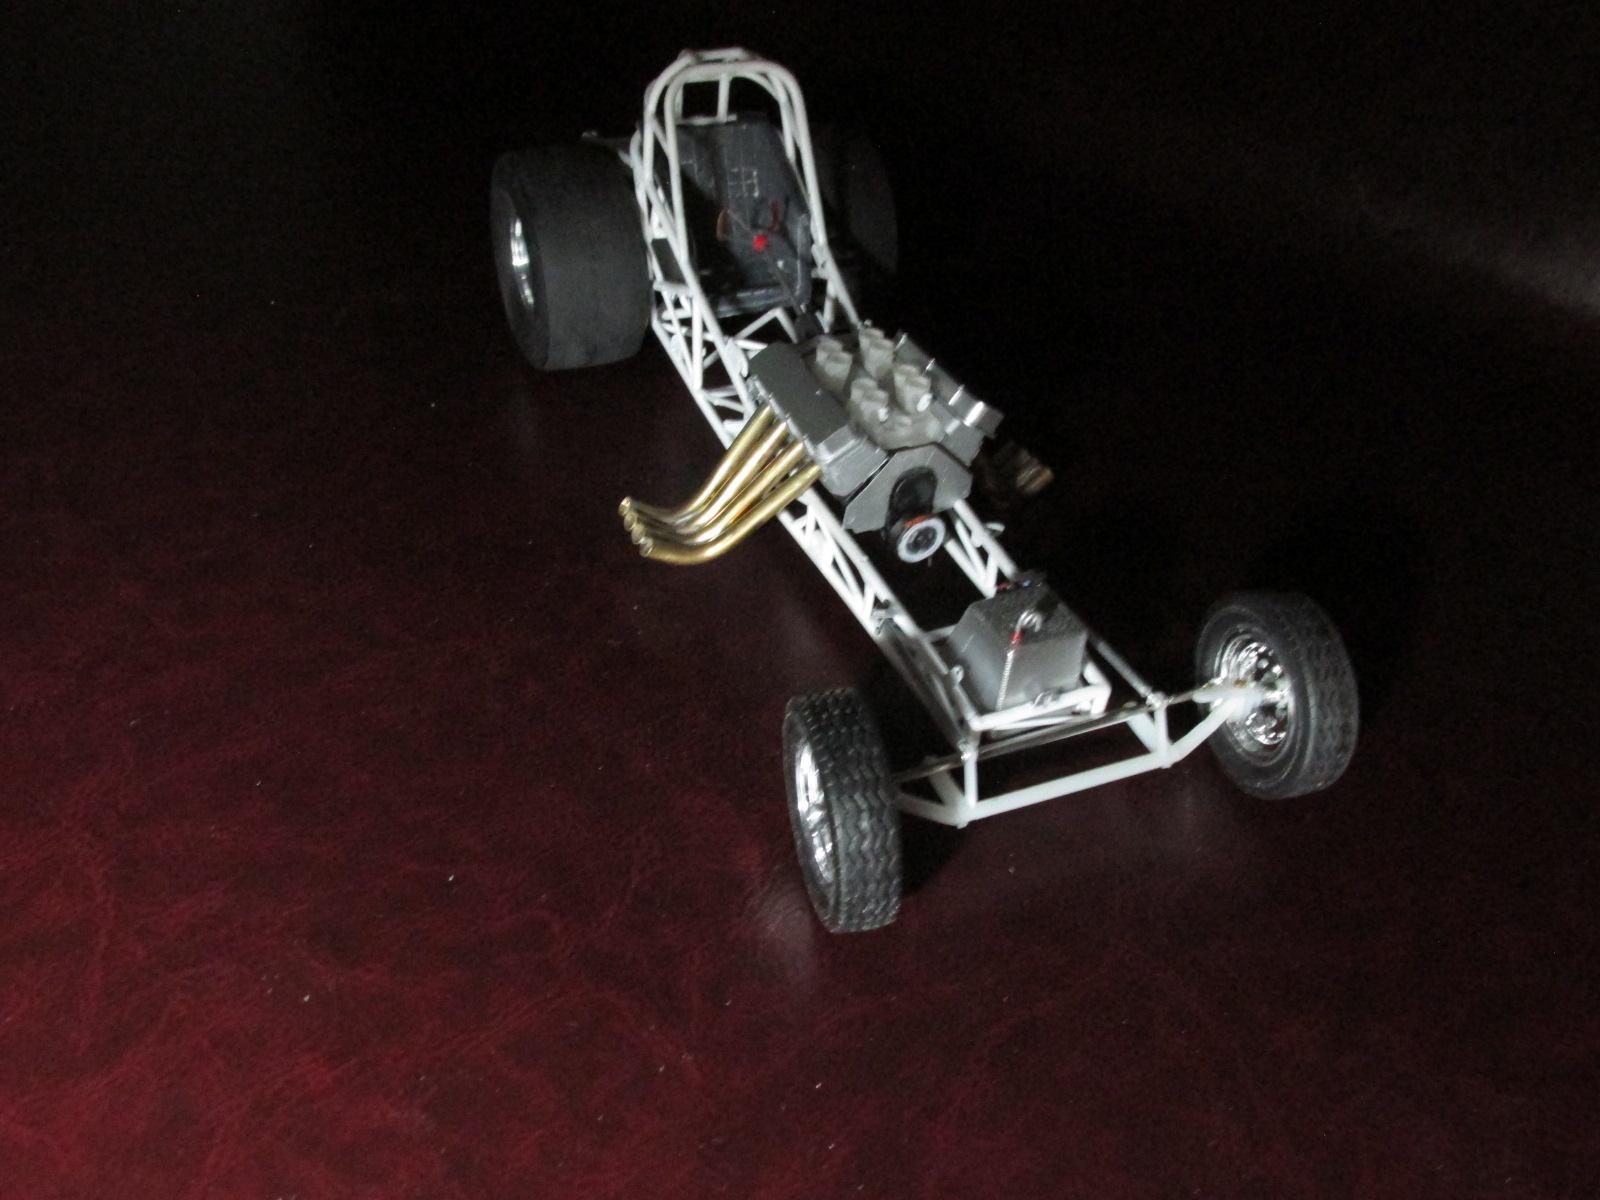
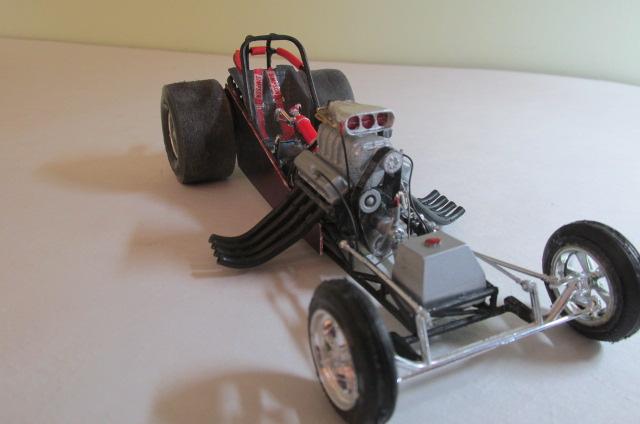
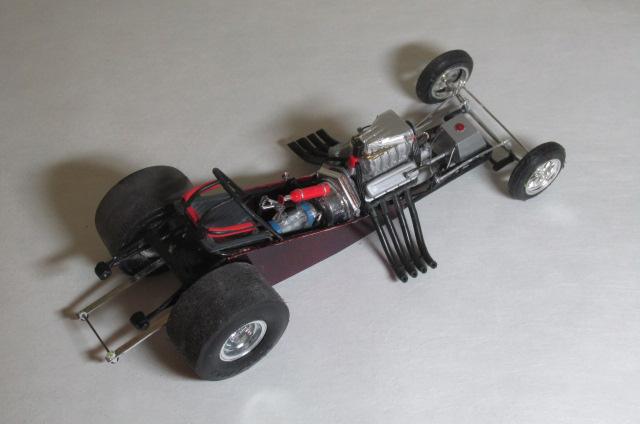
Aluminum body mounts fabricated and temporarily installed, to allow preliminary alignment of the chassis with the body. Front radius arms shortened and brackets moved to avoid interfering with the steering gear. Chassis secured to the body to determine the correct position of the rear body support tube/structure (a bigger diameter tube will be installed to better fit the brackets). First time the body and chassis have been joined. Just going to let it sit on the desk for a day or two before committing the current alignment to permanent. I think I'm happy with the ride height once I raise the nose 3/16 at the spoiler, but I may alter the front /rear positioning slightly.
-
1/16 SCALE A/FC NITRO FUNNY CAR
Ian McLaren replied to Ian McLaren's topic in WIP: Drag Racing Models
Rear structures roughed in differential is supported and secured by functional bolts new rear body mount is also installed, drive line has been mocked up to make sure everything lines up and fits. now coming apart for cosmetic cleanup and beginning to add attachment points for various sub assemblies.
-
1/16 SCALE A/FC NITRO FUNNY CAR
Ian McLaren replied to Ian McLaren's topic in WIP: Drag Racing Models
Fabrication has moved to the rear of the car now. Differential anti rotation bars (upper and lower), body rear support structure and chassis modifcations. Original structure removed new pieces to be fabricated and installed. I want to give full credit to Chris Sobak ( Mooneyzs) for inspiring this build with his absolutely off the hook Vega model. I'm not going to the extreme his Vega was built to, but I'm venturing into areas I would have never have attempted were it not for Chris's photos and explanations, not only what was done but also how. Thanks Chris!
-
Congratulations Tim! I didn't discover this thread till a couple of days ago but I went through every page of it and it is just jaw dropping! Thank you for being an inspiration and a teacher to the rest of us modelers. Both you and Tim have really pushed me to push my boundaries. I'll never get to the level you and Tim achieve but you both have made me a better modeler. THANK YOU!
-
1/16 SCALE A/FC NITRO FUNNY CAR
Ian McLaren replied to Ian McLaren's topic in WIP: Drag Racing Models
Finally got the jig done, now the chassis is straight, level and secured at the correct ride height. Now the rear structures for the differential añd body mounts can be built. Also shown is the front motor plate I built leaning up against the engine. Looks like it will work out fine. Once the engine location is set I can either modify (if I use the kit headers) or fabricate new ones, which I have never attempted. Not sure how that's going to turn out.
-
Not much left to say about the quality and professionalism of this project that hasn't already been said, simply jaw dropping!
-
1/16 SCALE A/FC NITRO FUNNY CAR
Ian McLaren replied to Ian McLaren's topic in WIP: Drag Racing Models
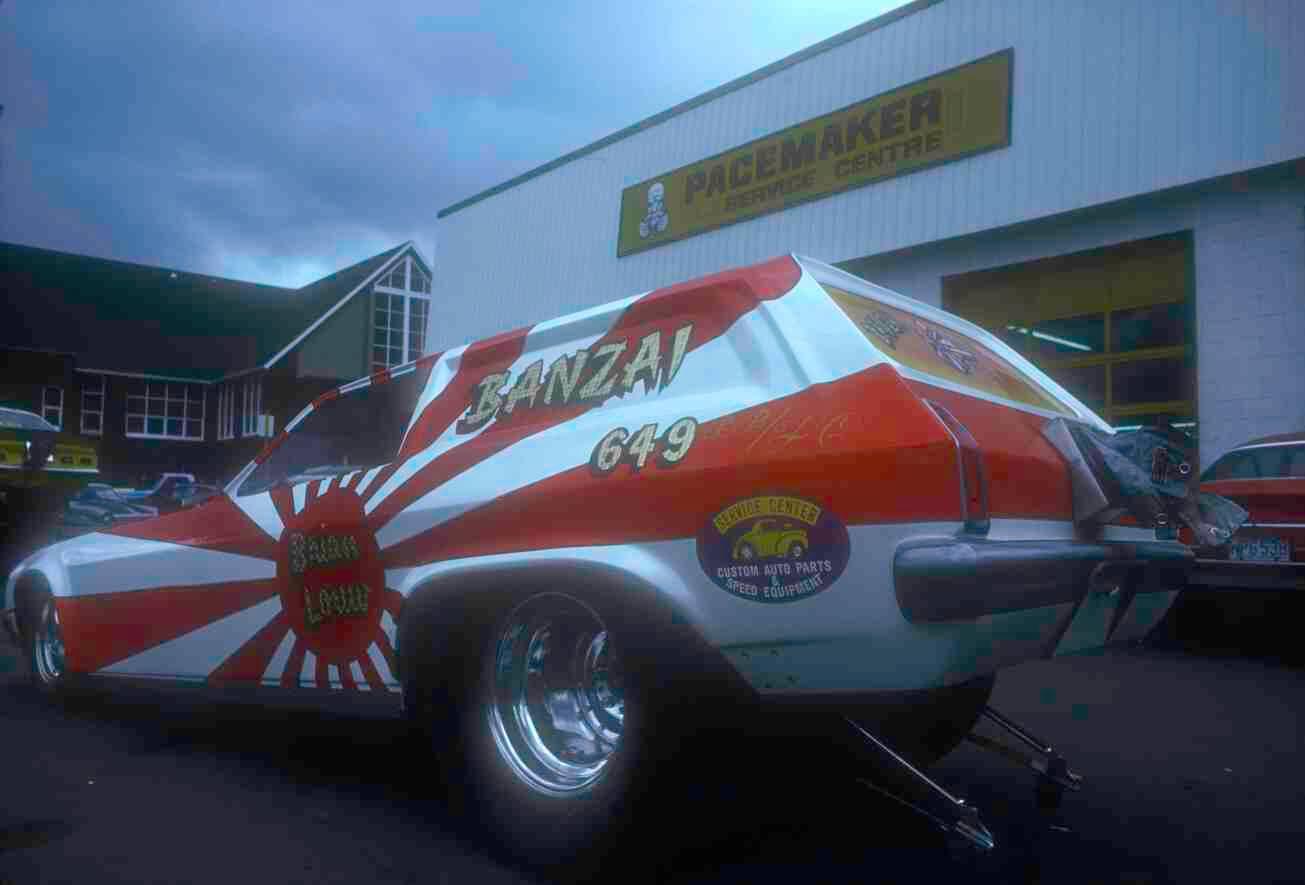
This is not the car I'm building but it is the inspiration for it
-
NHRA GT/AA '96 Firebird Slammer
Ian McLaren replied to Straightliner59's topic in WIP: Drag Racing Models
Good looking car, and a very ambitious paint scheme, well done -
1/16 SCALE A/FC NITRO FUNNY CAR
Ian McLaren replied to Ian McLaren's topic in WIP: Drag Racing Models
Basic front end fabrication done, Removed molded radius arm mounts from top of frame rail and replaced them with scratch built aluminum brackets in the proper side position. Front of aluminum radius arms now attach to modified existing axle brackets with RB Motion clevis ends. Updated the fuel cap, but it may get changed again, at least this one would have been legal. Now it all comes apart so I can make it pretty. Chassis mods will continue with updated bracing from the firewall forward, differential mounting framing and rear body mounting structure
-
1/16 SCALE A/FC NITRO FUNNY CAR
Ian McLaren replied to Ian McLaren's topic in WIP: Drag Racing Models
Update to steering, rear axle and engine front motor plate. On the steering the spindles have been drilled and 1.2 x 8MM bolts have been added as king pins and well as the kit steering arms have been replaced by .015 scratch built aluminum pieces. The tie rod is being replaced by a stainless steel tube and RB motion rod ends, as will all of the rest of the steering rods and radius rods. The 9" ford rear end has been narrowed to move the slicks in towards the chassis and to allow the body to fit over them , The front motor plate has also been made out of aluminum and is designed to hold the motor in its correct position in the chassis.
-
1/16 SCALE A/FC NITRO FUNNY CAR
Ian McLaren replied to Ian McLaren's topic in WIP: Drag Racing Models
Mocked up the chassis to get the ride height measurements for the jig. Had to try the body on and there is almost a 1/4 inch between the roll cage and the roof (the advantage of a panel roof line). Have to pull the slicks in a bit and thin the resin body back there but there is enough room to do both. It will be lower in the front, that was the only spacer I had handy. Its been a good day
-
55 Nomad delivery street Gasser (On the bench)
Ian McLaren replied to Gumball's topic in WIP: Drag Racing Models
Great project -
1/16 SCALE A/FC NITRO FUNNY CAR
Ian McLaren replied to Ian McLaren's topic in WIP: Drag Racing Models
Mocked up the BBC and the nine inch on an alignment bar with engine as low as it can go in the frame and the differential in the stock location. That puts the bar right up against the seat. Looks like the seat has to change just to get clearance to allow the engine some distance from the frame. Moving the axle location up is a non starter to reduce the ride height and improve the stance but after setting the body in place I think a tweek of the seat may be all that is required. As this is an earlier style car the engine wasn't move out as much the later one, so the stock motor plate location is going to be pretty close. Next up building a ride height jig to allow building a proper body mount structure at the rear and differential supports.
-
1/16 SCALE A/FC NITRO FUNNY CAR
Ian McLaren replied to Ian McLaren's topic in WIP: Drag Racing Models
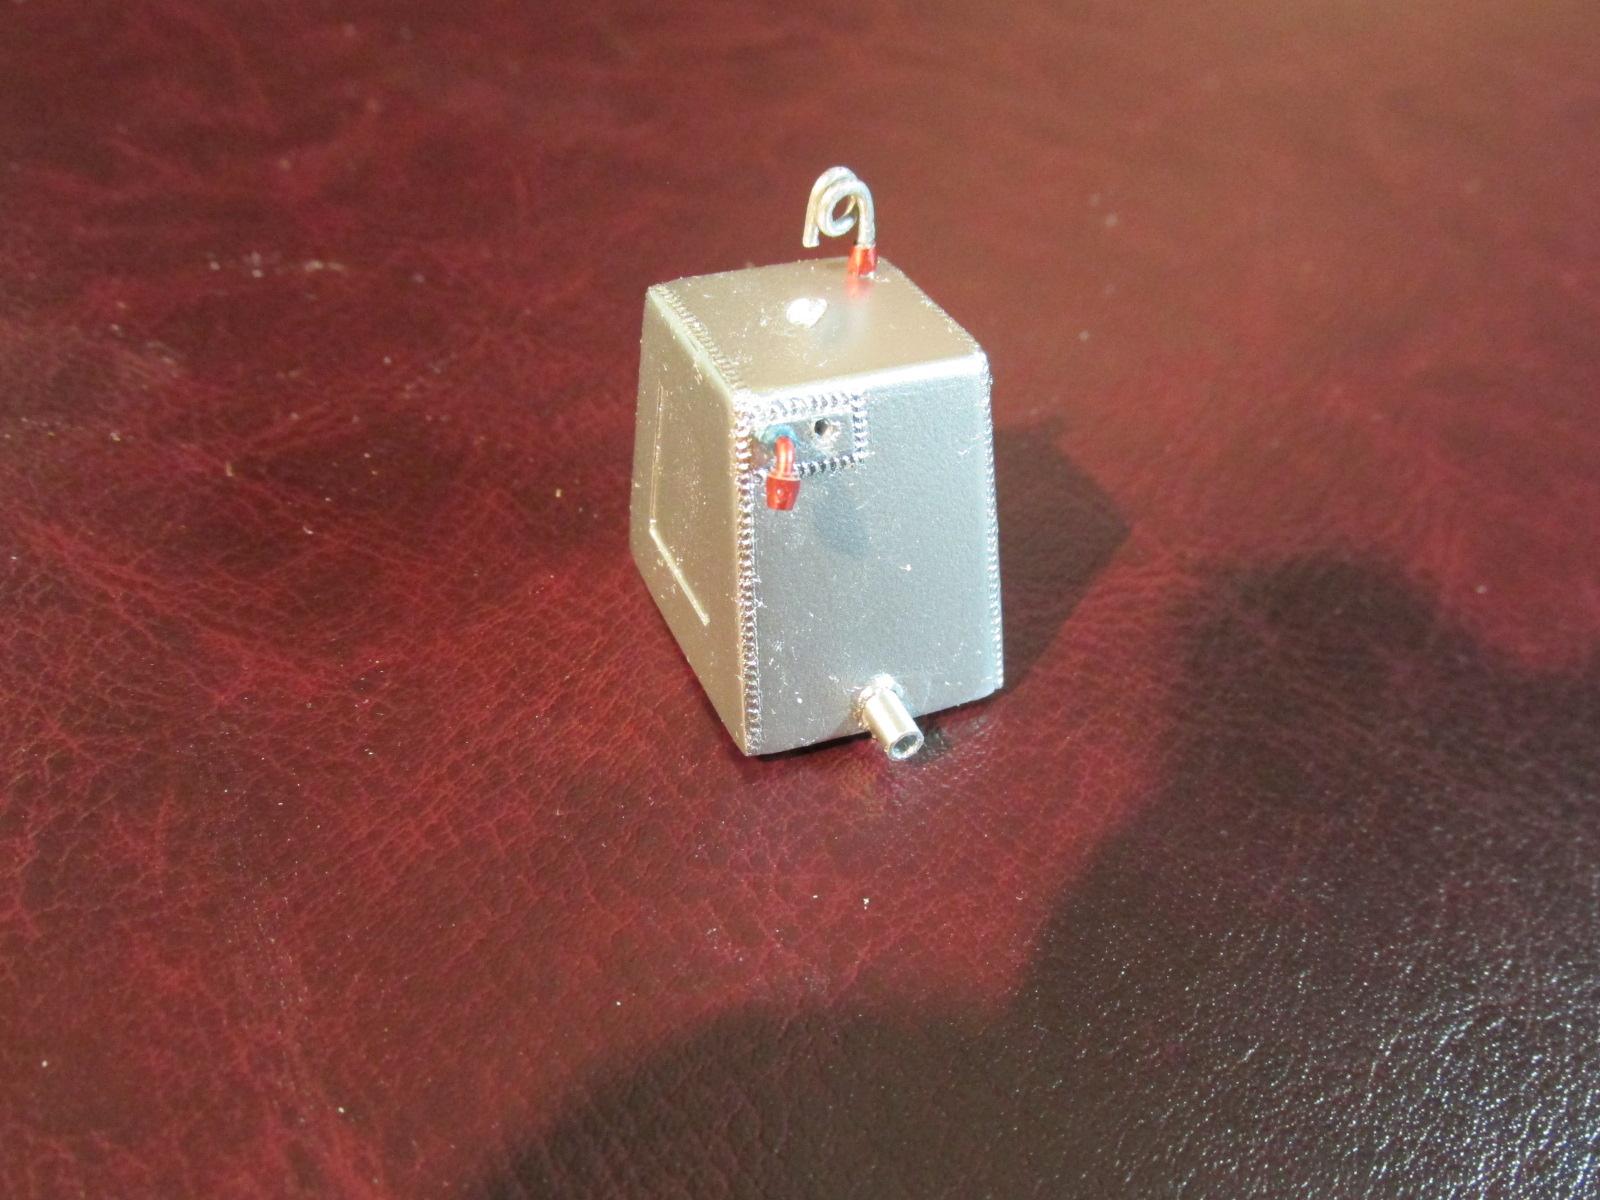
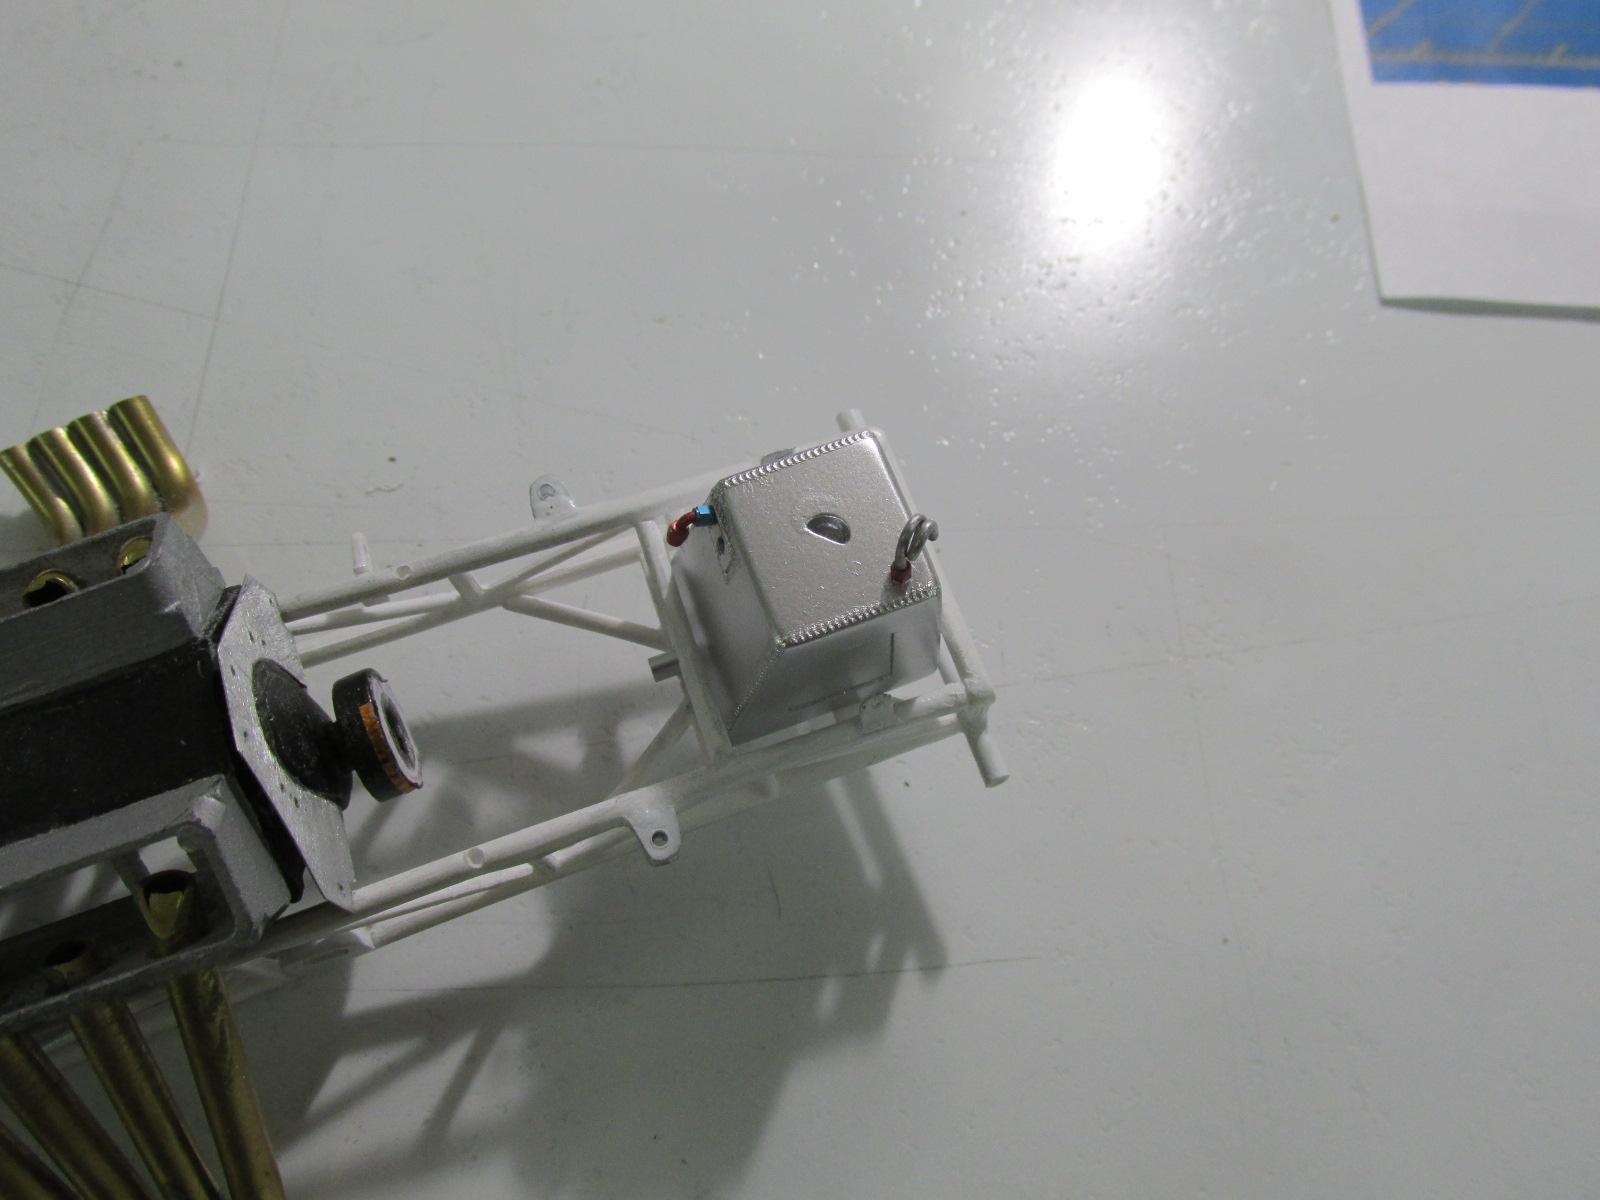
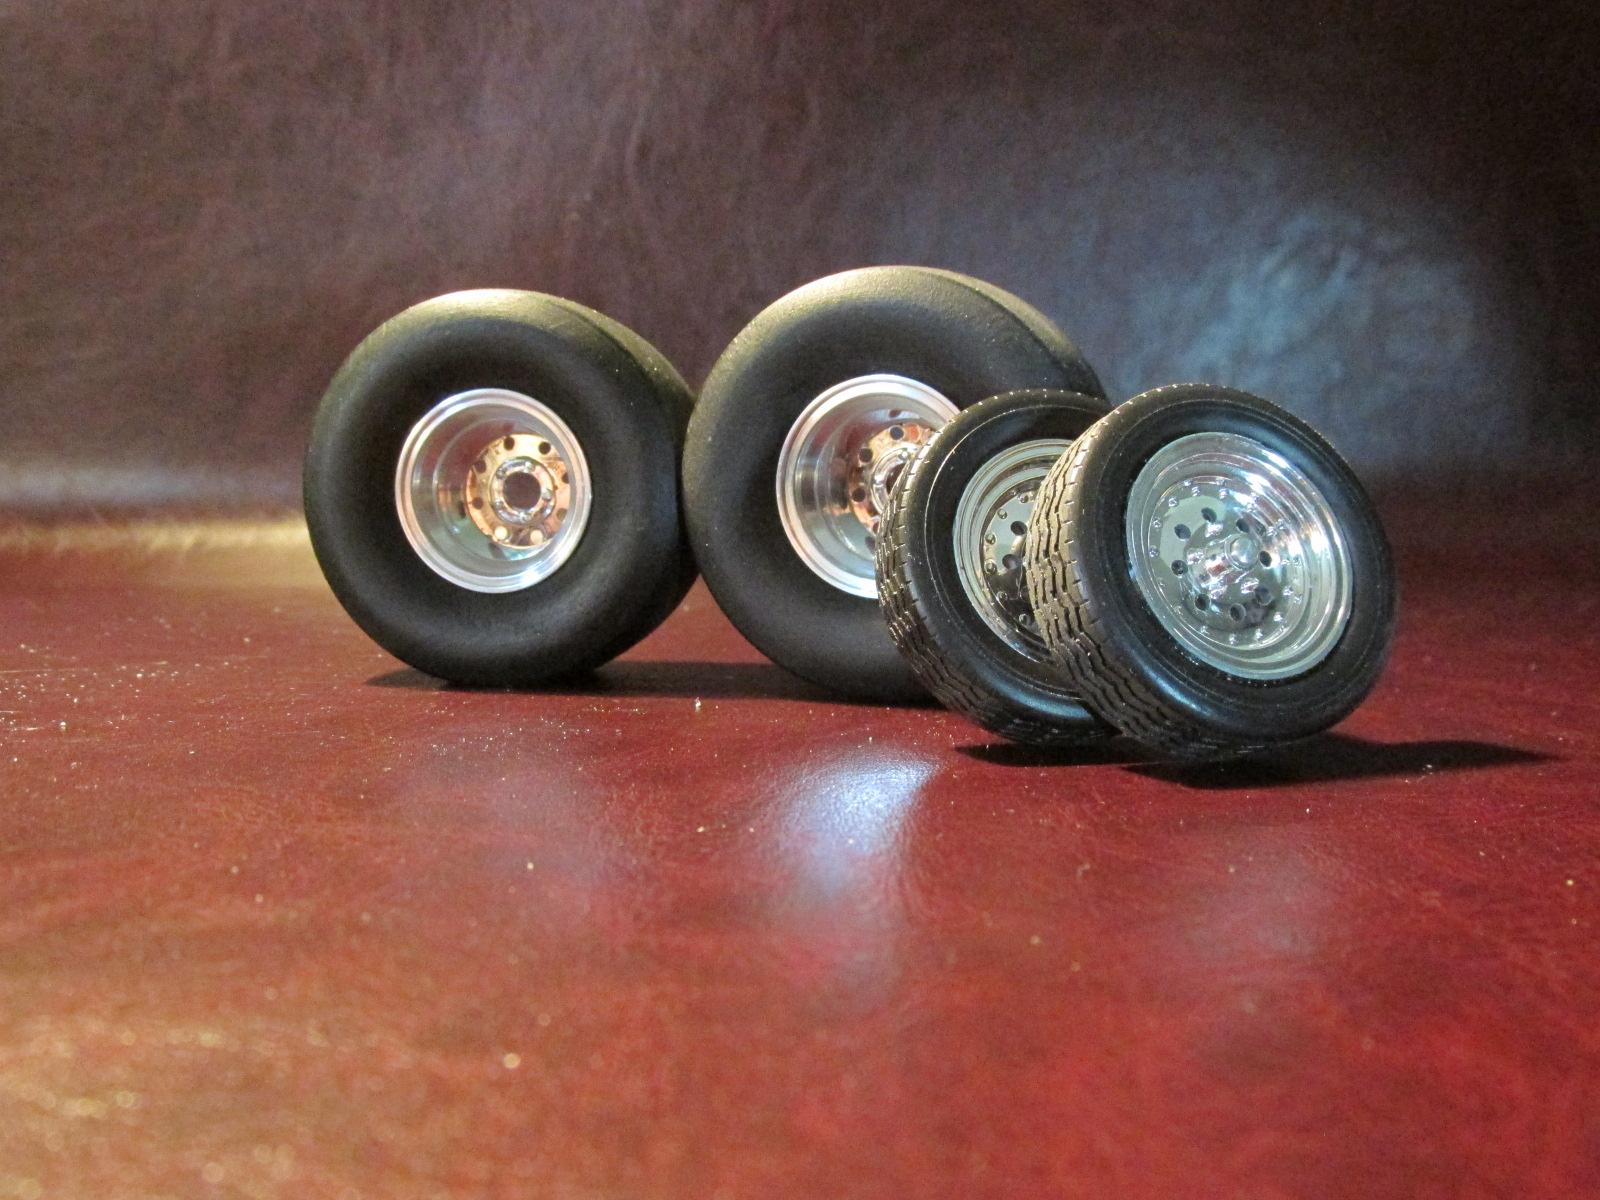
Just a quick addition fuel tank with side detail and partially plumbed, have to add a vent and the weld beads but that will be just before the final metallizer coat as they get hidden by paint very easily and the tank will be handled quite a bit yet, with additional fabrication for the retaining strap different filler cap and fuel system plumbing


.JPG.3ff2e9f49f3ad7a6eeecf491998b0ad5.JPG)


.JPG.58010c0227ba273d61136f3e46fdb4e1.JPG)
.JPG.3610066ea900cf178b4f99f974857ae2.JPG)


.JPG.ef8420f788420f61143ebfcfeb10da3a.JPG)


.JPG.9e34bfe0a4815106cfcbe4b8f27d6042.JPG)
.JPG.1a6edd8df129314efacbf0d45ffb5331.JPG)
.JPG.7e1f88e116471b37f4b2d4b7c4c8a871.JPG)


