RCprofile.JPG.6b95b19b856bf00a3becd6aeaaa48f3b.JPG)
Ian McLaren
-
Posts
1,354 -
Joined
-
Last visited
Content Type
Profiles
Forums
Events
Gallery
Everything posted by Ian McLaren
-
RCprofile.thumb.JPG.1691ea753d0f0897fdc1b2510cf06775.JPG)
Dodge (Color me Gone) Promod
Ian McLaren replied to Tortuga Kustomz's topic in WIP: Drag Racing Models
This is looking great, the detailing is exceptional! Outstanding. -
1/16 SCALE A/FC NITRO FUNNY CAR
Ian McLaren replied to Ian McLaren's topic in WIP: Drag Racing Models
Thank you for the kind words Marcos and Dwayne. On a long project like this it really helps to know someone takes the time to look and comment, and coming from two modelers such as yourselves it helps even more Thank you -
1/16 SCALE A/FC NITRO FUNNY CAR
Ian McLaren replied to Ian McLaren's topic in WIP: Drag Racing Models
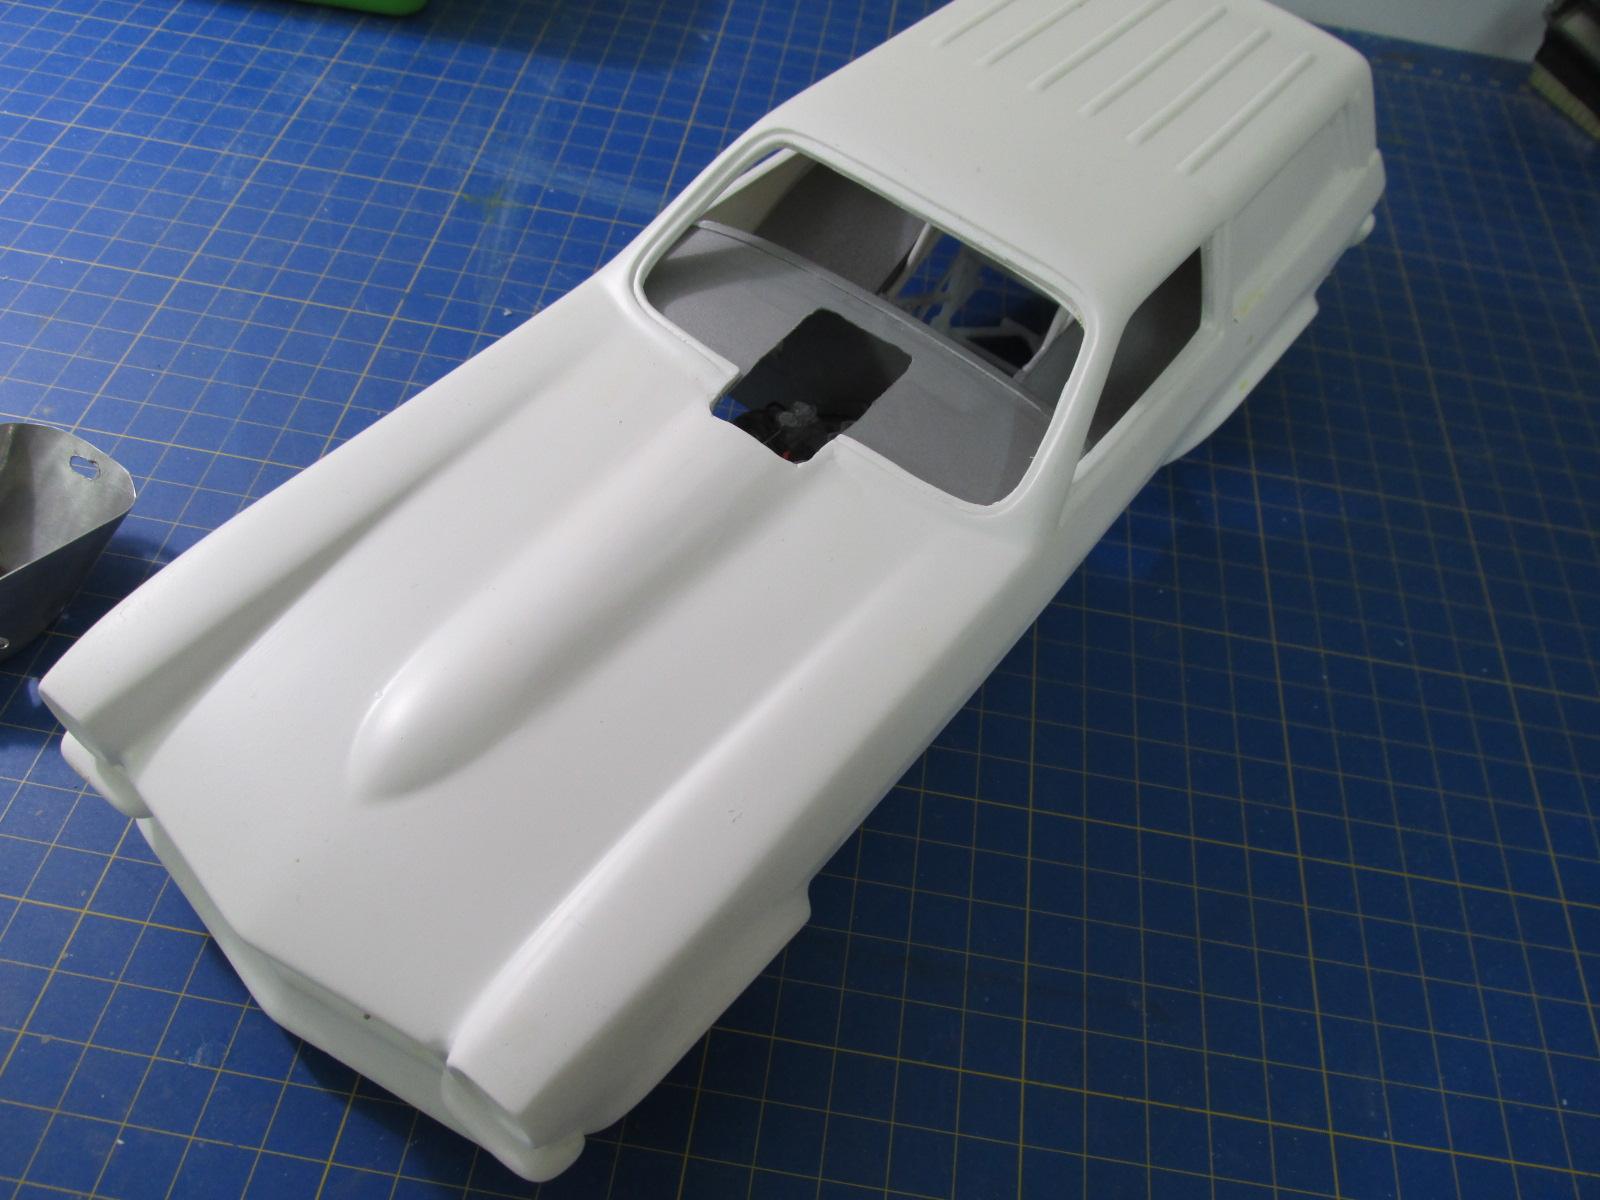
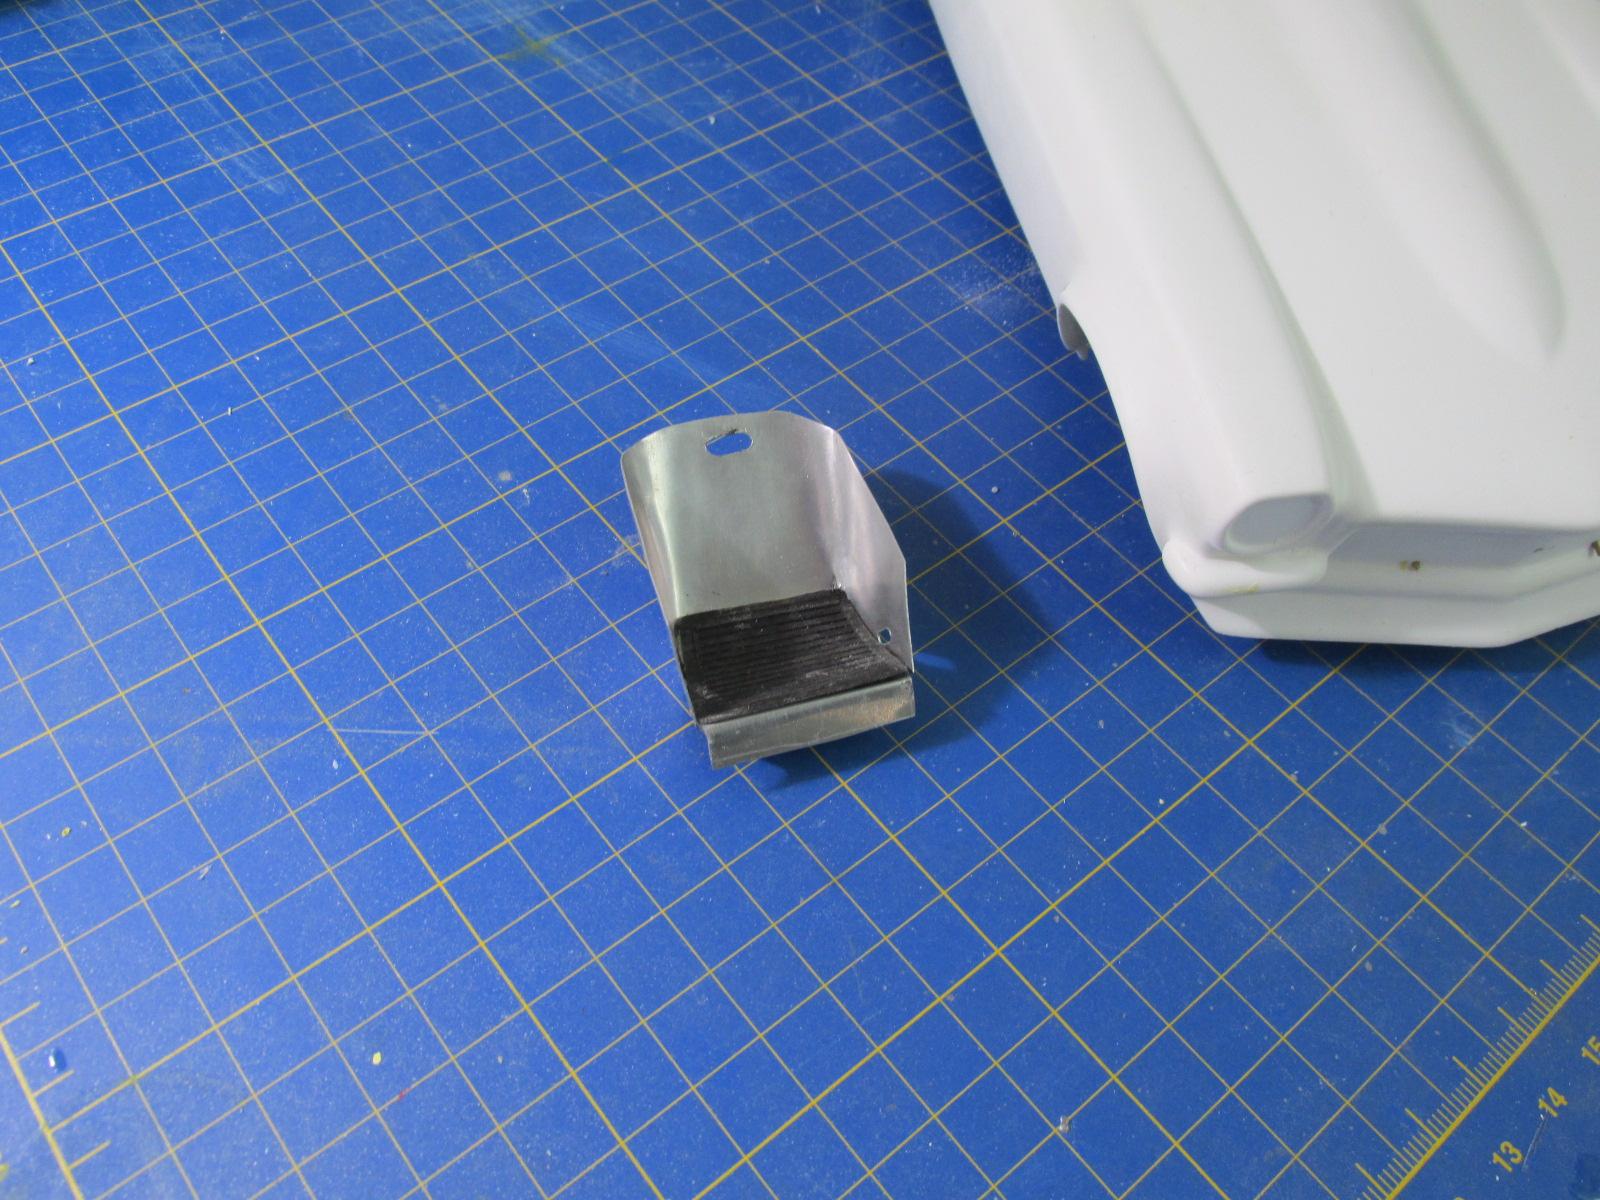
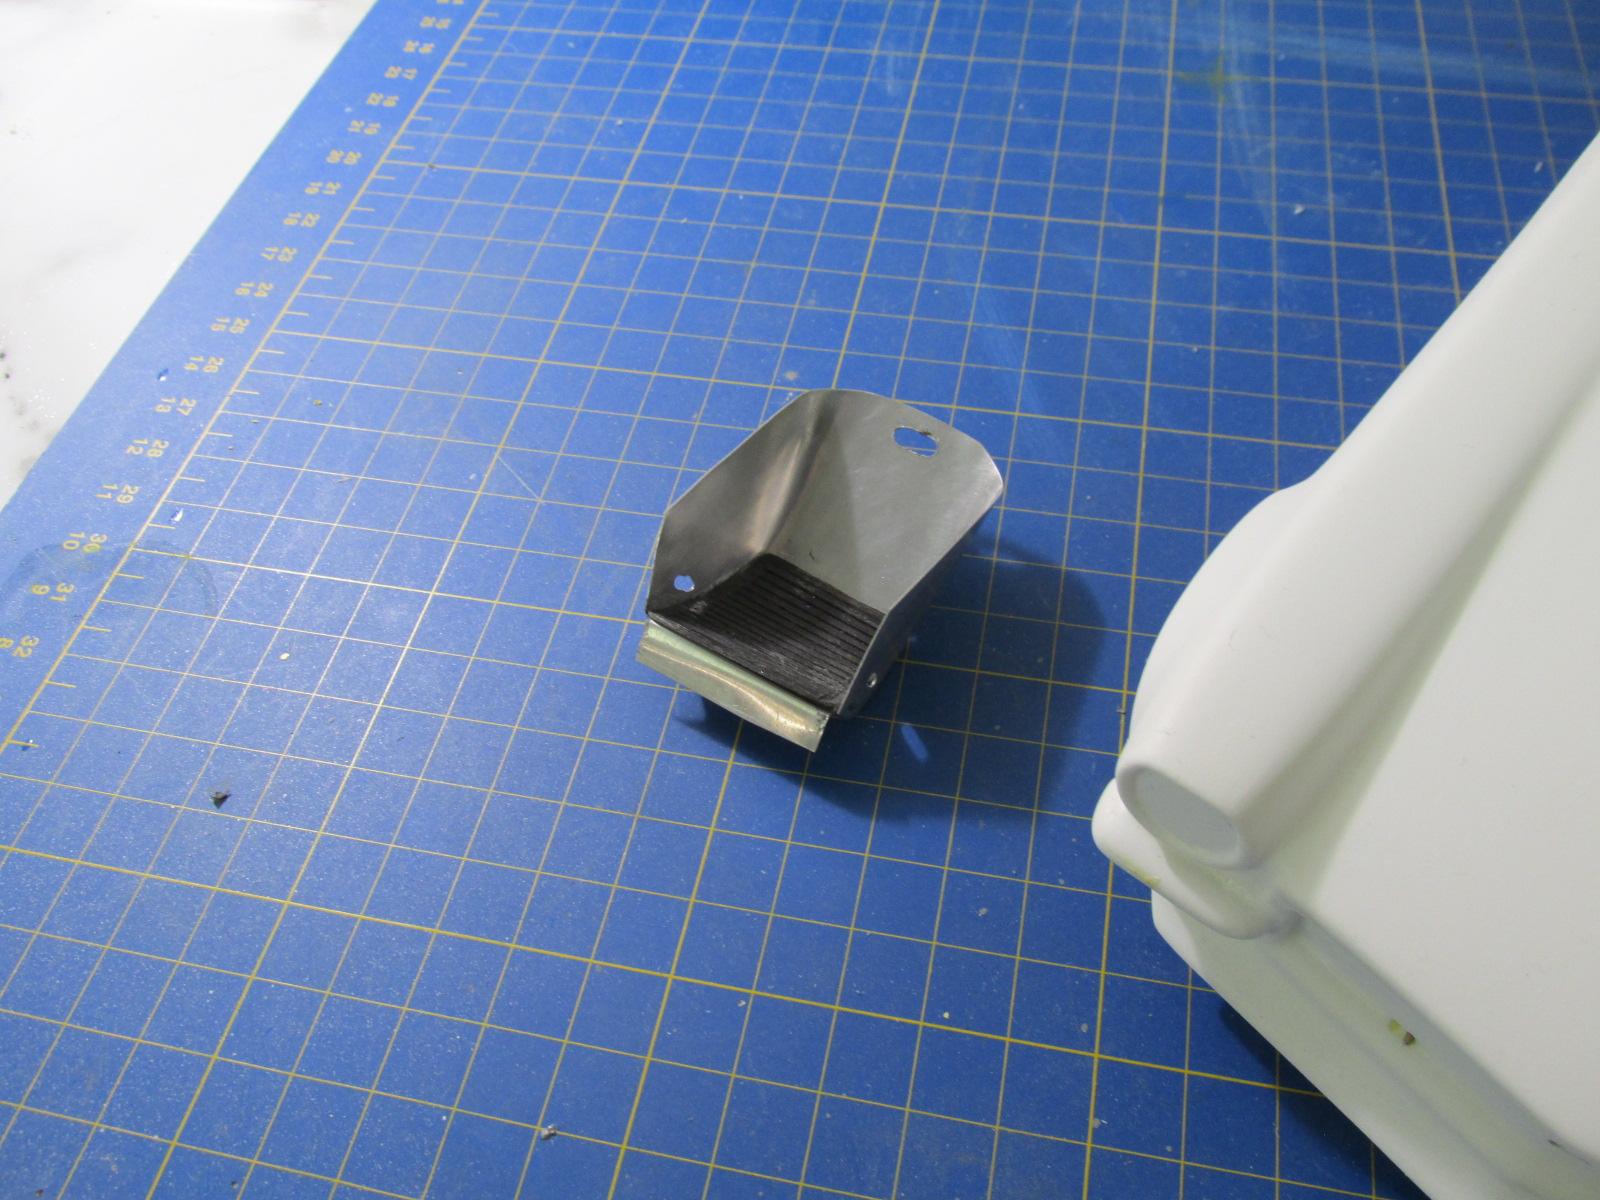
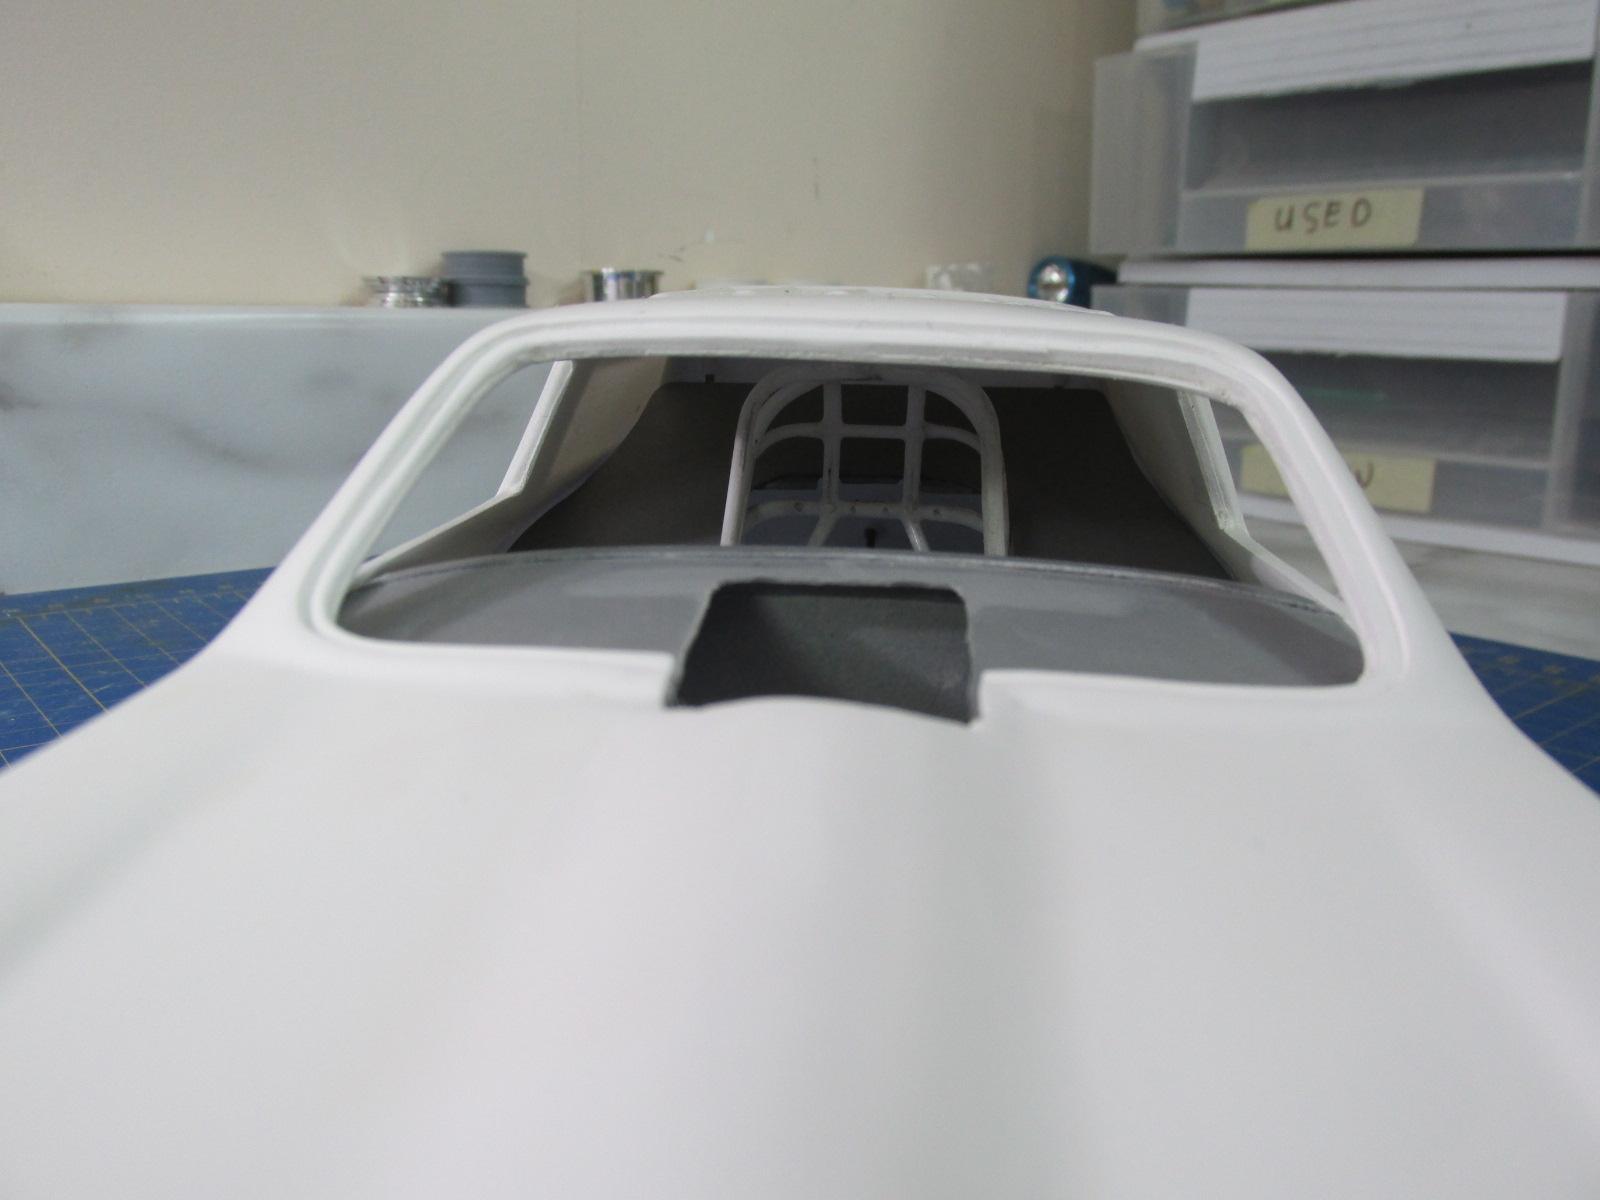
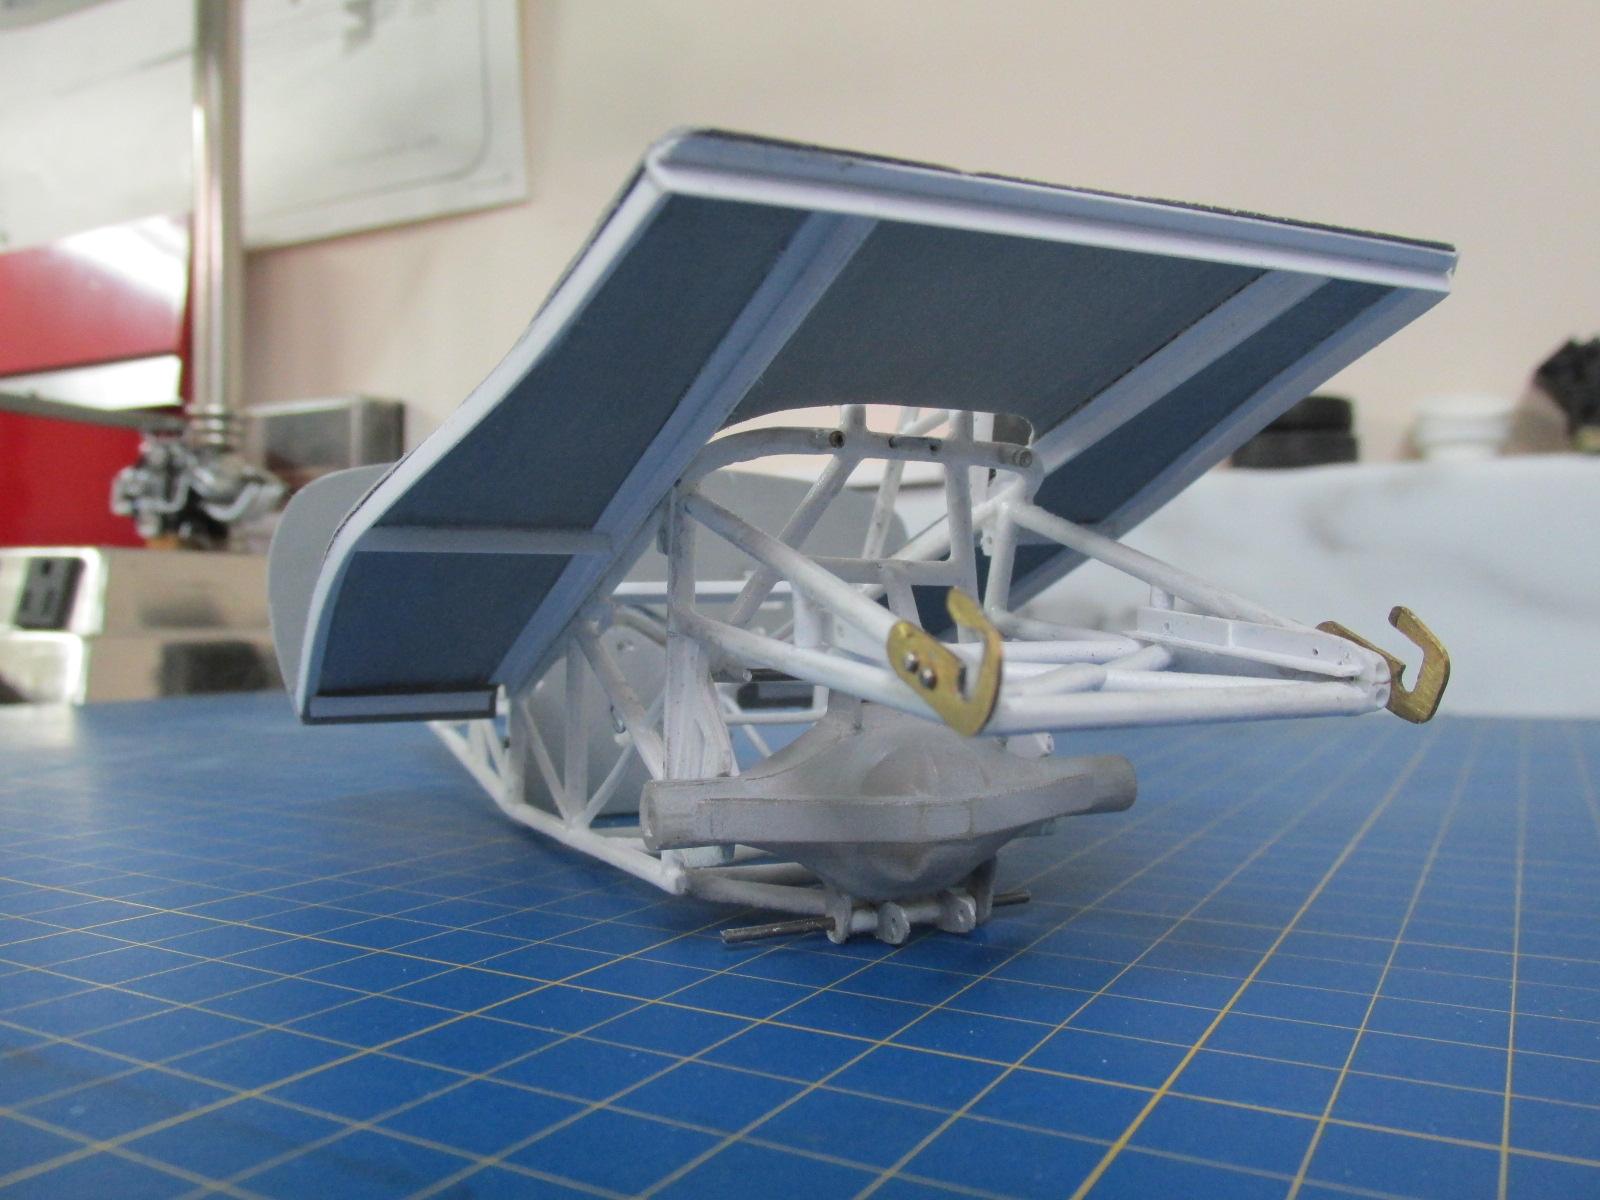
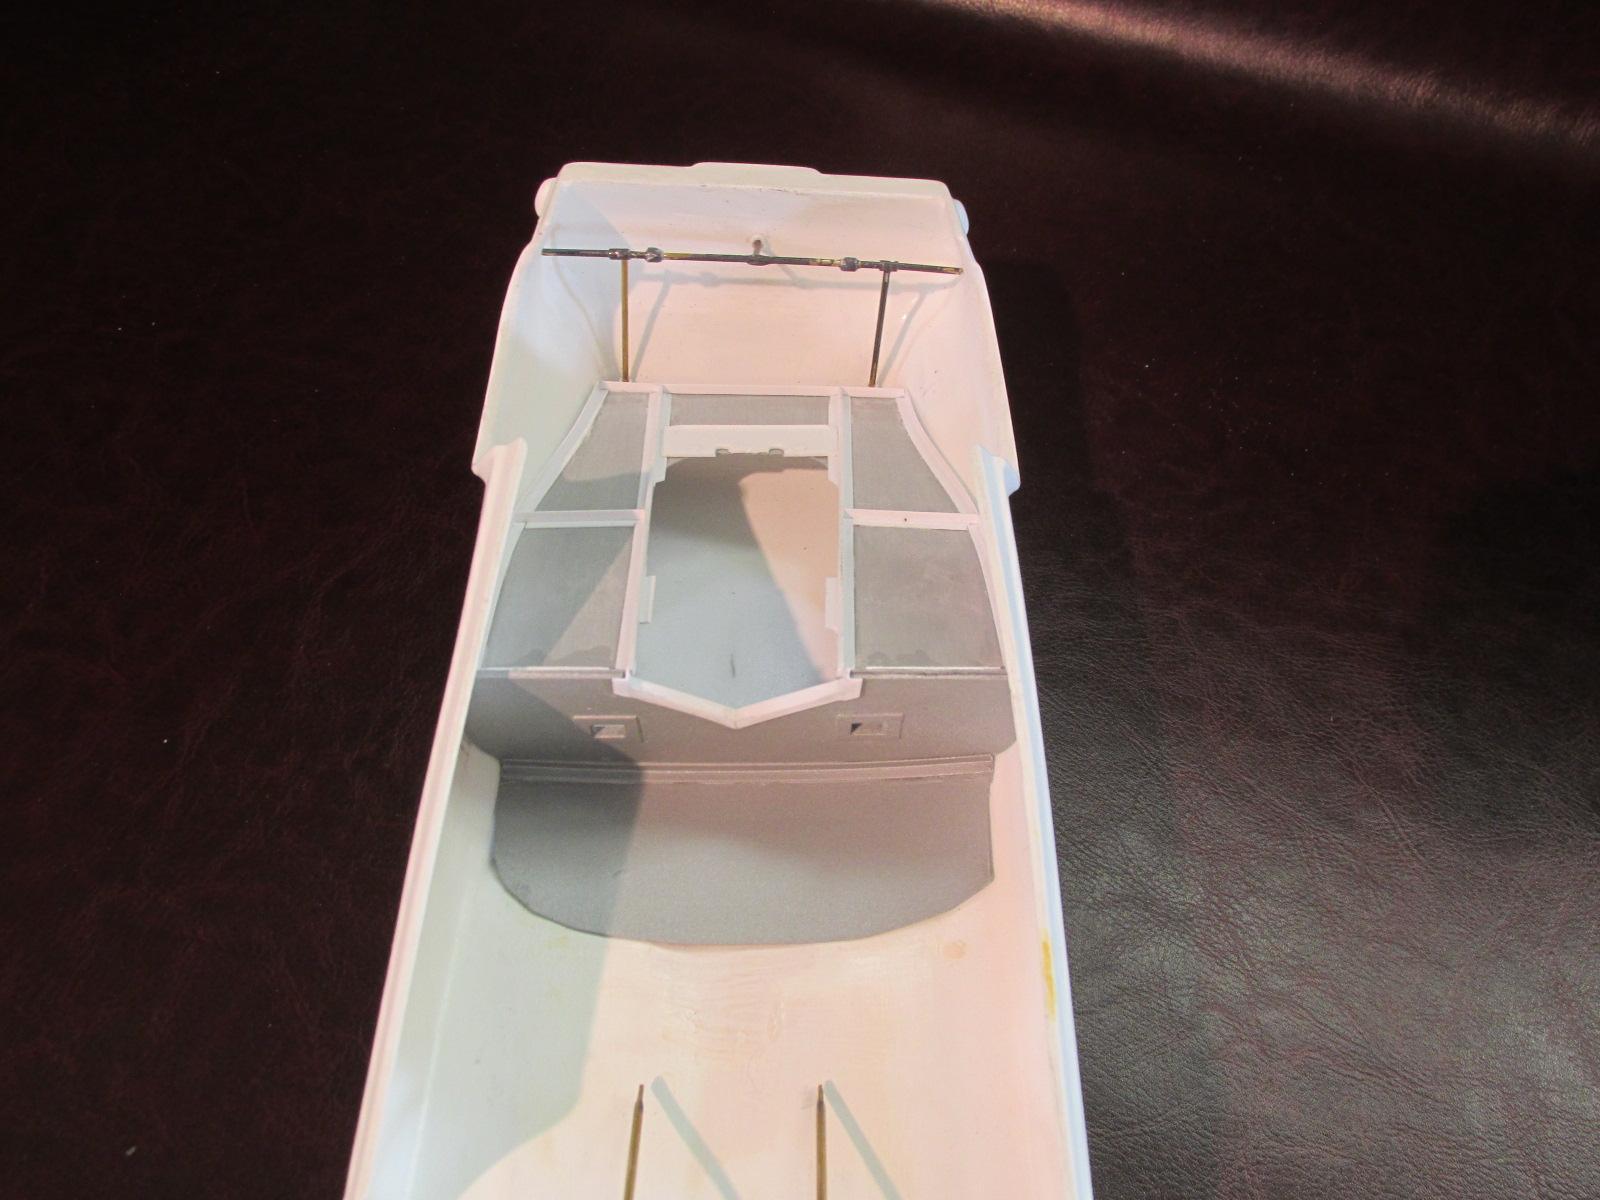
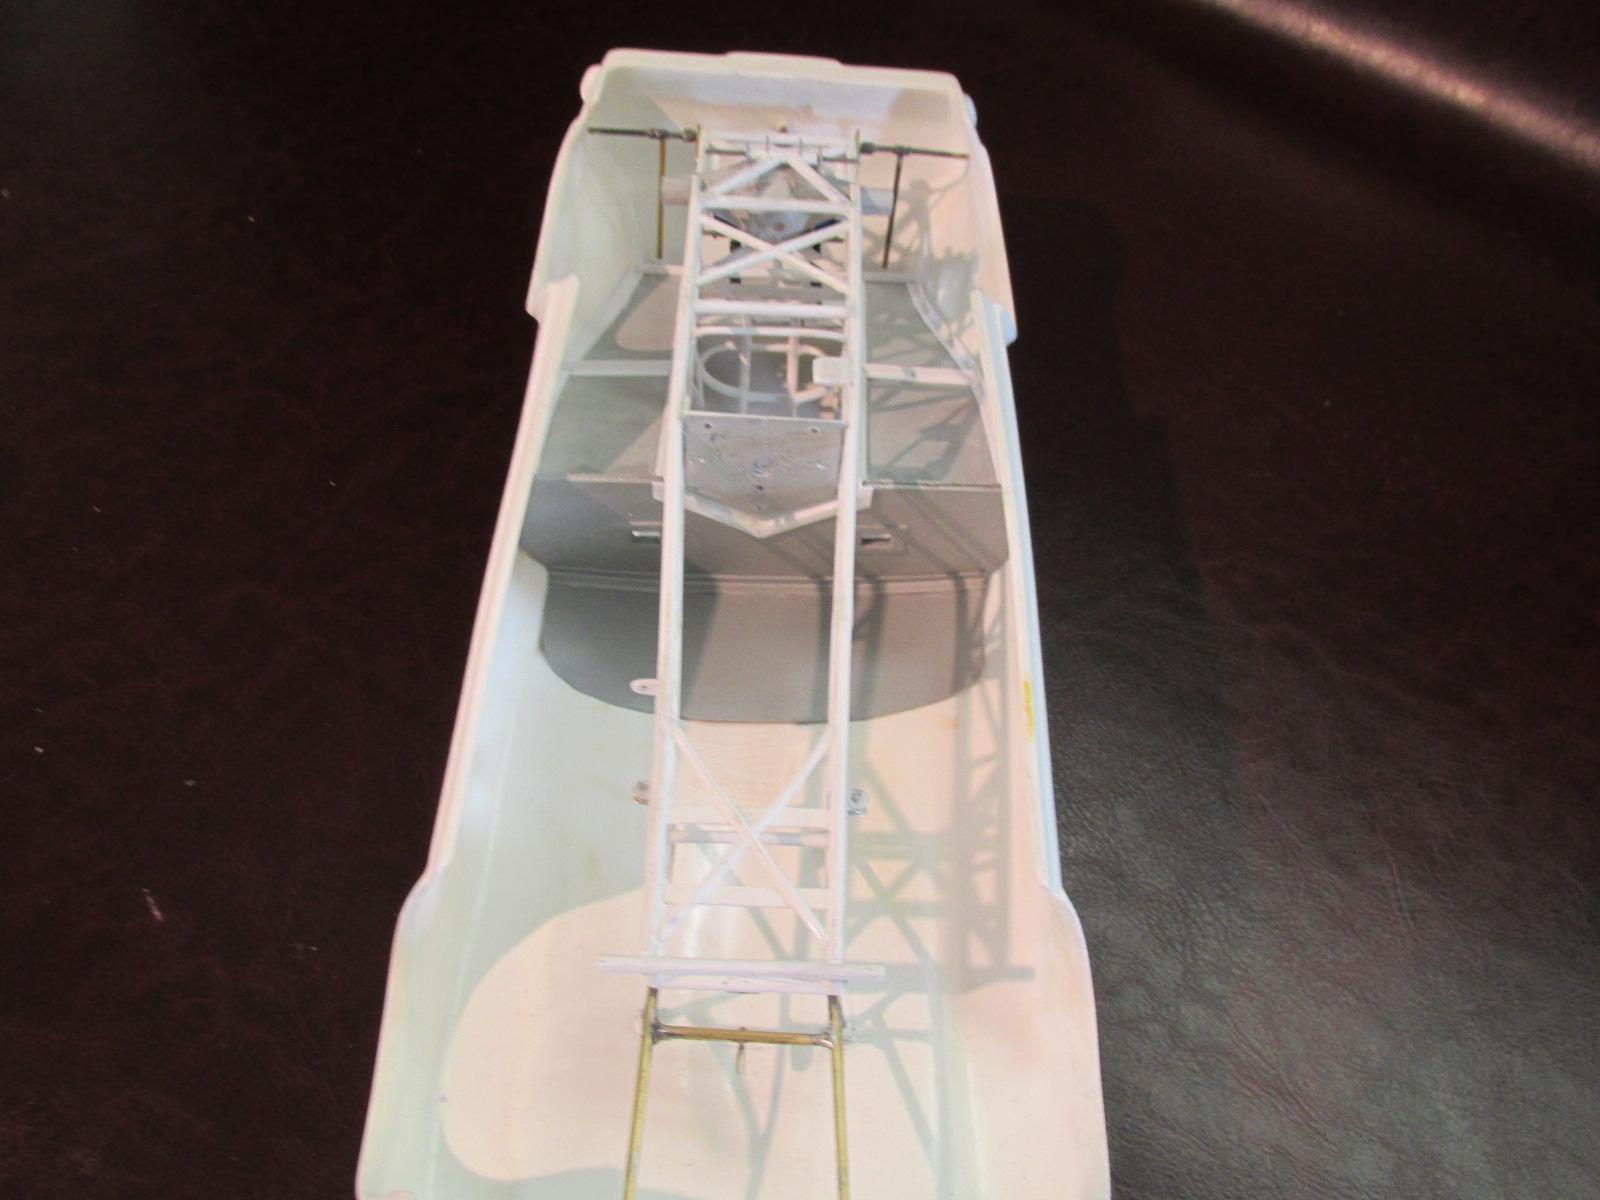
Parts being clean up and final details added Just about ready for some color.Body mods finished final finishing and color soon Aluminum seat roughed out final finishing to do before primer and paintSeat cushion ready for installation Upper dash area installed and cut to fit body side braces to be built and installed
-
Dyno Don Maverick-1 Year Project-Finished!!
Ian McLaren replied to mustang1989's topic in Drag Racing
WOW I don't know how I missed this one, great model and the details are spot on. Well done Joe! -
Vintage Top Fuel FEDs, 1:16 brass chassis
Ian McLaren replied to Mike Williams's topic in WIP: Drag Racing Models
Thank you Mike, lots of great info and perspective on this, the car I'm doing is 392 powered and the motor is quite a ways out, don't have the measurements yet, it currently is running a reverser configured as an in and out box to make it easier for Pro Idle Events. We are back dating the model as a direct drive push start configuration -
64 Dodge D100 Pickup Pro Street
Ian McLaren replied to AmericanMuscleFan's topic in WIP: Drag Racing Models
That looks great, seemingly simple but so hard to do well. -
Vintage Top Fuel FEDs, 1:16 brass chassis
Ian McLaren replied to Mike Williams's topic in WIP: Drag Racing Models
Hi Mike I've just been commissioned to replicate a 215 inch Don Long car. I'm not where I need to be to try a brass chassis so I'm starting with Prudhomme's Wynns Winder 1/16 kit, I will be using some brass because some of his brace tubes are too small to use abs. (.048 on the real car) The one area that has me concerned are the headers. Is there a specific angle to shoot for when bending the tubes, with funny car headers there are variants introduced by the depth and width of the body. -
1/16 SCALE A/FC NITRO FUNNY CAR
Ian McLaren replied to Ian McLaren's topic in WIP: Drag Racing Models
Thank you Michael -
1/16 SCALE A/FC NITRO FUNNY CAR
Ian McLaren replied to Ian McLaren's topic in WIP: Drag Racing Models
Thanks Mike Fancy running into you here. I'll be checking out you posts here -
1/16 SCALE A/FC NITRO FUNNY CAR
Ian McLaren replied to Ian McLaren's topic in WIP: Drag Racing Models
Thank you It has been a lot of work. -
1/16 SCALE A/FC NITRO FUNNY CAR
Ian McLaren replied to Ian McLaren's topic in WIP: Drag Racing Models
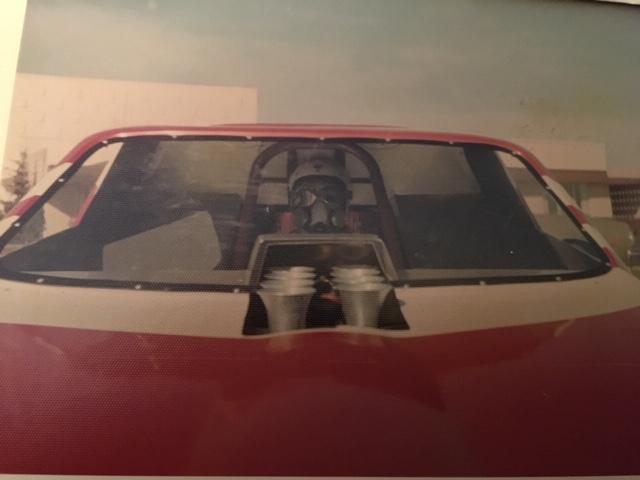
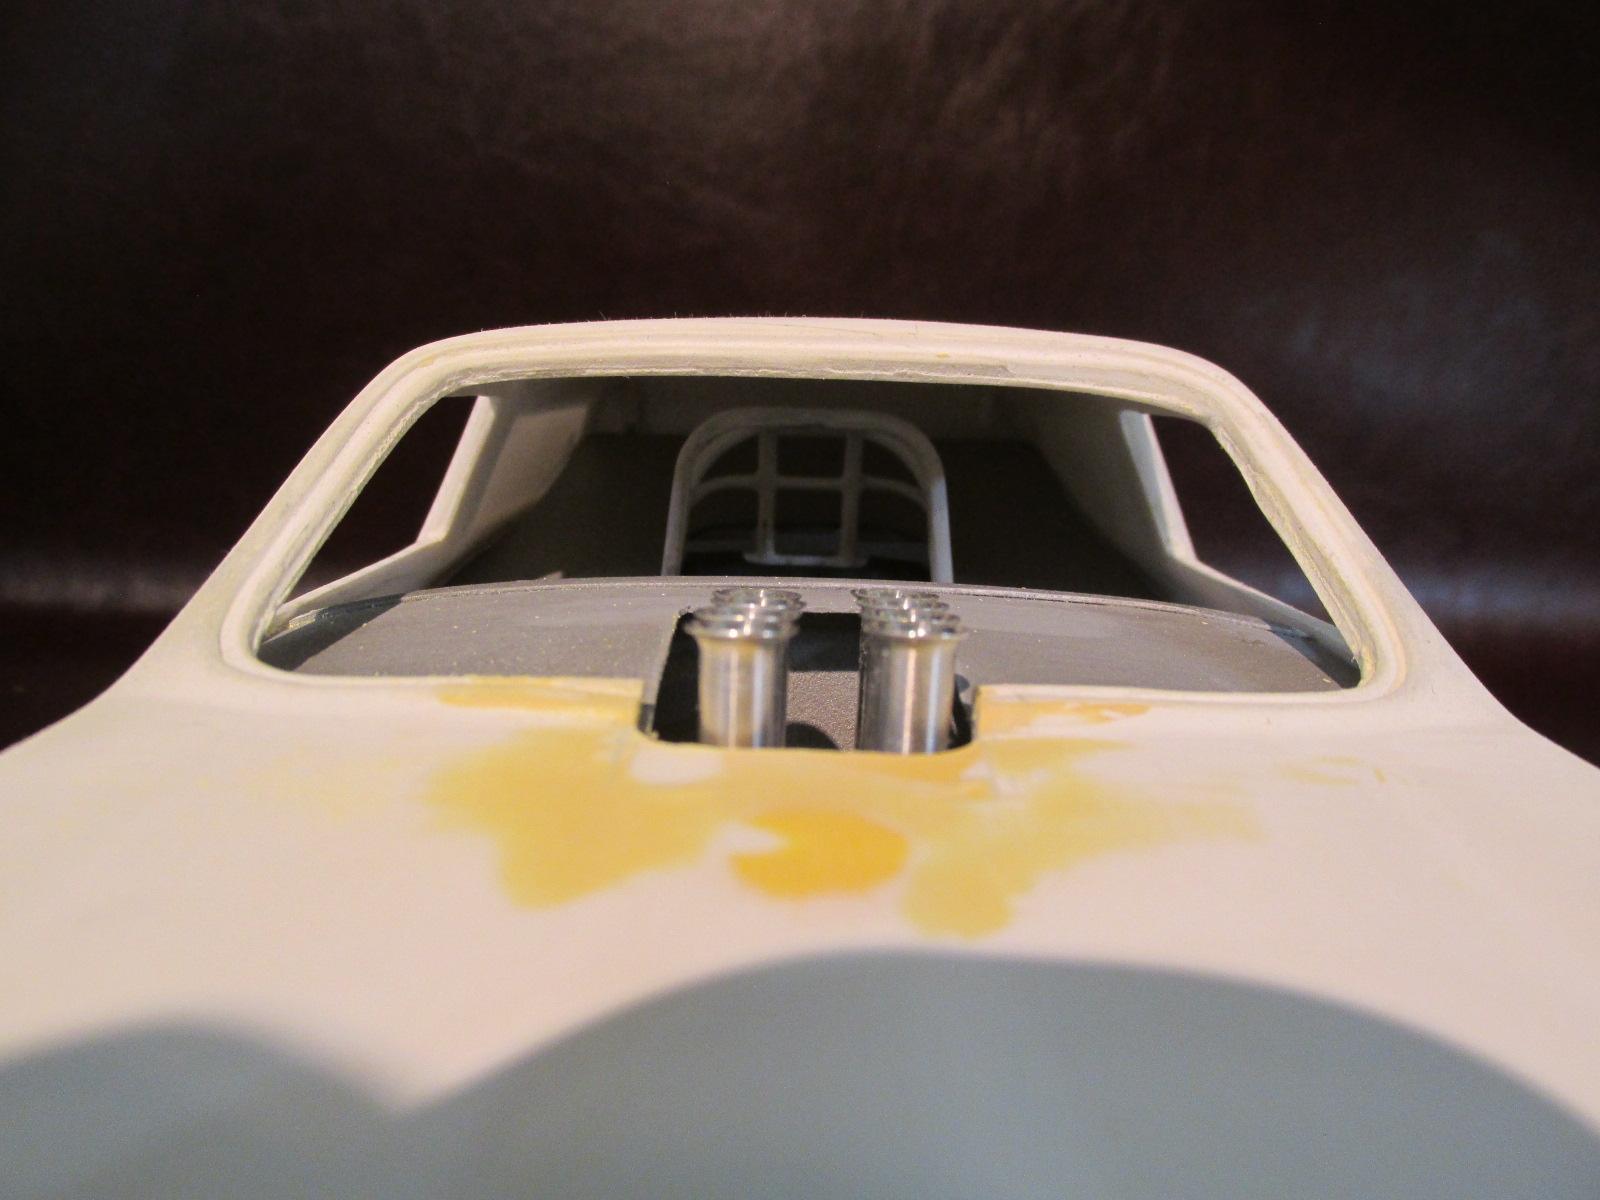
This is how the real car looked, Test fit of injector, stacks have not been fully secured or aligned but the body is too flat in this area, corrected body contour
-
1/16 SCALE A/FC NITRO FUNNY CAR
Ian McLaren replied to Ian McLaren's topic in WIP: Drag Racing Models
Thankyou Brad, the weird shape of the panel body in the rear does make thus on especially challenging. -
Vintage Top Fuel FEDs, 1:16 brass chassis
Ian McLaren replied to Mike Williams's topic in WIP: Drag Racing Models
Superb workmanship throughout Mike -
Tamiya McLaren MP4/6 build
Ian McLaren replied to Josie's topic in WIP: Other Racing: Road Racing, Land Speed Racers
Great job! I've been building one of these for so long I have three different sets of detail parts from perfect parts on up. I'm impressed with your progress and quality. -
March 707 Can Am
Ian McLaren replied to Dave B's topic in WIP: Other Racing: Road Racing, Land Speed Racers
Looks good! Nicely done -
Tamiya 1/12 Ferrari 312b
Ian McLaren replied to IanH's topic in WIP: Other Racing: Road Racing, Land Speed Racers
Well done, this is going to be a great model, I have a 1/12th MP 4/6 in progress but I have been seduced by the dark side "drag racing" Hope to get back to it soon. -
Very cool, you don't see a lot of injected 409s. Dual quads and white paint will be next level, well done.
-
Dodge (Color me Gone) Promod
Ian McLaren replied to Tortuga Kustomz's topic in WIP: Drag Racing Models
I had a similar problem my wife is super sensitive to any type of paint other than water based acrylics. I finally fell off my wallet and build a spray booth out on one sheet of MDF and a bathroom fan 150 CFM. Changed my life cut out a blank to go into the tracks of a sliding window and attached the exhaust hose to that Got fancy and added a furnace filter to the system Net result out of pocket $195,00 CAN, spray anytime I want to, wife HAPPY, so I'm happy, can spray small pieces without worry and the paint Jobs are better With the filter zero overstay on the exhaust fan. This has helped my modeling more than any other cash outlay, and our home life is much better. My recommendation build one ,buy one , or borrow one it's a no lose deal! -
1/16 SCALE A/FC NITRO FUNNY CAR
Ian McLaren replied to Ian McLaren's topic in WIP: Drag Racing Models
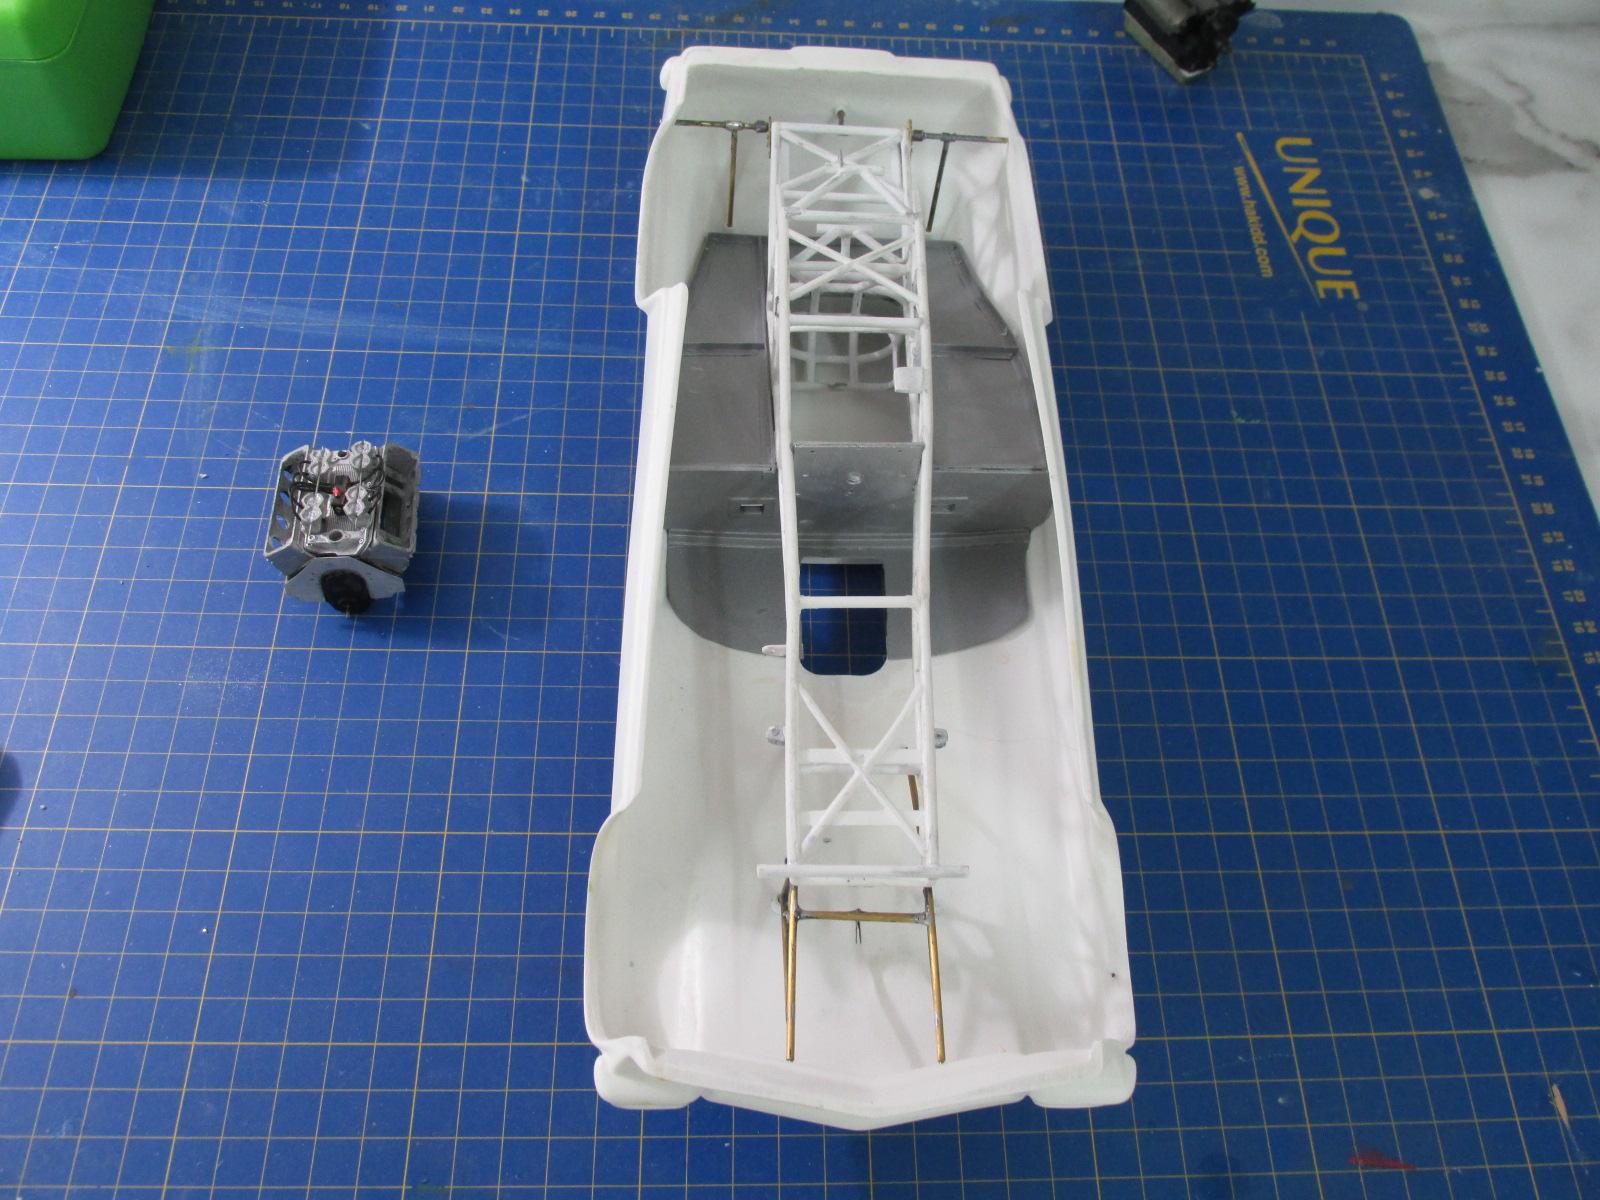
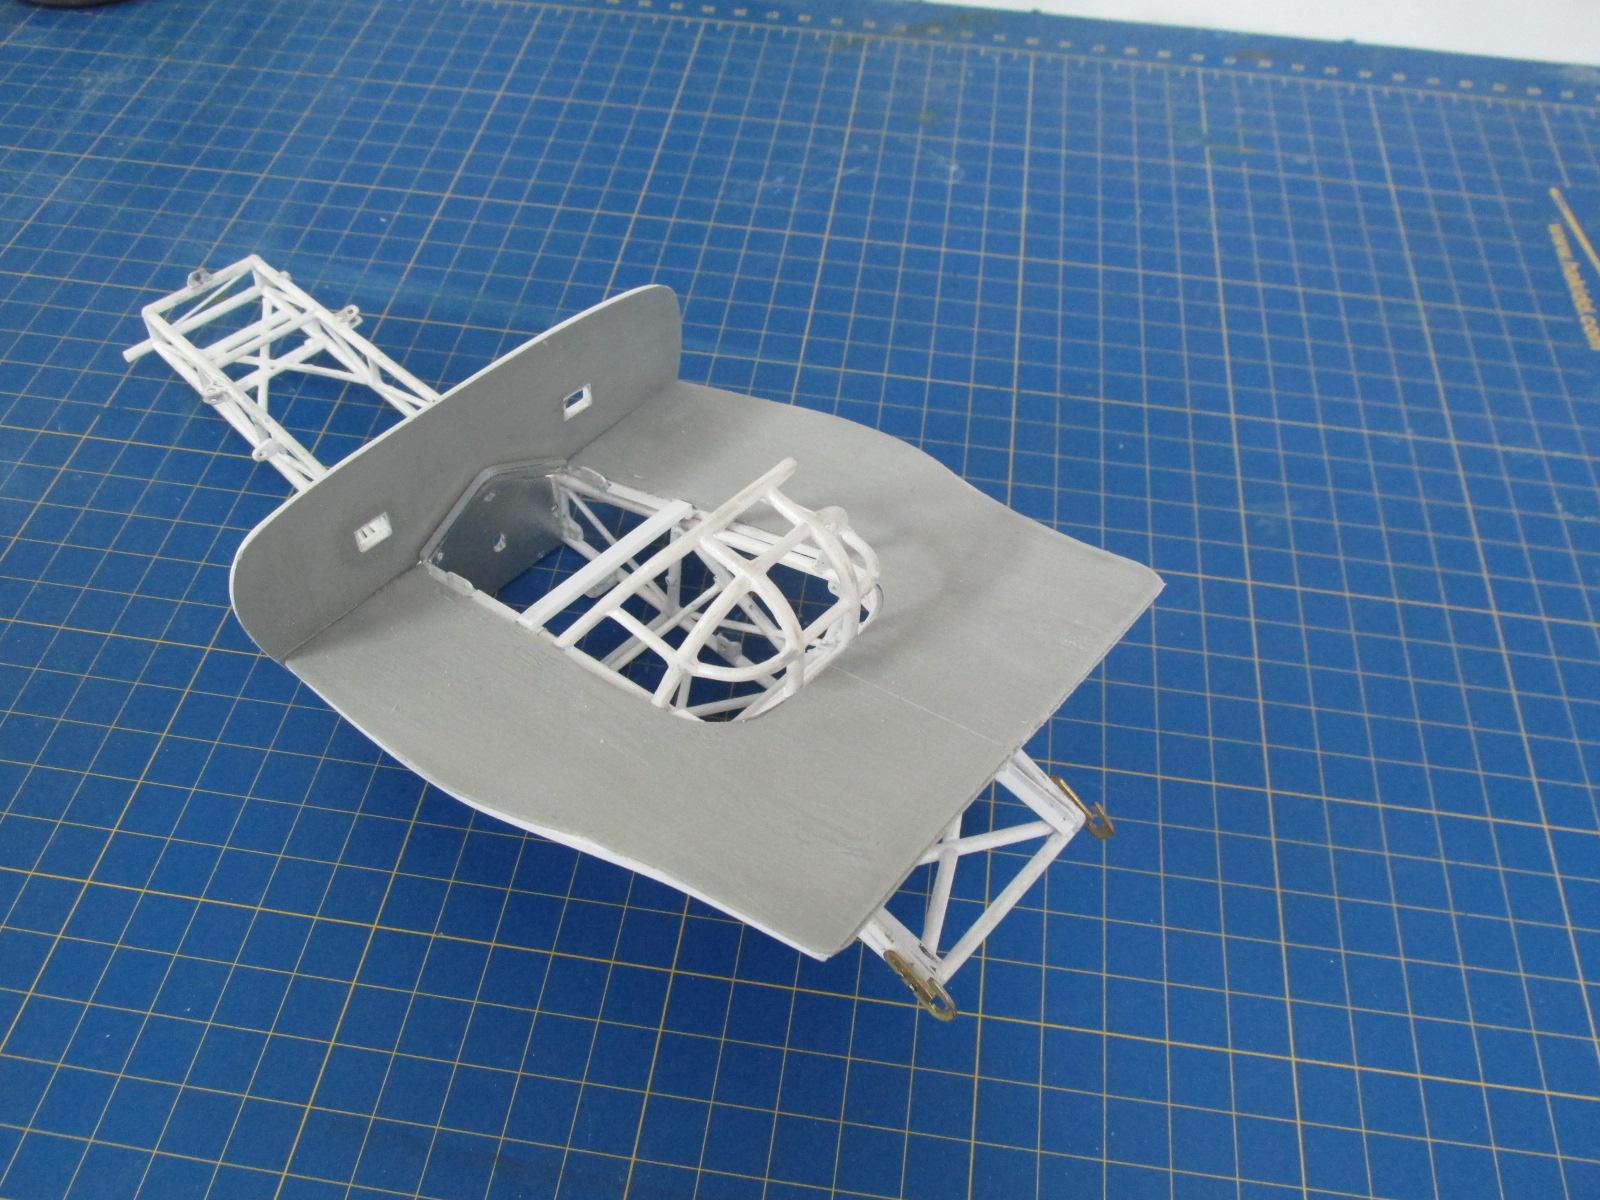
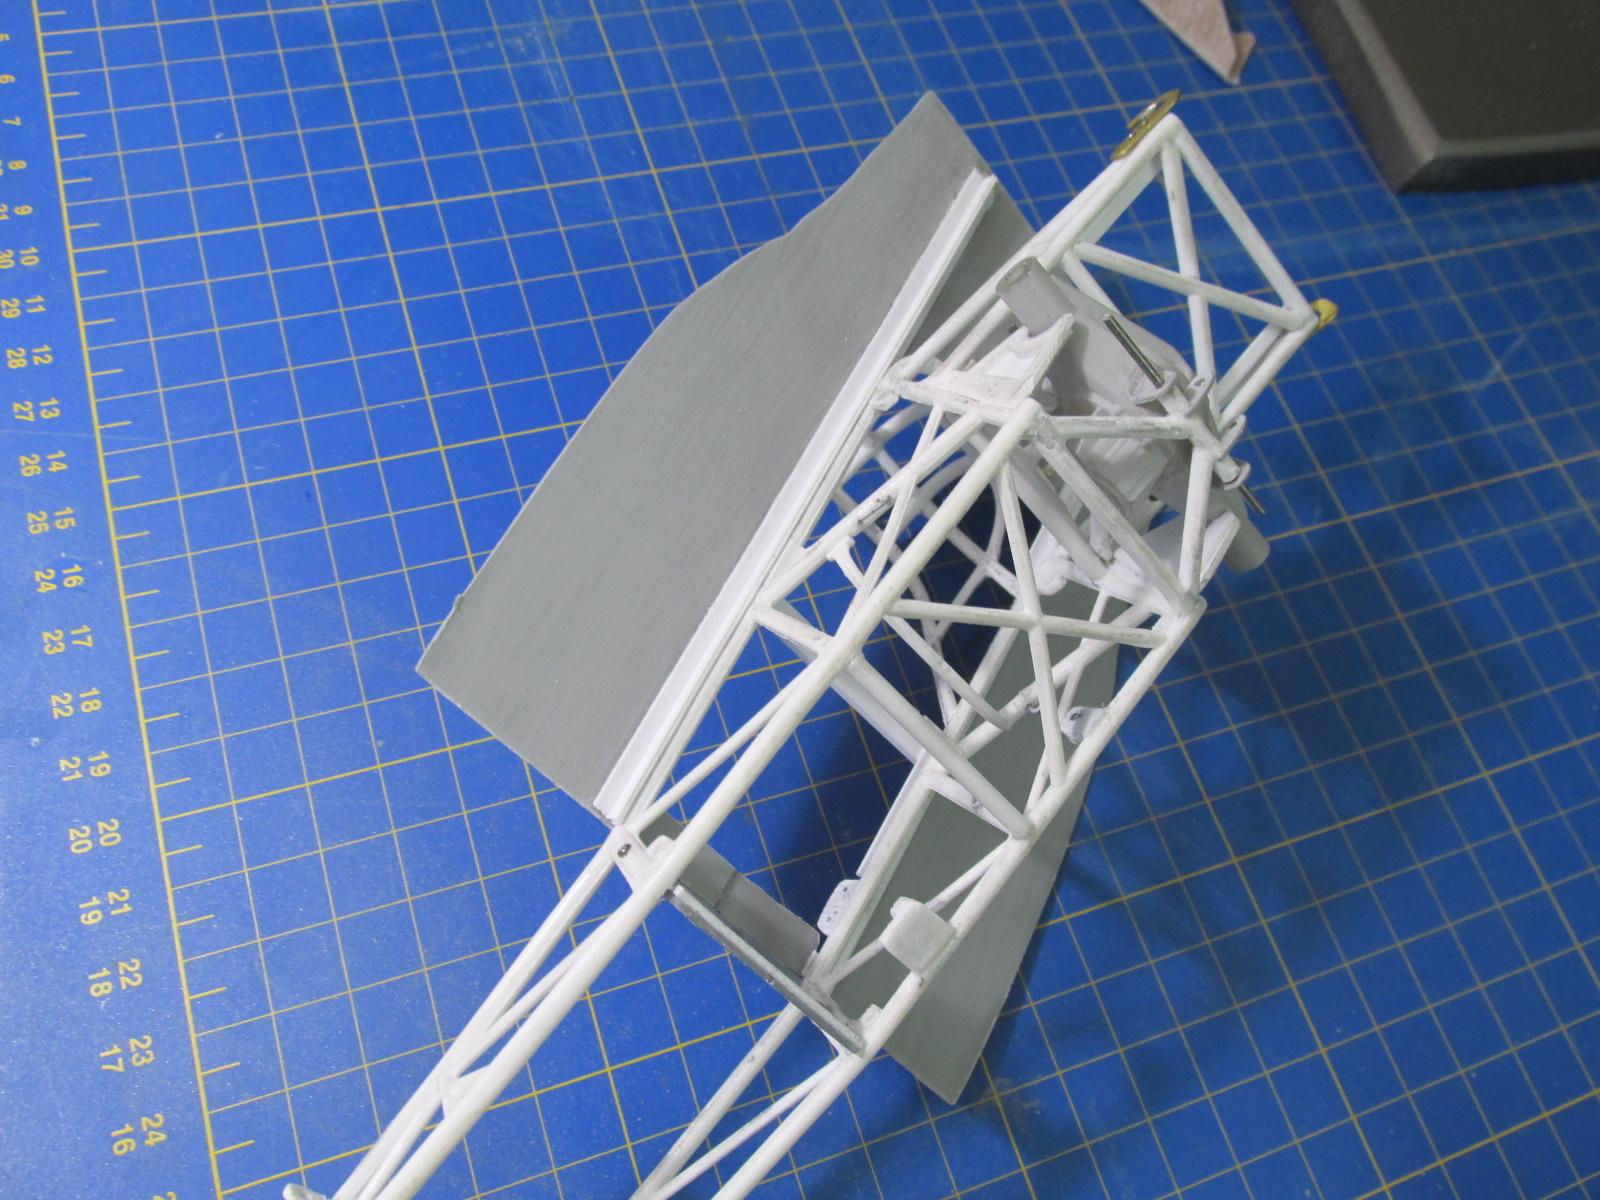
Firewall with fire windows cut out and framed, Upper tin framework and outer support structure added, tin and firewall test fitting body, tin, and chassis assembled for the first time Front and rear structures and fire wall all touching equally, the assemble is centered and straight. Success!
-
1/16 SCALE A/FC NITRO FUNNY CAR
Ian McLaren replied to Ian McLaren's topic in WIP: Drag Racing Models
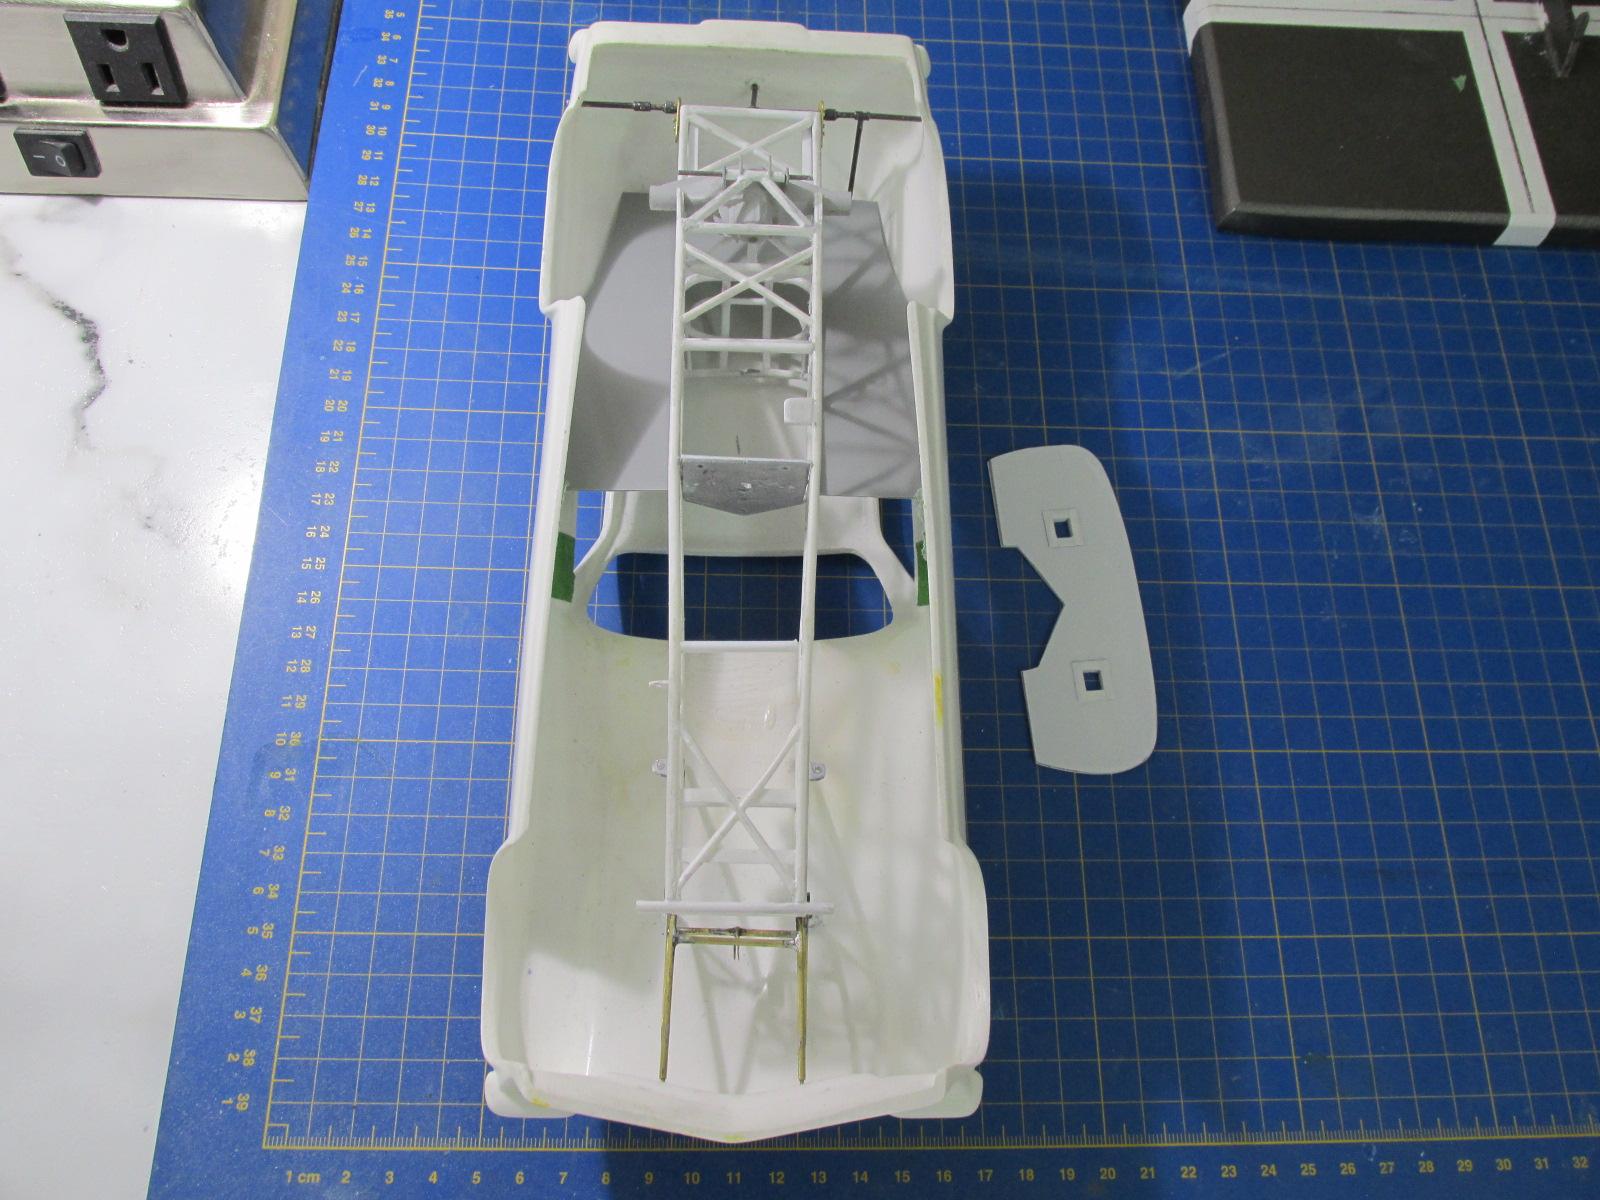
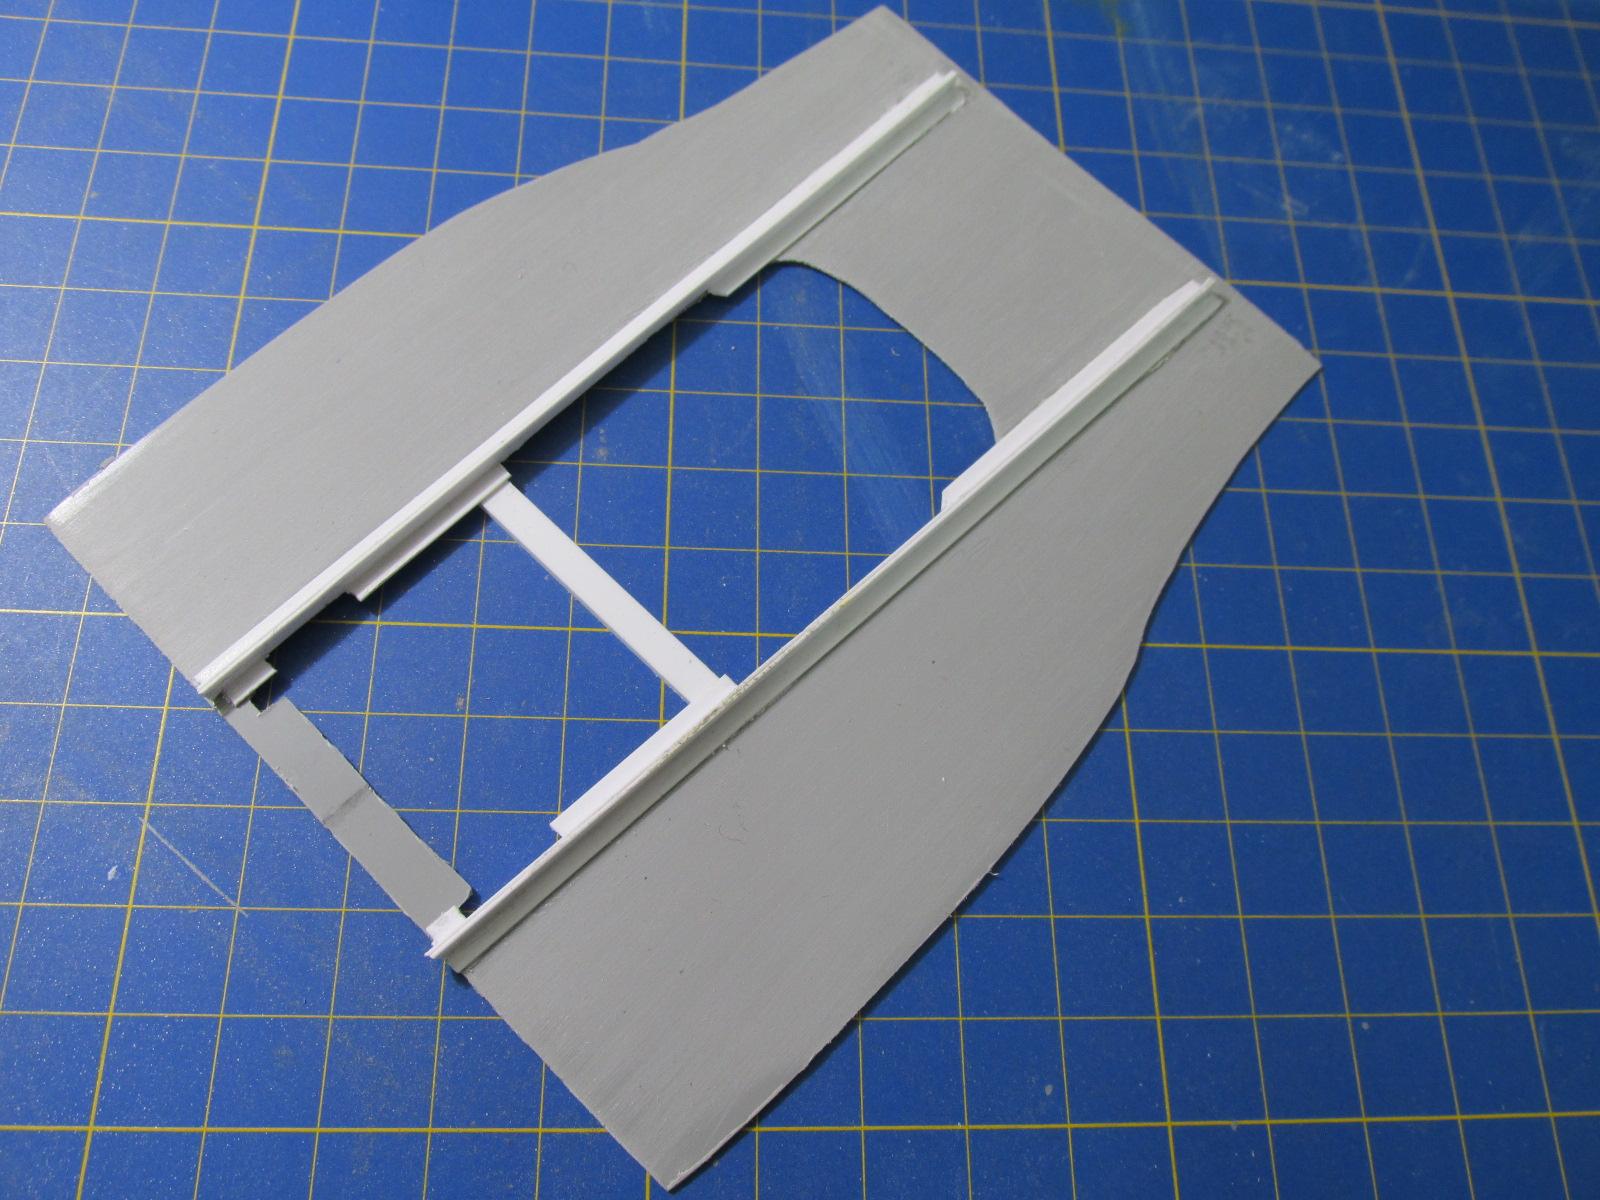
Shaping upper tin panel to inner body contours, Side rails only fitted and checking alignment with the chassis, Fitting process chassis to upper tin panel
-
BB/FC was a NHRA class back in the 70s it was part of a class call Pro Comp which pitted Dragsters, Funny cars and Altereds against one another. Dragsters and funnycar were further broken down into injected nitro A or blown alcohol BB, Altereds were very scarce and I'm not sure if both were allowed to compete or not but I think it was just one class. Beyond that the rules consisted primarily of safety issues and not so much performance related. It was pretty much a open series that spawned a lot of greats in drag racing. Ken Veney, Dale Armstong and many more.
-
Thanks Jerry we always enjoyed racing in Saskatoon, except mid afternoon when the wind came up and threw sand all over the track LOL I was with the Pony Express Pinto and raced with these guys for three years. It was those memories that drove this project.
-
No it was a Vega, originally with the old style flat nose when it was an A/FC ( injected nitro) then Brain put on the newer style nose and switched to BB/FC. Brian Louw the owner and driver and I have been talking through most of the build so it's pretty close to the original car. I'm now in the process of building the car In 1/16 in its earlier configuration . See WIP, Drag racing, Injected A/FC
-
64 Dodge D100 Pickup Pro Street
Ian McLaren replied to AmericanMuscleFan's topic in WIP: Drag Racing Models
36132.2 miles? In a lot of parts of the country cutting up a truck with that low mileage would have a lot of angry people at your door, I wouldn't spread that around too much! -
1/16 SCALE A/FC NITRO FUNNY CAR
Ian McLaren replied to Ian McLaren's topic in WIP: Drag Racing Models
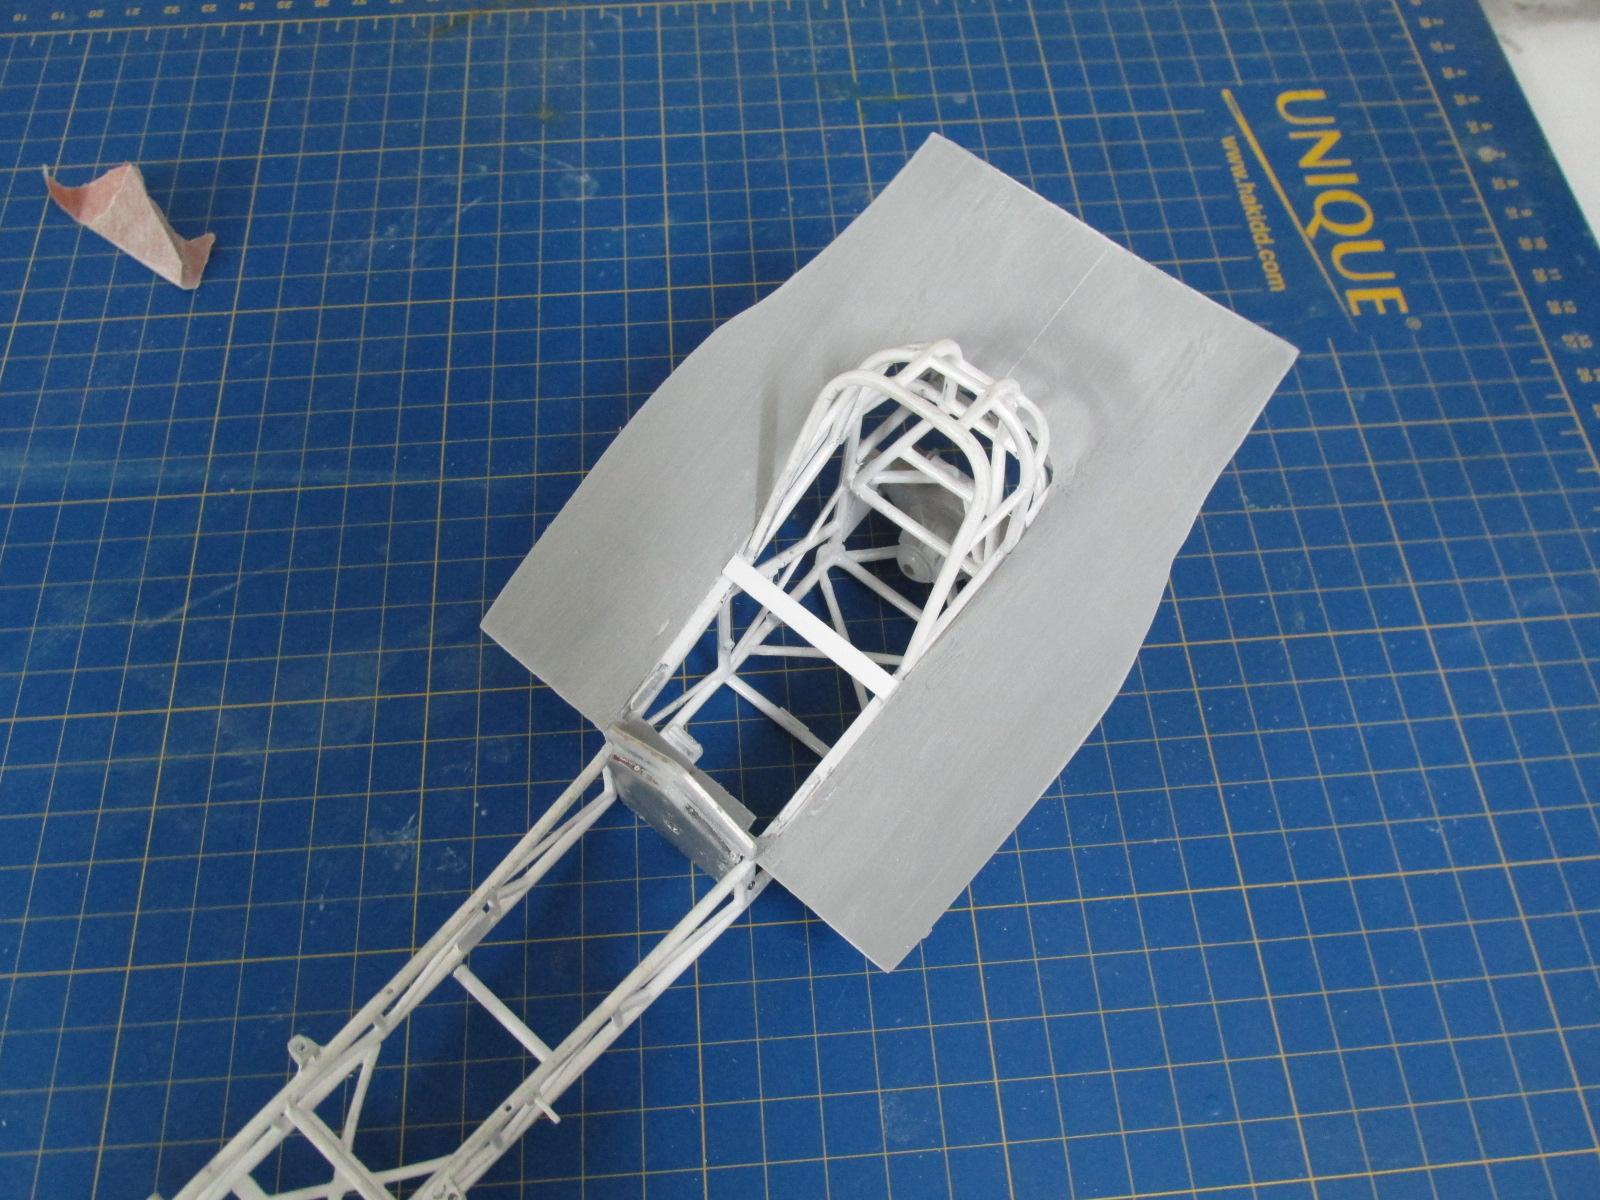
The inner tin support frame sitting on the roughed out upper tin panel lots of sanding and fitting before they can be assembled