.jpg.b9265433dc8c3b550370b1d0e4e4d2fc.jpg)
MarkJ
-
Posts
4,777 -
Joined
-
Last visited
Content Type
Profiles
Forums
Events
Gallery
Everything posted by MarkJ
-
.jpg.b9265433dc8c3b550370b1d0e4e4d2fc.thumb.jpg.915f5b46e3c9402eeaa6972073121c87.jpg)
Guess what it is.
MarkJ replied to MarkJ's topic in WIP: Other Racing: Road Racing, Land Speed Racers
Polystyrene melts at about 250 and boiling water is 212 so hopefully that will make the squarer rod soft enough to bend into a circle with some forceps without putting forceps marks in it. I will try it and see what happens. -
Guess what it is.
MarkJ replied to MarkJ's topic in WIP: Other Racing: Road Racing, Land Speed Racers
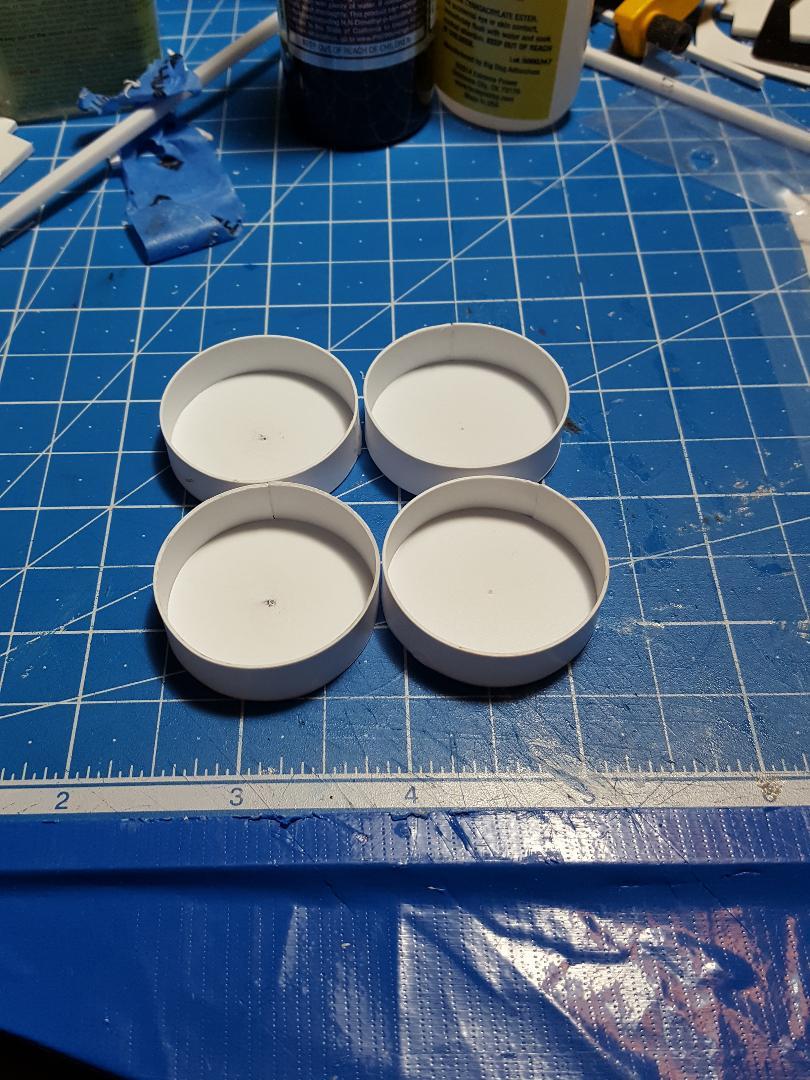
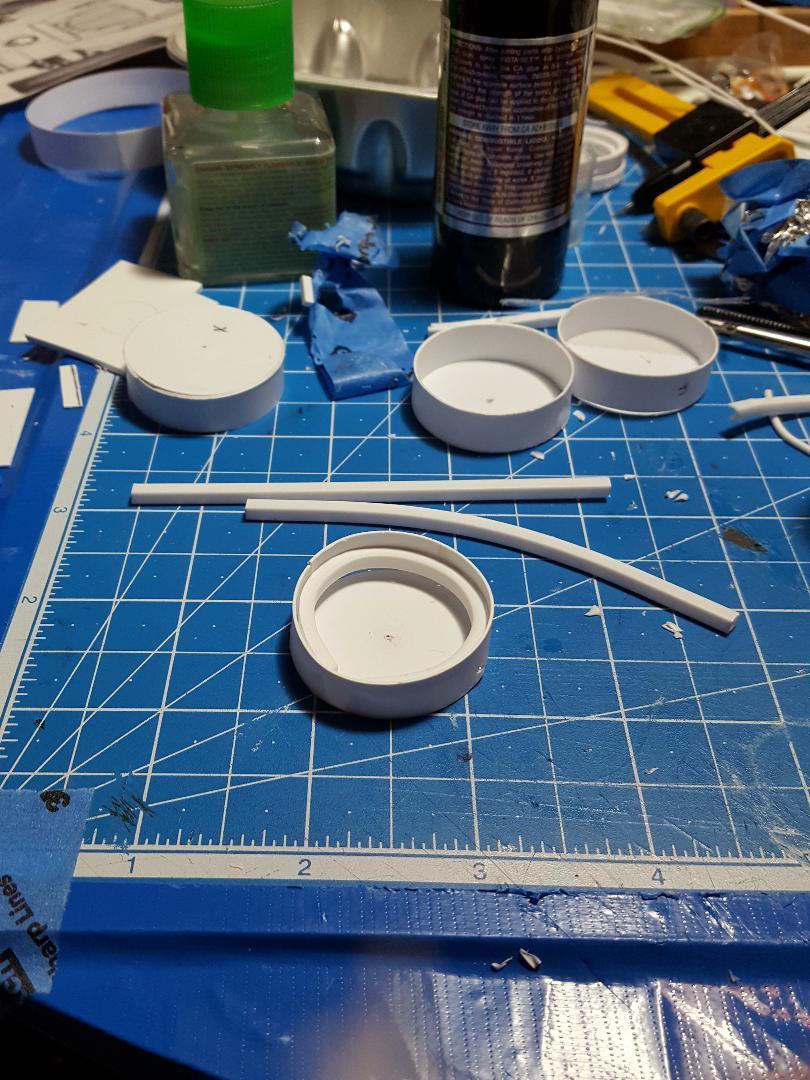
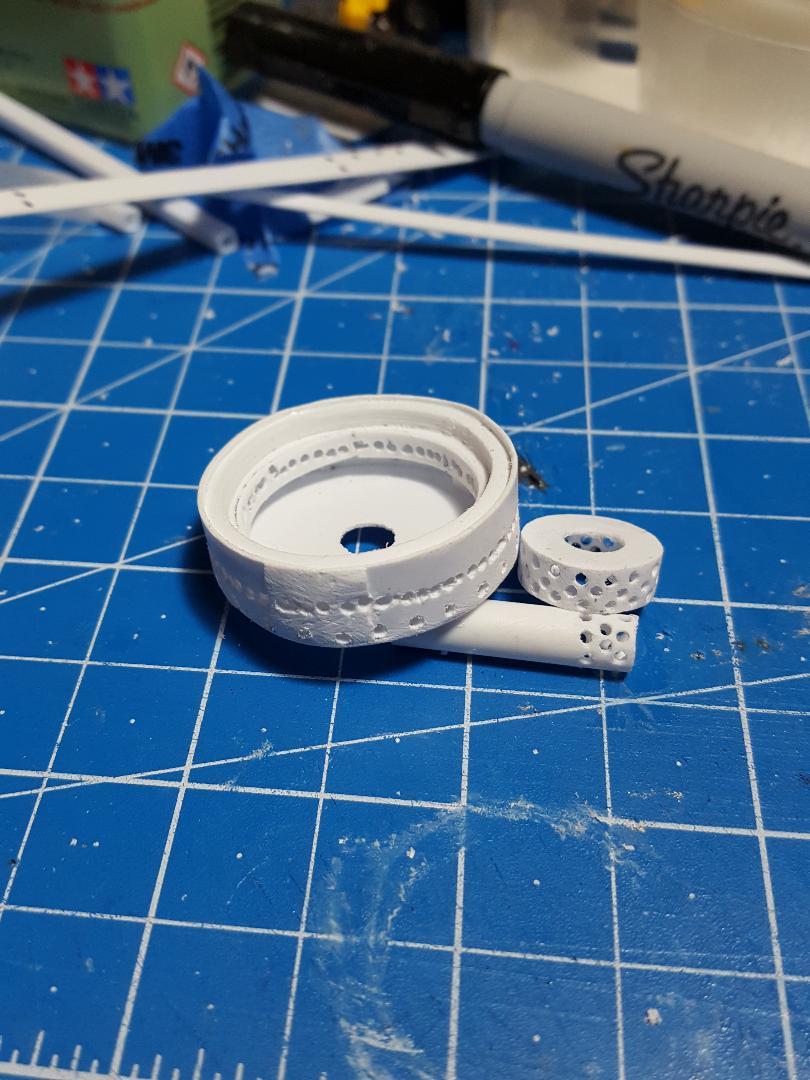
I started putting the 4 wheels together as a group this time and I'm having much better success with the thick gel CA glue and the spray accelerator. The only problem with the accelerator is the bottle is not aerosol so a very light actuation of the spray bottle gives you lots of accelerator. You better have everything lined up because in less than 10 second you have a permanent bond. keep a paper towel handy because the accelerator goes all over what is behind what your spaying. I'm thinking of spraying some in a small cup and dipping a brush in it to apply the accelerator to the glue. I will probably end up gluing the brush to the part I'm trying to-do. I need to find a way to make the square tube round that goes inside the wheel. I've tried using a hair dryer, but you can't hold the part or bend it while you're using the dryer. If I had 3 arms and hands, I might get it accomplished. I was thinking of boiling water in a coffee cup in the microwave and dipping the part in the boiling water with forceps and then quickly try to bend the part the shape I want. I wonder what temperature model plastic will melt into a mess. I guess I could google it and find out the temperature of boiling water as well. If I can't get the square rod perfectly round when I put it inside the wheel the tension in the plastic makes the wheel oblong as you can see in the second photo. I don't need oblong wheels.
-
Guess what it is.
MarkJ replied to MarkJ's topic in WIP: Other Racing: Road Racing, Land Speed Racers
Thanks, Lee for the offer but I'm pretty sure this is going to work, and I won't have to involve anyone else in this possible waste of time. Plus, I don't have any existing 1/12 scale wheels laying around to use. I've never bought a 1/12 scale model before to add the leftovers to my stash. But Thanks for dropping by and sharing your thoughts. It's much appreciated. -
Rolls-Royce No Chemicals, No Paint, No Harmful Glues
MarkJ replied to Anglia105E's topic in WIP: Model Cars
I have always been lucky enough to get cases for all my builds. I just hope Hobby Lobby does not quit selling them. It seems like slowly but surely, they are cutting way down on their modeling supplies or replacing them with lower quality items. They used to sell Iwata airbrushes but now have gone to a much cheaper brand. And they are not keeping up with their Createx paint supplies like they used to. They did add evergreen plastics to their inventory but stuff that is more in line with model trains than model cars. I'm having to buy sheets and cutting them into strips, and they don't sell anything smaller than 5/32 tubes or rods. All very disturbing for a guy who hates to order through the mail. Mark J. -
Rolls-Royce No Chemicals, No Paint, No Harmful Glues
MarkJ replied to Anglia105E's topic in WIP: Model Cars
Looks good to go now, David. I see no other issues at all. Some people I have heard like to wax their models. I have never tried it and afraid I might wish I had not. How do you feel about it? Mark J. -
Guess what it is.
MarkJ replied to MarkJ's topic in WIP: Other Racing: Road Racing, Land Speed Racers
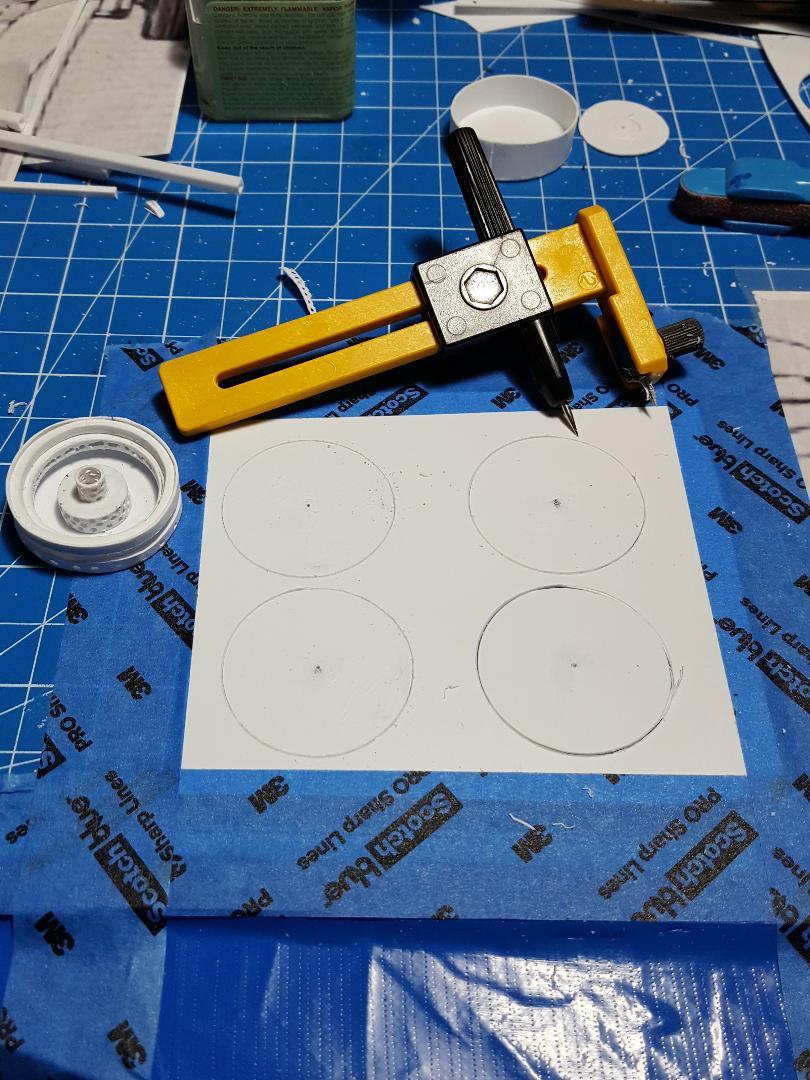
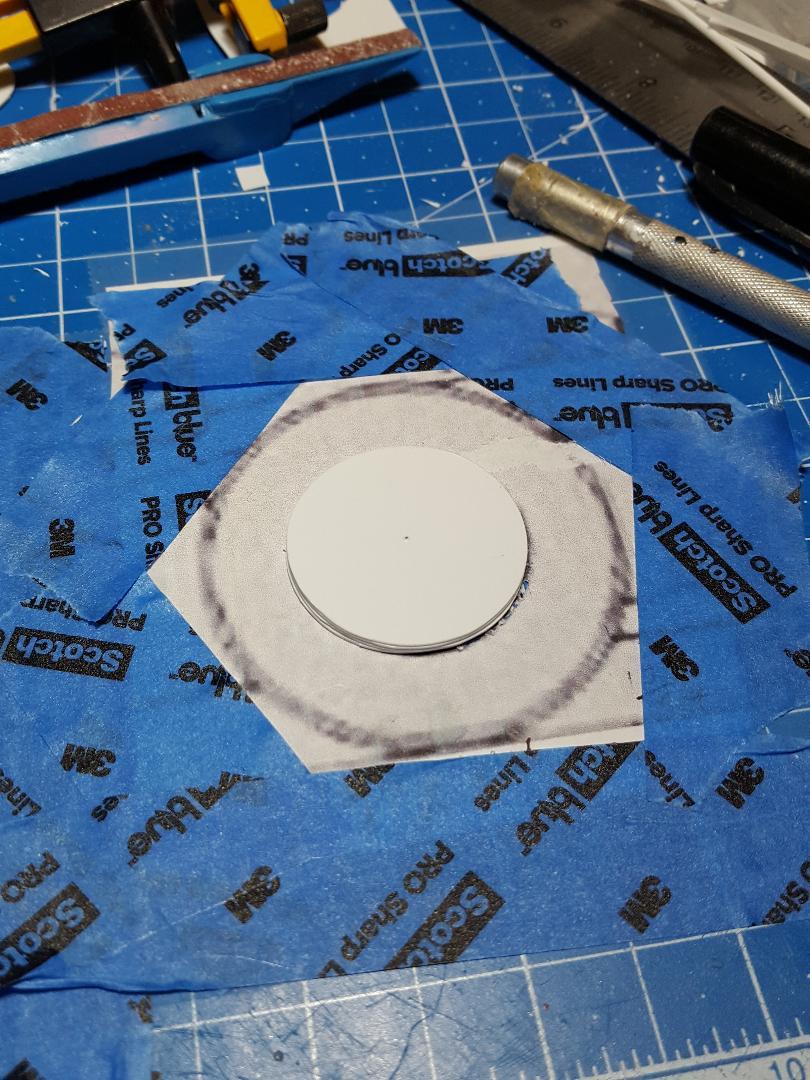
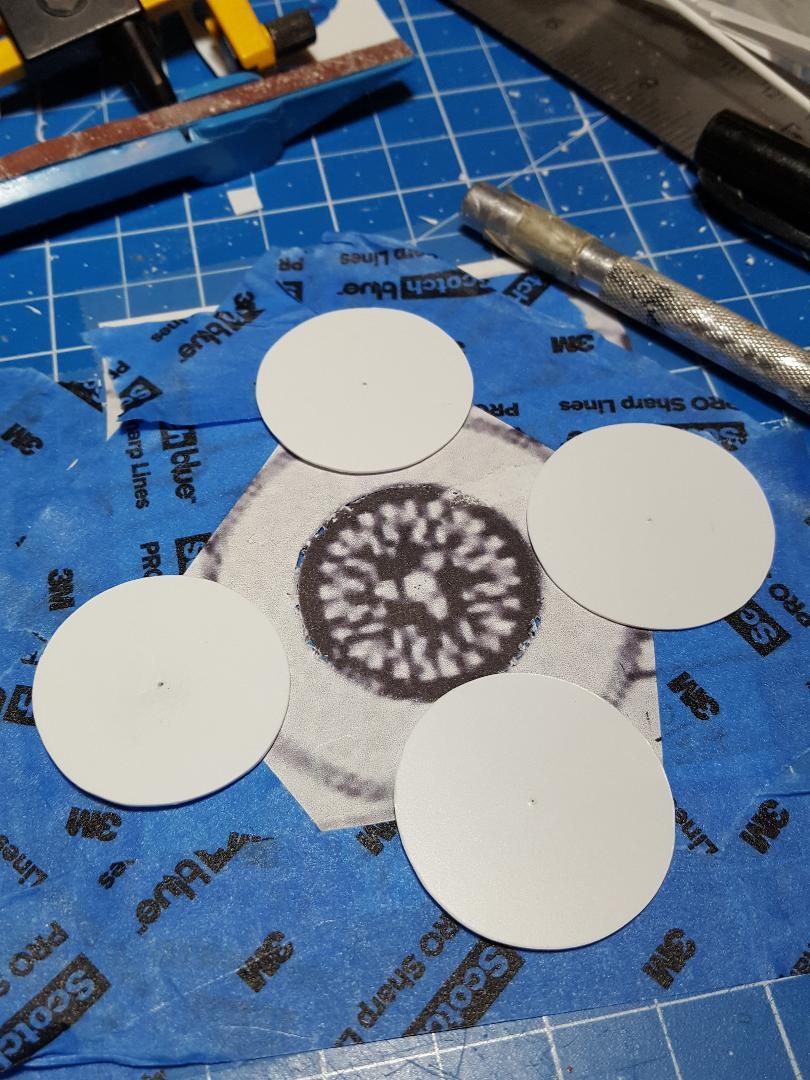
Well, I bought like 3 different bottles of CA glue and a can of accelerant if I deem it necessary. I started completely over by cutting out 4 new discs to make wheels with. I did them differently this time taping the plastic down tight for the cutting compass to have a solid base for cutting. I now have 4 really round discs instead of the oblong ones I got when I started. Like I said I will not drill any holes this time but make really thin ridges for the spokes to land on and receive the ca glue. I'm hoping this process will work out better because the drilled holes were not going to work at all. I think I have better dimensions too for the places the spokes originate and end up so I'm hoping for better results this time. If not I will forget this idea and start on a kit model. The mess of a wheel in the images below was the failed attempt and you can see that it wasn't going to work at all.
-
Rolls-Royce No Chemicals, No Paint, No Harmful Glues
MarkJ replied to Anglia105E's topic in WIP: Model Cars
David, I had noticed the back glass rubber but assumed it was supposed to be gray. The only nit-picky thing I can see is in the separation between the top of the trunk and the body it looks like you might need a little touch up in the trough where it looks like there might be a small amount of gray color in there that should be black. Maybe a light polish of a couple of very tiny scratches here and there. That's all I got. Looking very good overall. Congrats on a superlative build that you have my creative juices thinking about maybe trying myself to make one that I think you might remember what the subject matter might be. That is way in the future though, but I know who to ask for help on it if I ever get to it. Mark J. -
Guess what it is.
MarkJ replied to MarkJ's topic in WIP: Other Racing: Road Racing, Land Speed Racers
Thanks, Pierre. I hope hob lob carries it. I'm going there today. -
Guess what it is.
MarkJ replied to MarkJ's topic in WIP: Other Racing: Road Racing, Land Speed Racers
What do you guys think about CA glue with a spray accelerant as a good and durable adhesive for installing the spokes? If not, what would be a super-fast setting and durable glue that's not dangerous to breath and doesn't cause the plastic to break under stress? Thanks. -
Guess what it is.
MarkJ replied to MarkJ's topic in WIP: Other Racing: Road Racing, Land Speed Racers
I tried to start adding spokes after I assembled the parts you see in this image and found out very quickly that it wasn't going to work. Drilling the individual 144 holes was a bad idea. Plus, I really didn't make the parts the right size or shape to make it work anyway. I will start from scratch and try to be more knowledgeable about the parts I make, shape and size wise, knowing that attaching the spokes will have to be done only with adhesive. I will also make 4 of everything at the same time so I can have a little more duplication in the final wheels if I can ever get them to work. I see it in my mind as cluttered as it is and feel like I might just be able to come up with something that I can get by with. I'm not ready to throw in the towel just yet.
-
Guess what it is.
MarkJ replied to MarkJ's topic in WIP: Other Racing: Road Racing, Land Speed Racers
Thanks, Gerald for the support. I'm going to have to rethink the way I'm doing this because I have found out that it's not going to work the way I'm doing it on this first wheel. Have to start from scratch and ditch the idea of drilling holes. -
Guess what it is.
MarkJ replied to MarkJ's topic in WIP: Other Racing: Road Racing, Land Speed Racers
Anton, I think you were referring to Pierre. He is the ultimate master of brush painting with Vallejo paints and any other kind of paint for that matter. He is your man for questions about brush painting. I still do it for the stuff you don't actually see that much and I haven't got a clue how to weather. -
Guess what it is.
MarkJ replied to MarkJ's topic in WIP: Other Racing: Road Racing, Land Speed Racers
Anton, forgive me but I can't remember the painting technique advise I gave that you are describing. What actual build was it? I think you might have me confused with someone else. -
Guess what it is.
MarkJ replied to MarkJ's topic in WIP: Other Racing: Road Racing, Land Speed Racers
Anton, congrats. You figured it out. Okay guys you can all go home now. contest over. -
Pierre, as per usual your build is an amazing thing to behold. The realism you add to your models is unequalled in its perfection by anyone else. it's always such a joy to watch the images over and over again picking up something new every time. As I always say, I cannot wait till your next offering to us mere mortals. Don't make us wait too long.
-
A better buick
MarkJ replied to Kevinjr26's topic in WIP: Stock Cars (NASCAR, Super Stock, Late Model, etc.)
Really looking forward to it. -
Rolls-Royce No Chemicals, No Paint, No Harmful Glues
MarkJ replied to Anglia105E's topic in WIP: Model Cars
Looks very good to me, David. It would be impossible to get them perfect at this scale and the materials you are using especially the shape of the covers you are having to deal with. You should be proud of your results for sure. Mark J. -
Looking awesome as usual, Pierre. Looking forward to the final presentation that you do so well with the photos in the background. Don't forget to post a link.
-
A better buick
MarkJ replied to Kevinjr26's topic in WIP: Stock Cars (NASCAR, Super Stock, Late Model, etc.)
Looking fabulous, Kevin. Looks like you had a lot to do on this baby. Can't wait for the clear and the final assembly on to the chassis. Make sure you post a link to the final photo forum. -
Guess what it is.
MarkJ replied to MarkJ's topic in WIP: Other Racing: Road Racing, Land Speed Racers
Thanks Pierre. That 24/24/24 setup is starting to give me a little hope, but I have to sit down and think it out which is never fun to do. -
Guess what it is.
MarkJ replied to MarkJ's topic in WIP: Other Racing: Road Racing, Land Speed Racers
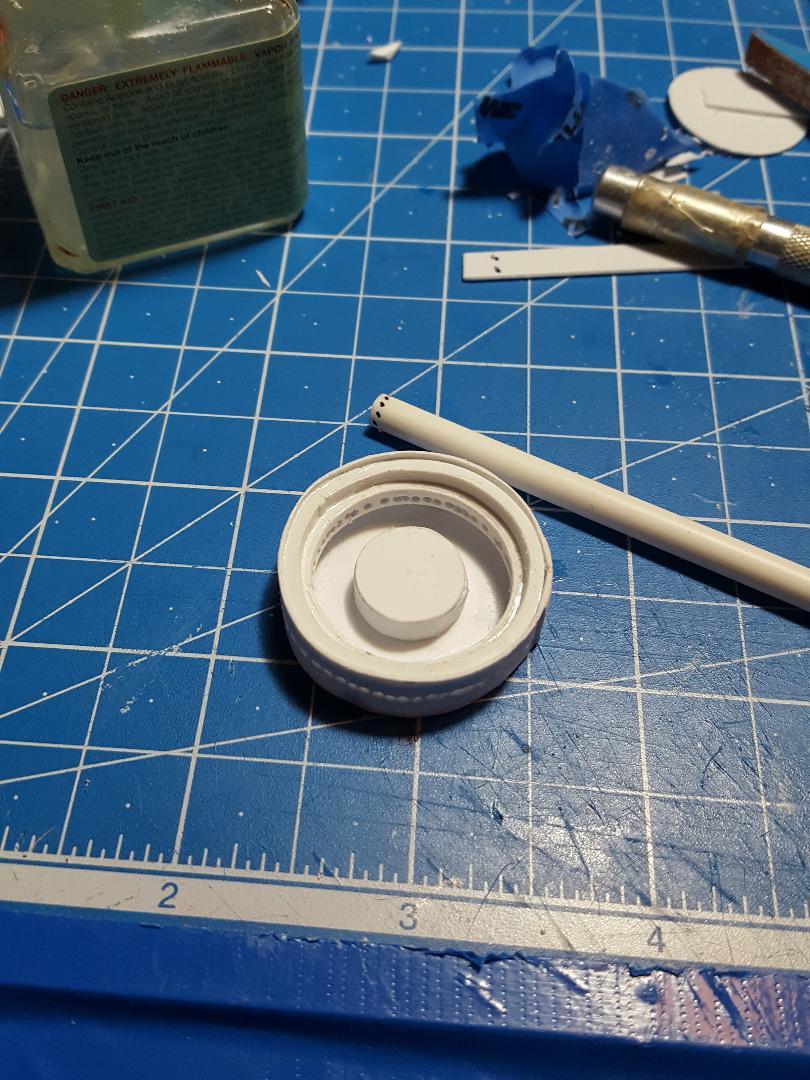
Thanks, Ken for clearing that up for me. The problem is I will not be able to squeeze that many spokes on to my wheels so there will be a huge fudge factor to my wheels. Then again that would be 18 spokes per row. I guess I could do 2 rows of 9 holes on the center tube right below the knockoff nut. I'm having to drill .040-inch holes with a tiny drill and its painstaking work for an old man. I keep accidently crossing over from one hole to the next an end up with a slot instead of a hole. I guess just put two spokes in that hole. I still have a feeling I'm going to be missing a lot of spokes. But who's going to be counting spokes anyway? -
Pierre, those tires and wheels again look like you took the real ones and magically shrunk them down to scale. Just like everything else on the build. We should call you the weatherman.
-
Guess what it is.
MarkJ replied to MarkJ's topic in WIP: Other Racing: Road Racing, Land Speed Racers
Almost ready to install the wires for the wire wheels. When you look at a ref picture of a wire wheel and try to make sense out of it, it makes your head hurt. At least my head does. You have to install them in layers starting at the back of the wheel and moving to the front. Hopefully I can end up with 4 wheels that look somewhat the same. Usually in the past when I've had to make my own wheels the last one looks better than the first one. I had to make wheels for an IROC Camaro and that's what happened on that build. The trouble with my ref pictures is that no 4 wheels look the same and ref pictures of the actual car showing the wheels that it had were in motion. So, I will just end up with whatever I get and hope that they look passable. You've heard of rivet counting. Well, this will be wire counting instead and you're not really sure how many wires you should have in the wheel.
-
Guess what it is.
MarkJ replied to MarkJ's topic in WIP: Other Racing: Road Racing, Land Speed Racers
Mark, 30 years in the future. It's weird how wire wheels have stayed basically the same for a long time. -
Pierre, those springs are next level awesome. If only my fingers would work that well.