.jpg.b9265433dc8c3b550370b1d0e4e4d2fc.jpg)
MarkJ
-
Posts
4,769 -
Joined
-
Last visited
Content Type
Profiles
Forums
Events
Gallery
Everything posted by MarkJ
-
.jpg.b9265433dc8c3b550370b1d0e4e4d2fc.thumb.jpg.915f5b46e3c9402eeaa6972073121c87.jpg)
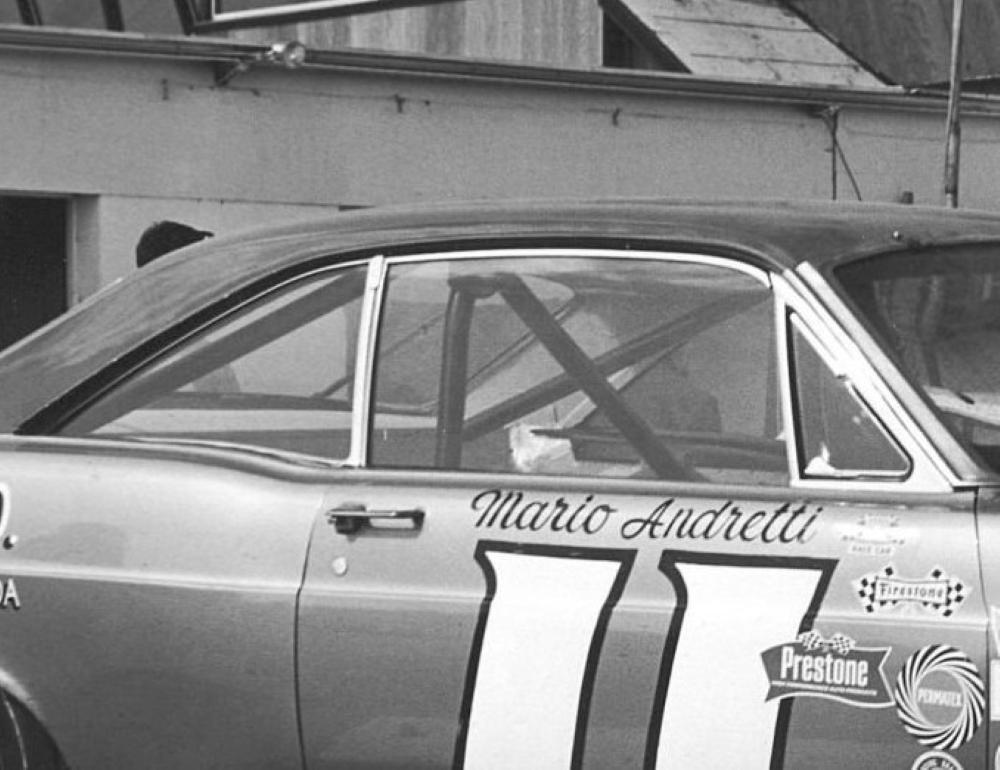
A better buick
MarkJ replied to Kevinjr26's topic in WIP: Stock Cars (NASCAR, Super Stock, Late Model, etc.)
Looking really good. -
Just keep adding more things to do. Just can't seem to move on and finish this thing.

-
Rolls-Royce No Chemicals, No Paint, No Harmful Glues
MarkJ replied to Anglia105E's topic in WIP: Model Cars
David, I applaud the patience that you exhibit in your modeling. That's a hard thing for most modelers to do. They want instant results right now and want to do a complete build in a weekend. Just crank them out like there's no tomorrow. I have to admit; I'm getting a little like that on my current build just because I am longing to get on to my next build as soon as I can. Mark J -
More and more , cowbell.
-
Rolls-Royce No Chemicals, No Paint, No Harmful Glues
MarkJ replied to Anglia105E's topic in WIP: Model Cars
Man, David. You have that roof looking like a black mirror. Very impressive. If you have trouble keeping that antenna from staying on the roof just drill a hole the same size as the pin and stick it in the hole with a dab of glue. Mark J. -
Eventually.
-
Maserati A6GCS Spyder
MarkJ replied to absmiami's topic in WIP: Other Racing: Road Racing, Land Speed Racers
How does he get that glue to stick and hold? I must be doing something wrong. I agree about how scary that level of skill is. Shaping that piece of metal for the quarter glass is really impressive. -
Maserati A6GCS Spyder
MarkJ replied to absmiami's topic in WIP: Other Racing: Road Racing, Land Speed Racers
Aaaah, to have that kind of dexterity again would be awesome. -
I hear with the 2k clear you really don't need to polish but also that it is very dangerous to inhale so make sure you are wearing the proper safety equipment when using it.
-
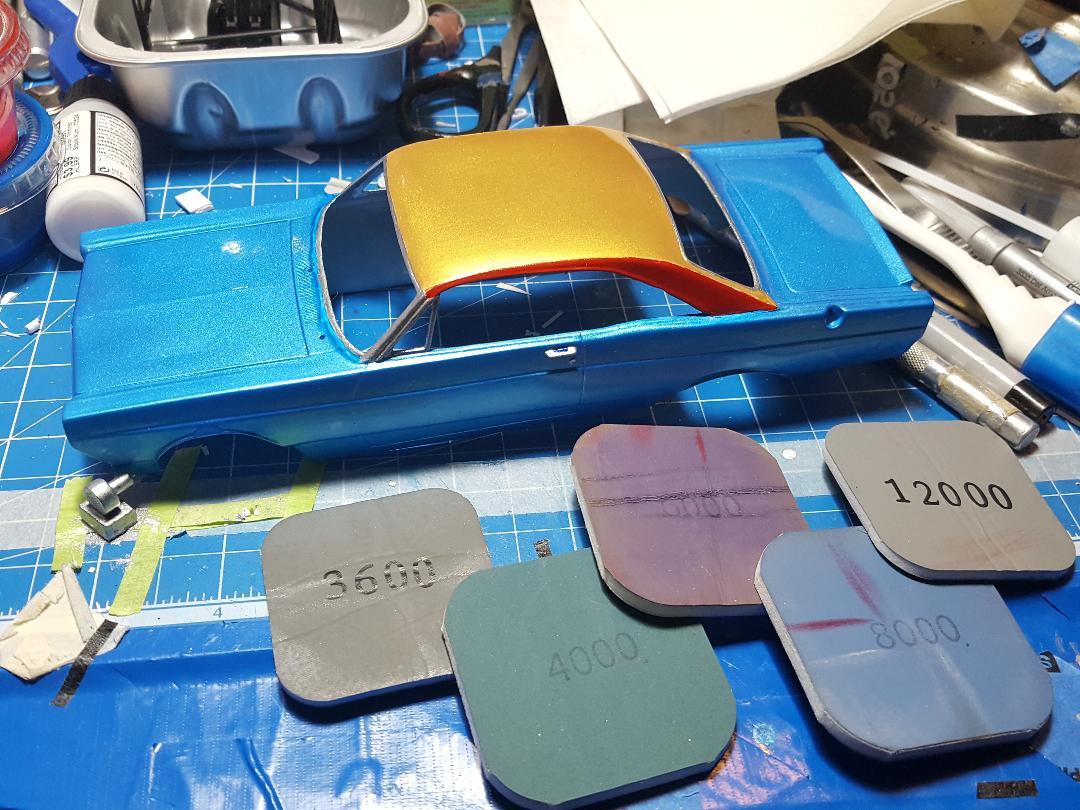
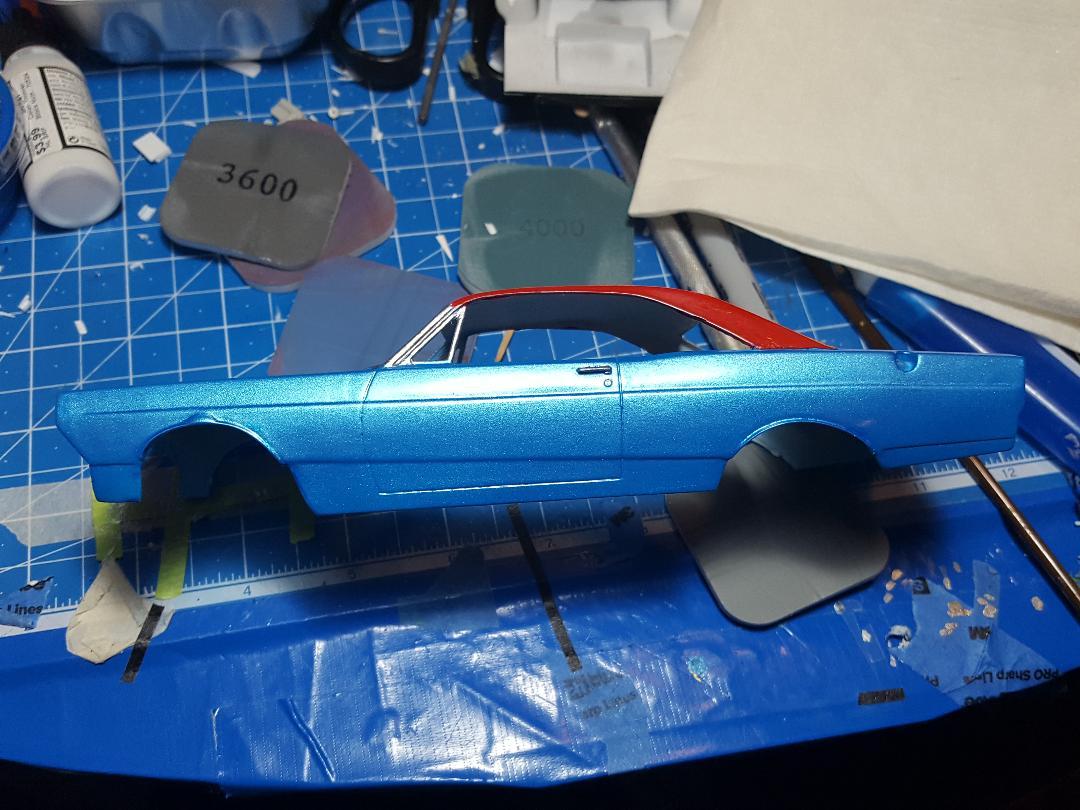
Kevin, yes, I like them very much. But I only use them on Tamiya clear. I never polish a pigment paint with them. Tamiya clear is a very tough clear, so it is hard to burn through it unless you are using a very course grit like 1500 or 2400. I usually start with 3200 grit and then up from there. You really don't see the magic until you go from 8000 to 12000. Then suddenly it gets mirror like, but you have to be patient with the process.
-
Rolls-Royce No Chemicals, No Paint, No Harmful Glues
MarkJ replied to Anglia105E's topic in WIP: Model Cars
Congrats on fixing your computer issues and you are right about detailing. Sometimes too much is just that, too much. Just need enough to add some interest. Mark J. -
A better buick
MarkJ replied to Kevinjr26's topic in WIP: Stock Cars (NASCAR, Super Stock, Late Model, etc.)
Looking better and better, Kevin. So much better than what out of the box would have been. -
Bocar XP5 - a 3D print
MarkJ replied to kensar's topic in Other Racing: Road Racing, Salt Flat Racers
That's awesome. The thought of making your own kit is every modelers dream and now you have accomplished it. Can't wait to see your next creation. -
Maserati A6GCS Spyder
MarkJ replied to absmiami's topic in WIP: Other Racing: Road Racing, Land Speed Racers
Wow, Andrew. You are definitely the king of the very small parts makers. Those parts are so small but yet so accurate. Amazing. -
Thanks, Donato. Always appreciate you stopping by.
-
Rolls-Royce No Chemicals, No Paint, No Harmful Glues
MarkJ replied to Anglia105E's topic in WIP: Model Cars
Sounds good to me. Mark J. -
Rolls-Royce No Chemicals, No Paint, No Harmful Glues
MarkJ replied to Anglia105E's topic in WIP: Model Cars
Didn't want to make more work for you, David. But maybe a touch darker wouldn't hurt? Mark J. -
Maserati A6GCS Spyder
MarkJ replied to absmiami's topic in WIP: Other Racing: Road Racing, Land Speed Racers
Who knew a six banger could look so good? You have your work cut out for you, Andrew. -
A better buick
MarkJ replied to Kevinjr26's topic in WIP: Stock Cars (NASCAR, Super Stock, Late Model, etc.)
Just follow your ref pics and you can't go wrong. Just do some work then check the pic, then do some more work and check the pic until they match. Easy, peasy. -
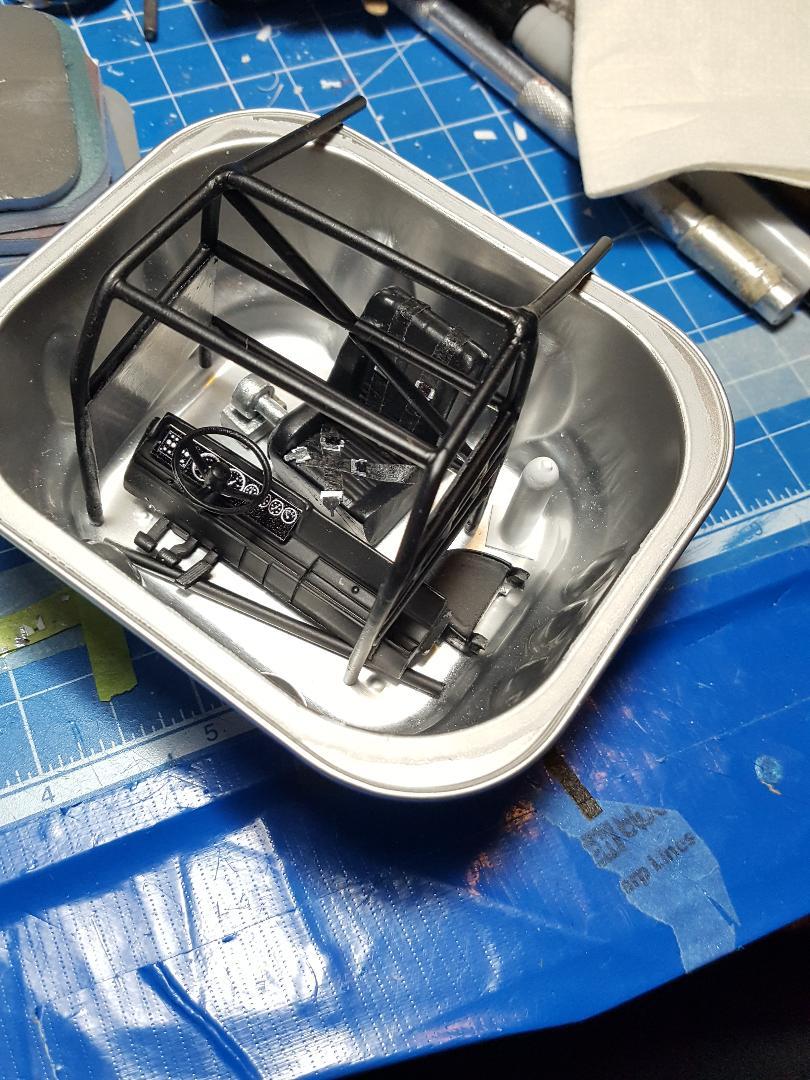
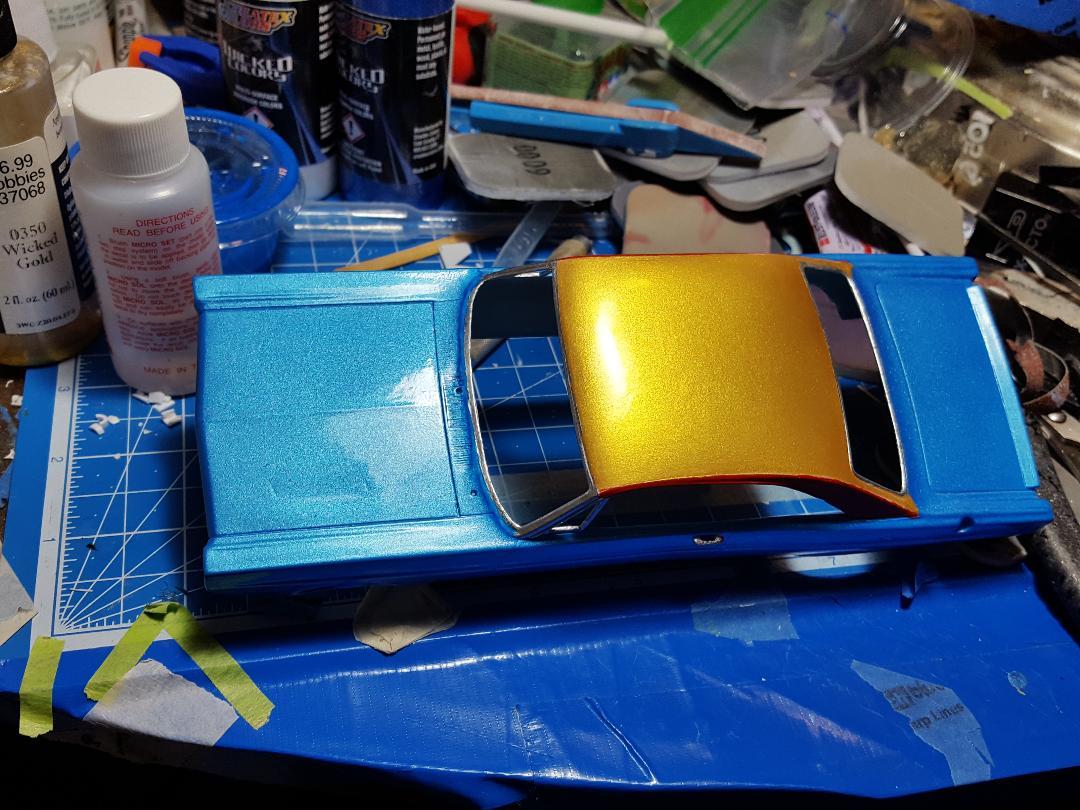
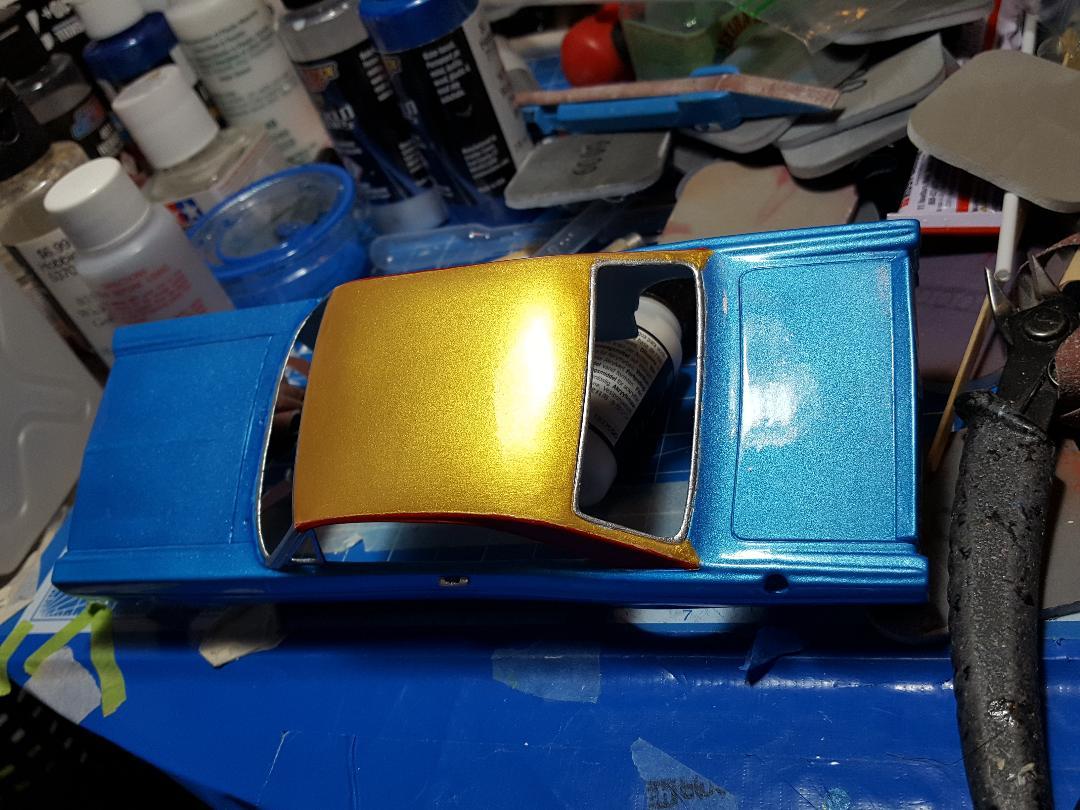
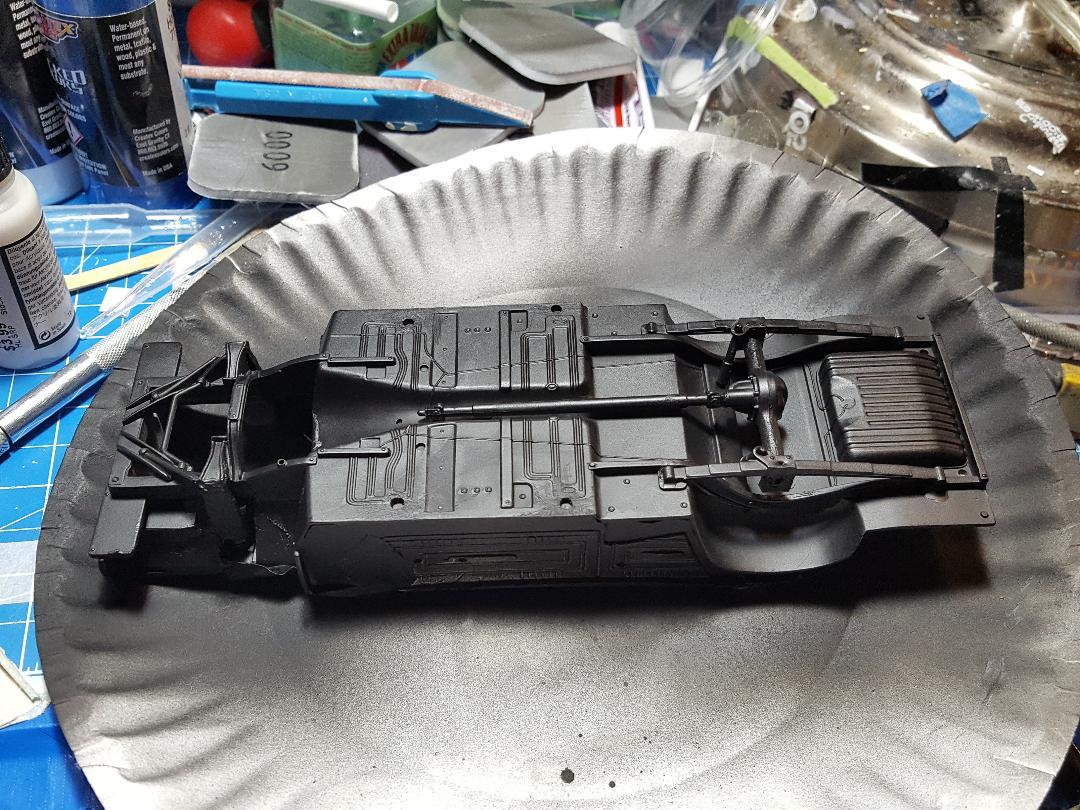
Got the upper surfaces polished. Pretty happy with it. You can see the reflection of the desk lamp in the hood and the trunk. The gold is a hint better looking too and the decals should adhere better as well. I painted a bunch of black stuff with a spray can I found in the garage. I believe it got the job done. I still need to polish the sides of the model. I'm using polishing pads dry because they tend to come apart when you wet them. I start with 3200 grit and work my way up to 12000.
-
A better buick
MarkJ replied to Kevinjr26's topic in WIP: Stock Cars (NASCAR, Super Stock, Late Model, etc.)
Good moves there Kevin. I agree. That nose needed some aero work done to it and what you've done will help immensely. -
Rolls-Royce No Chemicals, No Paint, No Harmful Glues
MarkJ replied to Anglia105E's topic in WIP: Model Cars
Thanks, David. That clears that up nicely. Wonder why they used grey. You'd think they would have used a black rubber seal. I'm sure they had a good reason for using the grey. Mark J. -
Rolls-Royce No Chemicals, No Paint, No Harmful Glues
MarkJ replied to Anglia105E's topic in WIP: Model Cars
David, you are making great progress. One thing I'm not sure of is the back glass molding around it. Will this be chrome or something else. I must have missed something earlier in the discussion. Model on, I'm liking what I'm seeing. Mark J. -
Bocar XP5 - a 3D print
MarkJ replied to kensar's topic in Other Racing: Road Racing, Salt Flat Racers
So, Ken. You made your own kit and built it. Very impressed with your results as always. Beautiful race car.