.jpg.b9265433dc8c3b550370b1d0e4e4d2fc.jpg)
MarkJ
-
Posts
4,771 -
Joined
-
Last visited
Content Type
Profiles
Forums
Events
Gallery
Everything posted by MarkJ
-
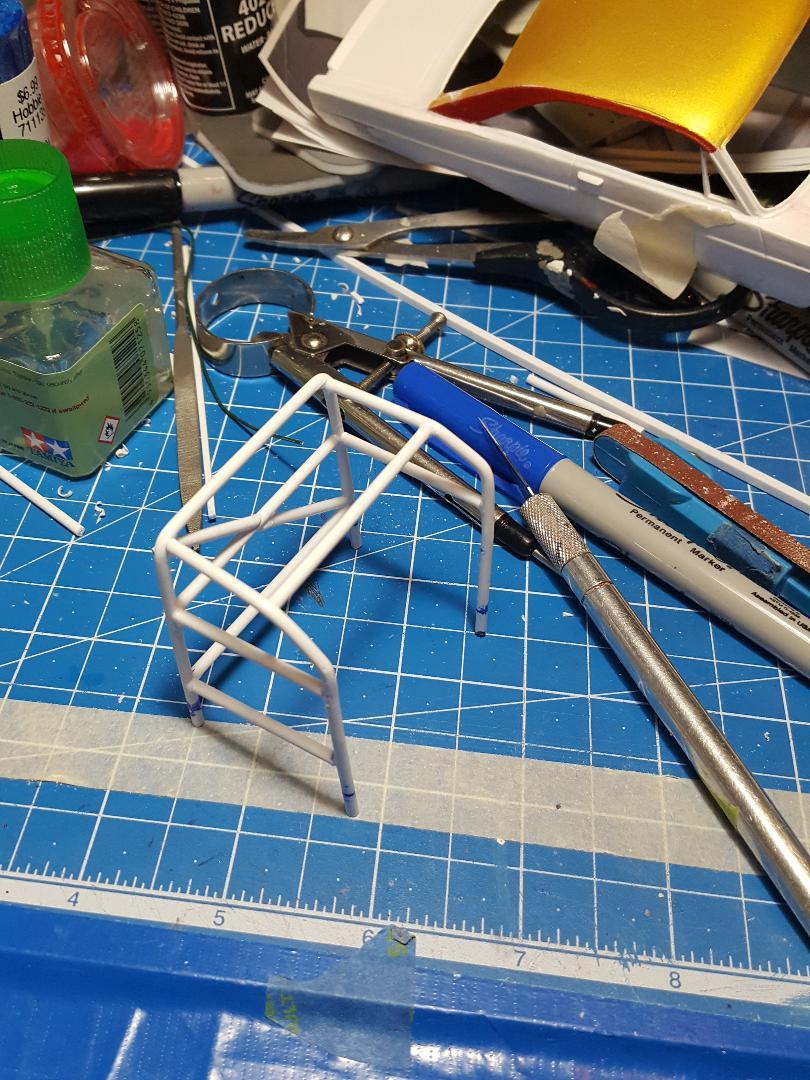
.jpg.b9265433dc8c3b550370b1d0e4e4d2fc.thumb.jpg.915f5b46e3c9402eeaa6972073121c87.jpg) More work done. The strut in the left back is supposed to go through the hole, but it fell out when I was getting the picture ready to take and did not realize it. I have to keep the cage where I can take it out of the tub until final assembly of the tub. It's glued to the cage.
More work done. The strut in the left back is supposed to go through the hole, but it fell out when I was getting the picture ready to take and did not realize it. I have to keep the cage where I can take it out of the tub until final assembly of the tub. It's glued to the cage.
-
Thanks, Todd. If only I had a picture of it. I guess I can just fake it the best I can. I'm not going to plumb it or anything like that.
-
Cage is slowly coming together. I have to use old timey Testors glue in the tube because the Tamiya liquid glue is too hot and makes the styrene break in a 90-degree angle. So, it is slow going for sure. Luckily it's not a very complicated cage. Plus, I don't have to make a window net for this car. It did not have one. I have to make a tank that goes behind the seat. I guess it's an oil tank. Not sure. Actual pictures of the real interior would help. I made it out from an overhead shot into the car on the banking. you can barely make it out but it's there.
-
Rolls-Royce No Chemicals, No Paint, No Harmful Glues
MarkJ replied to Anglia105E's topic in WIP: Model Cars
Great looking fit for sure. -
Rolls-Royce No Chemicals, No Paint, No Harmful Glues
MarkJ replied to Anglia105E's topic in WIP: Model Cars
You might want to try something like this. You can order it online and probably also get it from amazon. I always use Evergreen because it's what Hobby Lobby sells. But they do not have the half round. 240 - .040" (1.0mm) OPAQUE WHITE POLYSTYRENE HALF ROUND - Evergreen Scale Models Mark -
Rolls-Royce No Chemicals, No Paint, No Harmful Glues
MarkJ replied to Anglia105E's topic in WIP: Model Cars
Got it. So, you just need to add a molding. That doesn't sound bad at all. I misunderstood the situation. Mark -
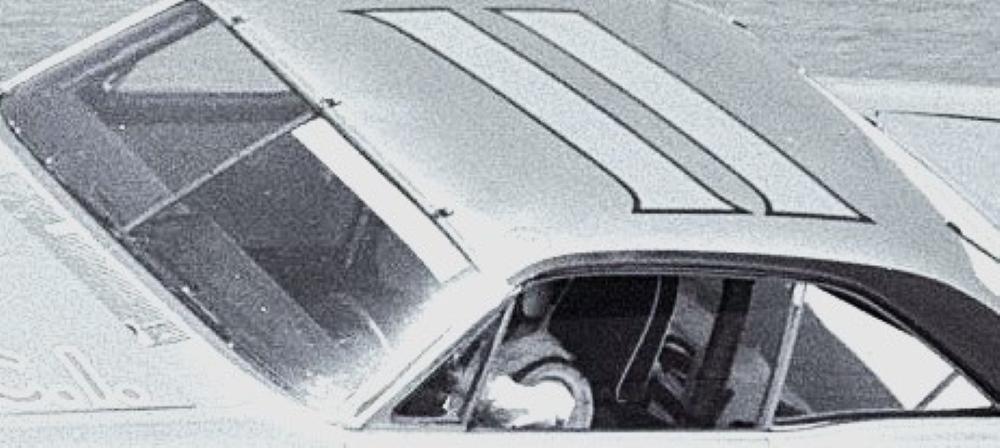
Some more done. If anybody has a photo of the dash and seat on a 1967 Holman and Moody Ford Fairlane from the Daytona 500, if you could post it here it would be much appreciated. I found some before but since then, they have been locked away where I can't get to them anymore. I guess I can start on the cage for now till I can decide on whether to use the 66 Comet dash and seat that I did on that model a couple of years ago and hope it is close.
-
Rolls-Royce No Chemicals, No Paint, No Harmful Glues
MarkJ replied to Anglia105E's topic in WIP: Model Cars
I see what you're saying but is it even possible to narrow those moldings successfully to make them match the real car in the photo. Your only option would be removing them completely and adding narrow ones in place of them. That would be a task you might not want to get involved in, but you have to do what you think you need to do. Whatever your decision I'm sure you will have a good result. Mark -
Rolls-Royce No Chemicals, No Paint, No Harmful Glues
MarkJ replied to Anglia105E's topic in WIP: Model Cars
Looking good. Did you ever try using the future to protect the silver sharpie. I put it on everything. Mark -
Thanks, David. If you have ever built a balsa and tissue model airplane you will understand the approach I will have to building this next model. The only difference is I'm using styrene tubes and square rods and styrene sheets instead of balsa stringers and tissue paper. I will use an overhead and side view of the model in scale to build off of. I will have 5 bulkheads as I call them to have something to connect everything together with the sguare rods. Mark
-
Thanks, Steve. I finally got the body to fit the chassis yesterday after a lot of surgery under the hood that thankfully won't show because I glued the hood shut. Typical AMT kit that doesn't go together that well and you have to do a lot of things to make it fit. Now I can go ahead and finish the tub and get this baby painted and built.
-
Thanks, David. I agree. It just came over me one day to build a certain car that there are really no kits for and diecast kits for them are over 2000 bucks and I wouldn't want to build a diecast kit anyway. The only problem is I keep sneaking on to the computer to work on the next build when I should be working on the Fairlane. The reason it is 1:16 scale is the plan I'm making to build the model off of has to fit on an 8.5 inch by 11 inch piece of paper. The model will be 10.5 inches so it will just fit on that size piece of paper and that happens to make the model 1:16 scale. If I can make the wheels and tires for it, I think can do it, but if I can't, I will just throw in the towel and build something else.
-
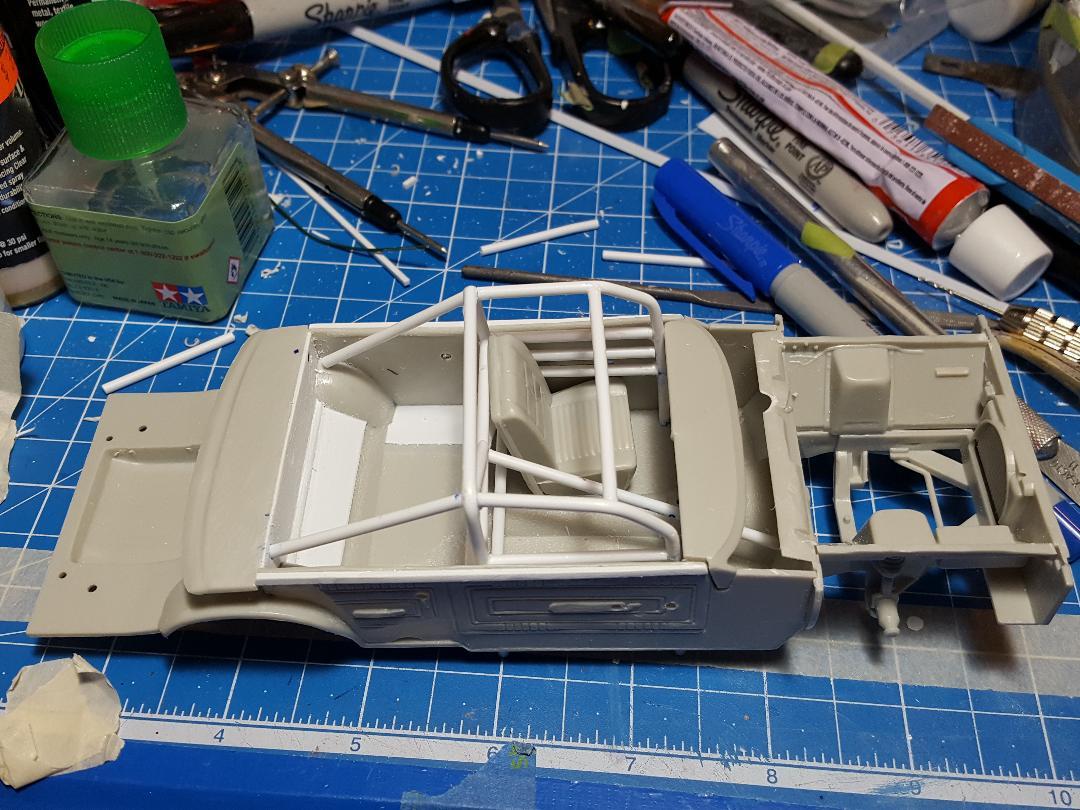
Got some more done on the chassis. Added more filler panels to the interior tub and trimmed up the package shelf so it looks like it should. I can go ahead and mask the body and get it ready for the blue after I figure out a recipe for it that I can duplicate the same every time I need to mix some up.
-
Getting into the chassis now. To remove the rear seat, you have to add a new rear bulkhead and reattach the package shelf to it but it's very flimsy, so you have to add a center support. I flipped the door trim from left to right so I don't have to remove all the armrest and trim panel garnish. you just need to drill holes where the handles poke through. You also have to remove the top of the door trim and add a new one to fill in between the door trim and the door and quarter panel at the top. I will eventually remove that excess plastic at the top of the new rear bulkhead and also fill in the stuff in the rear seat floor area. I was careful to let the rear fenders show through inside the rear of the car like the real car had it.
-
Rolls-Royce No Chemicals, No Paint, No Harmful Glues
MarkJ replied to Anglia105E's topic in WIP: Model Cars
Yes, the Quickshine is the new name for future but it's the same stuff. I always use this product on every build I have. My home-made decals would eventually peel off the model just sitting in a clear case if I did not use it and I have never witnessed it yellowing with age on any of my builds. The oldest of them being 18 years old. Of course, all of my builds are stored in clear plastic airtight cases. -
Tomorrow, I get out of airtime prison and will be able to post more photos. I just can't go crazy with it and keep it to one or two photos per day.
-
Todd, actually I was thinking about not revealing what it's going to be and not even having any text to go along with the build. Just start building it and let you guys figure out what it is. The topic name might be "Guess???" but it won't be in this forum. It will have to be in the WIP: Other Racing: Road Racing, Land Speed Racers forum. There won't even be a kit involved. It will be my attempt at completely scratch building a model from styrene, parts from my stash, and maybe a little putty here and there. If I can build the tires and wheels, I feel that I can go on from that point. If I can't then the build will come to an abrupt end. But I have to finish the Fairlane first.
-
Rolls-Royce No Chemicals, No Paint, No Harmful Glues
MarkJ replied to Anglia105E's topic in WIP: Model Cars
Thanks for the info. I like that the basic Rolls Royce shape does not change over the years. Just about anybody can see a Rolls Royce and know that it is a Rolls Royce as long as it's like the one you are building here. Mark -
Thats true. When you get in those huge scales like 1/12 and 1/8, I don't have any shelf space to display them in. 1/16 is about the largest I will be able to handle for shelf space and it will probably be my first and last 1/16 scale model if I am able to complete it. Mark
-
Rolls-Royce No Chemicals, No Paint, No Harmful Glues
MarkJ replied to Anglia105E's topic in WIP: Model Cars
Wow, every time I look at this build it looks better and better. Now what exactly is the year and model of this Rolls Royce and various particulars about it, like engine type and size, and anything else you would like to share and also what scale is this model? You might have already covered this but I'm too lazy to go back and find it. Mark. -
You can usually tell from the window net that looks way to big and fills the whole opening of the left side glass area. Also, the wheelbase isn't quite right, and the wheels and tires are too large but whoever made the decals for that tiny build did a magnificent job. My next build is going to be 1/16 scale and the model will be 10.5 inches long. Decals for that should be very easy. Mark
-
Thanks, David for stopping by. Always like all the ref photos I can get my hands on. That little guy looks like it might be 1/64 scale. Pretty good job for that scale. I won't even attempt a build a model that small.
-
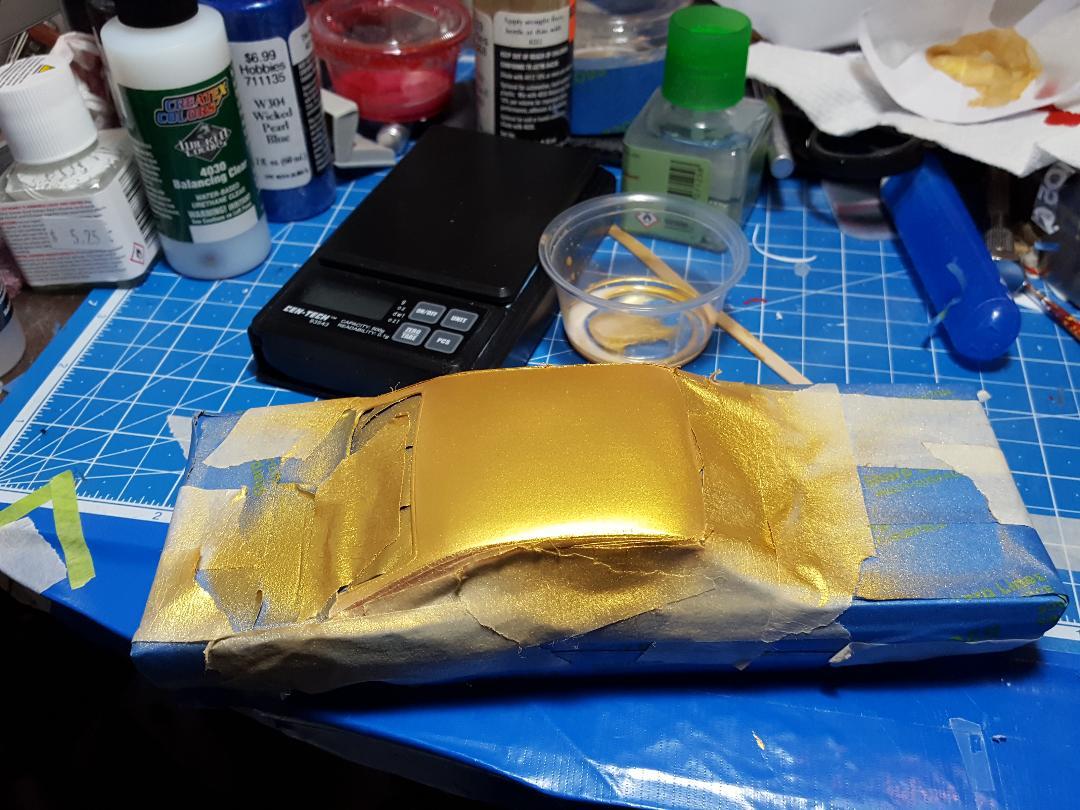
Got the gold shot today and learned some things while doing it. When I shot the red, I mixed the 4011 thinner which Createx calls reducer at 2 grams of reducer to 5 grams of paint. and it did okay. I decided to go with 4021 reducer this time instead of 4011 with the gold and when I shot it, it was way too watery coming out of the airbrush. I made another batch at 1 gram of 4021 to 5 grams of paint, and it was just fine. The 4021 is advertised as a more free flowing reducer that eliminates air brush tip dry out and also gives a smooth finish instead of a gravely one which happens when the paint dries when it hits the body and doesn't flow out. I will be using the 4021 when I paint the blue parts of the model. This is the same gold I used on the Bobby Allison Monte Carlo and it still has the iridescence I liked so much on that model. I'm being really frugal with my photo posting so I can make it to the 22nd.
-
Rolls-Royce No Chemicals, No Paint, No Harmful Glues
MarkJ replied to Anglia105E's topic in WIP: Model Cars
David, My current build is the 1967 Ford Fairlane that Mario Andretti drove to victory in at the 1967 Daytona 500. It has some moldings around the windshield and back glass that need done that I usually use a small brush and acrylic silver metallic paint to get them done. I hope to paint the roof gold metallic today if the weather outside stays dry. It's over at the Nascar wip forum if you want to take a look at it. I haven't posted many pictures lately because I'm running low on air time on my phone and don't want to pay a penalty on my next bill. I will have full airtime again on the 22nd of this month. Apparently posting photos from my phone on Verizon e-mail uses a lot of airtime for each photo. Continue on your quest for healthy modeling. It has been an enlightening journey for us that have health issues but still want and have to model. Mark -
Rolls-Royce No Chemicals, No Paint, No Harmful Glues
MarkJ replied to Anglia105E's topic in WIP: Model Cars
Looking great. I might have to try that on my current build.