.jpg.b9265433dc8c3b550370b1d0e4e4d2fc.jpg)
MarkJ
-
Posts
4,697 -
Joined
-
Last visited
Content Type
Profiles
Forums
Events
Gallery
Everything posted by MarkJ
-
Sounds good. Can't wait to see the results.
-
.jpg.b9265433dc8c3b550370b1d0e4e4d2fc.thumb.jpg.915f5b46e3c9402eeaa6972073121c87.jpg)
1963 Super Torque Ford
MarkJ replied to MarkJ's topic in WIP: Stock Cars (NASCAR, Super Stock, Late Model, etc.)
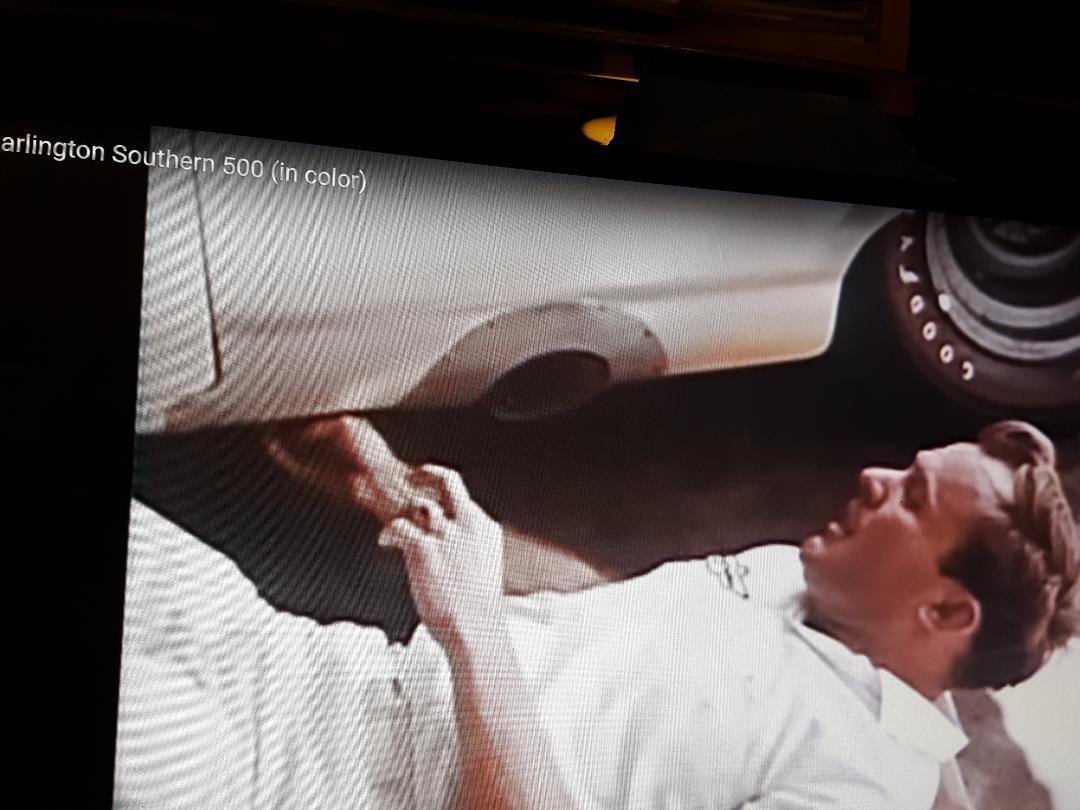
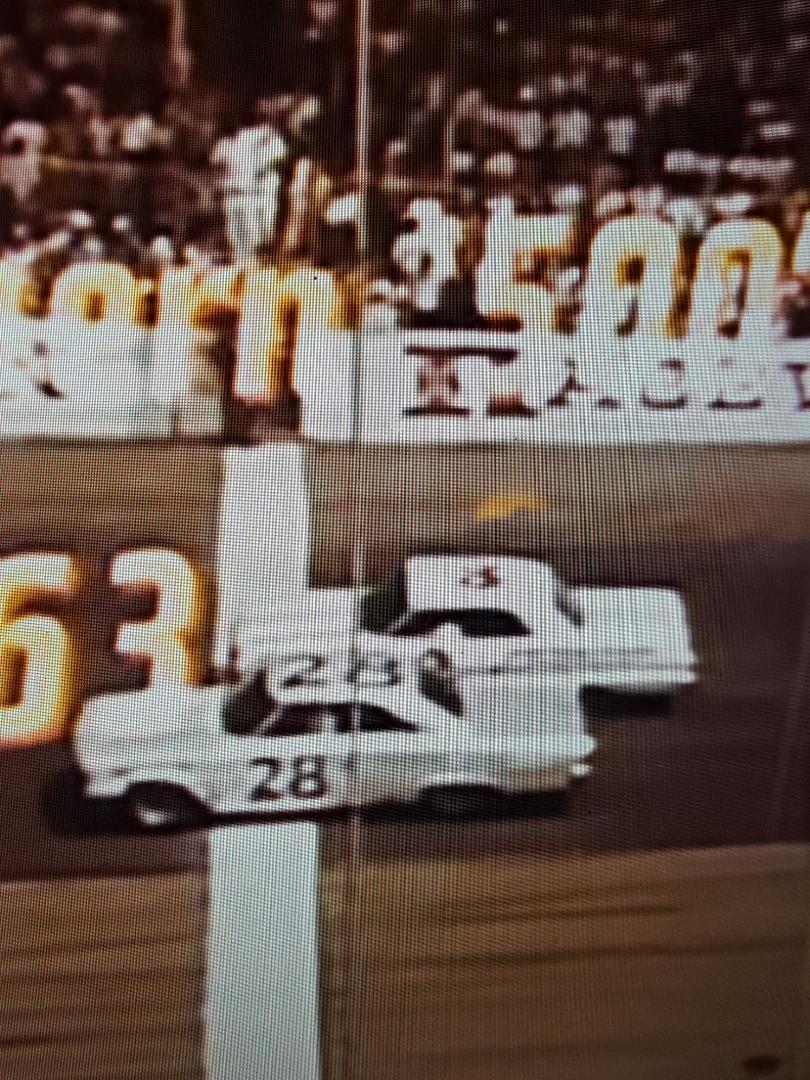
The image above was the start of the race showing Fred on the pole and Junior starting second and it has Southern 500 63 across the image. -
1963 Super Torque Ford
MarkJ replied to MarkJ's topic in WIP: Stock Cars (NASCAR, Super Stock, Late Model, etc.)
Thanks Jim. I have another image from the you tube video that shows the difference of Fred's Ford to Junior's Chevy which was a bright white. You can tell Fred's Ford is a little darker with the pearlized white paint. and Fred's ford has gray wheels not light blue. Its a color image because Junior's roof number is red.
-
Very close color match that went on very nicely. Do you plan on doing any polishing?
-
1963 Super Torque Ford
MarkJ replied to MarkJ's topic in WIP: Stock Cars (NASCAR, Super Stock, Late Model, etc.)
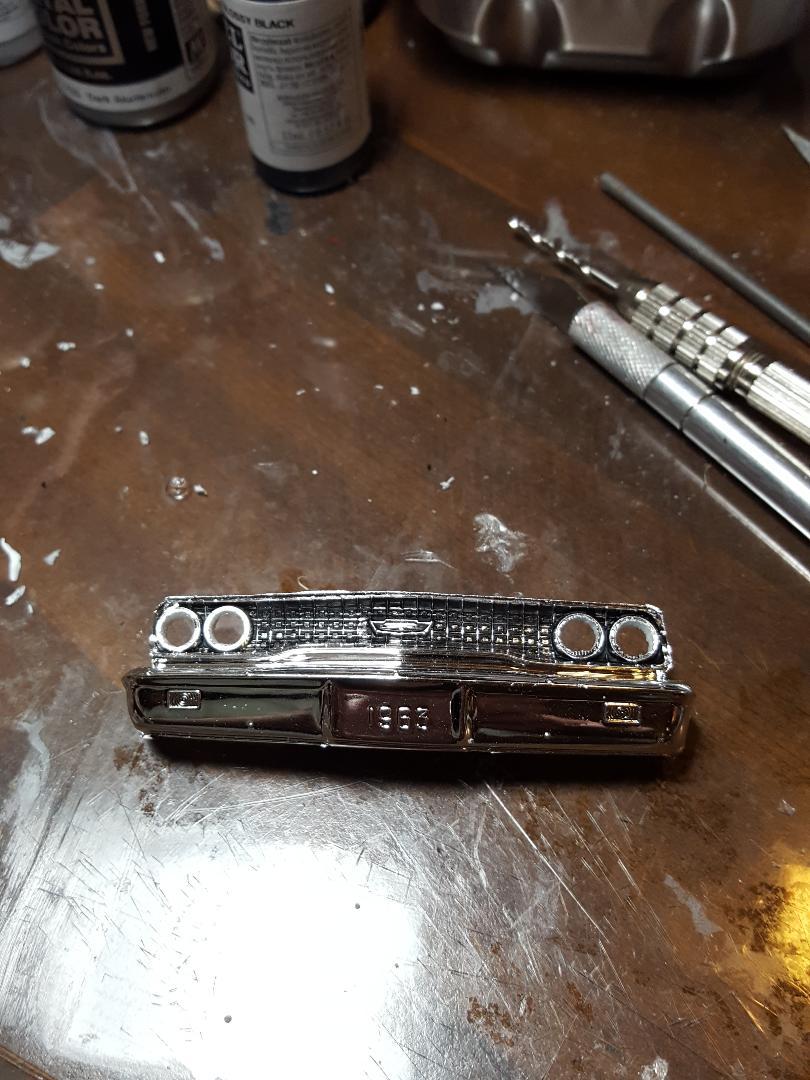
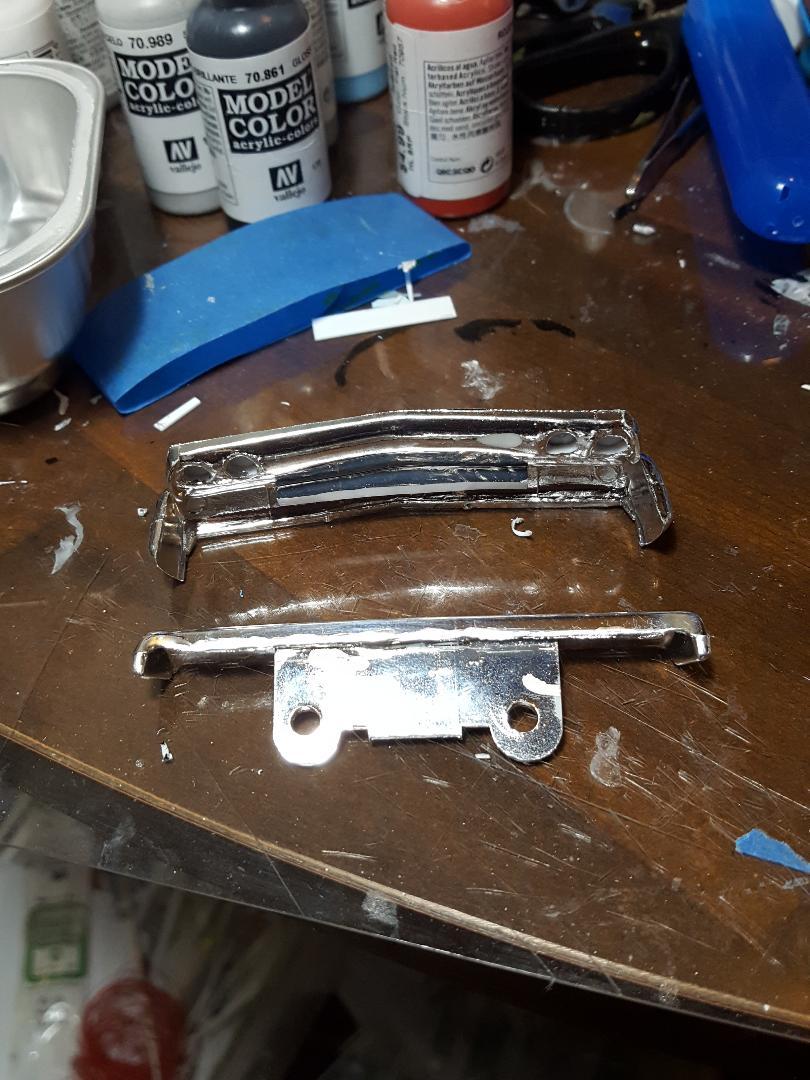
If you're using the kit I'm using and want the body to fit better on the frame you need to remove the tab as I have shown in the picture below that has the two holes in it. You can keep the tab on the rear bumper. The grille also fits better if you do this modification. If you don't the engine does not line up properly with the radiator and sits too low in the engine bay. It's the typical amt type problem you will run into with their kits,
-
1963 Super Torque Ford
MarkJ replied to MarkJ's topic in WIP: Stock Cars (NASCAR, Super Stock, Late Model, etc.)
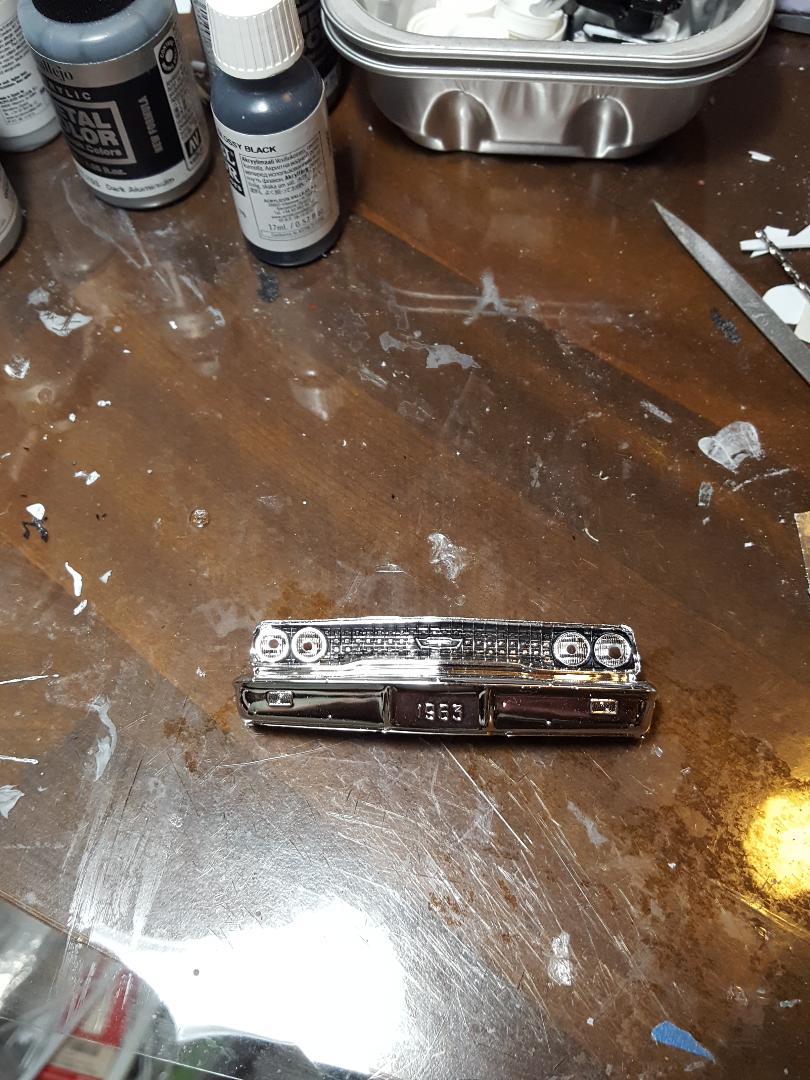
Thats perfectly okay, Keith. I'm just glad to get some feedback. I finally got the body attached to the frame and just need to attach the wheels and tires so I can get this baby decaled and the final touch up done to it. -
1963 Super Torque Ford
MarkJ replied to MarkJ's topic in WIP: Stock Cars (NASCAR, Super Stock, Late Model, etc.)
Keith, you are not catching my drift. The car normally had baby blue wheels, but for this car, the 1963 Southern 500 car, it had gray wheels and a pearalized white paint job that almost looks like a very light silver. The pictures you have posted are not from the 63 Southern 500. One is not even from 1963. But thanks for the input. -
1963 Super Torque Ford
MarkJ replied to MarkJ's topic in WIP: Stock Cars (NASCAR, Super Stock, Late Model, etc.)
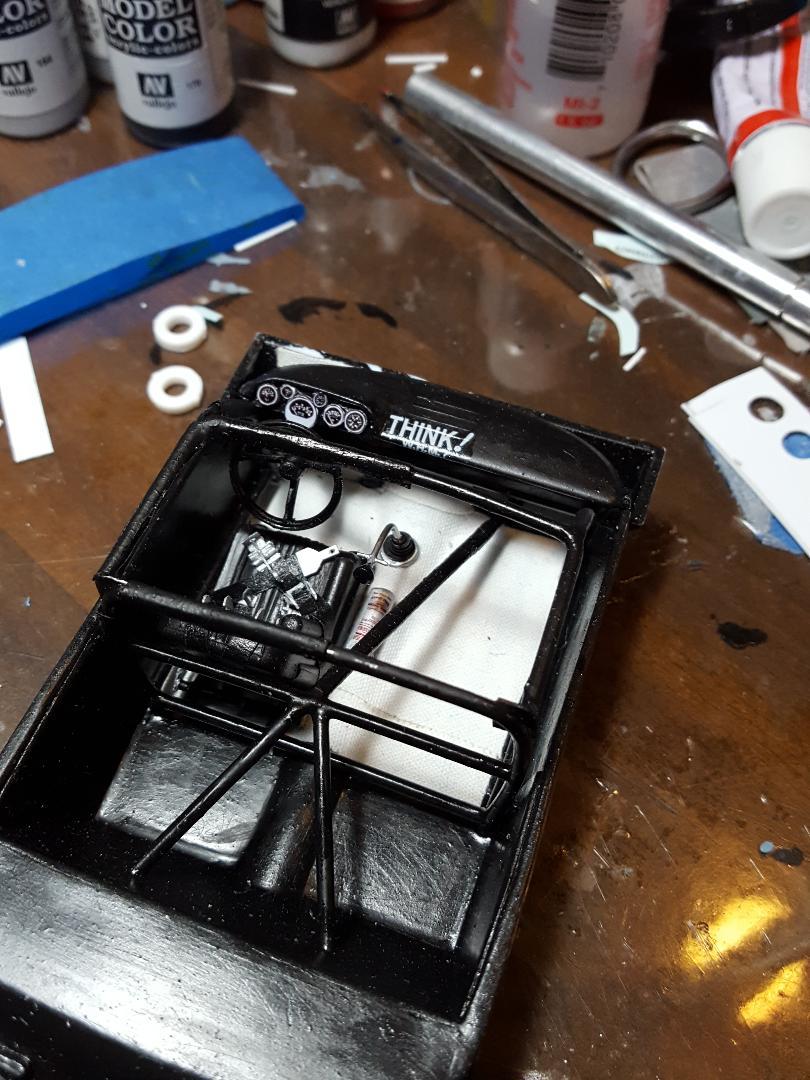
I'll be going with gray wheels. The only images of this car I could find were from a Youtube video of the race and nowhere in the video do the wheels look blue in any way. Added some decals to the dash. I could not find any still color pictures of this car from the 63 Southern 500.
-
Coming along very nicely. Interior looks Awesome and under the hood. Body prep looks great as well.
-
Yes, it would be too difficult for me to make that trip as well. Gotten too old for it. glad I did it back then.
-
Excellent very clean job, Yoshimi. Everything looks just right, and you took a very basic kit and refined it nicely. Hope someday you can make that trip to Virginia to visit the Wood Brothers shop. The summer of 2000 we made a trip to North Carolina to visit the Bill Davis Shop, The Hendrick Motorsports shop and the "Garagemahol" D.E.I. incorporated shop. I missed seeing Ward Burton by one day at the Bill Davis shop but Tommy Baldwin gave us free reign to walk around the shop and get up close and personal with the mechanics while they worked on the 22 and 93 Pontiac Grand Prix's. I dont think you can get access like that anymore, but you never know. Those are memorys I will never forget.
-
1963 Super Torque Ford
MarkJ replied to MarkJ's topic in WIP: Stock Cars (NASCAR, Super Stock, Late Model, etc.)
No way, Pierre. Not this close to the end. So far, I have never stopped on a model and not finish it, even when I know it's not going to turn out very good, like this one. I never could get this pearlized paint to turn out right. Needless to say, I'm not doing any more of these. Thanks for the support. -
1963 Super Torque Ford
MarkJ replied to MarkJ's topic in WIP: Stock Cars (NASCAR, Super Stock, Late Model, etc.)
Carl, yes, I will be making covers for the head light pods and park lights. I'm not familiar with the vents you are talking about. I have a paper hole punch that makes perfect covers for the headlights, but you have to remove the bulging headlights for them to fit on the edge of the headlight pods. -
1963 Super Torque Ford
MarkJ replied to MarkJ's topic in WIP: Stock Cars (NASCAR, Super Stock, Late Model, etc.)
Just a few more things to do to get this thing assembled. The wheels don't seem to be the baby blue they usually appear to be. I have a picture of Fred lieing next to one from the actual southern 500 car taken from a YouTube video of the race itself and the color seems to be a light blue/gray metallic.
-
1963 Super Torque Ford
MarkJ replied to MarkJ's topic in WIP: Stock Cars (NASCAR, Super Stock, Late Model, etc.)
Thanks for the info, Robert. -
So true, Chuck. Thrift store does make sense though.
-
Kenneth, I'm not up on the newest names for things. Exactly what is a theft store.
-
All I can say is WOW. Too awesome for words. Love to know the story about the King figurine.
-
1963 Super Torque Ford
MarkJ replied to MarkJ's topic in WIP: Stock Cars (NASCAR, Super Stock, Late Model, etc.)
Thanks, Brock. I must be getting old because this one is taking a lot more time than previous similar builds. Oh well, no need to hurry. I'm not on any kind of time restraints. -
Just by looking at the picture of the parts before you began assembling, it looks to me like the problem is with the roof and not the windshield frame. jmho.
-
Hanjo, if you have a hair dryer, I always borrow my wife's , you can rig it up and adjust the temperature on it to lightly bend as you move the item that needs reforming. i have used this process with surprisingly good results on styrene. i'm guessing that's what this model is.
-
1963 Super Torque Ford
MarkJ replied to MarkJ's topic in WIP: Stock Cars (NASCAR, Super Stock, Late Model, etc.)
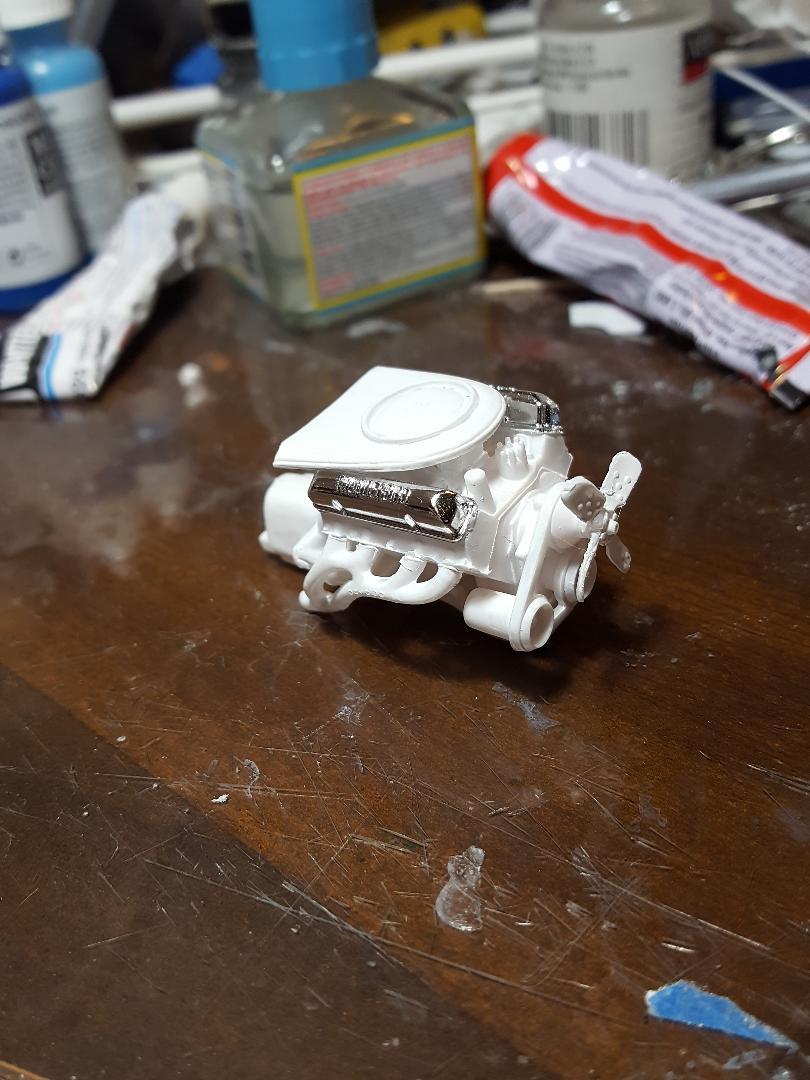
Too bad they put Thunderbird script on these valve covers; I sanded off the script and added small rectangular pieces of bare metal foil. It's not perfect but when I get the Holman and Moody decal on the center of the valve cover it won't be that noticeable. Getting very close to the end. The kit I used for the Fireball Roberts car had smooth chrome valve covers as you can see in some of the previous ref pictures. -
Alfa Romeo 8C 1933 Le Mans winner
MarkJ replied to Pierre Rivard's topic in WIP: Other Racing: Road Racing, Land Speed Racers
Wow, that's about the best resin casting I have ever seen. I've only done one resin so I cannot tell you much about it. The one I did was of very poor quality. So, the final result was not very good either. -
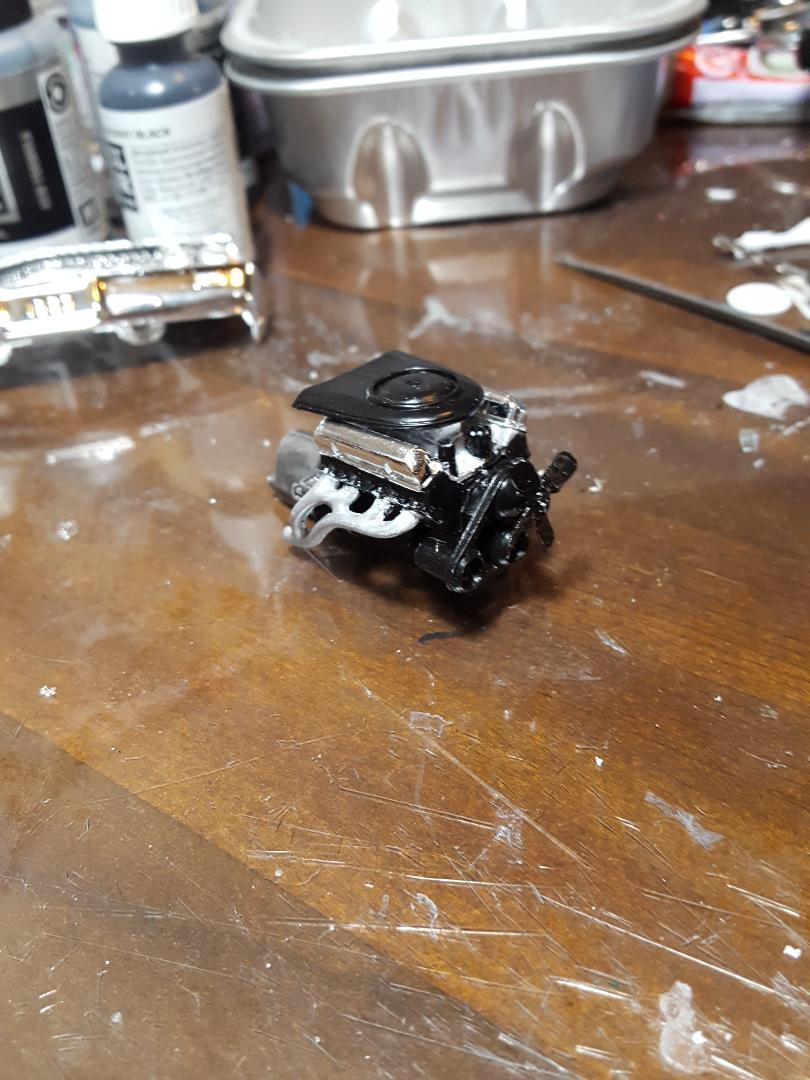
1963 Super Torque Ford
MarkJ replied to MarkJ's topic in WIP: Stock Cars (NASCAR, Super Stock, Late Model, etc.)
Had to get rid of the Thunderbird letters on the valve covers.
-
1963 Super Torque Ford
MarkJ replied to MarkJ's topic in WIP: Stock Cars (NASCAR, Super Stock, Late Model, etc.)
It will be a while before I get to a 65 Ford. My next build will be a 3rd gen Camaro.
.jpg.bce124635d6f3b17b3d1ea5bbd82642e.jpg)
.jpg.f209f12abda7d9fda1ec1648571e2715.jpg)