e30lover
-
Posts
367 -
Joined
-
Last visited
Content Type
Profiles
Forums
Events
Gallery
Everything posted by e30lover
-
Thank you. I used sanding file to remove all the mold lines.
-
Appreciate the compliment! Thanks. Tamiya body is very sharp and I almost burned through some edges and had to touch it up afterwards!
-
Thanks! Appreciate the compliment! Yes sidewalls are important - I hate seeing these cars sitting on low profile tires! Thank you! Thanks a lot! Thanks! Thank you! Thanks! Thank you! Thanks a lot! Thank you! Appreciate it! Thanks! Thank you! Thanks a lot! I highly recommend this kit - they do know how to engineer an excellent kit! Thank you! If you have any questions lmk! Appreciate the kind words! Good that Tamiya now makes a version with most of those mods included now Thank you! I used to hear body shop guys saying "it's all in the prep" and now I know! Thank you! Thanks a lot! Glad to hear that - I don't think I've ever seen actual ZG with its iconic nose shape, in person. Thank you! Thanks a lot!
-
Here's the full post for the finished build:
-
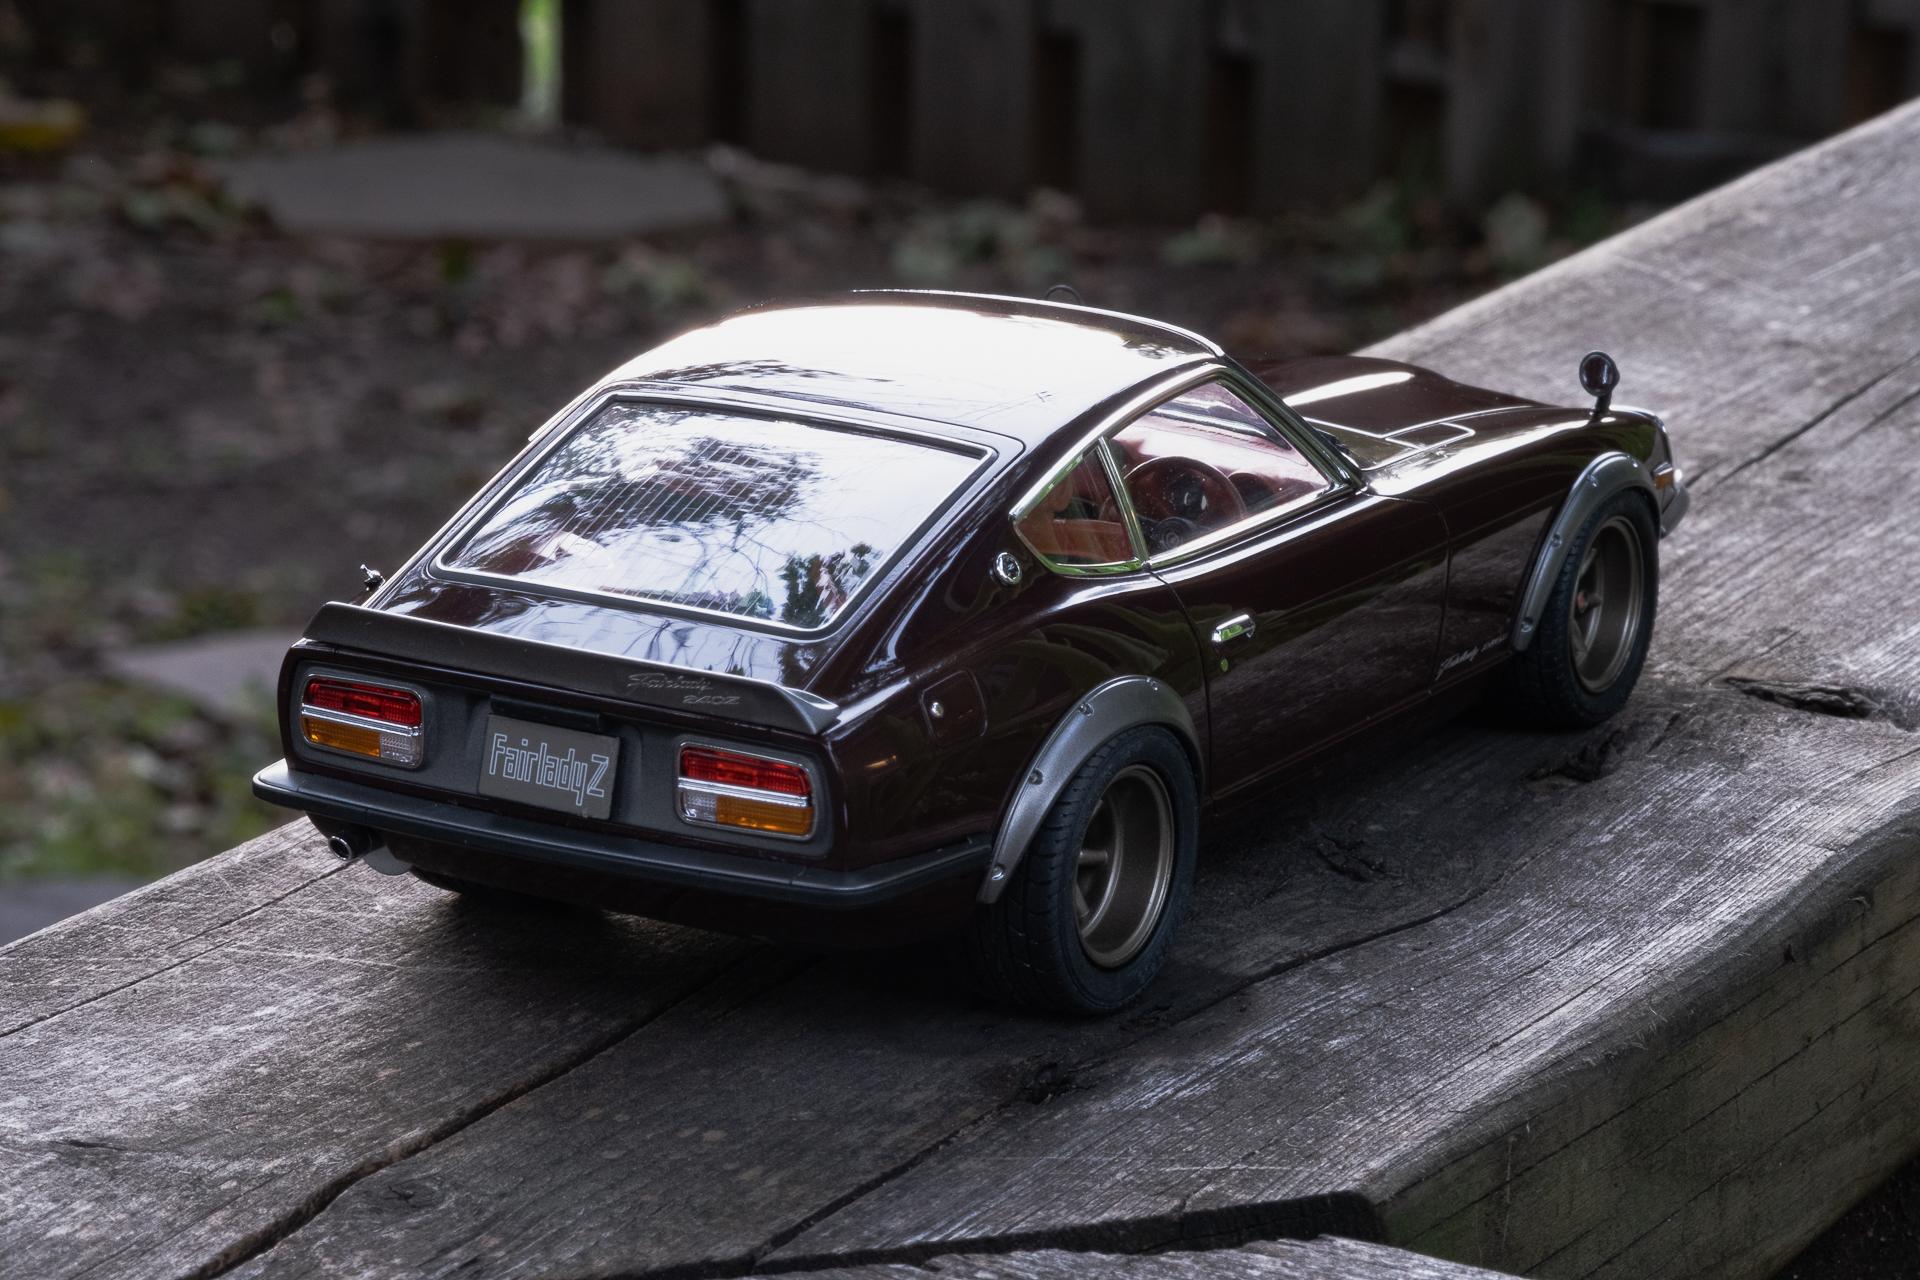
My 1/24 Nissan 240ZG build is now finished! I bought this kit before Tamiya released the “street custom” version that had most of additional items I was looking for, but the street custom version didn’t include the G-nose anyways. My goal was to create period OEM+ look with a bit of enhancements, so I used Scale Production’s weber carbs, Singer-style bucket seats, Fujimi’s Watanabe wheels and meatier tires from Tamiya NSX kit. Here’s the full process: - Scribed panel lines and wet sanded with 2000 grit - Painted silver then wet sanded with 3000 grit - Mixed red, blue and black to simulate maroon then laid 2 base coats - Laid 2 clears (Super Clear III), wet sanded with 3000 grit, then laid 3rd clear coat - Cured paint for more than a month - Wet sanded with 3000 > 6000 > 8000 grit then polished with Tamiya 3 stage compounds and Hasegawa ceramic compound - Cut wheels to fit them within the fenders and painted with mixture of gold, silver, flat black - Added weber carb, intake manifold, fuel line, throttle cable, ignition wires and ignition coil - Painted interior with mixture of red, yellow and brown, flocked the rear trunk area and laid flat clear on top - Lowered suspension As usual with Tamiya’s newer releases, everything fit perfectly and intricately engineered parts really elevates the finished look.

- 34 replies
-
- 19
-

-
Final assembly was actually somewhat challenging as there were so many parts involved! Brake light assembly is like 10 parts, all chrome trims are separate parts but it's now finished.
-
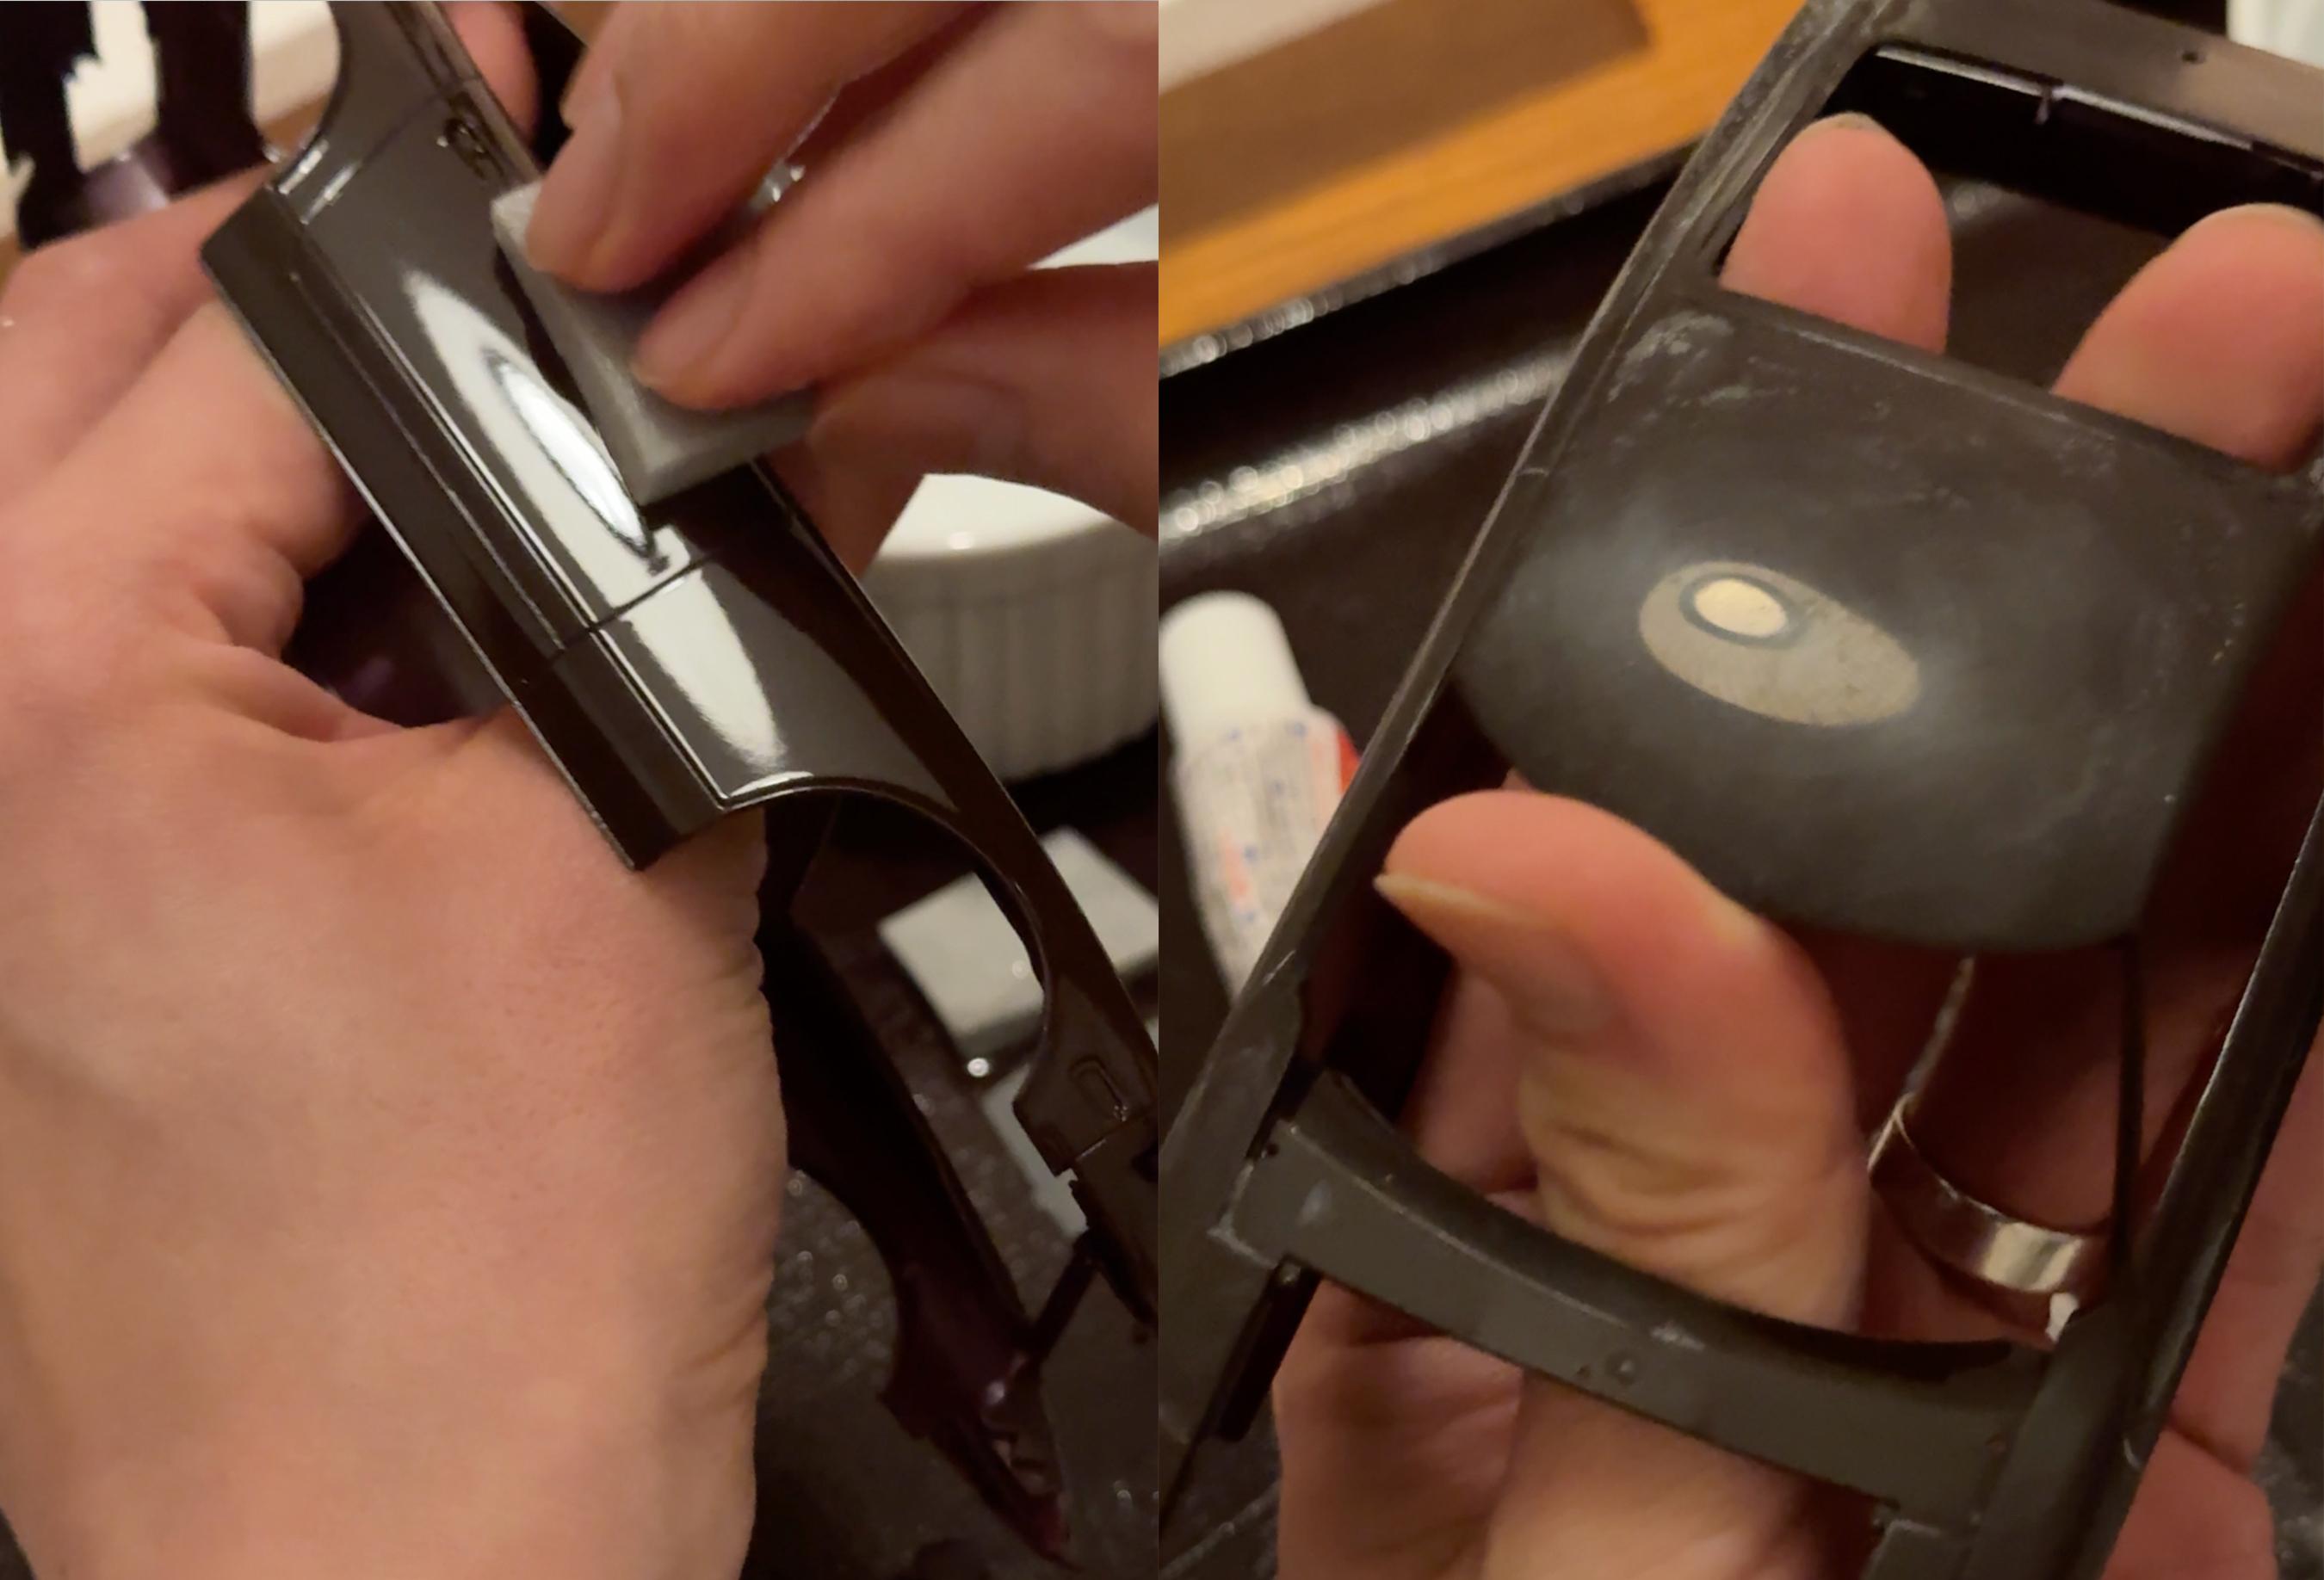
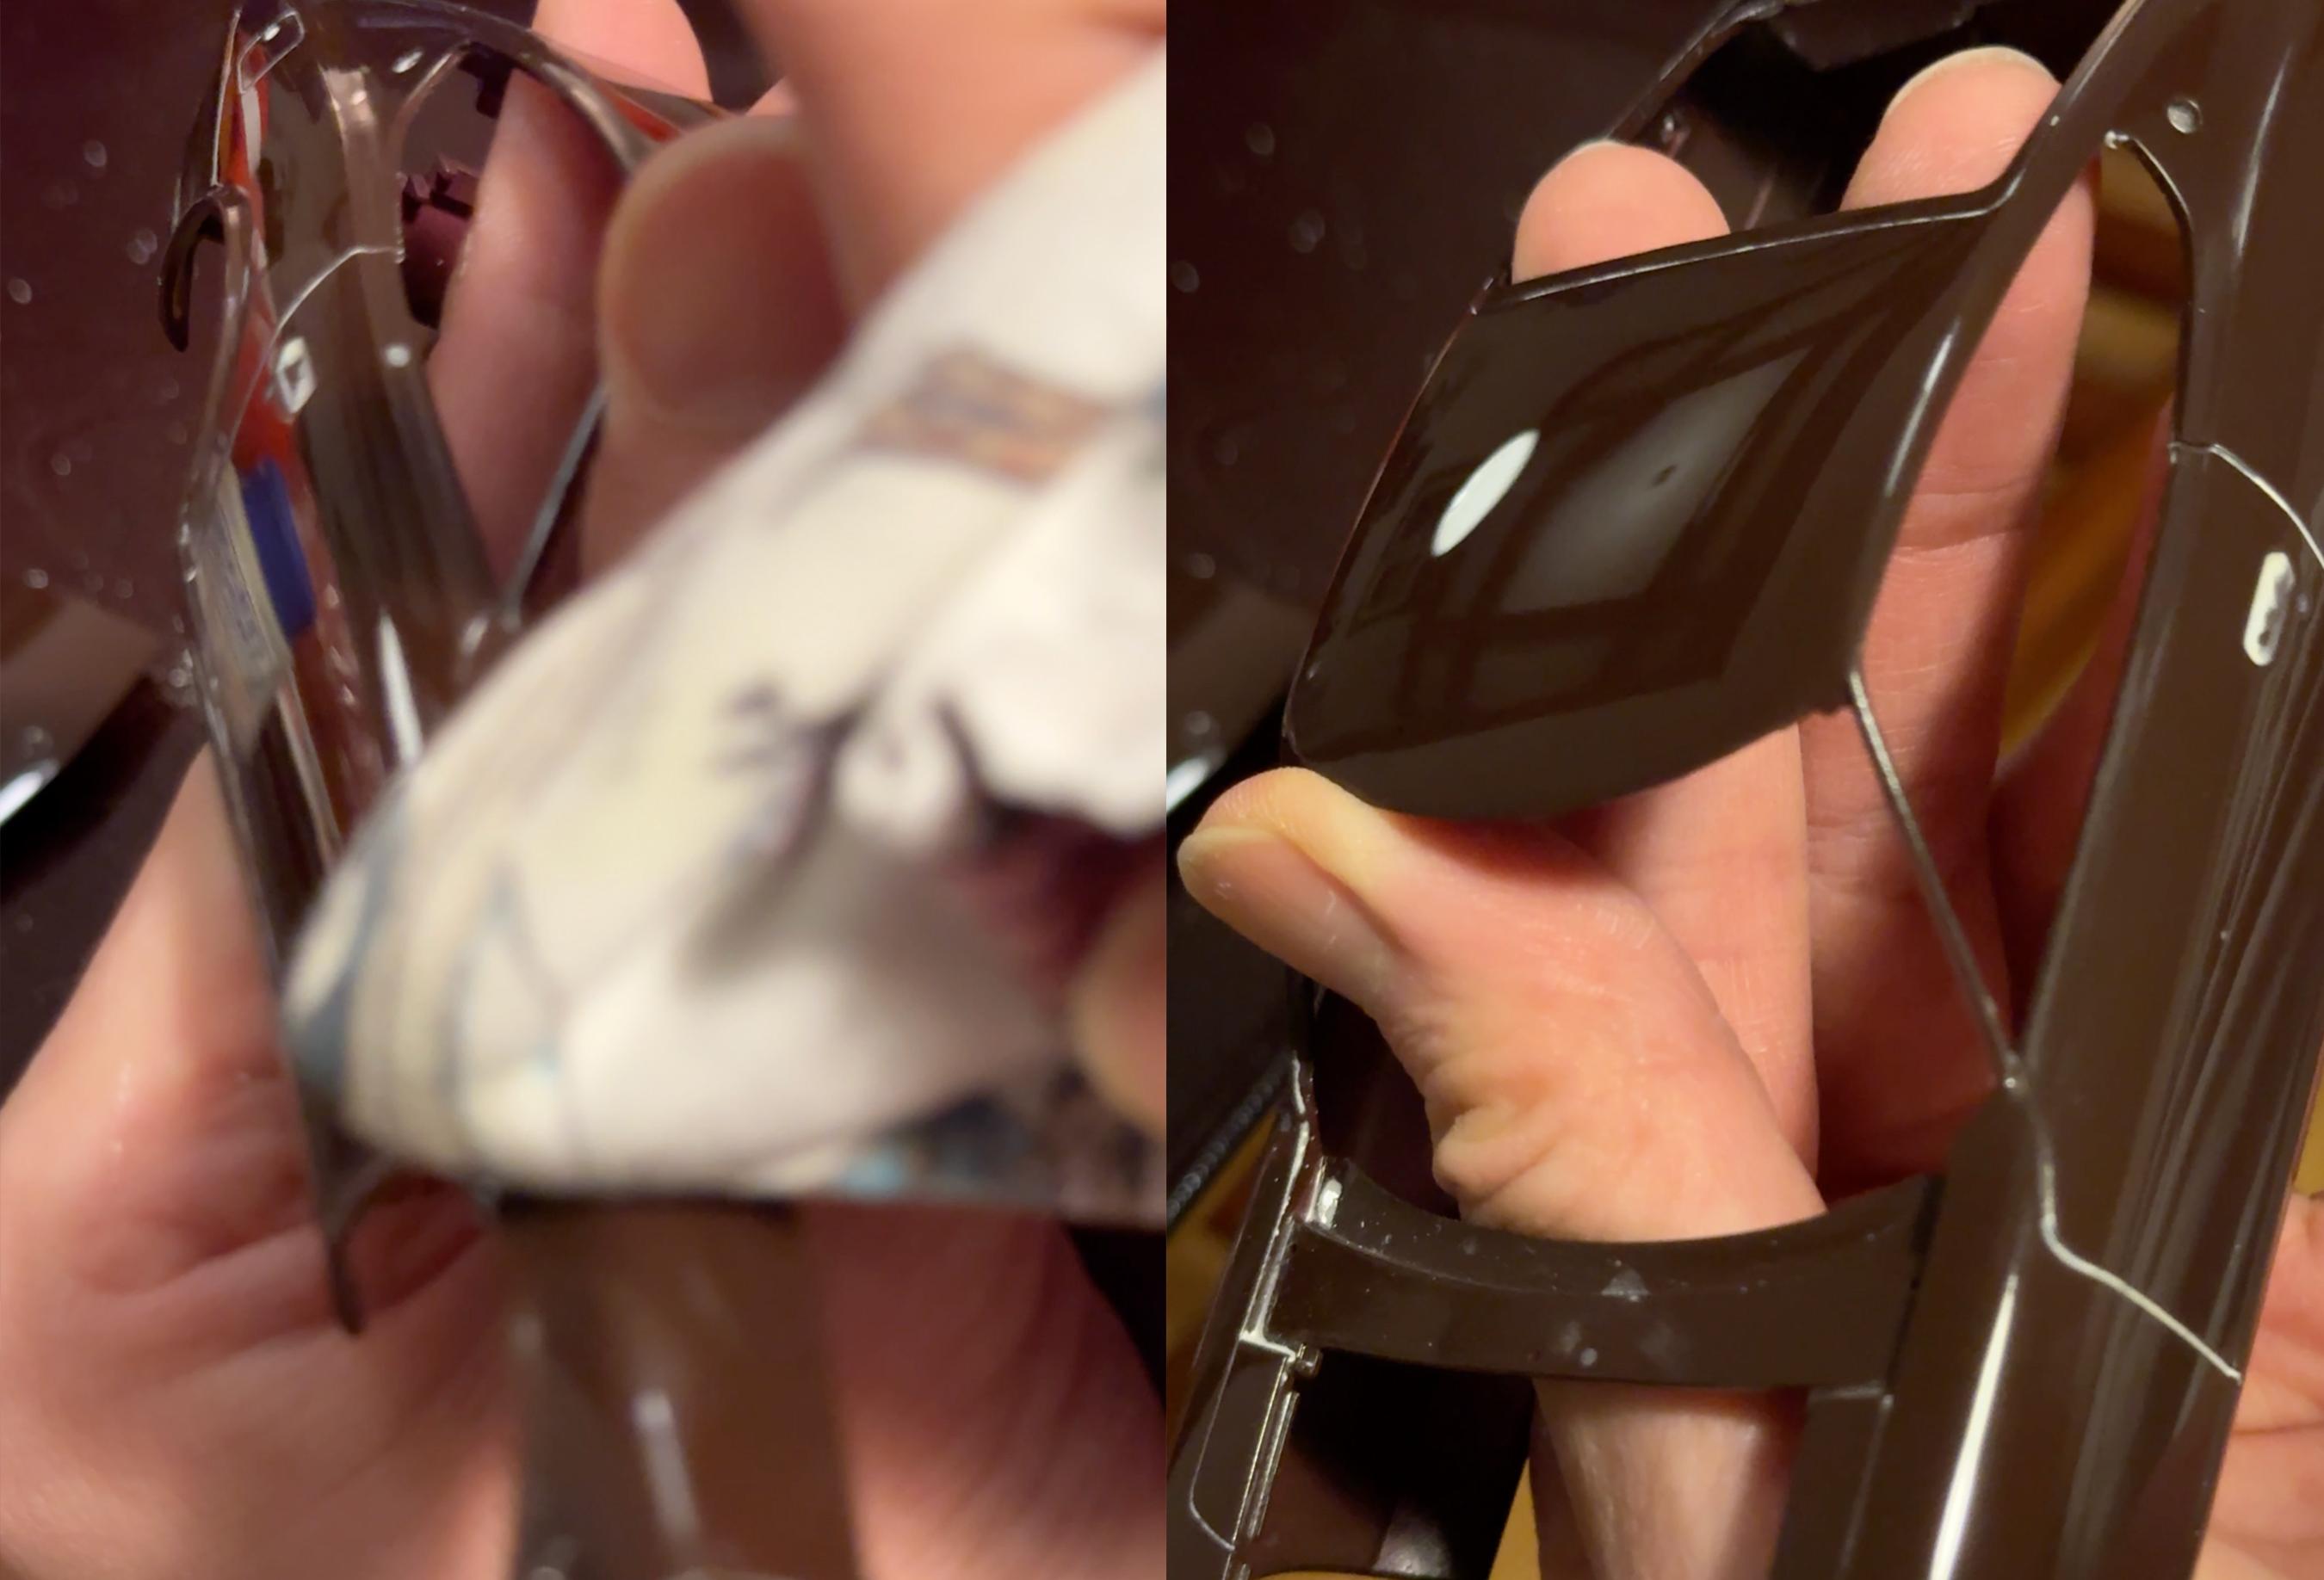
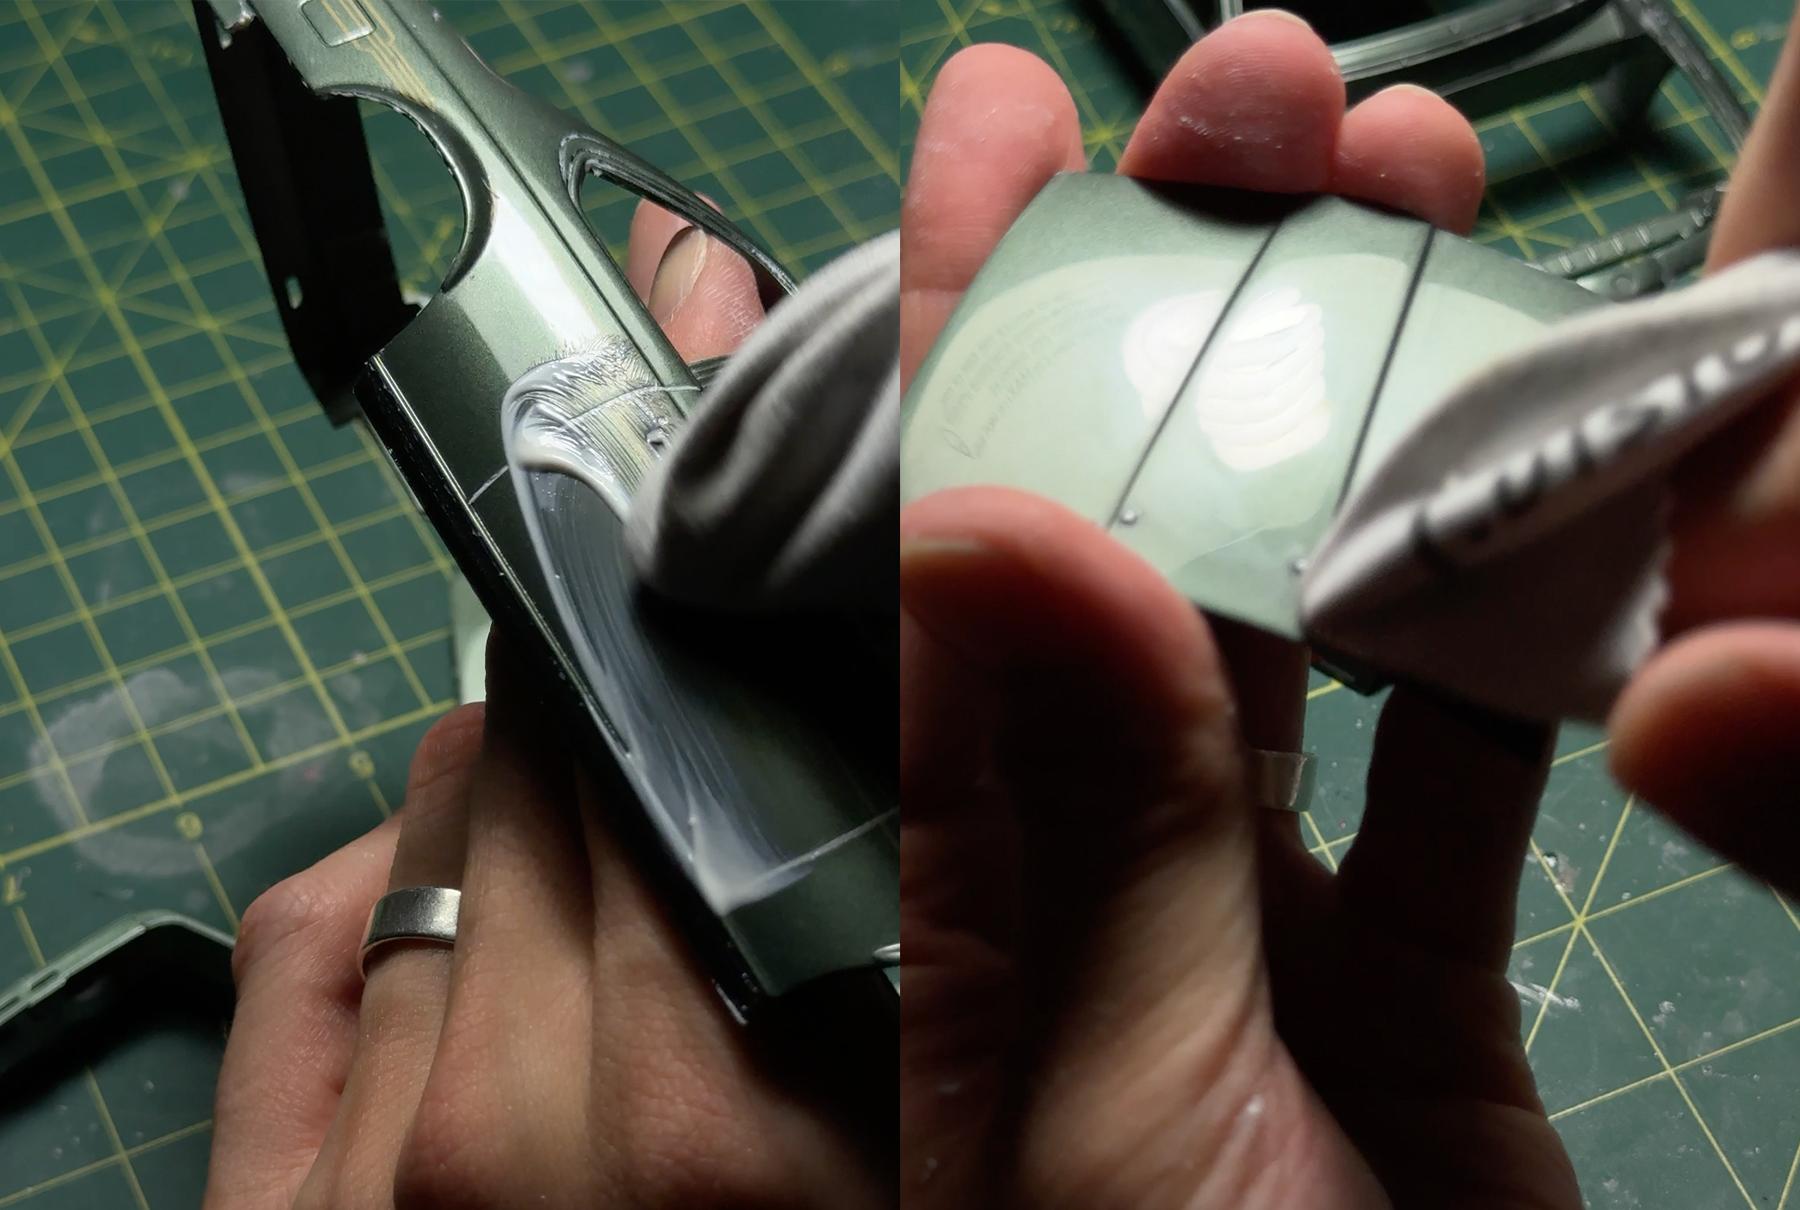
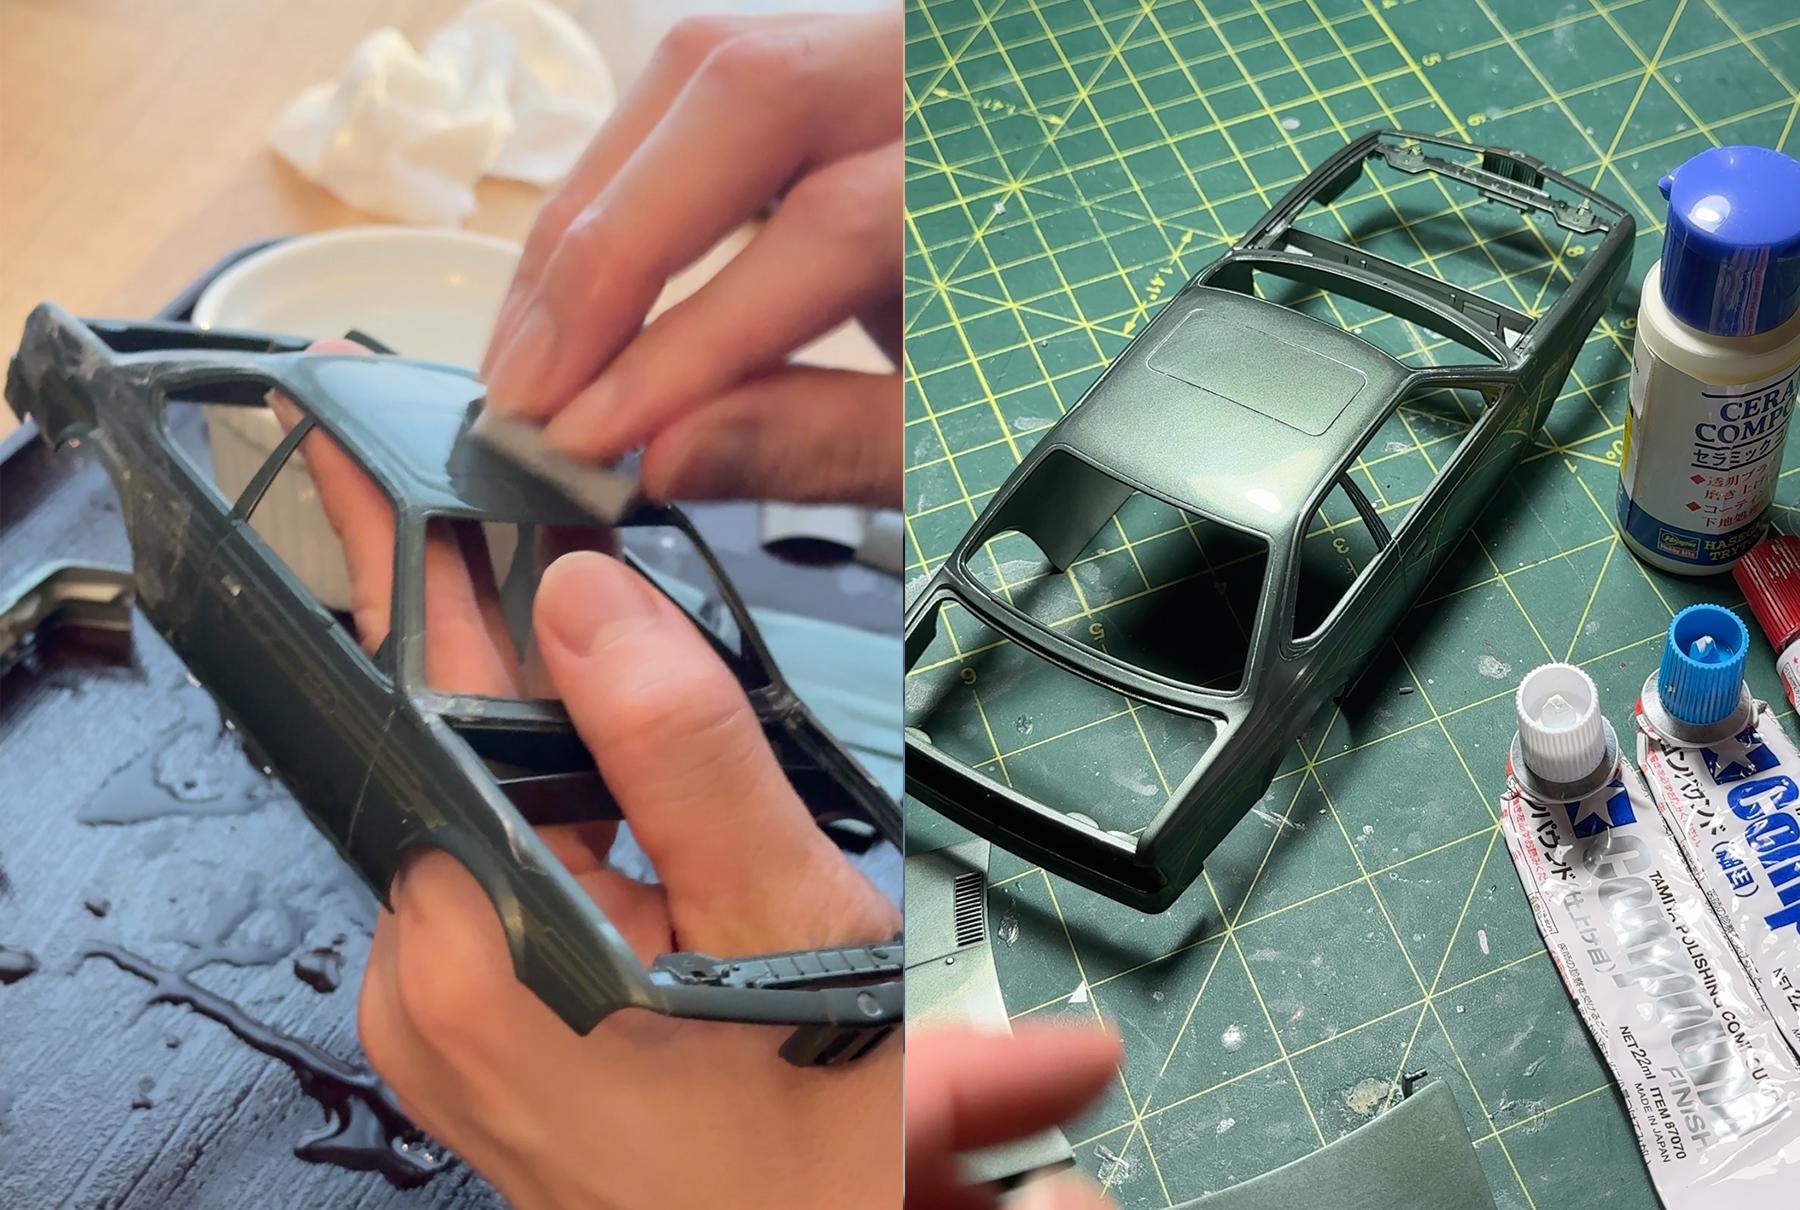
Once paint was fully cured (+1 month curing at minimum) I started wet sanding with 3000, 6000 and 800 grit . Then I polished with Tamiya 3-stage compounds and Hasegawa Ceramic compound. This is what the surface looks like under the natural lighting. Not too shabby!
-
Thank you! Thanks a lot! It's a Fujimi 15" RS Watanabe! It's got a nice dish but way too wide for most street cars. I tried mixing a lot of variants but most browns just make them dull - primary colors are way to go! Thank you! One of best accessories I bought! Thank you! That's very cool!
-
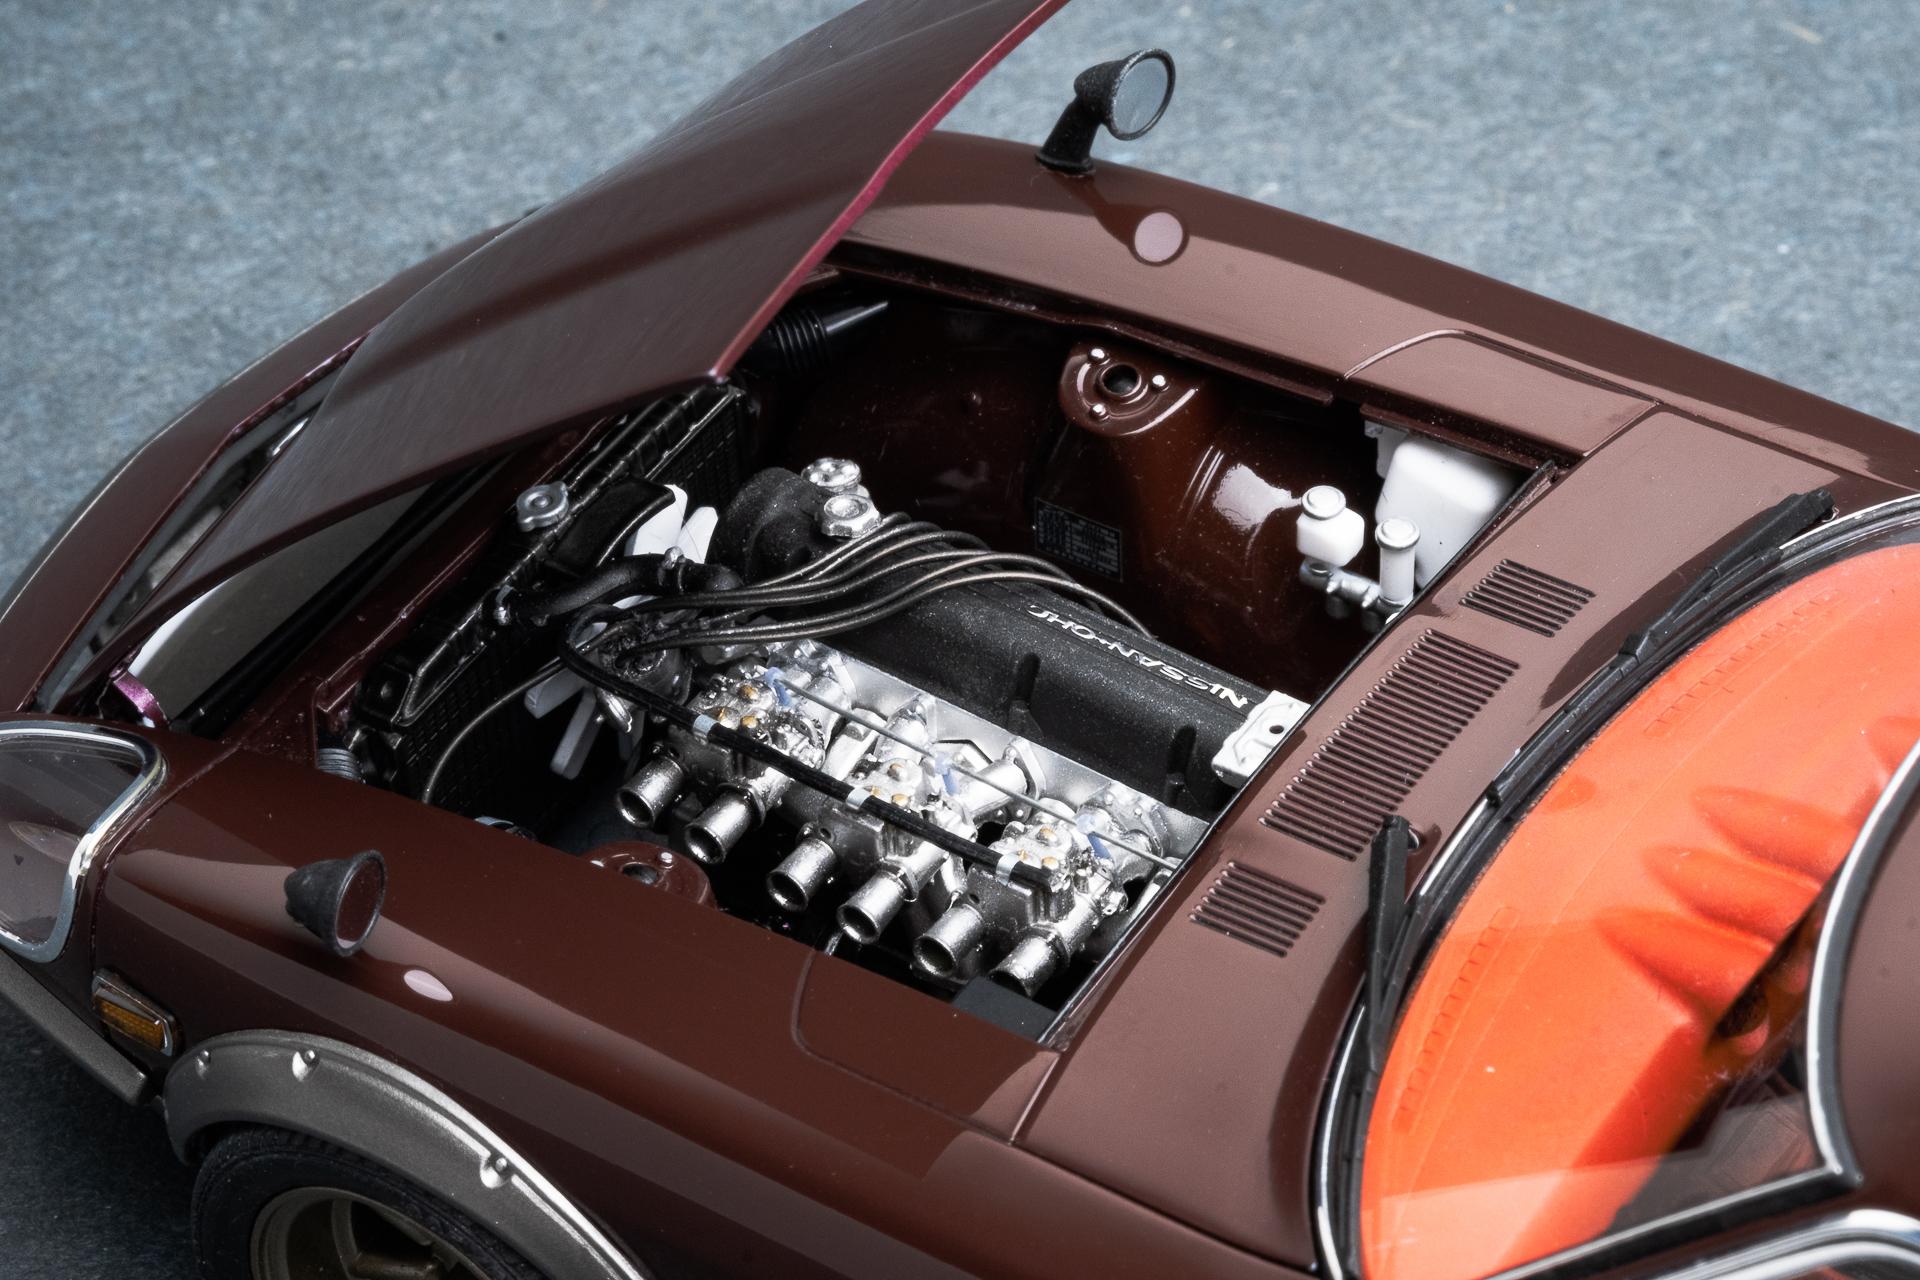
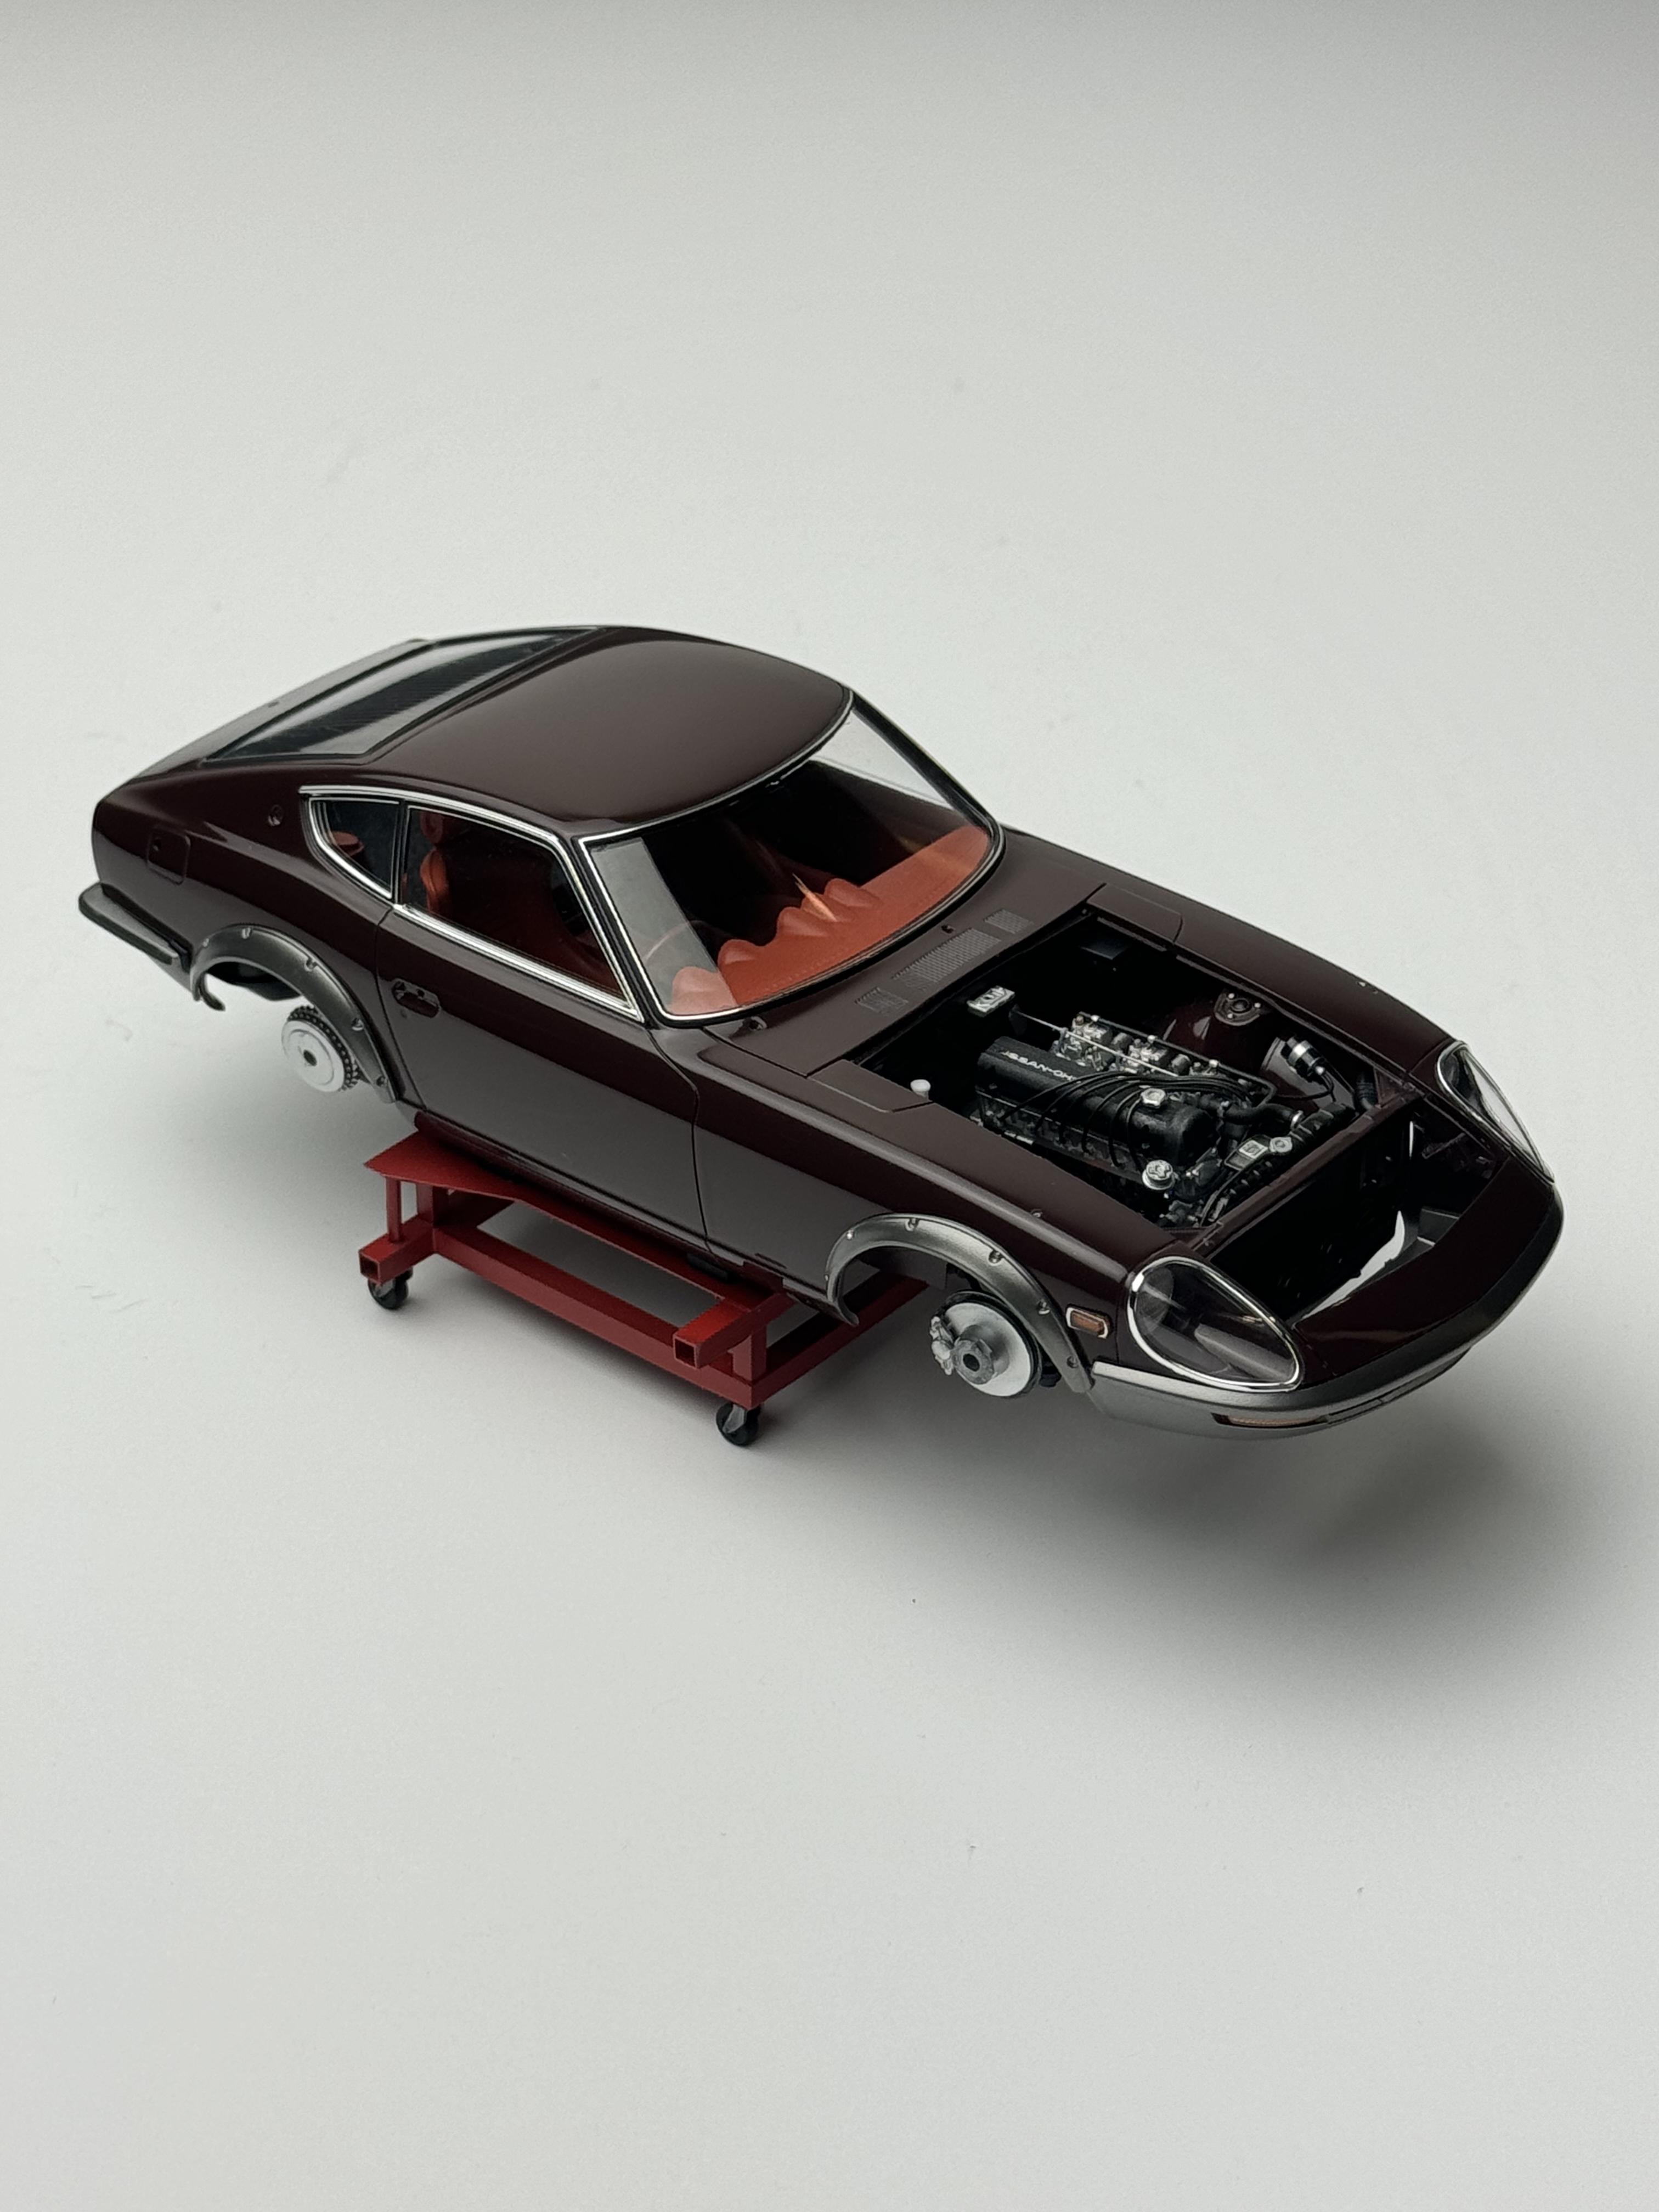
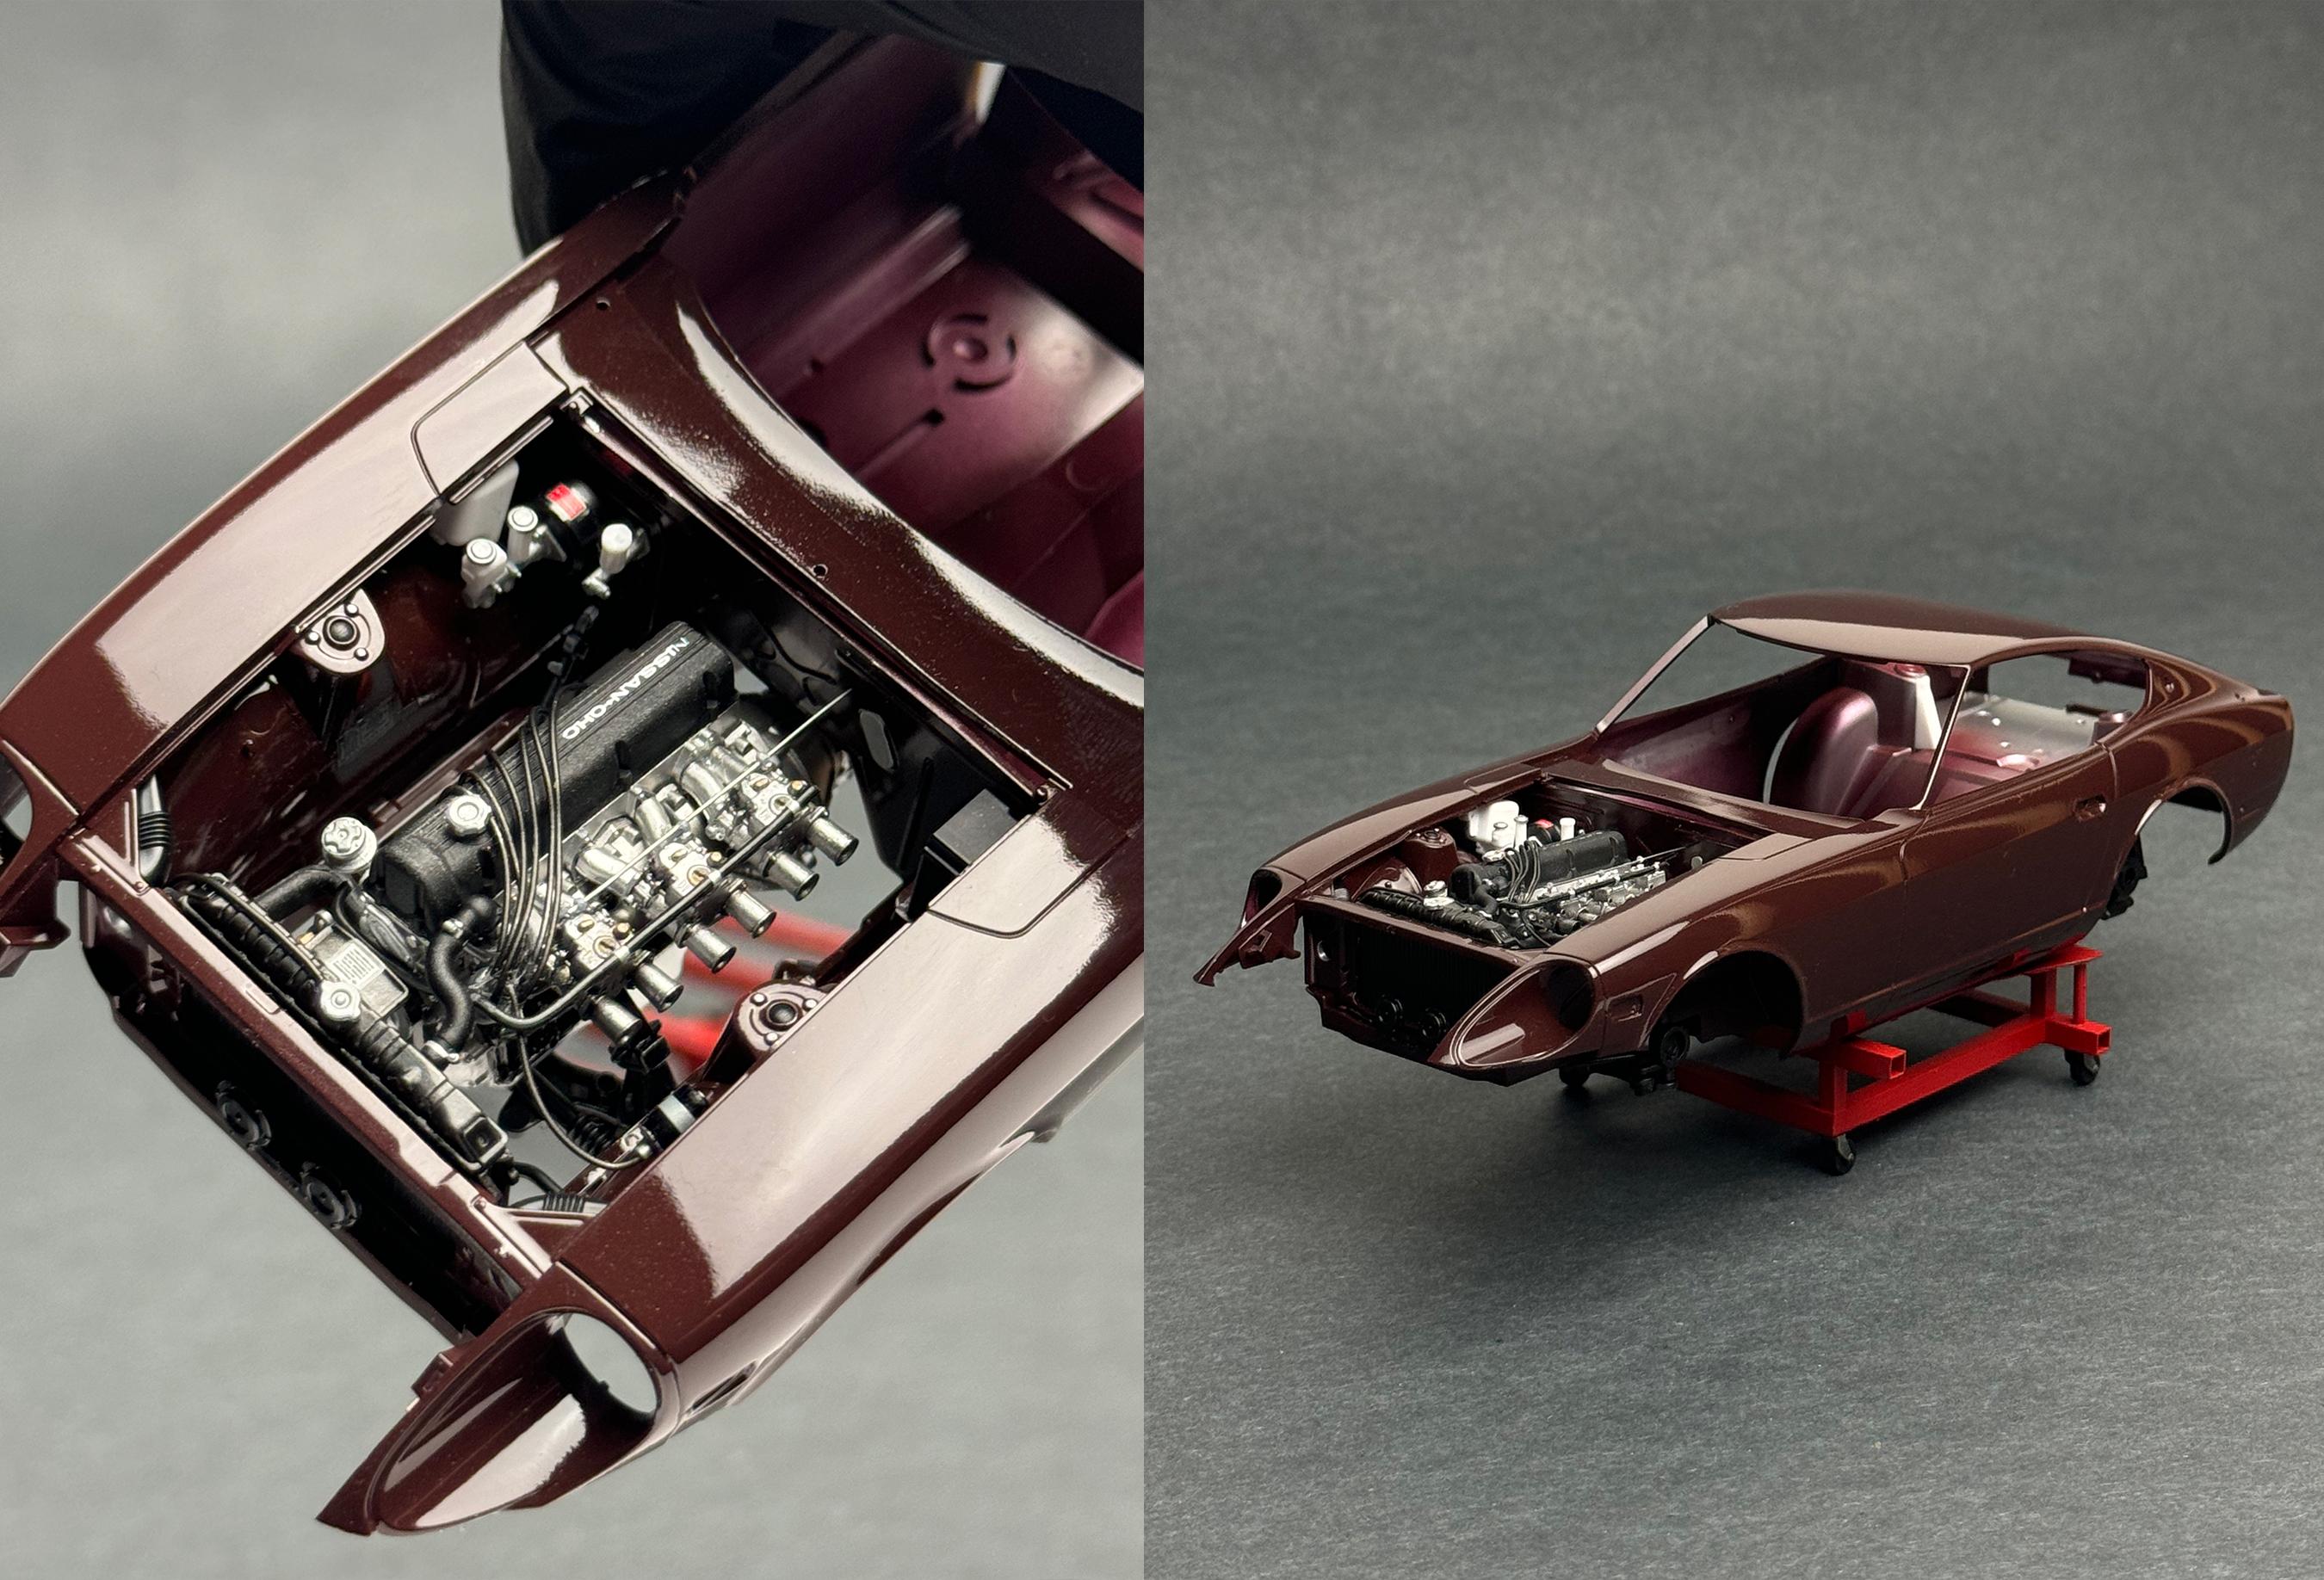
I bought this kit before Tamiya released the street custom version that had weber throttle body.. so I used resin weber and made my own intake manifolds using leftover parts, and added ignition wires. Then I used couple of small brackets, drilled them and put thin metal rod across to simulate throttle cable, and added radiator overflow hose as well as fuel line. I also made ignition coil as kit didn't come with one. I mixed brown, red and yellow to create saddle brown colour for the interior. Seats are aftermarket singer-style recaros. I used leftover GT2 shifter boot instead of stock one, masked the interior to get two-tone look then flocked the trunk area. Watanabe wheels were painted with mixture of gold, silver and flat black to get titanium-like finish.
- 32 replies
-
- 10
-
-

-
Thank you!
-
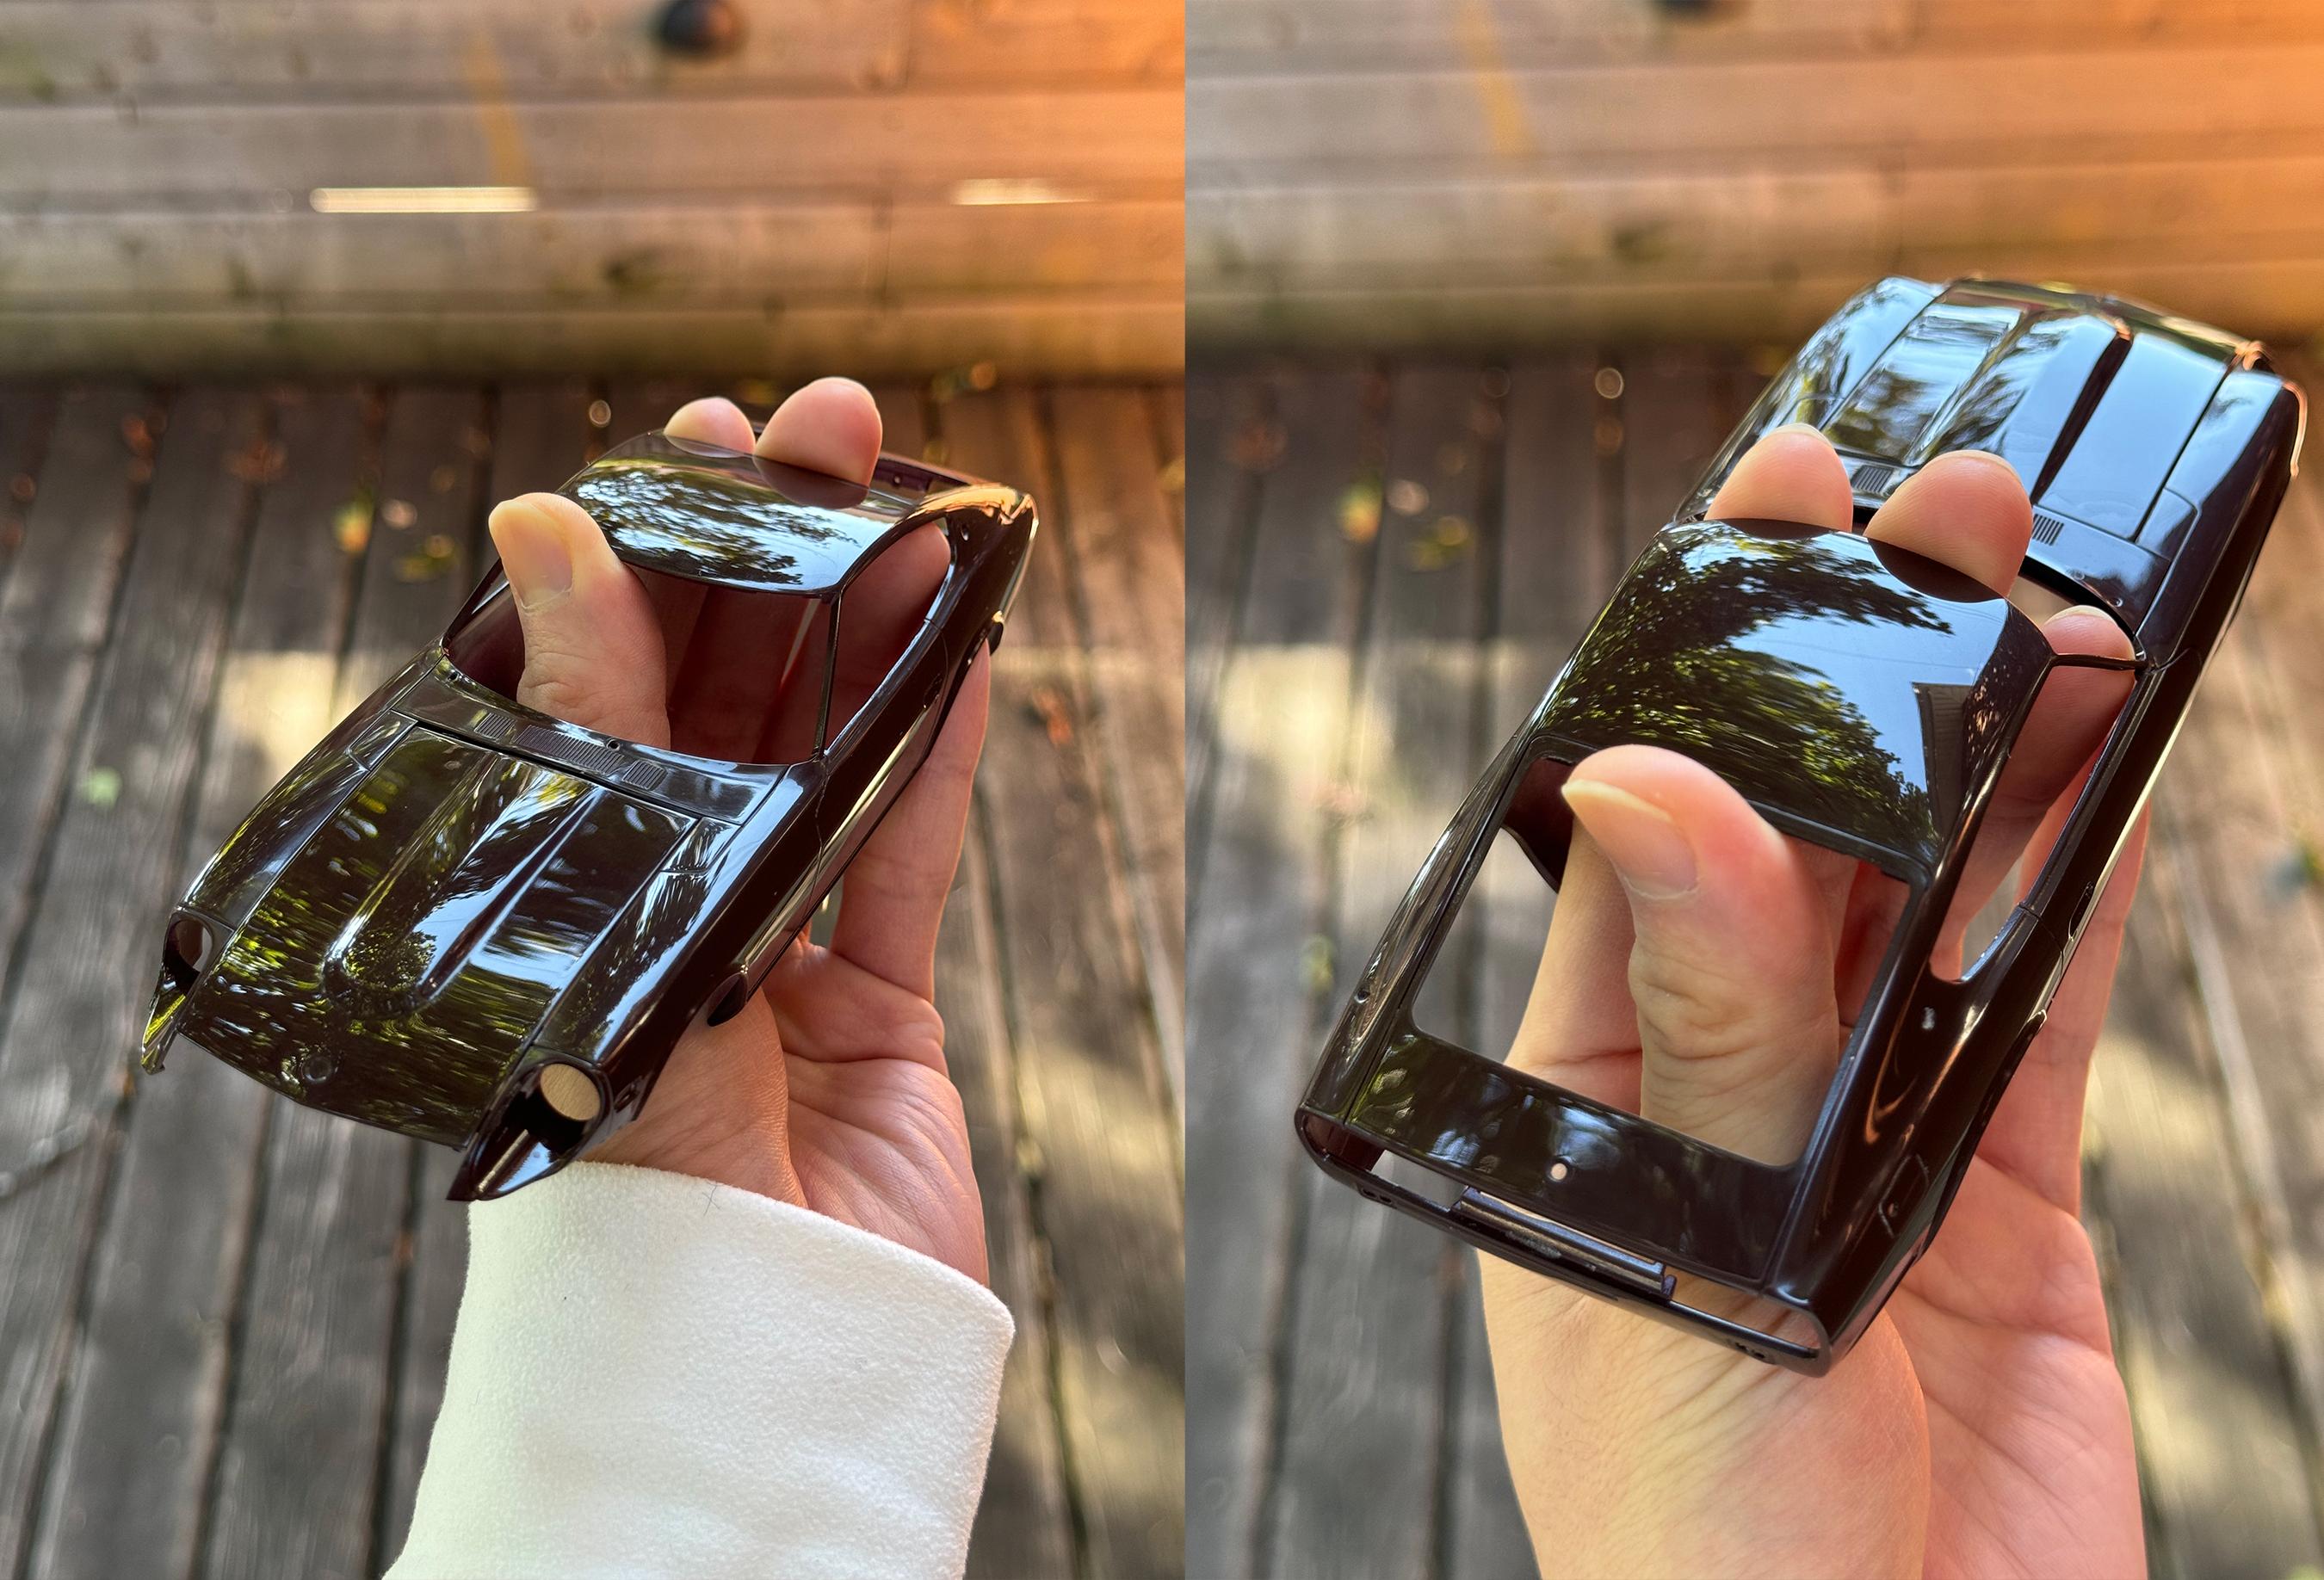
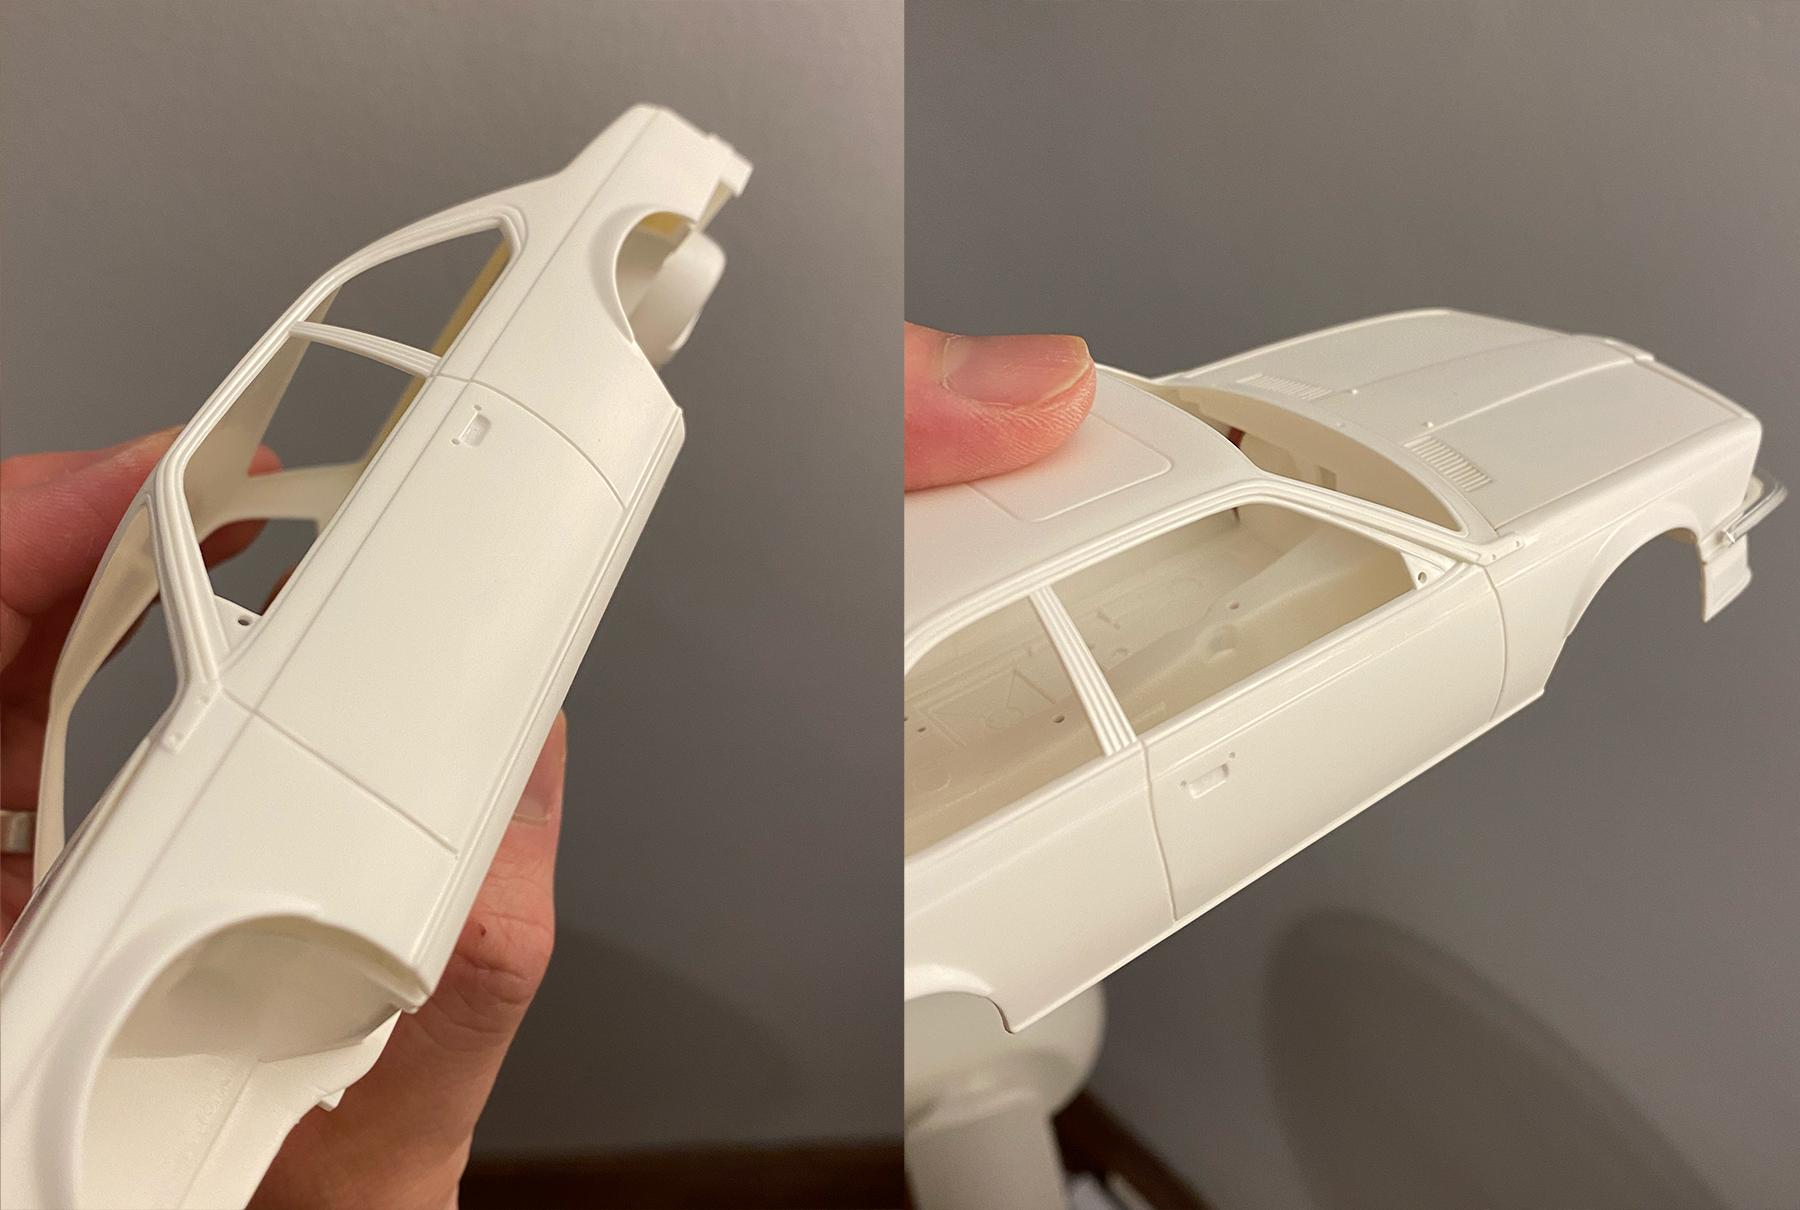
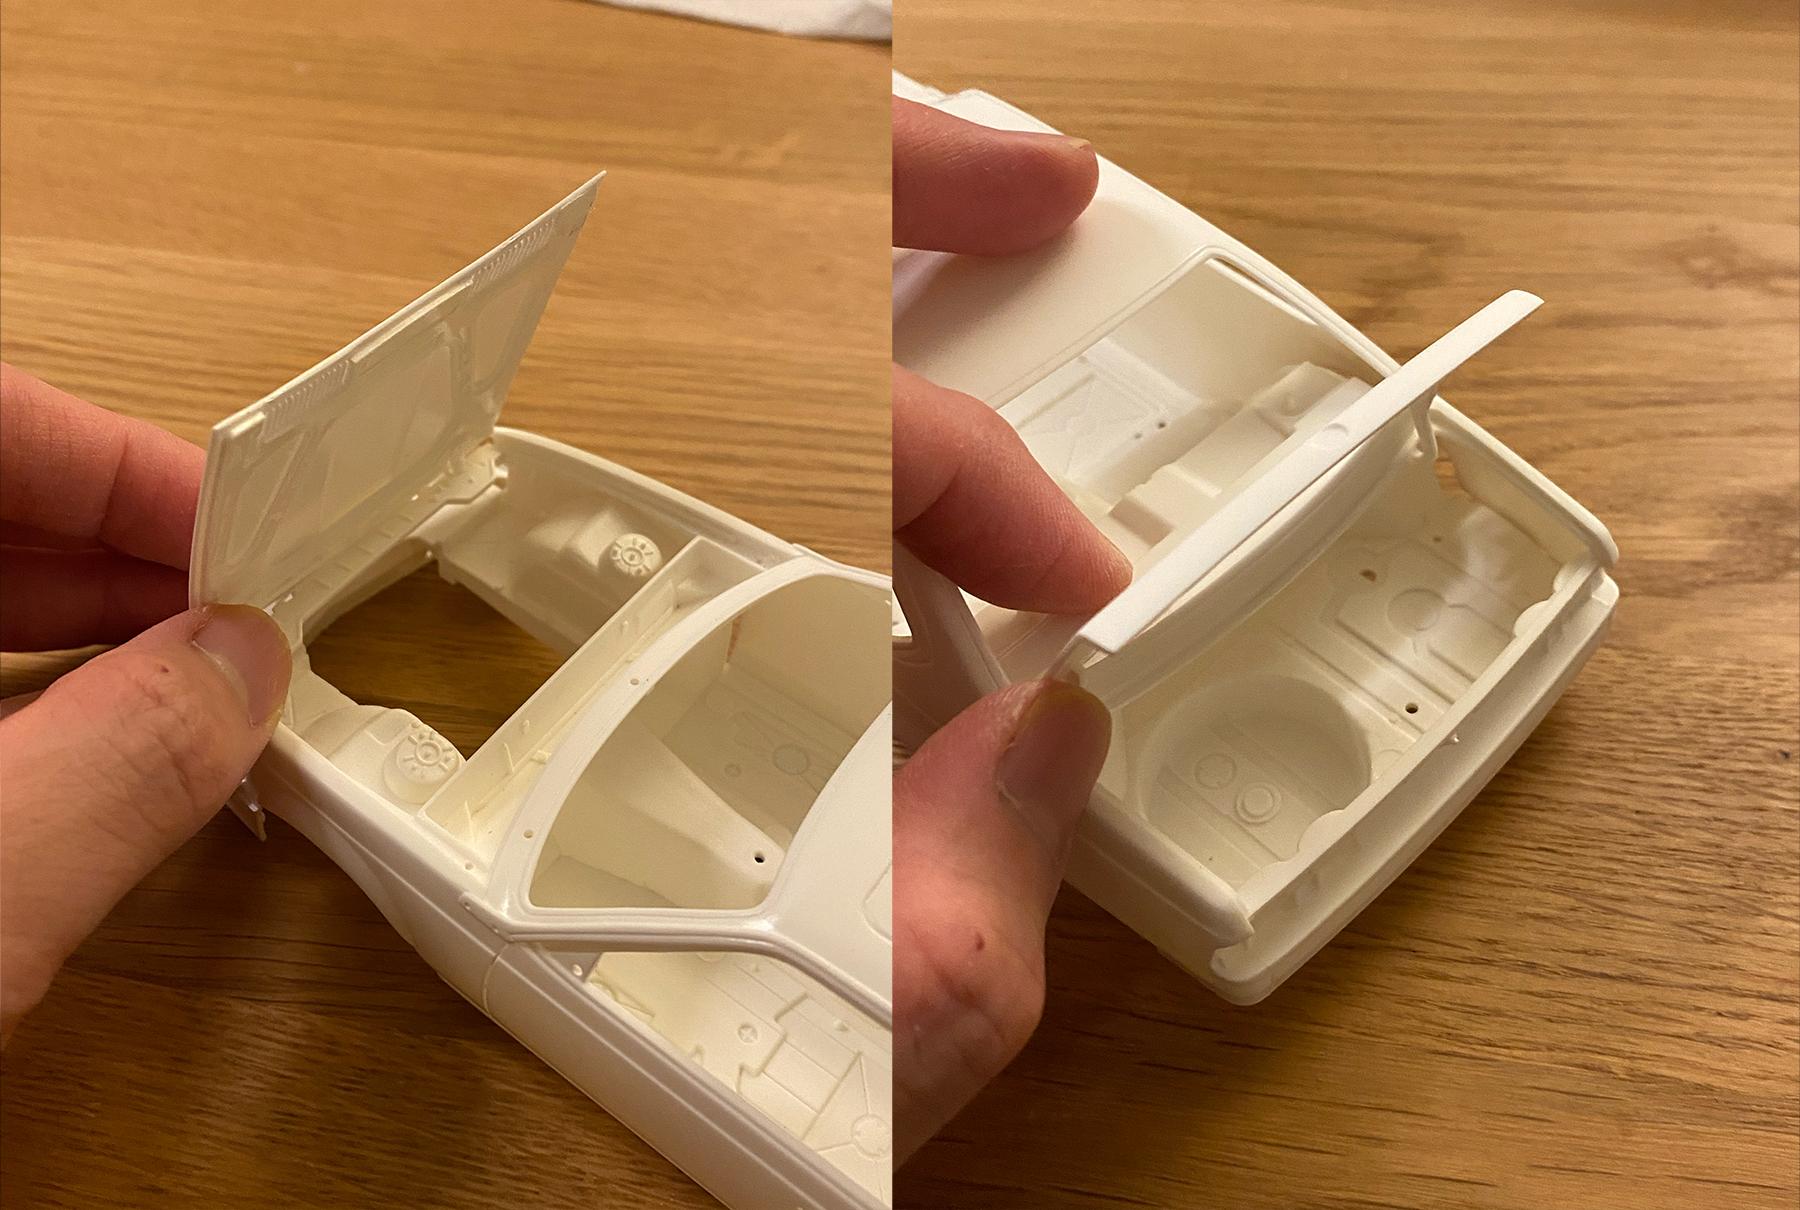
Thank you! I love maroon. My pleasure. Thank you! Thanks a lot! I usually glue all the non-movable body panels (as long as I can actually assemble bottom without breaking) first to make sure I don't rub any paint or get glue marks. Cutting the roof support was dicey but looking at the spruce location I had to cut it to make sure none of them are visible after painting. Sometimes I break A pillars but this time I was super careful!
-
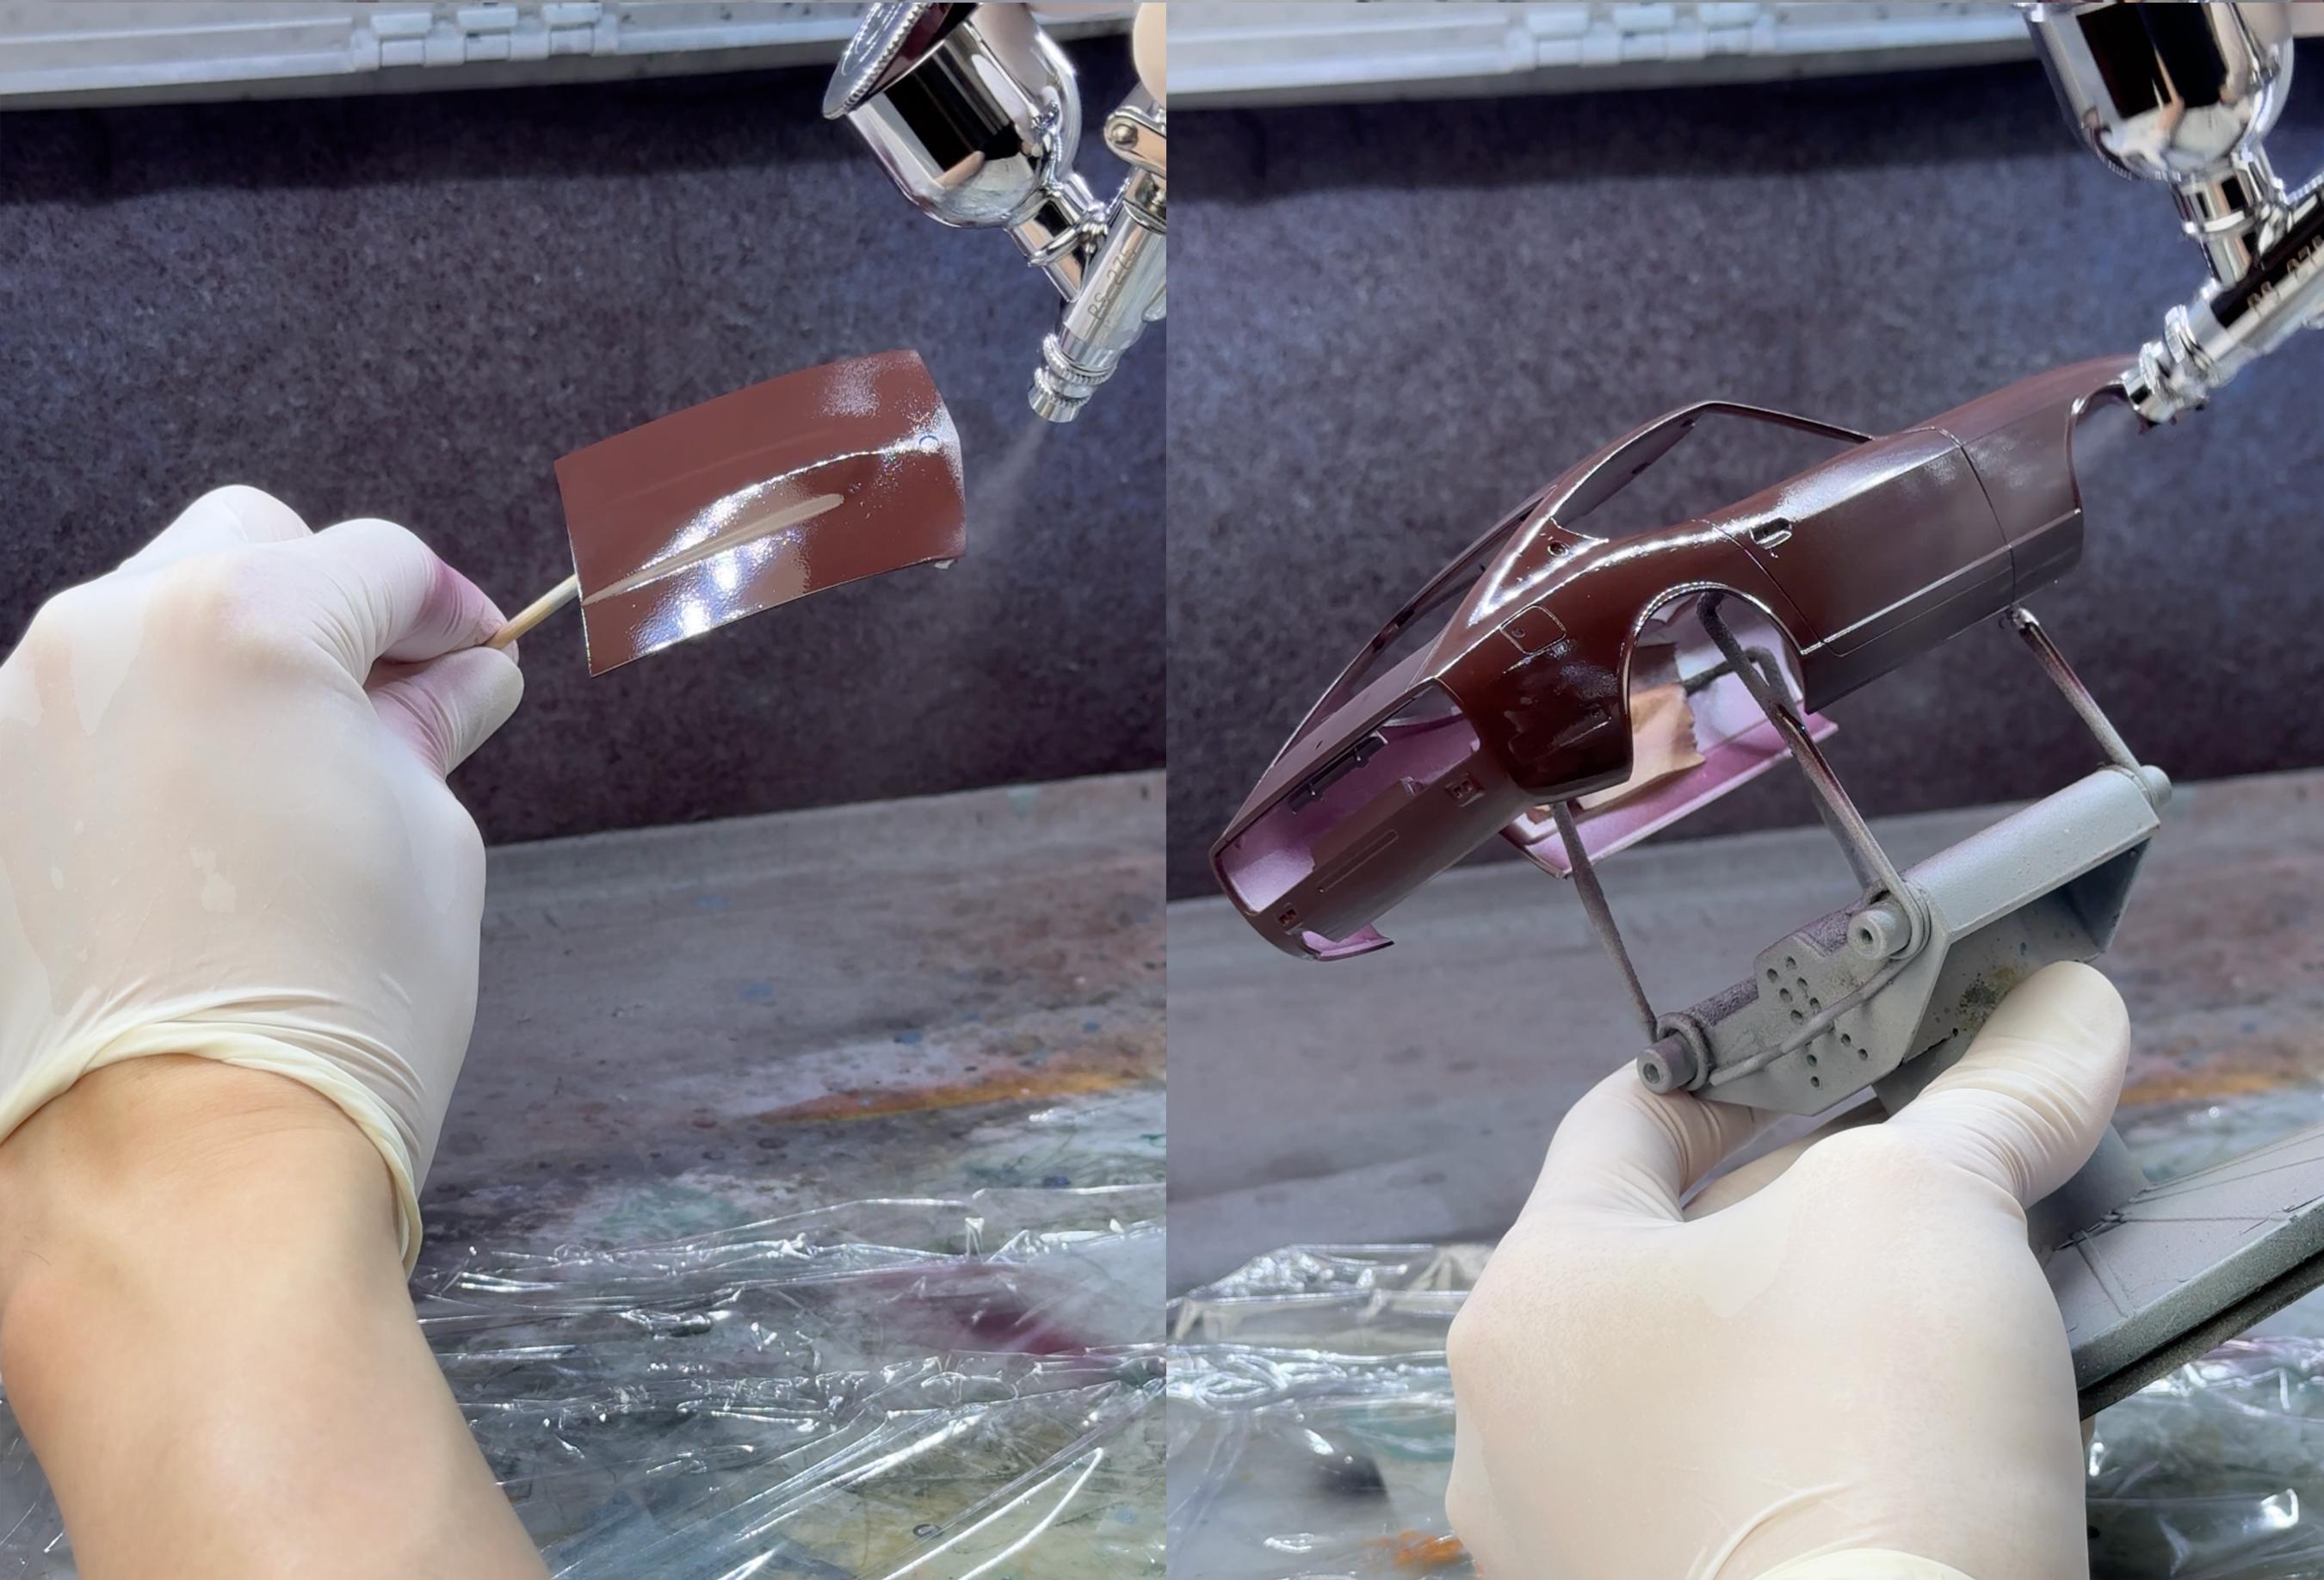
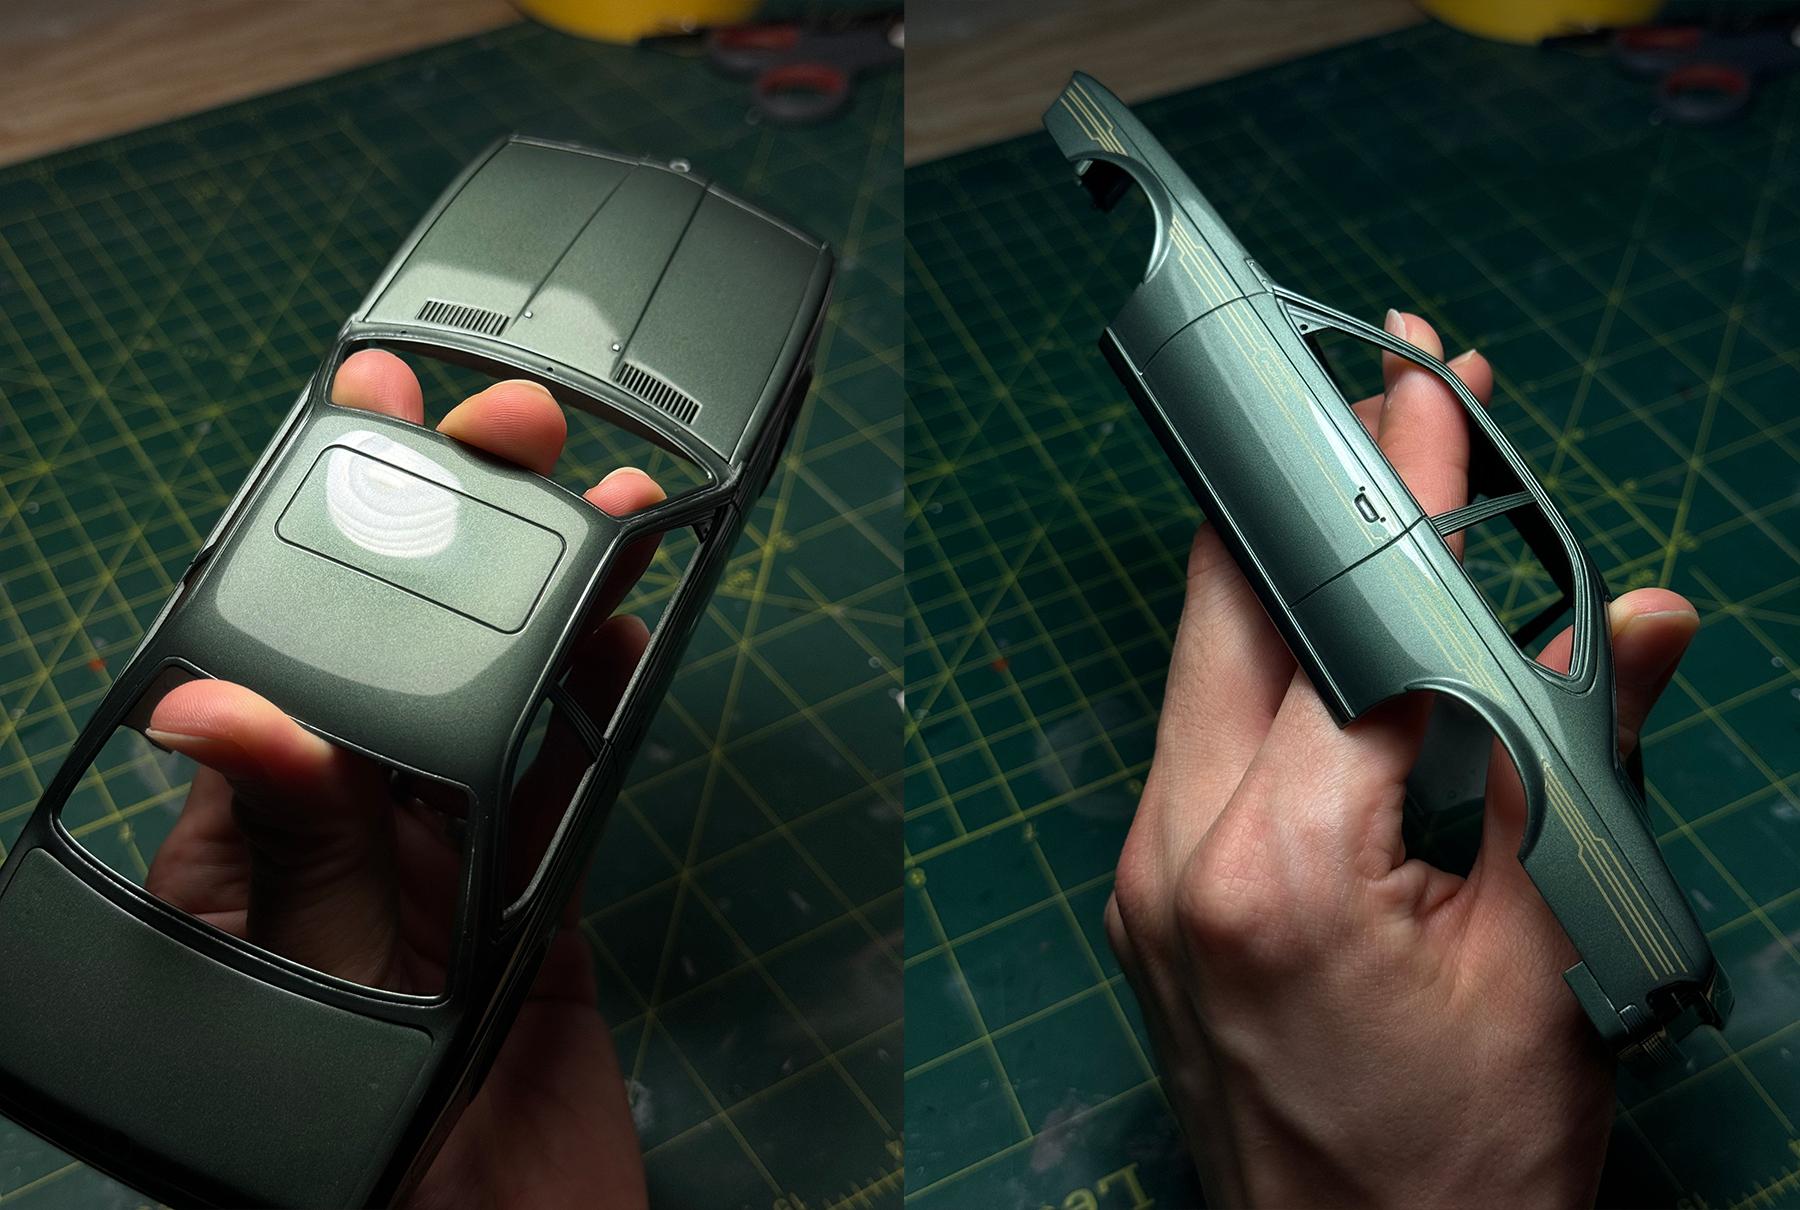
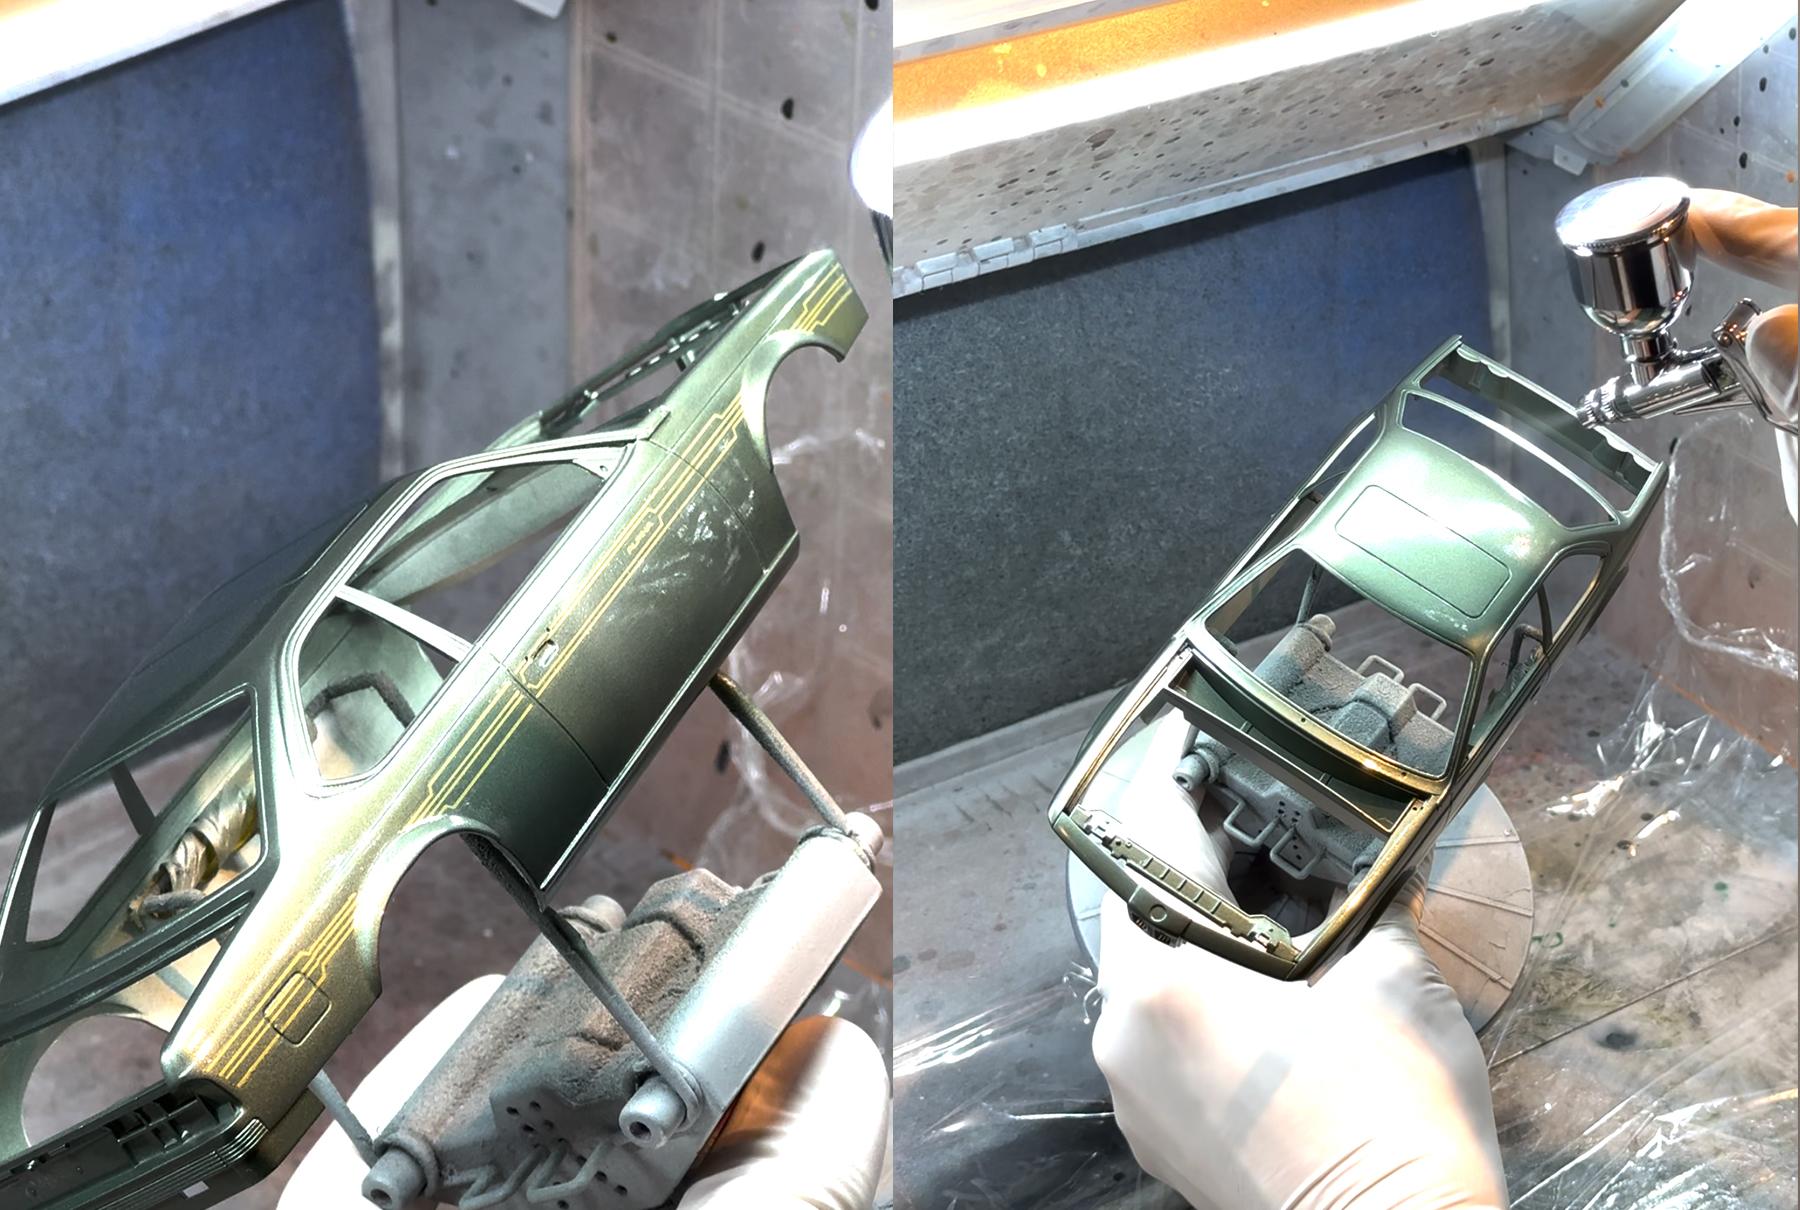
Hi gents, here's the build update! I started painting the body with maroon colour. I mixed red, blue and black until I got the shade I wanted and laid two base coats: After that I laid the first clear coat (mr color super clear III with self leveling thinner) Once the first coat dried, I wet sanded with 3000 grit sandpaper until all the surfaces especially around the panel lines are completely flat. Then I laid 2 additional clear coats, with non-metallic colours I can go pretty wet without disrupting the metallic flakes. Next up will be engine bay and interior!
- 32 replies
-
- 11
-
-
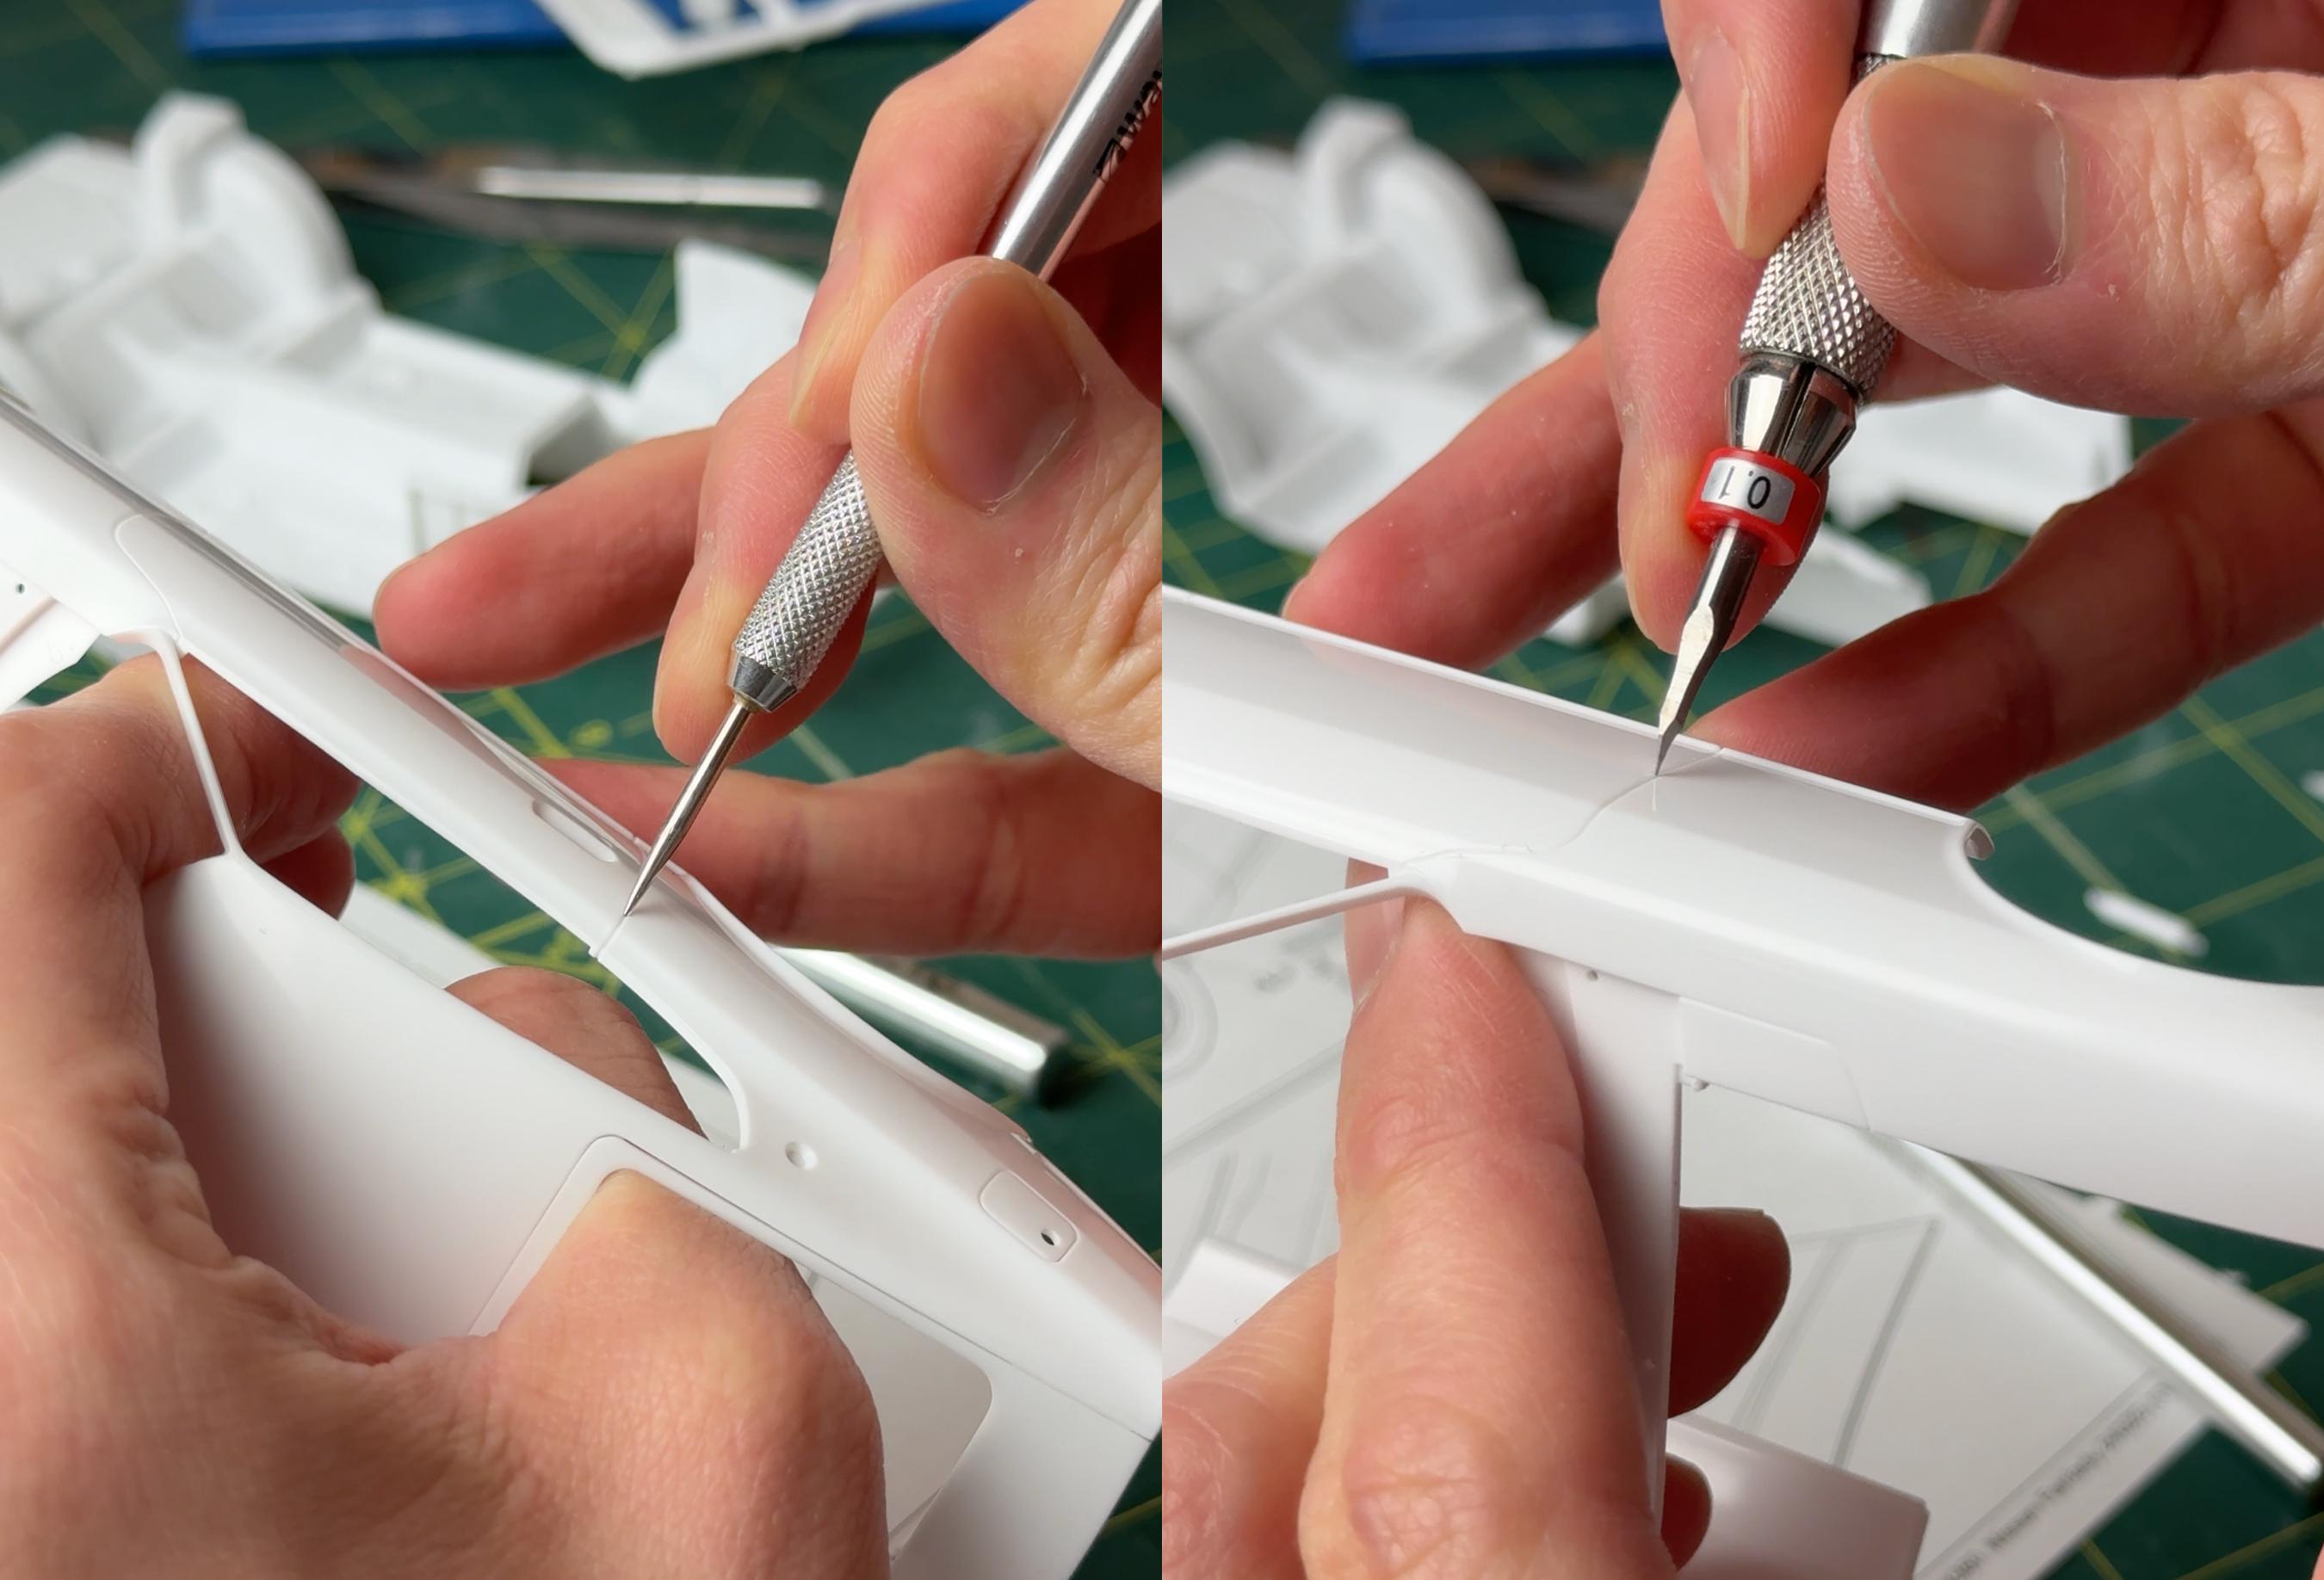
Always! Thank you! Thanks! 🍿 I use Wave materials carving needle and Funtec scriber with interchangeable blades. These two are what I use! https://www.plazajapan.com/4580488730751/ https://www.plazajapan.com/4943209382538/ Thank you!
-
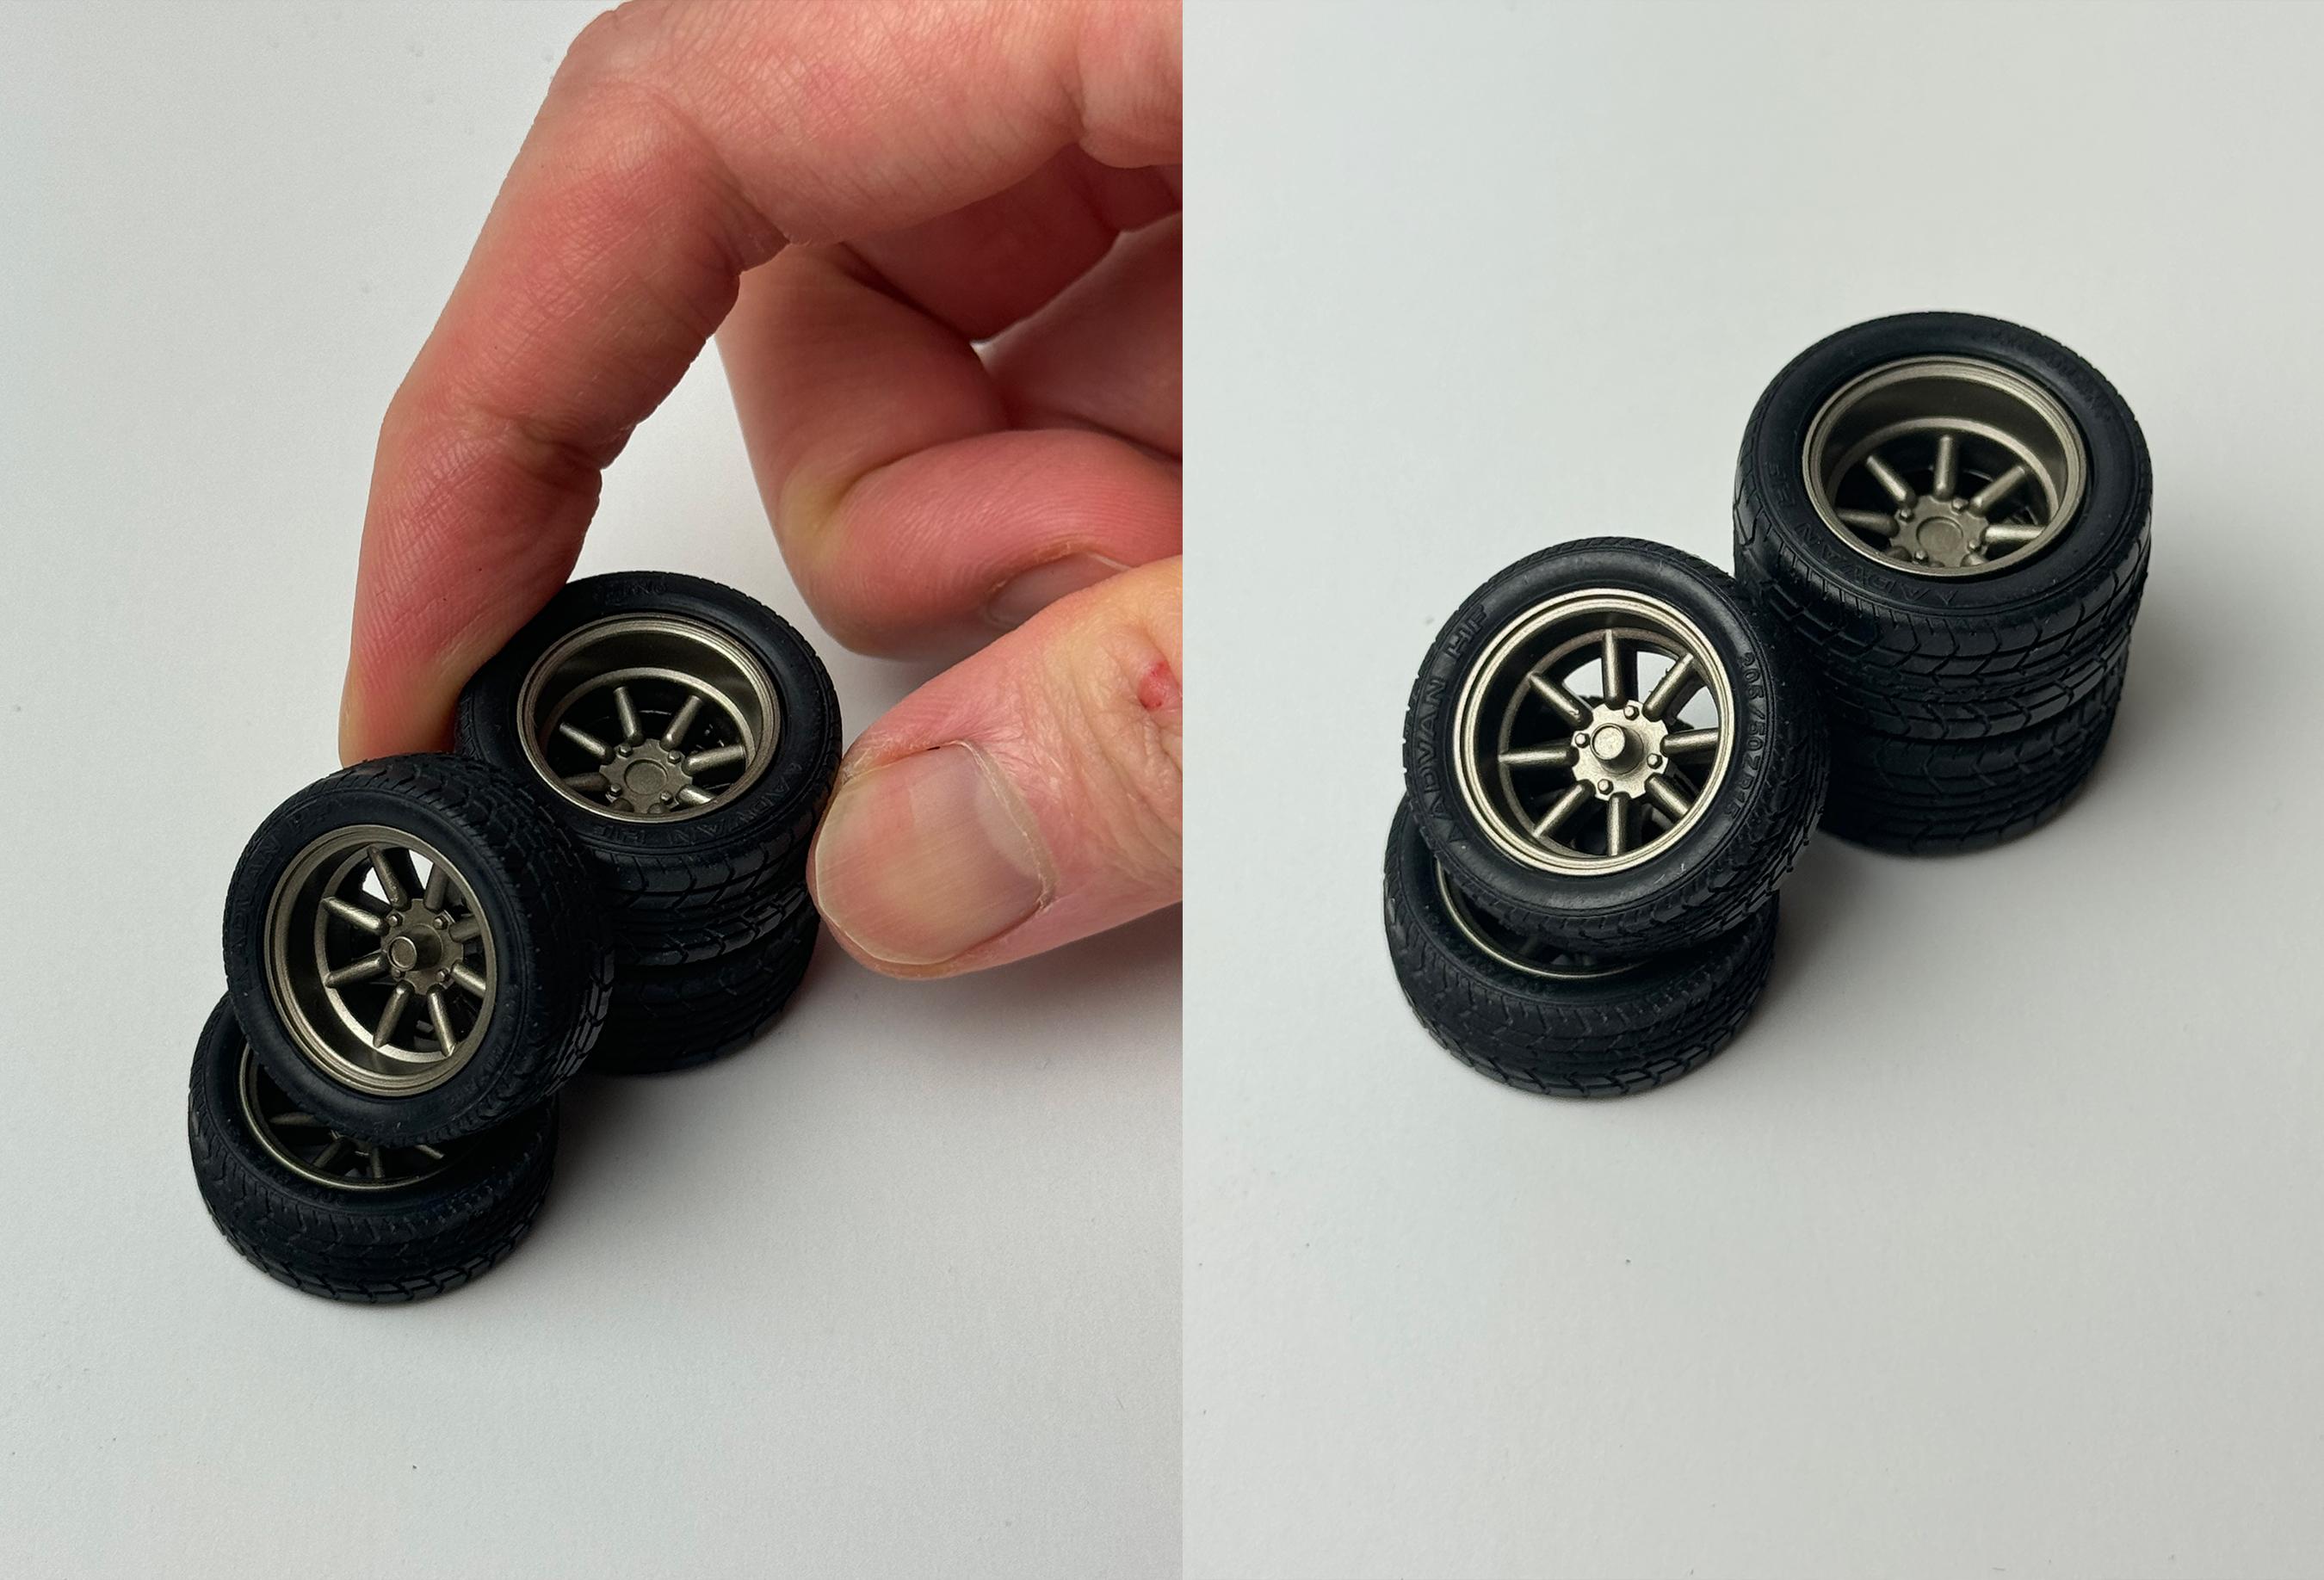
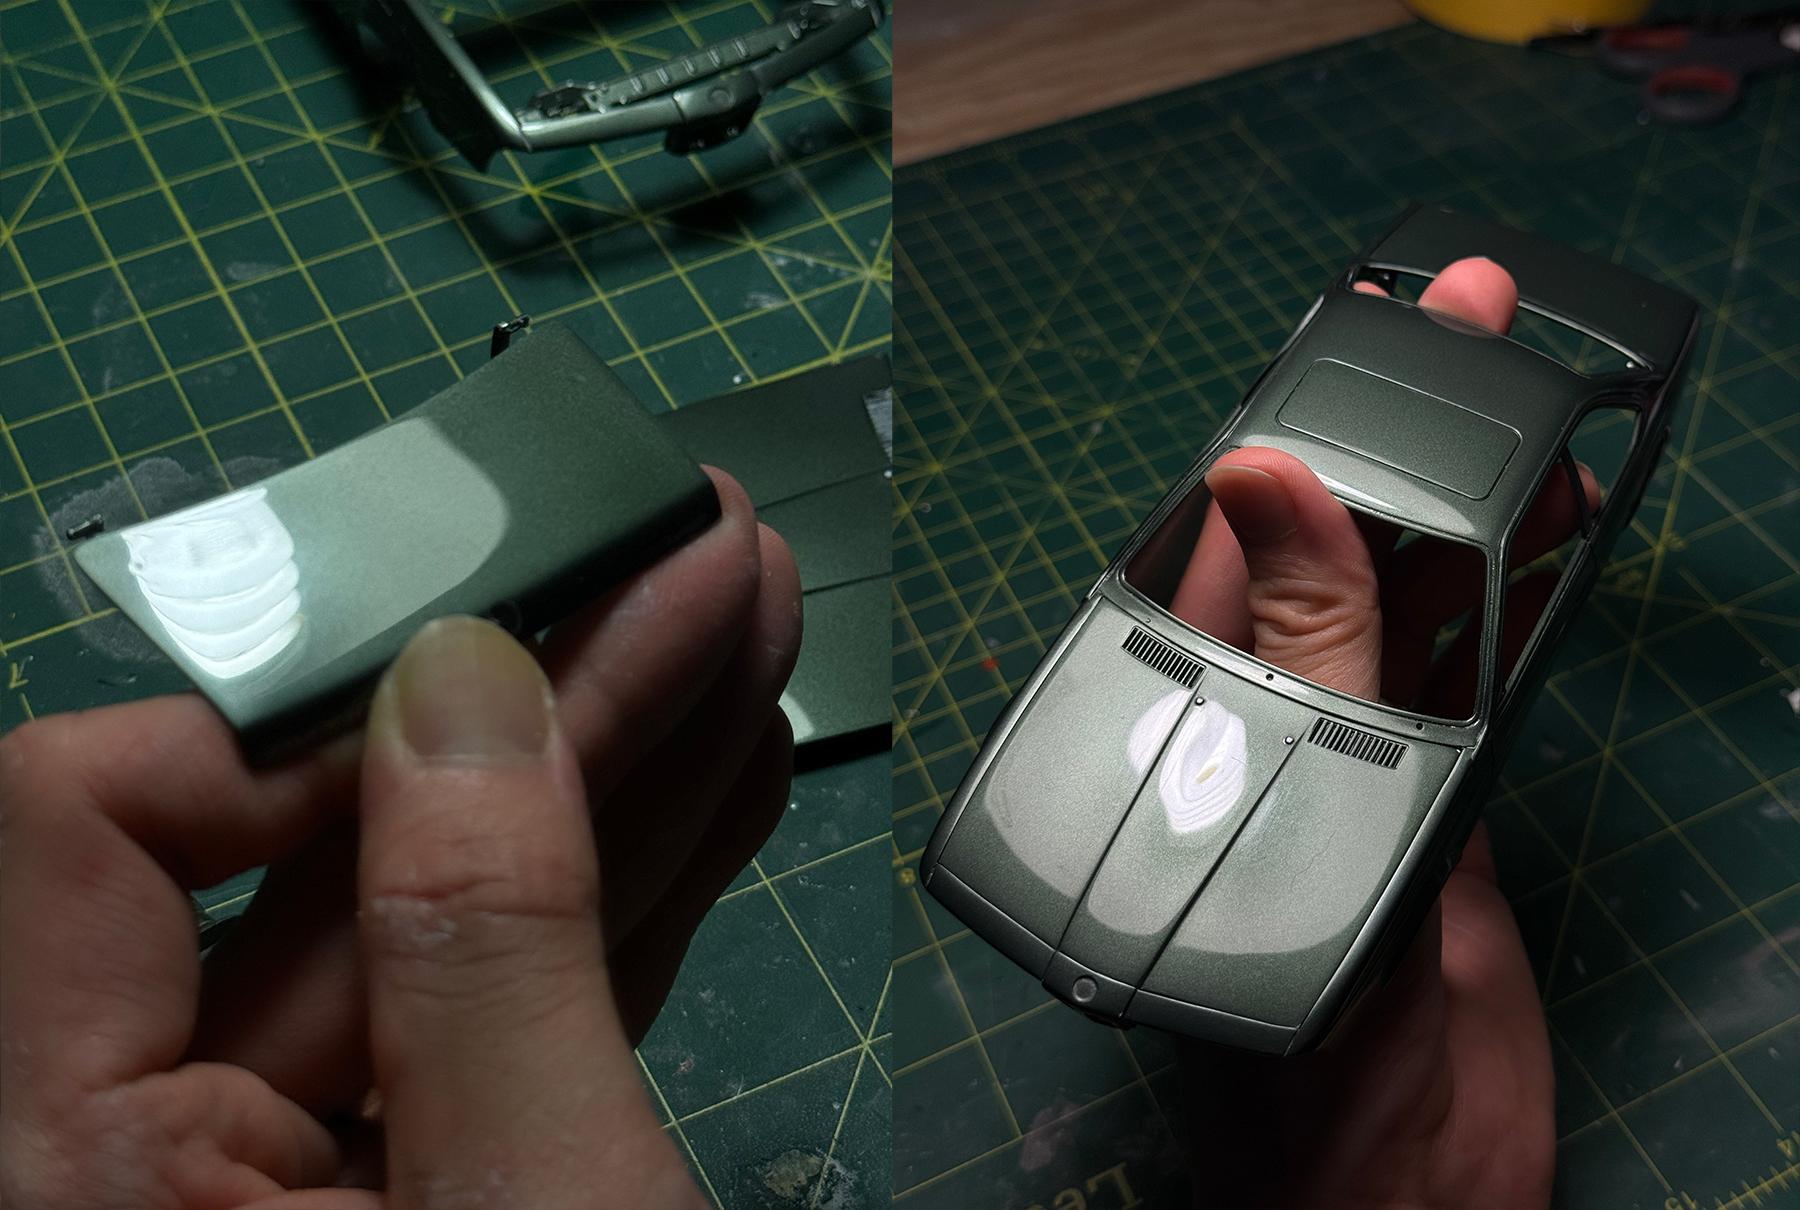
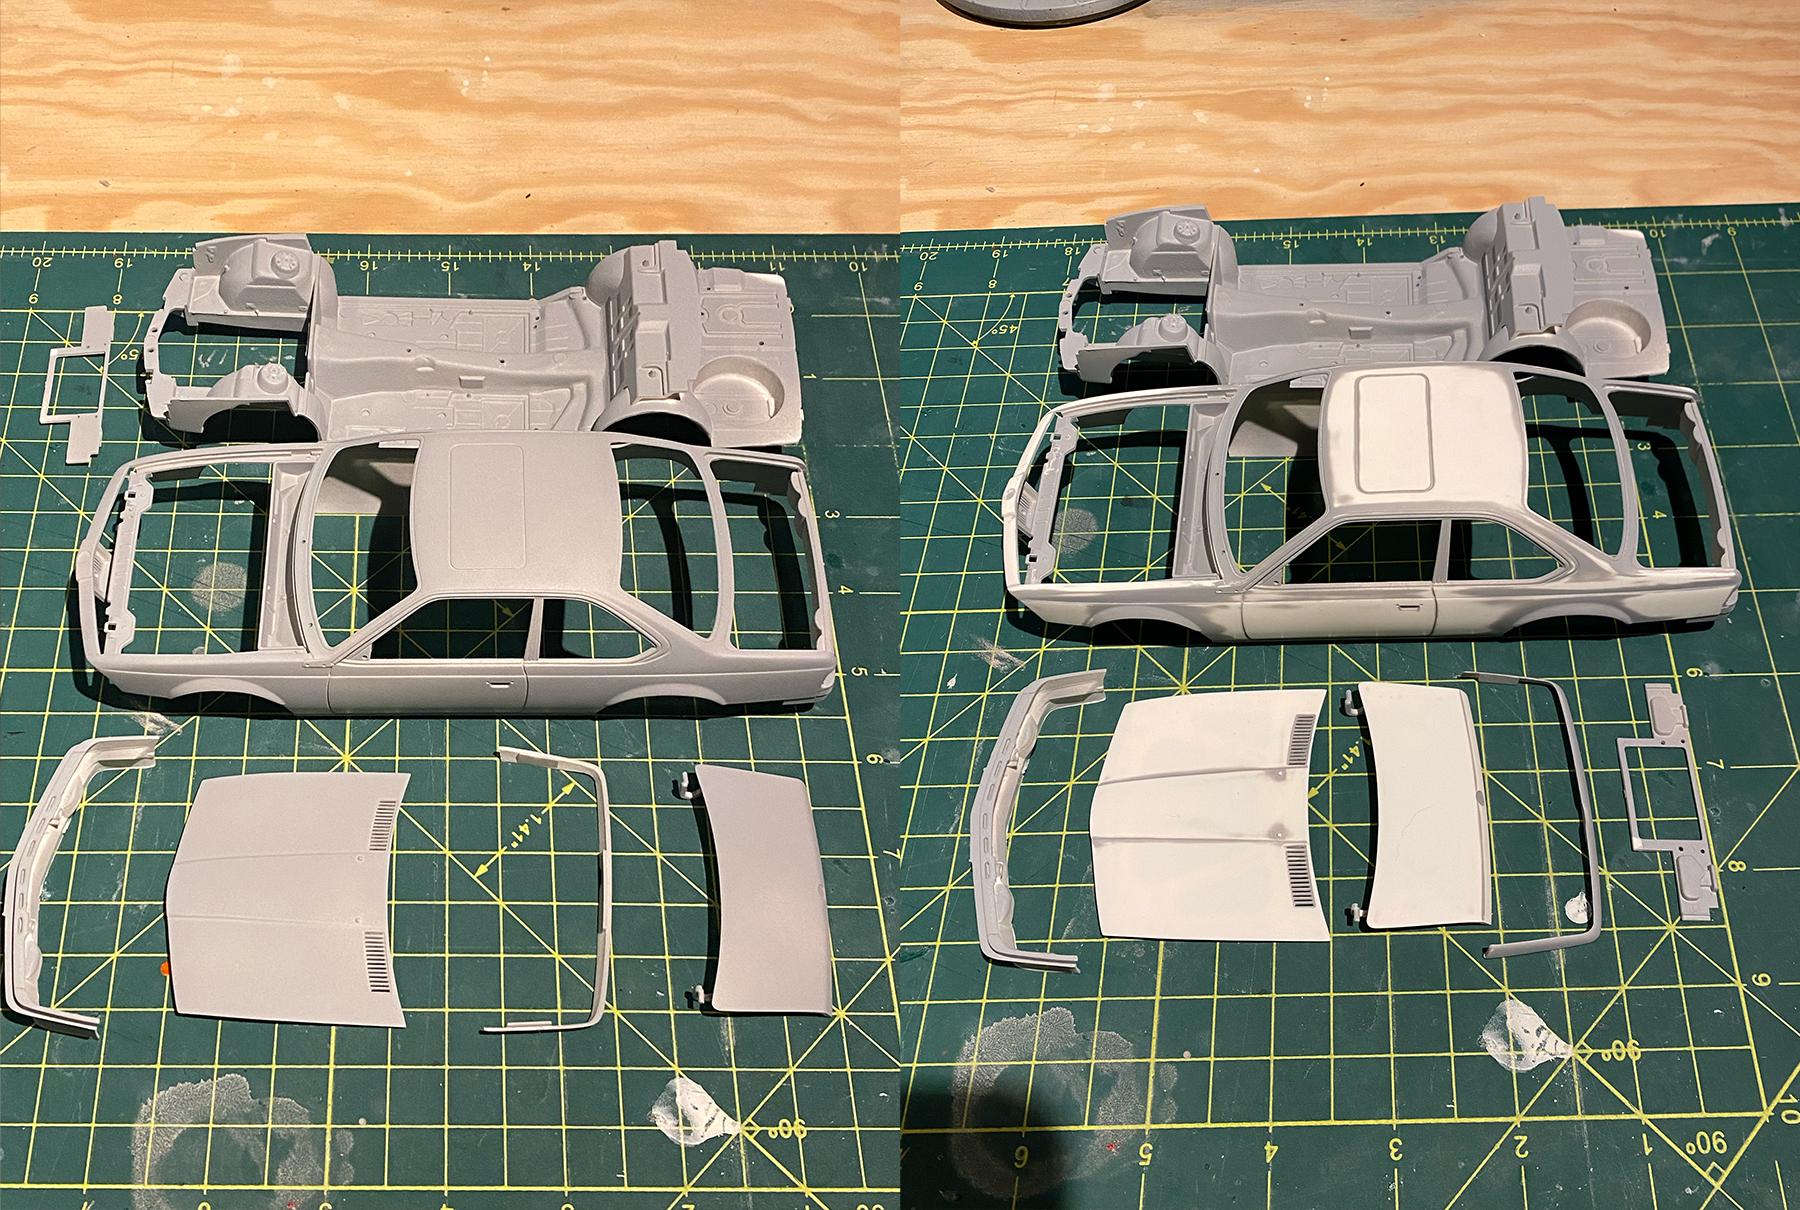
Hi everyone, After building Fujimi EM series B7, I needed an easy kit to build so I started Tamiya's 240ZG kit. My build concept is to keep it OEM+ by adding wider period wheels & tires, weber carb, and some nice seats. As usual I started off by wet sanding the body and scribing body panels. Fujimi's watanabe wheels I prepared were so wide I had to cut them to fit. I chose Tamiya NSX tires to achieve staggered setup that has some serious tire walls. I painted the body in silver (great way to check for small scratches and completely seal the body while keeping the paint super thin - but the painted surface isn't as sticky and strong as surfacer) then lightly sanded the body with 3000 grit to make sure I have a clean, flat body to lay base coat.
- 32 replies
-
- 19
-
-
Thank you! Thanks a lot David! Appreciate it! Thank you! Appreciate it! Thank you Steve! Thank you! I like smaller, more nimble cars but E24 is an exception. Thank you! A lot of Fujimi EM kits have incorrect wheels so updating them really makes the difference. I mostly shoot with narrowest aperture possible but I might give this a shot! I can't imagine what these cars would've felt when they were brand new. I recommend dry fitting everything then sand parts accordingly to make sure everything fits like they should, reinforcing rear window frame (Mine snapped when removing masking tape, so I had to do a partial respray to fix that) or any weak spot with thin metal wires, and using correctly sized aftermarket wheels instead of kit wheels. The way that EM kits assemble it's difficult to get the right stance - you might see a lot of EM builds with inconsistent camber or suspension height - and the best way to achieve right stance with EM kits is to dry fit the suspension and cut struts/spring until you achieve the right suspension height, glue brake/wheel hub with rim first, then use glue/putty to put all four wheels to the chassis and keep adjusting the camber while the glue dries and hardens (I put thin sponge to lift the car up a little to make sure all four wheels sit correctly).
-
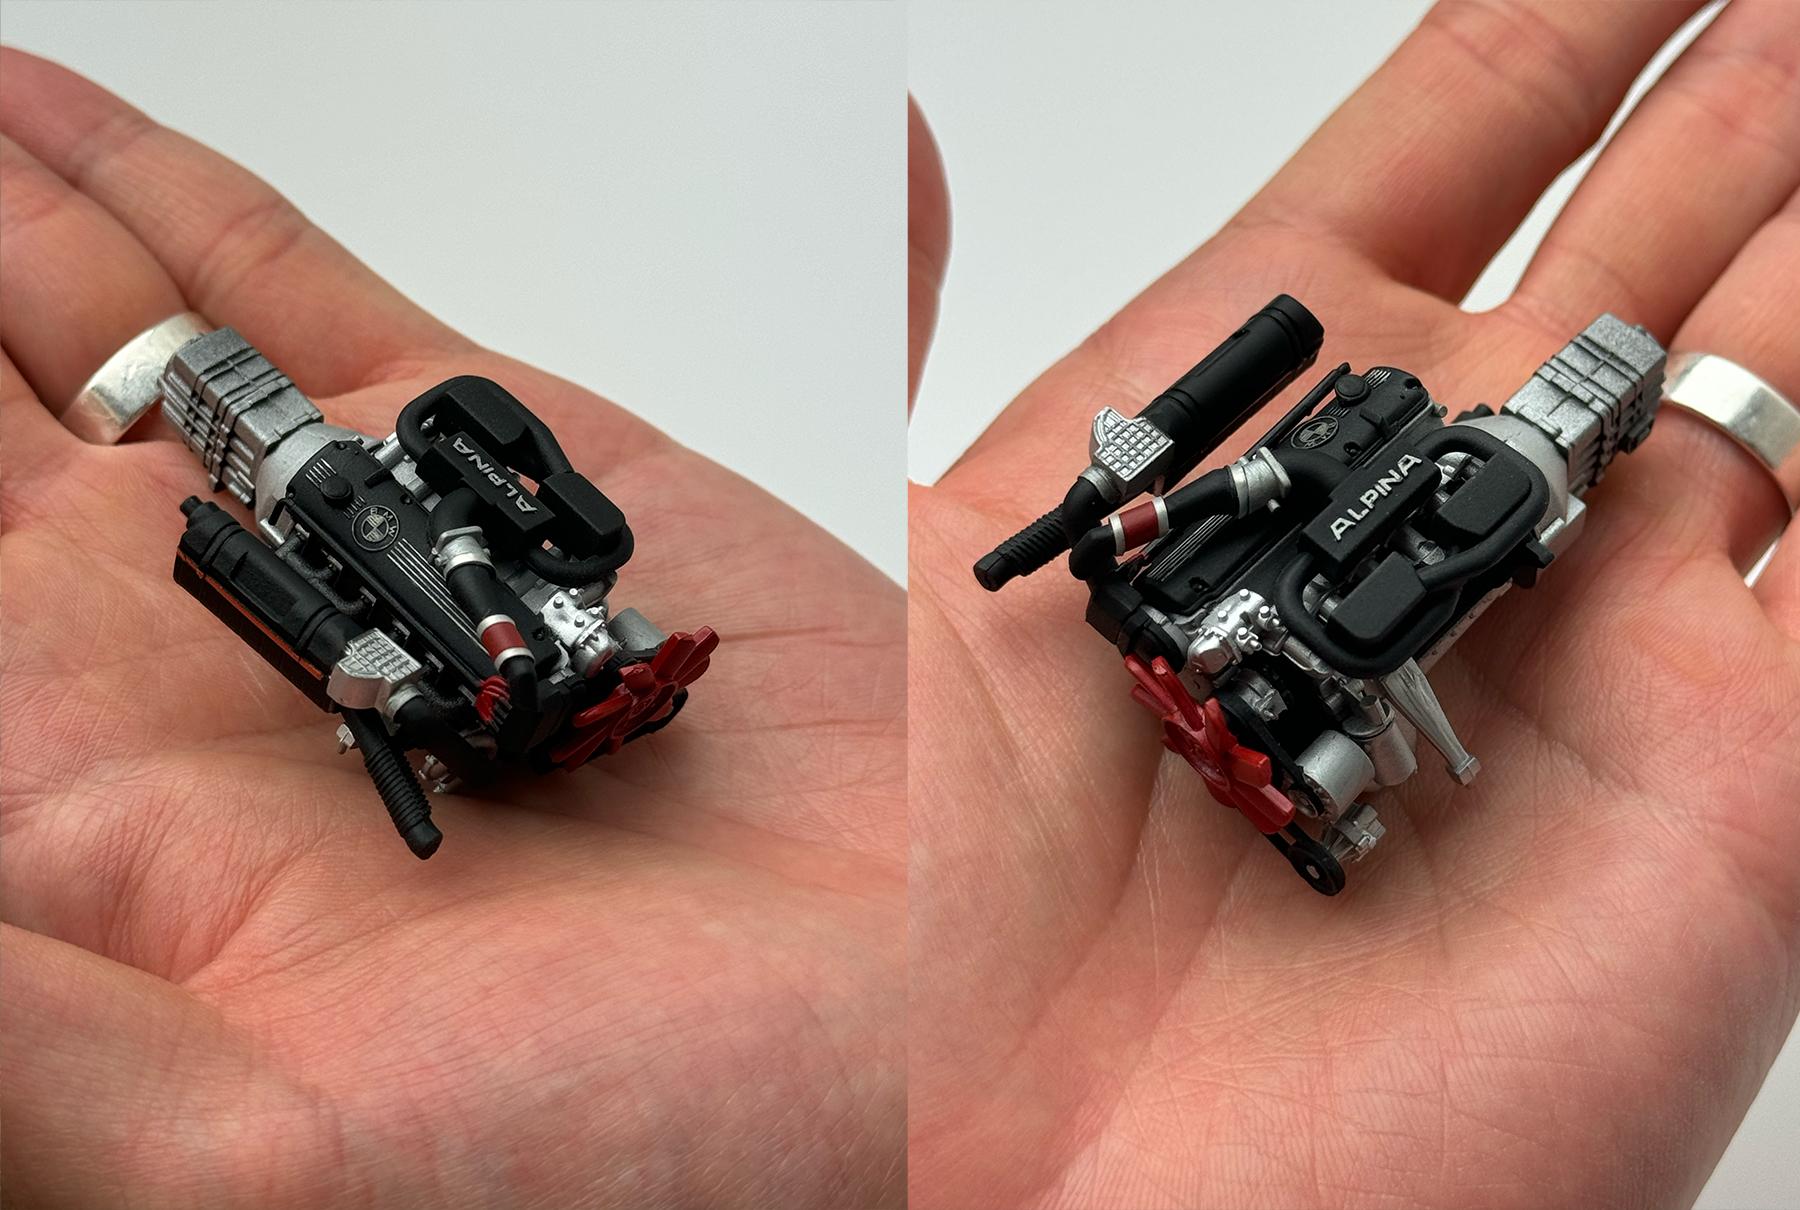
Thank you! E24s are truly amazing machines - especially M88/S38 under the hood! Thanks a lot! Some of them cracked so I had to puzzle them together but they were mostly in OK shape! Thank you! 80s BMWs are my favourite. Thank you! Thanks a lot! Thanks! Appreciate it! Thanks! M635CSI version of this kit was recently re-released a few years ago Thanks! Thank you! Thanks a lot! Thanks! Just like how I like my cars to sit! Thank you! Thanks a lot! Thank you! I end up painting my builds mostly in some shade of green or blue when I look back.
-
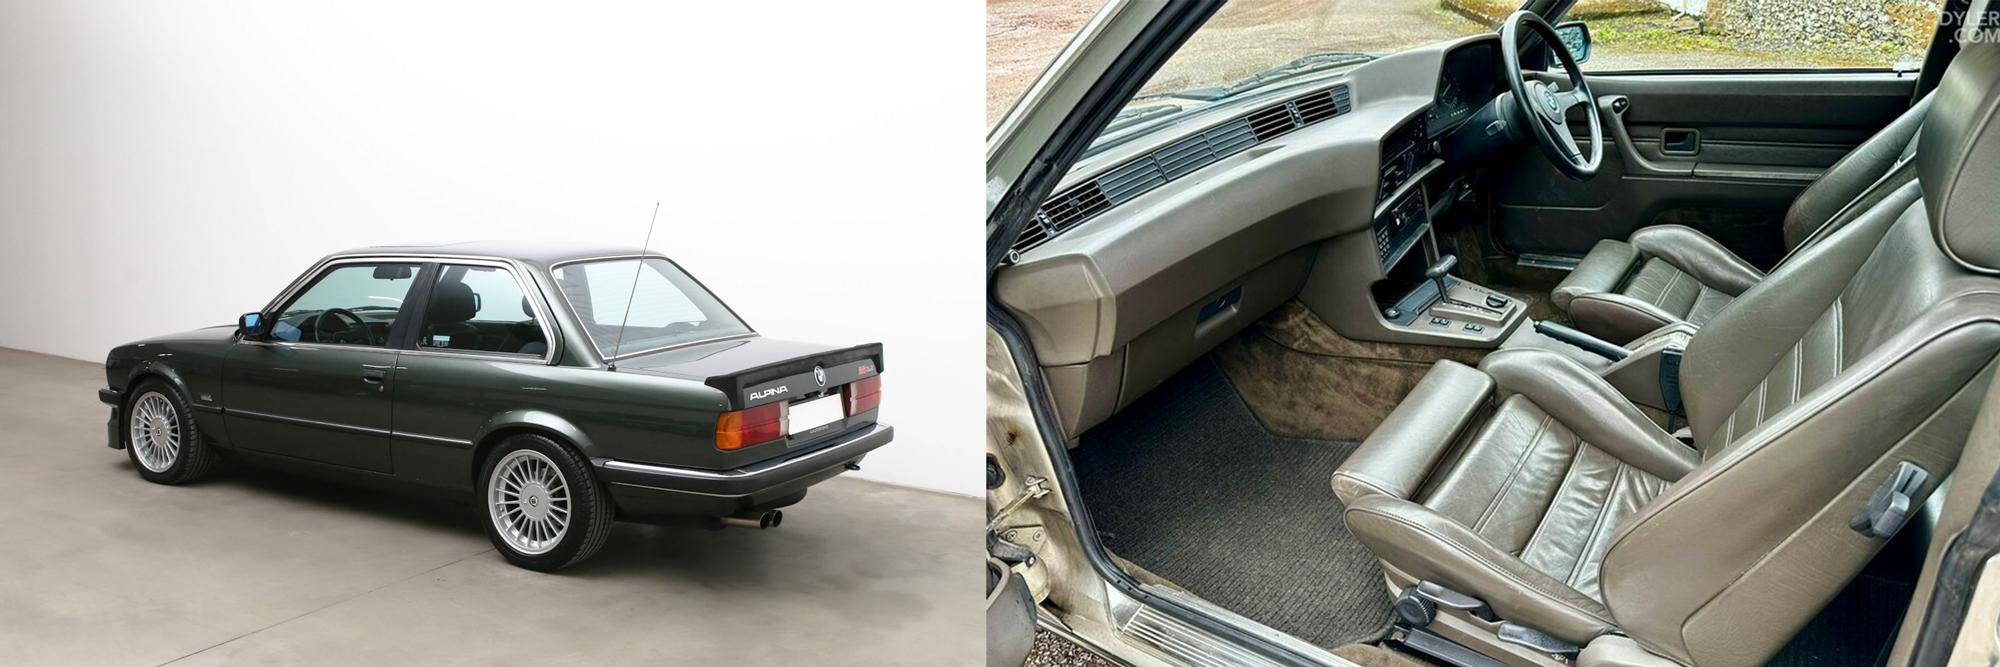
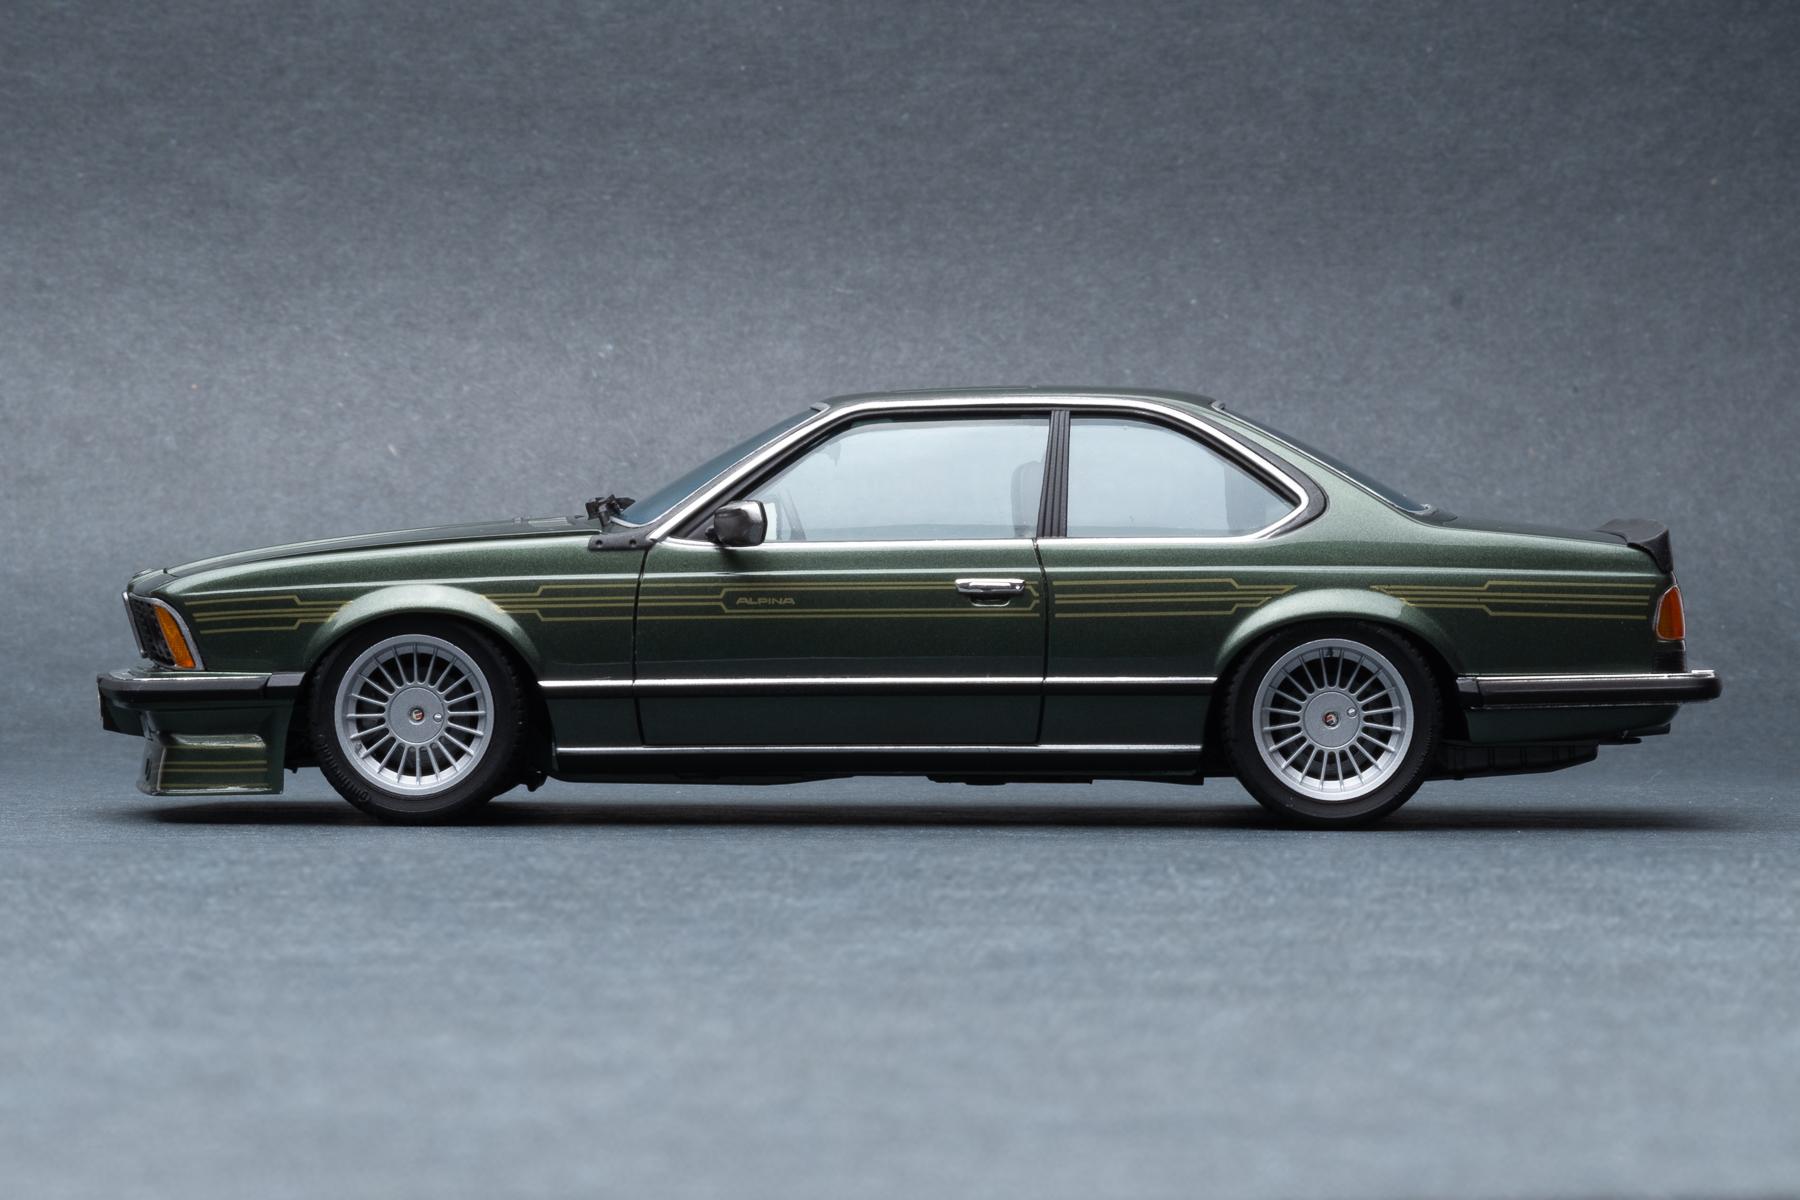
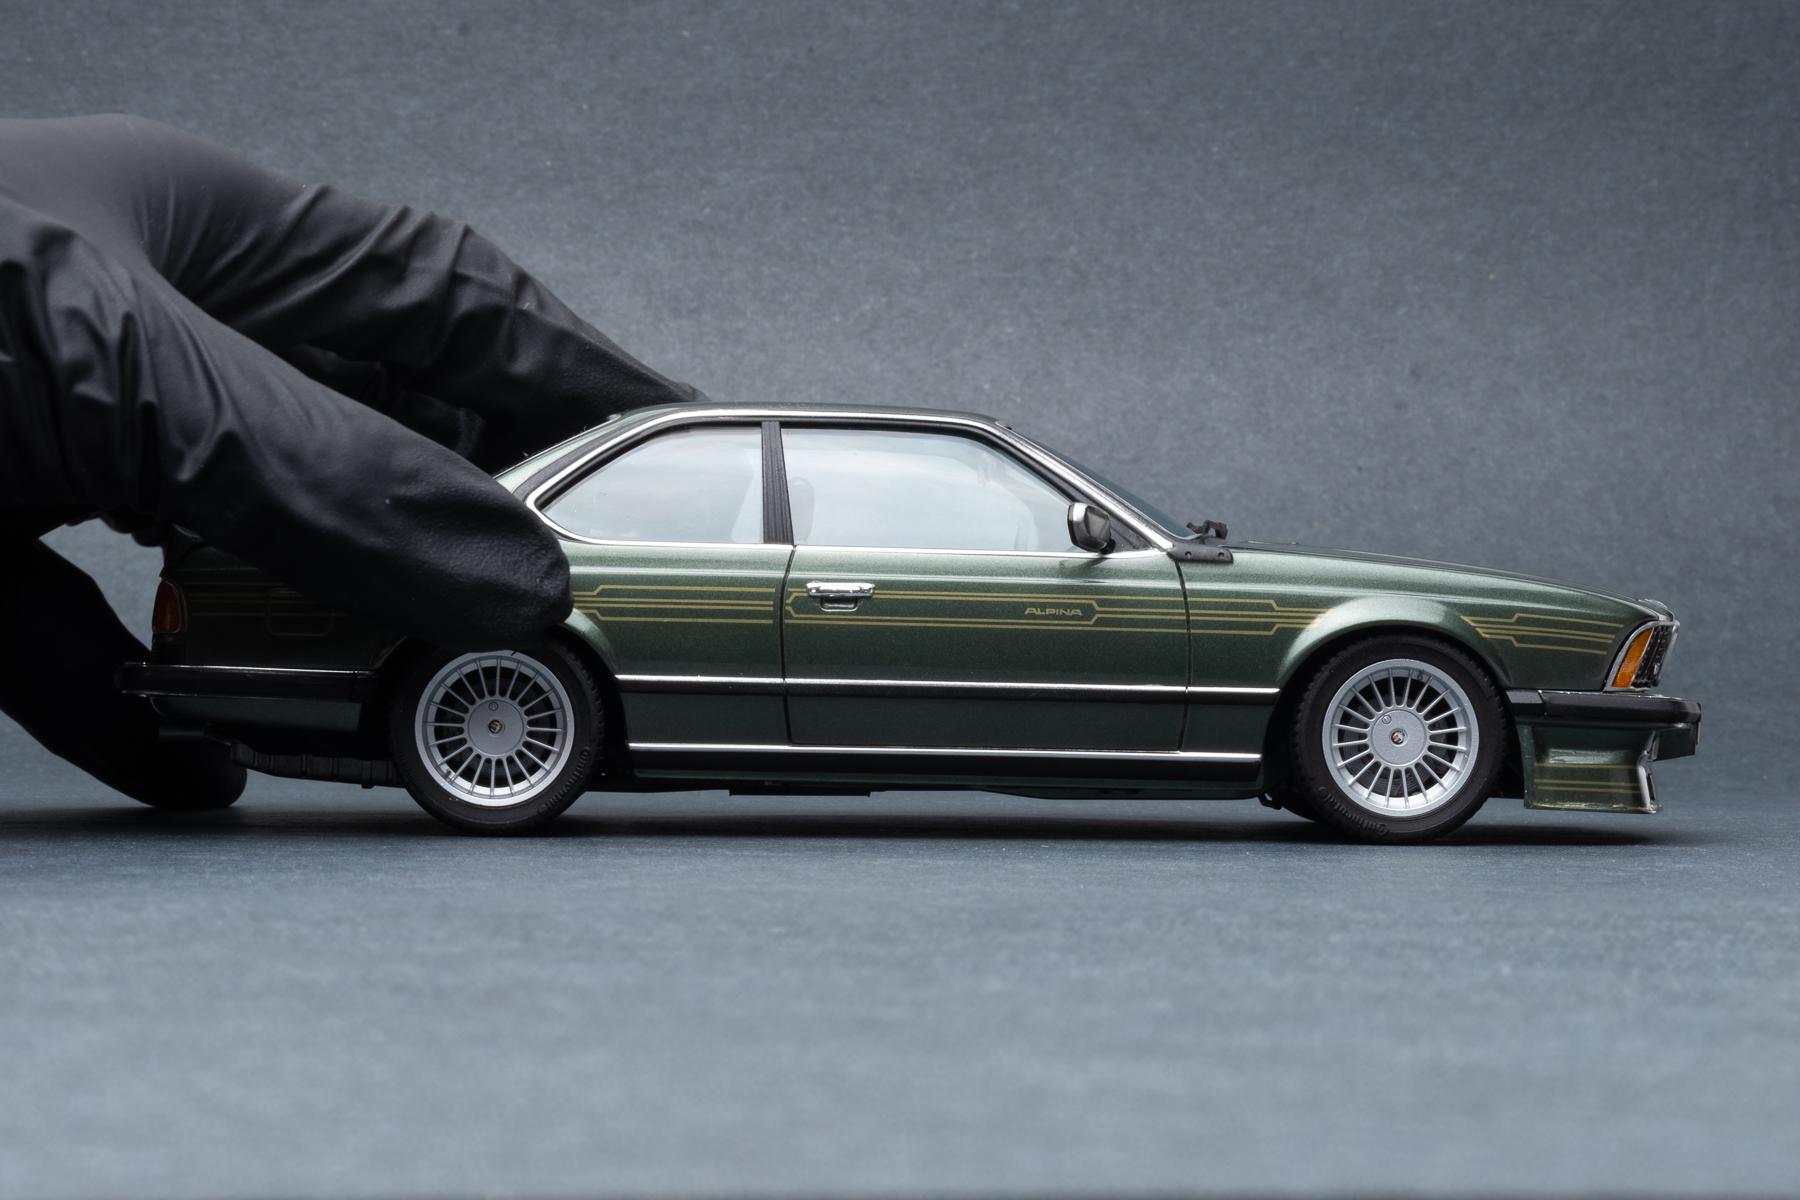
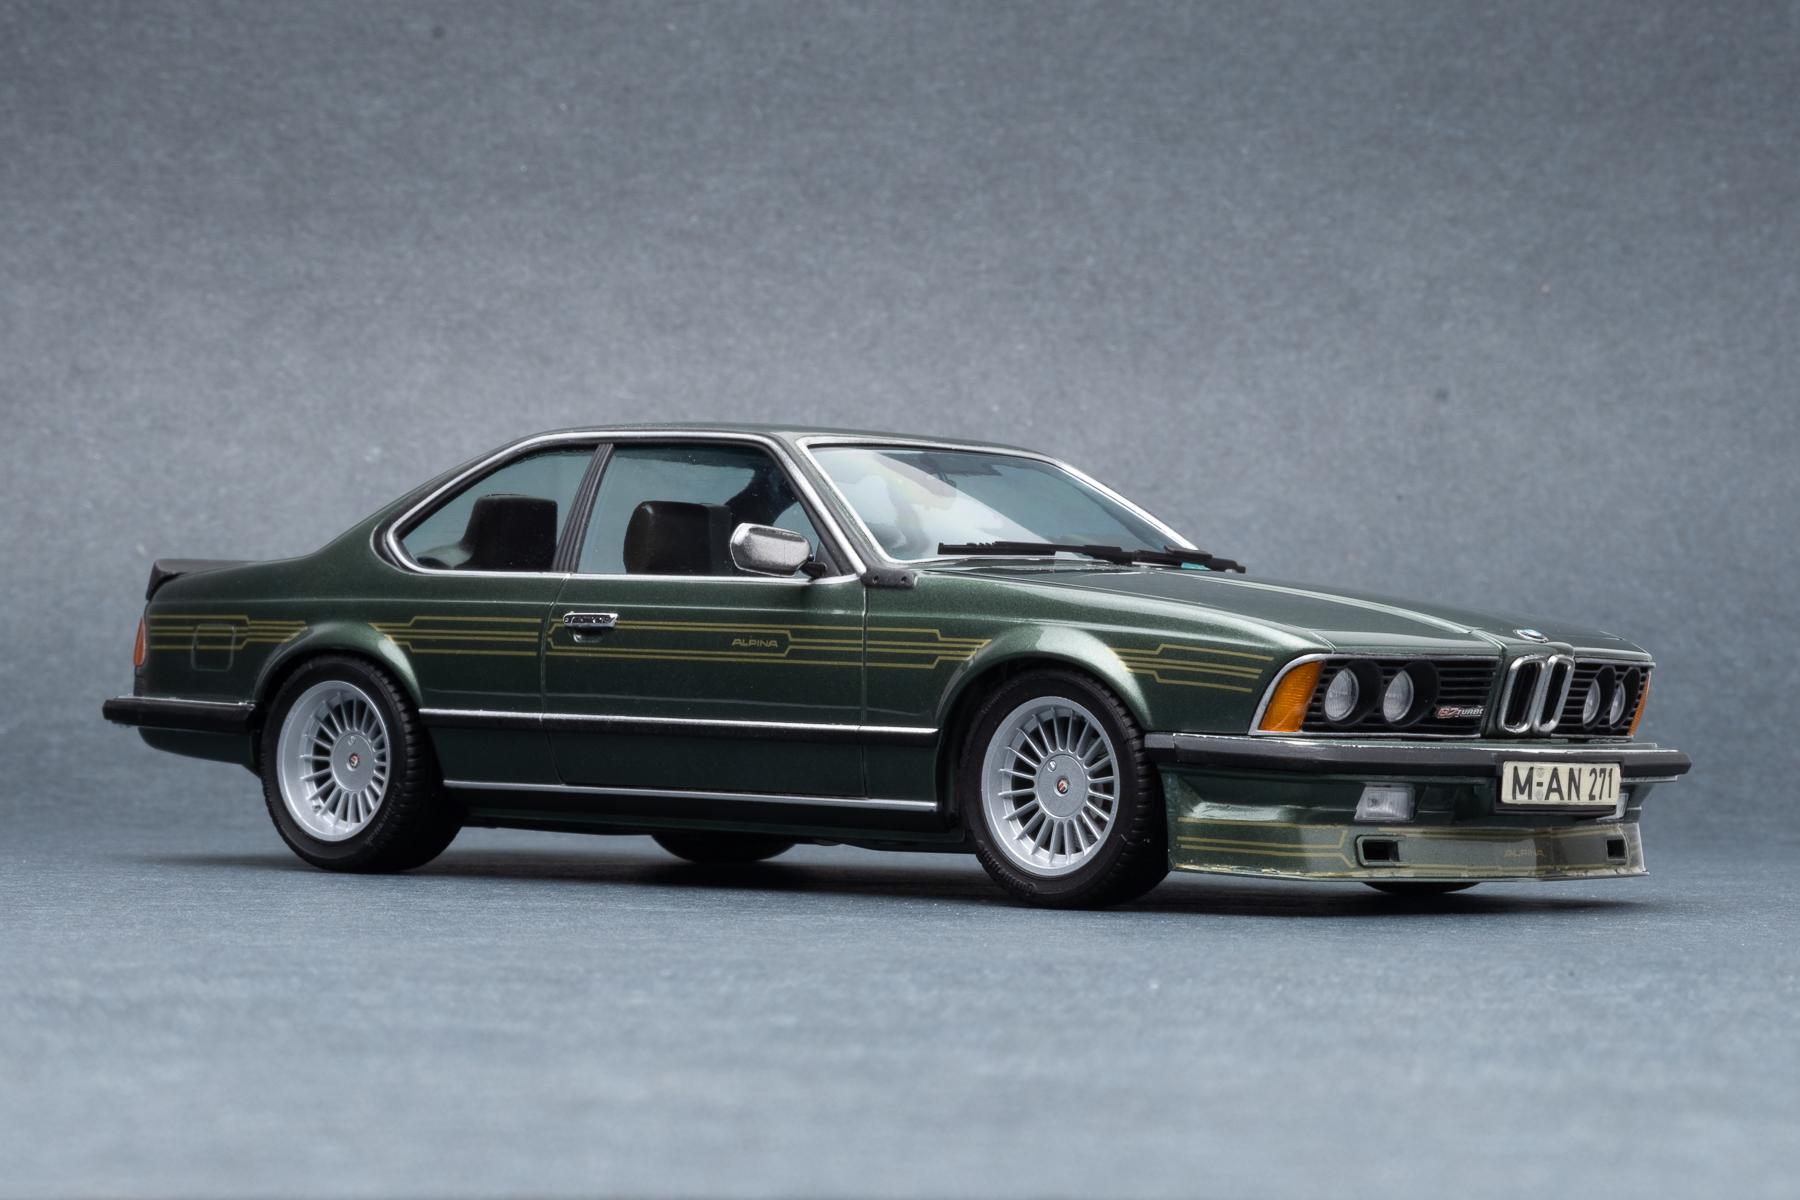
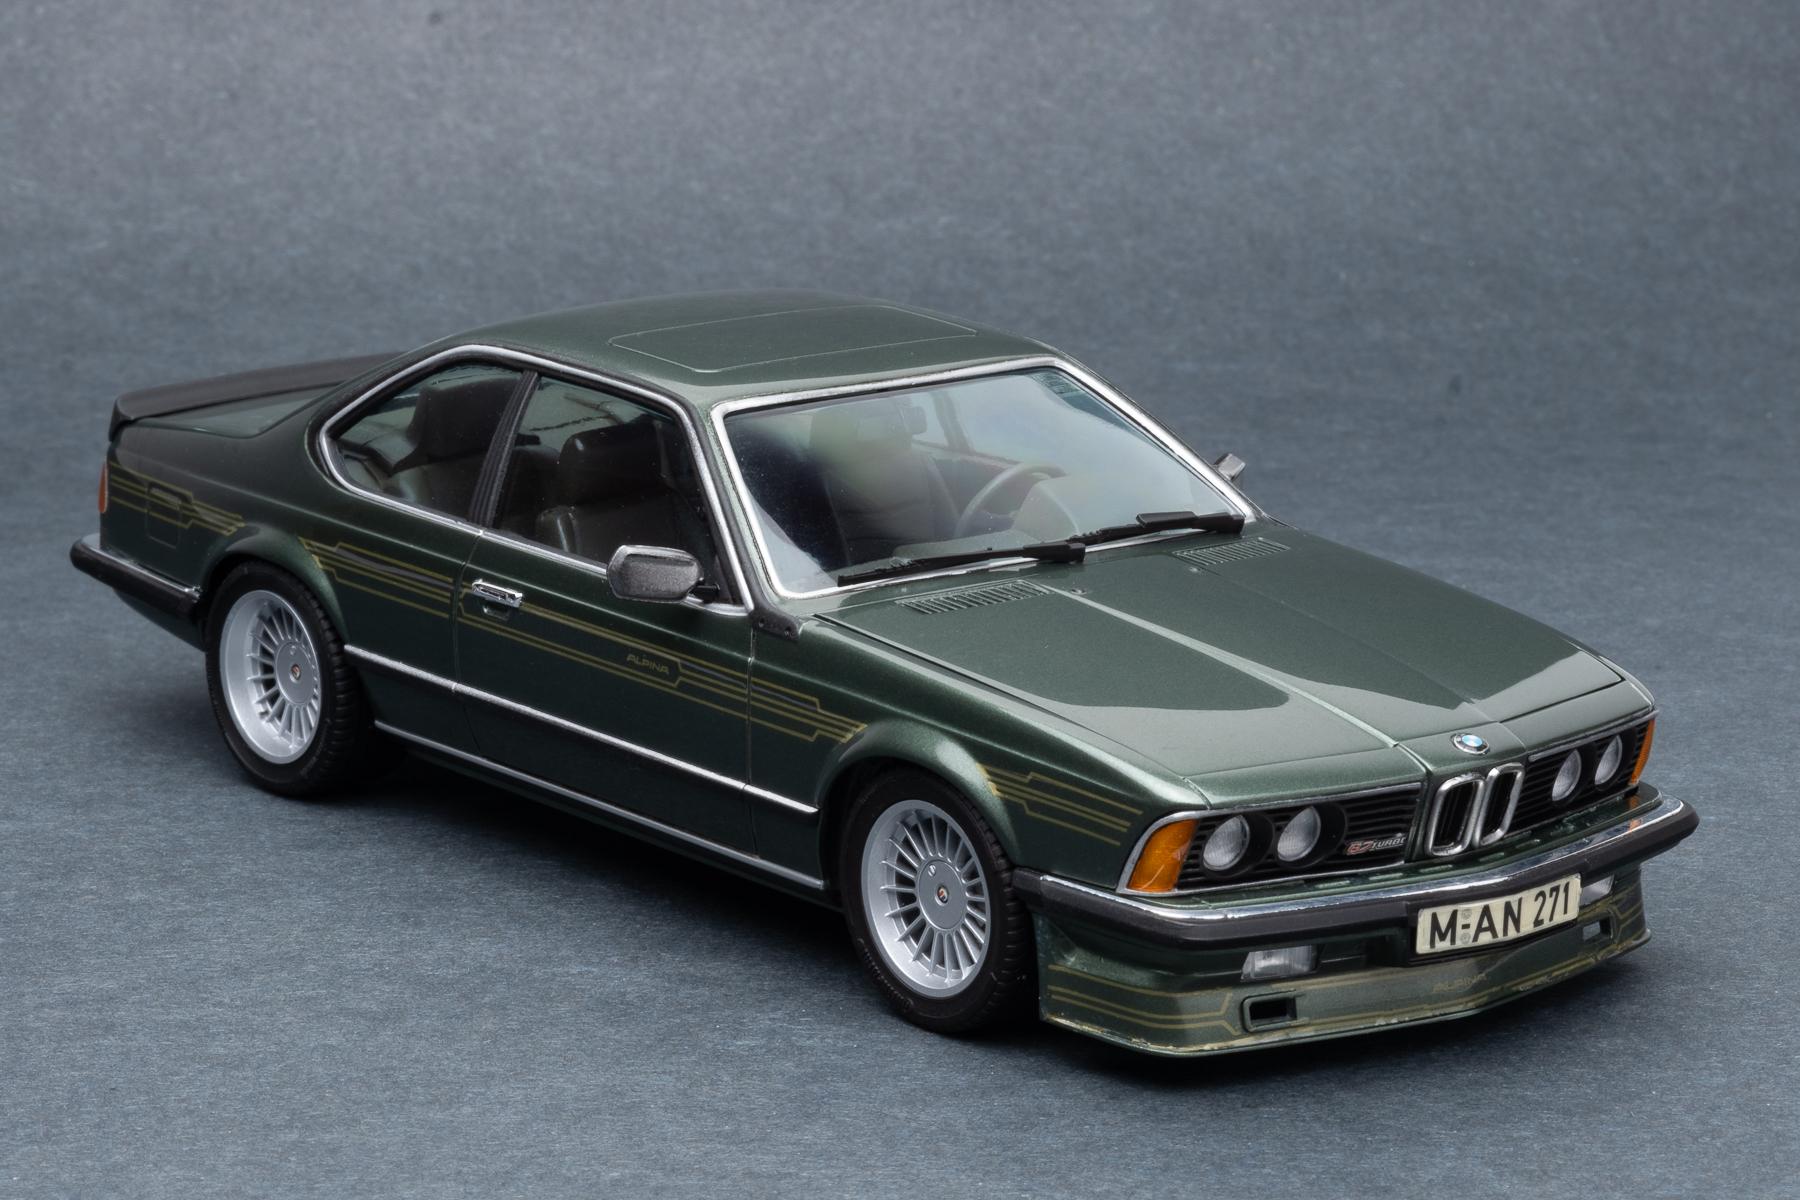
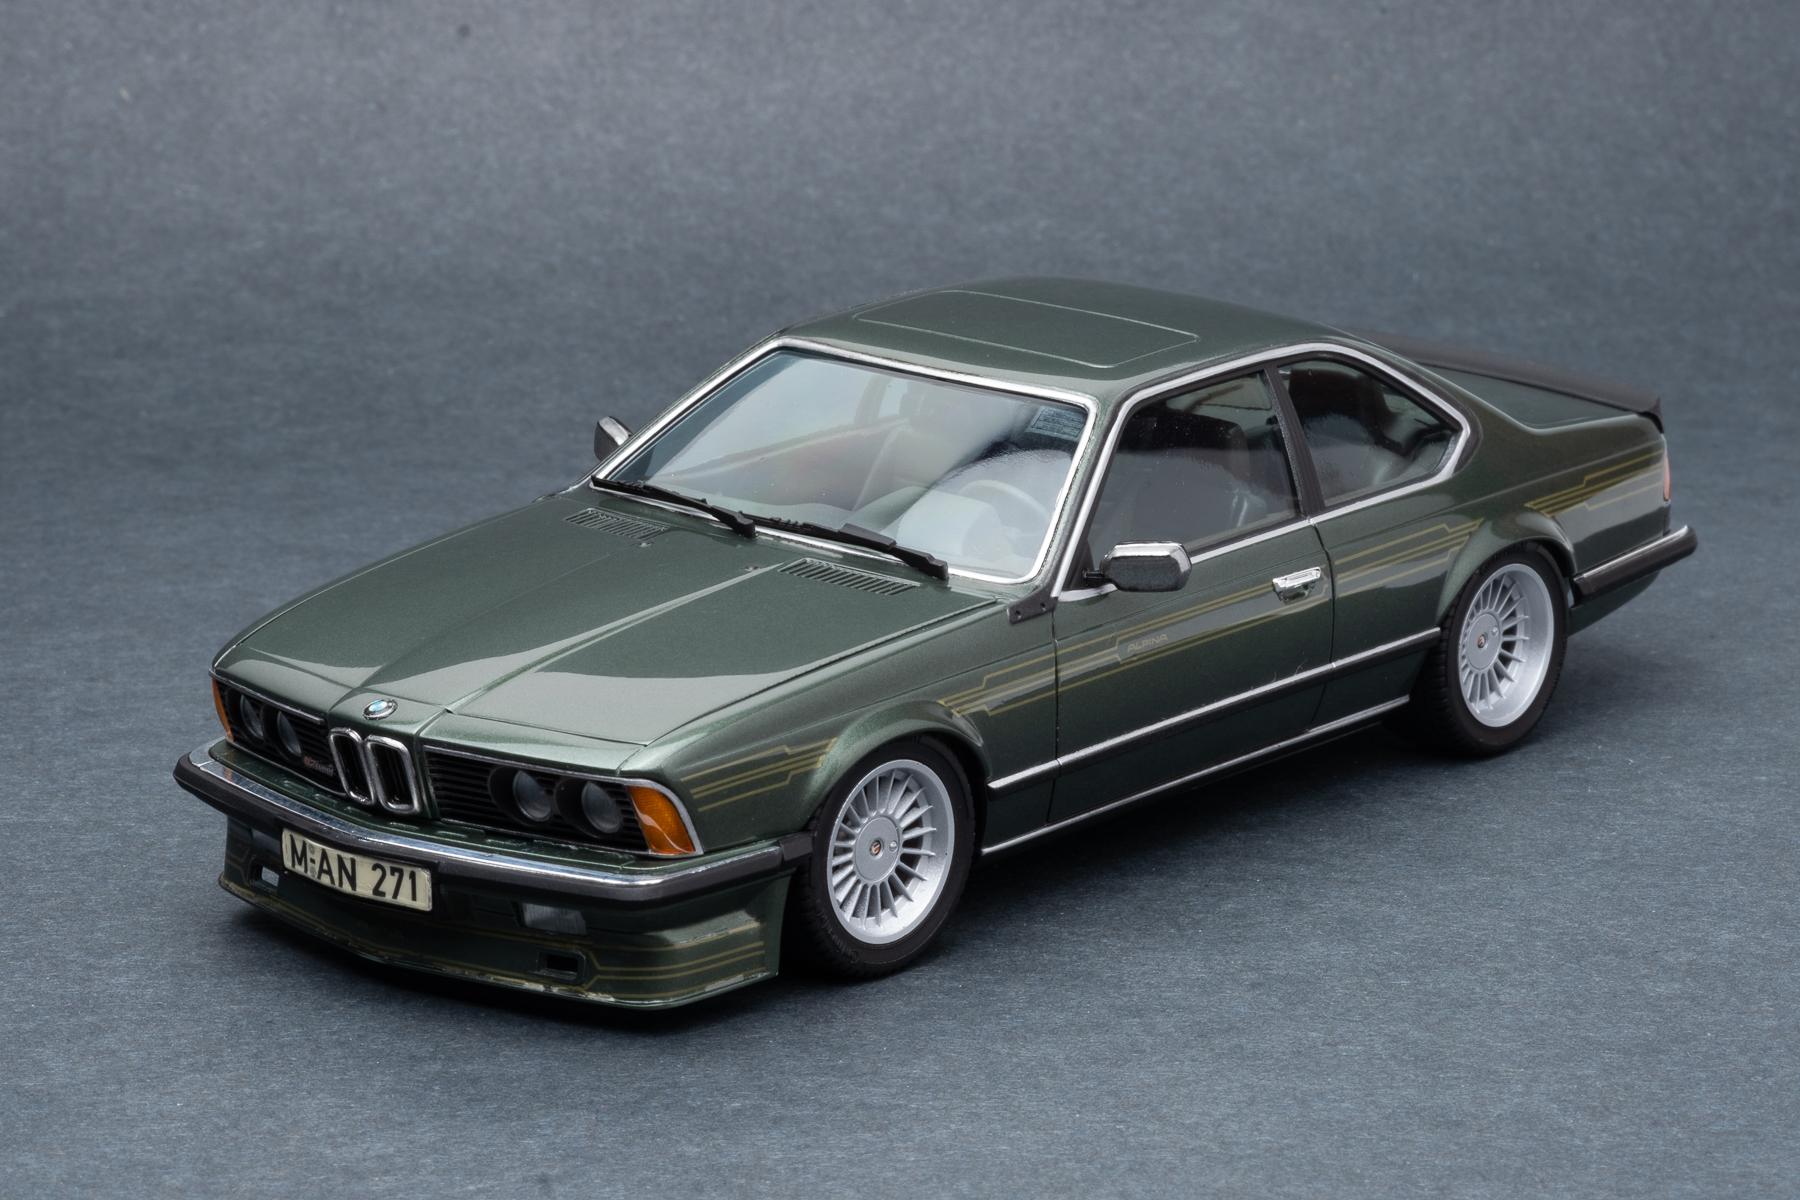
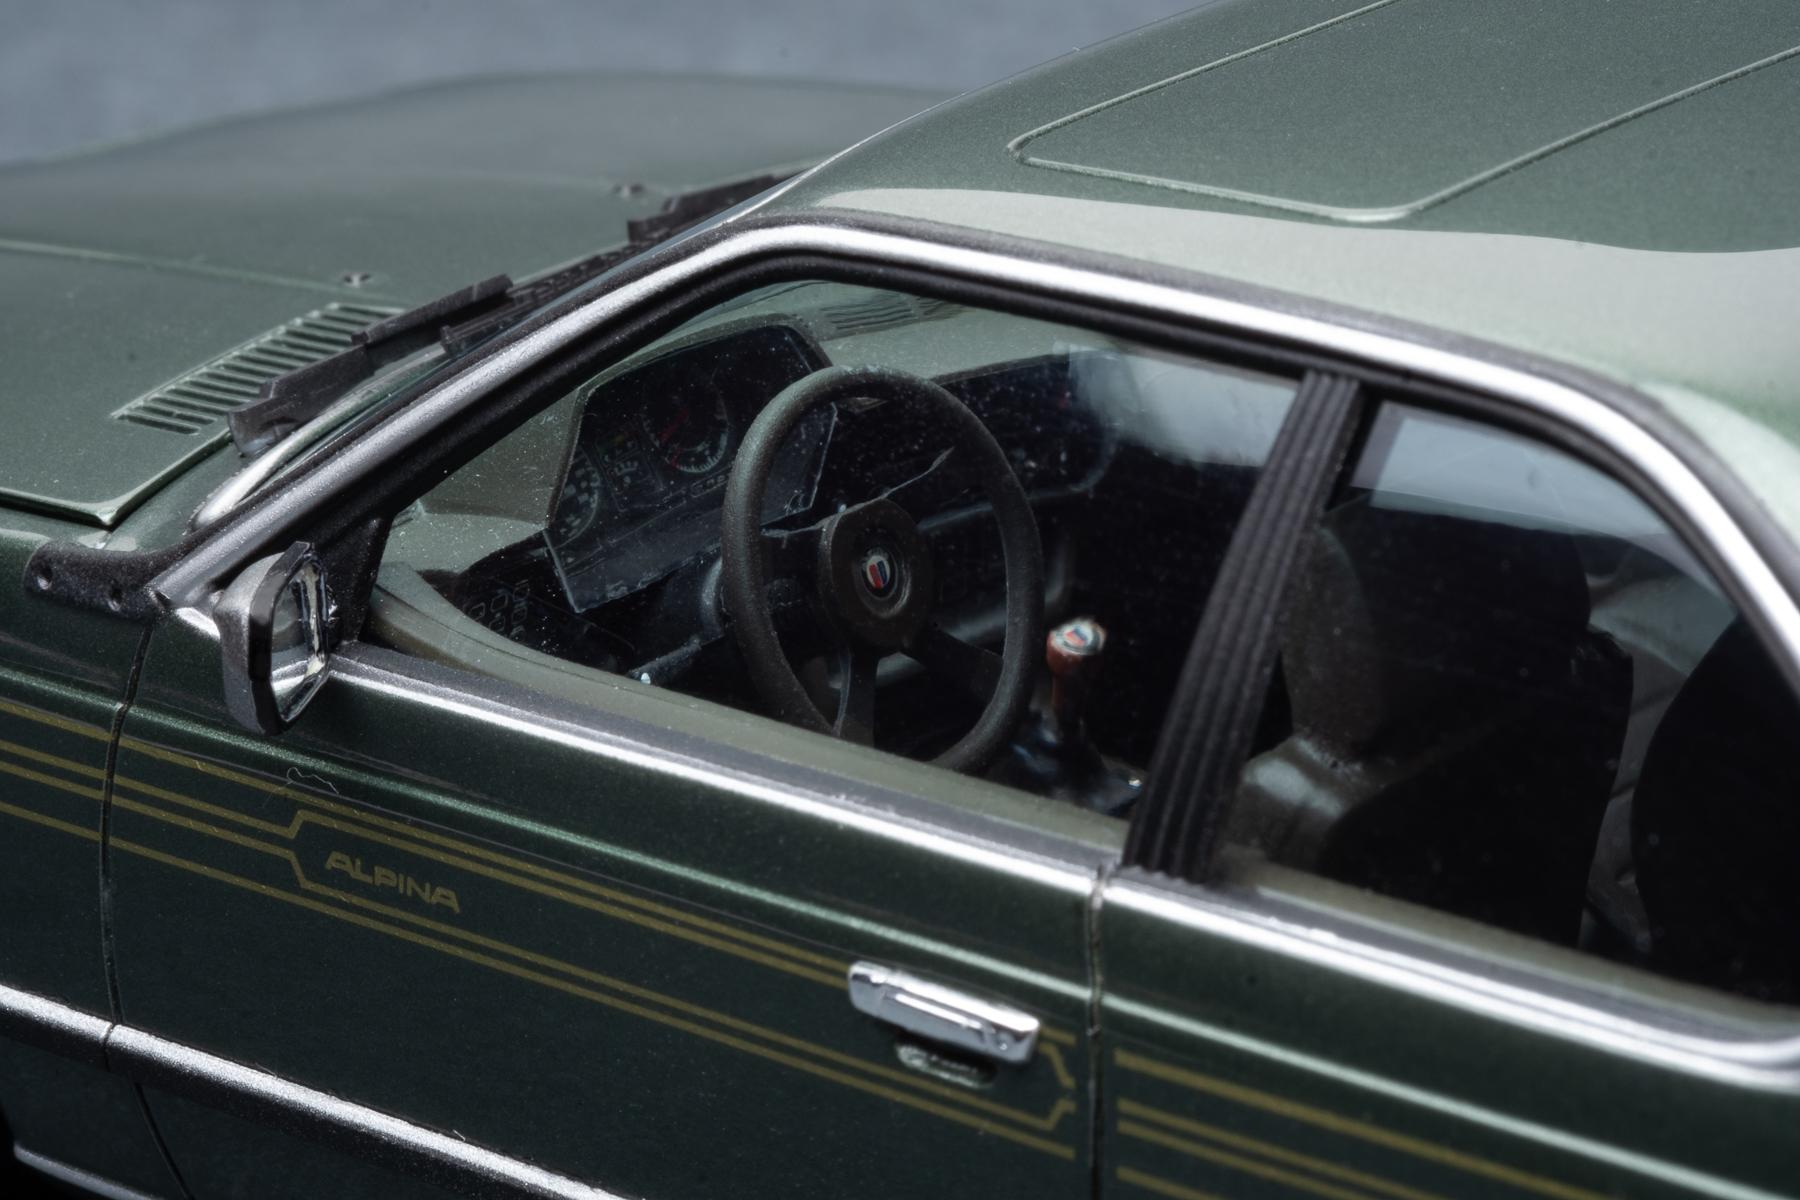
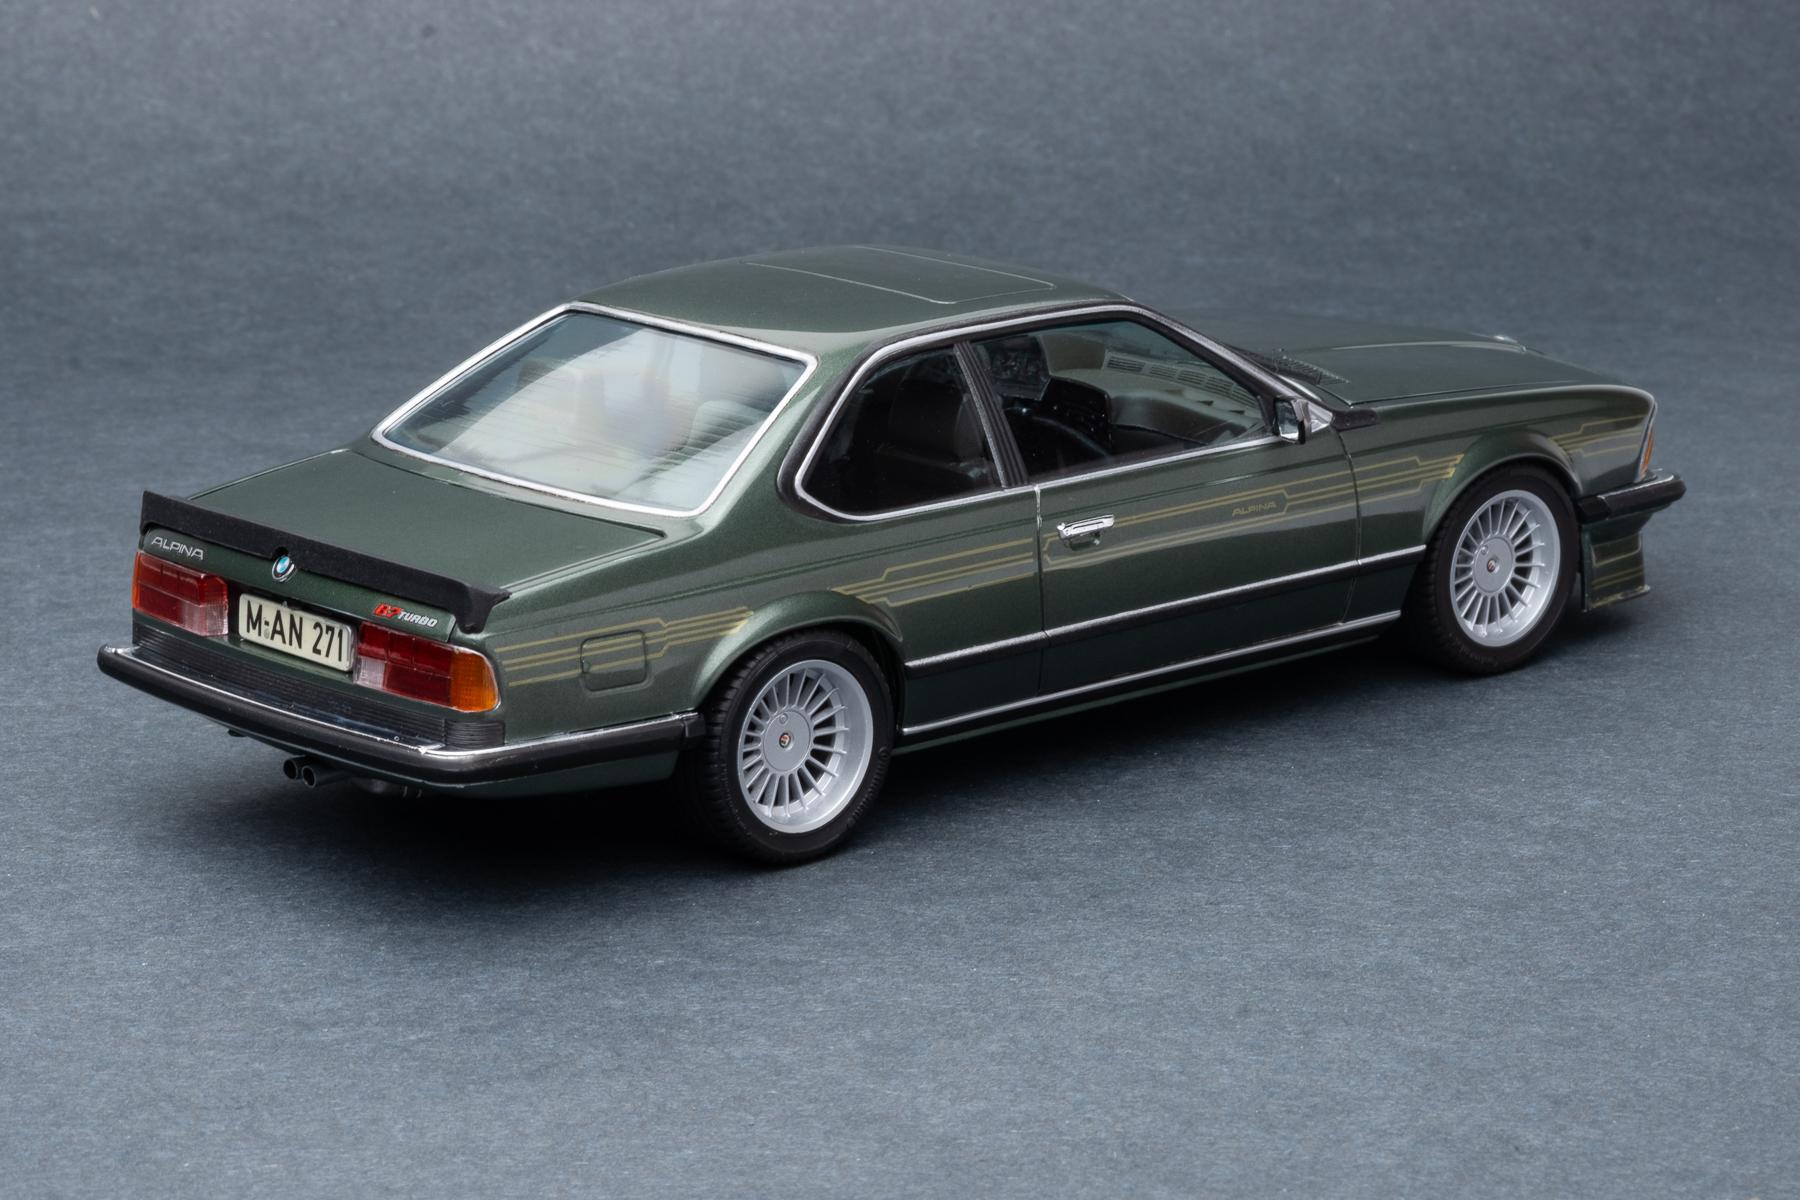
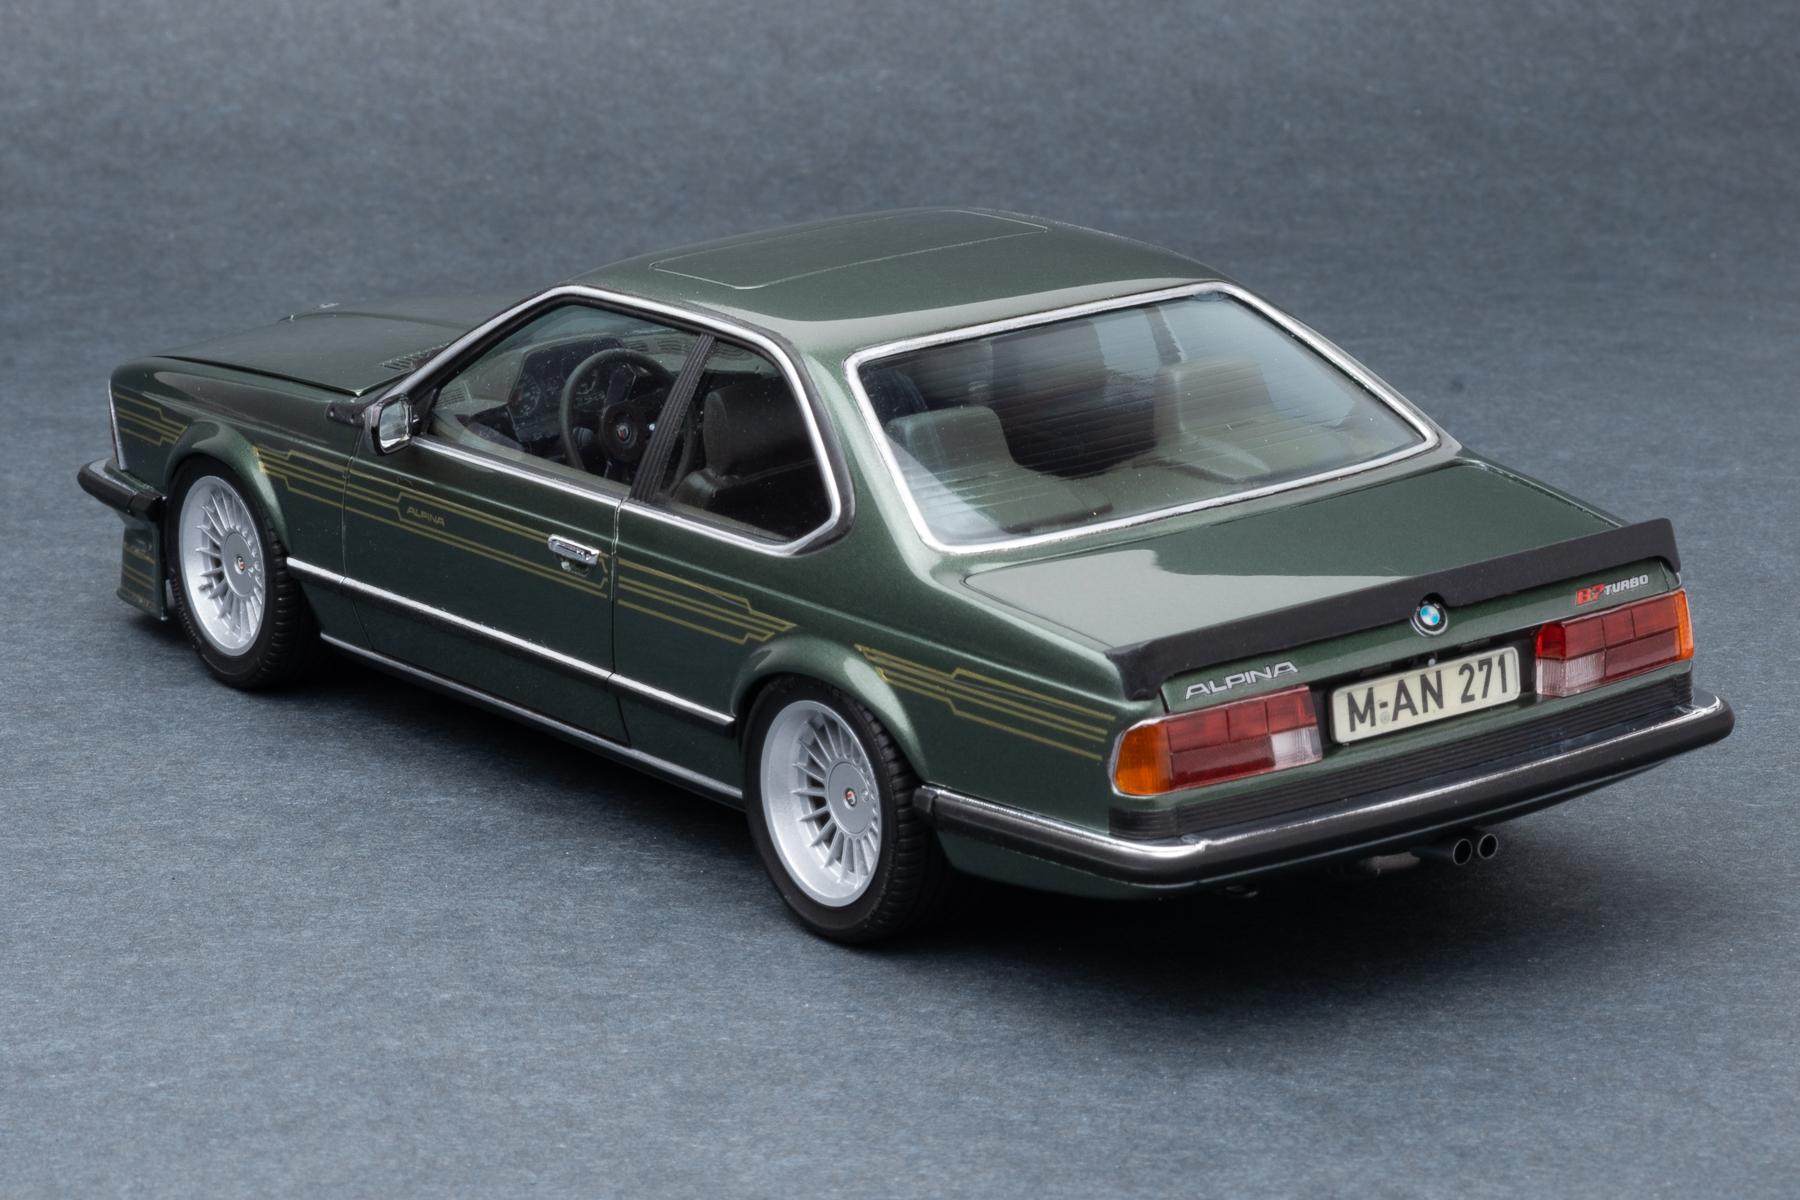
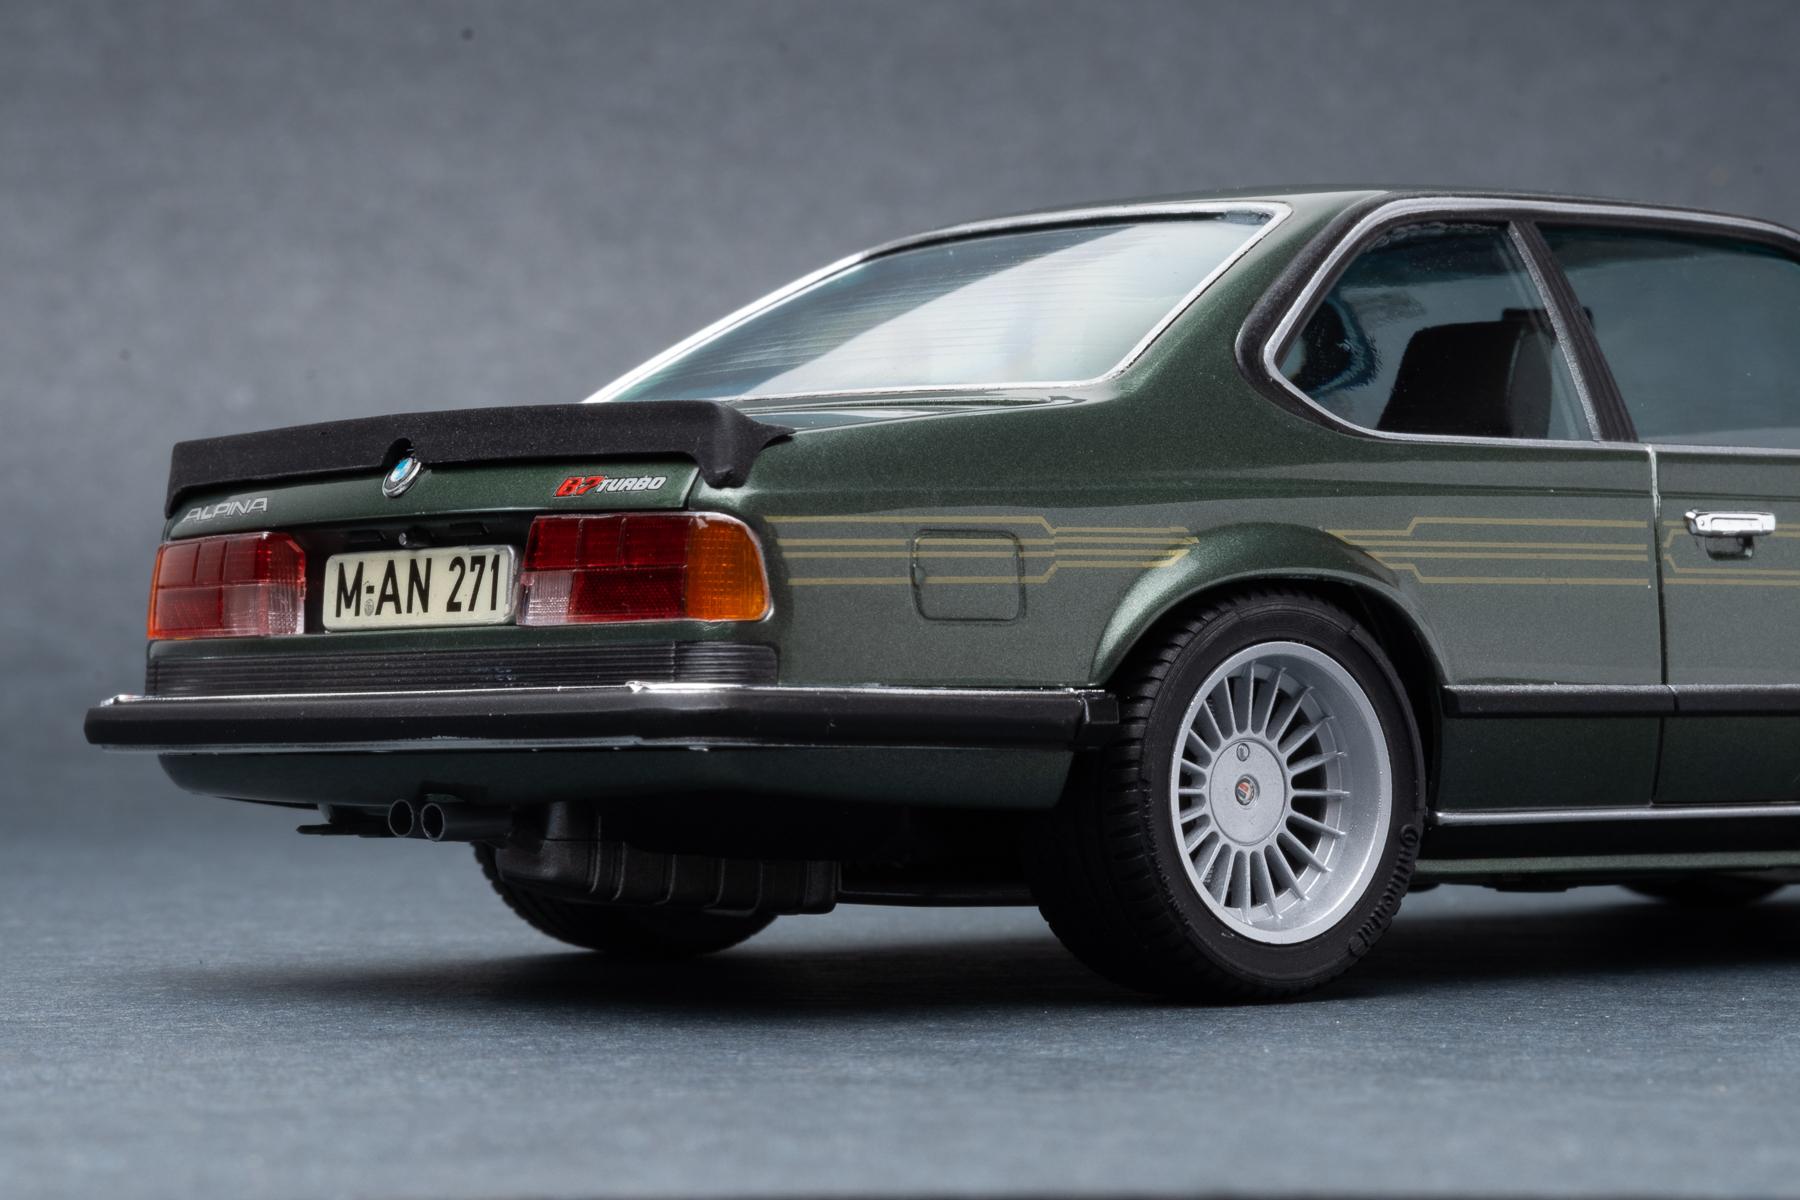
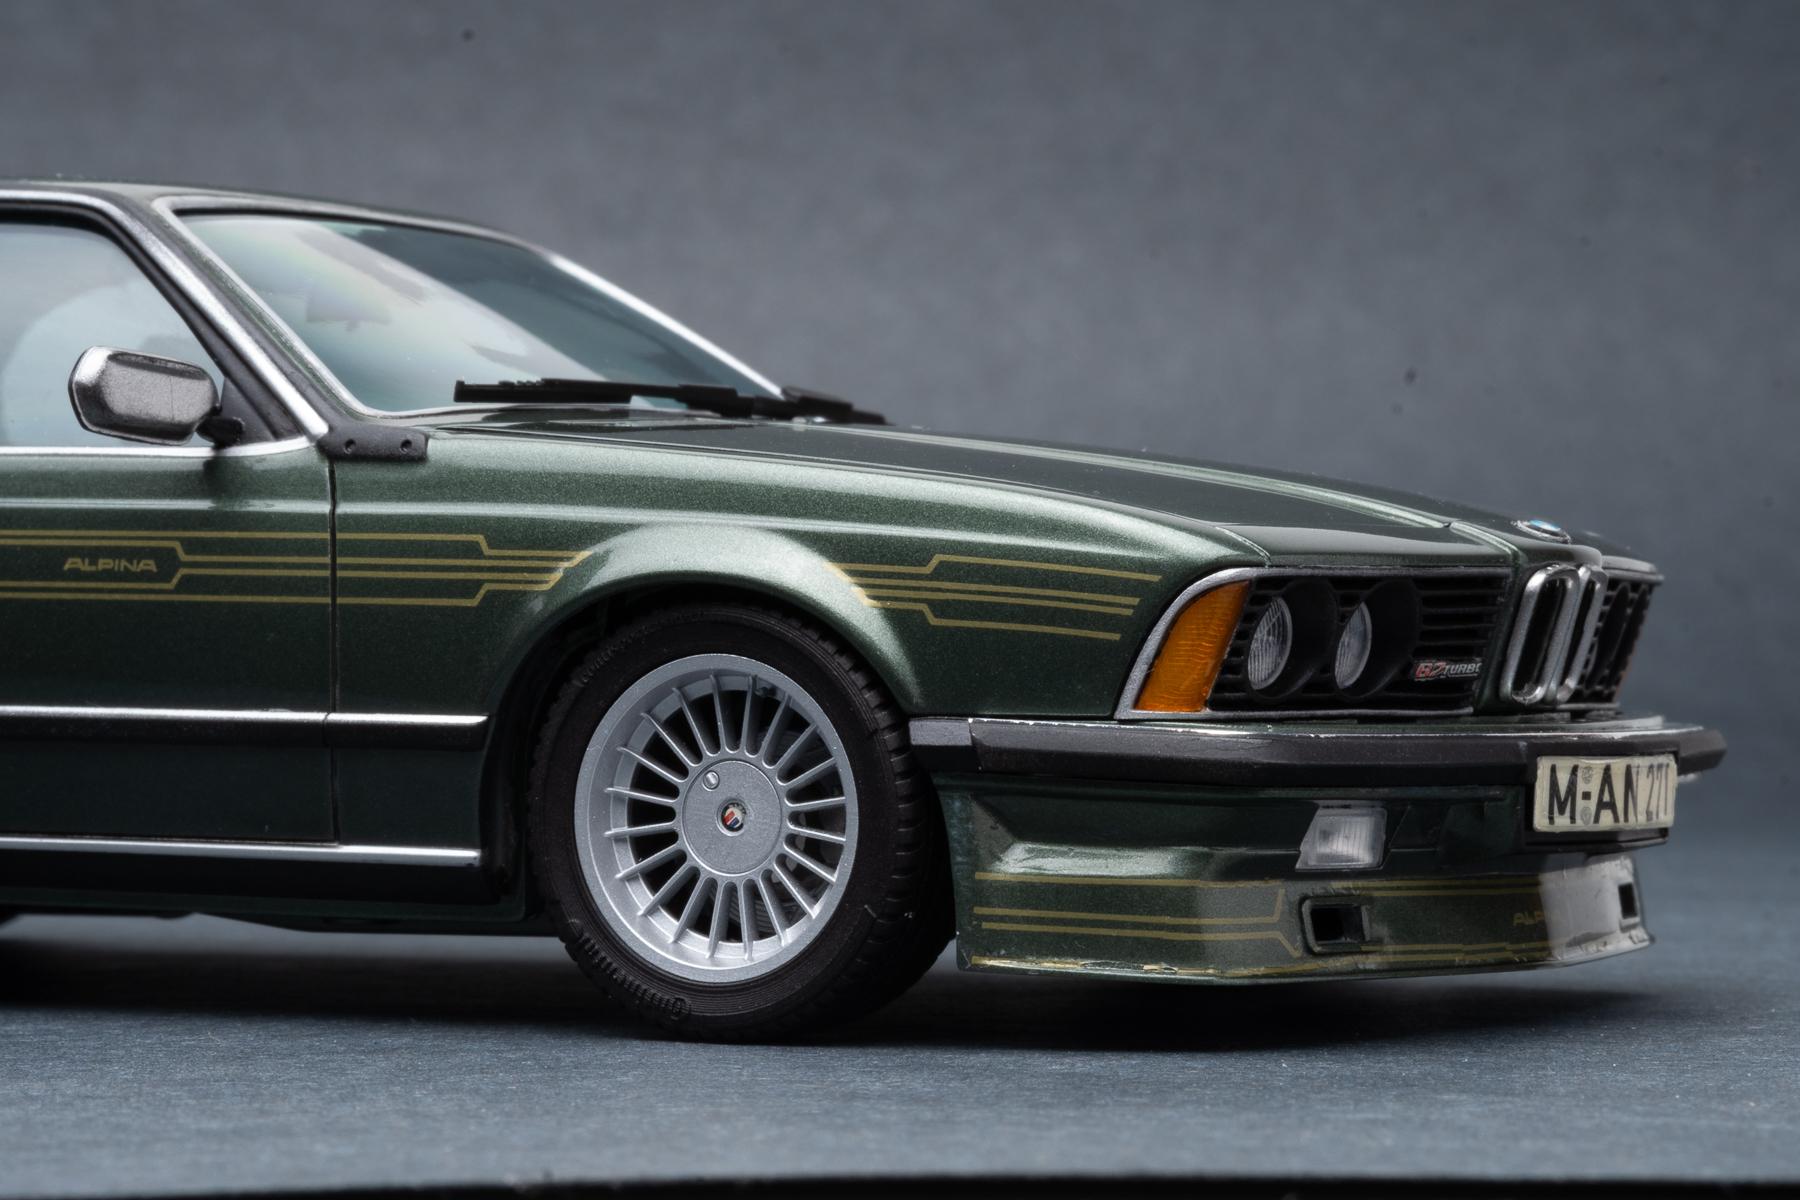
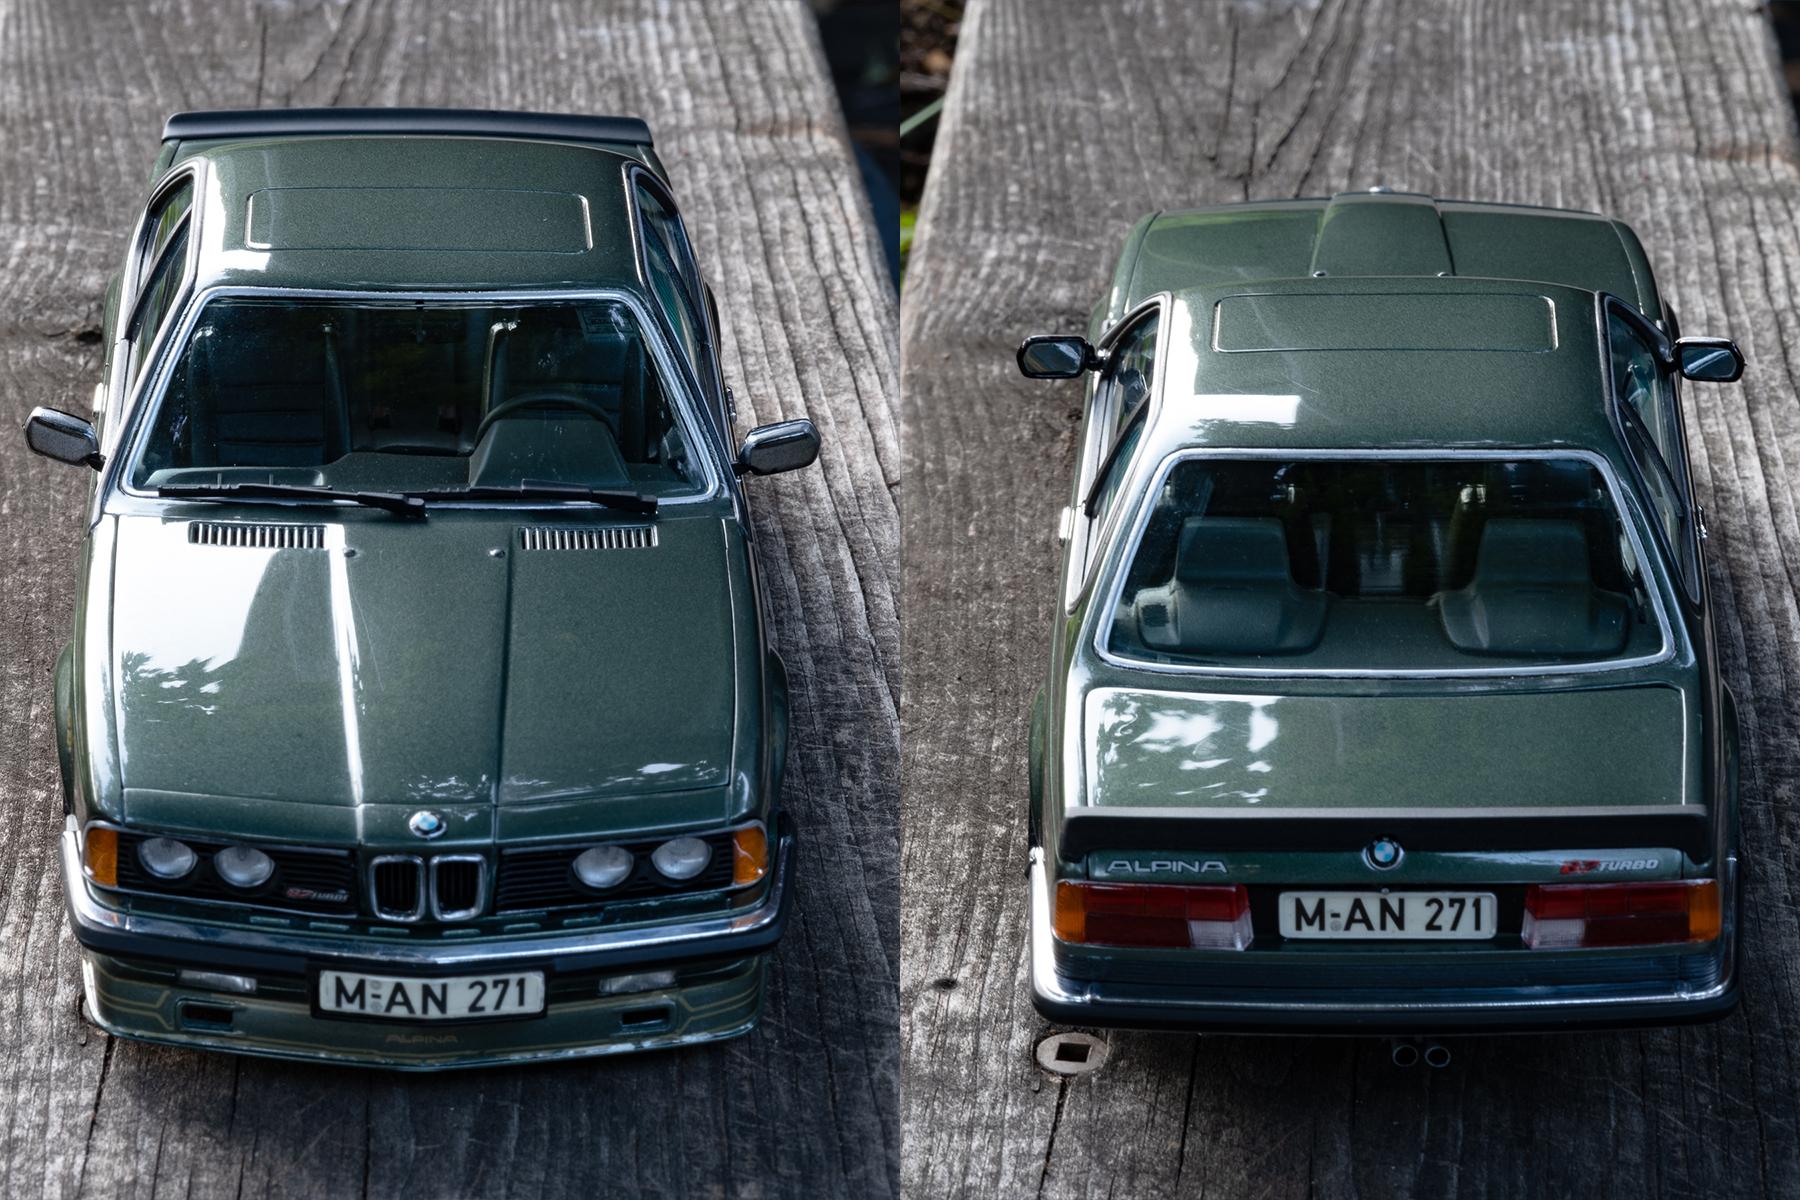
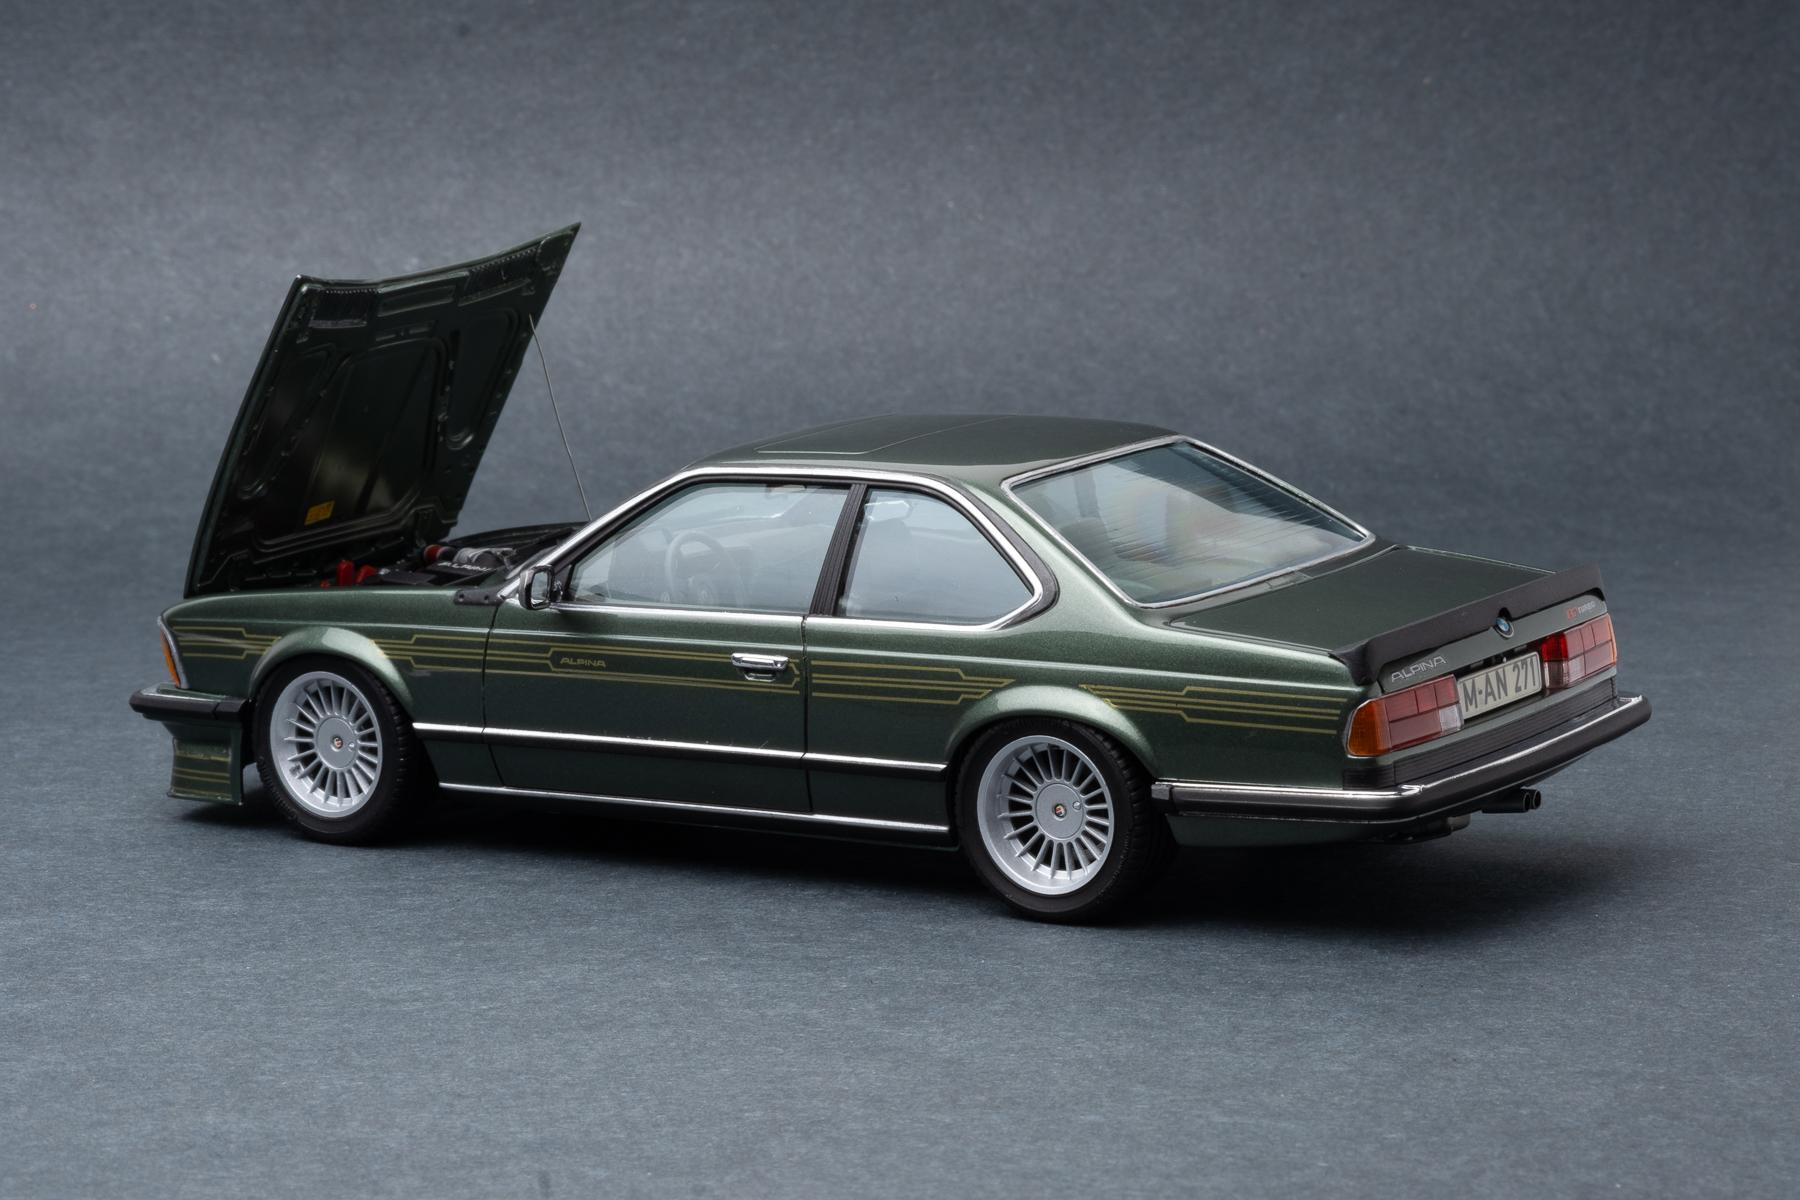
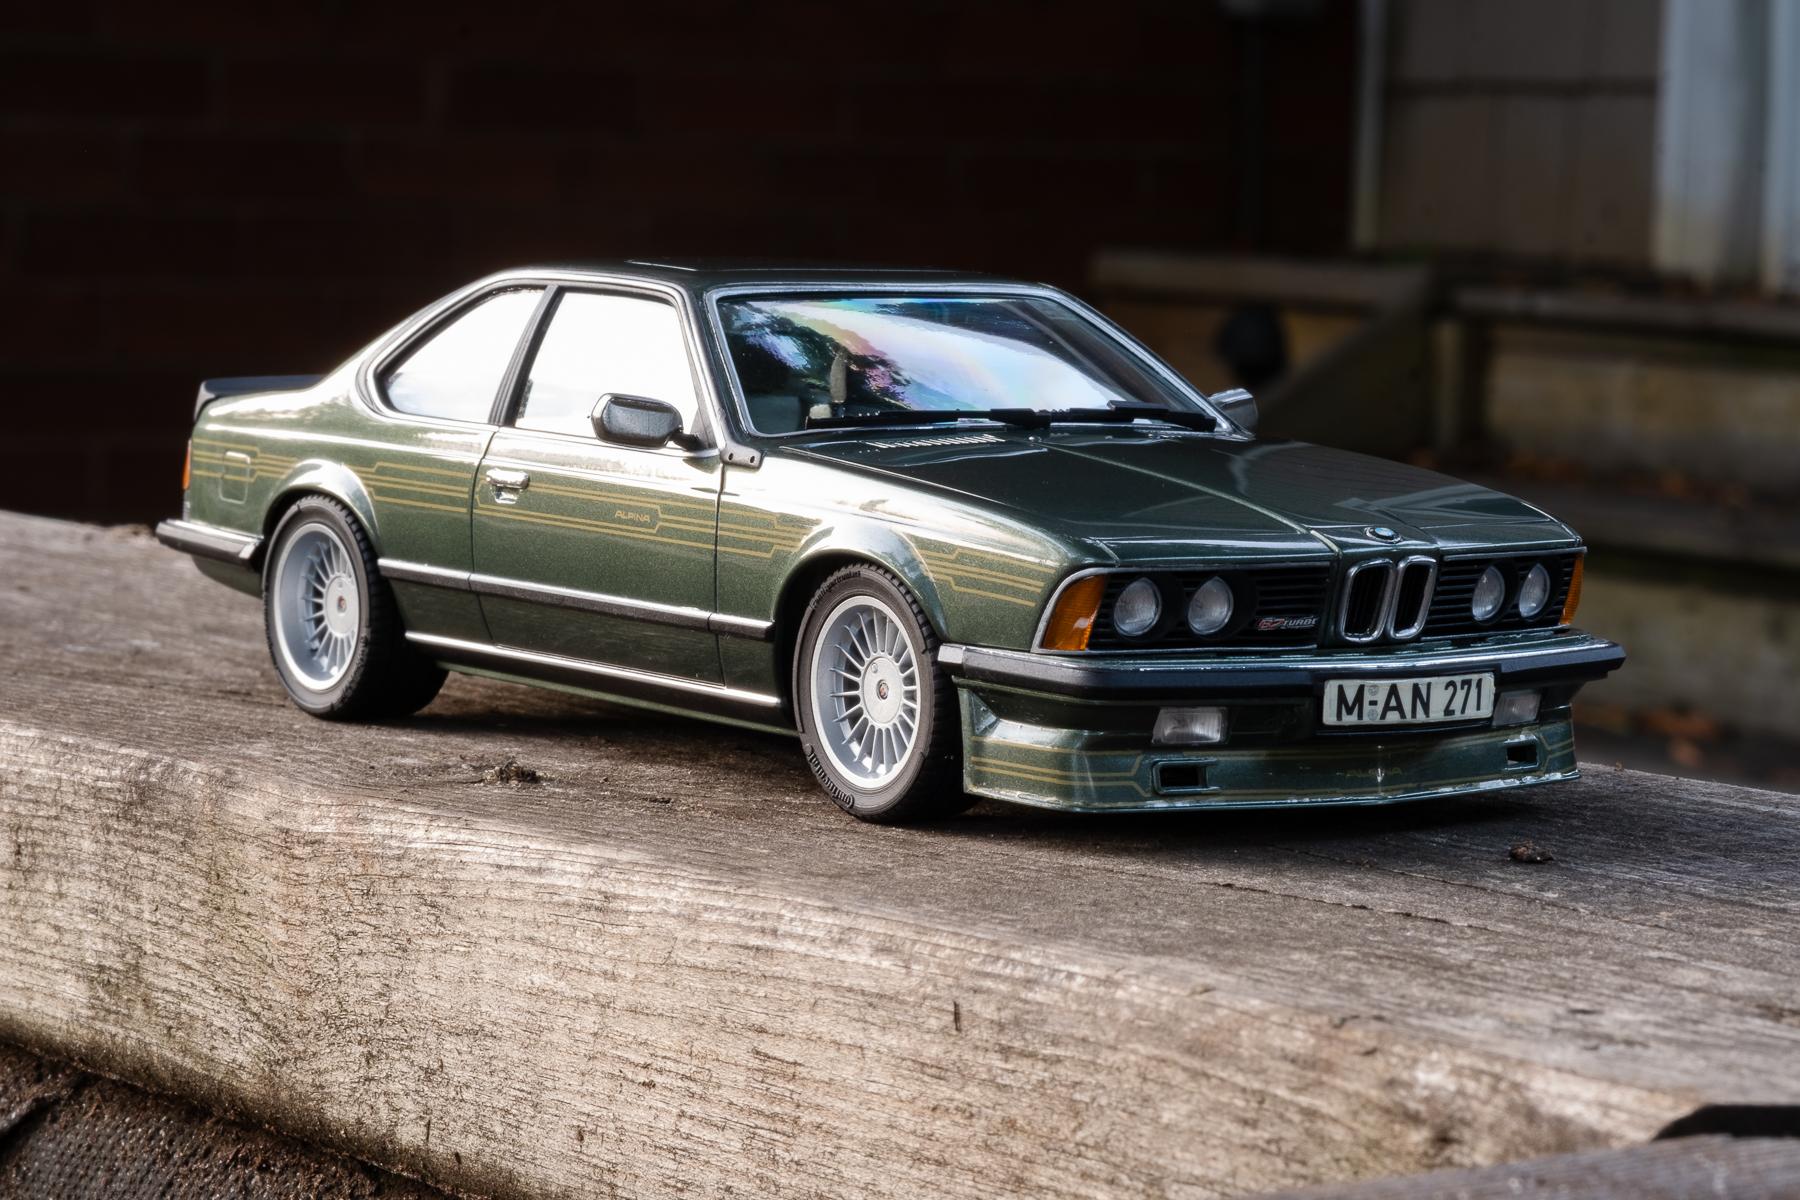
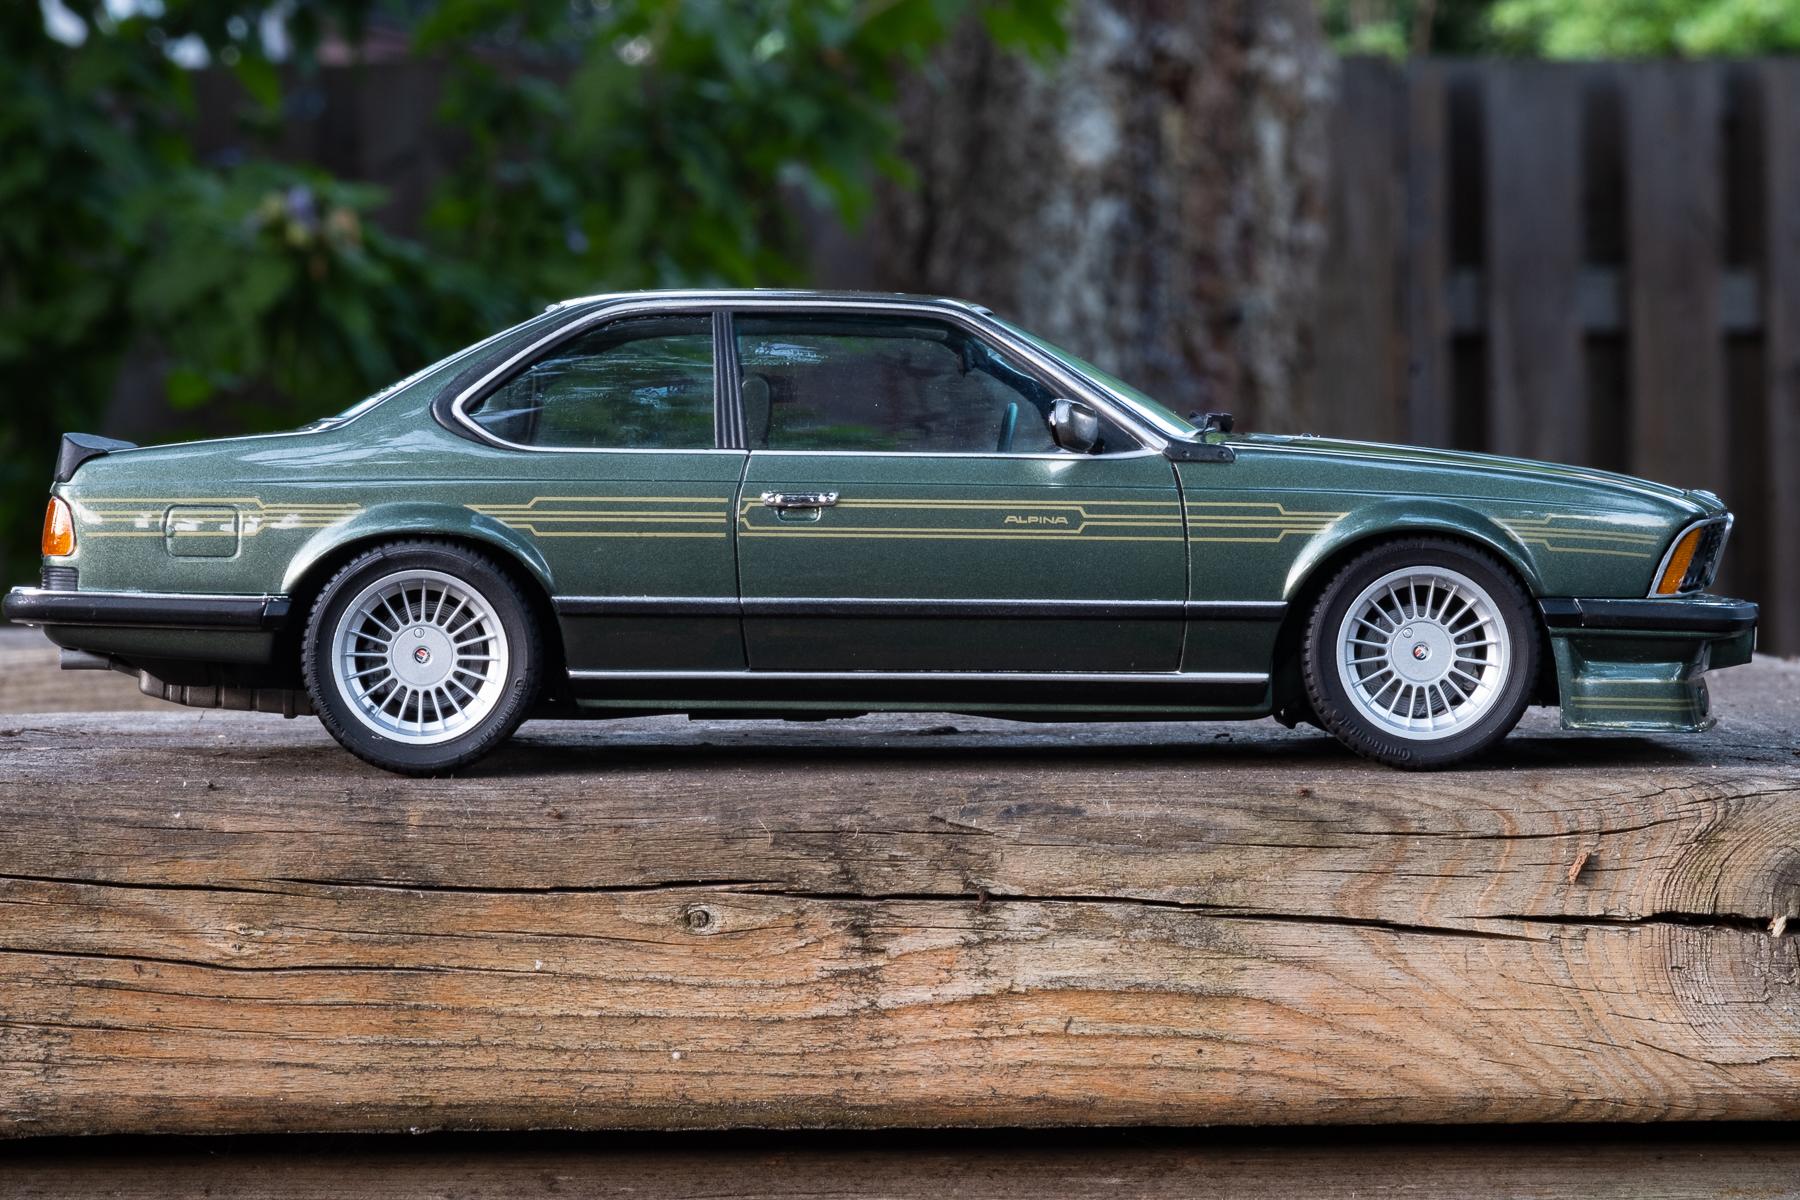
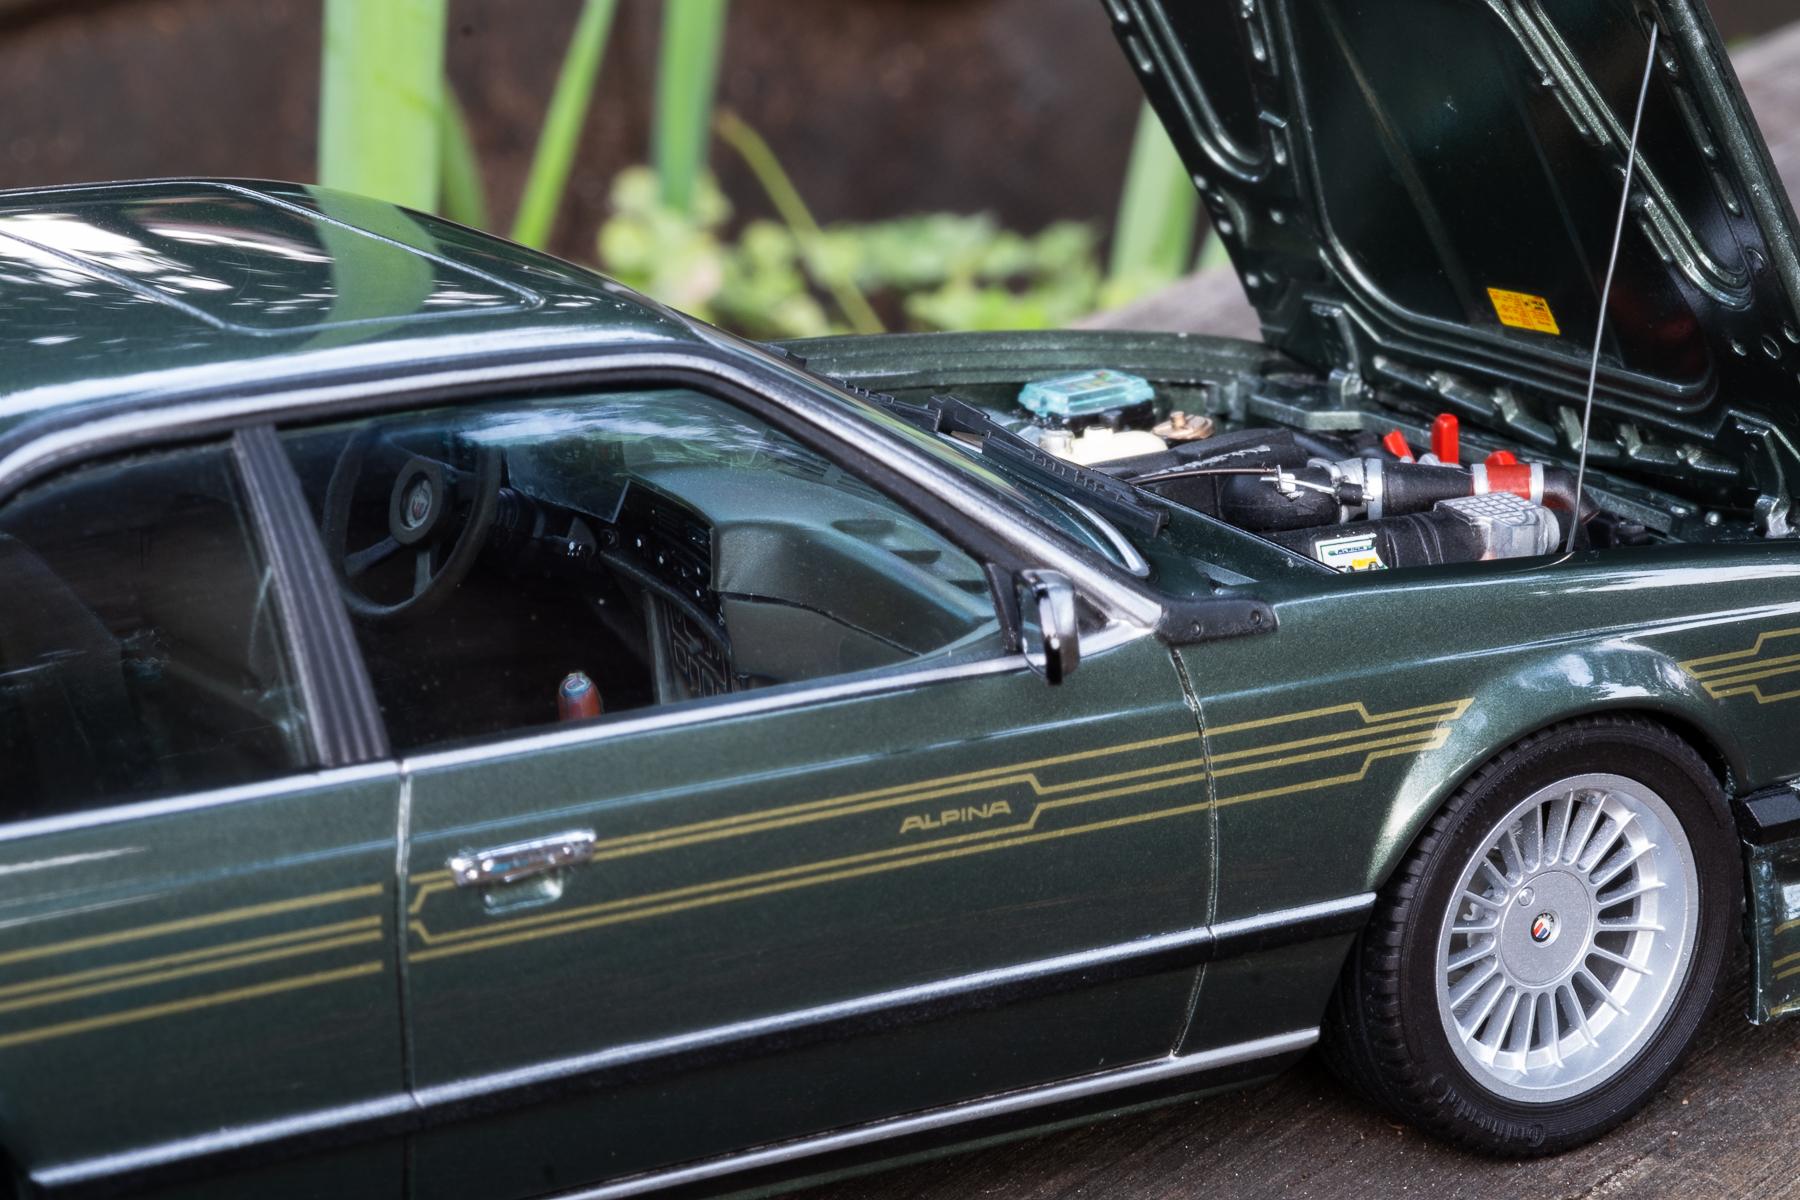
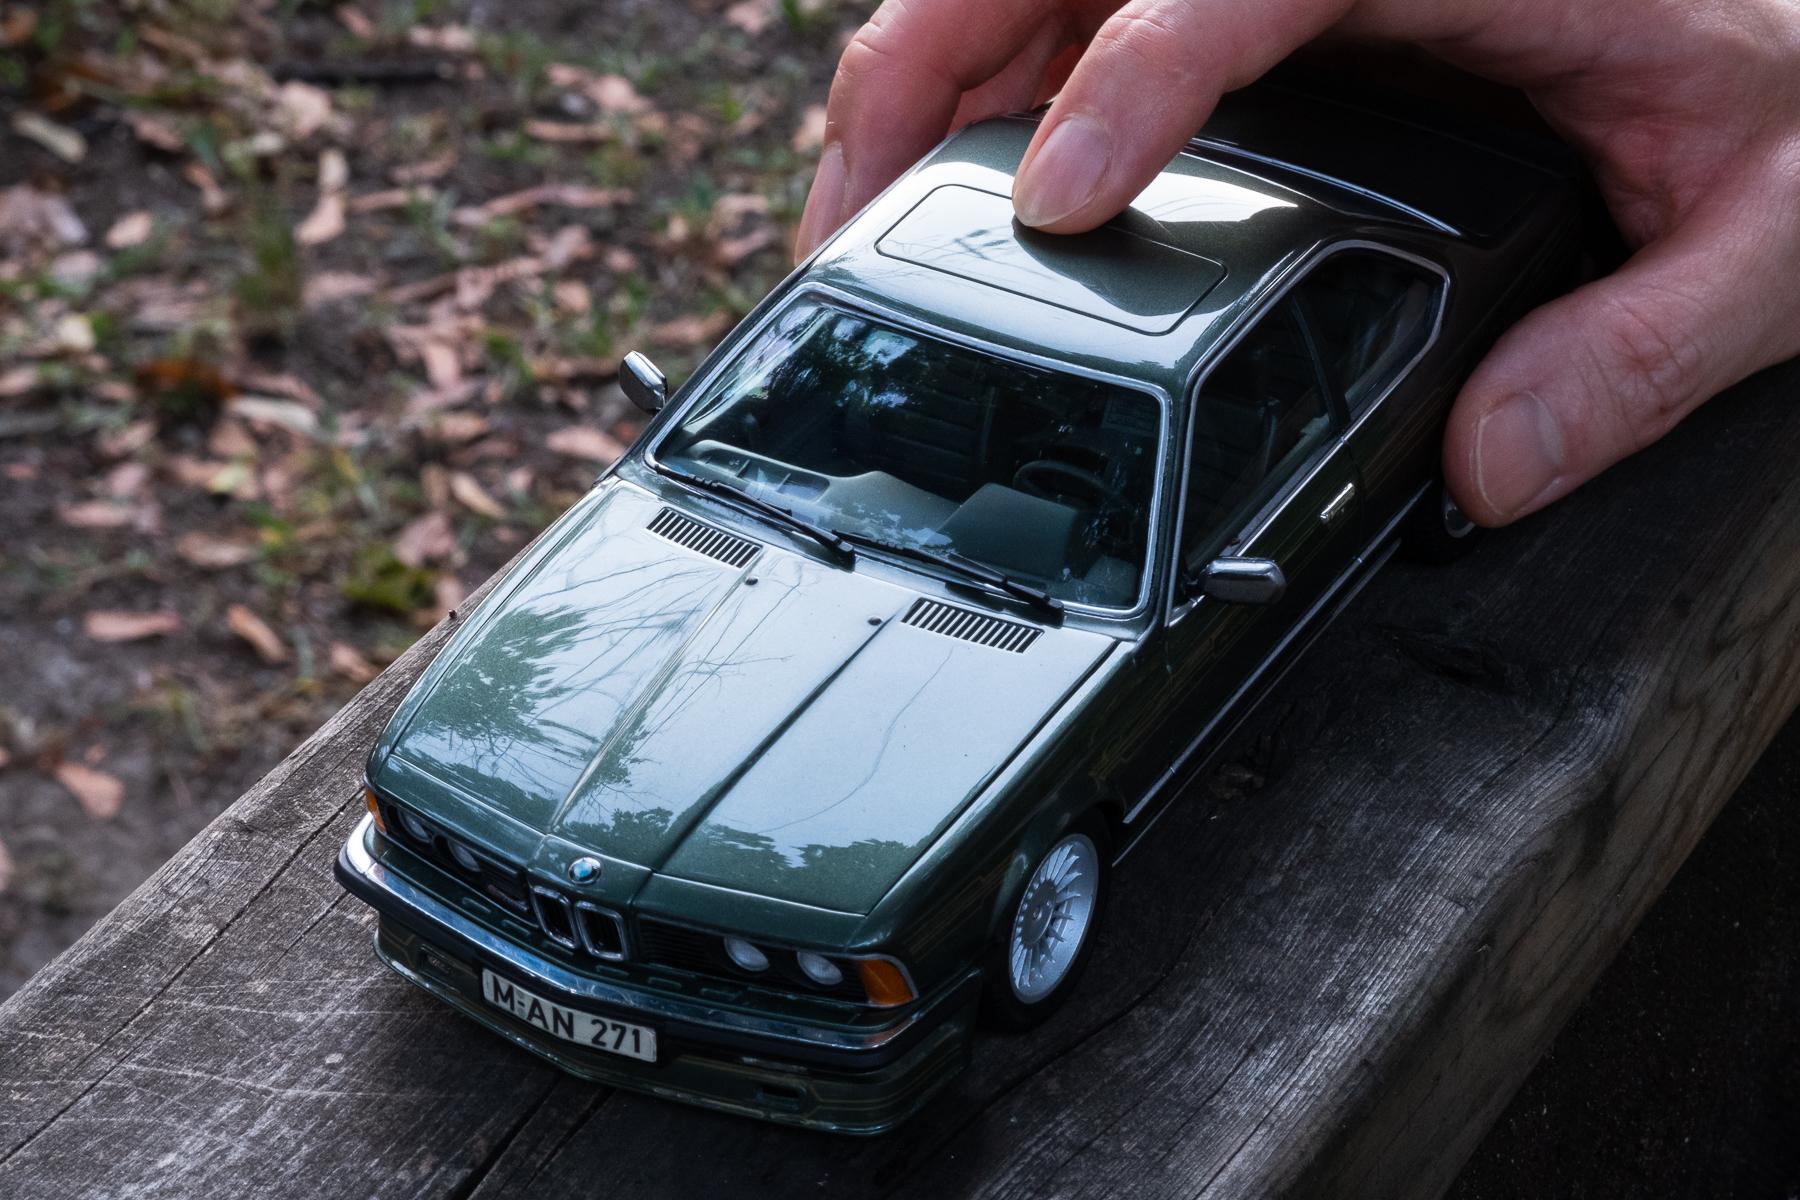
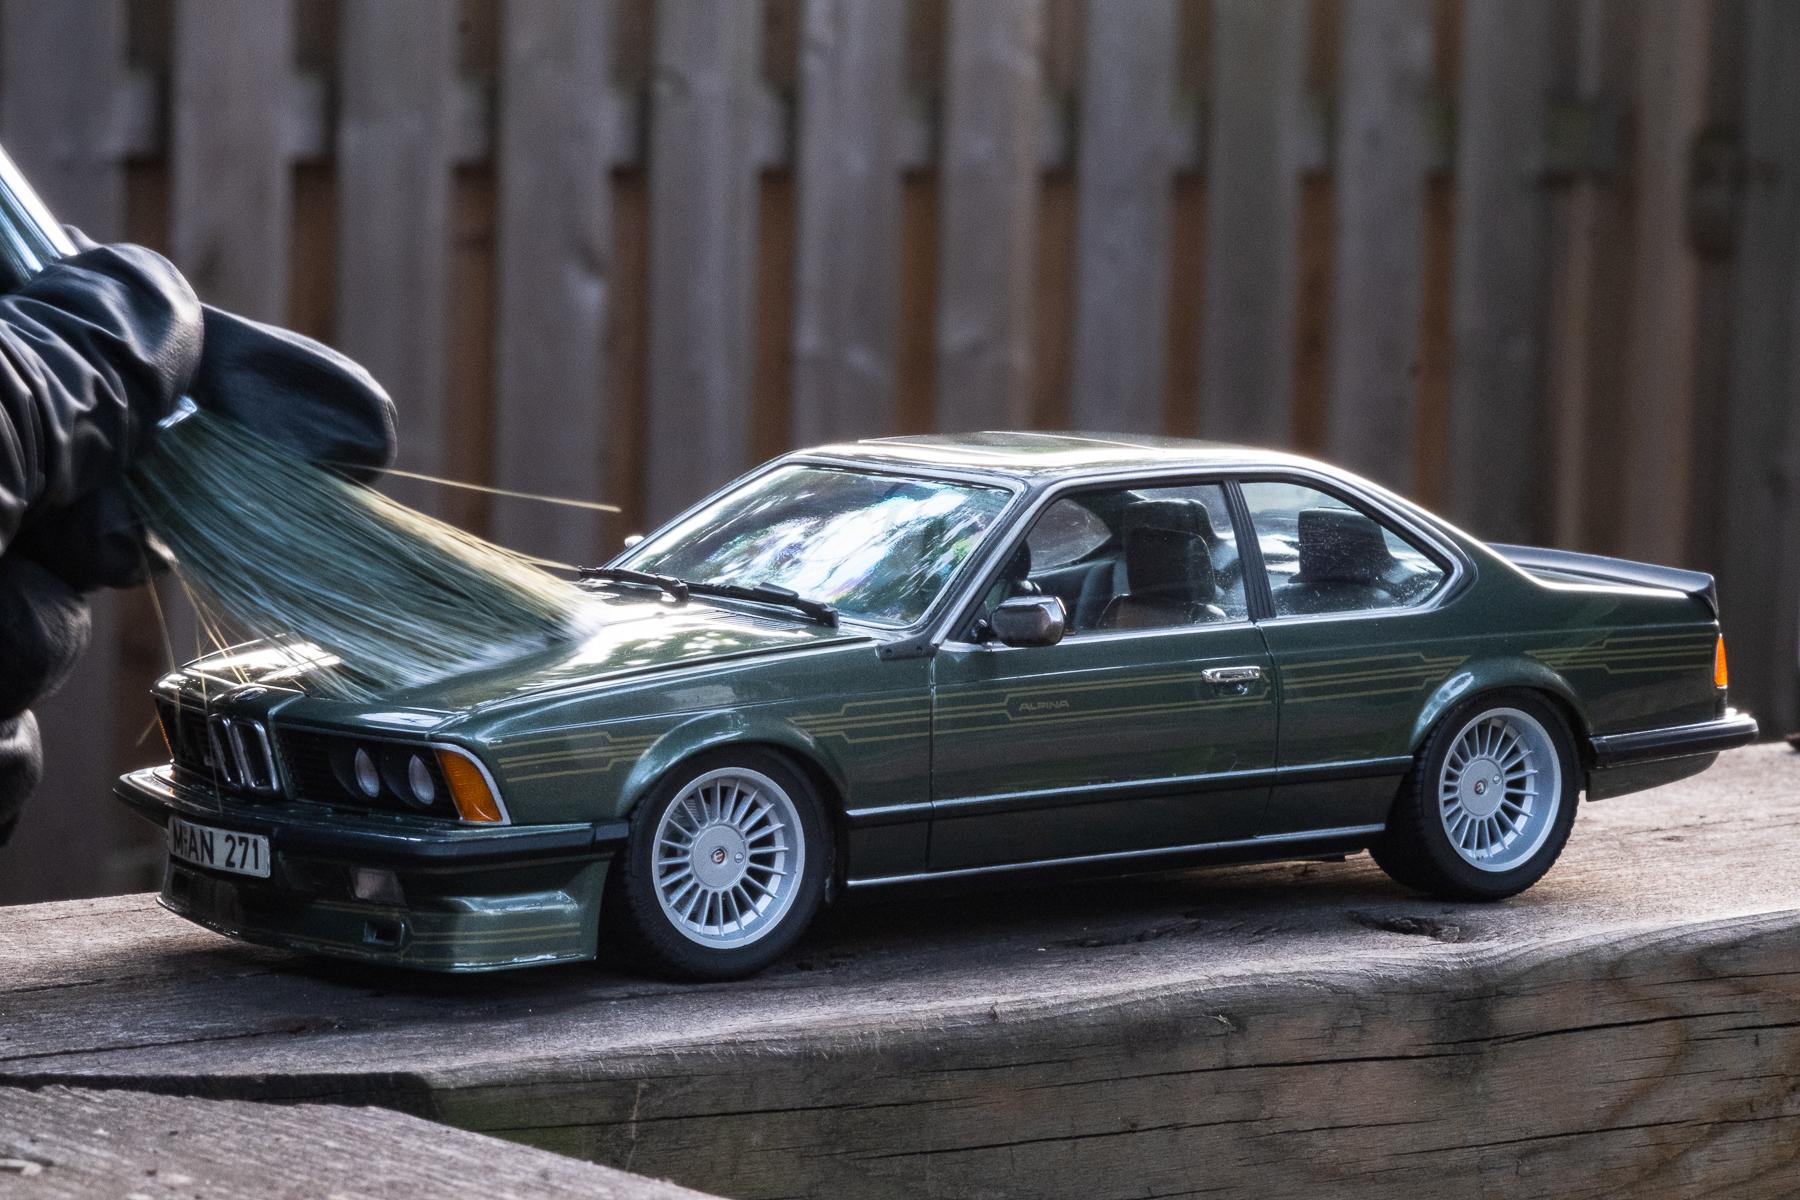
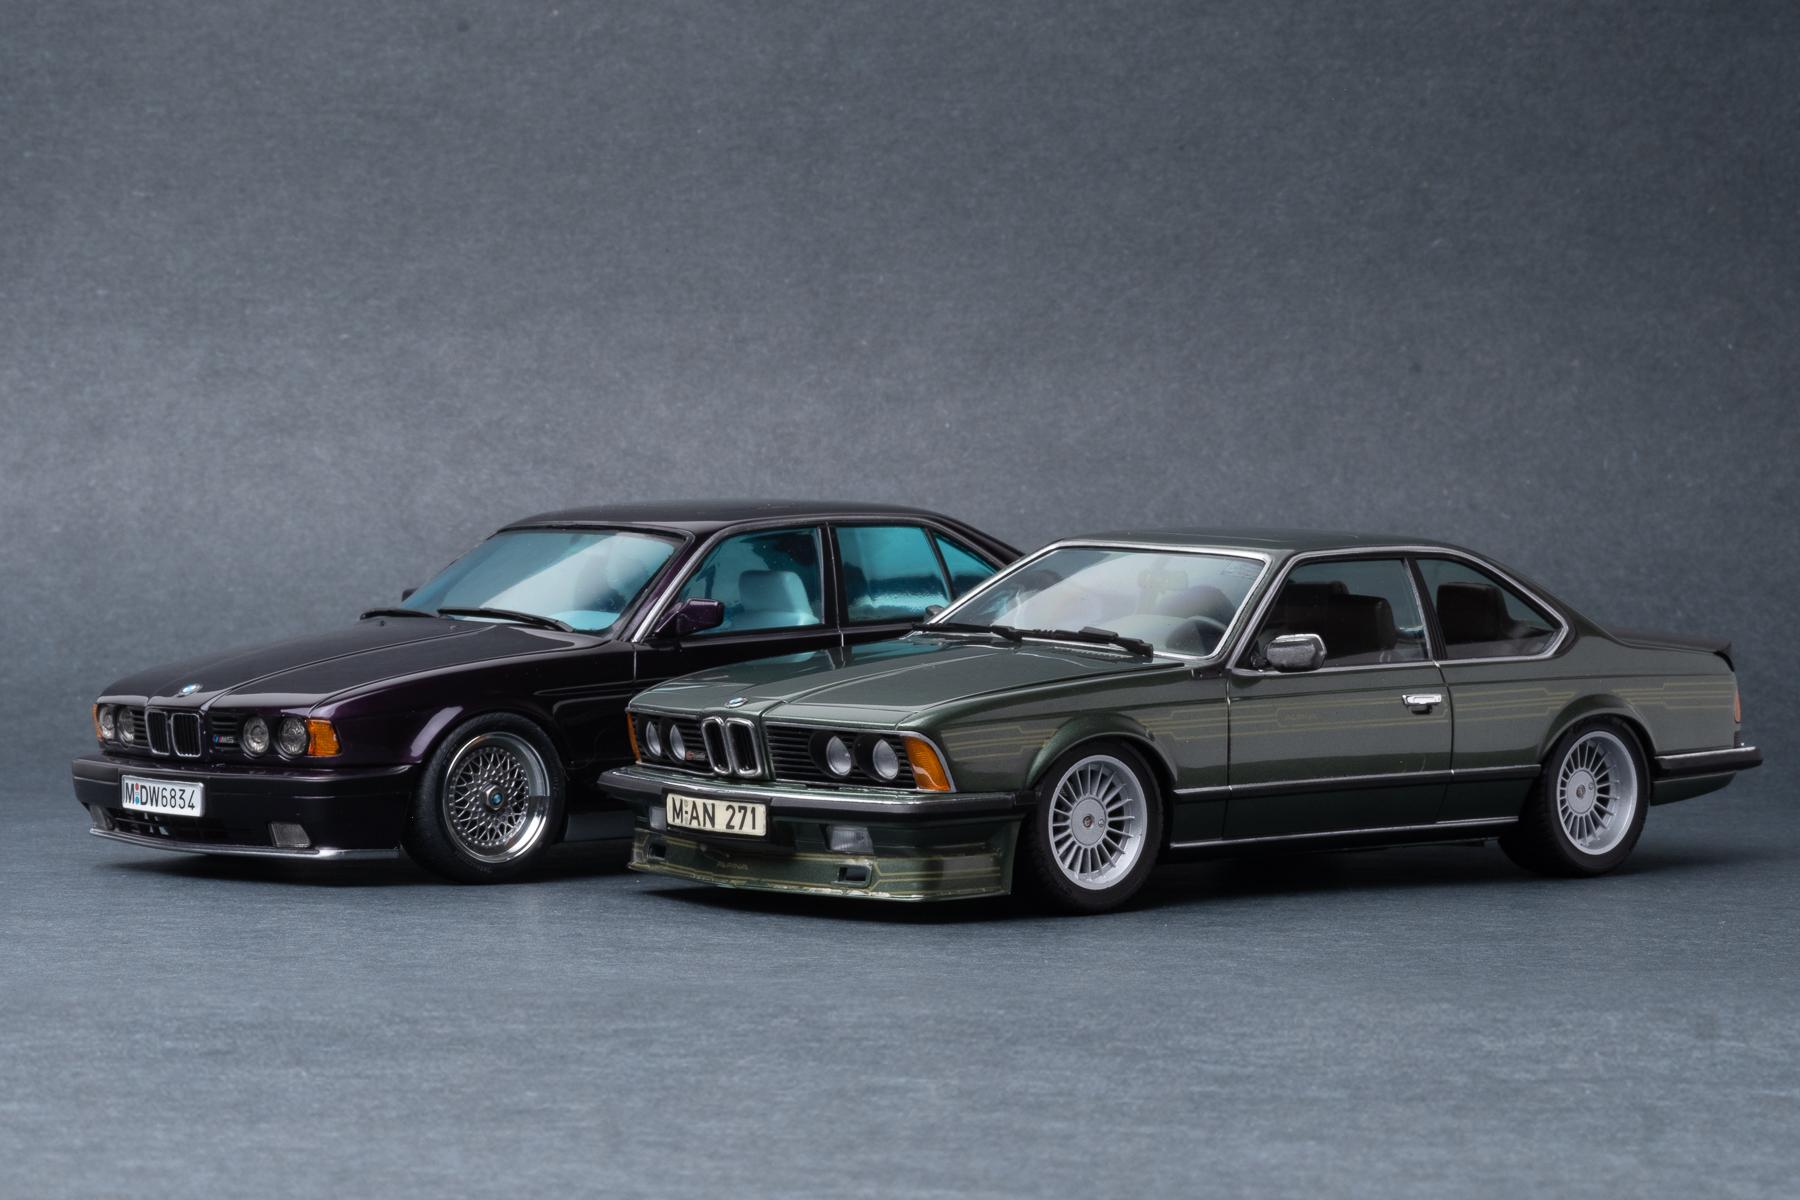
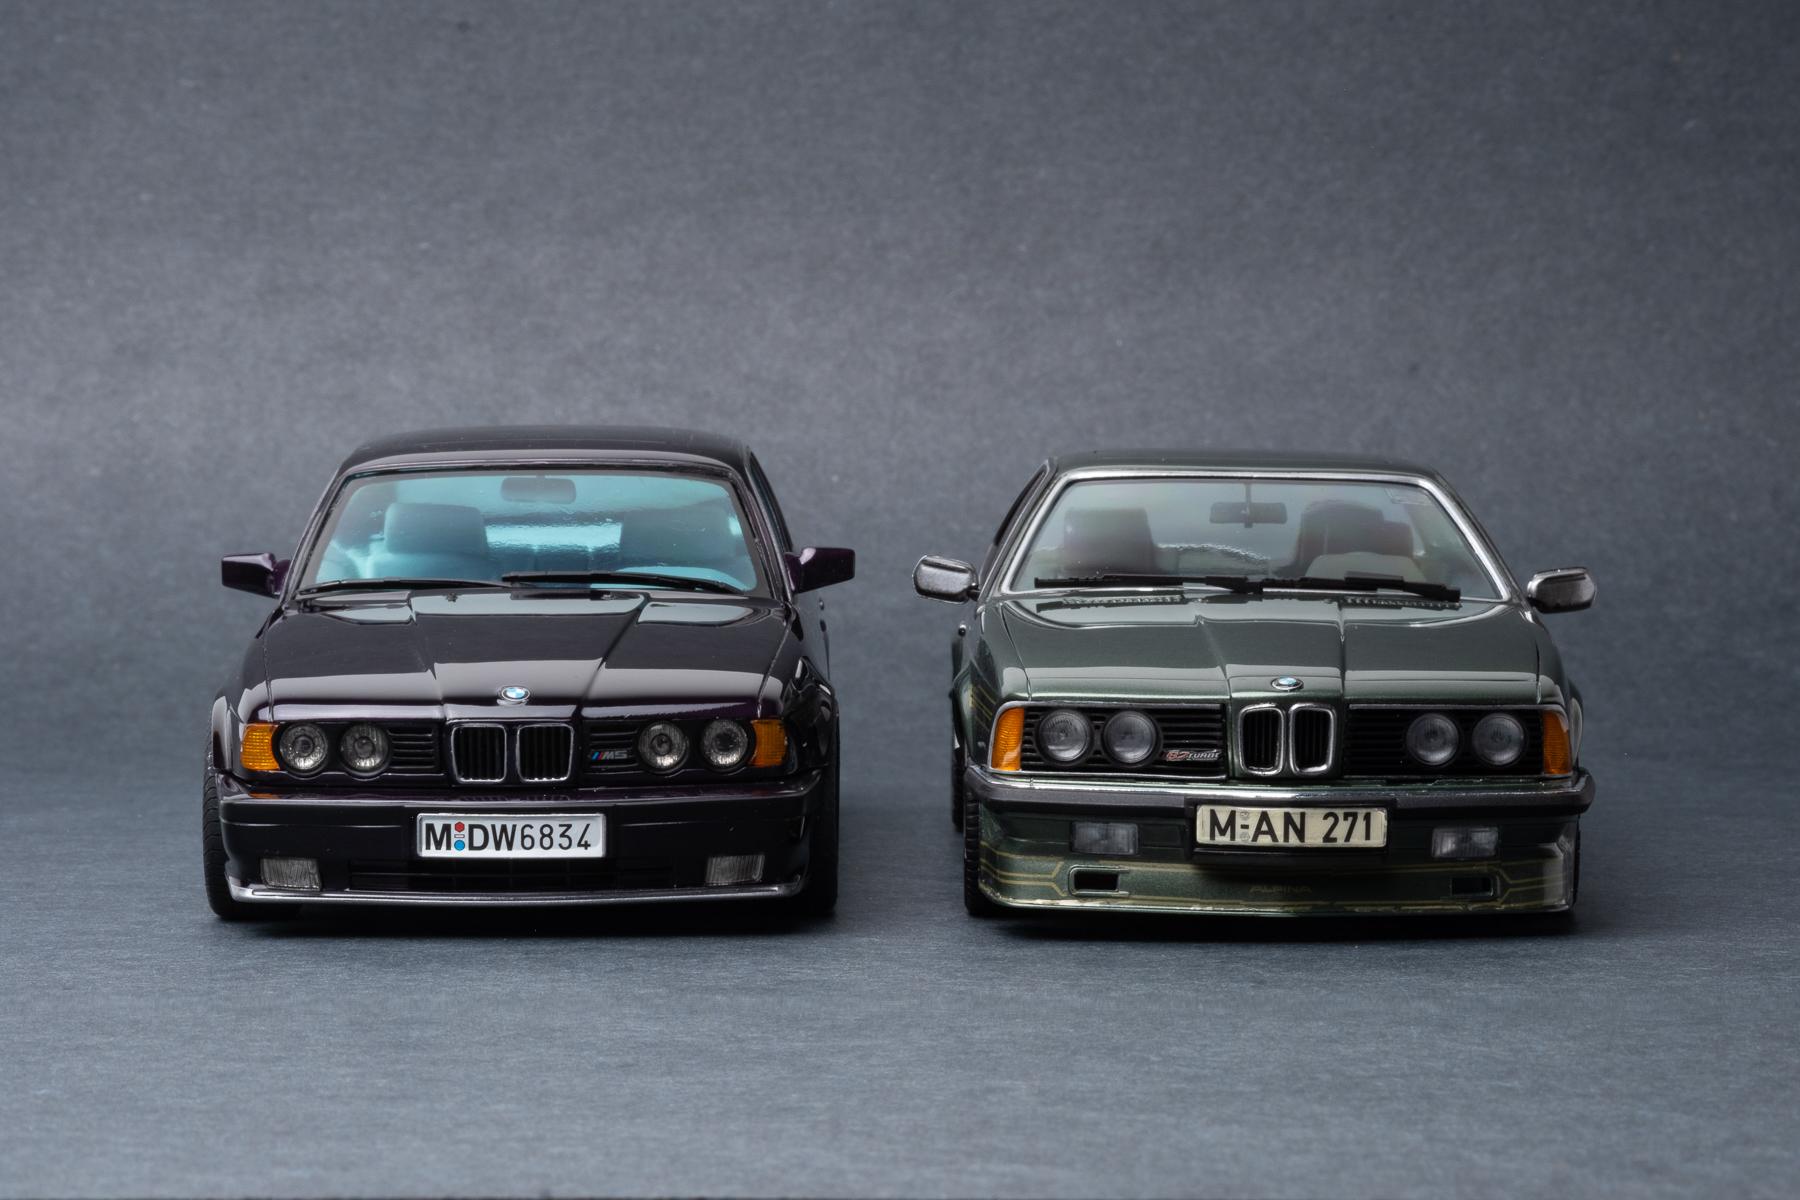
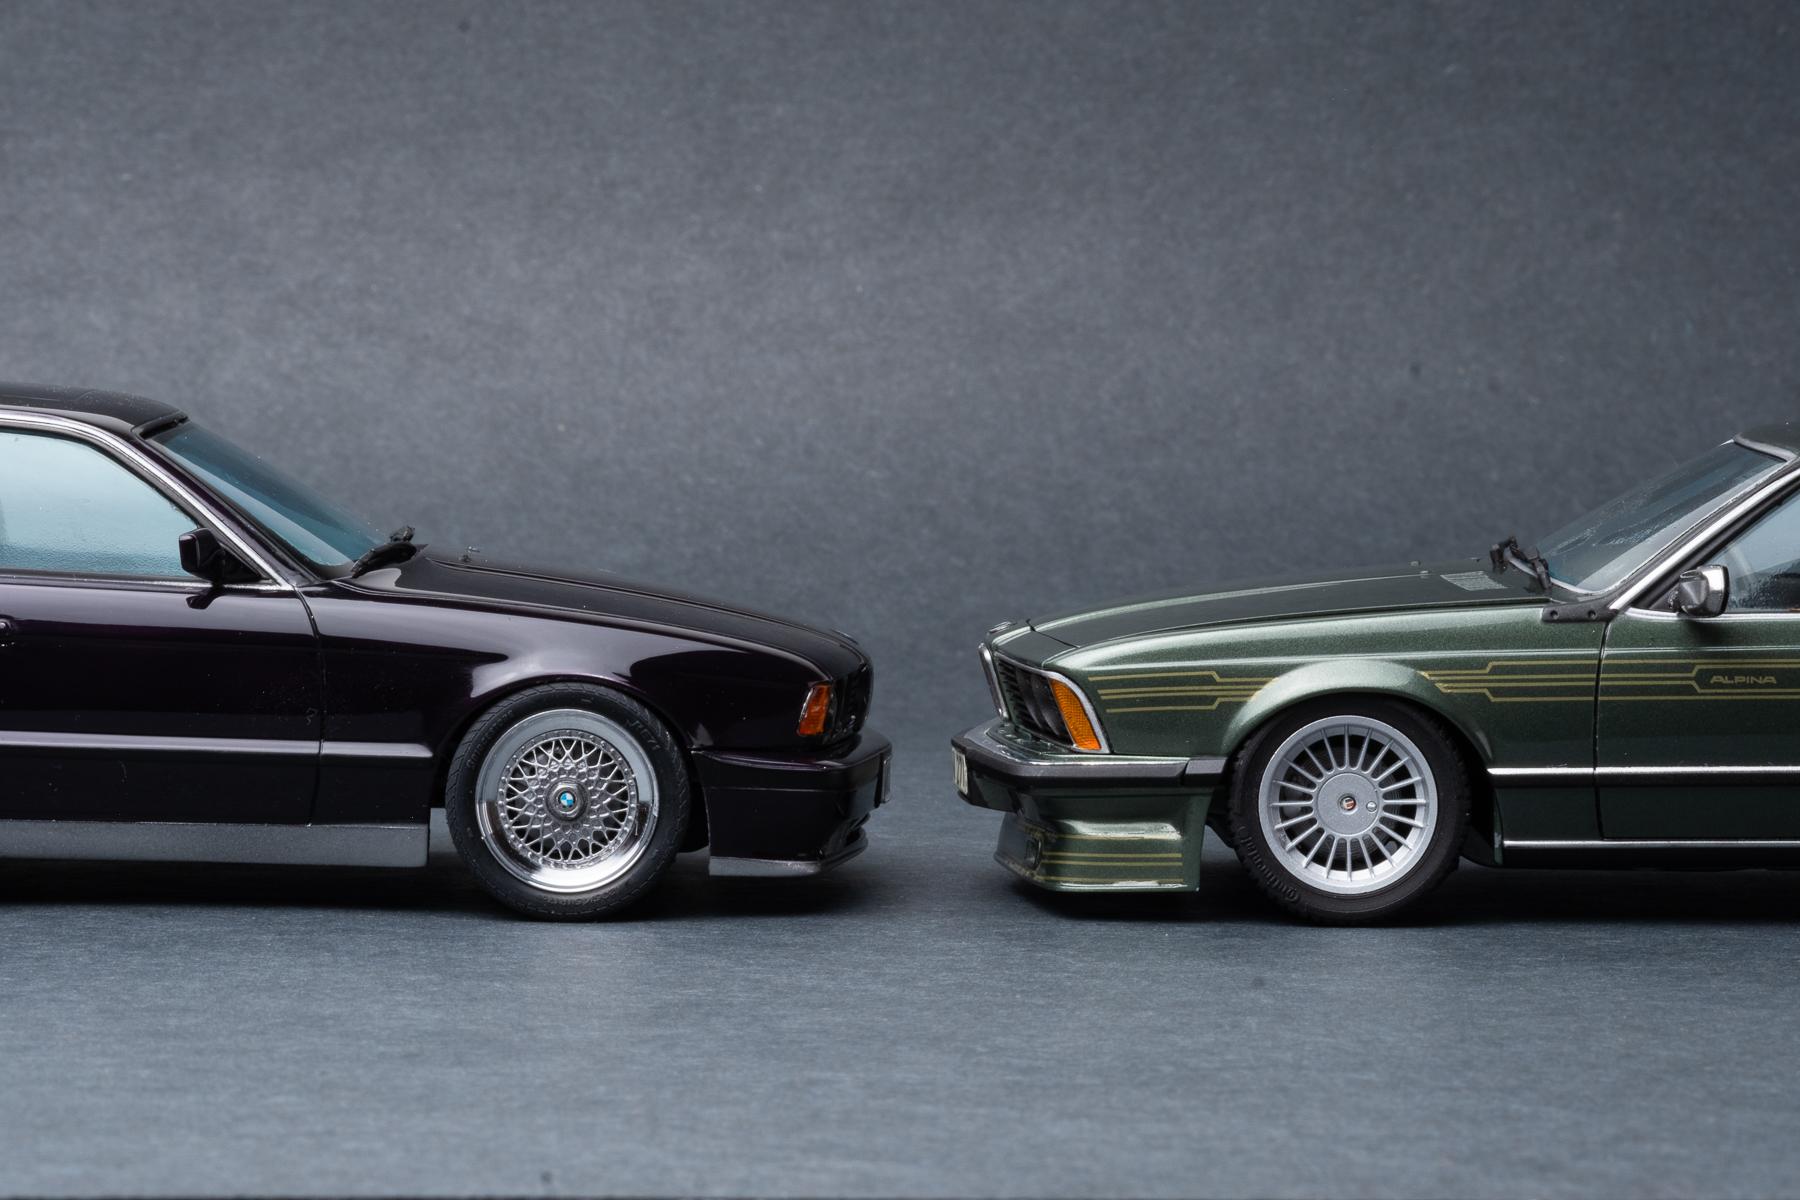
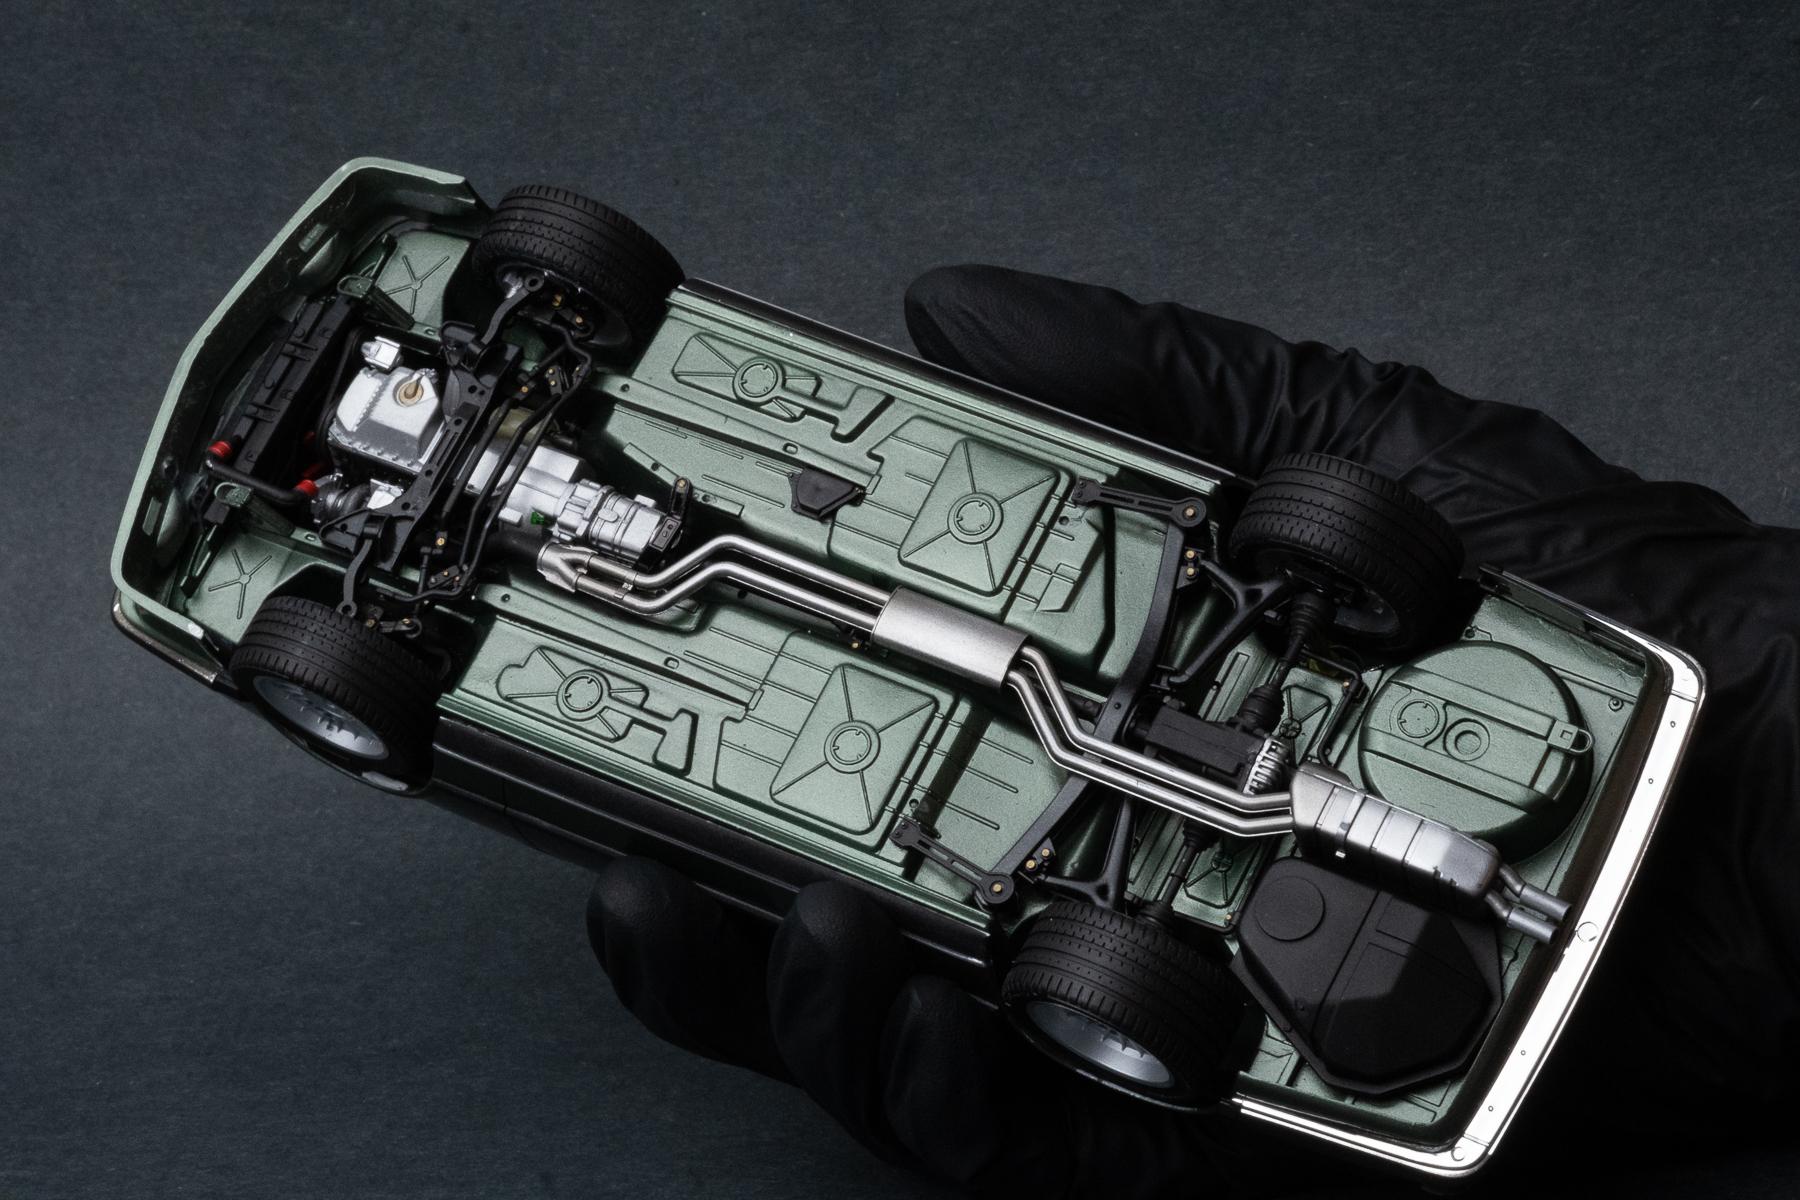
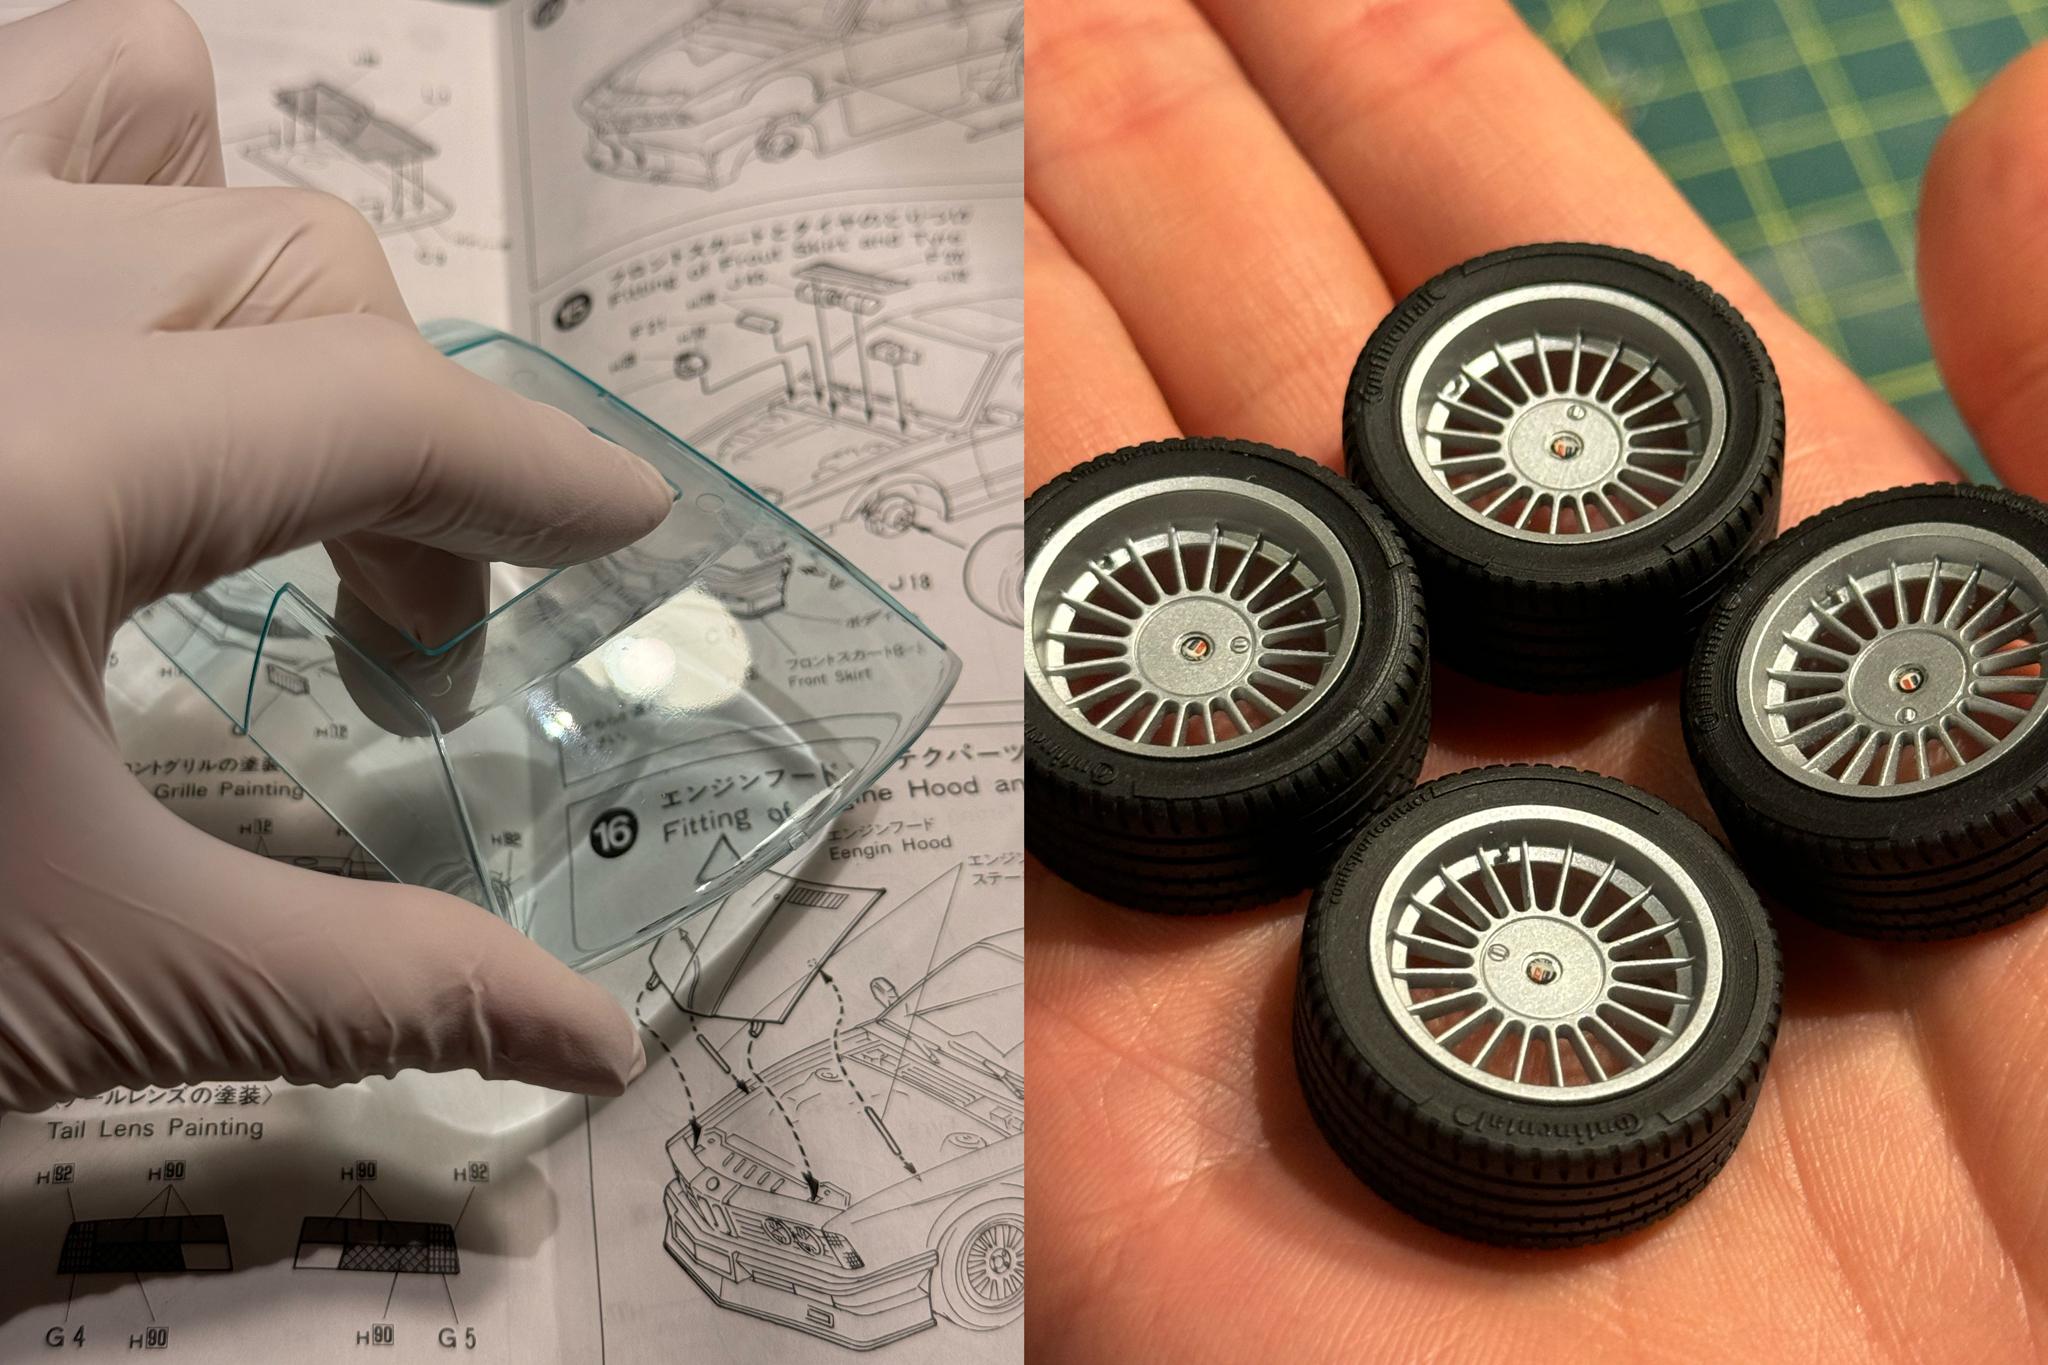
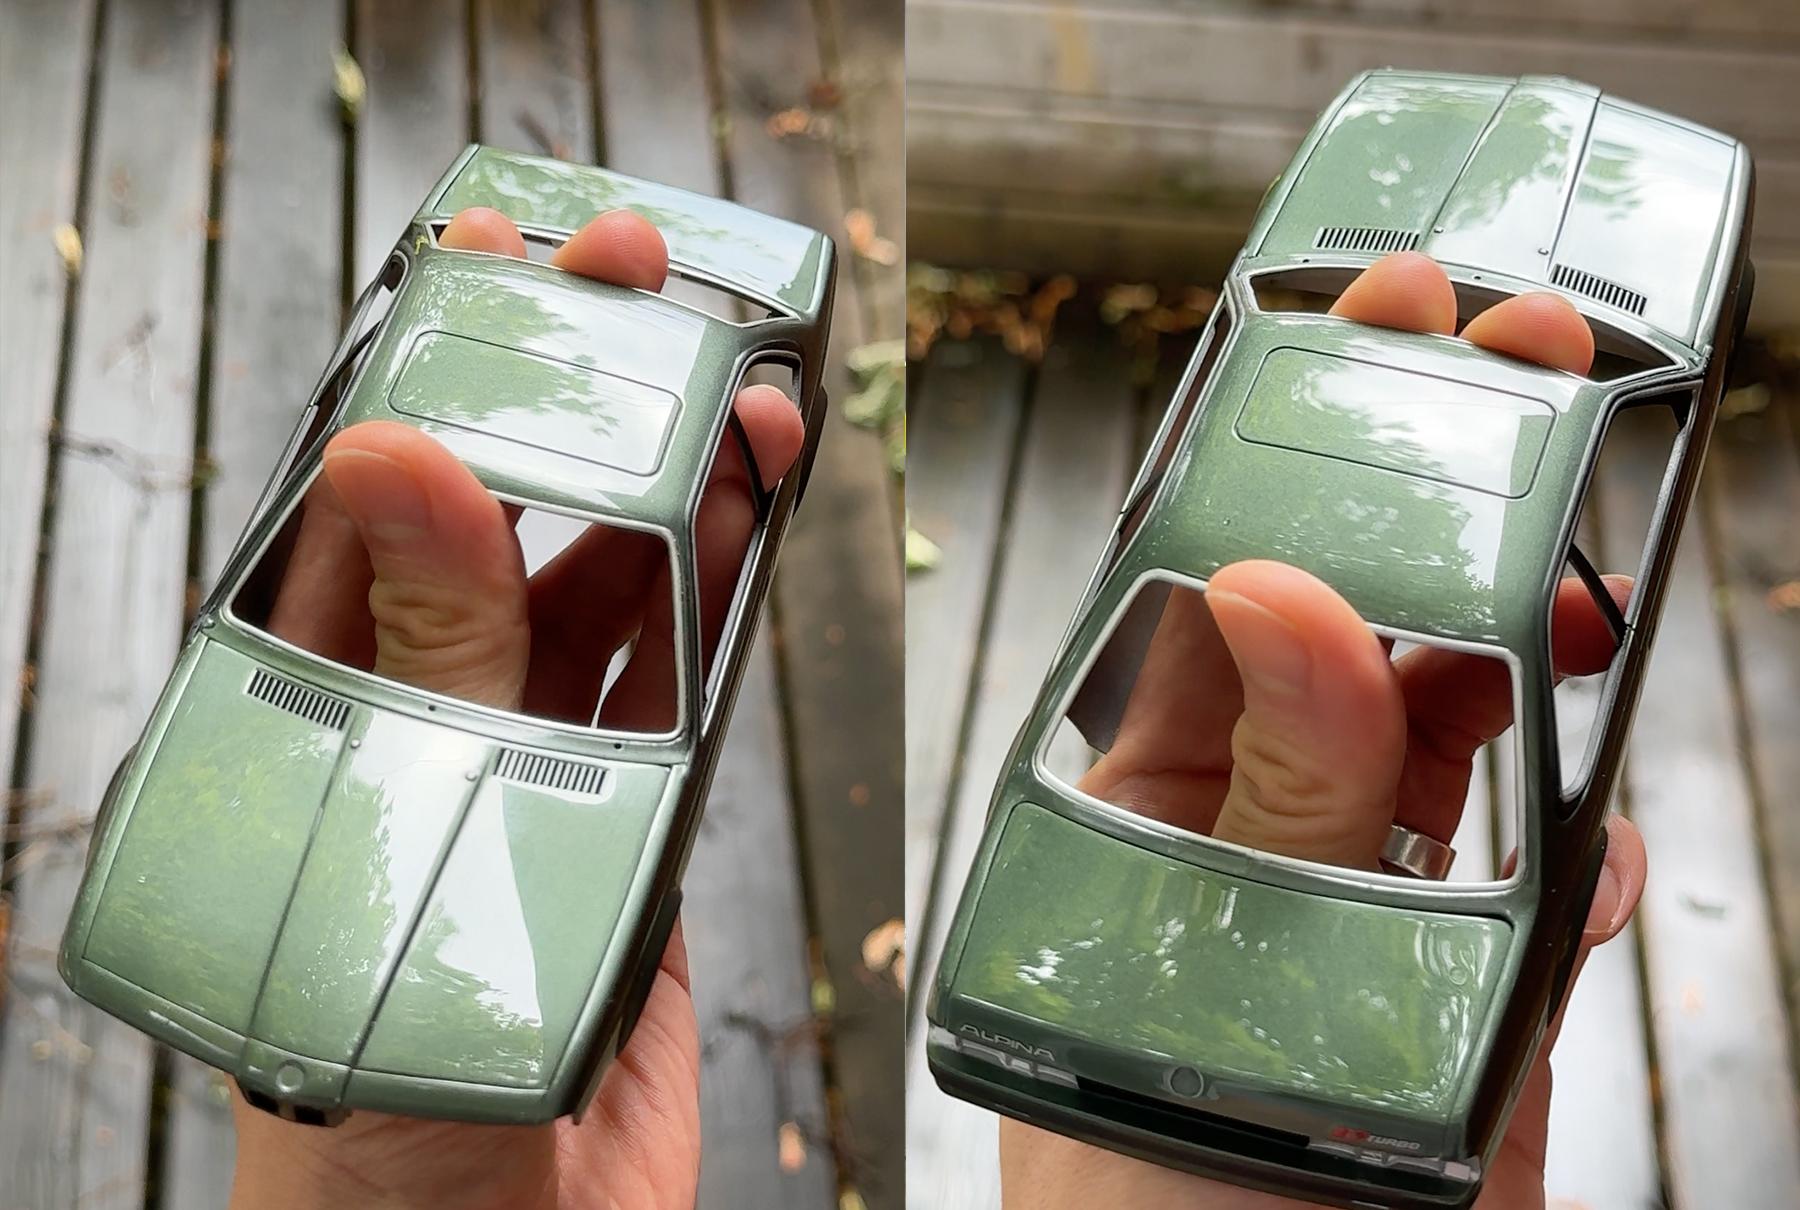
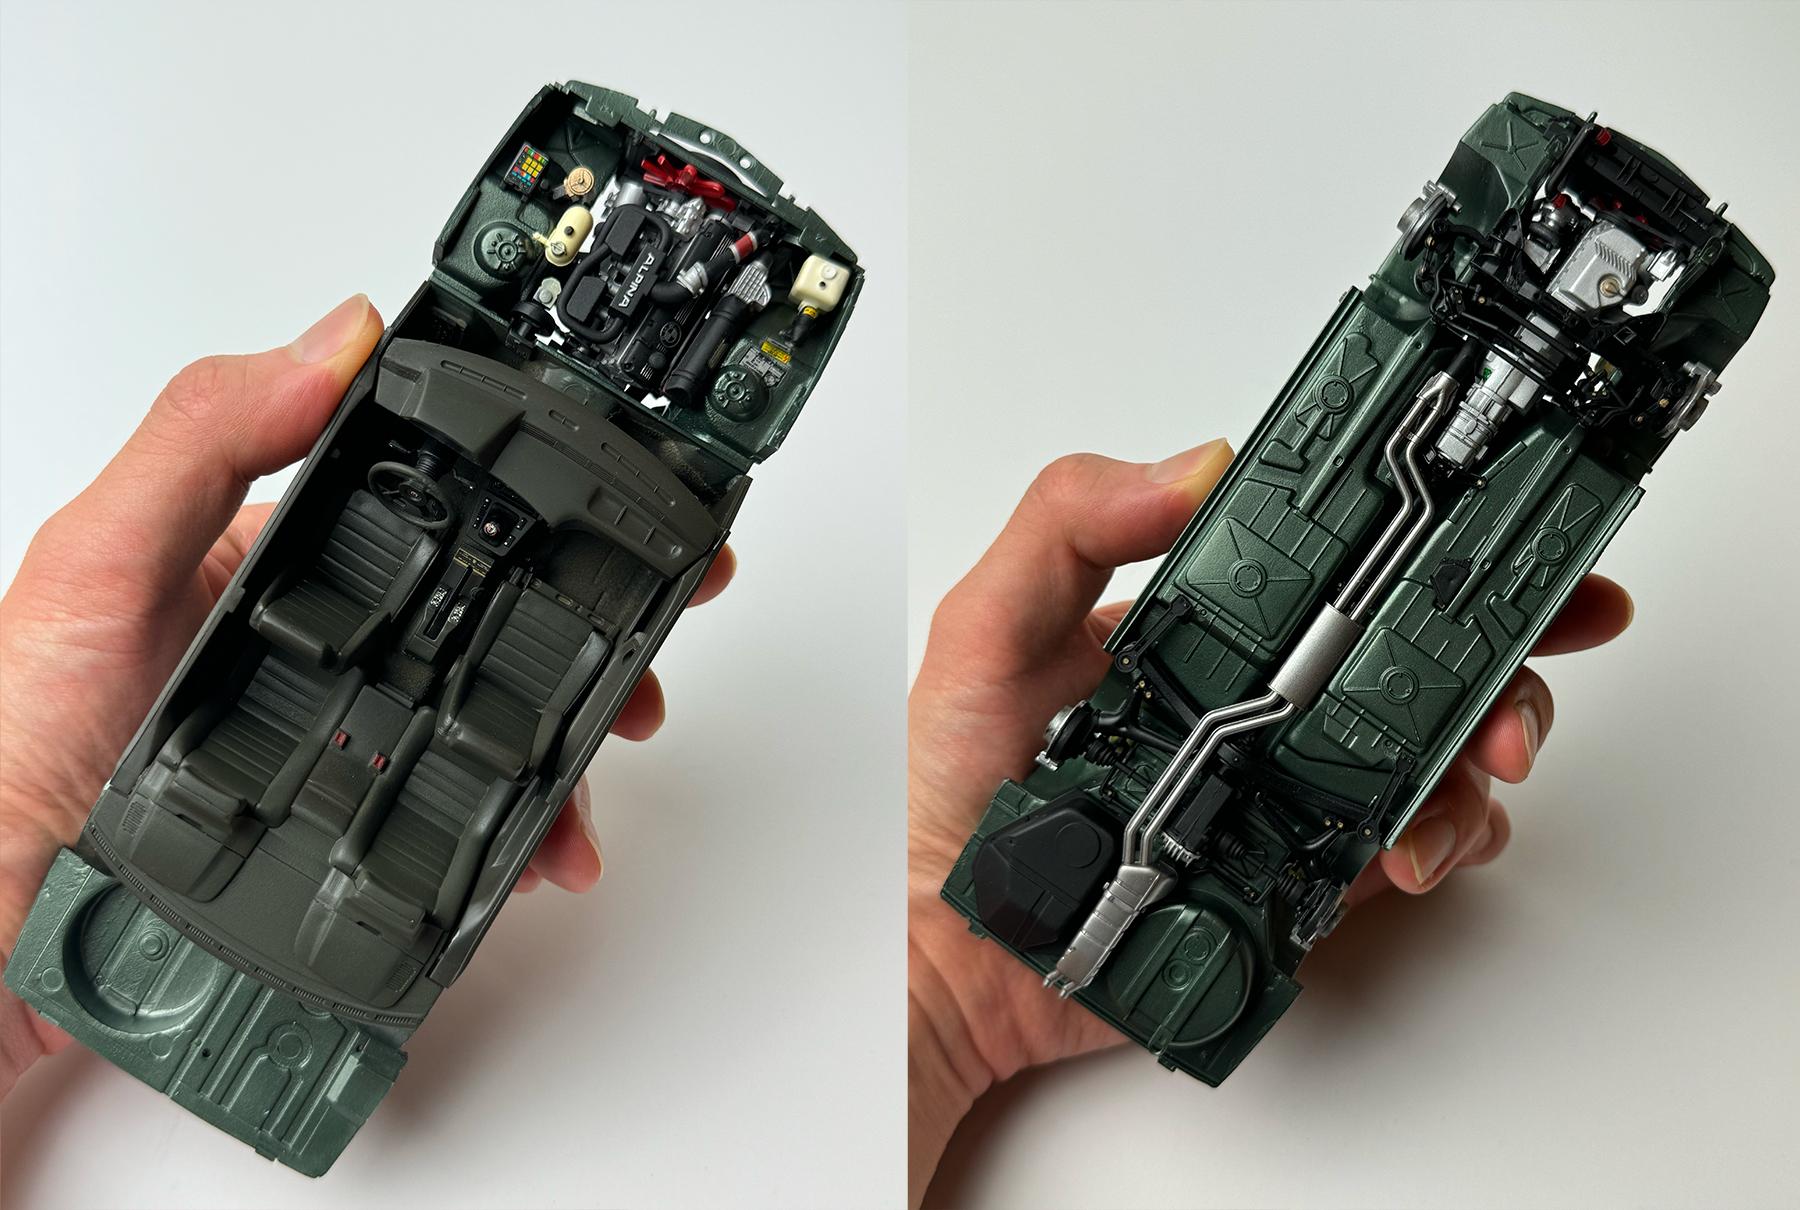
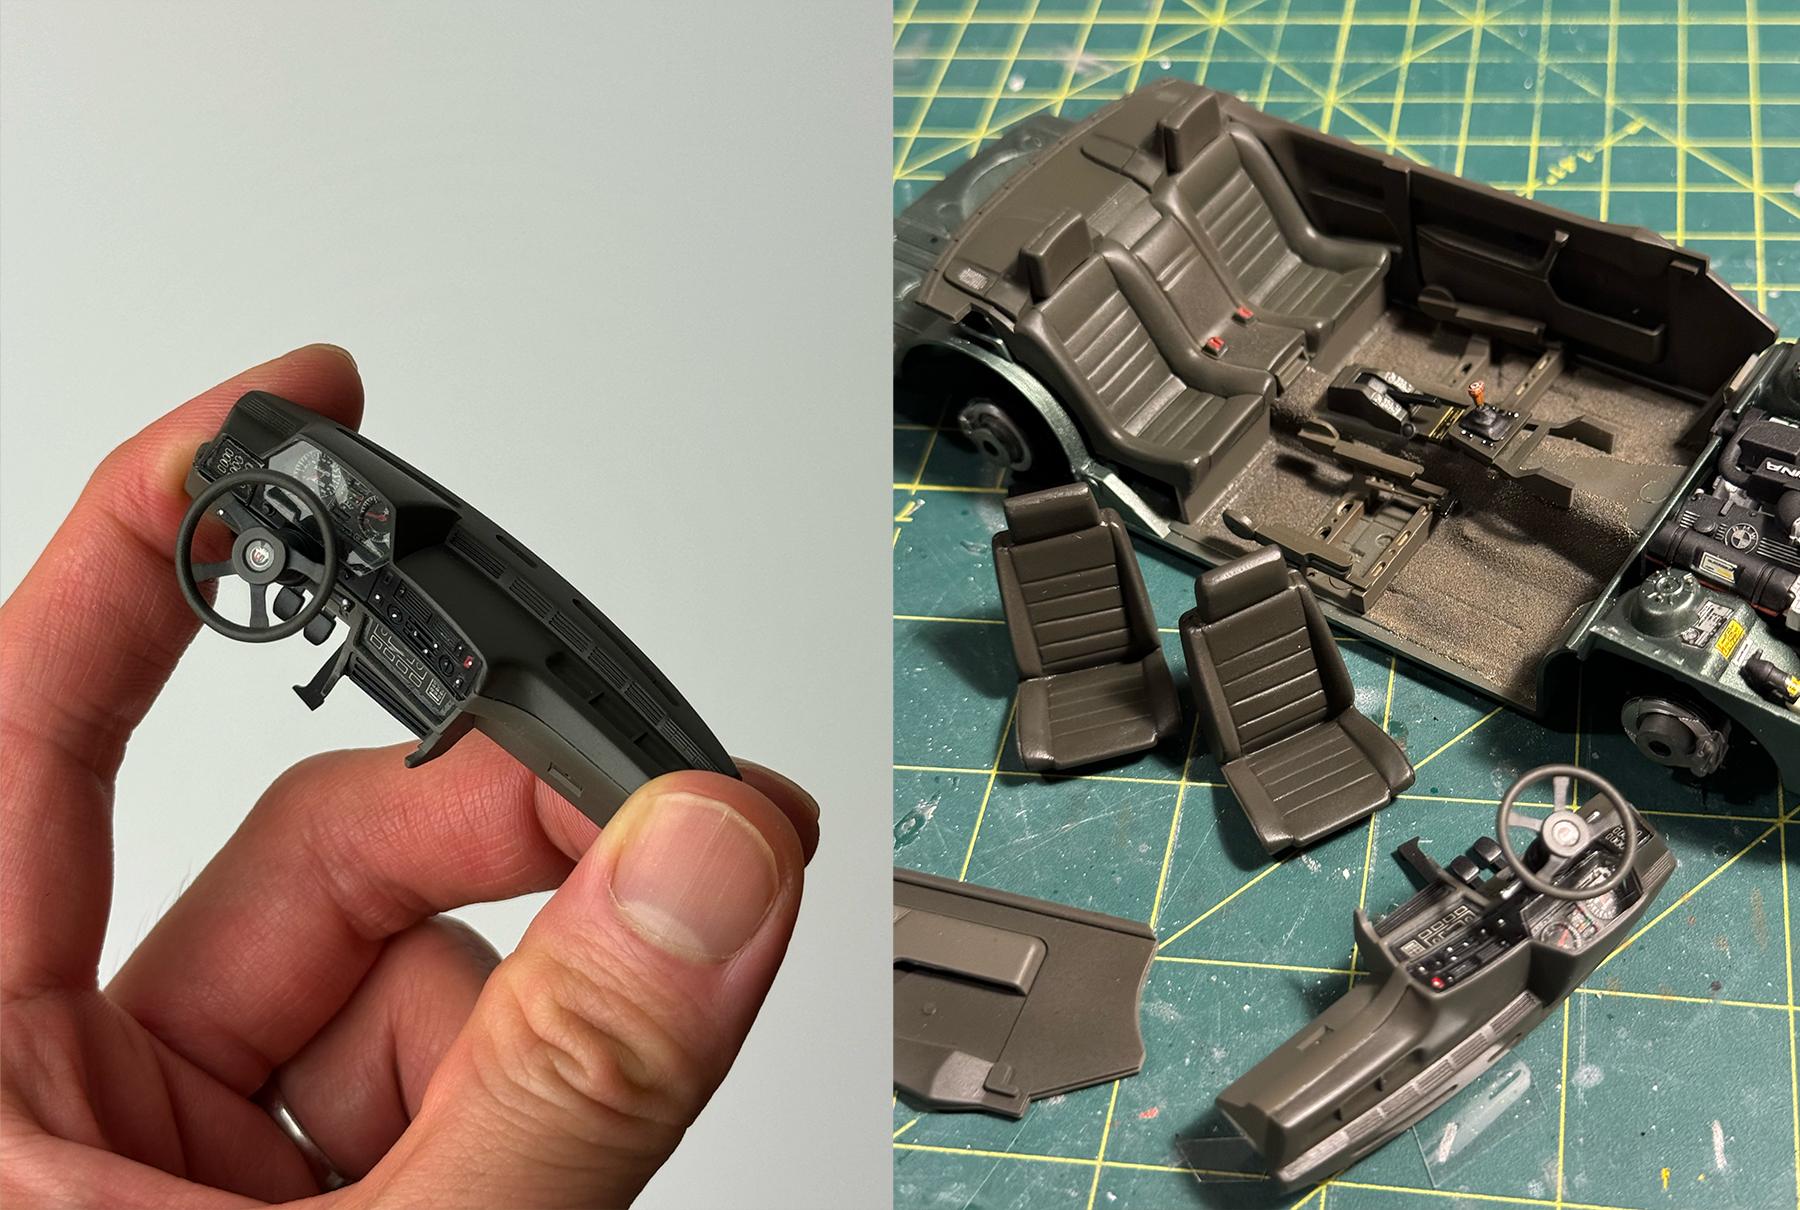
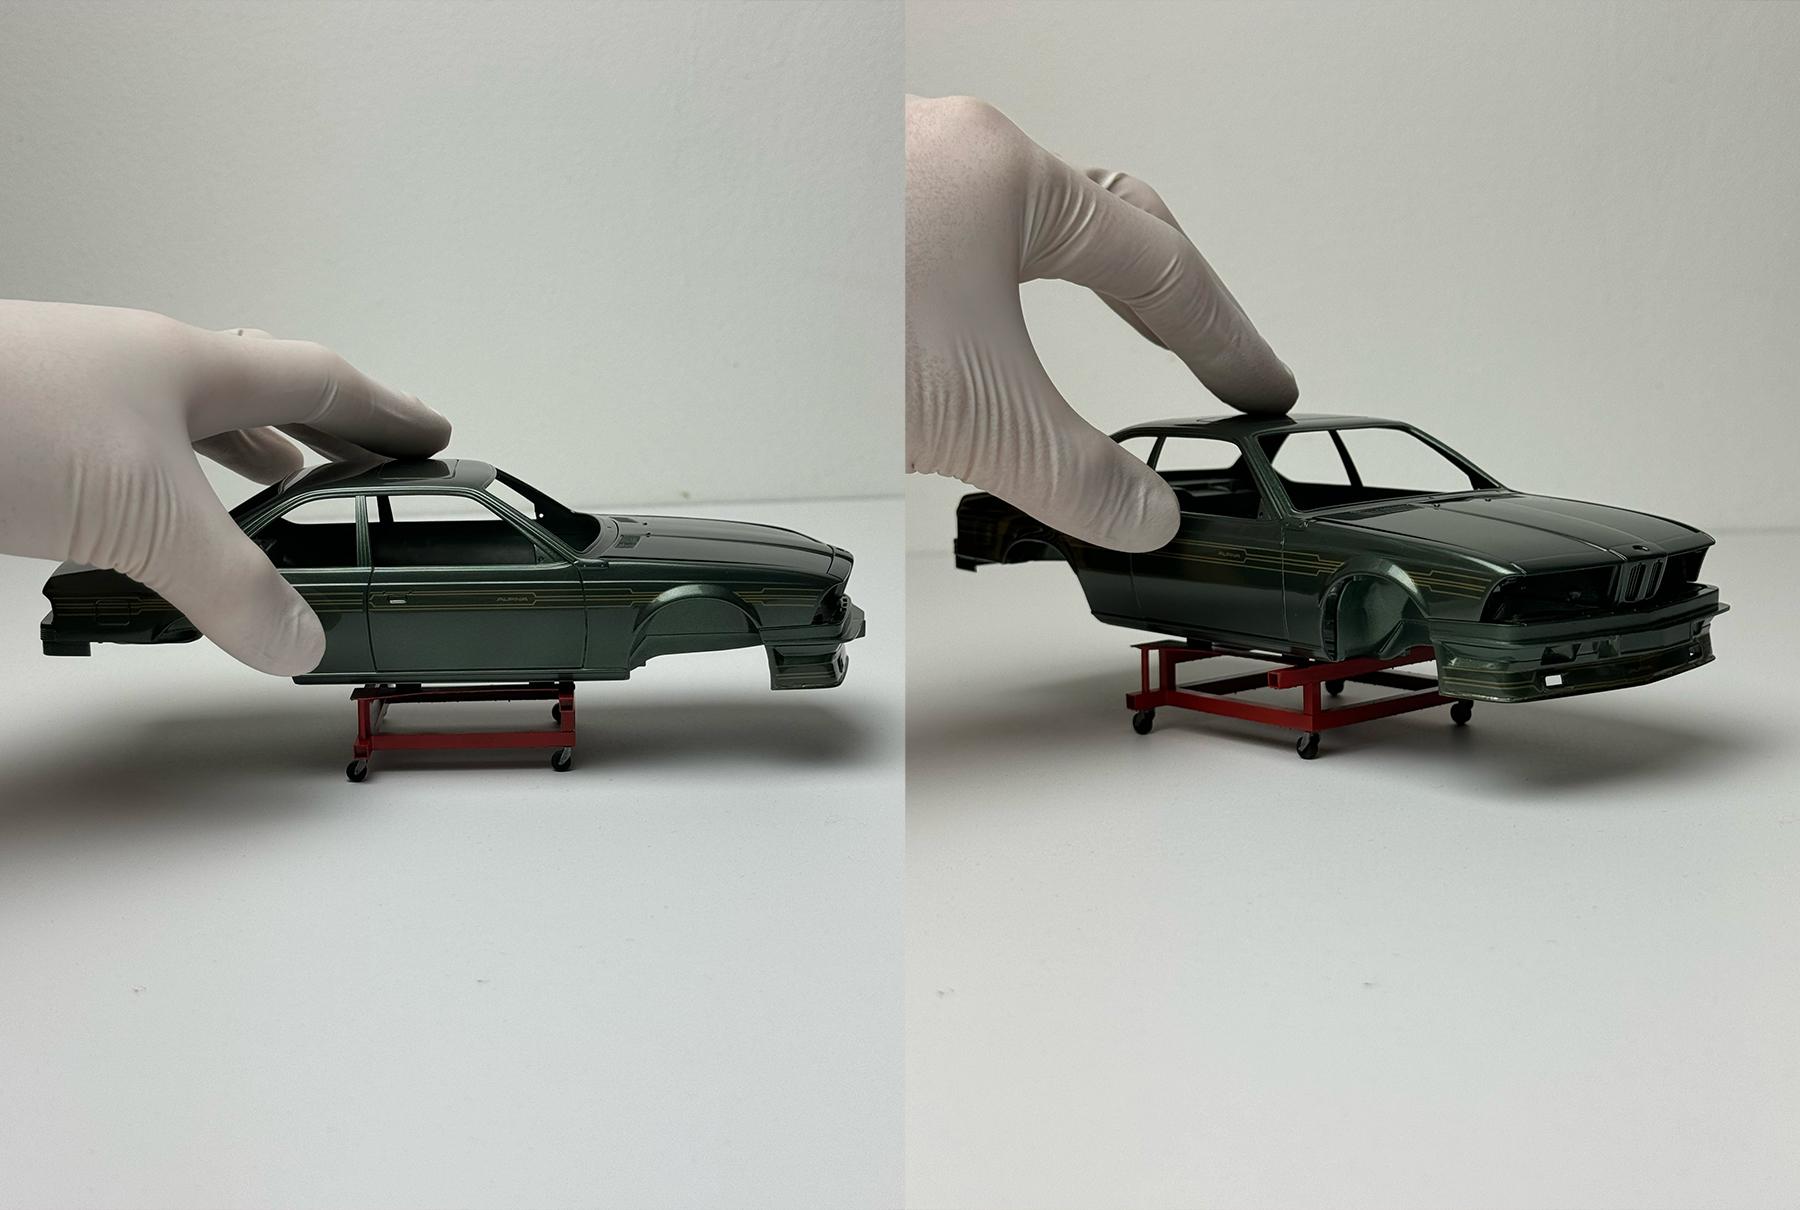
Hi all, Here’s my finished Fujimi’s Enthusiast Series Alpina B7 Turbo coupe! With more than 250+ parts to assemble I kept the build mostly out of box except for lowering suspension and fitting larger and wider 17” staggered Alpinas from USCP. This time I wanted to simulate one of my favourite BMW colours - Malachitgrün (Malachite green) for body and Pine green for interior. (Some of reference pics below) The full process: - Scribed panel lines and wet sanded the whole body with 1500 grit - Airbrushed silver and wet sanded again with 2000 grit - Mixed Mr Color’s GX metallic green + black + silver and gold and laid 2 base coats - Applied decal and laid 3 layers of super clear III with wet sanding in between to smooth out the decal and rest of the surface - Fully cured the paint and wet sanded 3000 > 6000 and 8000 grit - Polished with Tamiya 3 stage compounds and Hasegawa ceramic compound - Added embossing powder to the floor and painted the interior with flat black, IJN green and IJN gray - Added cooling houses and throttle cable - Mask painted window trim with flat black and chrome silver - Wet sanded window and painted the inside with diluted clear green and clear blue to simulate factory glass color There are areas I could've done better but overall I’m pretty happy with how it turned out.
- 34 replies
-
- 24
-
-
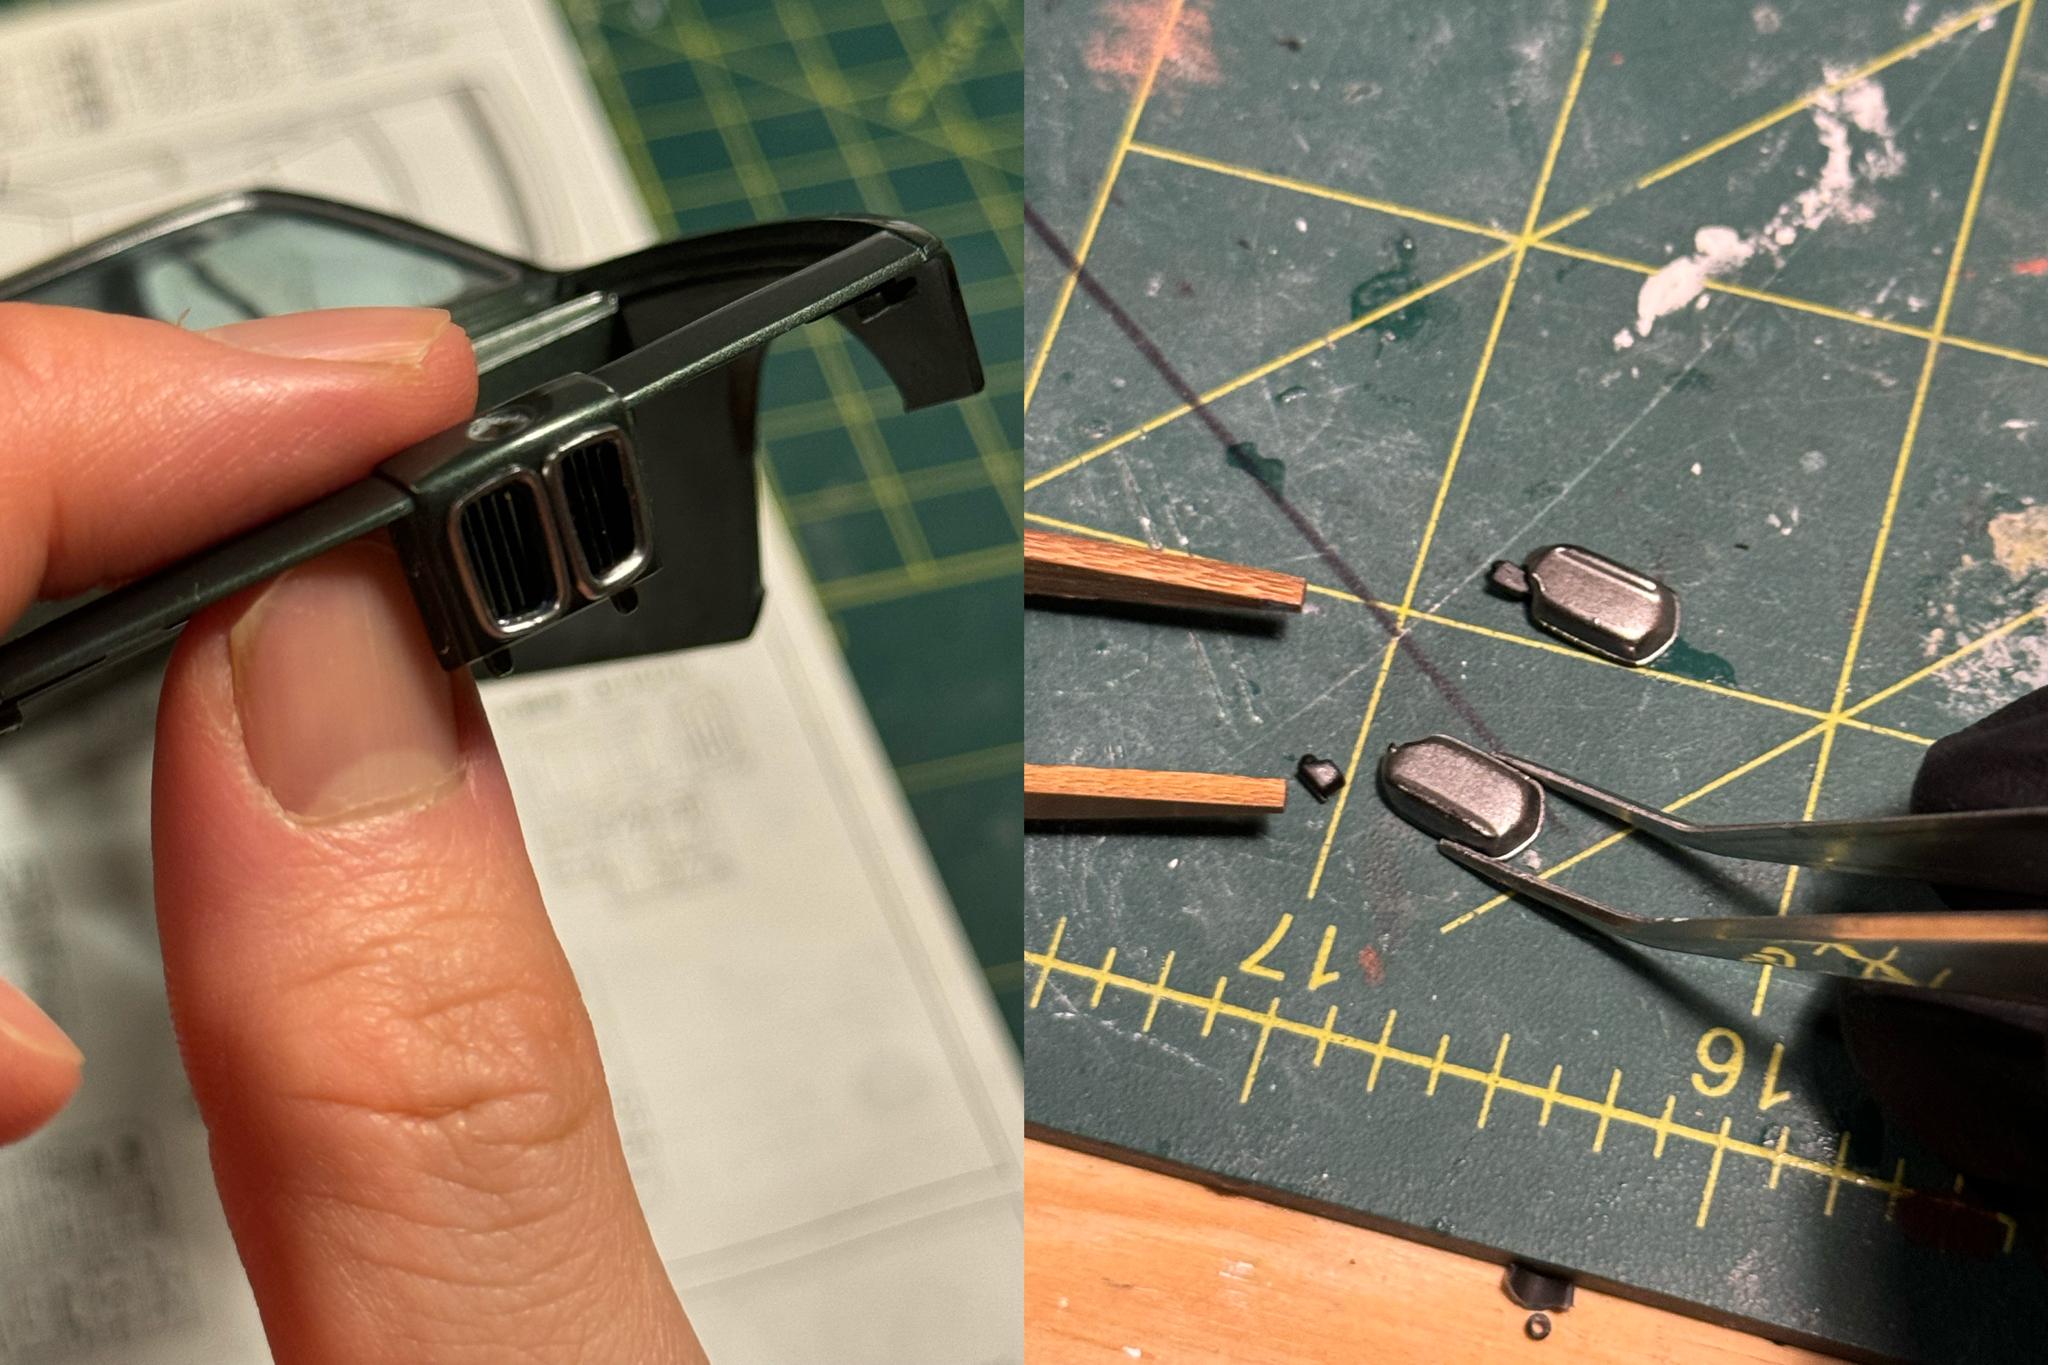
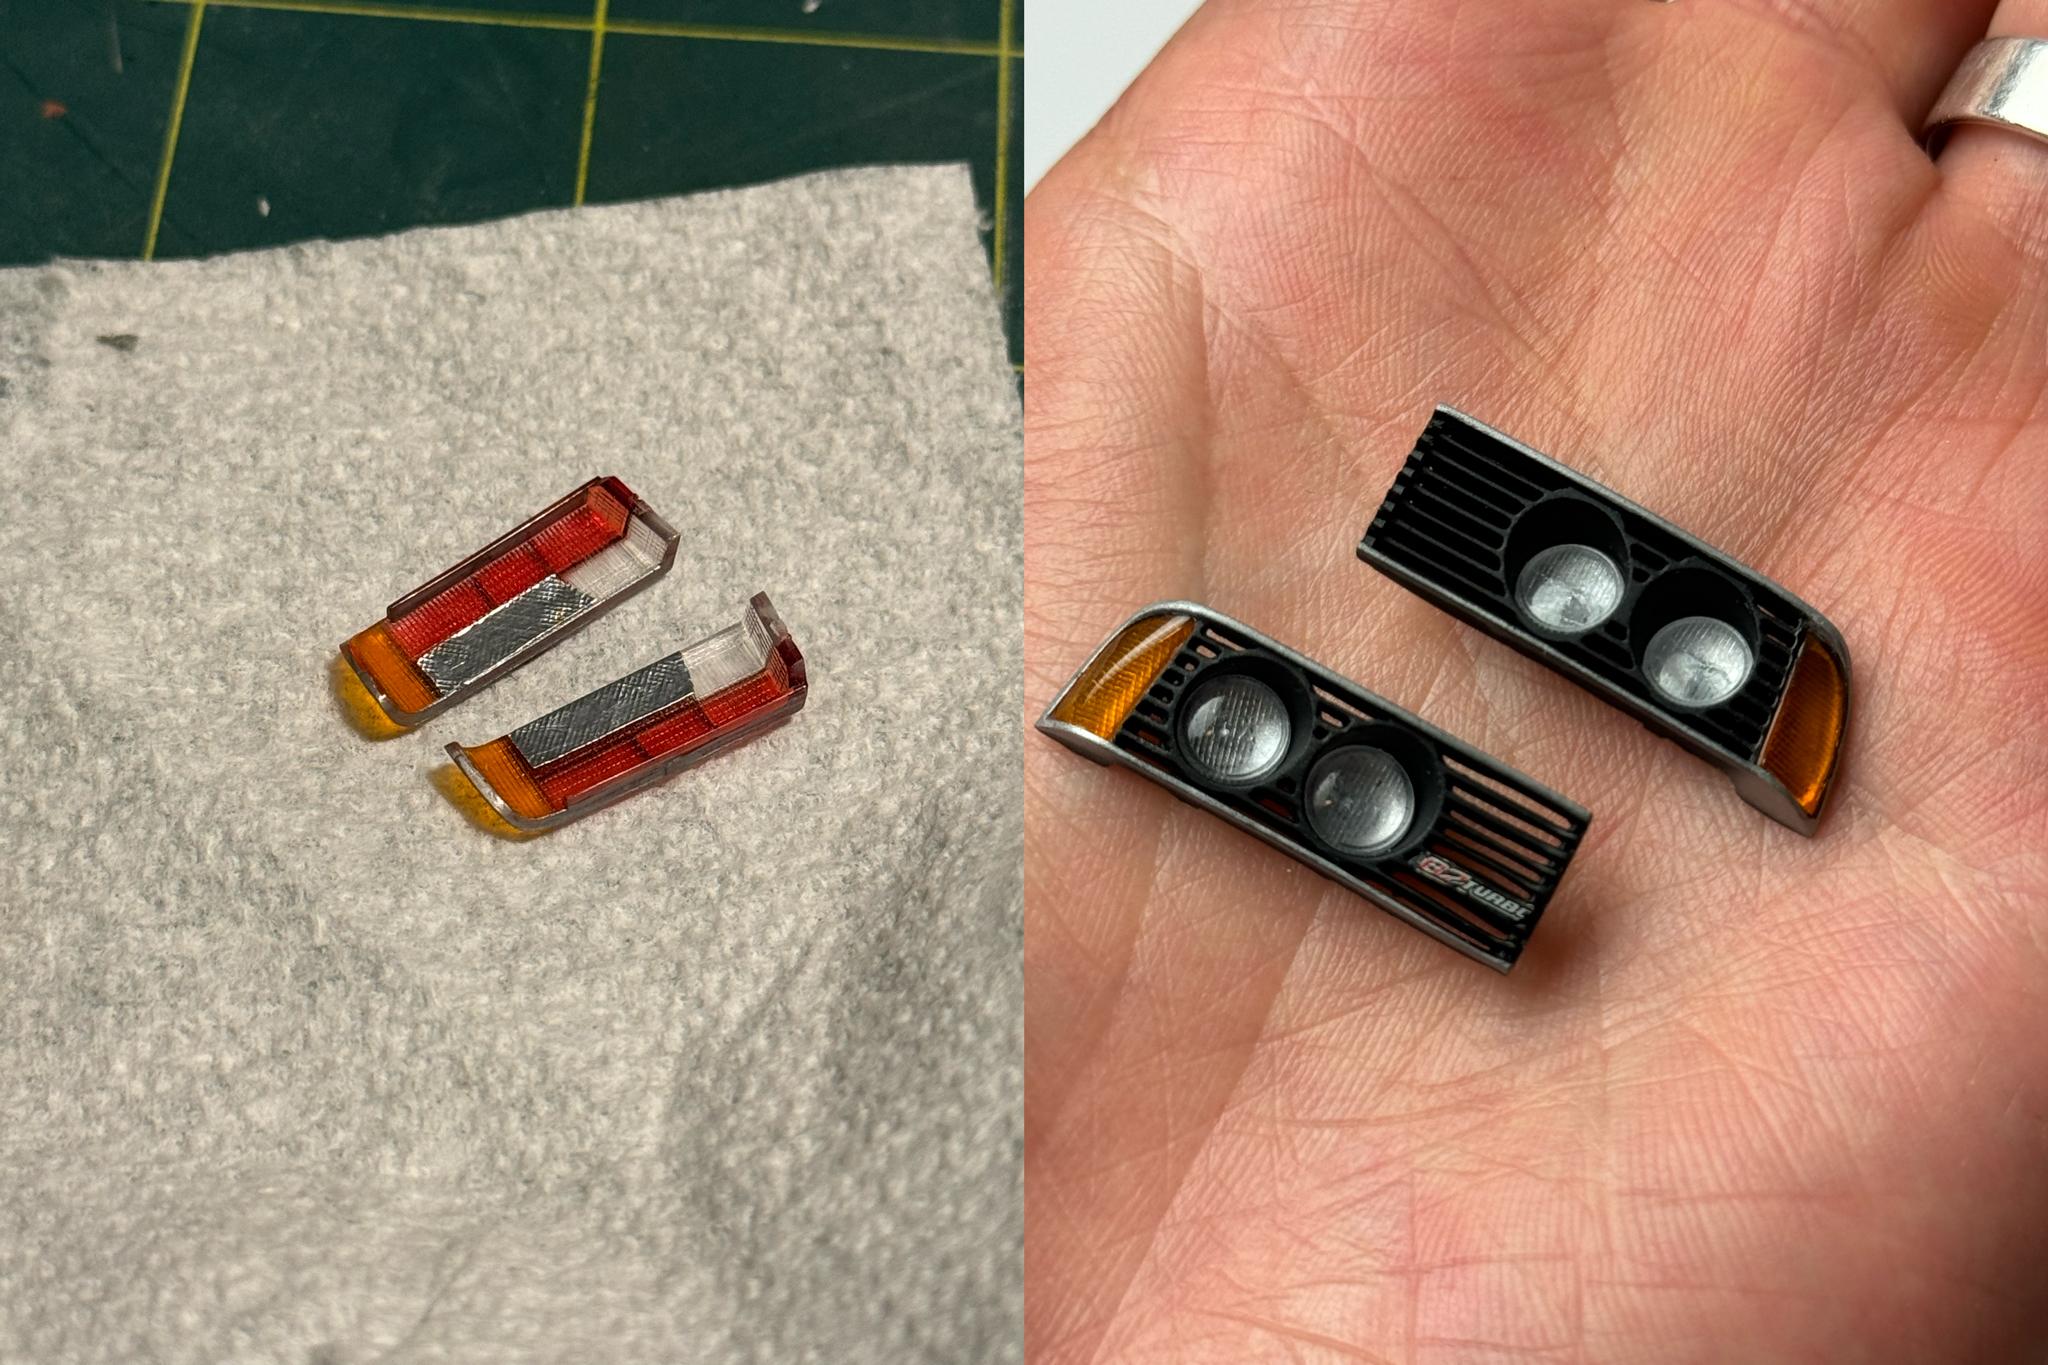
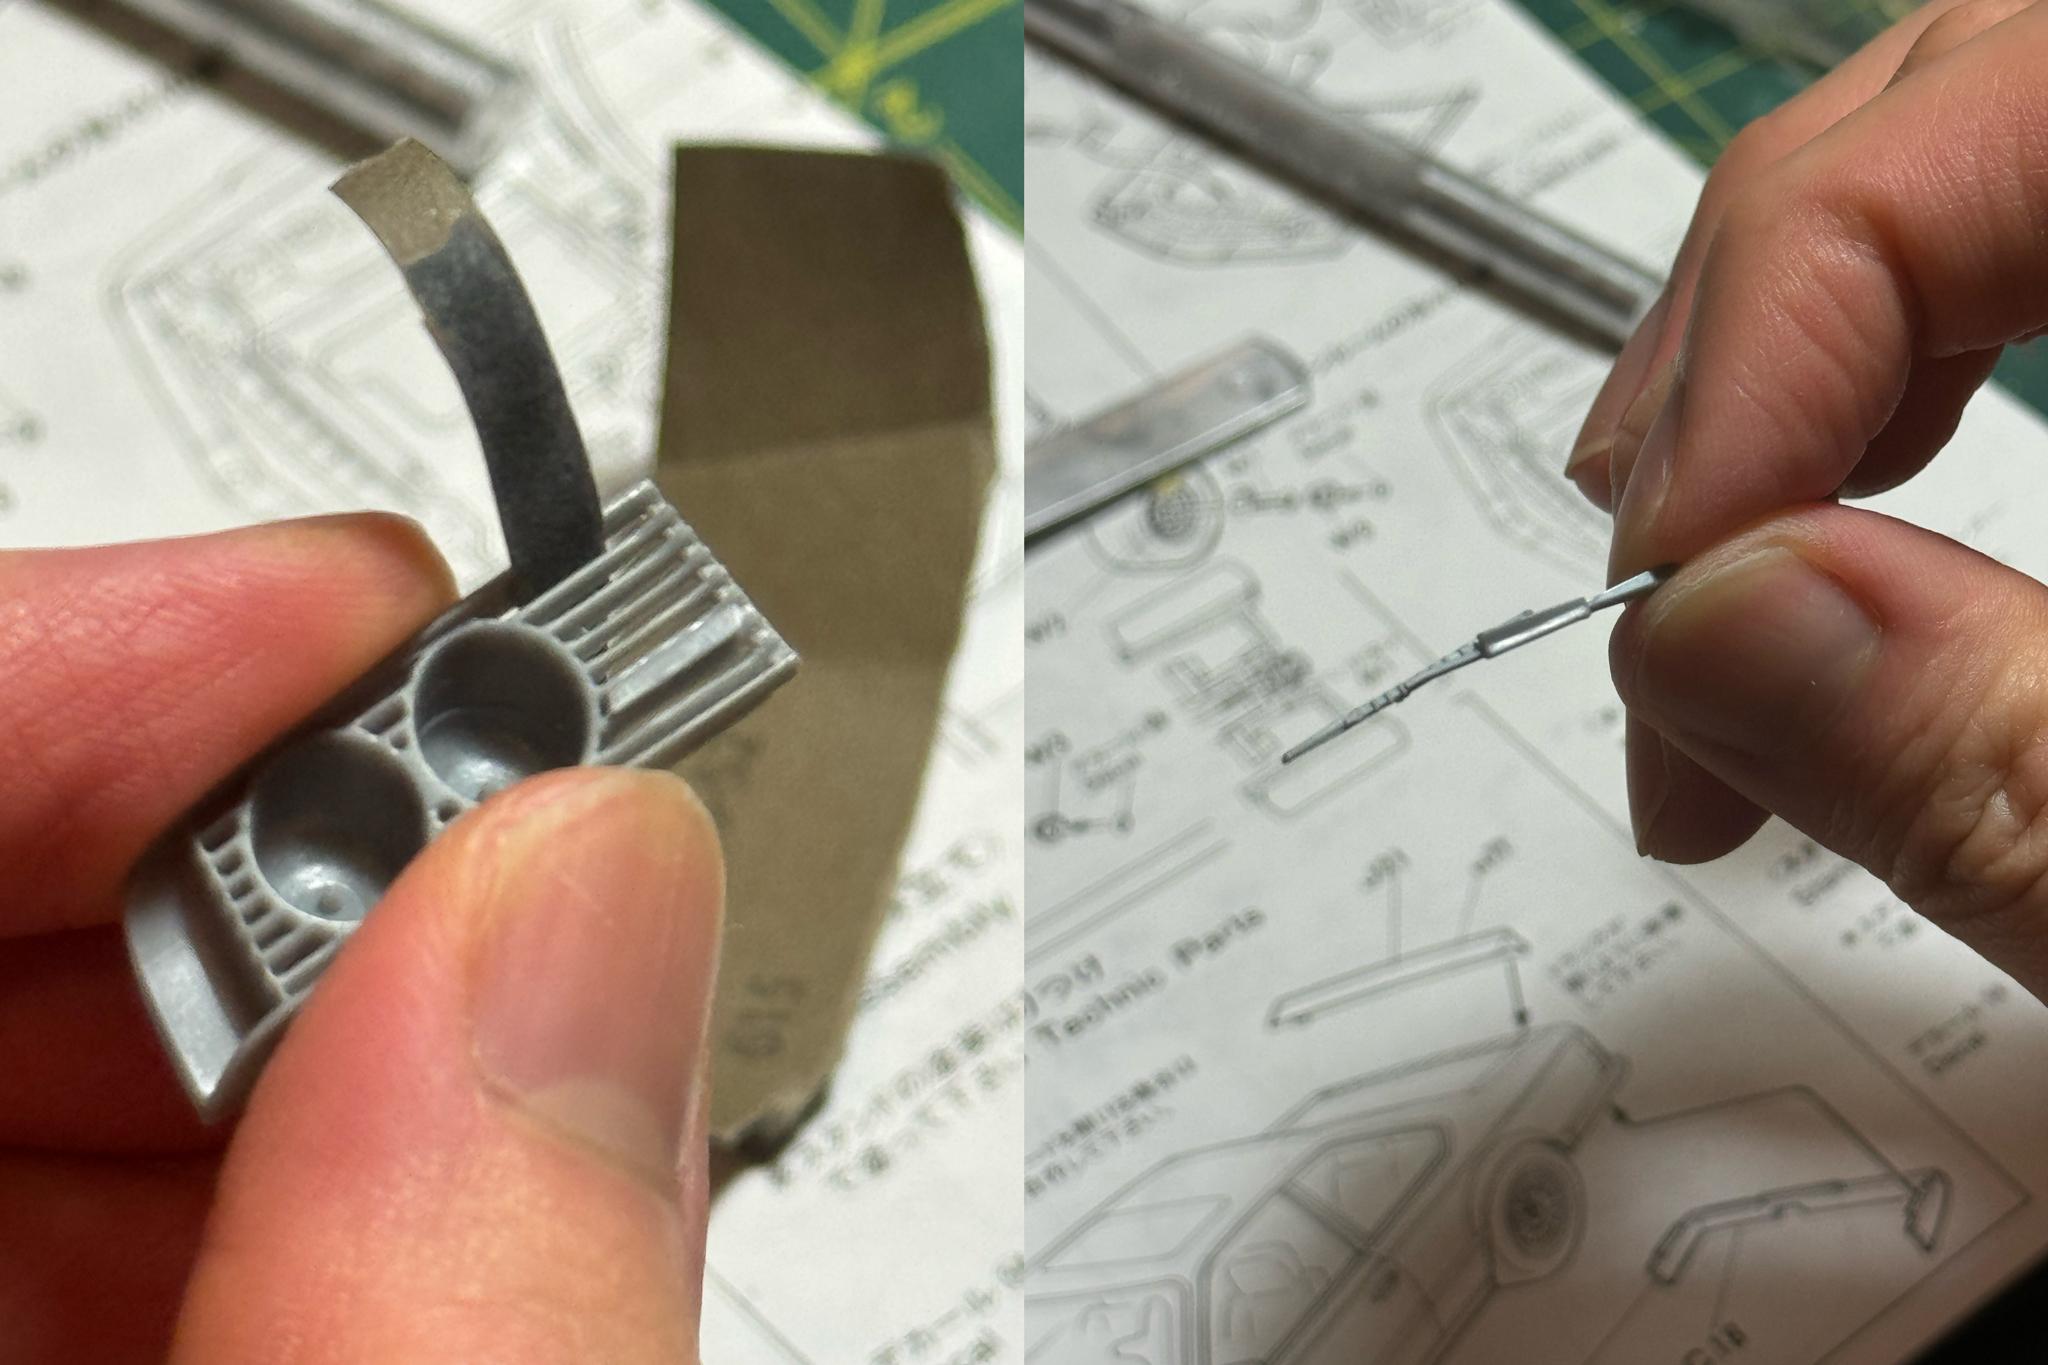
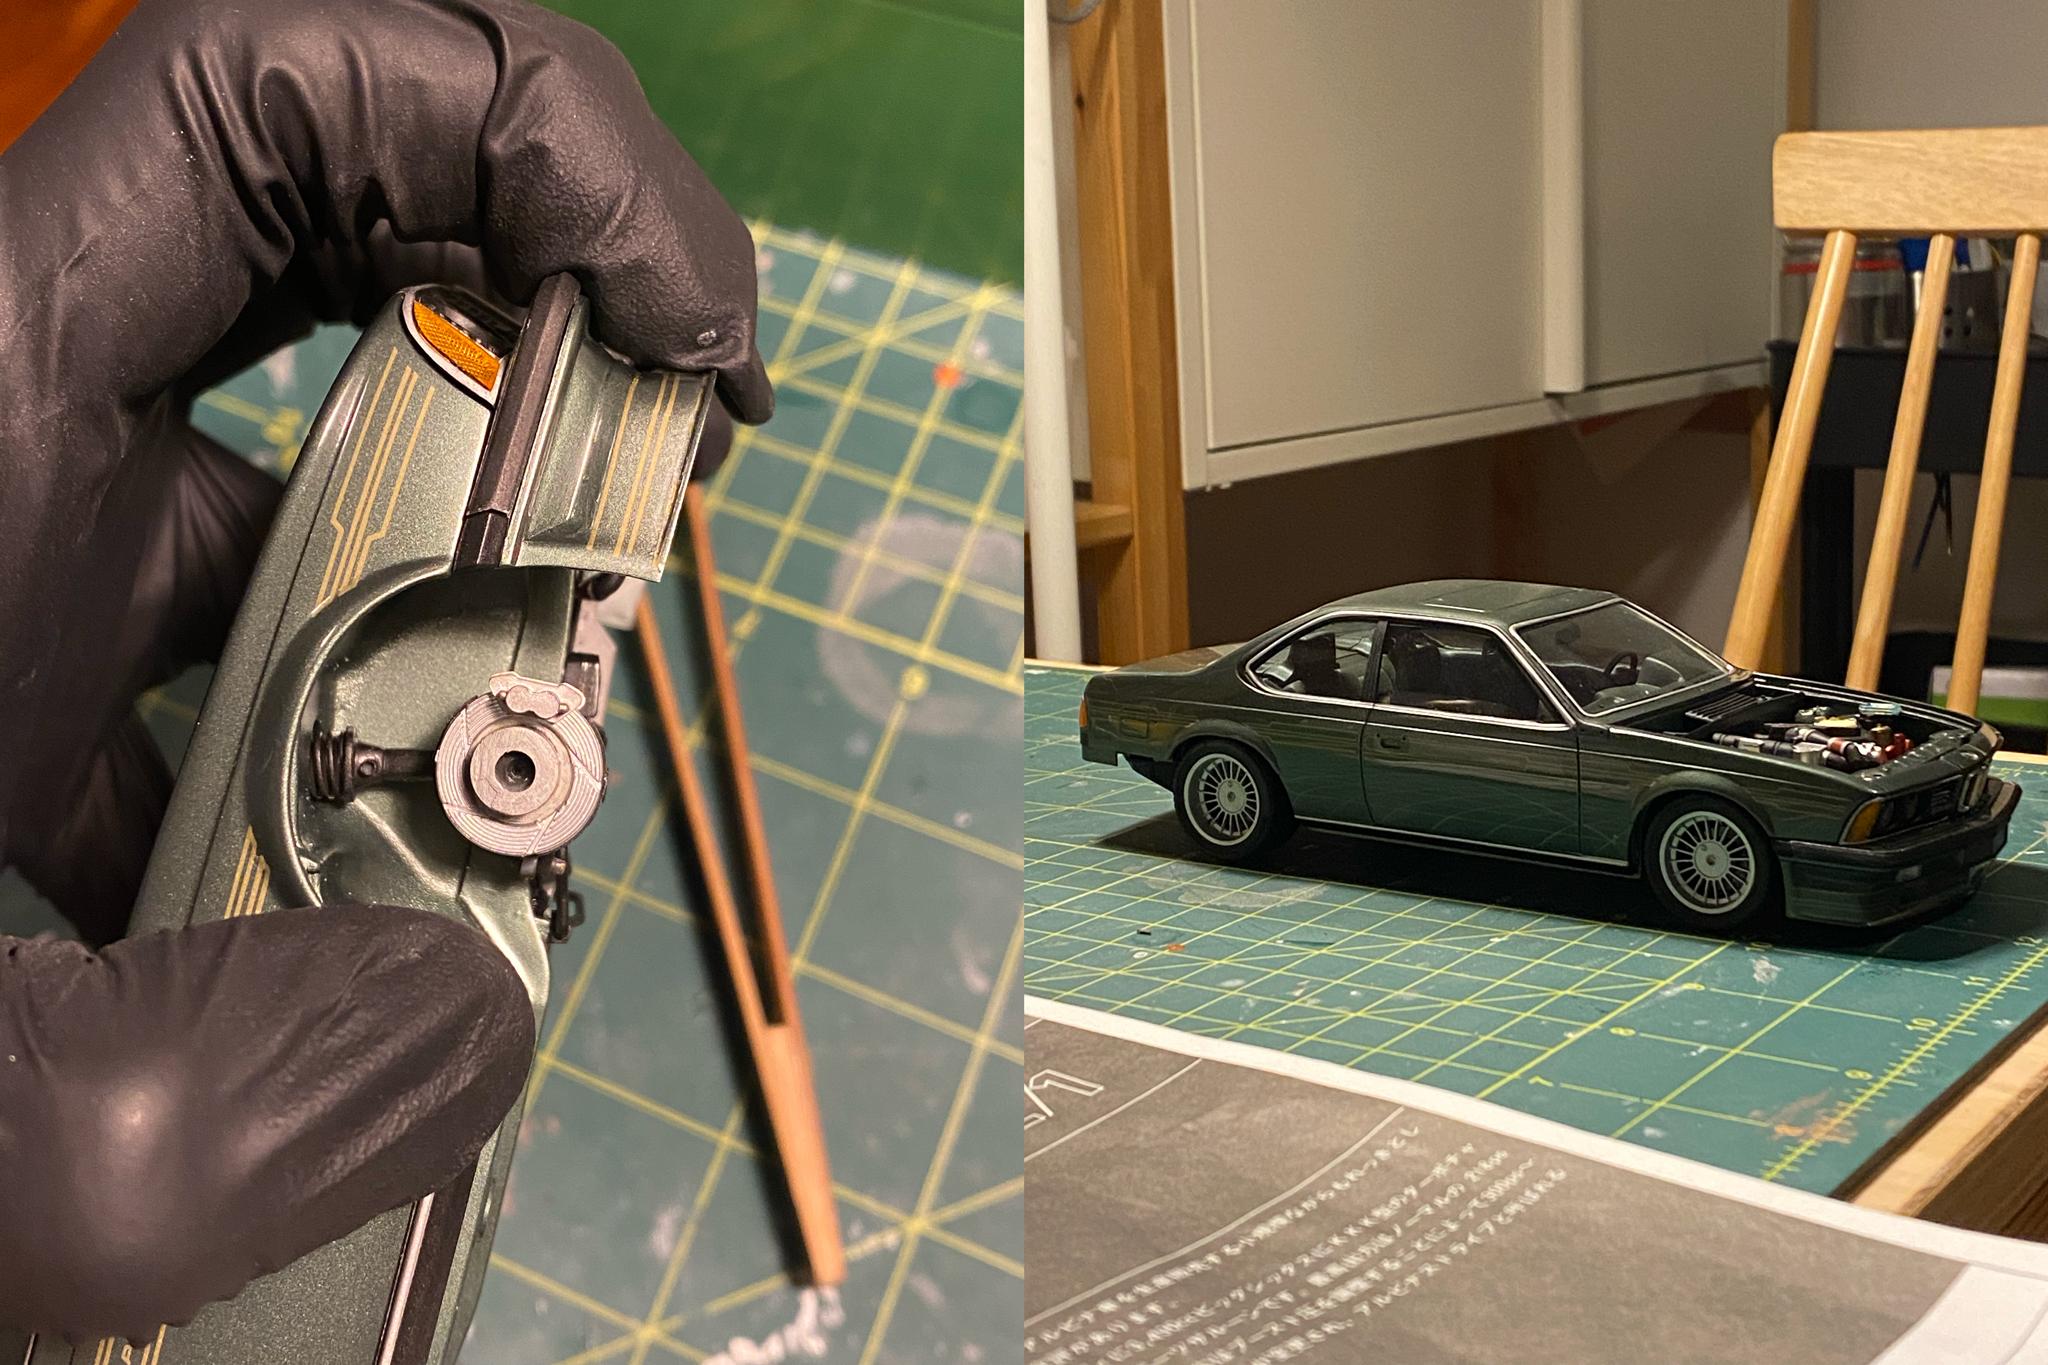
Hi all, here's the final build update: Mold qualities are generally great but I had to sand pretty much every single part (the grill part has separate badge part and this driver side wiper has also two parts) before assembling and painting them. As usual I de-chromed all chrome parts, painted them with gloss black then laid Alclad chrome. Actual BMW taillamps have different depth so I applied BMF to the lower section. I then wet sanded the windshield with 1000, 1500, 2000, 3000, 6000, 8000 and followed the same polishing process, then painted the inside with mixture of clear blue, clear green, (lots of) clear to simulate the factory tint. I also added valve stem to the Alpina wheels. Assembling EM kits are always nerve-wracking because they don't have much support for glue to work its magic. I think I ended up securing front bumper and valence overnight with super glue to make sure they don't sag. To get the right stance, I cut the both front and rear shock and adjusted the camber with white putty until I got the stance I wanted. I'll soon post the finished photos - thank you for reading!
-
Thank you! Yeah go for it! Make sure you spend time aligning the wheels ? Tamiya curve masking tape is great (and it's got some awesome sealing) but it tends to want to go back to its original shape after applying. So I had to do them all at once.. Thank you!
-
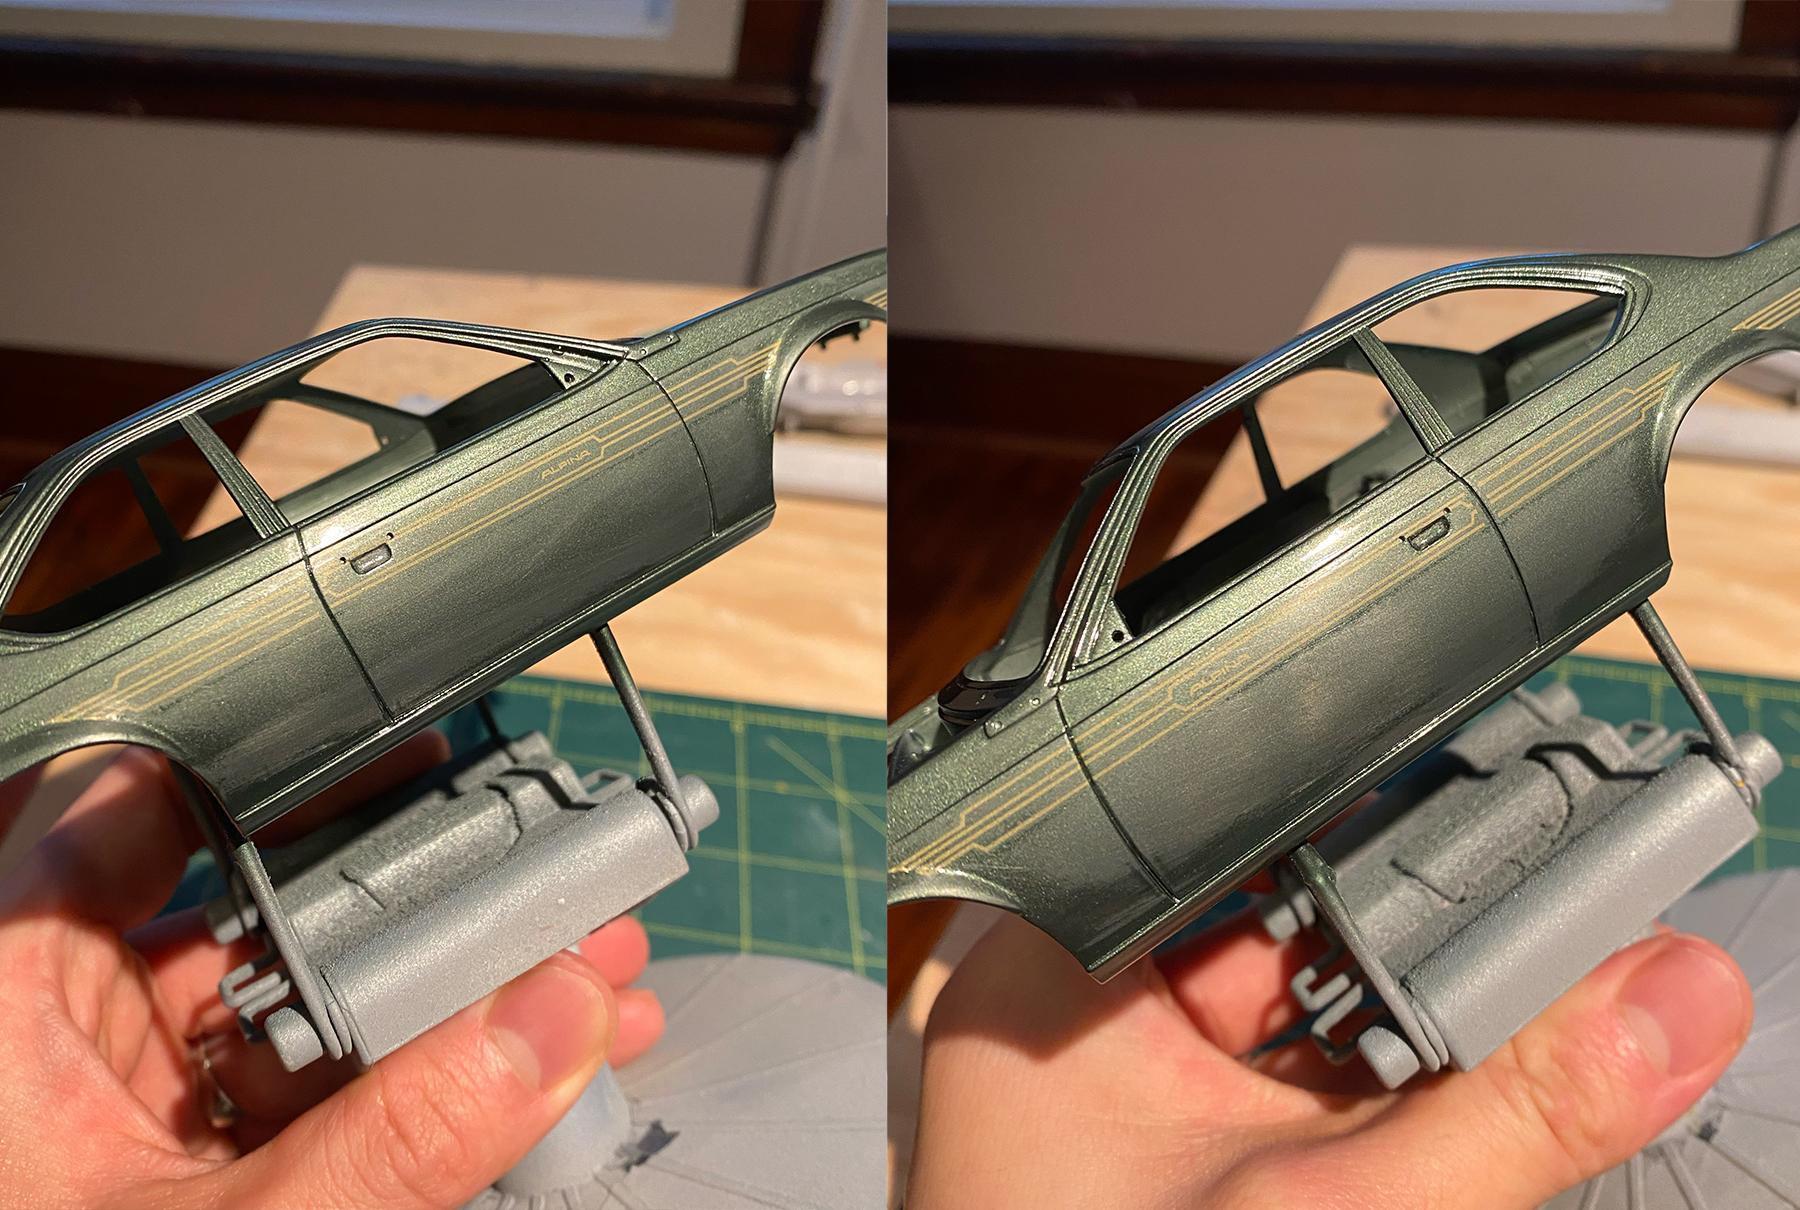
After curing the paint for few months (I always cure minimum 1 month), I wet sanded with 3000 > 6000 > 8000 grit and polished with Tamiya three stage compounds and Hasegawa ceramic compound. Masking the windows were a bit tedious since it has rubber seals between the chrome trims - so I ended up masking three times to paint the each part. I still need to fix a bunch of imperfections around masked area (touching up + removing any over painted bits with polishing compounds) but it turned out pretty decent.
-
Thank you! Appreciate the compliment! Thanks a lot! Thank you! I think this is one of the better EM kits vs. some incorrect 911 and Stratos kits Thank you! Hopefully I can assemble all these without any accident! Thank you! Thanks a lot! Not quite immaculate but I try!
-
Thank you! Finishing EM kits always feels super rewarding. Thank you! I love the E24! Thank you so much! It's always the assembly that makes these kits super tricky - I'll try not to make any mistakes! Alpina B7 definitely commands premium but 635csi had been recently re-released so they should be easier to find! Thank you! Appreciate it!
-
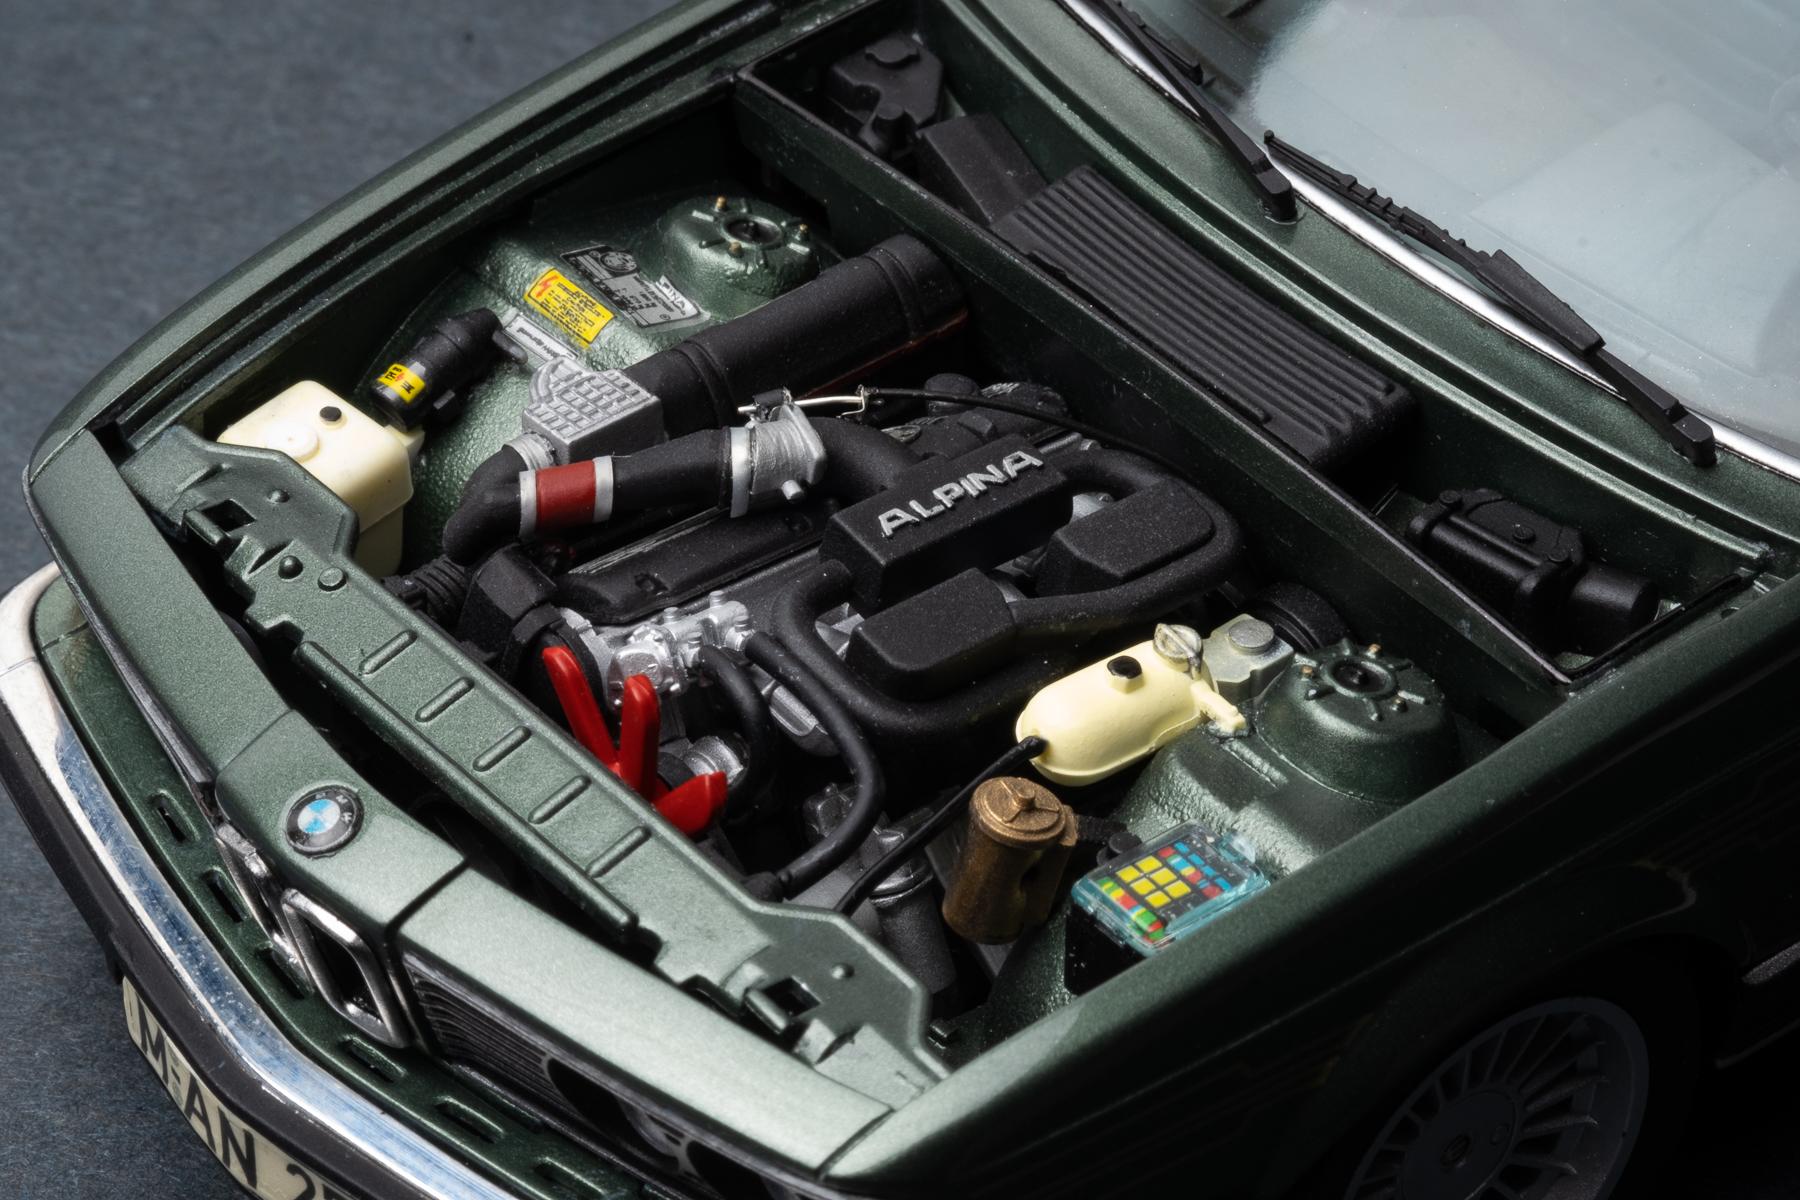
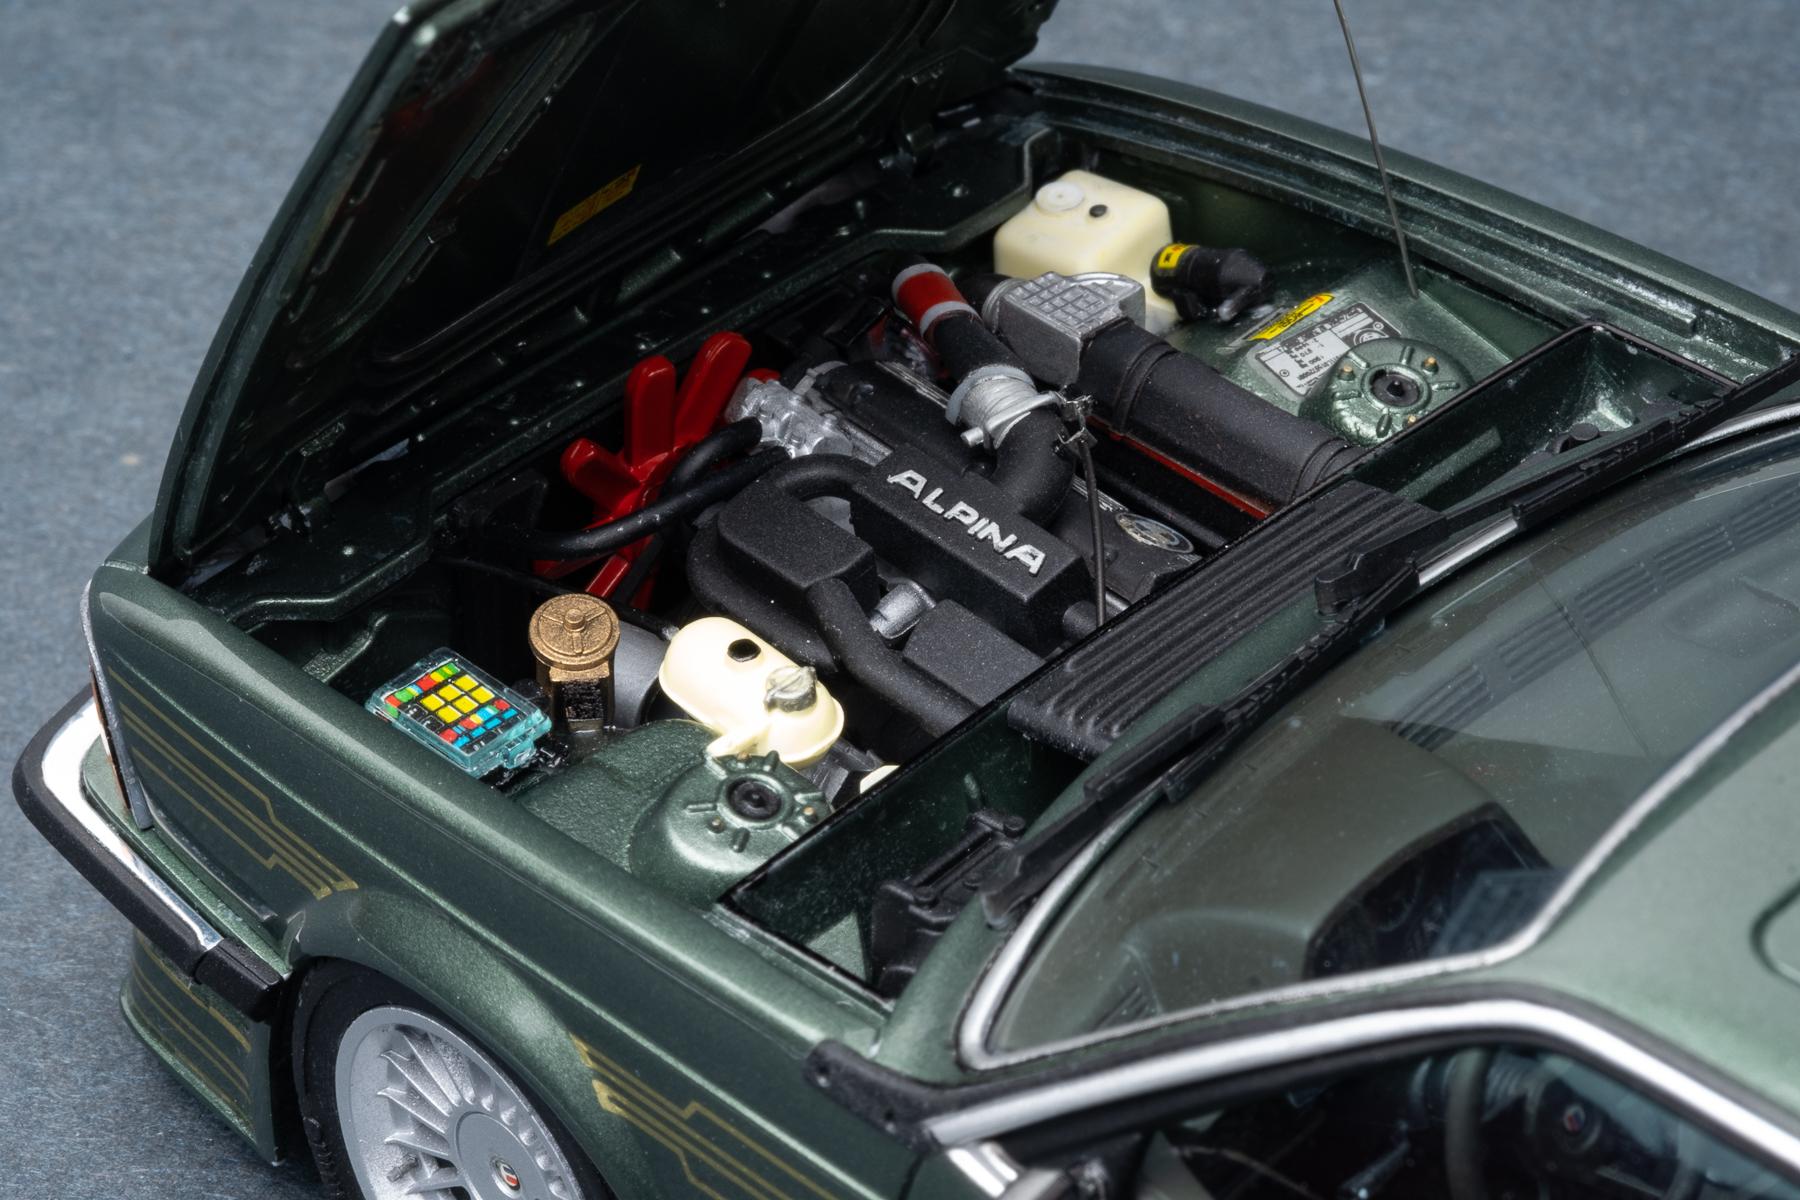
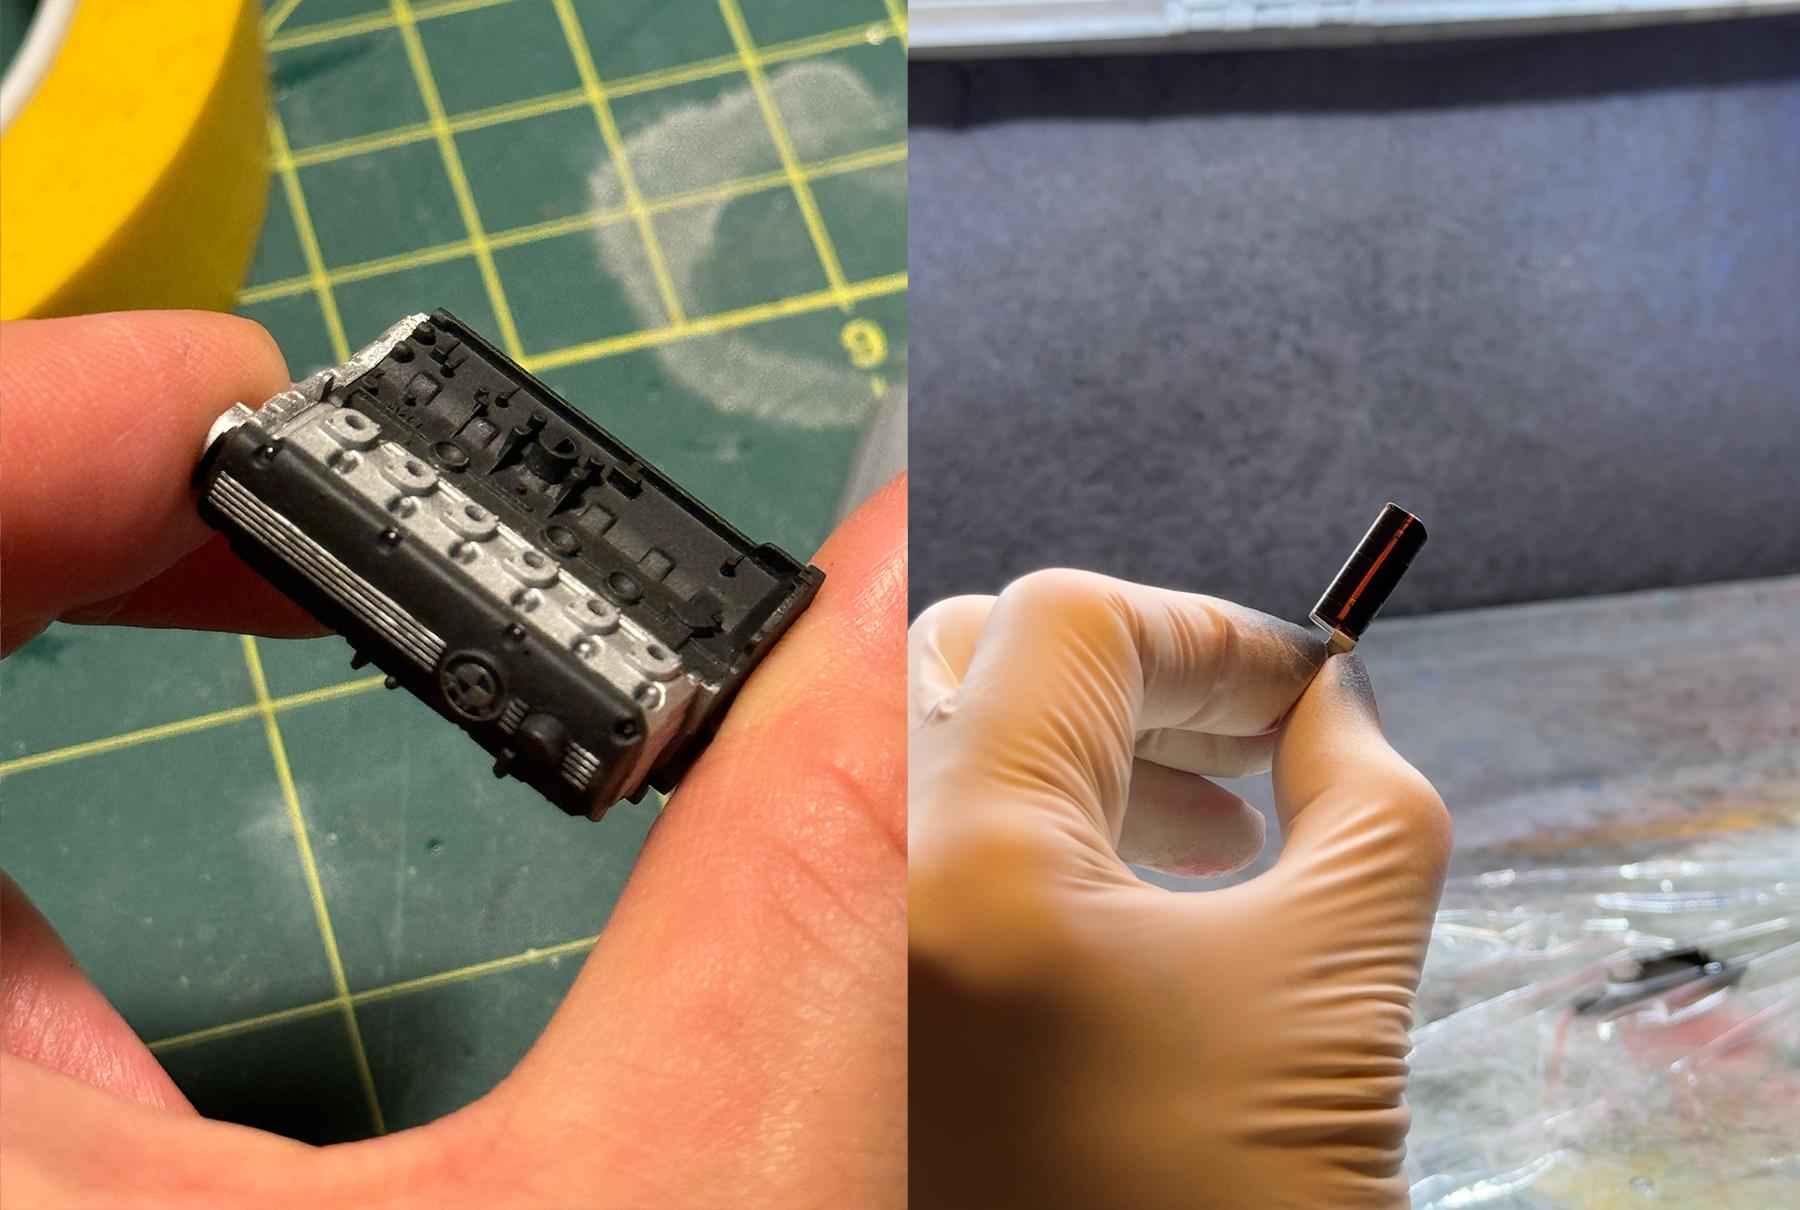
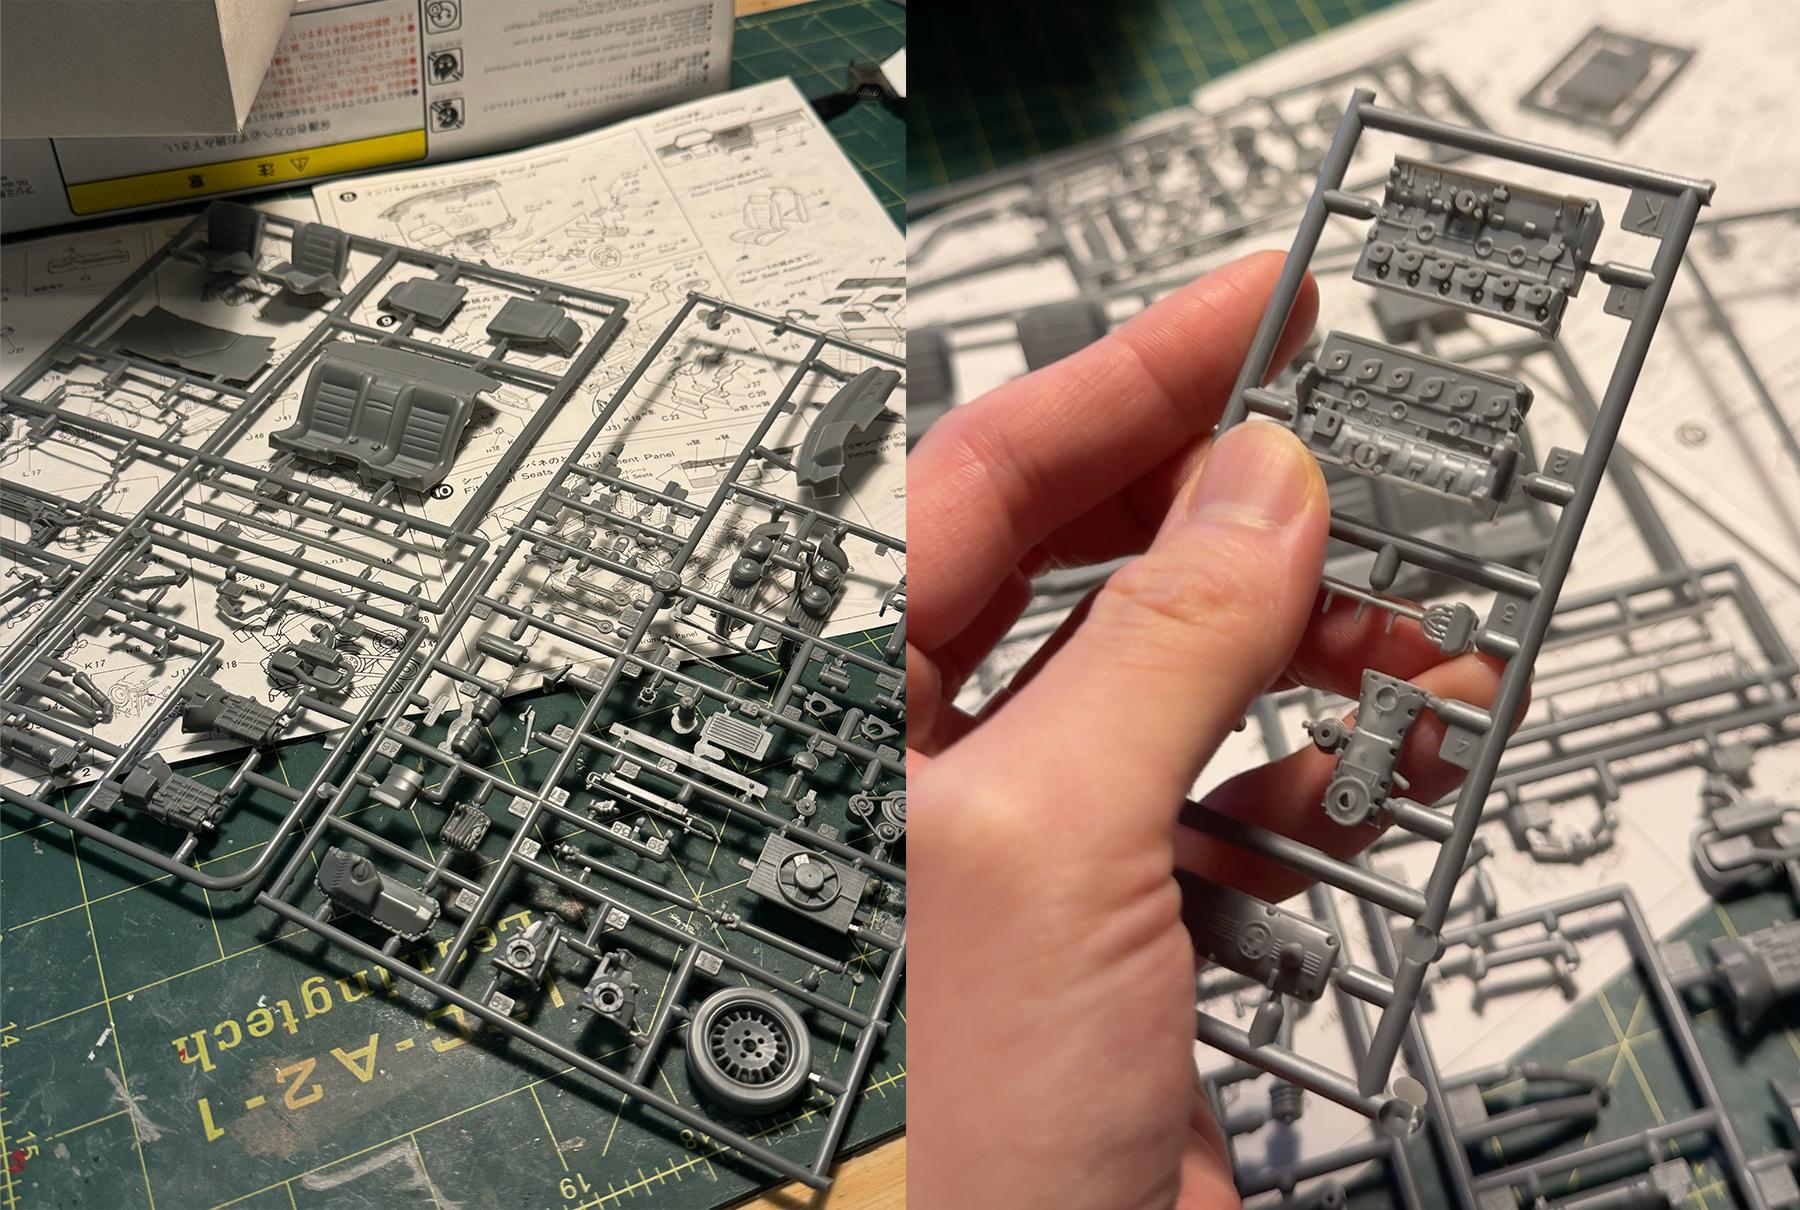
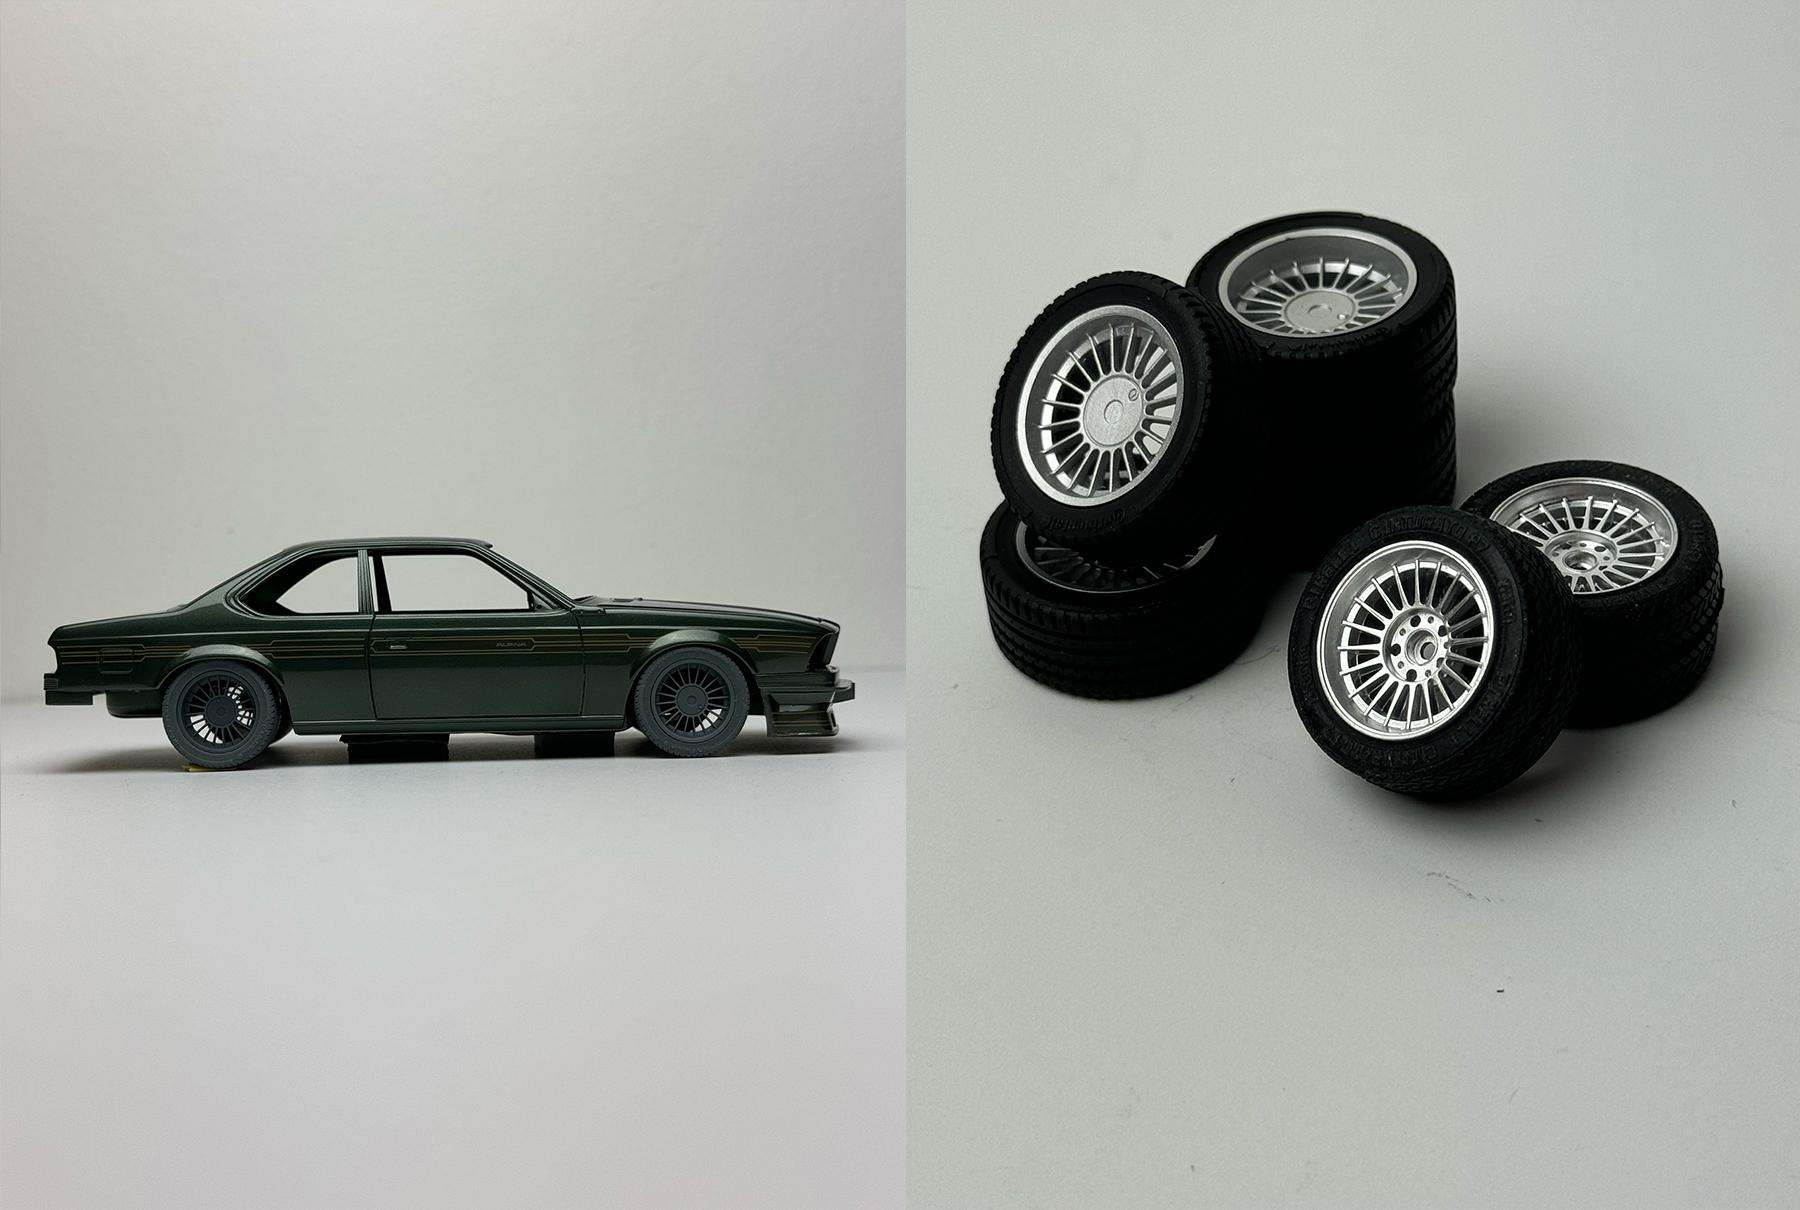
Hi all, My latest build is one of Fujimi Enthusiasts series - E24 Alpina B7 Turbo Coupe. This had been released twice (86 and 97) and this is likely the second release given the decal is still alive. Mold detail is almost as good as new releases from Hasegawa. So much detail! I started scribing the panel lines, wet sanded the body with 1500 grit then adjusted panel gaps for hood and trunk. I then laid grey surfacer, wet sanded again with 1500 to get rid of any flashes, laid silver then painted the base coat. To simulate one of my favourite BMW colours Malachitgrün (Malachite green), I mixed Mr Color’s GX metallic green, black, silver and gold. One of pitfalls of this kit is stock Alpina rims that feel a bit too small. The kit simulates E28-based 6 series but the wheel looked like smaller ones made for older E12-based 6 series. So I ended up ordering custom staggered 17” alpina with correct tires from USCP. I was scared of dried decal but most of them were good to use straight out. I laid Super Clear III and wet sanded the thickness and repeated that three times. Here's the shot after 3 layers of clear, before any wet-sanding and polishing. While the body was getting fully cured, I started the other stuff. M30B35 and Getrag 265 are faithfully shown - so many parts and so much details! I masked the airbox to paint the rubber/sponge seal in red, and used silver sharpie for valve cover letterings. And this is how engine looks after assembling - quite nice even without any detail-up parts! I painted all the suspension bits, wheels and tires.. And cleaned up all the interior bits. I wanted to do green on green so I chose to simulate BMW pine green for the interior by mixing flat black, IJN green and IJN gray. I used lighter shade of mix for carpeted area. After assembling the dashboard I made cluster cover using clear acetate. This is probably as good as injection-molded kits can go. Now I'm going to polish the body and move onto the final assembly!
-
Thank you very much! Thank you! Good luck with your build! Appreciate the compliment! I had some concerns knowing the history but it turned out much better than I anticipated. I didn't even have to adjust anything other than doing a lot of sanding! Thank you so much!
-
1965 Plymouth Belvedere I 426 Commando [1/25 Moebius]
e30lover replied to e30lover's topic in Model Cars
Thank you! I learned most of my process from Korean modeling forum and this is a one of "standard" build approaches (scribe, wet sand, super clear, masking etc) Thank you! Thanks a lot! Thank you so much! I want to build NHRA version too. Thanks! Appreciate it!