Supernurd
-
Posts
528 -
Joined
-
Last visited
Content Type
Profiles
Forums
Events
Gallery
Everything posted by Supernurd
-
Pretty cool. 👍
-
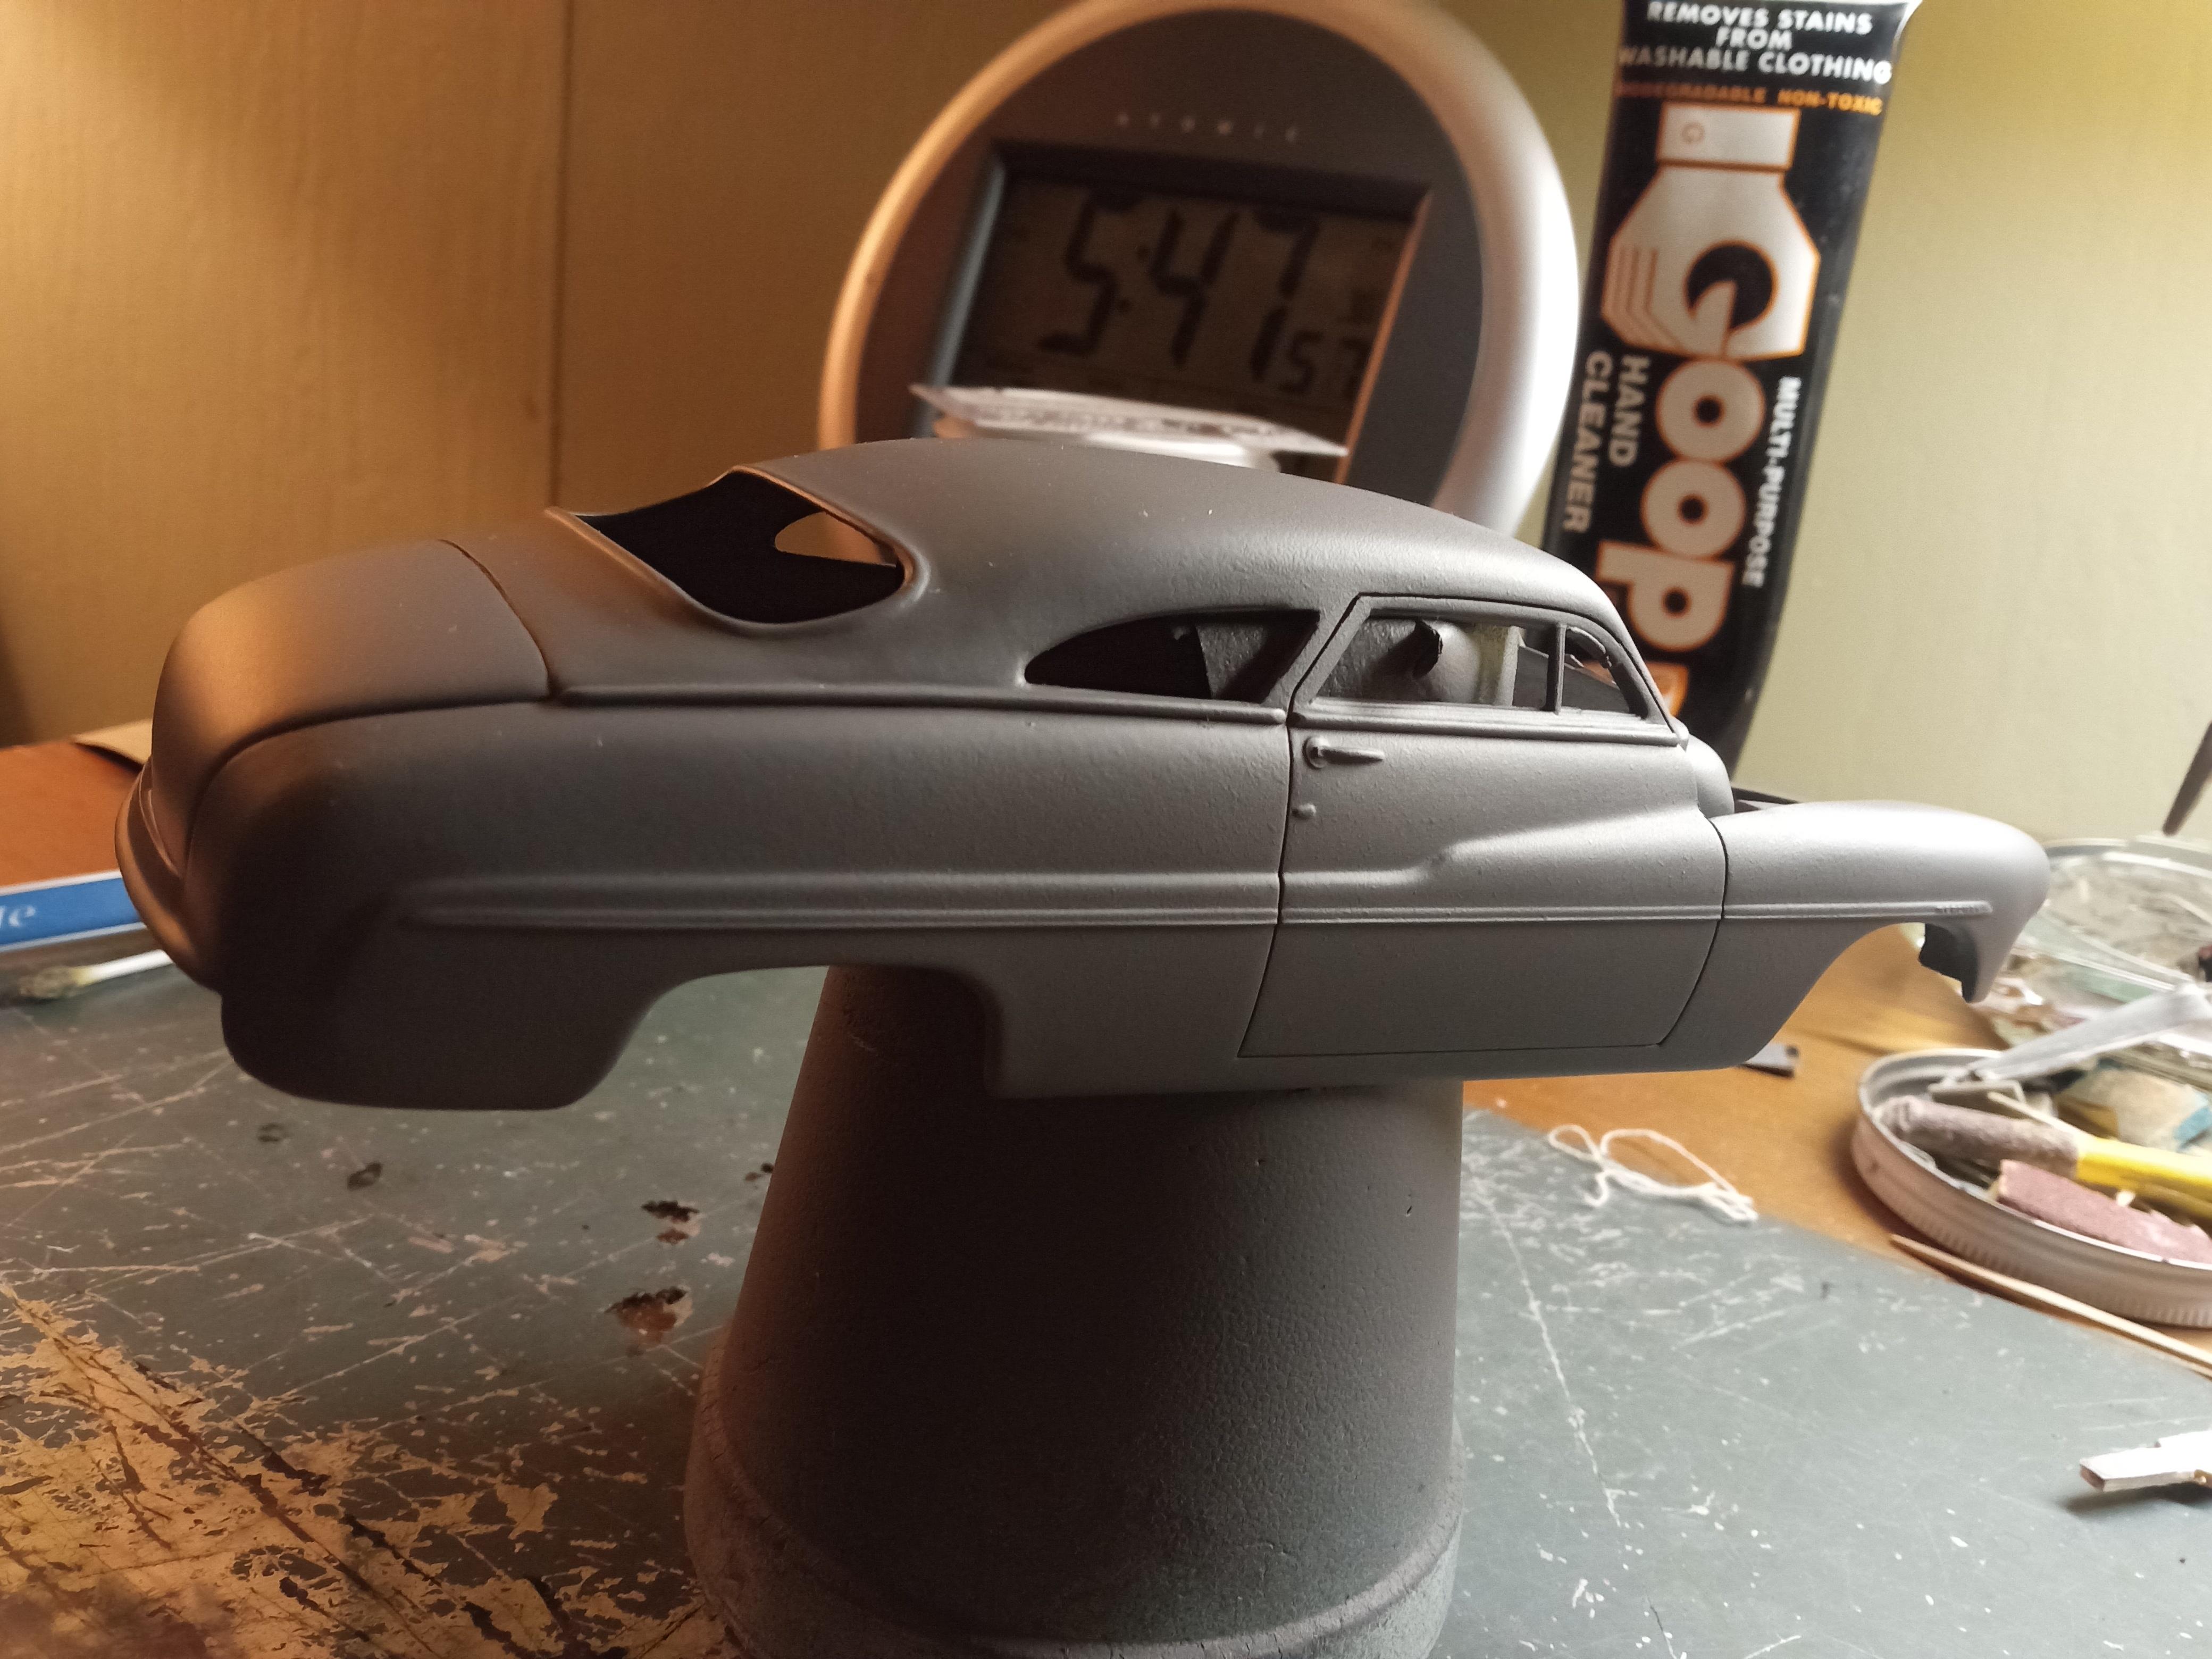
Hi! Just a quick update on the Mercury. It's been slow going with all the cold weather. But its in primer now. I shouldn't have used this Rust-Oleum 2X, it takes stays tacky for weeks. It also shows there's still a ton of "fine tuning" body work to be done.

-
Great engine work. 👍
-
That came out really nice . 👍
-
Looks like some kind of batmobile. 👍
-
Nice do over 👍
-
Nice T-bird. 👍
-
Restoration of fathers ole GTX from the early 80s
Supernurd replied to Rescued customs's topic in WIP: Model Cars
That ought to come out nice. 👍 -
Excellente. 👍
-
That's very nice. 👍
-
Galaxie Limited 1947 Chevrolet Fleetmaster Aerosedan
Supernurd replied to Katsusauce's topic in WIP: Model Cars
That's gorgeous. 👍 -
1965 Chevrolet Urban 2-door station wagon
Supernurd replied to '70 Grande's topic in WIP: Model Cars
I guess there had to be a "urban" before there was a "suburban". Cool. 👍 -
Great work. 👍
-
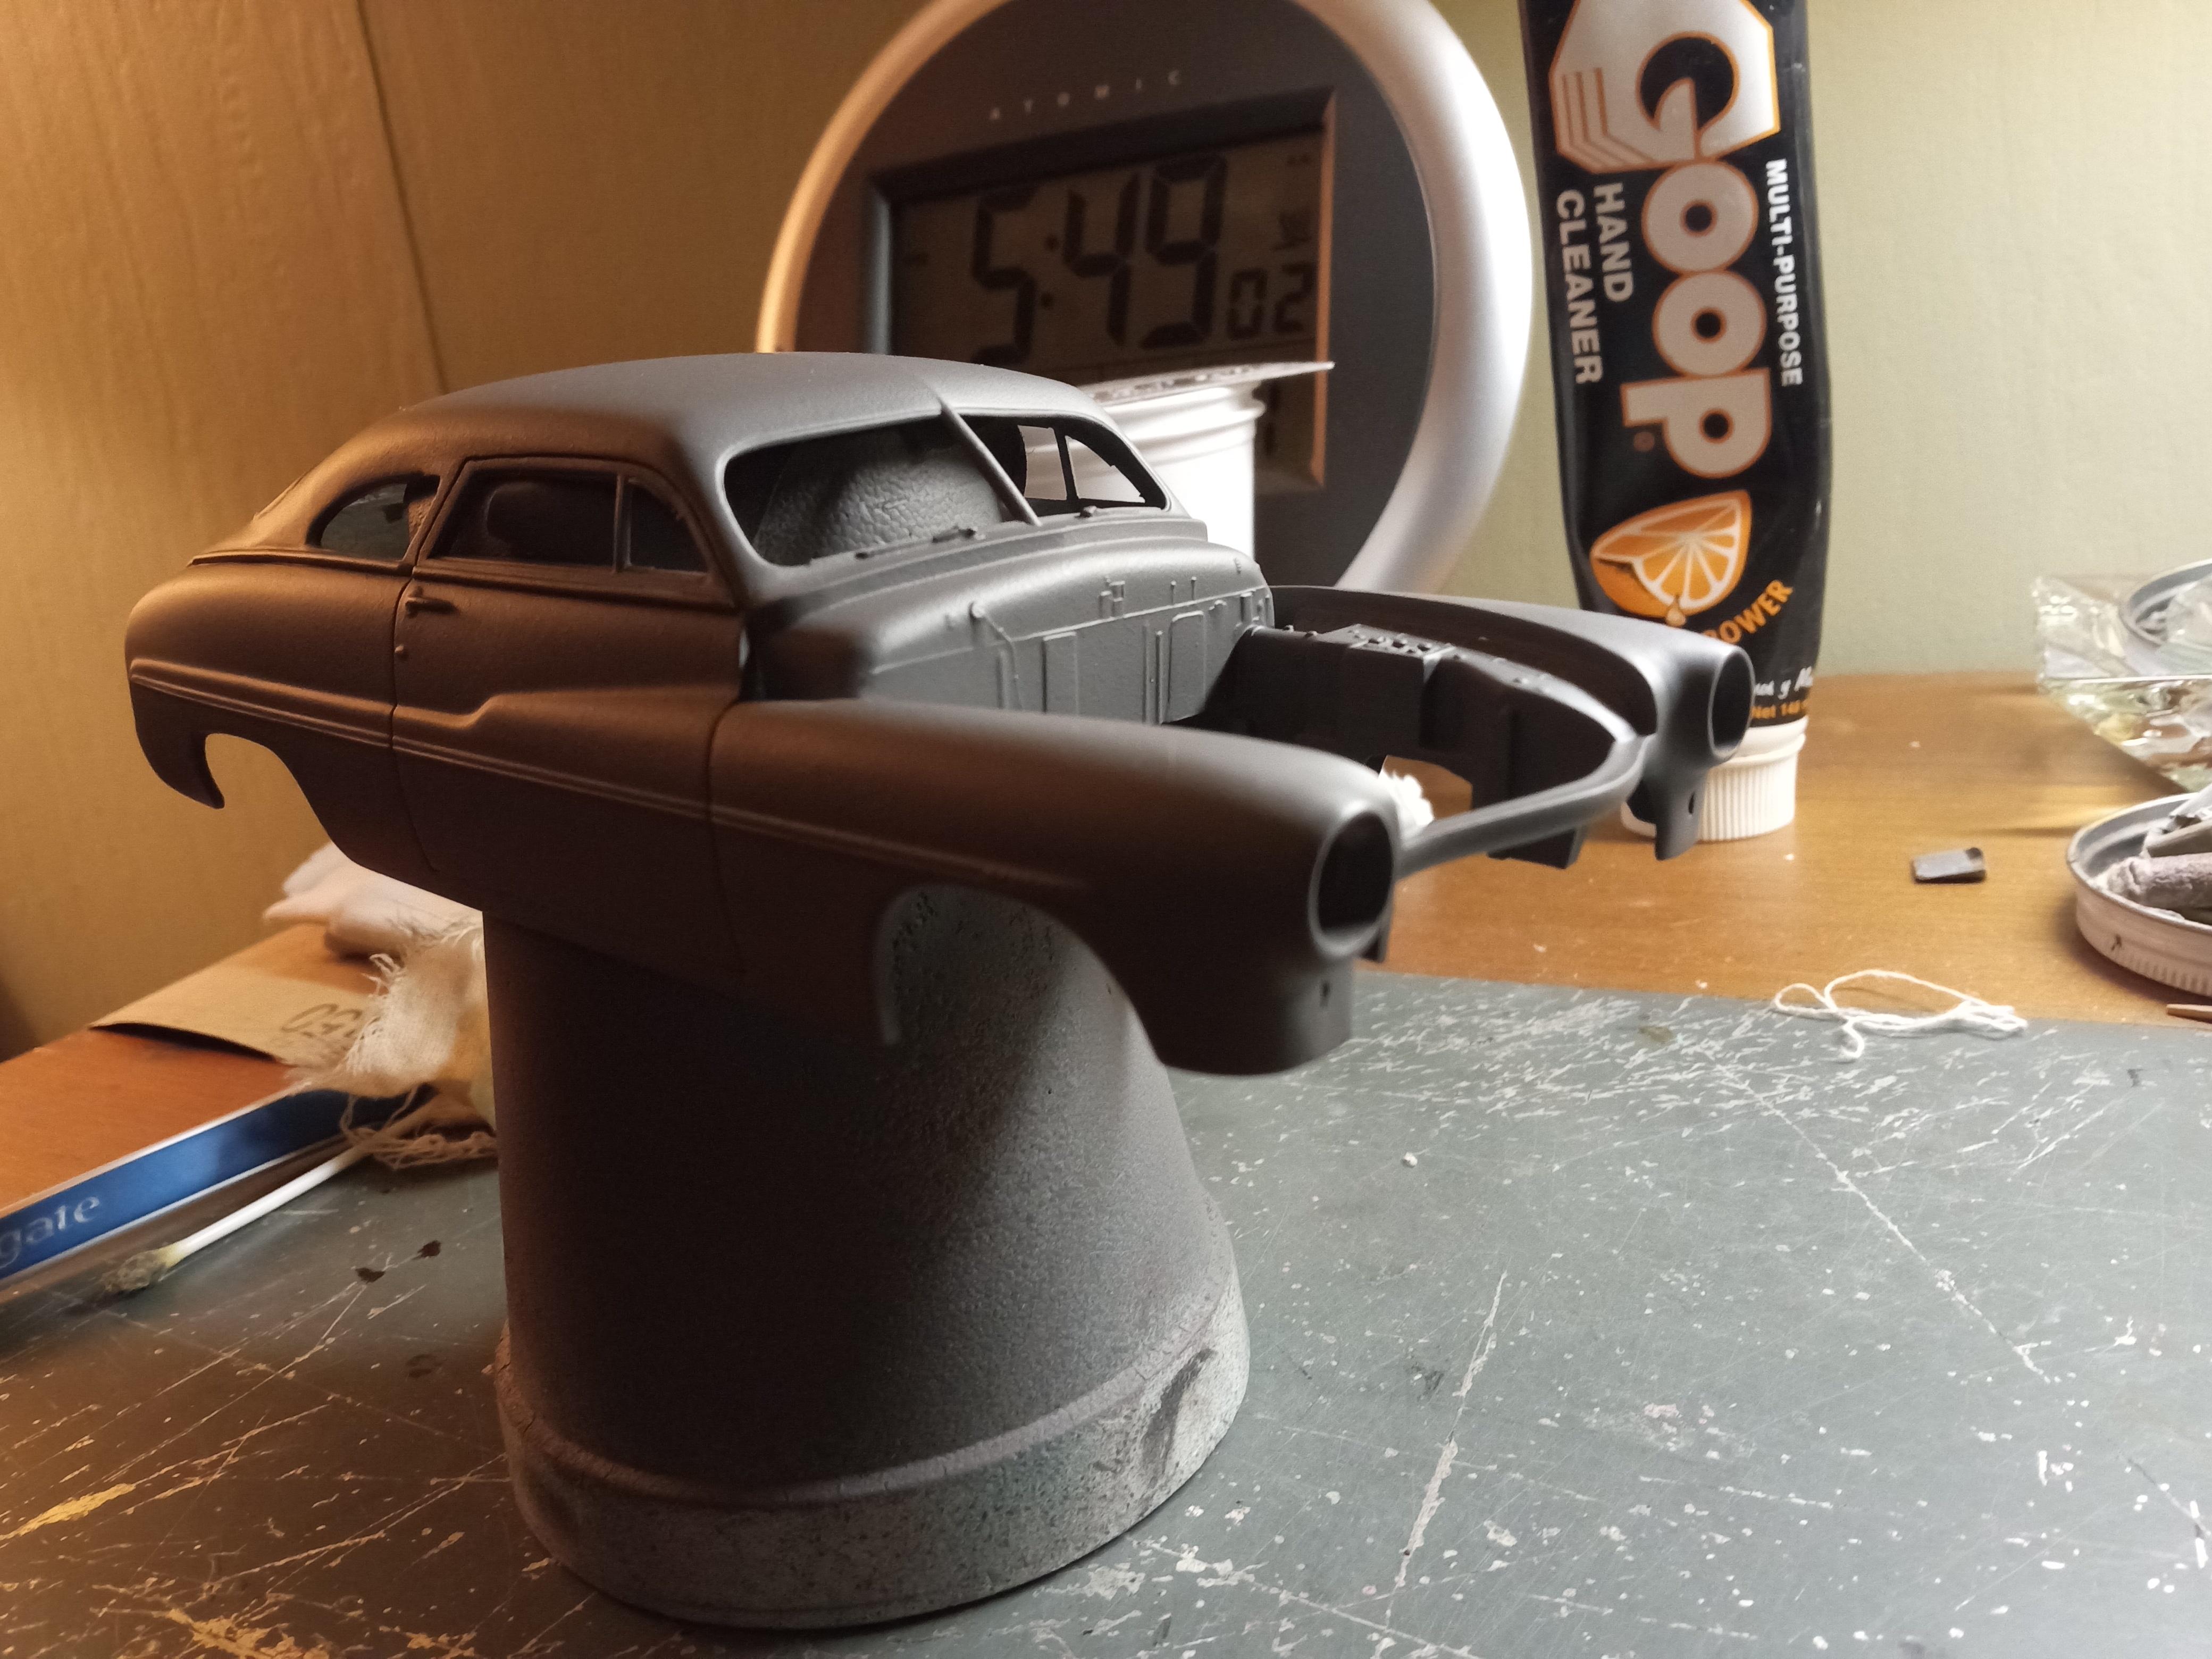
The rear end was sitting too high so I dropped it down a little.
-
It's been to cold for painting (priming) so I have been addressing some other details. I added the trim back in on the doors and rear quarters. Also made some bullet taillights.
-
Some fine work there. 👍
-
That's gonna be one "wild" cat. 👍
-
Great work. 👍
-
Beautiful work.👍
-
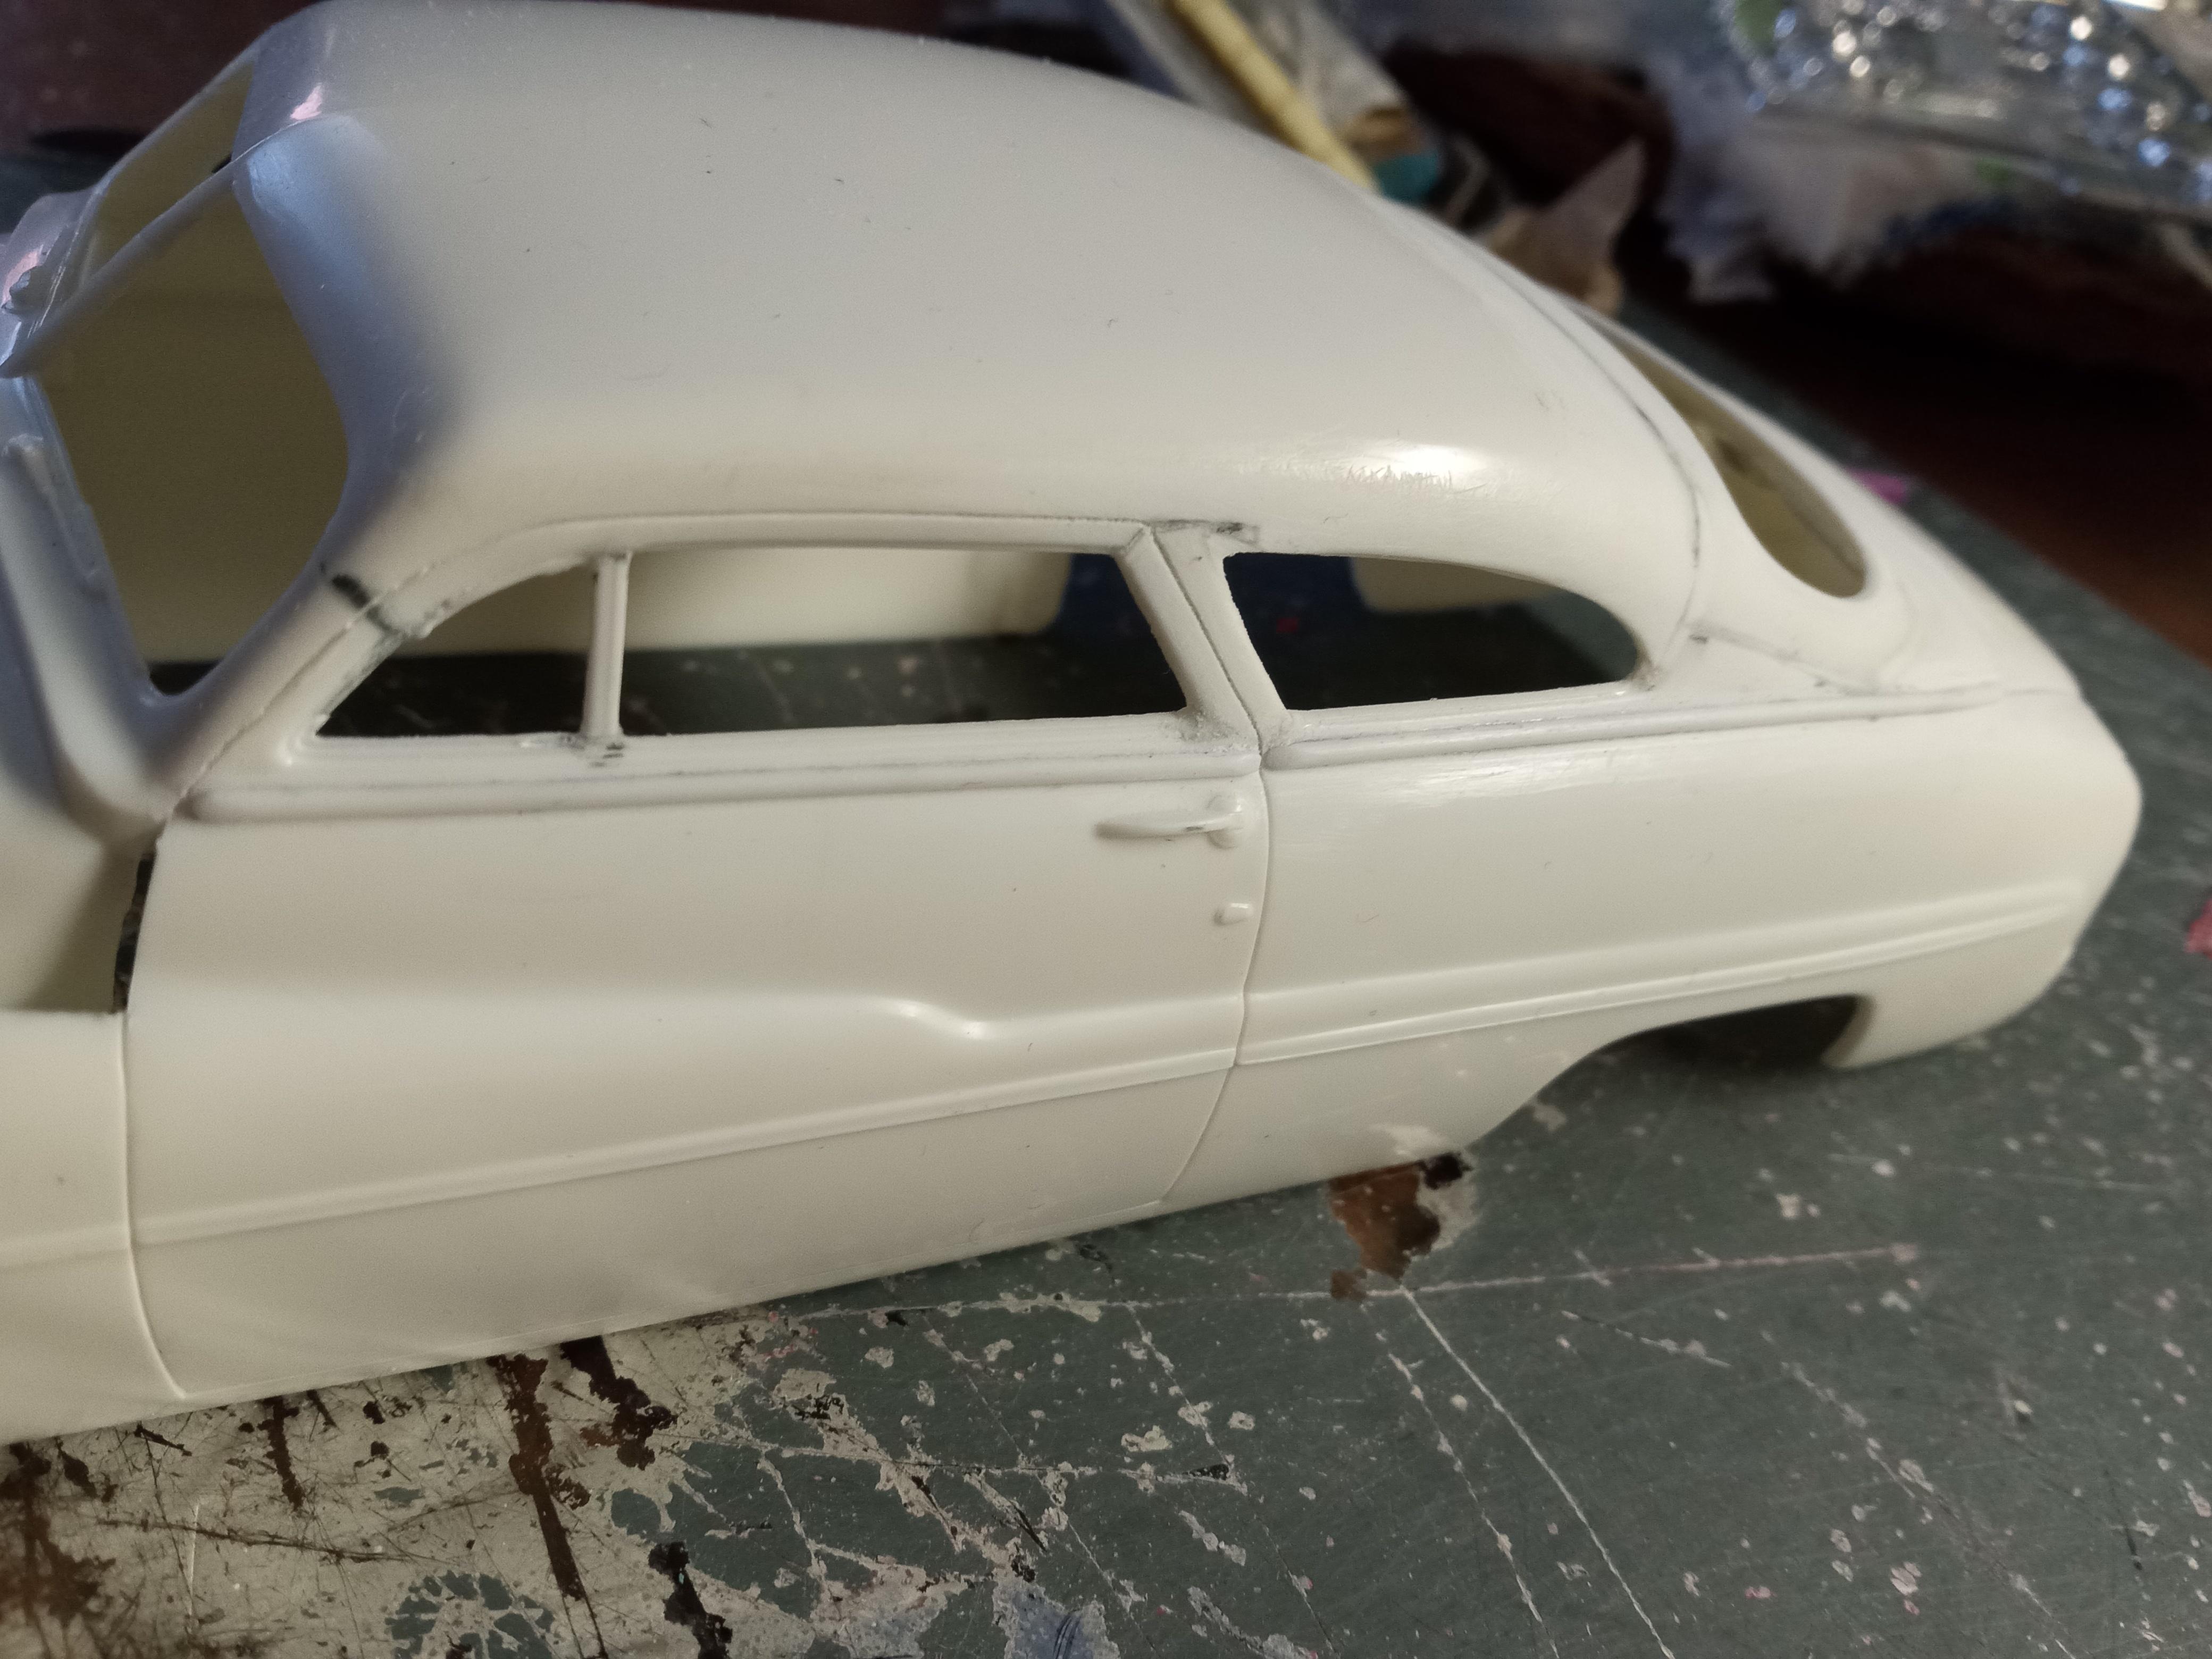
The vent window pillars have been added back in. Now on to the headlights. Let's weld in some pie plates and get to work. I may go with the chrome bezels, or may go frenched. Yet to be determined.
-
1959 Dodge Custom Royal Lancer. New Photos.
Supernurd replied to StevenGuthmiller's topic in Model Cars
Phenomenal. 👍 -
Looks good with a red roof. 👍
-
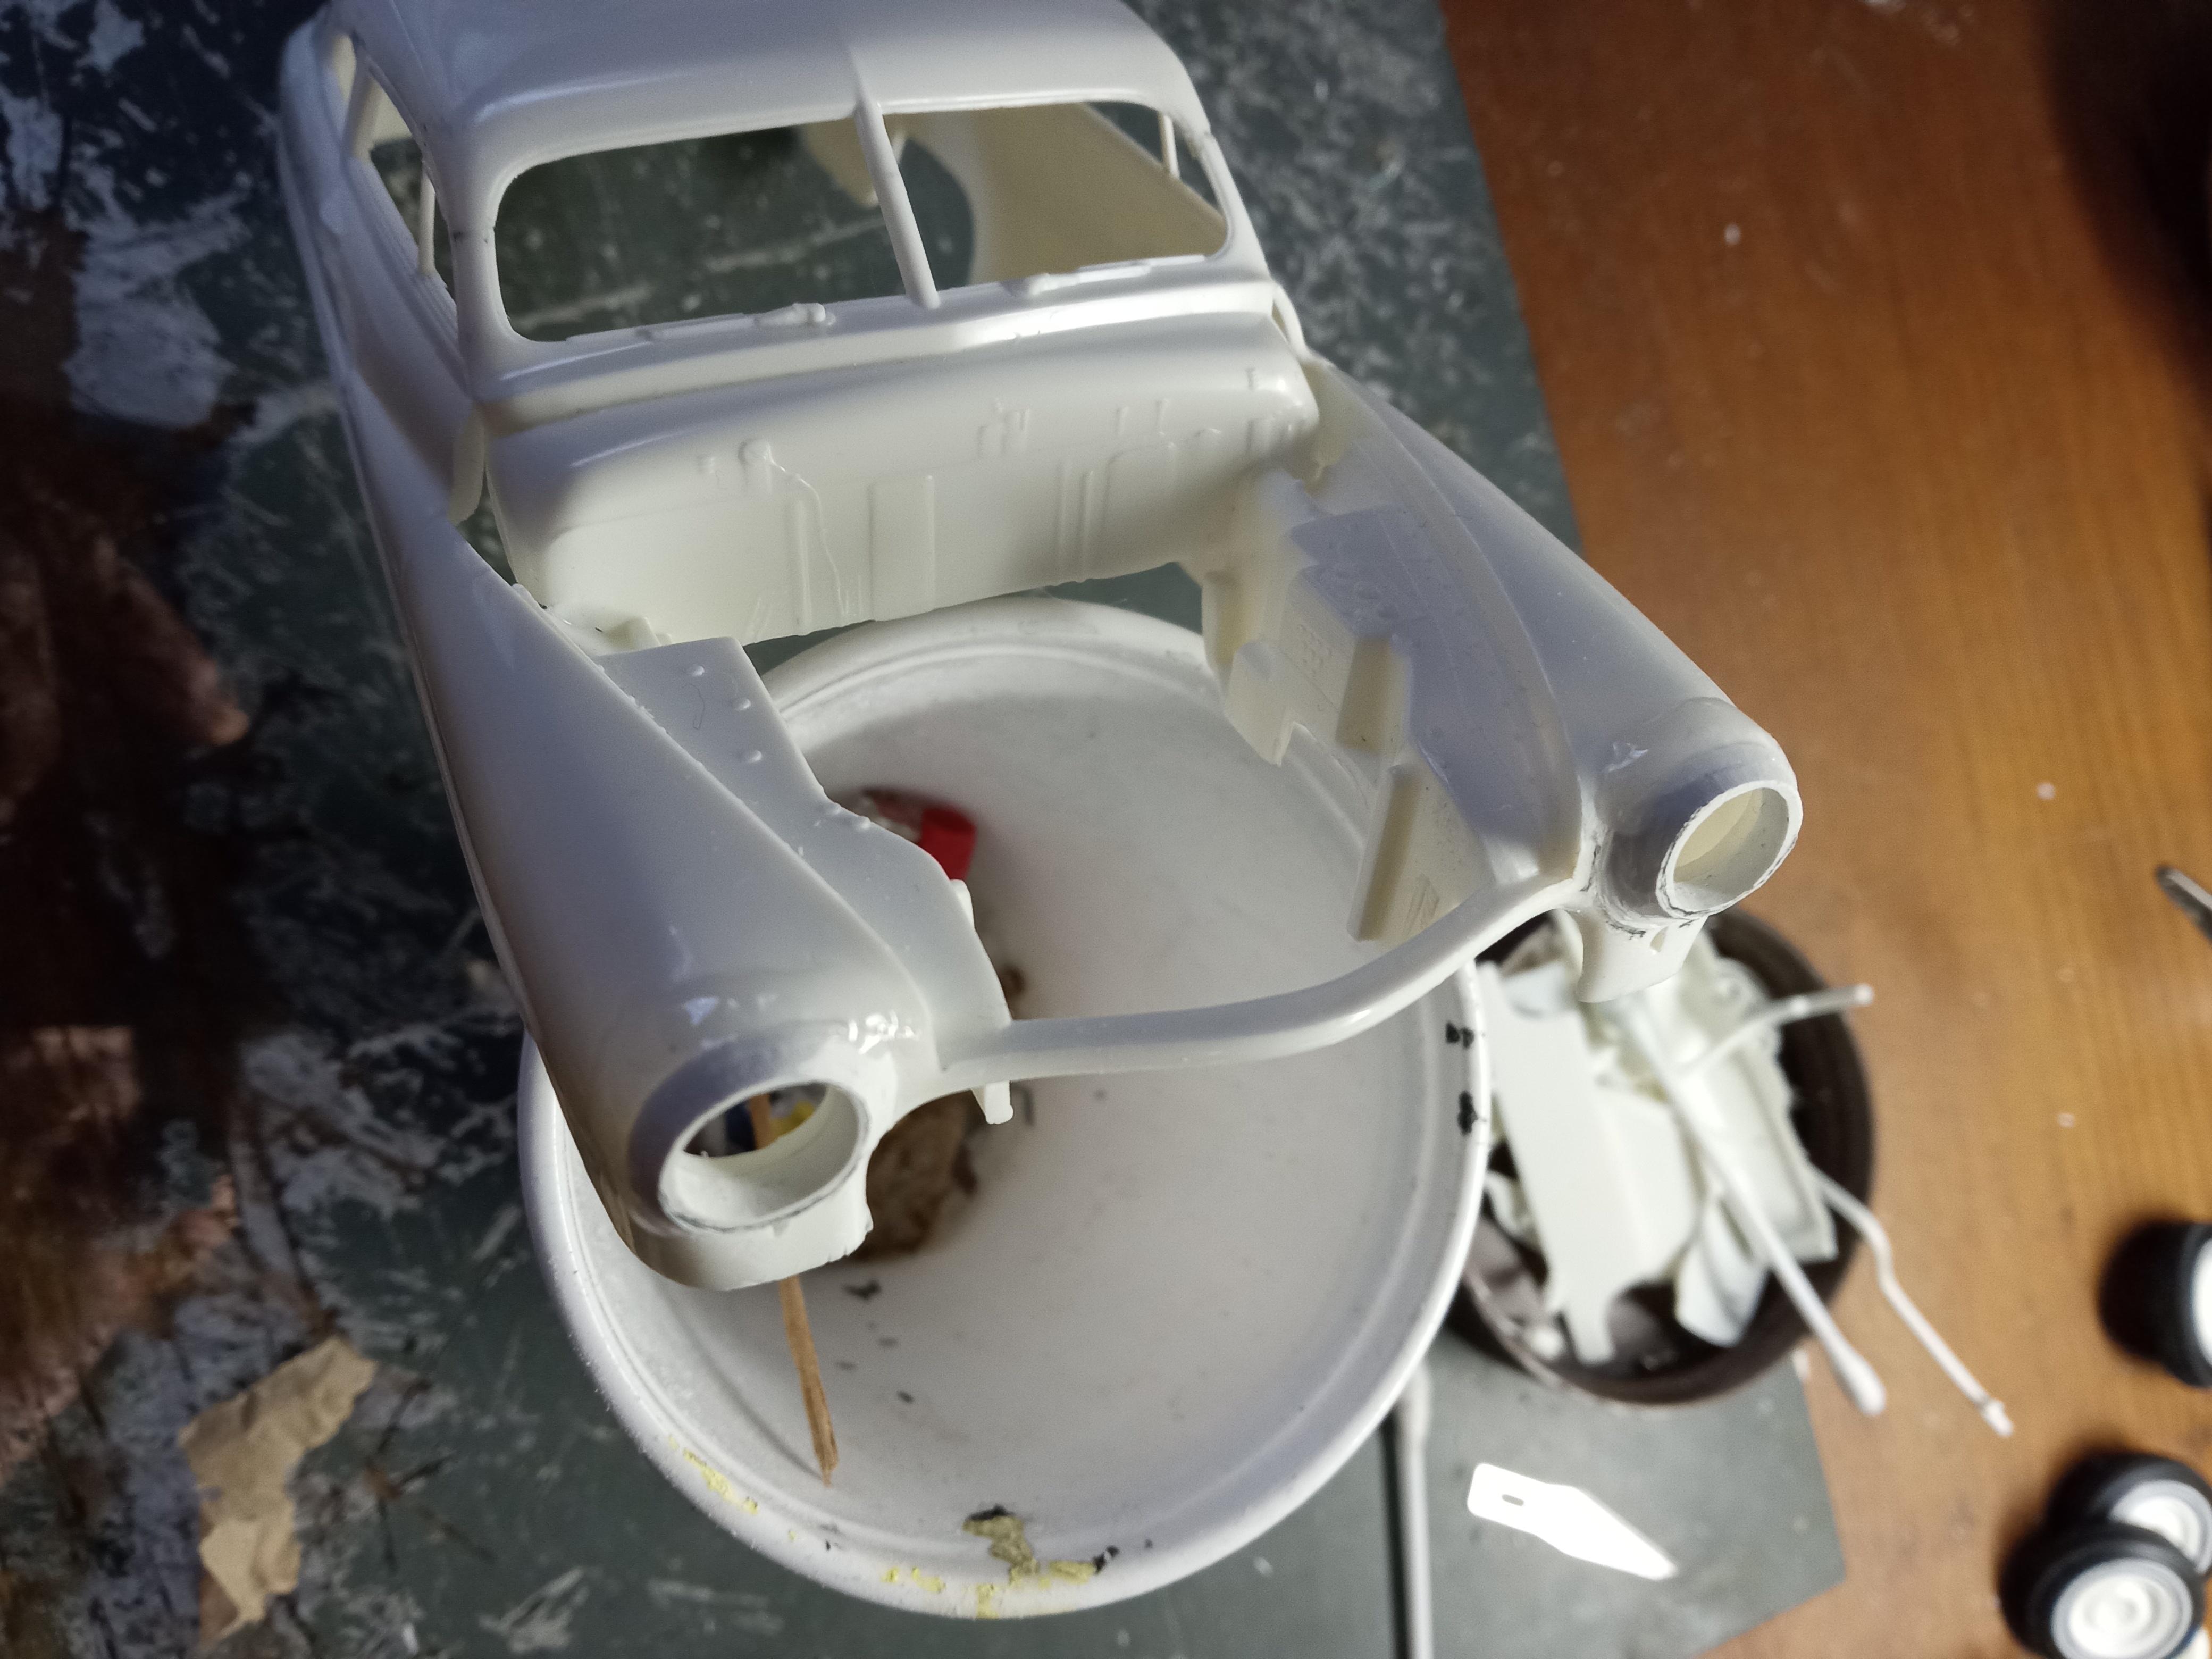
I've roughed in the C pillars. In Gene's tutorial he converts it to a hardtop but shows the process for adding them back in. Most customizers delete the locks and door handles but I'm leaning toward keeping them just to be different. I may keep the stock grille too. And the flathead. I'm more concerned with thinking about what to do about the headlight bezels. The ones in the kit are horrible.