70 Sting
-
Posts
1,369 -
Joined
-
Last visited
Content Type
Profiles
Forums
Events
Gallery
Everything posted by 70 Sting
-
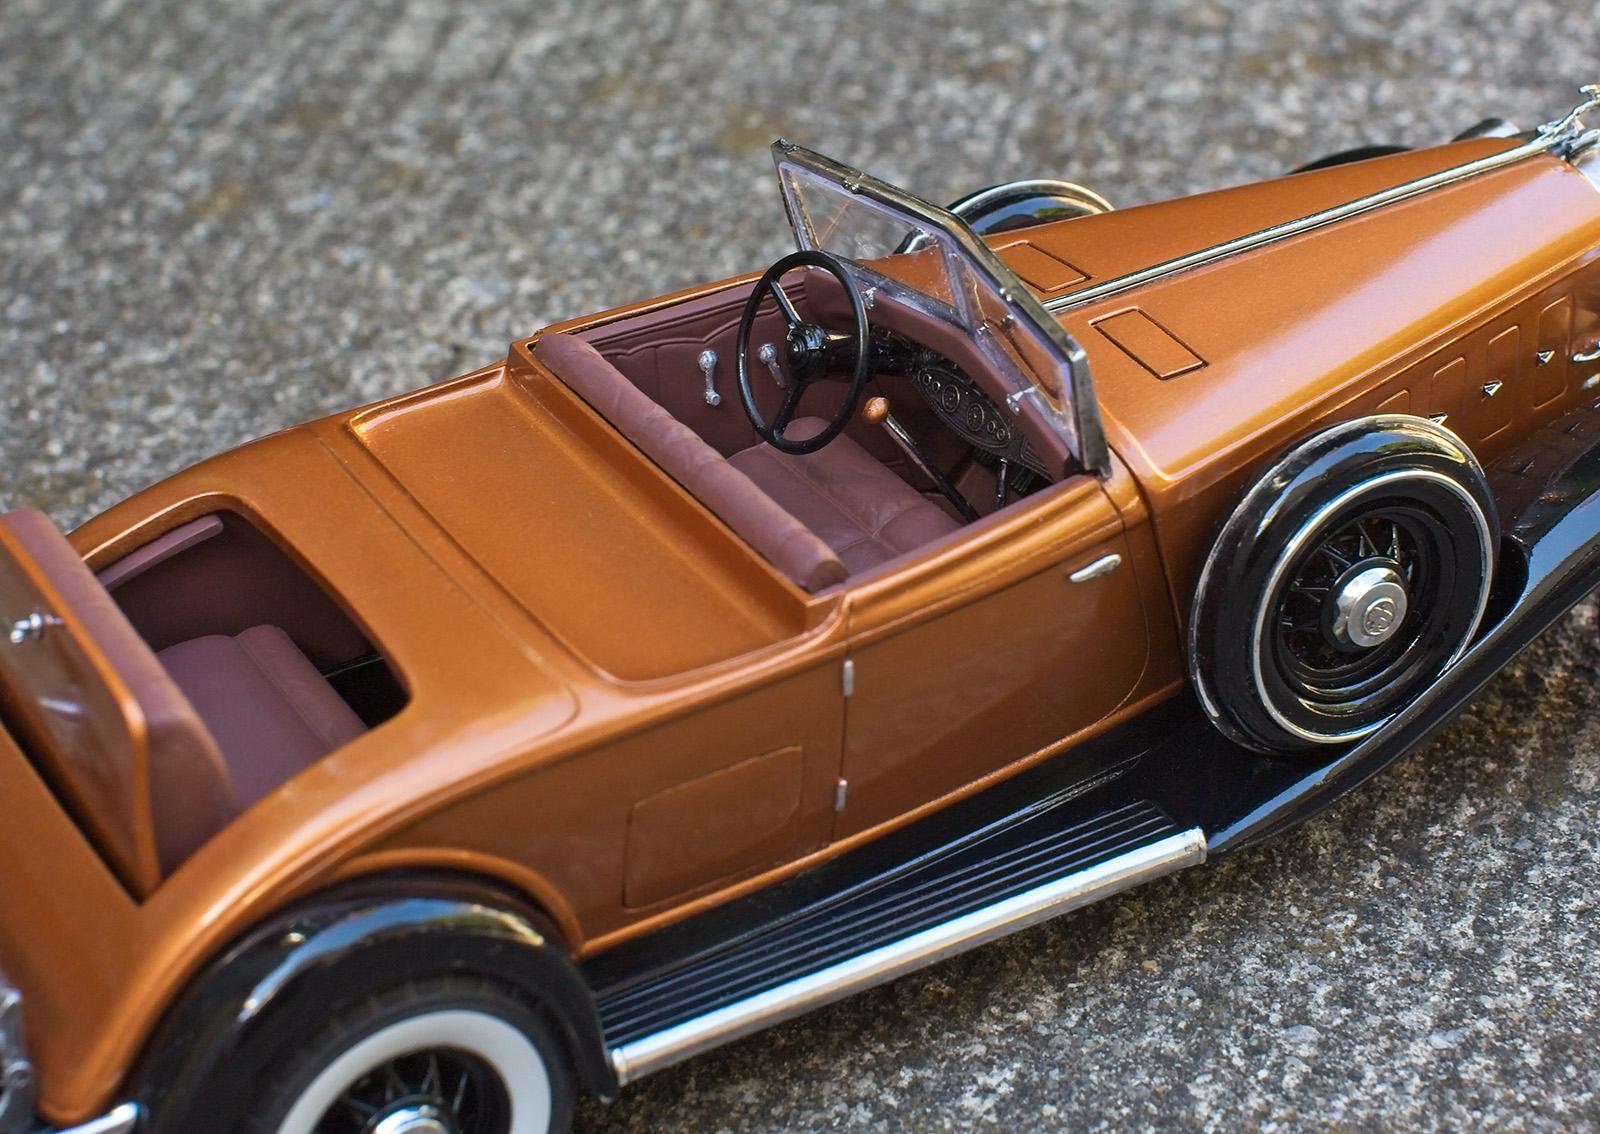
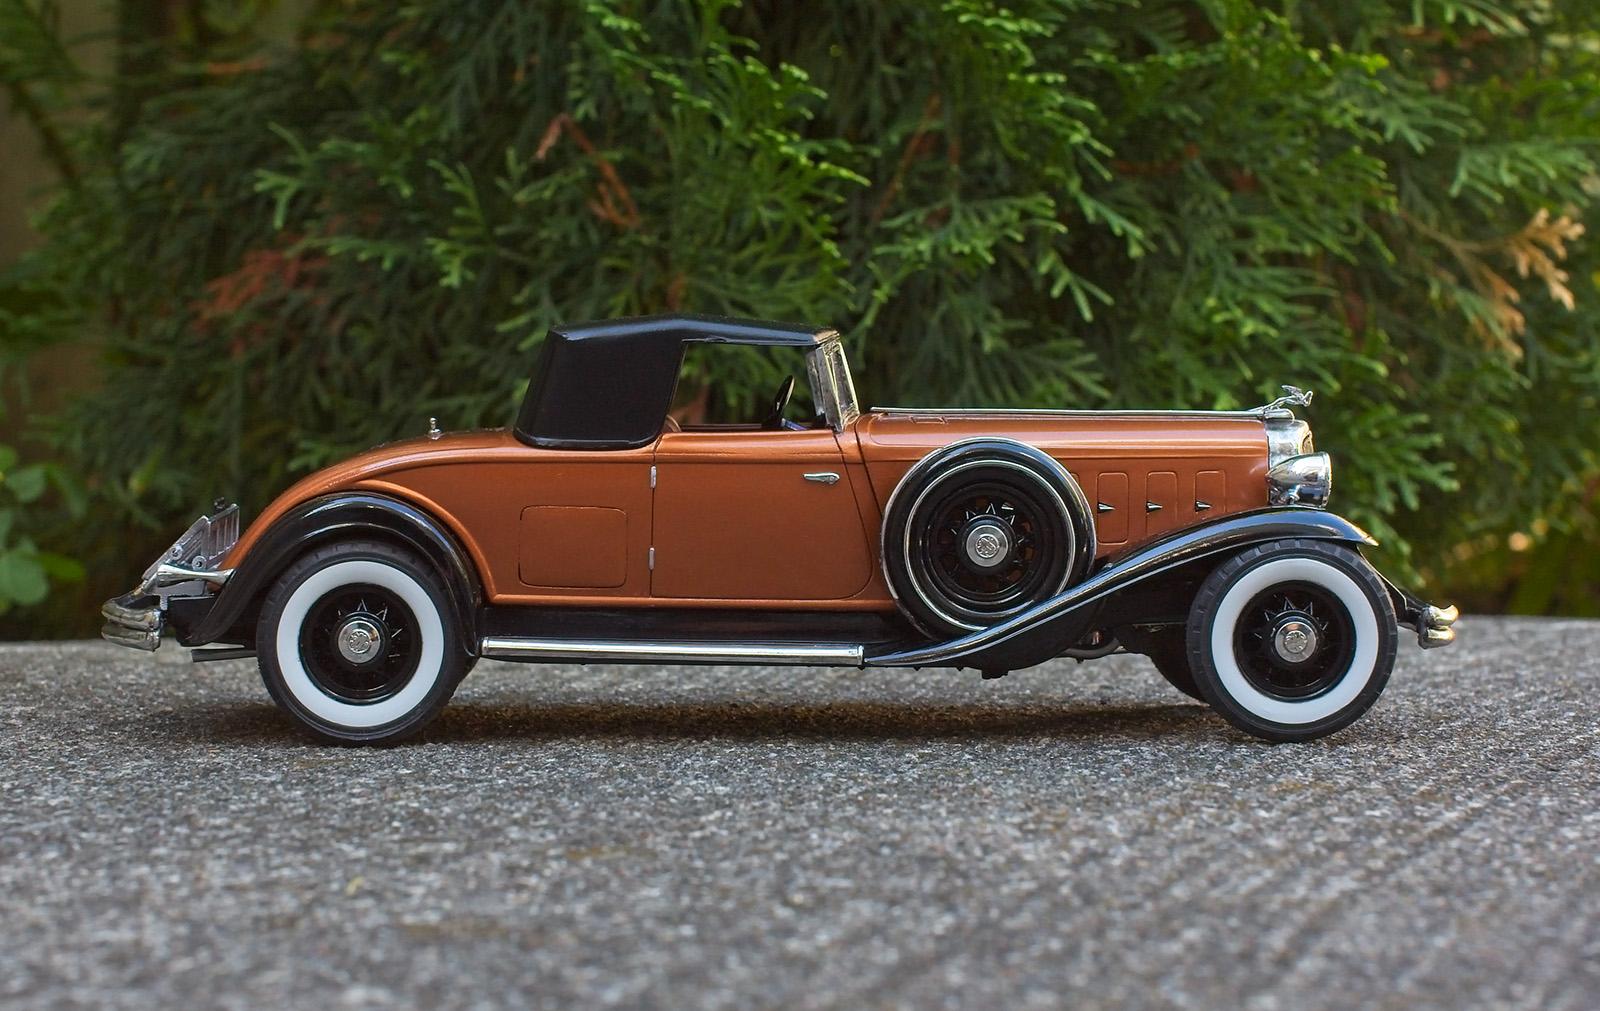
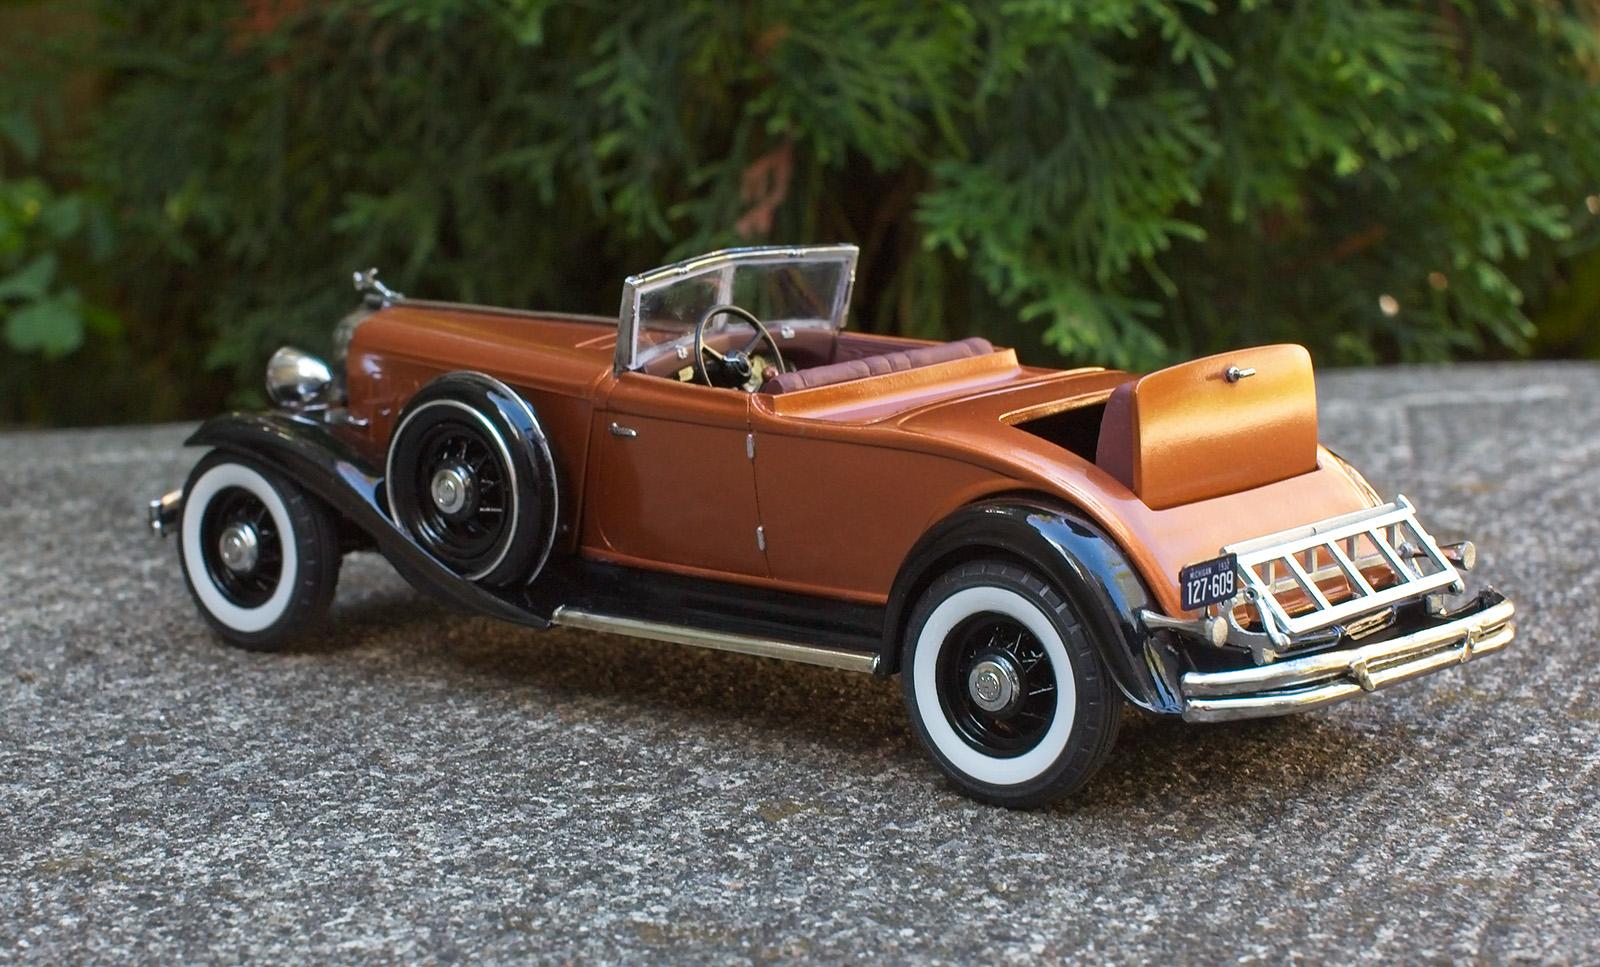
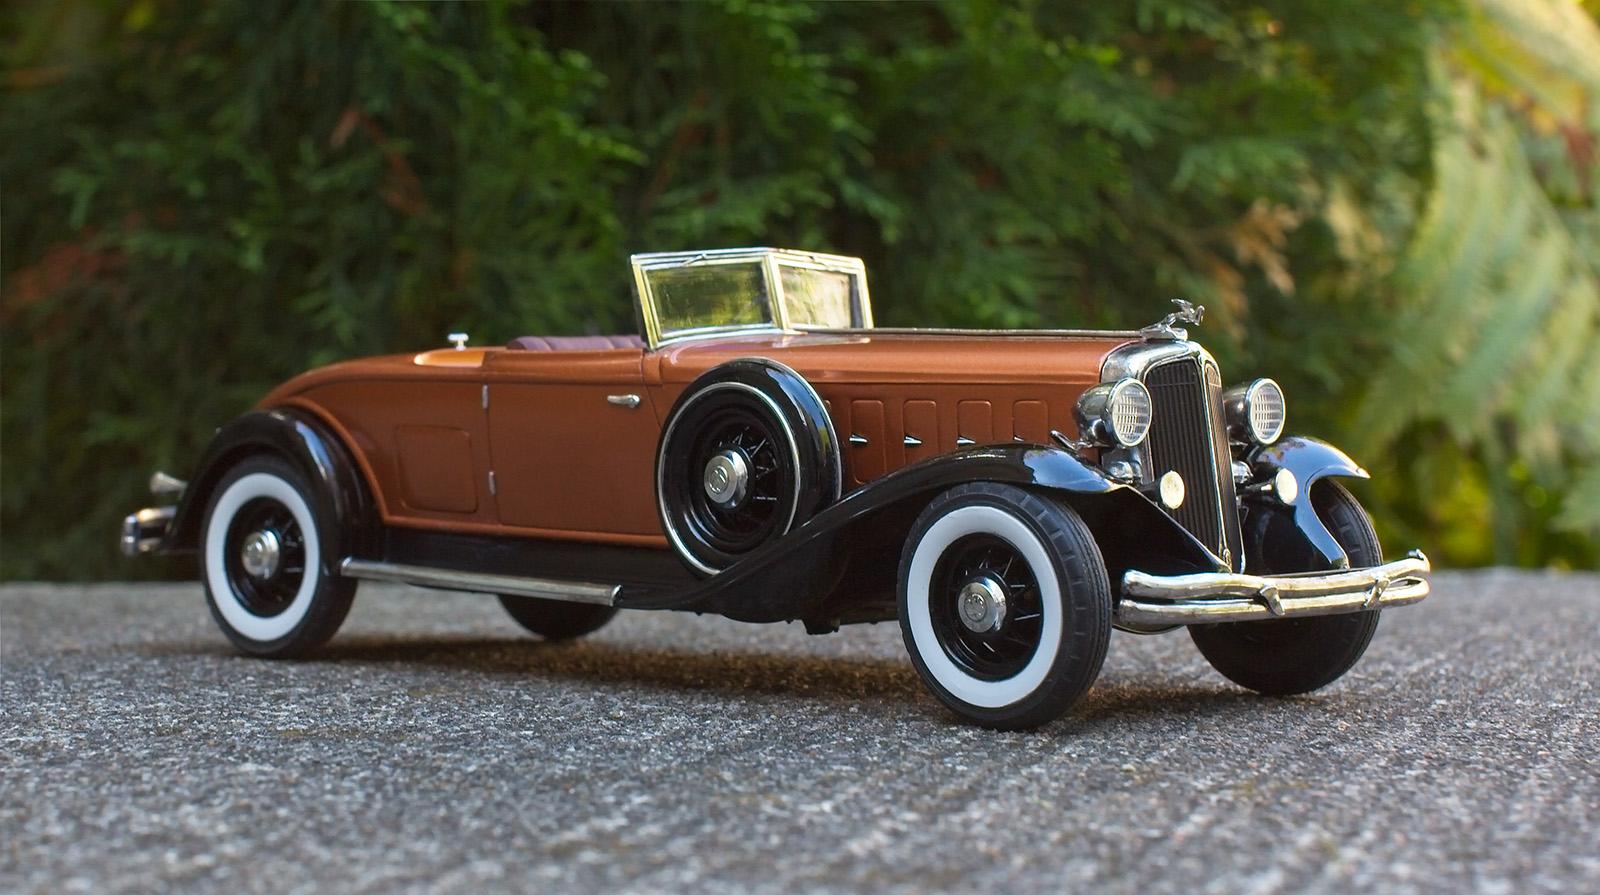
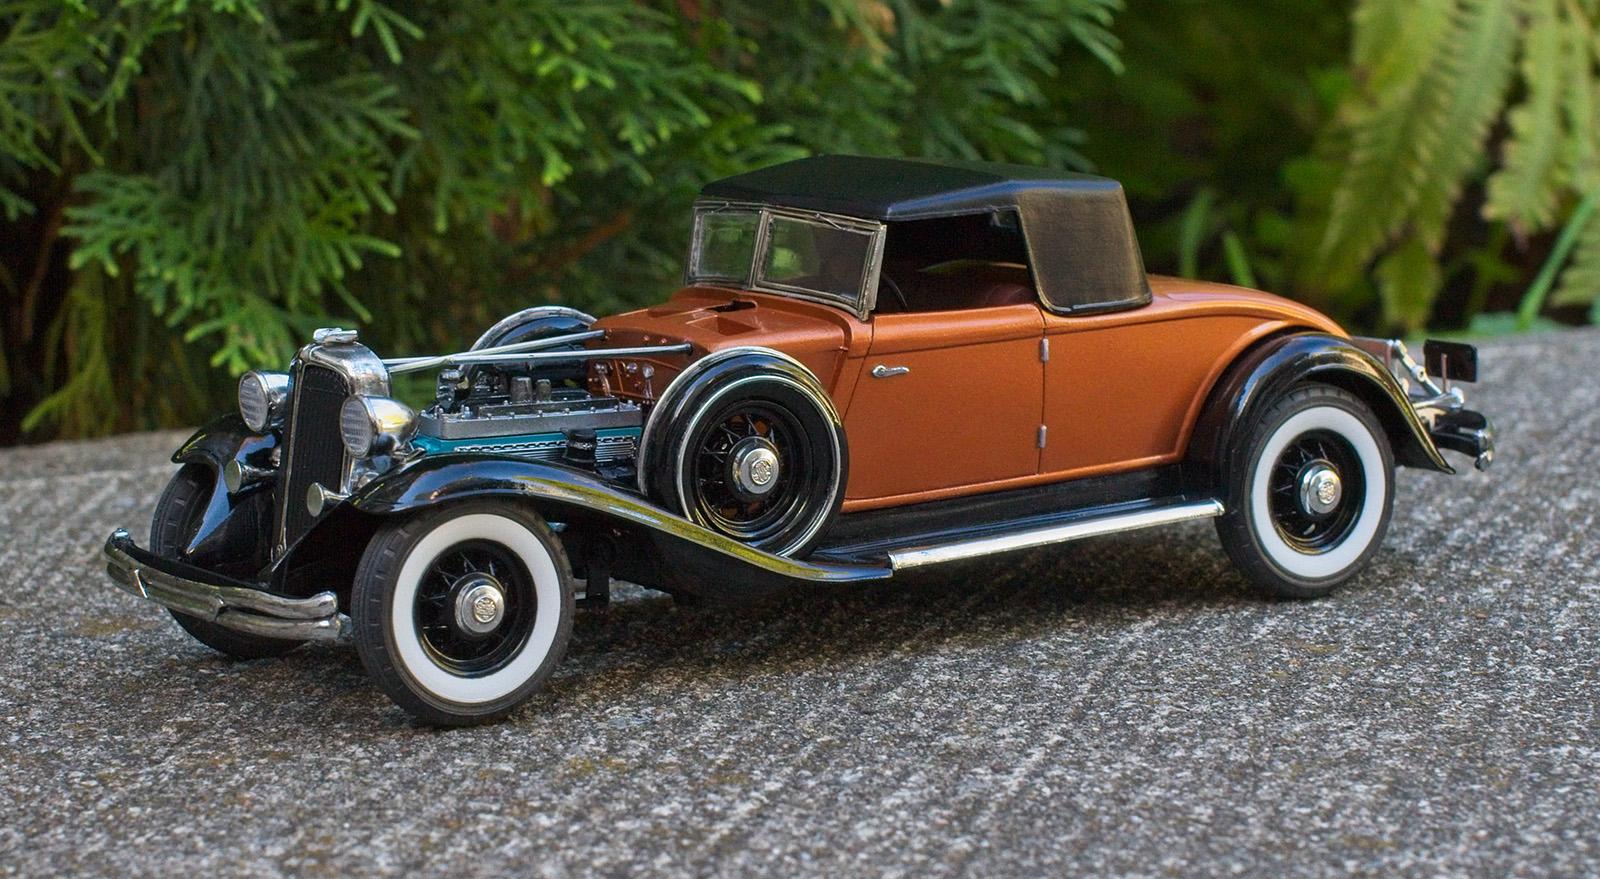
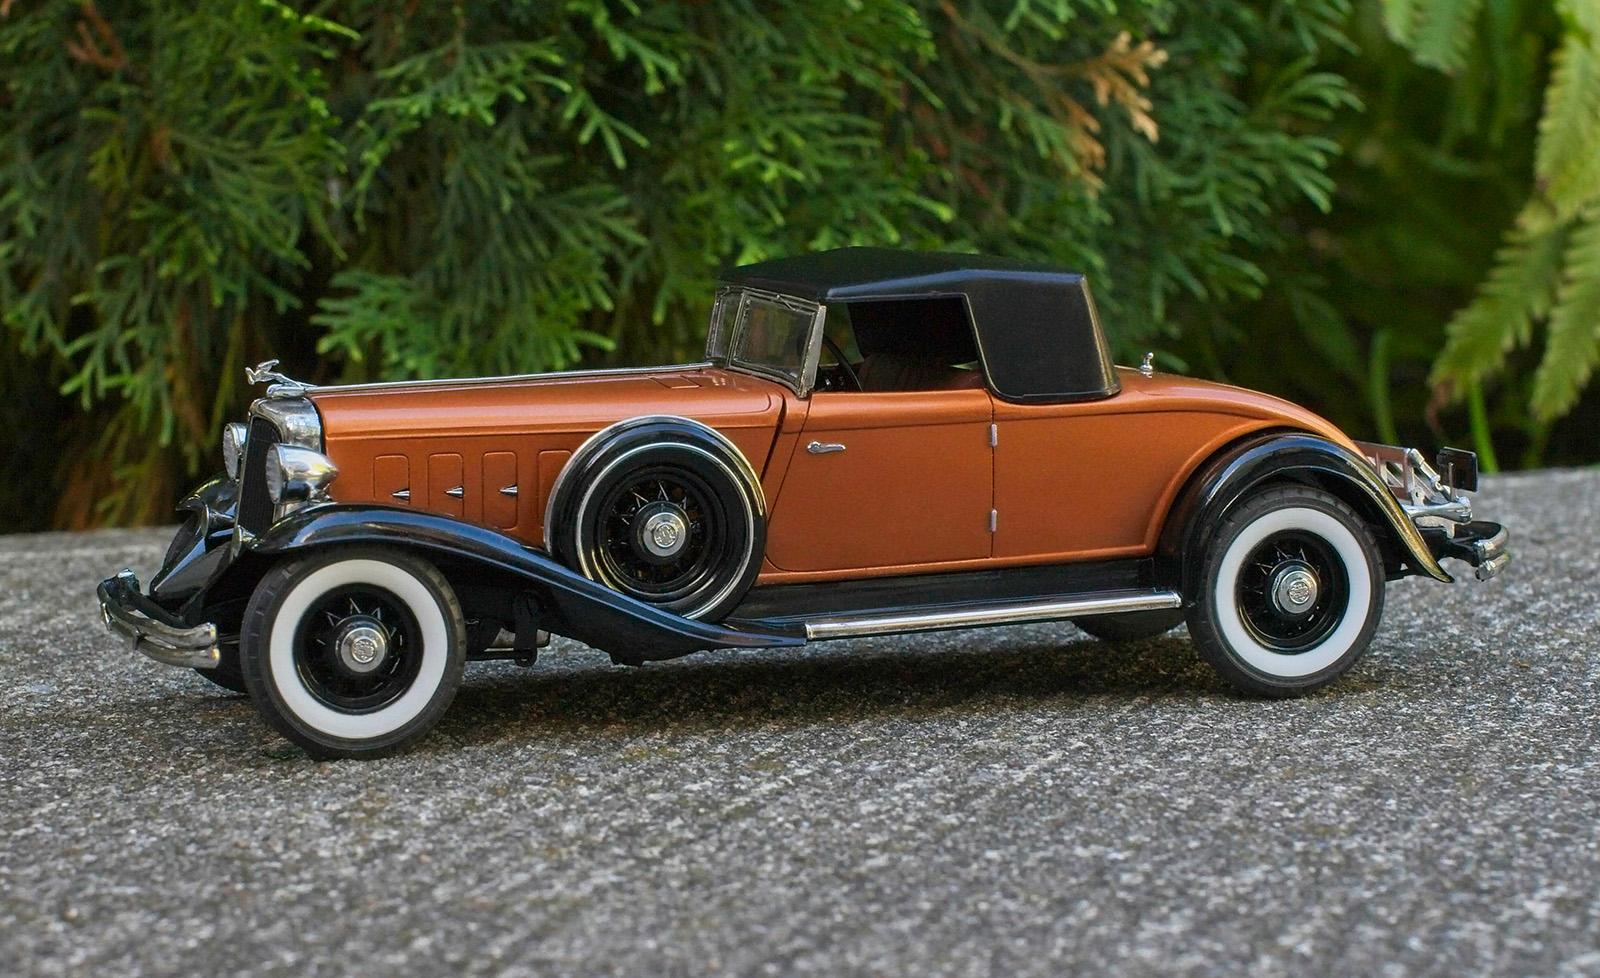
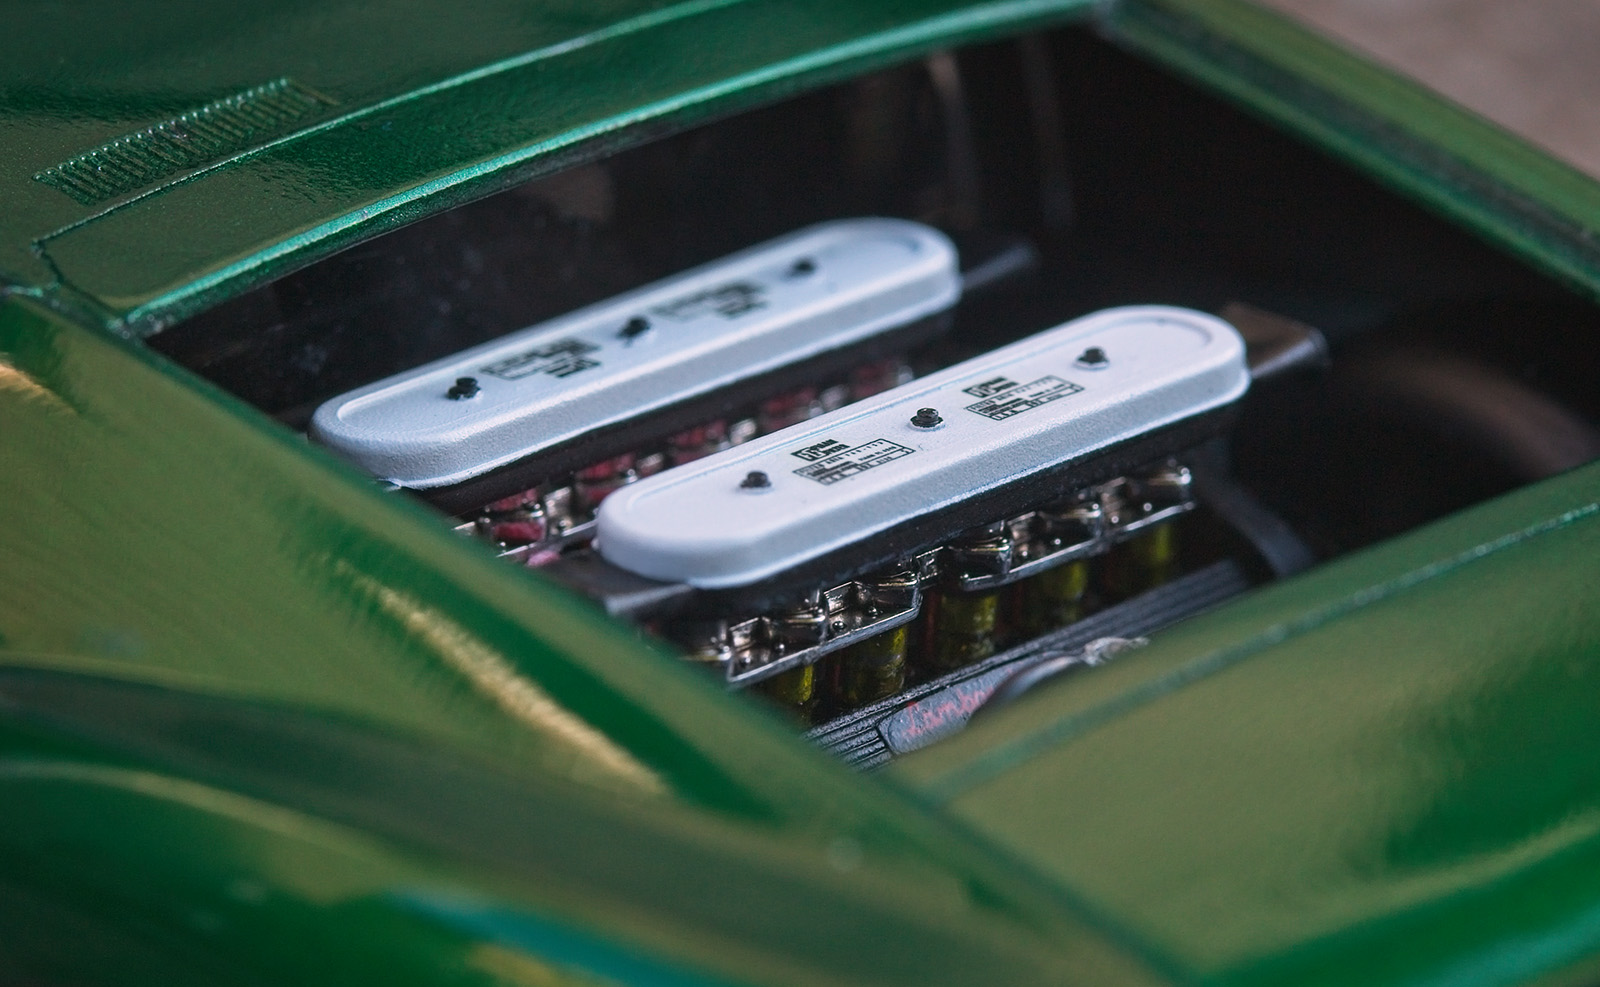
You said it @bbowser. A number of finicky parts for sure including the flimsy front steering and suspension. The worst fitting were the white wall inserts and tire rims. @bh1701 I used Tamiya Surface Primer Grey - it's a little darker than their Fine Surface Primer Grey. I had to look up the Chrysler Tubine, X-34 does look like a close match. @Monty I used Tamiya's Panel Line Accent Color (Black) on the chrome pieces. I got back into the hobby because of the pandemic - after a 30 year hiatus. So much has changed since the Testors tube glue days. The wealth of information on the net has been a real eye opener. @chris chabre Nor was it mine. I thought it would be cool to try something different. Additional paint info: The soft top was painted with Tamiya X-18 Semi Gloss Black and coated with X-35 Semi Gloss Clear. White walls were painted with Tamiya XF-2 Flat White. Engine block is a 1:1 mix of Tamiya X-4 Gloss Blue and X-5 Gloss Green and toned with X-2 Gloss White.
-
Thanks very much, fellas. ? @Zippi I didn't have brown paint on hand for the interior so I mixed Tamiya flat red + blue @1:1 then toned it with white. The parts were then coated with Tamiya X-35 Semi Gloss Clear. Something else I learned through a little testing: Tamiya X-86 Flat Clear is very flat over flat paint and you can't really tell it has been applied. I wonder how it would look over gloss paint?
-
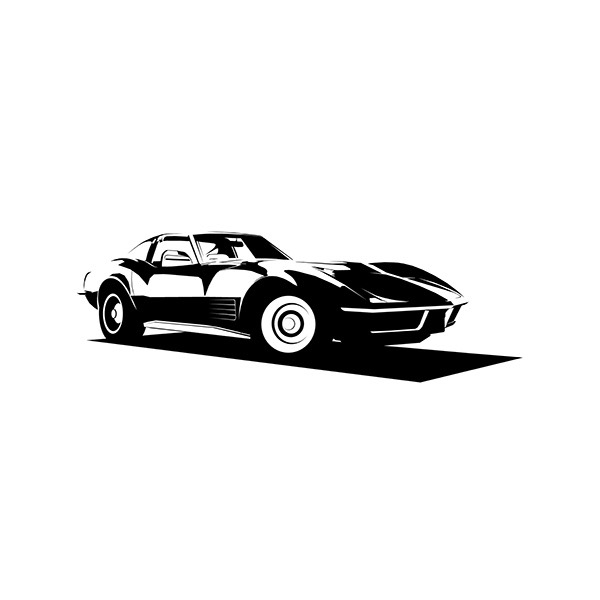
Photographed my most recent model this afternoon and though I'd share it here. This is the 7th kit I've built since returning to the hobby and chose this particular model after watching a build video by a YouTuber. It was painted with Tamiya X-34 Metallic Brown, X-1 Gloss Black and clear coated with Pledge. It's certainly not perfect and looks better in the photos, however I'm learning new things and trying to get better each time. What I learned from this build: 1. Should take reviews/opinions with a grain of salt. 2. I am new to airbrushing but found Pledge went on quite well - just don't lay it on too heavy. 3. Covering larger chromed parts with panel liner requires extra care so that it goes on evenly, and that it can smudge days after drying with too much handling. Going forward I would choose to strip the chrome and repaint it or perhaps cover it with a couple, light coats of Tamiya Smoke. Thanks for looking!

-
Beautiful work.
-
Perfection.
-
@Venom & @gotnitro? Thanks, fellas. It was a good learning experience overall.
-

Airbrushing & Conditions
70 Sting replied to 70 Sting's topic in Model Building Questions and Answers
@Pete J. That’s pretty much what I’ve been doing. Testing paints, thinners, ratios, pressures, distances, speed and taking notes. I’m just starting to get a handle on temperature and humidity. -
Airbrushing & Conditions
70 Sting replied to 70 Sting's topic in Model Building Questions and Answers
Update #2: Today the temperature was 70˚ with 55% humidity (basement). I sprayed Tamiya Semi Gloss Black, Gloss Black and Metallic Brown. All 3 were thinned with either Tamiya Lacquer Thinner Retarder type or Mr. Color Levelling Thinner. No problems to report. The only thing I can conclude is that perhaps the cooler temperature combined with the higher humidity was the culprit. -
Airbrushing & Conditions
70 Sting replied to 70 Sting's topic in Model Building Questions and Answers
Update: Sprayed decanted Tamiya Grey primer thinned 1:1 with Tamiya's regular lacquer thinner. The conditions were 69˚ with 58% humidity. Air conditioner was not running today. No problems to report. Primer may have dried a little quick, however I think that might be due to the thinner. I'll see if I can spray some actual paint tomorrow and report back. -
Airbrushing & Conditions
70 Sting replied to 70 Sting's topic in Model Building Questions and Answers
Hmm, much to ponder. AIr conditioner hasn’t been running as much the past couple days and it is definitely more comfortable in the basement (shorts & t-shirt). Hoping to spray some primer today, though perhaps that’s not as good an indicator as actual paint. I’ll post my findings later. Thanks for the replies. -
Being new to airbrushing I have a lot of questions as you might expect. The most nagging one is temperature and humidity. I have sprayed Tamiya Acrylic X-22 Clear thinned 1:1 with Tamiya Lacquer Thinner Retarder type in what I believe were near perfect conditions 70˚ with 50% humidity (measured with a Thermometer/Hygrometer). The stuff went down very well. On the other hand, recently I tried spraying Tamiya X-18 Semi Gloss Black in 65˚ with 66% humidity in my basement (air conditioner had been running non stop for days) and no matter how I thinned it, 1:1, 2:1 with regular Tamiya Lacquer Thinner or their Retarder type, it would not go on even. It would dry quicker in some areas and slower in others. I tried applying mist coats as well as heavy with similar results. What did seem to help 'a little' was warming the paint and the part to be sprayed. I hear people say they would never paint during days with high humidity while others say it can actually help slow down the drying time... but don't spray gloss paint. Any insight would be appreciated.
-
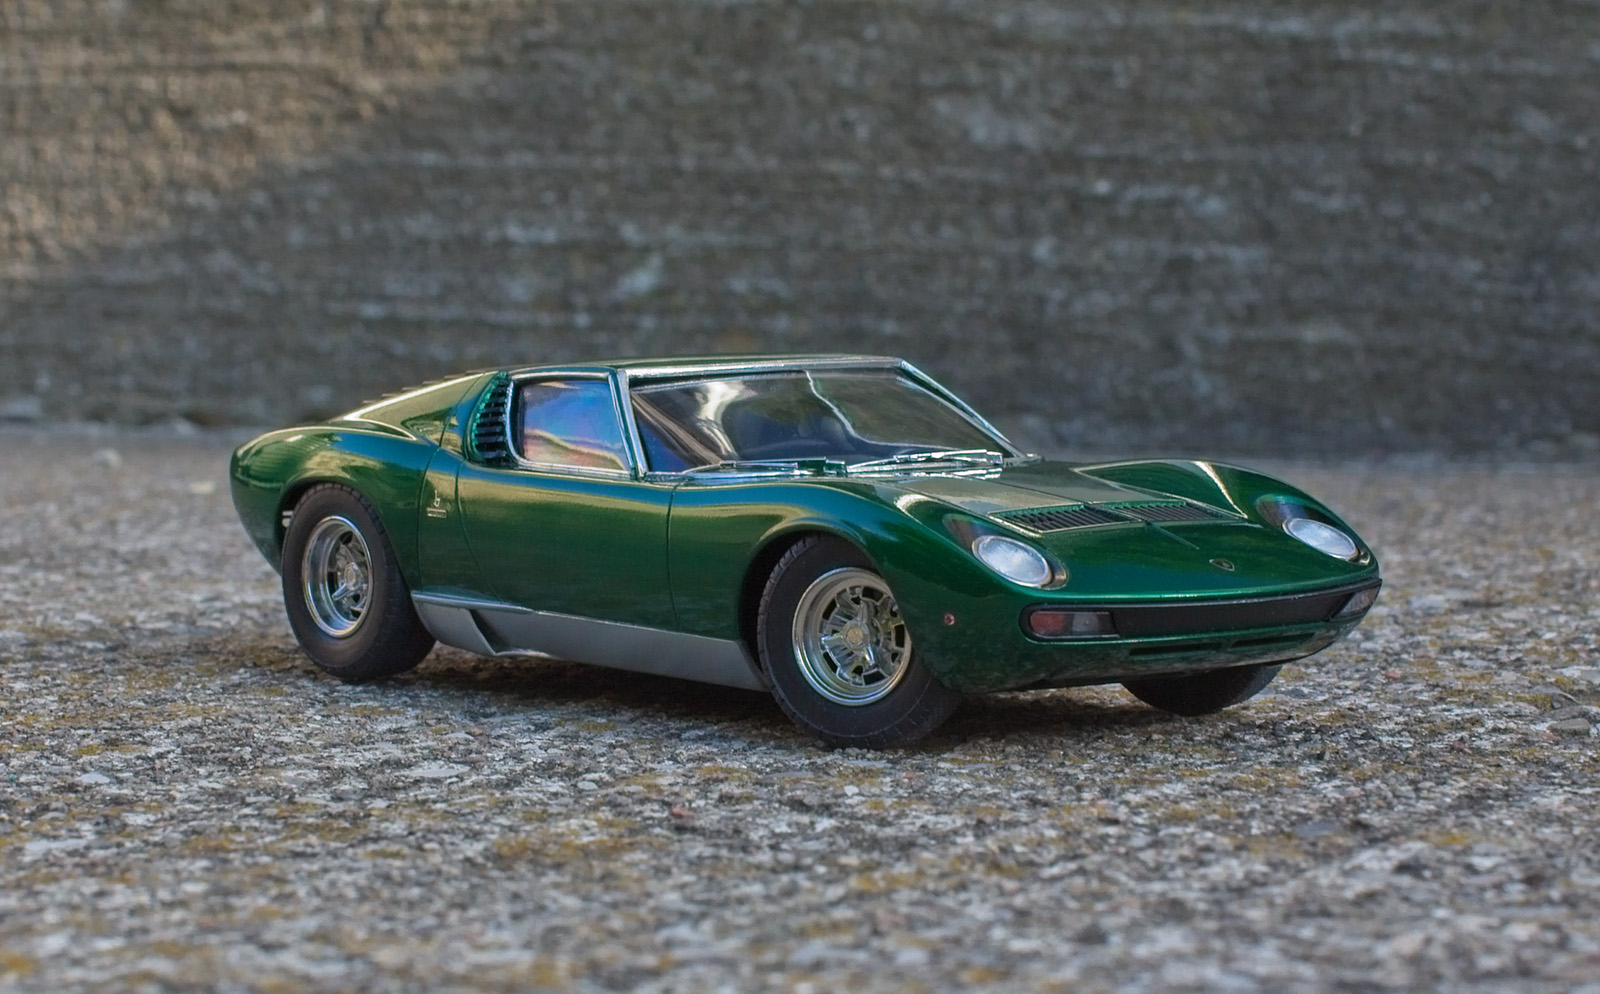
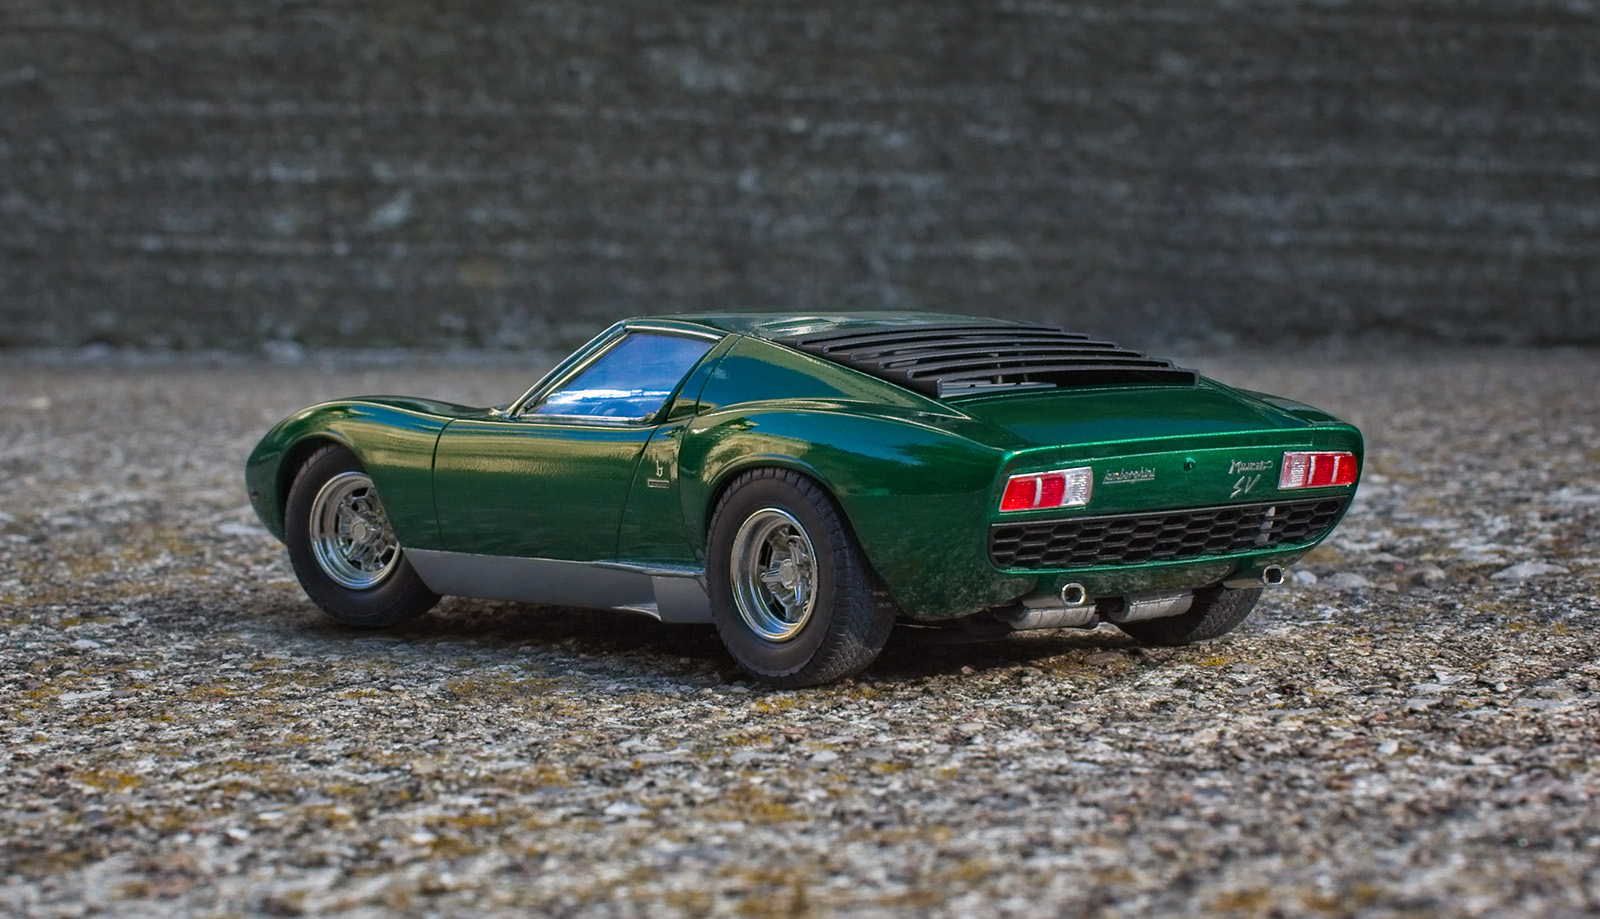
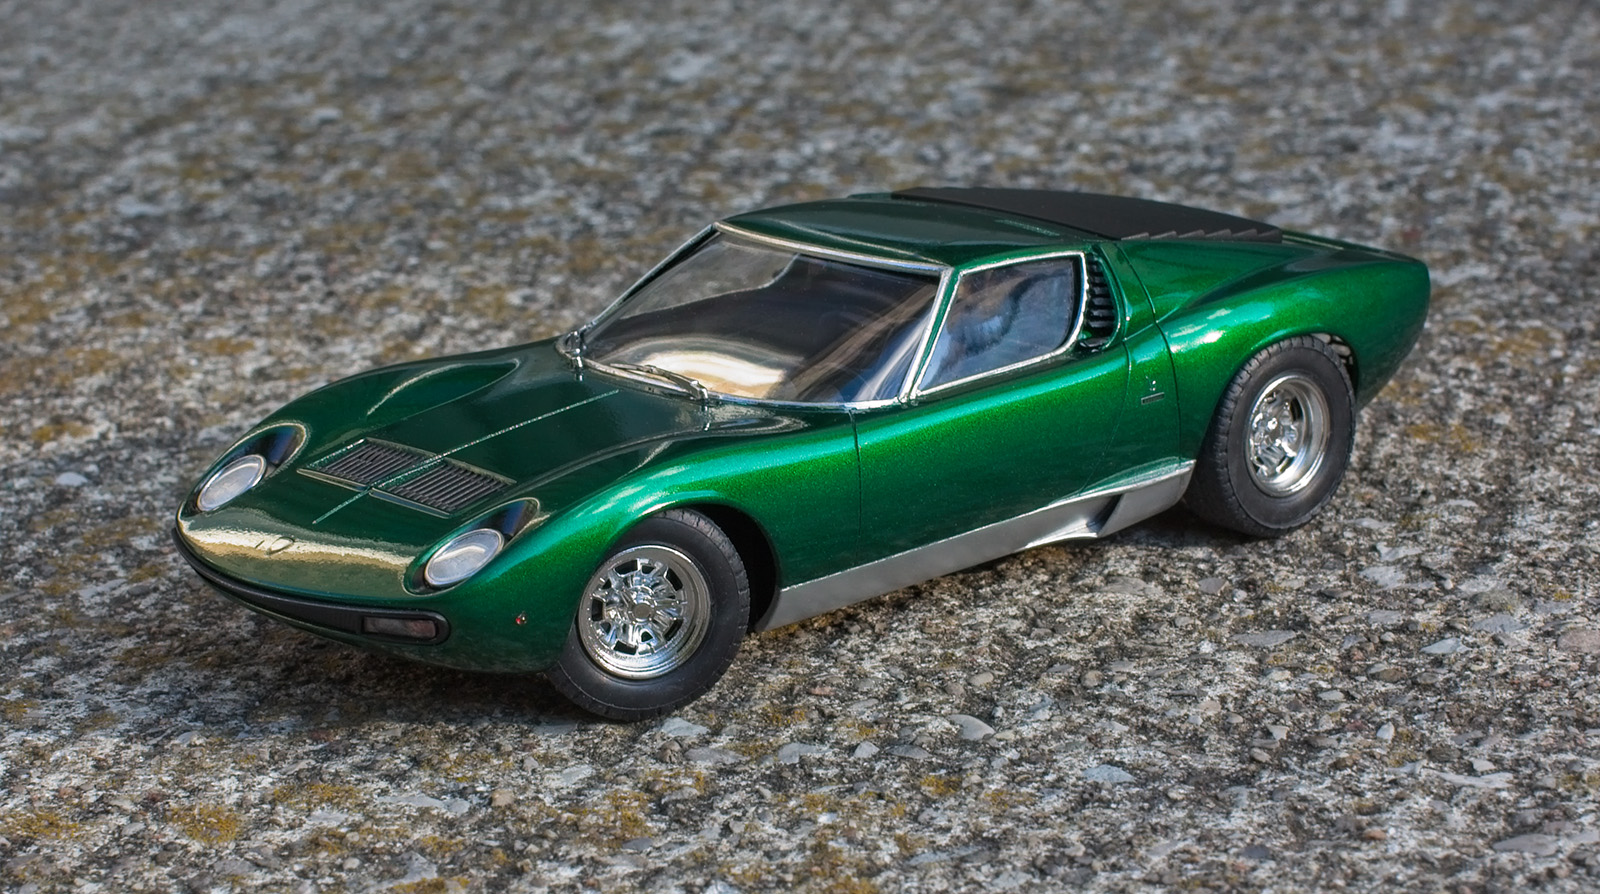
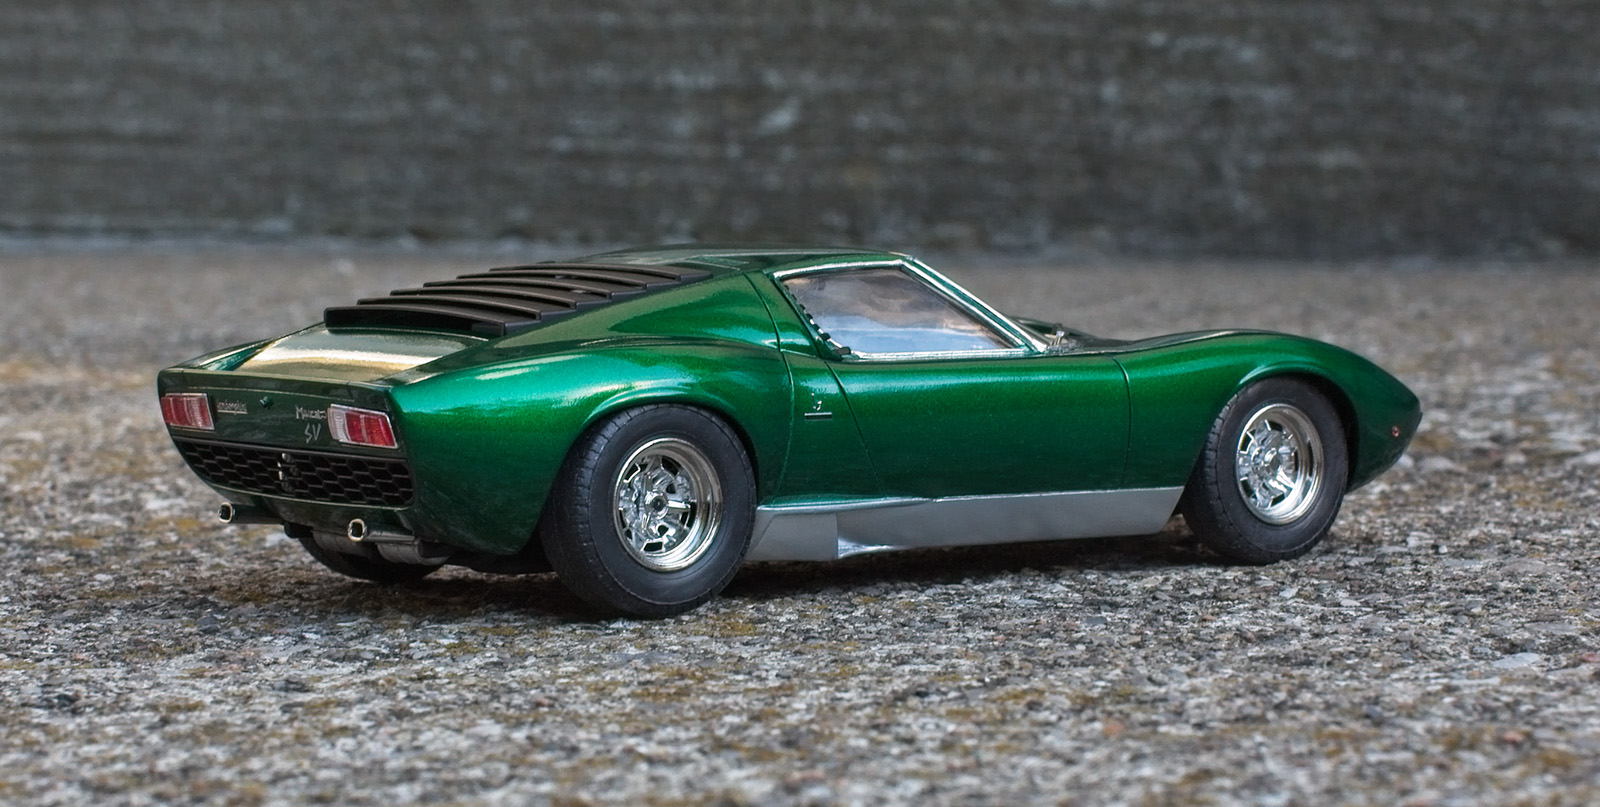
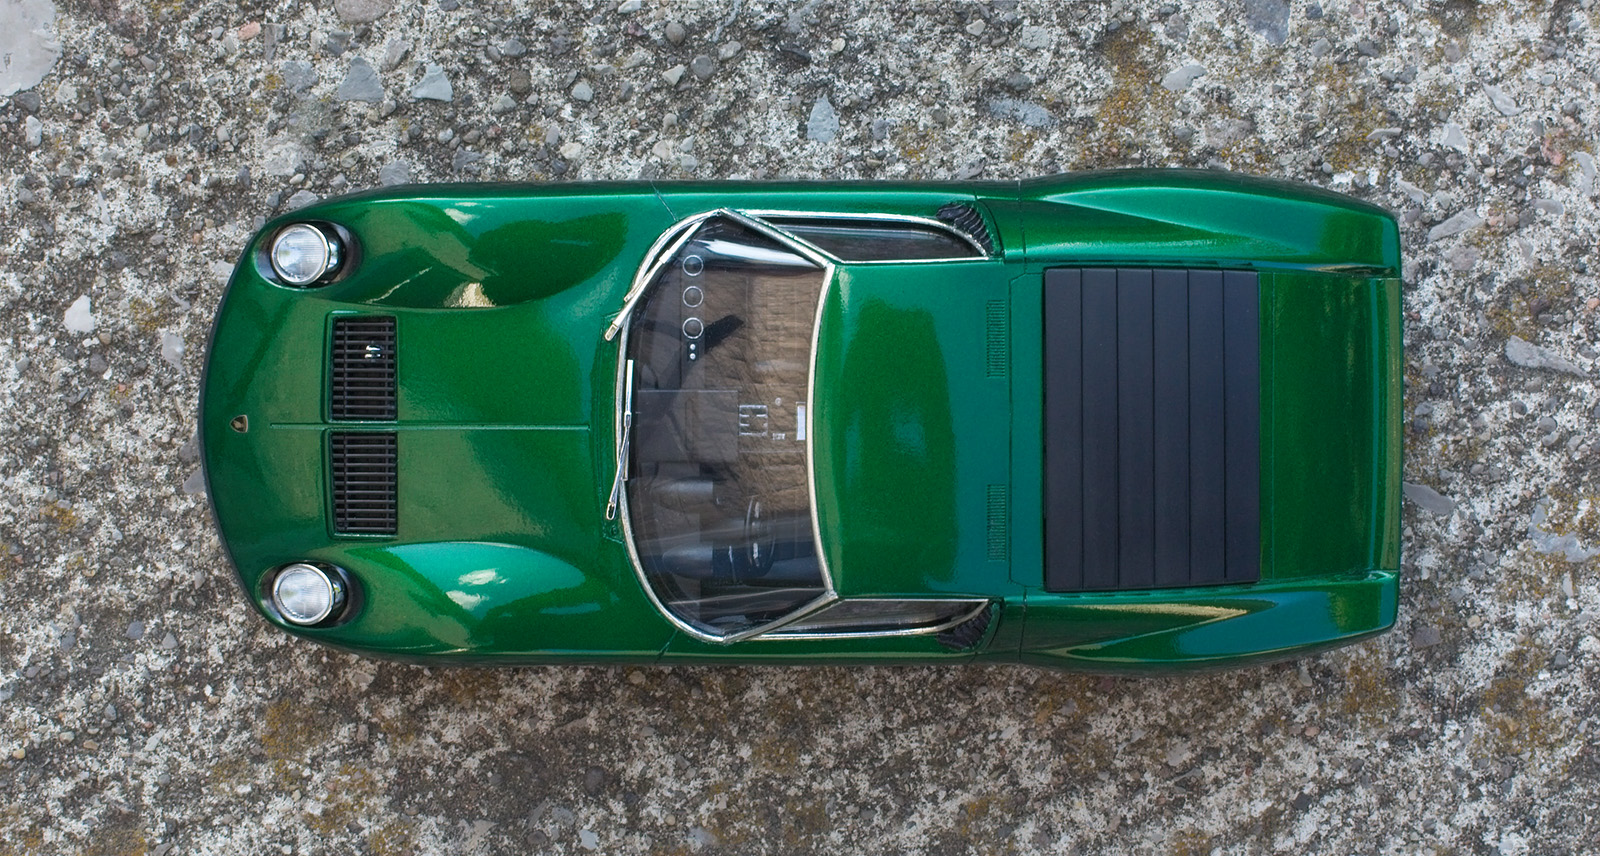
Thank you kindly @David G. @Can-Con @mustang1989 @chris chabre. Definitely a few errors made and new techniques learned along the way. The photos flatter the build a little, however, overall I'm pleased with the final result. ? Cheers!
-
All done! Took some photos this afternoon. Many thanks to all those who gave me good advice along the way. Cheers! ?
-
Hasegawa Lamborghini Miura Rear Louvers
70 Sting replied to 70 Sting's topic in Car Aftermarket / Resin / 3D Printed
I have received a replacement set of louvers courtesy of a forum member. -
I want to send a huge thank you to @Dann Tier for generously sending me a replacement set of louvers for the Miura.
-
Thanks @slusher
-
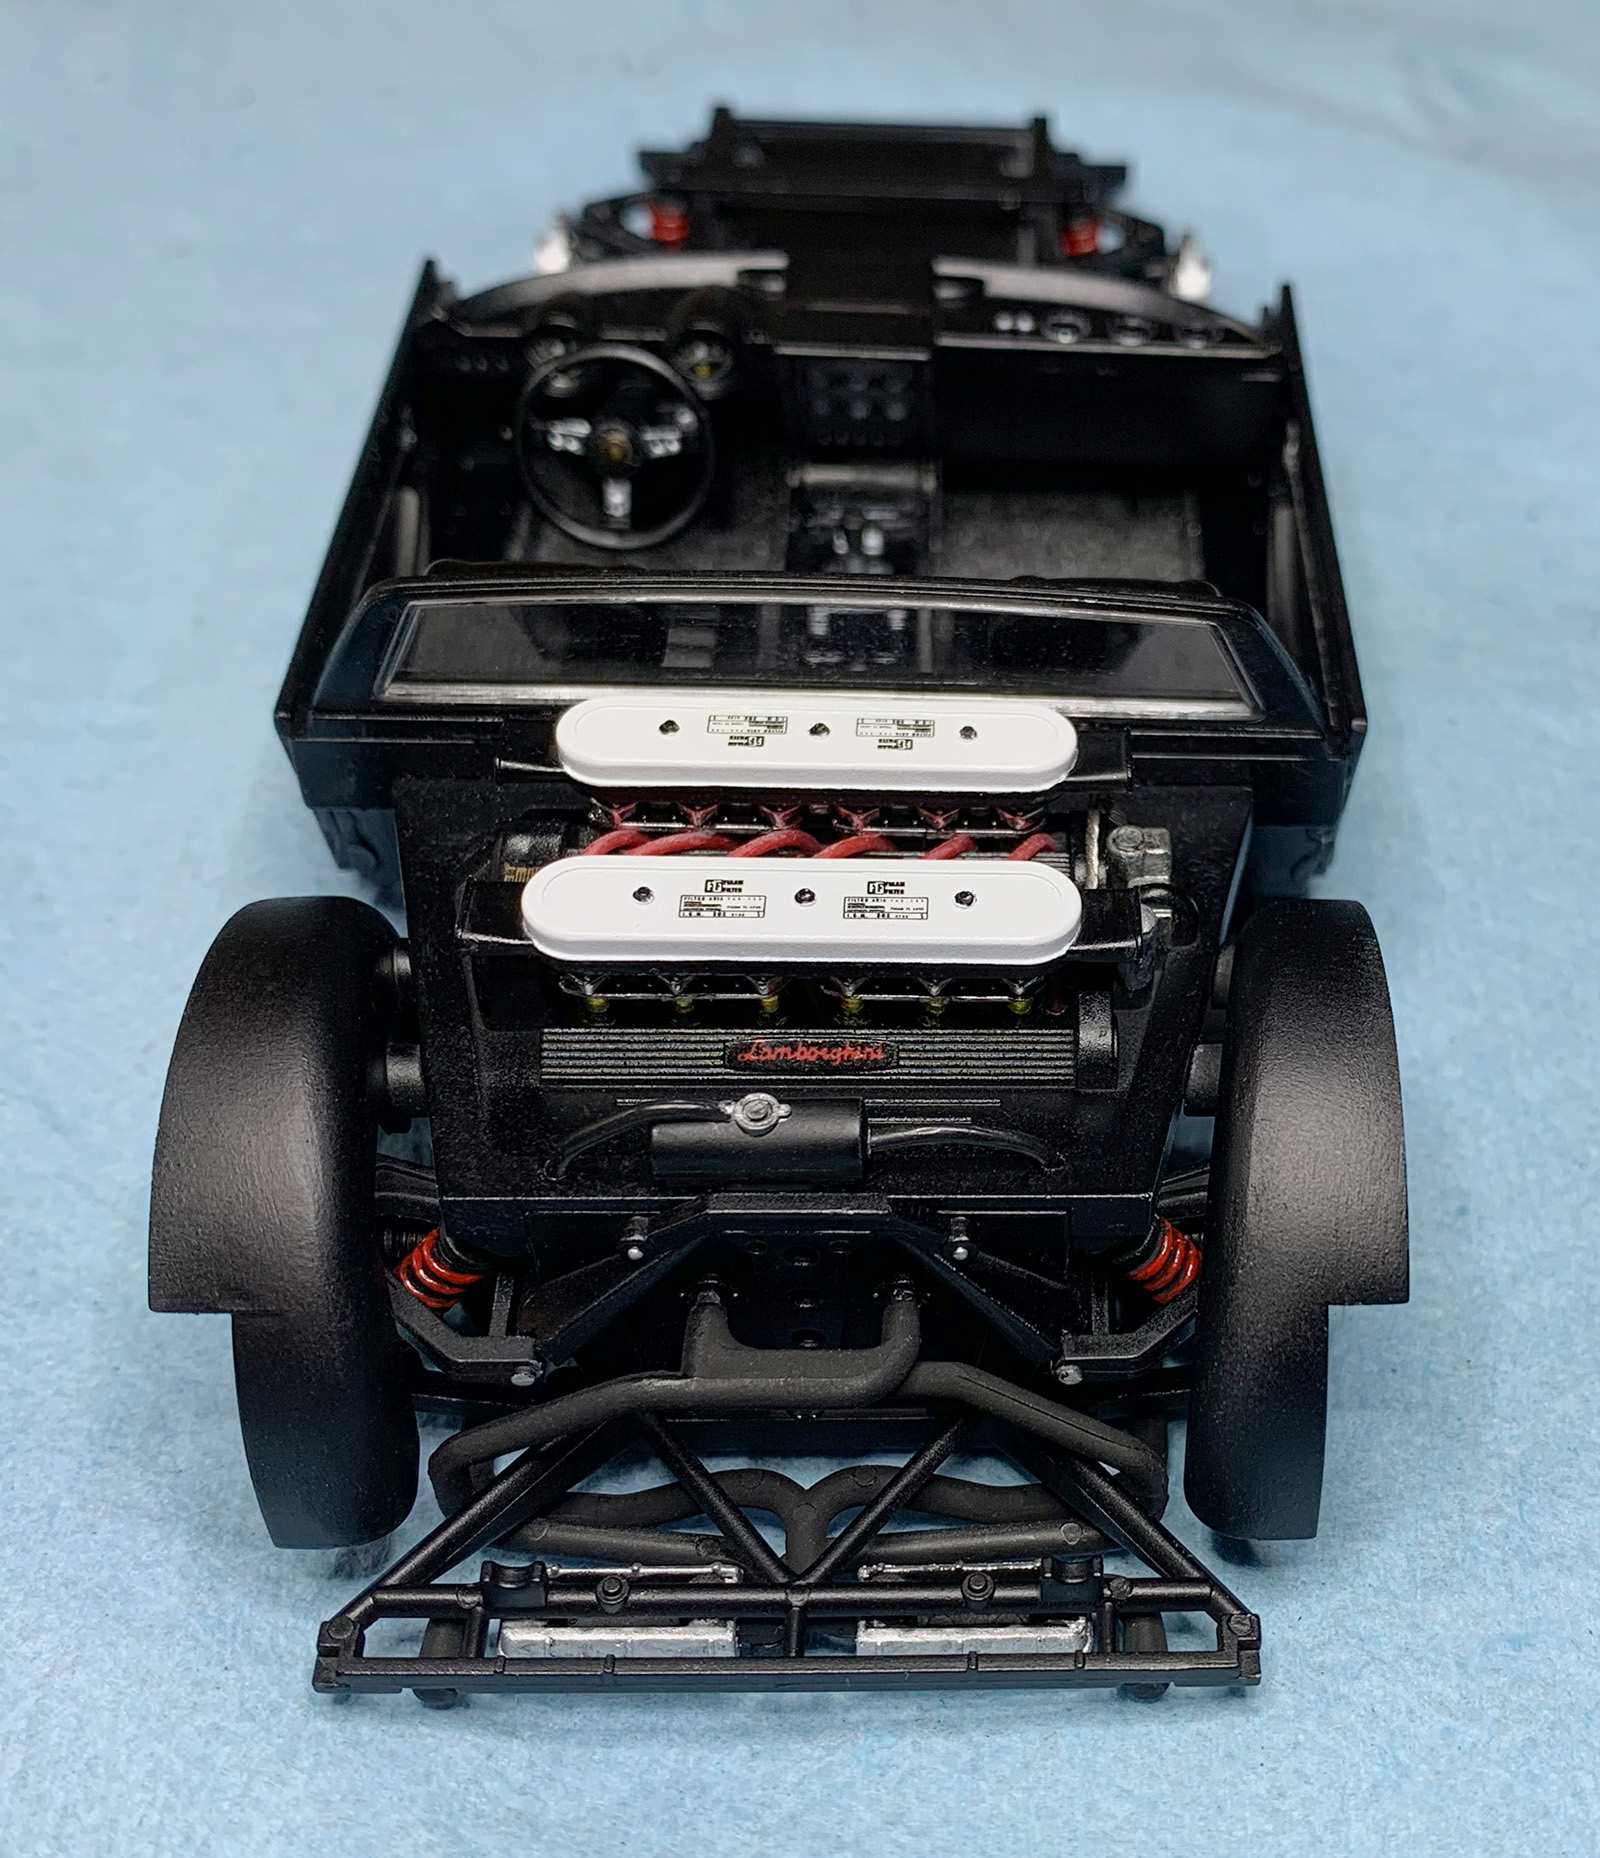
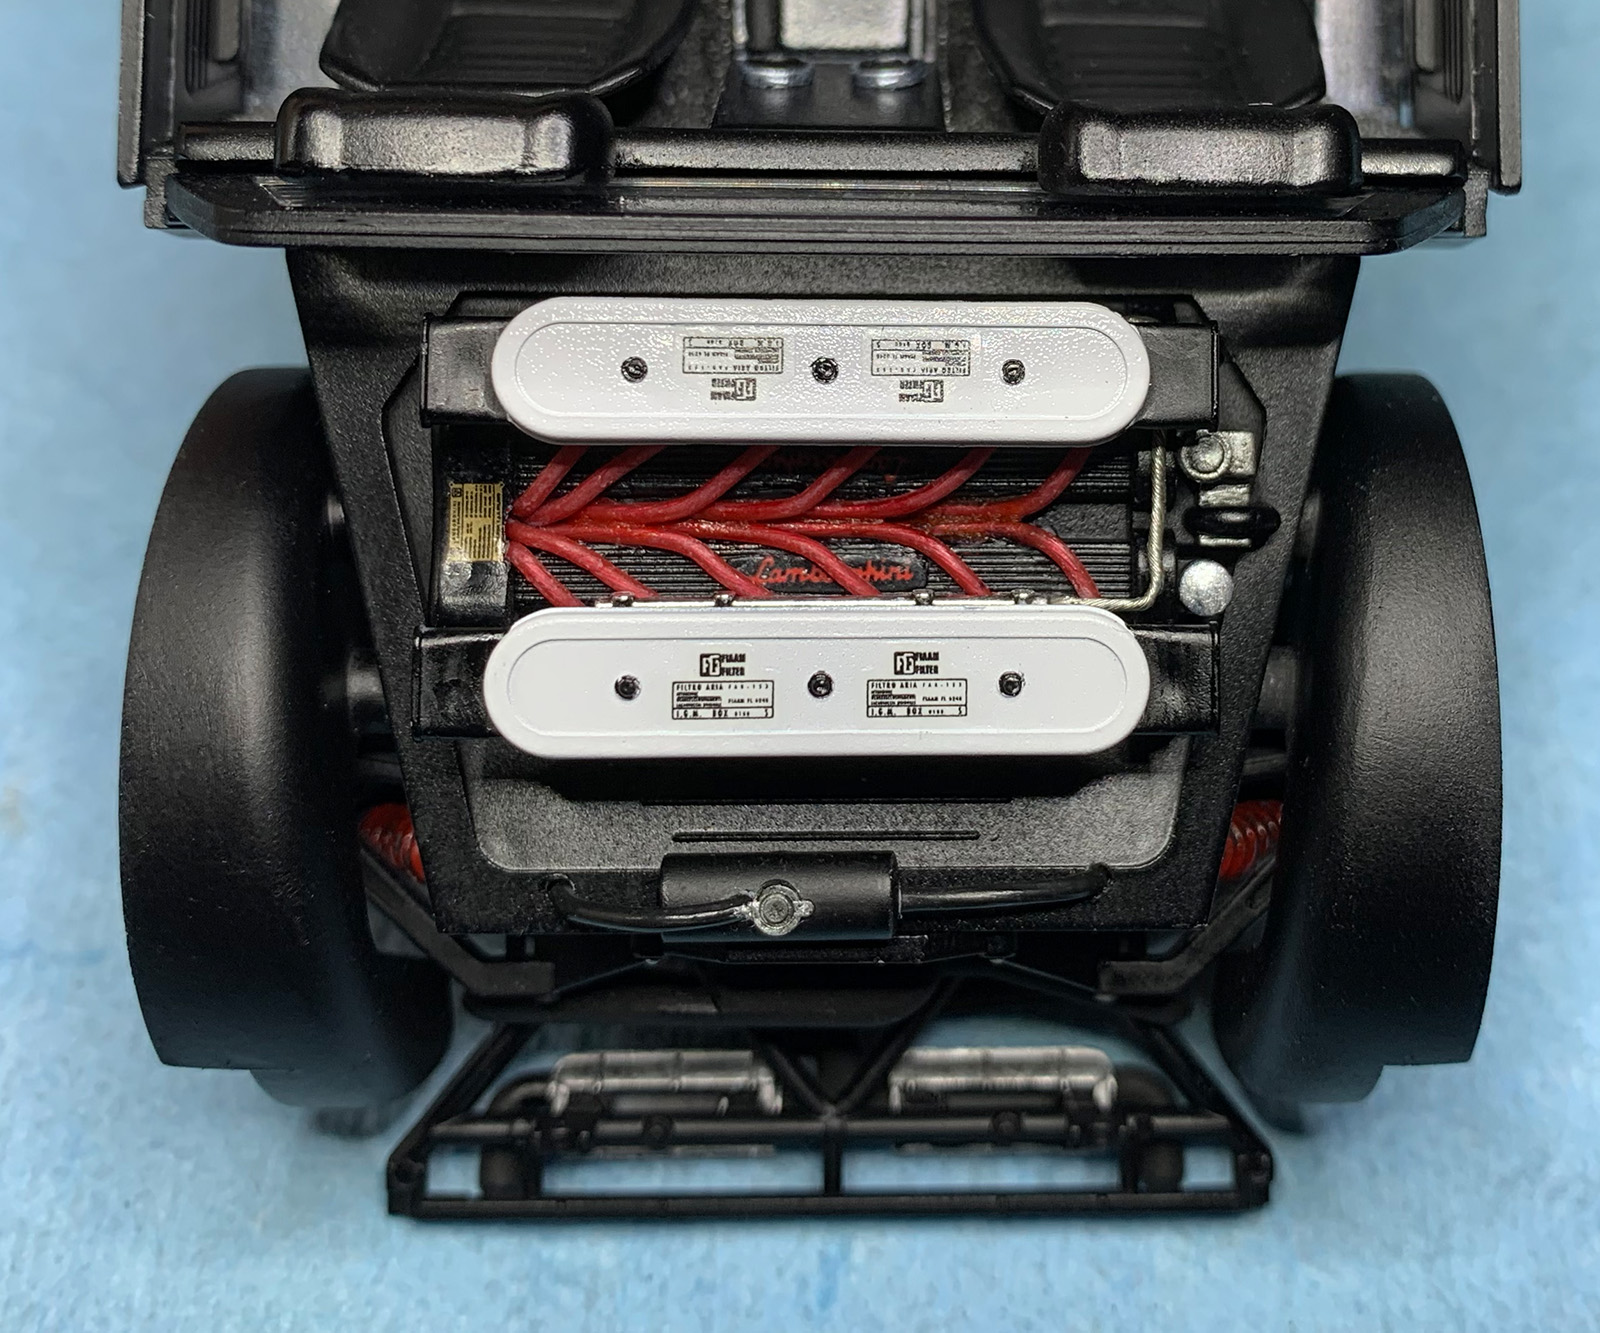
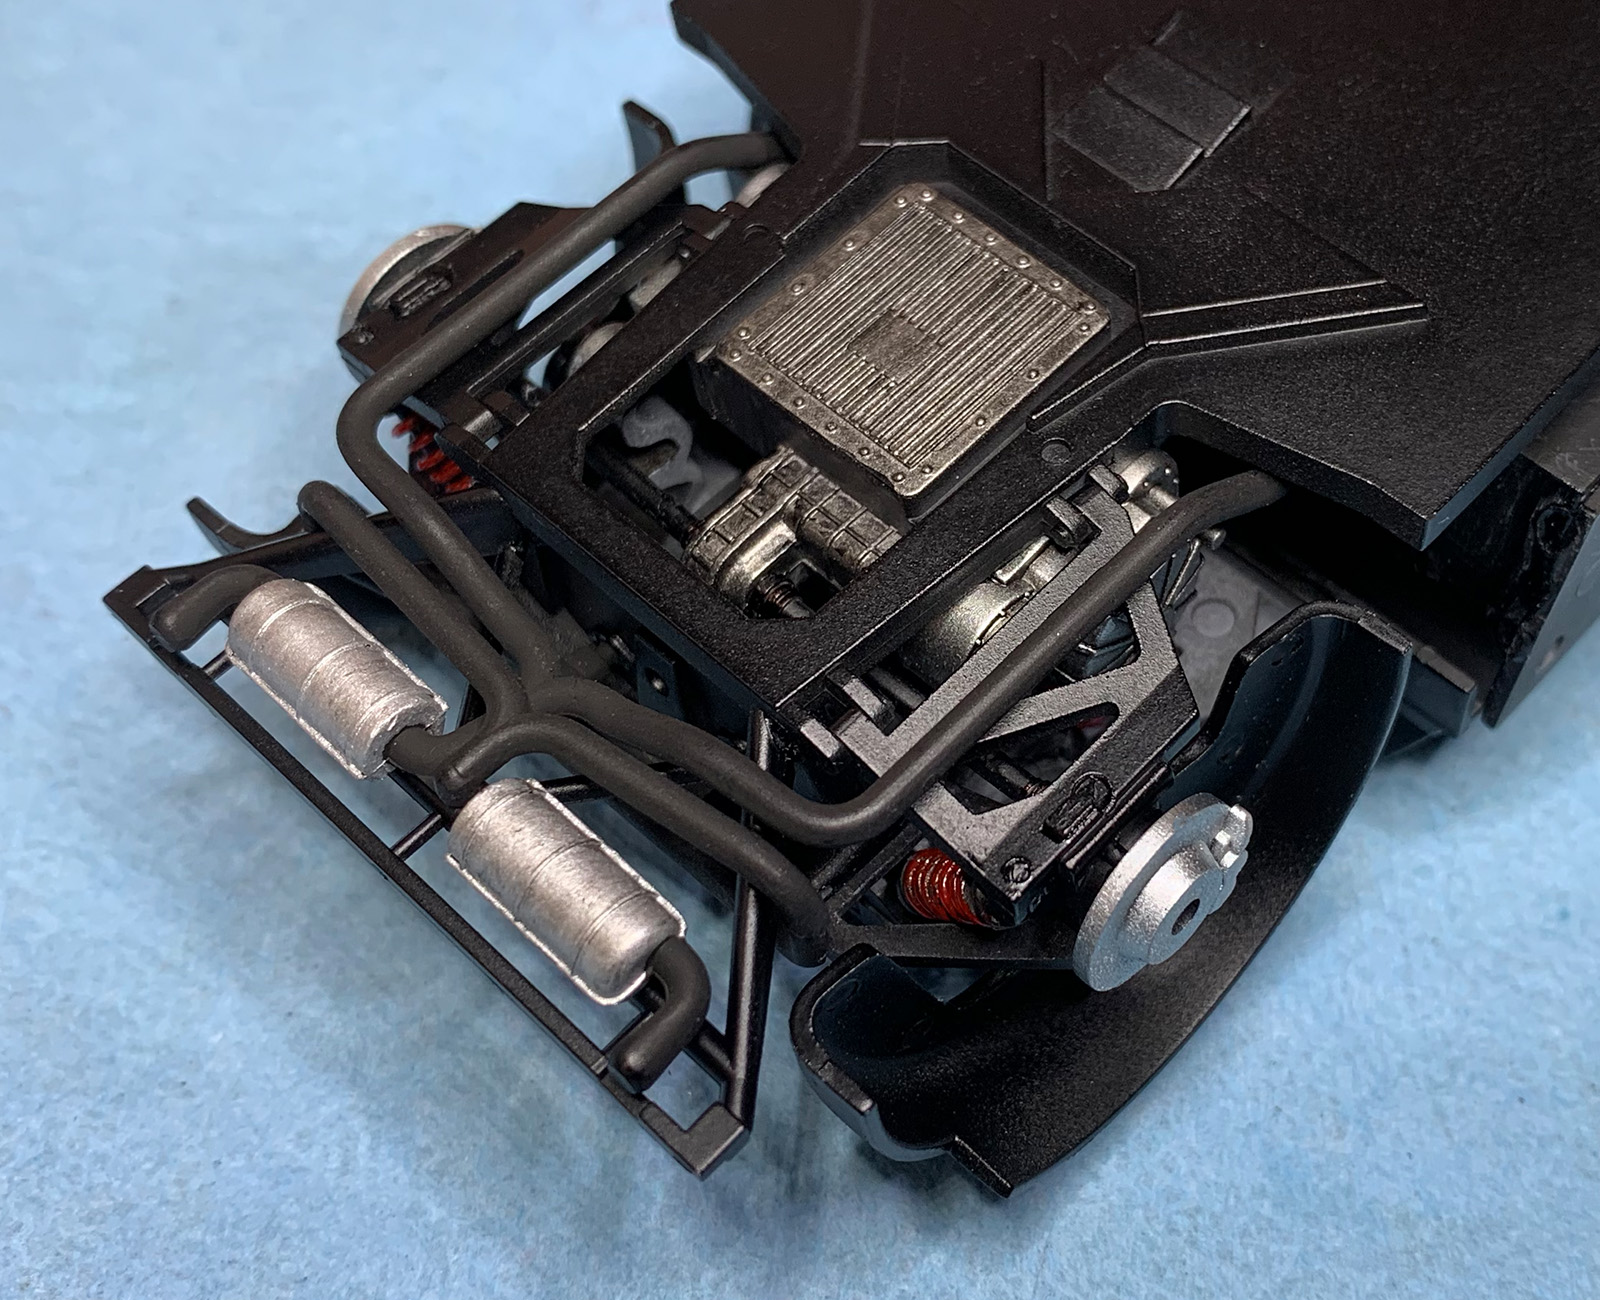
Engine and chassis are complete. Tried my hand at adding some wiring - turned out ok, I guess. It's not to spec but rather what I thought looked interesting. On a side note, what a difference a quality pin vise and drill bits make - no more skipping across the surface like the cheapie, generic set I bought off Amazon. Thanks for looking.
-
@Modlbldr Great minds think alike ?. Interesting that you sprayed green on top of the silver before applying the candy green. Was that to reduce the number of candy coats required? How did you dull the chrome? Panel liner, dullcote, clear smoke? @David G. I think I got lucky with the clear coat - thanks to tips from forum members.
-
Sounds like it’s similar to Meguires Scratch X. I had to remove a couple blemishes in the clear that happened from transporting the model - a blue shop towel had stuck to it - even after 24 hours including 12 in a dehydrator. I used some wet sandpaper and Tamiya Finish compound but it didn’t seem to work as well as Novus #1. Yet more lessons learned. Beginning to wonder if a problem-free model is even possible. ?
-
This past weekend I rolled the dice and sprayed Tamiya X-22 thinned 1:1 with Tamiya Lacquer Thinner Retarder type. I applied 3 lighter coats and 2 wet coats with about 10 minutes dry time in between. It went on better than I expected and hid the grainy texture in the candy coats. However, not sure I want to continue using X-22 as it takes forever to dry - even after 2 days and at least 12 hours in a dehydrator (ask me how I know, as they say). Been hearing some good things about Future floor polish or perhaps I'll try Tamiya LP-9 or decanted TS-13. Any thoughts on these? Thanks!
-
Thanks for the heads up, @Venom. No doubt I would have been freaking out. It's very difficult for a newbie to sort through and determine the best way to proceed - 'build in layers', 'spray it on heavy or you won't get a glossy finish' < I'm sure both methods worked for those who used them. Judging by the excellent results in your before and after photos, I have a little more confidence going forward. It makes sense that the glossy finish comes from proper sanding and polishing. @Can-Con Are you saying that the lacquer thinner used to thin the clear could ruin the acrylic paint underneath? I'm using all Tamiya products. I would say 75% of the information/posts I could find used Mr. Color Lacquer Thinner or Tamiya brand with the remainder being mostly Tamiya X-20A. I recall someone saying that IPA dried too quickly... wait, now that I think about it, Tamiya has a paint retarder that slows down the drying time and I believe that's what he used with IPA. There was no real mention of what type of paint they were applying the clear on top of. Hmm, more stuff for me to think about ?
-
Hey Alan, I used a Tamiya rattle can on my previous model and was quite happy with the results - way better than the hardware store offerings I had used prior. Of course part of that was me not really knowing what I was doing (much like now). I know there is a 'general' rule about the order in which the 3 main types of paint can be applied, however that's not likely the case in mine or your situation. I'm fairly certain it has to do with distance and the amount of paint applied. I realize there is quite a learning curve when it comes to airbrushing, but it's kinda fun and I'm finding myself looking for things to paint with it. :^)
-
Thanks for the advice, fellas. I guess I'll be learning another new skill - airbrushing clear. Will it hide the slight texture in the paint? I have Tamiya X-22 on hand and after reading various methods of application, I gather the consensus is to thin it with Lacquer thinner, preferably the retarder type, 50/50 or 40/60 (paint to thinner) and sprayed between 15 to 20 psi. There's quite a discrepancy on how it's actually applied. Some suggest multiple light layers until desired thickness or gloss is achieved, other say fewer, heavier applications. Not much mention of drying time between coats. Guess I have some experimenting to do.
-
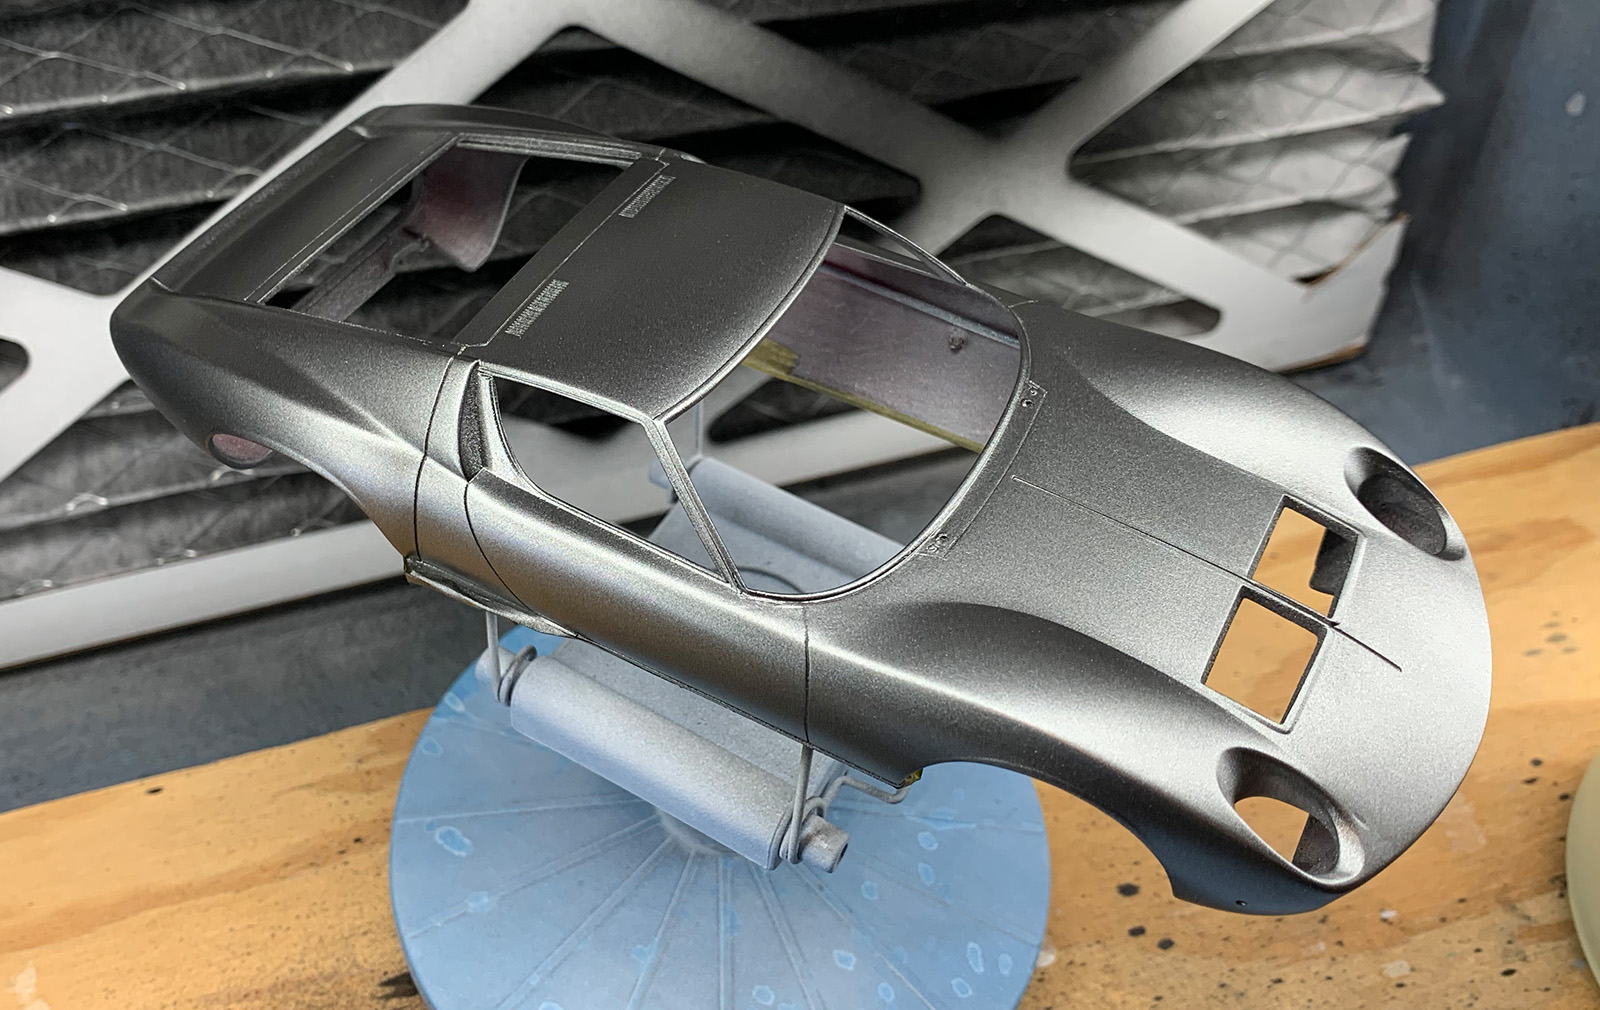
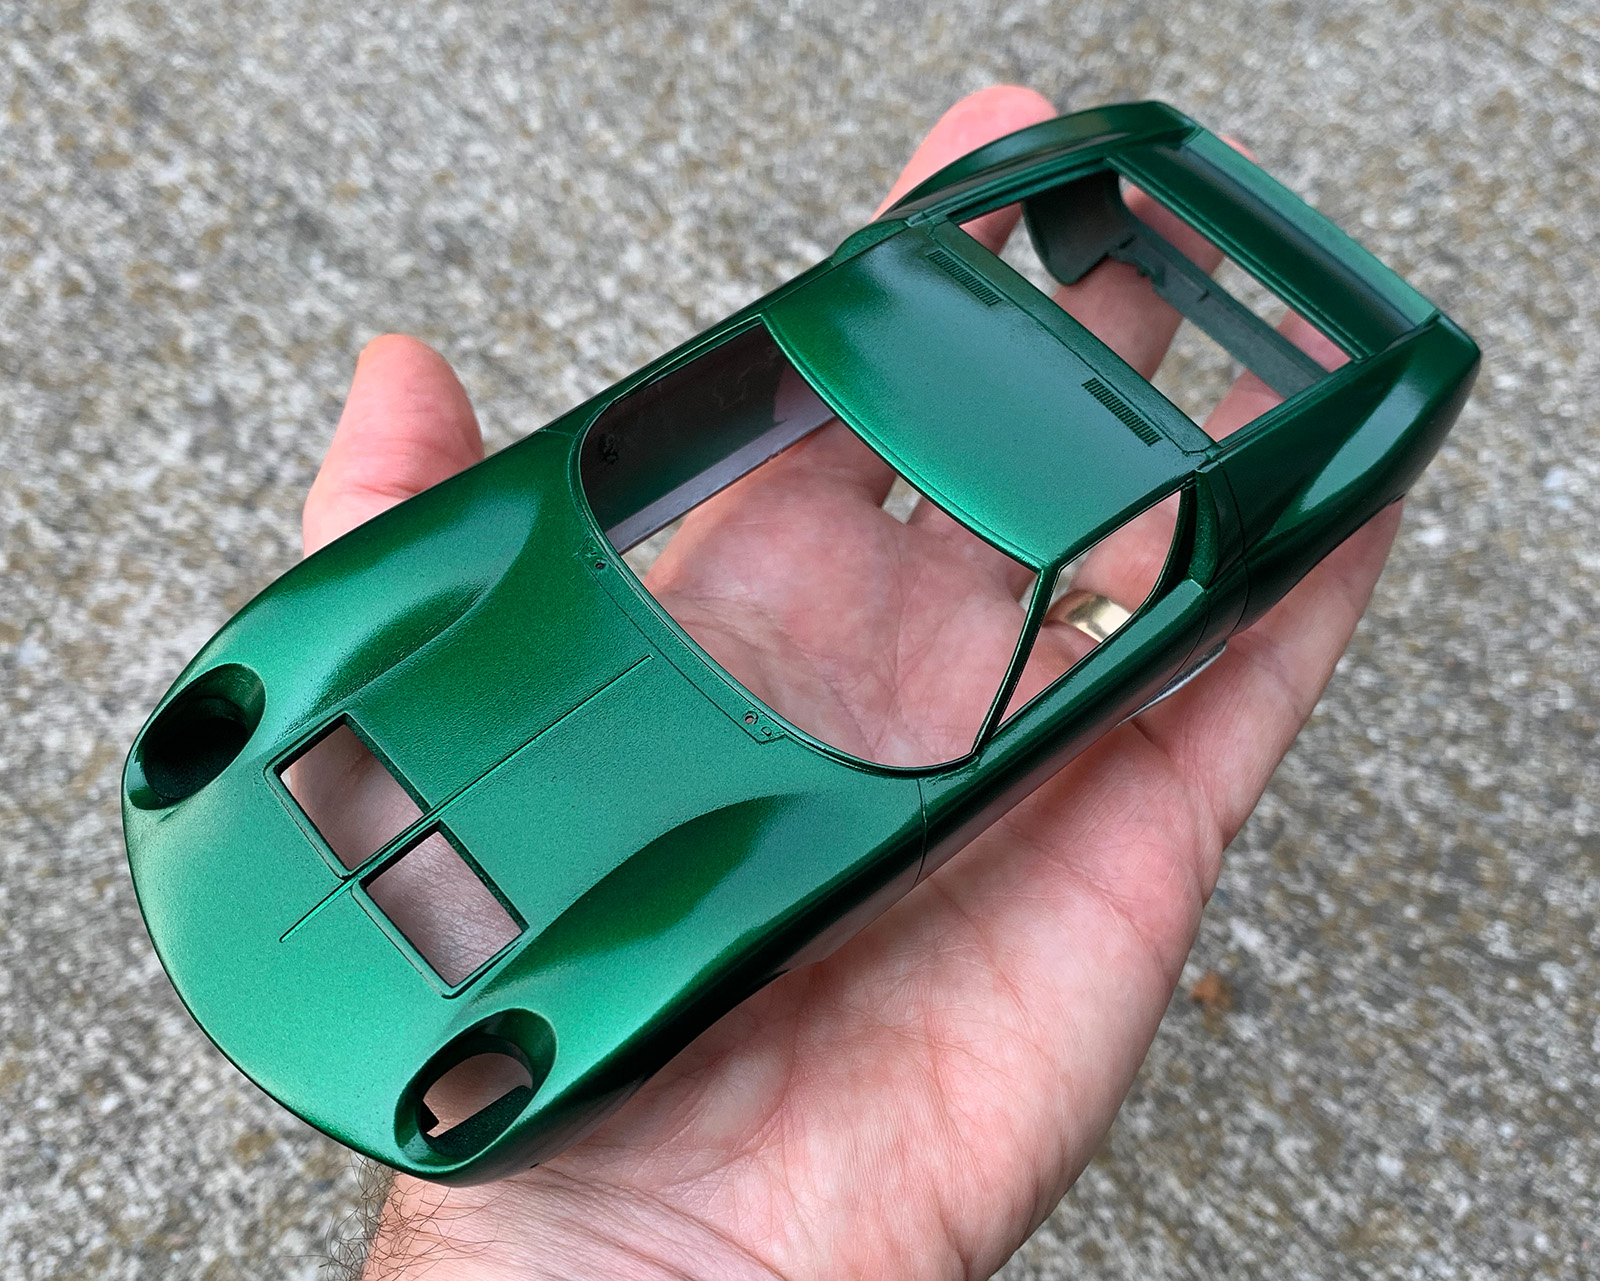
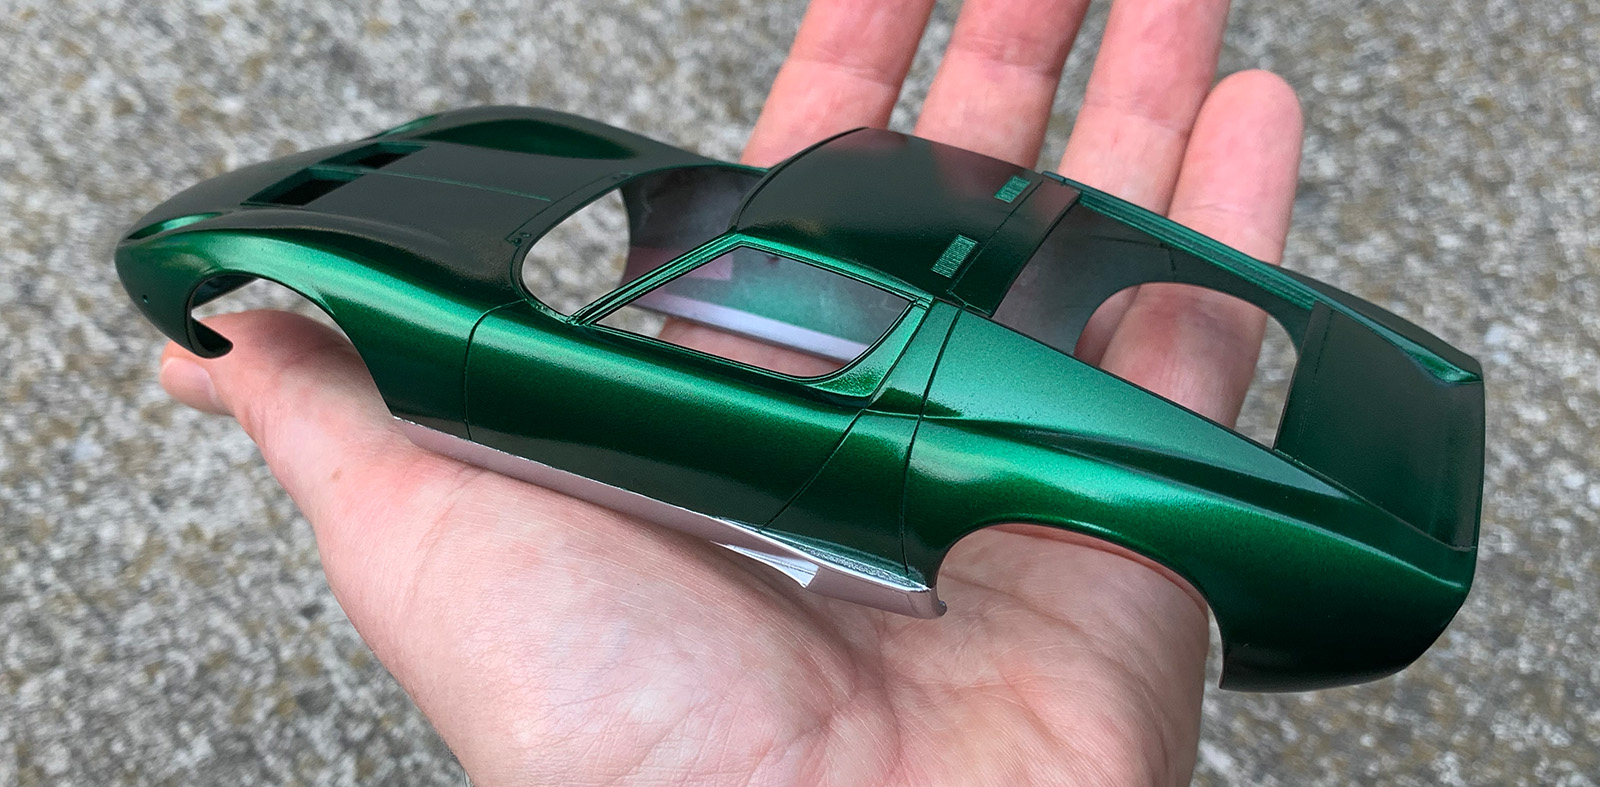
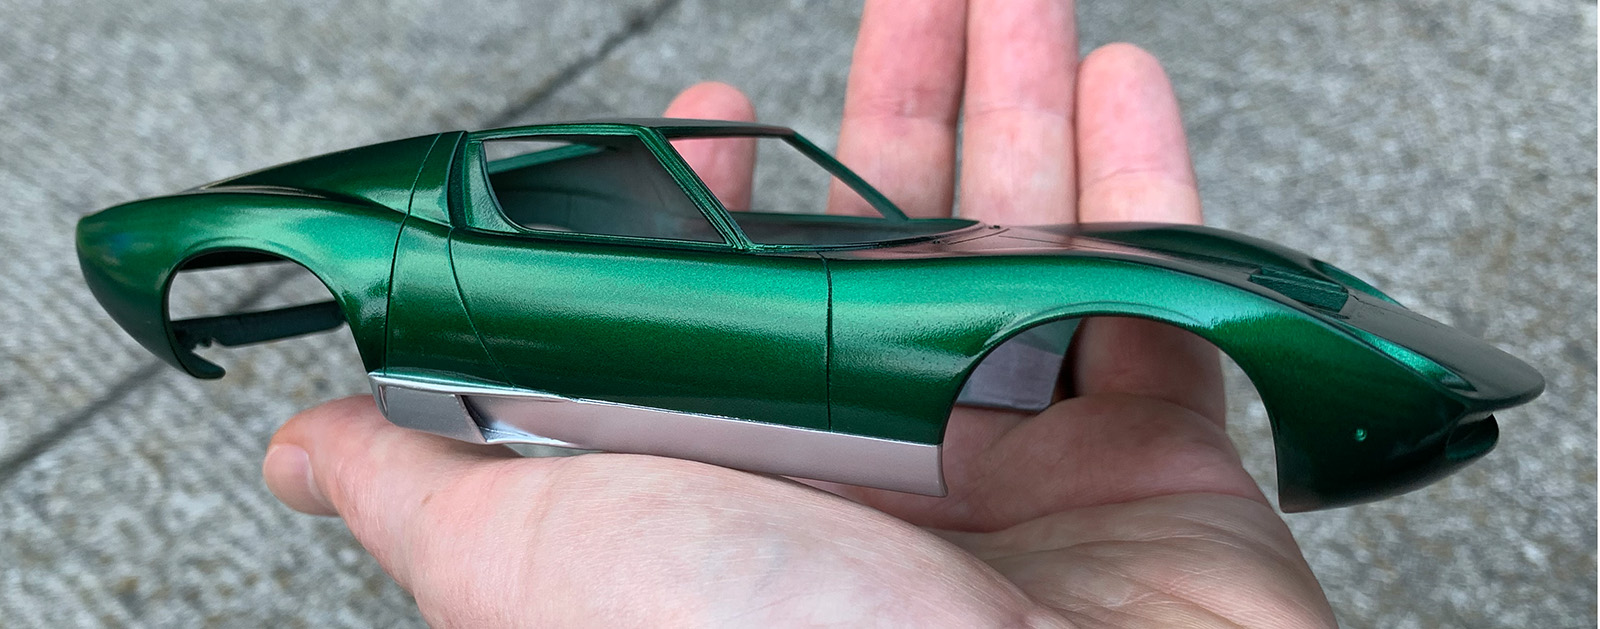
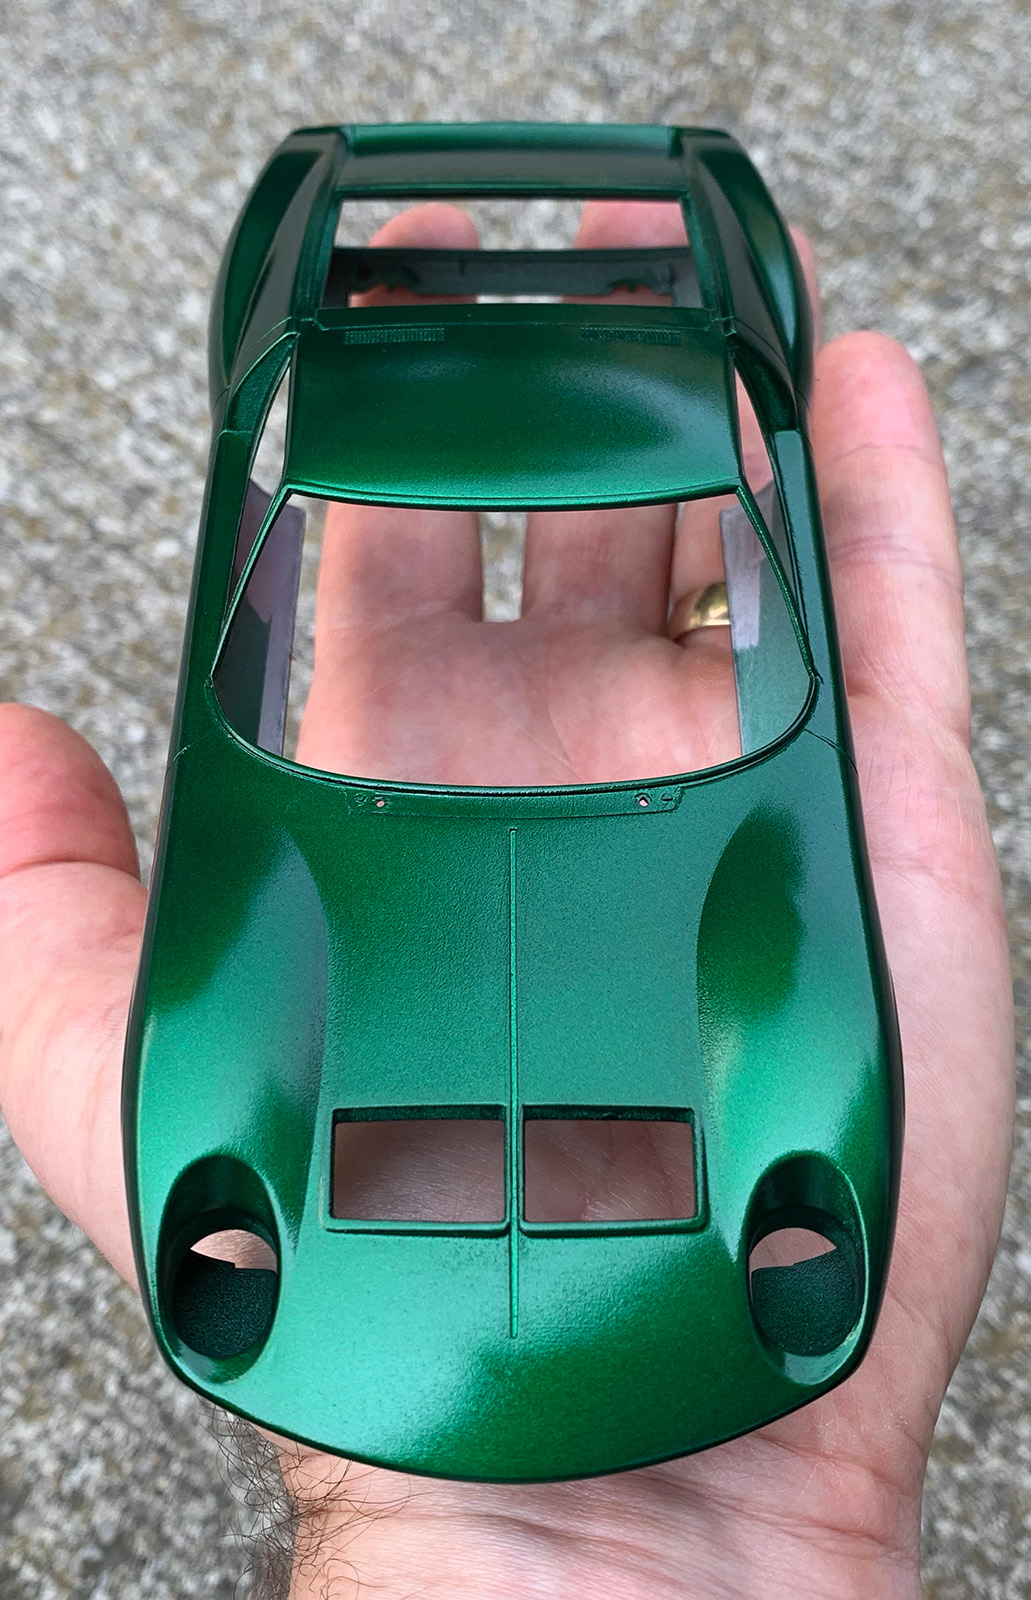
Airbrushing day... nerves were high but I think the base coat went down ok for my first body. Still holding the brush too far away and/or not applying enough paint. I think I'm too worried about runs and orange peel. I sprayed a mist coat, a medium, then heavier 3rd coat with Tamiya X-10 Gun Metal thinned 2:1 with Tamiya Lacquer Thinner. Let it dry for about 1 hour then it was time for Tamiya X-25 Clear Green thinned 1:1 with Tamiya X-20A (for the quicker drying time). I applied a light mist coat, followed by 4 heavier coats with 10 minutes dry time in between. Unfortunately I ended up with some texture in the paint. It did improve over time but I can't imagine it will level out any further after 48 hours. I might try sanding and polishing the candy green at the risk of creating unevenness in the finish. Any suggestions for a starting grit? I also have Tamiya's 3 step polishing compounds.
-
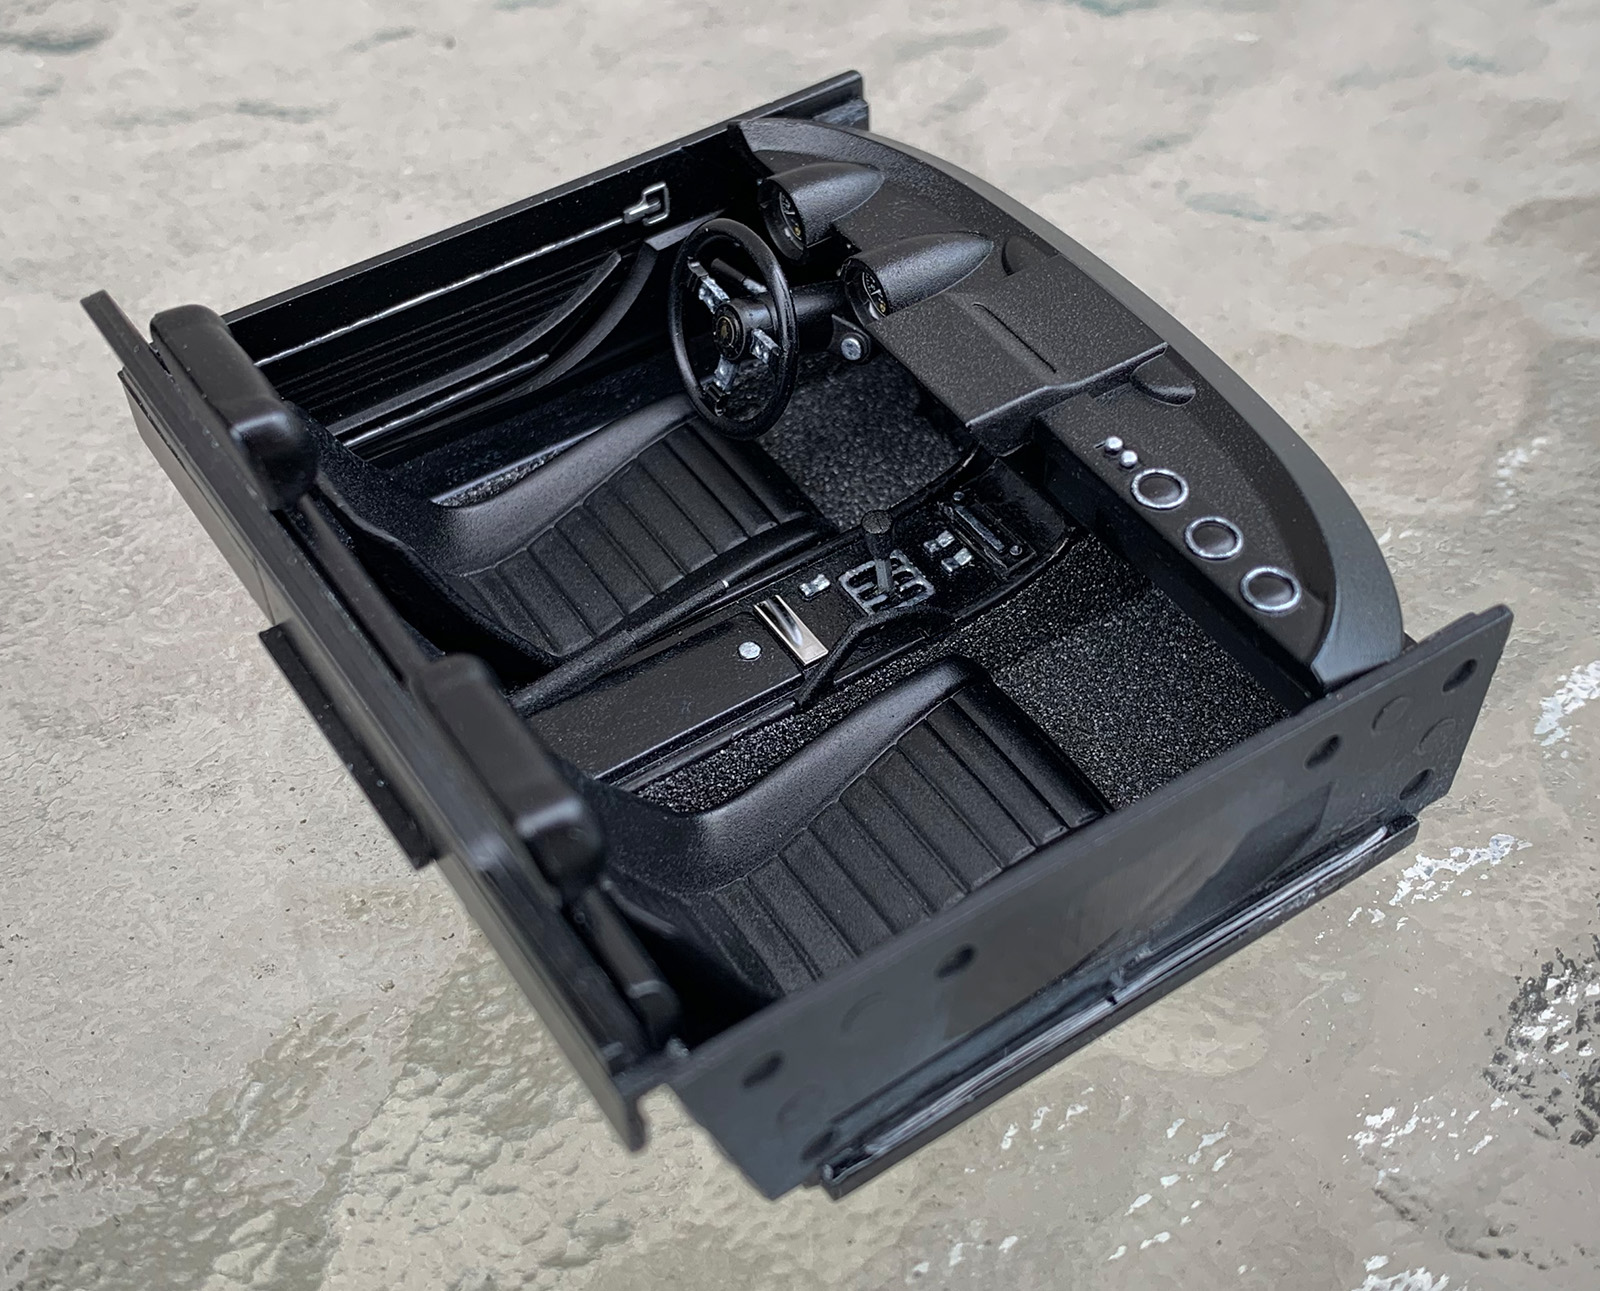
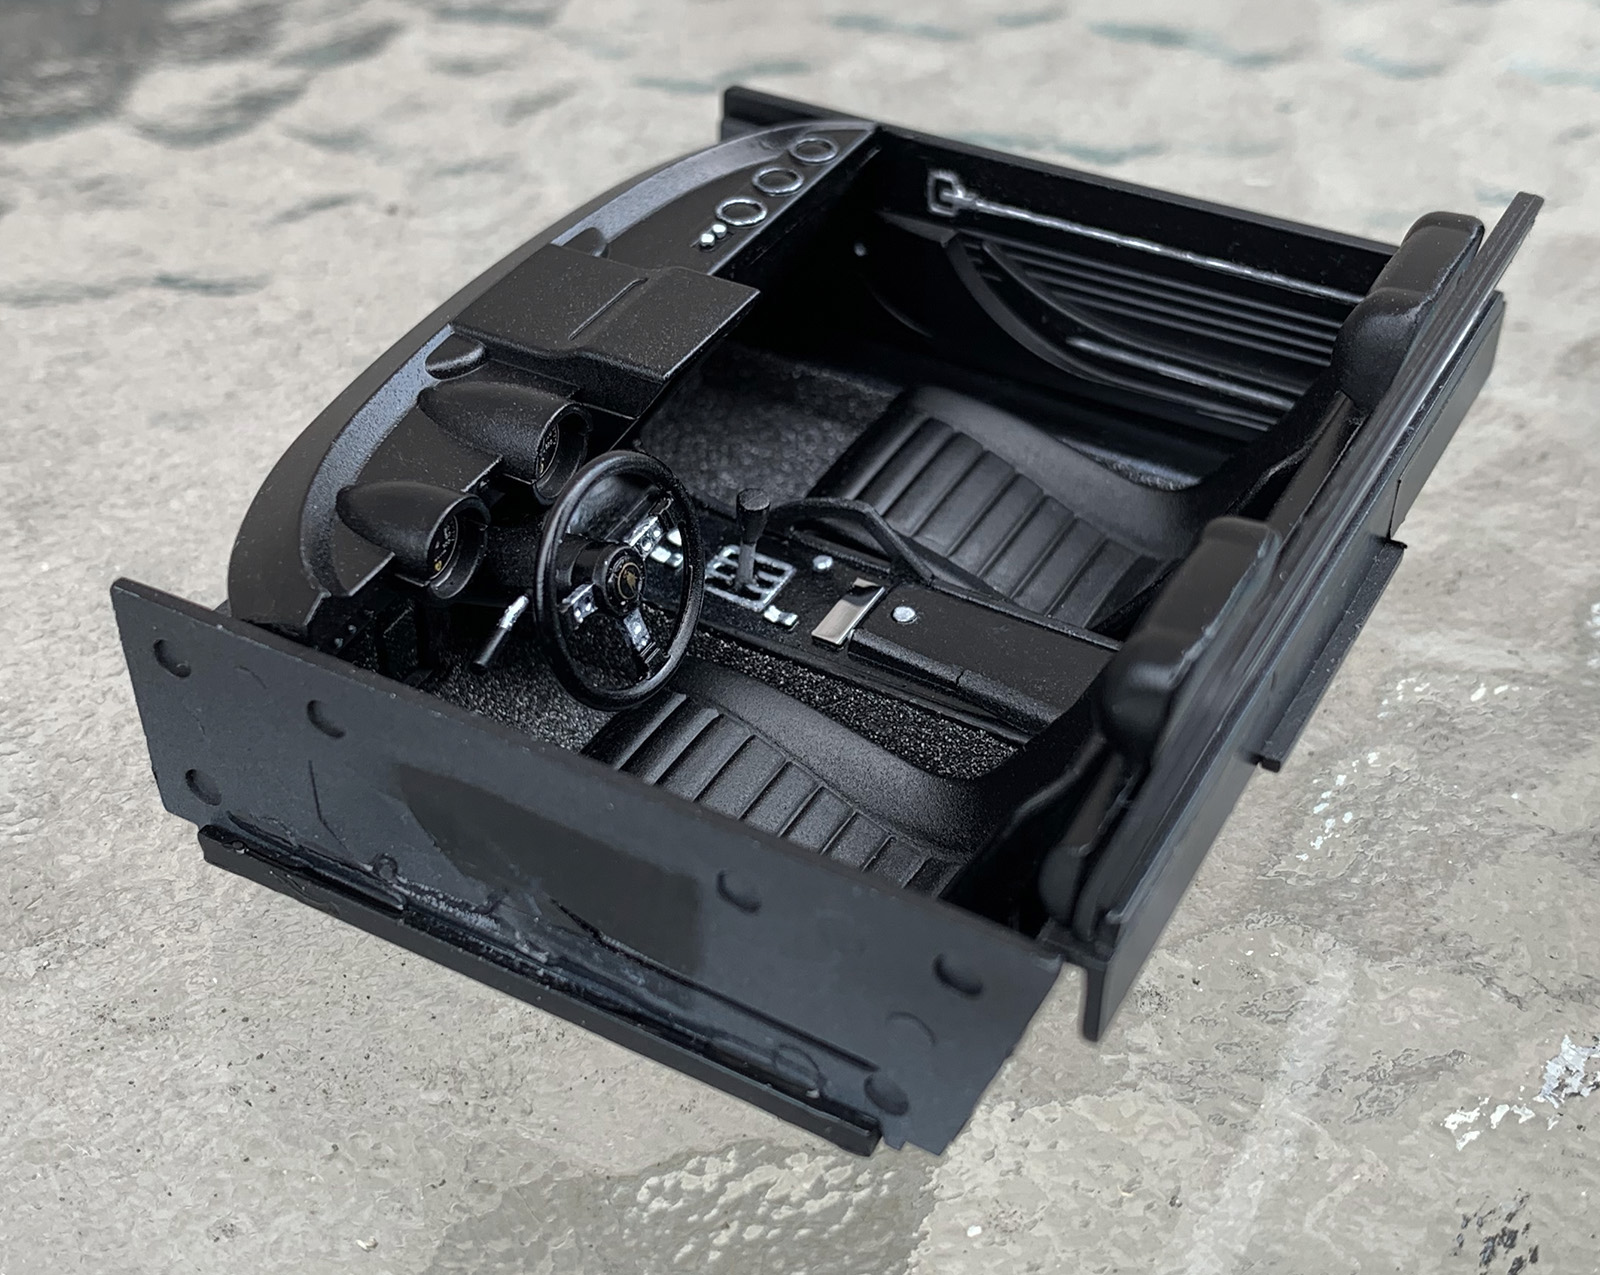
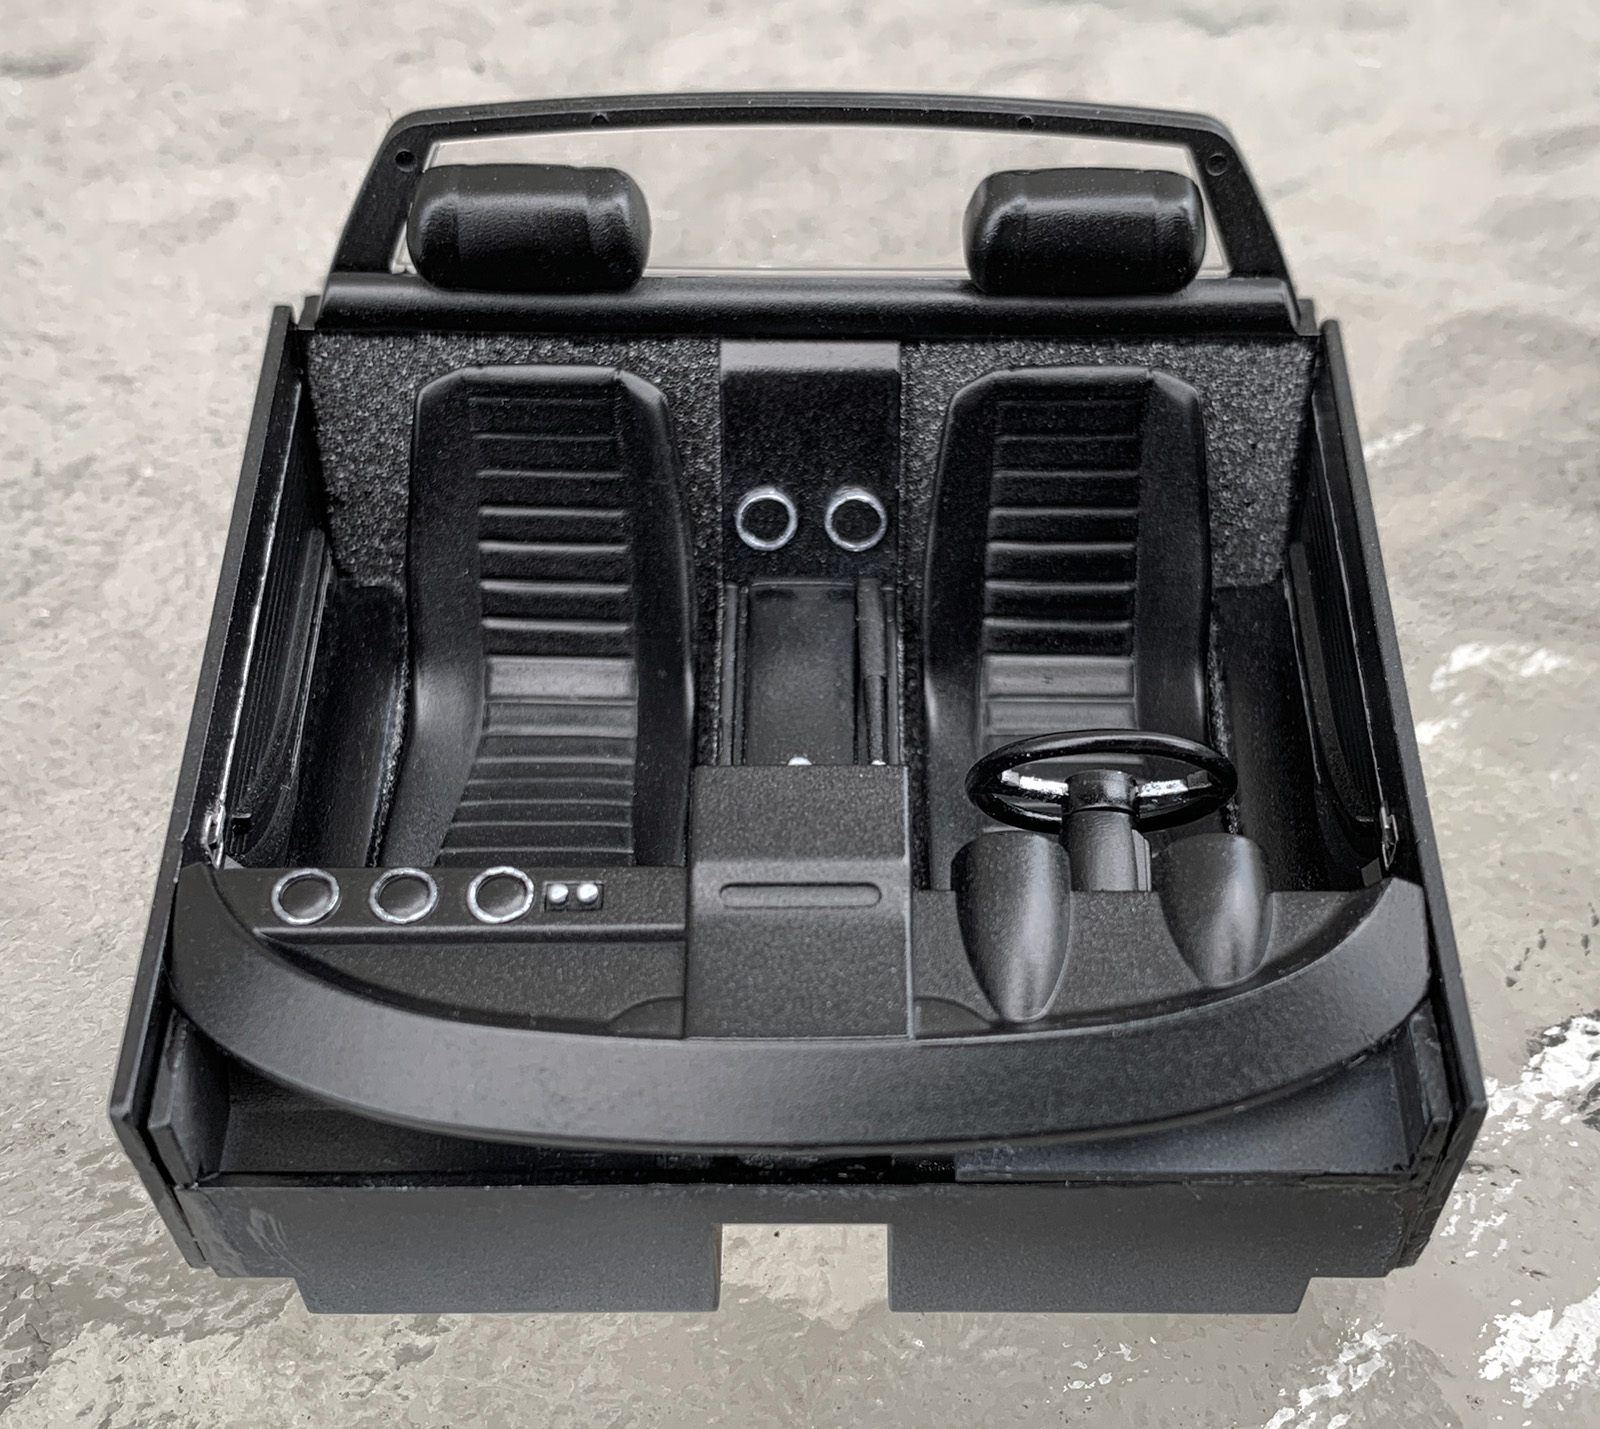
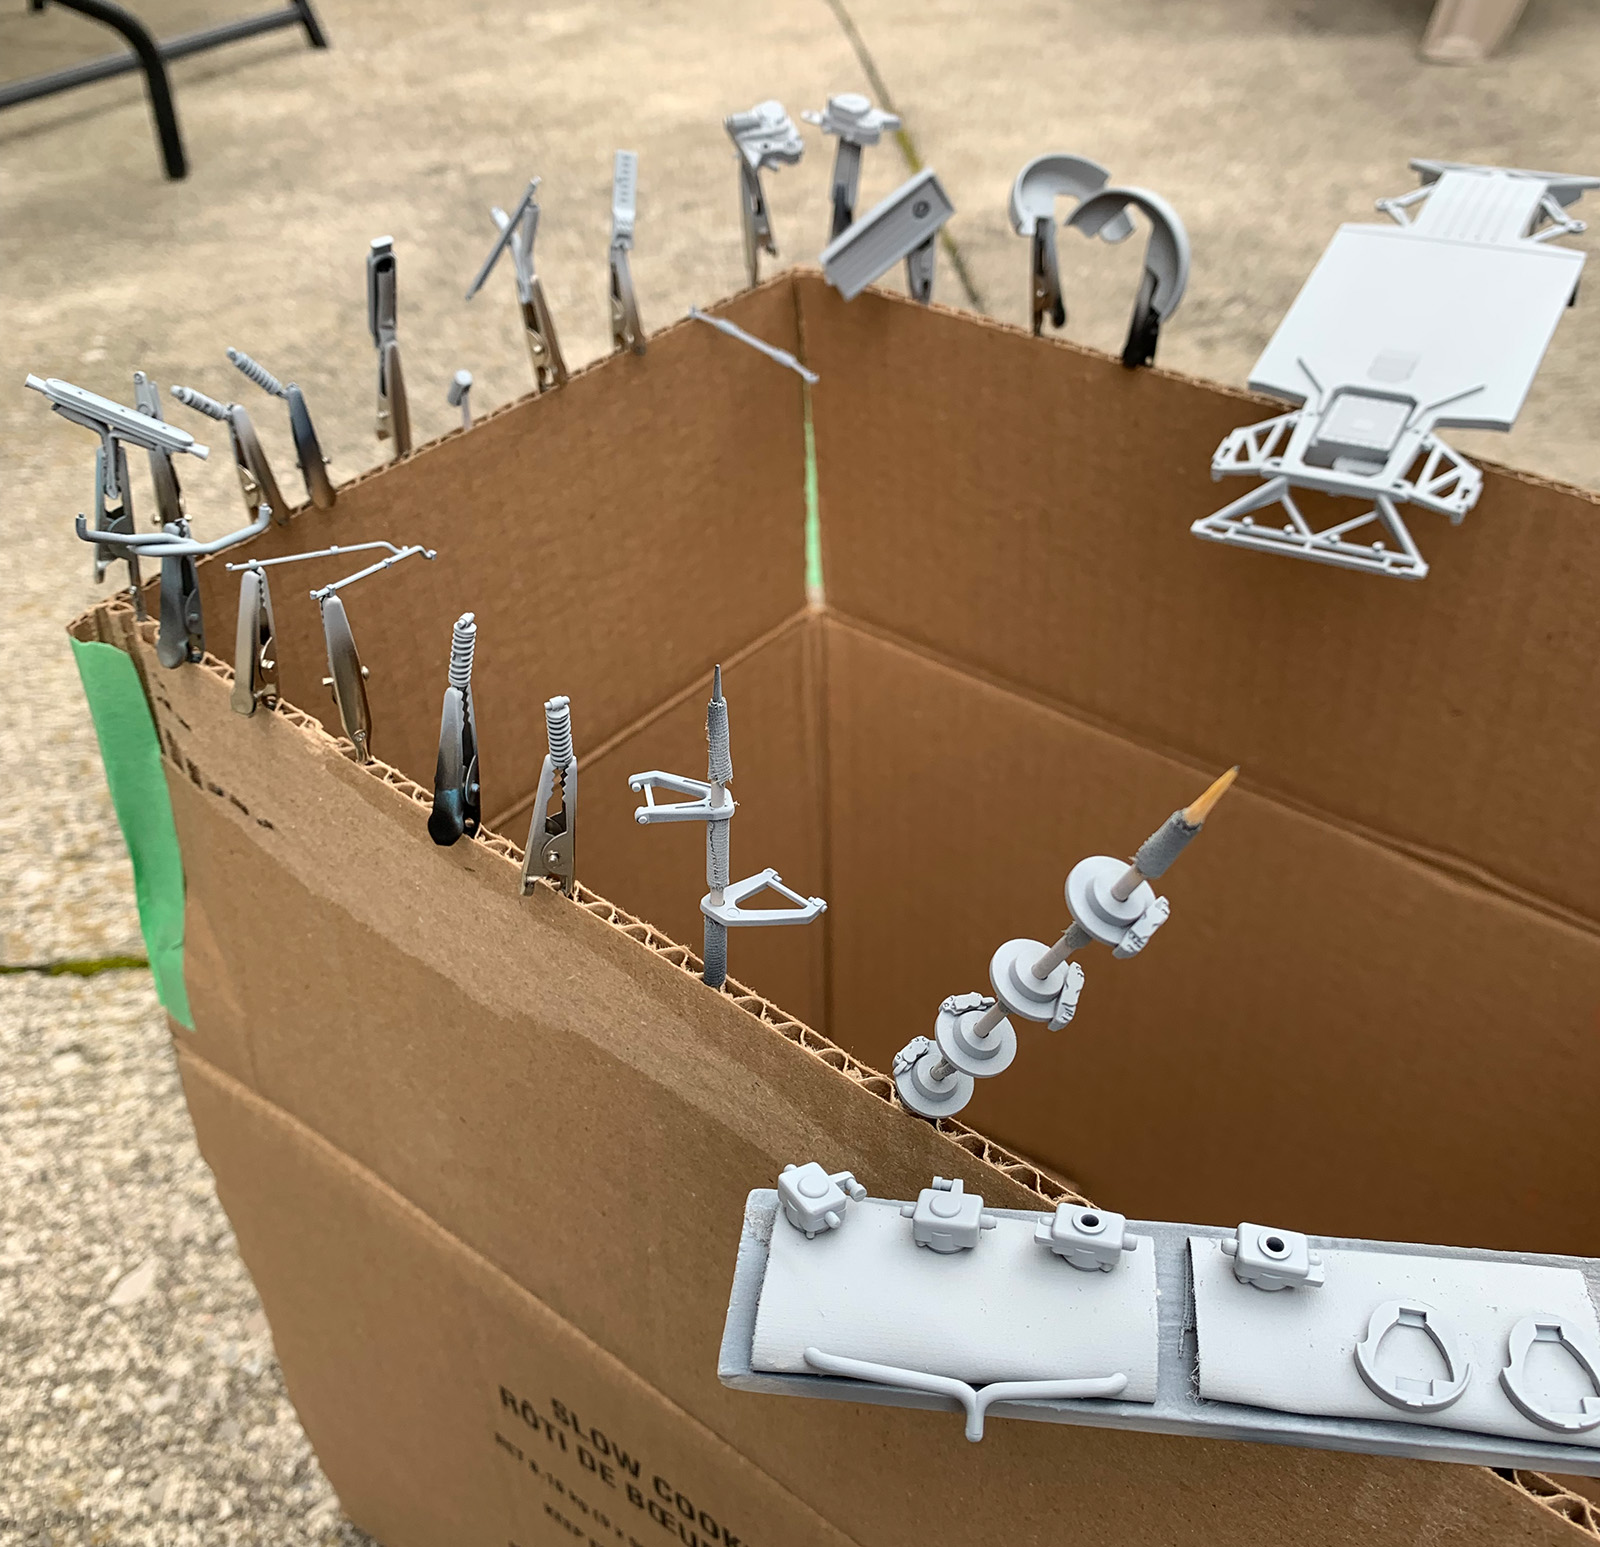
Got the interior completed. Decided to skip the 2-tone black paint and went all Tamiya X-18 Semi-Gloss with gunmetal embossing powder for the carpet. The paint went on a little pebbly but it doesn't show so much in person. No problems with the rear glass - YES!! I didn't have any decal setting solution on hand so I tried using straight vinegar and also mixed with warm water. It didn't work on the 6 smaller gauges but it did work on the speedo and tach. The Lamborghini decal on the steering wheel would not lay down so I tried something I heard on a podcast... Tamiya Extra Thin Cement. The guy said to use it with extreme caution and don't touch it. I put a tiny amount around the outer perimeter and it laid down beautifully. All remaining parts have been primed. I tried using gaffers tape to help hold parts with no obvious gripping/hiding places for the alligator clips as it is stickier than traditional, cheap masking and leaves no residue behind. It held on to the smaller parts pretty well and did't let go under airbrush pressure. Thanks for looking. :^)