Gary Chastain
-
Posts
2,495 -
Joined
-
Last visited
Content Type
Profiles
Forums
Events
Gallery
Everything posted by Gary Chastain
-

£1 Aerodyne-not
Gary Chastain replied to Rockford's topic in WIP: Model Trucks: Big Rigs and Heavy Equipment
Curious to see what you do with it, like your direction already -
Thanks Steve
-
Kenworth C500
Gary Chastain replied to Gary Chastain's topic in WIP: Model Trucks: Big Rigs and Heavy Equipment
Did not know that….hhhmmmm……now you got me thinking. -
Kenworth C500
Gary Chastain replied to Gary Chastain's topic in WIP: Model Trucks: Big Rigs and Heavy Equipment
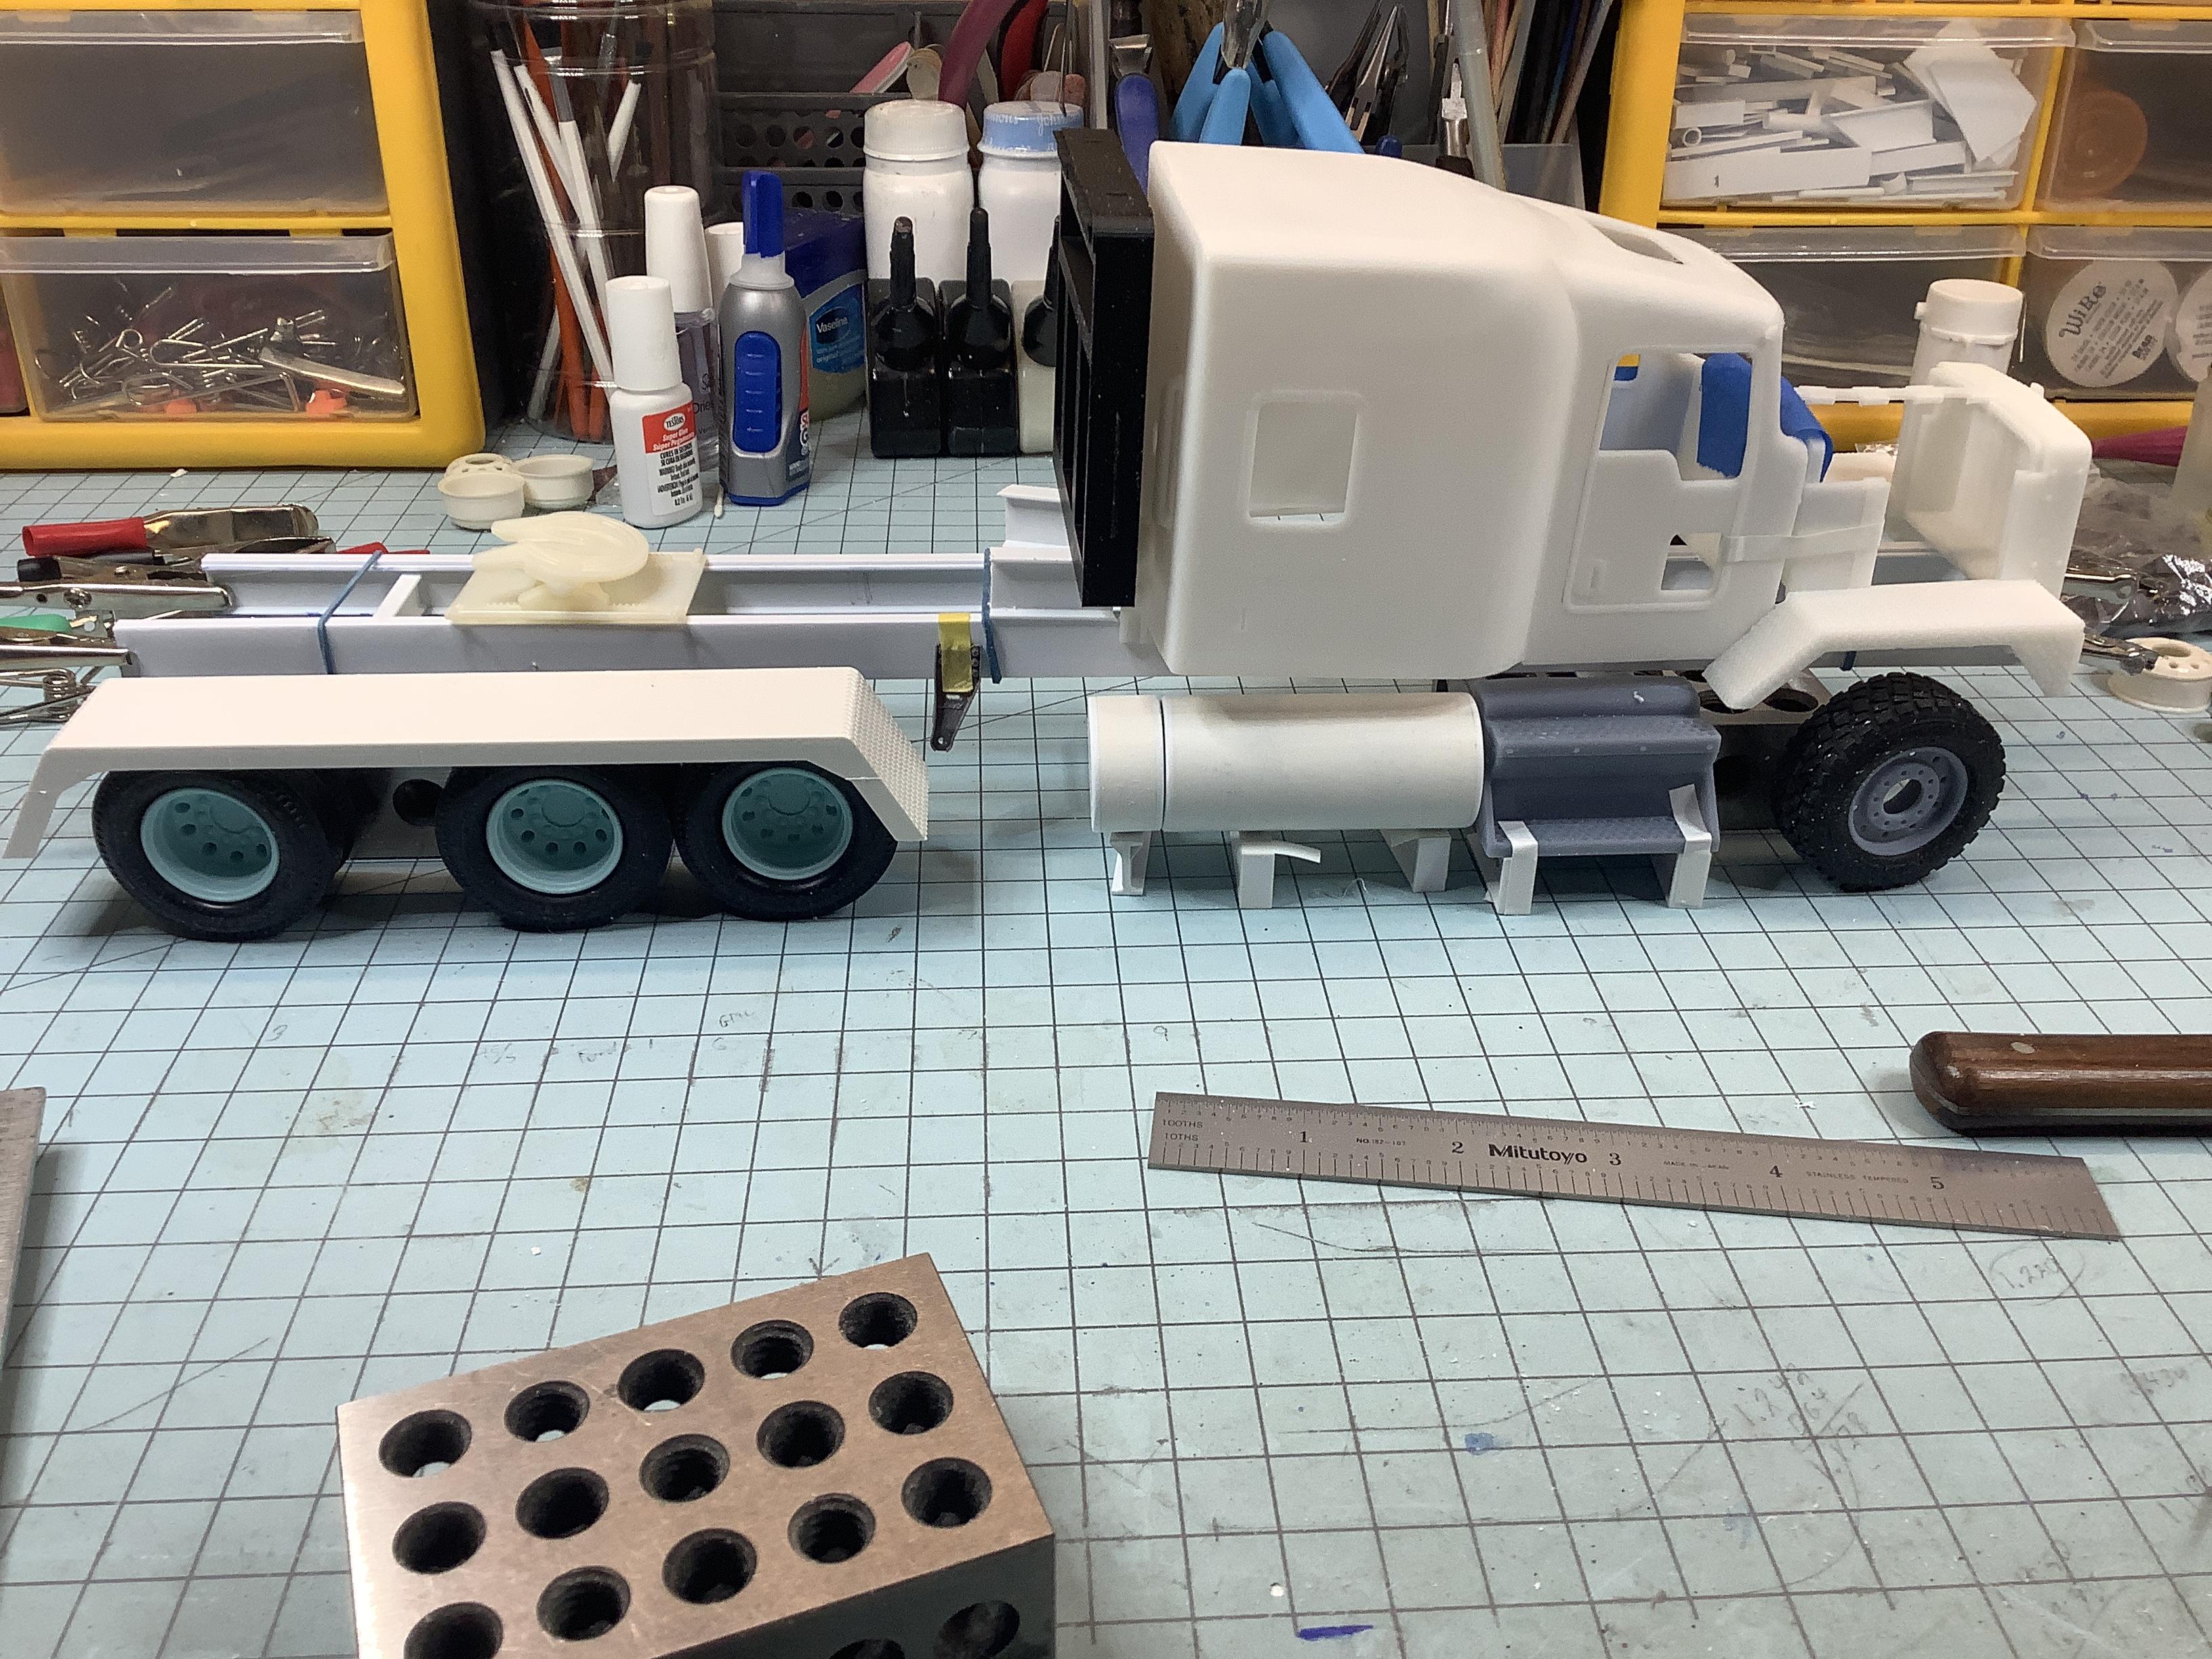
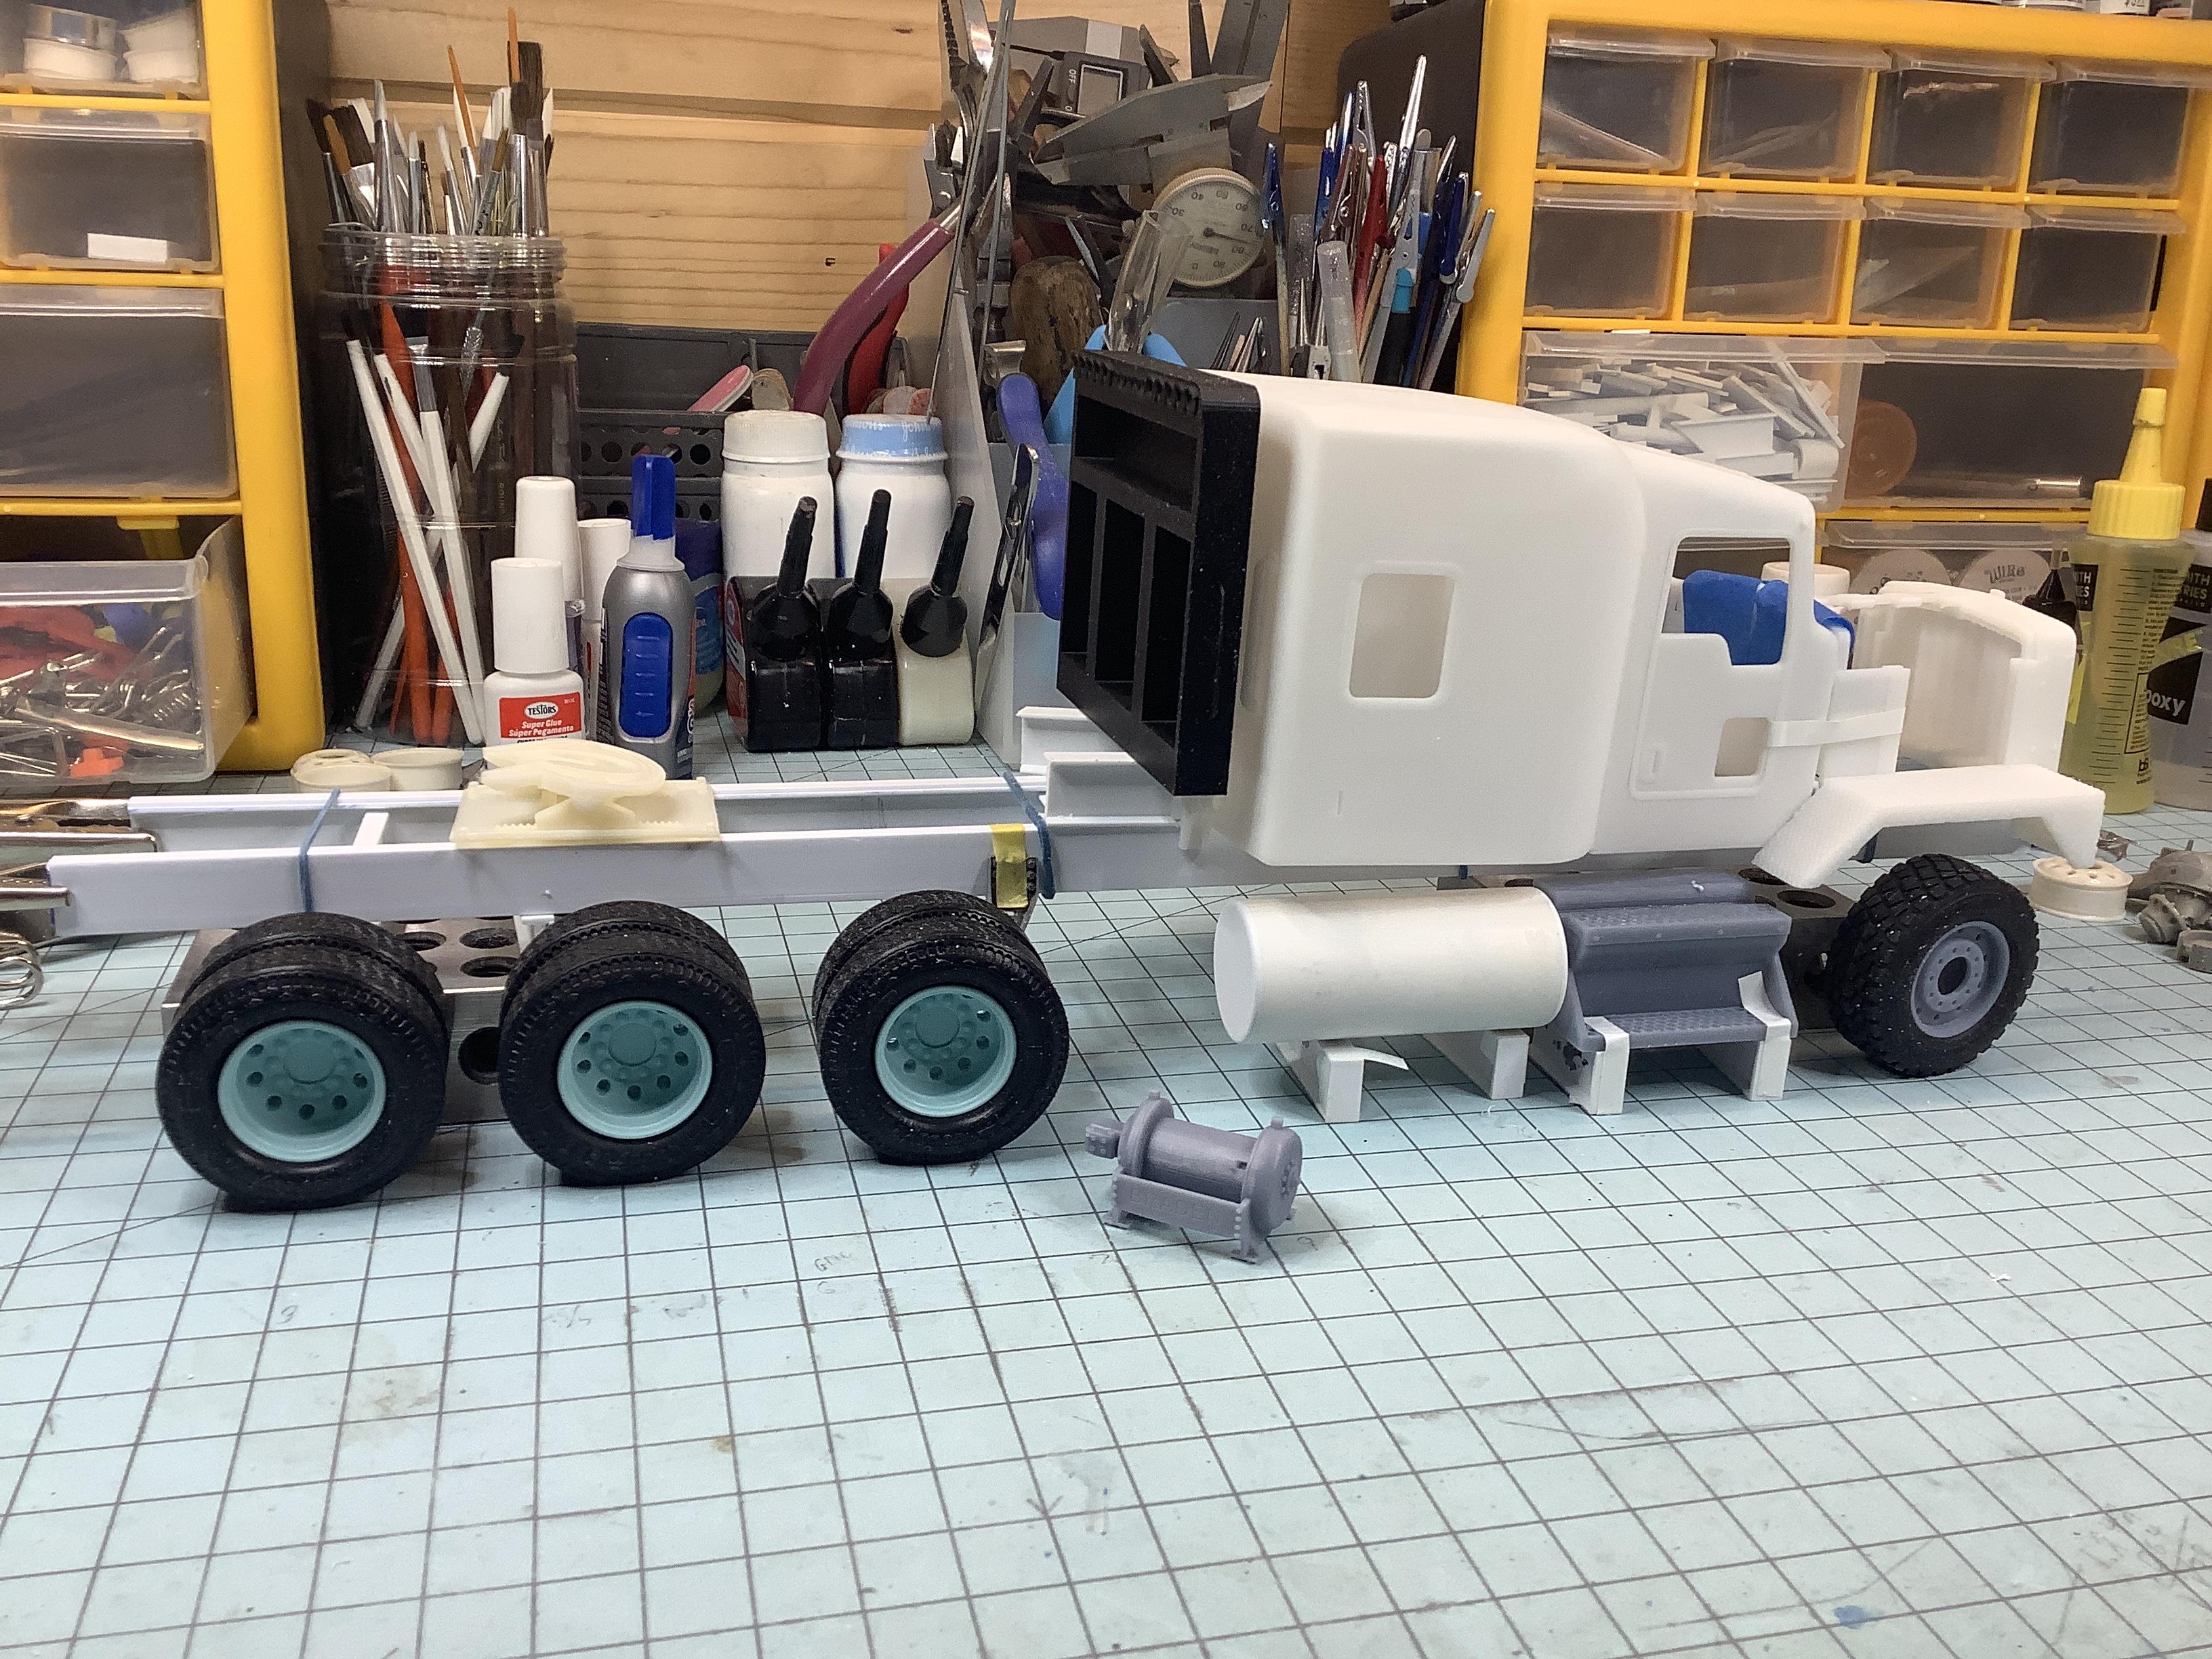
Ok, a DEF tank, now to figure out how to mount in and strap it.
-
Kenworth C500
Gary Chastain replied to Gary Chastain's topic in WIP: Model Trucks: Big Rigs and Heavy Equipment
I know I just bought one for stock, and just tore apart everything and can’t find it. So making one out of my fuel tank stock I have. Those come in a ton of sizes and shapes so making it to sit close to the tank. See how this goes -
Kenworth C500
Gary Chastain replied to Gary Chastain's topic in WIP: Model Trucks: Big Rigs and Heavy Equipment
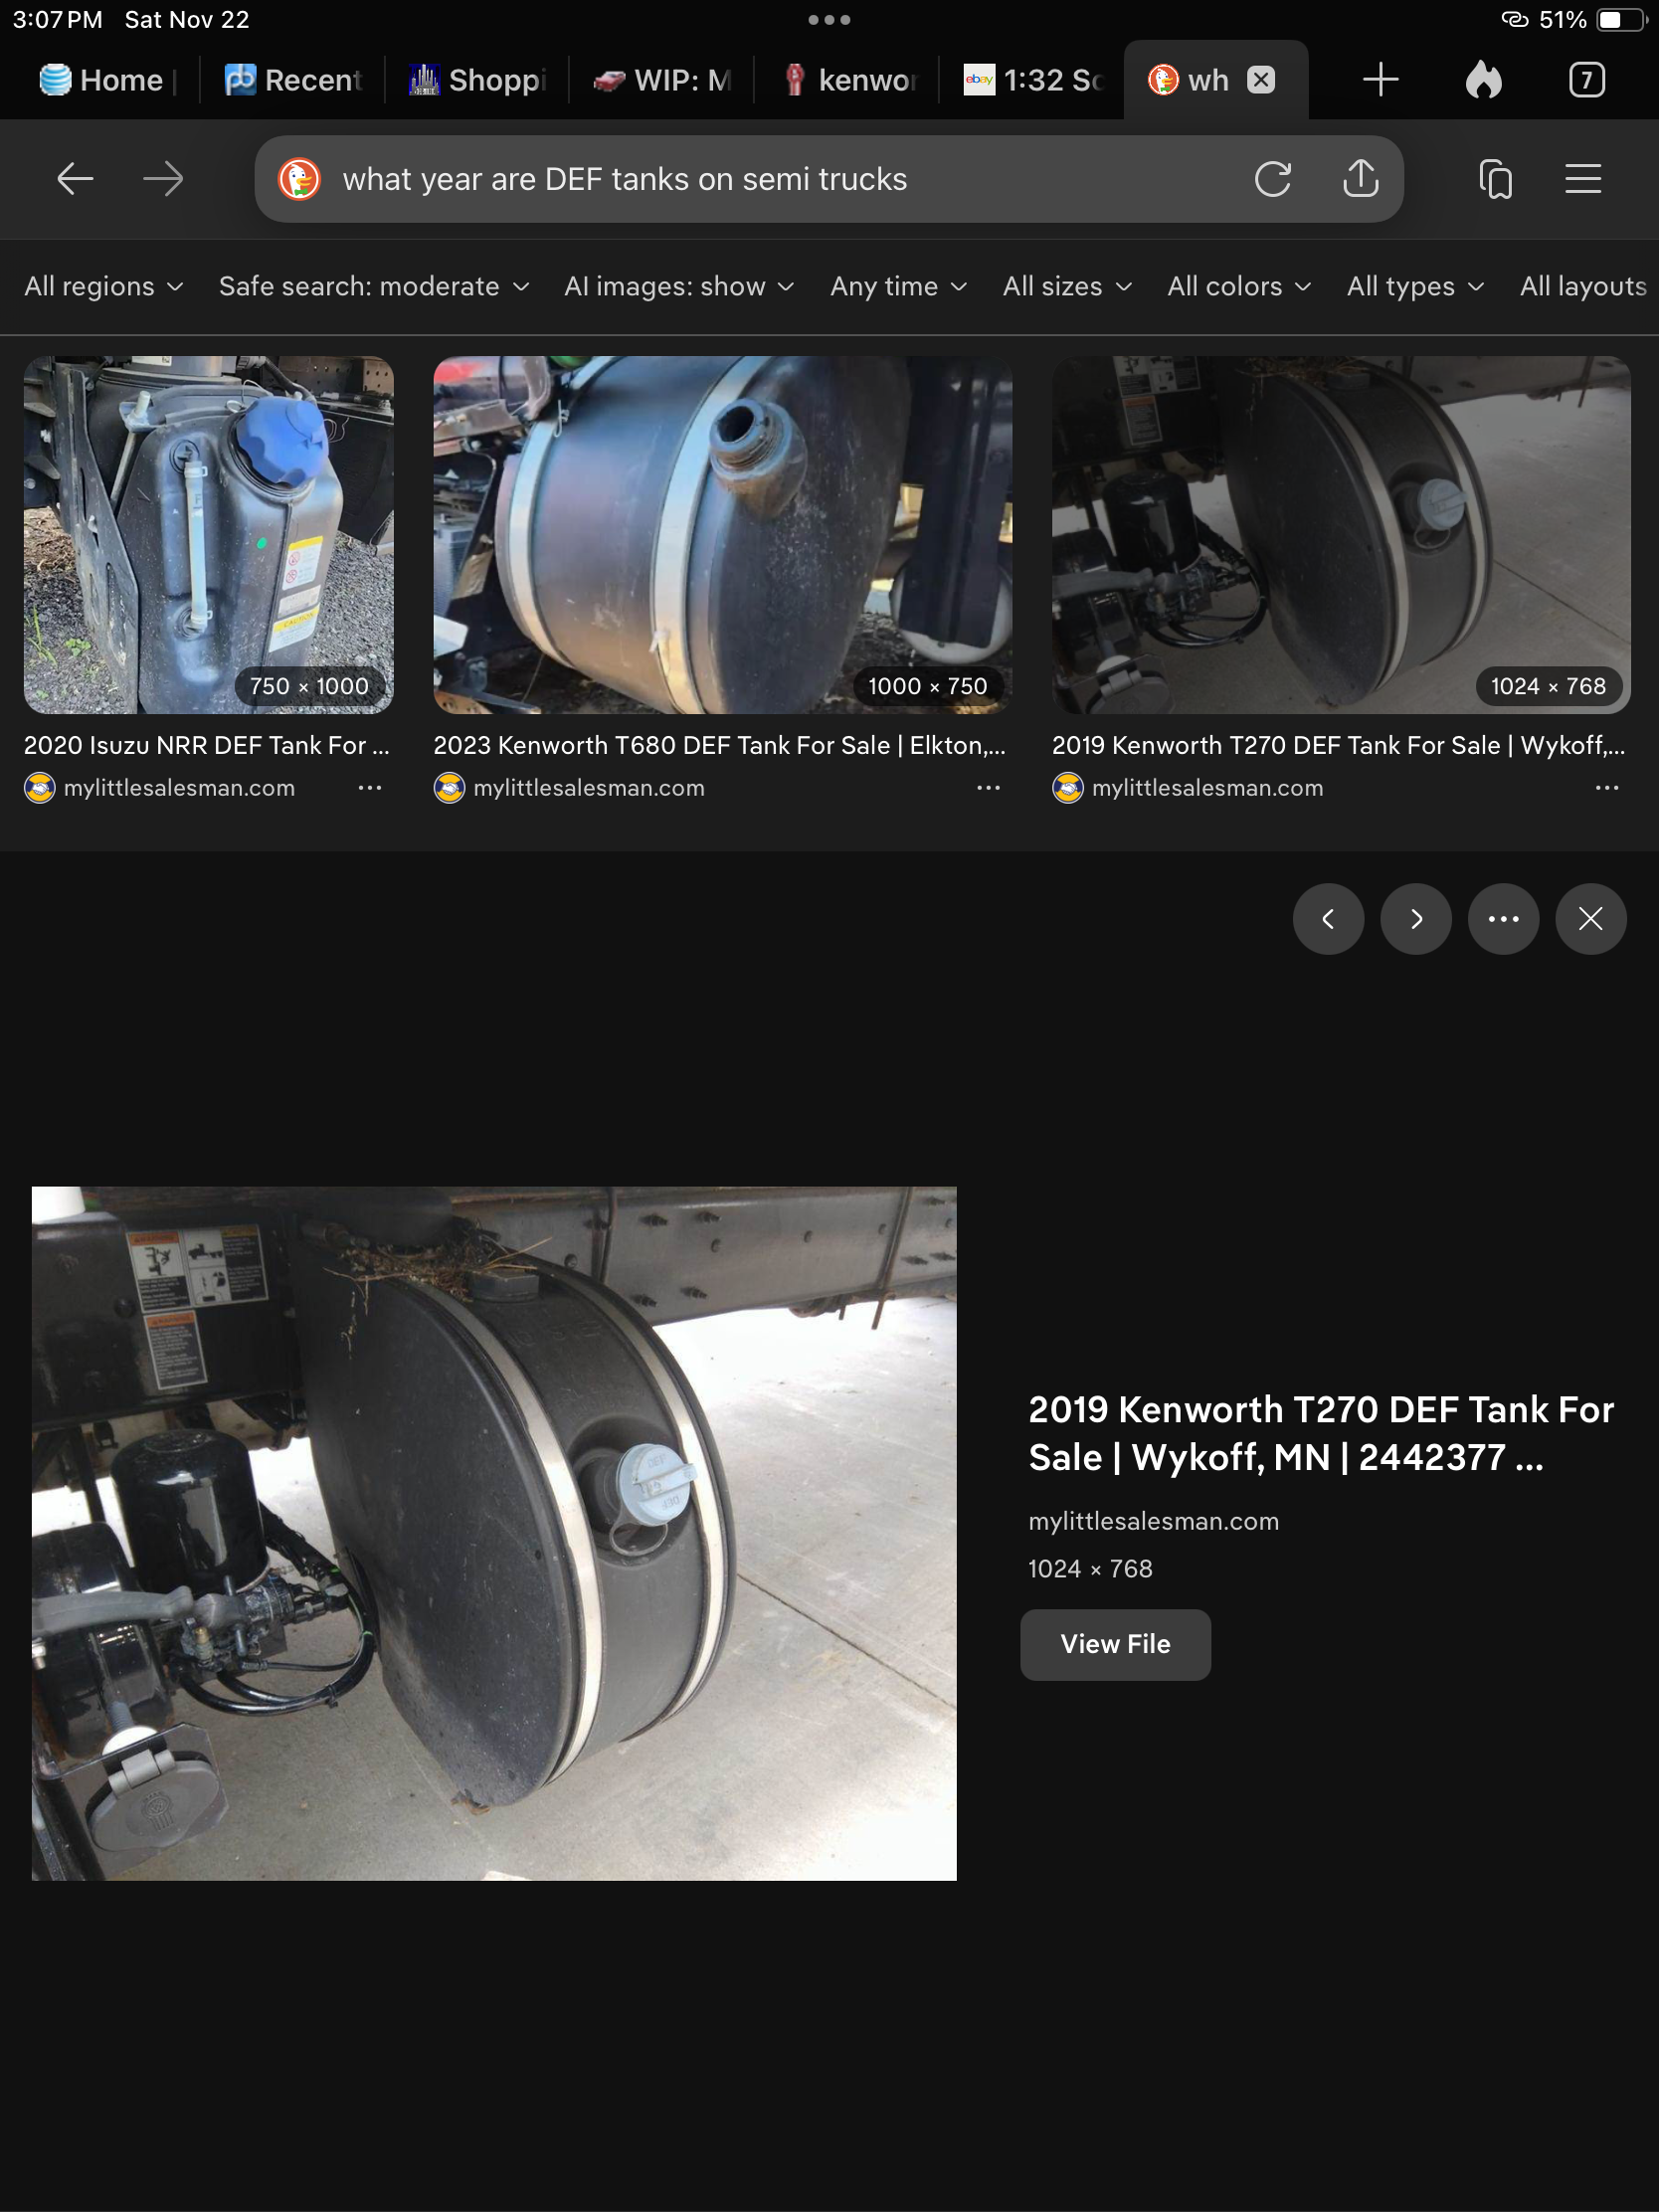
Well darn, didn’t think about a DEF tank. Implemented since 2010 on semi trucks.
-
Kenworth C500
Gary Chastain replied to Gary Chastain's topic in WIP: Model Trucks: Big Rigs and Heavy Equipment
Getting fuel tanks built and quick mock-up
-
Thanks Lee
-
Kenworth C500
Gary Chastain replied to Gary Chastain's topic in WIP: Model Trucks: Big Rigs and Heavy Equipment
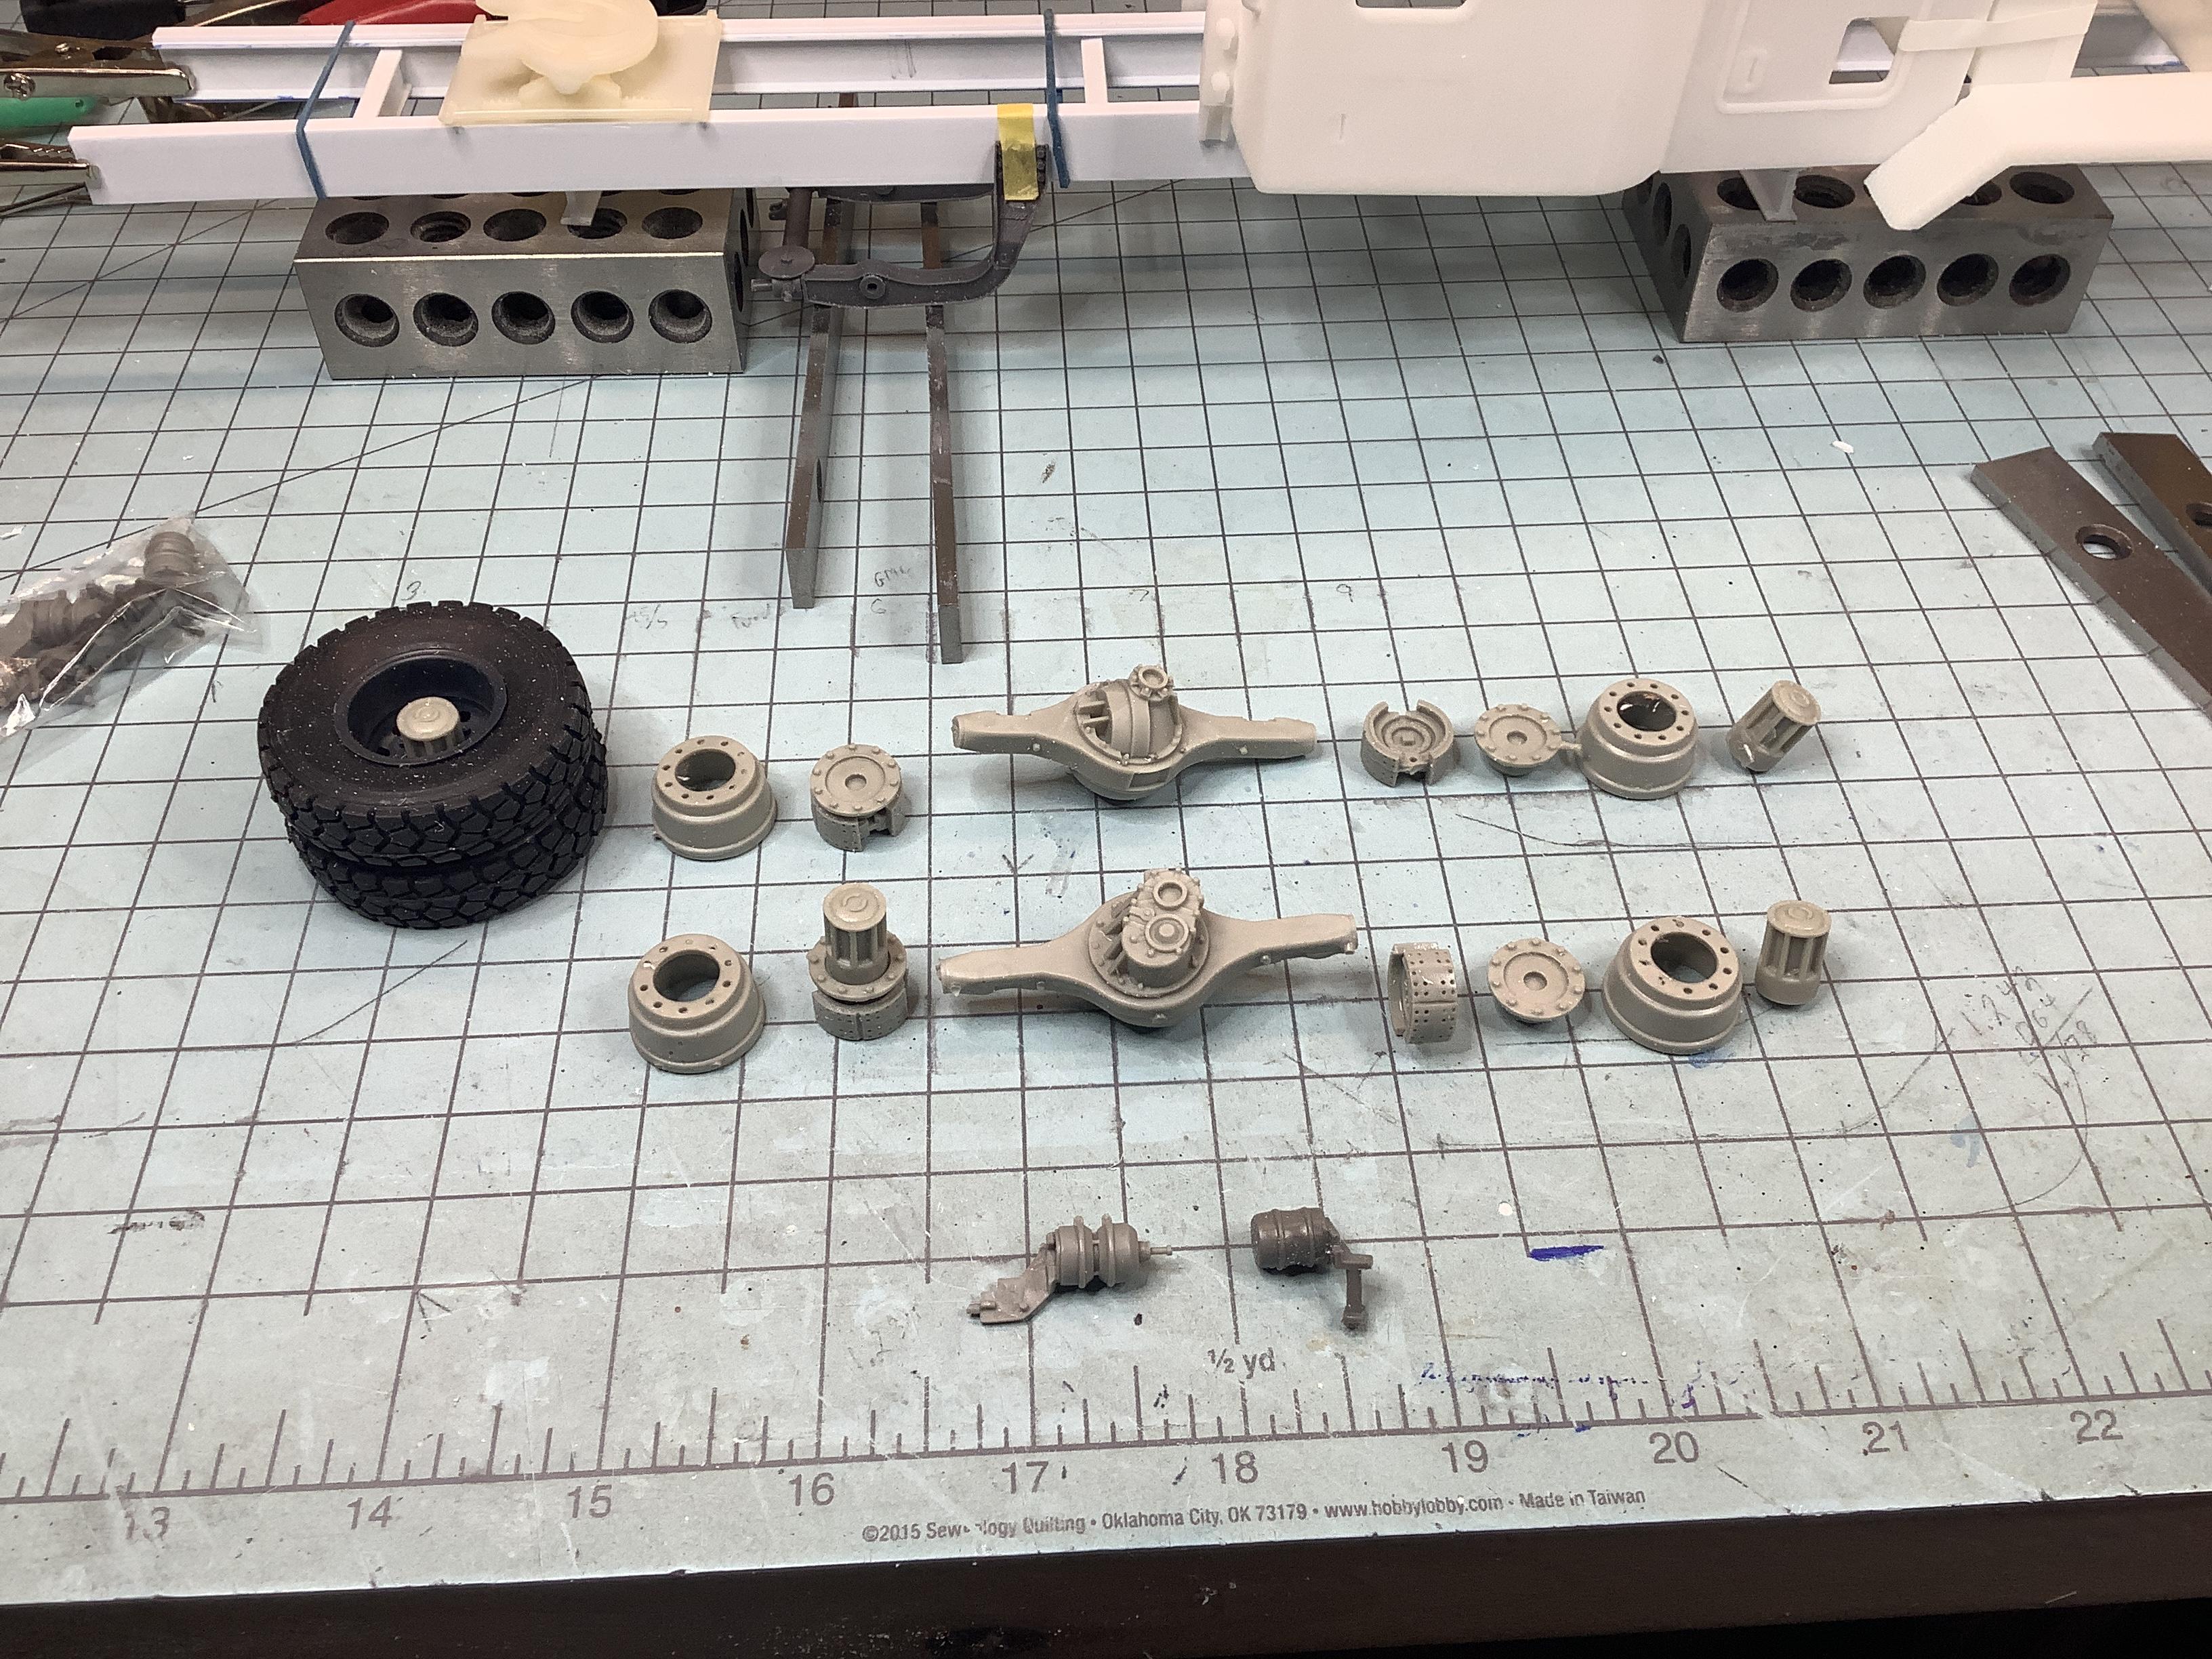
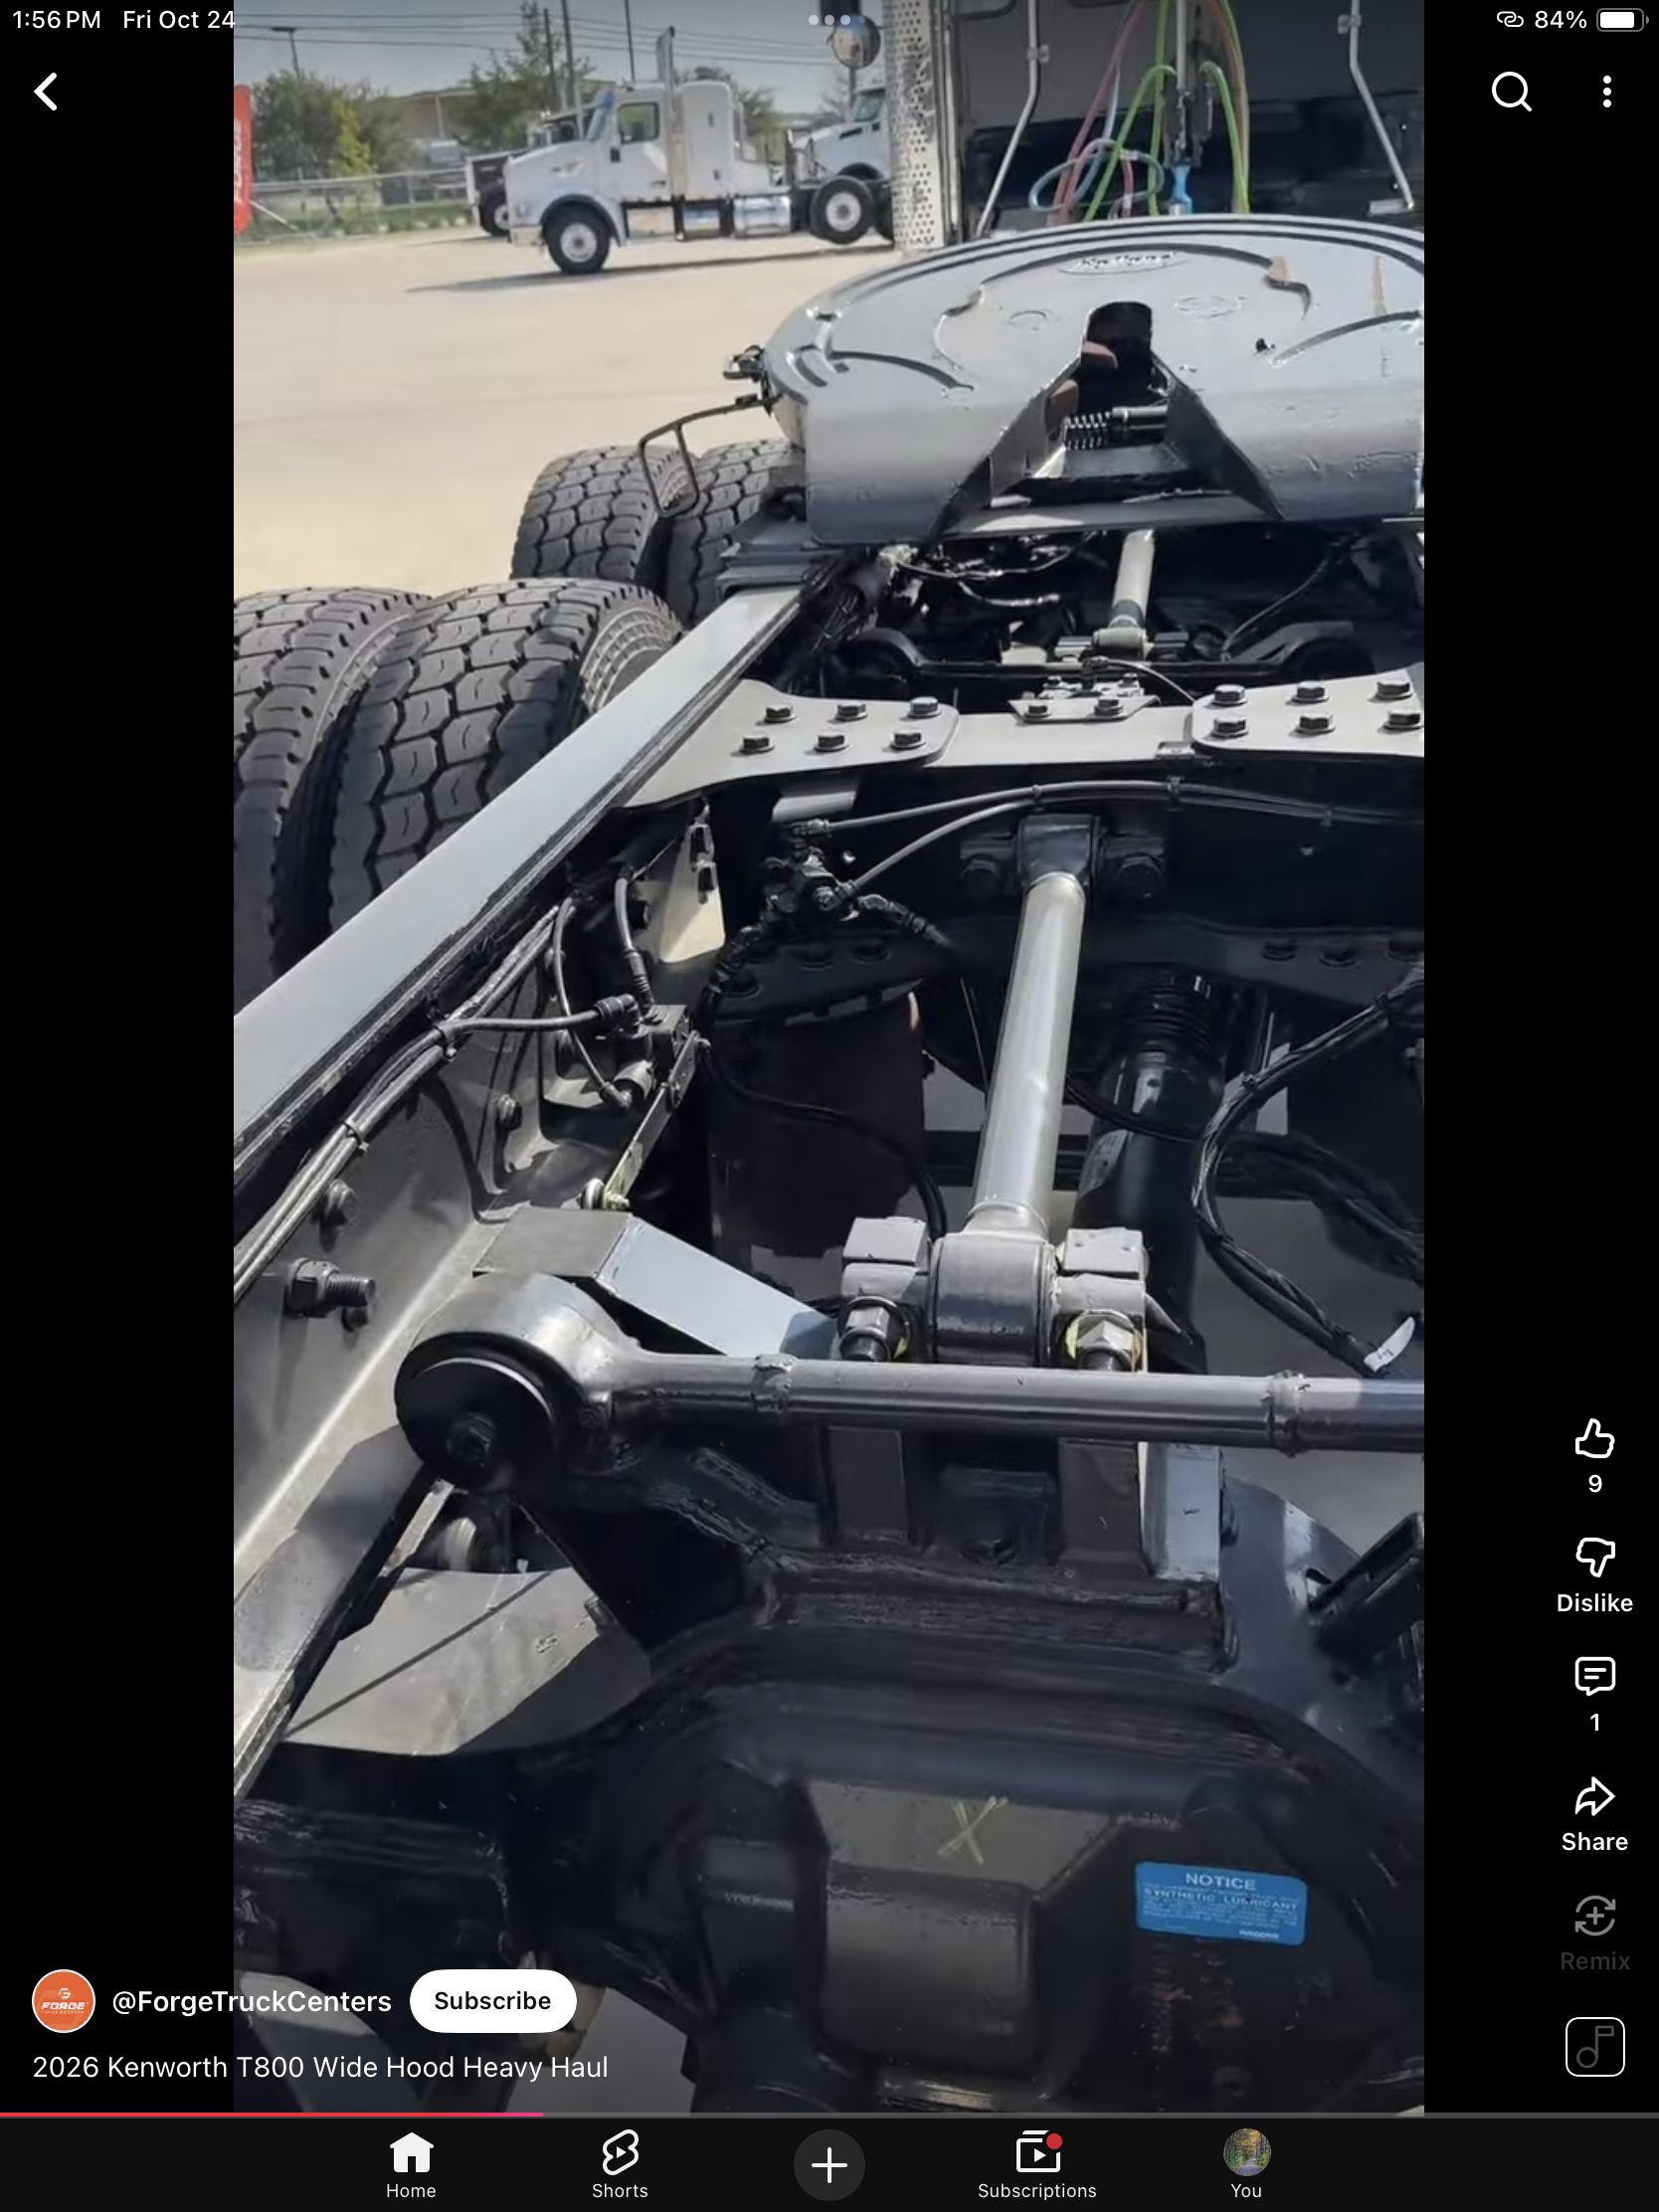
Axle assembly , the brake chamber/actuator on the right came in the kit, the definition looks like a single chamber air brake. The brake chamber on the left are from ST Supply and have much more definition, now if I can use the better chambers on actuator from axle kit.
-
1975 International 4300 Transtar
Gary Chastain replied to Pete68's topic in WIP: Model Trucks: Big Rigs and Heavy Equipment
Like the new direction and colors -
White Freightliner
Gary Chastain replied to TopherMcGinnis's topic in WIP: Model Trucks: Big Rigs and Heavy Equipment
Oohhhhhh, lm liking those photos, never given much thought to a custom Cabover, but my mind is running amuck now. Can’t wait to see what you do. Watching -
Thanks Lee
-
1976 Kenworth Aerodyne COE
Gary Chastain replied to J.B. Customs's topic in WIP: Model Trucks: Big Rigs and Heavy Equipment
That’s a sharp paint job, well done. -
Kenworth C500
Gary Chastain replied to Gary Chastain's topic in WIP: Model Trucks: Big Rigs and Heavy Equipment
Not sure until my other cab arrives with smaller sleeper, my frame rails will be cut to length also. -
Kenworth C500
Gary Chastain replied to Gary Chastain's topic in WIP: Model Trucks: Big Rigs and Heavy Equipment
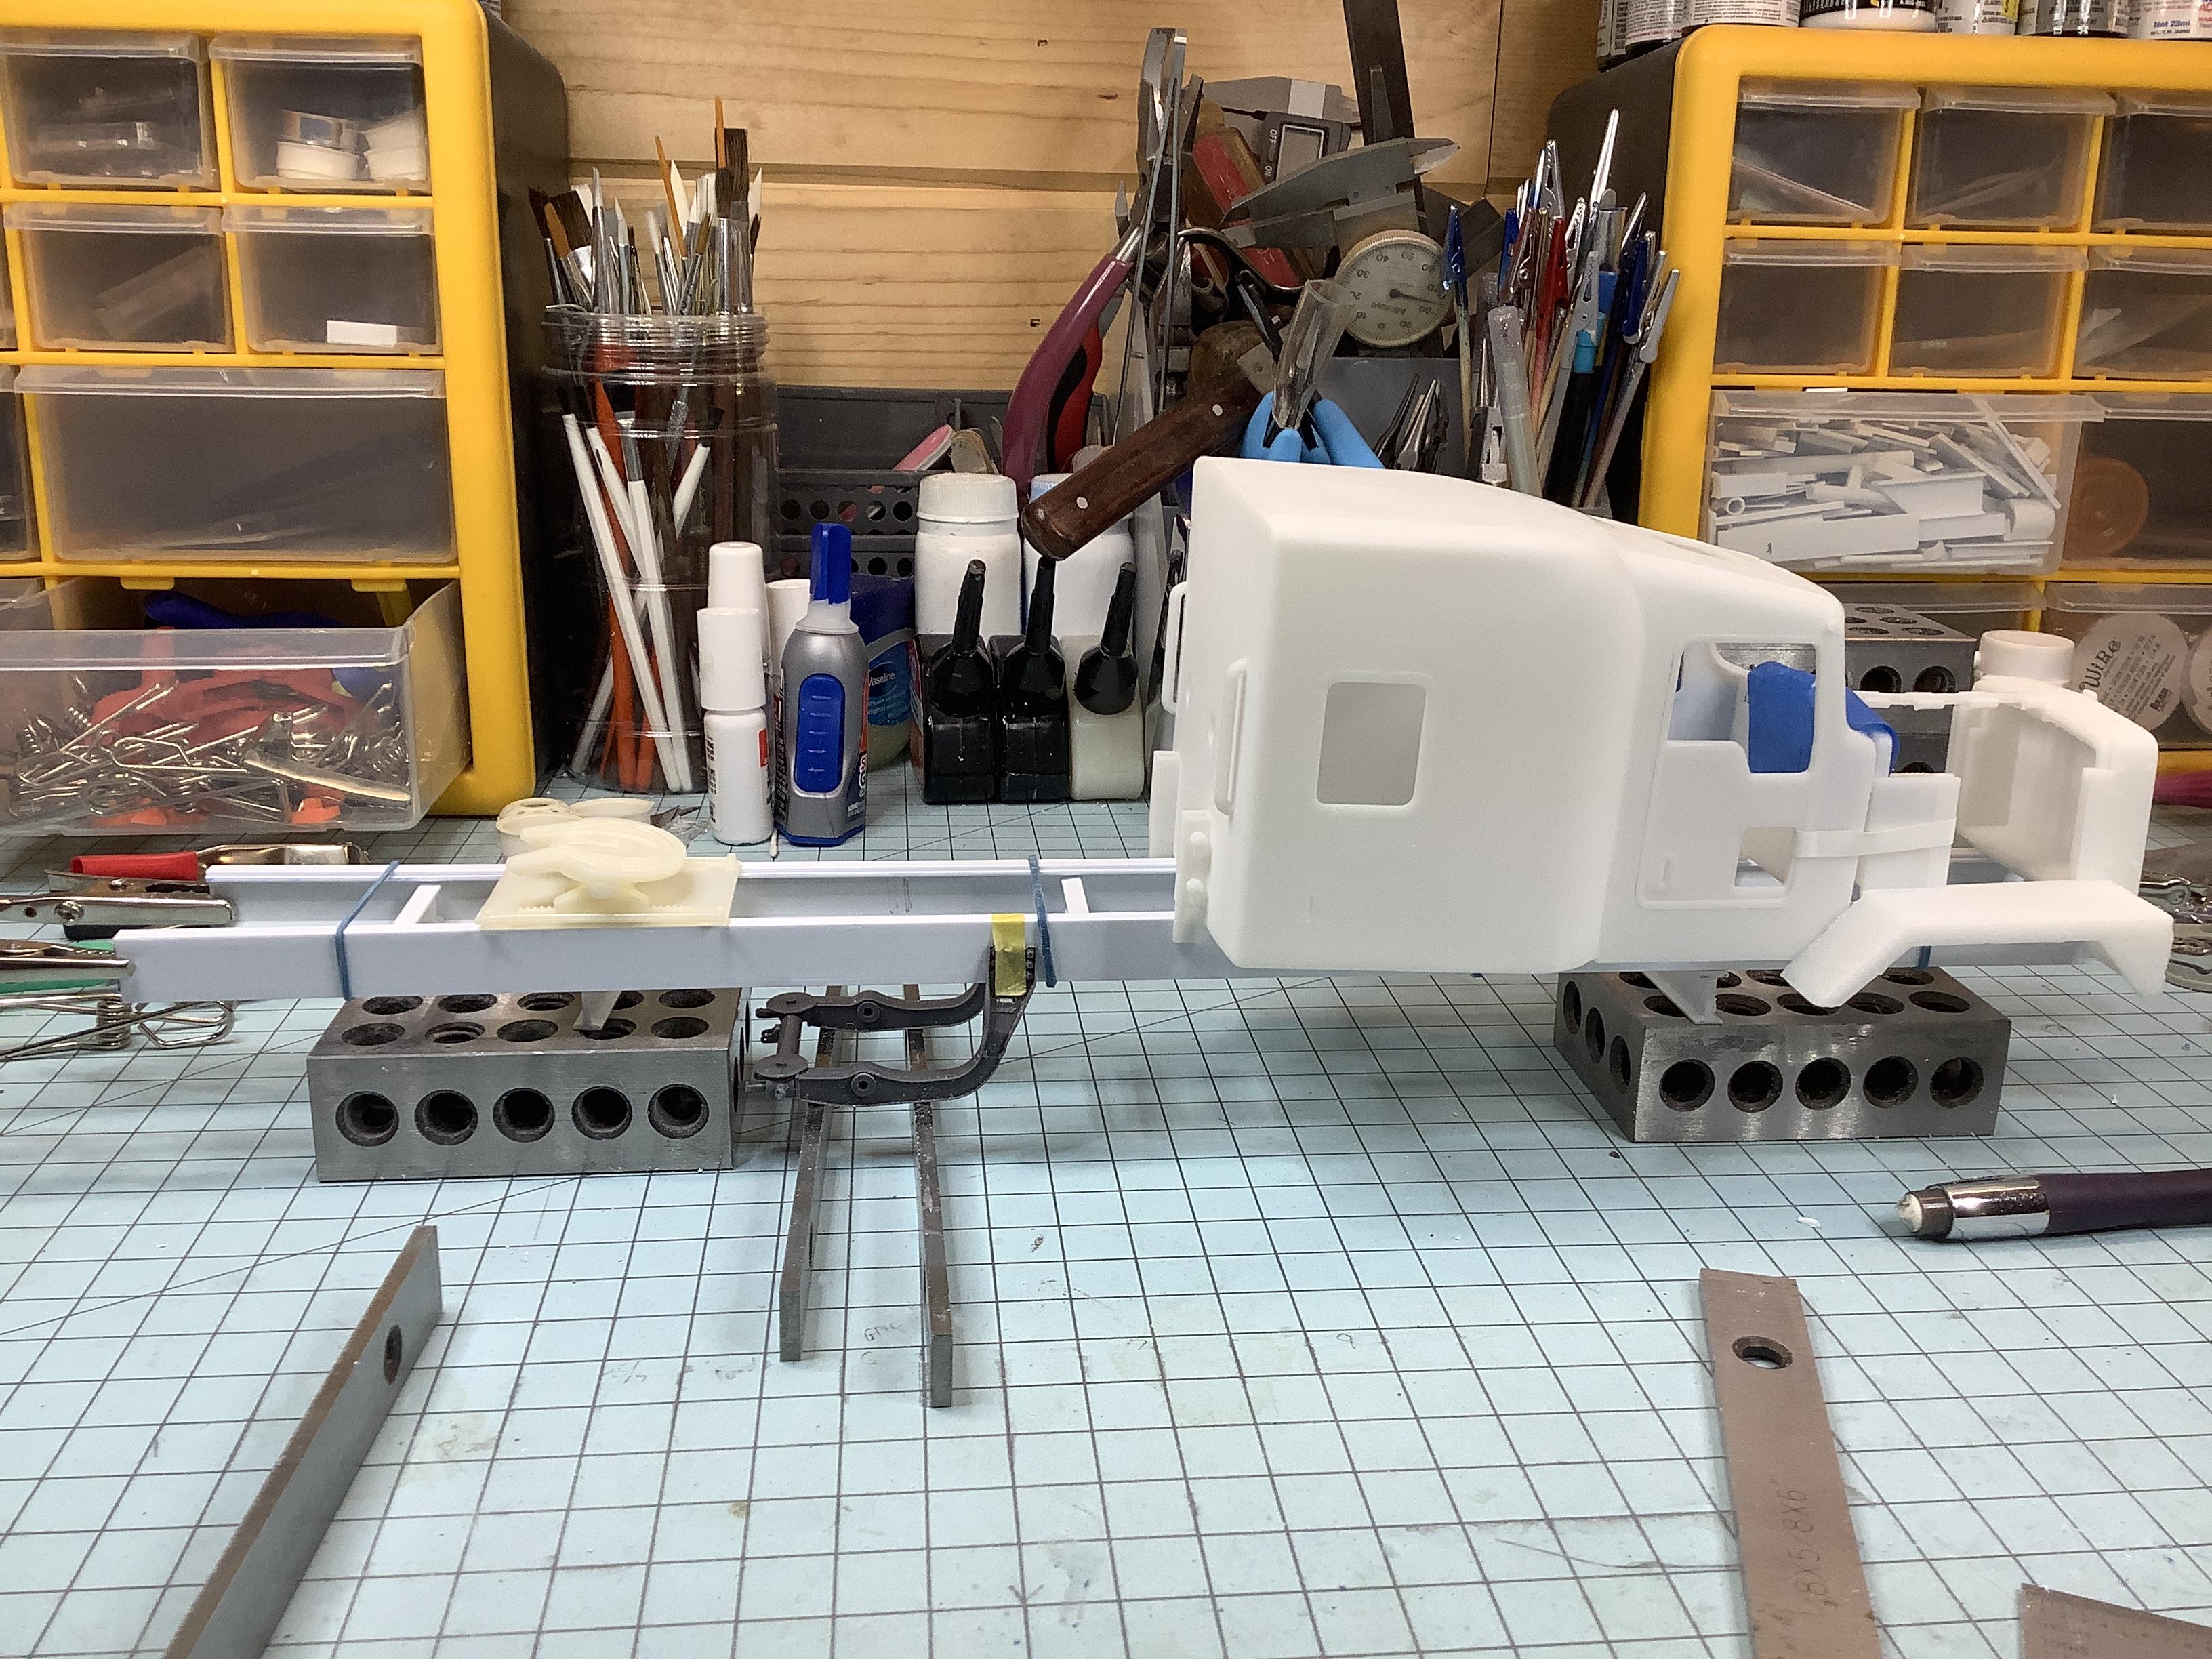
Mock-up to see if frame width will work, suspension and cab fit.
-
Kenworth C500
Gary Chastain replied to Gary Chastain's topic in WIP: Model Trucks: Big Rigs and Heavy Equipment
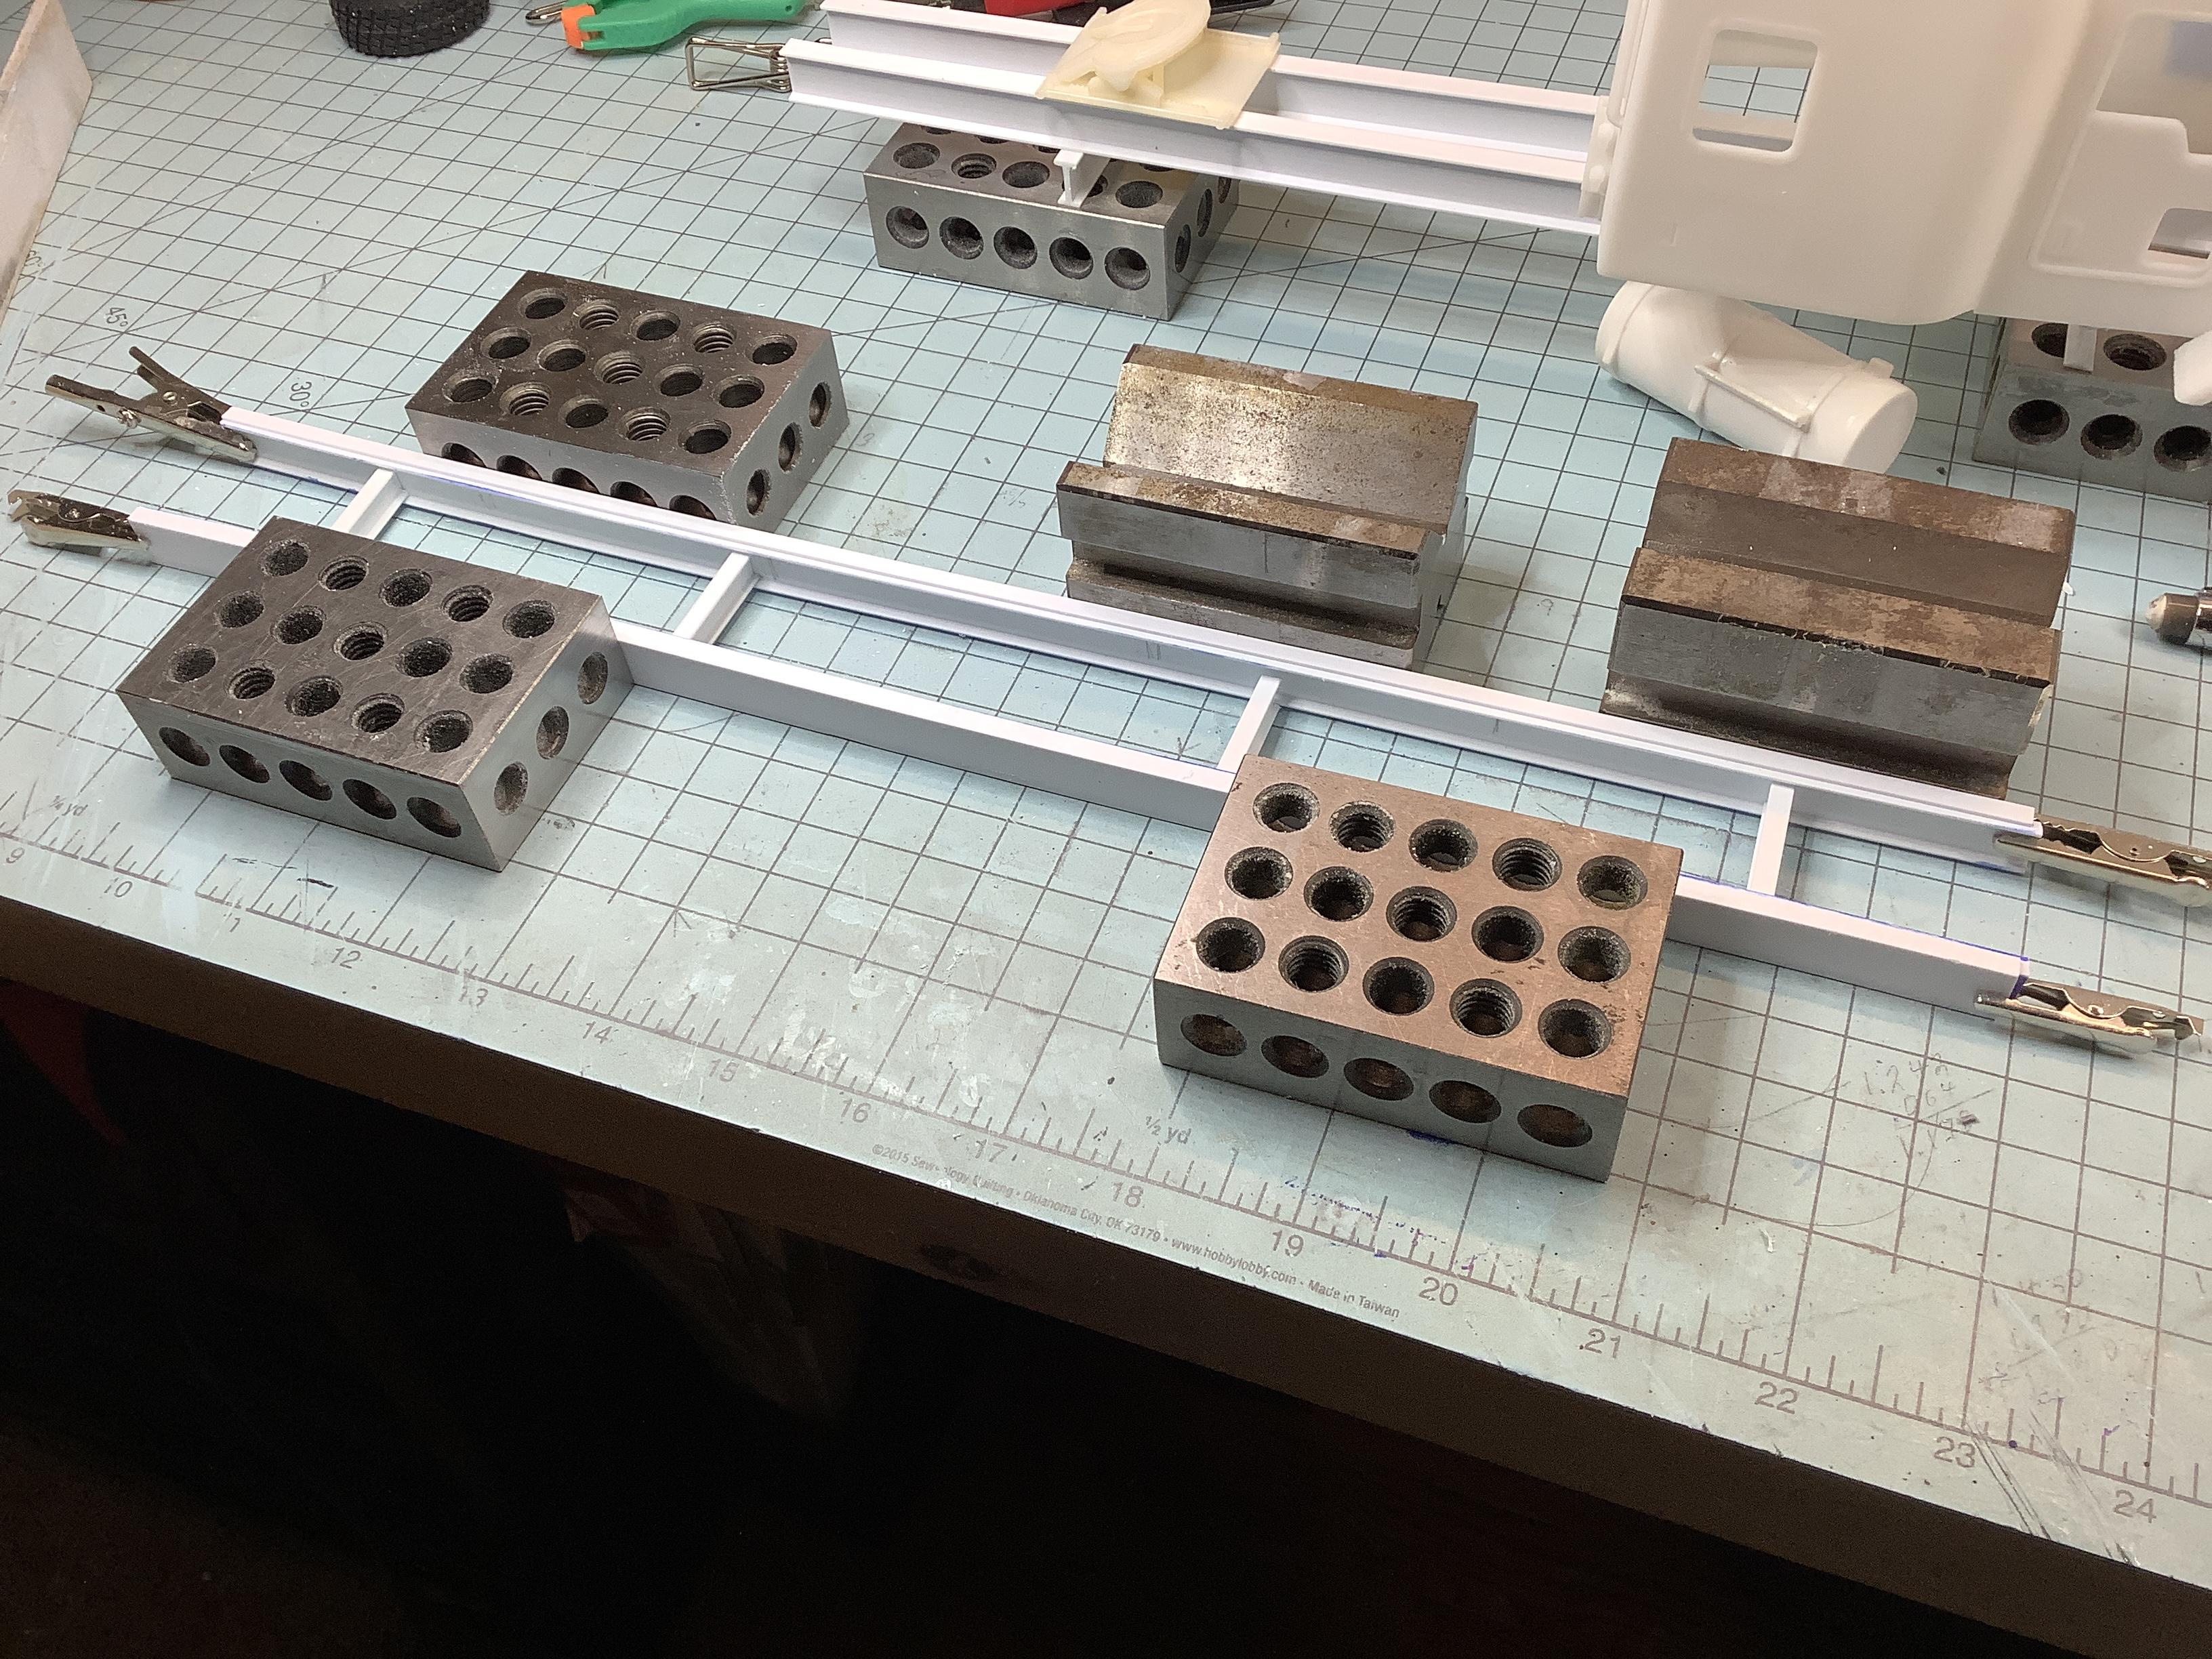
Starting to see a frame.
-
Kenworth C500
Gary Chastain replied to Gary Chastain's topic in WIP: Model Trucks: Big Rigs and Heavy Equipment
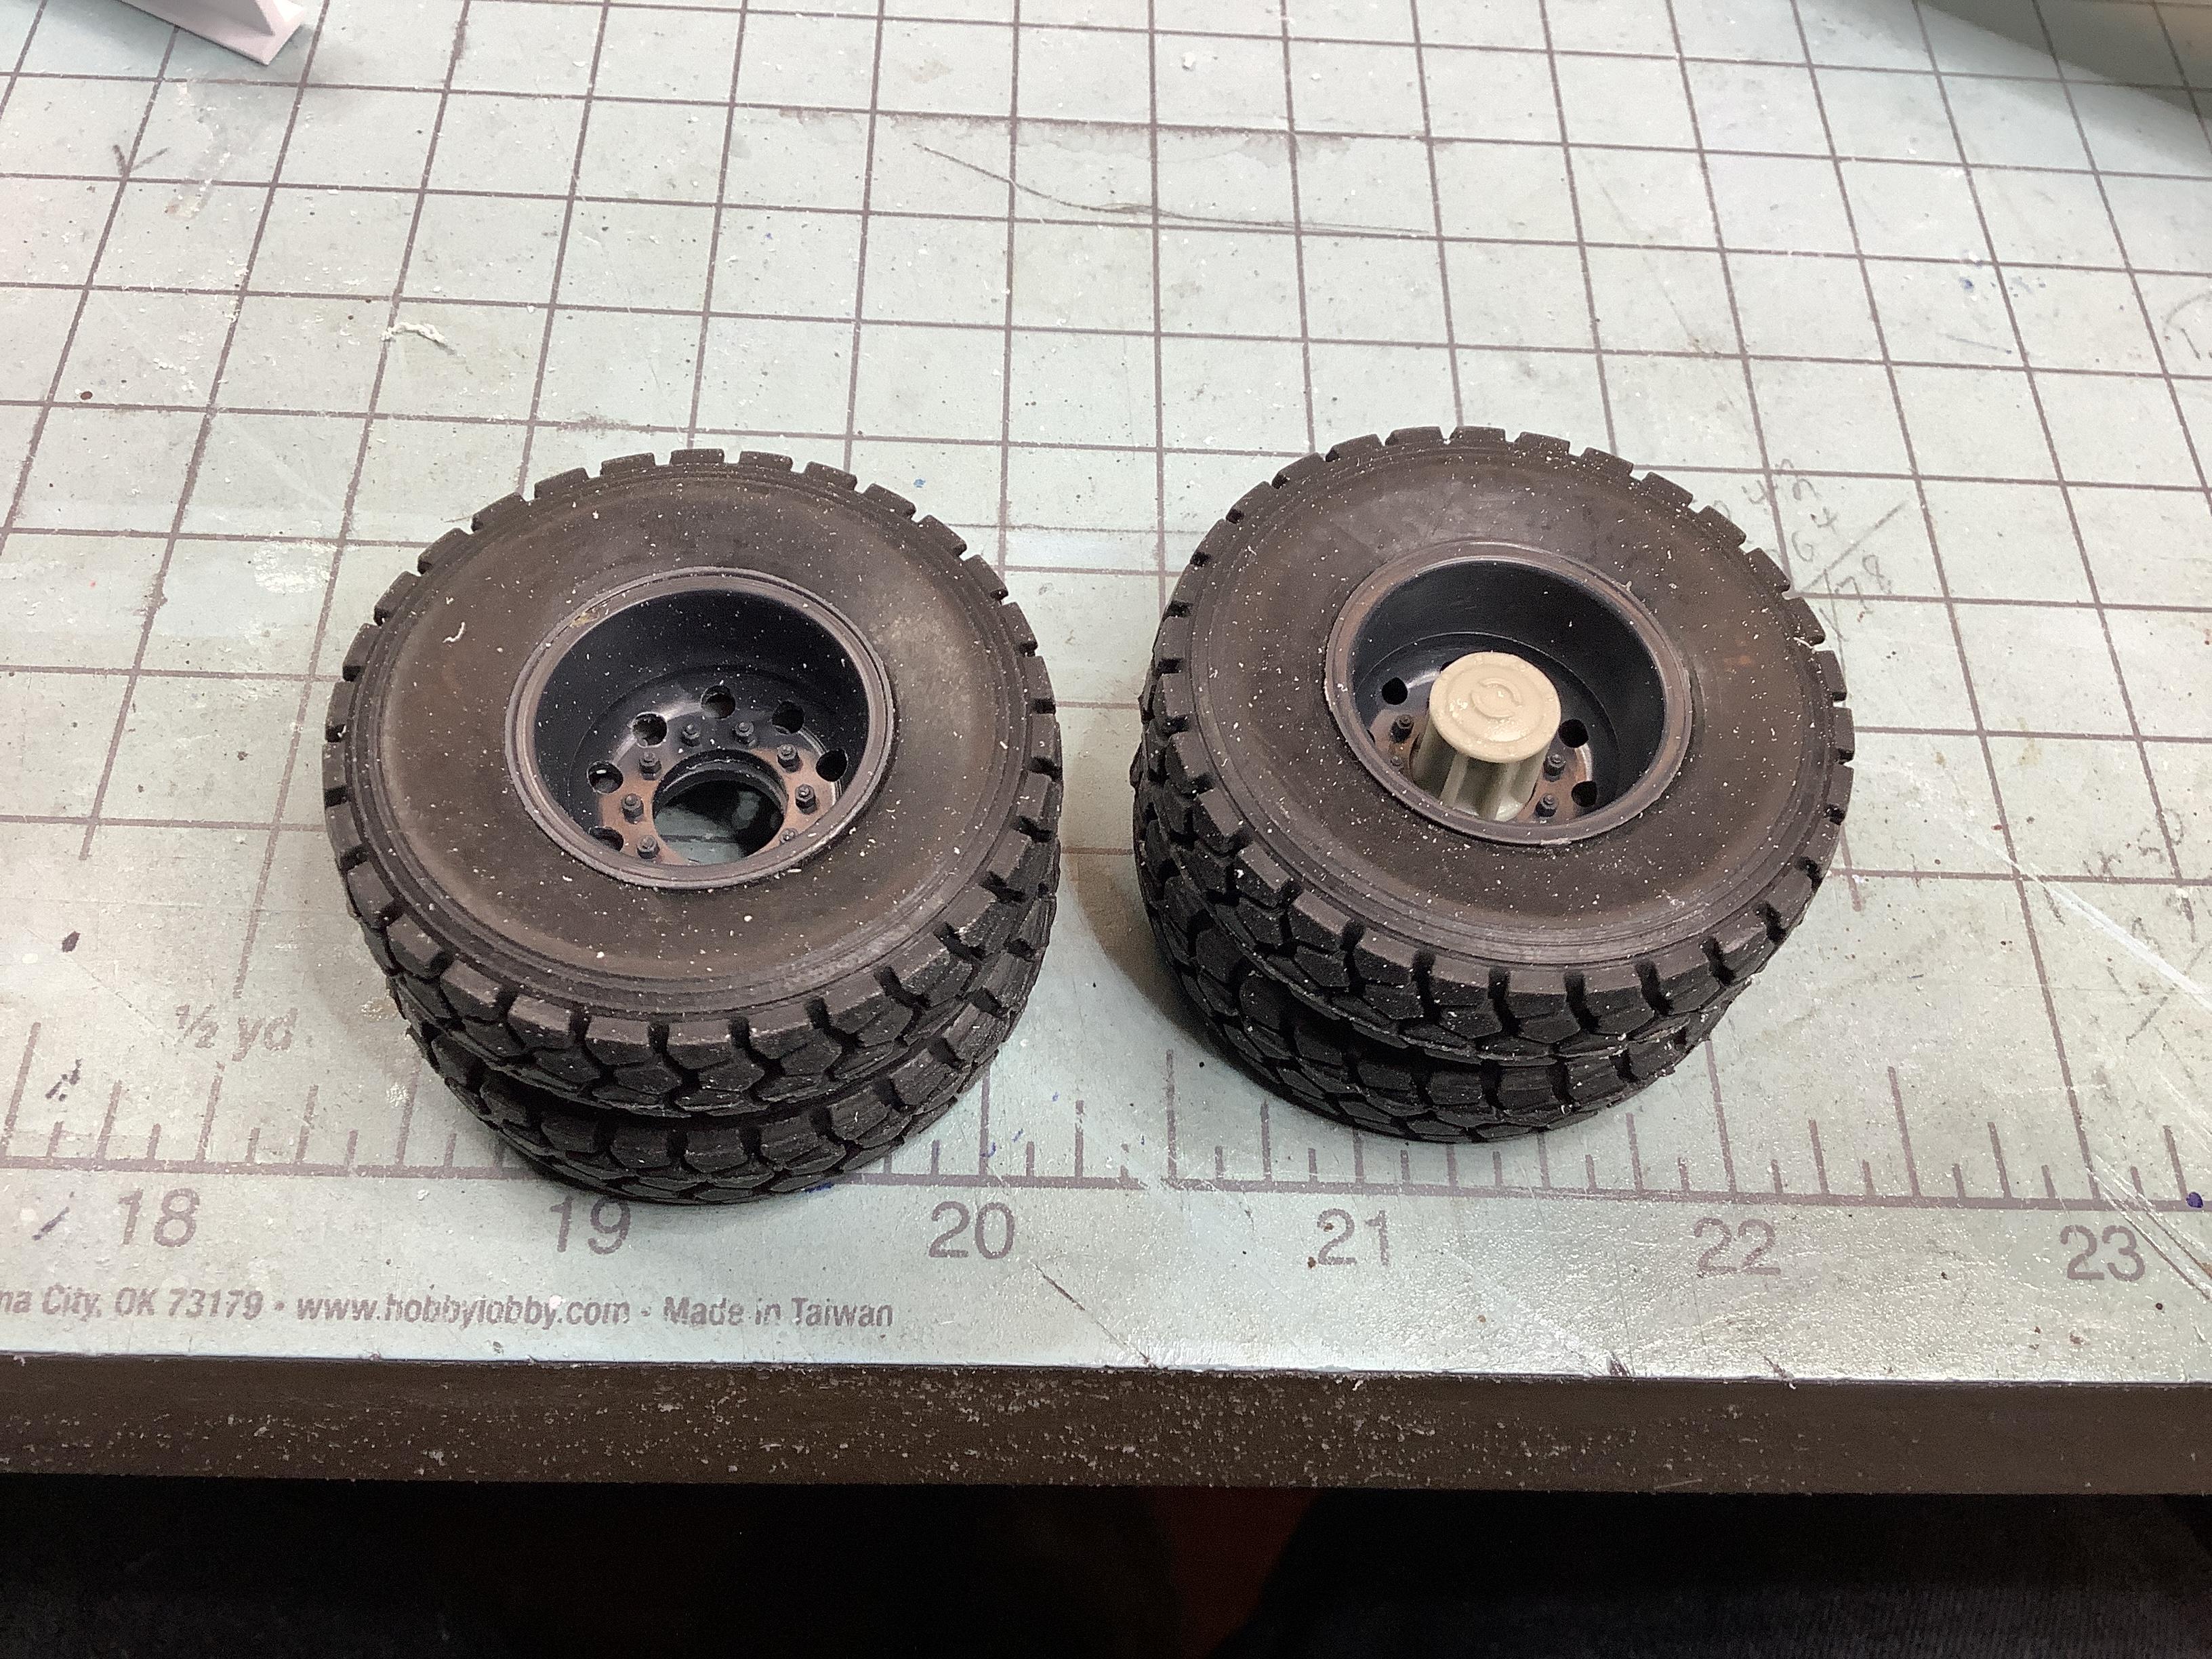
Did get a set of wheels built up, still need paint and finish work, but all the chrome is gone. Not 100% happy with tire to rim fit but would work. Got paint ordered yesterday, trying to follow the color scheme of the inspiration truck.
-
Kenworth C500
Gary Chastain replied to Gary Chastain's topic in WIP: Model Trucks: Big Rigs and Heavy Equipment
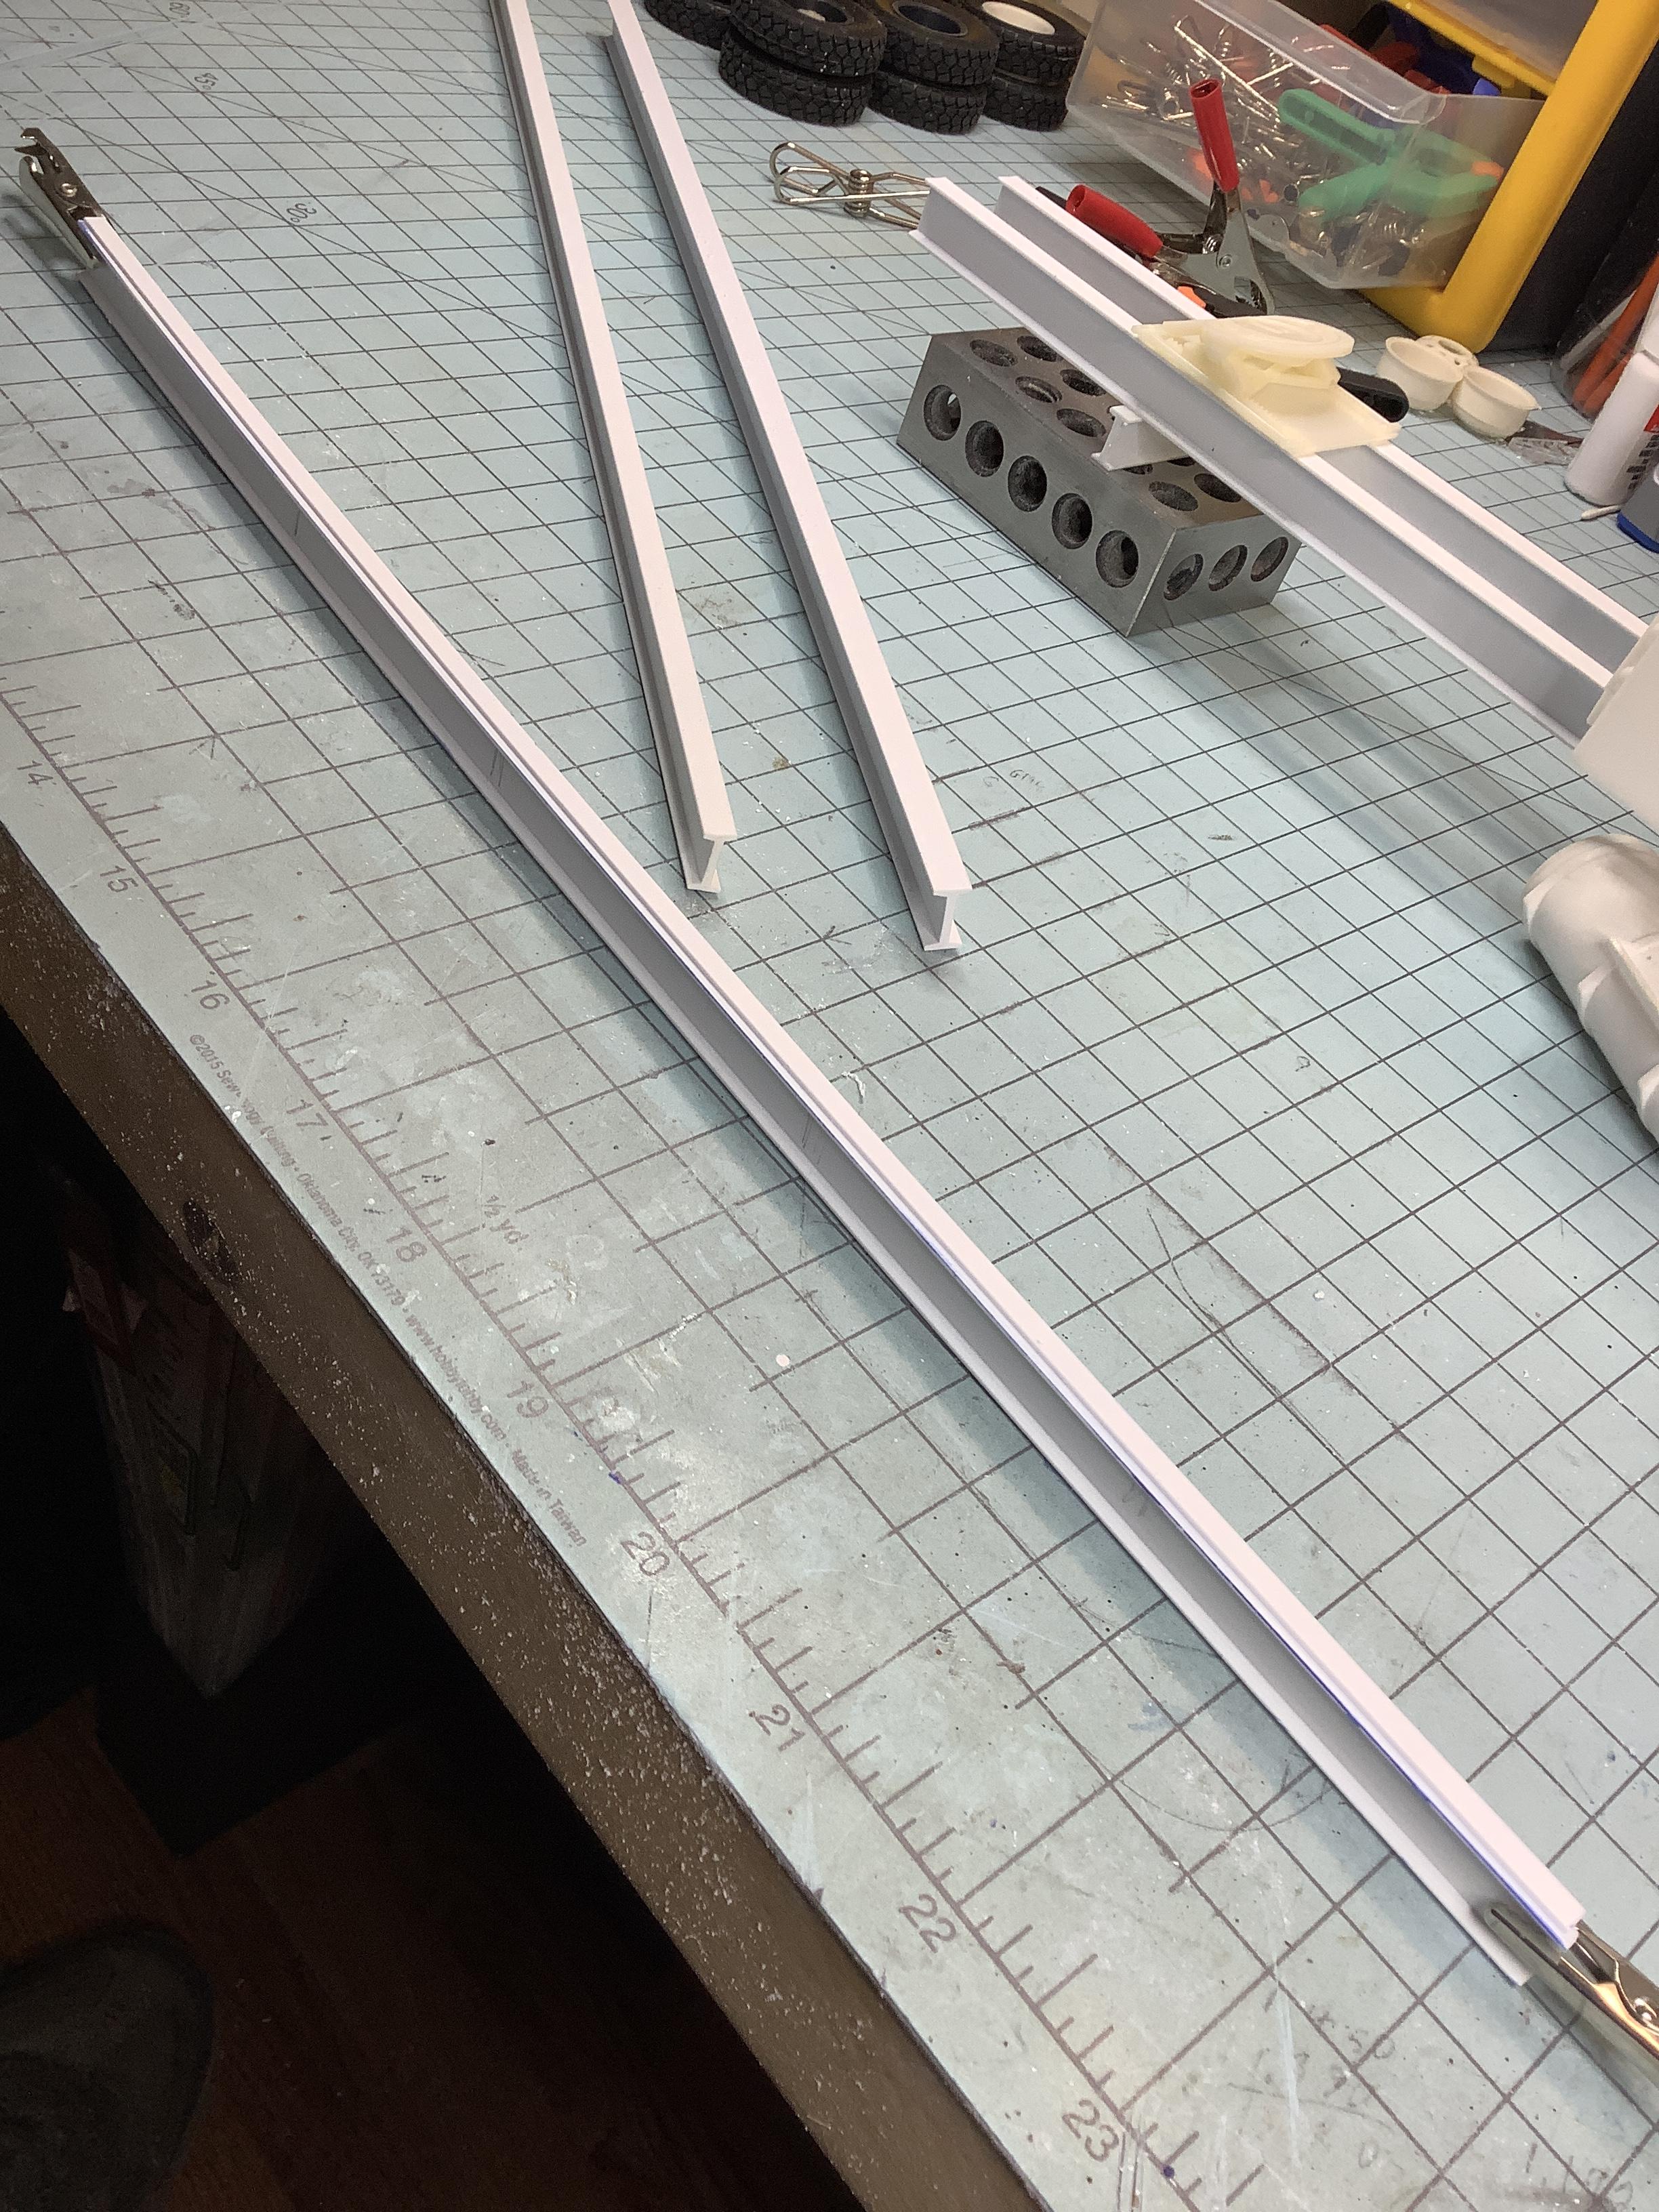
Building inner and outer frame rails for the C500 from I-beam to get the flange width correct. One side complete, now to start on second frame rails for the, just gonna leave the frame rails at 12 inches for now. Still waiting on correct cab and axle parts.
-
Ford Louisville
Gary Chastain replied to Jürgen M.'s topic in WIP: Model Trucks: Big Rigs and Heavy Equipment
Fantastic, well done -
Hey Wolf, how da heck are ya? Thanks for the kind words
-
Western Star 4900 FA plow truck
Gary Chastain replied to BK9300's topic in WIP: Model Trucks: Big Rigs and Heavy Equipment
Good read on your post. The mirrors on my KW925 caused me stress as well, I sprayed painted Revell for the shiny side and it shows every imperfection as well, but I was undecided on using chrome tape of some sort. I think your tape/film looks better. -
Watched your build thread, very outstanding build, that Brockway looks great.
-
Headed to under glass, but are you doing a build thread on the GMC?
-
Kenworth C500
Gary Chastain replied to Gary Chastain's topic in WIP: Model Trucks: Big Rigs and Heavy Equipment
Yup, I am hoping to clip them off and use then as just lug nuts, aligning the wheels on the drive hub, I am using a different drive hub that came with my axles. Well at least that is the game plan ……or…….more parts for my “box of bad ideas” . -
Kenworth C500
Gary Chastain replied to Gary Chastain's topic in WIP: Model Trucks: Big Rigs and Heavy Equipment
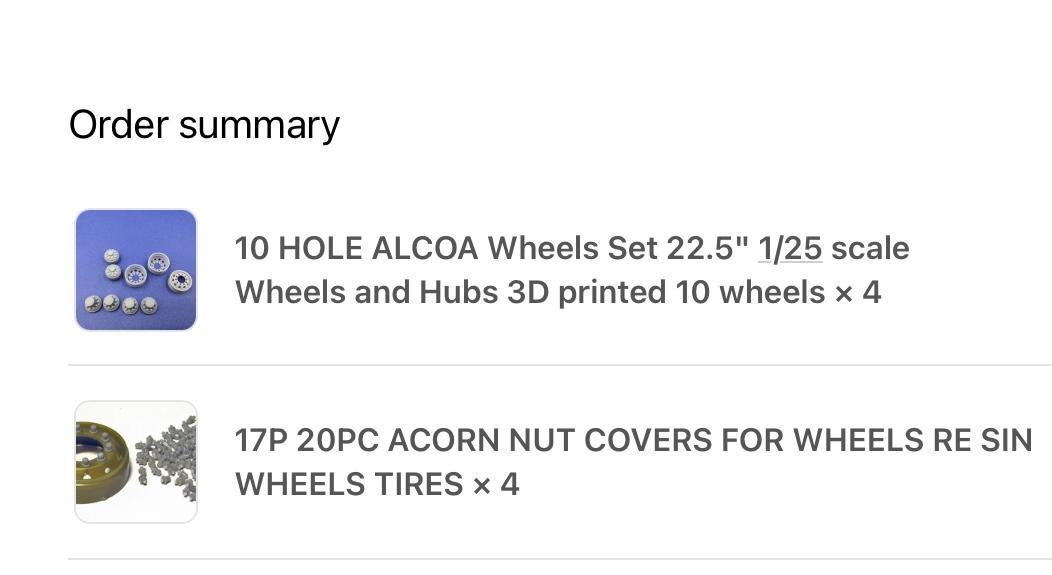
Well I got educated the last couple days, the offset for rear dual wheels from many different kits vary a lot, little unsure why. The wheels I thought about using are from the GMC General, but lug nut detail is poor and not convincing. So after some digging I ordered a set of 10 hole Alcoa wheels and separate lug nuts. The inspiration truck has dark gray wheels with chrome lug nuts, so shooting for that look.