dsummone
-
Posts
241 -
Joined
-
Last visited
Content Type
Profiles
Forums
Events
Gallery
Everything posted by dsummone
-
I agree with ya on the pattern. I think I’m gonna go with the bench seat. My dad had a 69 Continental when I turned 16 and having a girl slide right up next to you while you were driving was pretty sweet… when he’d let me take the car that is.
-
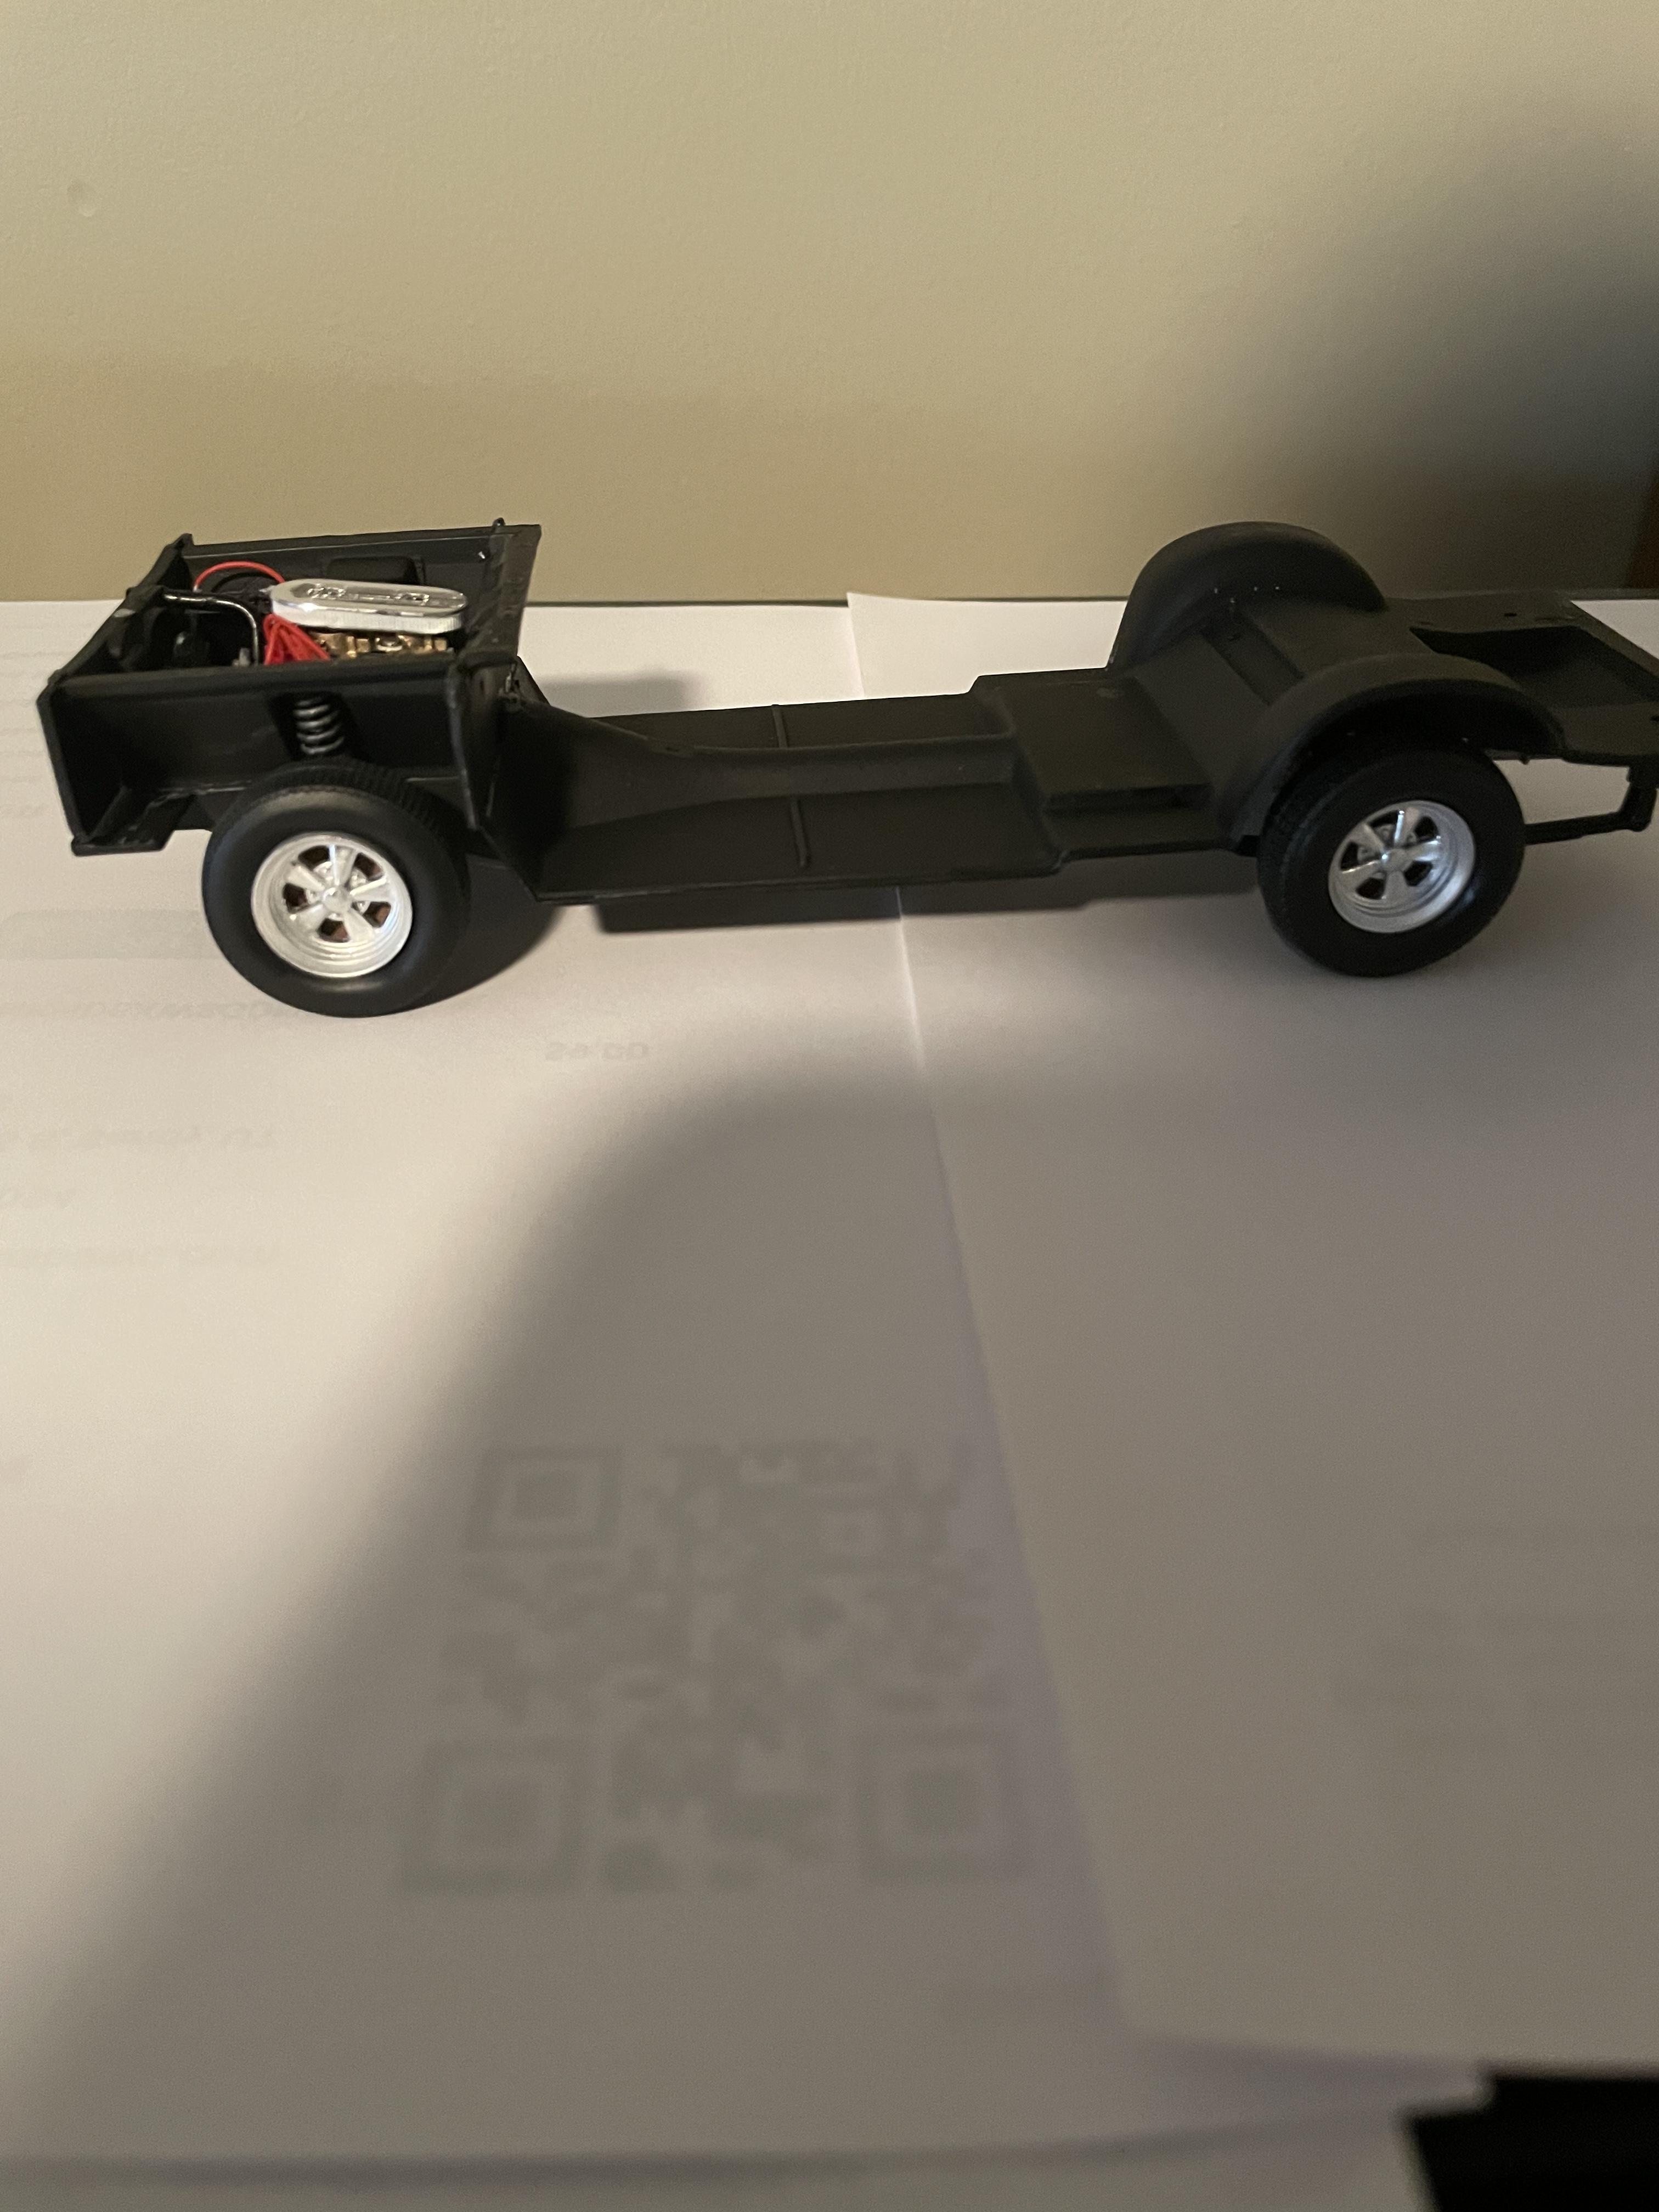
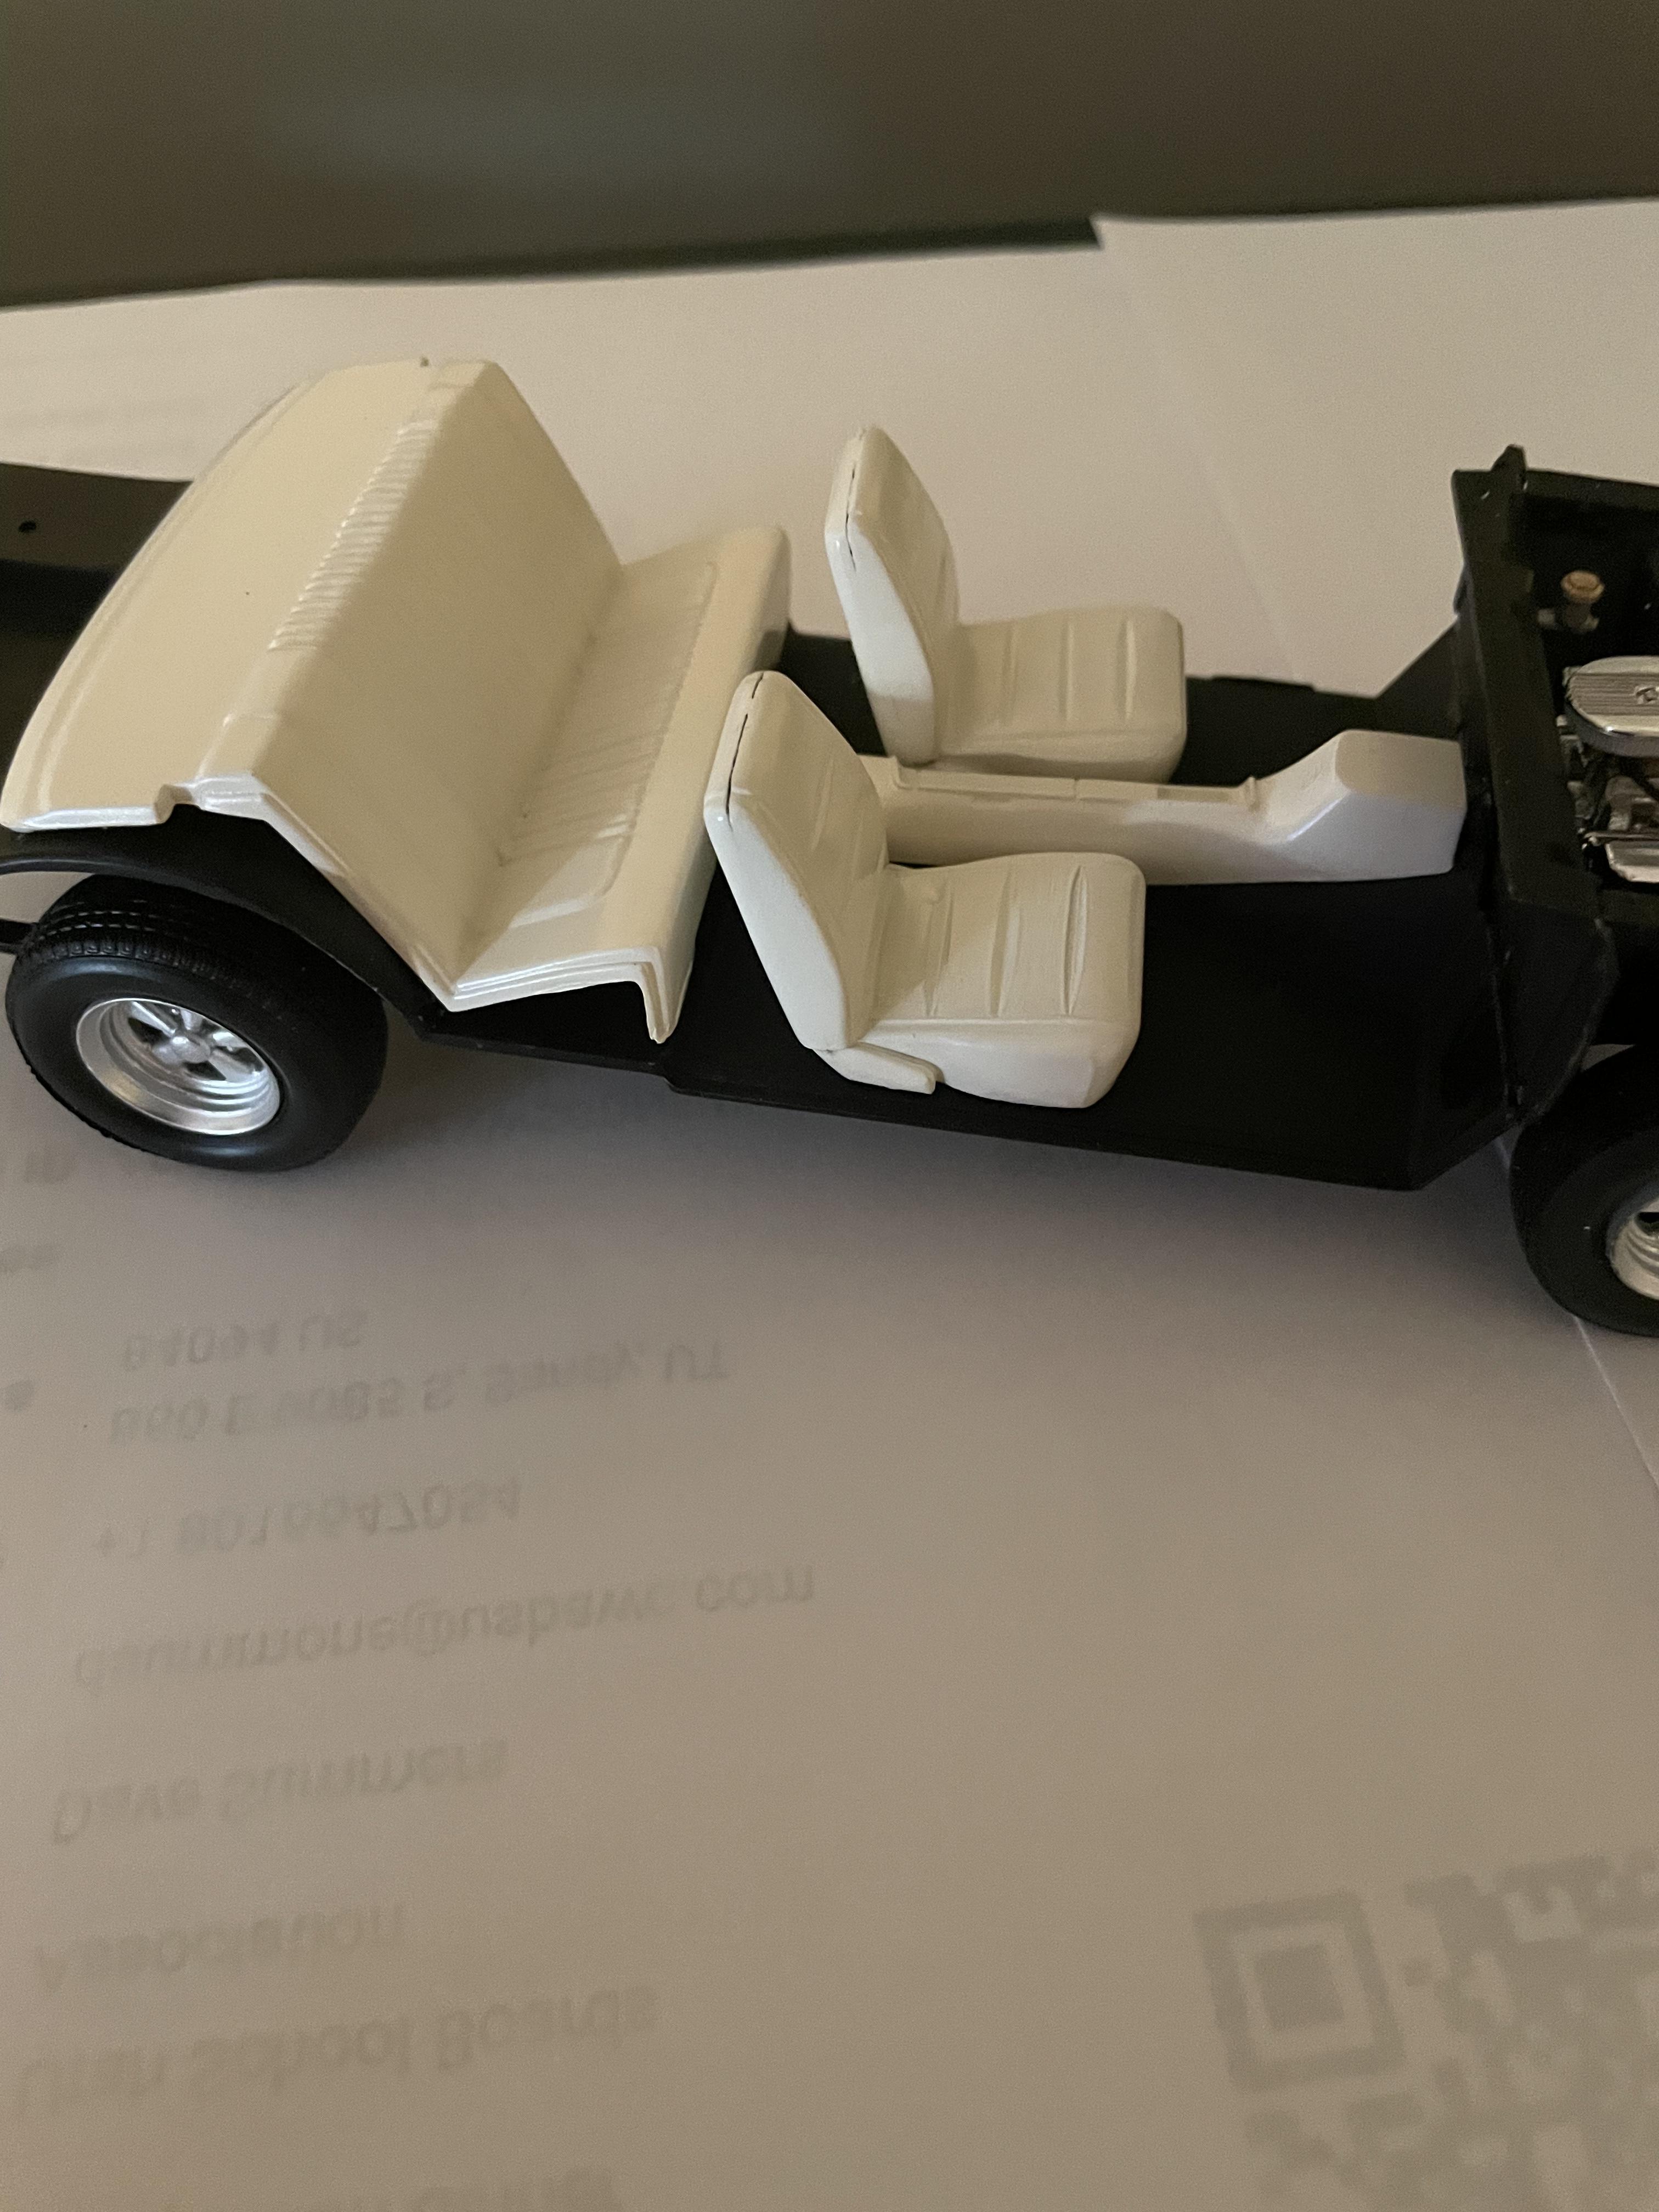
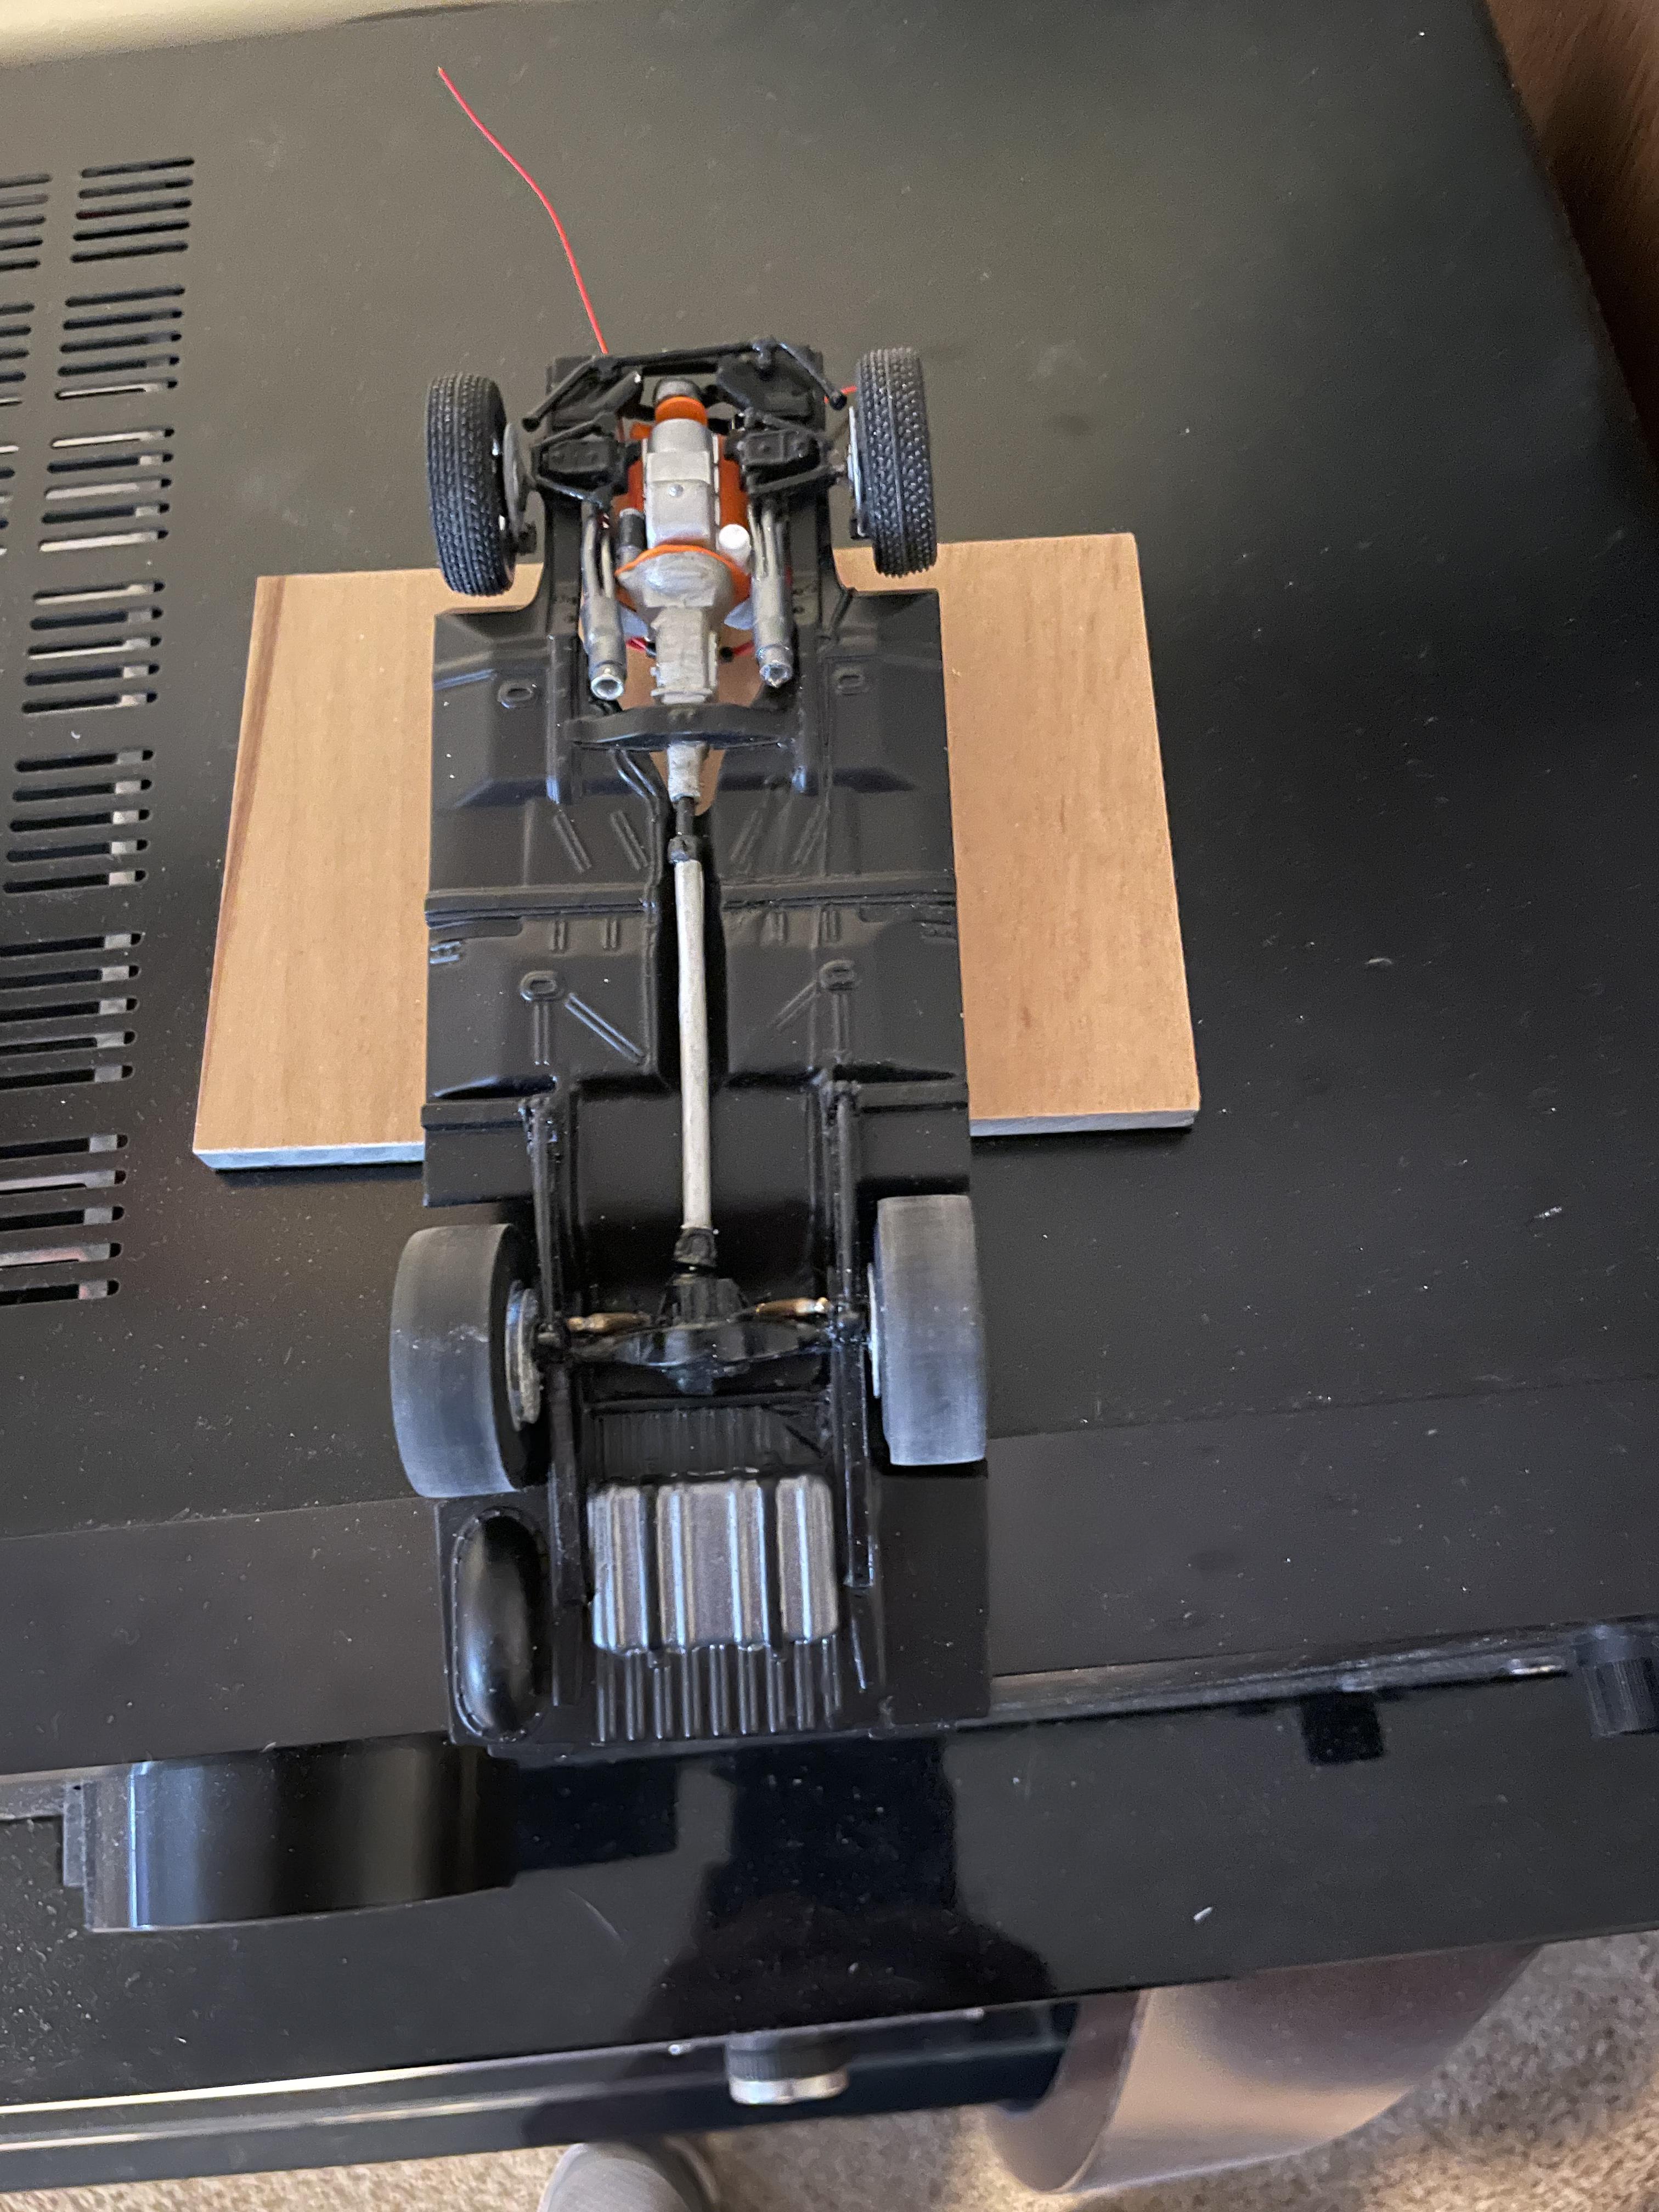
Engine is in the chassis and it’s now a roller. Set the body on and I’m going to have to work on the inner fenders a bit, they won’t allow the front of the chassis to fit up in the body quite high enough but this shouldn’t be to big a problem. My dilemma is, do I go with the bench seat or the buckets (from a charger) and the center console. Comments would be appreciated. Dave.

-
Thanks, the engines are my favorite part.
-
Nice to see the next generation of builders and tinkerers.
-
Wheels came in the mail today.
-
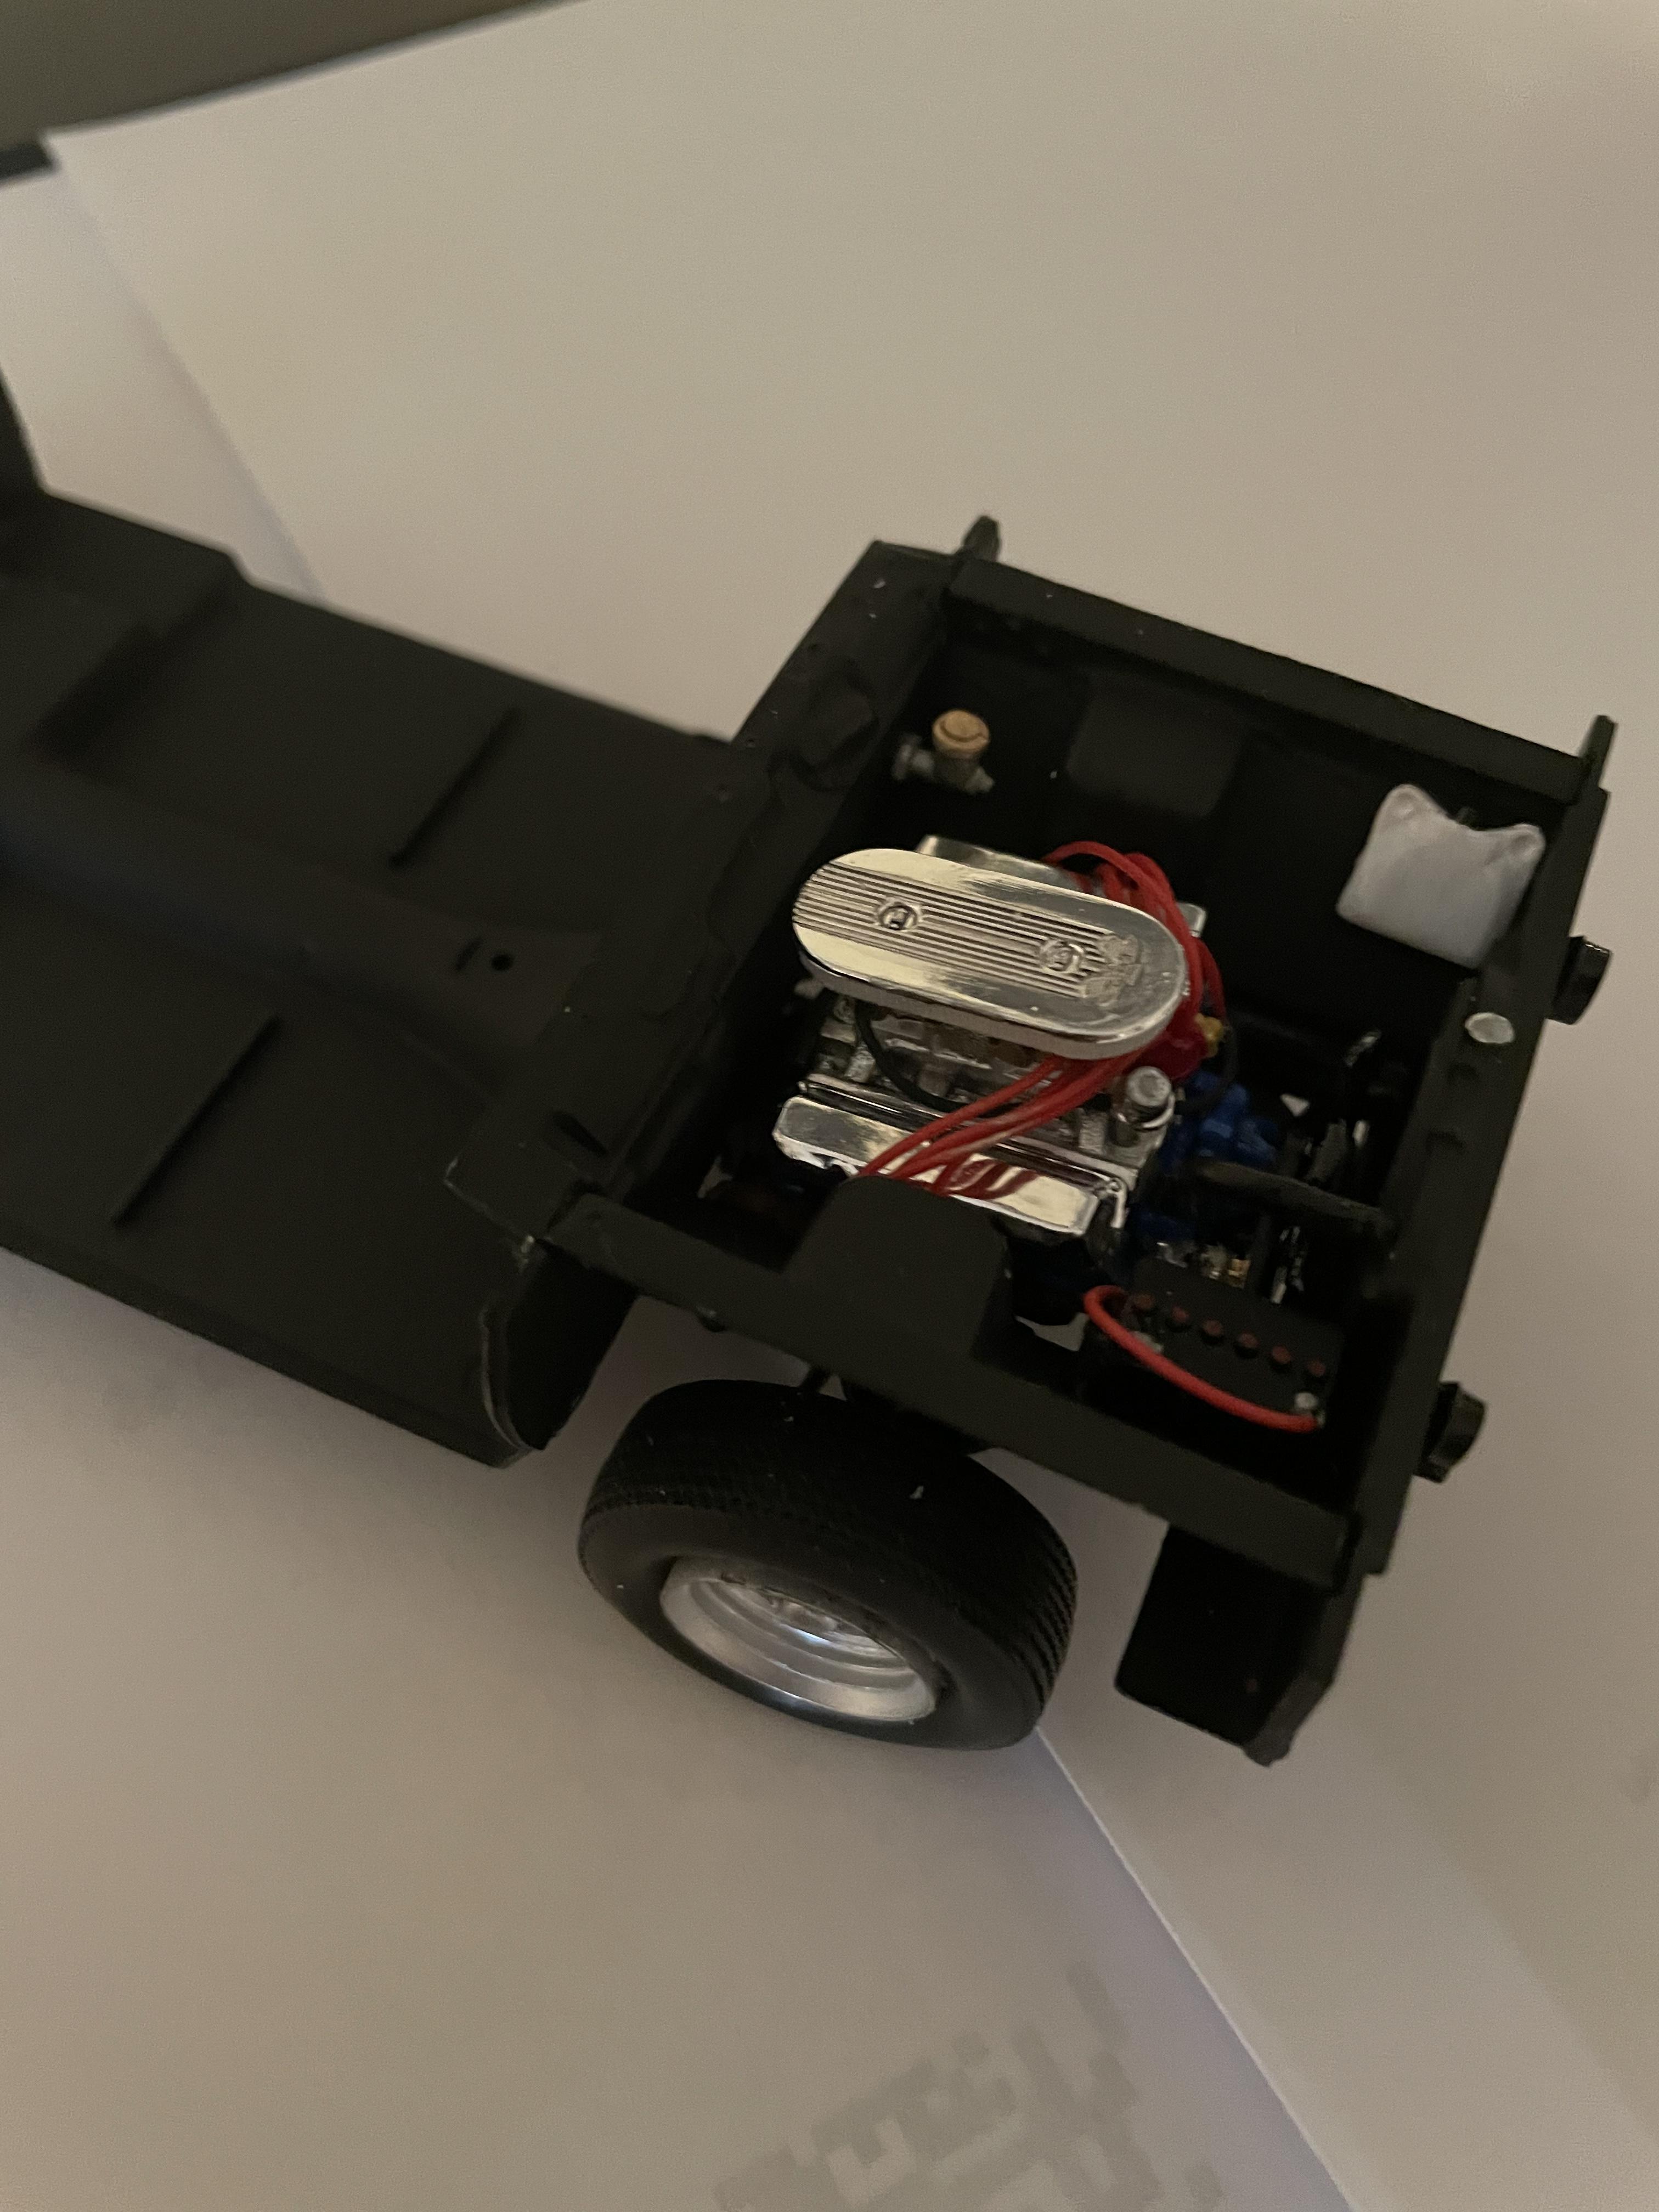
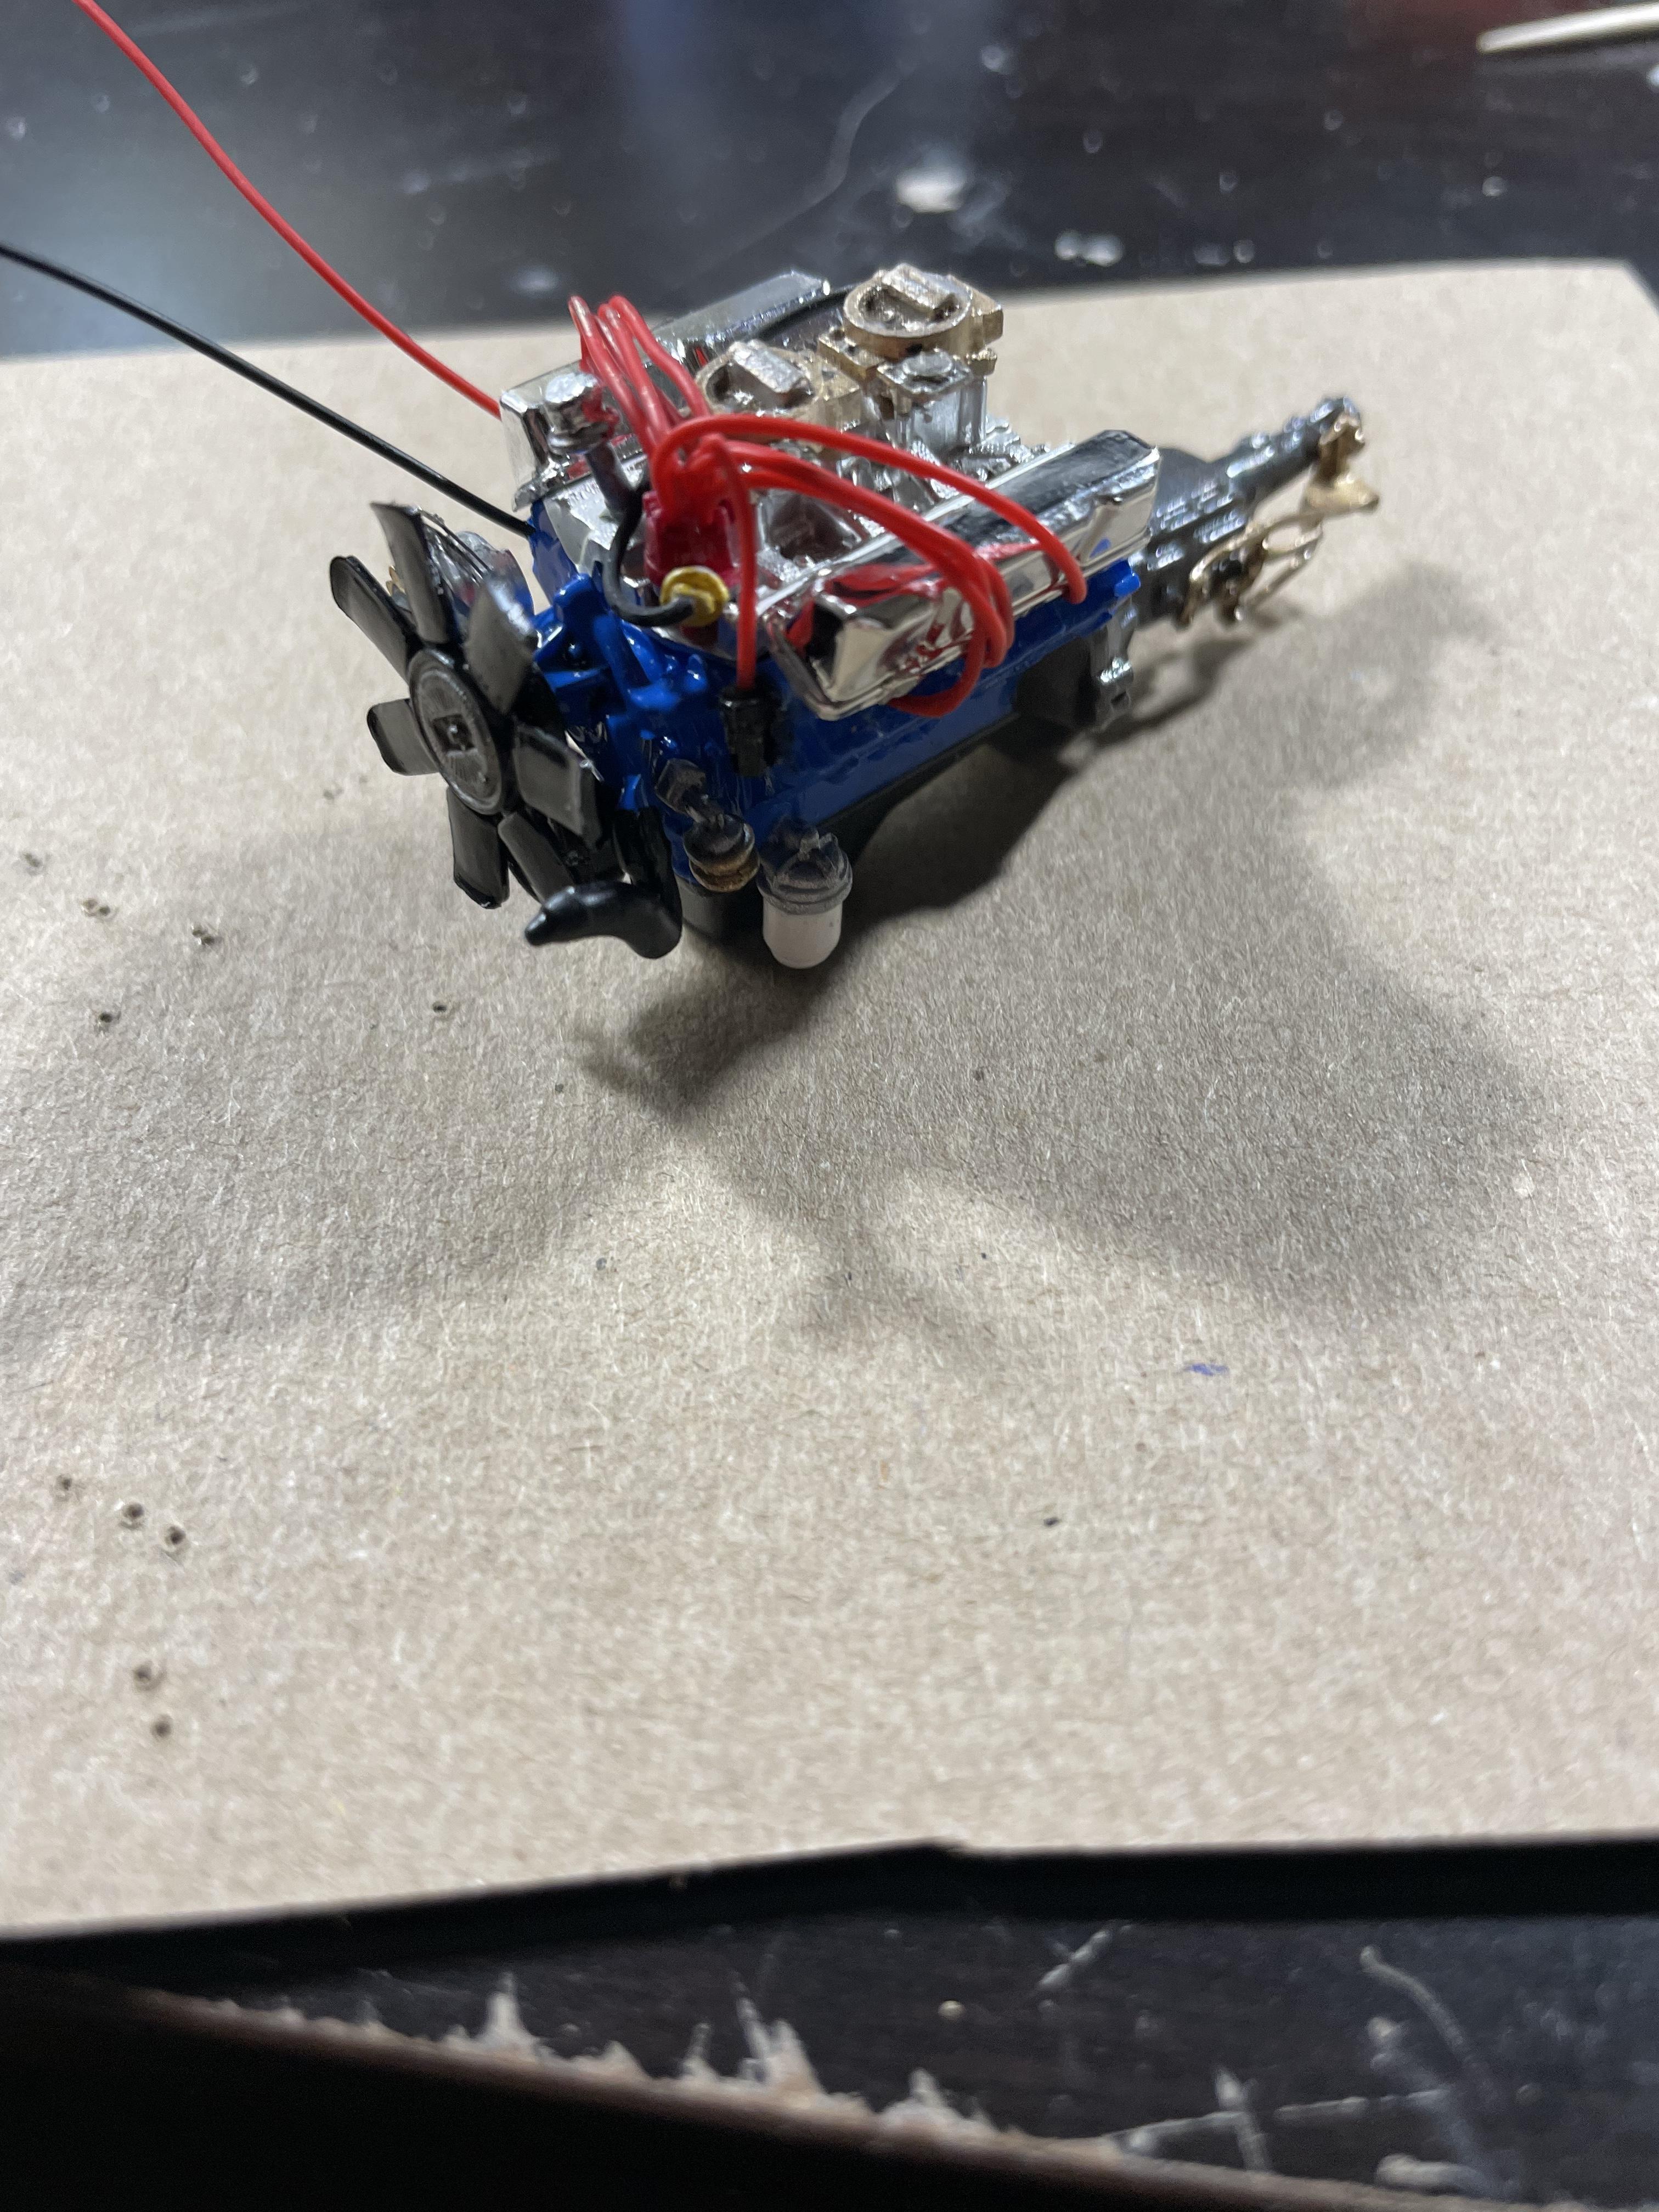
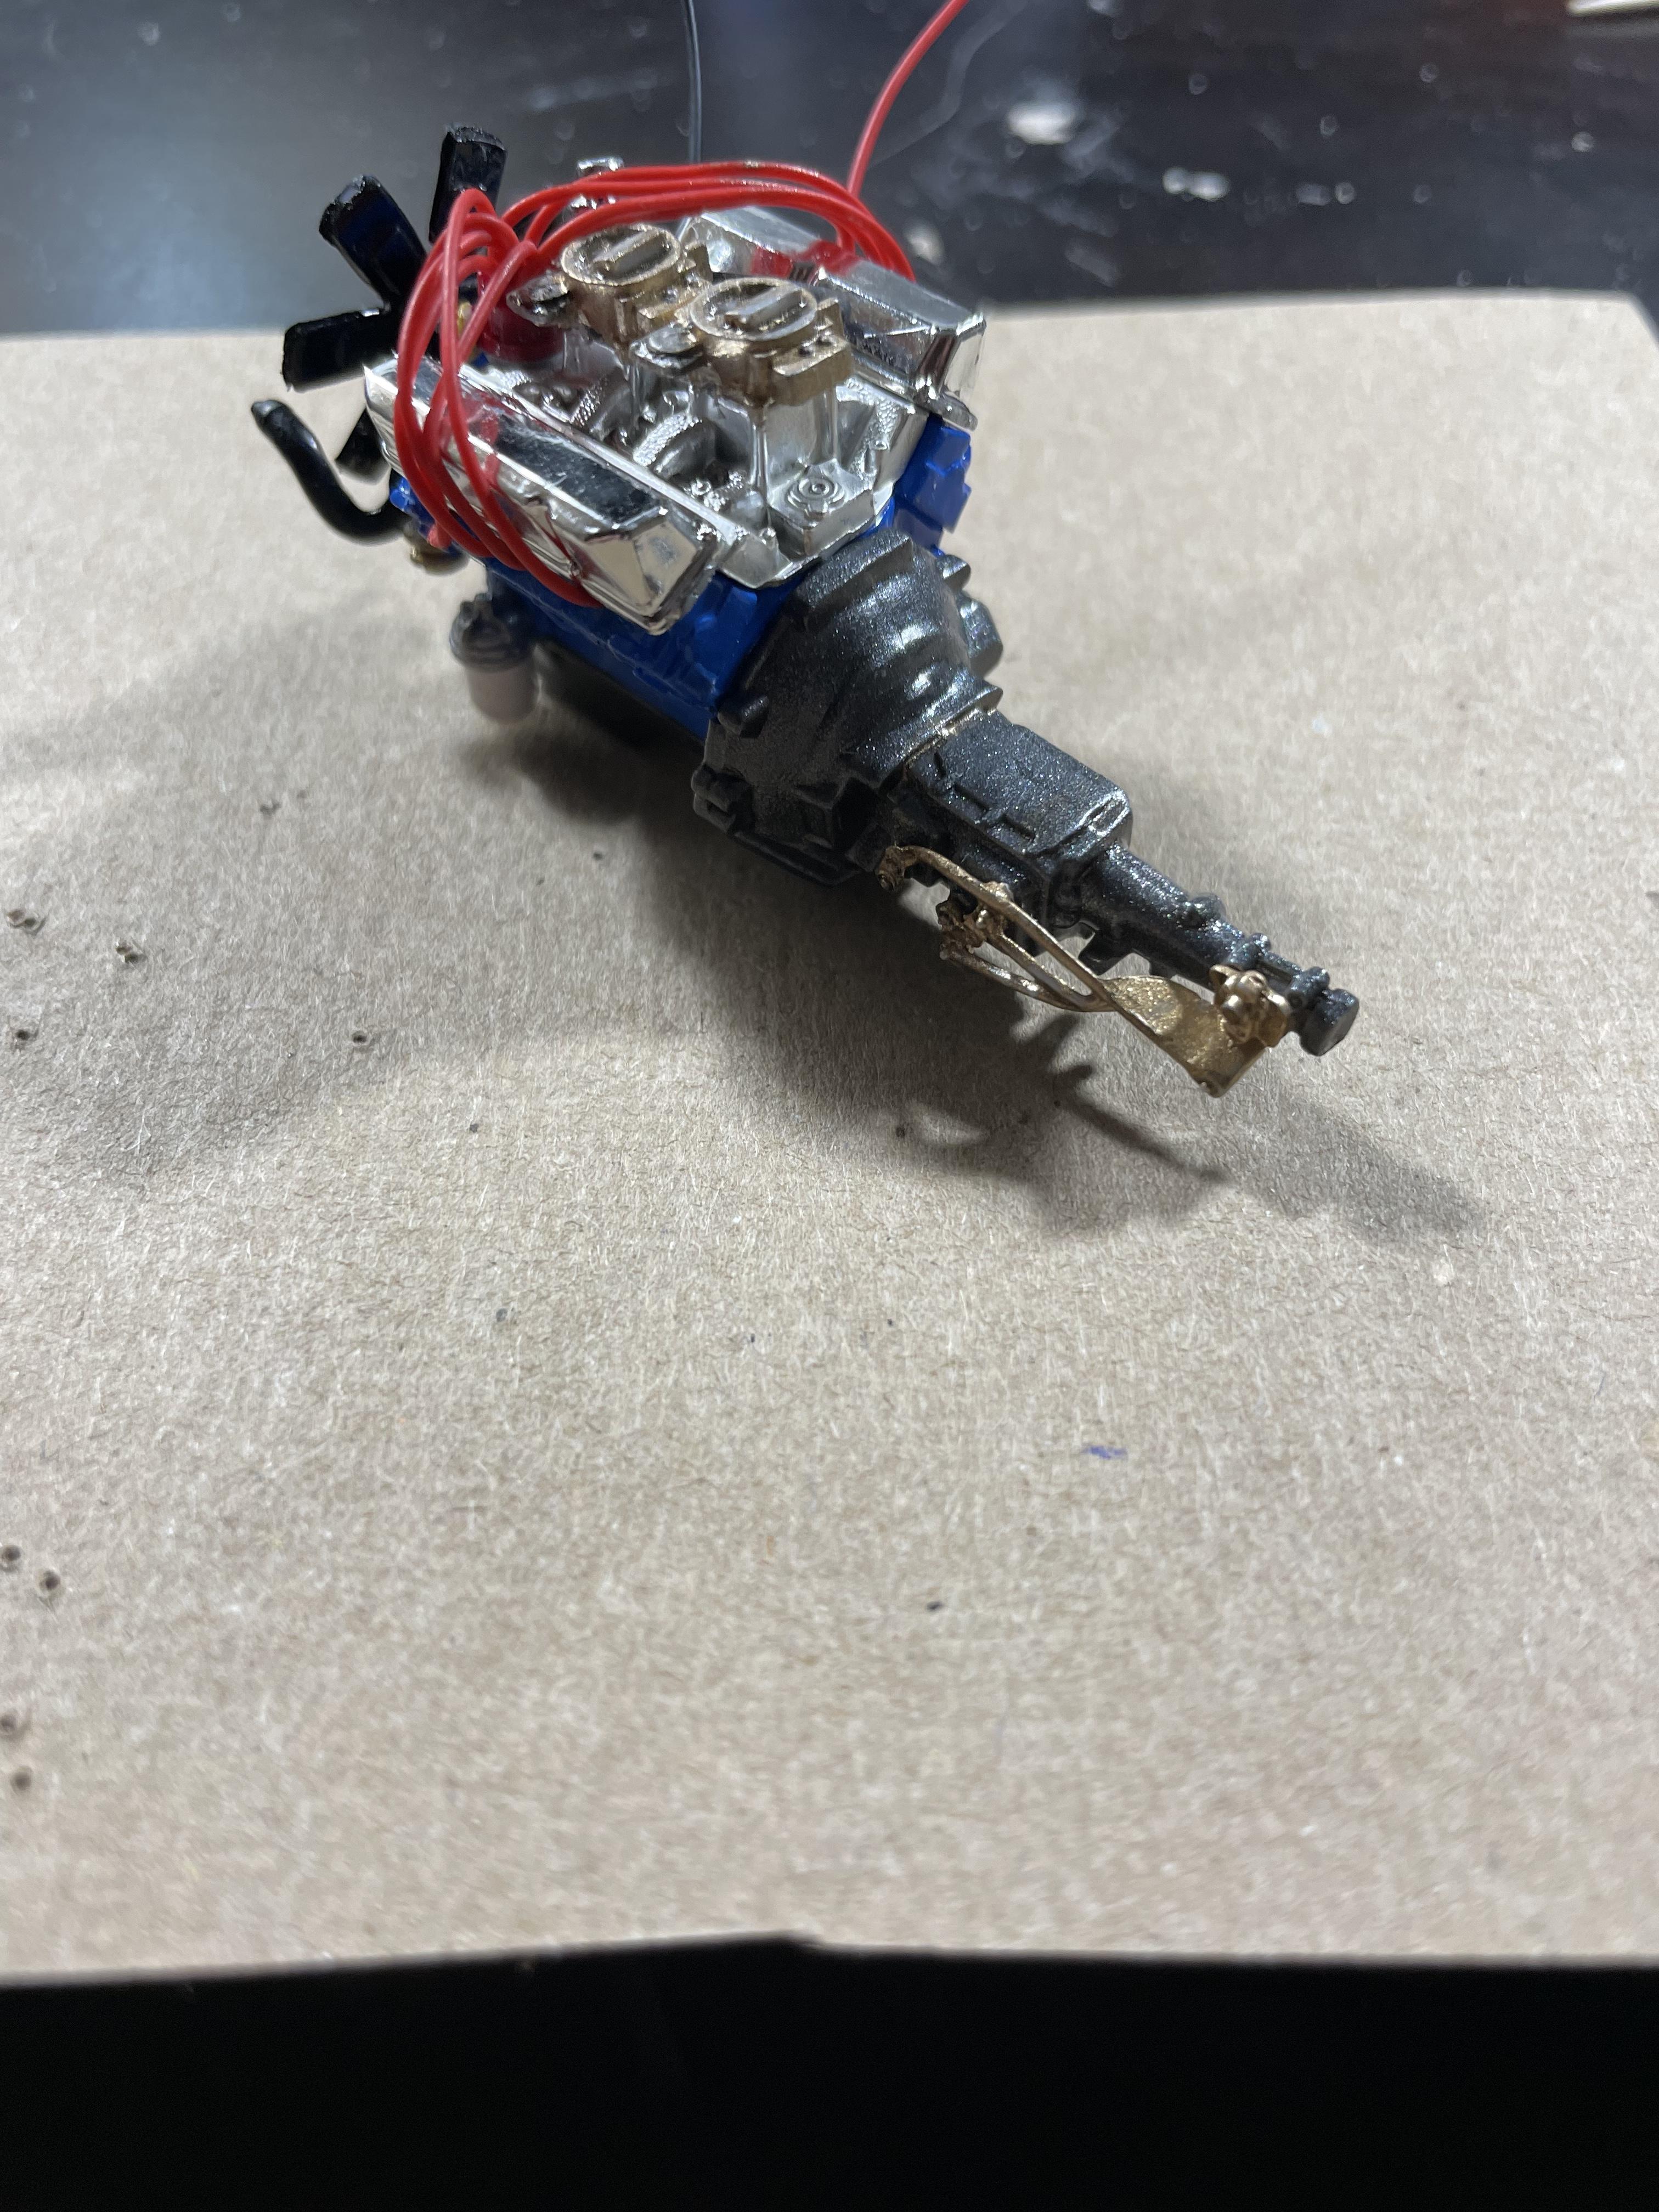
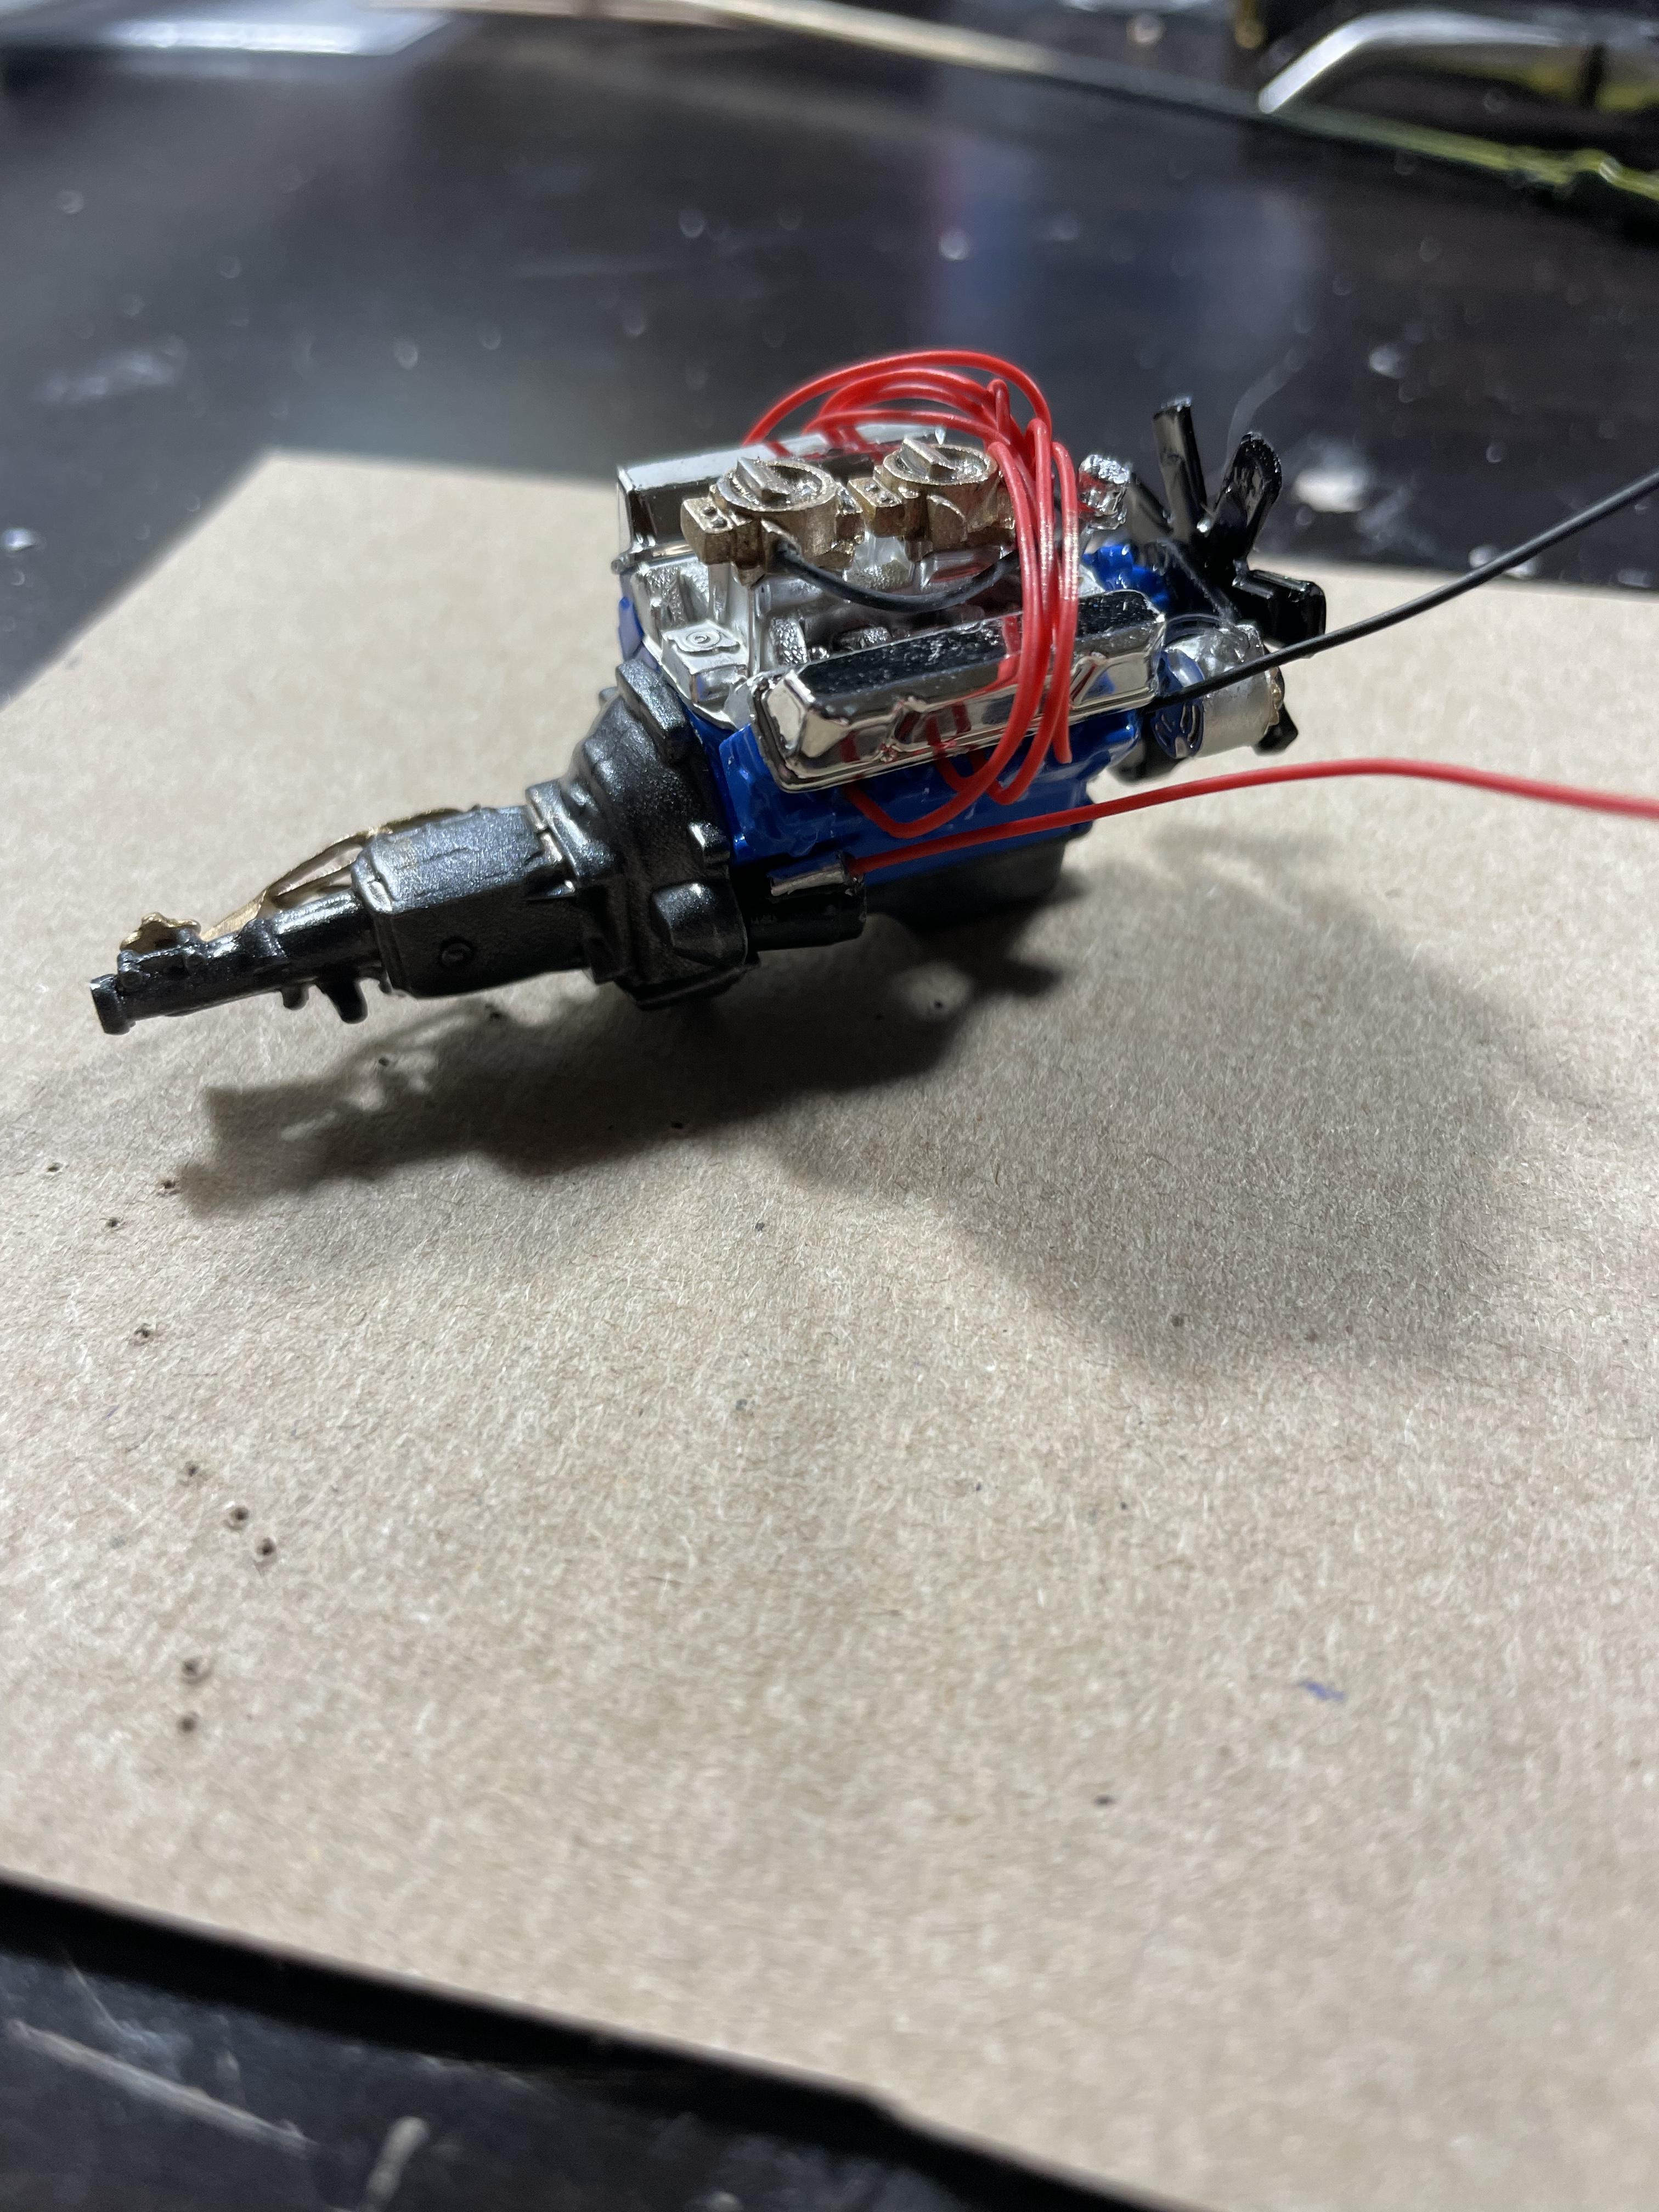
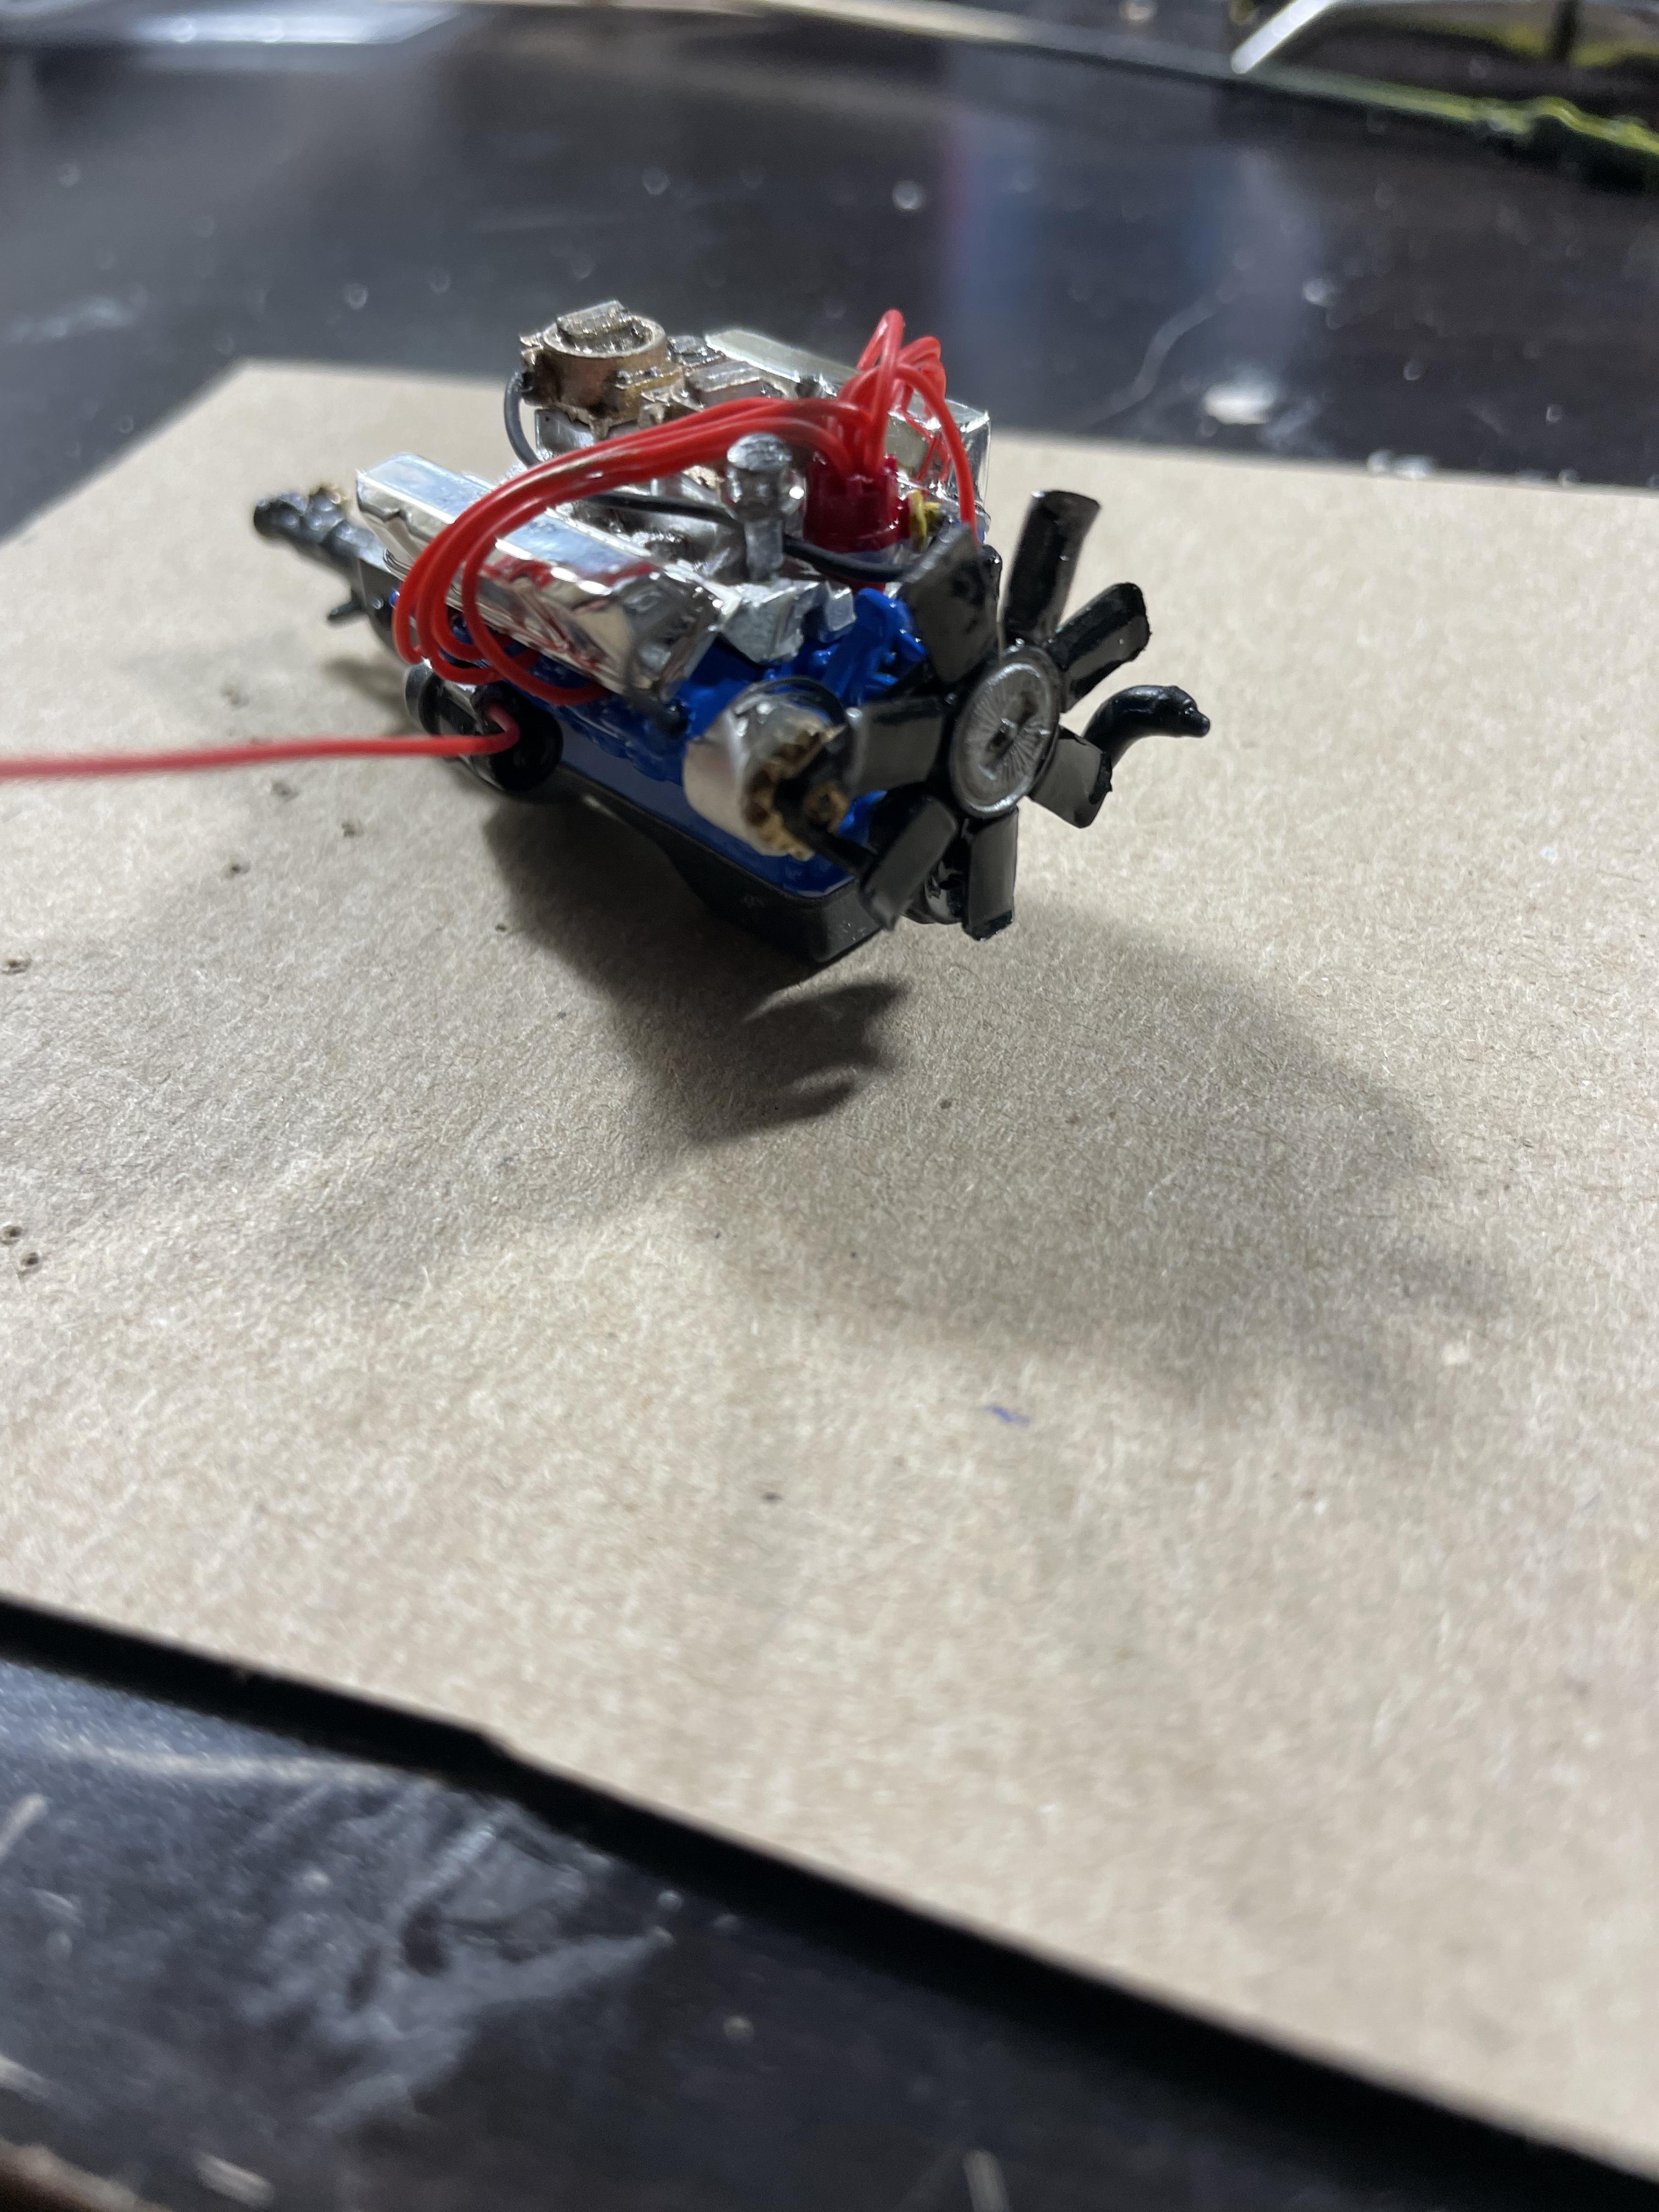
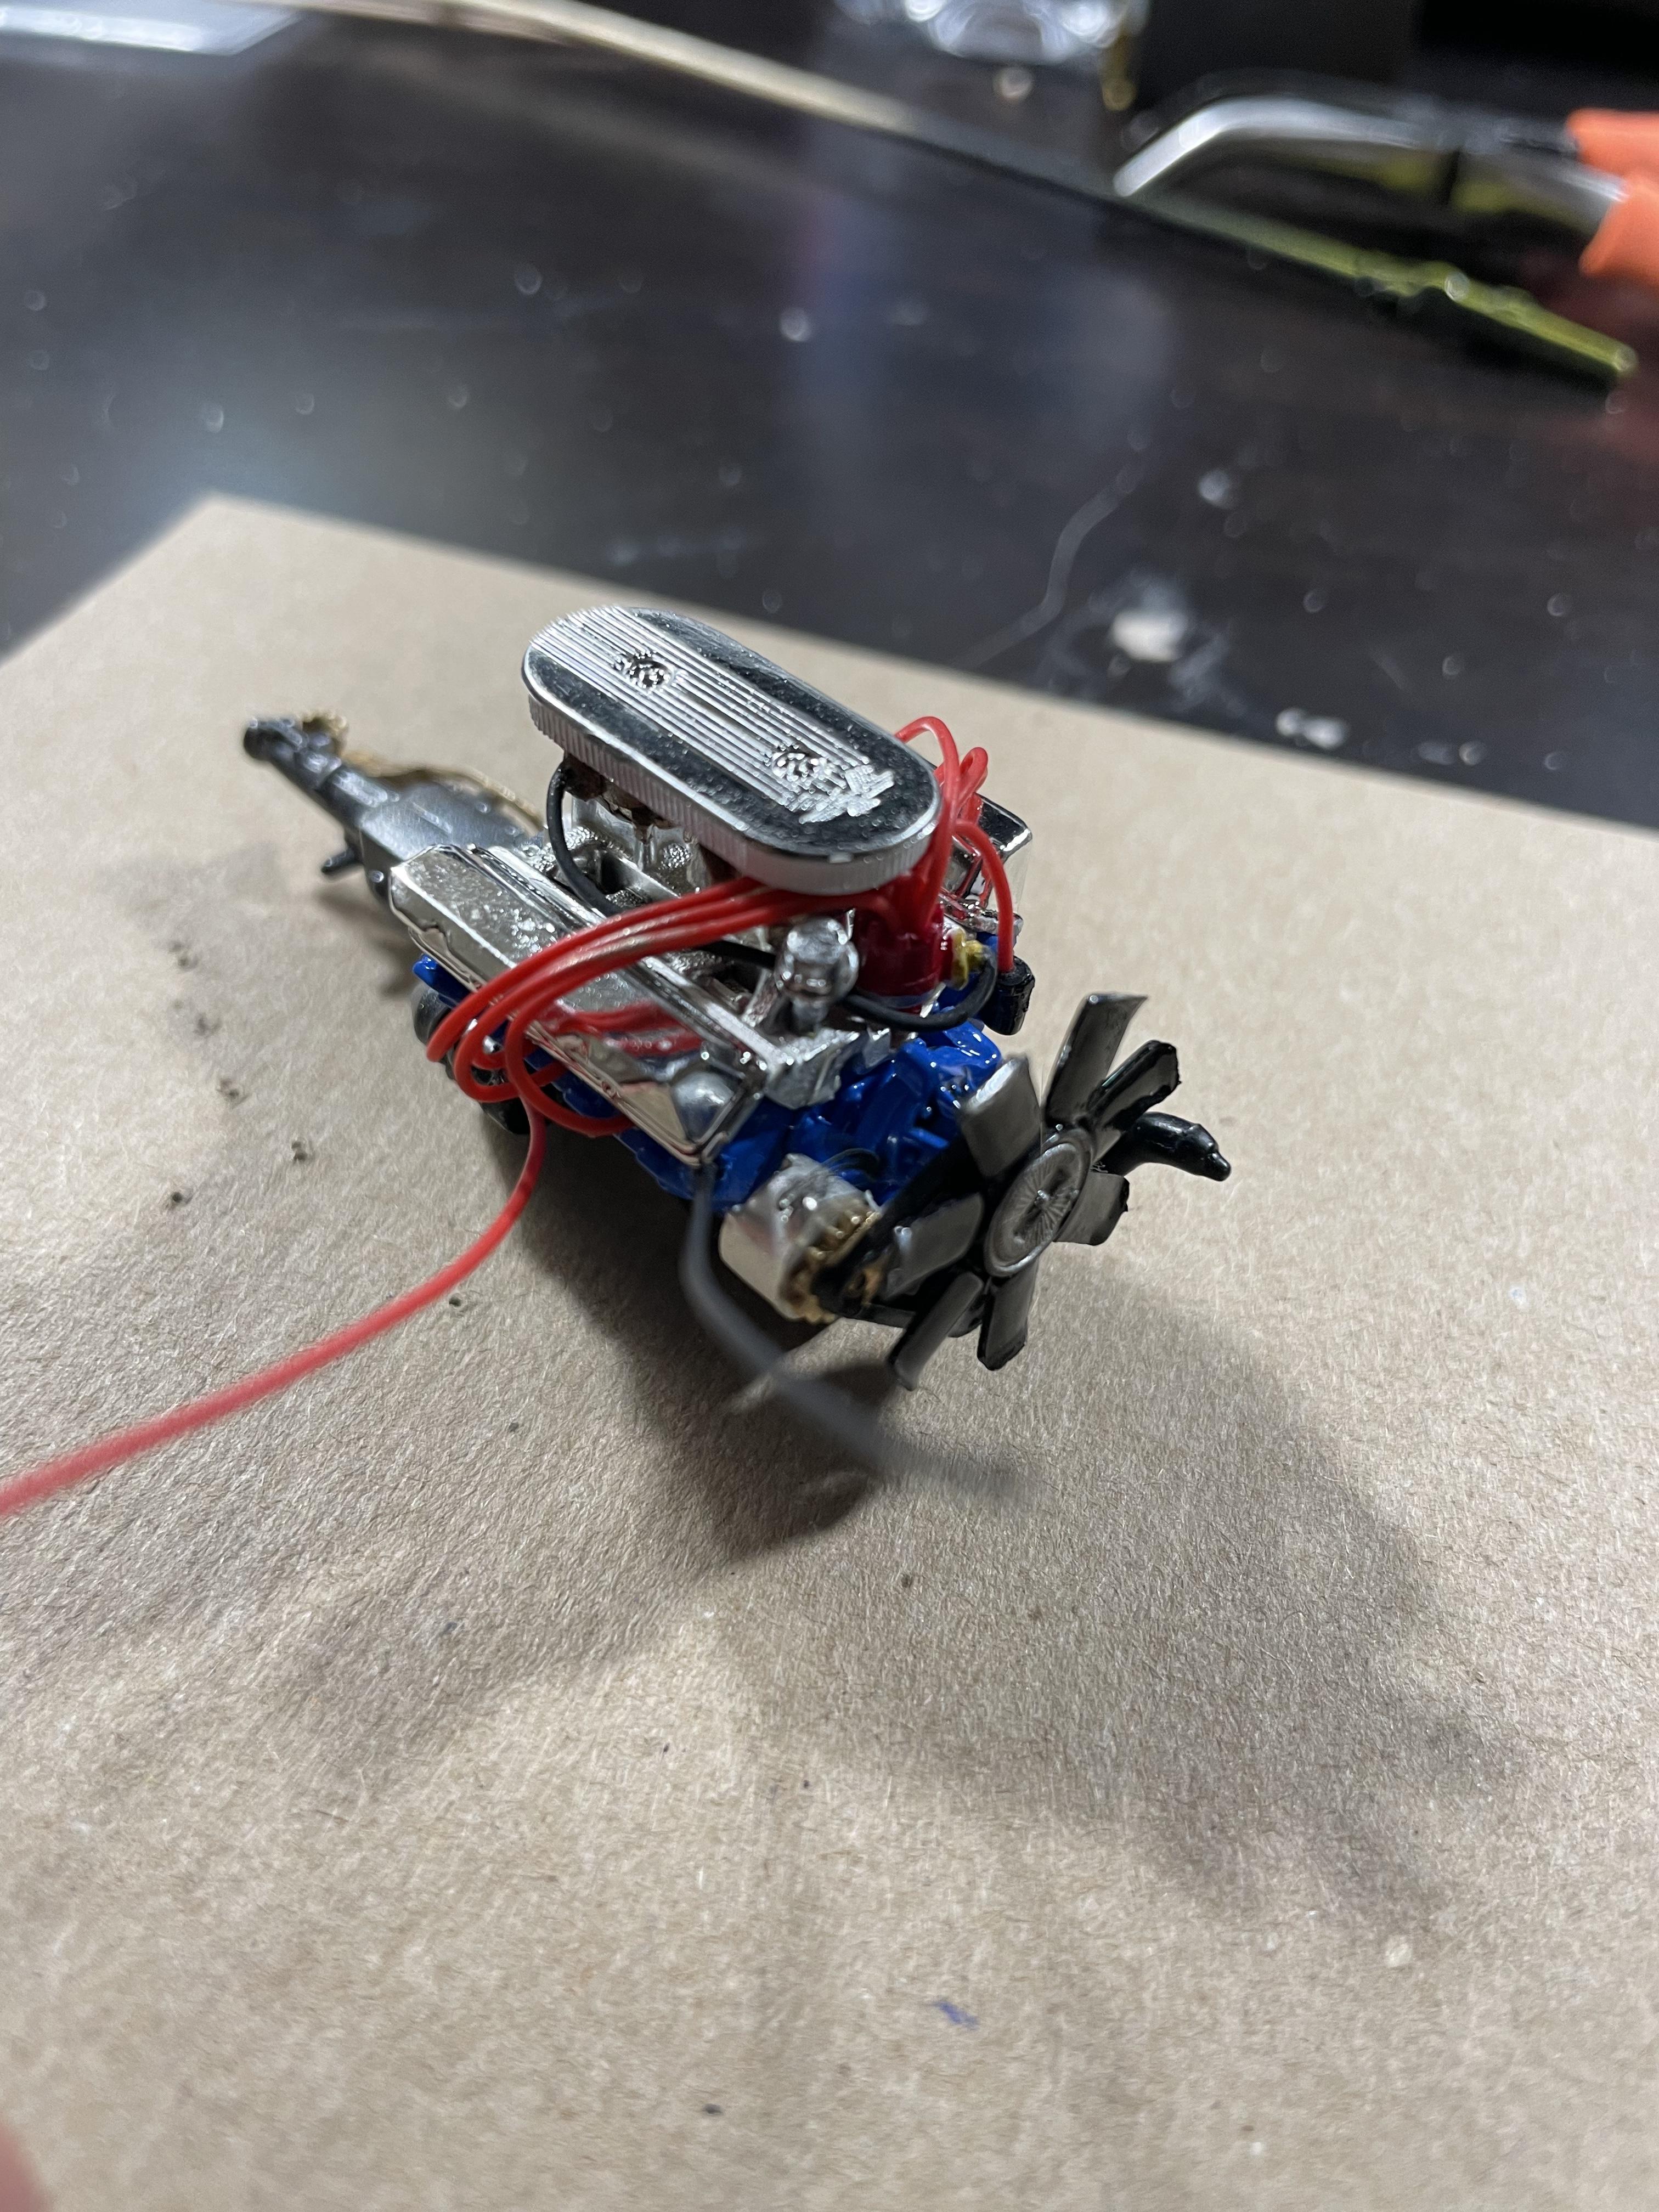
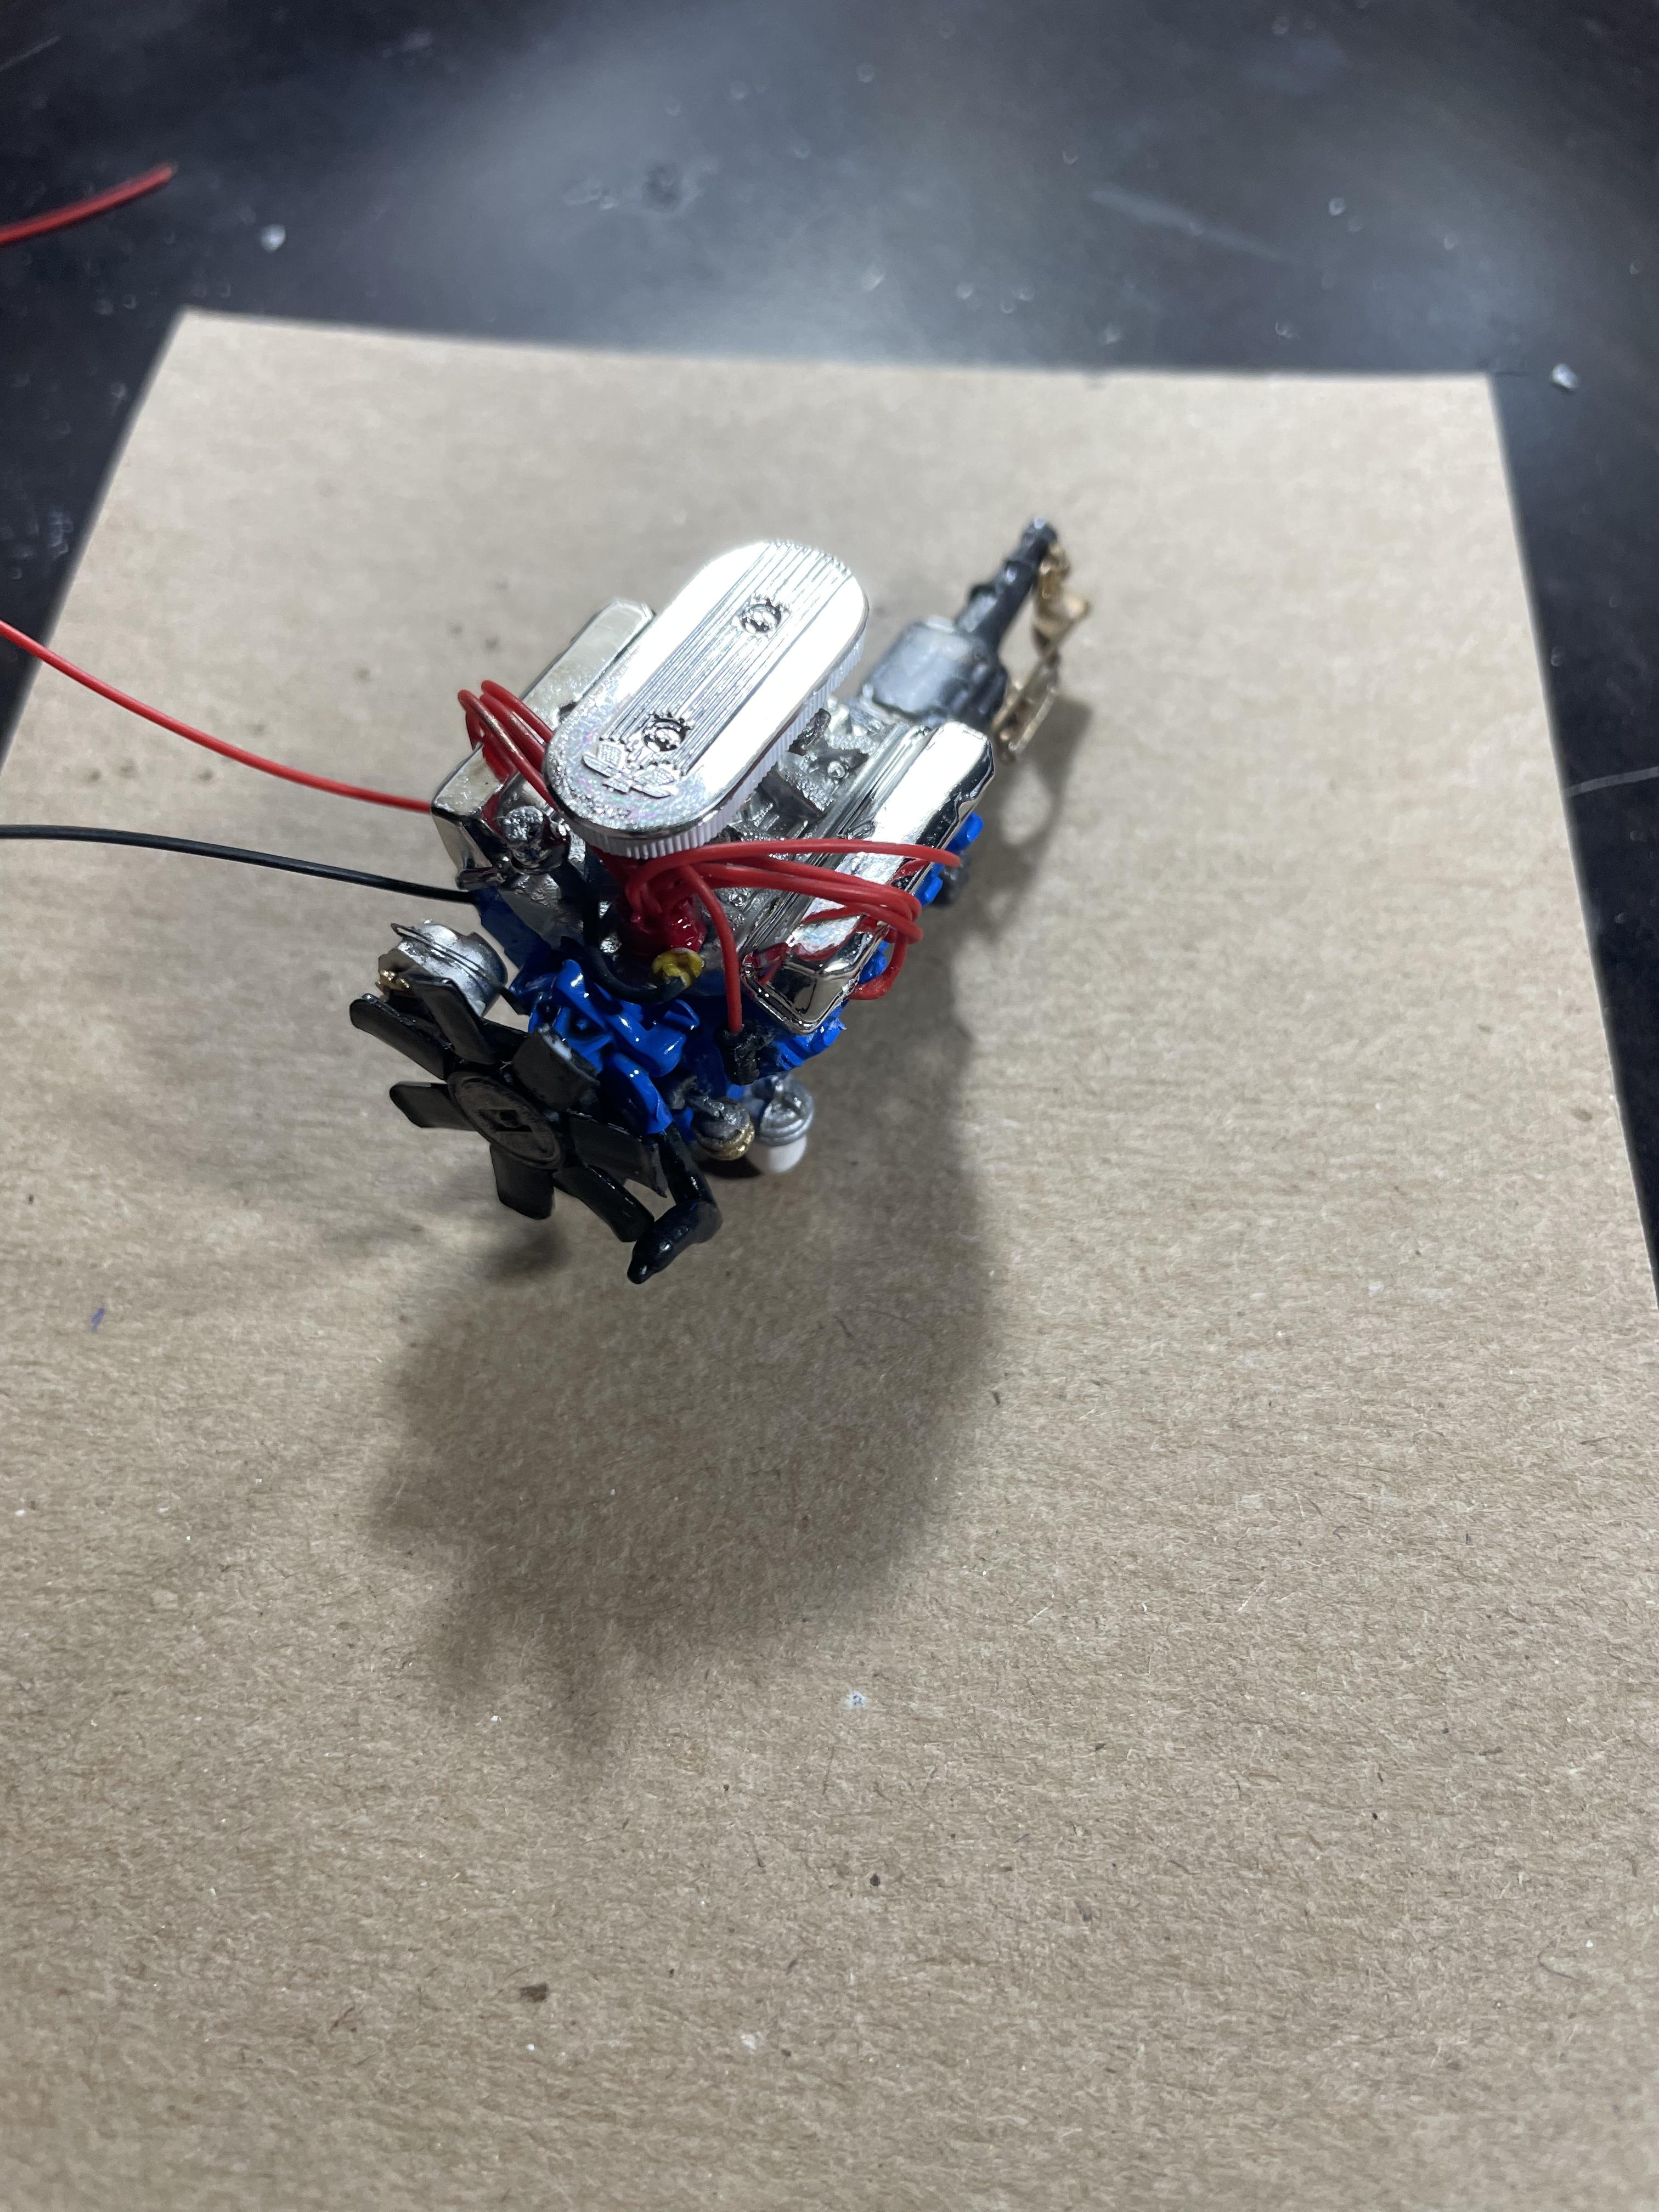
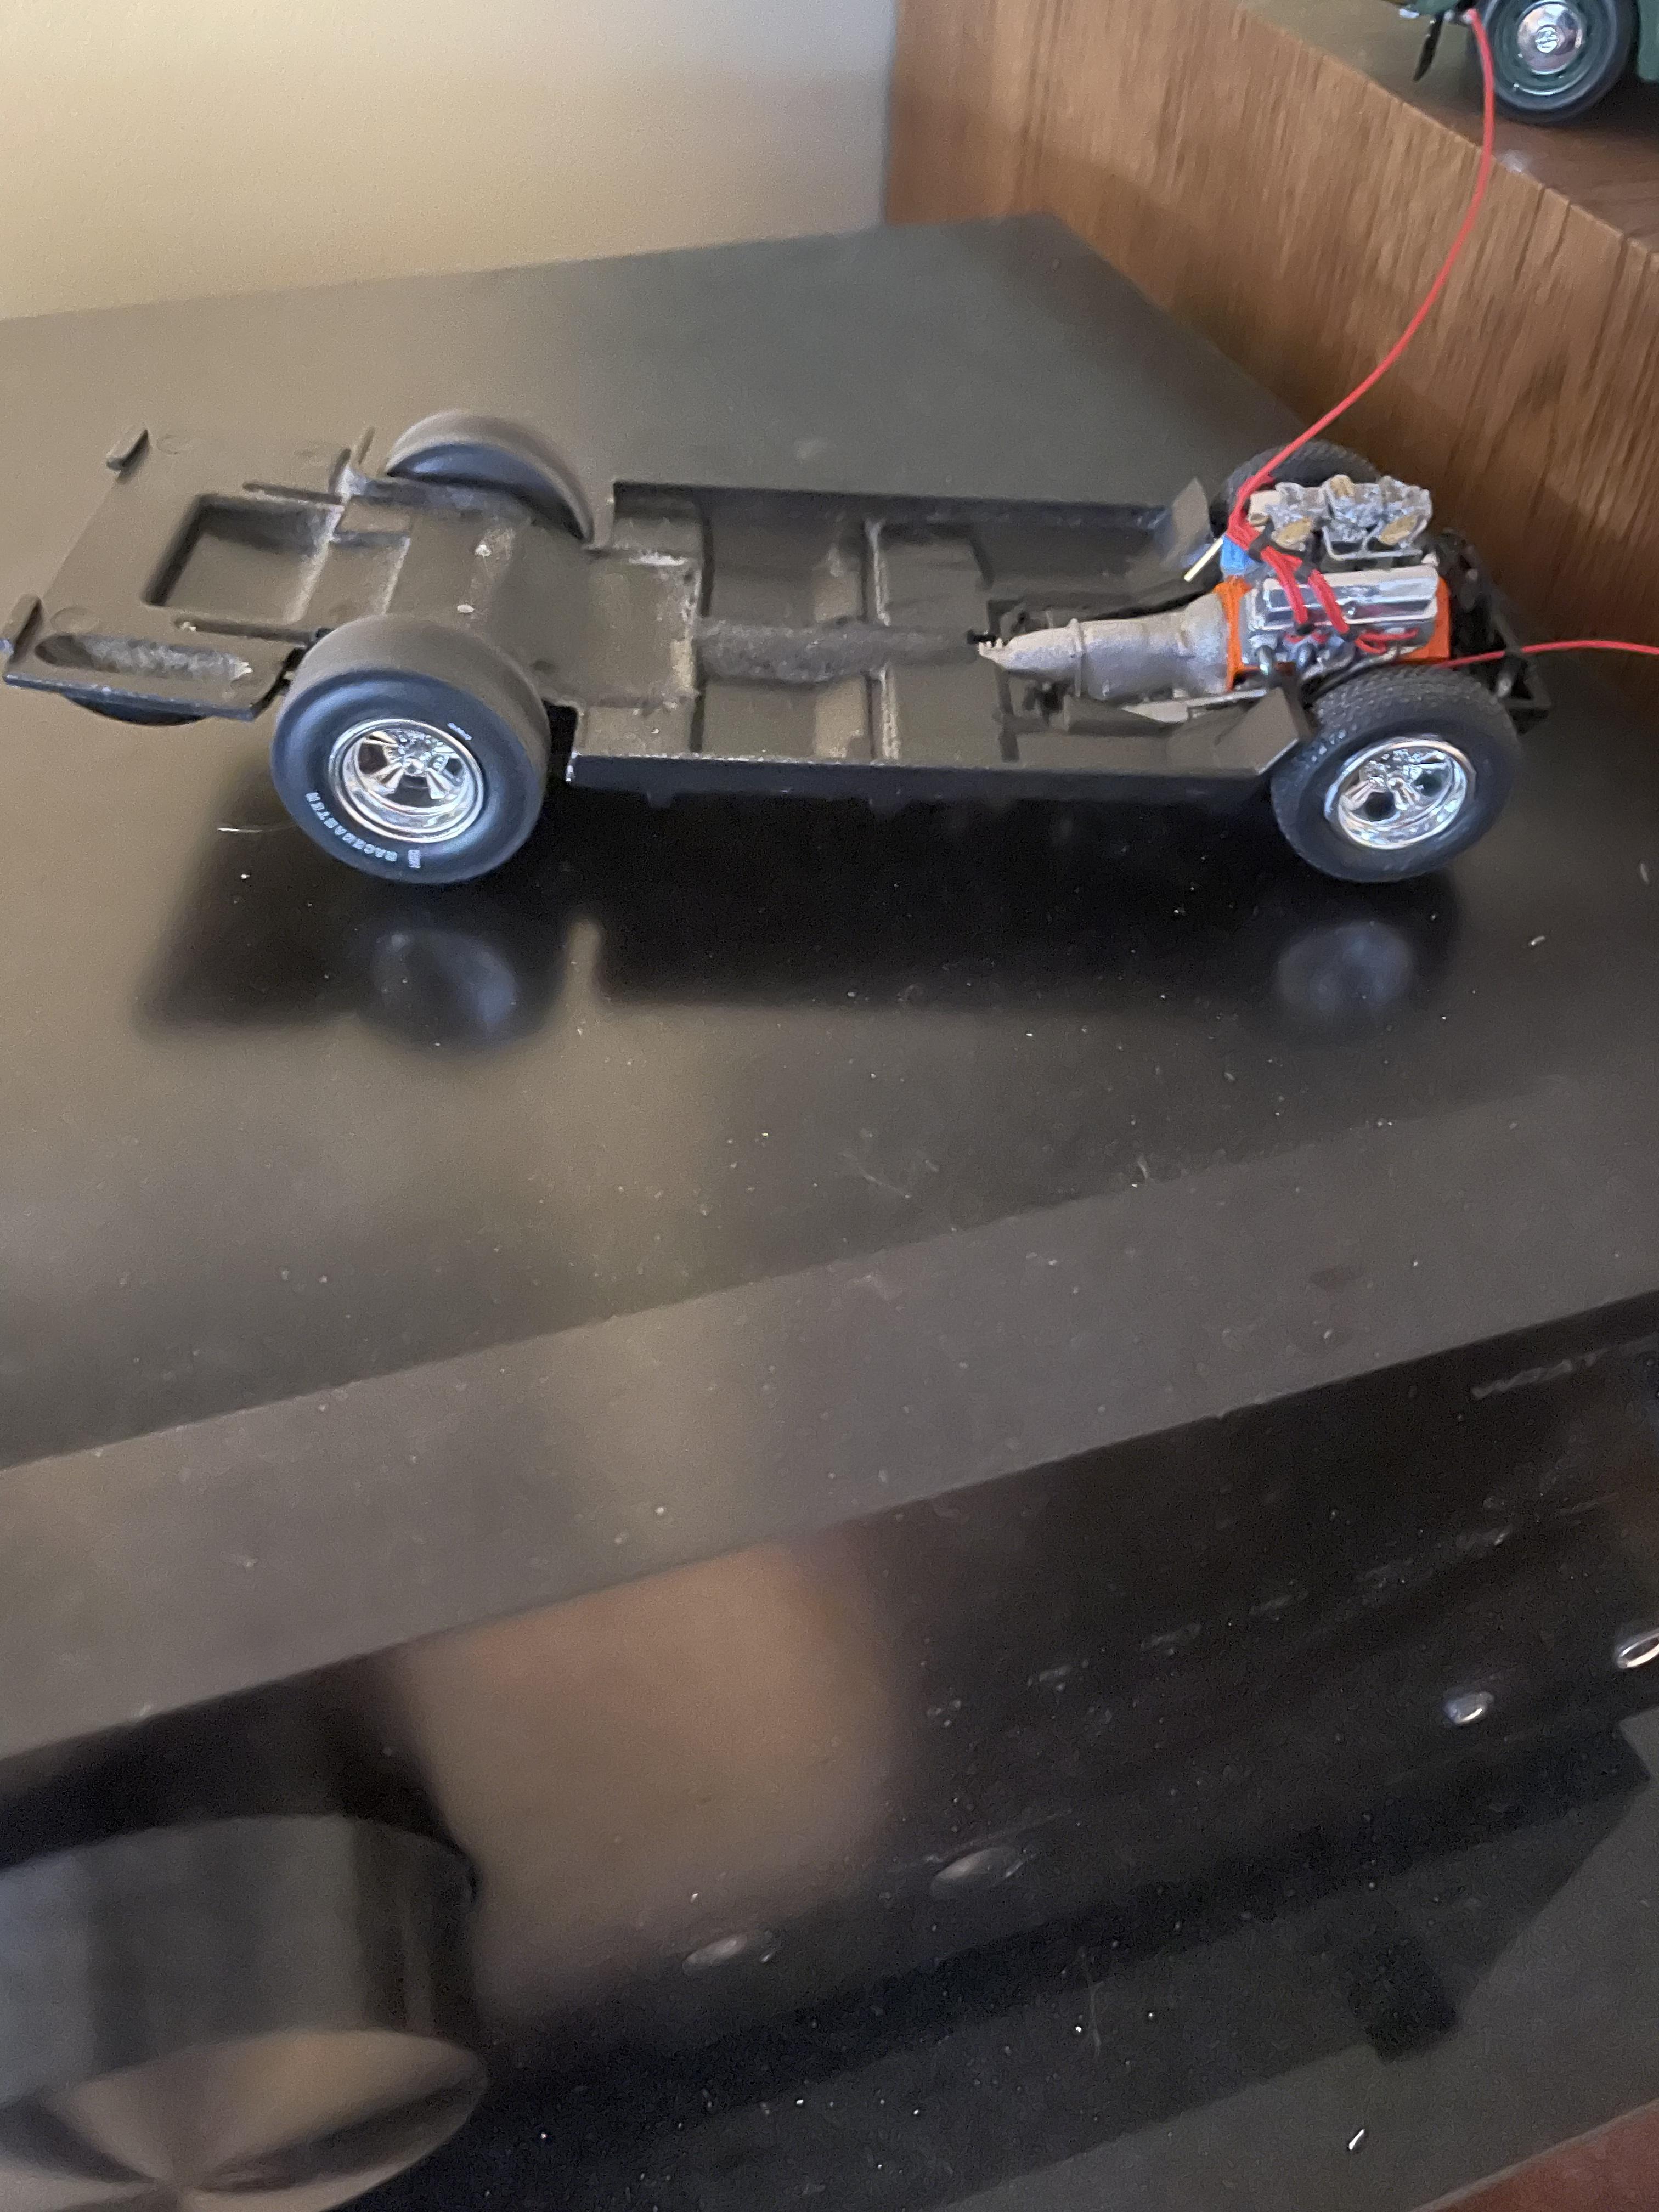
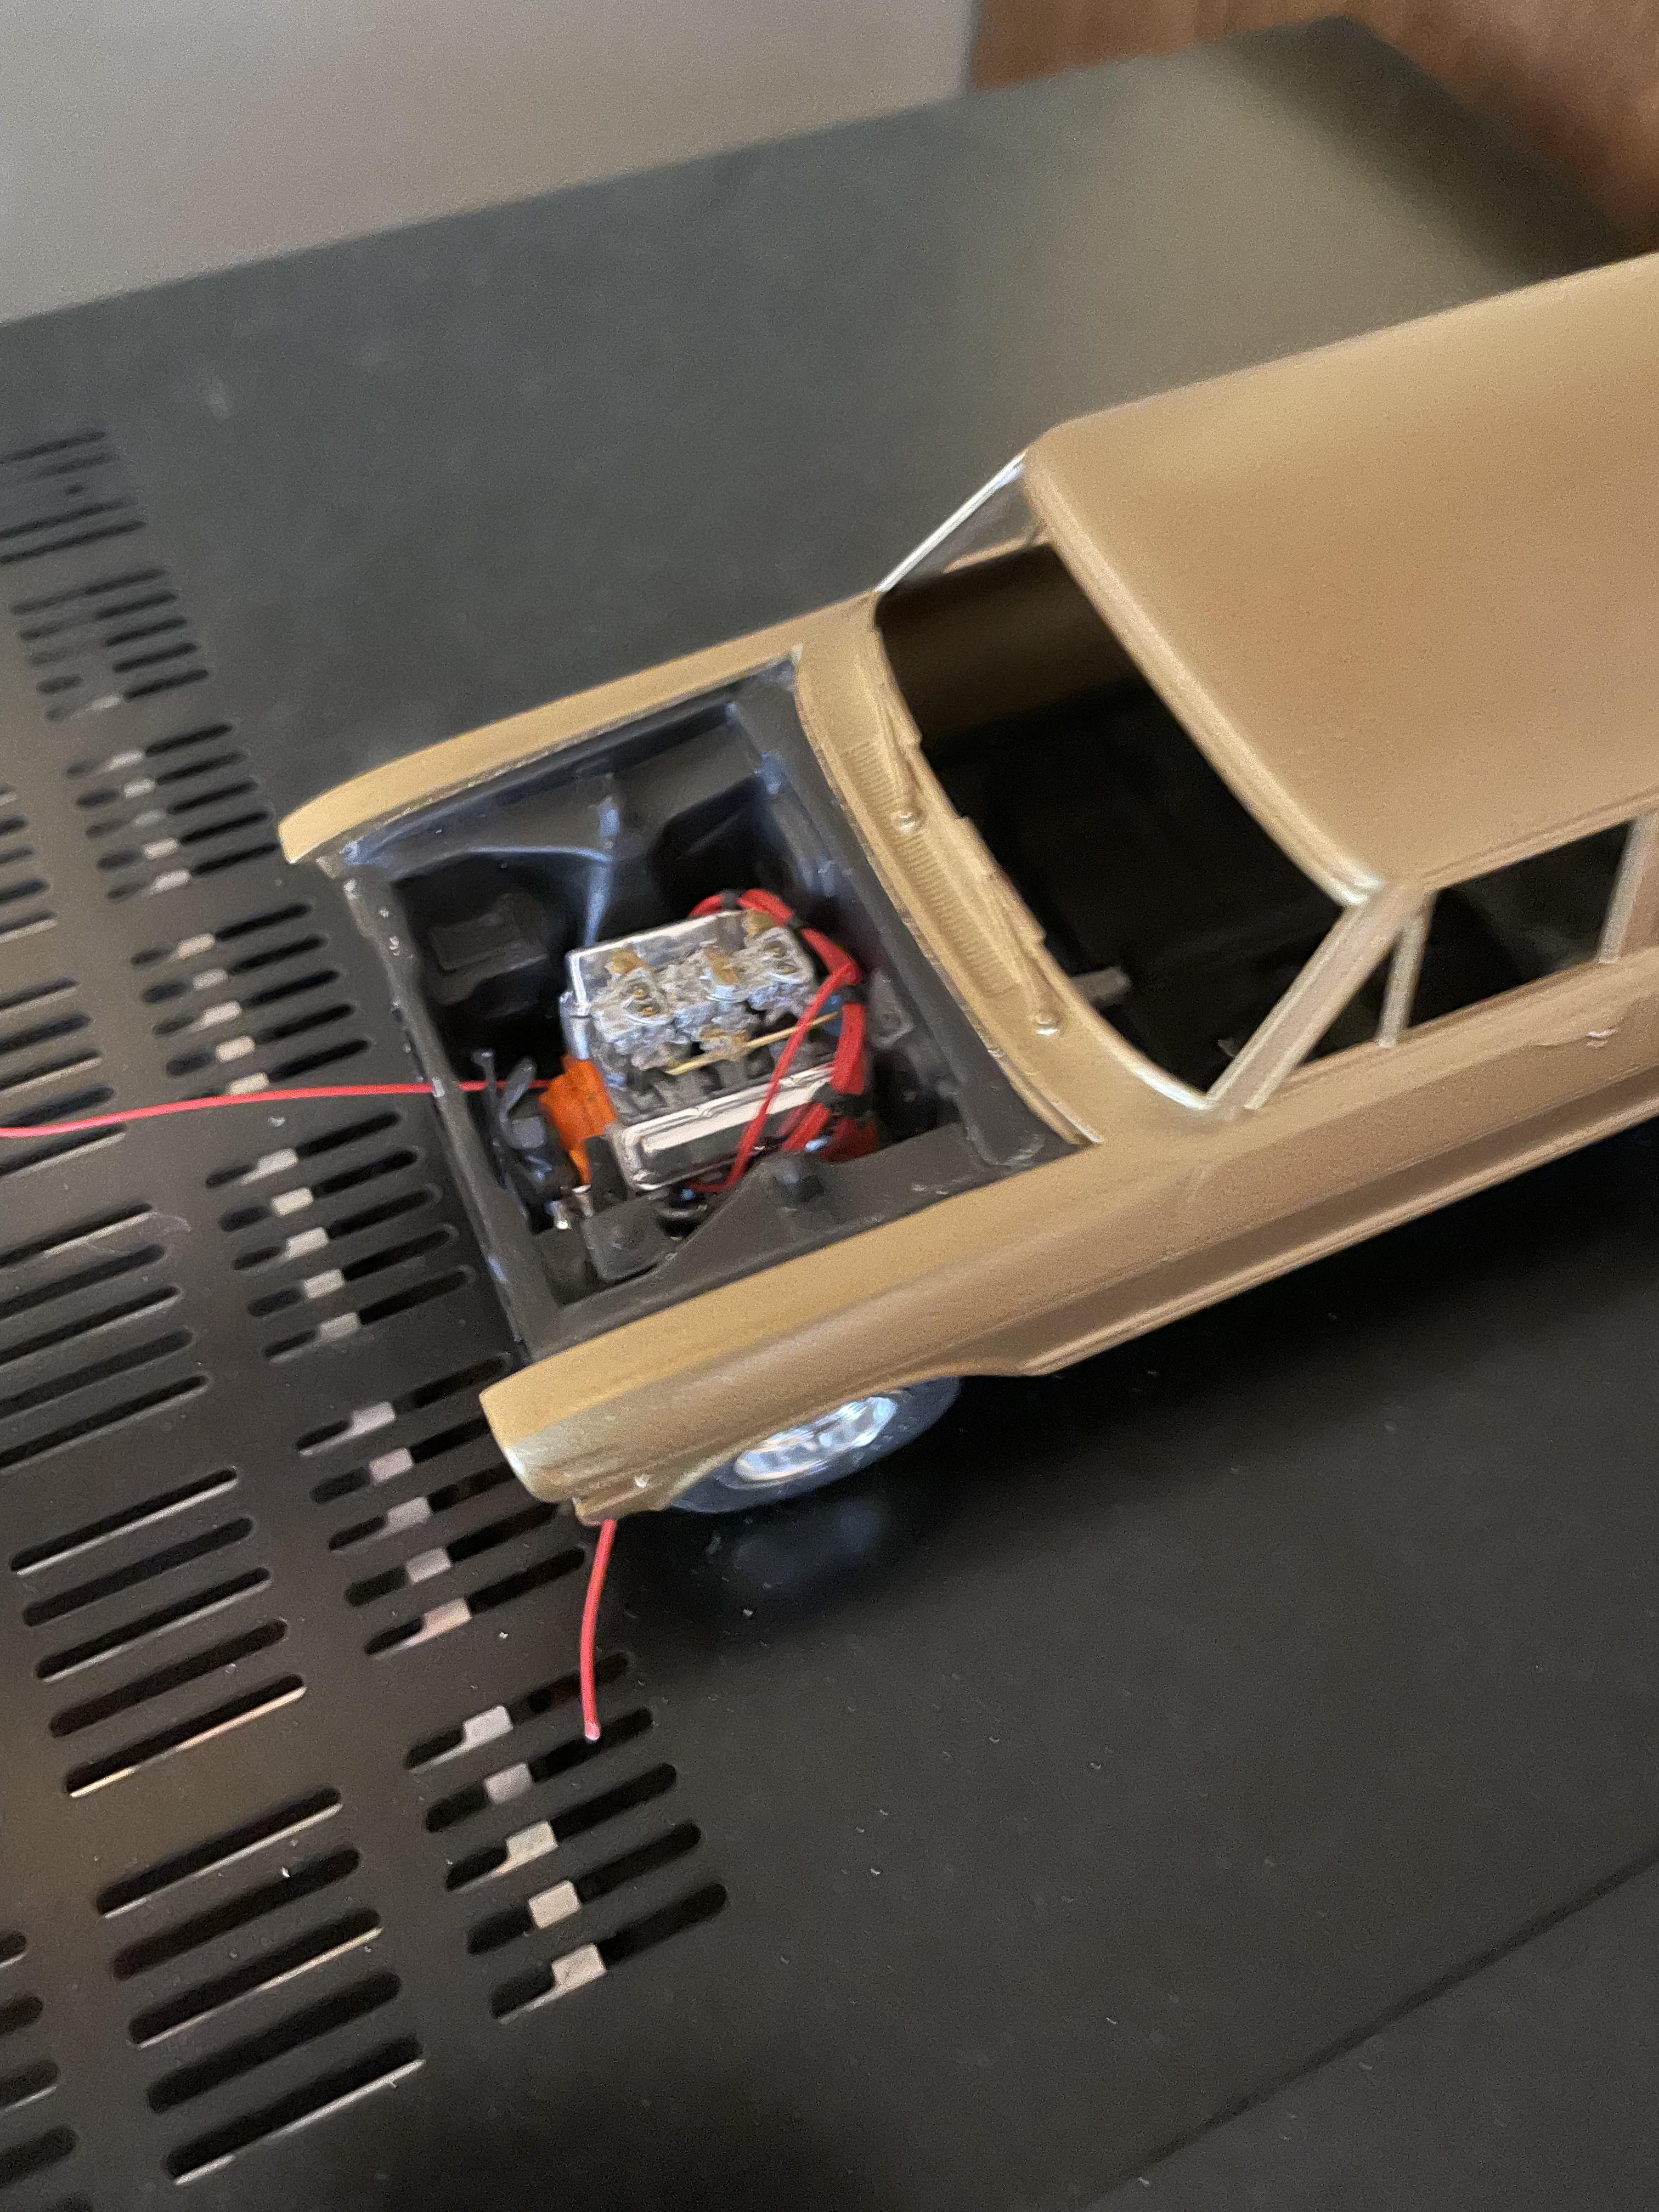
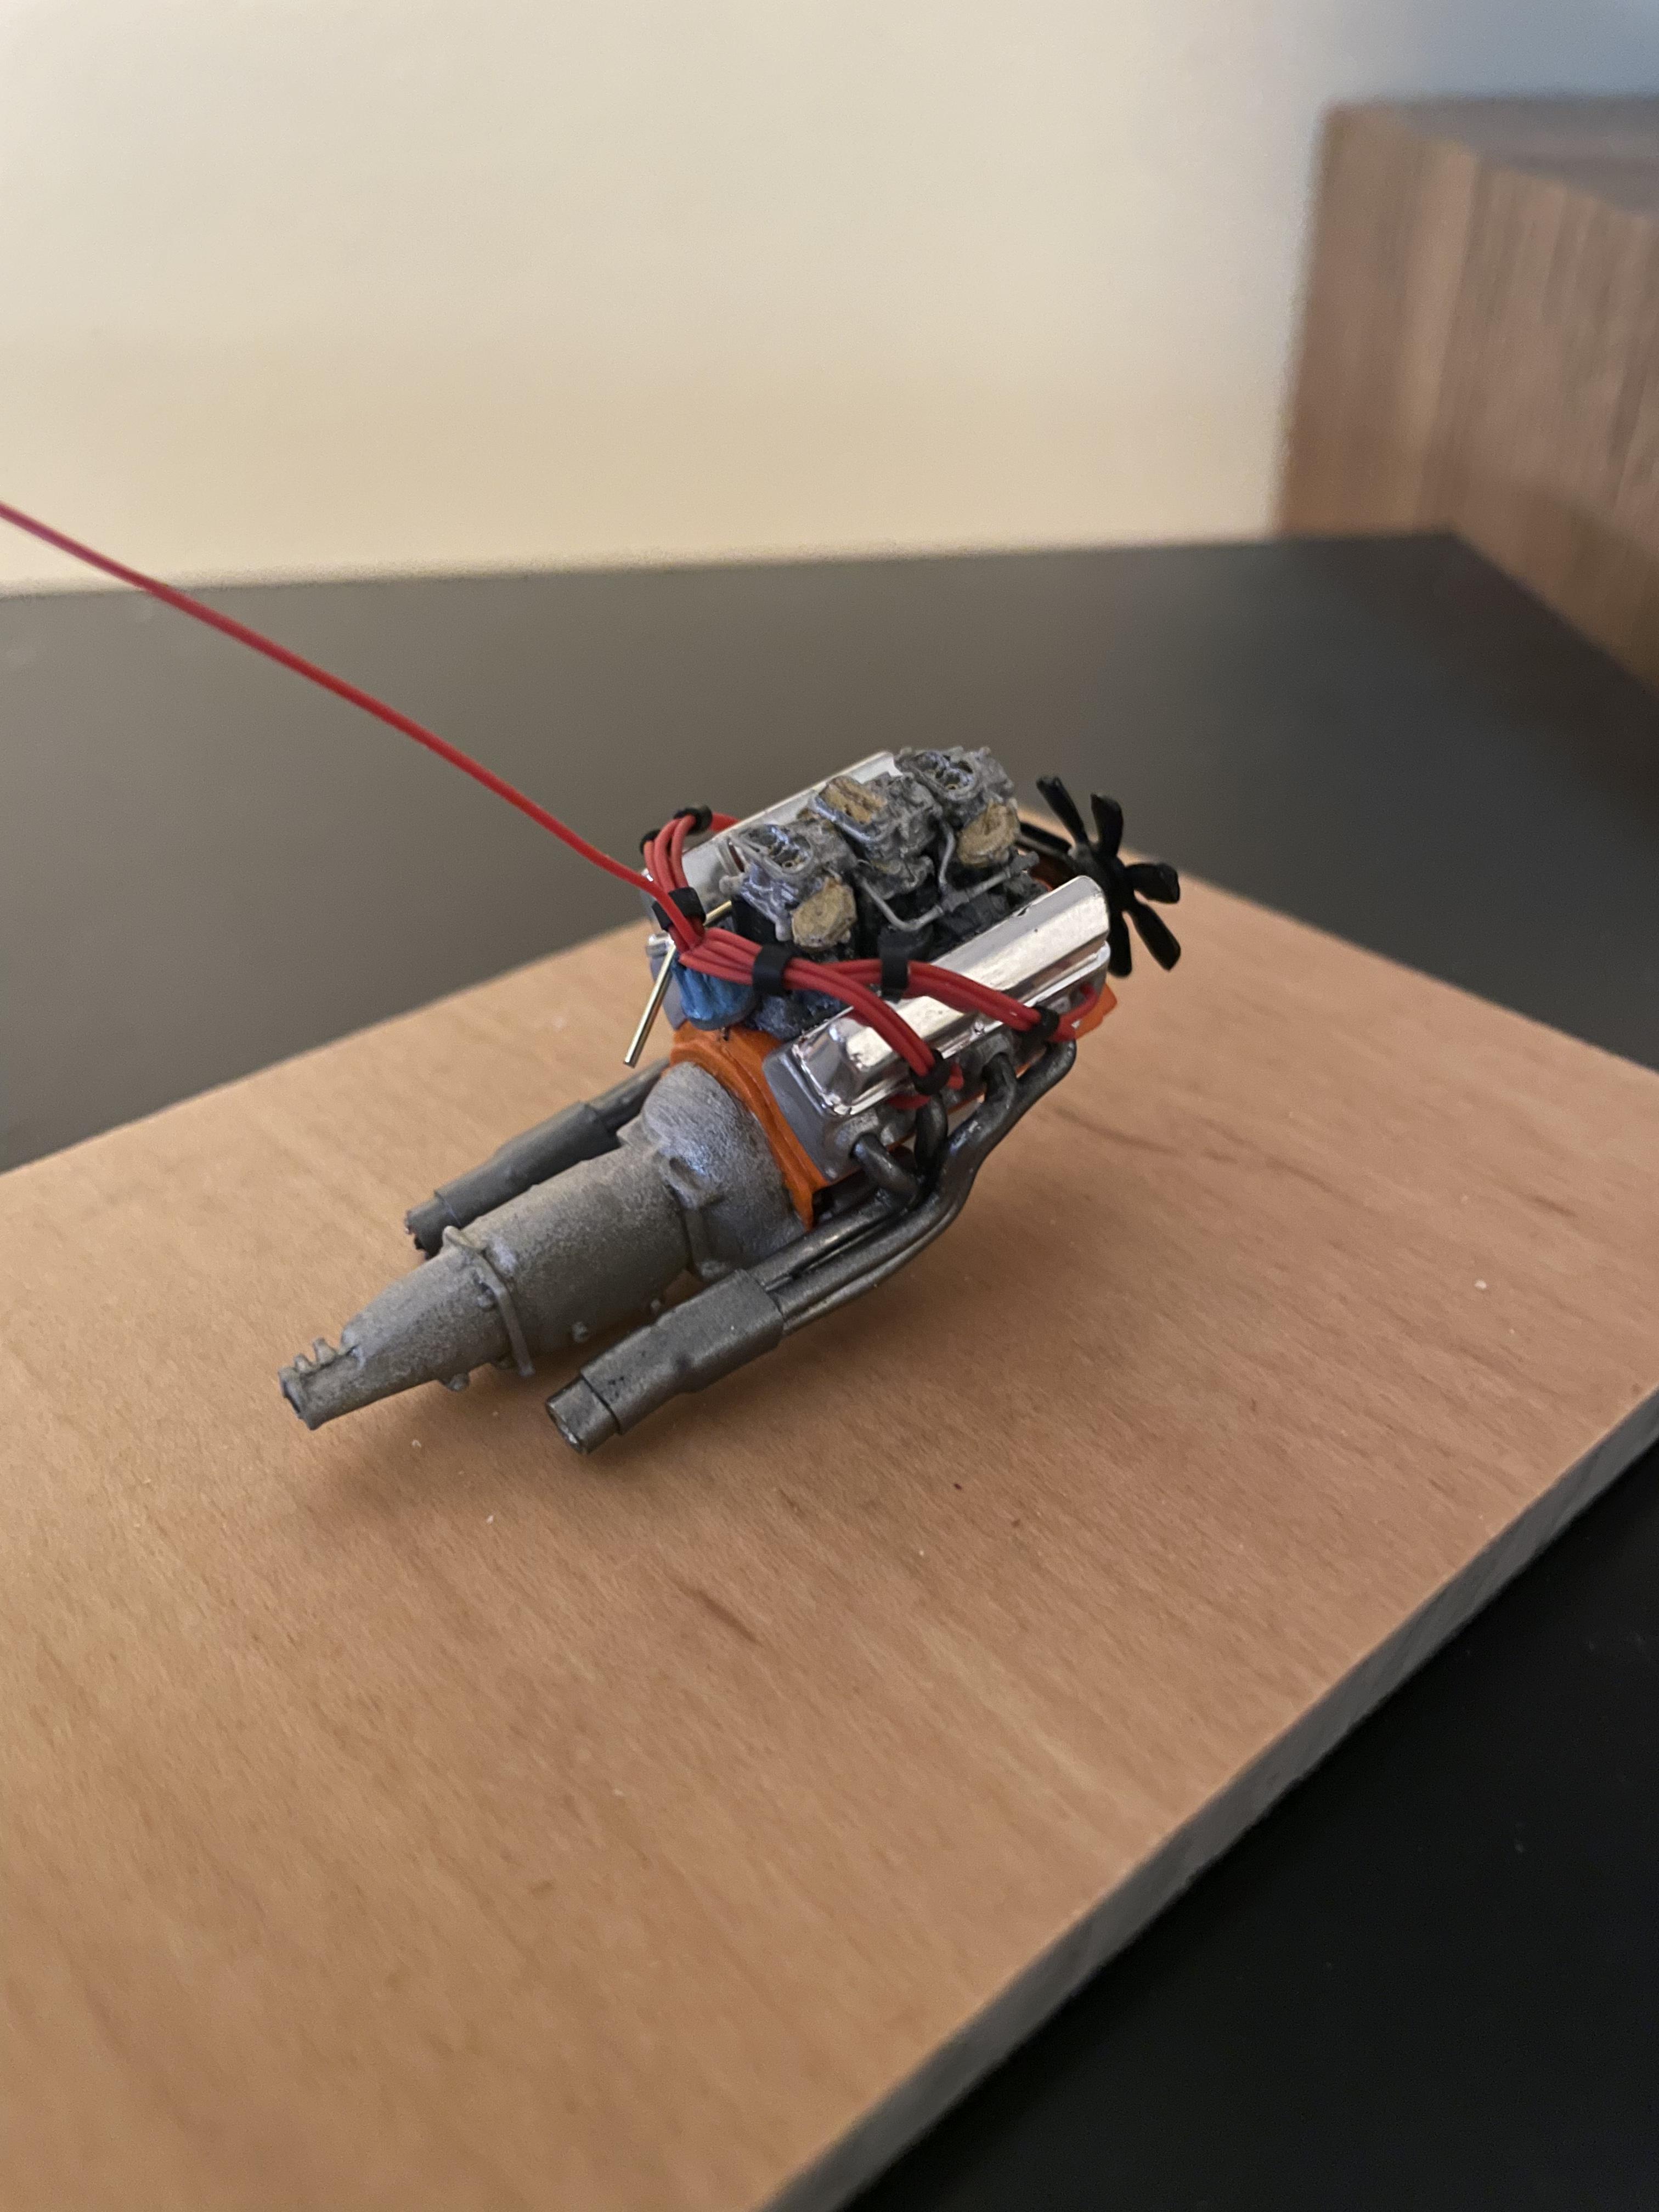
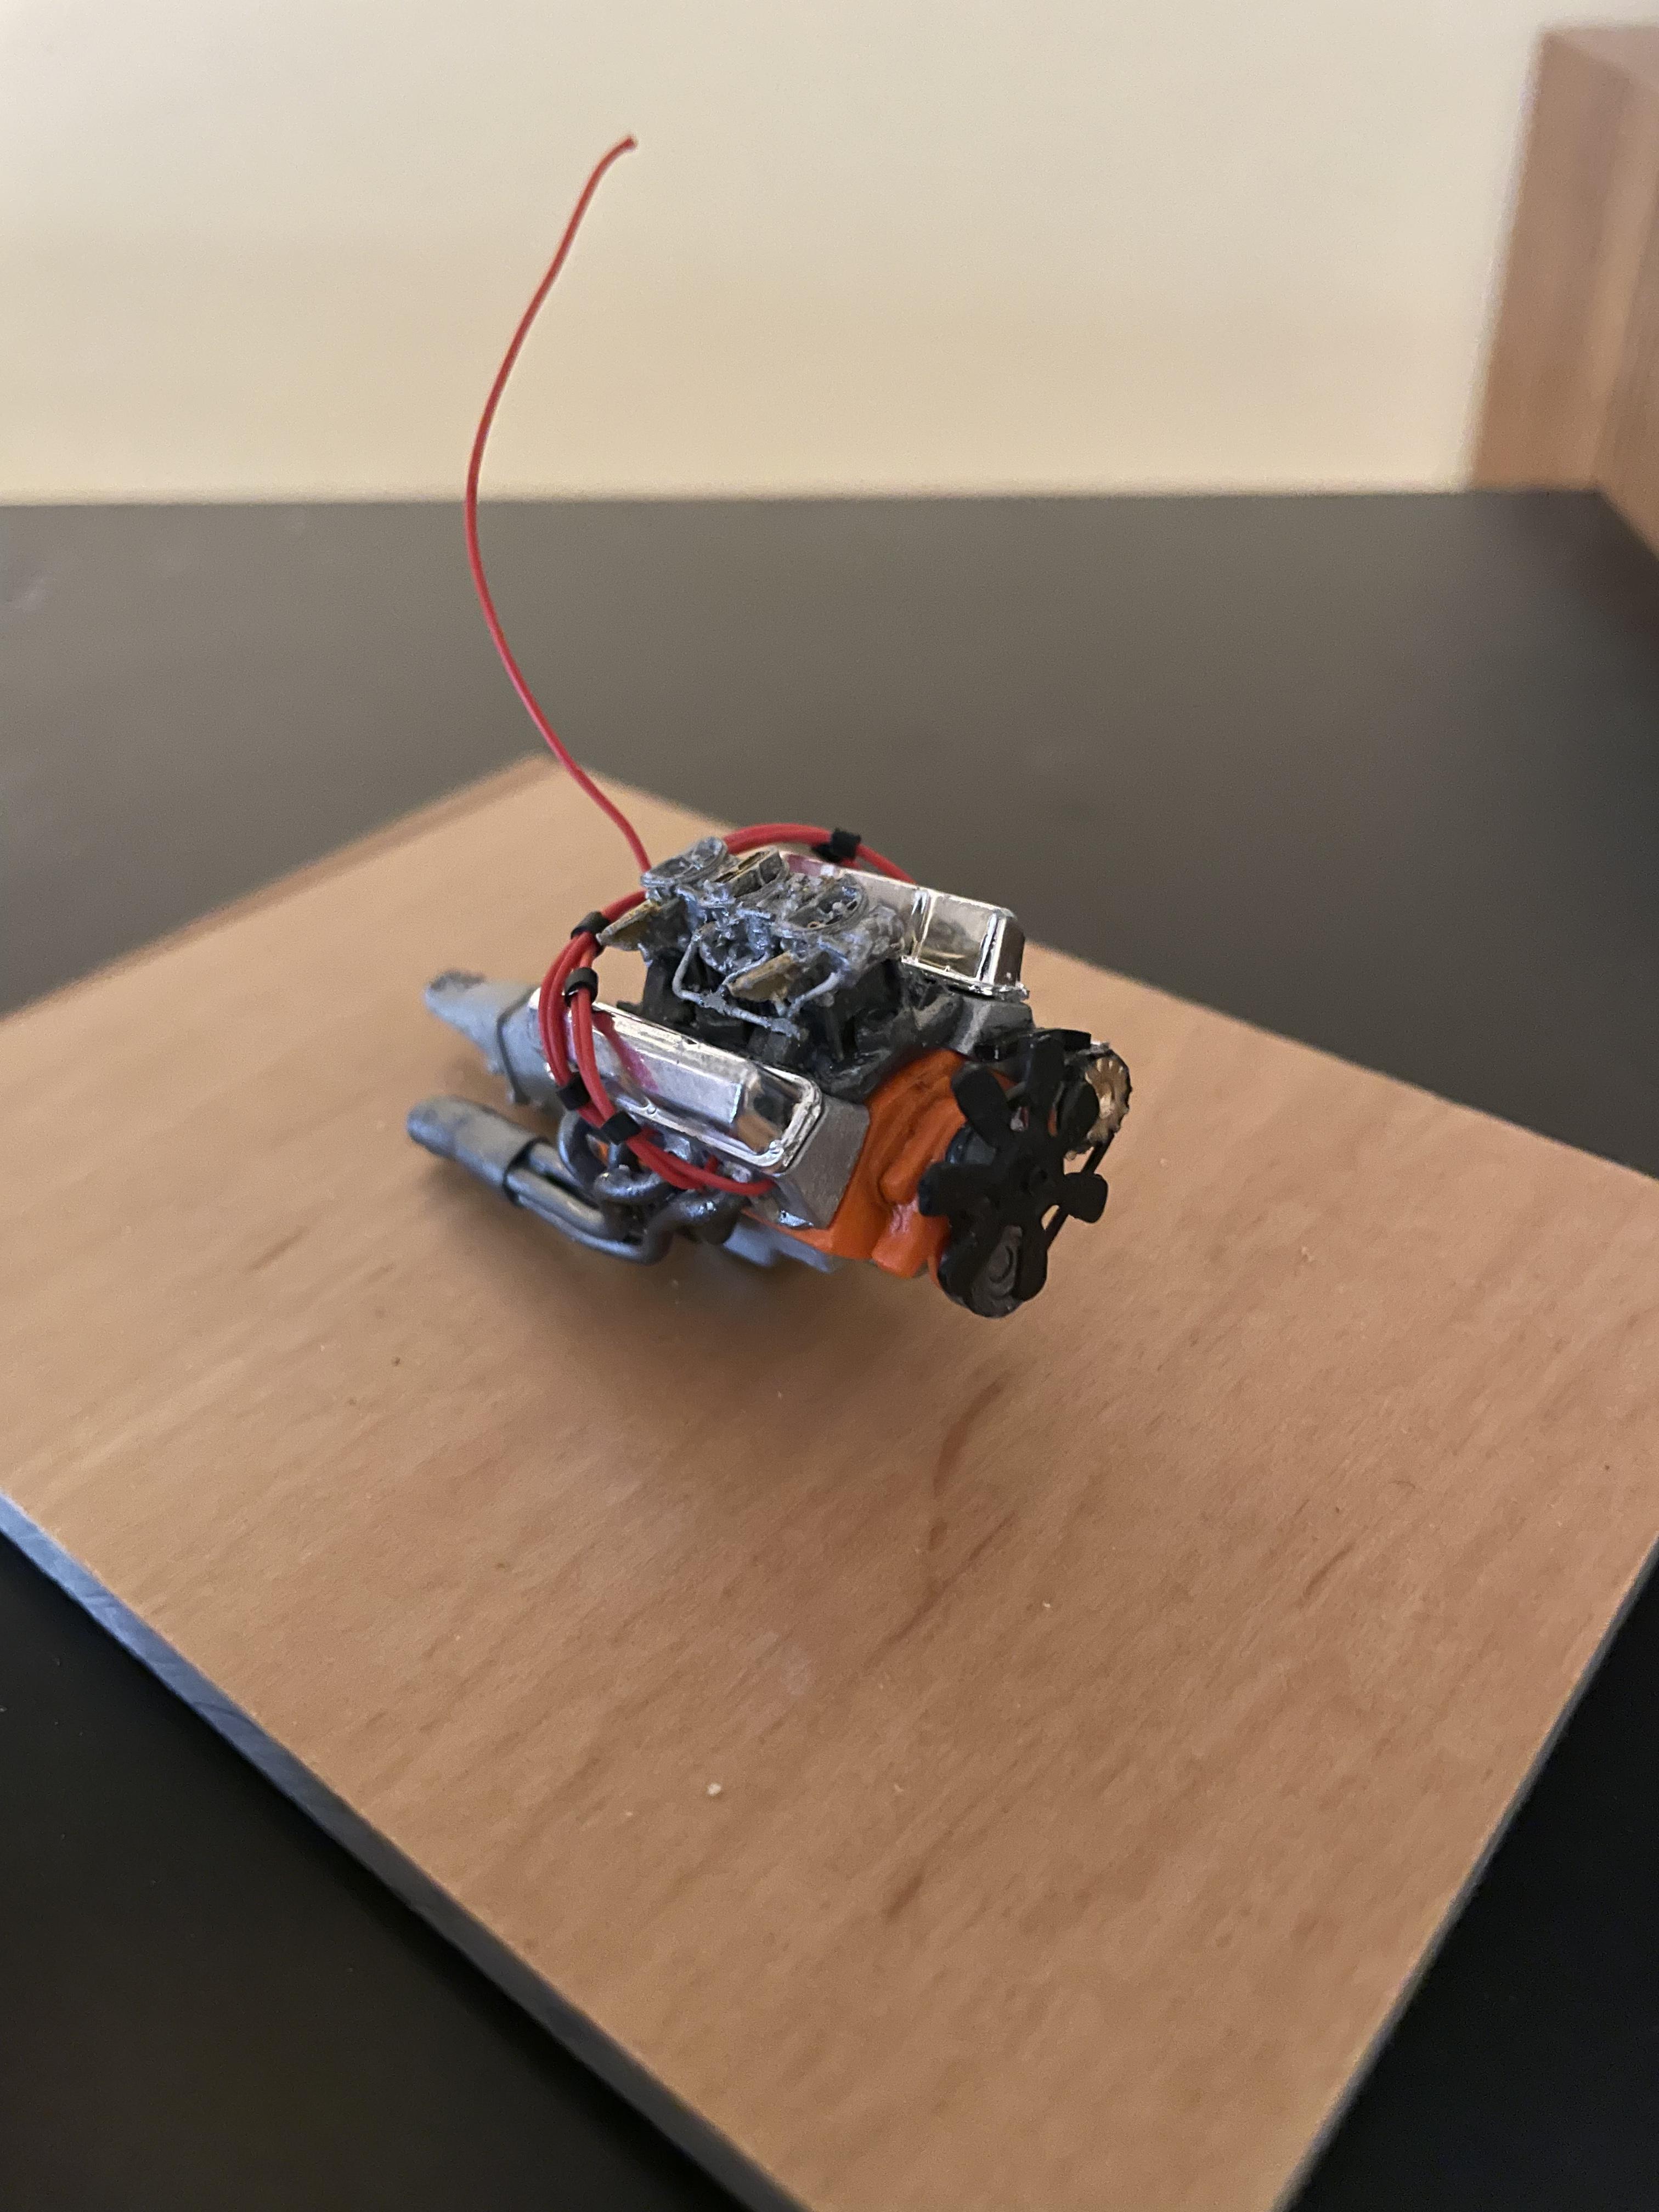
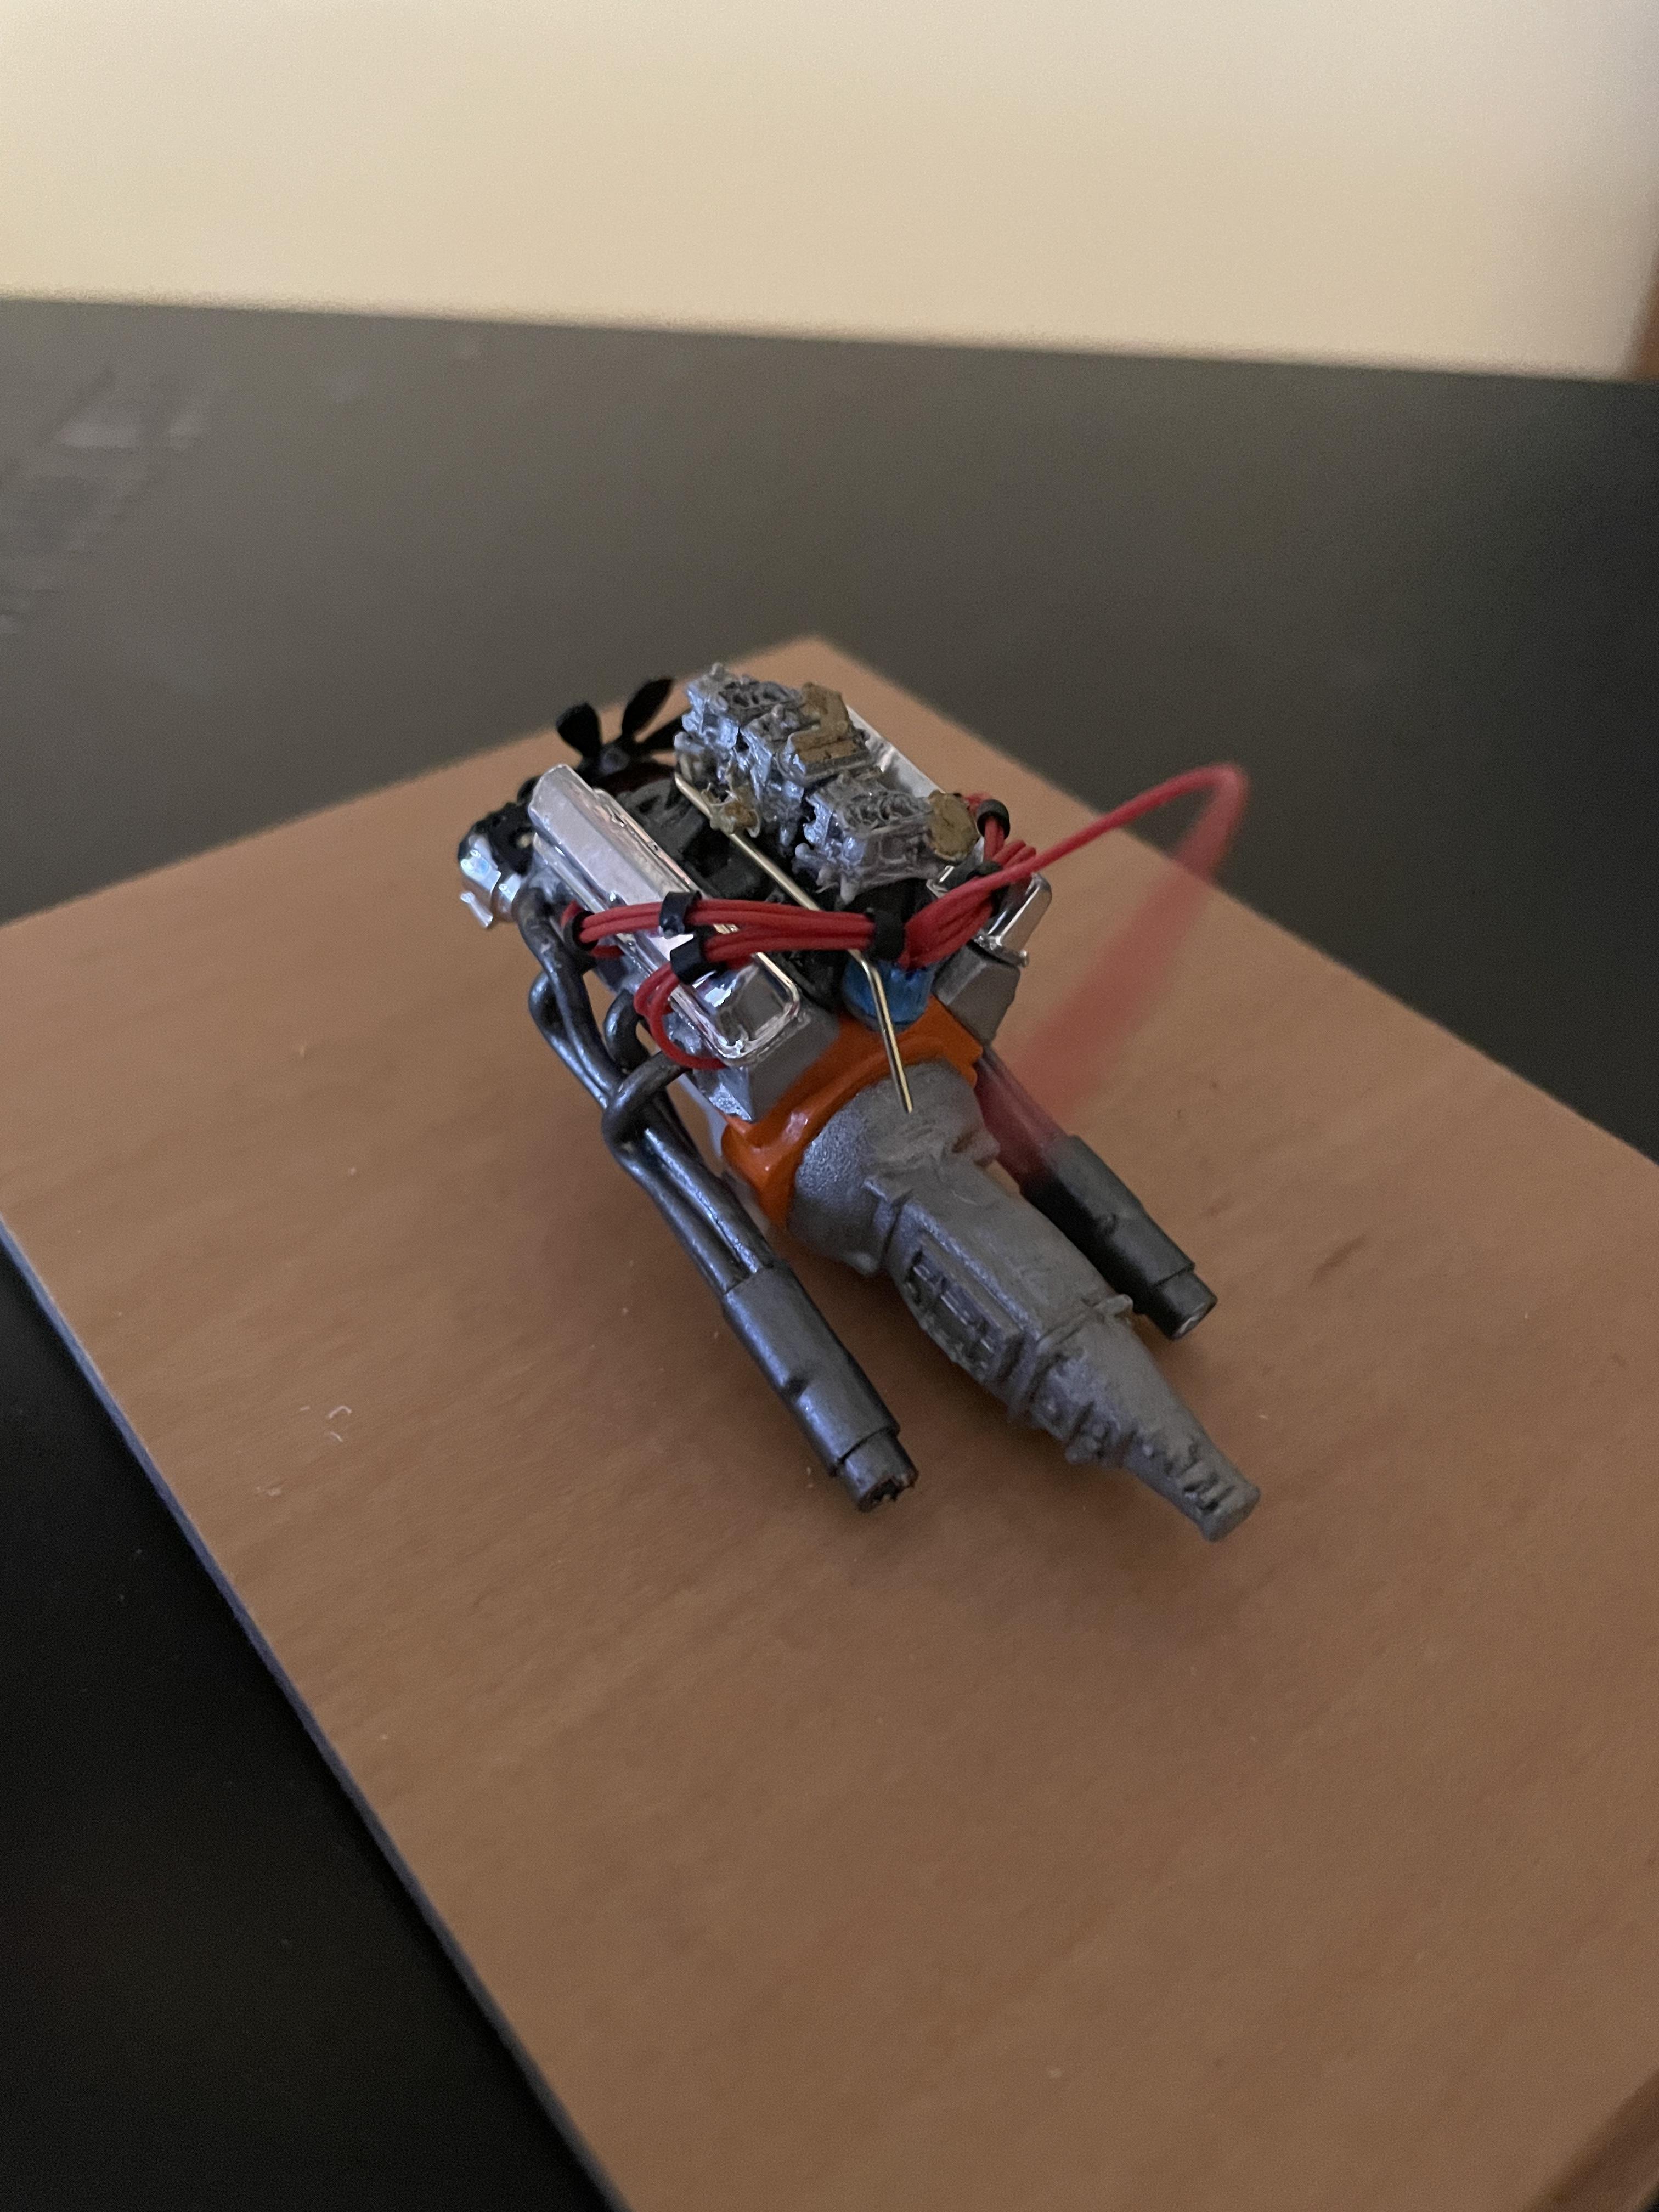
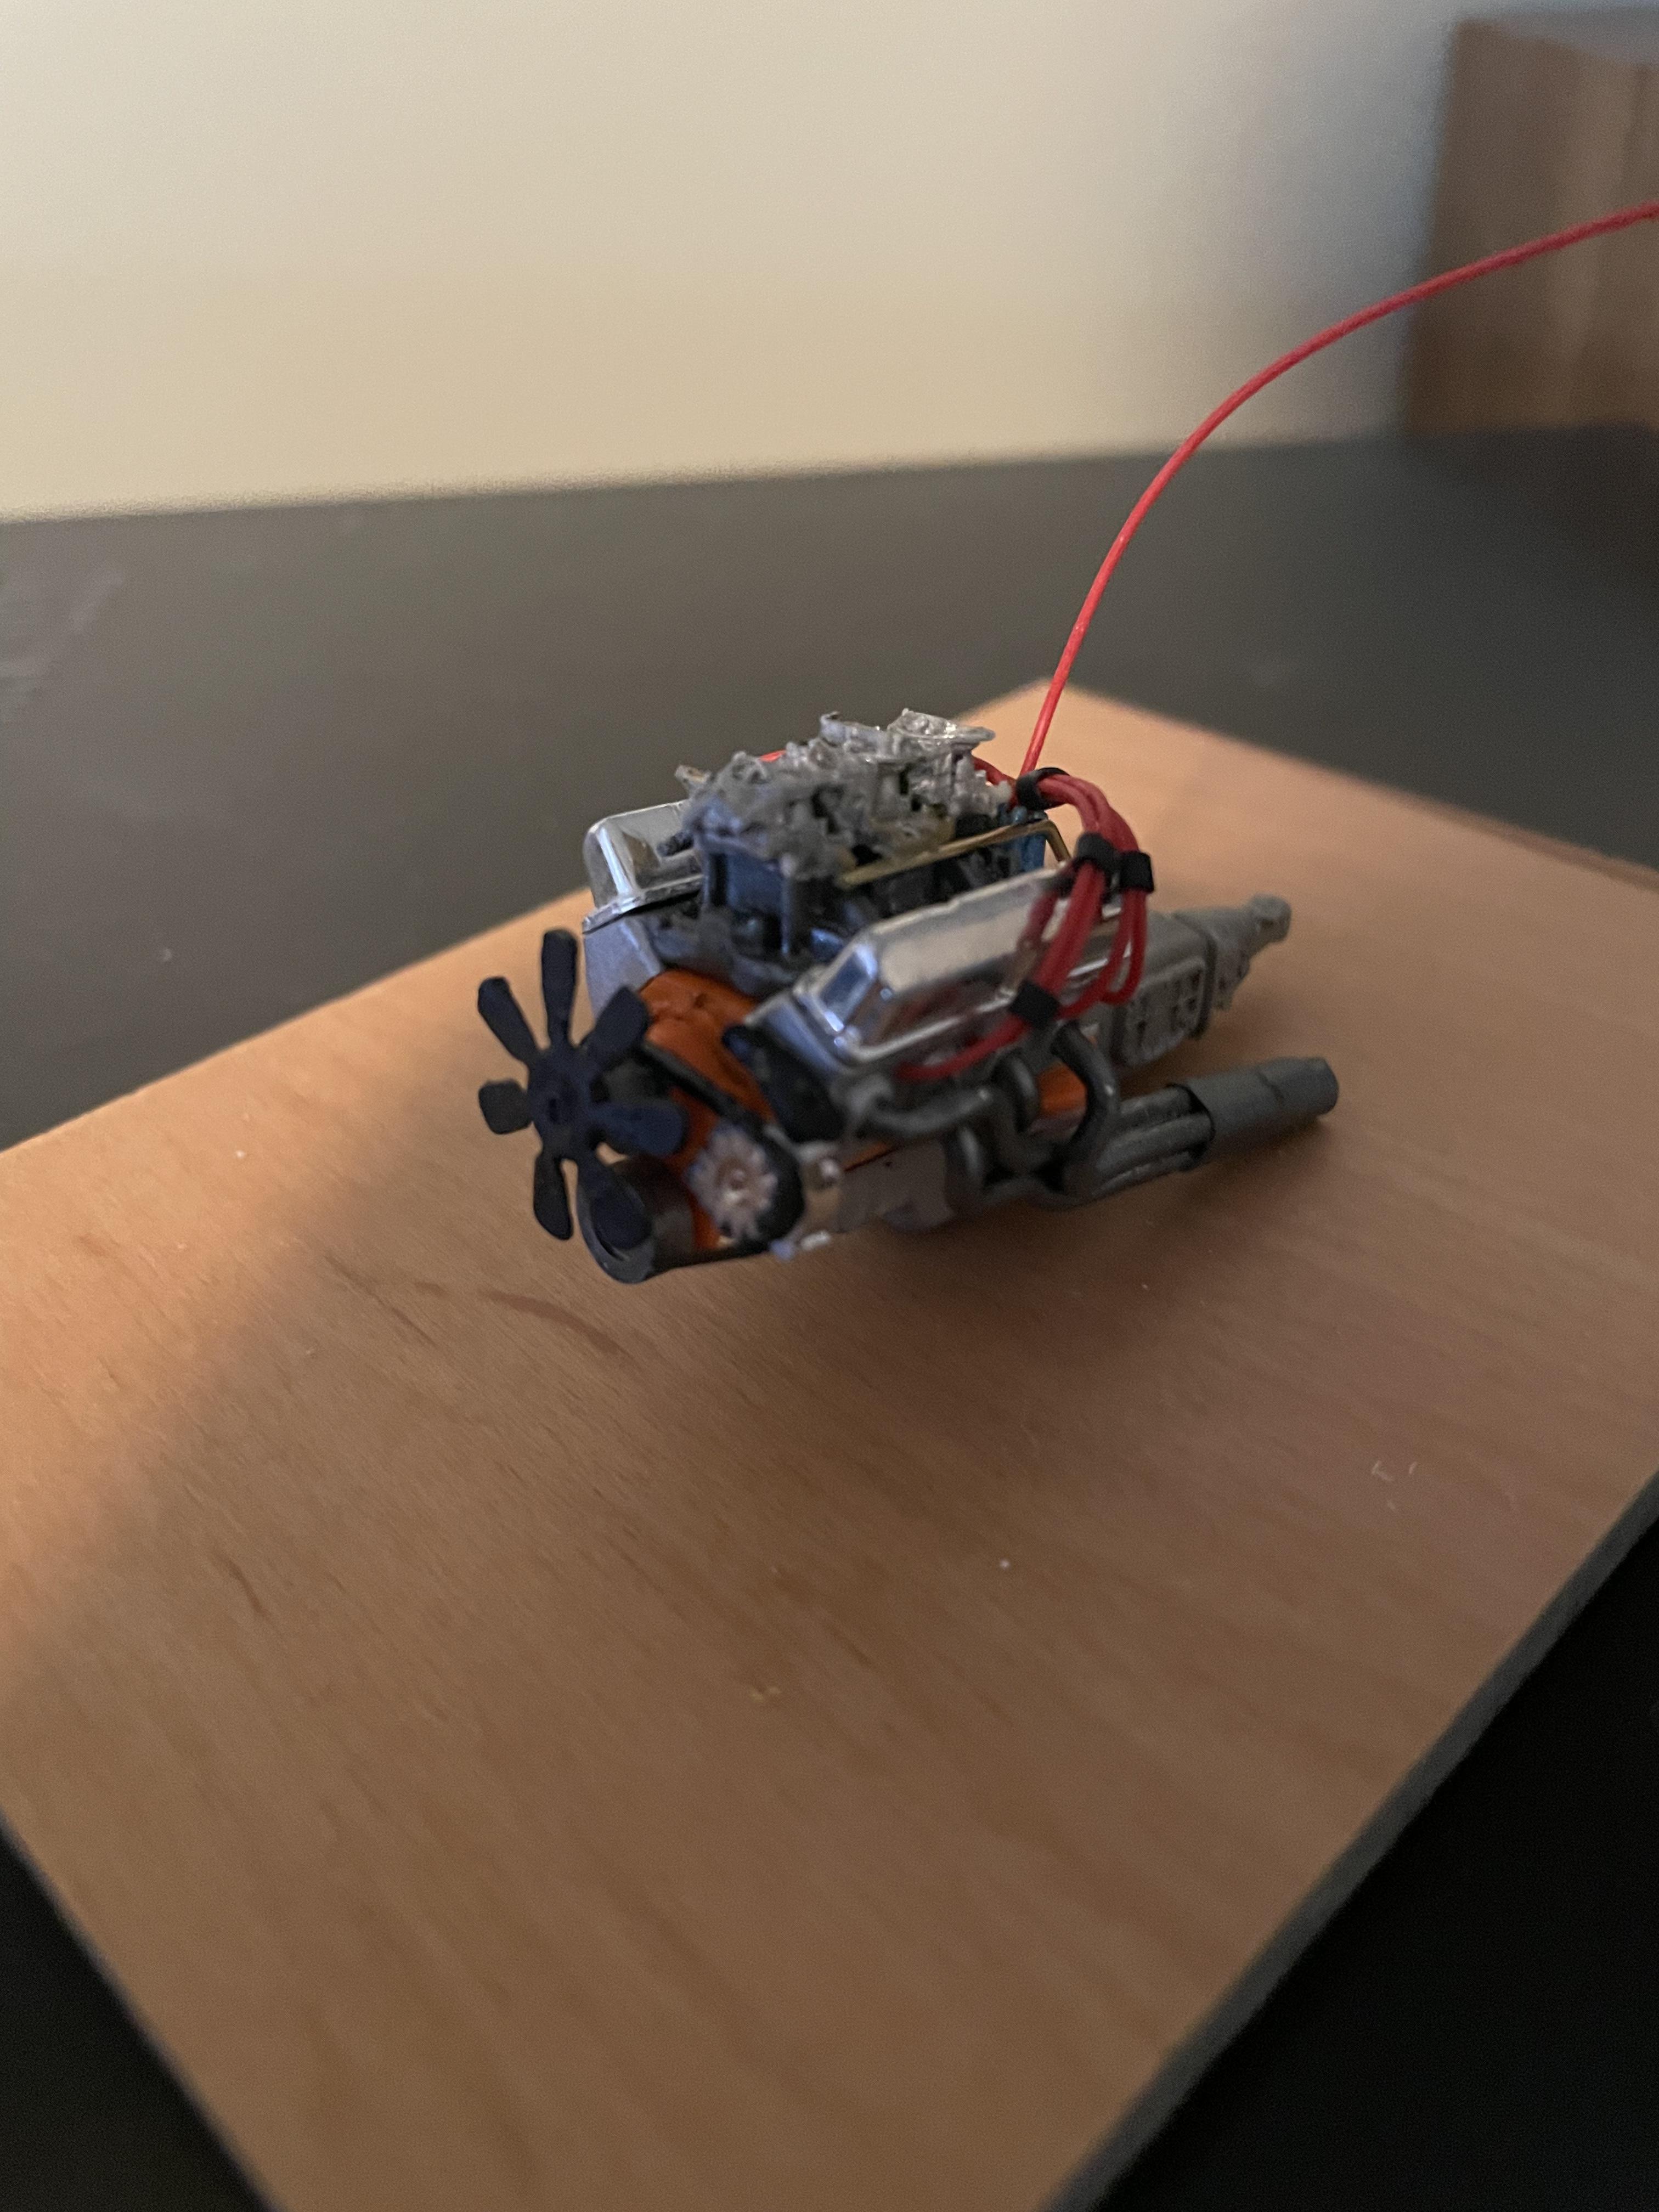
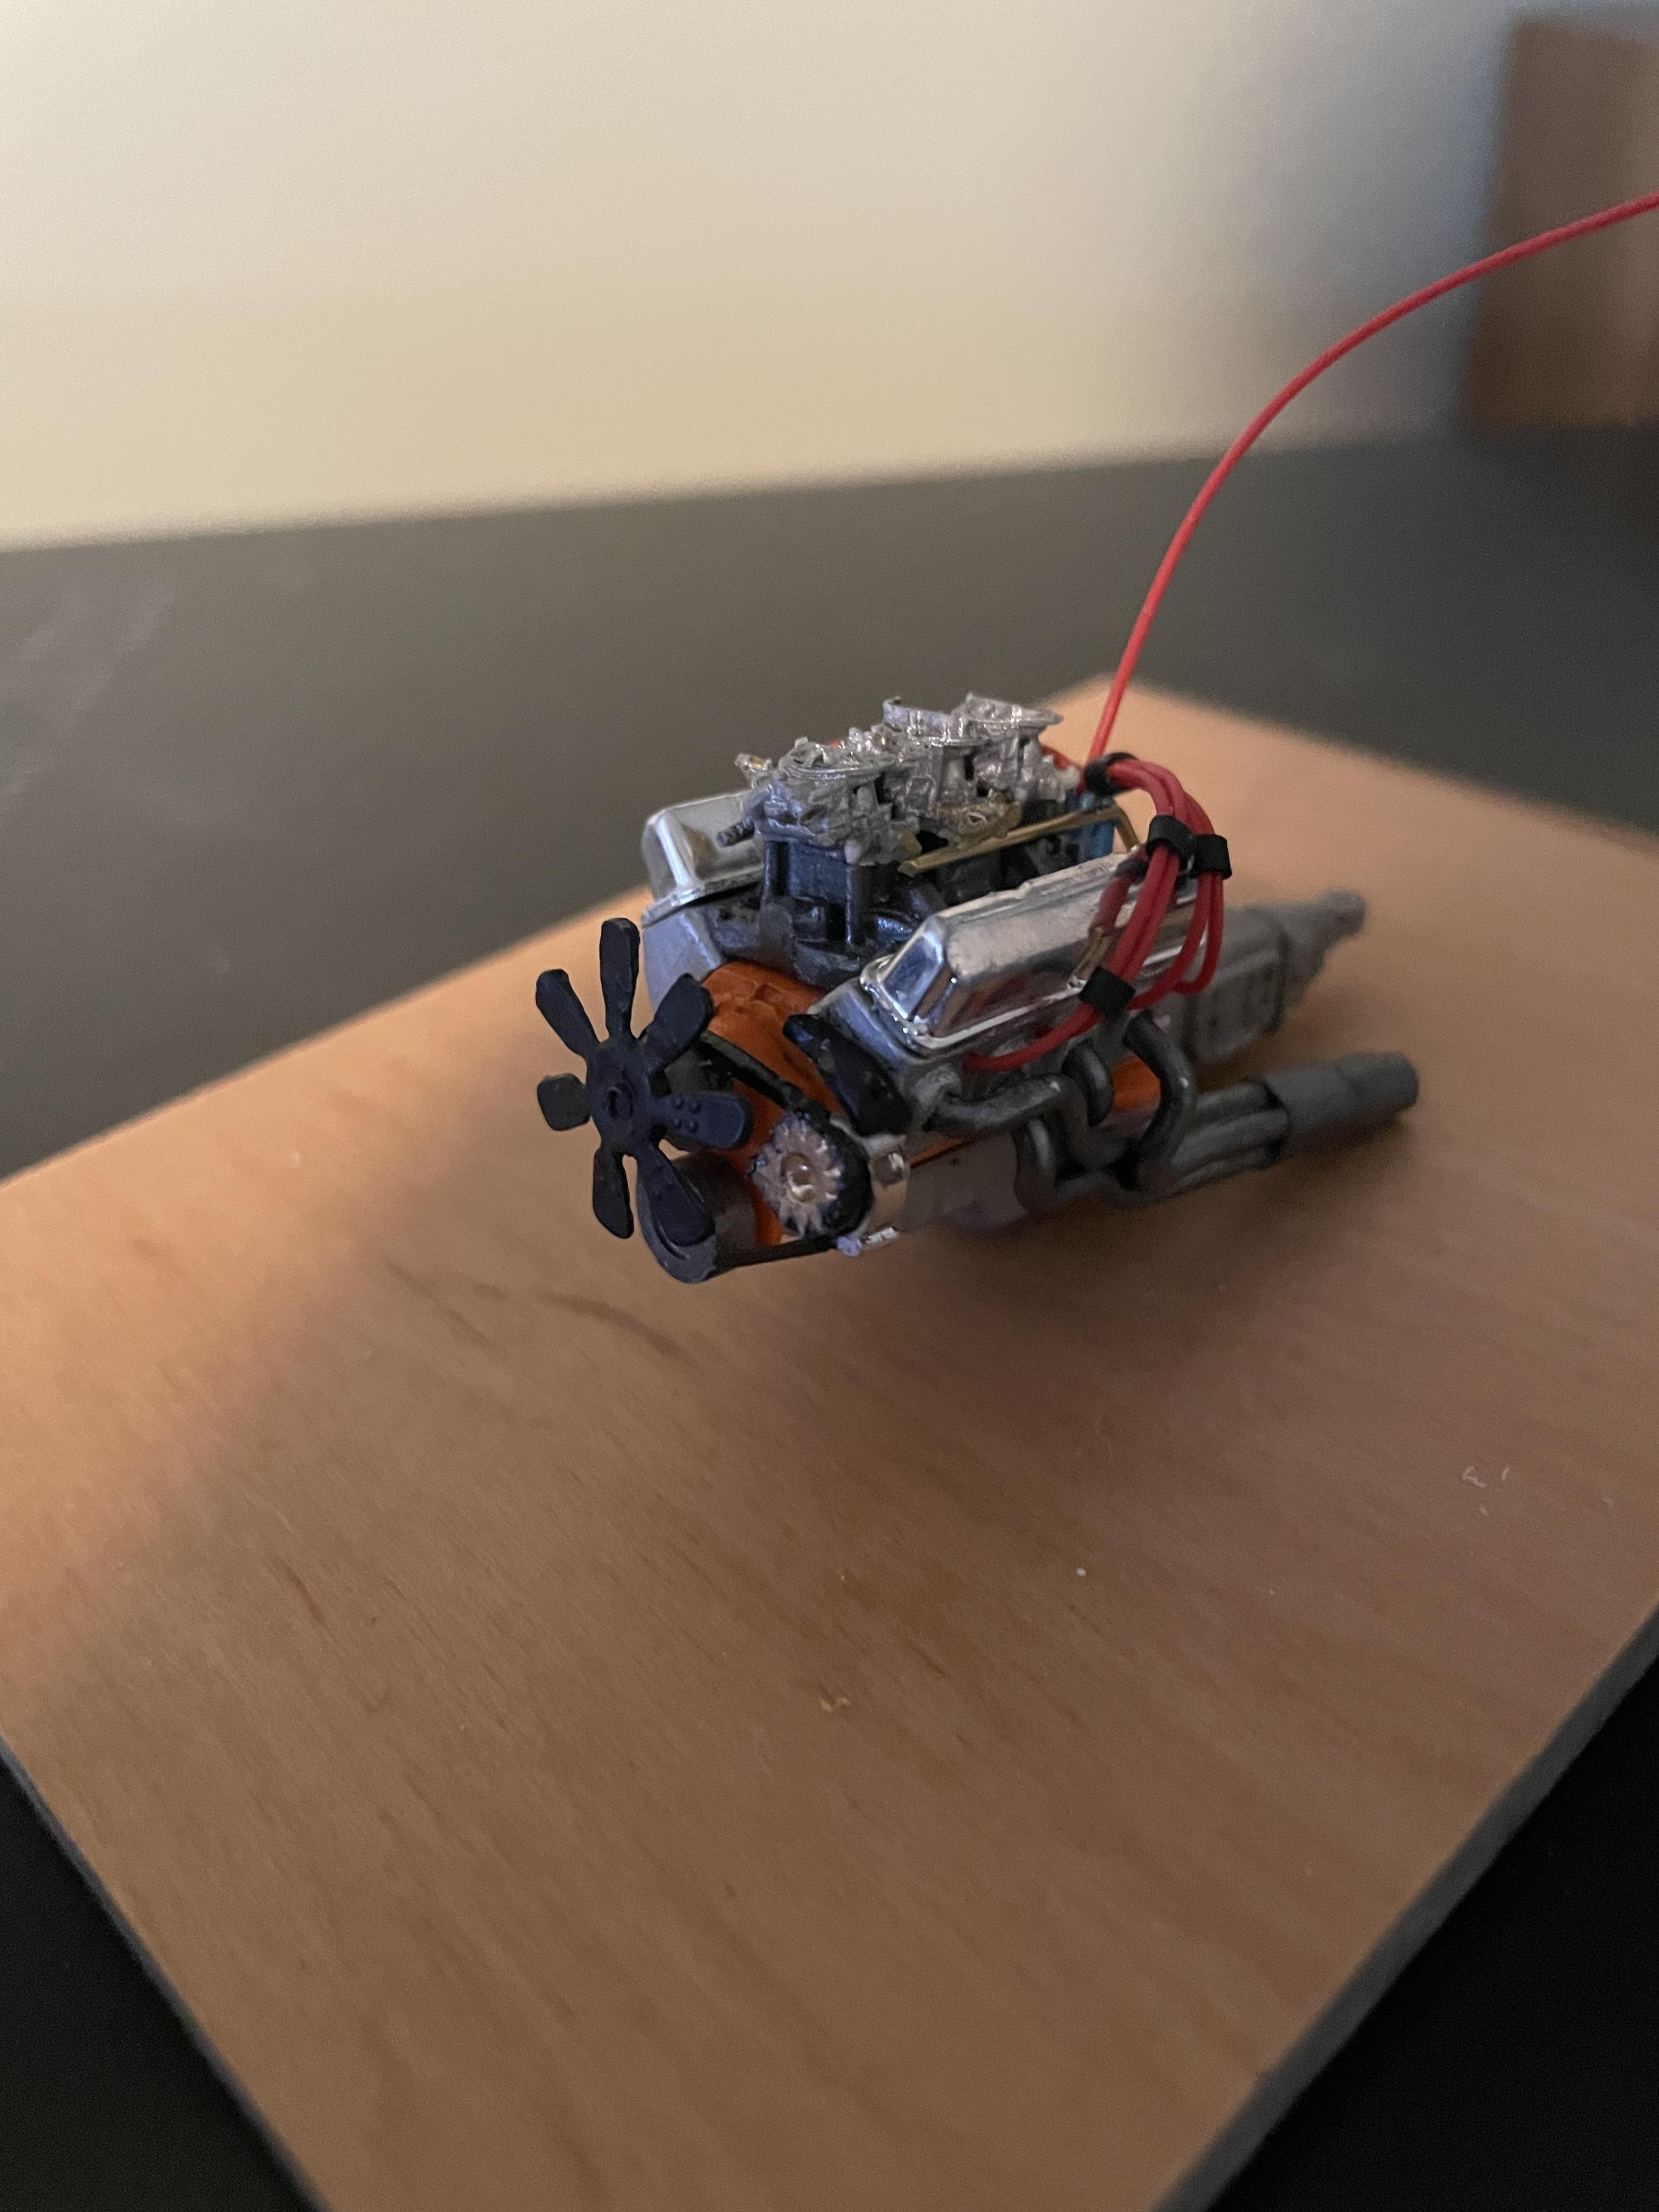
Got the 427 built and wired, not sure yet on the exhaust.
-
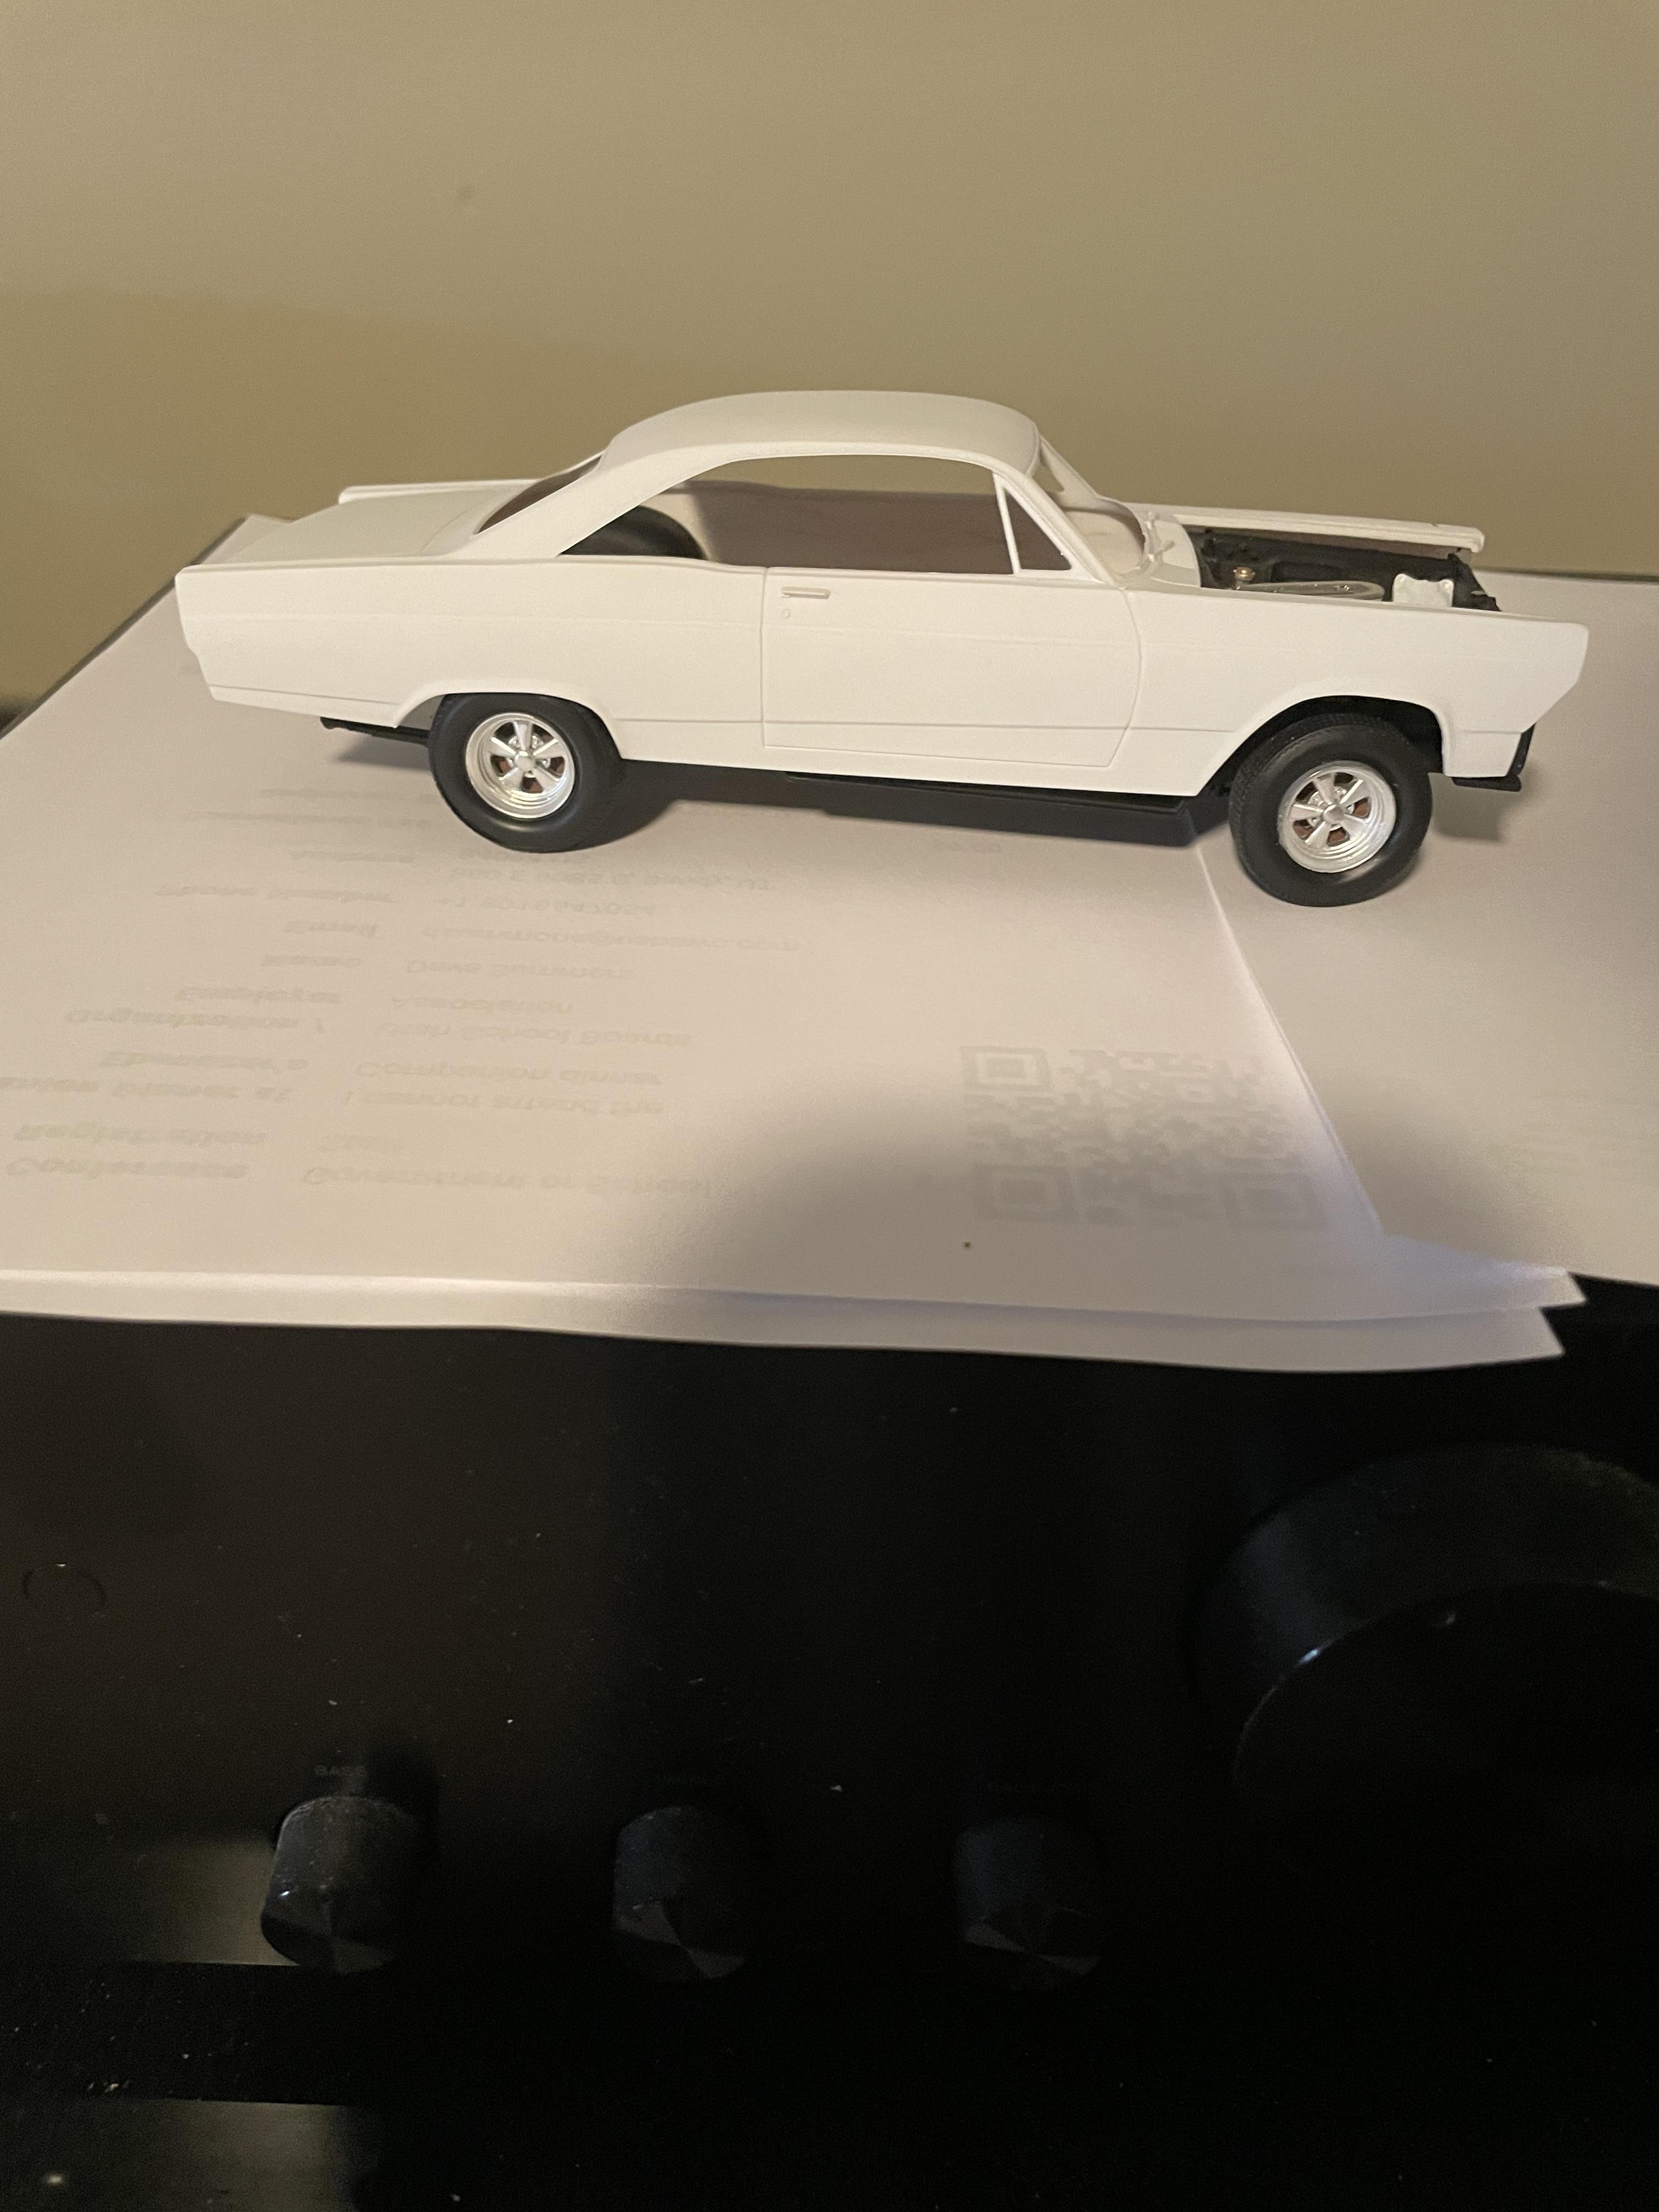
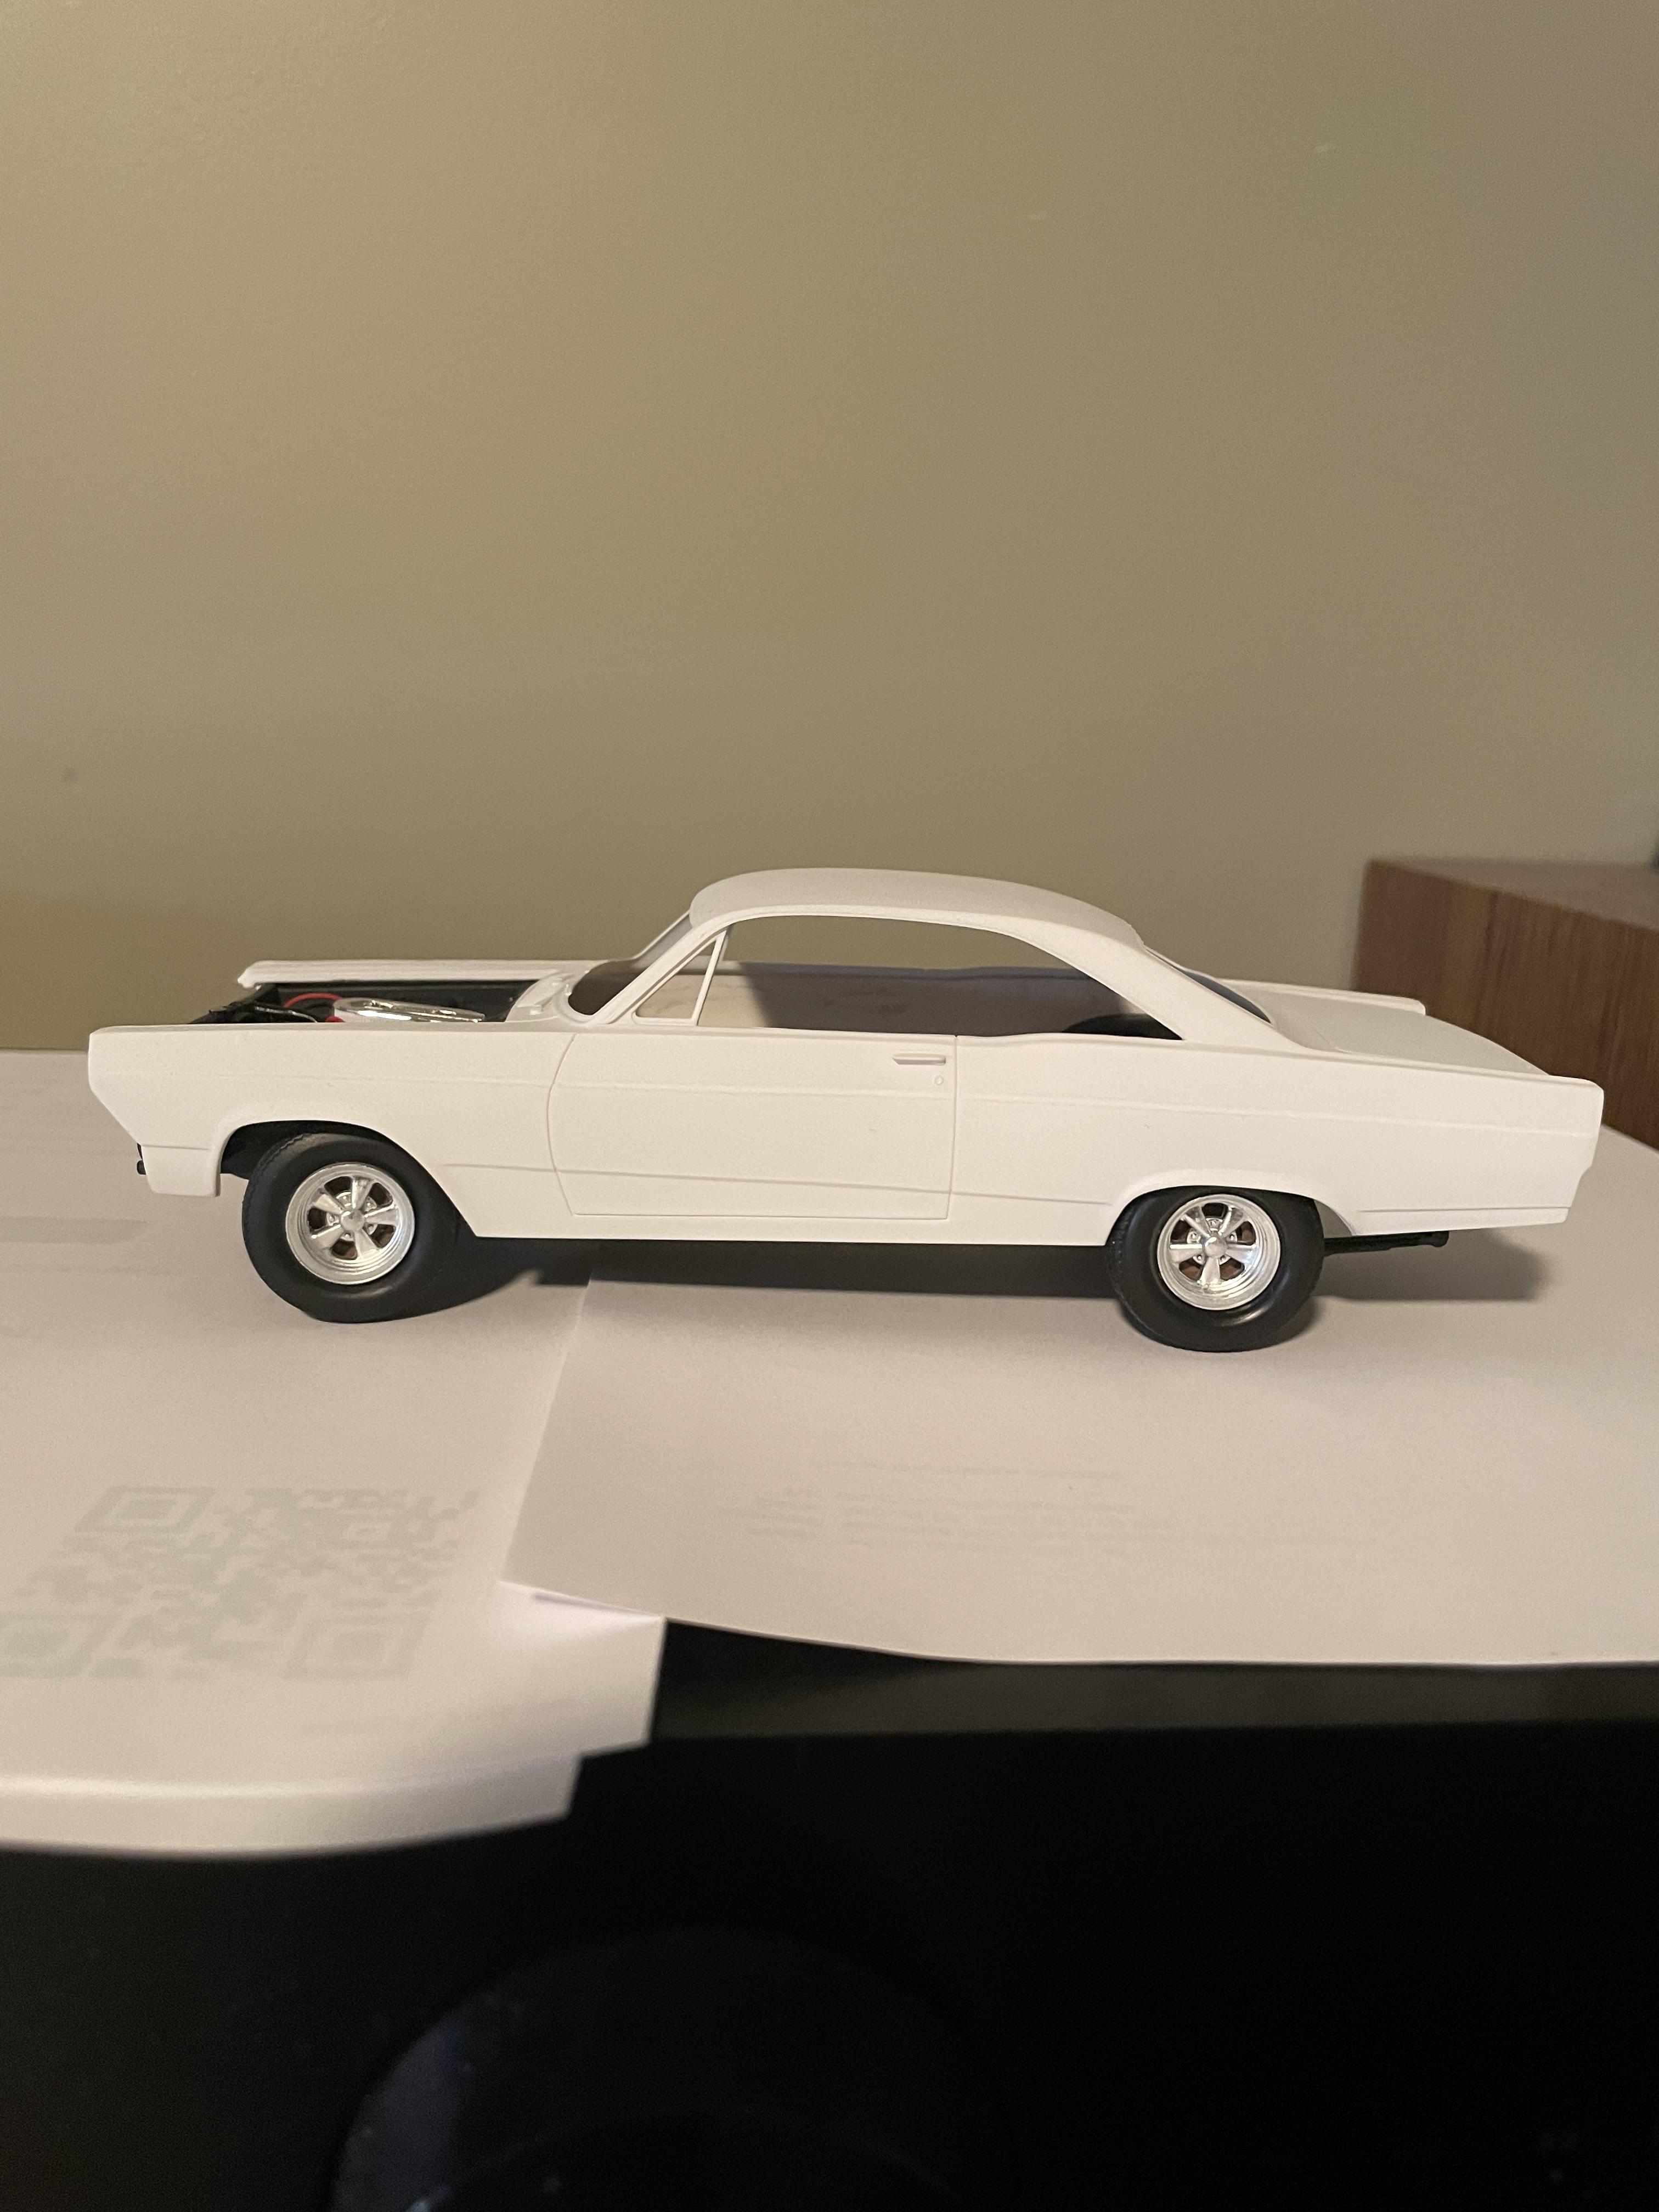
With the recent paint debacle on the midget I have decided to shelve that one for a bit and am starting this 66 Fairlane. I’ve never been a big fan of Ford but the lines on the Fairlane are cool. This seems to be a great kit, the engine is very detailed, separate oil filter, fuel pump, coil, oil fill tube, even trans linkage. Im not exactly sure where I’ll be going with this yet, stock with steel wheels or aftermarket wheels? Stock exhaust manifolds or do I build headers? I’ll probably end up with my favorite style, 70s street rod… but who knows. Dave.
-
Thanks so much. The engine came from an MPC GTO kit that was terribly molded so I only used it for parts. The valve covers are from a 427 cobra kit… I know, it’s not correct but it’s what I had. The intake and carbs are resin and from a 1:24 Plymouth 340, again not correct but cool. I’m not sure what the side pipes are from but I think from either my Dodge Dart build or the Duster.
-
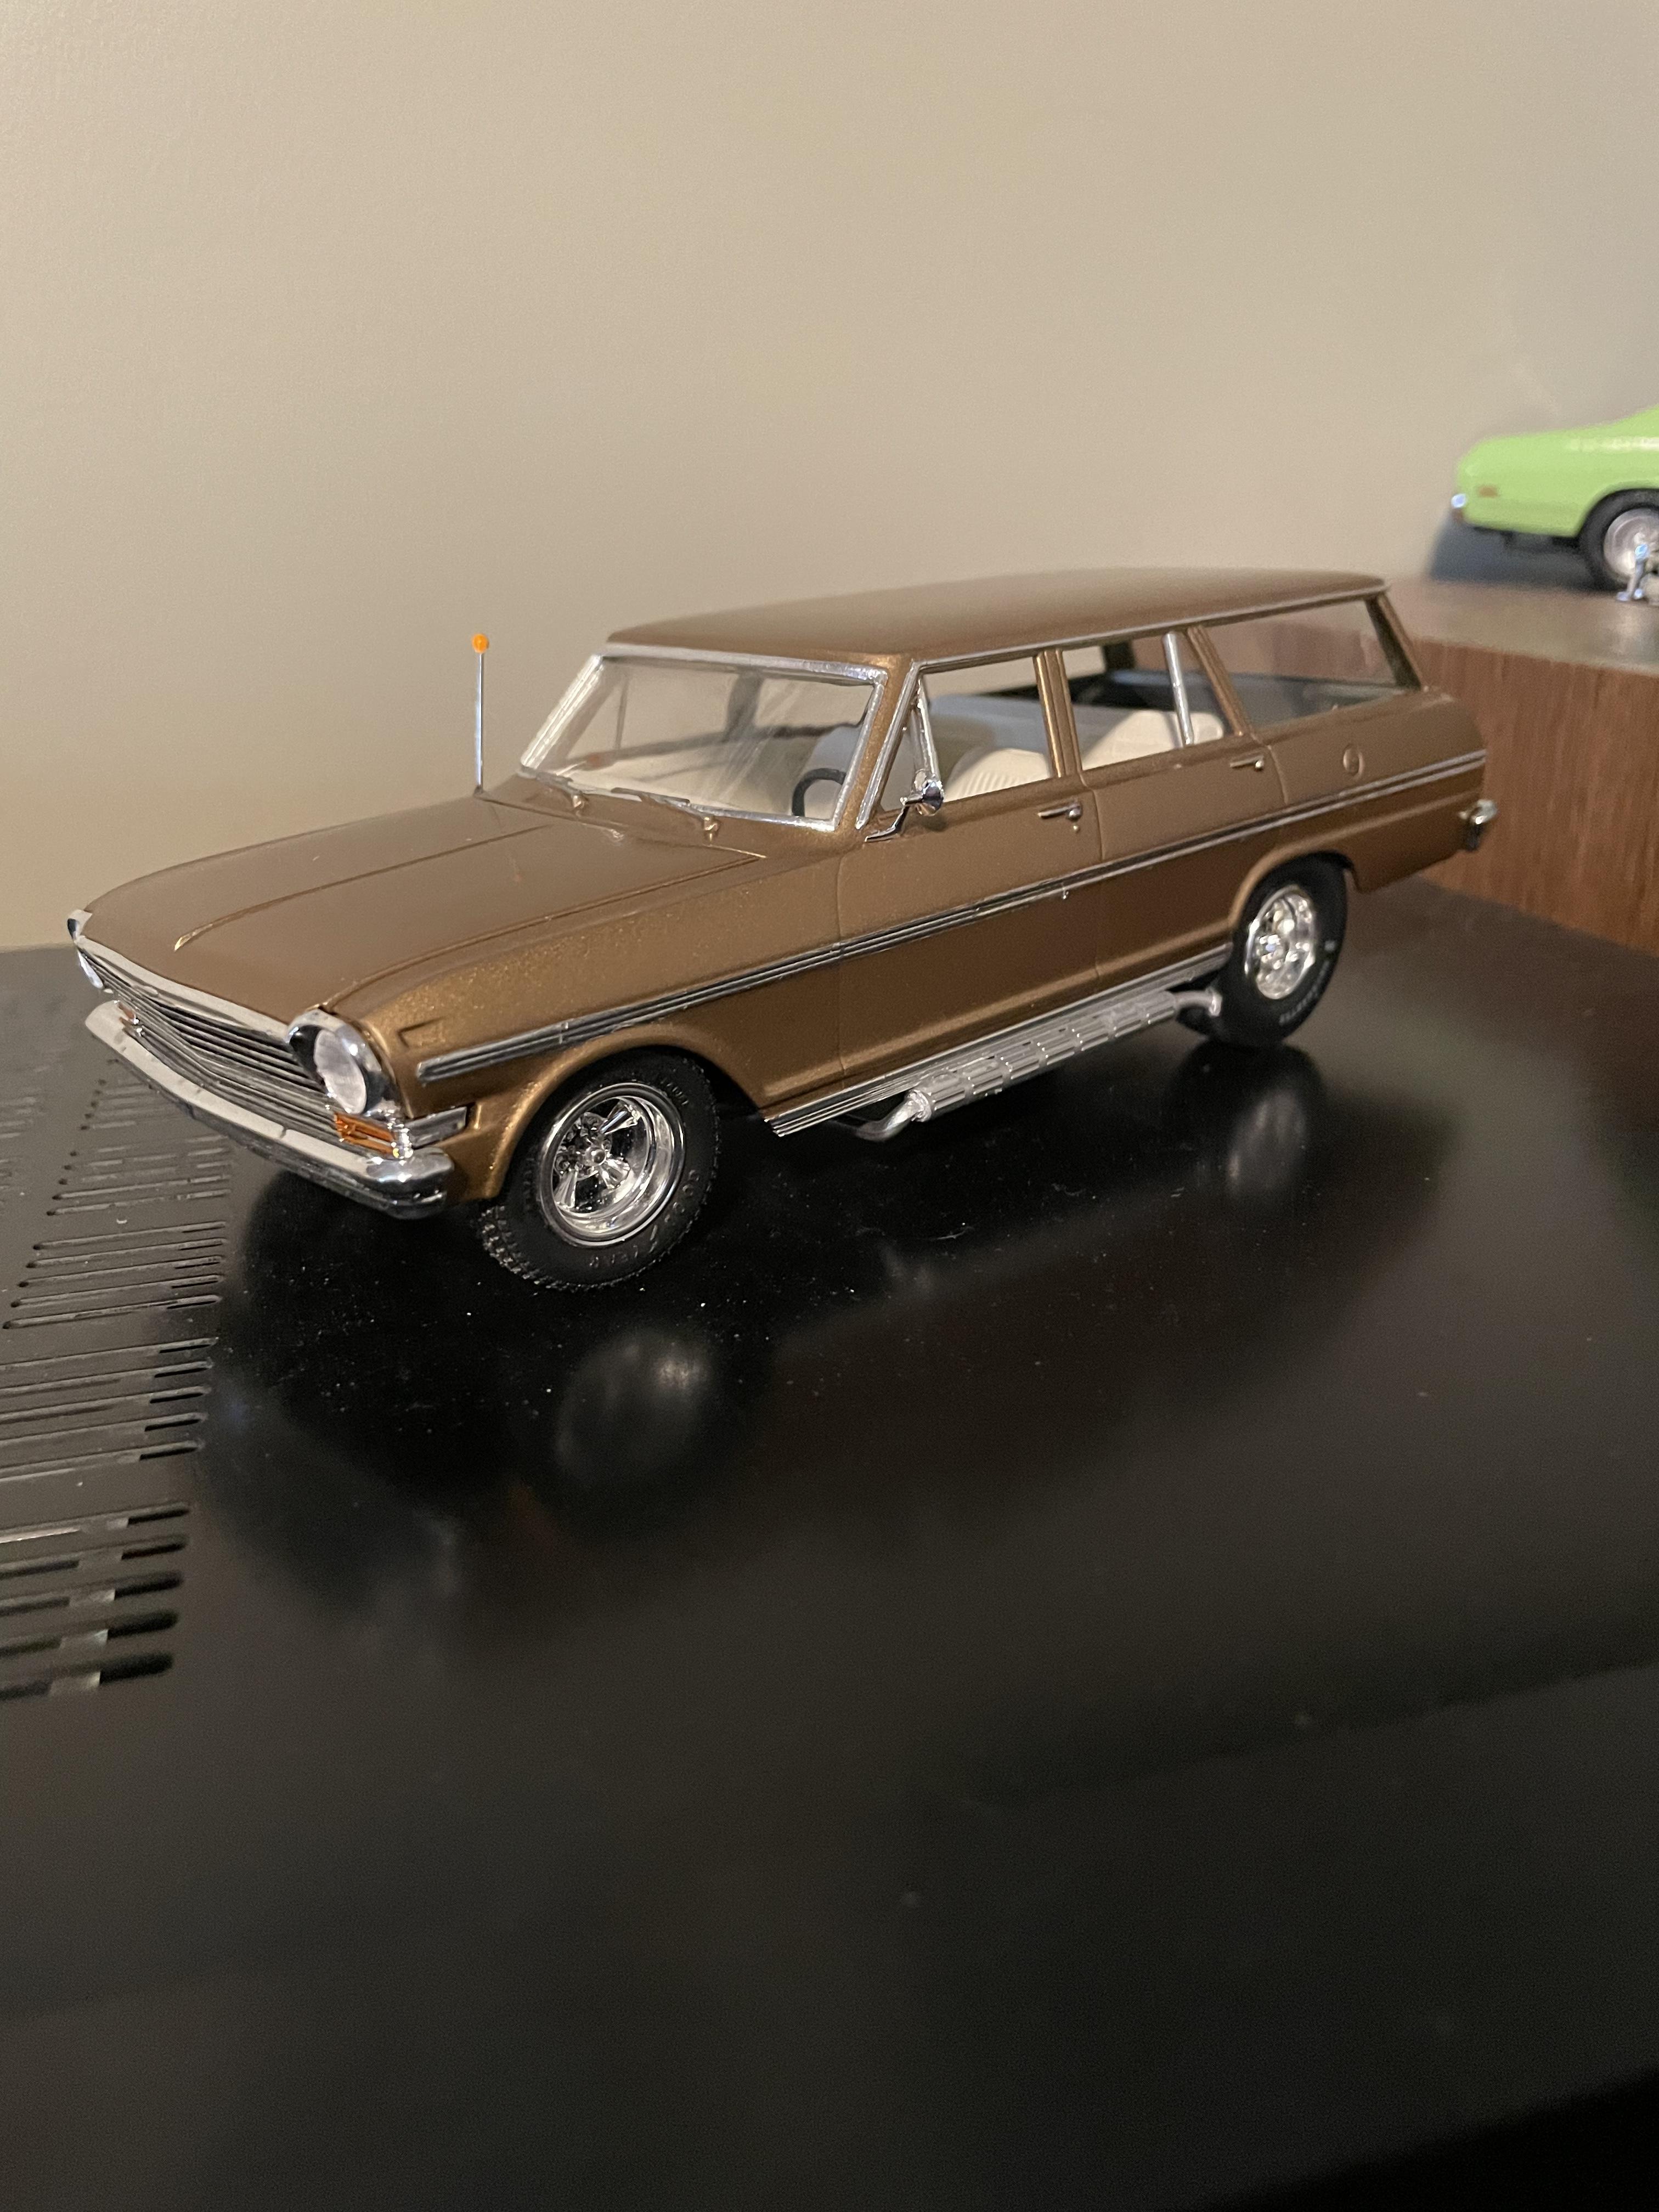
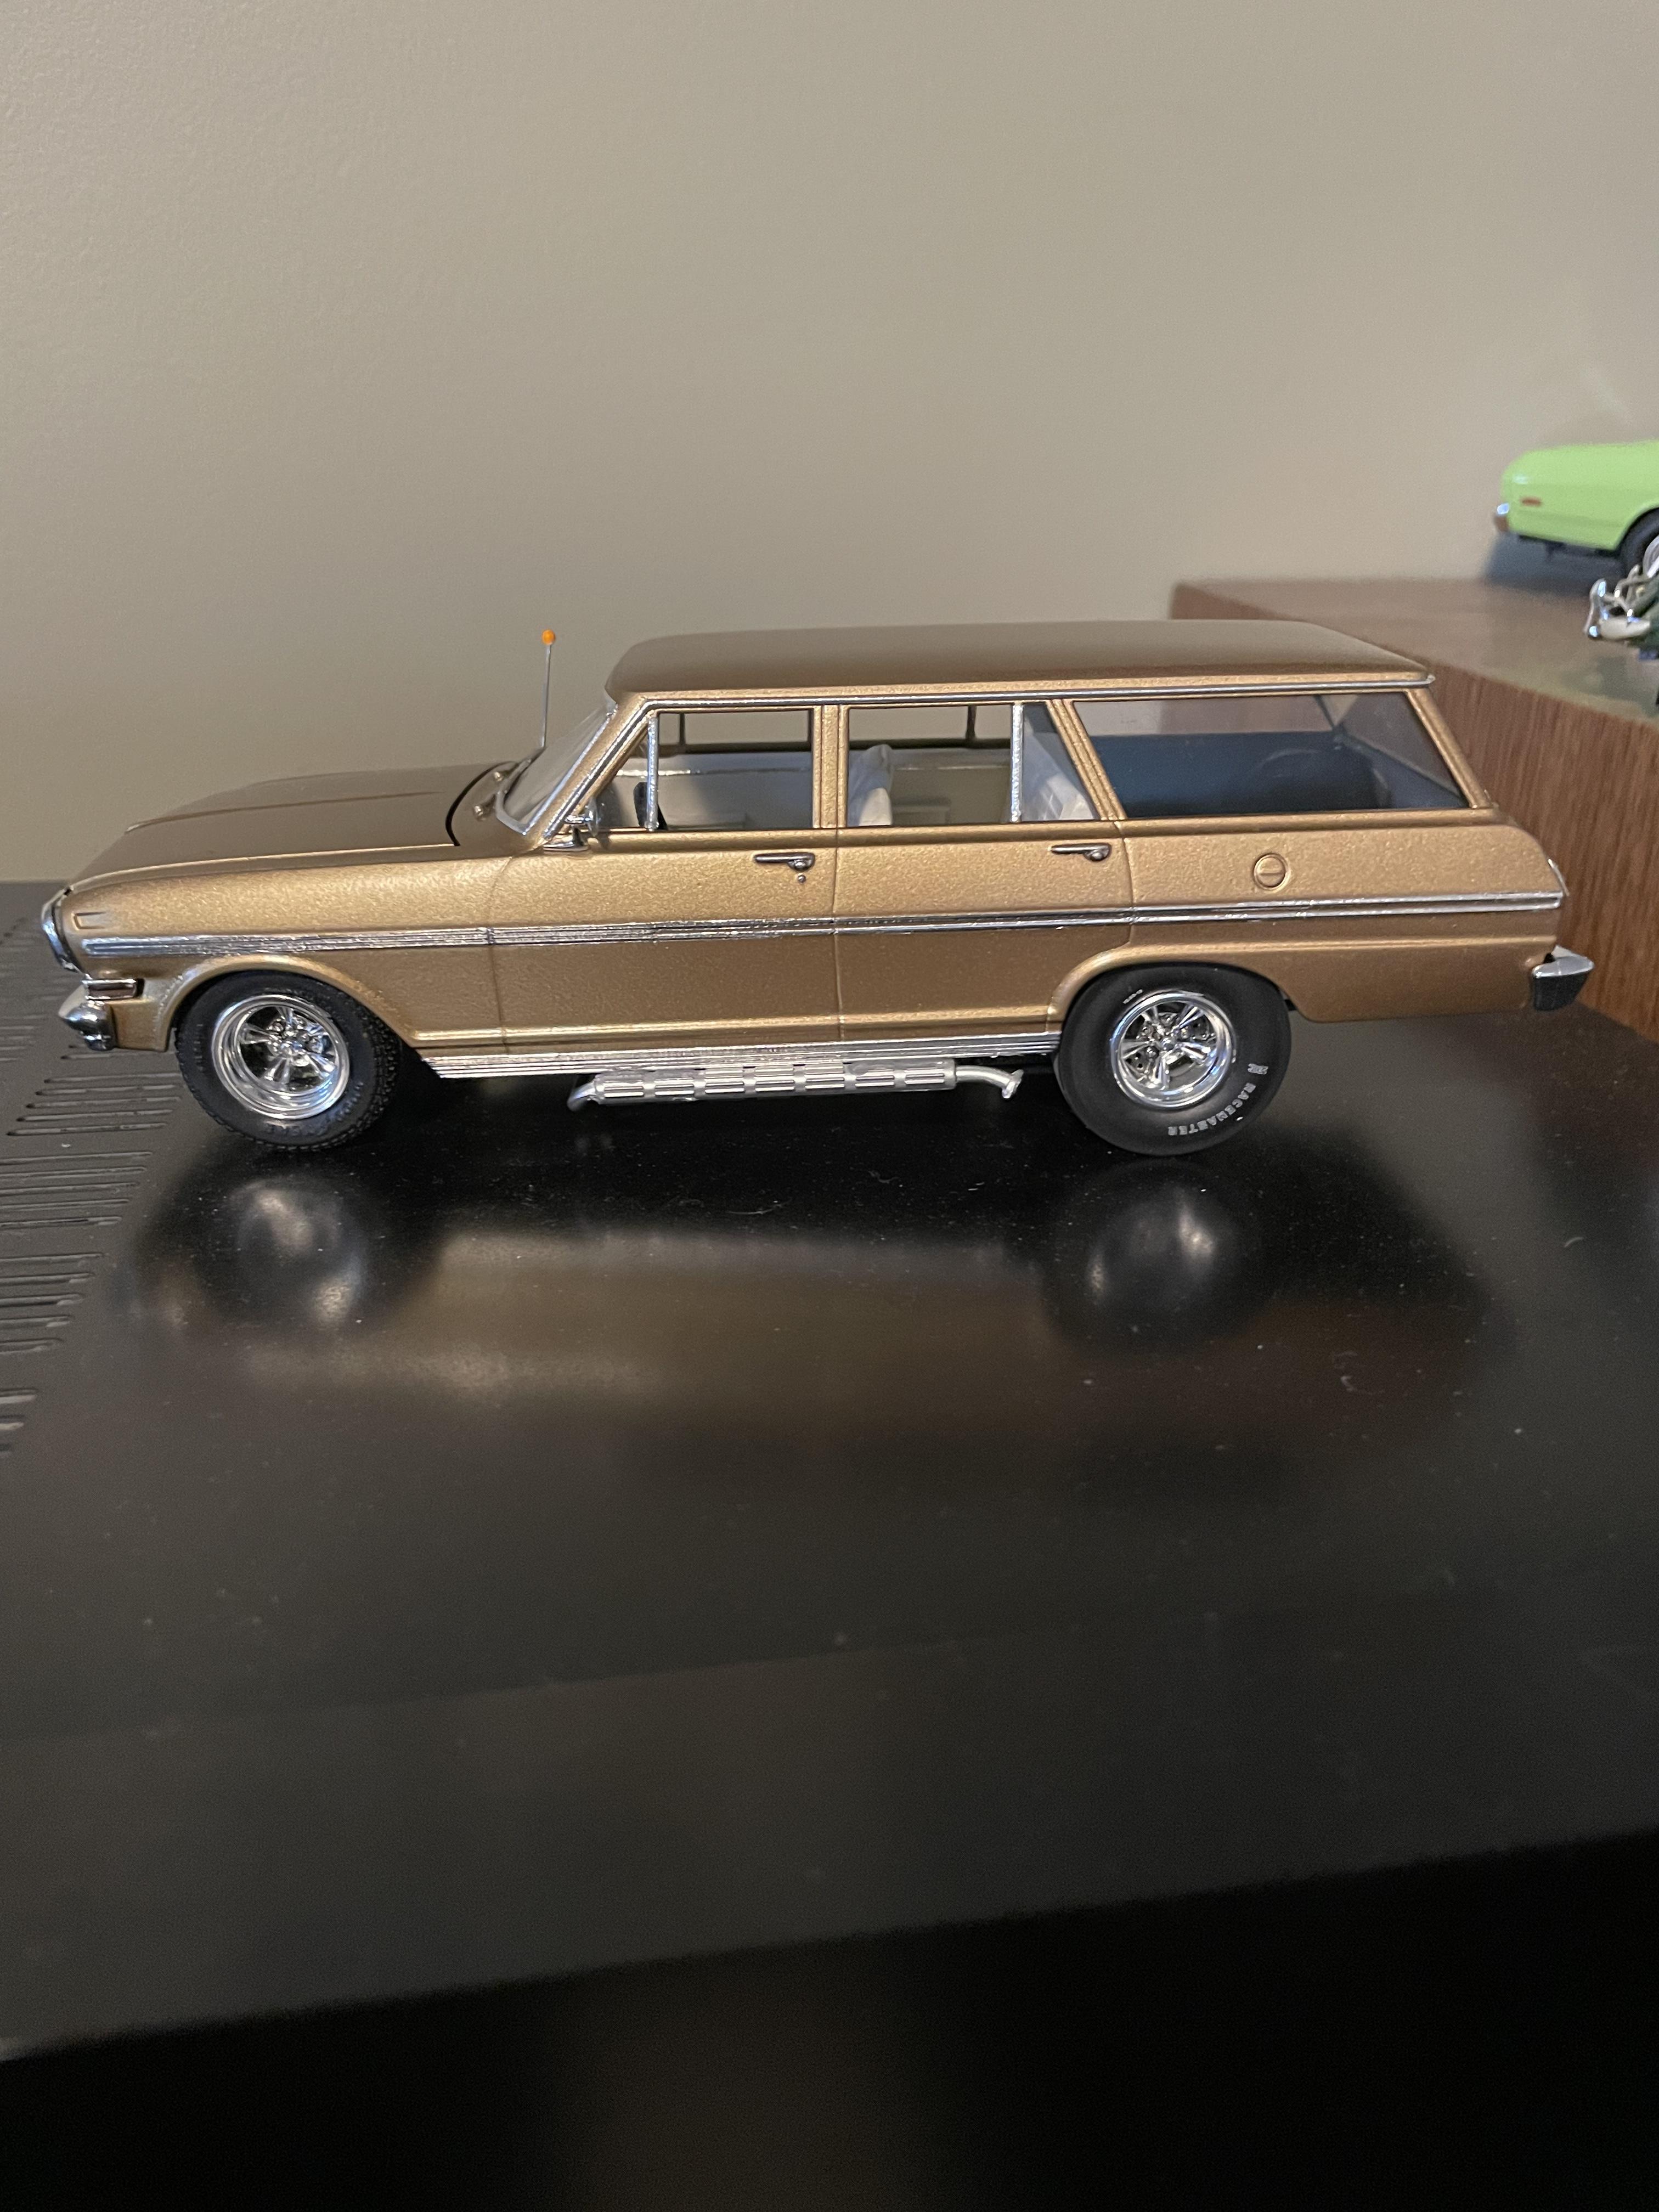
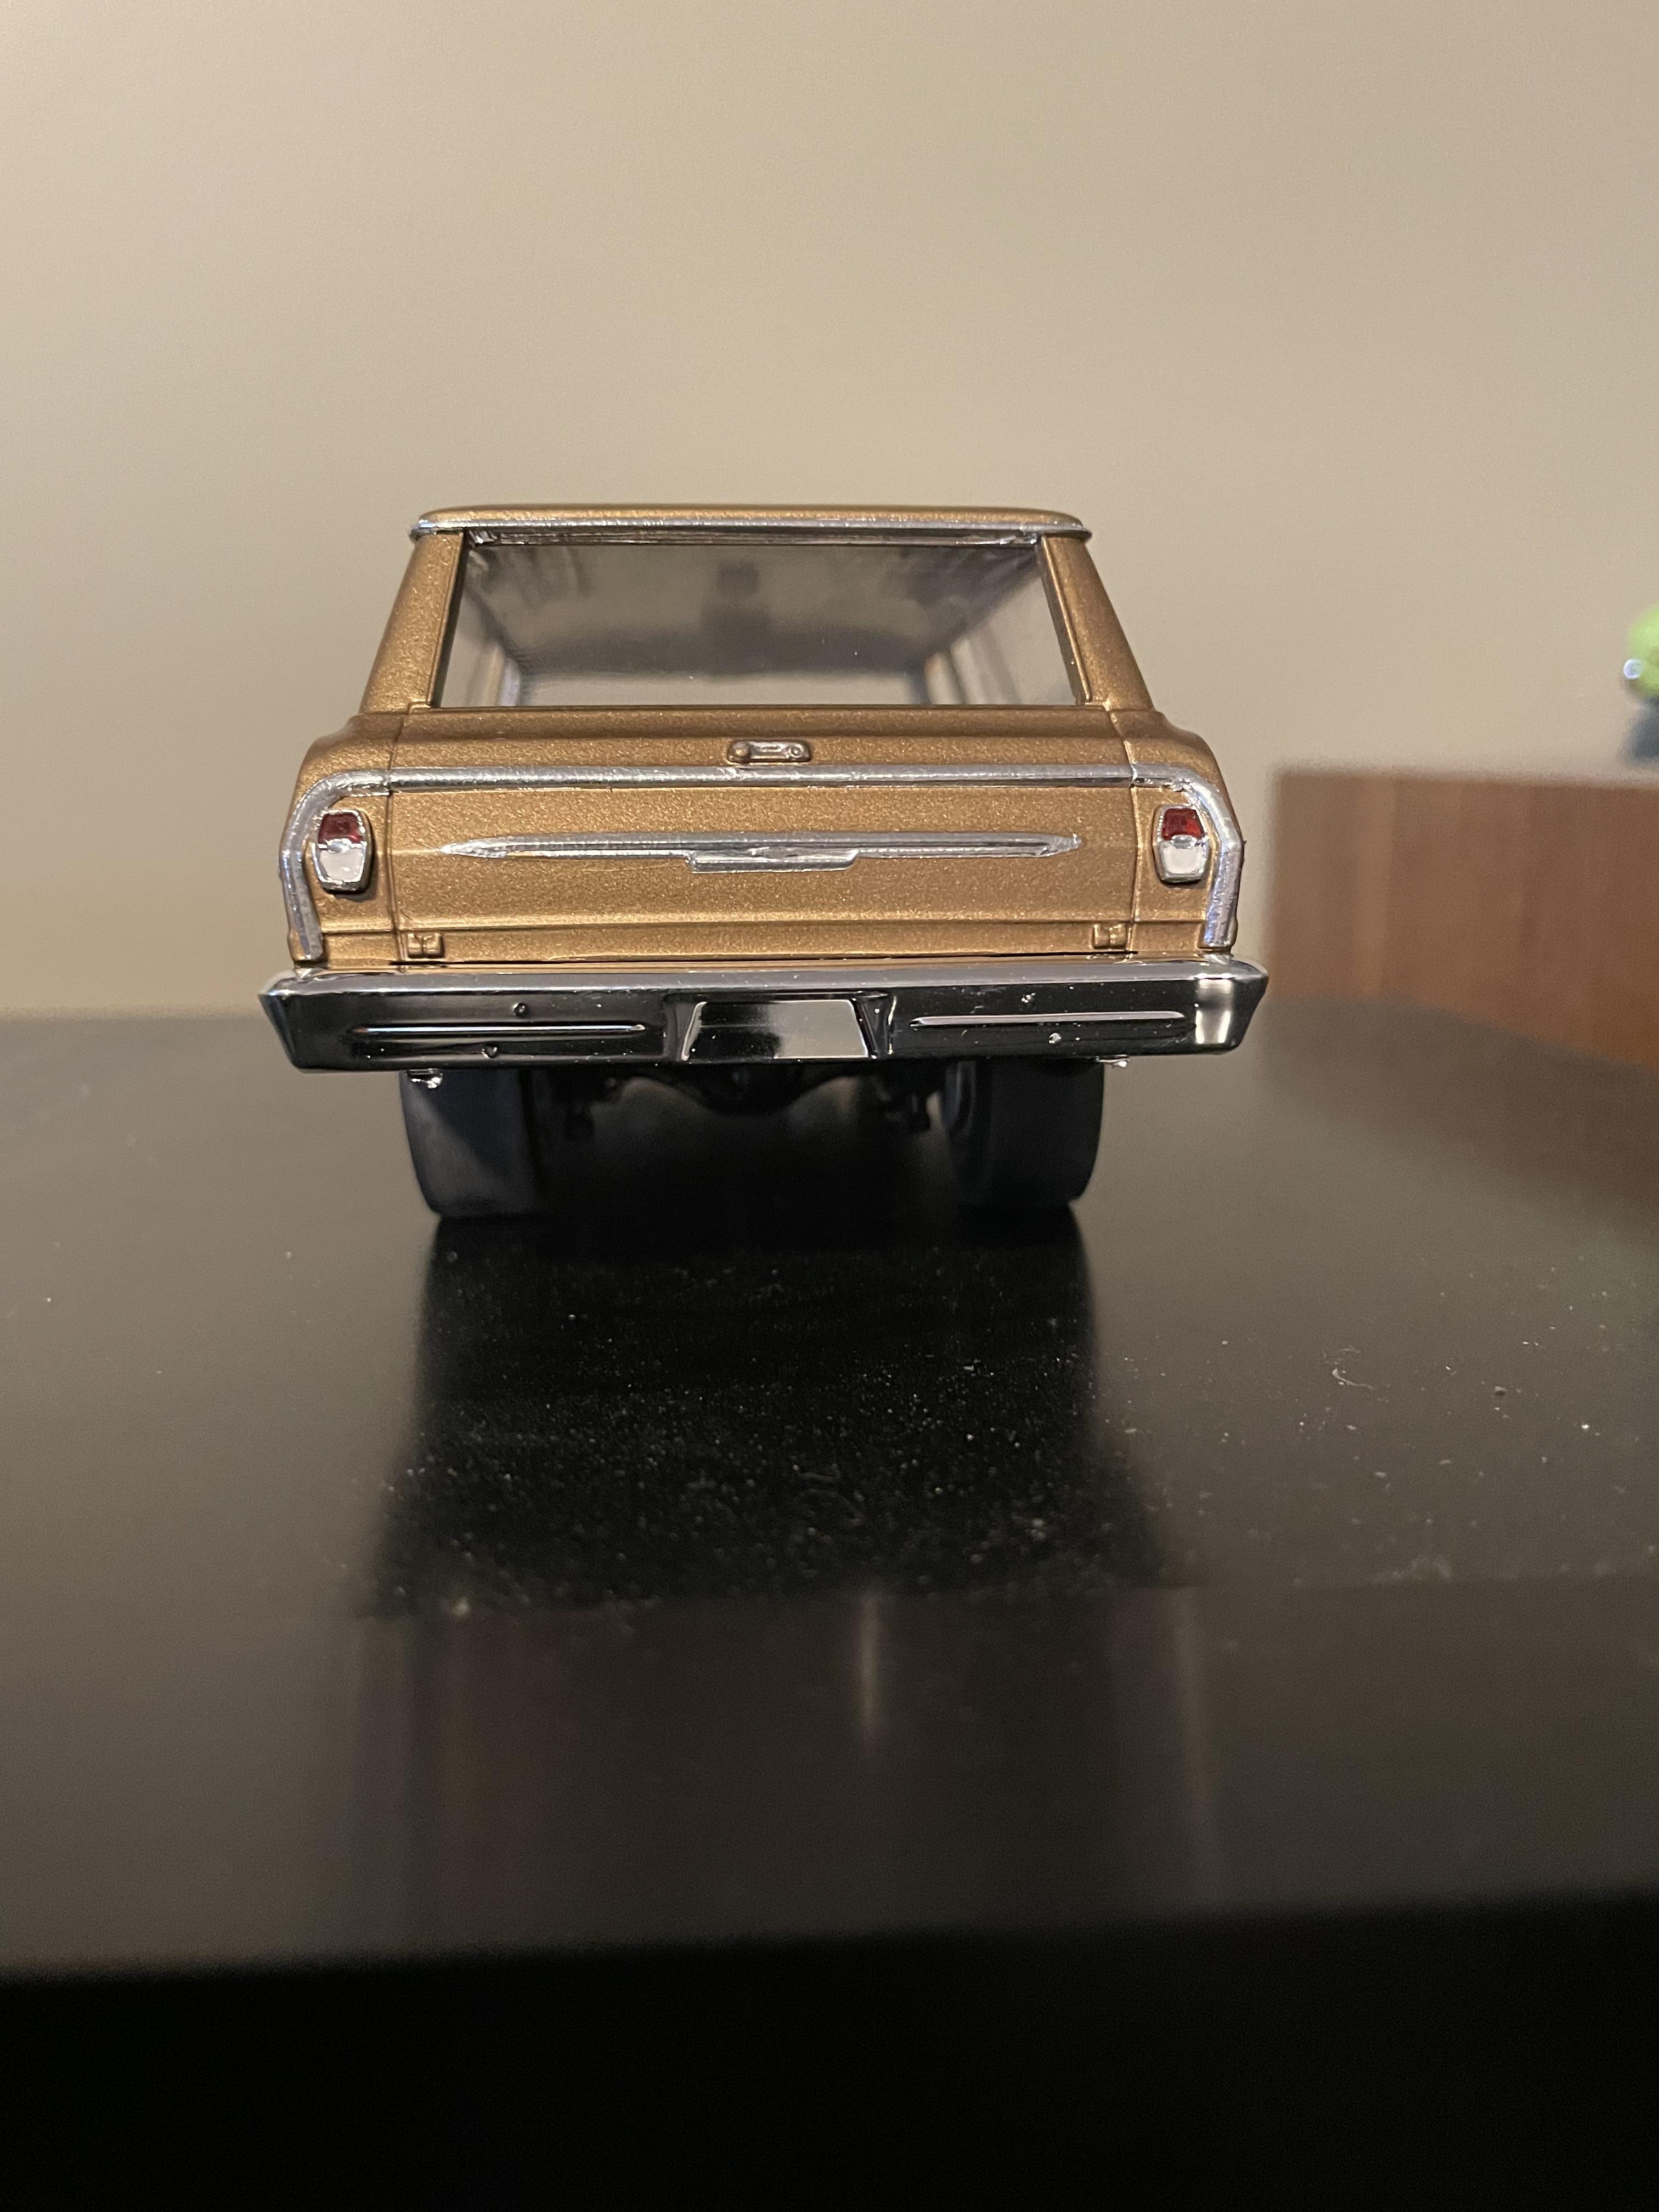
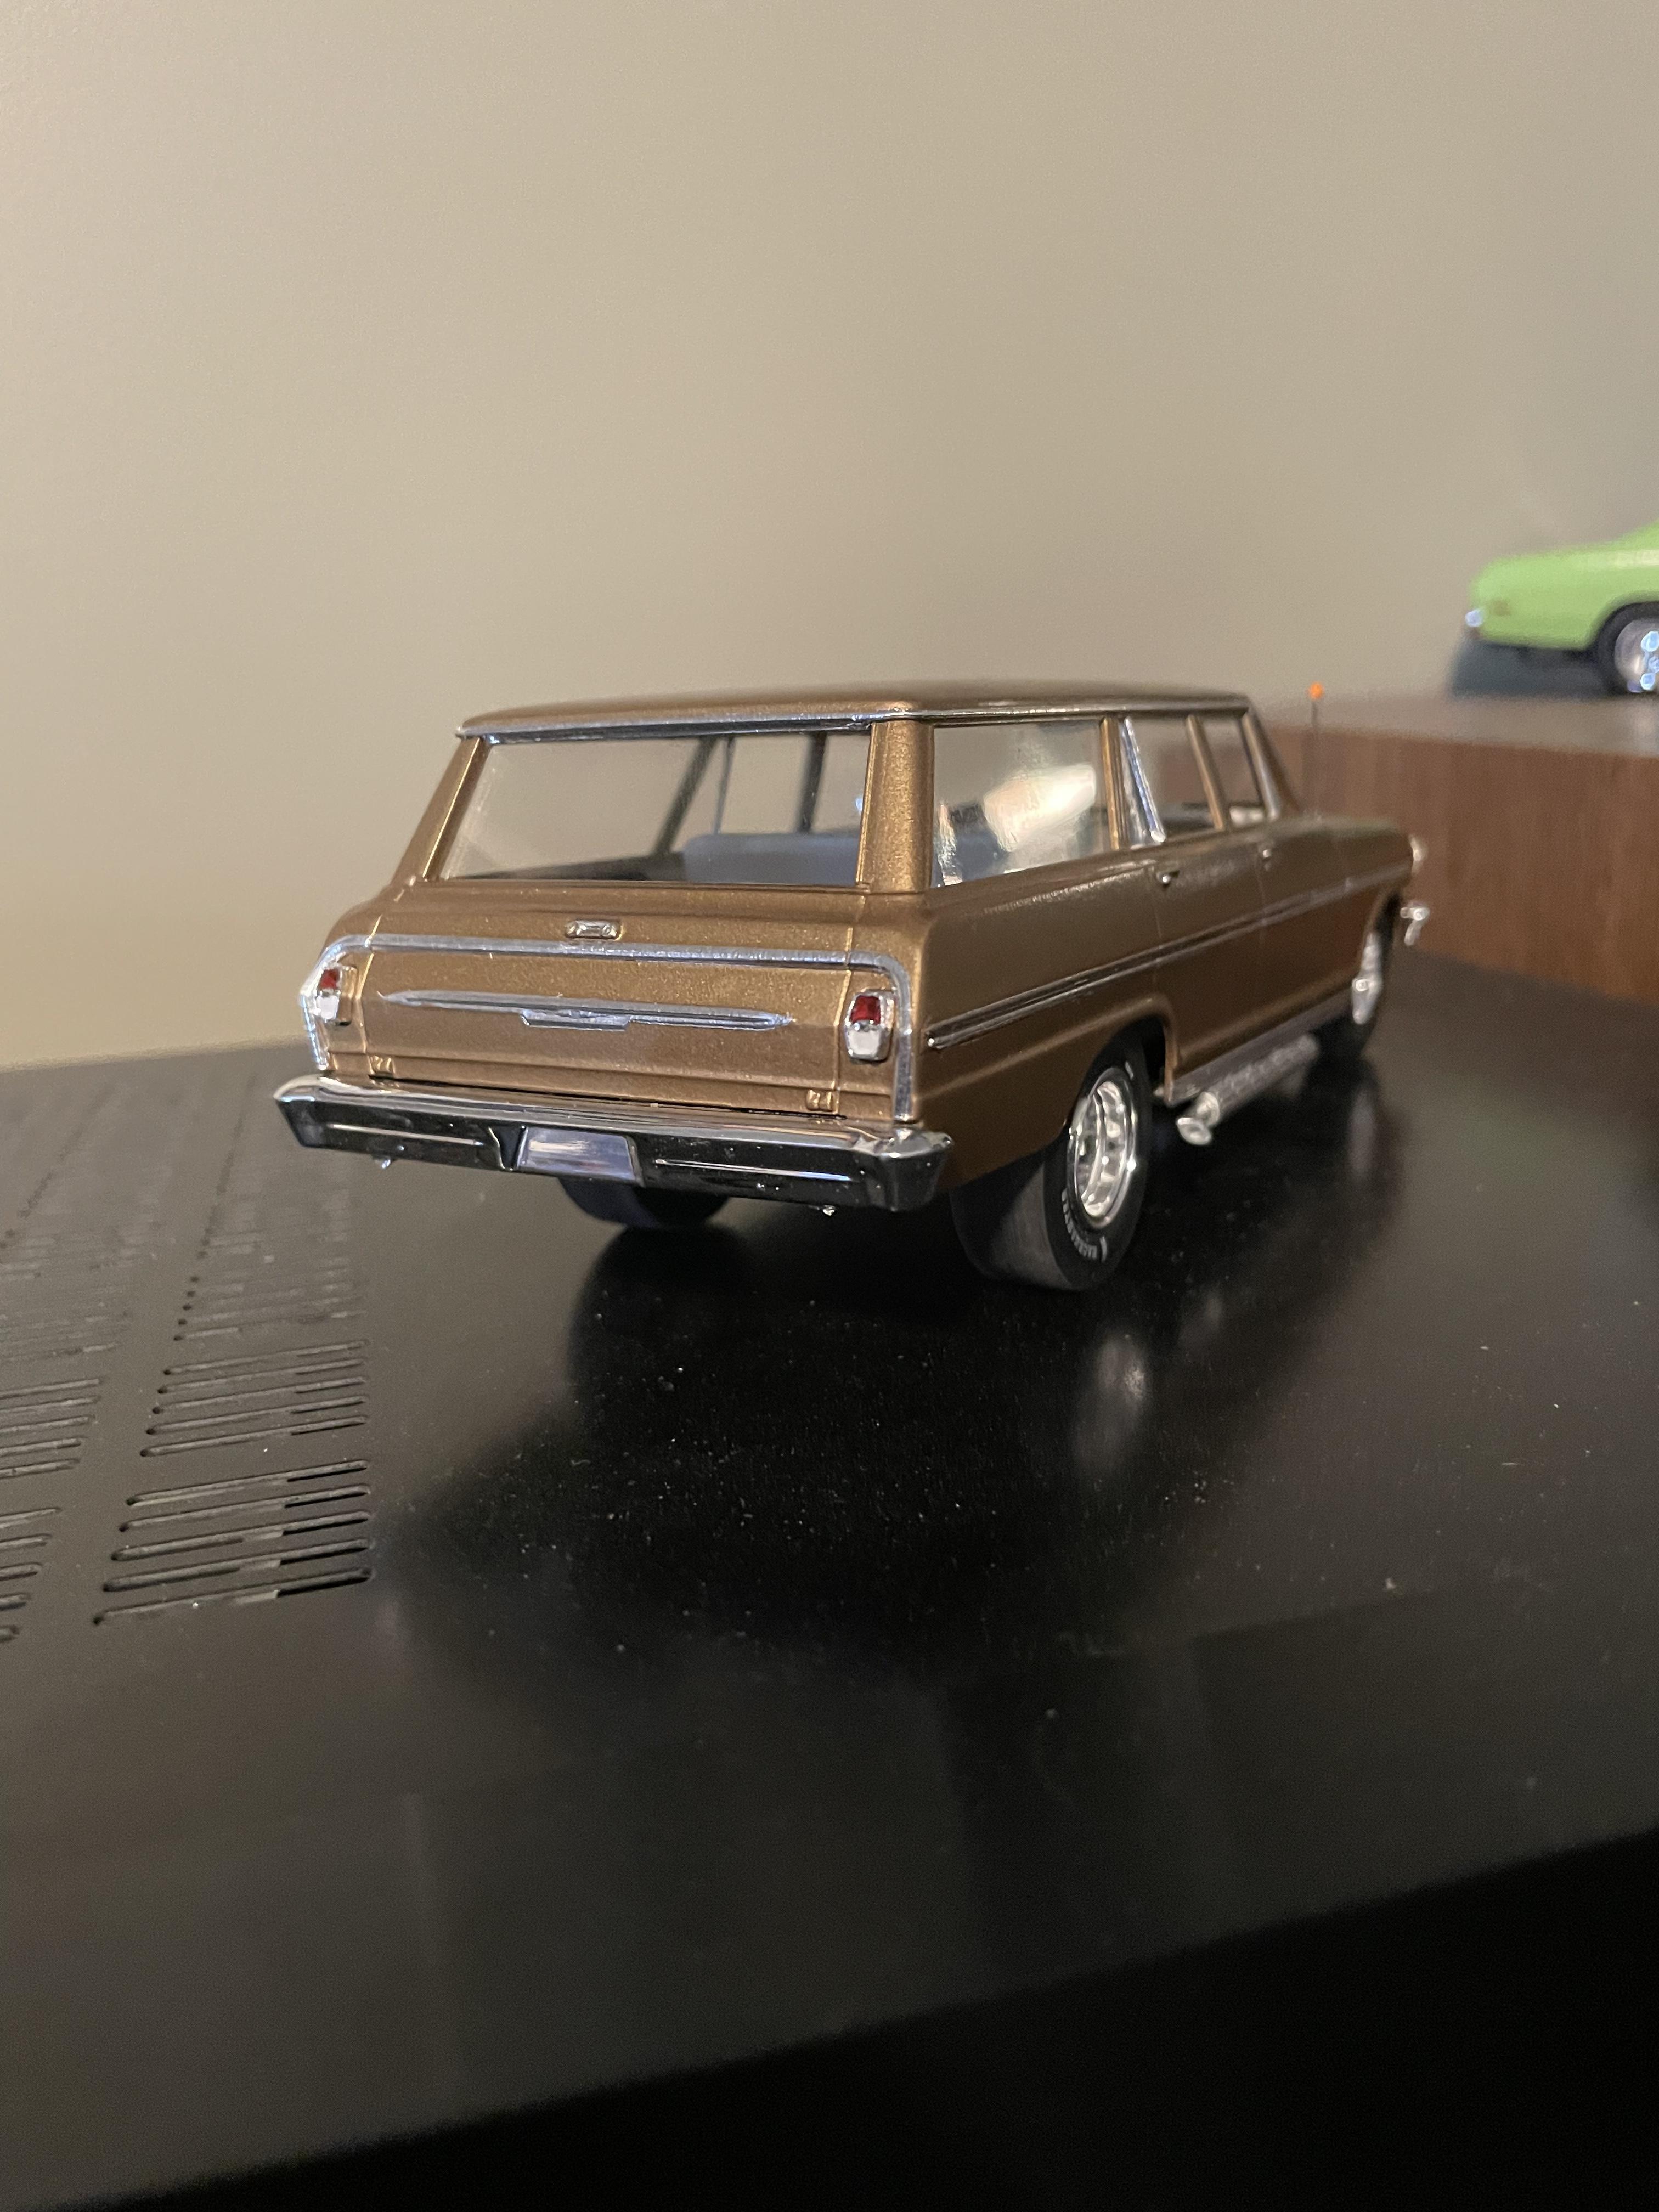
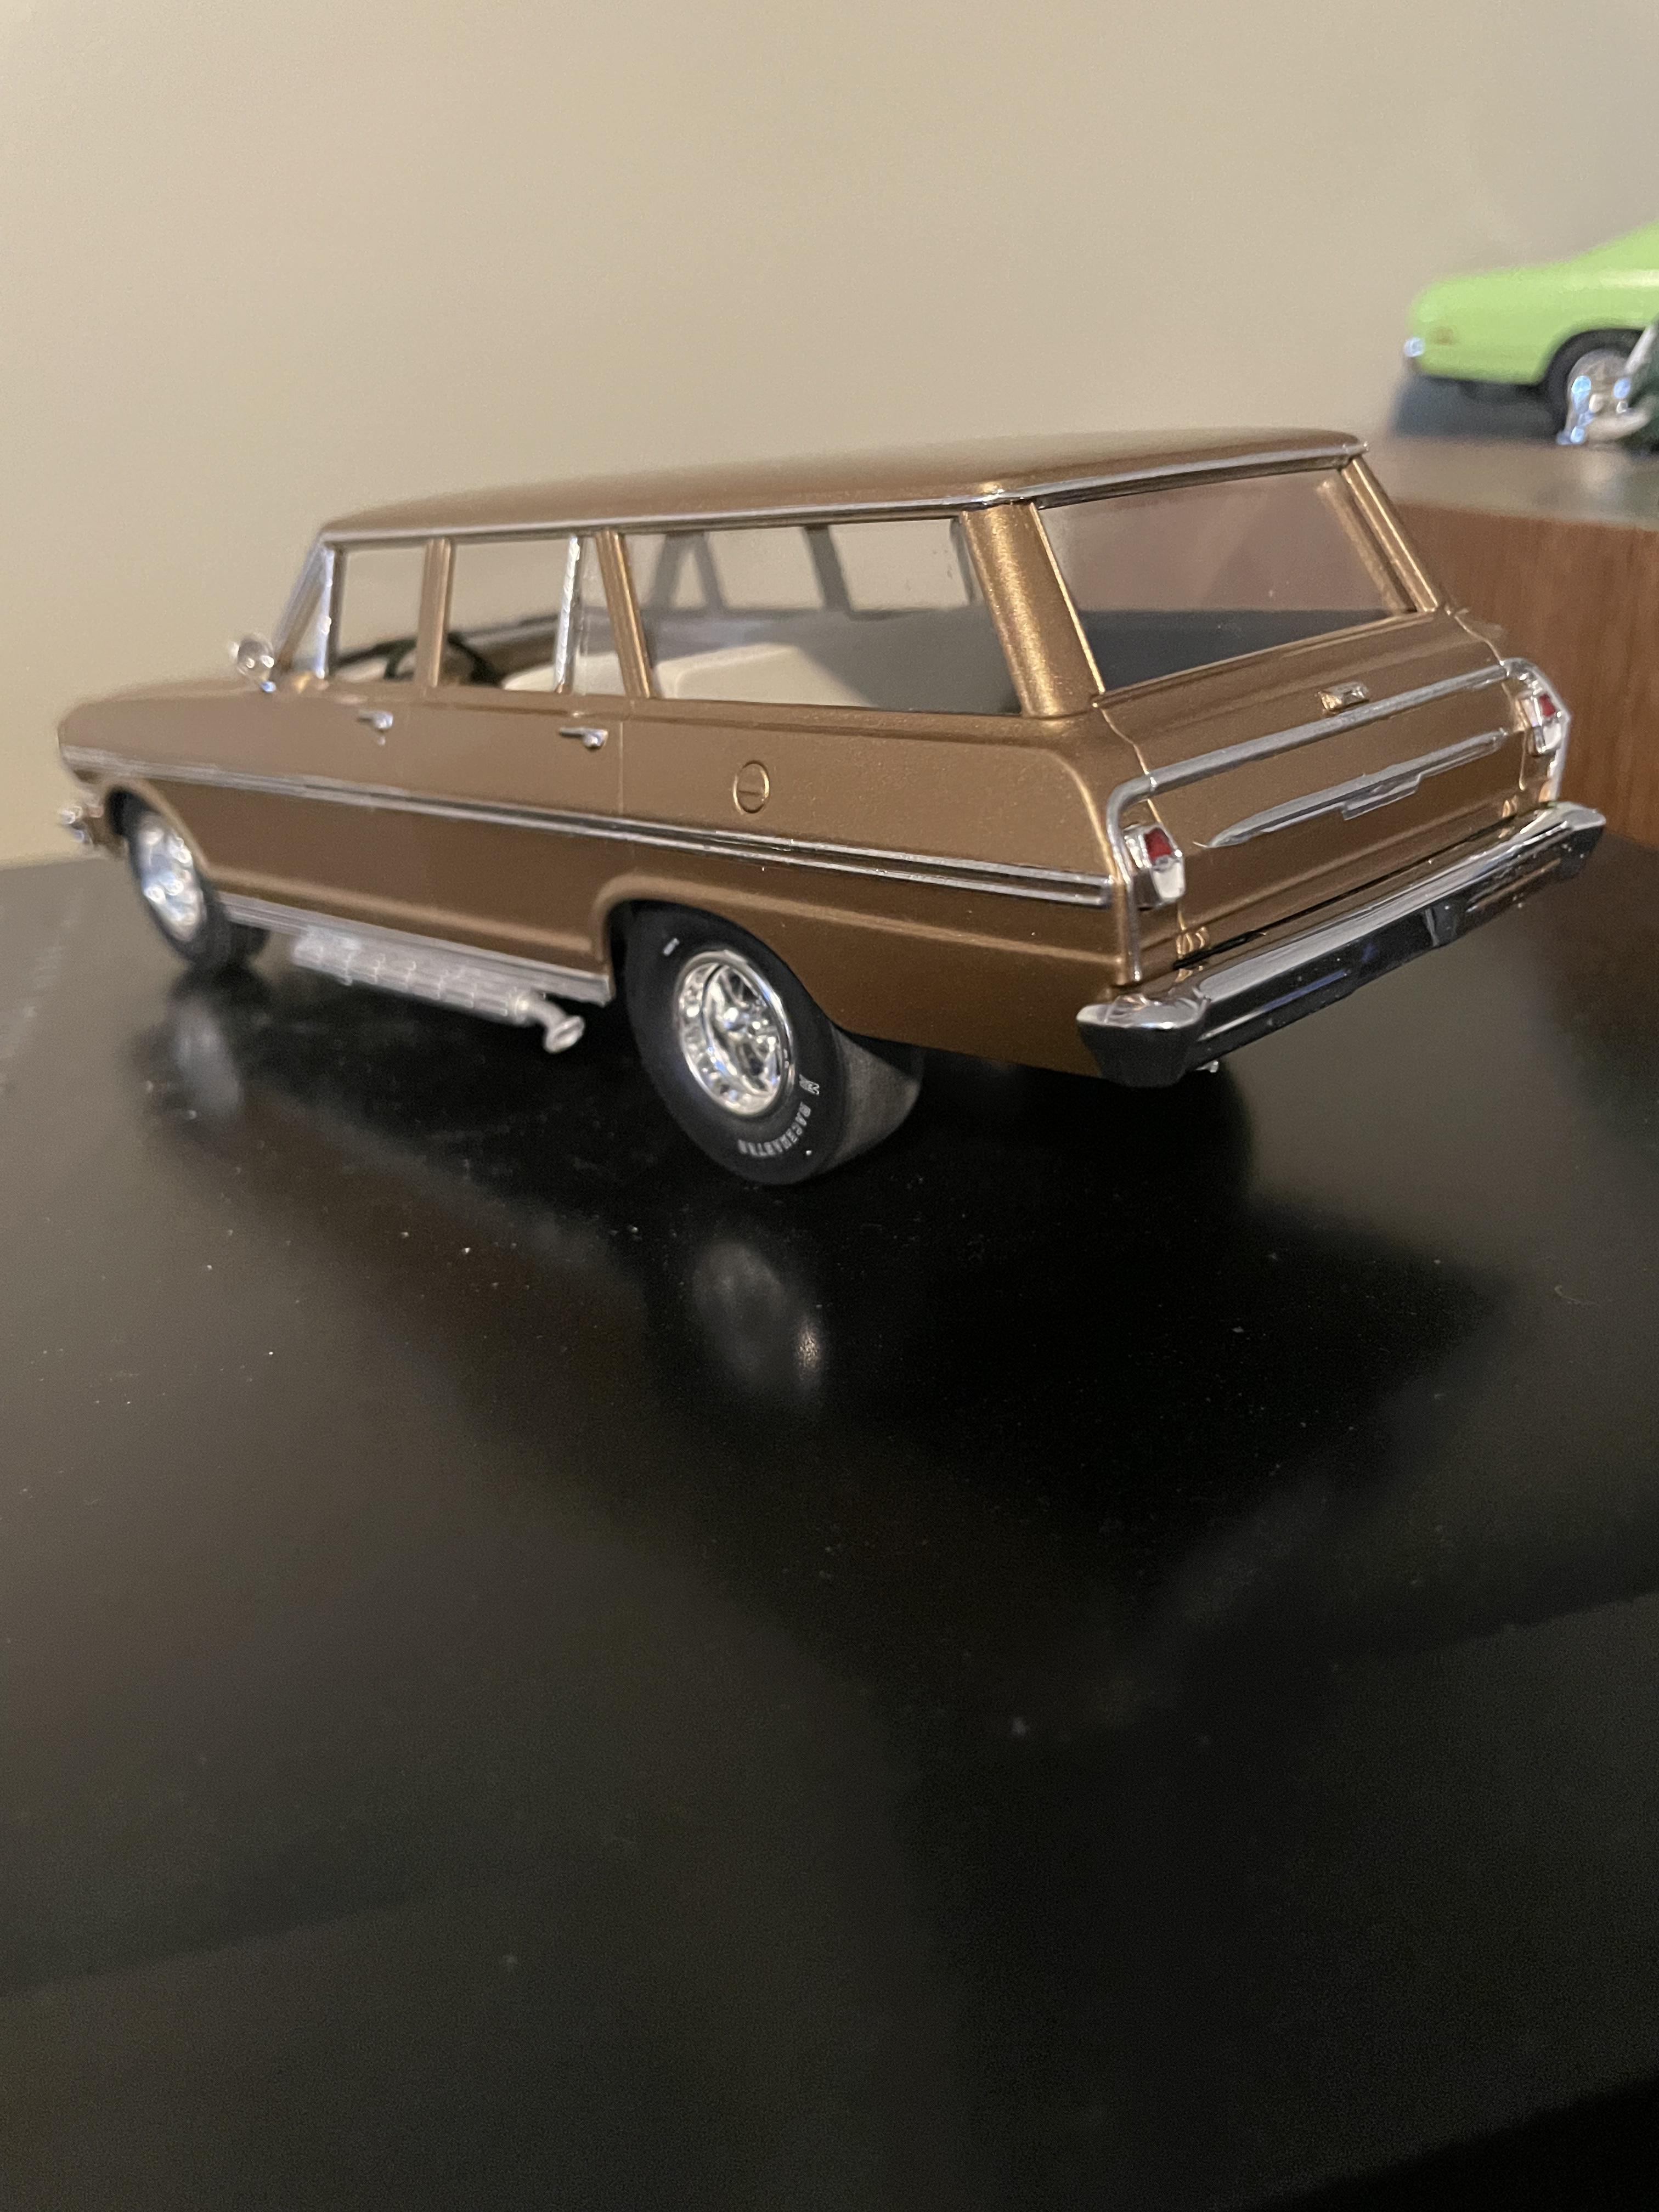
Well, I’m calling this one finished. Got a few dimples in the paint (paint is my nemisis) and the bmf is a little rough in a few areas but I really enjoyed this build. Taking a curbside kit and adding the drivetrain was fun as well as cutting all the pre molded suspension out and adding new parts was a challenge especially the front end. As always, thanks for looking and the comments. Dave.
-
I had the same problem with this hood, I didn’t do a good test fit before paint and on final assembly it rocked corner to corner badly. I twisted it so much I was afraid I was going to crack the paint.
-
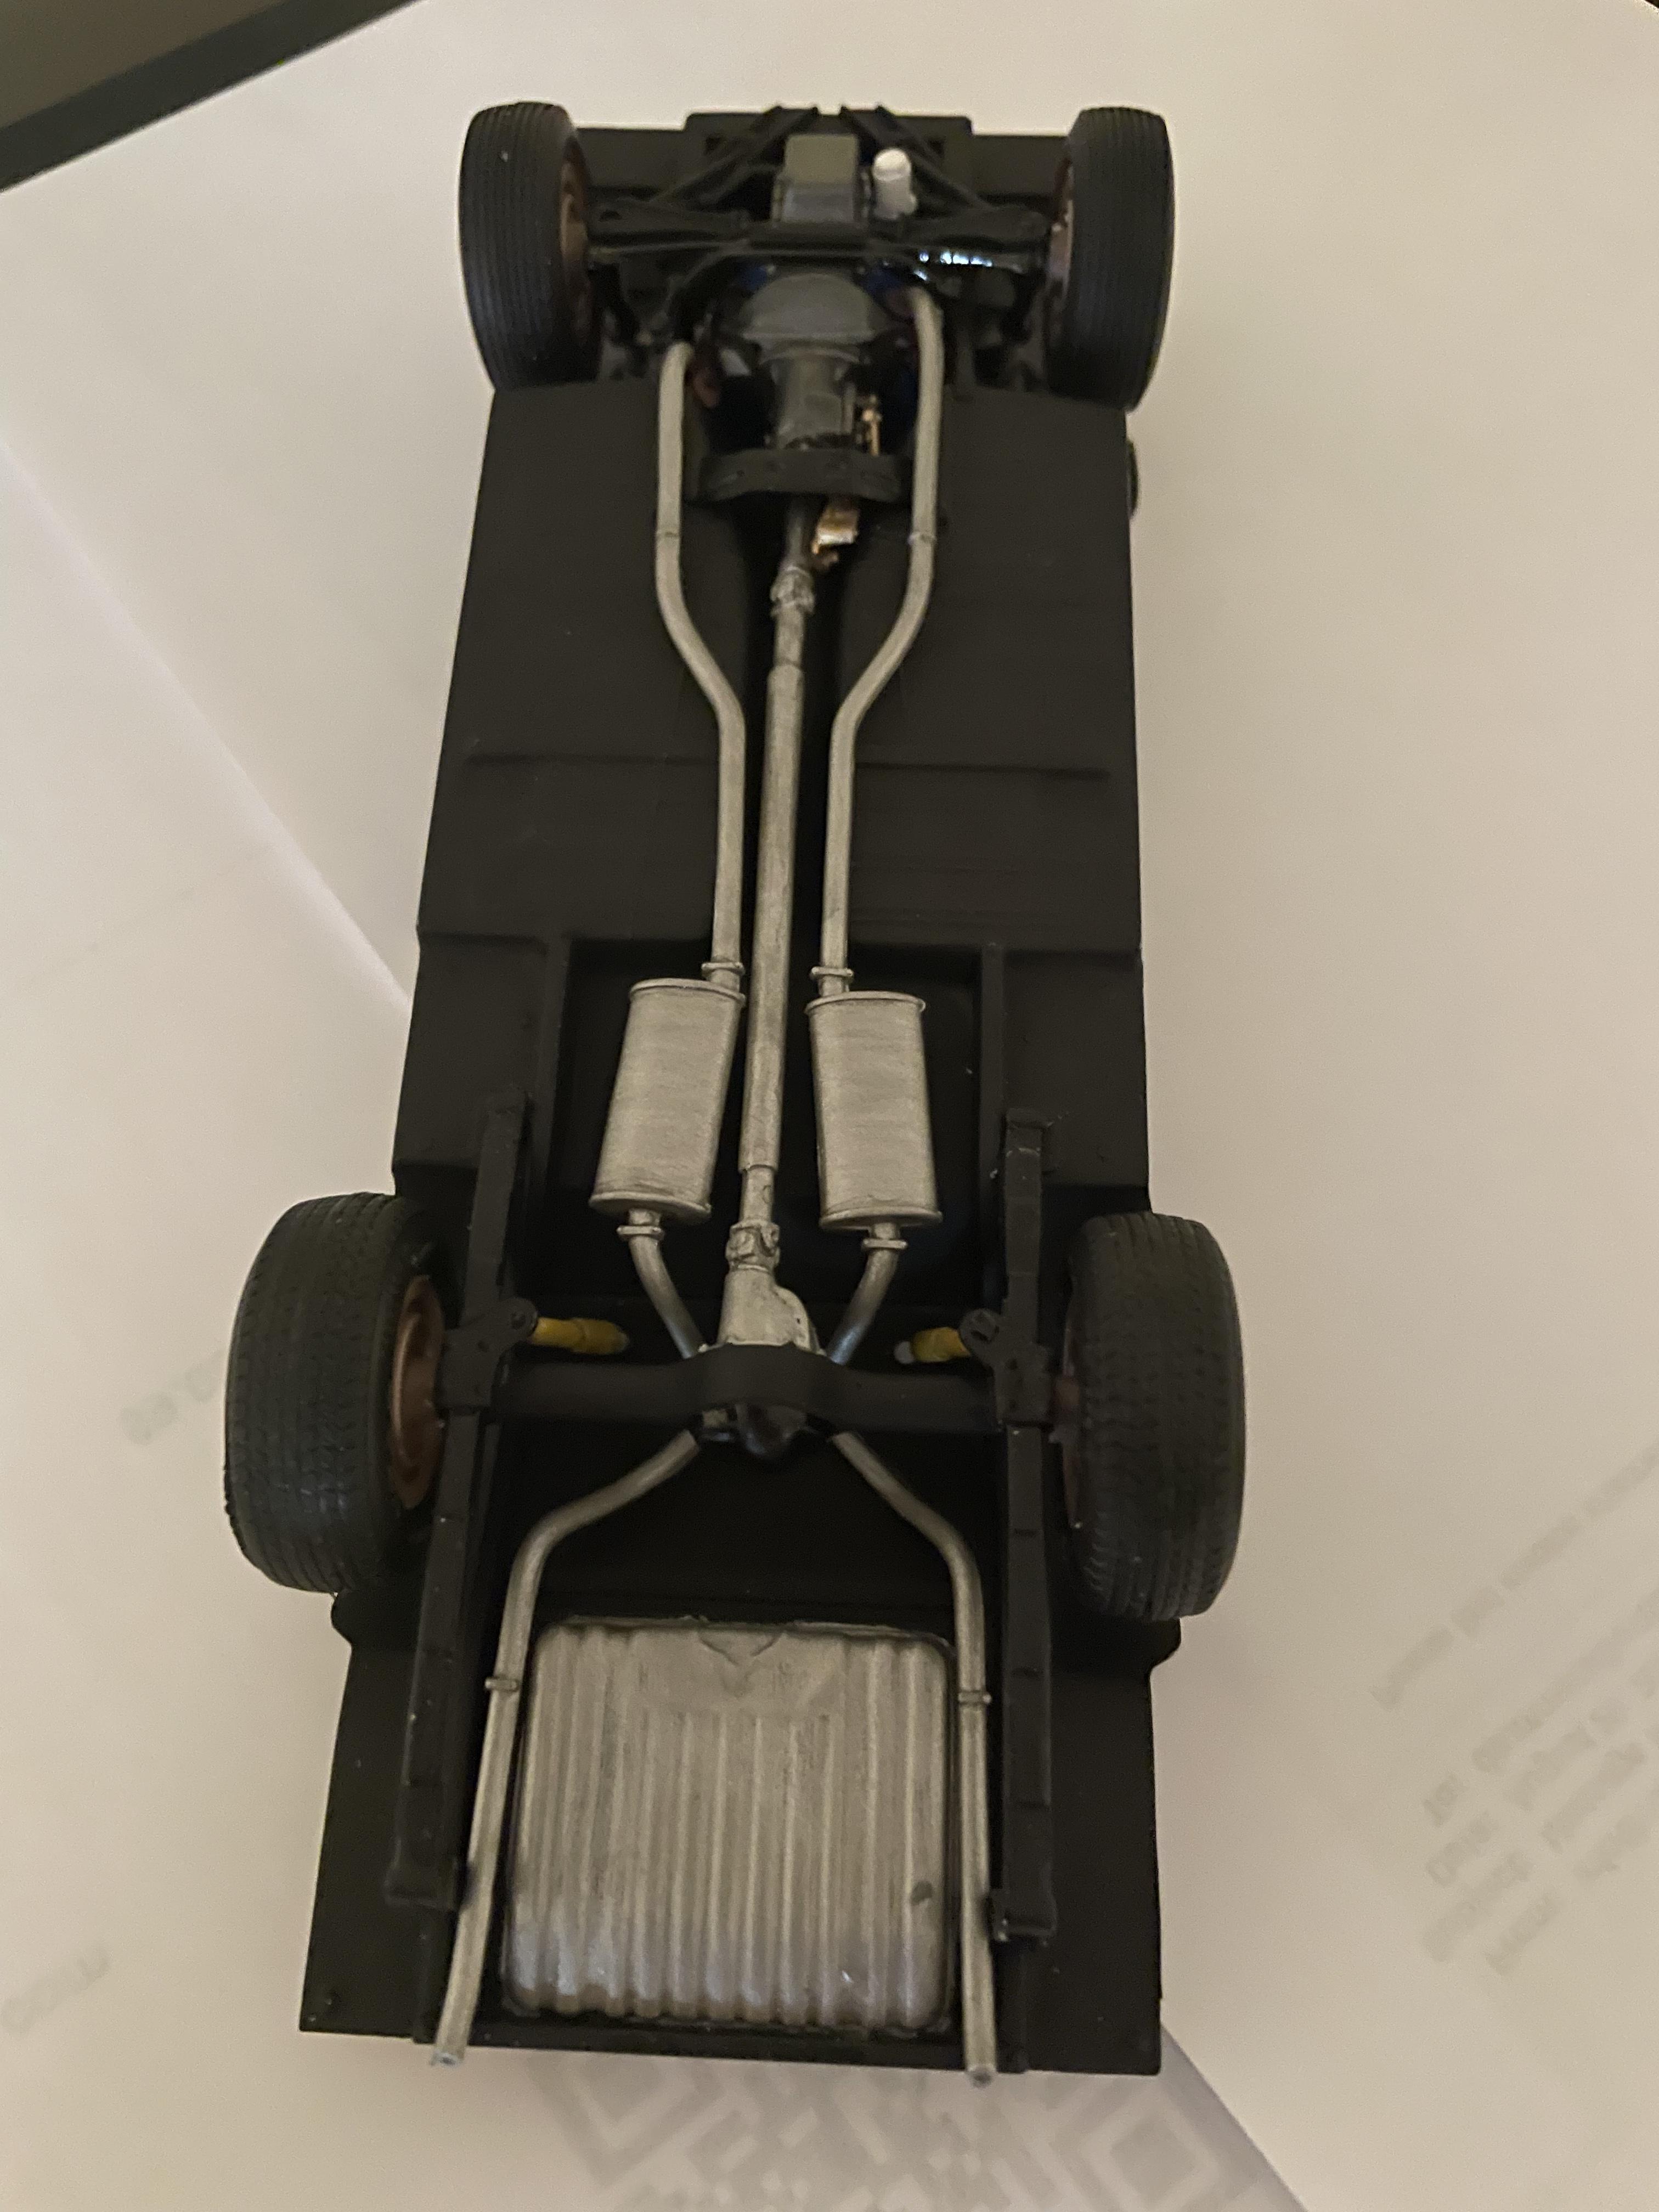
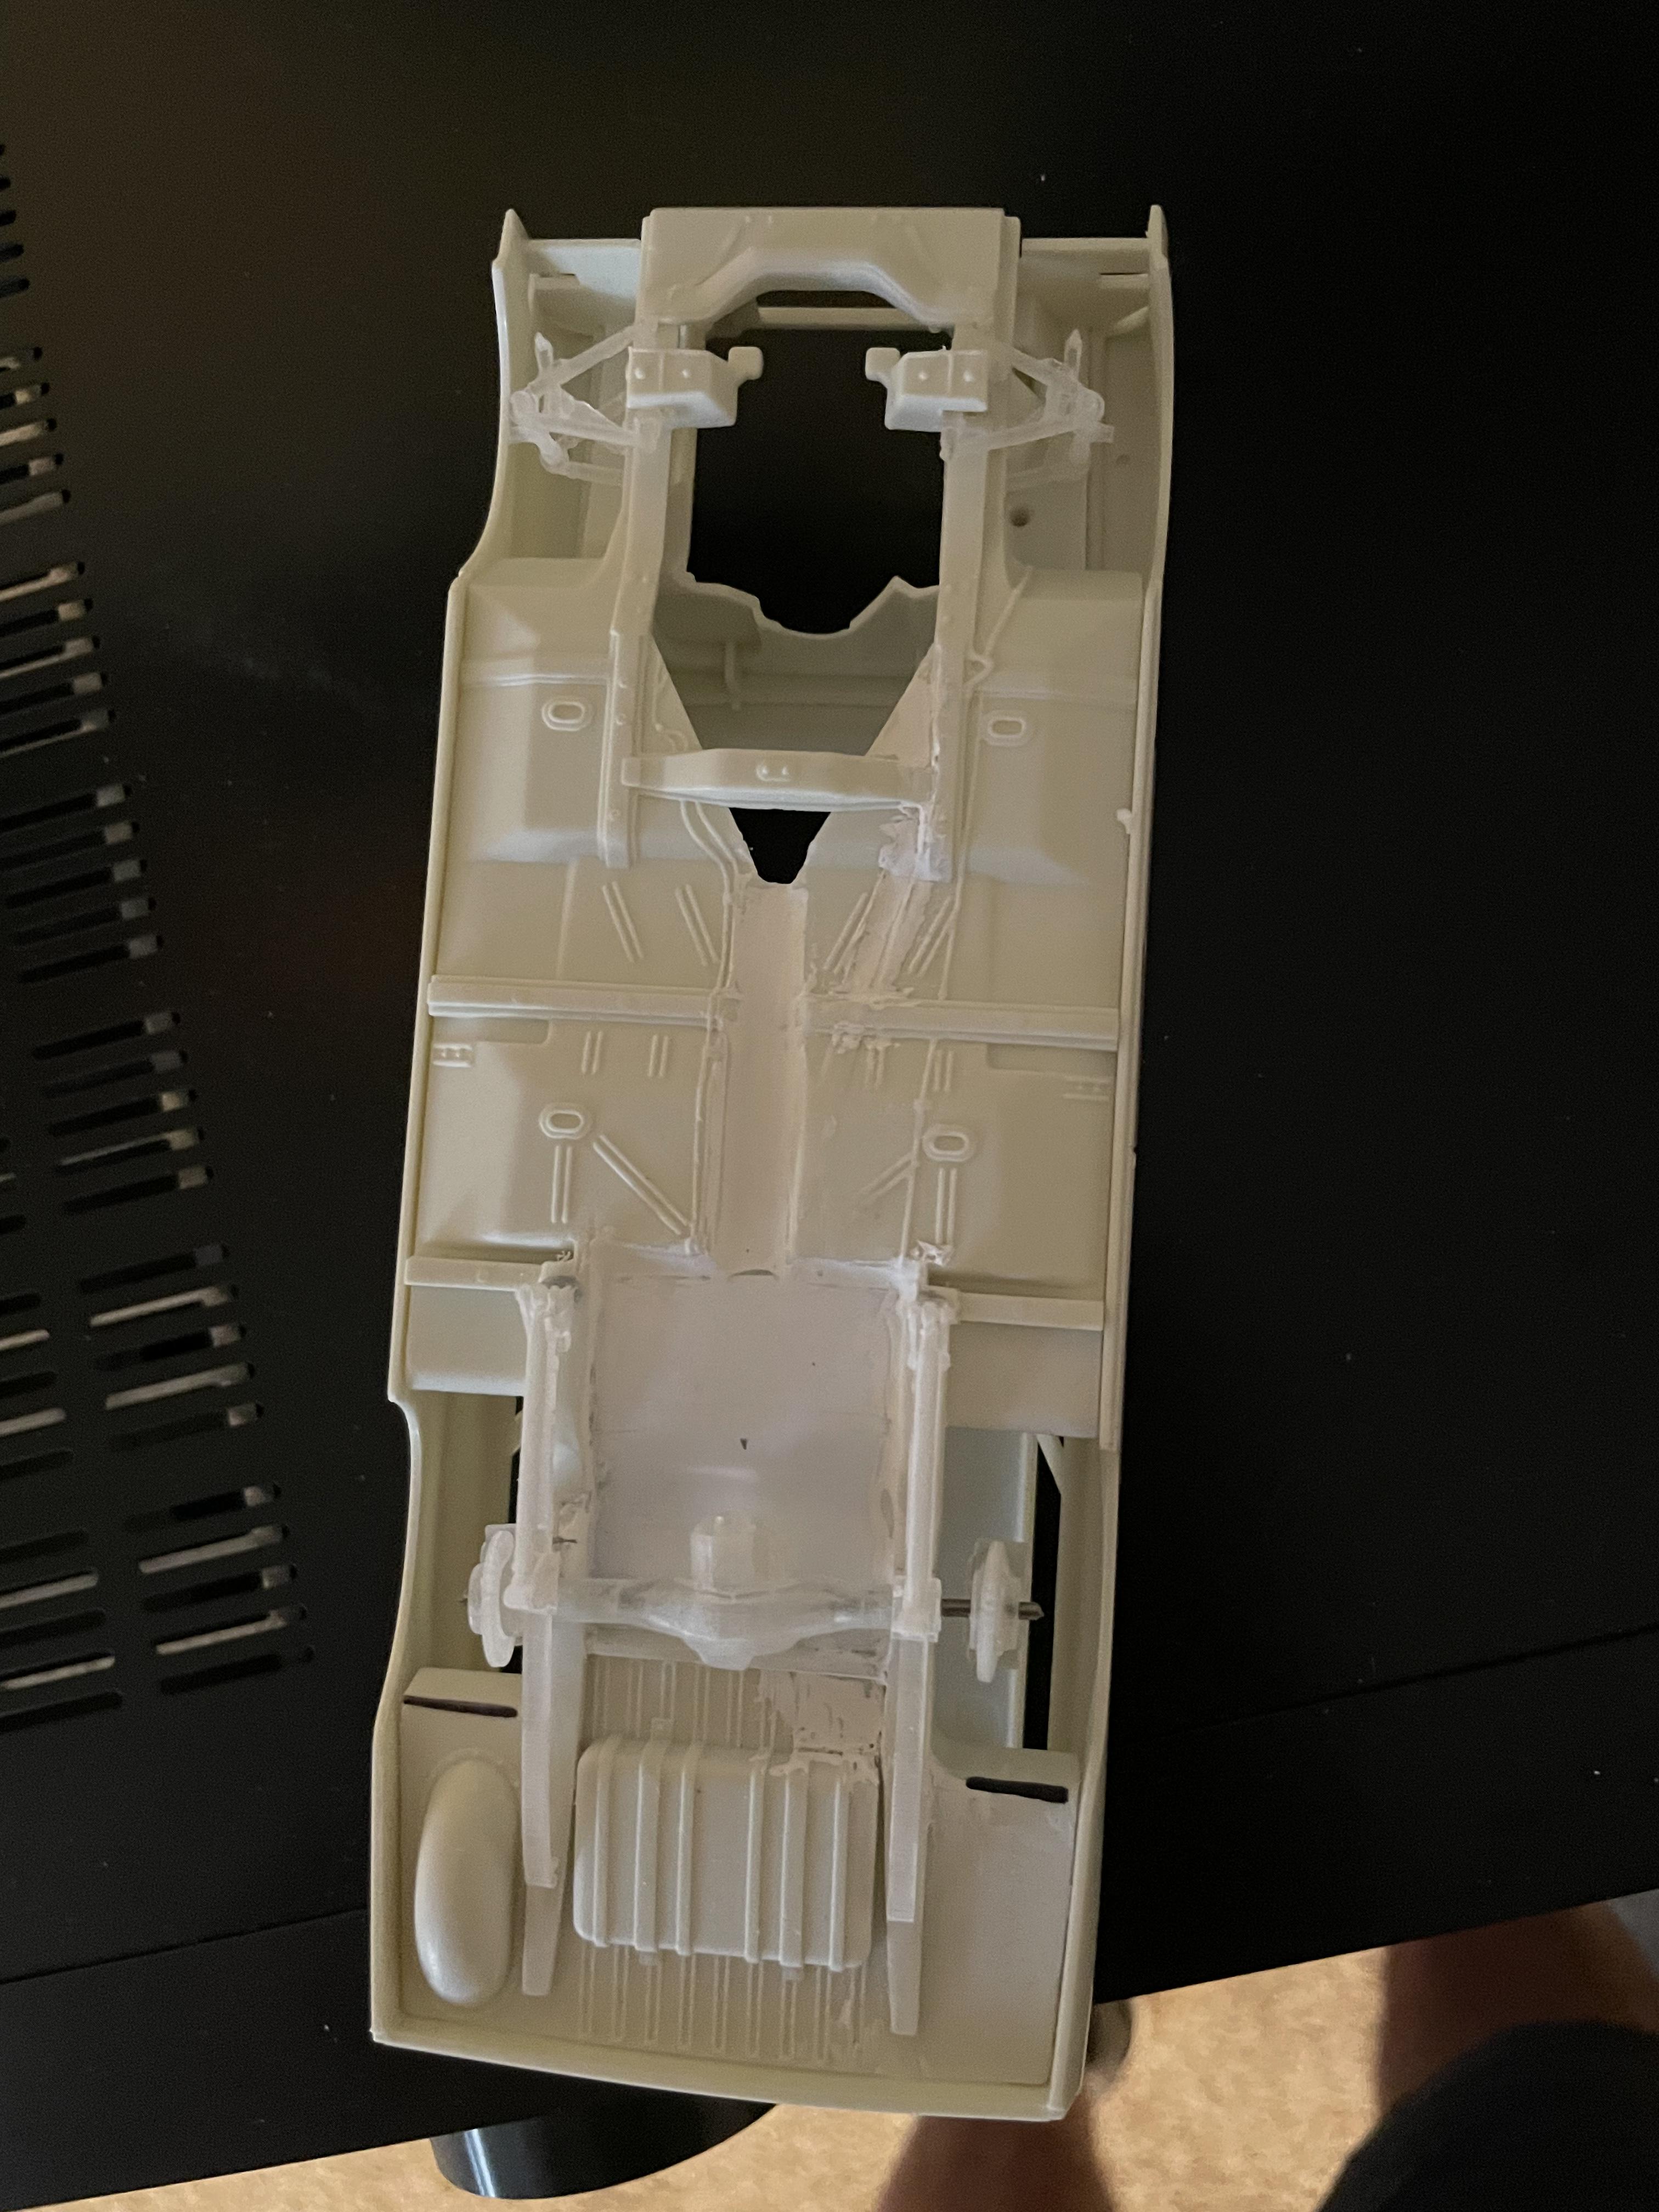
Got the chassis together except for the exhaust and some touch up. The 3D printed front suspension turned into a nightmare, it needed a lot of modifications to get it to fit and is so brittle that I went through 2 sets and had to abandon the axle shafts as there was no way they were going to hold the car up without snapping off. I ended up just using the lower a-arms as decorations only. The rear springs were much better as to being so much thicker but I had a heck of a time painting them, the material didn’t sand well and the paint didn’t want to dry… anyone else have this experience? I even painted some styrene to see if it was the paint and it dried just fine. The gold color is just a base coat and I am planning on using a purple for the final color. Thanks for looking, Dave.
-
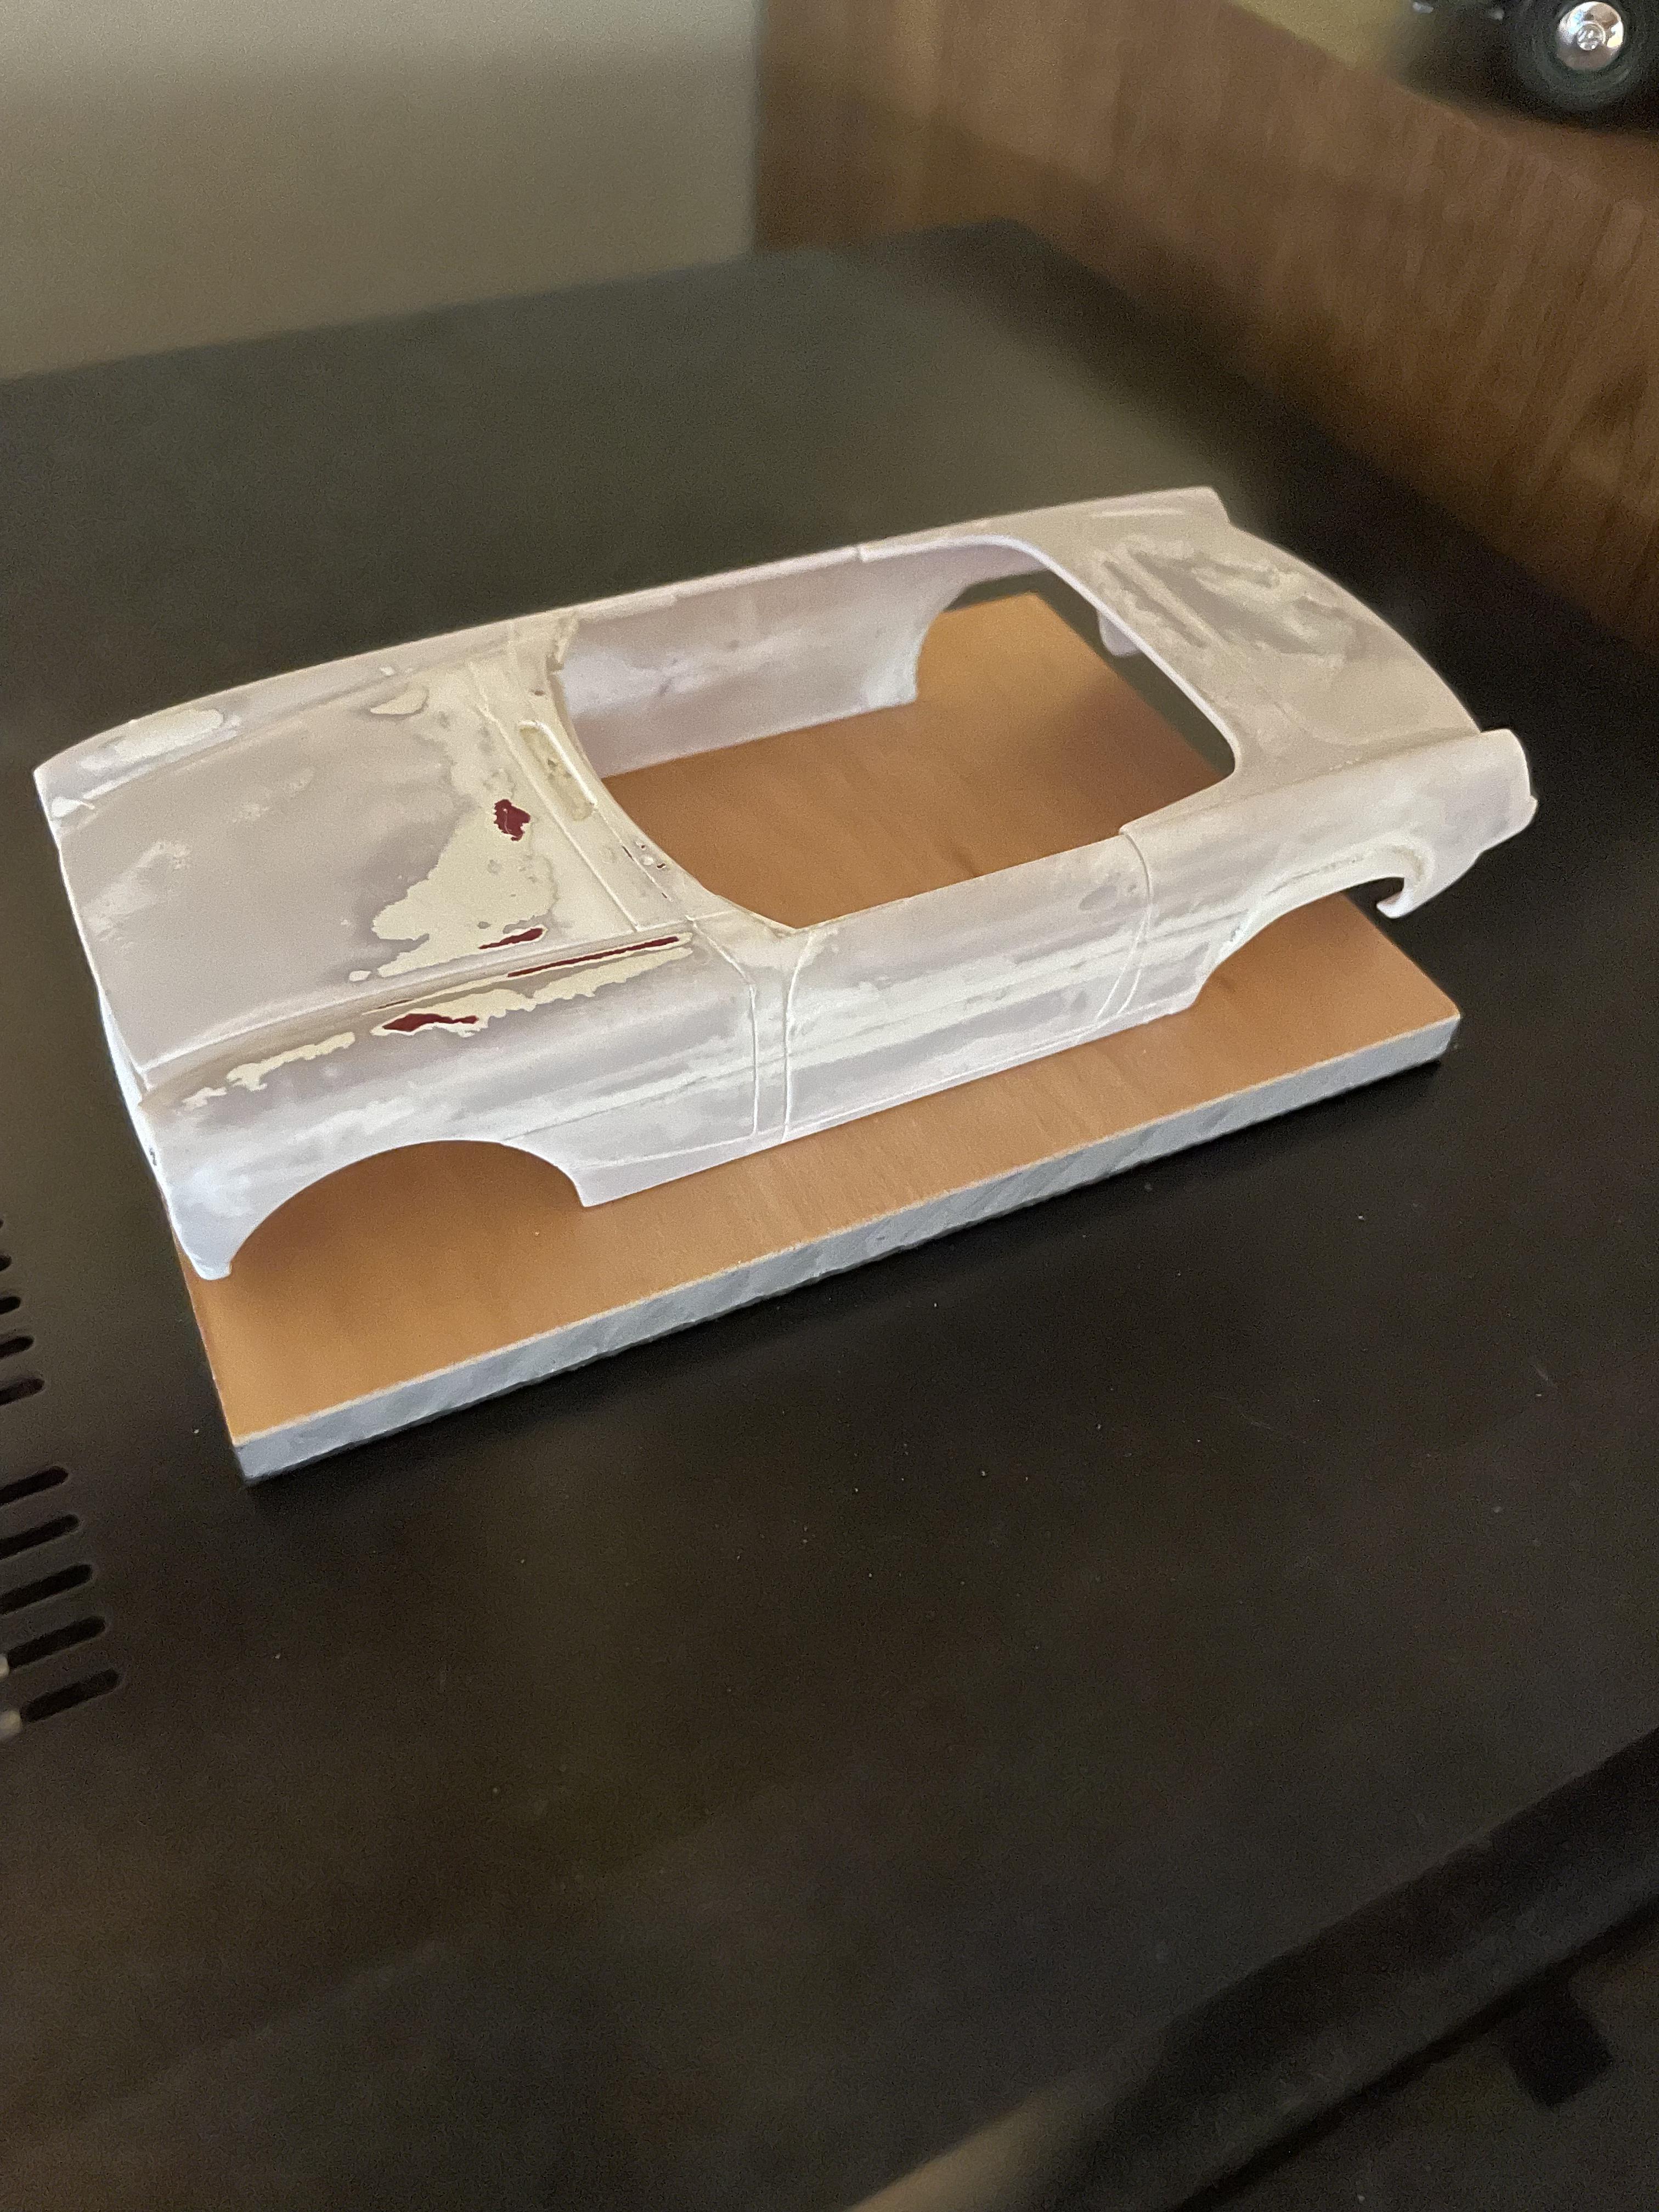
Well the body is back from the pond and I’m going to have to redo all of the filler I added… ugh.
-
Yeah the valve covers came from a really poor quality GTO kit I started. Not the best detailing on them but believe it or not, they are probably the best parts that were in that box.
-
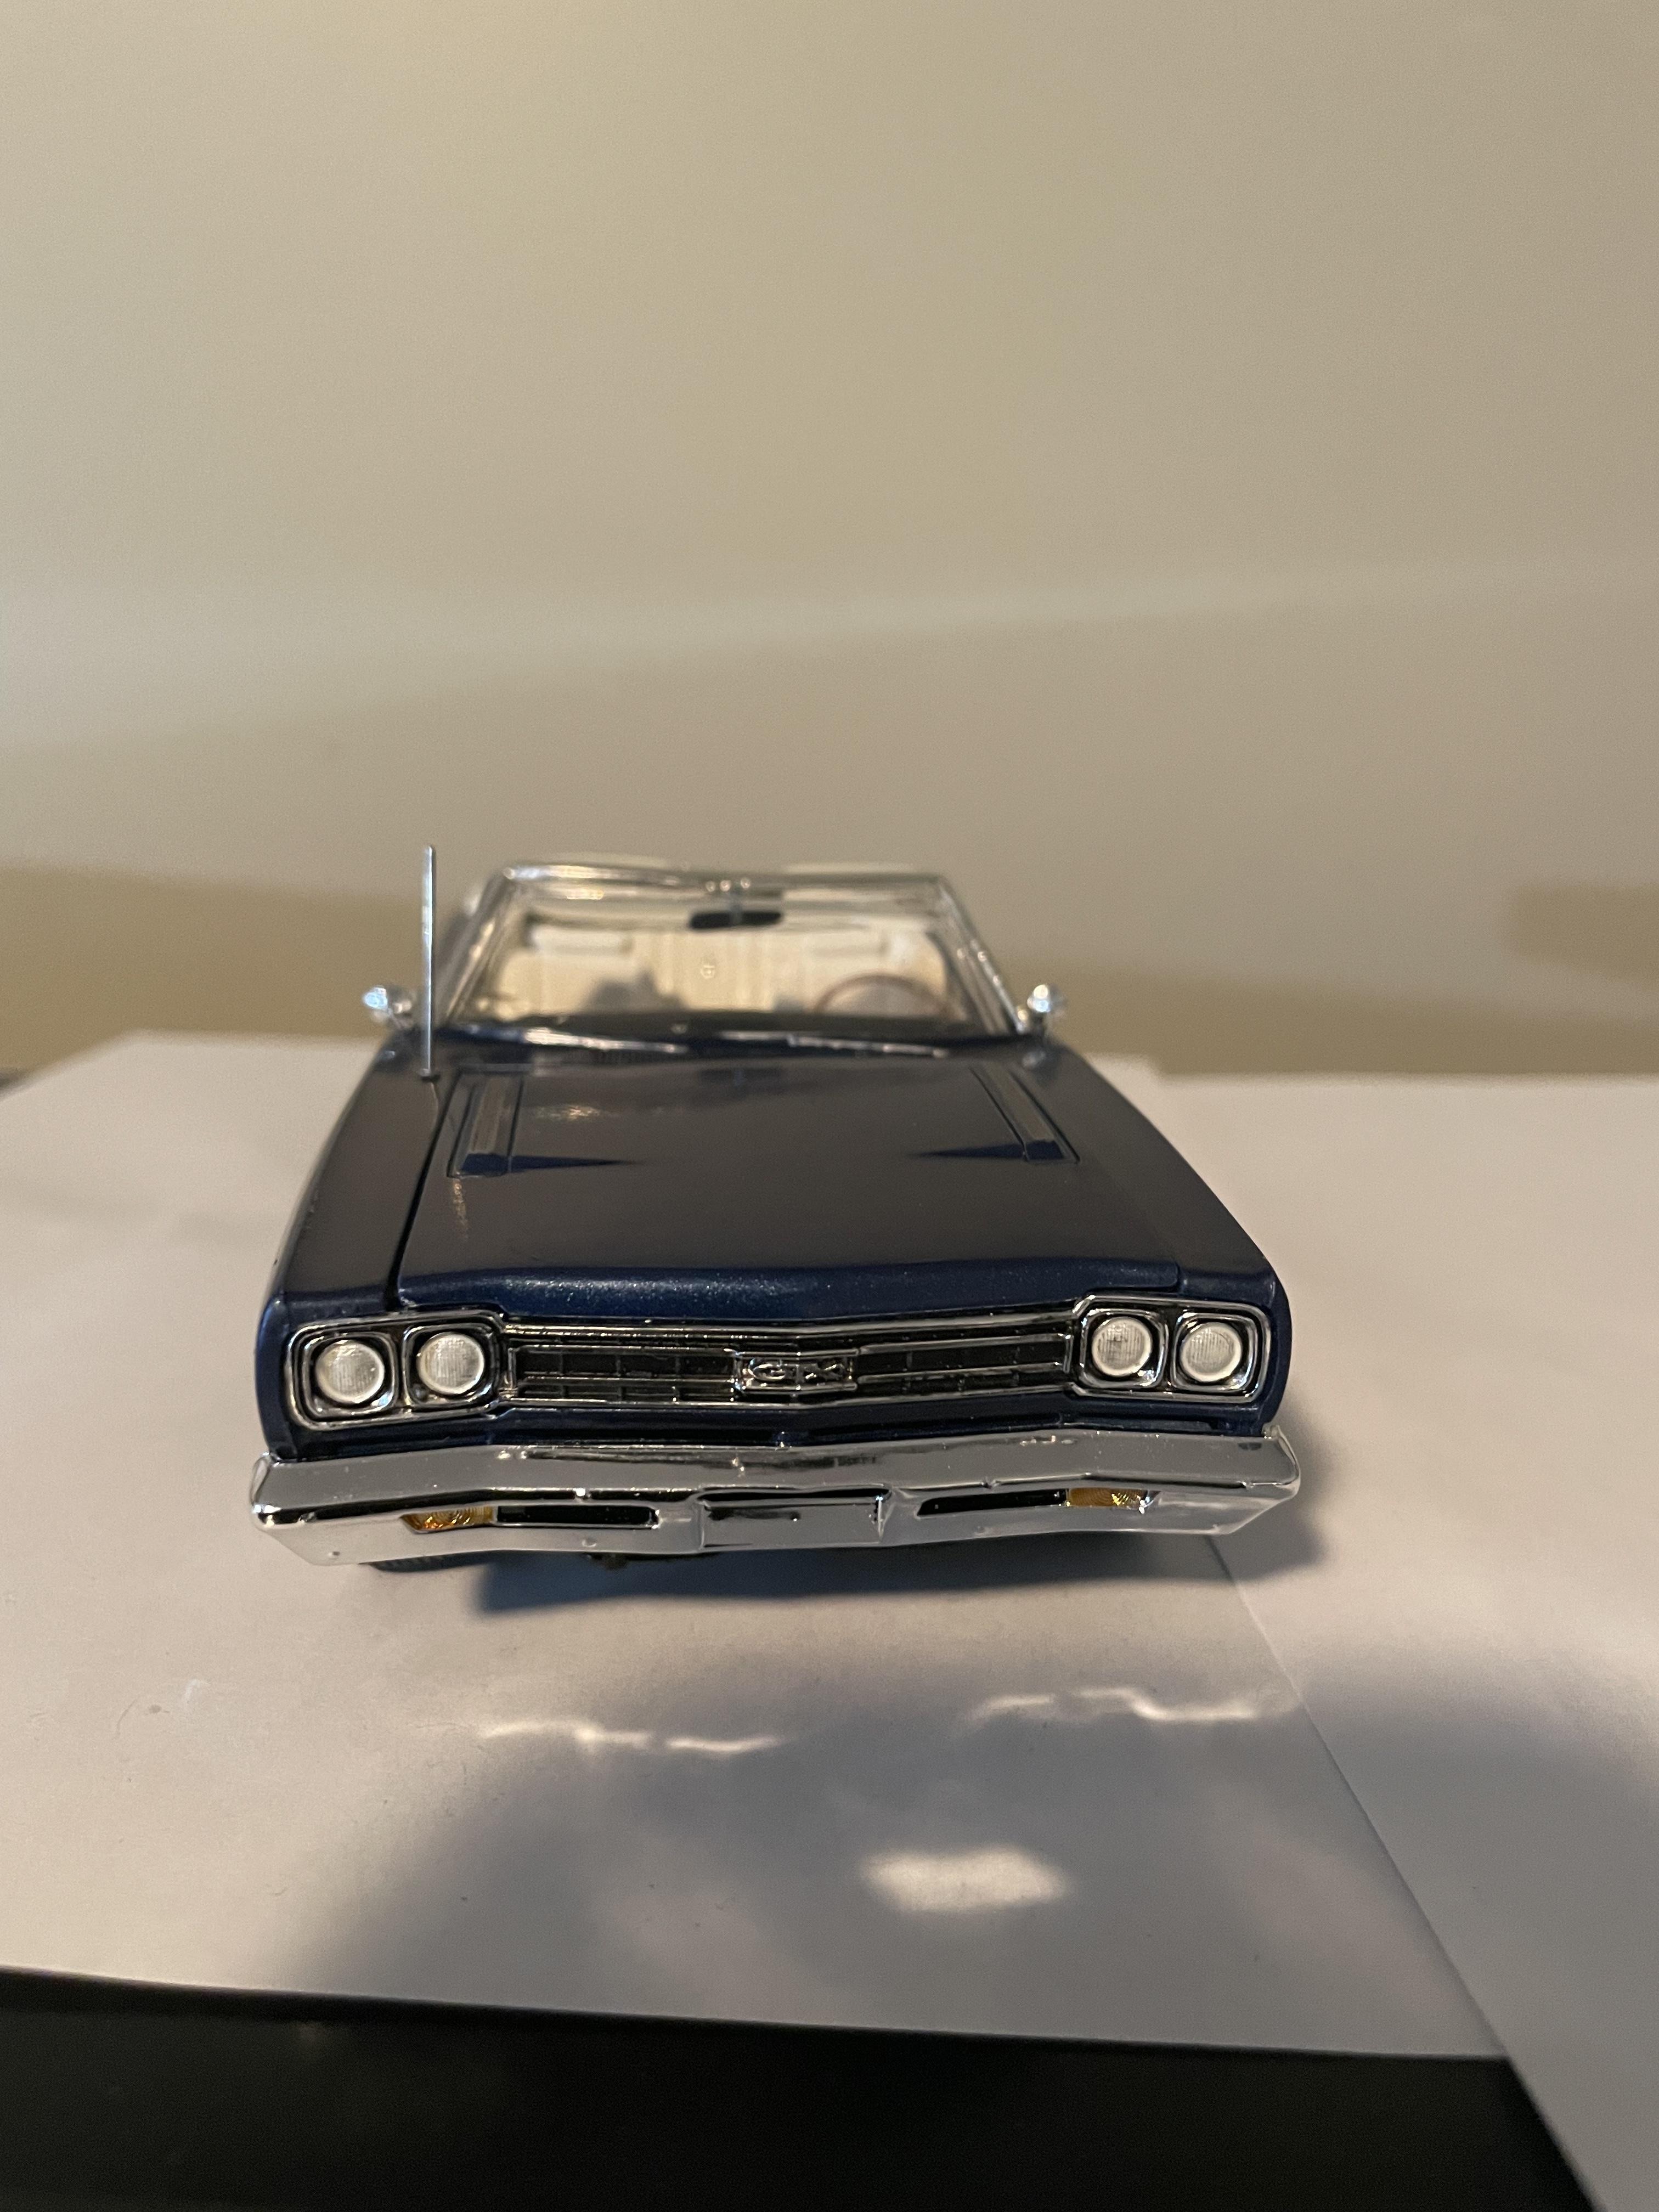
Yeah it’s actually for a Mopar… don’t tell anyone:)
-
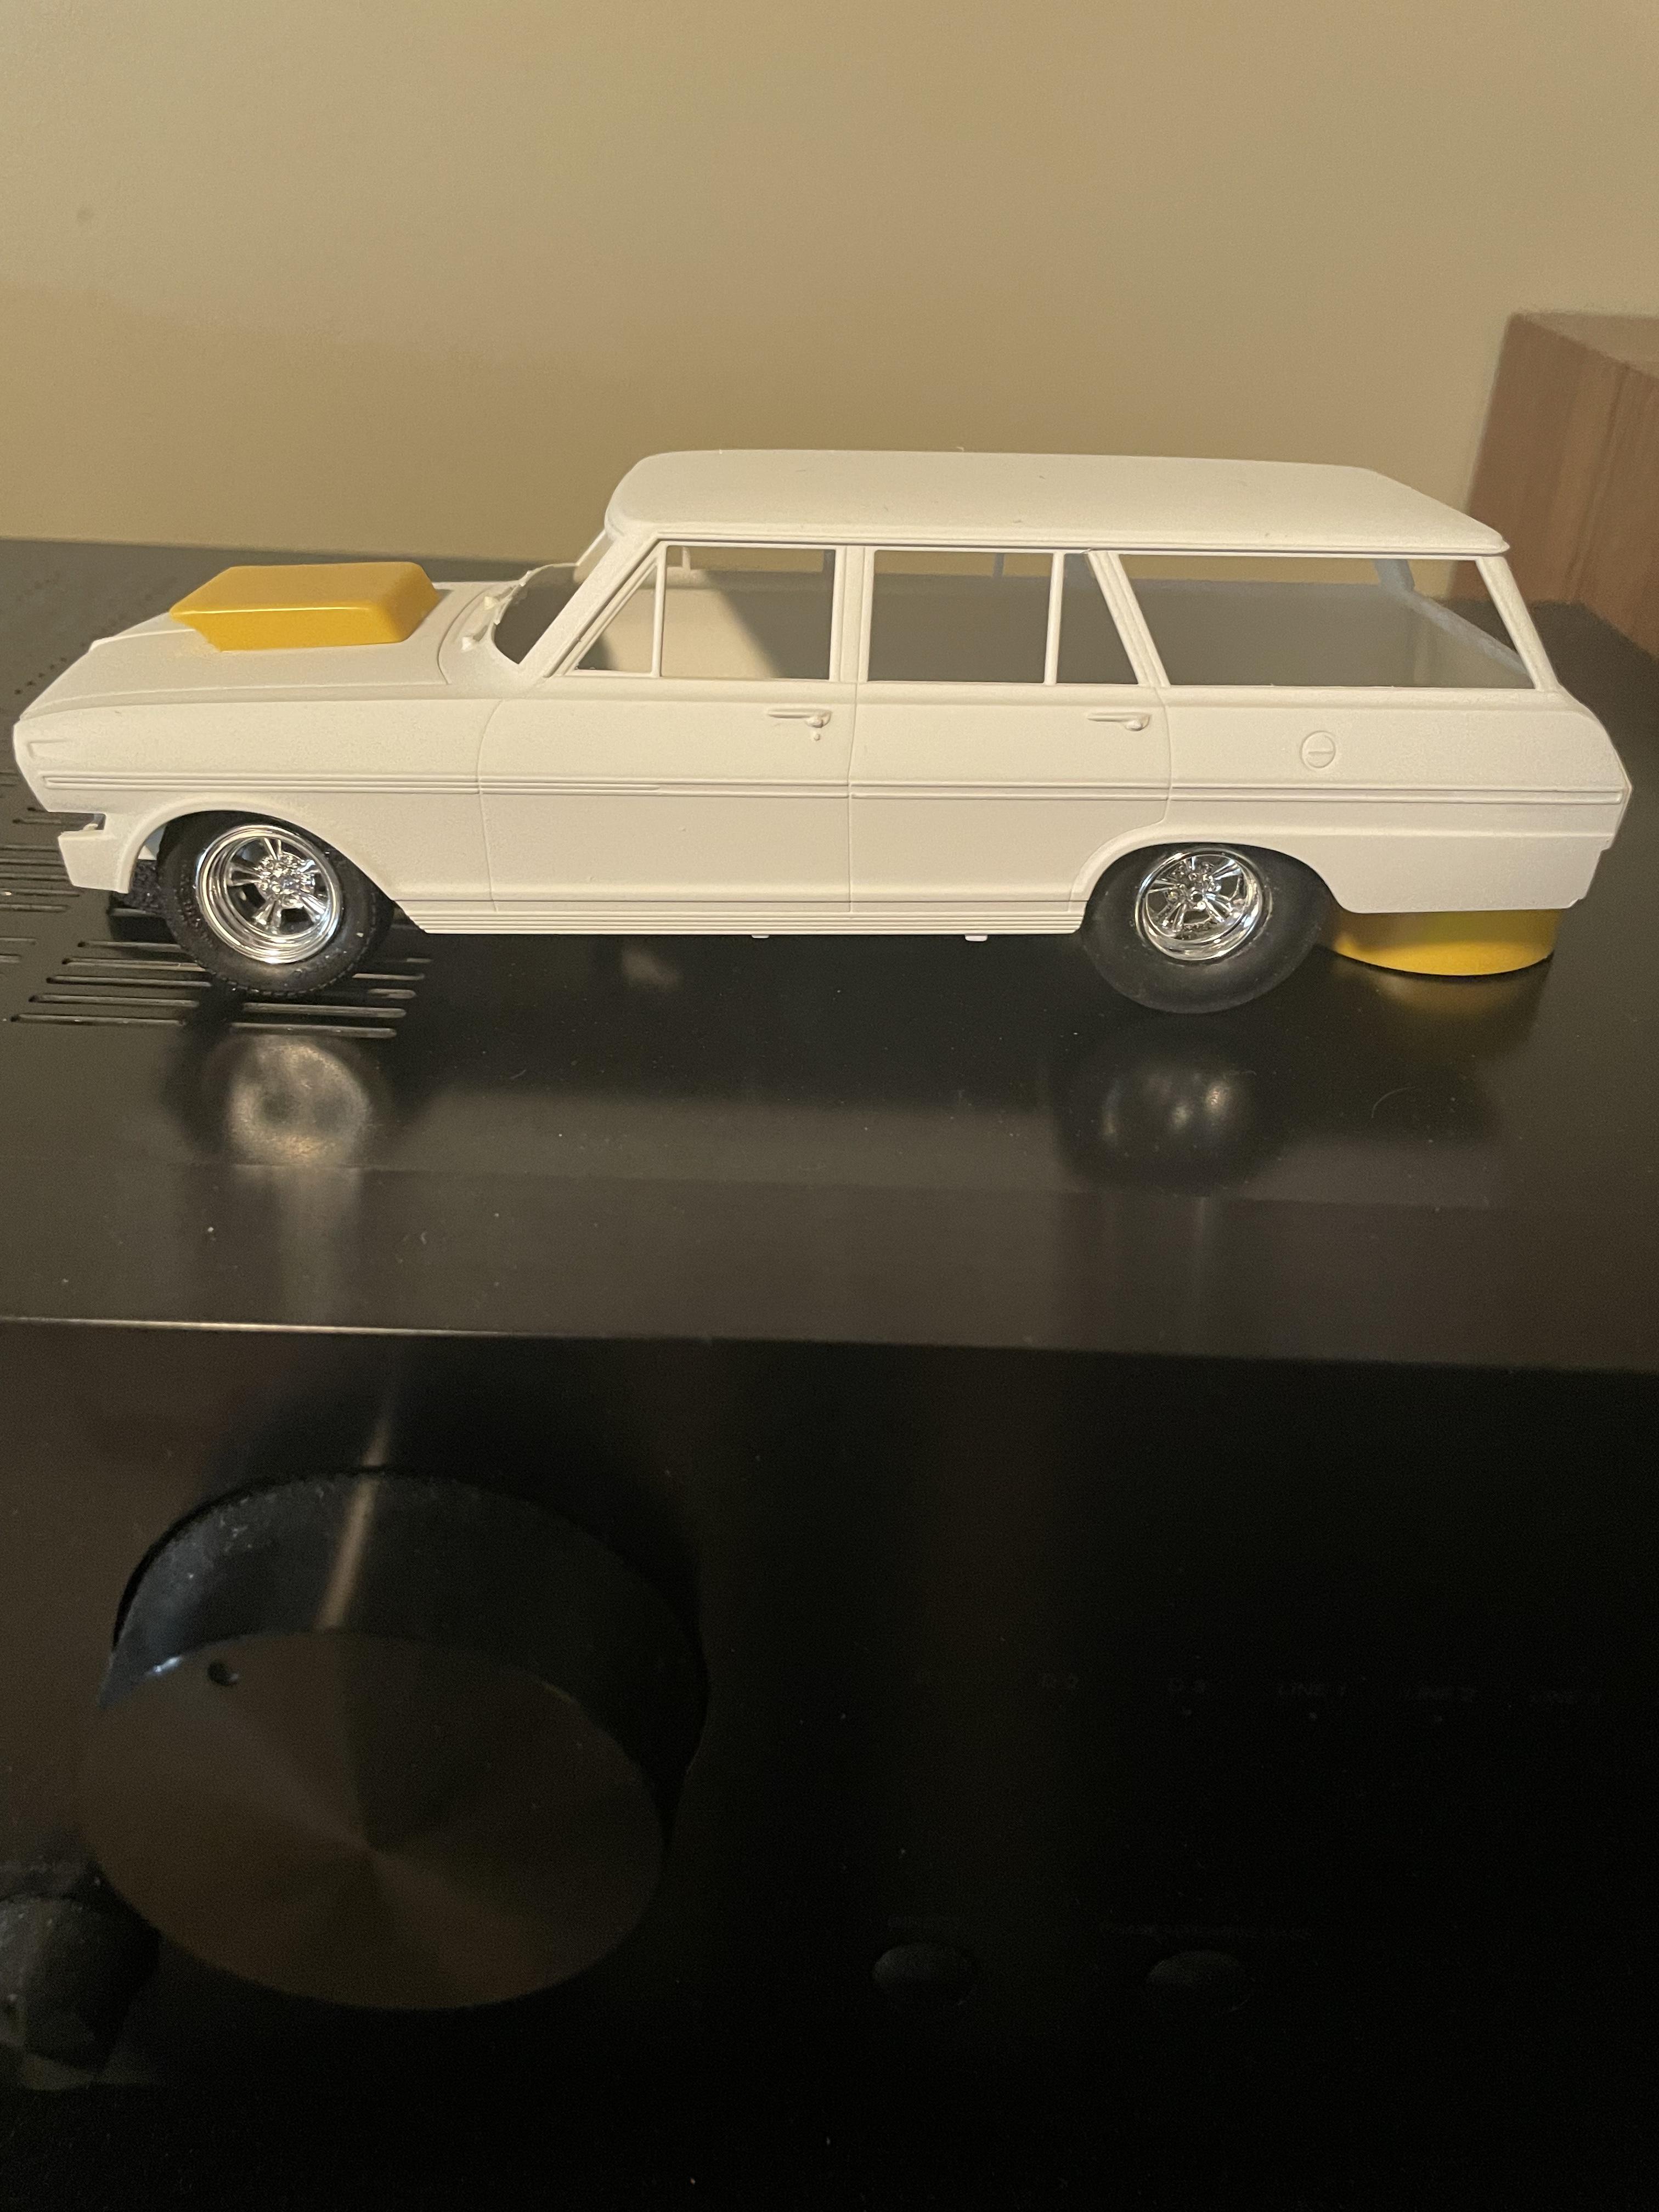
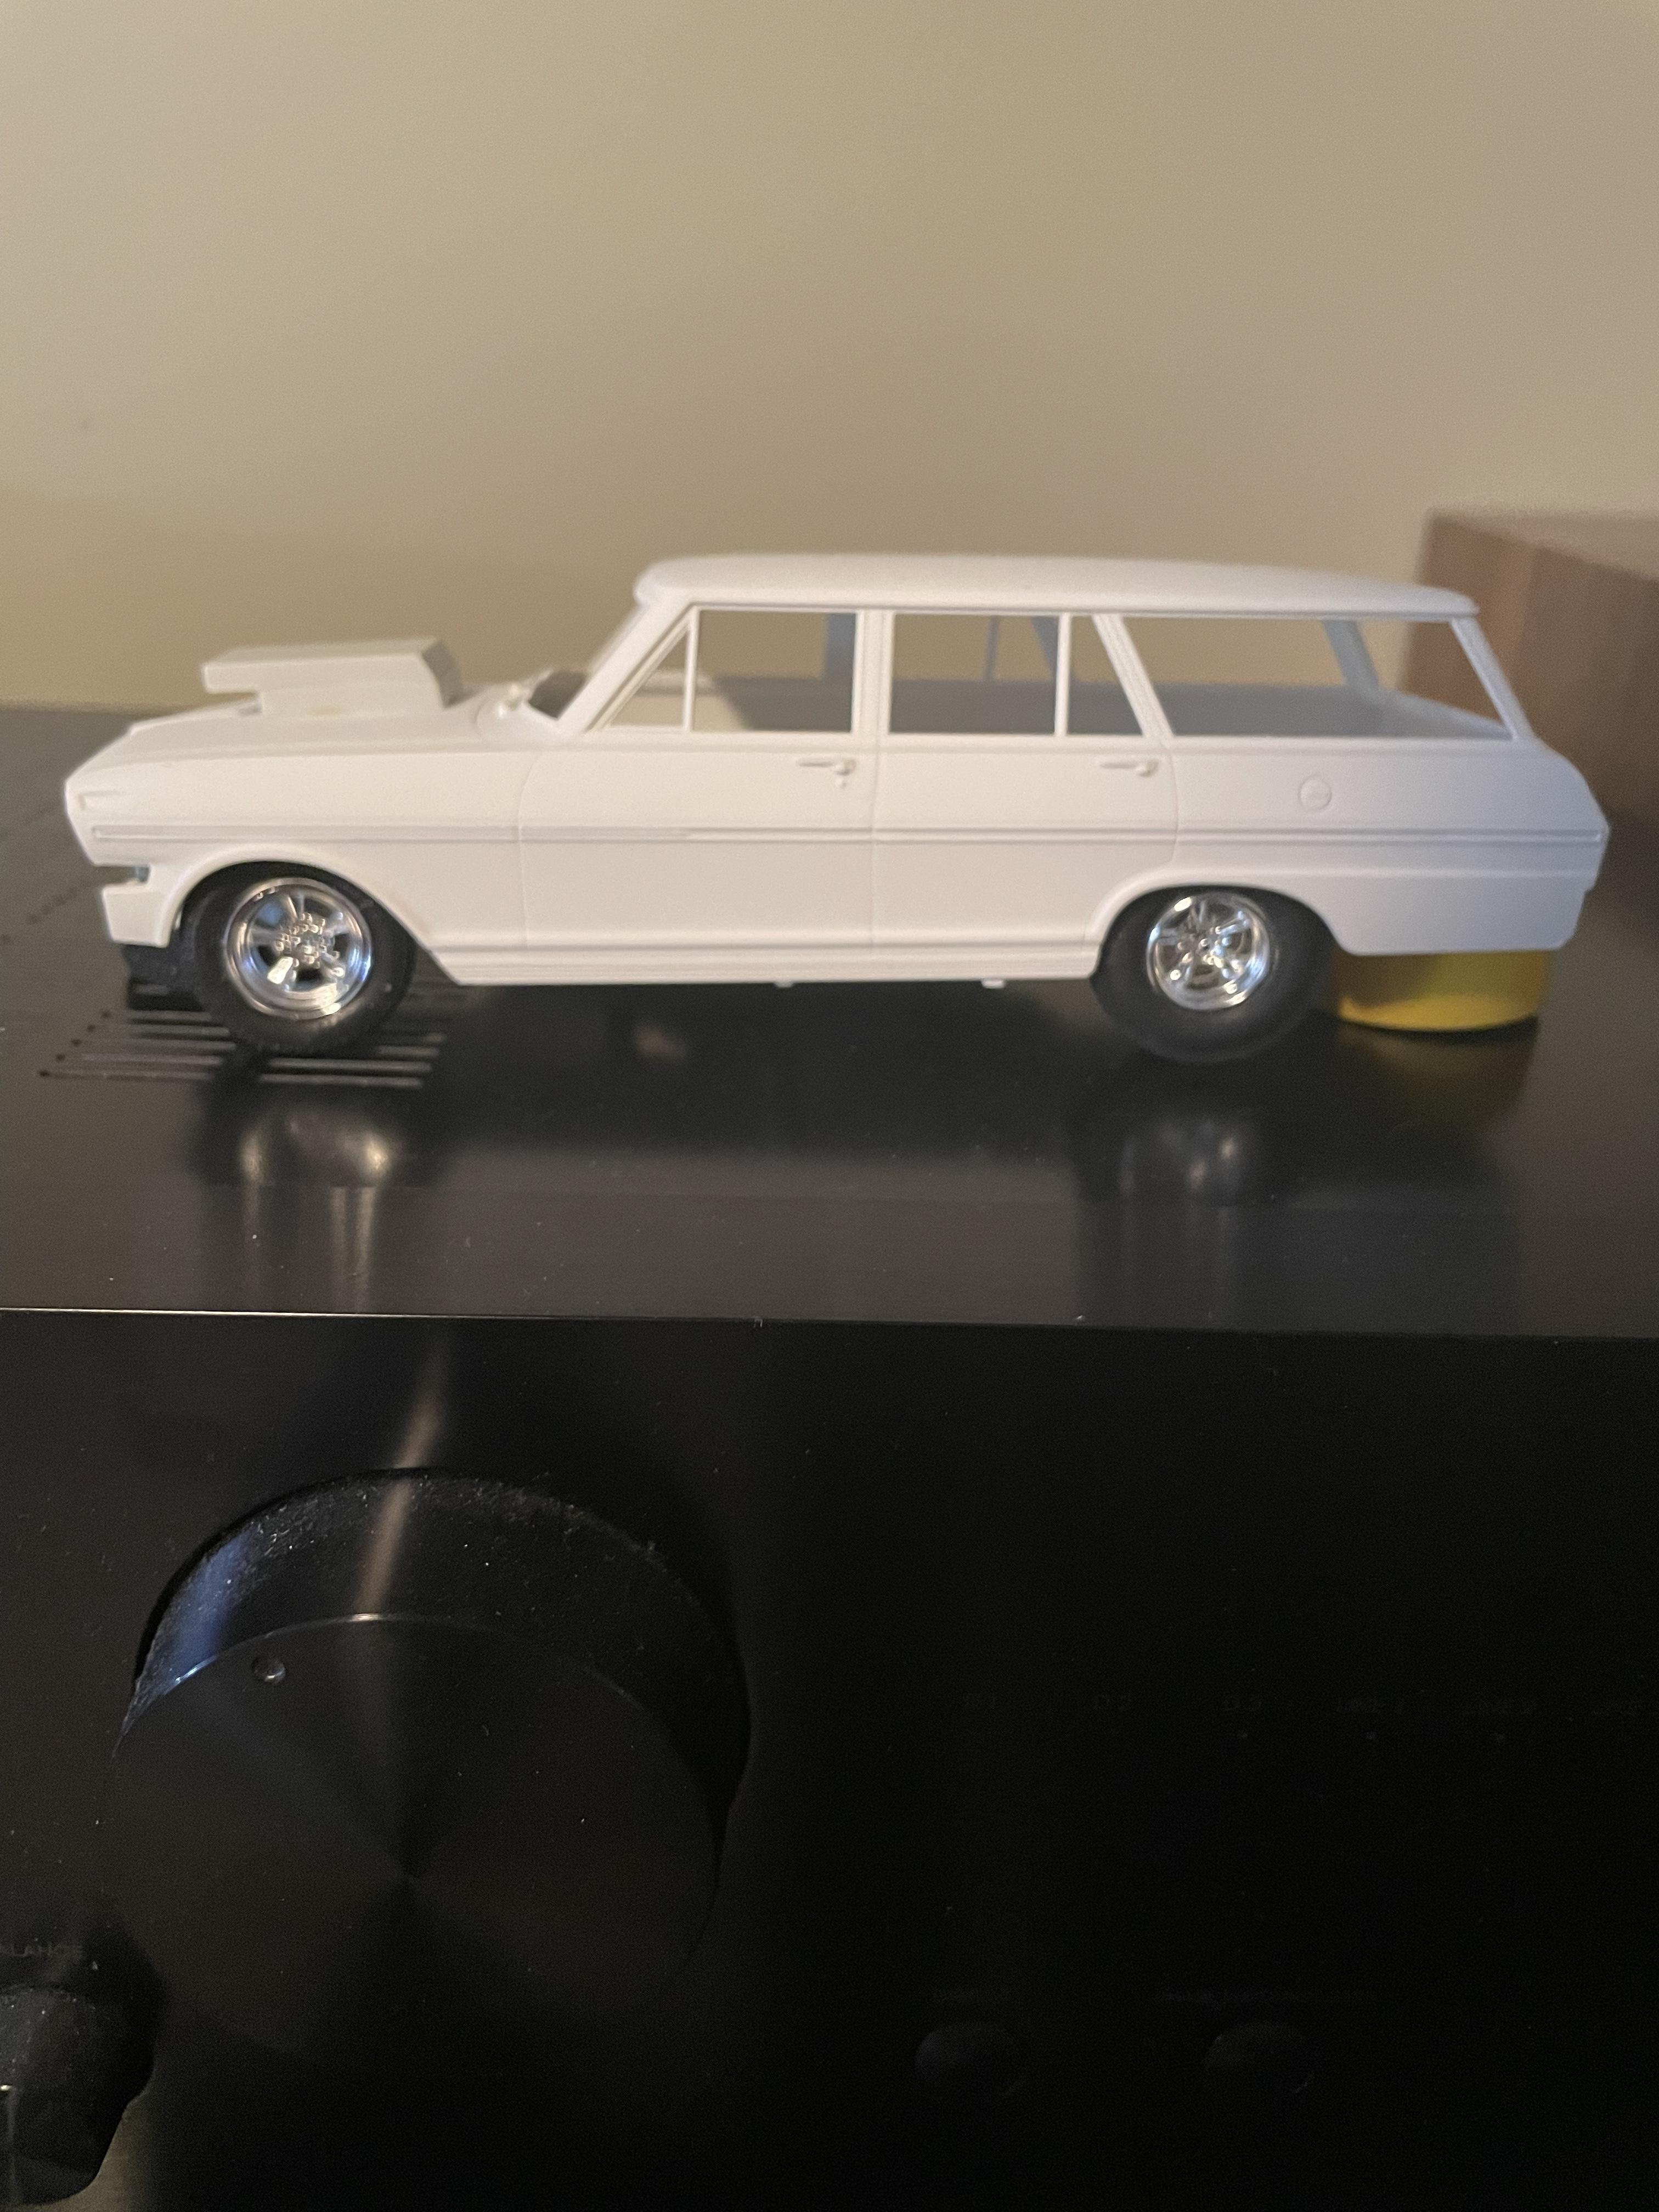
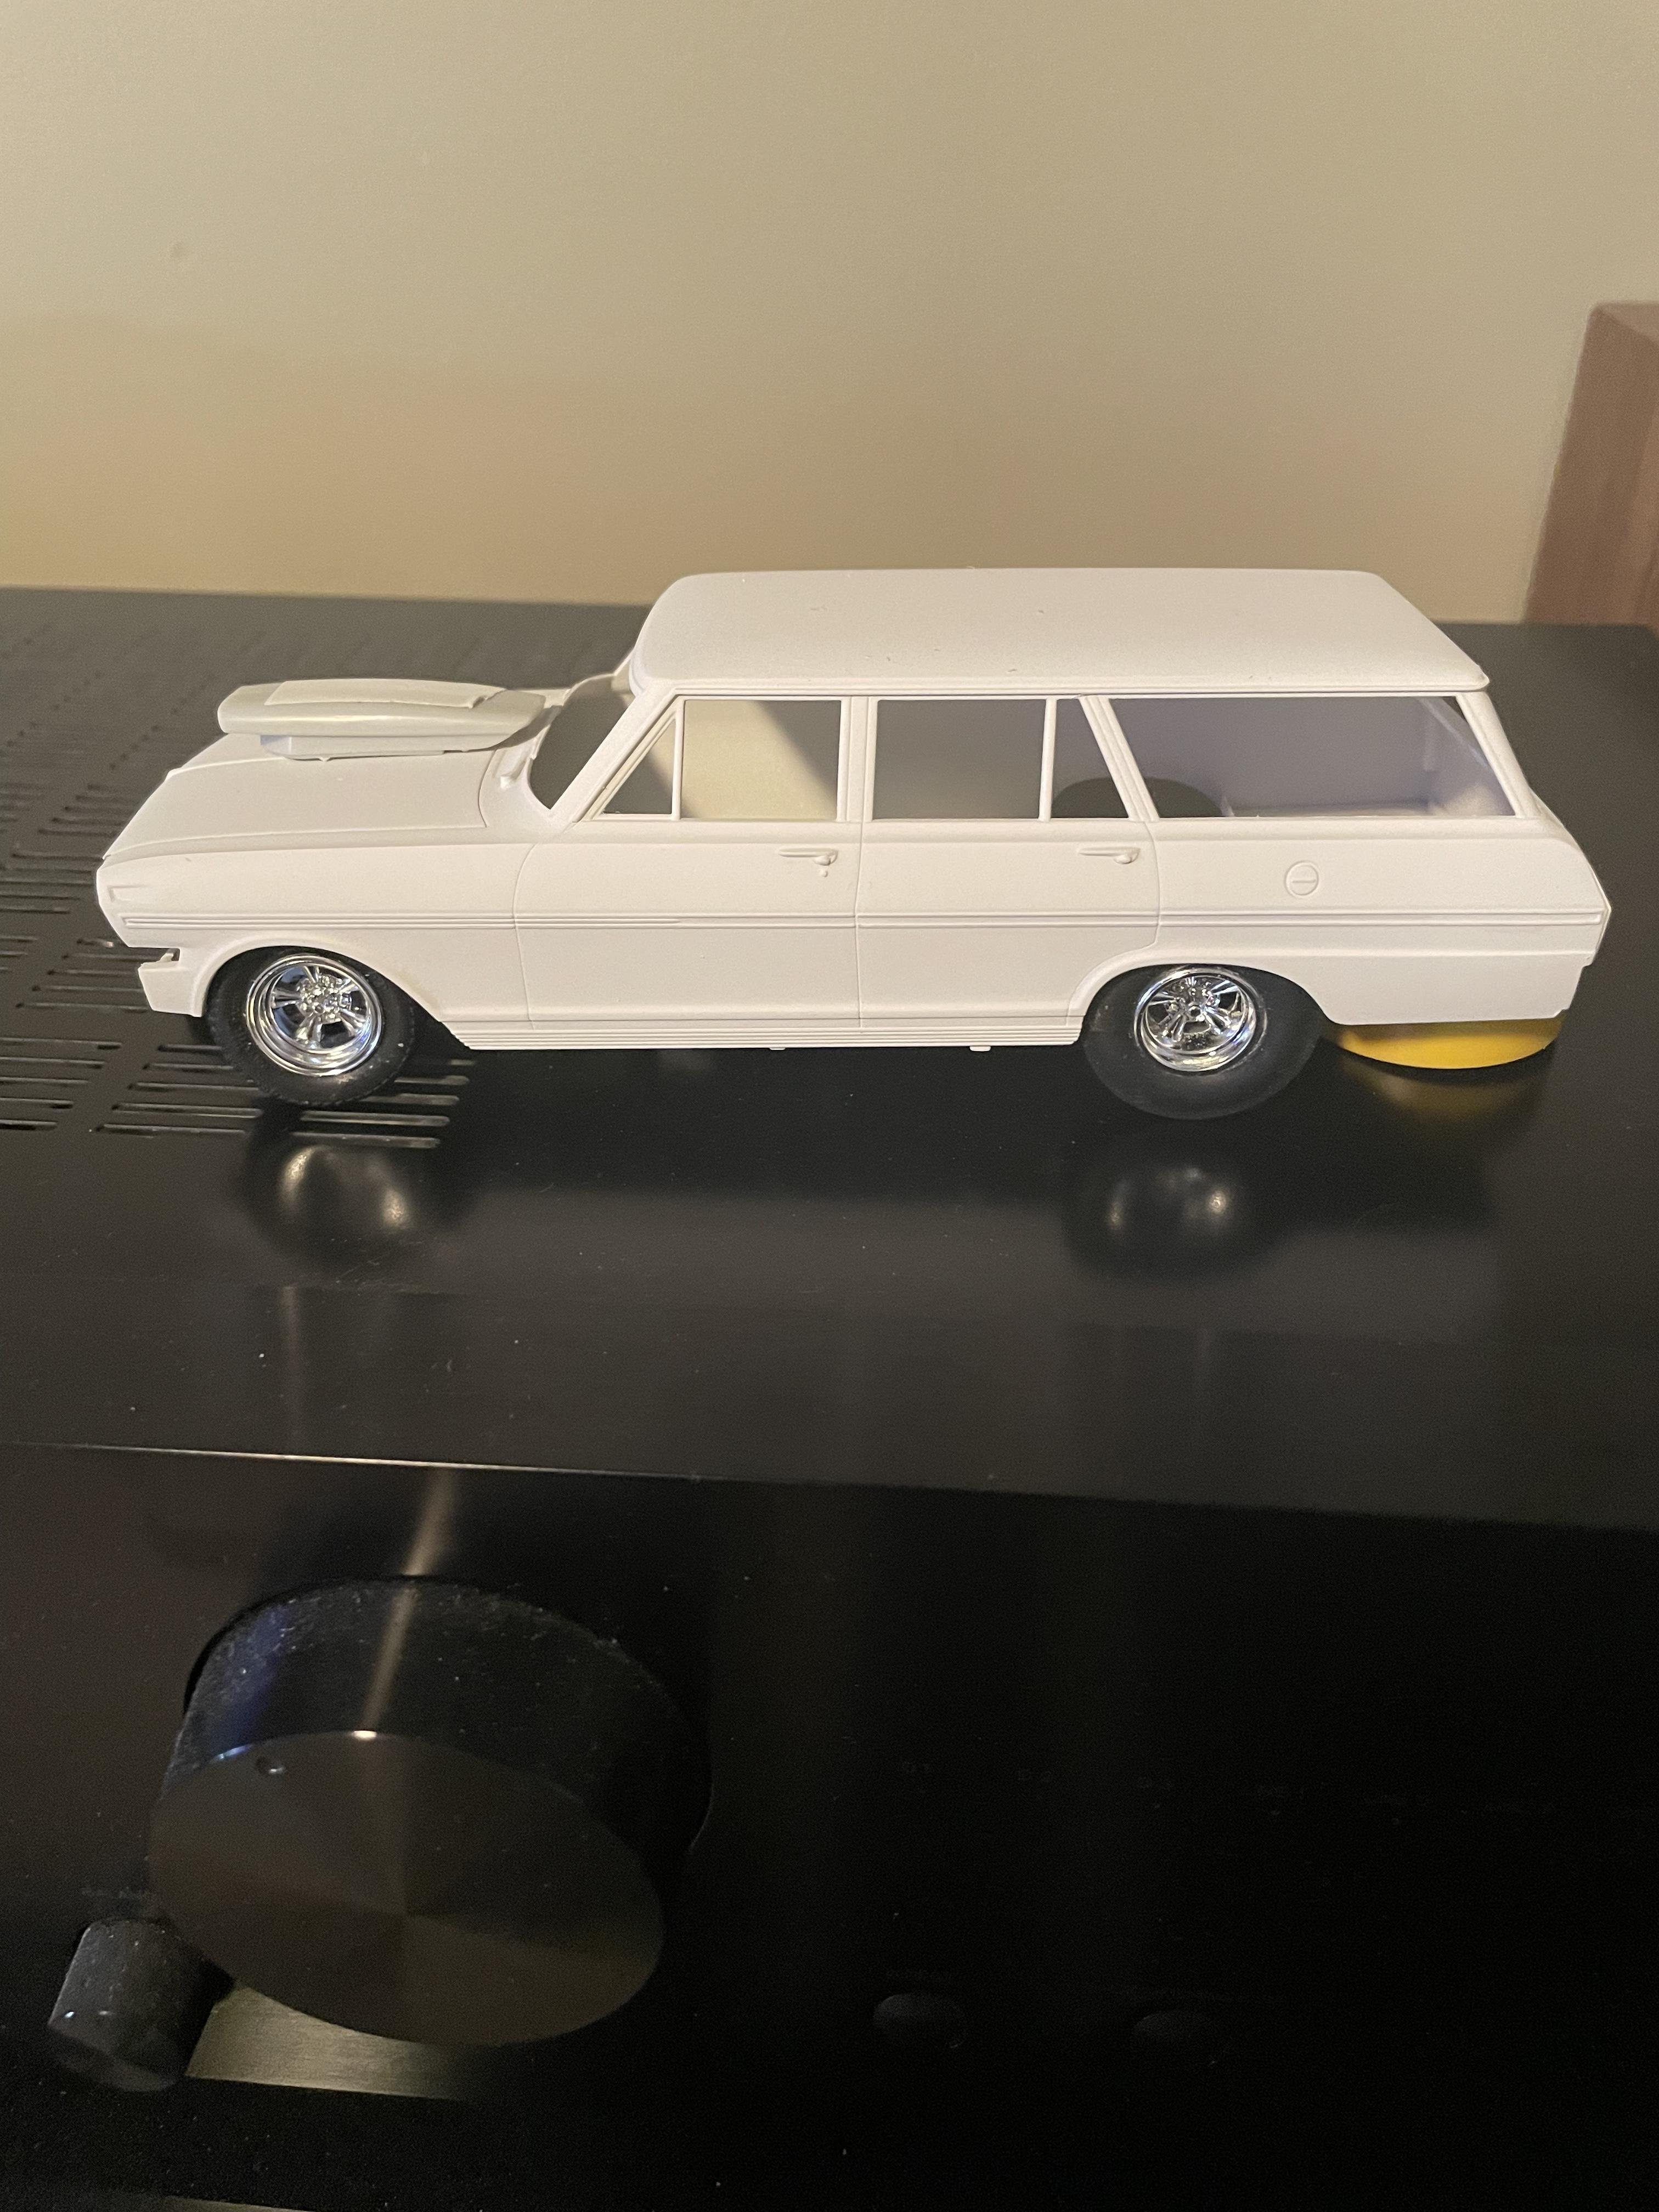
Okay, I think that the consensus is no scoop. The big block is wired and plumbed, so it’s going to come down to if it fits or not. Dave.
-
But I do kind of like the yellow one. Aaaagh.
-
So if I can keep the carbs low enough you’d go with no scoop? Im leaning that way myself.
-
I need to make a decision, no scoop or one of these…. Help please. Dave
-
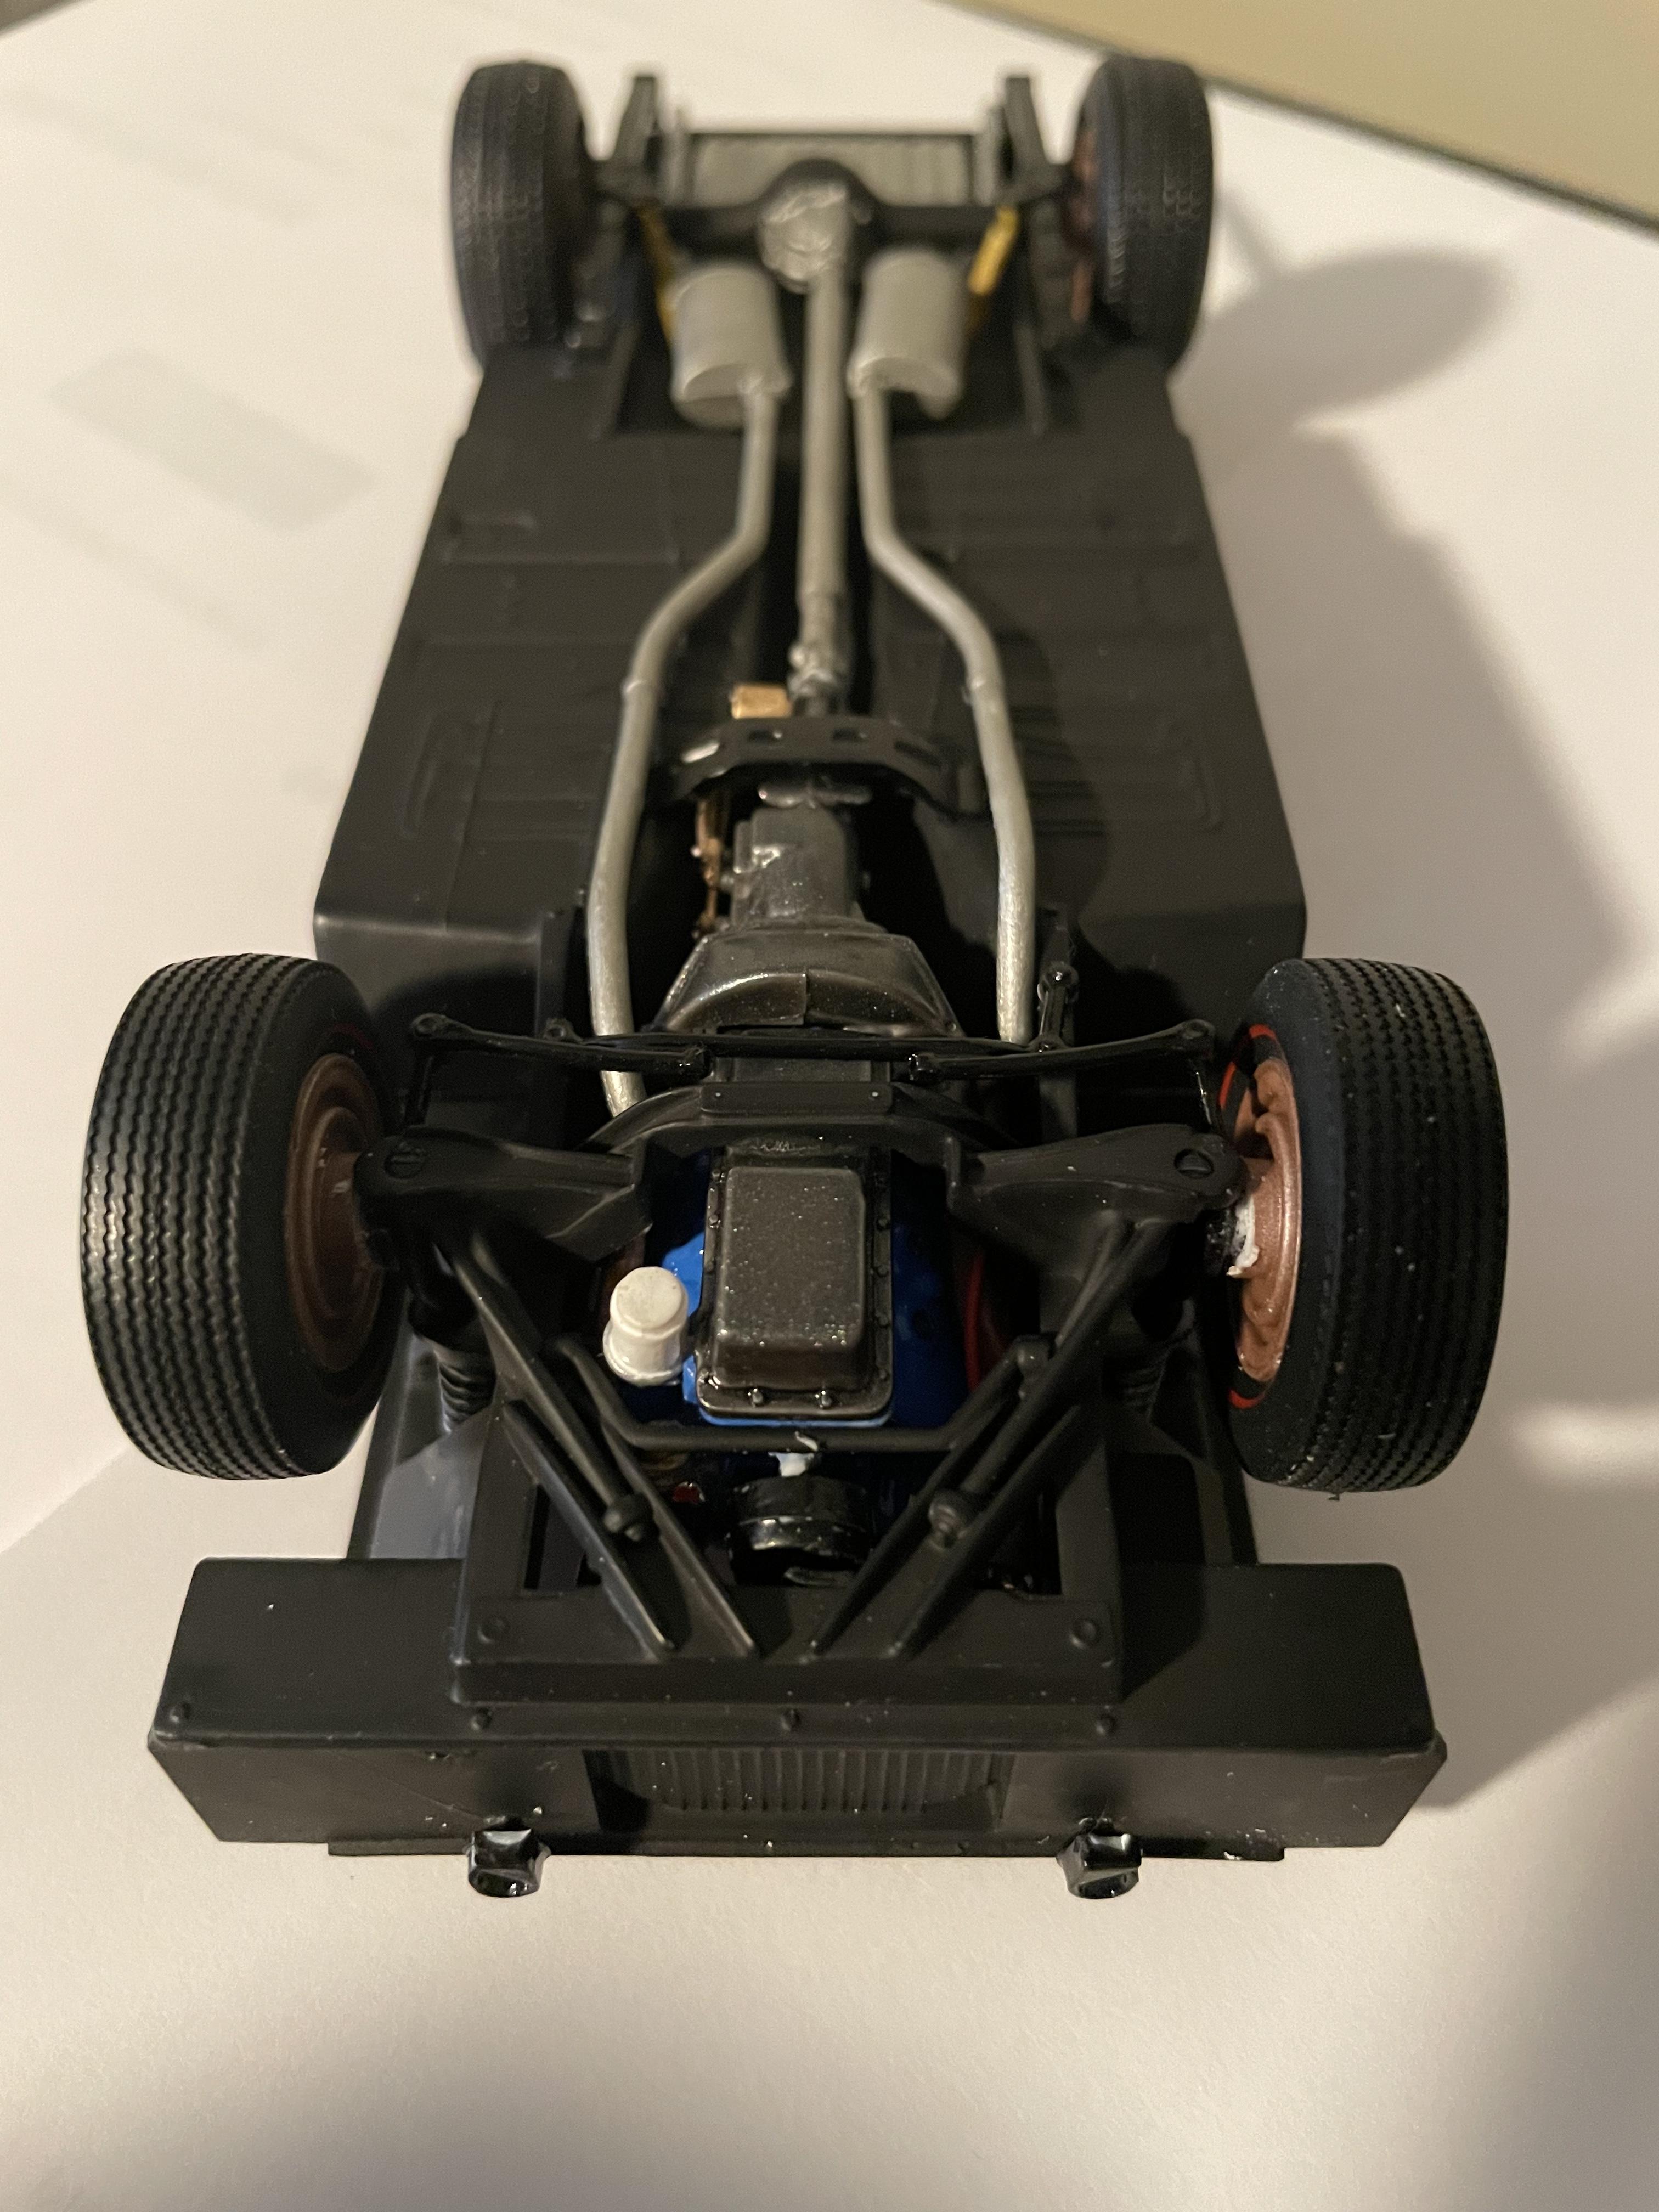
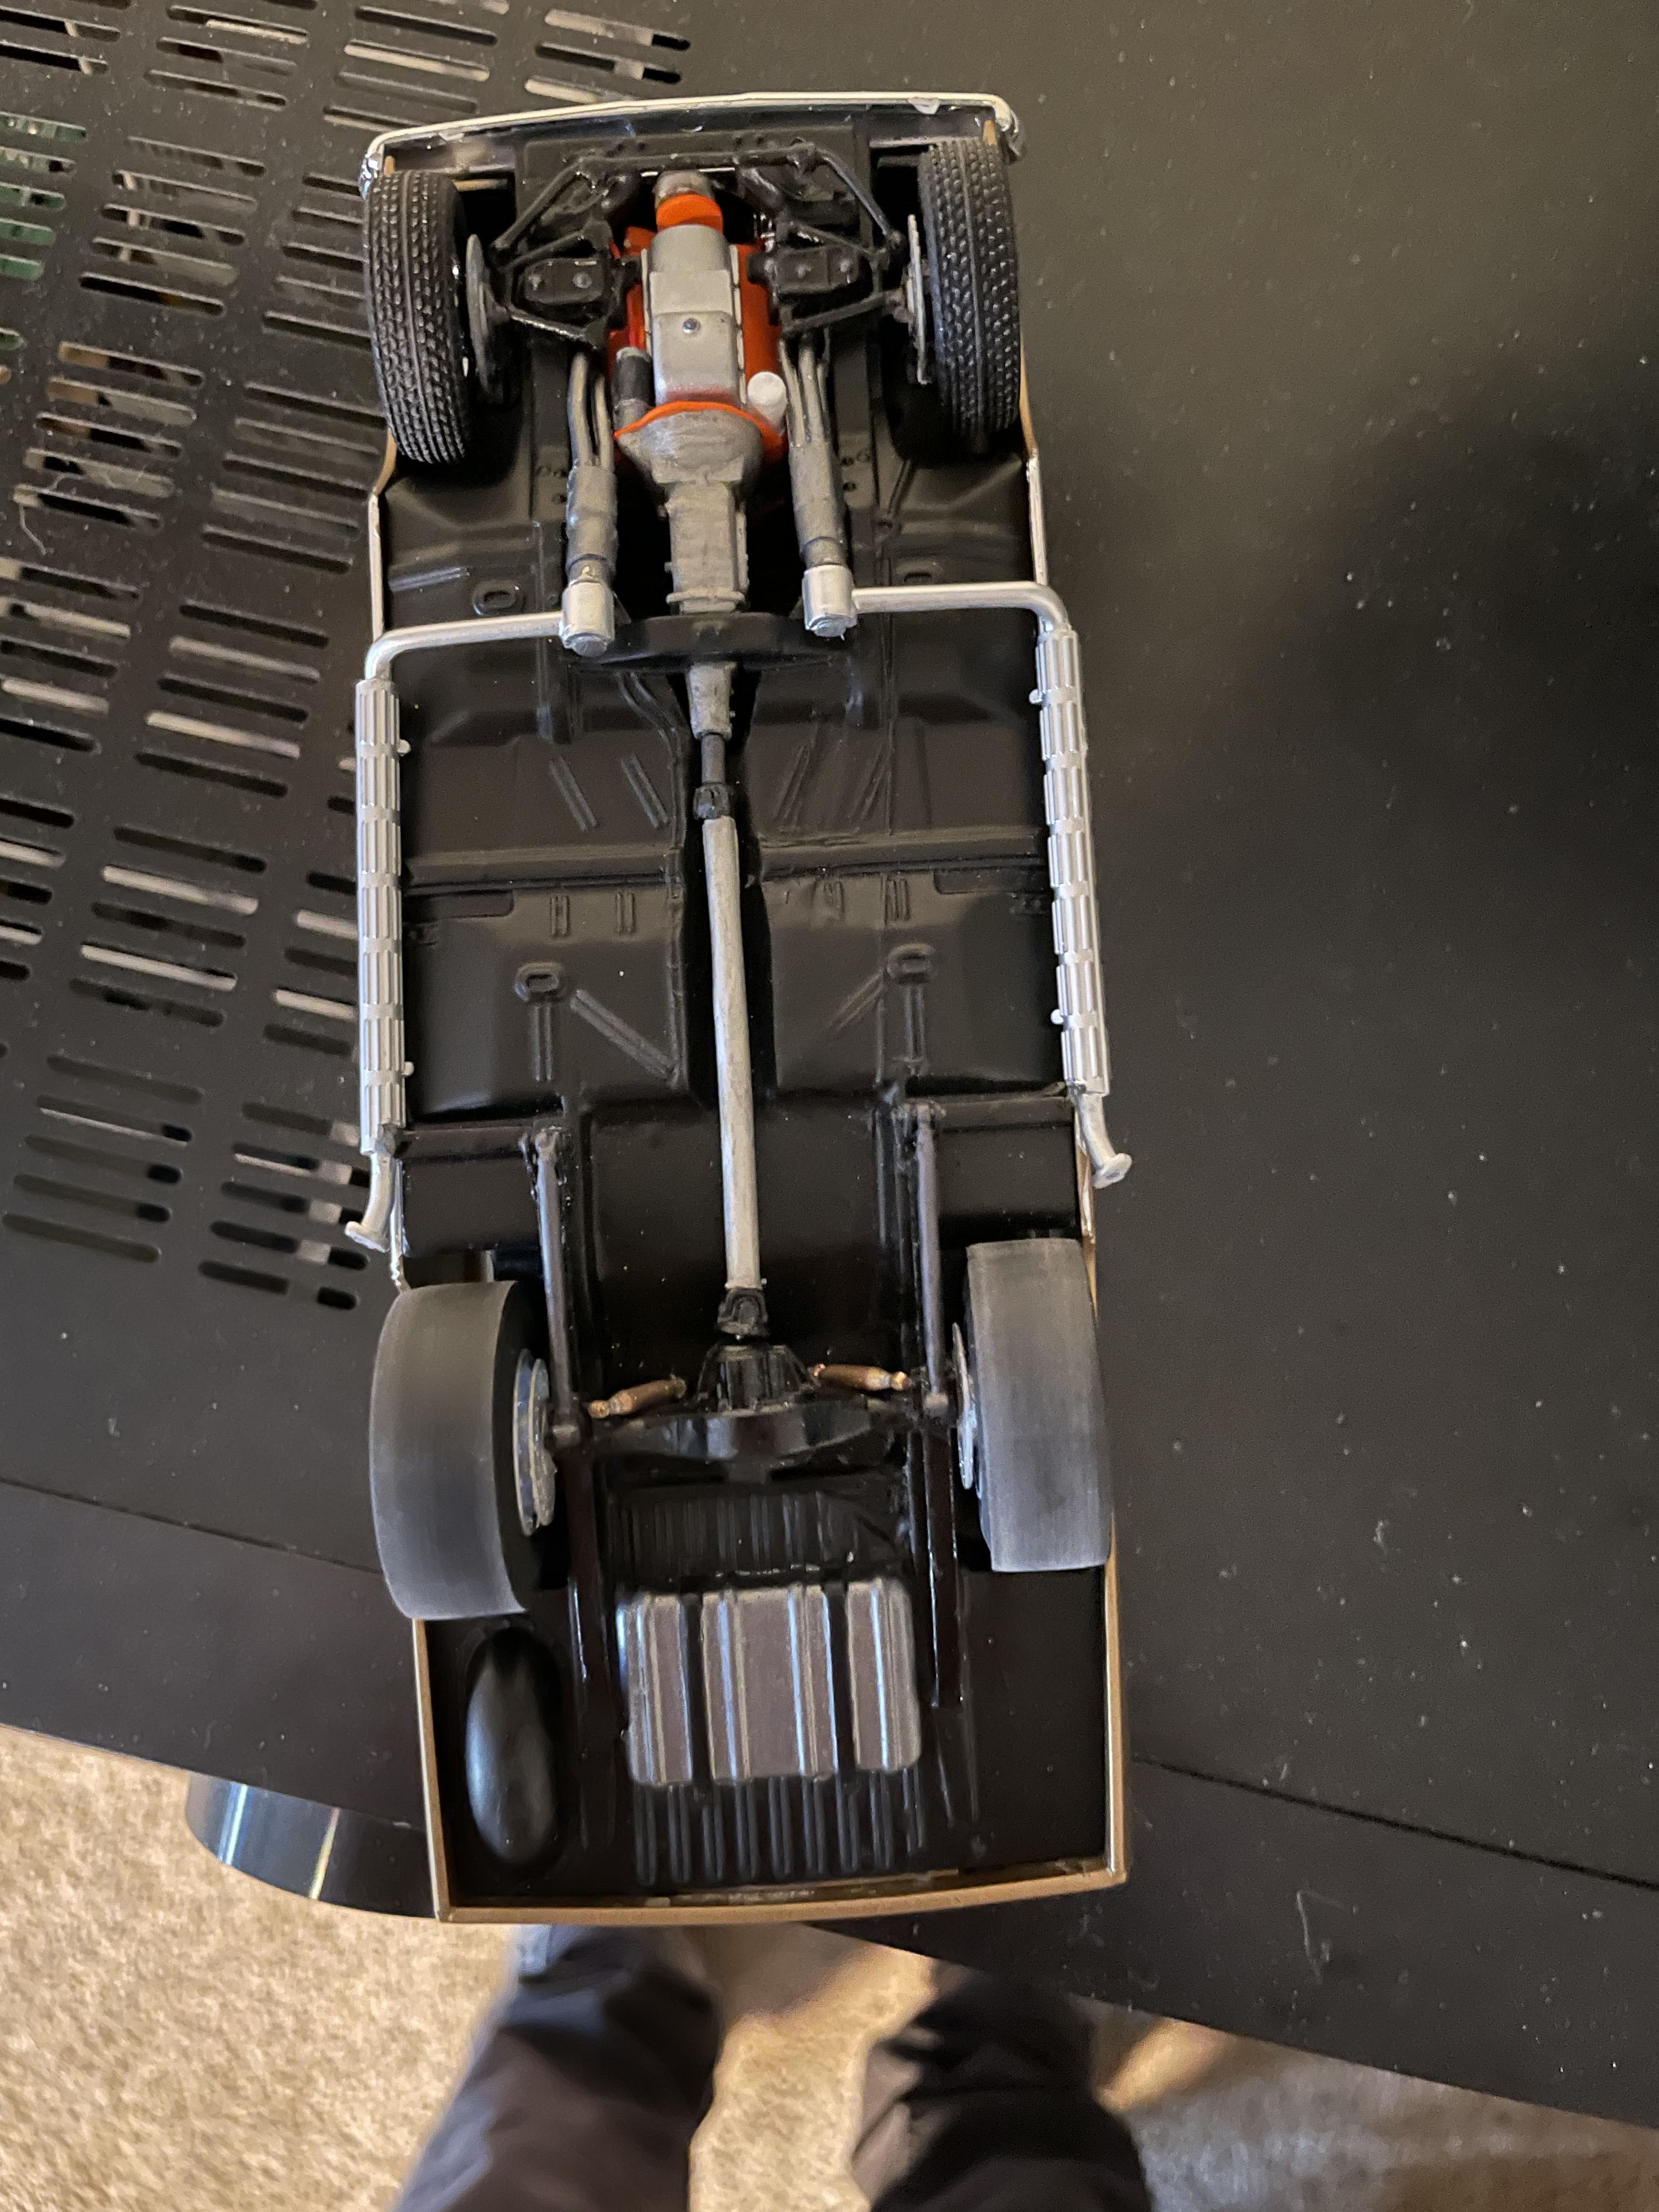
Thanks, I think I do too. Got the rear end narrowed down and found that the axle housing is hollow, so I can run a rod through it. Will make the alignment of the disk brakes much easier. The front a-arms are going to fit, although I’m not sure I’m going to have enough room for a set of disks up front, more fiddling to do yet. Dave.
-
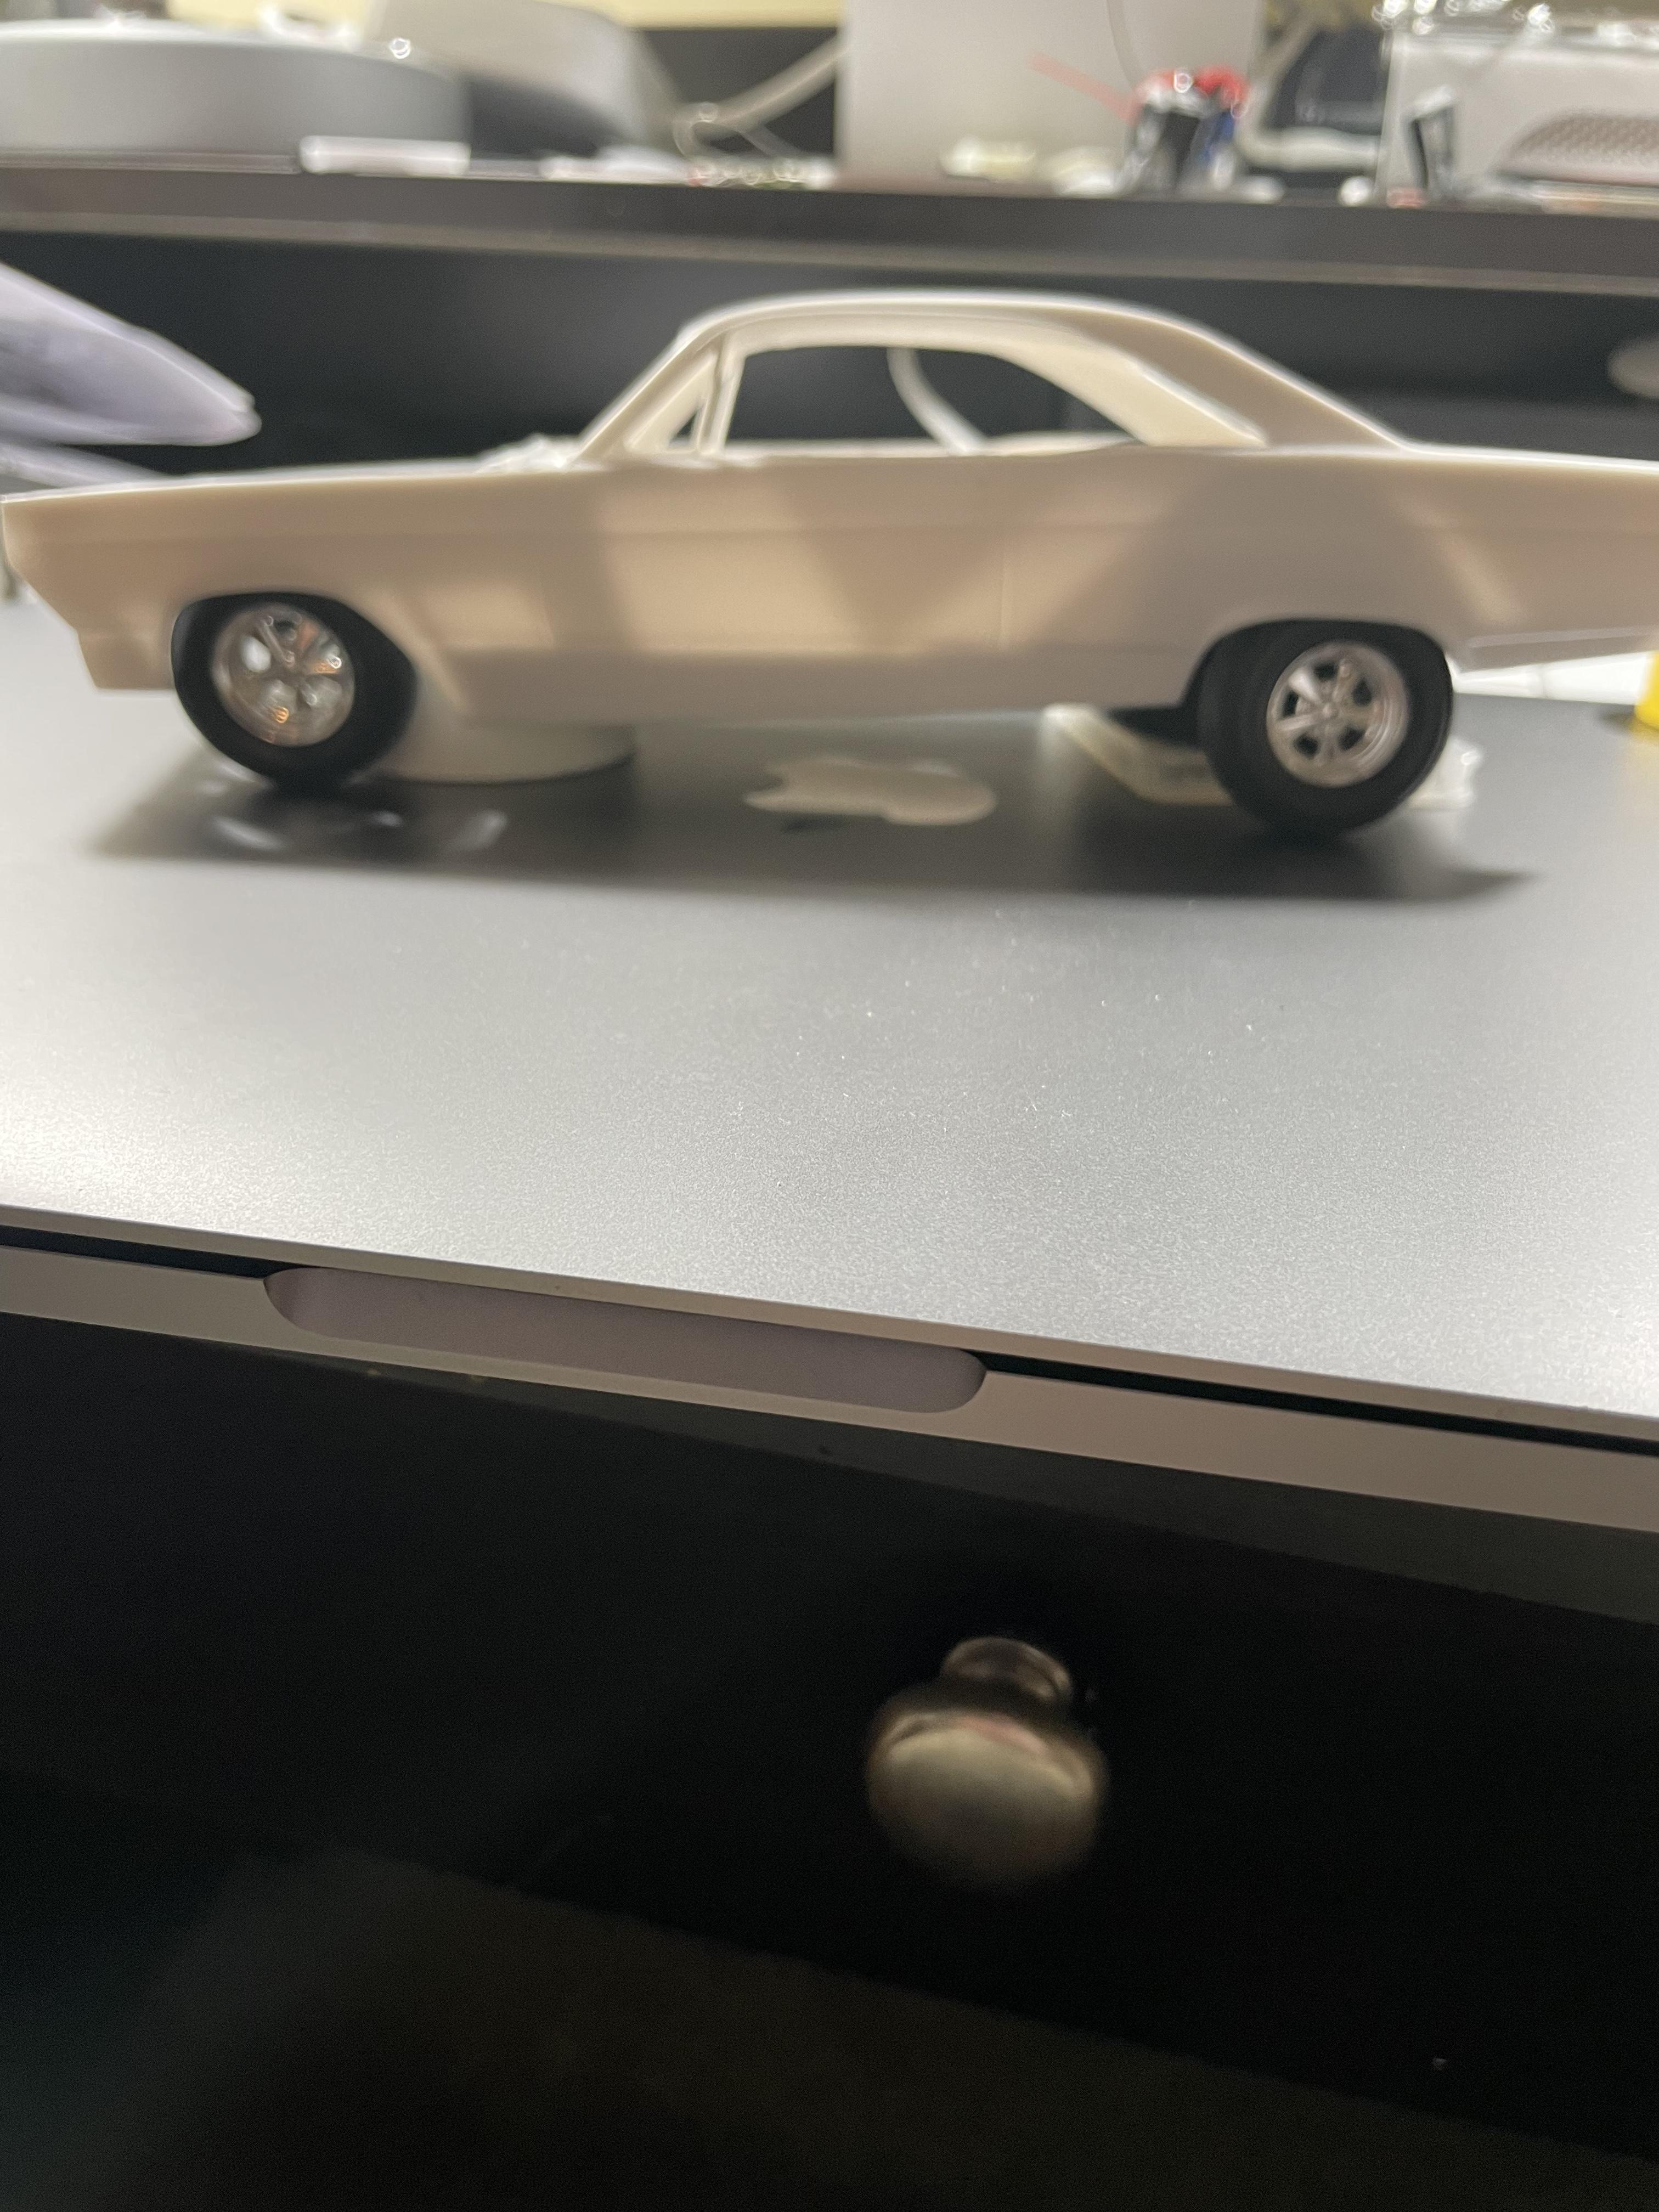
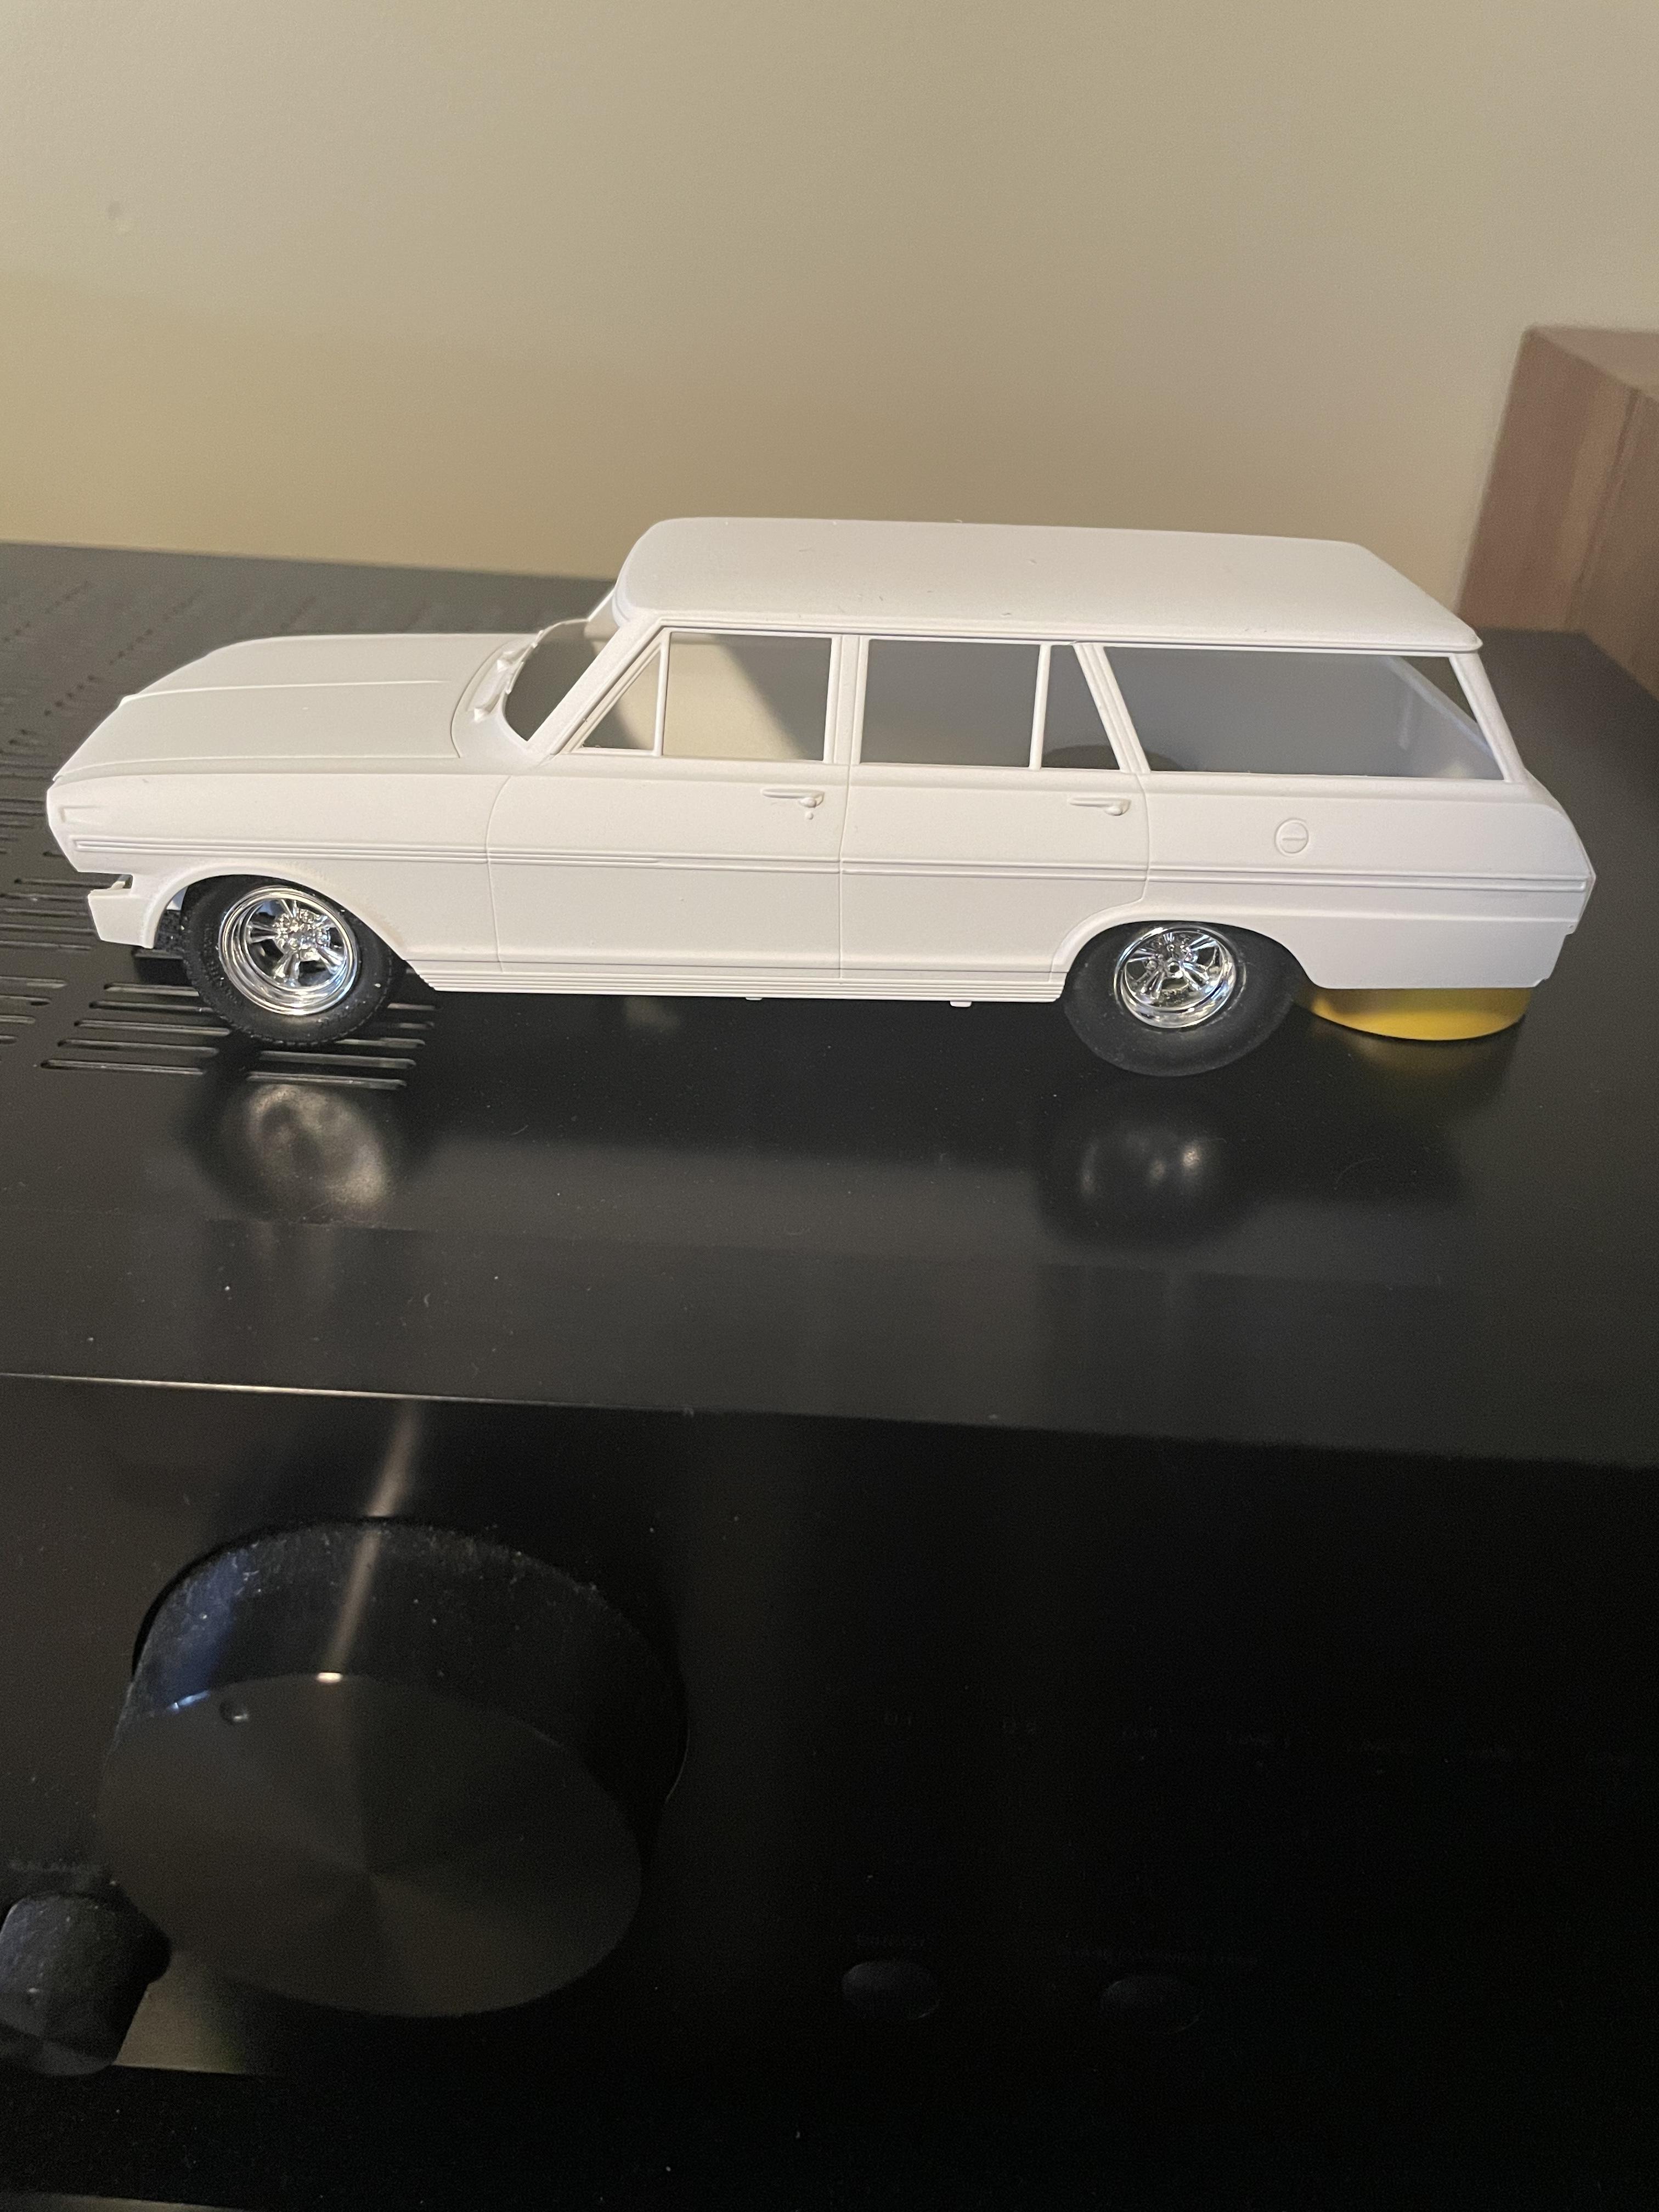
This is the stance I’m going for, undecided on the wheels though.
-
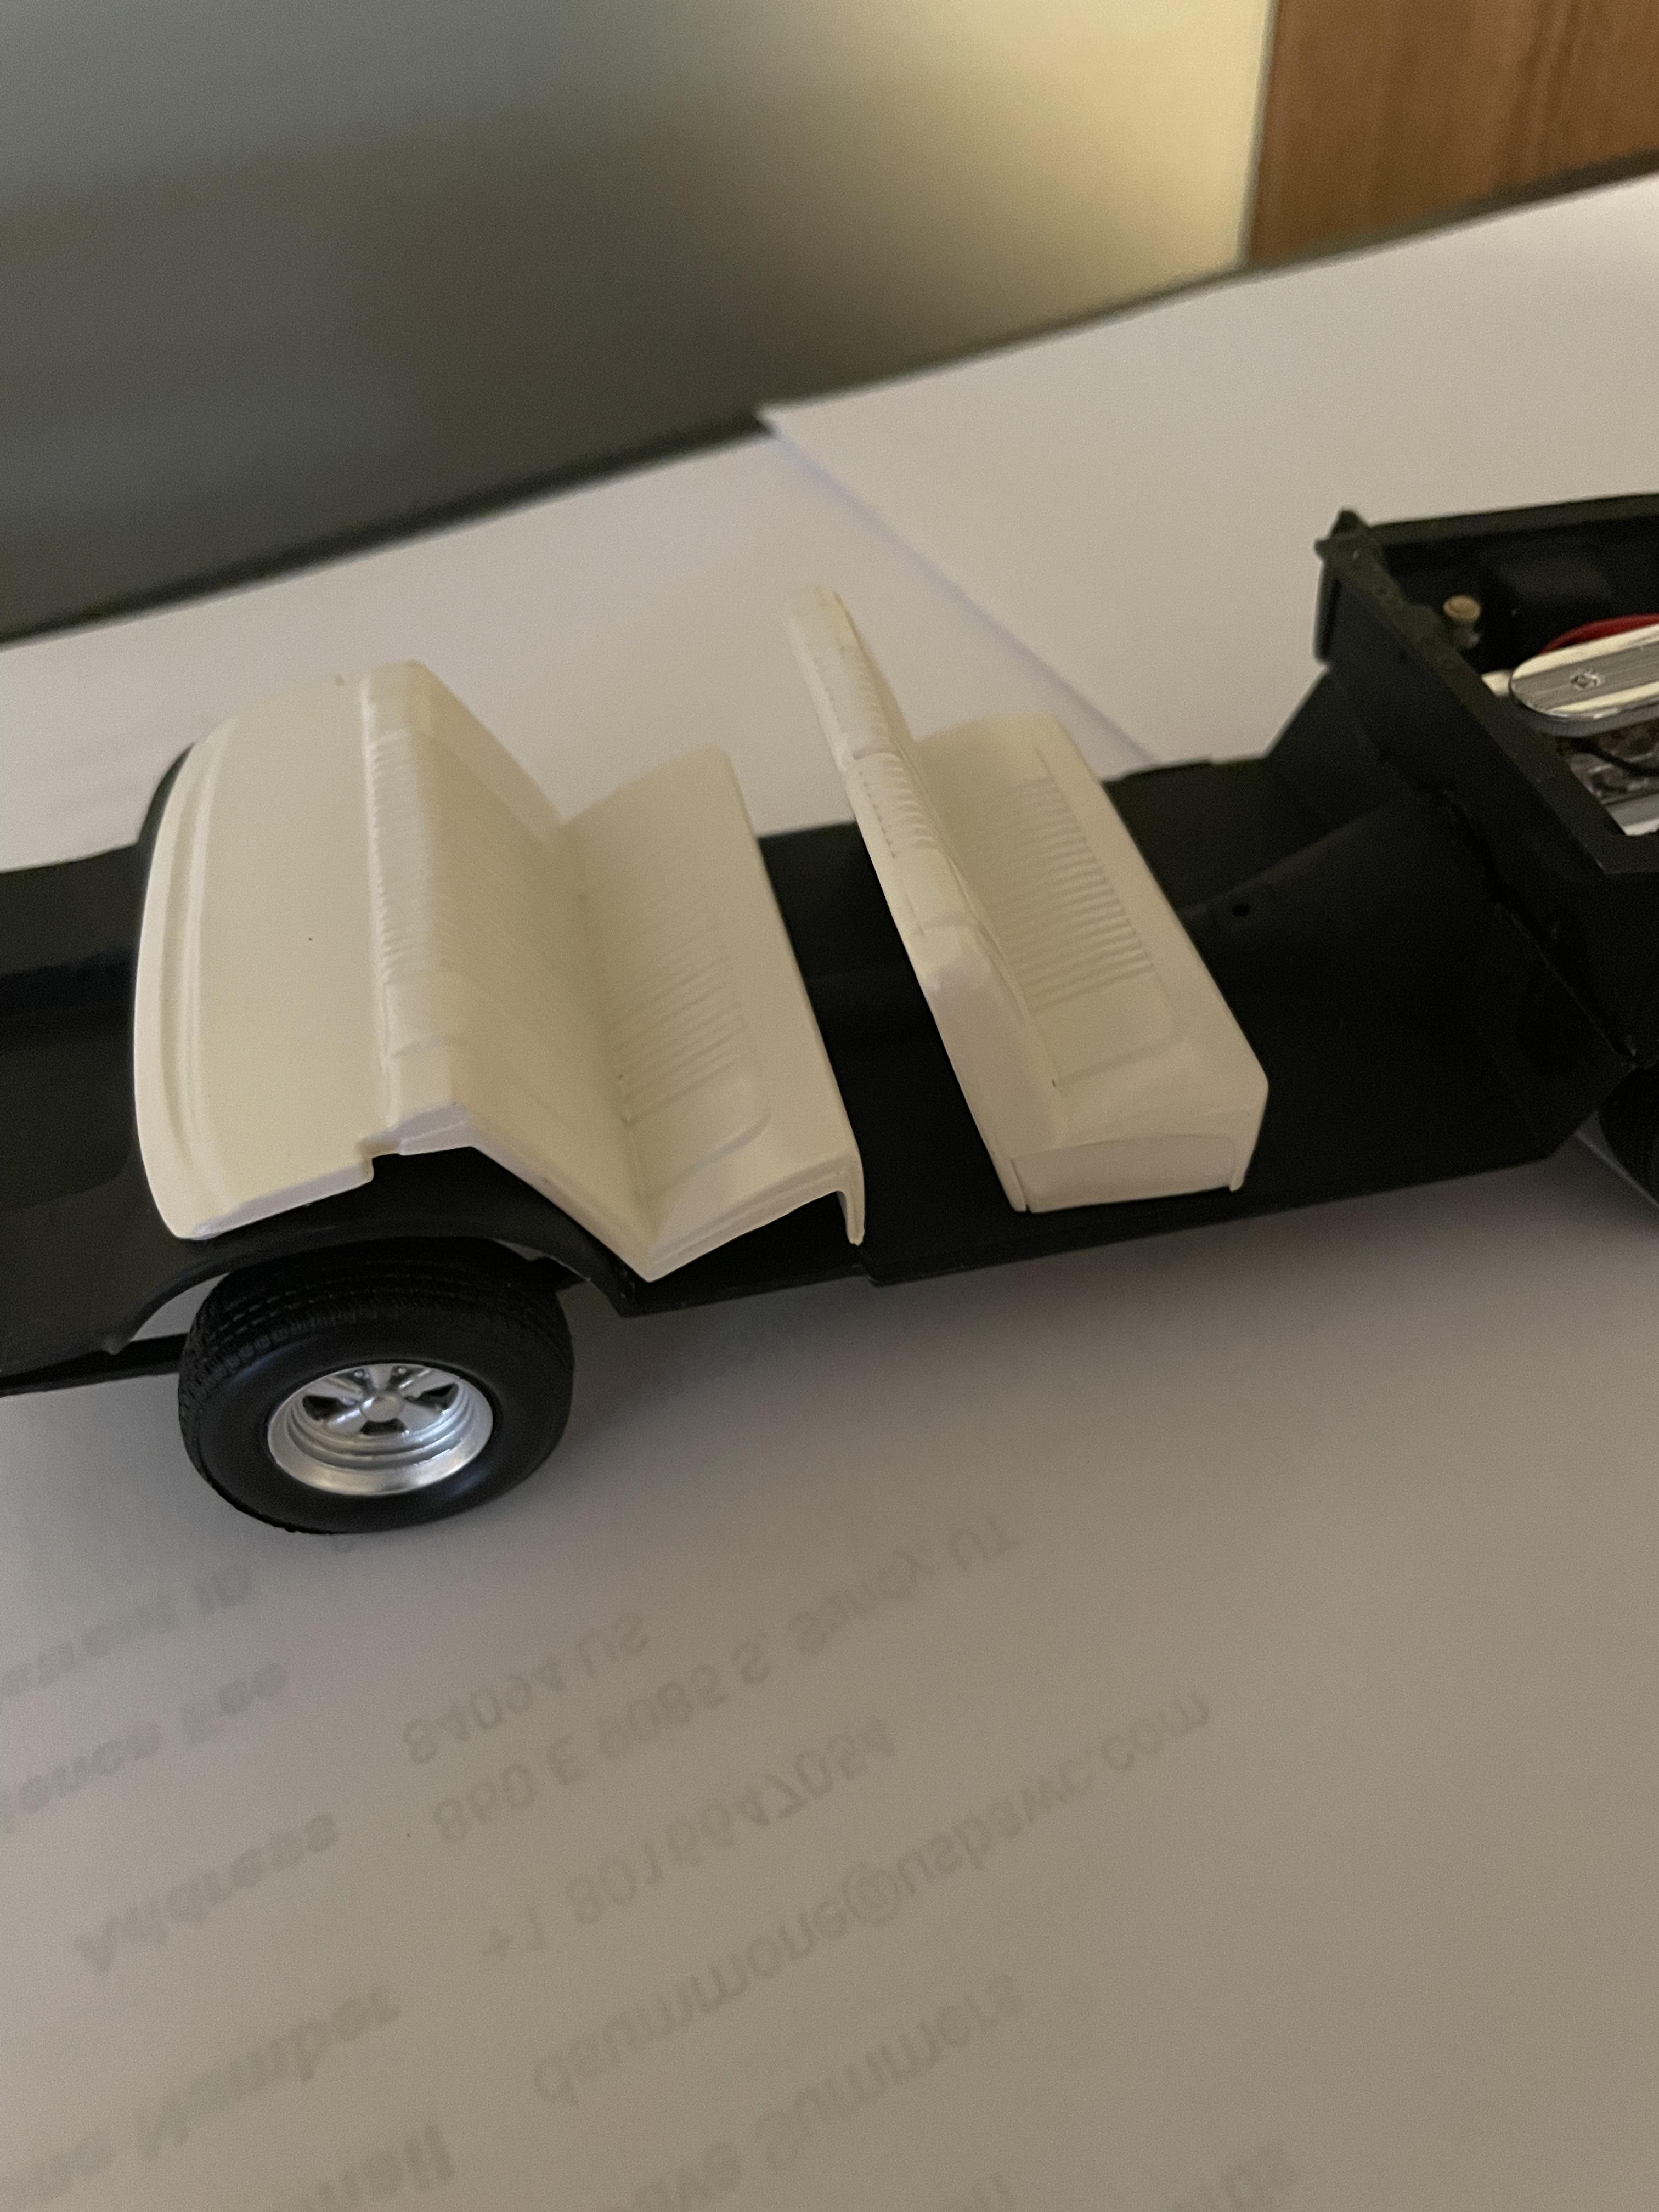
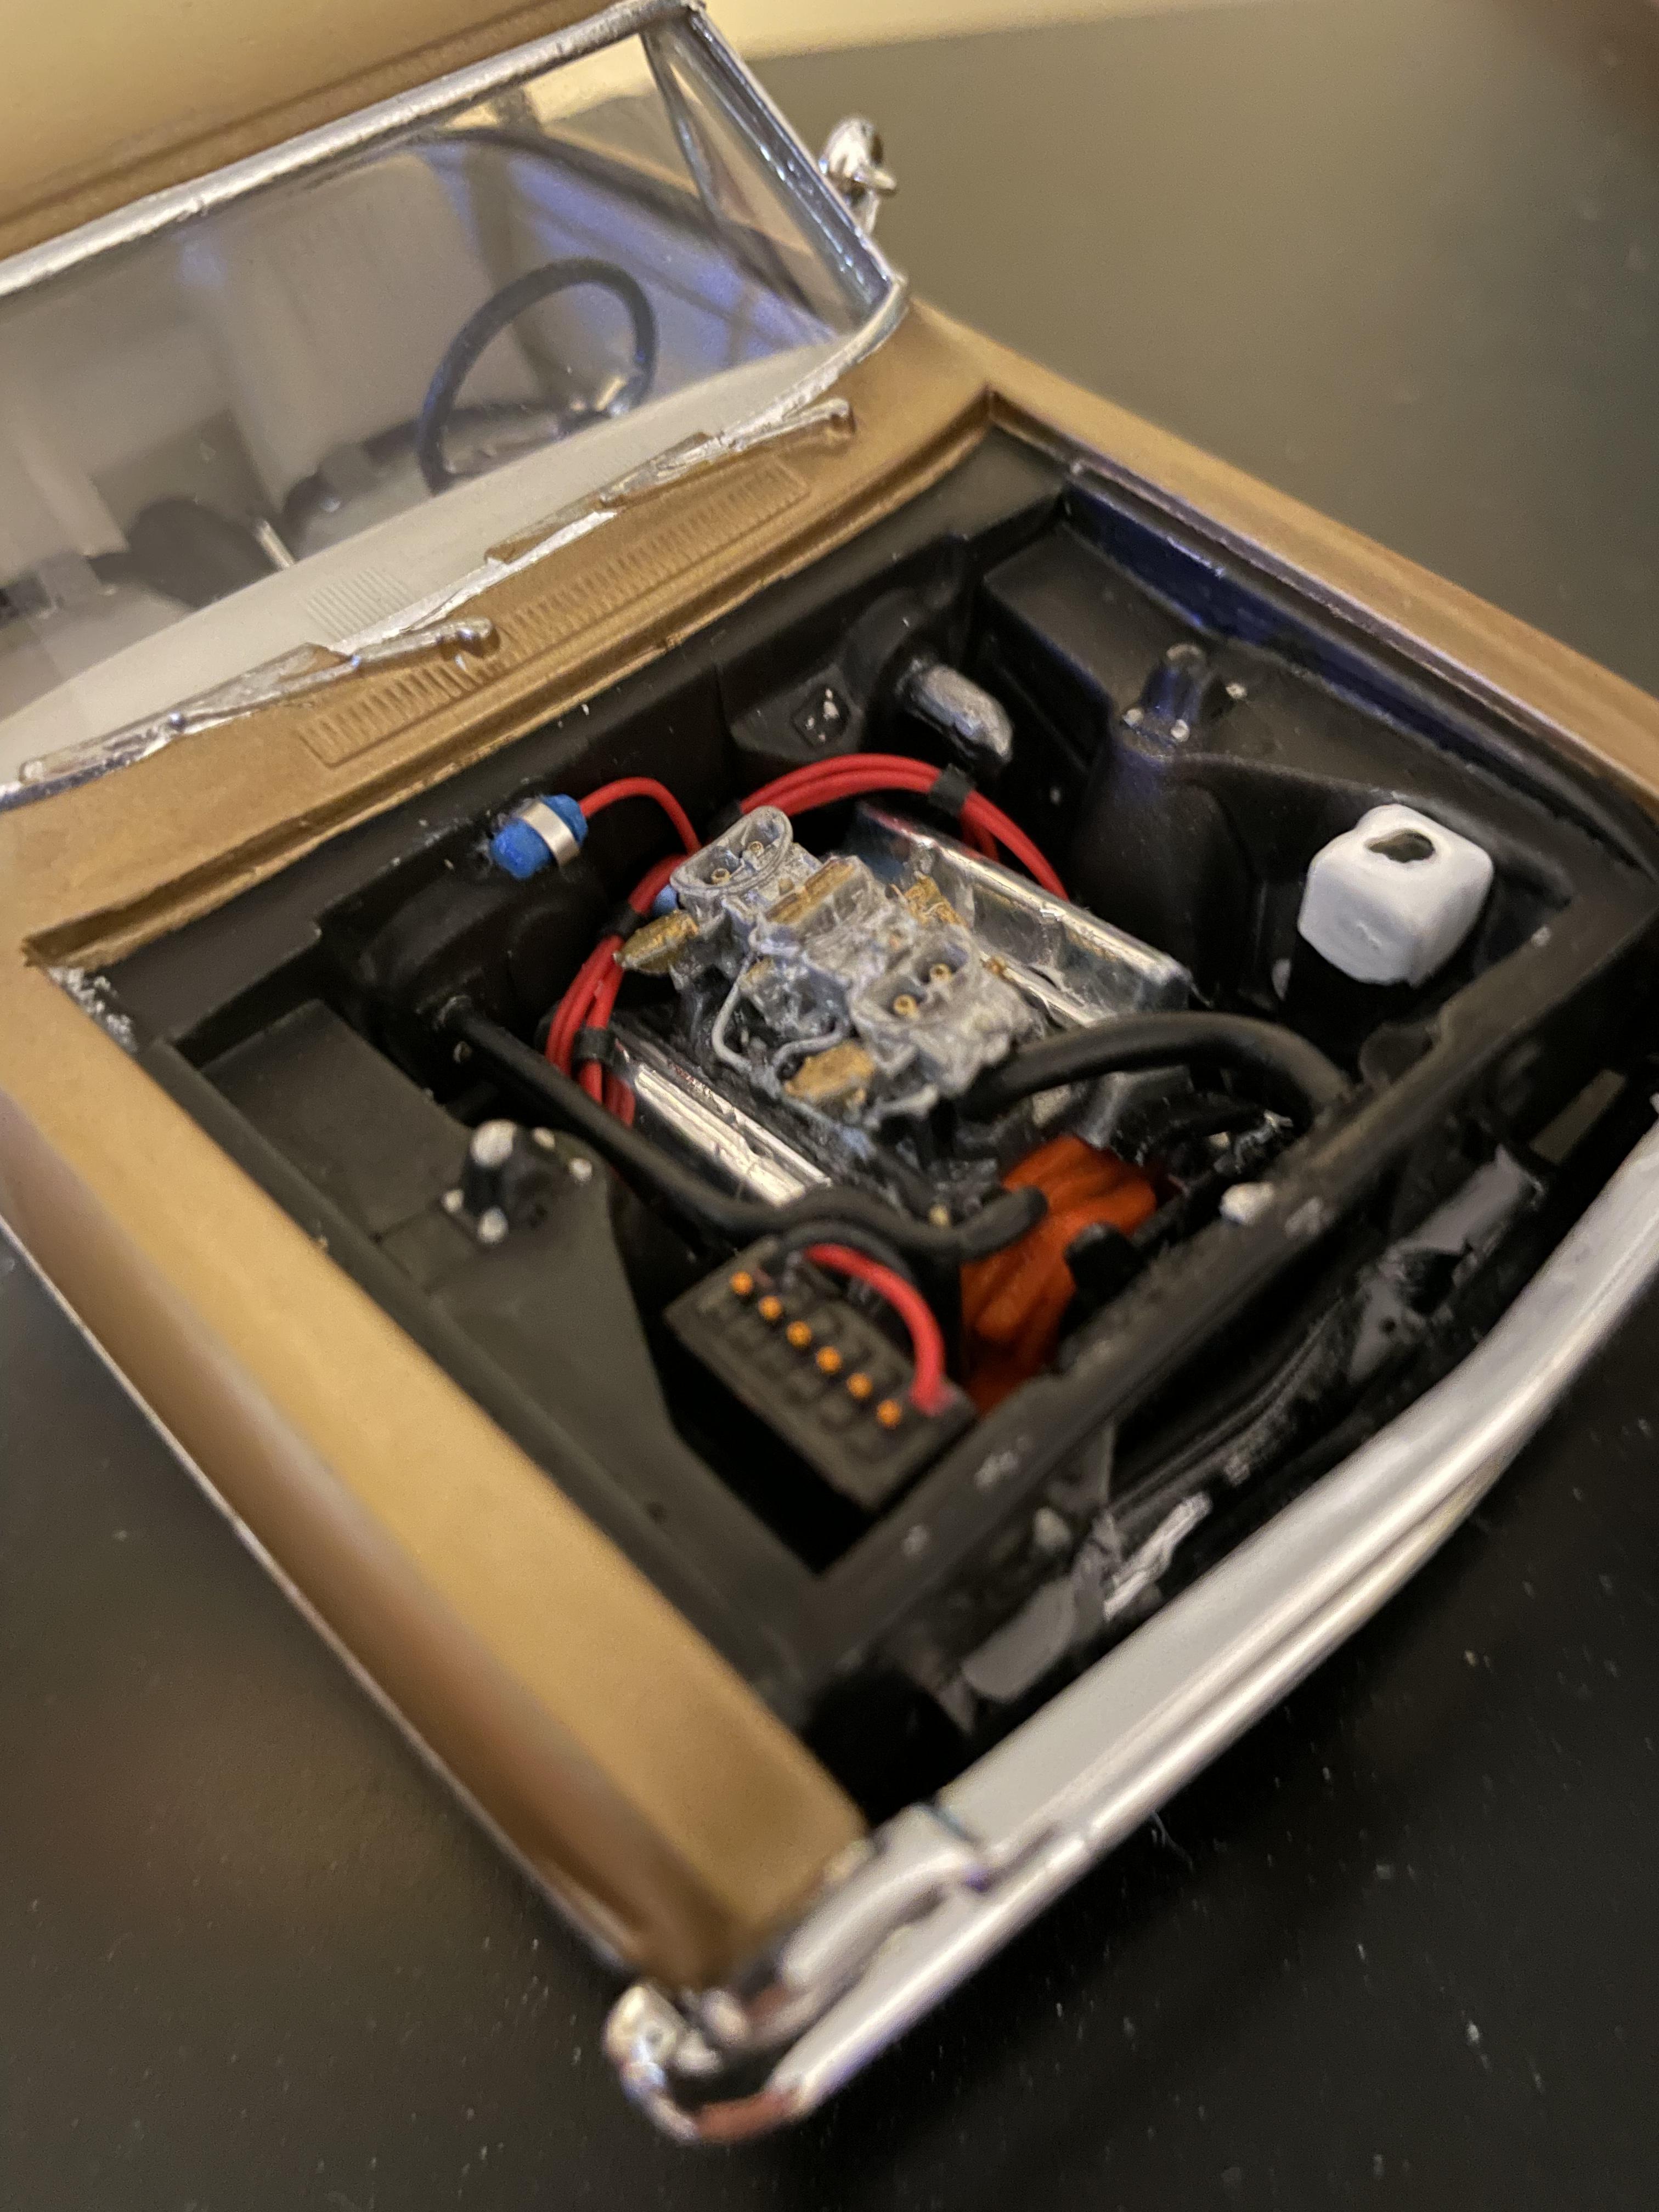
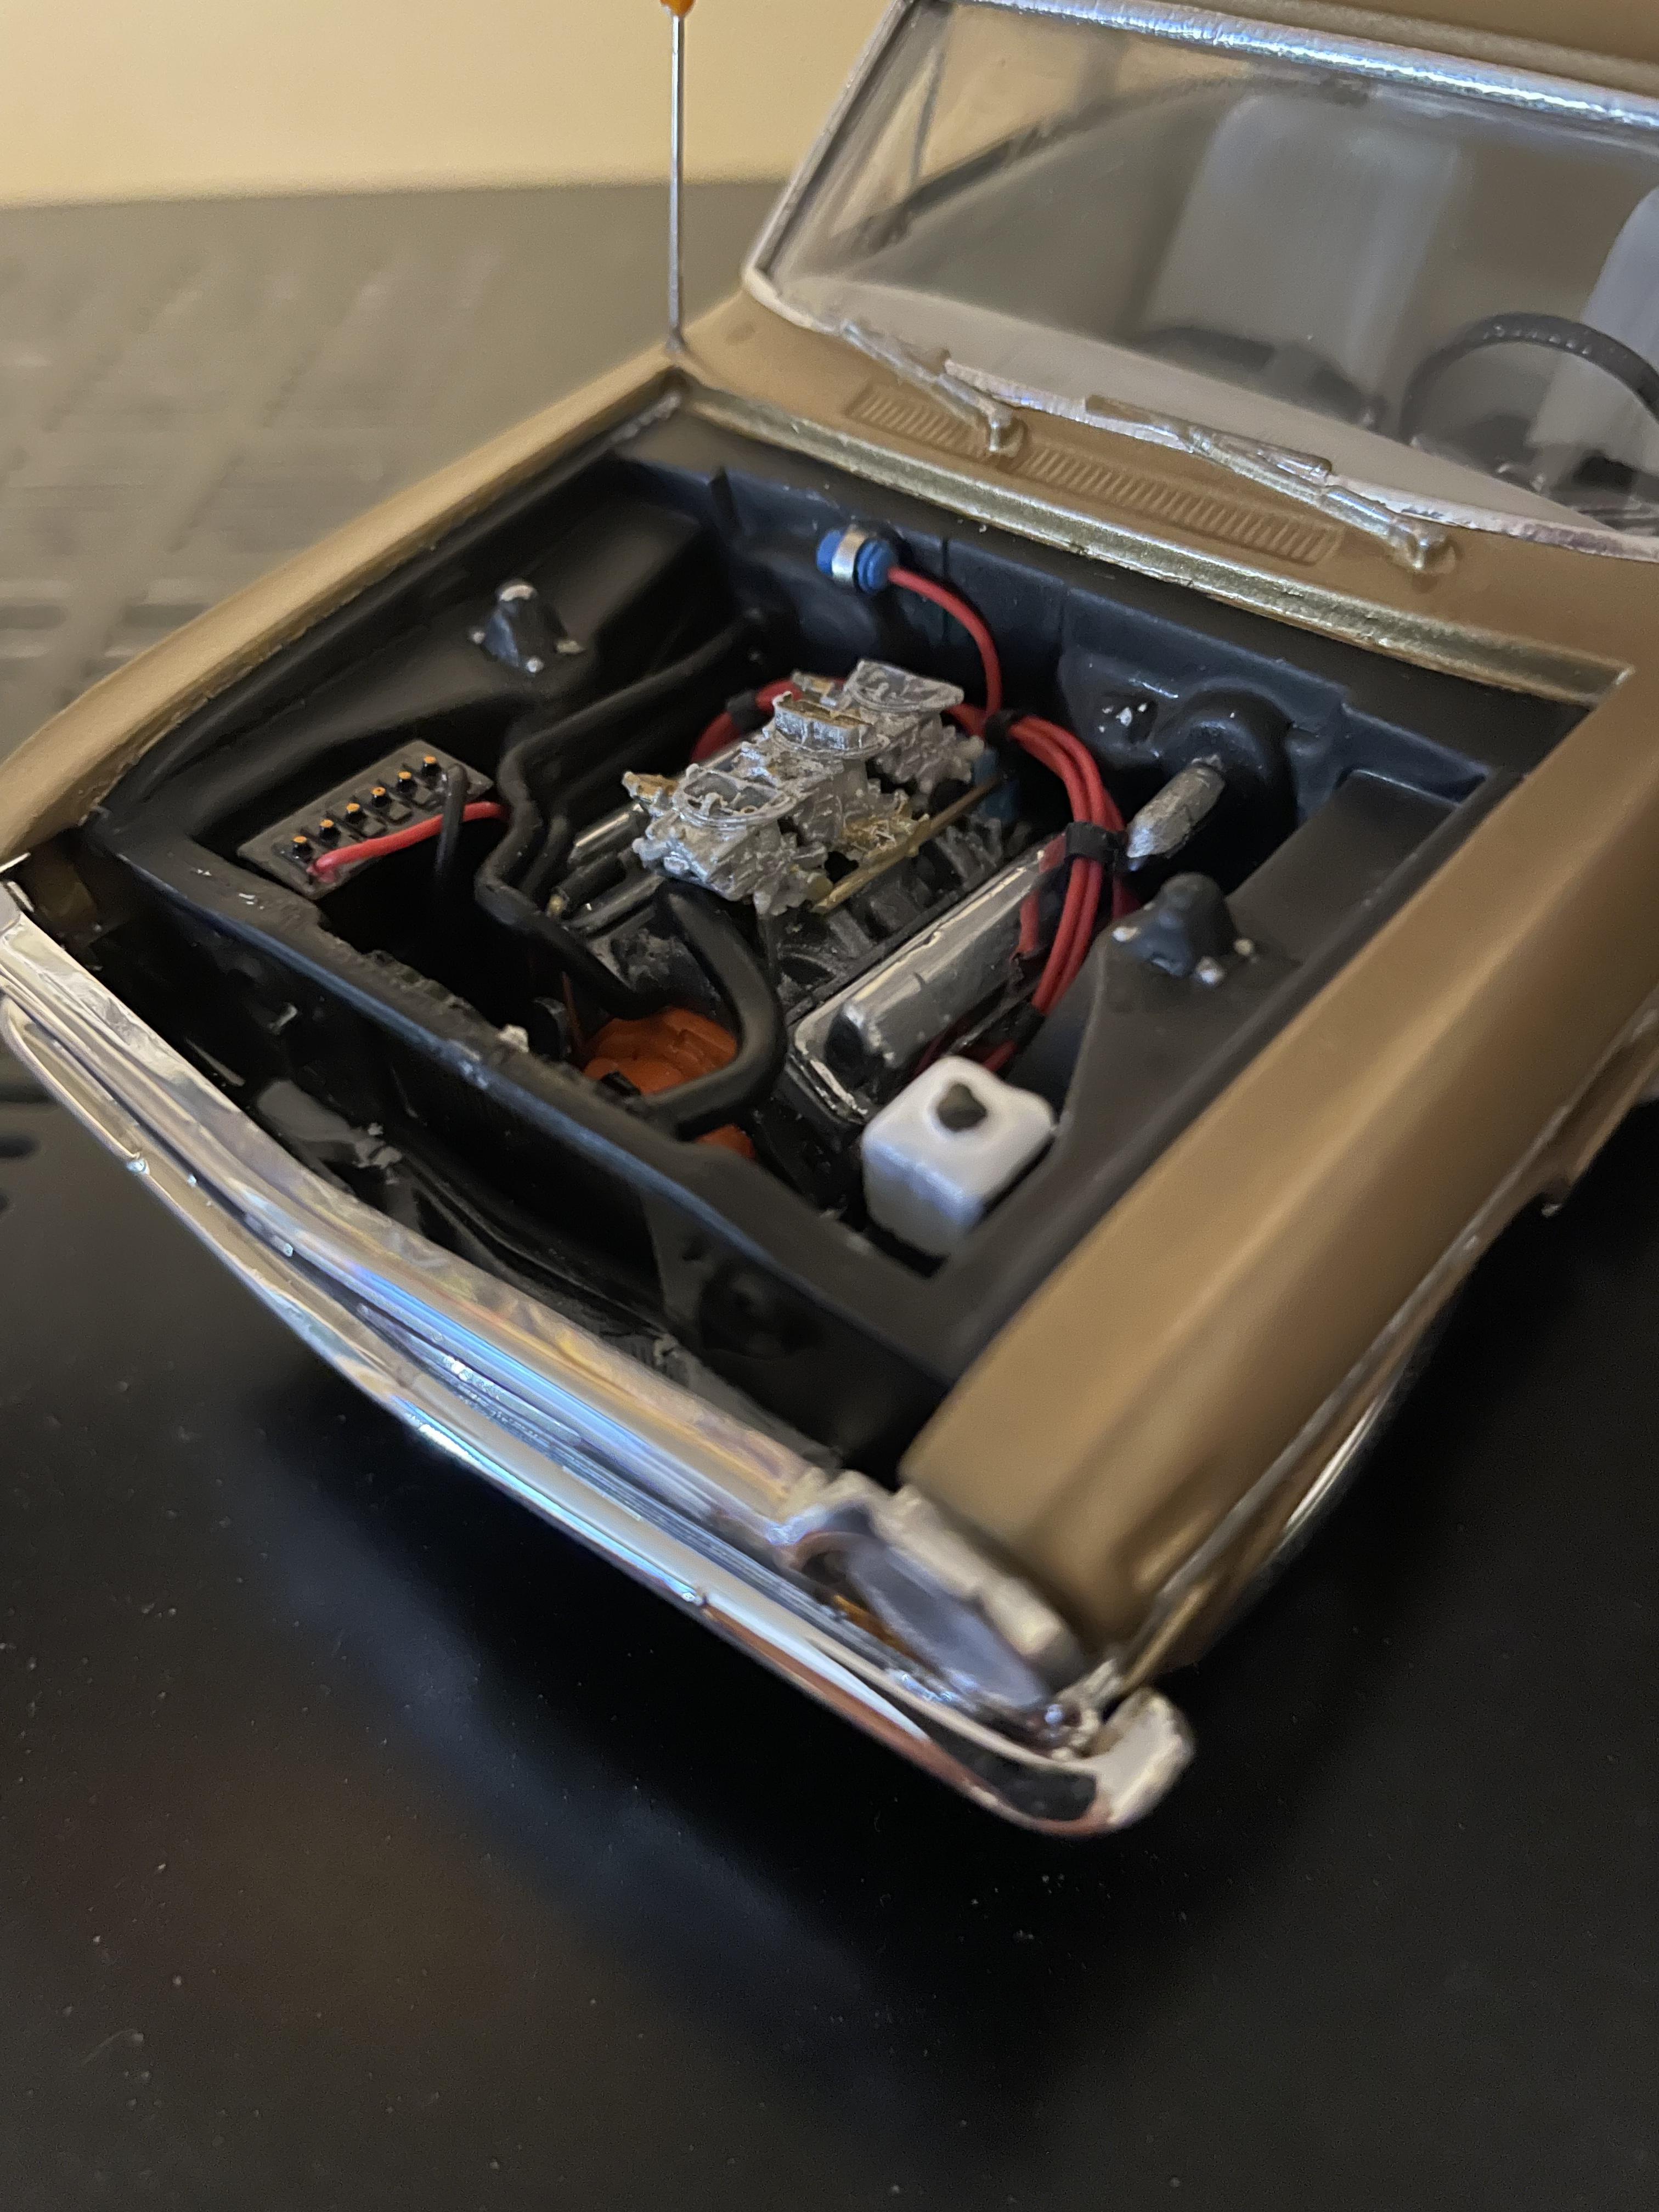
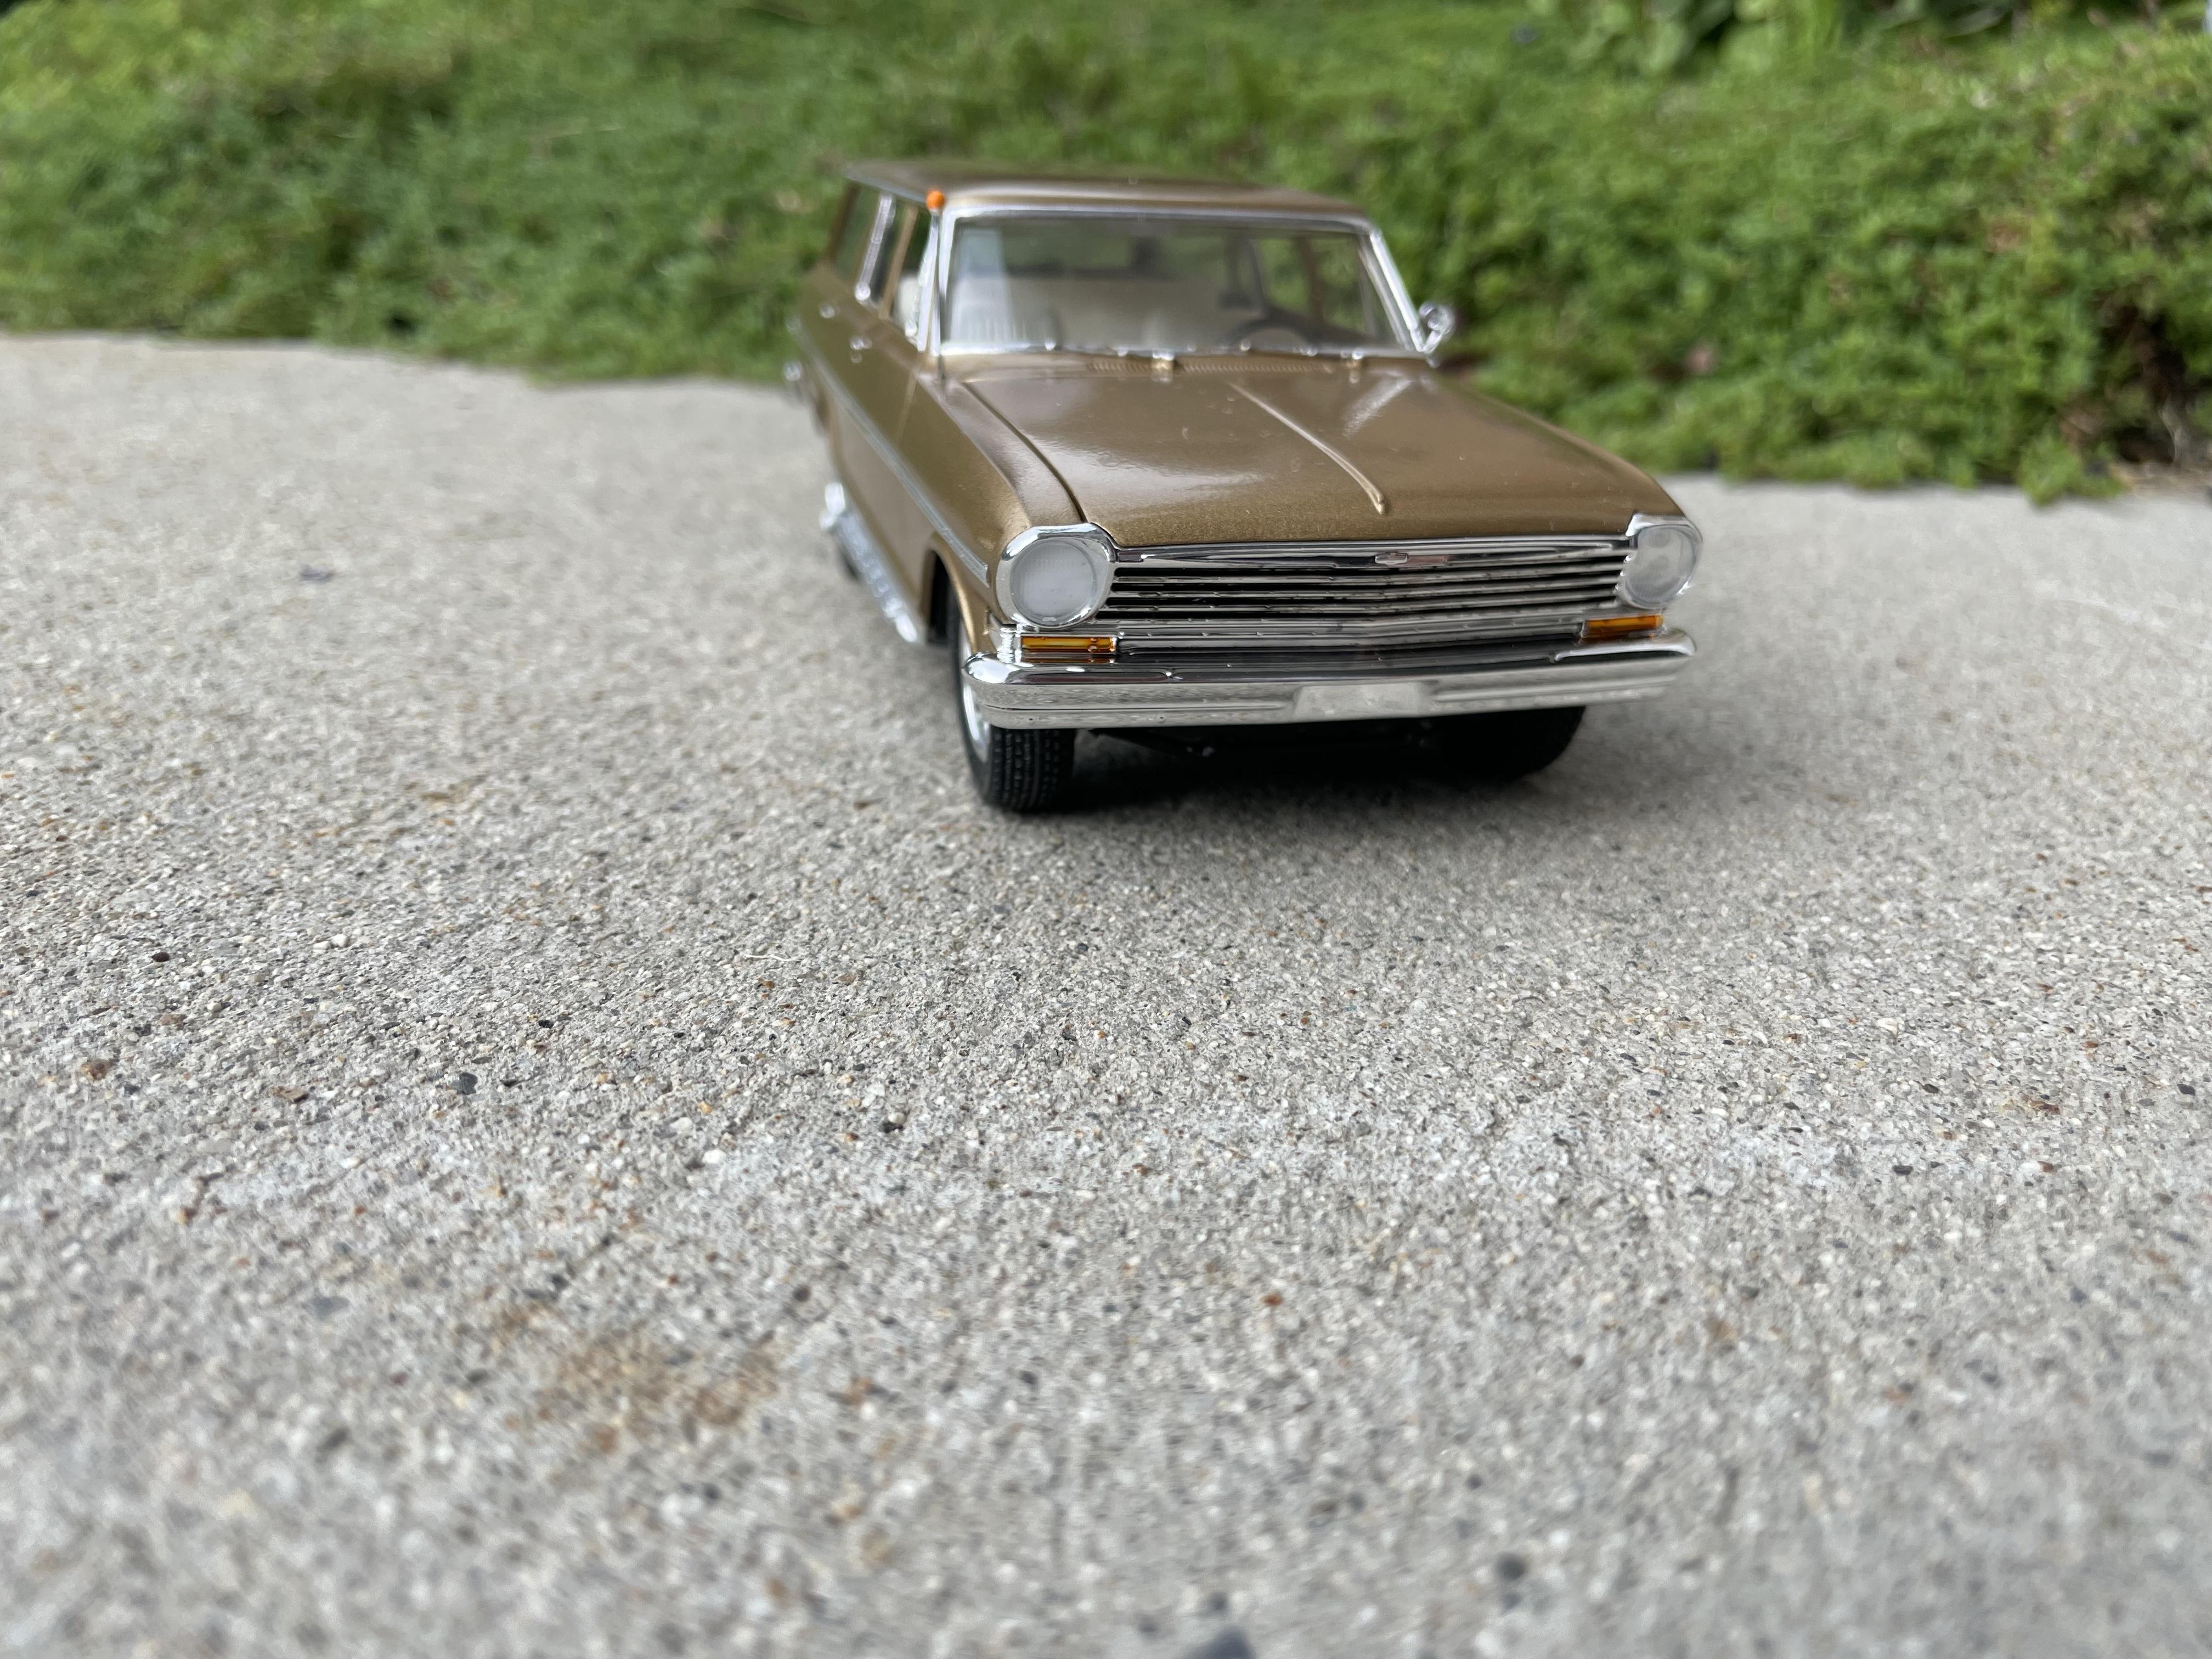
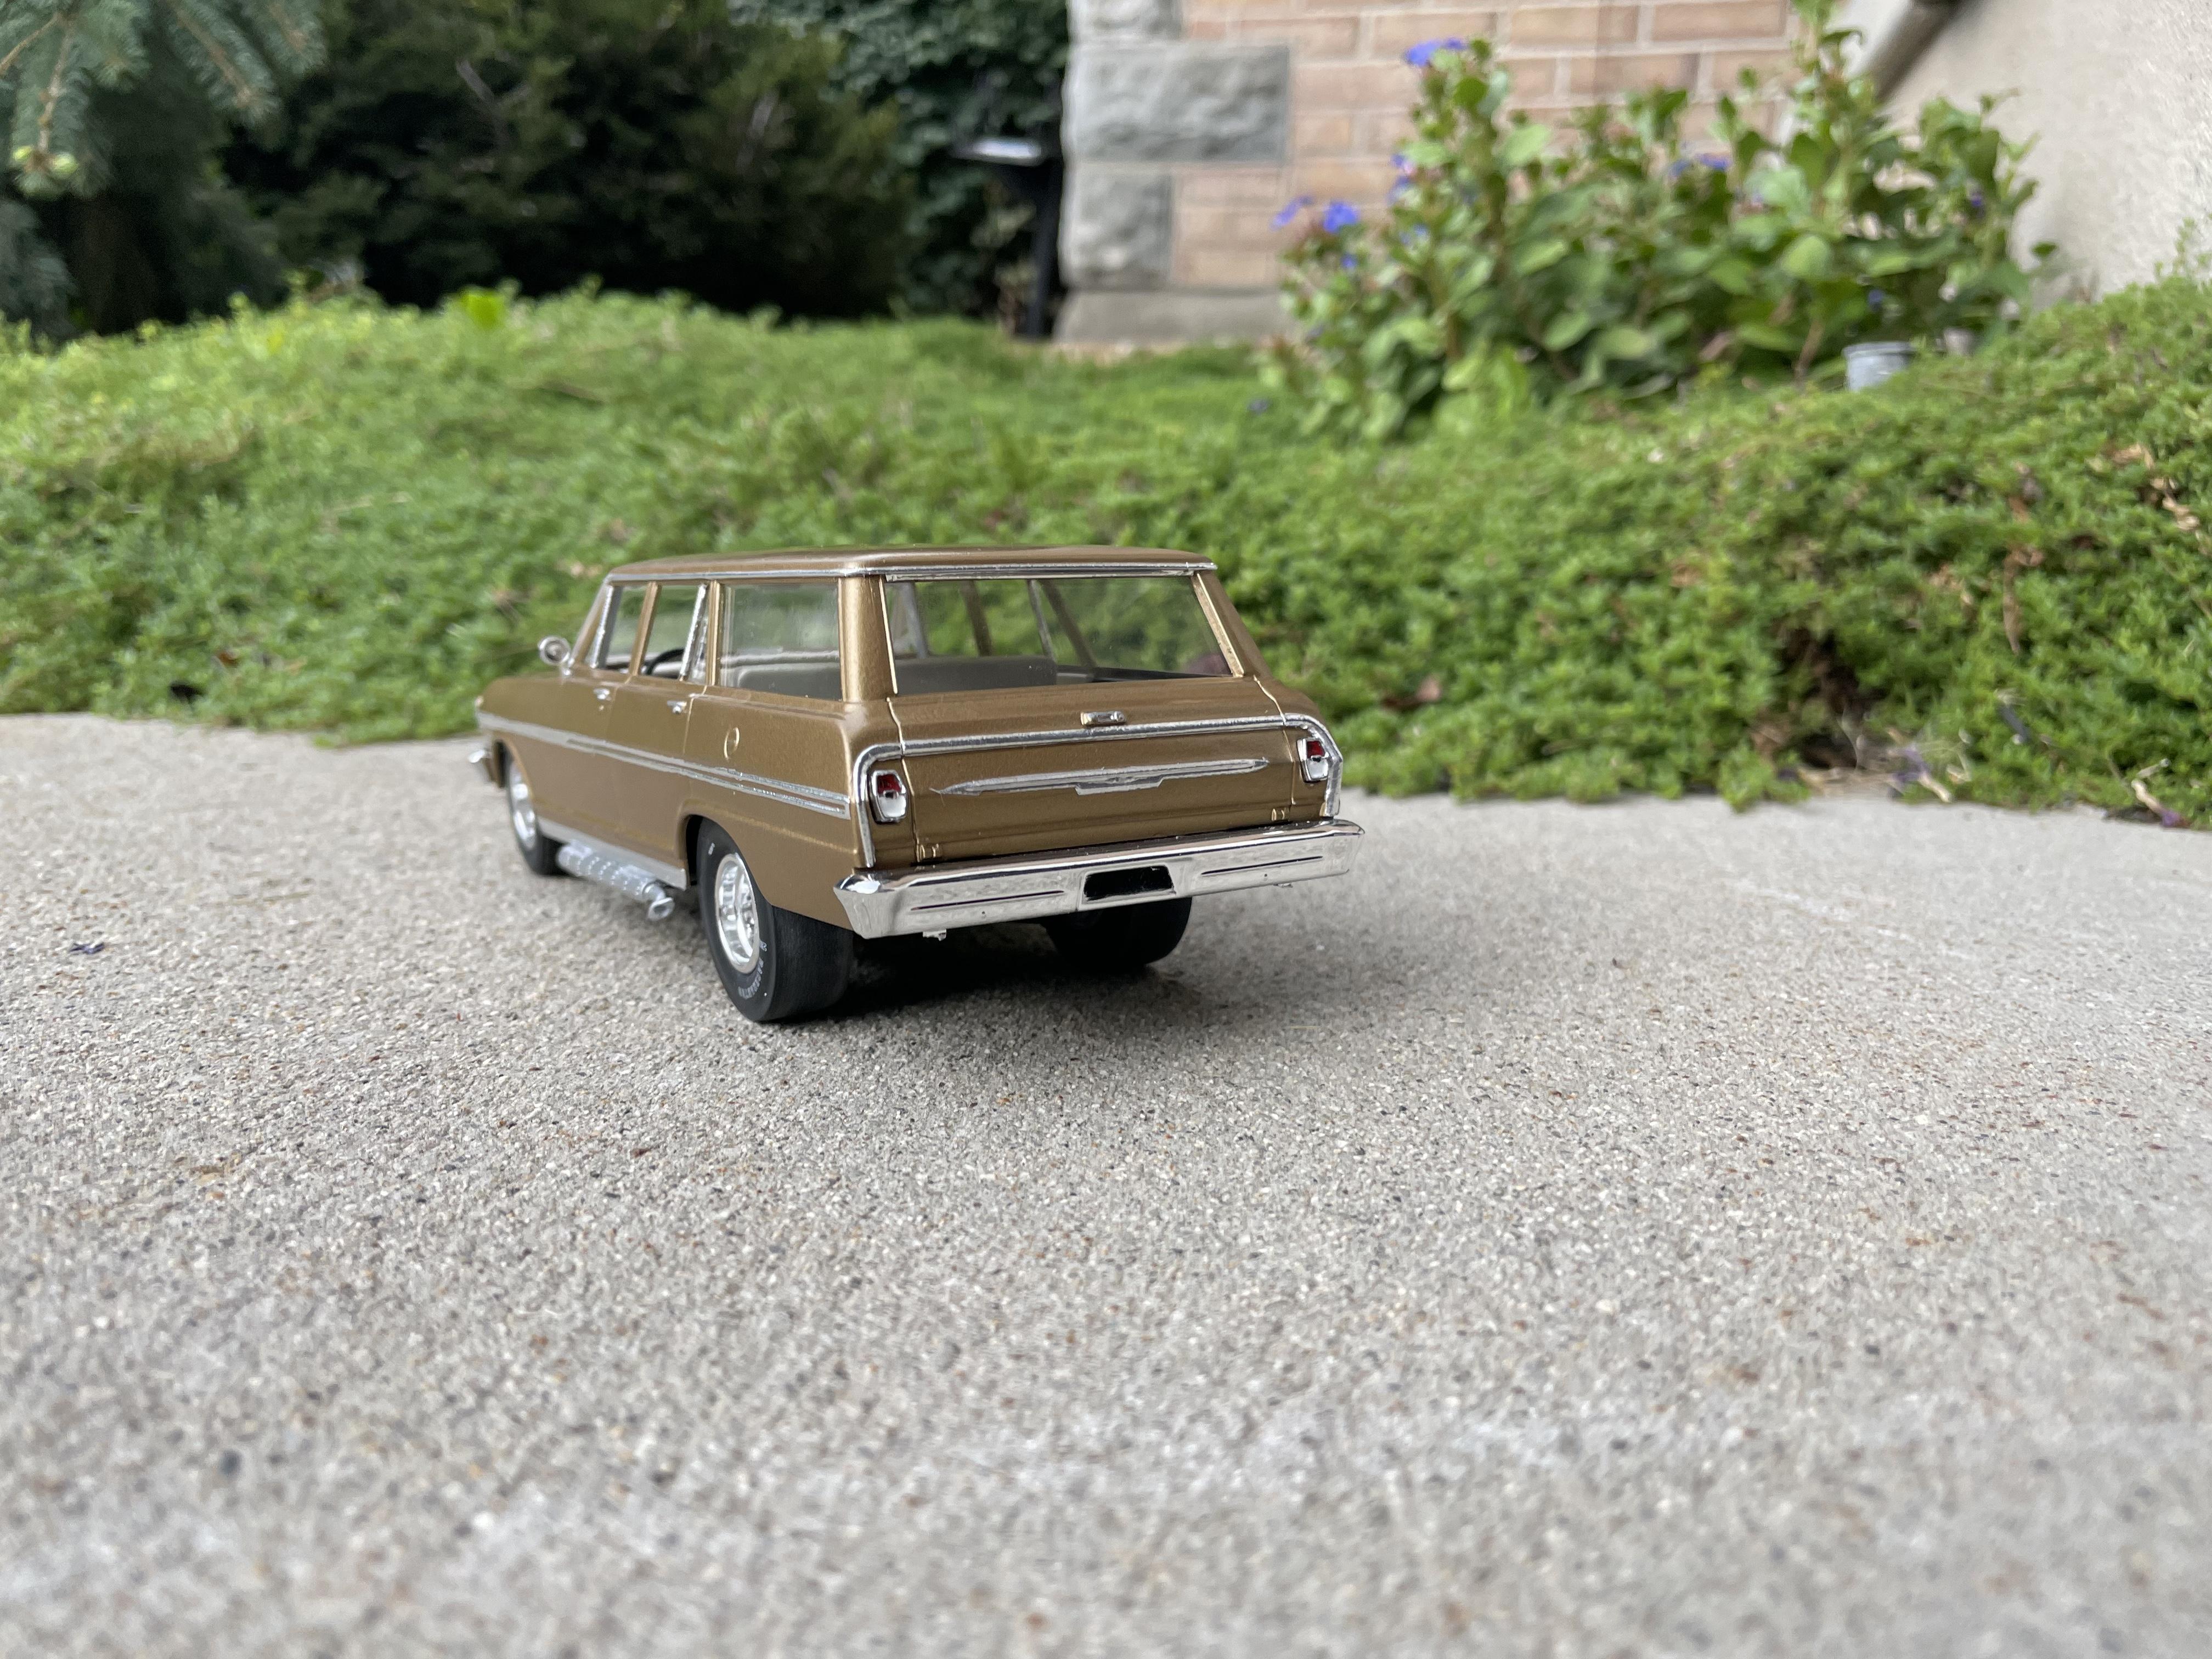
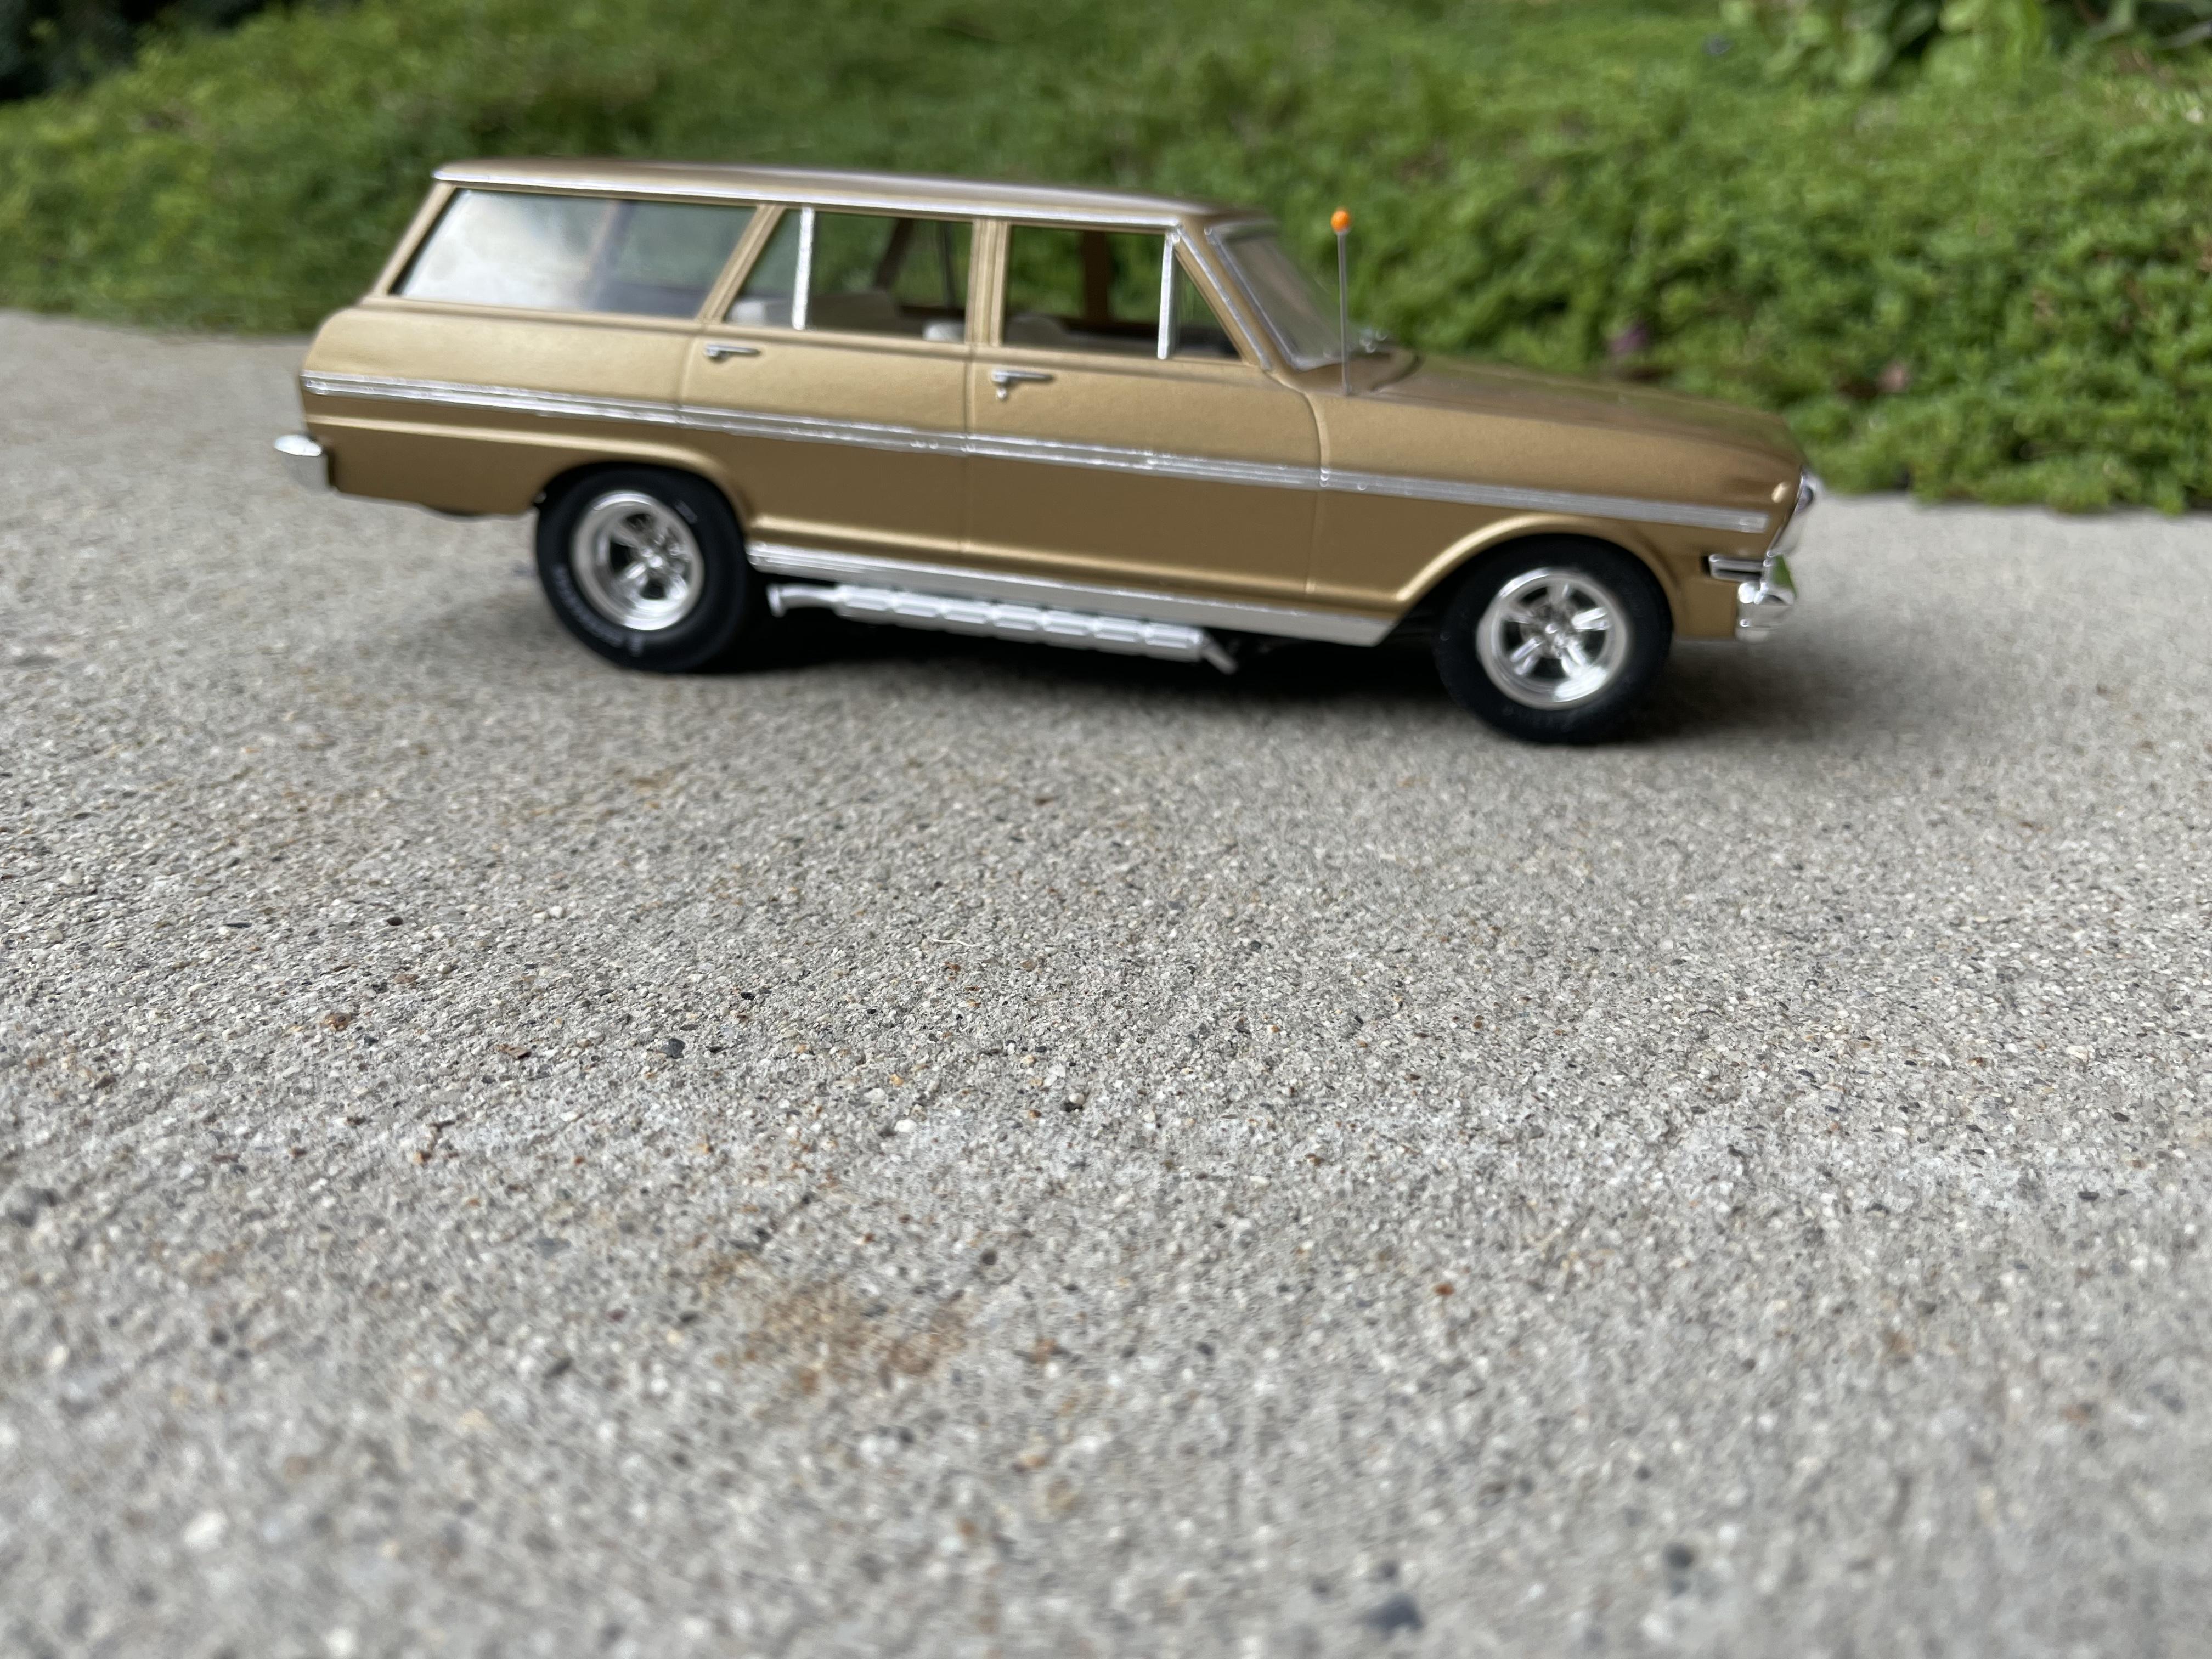
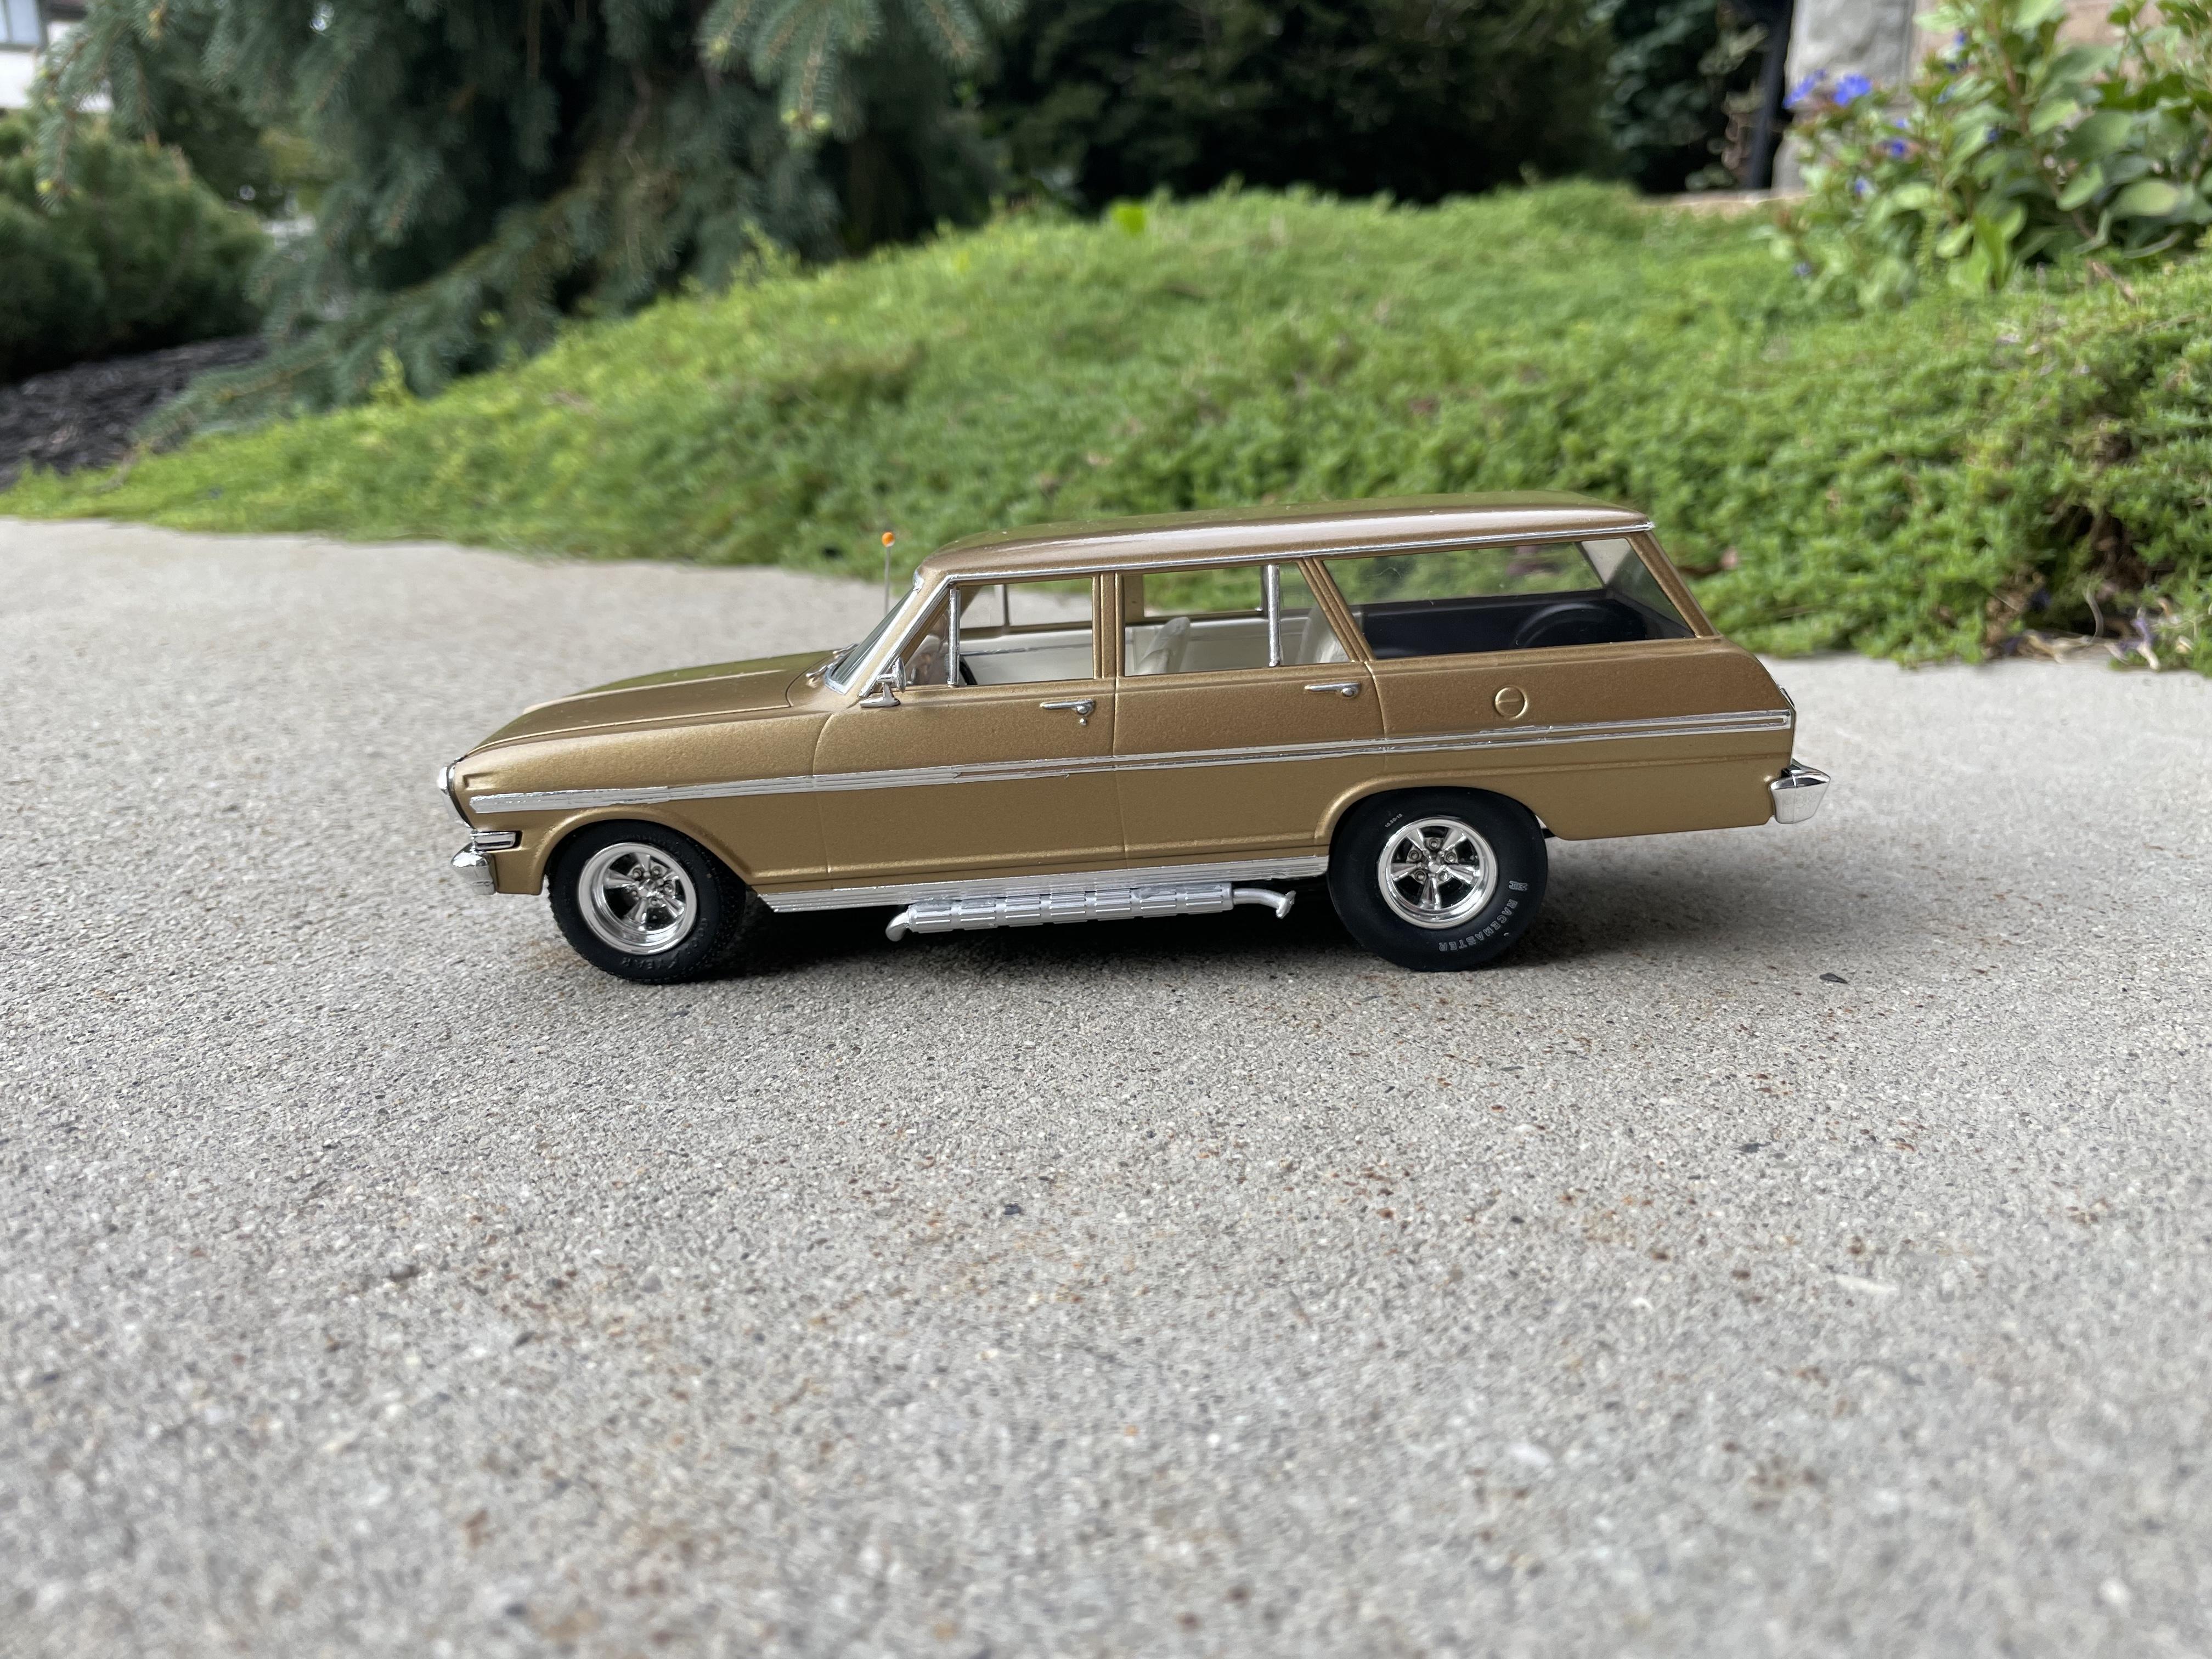
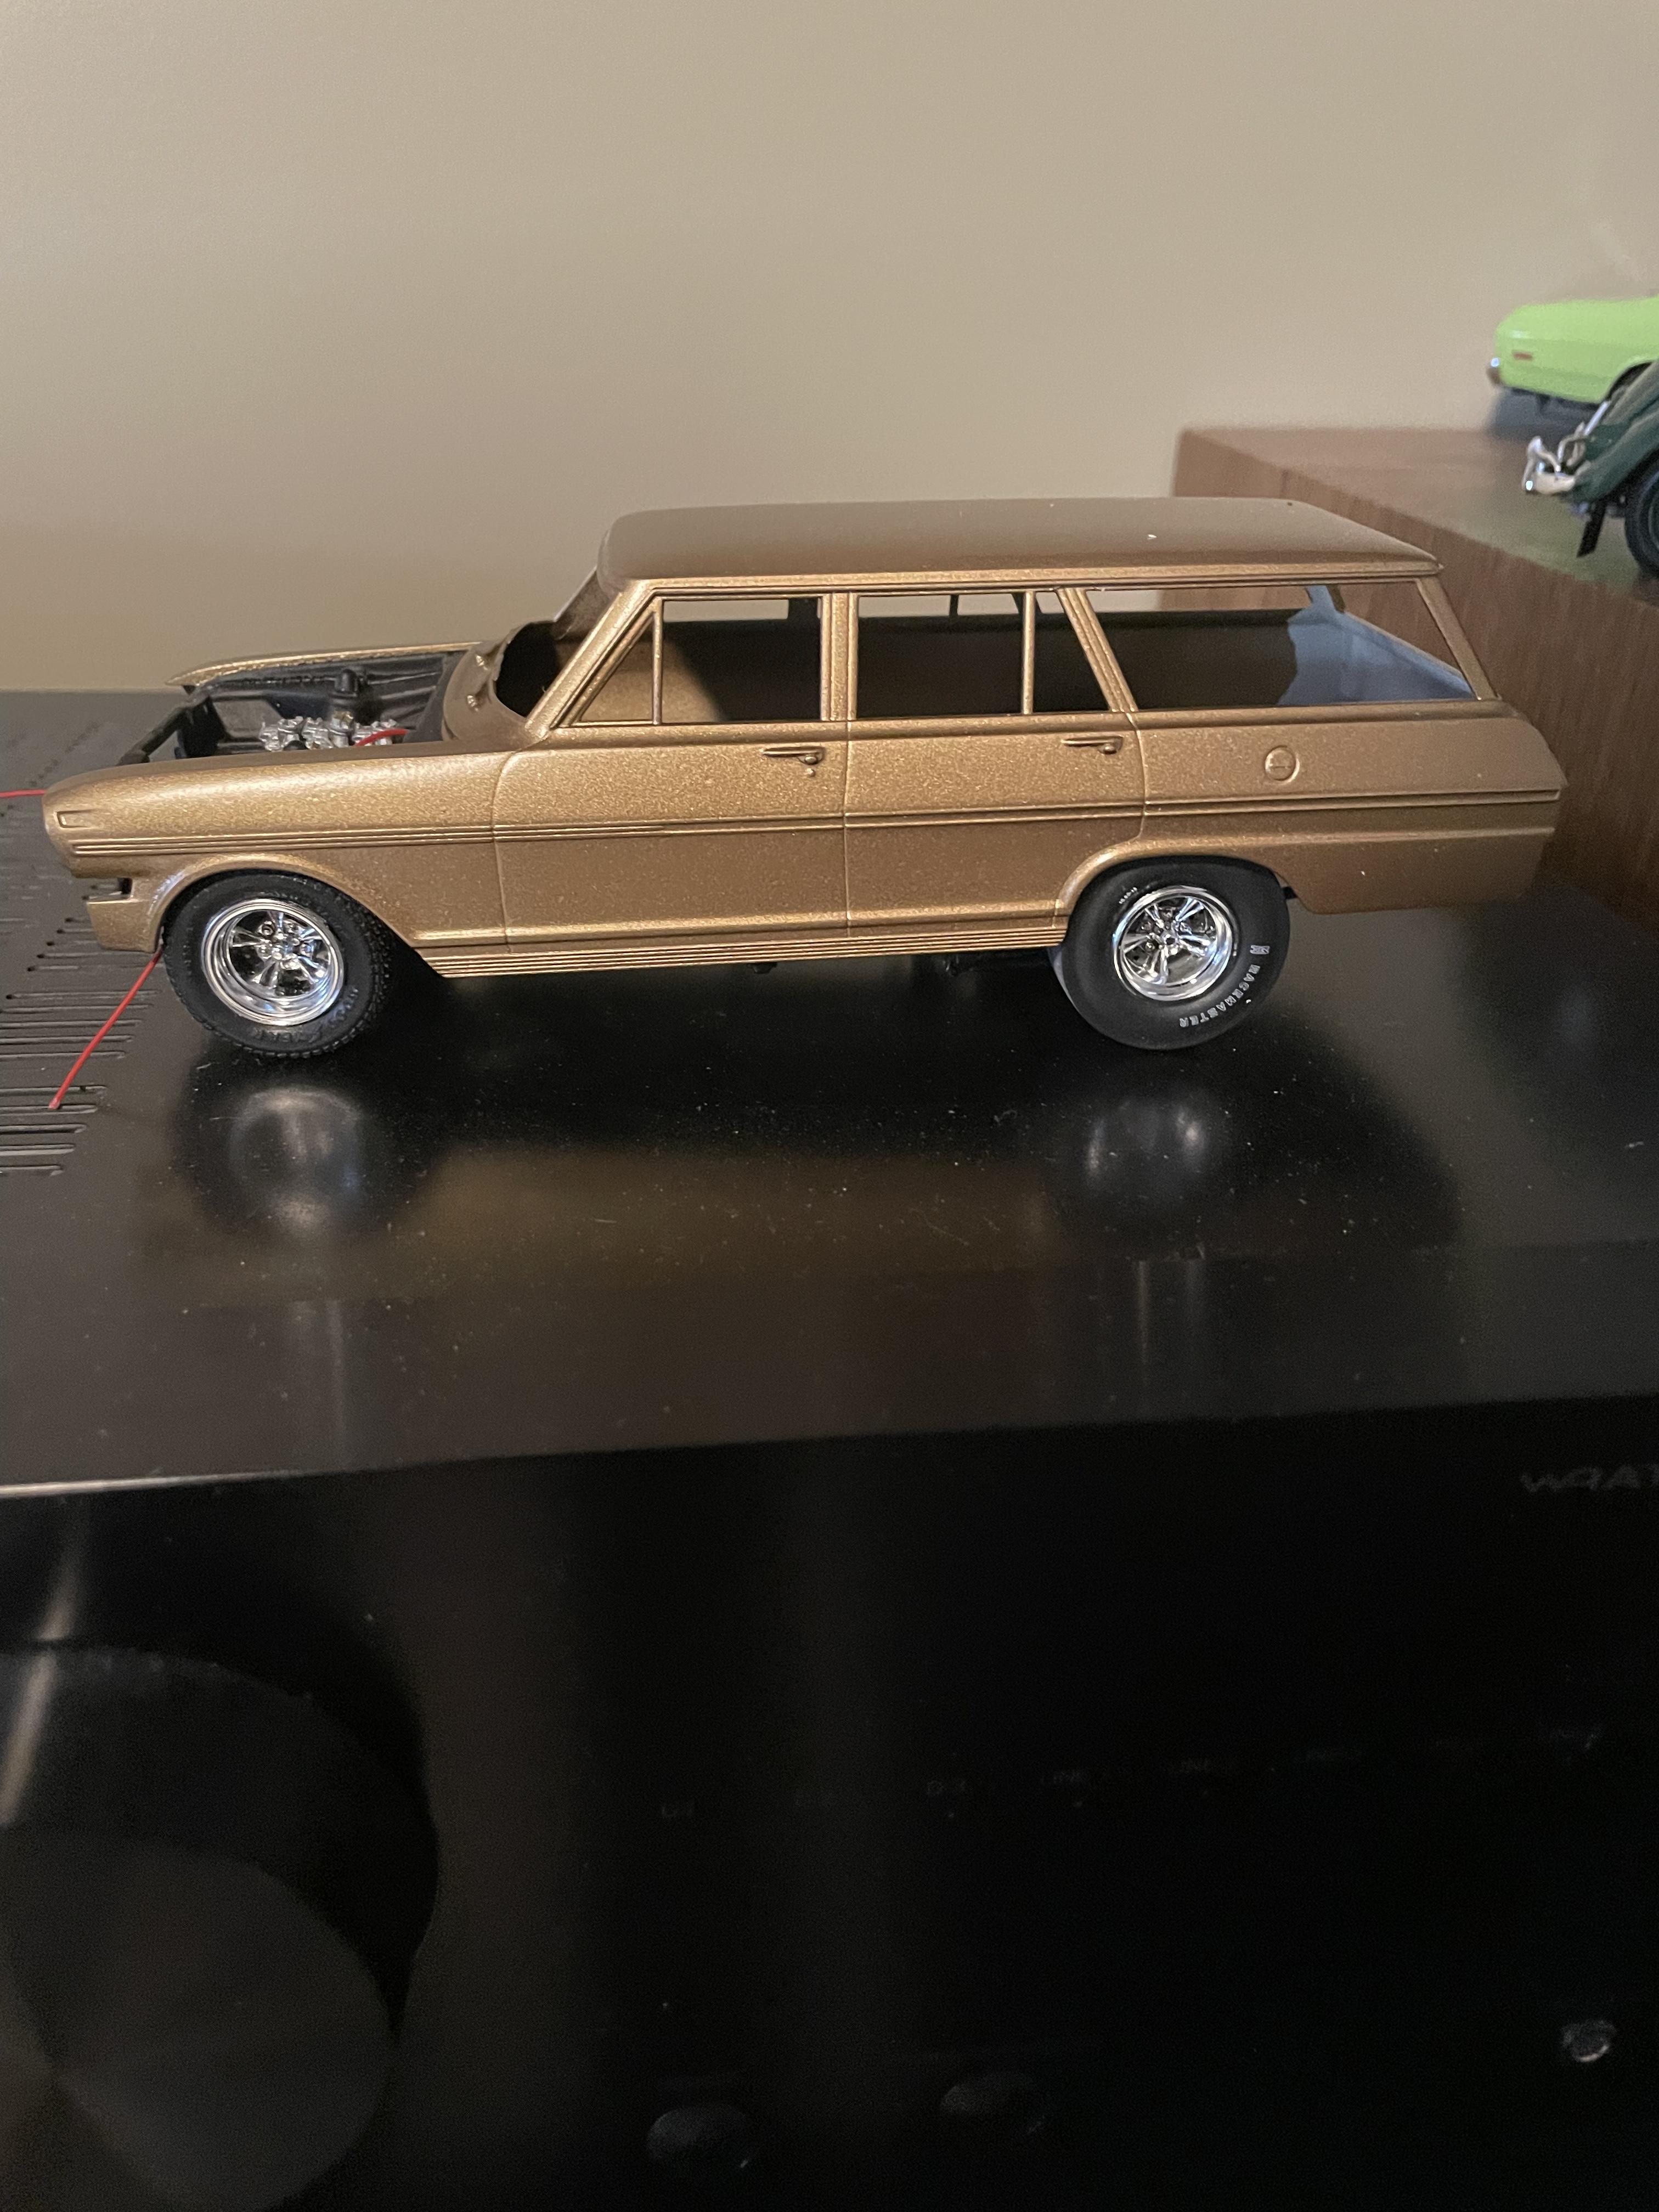
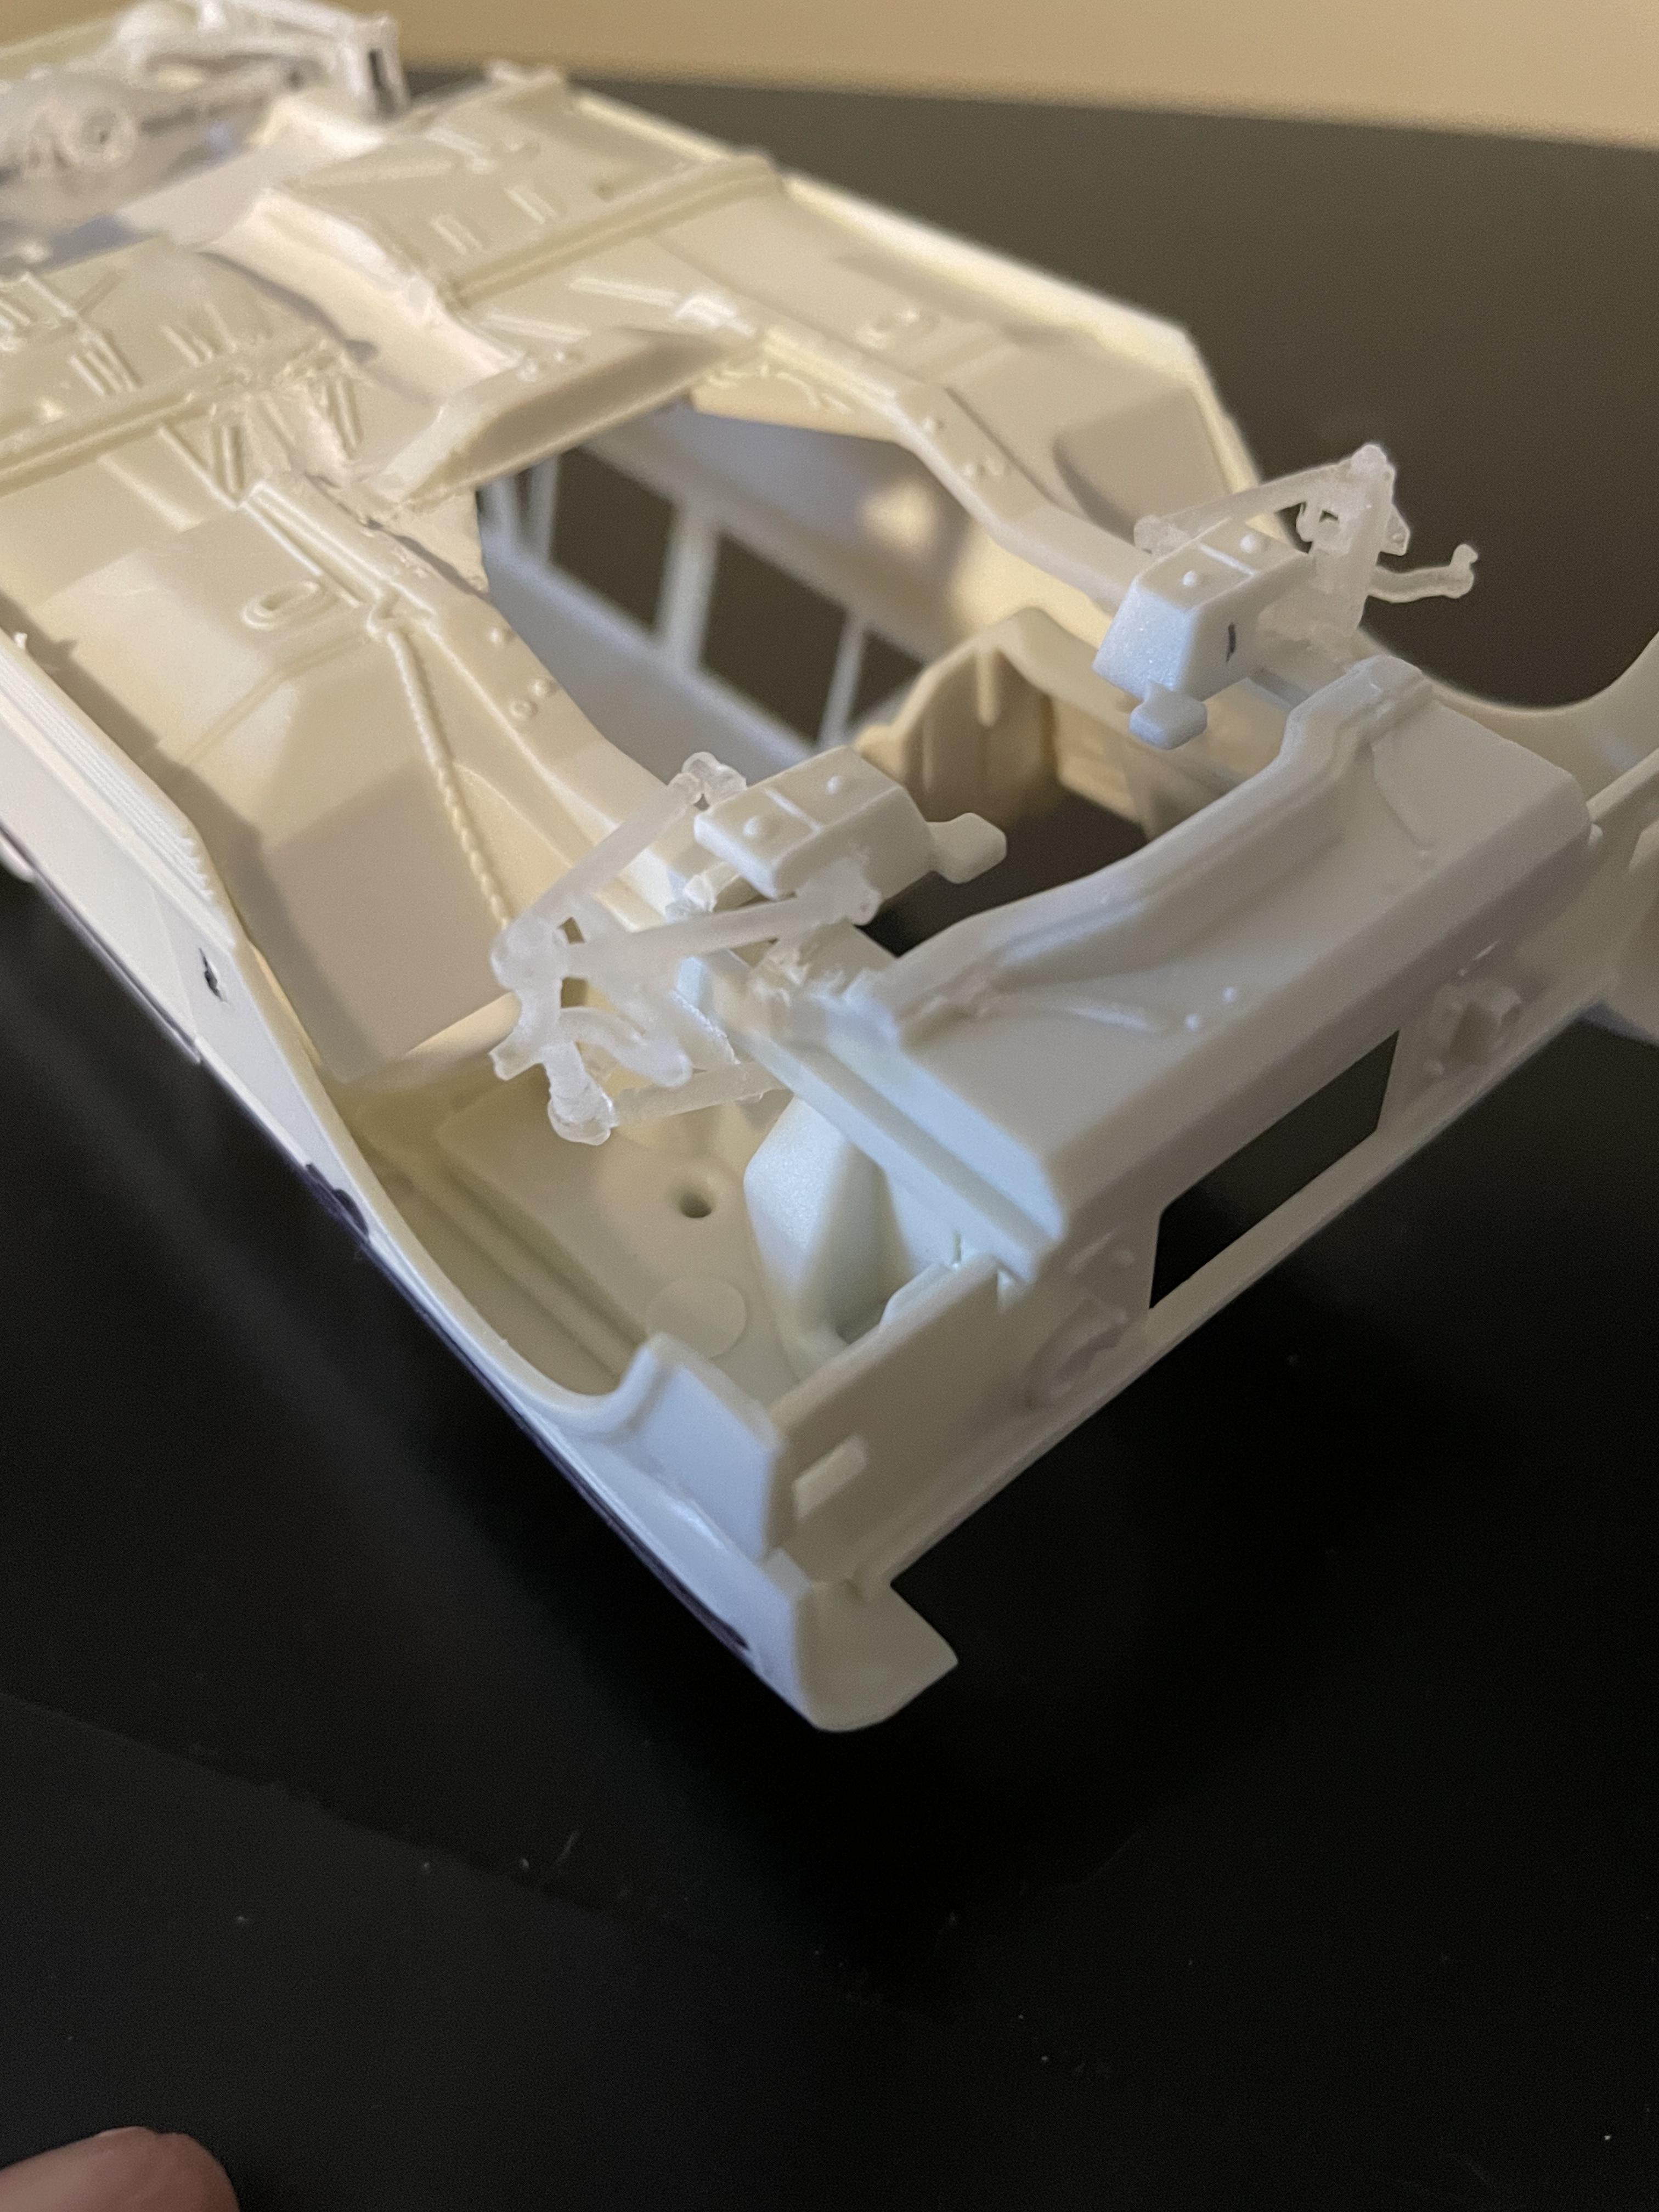
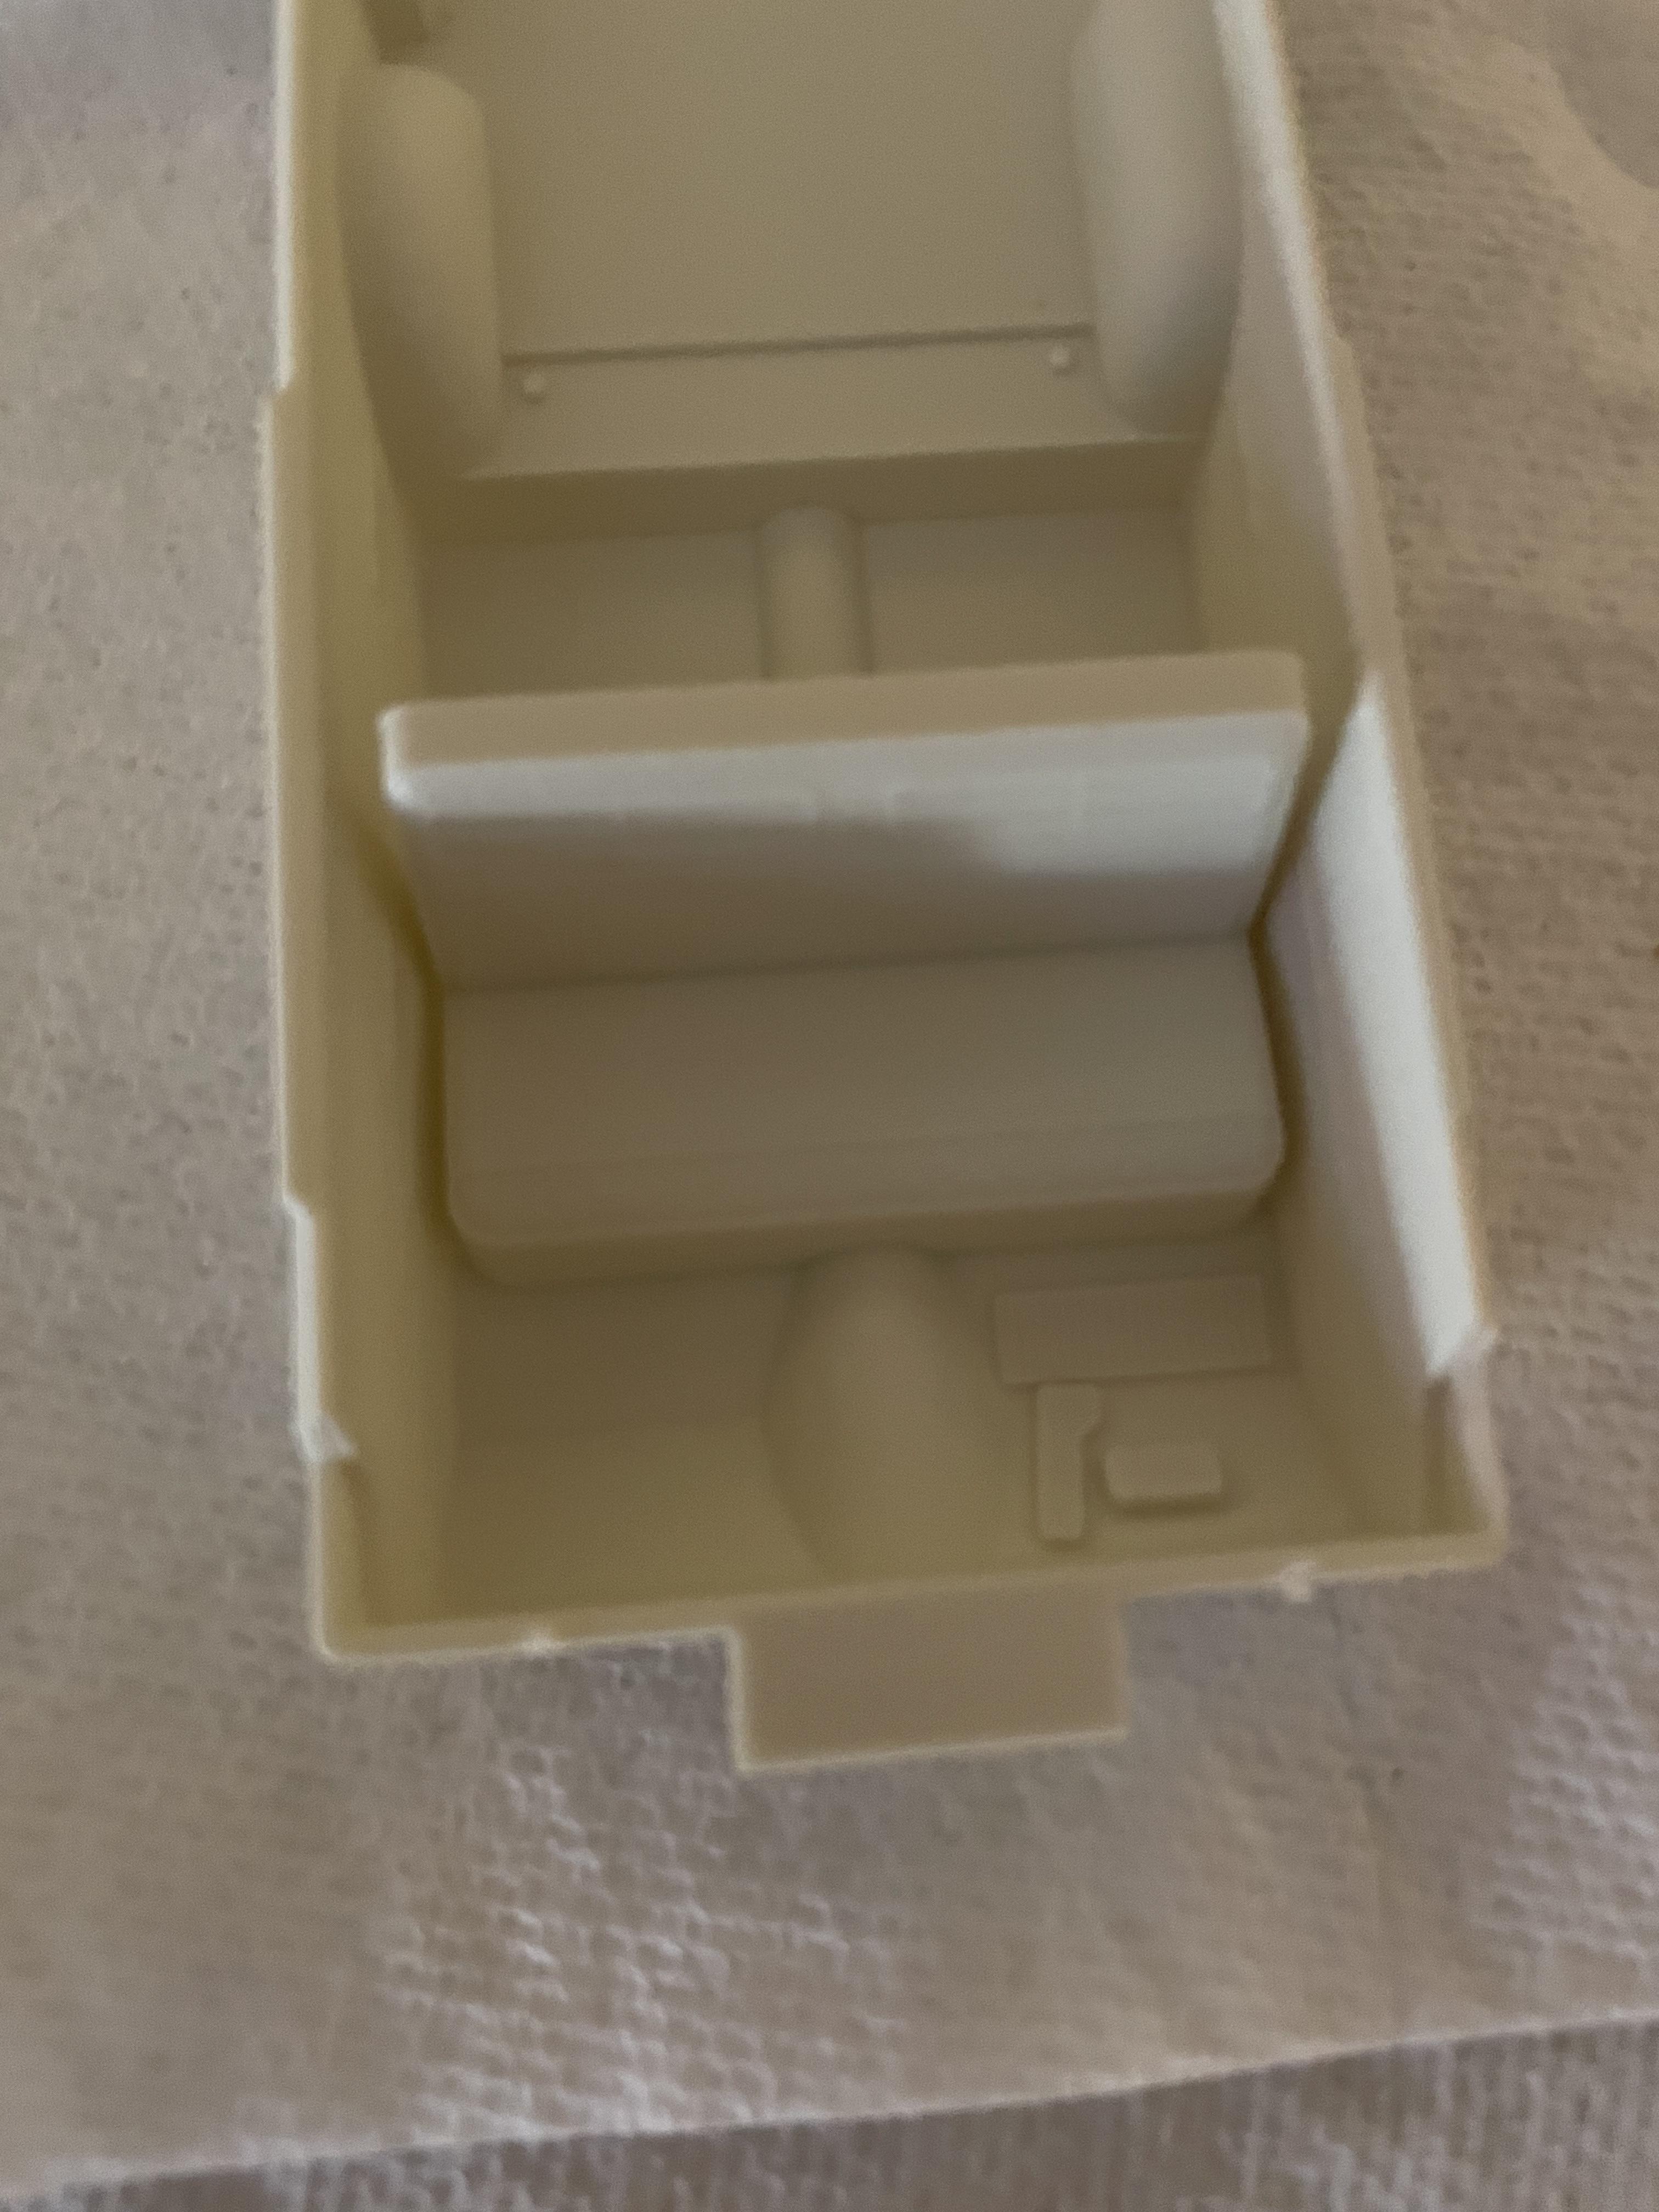
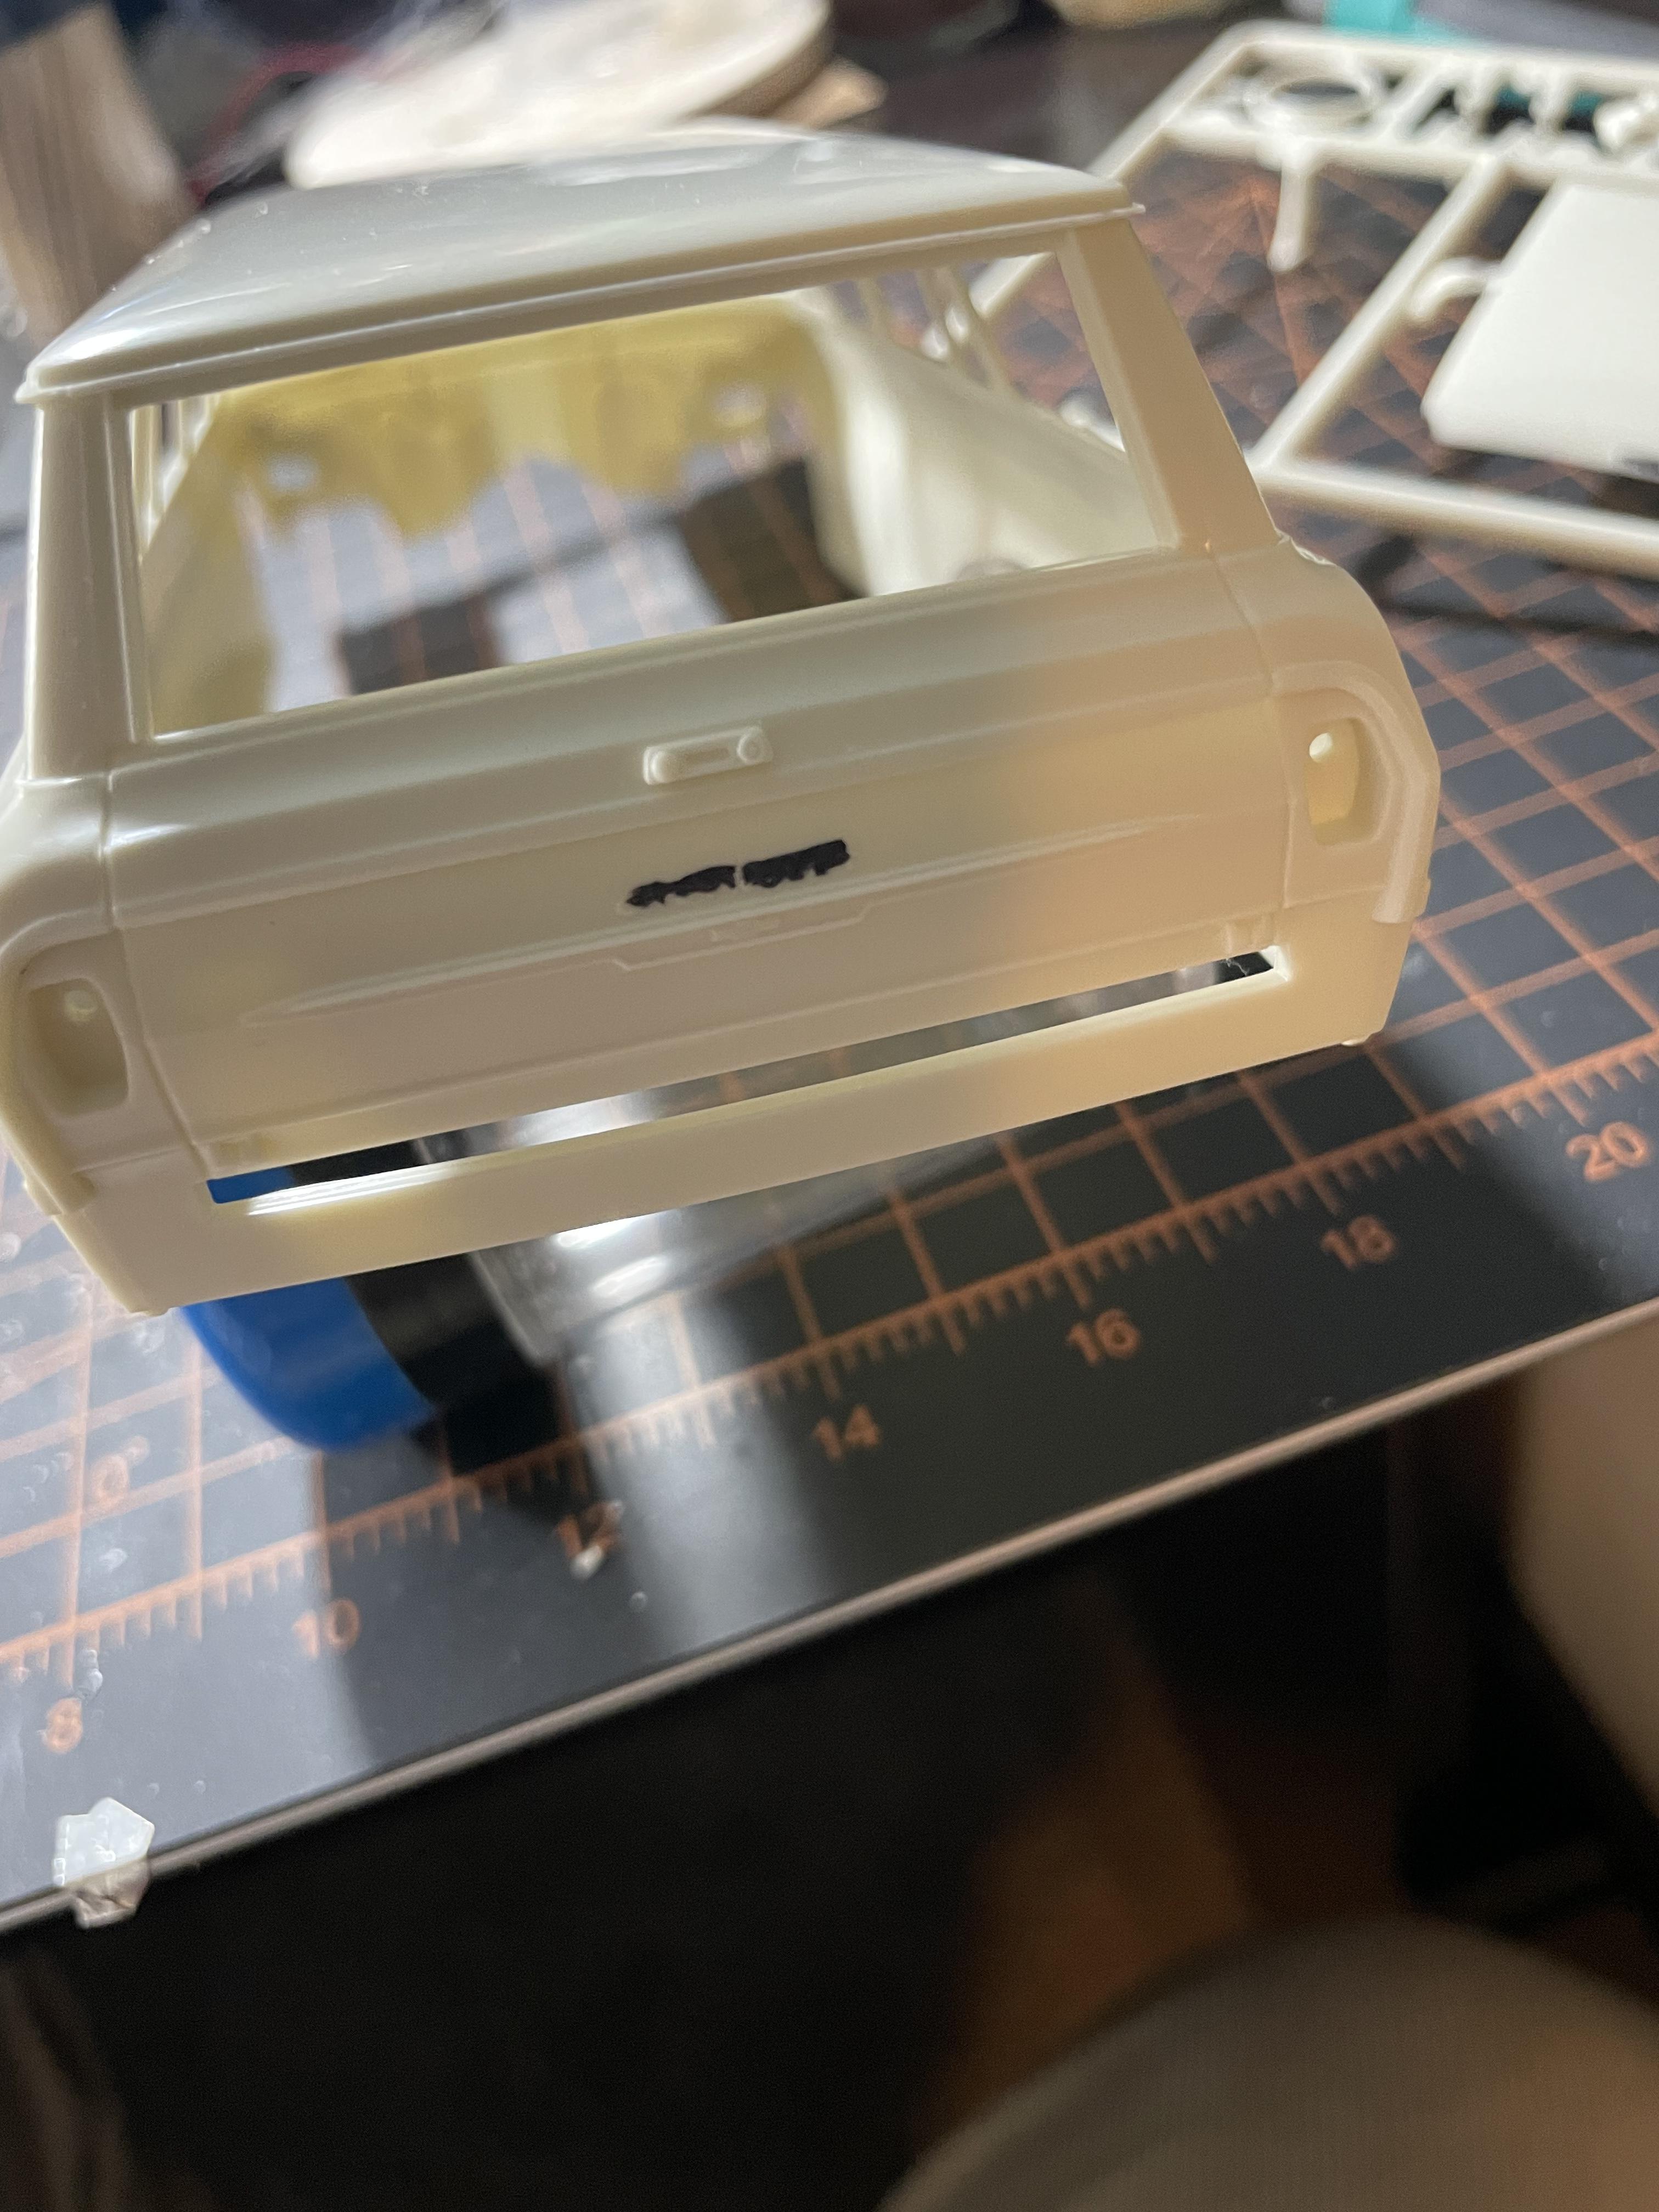
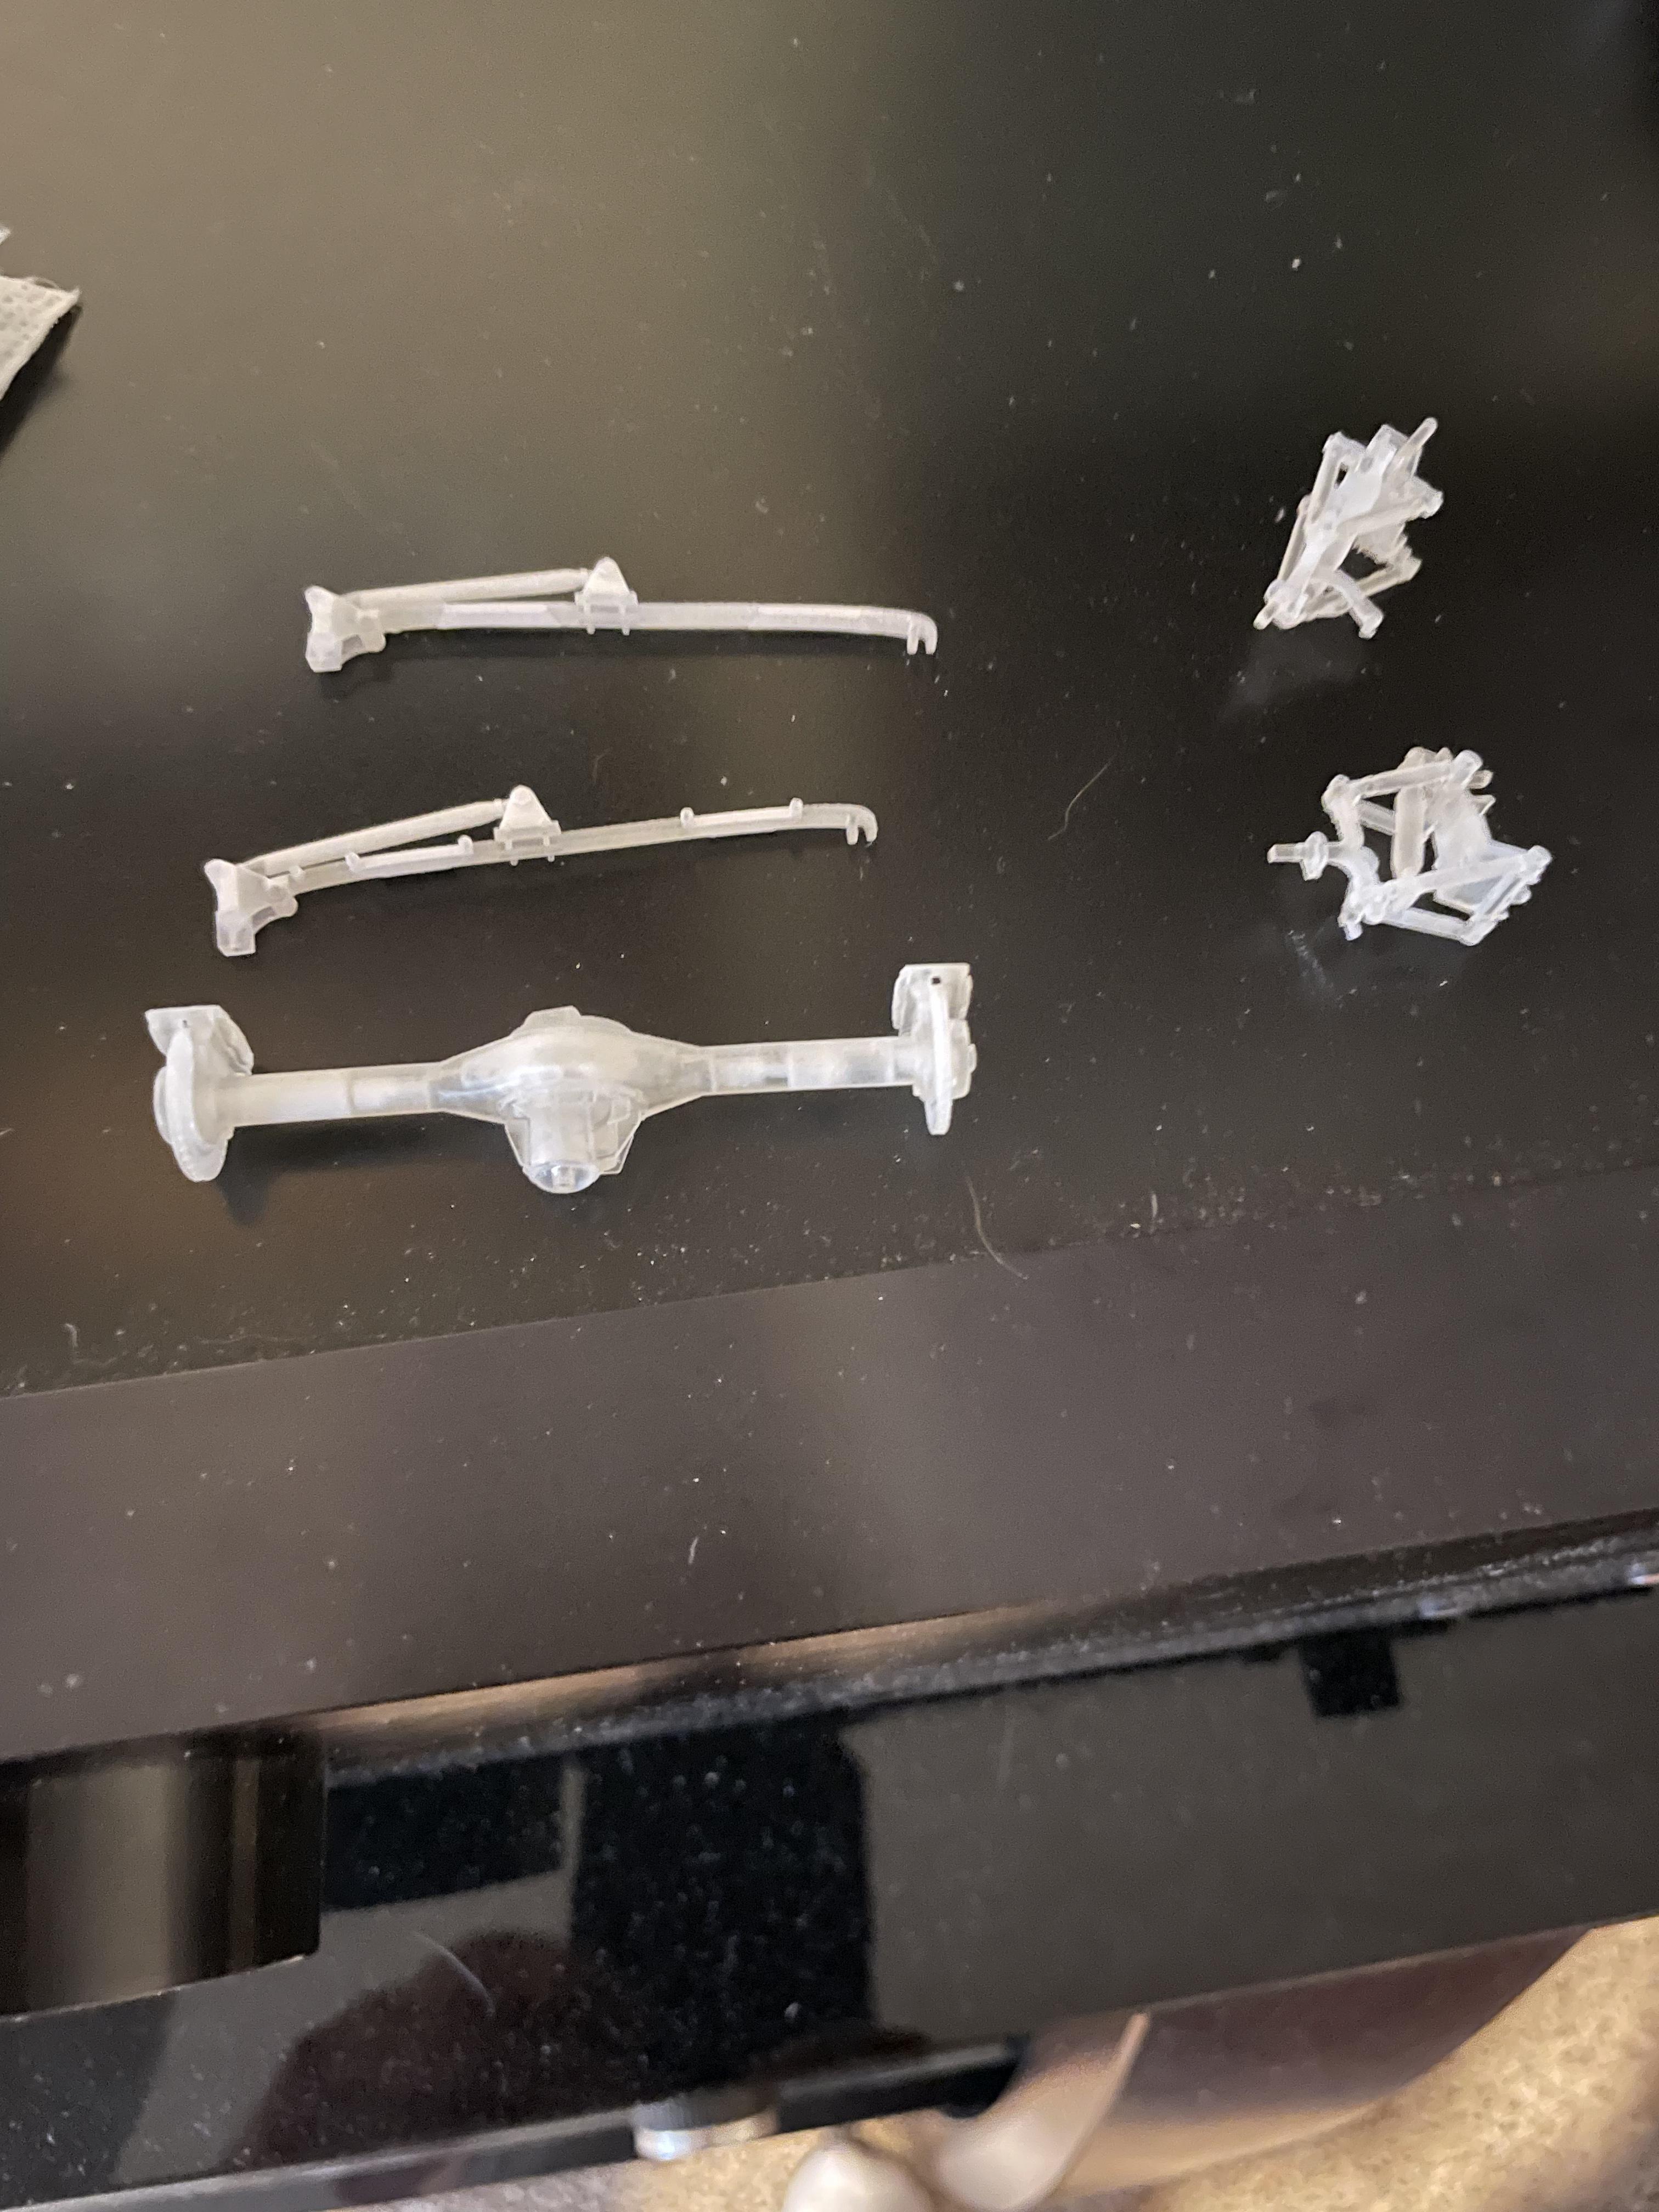
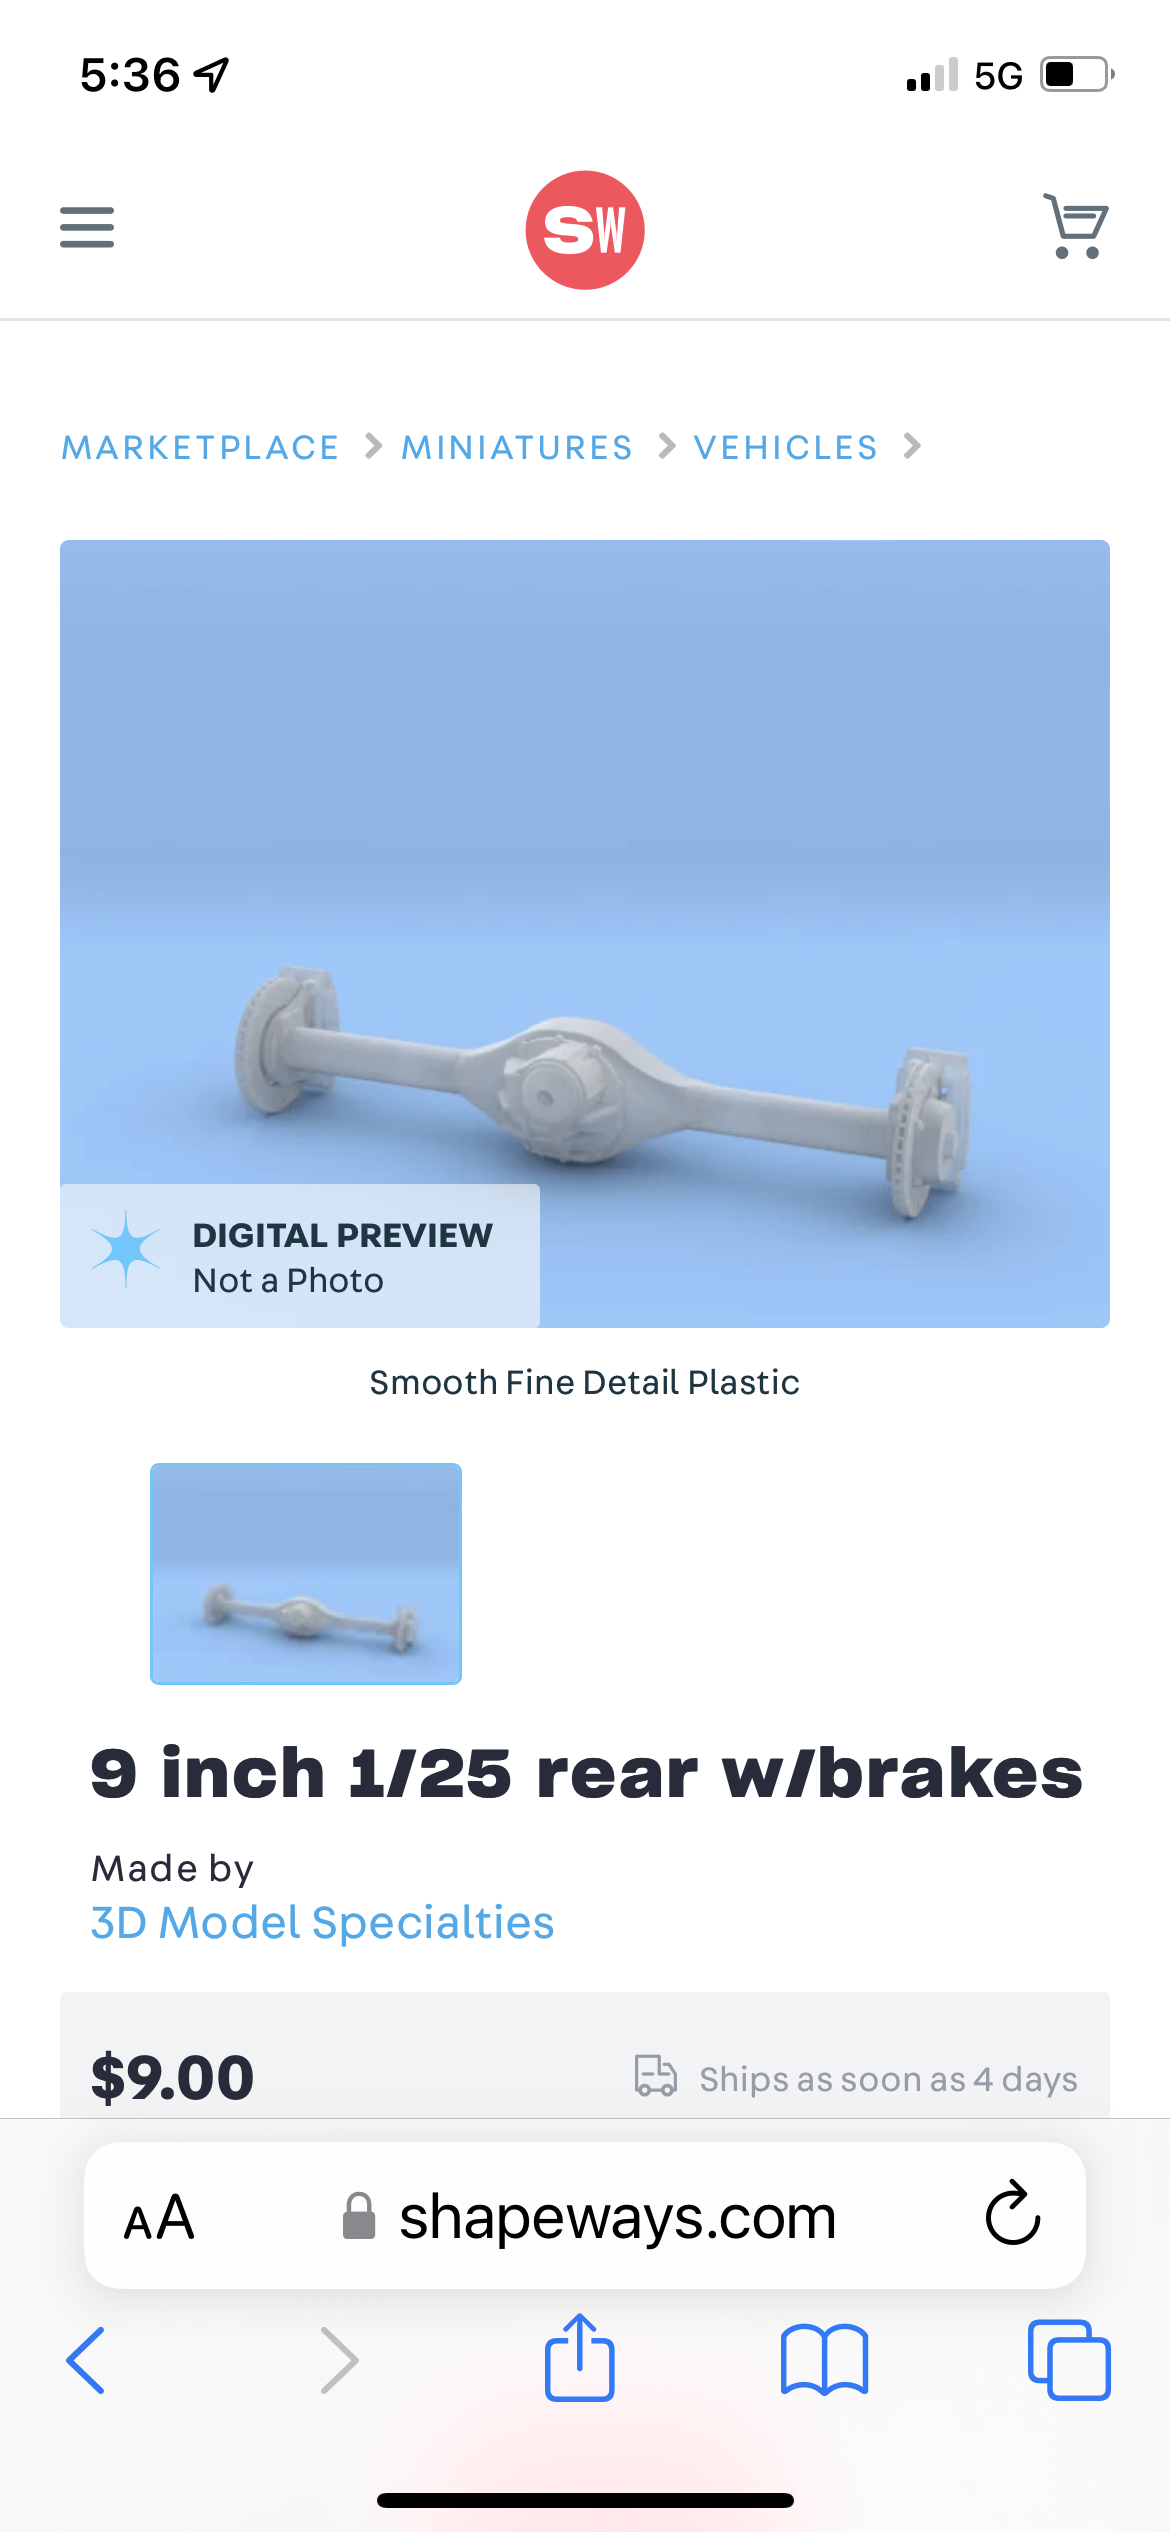
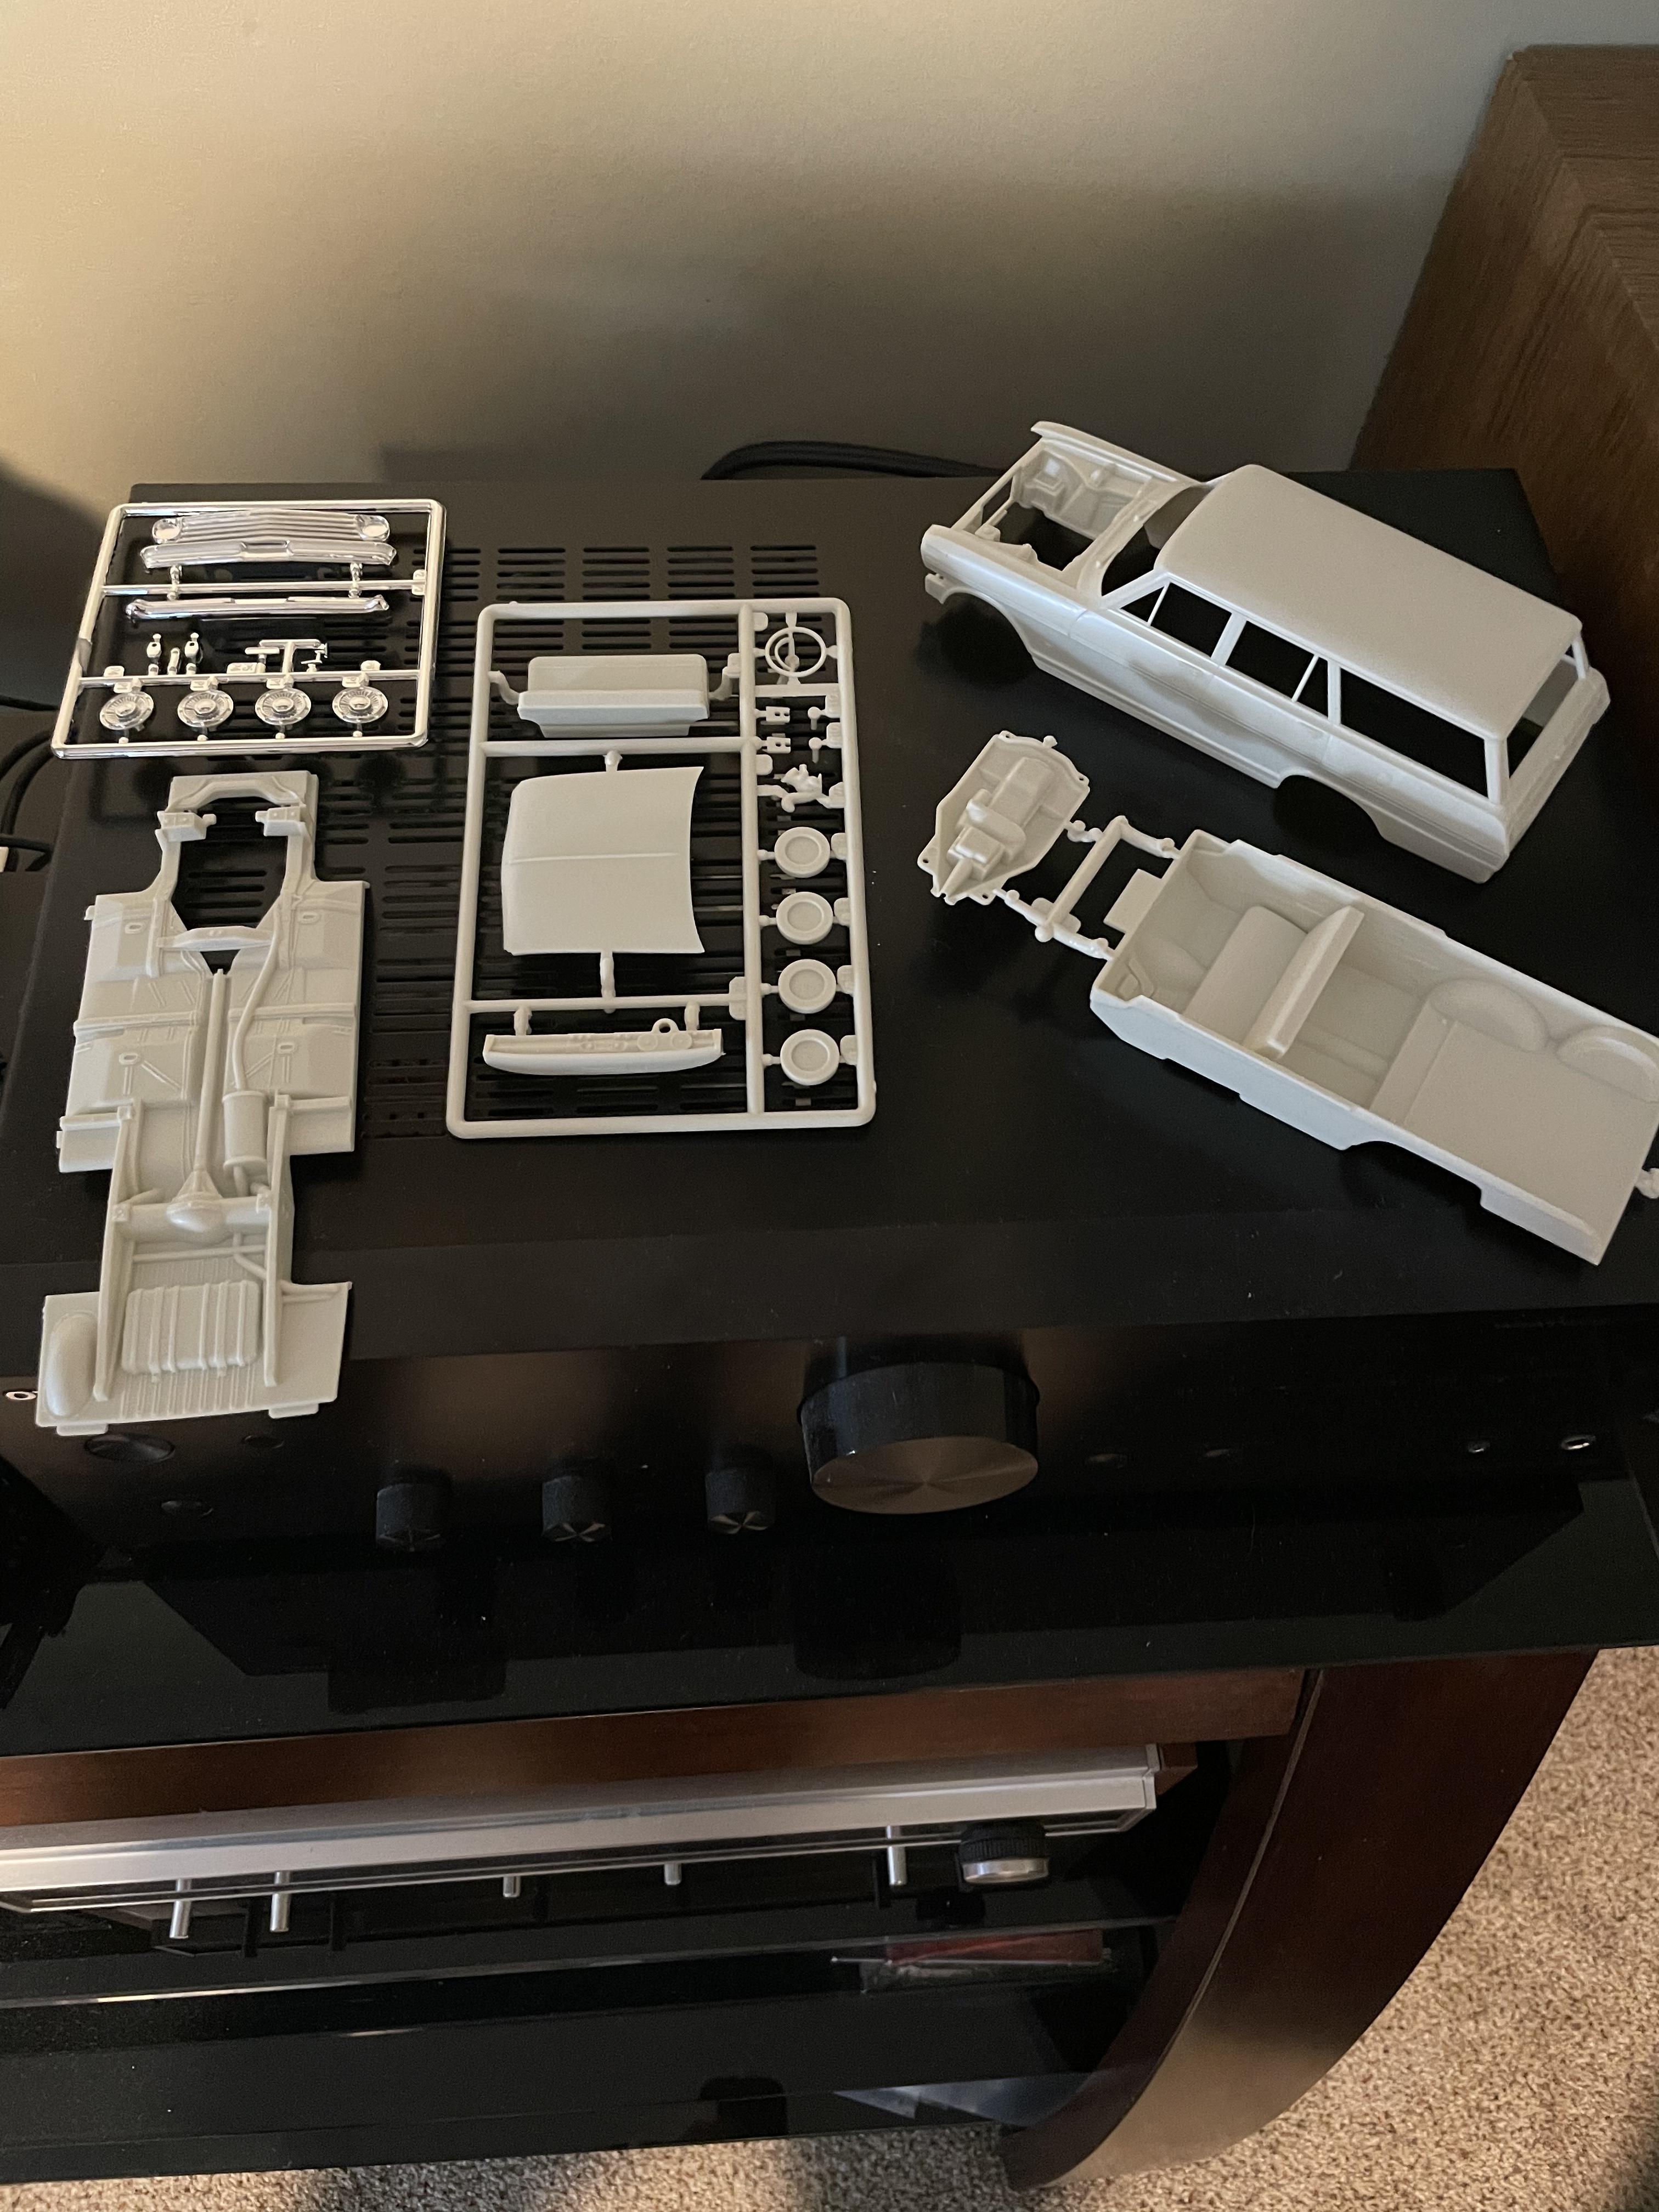
The interior is going to get cut apart, the door card moldings are horrendous and I am thinking of replacing the front bench seat or maybe trying to cut the center out and make a foldable center arm rest… I’ll have to see how a floor shifter fits in with the bench seat. The plan is to shave of the body trim and the Chevrolet lettering front and back, the molding for the lettering leaves a bit to be desired. Got my goodies from Shapeways and am very impressed with the detail. I’m going to have to narrow the rear end some and fit the front upper and lower a arms. This one’s gonna be fun. Dave.
-
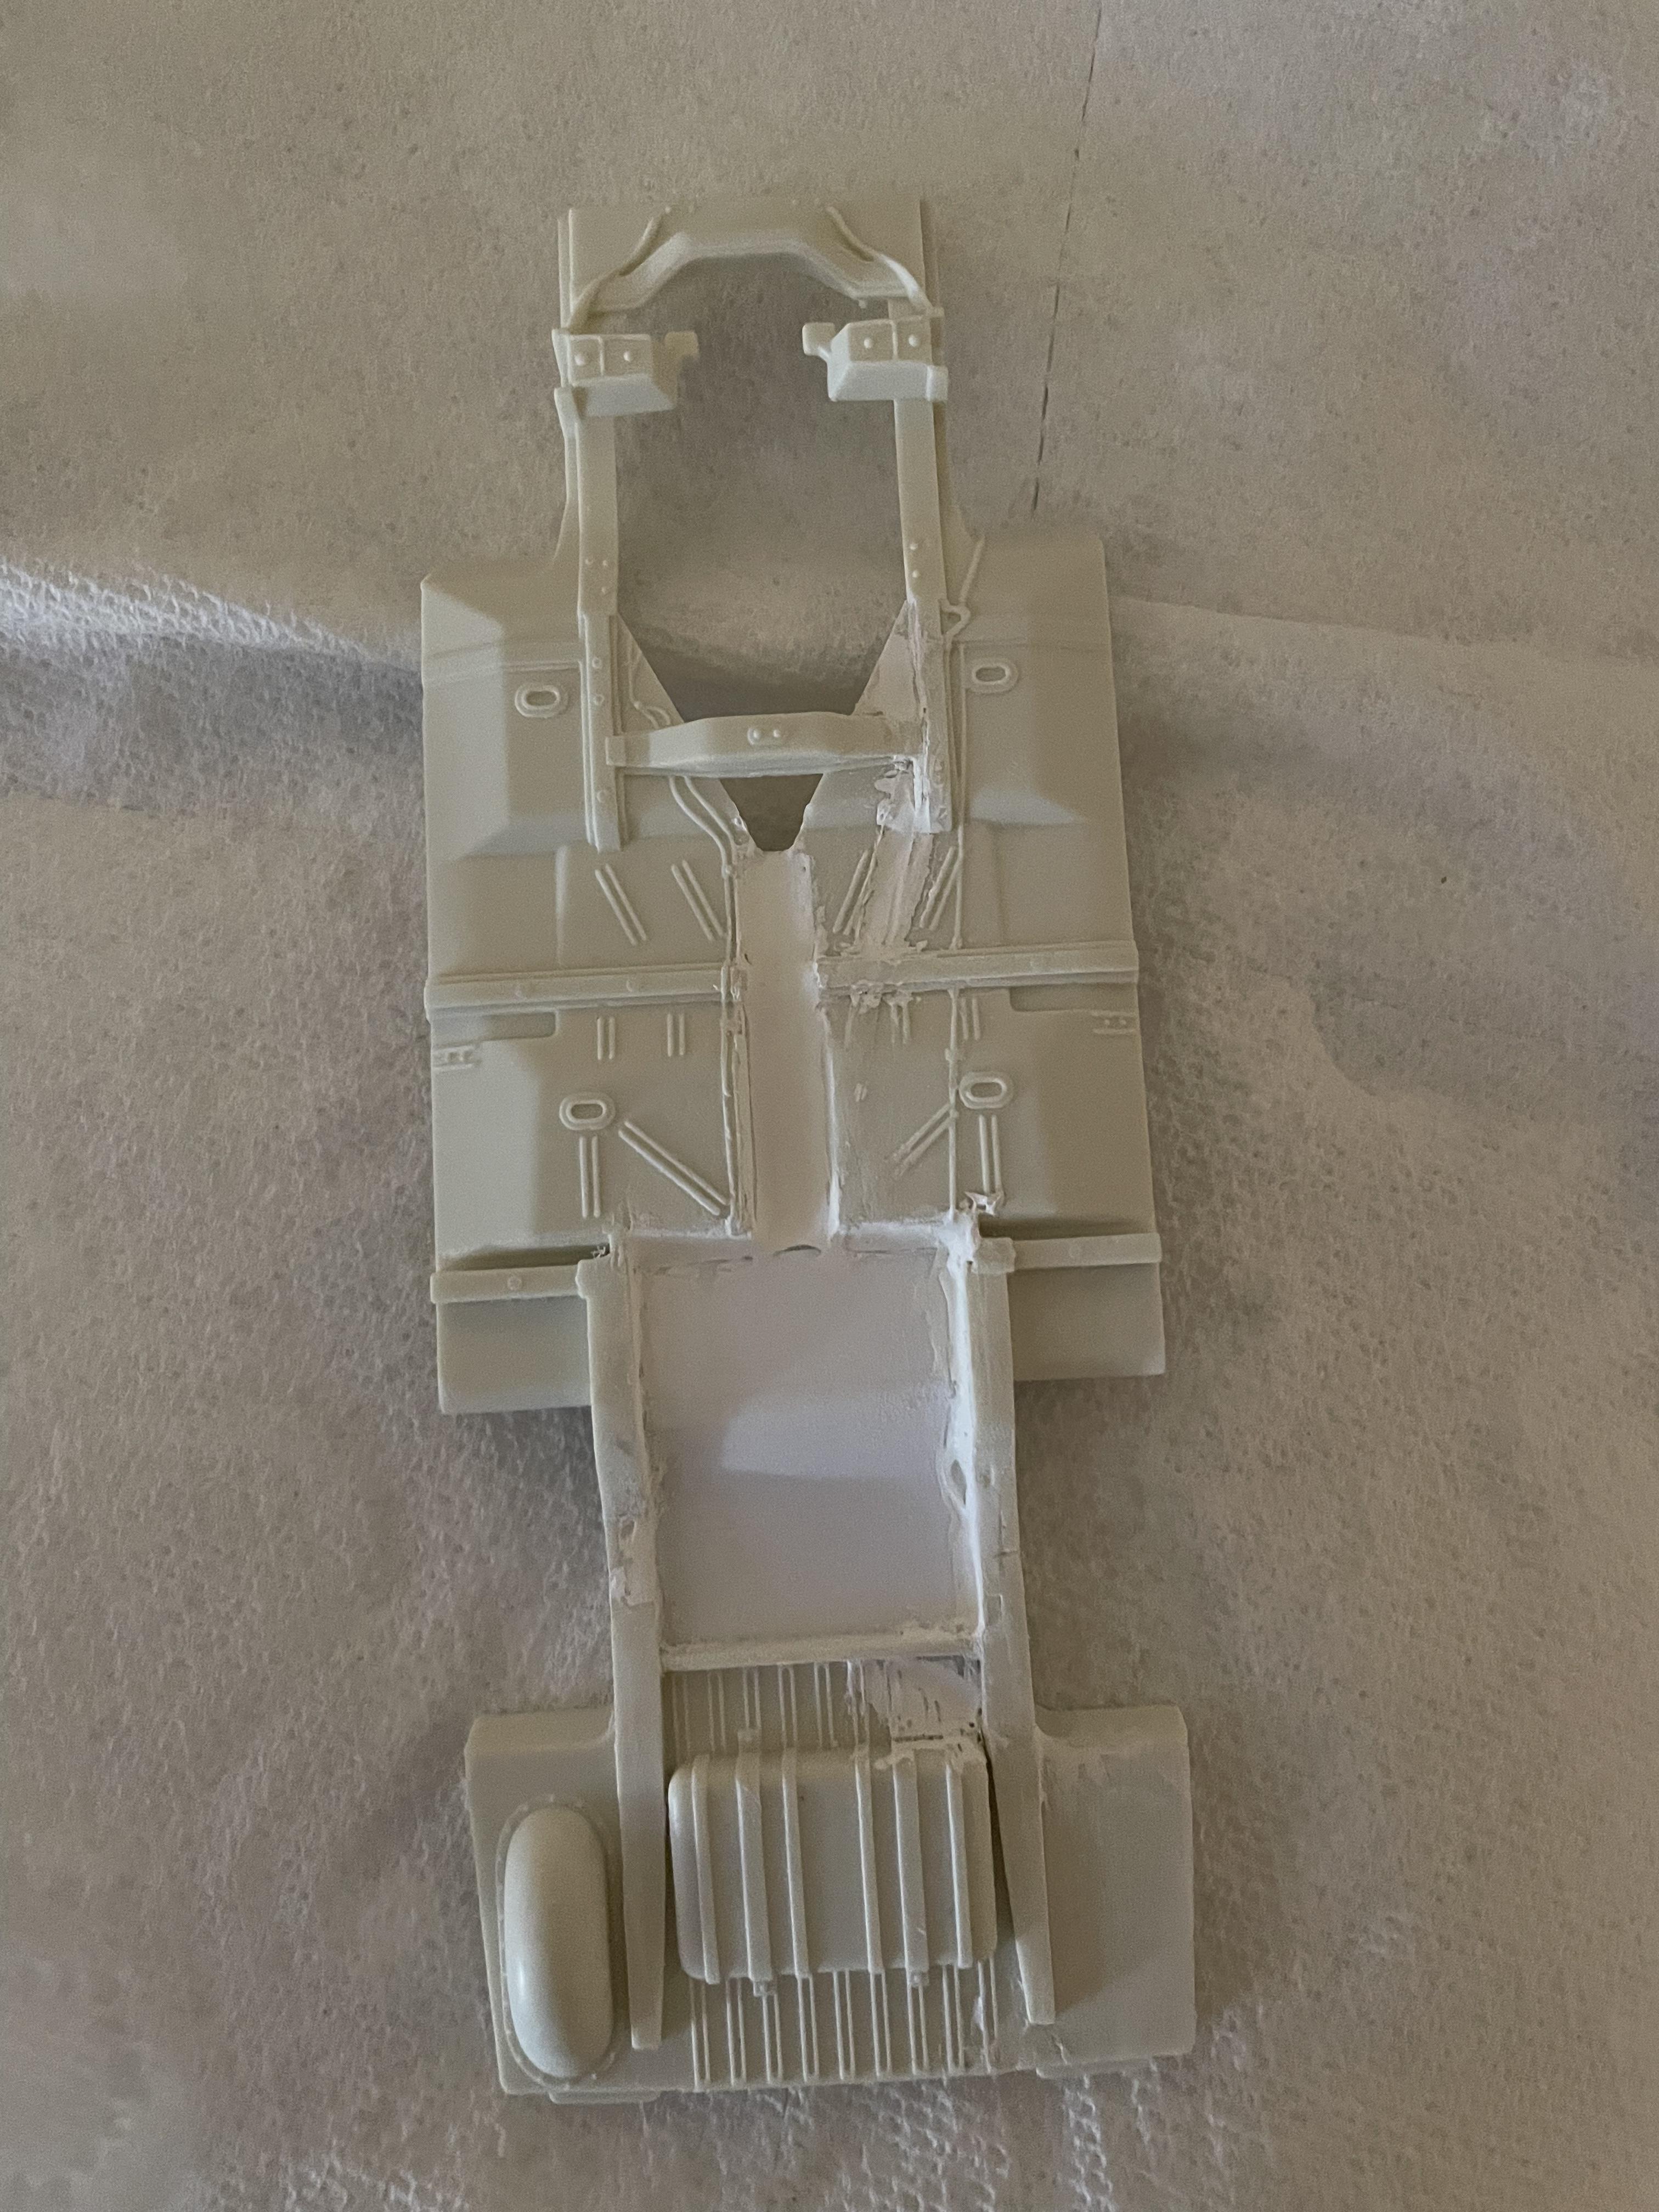
Started with cutting out the molded in reset end and exhaust. Have the chassis roughed in and ordered some suspension parts from Shapeways.
-
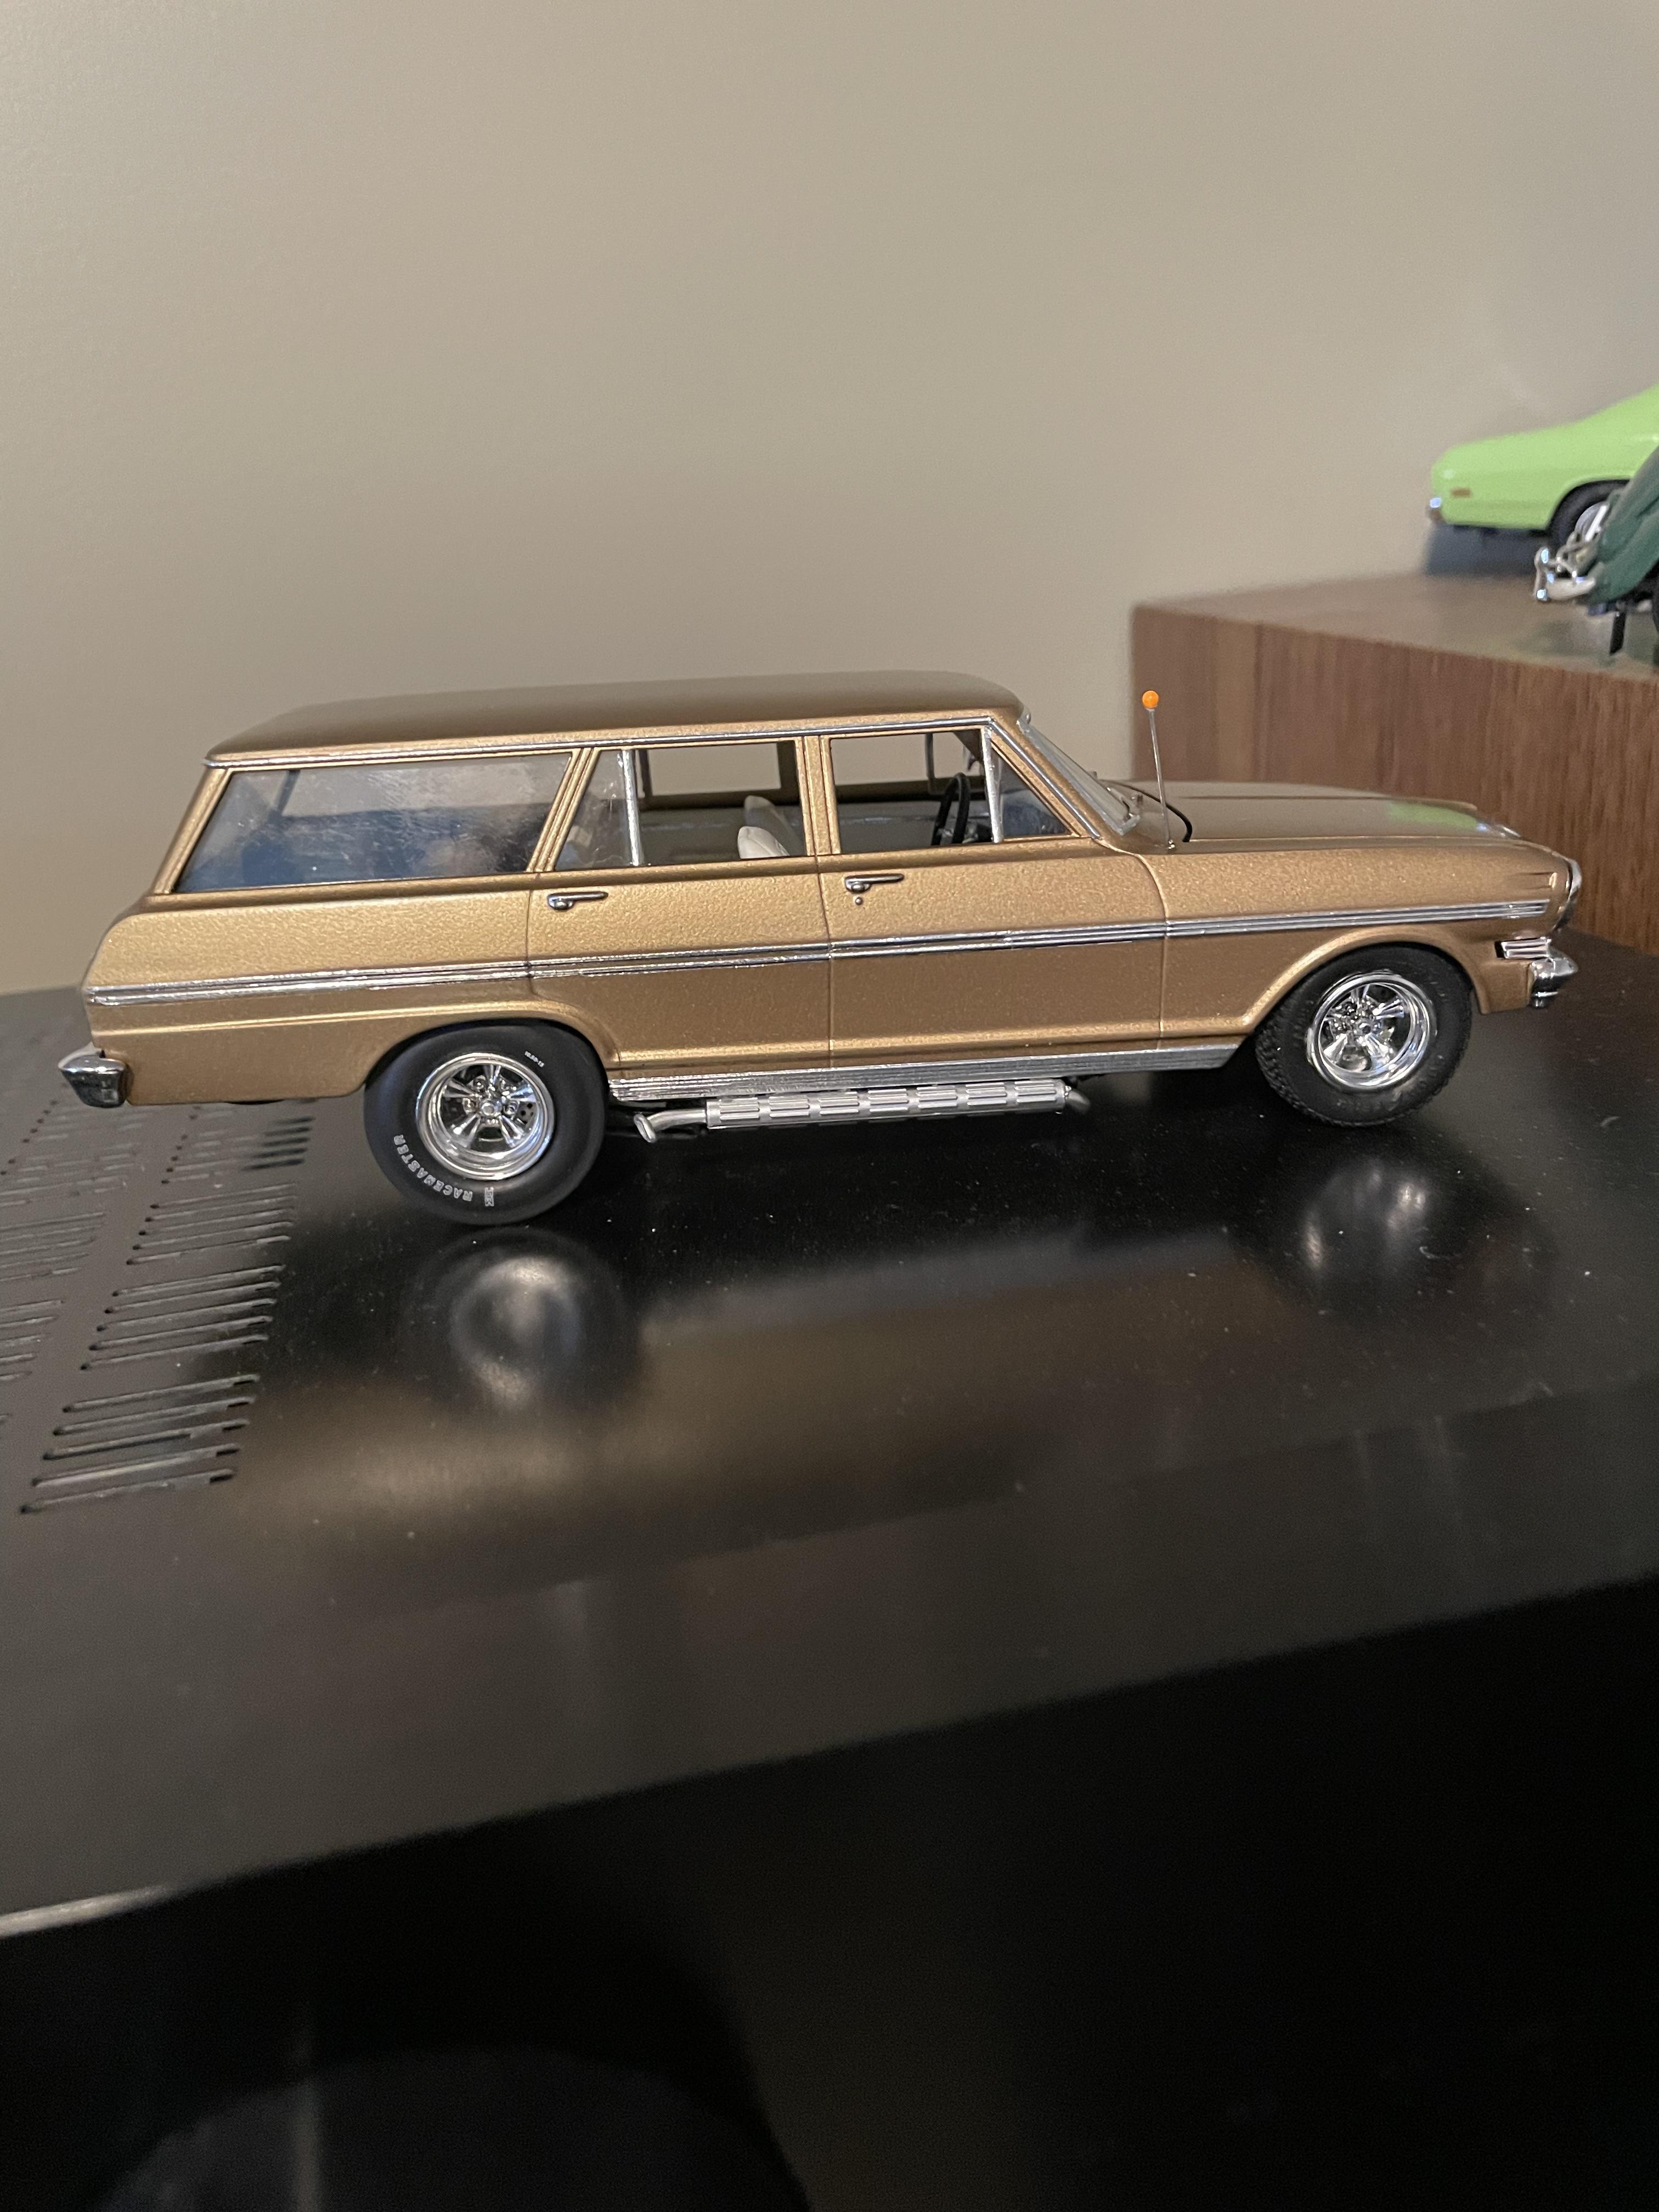
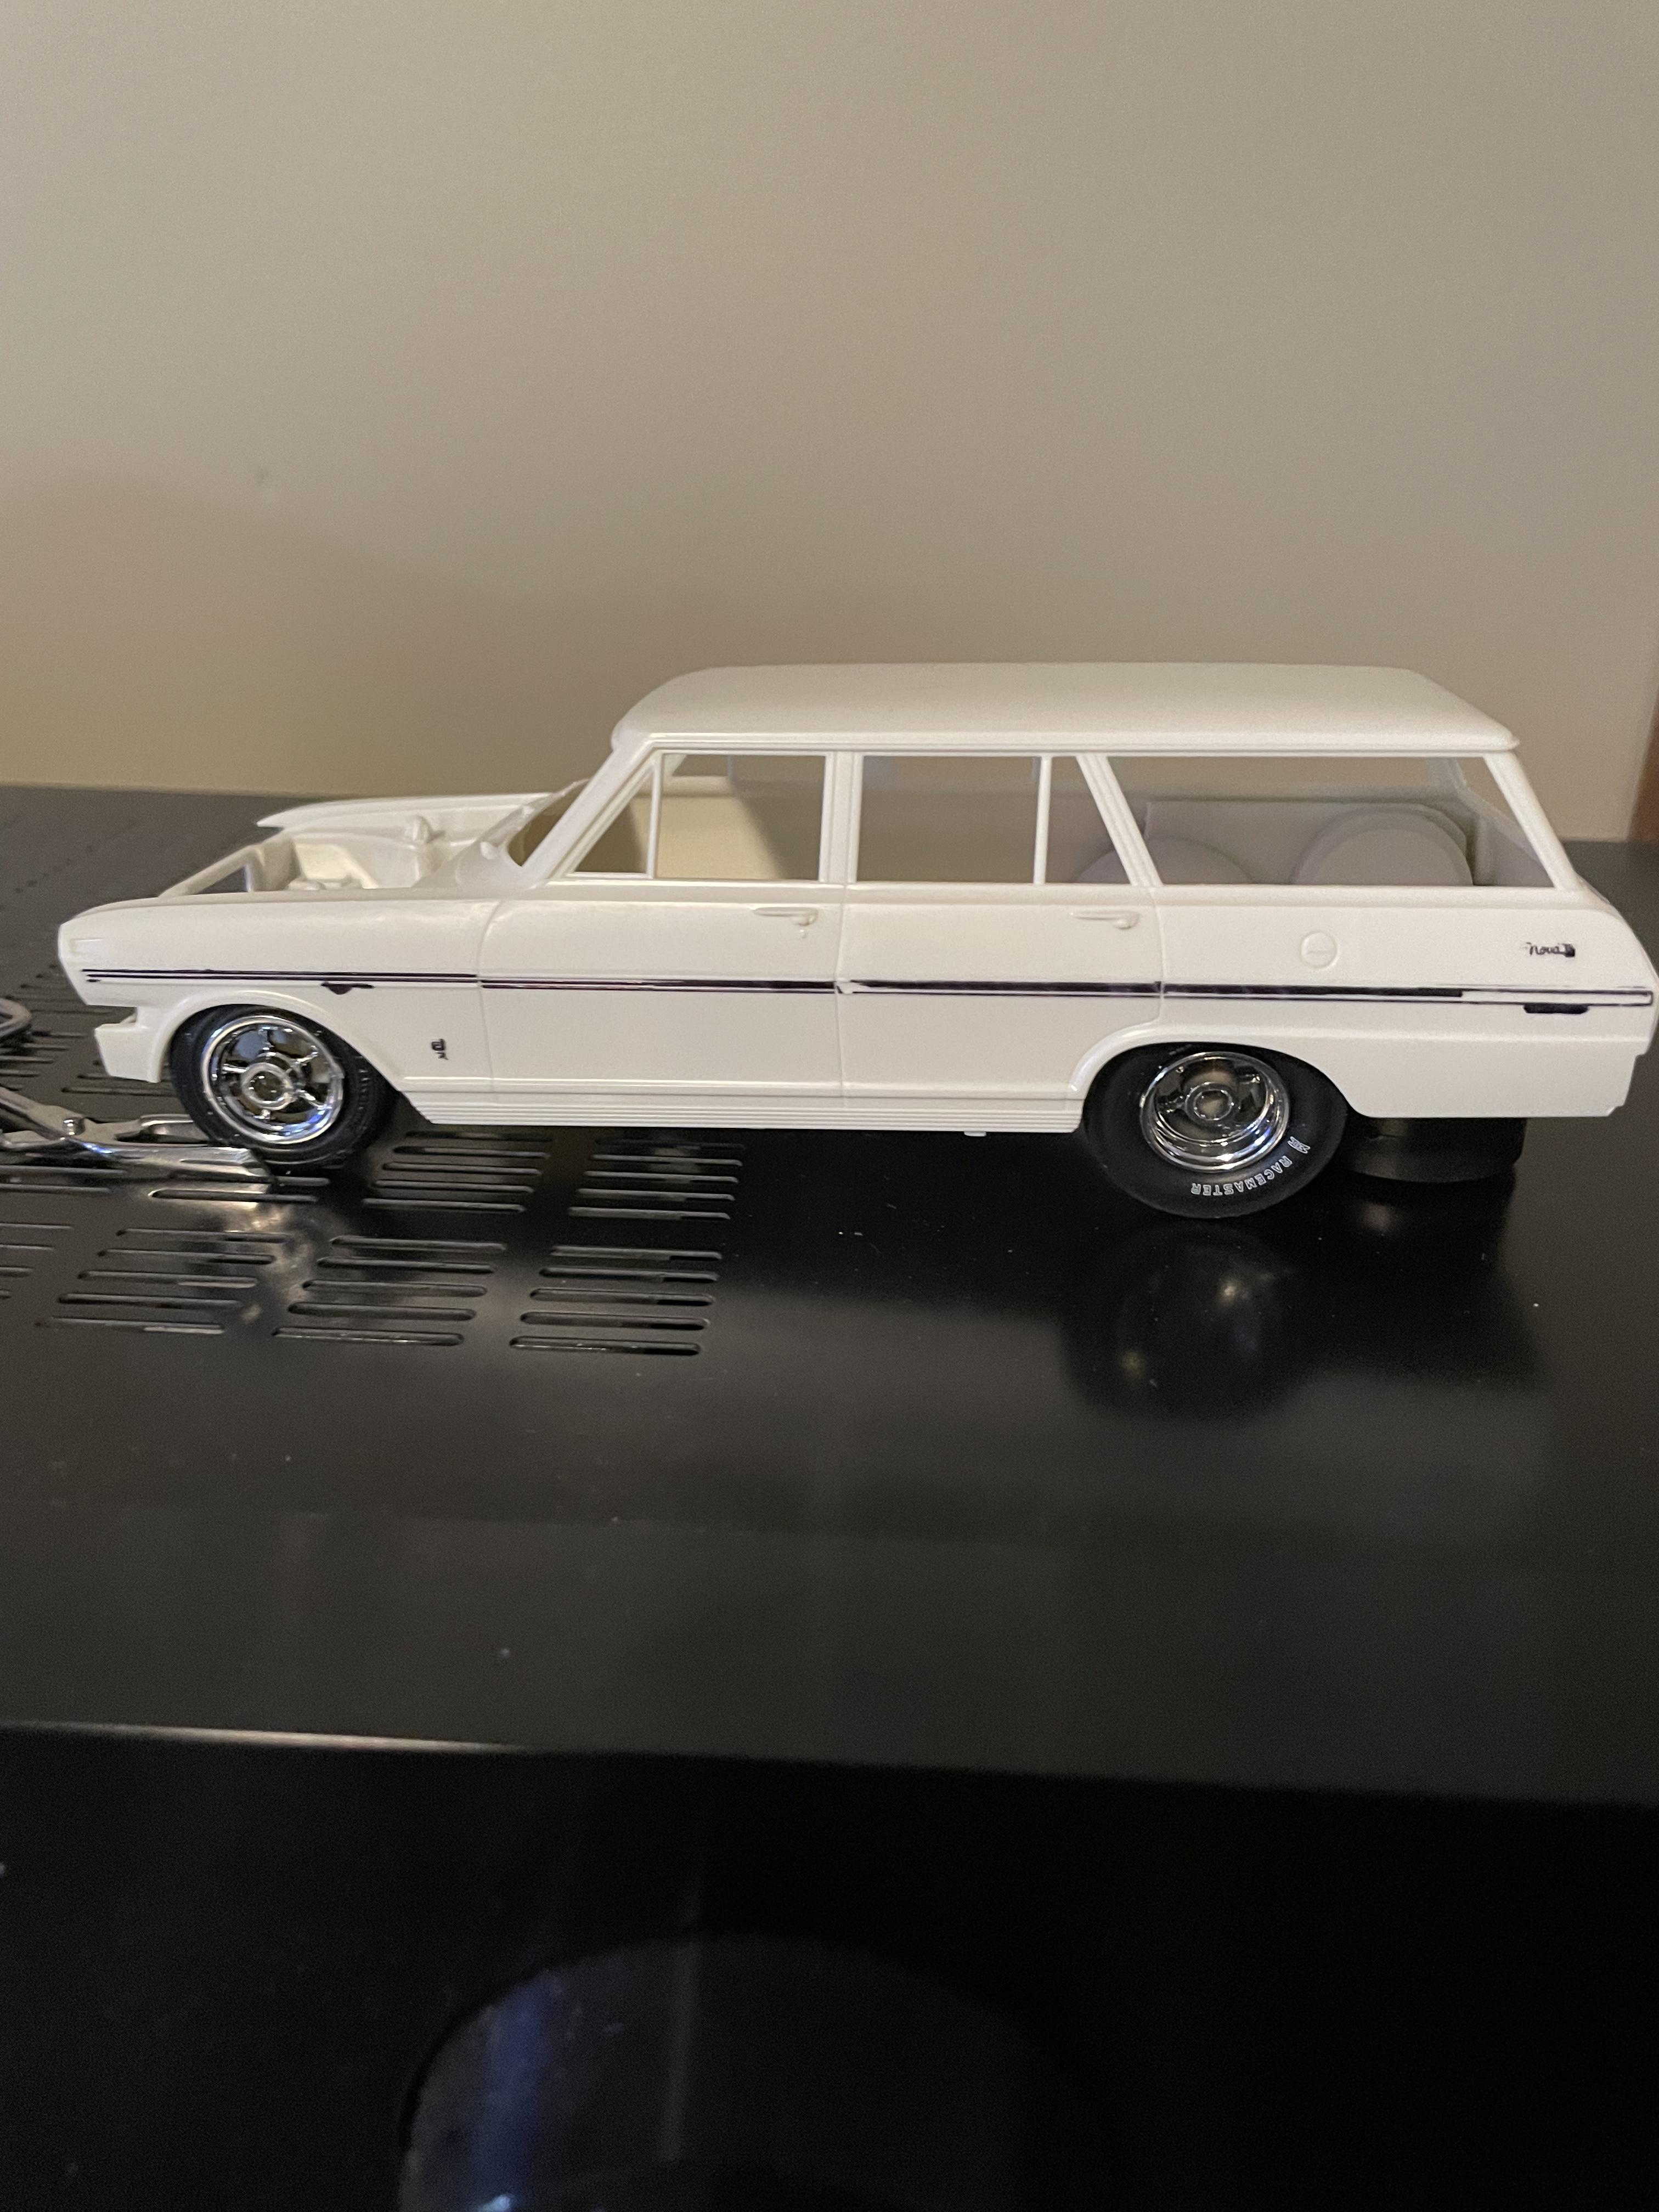
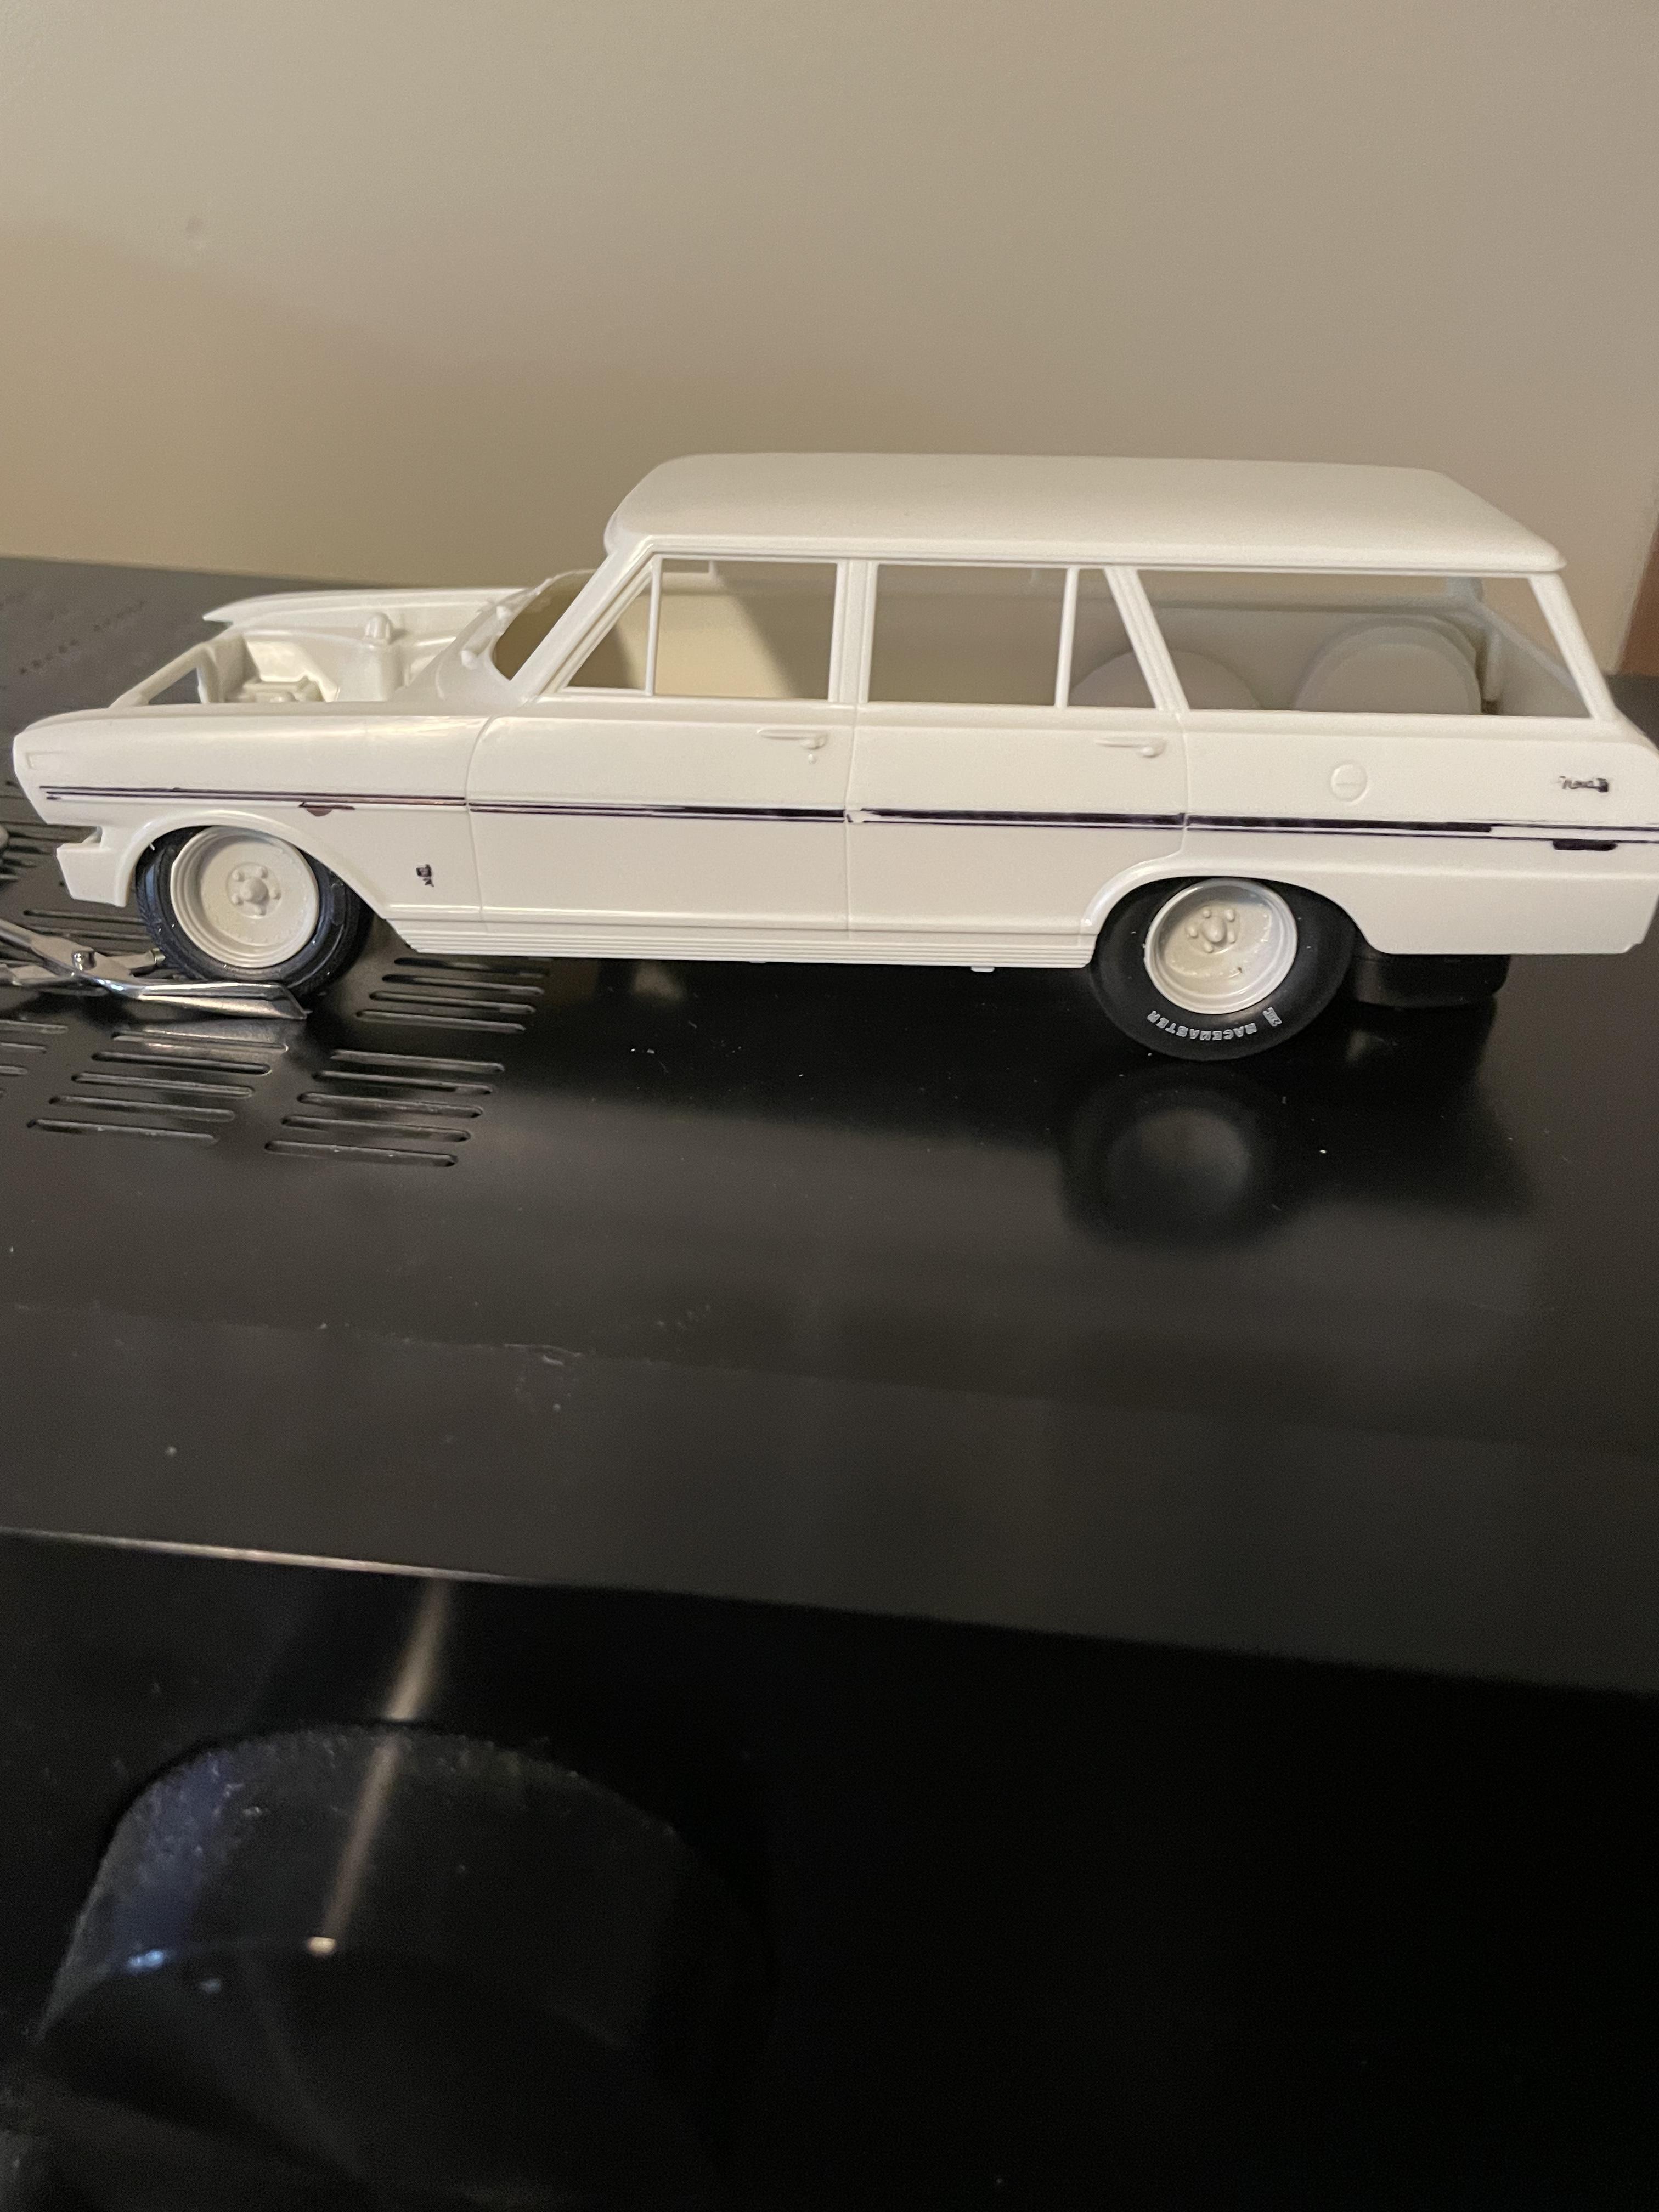
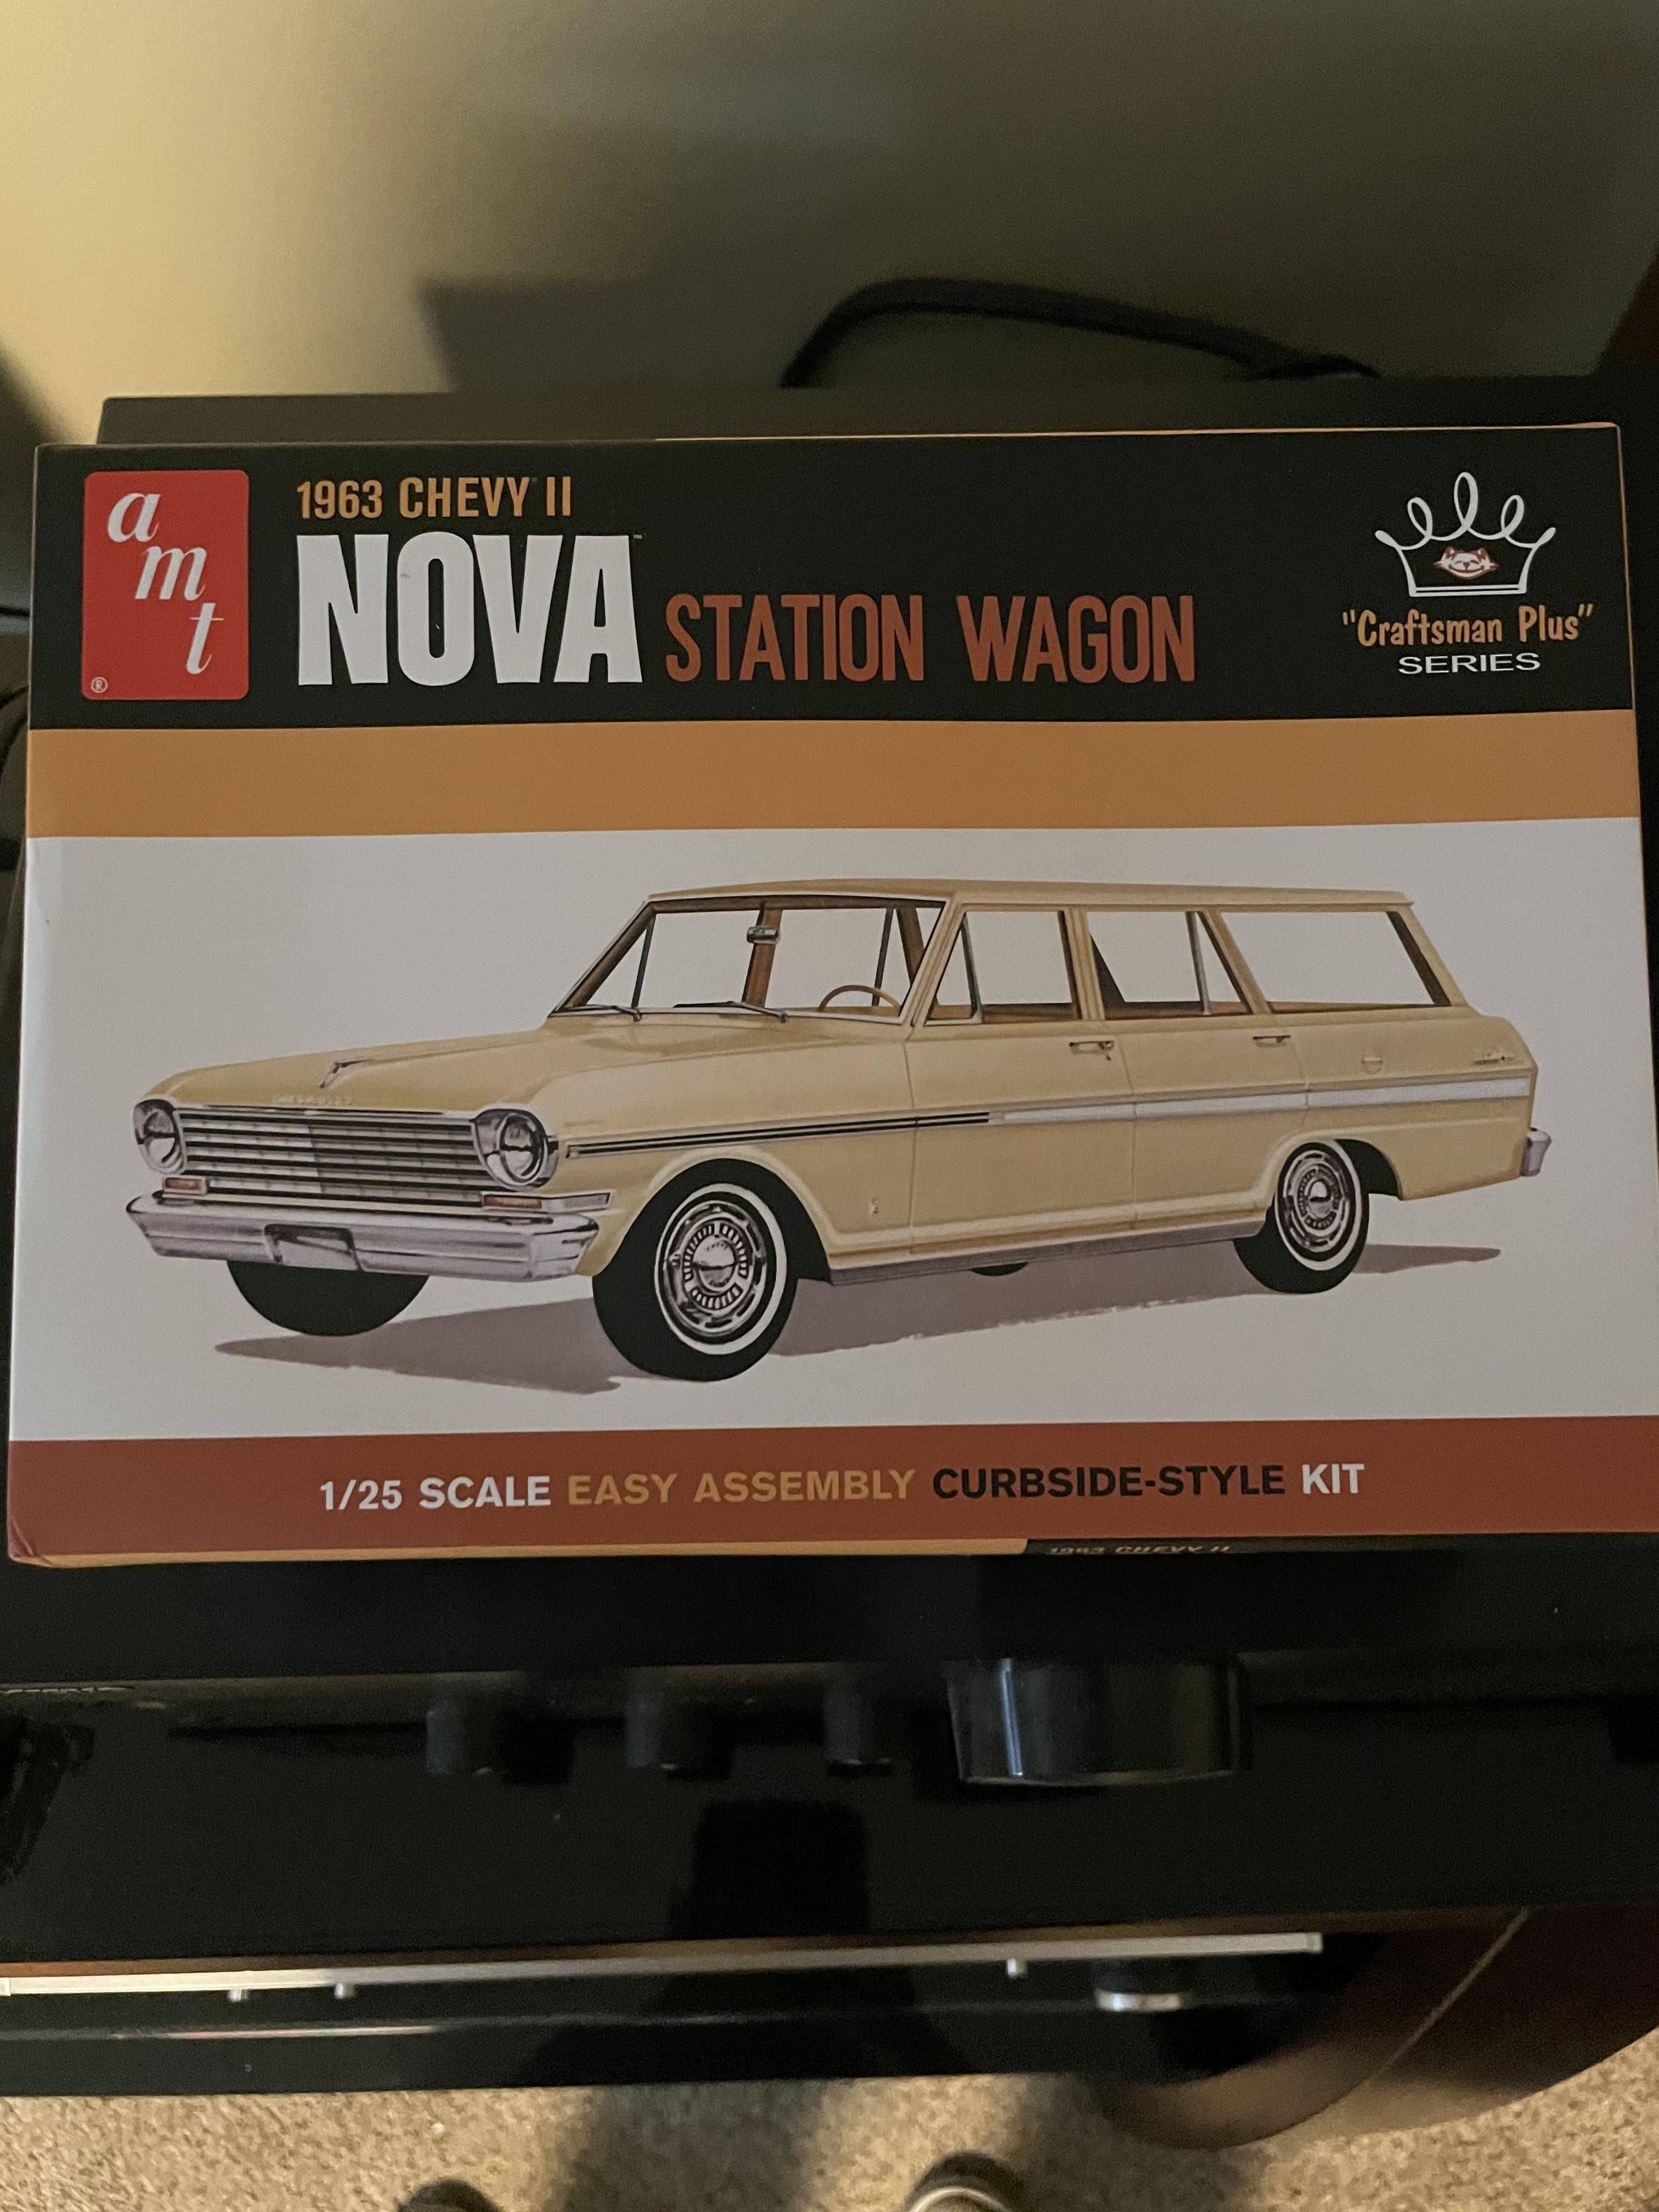
While I’m working on the Midget I picked up this wagon. It’s a curbside kit and I’ve got plans for it. Adding a big block Chev with tri power to it and going to build it in my favorite style, 70s street machine. Dave.
-
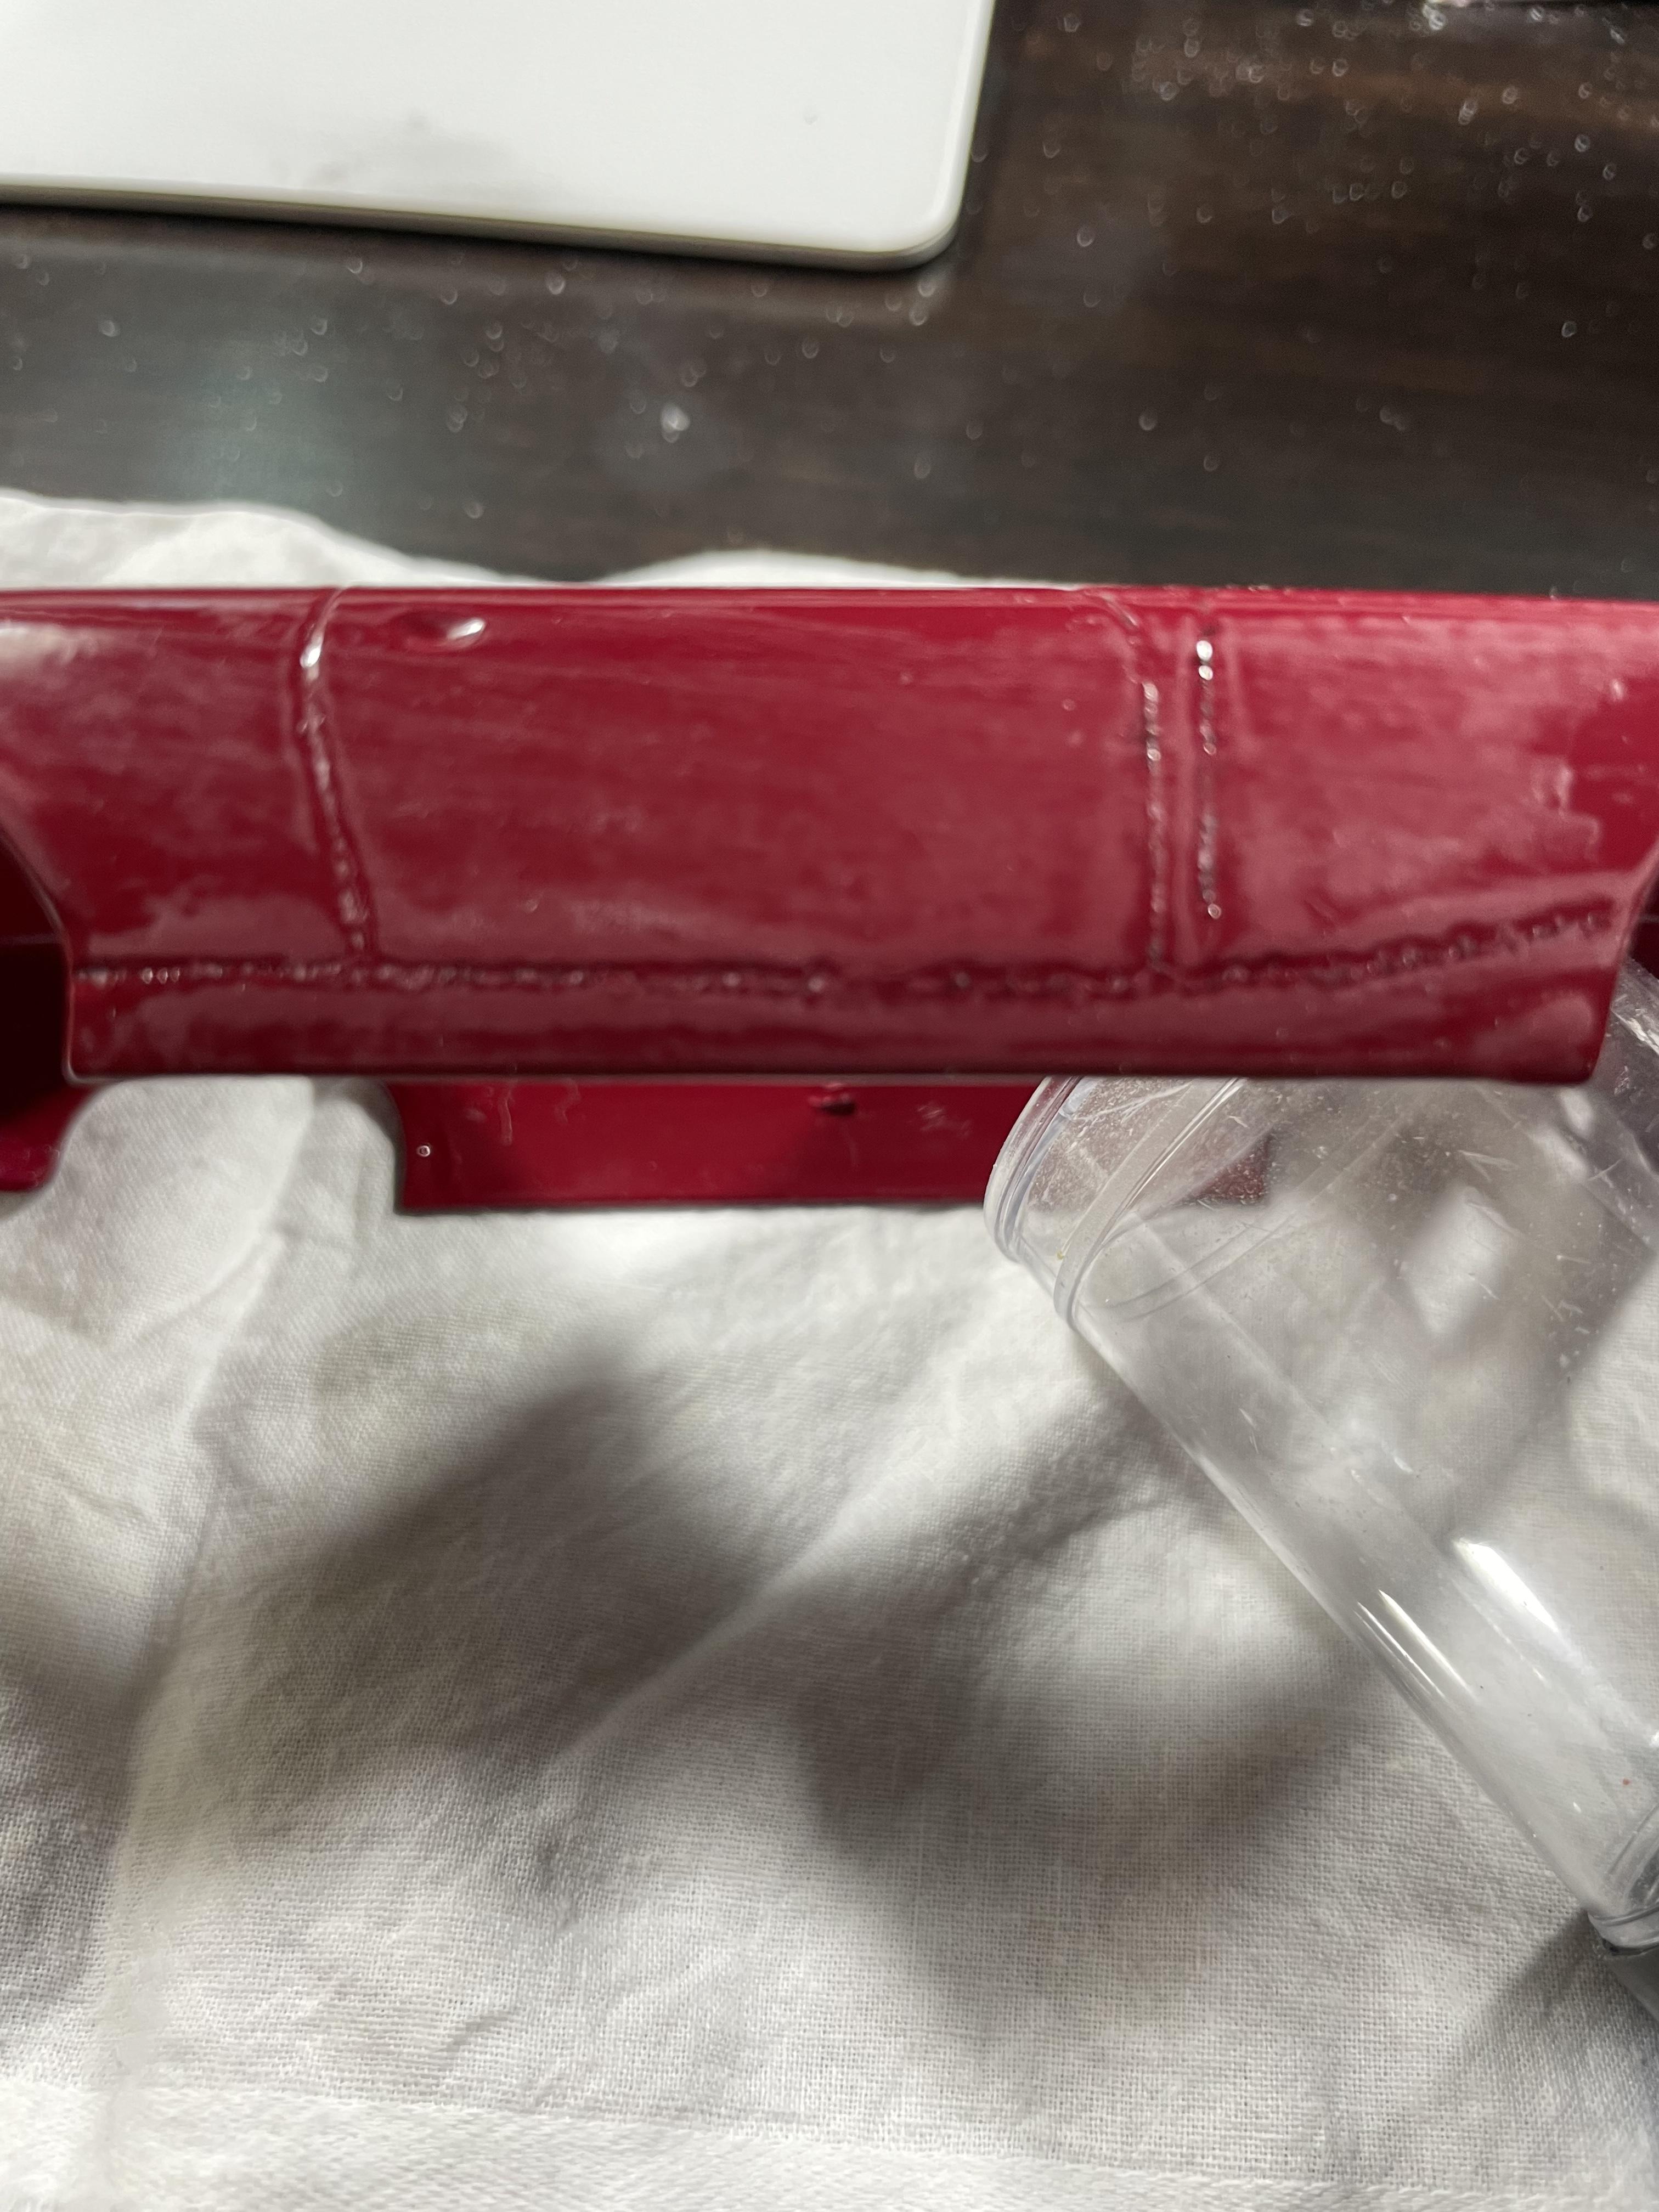
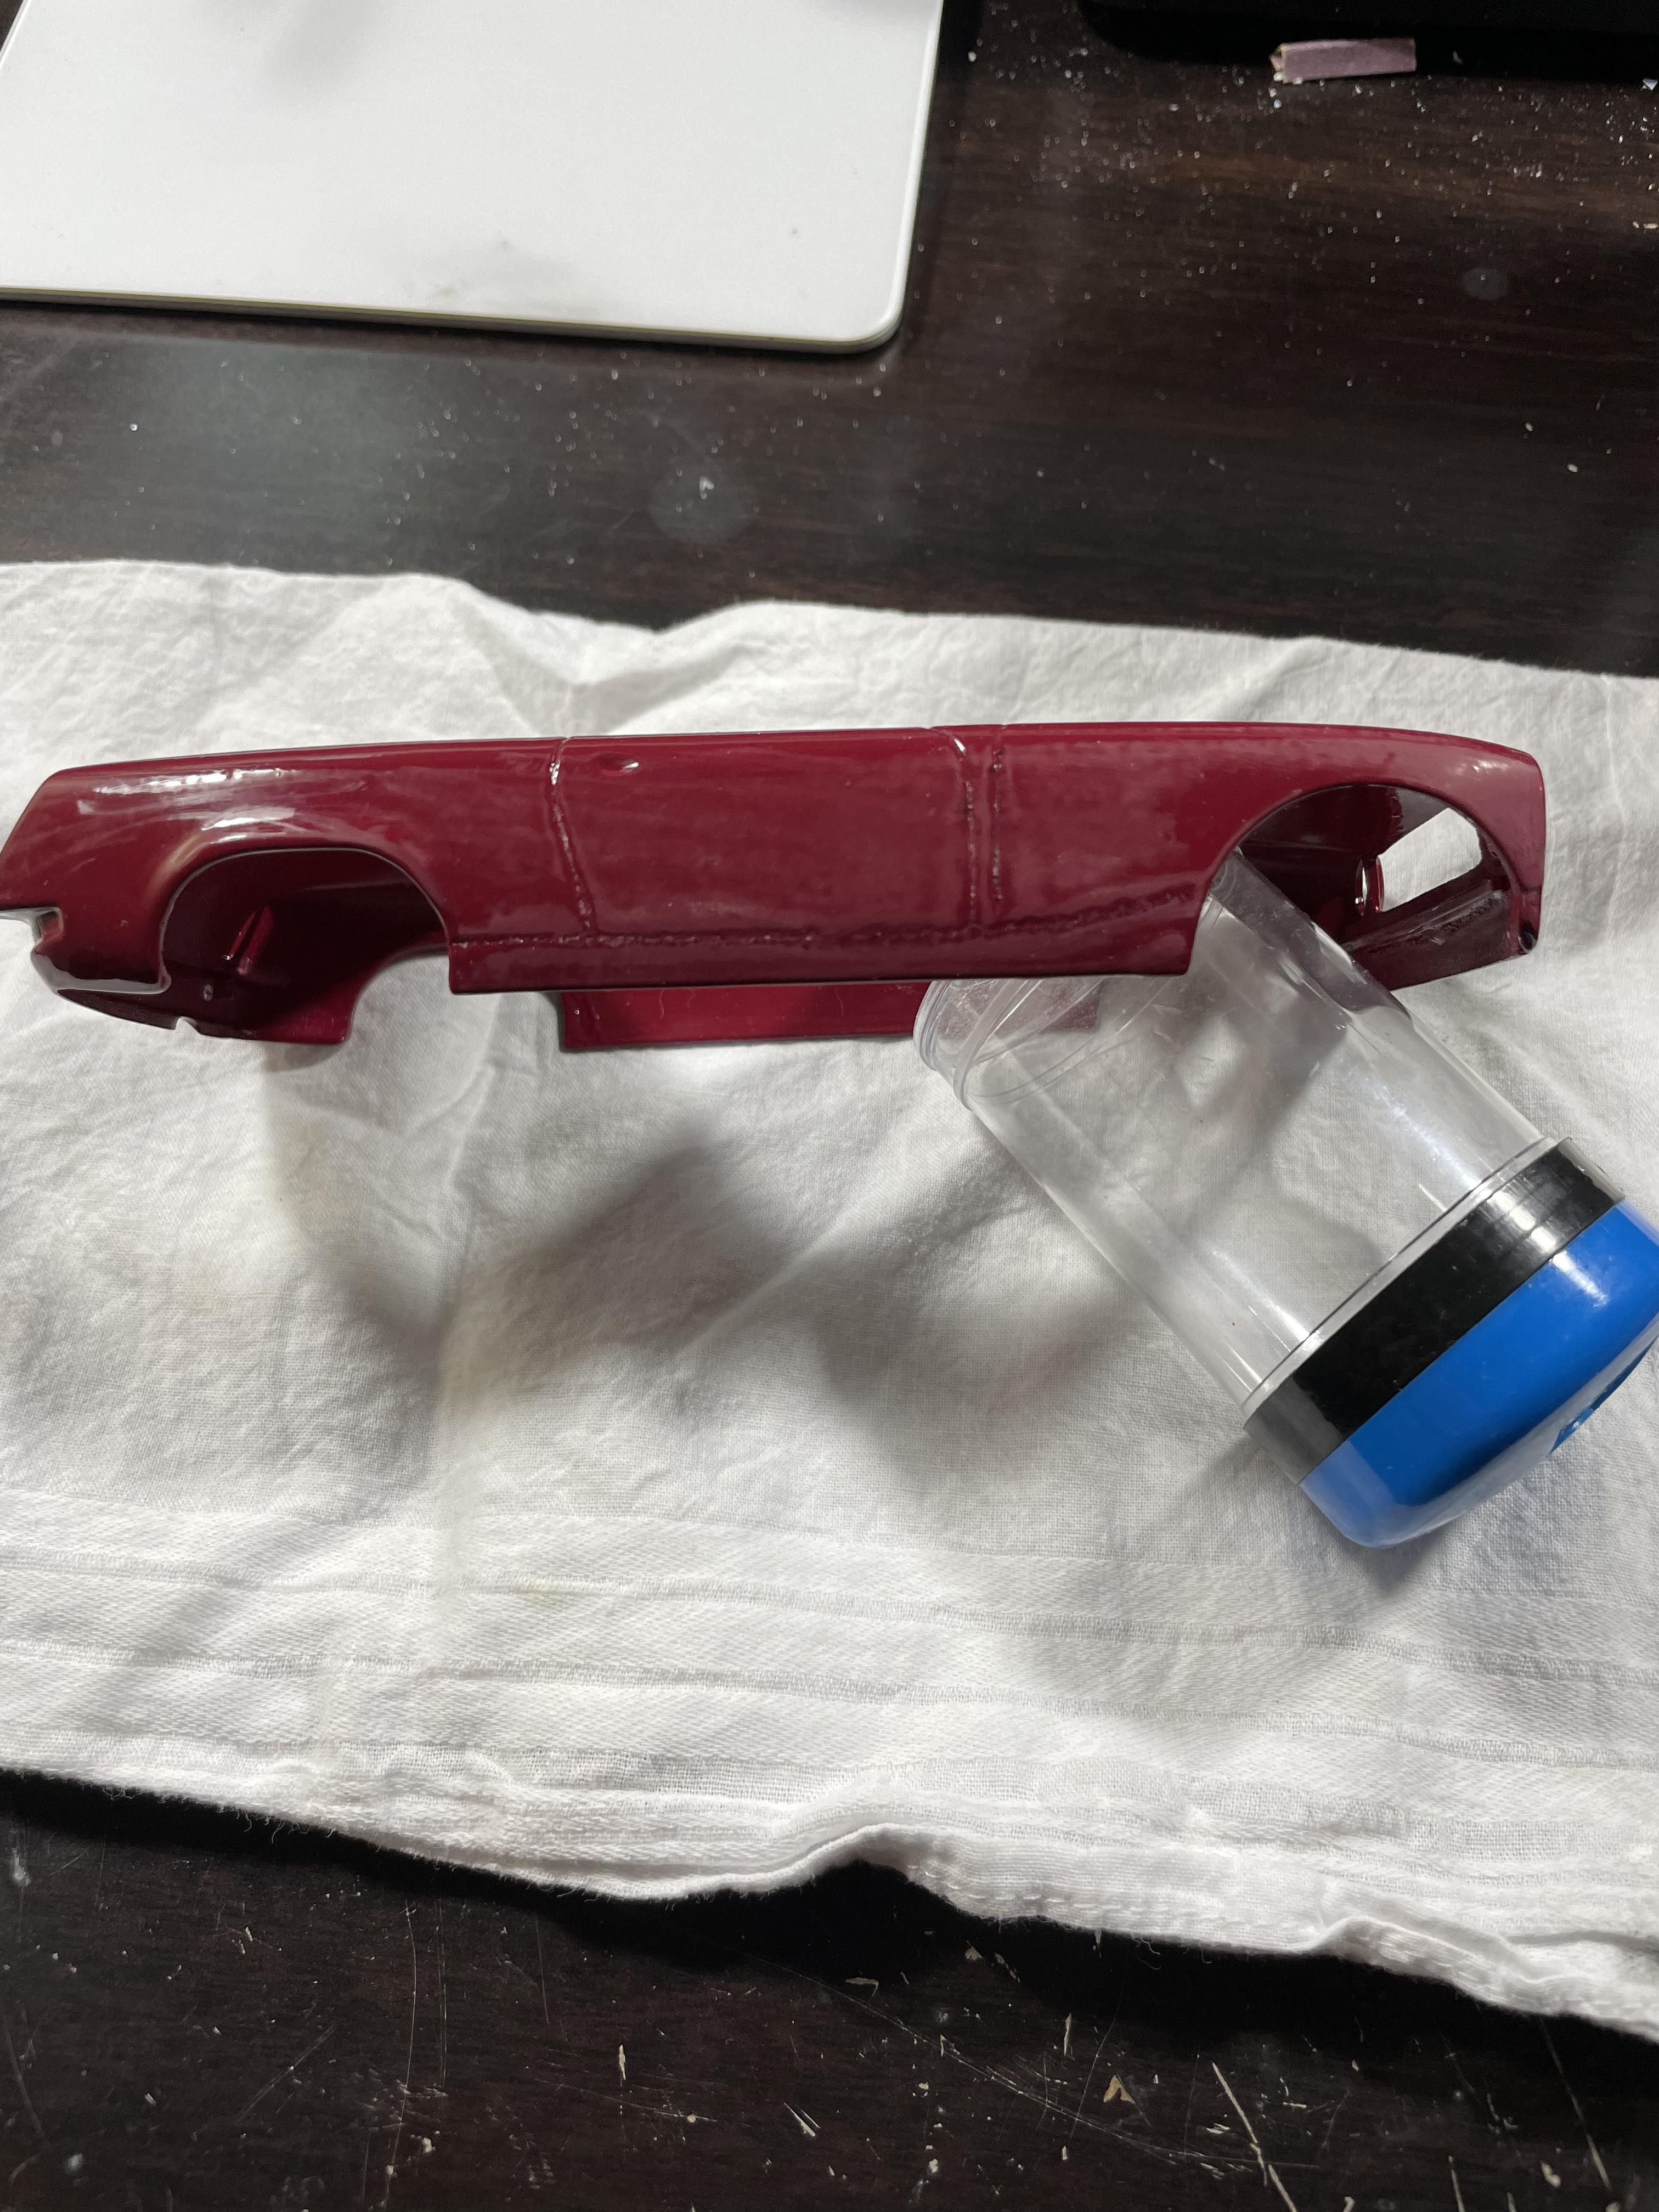
It darkened up nice with 5 coats of color. I won’t be using the white primer this time. I used maroon rust oleum. With rust oleum clear.
-
Well, I got the color on and went to clear it and the clear reacted to the panel line color. I’m at a loss as to why, but it’s going in the chemical bath. Dave.