Mothersworry
-
Posts
409 -
Joined
-
Last visited
Content Type
Profiles
Forums
Events
Gallery
Everything posted by Mothersworry
-
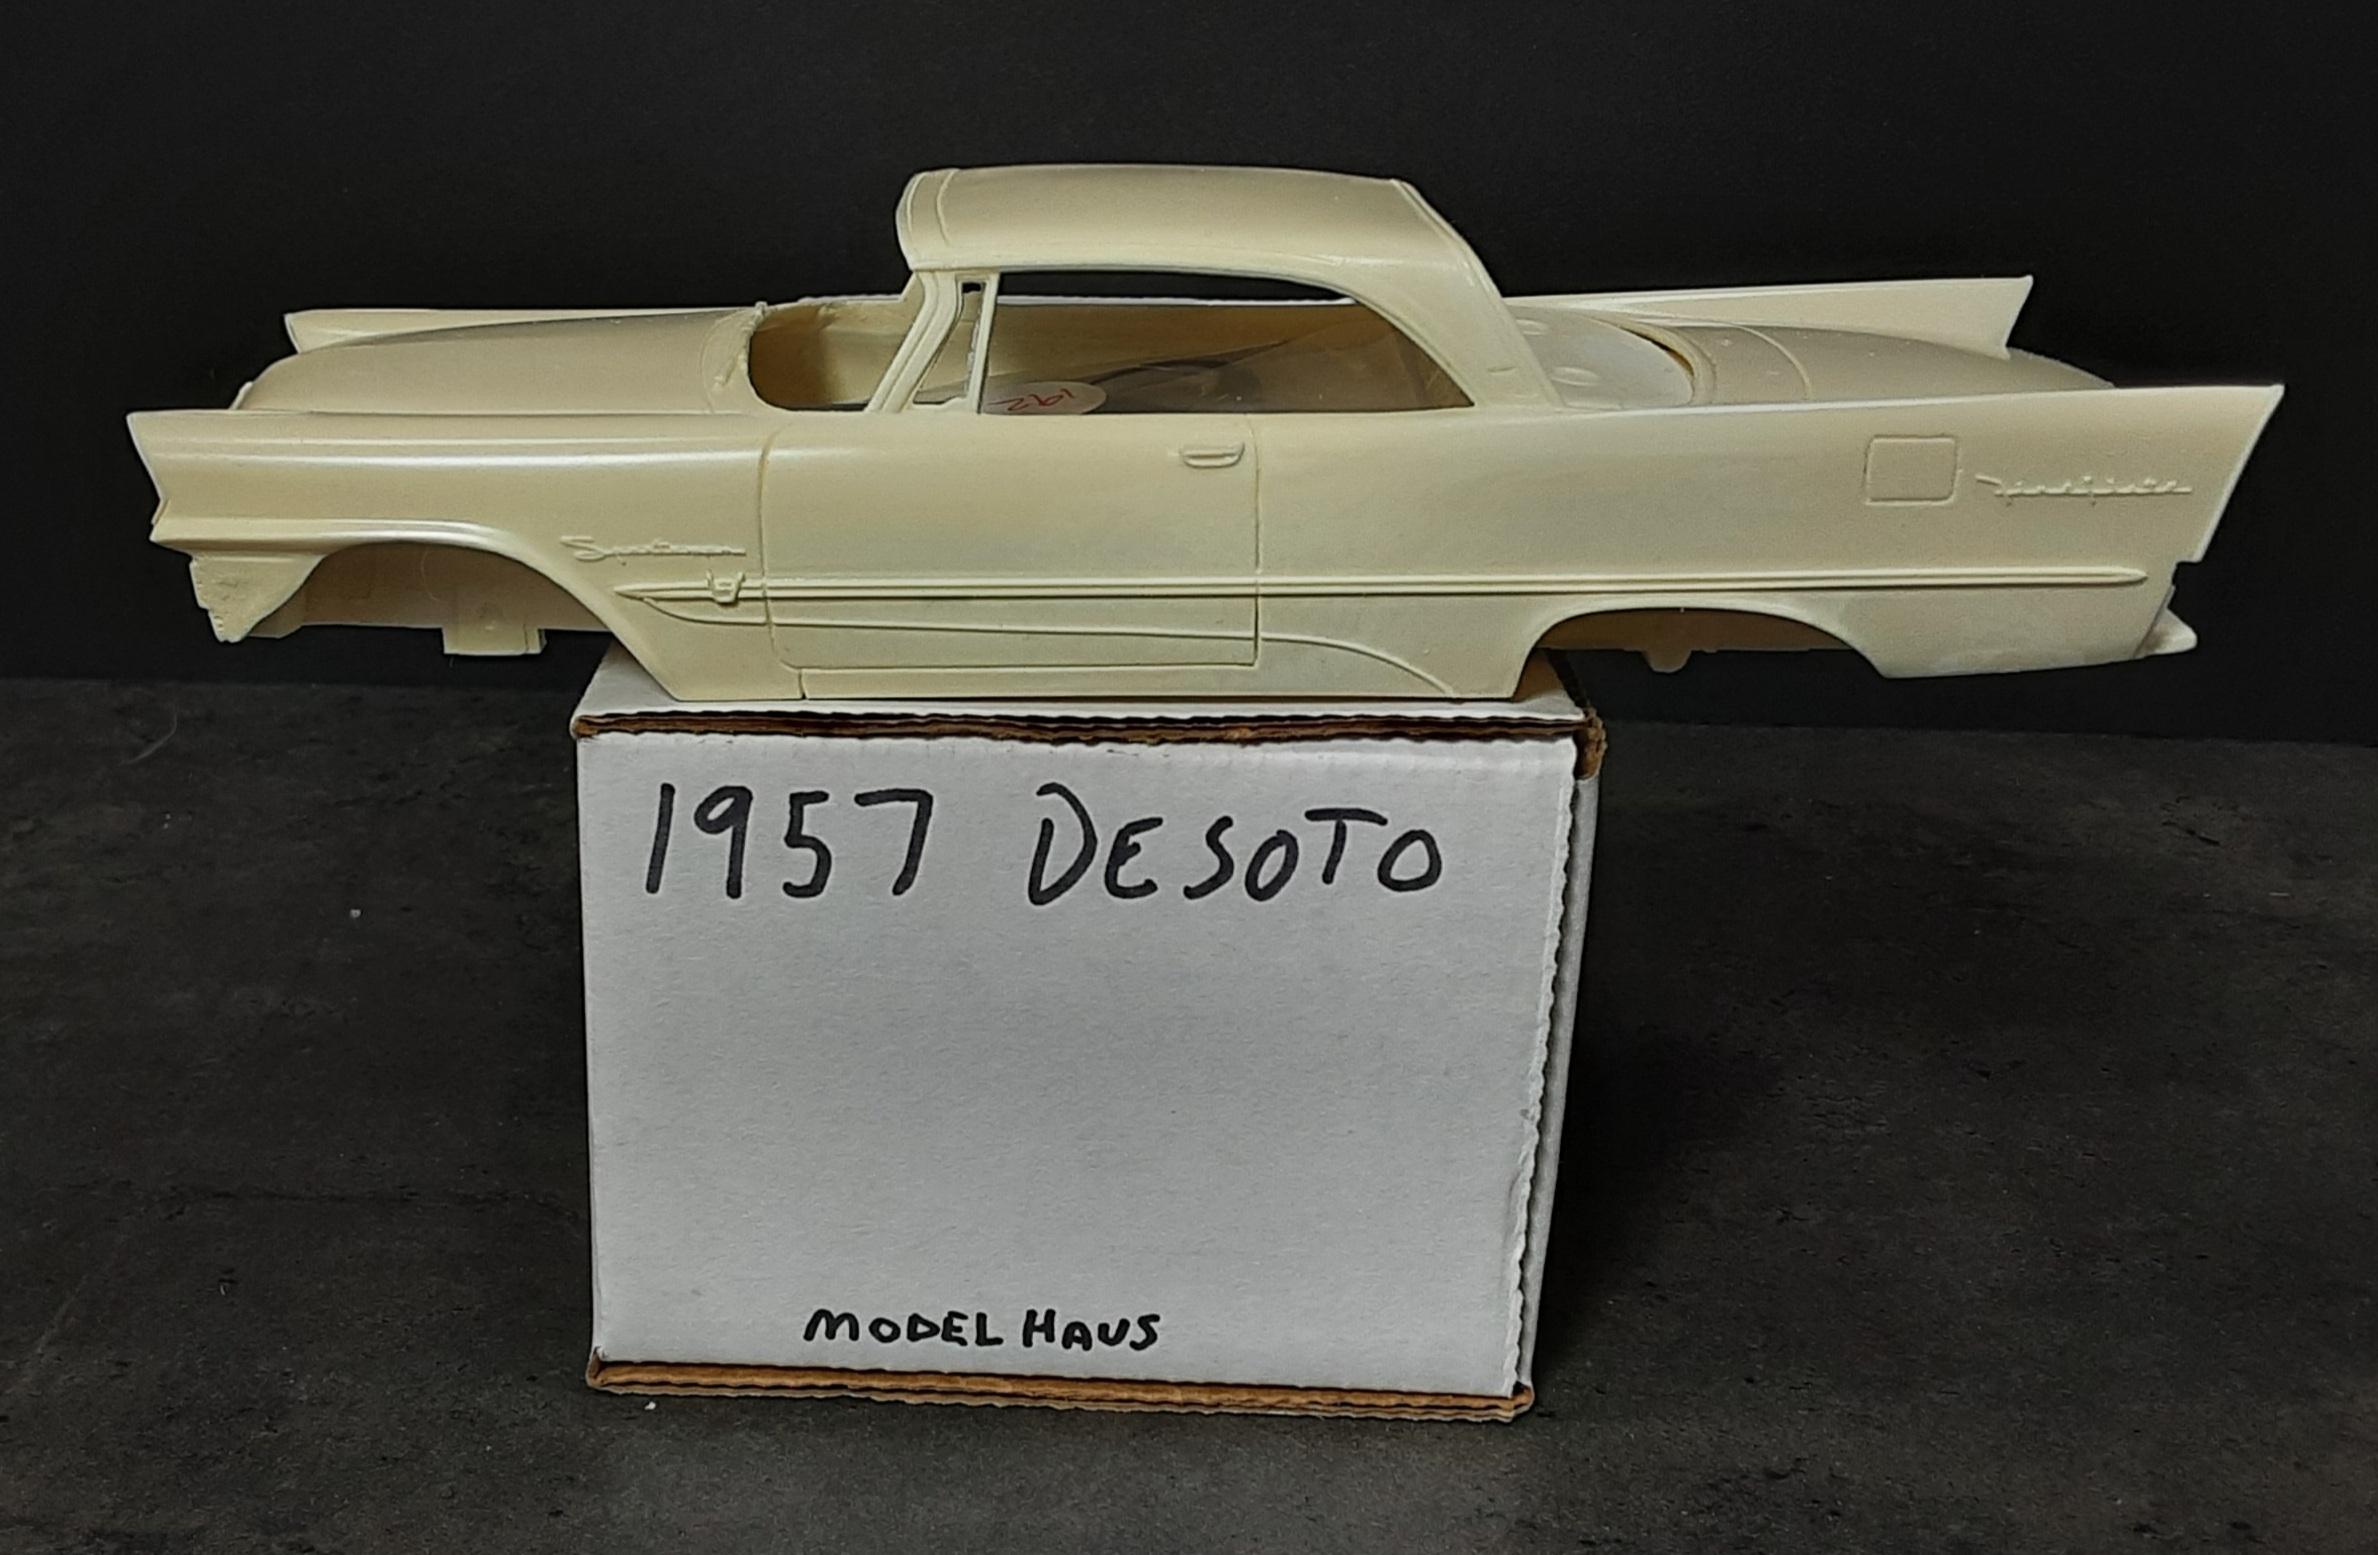
 Modelhaus 1957 Desoto resin kit...
-
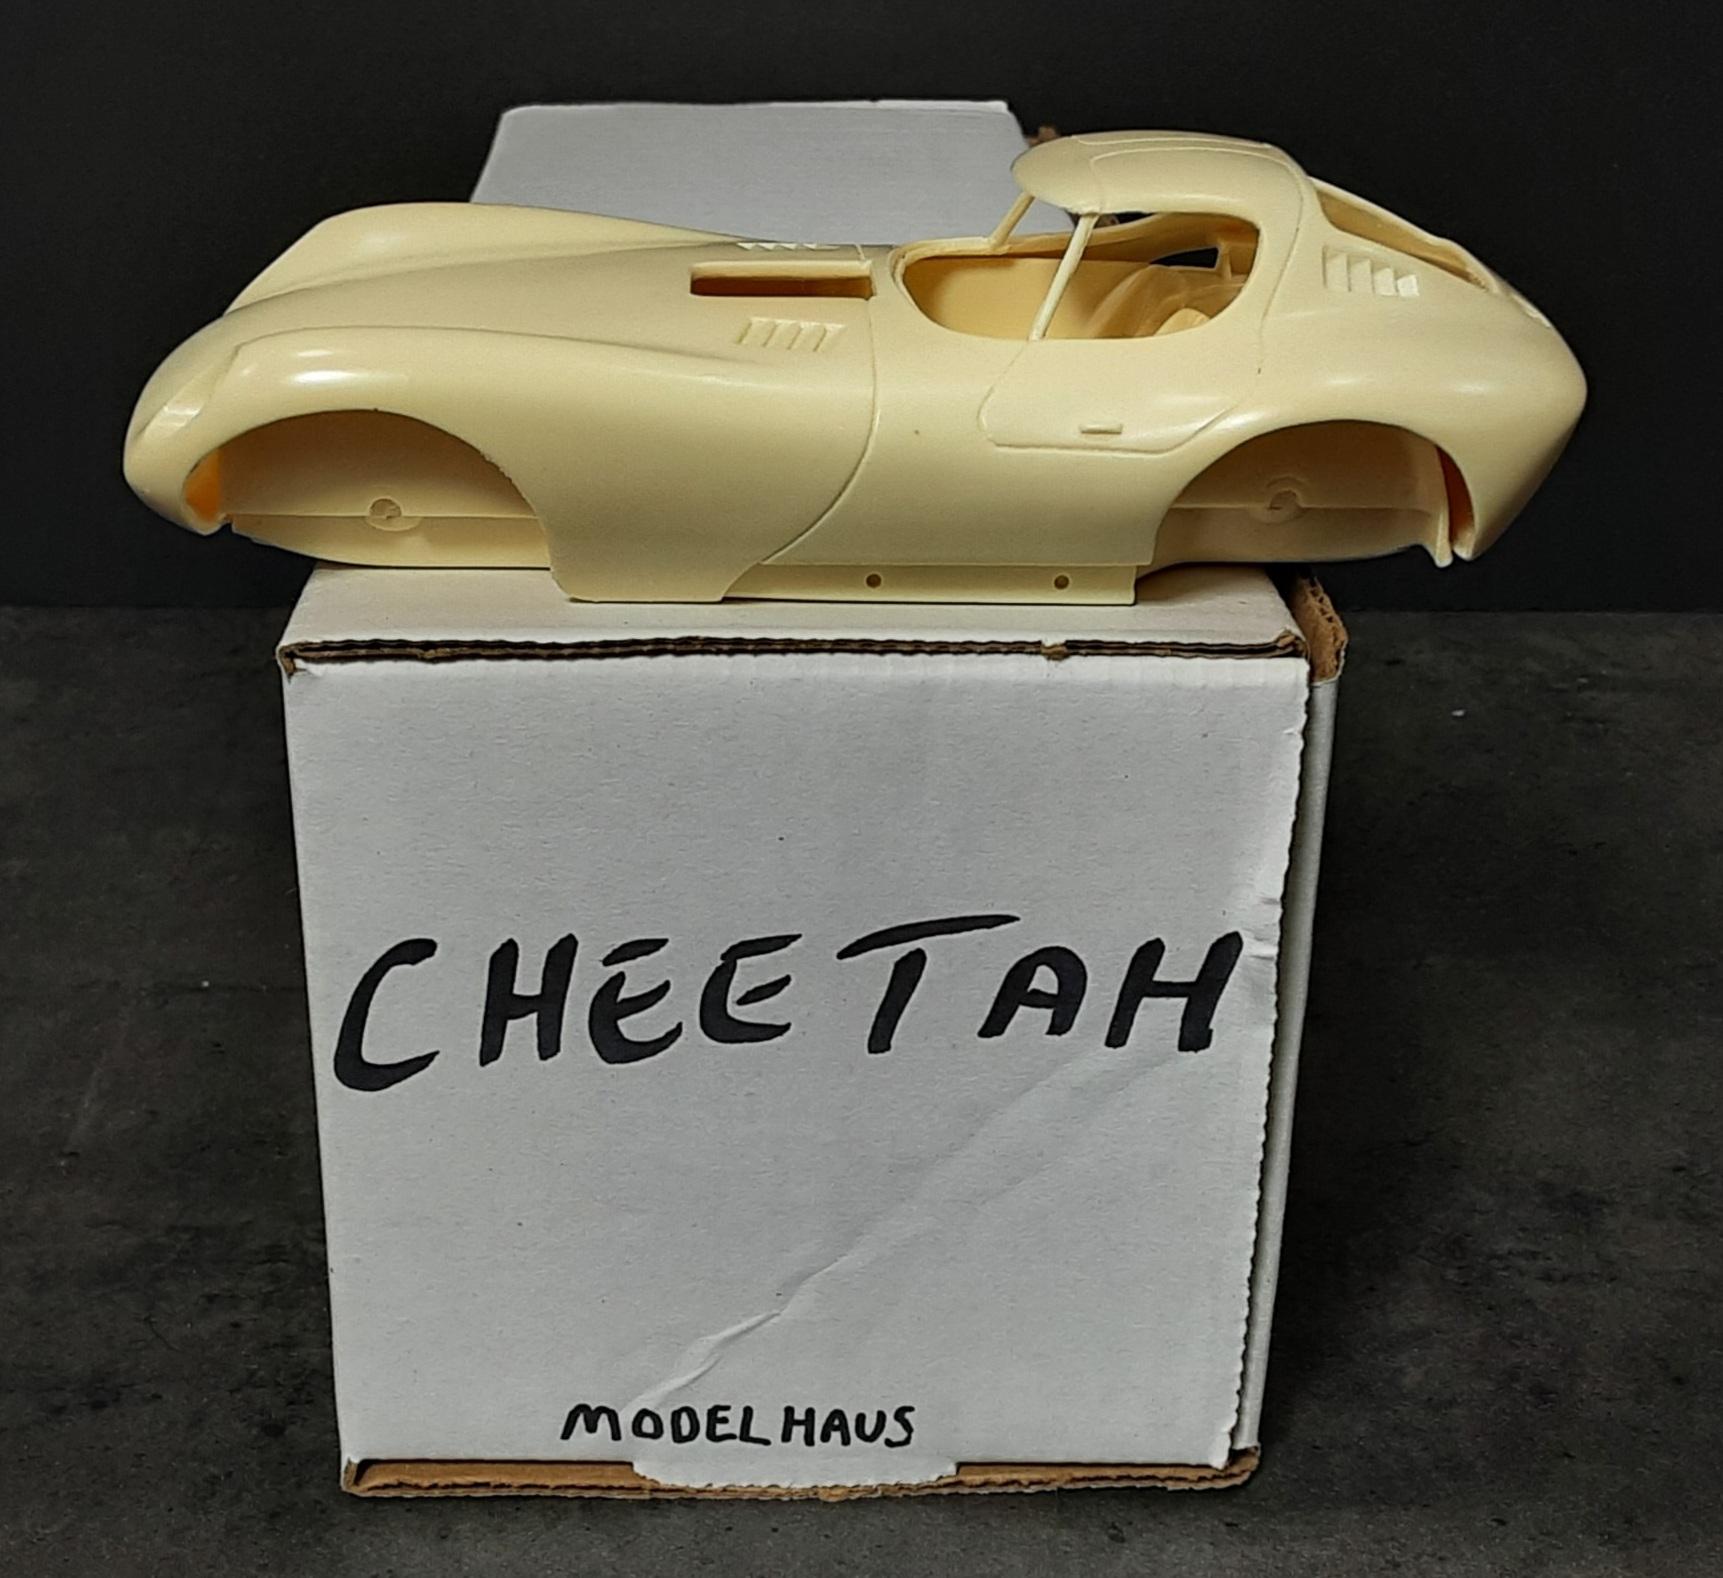
Modelhaus Cheetah resin kit...
-
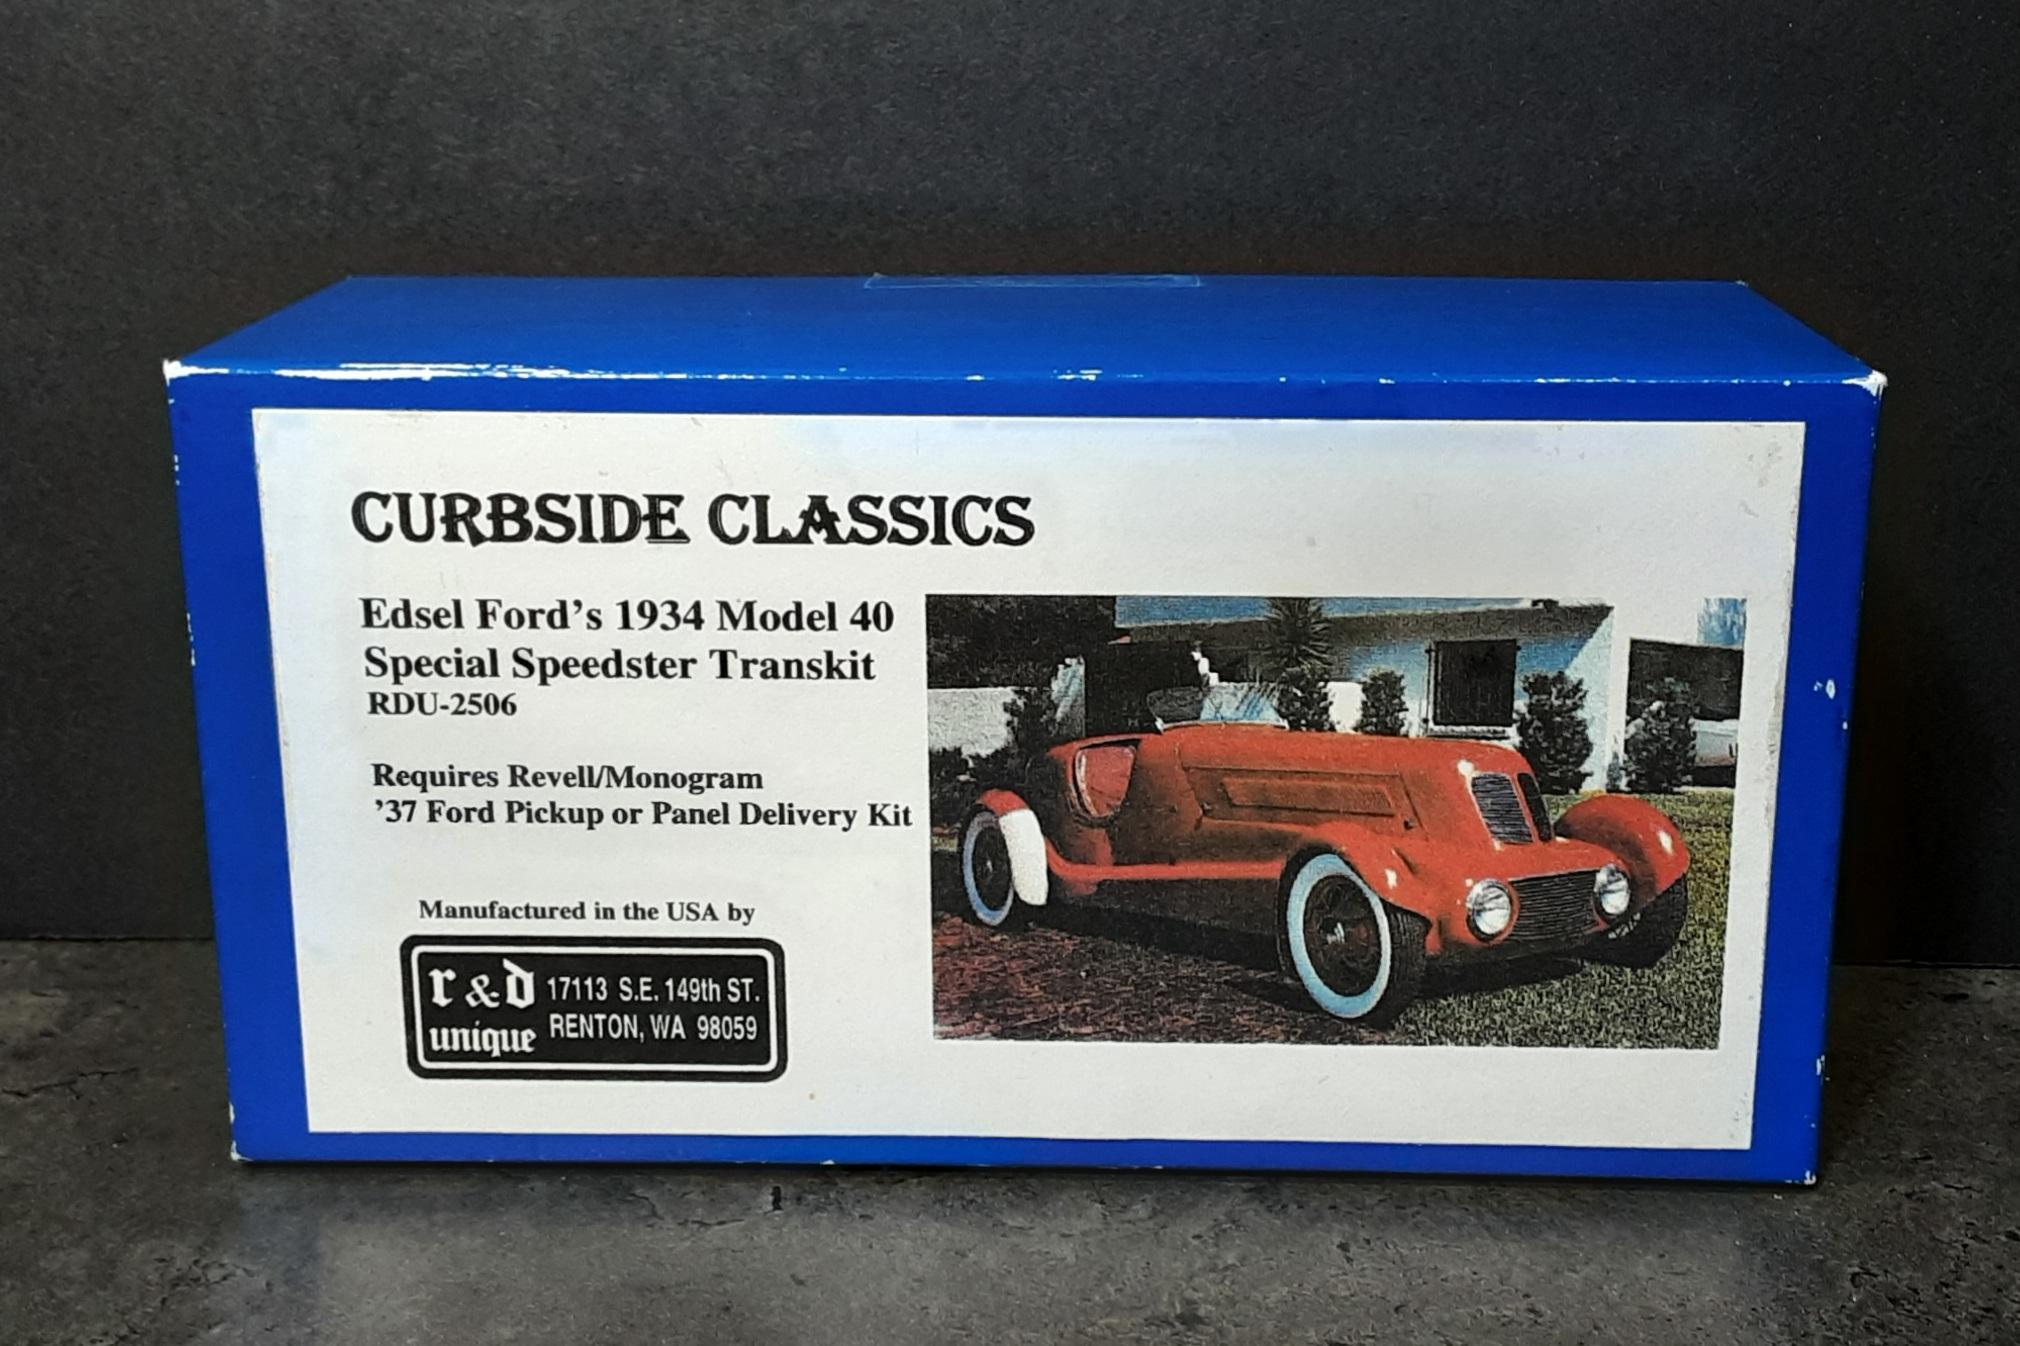
Edsel Ford's Speedster...
-
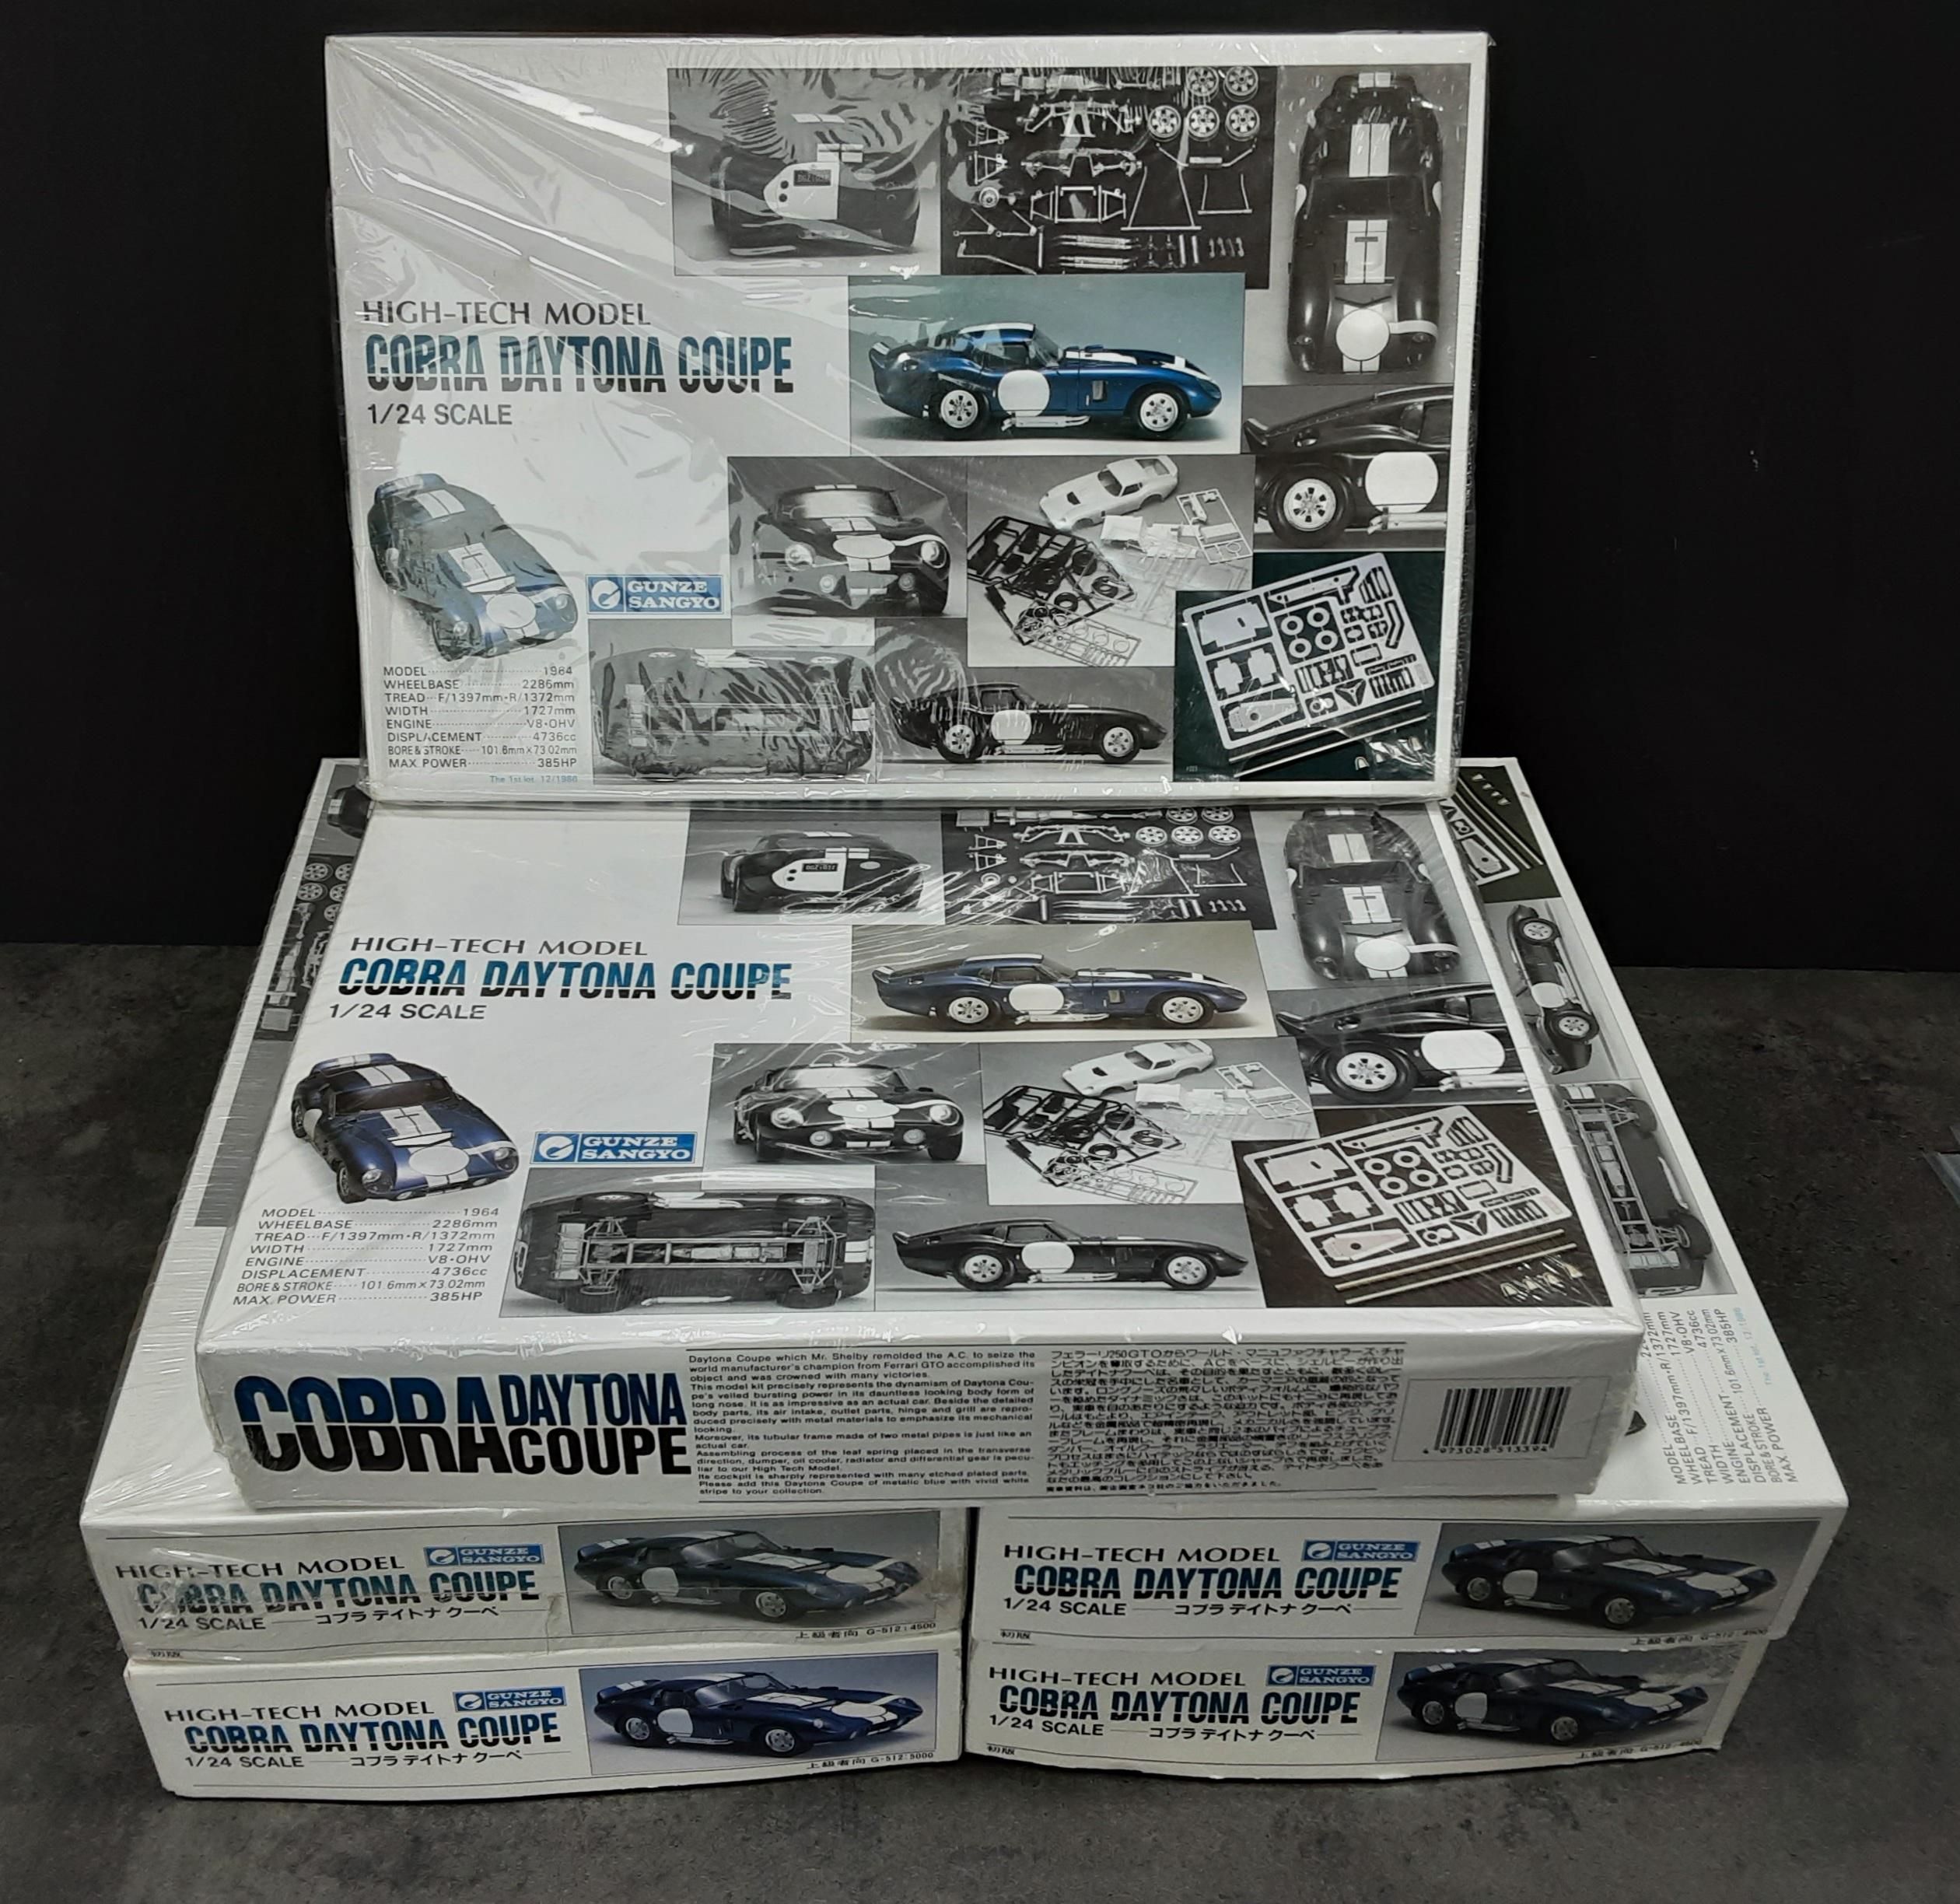
A plethora of Gunze Cobra Daytonas...
-
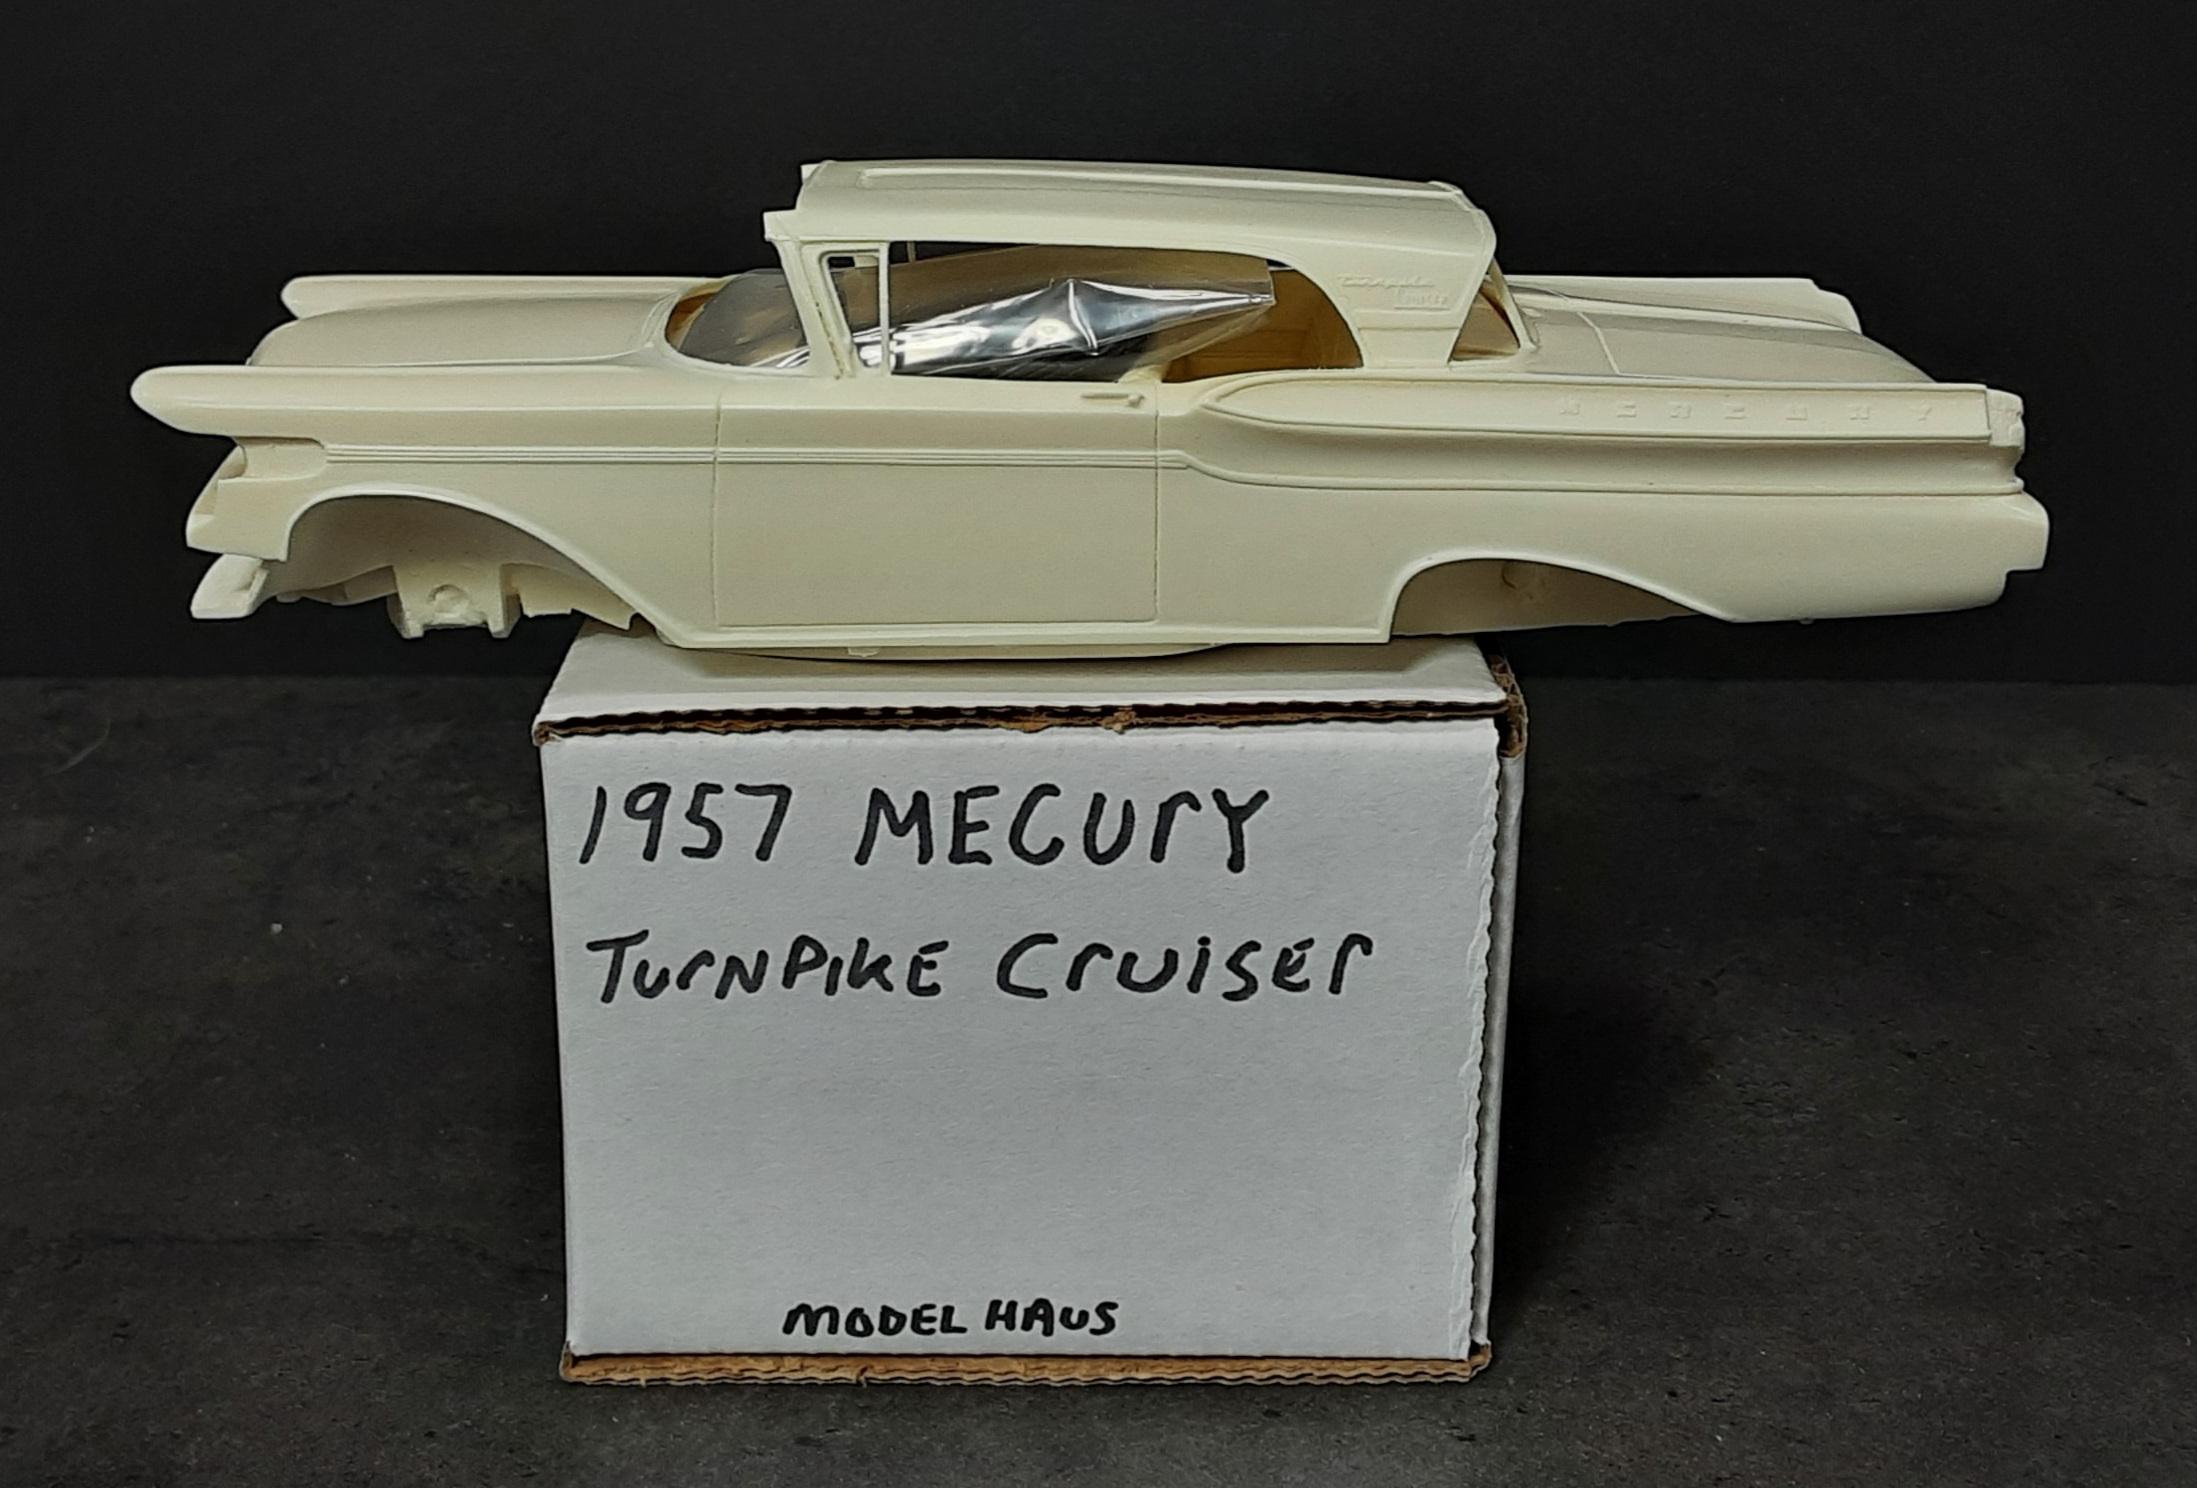
Modelhaus '57 Mercury Turnpike Cruiser kit...
-
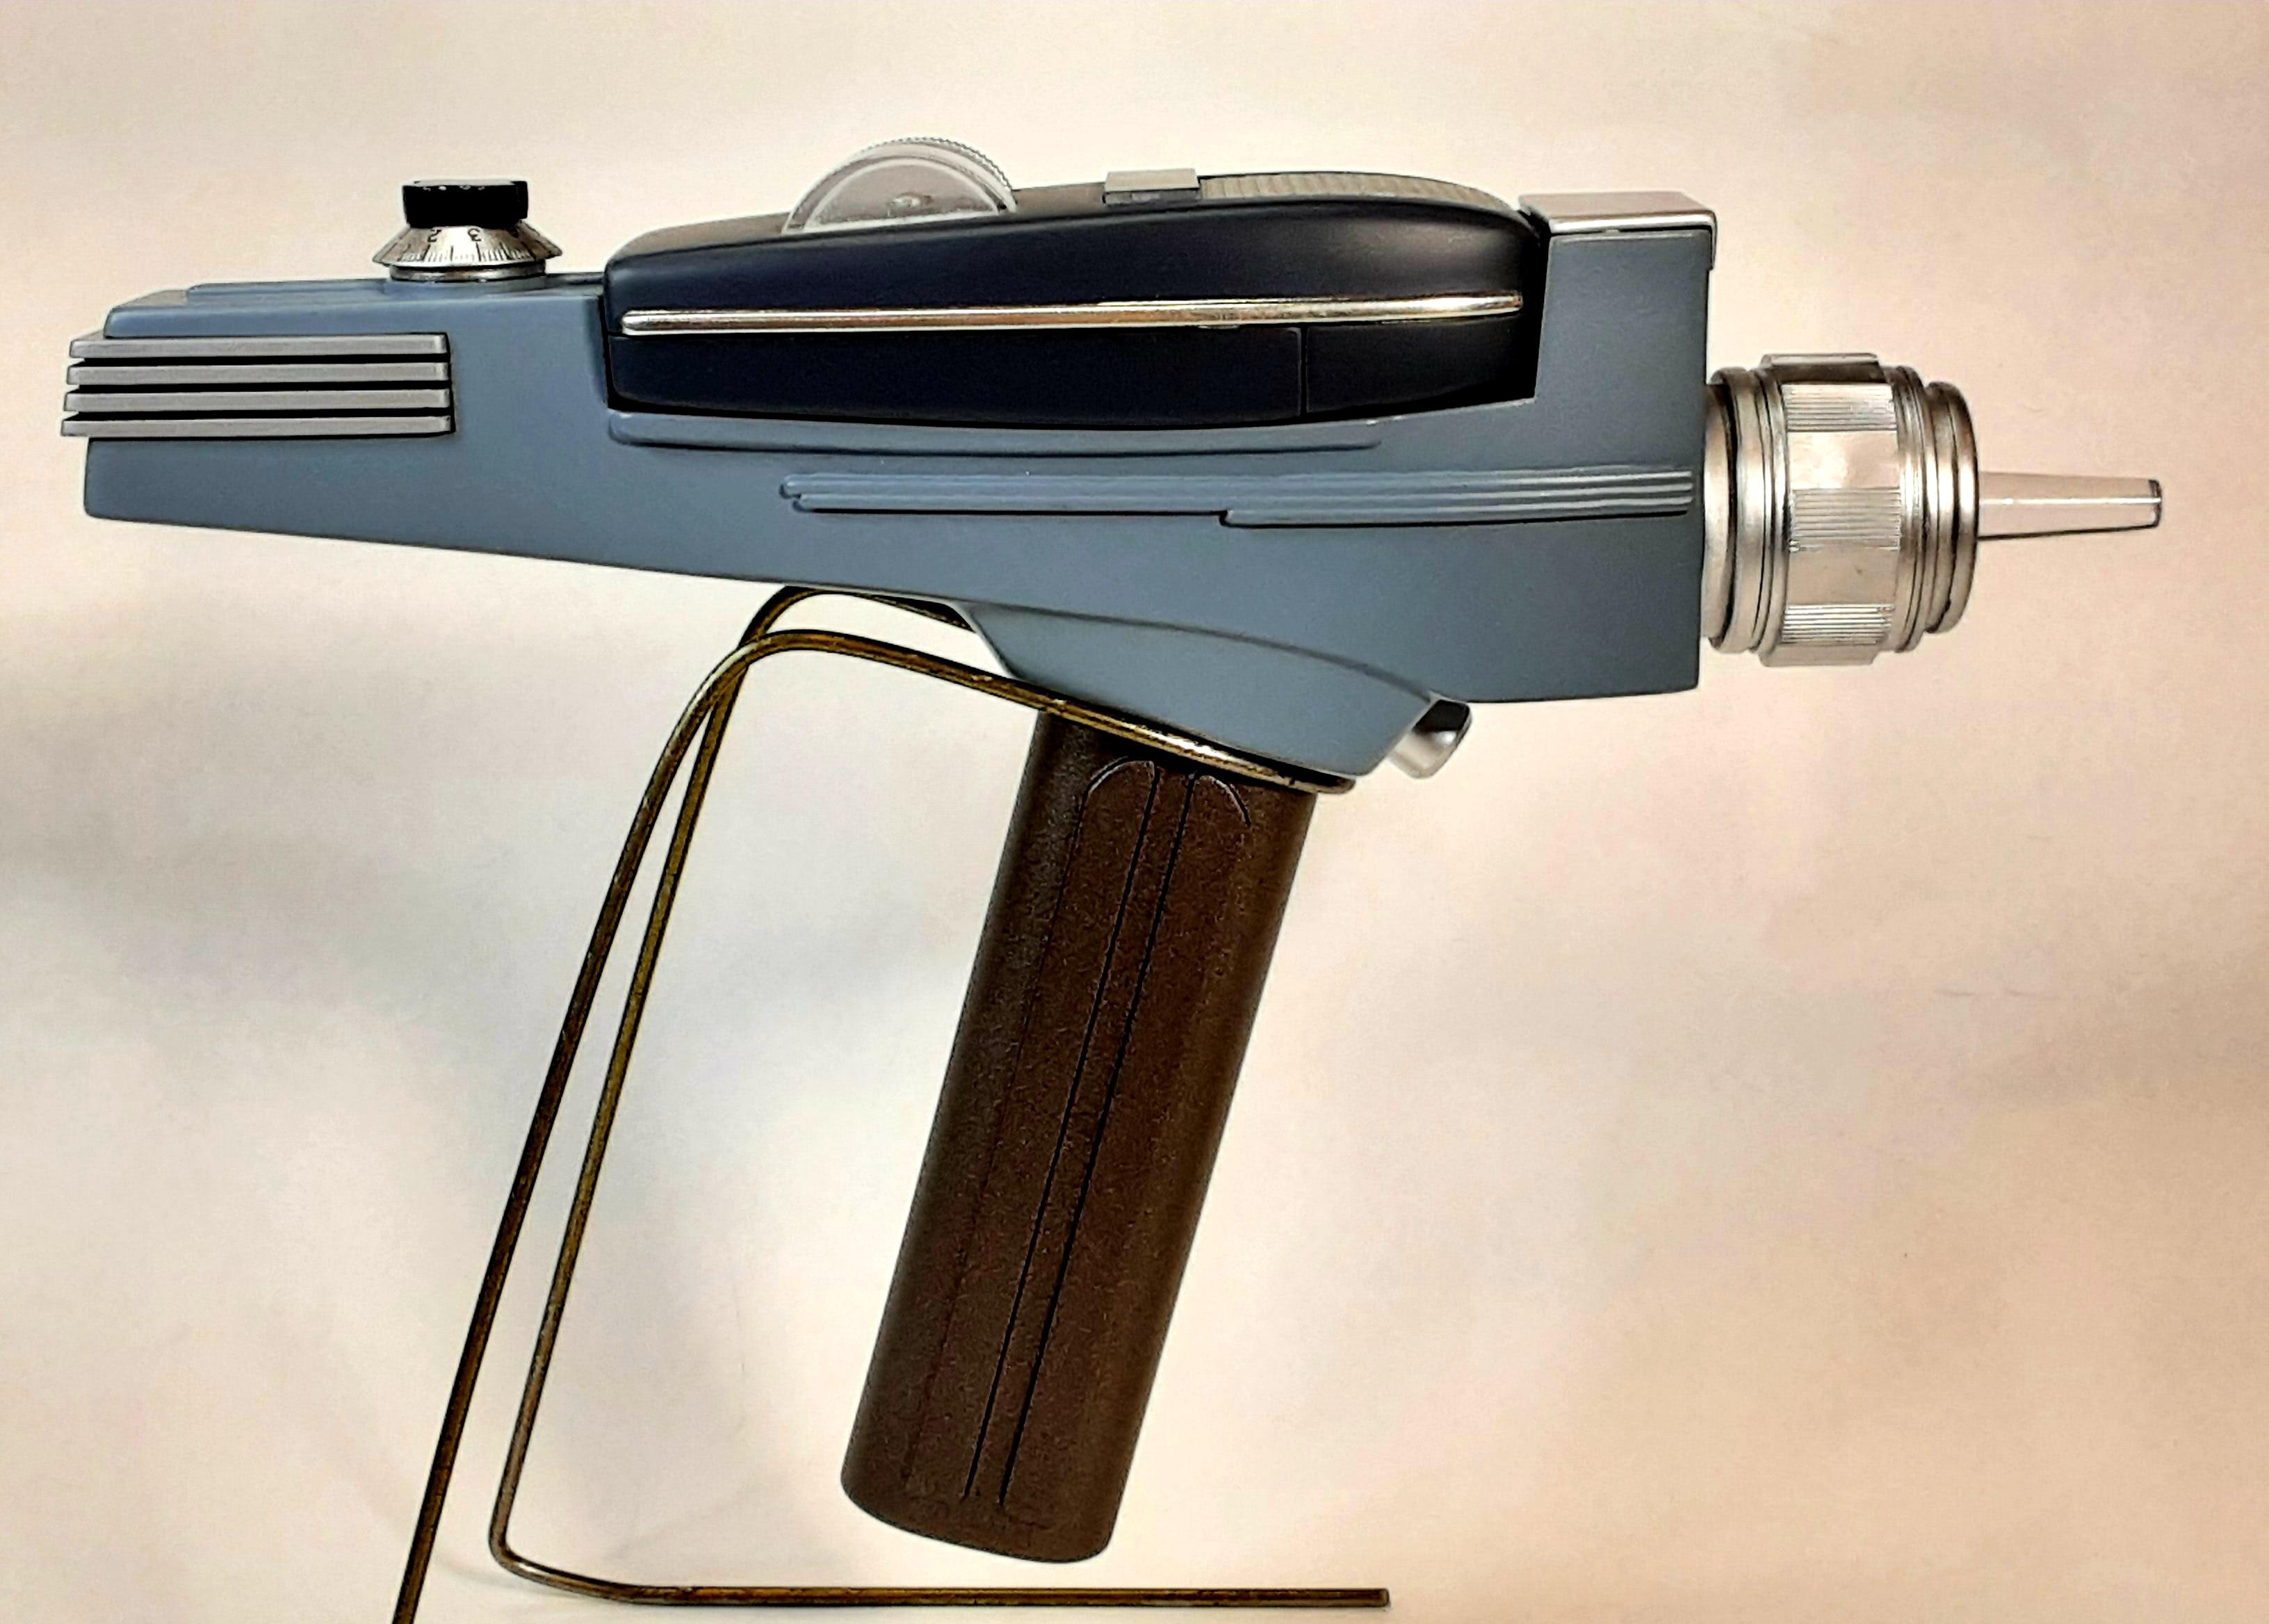
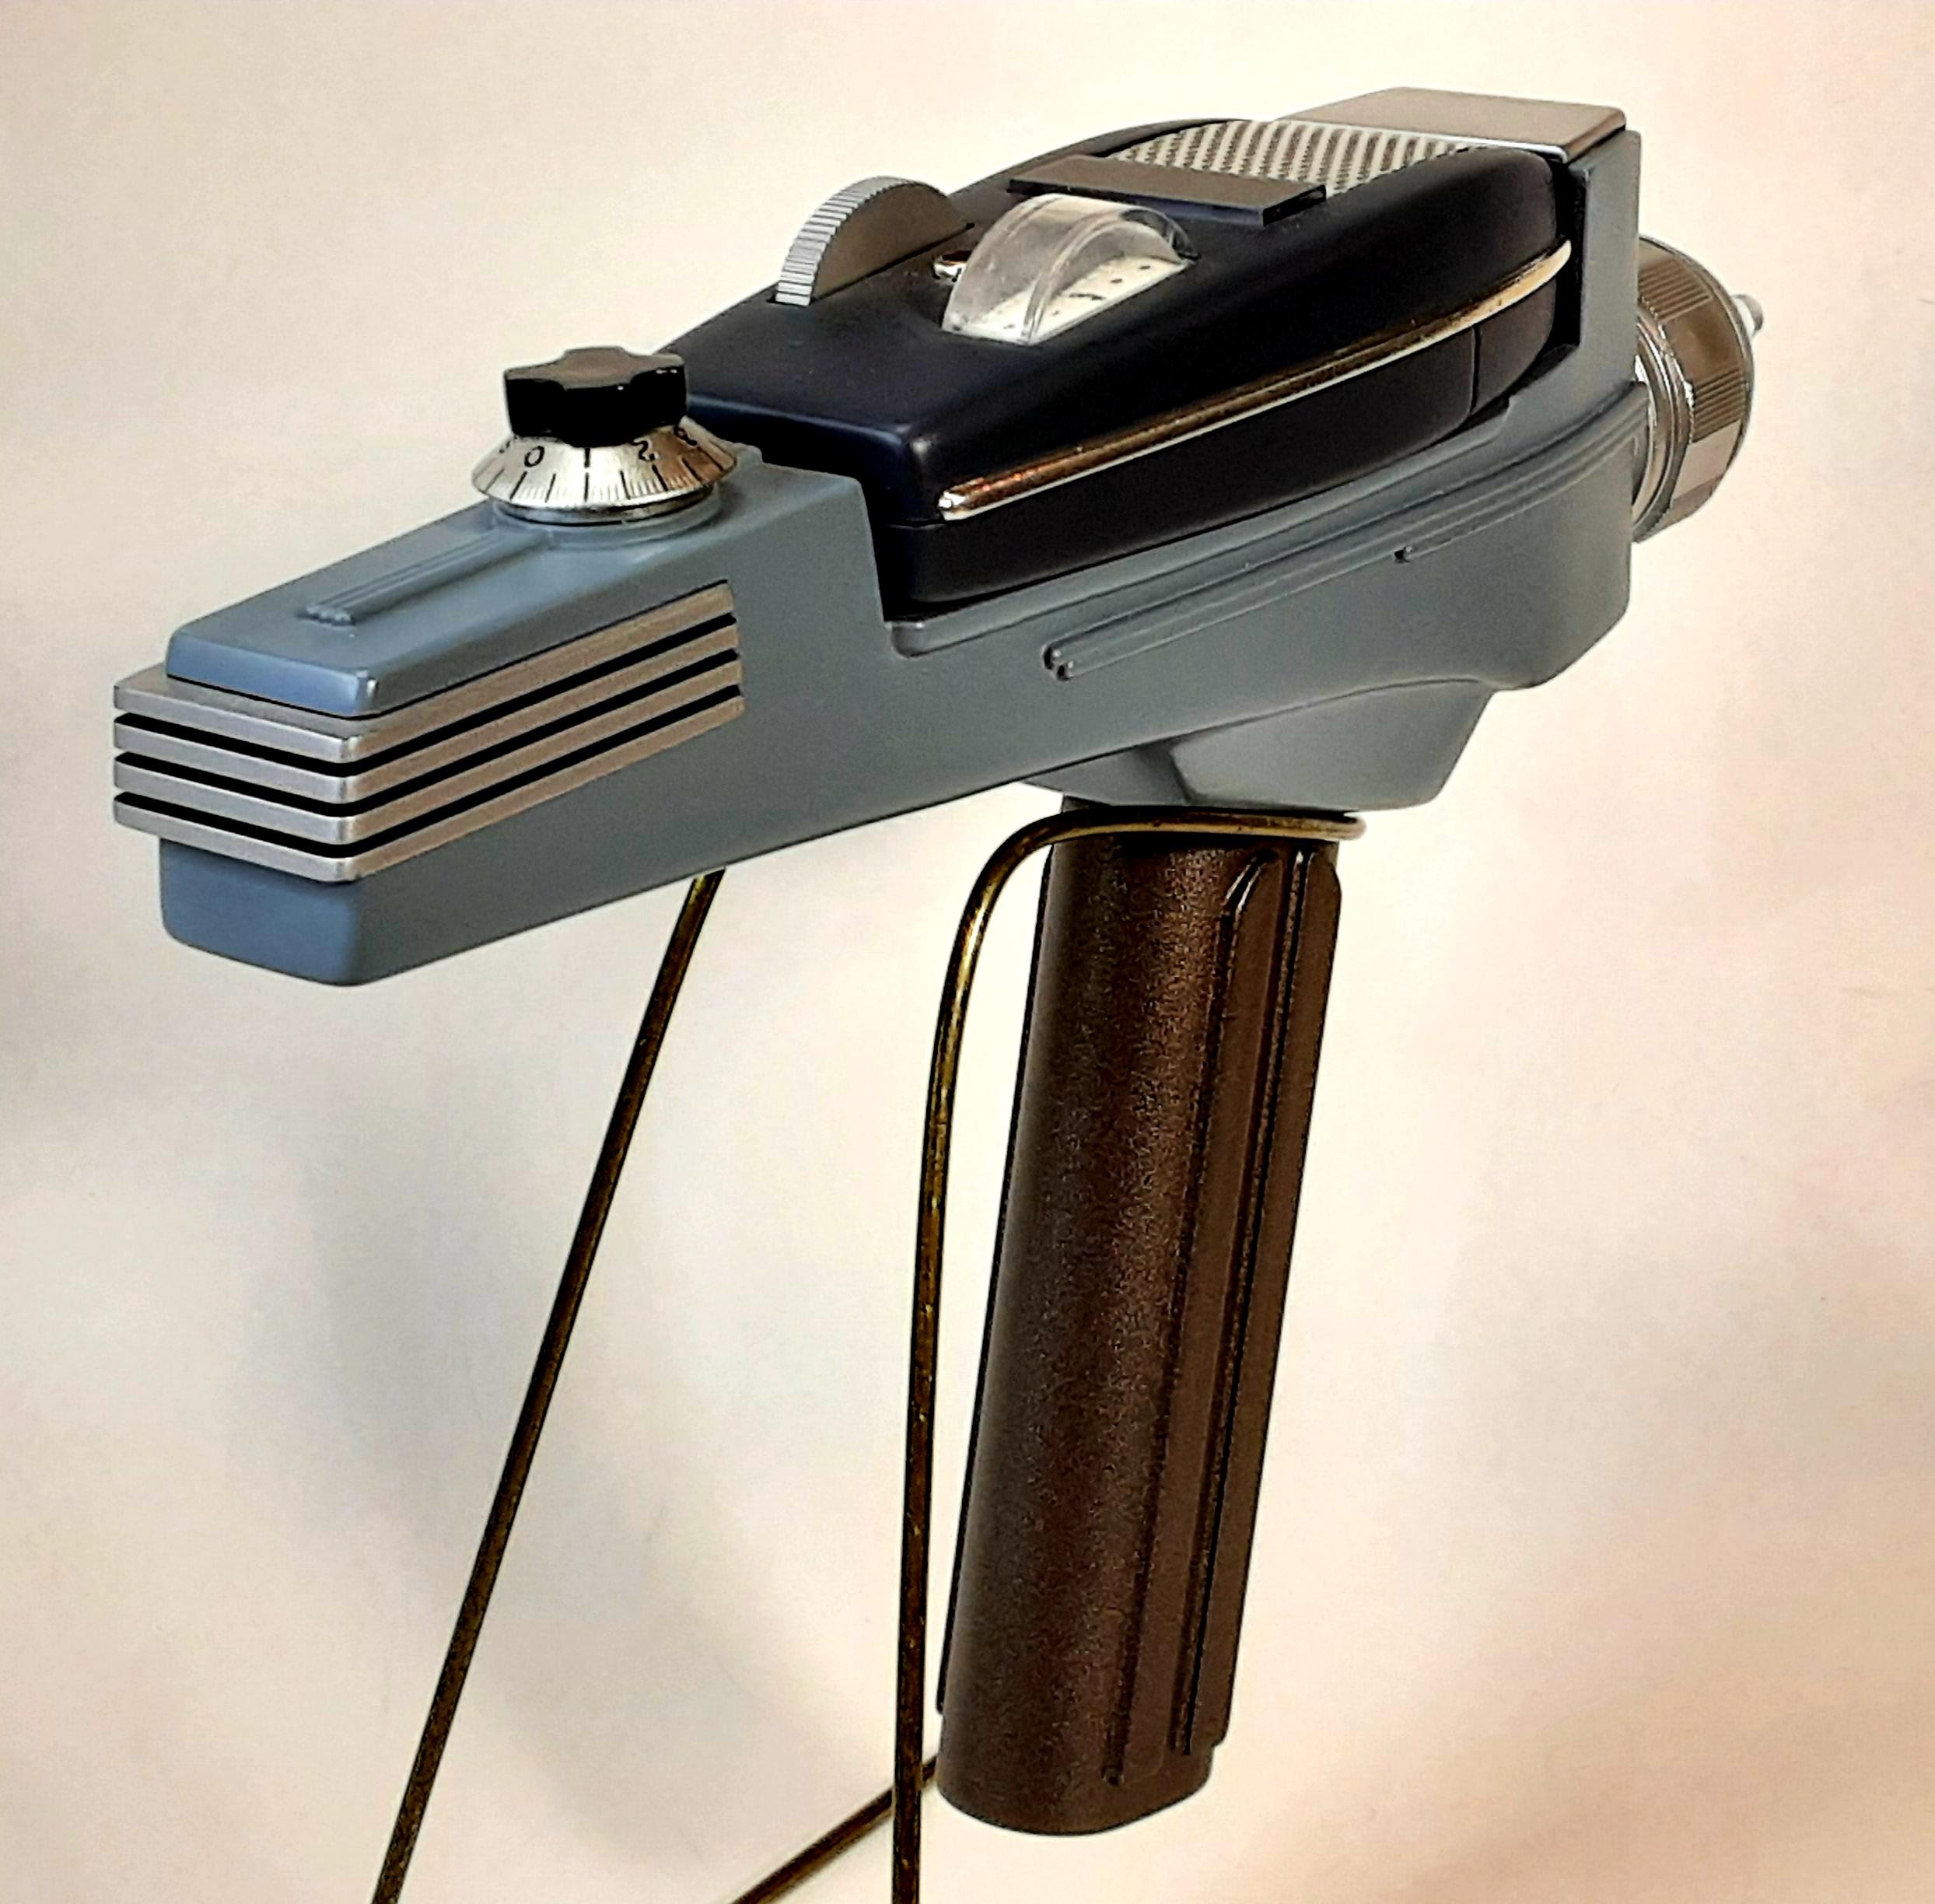
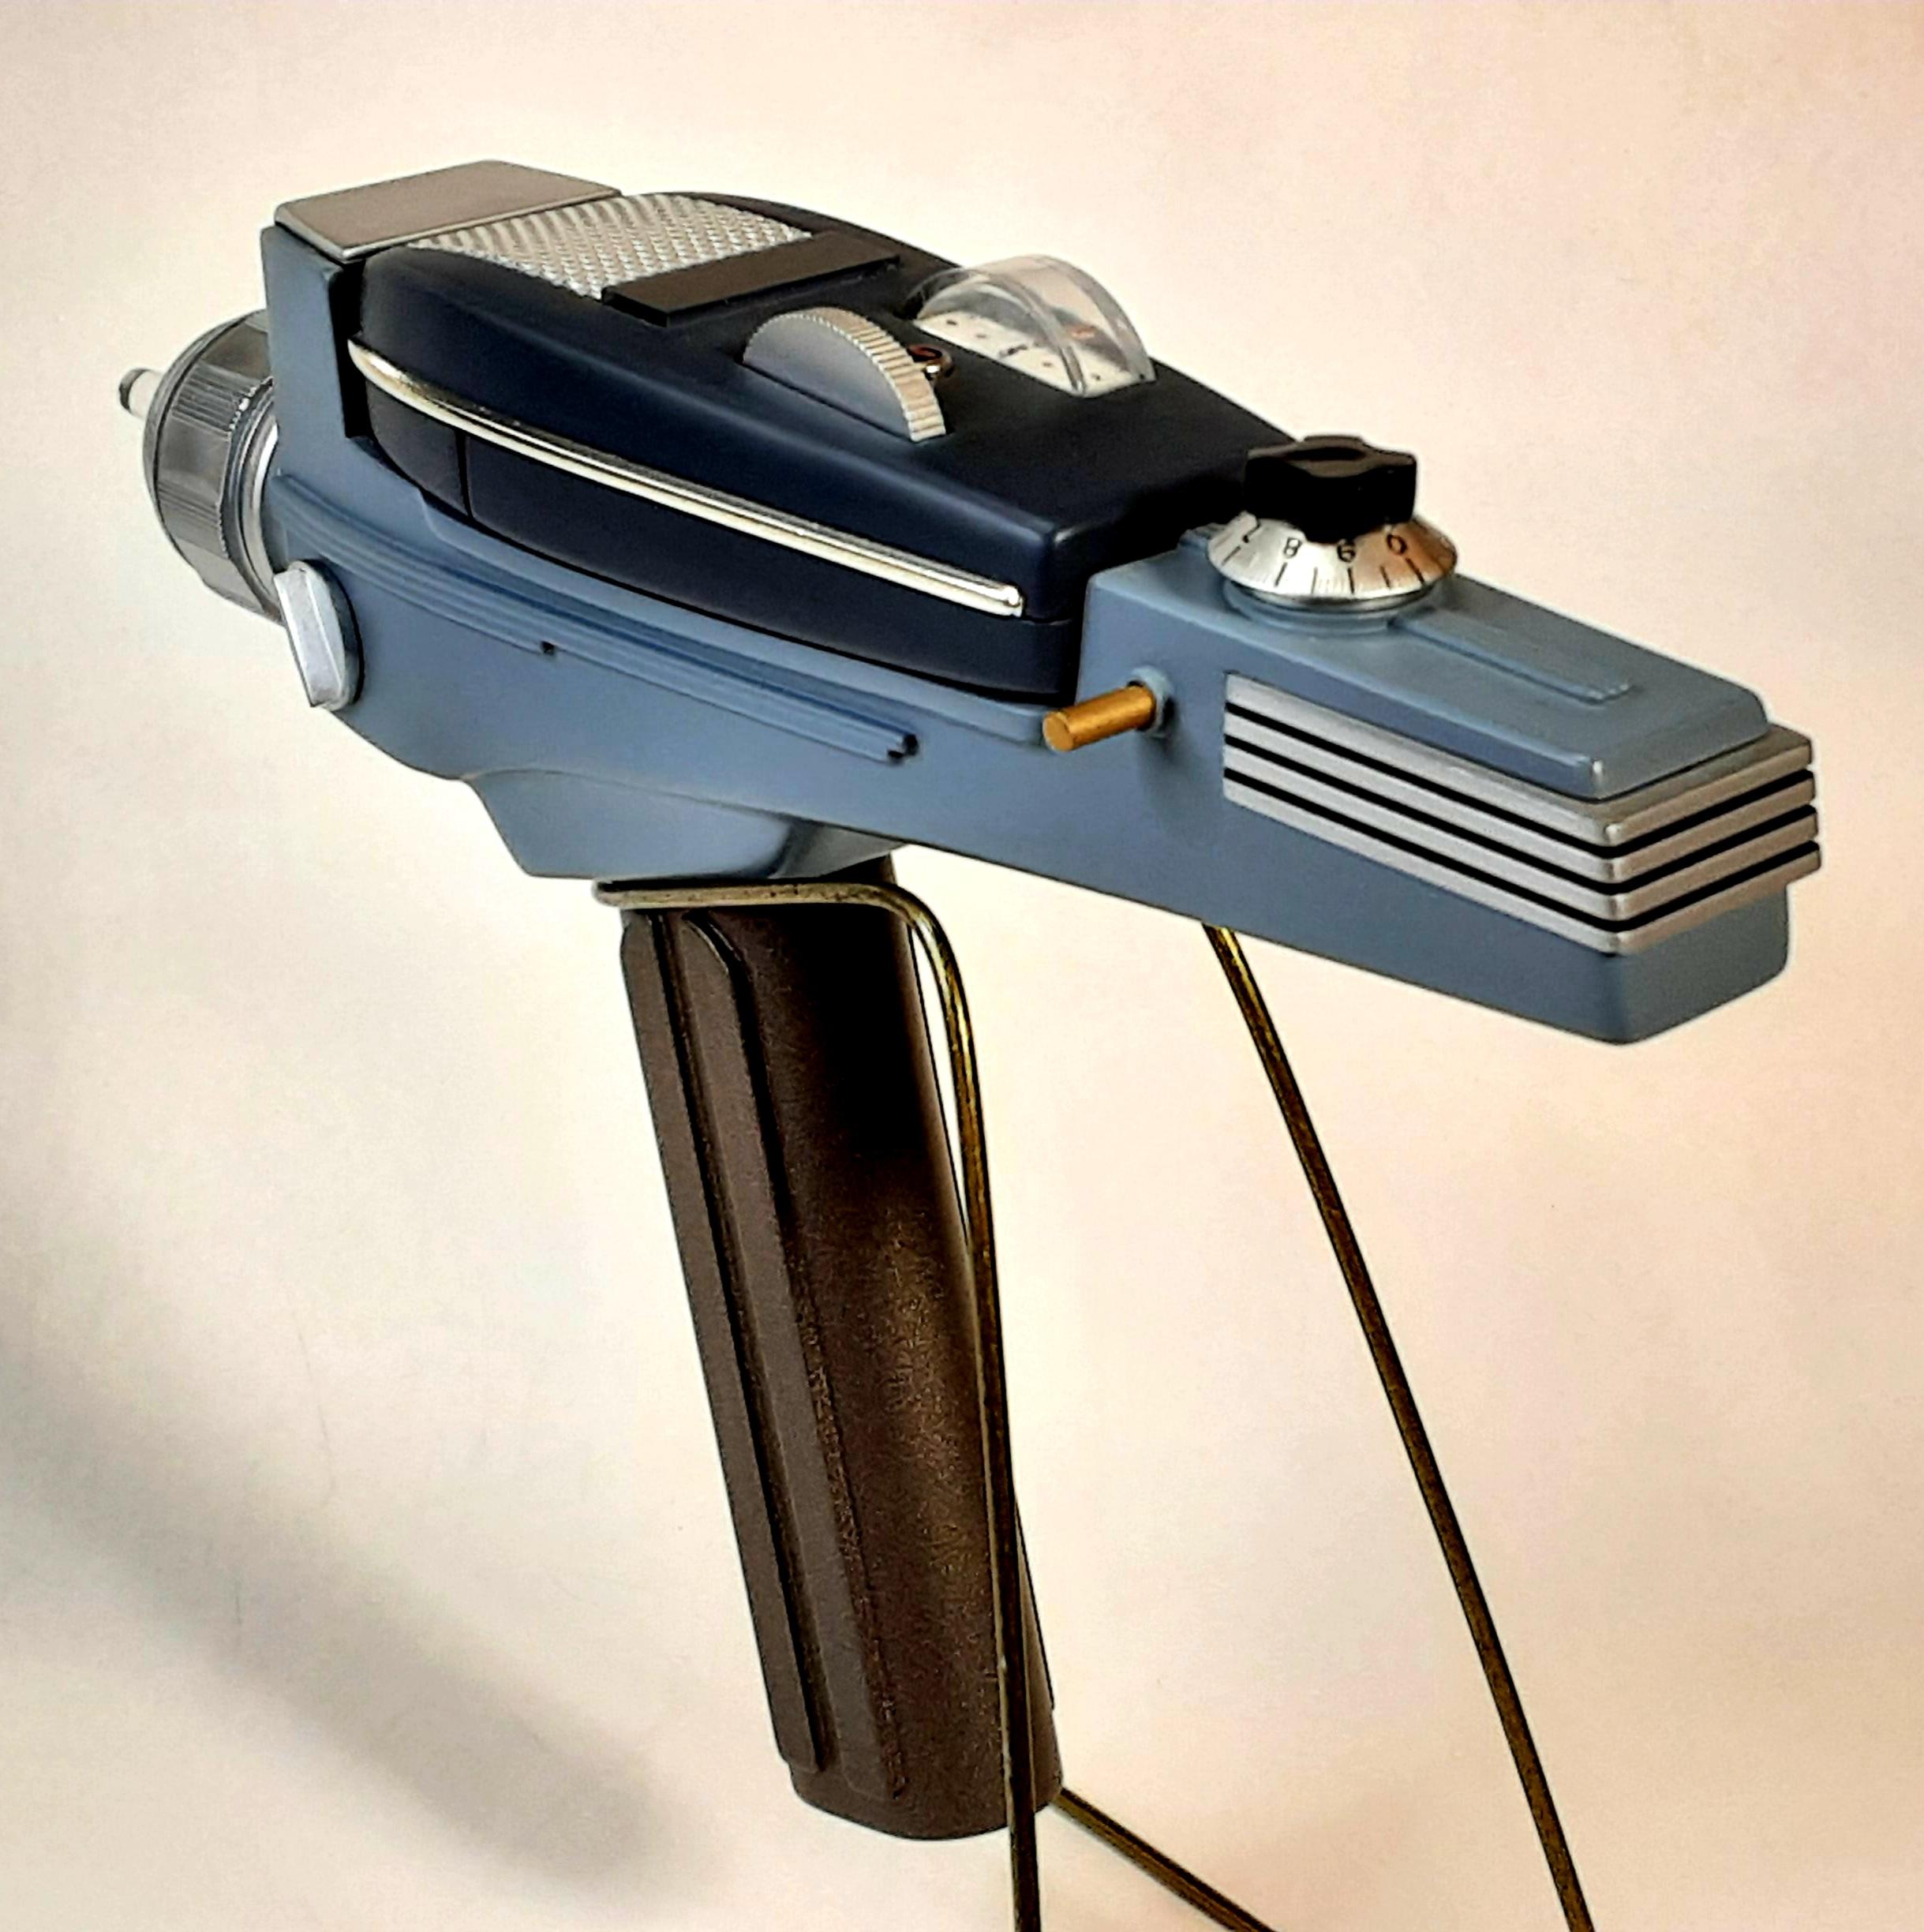
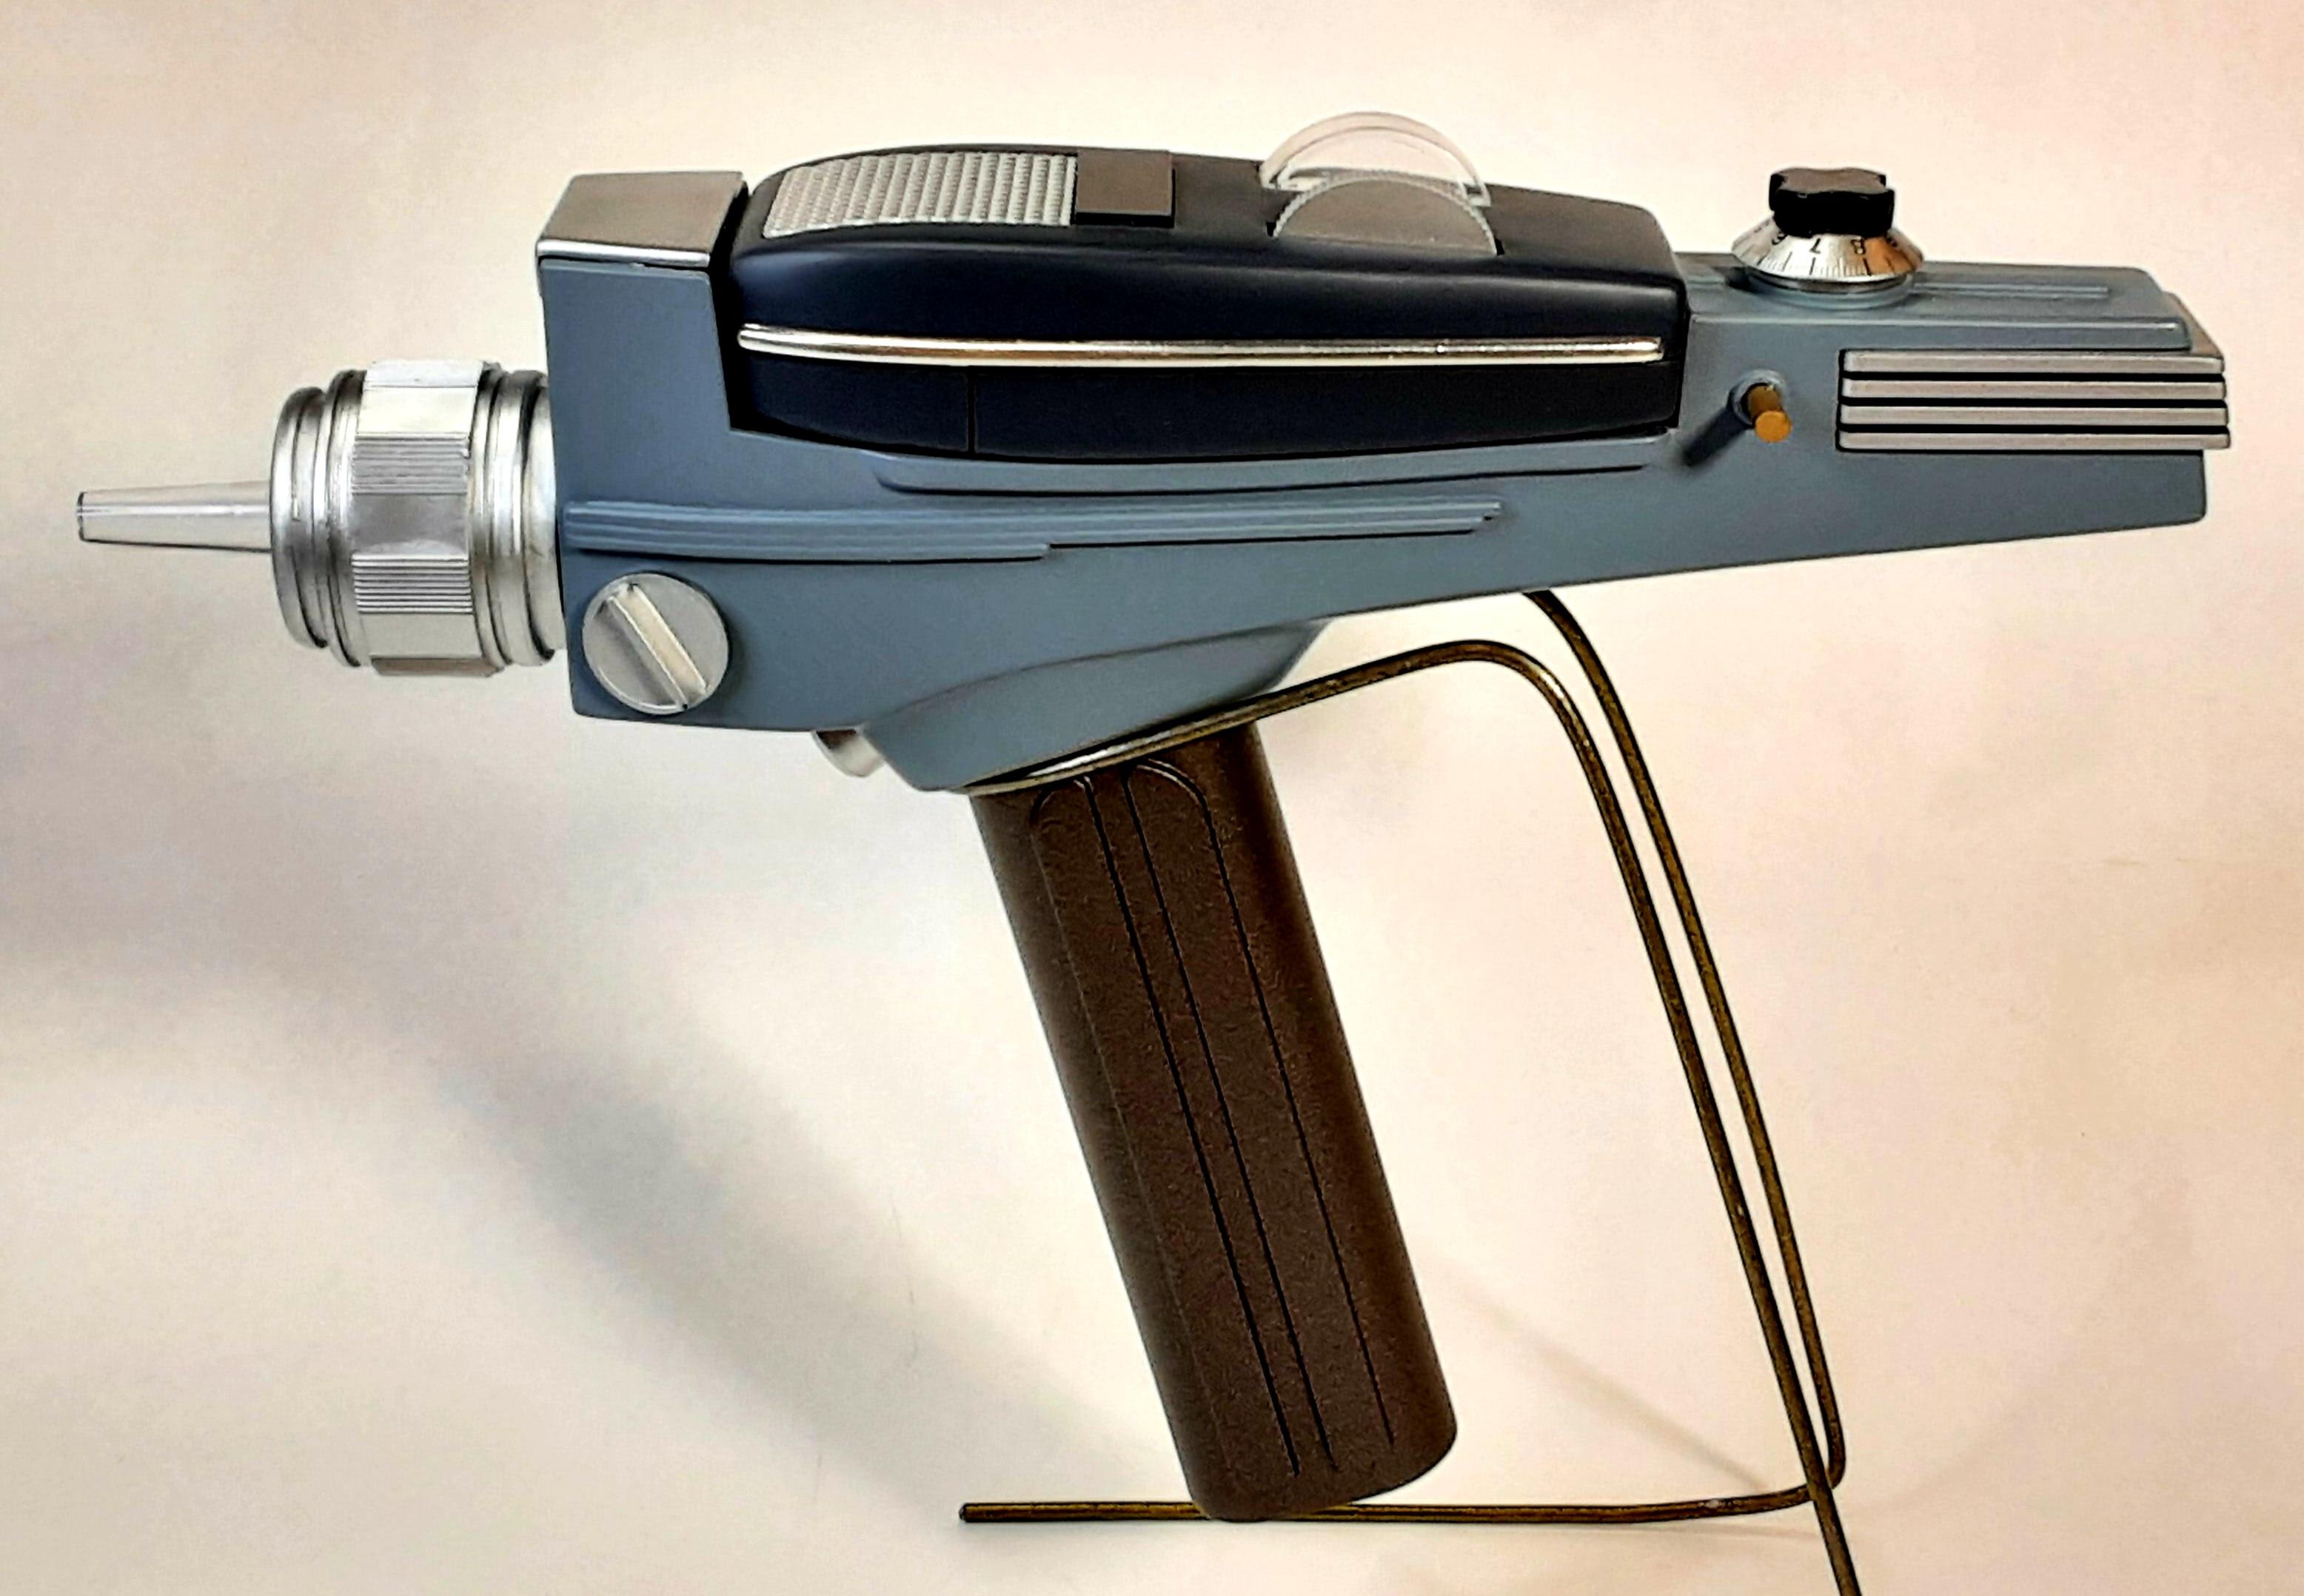
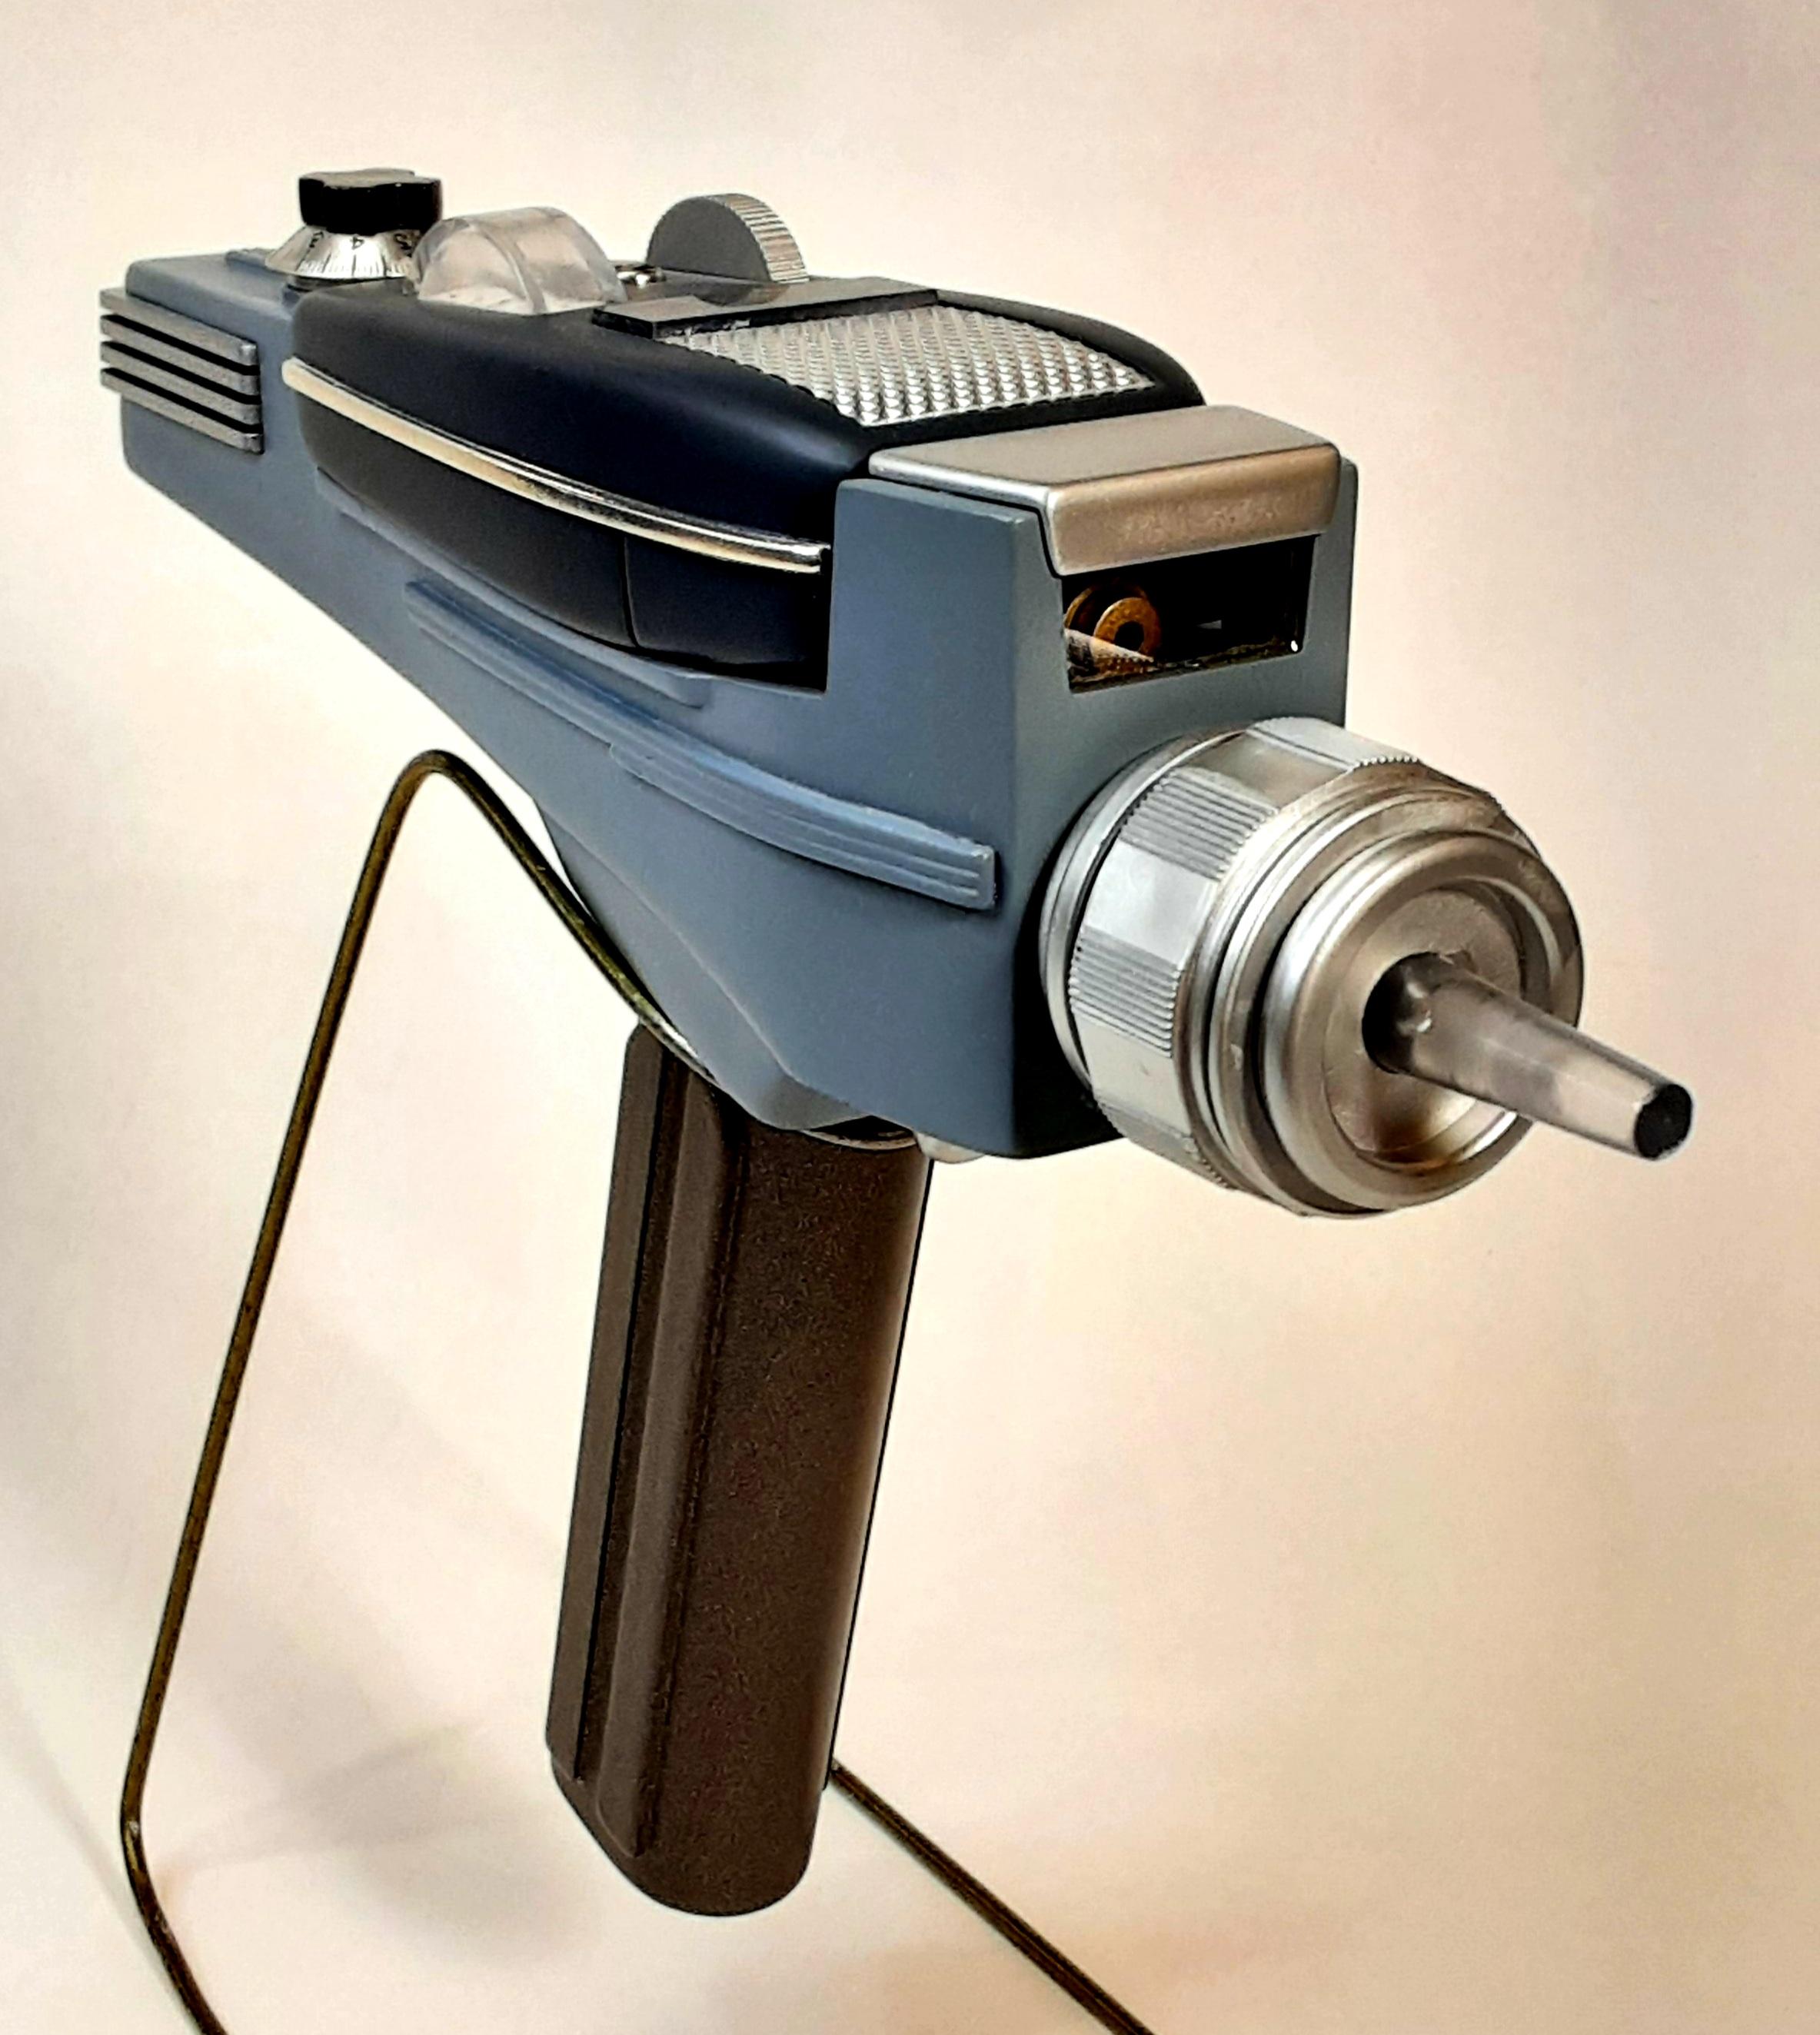
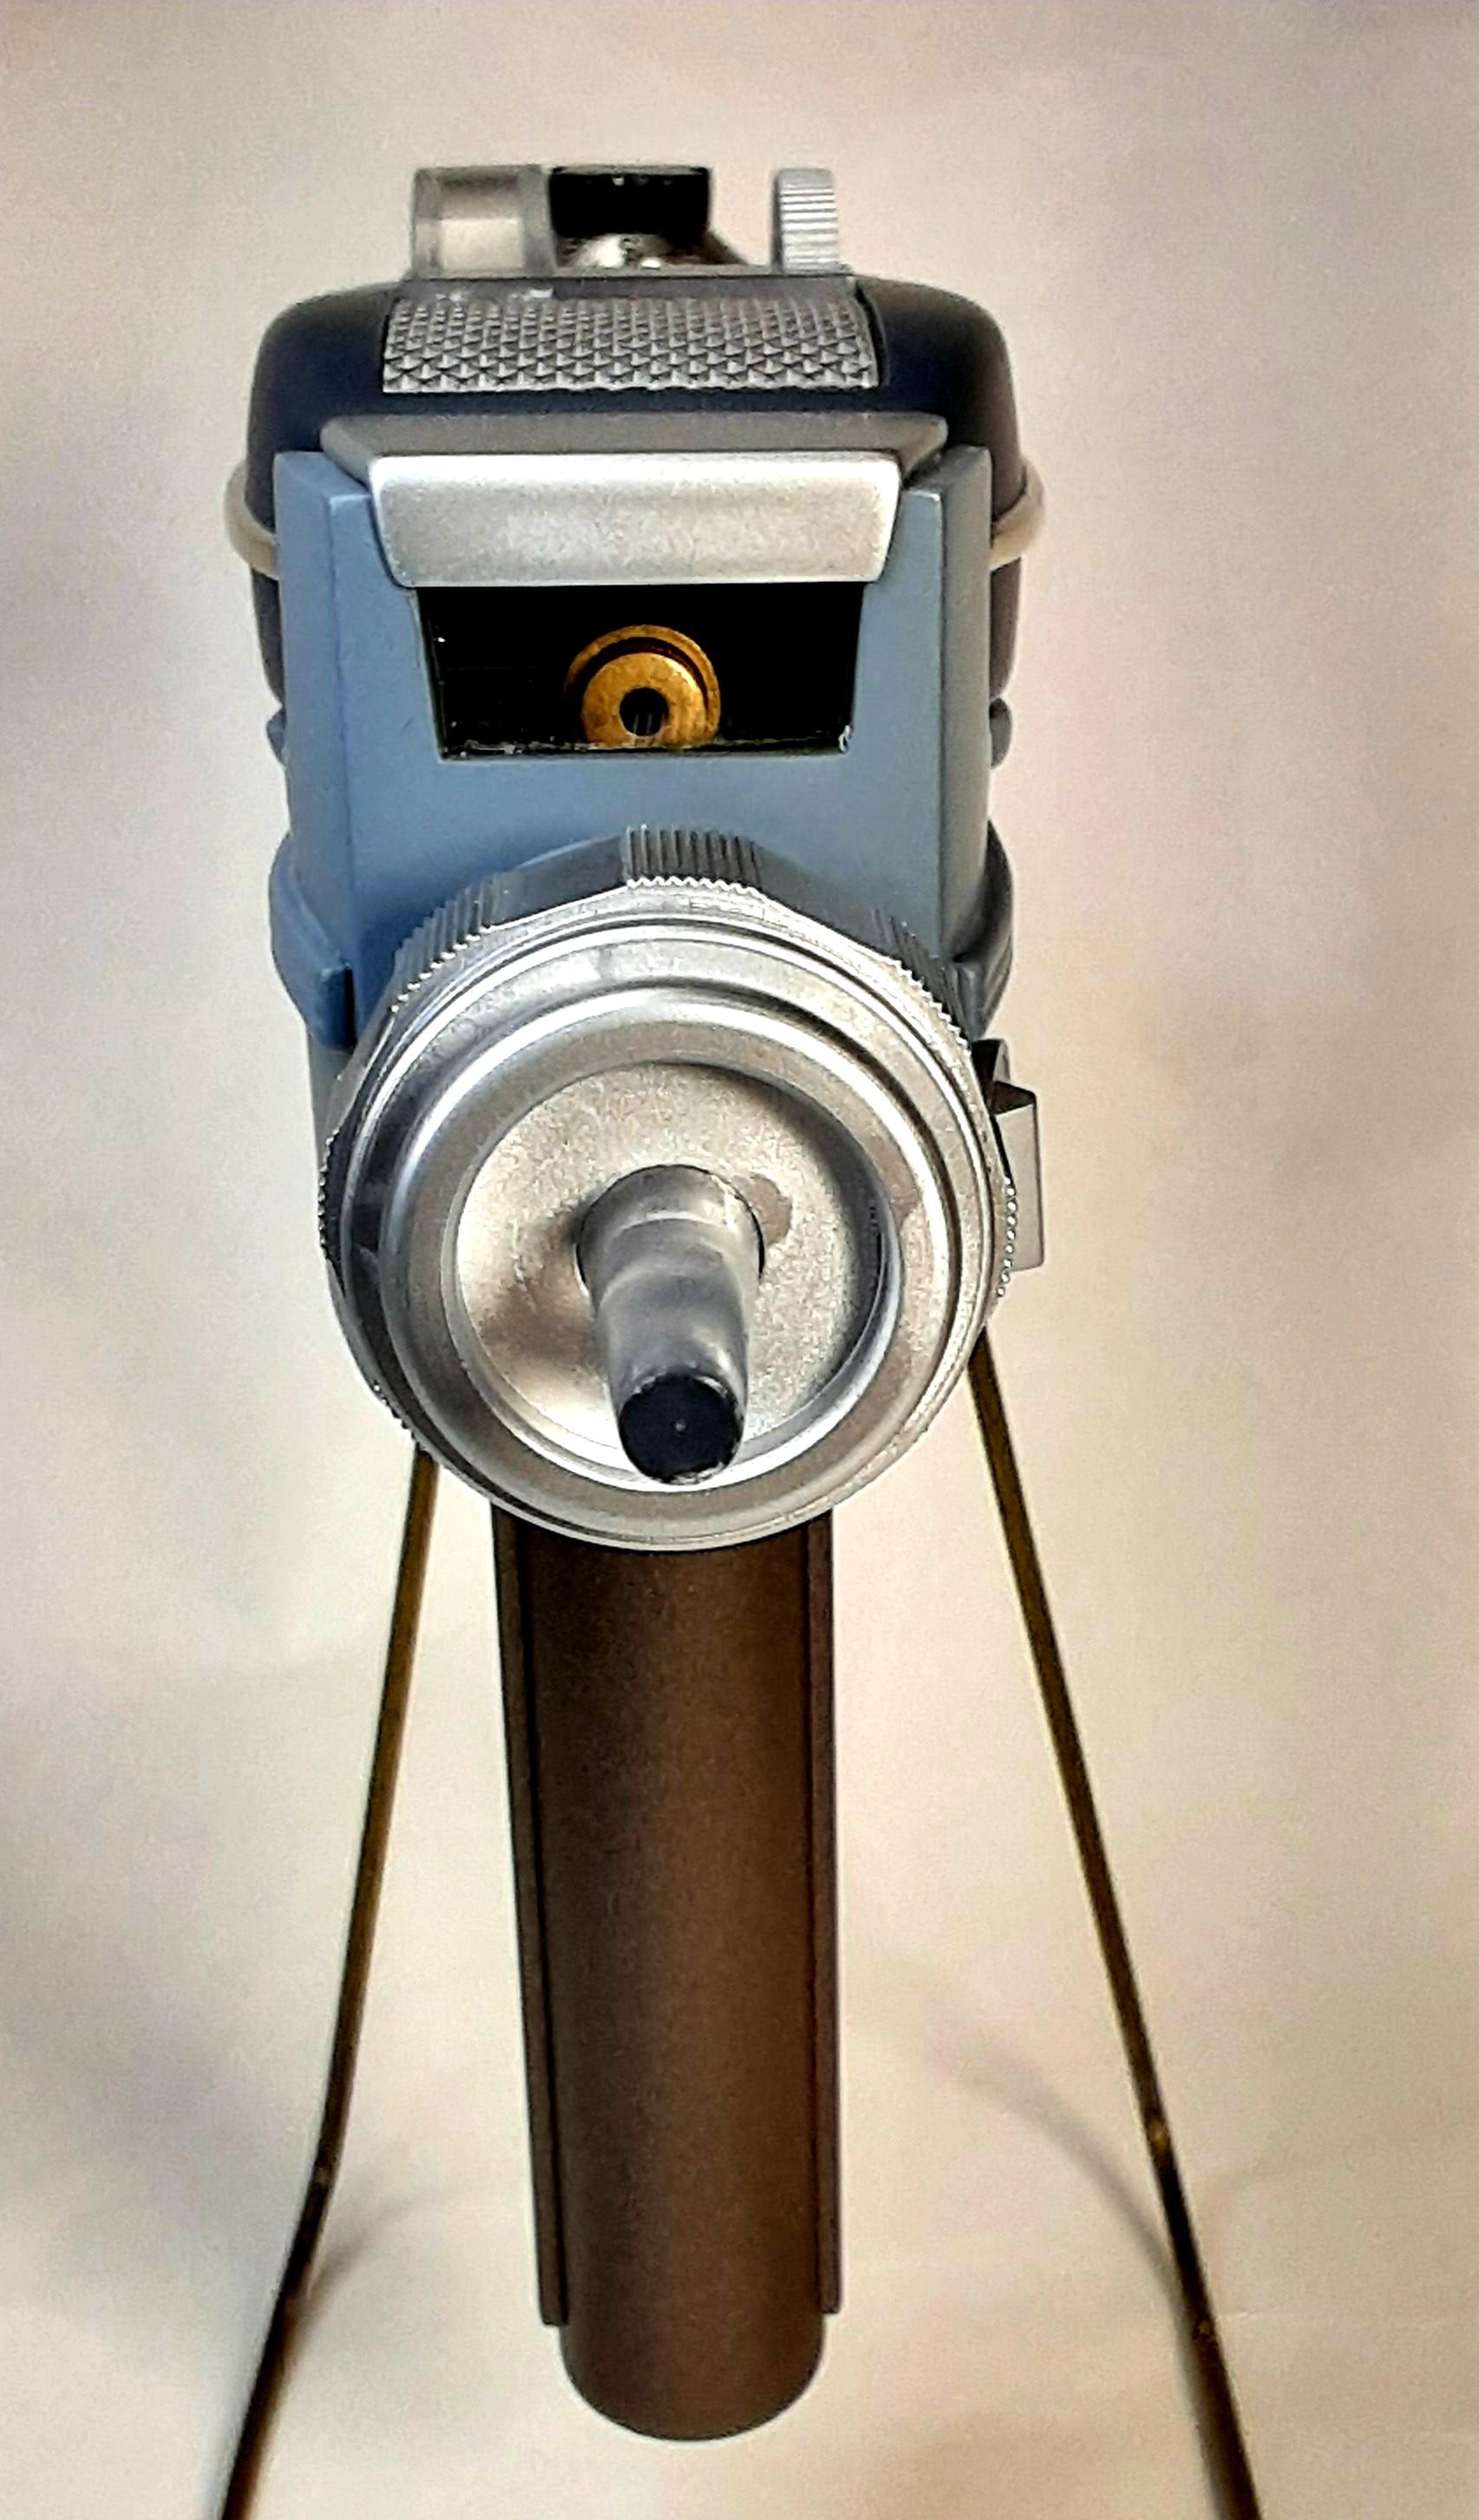
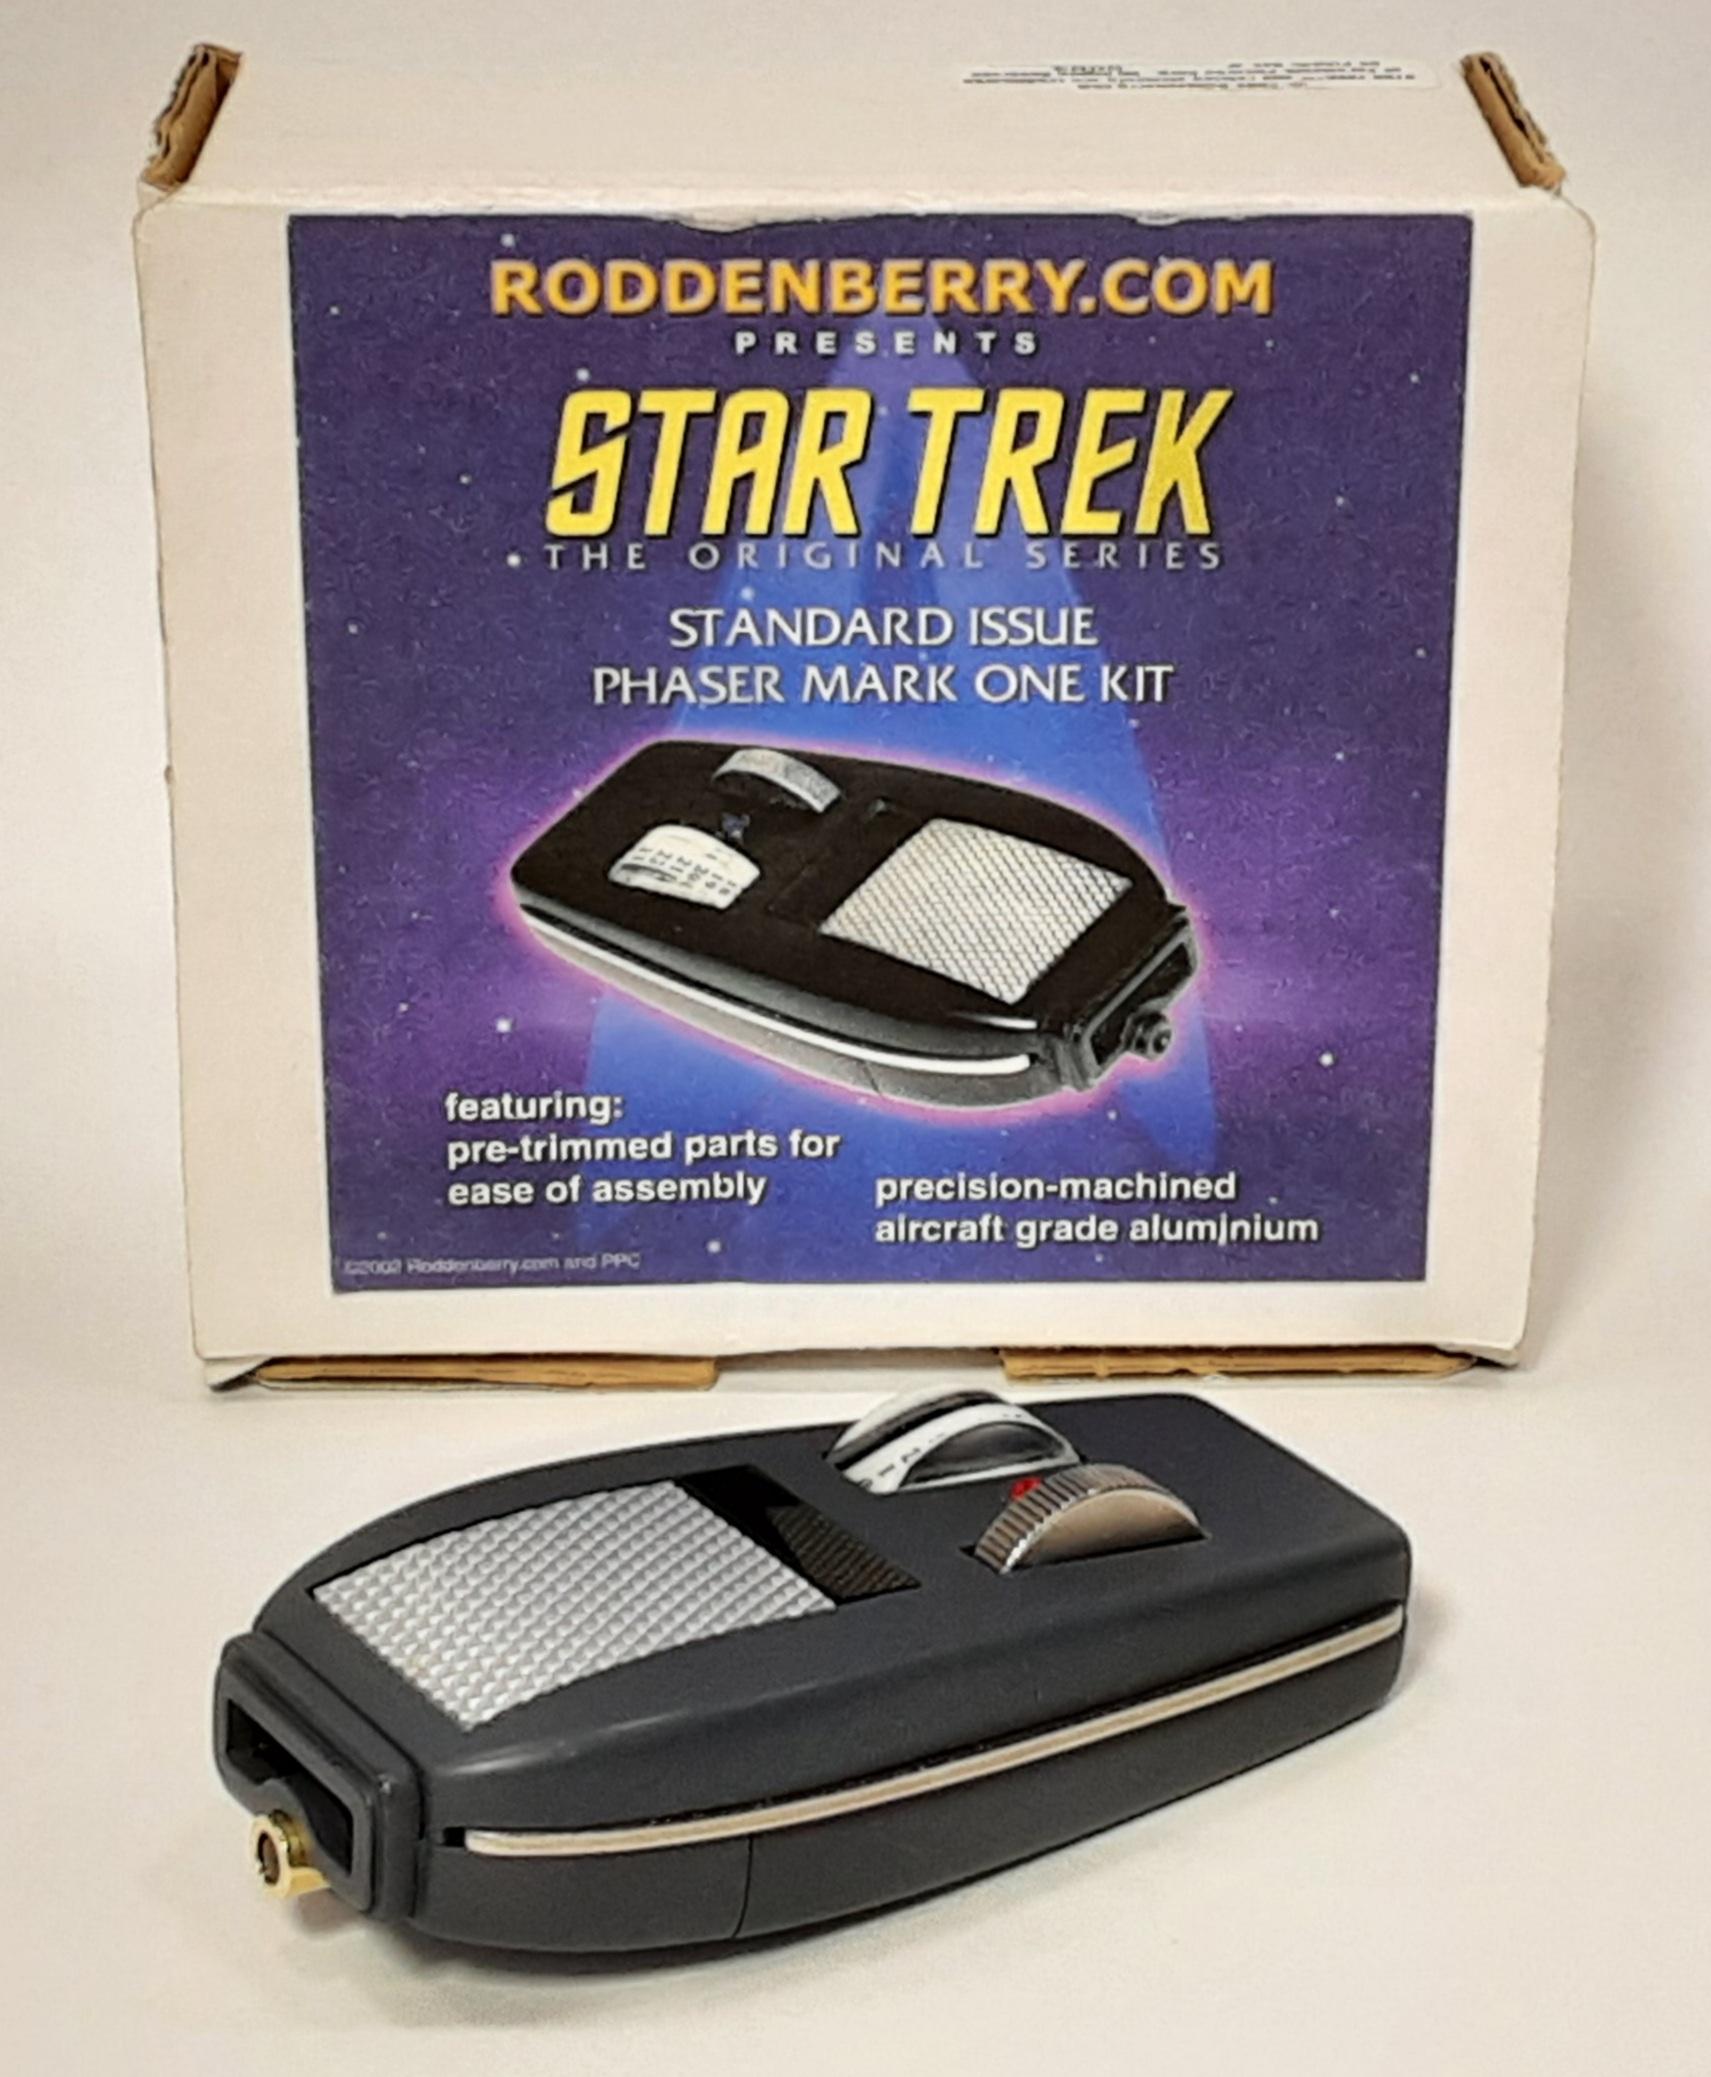
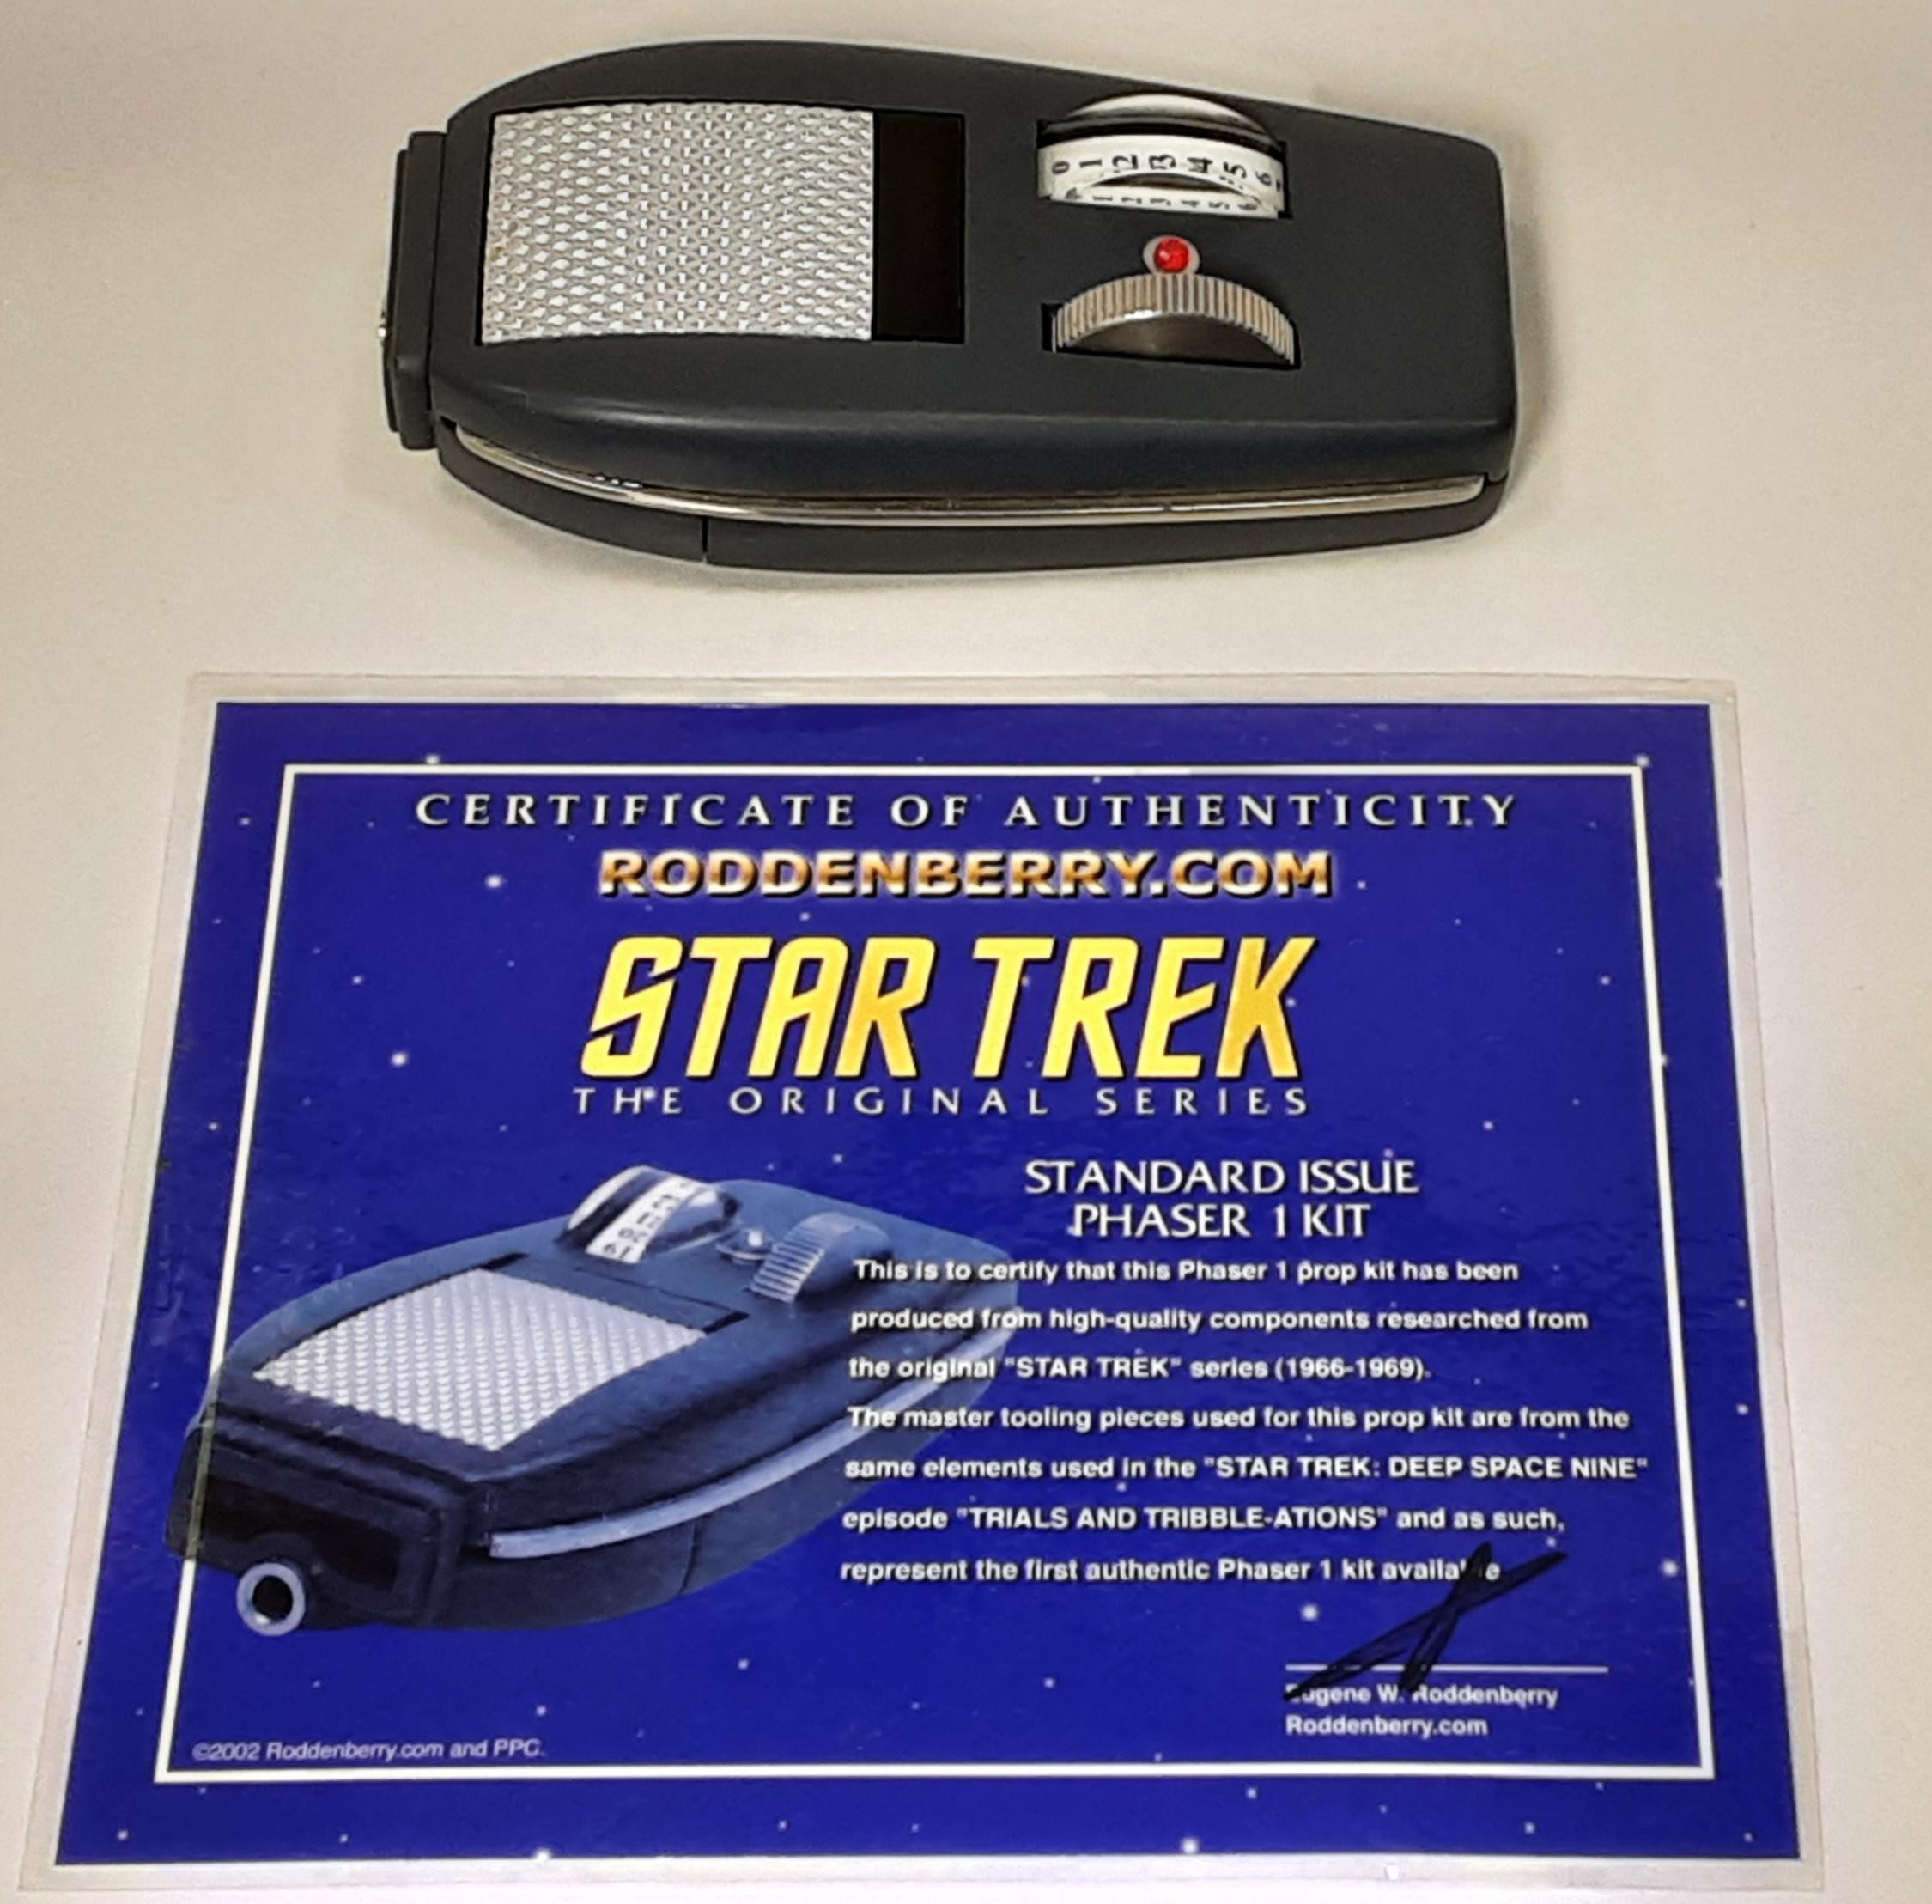
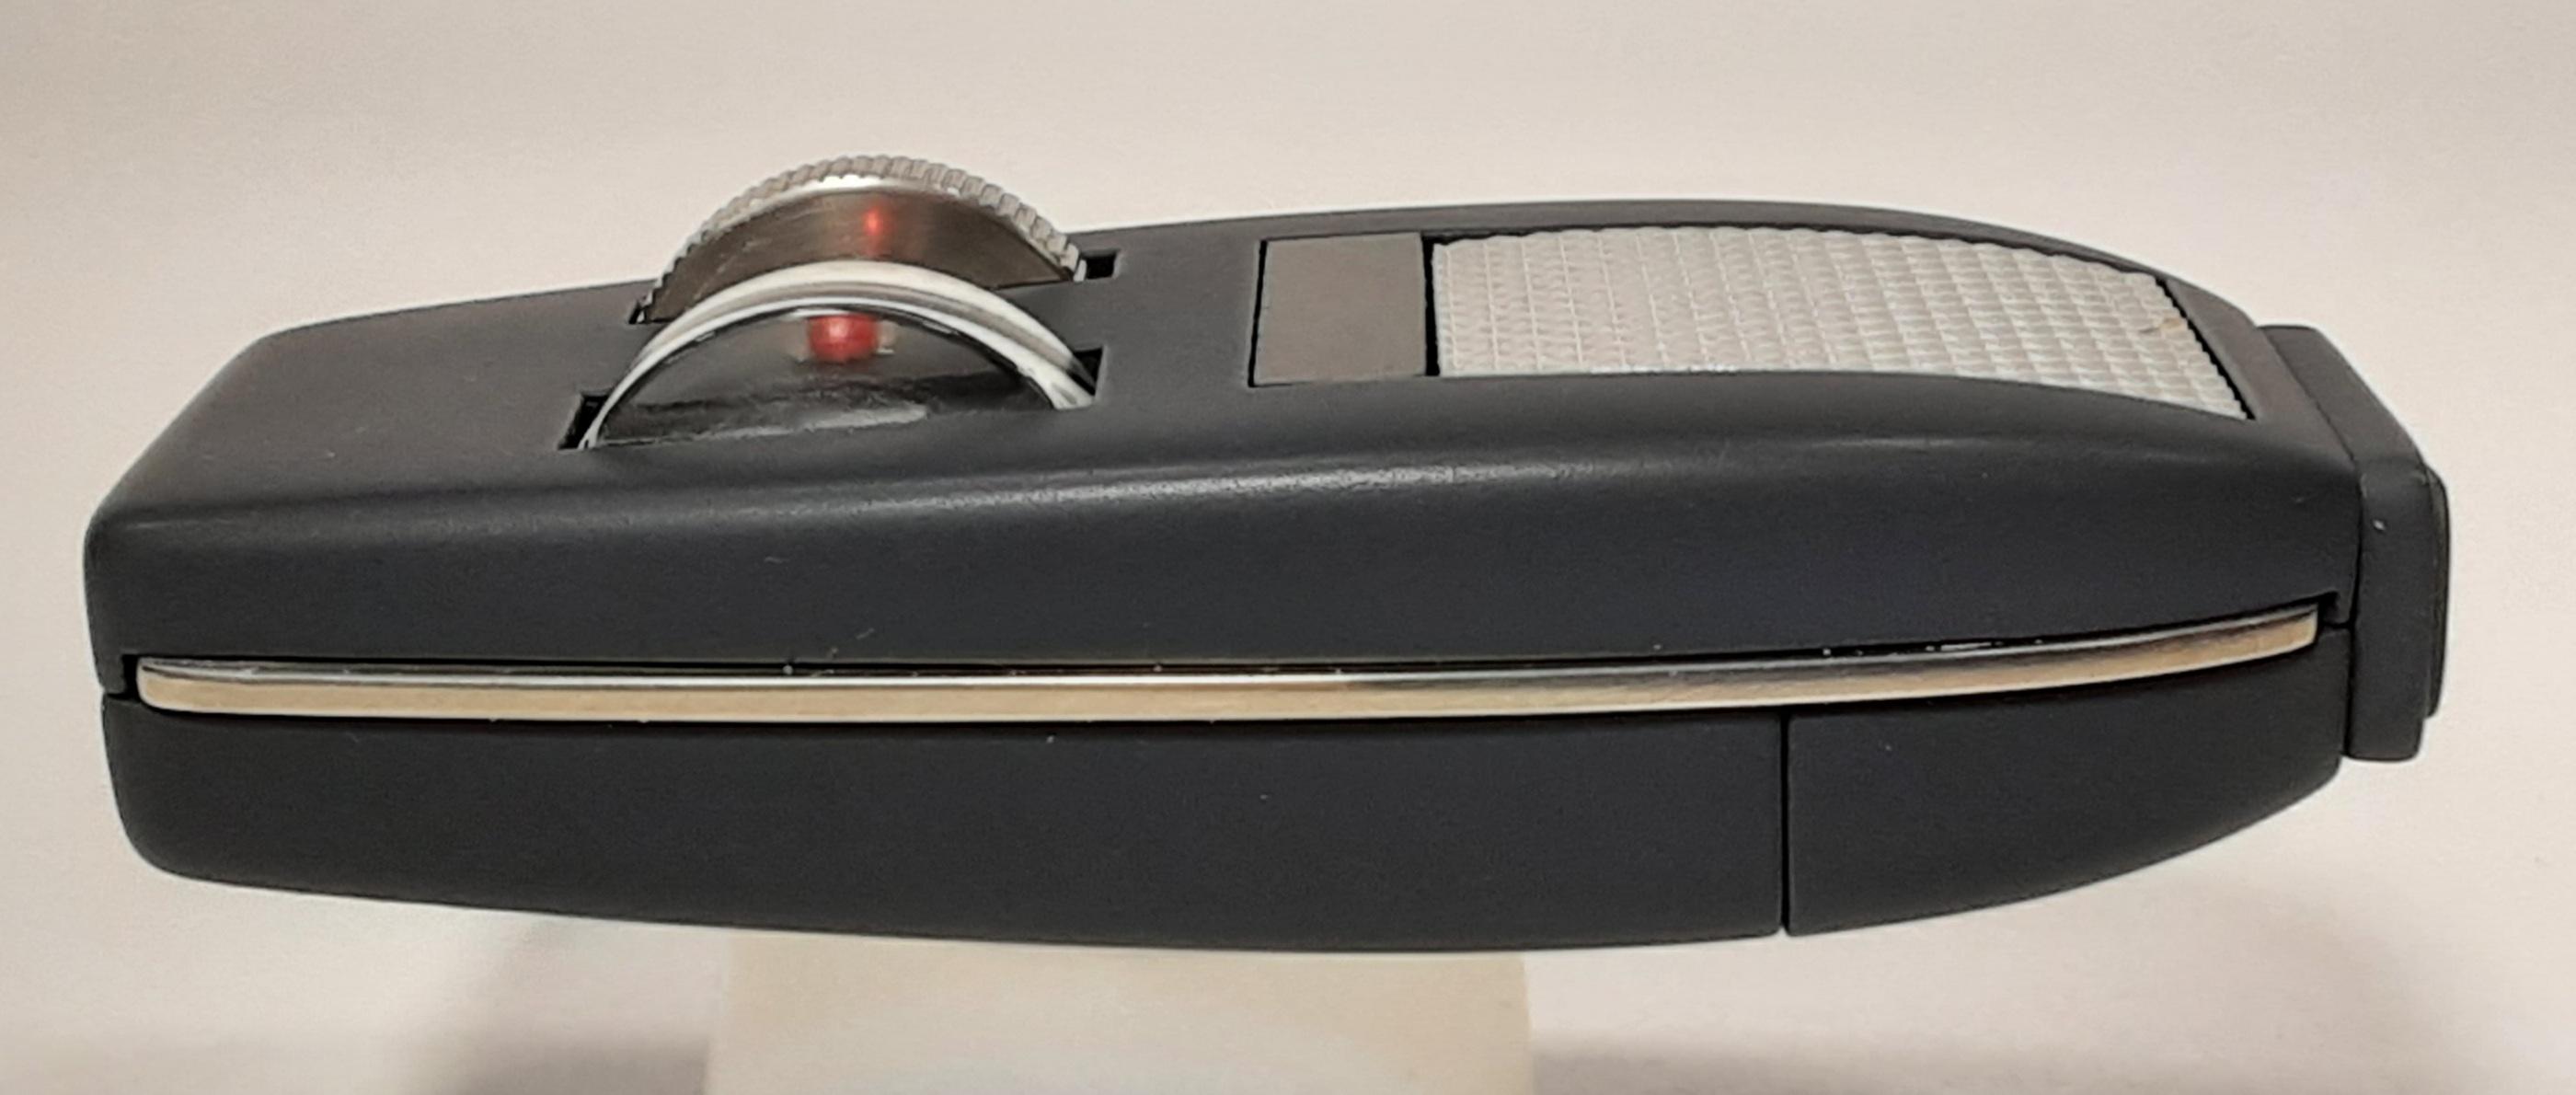
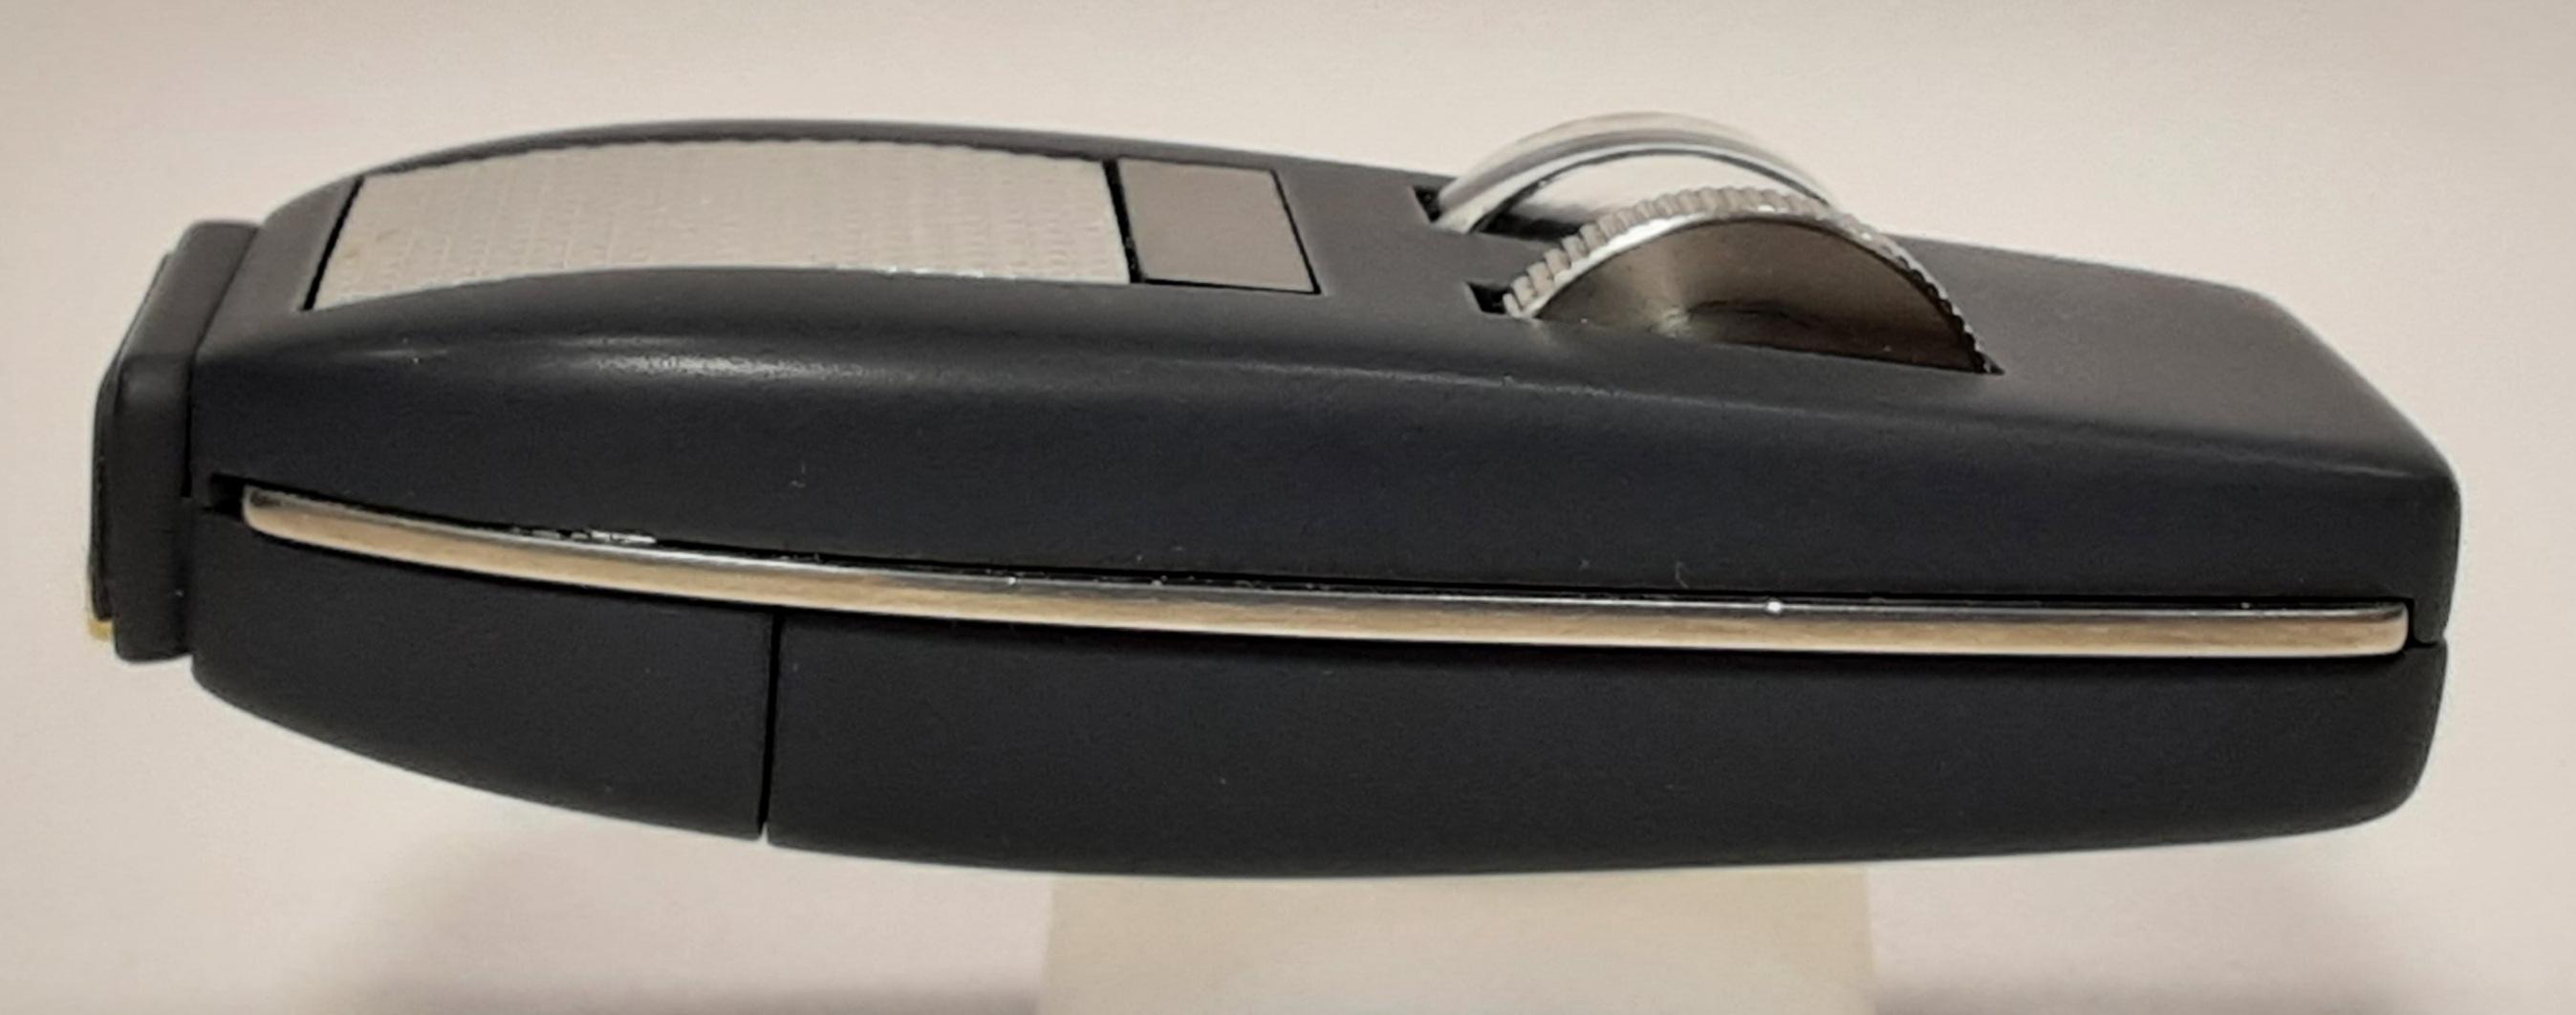
Yup, smaller Phaser I mounts in in a pistol frame to, as an assembly, become a Phaser II which is a more powerful and versatile weapon according to Star Trek lore. I built this one a few years ago, not exactly screen correct but pretty close.
-
Yup...that's what I need, another project. I did do a 1/32 build of the old Aurora kit on a Slot it chassis some years ago.
-
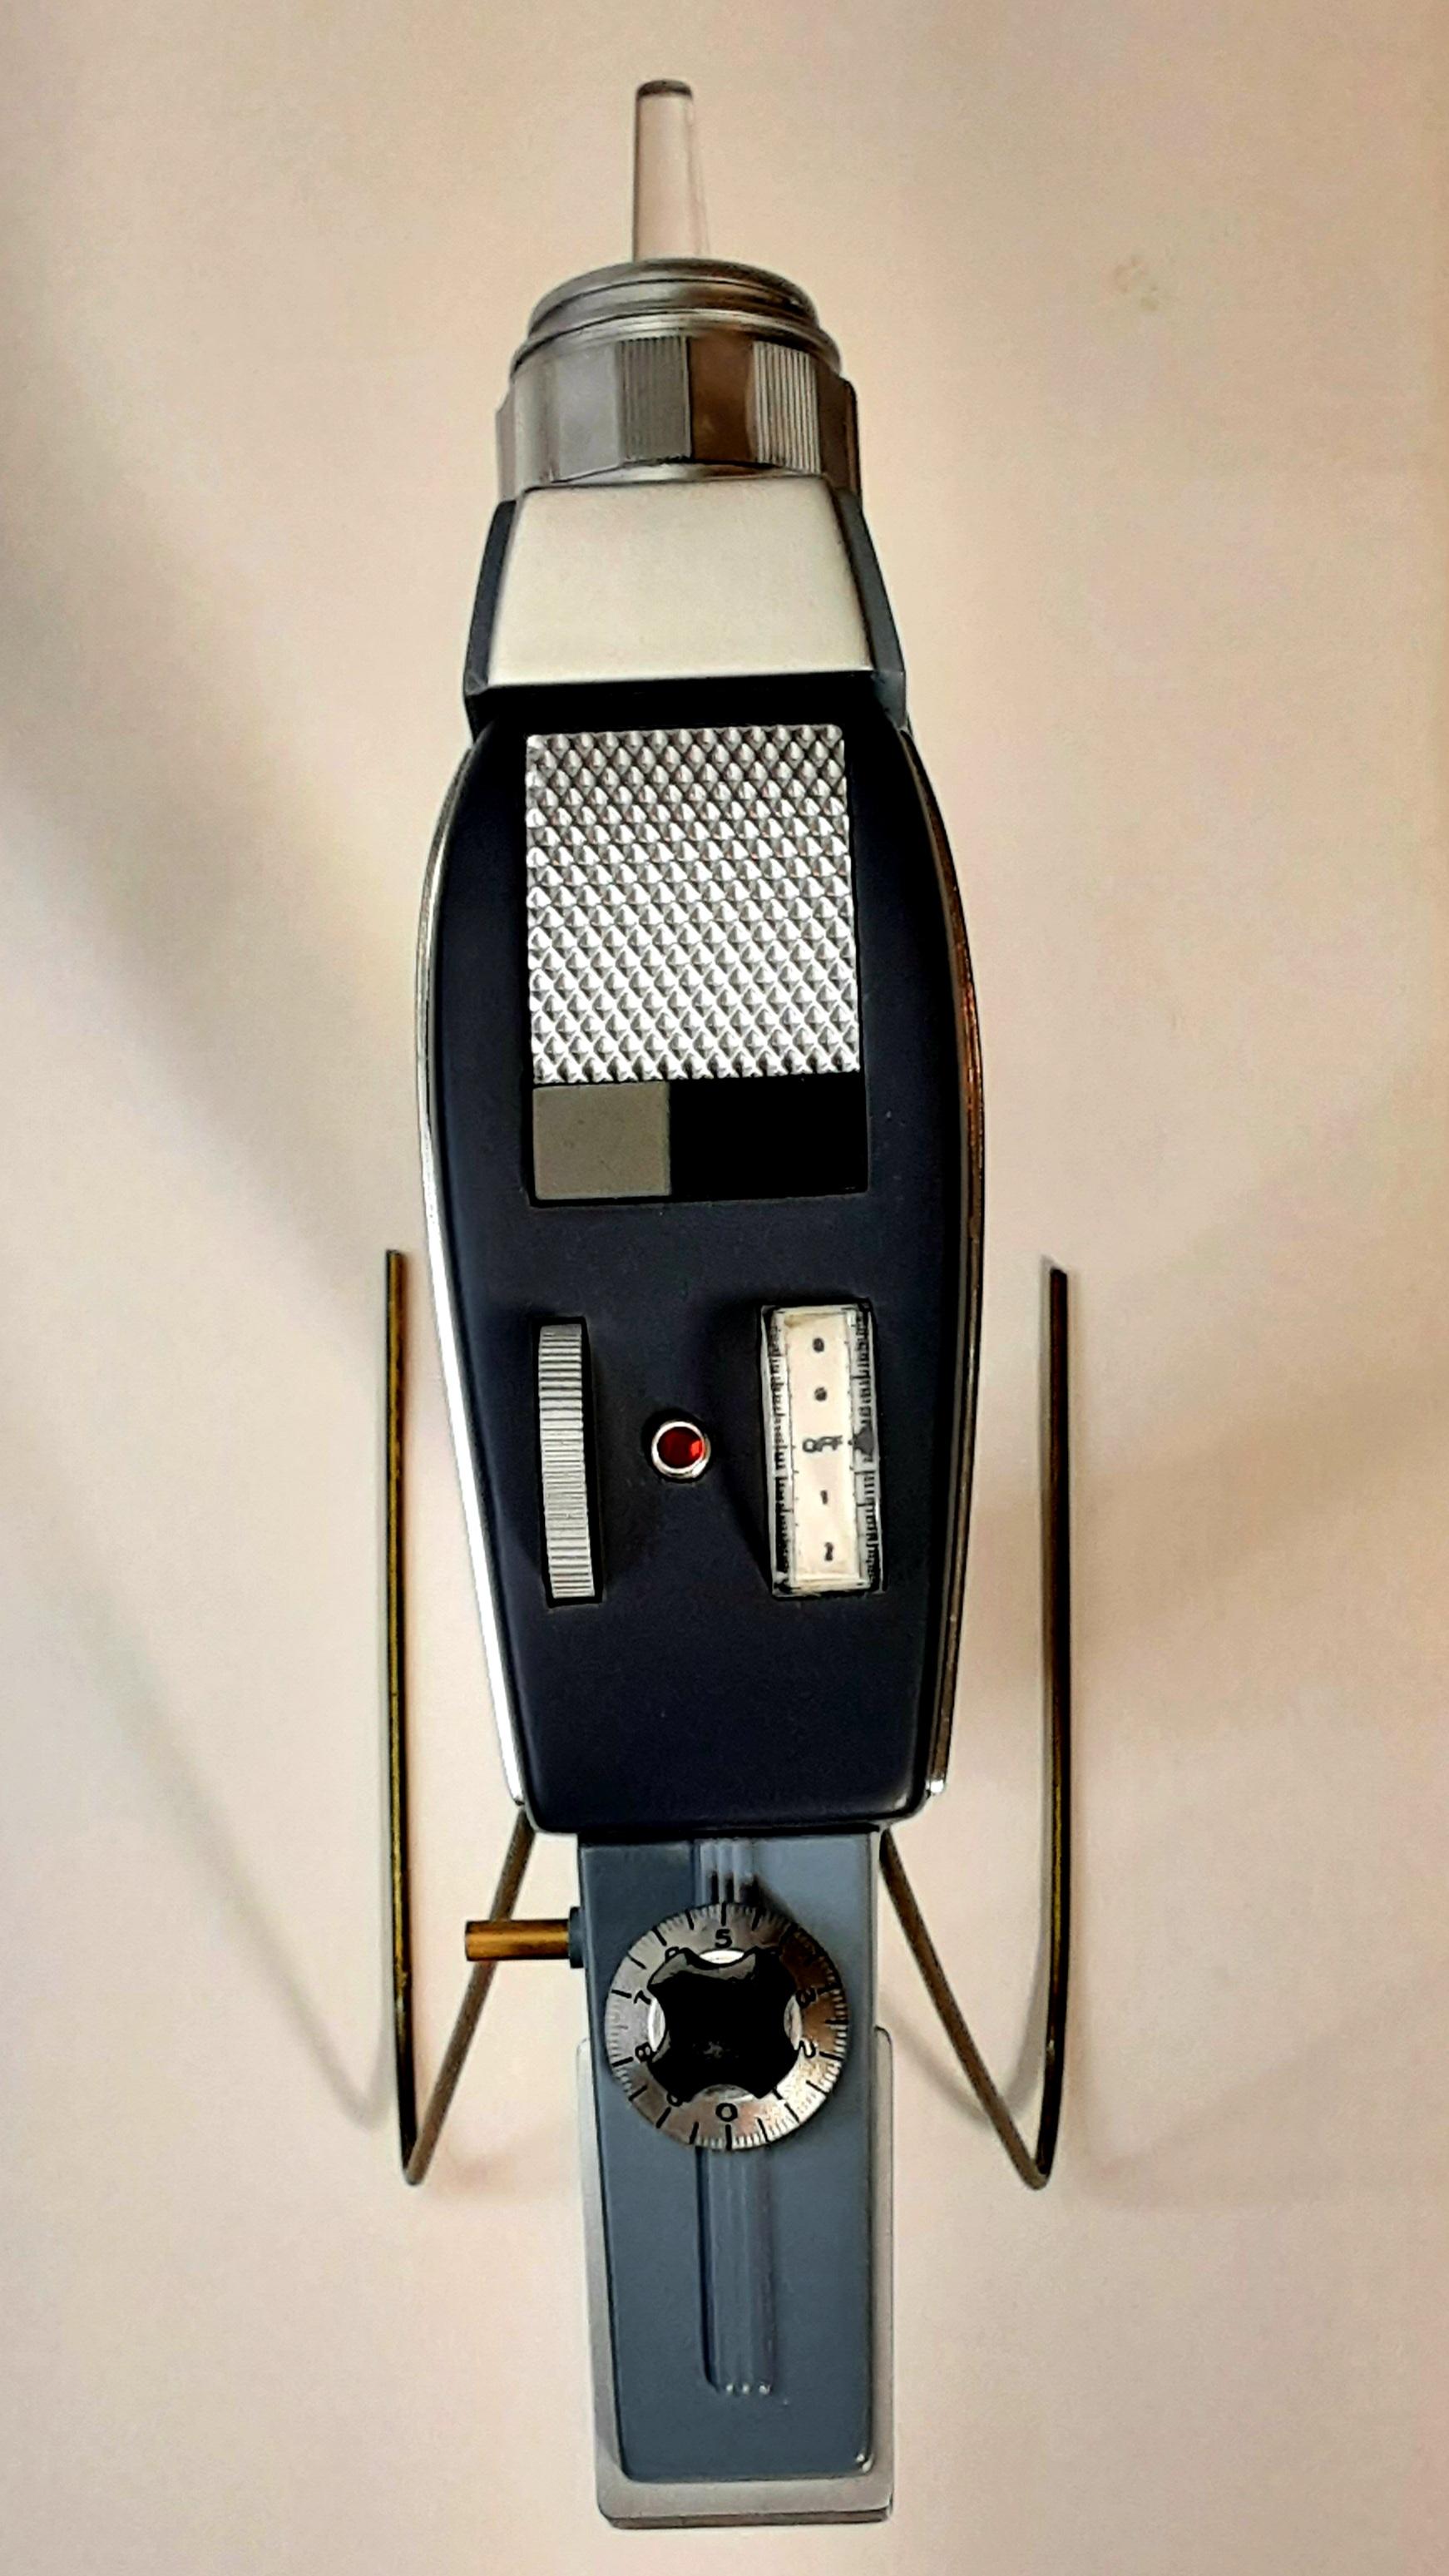
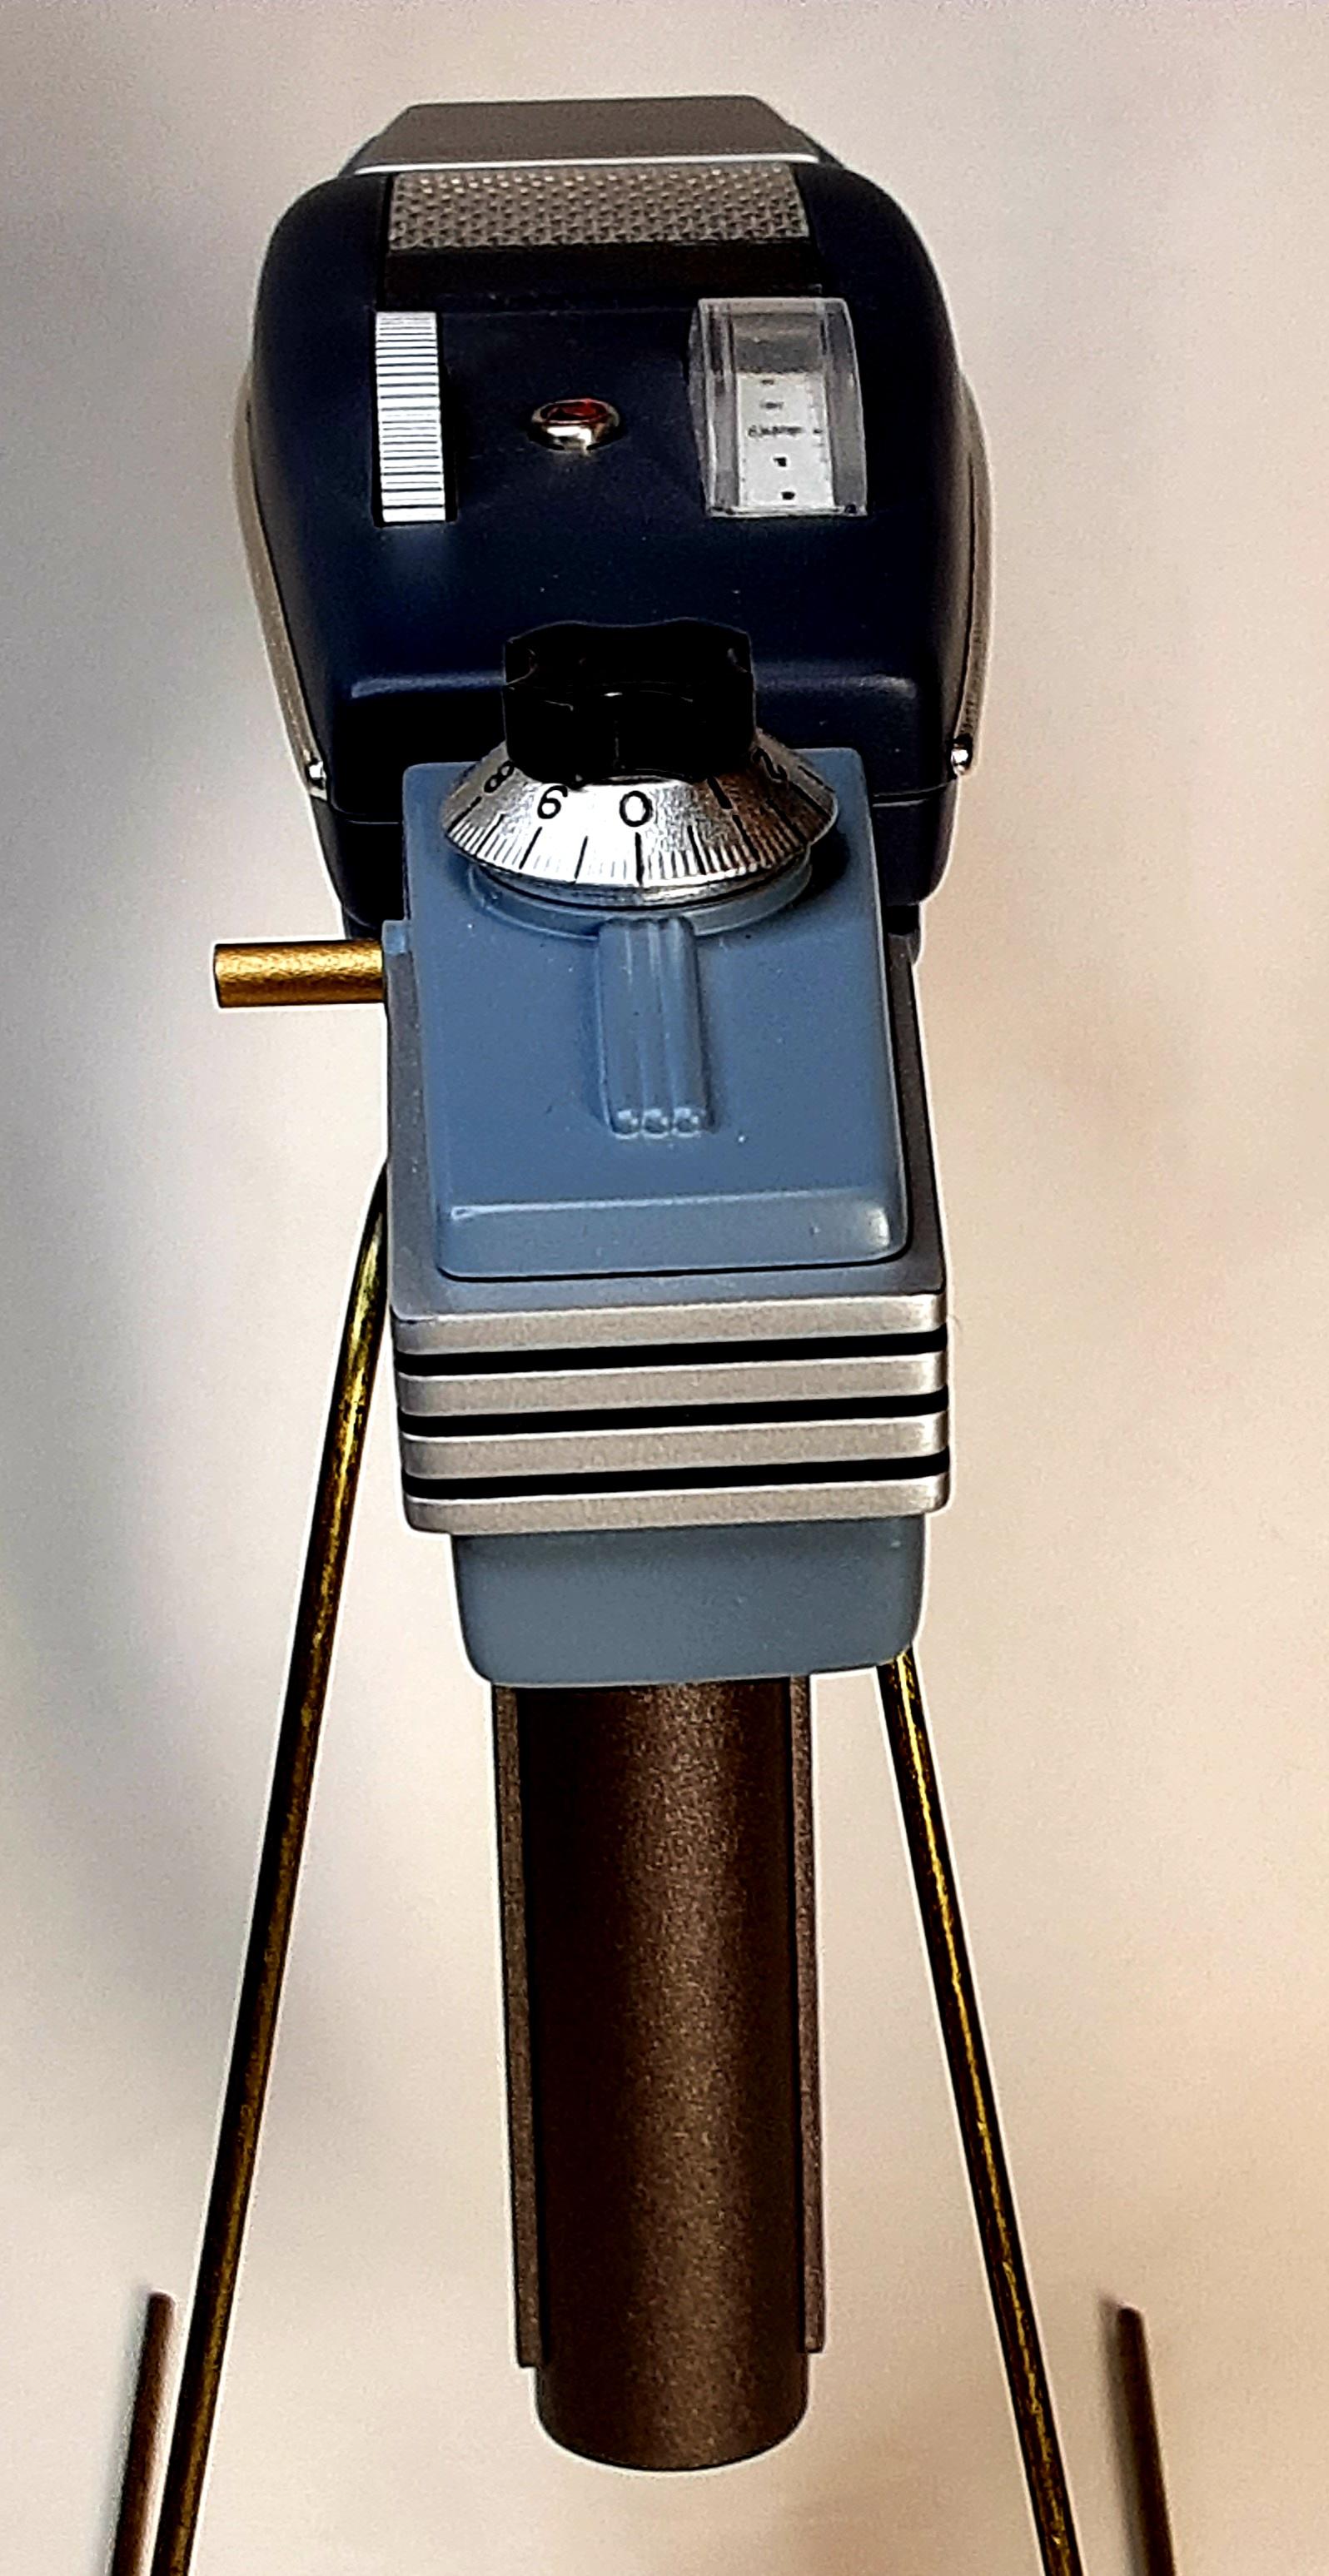
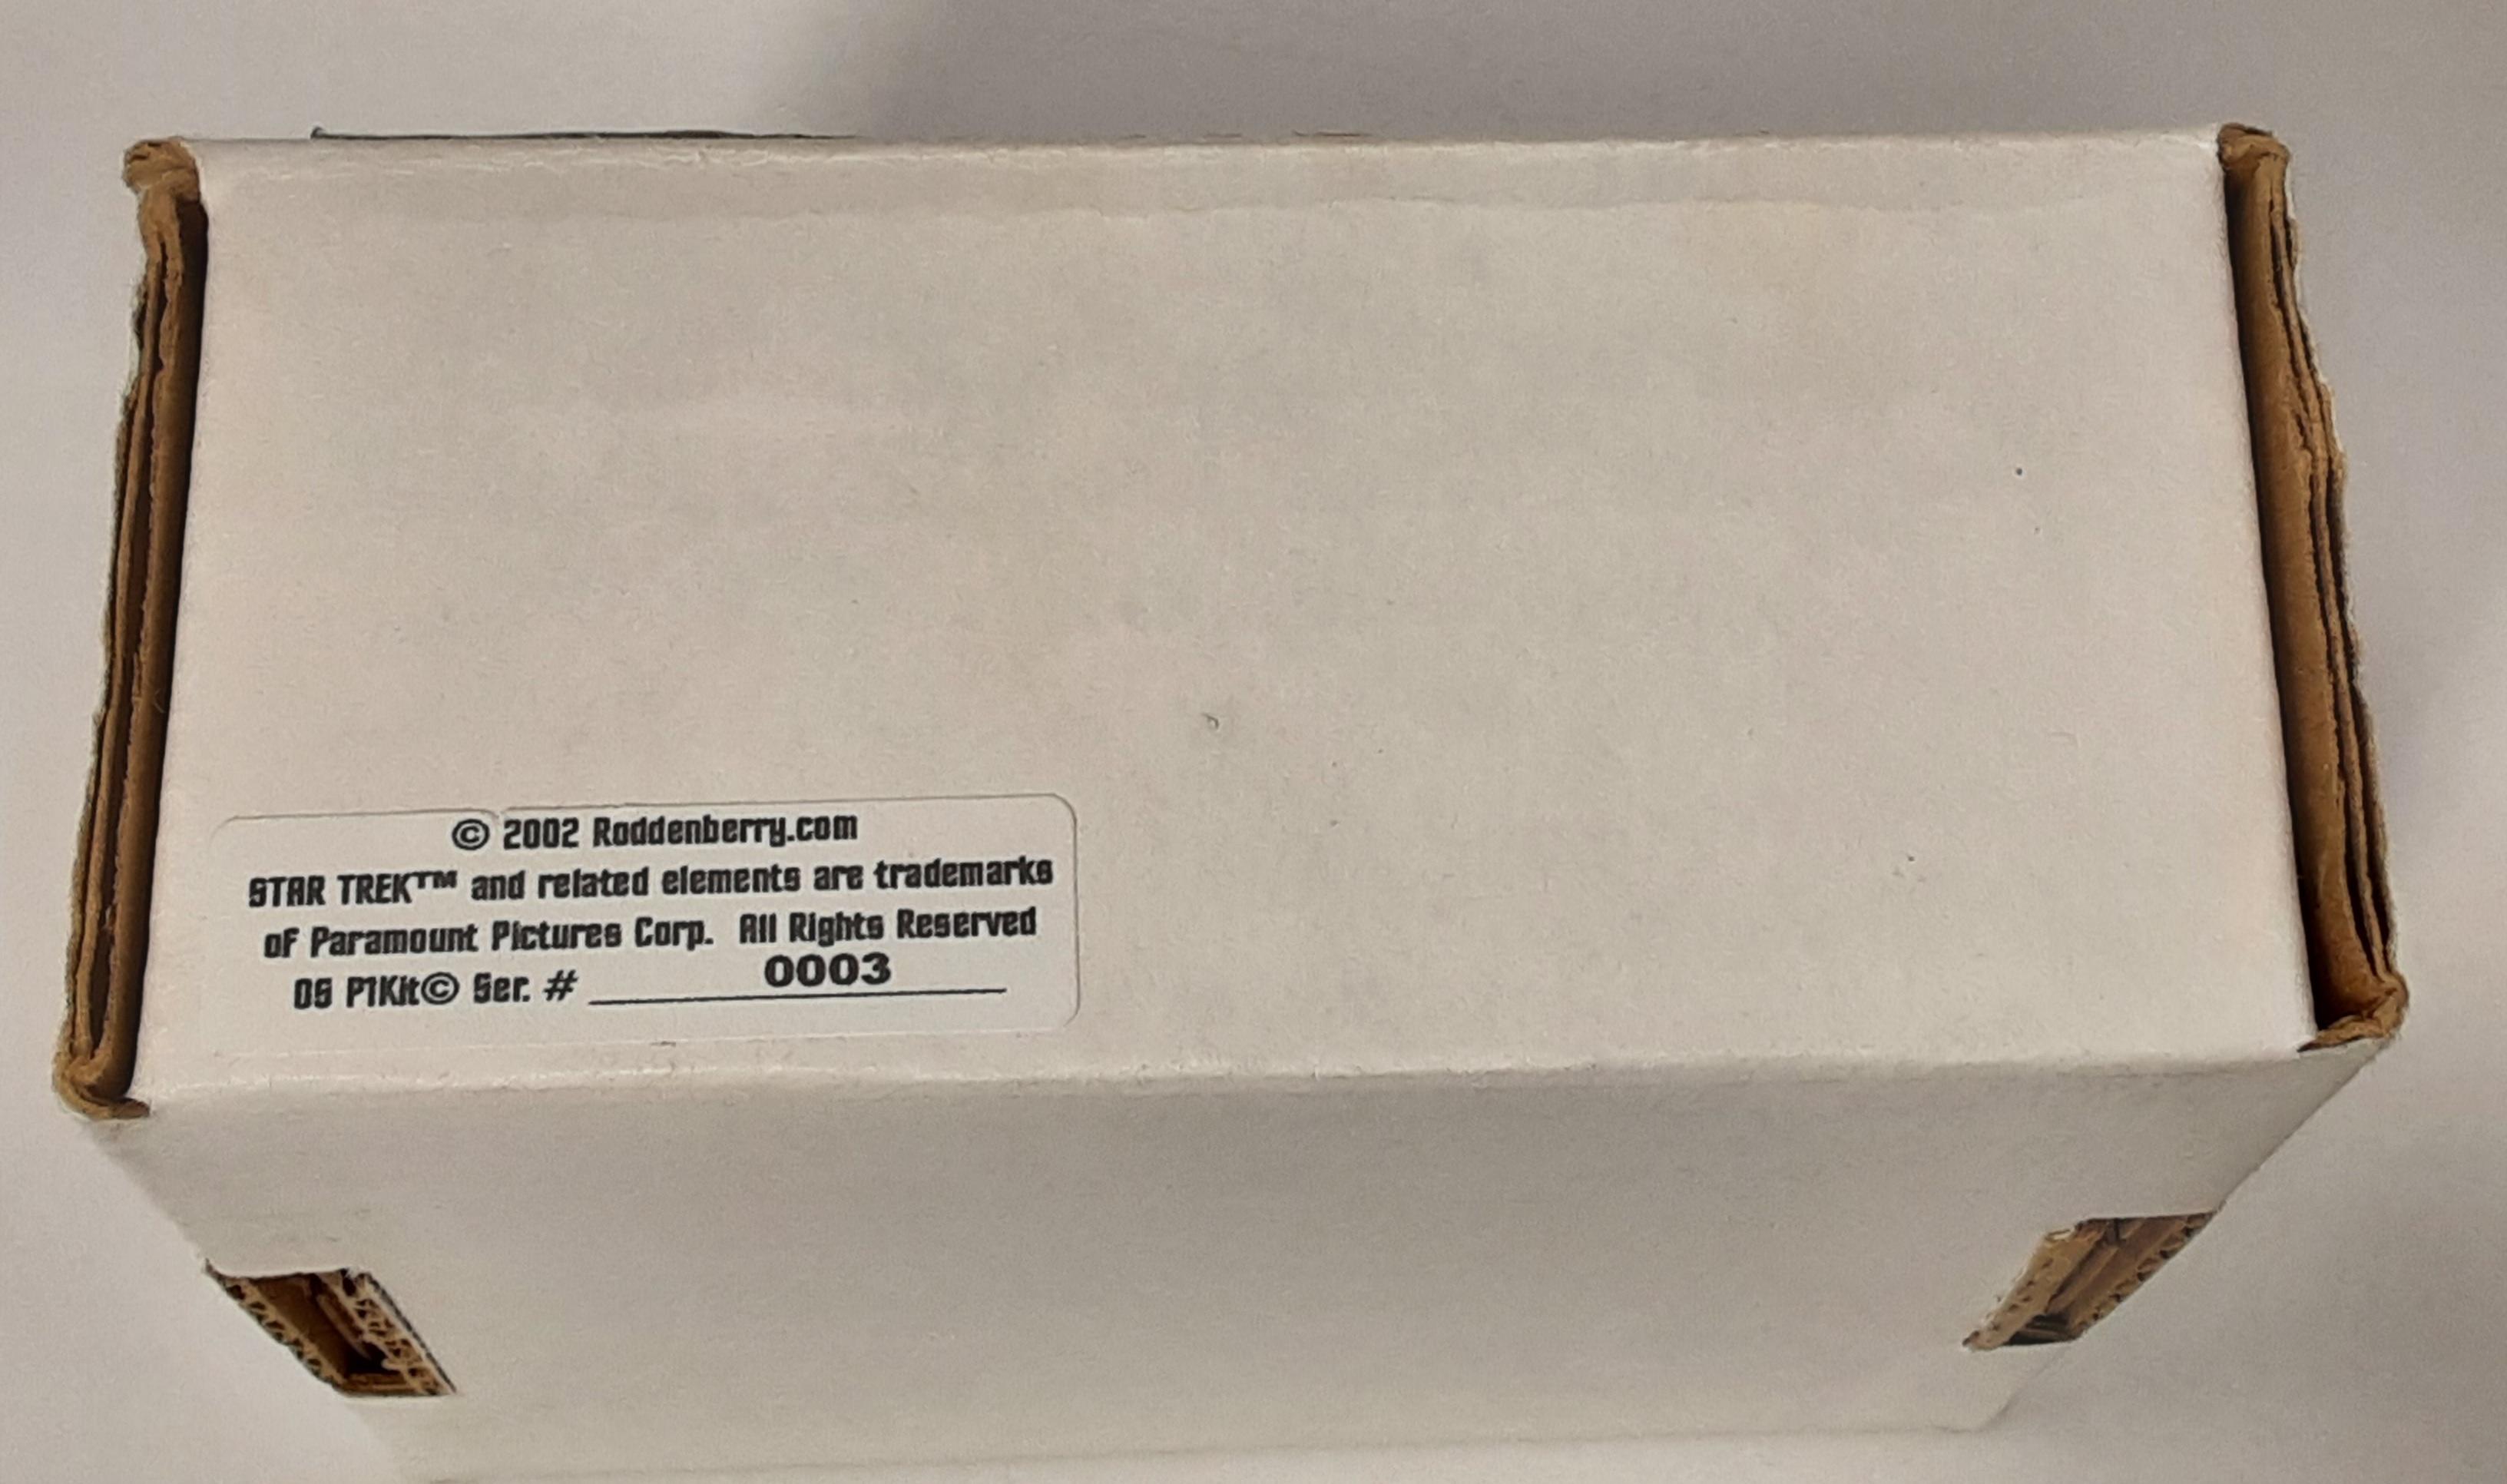
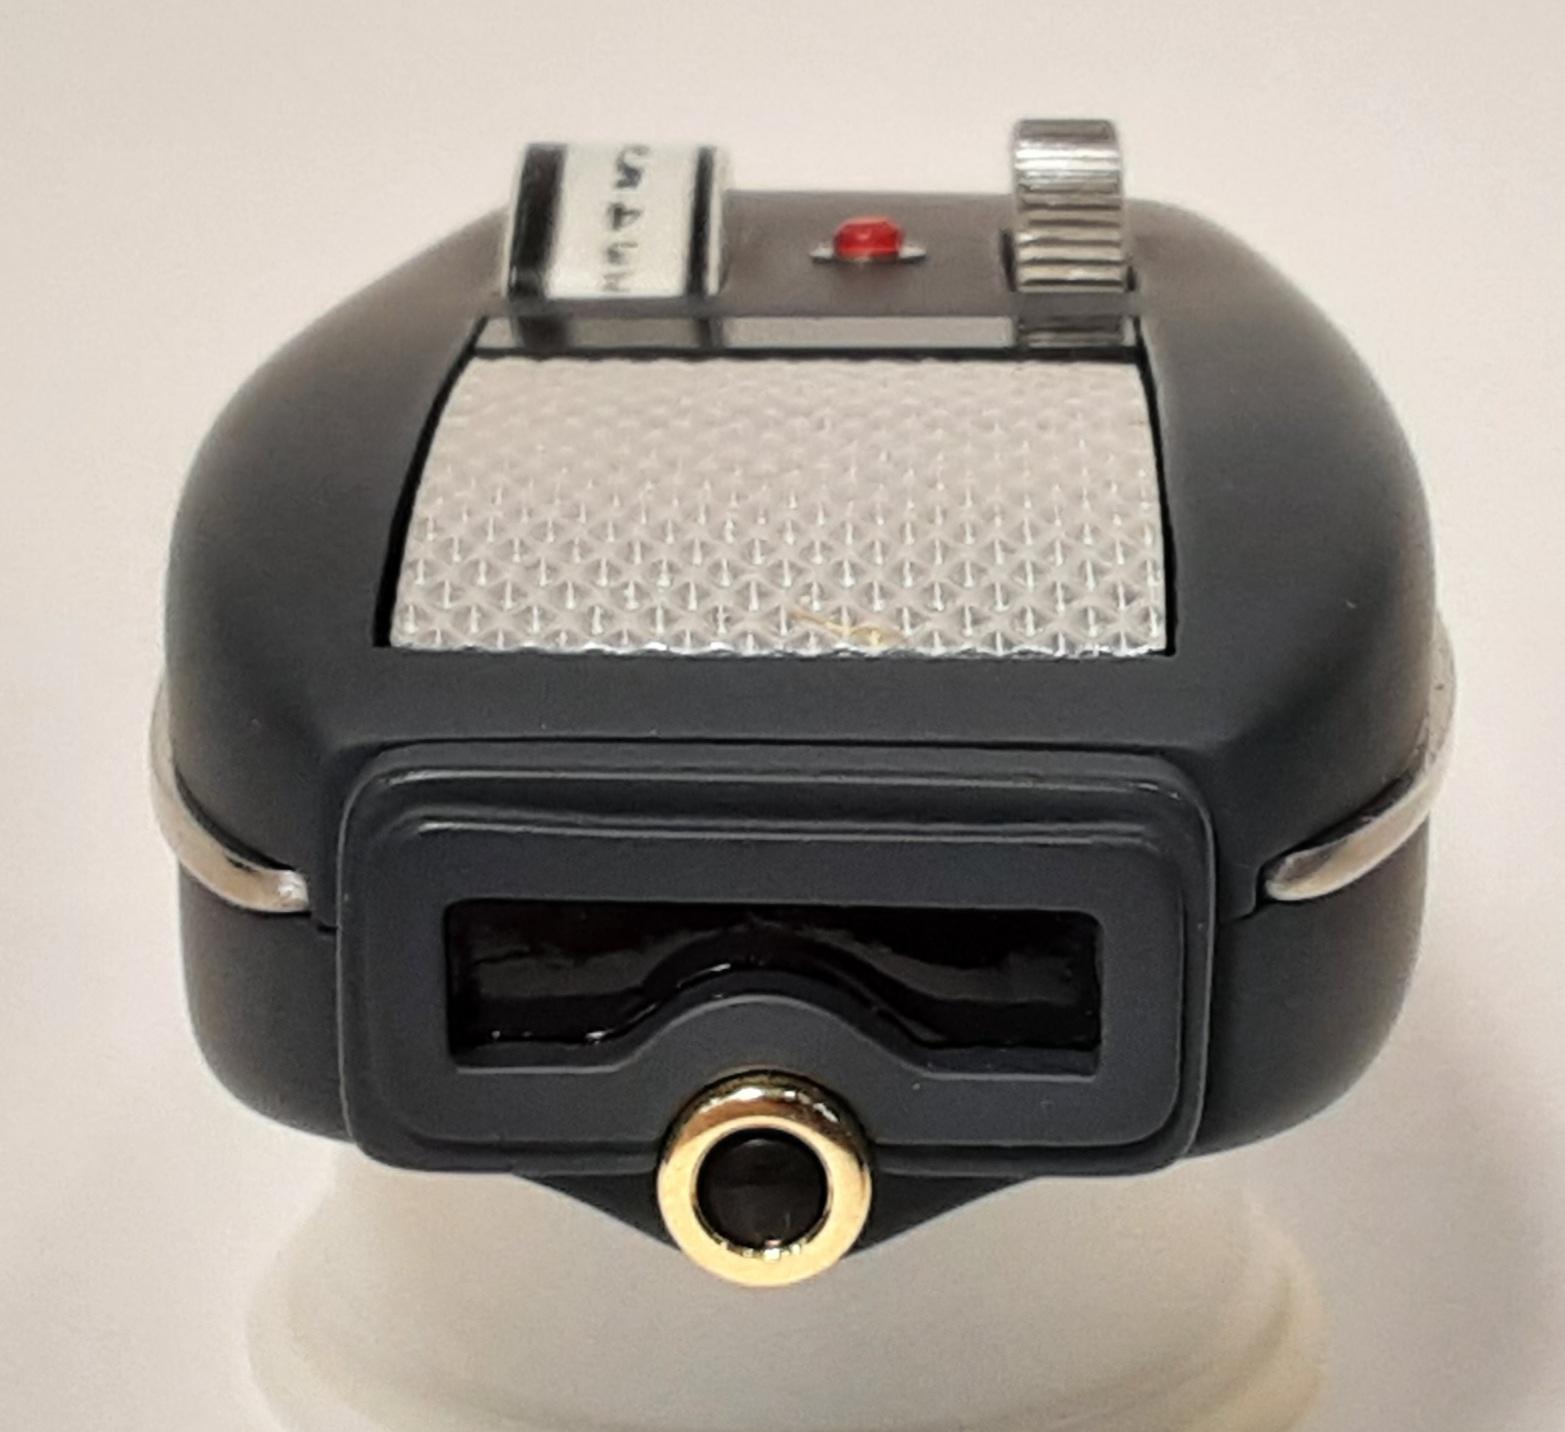
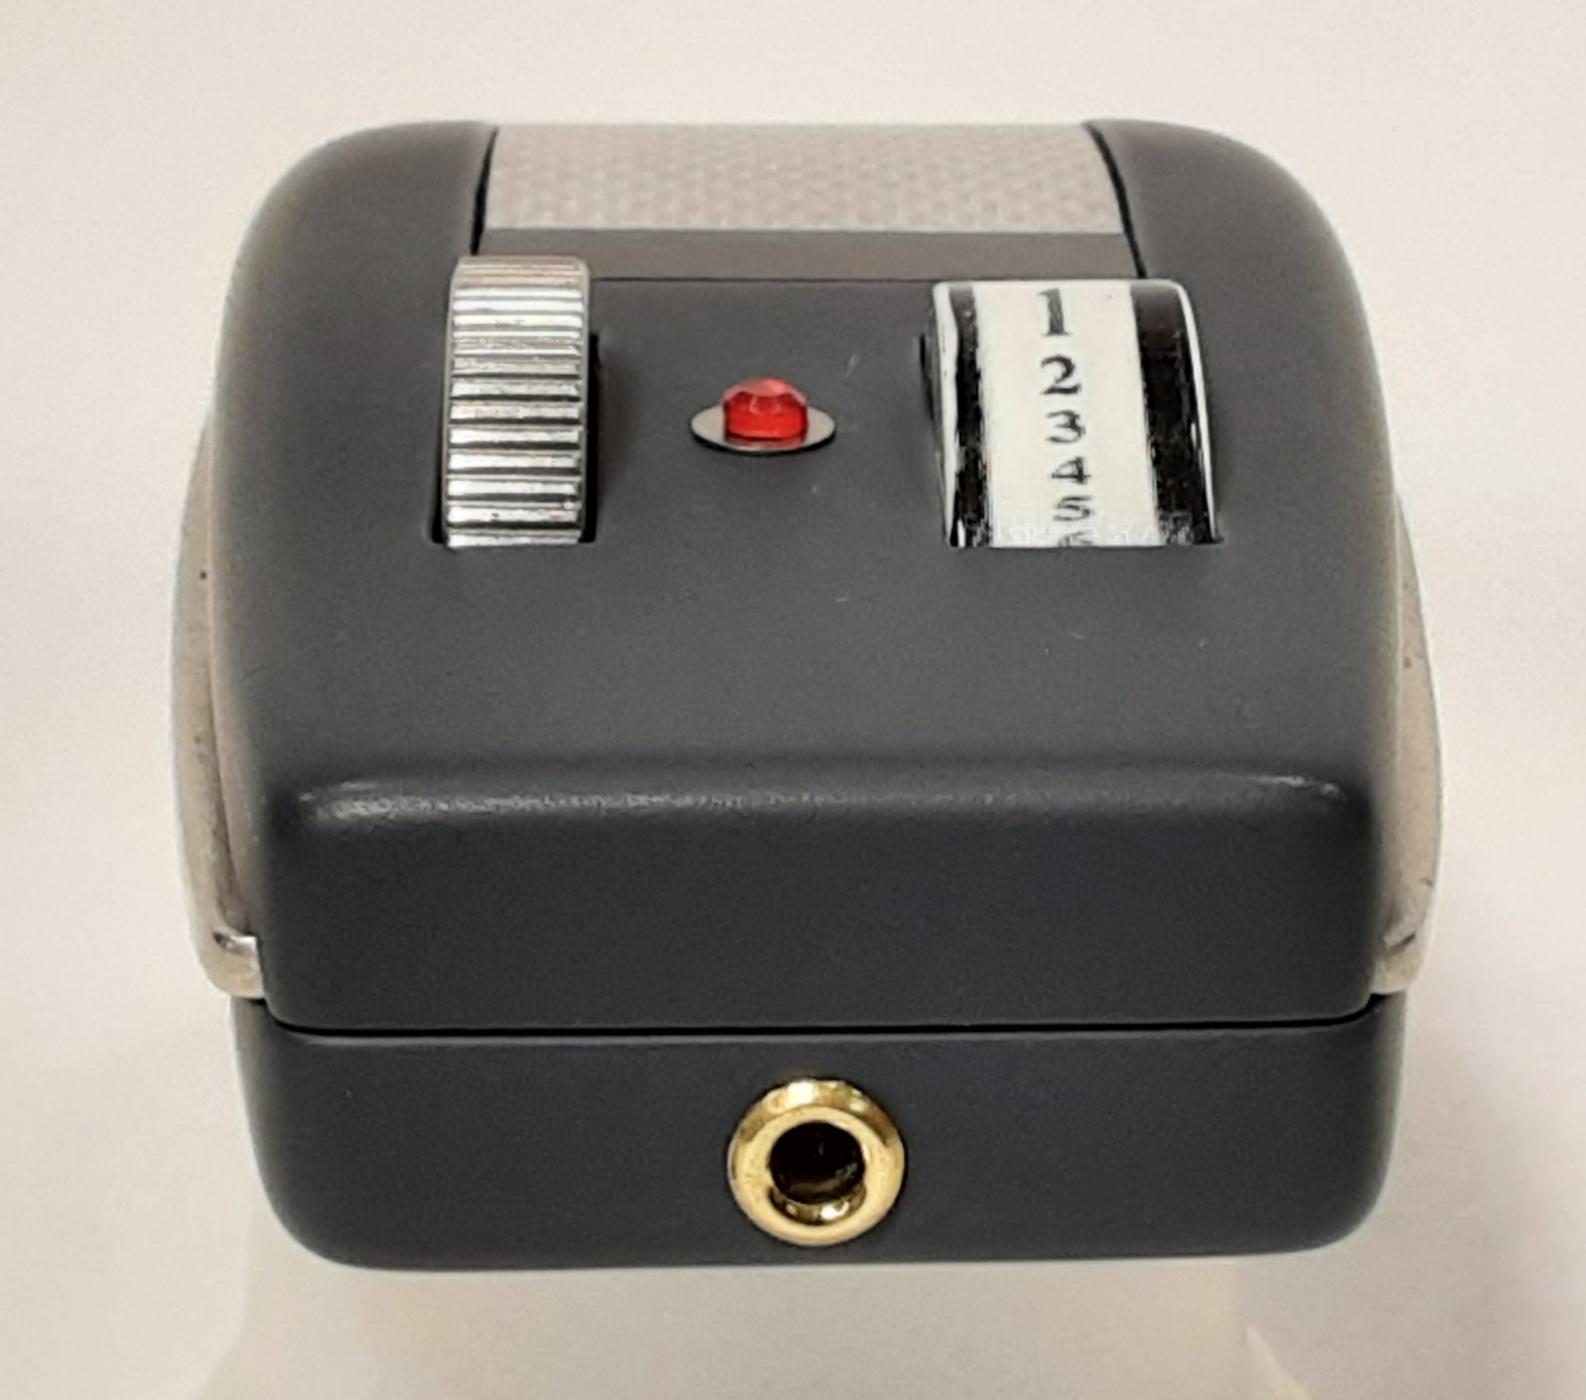
Full size replica of a Star Fleet Phaser Type I as seen in the original TV series Star Trek (1966-1969). Built from a very rare Roddenberry.com multimedia kit from 2002. This particular example is #3 of a very limited production run.
-
Tamiya two part Polyester putty...about $10.00 +/-.
-
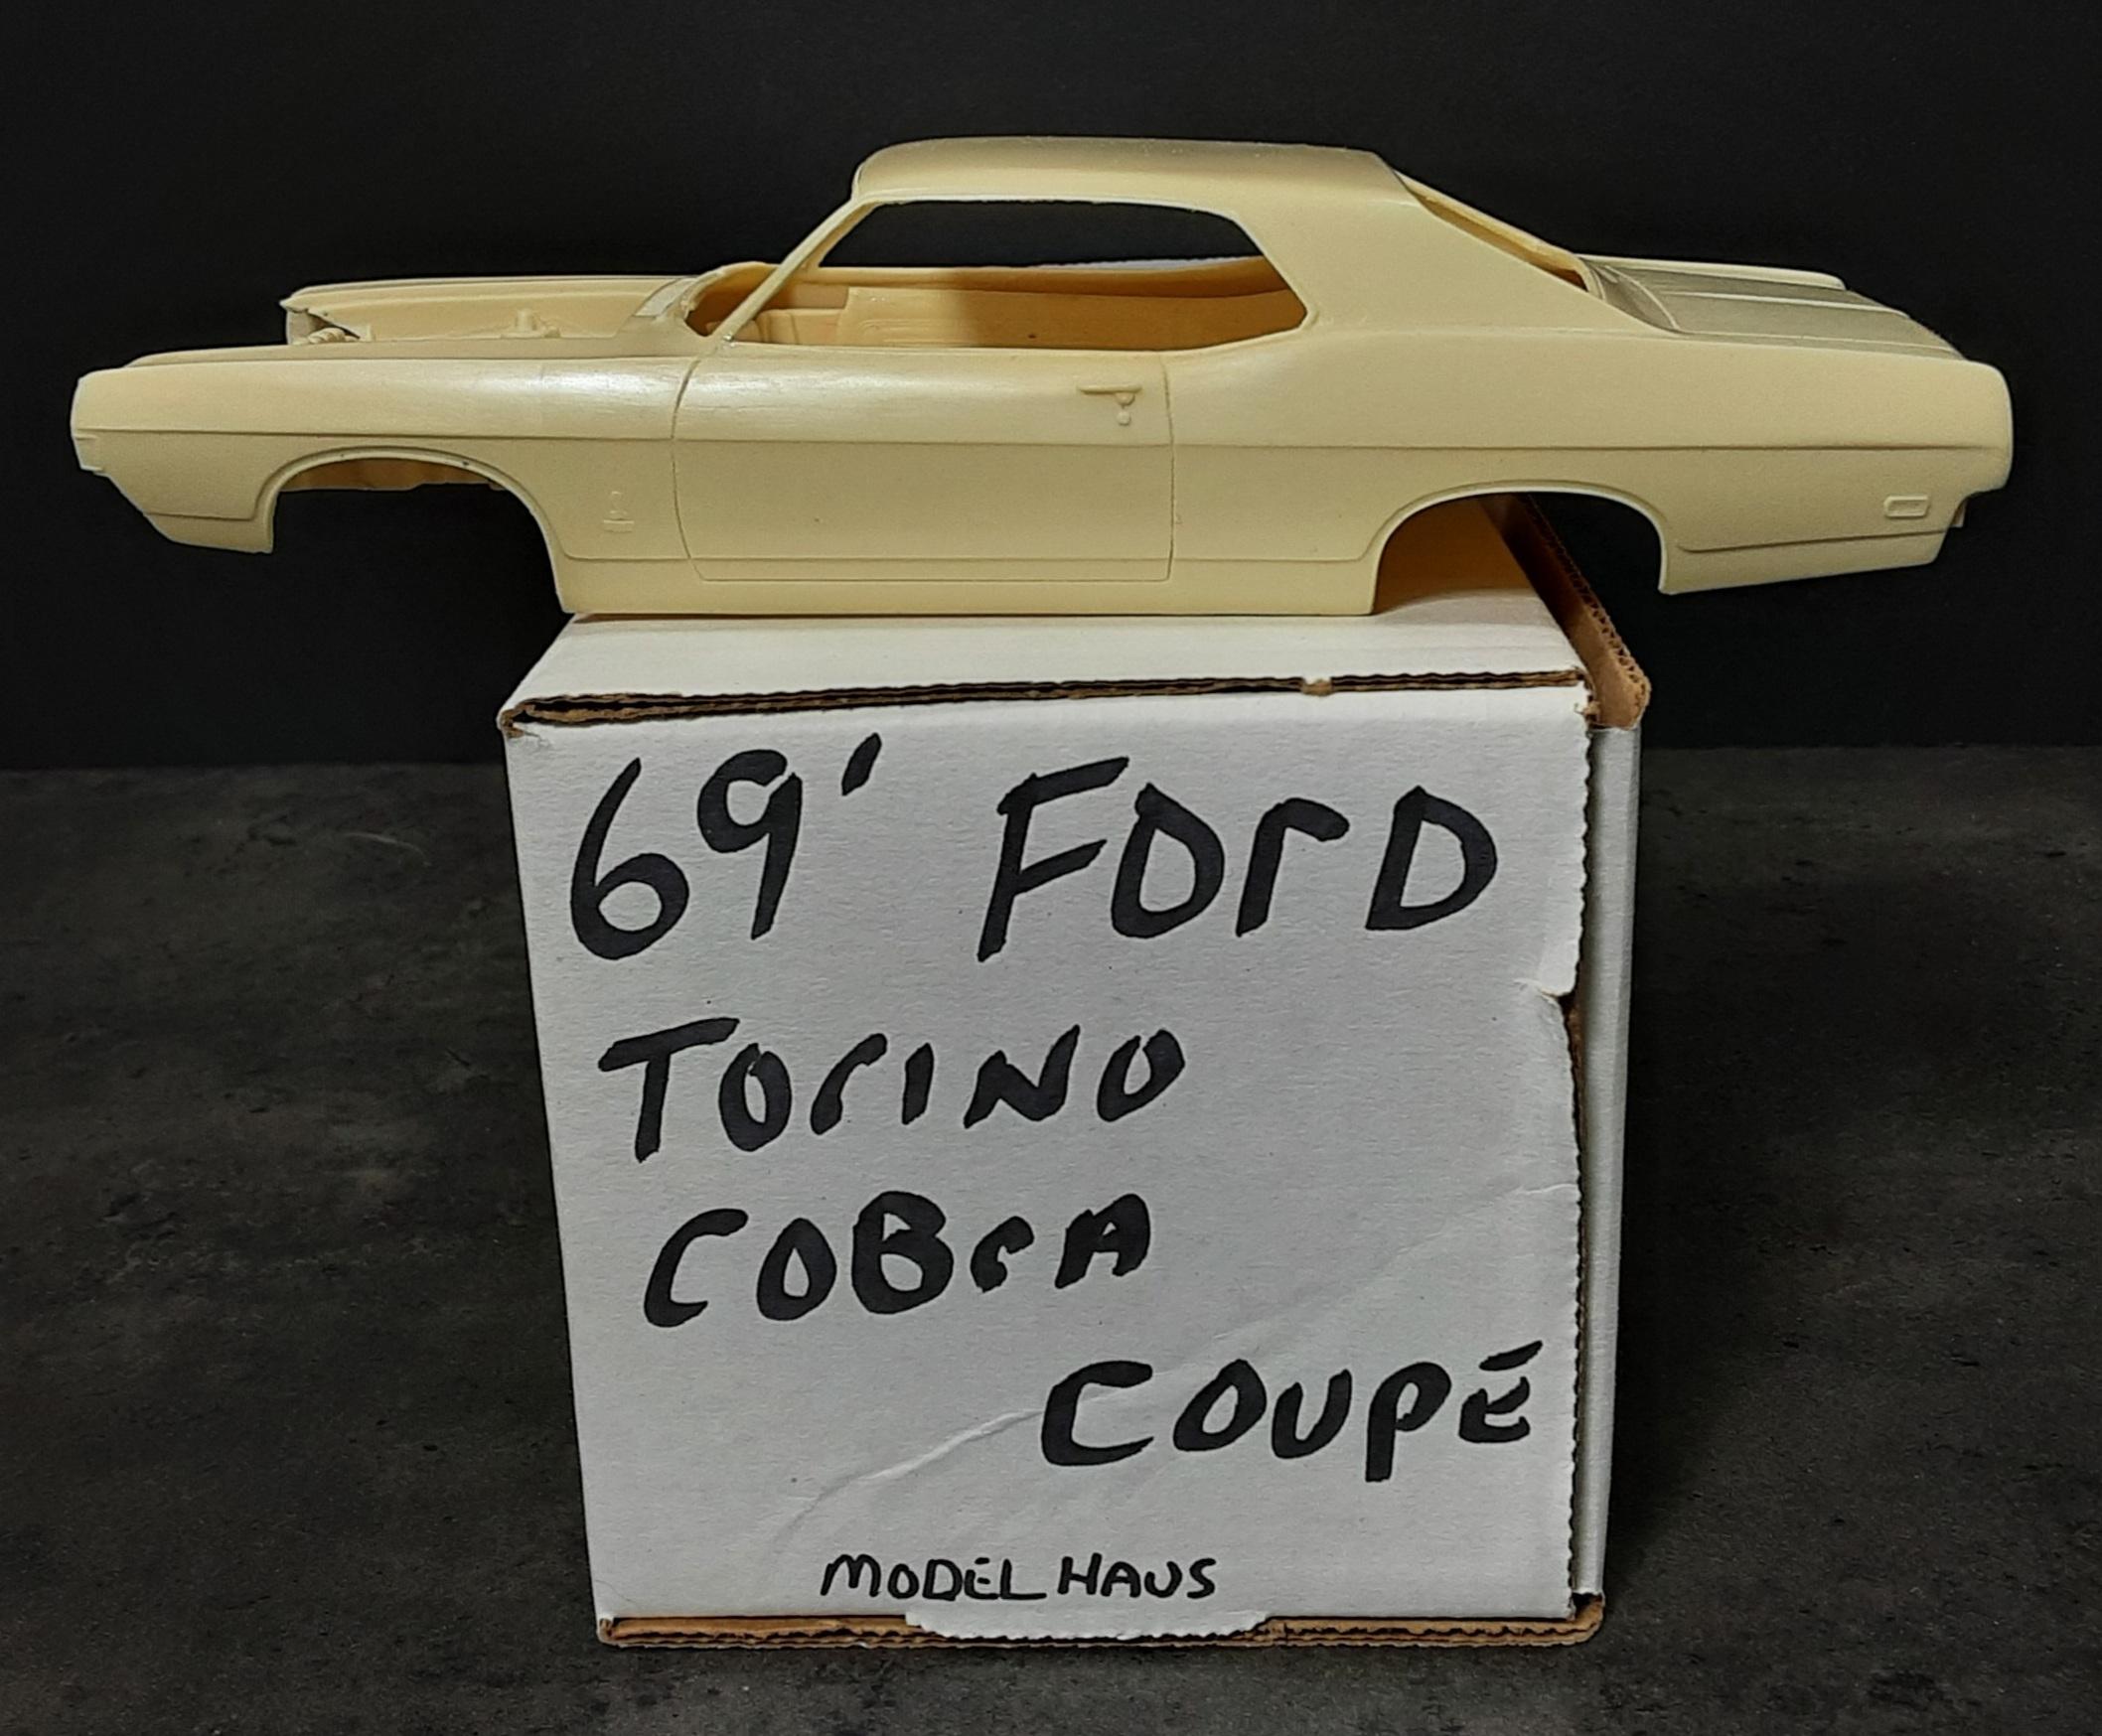
Modelhaus '69 Ford Cobra coupe resin kit...
-
Show your iconic Custom Car/Hot Rod replicas
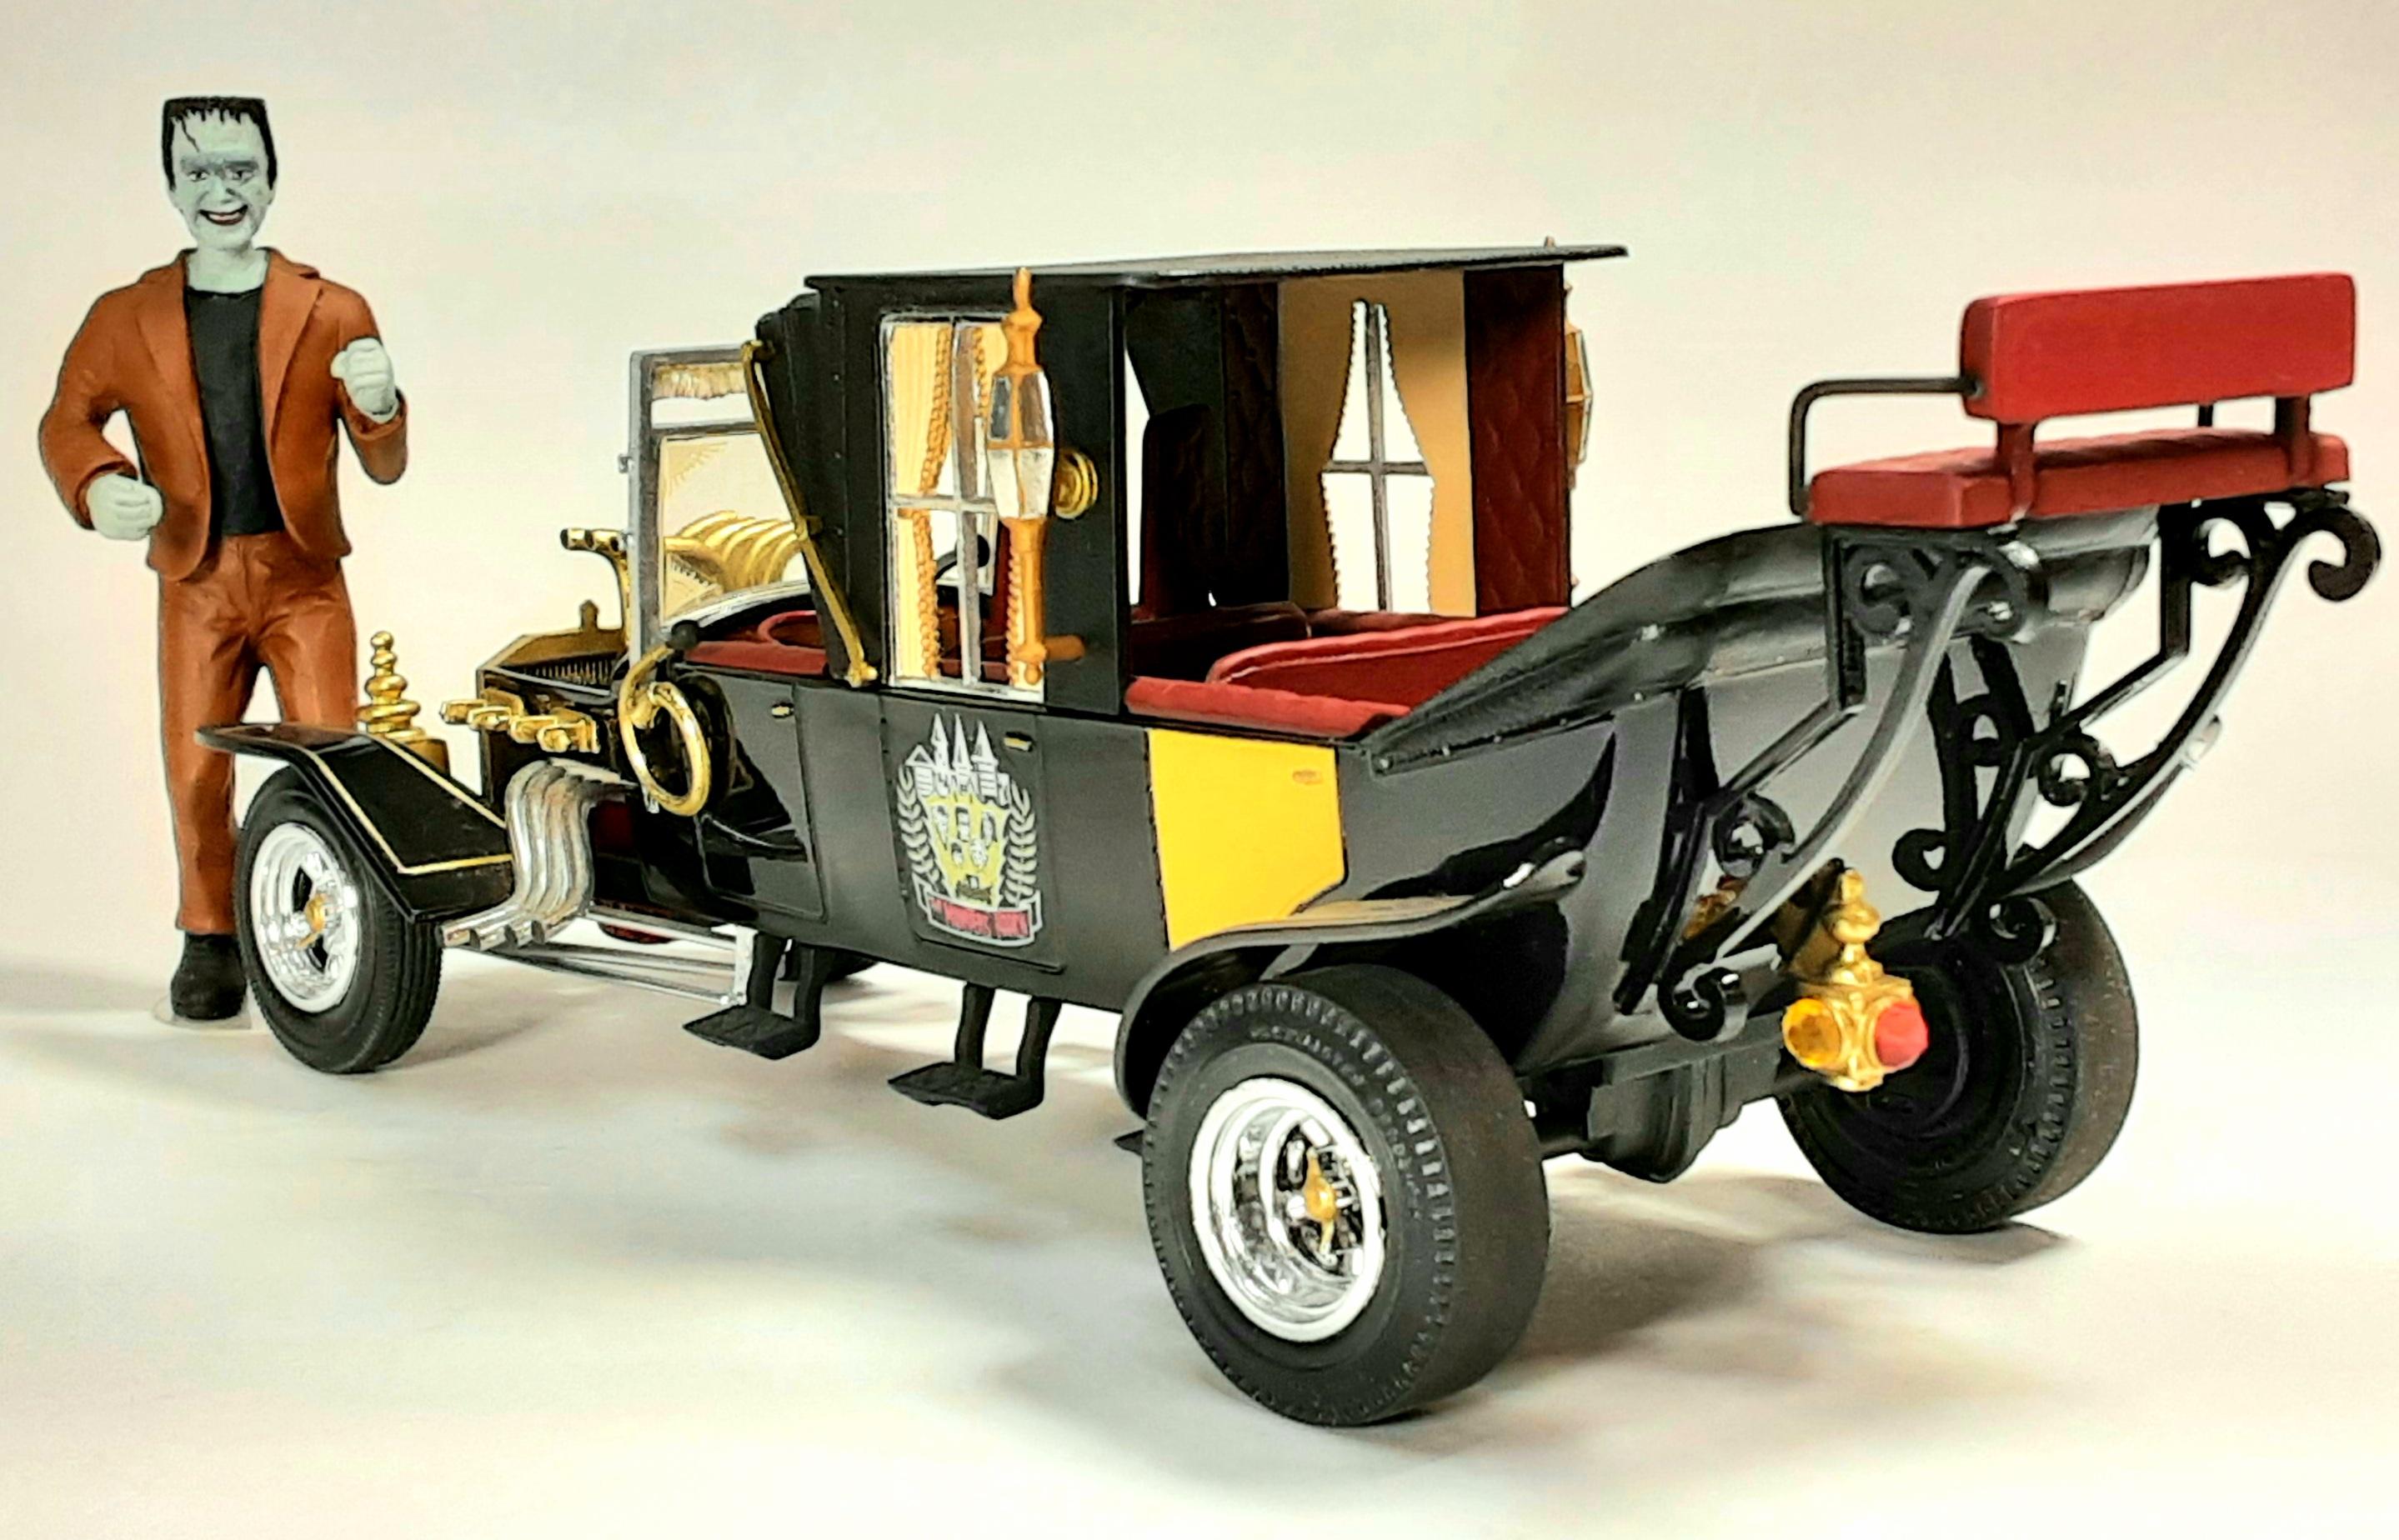
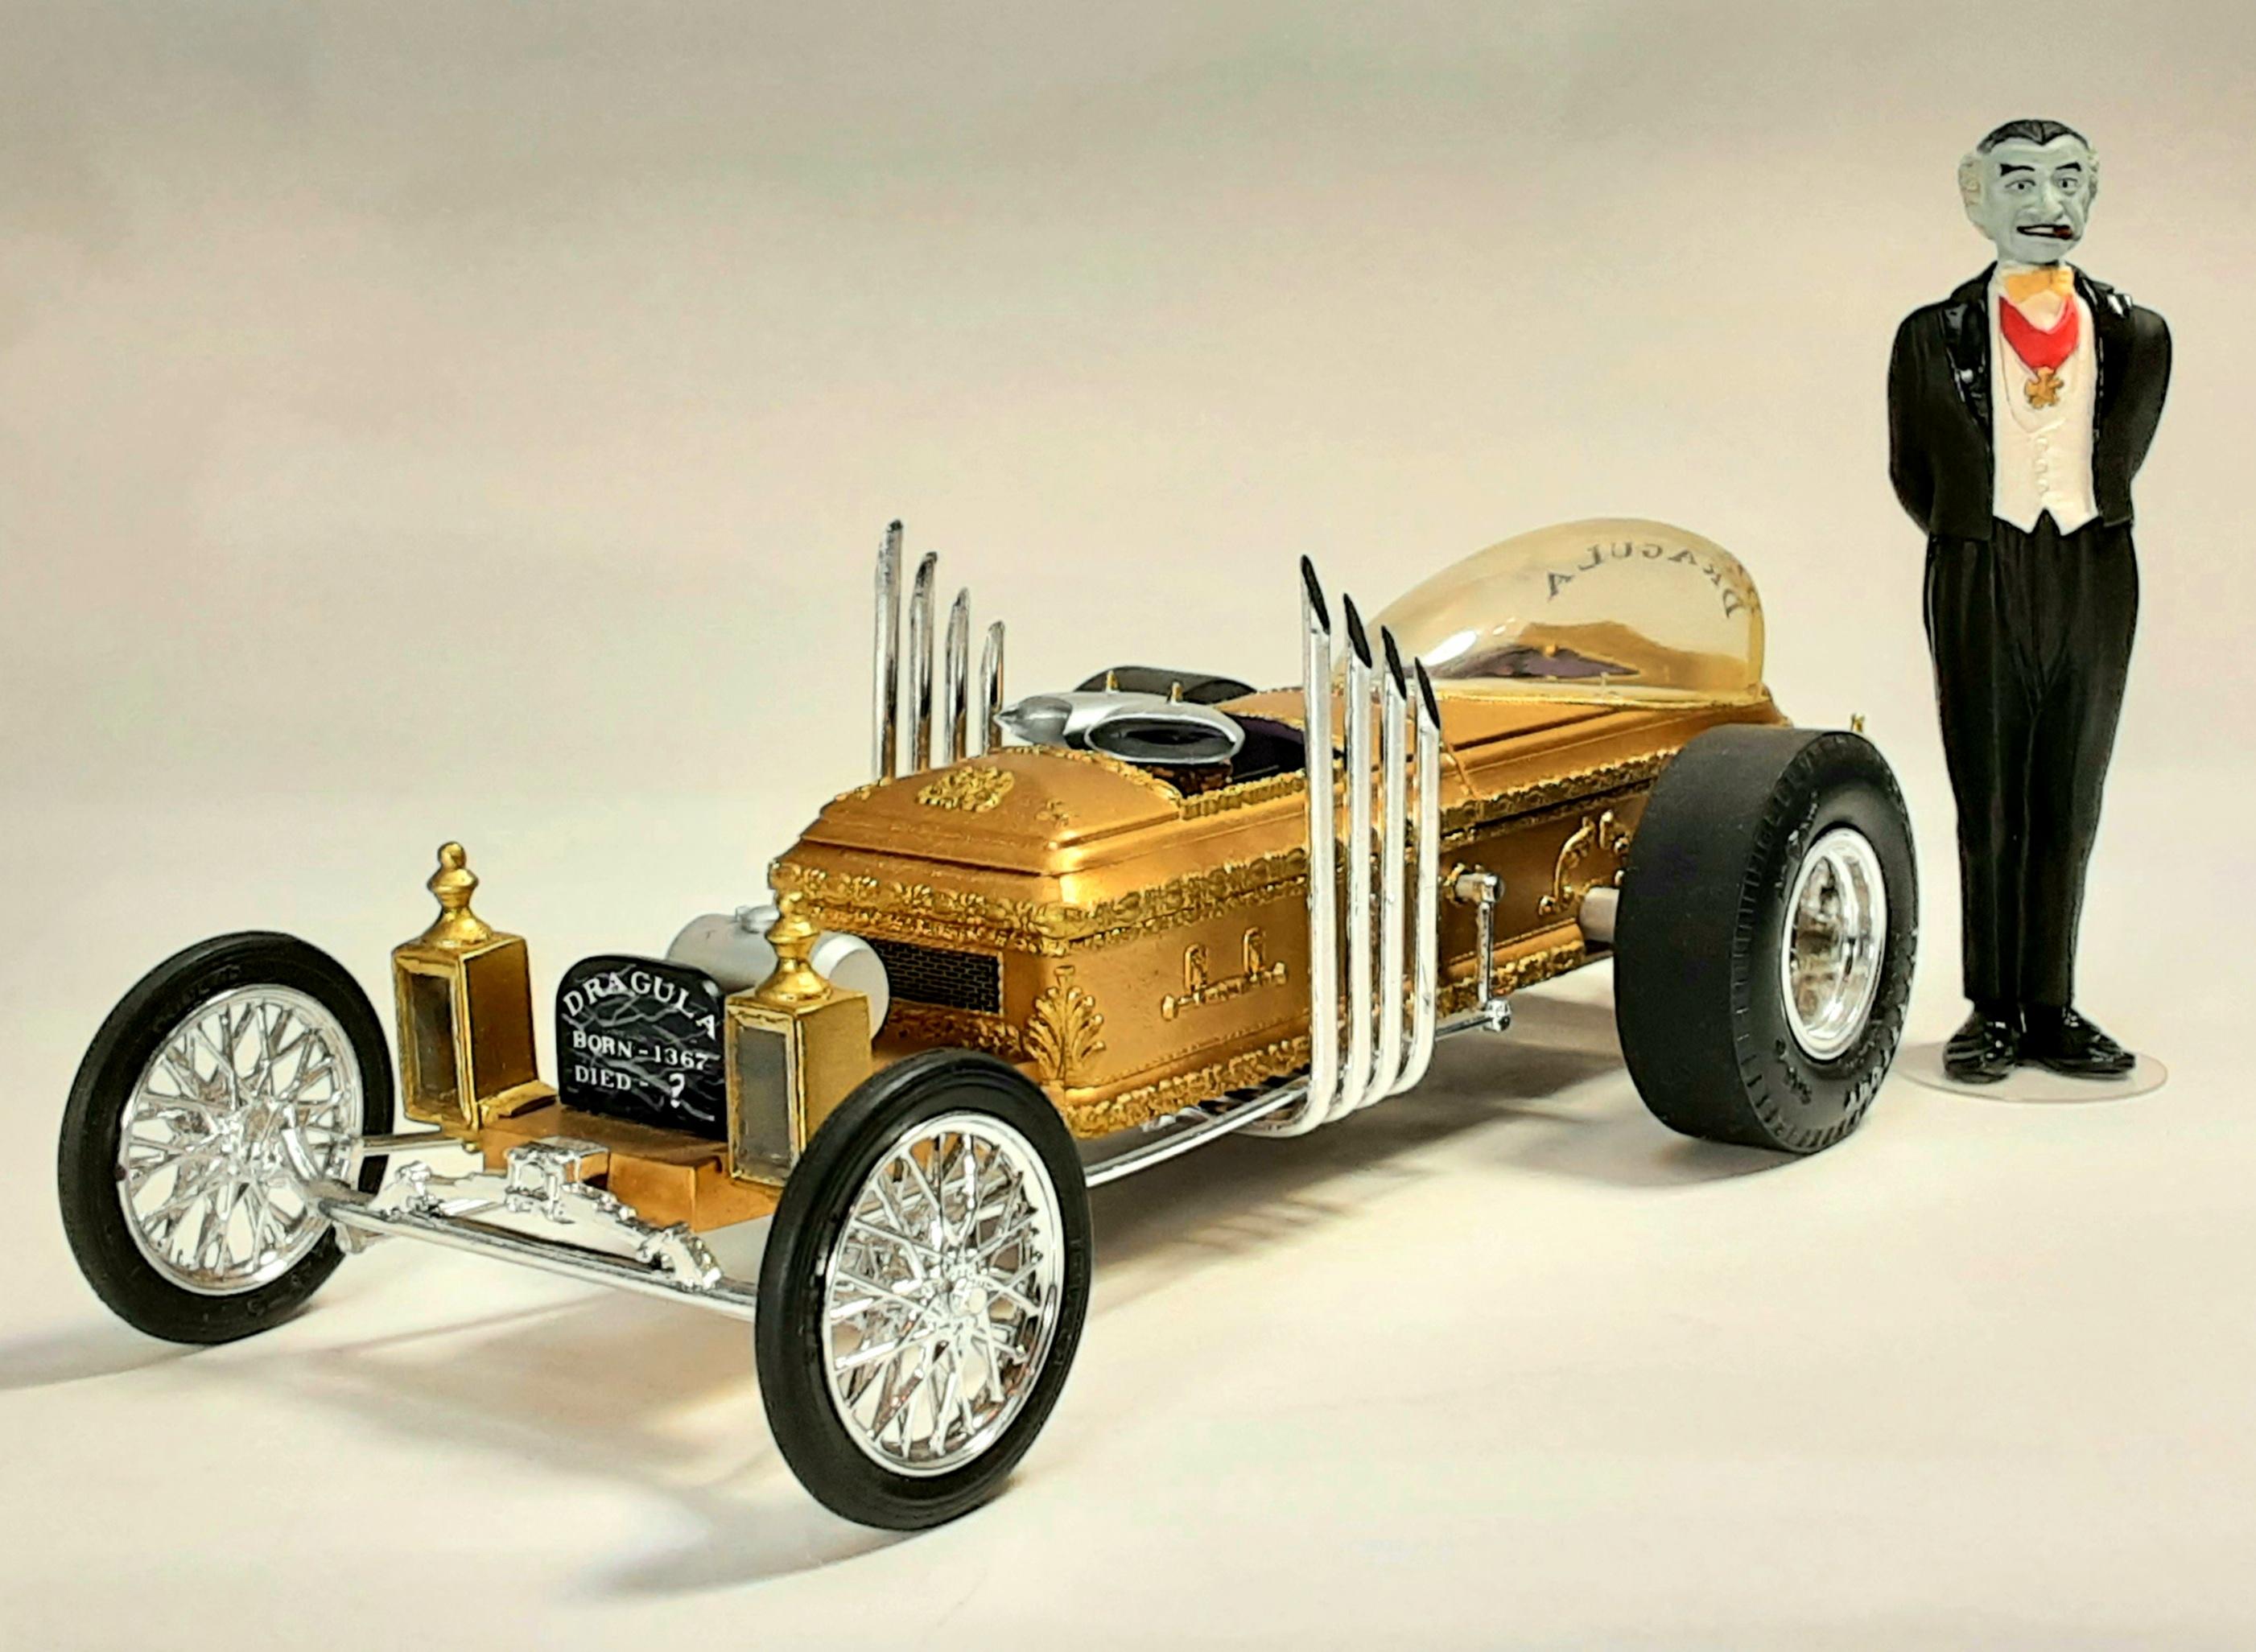
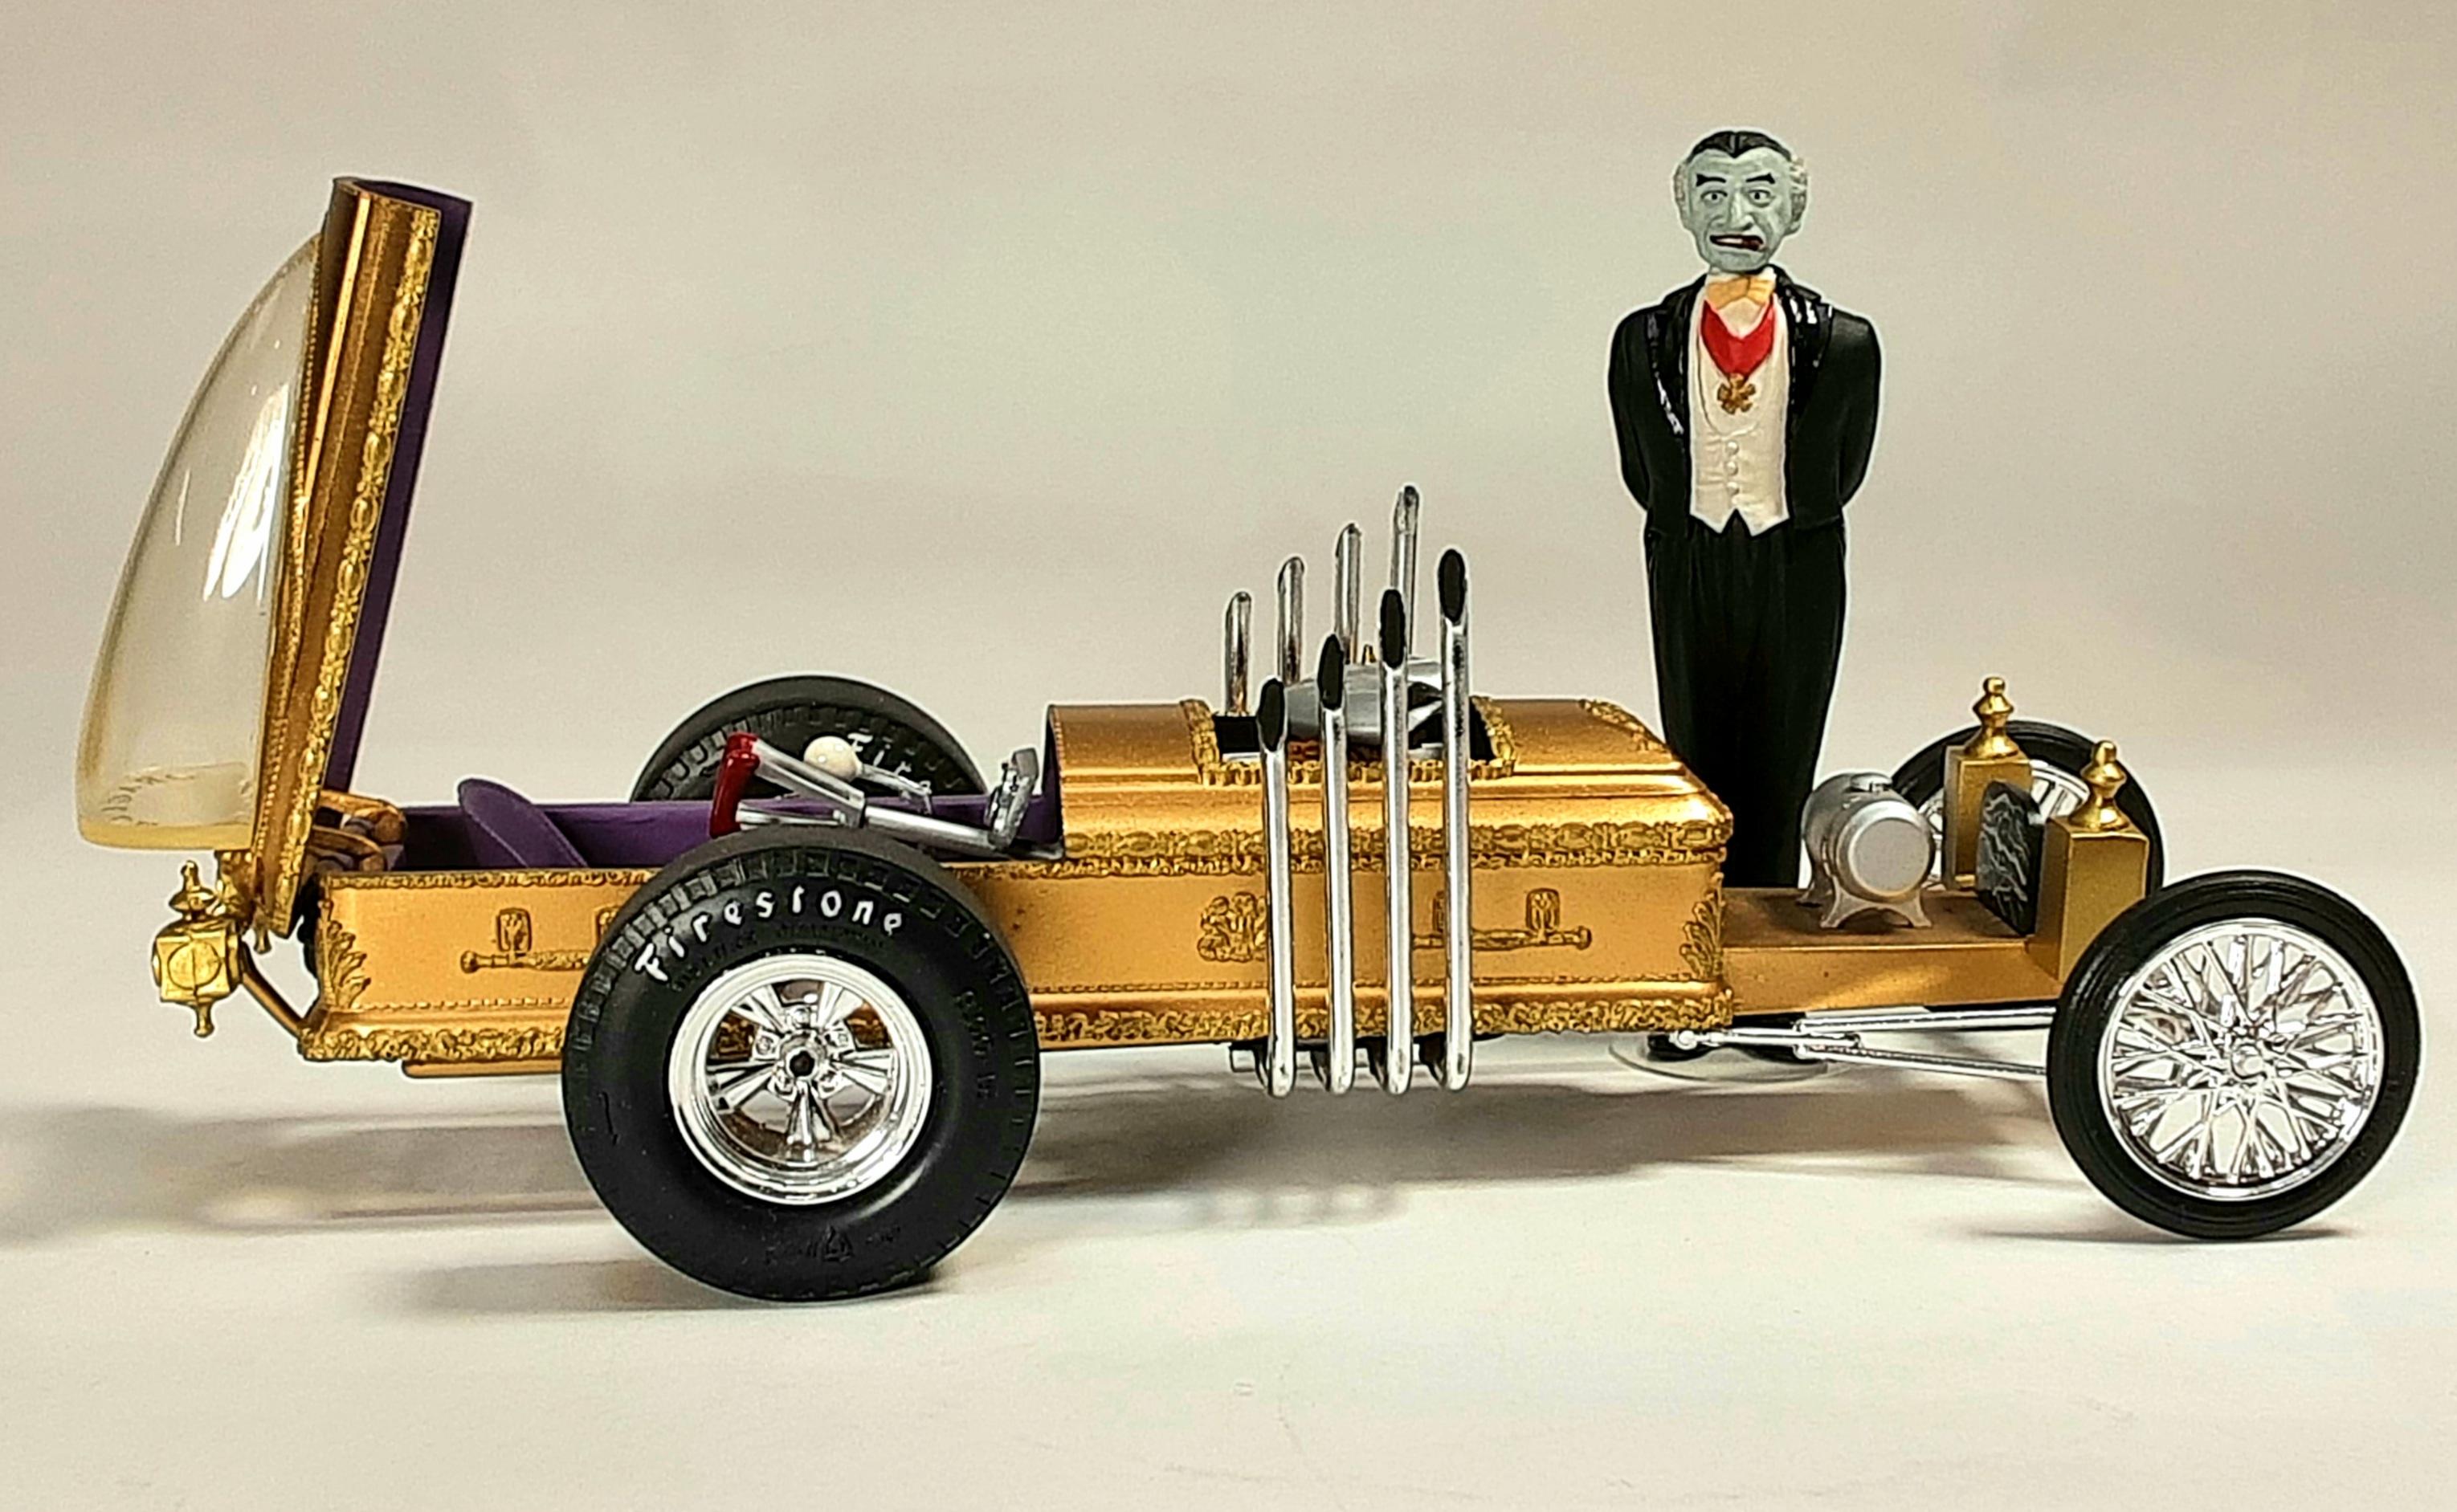
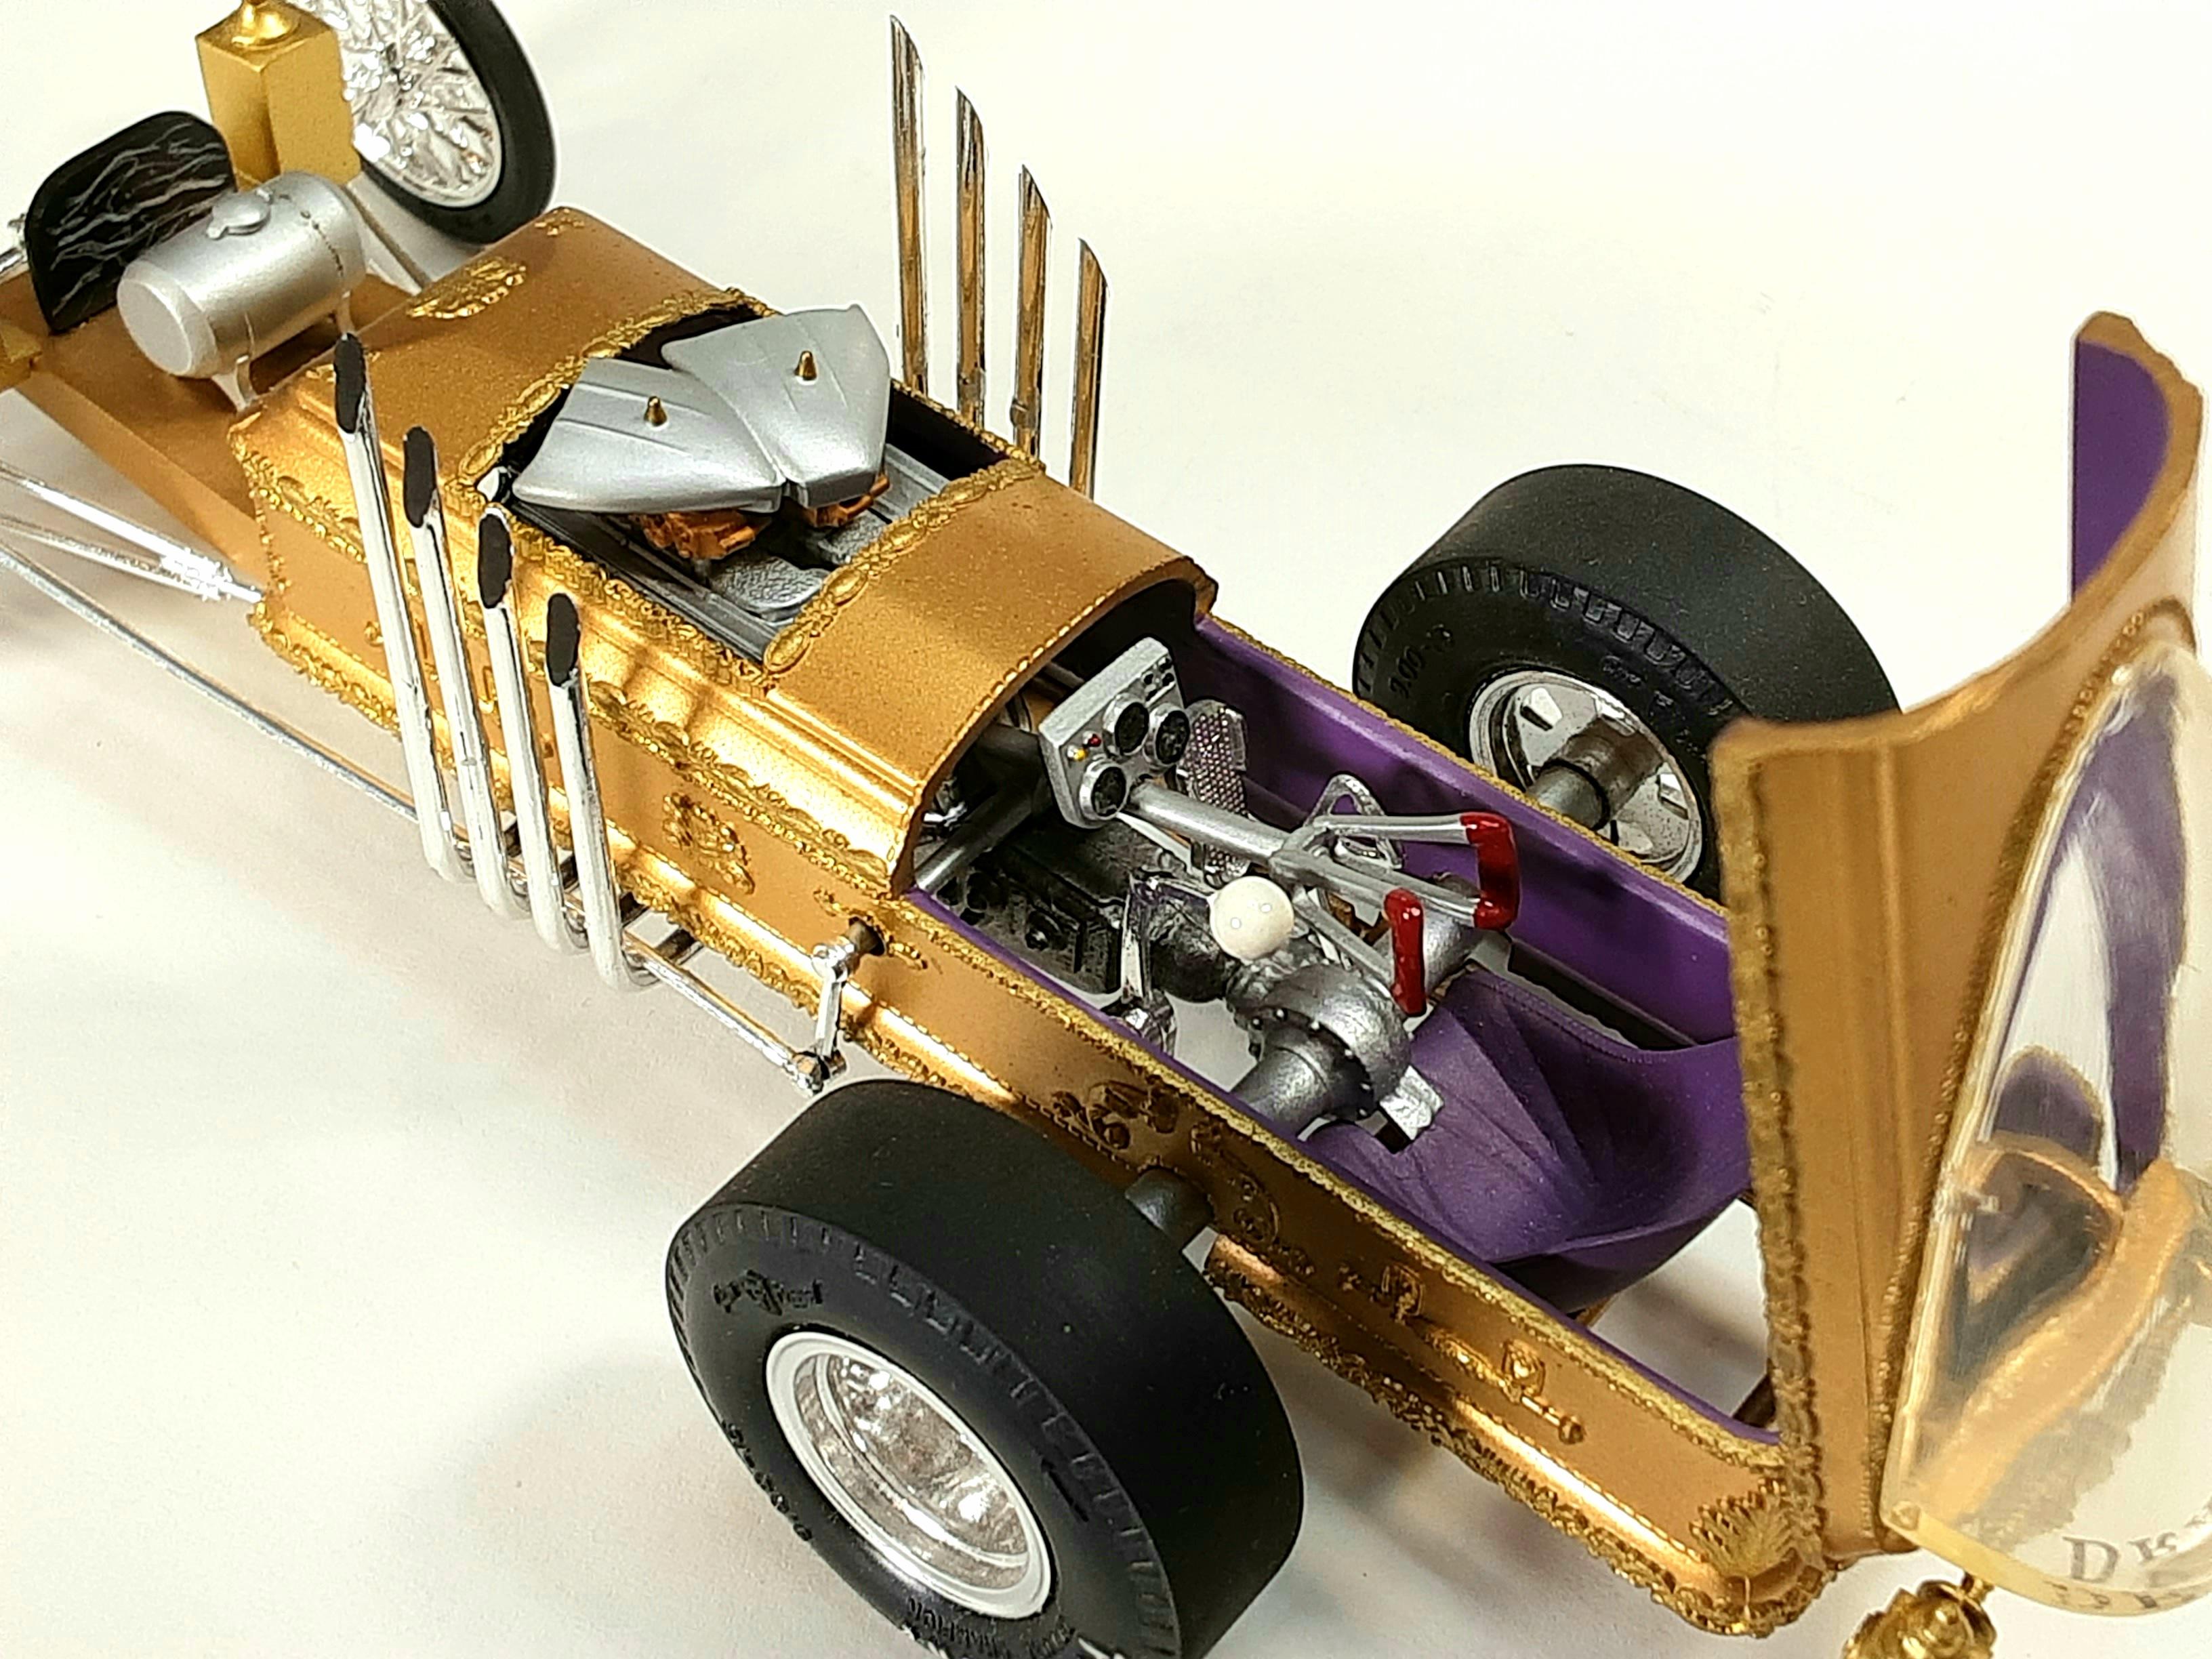
Mothersworry replied to Koellefornia Kid's topic in Model Cars
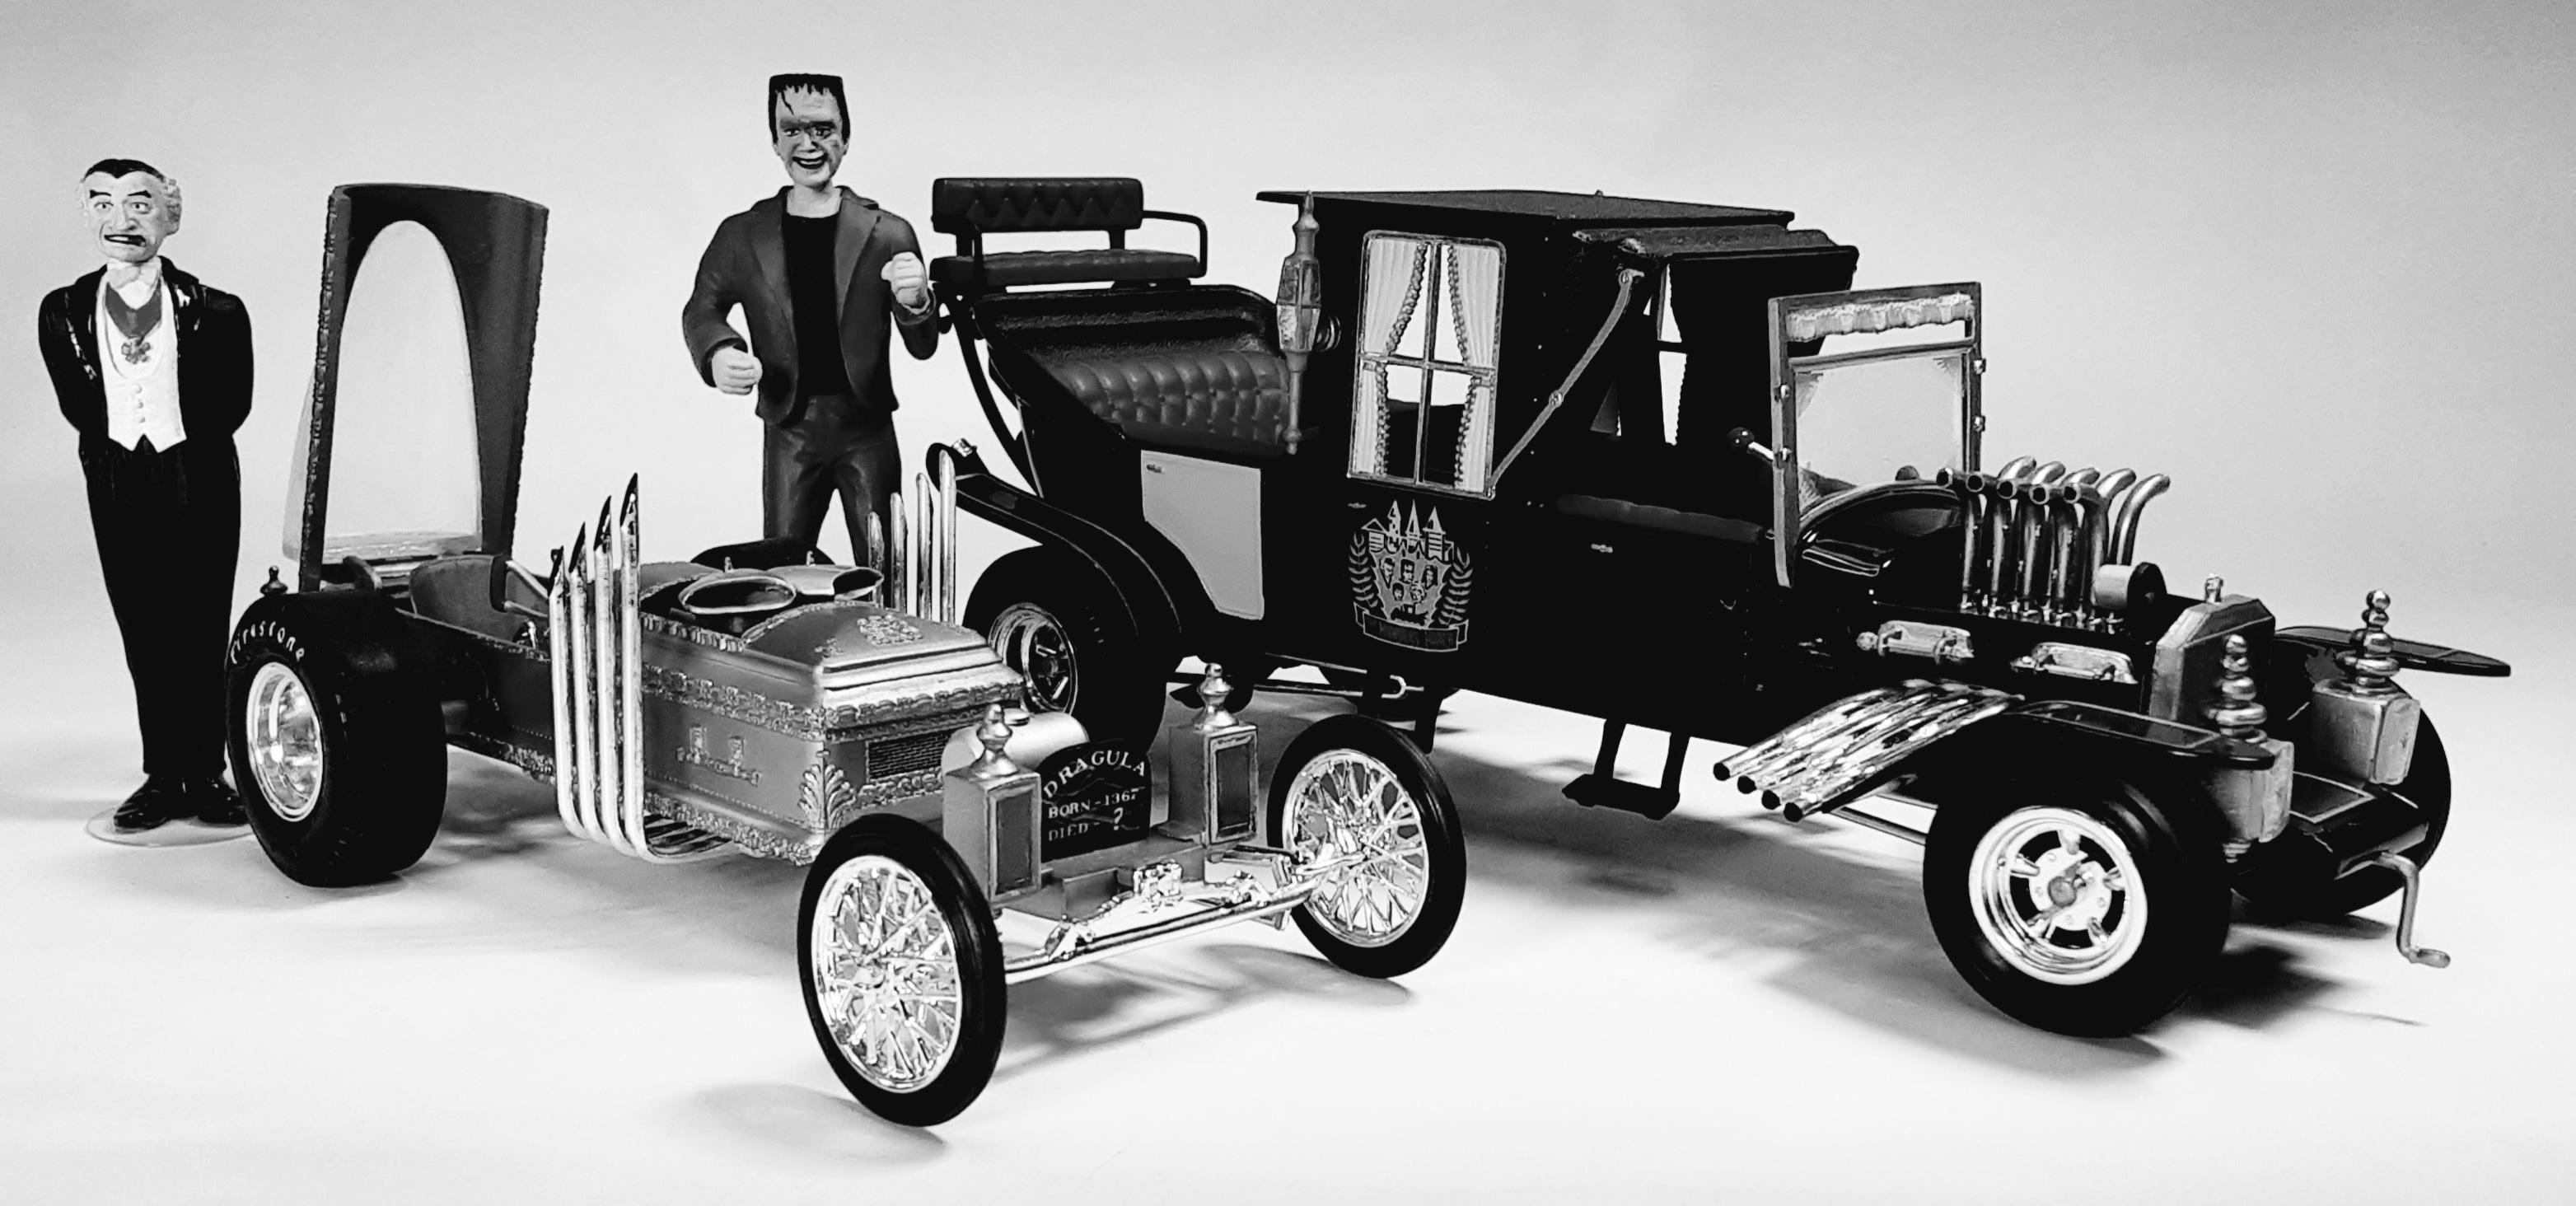
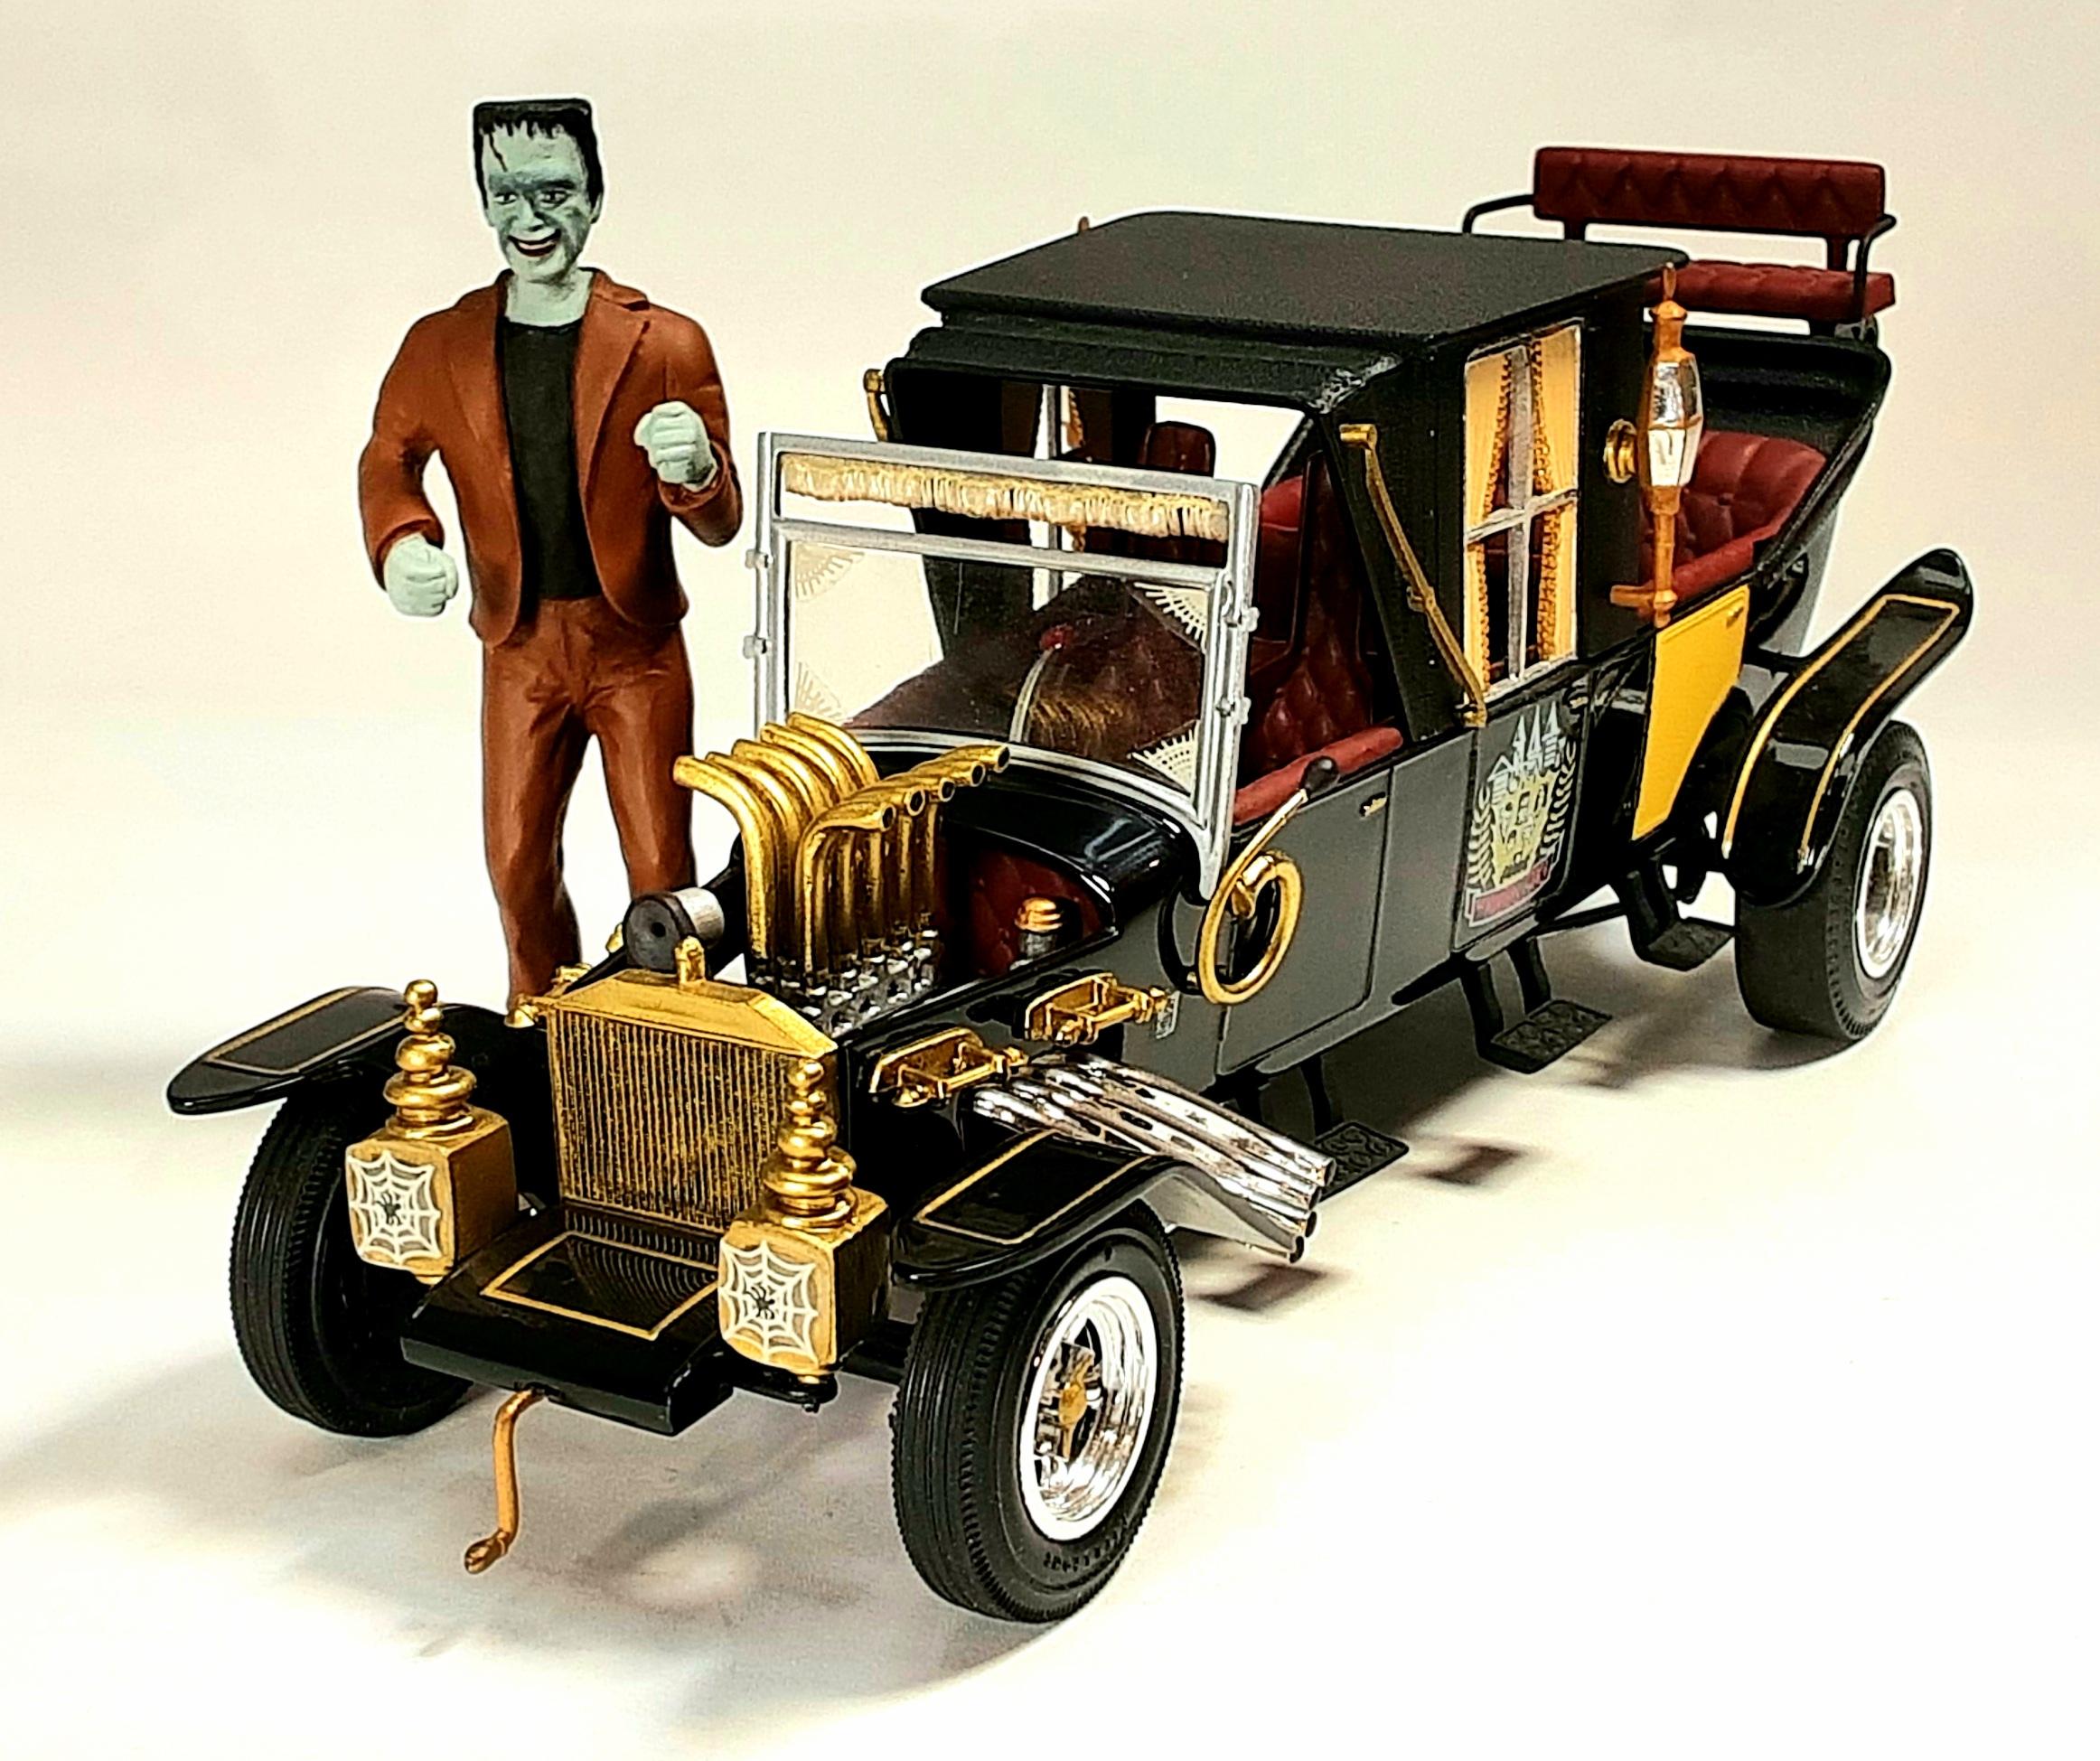
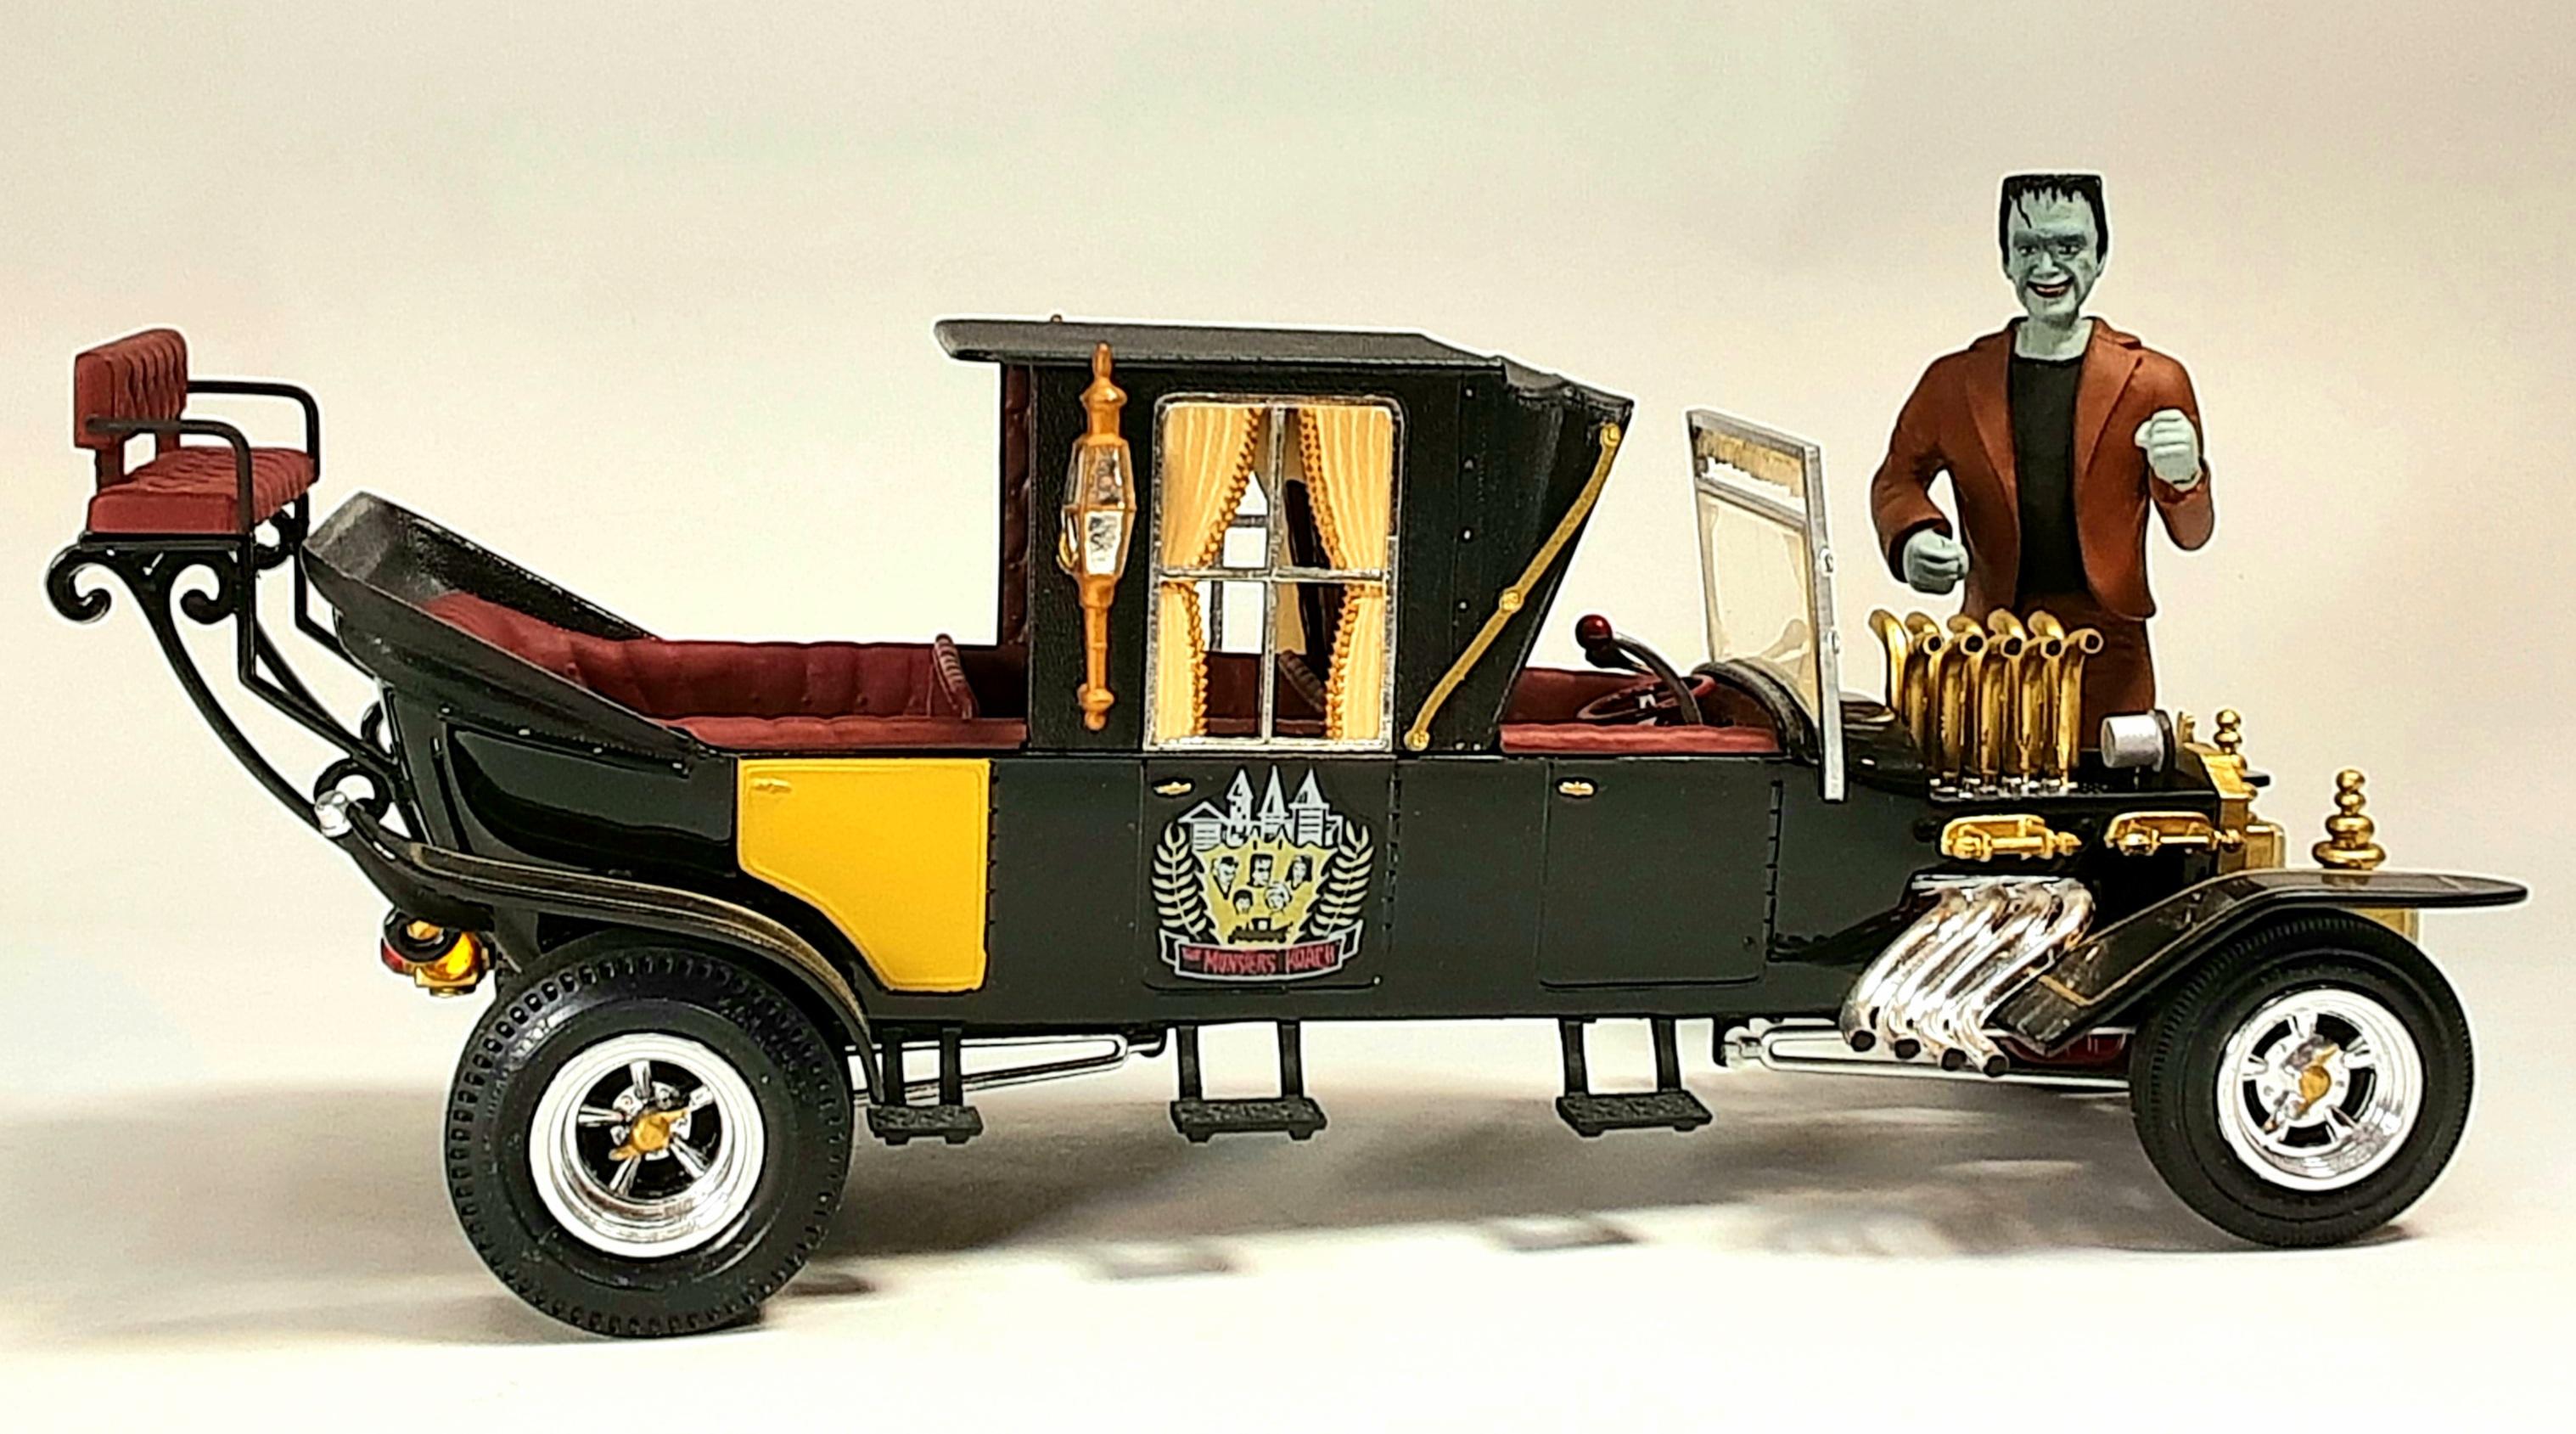
The Munster's Coach and Grandpa's Dragster....
-
Norm, at Replicas and Miniatures of Maryland has that scoop in the #P65 Scoop set, in this set are a few other scoops as well. P65 is not listed in the last catalog I have but I understand that it is still available.
-
Flocking/ embossing powder not covering
Mothersworry replied to Hondamatic's topic in Model Building Questions and Answers
For securing embossing powder or flocking Elmer's white glue diluted with water has been my go to fer lotsa years and for me it works quite well...but there is a recipe. I have found it helpful to use a matt finish on the surface to be flocked, the Elmer's mixture seems to work better on the more porus surface of a matt paint. I use a small mixing cup, an ounce or so. I thin the Elmer's with warm/very warm water to about the consistency of Testors gloss enamel (maybe slightly thinner), to this I add several drops of Dawn blue dish washing soap and mix thoroughly but gently...no bubbles. I test the mixture on a surface similar to the one to be flocked and adjust it as necessary to get the diluted glue to behave like paint and not "bead up". I apply the glue like paint with a soft brush and flock it. If yer curious...the physics...water has a very high surface tension, second only to liquid Mercury...simply put, it is attracted to itself. That is why water "beads" on surfaces like a kitchen countertop or a car hood. When water is used to thin the Elmer's glue the glue takes on the characteristics of water and tends to "bead" or pull into corners and leave "dry" spots. Heating the water and adding soap relieves the surface tension and allows the glue mixture to work like more paint. Other chemicals also will work but wouldn't play well with plastic or paints. By the way, adding a few drops of Dawn blue dish soap to warm water when applying decals makes it easier to move and postion decals and also helps prevent silvering (on gloss surfaces). Fer what it's worth... -
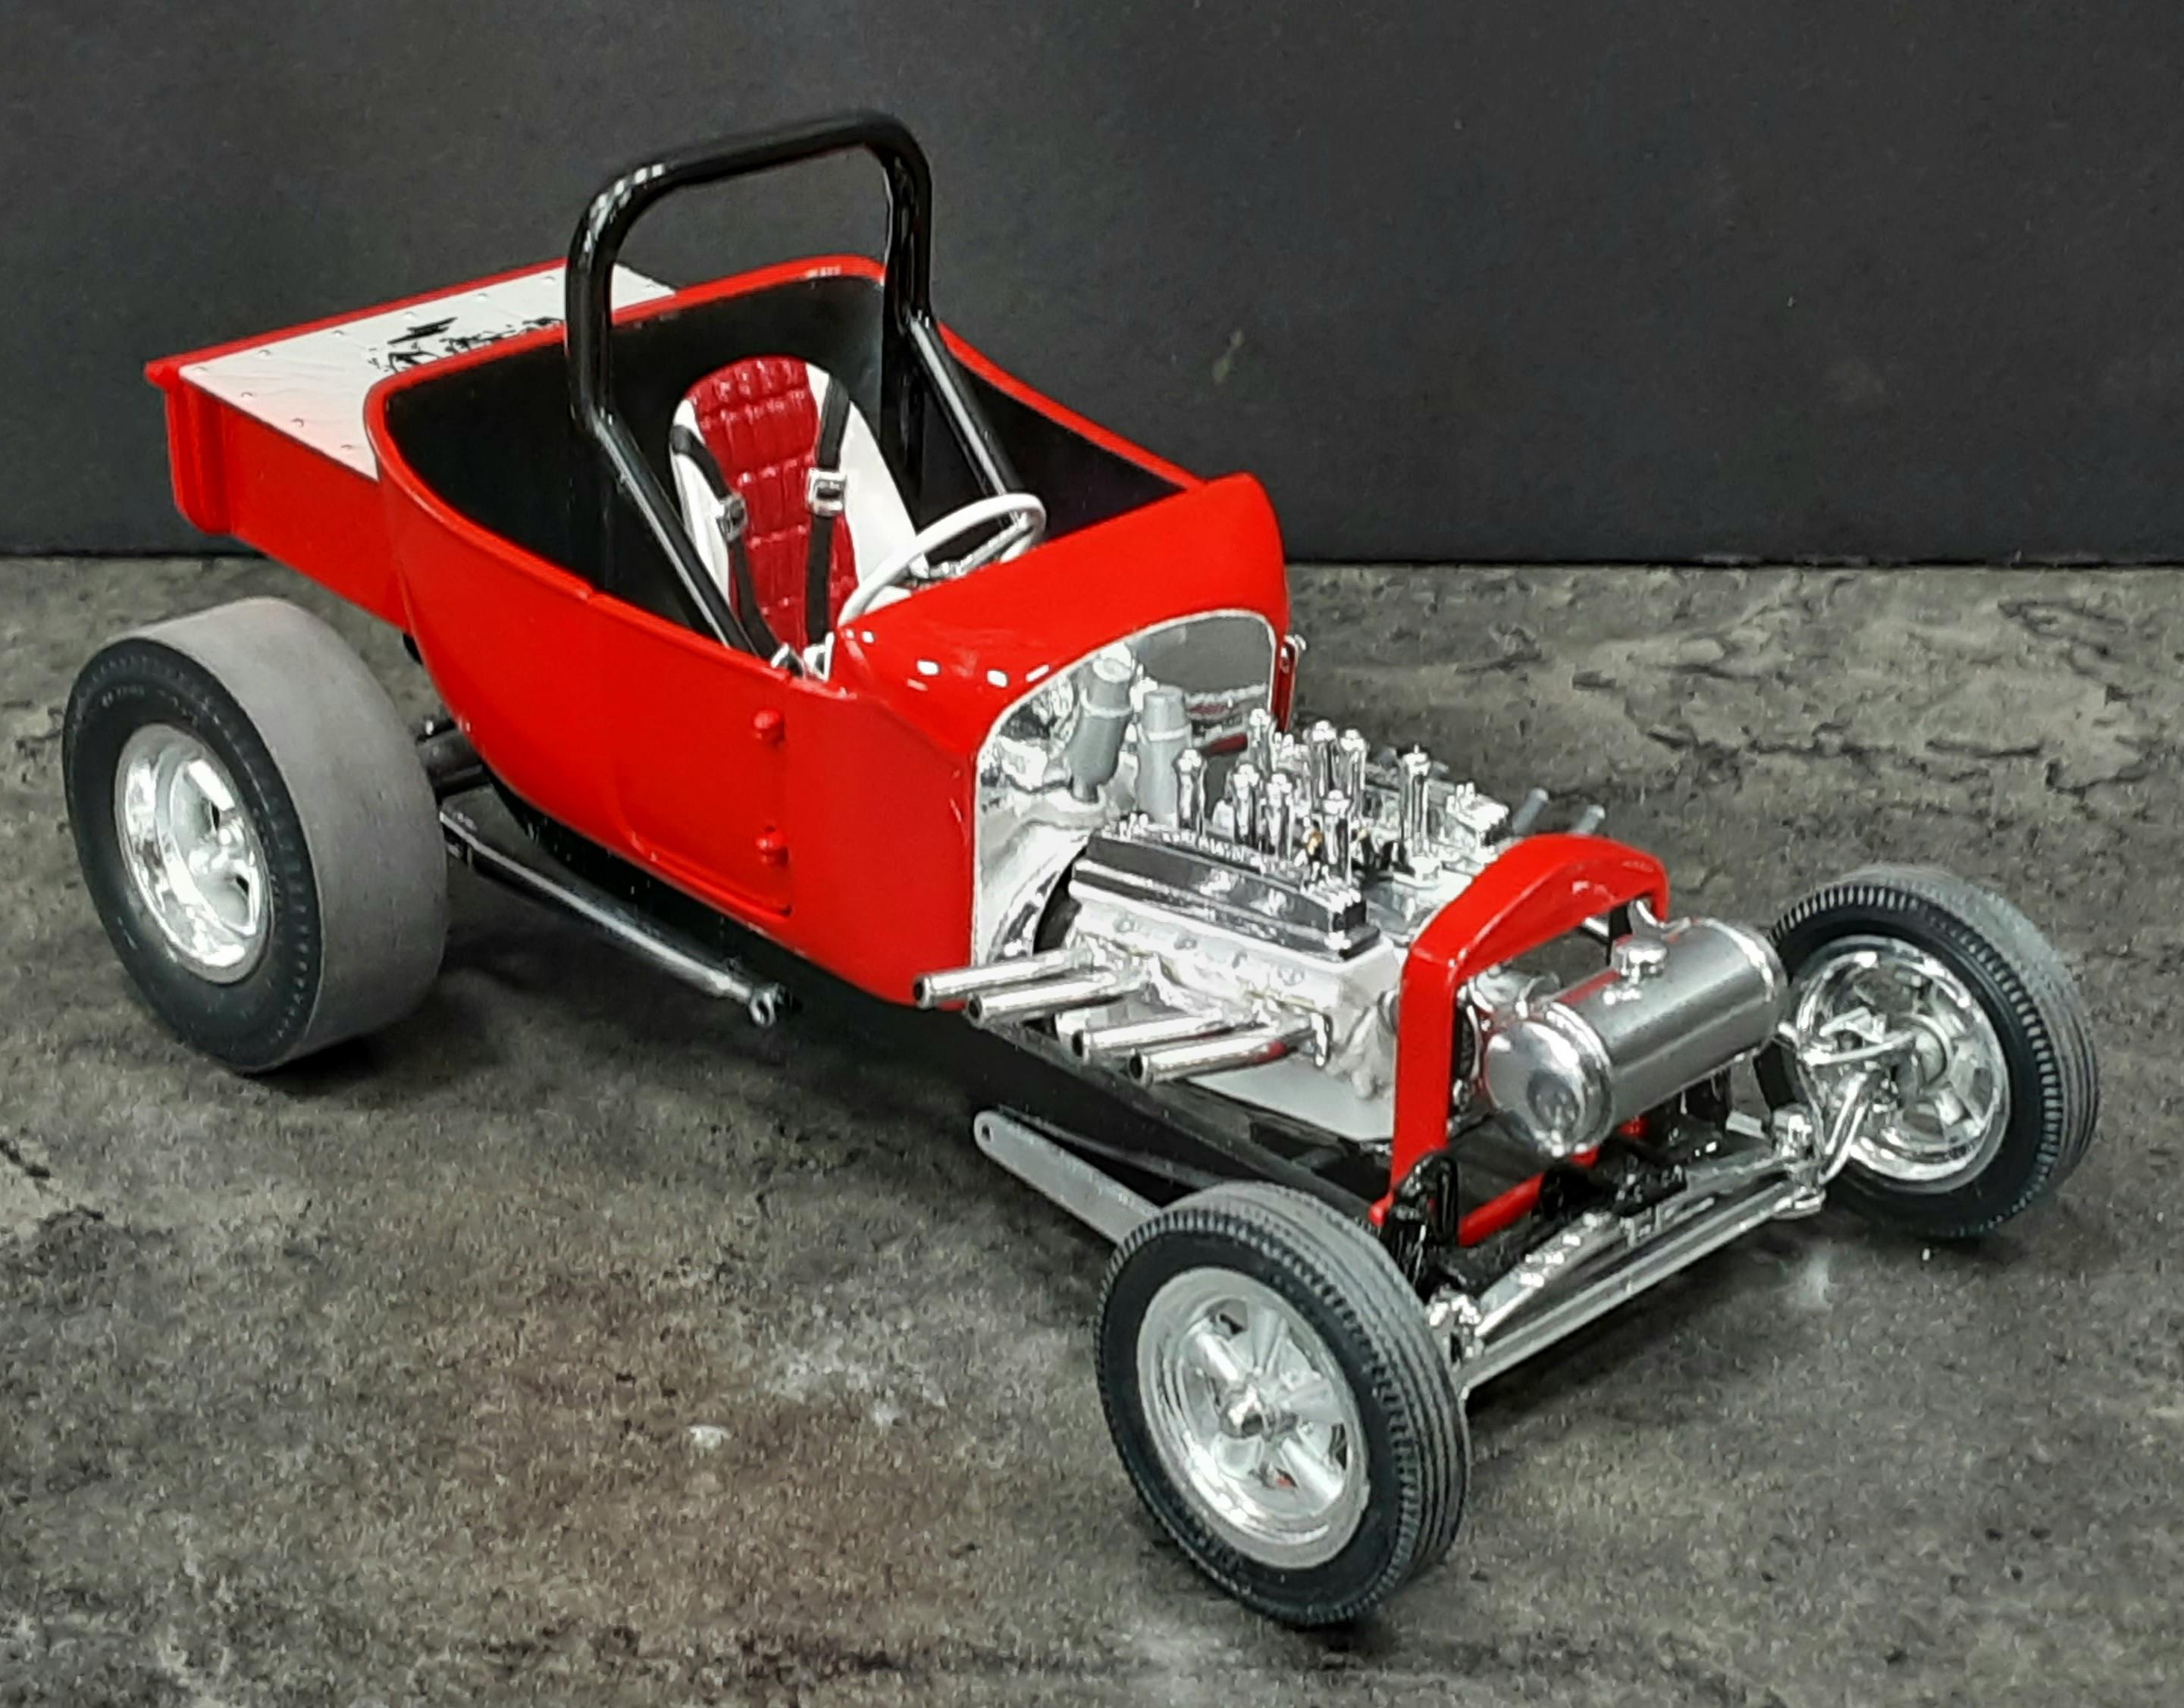
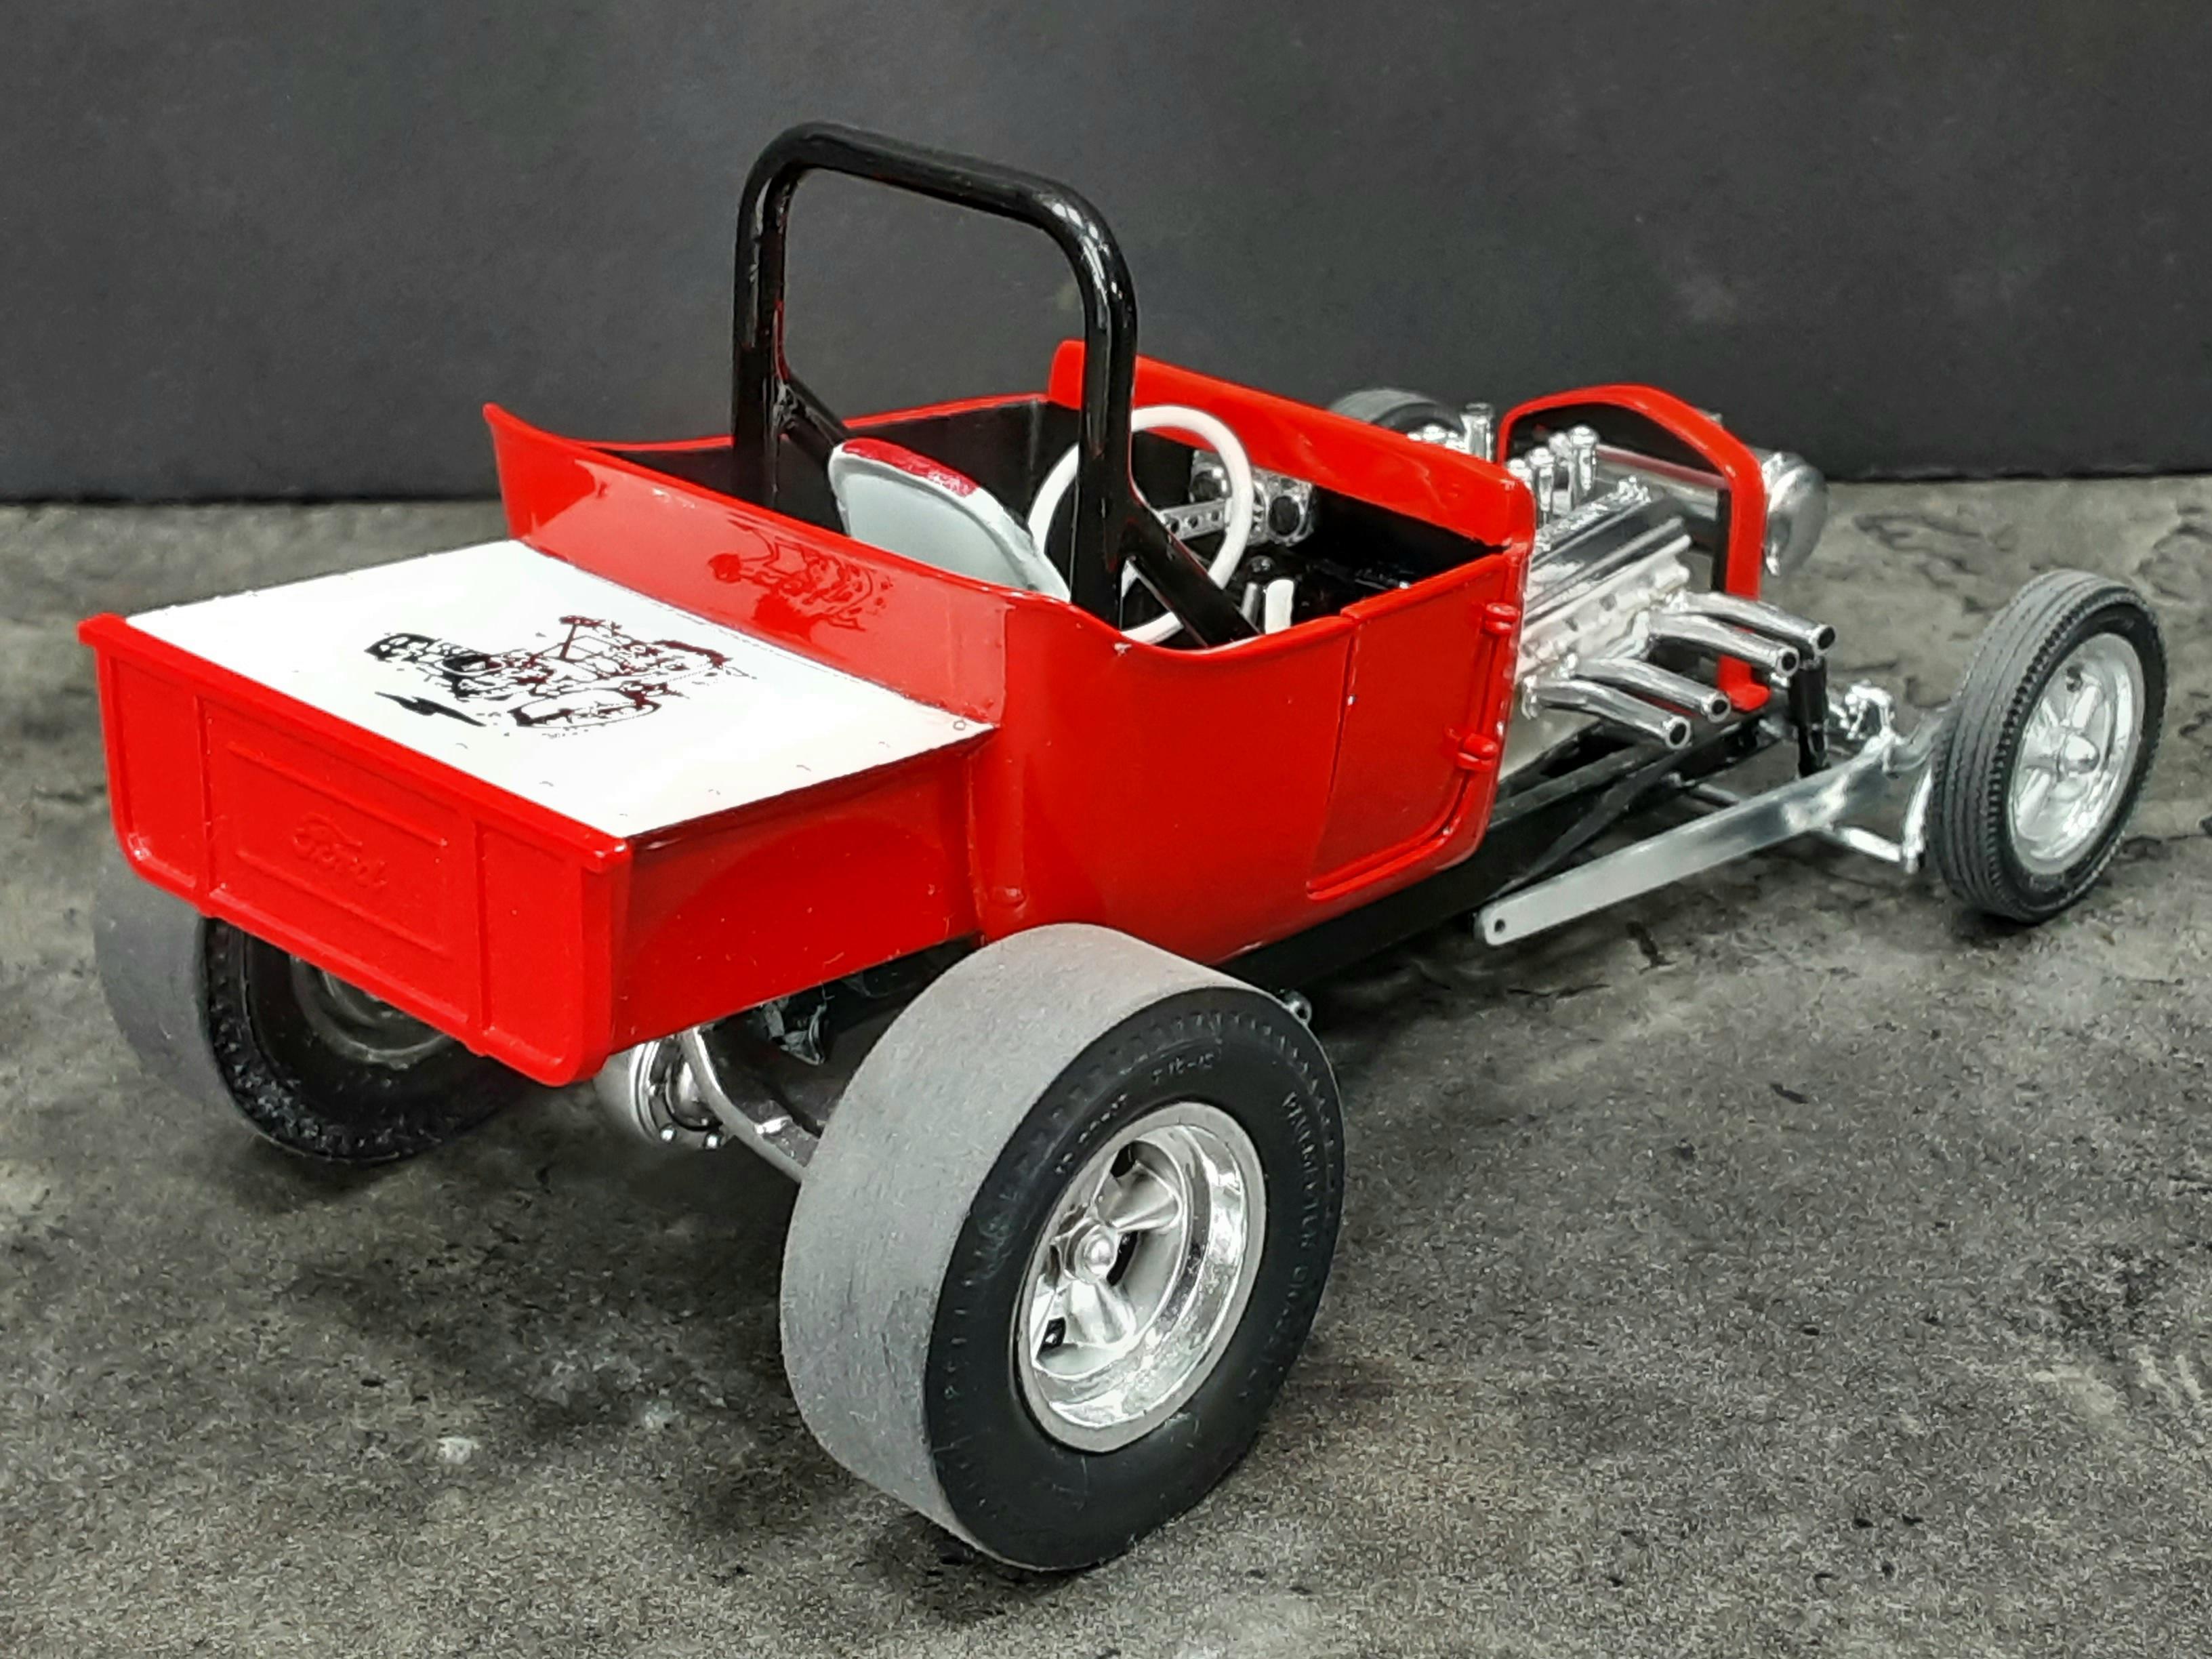
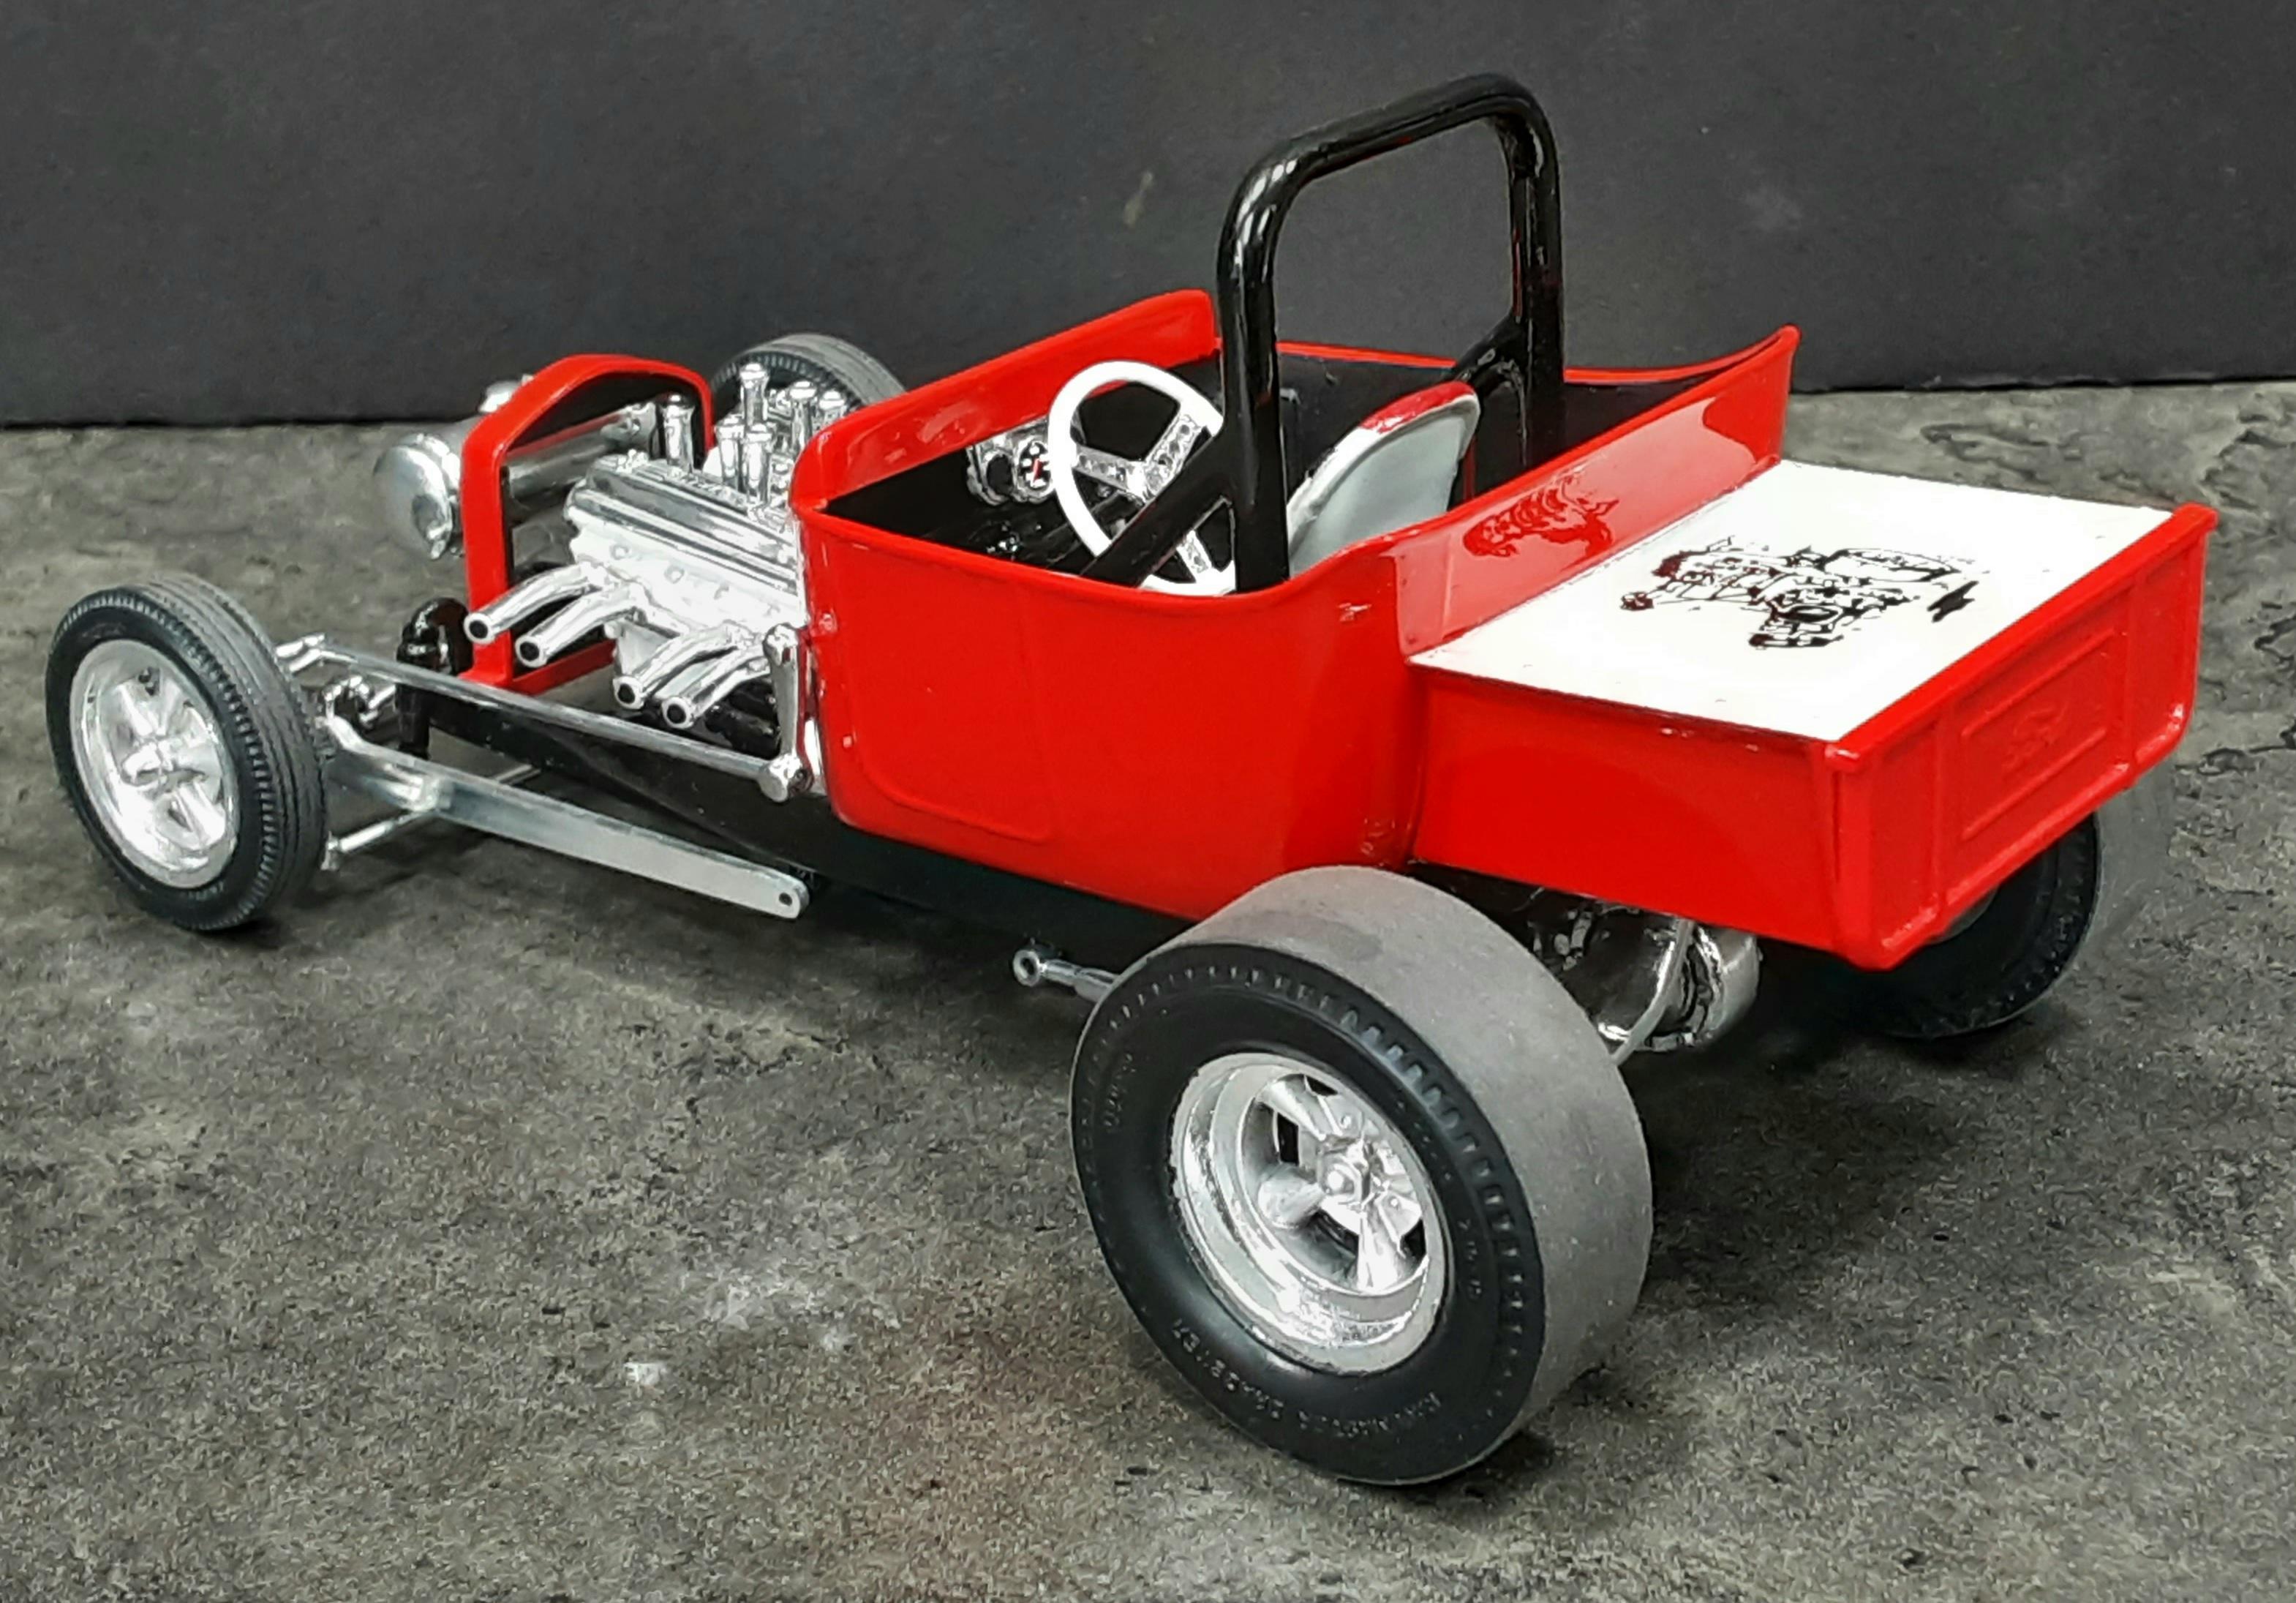
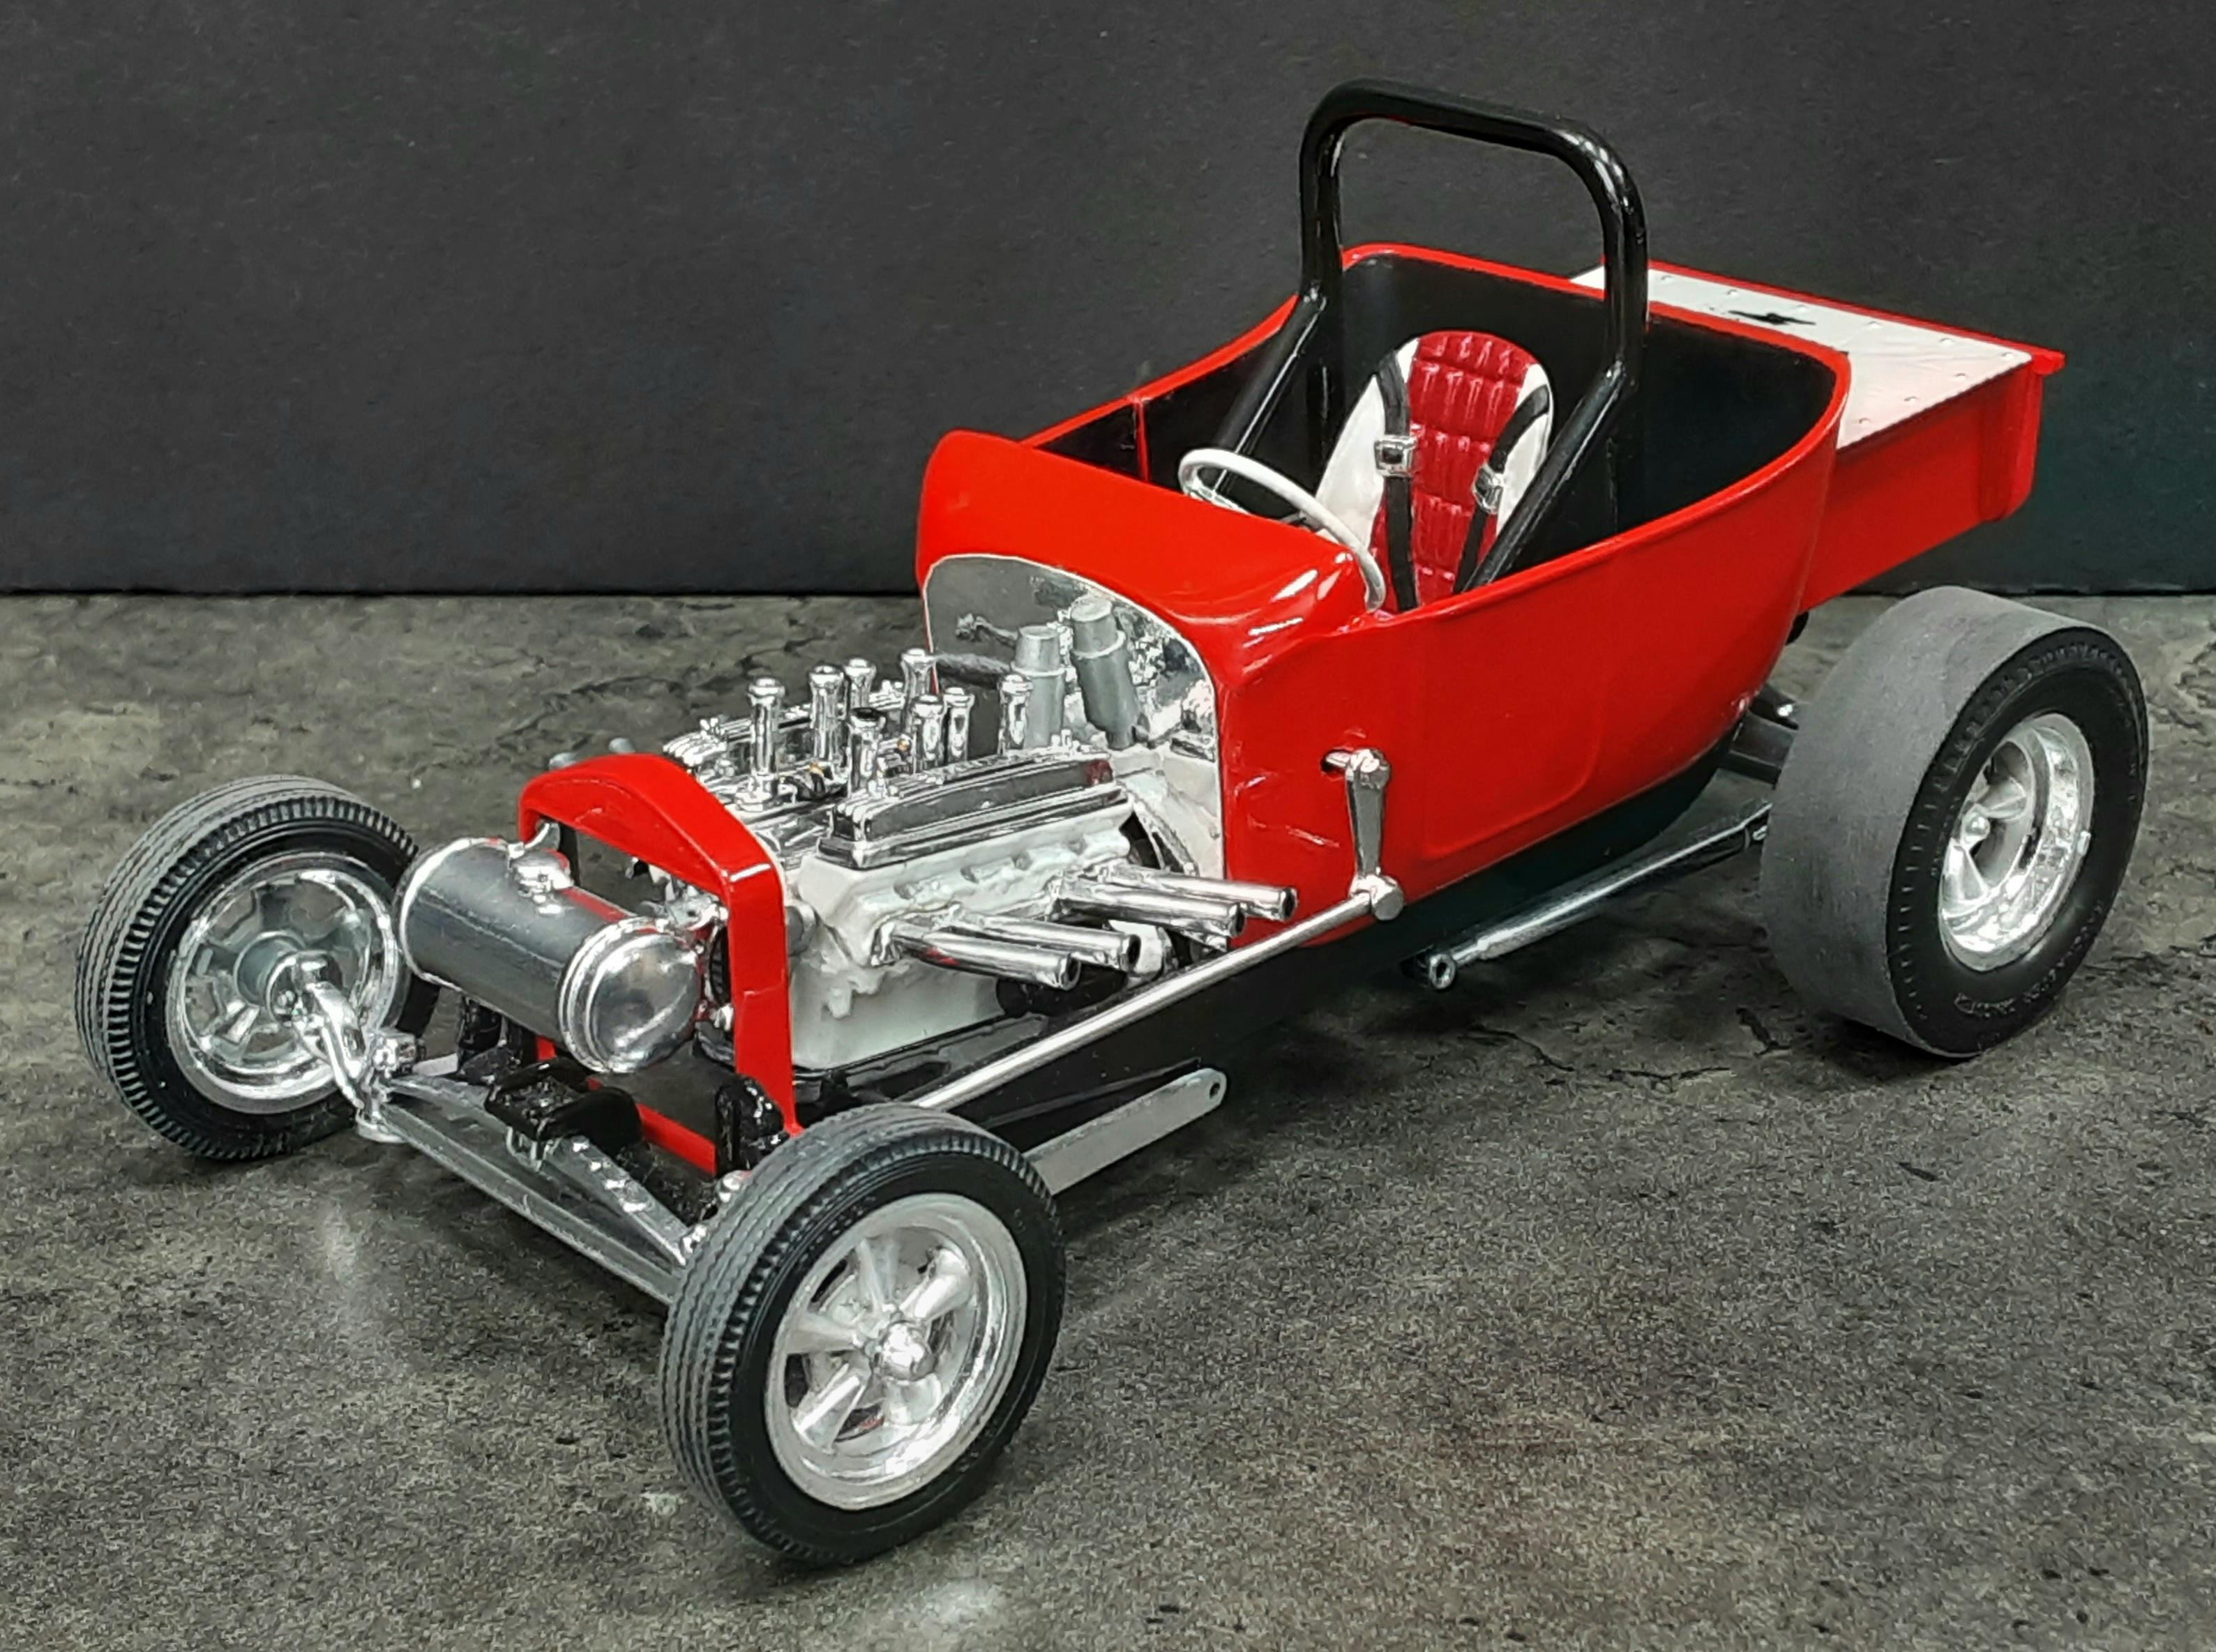
Revell Parts Pack T Bucket Pickup...
-
Show your iconic Custom Car/Hot Rod replicas
Mothersworry replied to Koellefornia Kid's topic in Model Cars
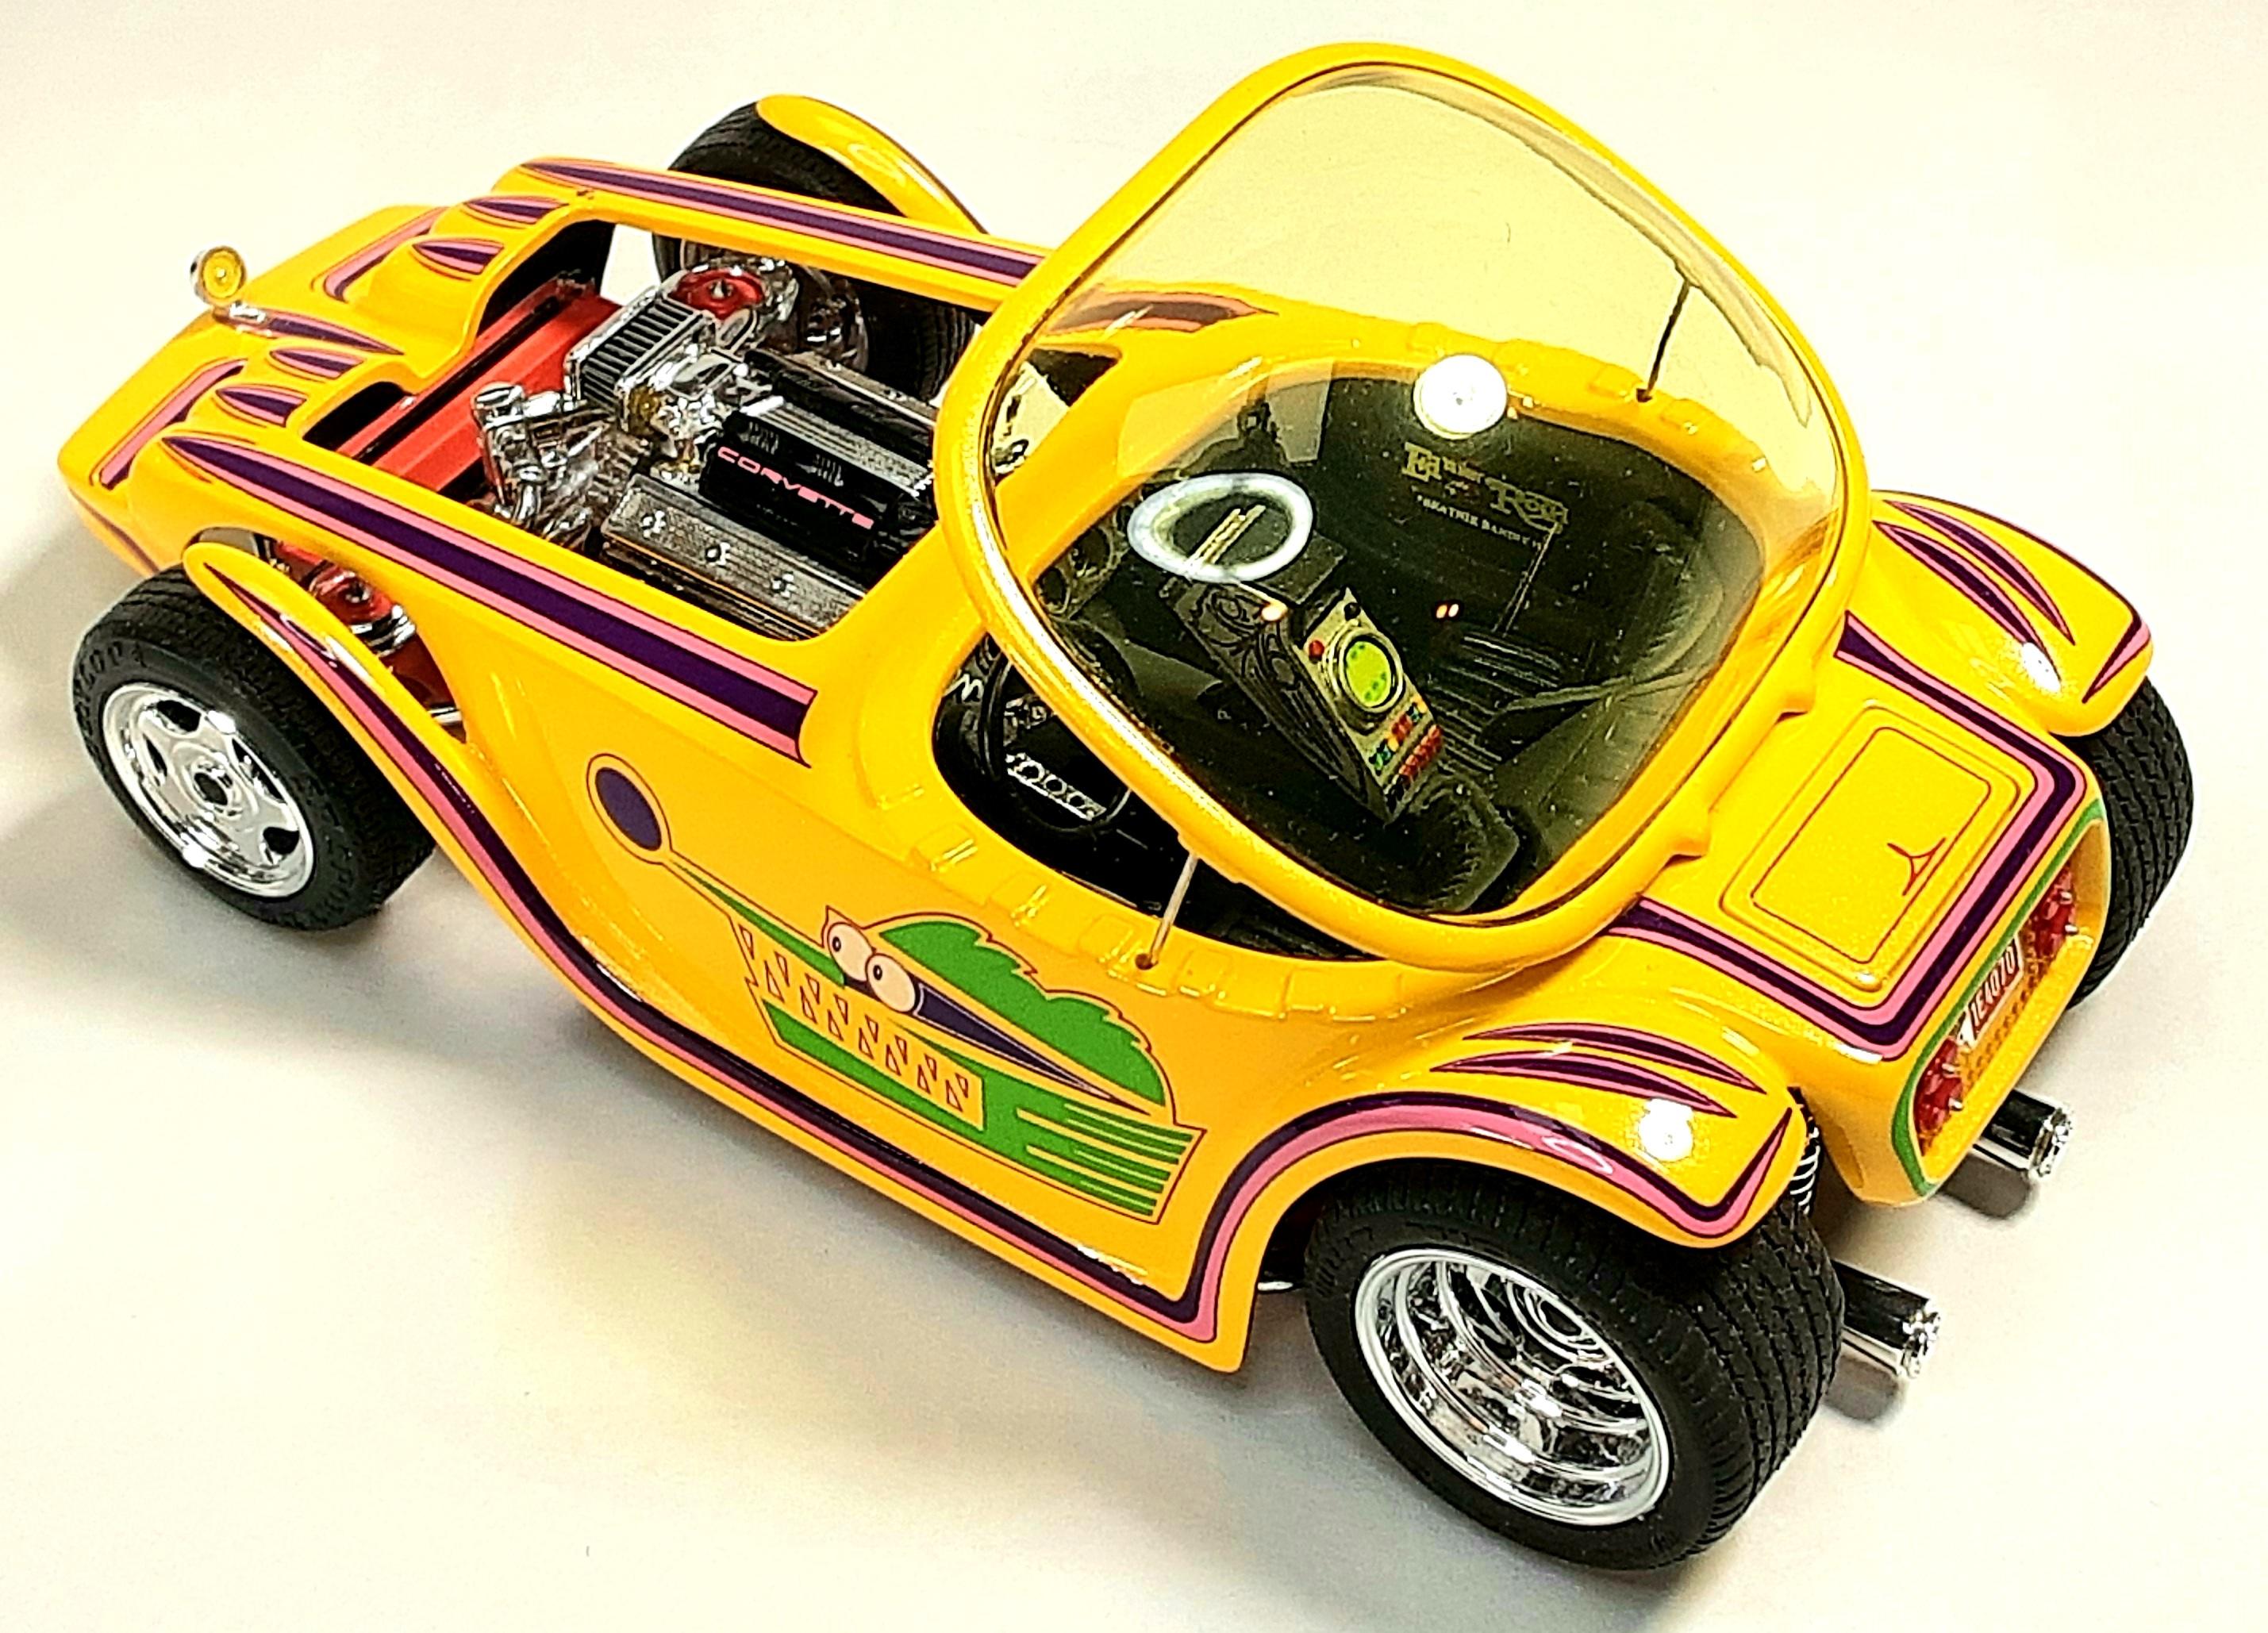
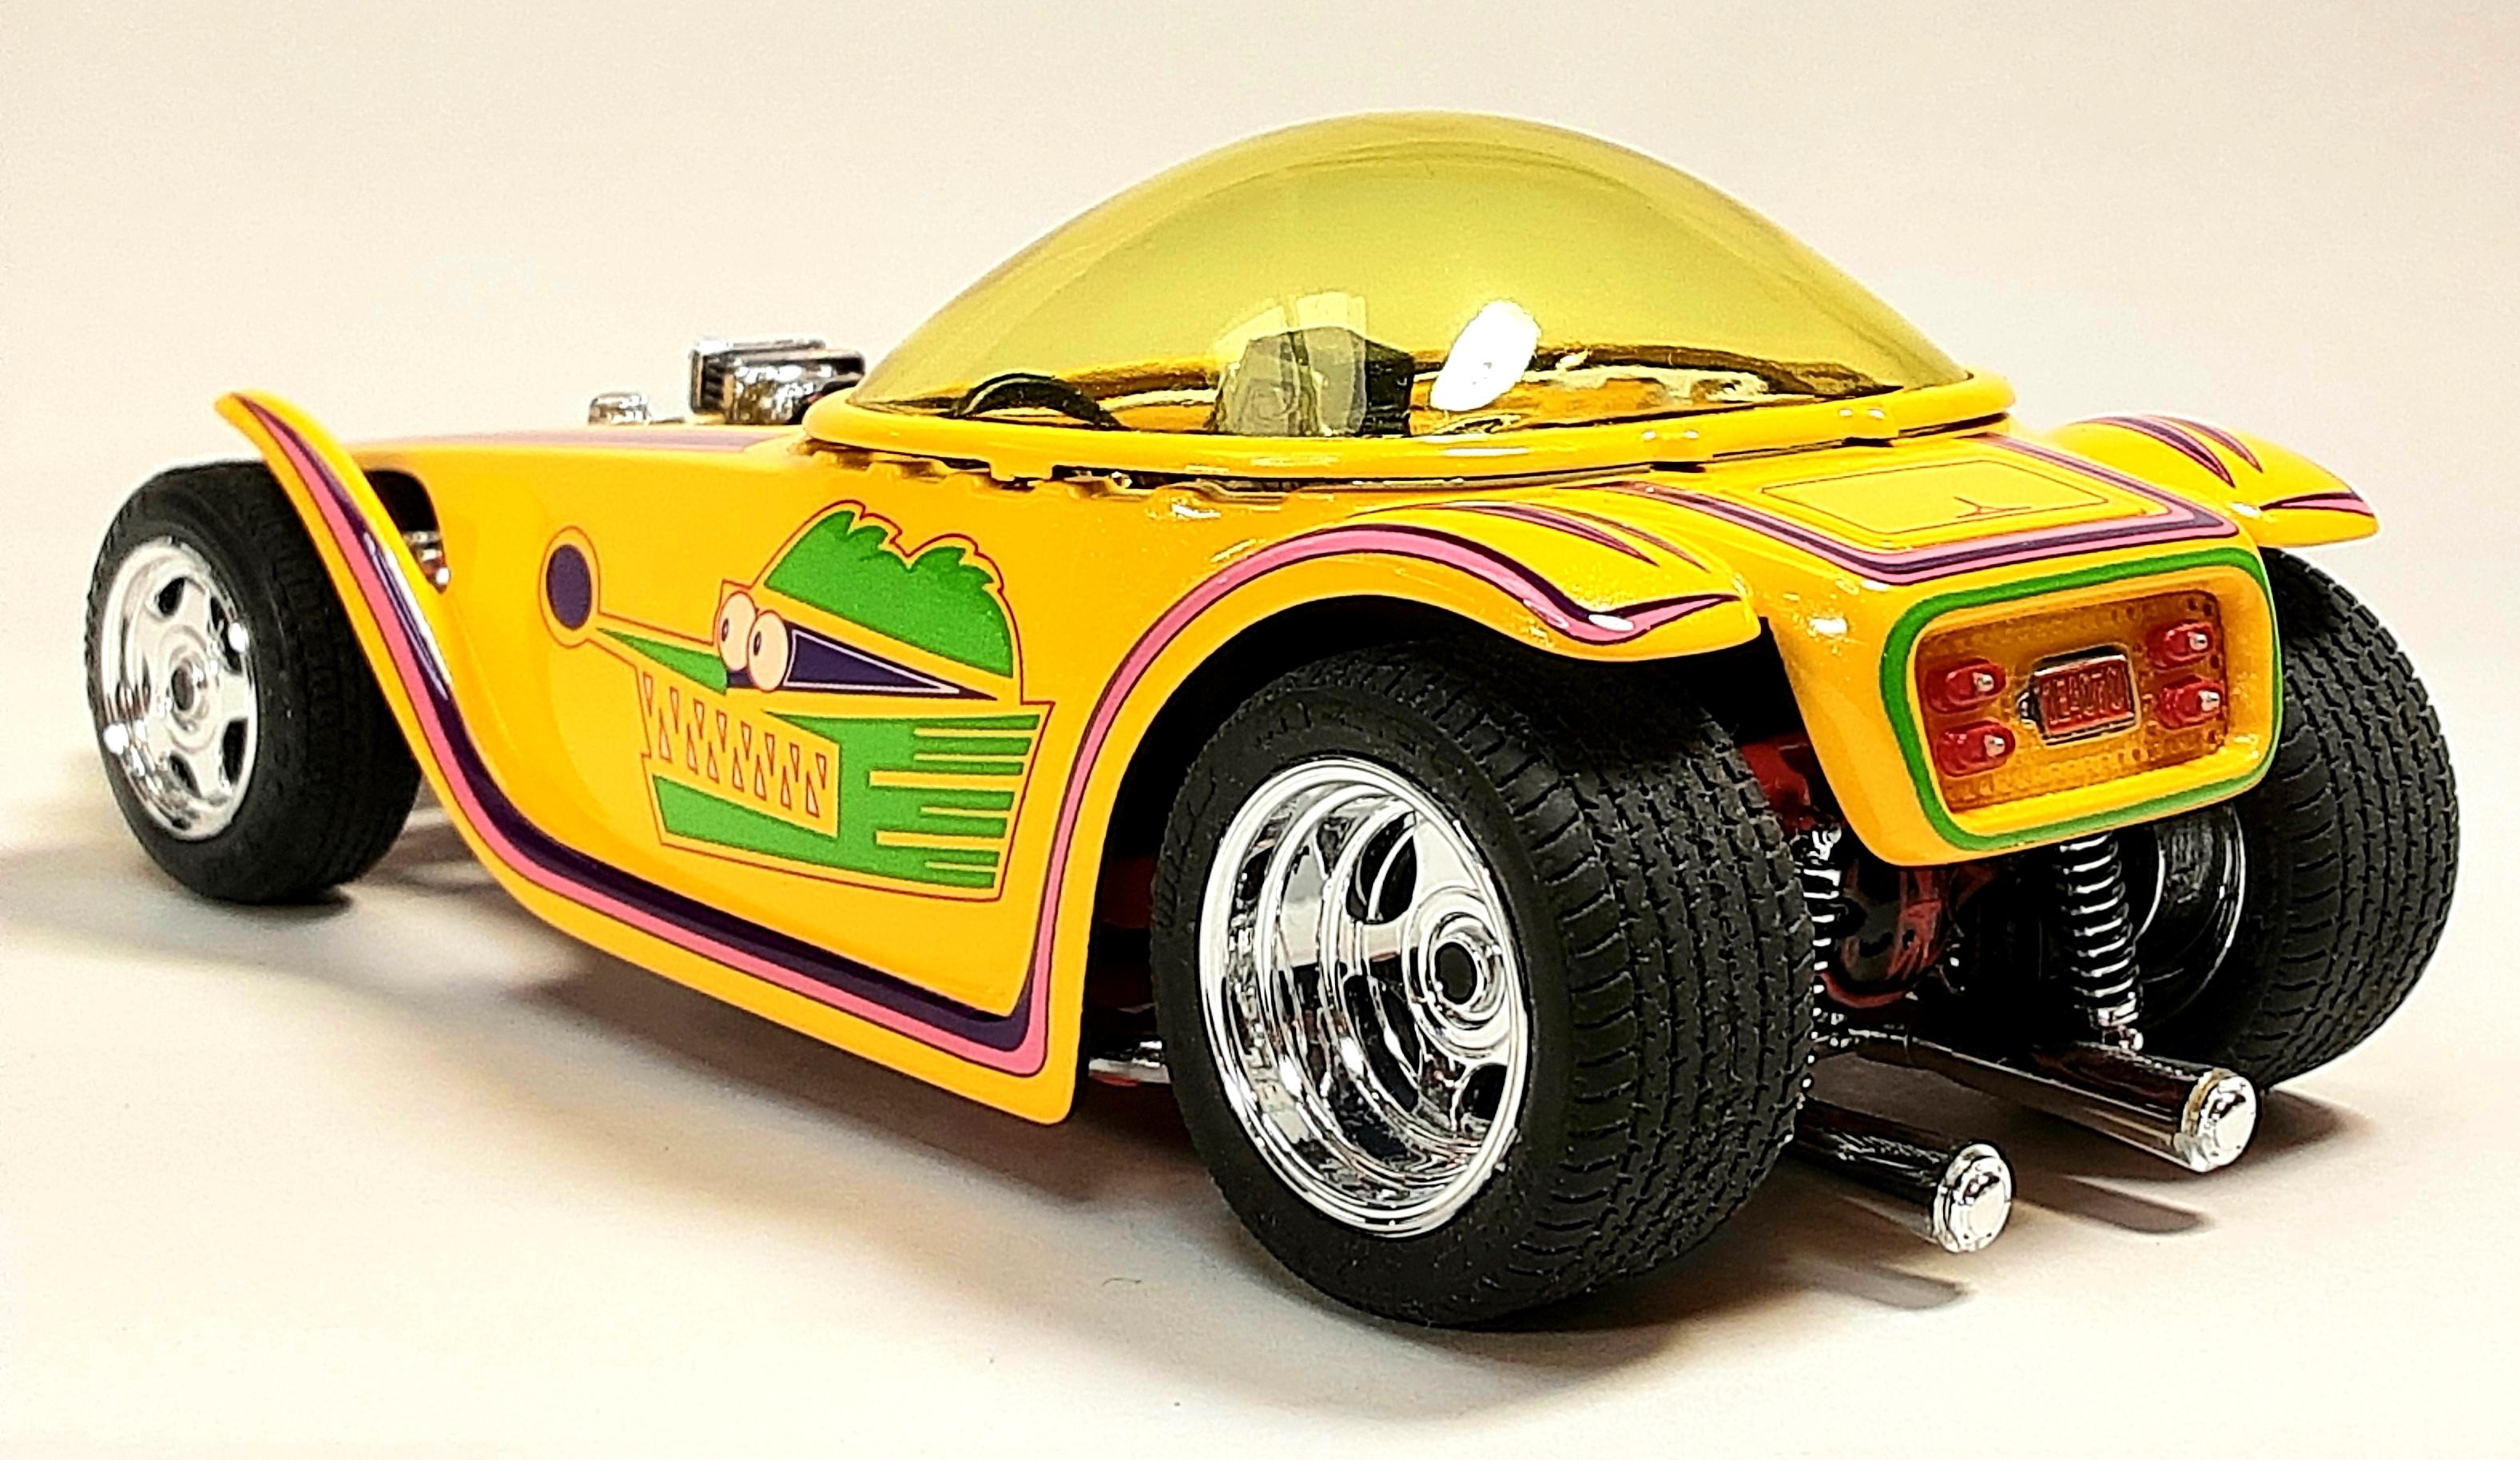
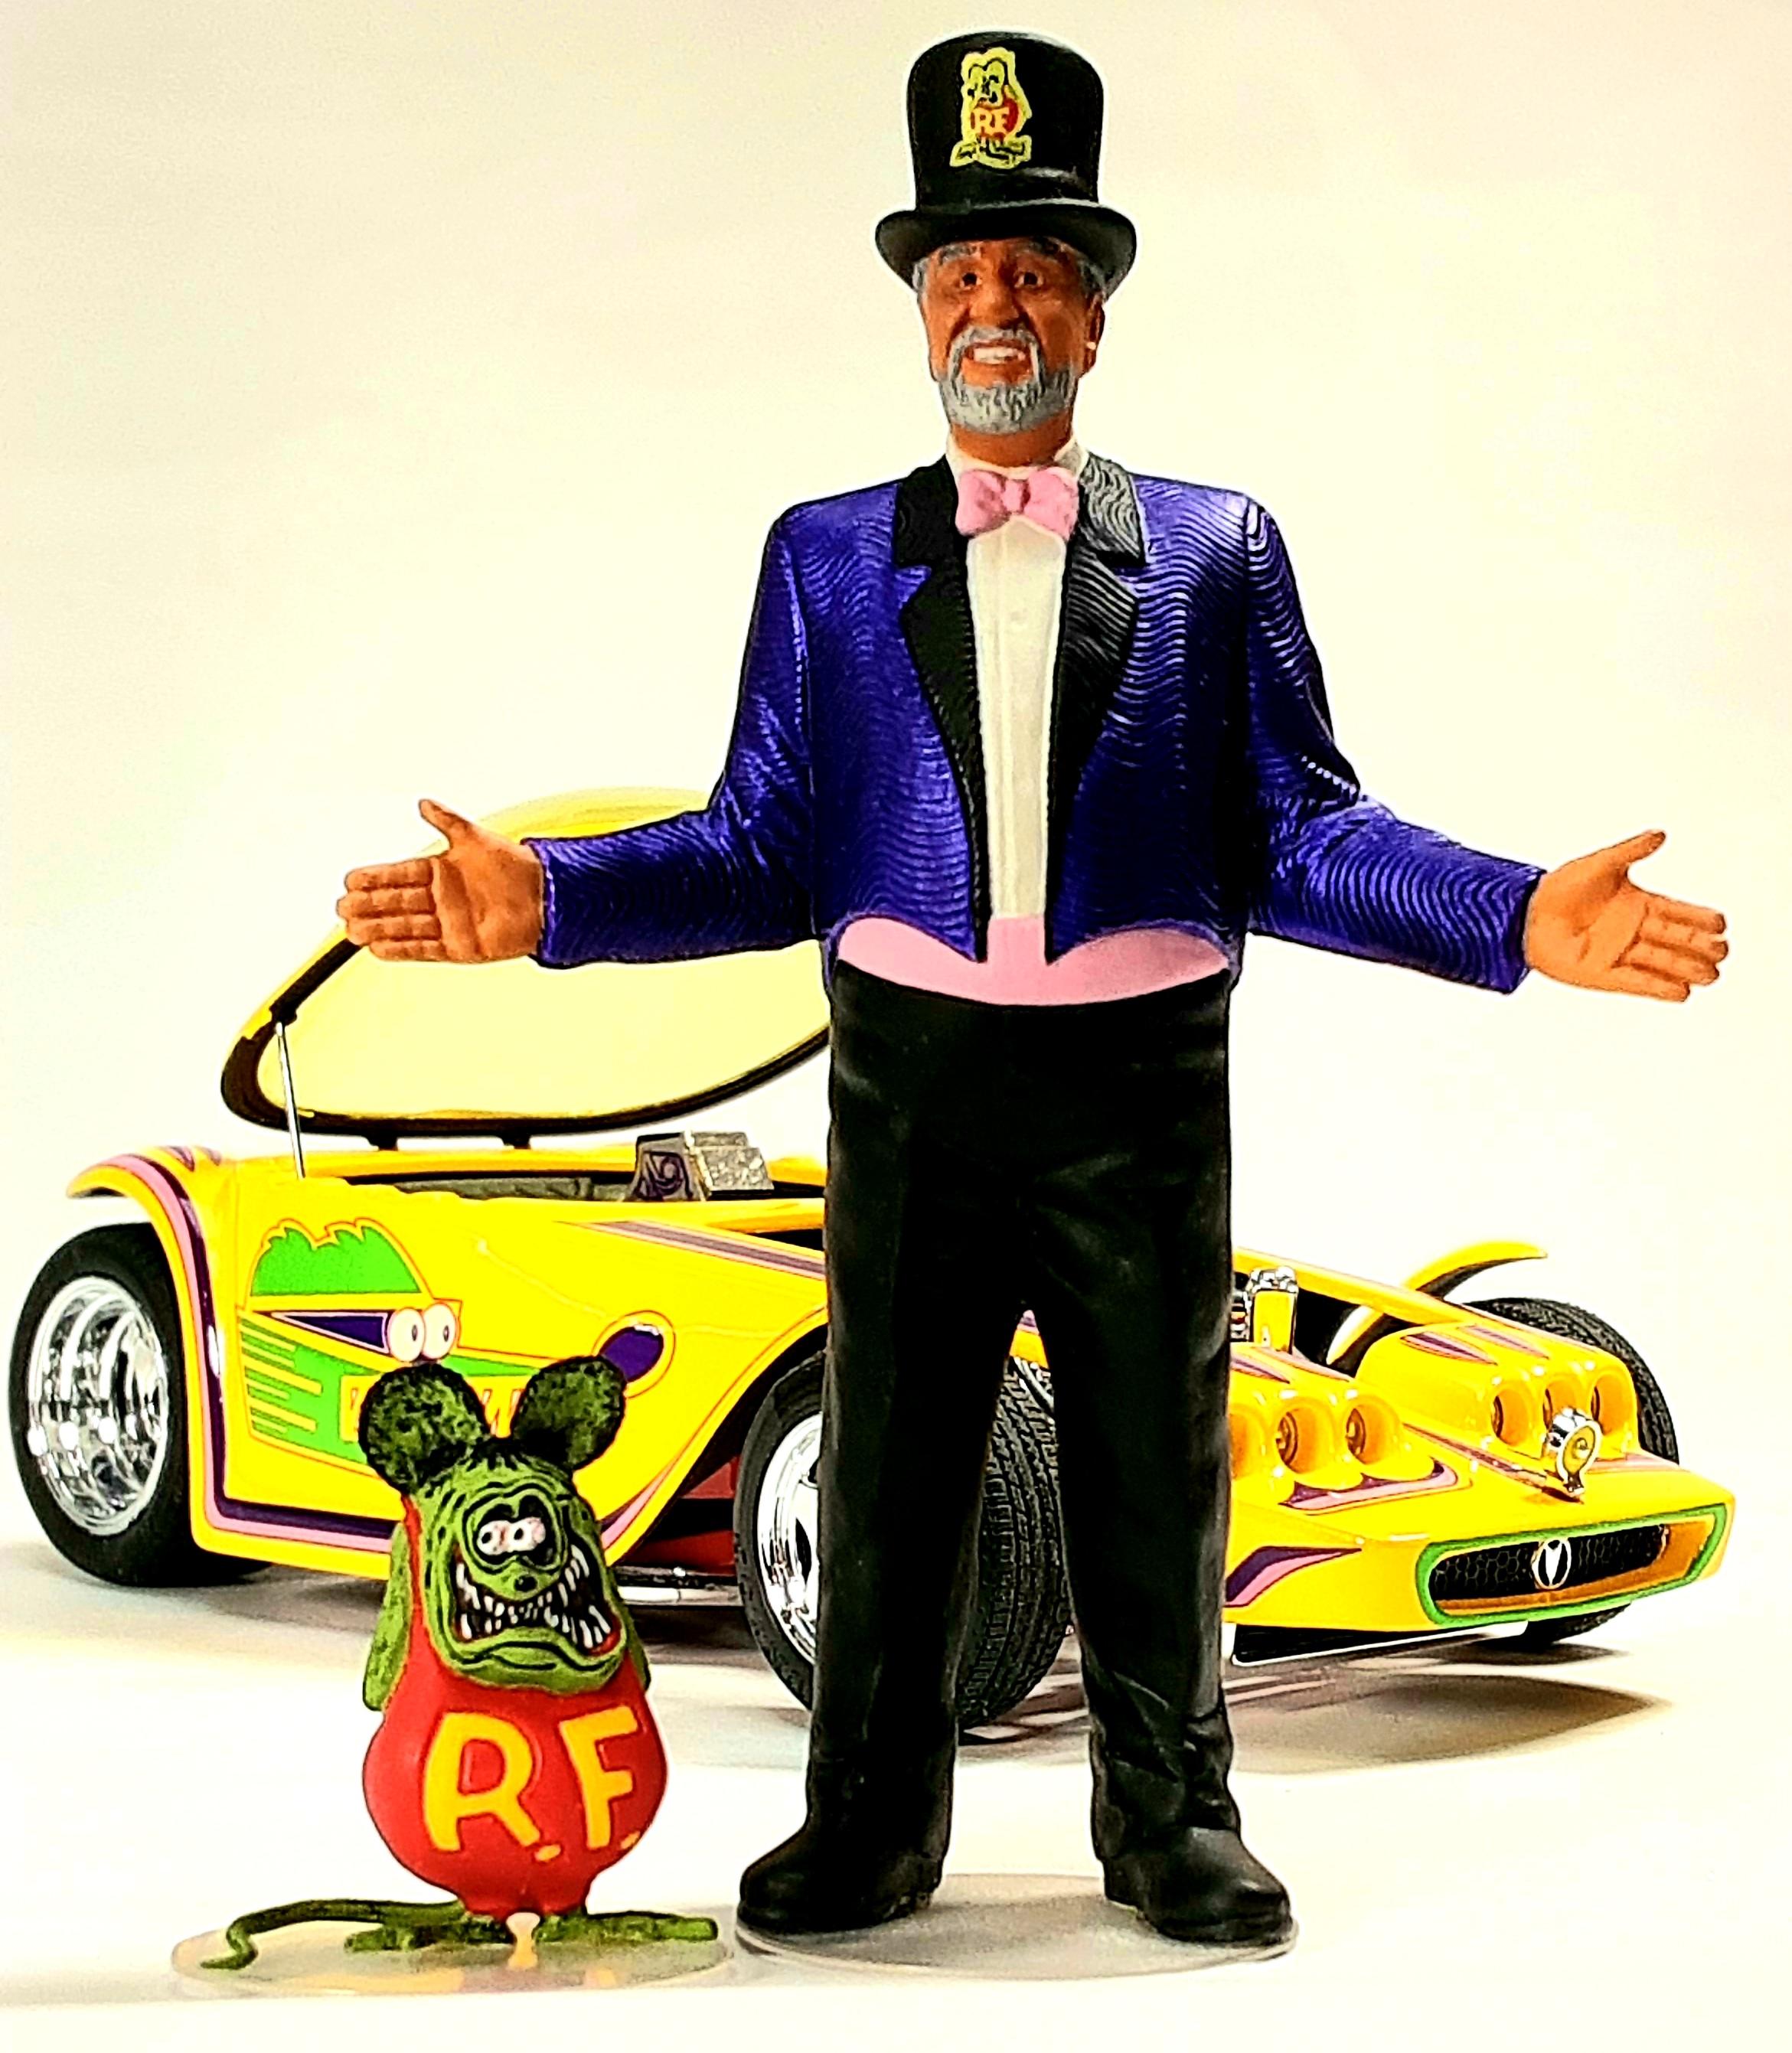
Roth's Beatnik Bandit II...with BDR and his li'l buddy
-
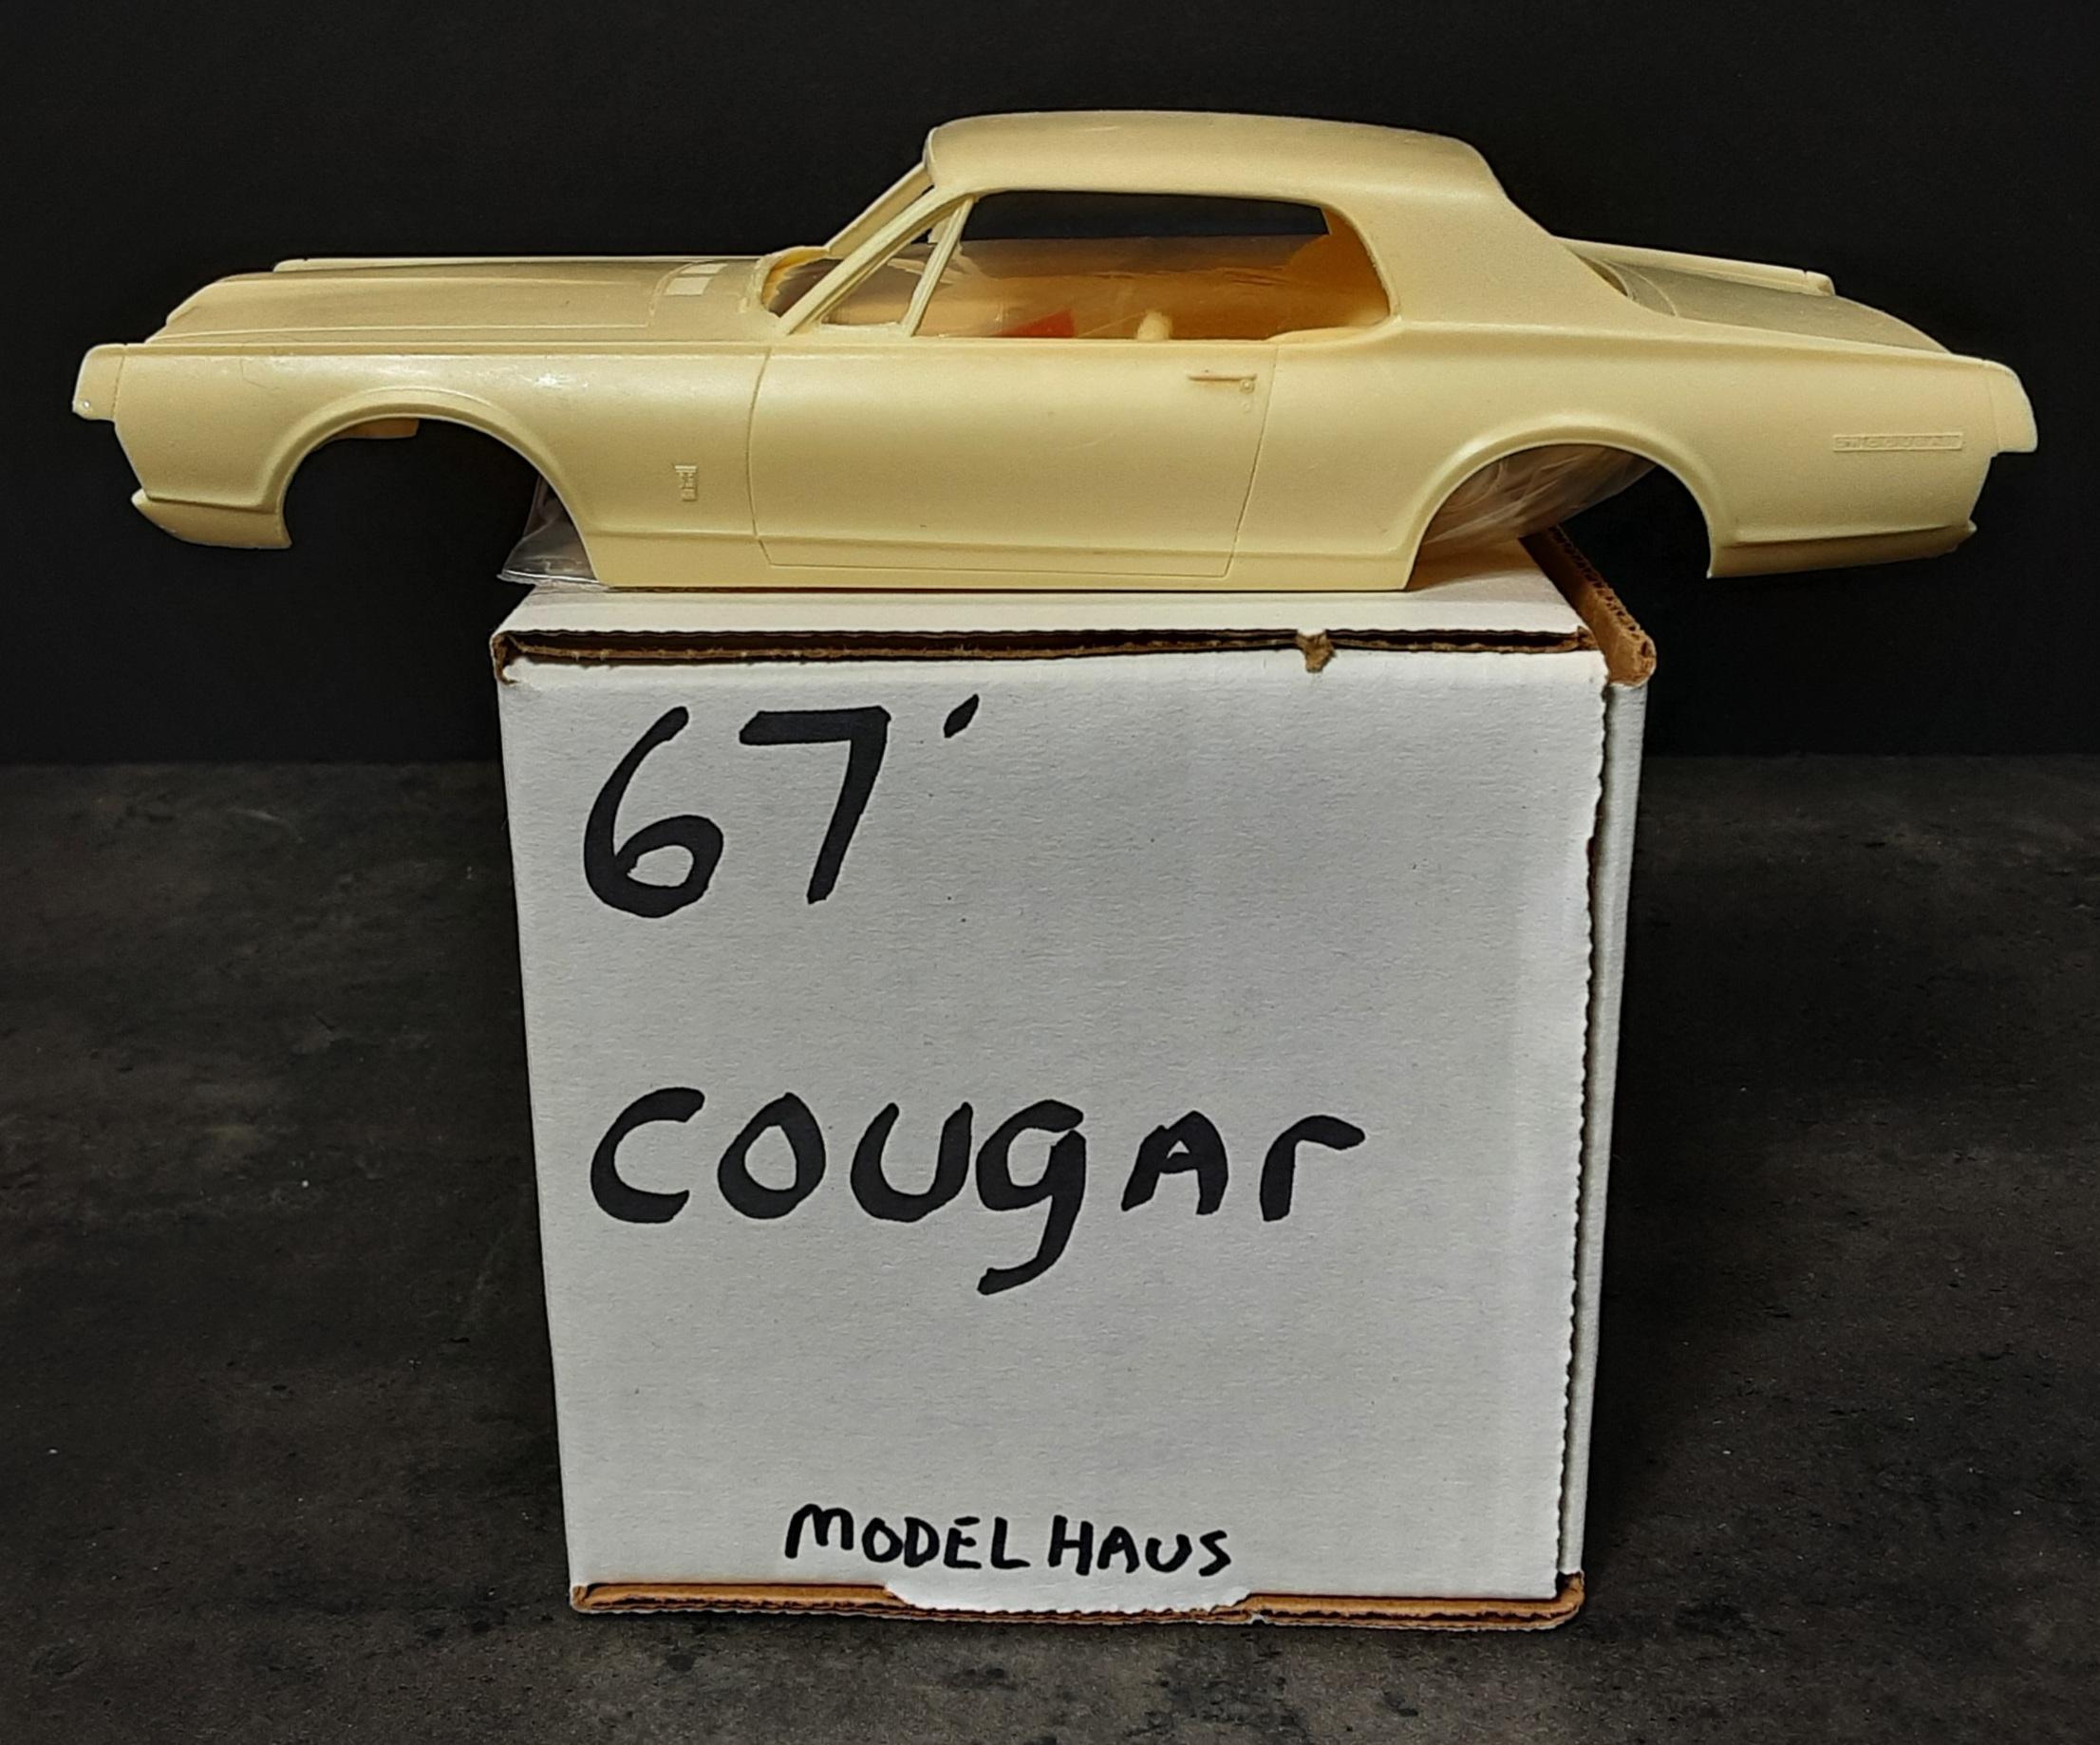
Modelhaus '67 Cougar resin kit...
-
Tooling is already done, Eleanor is on the way...pics of Revell test shots.
-
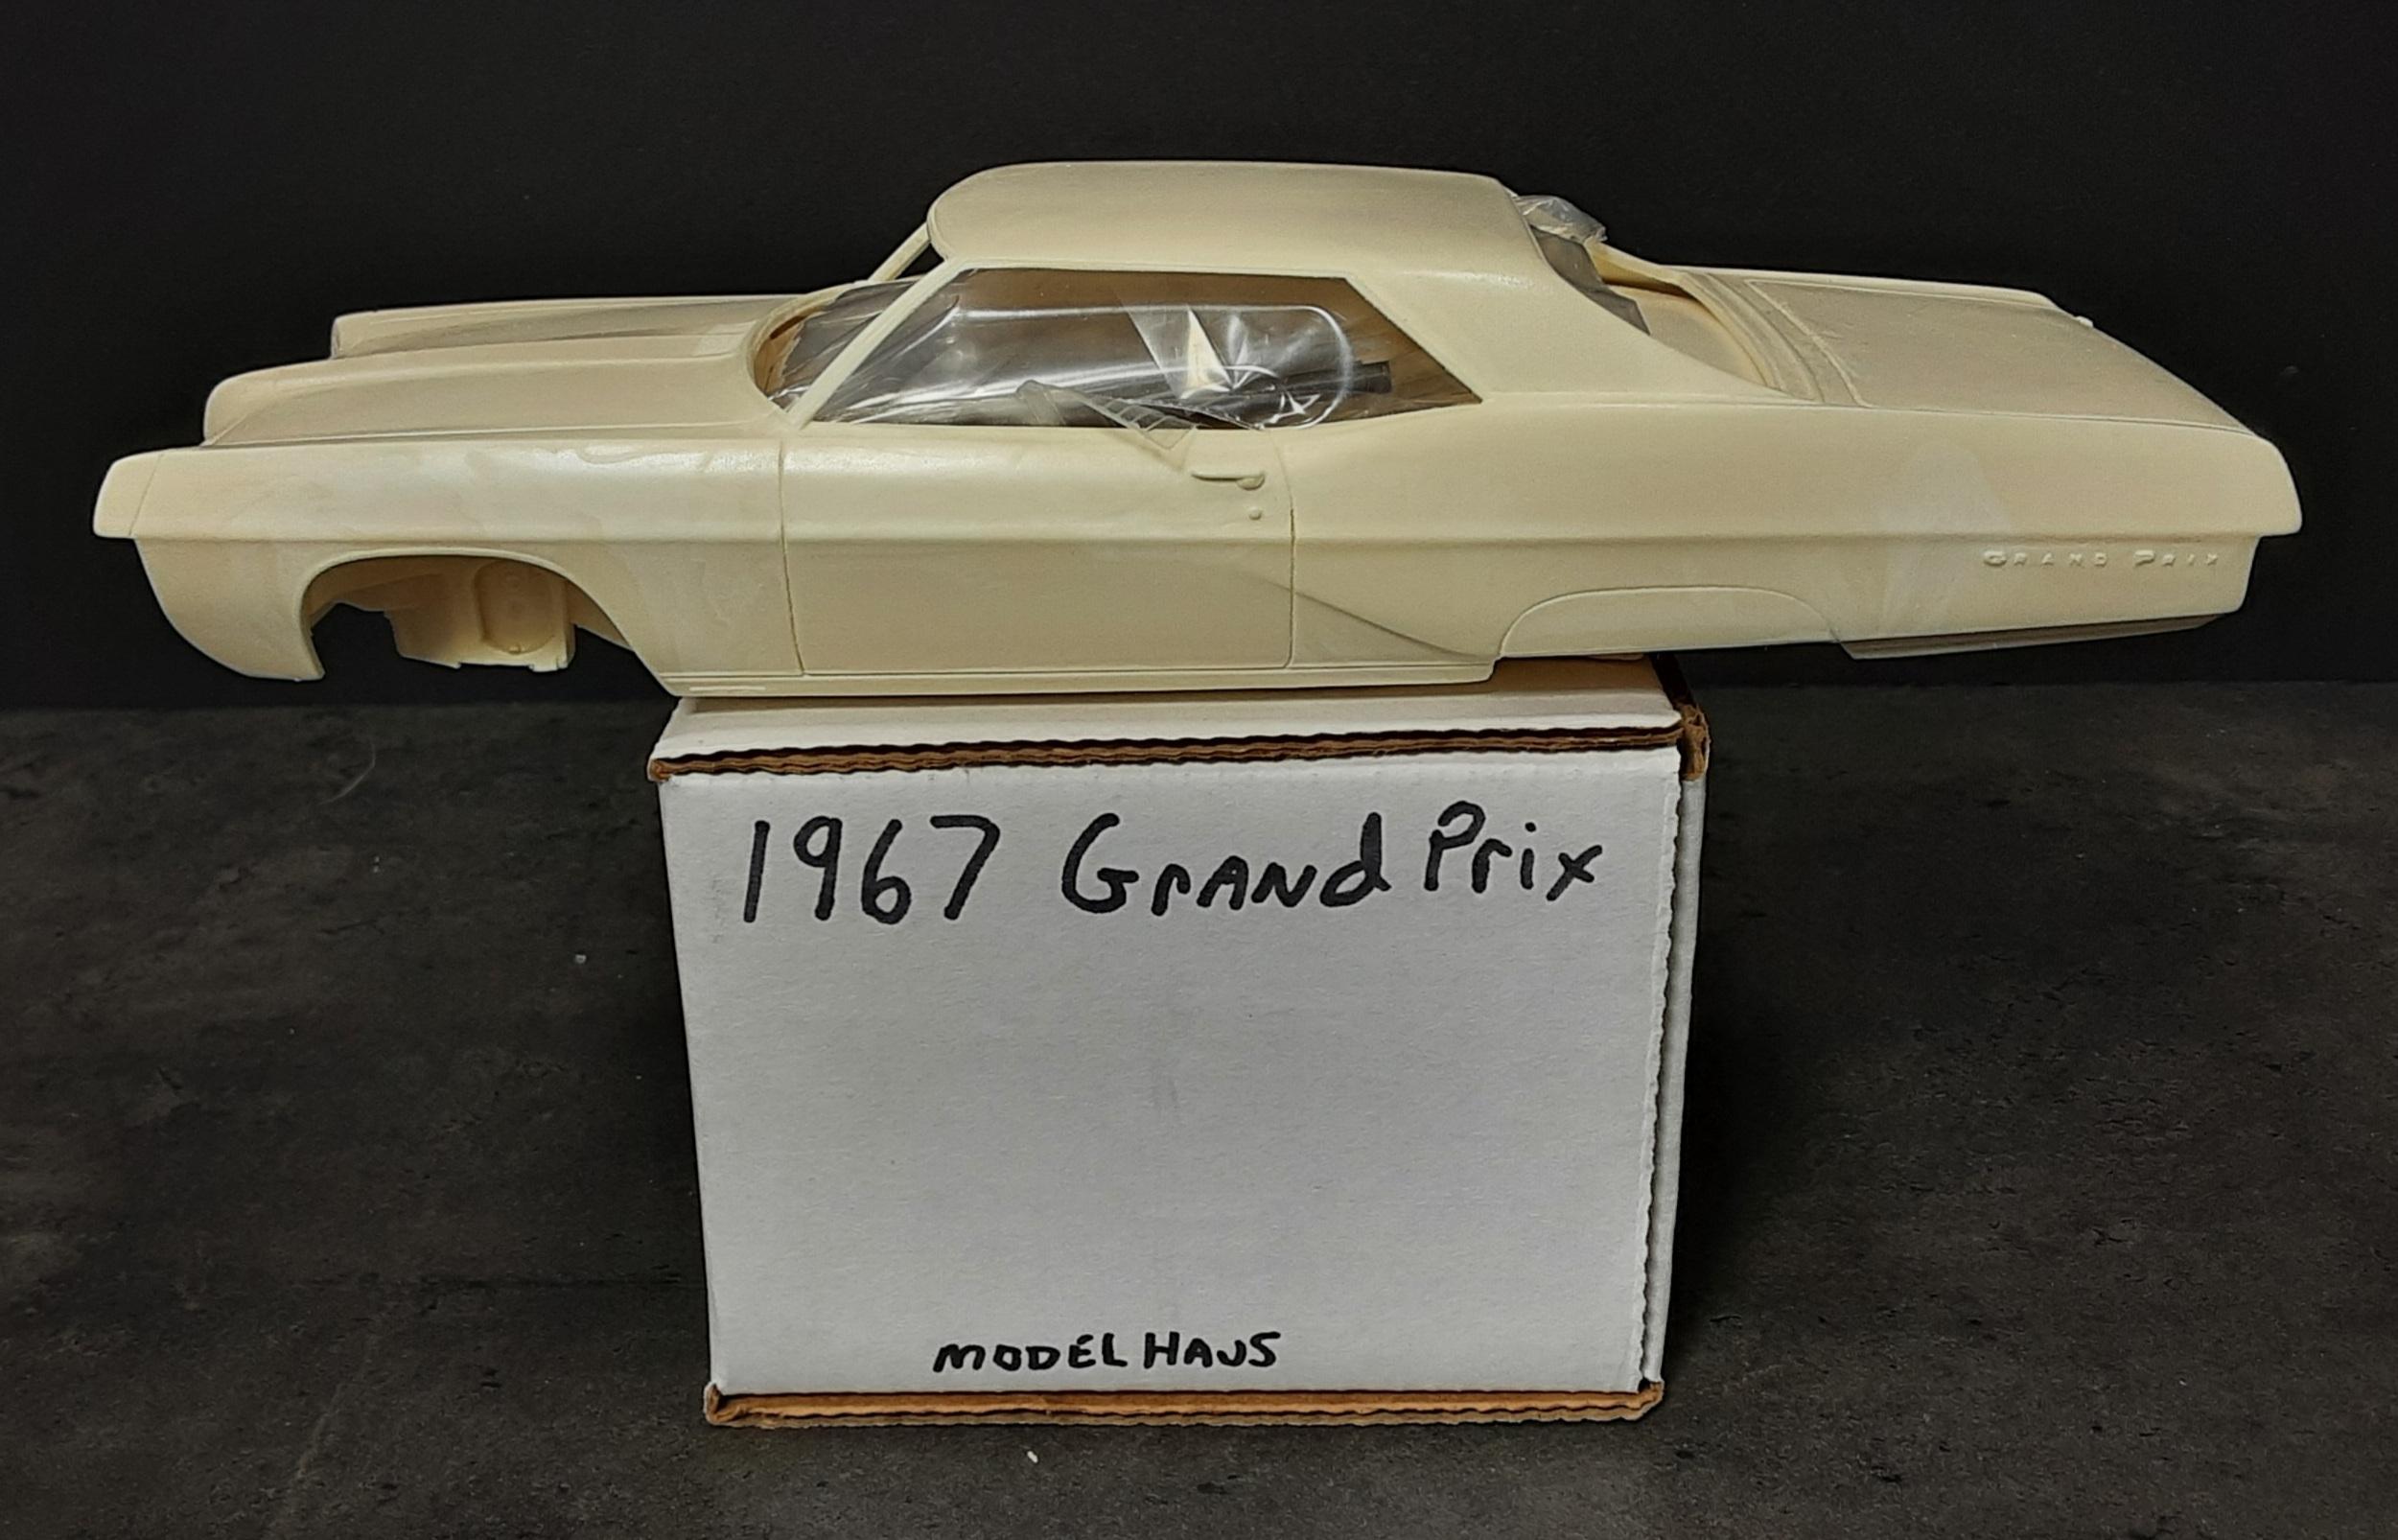
Modelhaus 1967 Pontiac Grand Prix resin kit...
-
Acoupla Sonny & Cher Mustangs...
-
MPC Shirley Muldowney Plymouth Roadrunner Funny Car...sealed inside.
-
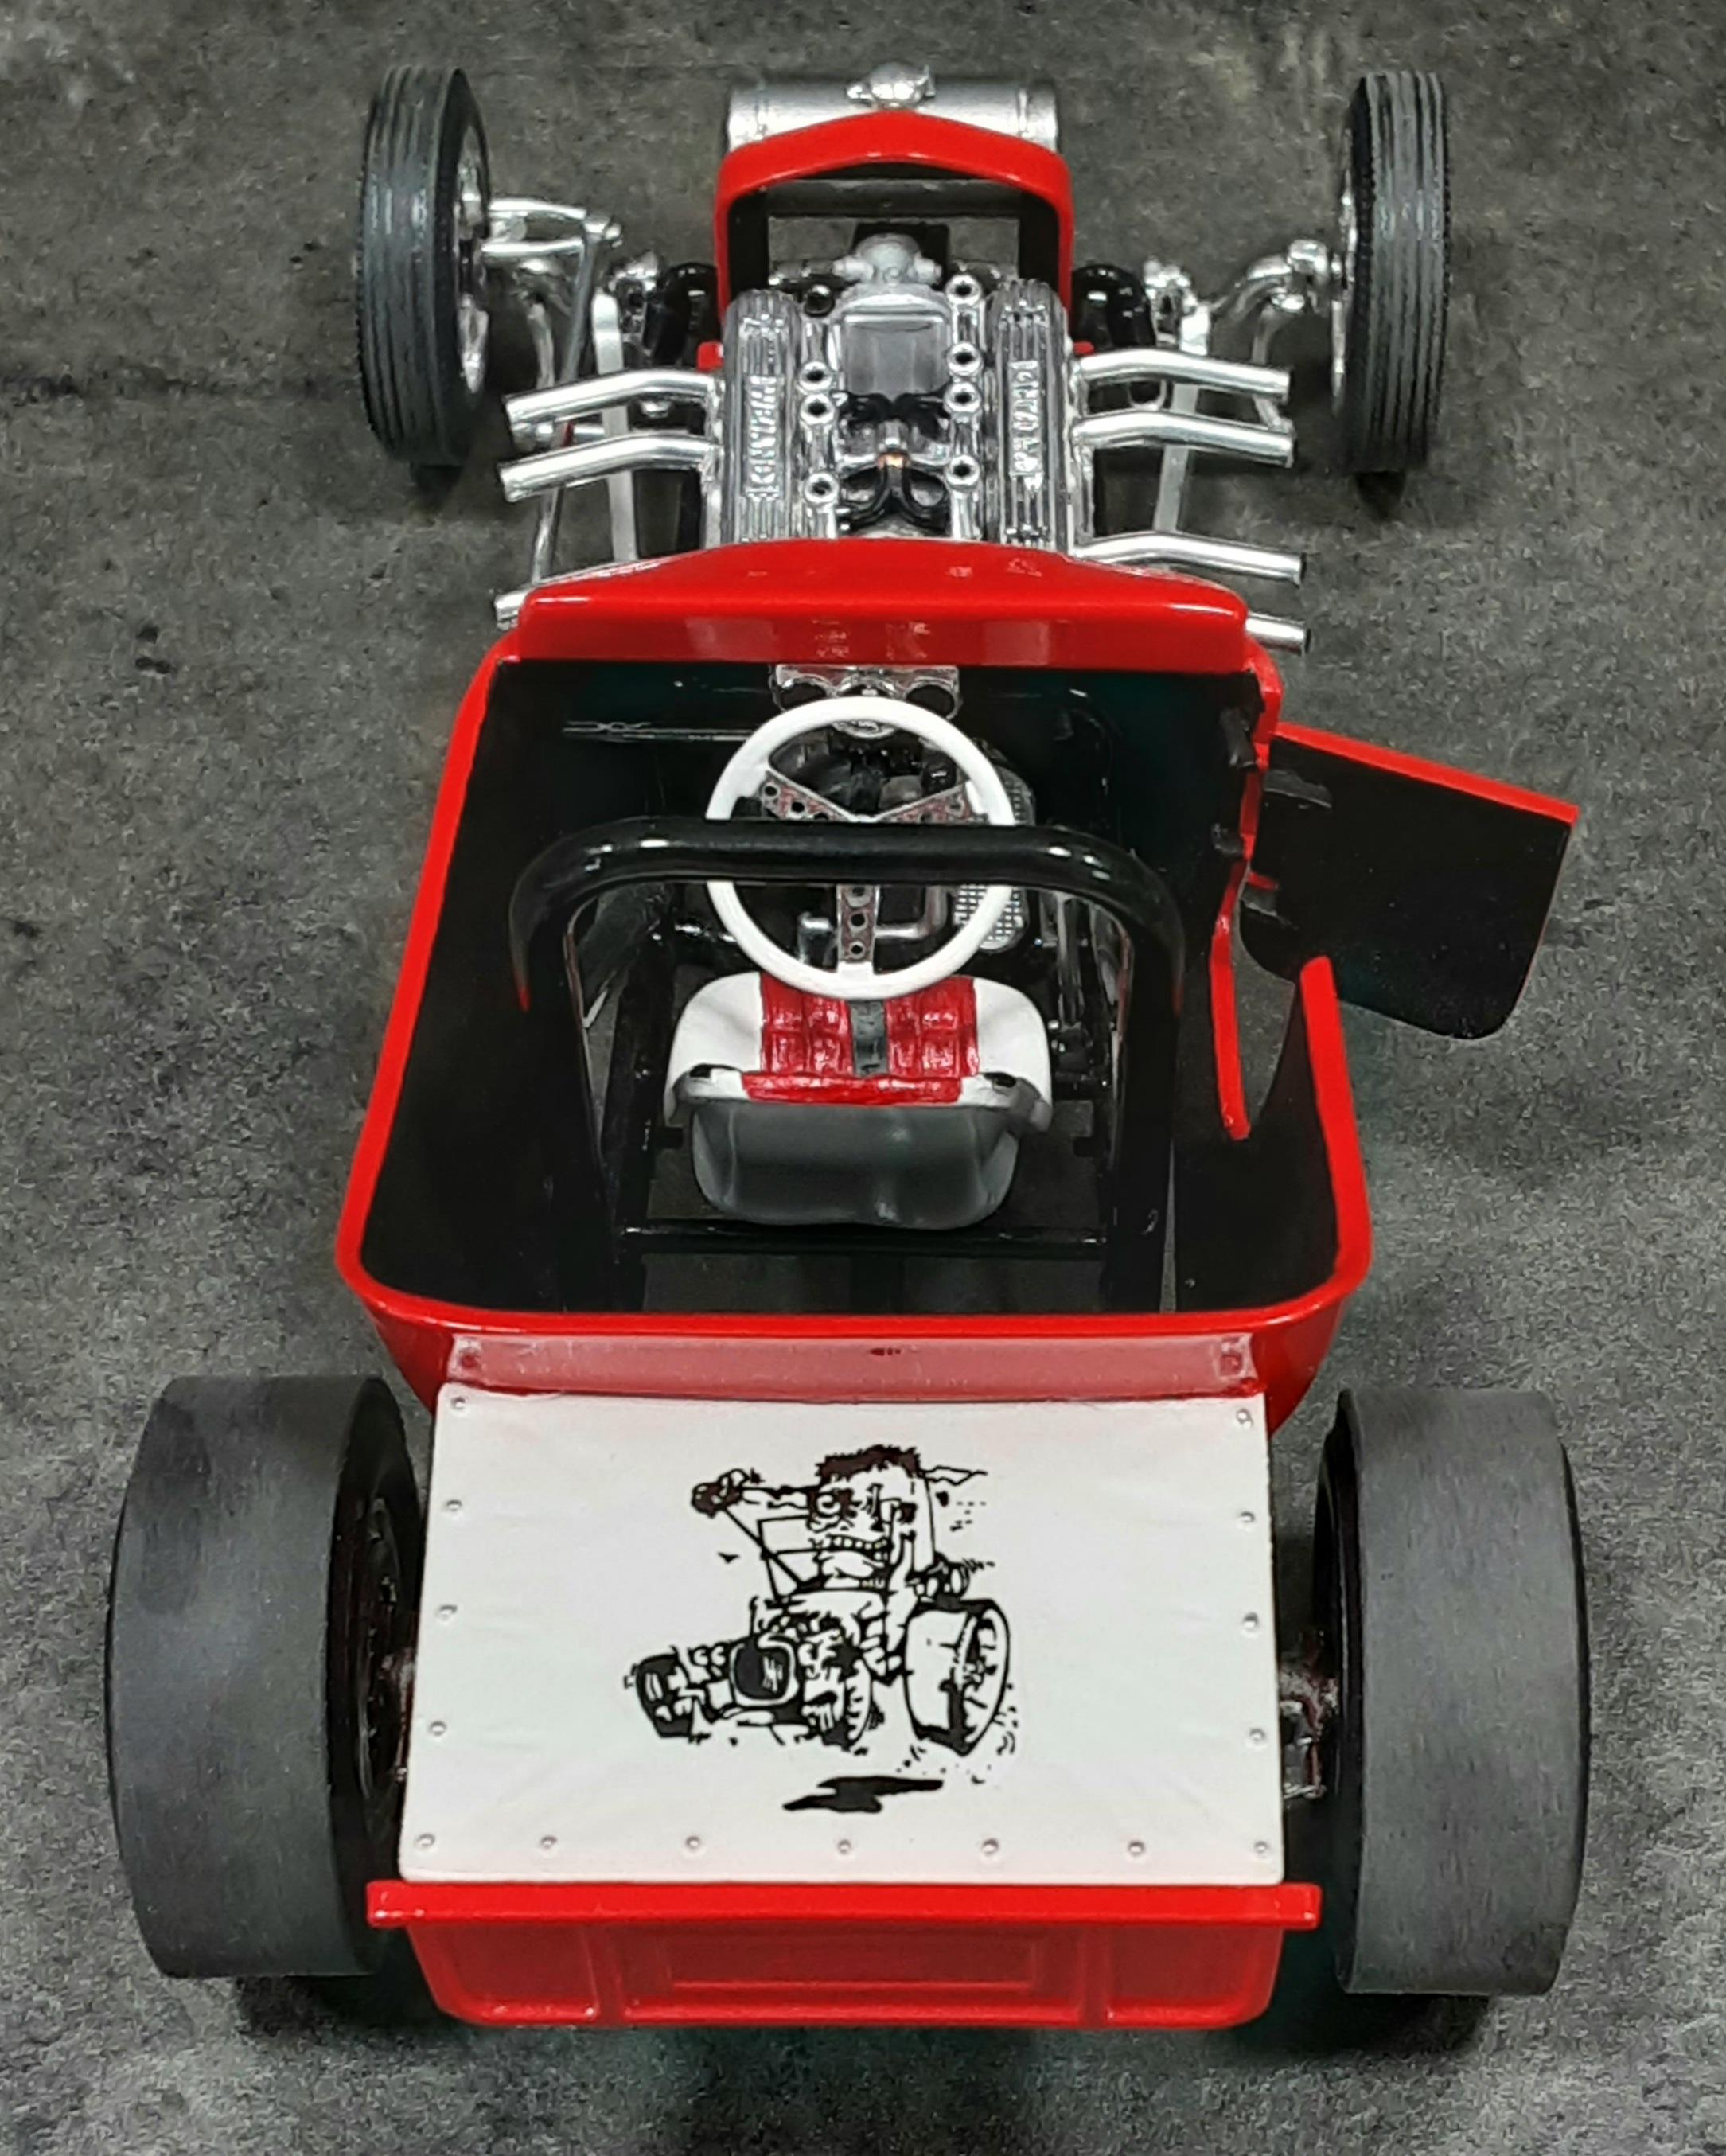
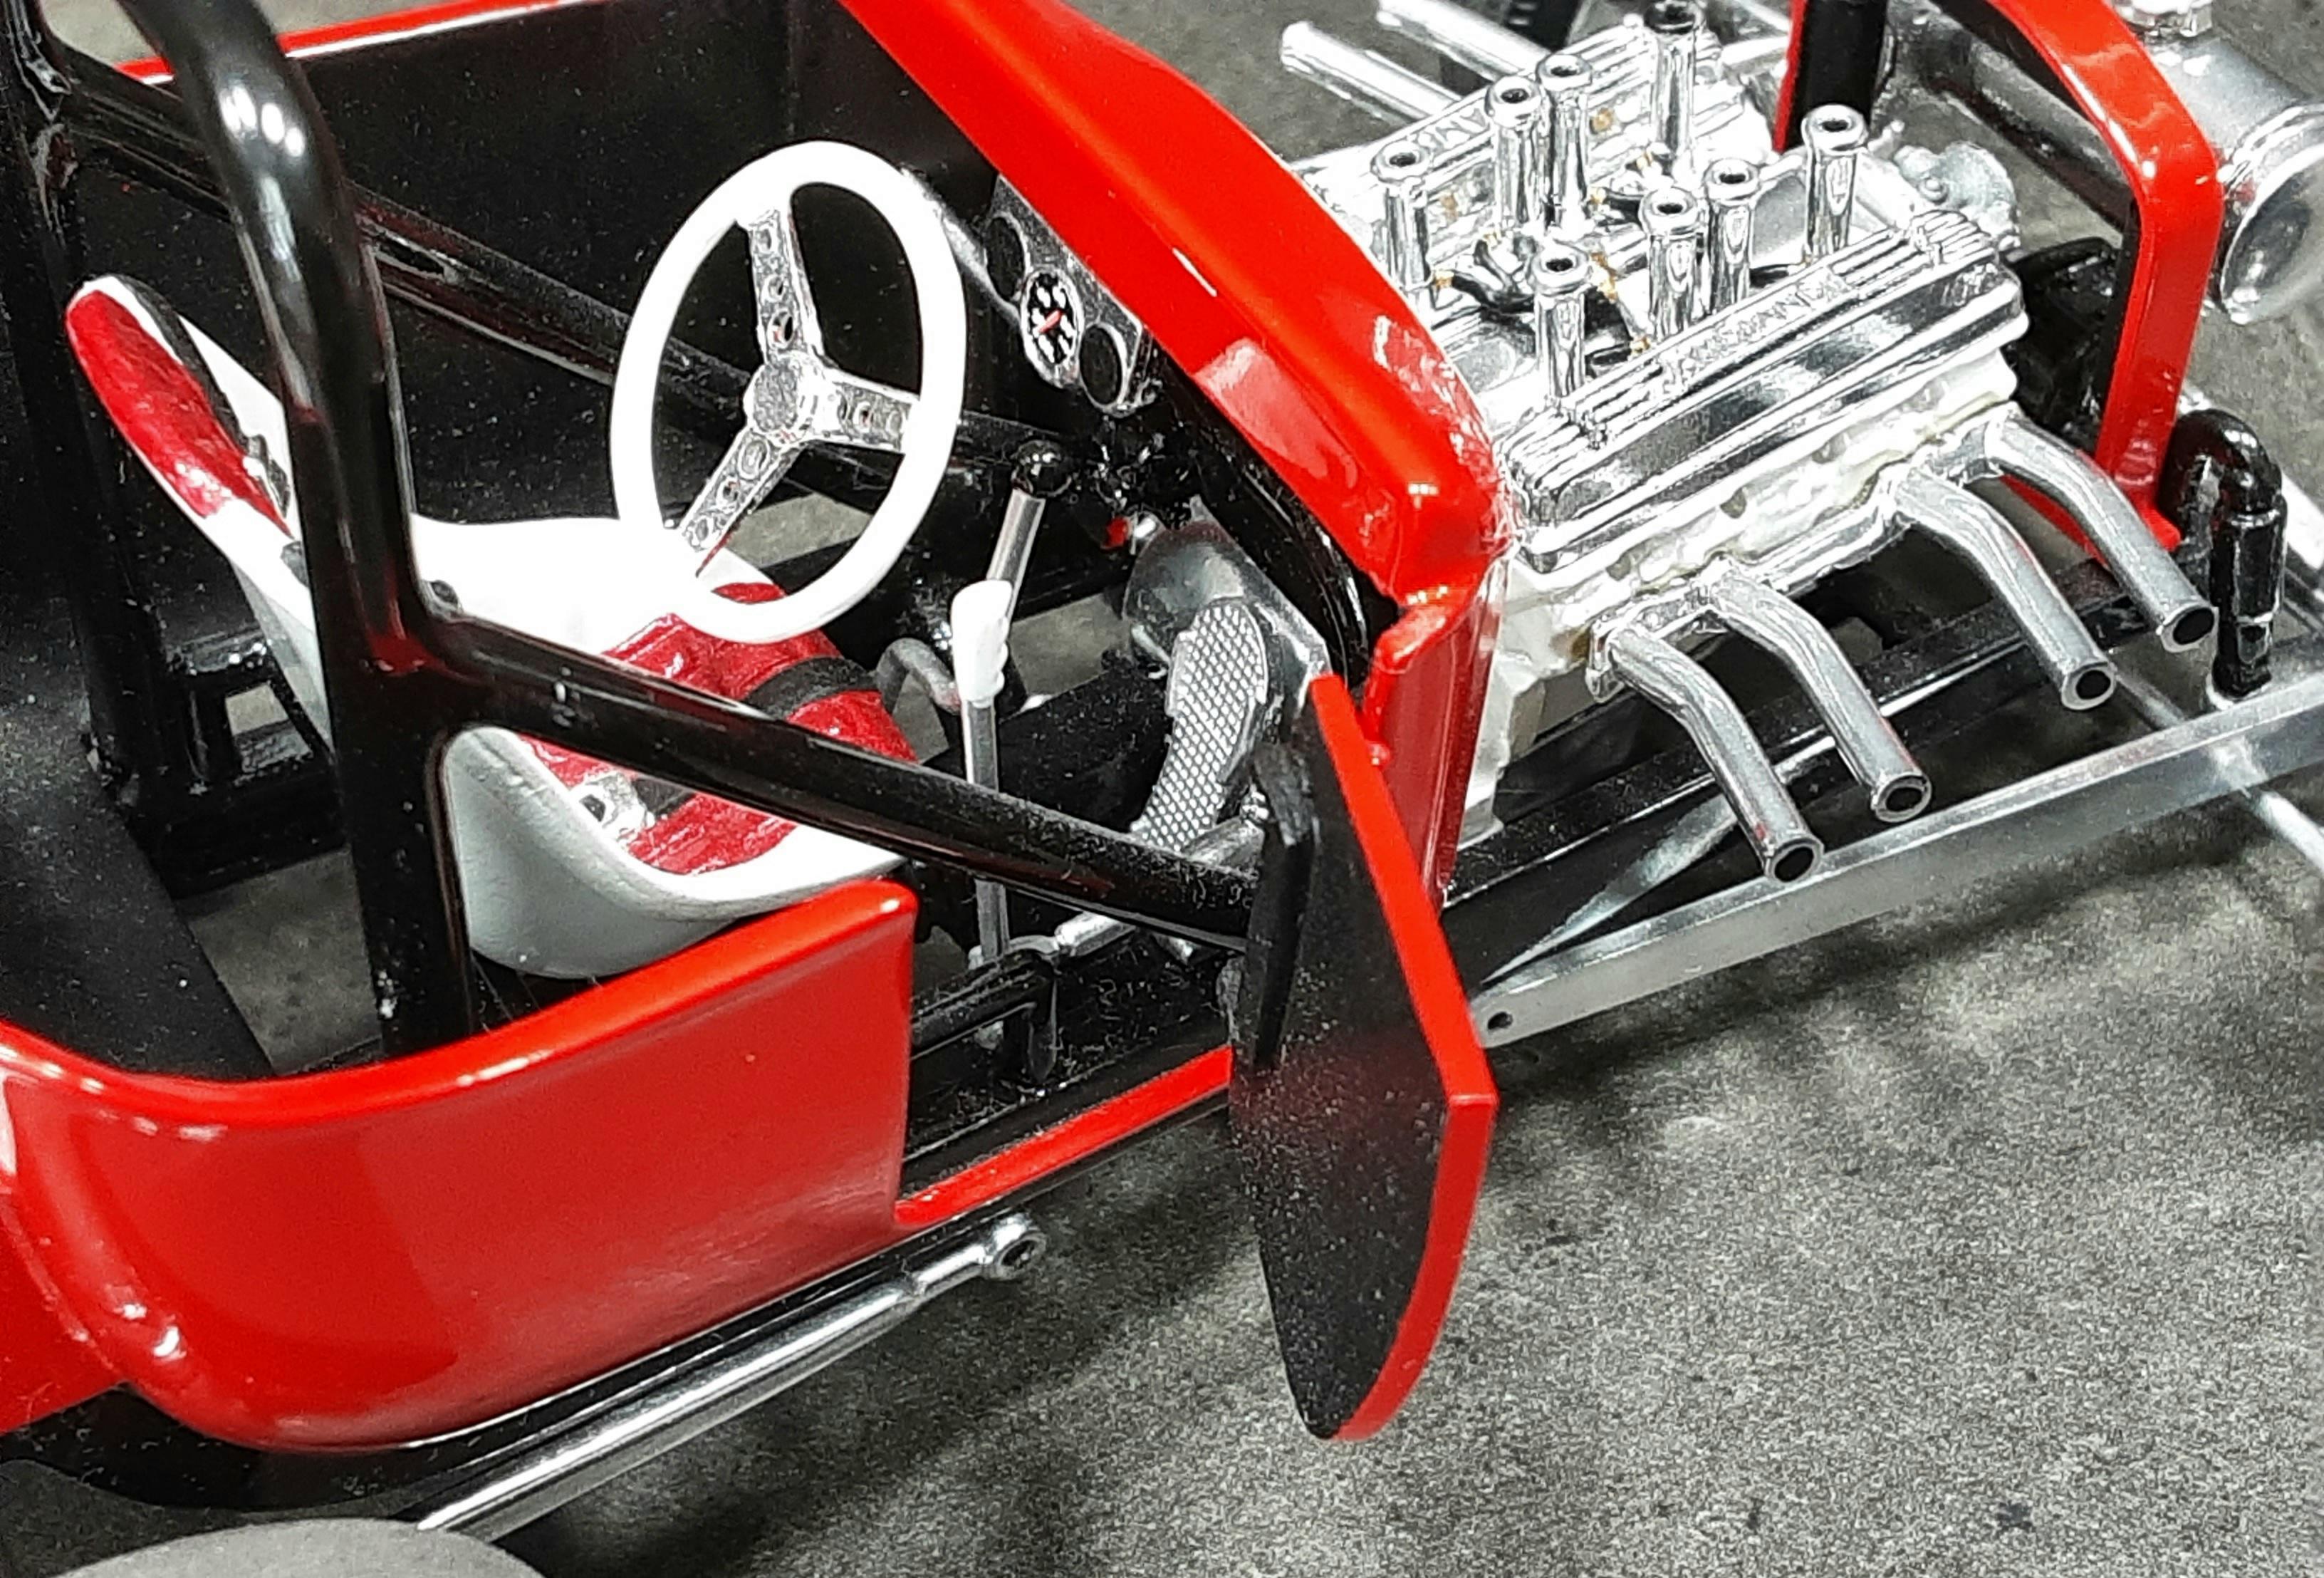
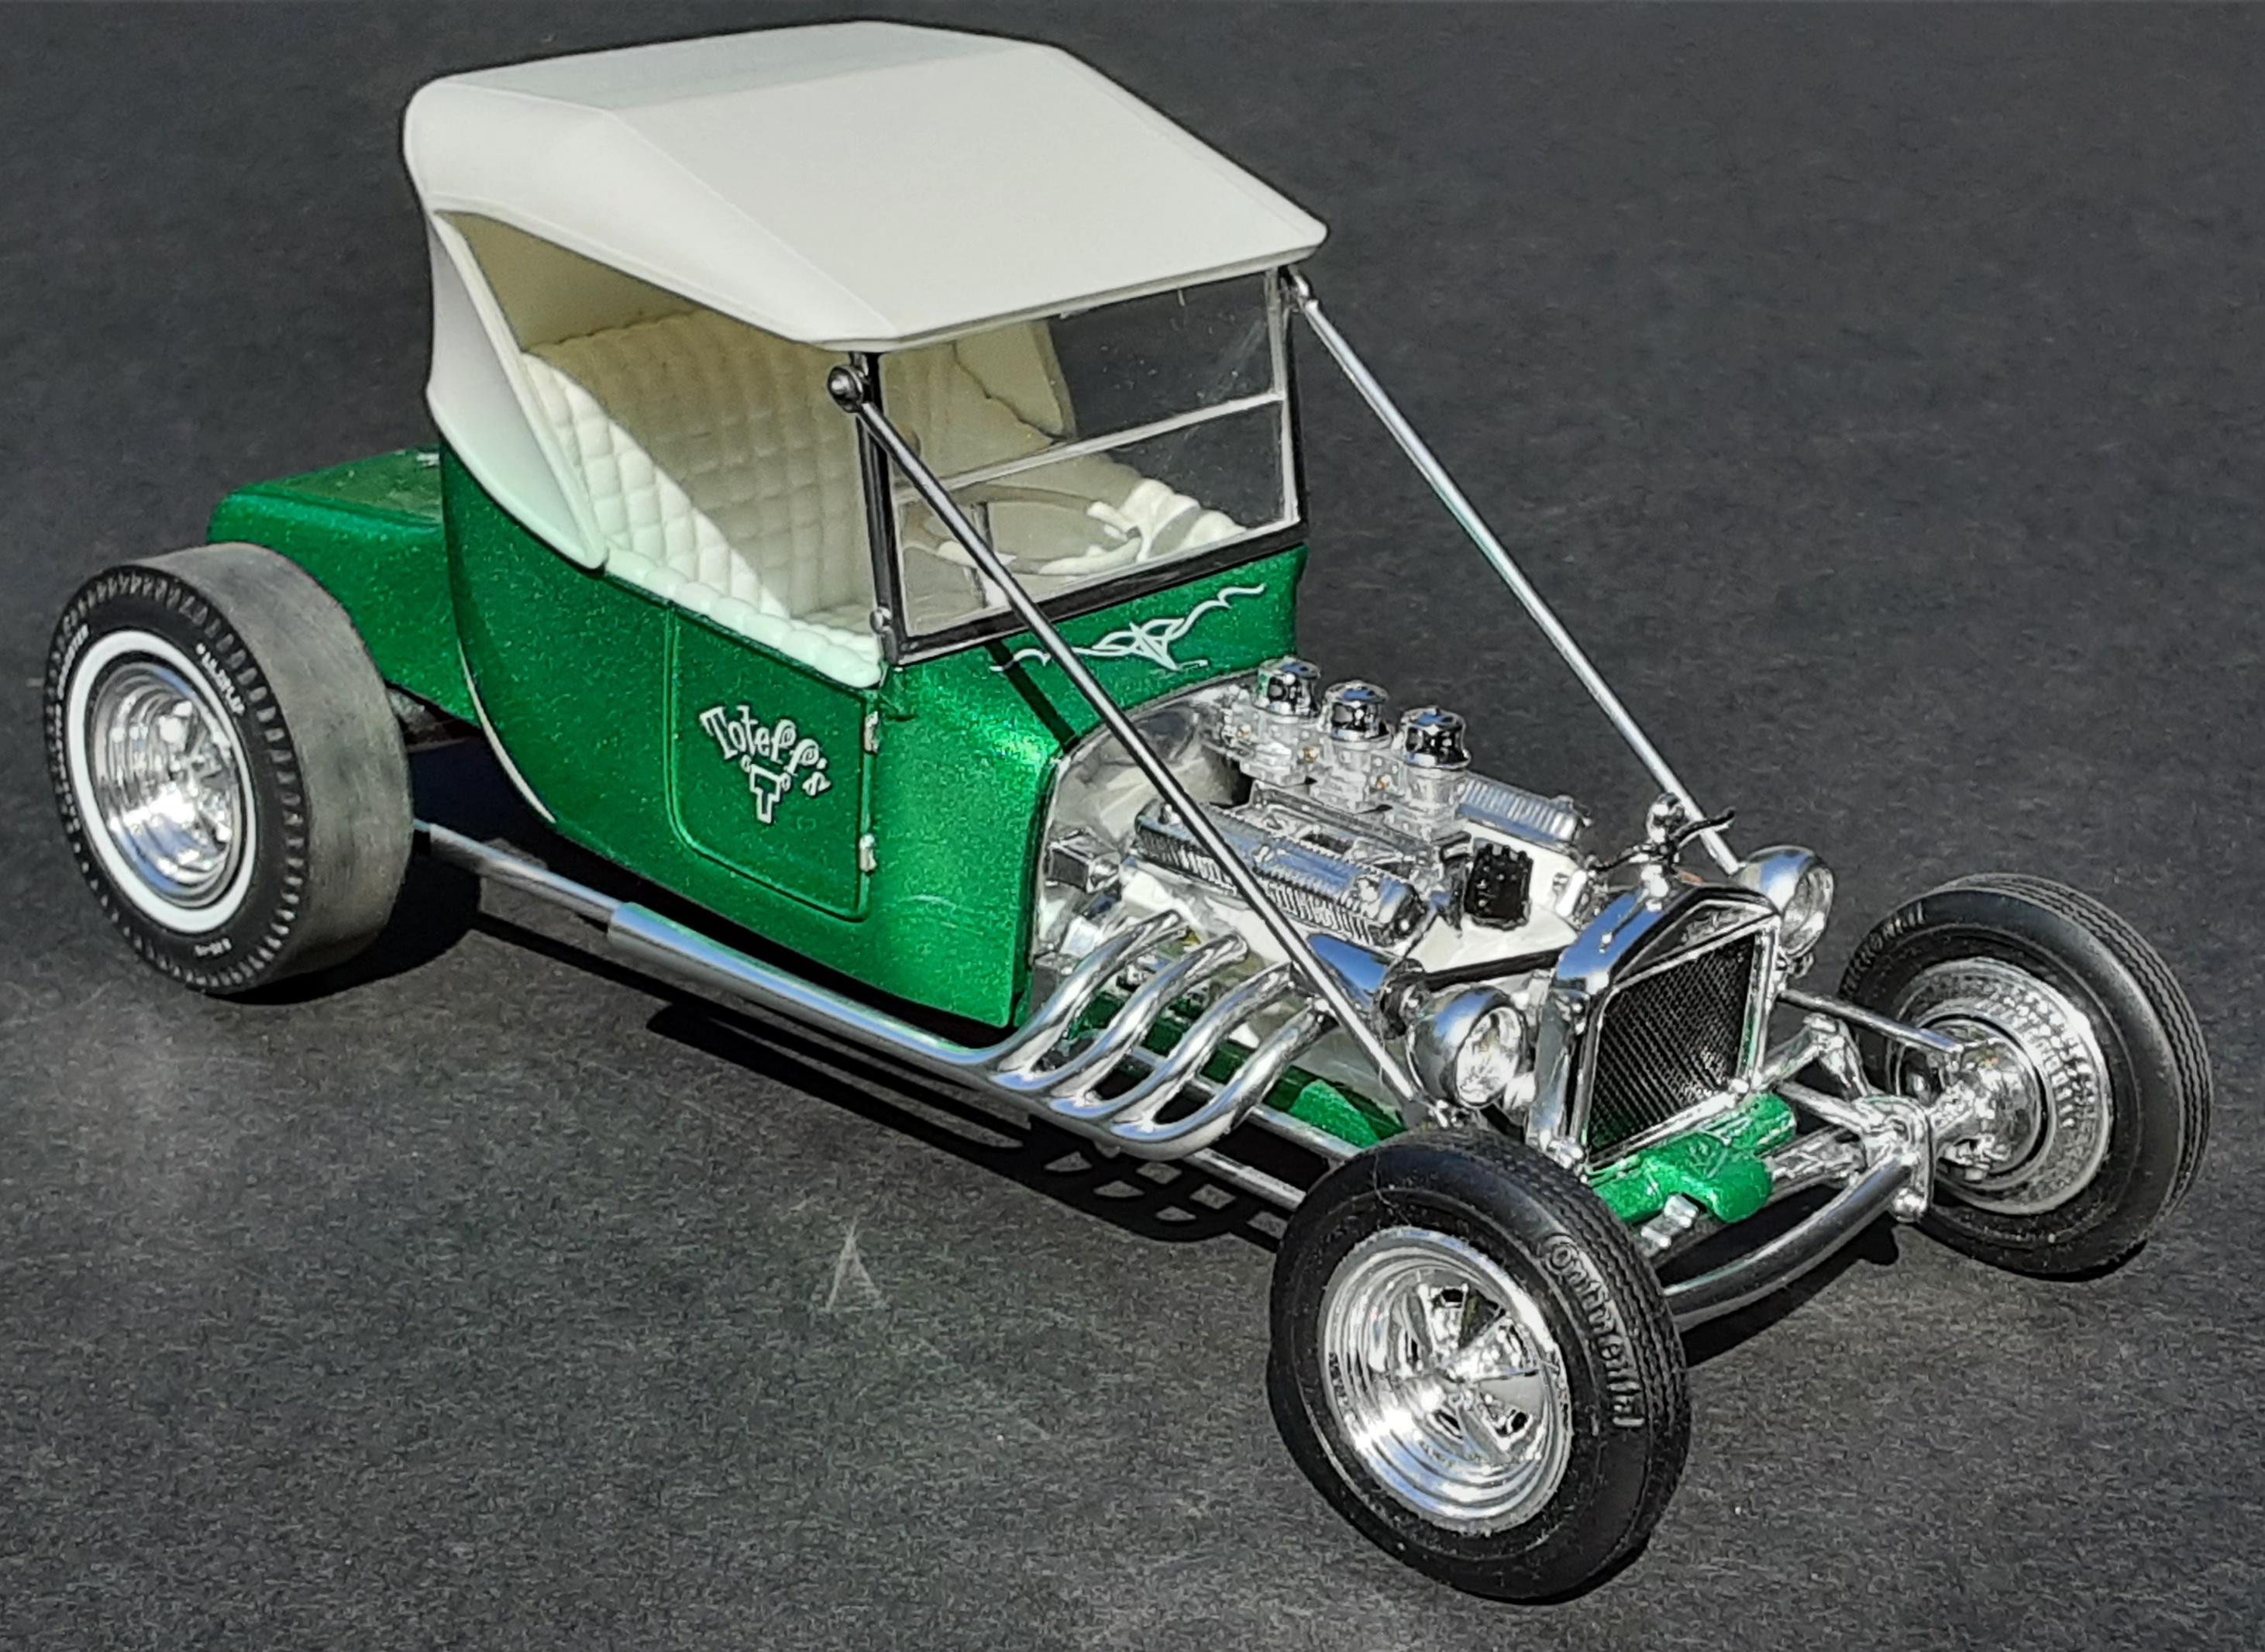
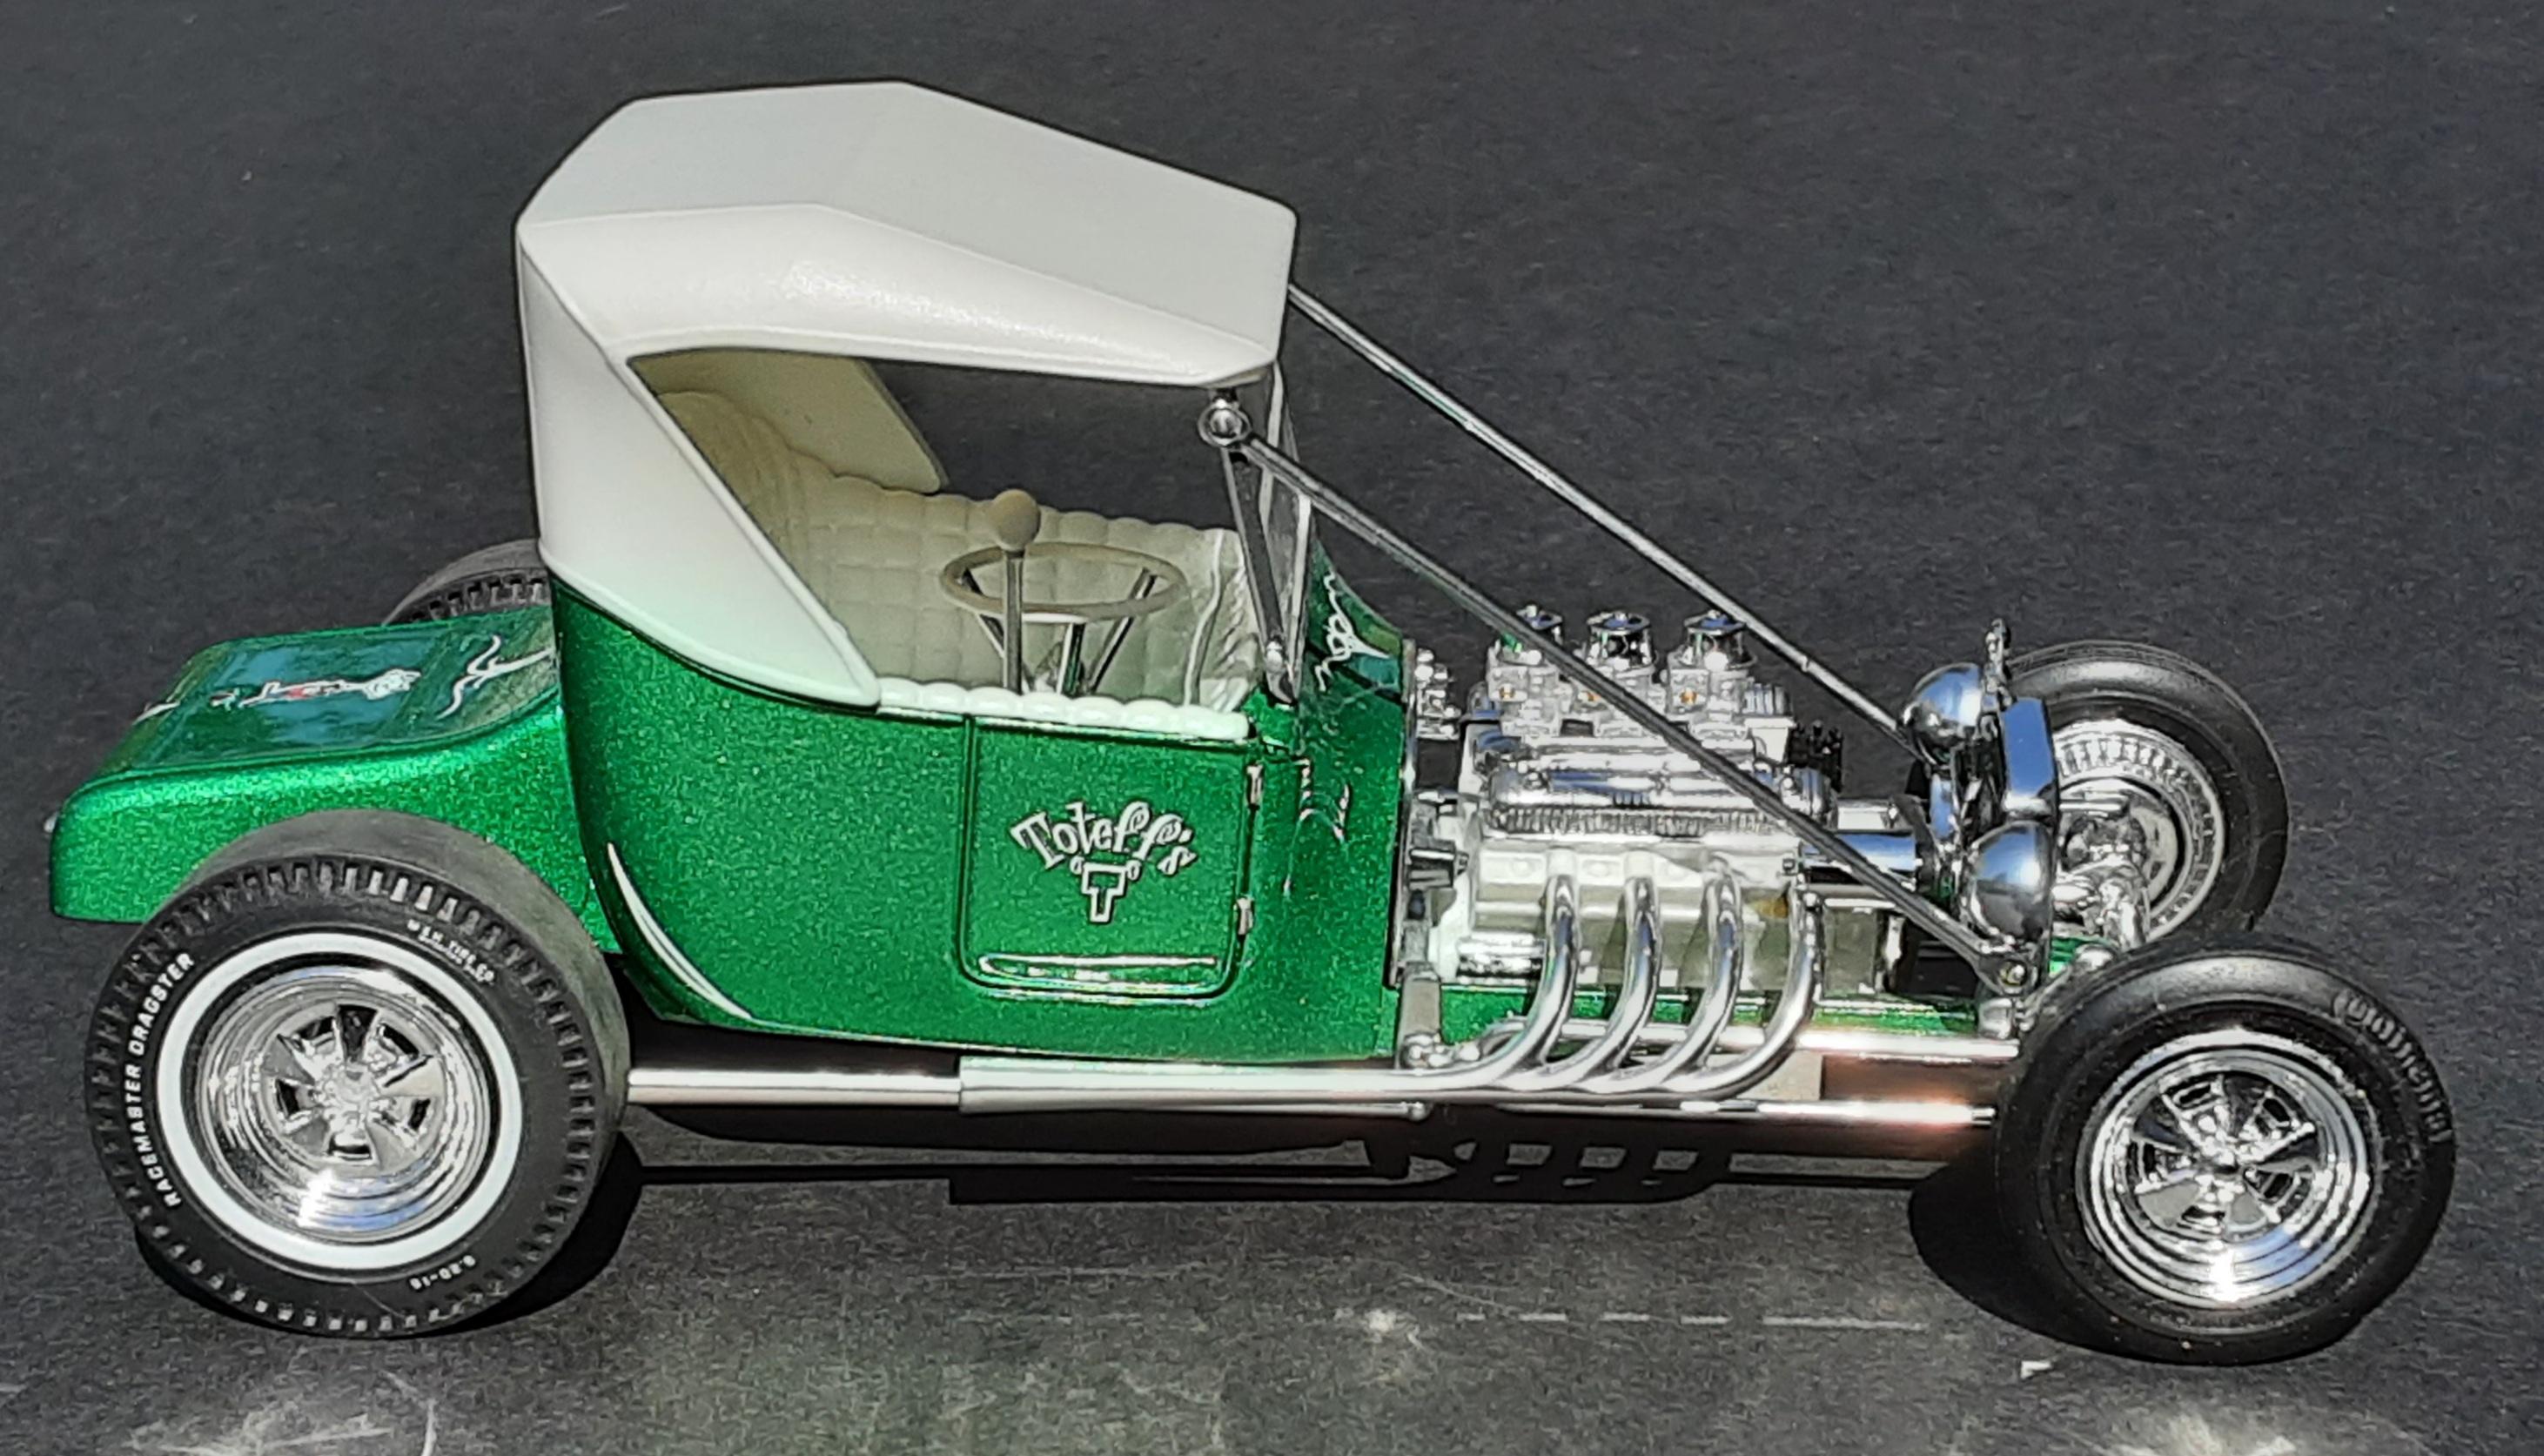
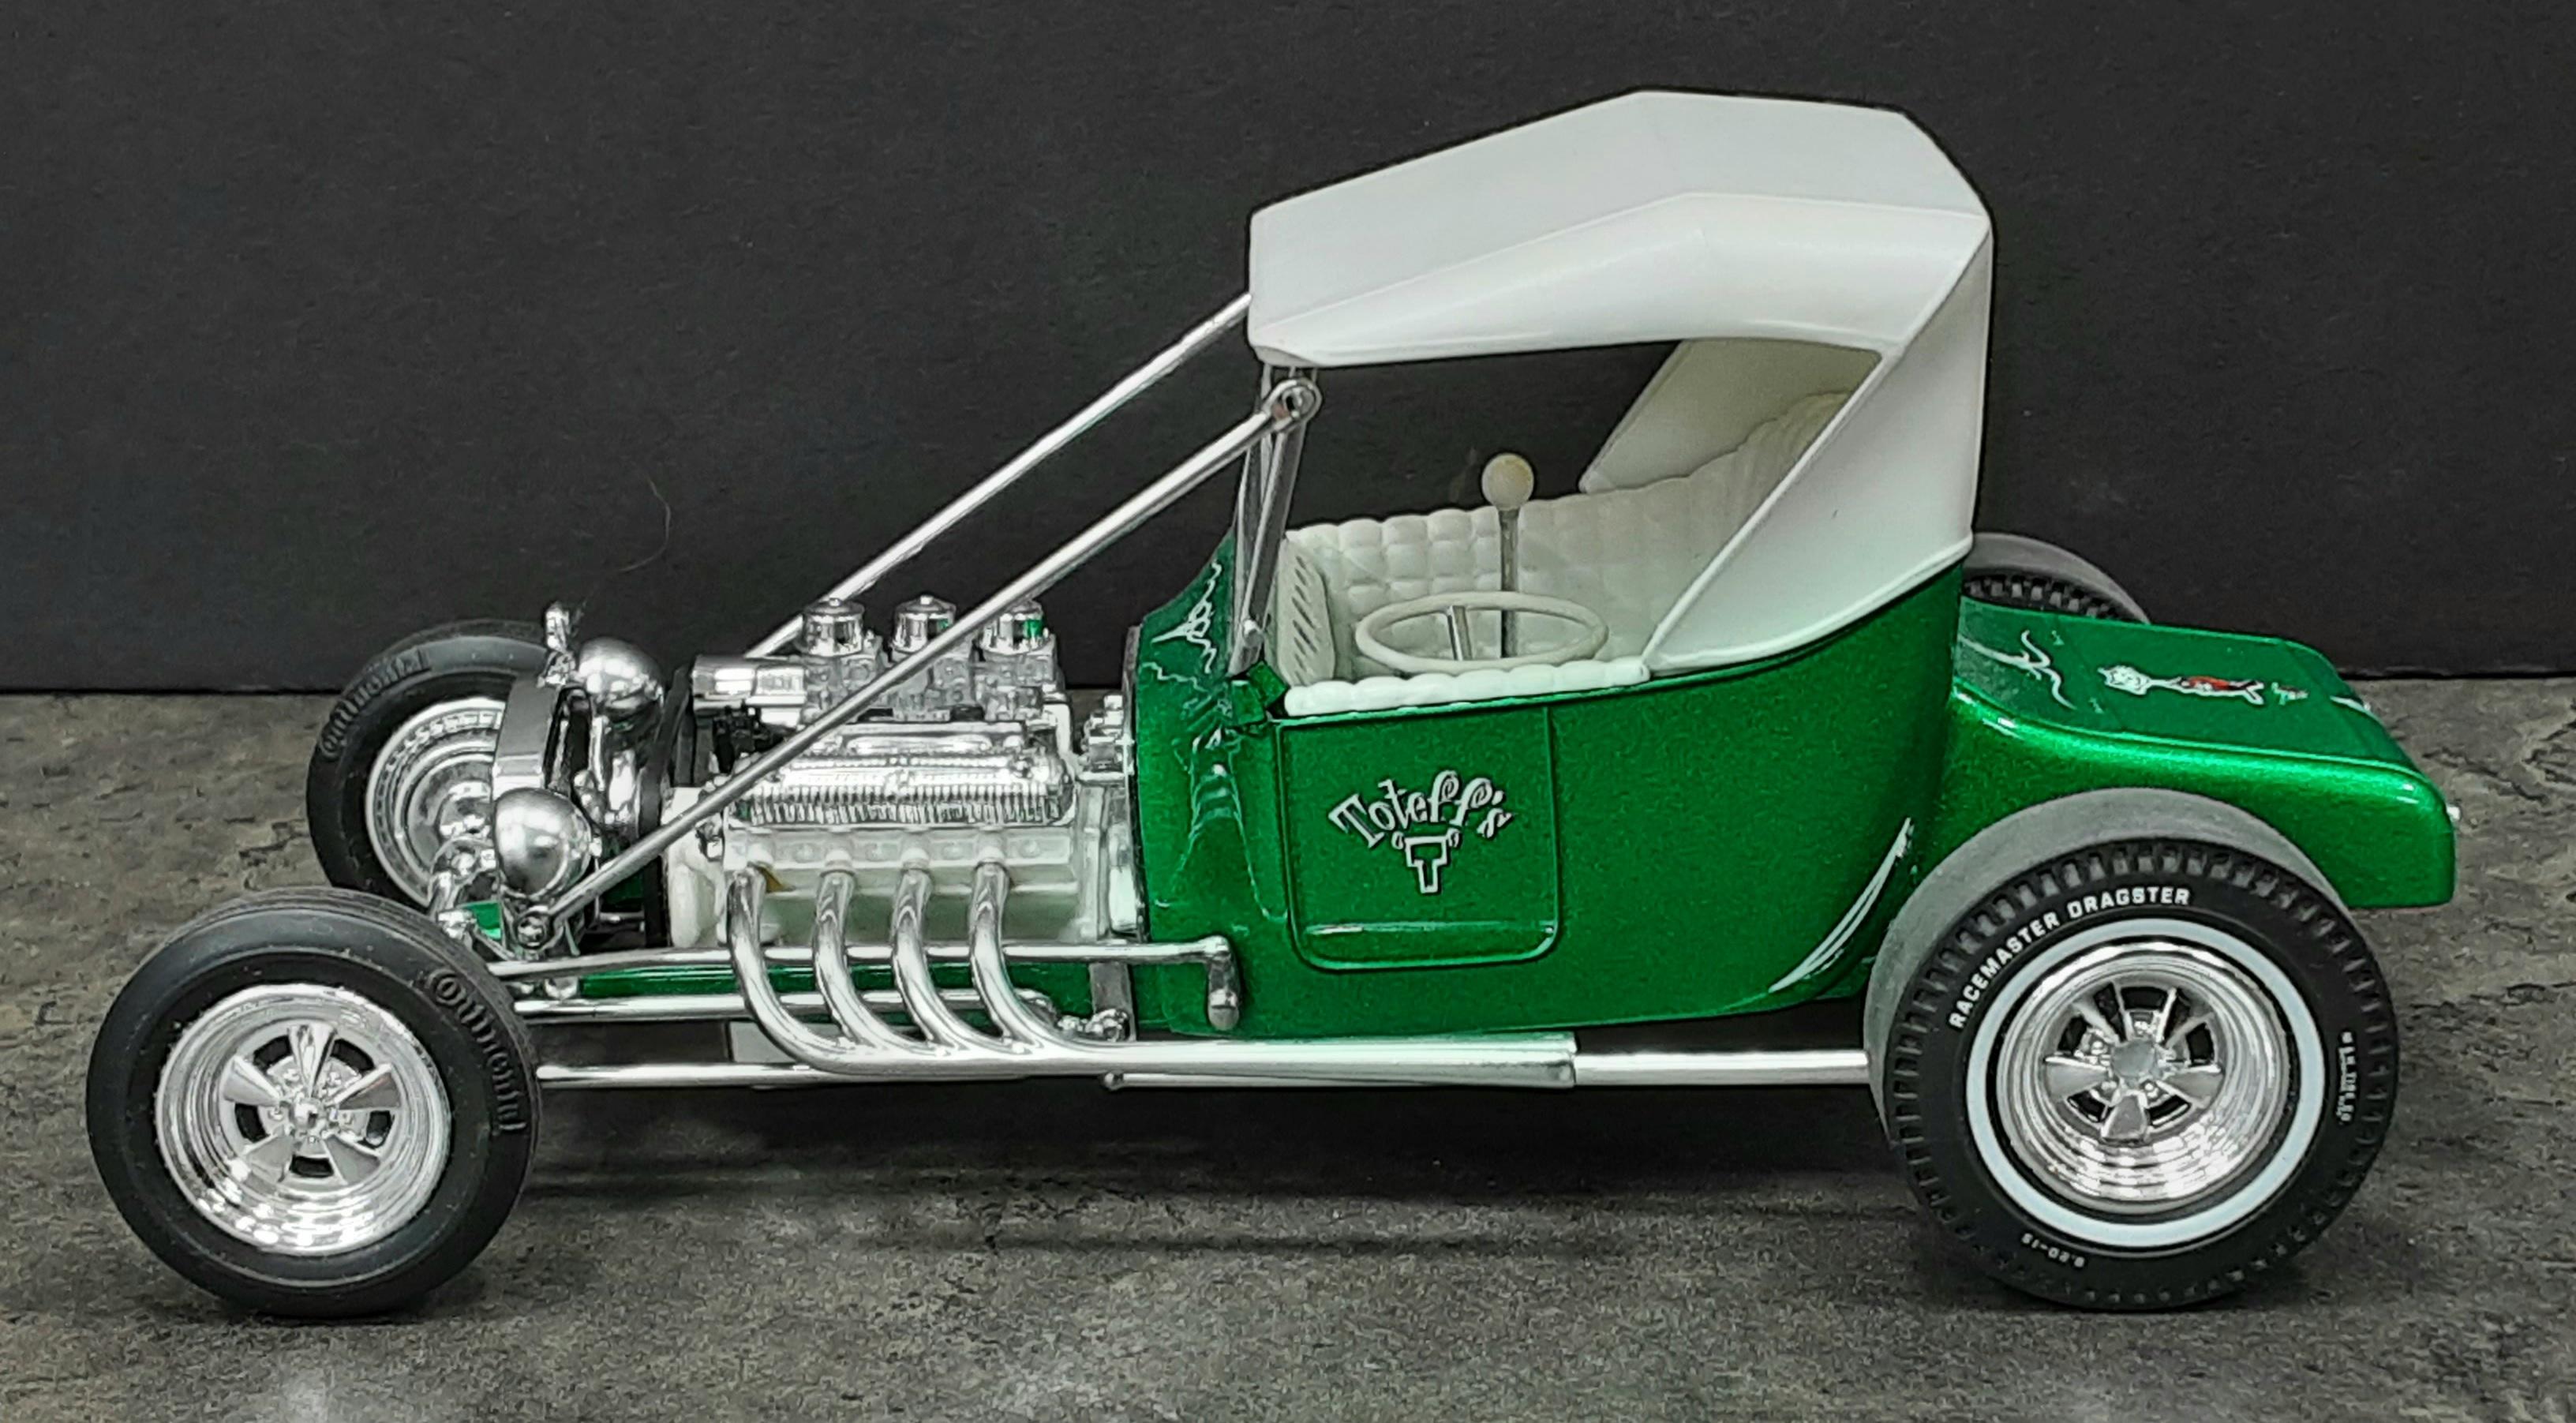
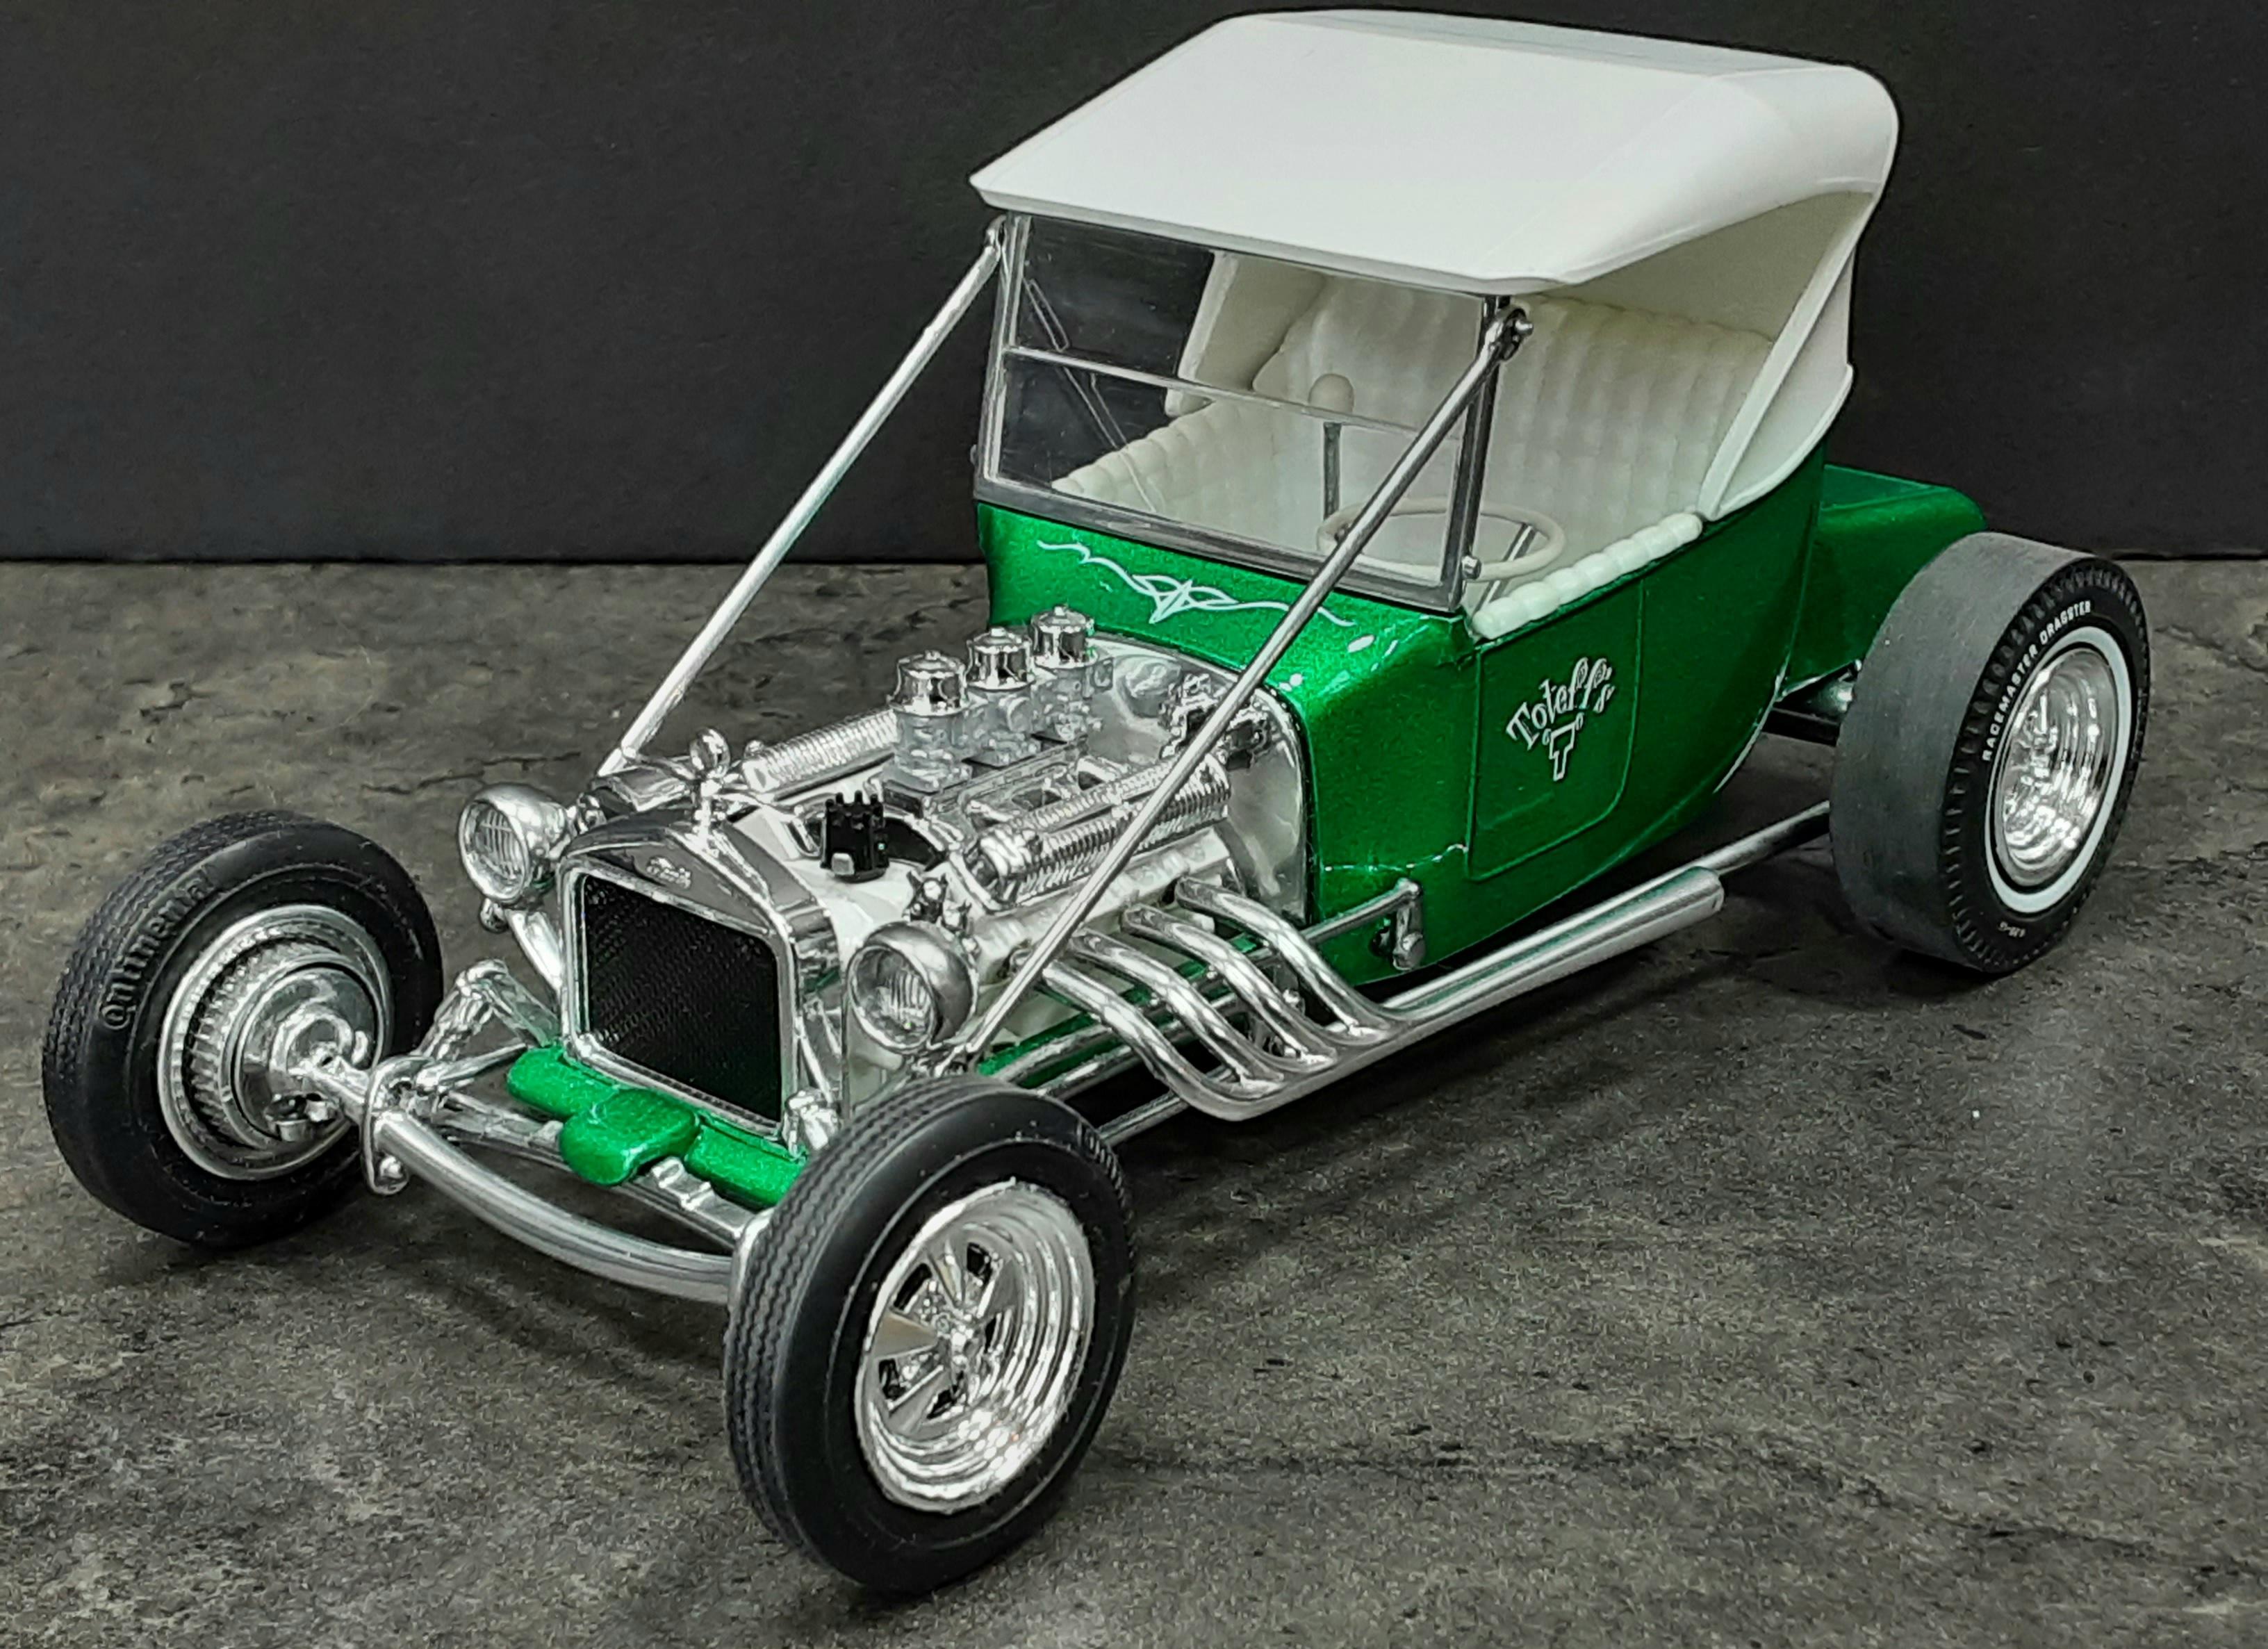
Amt '25 T Bucket.
-
Show your iconic Custom Car/Hot Rod replicas
Mothersworry replied to Koellefornia Kid's topic in Model Cars
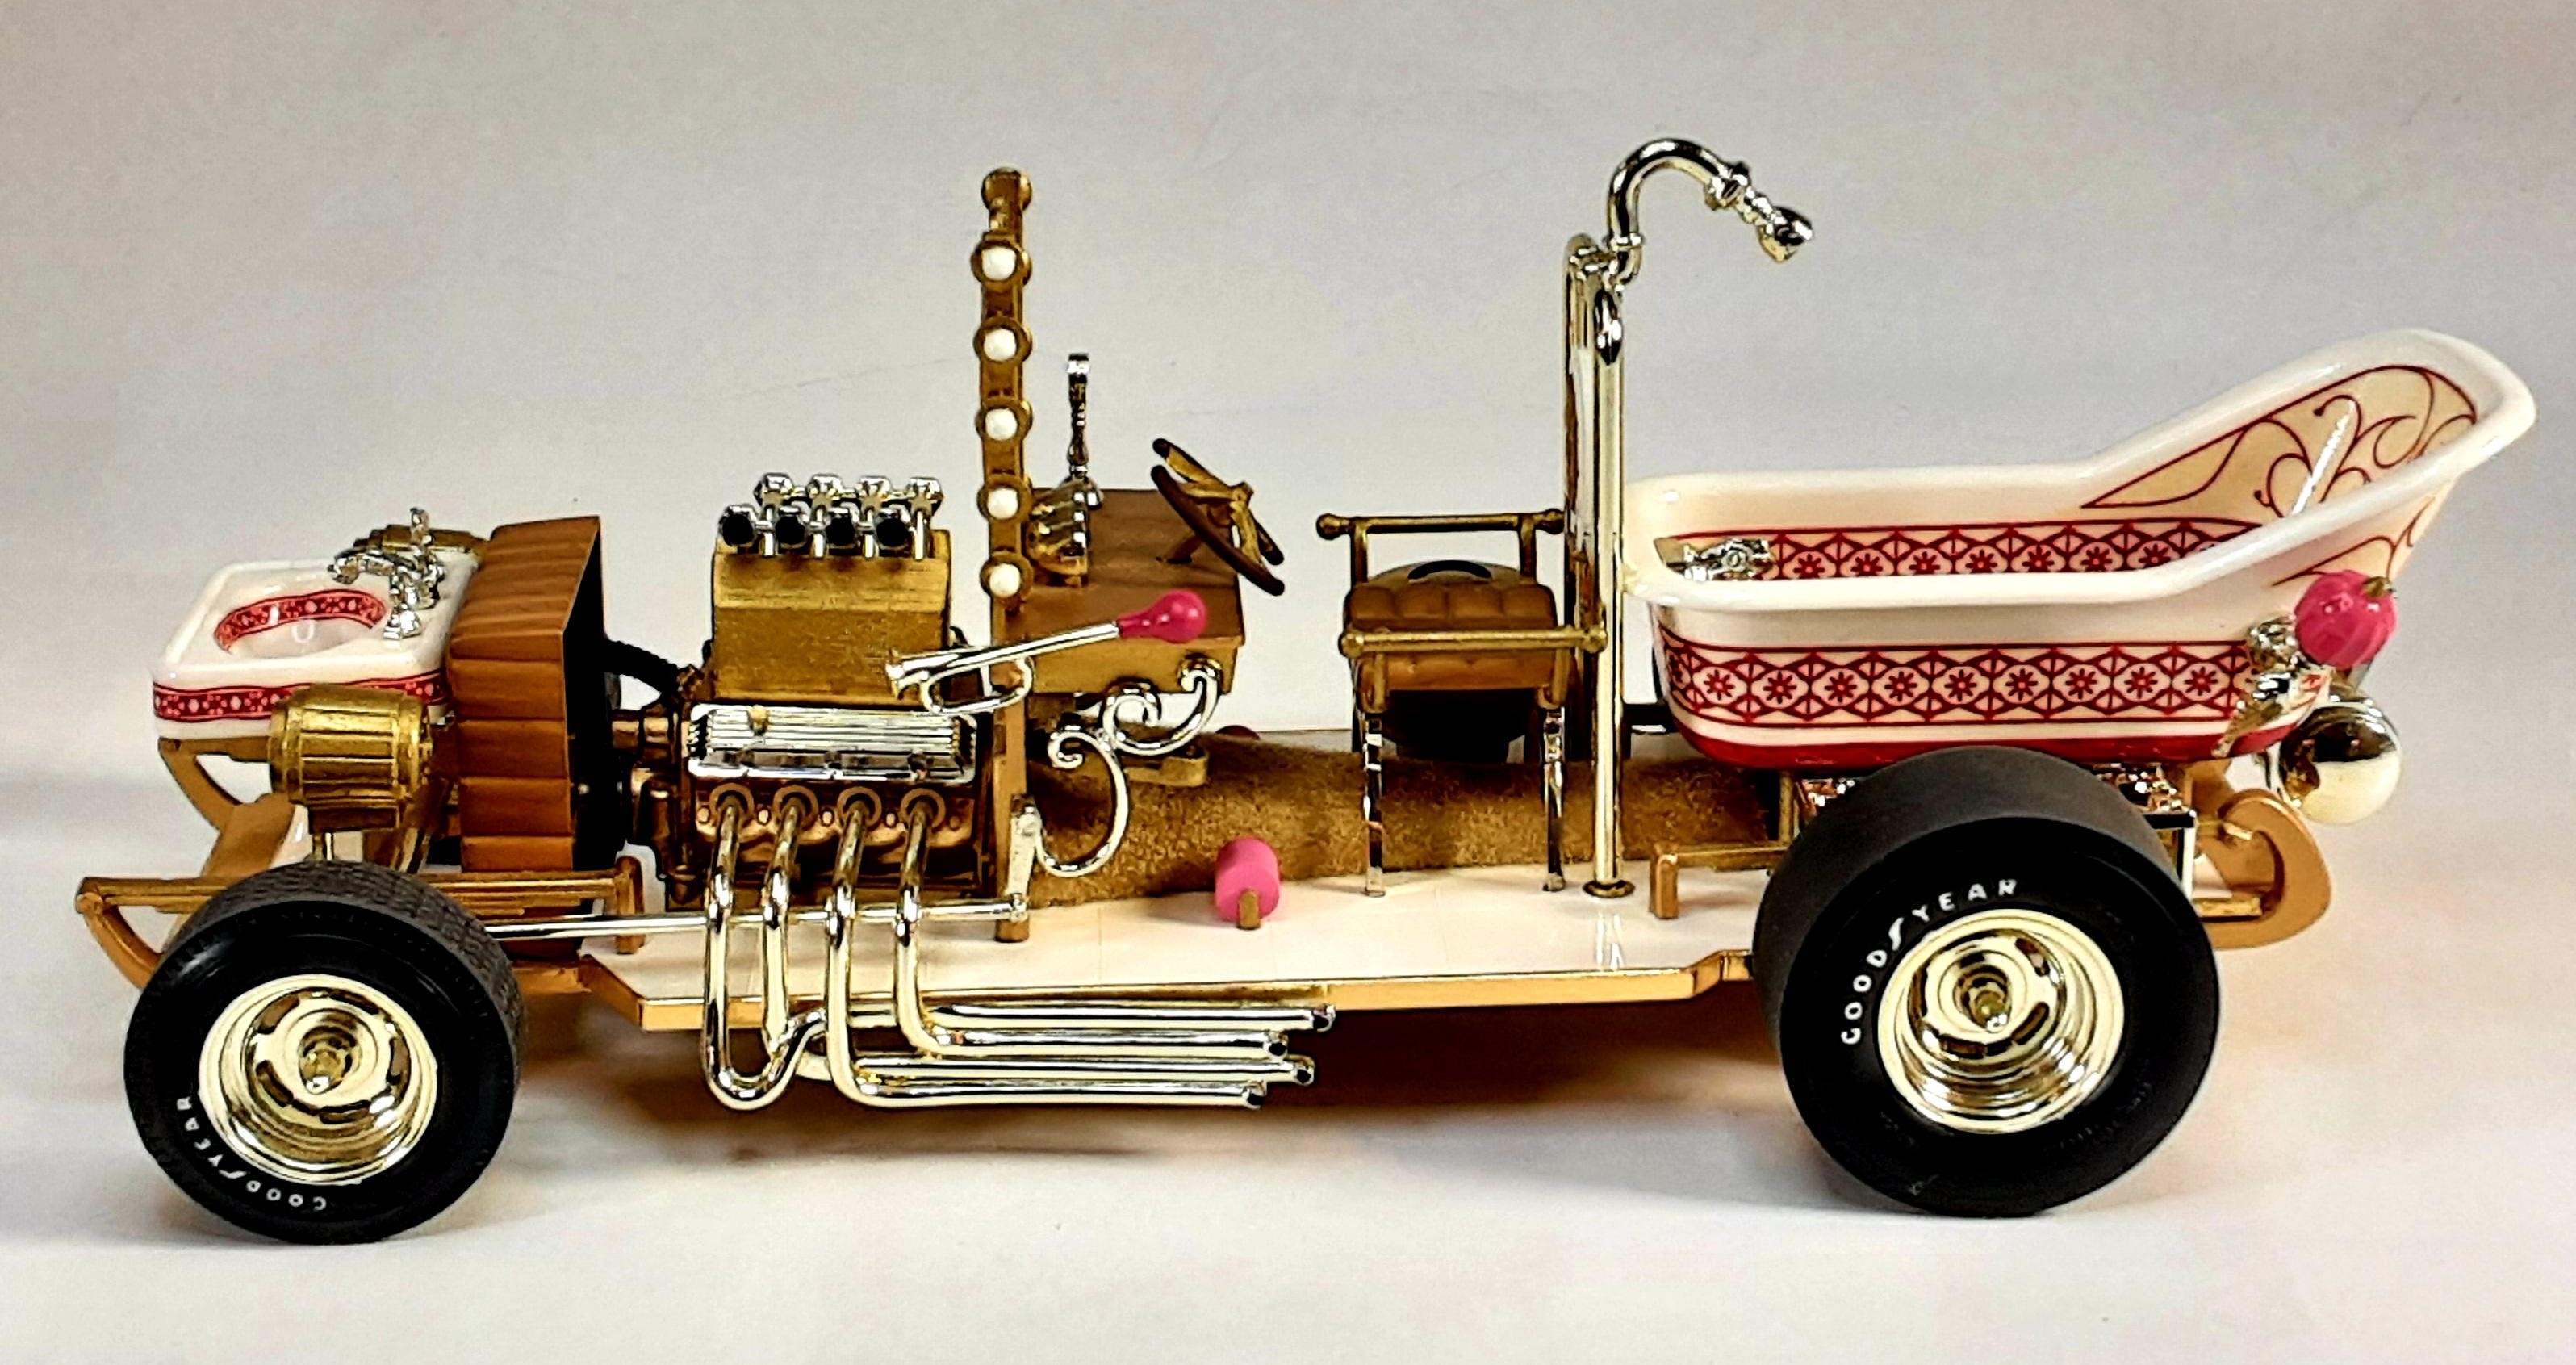
Barris's Bath Tub Buggy...one of his screwier contraptions. I built it a few years from an original mint kit circa 1969, even the decals worked well.
-
Mach I concept car....
-
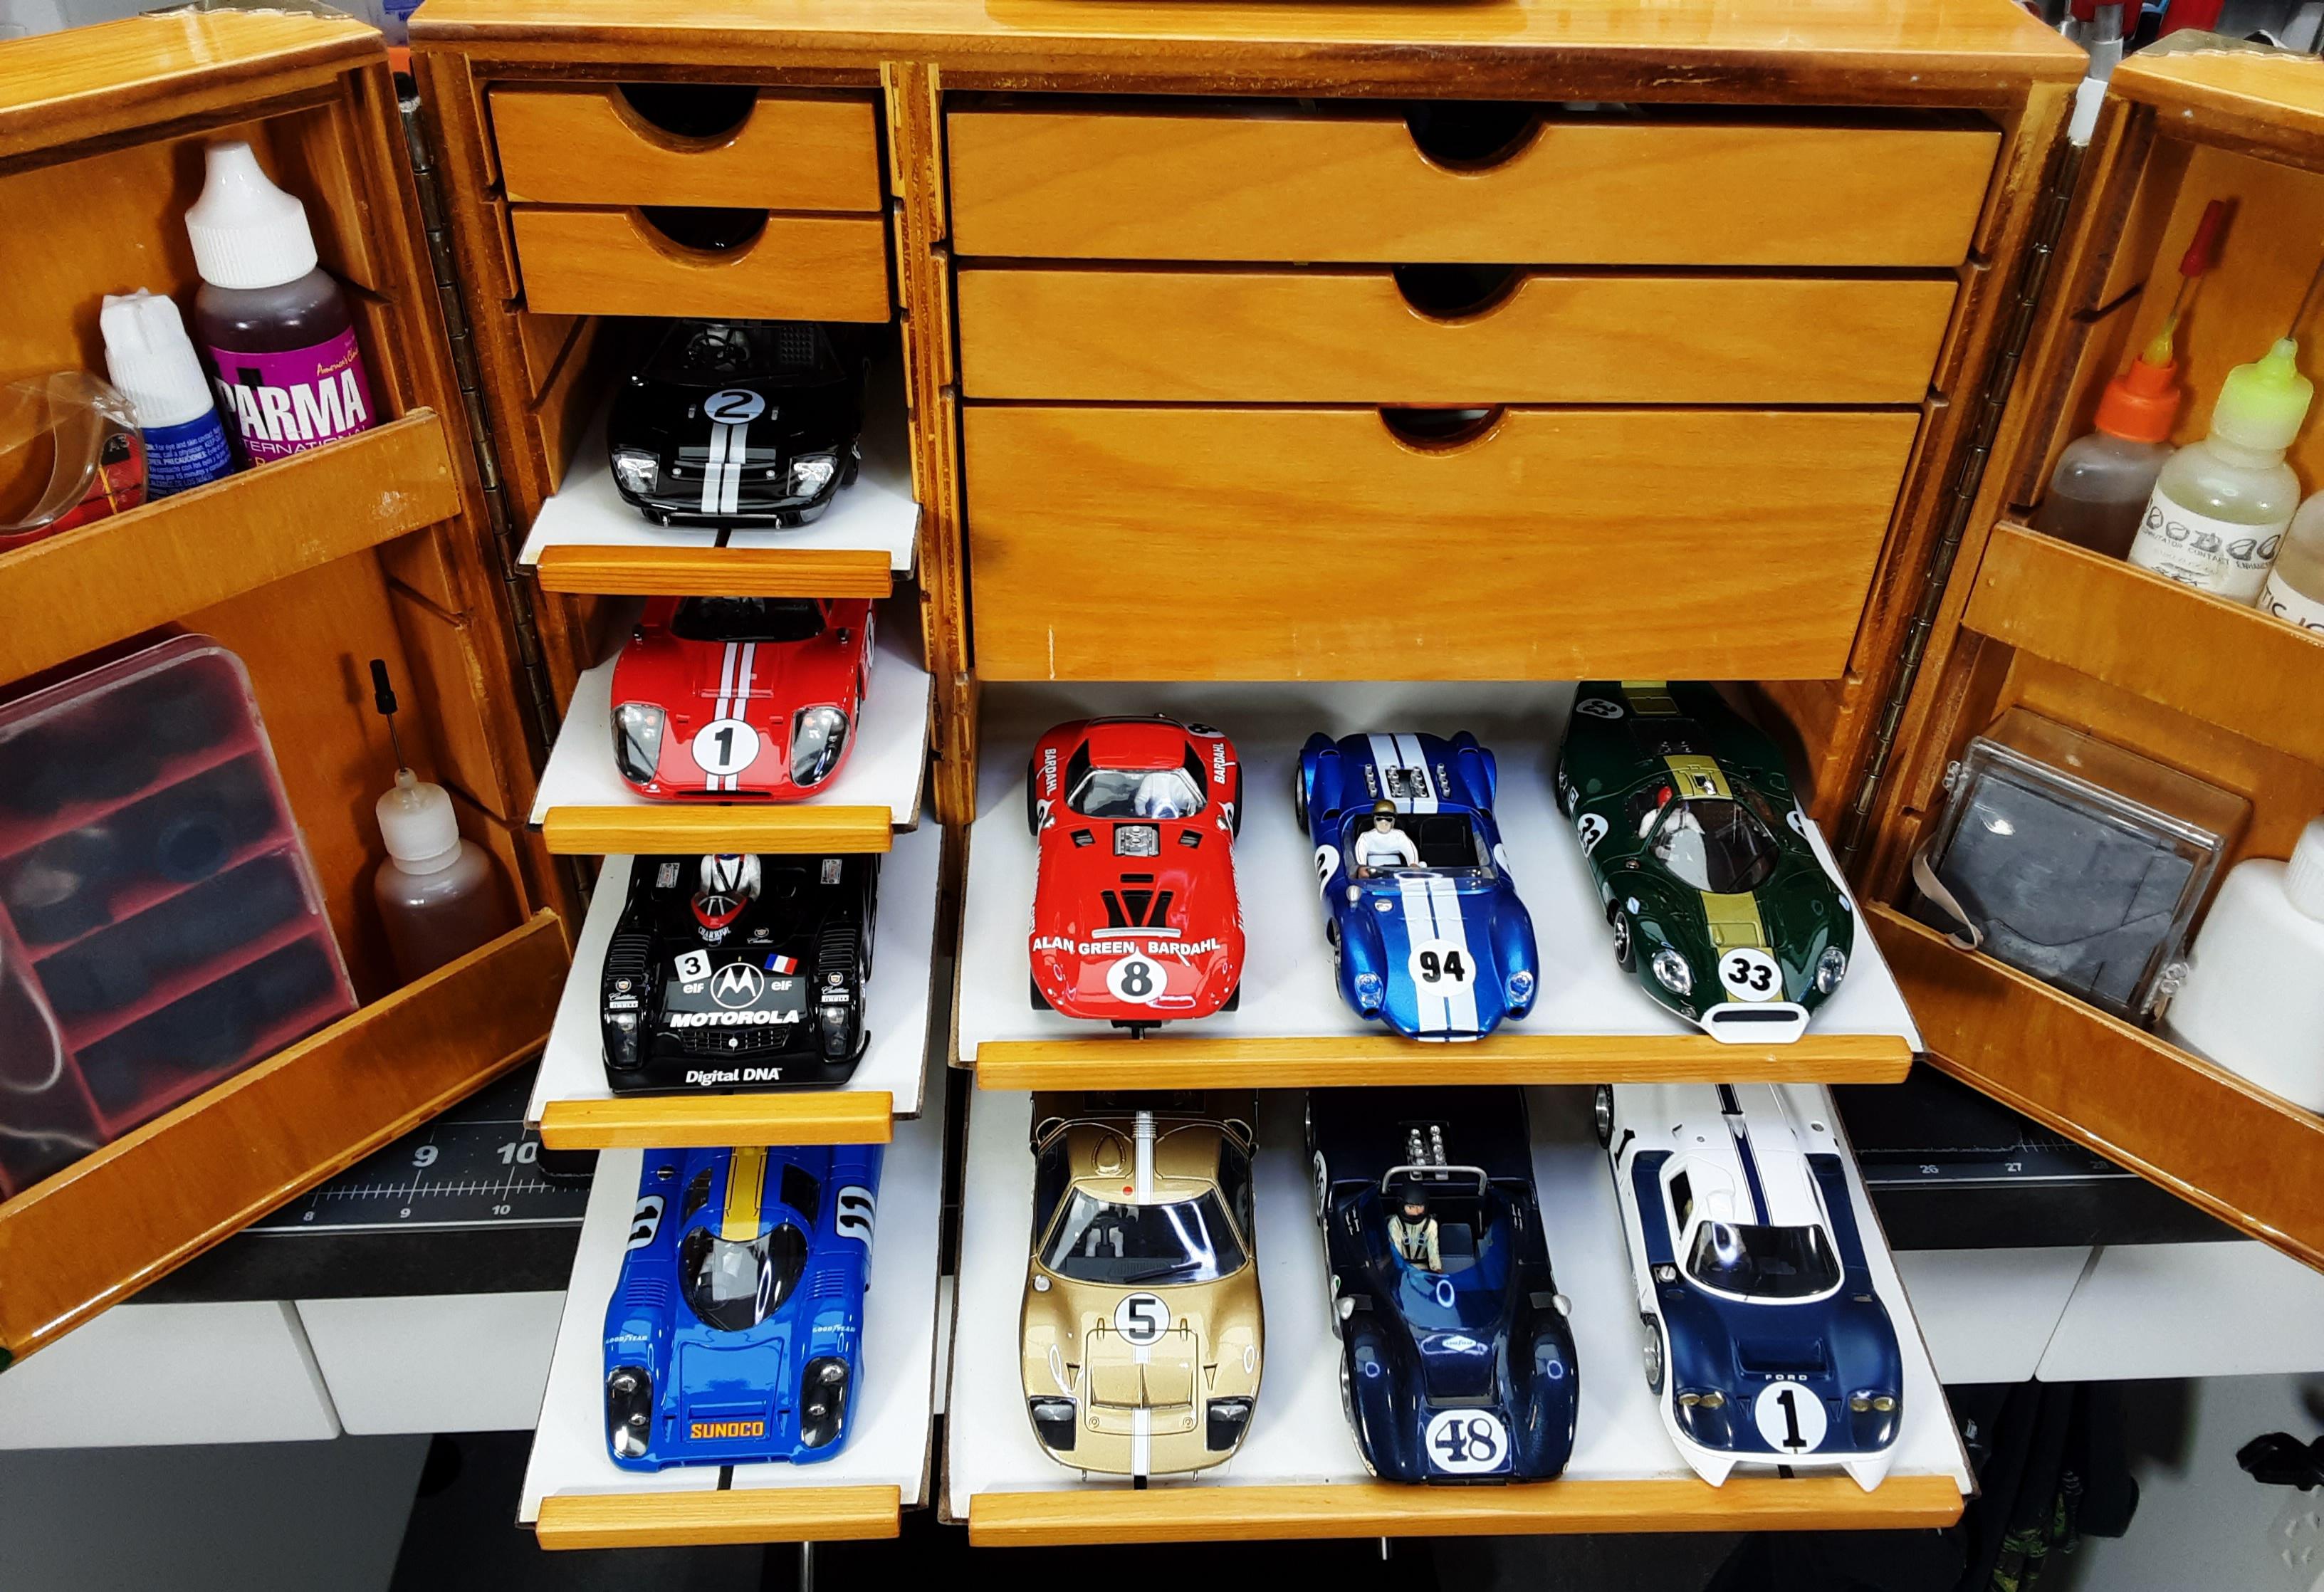
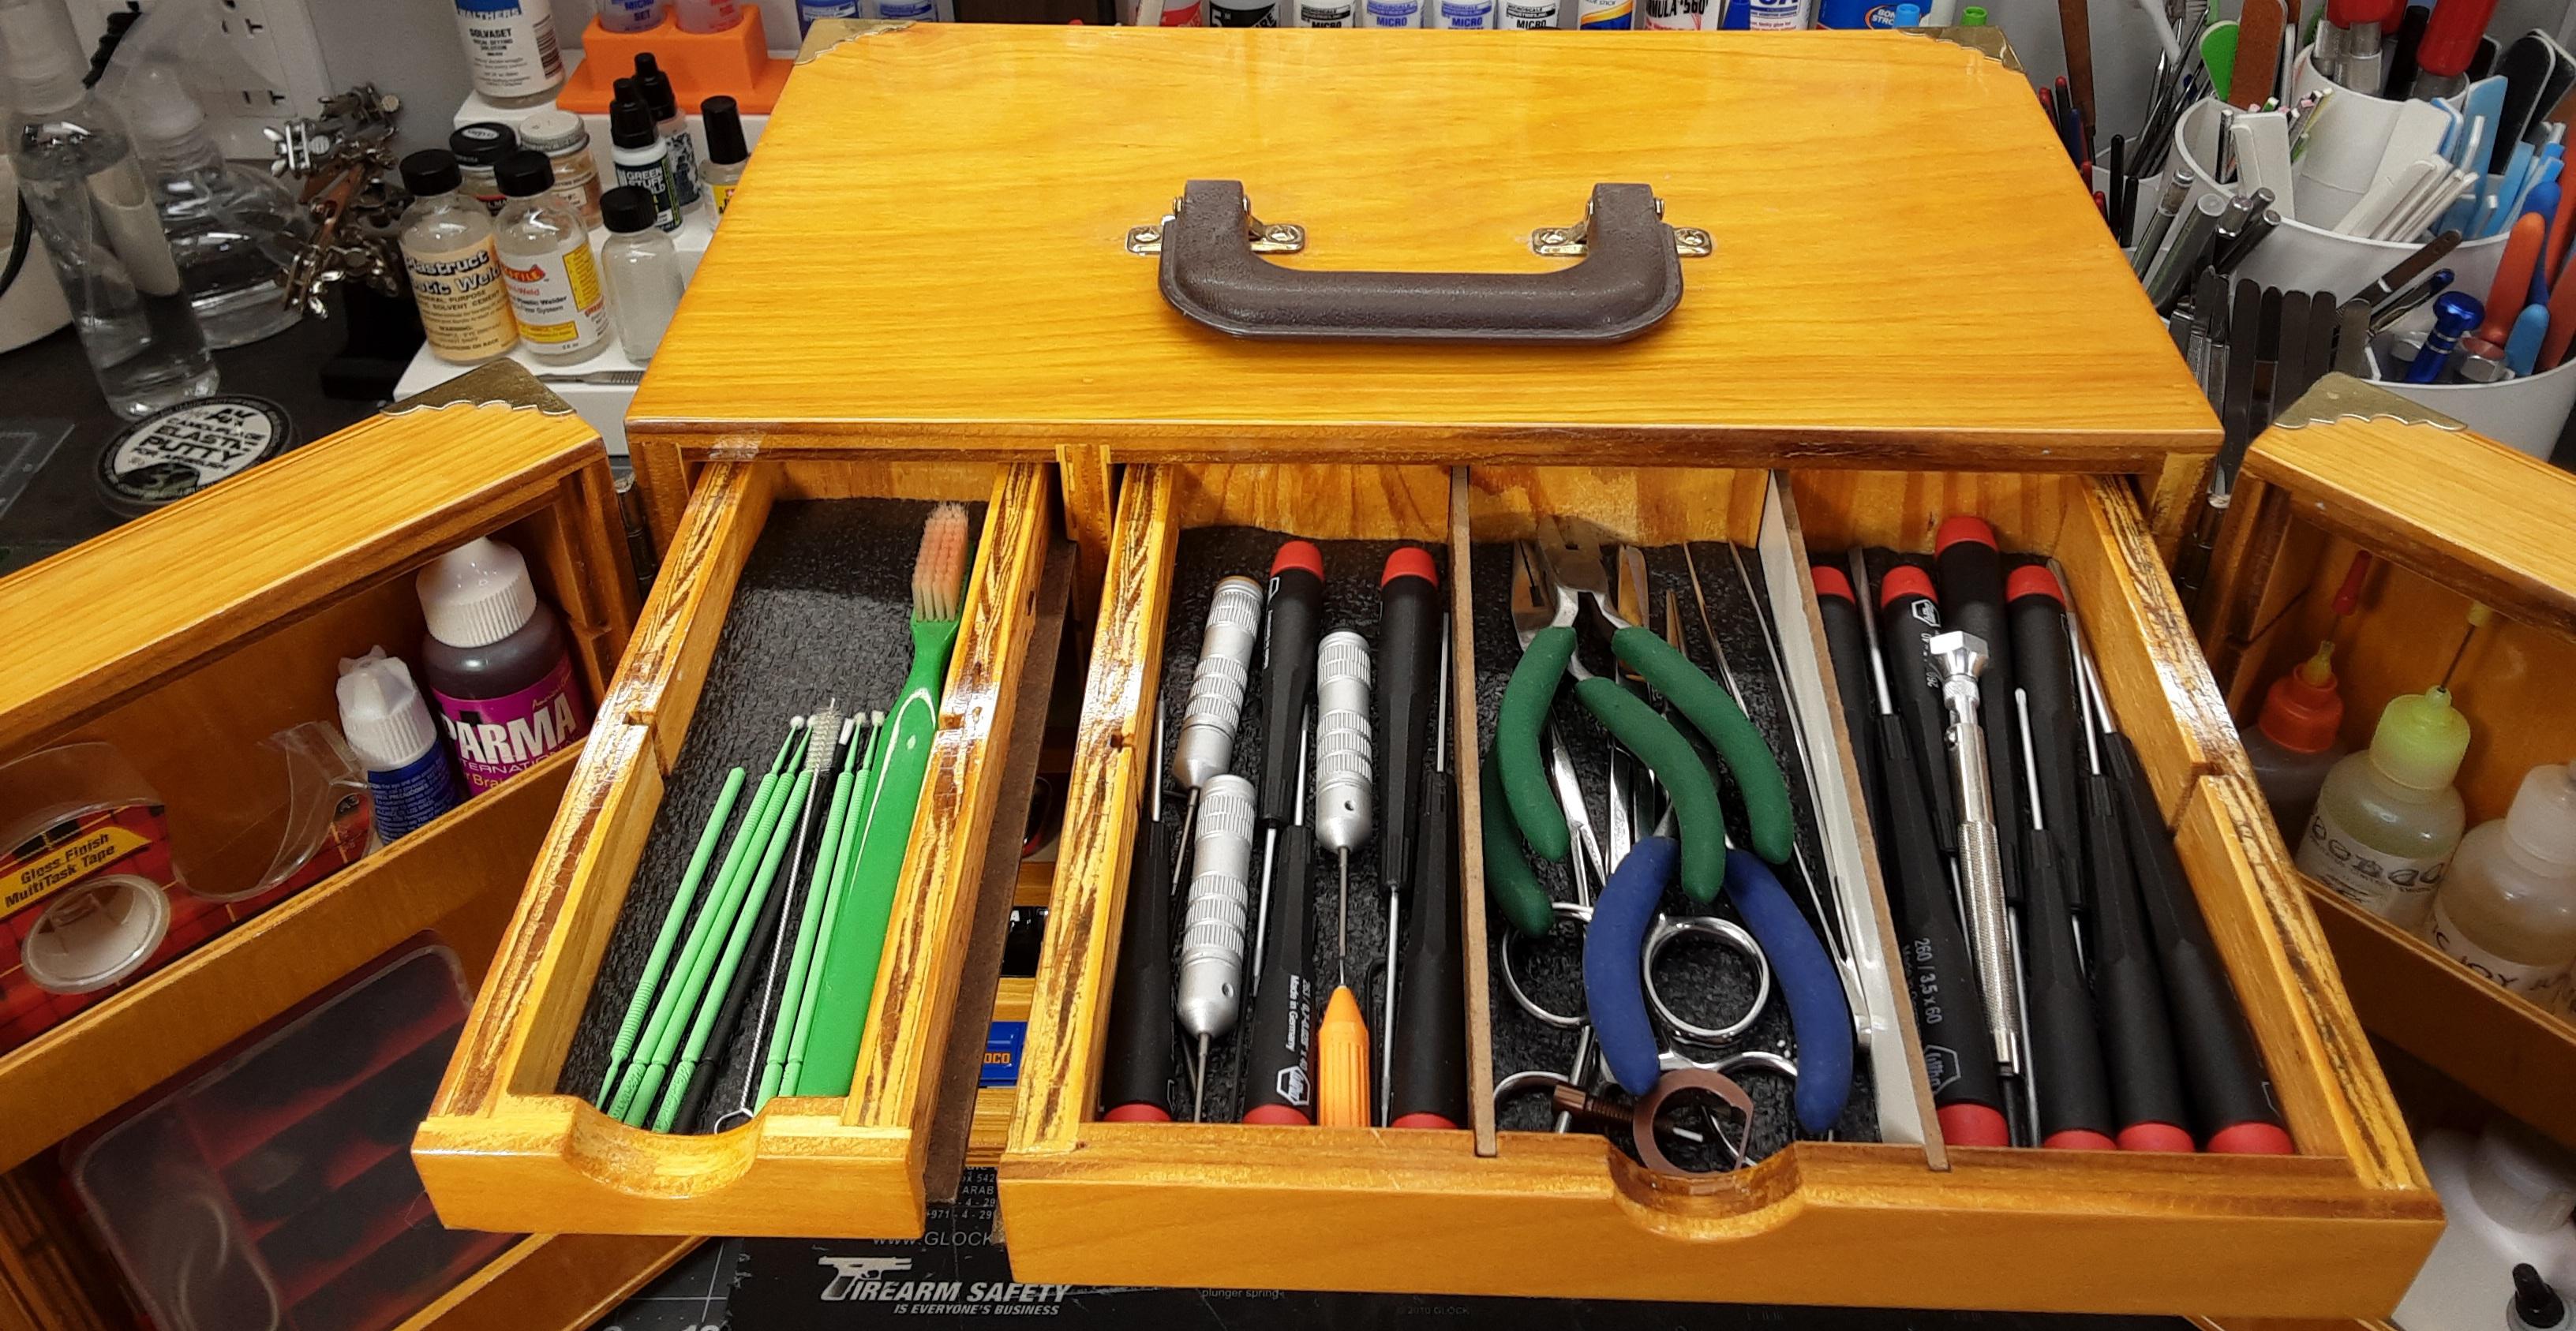
My Slot Car Pit Box. Had it custom built to my specs about 15 or so years ago and finished it myself. Lotsa storage fer cars, trackside maintenance goodies, controller and other such stuff.
-
Show your iconic Custom Car/Hot Rod replicas
Mothersworry replied to Koellefornia Kid's topic in Model Cars
Roth's Outlaw...


.webp.723226ad99bd0ef7901839c7bdb30c79.webp)