

Tim W. SoCal
-
Posts
2,109 -
Joined
-
Last visited
Content Type
Profiles
Forums
Events
Gallery
Everything posted by Tim W. SoCal
-
 This thread SHOULD be in Tim Boyd's "Mobius Models' new 1965 Dodge Coronet Two Door Sedan A990 and "Street Sleeper" - first look inside these boxes..." thread.II don't know how I added it to THIS thread...
 -
What Did You See In Your Yard Today?
Tim W. SoCal replied to Tim W. SoCal's topic in The Off-Topic Lounge
A Cooper's Hawk screeching as it flew by. It passed by way too fast to get a photo... I LOVE seeing the wildlife where I live!... -
are you like me and wish you changed the world and made every little thing in it right forever when you were 14 years old and knew everything?
-
N. D. Pitts - Quick Oil Change Employee
-
B. A. Cooper - Barrel Making Instructor
-
C. M. Wings - Bird Hunting Guide
-
I. C. Ewe - Private Investigator
-
the Wienermobile lives
-
end of the universe, which is reputed to be infinite, is far, far, FAR beyond what I can imagine
-
Actually, it looks like they ran one set of parts for the A990 with the Hemi heads, then changed out the tooling to run another set of parts for the Sedan. That is the basis of my question, why did they not just design and fabricate one mold with both sets of heads instead of changing the tooling for each model.
-
challenged by the uncertainty of the task and the risk involved, we soldiered on until we were successful and satisfied with the assignment's completion
-
Joe Bonamassa Bird On A Wire from his Black Rock album. Leonard Cohen cover.
-
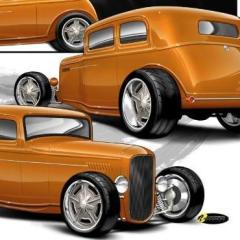
'32 Ford Tudor Sedan Good guys Hot Rod of the Year
Tim W. SoCal replied to mrm's topic in Model Cars
Flaws? I don't see any flaws! Bitchen Deuce Sedan, Mozzi! There is nothing like gaining inspiration from a real 1:1 car... -
sampling his wieners "Oh I wish I were an Oscar Mayer wiener, That is what I'd truly like to be, 'Cause if I were an Oscar Mayer wiener, Everyone would be in love with me!" https://www.google.com/search?client=firefox-b-1-e&q=oscar+mayer+wiener+song+commercial#fpstate=ive&vld=cid:3910c552,vid:aNddW2xmZp8,st:0
-
poverty caused by obtaining Holy Grail model car kits, as well as collecting many current kits to build, may be detrimental to our bank accounts, but the passion it sparks can be rewarding and lead to indulging in much fun
-
his 1993 Oscar
-
First off, I applaud Moebius for bringing these kits to market and I am going to thoroughly delight in building multiples of each kit. One of the aspects of our hobby that I REALLY enjoy is researching the cars I intend to build model replicas of. The Moebius '65 Dodge A990 kit comes with a manual transmission molded onto the engine. In my research of the '65 Dodge Coronet A990, I cannot find one 1:1 car with a 4-speed manual transmission. They are all showing the Hemi-Torqueflite with a reverse pattern manual valve body, park delete and a column shift. In my research, I have learned that 101 Dodge A990s and 102 Plymouth A990s were built. Of the Plymouths, 90 were equipped with the Hemi-Torqueflite and 12 were built with the New Process A833 4-speed manual trans. Try as I may, I cannot find production info for the Dodge A990s anywhere online. Were all 101 Dodges automatic trans cars? Were some of the A833 cars that may have been built sacrificed to build the AWB cars? To build an accurate replica, should I remove the manual transmission and glue on an aftermarket 727 Torqueflite? (the supplied steering column DOES include a column shifter) Also, what colors were the Dodges available in? I know all of the interiors were the same metallic tan color with matching carpet. Also, this is not meant as criticism but to satisfy my curiosity, the chrome trees on both the A990 and Coronet Sedan kits have valve covers for both the Hemi and Wedge Head engines. The Coronet Sedan kit has both single 4 barrel and cross ram dual quad intake manifolds. (I believe the cross ram will fit BOTH the Hemi and Wedge head engines) On the engine parts trees, the A990 kit has Hemi heads, and in the same location in the castings, the Coronet Sedan kit has corresponding Wedge heads. If all the other engine parts are included, why not just cast both sets of heads also? BTW, in my imagination, I see the Little Old Lady From Pasadena rowin' a 4-speed, not boppin' a column shifter!
-
generation of wealth is what I need much more of before I can retire and pursue a life of leisure
-
than wrecking balls
-
People who have a pleasant, positive attitude are much more enjoyable to interact with than those who are whiny and irritable all the time
-
I don't believe in the Friday the 13th curse, it IS, after all, just another day on the calendar. I start work at 3:00am. I jump into my service truck this morning to head for my first job and the TPMS low tire pressure light is on. Monitor shows 46psi in an 80psi tire. There was a large, long screw through the tread on a tire with less than 5,000 miles of use. On goes the spare. (at least this was found at the base facility on not on the road!) Then, I get to my first job, it is still dark outside, break out my high-falutin' LED flashlight, which worked perfectly yesterday, and the batteries are dead. No problem, I have spare batteries. NOPE! - someone helped themselves to my spares...
-
I. P. Standing - Plumber
-
Seymour Butts - Proctologist
-
variety is said to be the spice of life
-
two eagle chicks

