RoninUtah
-
Posts
449 -
Joined
-
Last visited
Content Type
Profiles
Forums
Events
Gallery
Everything posted by RoninUtah
-
White Road Commander 2
RoninUtah replied to DRIPTROIT 71's topic in Model Trucks: Big Rigs and Heavy Equipment
Very nice White, I like it! Great job! -
1966 Peterbilt Unilite 352 COE
RoninUtah replied to RoninUtah's topic in Model Trucks: Big Rigs and Heavy Equipment
I say, go for it! You'll probably do a better job than I did! -
The Same but “ a little “ Different
RoninUtah replied to Biggu's topic in WIP: Model Trucks: Big Rigs and Heavy Equipment
I agree 200%! -
1966 Peterbilt Unilite 352 COE
RoninUtah replied to RoninUtah's topic in Model Trucks: Big Rigs and Heavy Equipment
Thanks, all! Yeah, this goes back to when I was a truck-crazy kid growing up in Northern California in the 60's. Peterbilts were my favorites, and COEs were my favorite Petes. There was just something about them that screamed, TRUCK! They were all machine, but still attractive. I always wished I could own one, but I never did, except in 1/25 scale. Thinking back on it now, that's probably just as well. I did a similar backdate on a White Freightliner a while back, and that turned out well. A couple of shots were in my "Ragtop Trailer" thread on this forum a few months ago. Beyond that, maybe a Kenworth COE? Hmm... -
The Same but “ a little “ Different
RoninUtah replied to Biggu's topic in WIP: Model Trucks: Big Rigs and Heavy Equipment
Well, you’re putting a lot more work into yours than I did to mine, and the results already show it. Keep it up! Thus will be awesome! -
The Same but “ a little “ Different
RoninUtah replied to Biggu's topic in WIP: Model Trucks: Big Rigs and Heavy Equipment
Those stripes look fantastic! Well done! I also rolled down the driver side window on mine, makes it easier to see the interior. -
Mid 60s Peterbilt Unilite COE
RoninUtah replied to RoninUtah's topic in WIP: Model Trucks: Big Rigs and Heavy Equipment
My thanks to Jürgen who designed them! -
Mid 60s Peterbilt Unilite COE
RoninUtah replied to RoninUtah's topic in WIP: Model Trucks: Big Rigs and Heavy Equipment
Yeah, that’s a little detail. I thought I would add. It wasn’t super-common at the time, but quite a few trucks had them. I suspect it would be a OOS violation today! -
Mid 60s Peterbilt Unilite COE
RoninUtah replied to RoninUtah's topic in WIP: Model Trucks: Big Rigs and Heavy Equipment
Thanks! I’m lucky to live in a photogenic part of the world! -
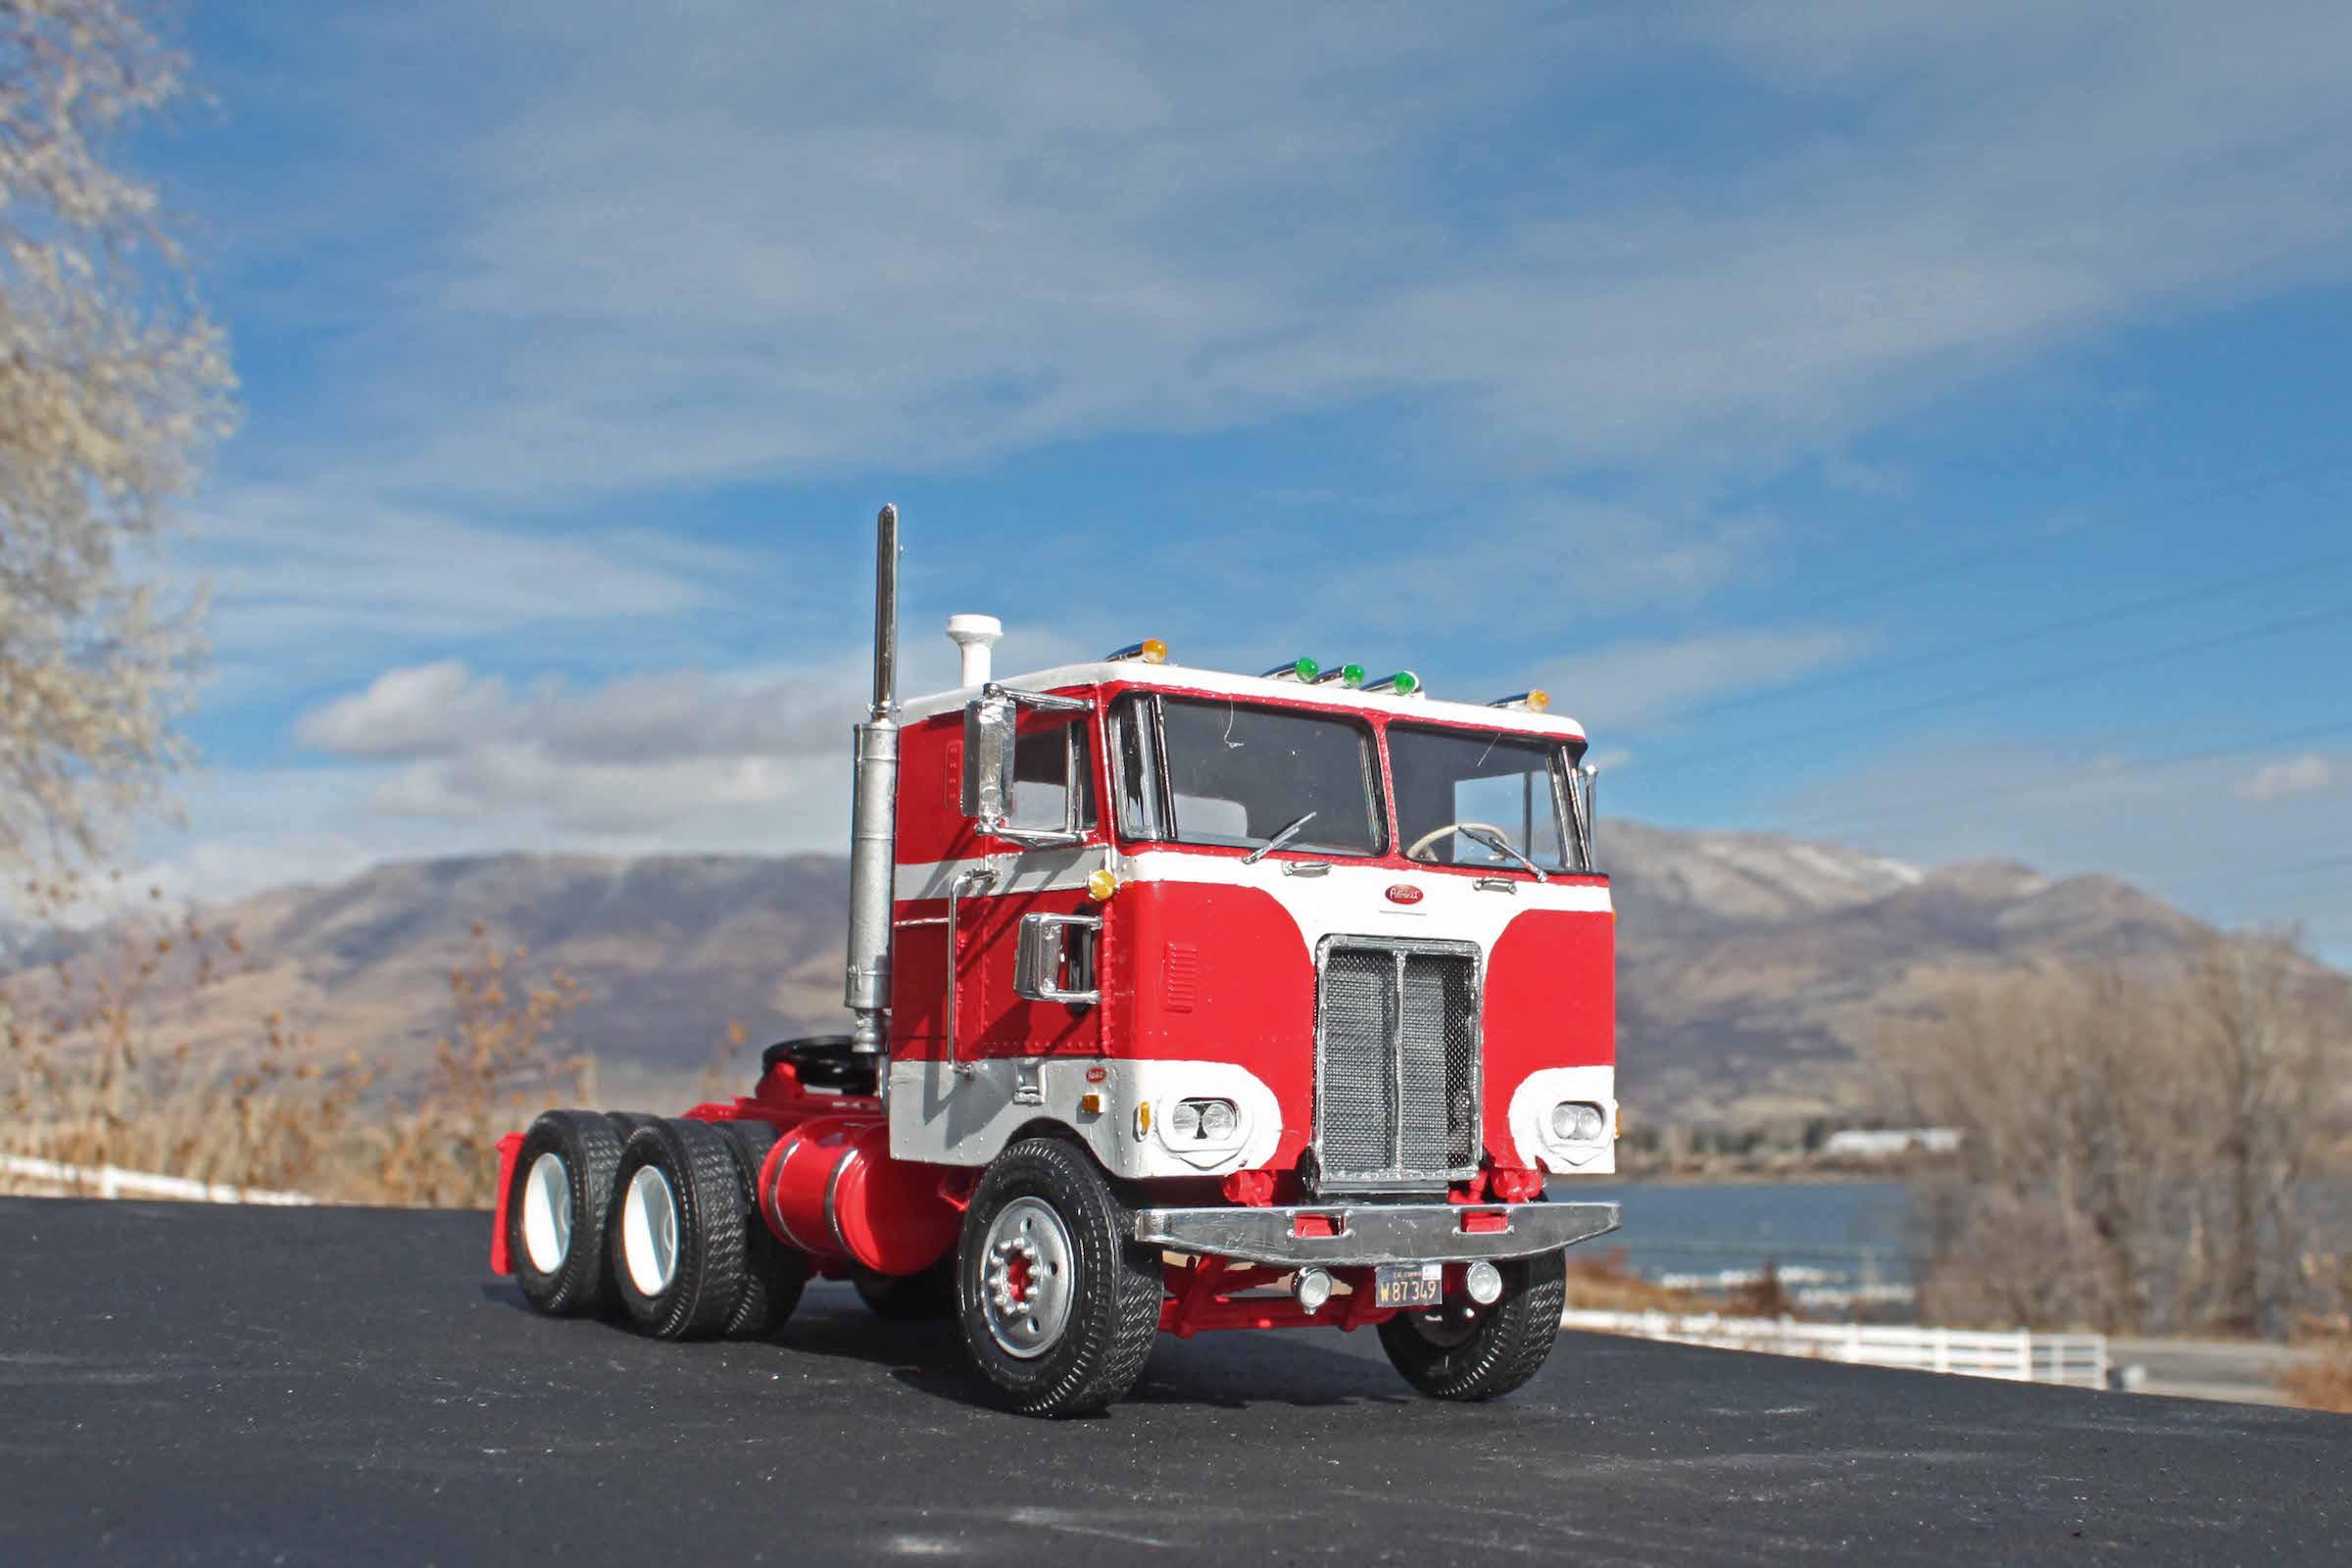
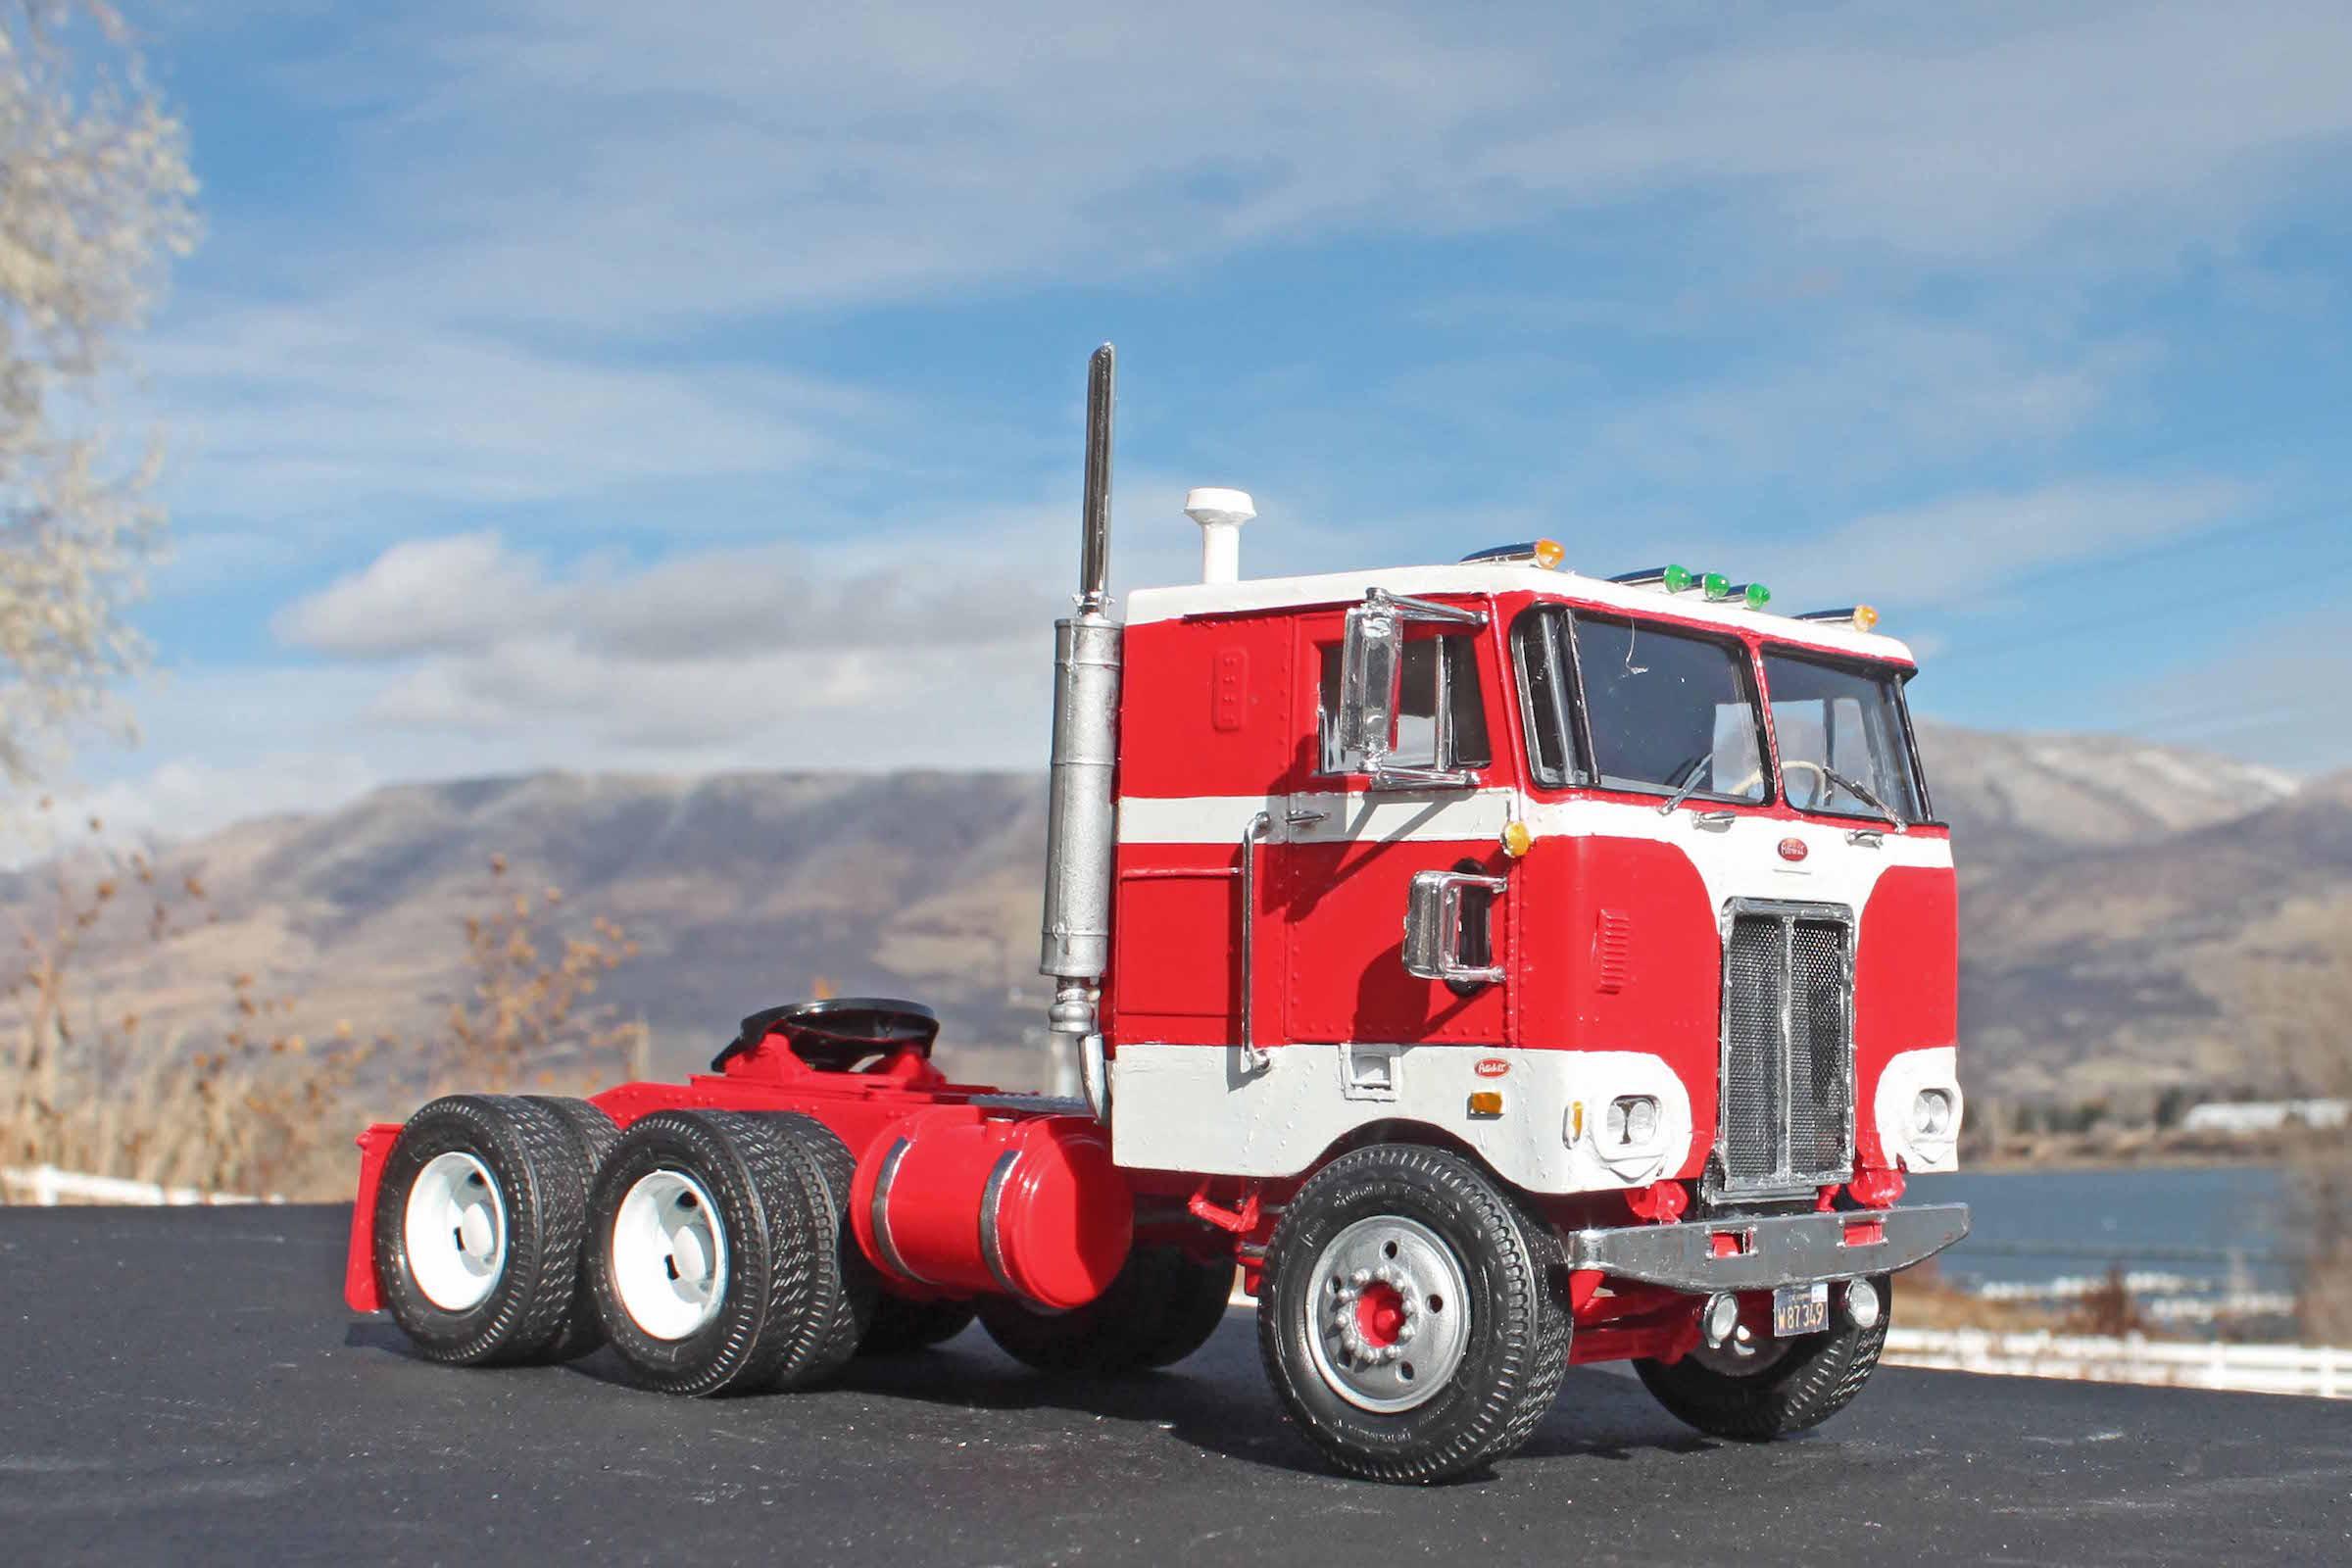
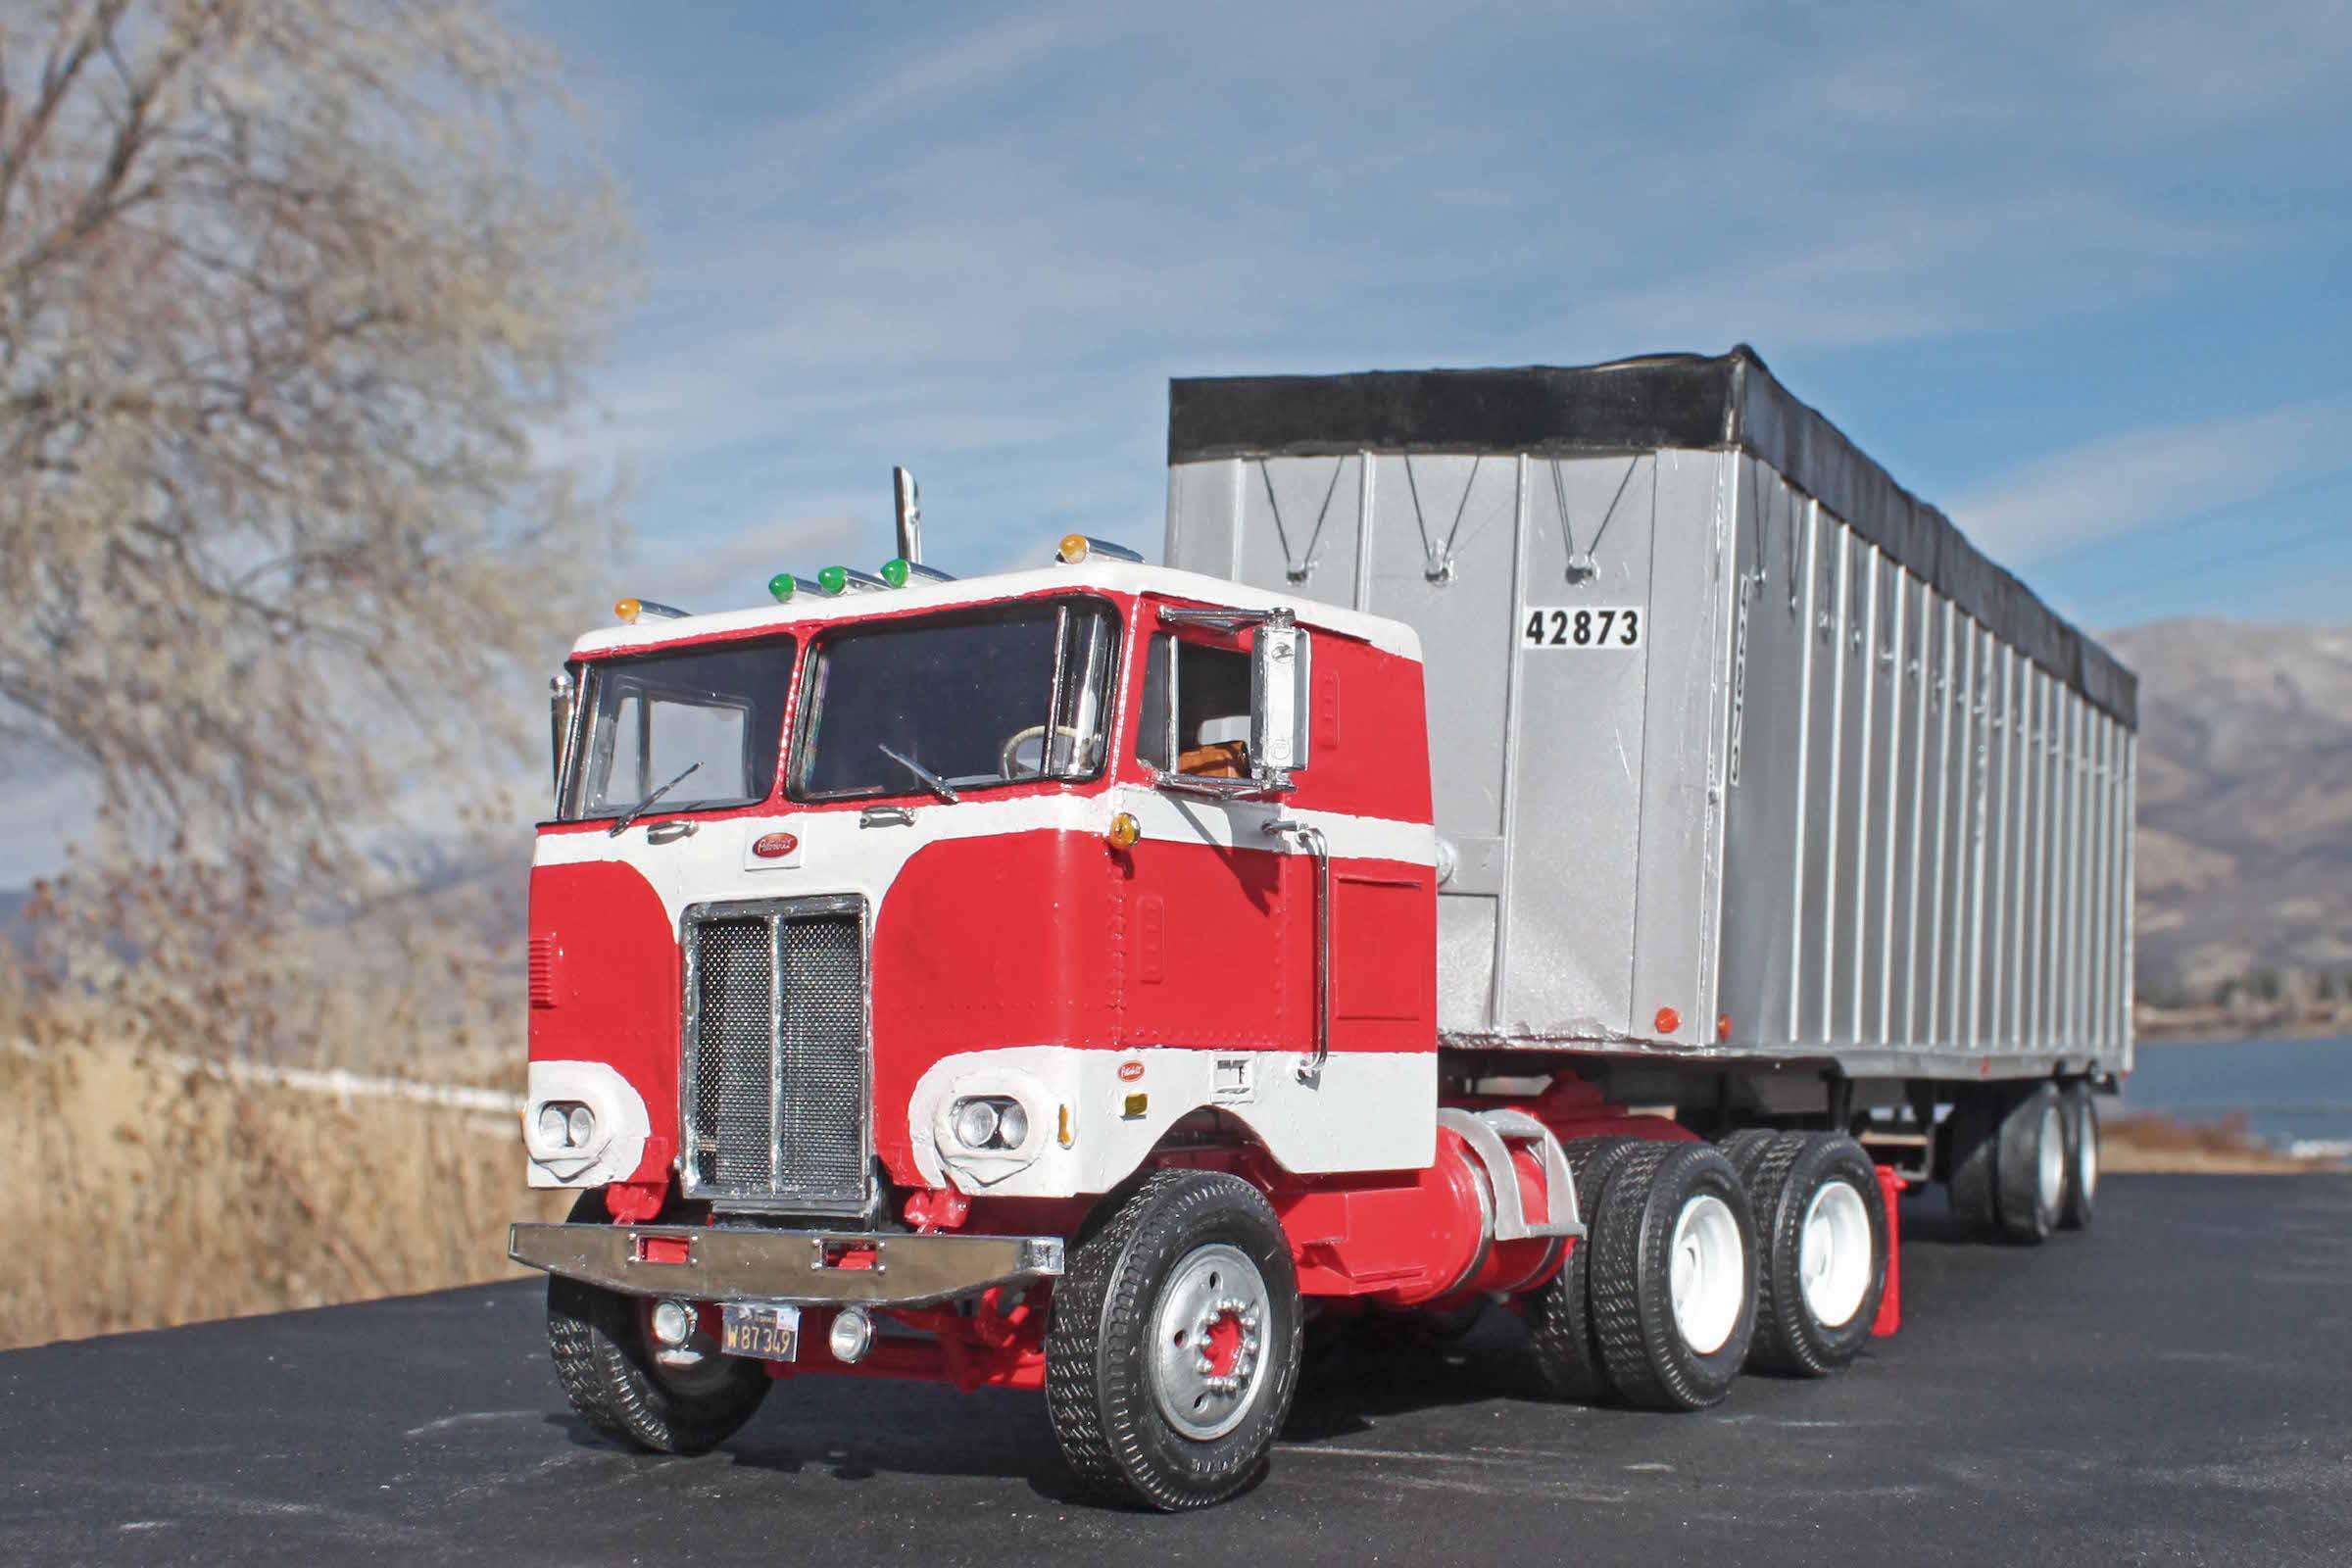
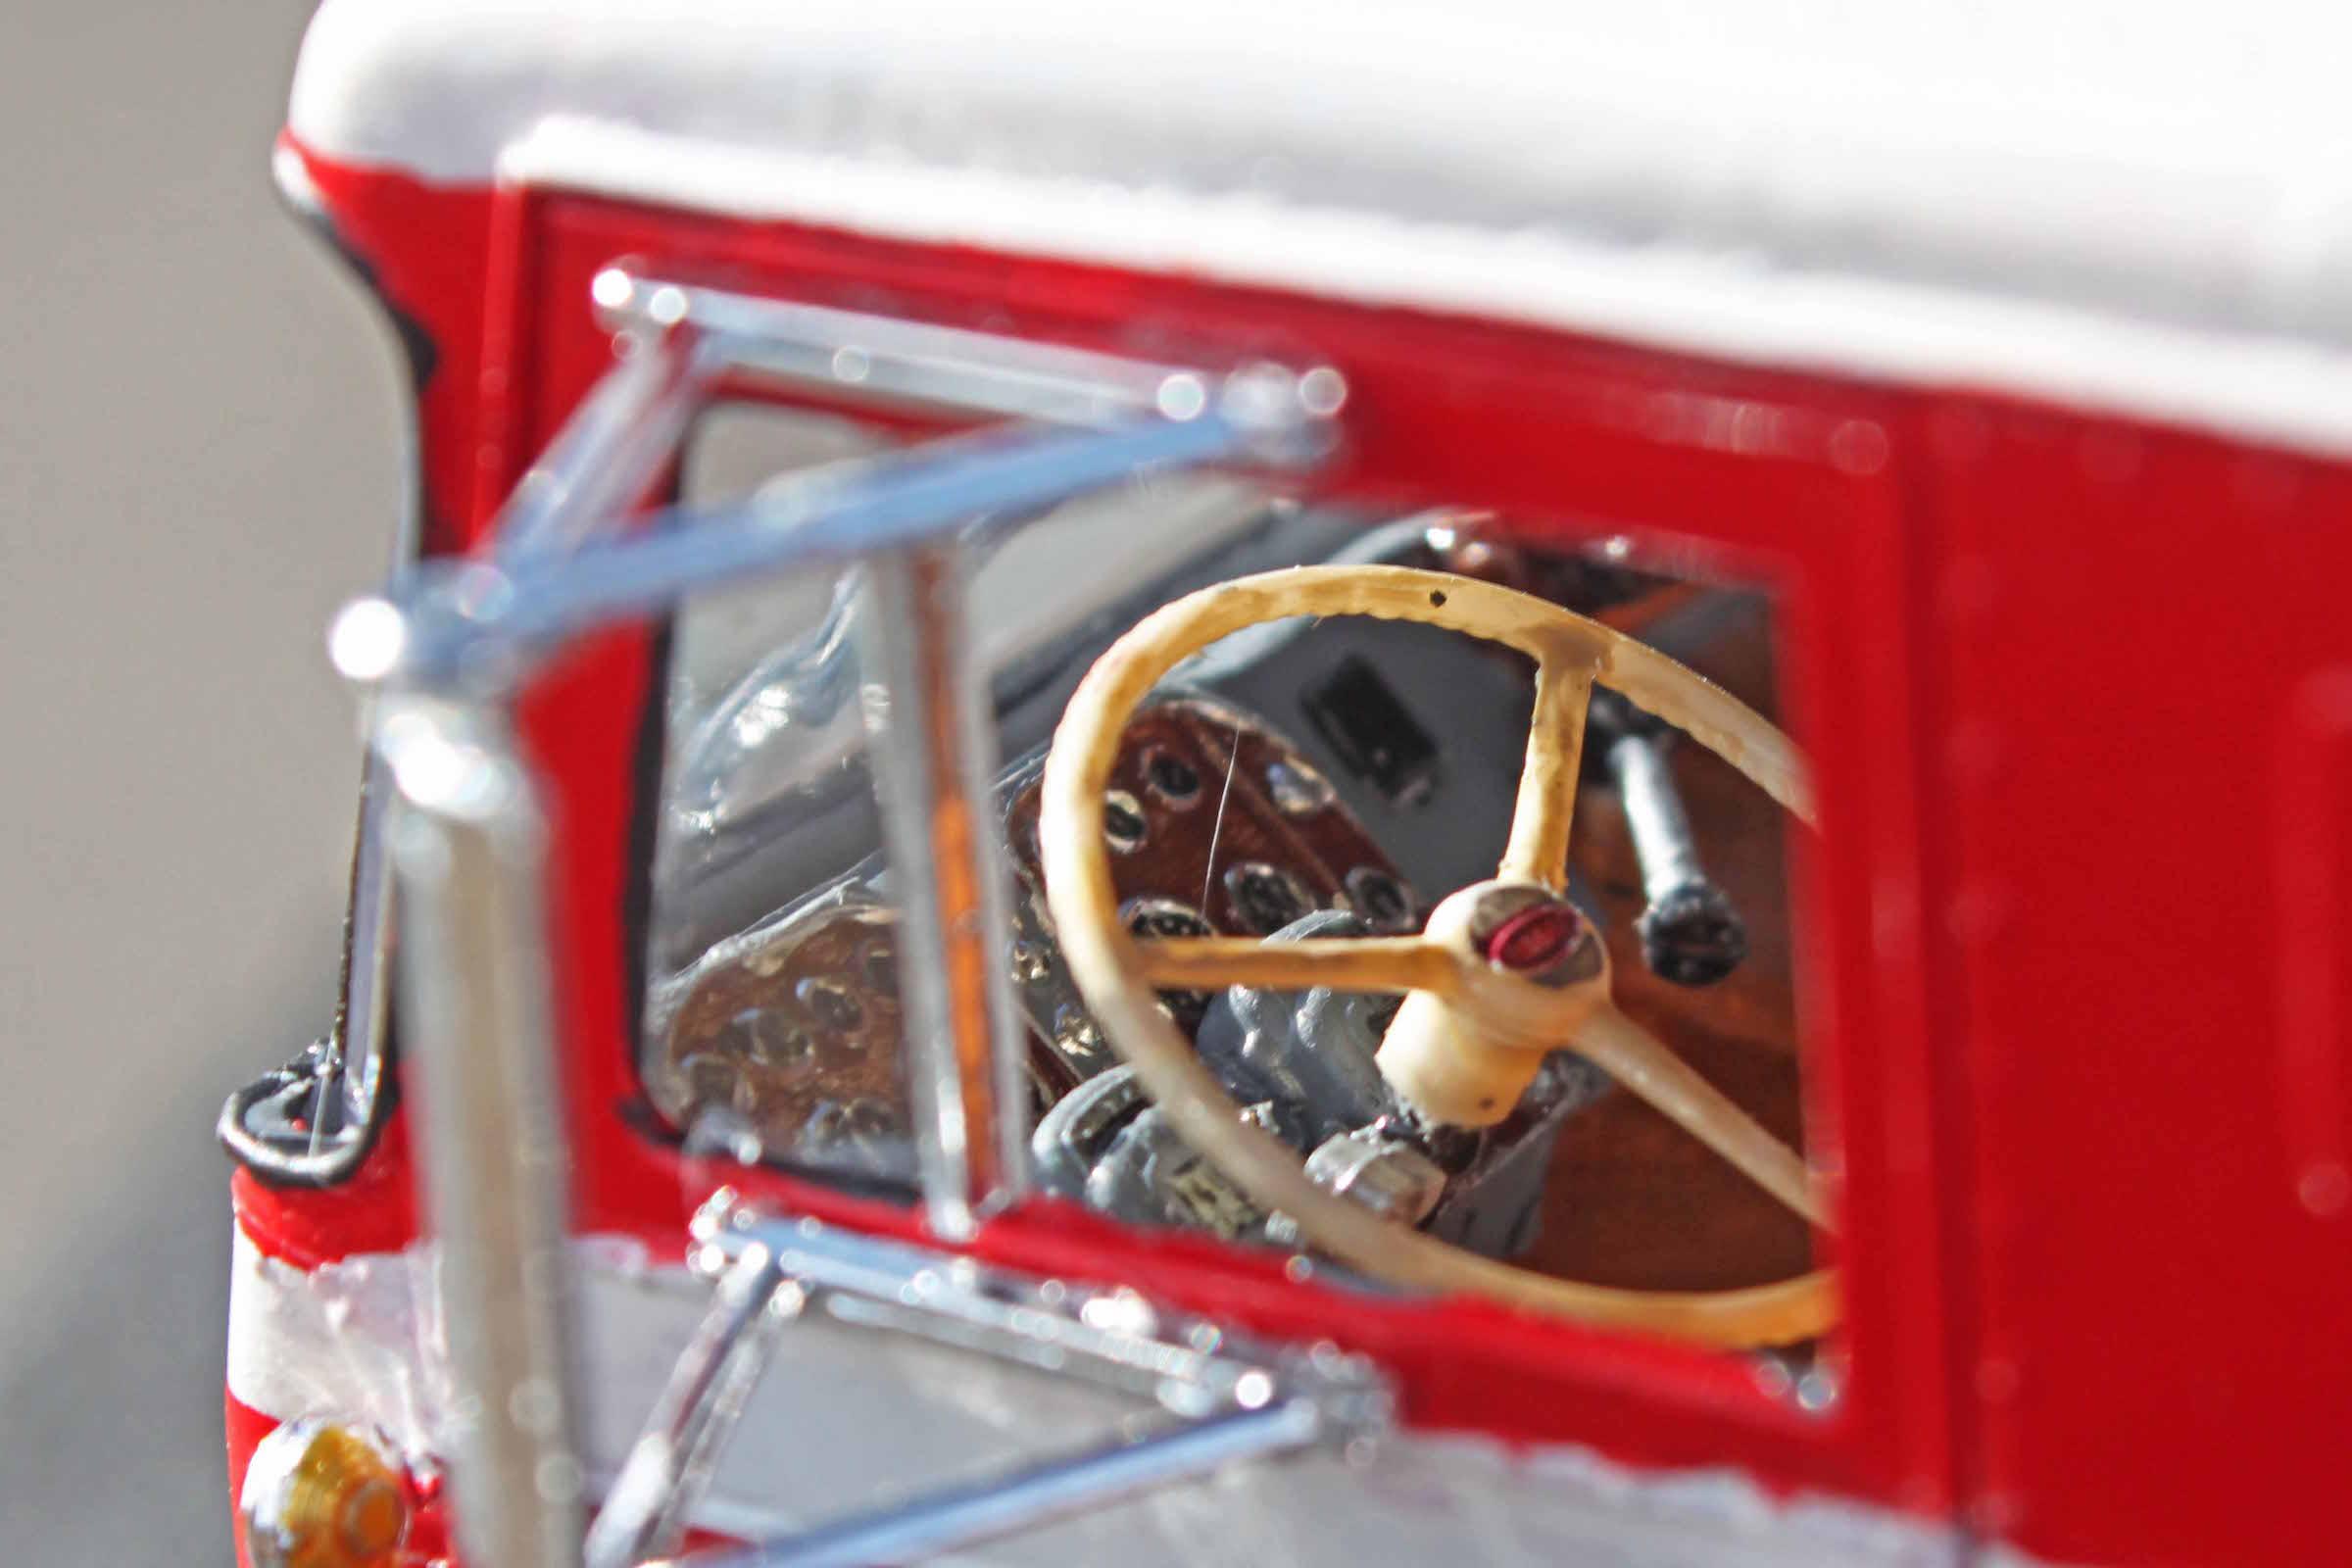
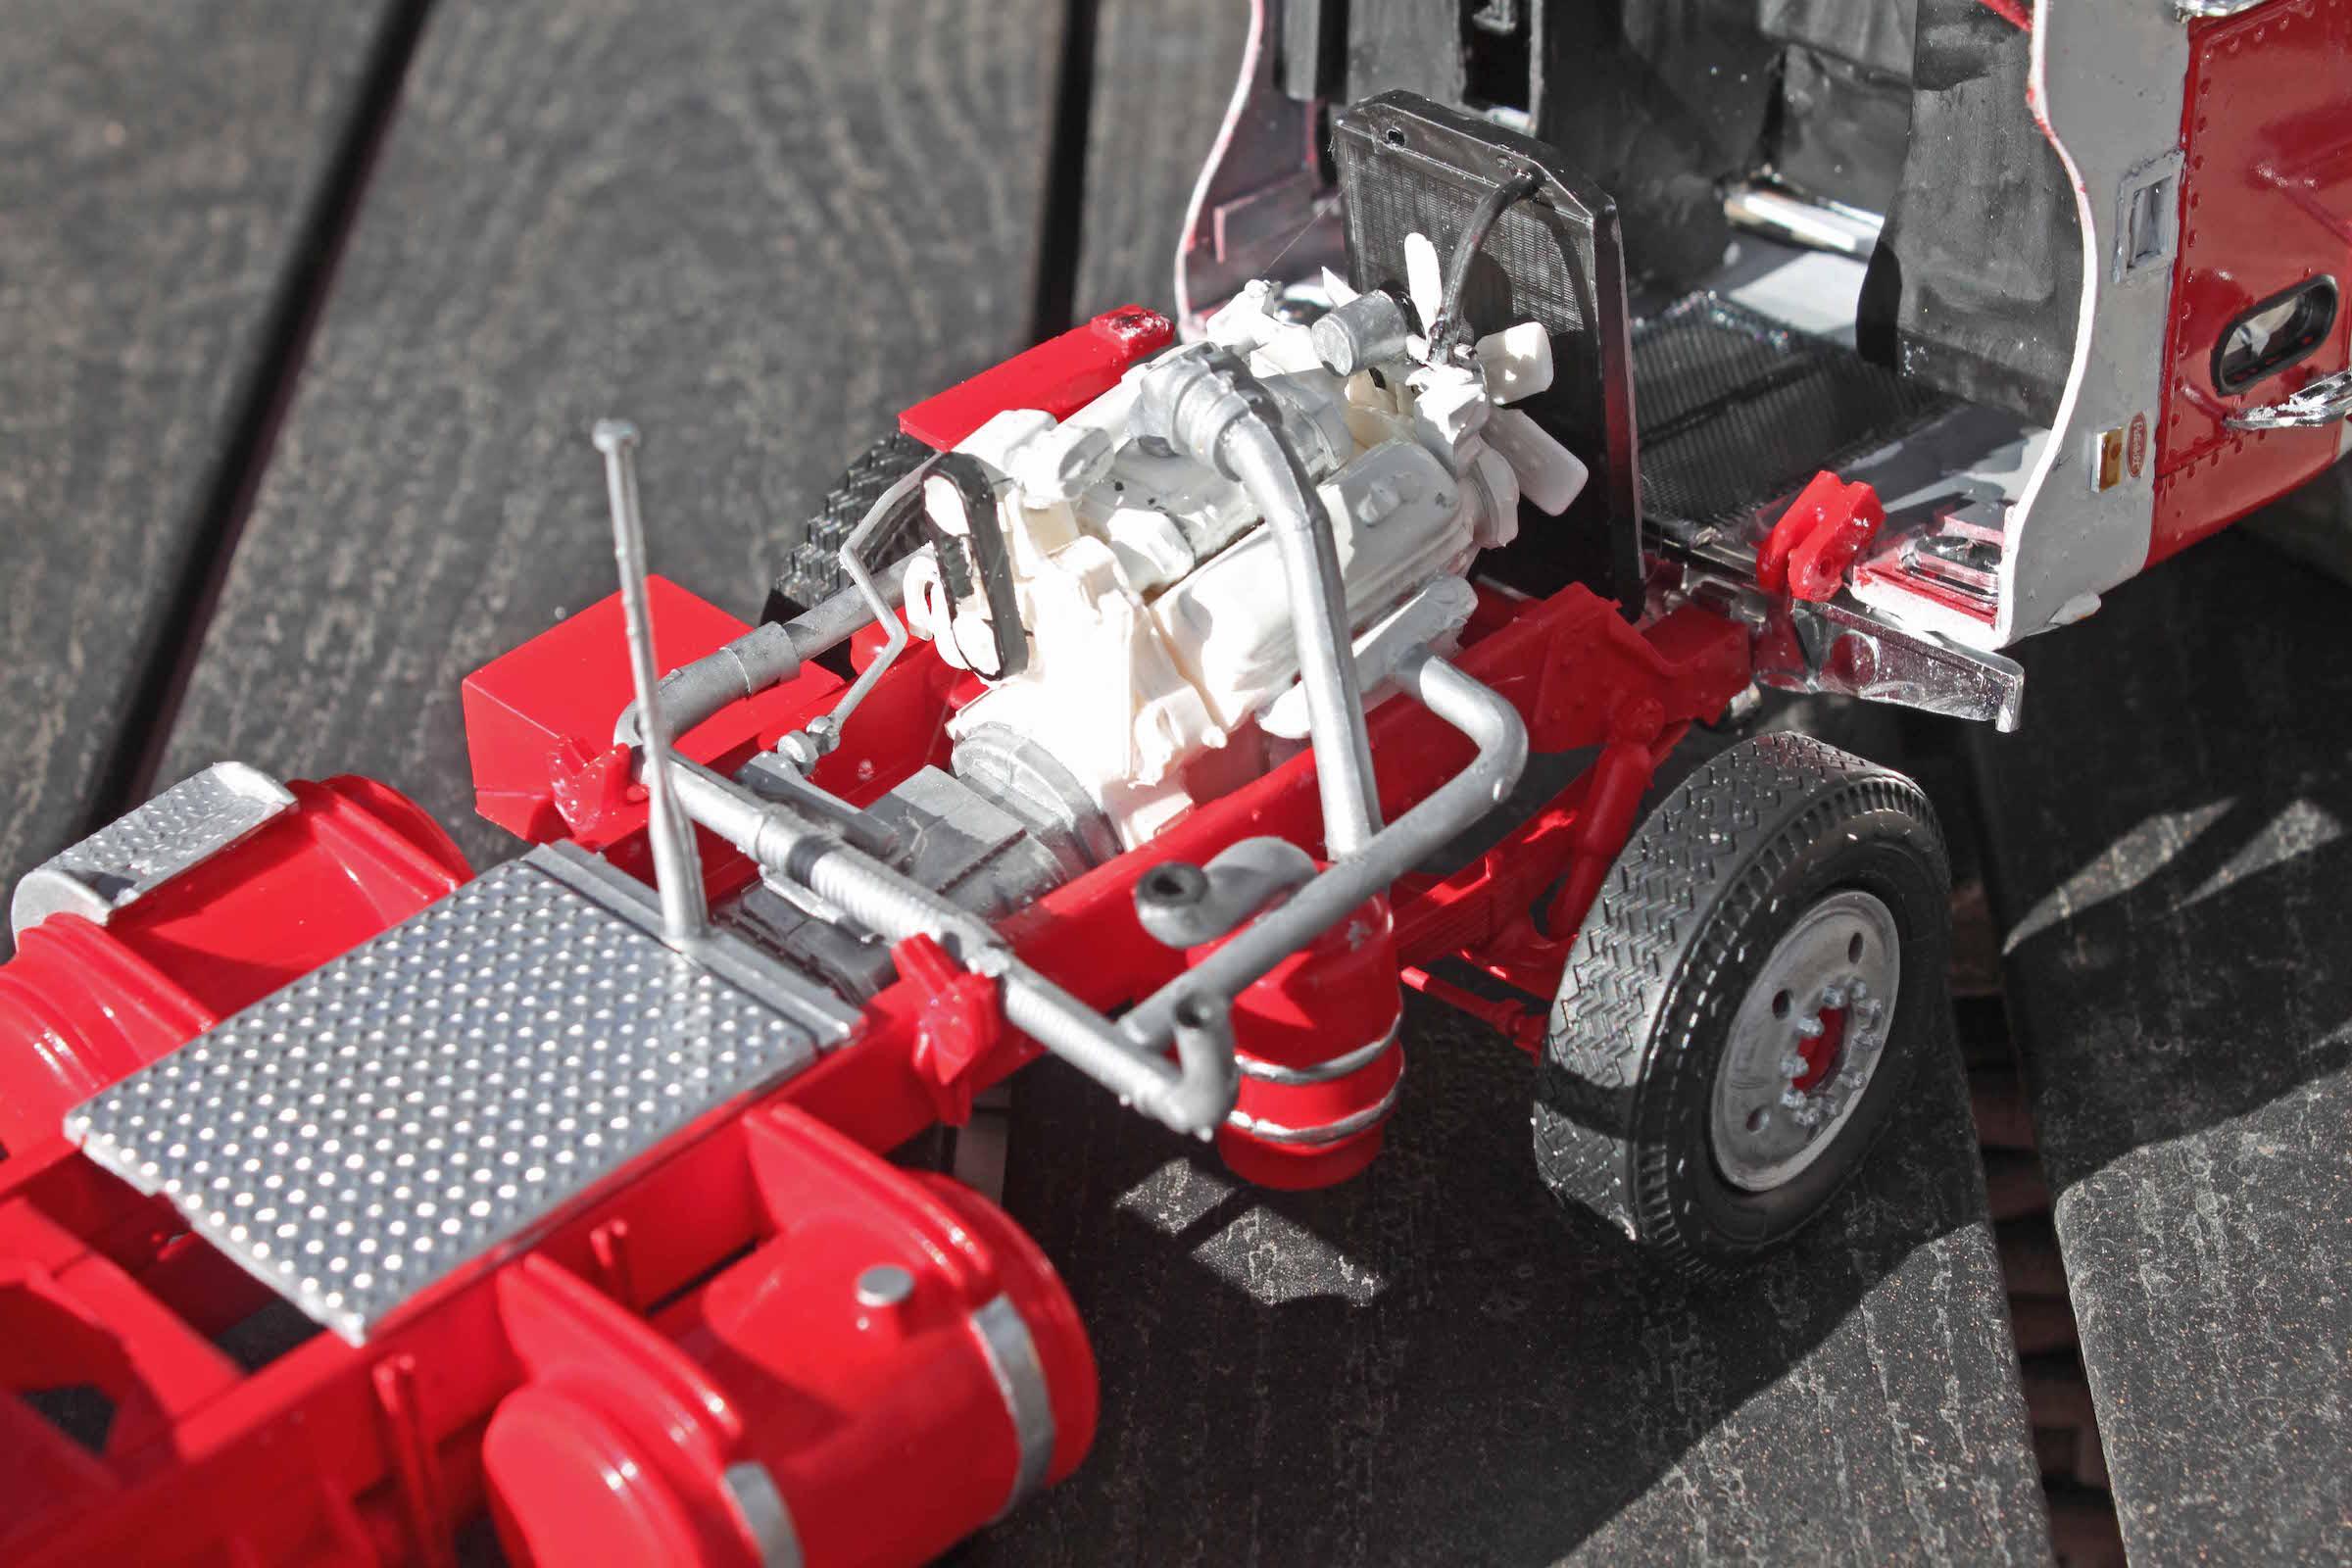
This build is a modification of the Coca-Cola version of AMT's Peterbilt Pacemaker 352 COE; I backdated it to a mid-sixties Unilite 352. Some of you guys have been following my build thread in the WIP section, and now it's done! My thanks to everyone who rode along with me on this ride, your advice and encouragement made this build what it is. My thanks also to Tim Ahlborn, who generously shared advice on how to approach this build, along with photos of his prototype cab and notes on the differences between the pre-1970 Unllite 352 and the post-1970 Pacemaker, which is the basis of the AMT kit. Tim, as you all know, is not only a master modeler, but the authority on all things Peterbilt. The depth of his knowledge is matched only by his generosity in sharing it, and for that I am very grateful. My gratitude also to Jurgen, who generously shared his design skills to create period-correct details that I could then print in 3D. Details like that make all the difference in the world! Modifications to the kit are many- 3D printed headlight surrounds and front louver, new lower side skirts, changed luggage doors, added a cutout for the exhaust stack, moved the air intake stack, etc. etc. I added shutters from a 359 kit to the radiator, cut out the grille surround, and added a vinyl screen to show the radiator shutters, as was typical of its day. The interior was changed to accommodate a flat dashboard with 3D printed tach-o-graphs; the wheels are 3D printed as well. The engine is the kit Detroit 318, painted white per Peterbilt spec at the time, and with the exhaust re-routed to accommodate the single stack. The rest of the chassis is box-stock; it came with the Peterbilt "stabiil-aire" rear suspension that first came out in 1965, making this a post '65 and pre '70 model; I arbitrarily decided that it is a '66. I built it as a typical California truck of its time, perhaps owned by an owner-operator or a small fleet that takes good care of their equipment. Typical of west coast trucks of the day are the 5-hole Alcoa aluminum wheels on the steer axle, and 5-hole Budd steel wheels on the drive axles. With that 8V-71 and the 10-speed Roadranger, she's ready to haul!

-
Not Another Freightliner
RoninUtah replied to Rockford's topic in Model Trucks: Big Rigs and Heavy Equipment
Awesome truck! It's hard for me to wrap my head around the idea that this is 1/32! Well done! Good luck with the move... that's always stressful. But at least you'll have more space for models in the new place! -
Mid 60s Peterbilt Unilite COE
RoninUtah replied to RoninUtah's topic in WIP: Model Trucks: Big Rigs and Heavy Equipment
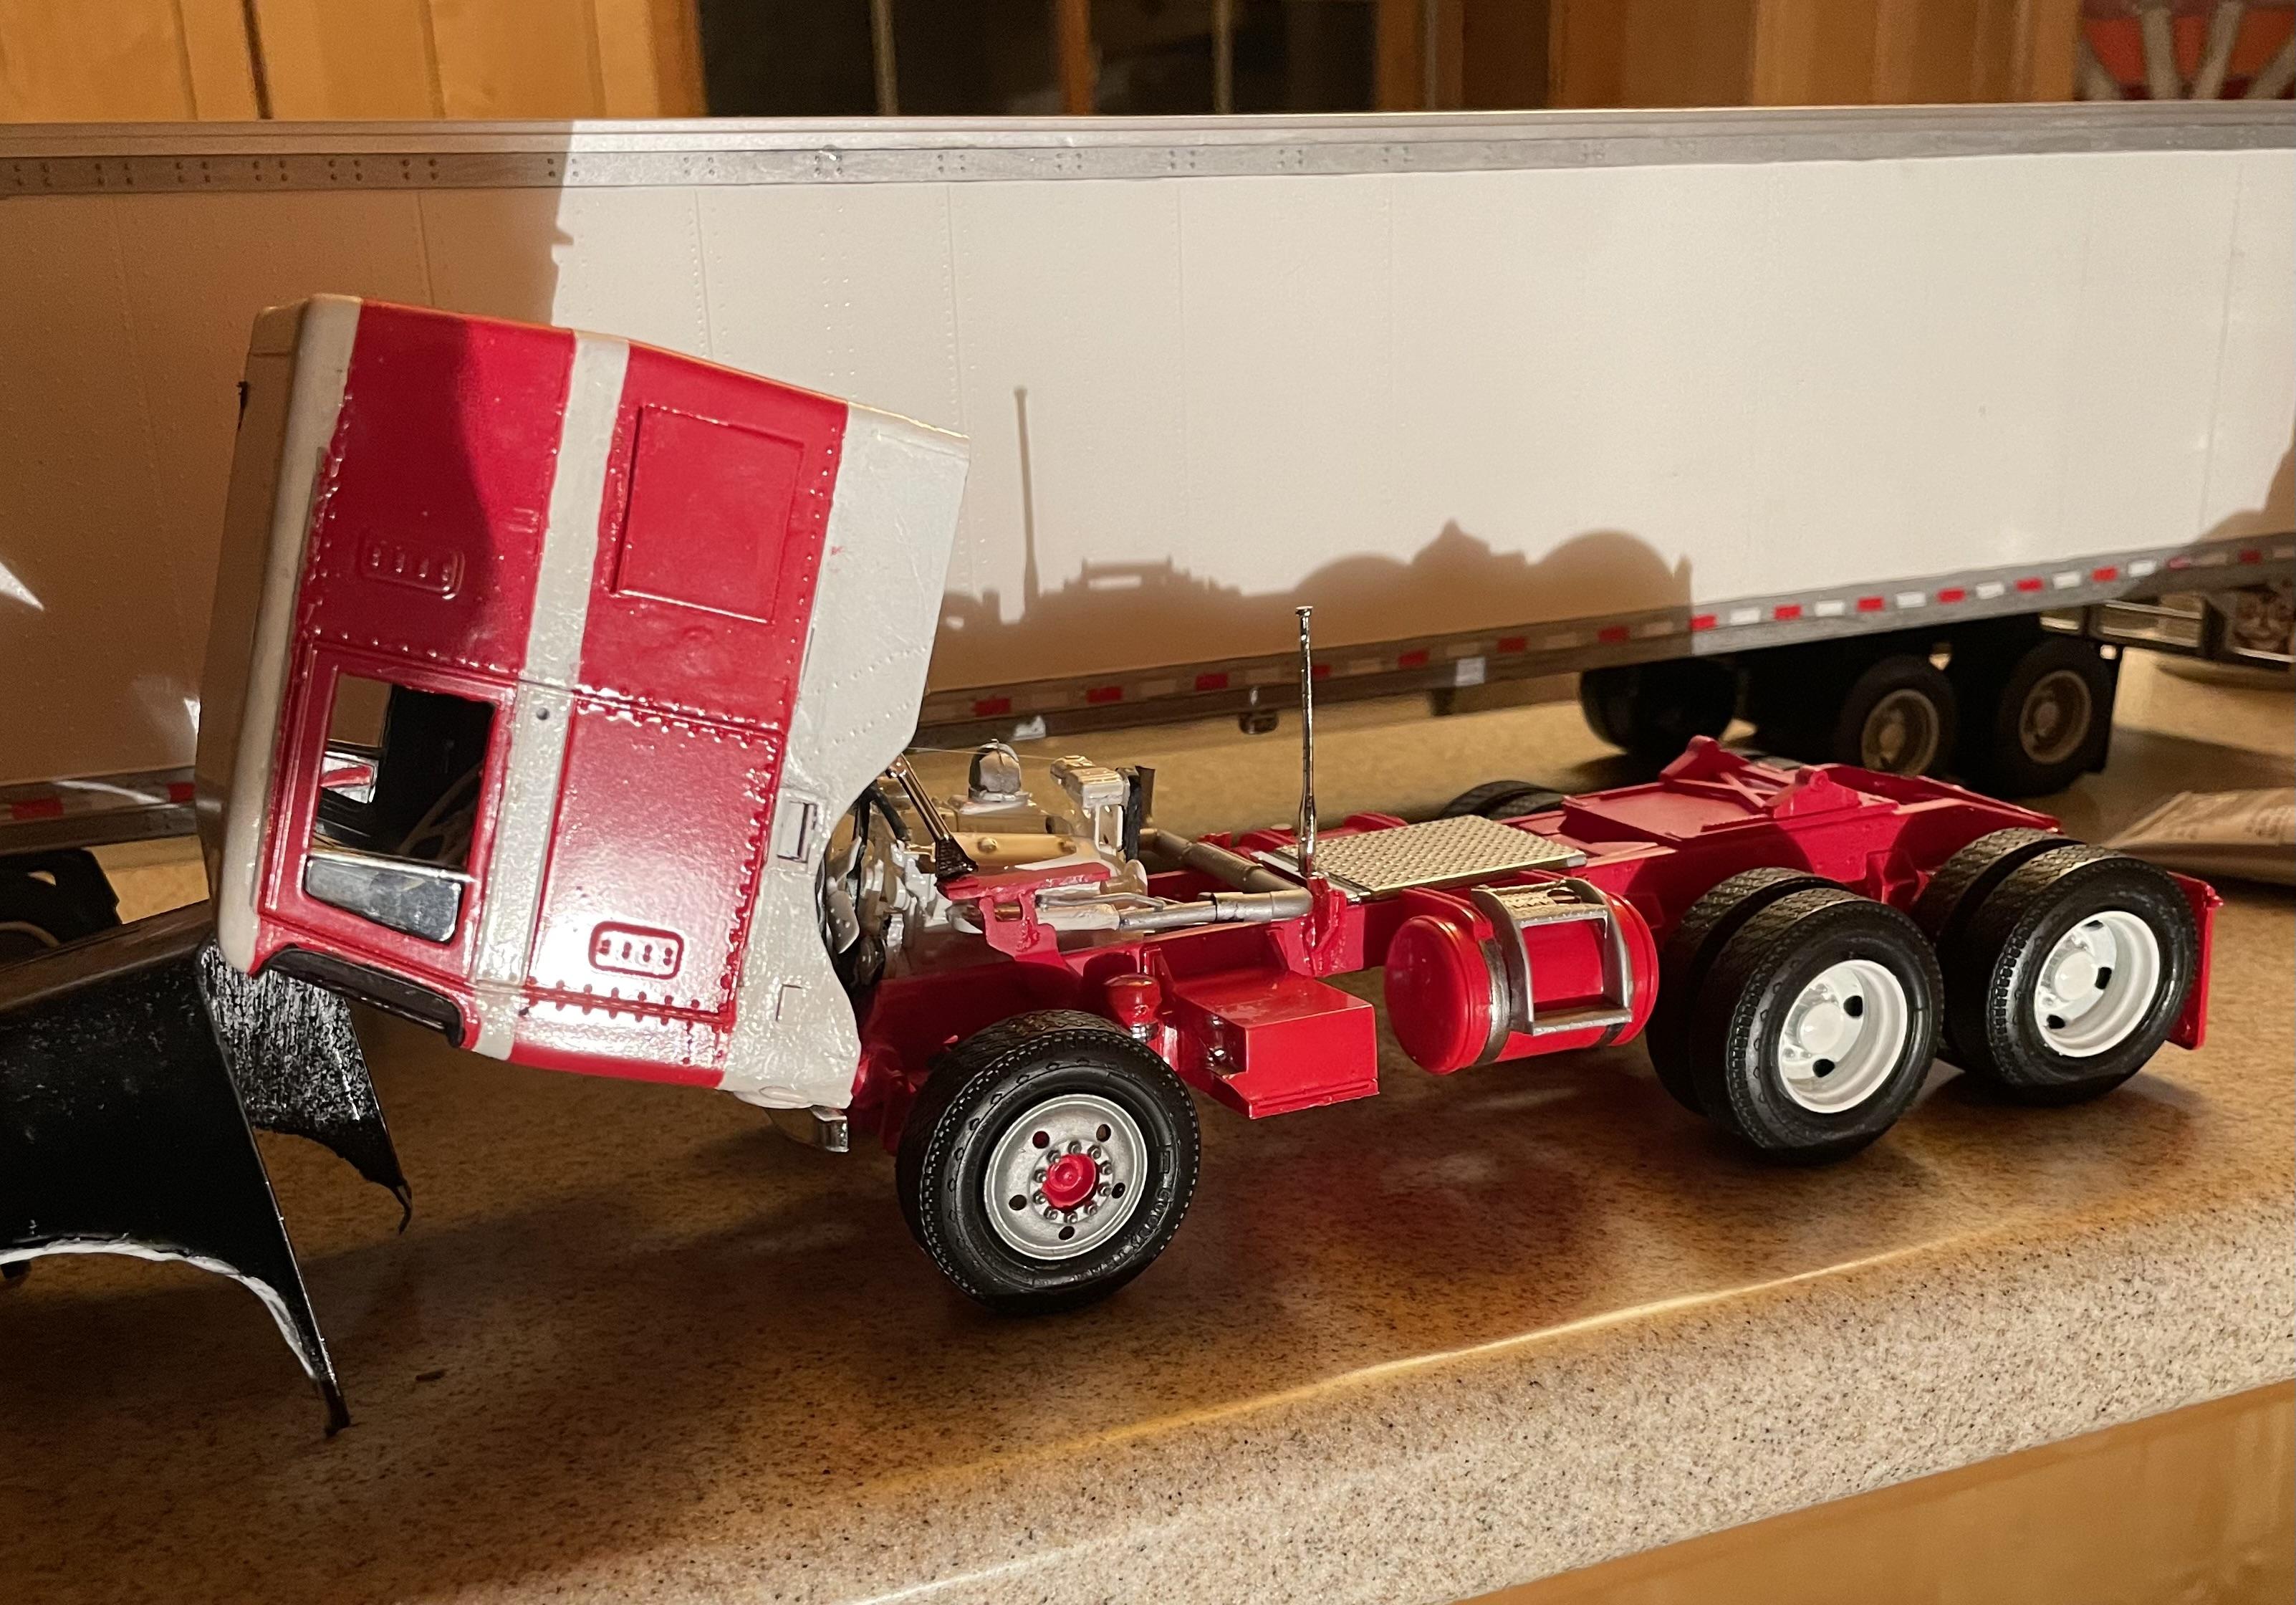
Much to my relief, the cab tilited forward just fine, but it was getting hung up on something going back. In my experience, that's nearly always caused by the shift tower, and this was no exception- the shifter was off center (it seems impossible to get that right) so out it went. Problem solved. Today was forecast to be a bright sunny day all day, but snow is predicted for tomorrow, so I decided I really wanted to wrap all the loose ends and get this in front of my camera. So, it was a frantic morning of attaching cab accessories and detail painting. But I got it done! Words cannot express how much I appreciated the advice and encouragement everyone gave me over the course of this journey. Everybody contributed, but special shout-outs to Jeff, Jurgen, Steve, Tommy, Sean and Gary for their help. This one very much felt like an international group build, with contributions from Canada, England and Germany as well as the U.S. All of you guys have skills and experience that pushed me beyond my comfort zone and helped me build a model that, while far from perfect, is much better than it would have been if I had been left to my own devices. Thank you all. Here are a couple of photos; I'll post more in "Under Glass."
-
Mid 60s Peterbilt Unilite COE
RoninUtah replied to RoninUtah's topic in WIP: Model Trucks: Big Rigs and Heavy Equipment
Hinging the cab for it to tilt is one of the most nerve wracking parts of a COE build! Will the glue hold? Will the cab be crooked? I can’t tell you how many times I’ve given up and just set the cab in place. So, here it is, ready to dry overnight, with my fingers crossed…
-
Pete 359 tanker with trailer
RoninUtah replied to Jürgen M.'s topic in WIP: Model Trucks: Big Rigs and Heavy Equipment
The LCD screen went out on mine, and I had to send to China for a replacement! So I’m waiting for days if not weeks before I can print again. Just like waiting for some aftermarket parts or something I ordered online- similar frustration! -
Mid 60s Peterbilt Unilite COE
RoninUtah replied to RoninUtah's topic in WIP: Model Trucks: Big Rigs and Heavy Equipment
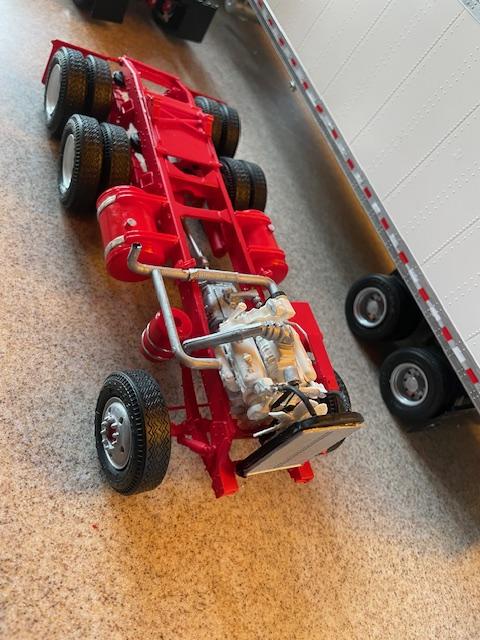
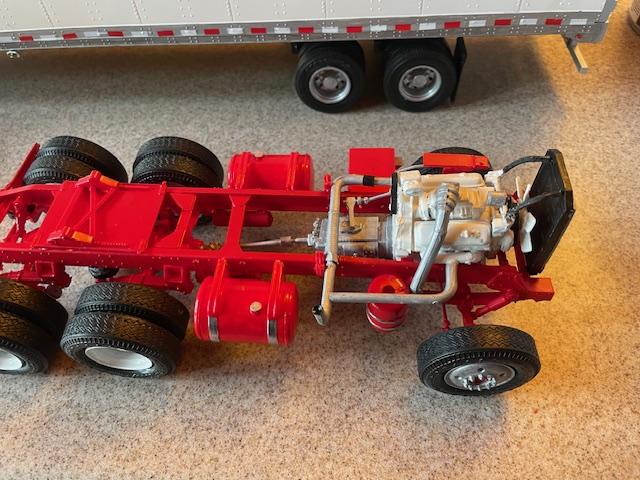
The chassis is coming along, too… almost ready. I improvised an exhaust setup for a single stack… I have no idea whether it’s even remotely authentic but it seems logical. The stack will be attached to the cab and should line up.
-
Mid 60s Peterbilt Unilite COE
RoninUtah replied to RoninUtah's topic in WIP: Model Trucks: Big Rigs and Heavy Equipment
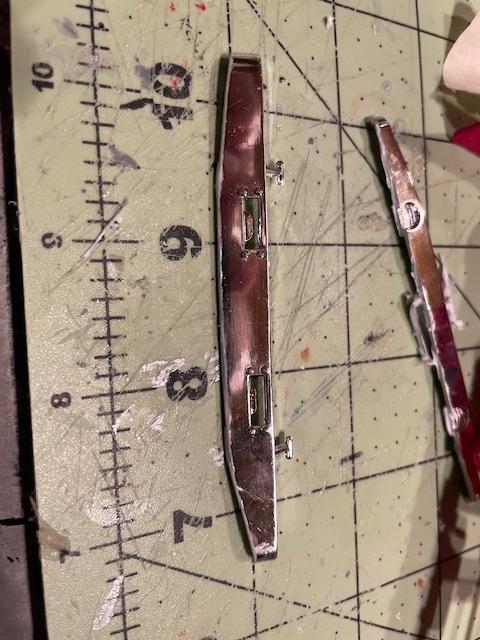
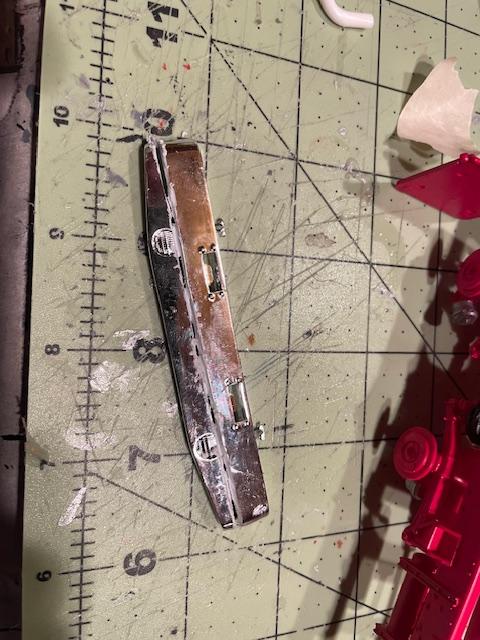
This build is moving right along! I like to think of a model build as a big circle, with lots of smaller sub-assembly circles inside. There's the cab circle, the chassis circle, the interior circle, and more smaller circles inside each of those. As the build moves along, the circles get smaller and smaller until they all finally converge and the project is done. I don't know if this makes any sense, maybe it's just an old man's rambling. Pay it no mind. Anyway, the circles are beginning to converge, and the path to completion is gradually beginning to appear! So, one of those smaller circles, inside the chassis circle, has to do with the bumper. I had set this one aside, a cool old style Peterbilt bumper left over from an old AITM conversion, as it is very period correct and would look awesome with this build: But then I started to wonder: How am I going to hinge the cab for it to tilt? I definitely want this one to tilt to show the engine and all that piping. I didn't have an answer. But then, I found myself looking at one of the chrome sprues, and an idea hit me: More surgery! I never had considered using the kit bumper because it is too tall, older bumpers were much smaller. A lot of the reference photos I had seen showed rigs with smaller versions of the iconic Peterbilt tapered bumper. So, I thought, maybe I can do one of those! I cut the kit bumper straight, just above the fog lights: And then tapered it, using the cut-off part as a template: And then smoothed out the bottom and hit it with some Molotow to restore the chrome: It's a little skinnier than the 1:1 bumpers in the photos, but I think it might work. But I really like the red bumper too. Decisions...
-
Mid 60s Peterbilt Unilite COE
RoninUtah replied to RoninUtah's topic in WIP: Model Trucks: Big Rigs and Heavy Equipment
Thank you, sir! I'm sure you'll do even better on yours! -
Mid 60s Peterbilt Unilite COE
RoninUtah replied to RoninUtah's topic in WIP: Model Trucks: Big Rigs and Heavy Equipment
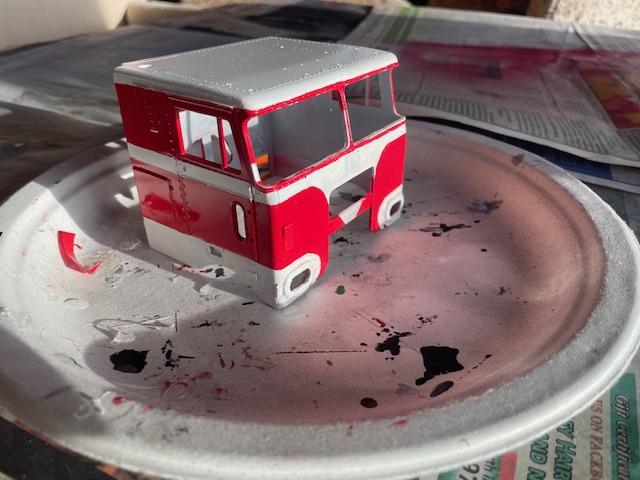
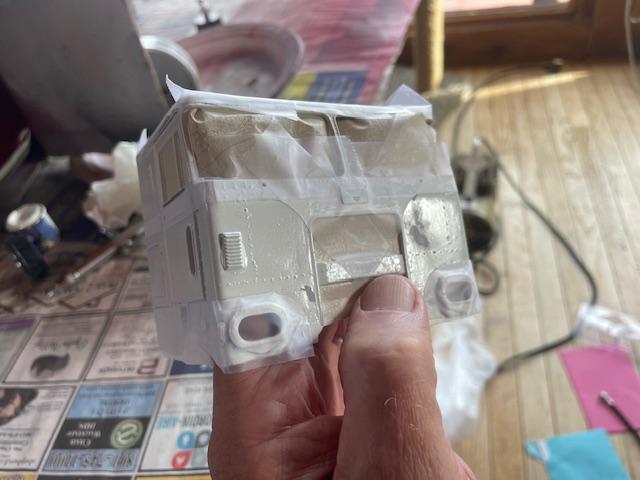
After I touched up both the white and the red paint, I feel a little better. I appreciate the thought, but doing a weathered old truck was never my thing nor was it my vision for this build; I want it to look like a well-taken care of working truck for an owner-operator or small fleet. I think it's actually pretty close now. Maybe another coat of white on the front... you guys tell me what you think!
-
Mid 60s Peterbilt Unilite COE
RoninUtah replied to RoninUtah's topic in WIP: Model Trucks: Big Rigs and Heavy Equipment
Thanks for the vote of confidence, Gary! I'm still not so sure, but I'll be doing something soon... Wish it had come out as clean as Jeff's build! -
The Same but “ a little “ Different
RoninUtah replied to Biggu's topic in WIP: Model Trucks: Big Rigs and Heavy Equipment
That’s looking amazing so far! You’re way ahead of me, keep it up! -
The Same but “ a little “ Different
RoninUtah replied to Biggu's topic in WIP: Model Trucks: Big Rigs and Heavy Equipment
Well, I'd say that turned out very nice! Certainly better than mine did, but that's typical for your entire build! Looks like our color schemes are similar, although with different colors. How do you plan to use the toothpaste? -
Mid 60s Peterbilt Unilite COE
RoninUtah replied to RoninUtah's topic in WIP: Model Trucks: Big Rigs and Heavy Equipment
Thanks, Sean, I checked out your Astro thread, looks like you saved that one nicely! I hope I have similar luck. -
Mid 60s Peterbilt Unilite COE
RoninUtah replied to RoninUtah's topic in WIP: Model Trucks: Big Rigs and Heavy Equipment
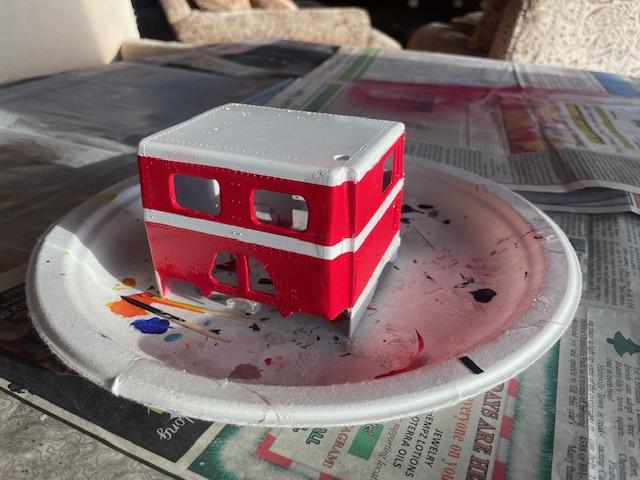
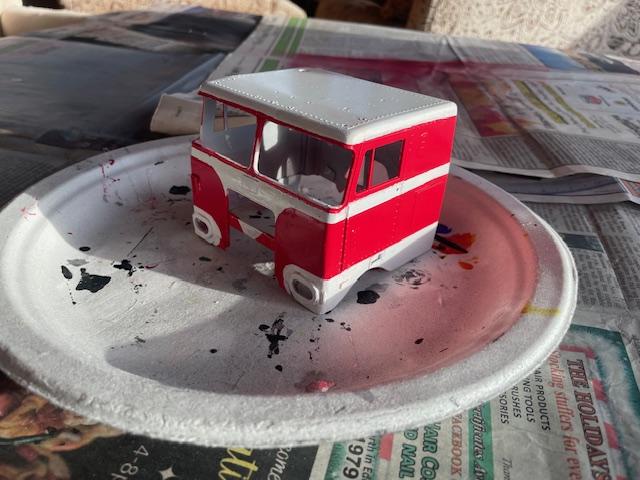
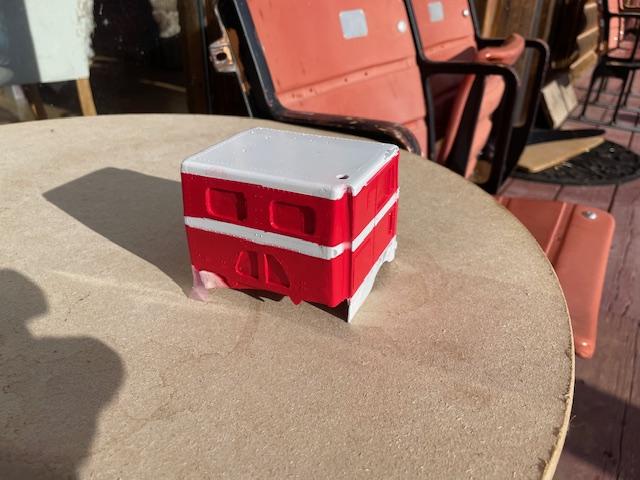
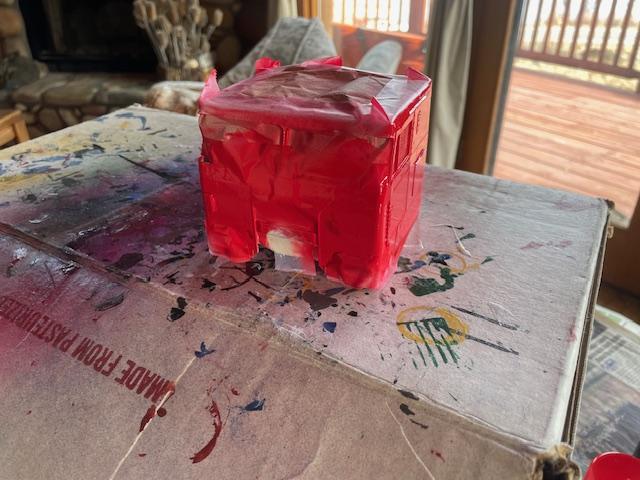
Thanks for all the supportive comments and advice, it is very much appreciated! Well, here is the grand unmasking! As you can see, there was some lift-off of the white, as I feared, as well as the usual (at least for me) bleed-through and misaligned masks. You can still see those blemishes in the red paint, but they're hardly visible. I'll probably hit them with a brush, at least the ones on the doors where you won't see the brush strokes as much. As for the white, I'll touch that up as best I can with a brush; I've got some Revell white paint that hopefully is opaque enough to do the trick. That's my best hope to salvage this thing. So, in all, it's far from perfect, but it could be much worse. I hope I can pull it out; to me, dunking it in stripper and starting over from scratch is always a last resort.
-
Mid 60s Peterbilt Unilite COE
RoninUtah replied to RoninUtah's topic in WIP: Model Trucks: Big Rigs and Heavy Equipment
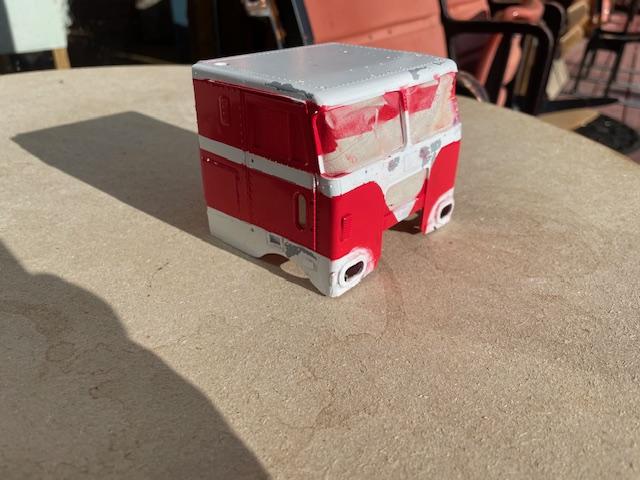
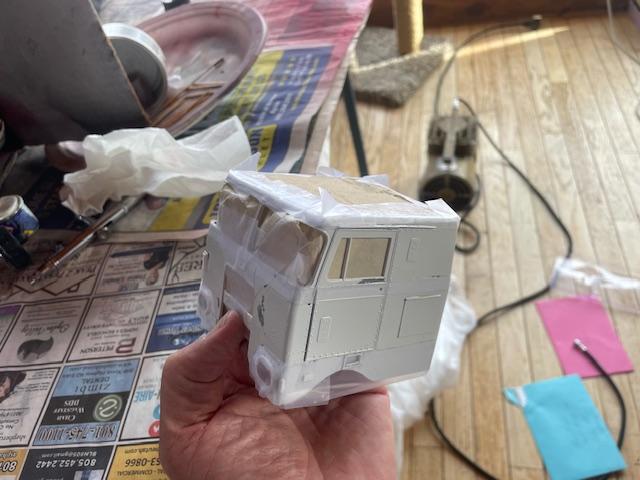
Thanks for all the kind comments thus far! But I think now you all will see me for the rank amateur I really am... painting, where the rubber meets the road, so to speak. I've had good luck in the past using Scotch Magic Tape for masking: It's thin, flexible, transparent, and it hugs tight; also, it's easy to trim to exact shapes with a razor blade. So, I thought I'd try it on this build; I use kraft paper to cover and block out larger areas. That little blemish you see above the left headlight is where I sanded down a high spot; I didn't want to repaint the white over that spot, figuring that the red will hide it. Also, when I pulled away the excess tape after trimming it, it pulled off some of the white, as you can see on the door. Again, that area will be red, though. But still, it's not a good sign of things to come! After shooting the red paint, the blemishes still show through. I'll wait a couple of hours and hit it with another coat to see if that helps, or I can brush it with unthinned paint after it dries. But frankly, right now this is looking like it's going to be a disaster. We'll see whether I can salvage it when I pull the masks off. BTW, I use enamel paints; the white is Tamiya from a rattle can, and the red is Testors from the tiny bottle, thinned down with regular paint thinner. I've never had good luck with acrylics, and once I ruined a good airbrush shooting acrylic when it started to set up too fast and clogged the airbrush. I usually give enamel about 72 hours to dry before messing with it; I've never thought that waiting for weeks or months for it to fully cure made sense, especially since I don't polish my models. Perhaps I've been wrong about that. But patience was never my strong suit. Anyway, my fingers are crossed hoping that this won't be a total disaster and that I'll somehow be able to pull it off. But right now, I'm not optimistic.
-
Beautifully done! When I was growing up in San Francisco in the 50's and 60's, my father had a record shop on Powell Street, and so those cable cars were part of my everyday life back then. Later in life, I lived on Nob Hill and the California Street Cable Car was my twice-daily commute. I got to know all the crews, it usually was the highlight of my day. These look look like they perfectly replicate modern-day Powell St. cable cars, down to every detail and nuance. Incredible! Maybe you should go back into history and do a Jones Street Shuttle! Well done, thanks for the memories they evoke.