Duddly01
-
Posts
1,048 -
Joined
-
Last visited
Content Type
Profiles
Forums
Events
Gallery
Everything posted by Duddly01
-
Thank you!
-
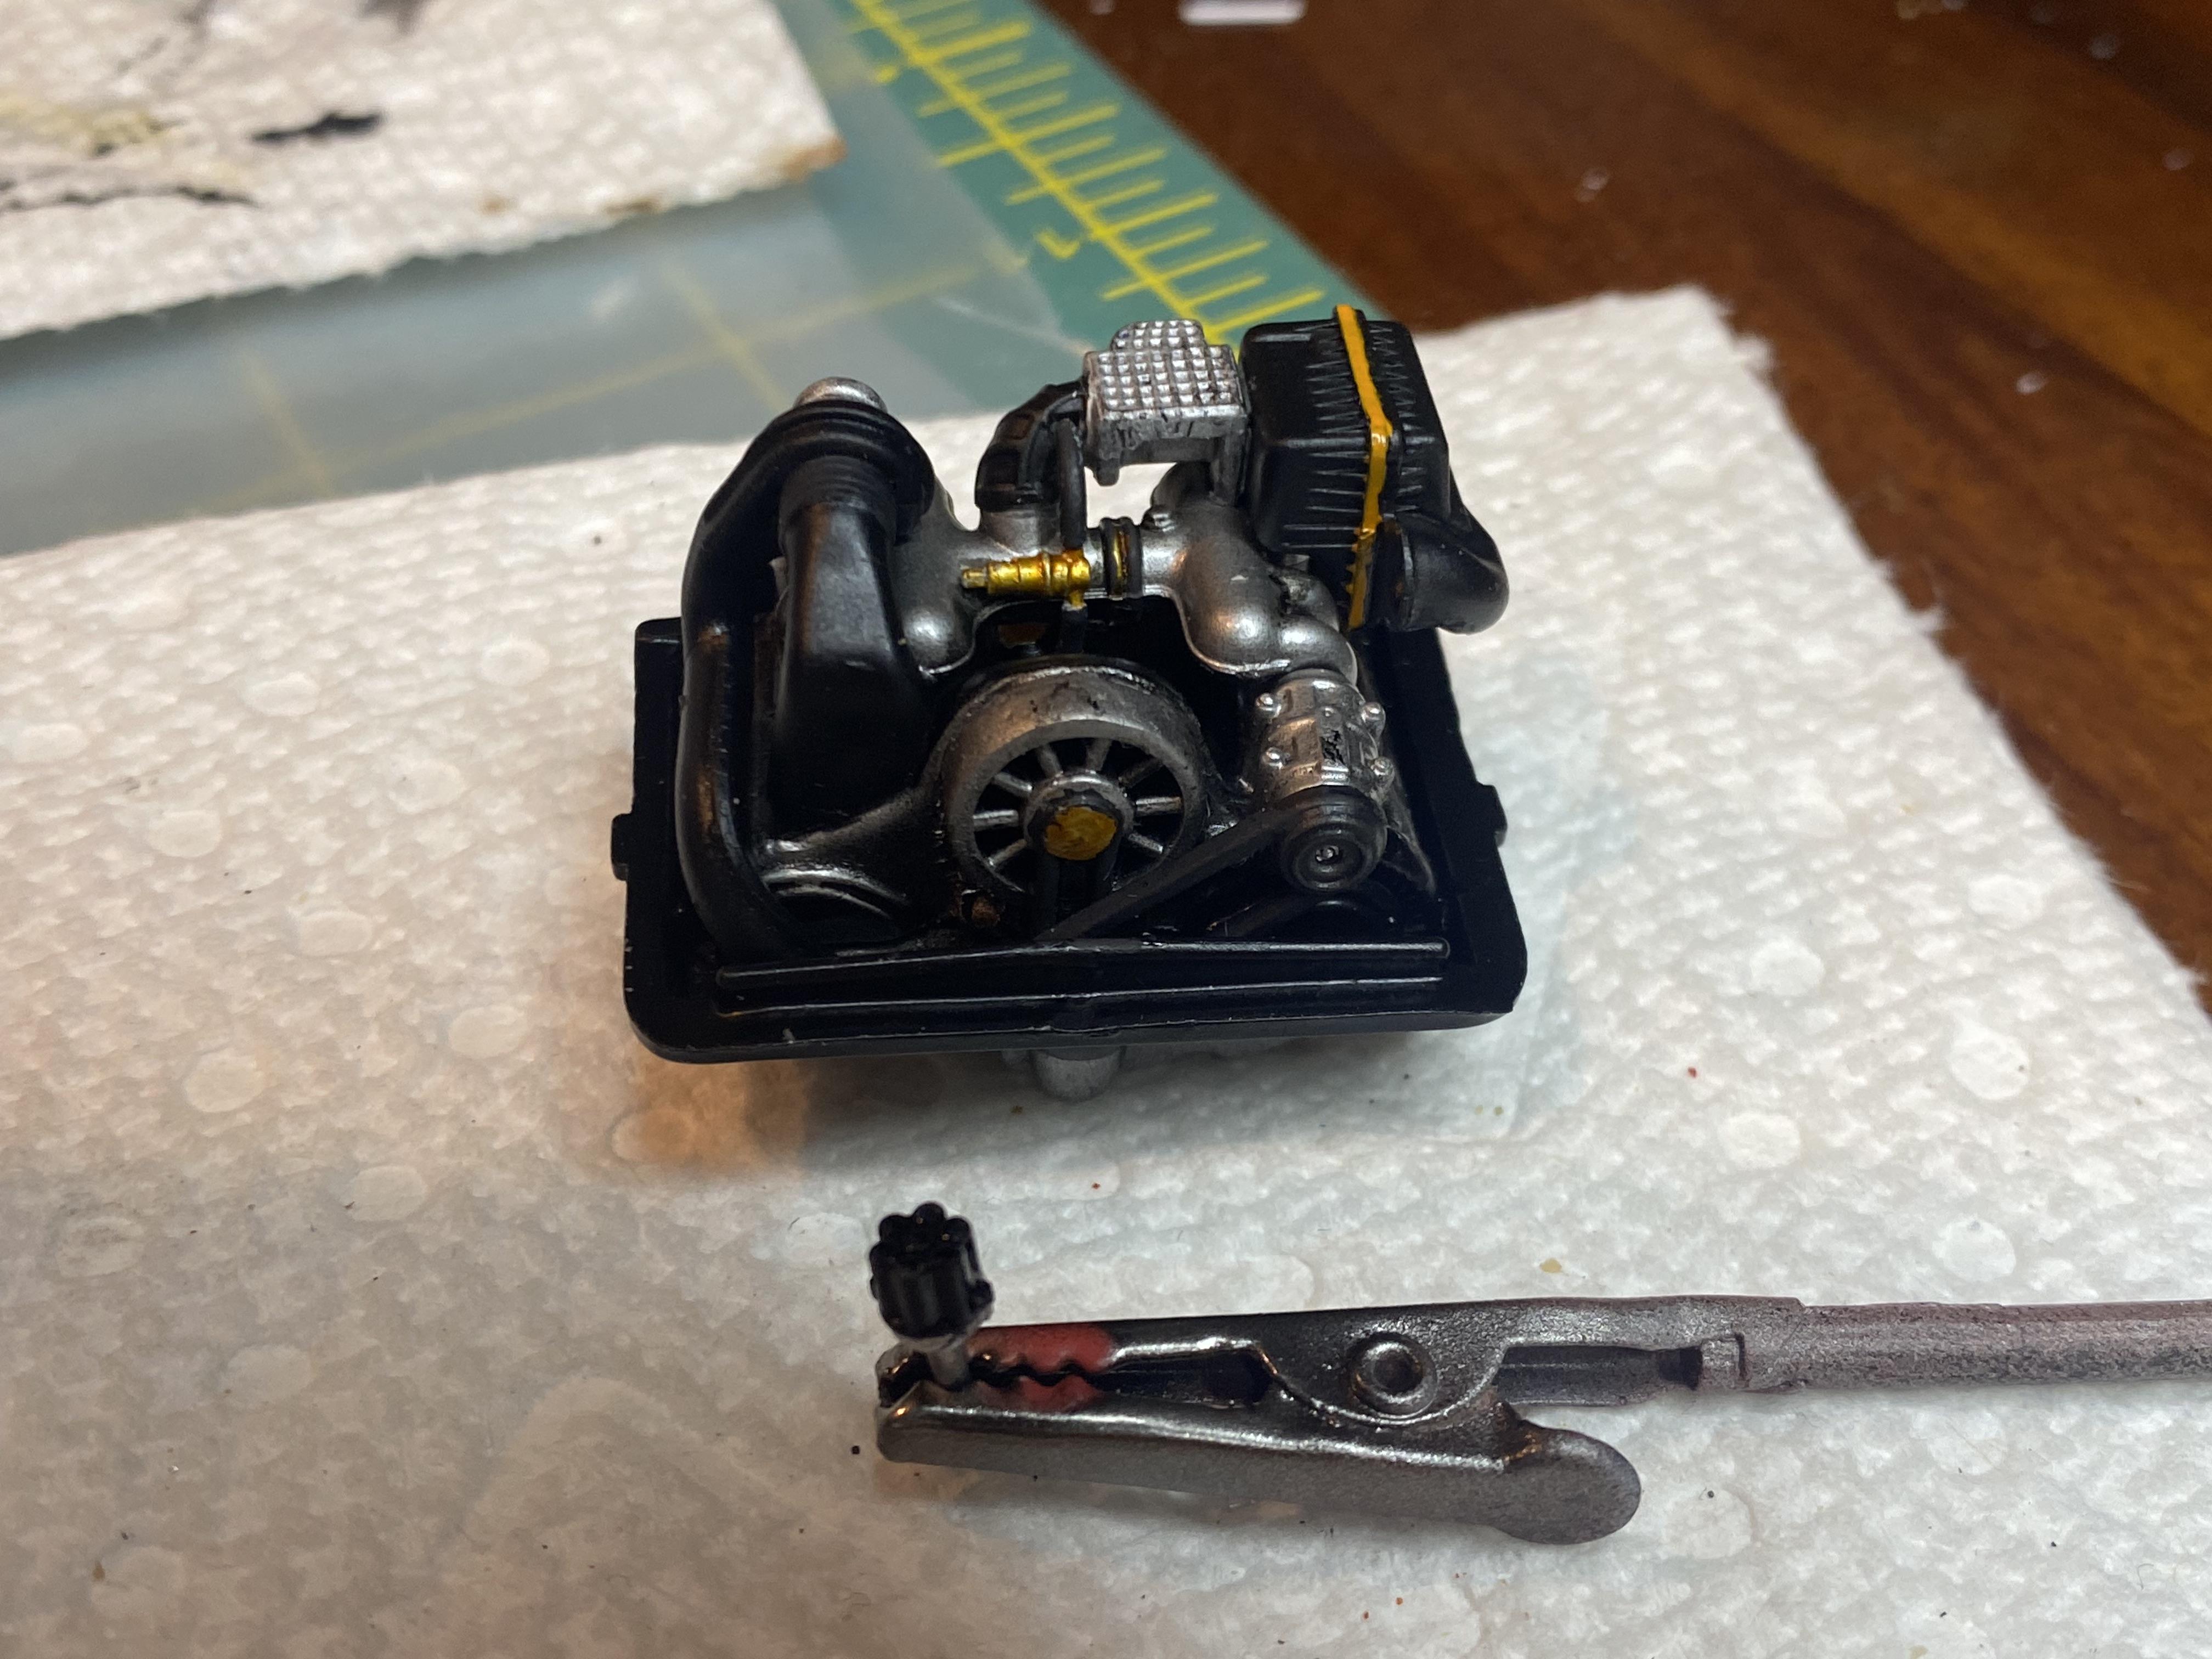
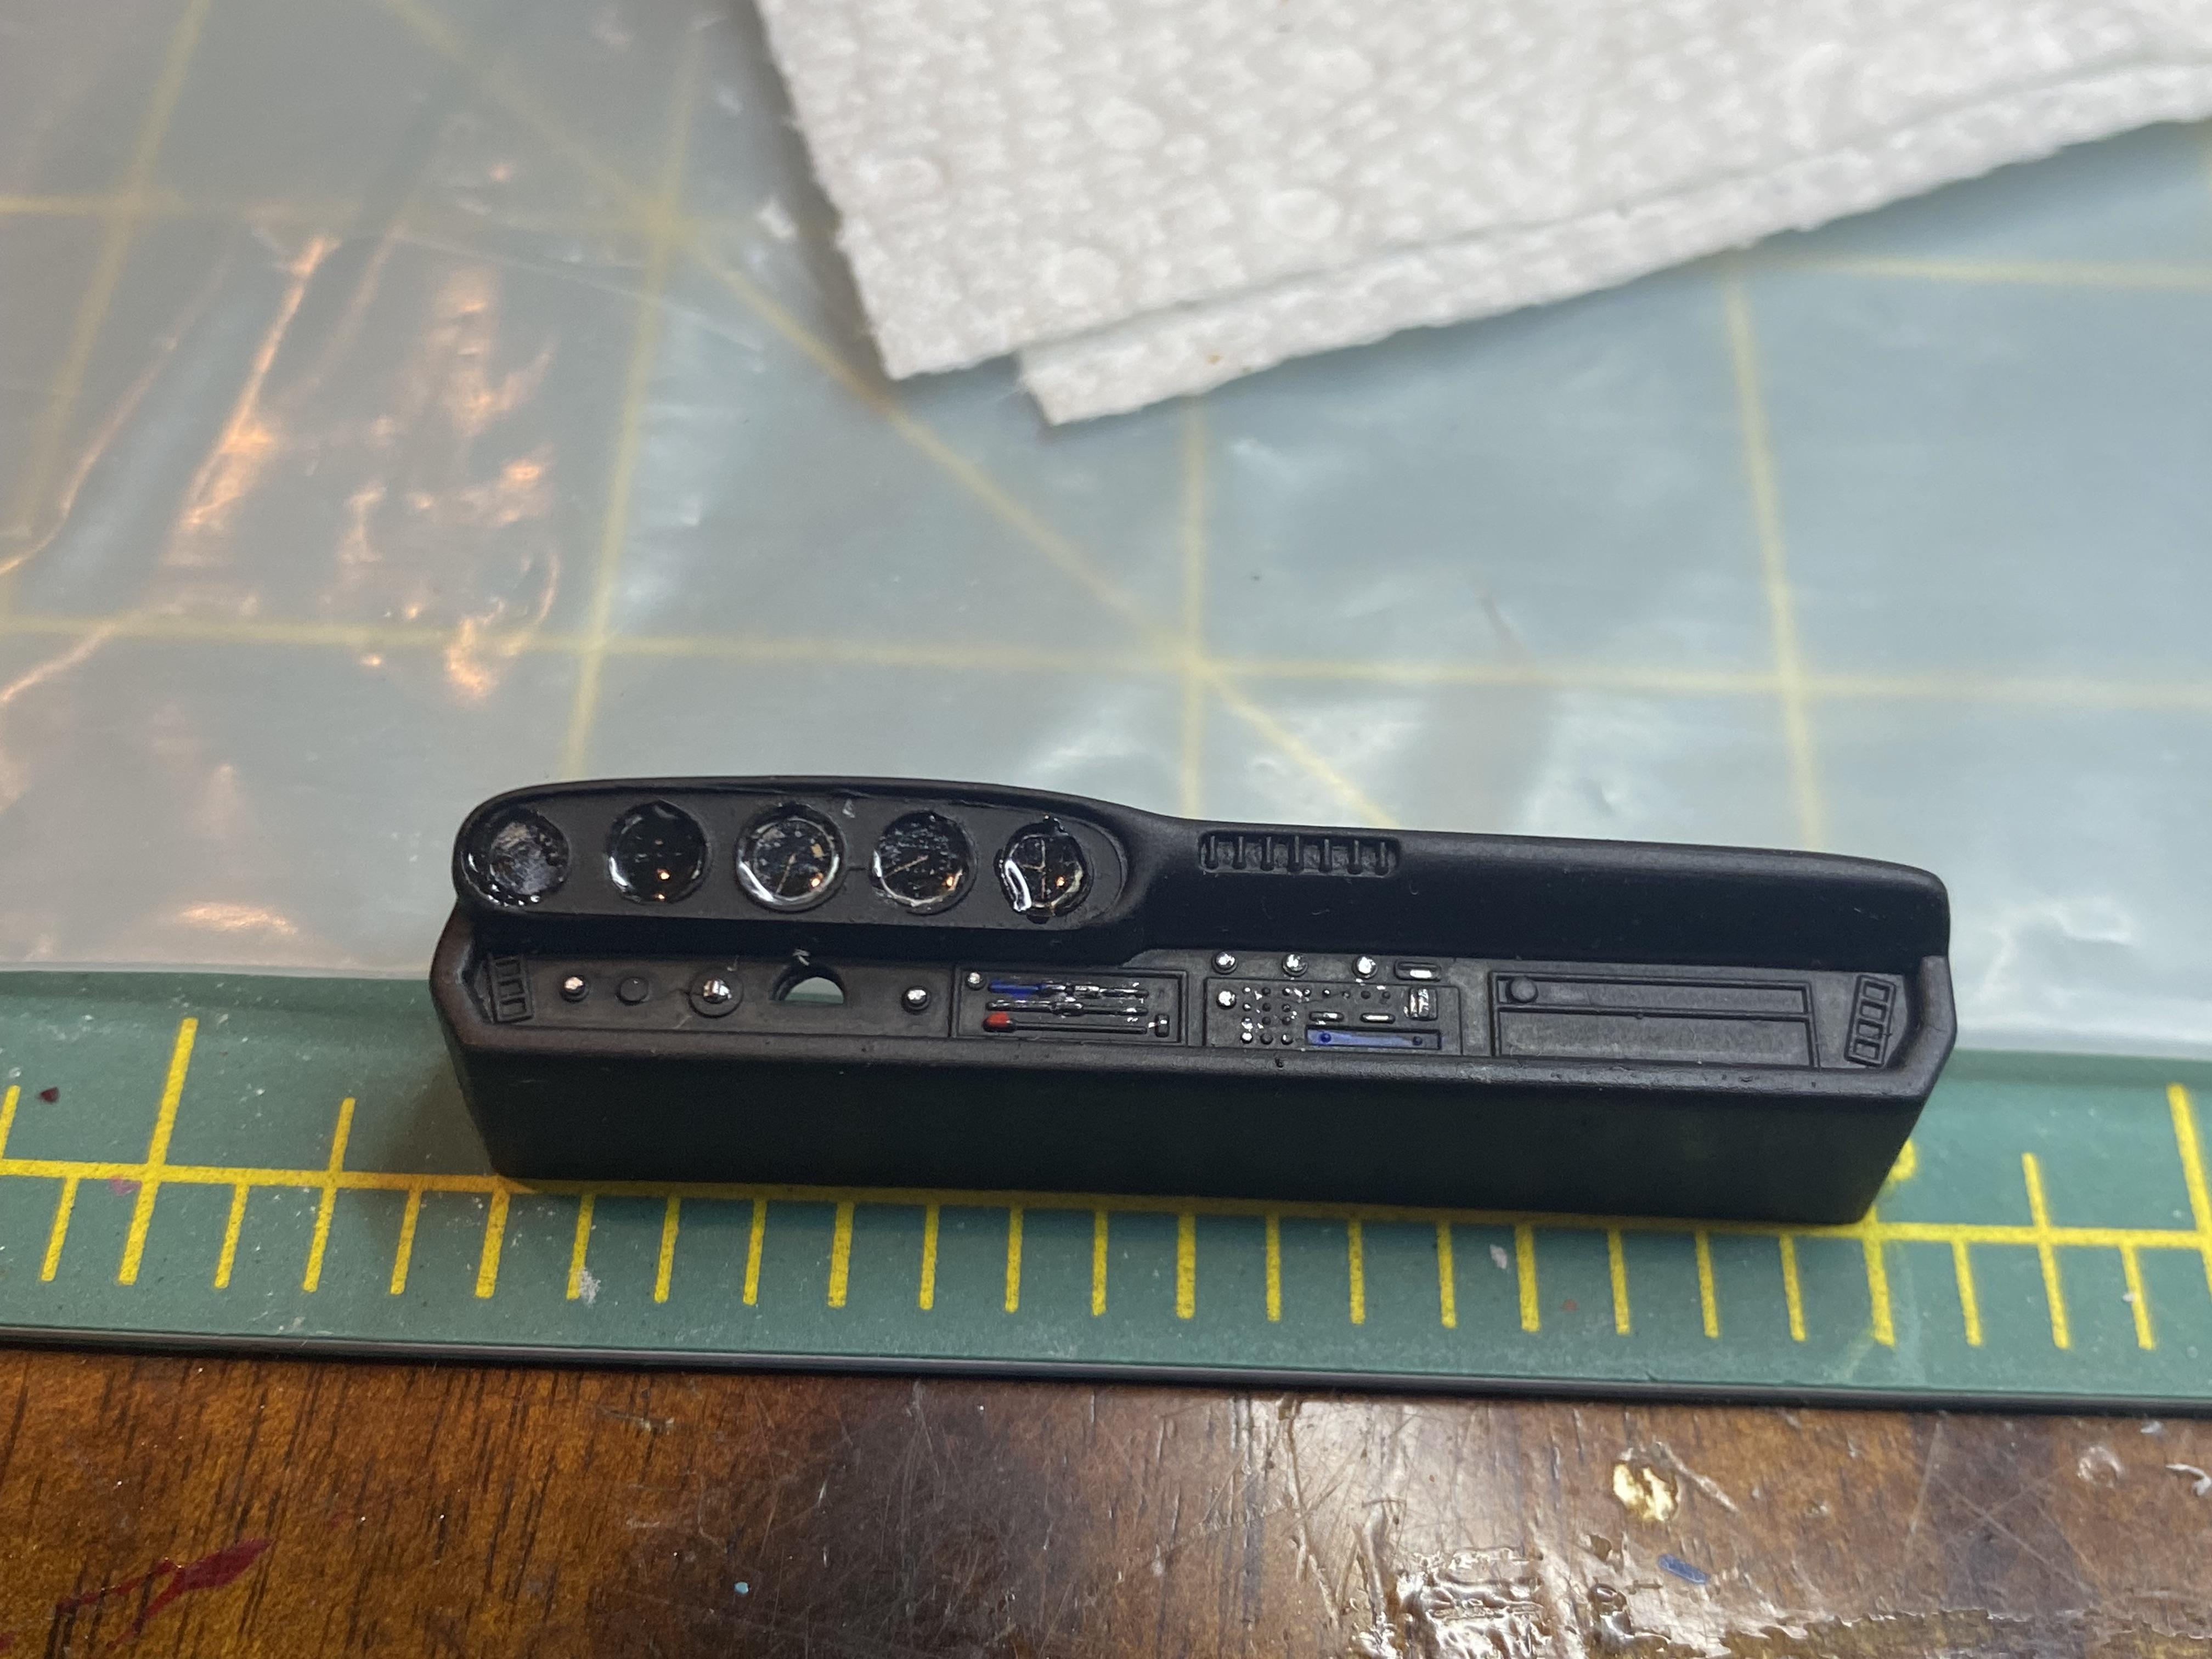
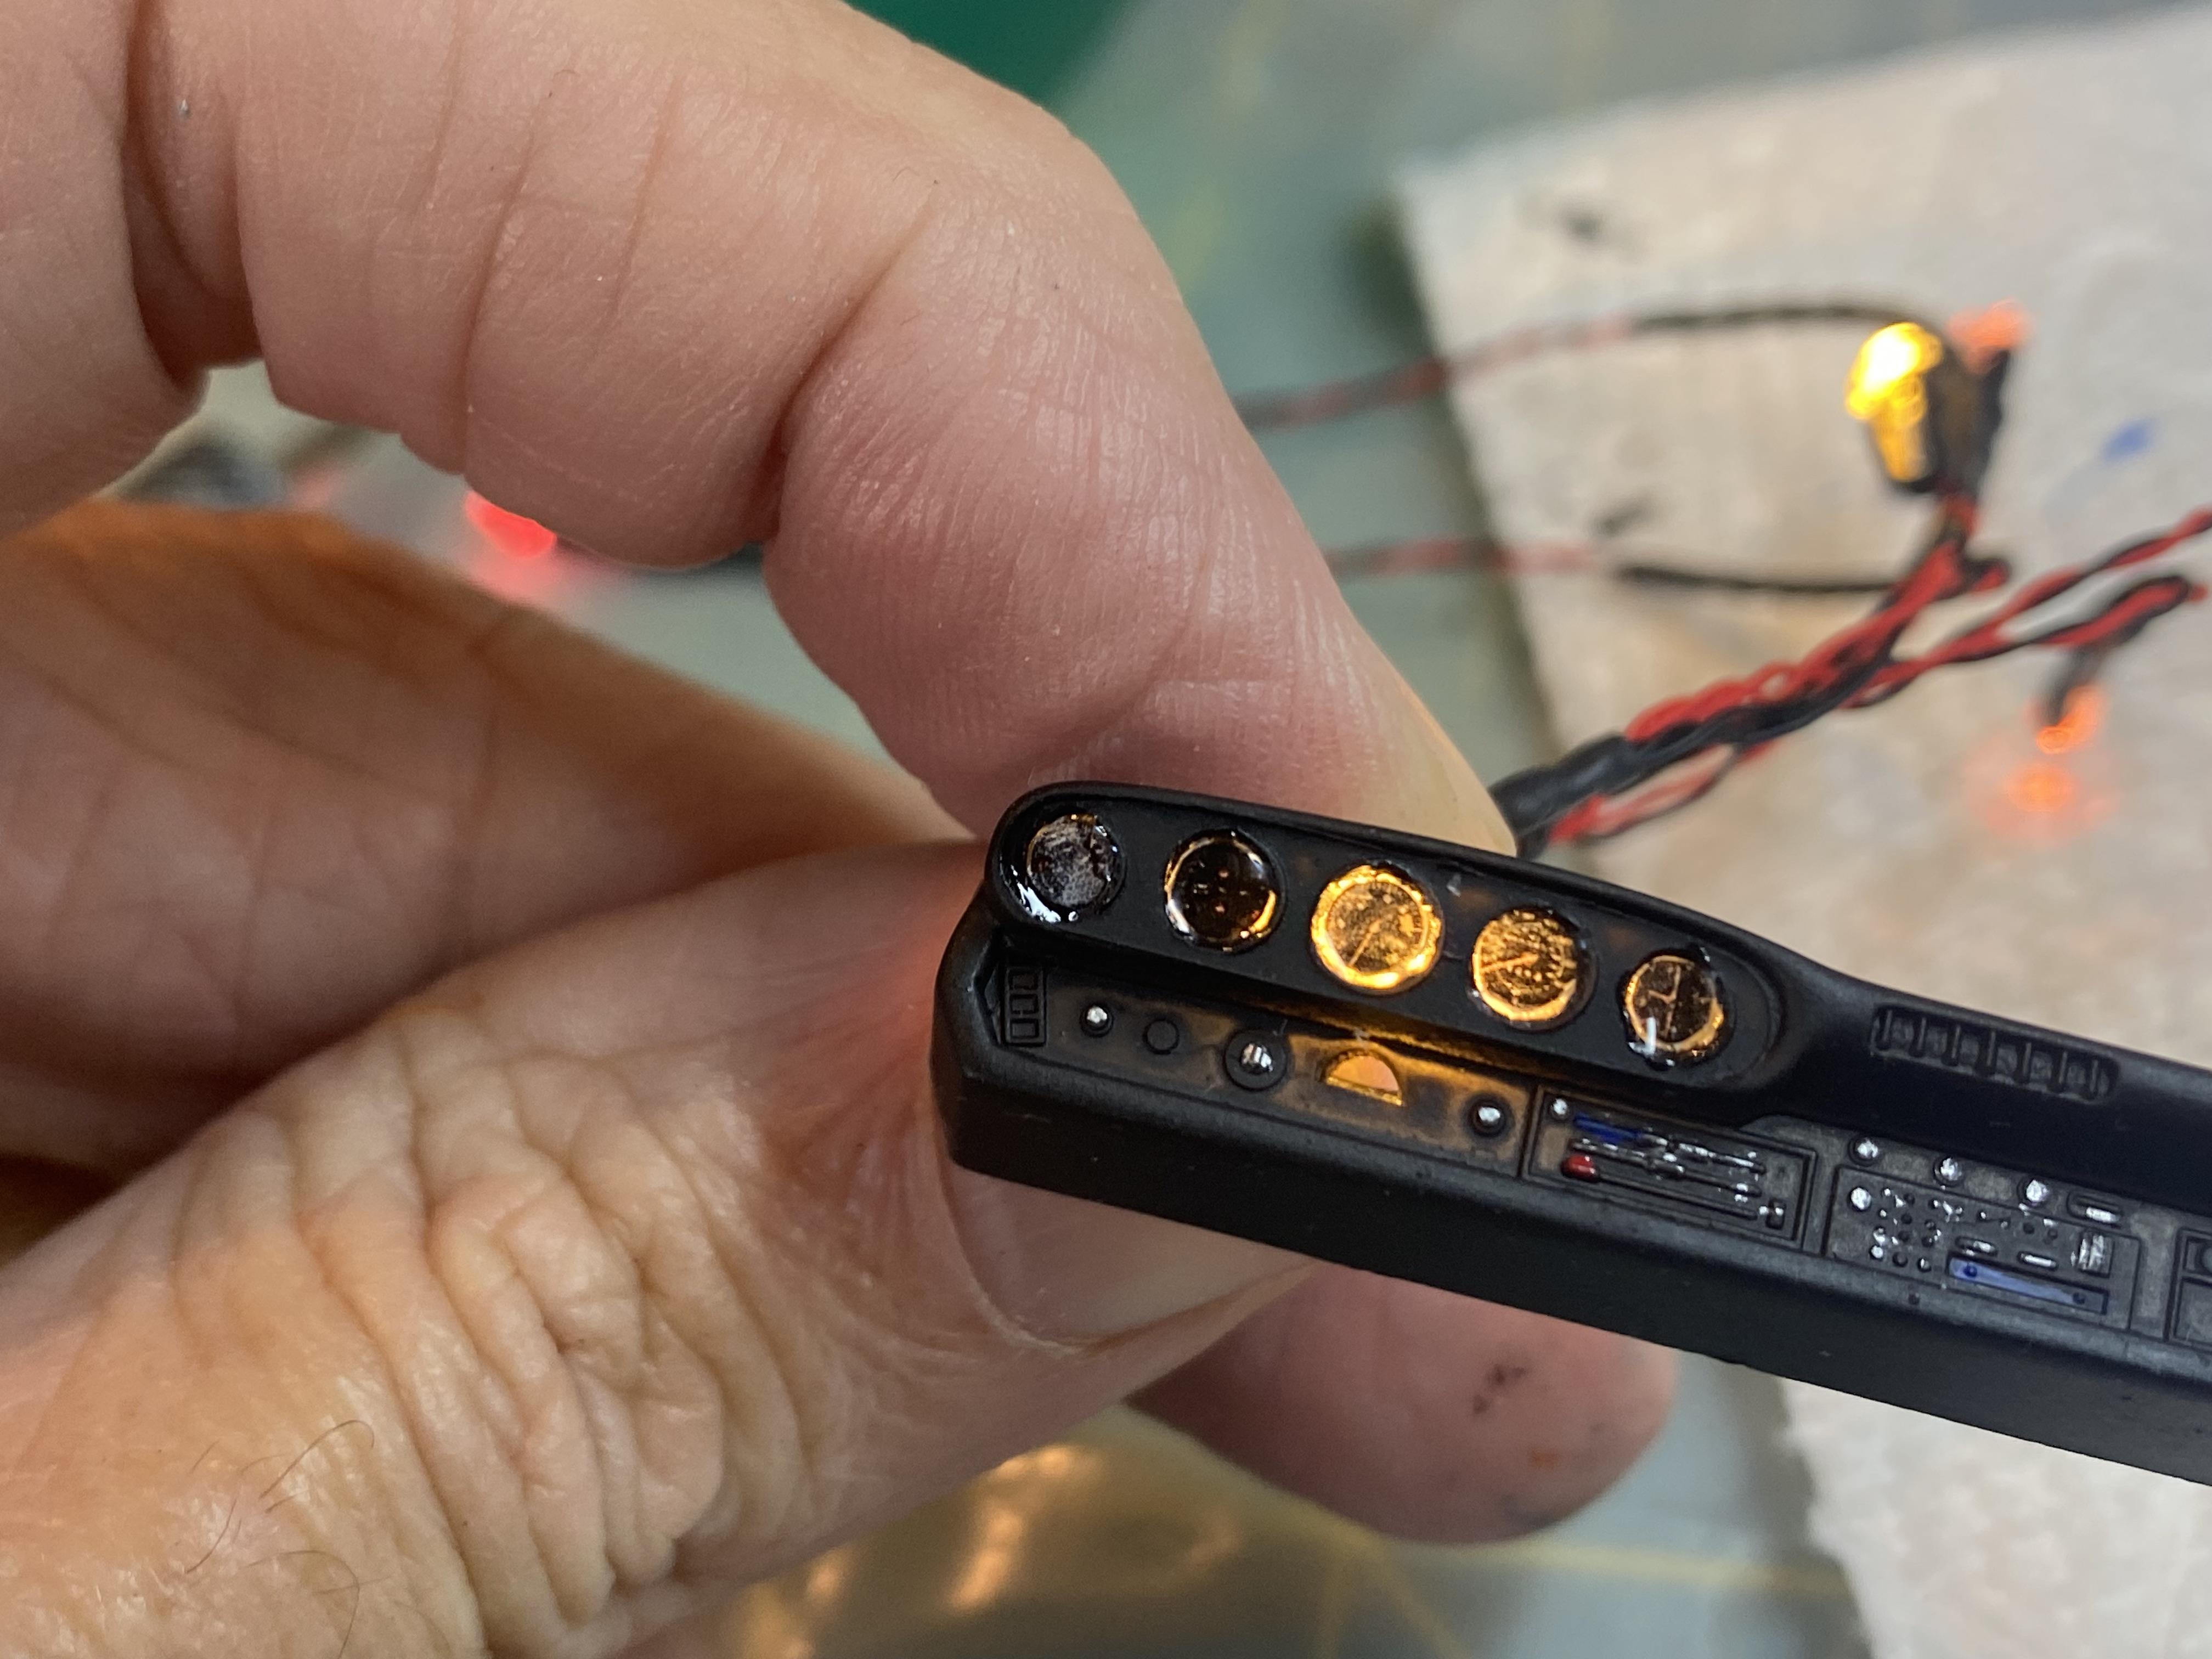
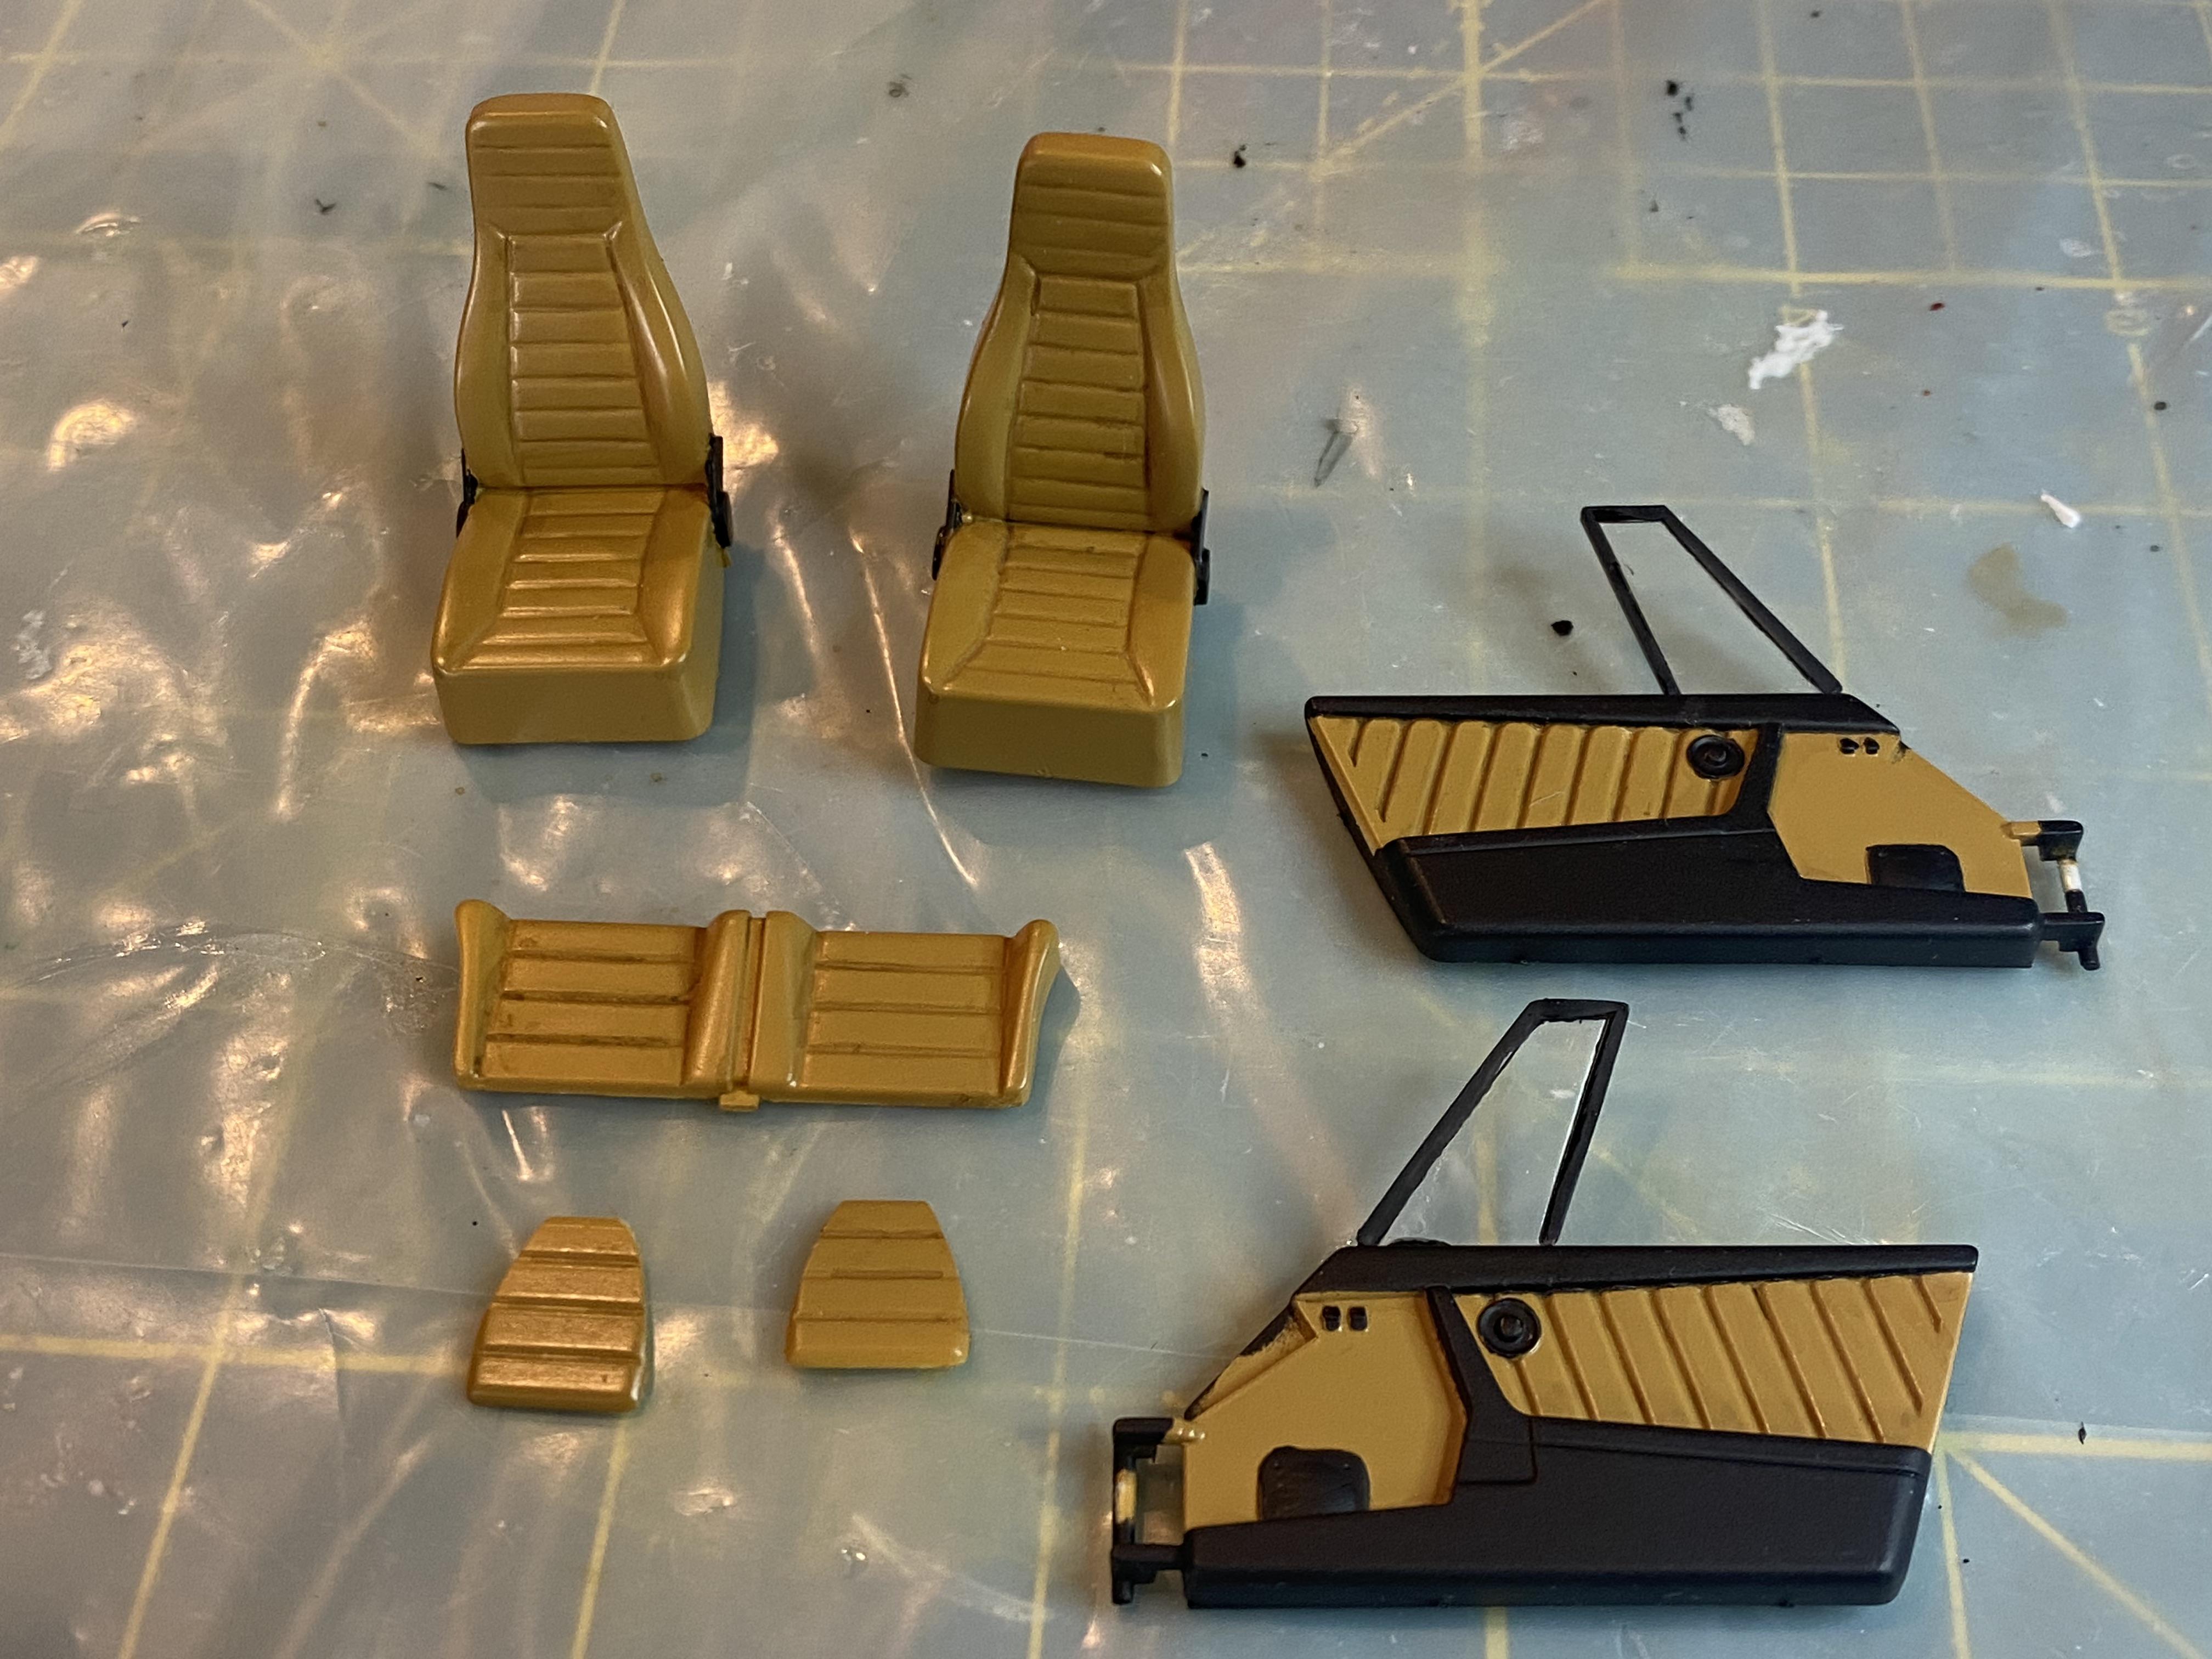
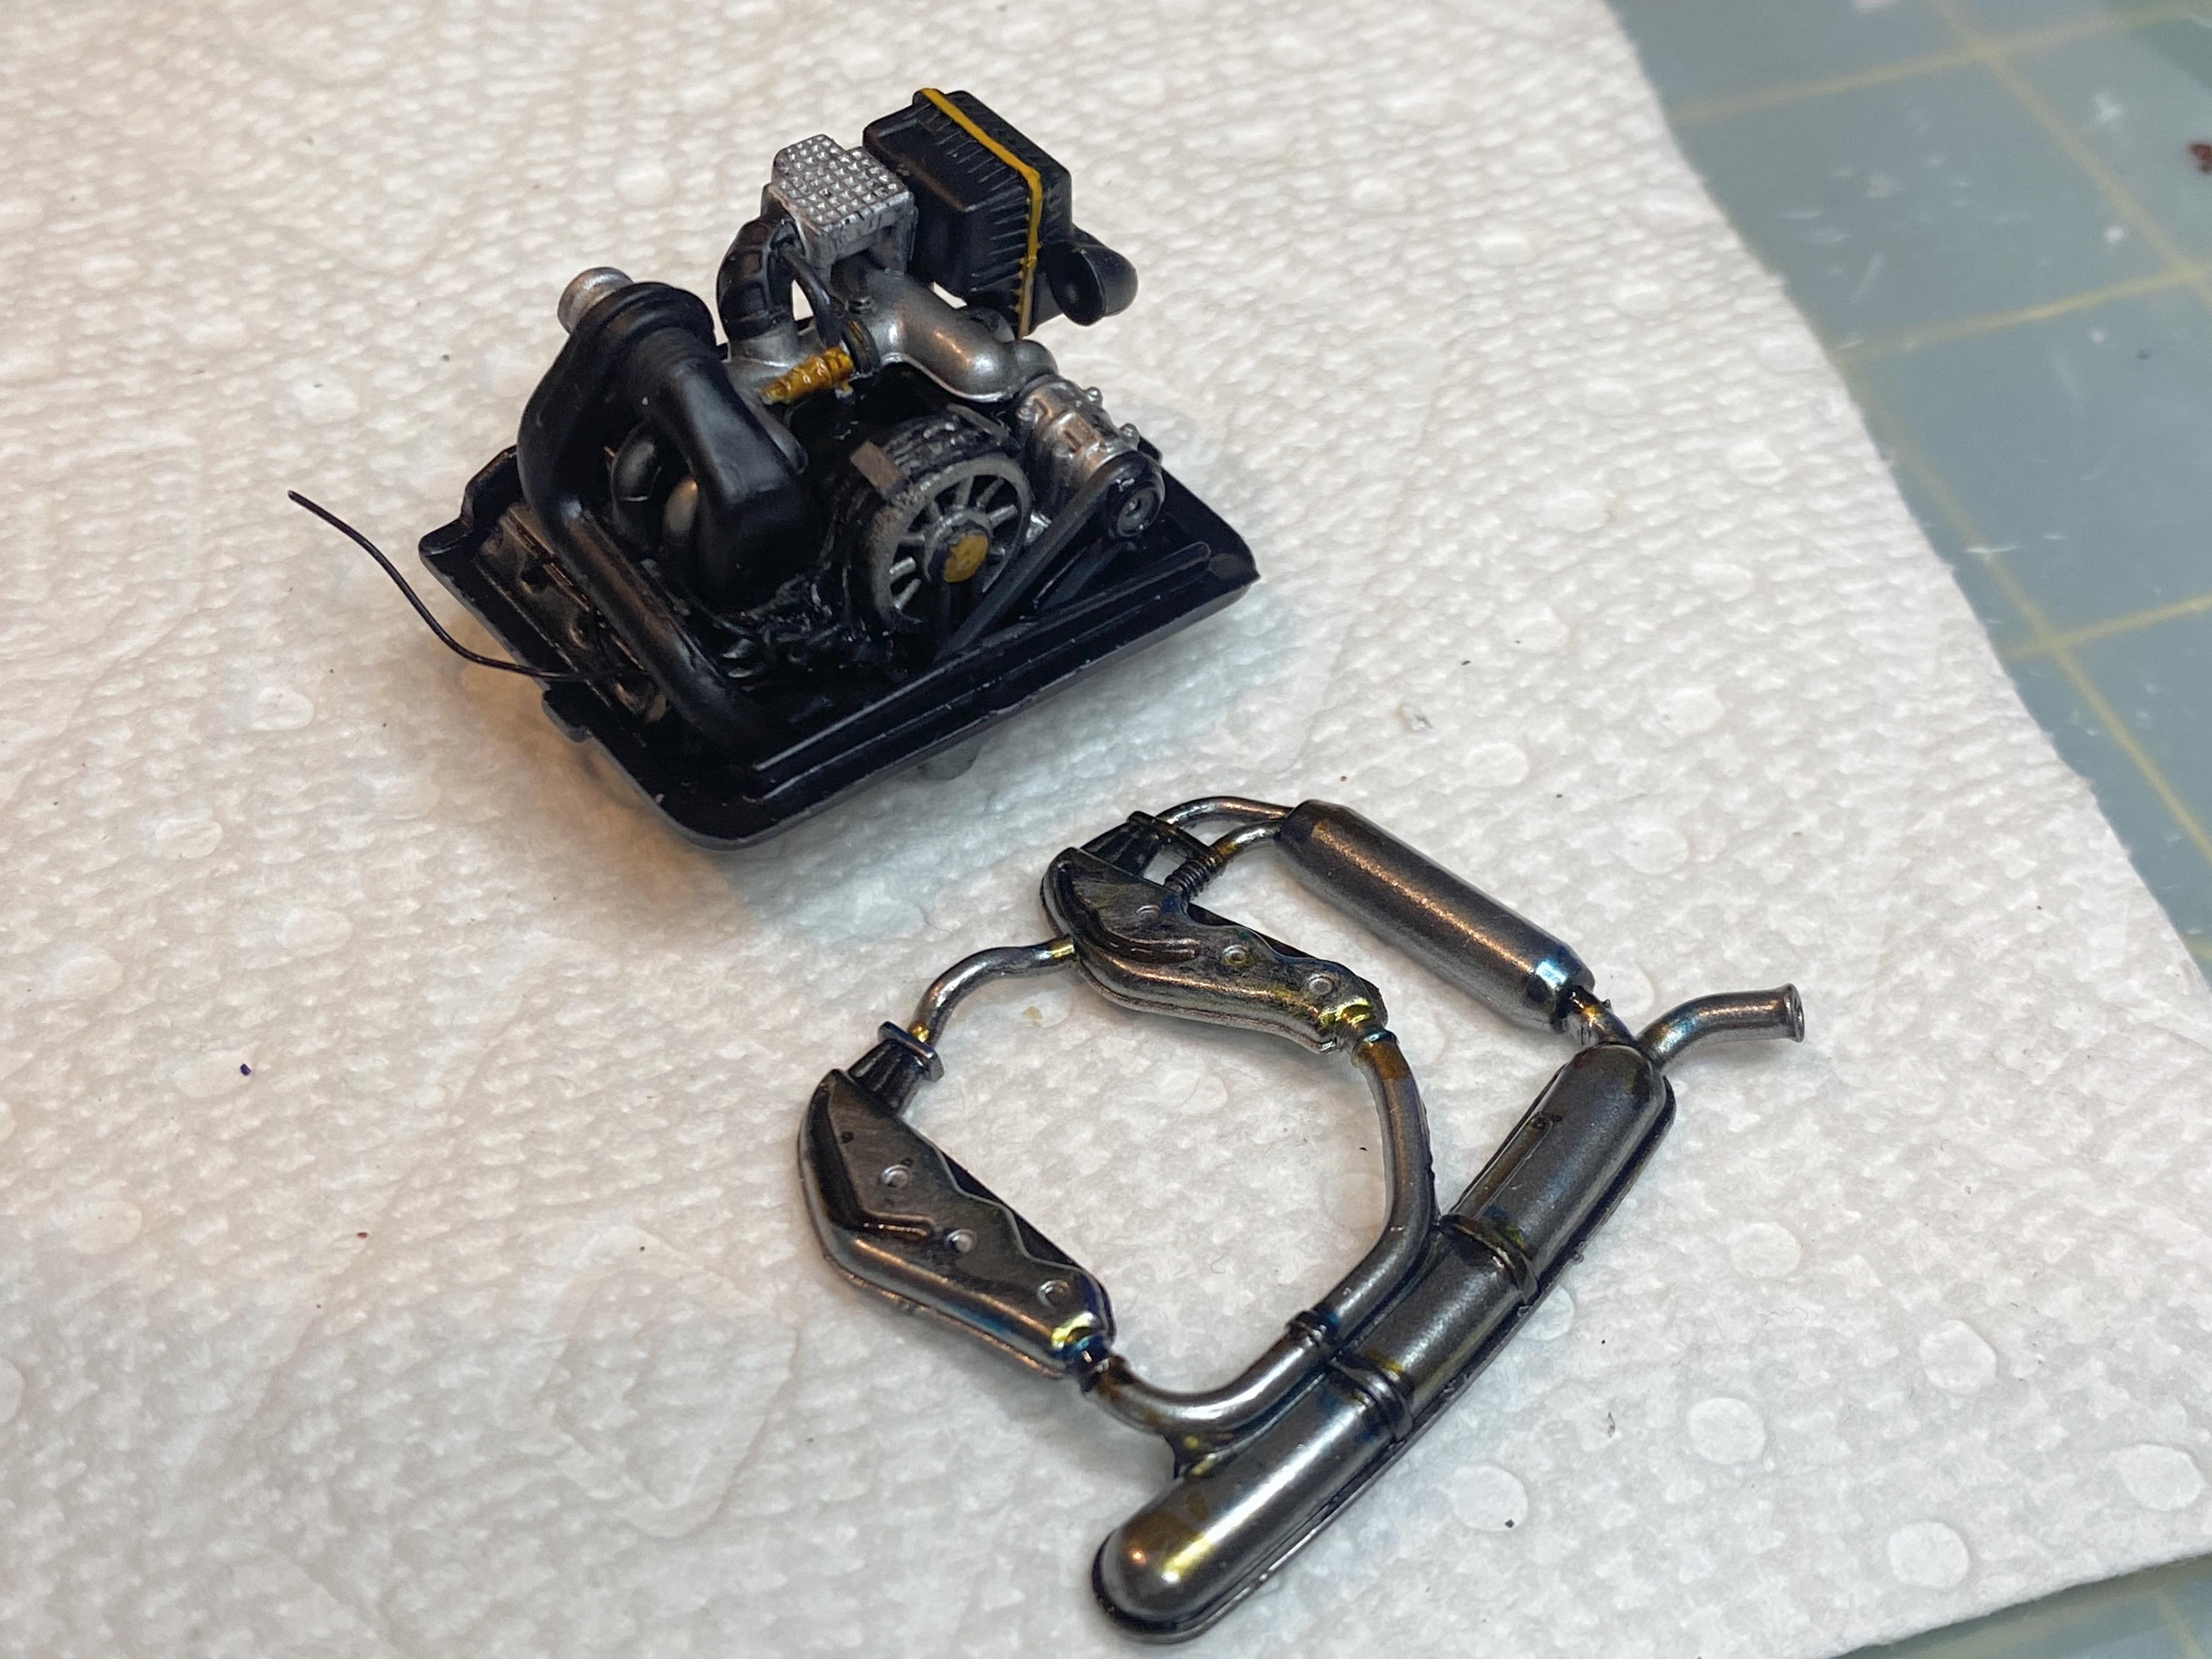
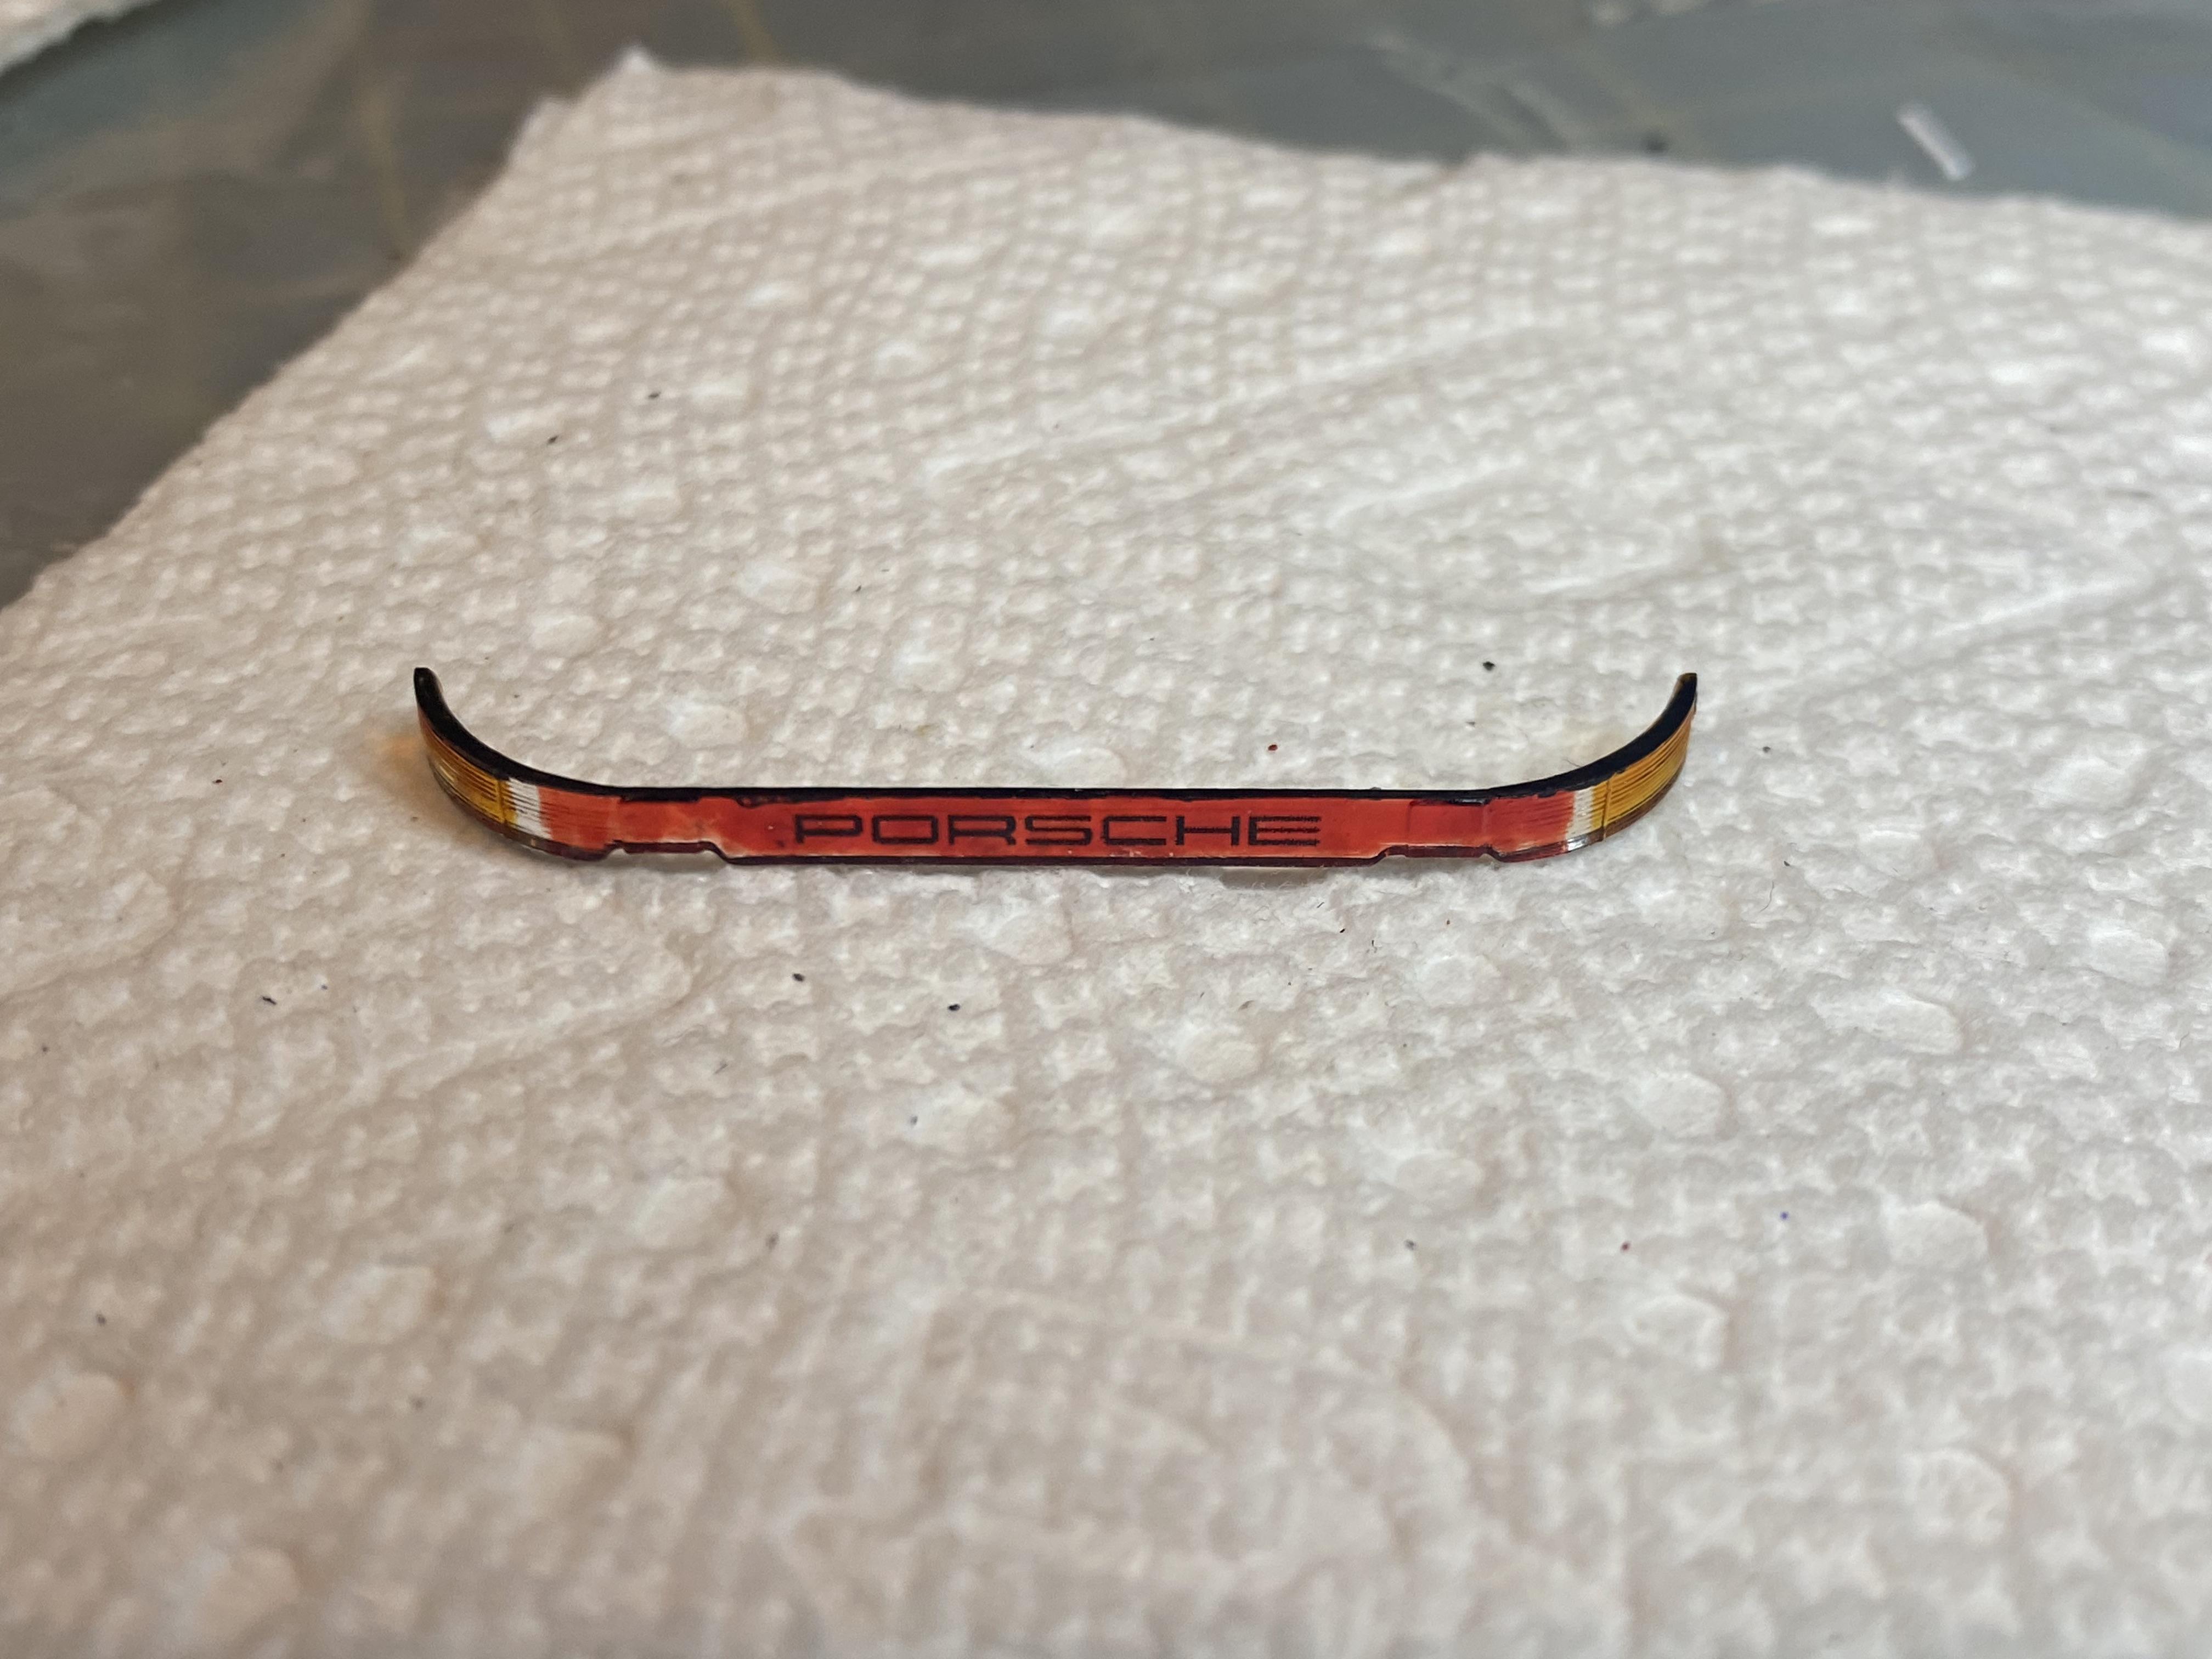
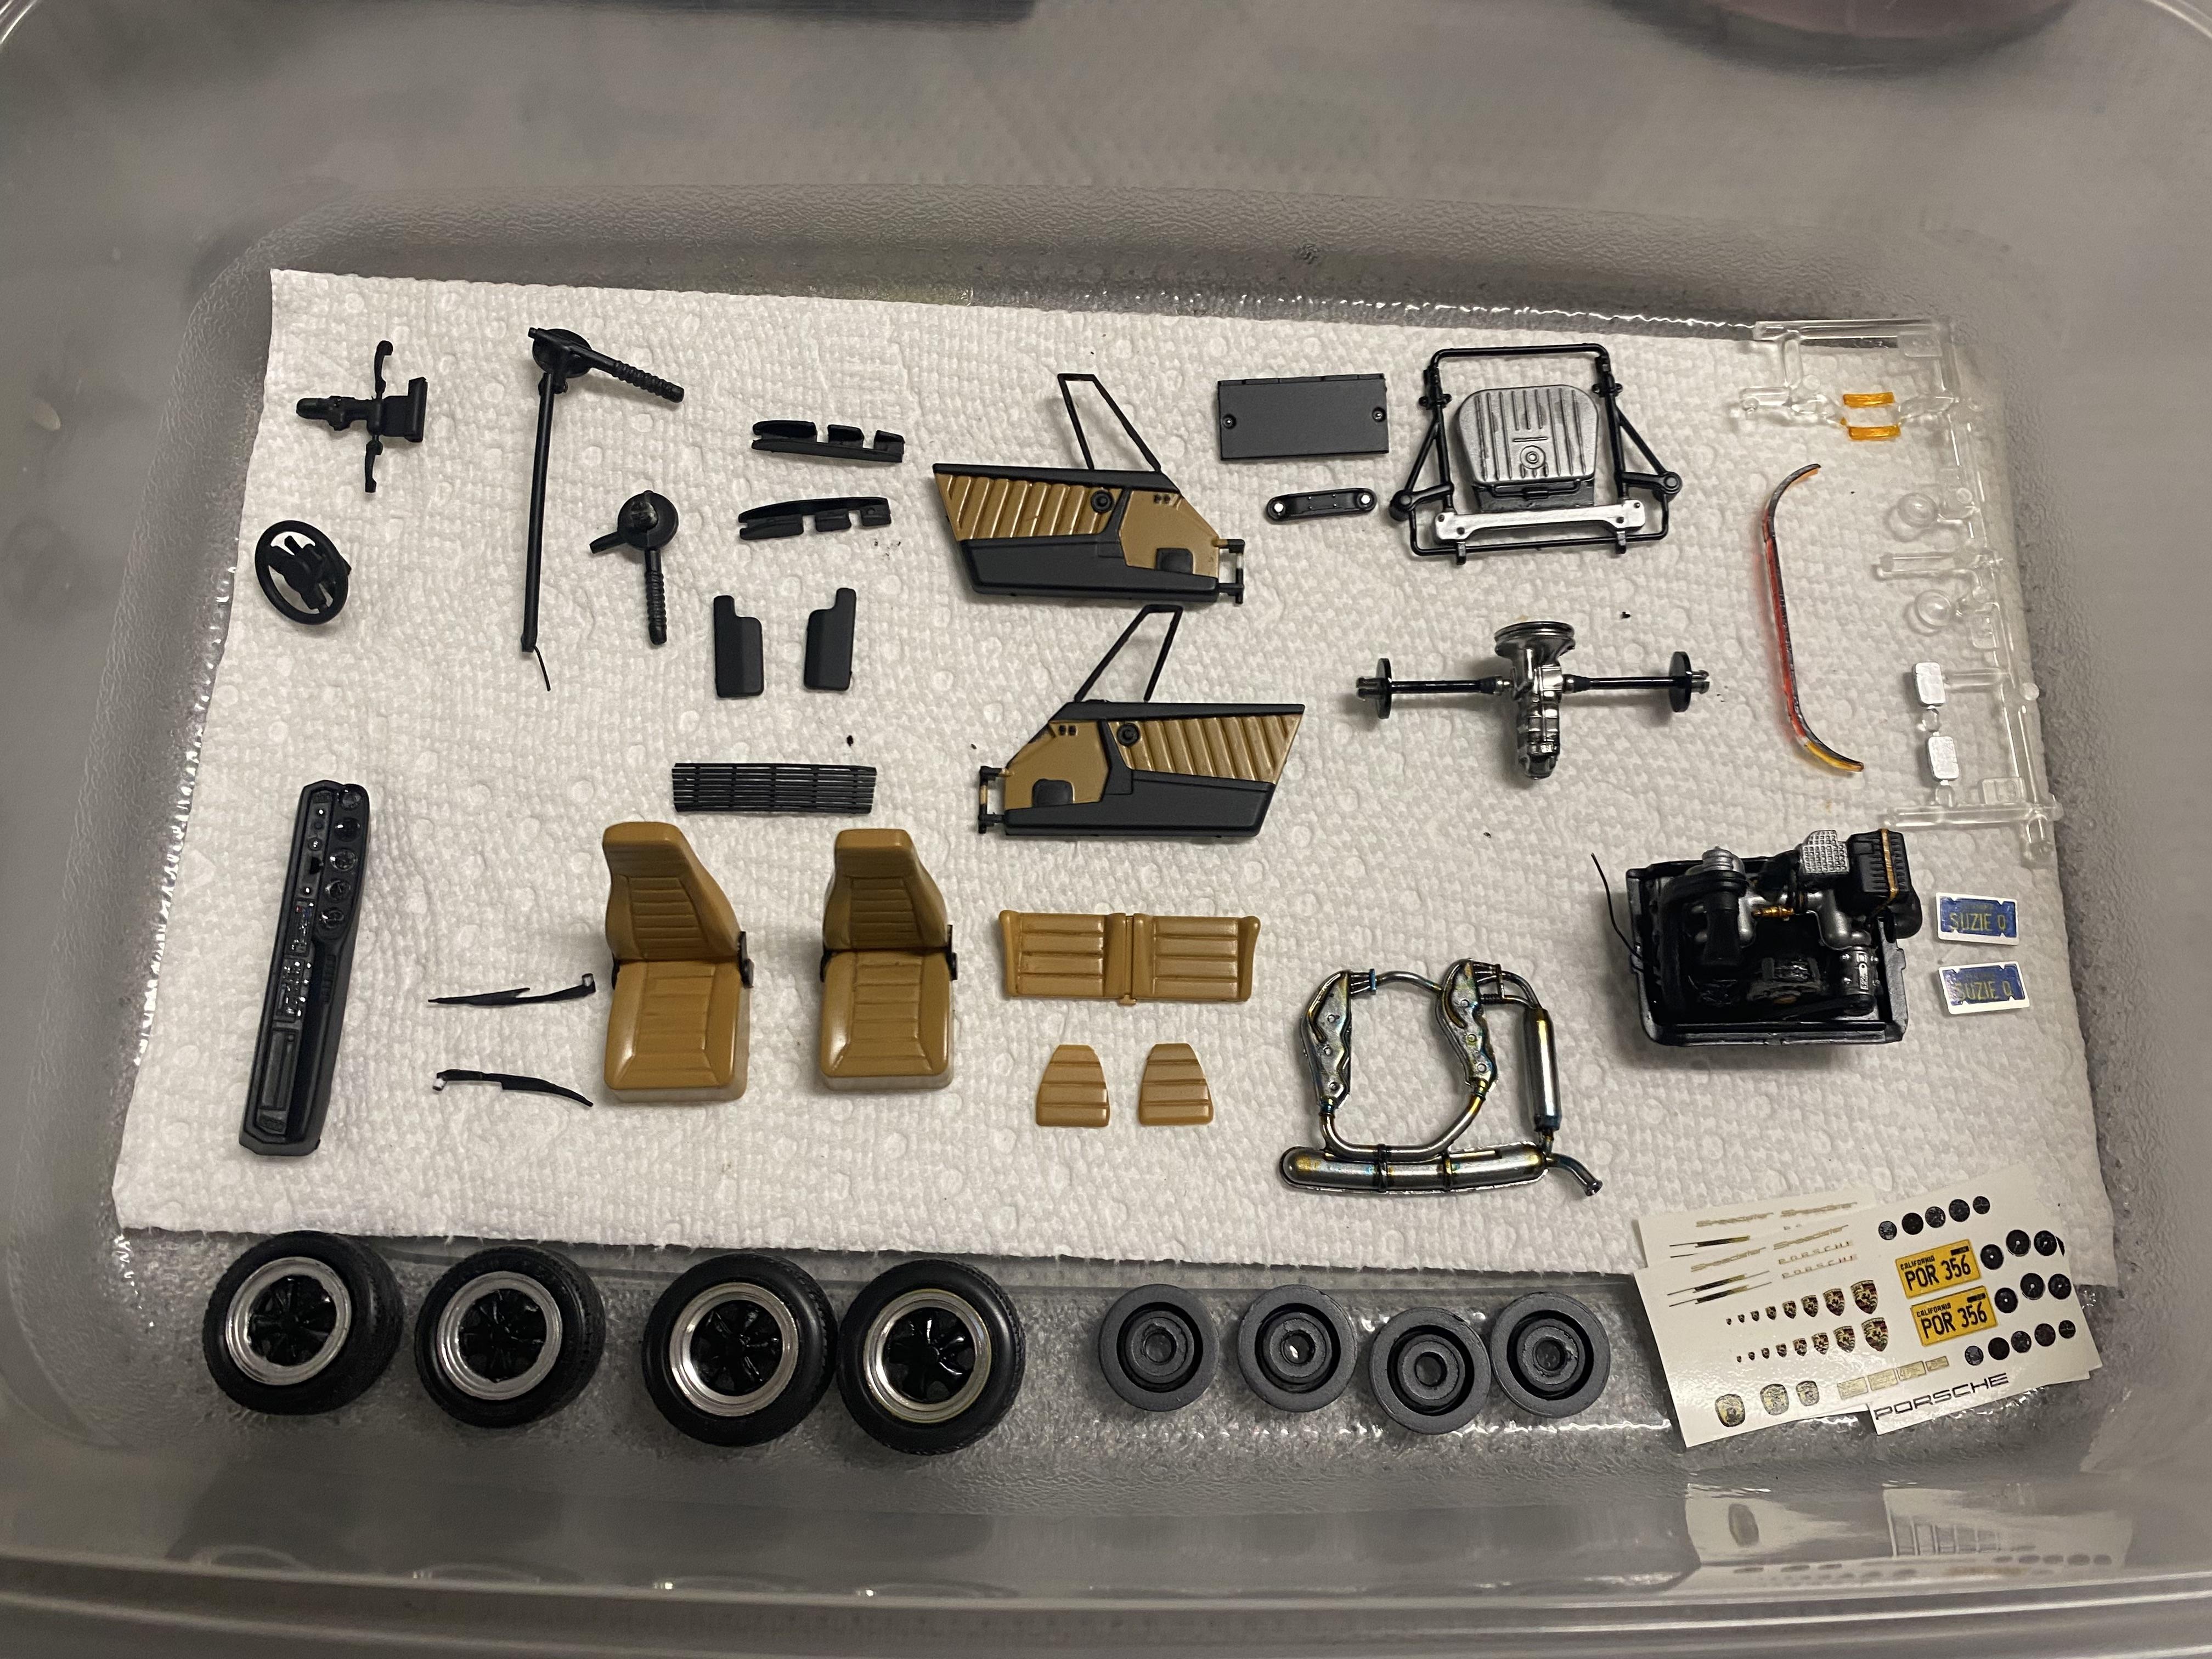
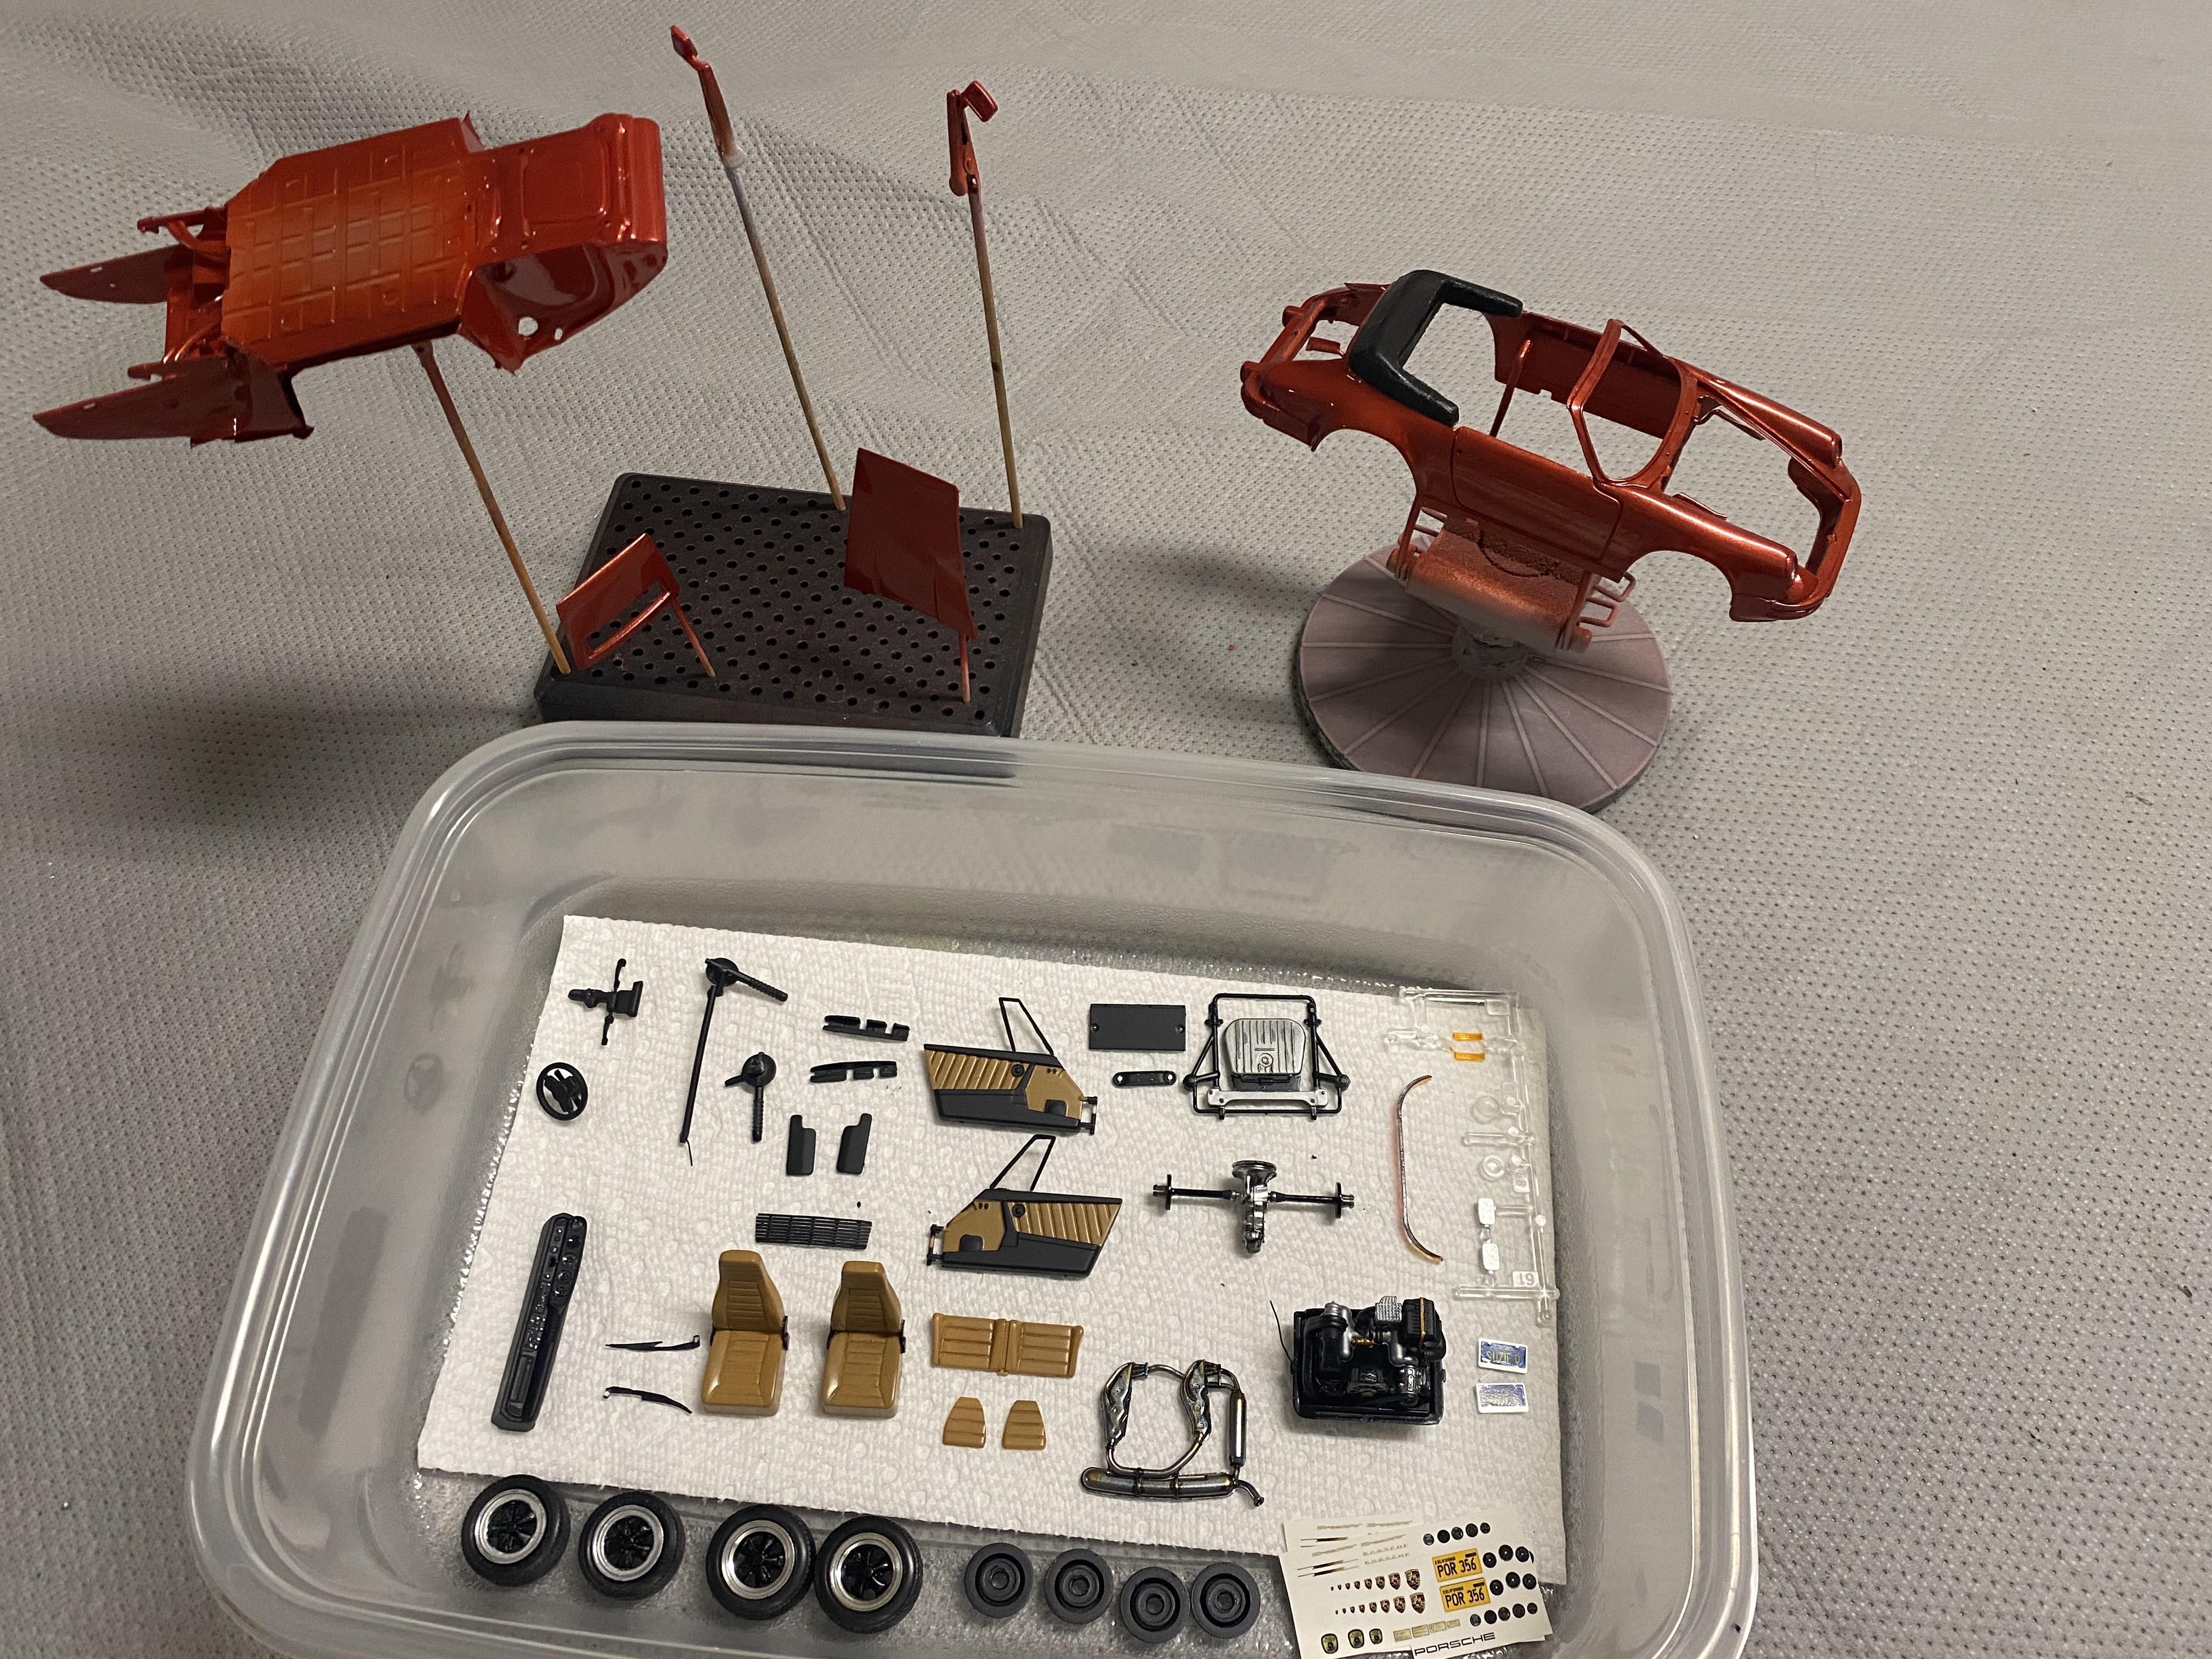
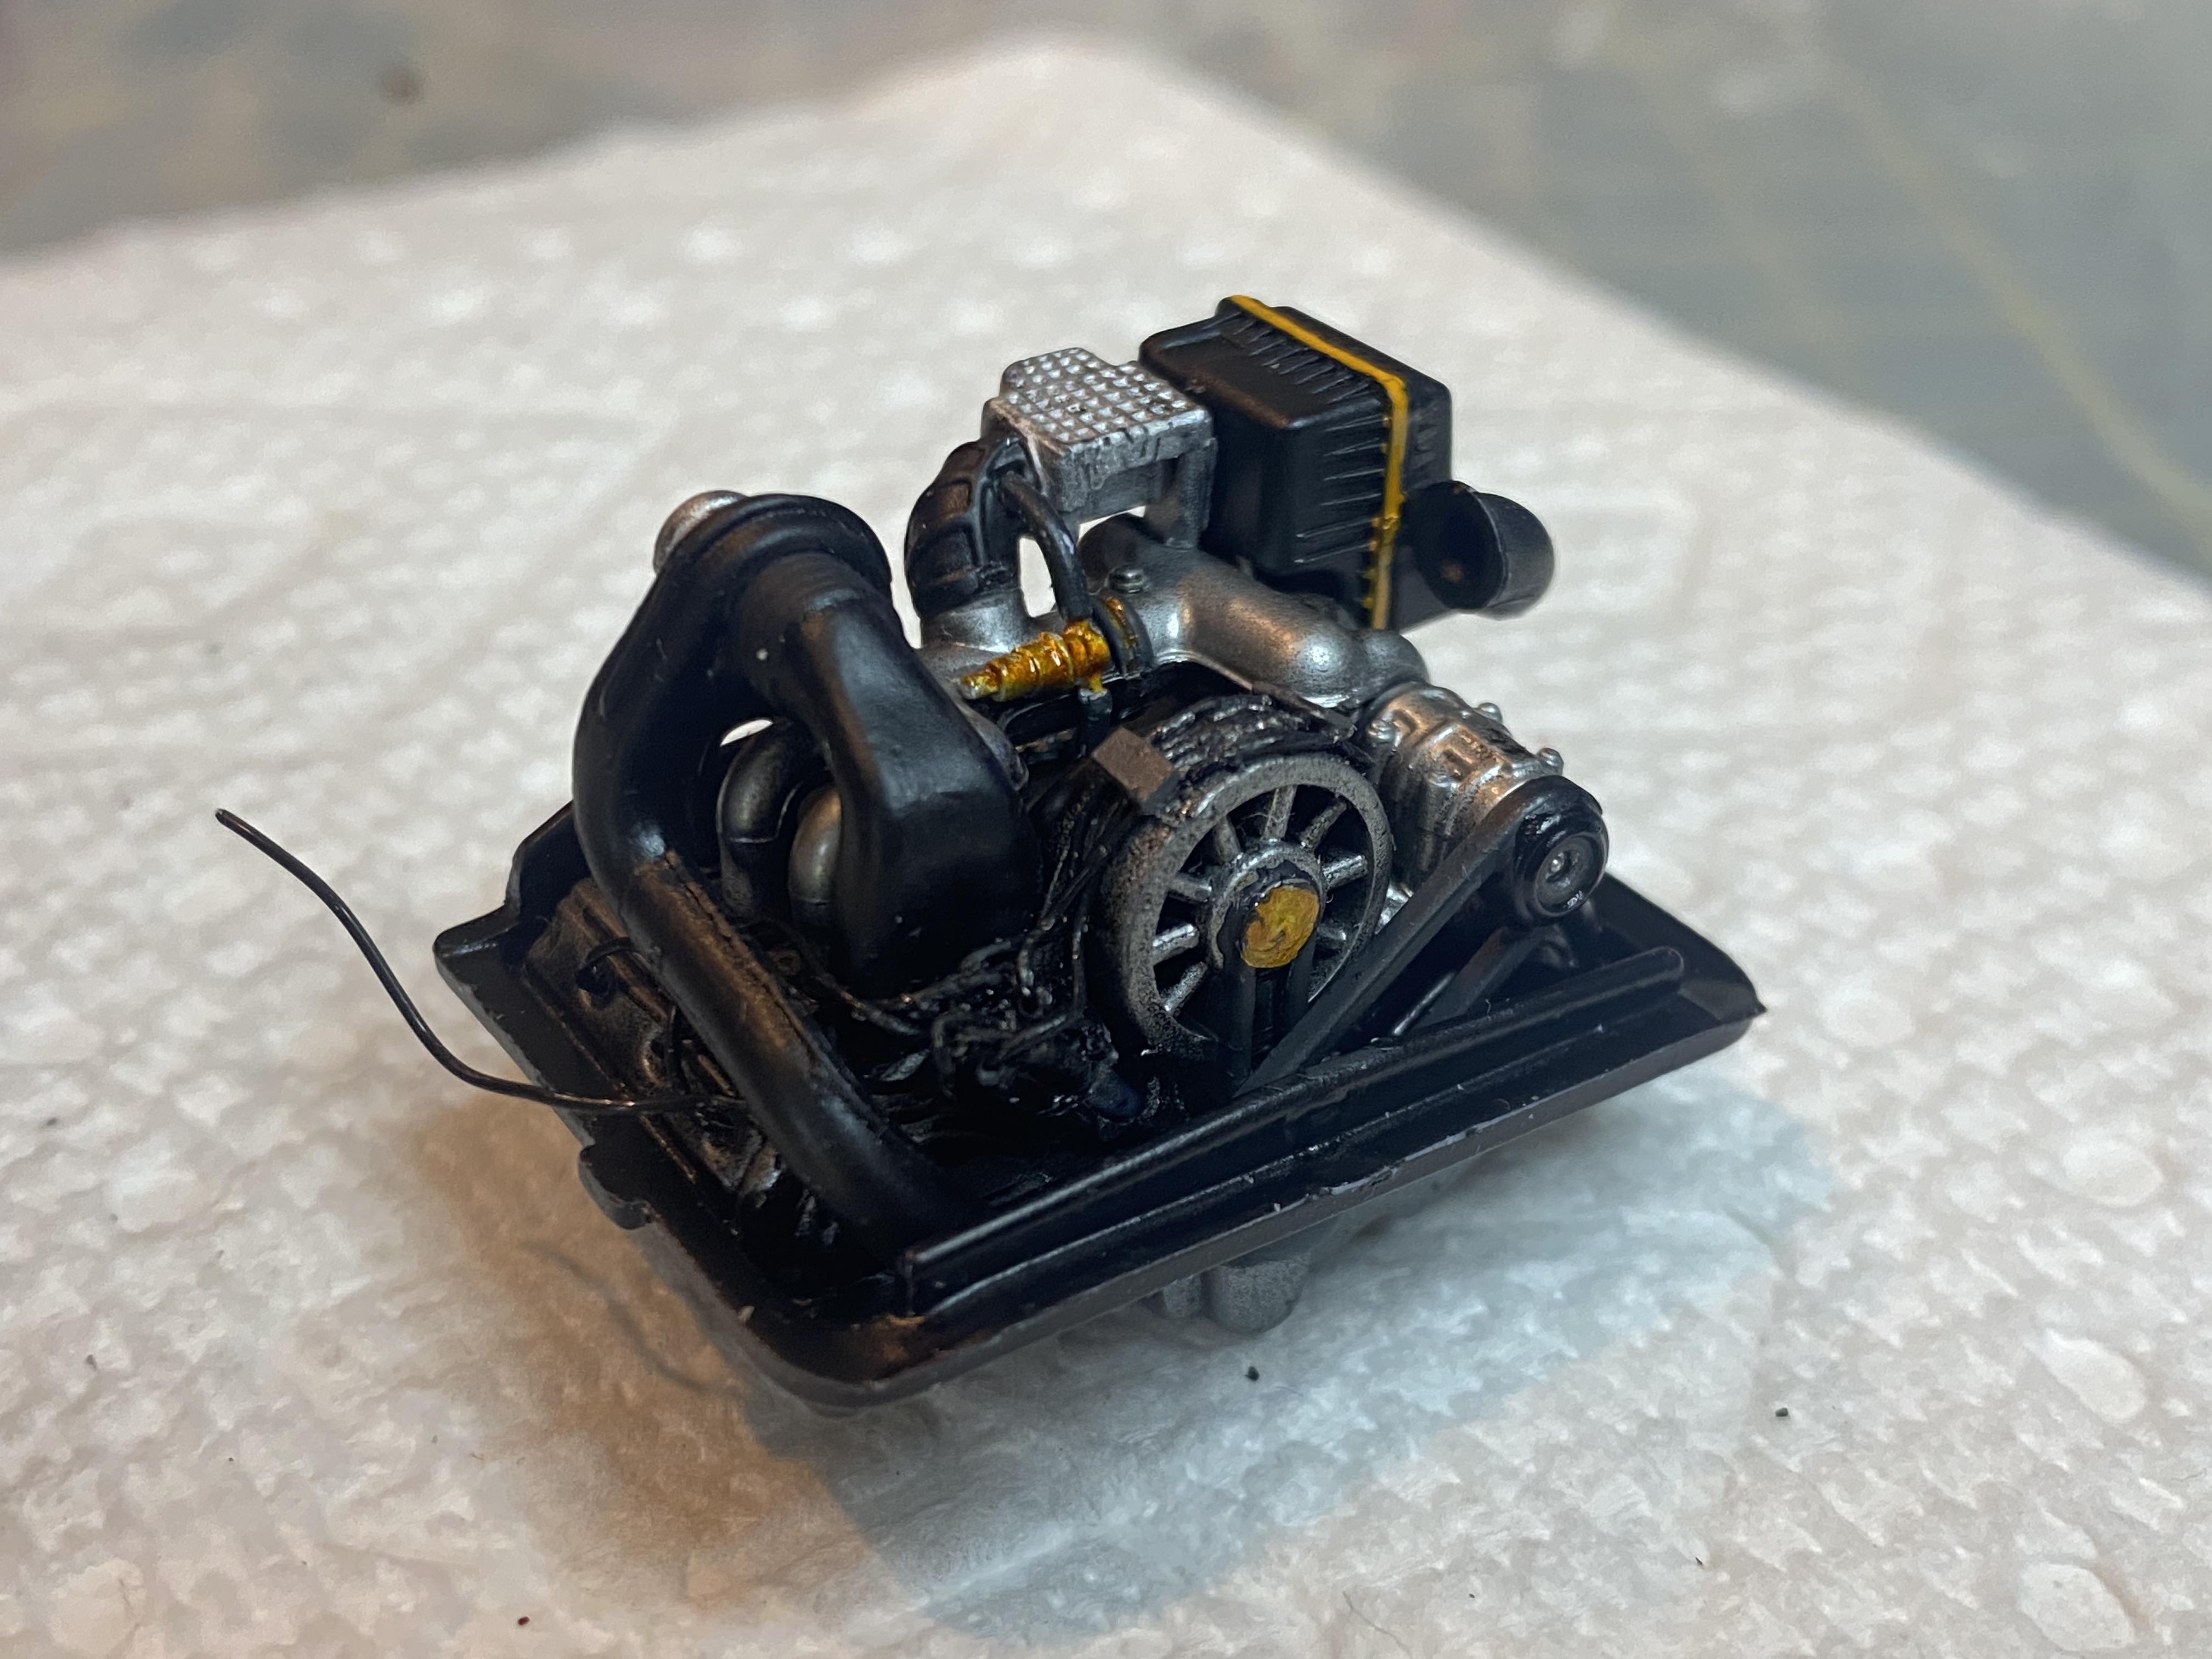
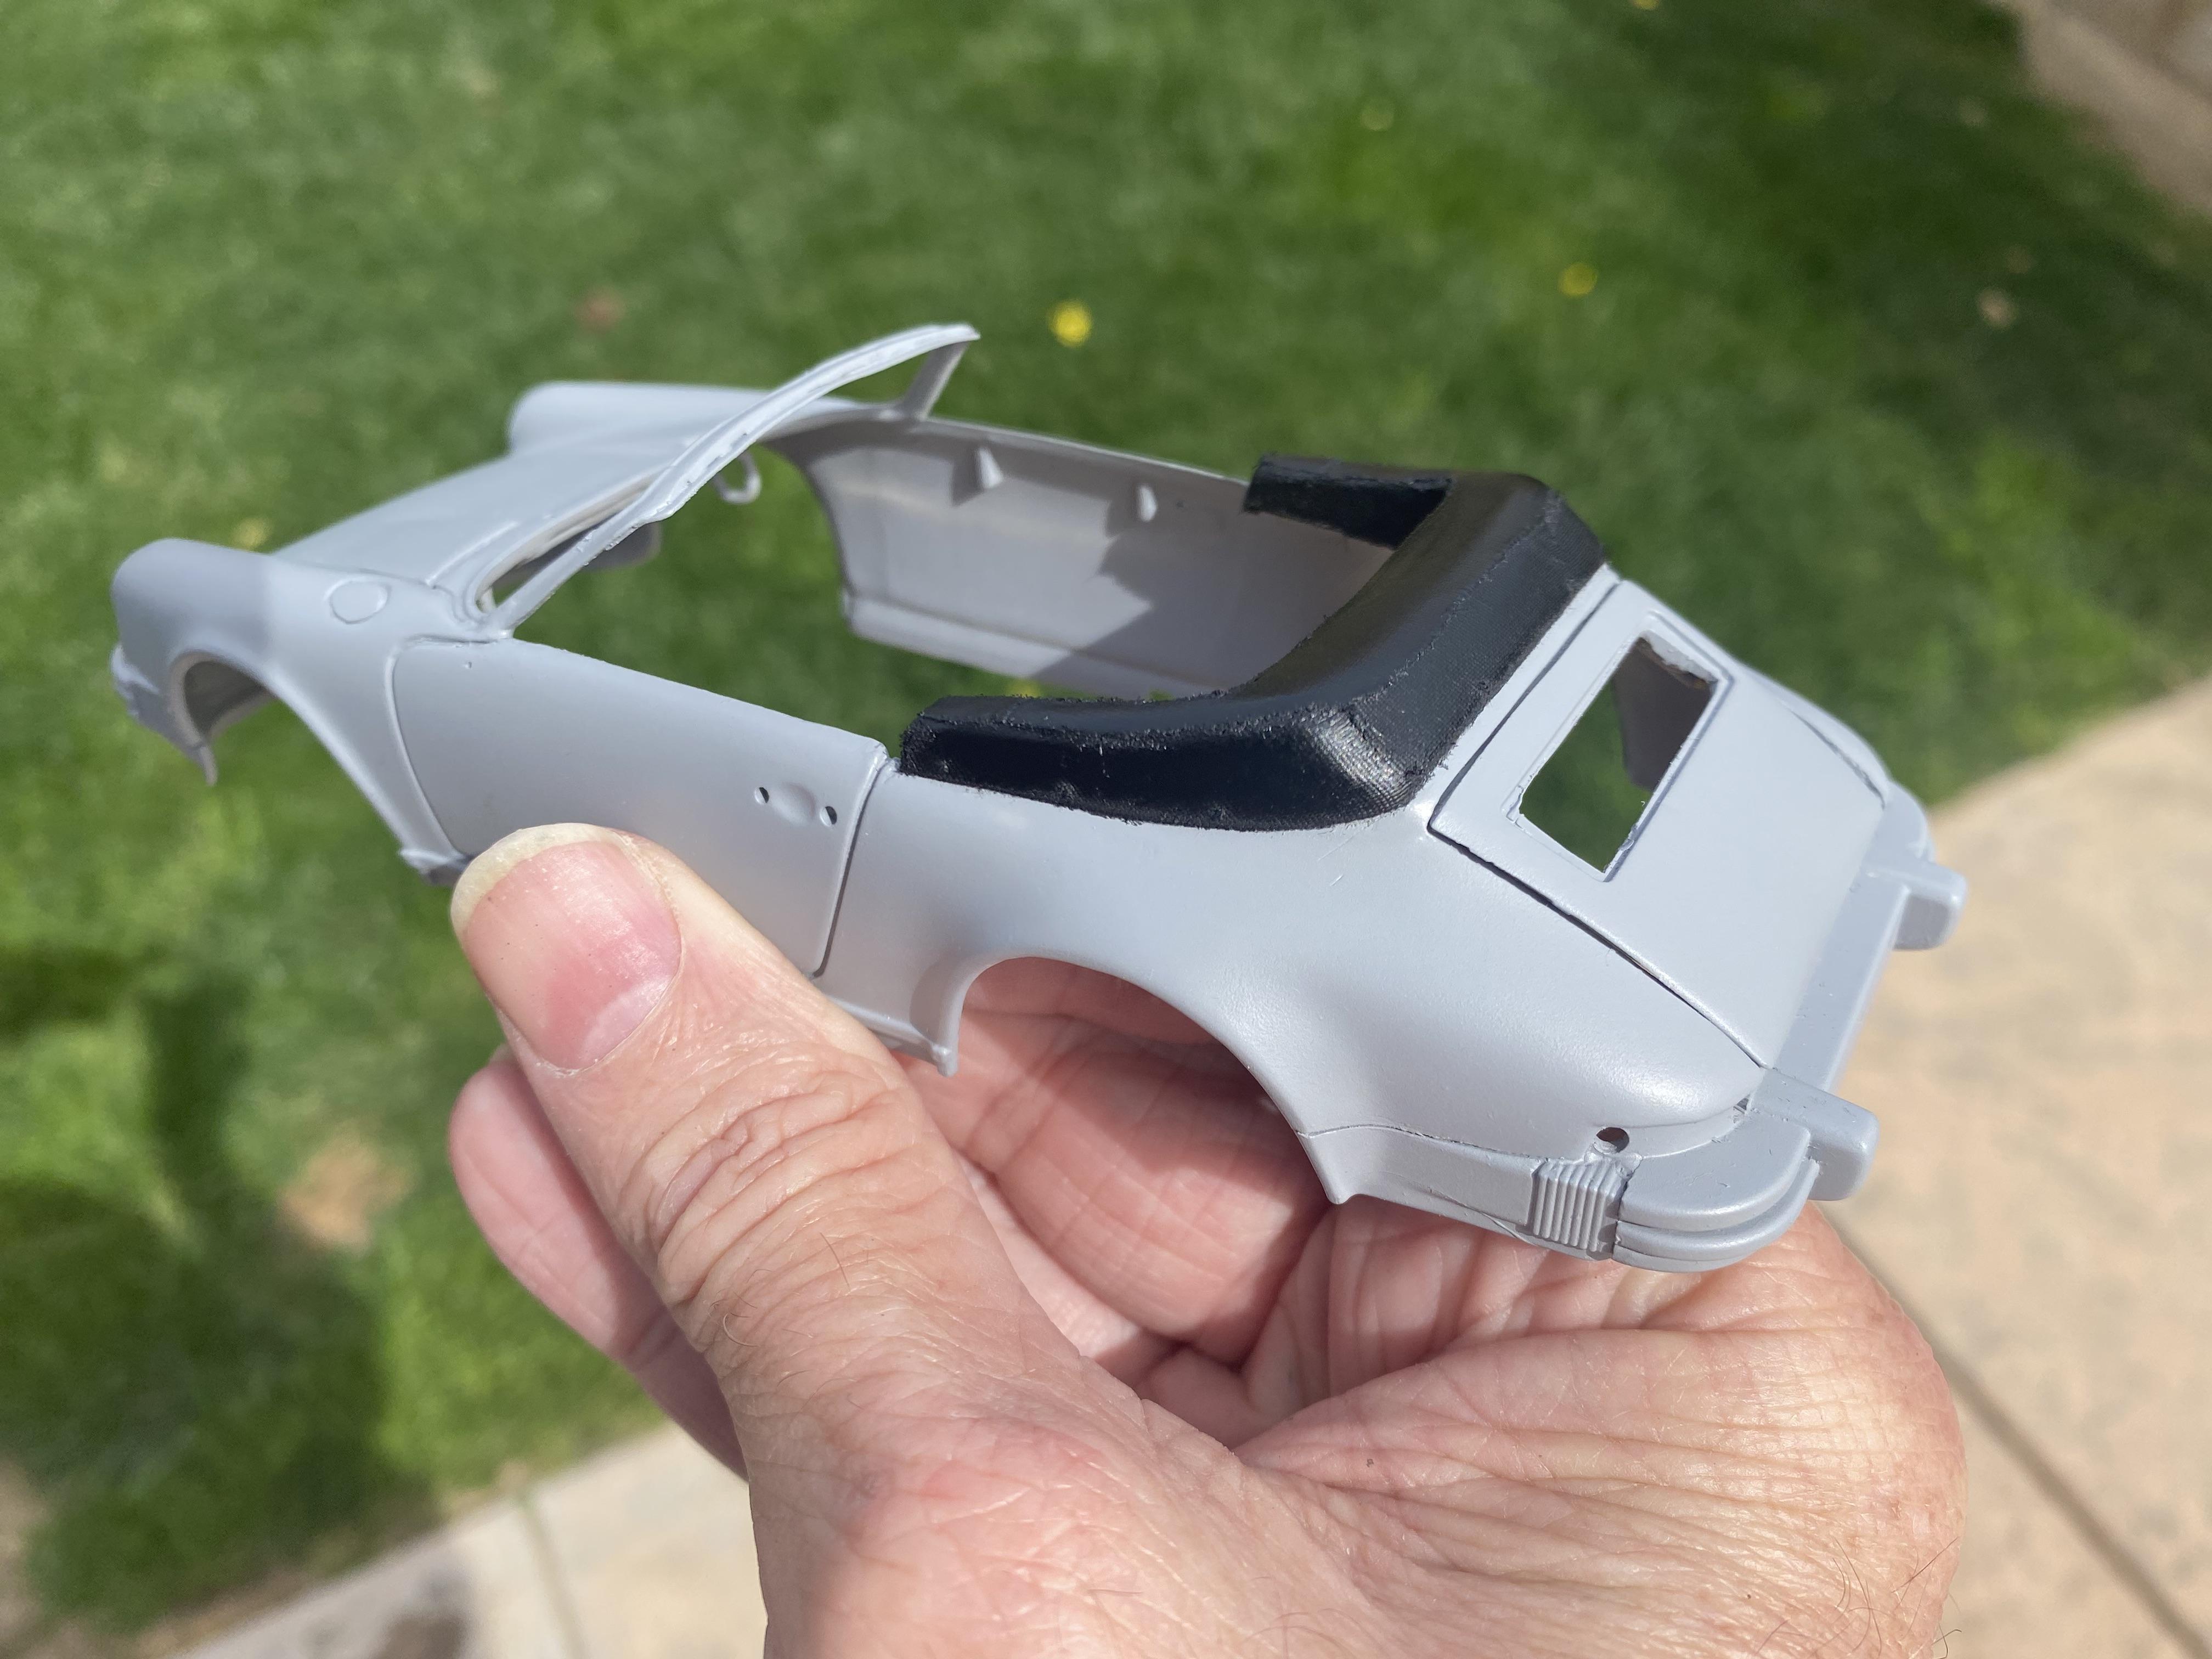
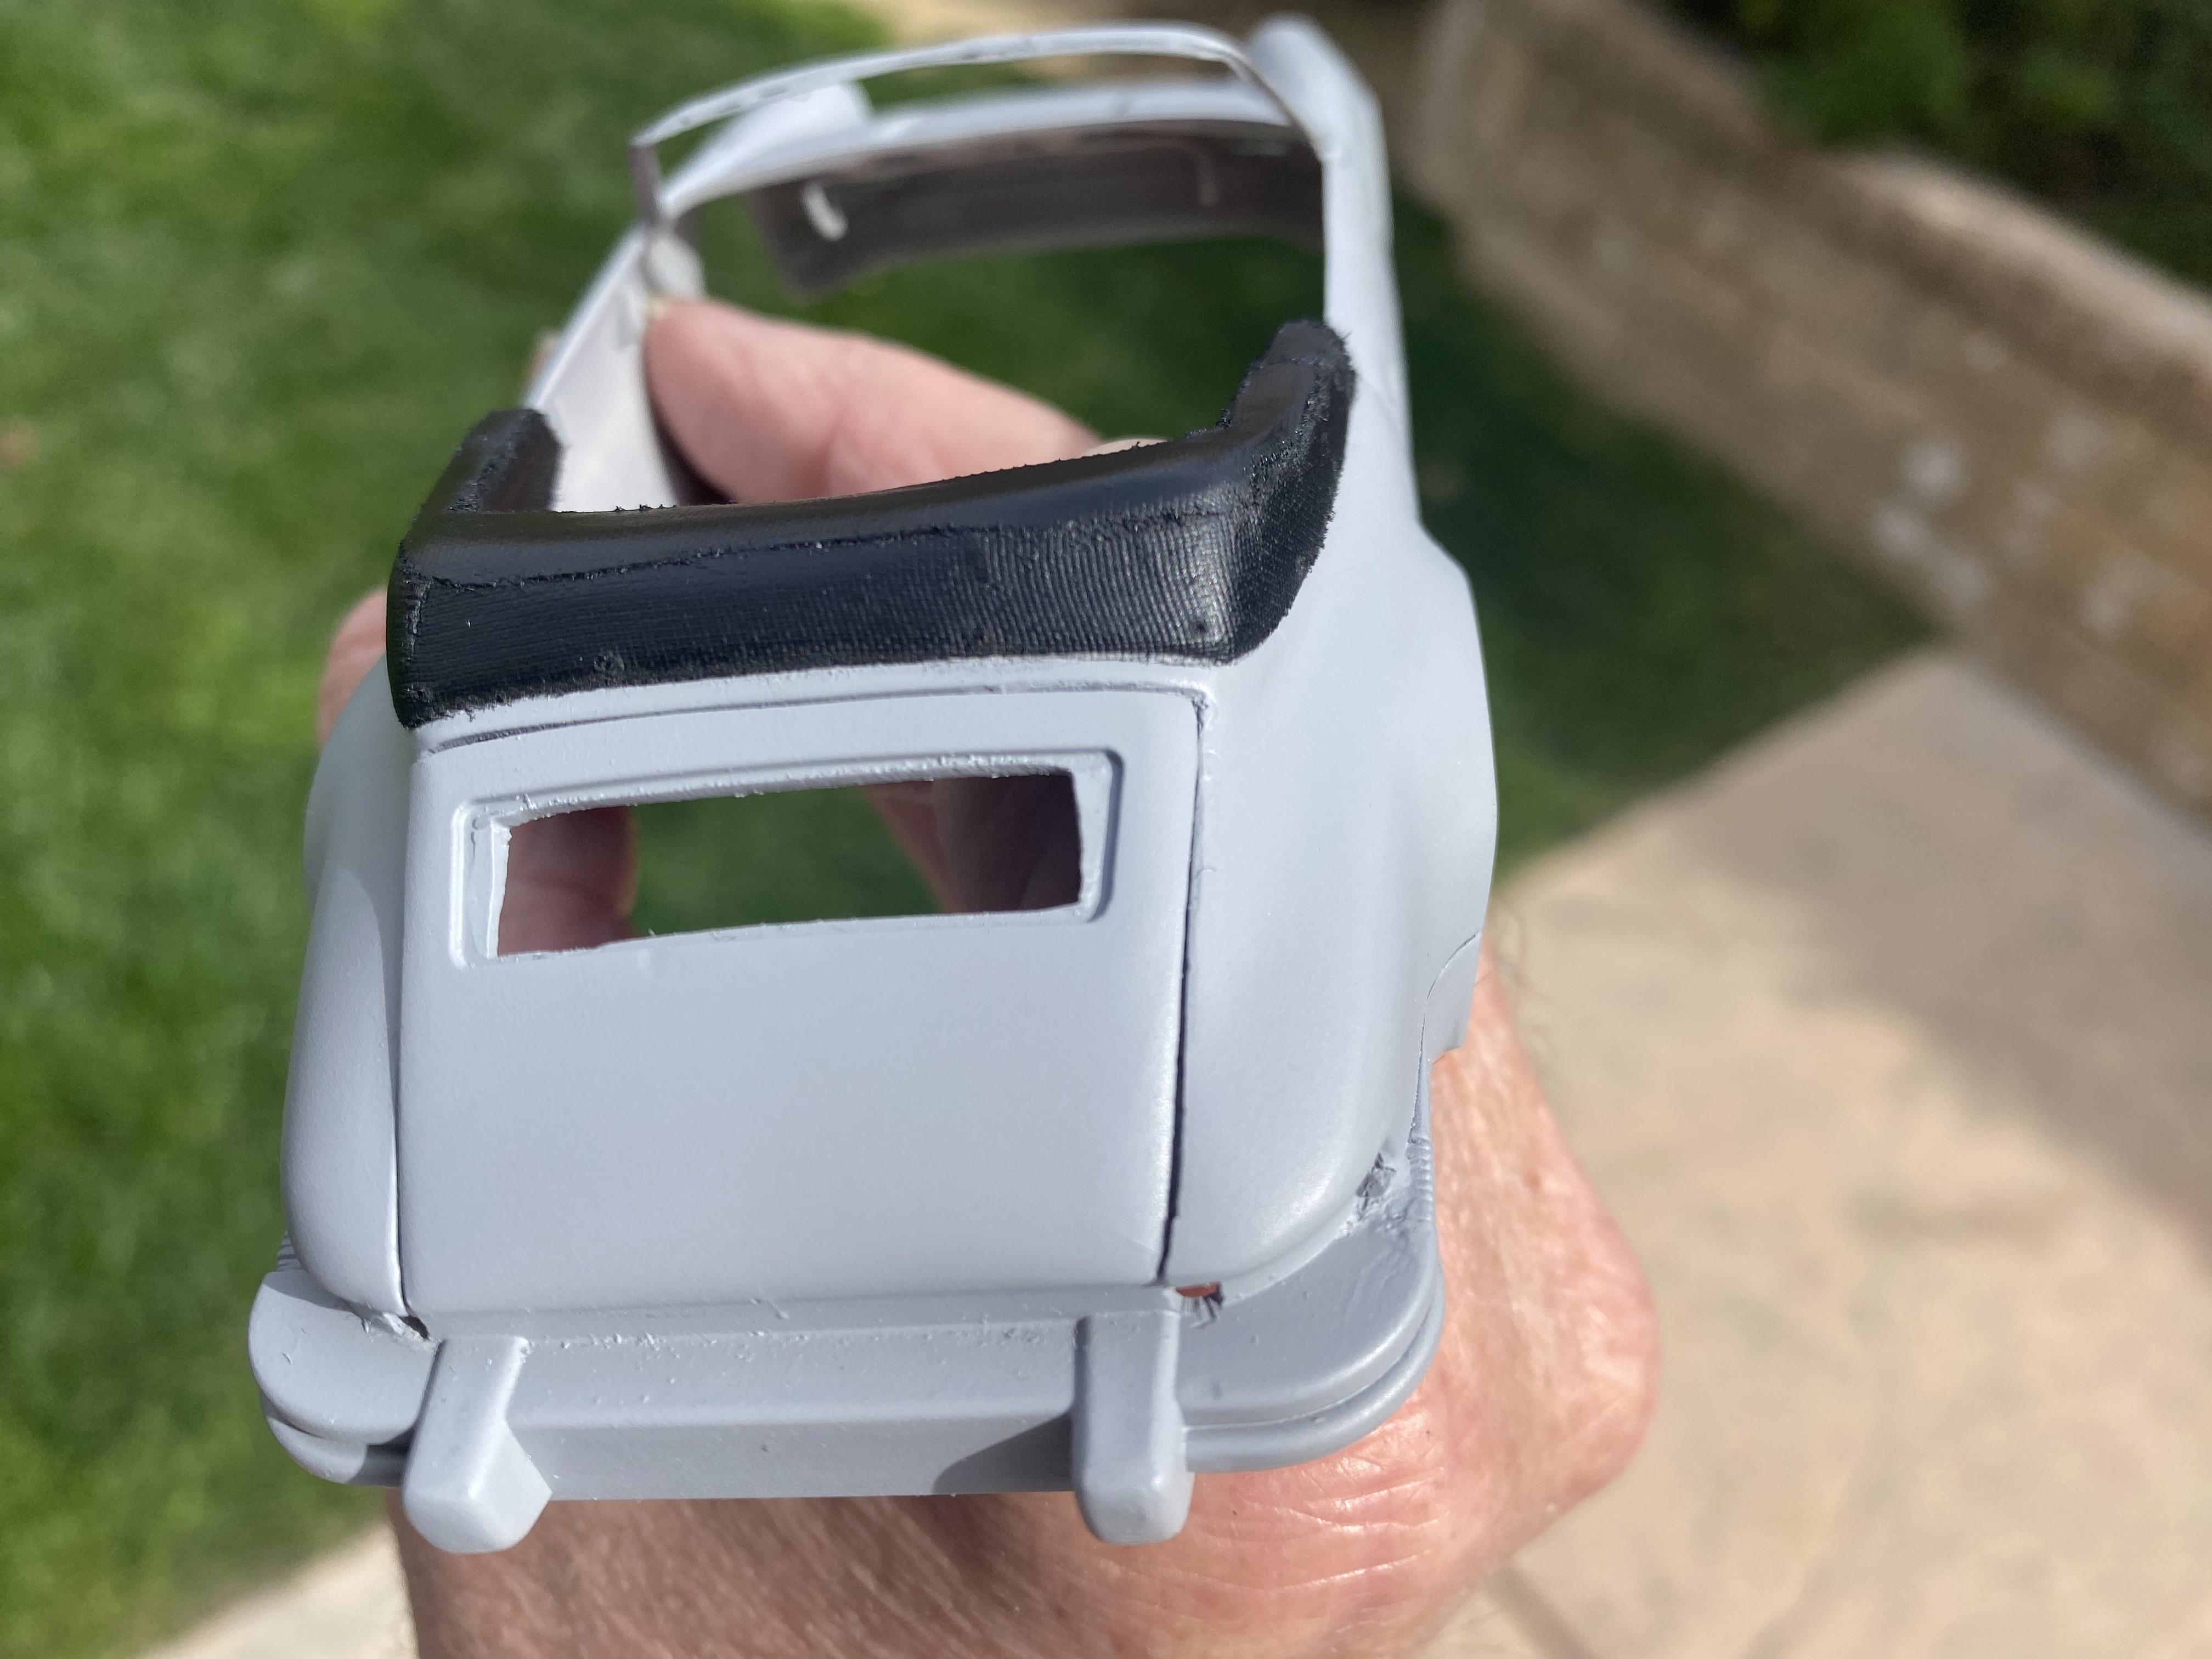
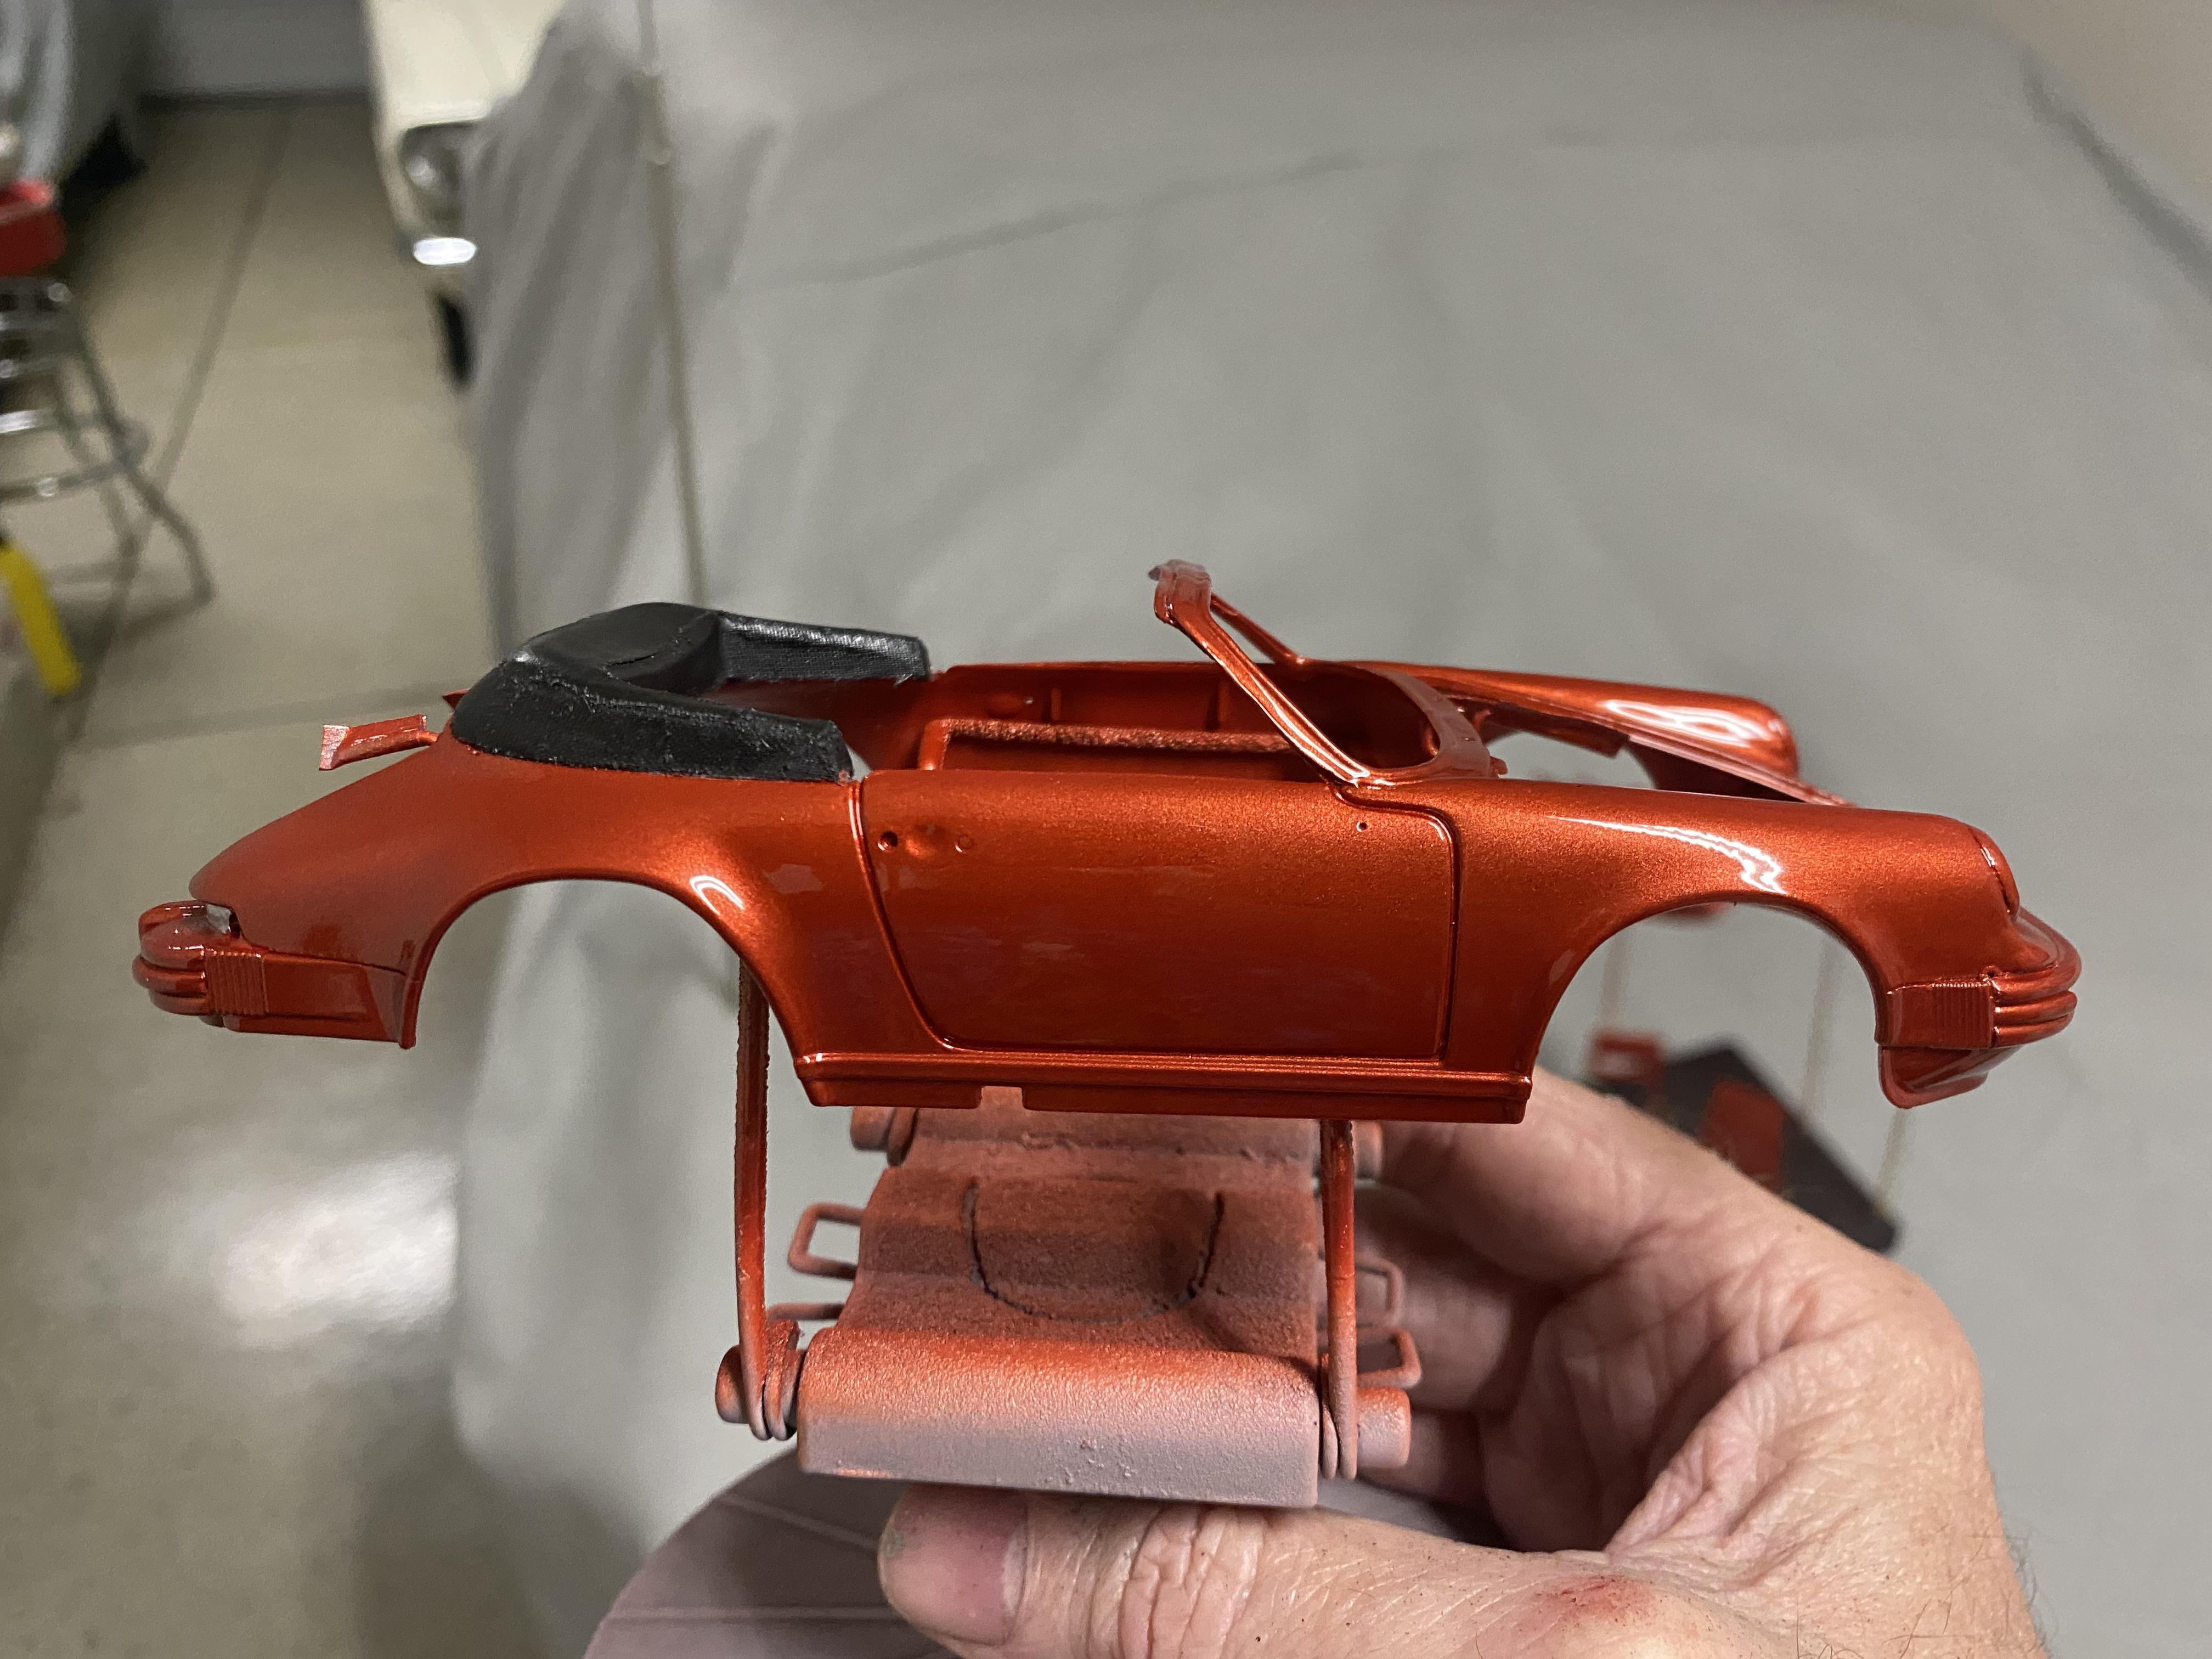
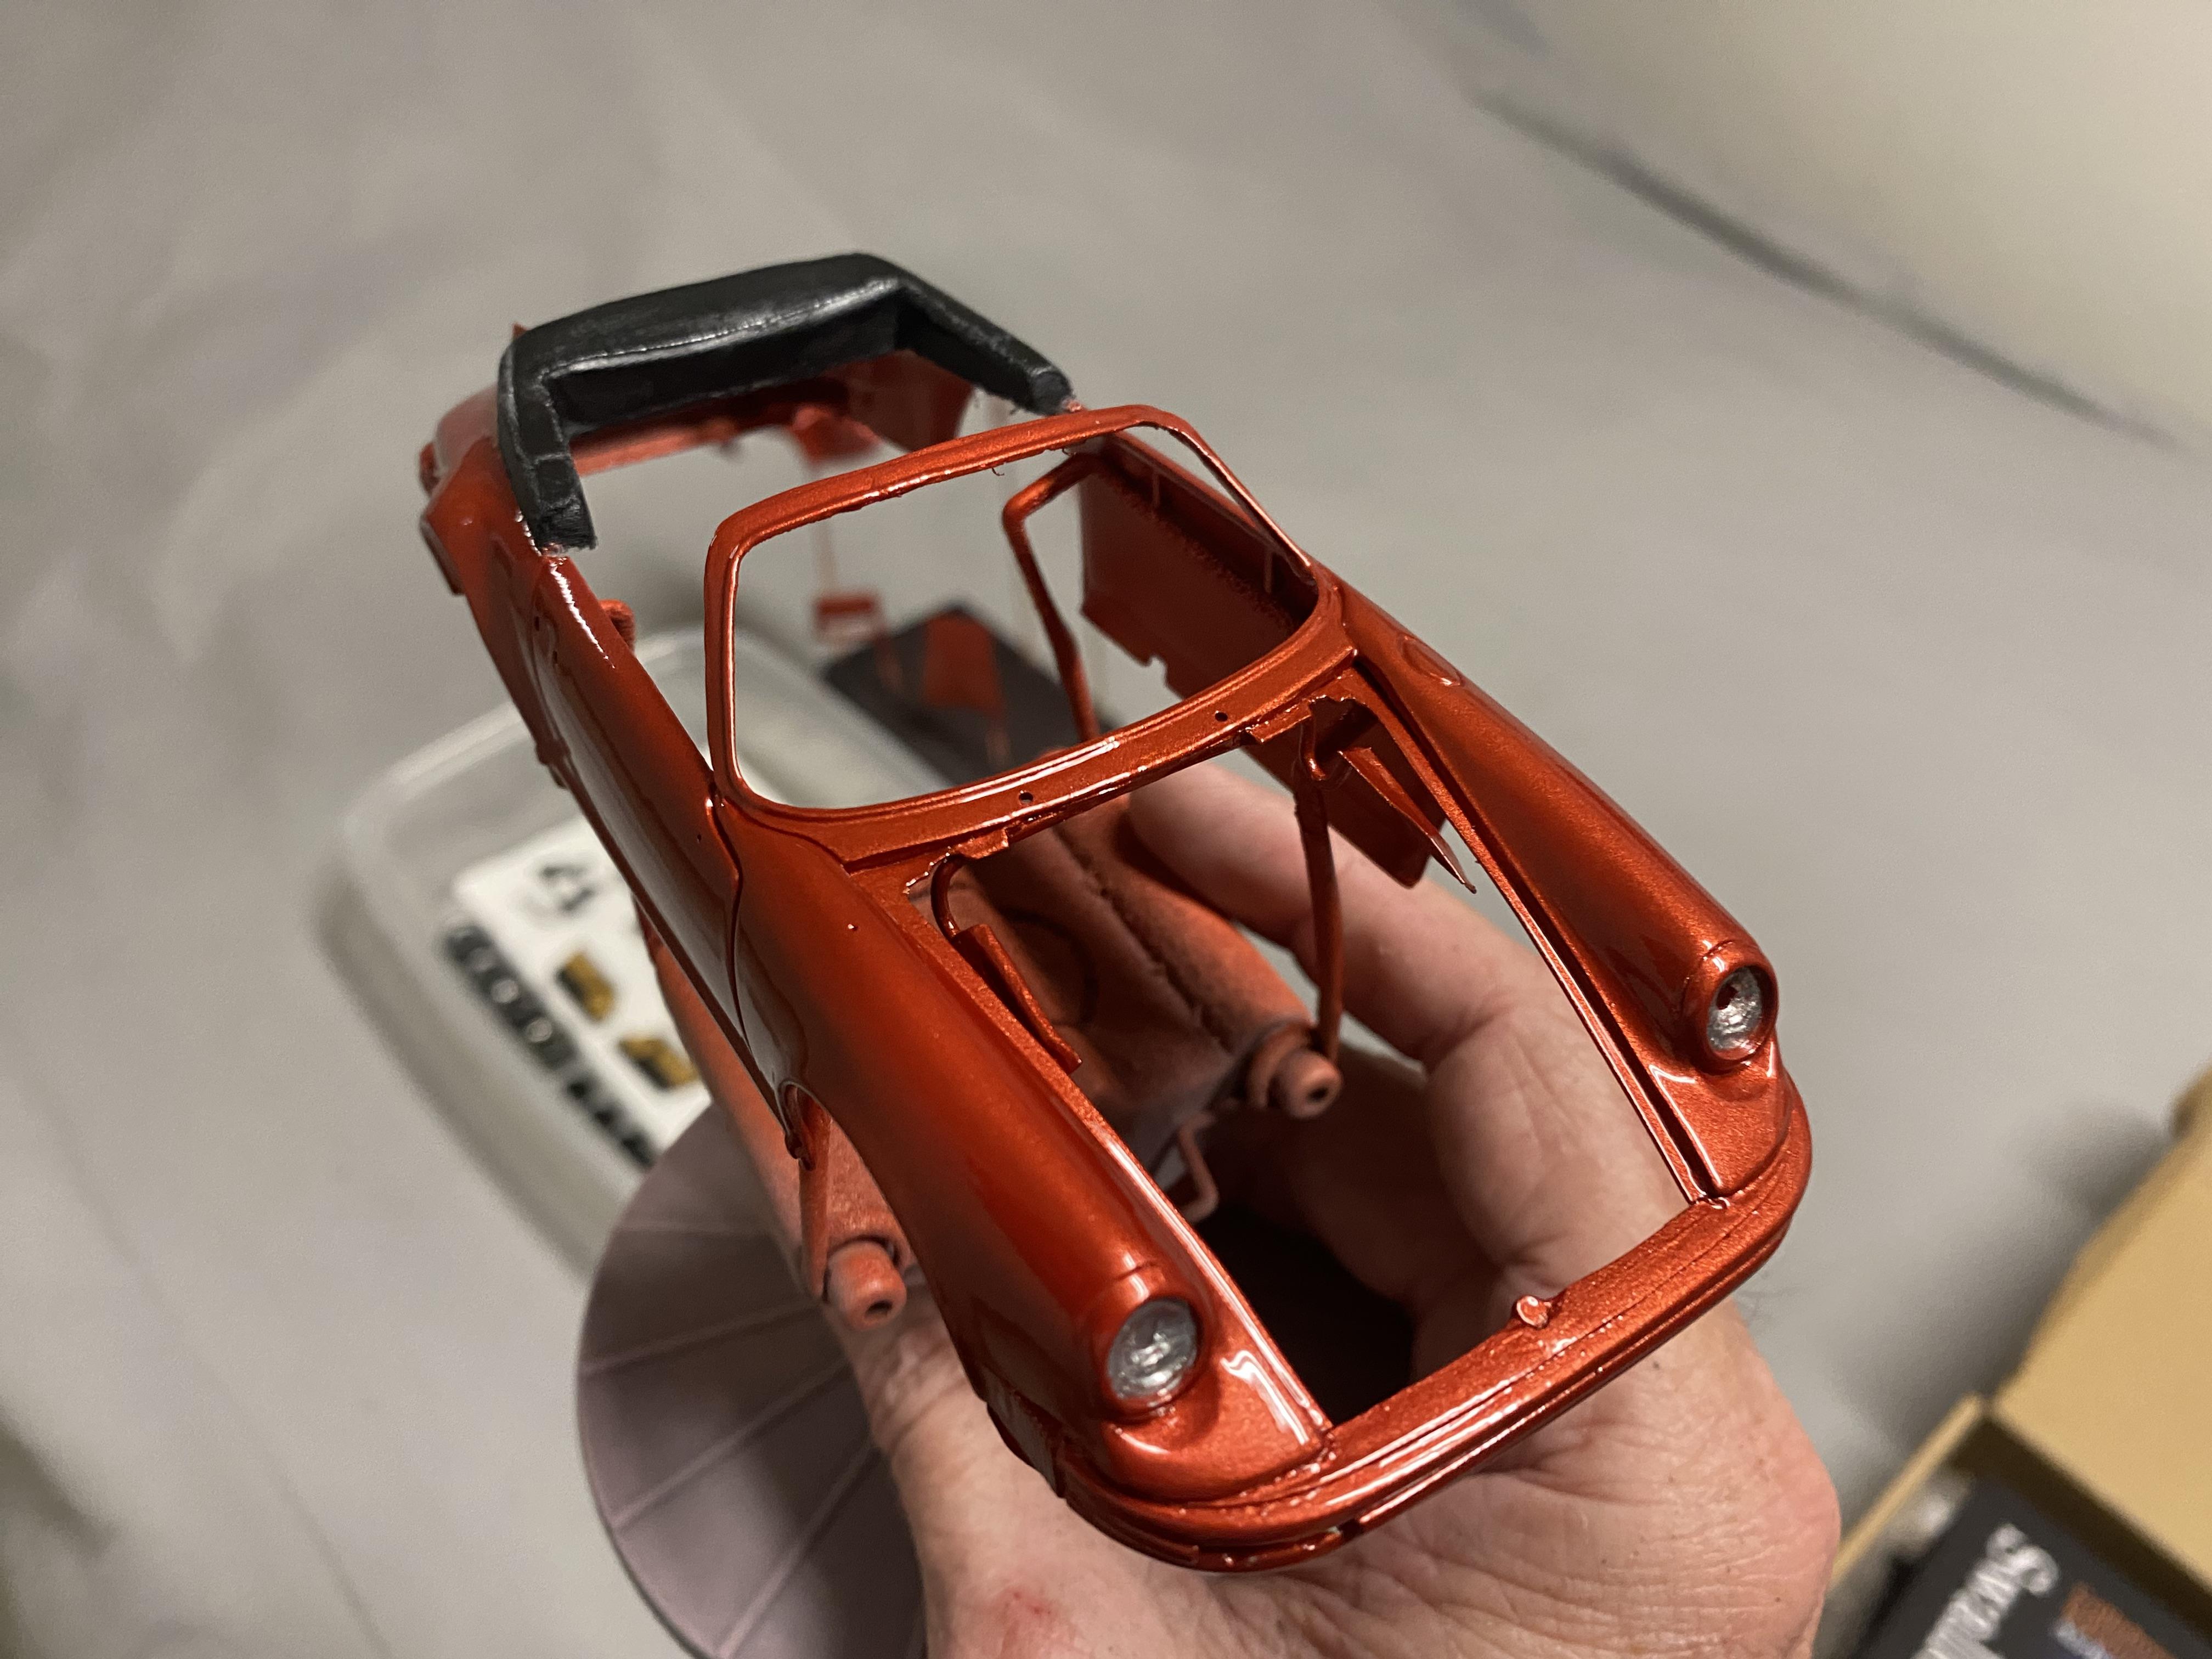
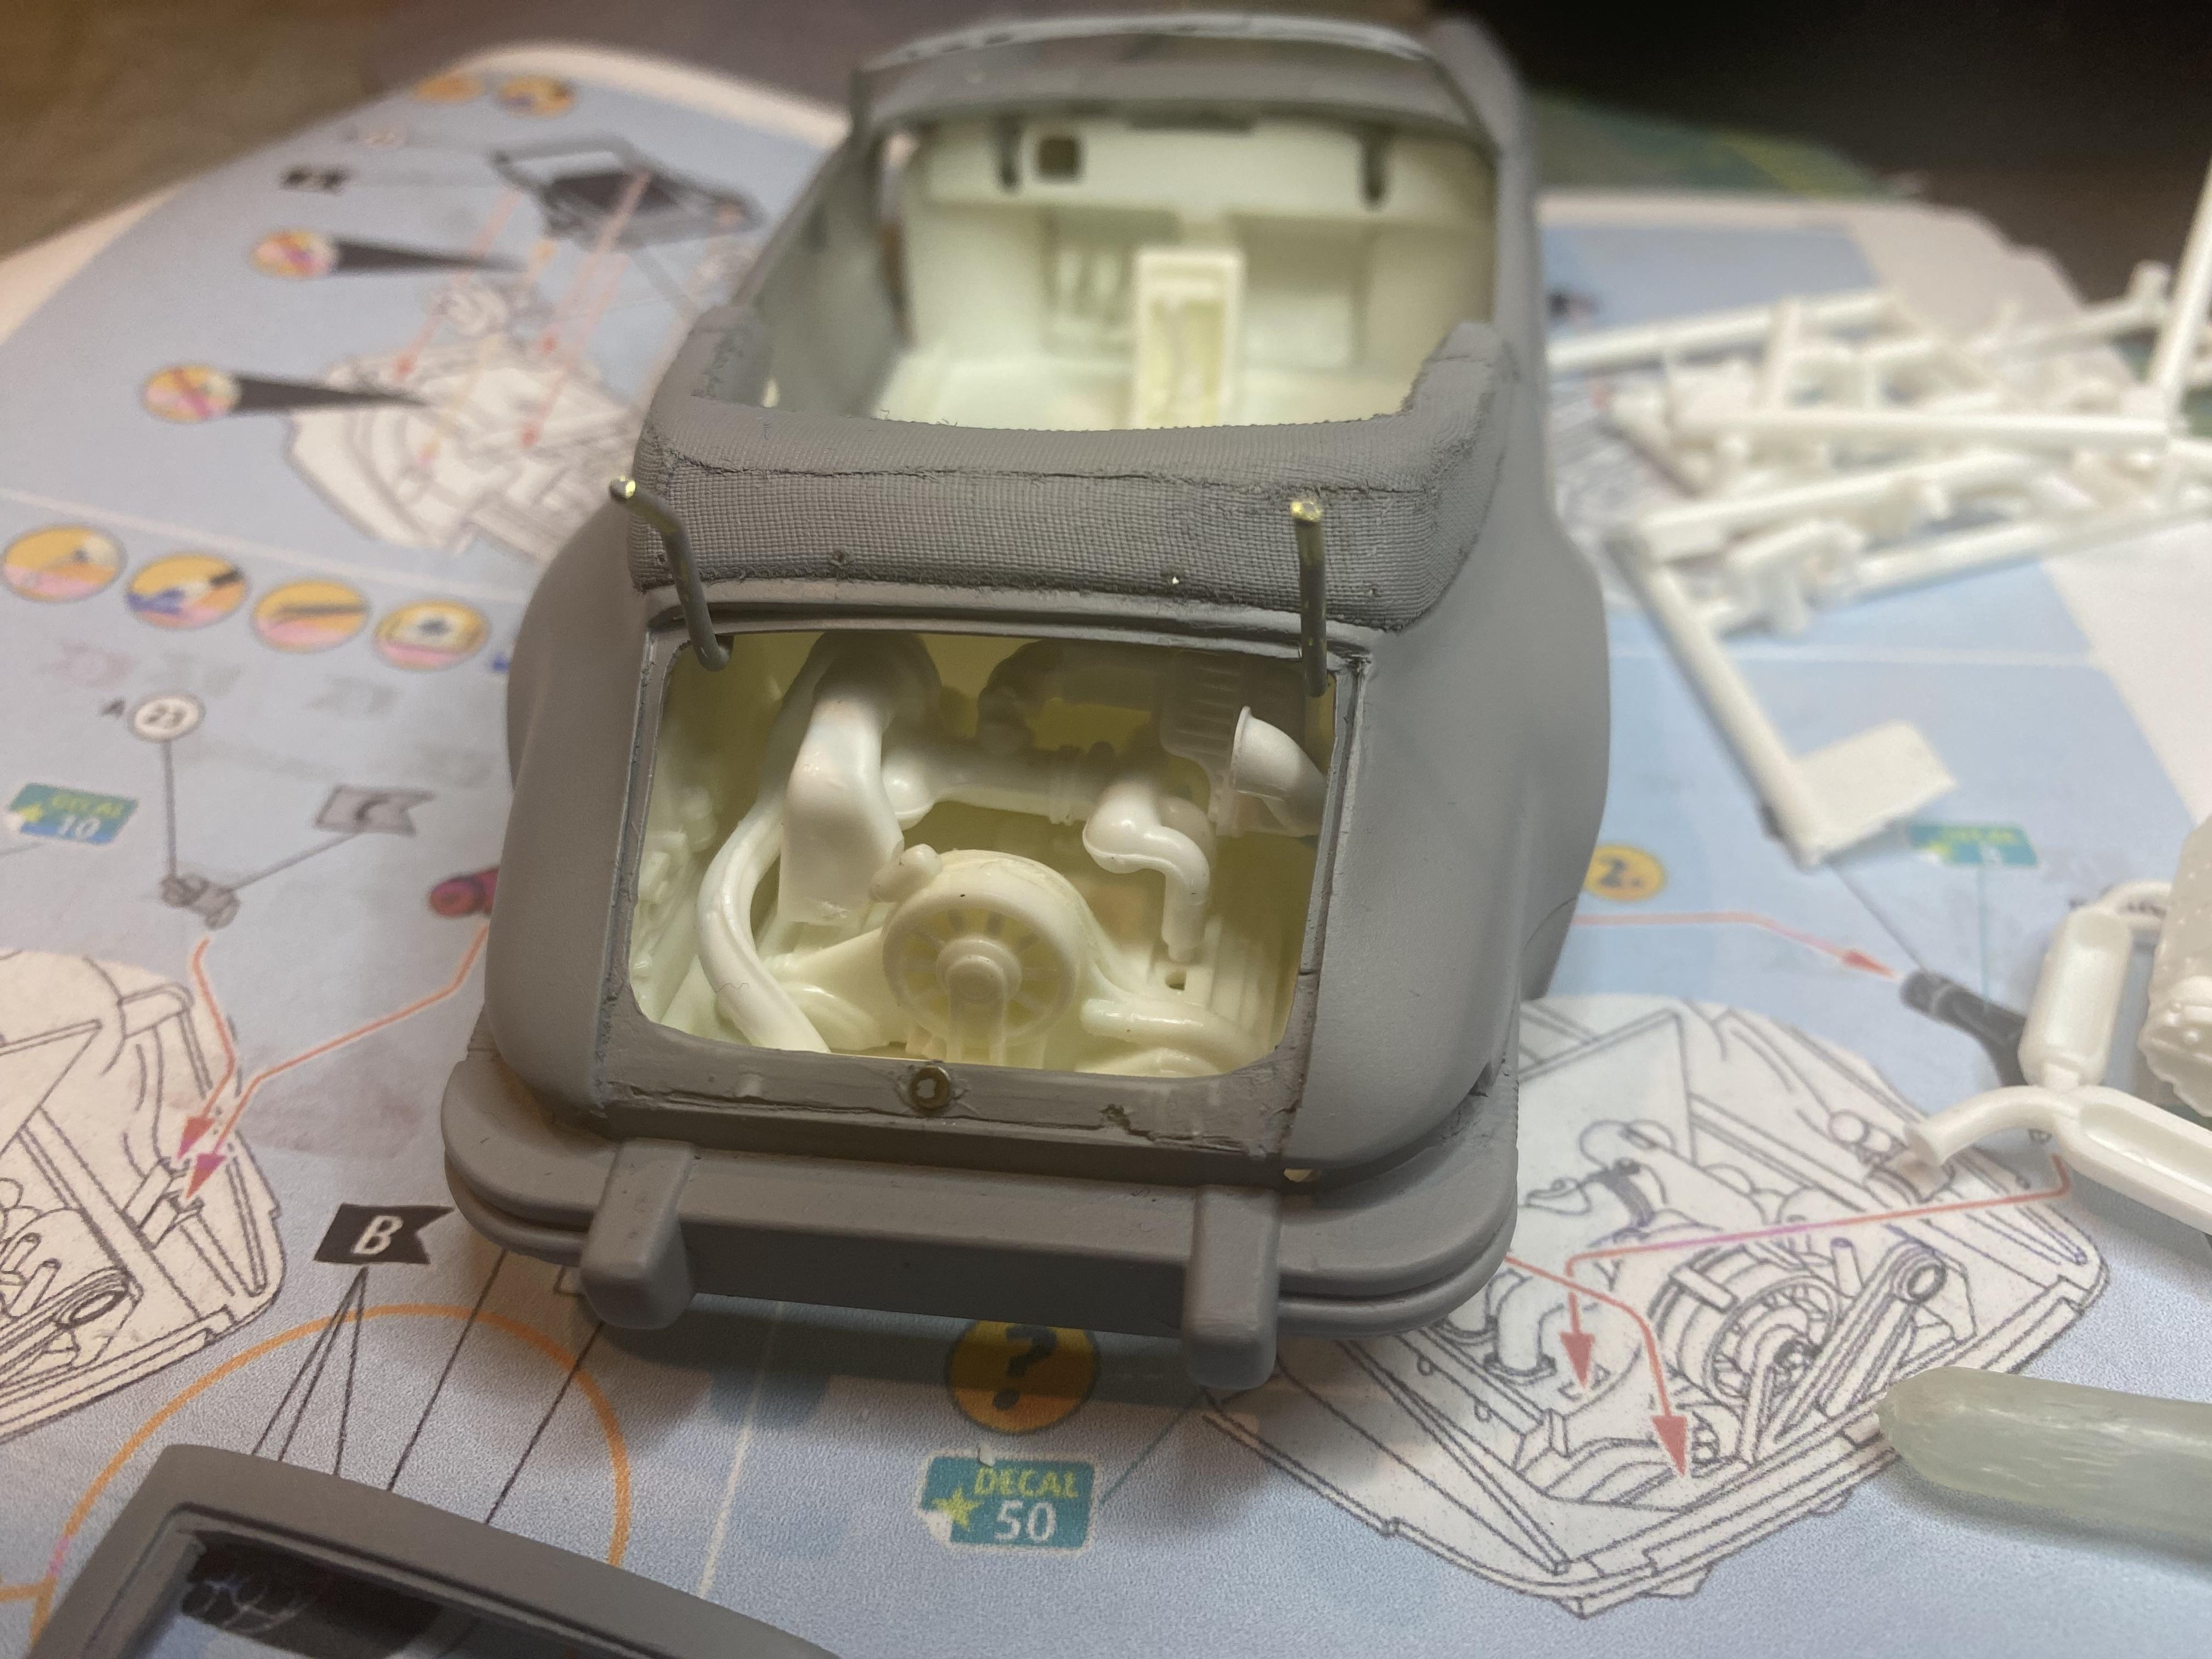
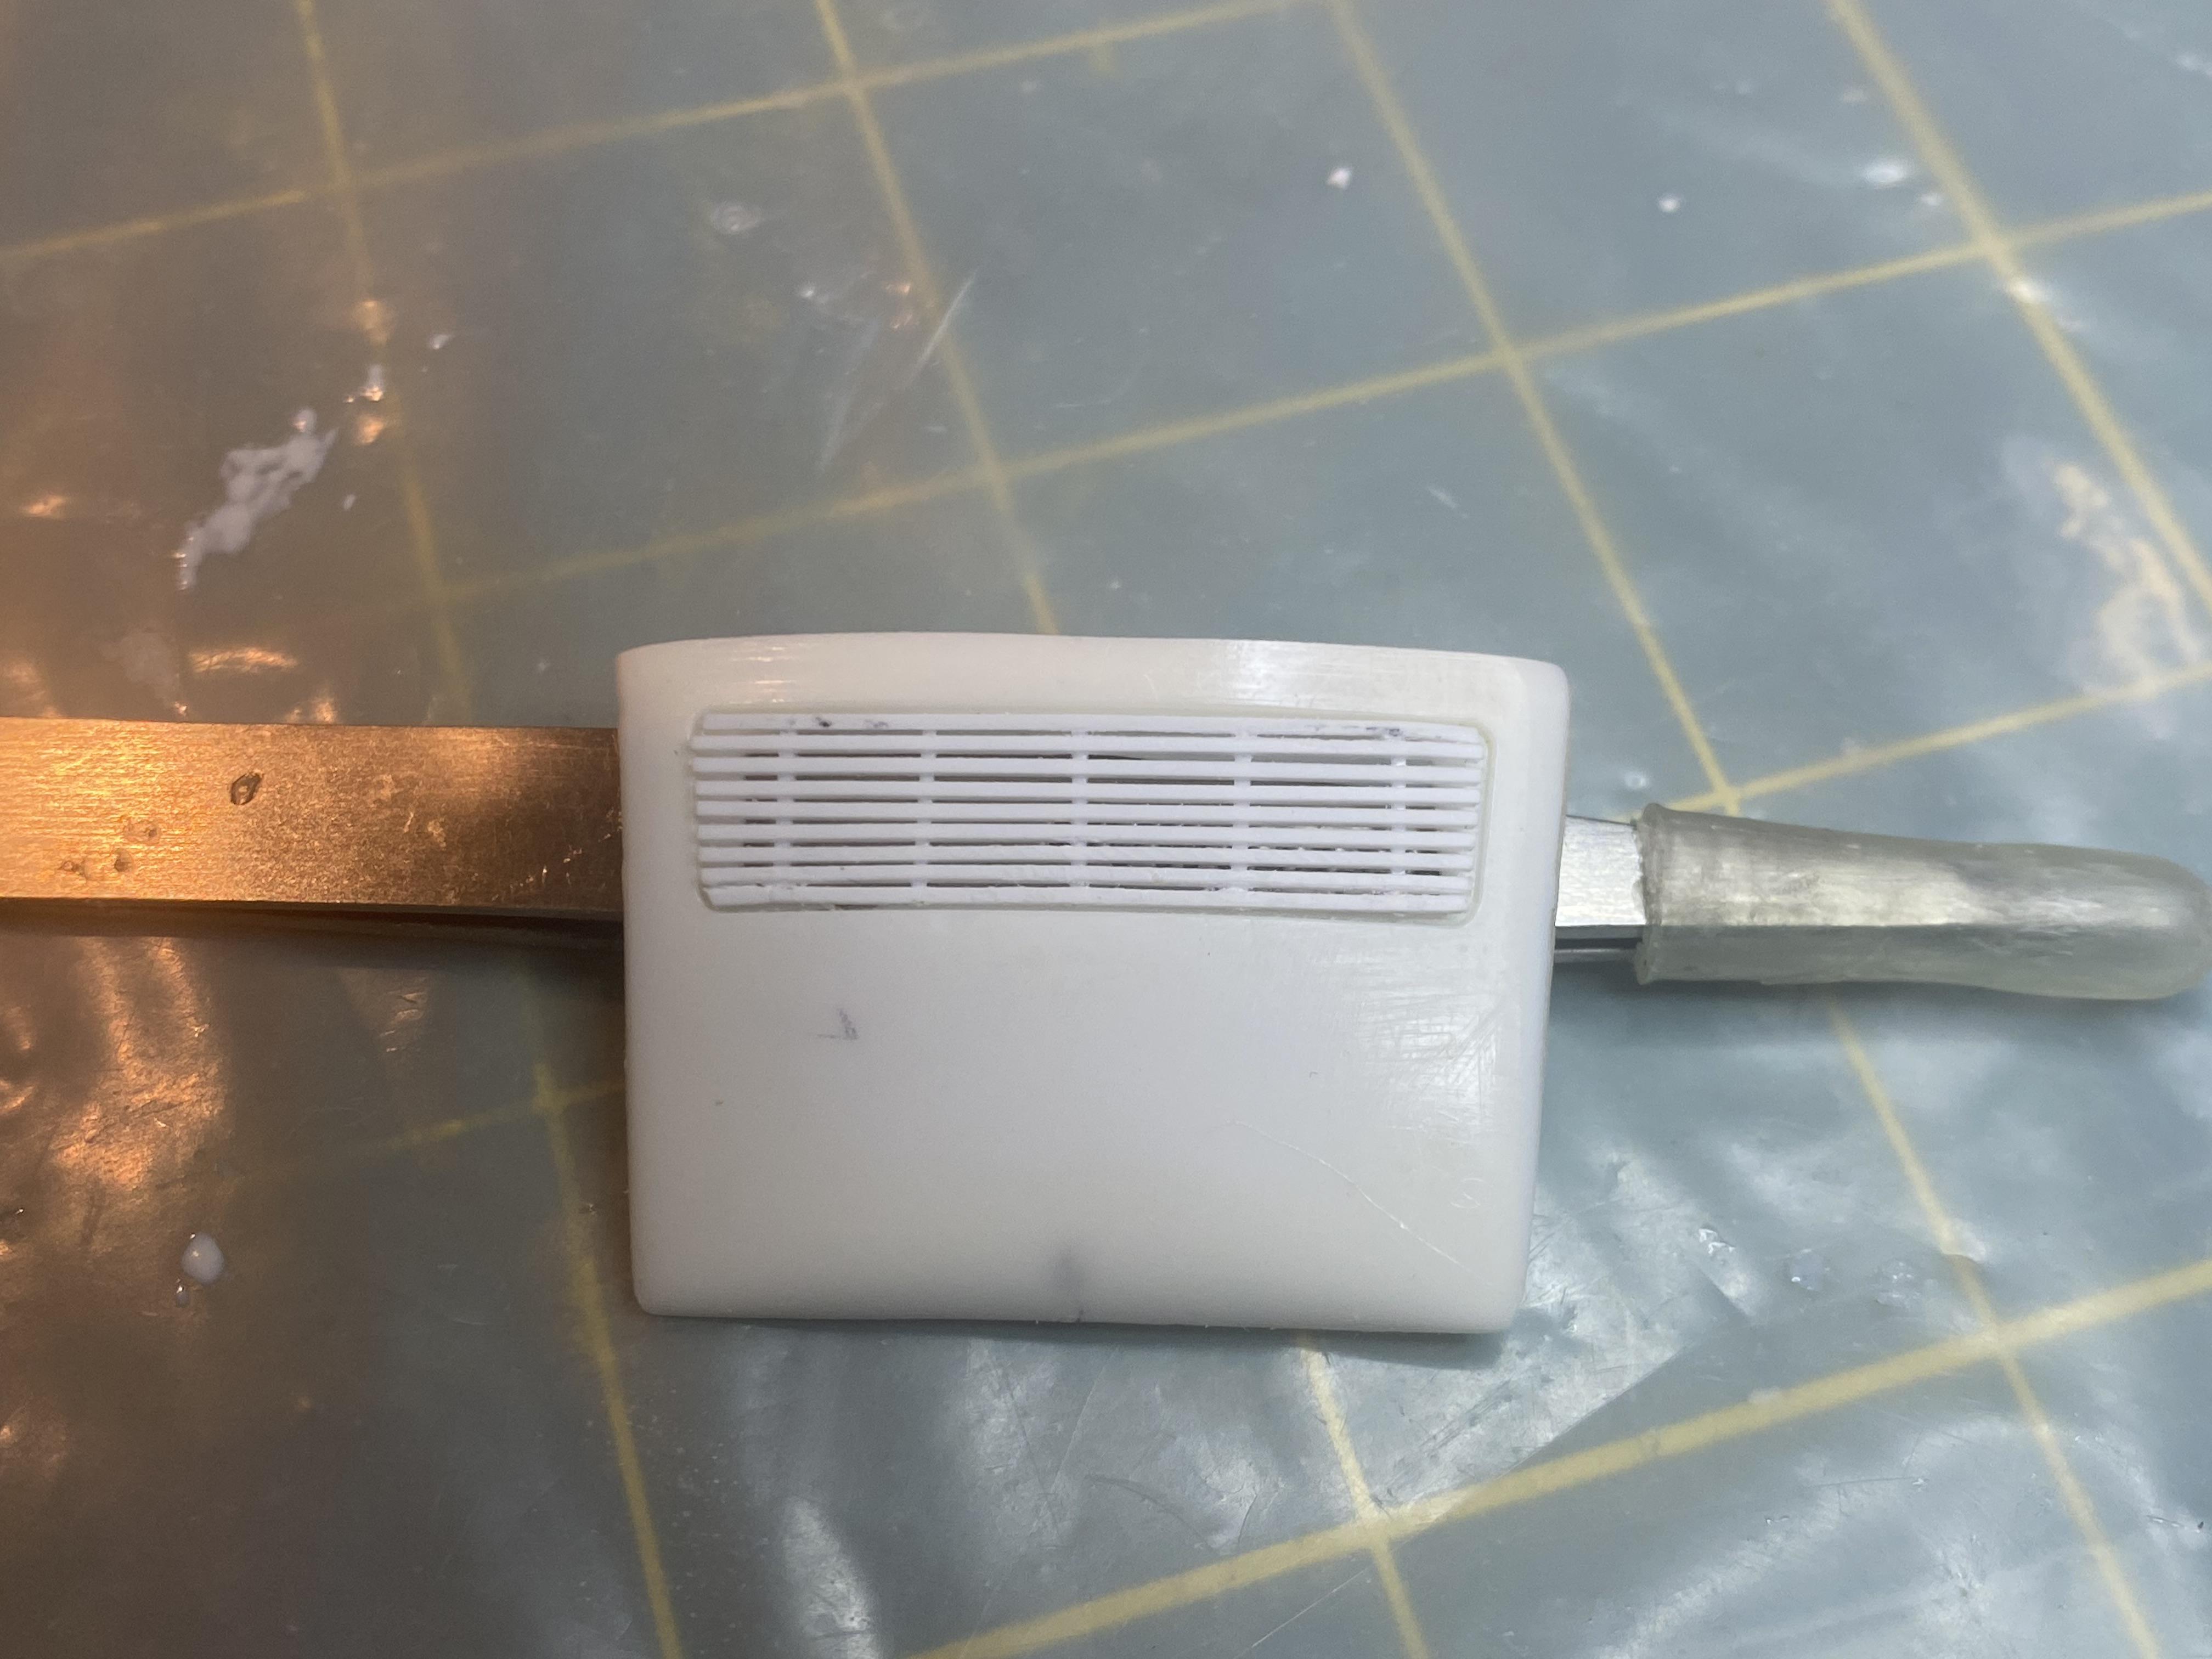
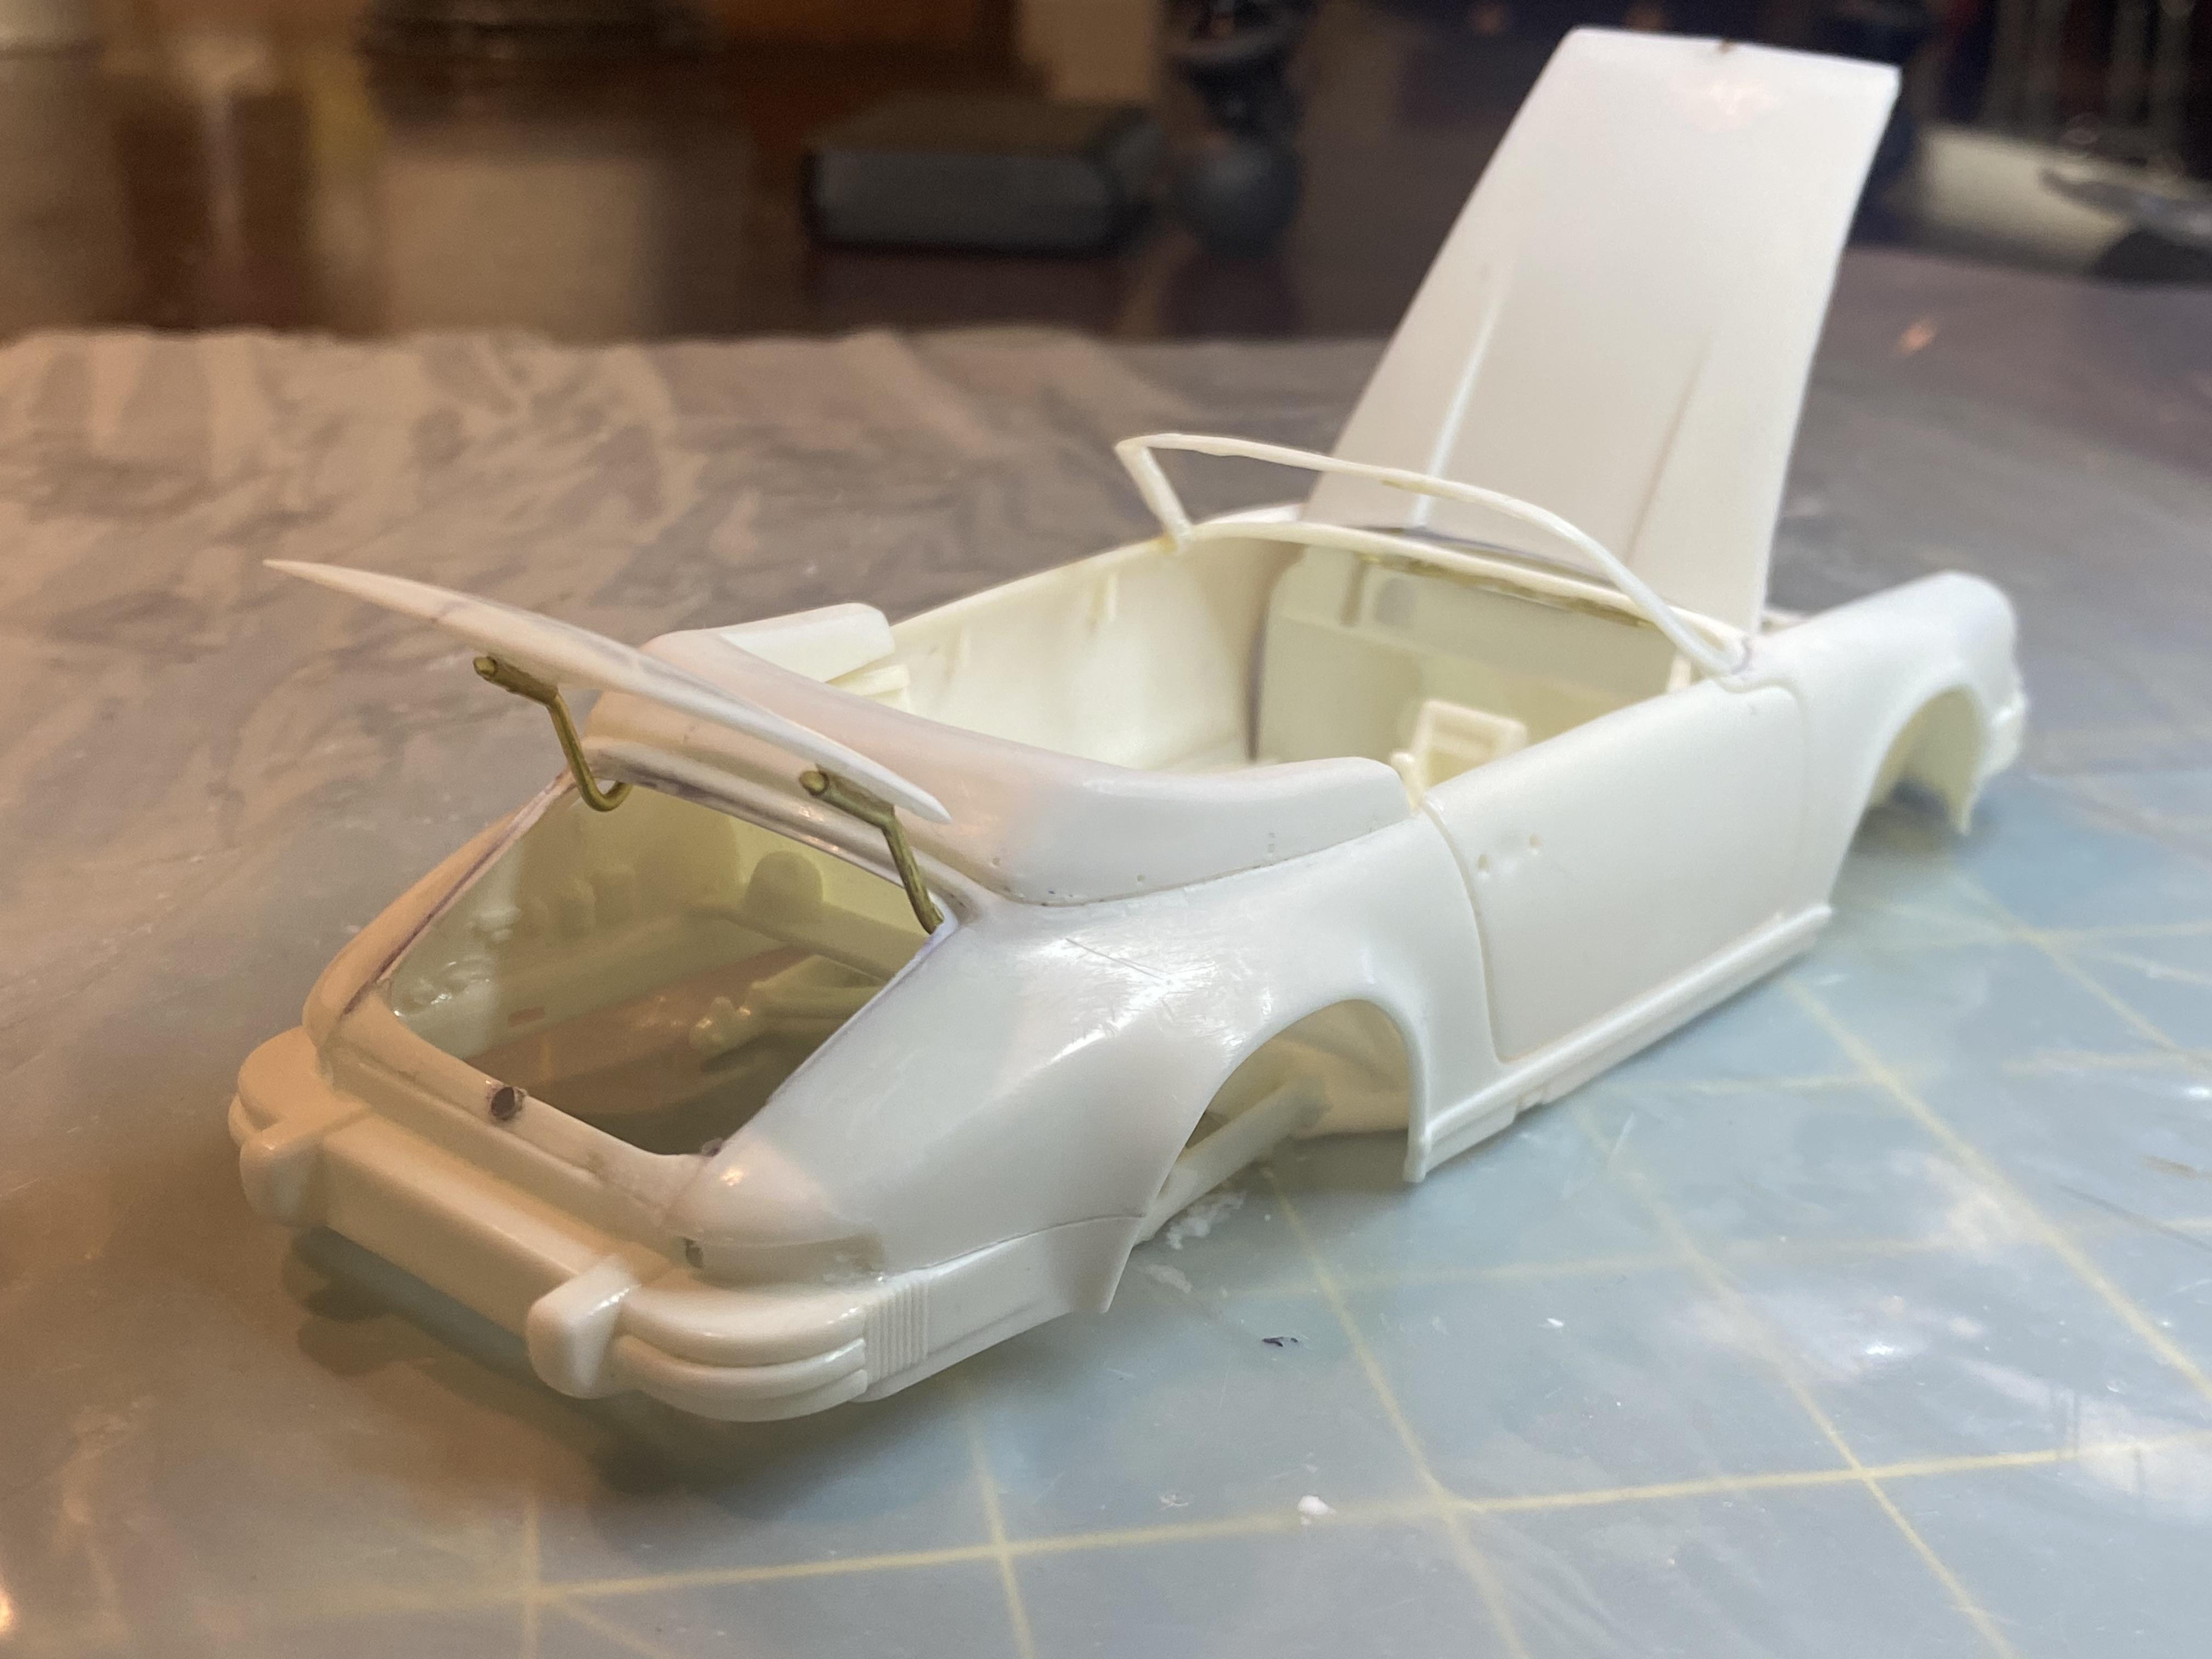
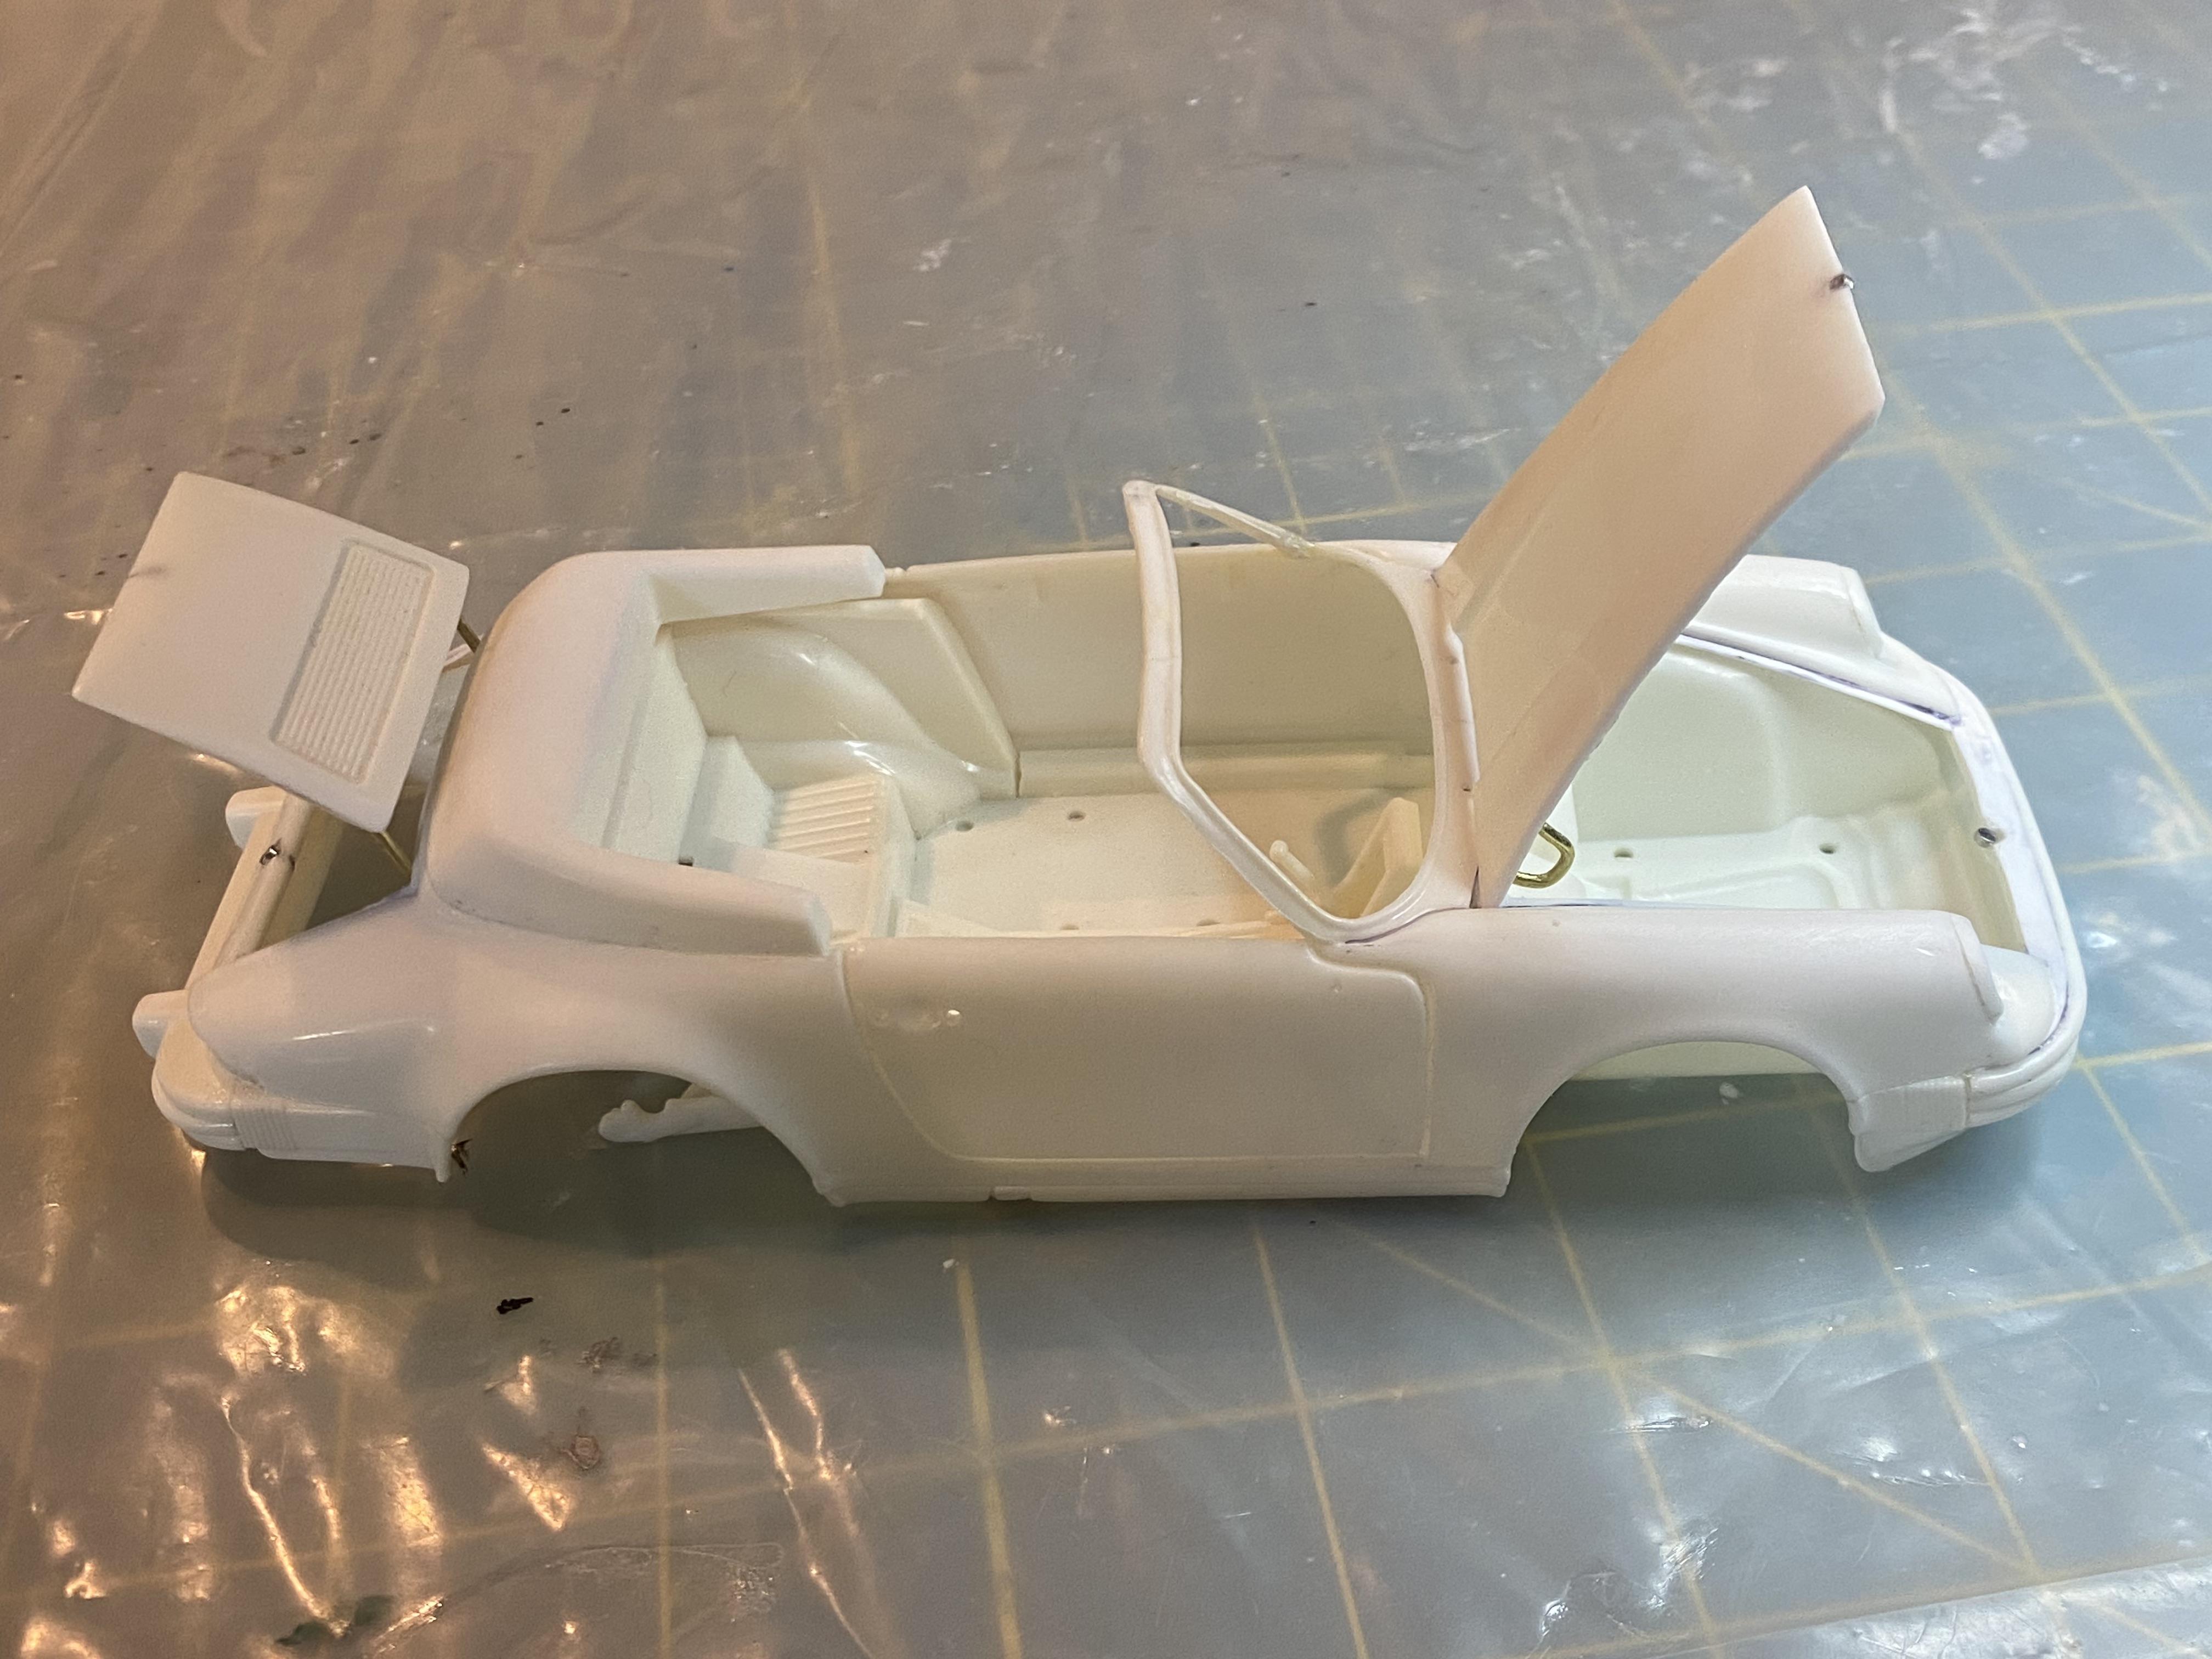
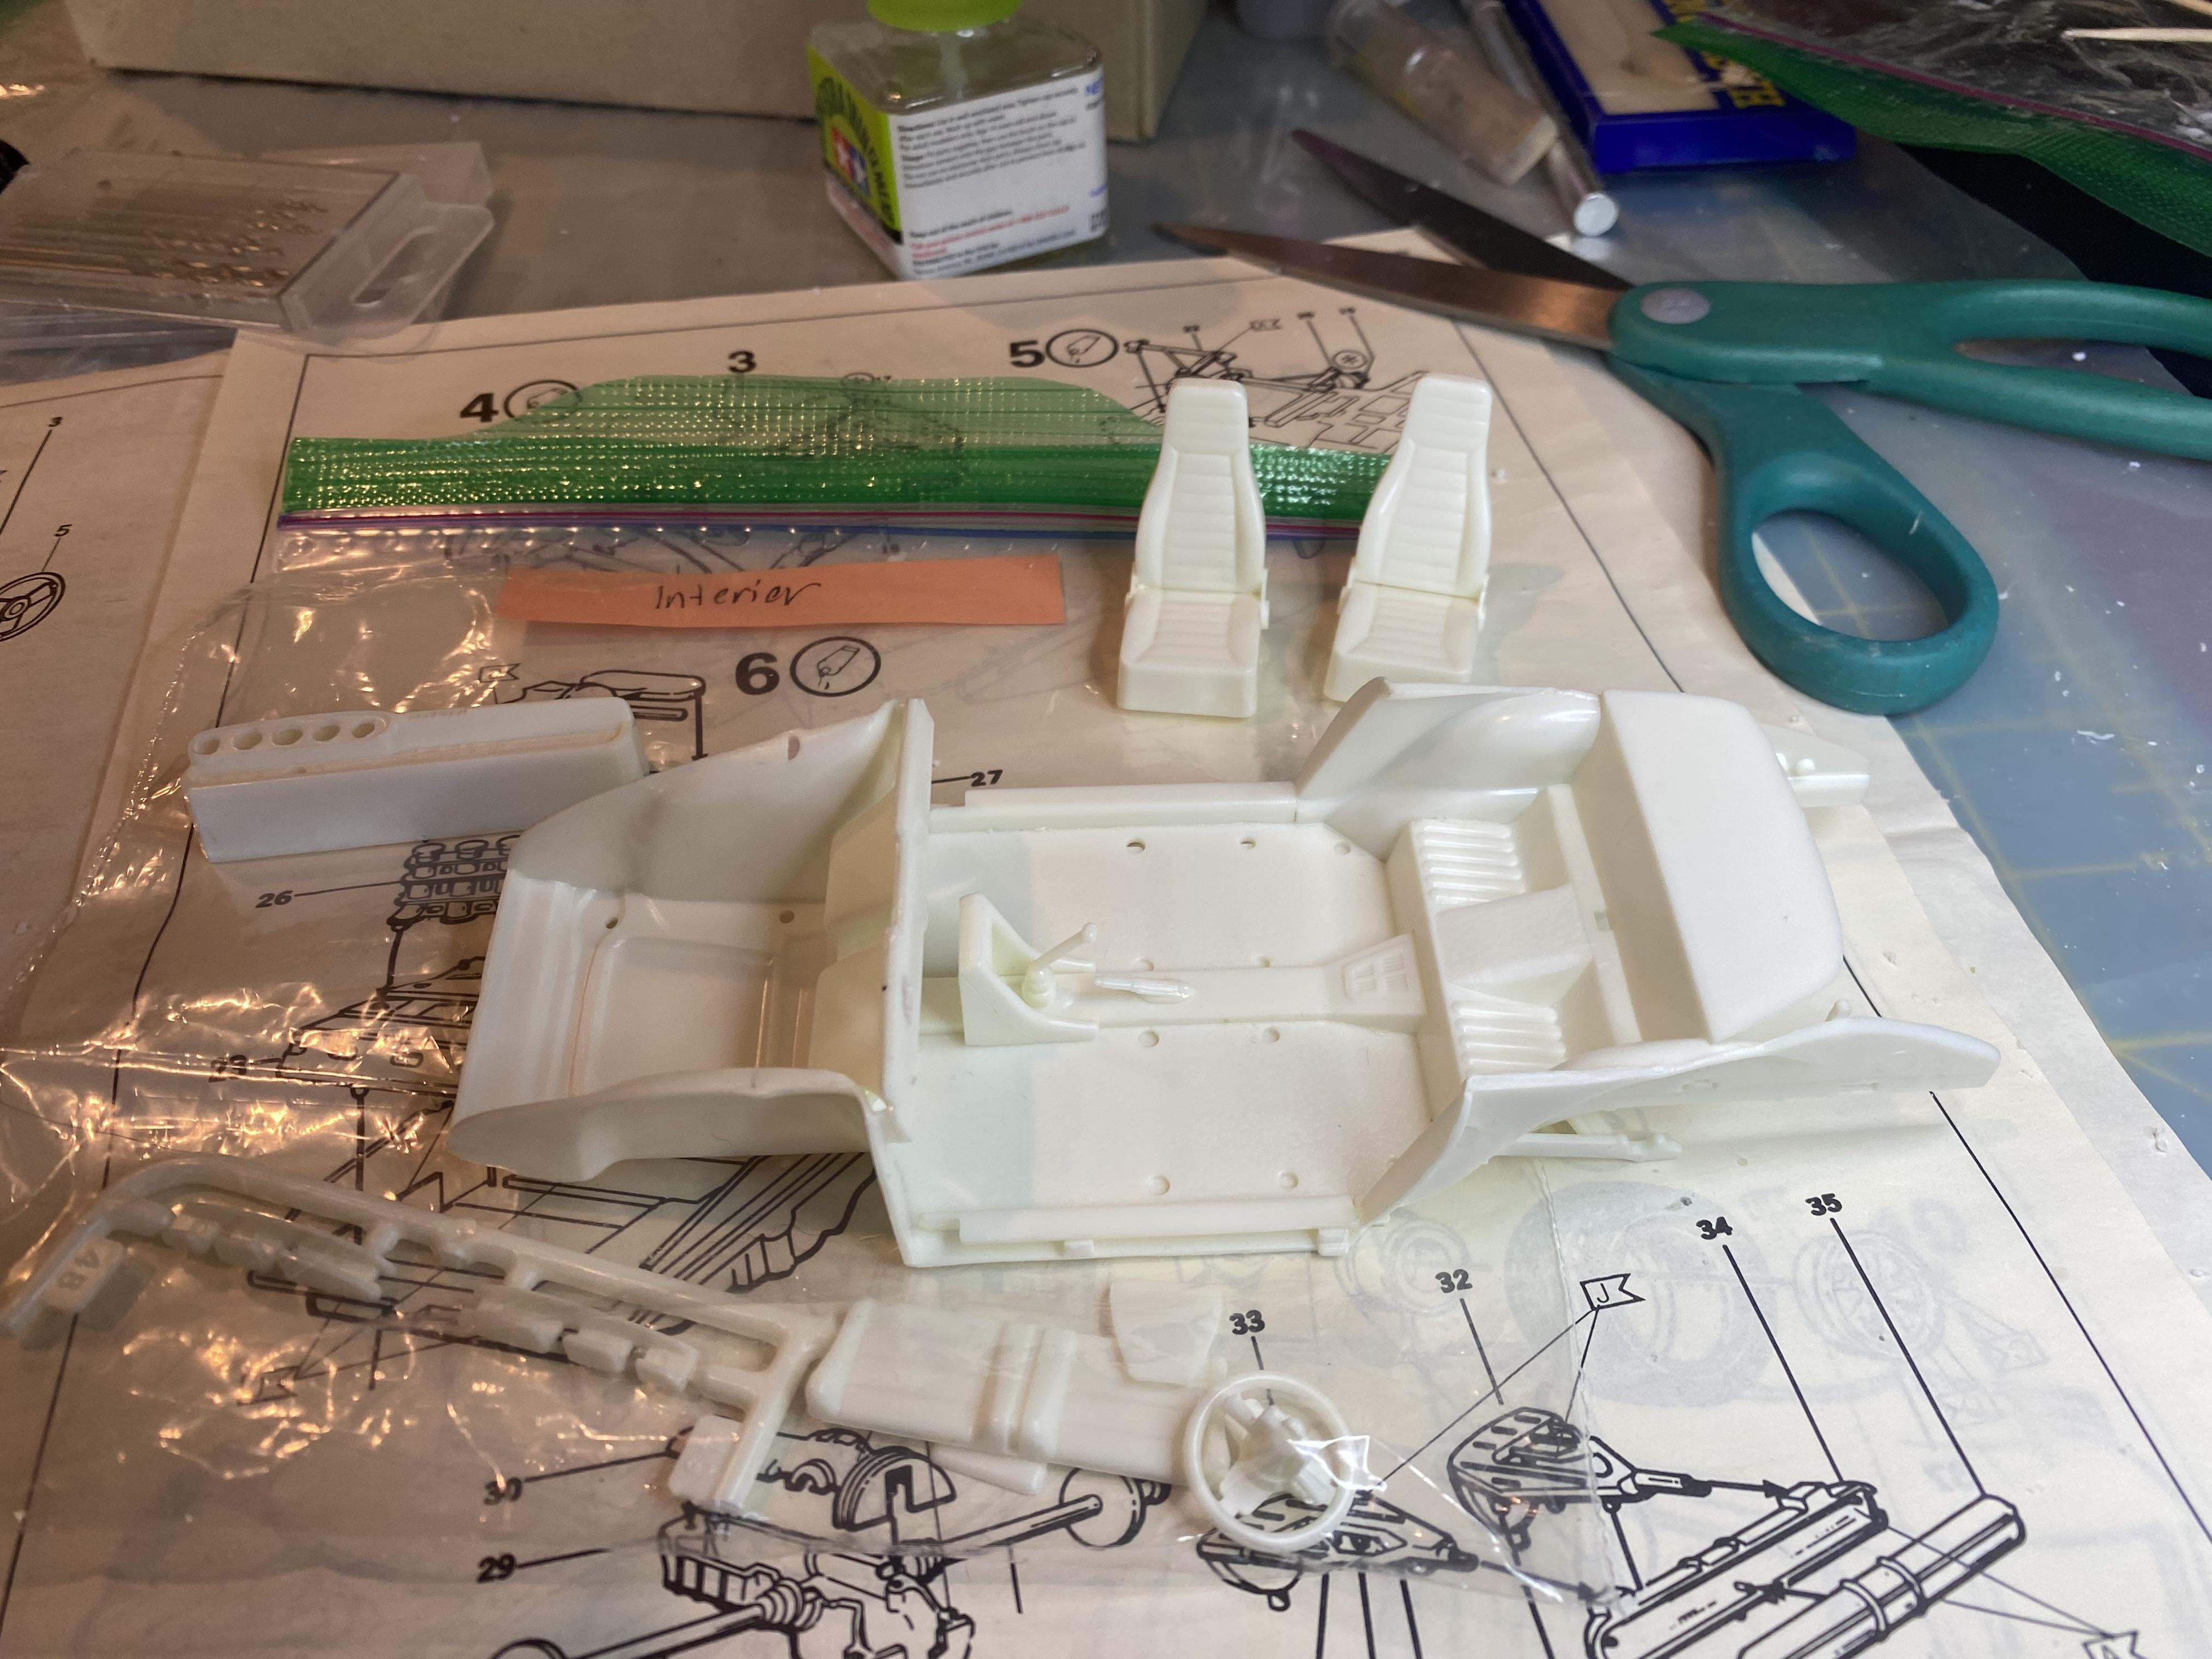
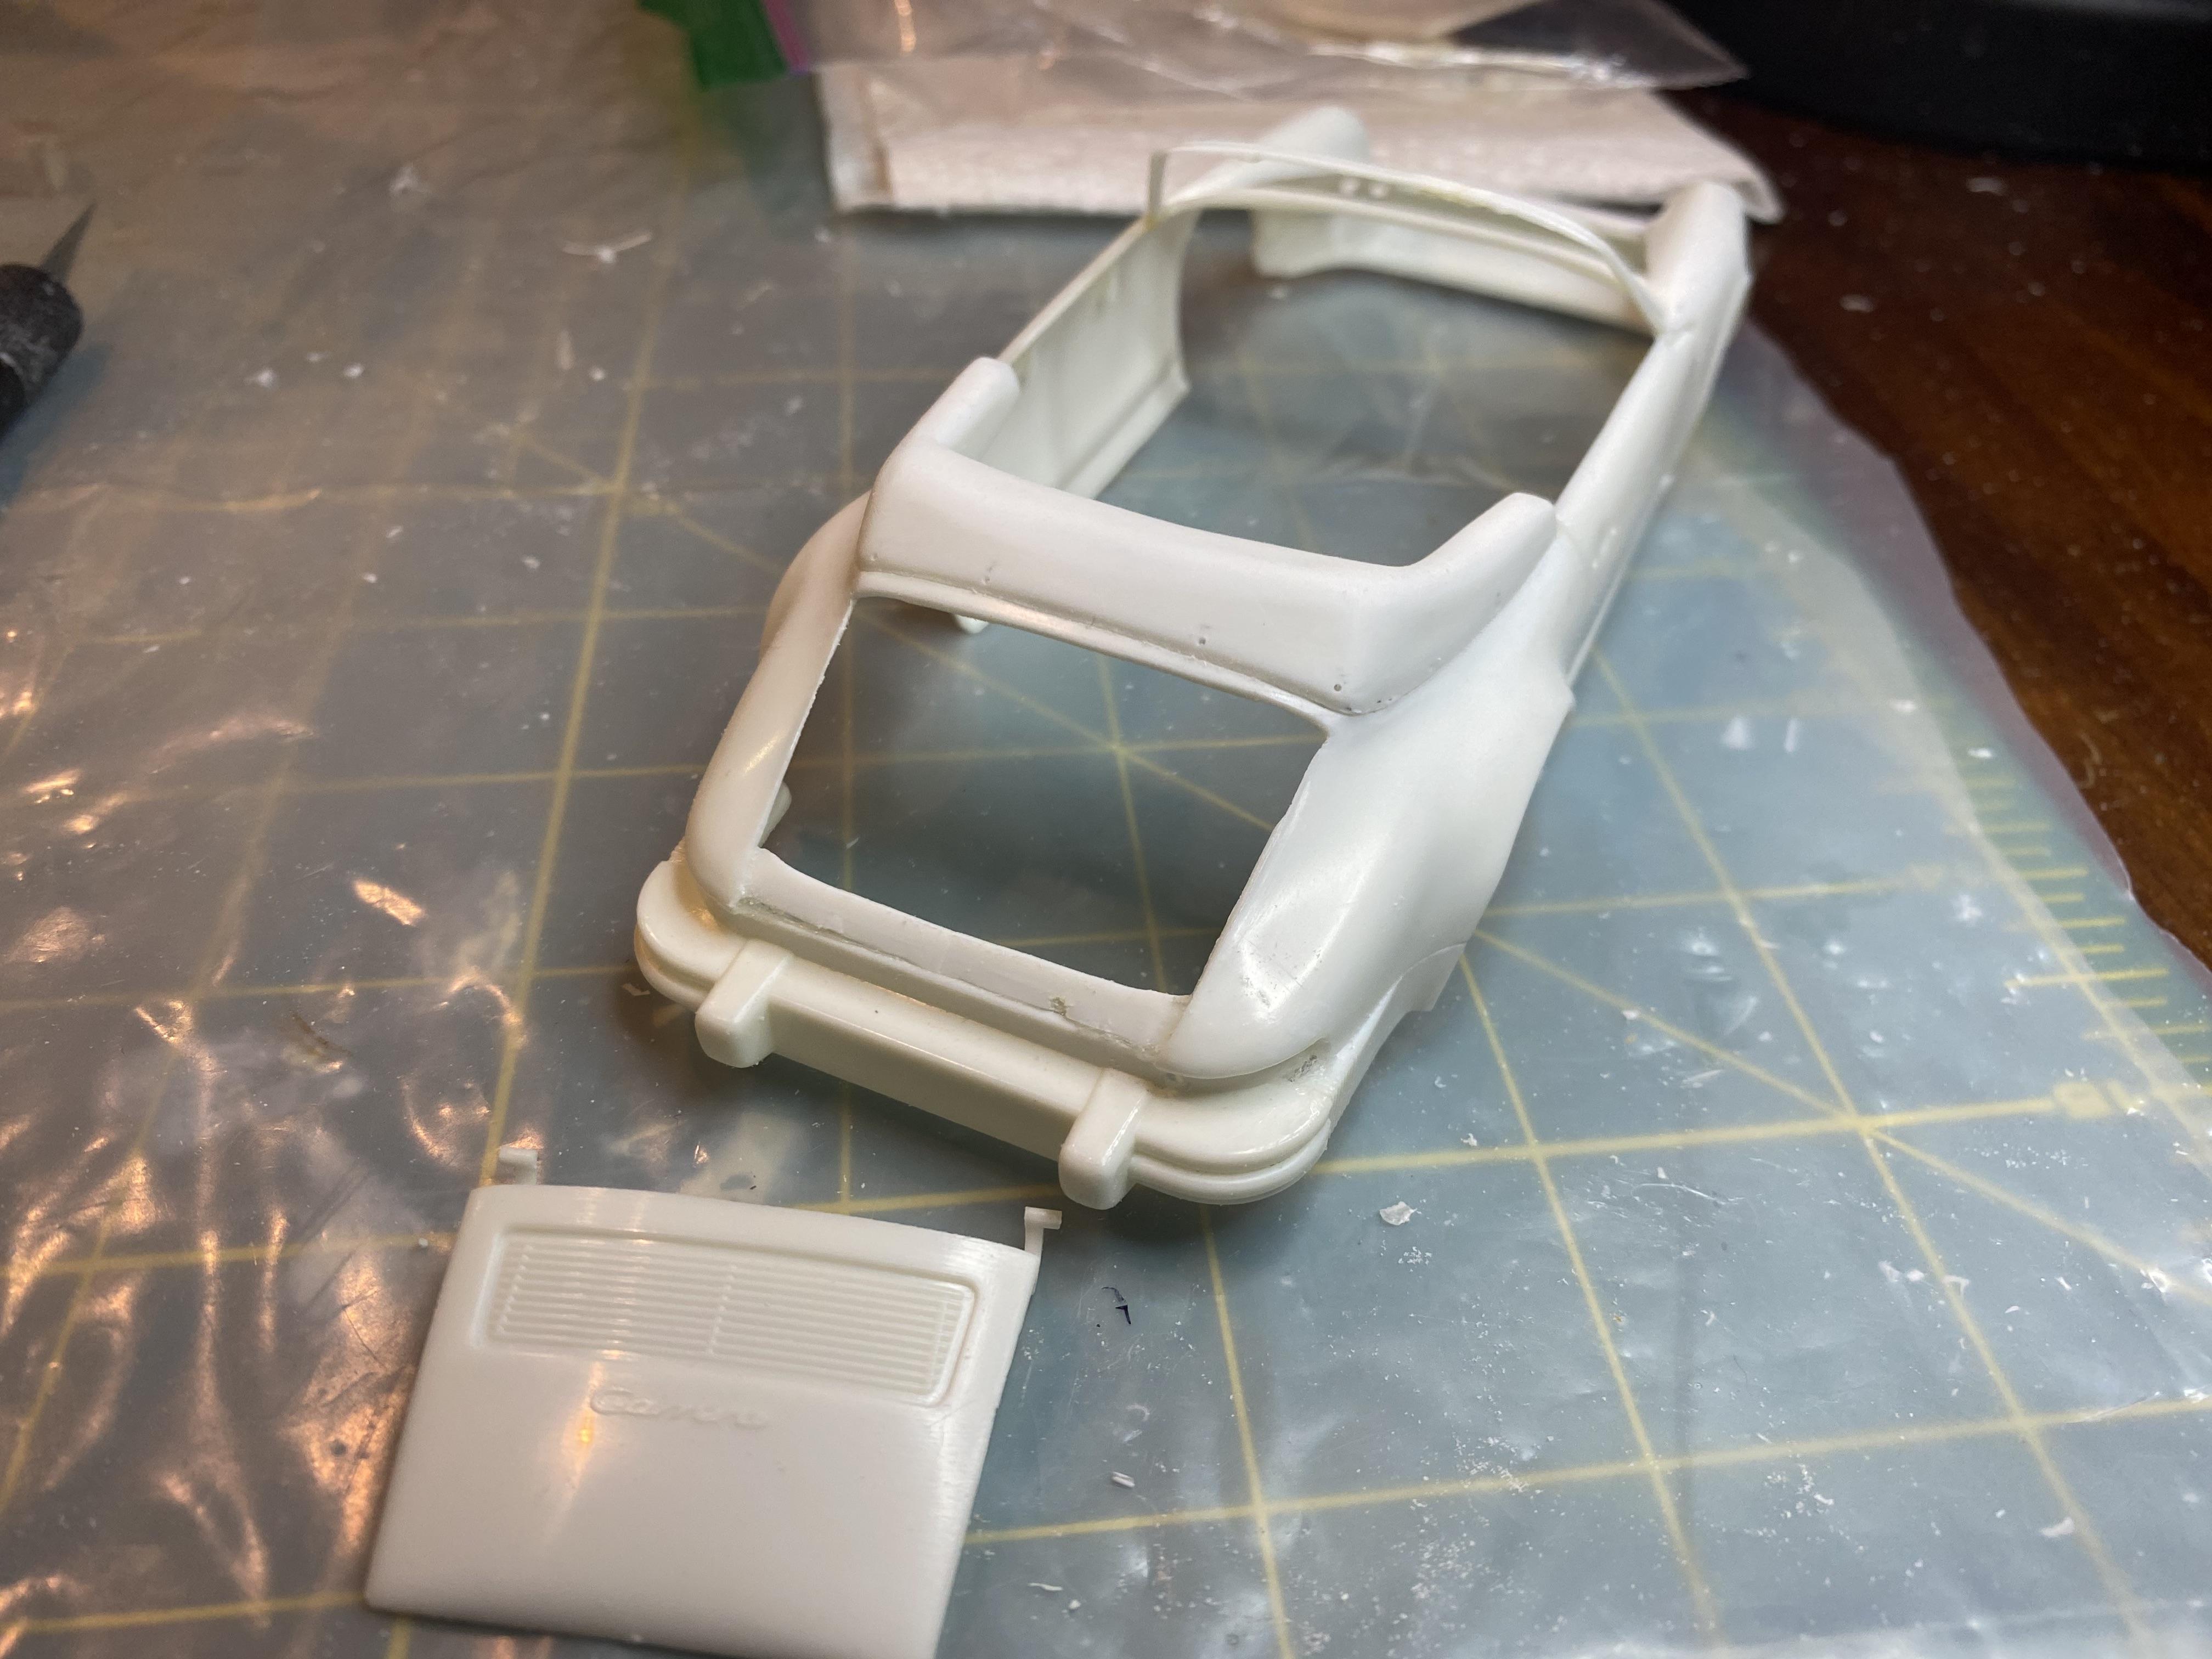
I as Able to get a little bit of Paint & Detailing done today on the 1984 Porsche Cabriolet. Added the missing section to the side vent window frames. Engine is now assembled, painted and wired. Added the gauges to the dash and tested. I will be able to get it to spread across all of the gauges better during assembly, did a bit of brown panel lining for the interior seats to give them a little depth. I did a little heat treatment to the exhaust.

-
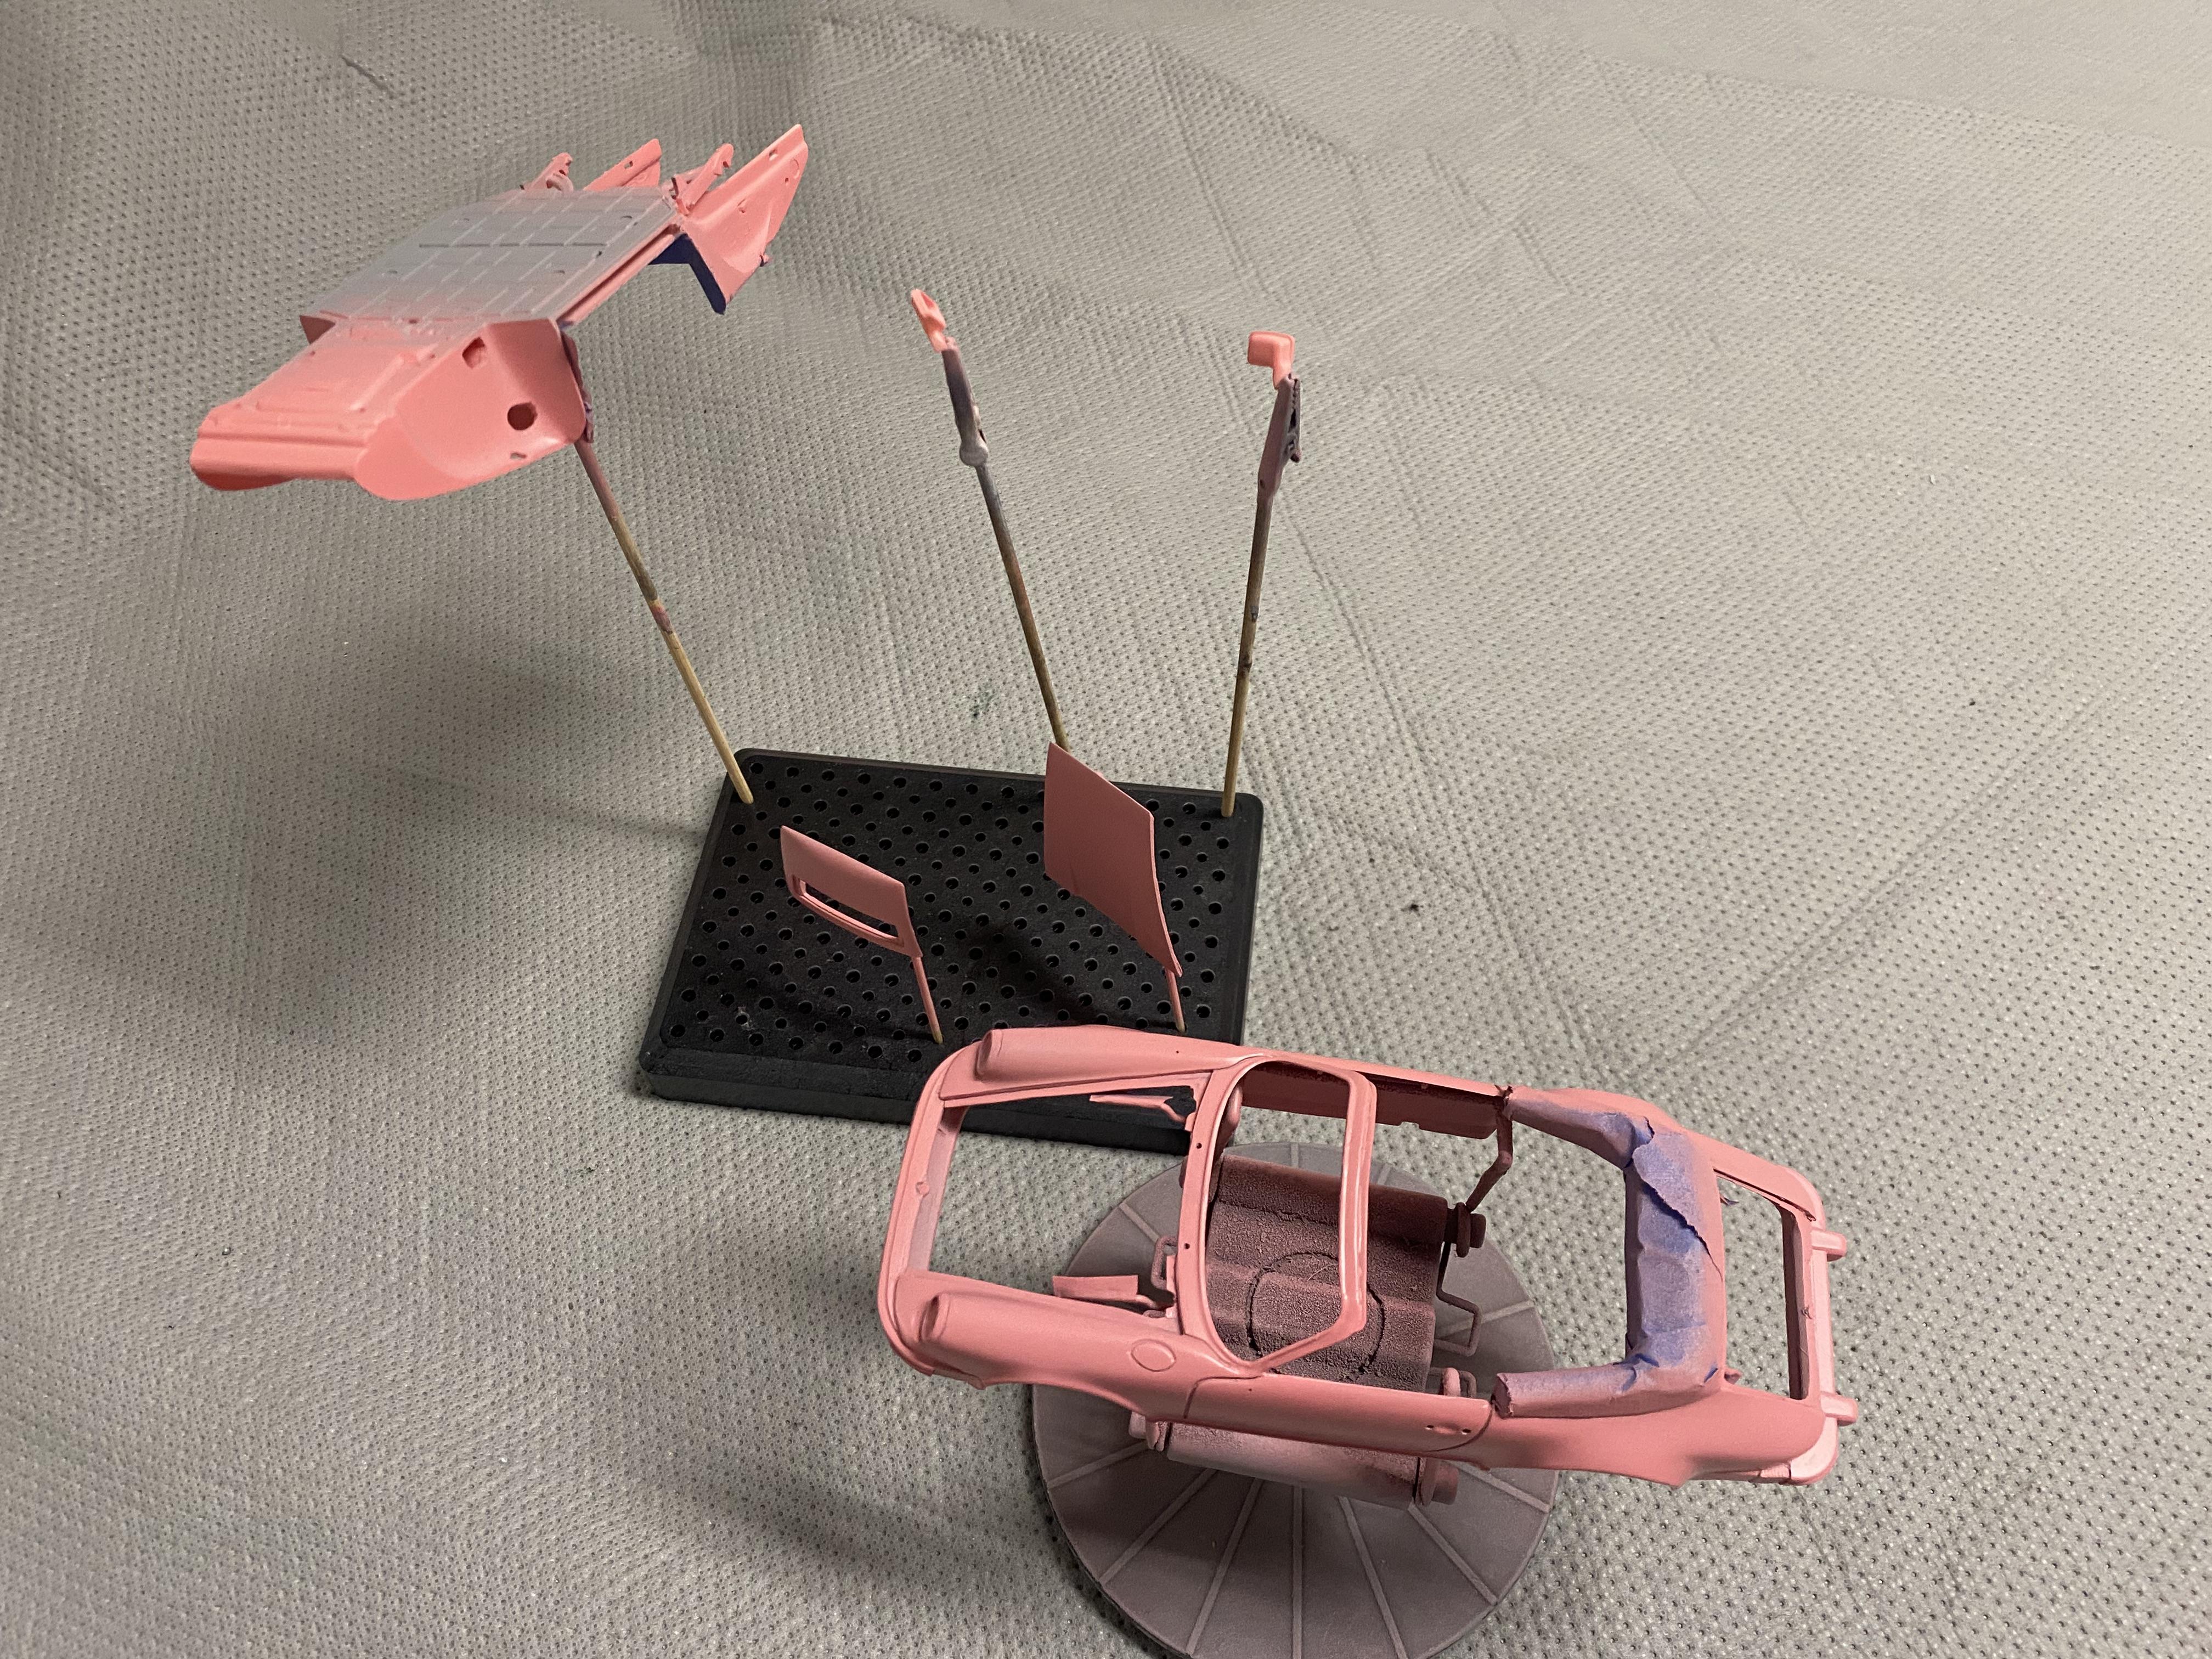
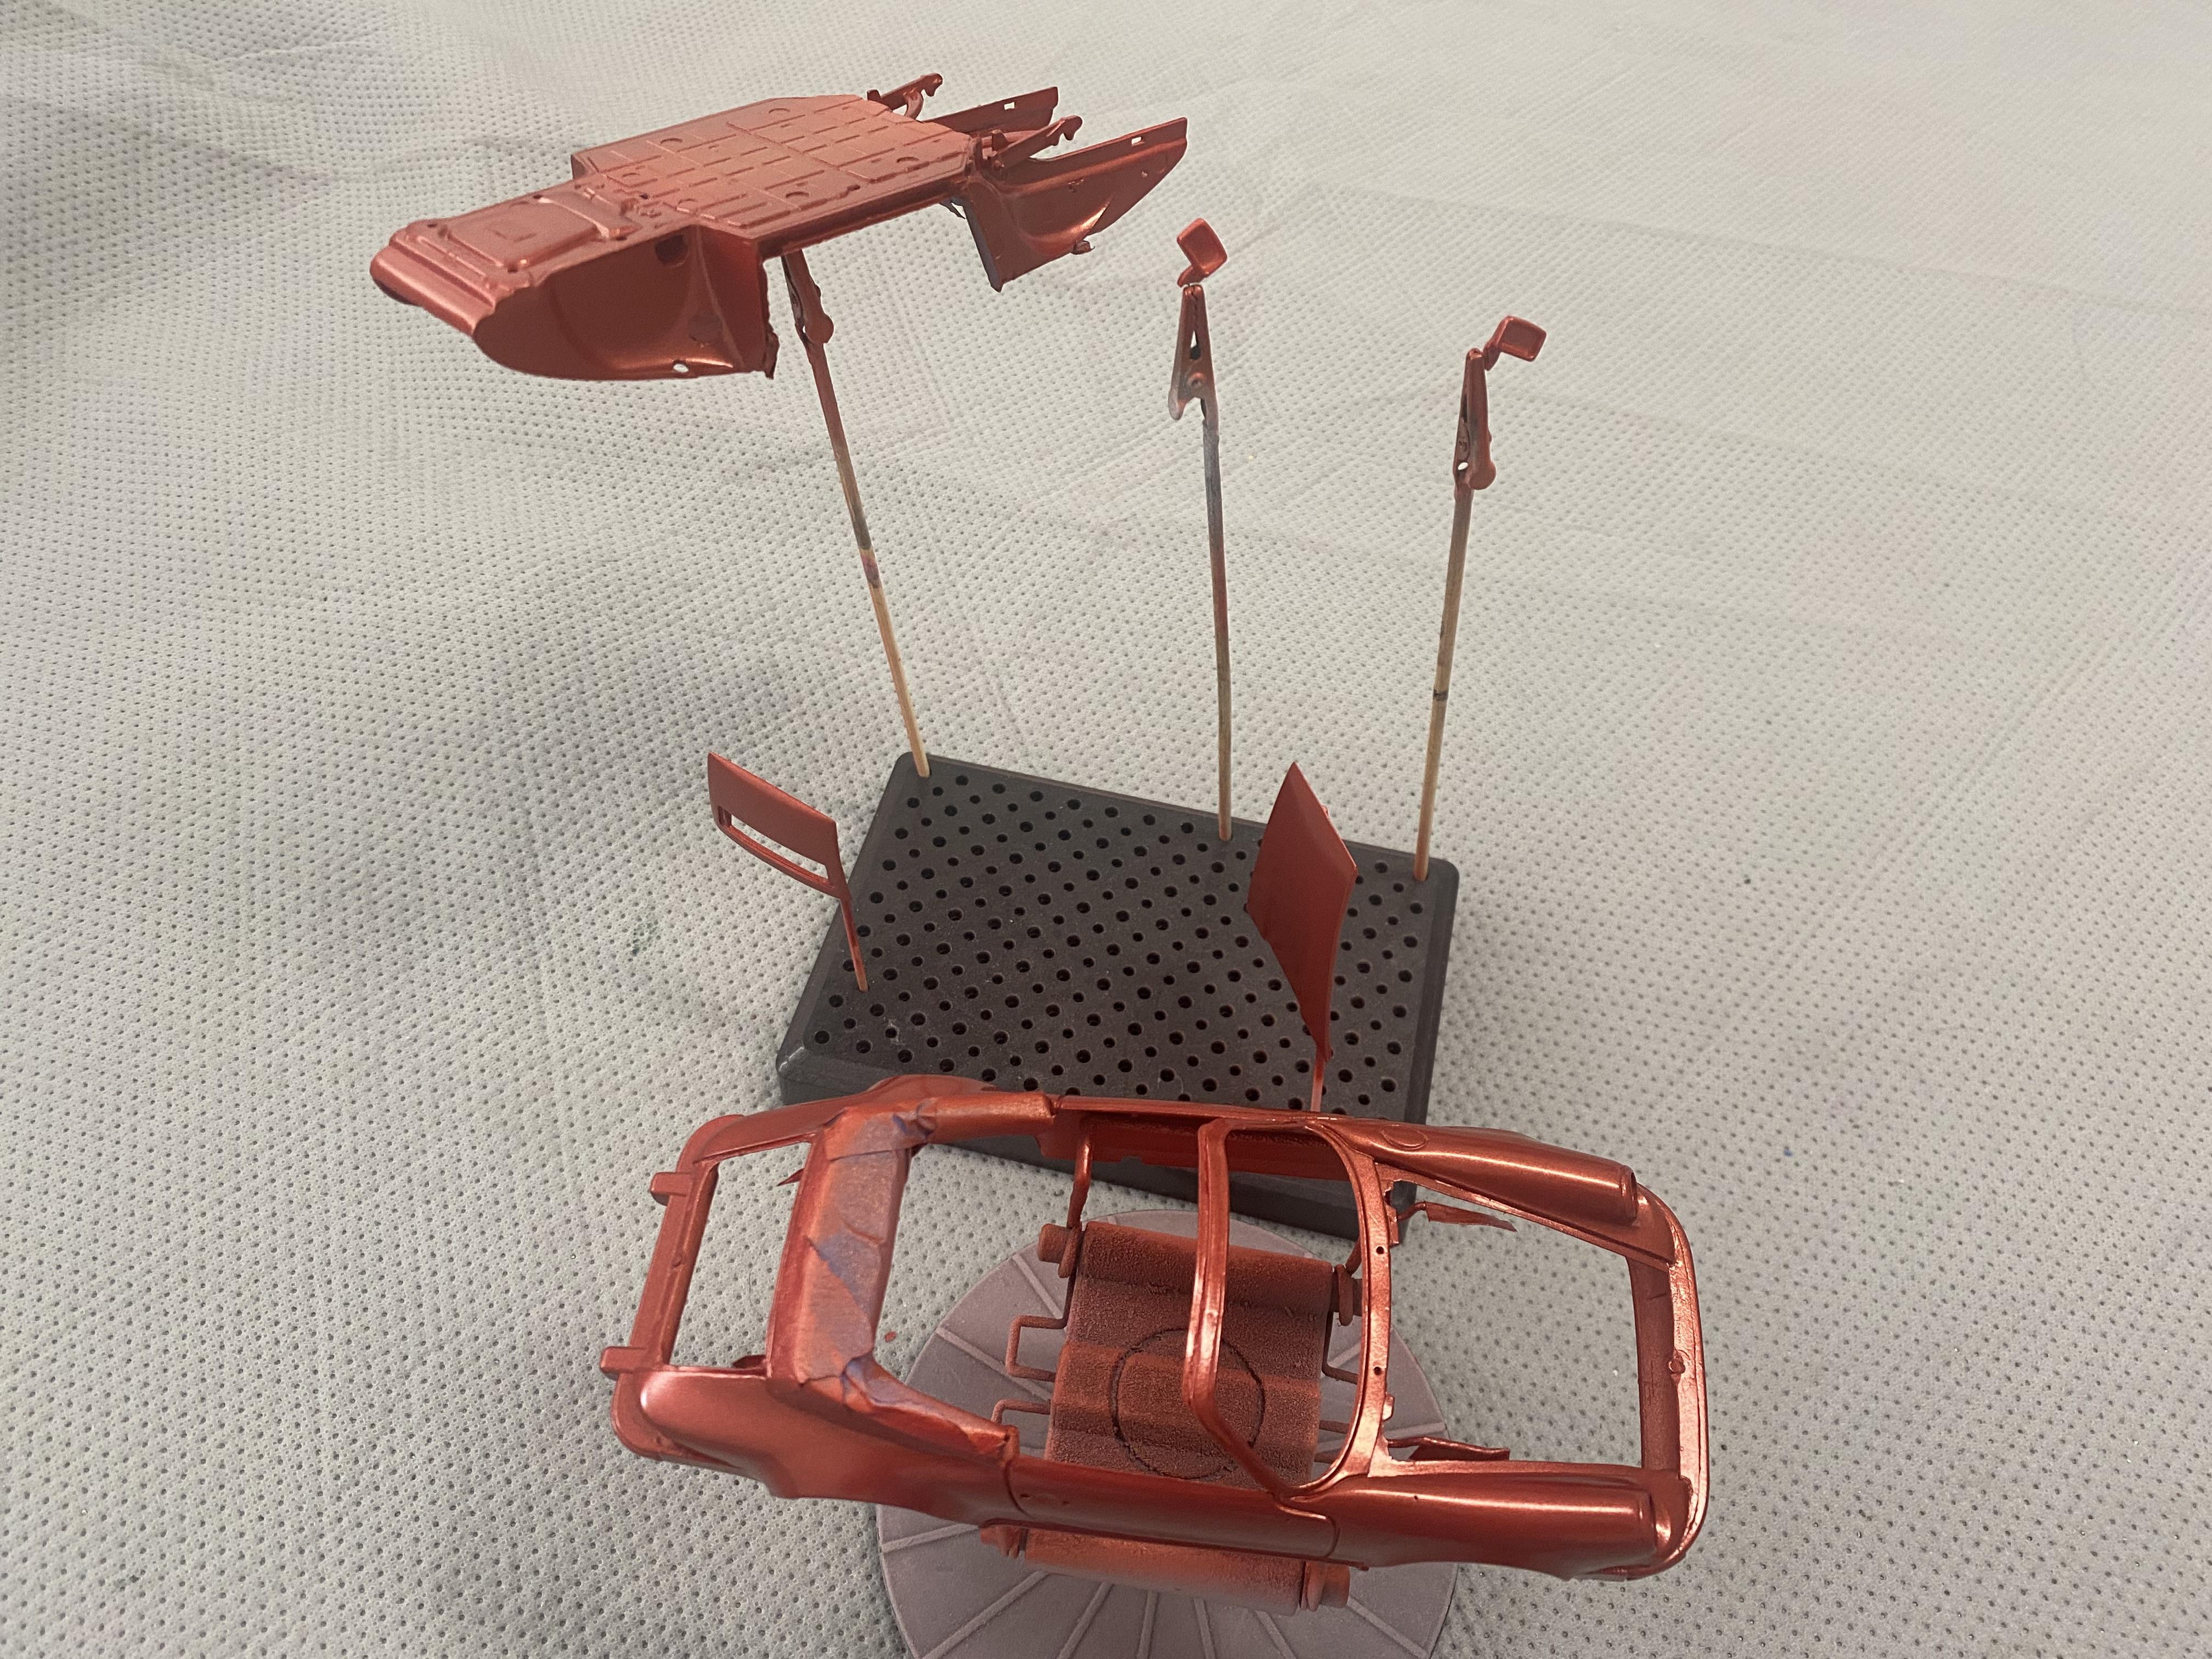
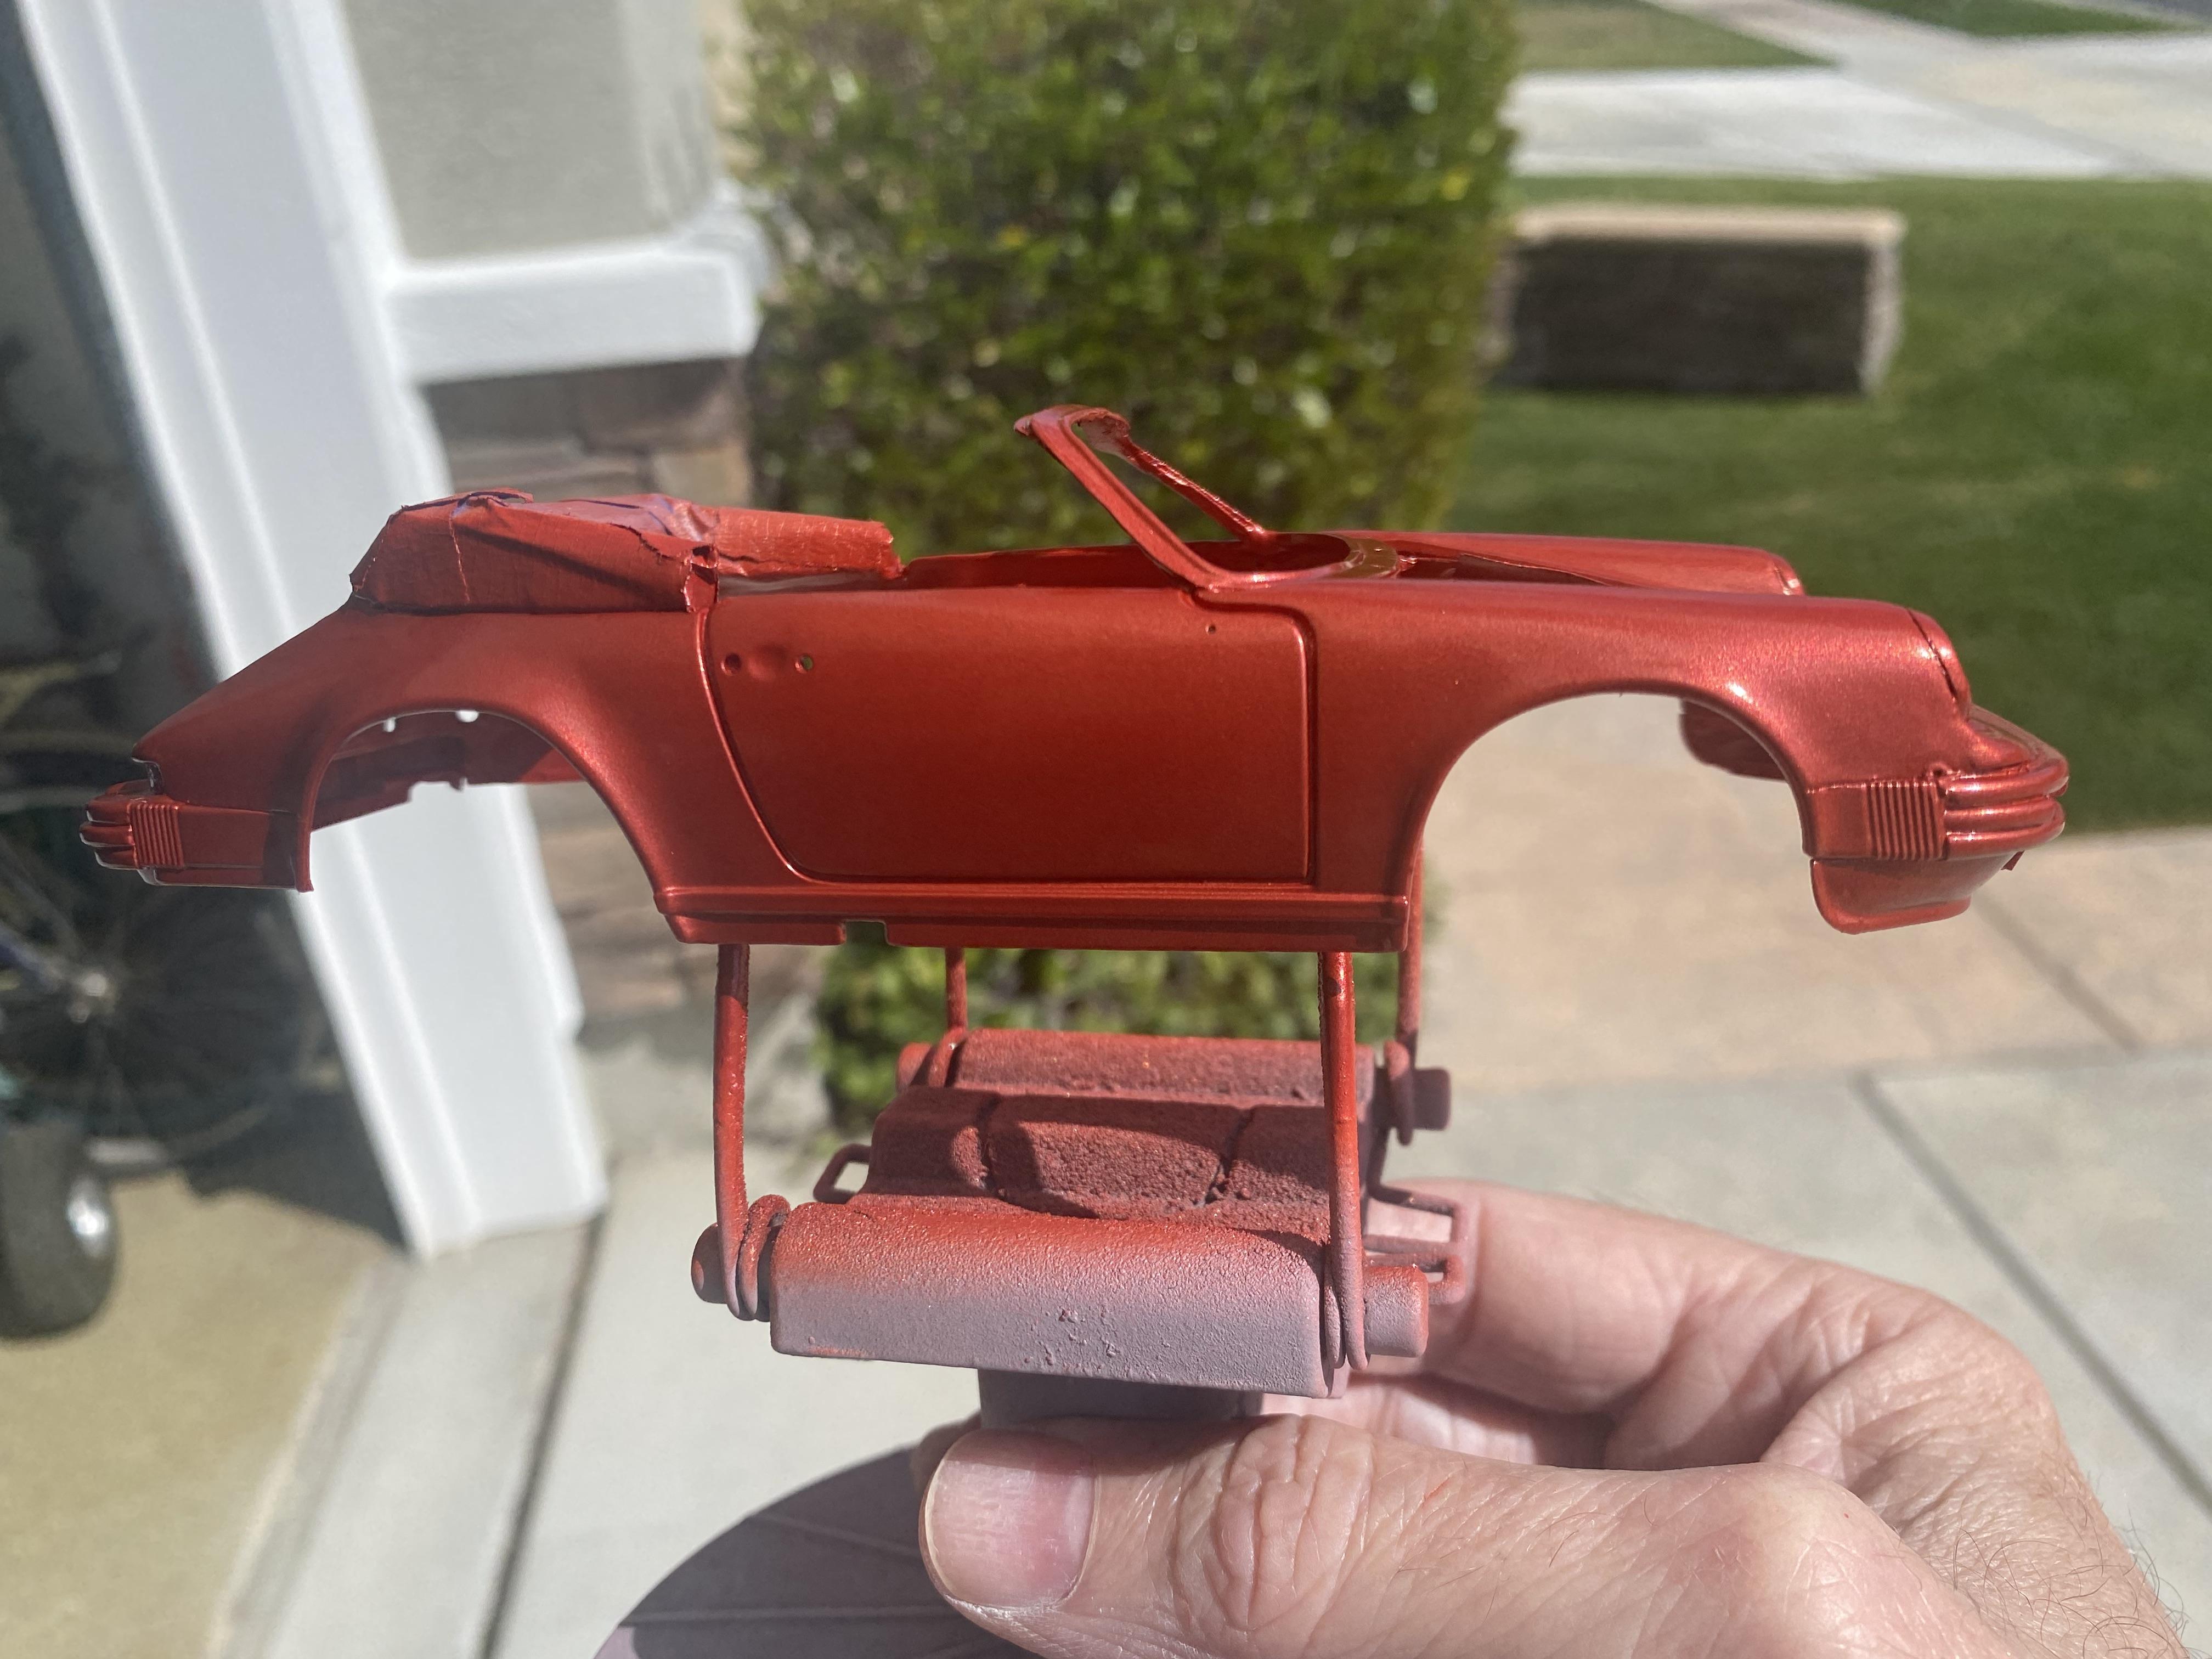
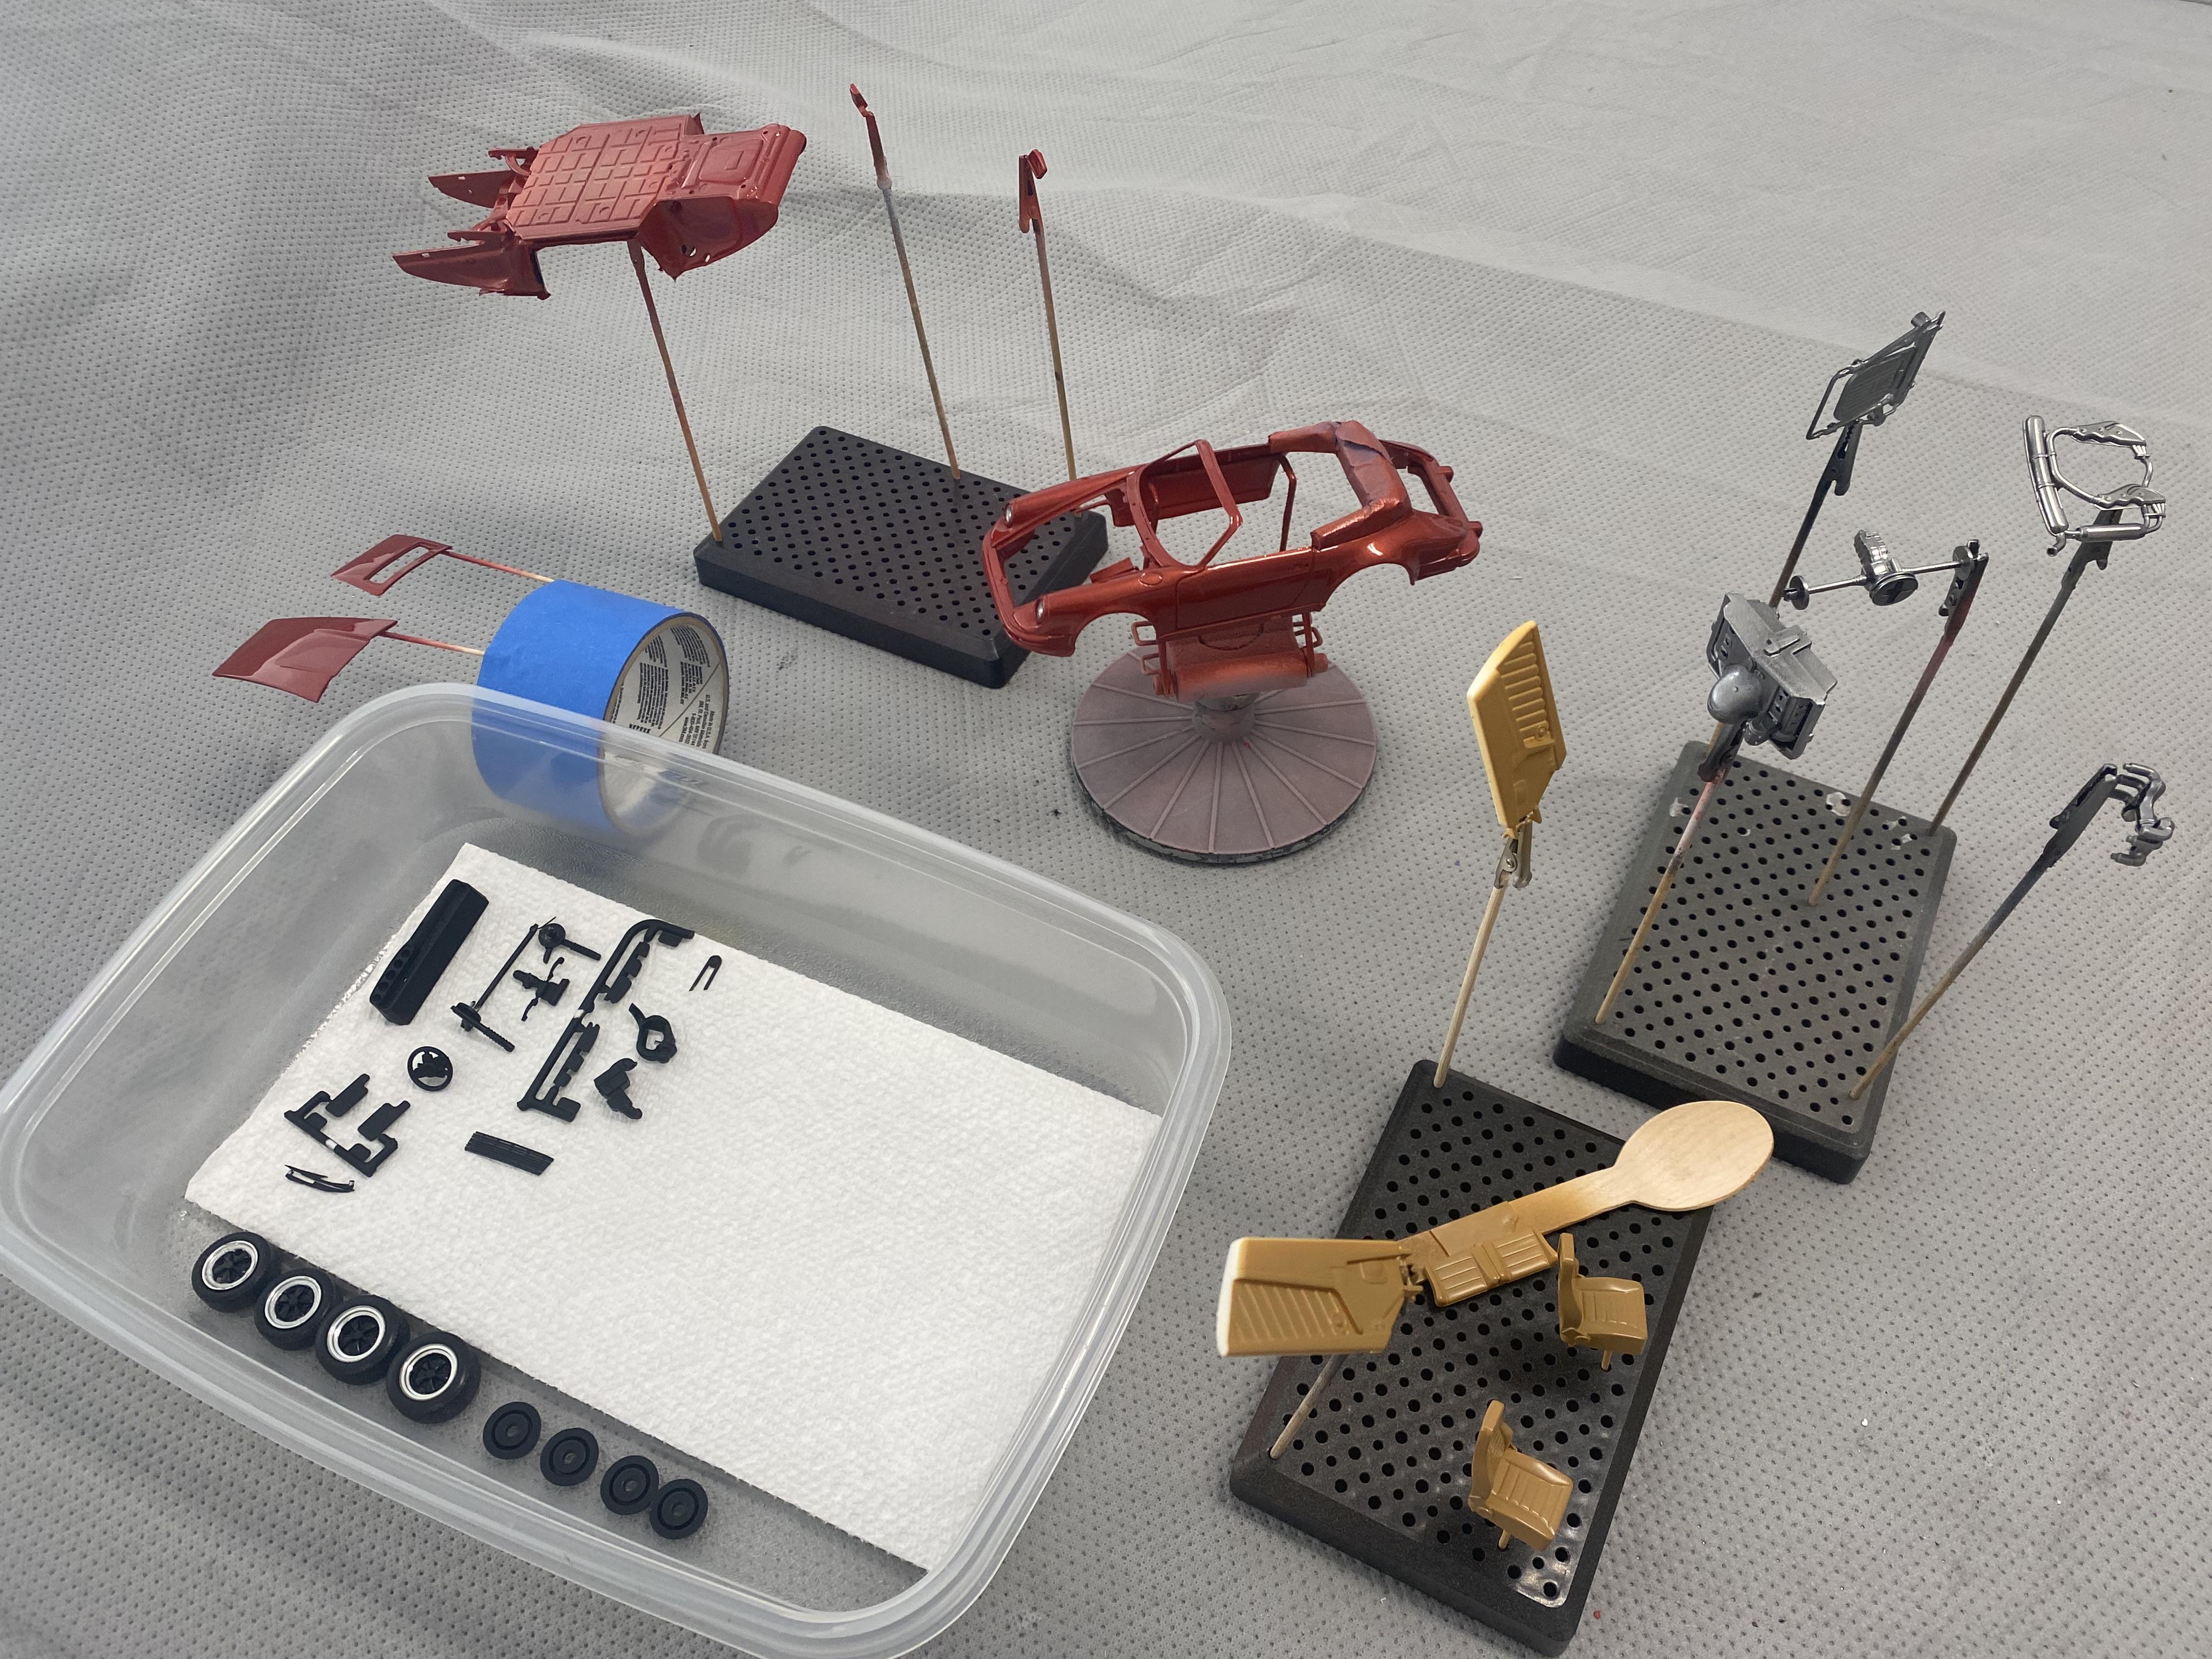
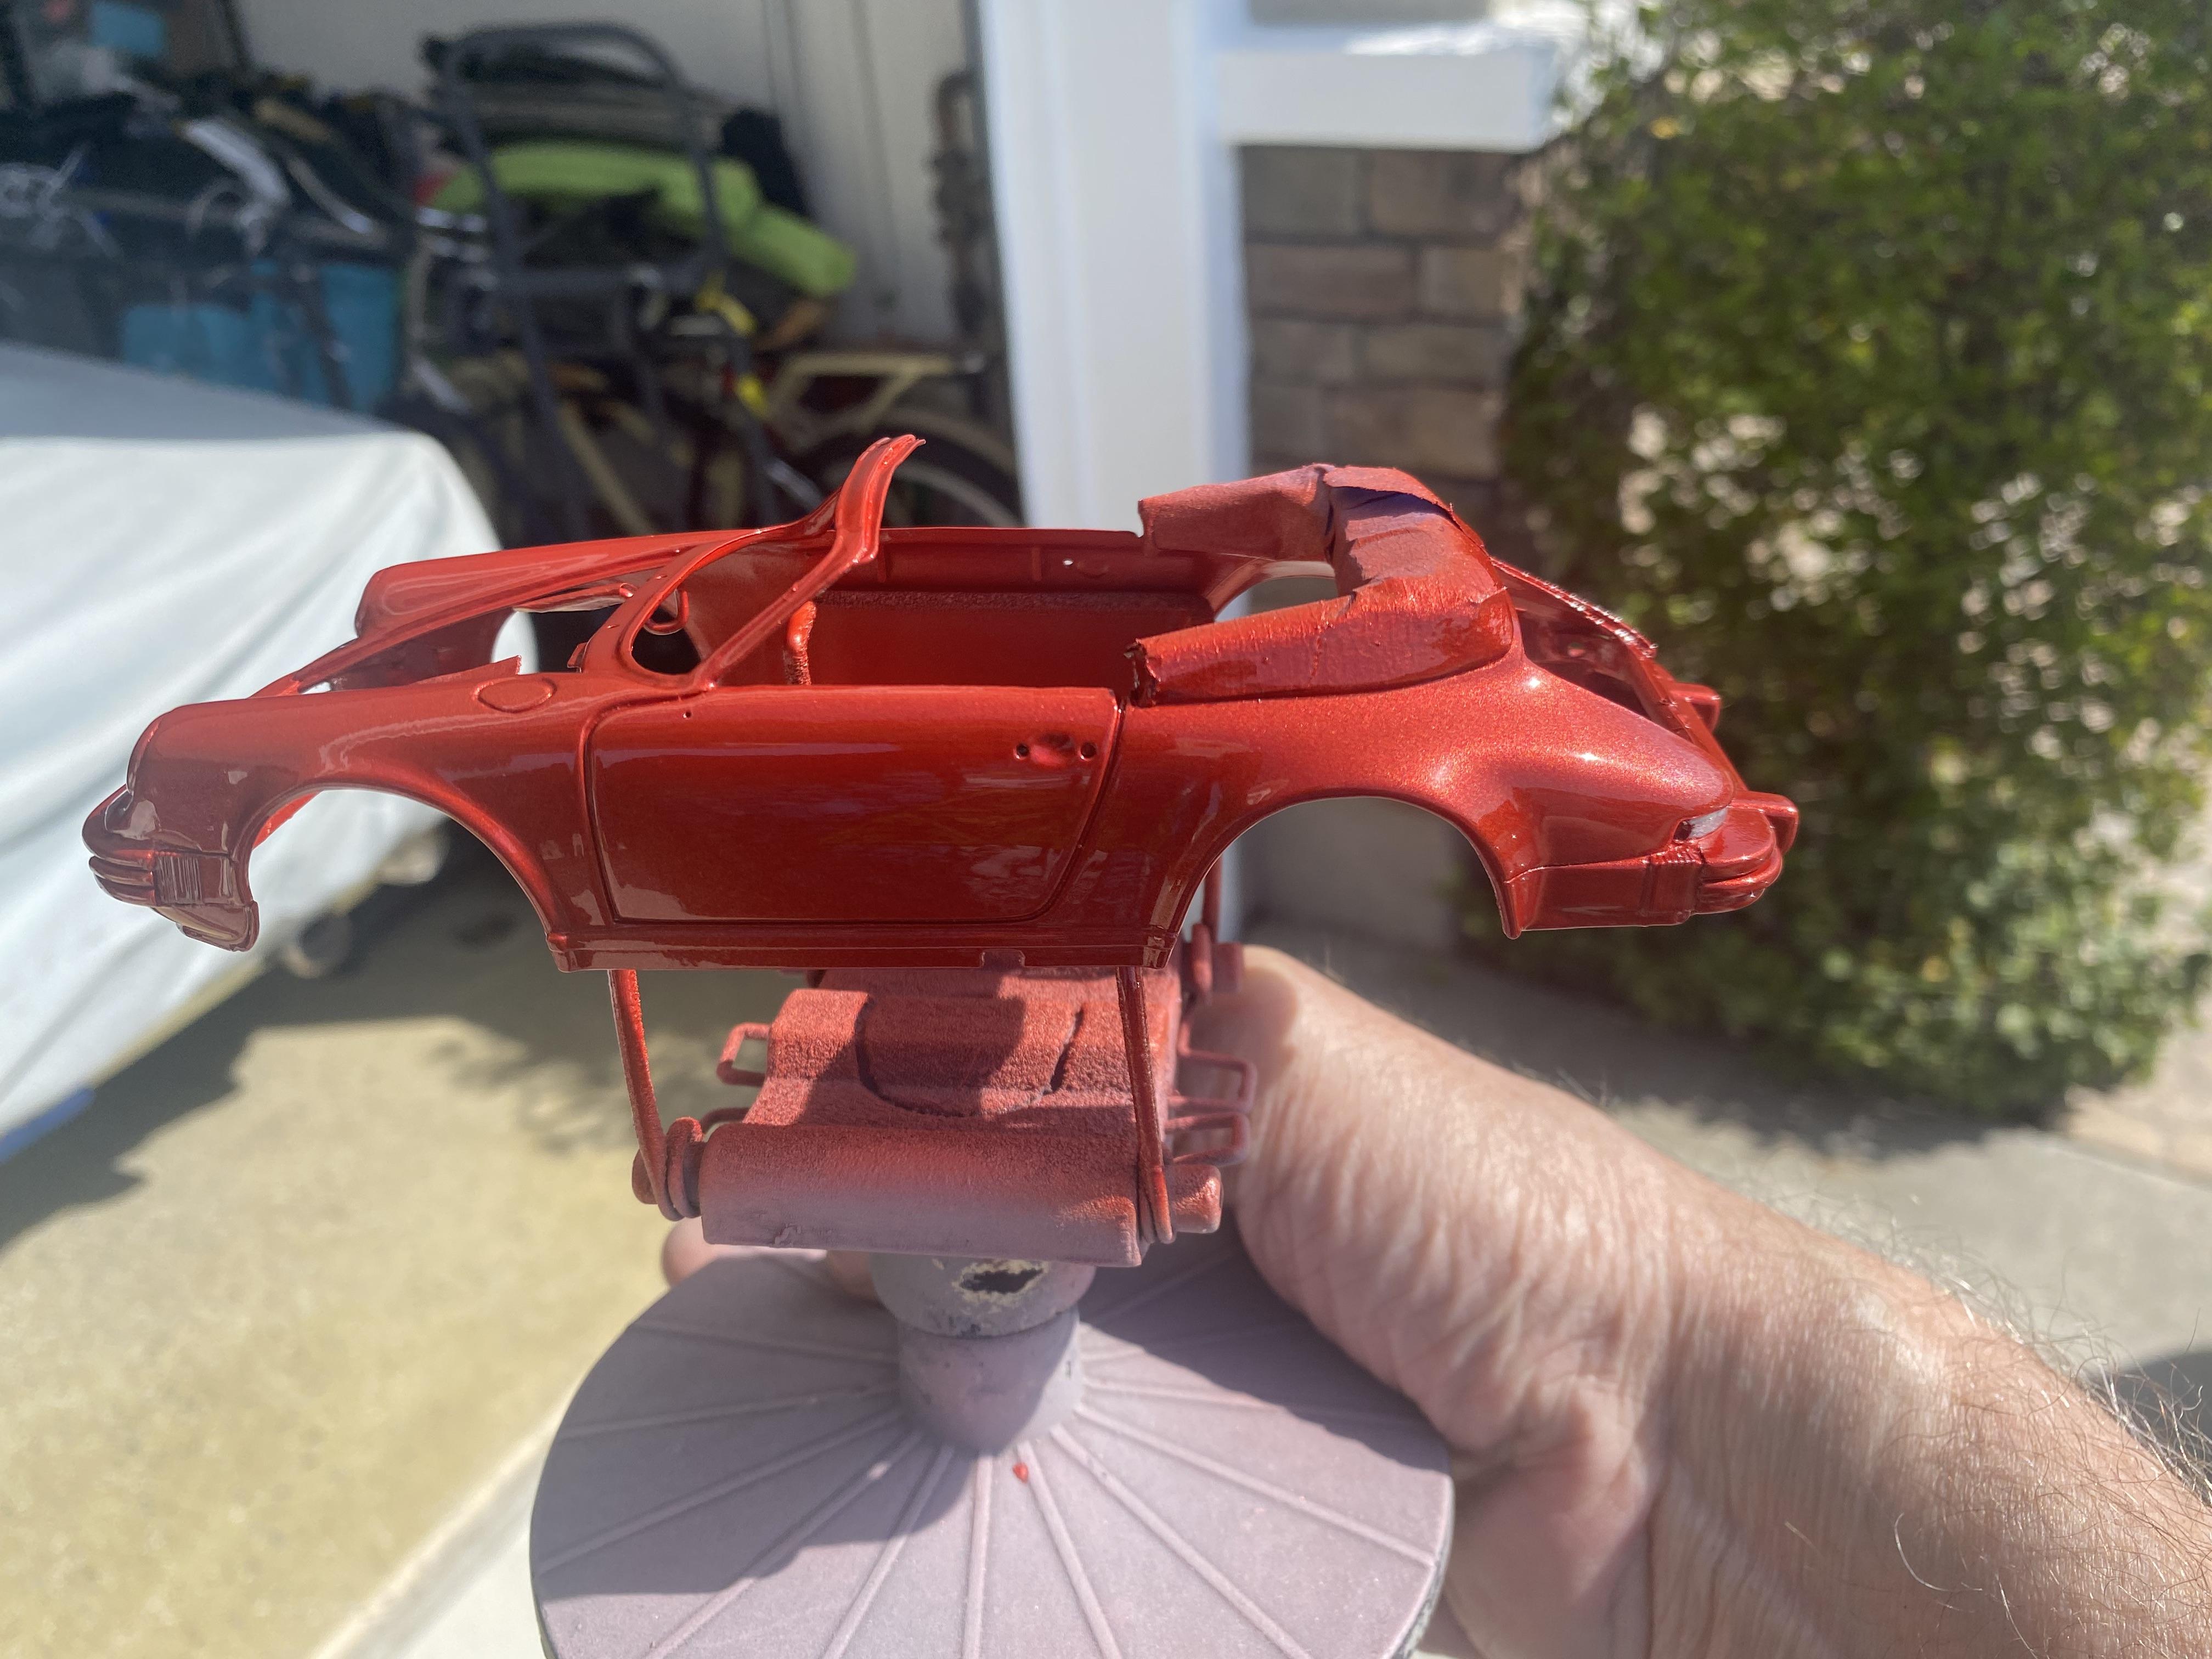
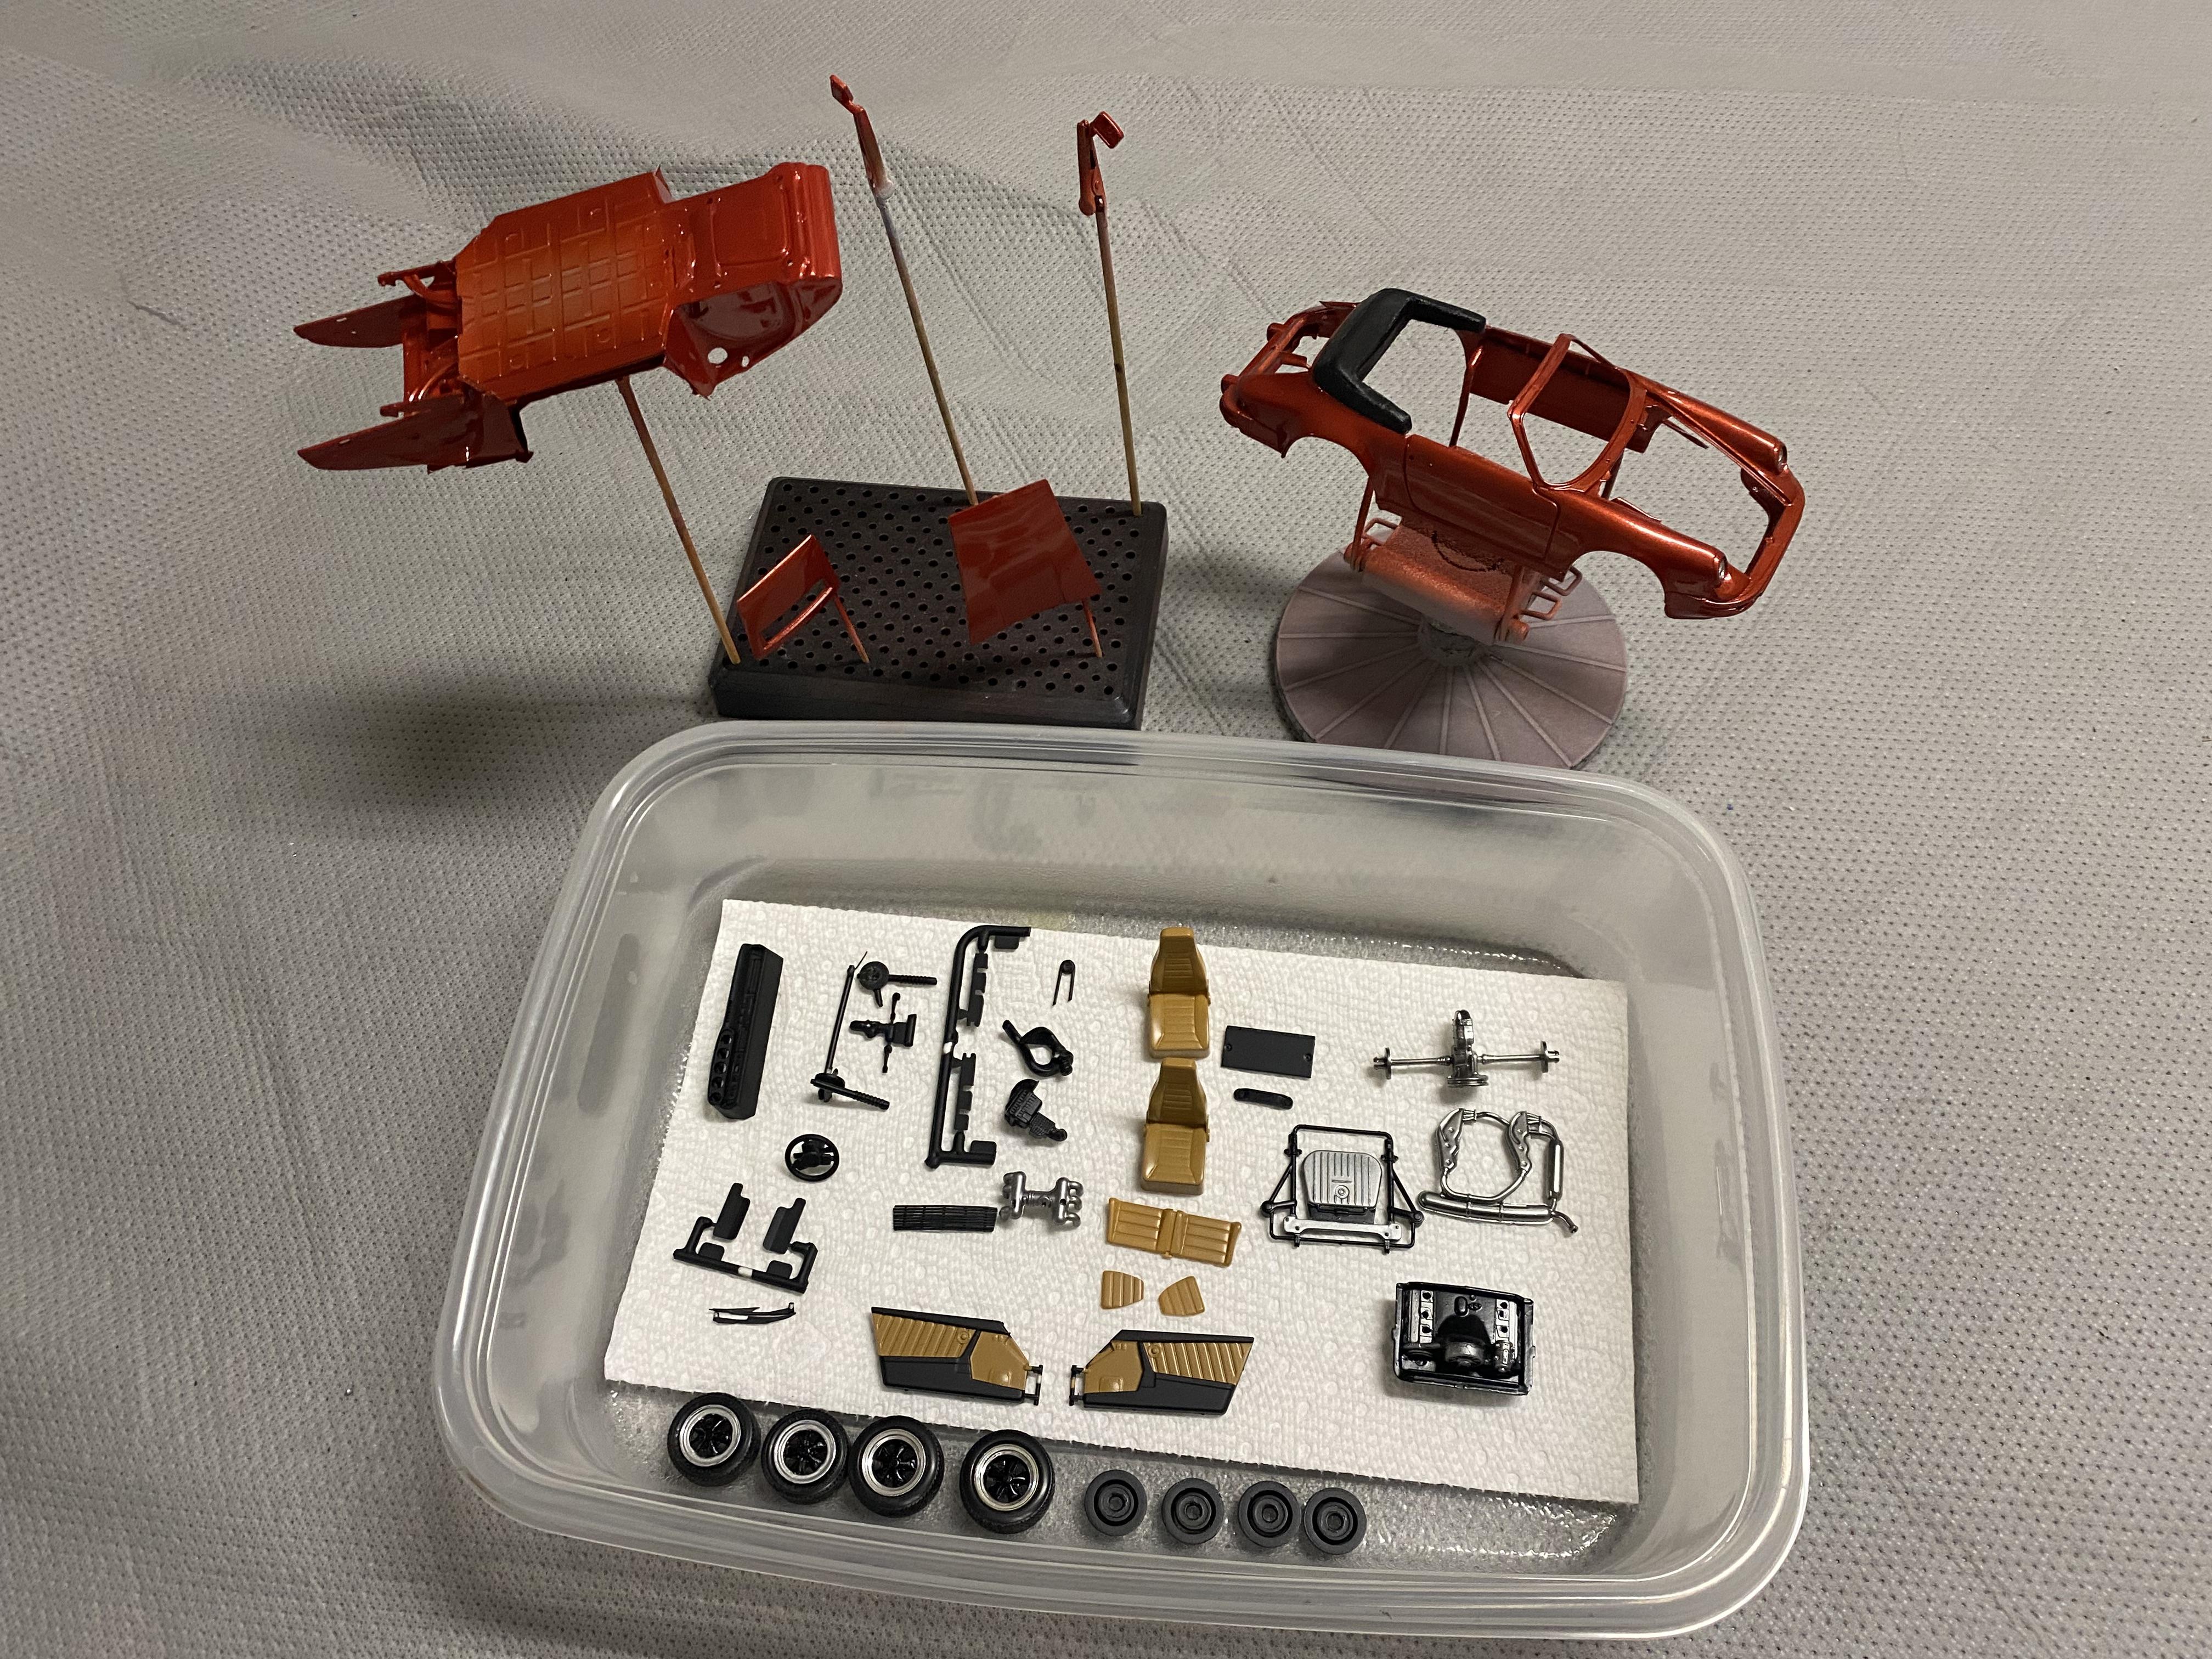
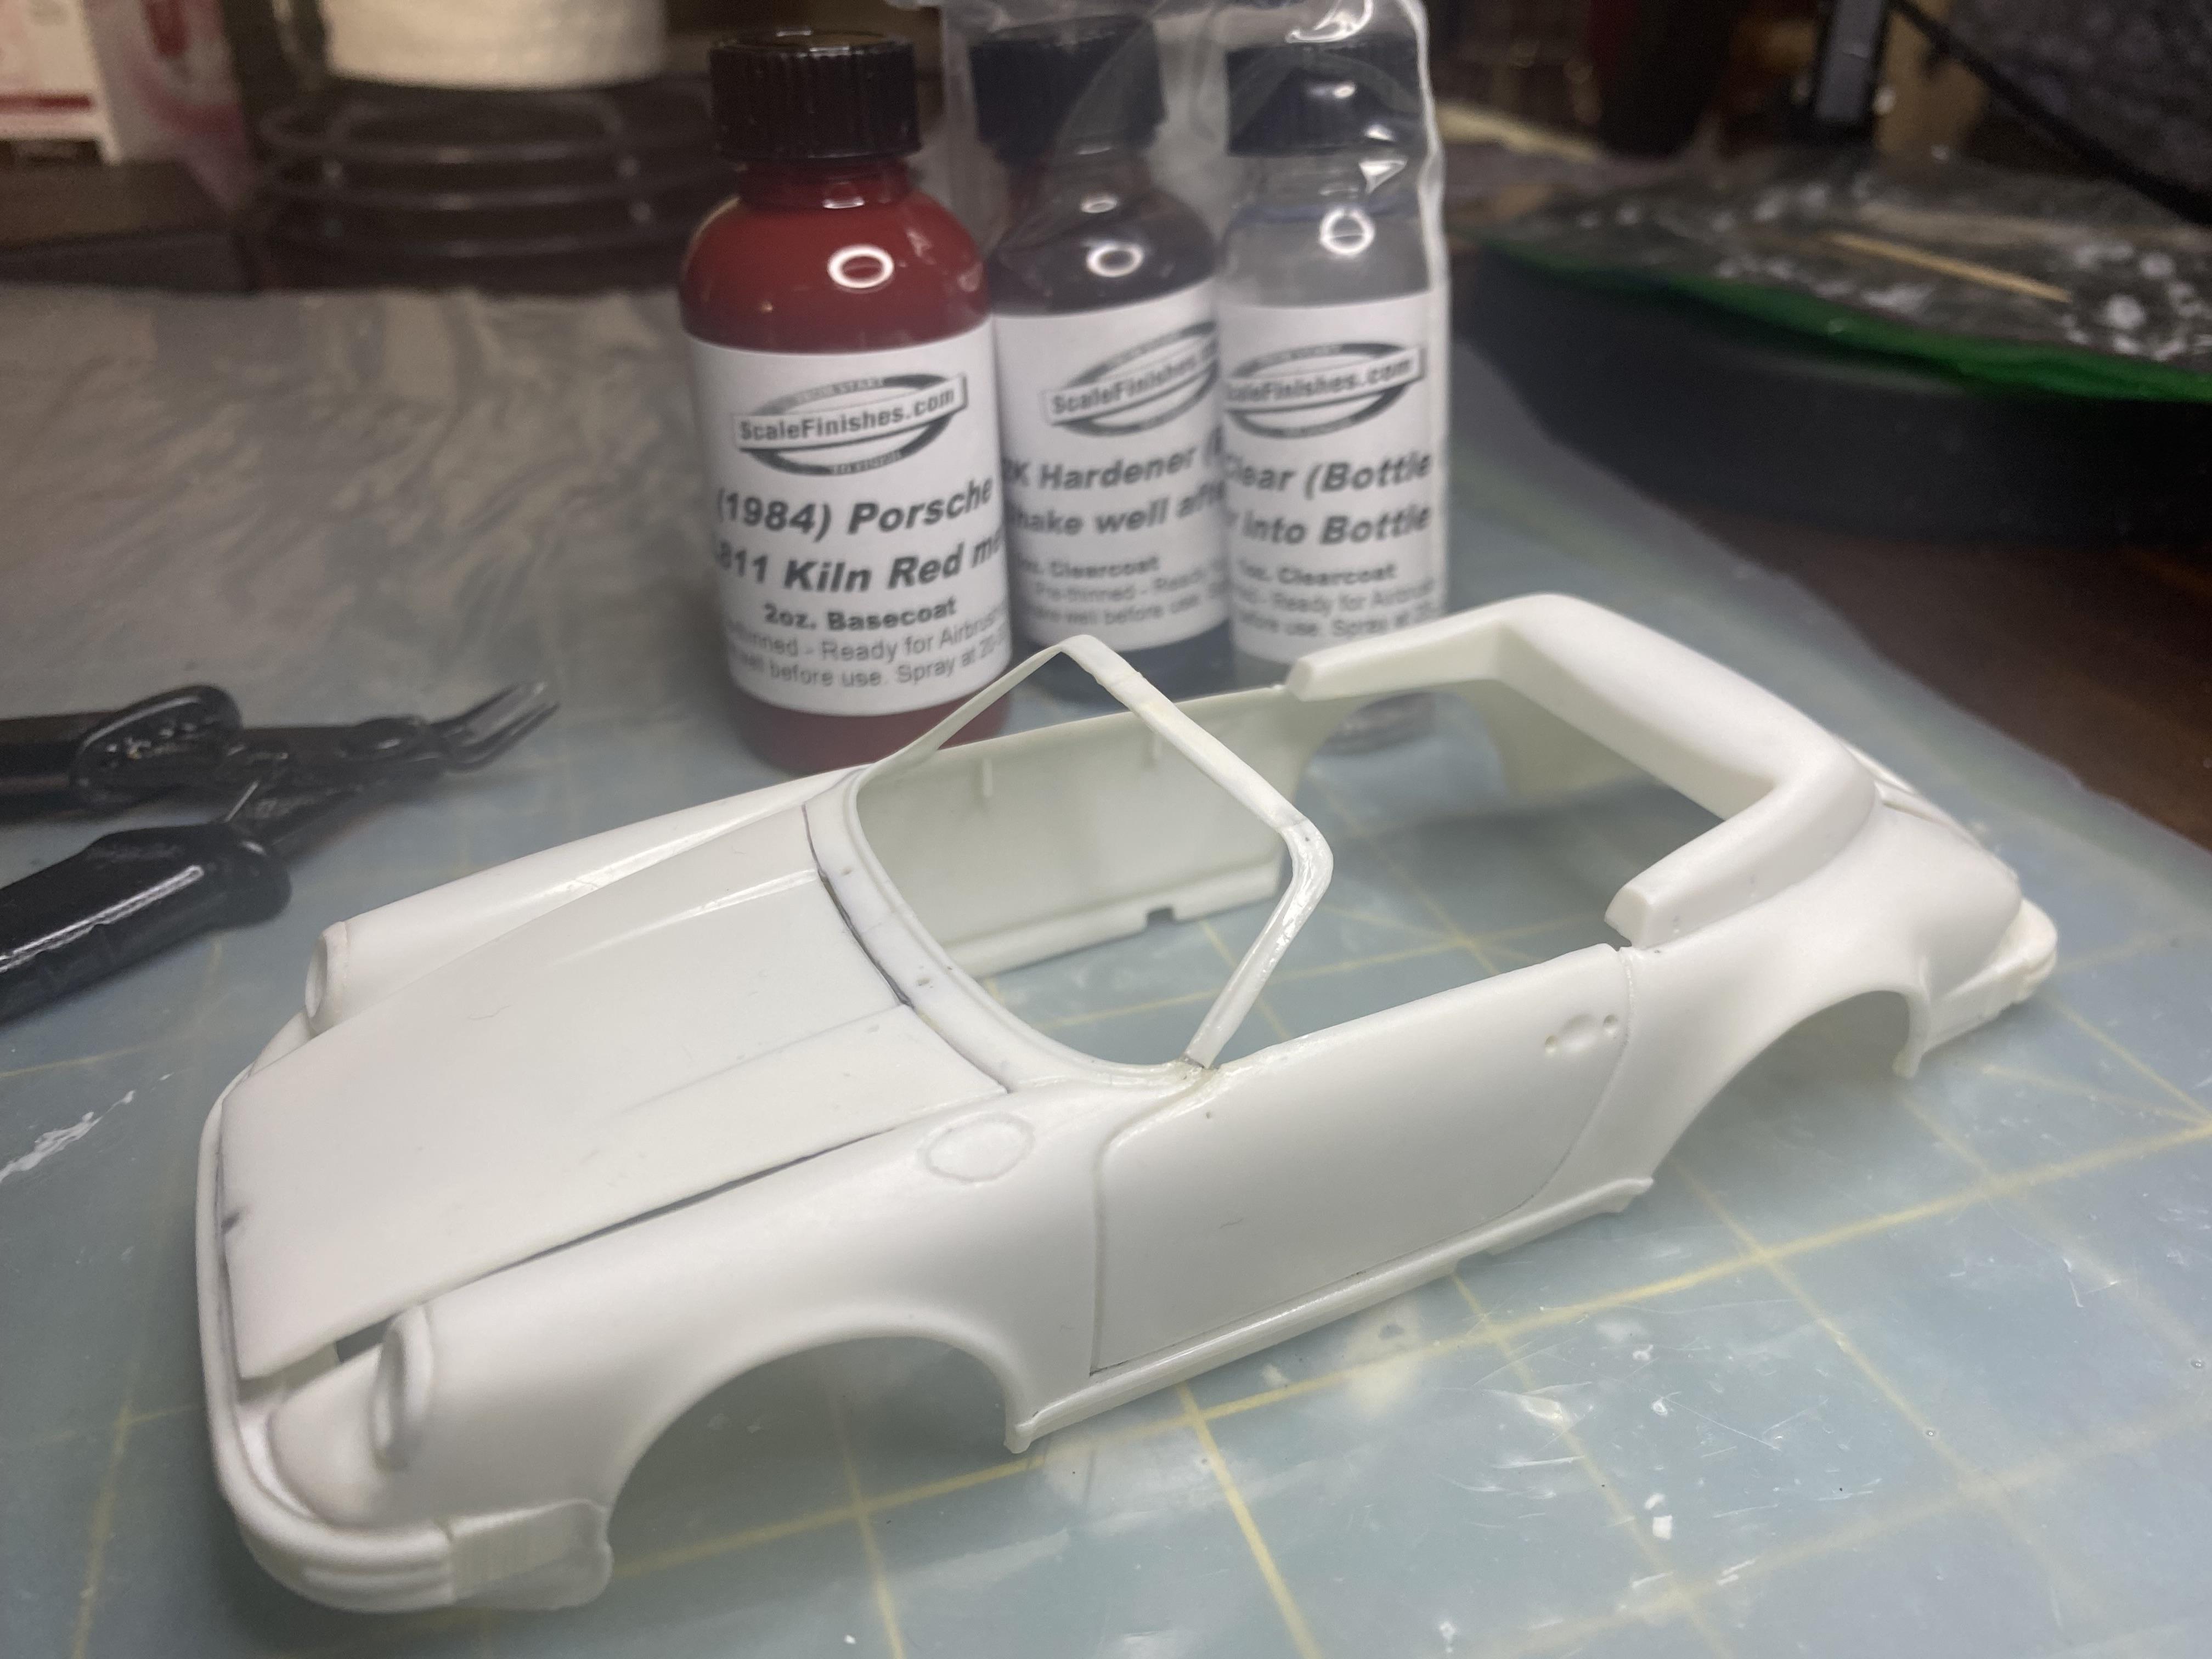
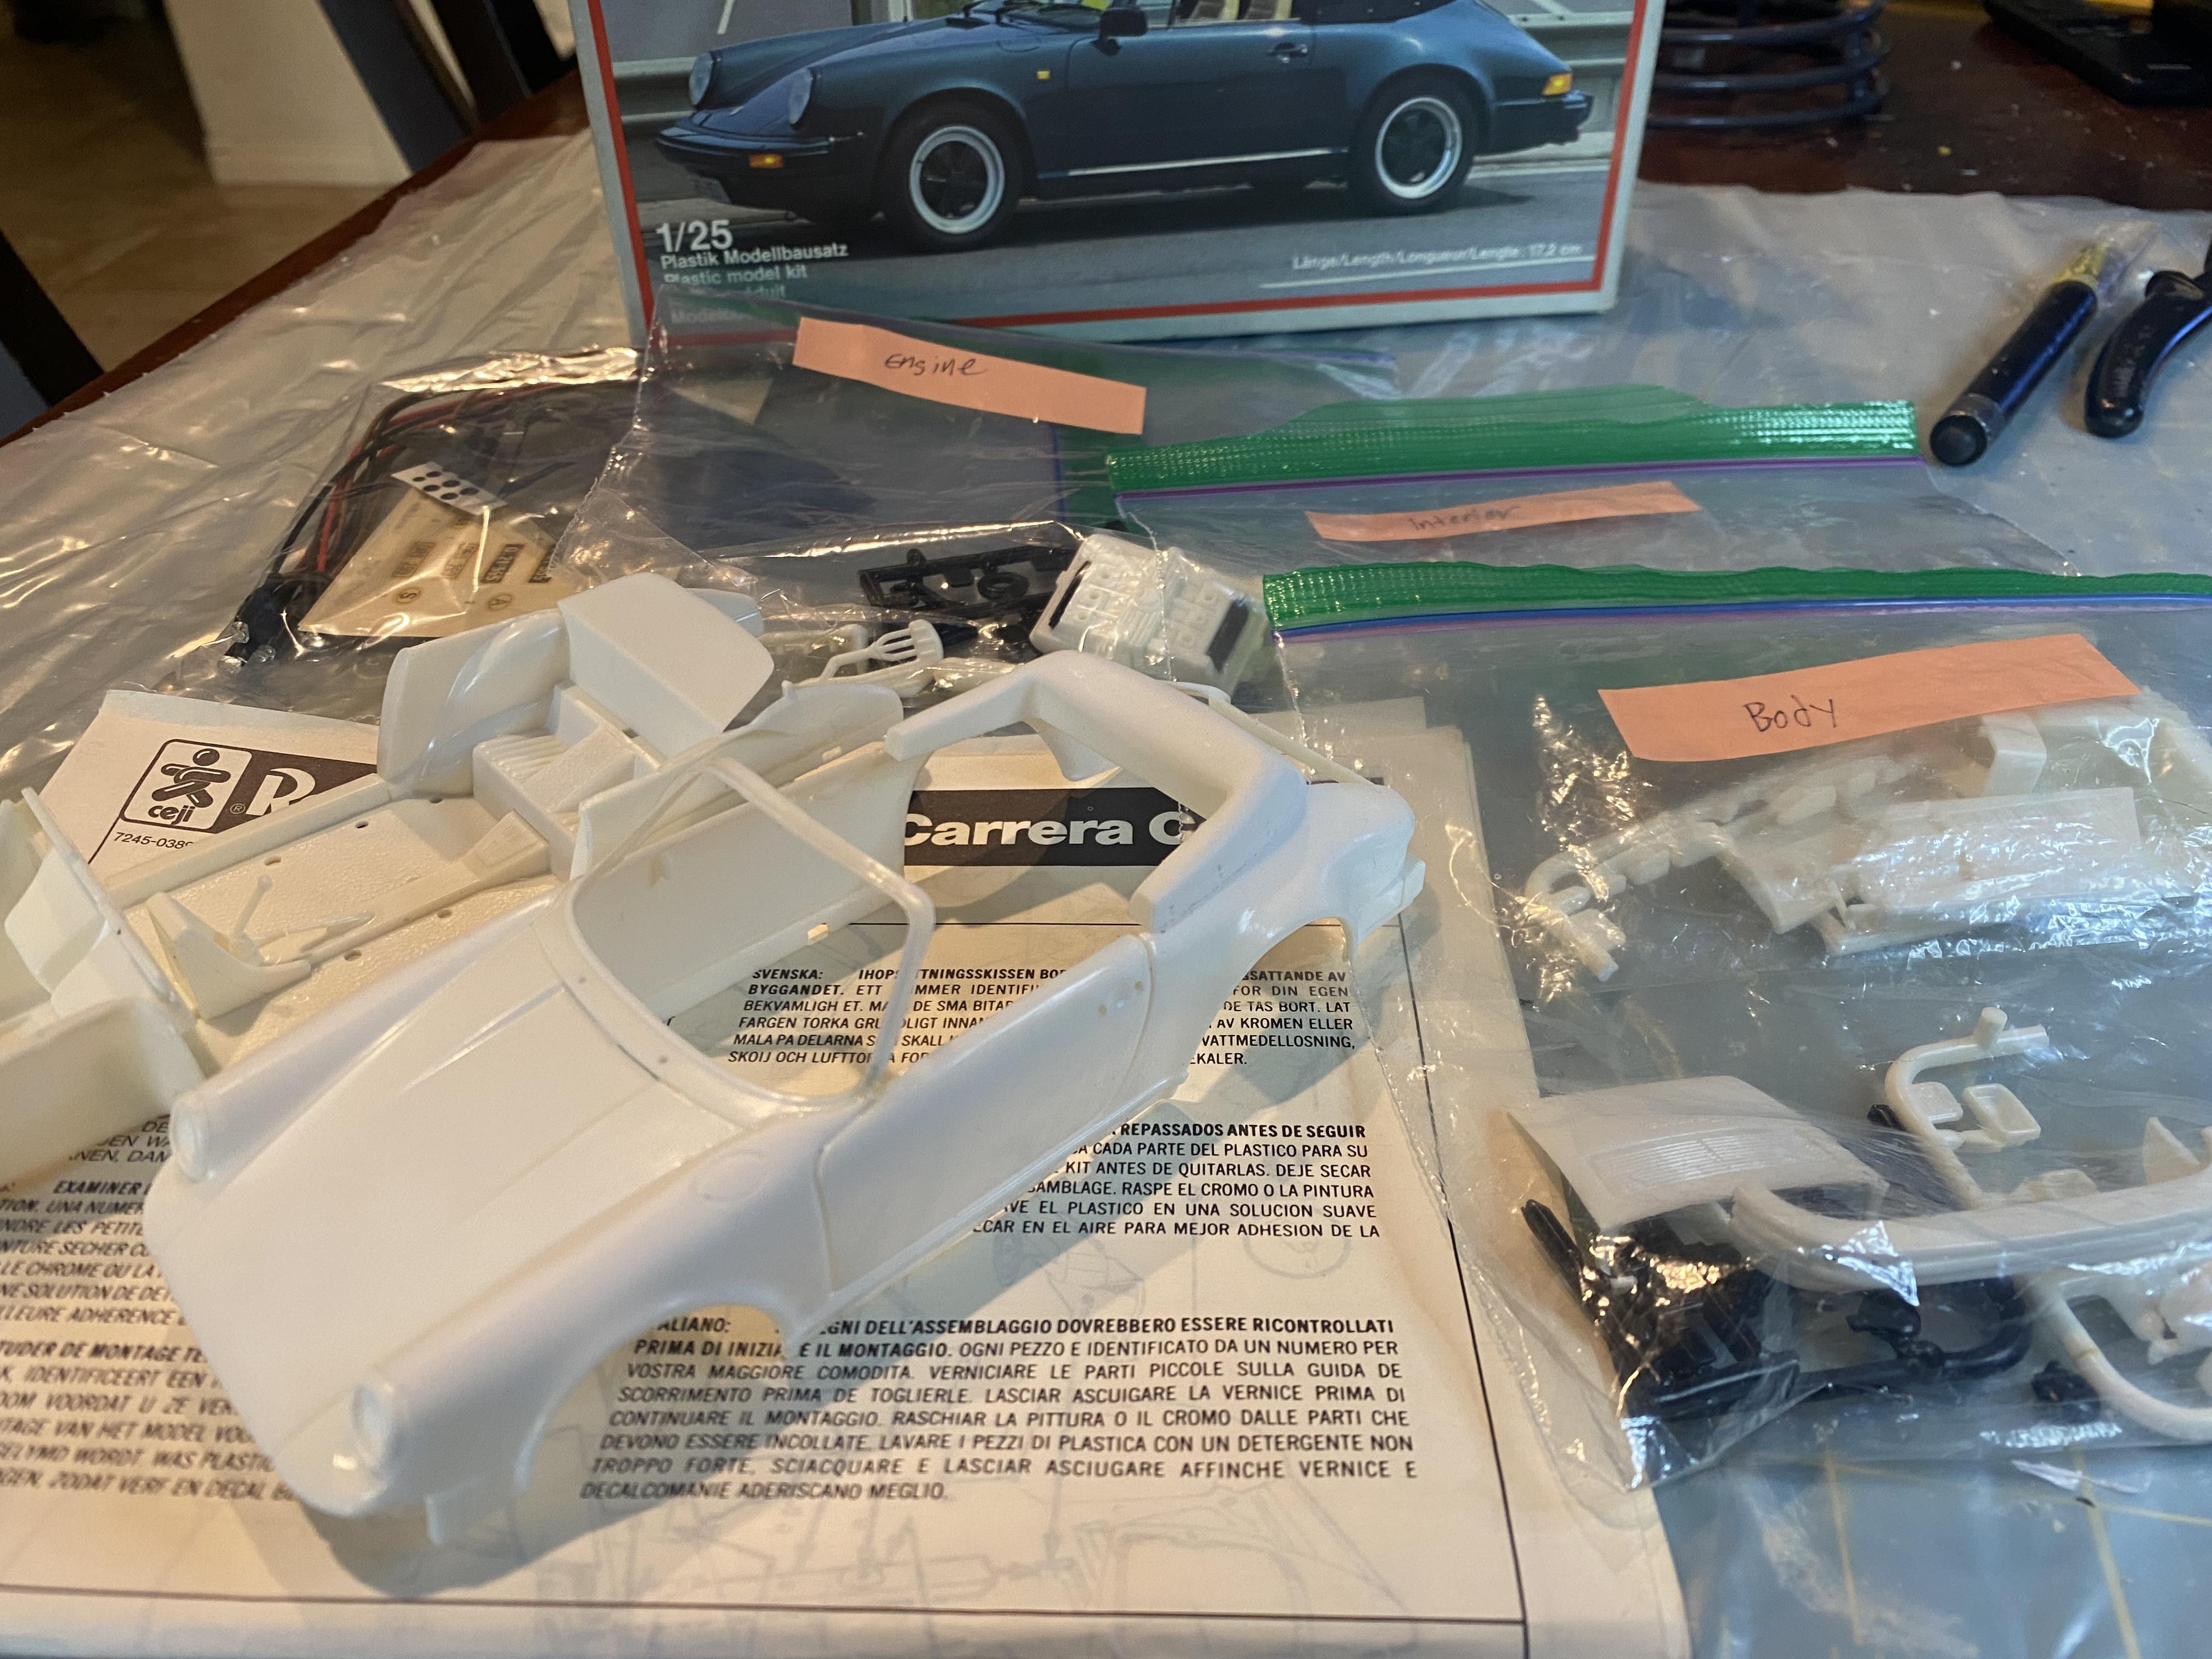
Finally reached the paint and detail stage of the build. Top boot fabric painted satin black. Body primed pink, airbrushed base 1984 Kiln Red and Clear coated, as well as the chassis. Most of the parts have now had their base airbrush pass but I still have a lot of detailing to do. The surgical tape for the boot came out pretty well after painting satin black I think. pink primer for a red base color. other parts prepared for paint. 2K clear came out nice, I don’t see any trash this time. most parts airbrushed with their base colors.
-
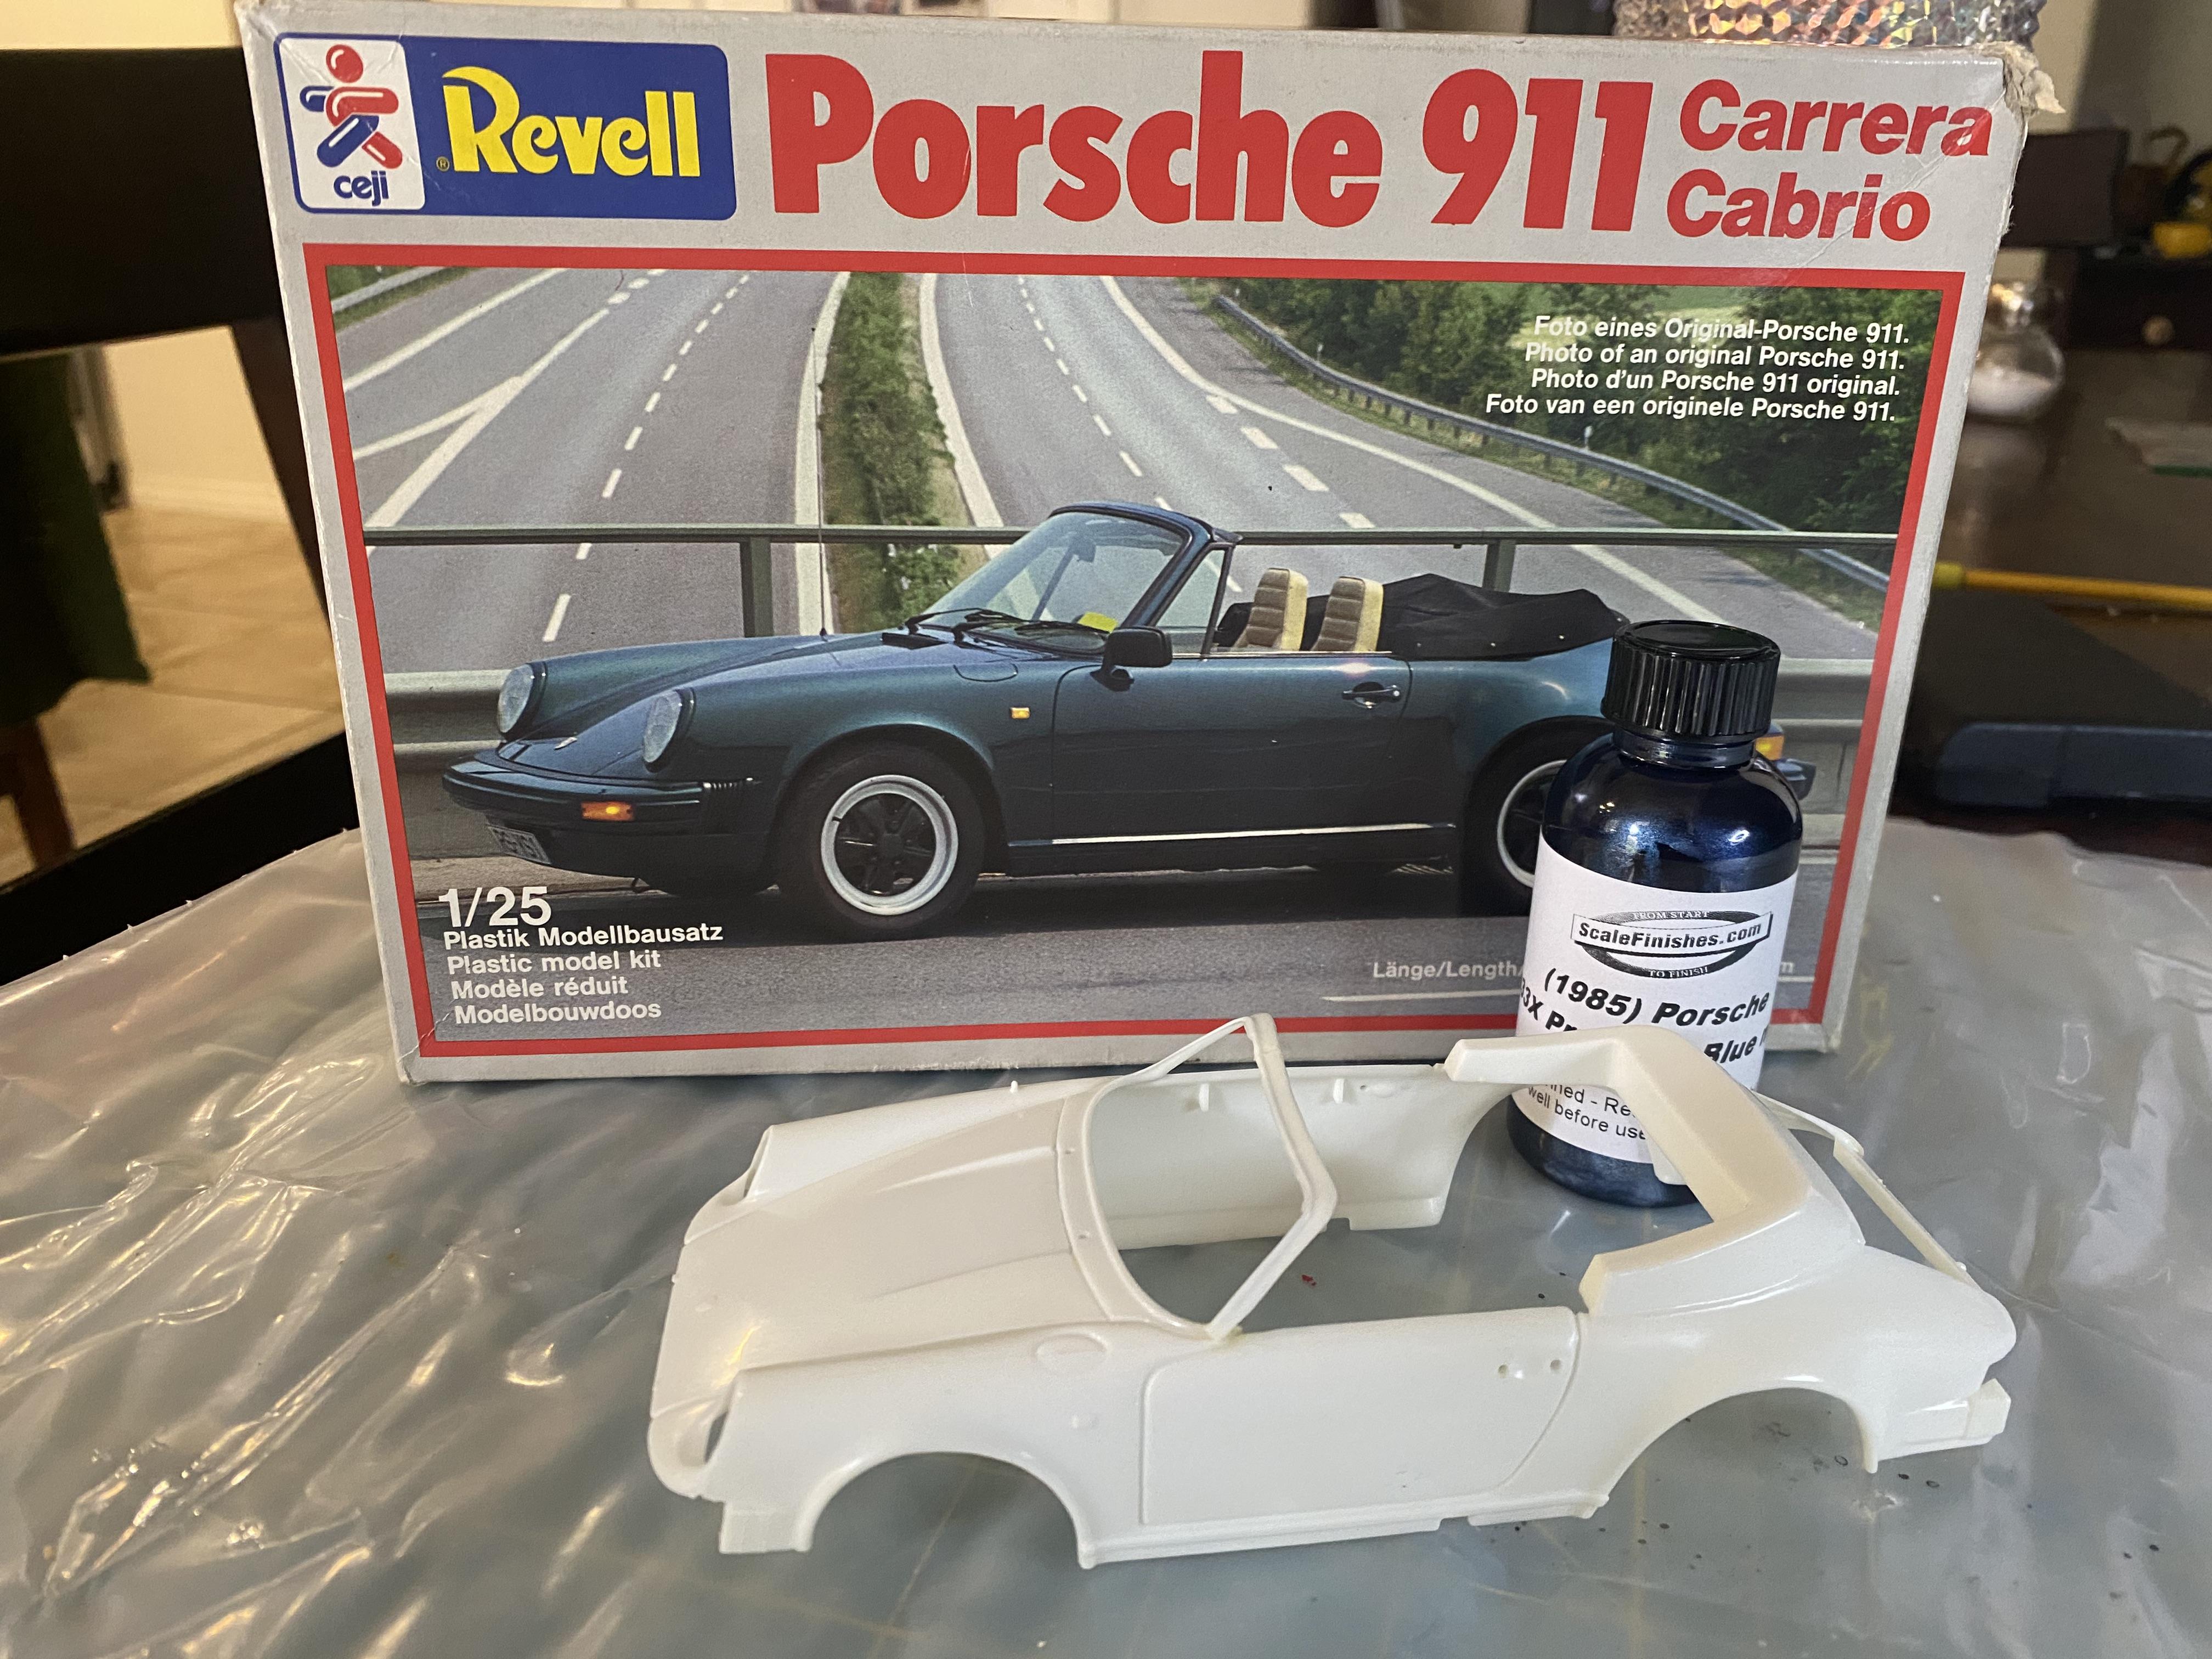
Thank you! It’s on paint now and I will be posting an update soon. I love the 1984 Porsche Kiln Red. So glad a changed color choice.
-
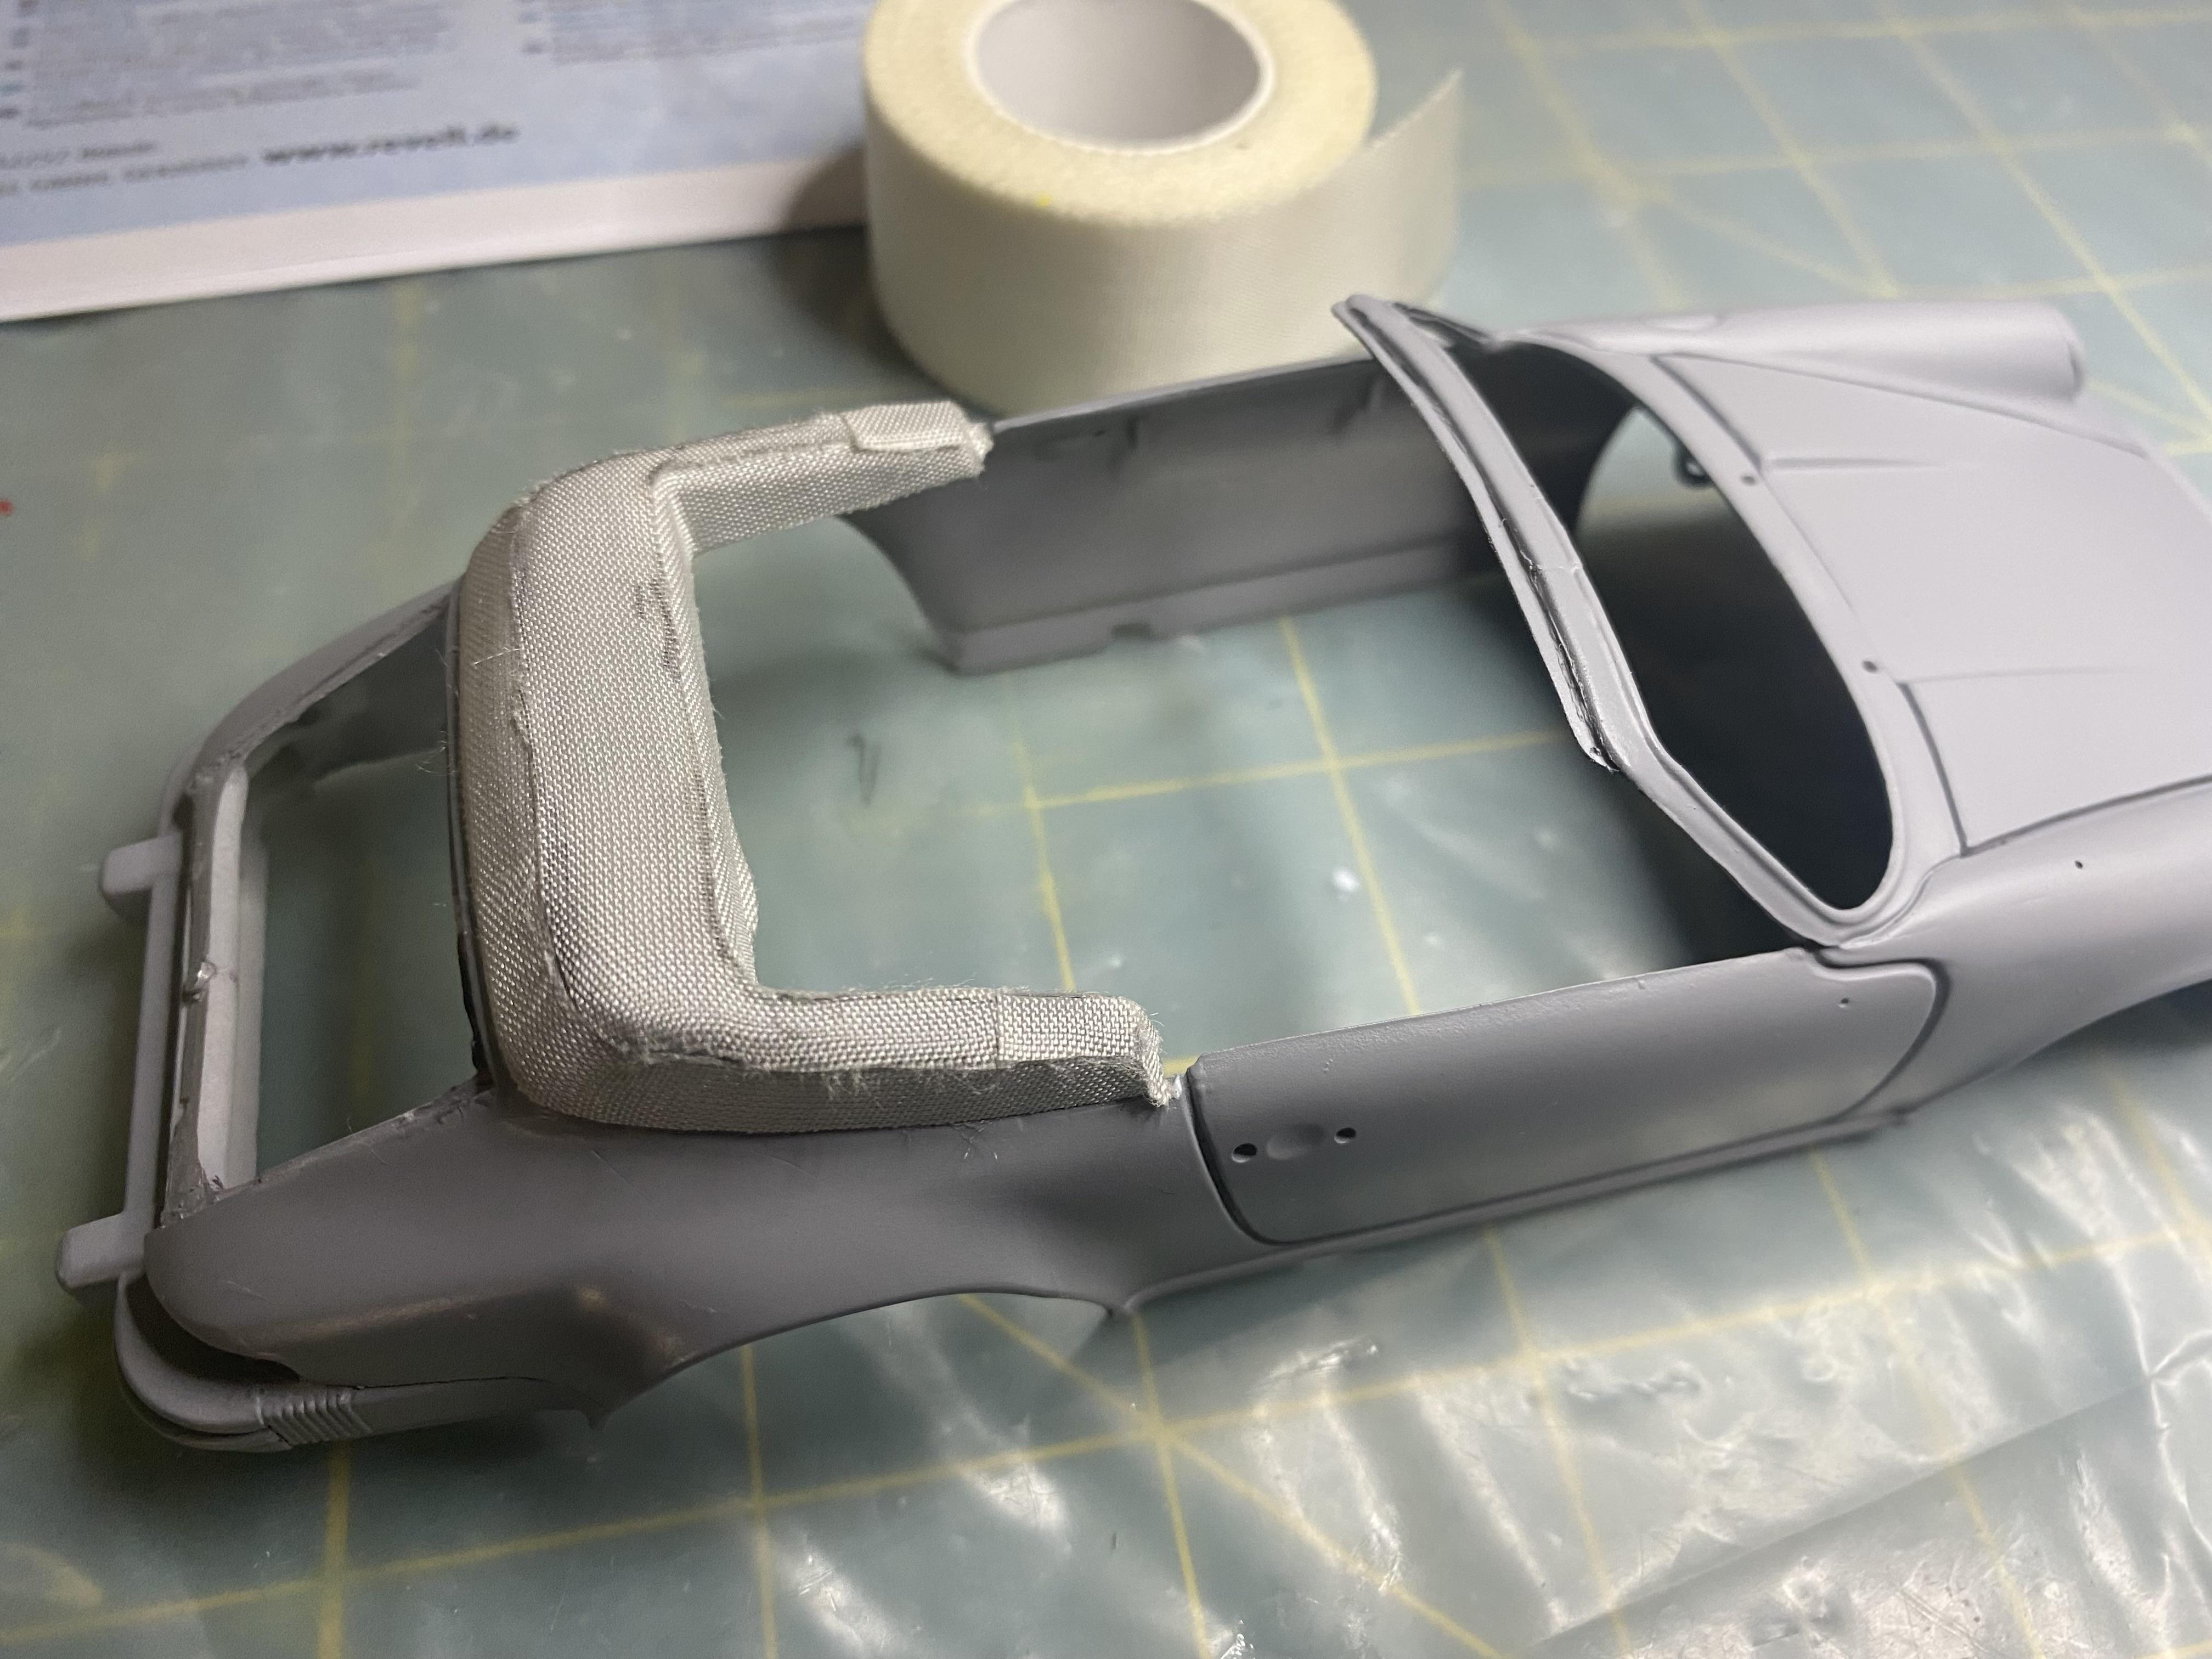
I have used it before. Many tops would. I used this method on the 2018 Mustang Convertible build I did some time ago.
-
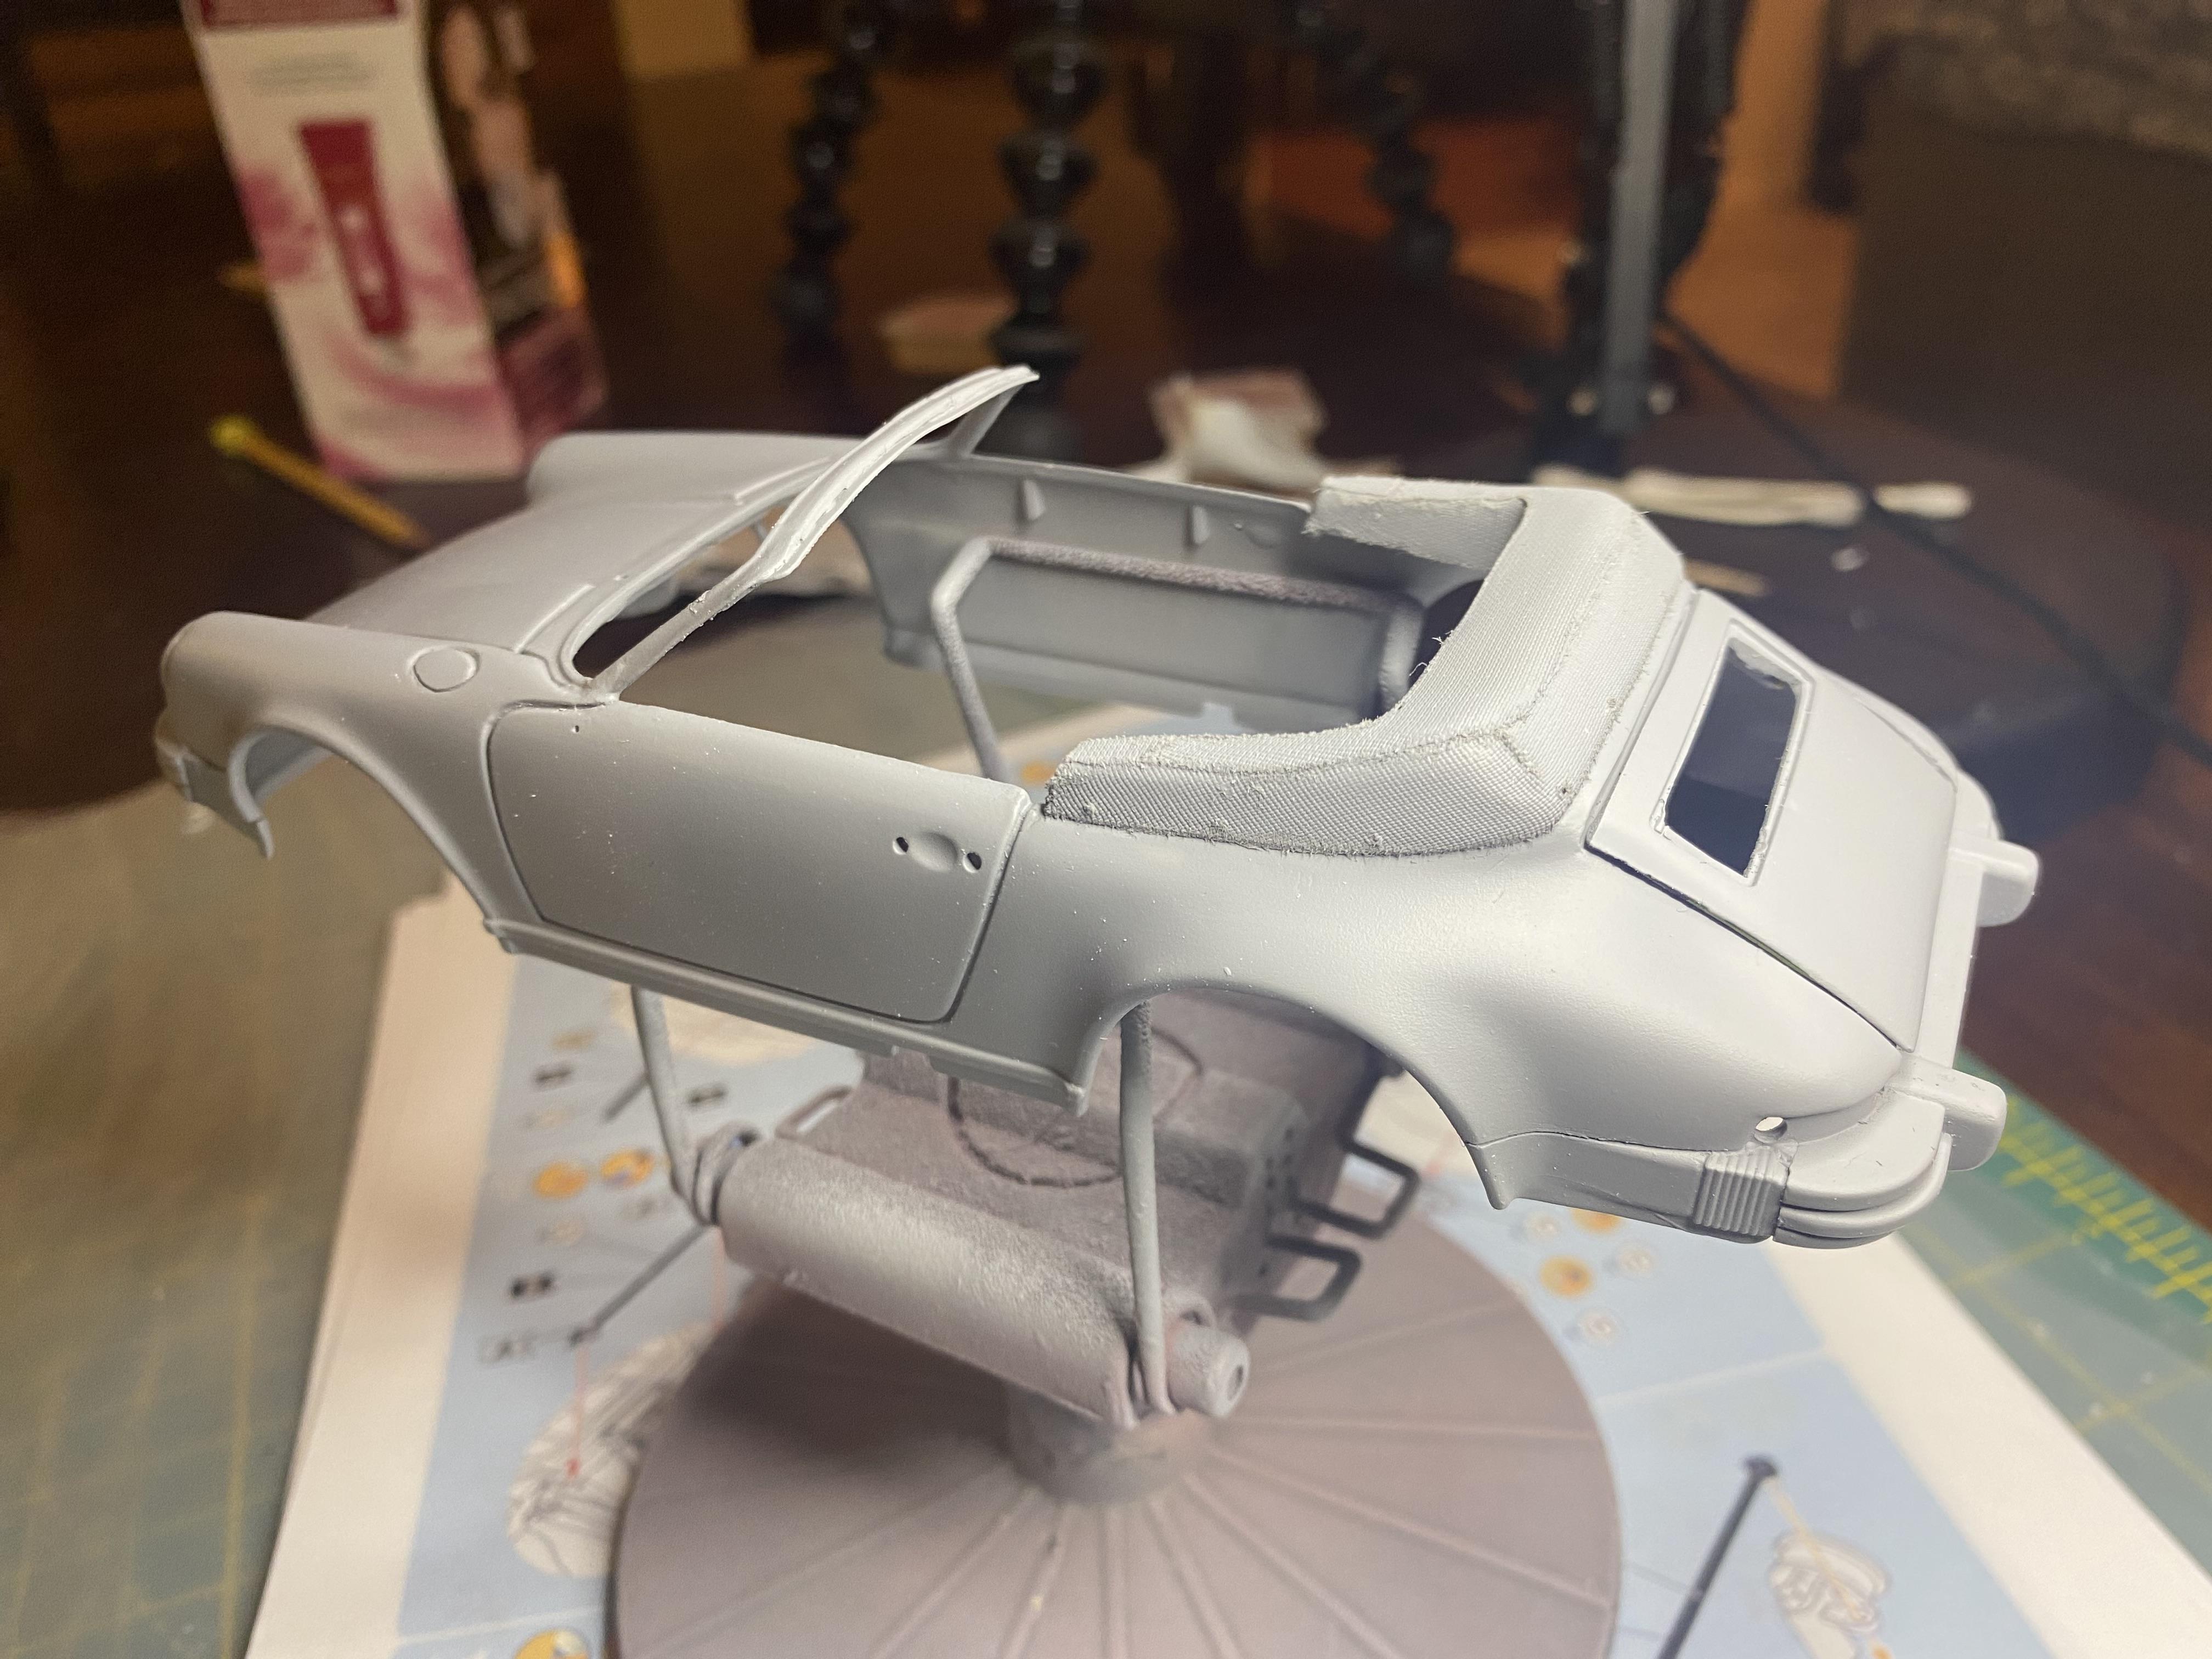
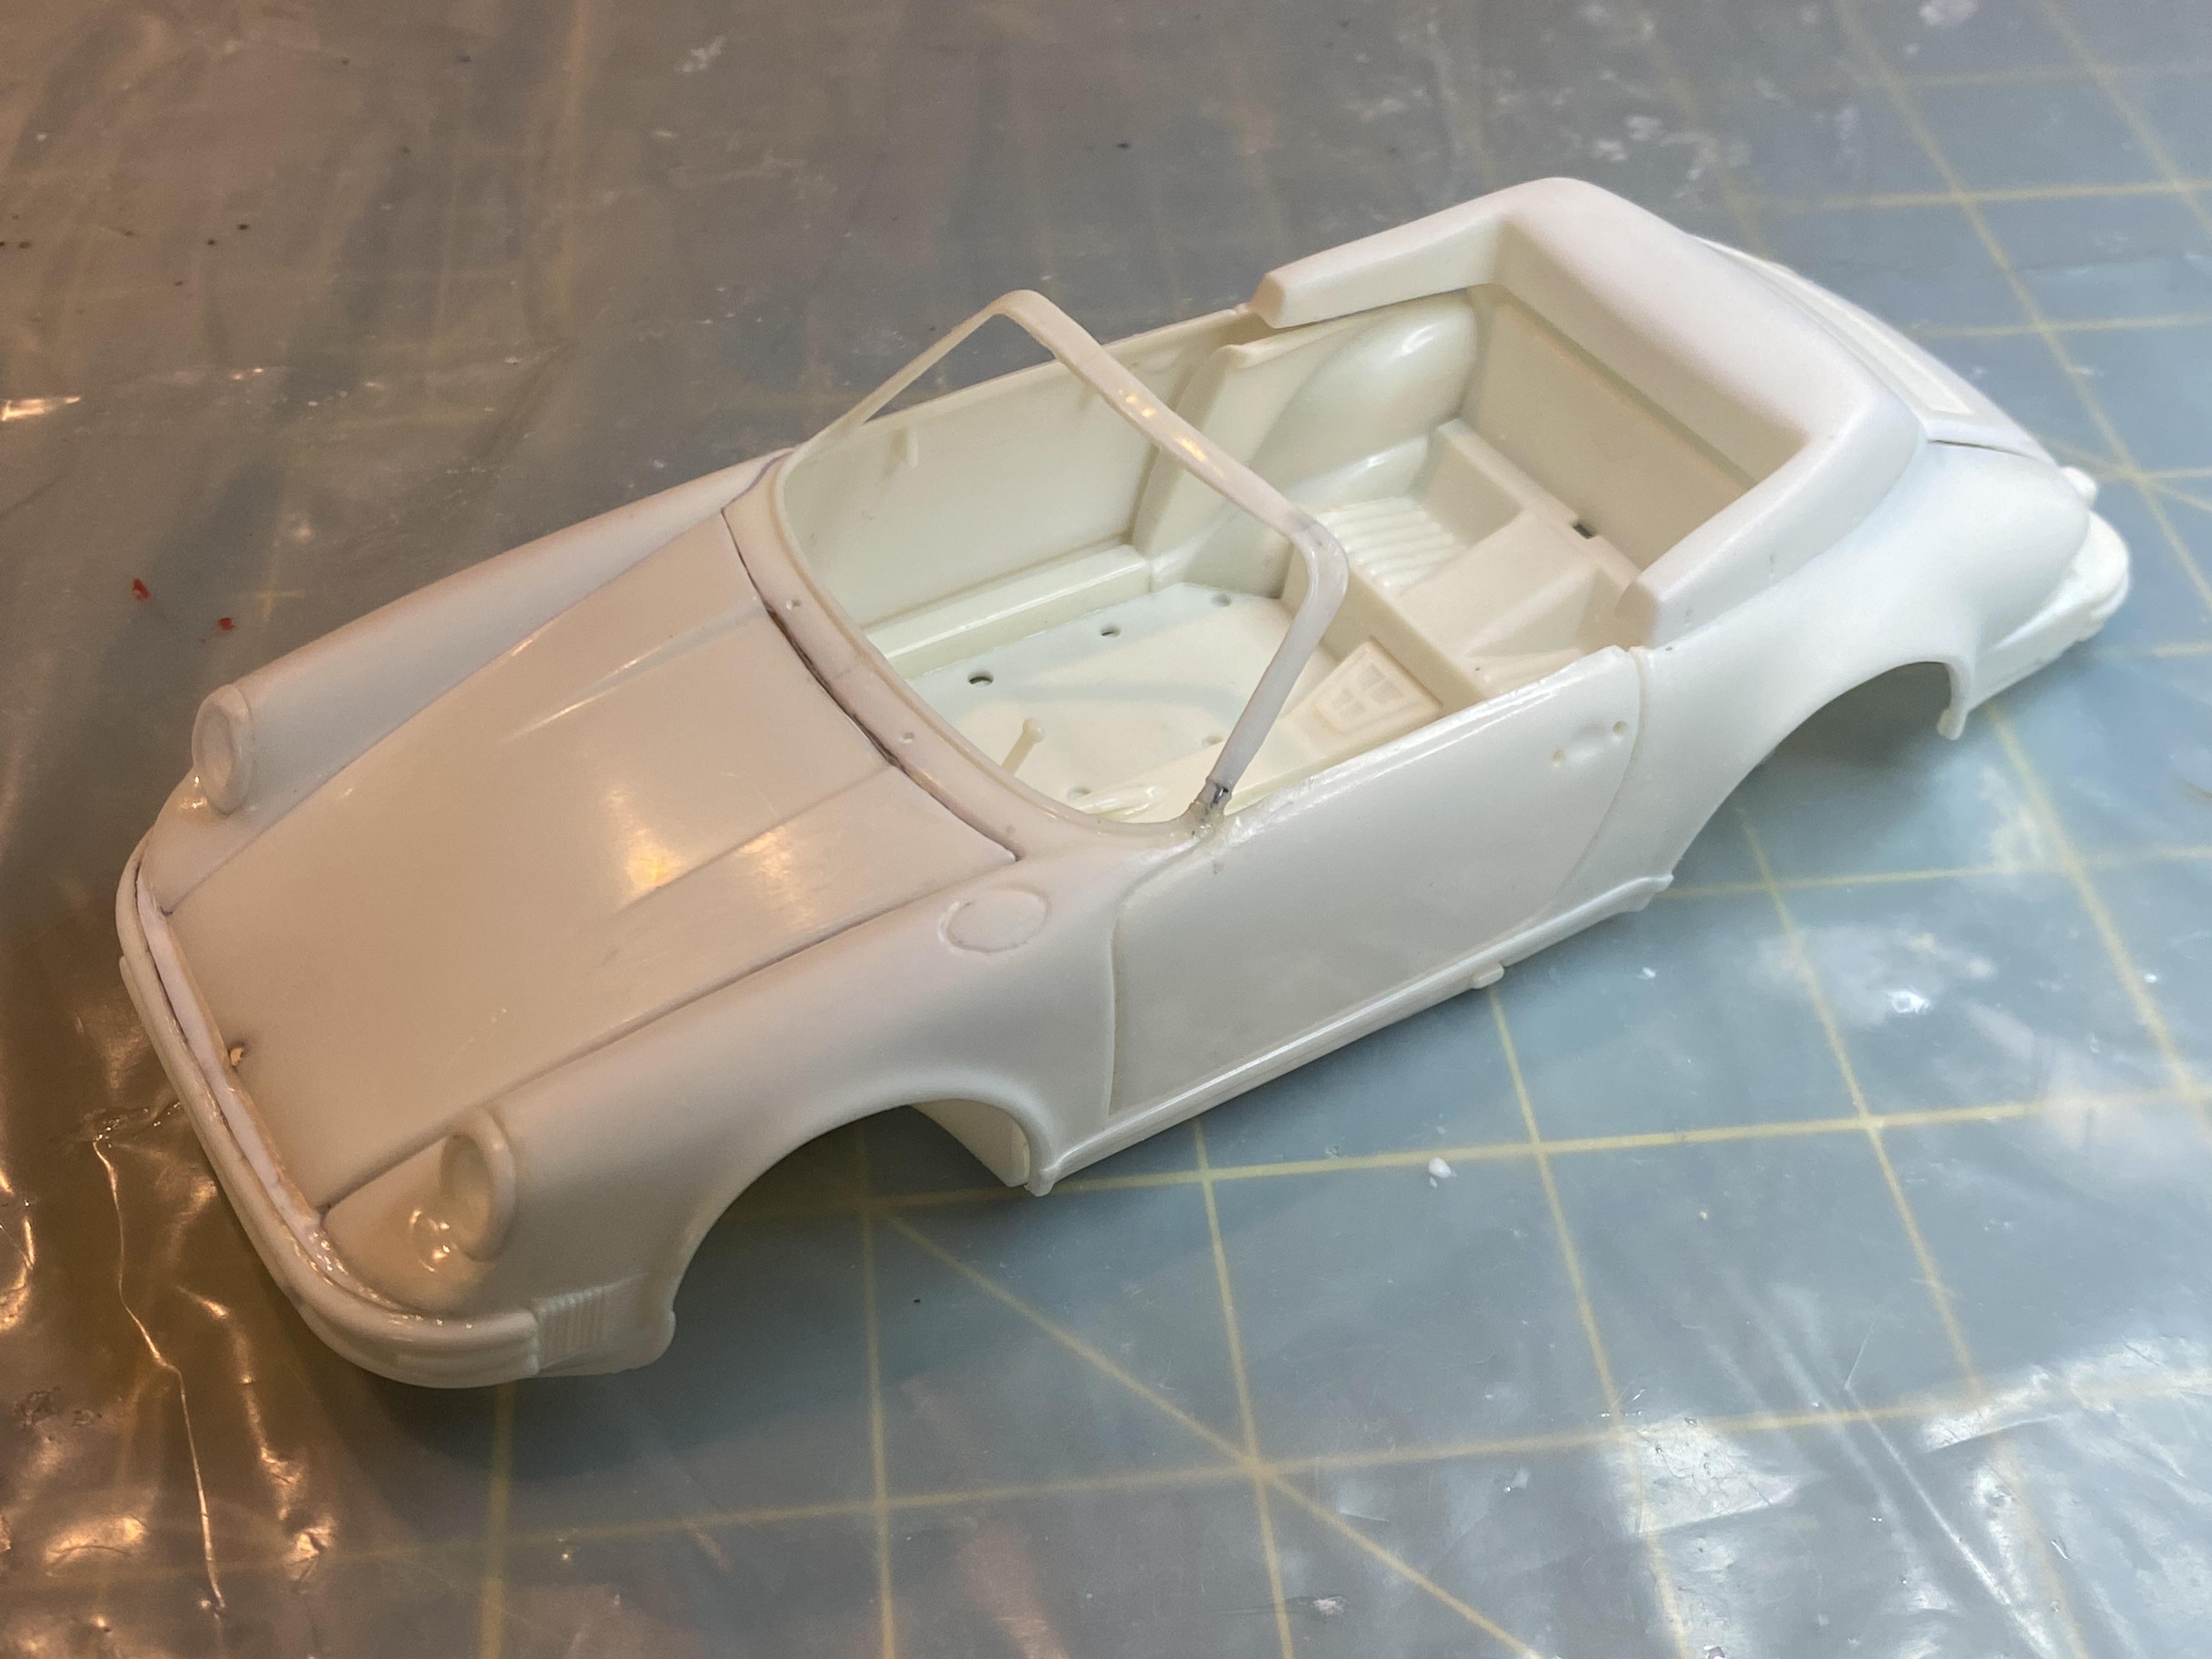
I created the top mounting trim to the window frame. added surgical tape to the top boot to give it the right texture. my newer engine and suspension parts arrived. I was hoping to use the whole engine but there is no way it will fit. Going to have to use the detail parts with the old block.
-
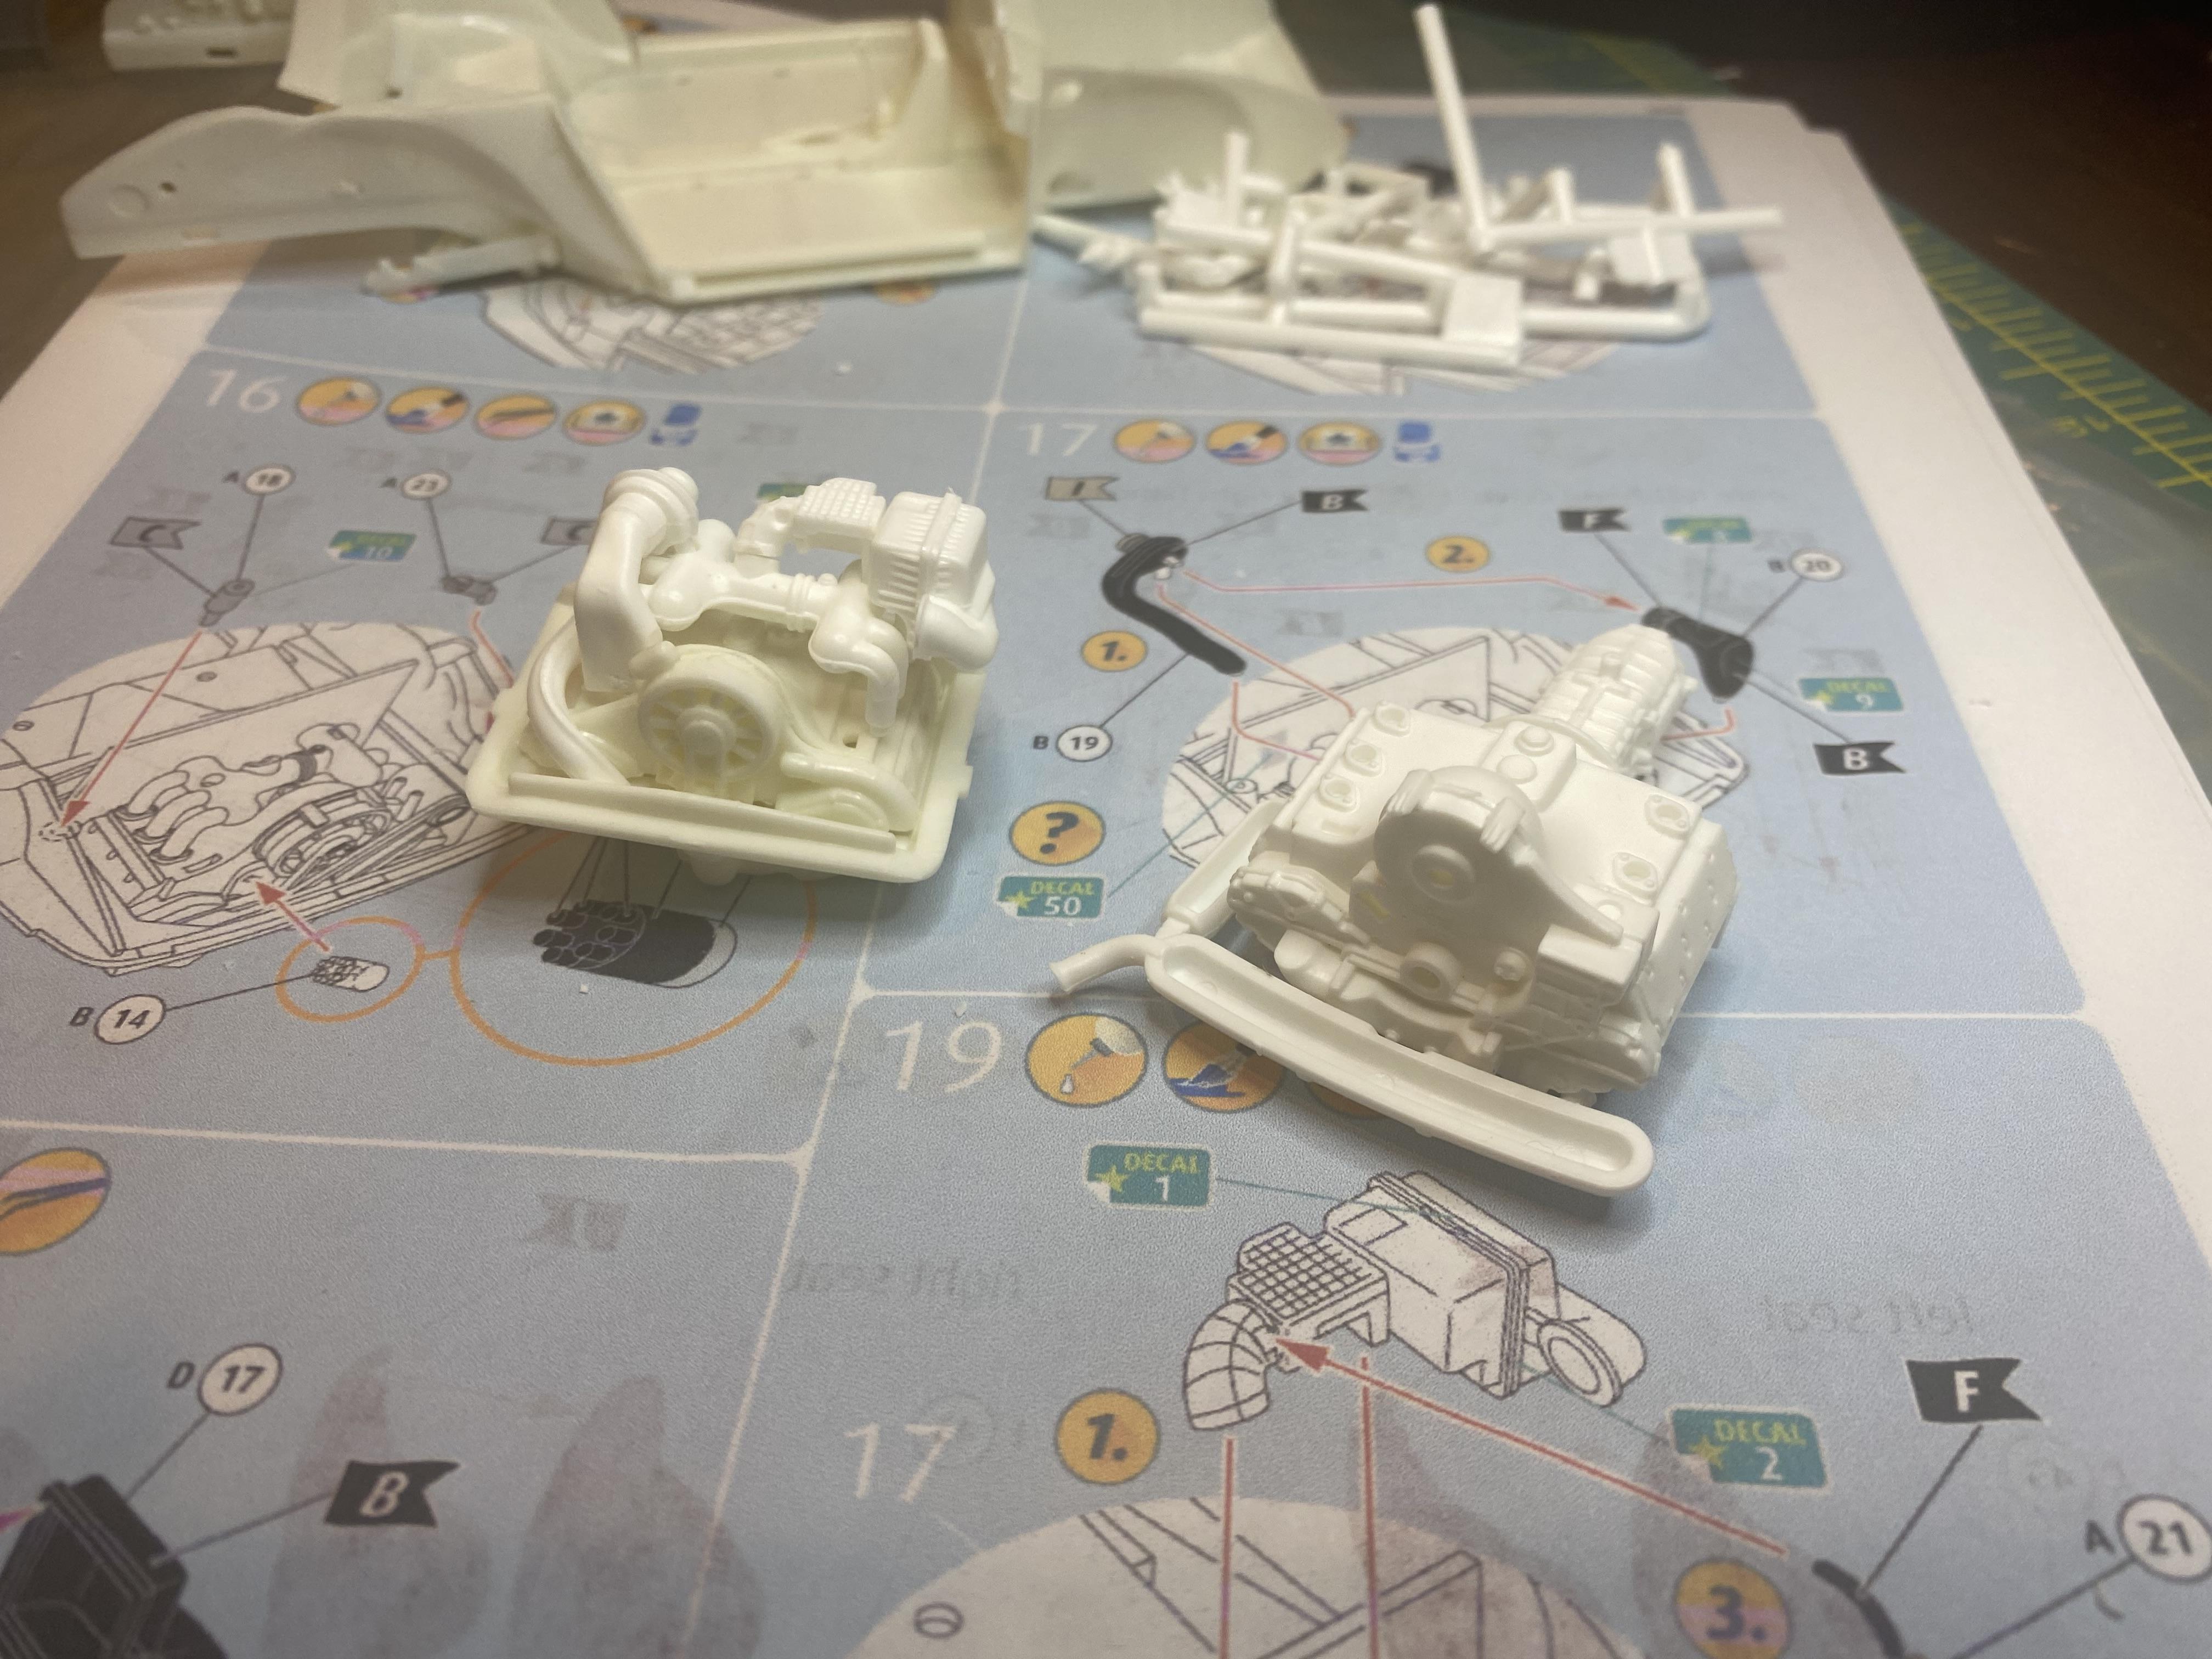
Yeah, that would have been terrible. Thanks again. My paint arrived today, I am just waiting on some engine parts I got off of Ebay from a newer kit to have the correct intake and such. The kit came with a 1st Gen 911 engine from 1965 to around 1971. As you have seen, I don't mind a bit of scratch building, but that would have been a pain. Thank you!
-
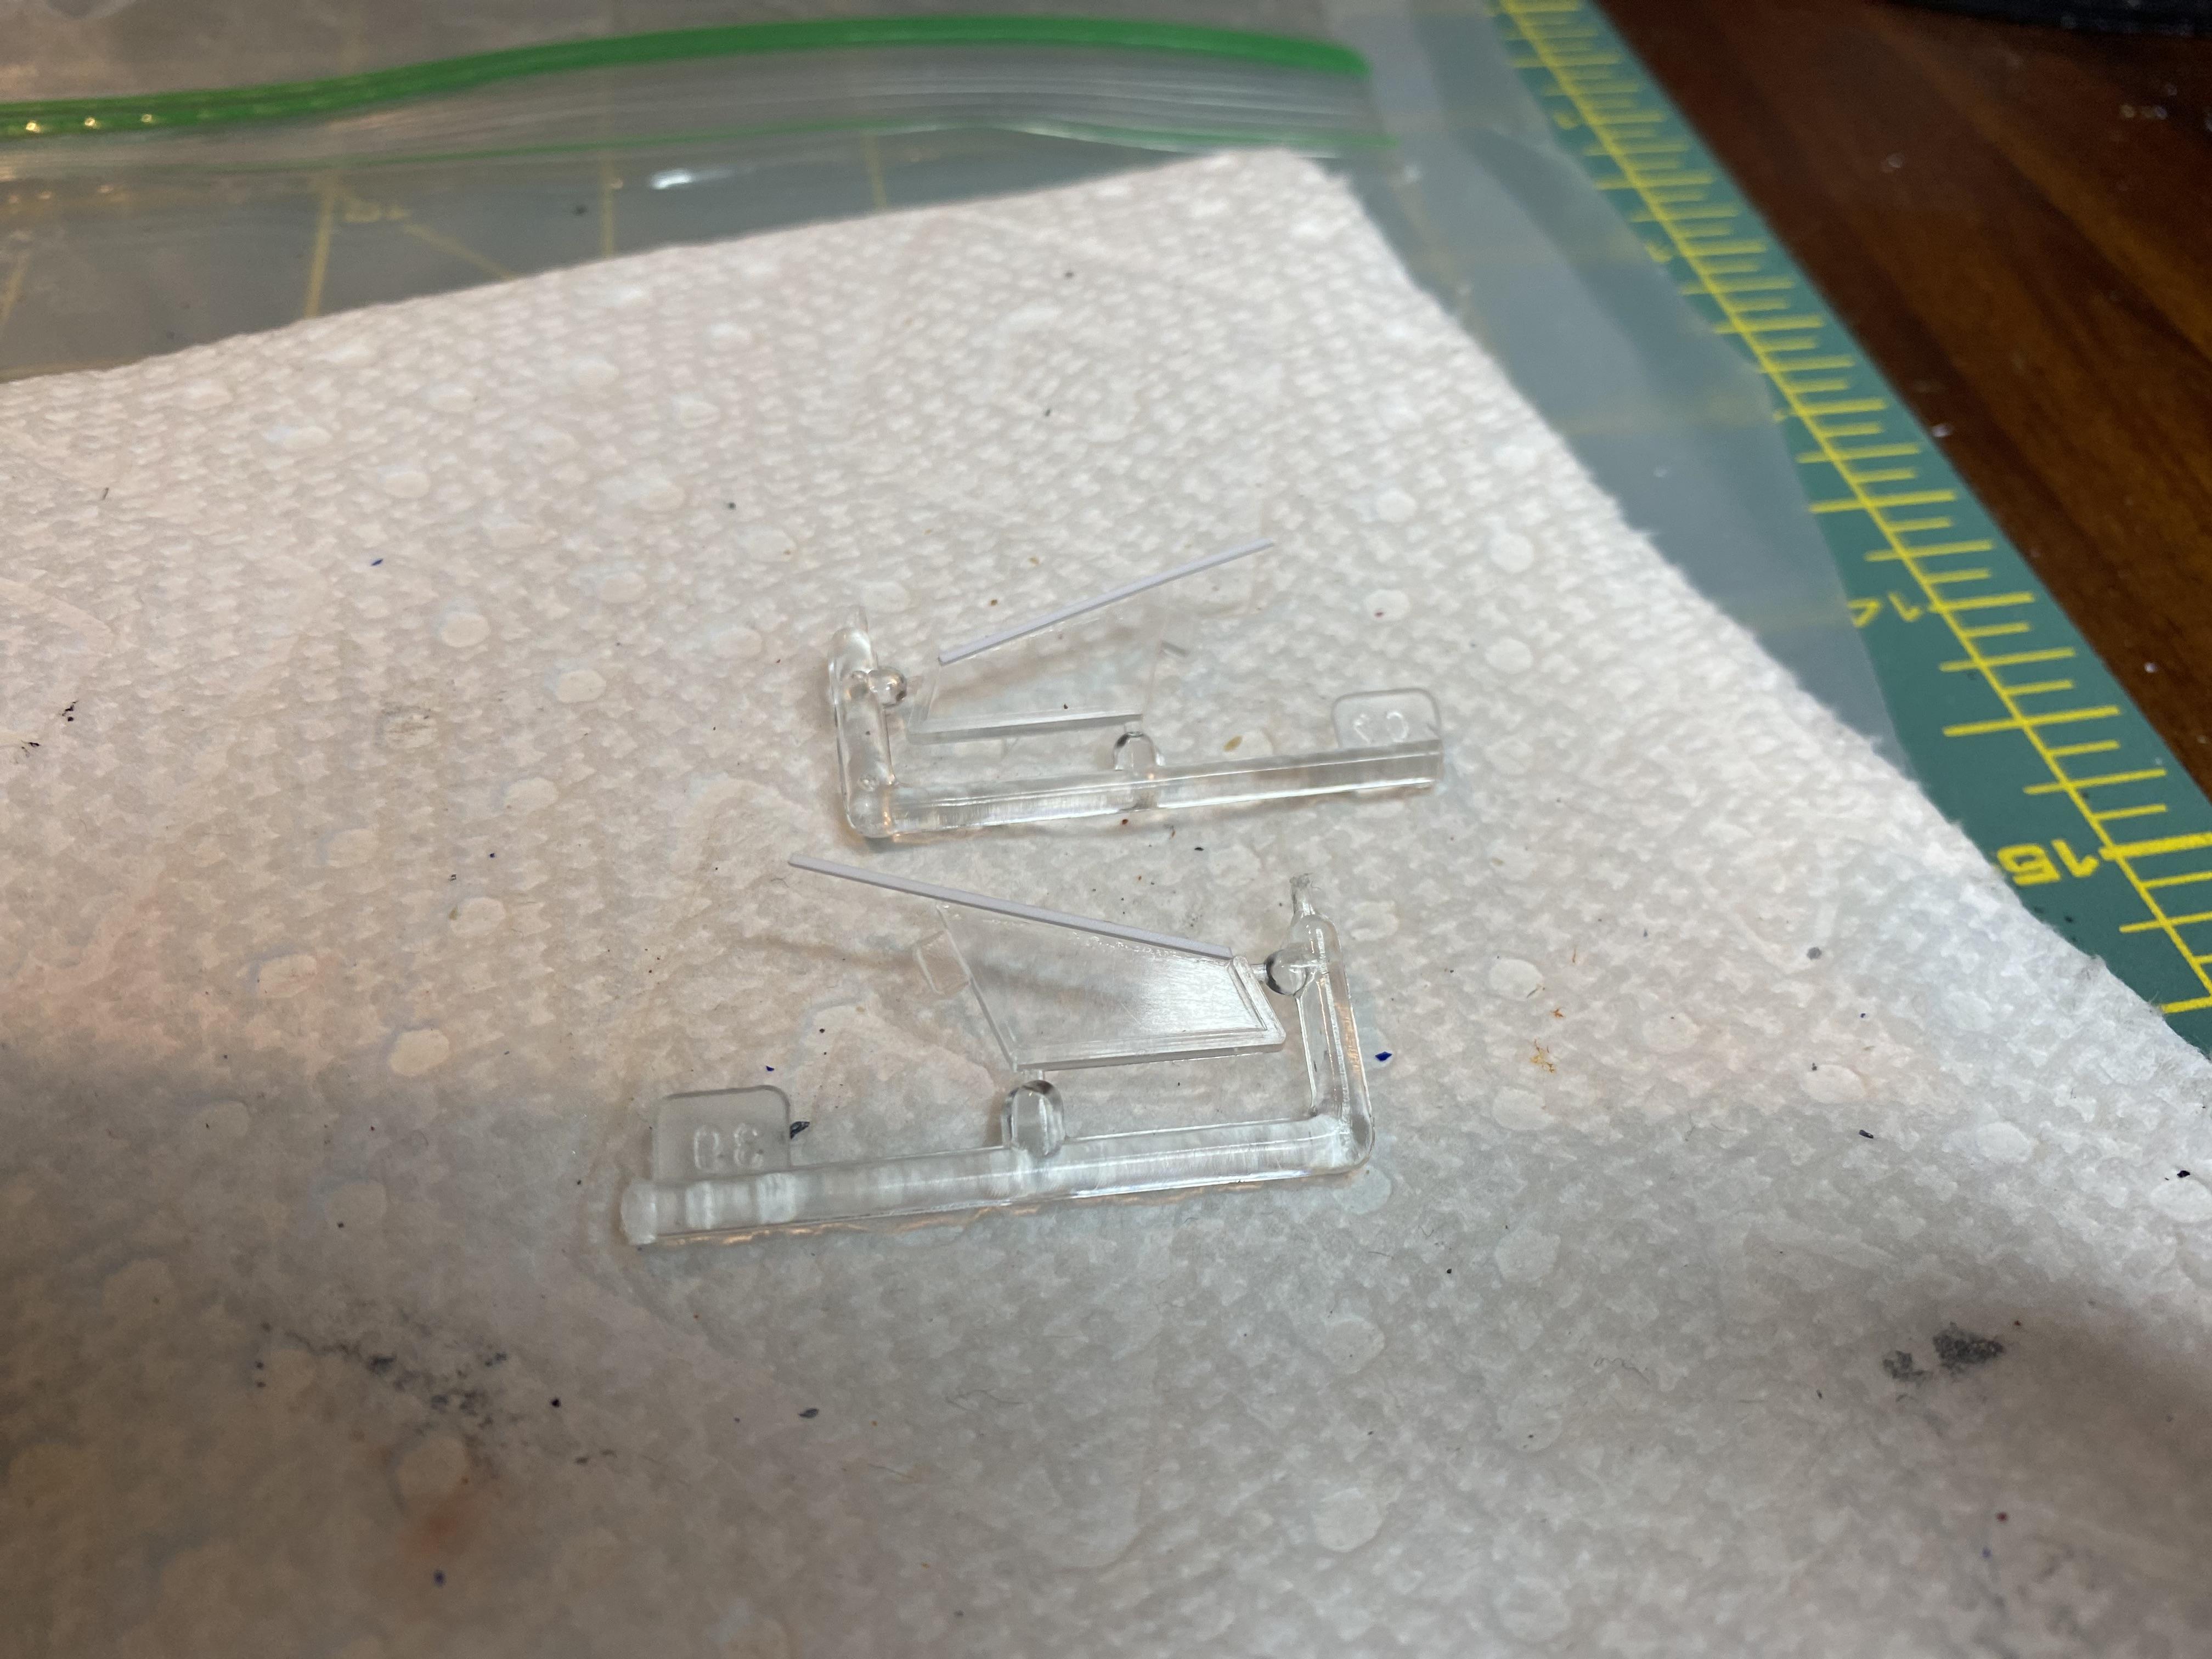
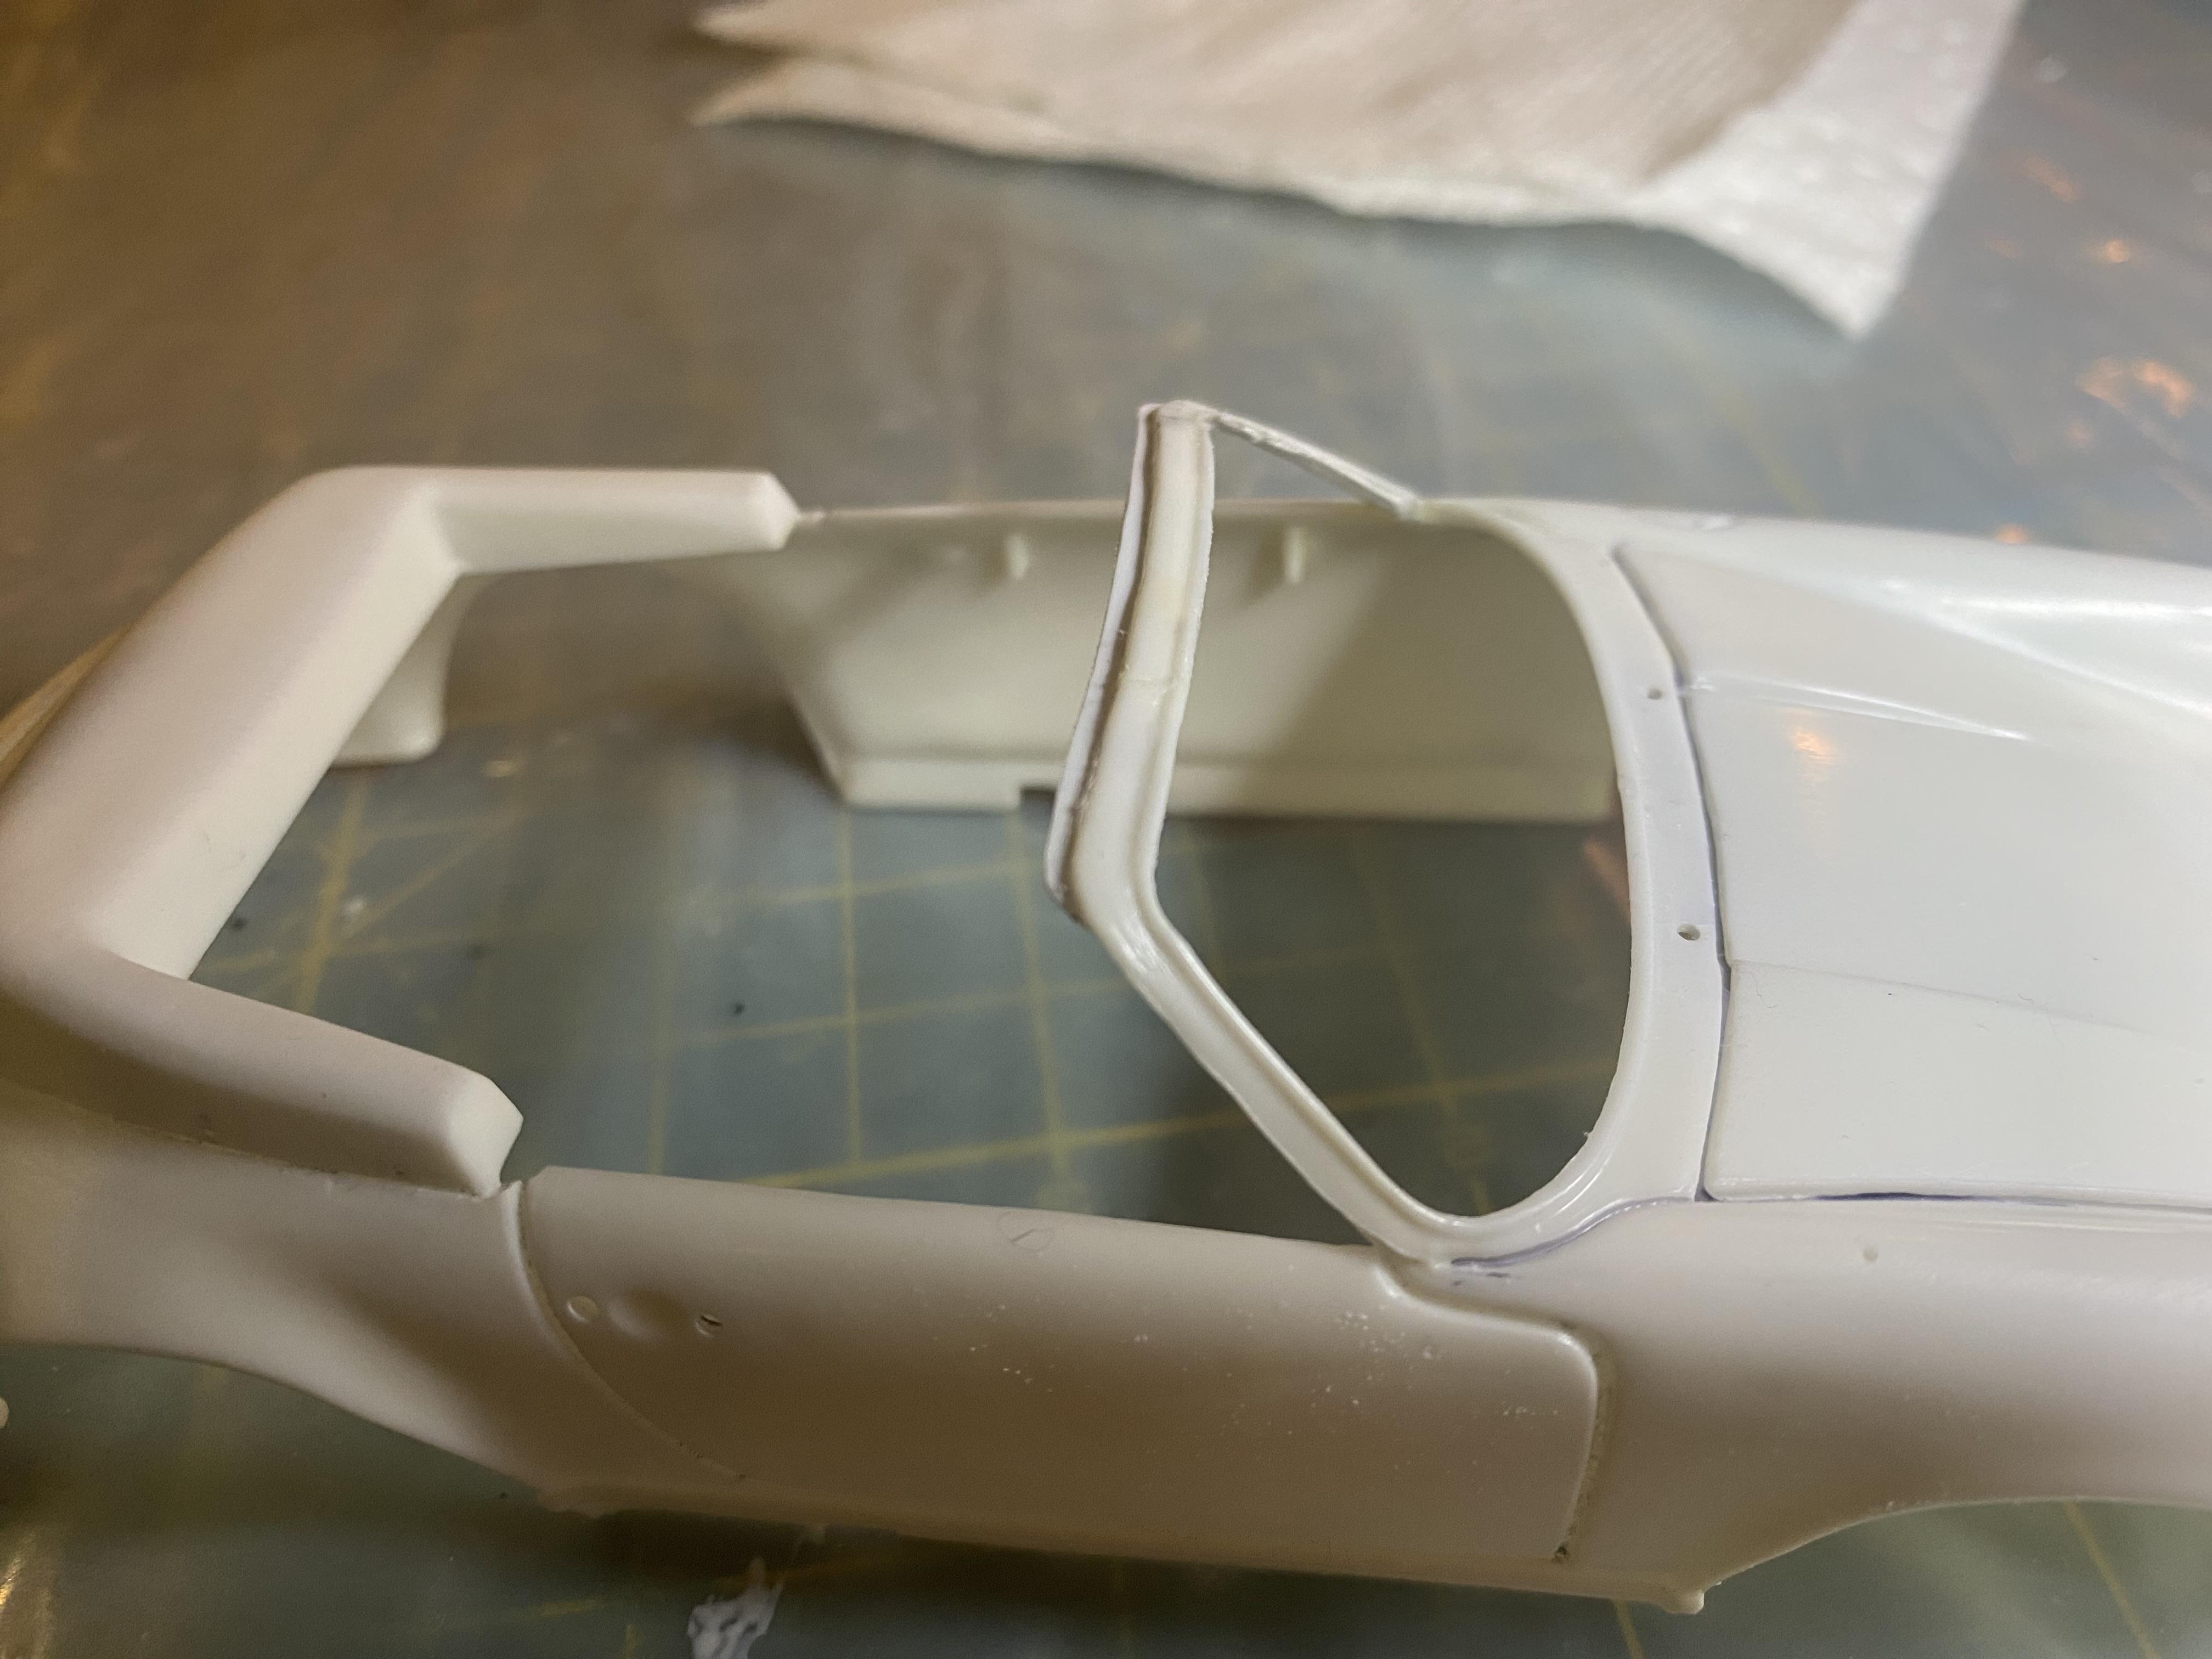
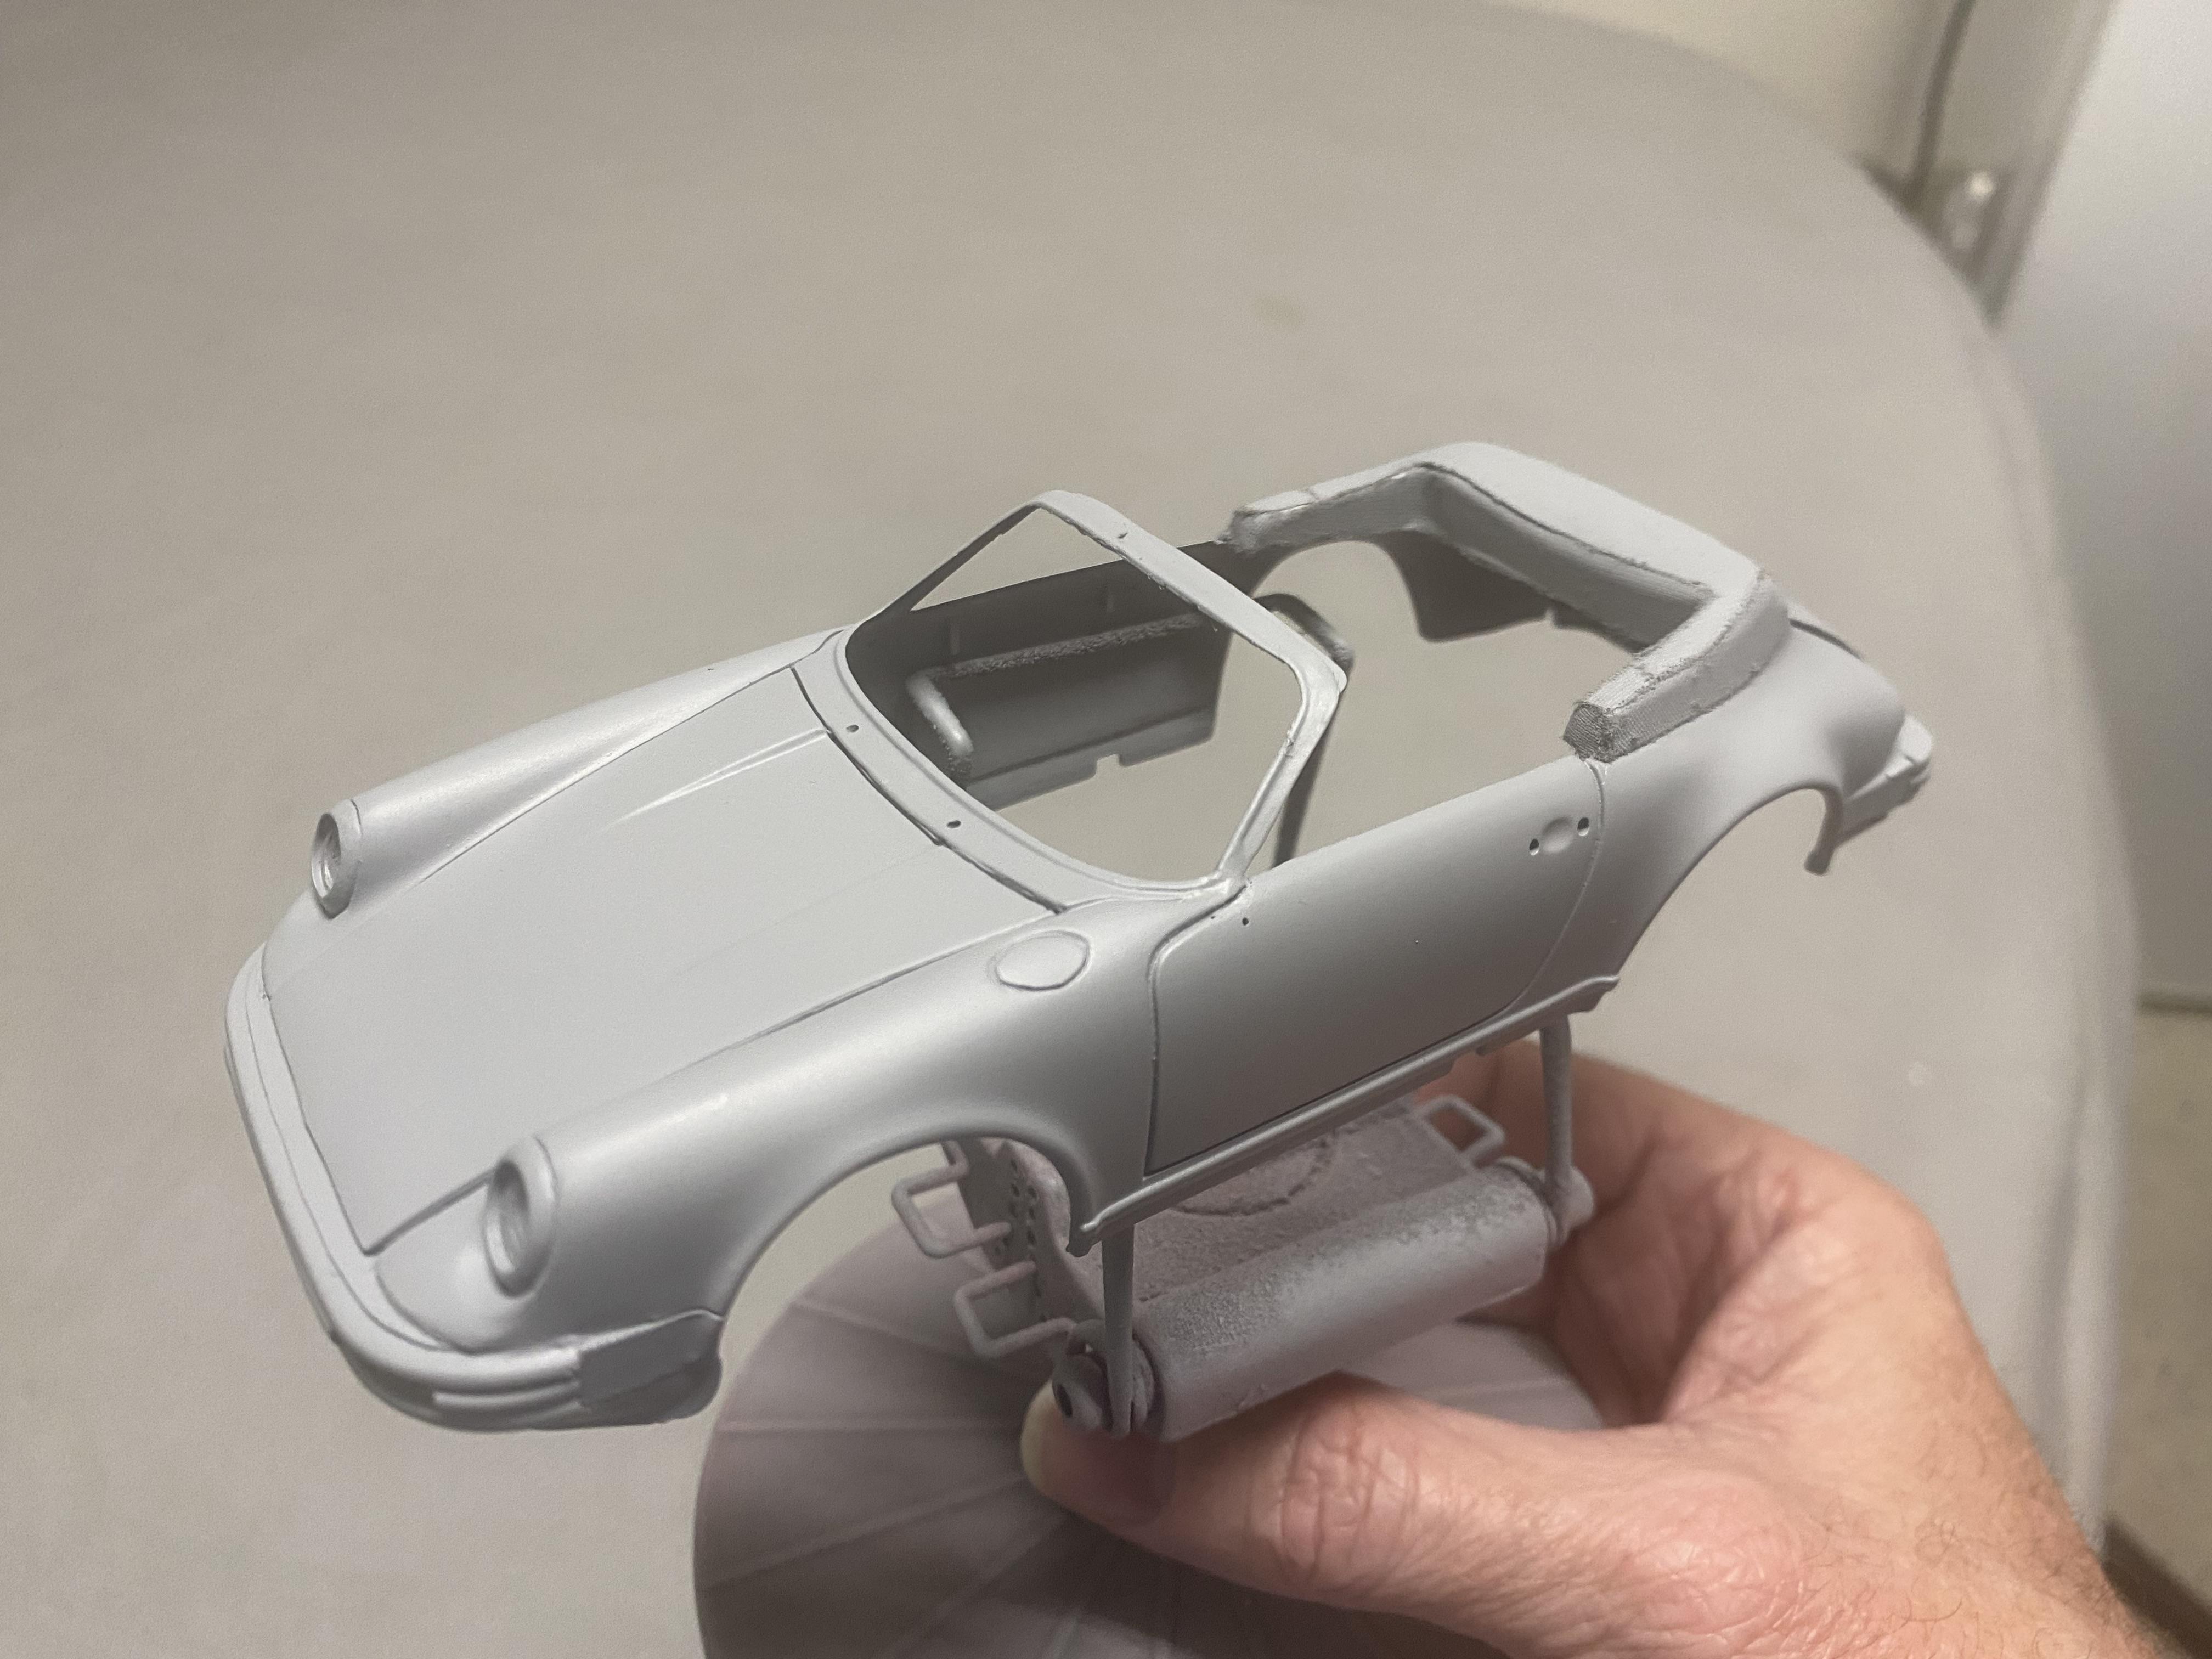
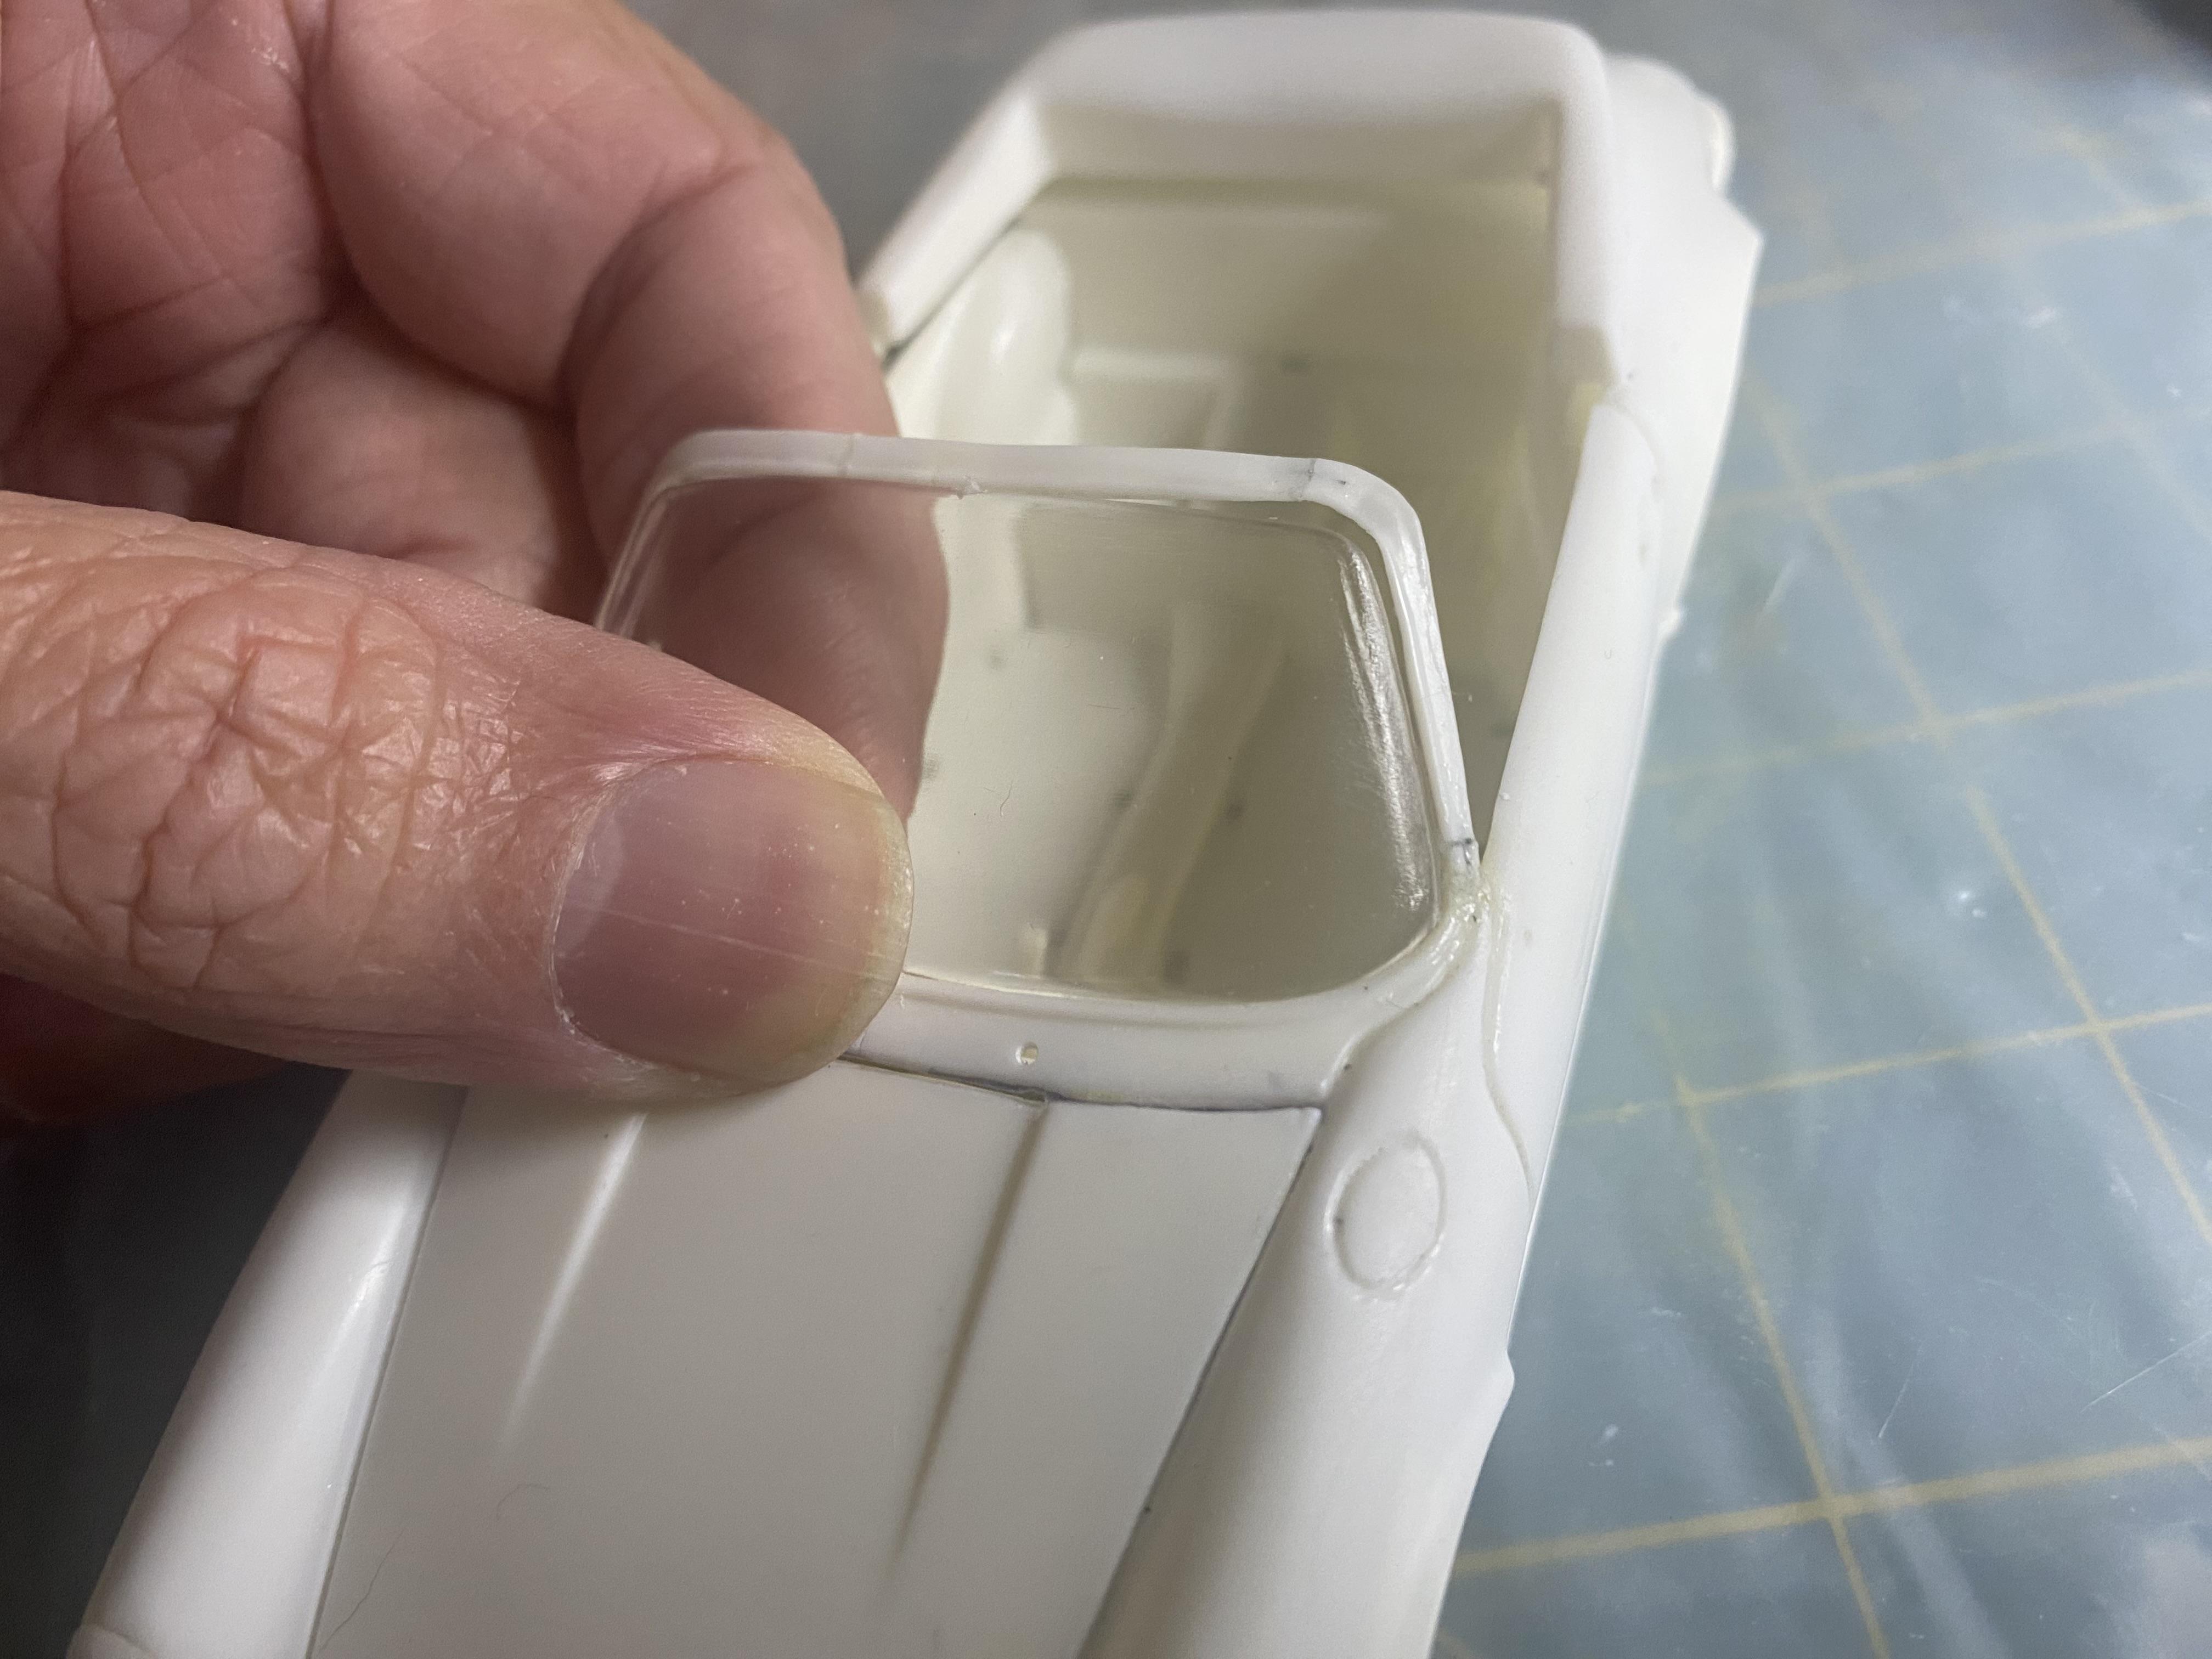
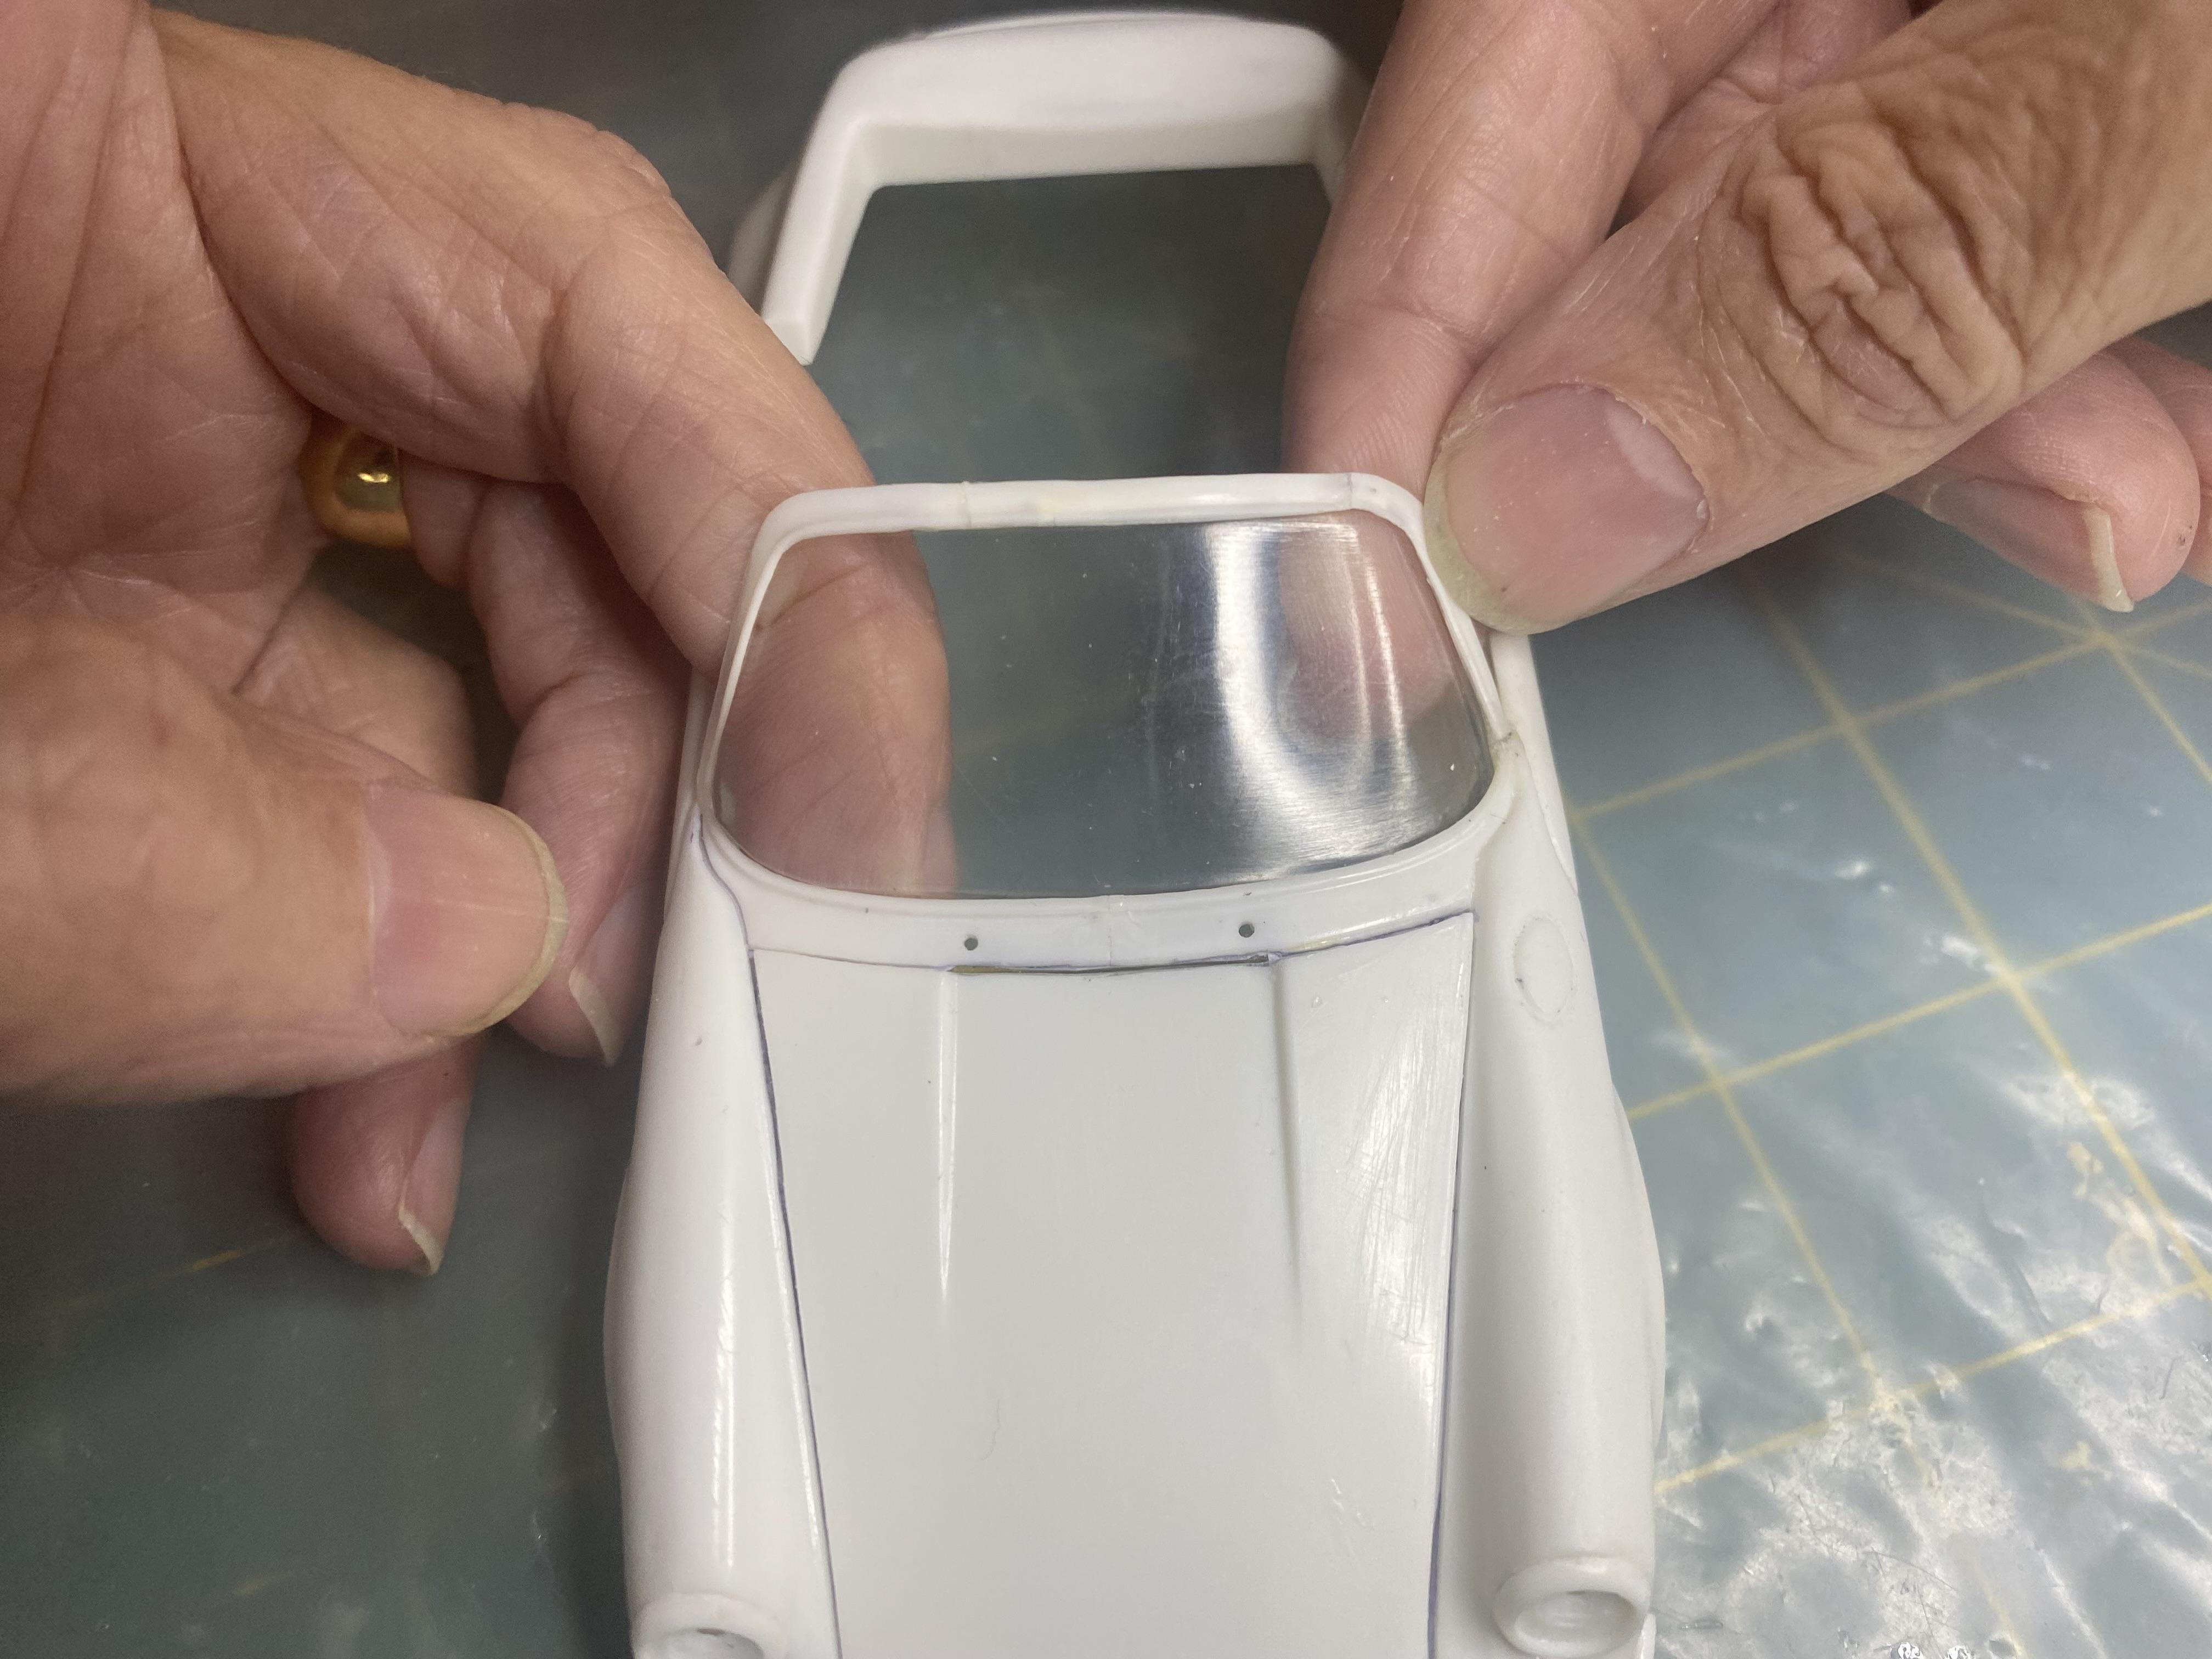
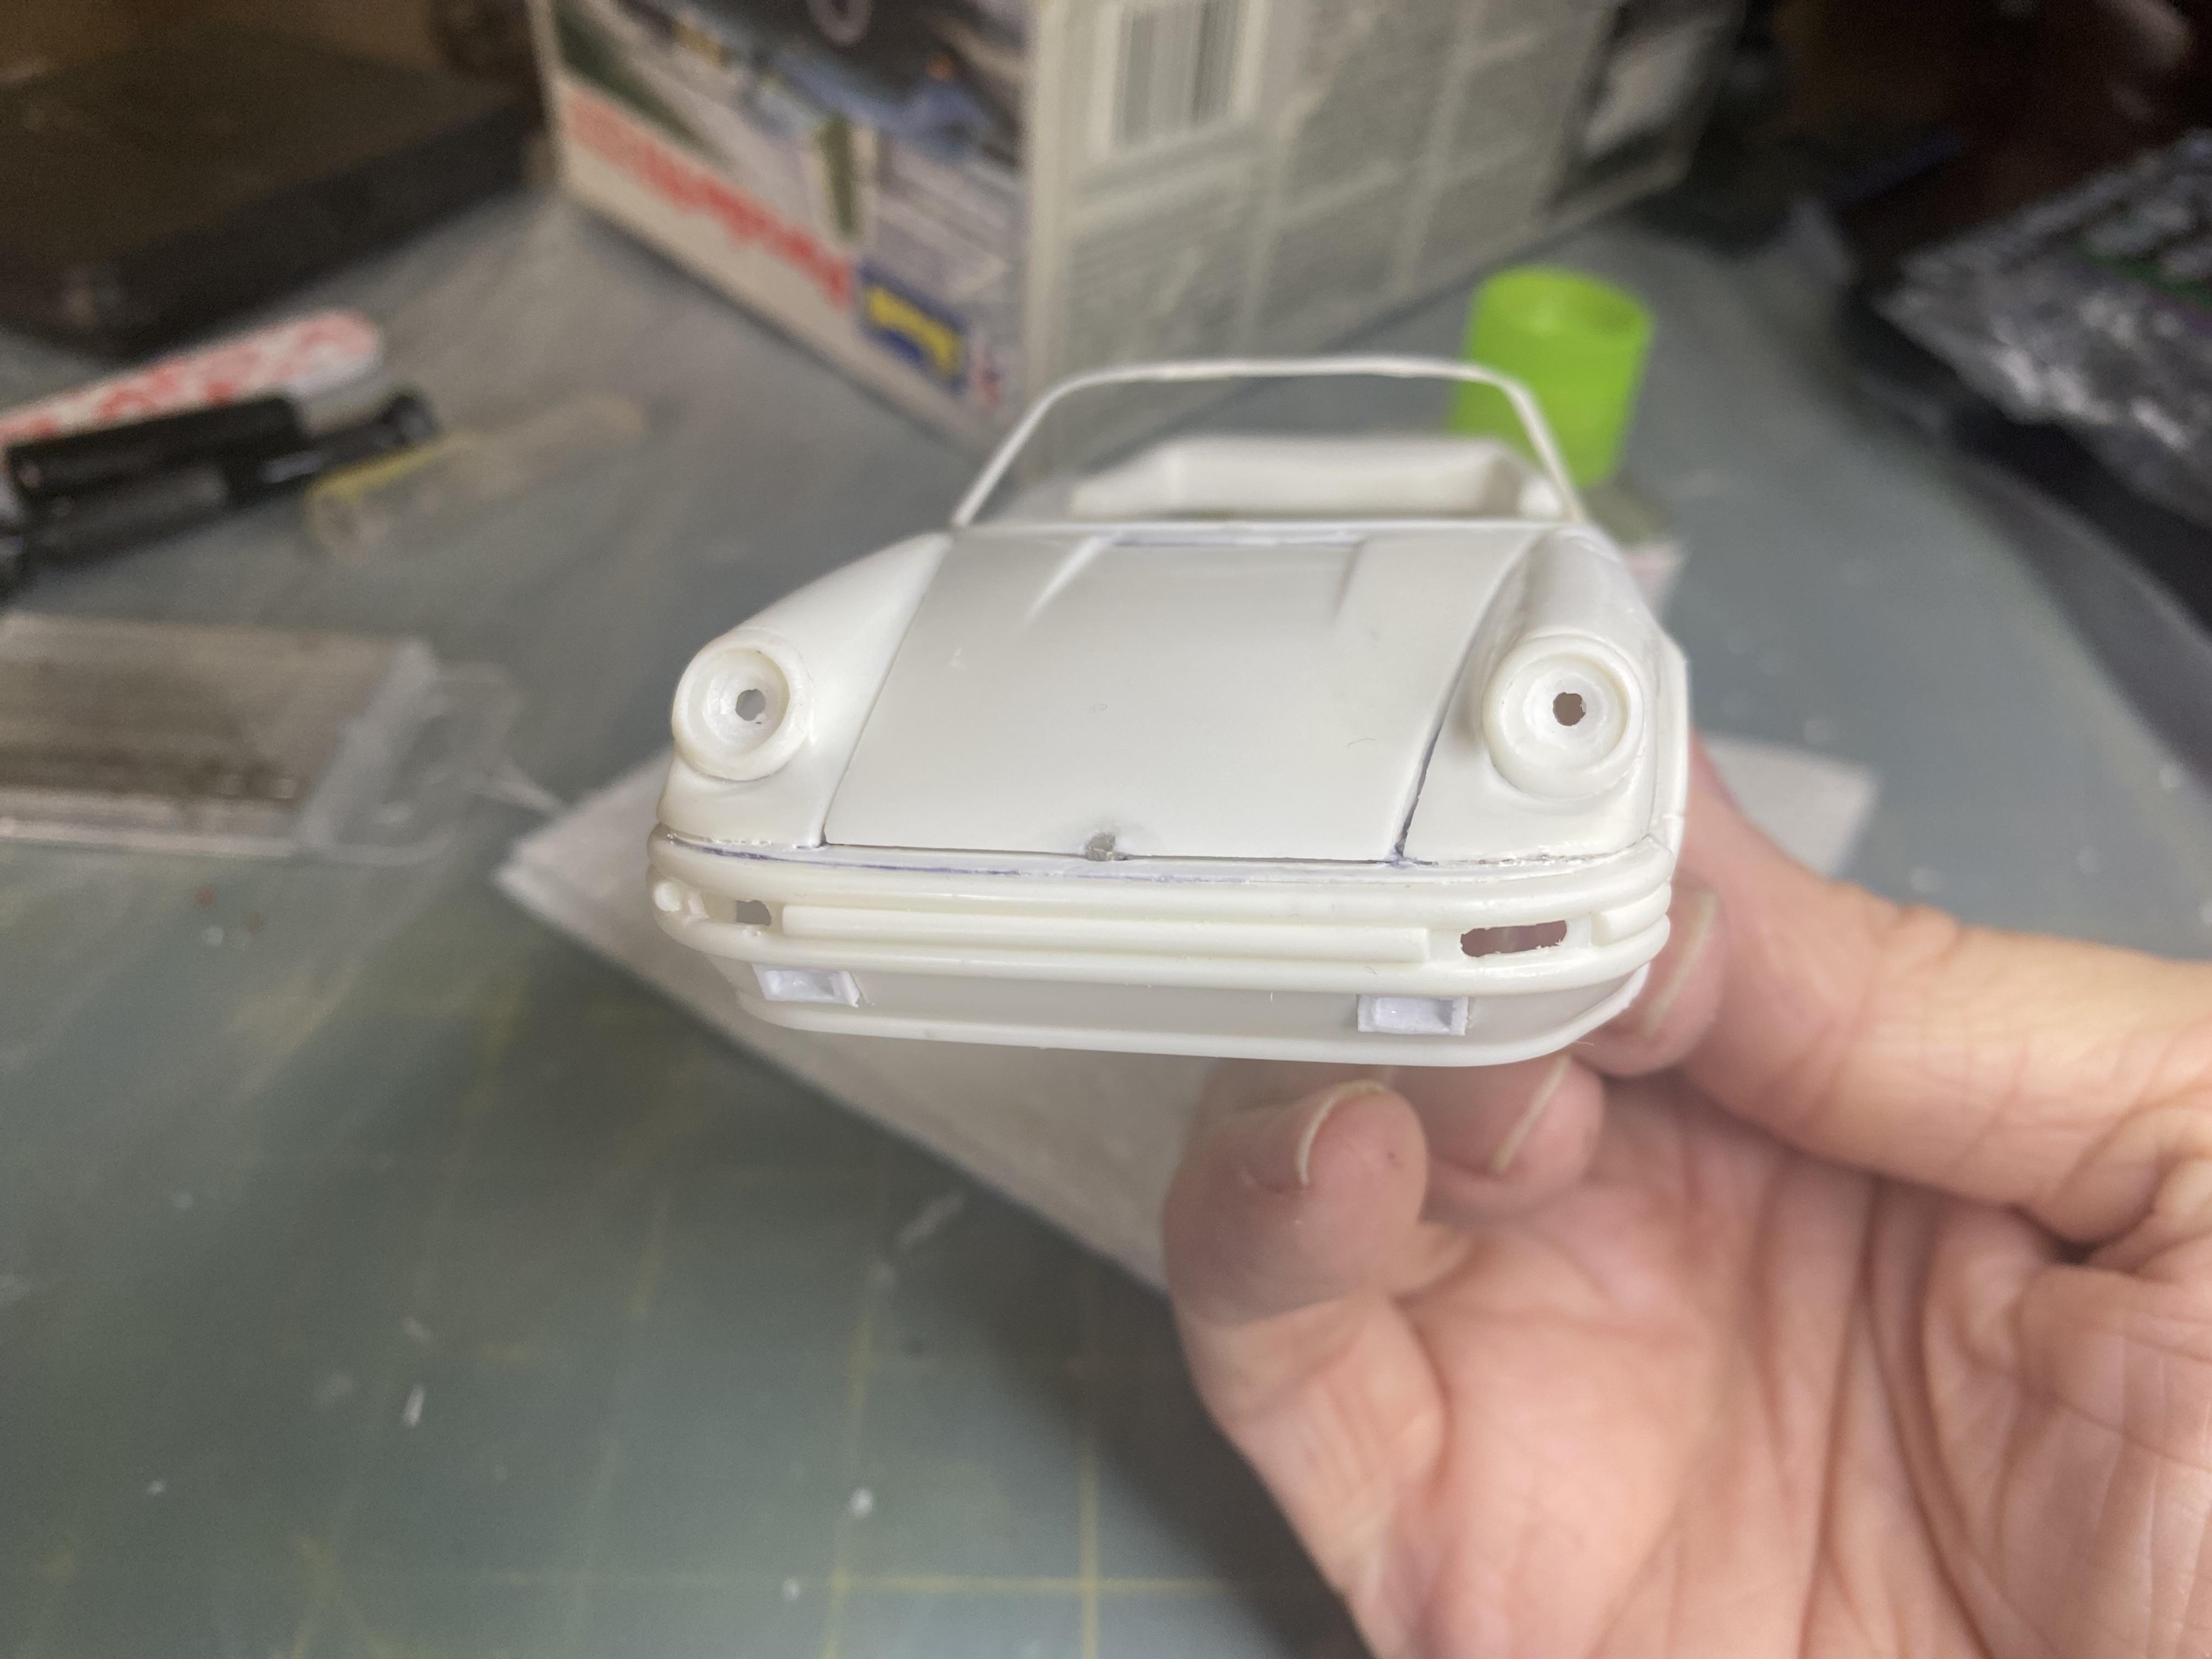
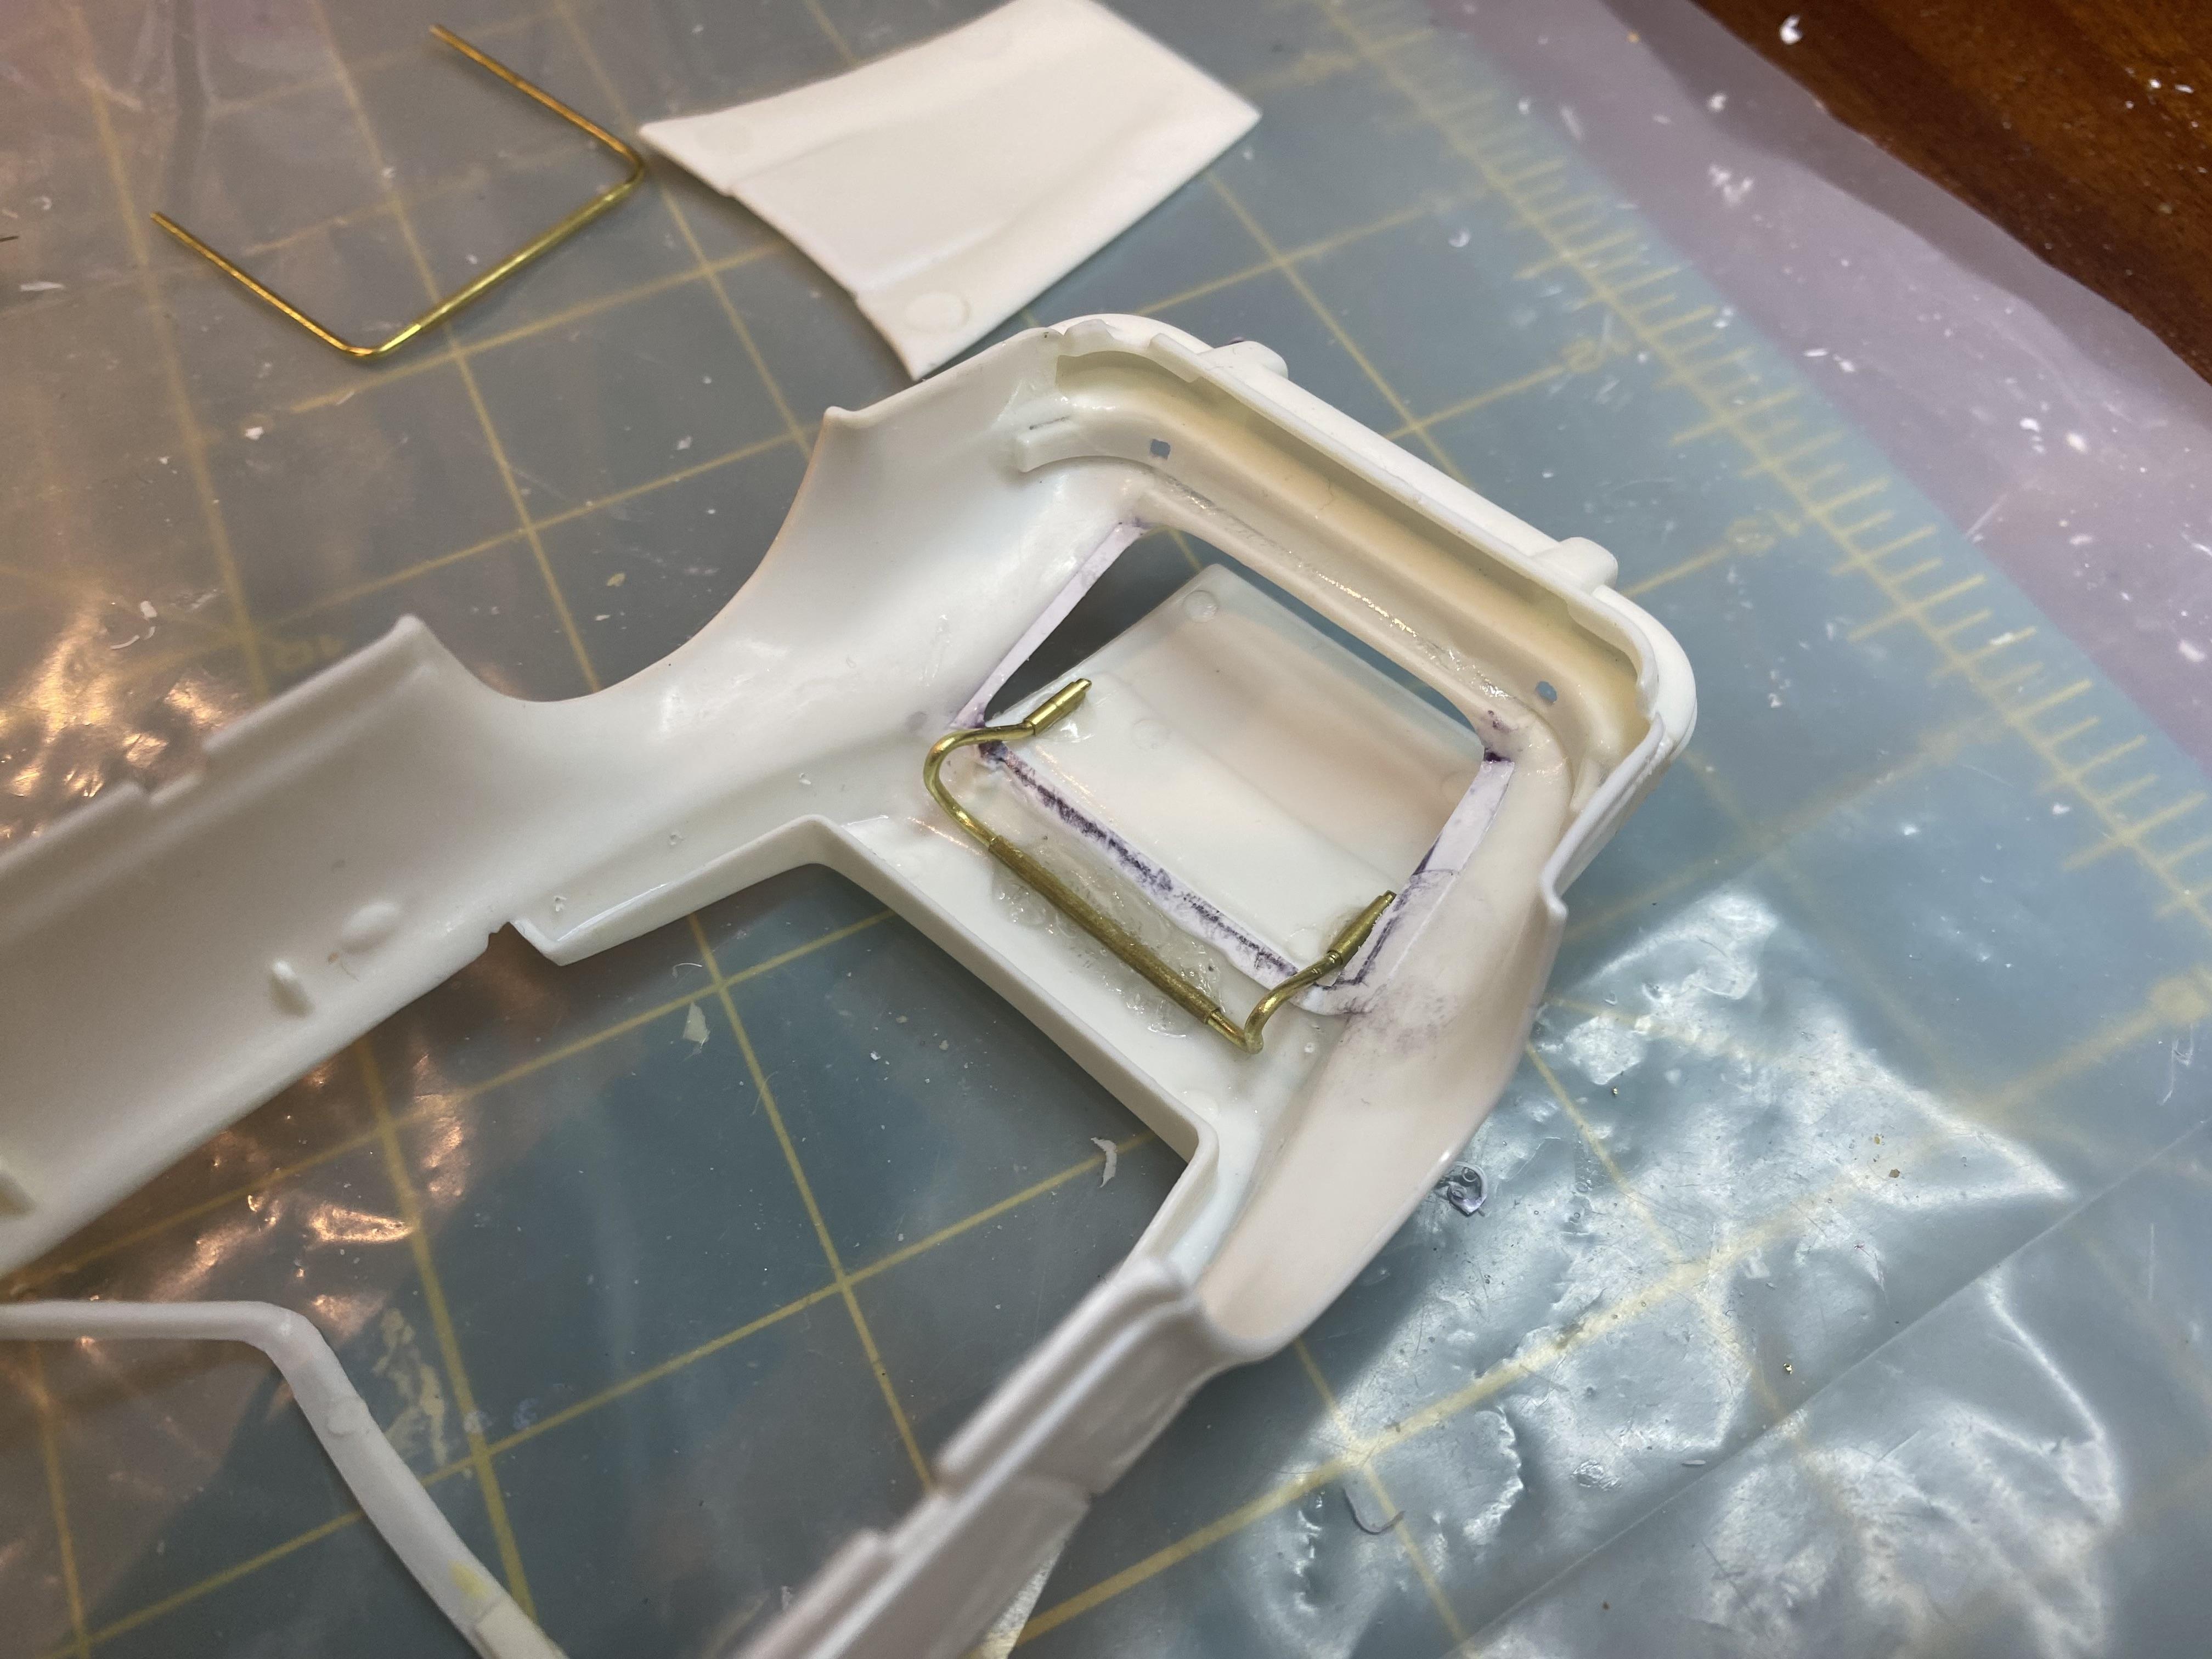
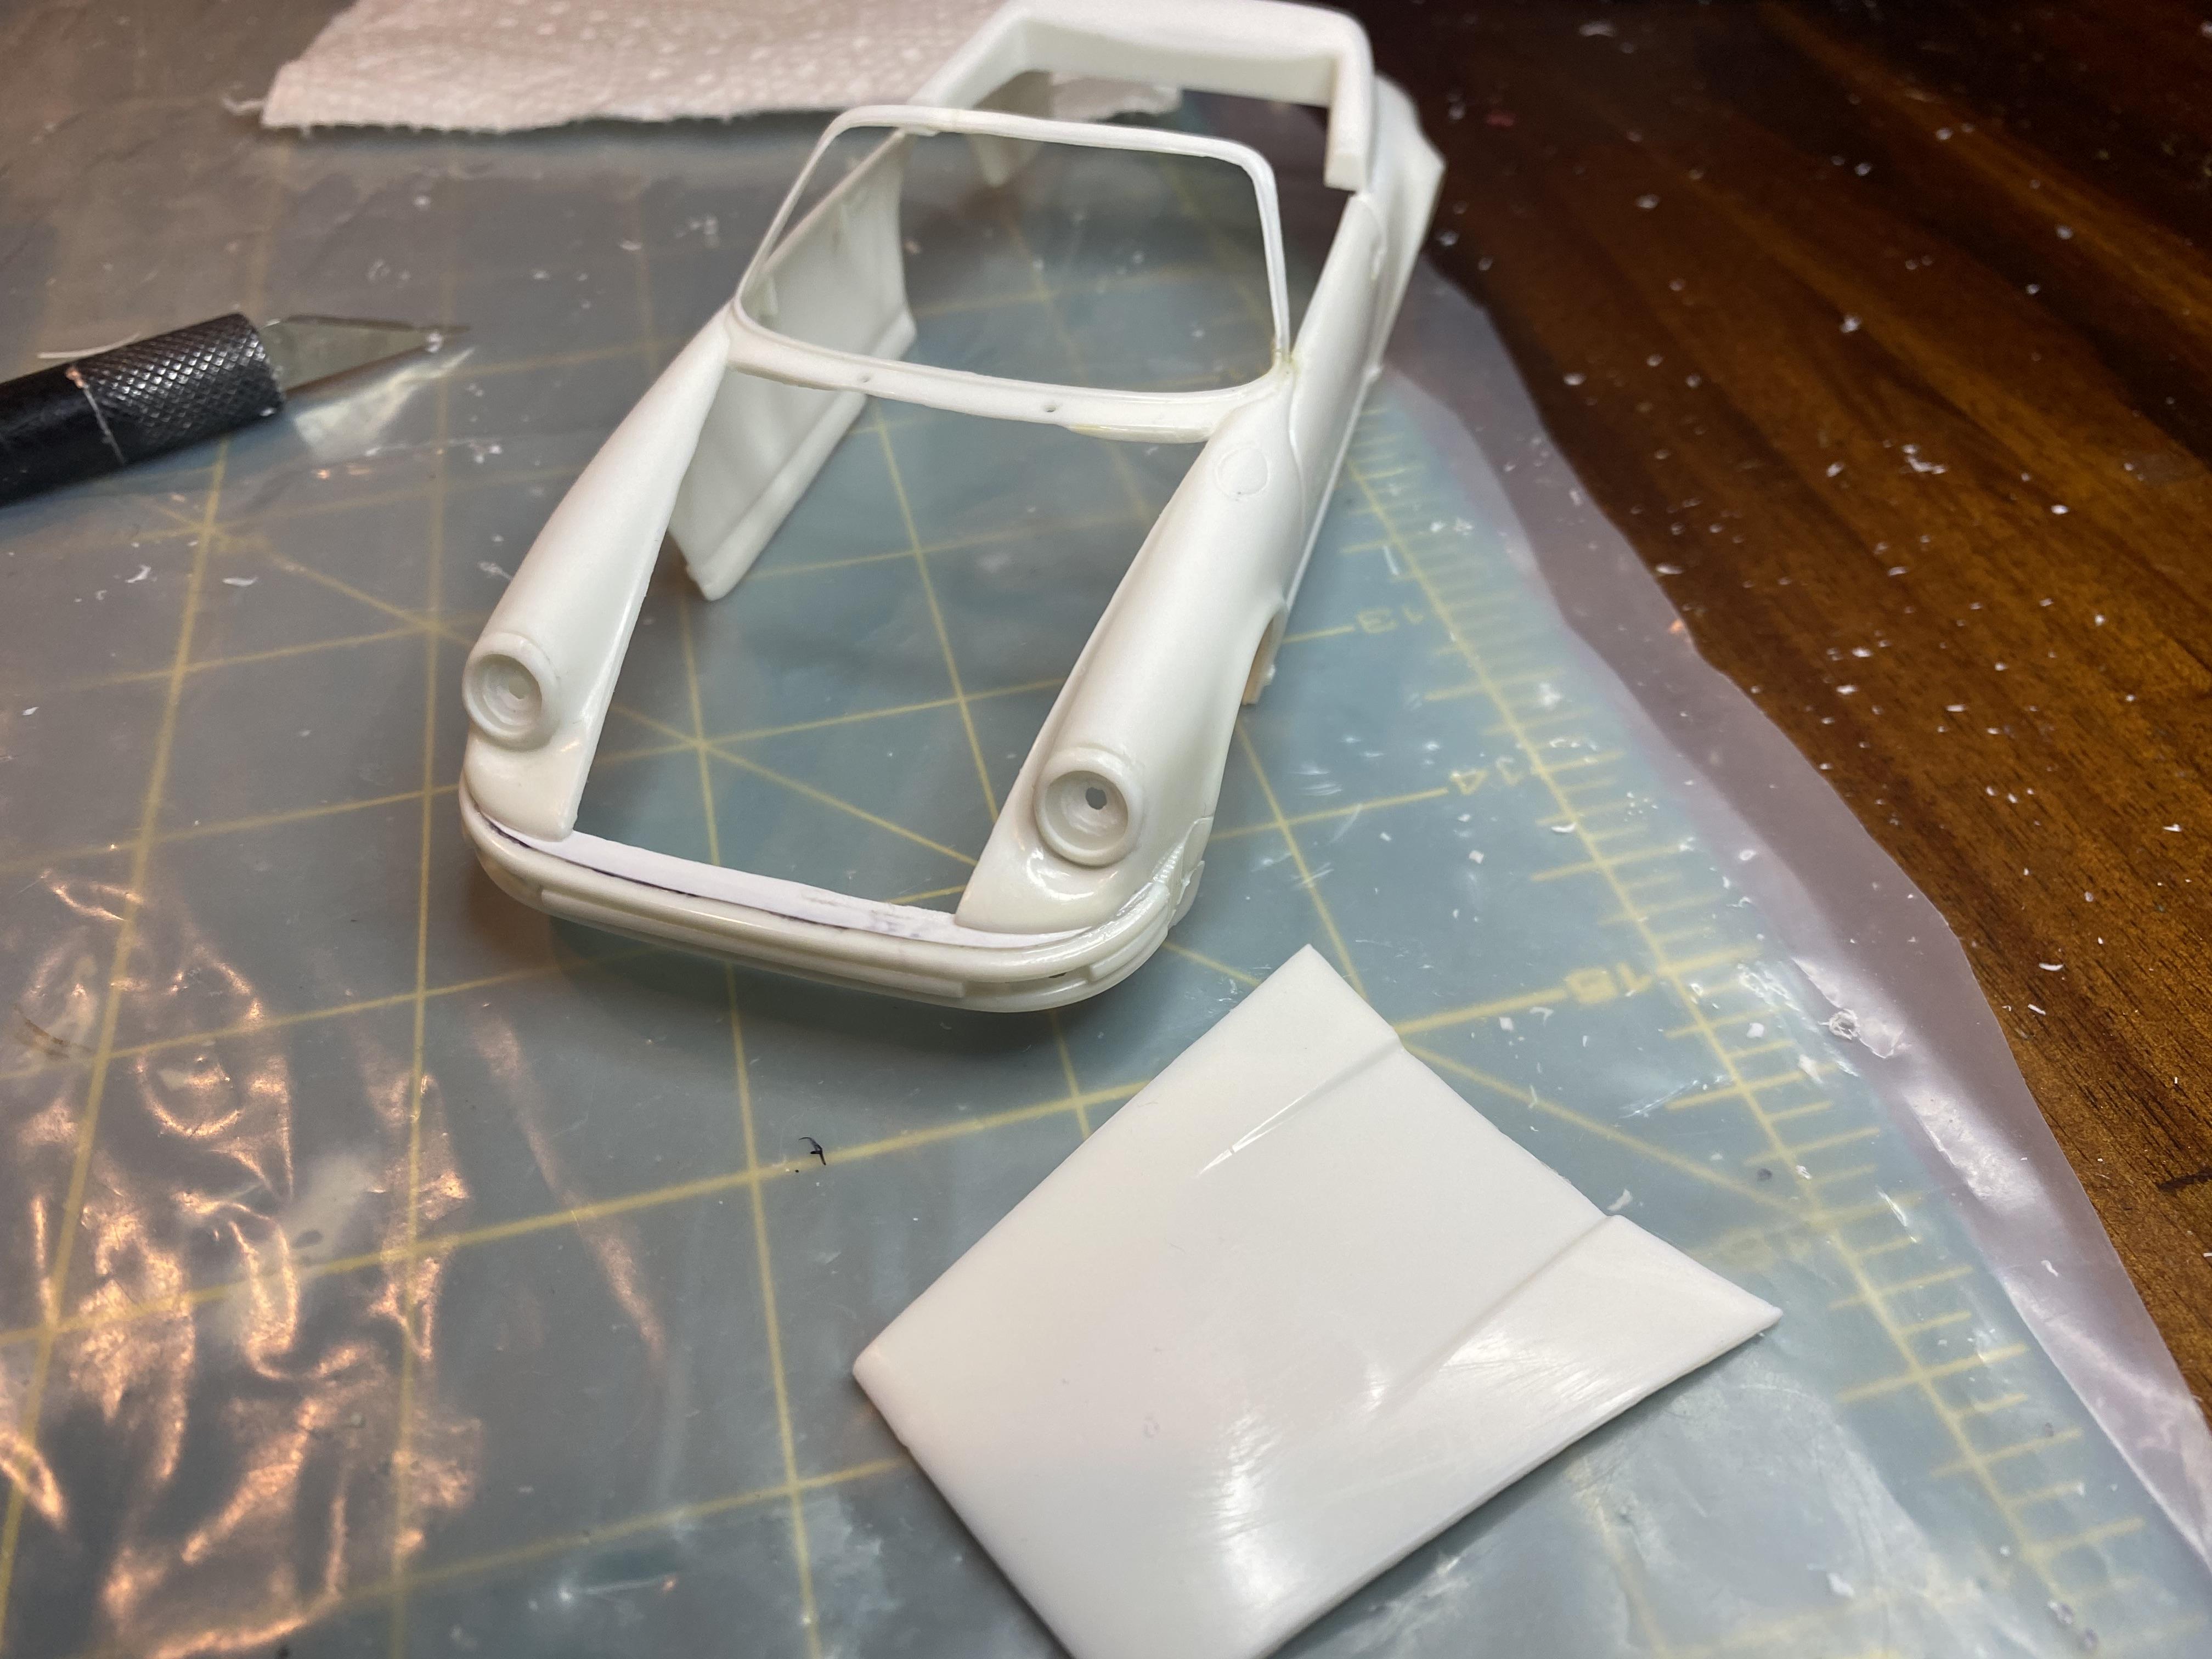
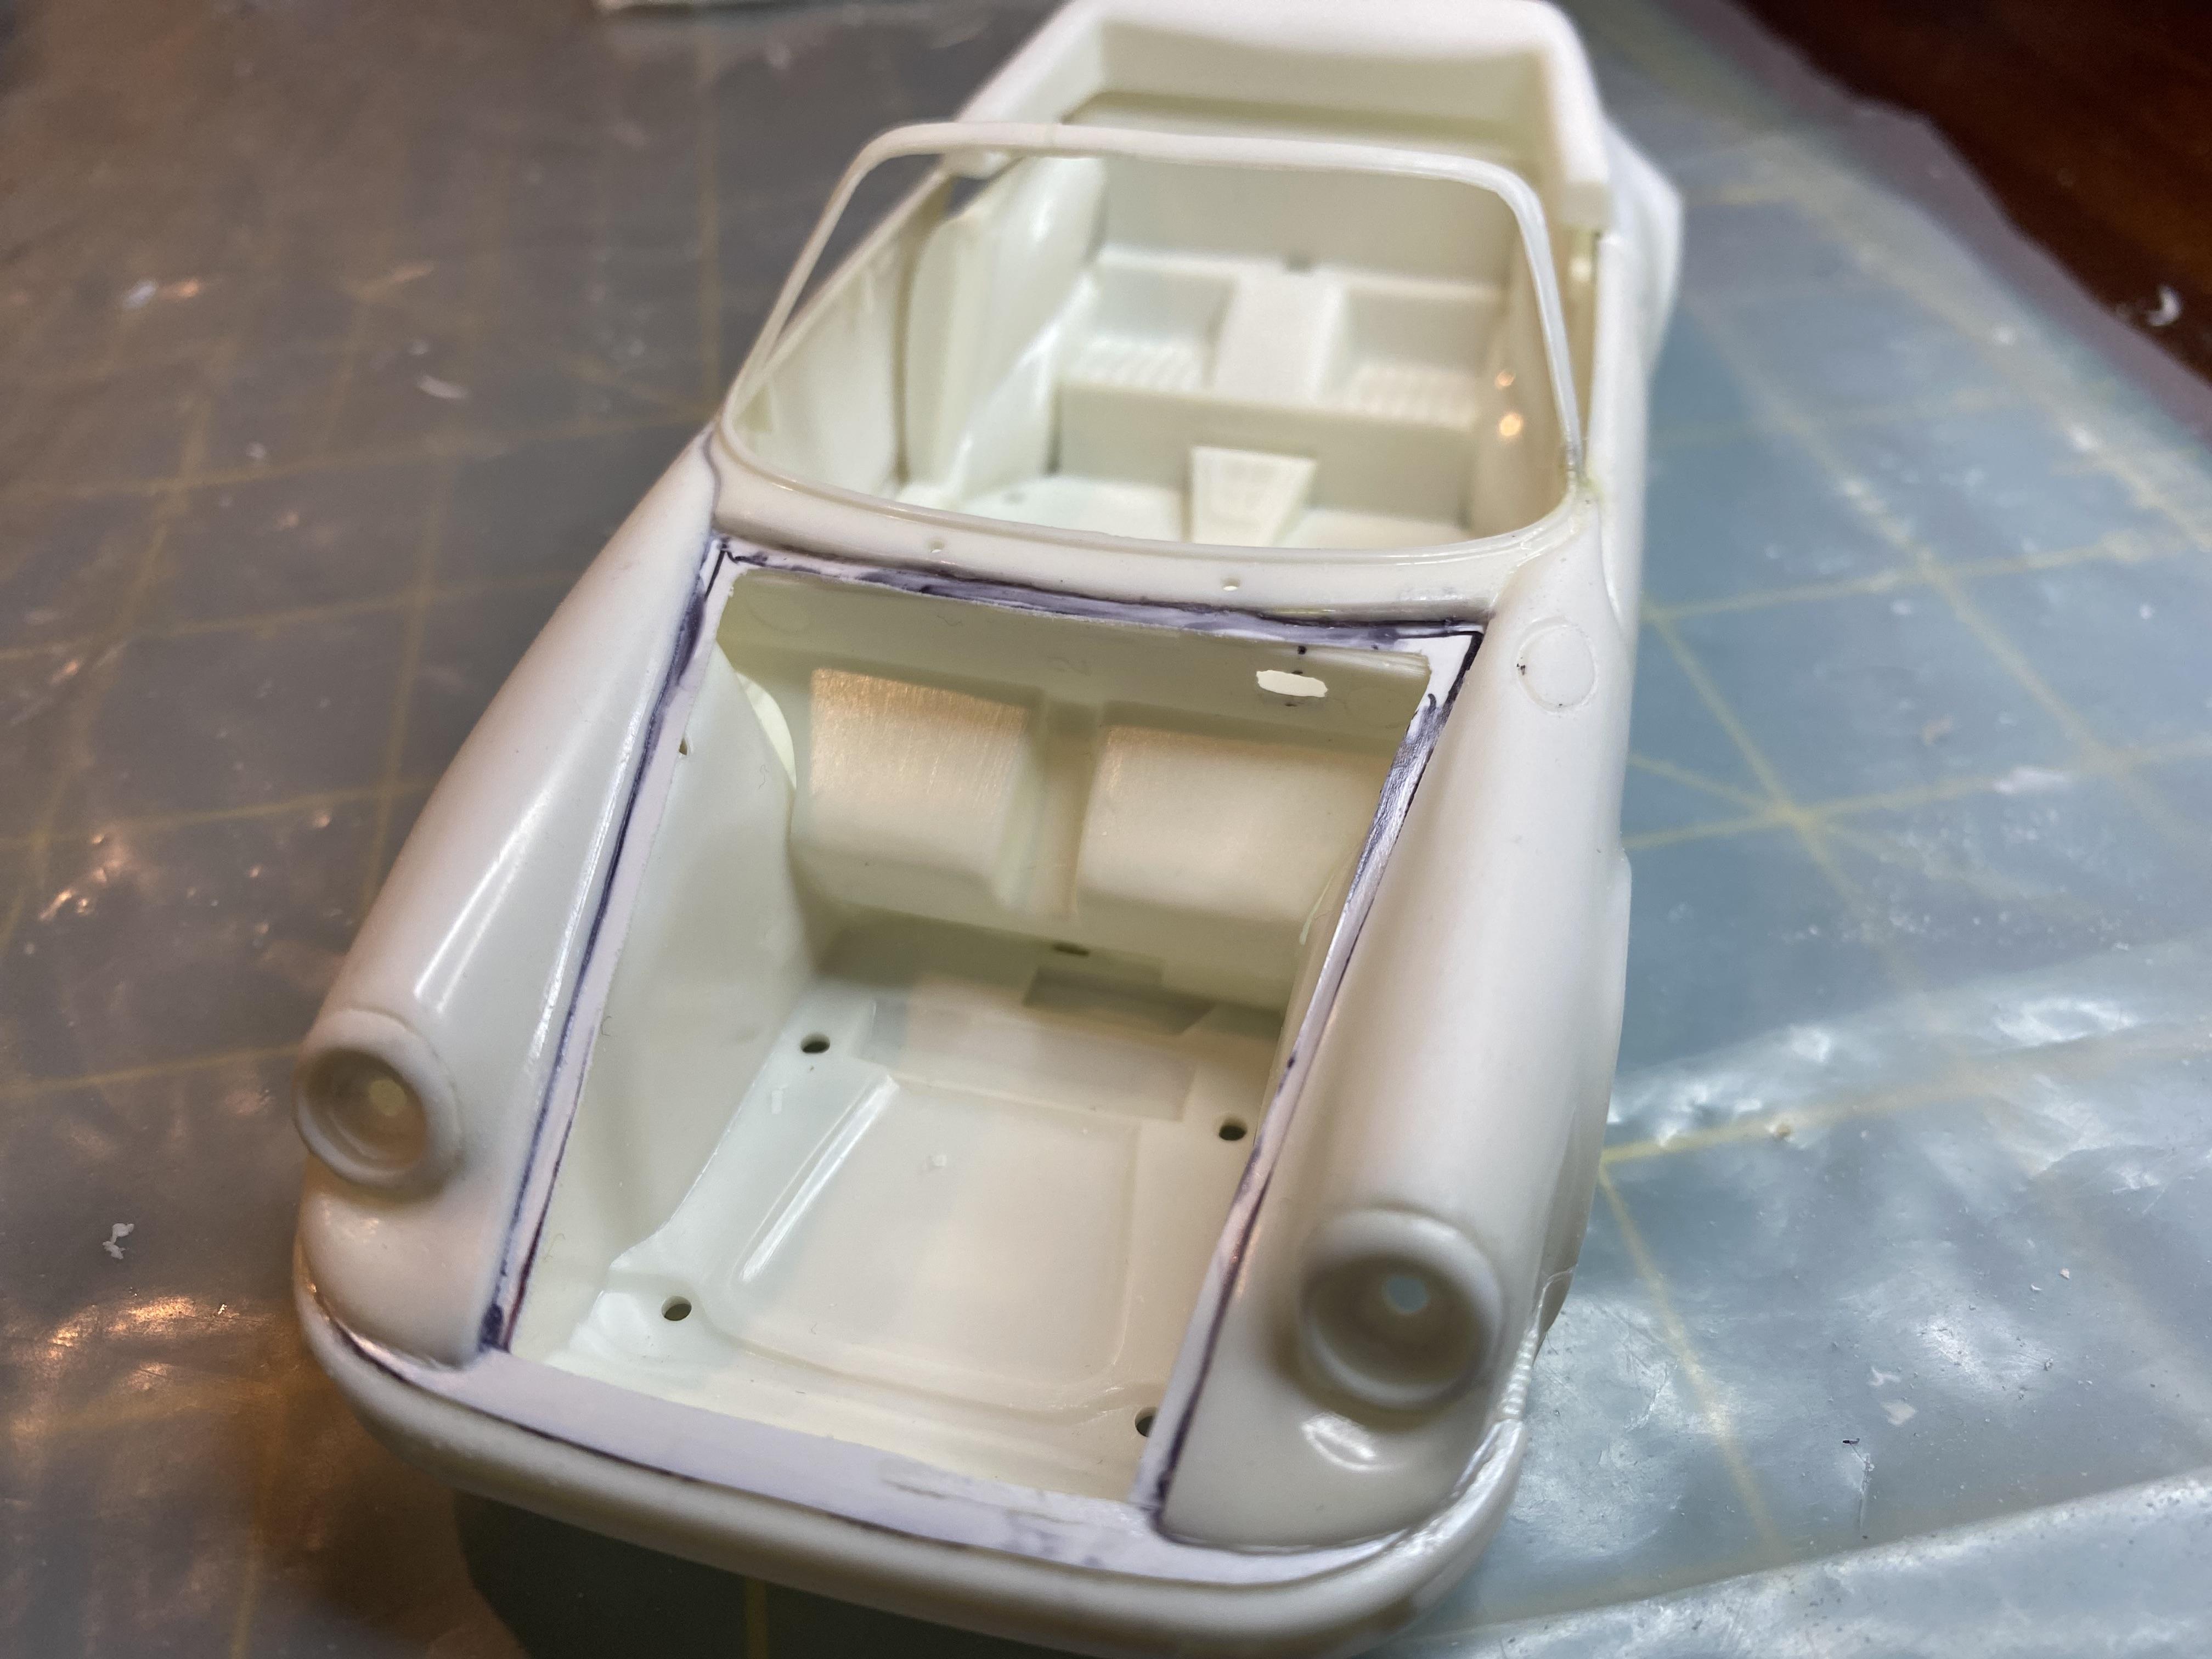
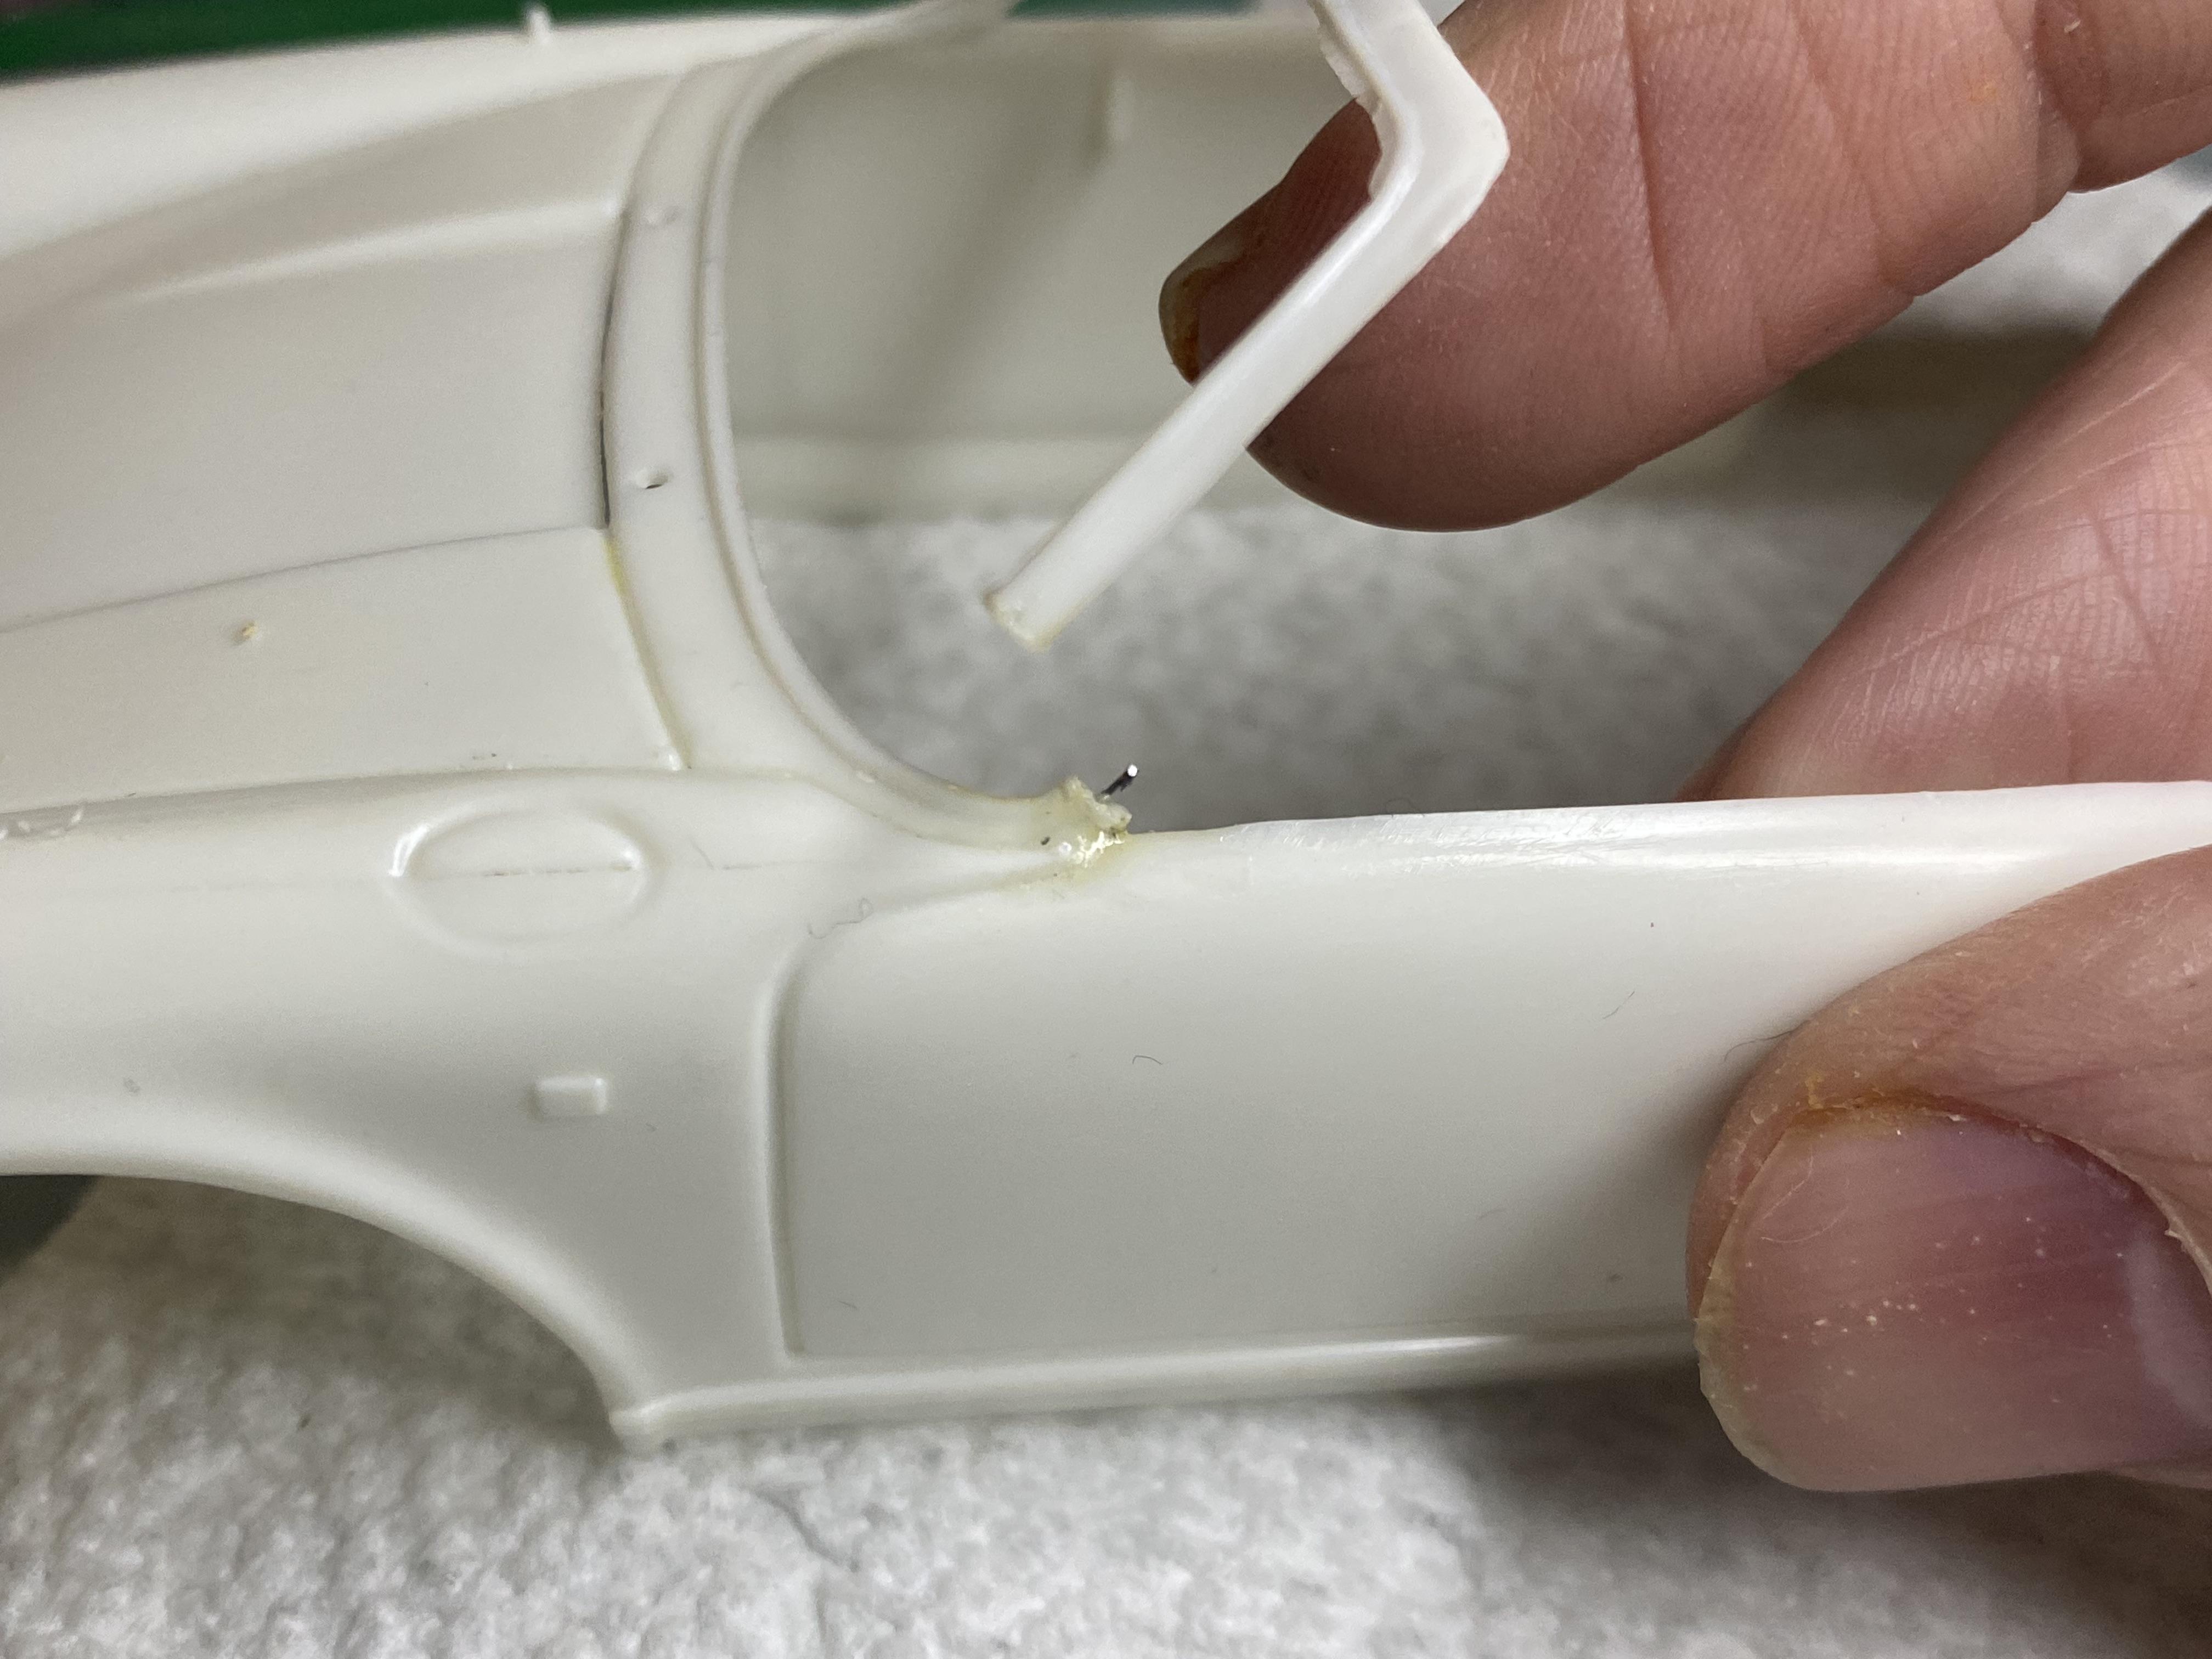
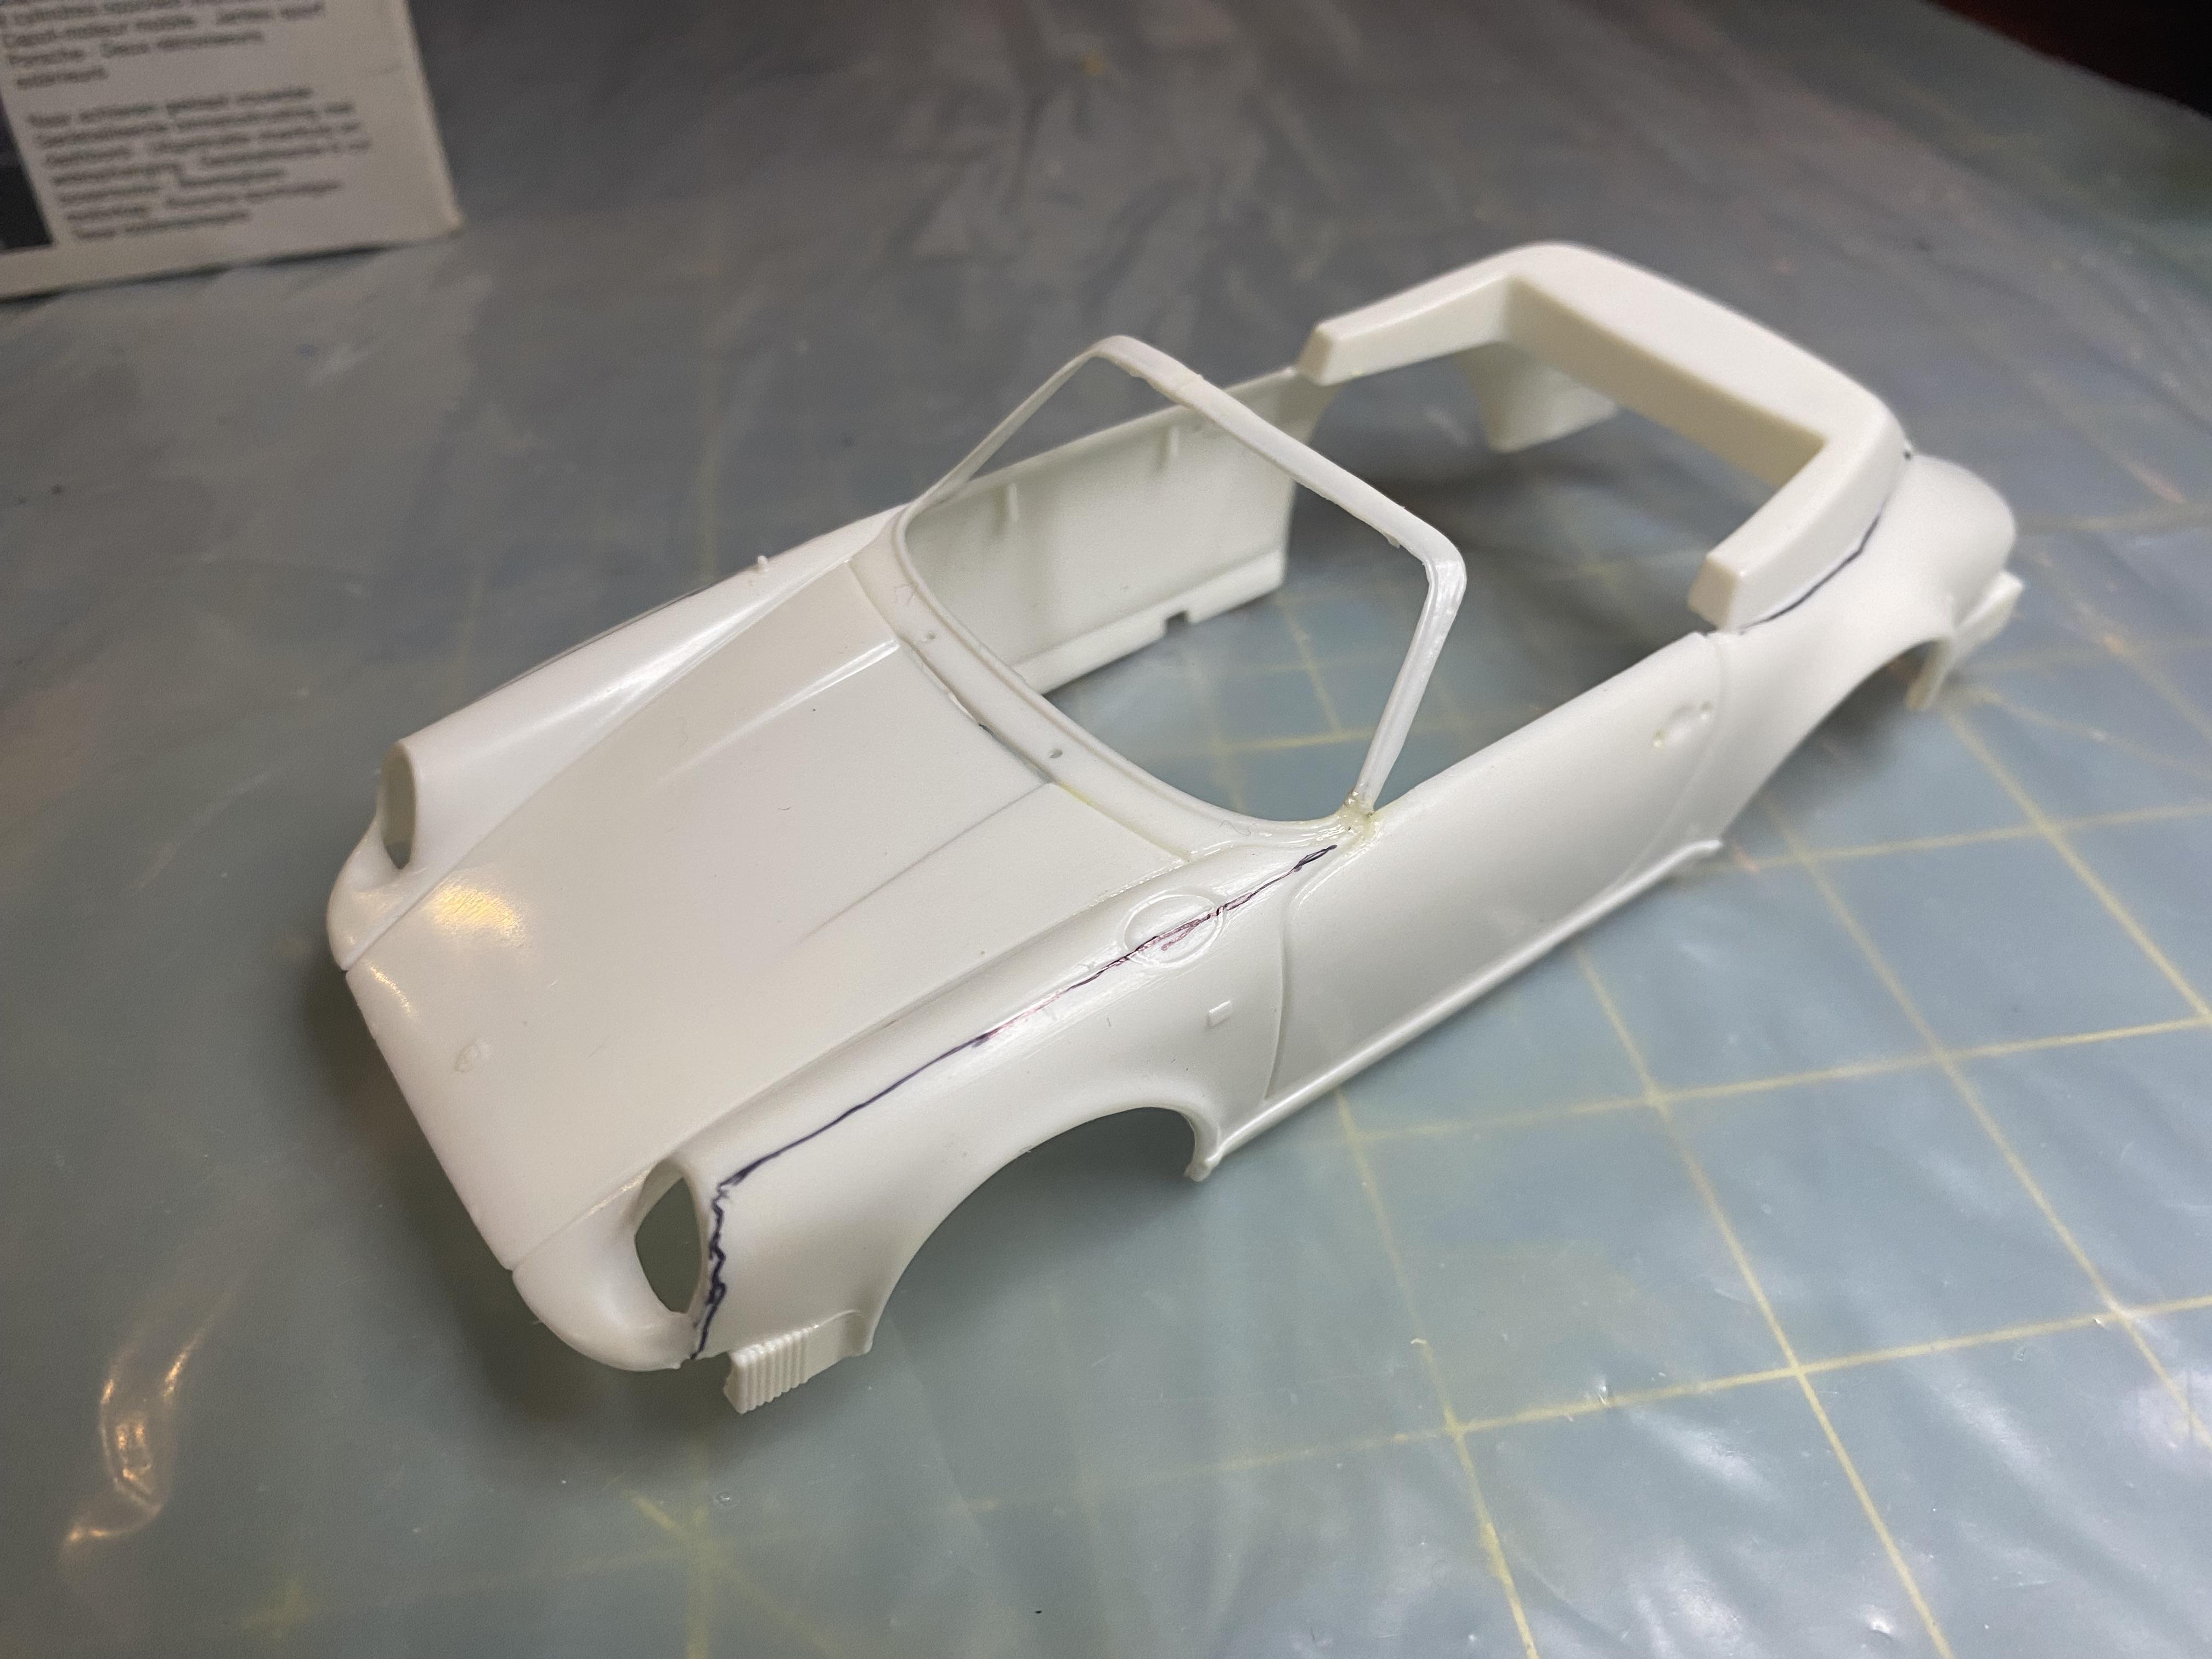
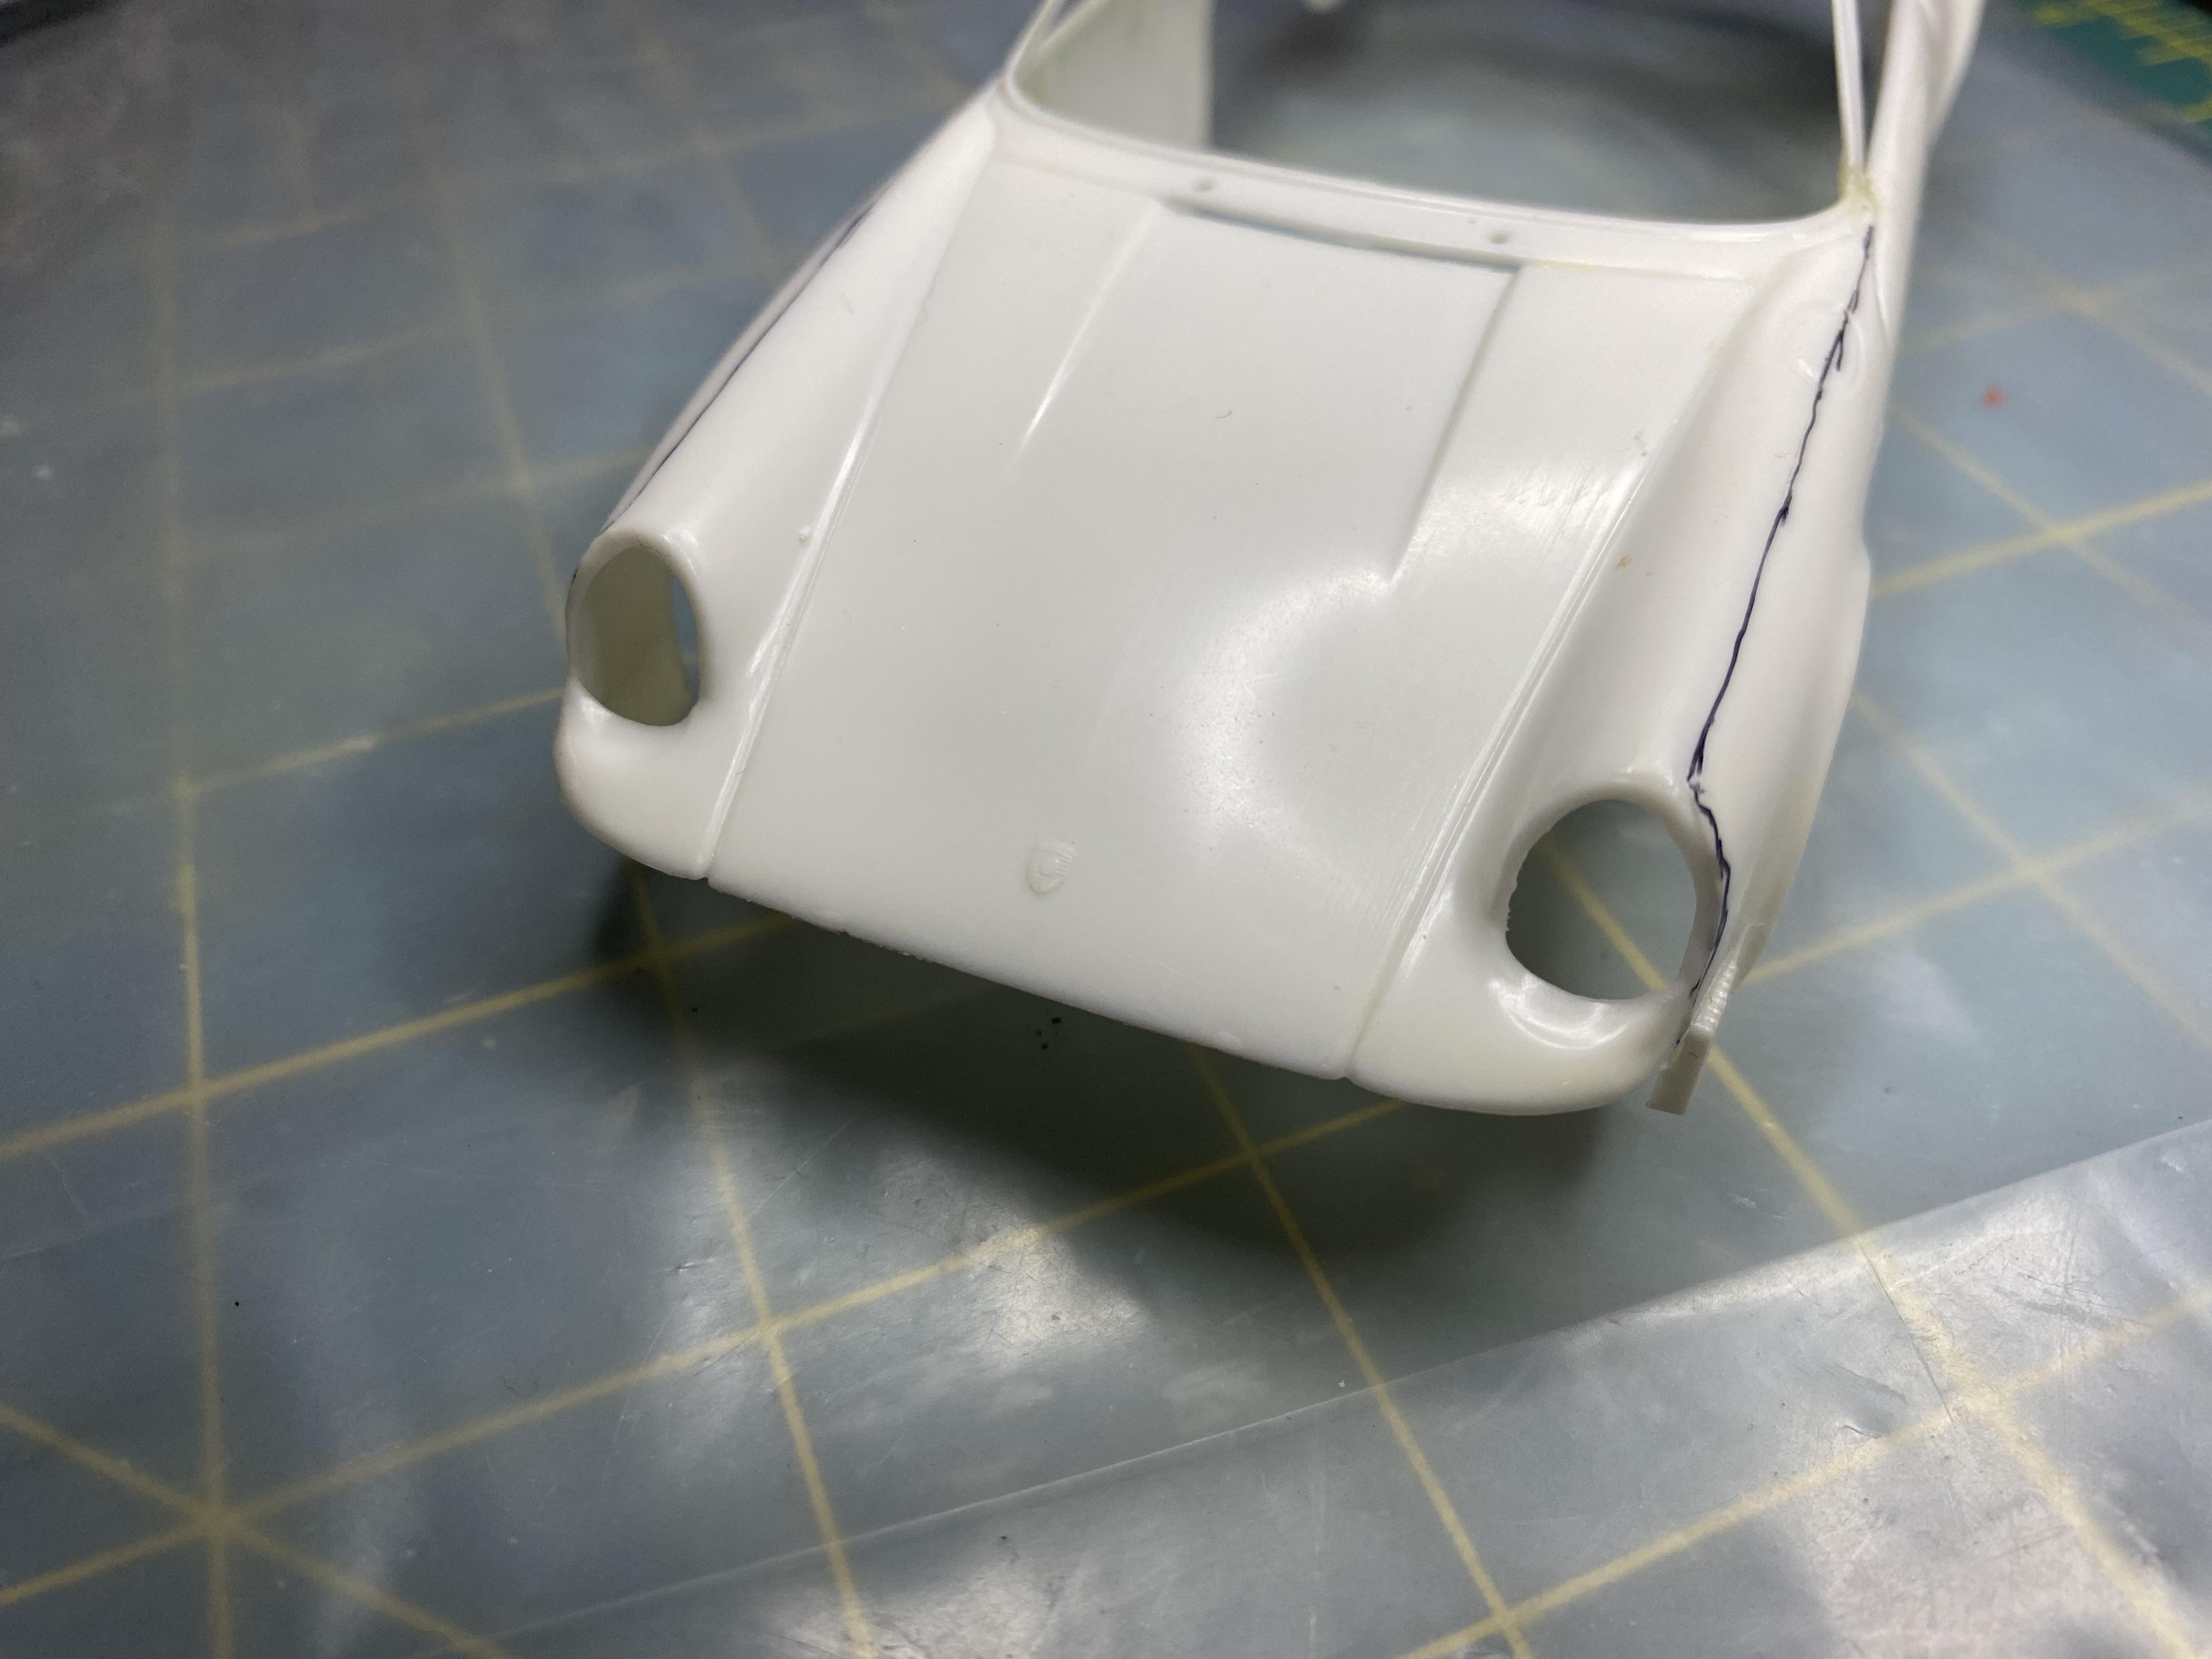
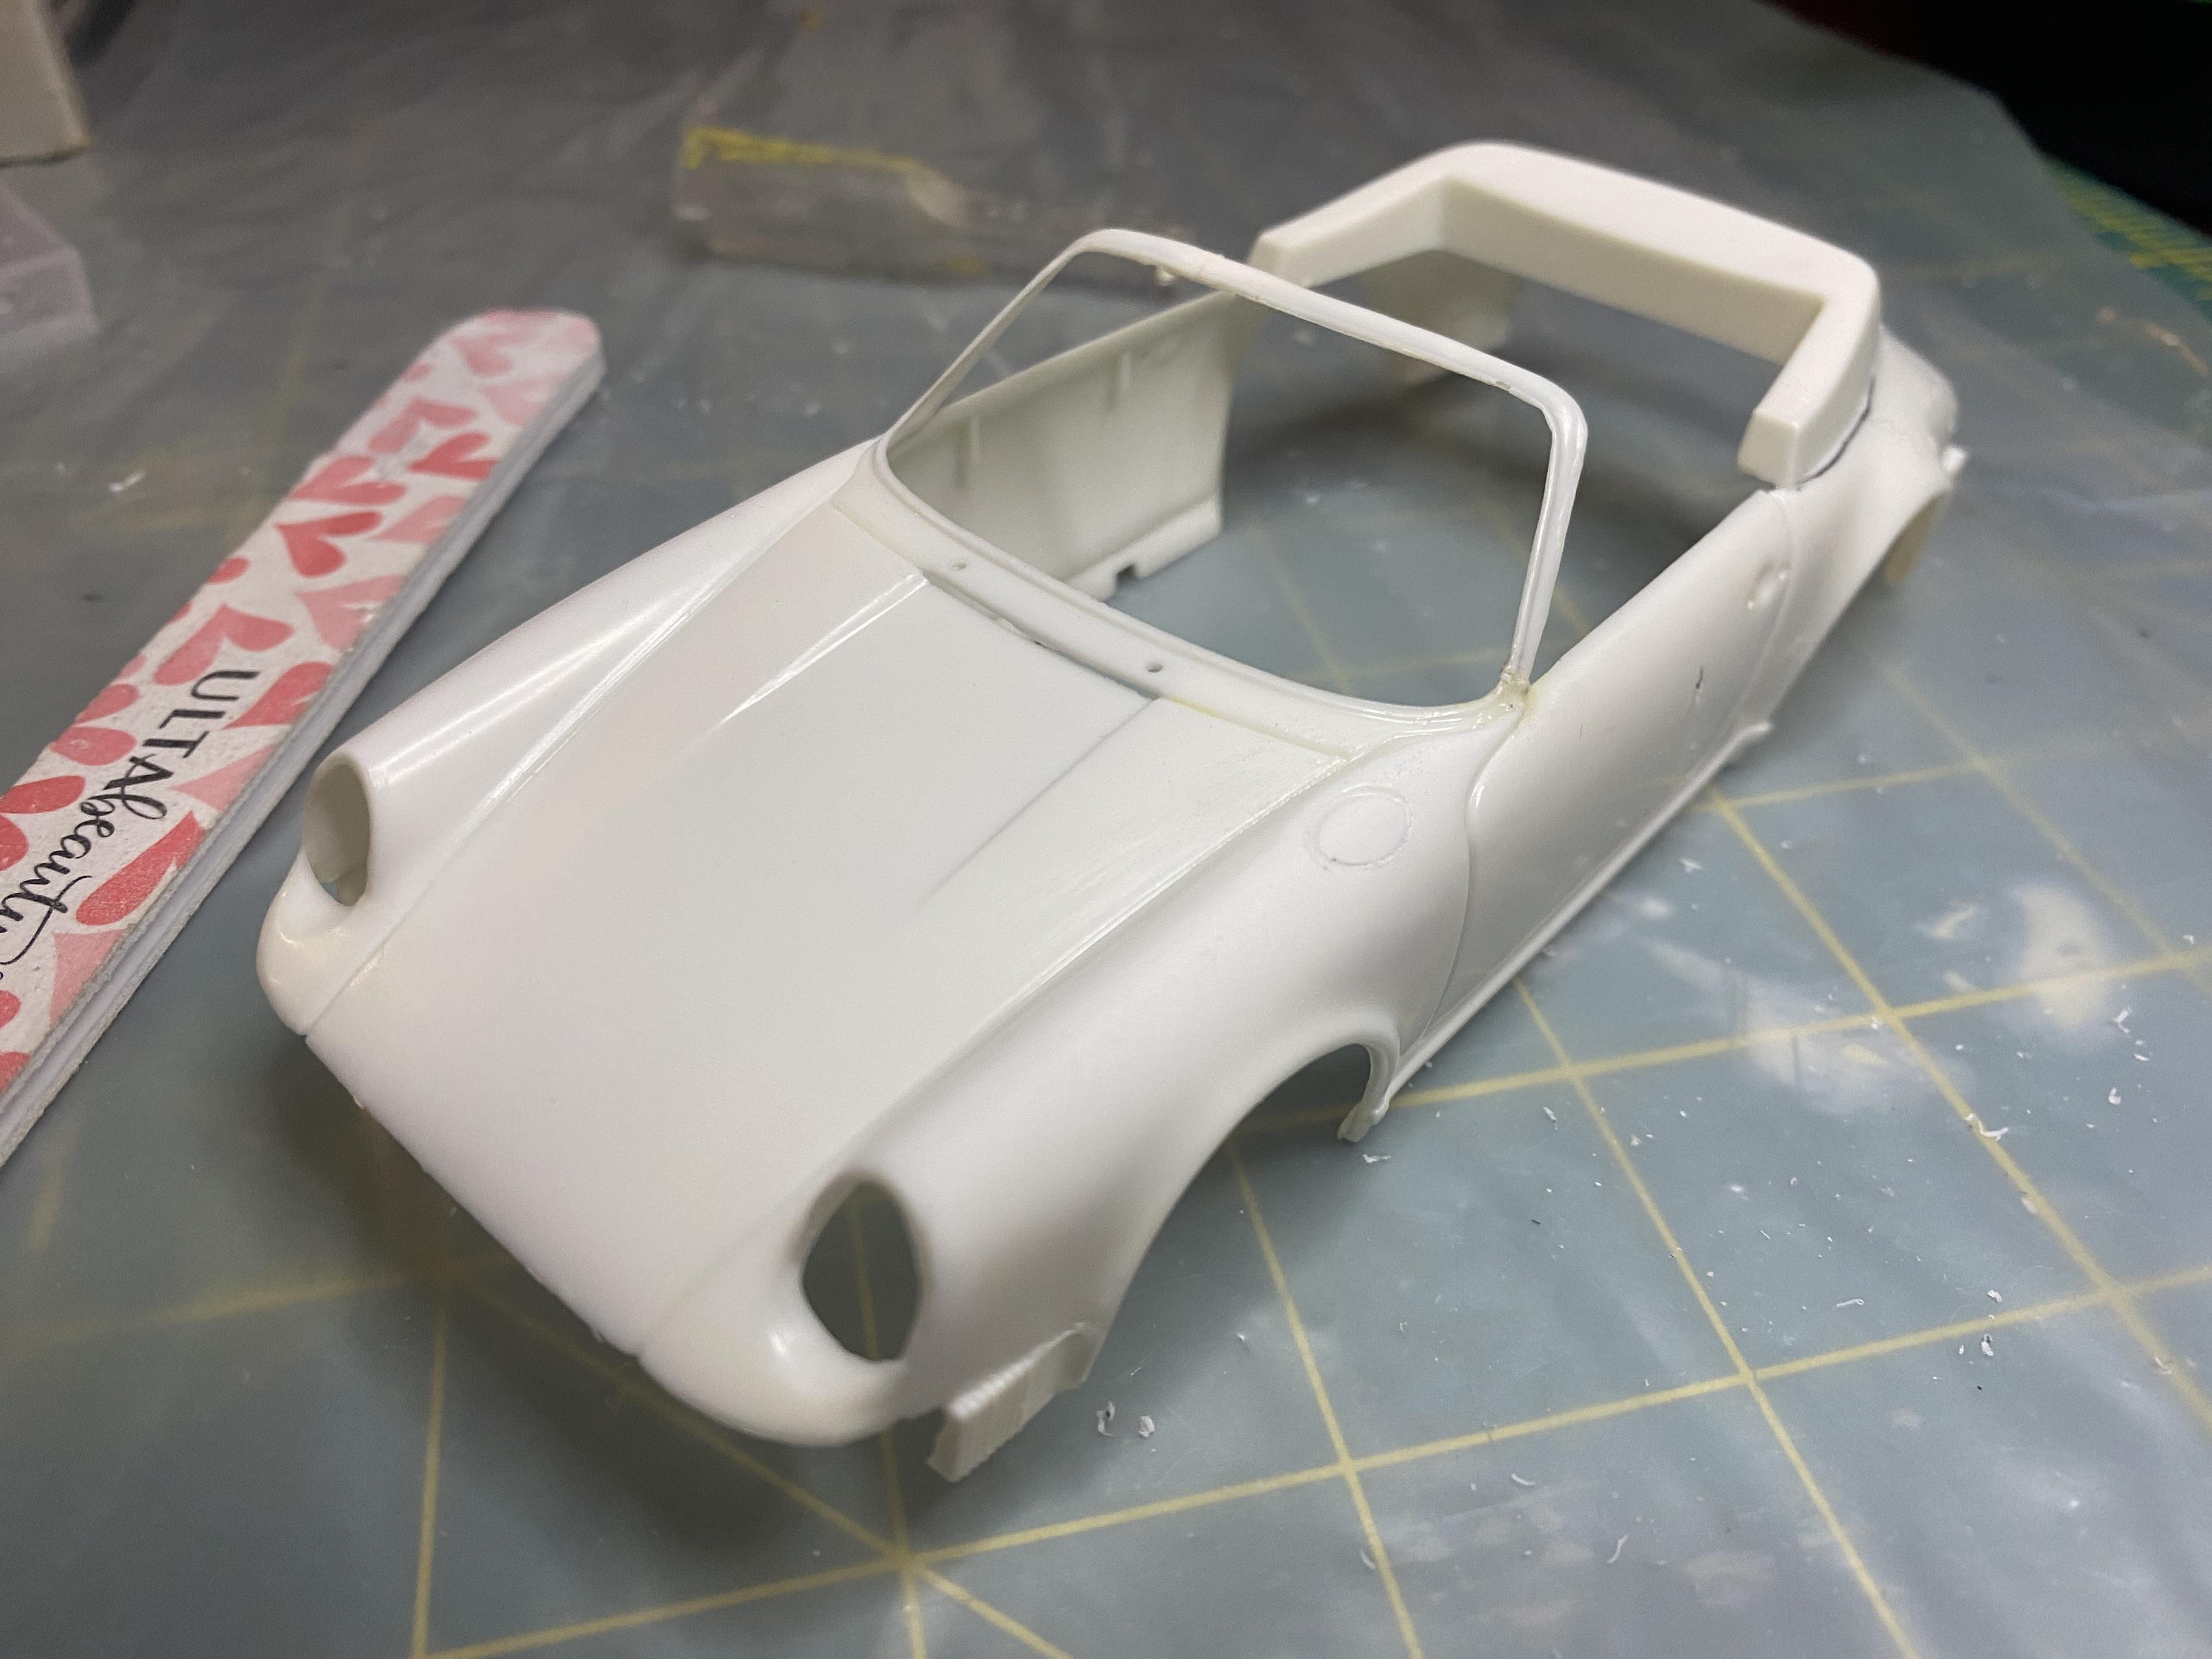
@NOBLNG, good call on checking the window frame. I ended up cutting out a 2mm section to make it fit properly on the repaired side. I have also changed my mind on the color. I like Prussian blue but it wasn’t available till 1985-86 so I decided to go with an 1984 color, Kiln Red.
-
Thank you! I do like early air cooled Porsches! Thank you! I do need to check the windshield fit before going to paint. good call!
-
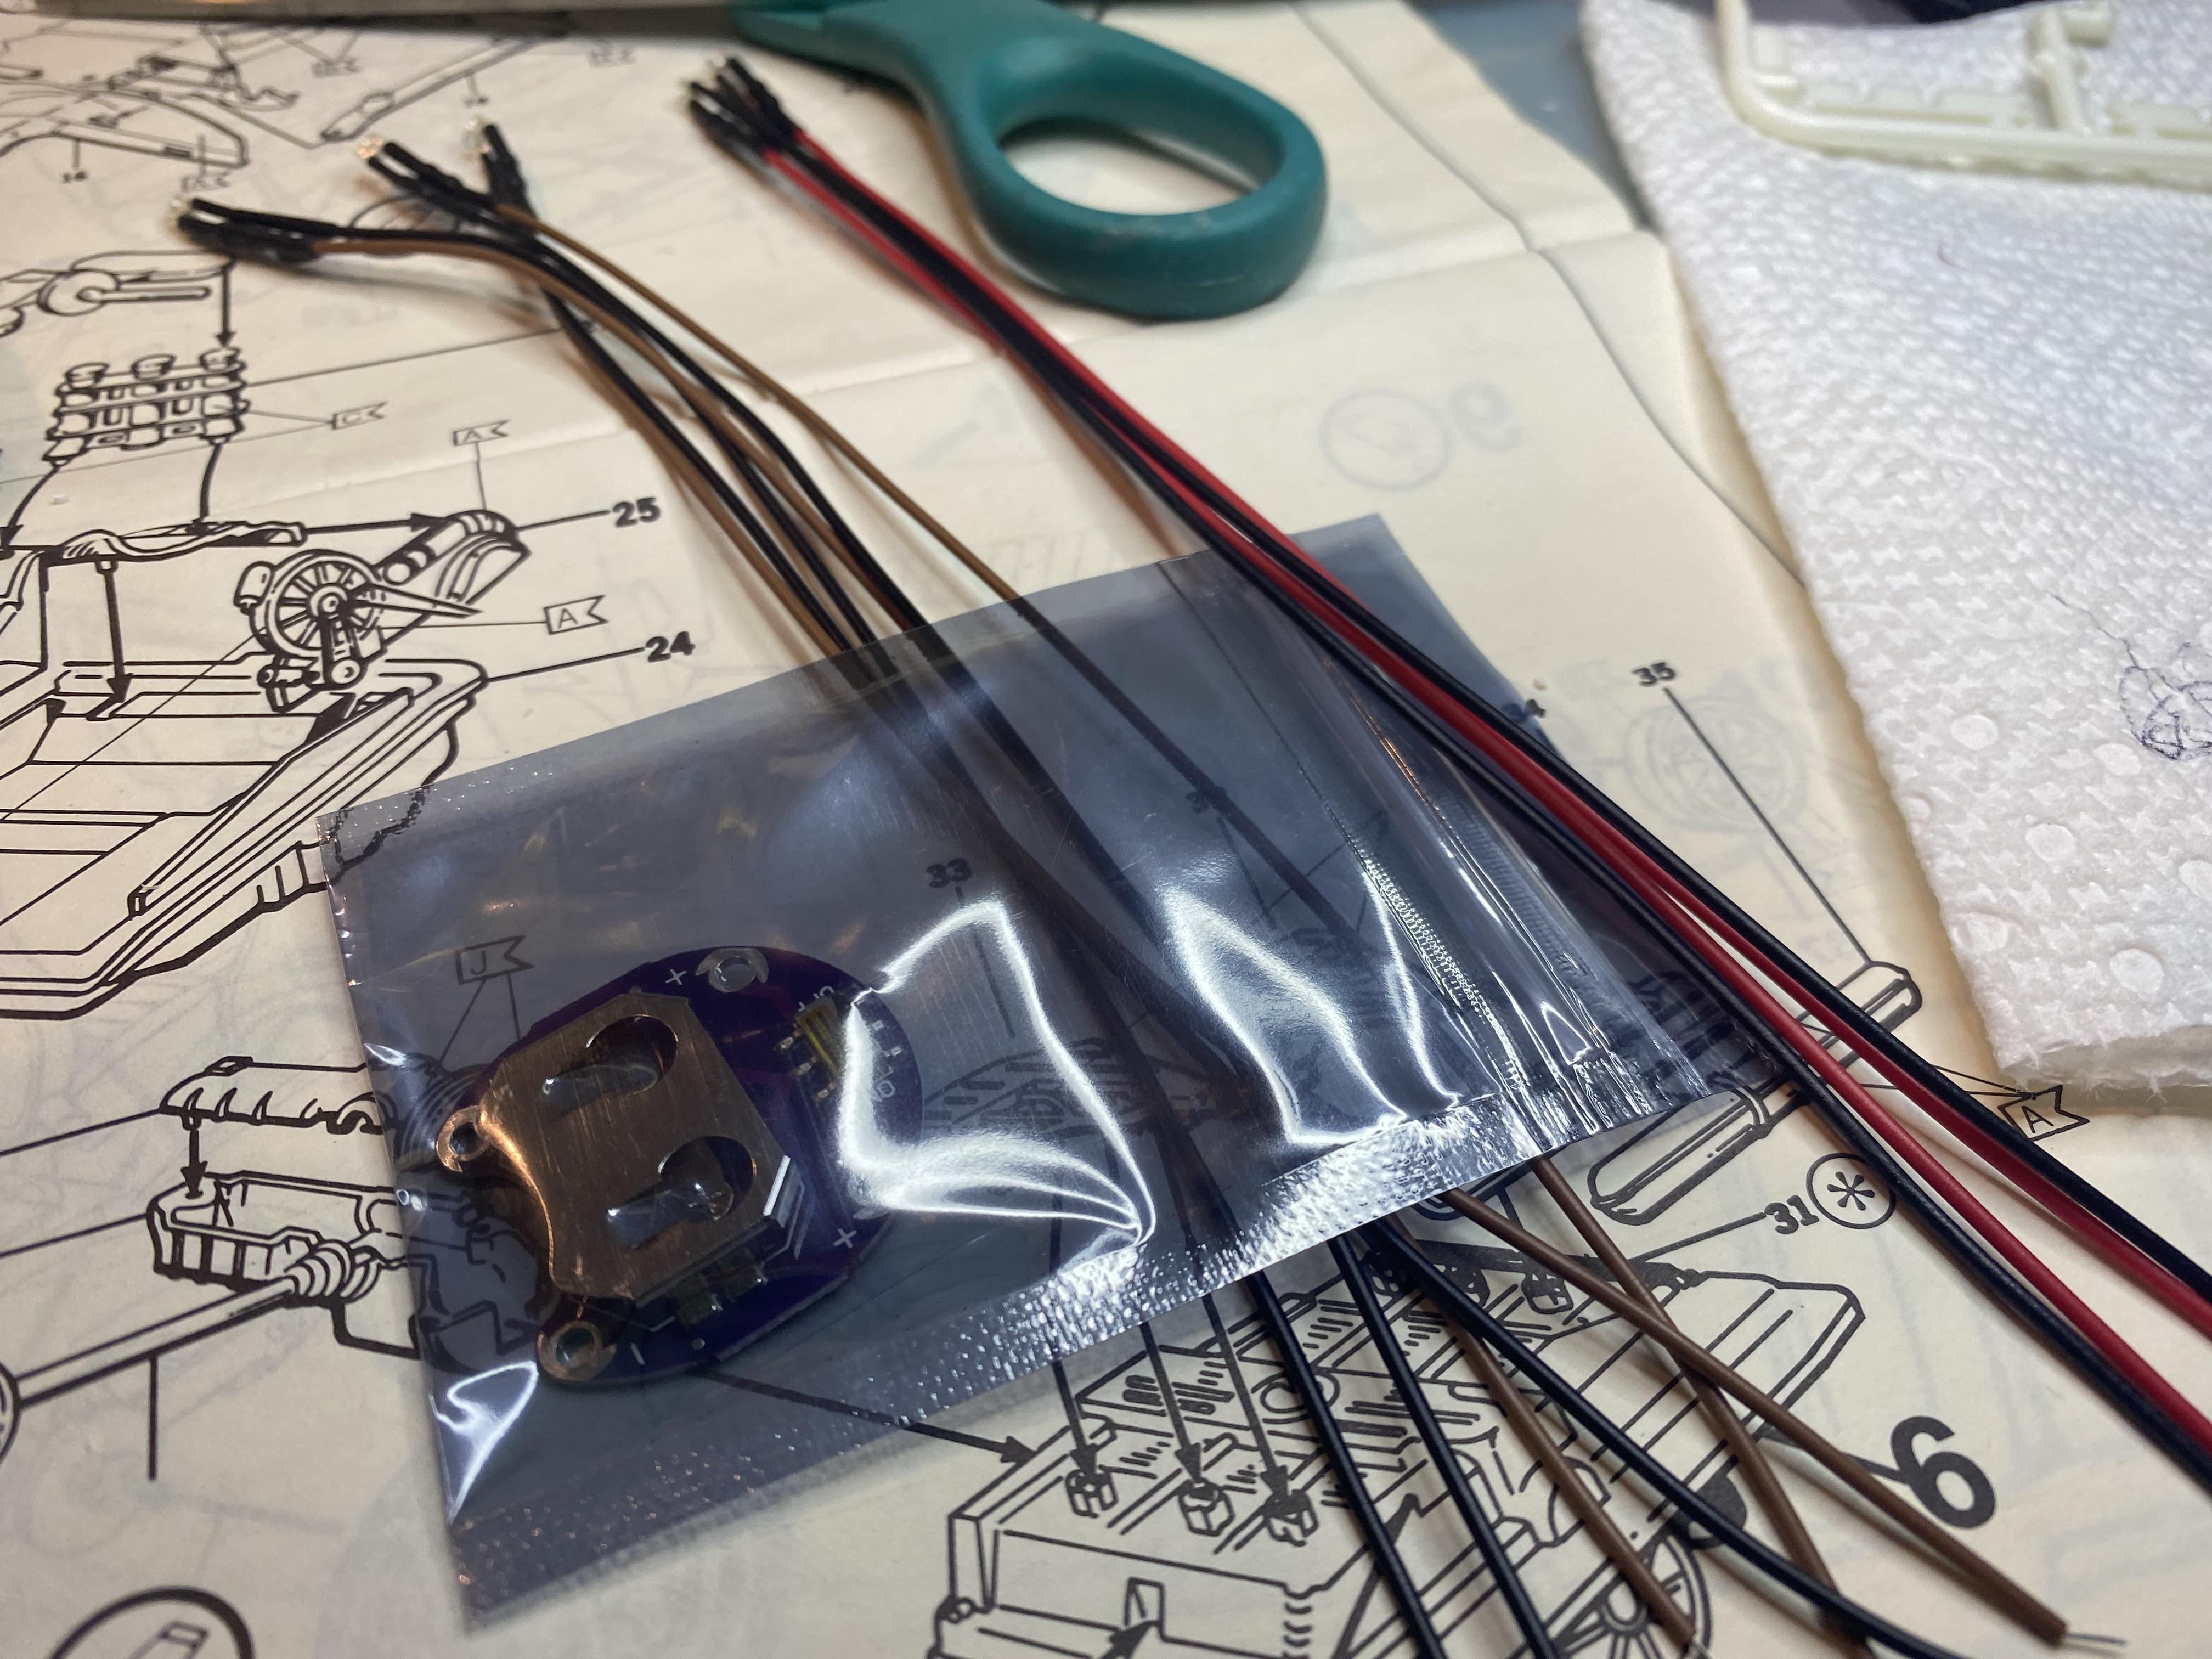
LED wiring harness created.
-
Thanks! LED wiring harness next. Waiting for a more correct engine to arrive. The one in the kit is totally wrong. It is a carbureted 1st gen 911 engine (1965- 1971ish). Kit came out in 1983 so must have been from an earlier kit instead of making it correct.
-
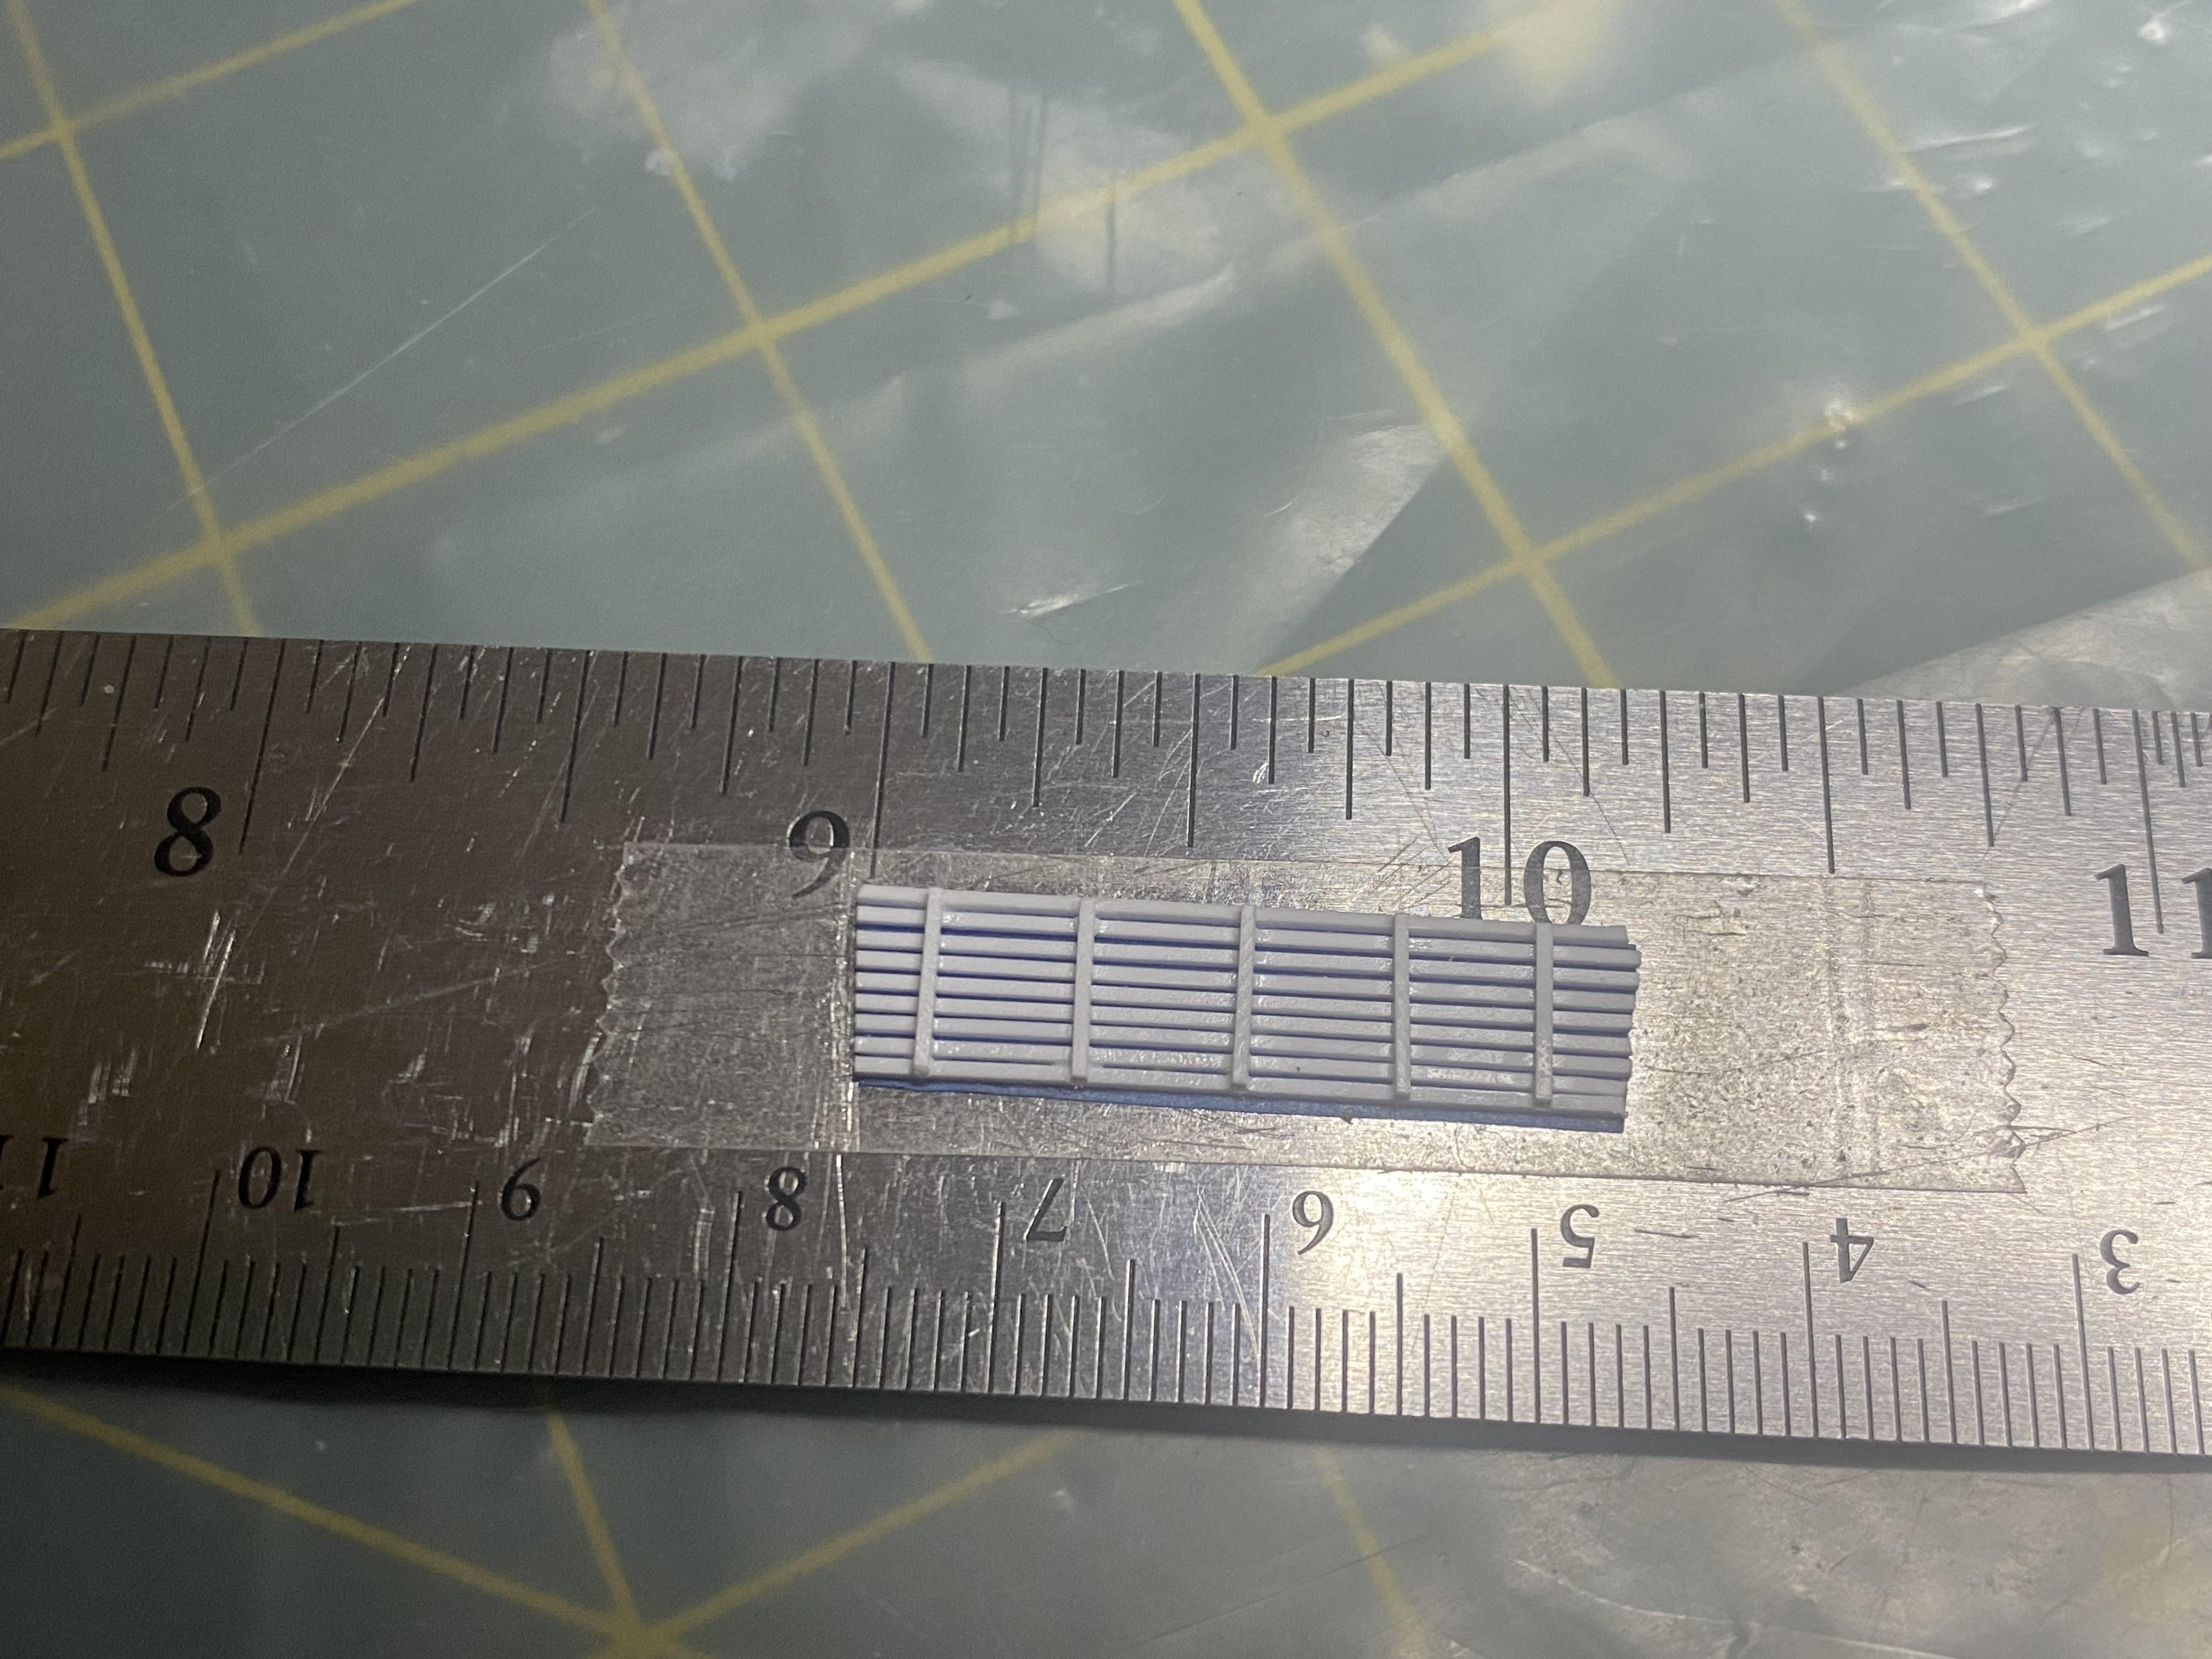
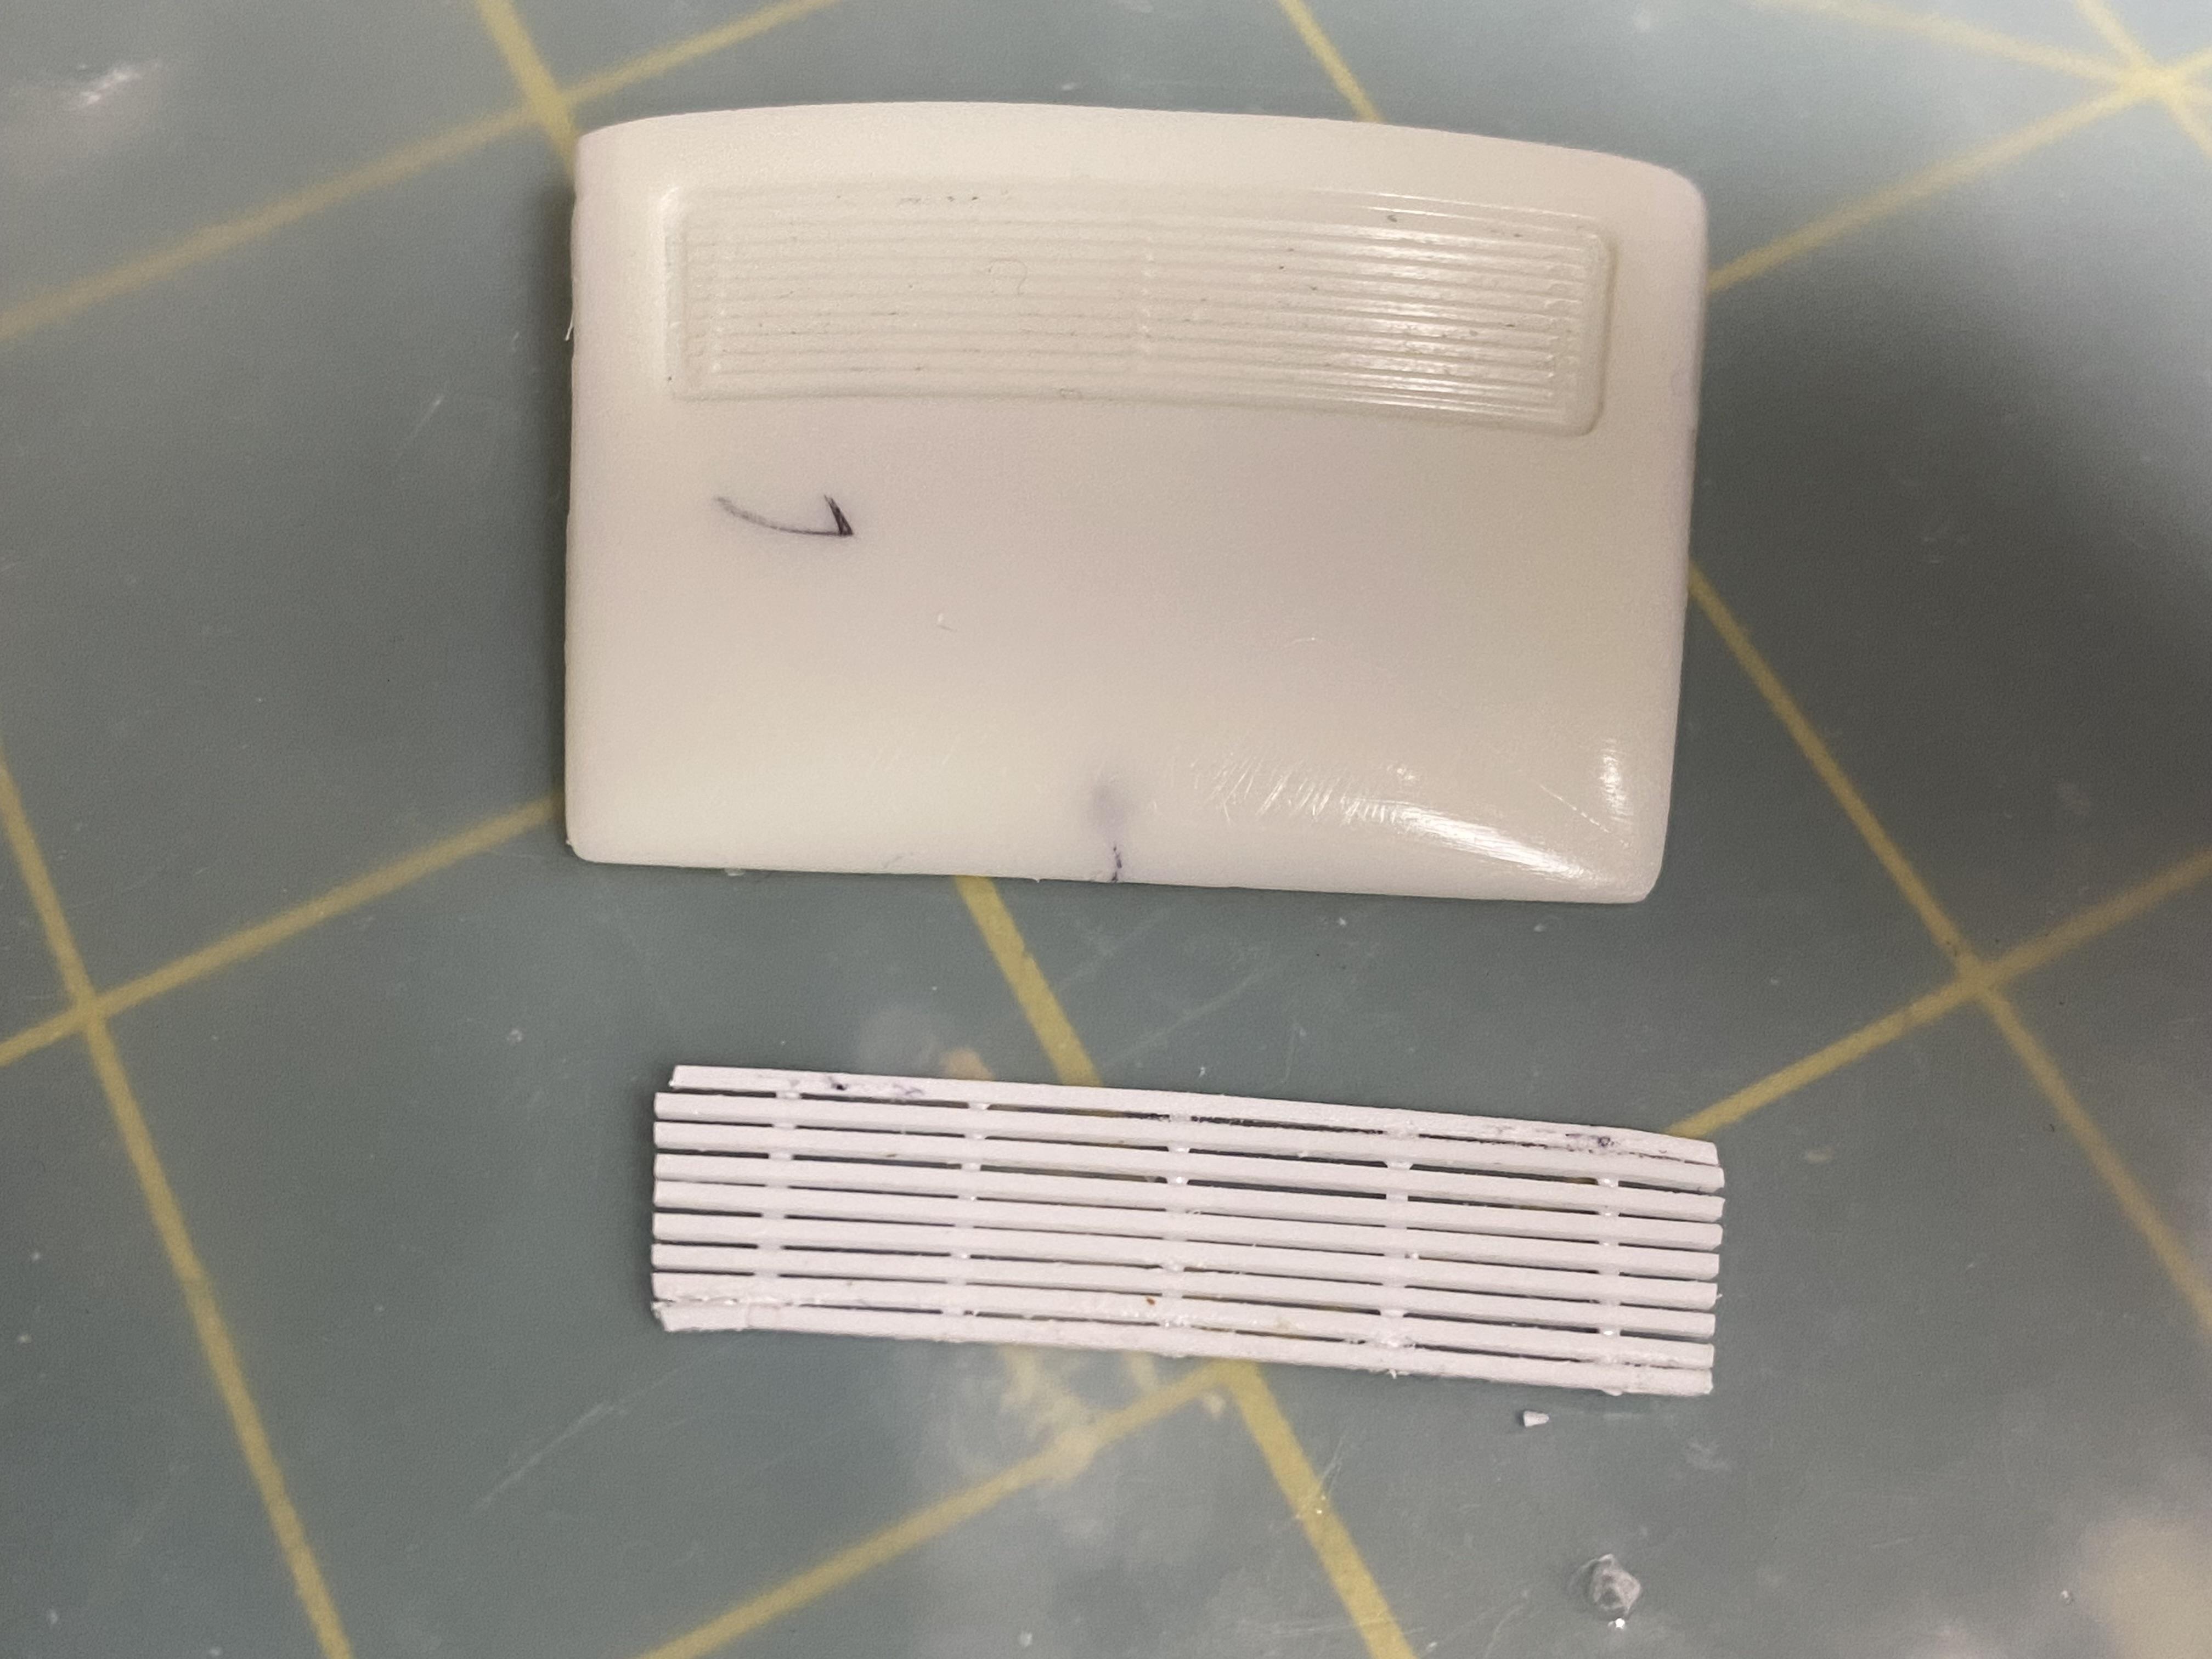
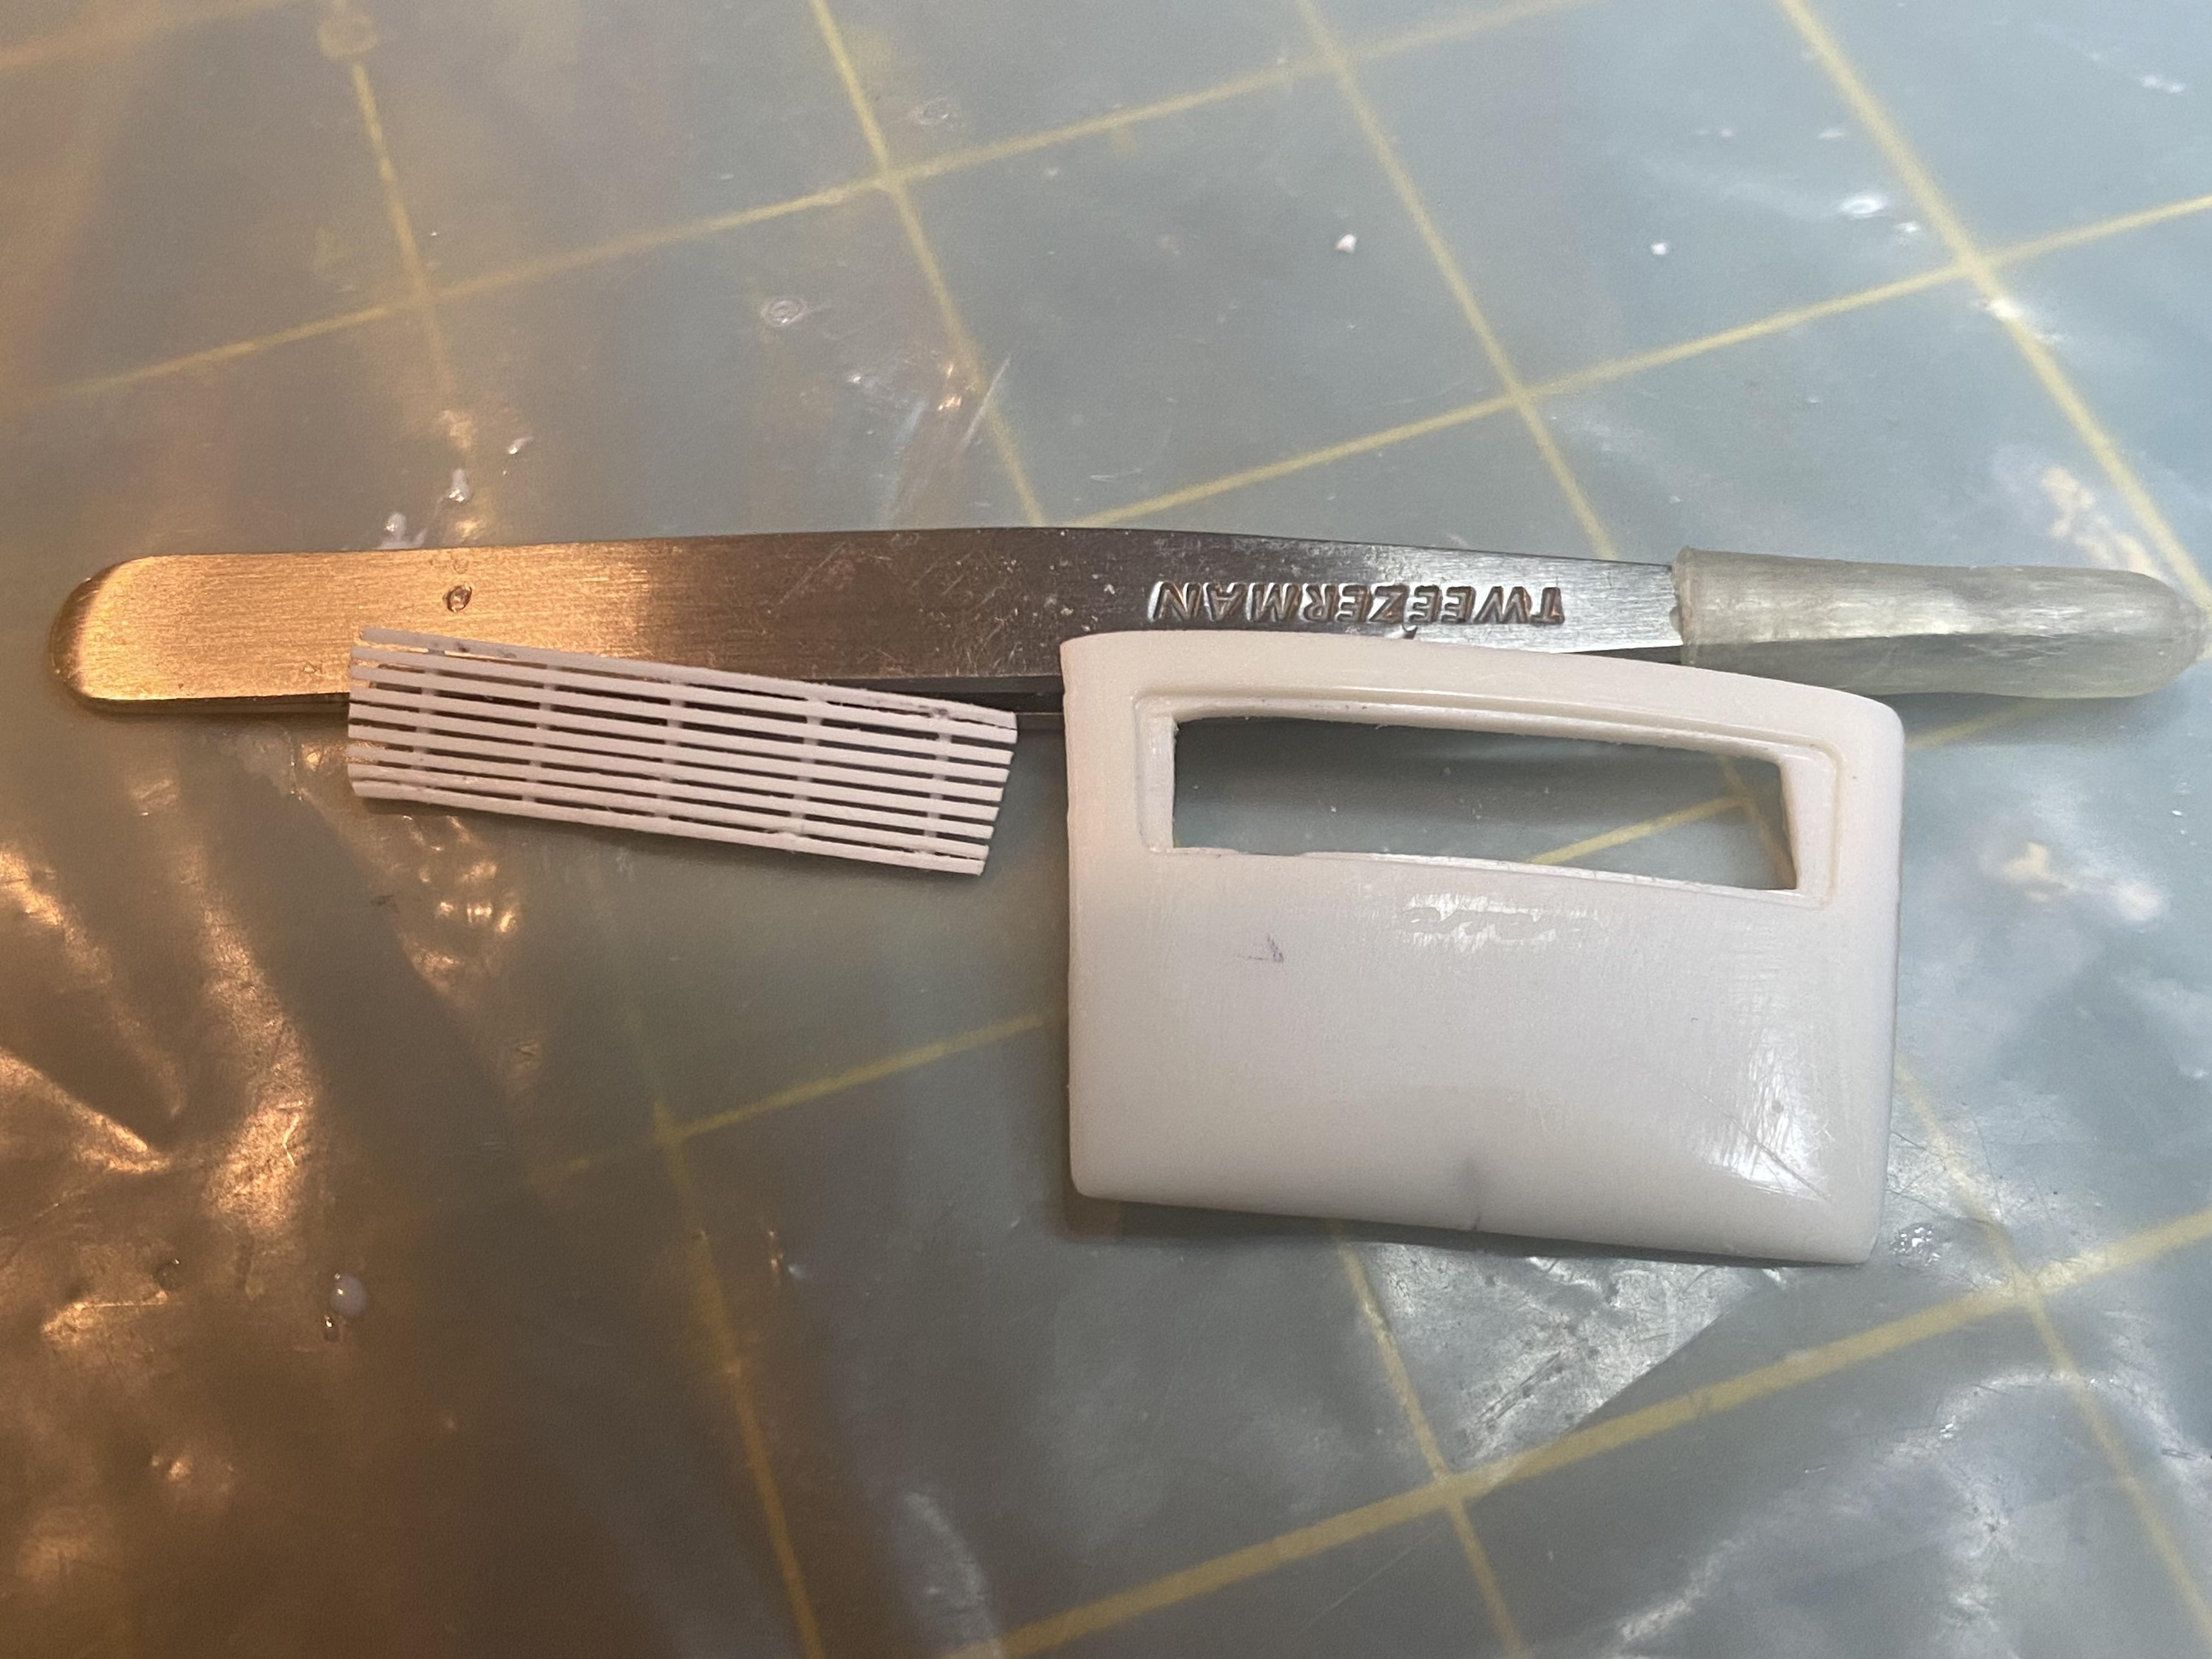
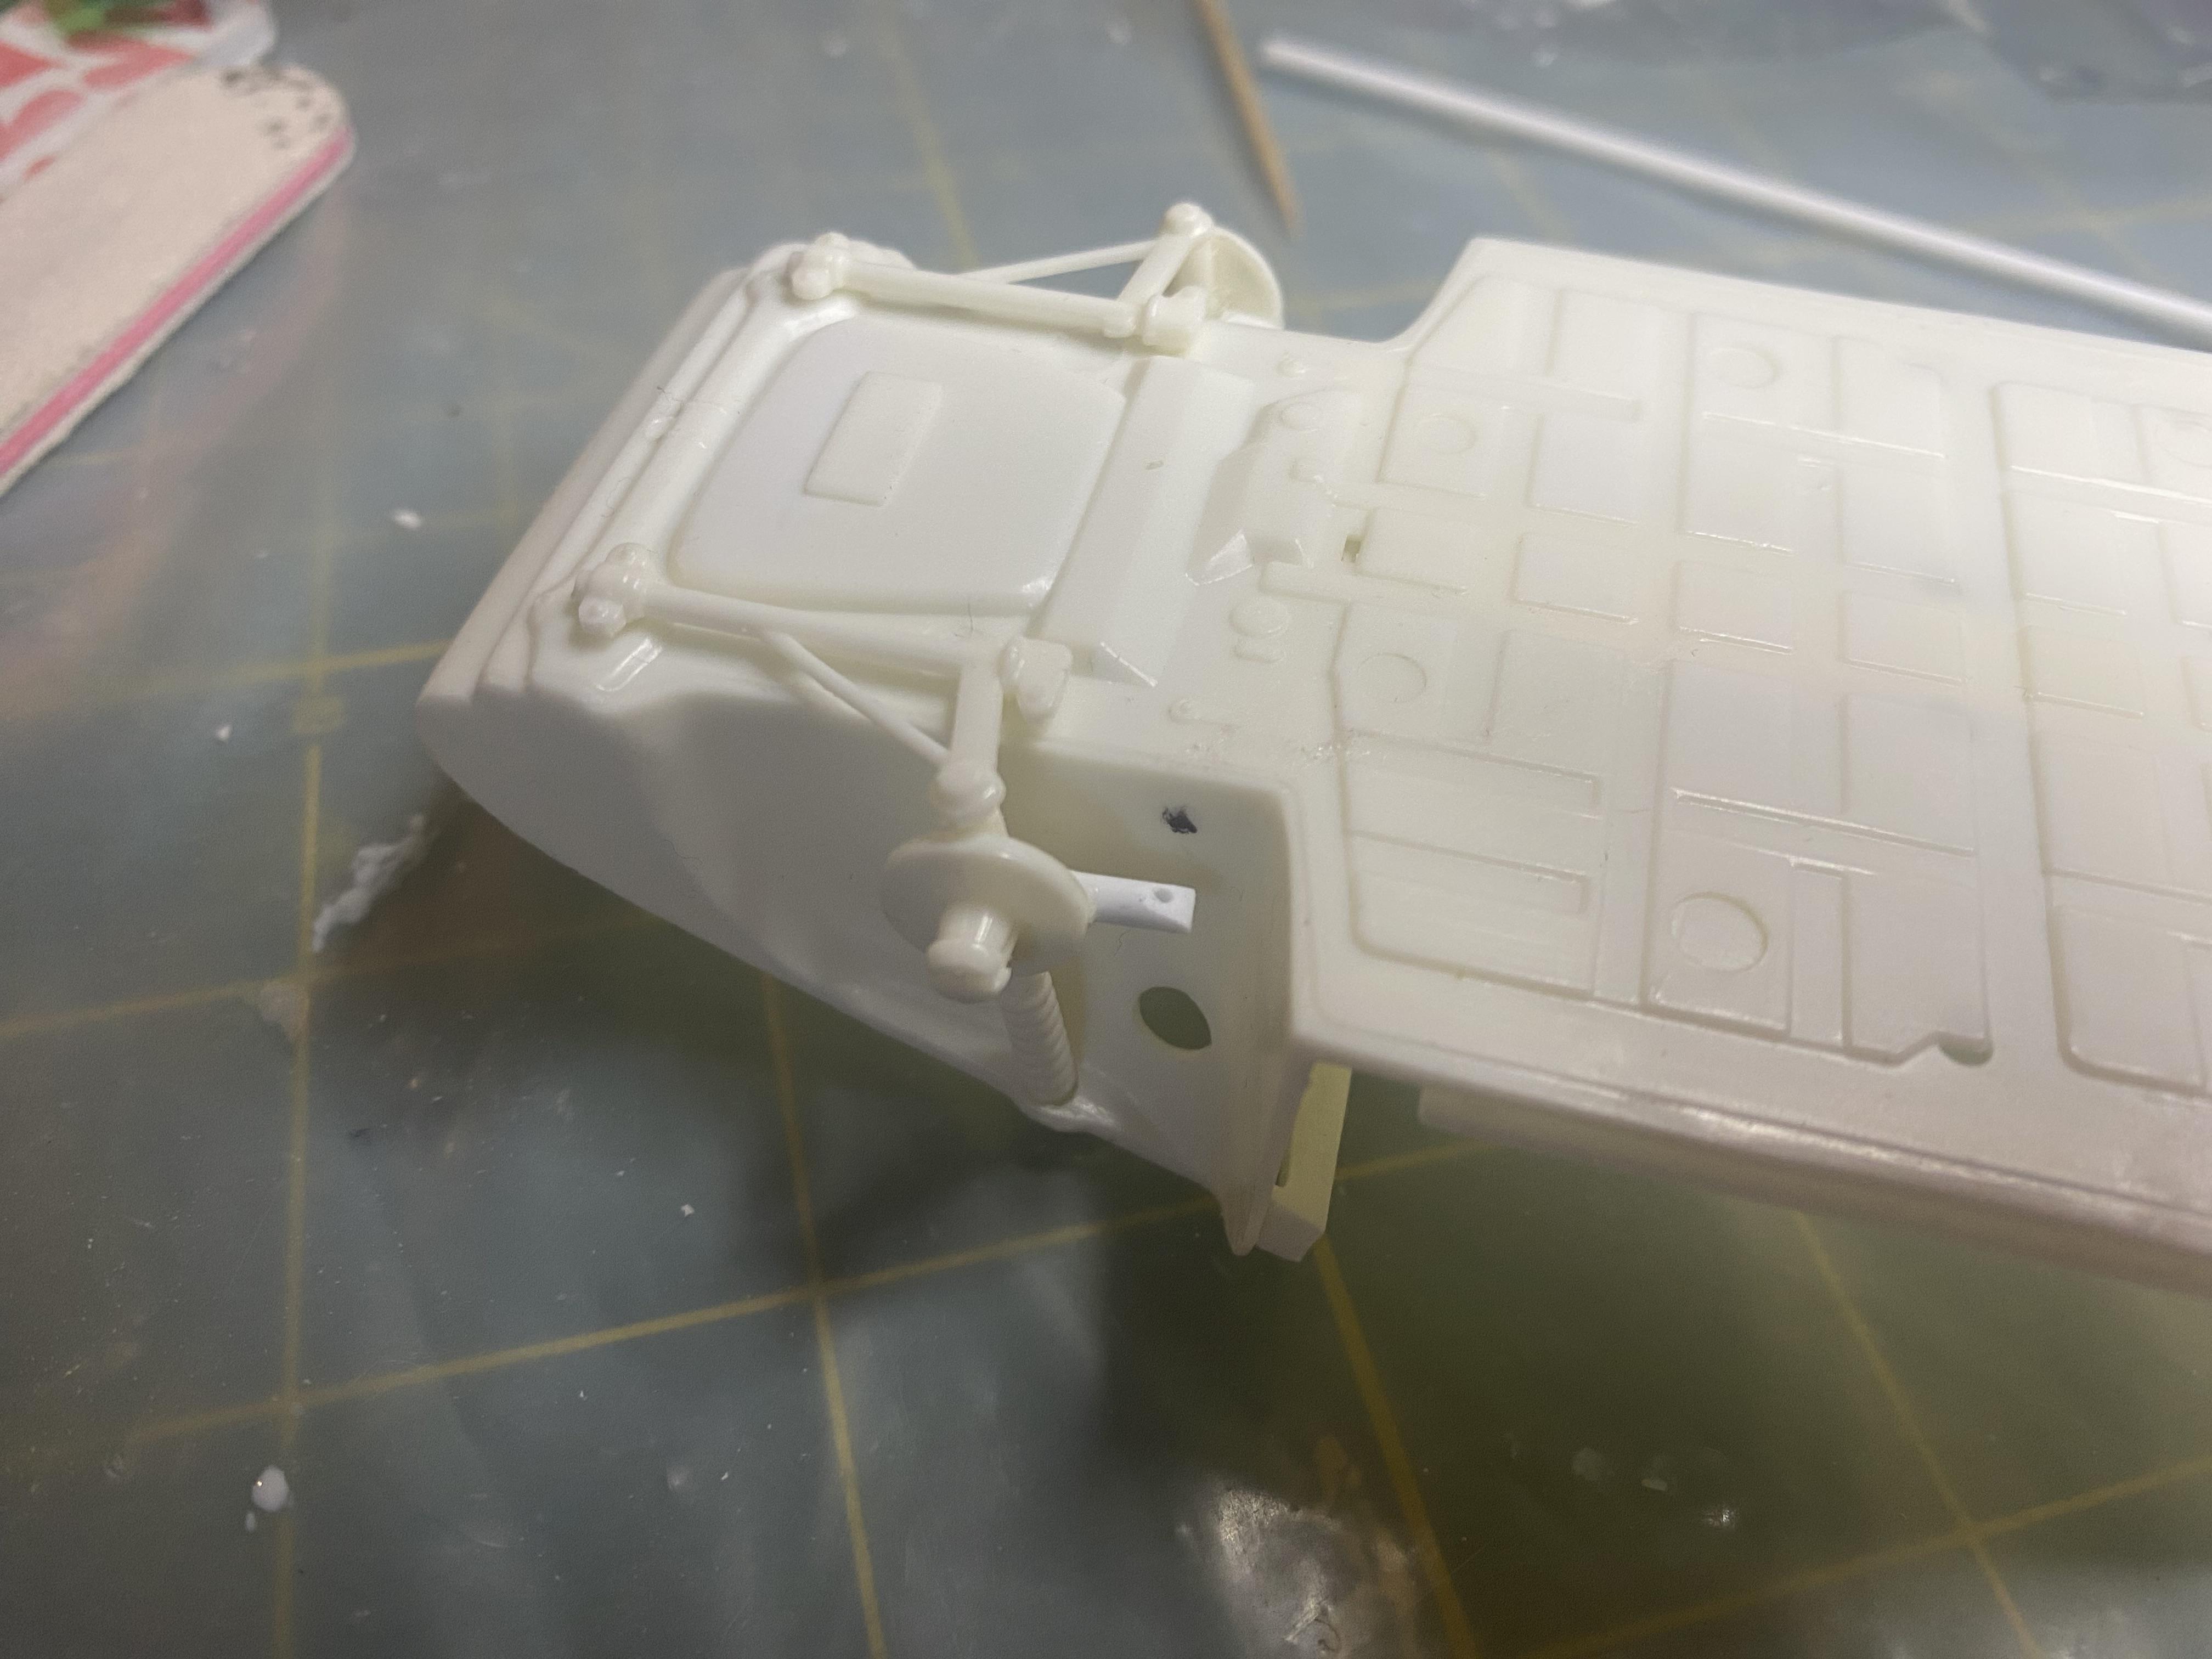
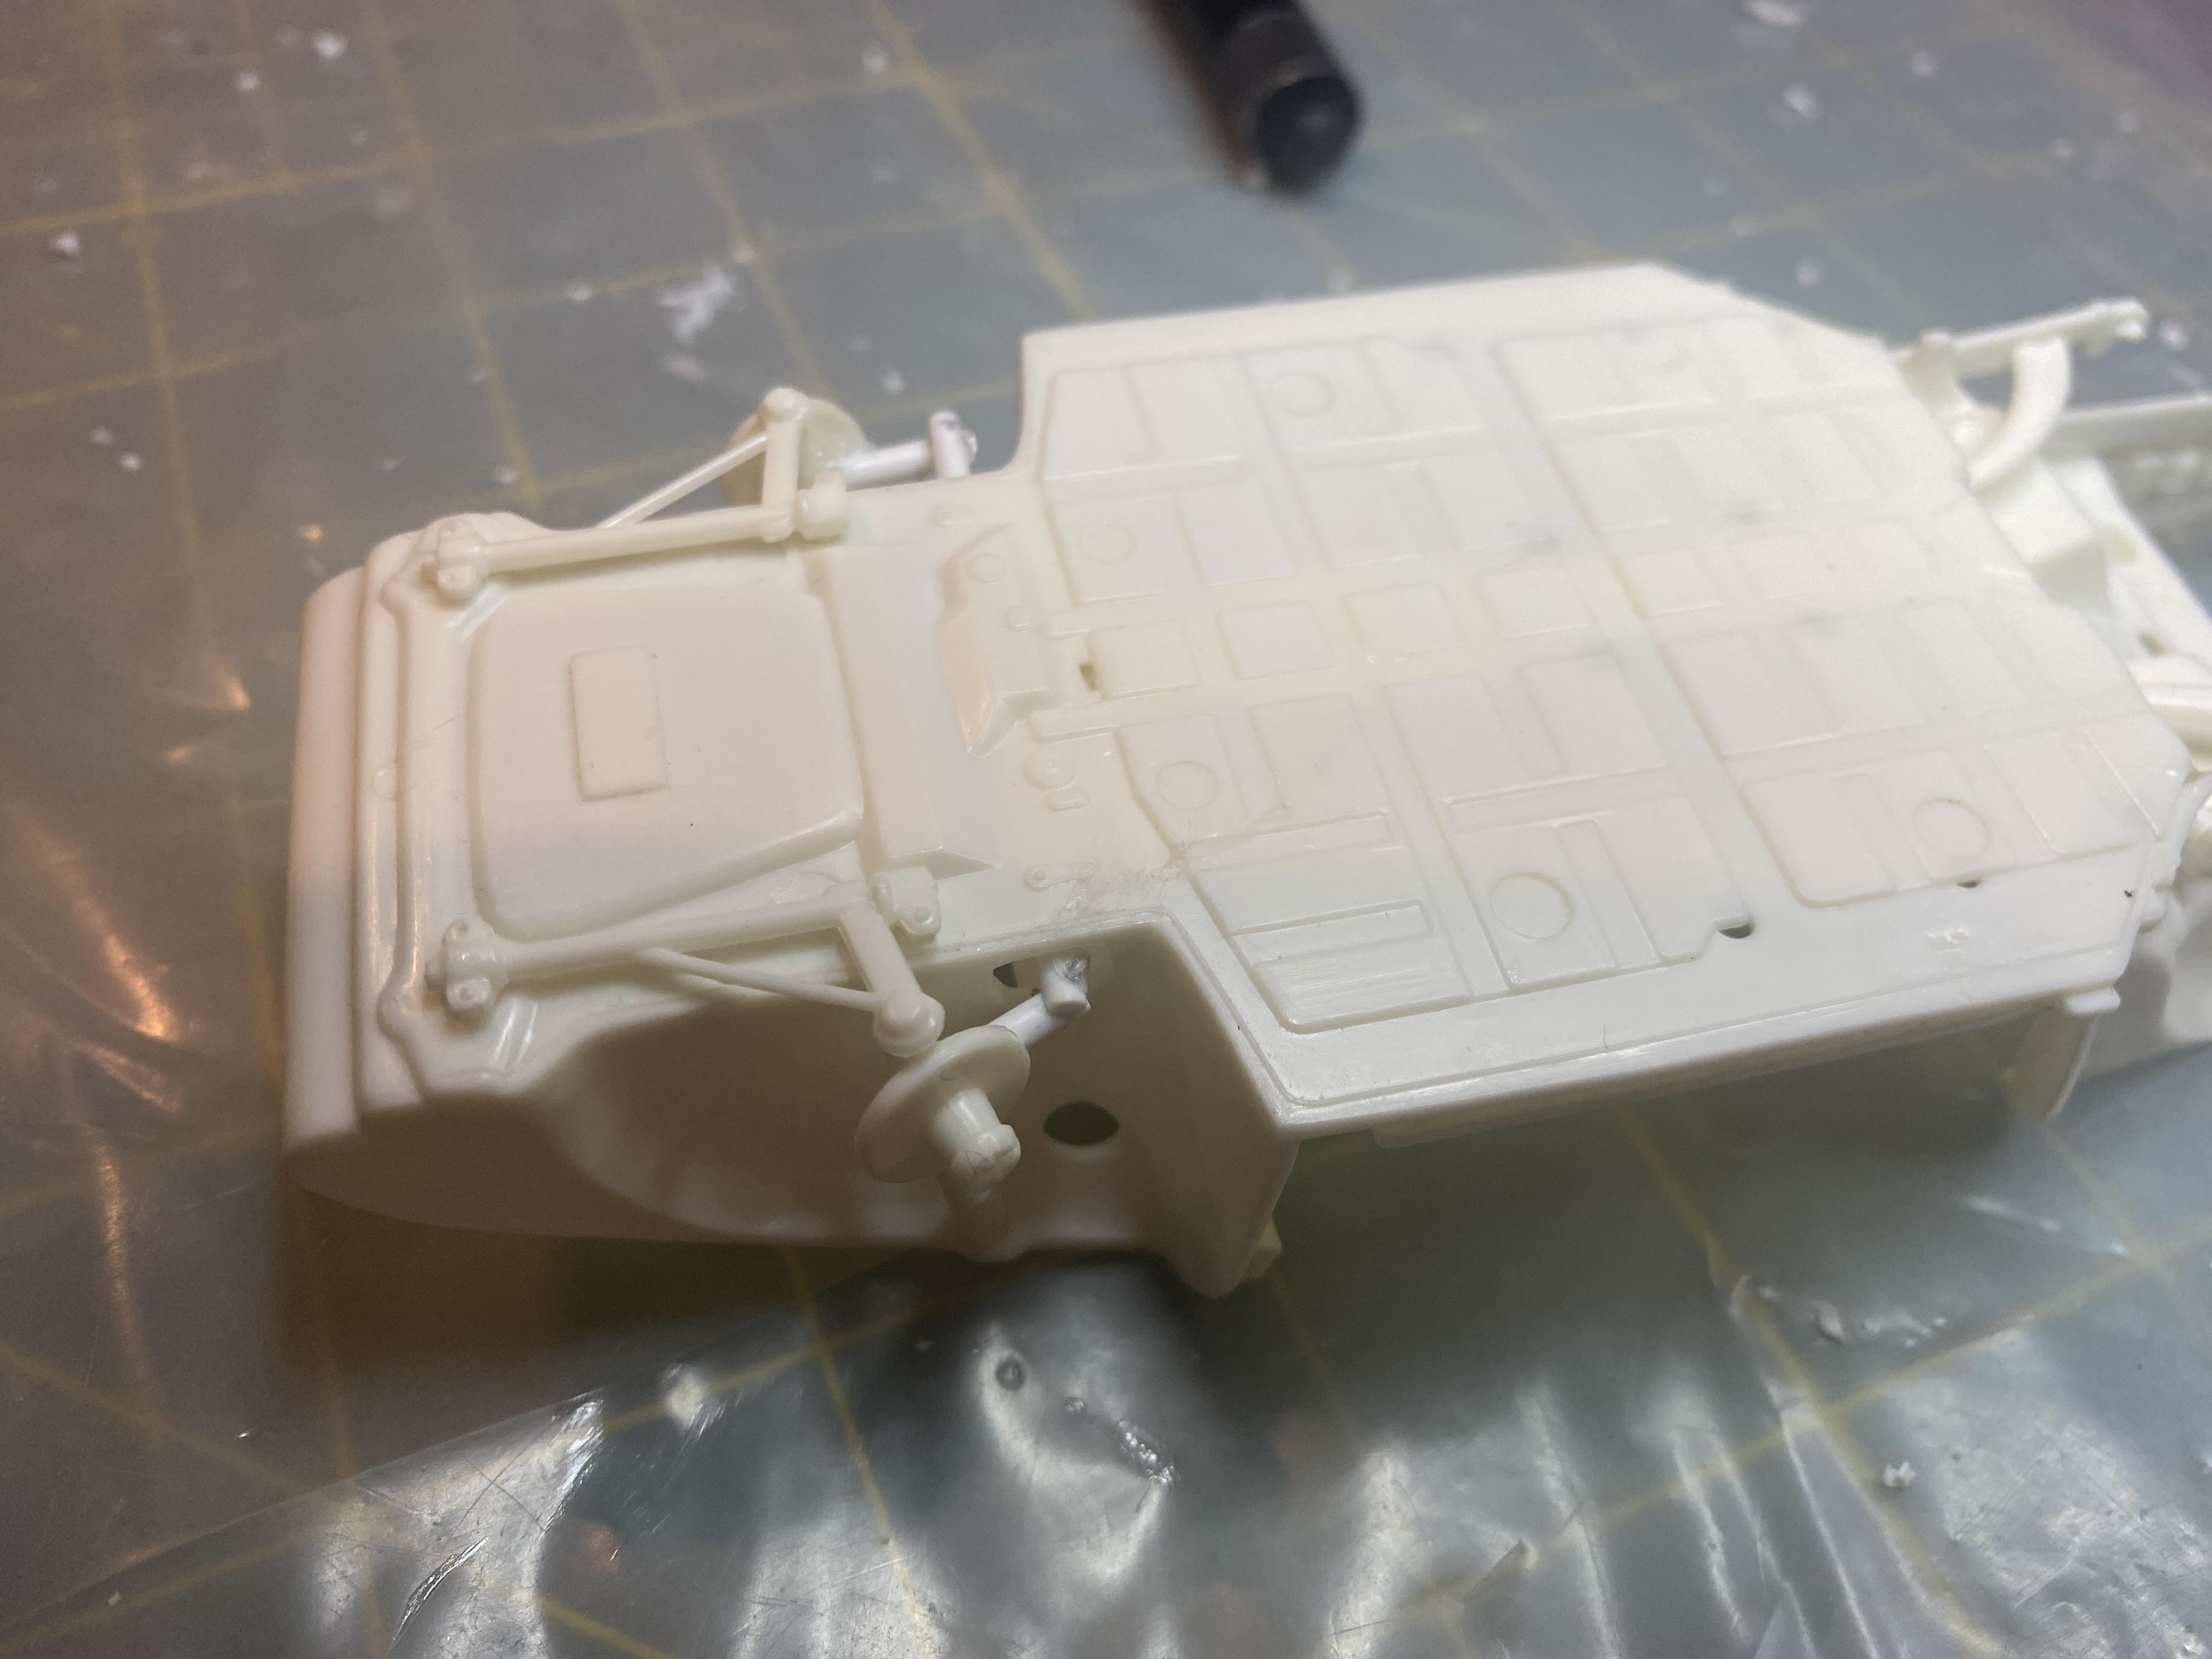
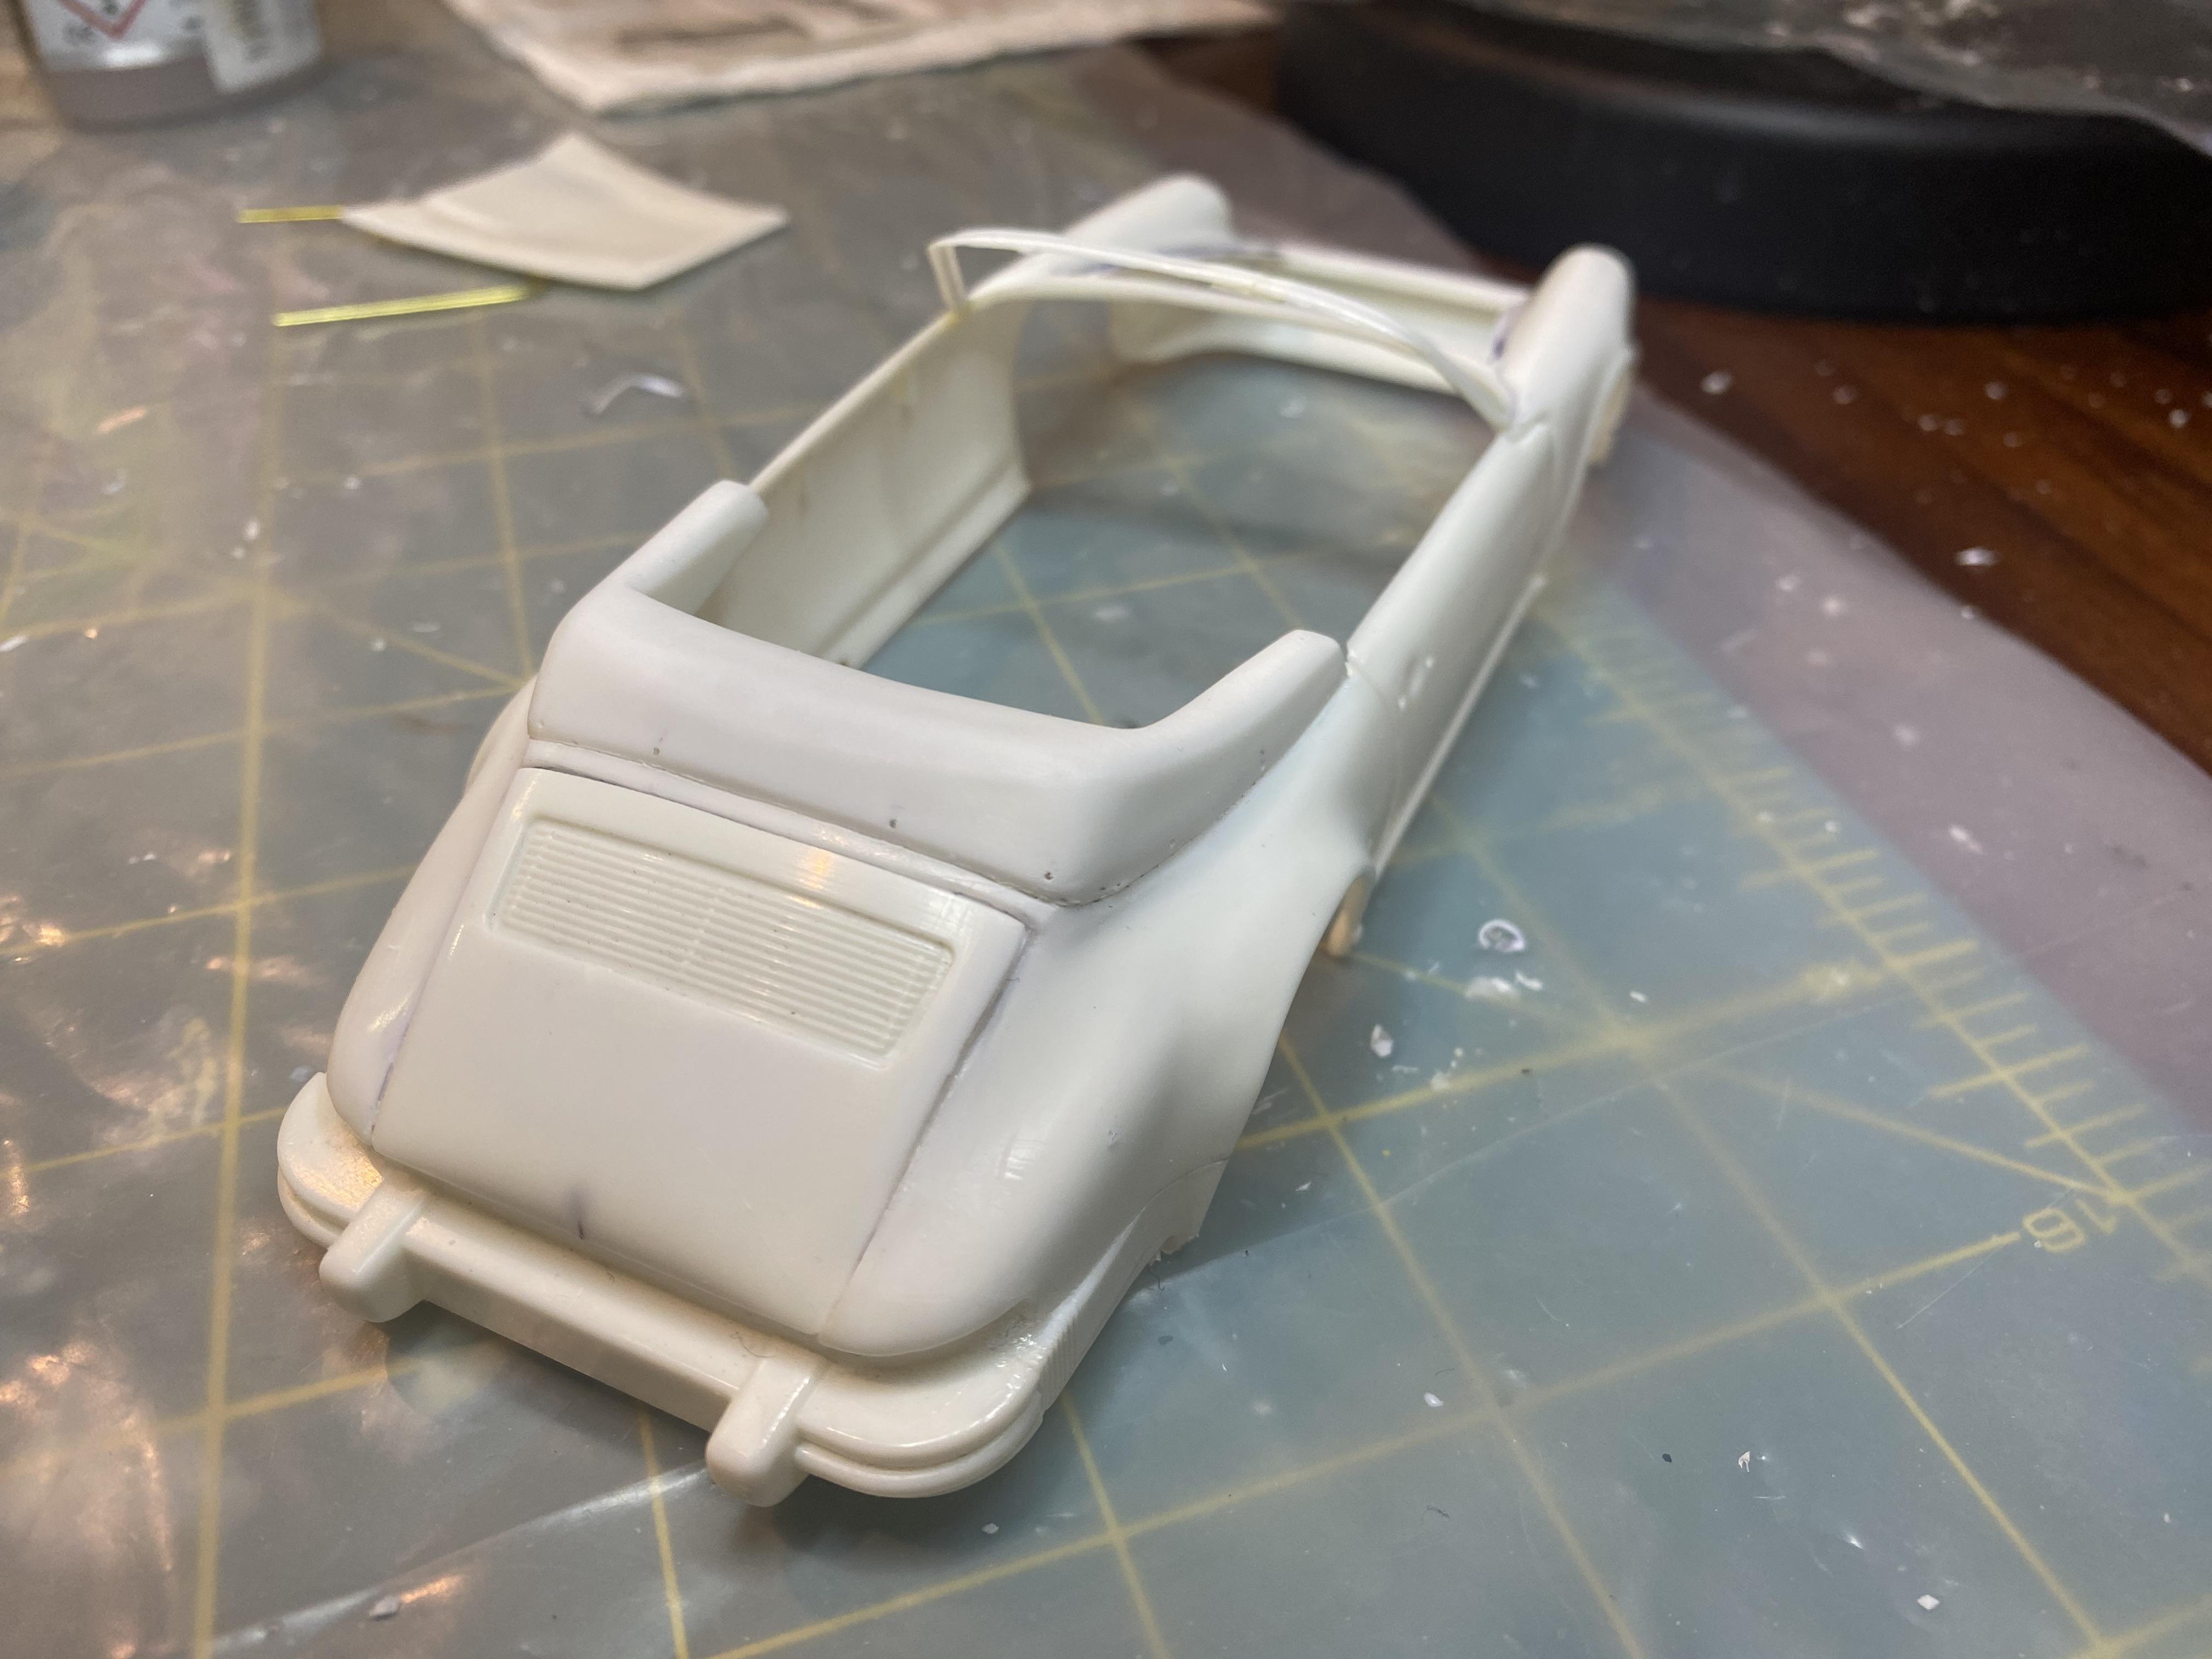
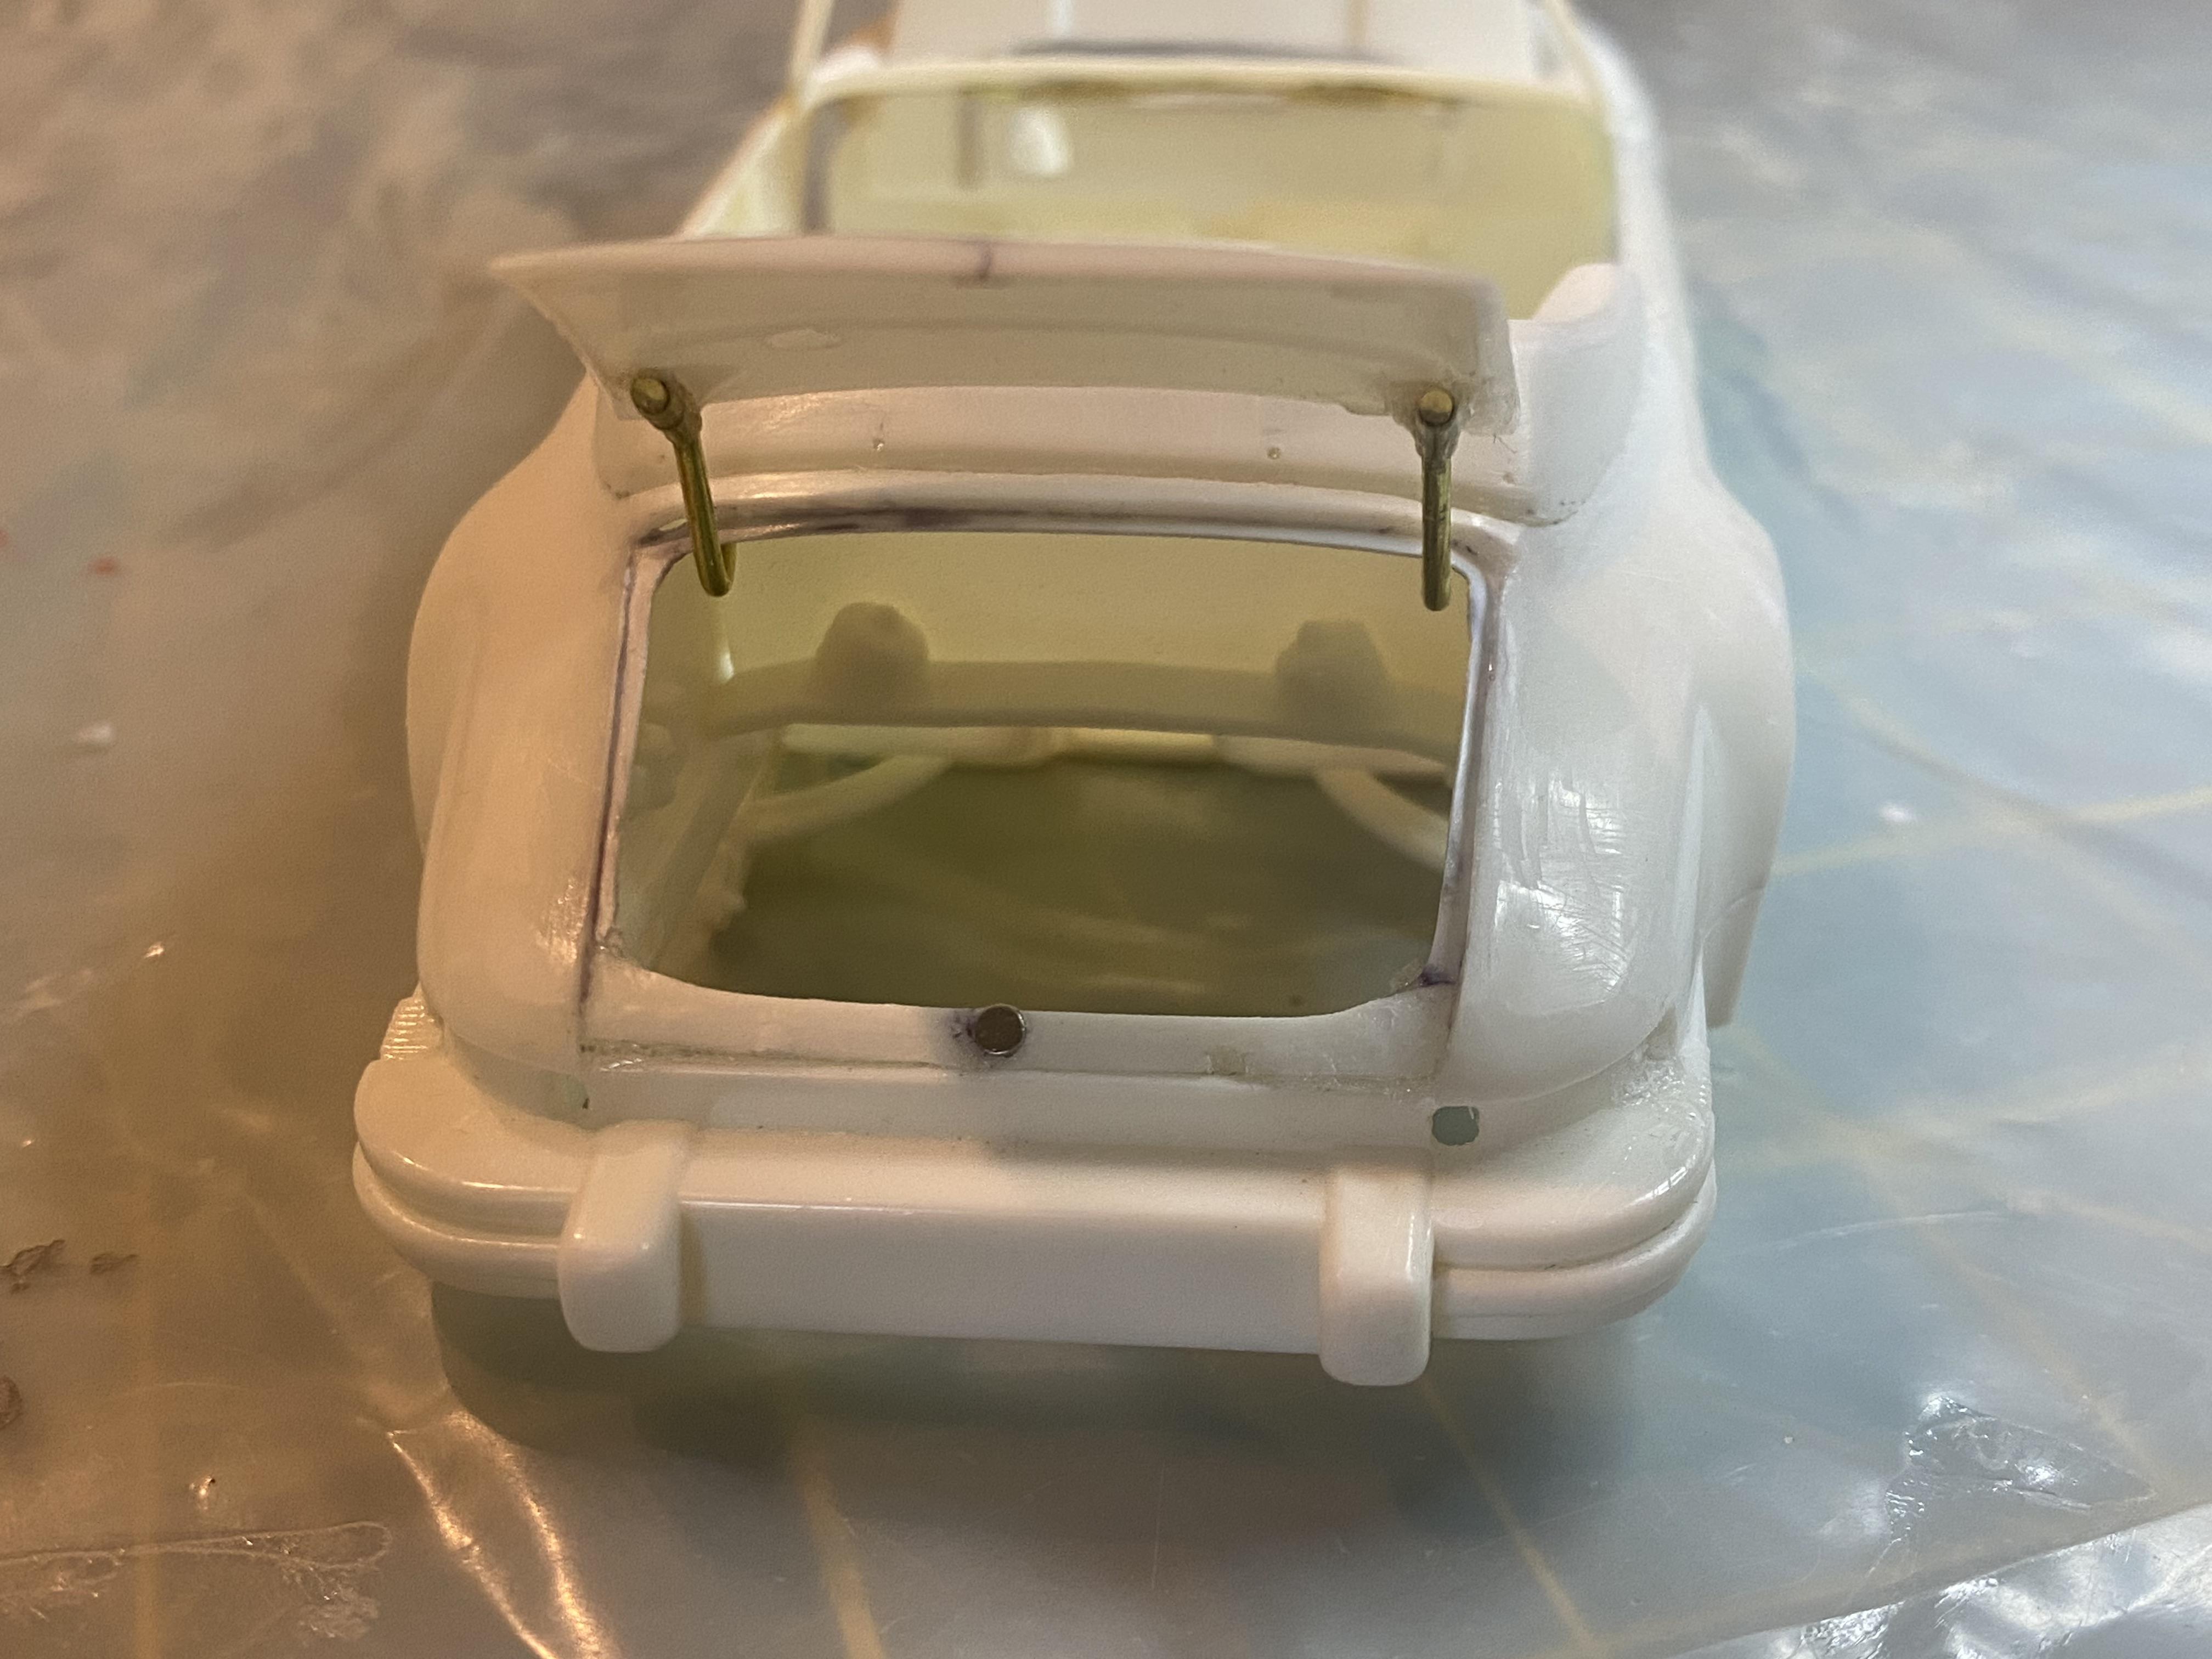
A few more fabrication and modifications completed. Cut open front fascia and created inset fog lights correct for a 1984 911. Created a more correct open rear hood vent and cut open hood. Modified front suspension to make poseable.
-
FYI: I was able to order the decals I wanted. I am not sure how long he is going to have any available, however.
-
I just sent him an email to see if he still has any of the decals I was interested in, but sounds like I may be too late. Thanks for letting us know.
-
There is currently only one listed on eBay, open box and shipped it would be $150.00. That is a bit more than I want to pay for a couple of parts. Hopefully one will show up lower or I can find the parts I need.
-
I’ll look out for it.
-
We can hope!
-
Is anyone making the parts necessary to make a 1977 Mustang II kit into a Cobra II kit? I think someone used to make the conversion parts in resin. I can't see myself paying $400-500 for a Mustang II Cobra II kit. I don't love the car that much.
-
Thank You!
-
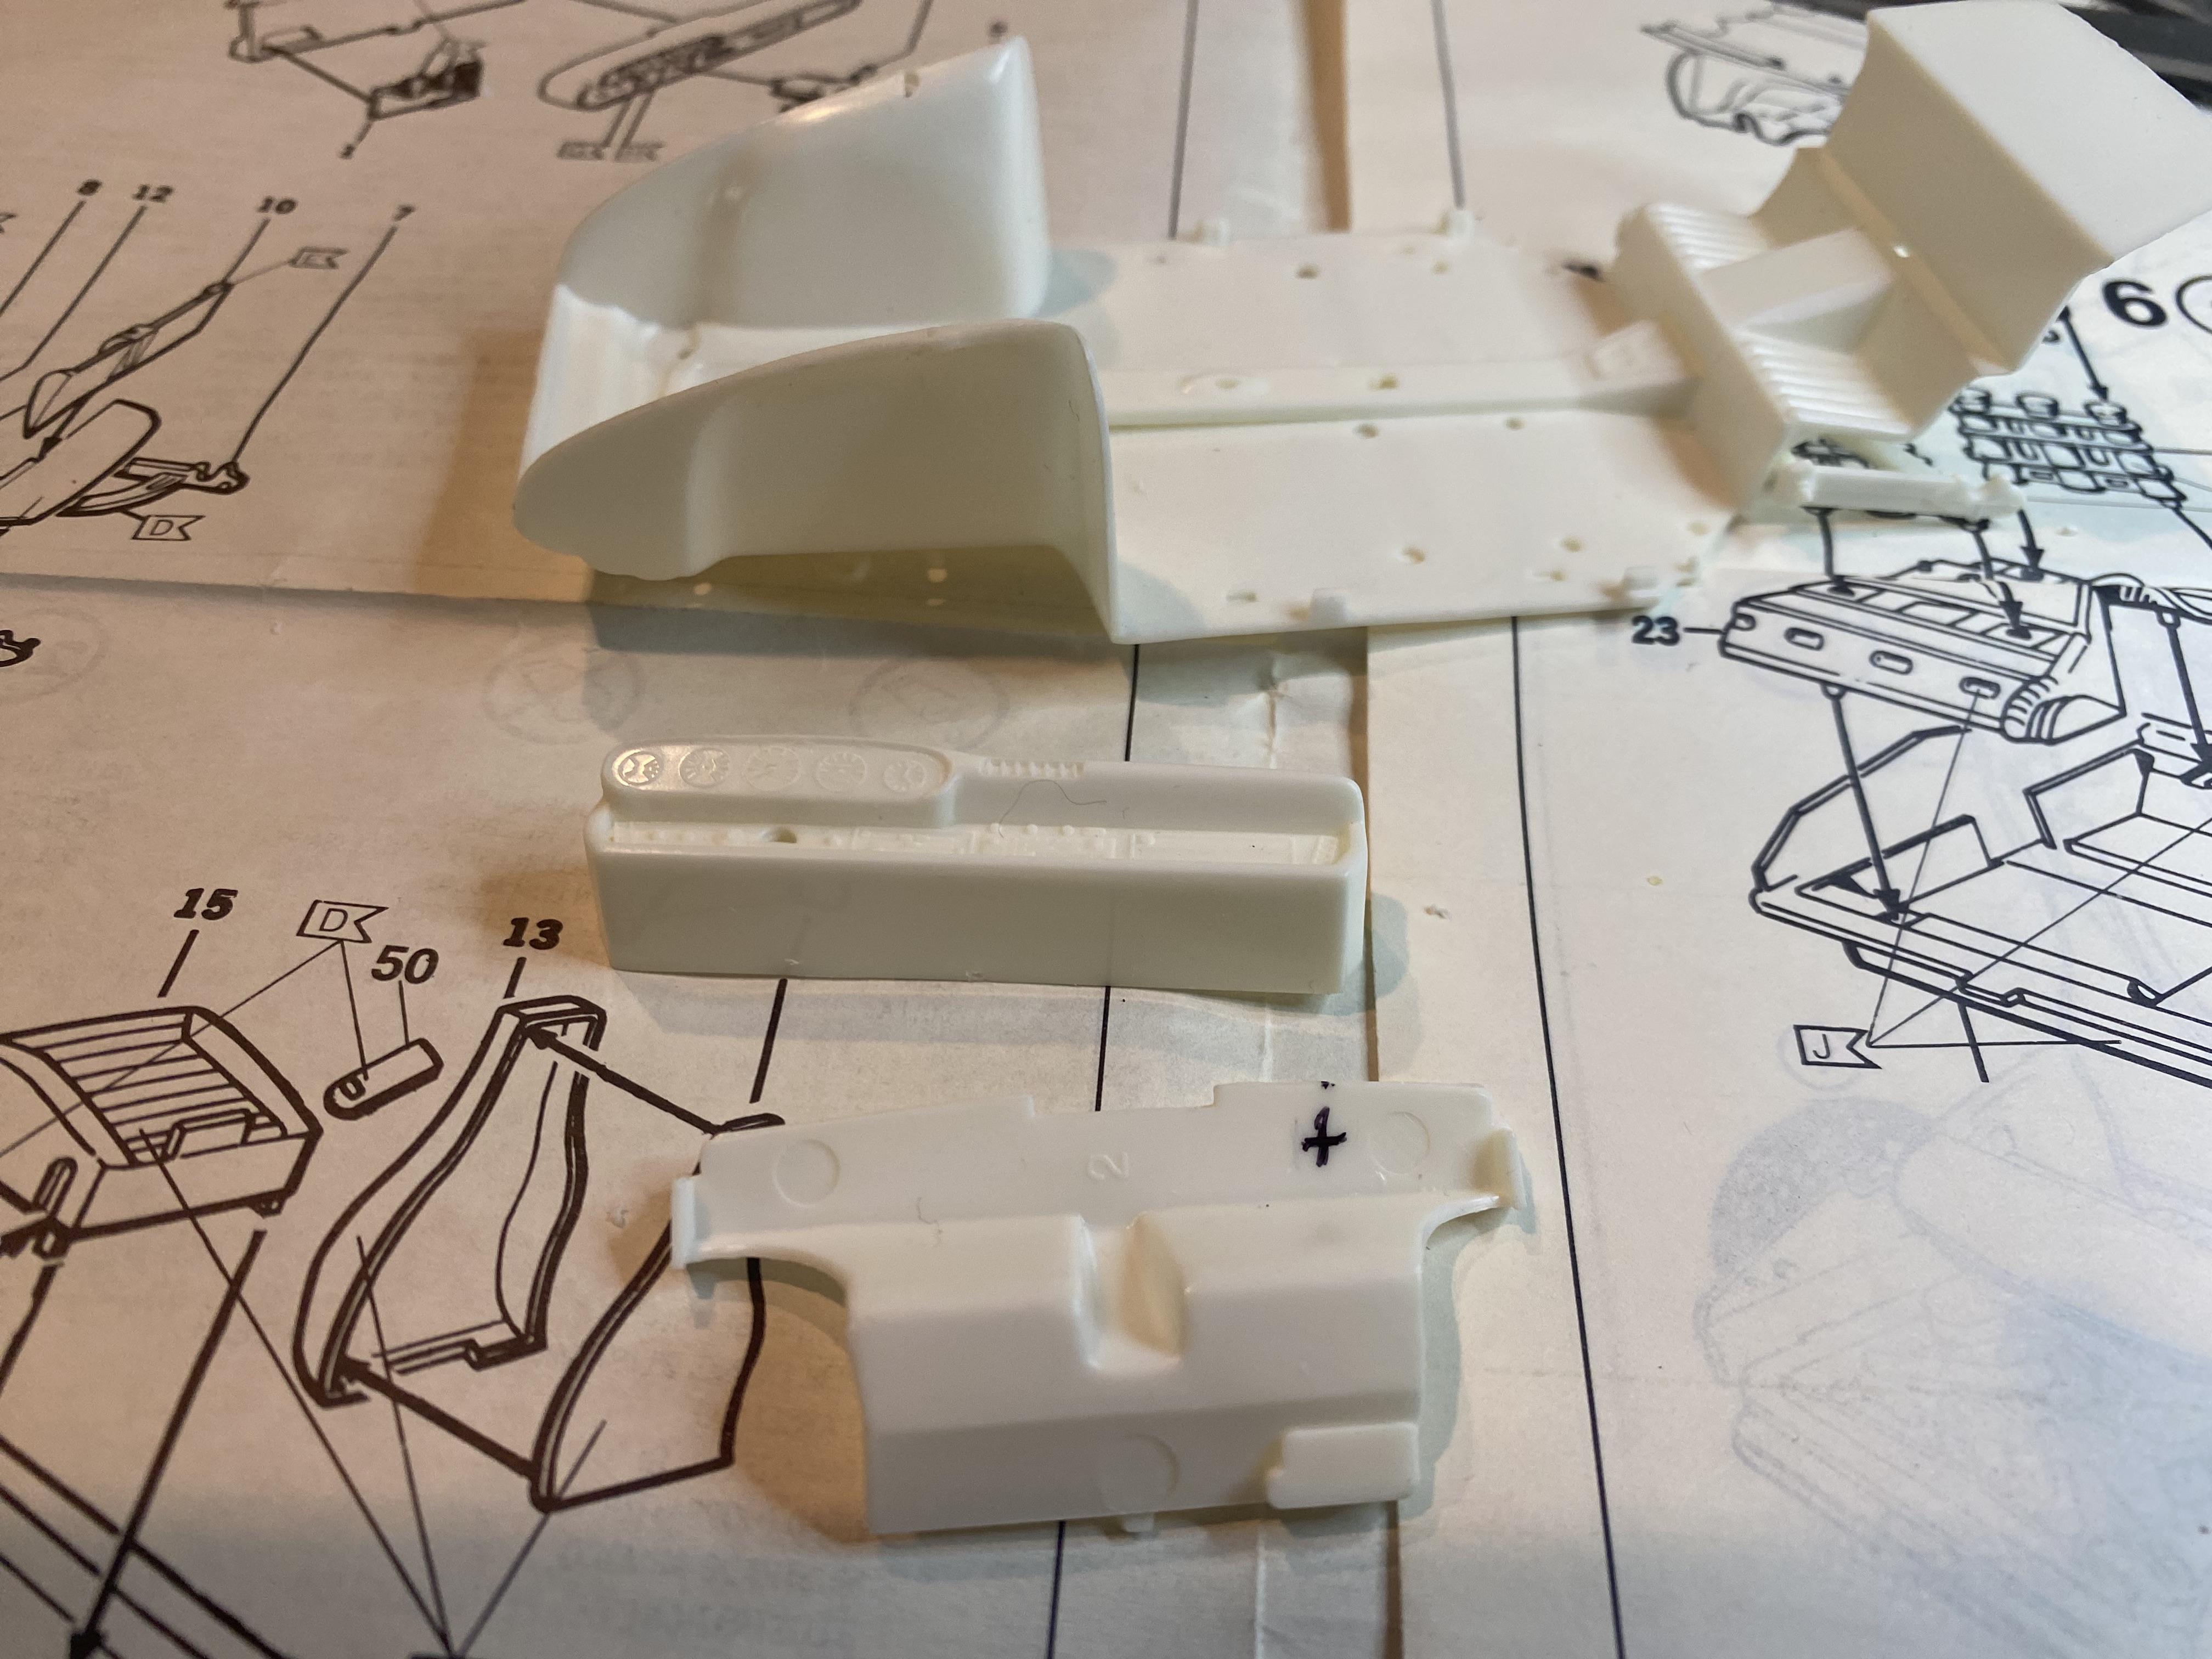
Doesn’t feel like a lot of progress but took awhile to get the hinges created for the front trunk and rear hood. Need a lot of modification to fit with everything else. Also drilled and pinned the rear view mirrors, not installed. I noticed the engine in the kit is not for an 80s 911, but a carbureted version from 1966-1971 based on the carbs and air cleaner. I found a new kits engine available on bay and ordered it so it has the correct vintage engine. Not sure if I will just need to use the intake and accessories or the whole replacement engine.
-
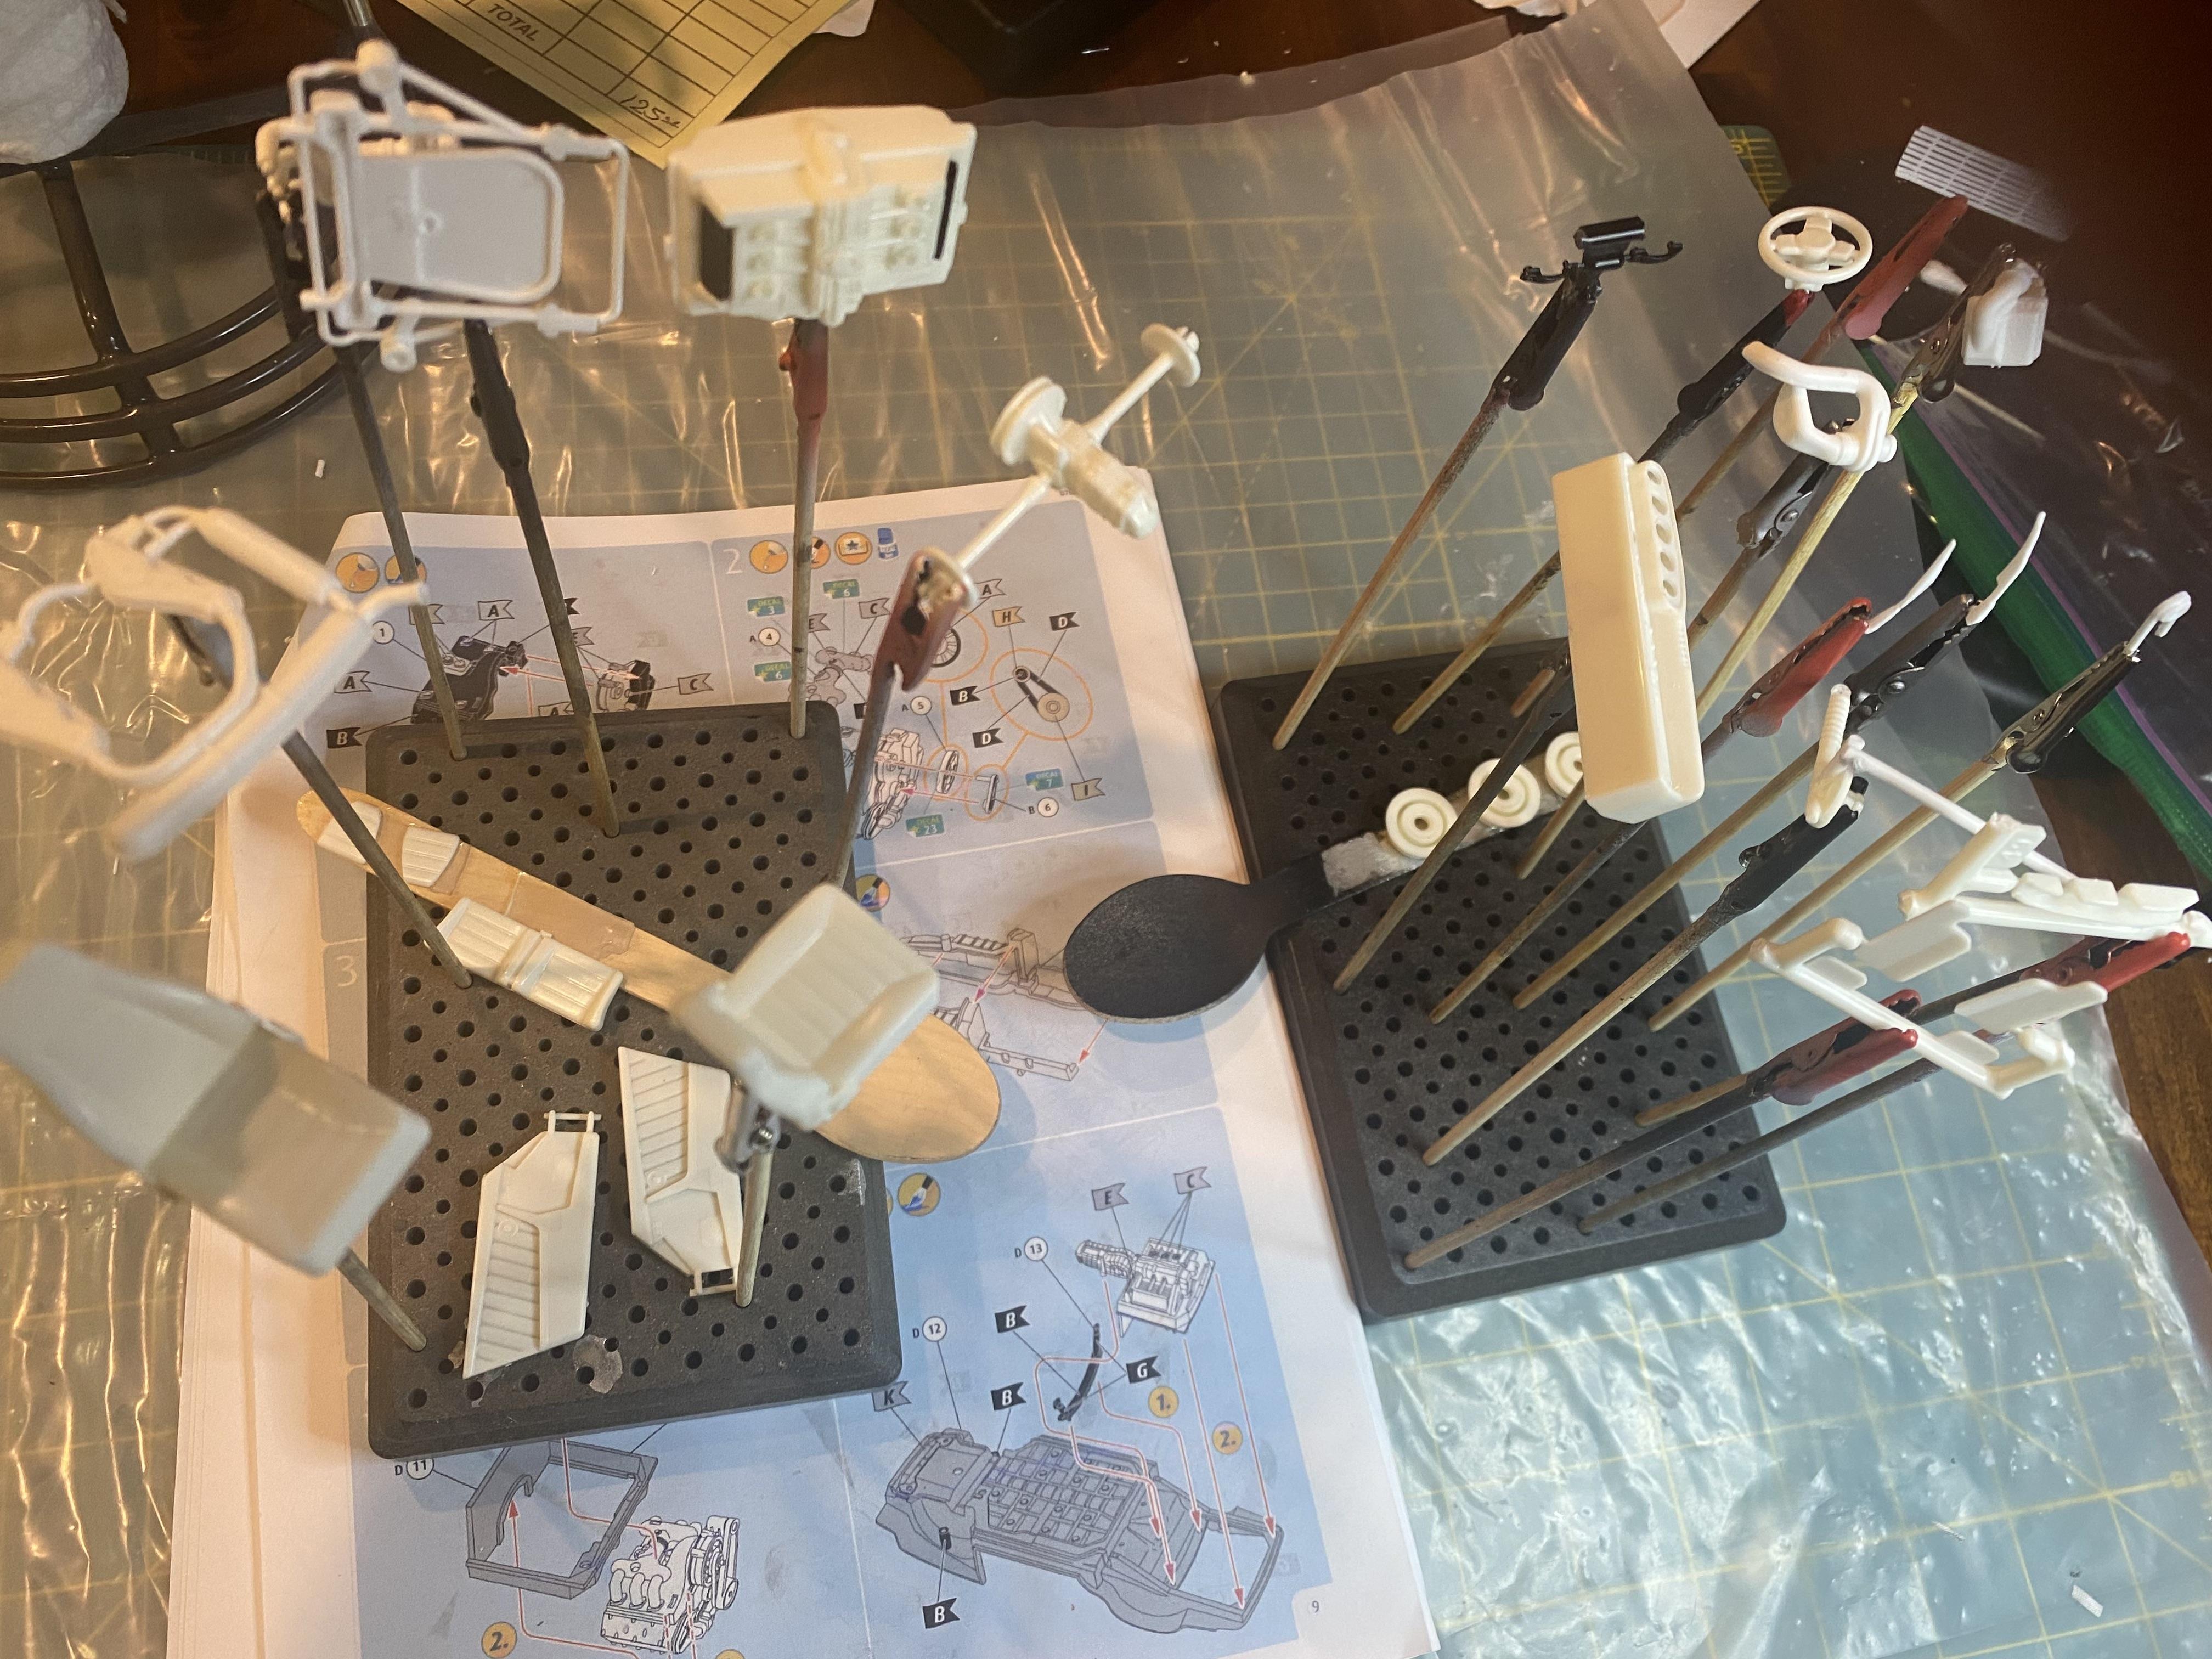
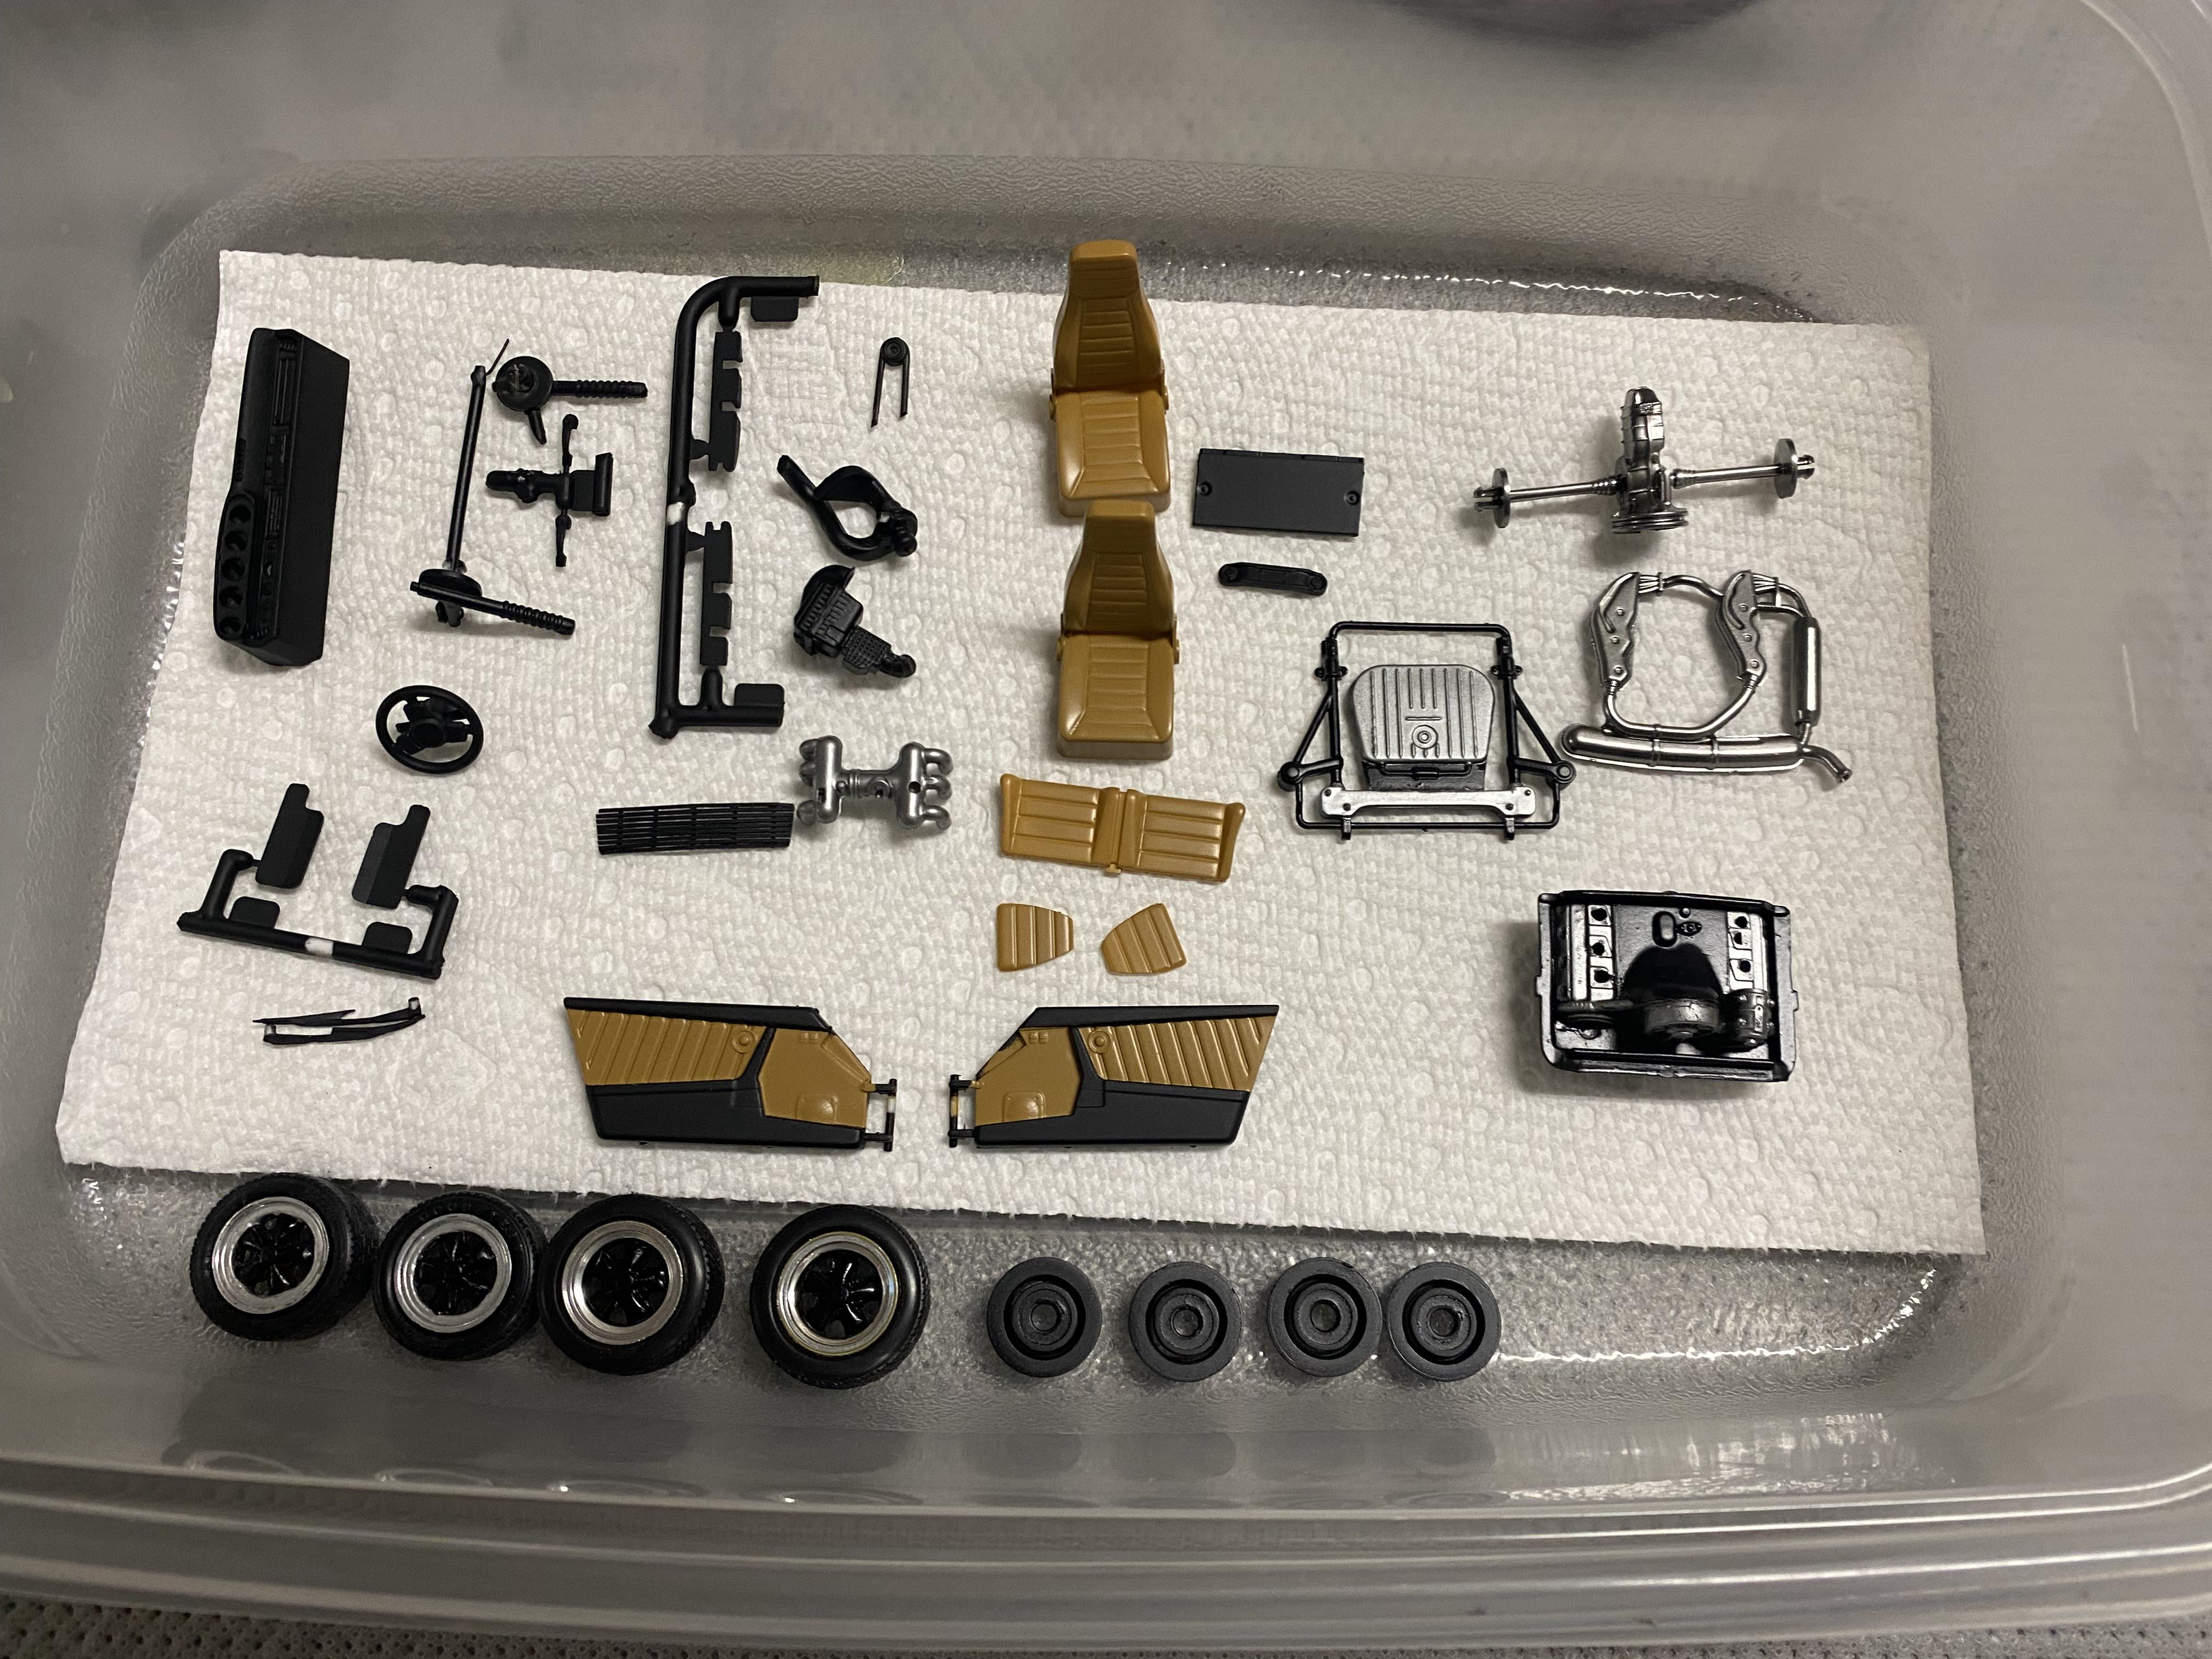
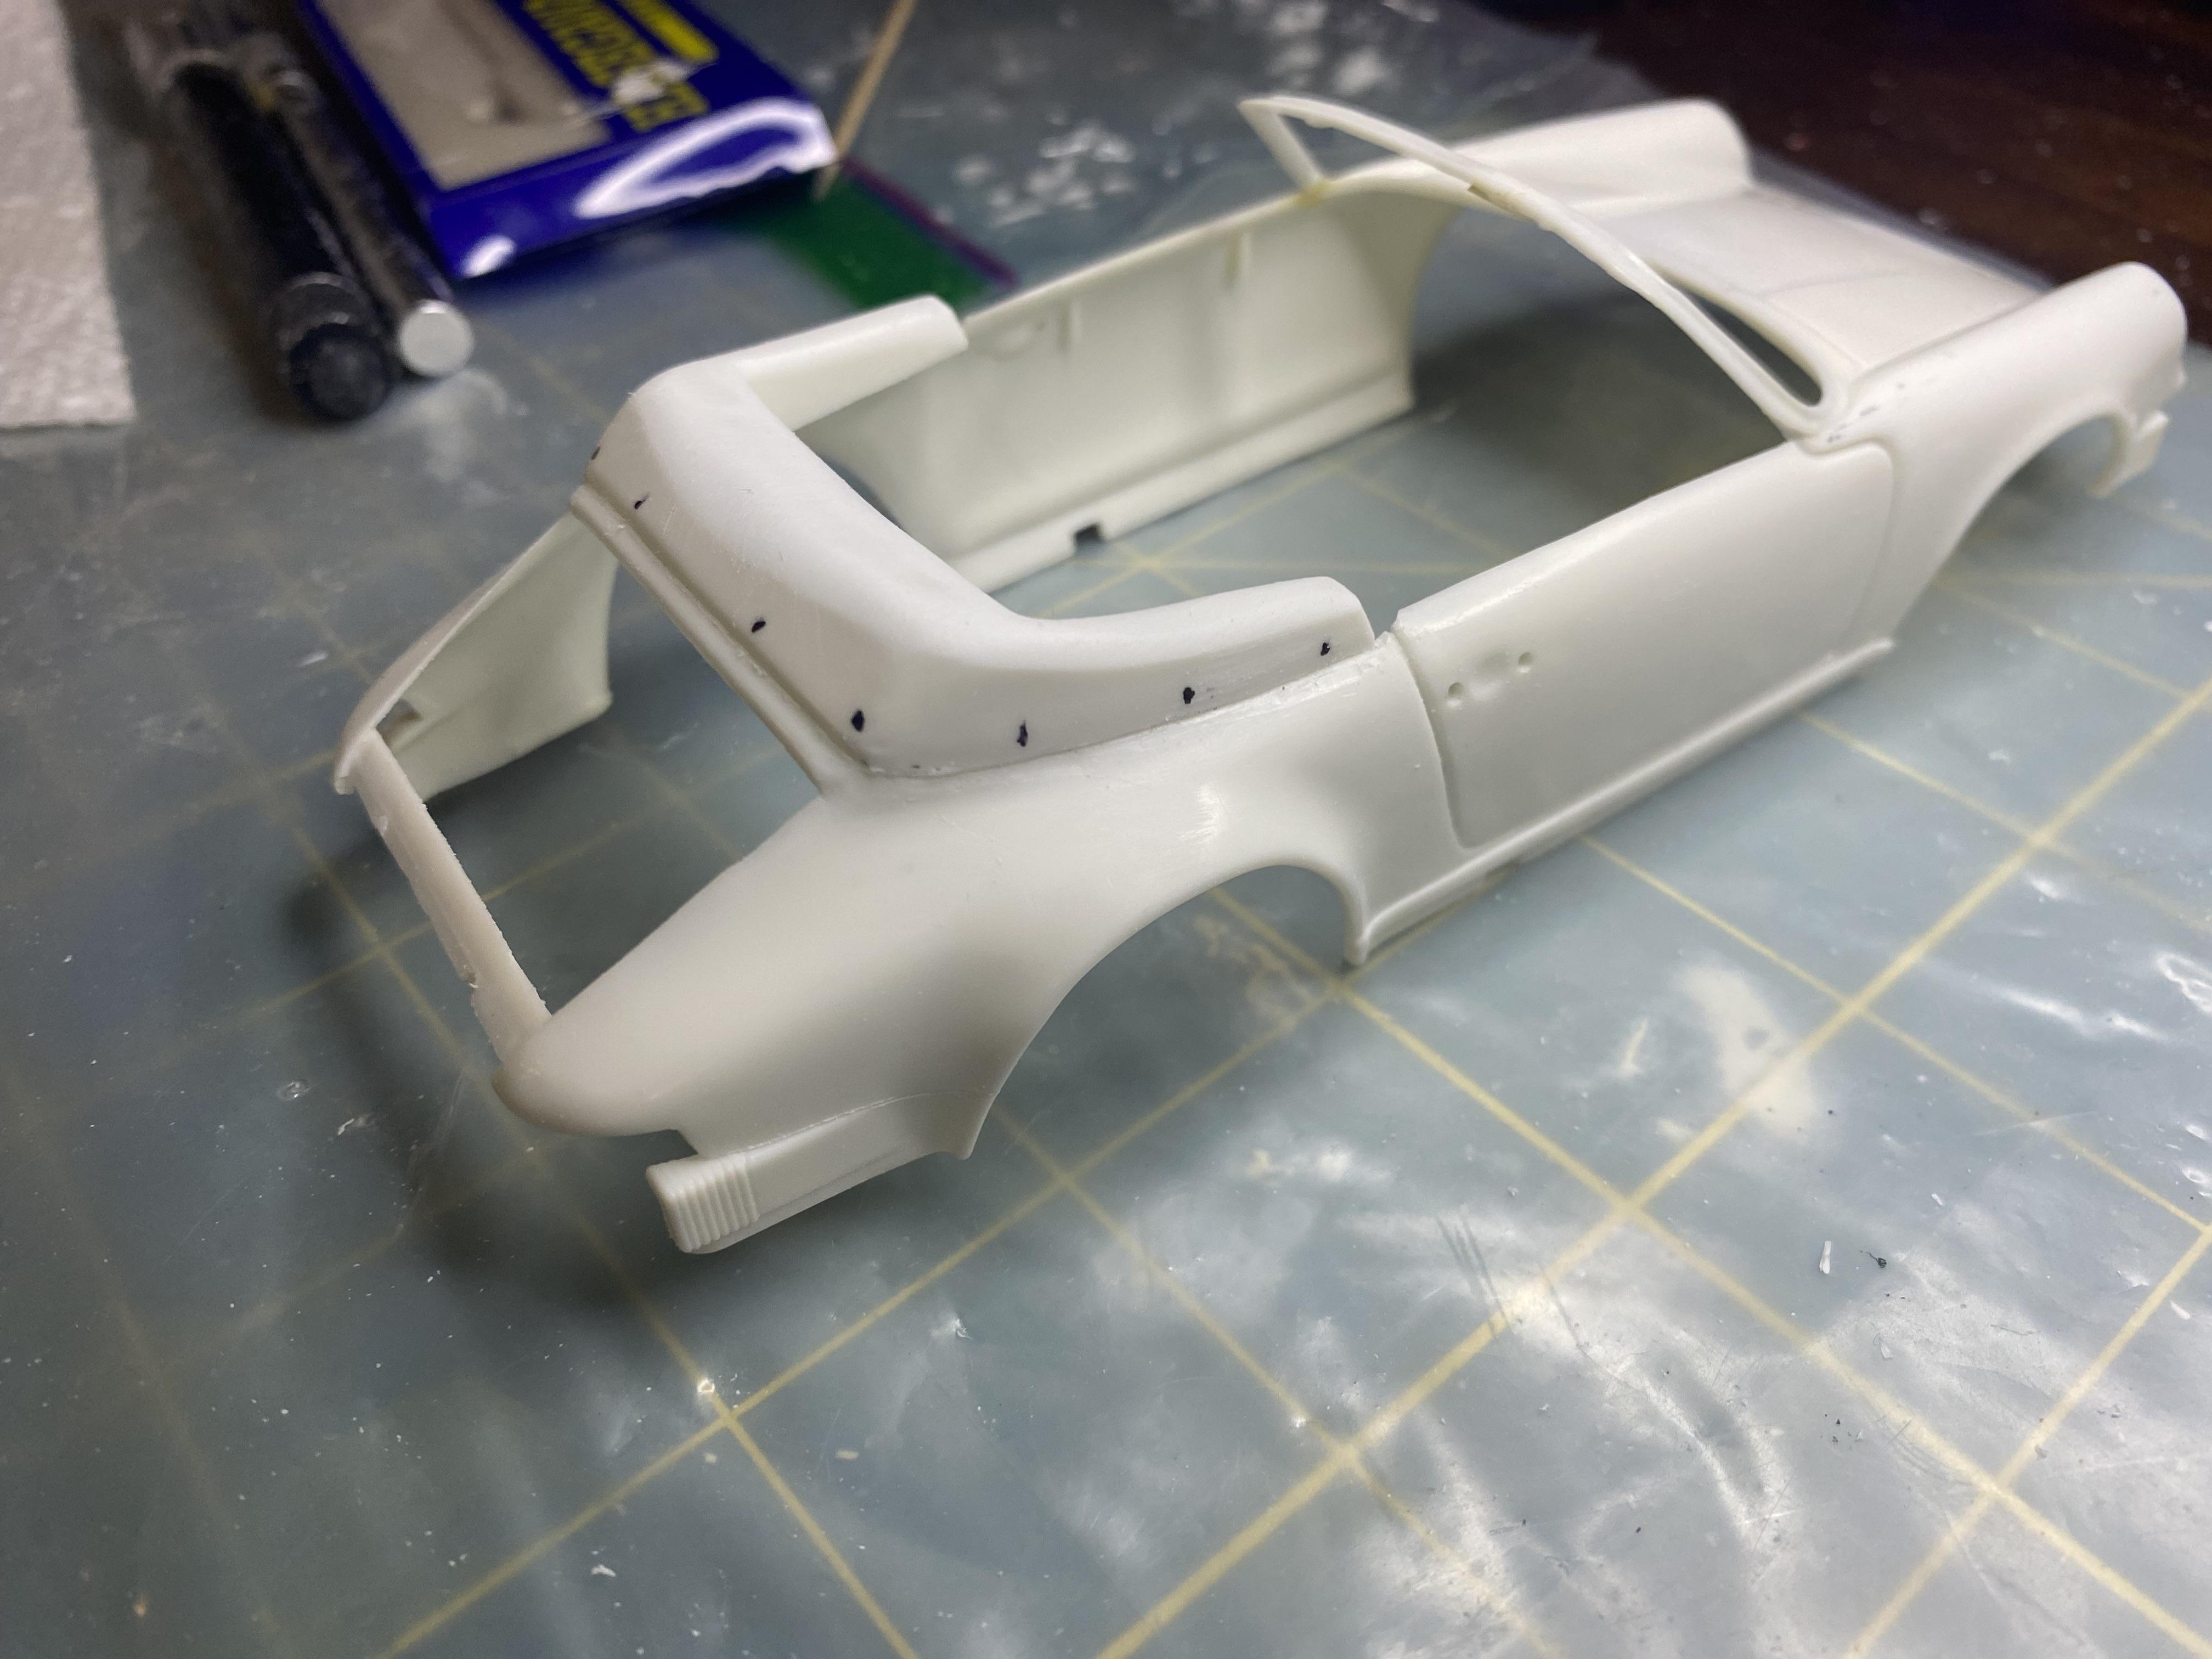
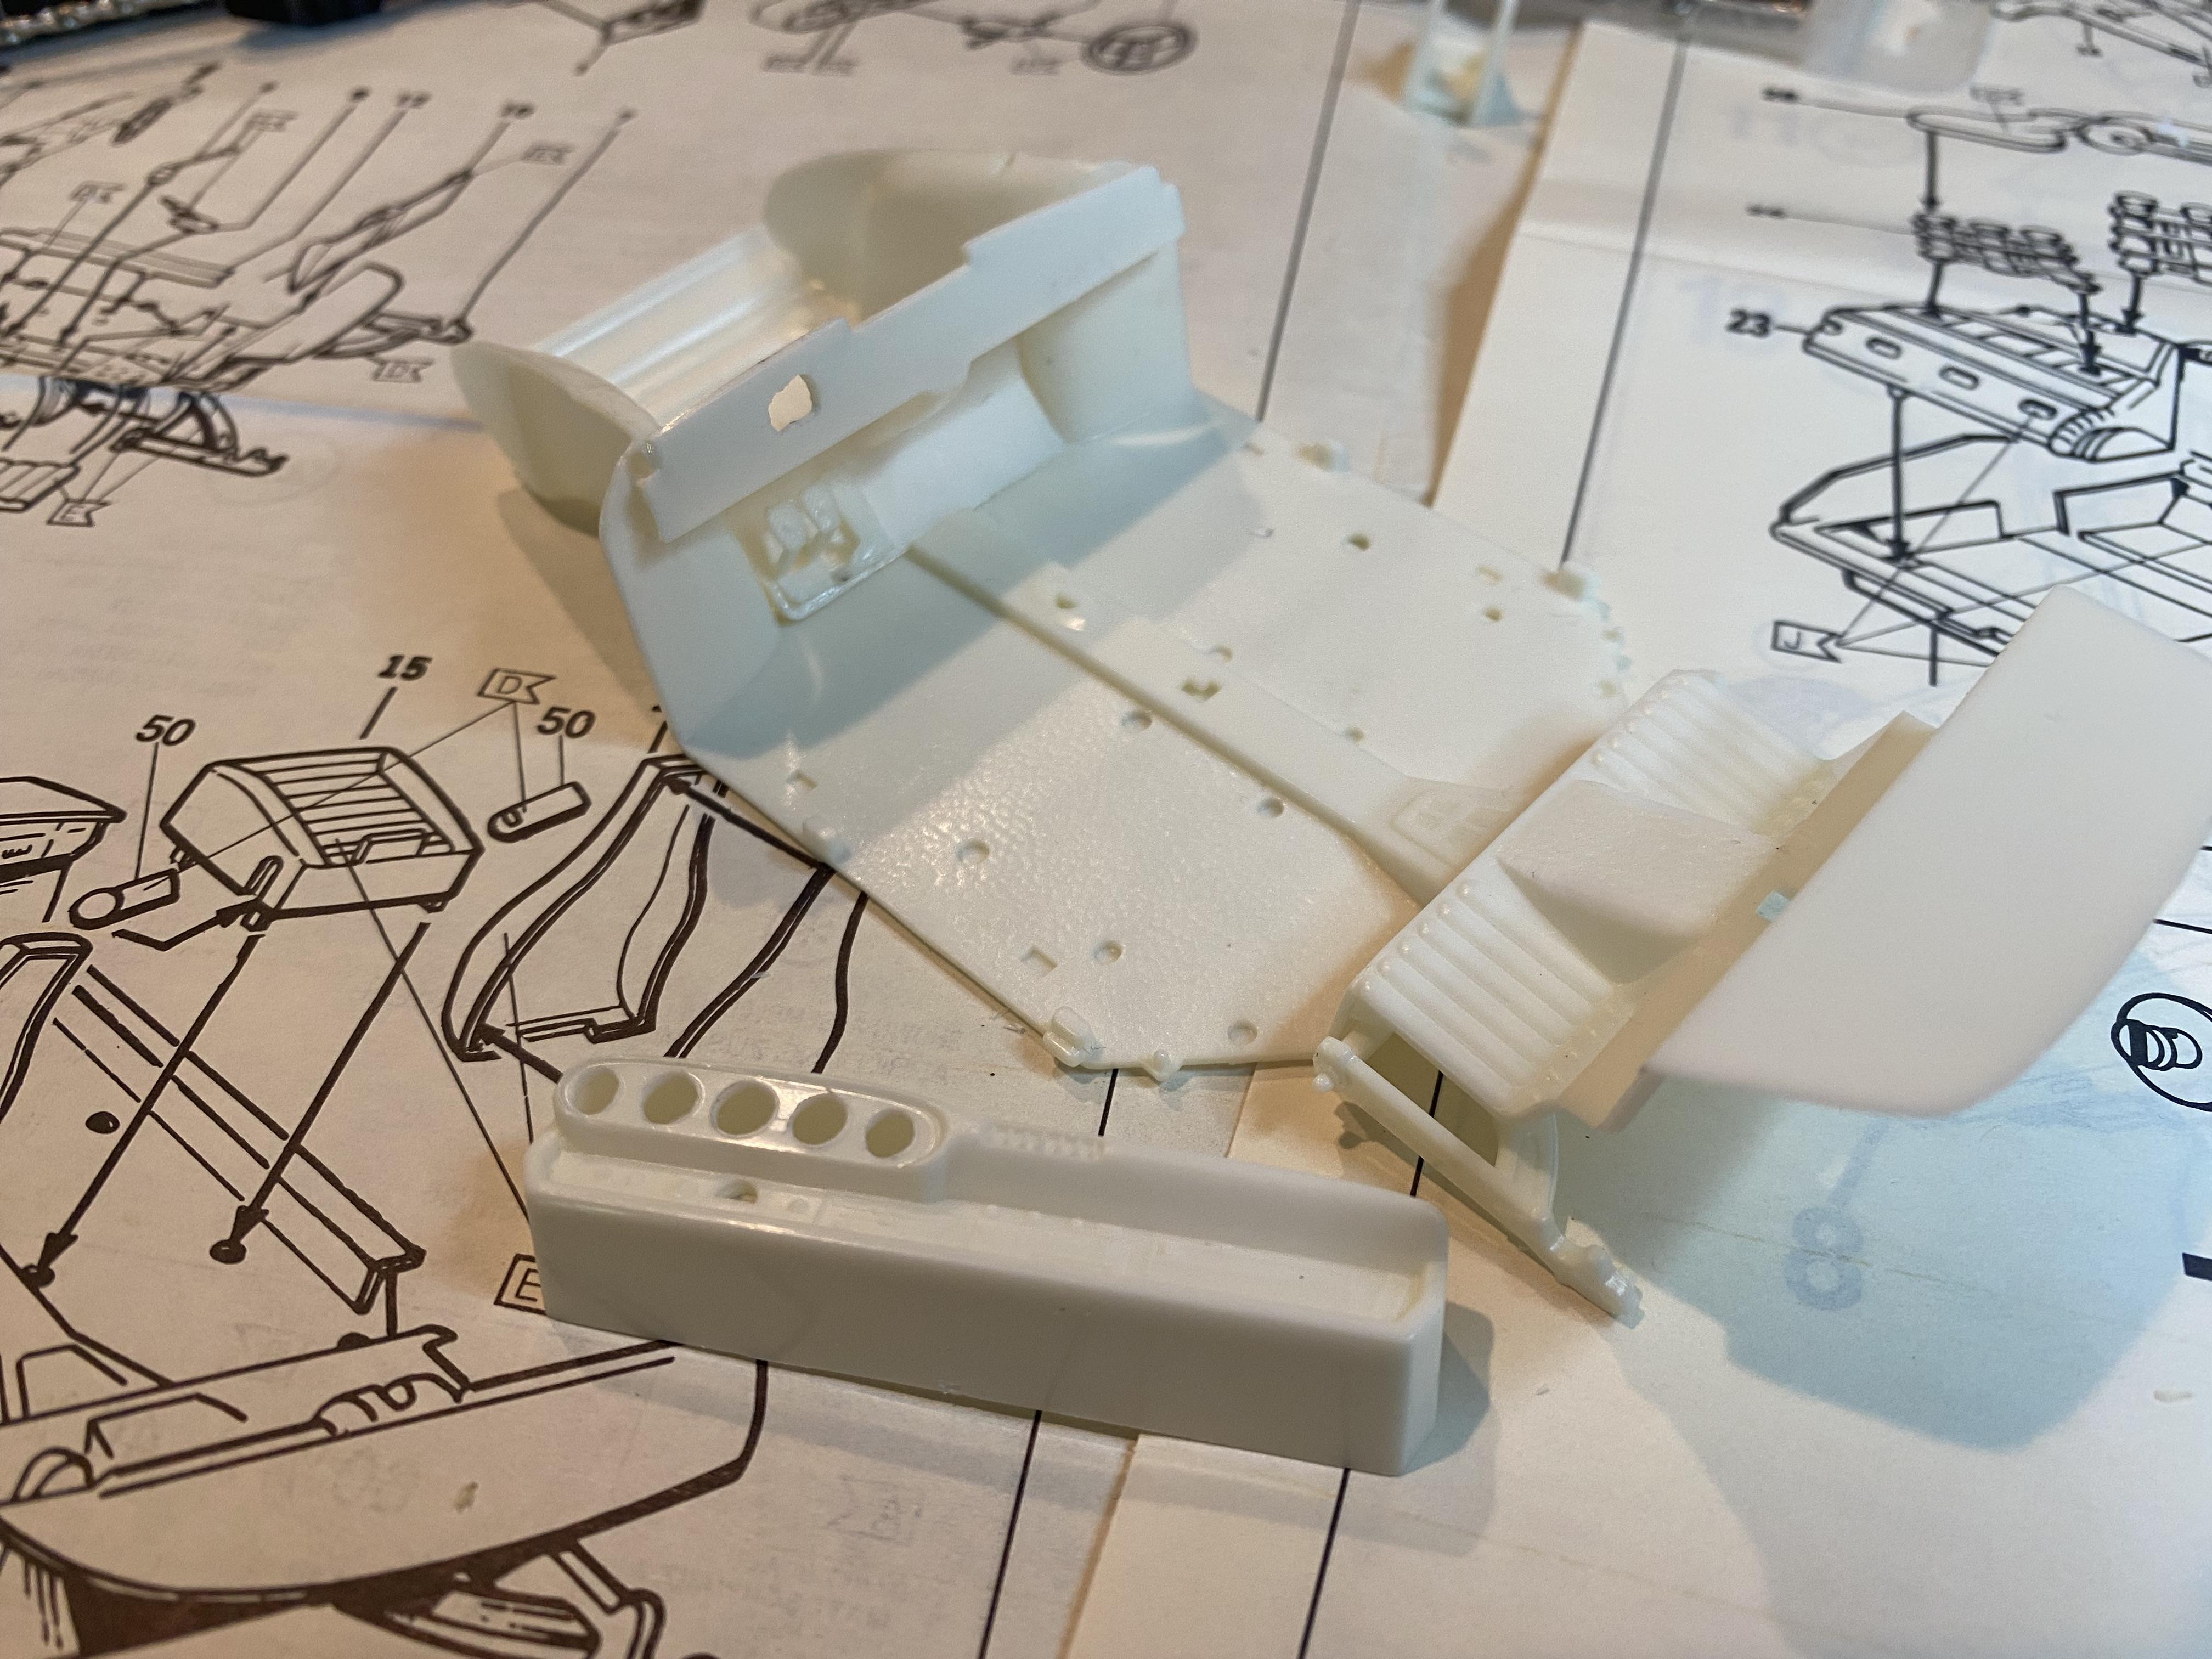
Got quite a bit of work done today, mostly assembling component in preparation for paint and bagging parts for organization. modified the top boot to be less angular and smoother and more realistic. Also drilled for snap studs. prepared dash for gauge LED lighting. parts assembled and bagged. cut open the front trunk, created the rubber seal for the bumper and attached to body. Attached rear bumper. added the lip for the front trunk opening.
-
Thank you!
-

Bringing it back from the dead 57 Ranchero
Duddly01 replied to junkyardjeff's topic in WIP: Model Cars
Quite the undertaking, good luck!! Should be fun -
Thank you! Me too.
-
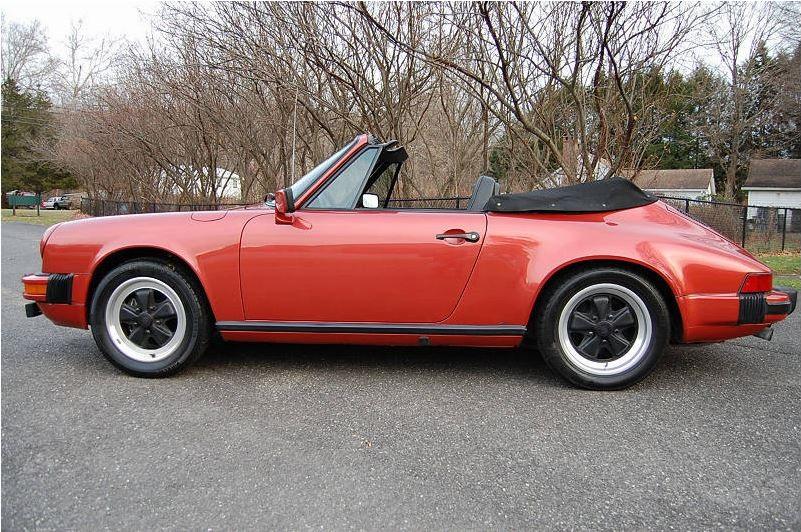
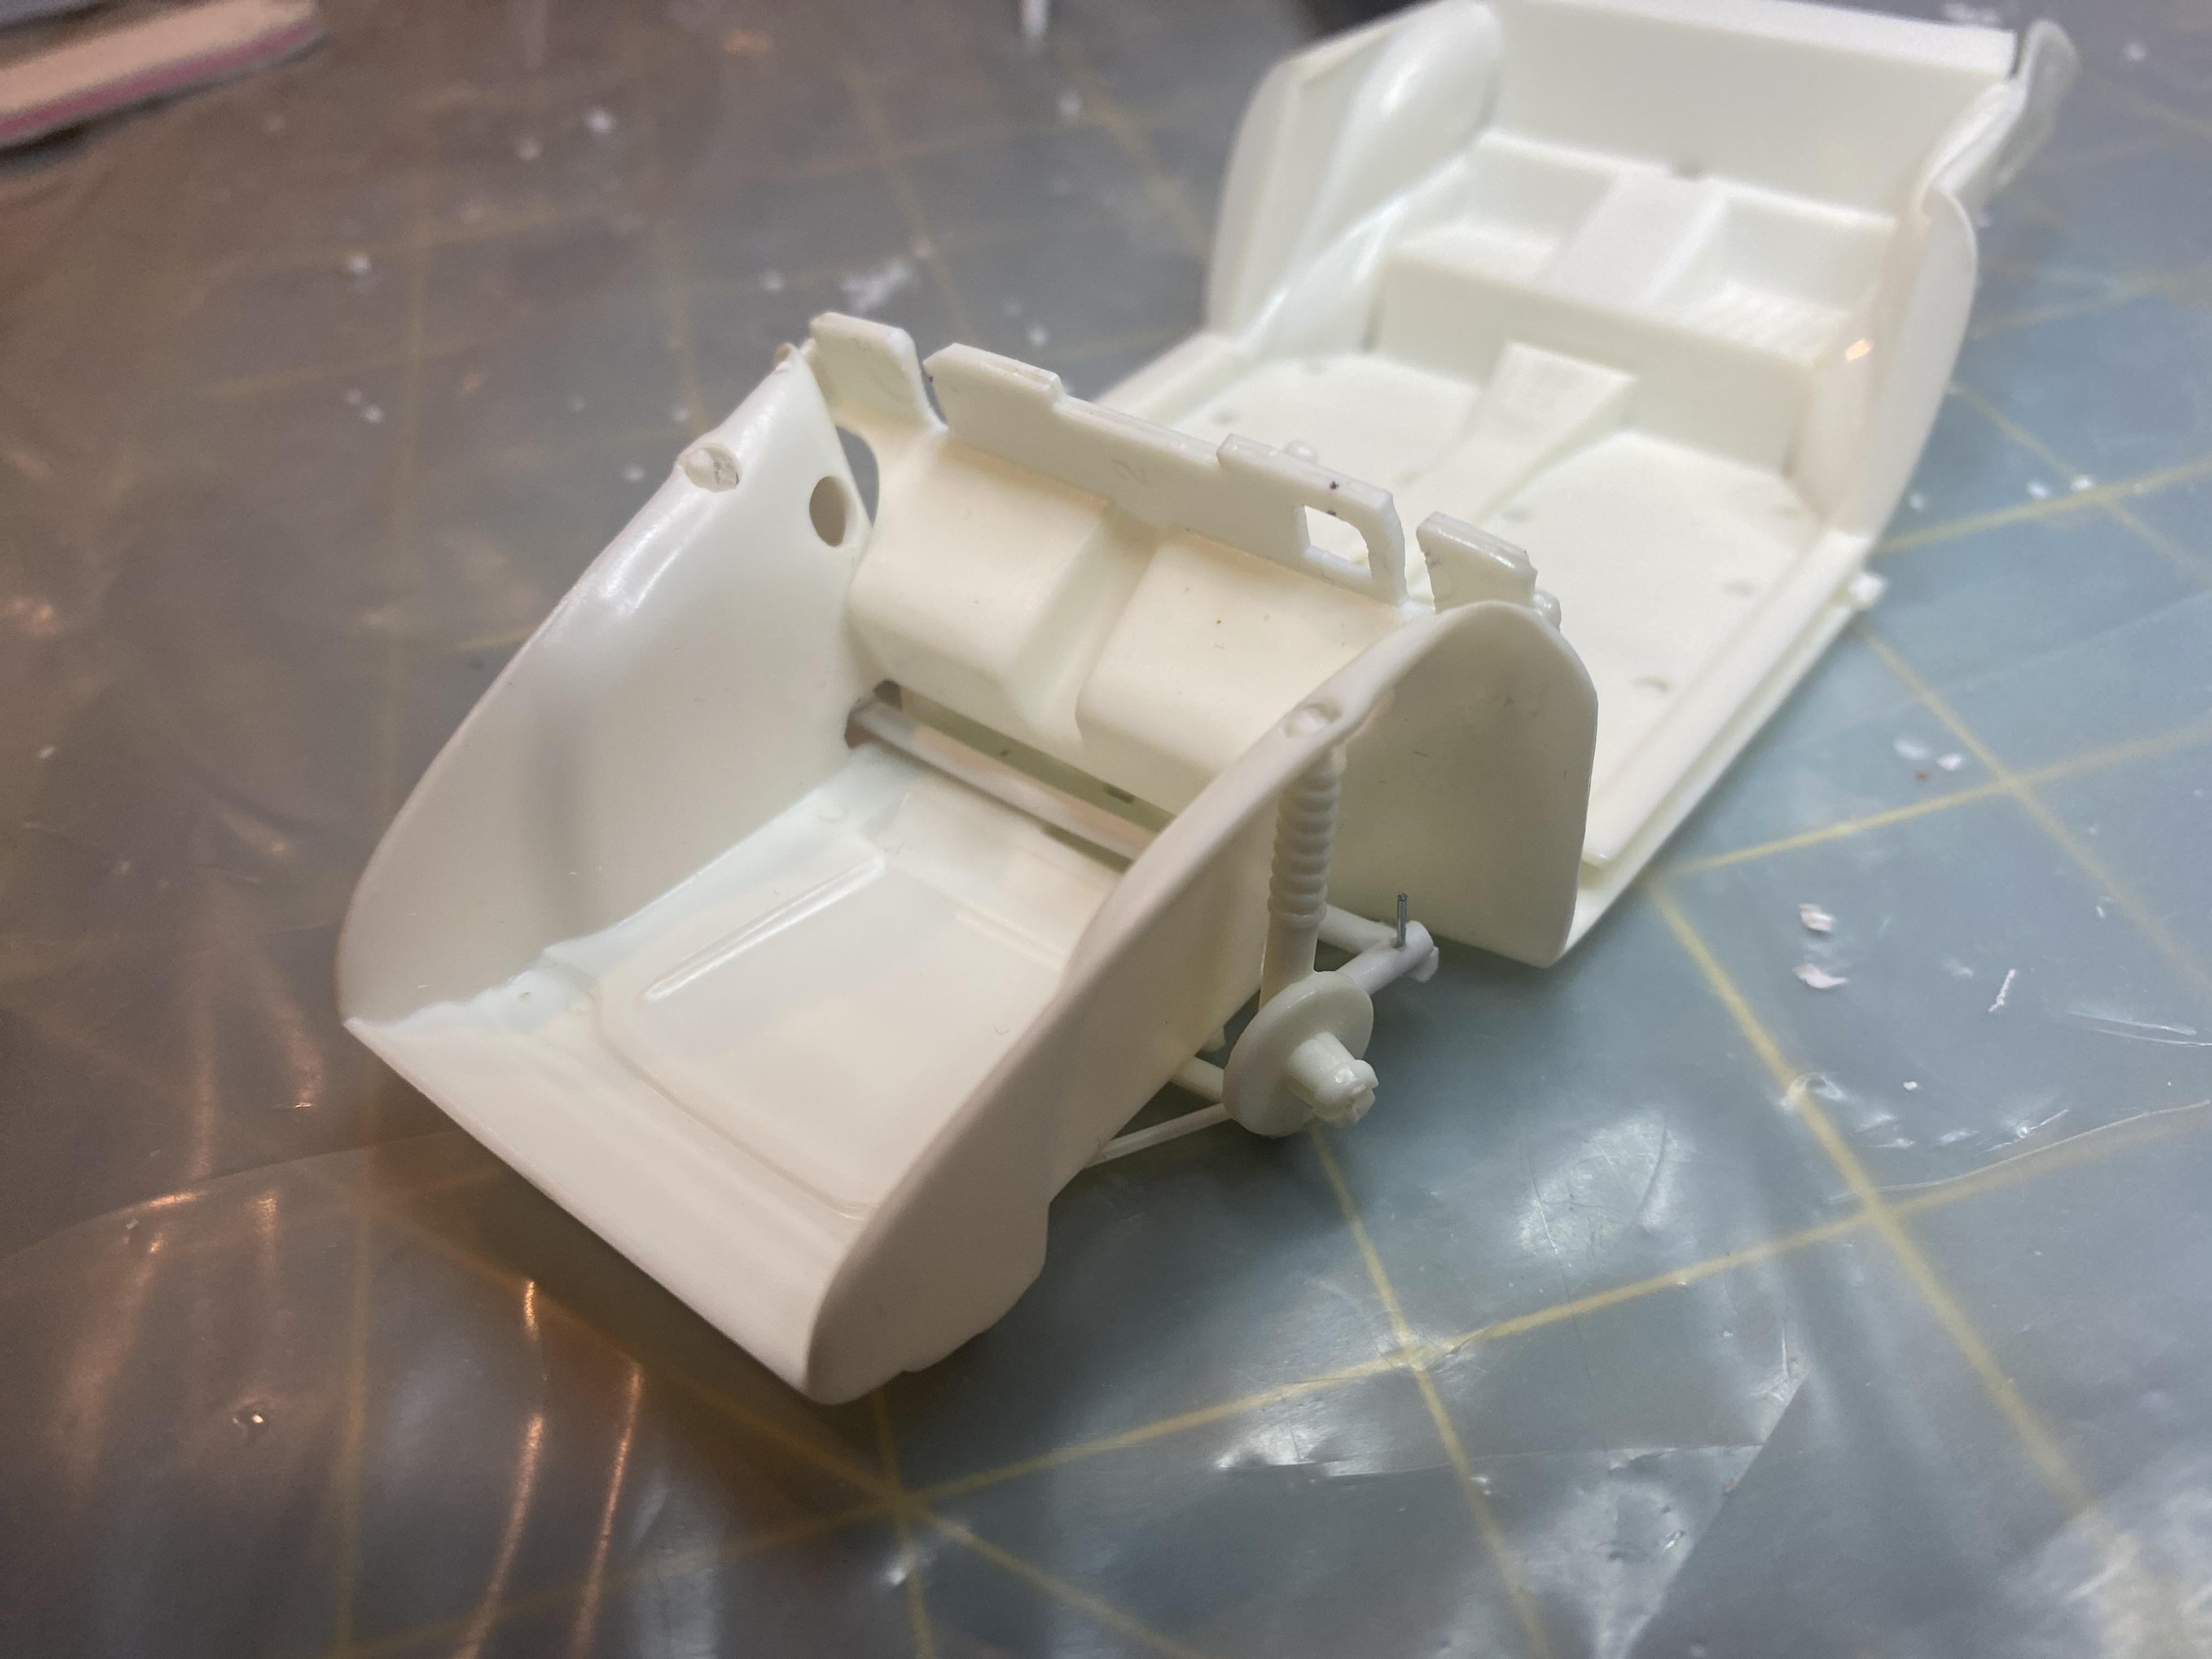
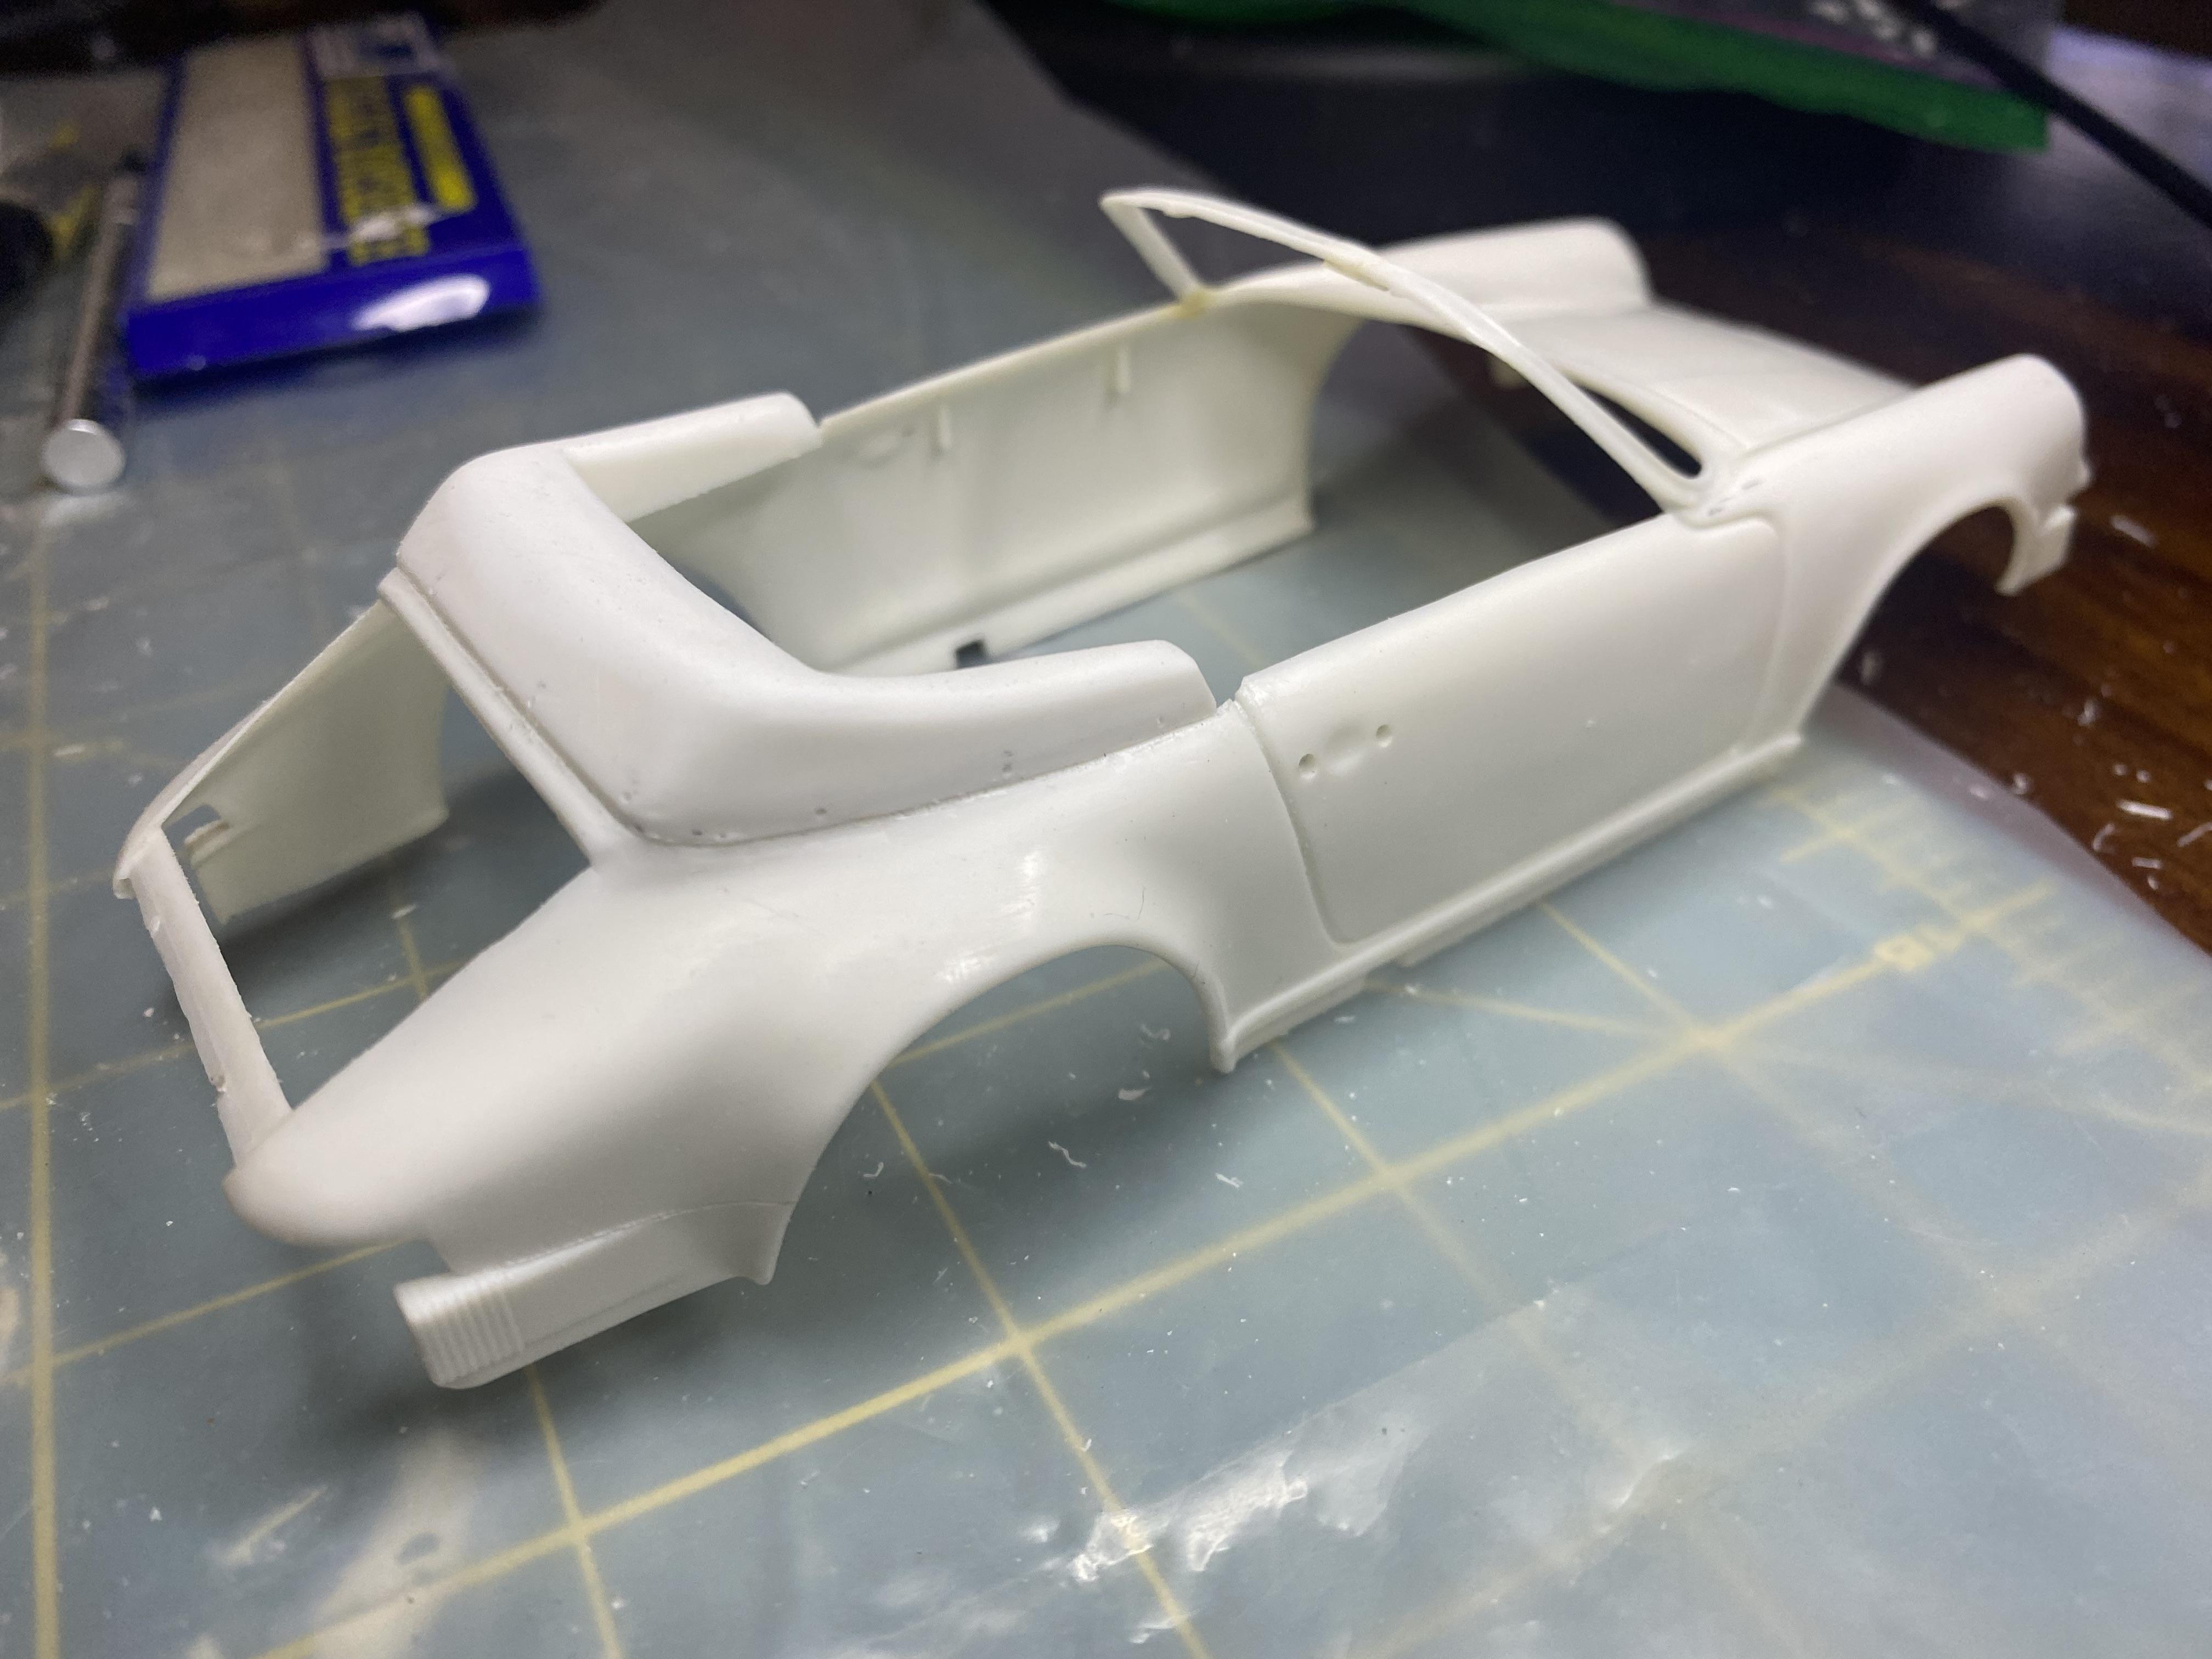
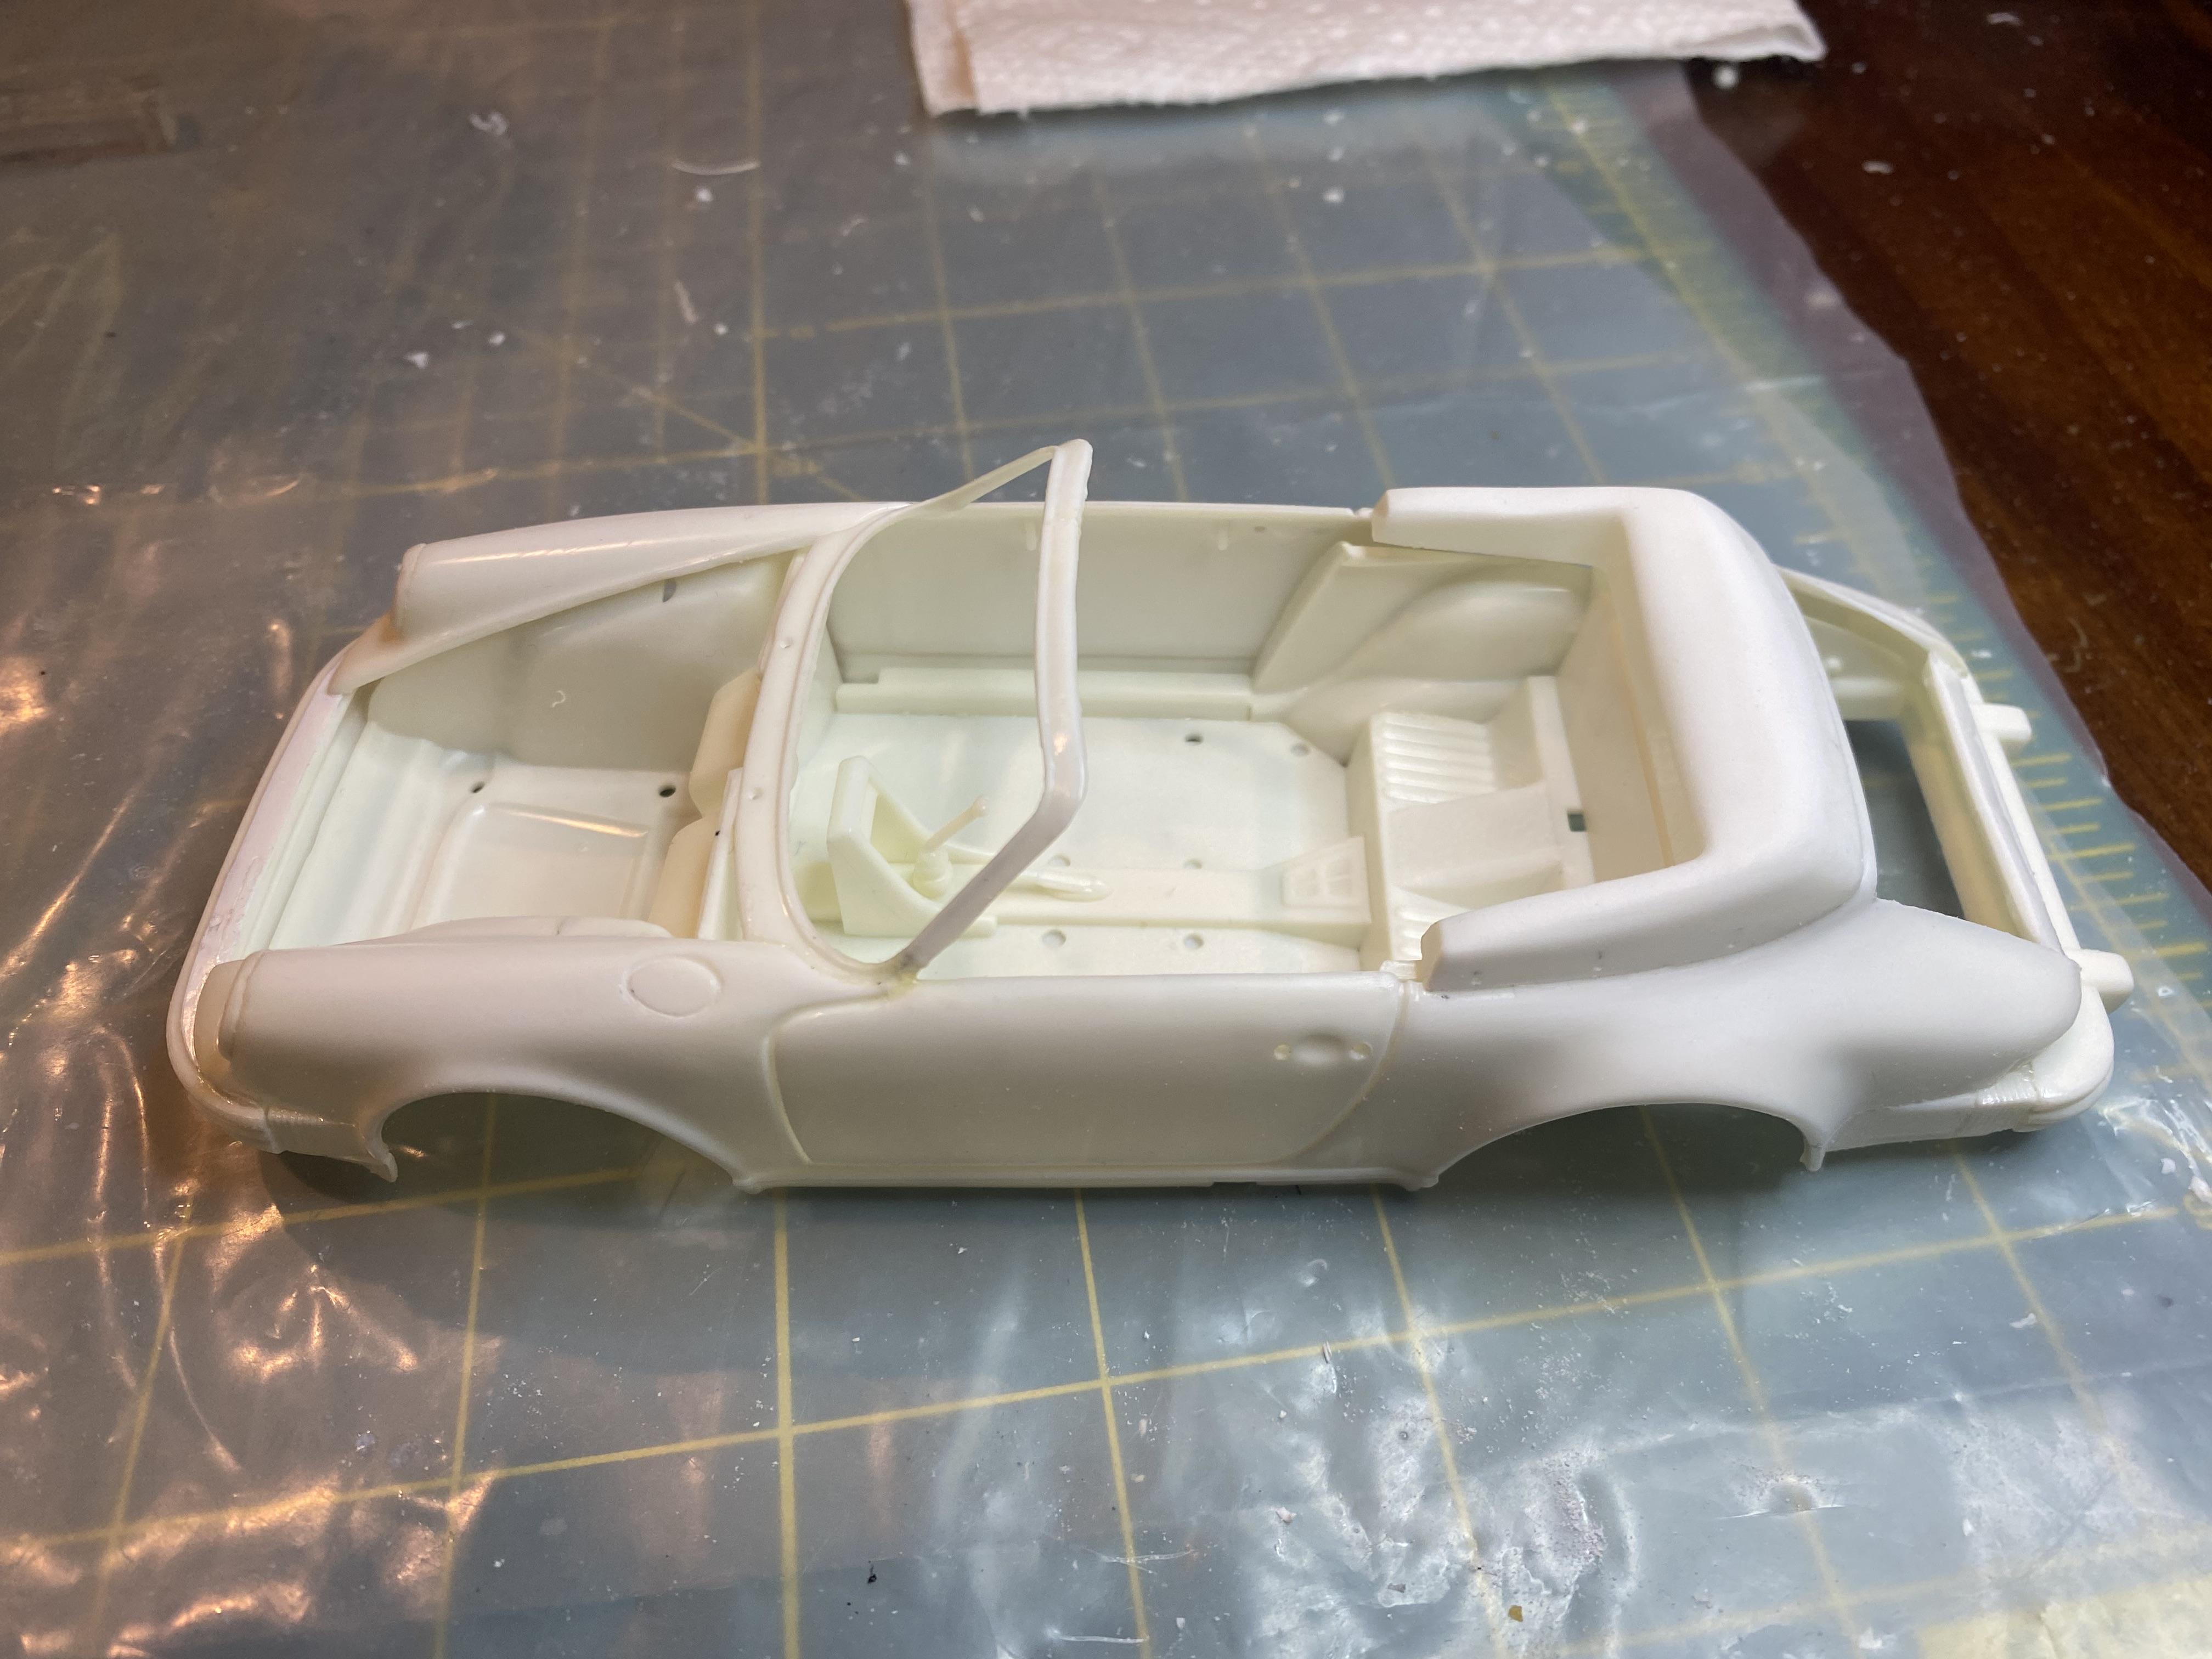
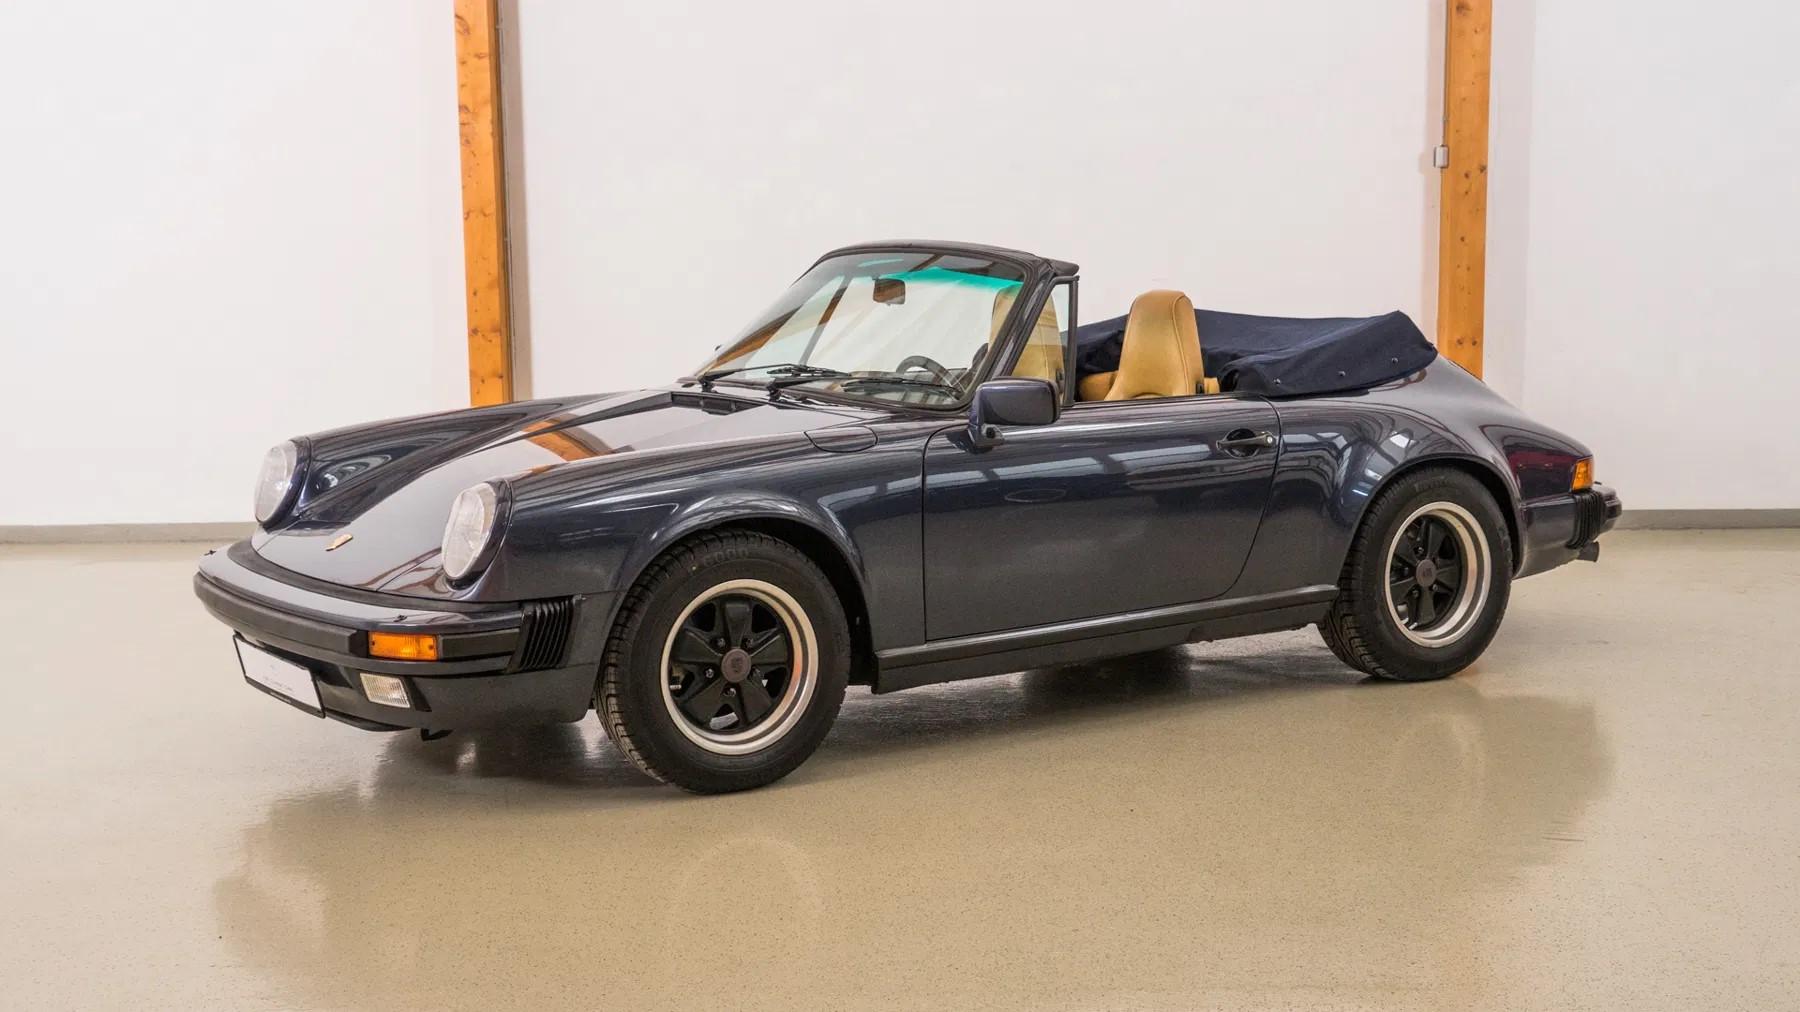
Next build on the table is an older 1/25 Revell Porsche 911 Carrera Cabriolet. This was an old opened kit I purchased at the SoCal Open last May. Sadly the window frame was busted in two places, repaired and one spot was broken again. I drilled, pinned and re-glued it so hopefully it will hold. Started removing the mold lines and cleaning up. The last picture is the inspiration I am going for. Prussian Blue with Tan interior. Actually a lot like the box cover. This is the first time the door gaps are too wide instead of too shallow, so weird.