Duddly01
-
Posts
1,048 -
Joined
-
Last visited
Content Type
Profiles
Forums
Events
Gallery
Everything posted by Duddly01
-
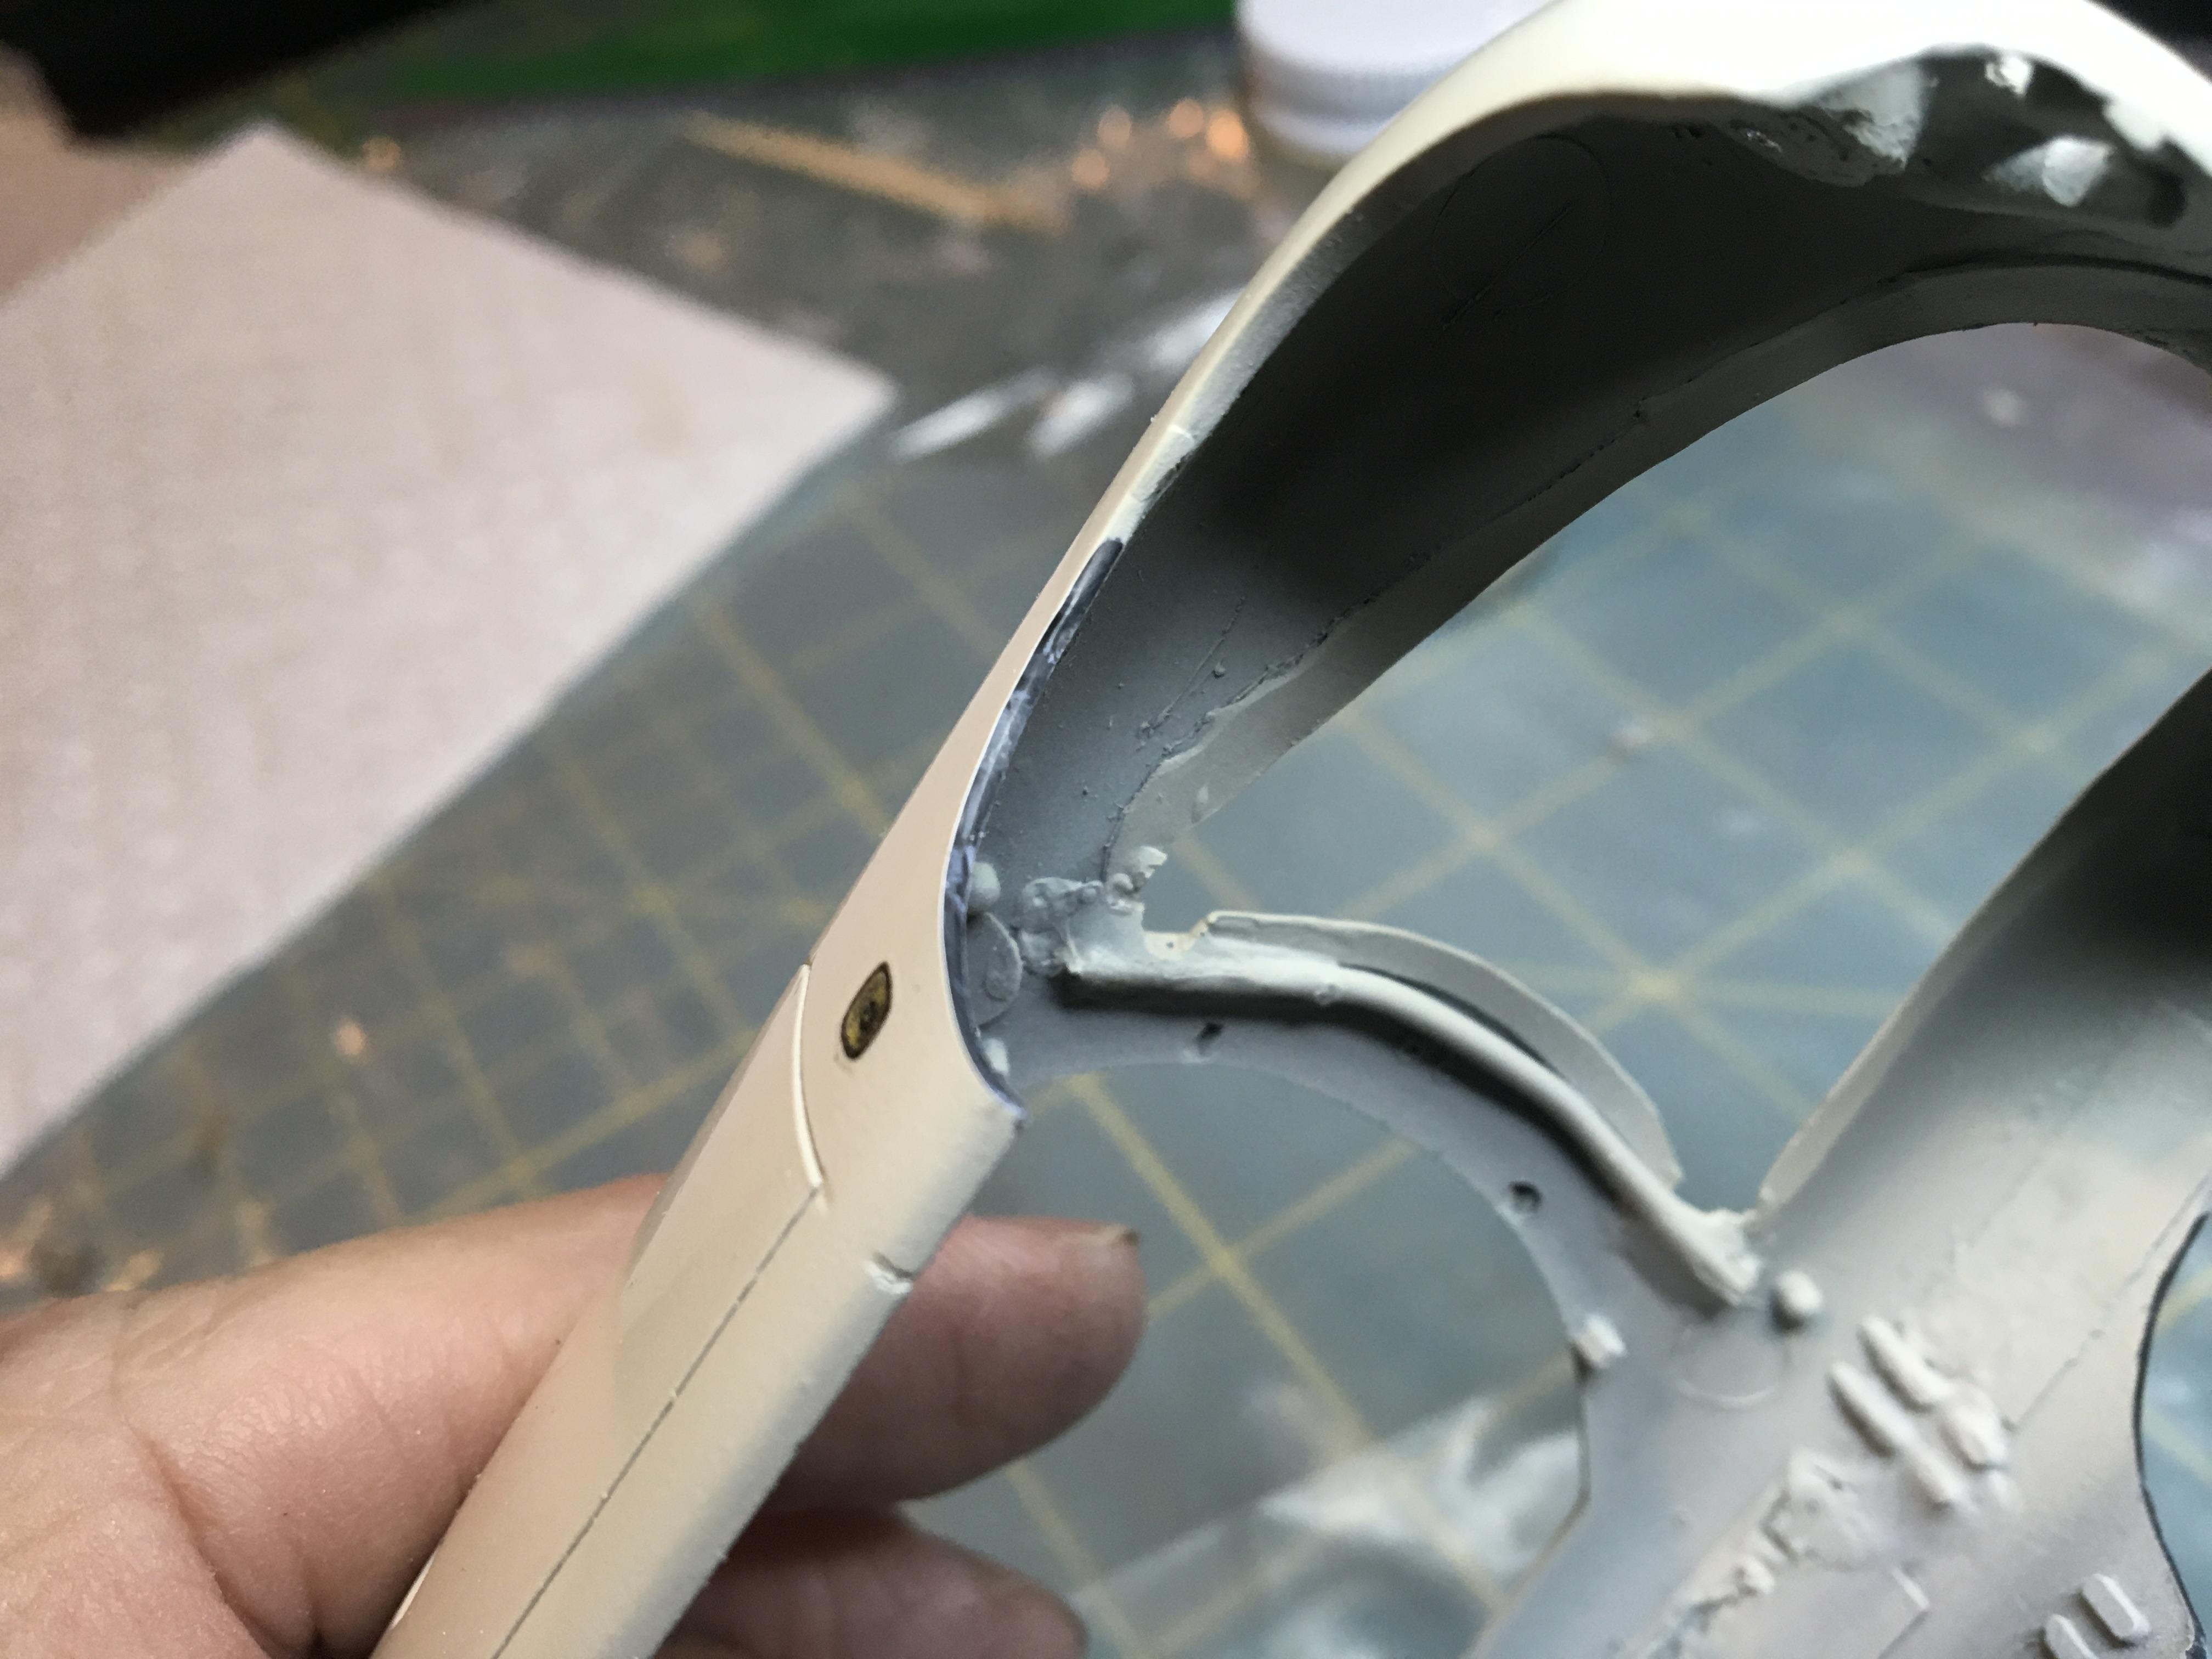
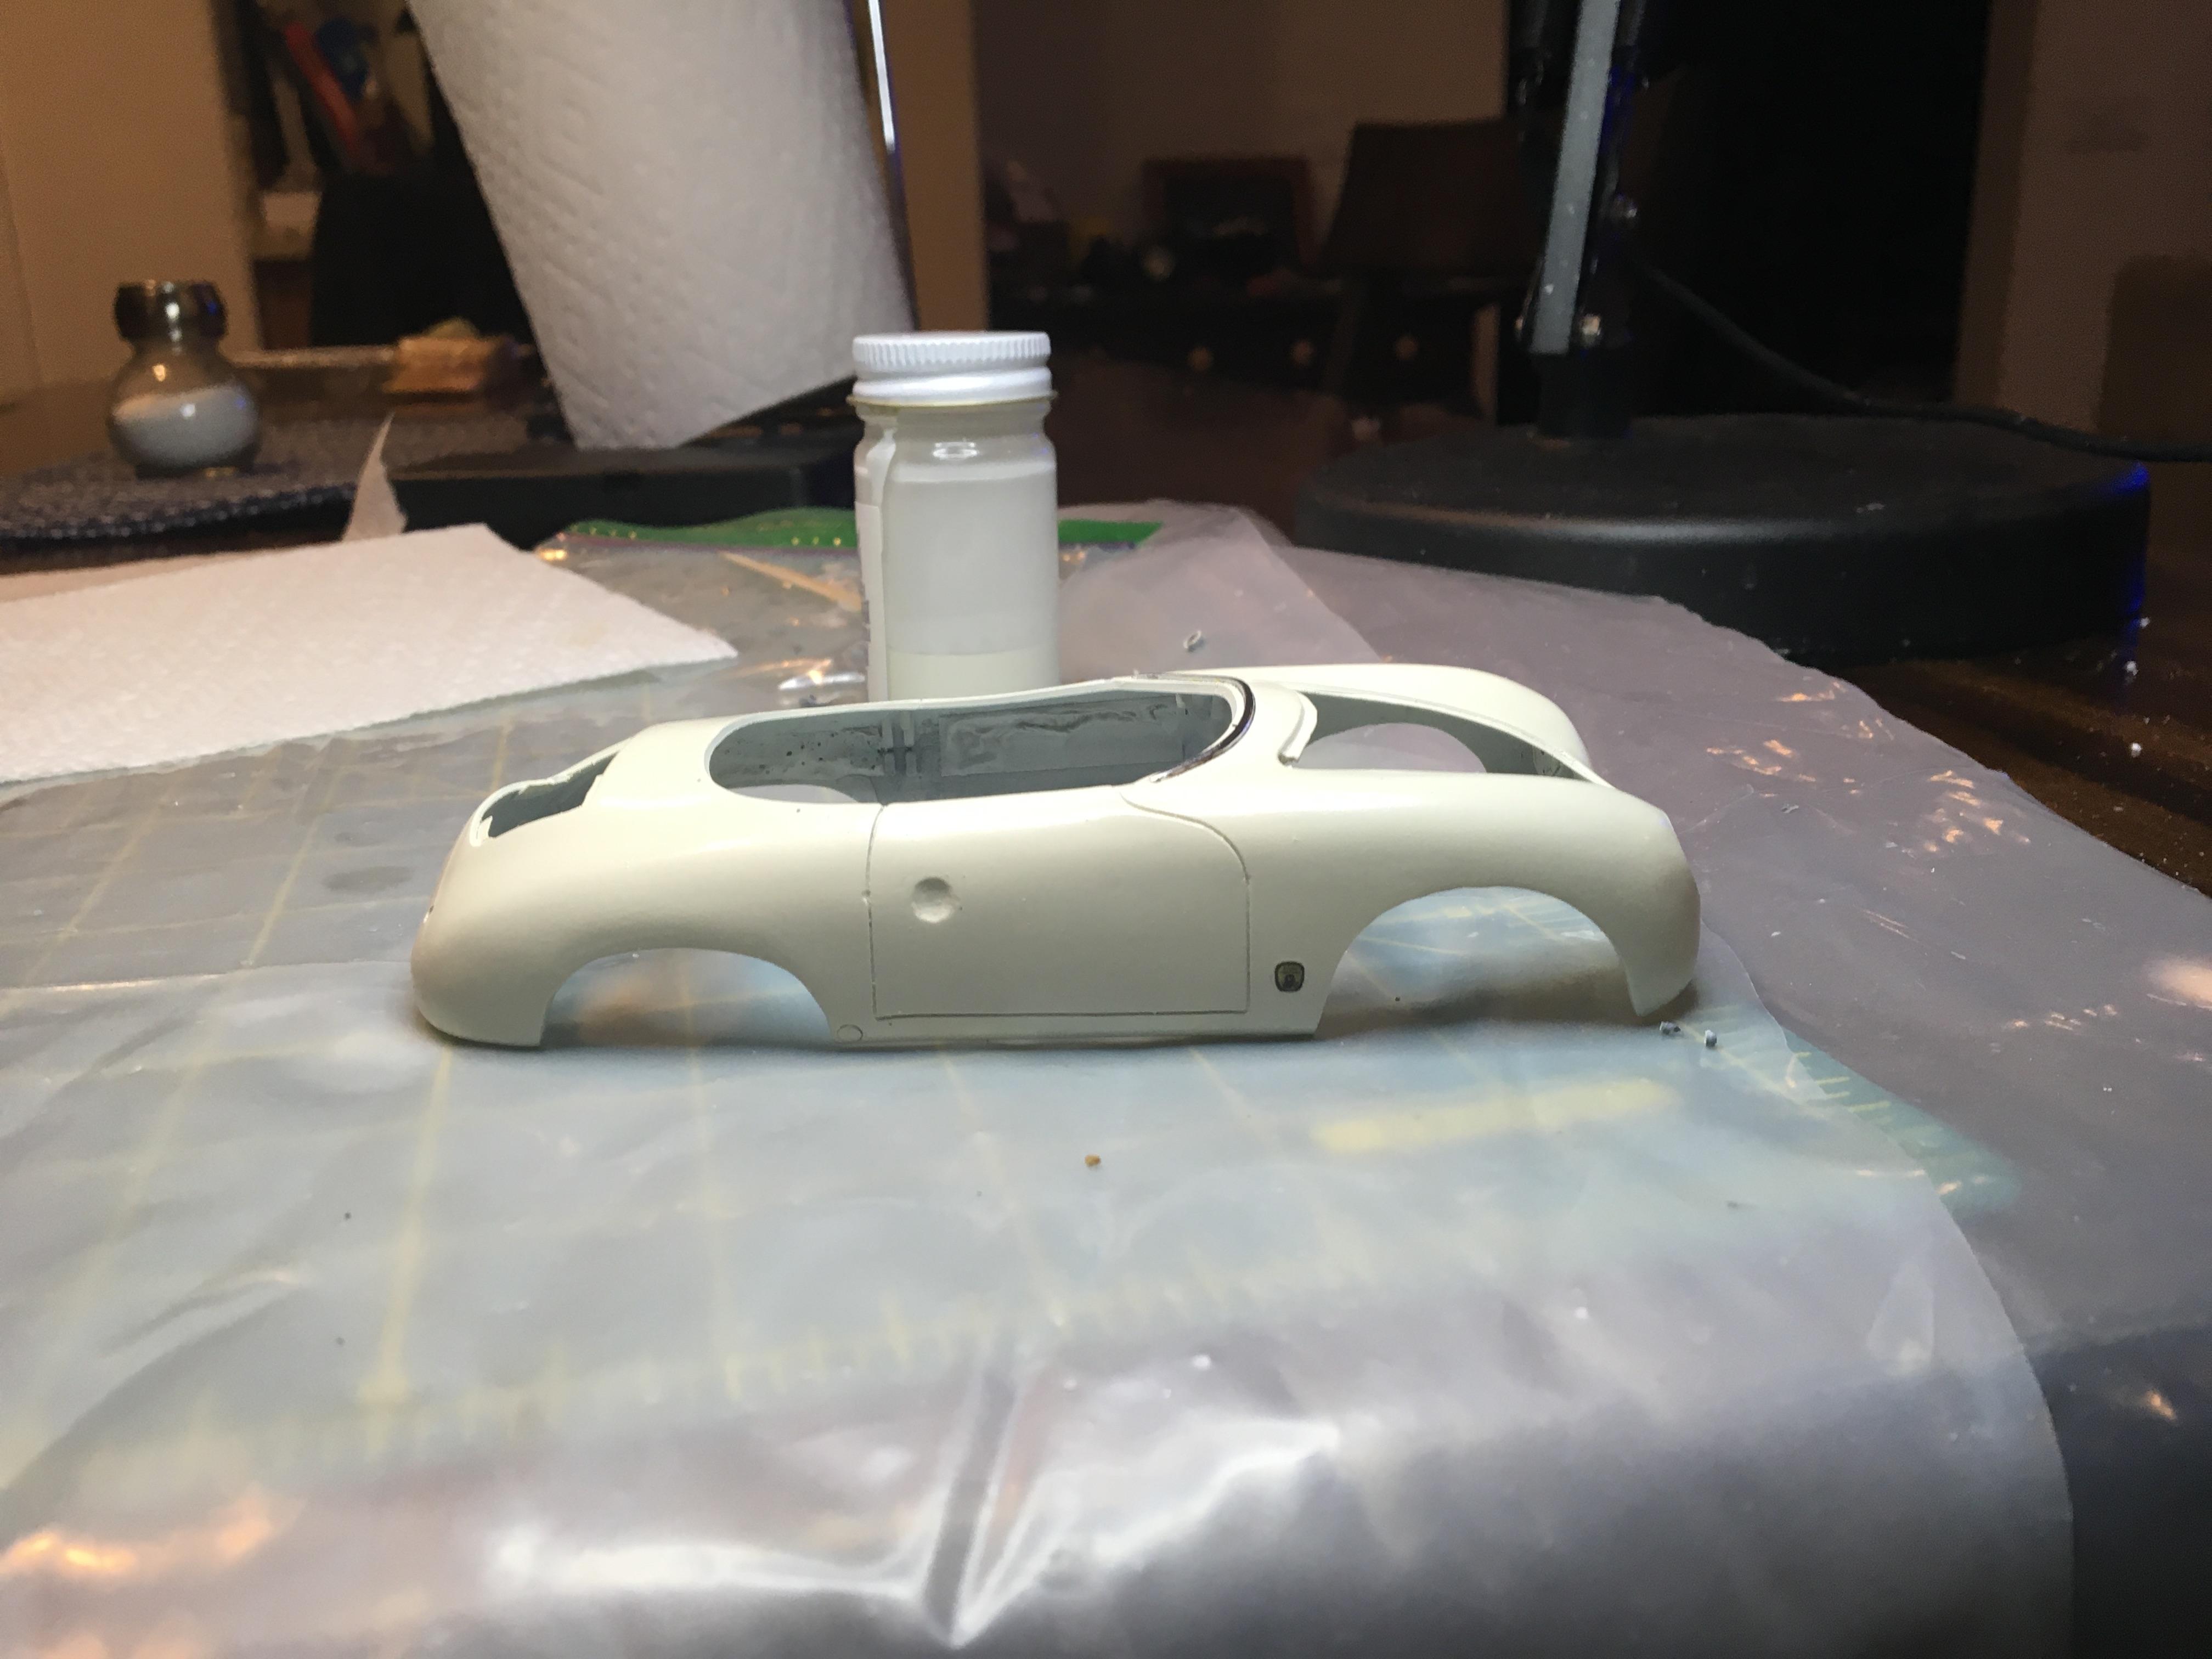
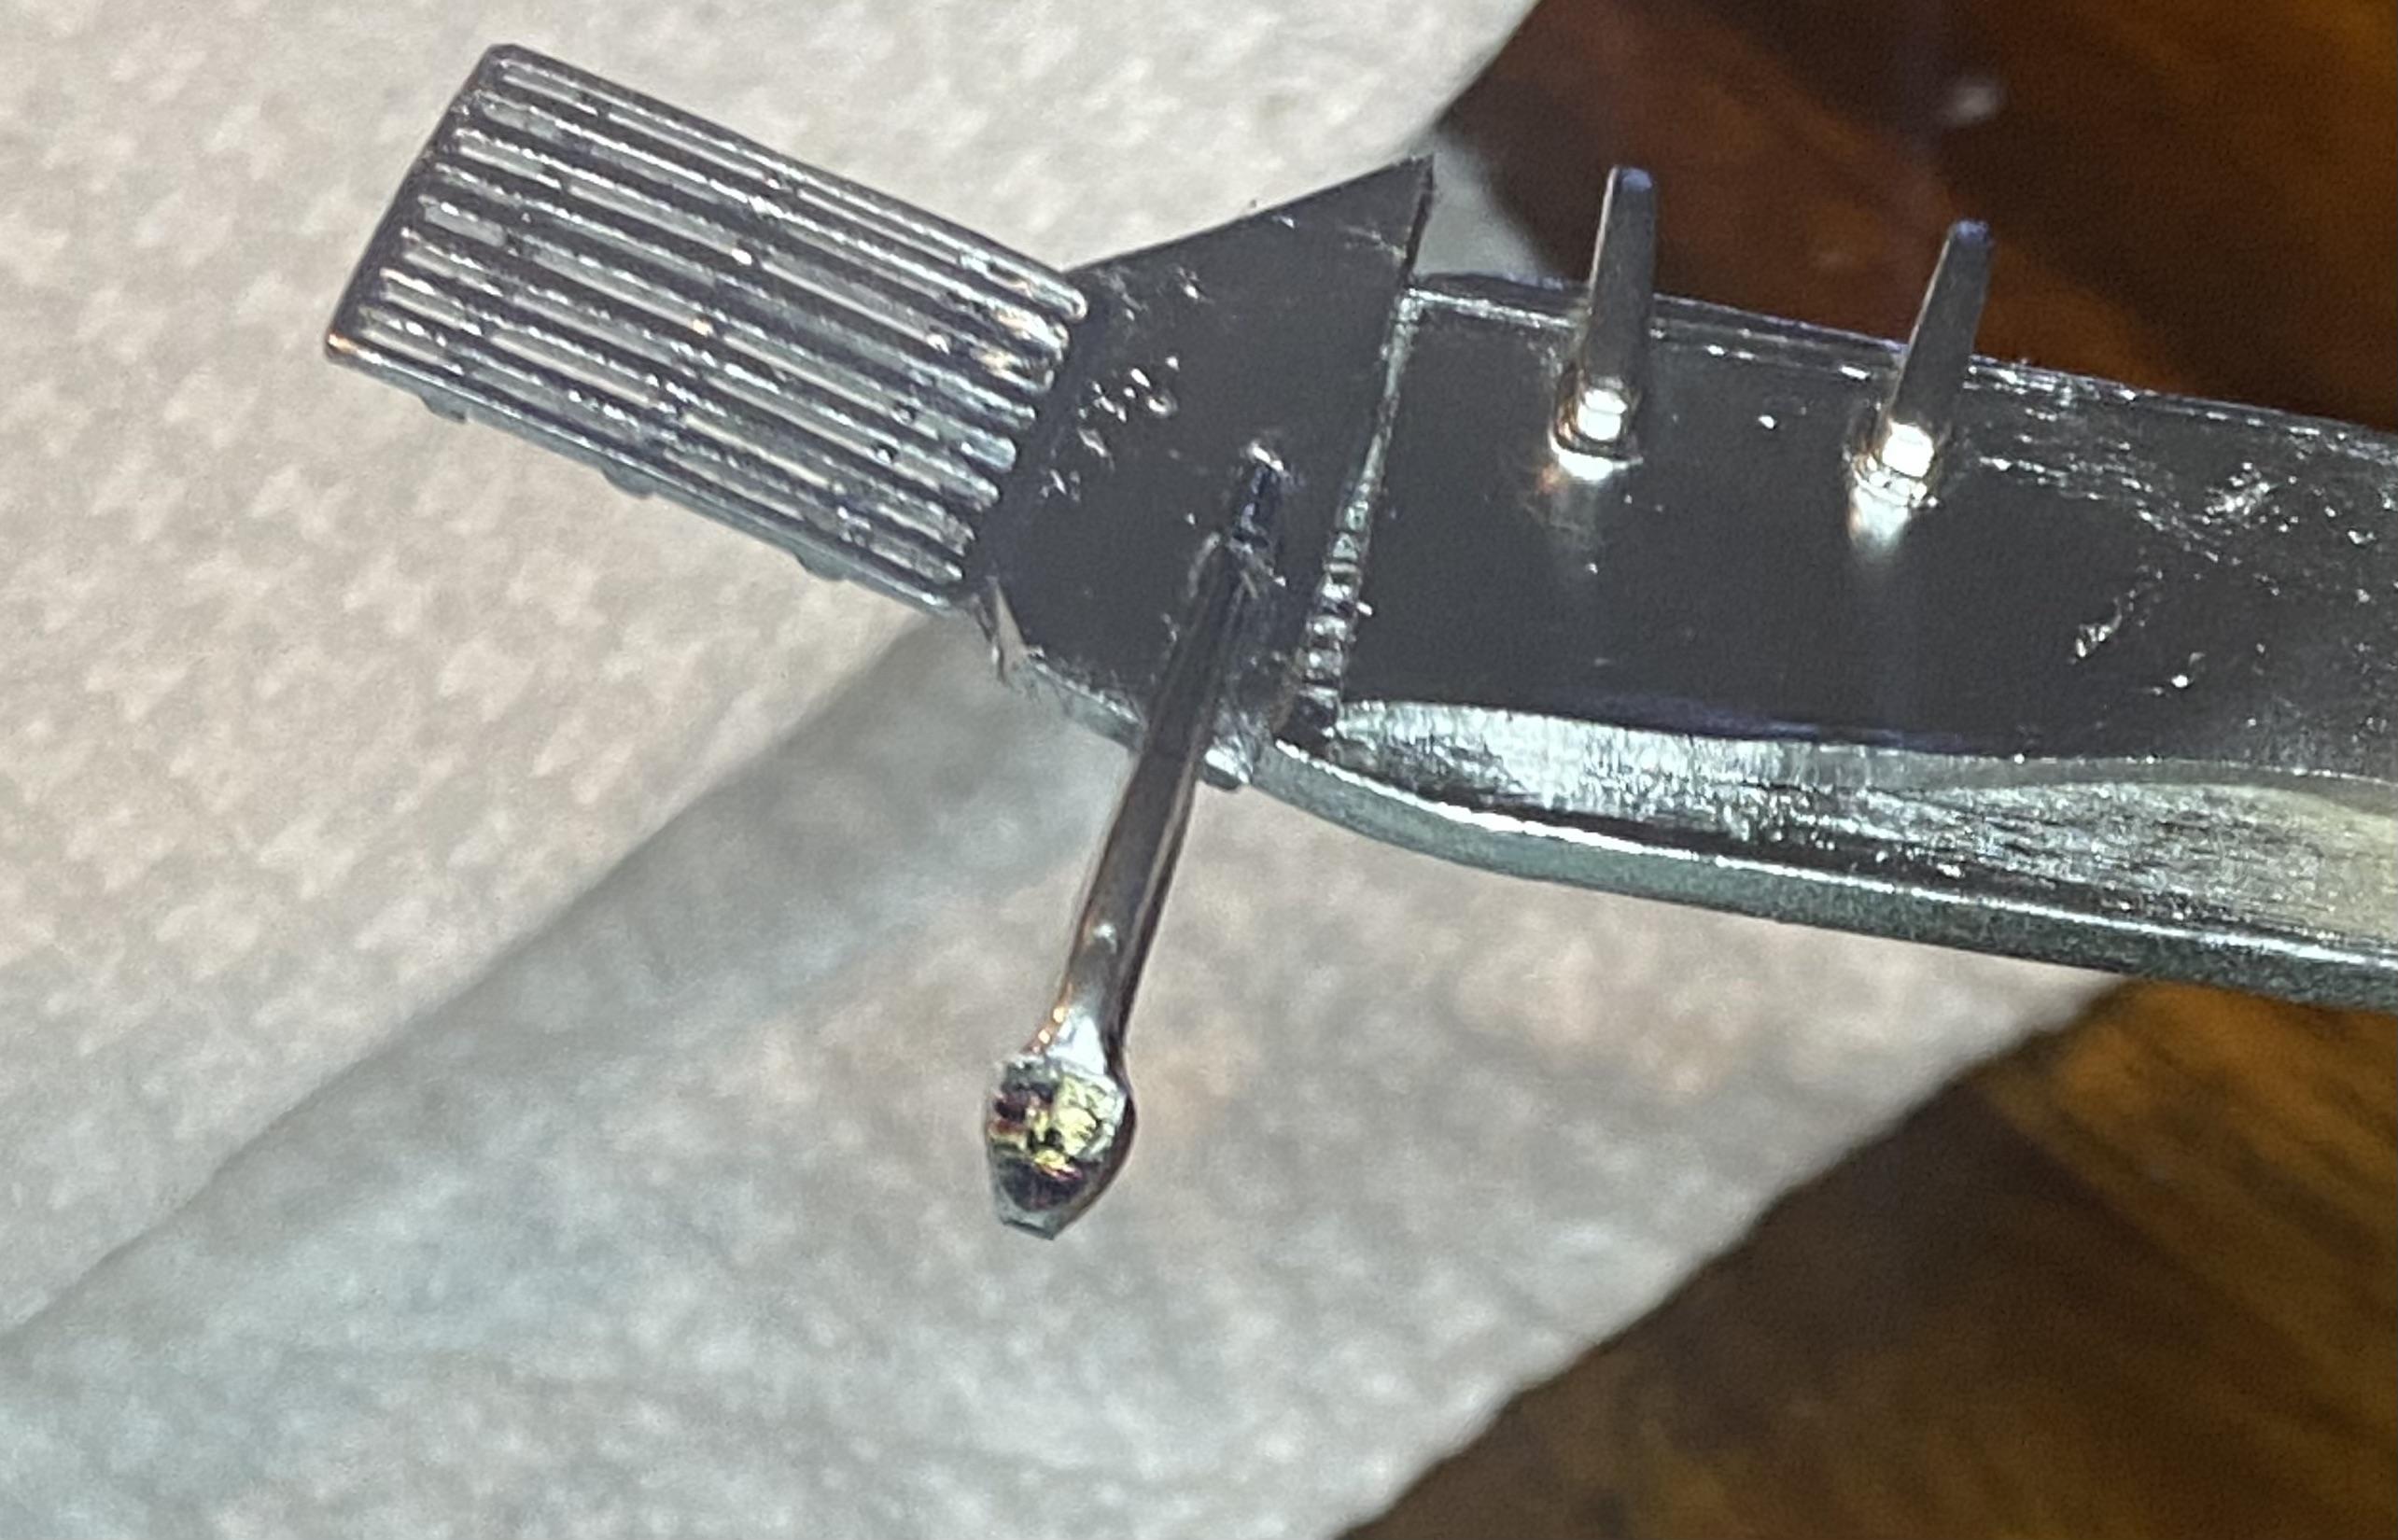
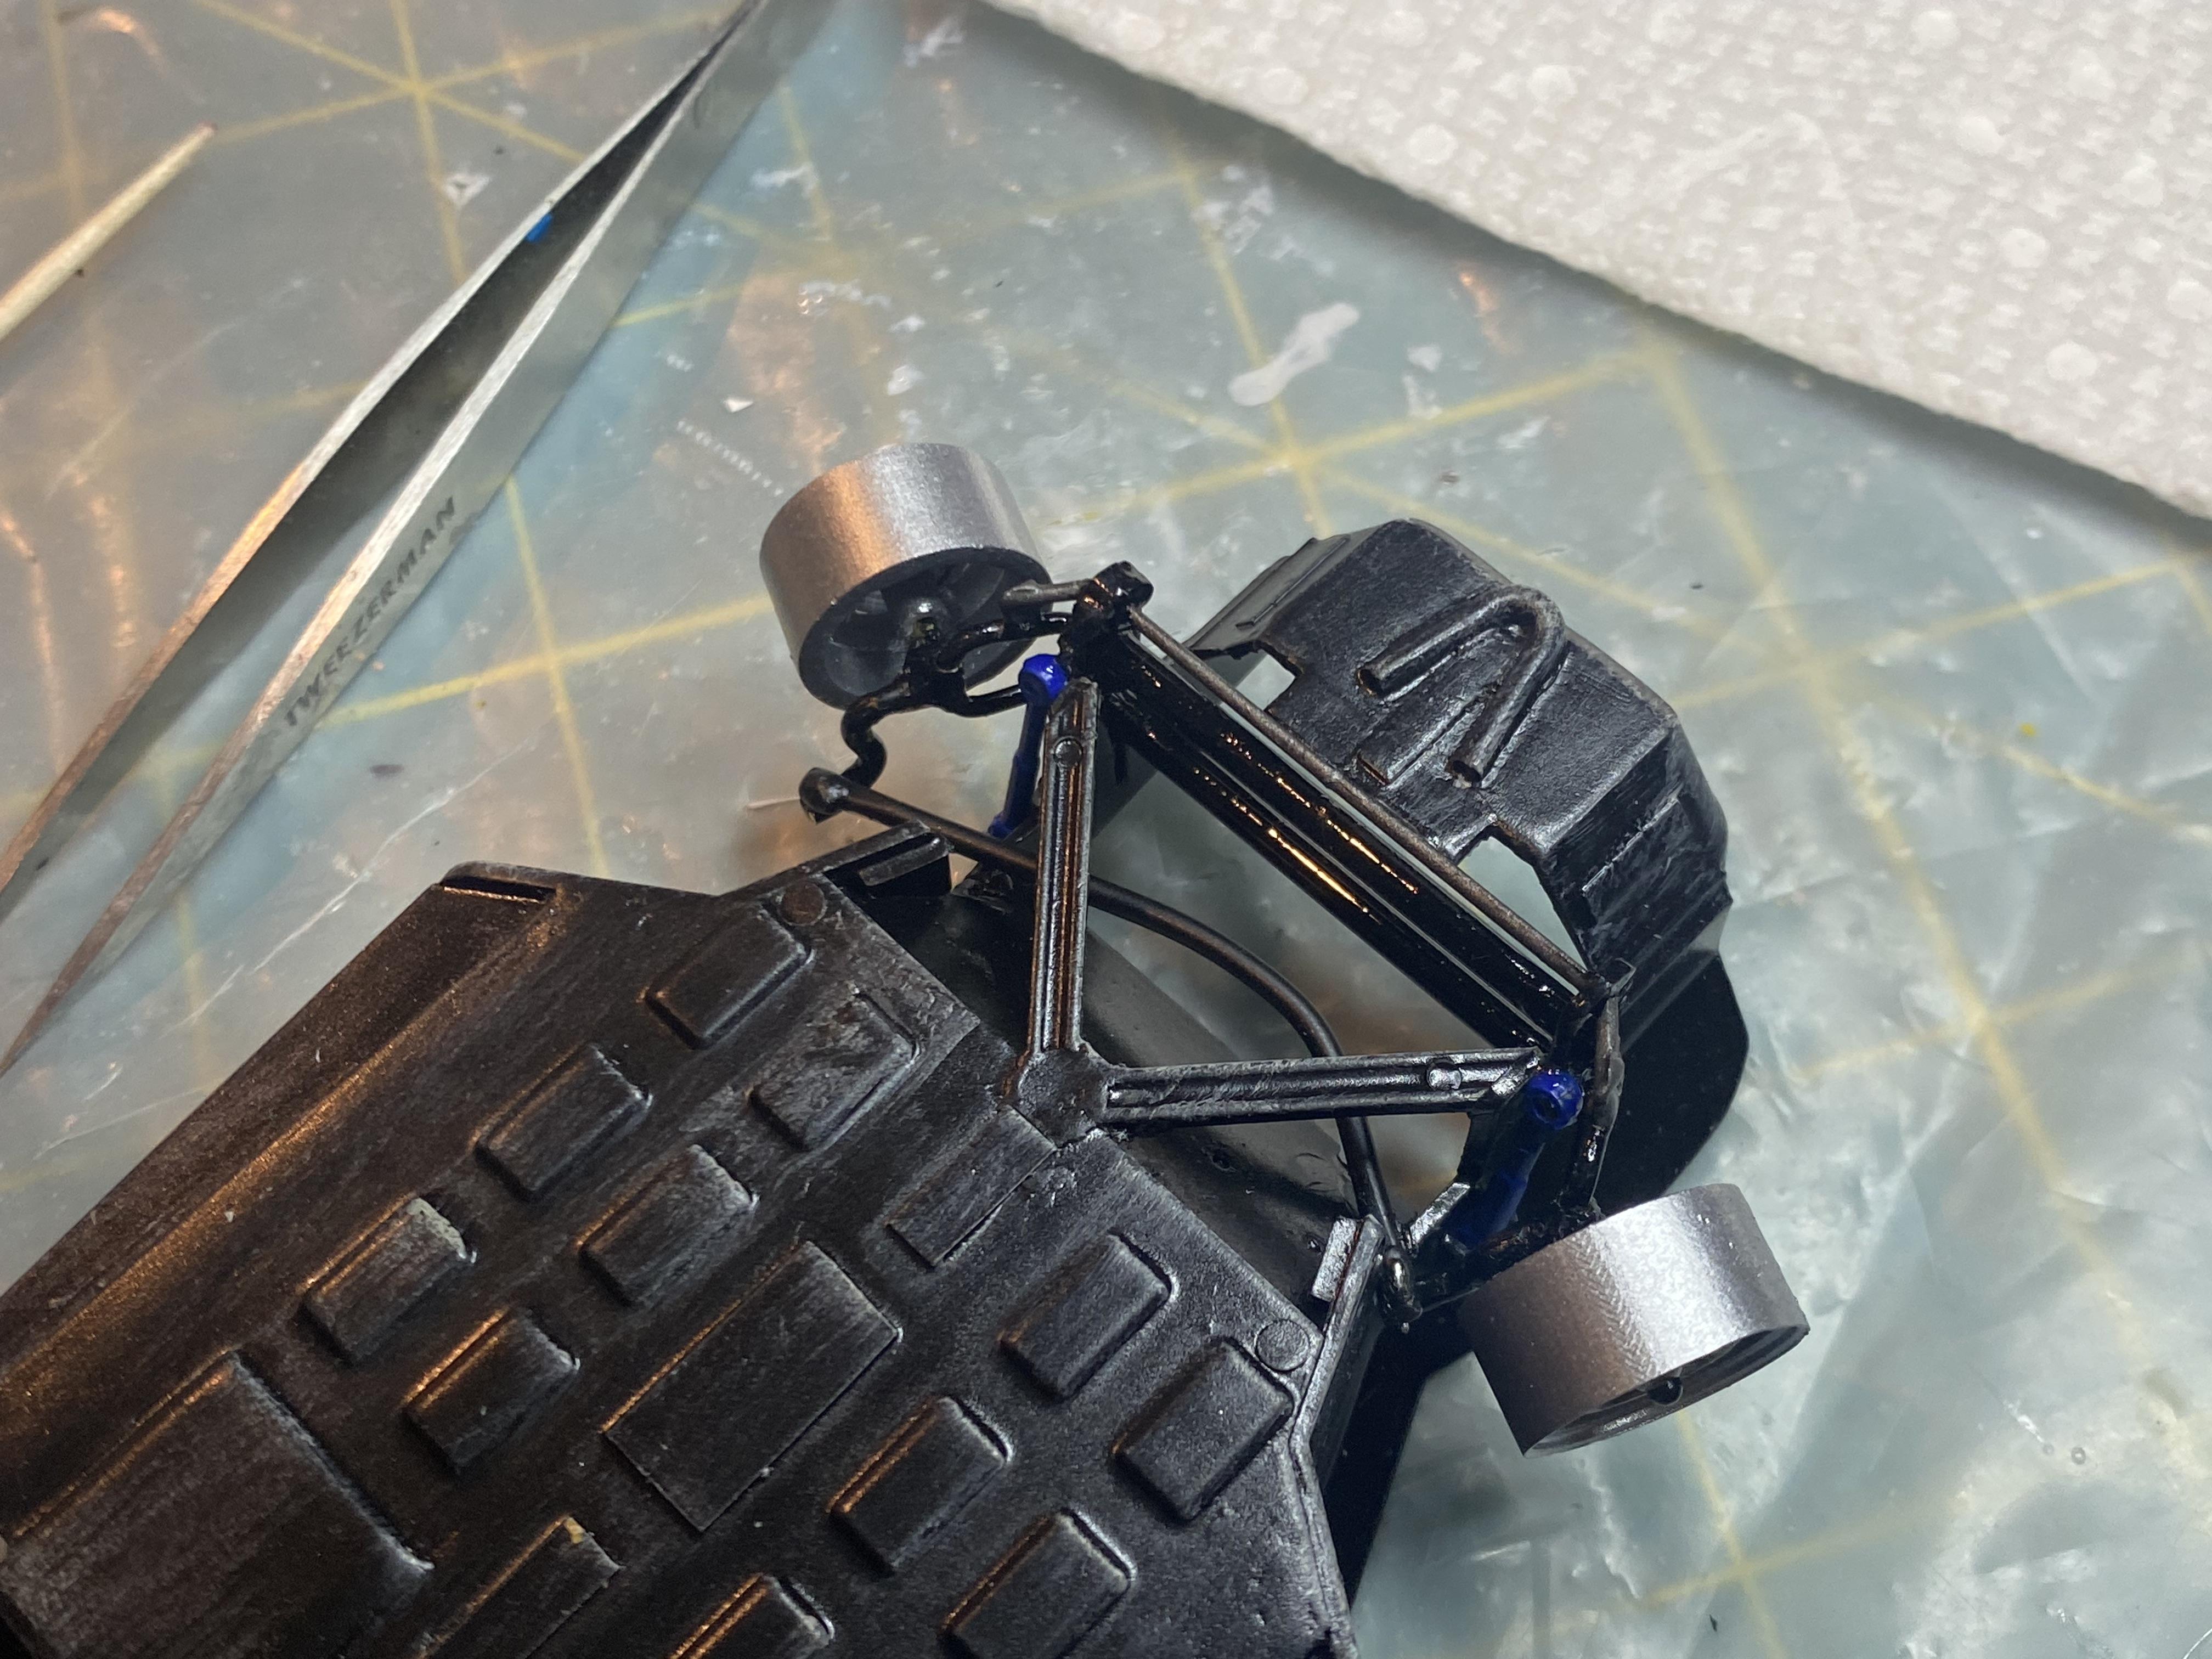
I did get a little more work done today and had one oops. Adding decals I printed as necessary and some detailing. For the oops, when I went to apply the side body decal I noticed that I missed one blaring issue with the body and the front gap between the door and front wheel opening was too large and the opening too perfectly round. This is what it looked like compared to an actual car and what I had to trim and how it came out. Good thing I caught it before it went to 2K clear. I plan on spraying the 2K tomorrow. I also added a Porsche to emblem decal to the front hood trim and finished detailing the dash panel. I installed the poseable steering and adjust fit for the chassis. The last thing I accomplished today was scratch building the front of engine distributor holder and drilled in preparation for the 3d printed distributors I have on order.

-
Thank you! I am about to hit a wall waiting on supplies but I think I have turned this bad kit into something presentable.
-
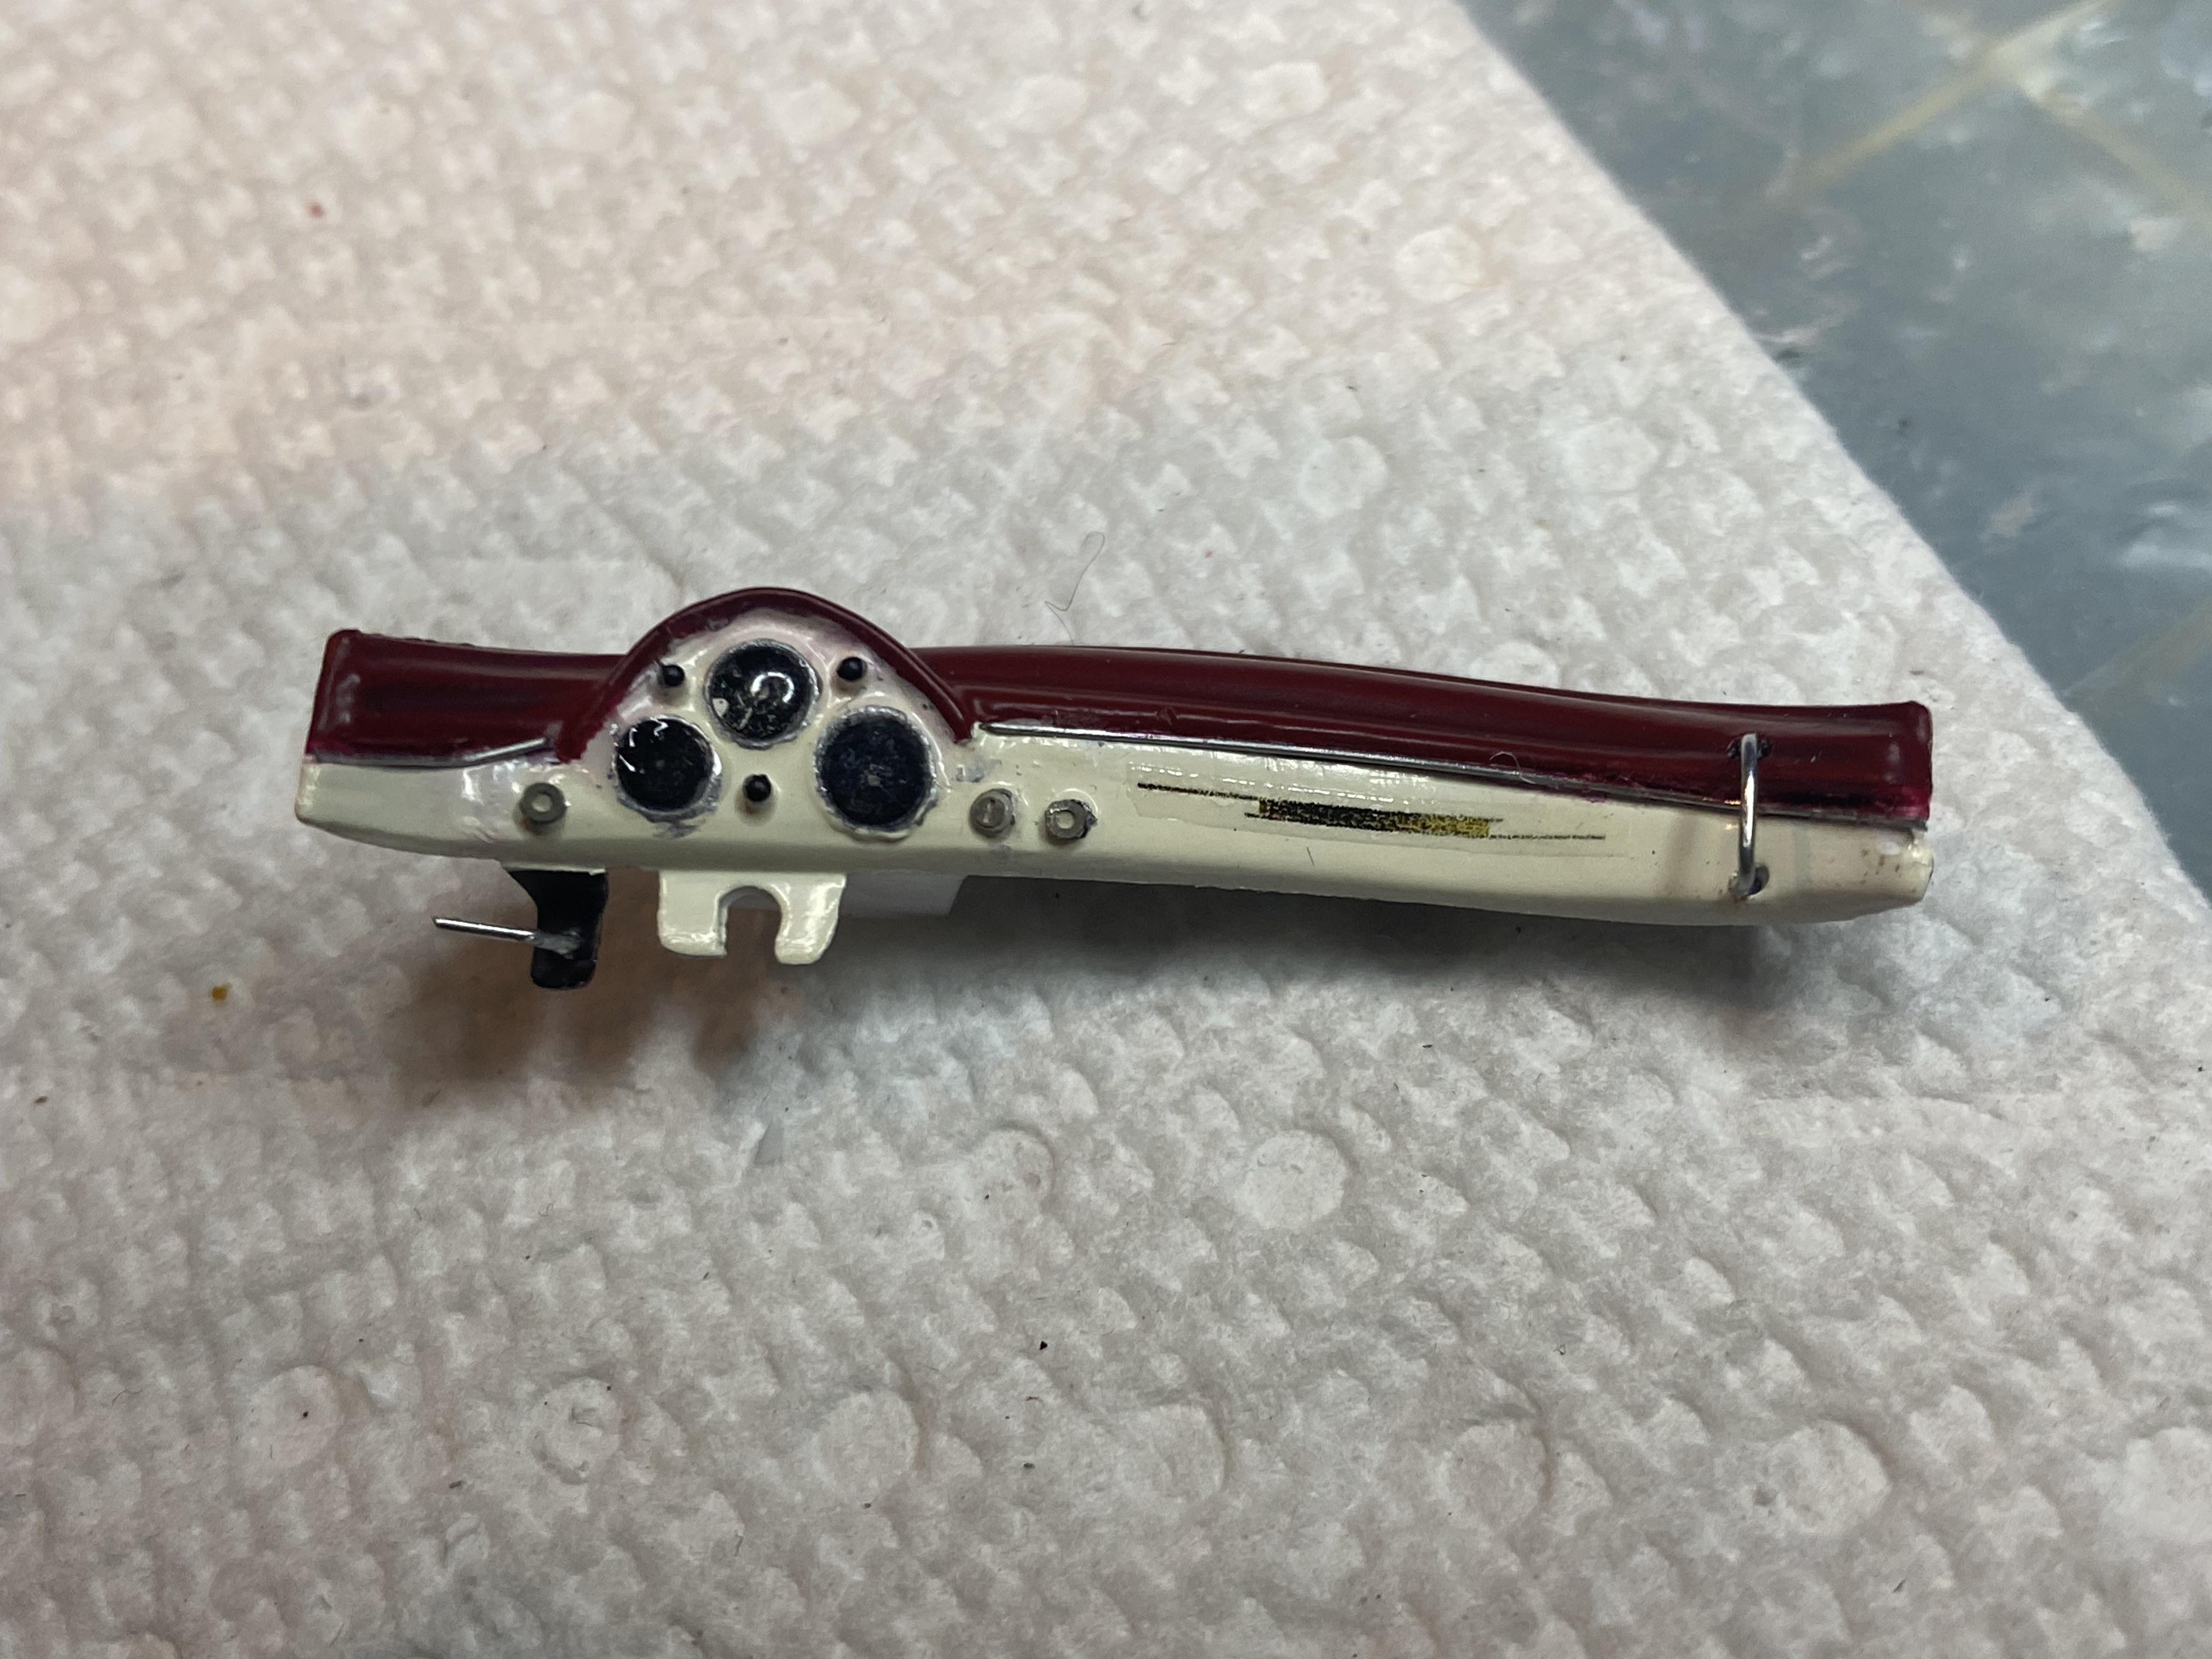
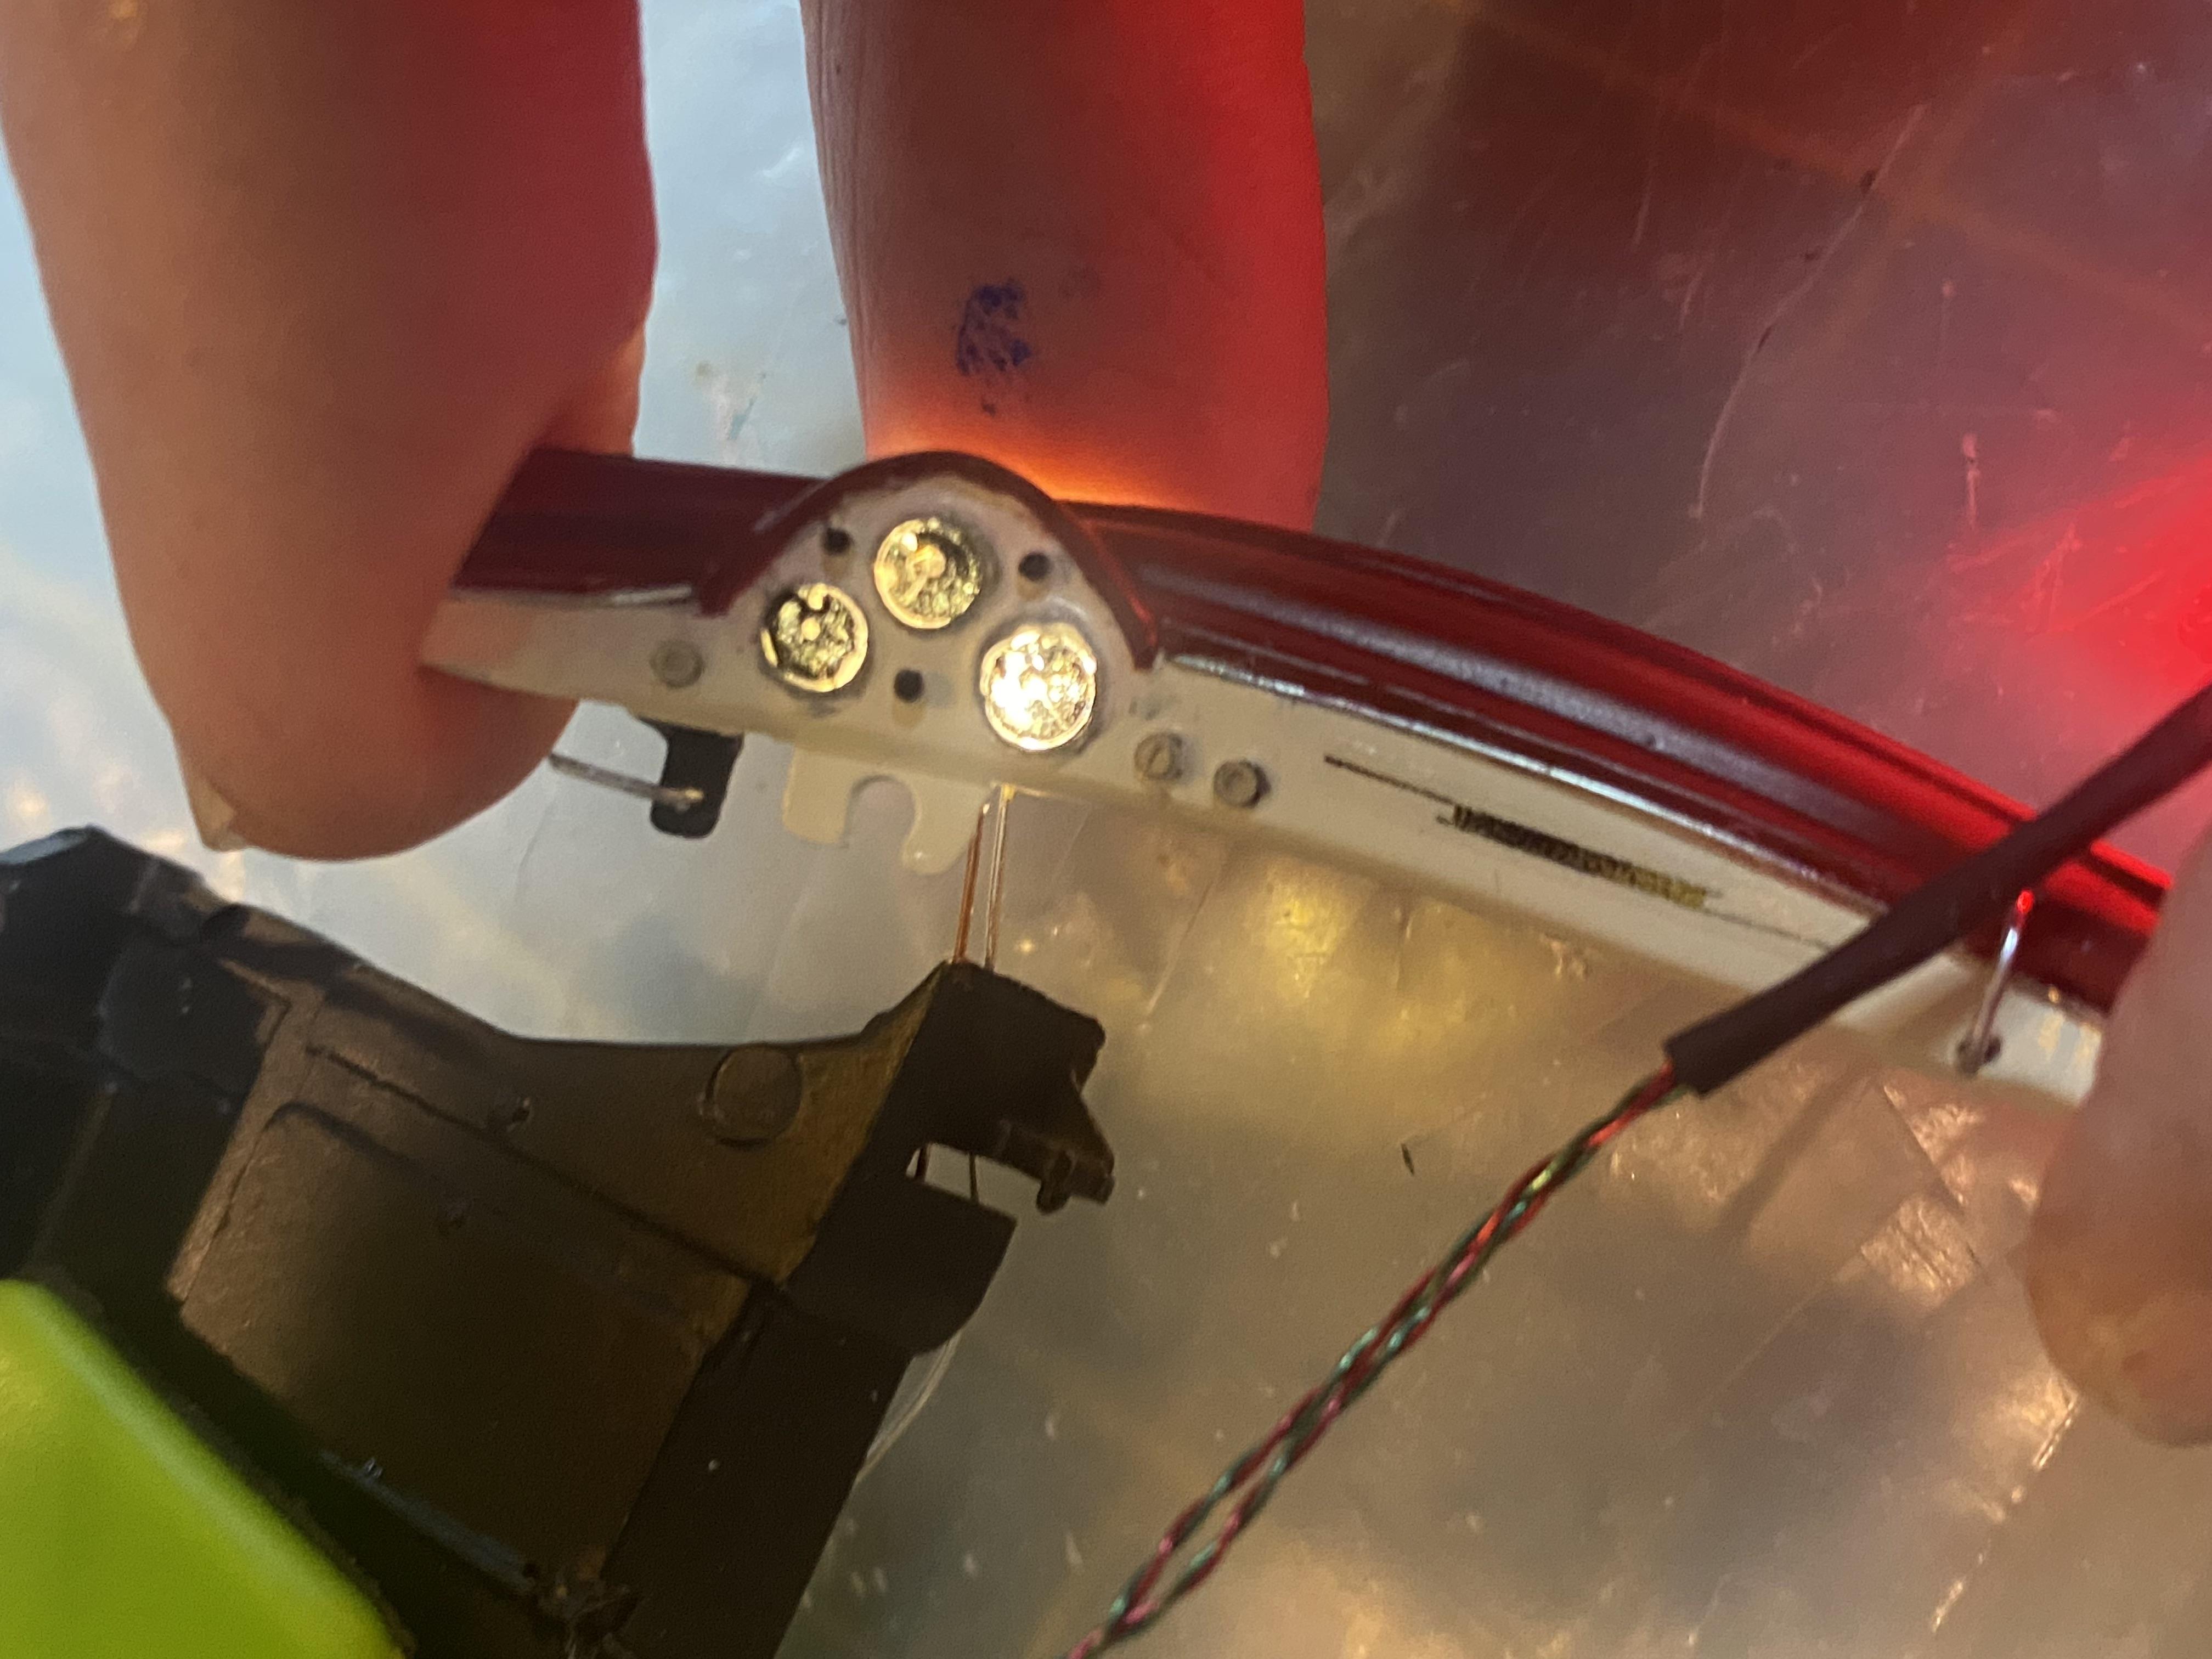
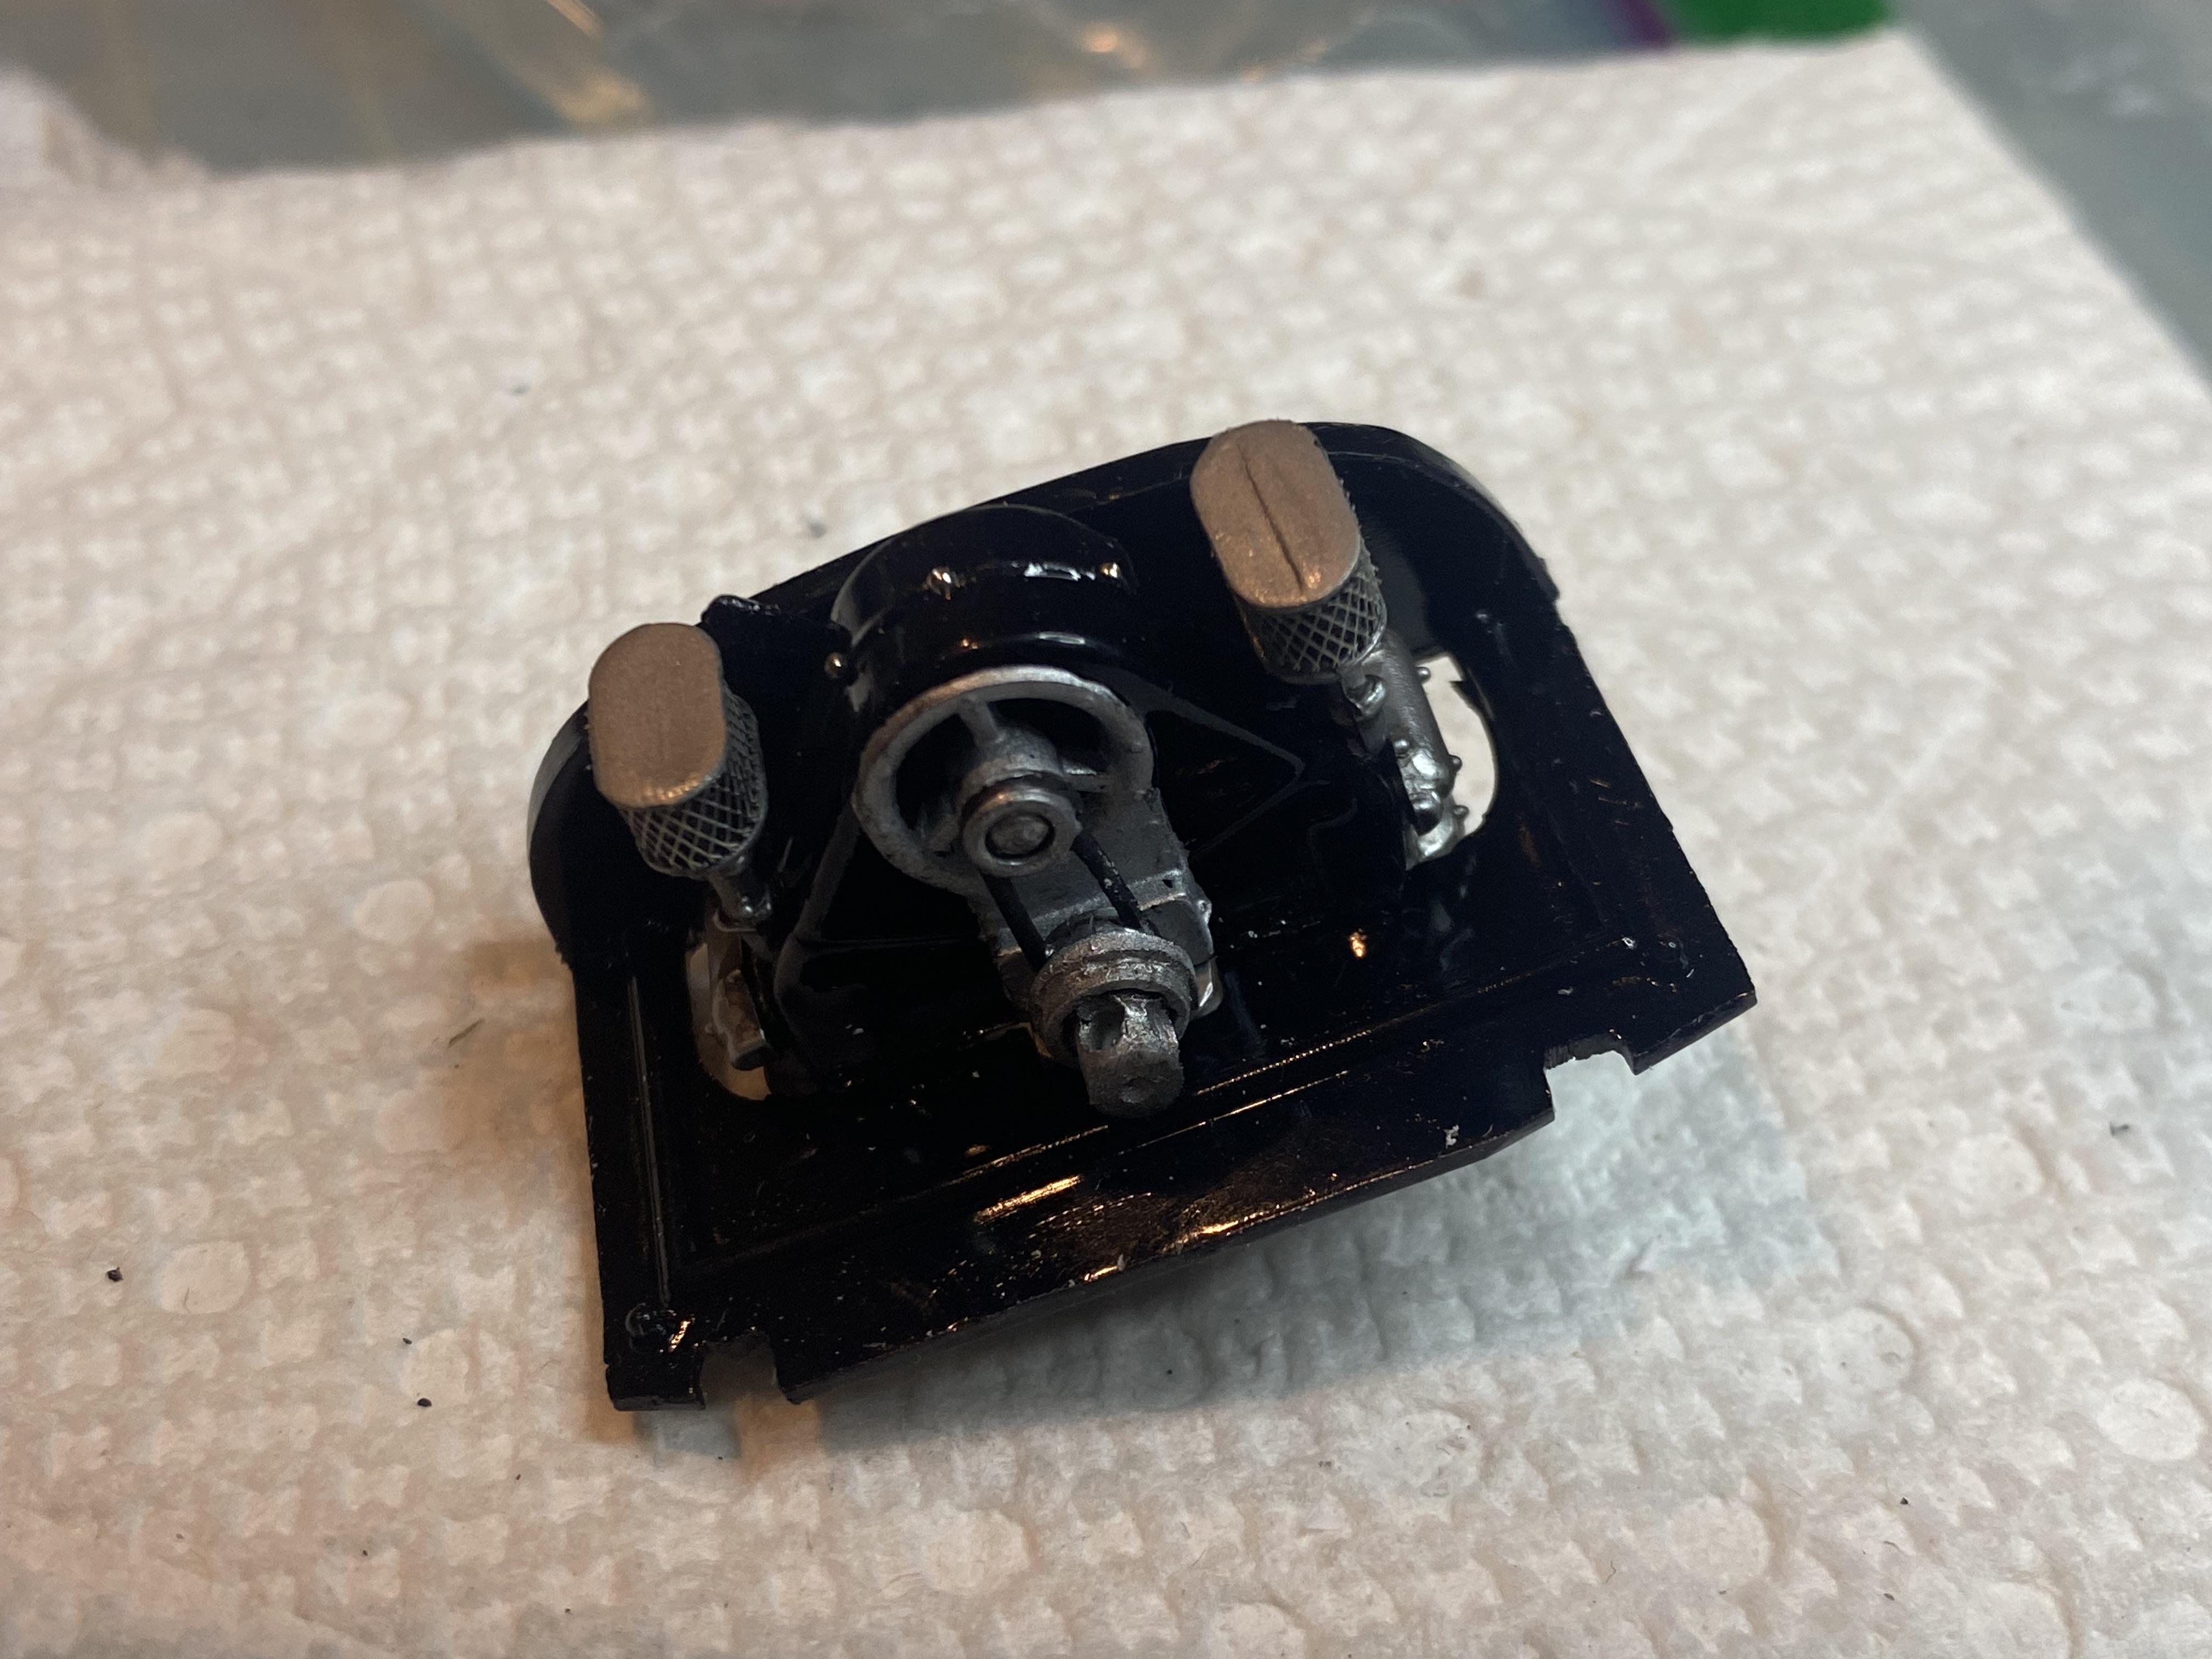
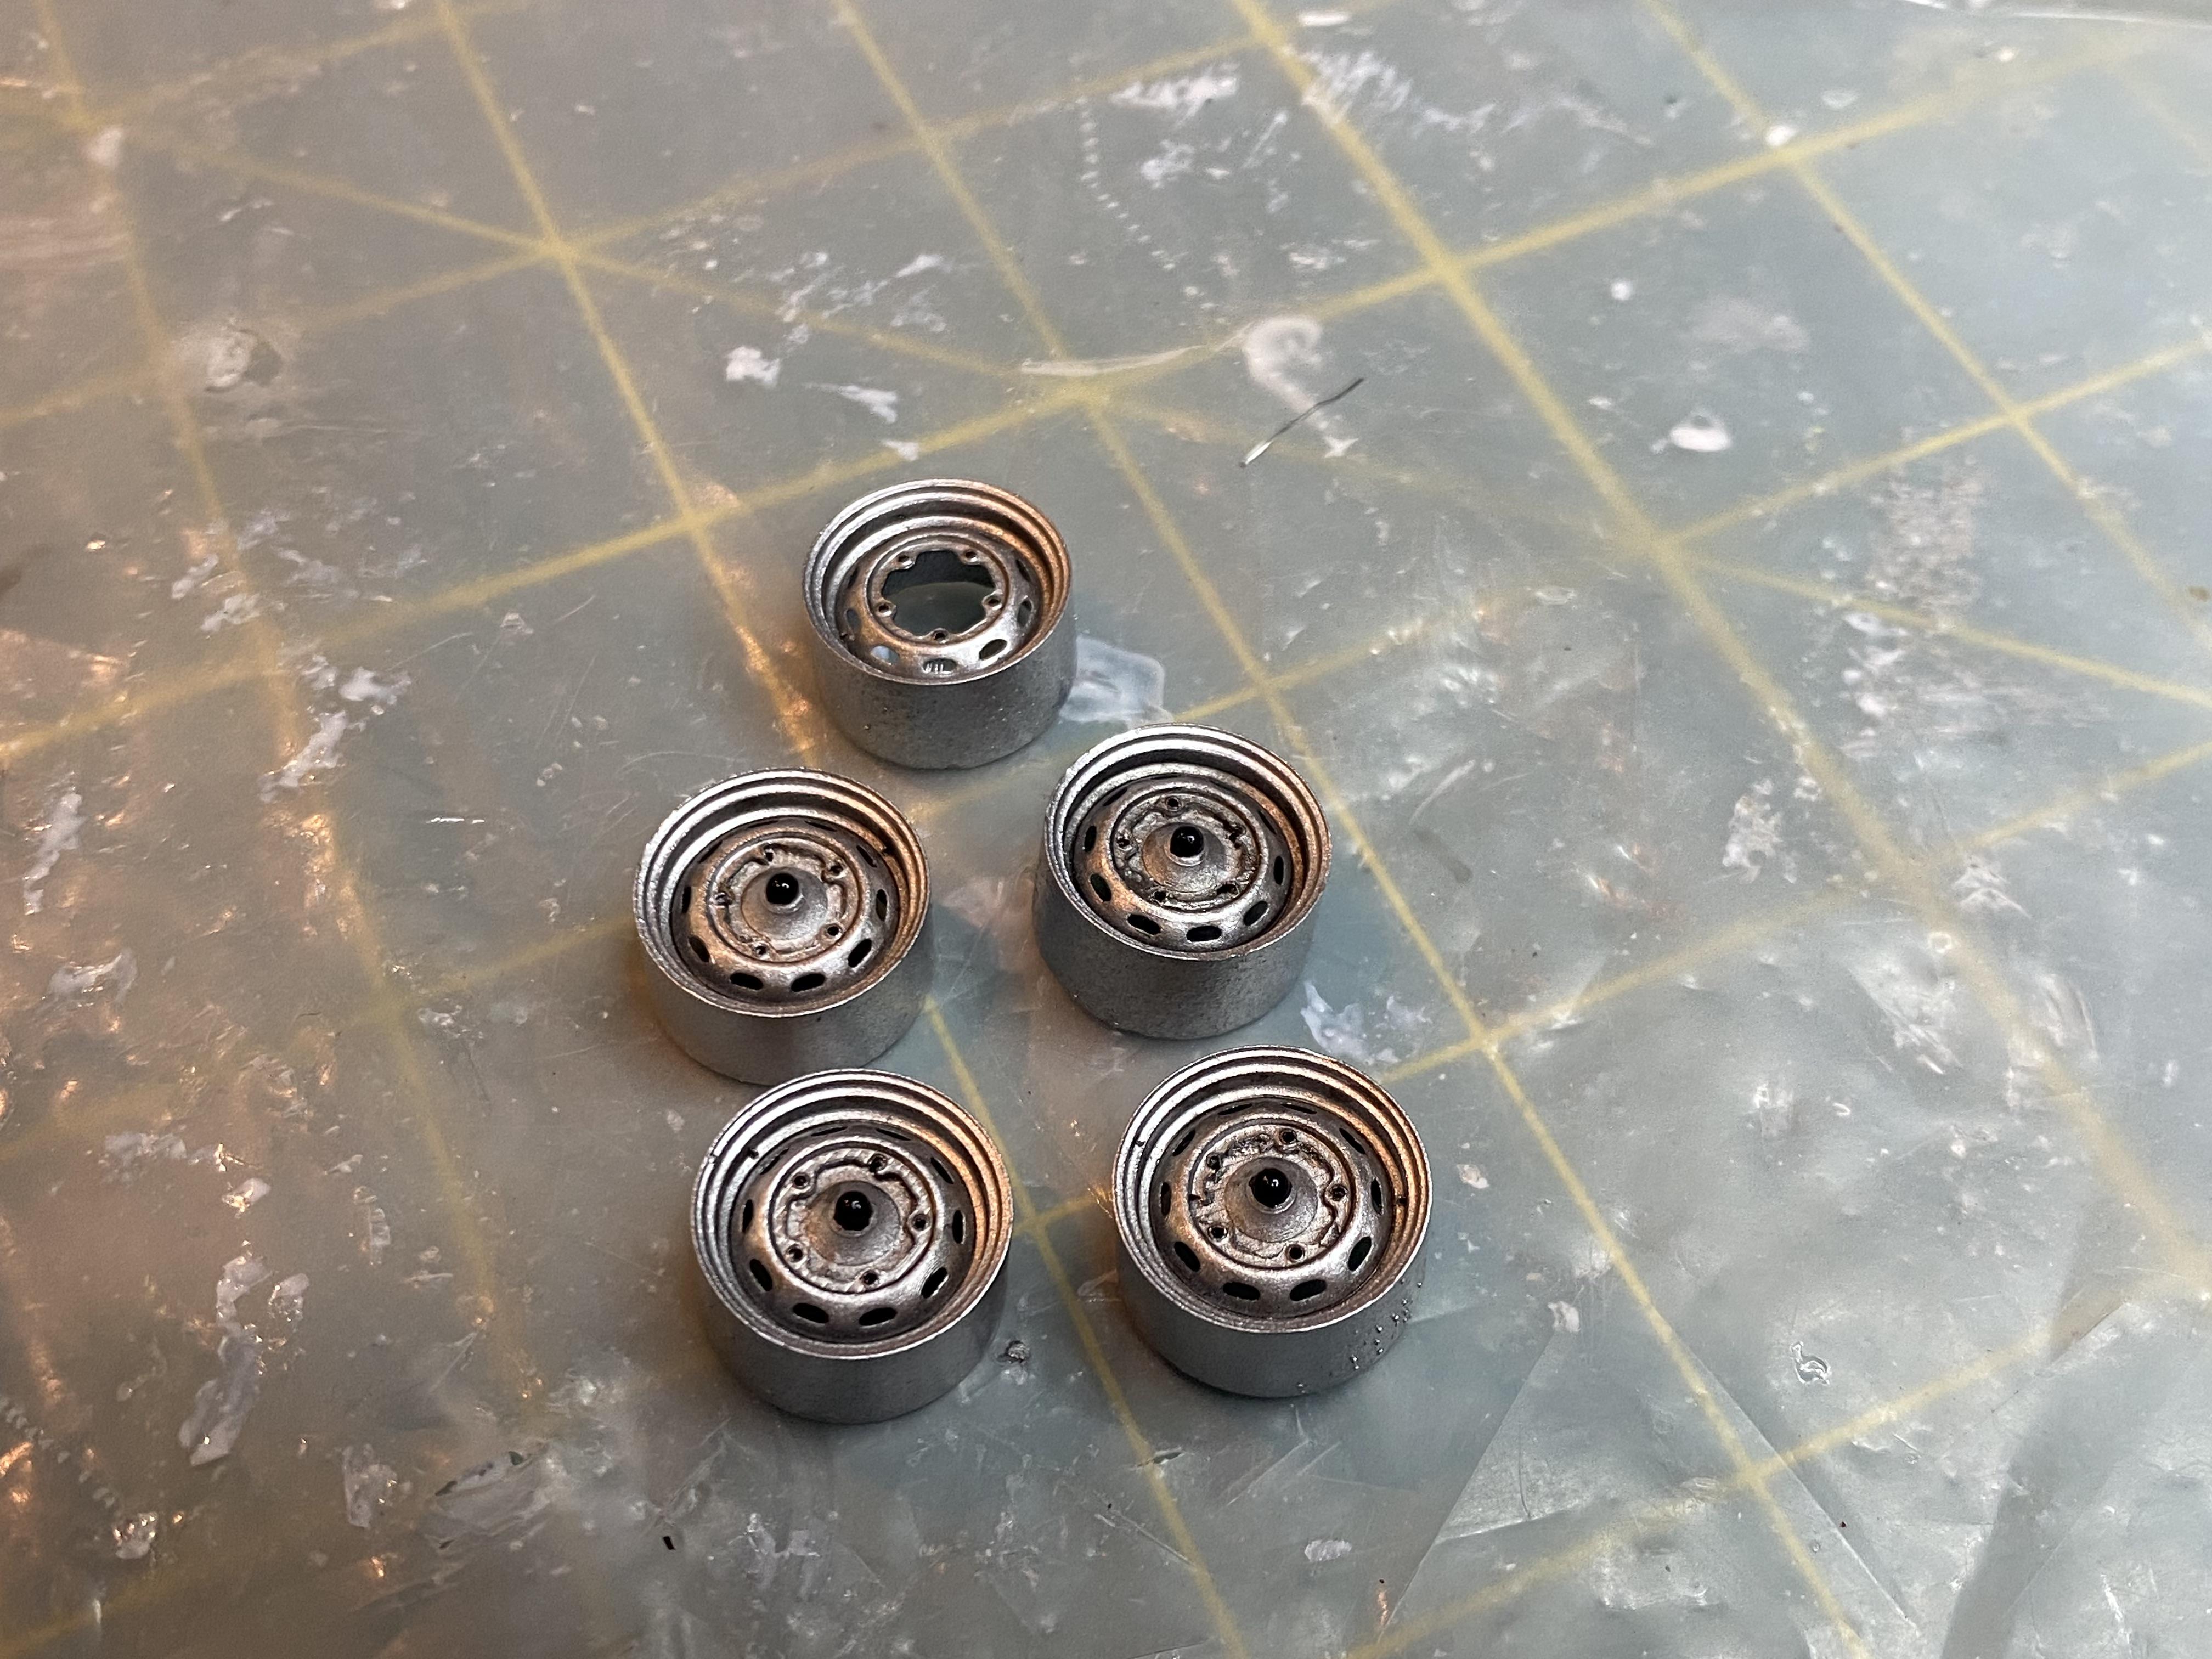
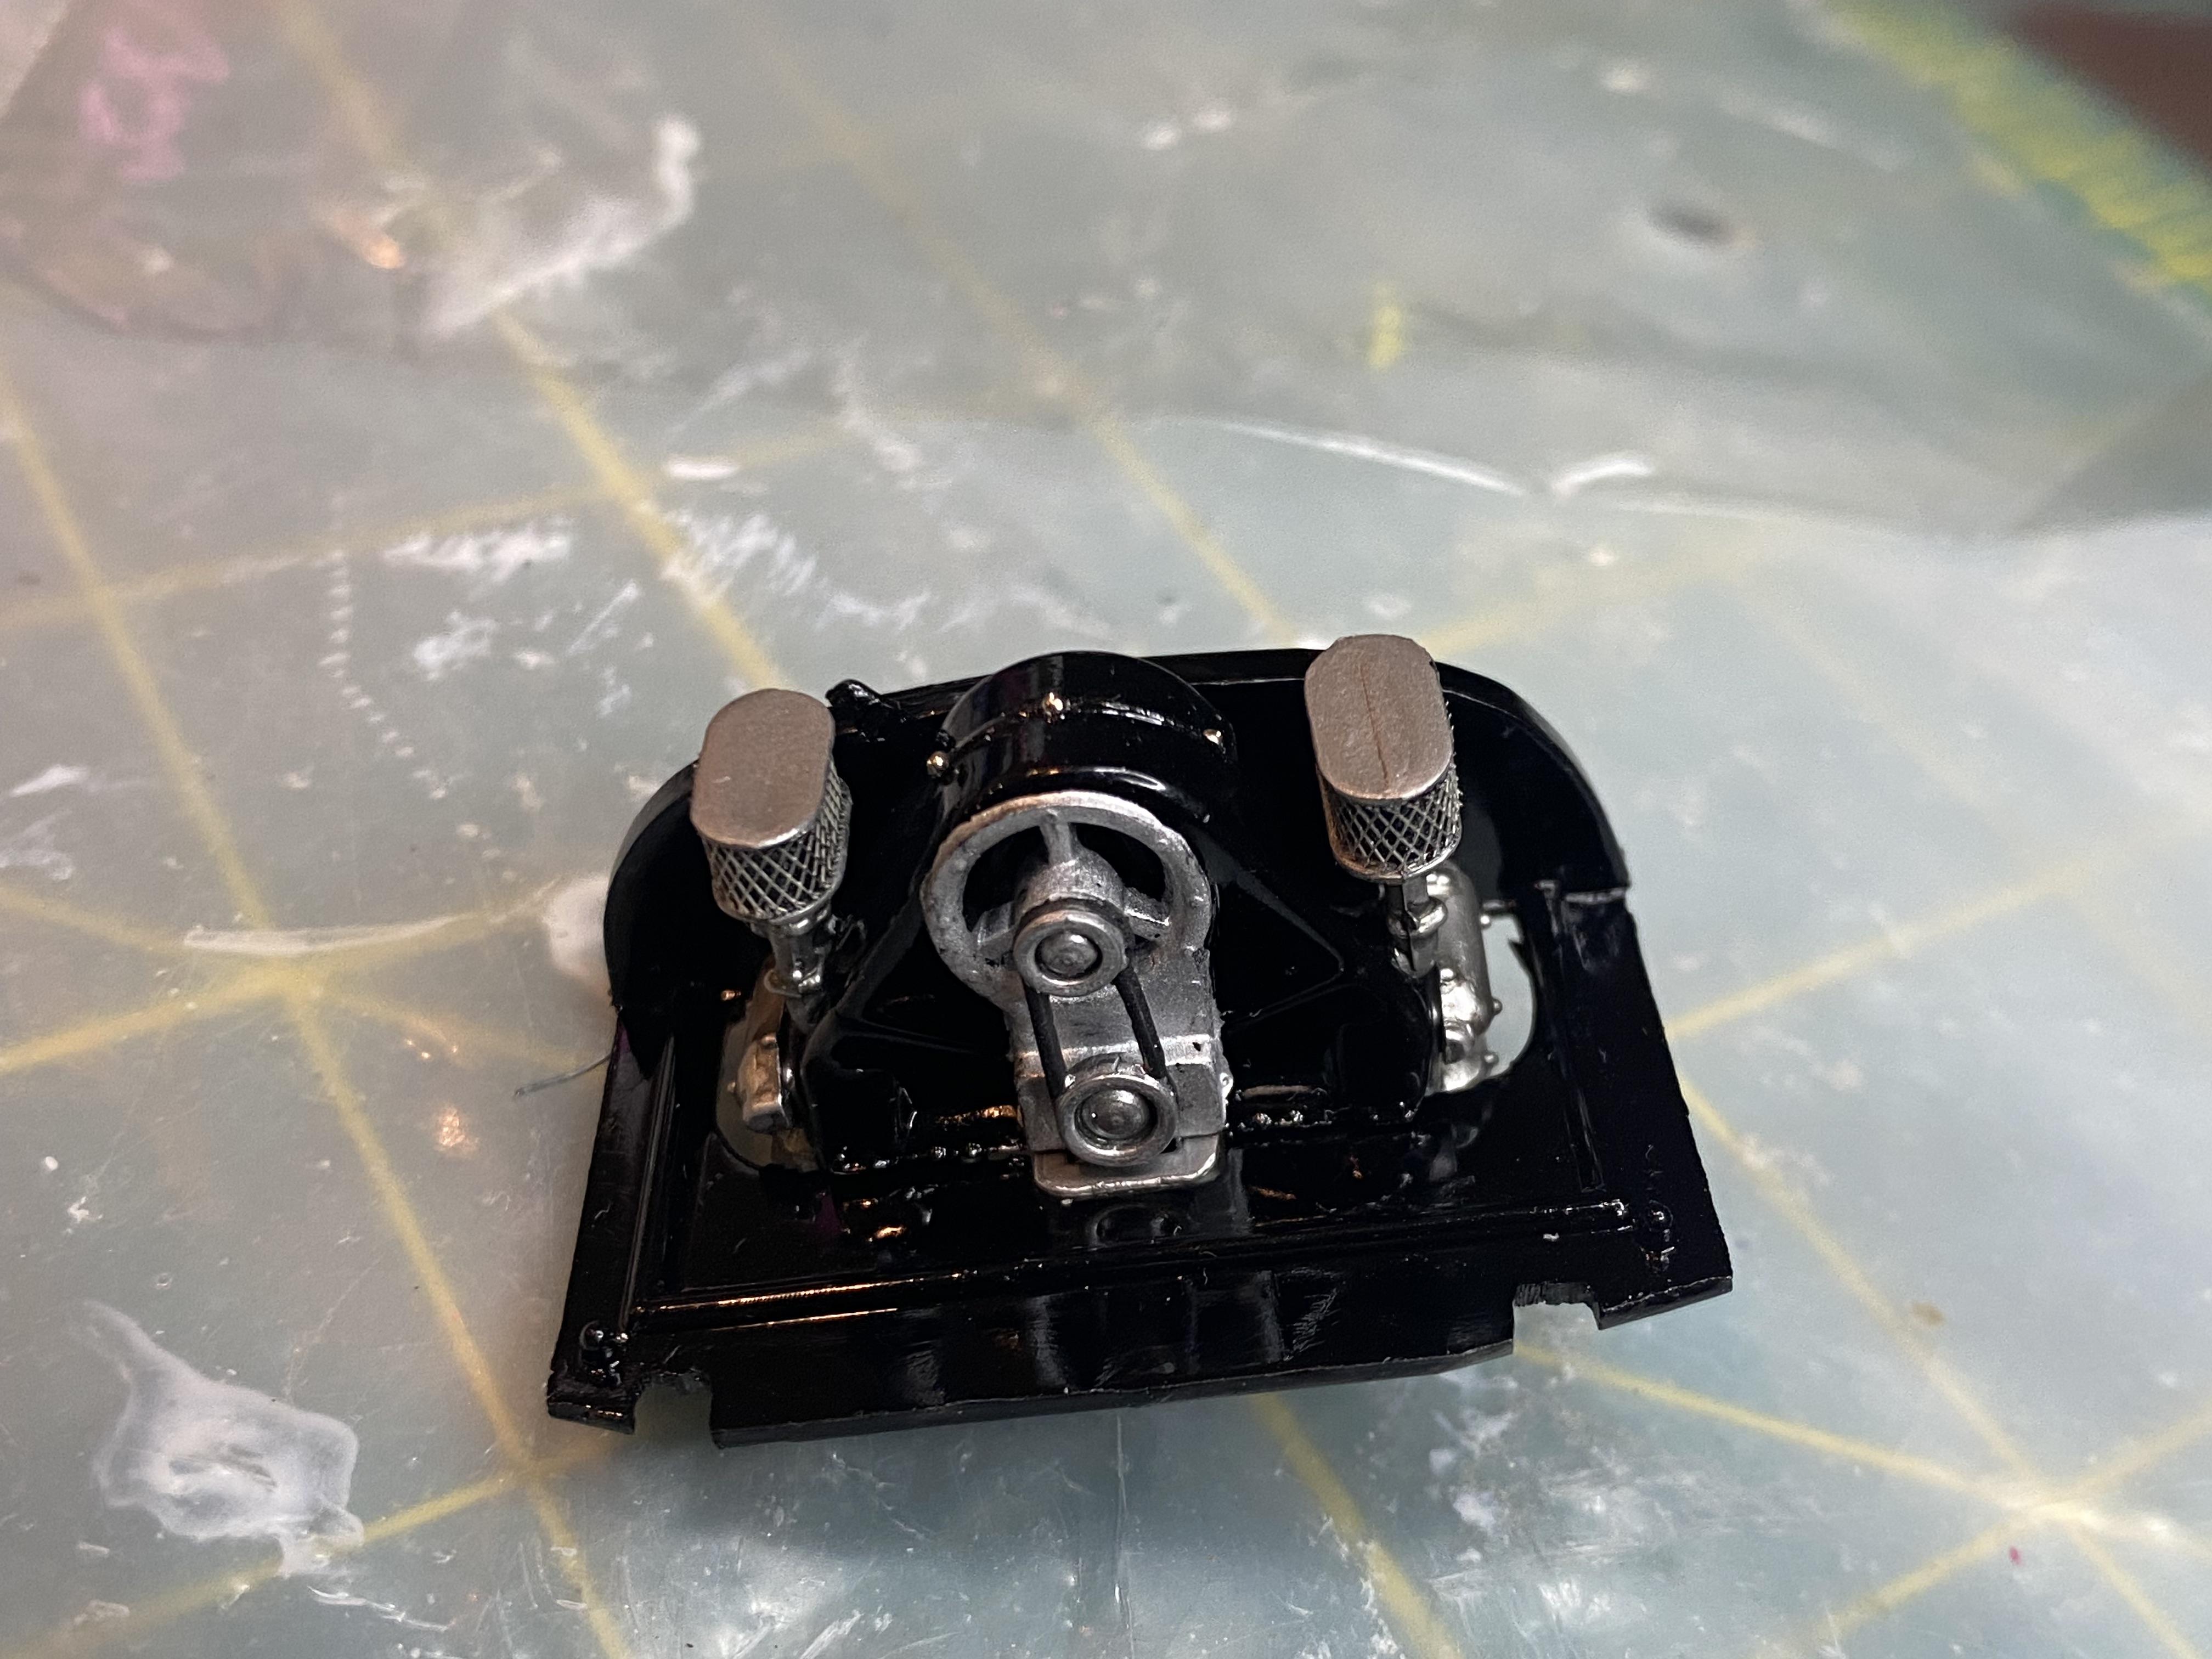
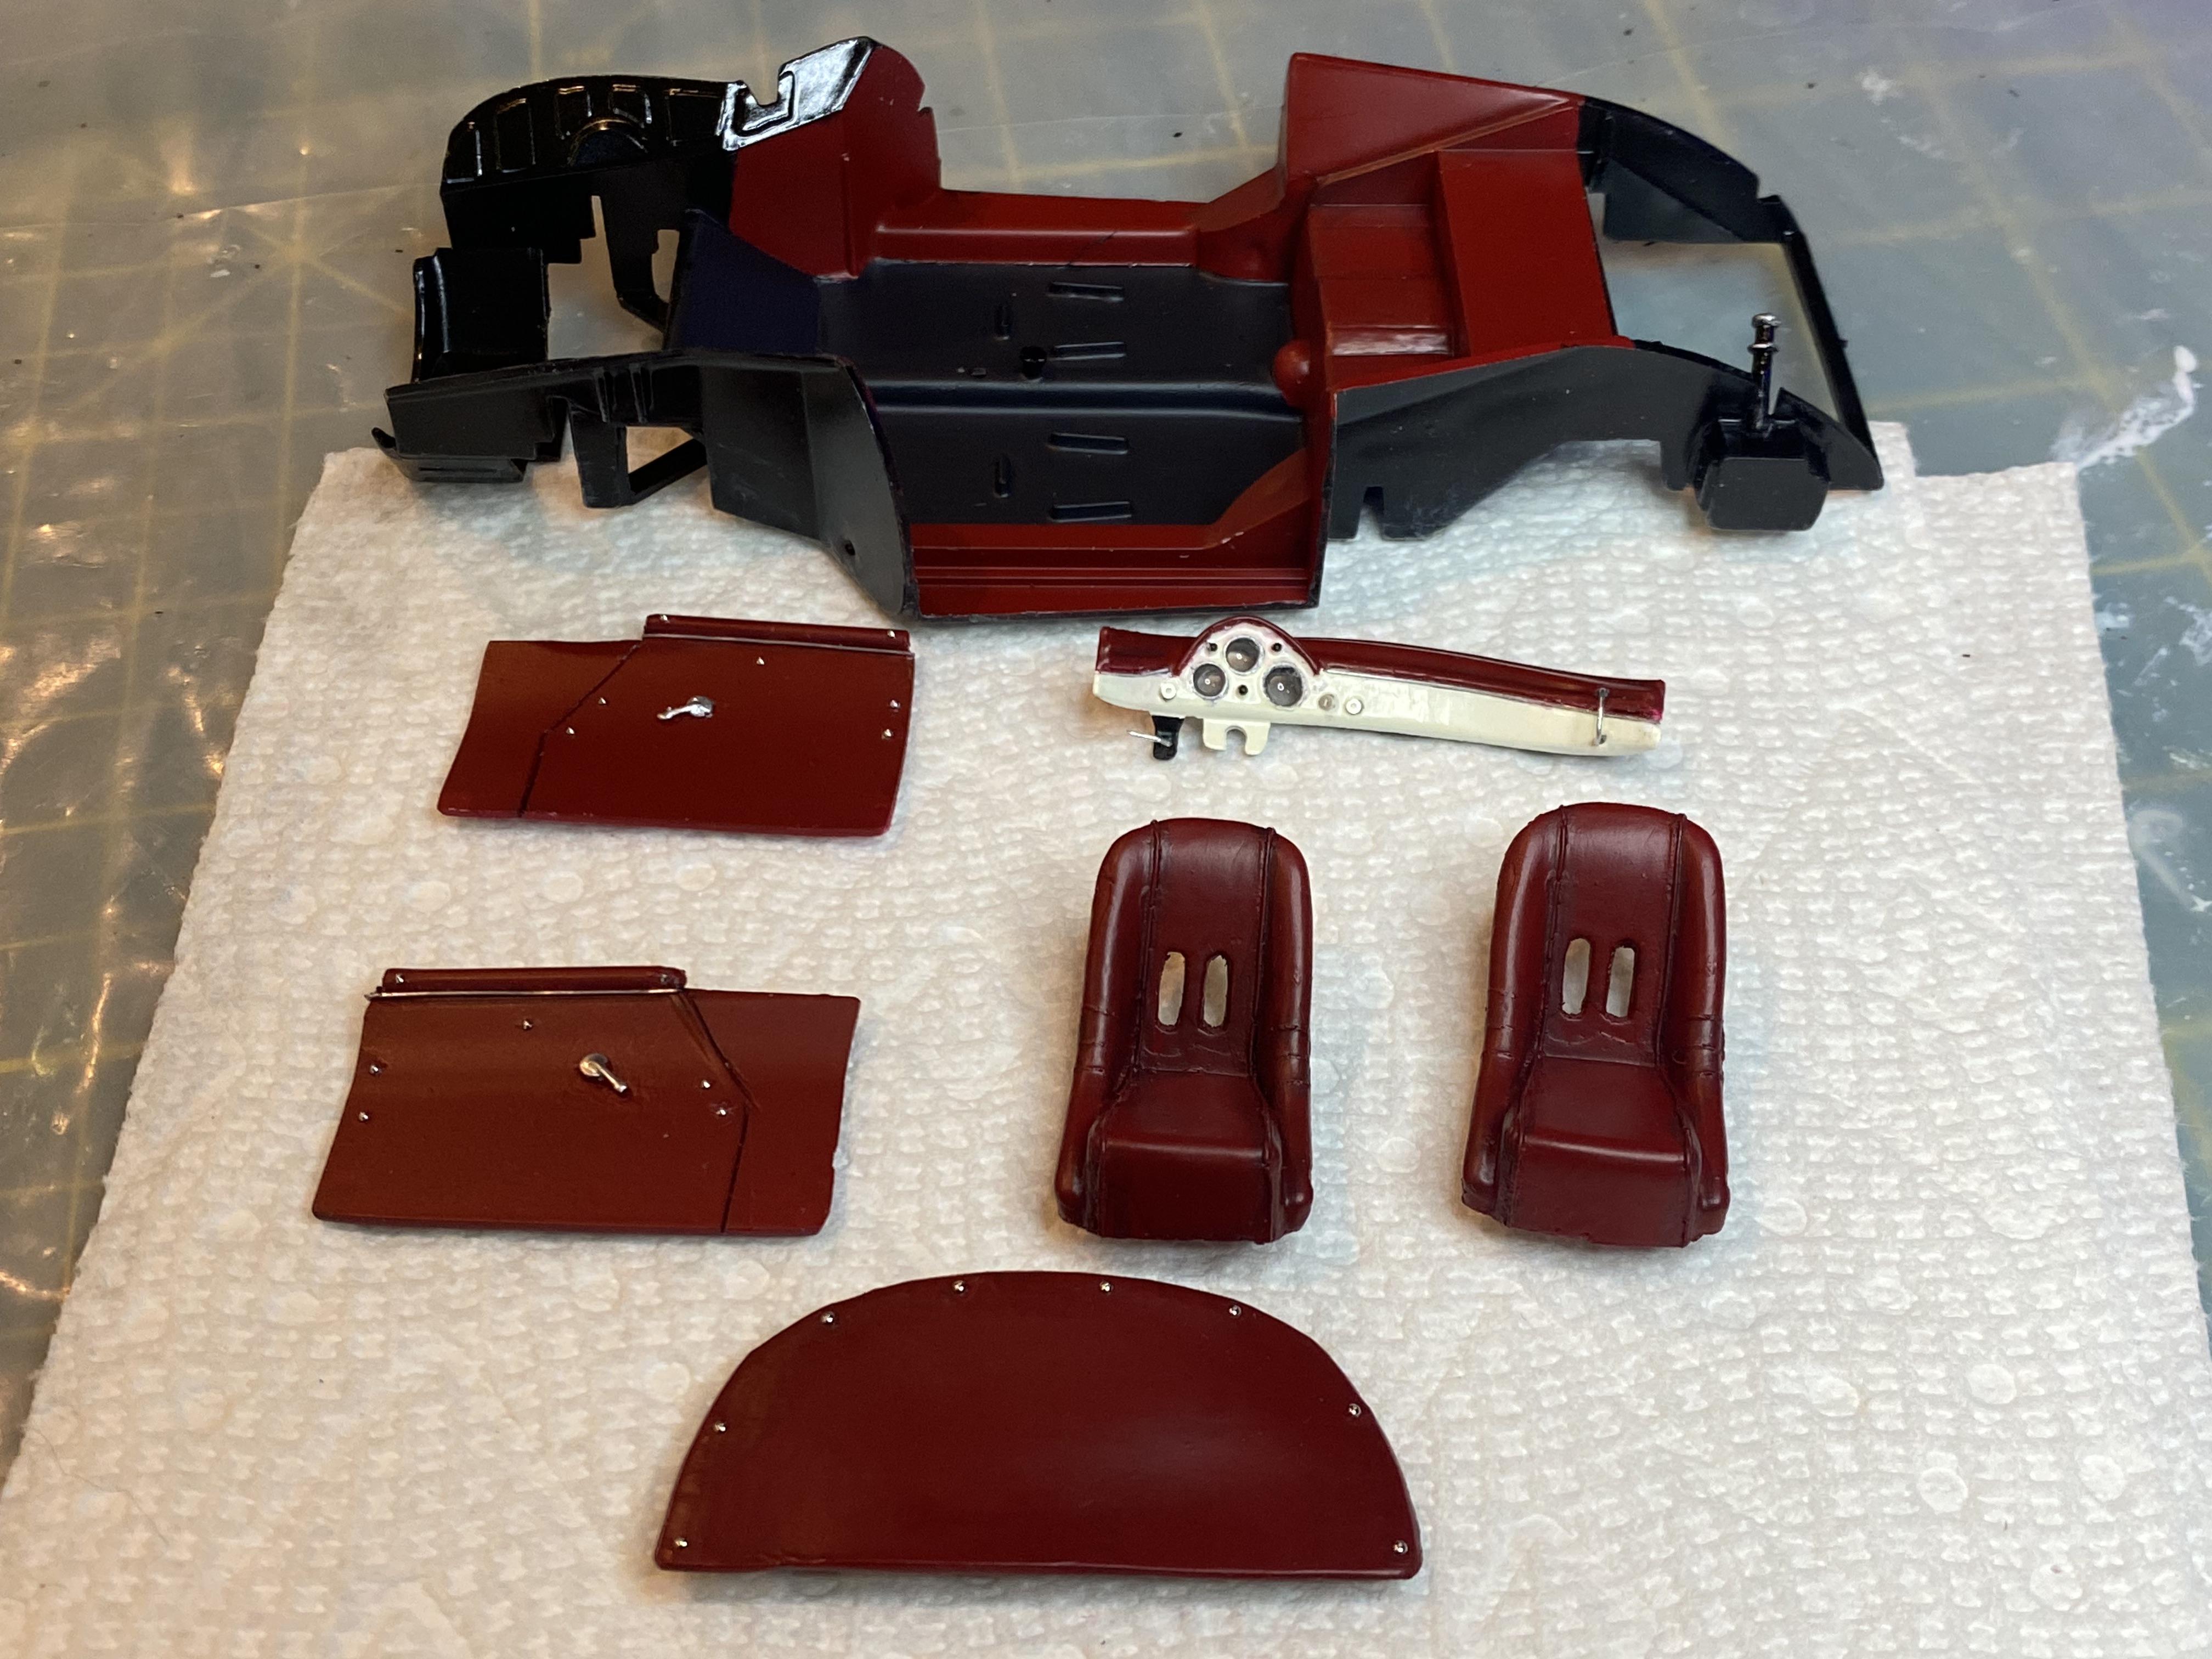
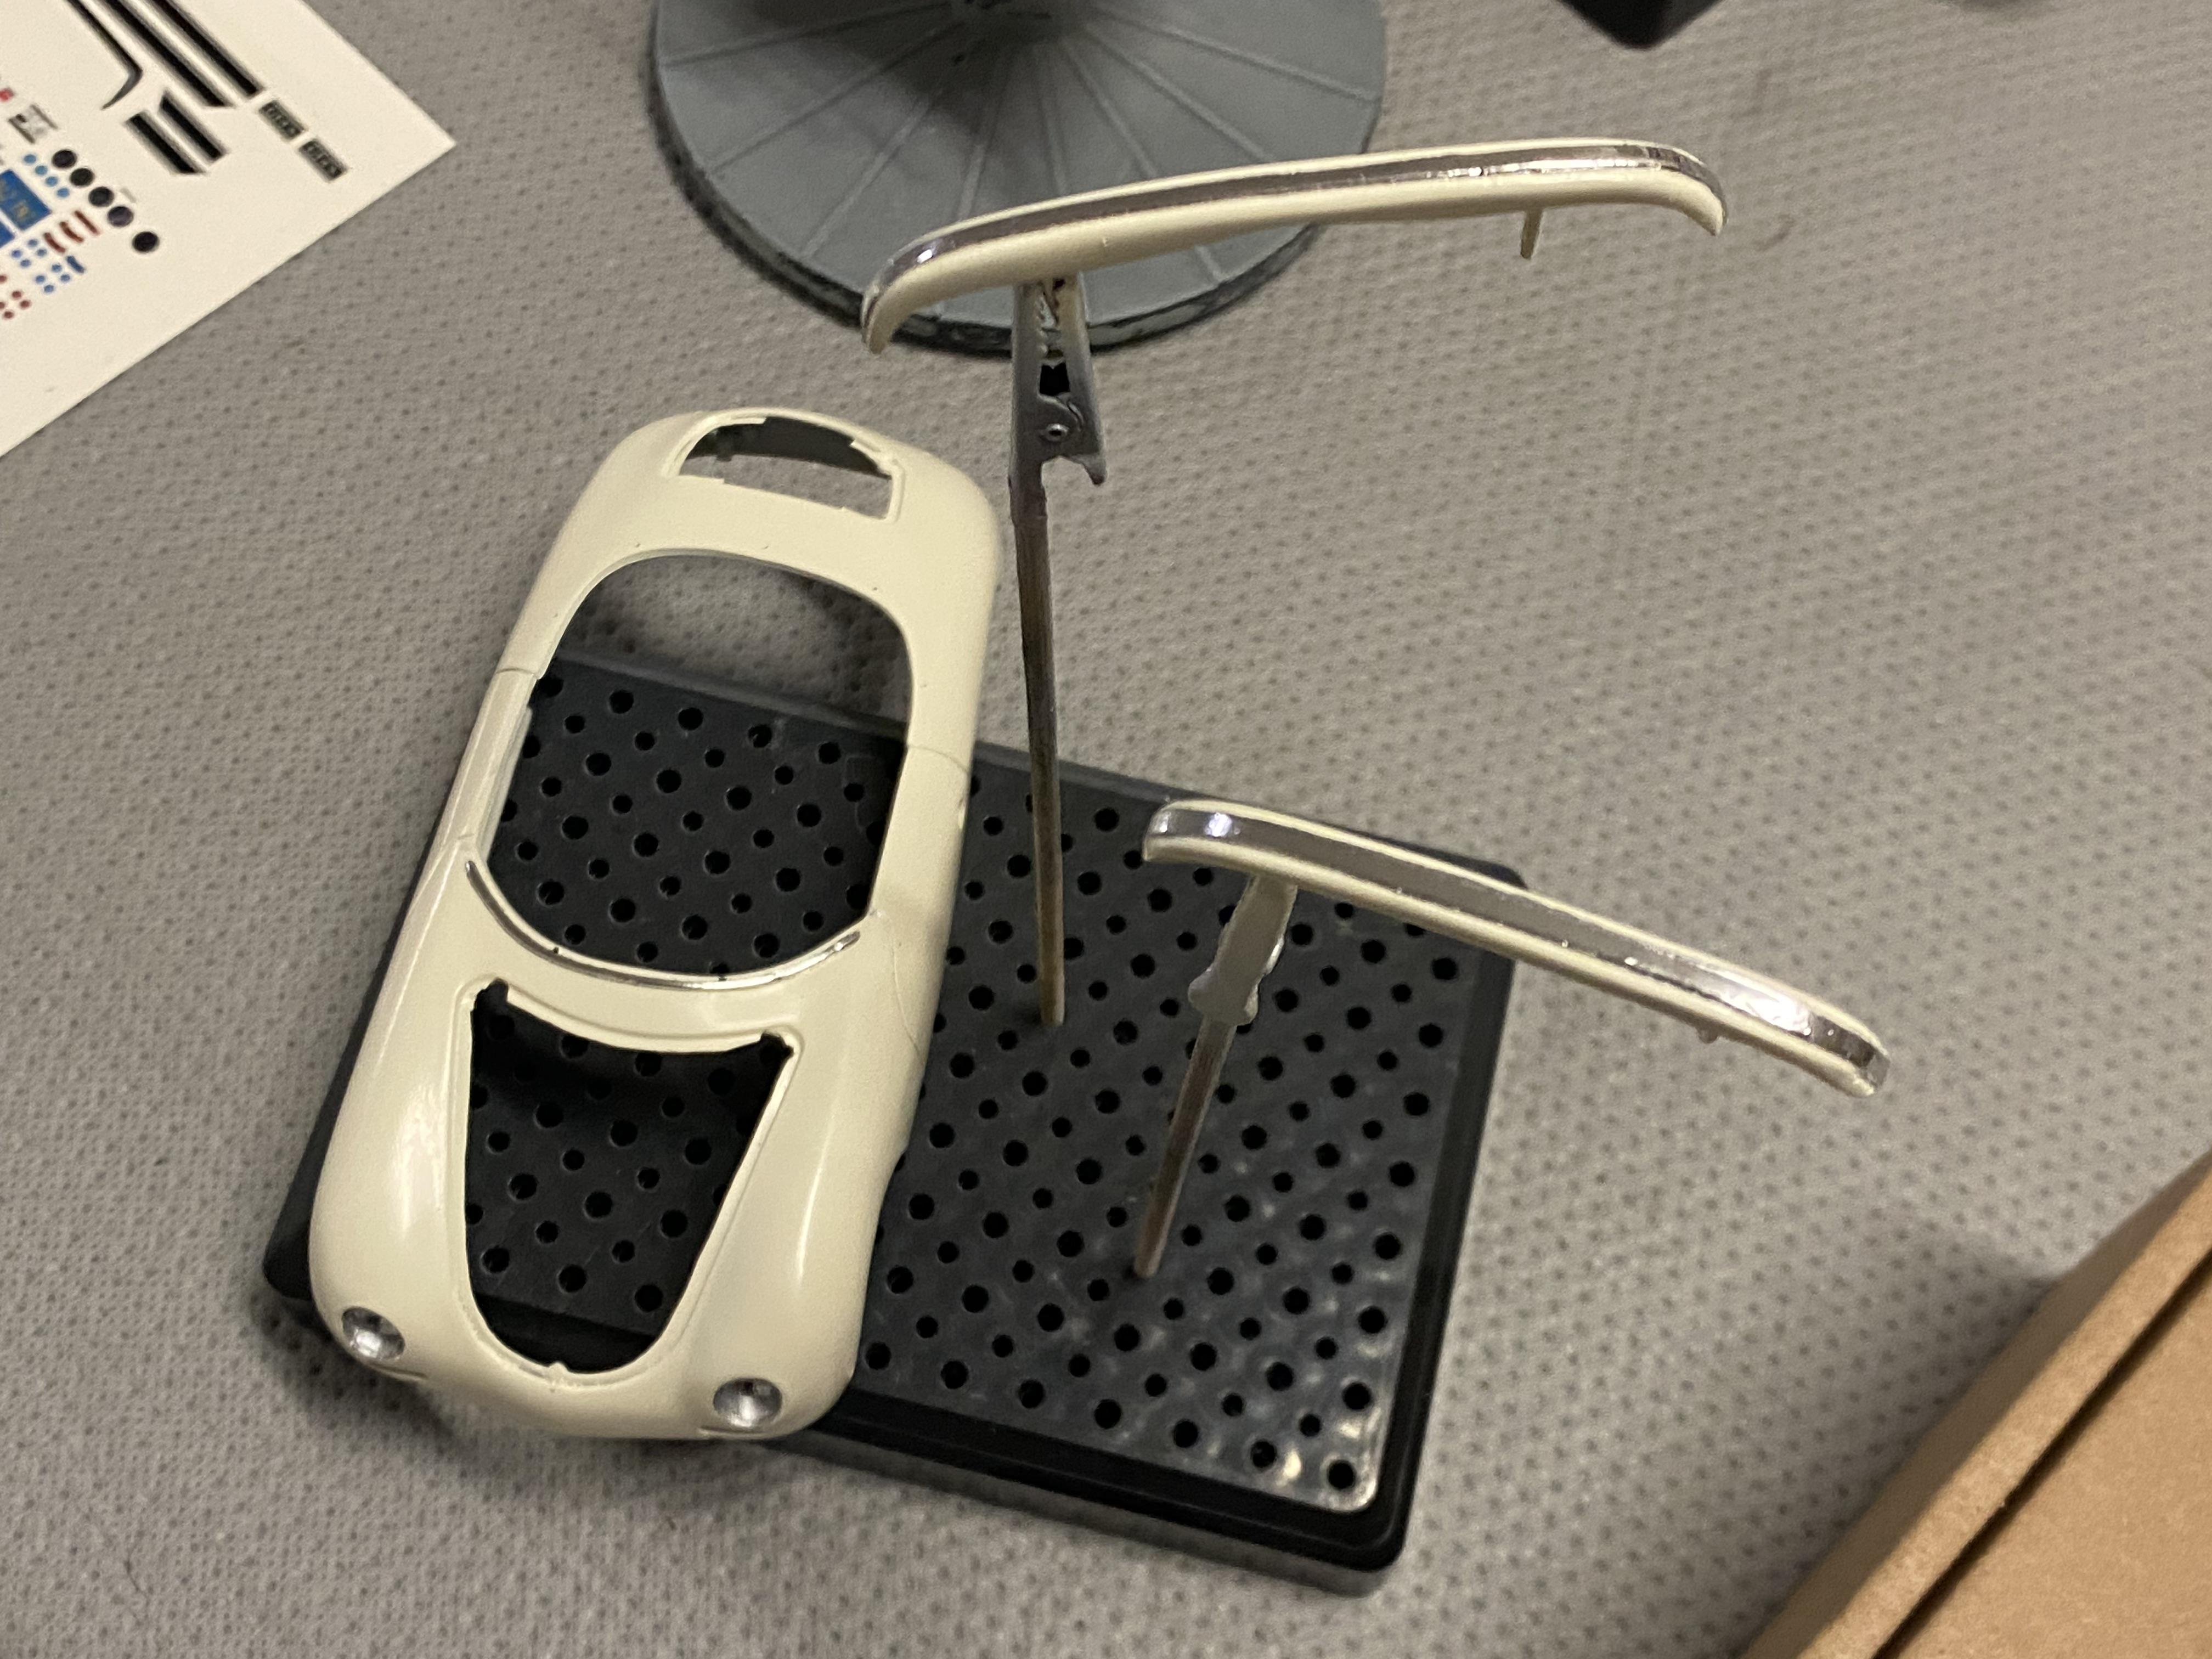
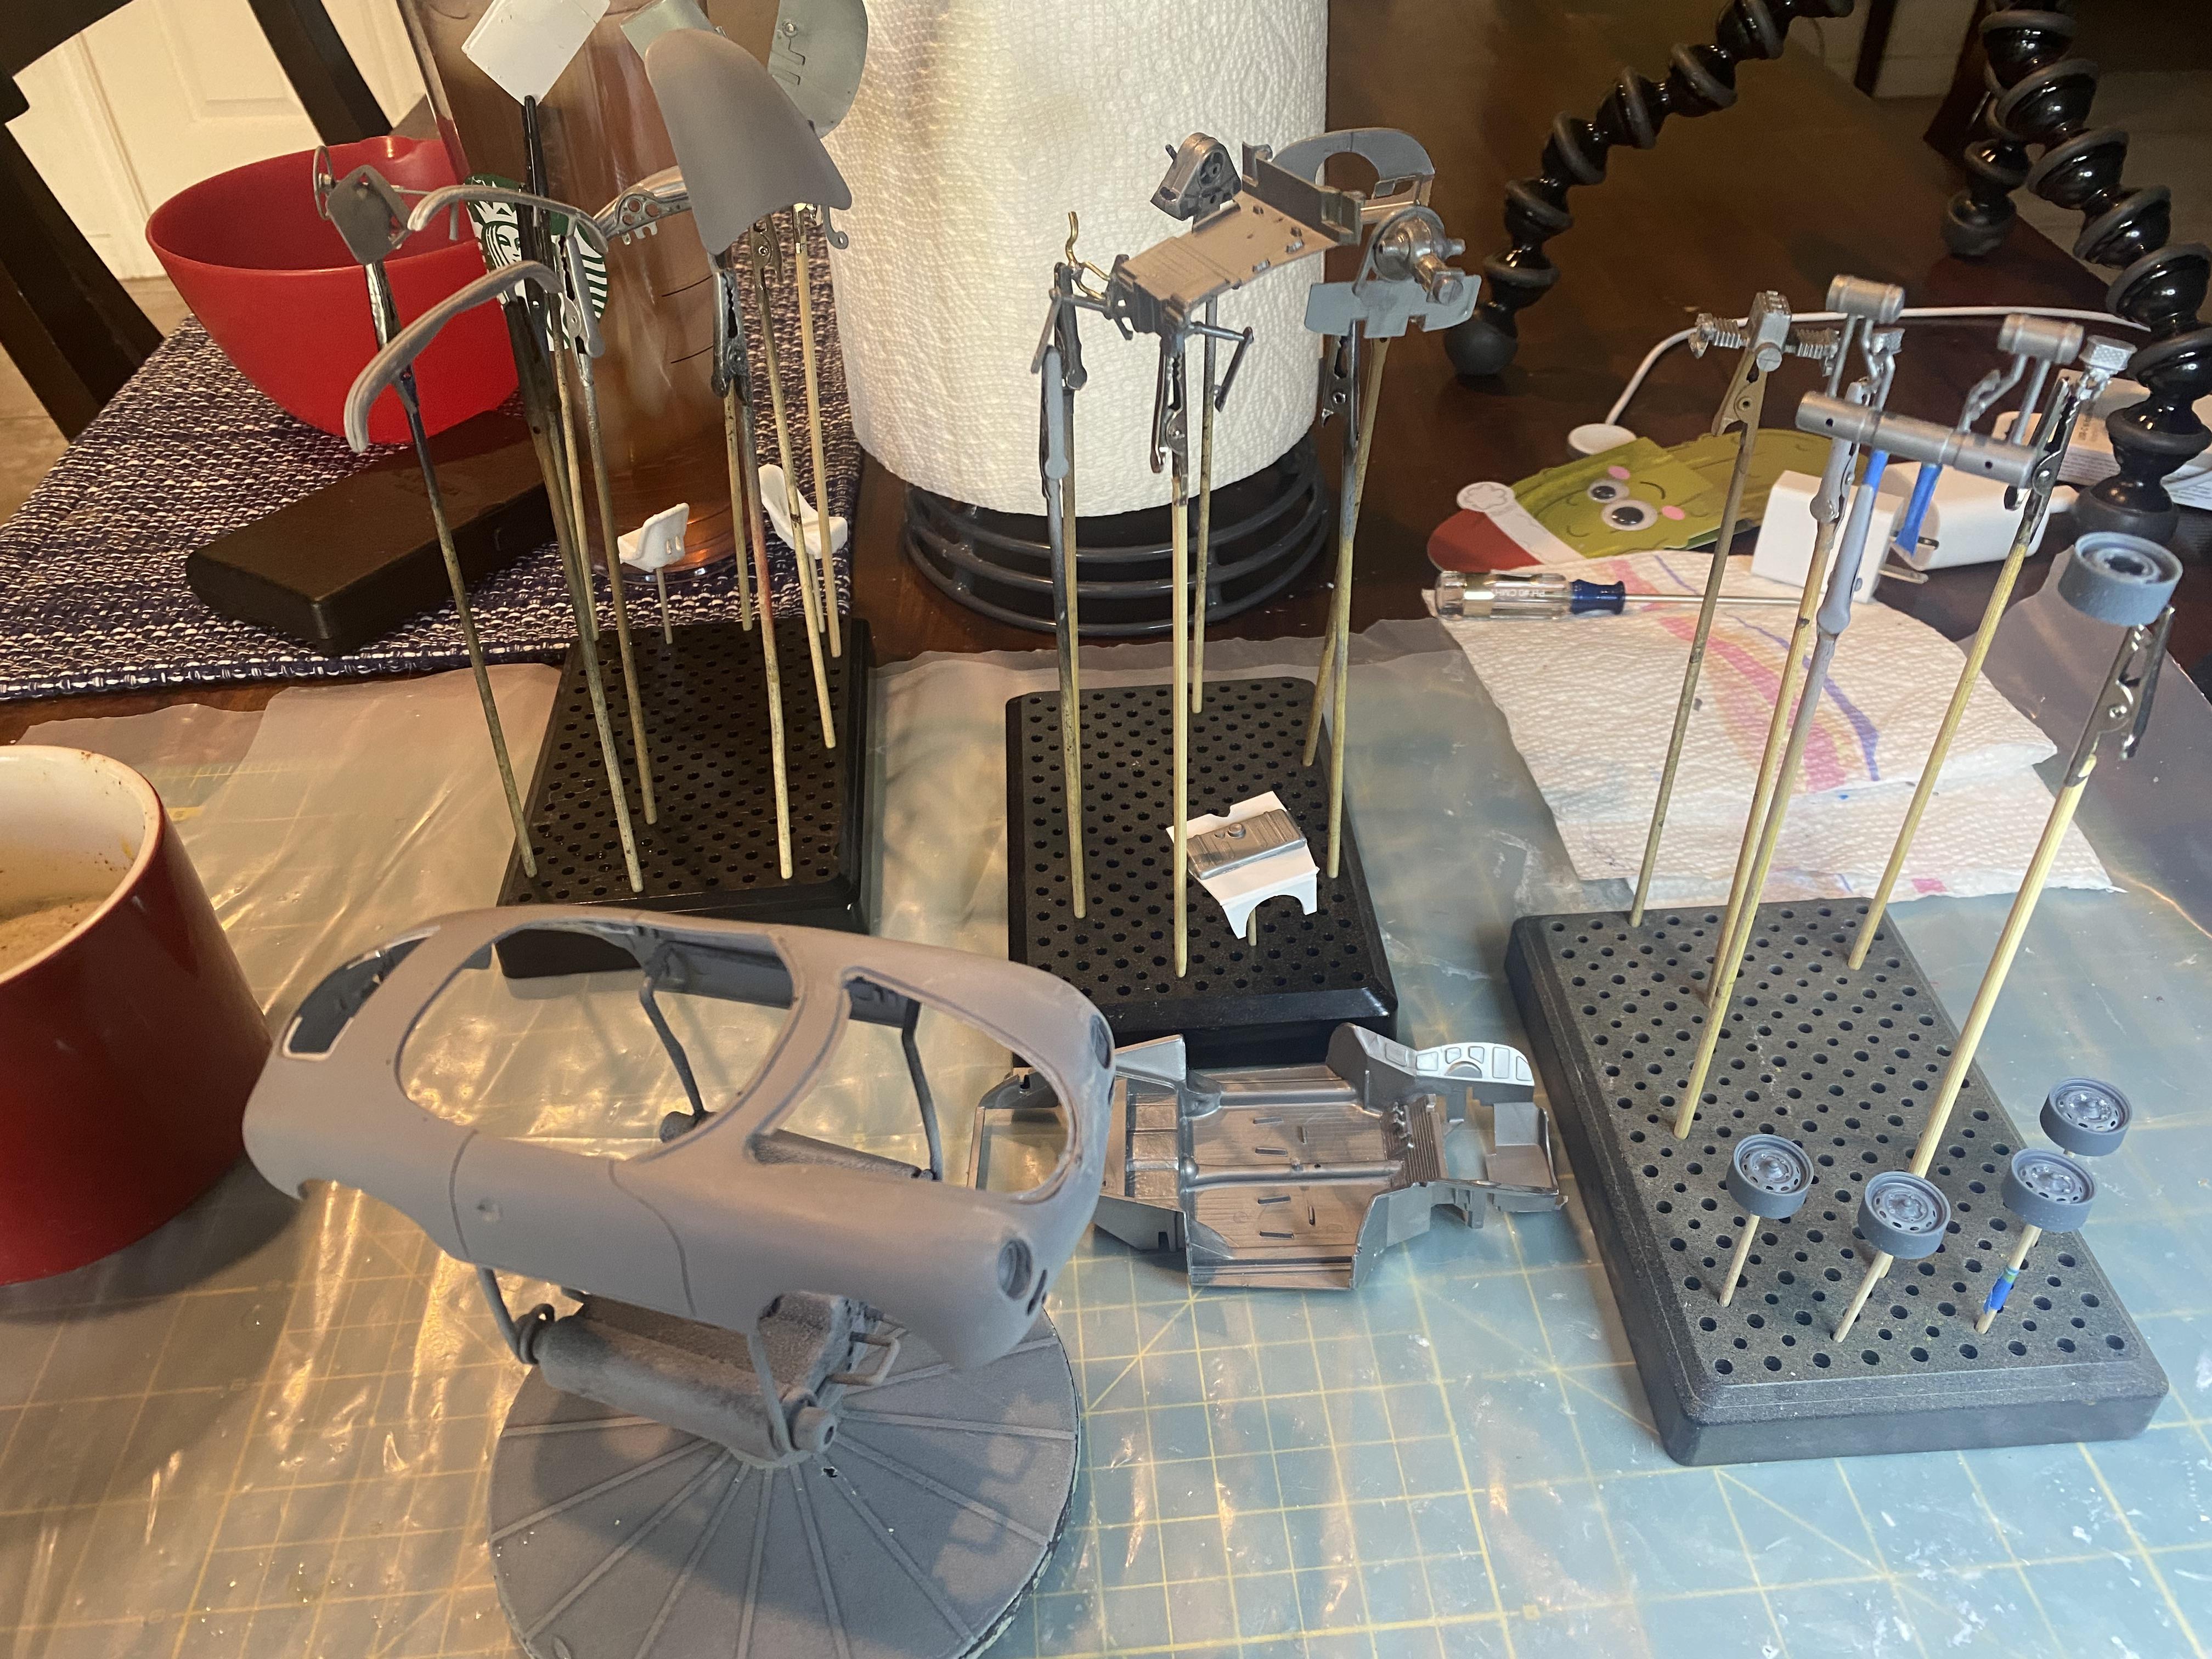
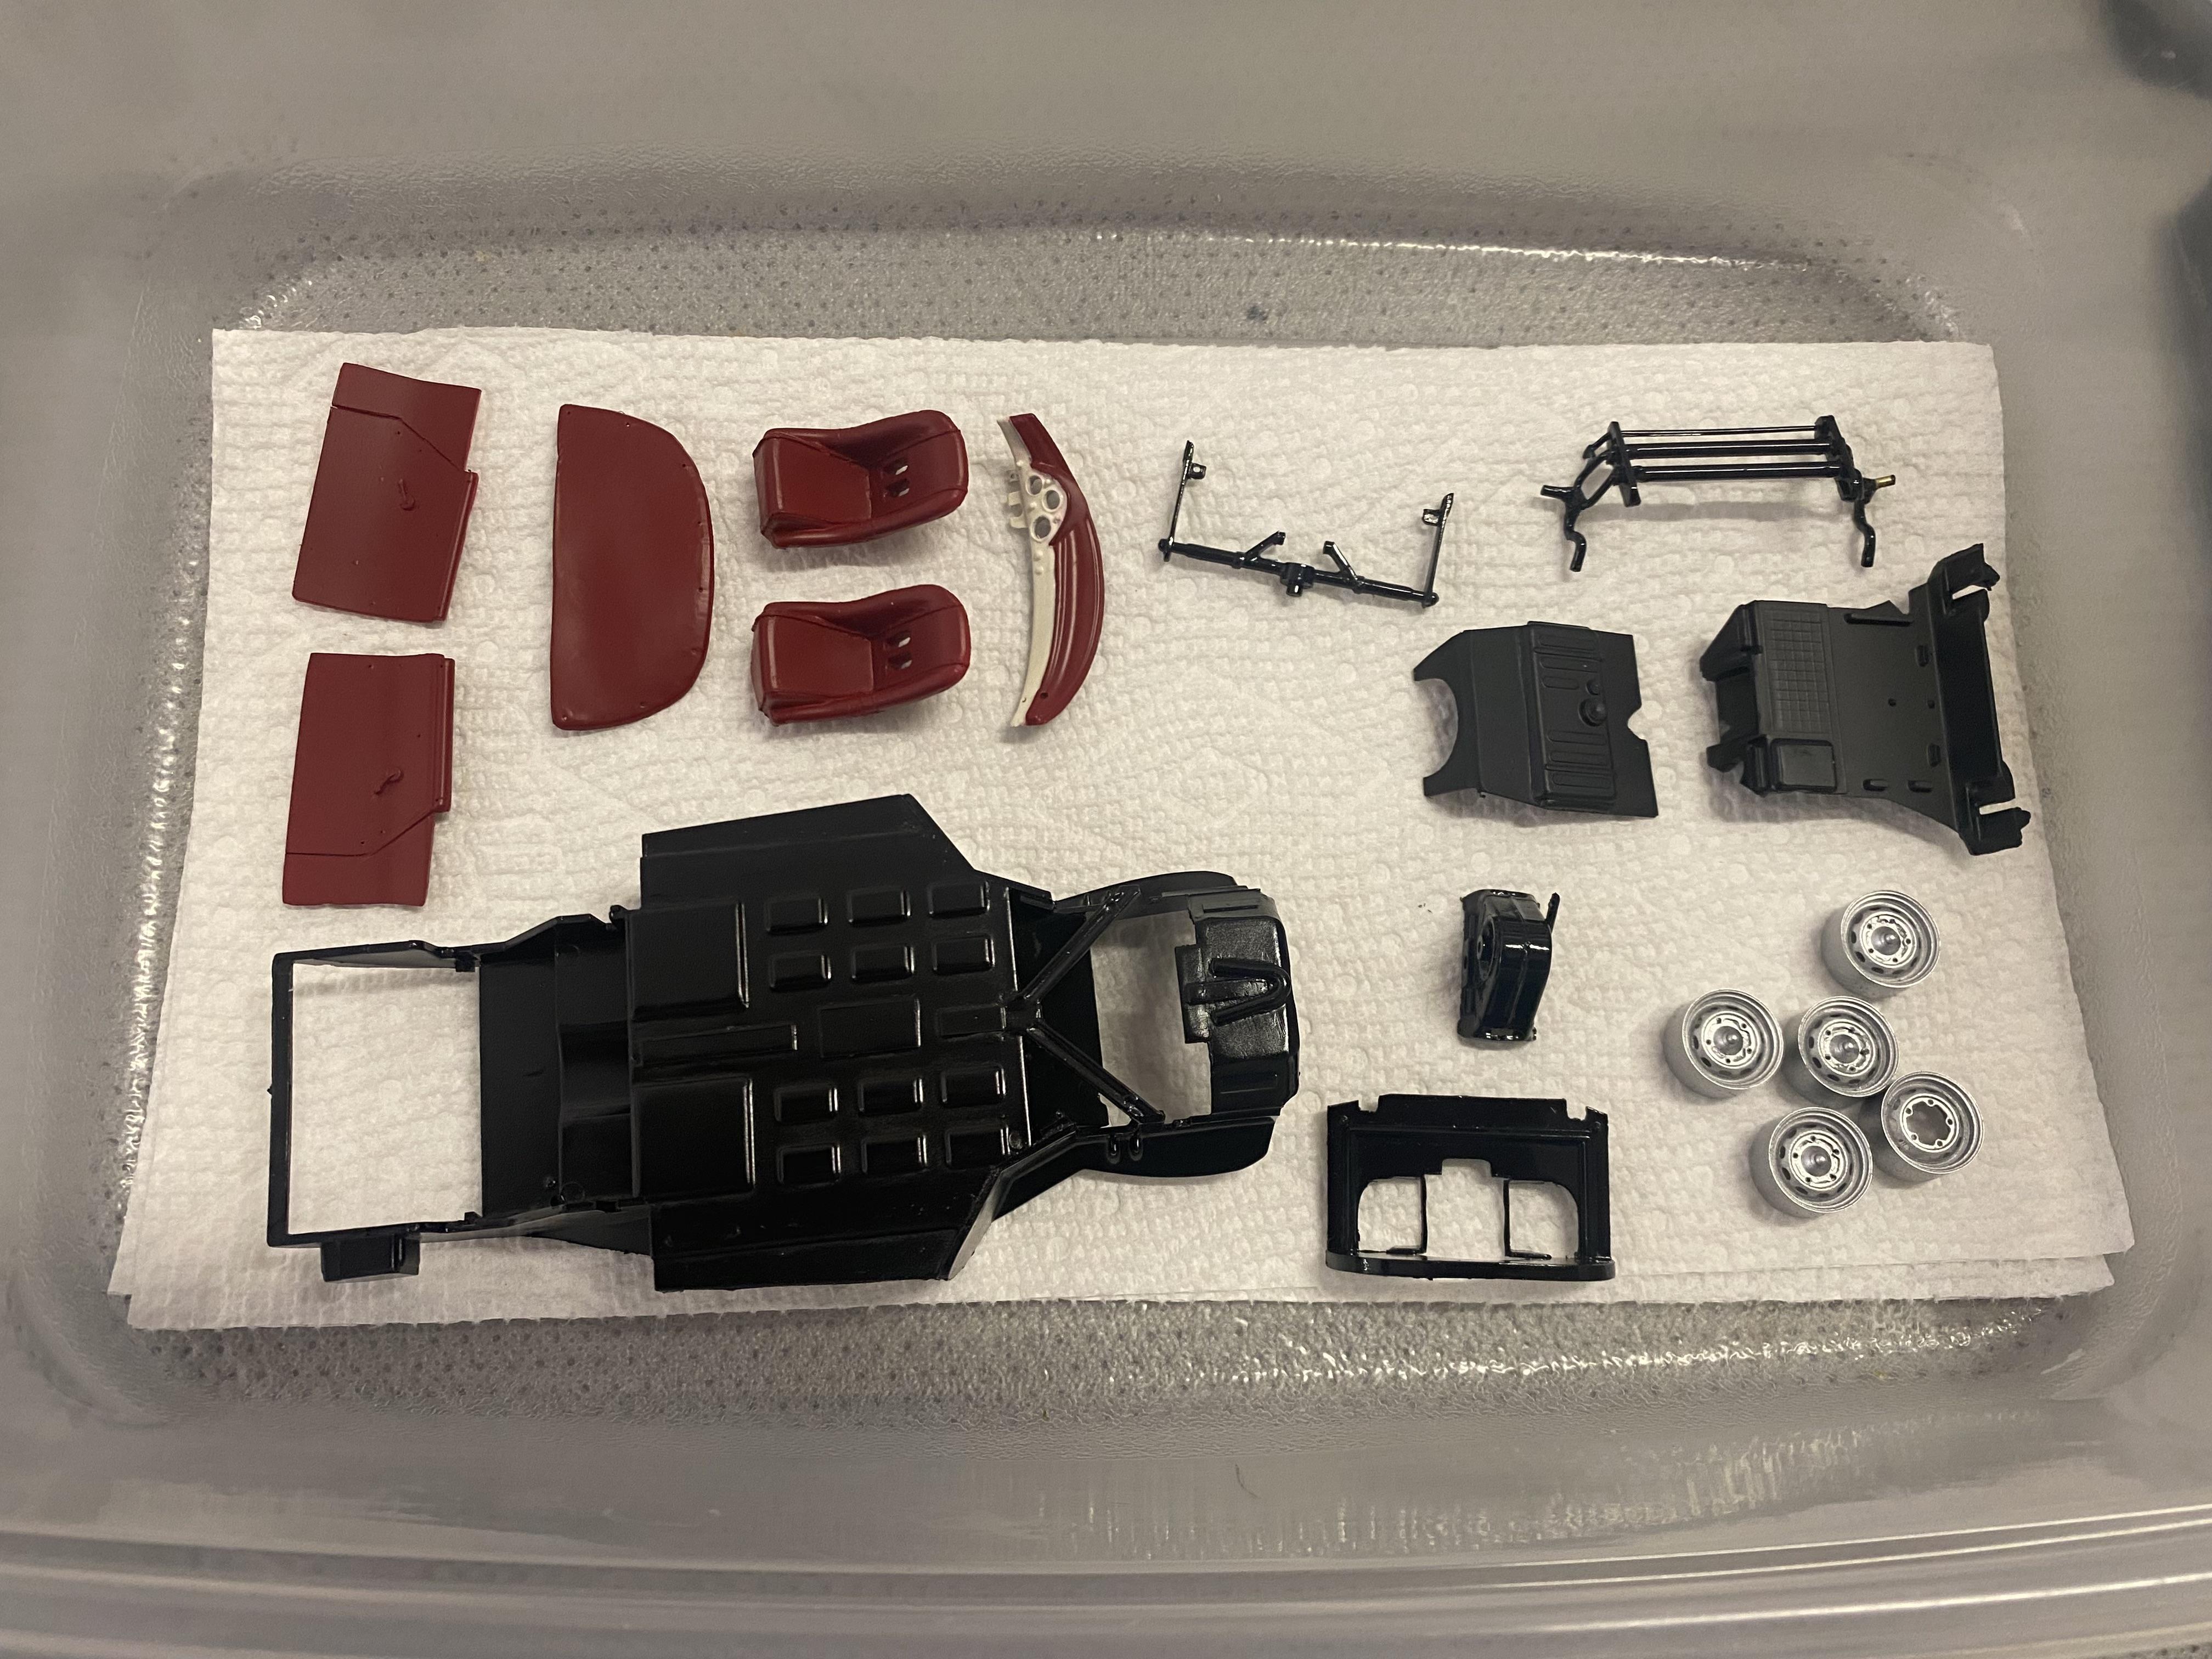
I got a little more detailing work done today. I created the decals I need and cleared them so waiting till tomorrow to add the gauge and dash decals as well as the body decal that goes on the right side. I added a bit of panel lining to the seats and interior to make them look more like natural leather. made the brake drums flat aluminum and blacked the caps. Hard to tell the difference in thr picture. Waiting on the hex rivets to arrive to add the lug nut detail. added rivets to the top case of the engine to simulate the screws and mesh for the carburetors. The kit didn’t include distributors or coils. I have some nice 3d printed coils I will use and ordered some 4 cyl distributors and will wire once they arrive. The carrera engine has two distributors and two coils. dry brushed the chassis a bit just to give it that slightly used look. interior components mostly done except for the decals for the dash. Rivets for the door panel screws and tonneau cover snaps. chromed the scratch built bumper trim, windshield base and headlight buckets Clear red on the taillights and chromed the taillights and headlight covers.
-
Thank You! I was going back and forth between this and aquamarine over tan.
-
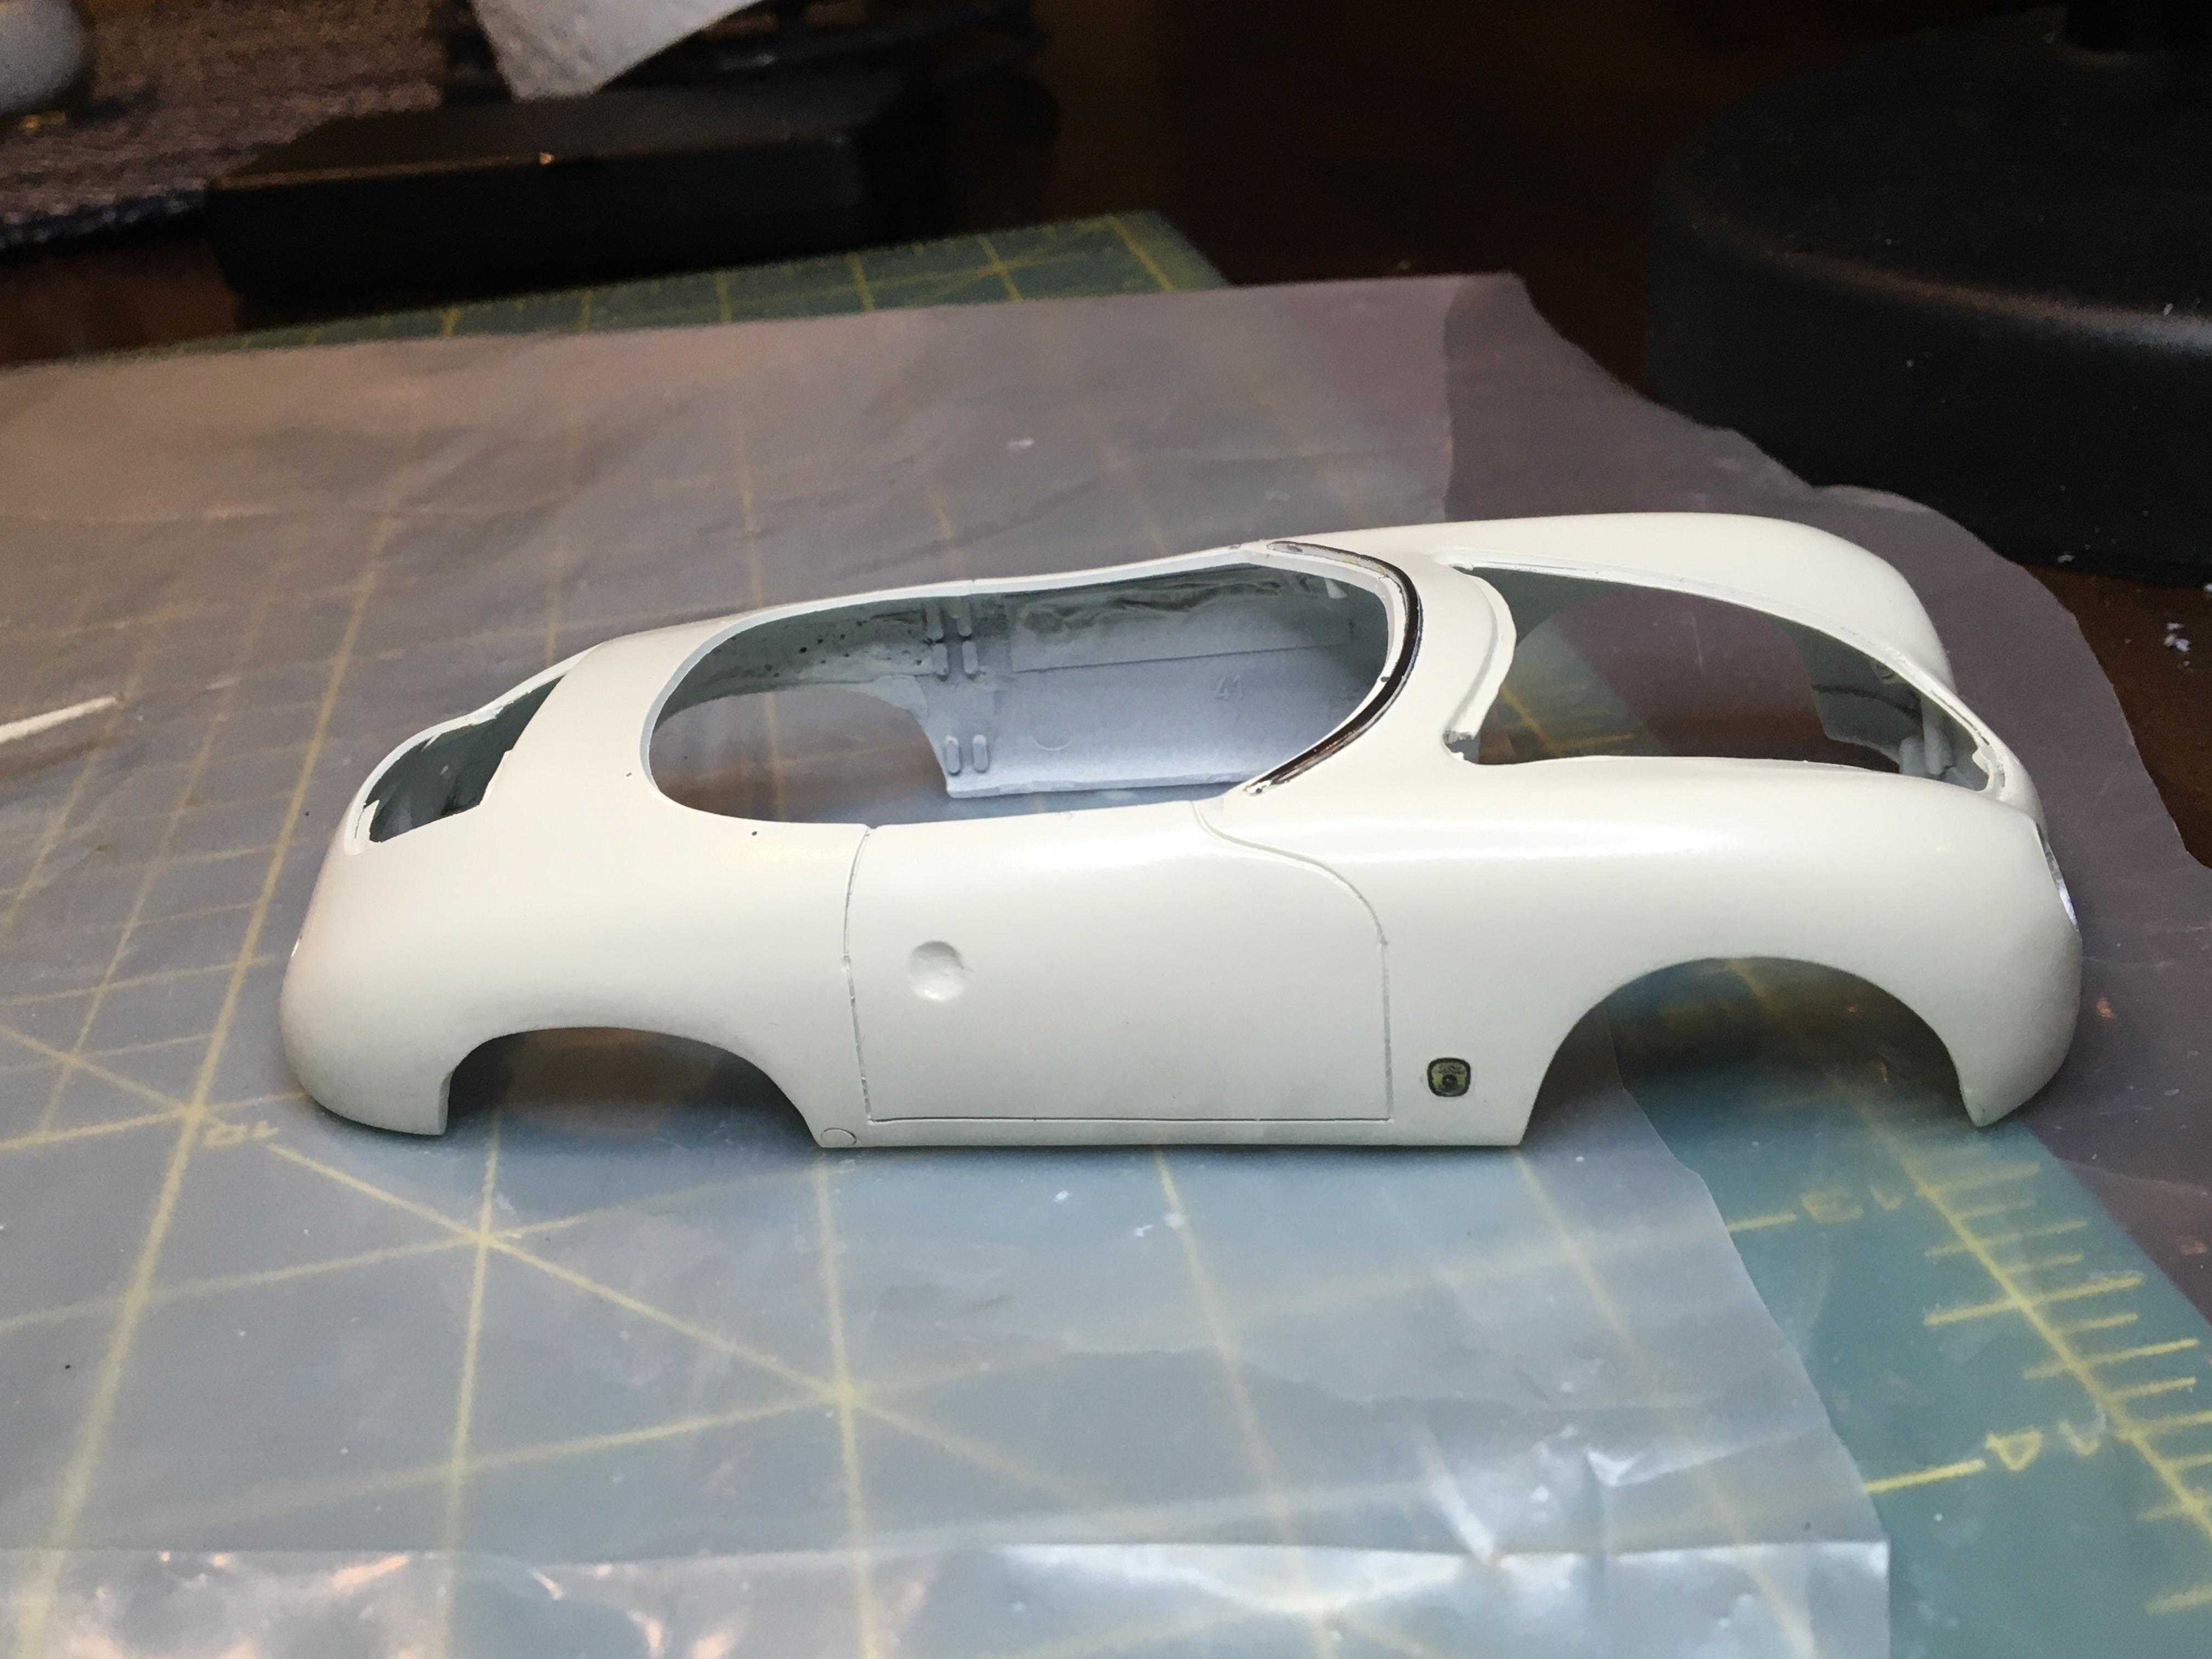
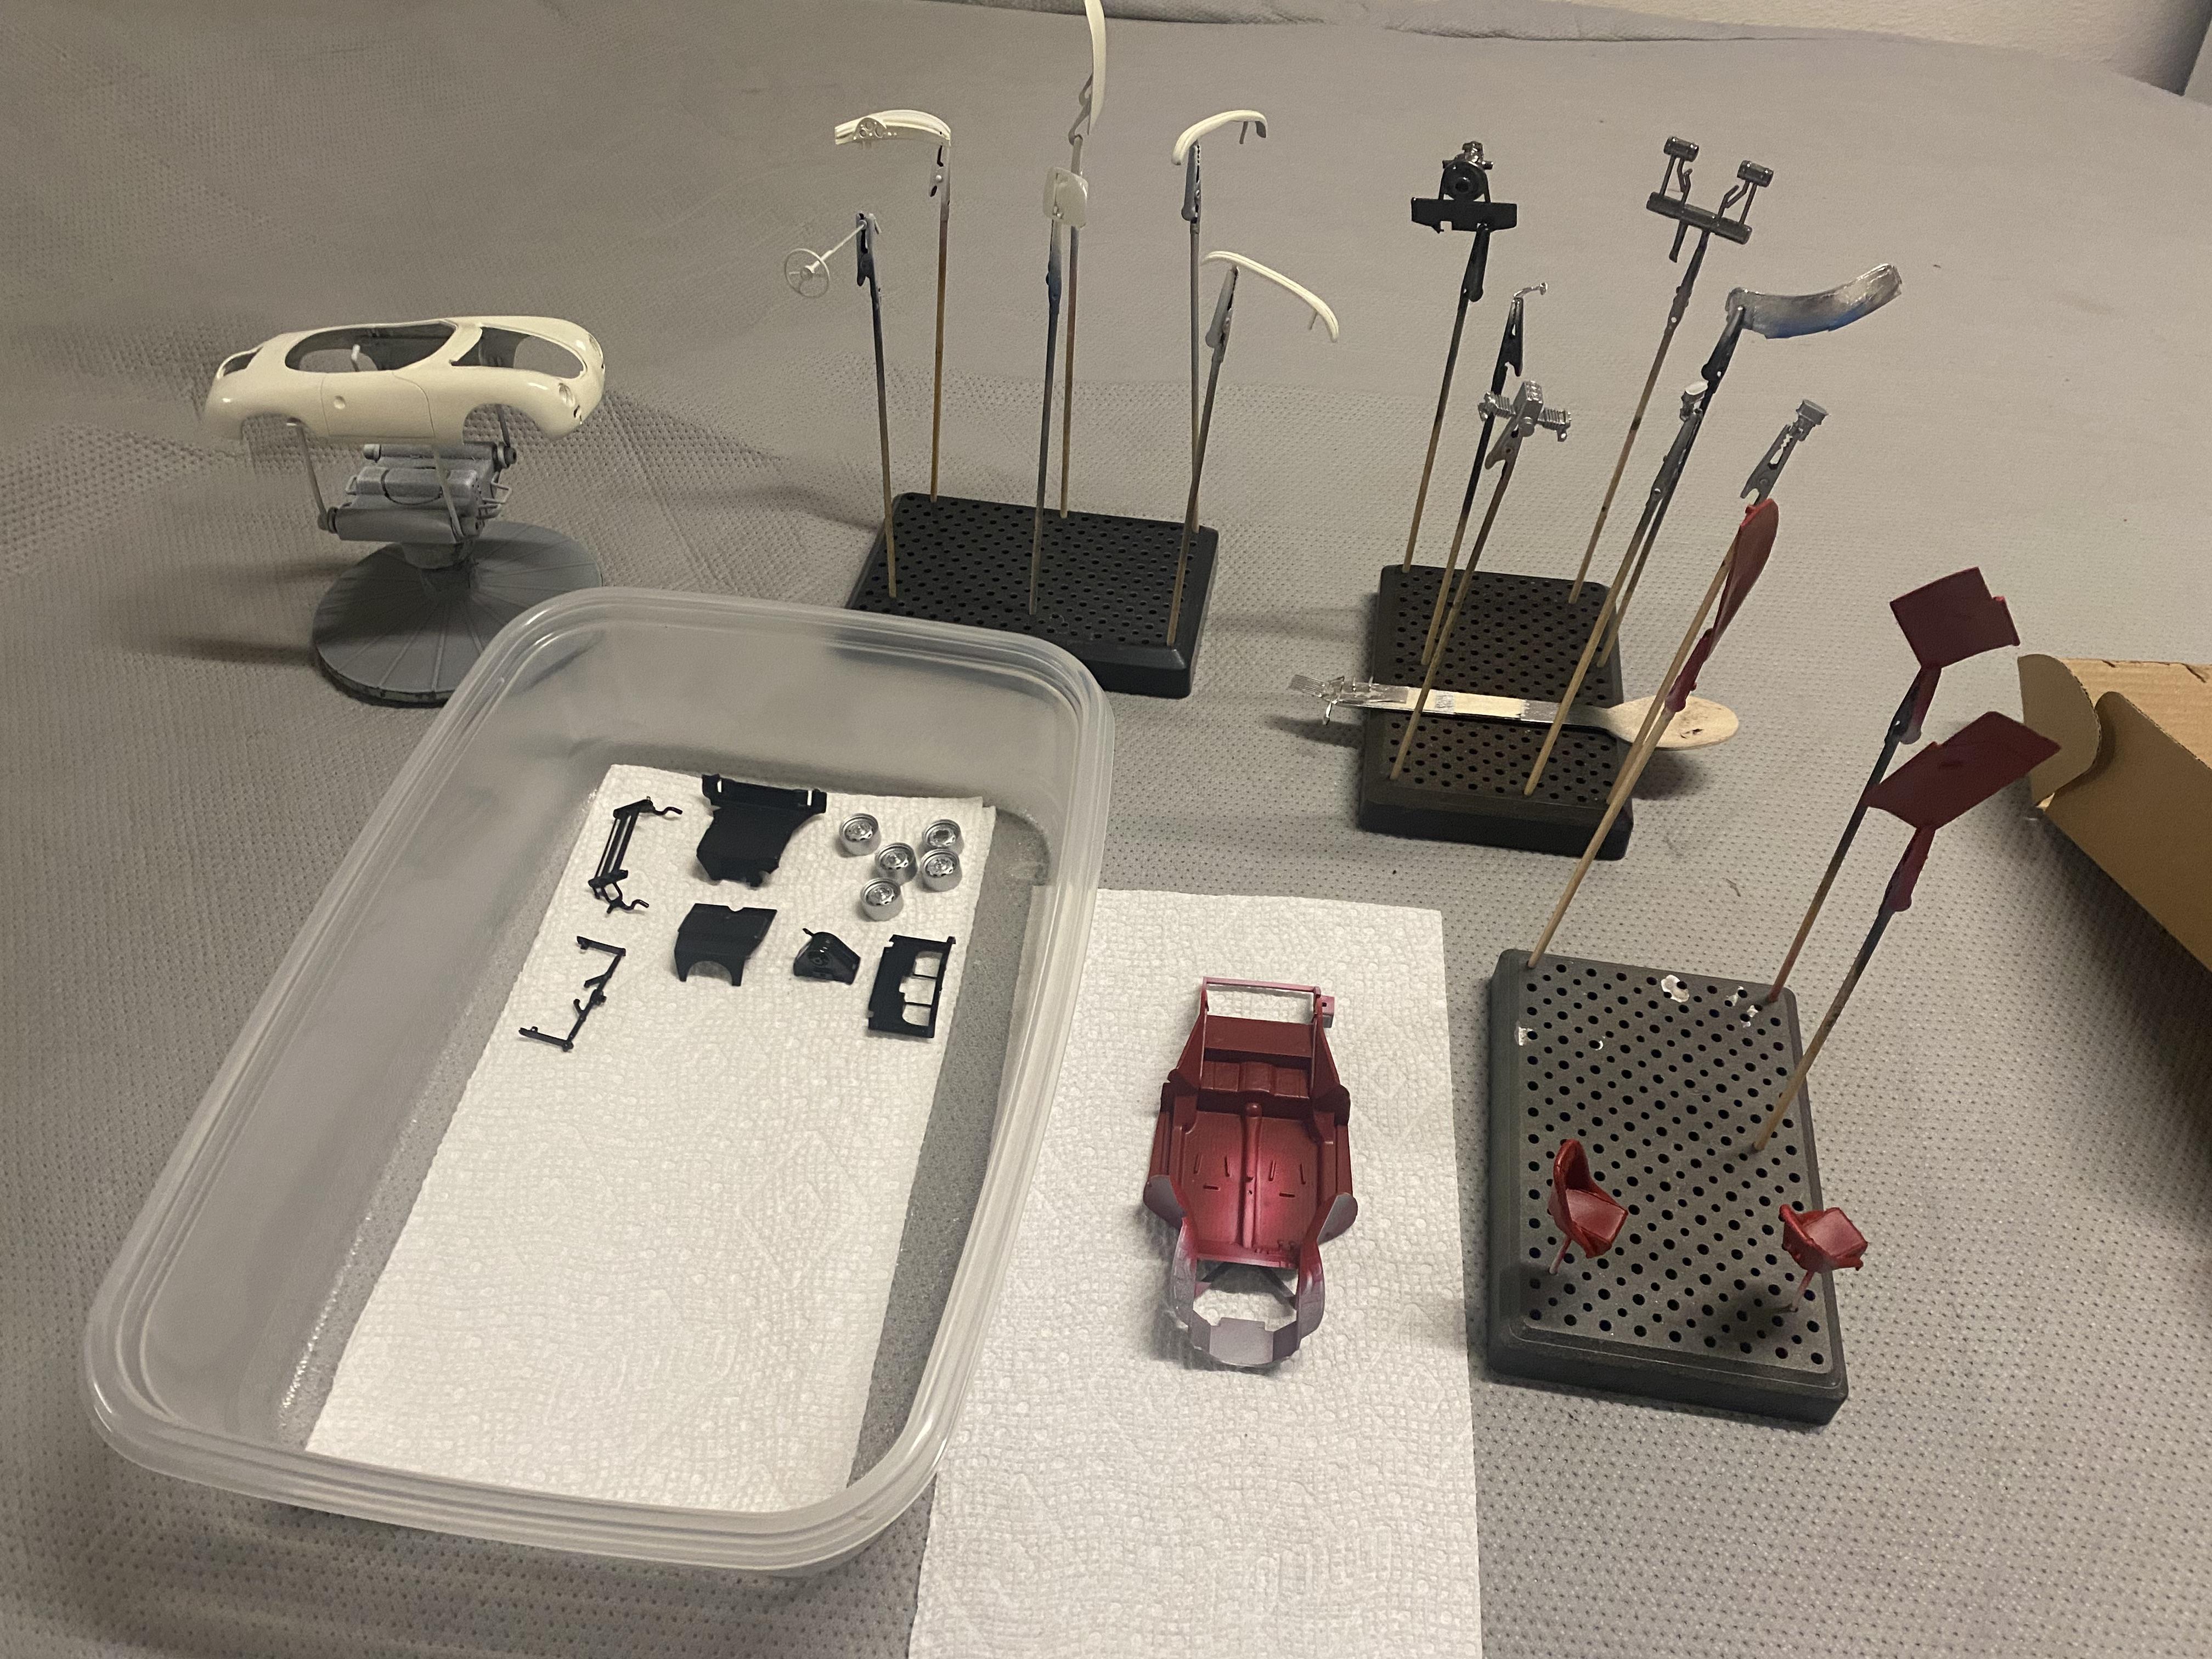
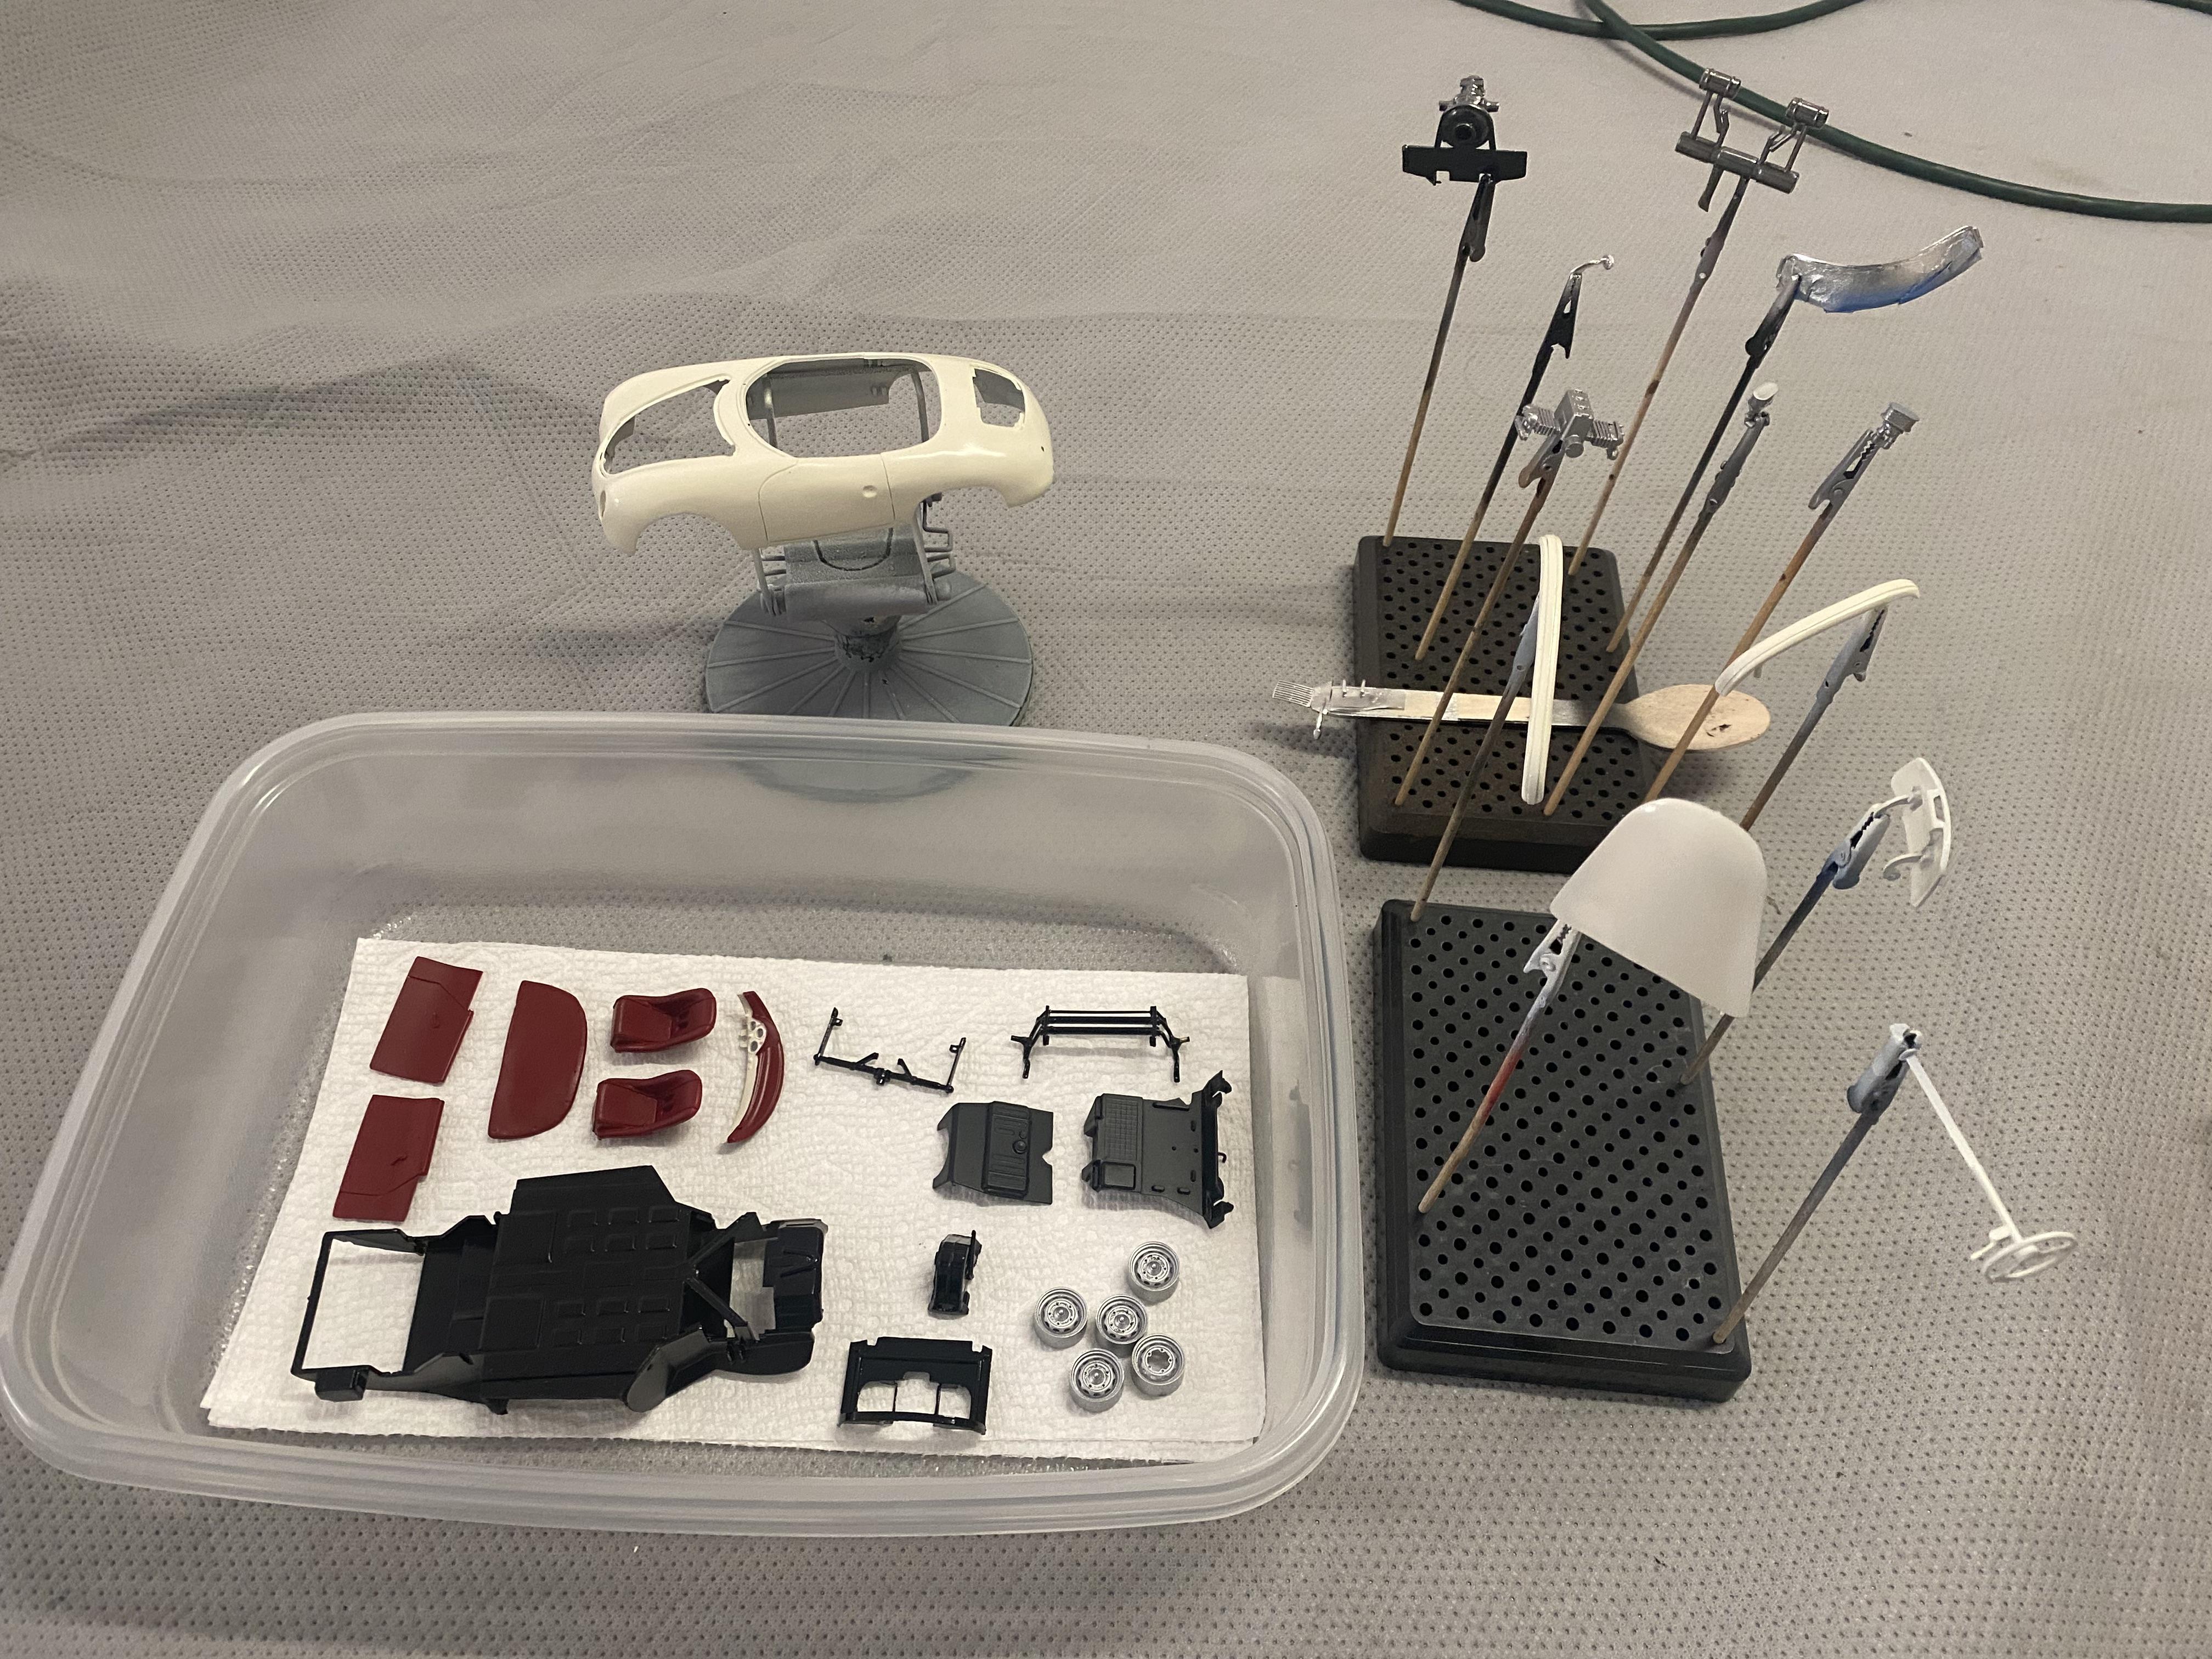
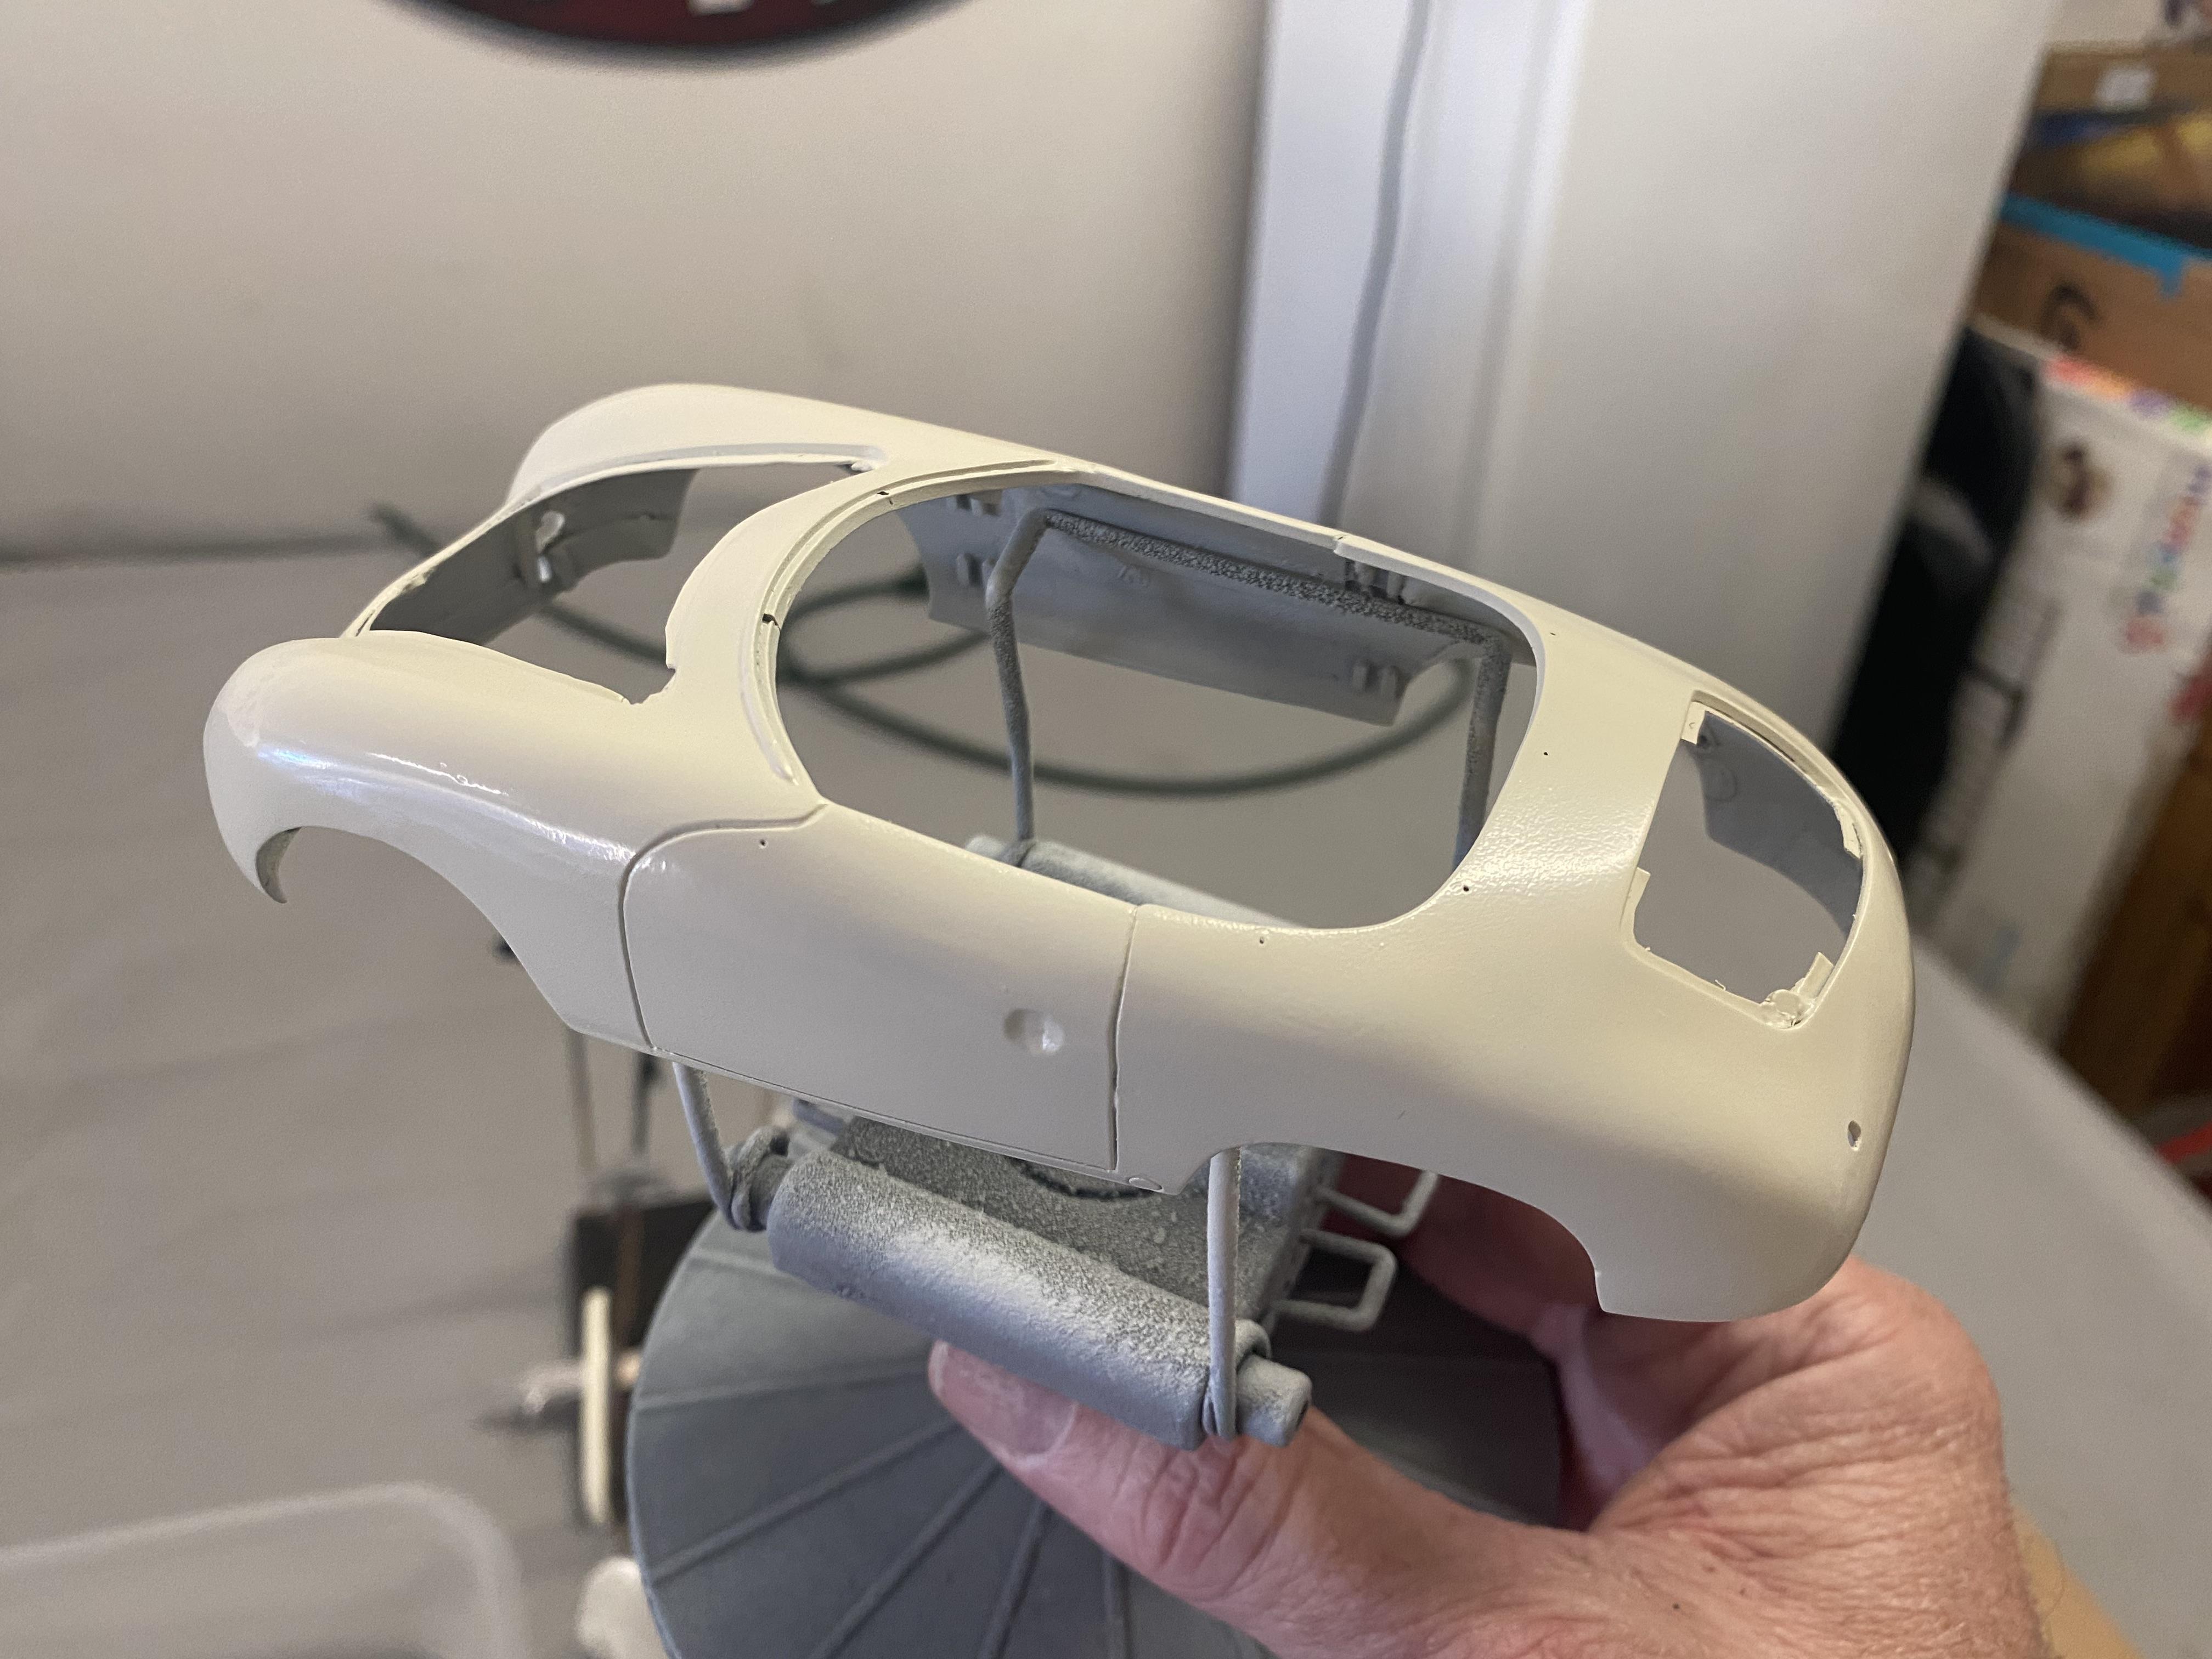
I was able to get some base color on most parts. As mentioned in the beginning I am going with Ivory over red. Just base coat on body, will be spraying in 2K clear in a few days once the base coat has time to completely cure.
-
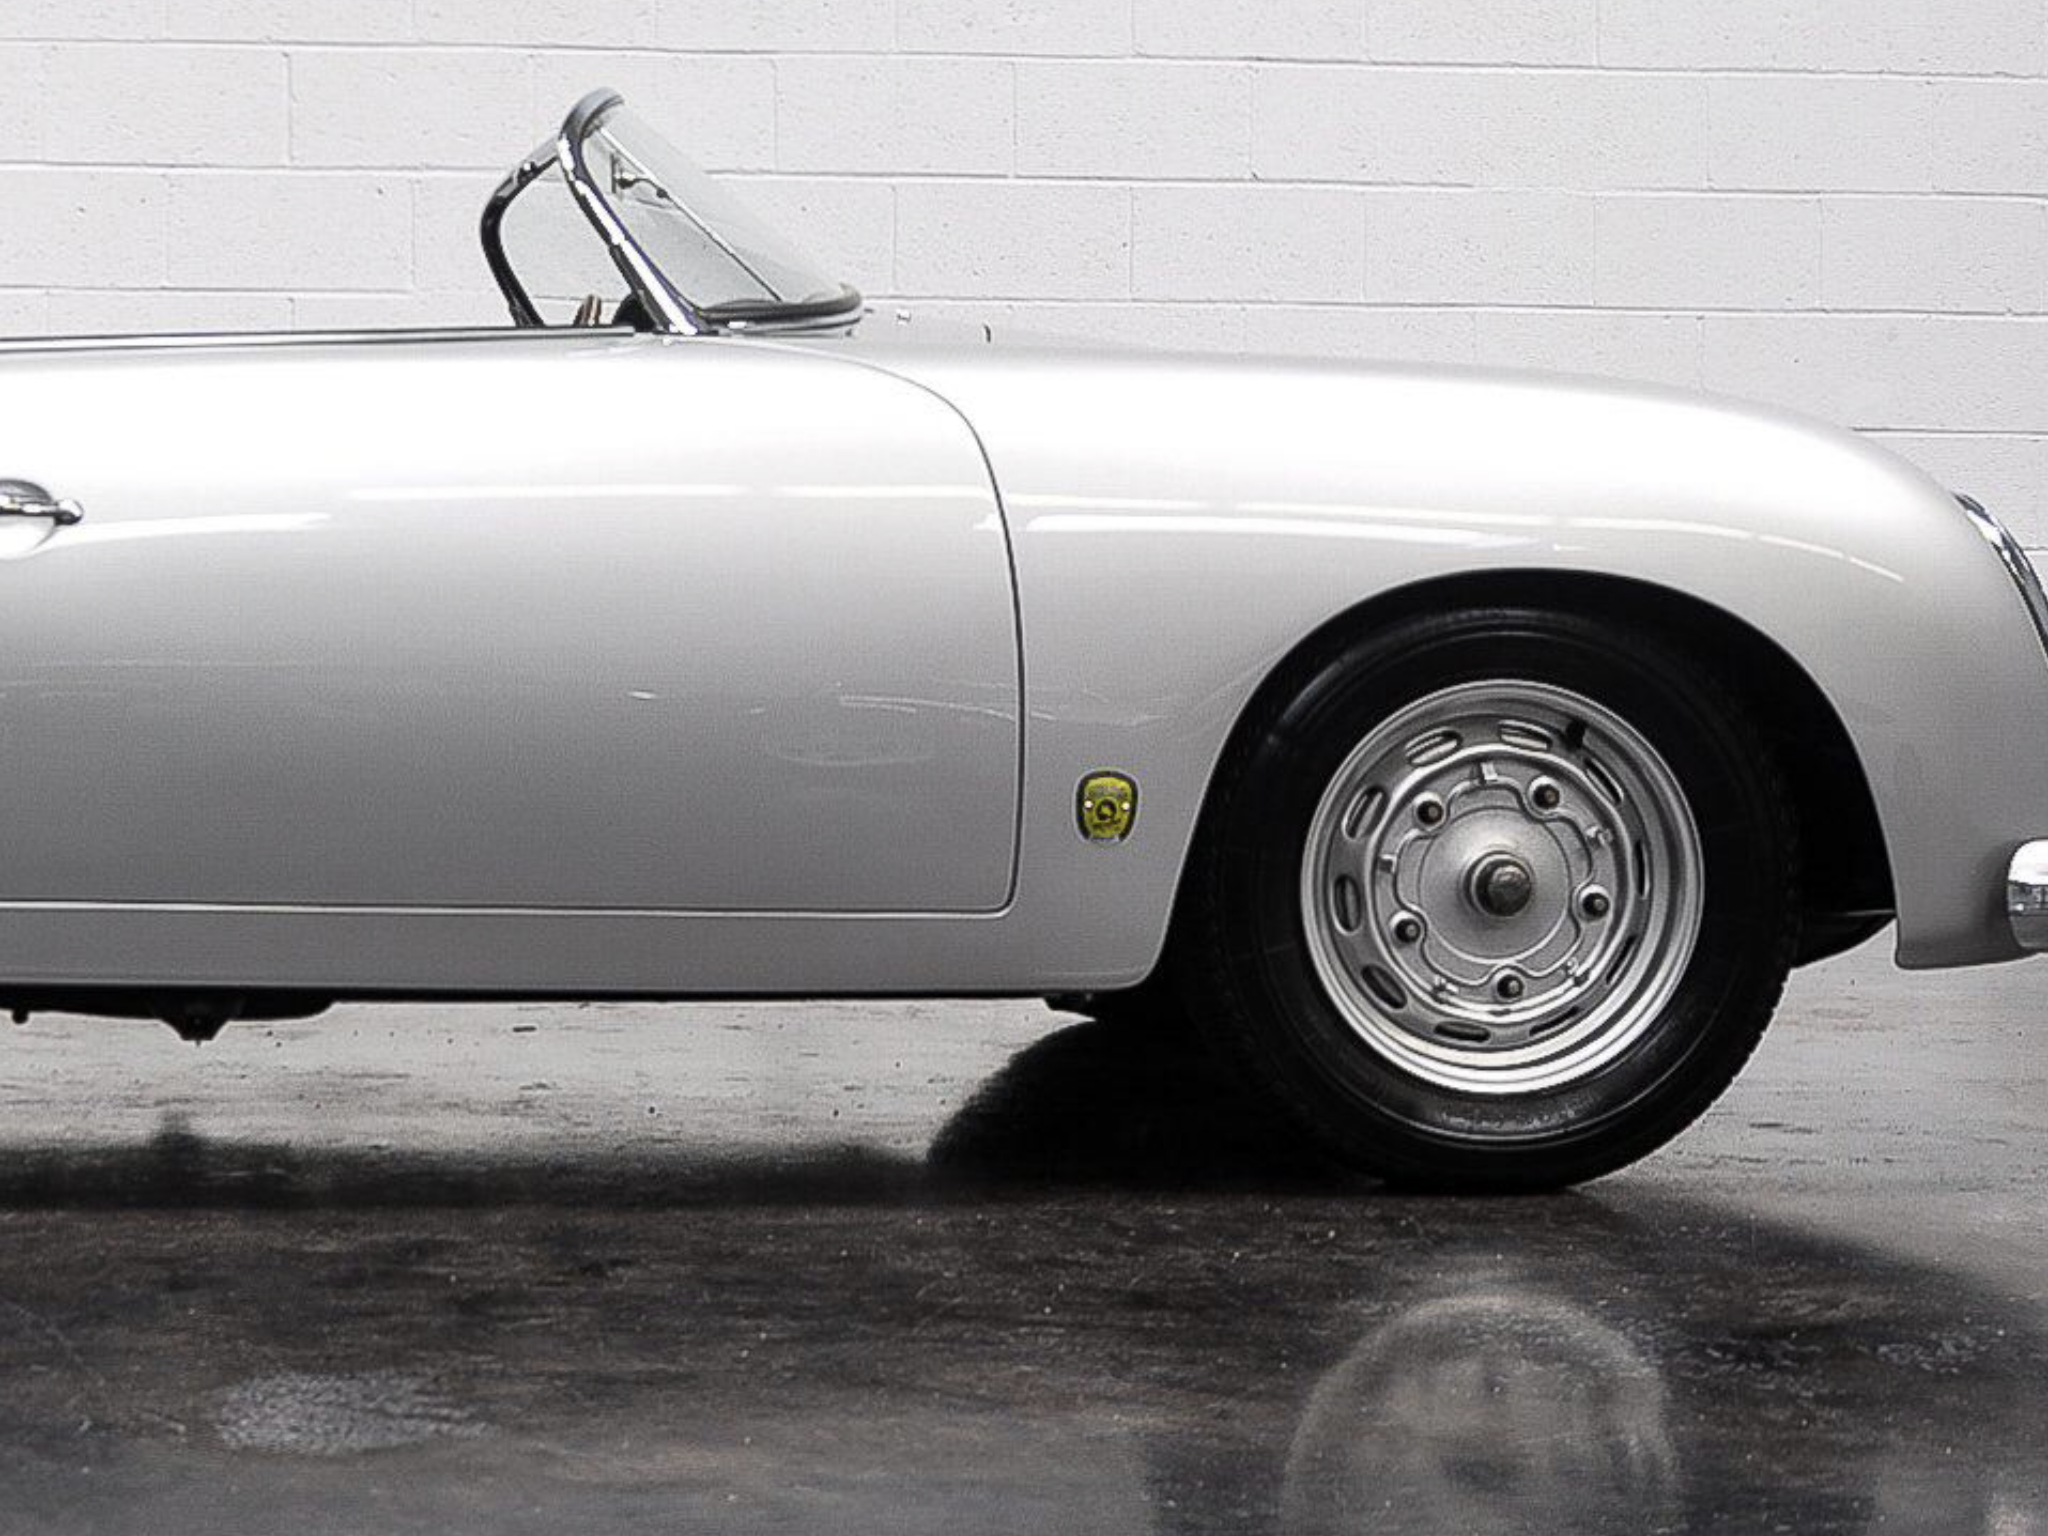
Thank You! The GT/CS is actually a replica of one I had years ago and let get away.
-
Thank You!
-
Thank You!
-
Thank you! This car is so small I wasn’t sure myself how I was going to hide it this time.
-
Thank You! My family won’t let me do a build without the lighting any more. Thank You!
-
Thank You! Thank You! It was a lot of work to get looking right. Boiling the back section to reshape could have gone so wrong fast but I think I got lucky. Thank You! I really wanted to add poseable steering considering all the work I had to do anyway.
-
Thank You! Thank you Zippi. Not that you’re biased to the 3100 right? Thank You!
-
Thank you! Glad to hear all of the work getting the headlights to open and working is appreciated.
-
Thank You!
-
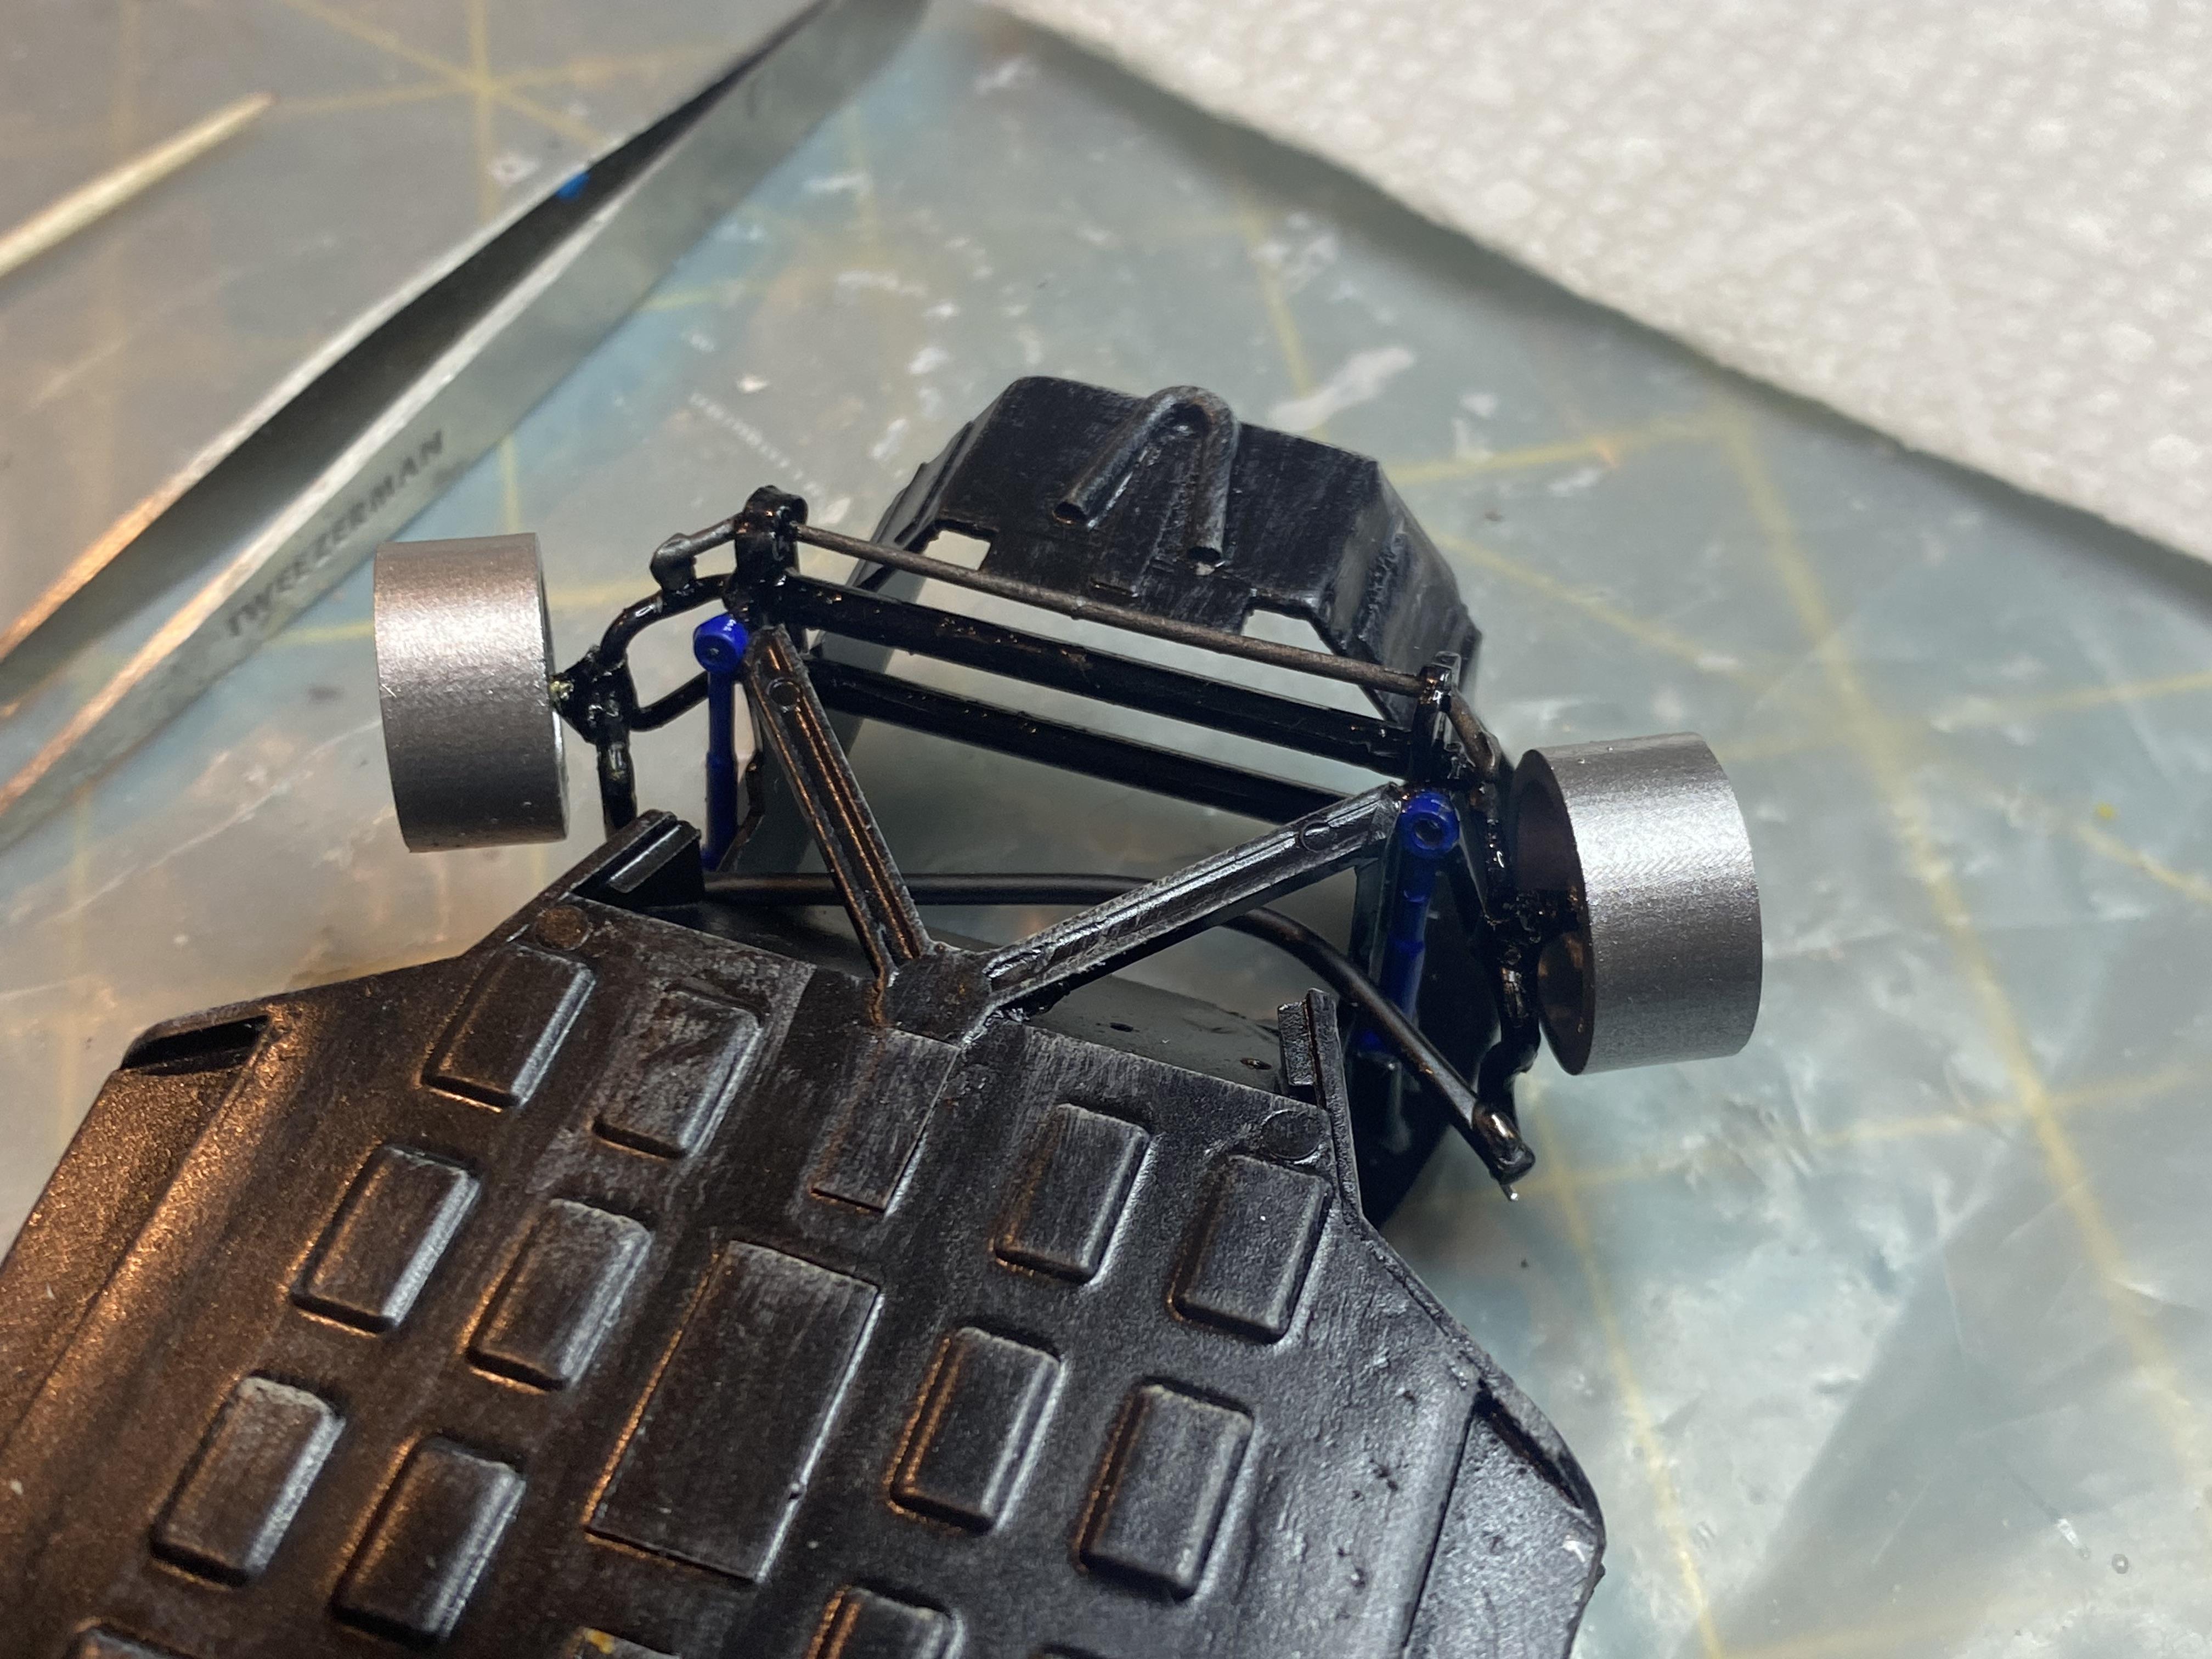
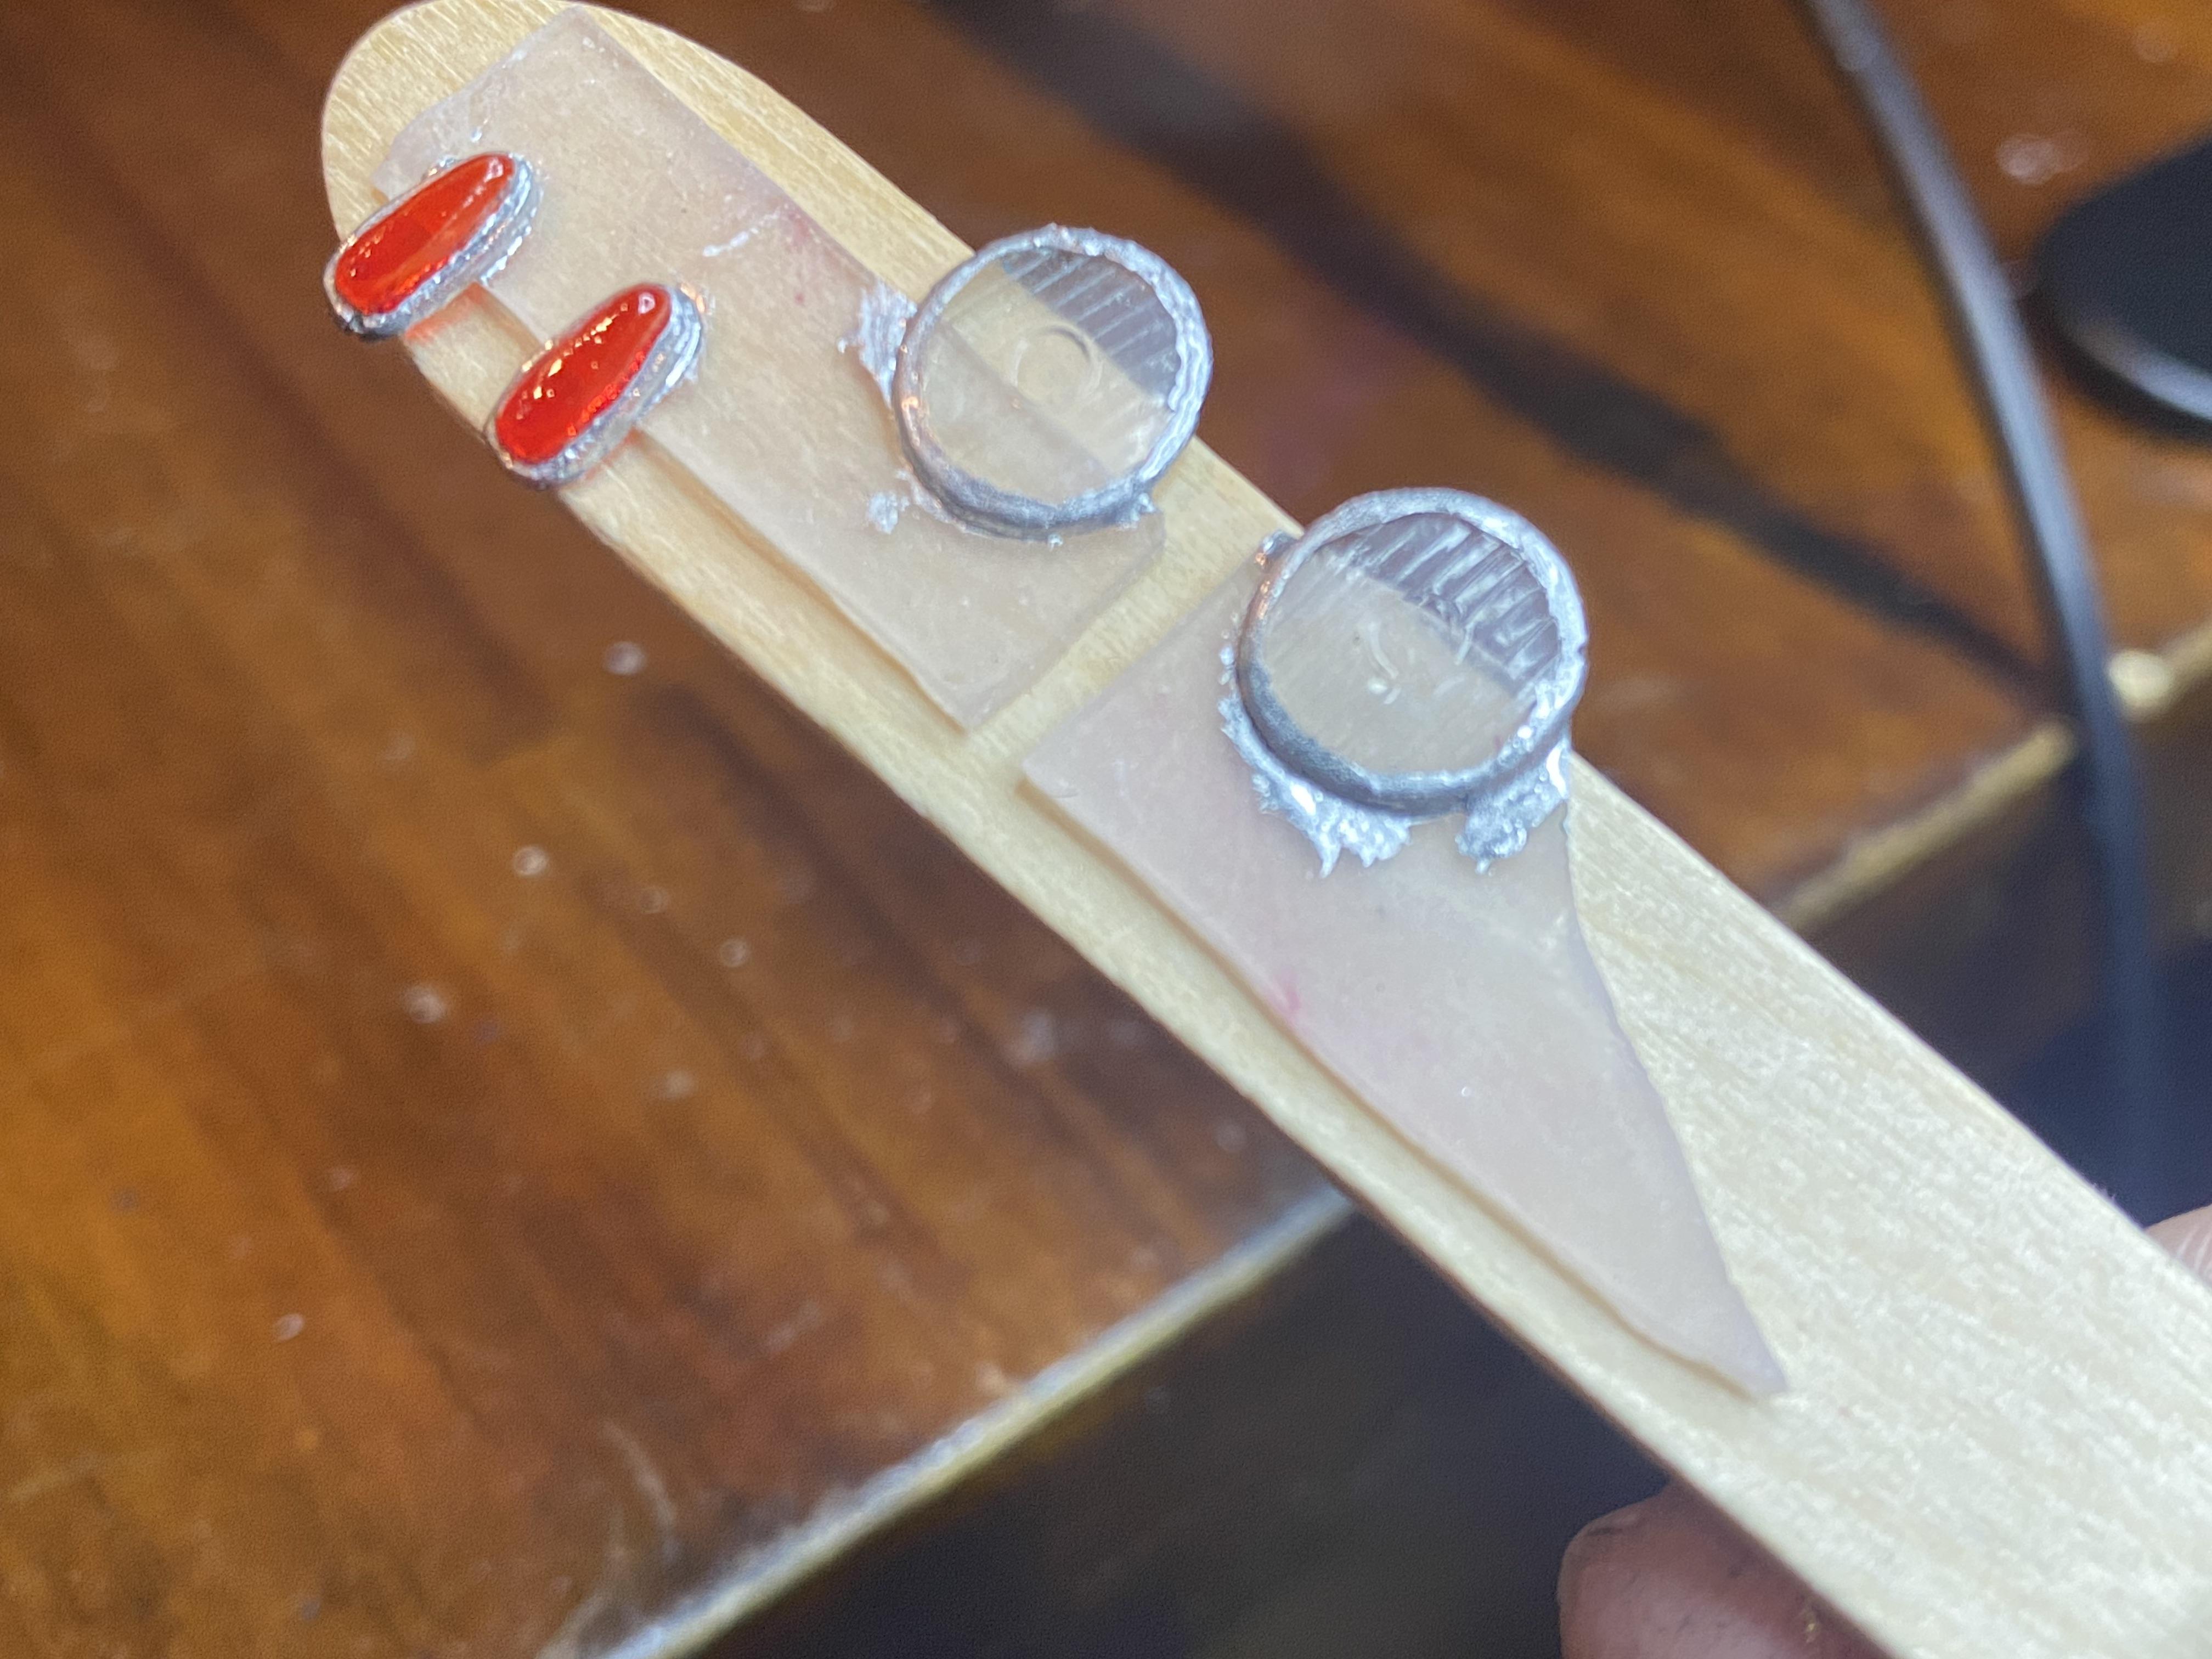
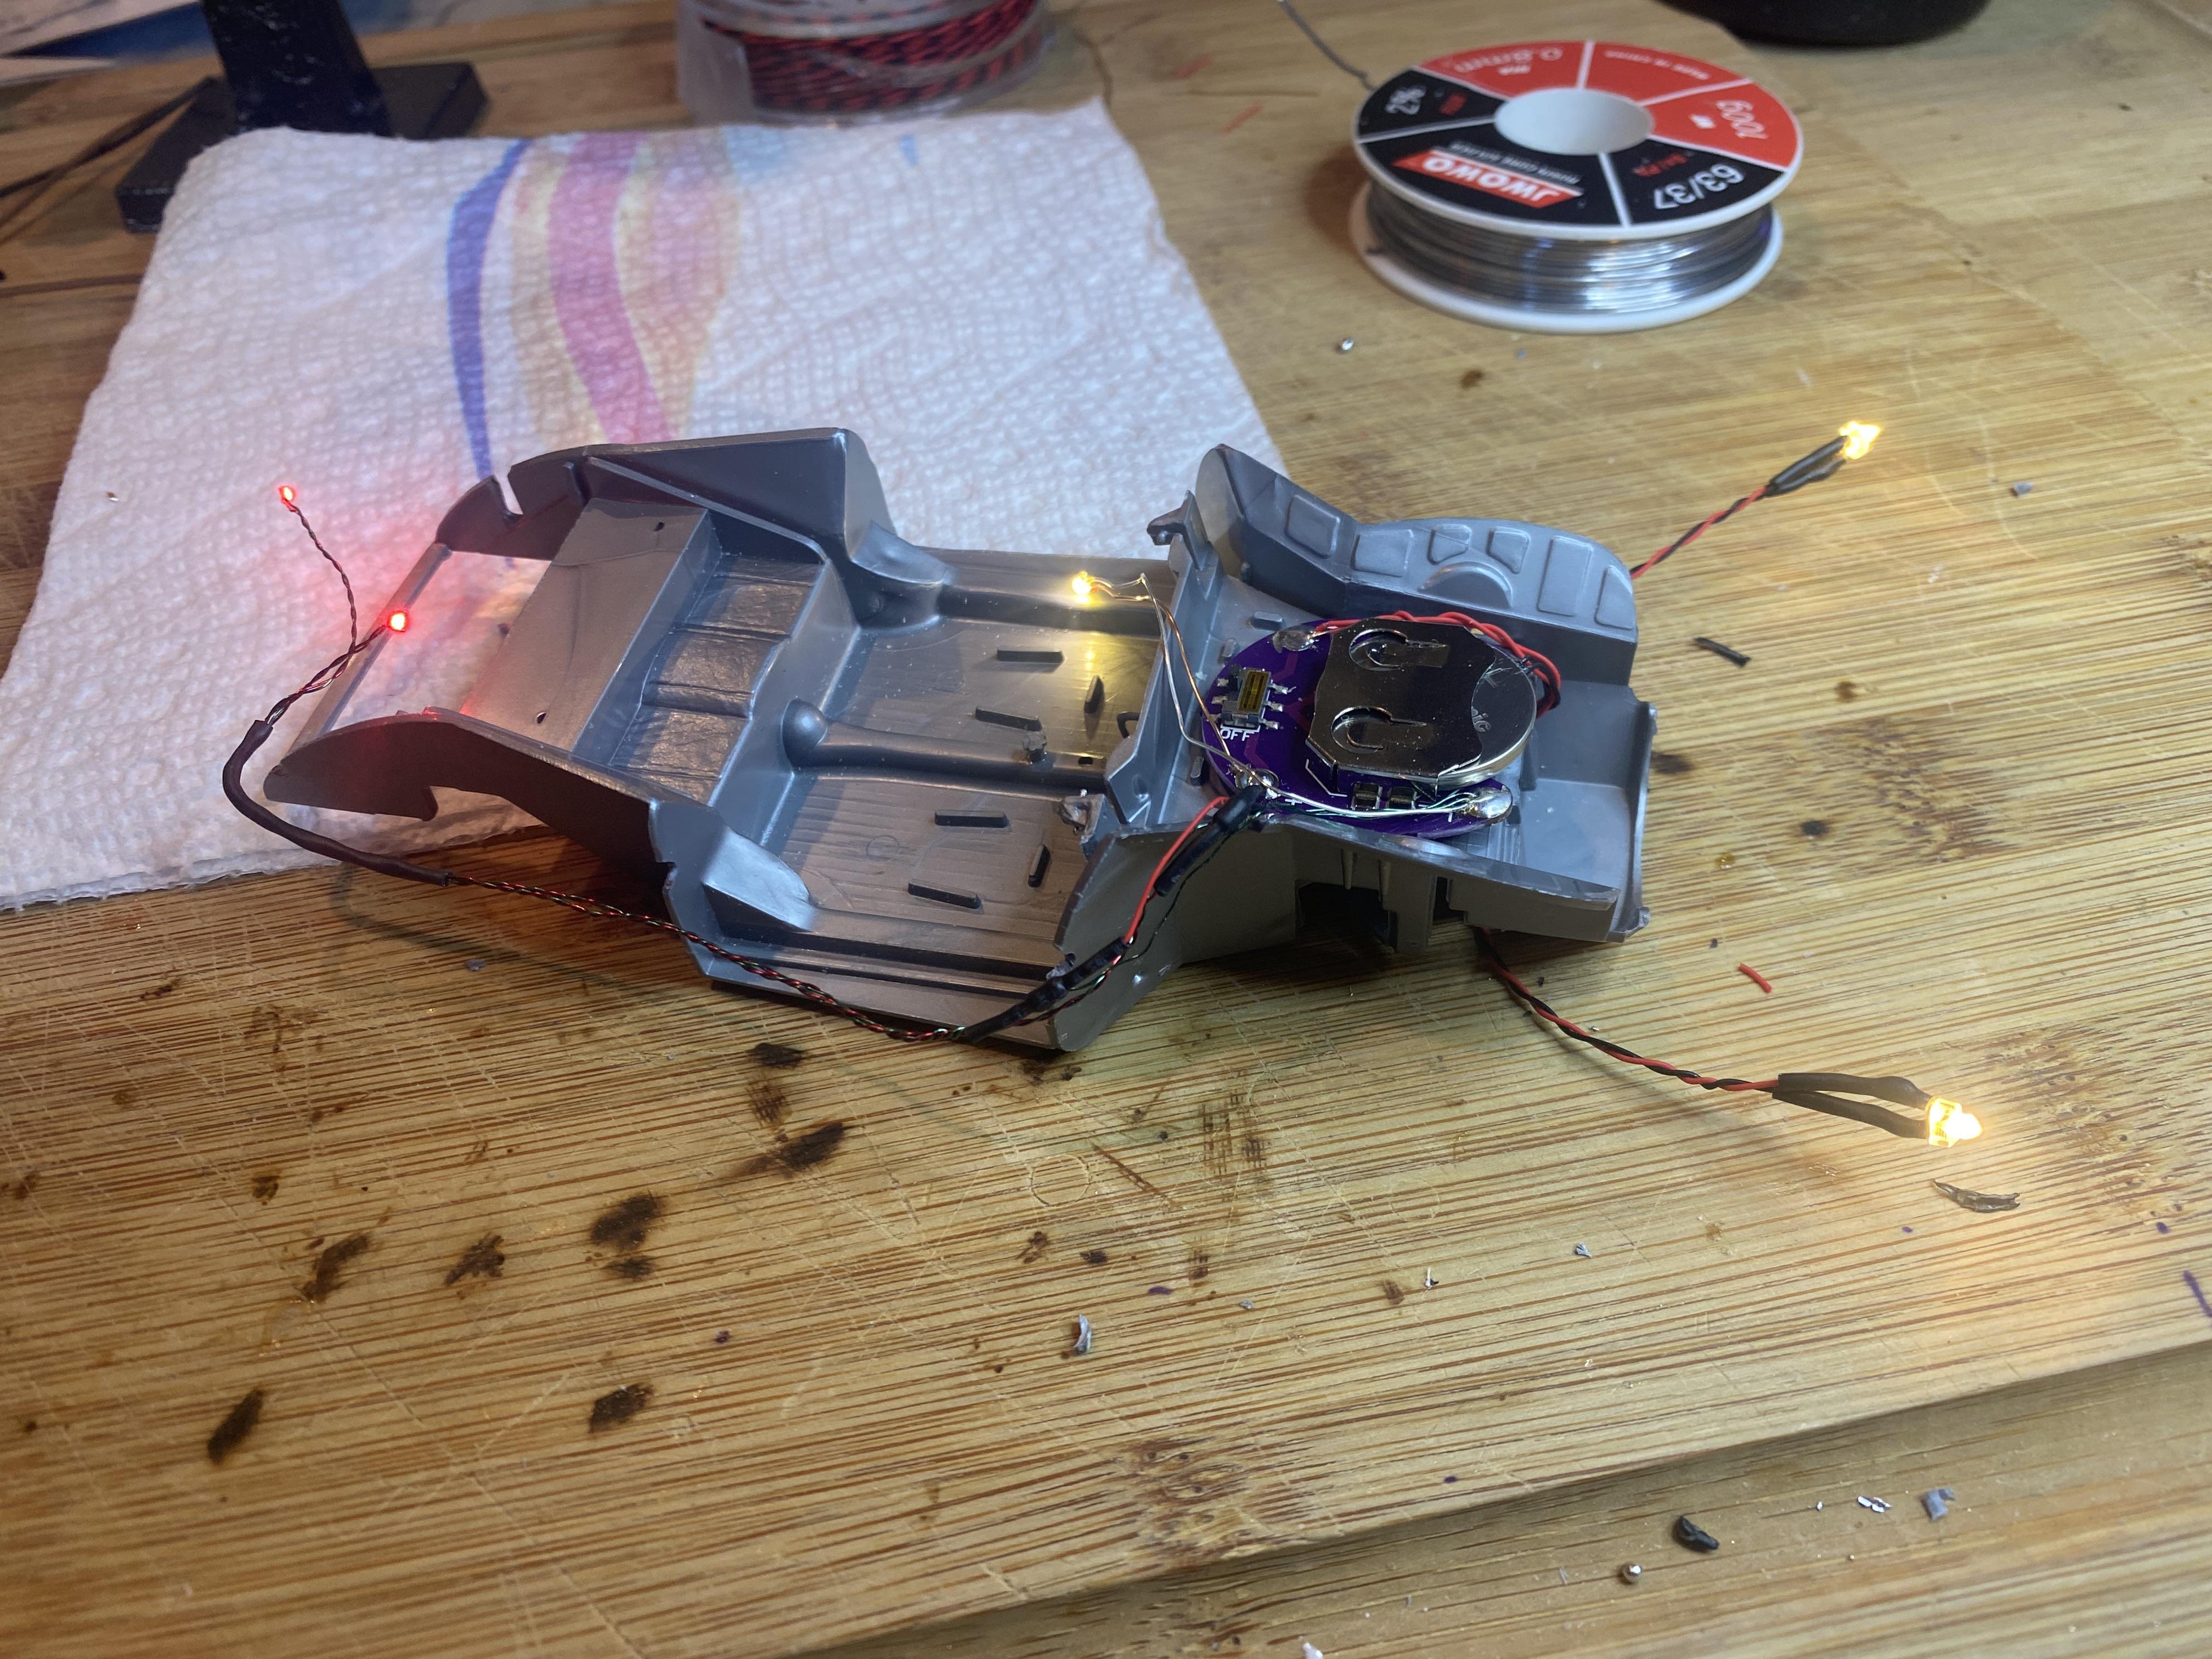
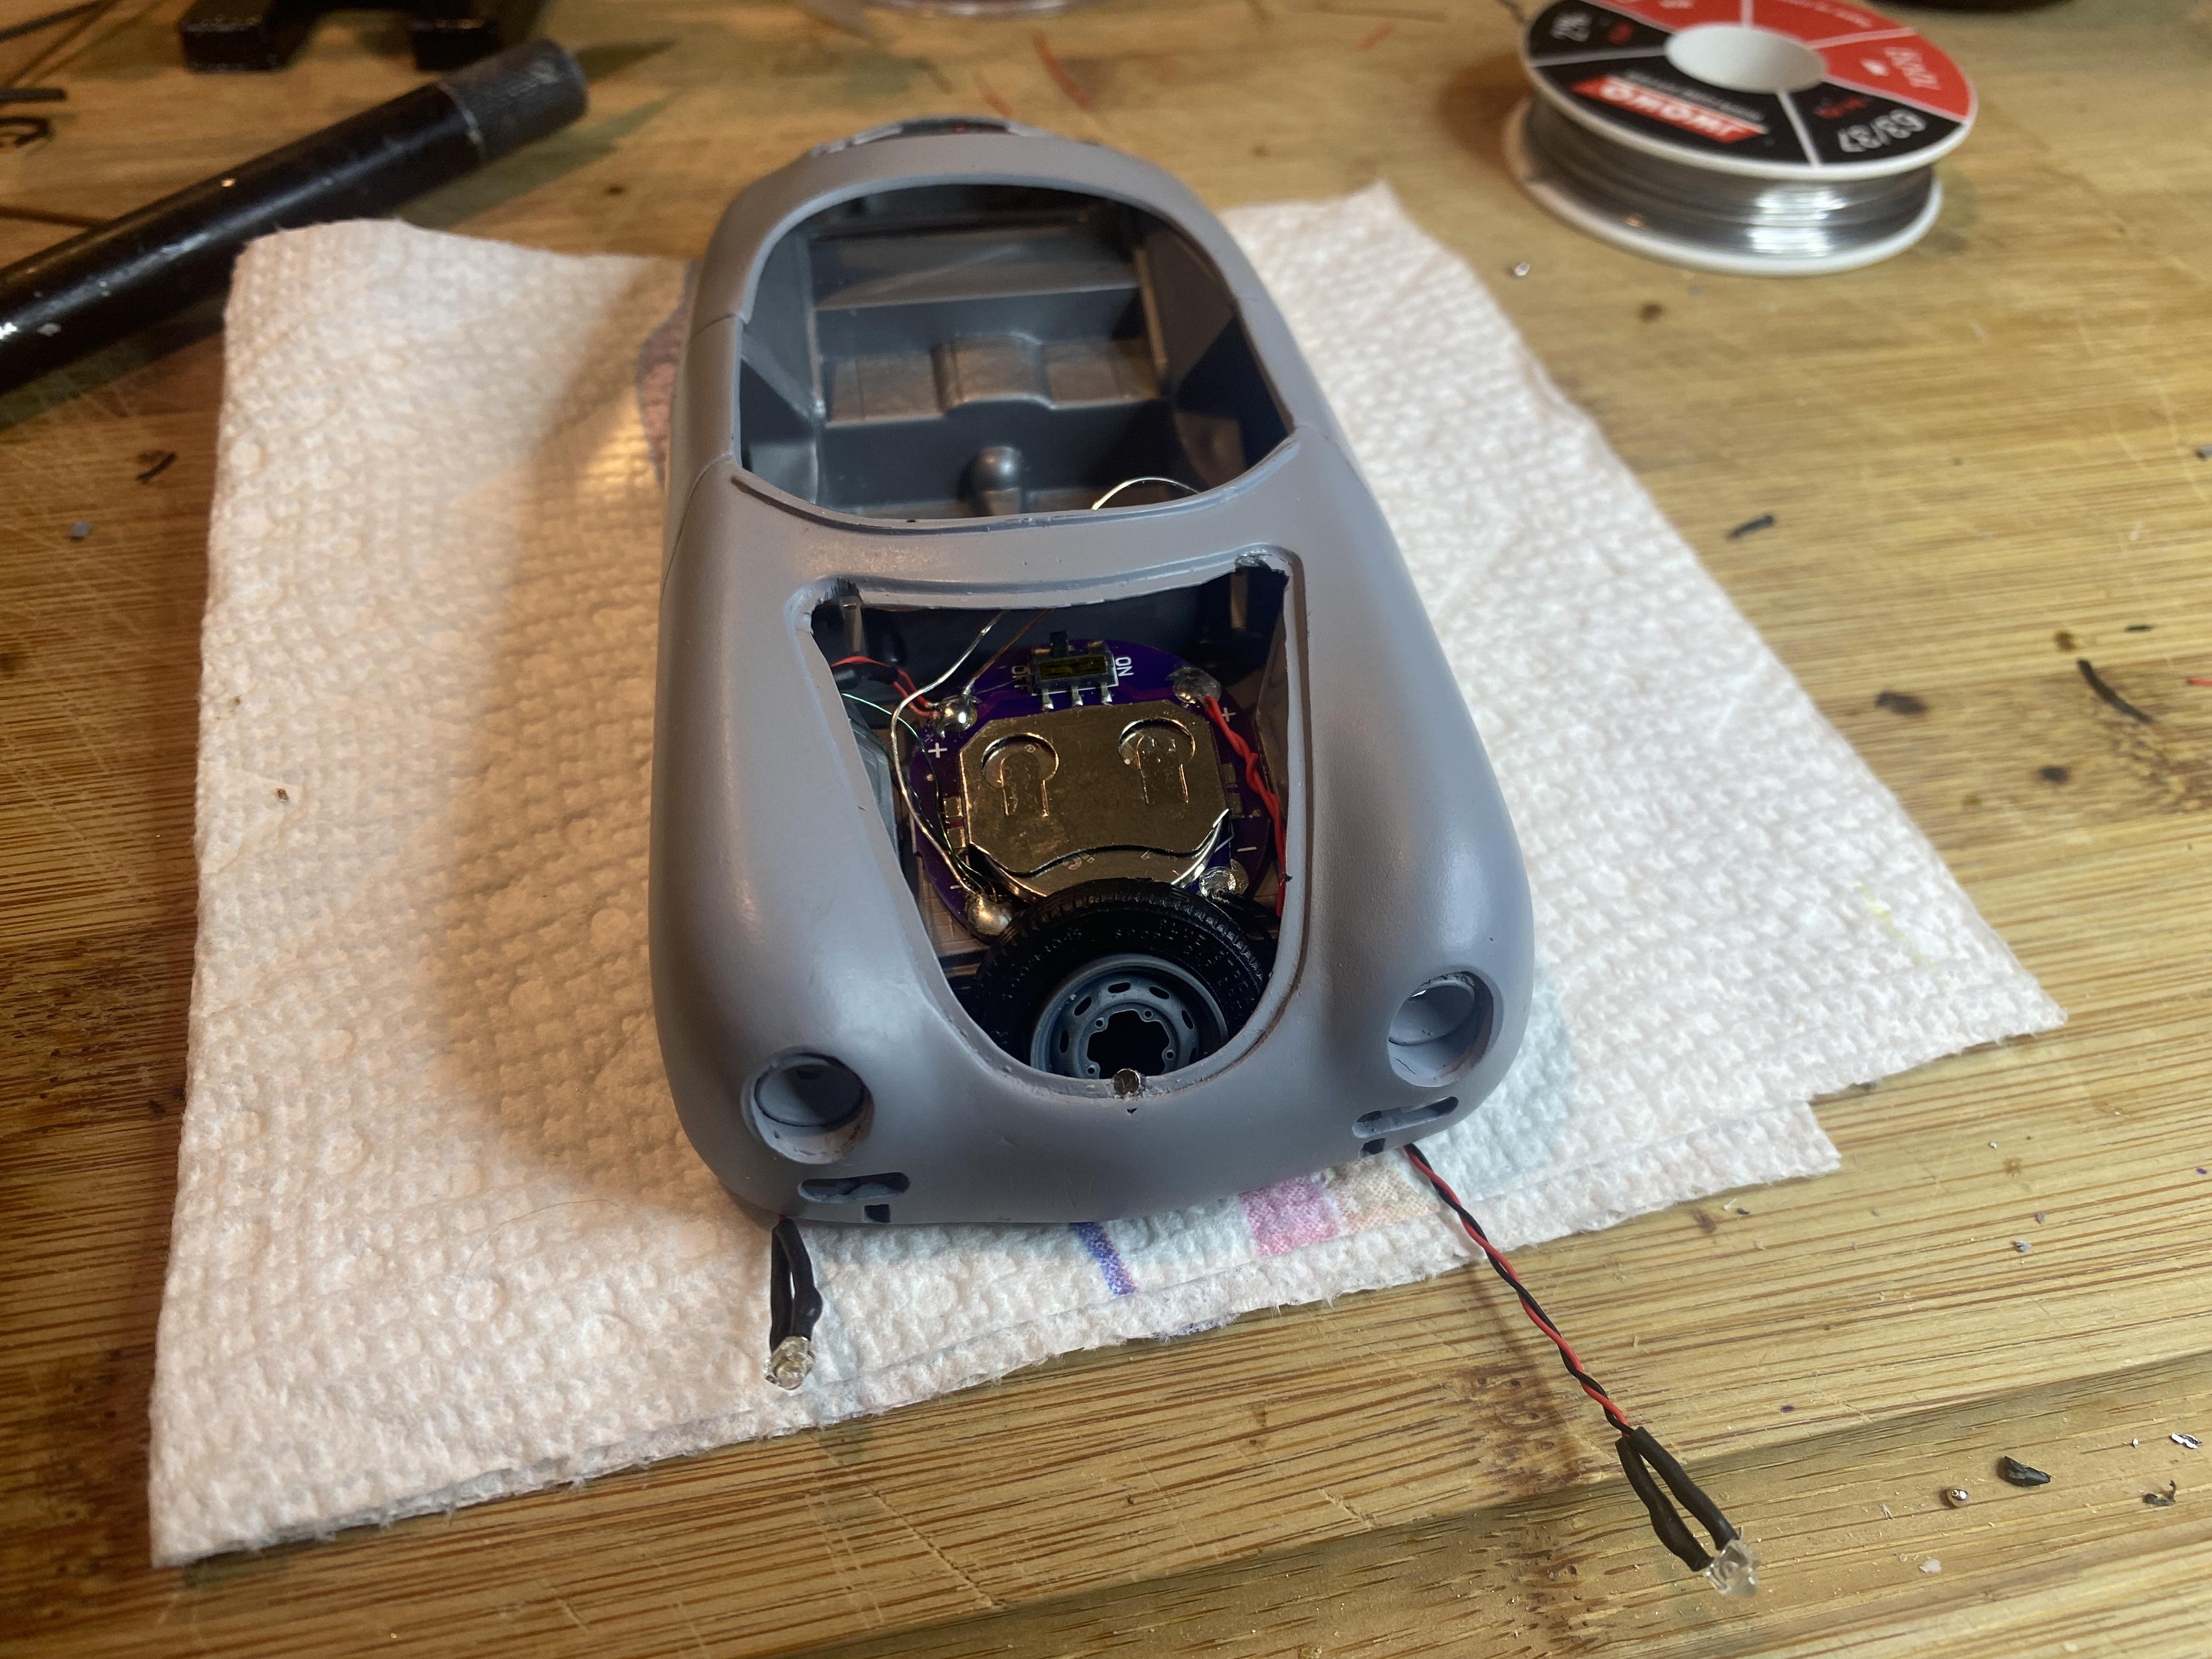
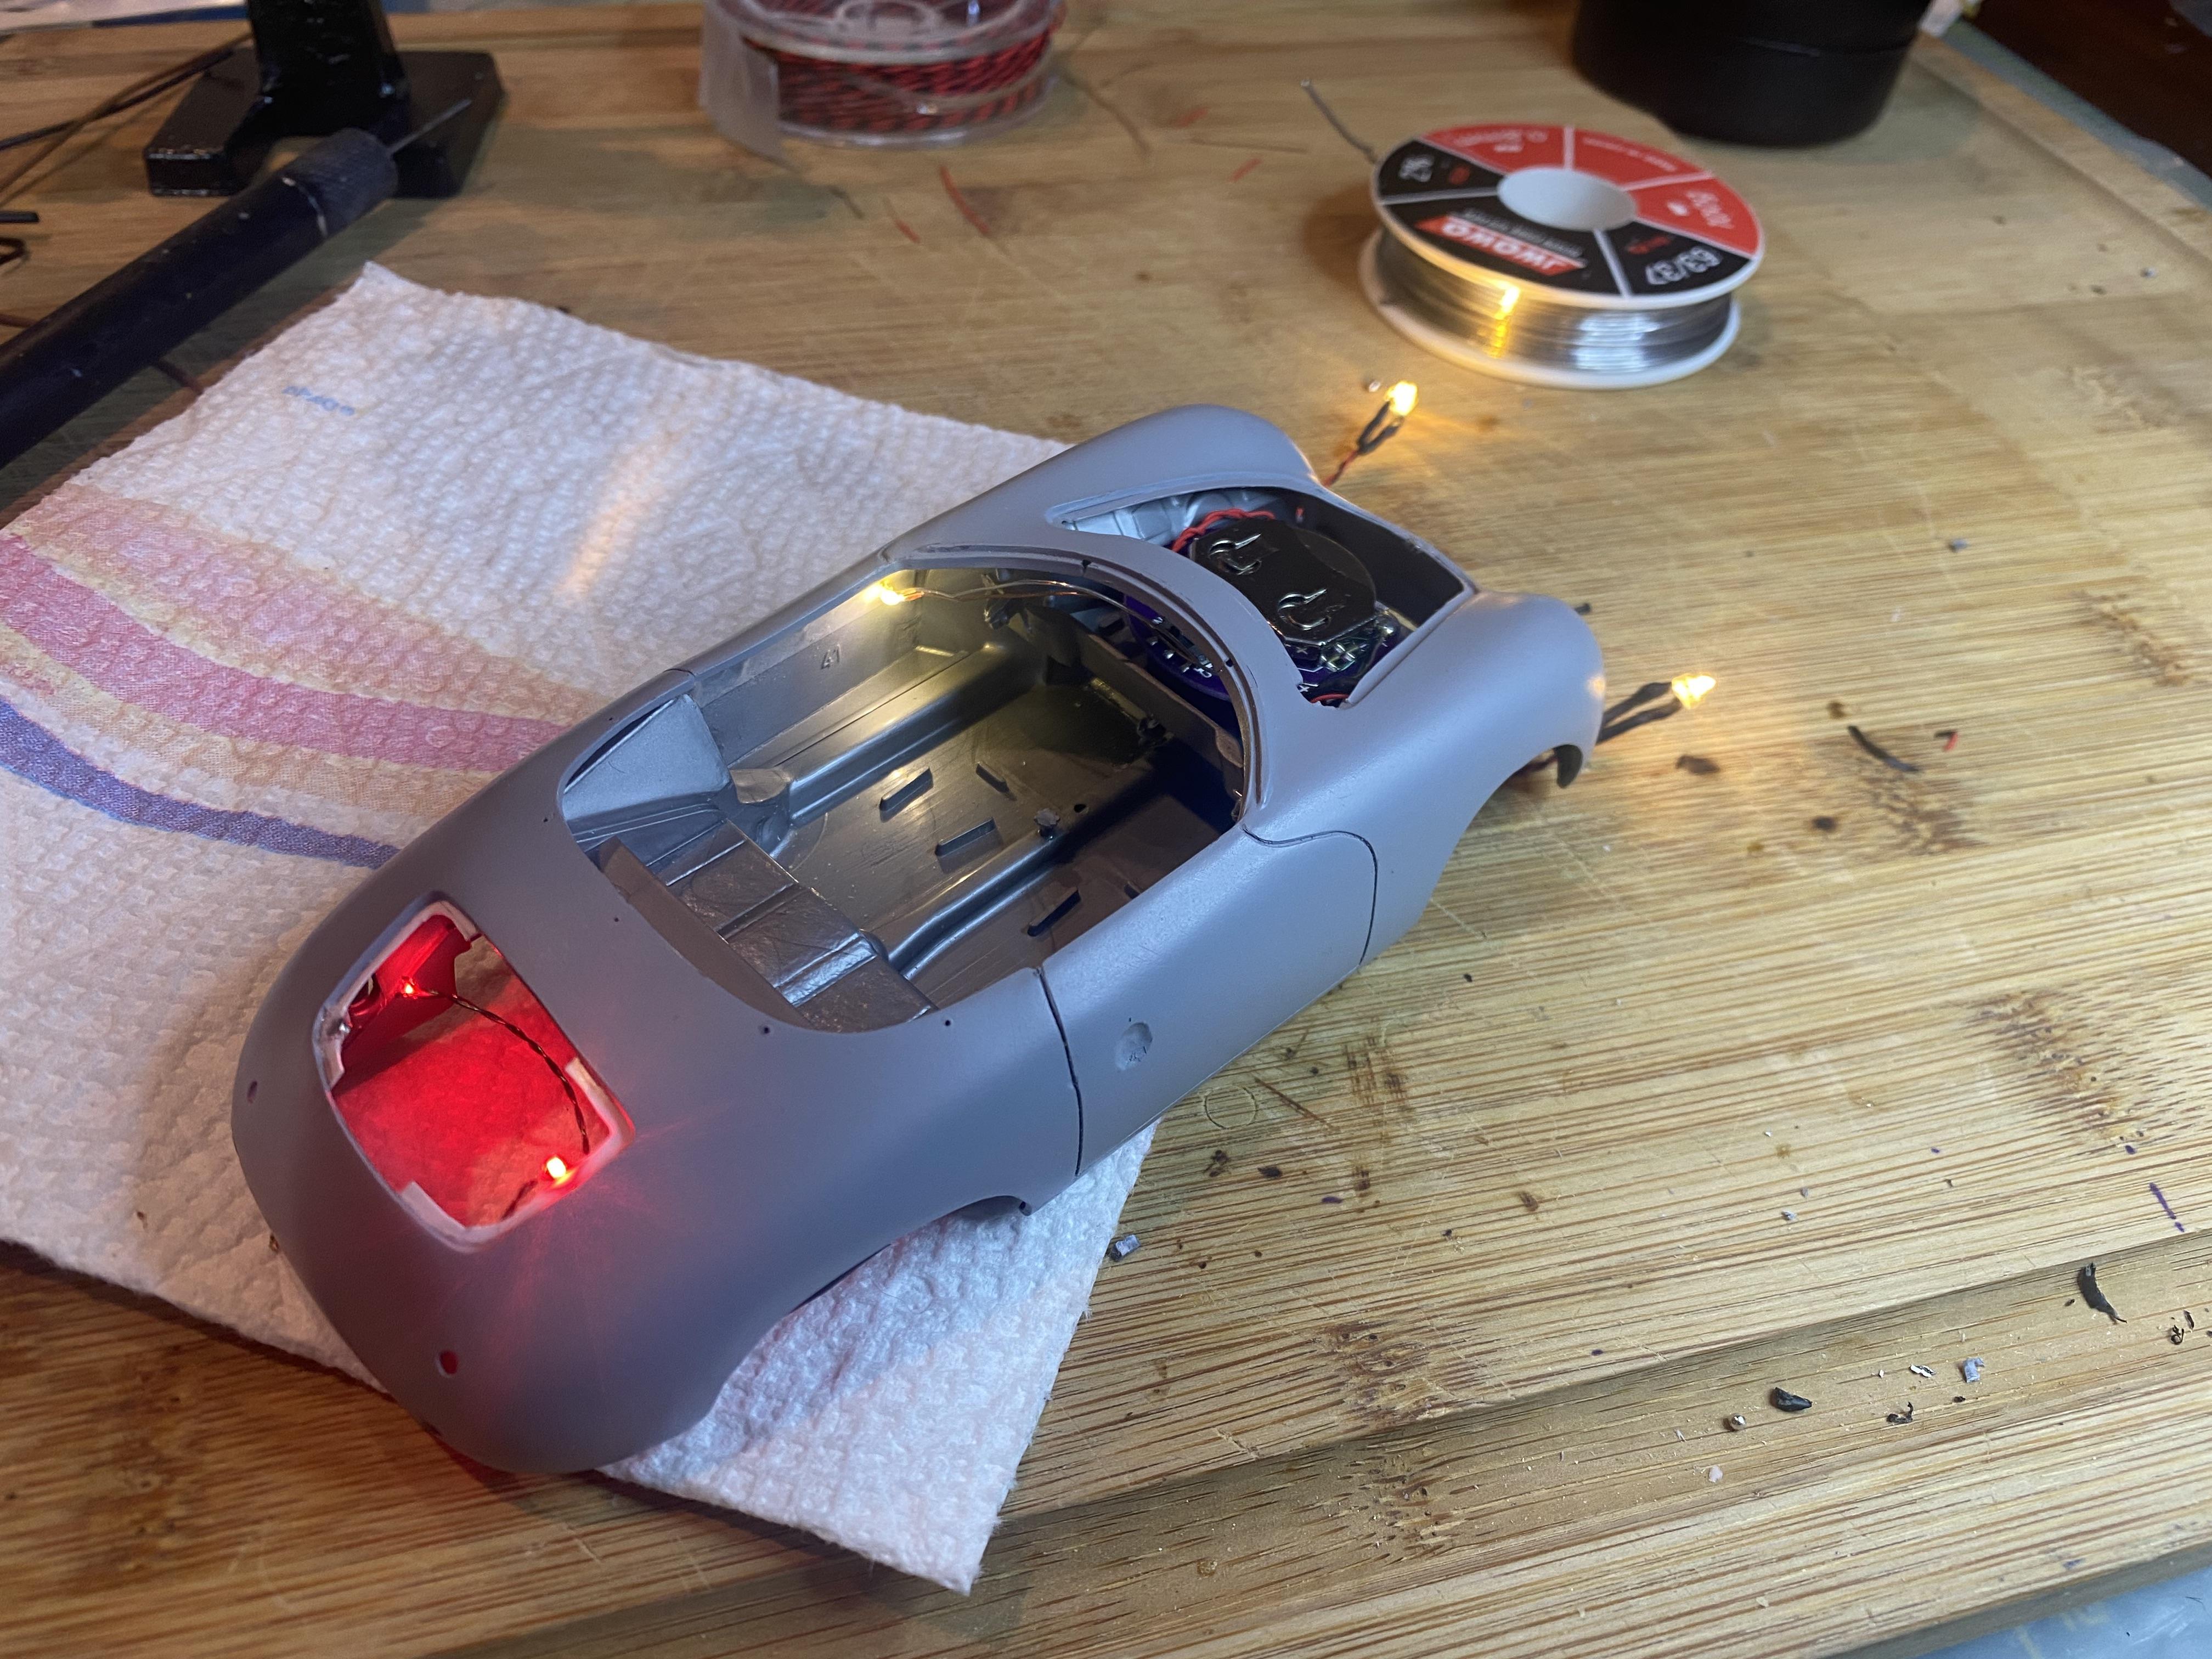
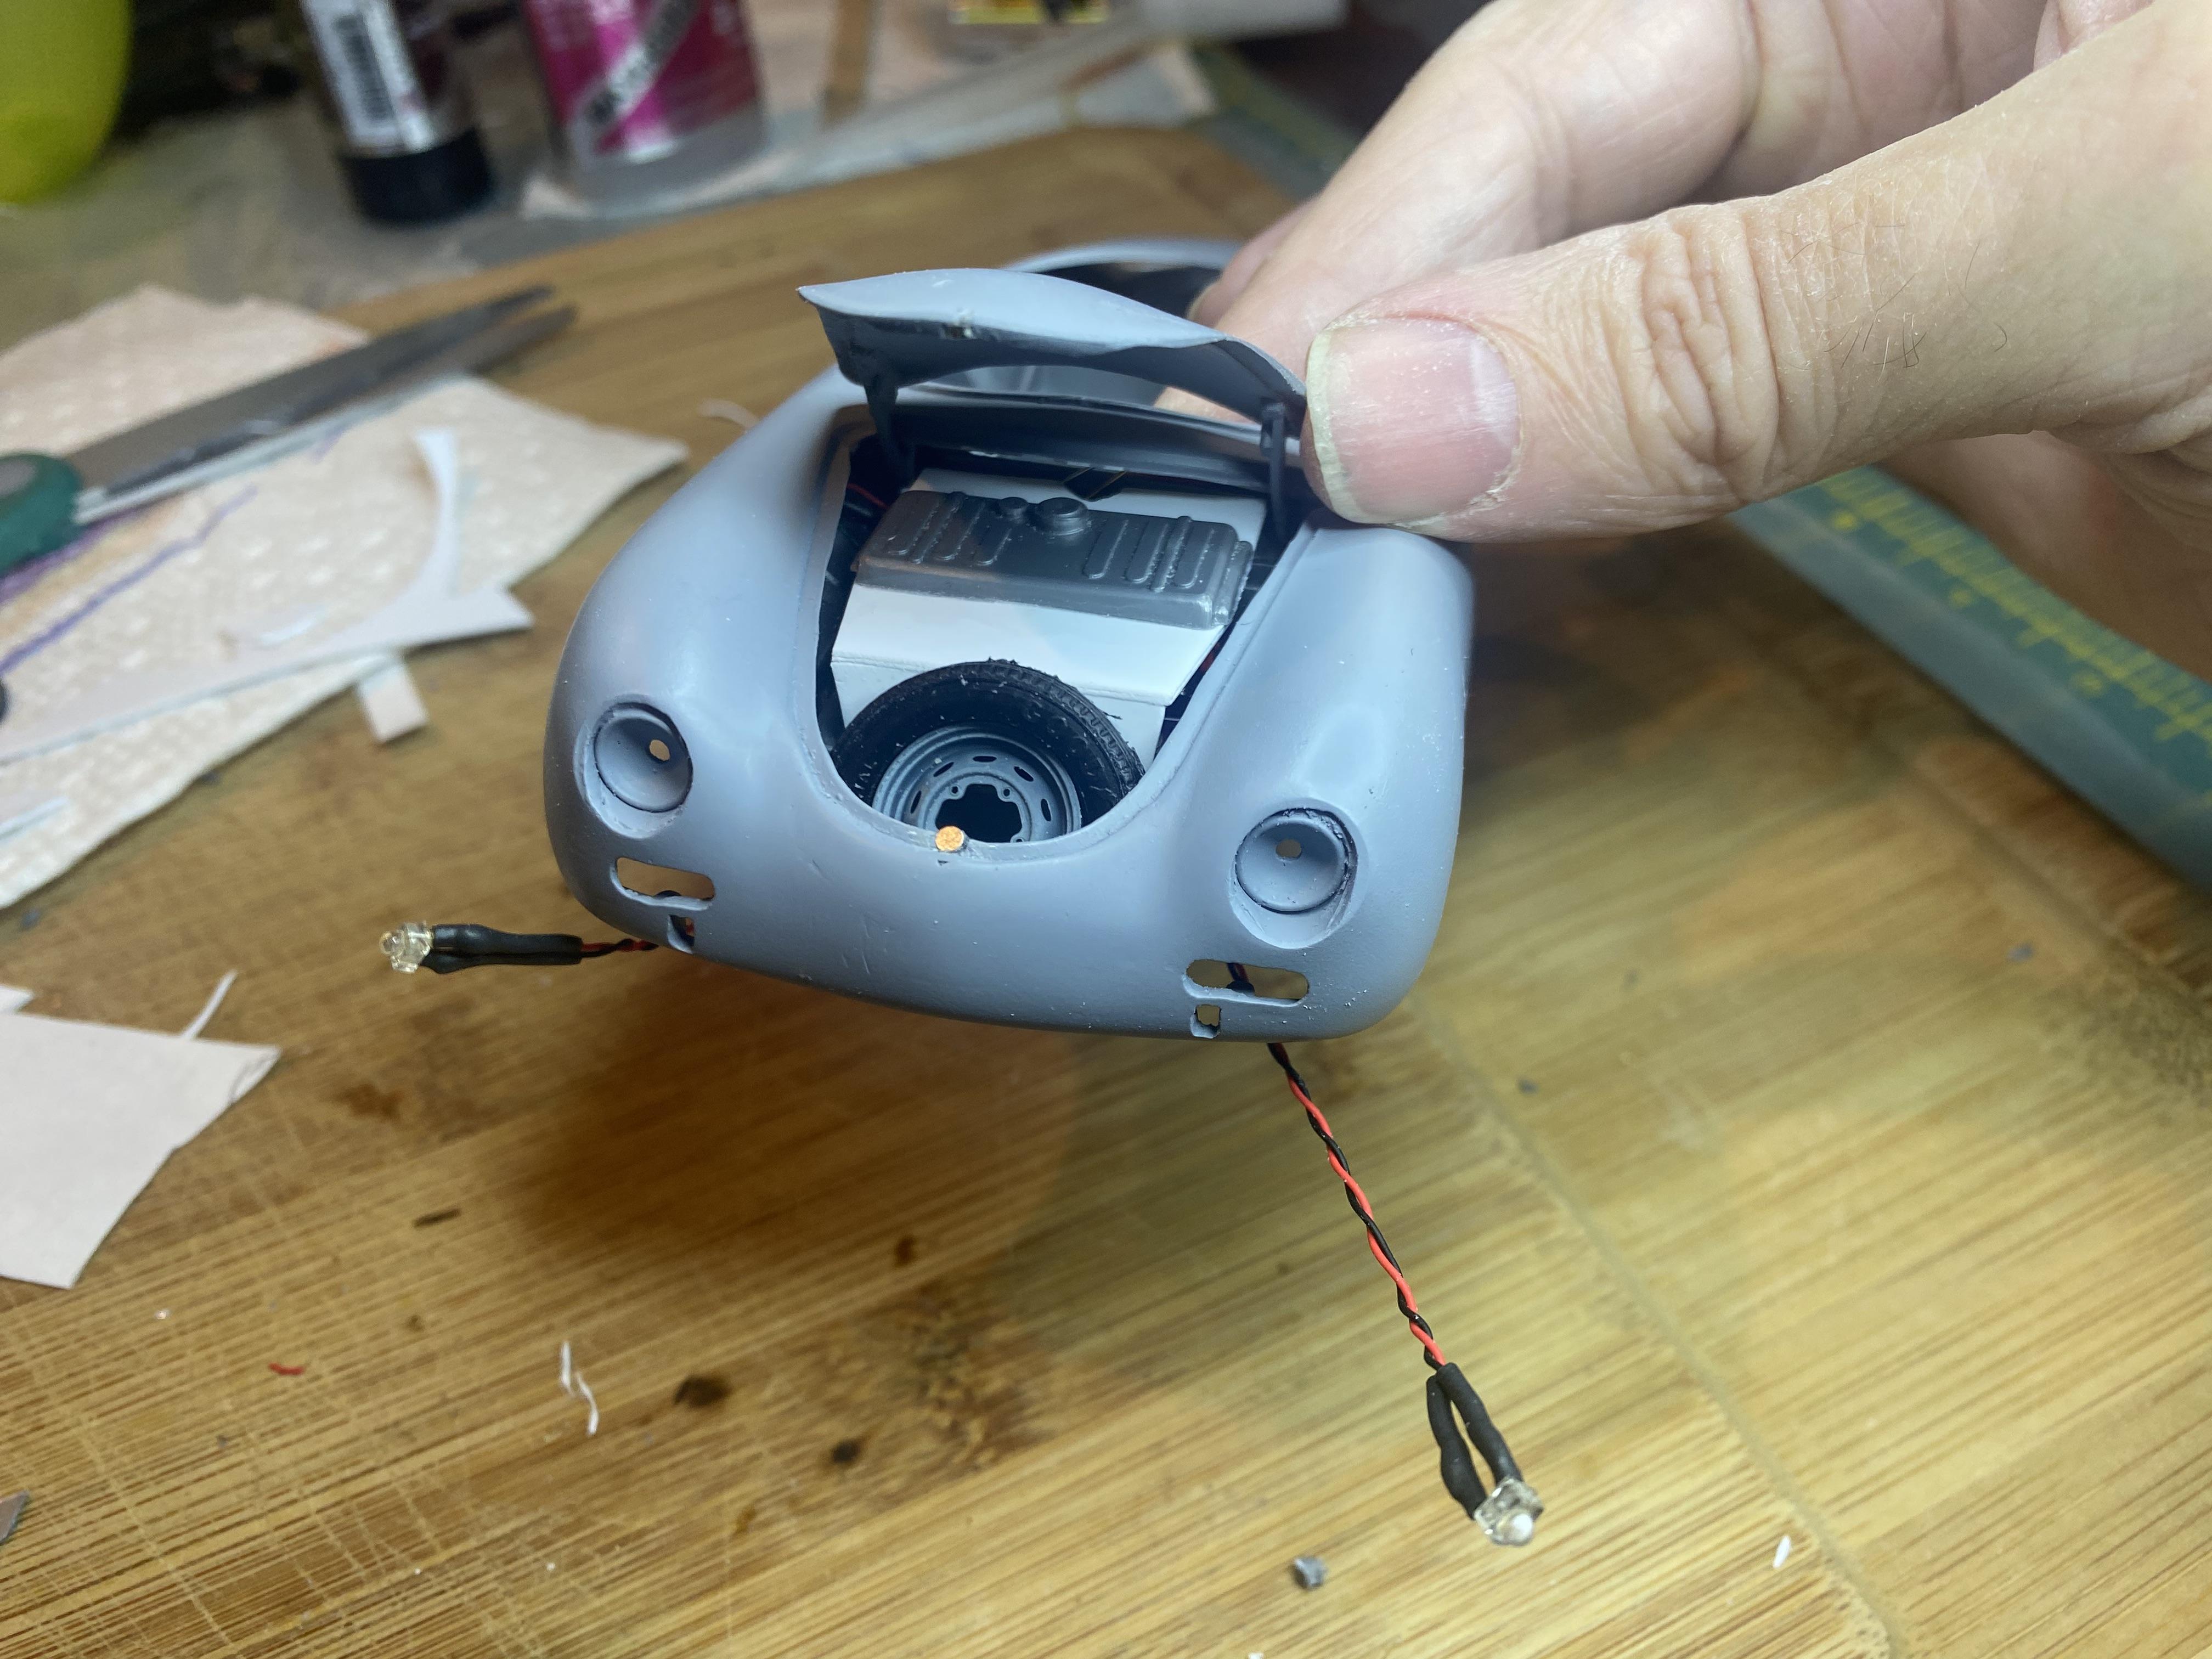
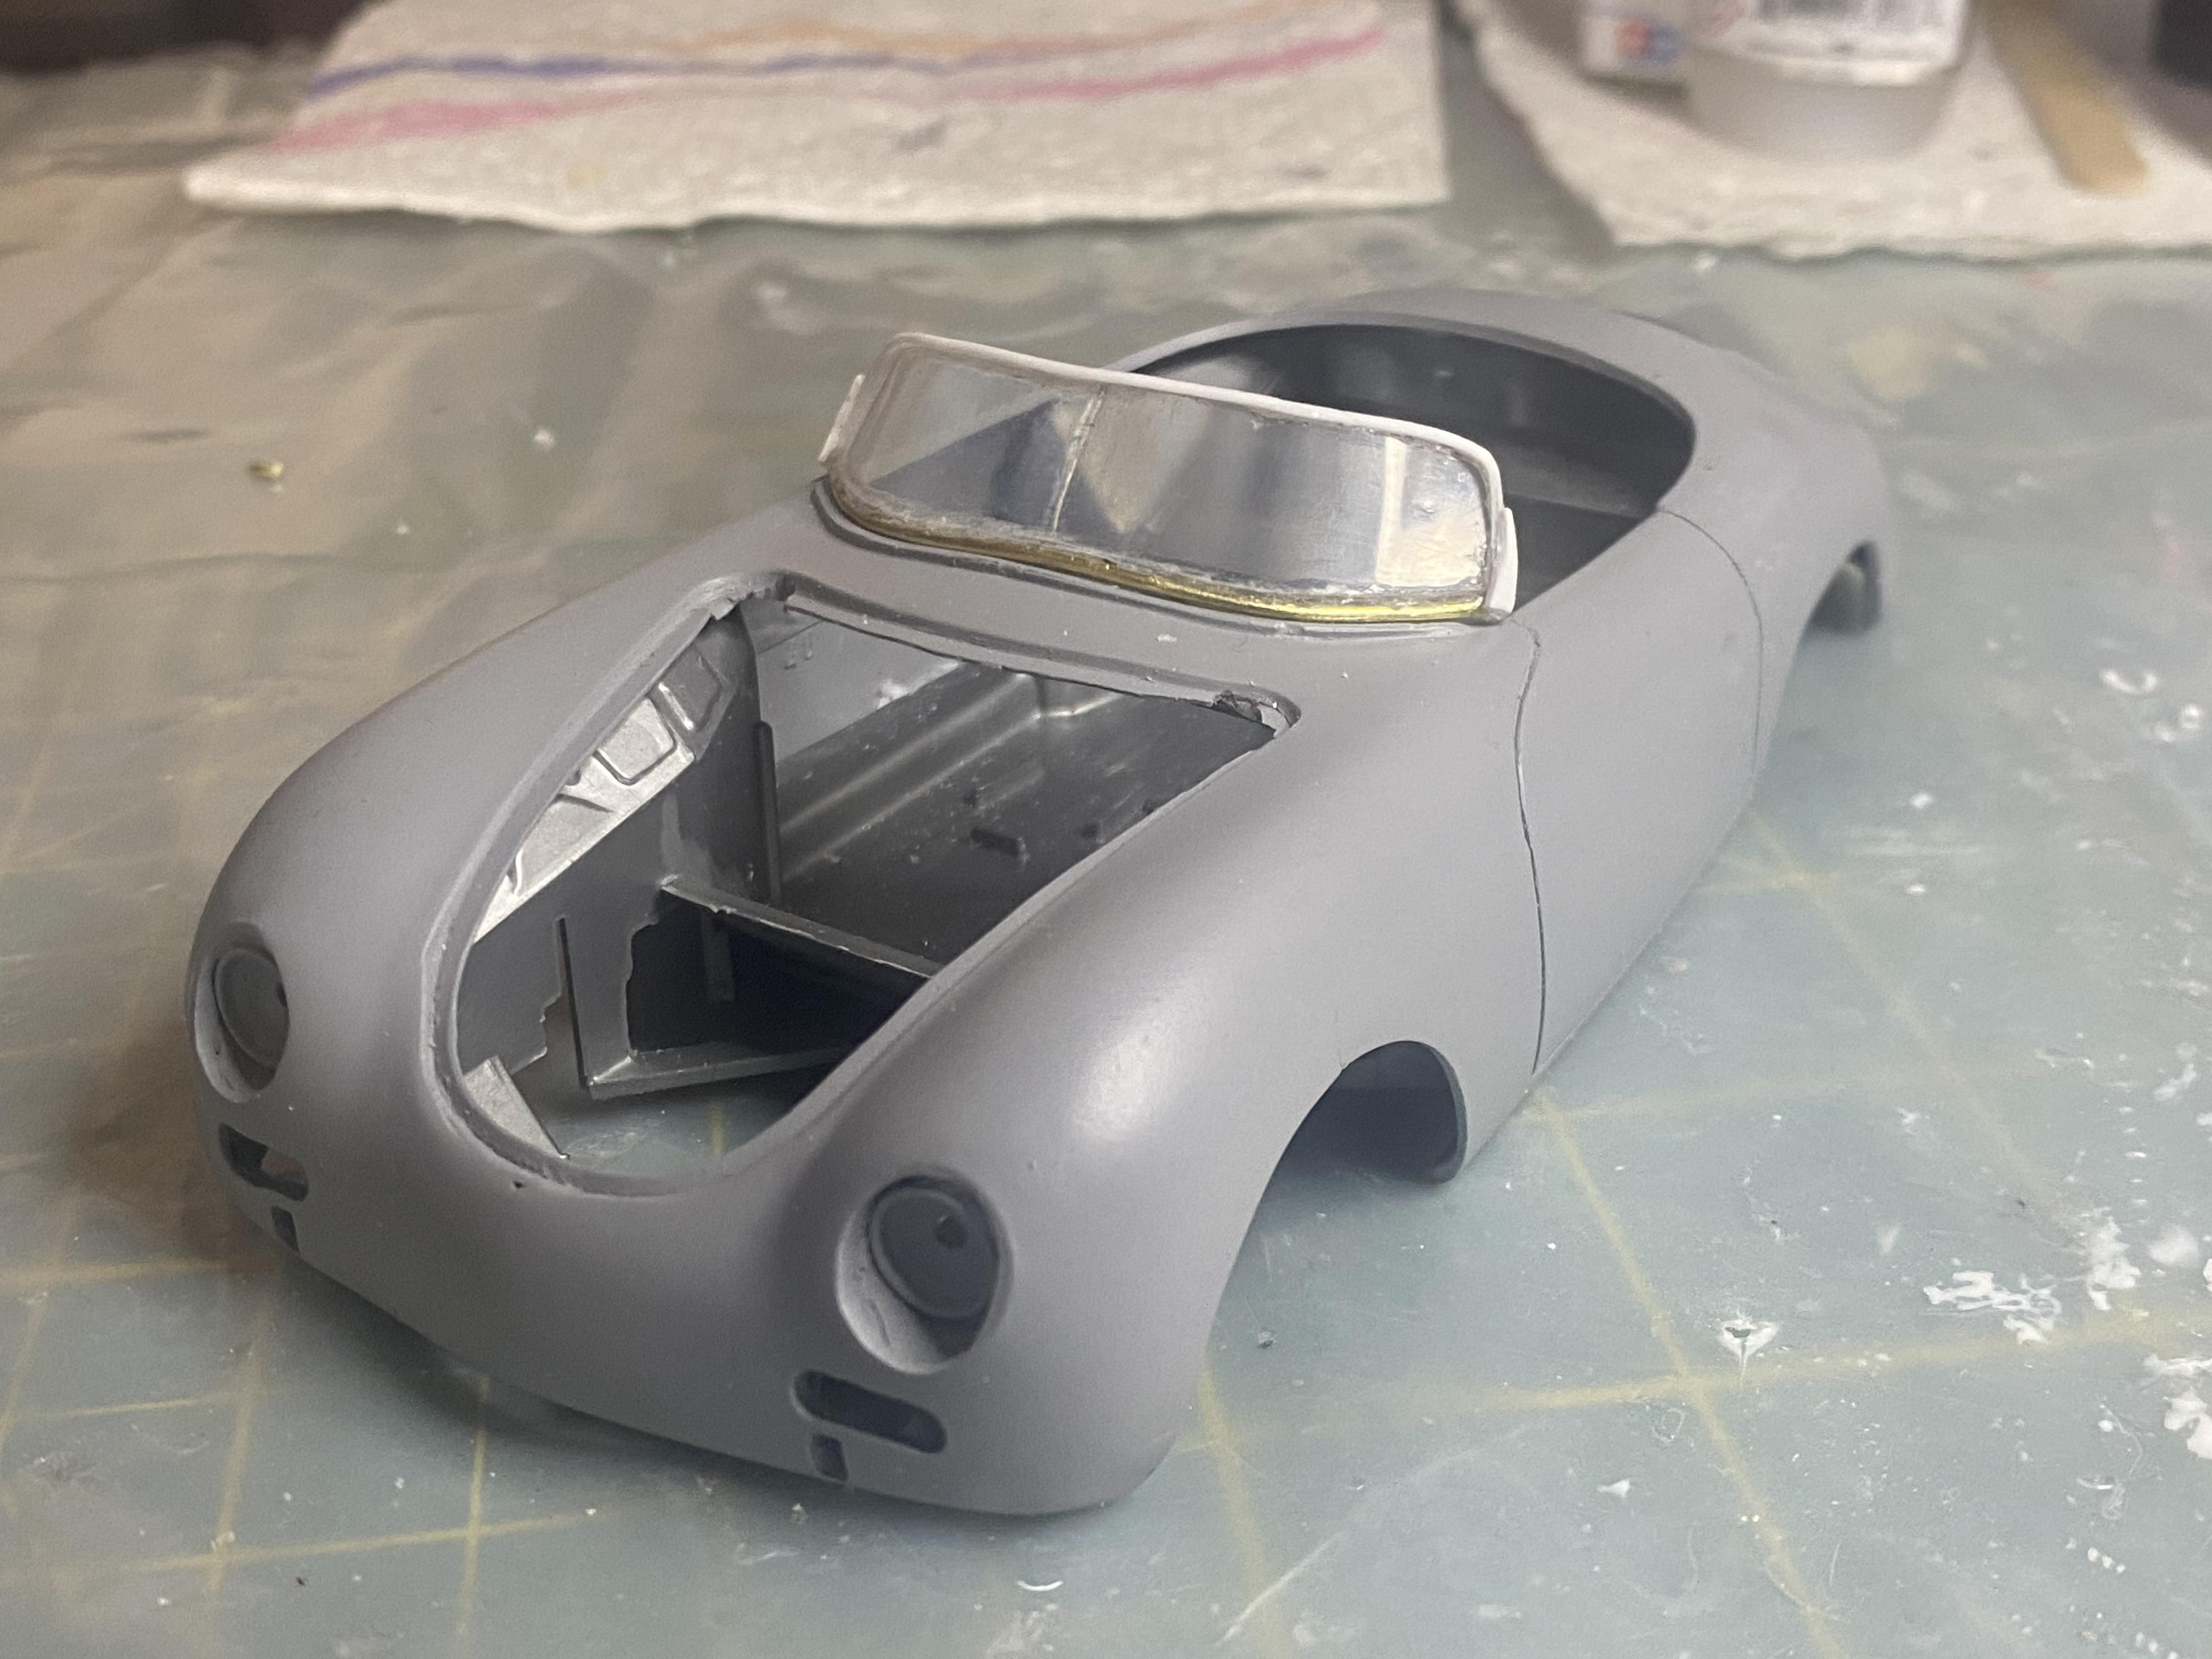
I created and test fit the LED wiring harness. I then created a trunk panel and spare to hide the battery holder. Then I scratch made the rear view mirror. Getting close to finishing fabrication and about ready to move to paint and body. I also drilled out the lug nuts in the rims to add hex rivet lug nut details to the wheels much like I did for the 1967 Mustang Convertible. I really am beginning to doubt this is going to be recognizable as a revell speedster kit any more.
-
Thank You! The hood came from the Revell 1968 Mustang Fastback kit. I molded and resin cast it. It requires a bit of trimming to fit the AMT kit but the body lines match up pretty well.
-
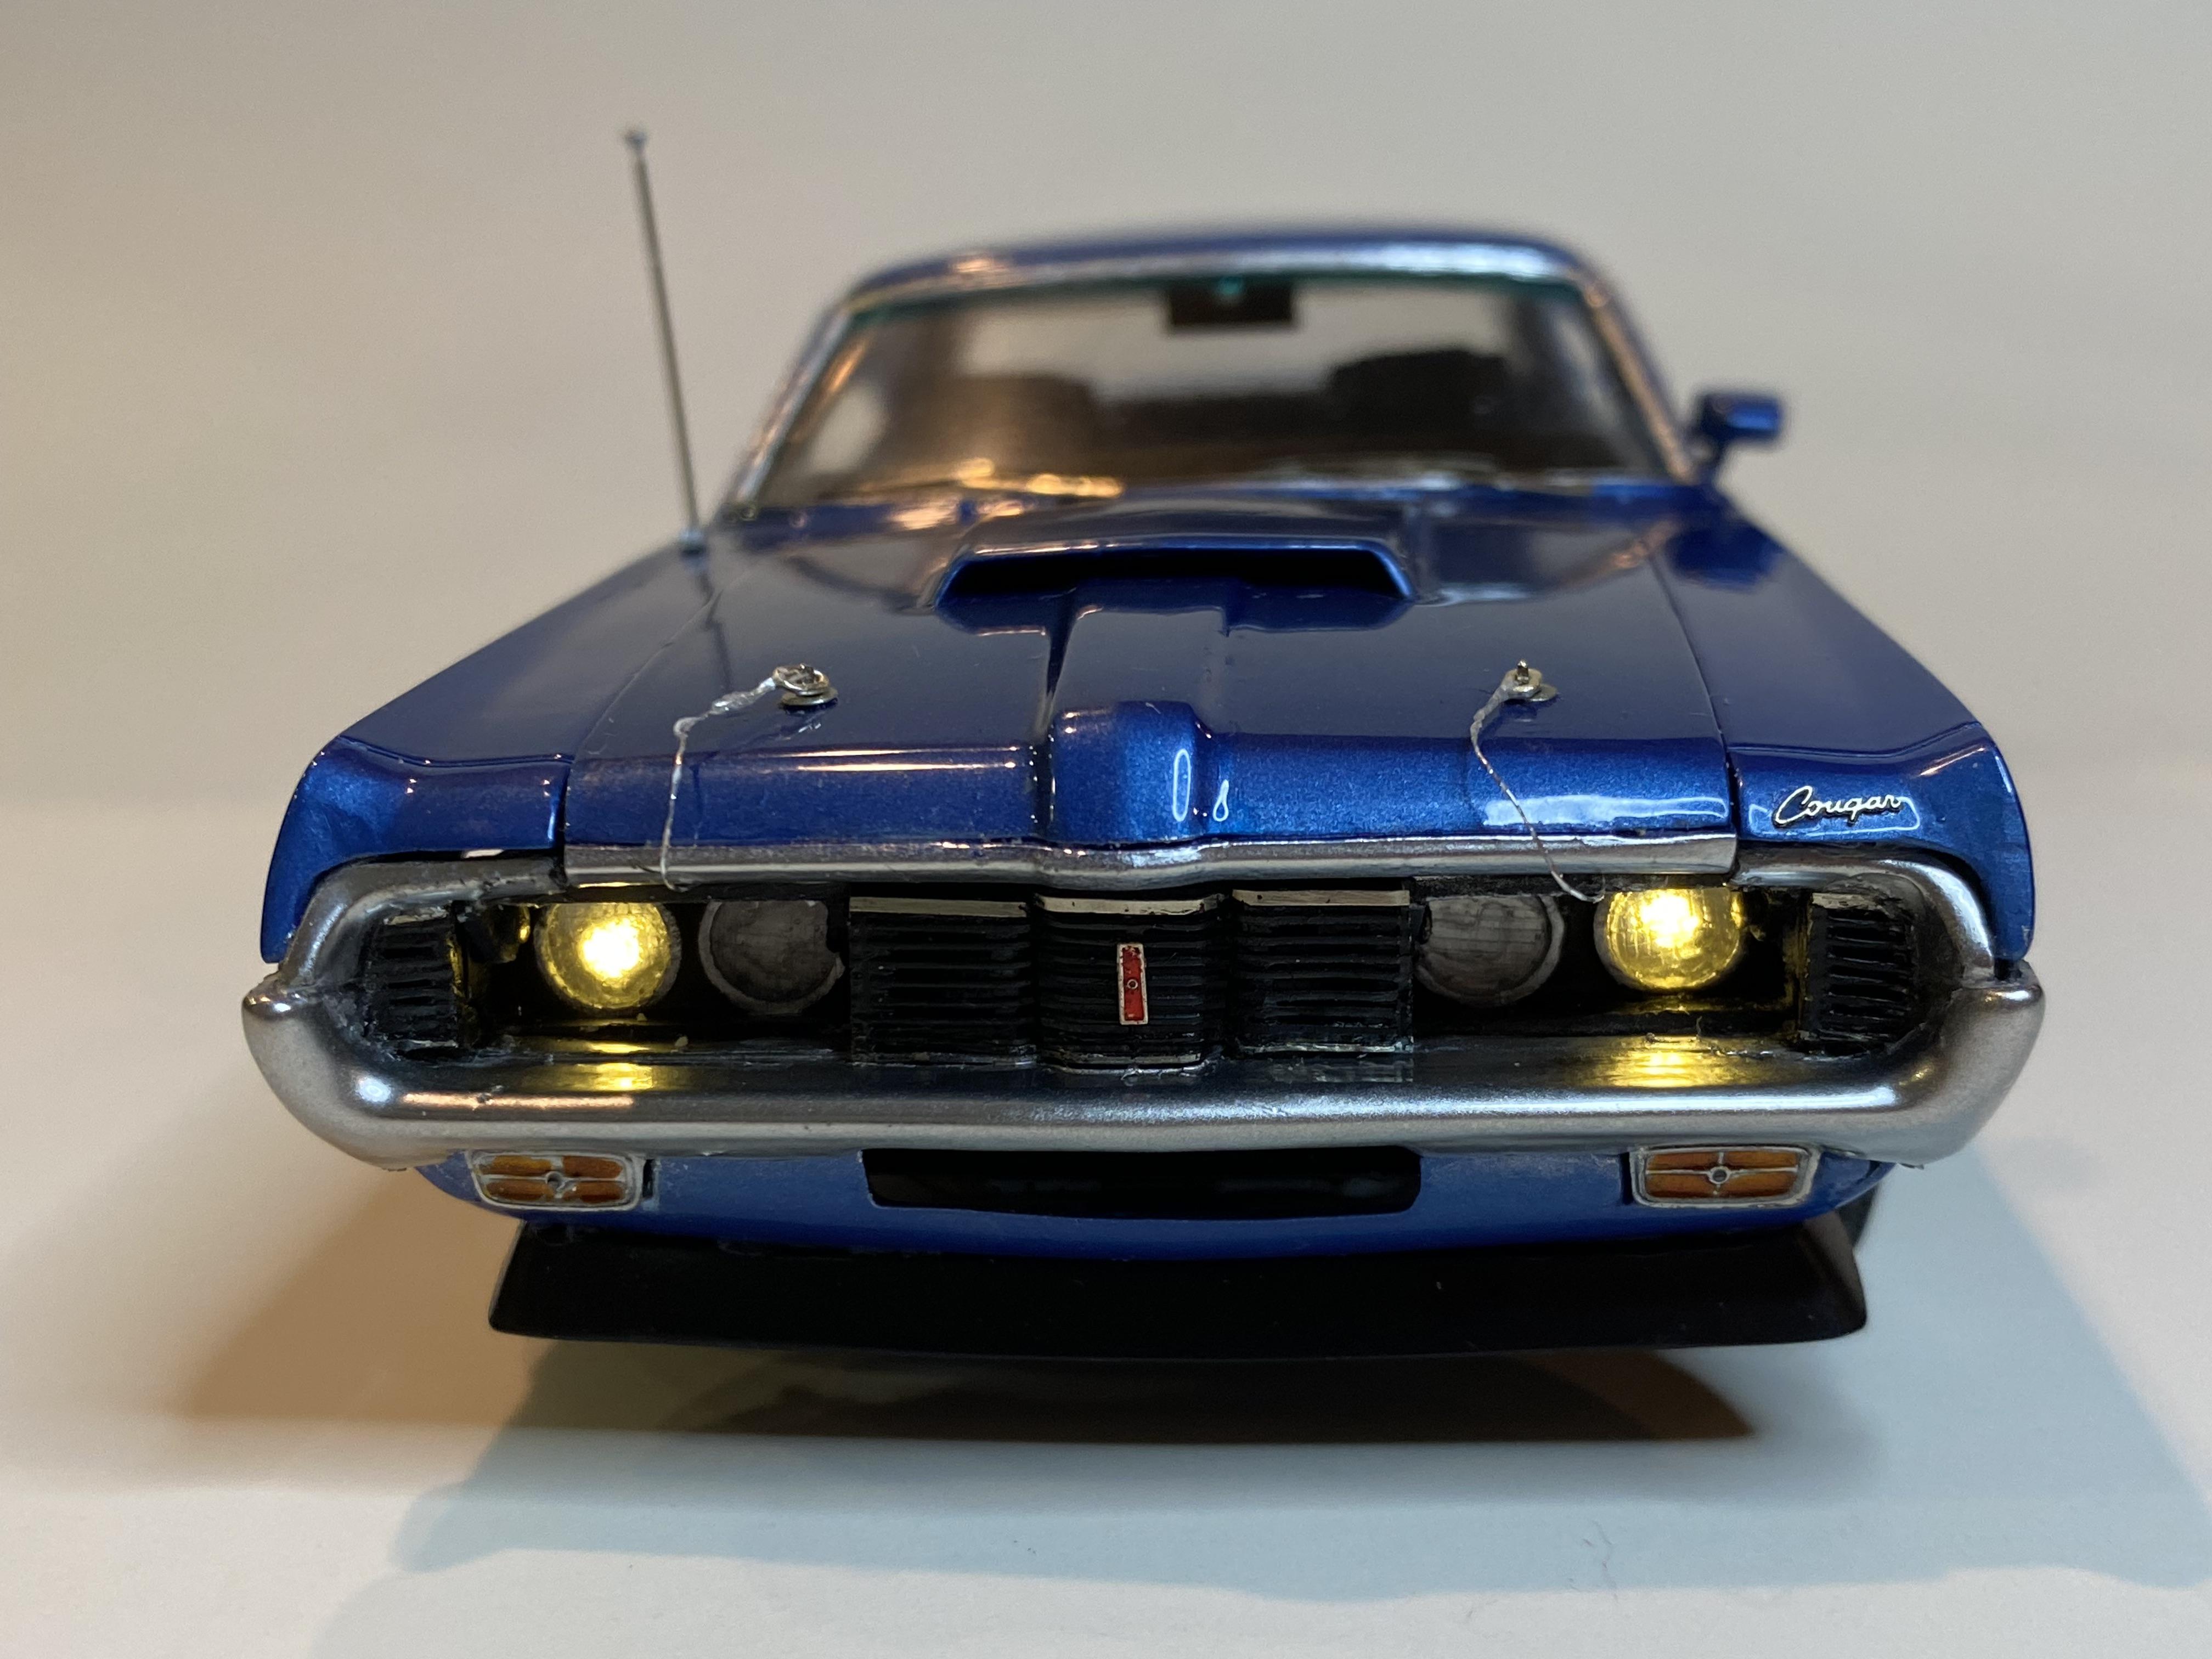
Thank You! Thank You! Making the lights open and close on the corvette and Cougar were the most difficult part of lighting them.
-
Thank You! Making the headlights open and close was especially tricky for the cougar. Thank You! Other than every build having LEDs, I added poseable steering to the 67 Mustang Convertible and now my family is saying I have to add that to all future builds.
-
Thank You! Thank You!
-
We own several Mustangs, so that could be accurate mostly. Thank You!
-
Thank You! Thank You!
-
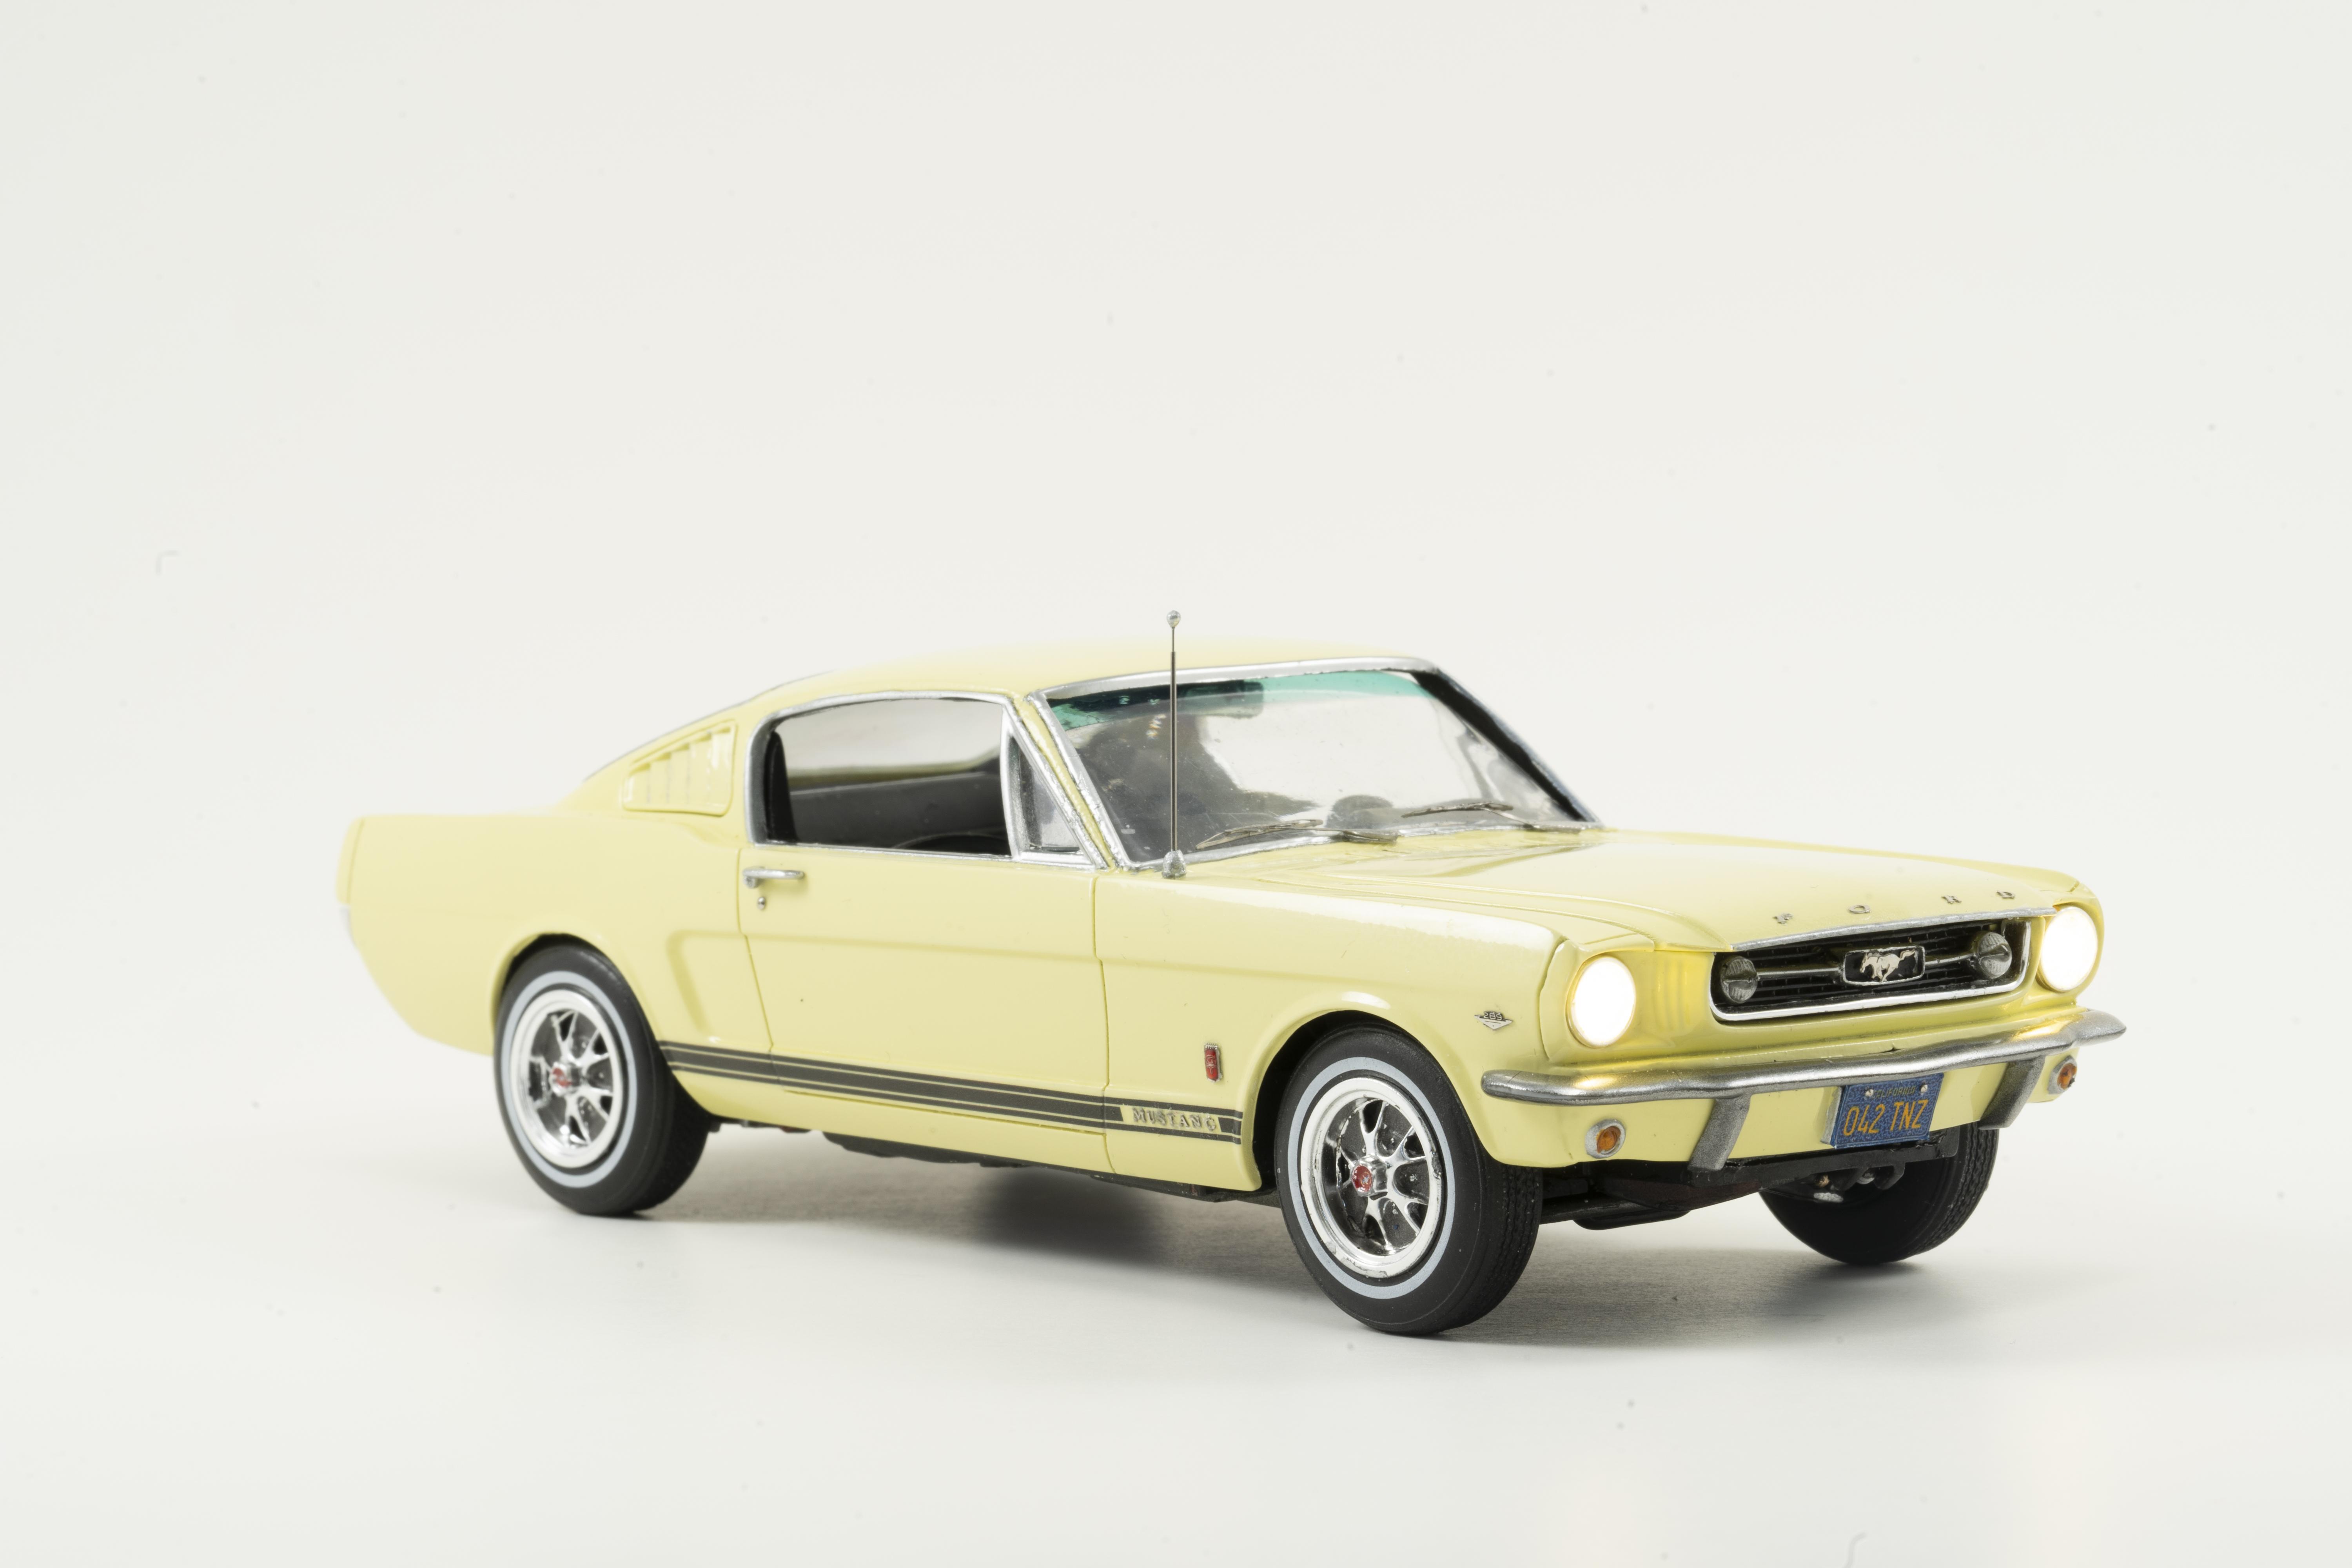
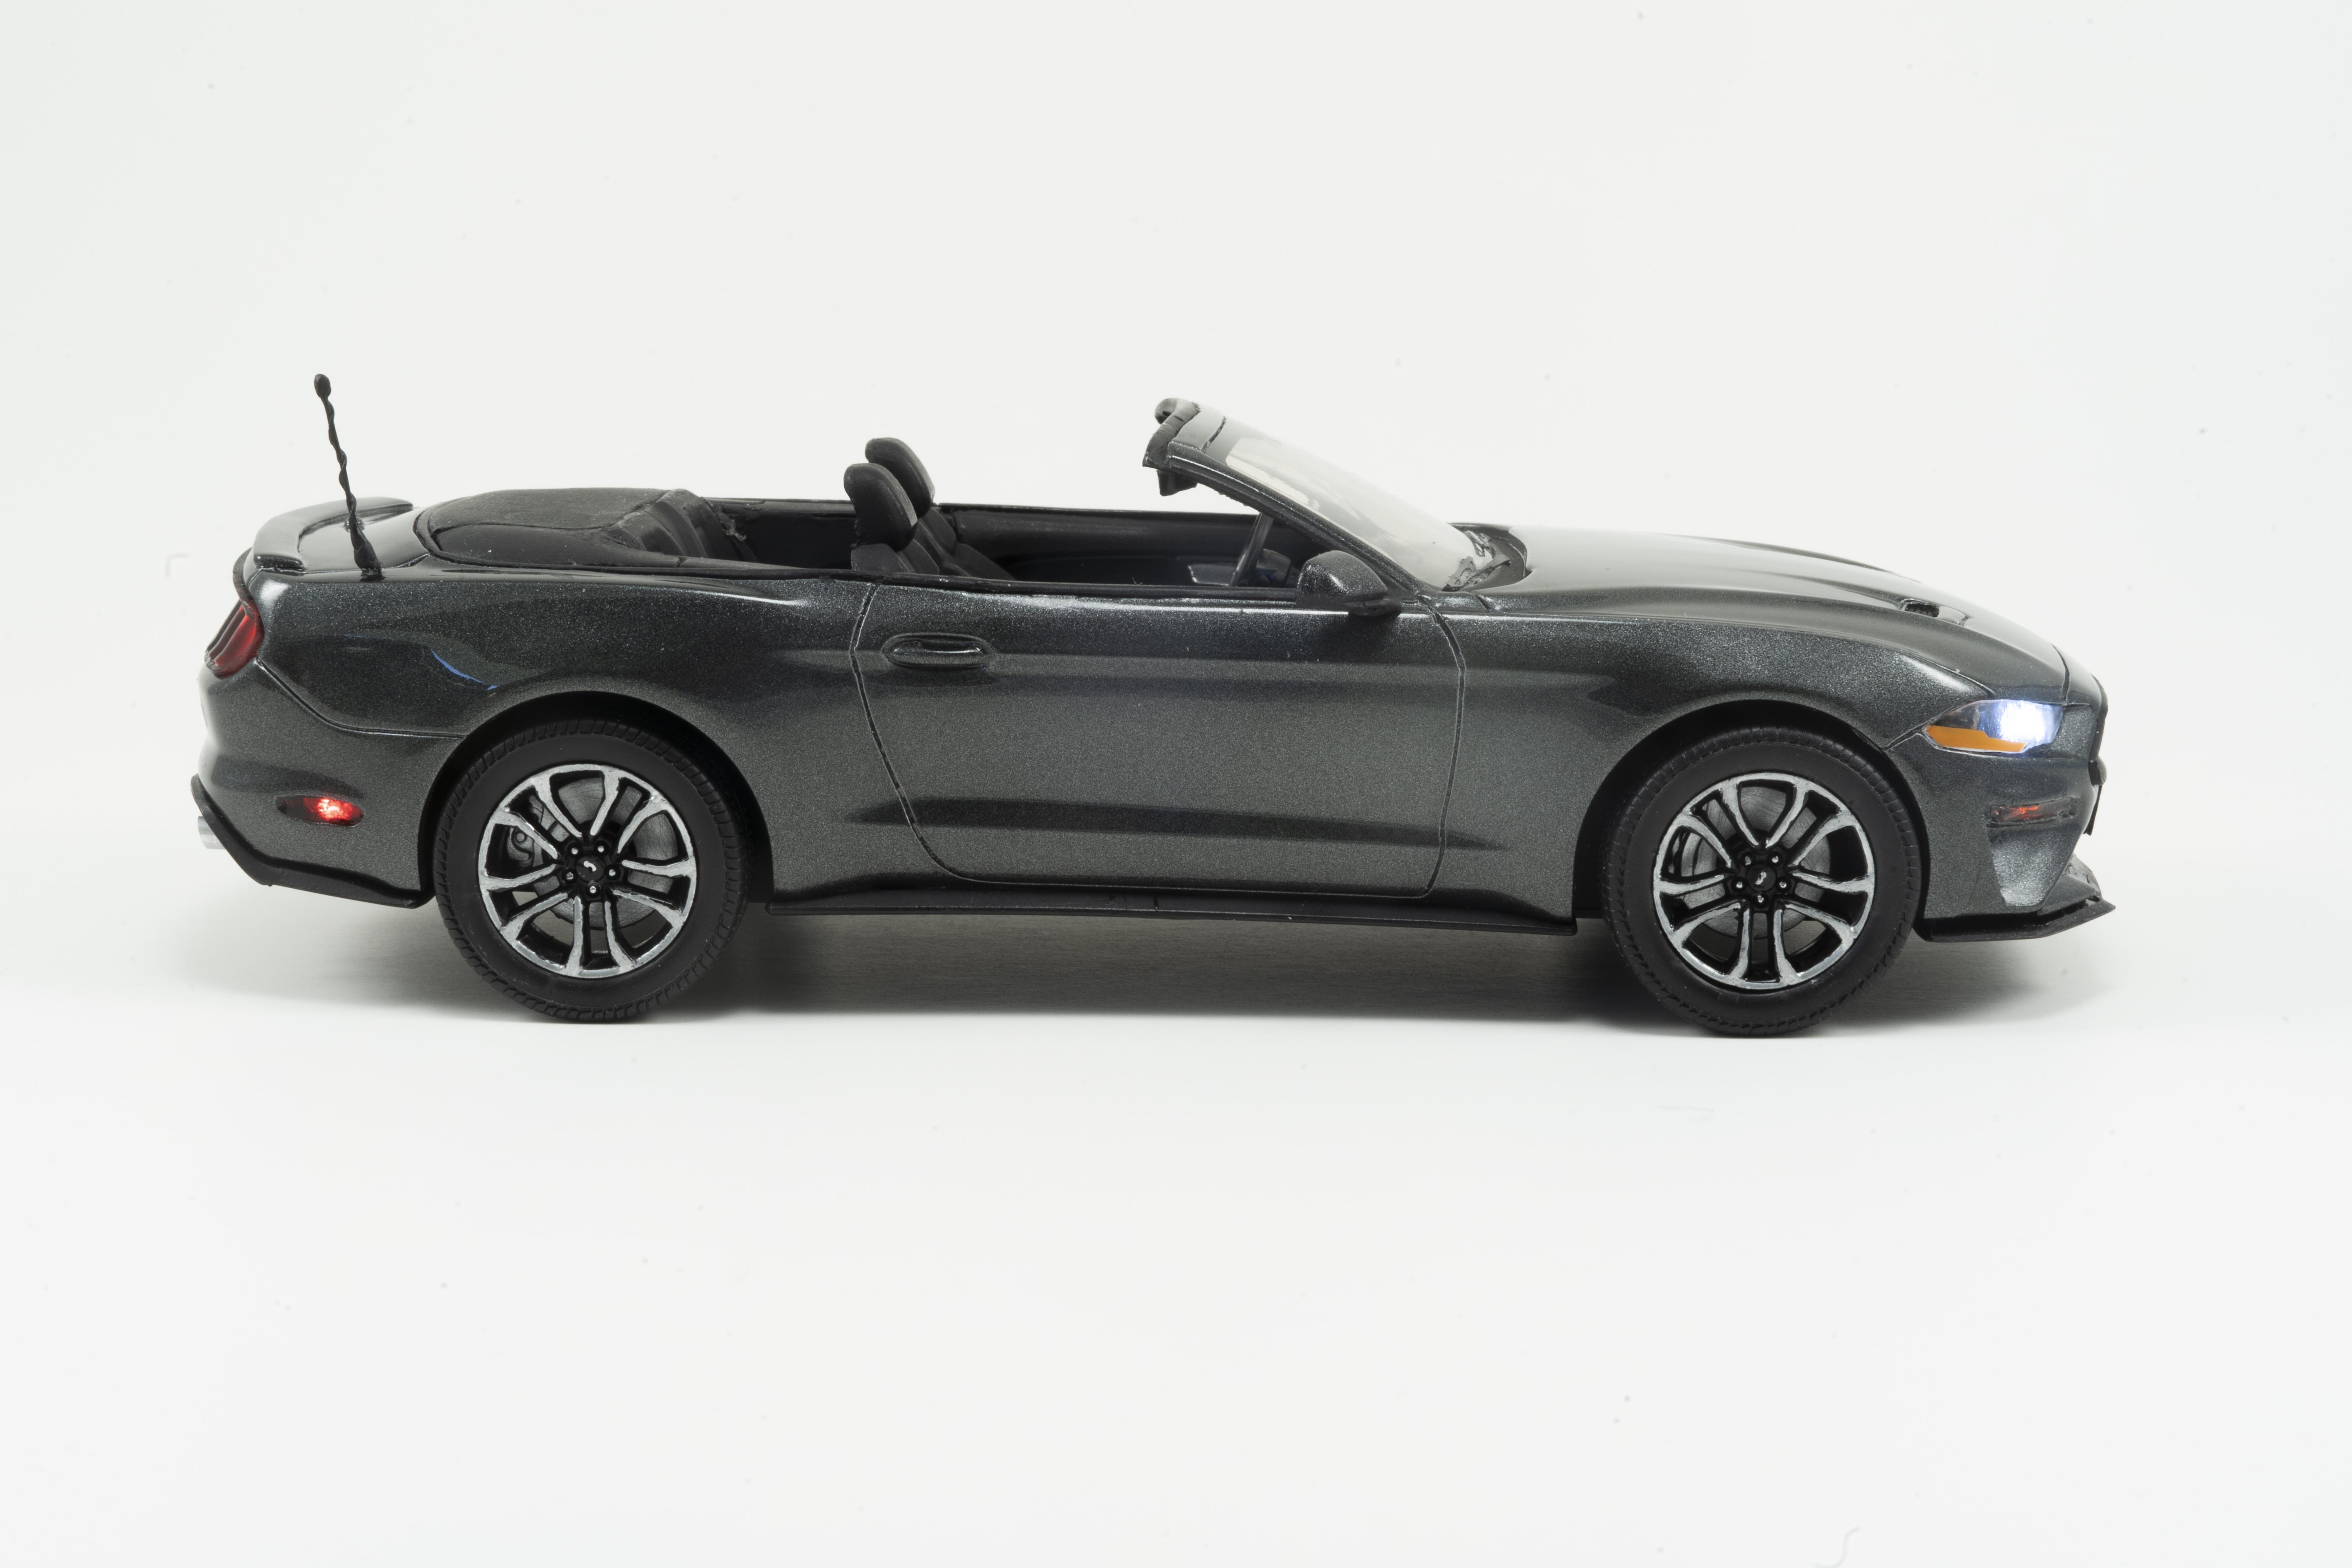
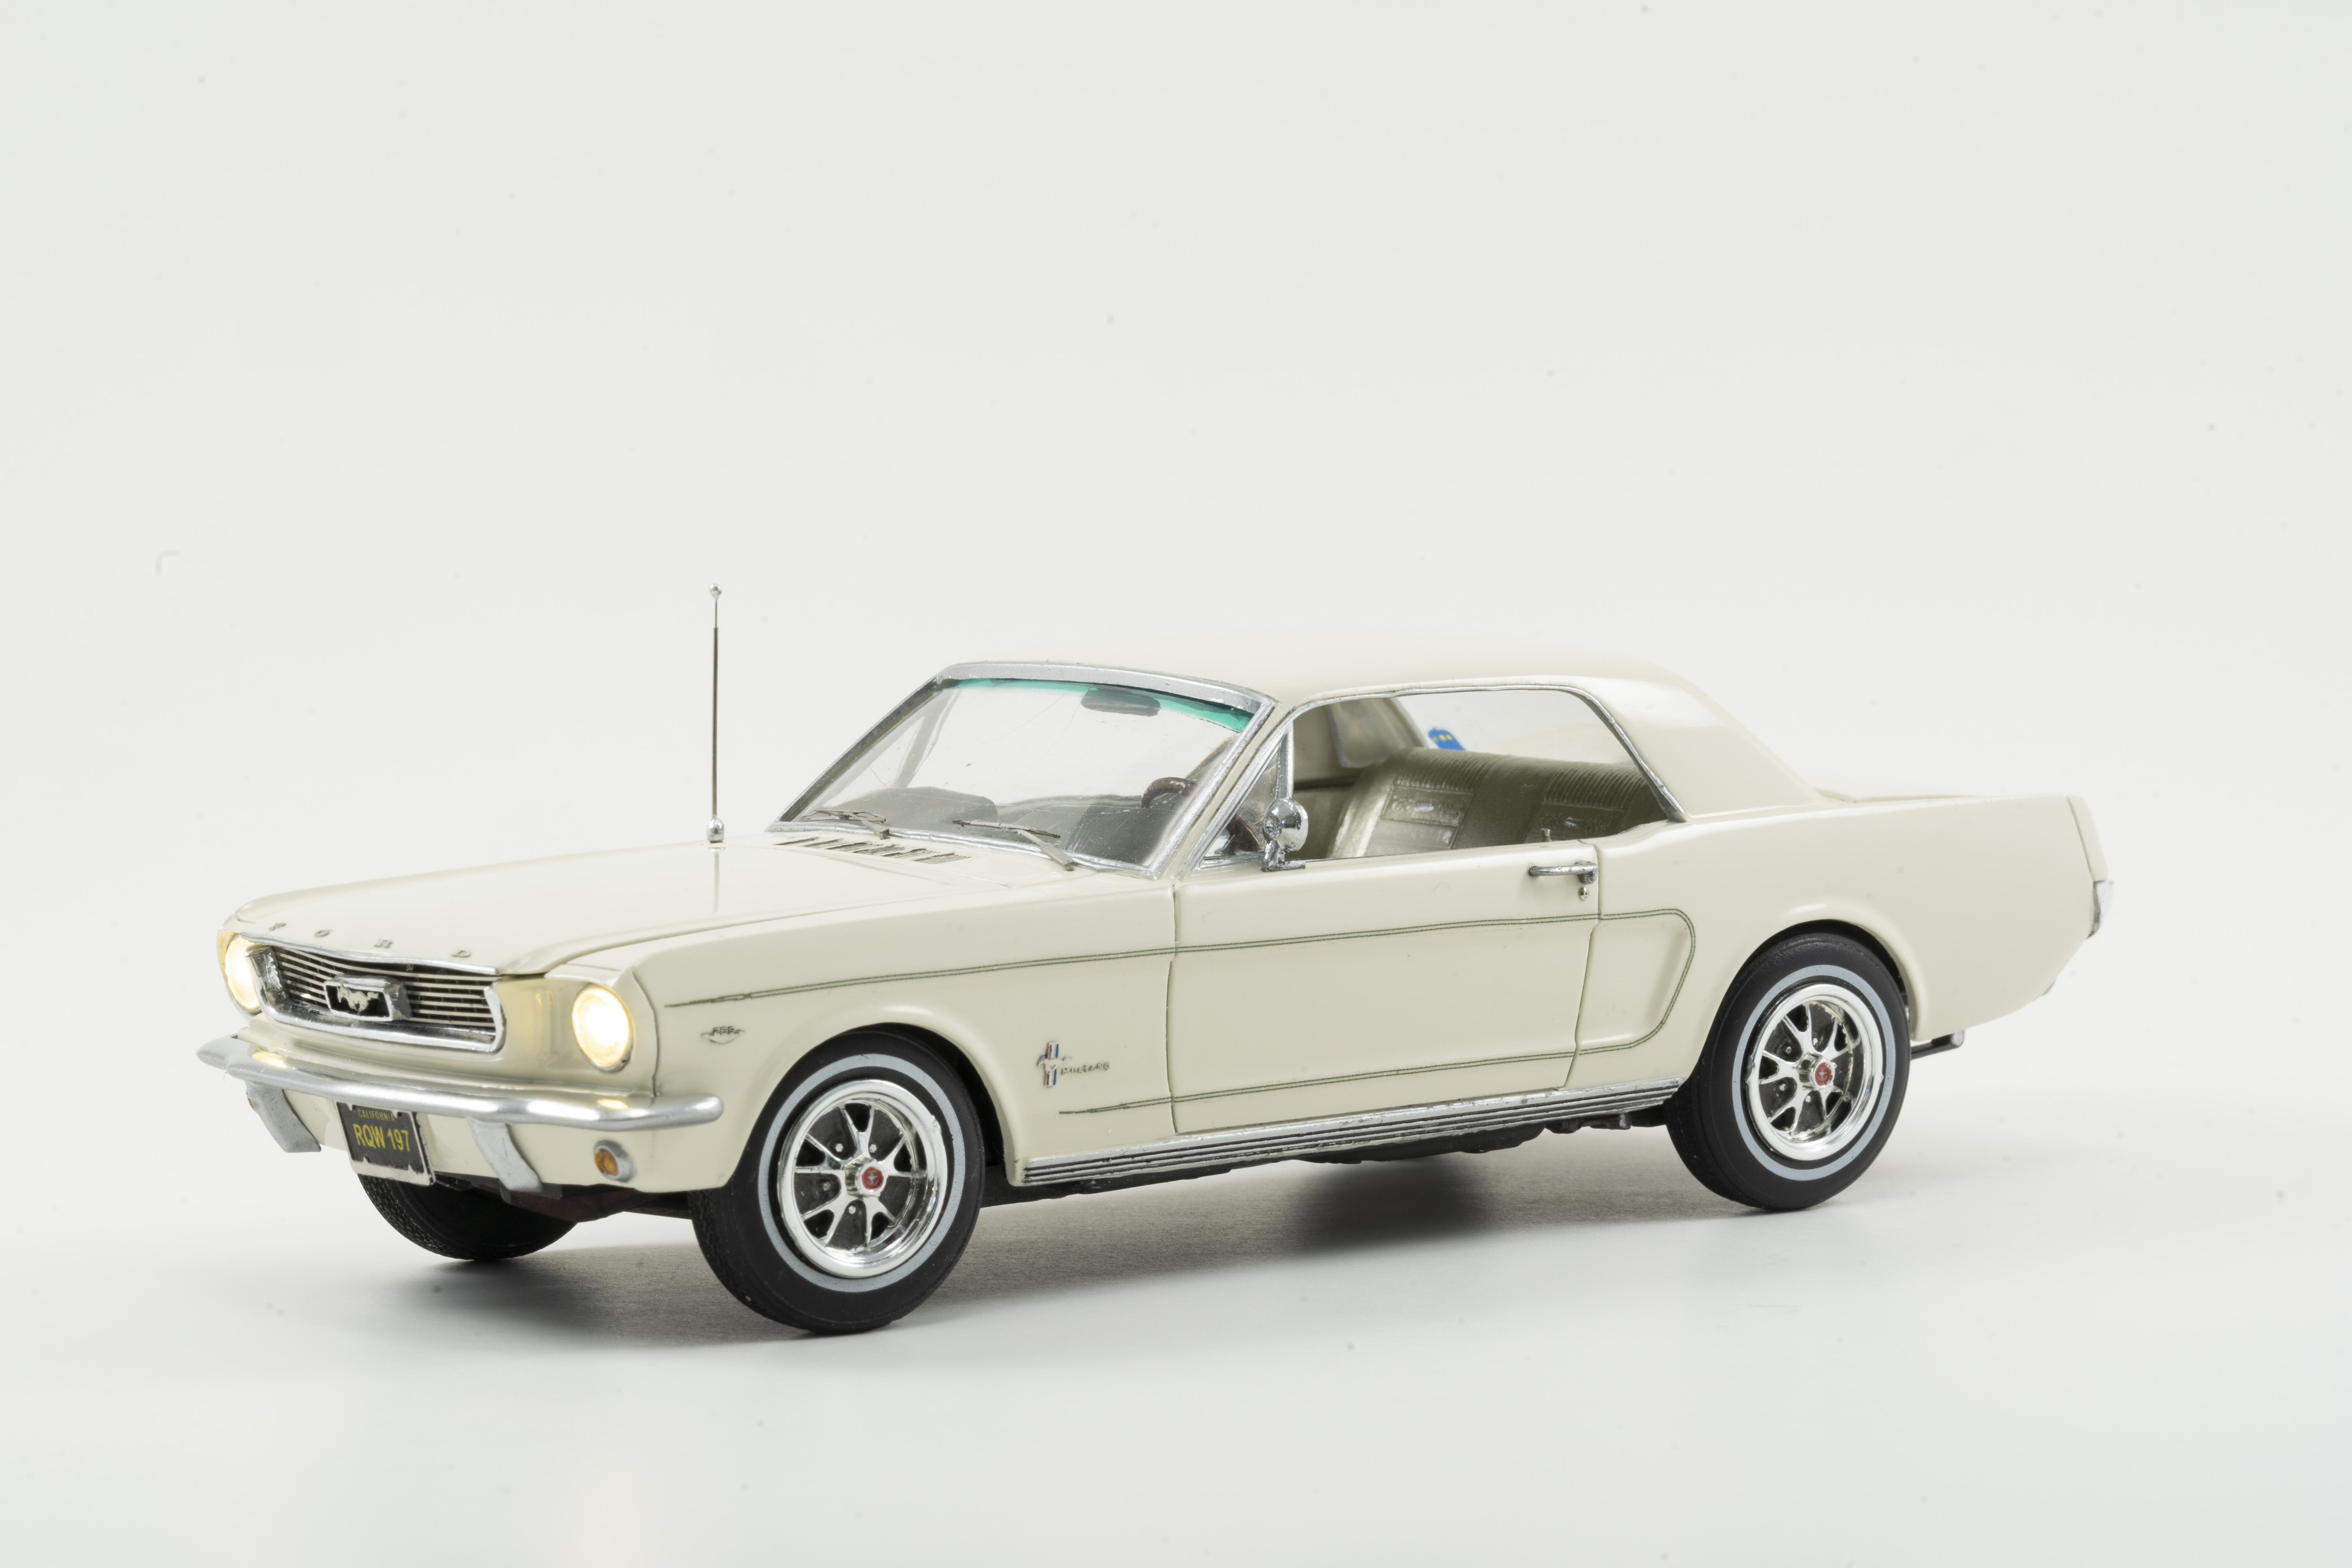
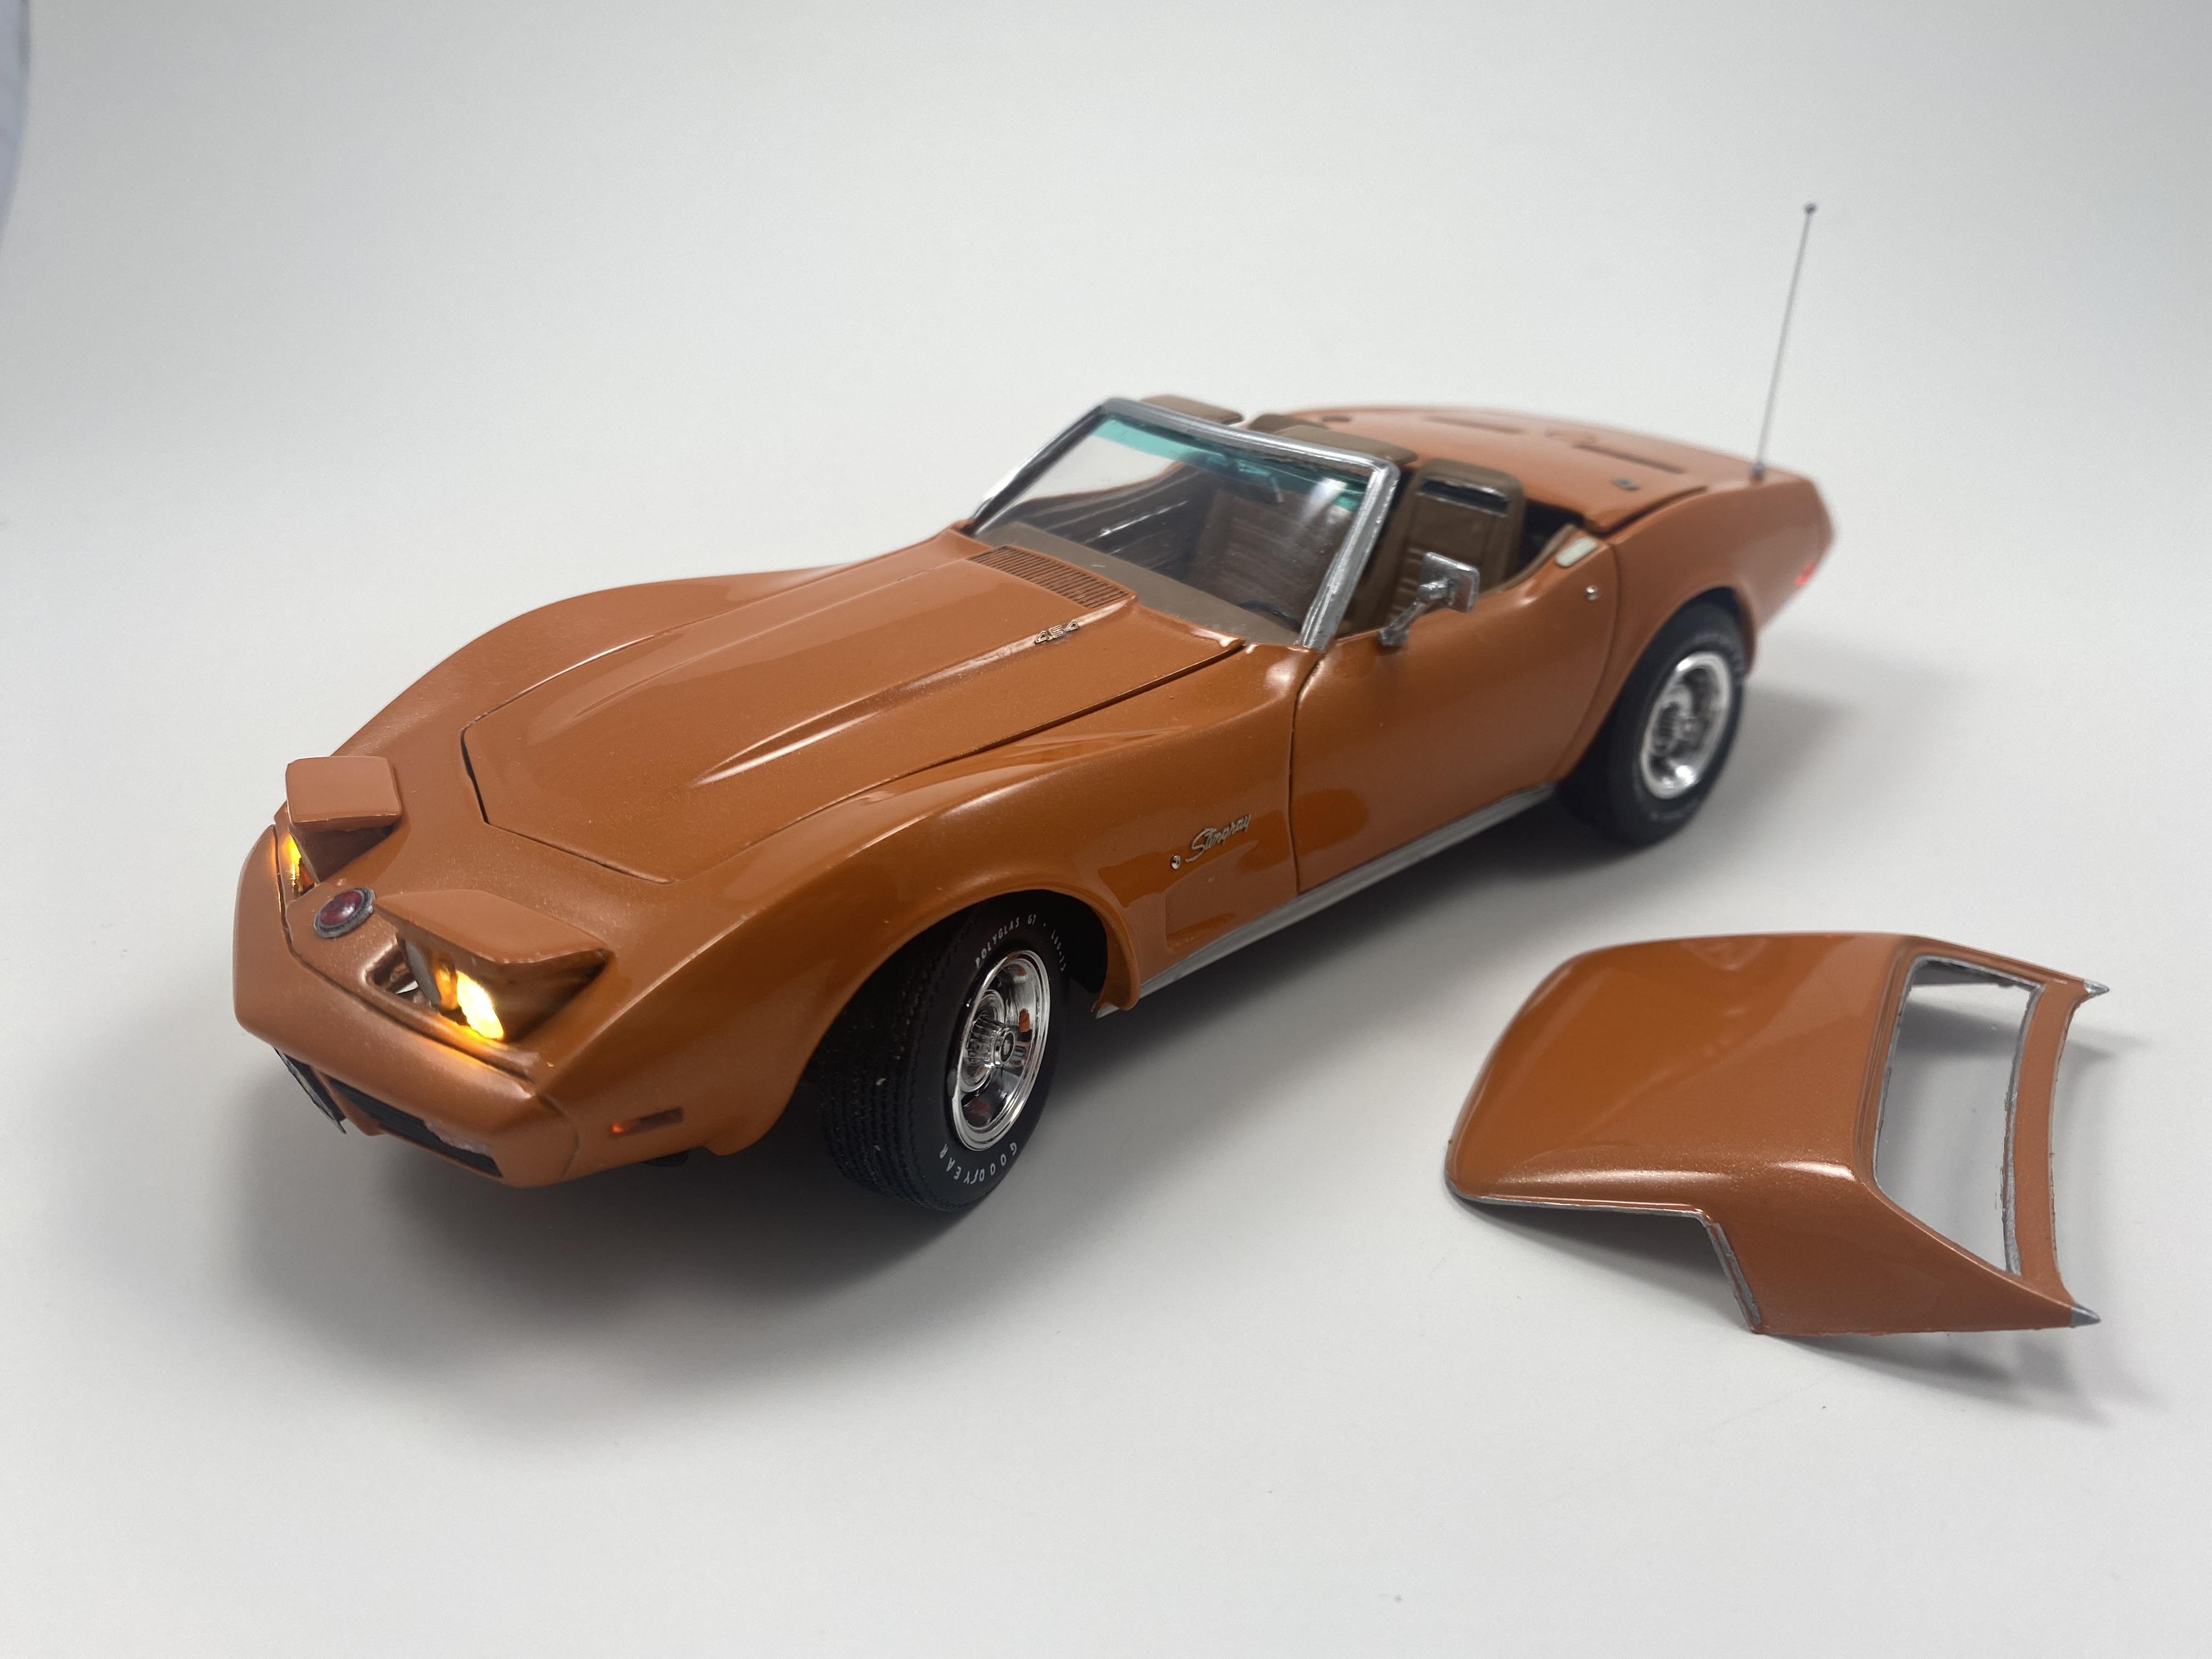
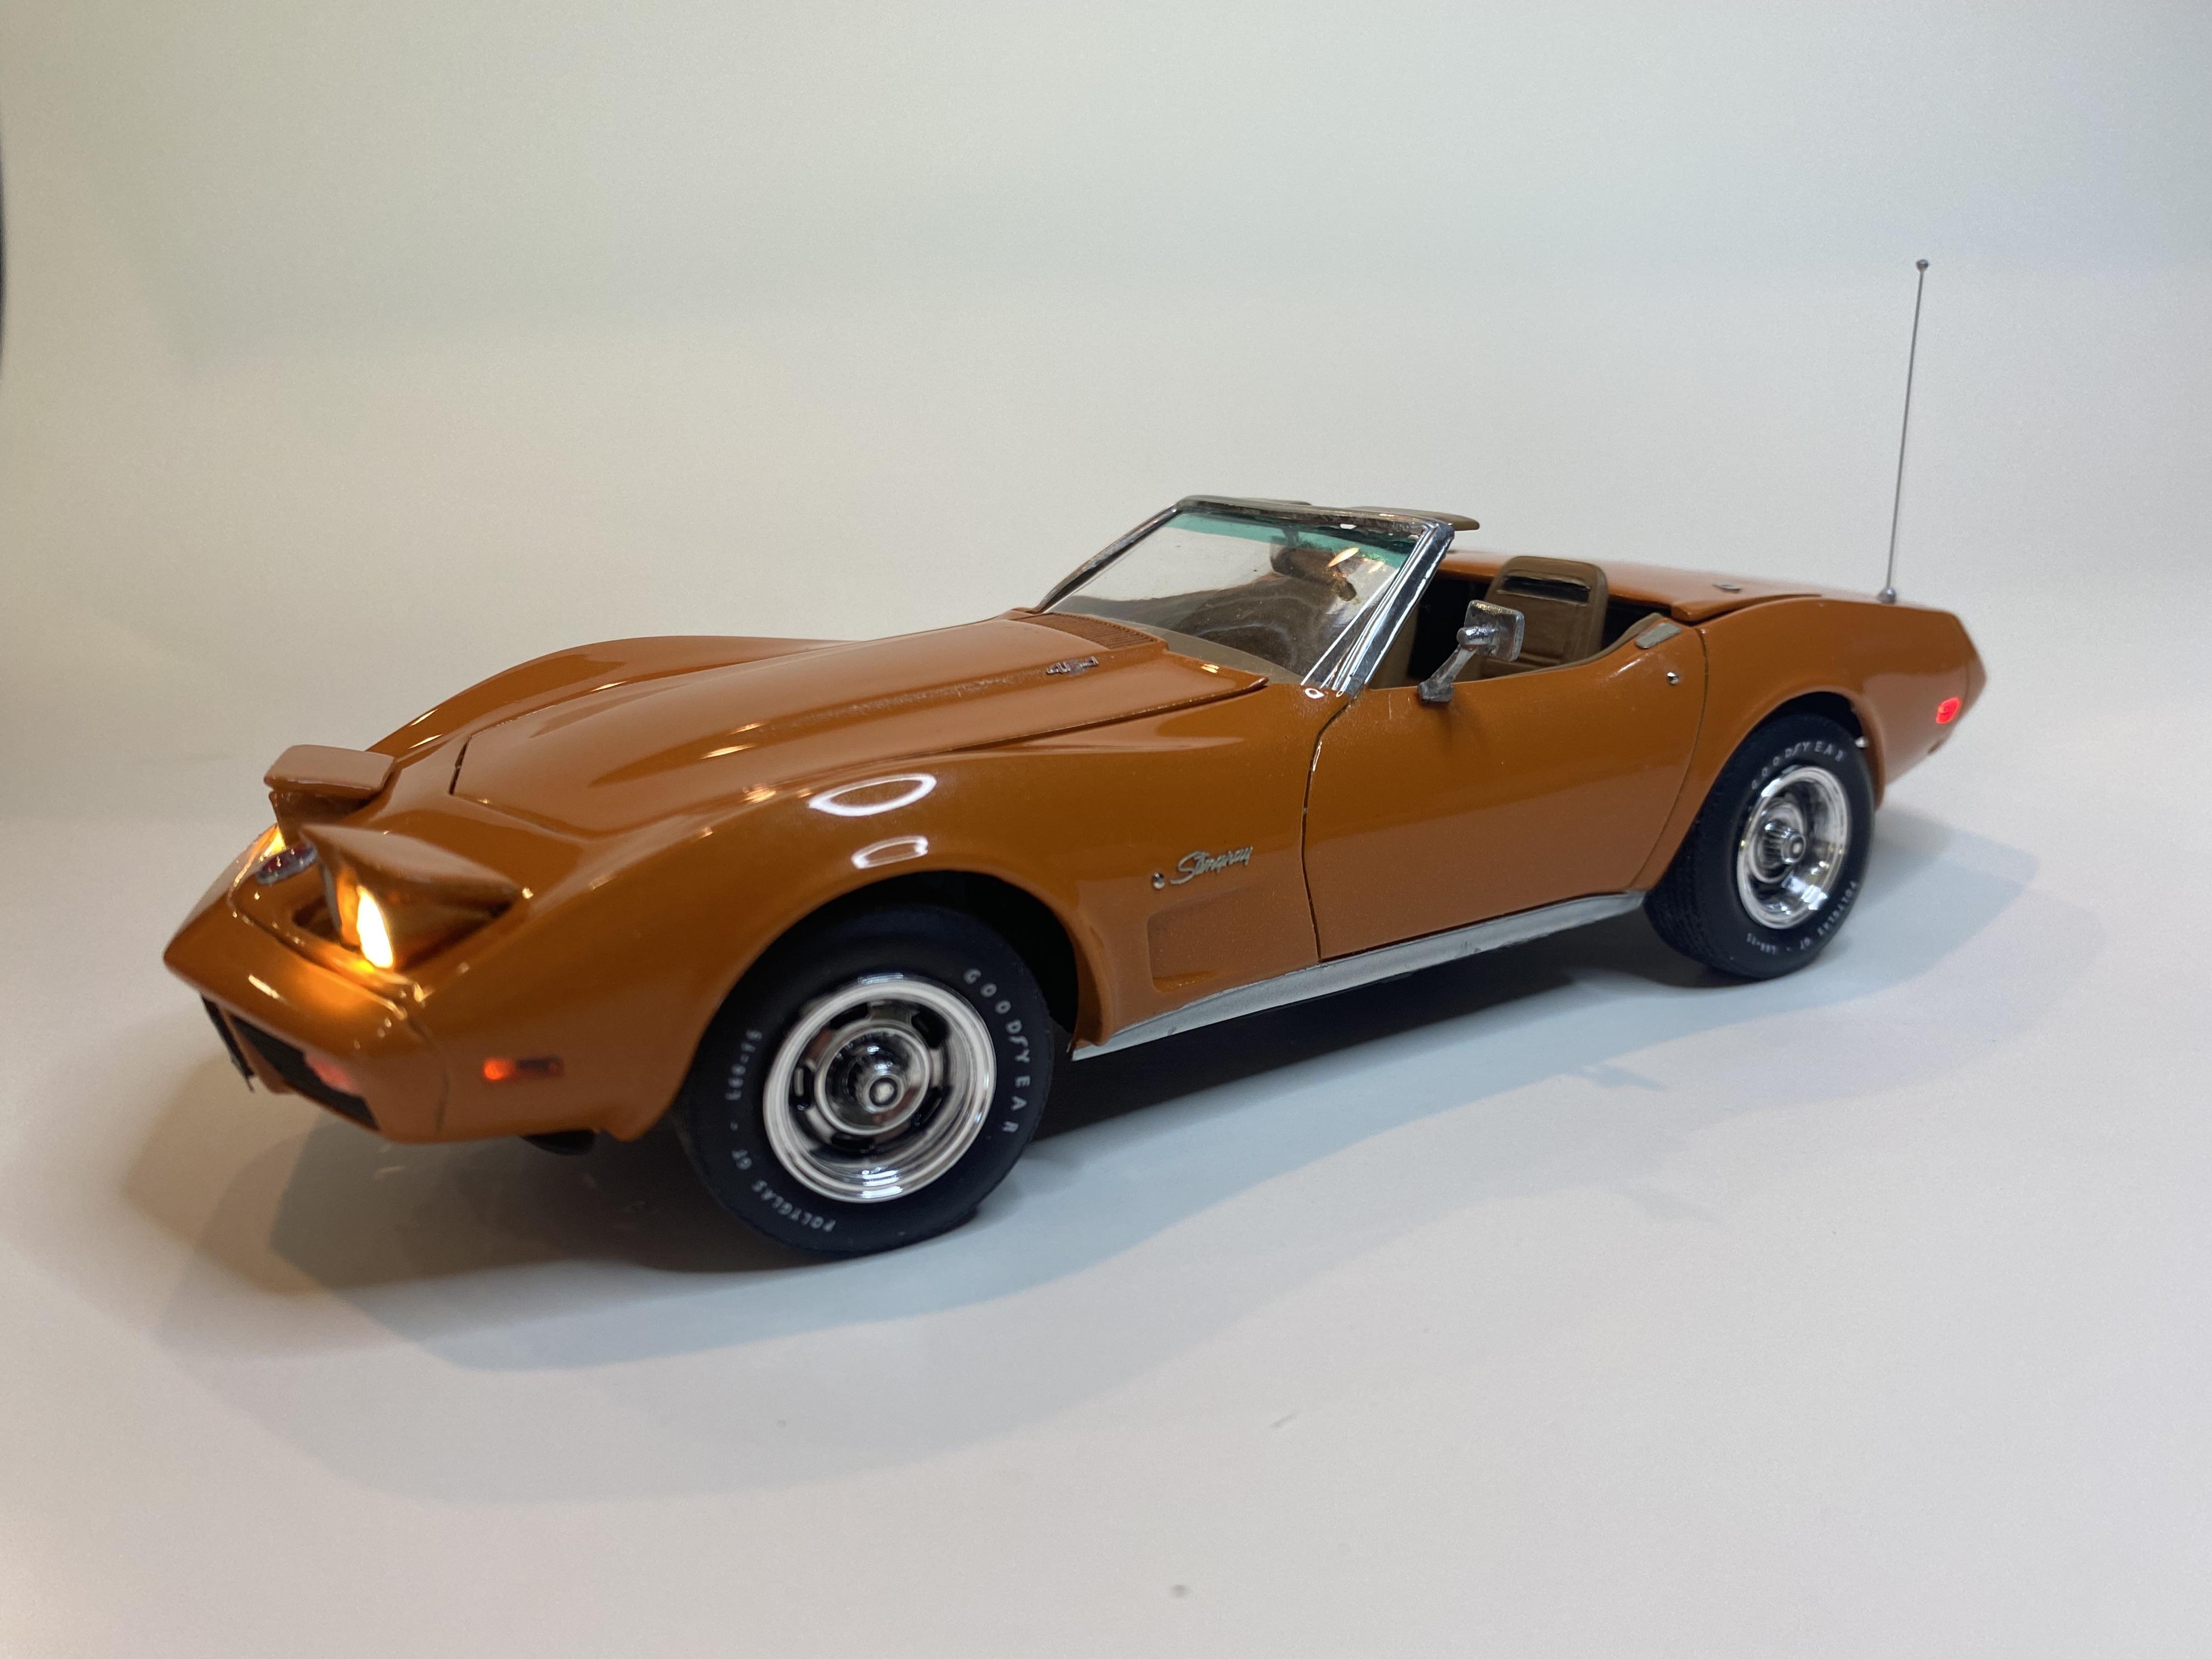
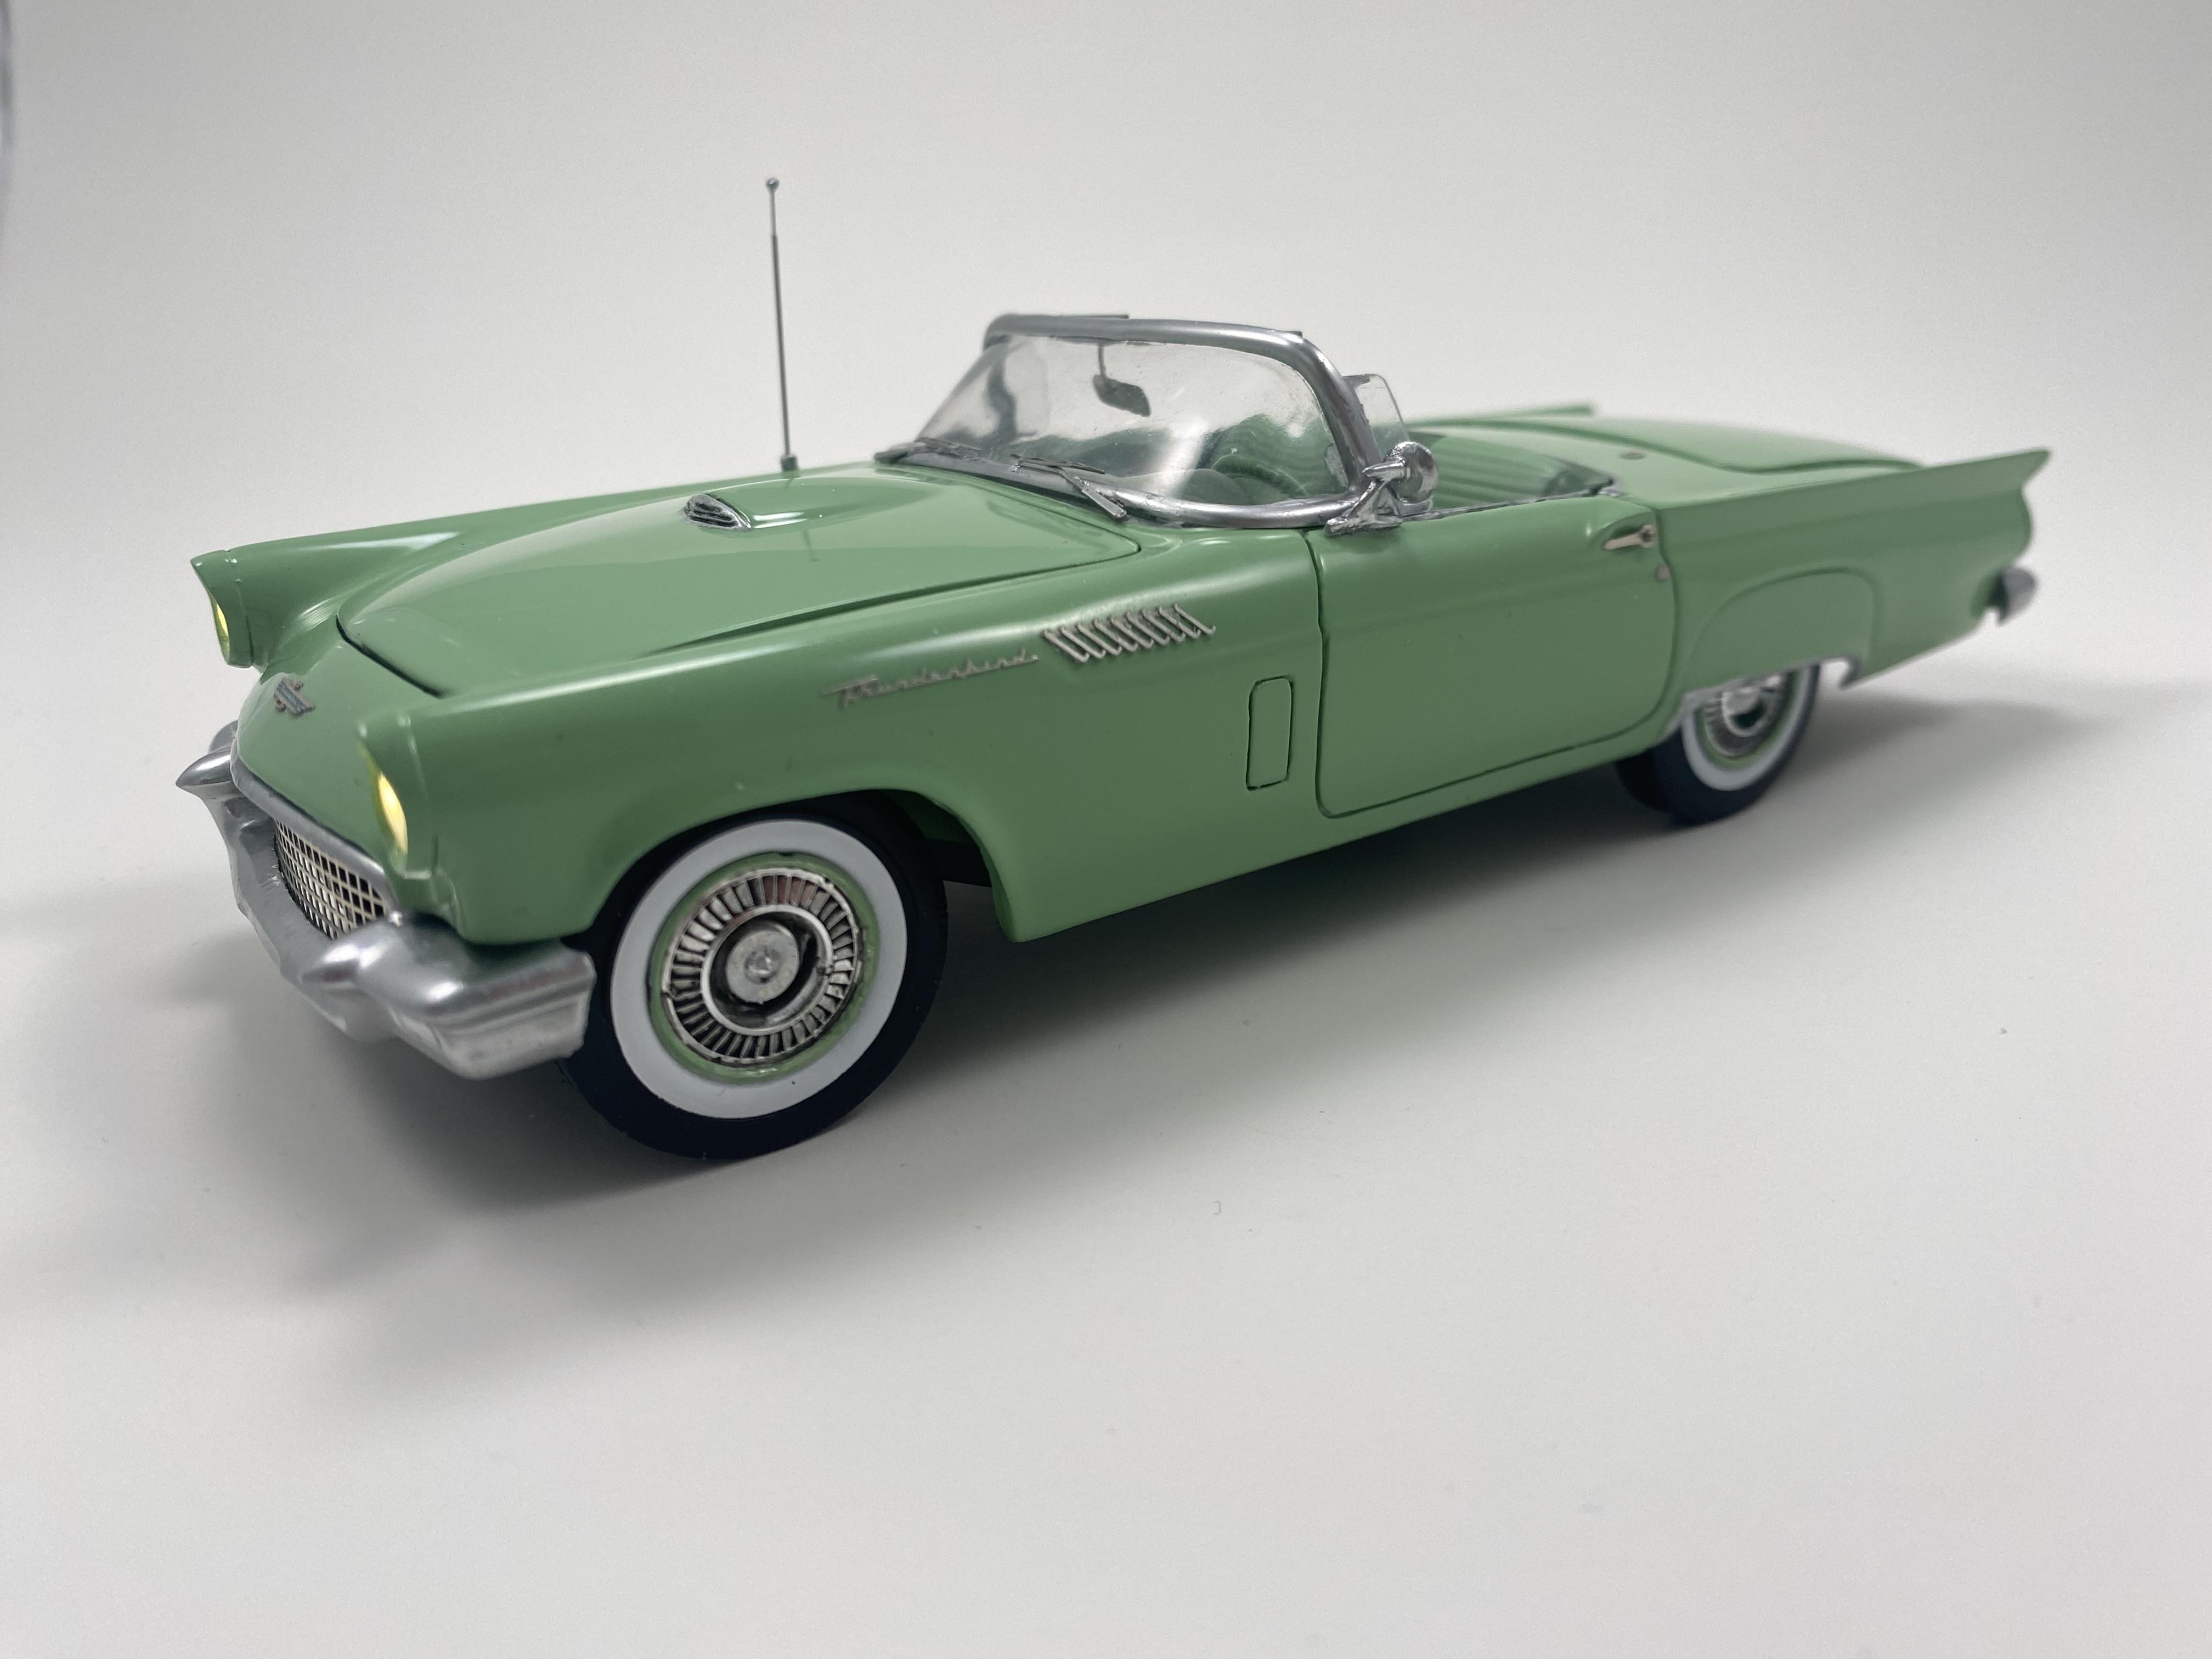
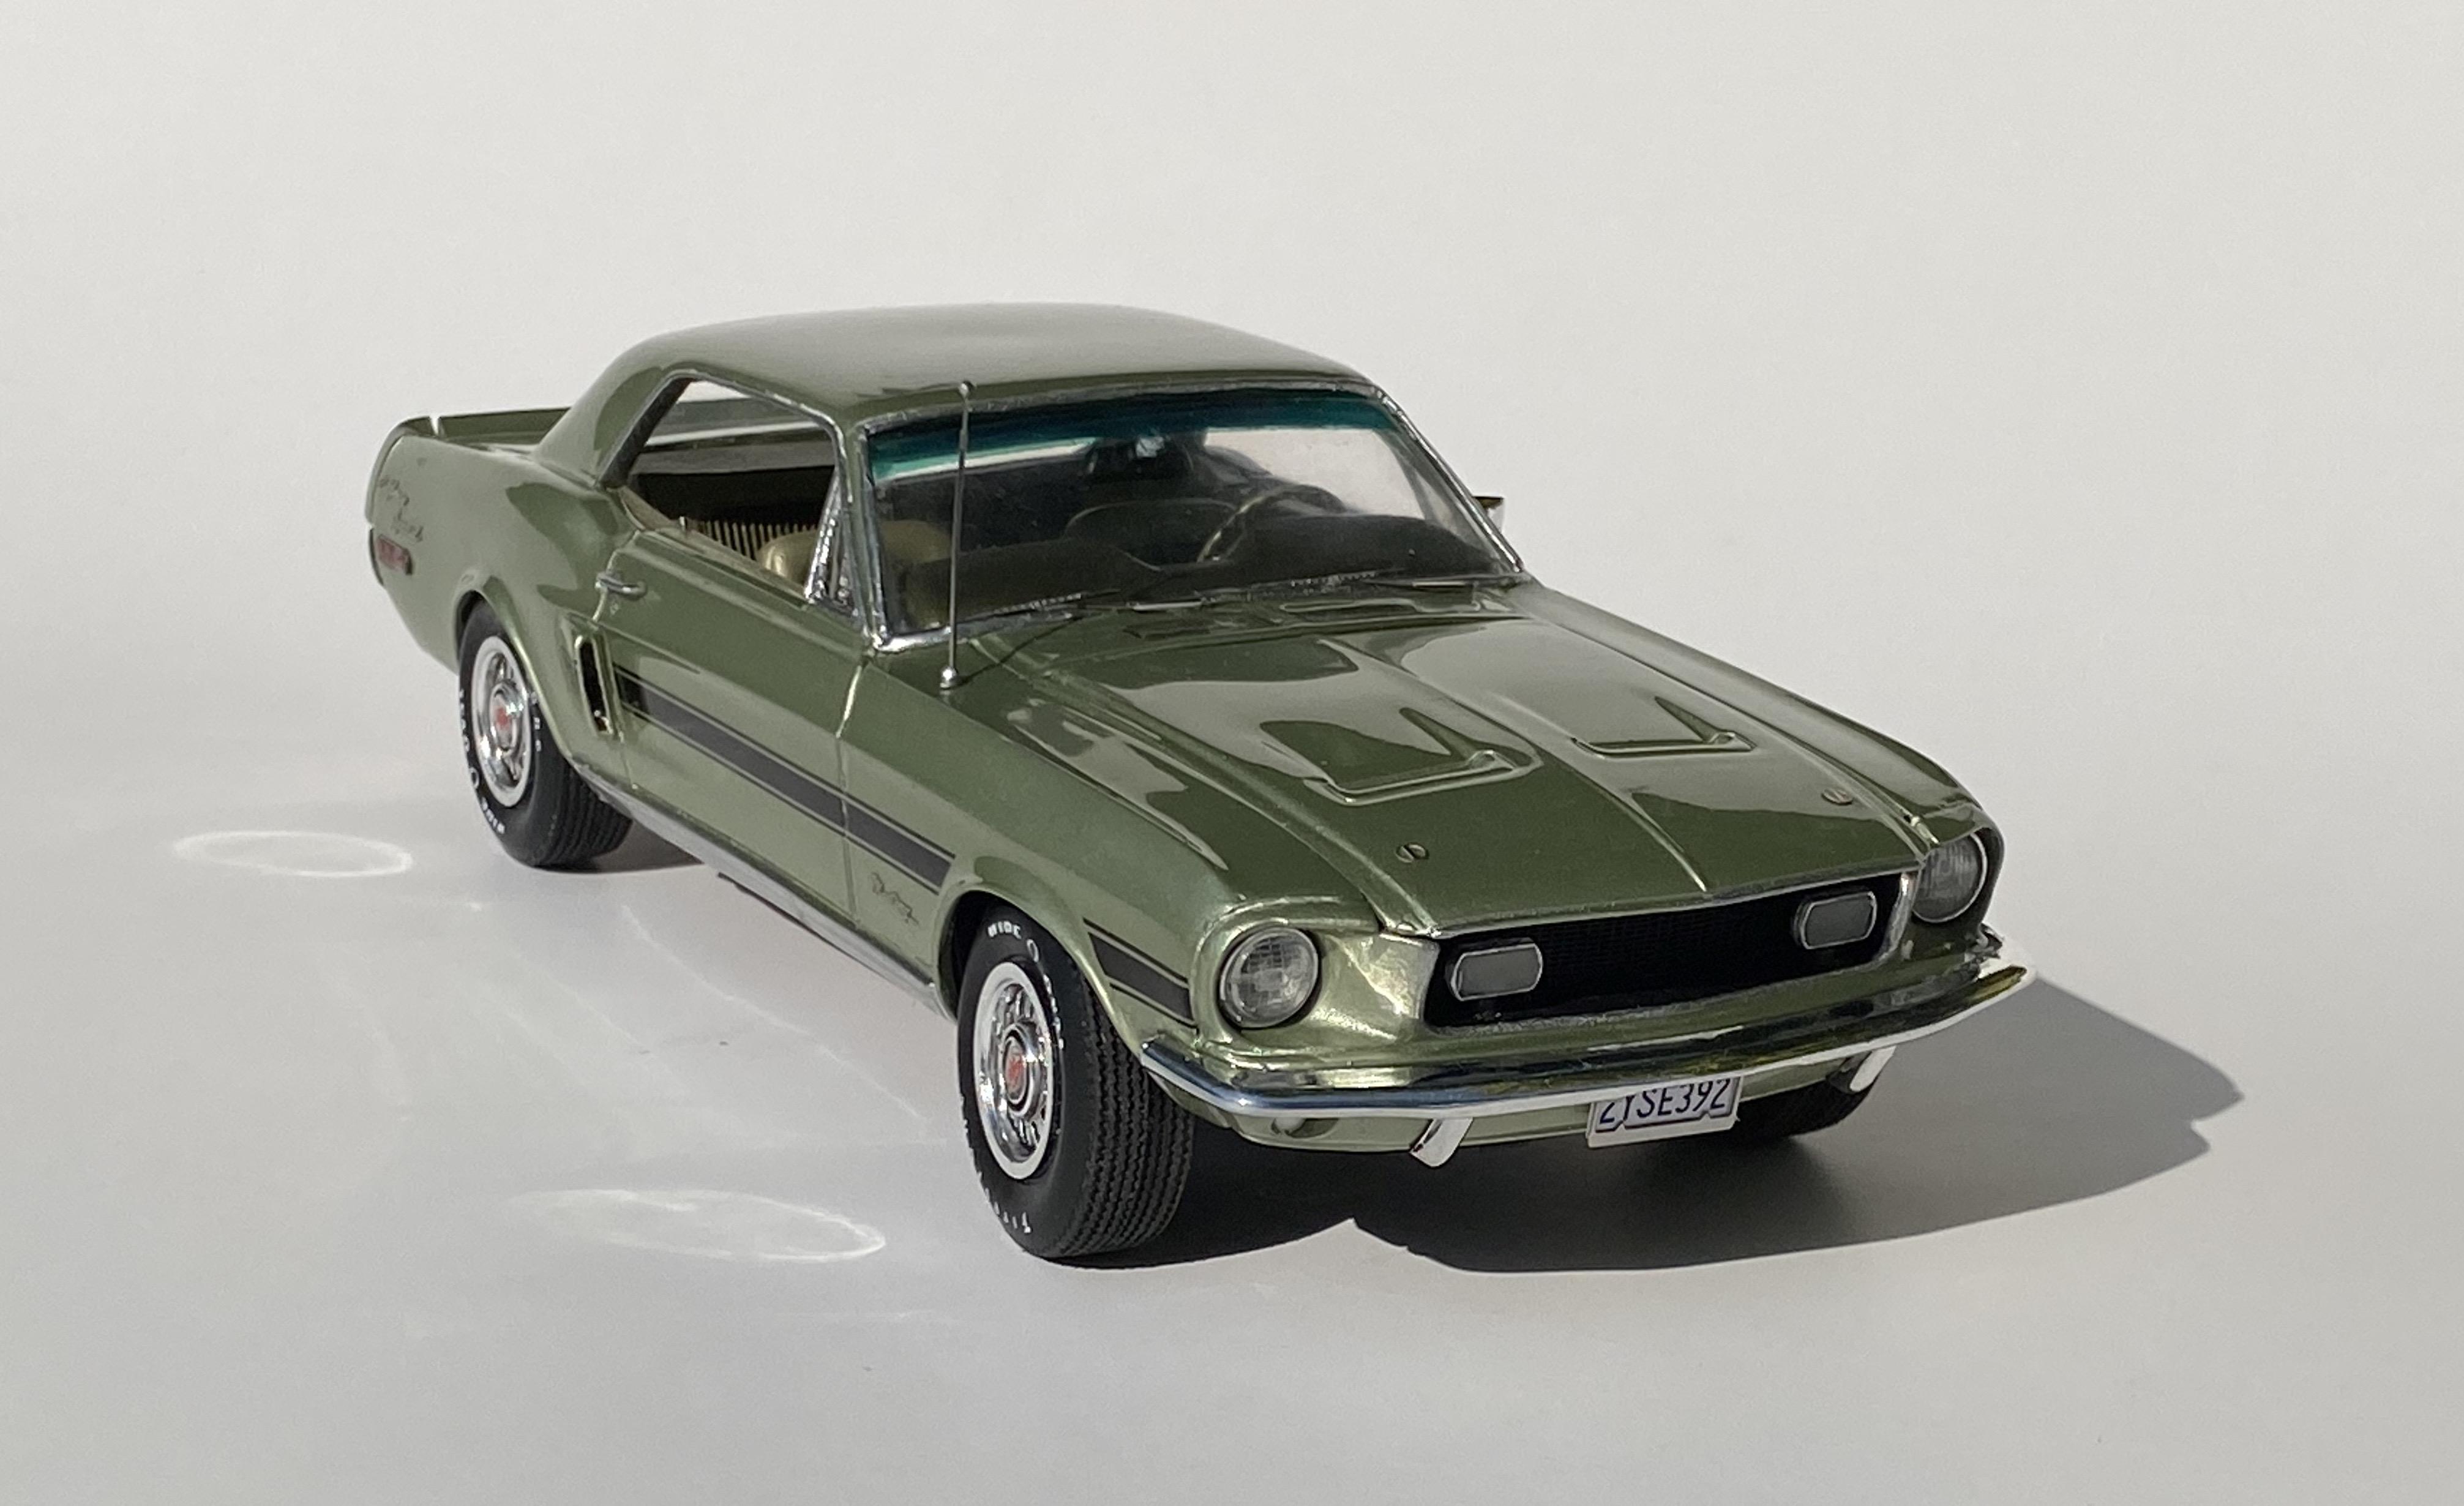
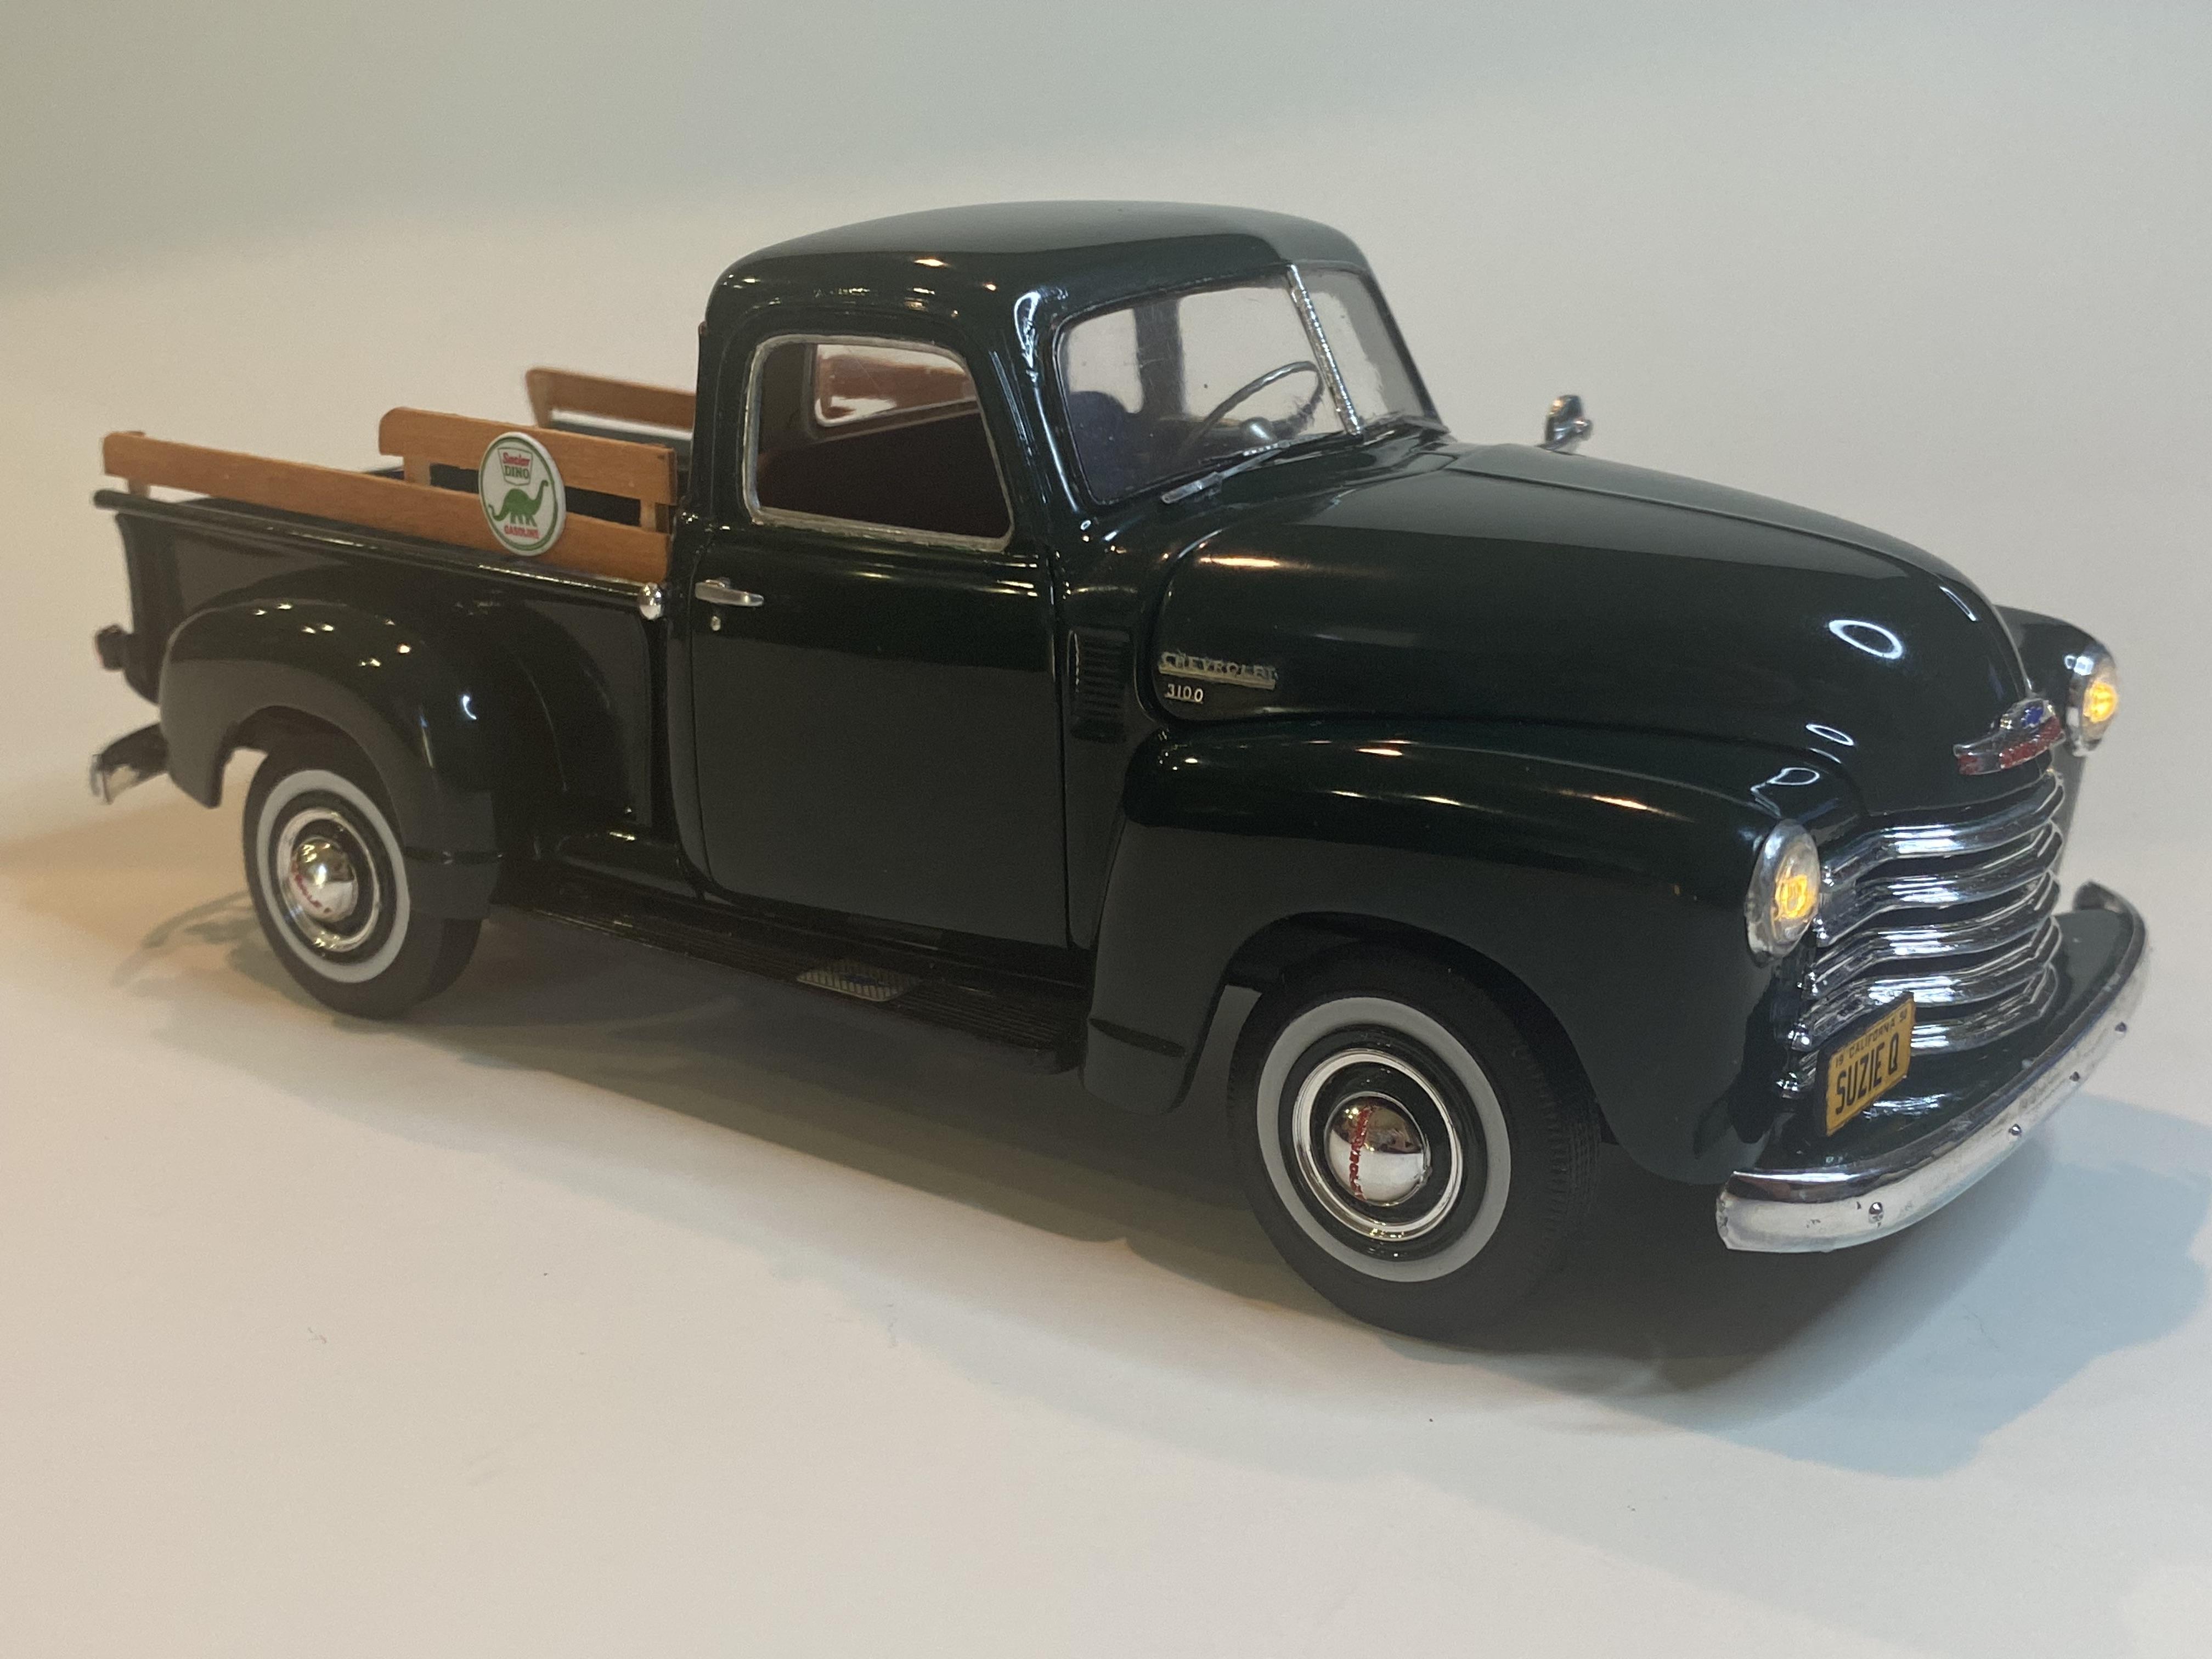
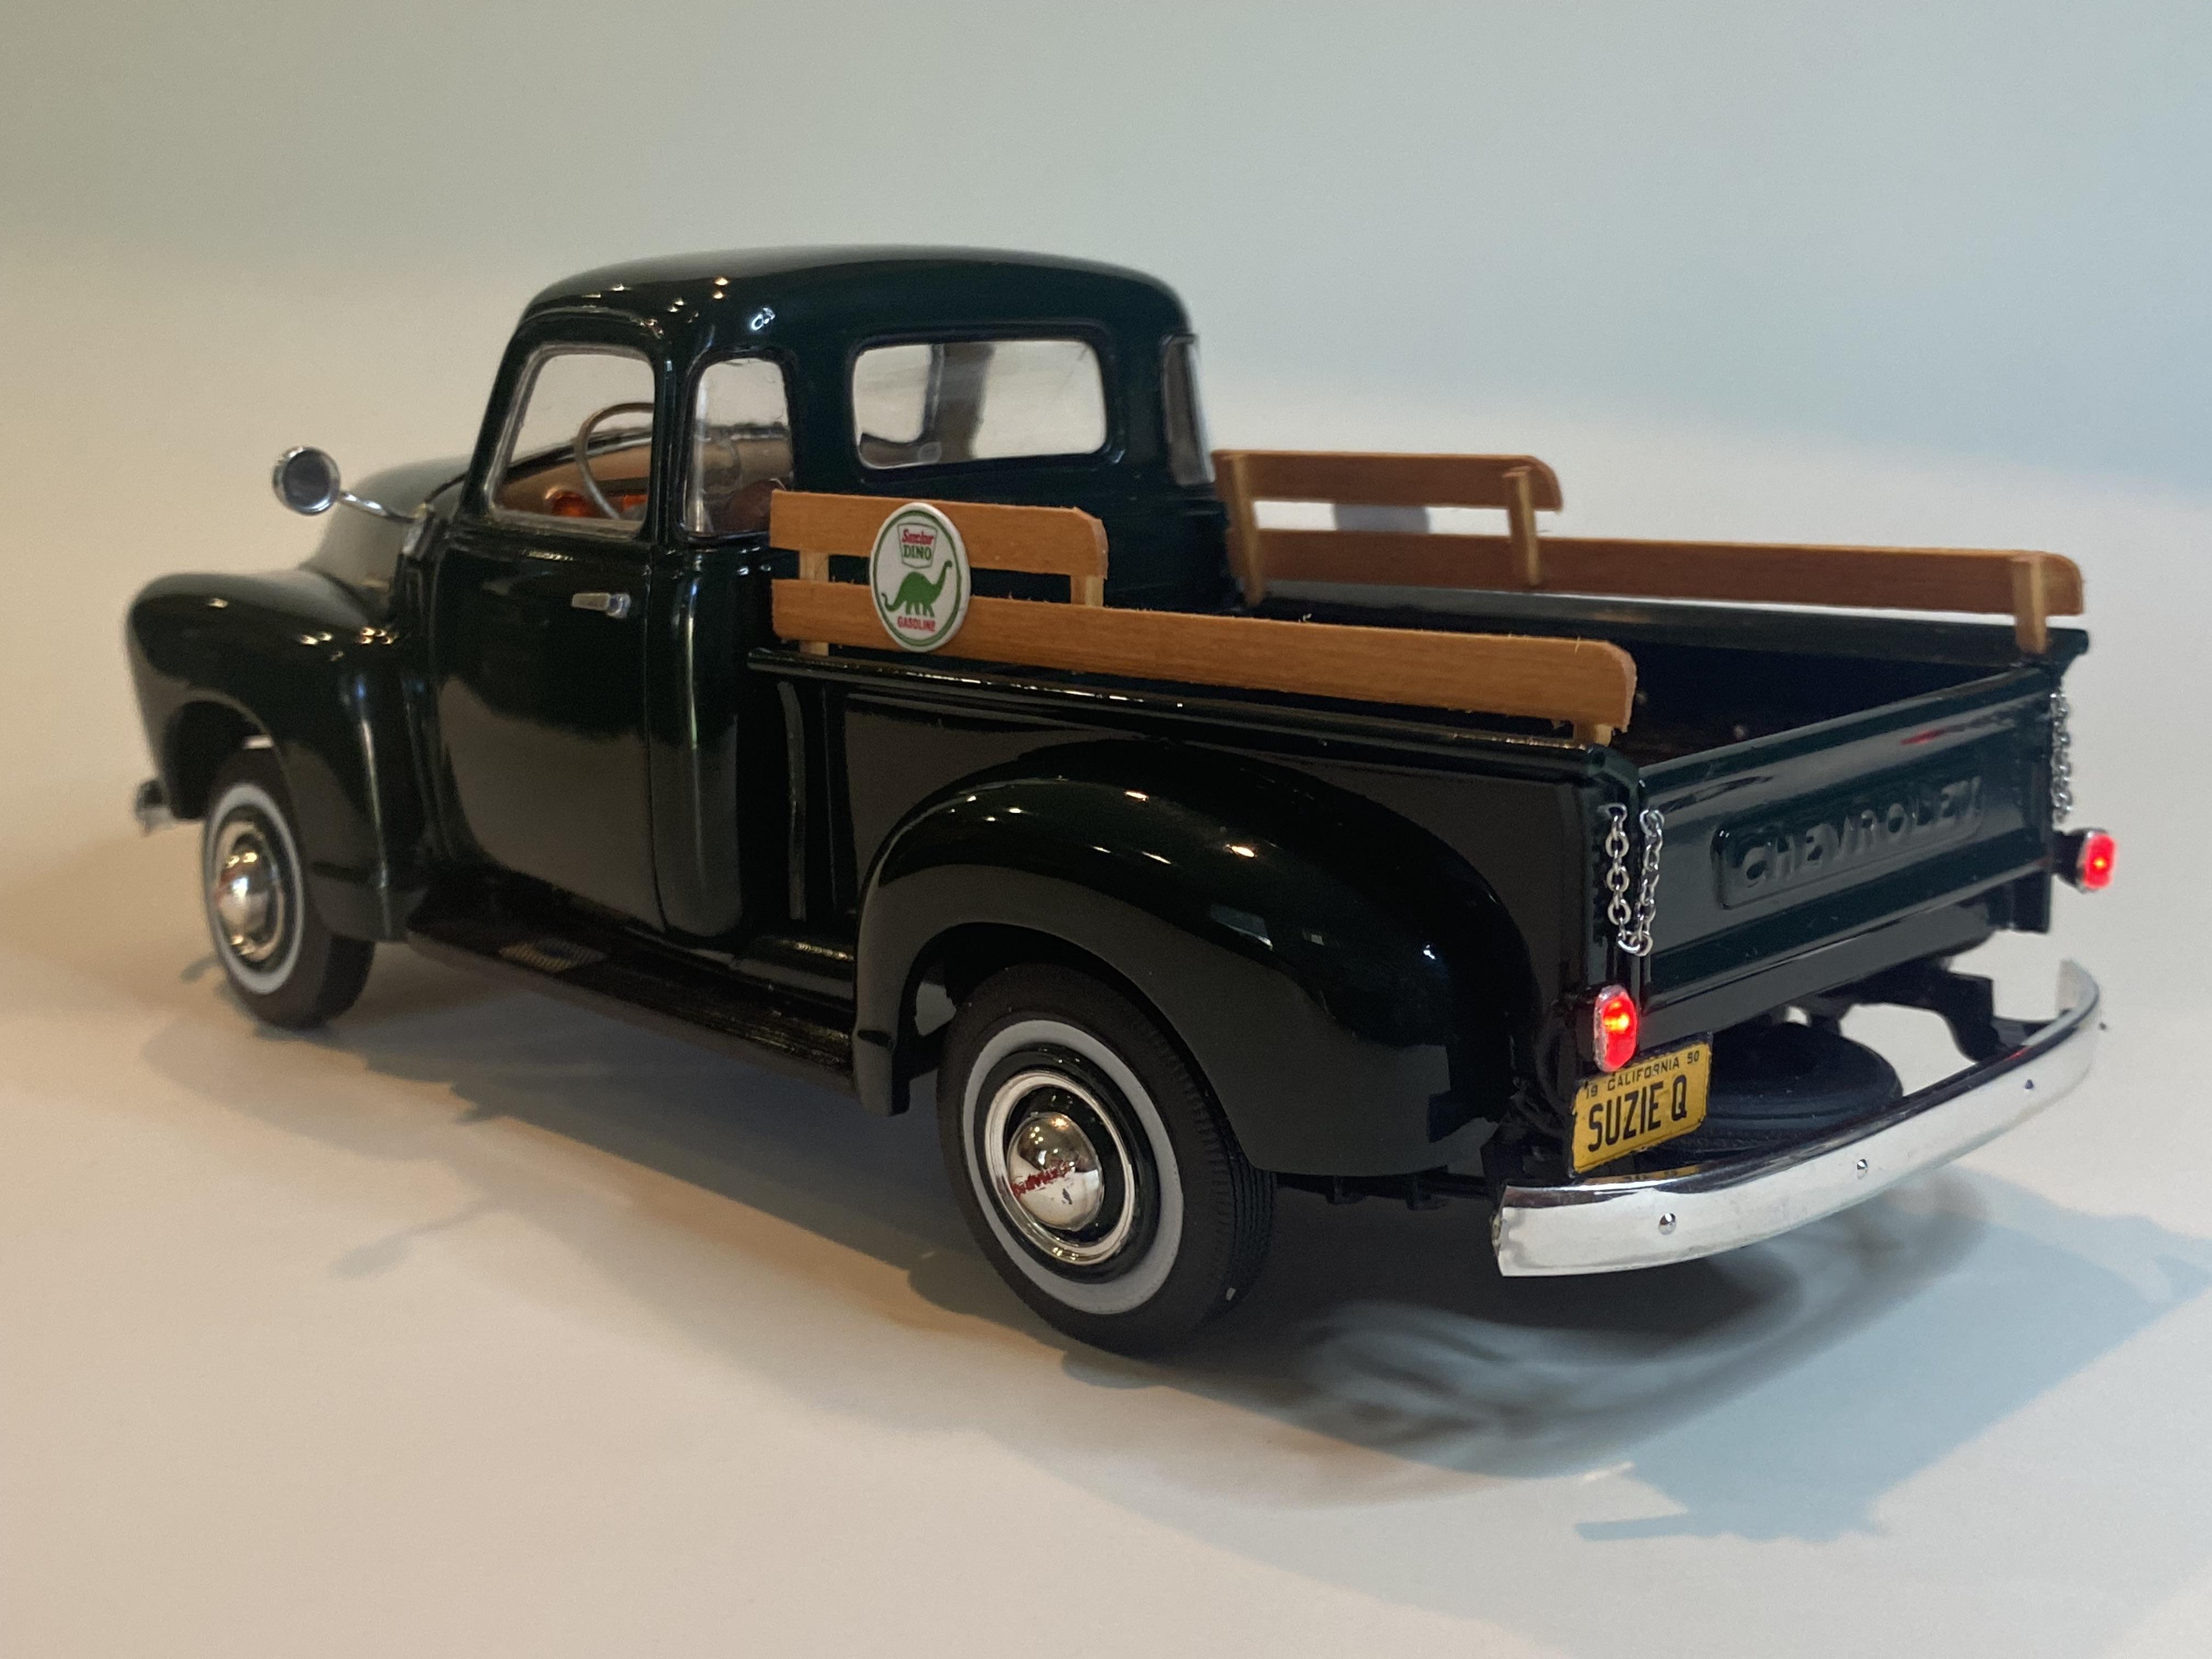
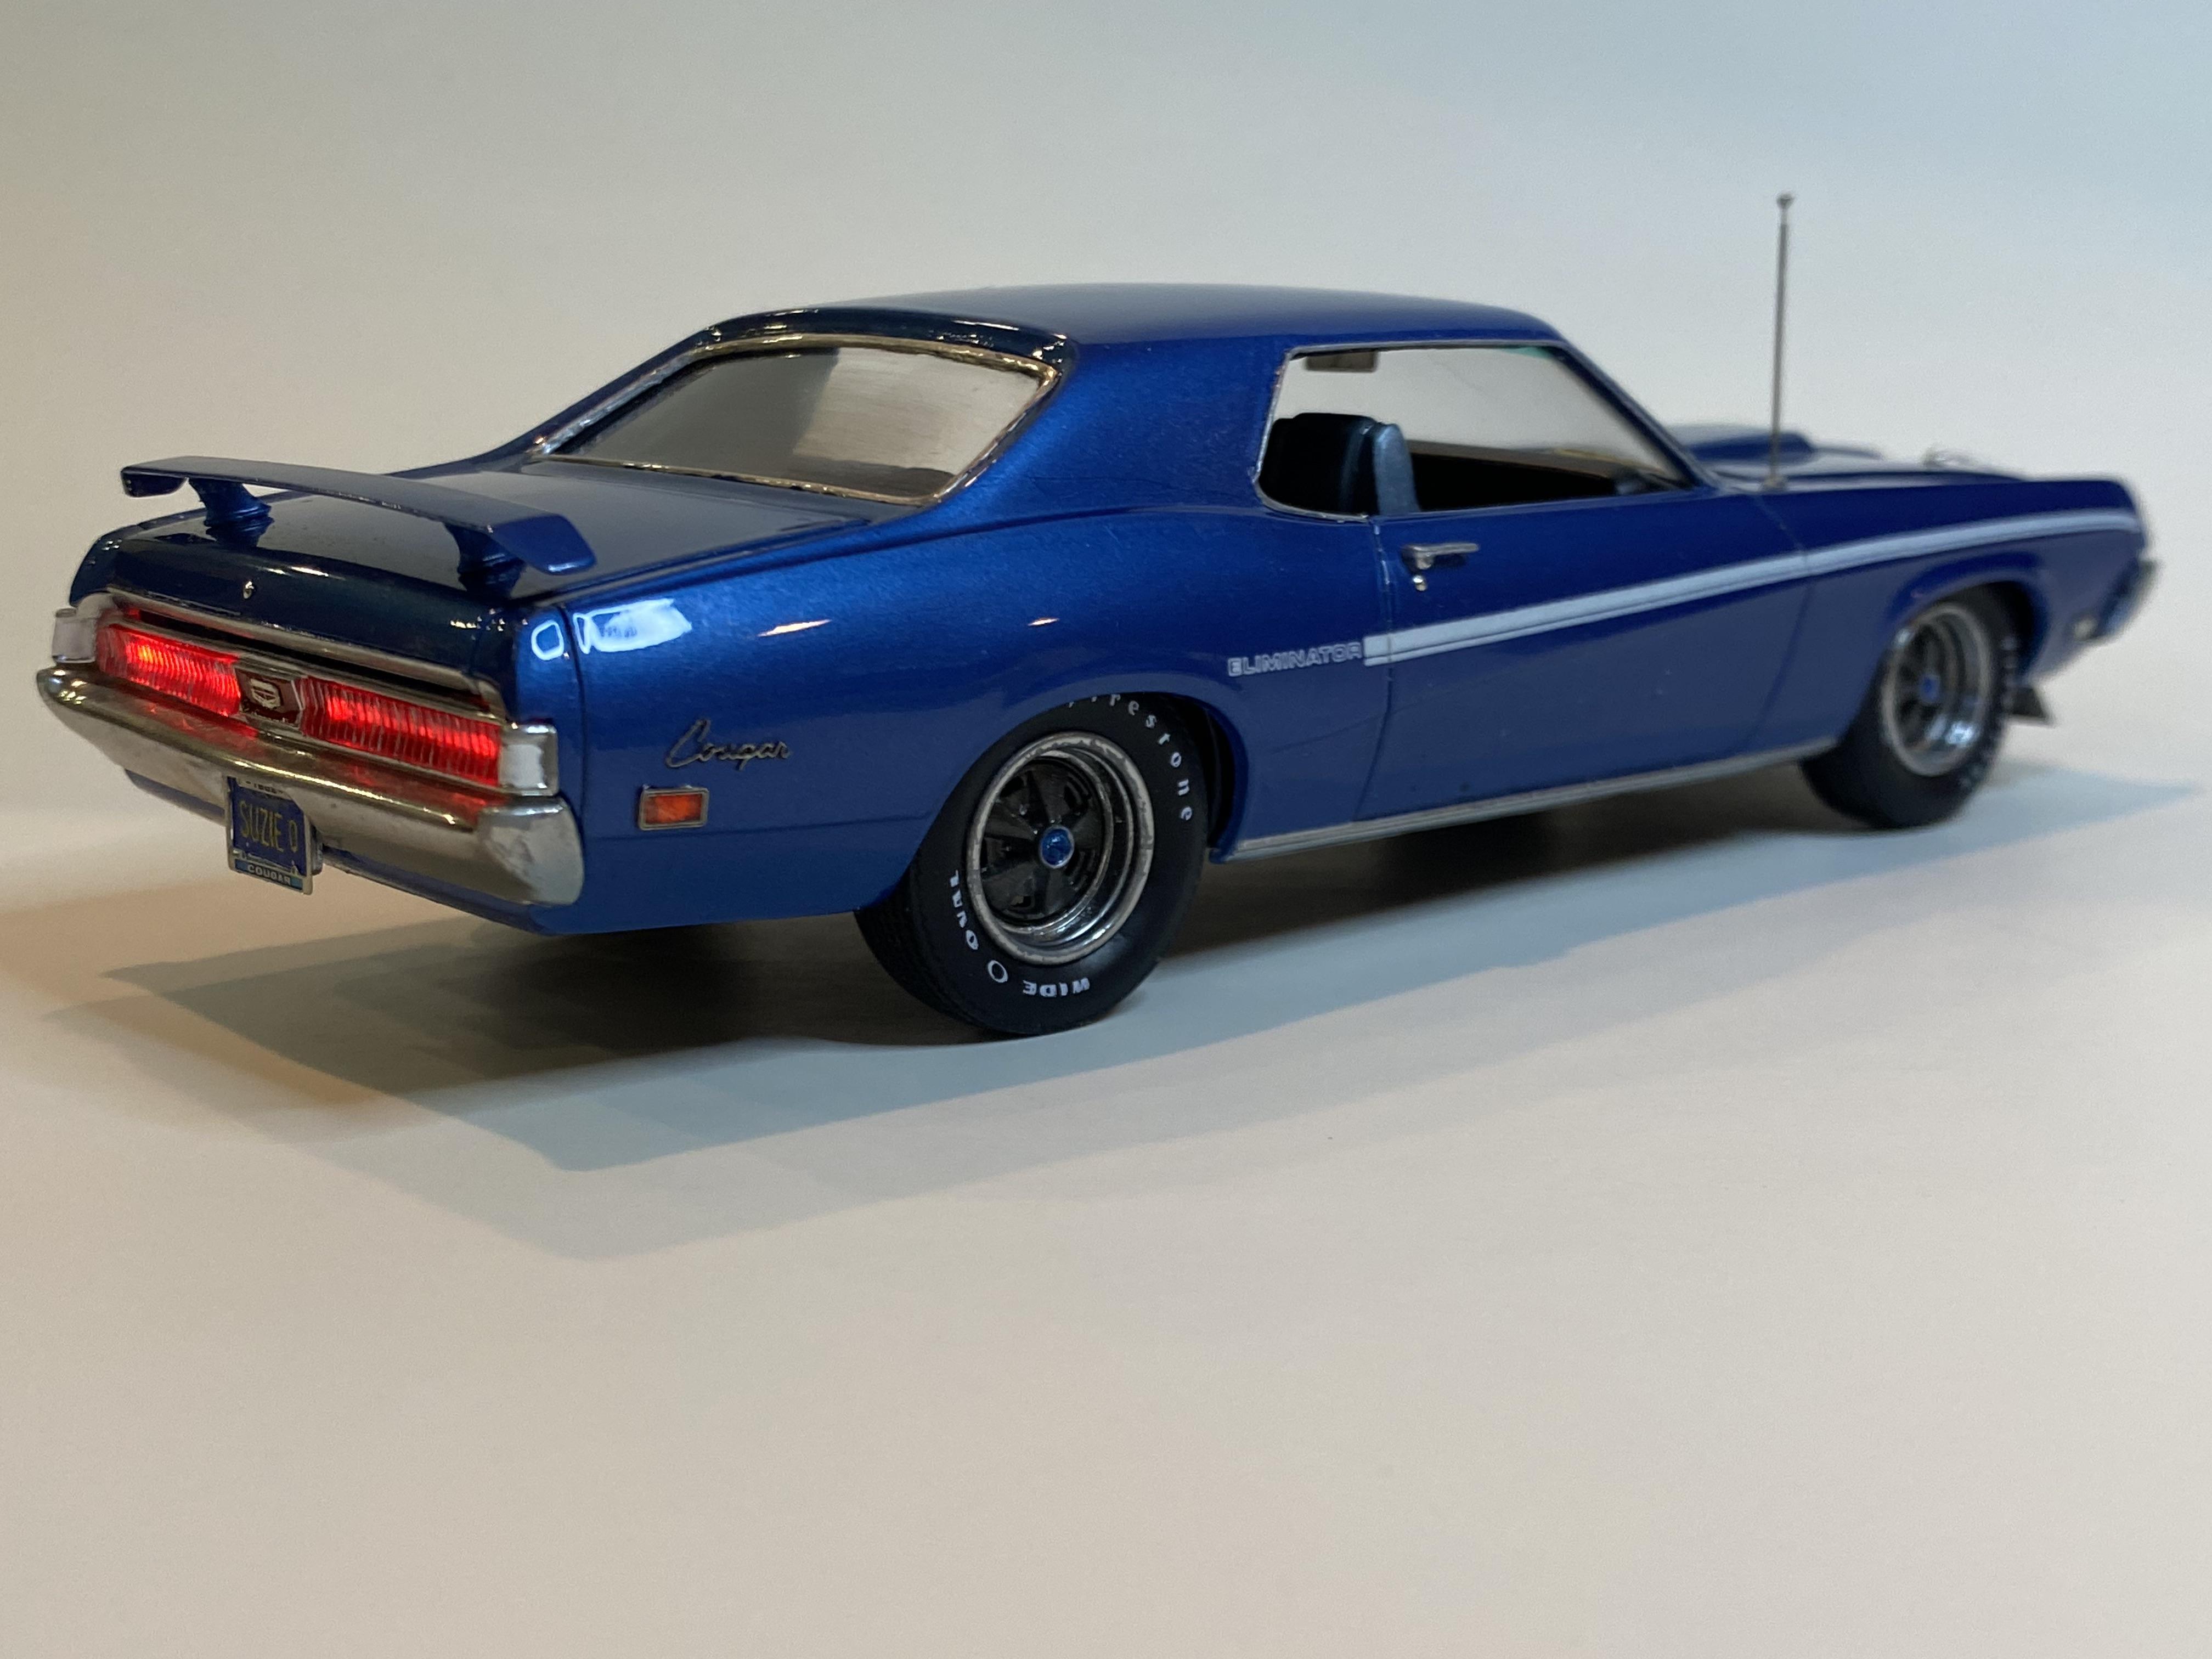
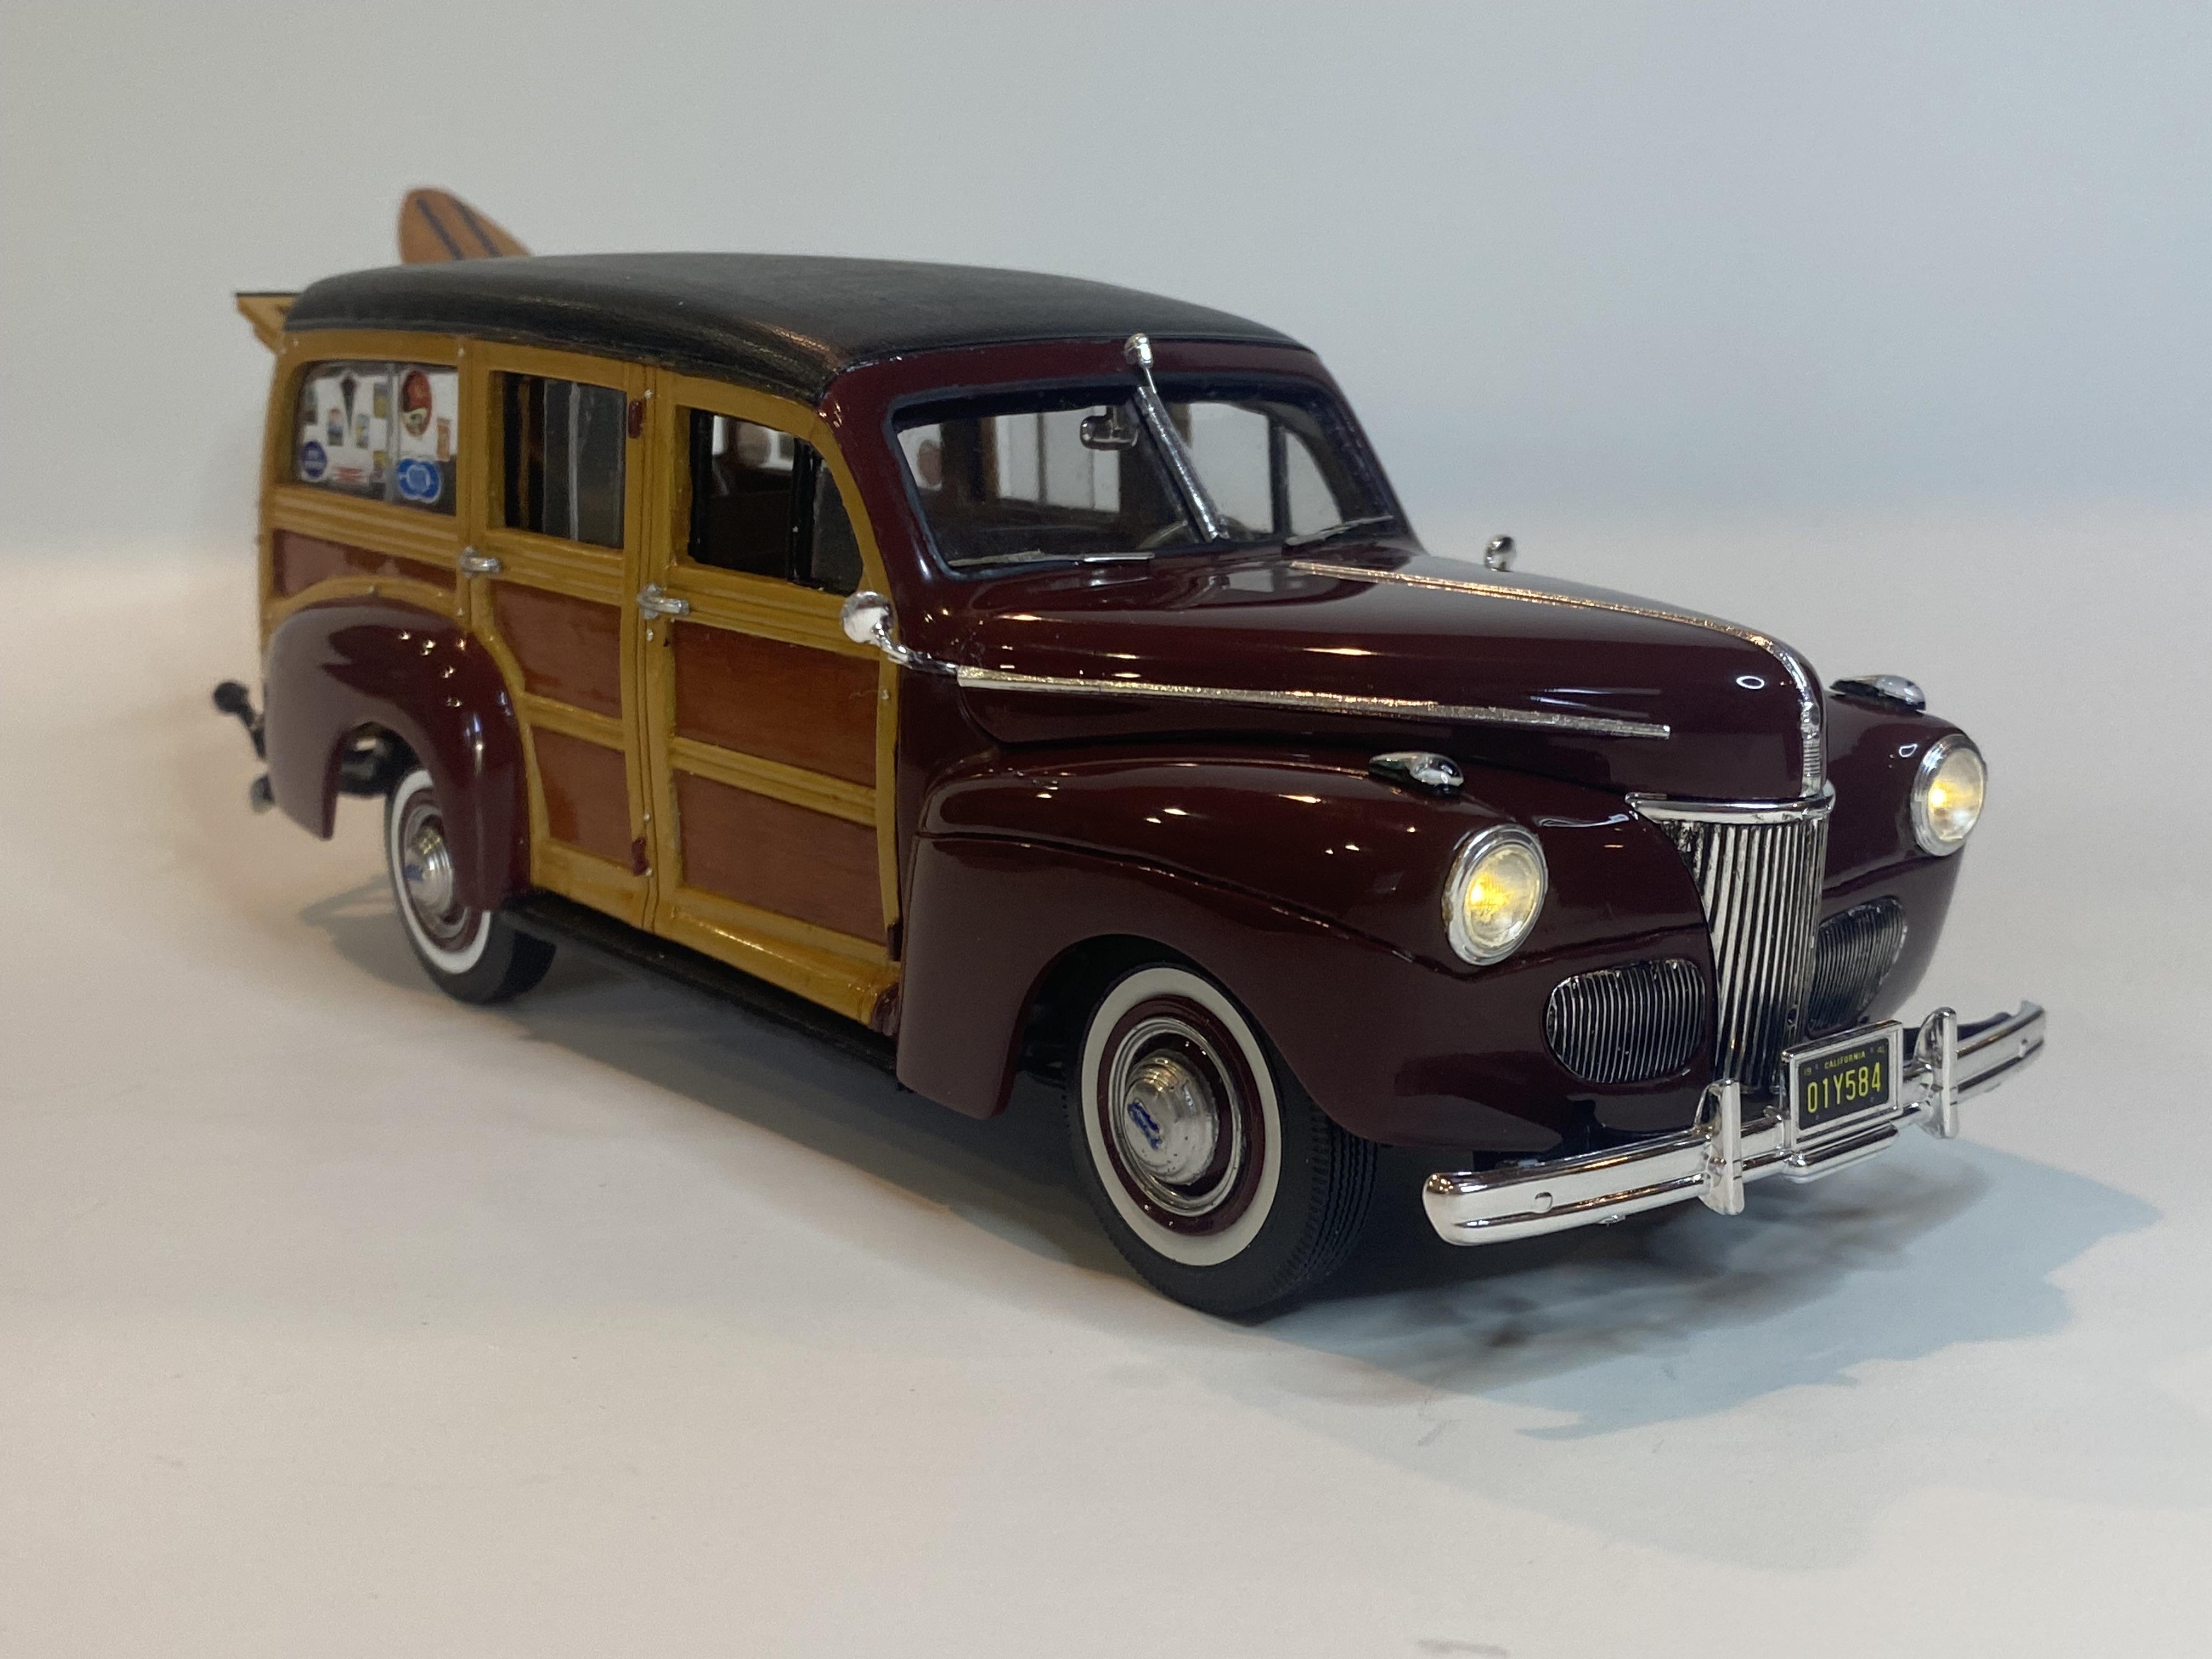
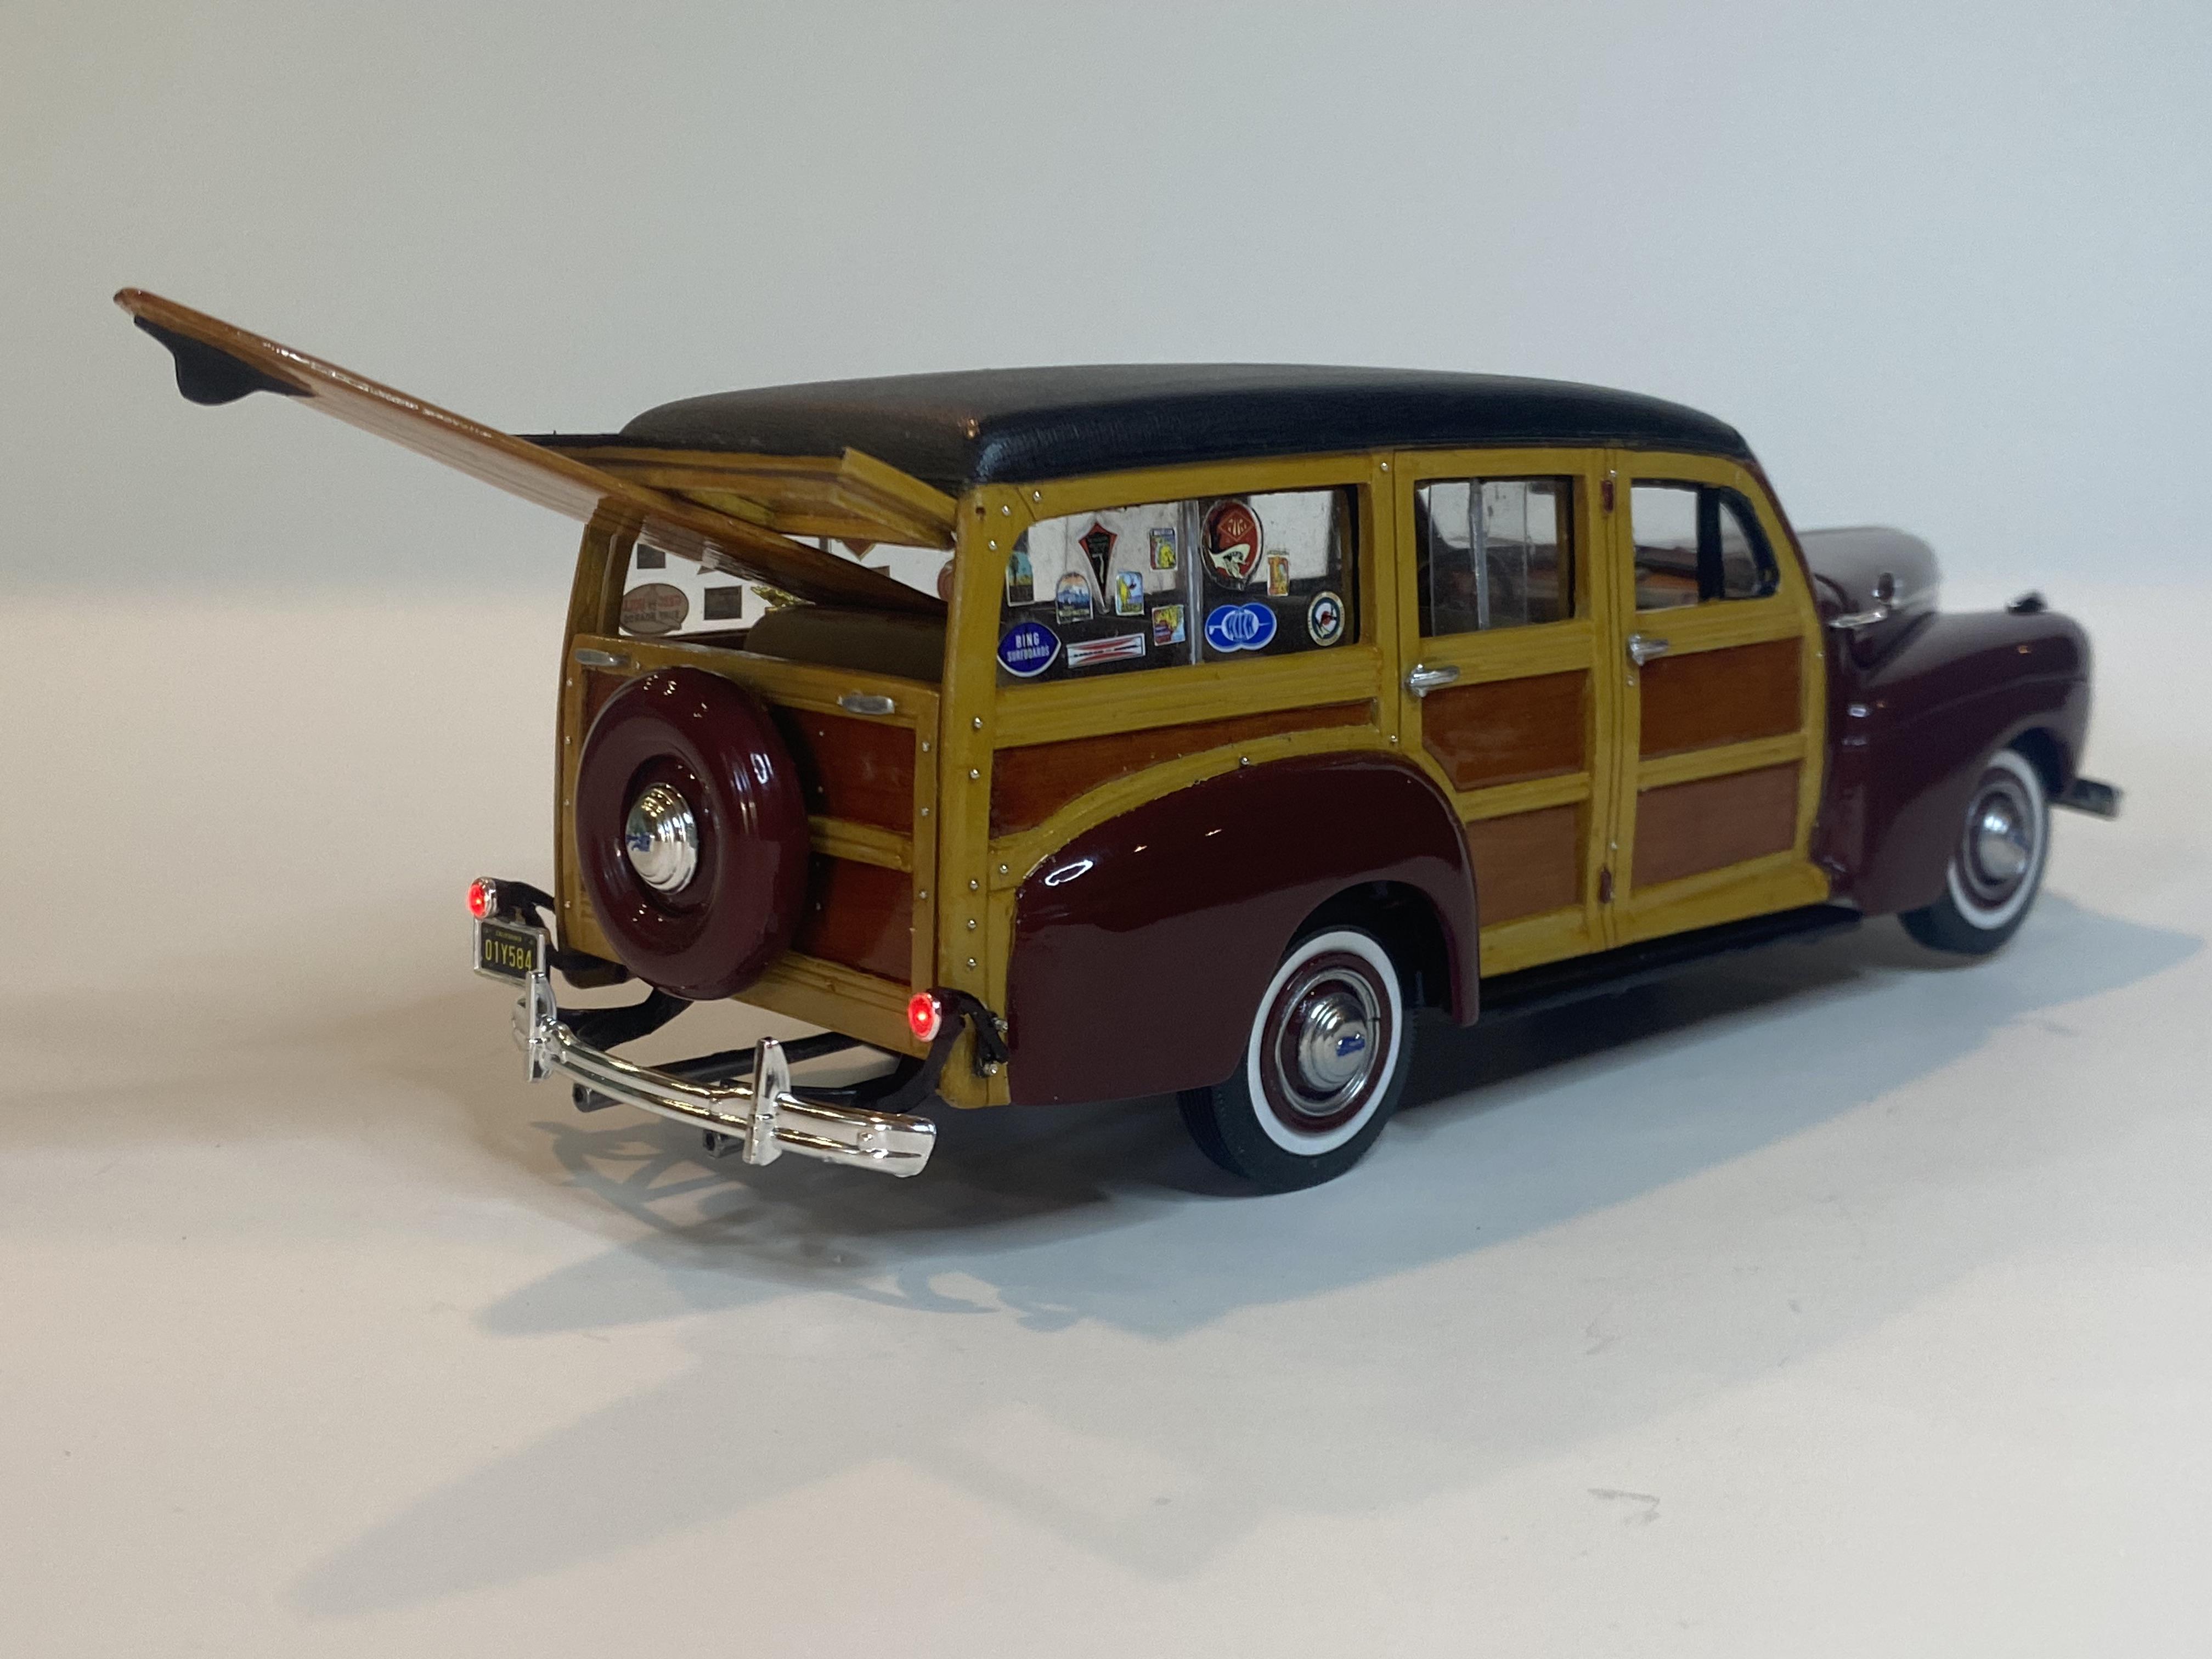
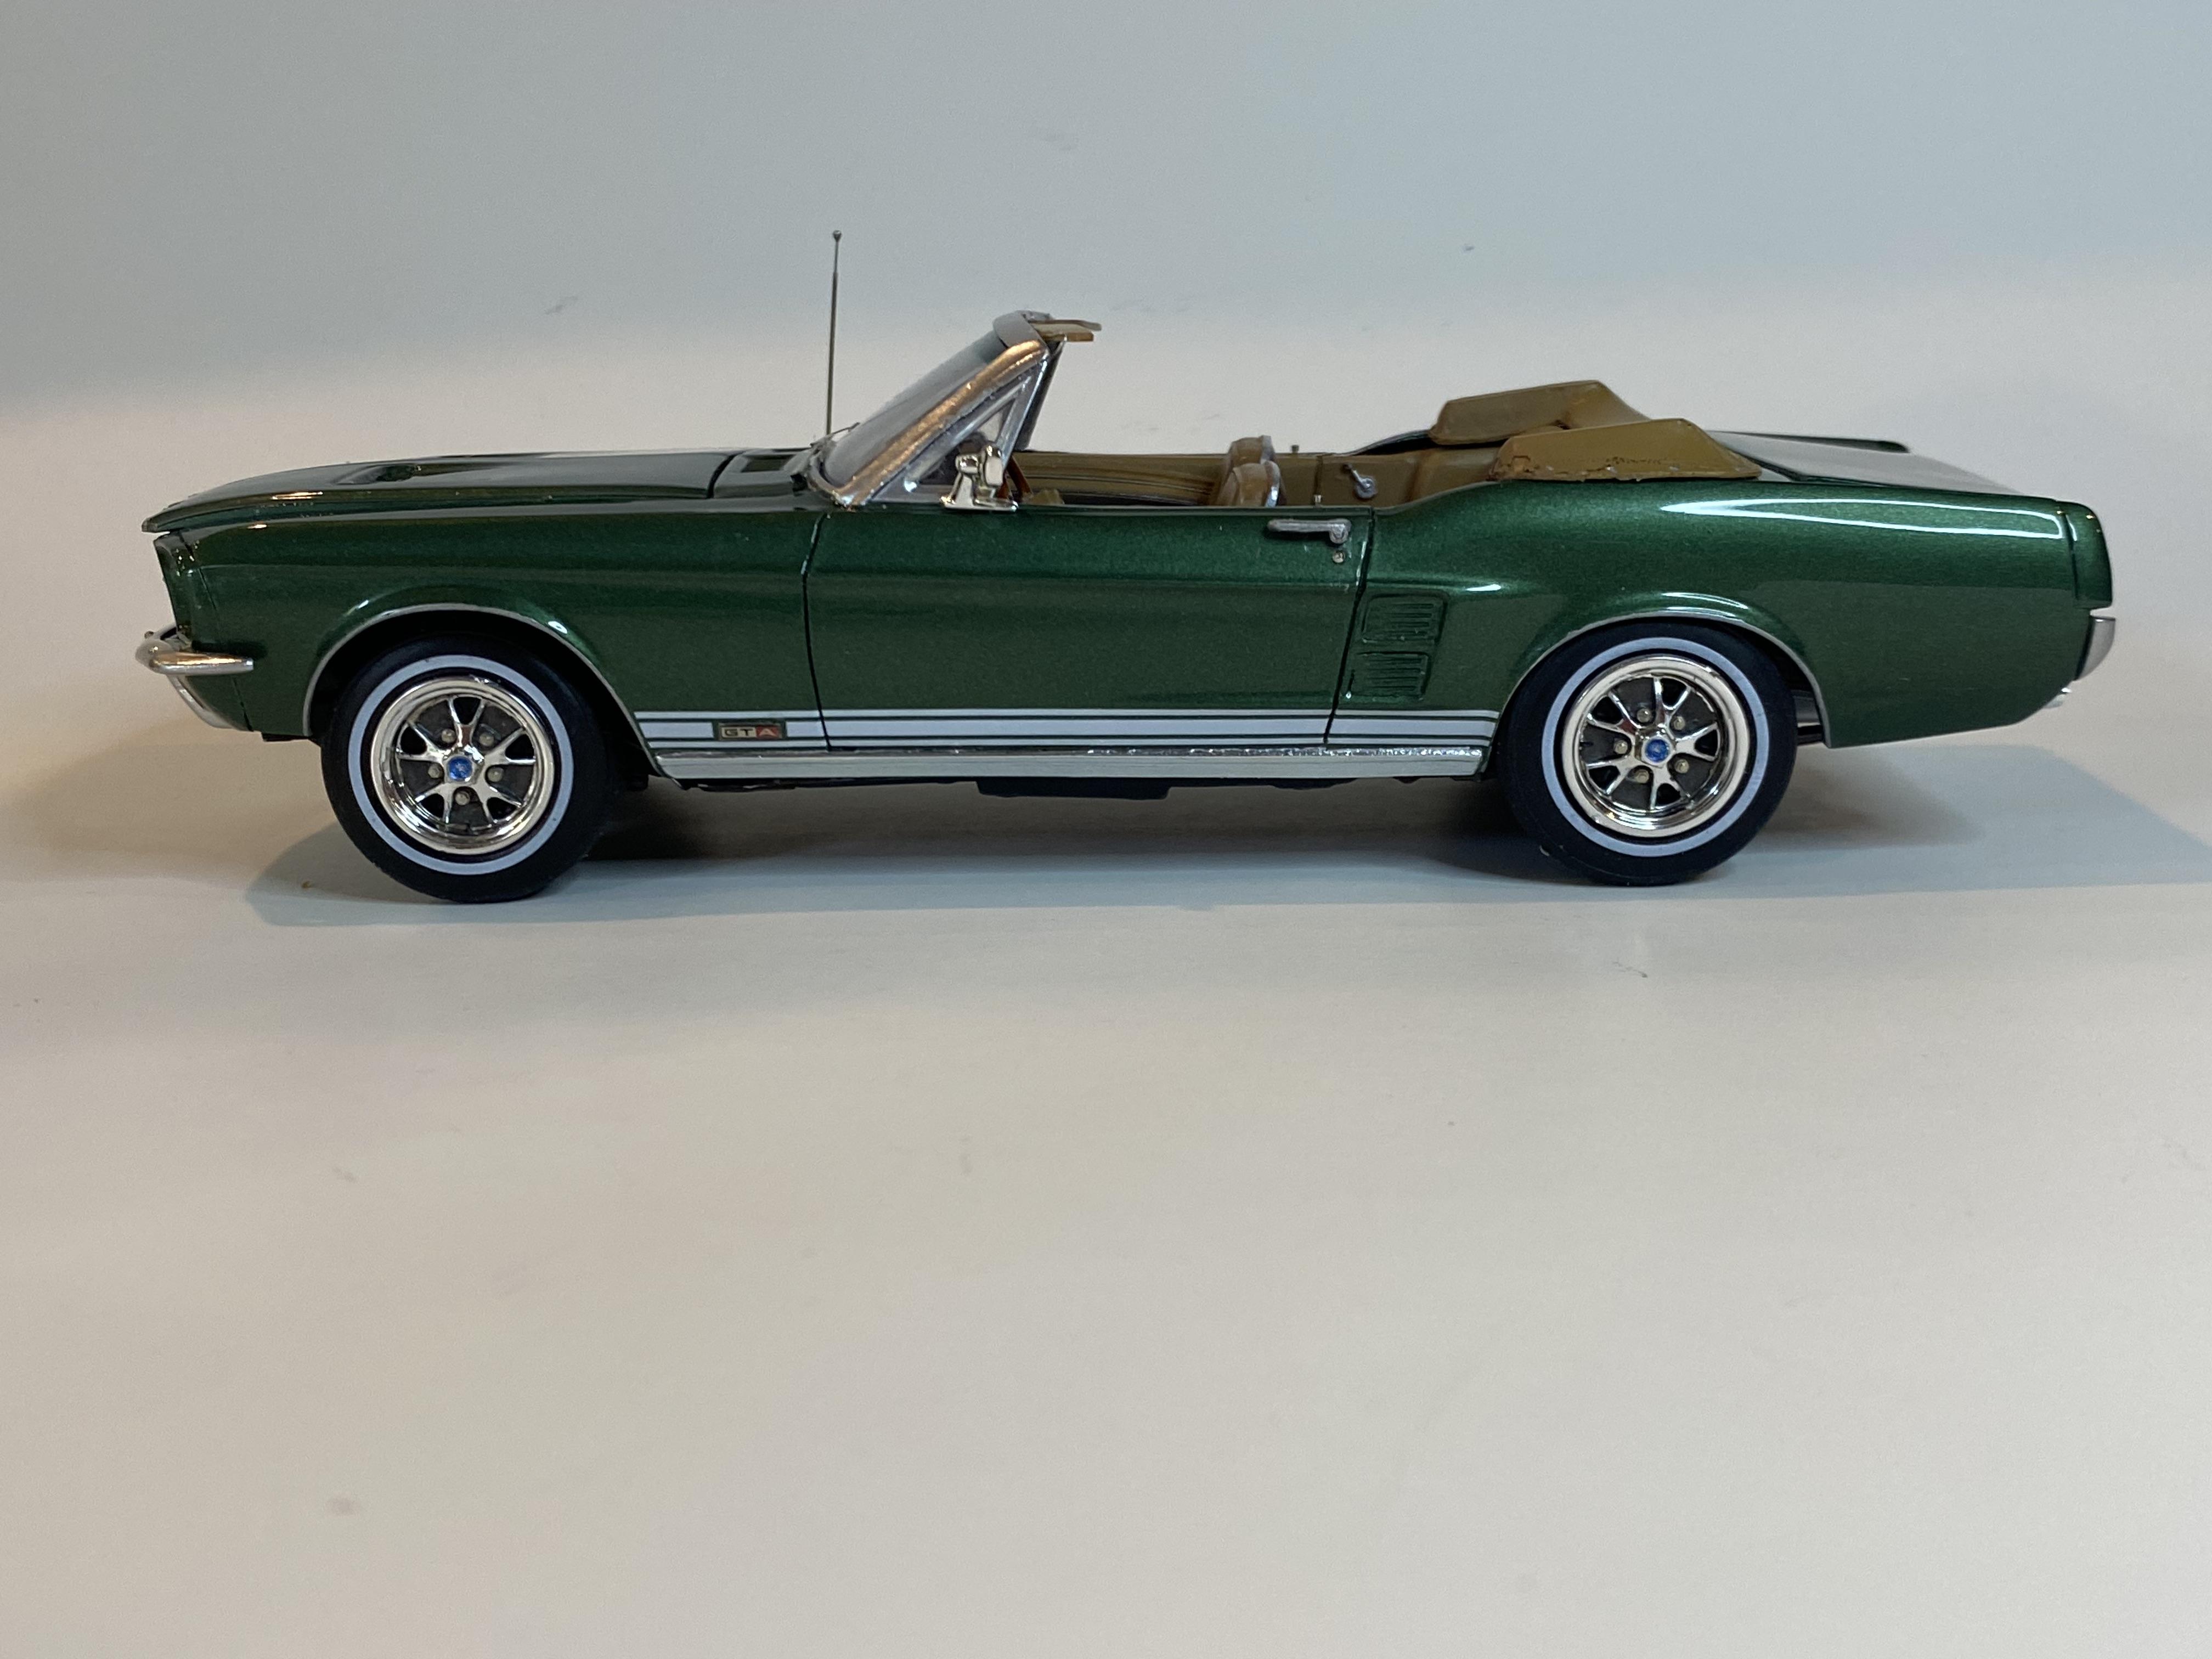
I thought I would post my year in review of builds completed in 2024. One was finished just into 2024. I was actually surprised how many I completed this year. All of these builds were shown in progress in WIP threads in this forum. January 2, 2024: 1966 Mustang GT Fastback replica February 16, 2024: 1966 Mustang Coupe replica April 2, 2024: 2018 Mustang Convertible replica April 27, 2024: 1974 Corvette 454 Convertible May 26, 2024: 1957 Thunderbird July 10, 2024: 1968 Mustang GT/CS California Special August 9, 2024: 1950 Chevrolet 3100 September 10, 2024: 1969 Mercury Cougar Eliminator November 19, 2024: 1949 Ford Woody Surf Wagon December 23, 2024: 1967 Ford Mustang GTA 390 Convertible
- 32 replies
-
- 11
-

-
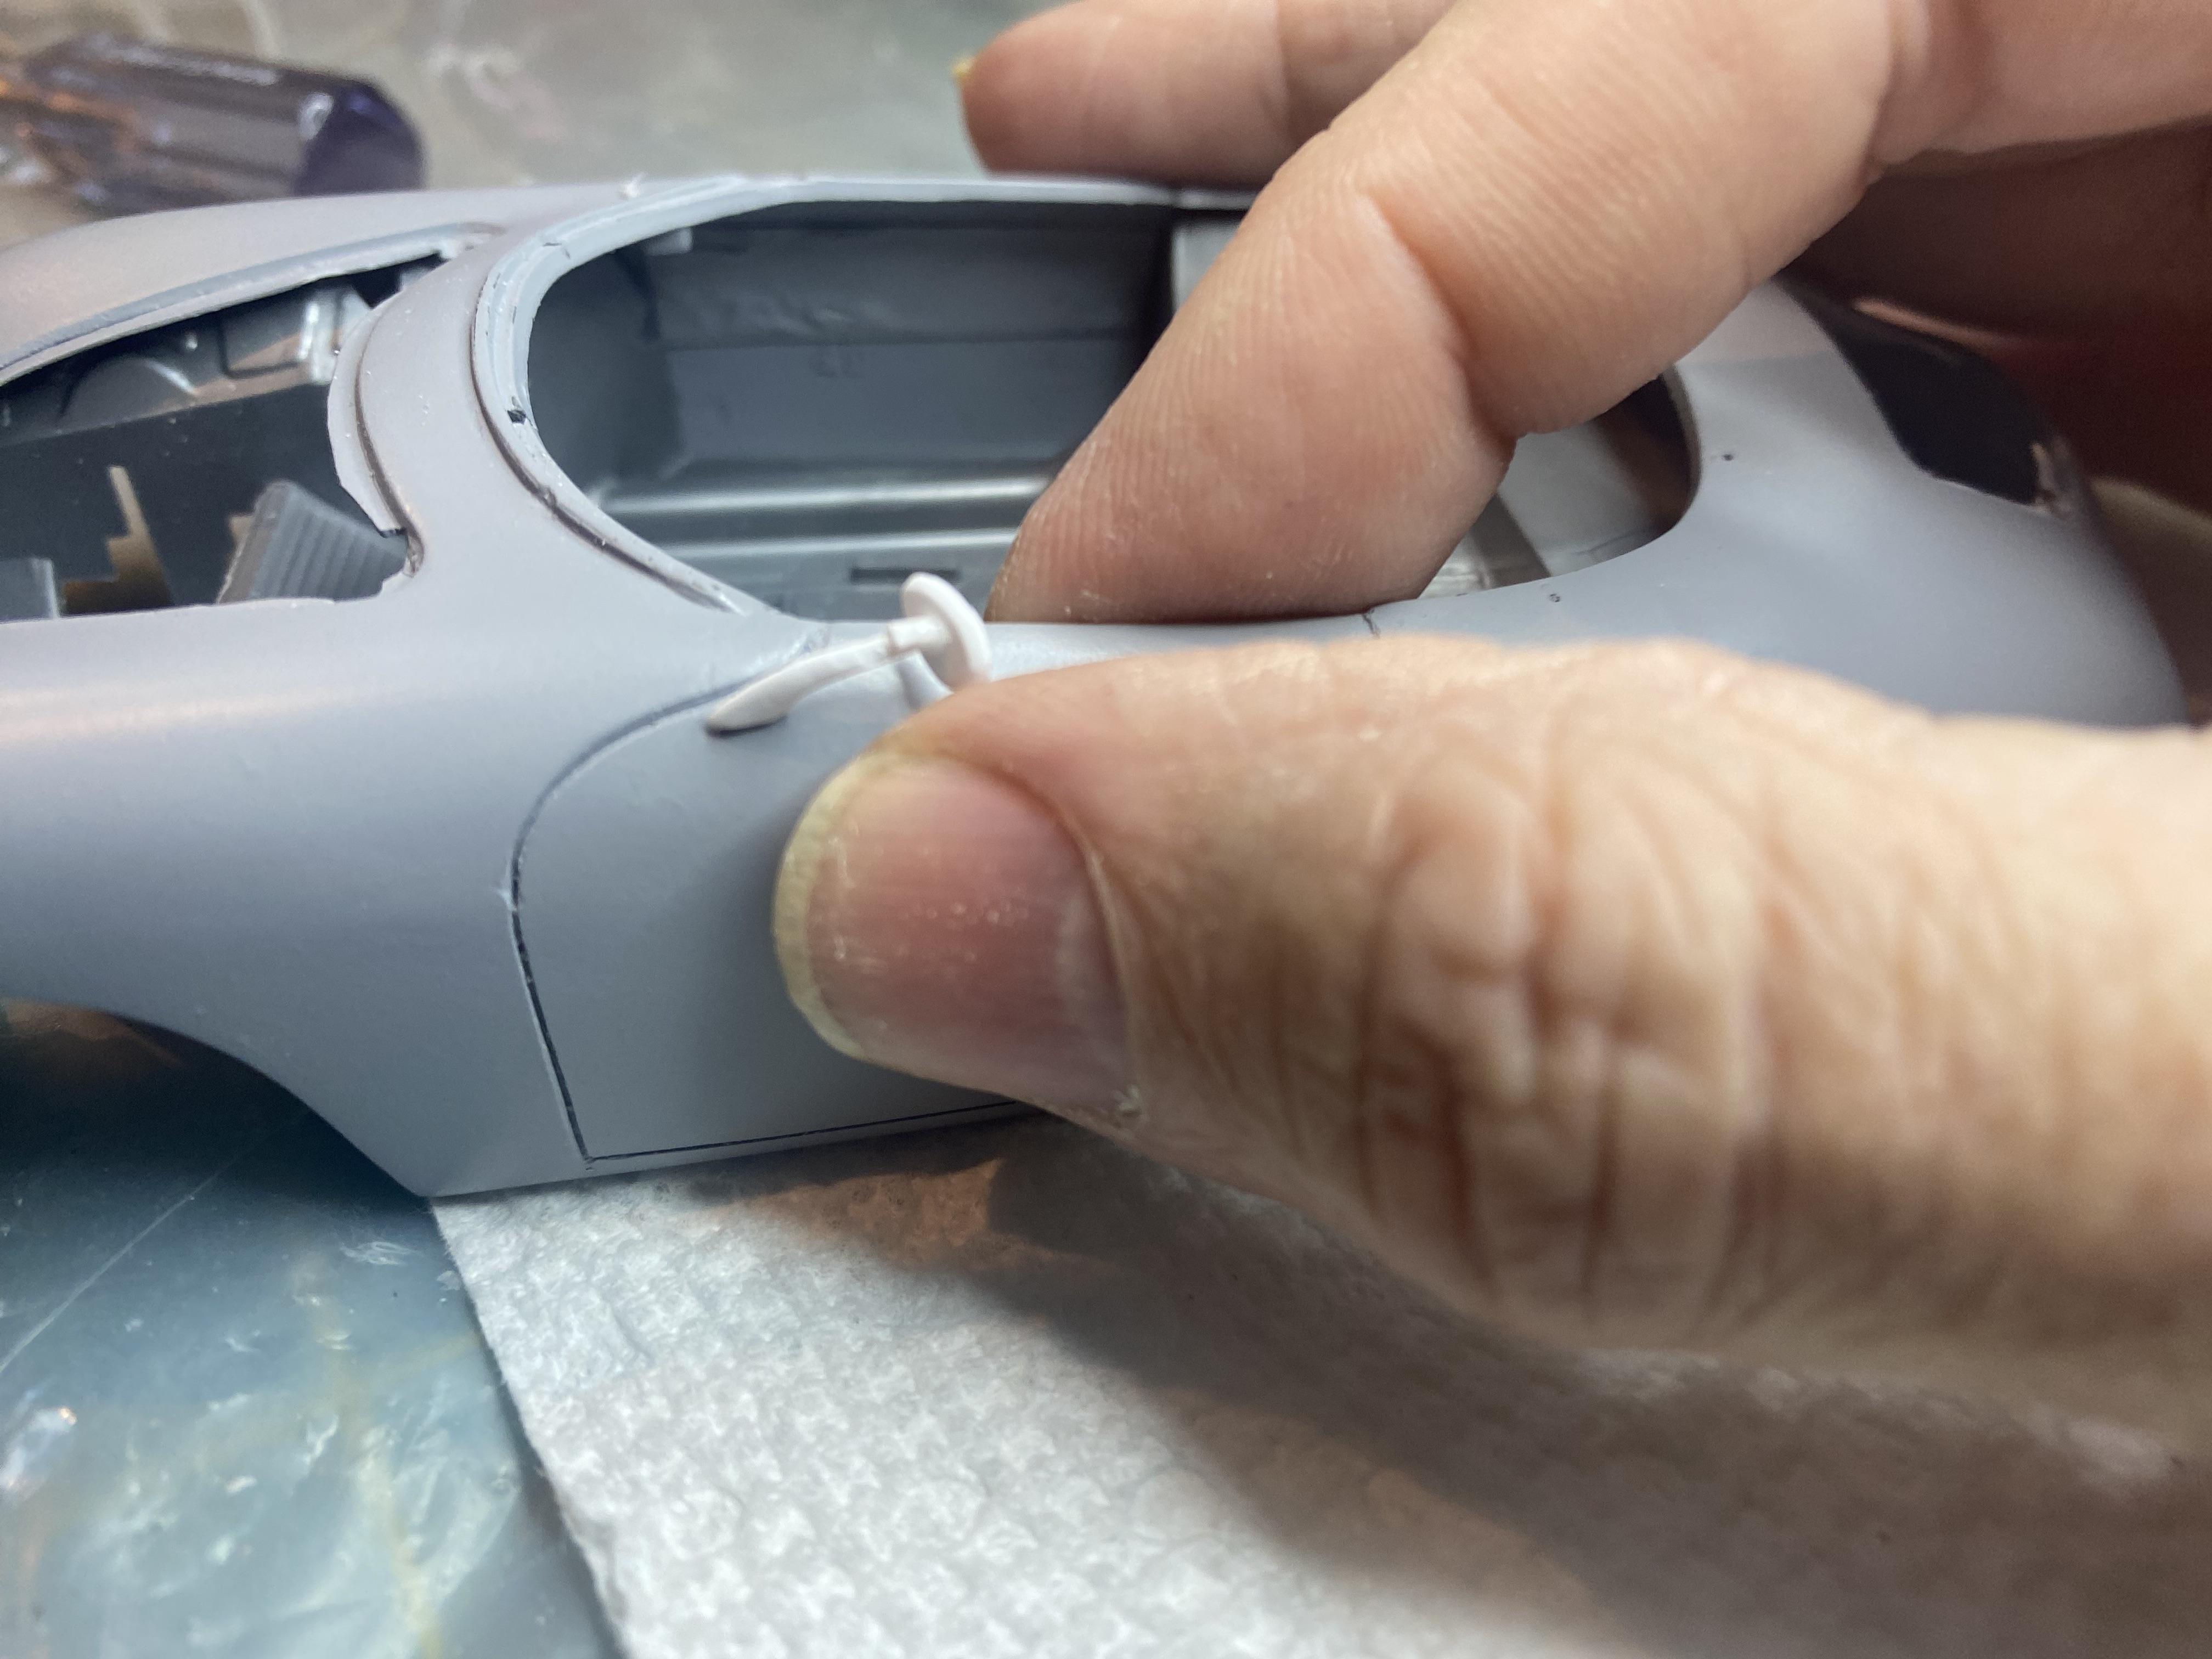
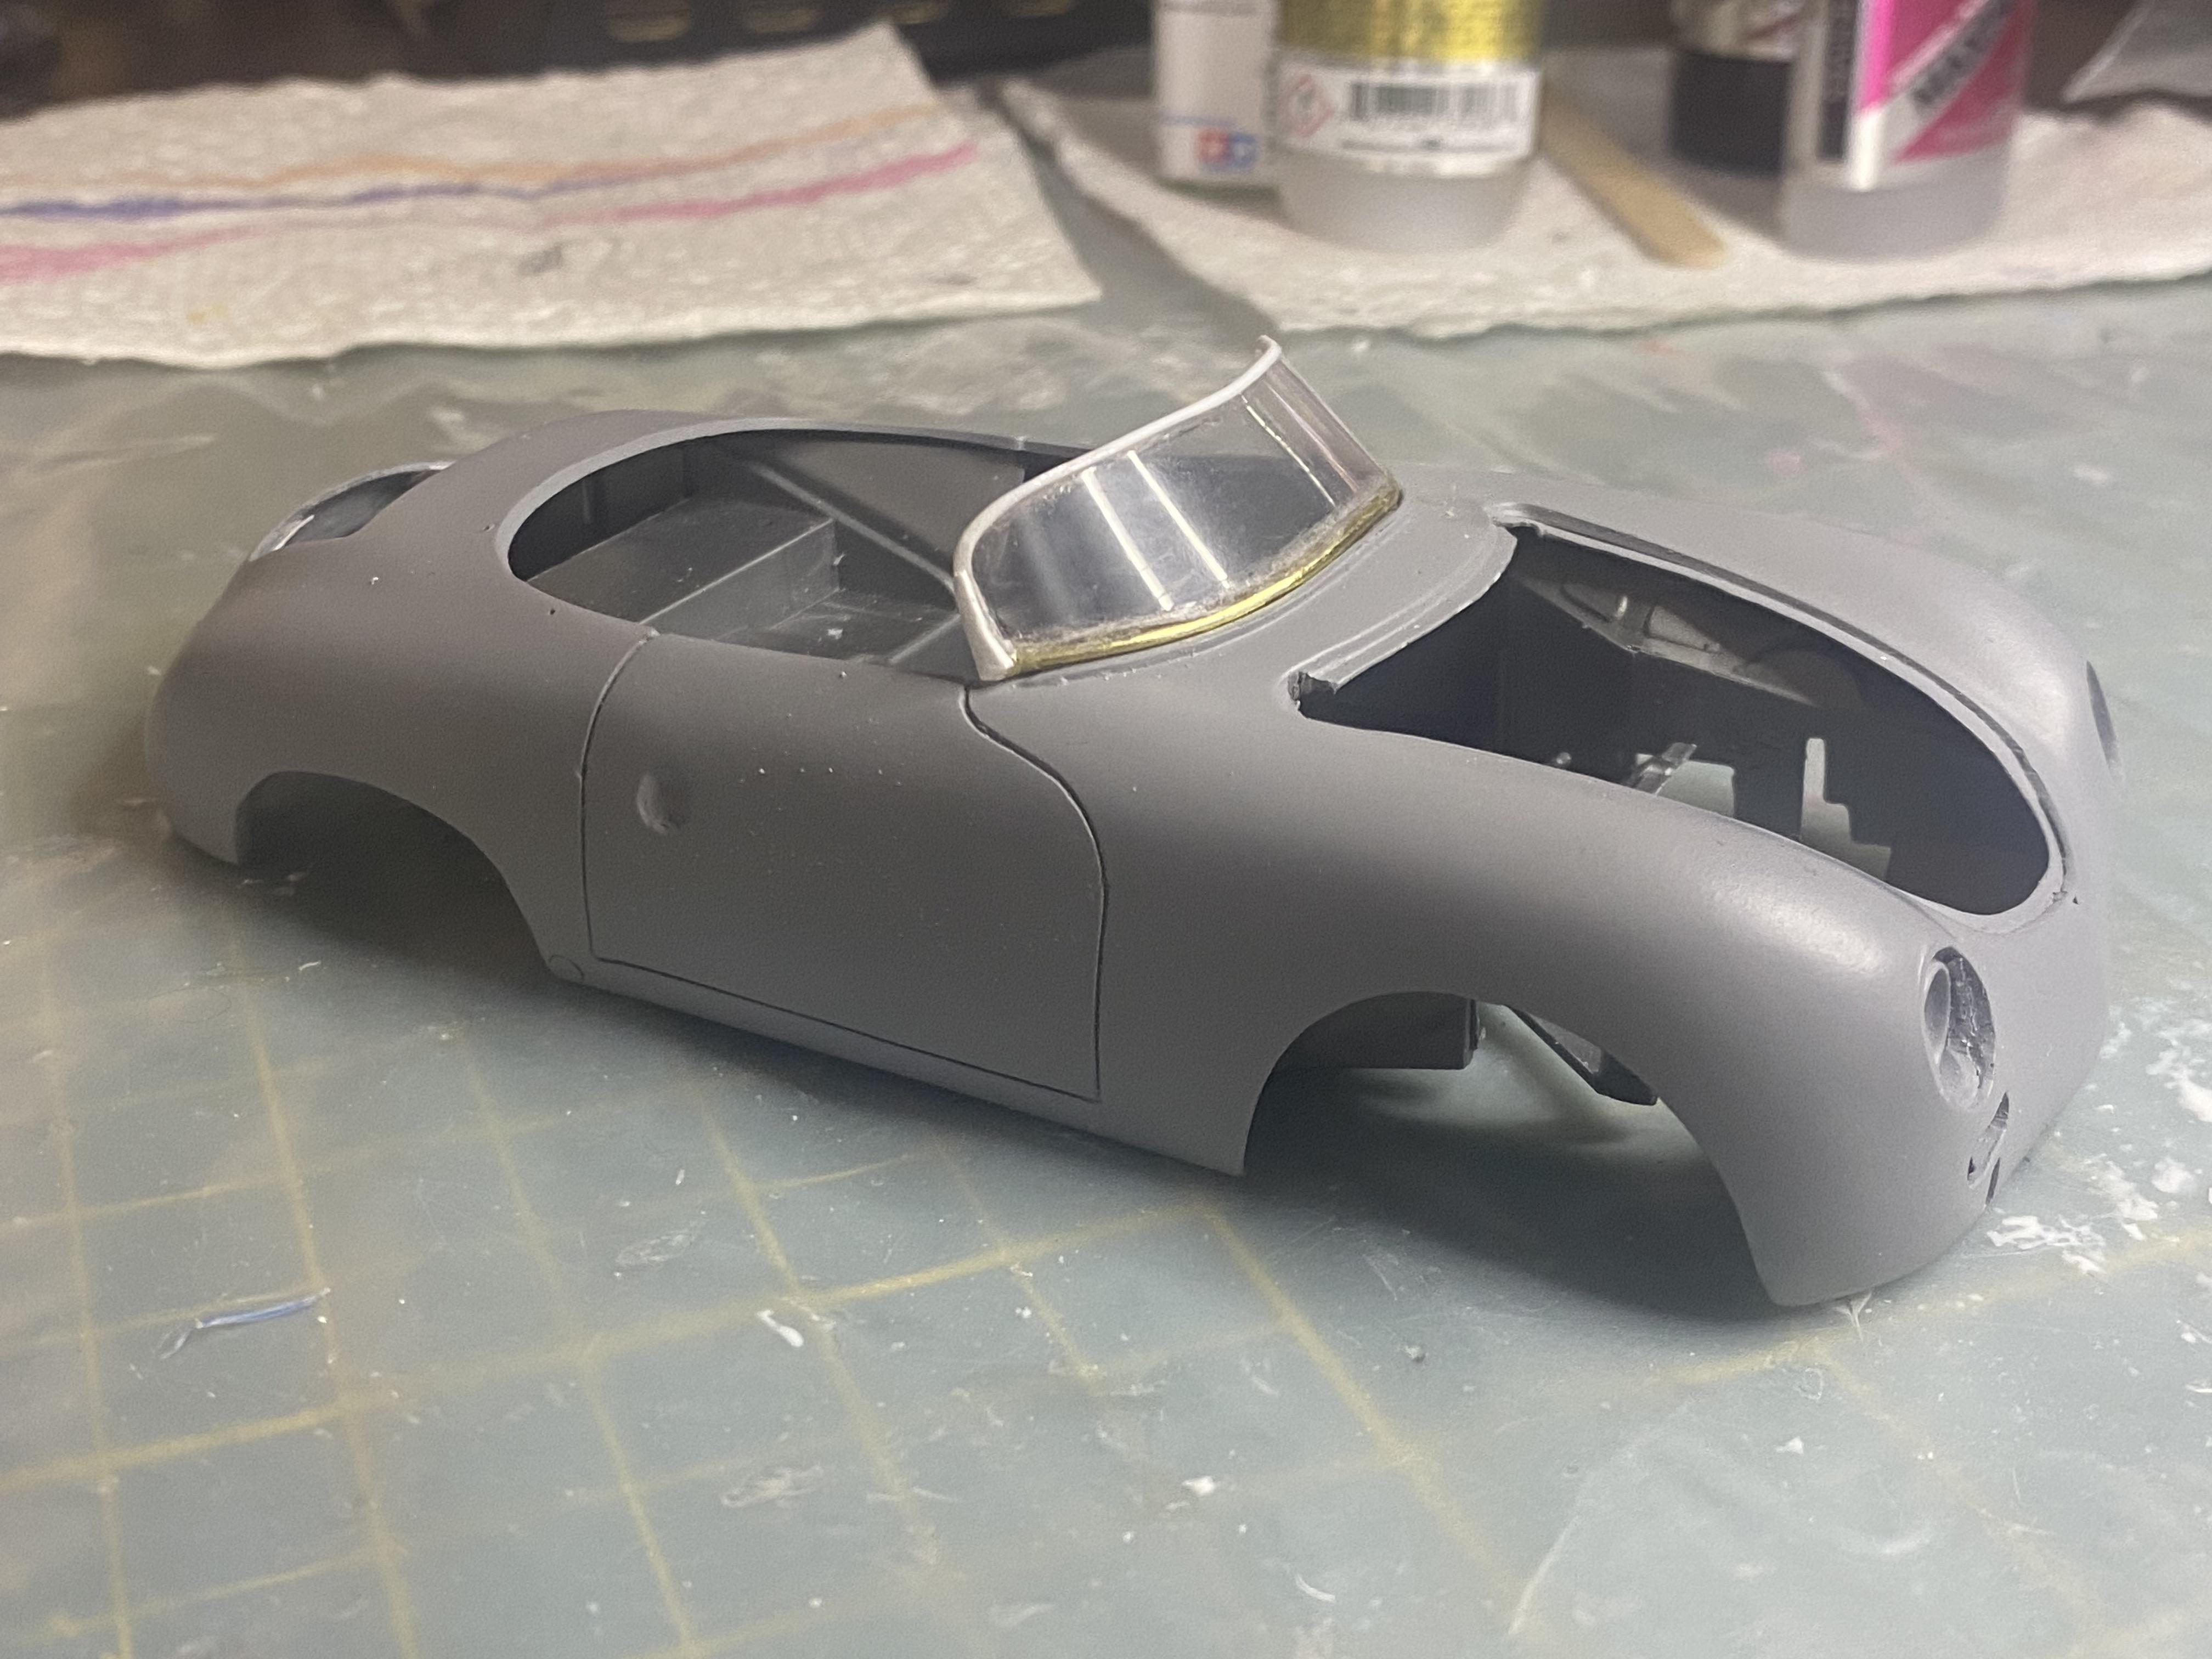
I added some minor details to the undercarriage, created an open rear hood vent and added trim to the cut down windshield. I am going to likely make the windshields optional. Next I need to make the LED wiring harness and make something in the front trunk to hide the battery.
-
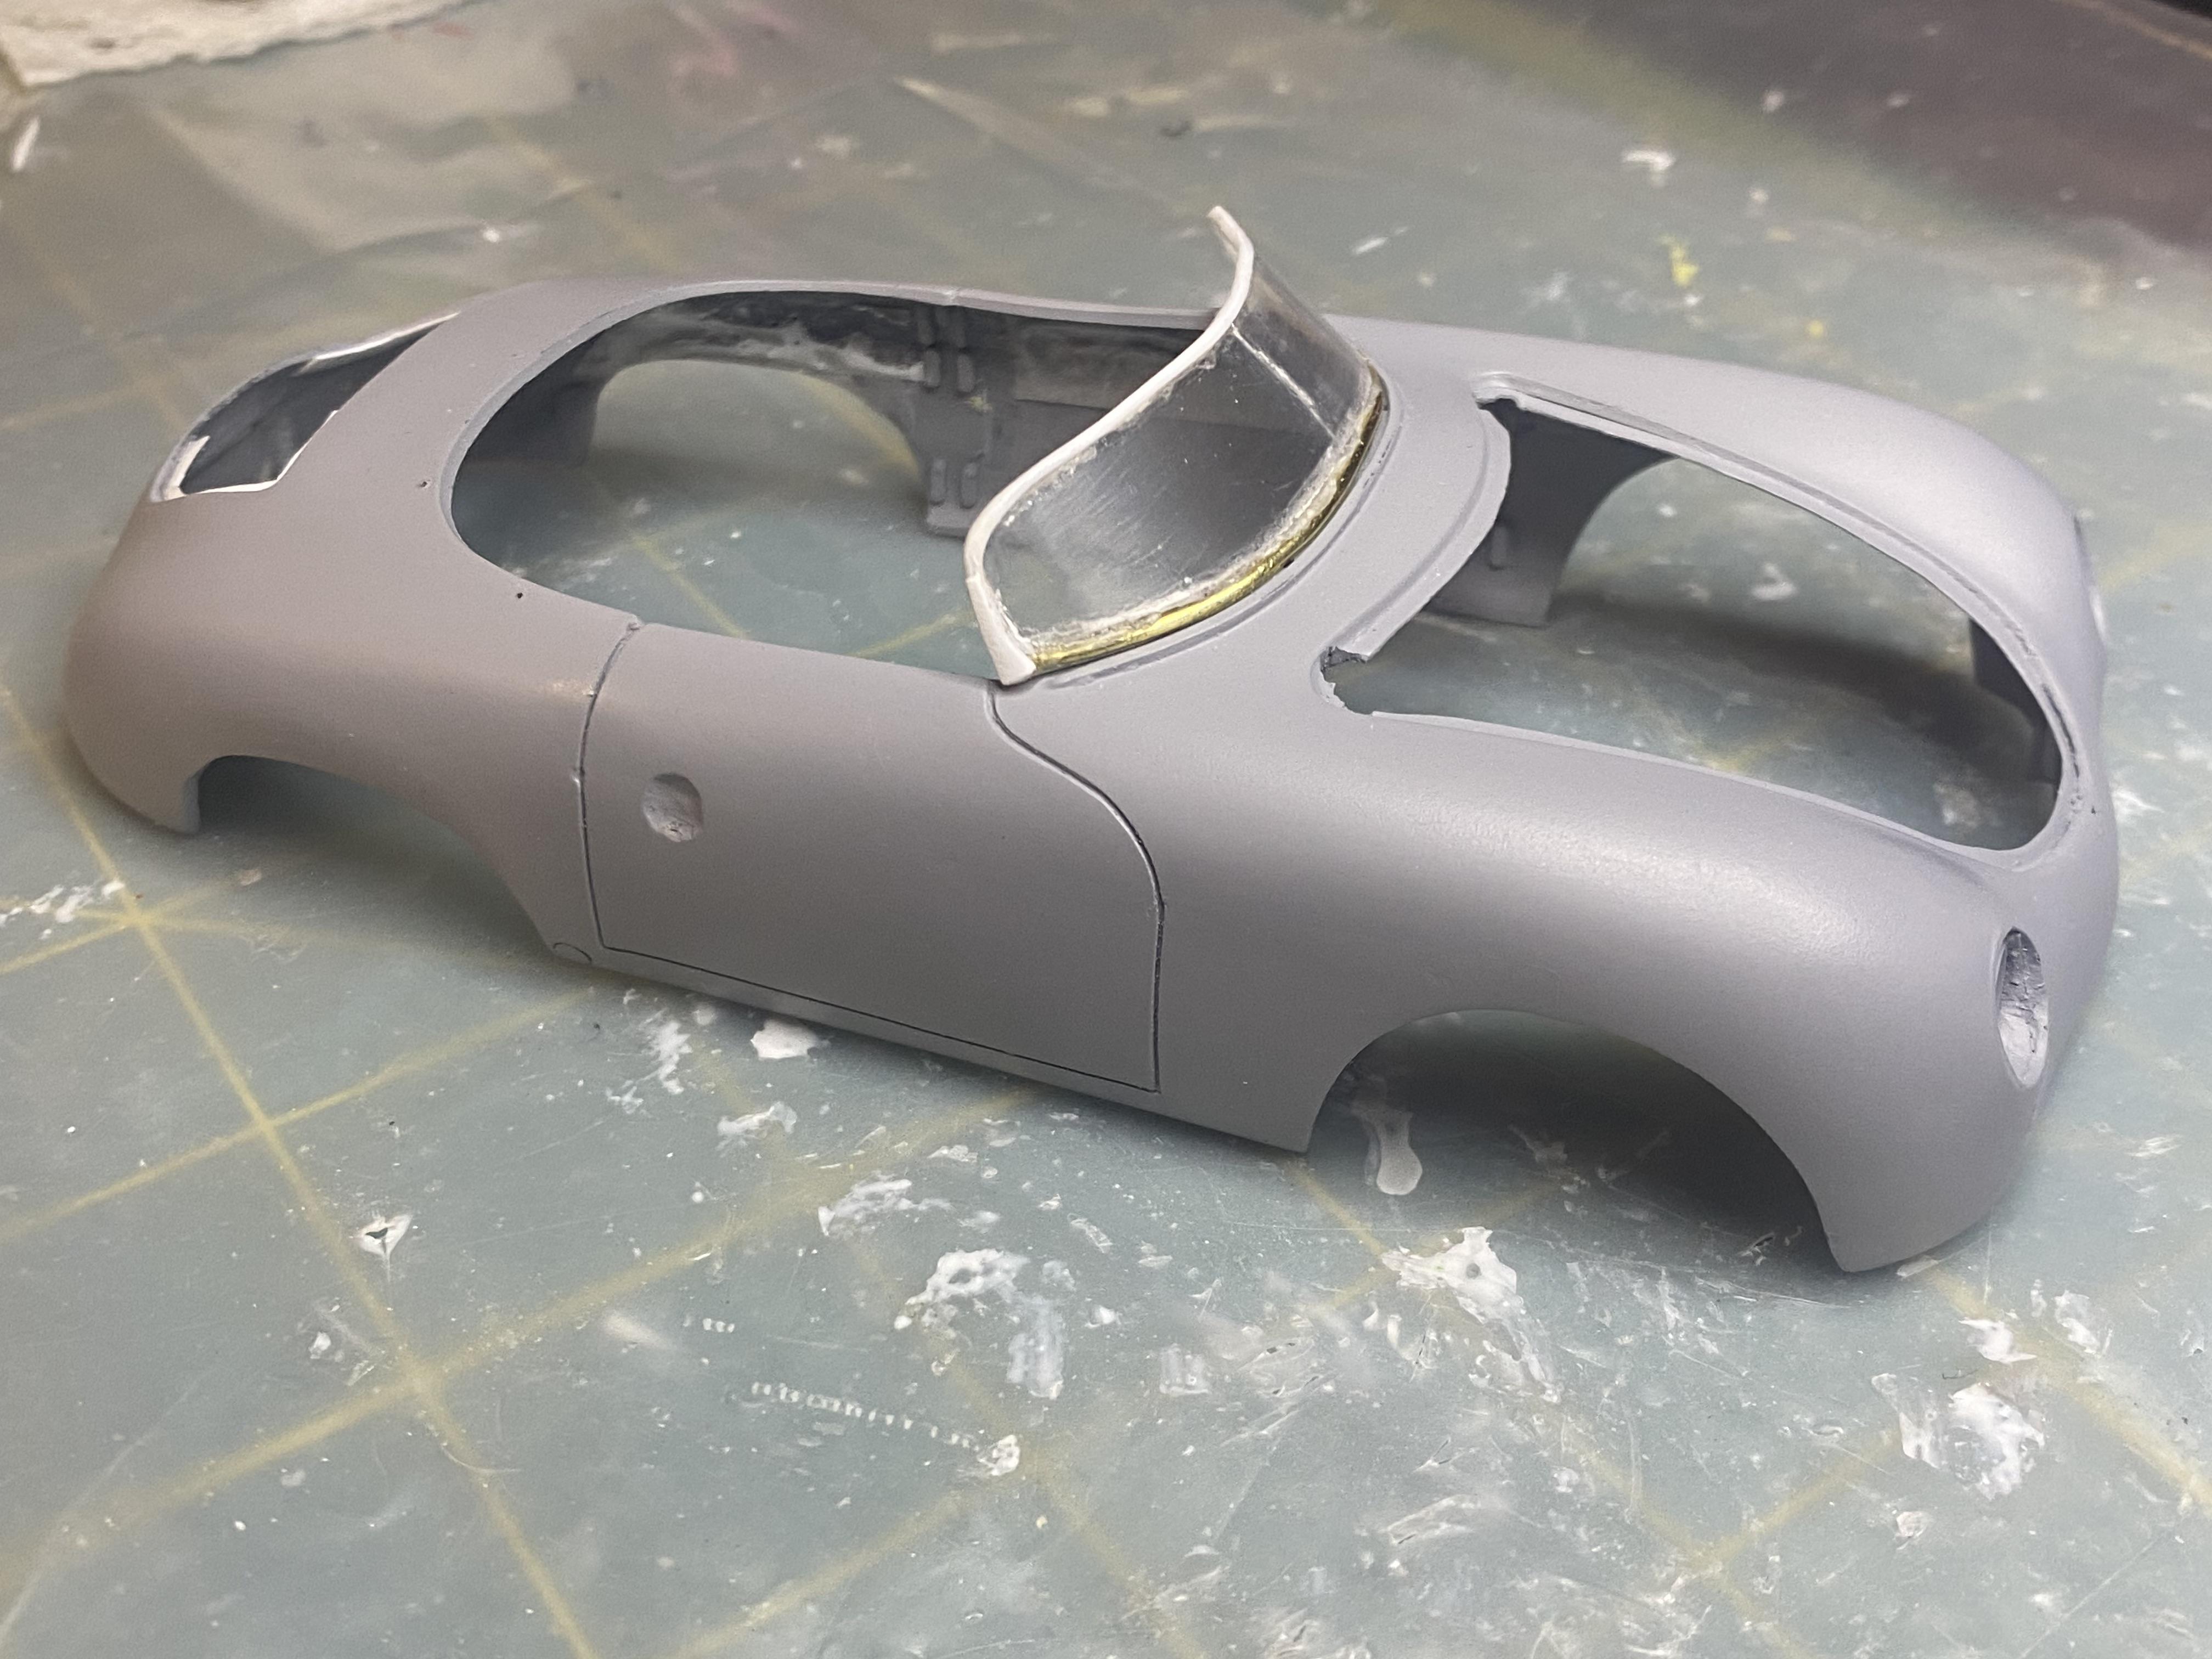
I created what I think is a fairly accurate windshield. Not perfect but not too bad either.
-
The body of the Fujimi is accurate out of the box, this one as you can see took a lot to get it there. With that said I feel this body is comparable now, but a lot of the other parts will also need a whole lot of work to get anywhere close to where you start out of the box with the Fujimi kit, not to mention the need for 3d printed rims and other additions.