Duddly01
-
Posts
1,048 -
Joined
-
Last visited
Content Type
Profiles
Forums
Events
Gallery
Everything posted by Duddly01
-
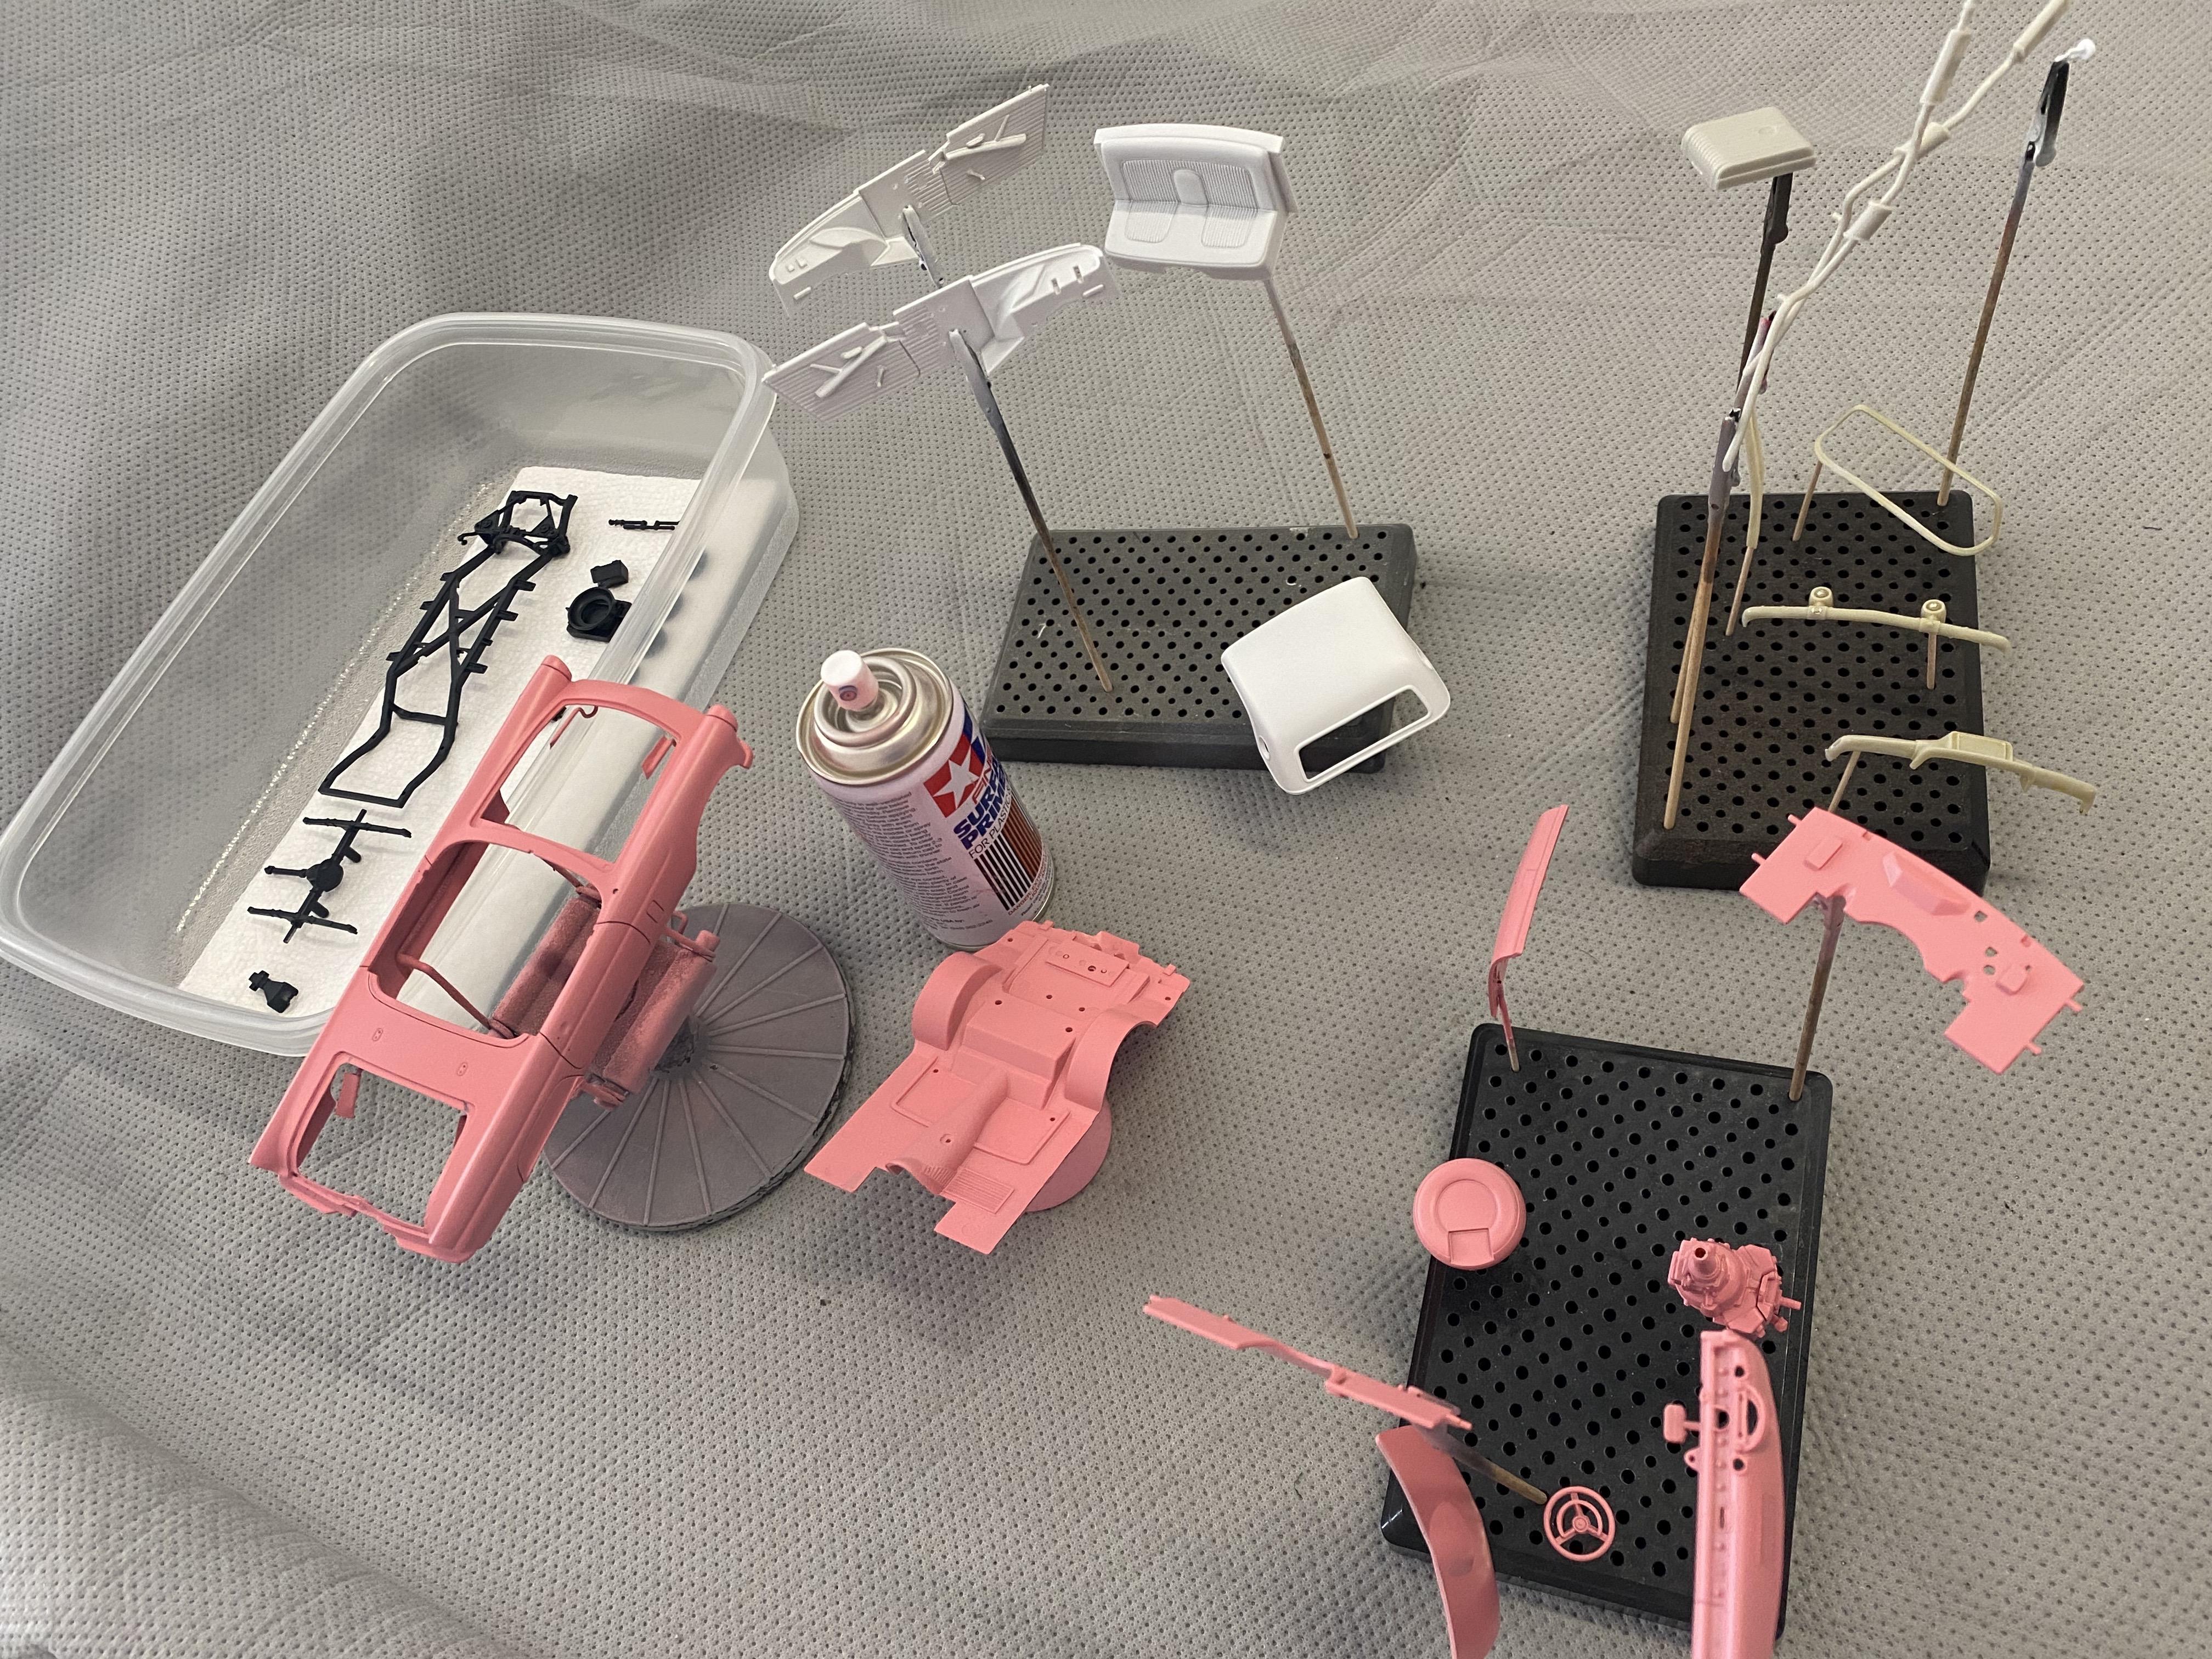
Starting to work on final detailing and assembly. A long way yet to go. I only trial fit the body, still to be wet sanded and polished.

-
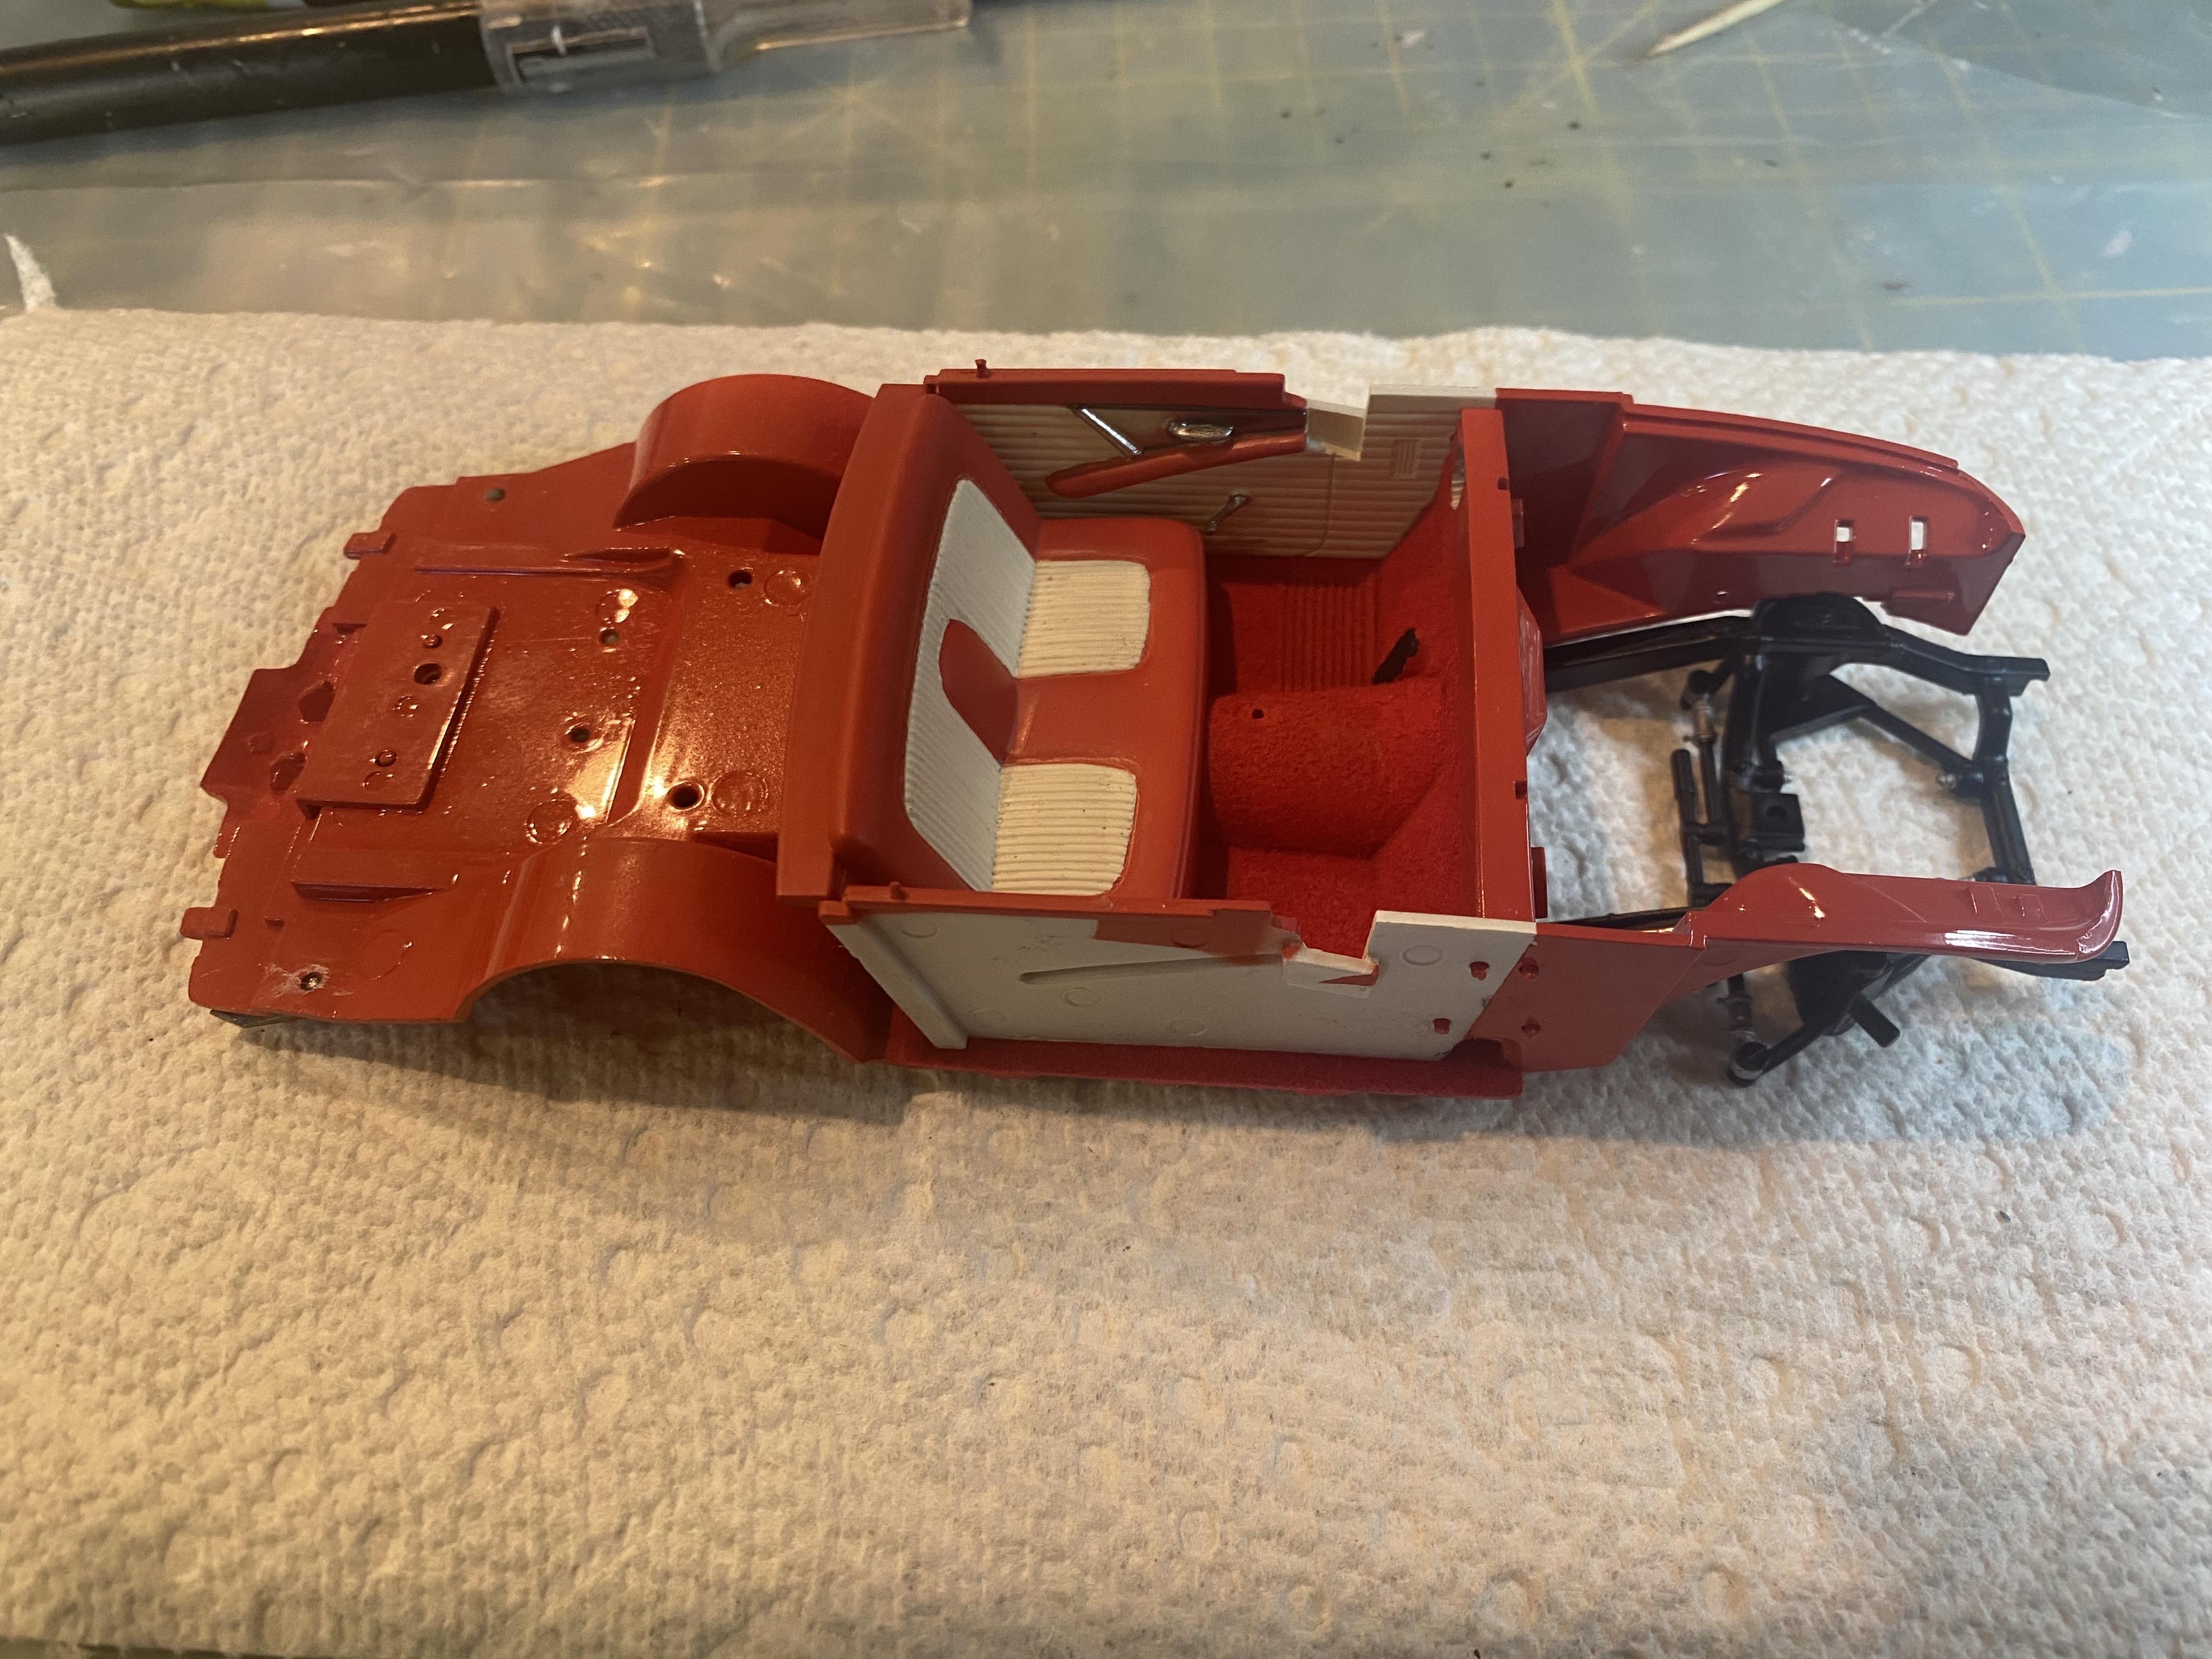
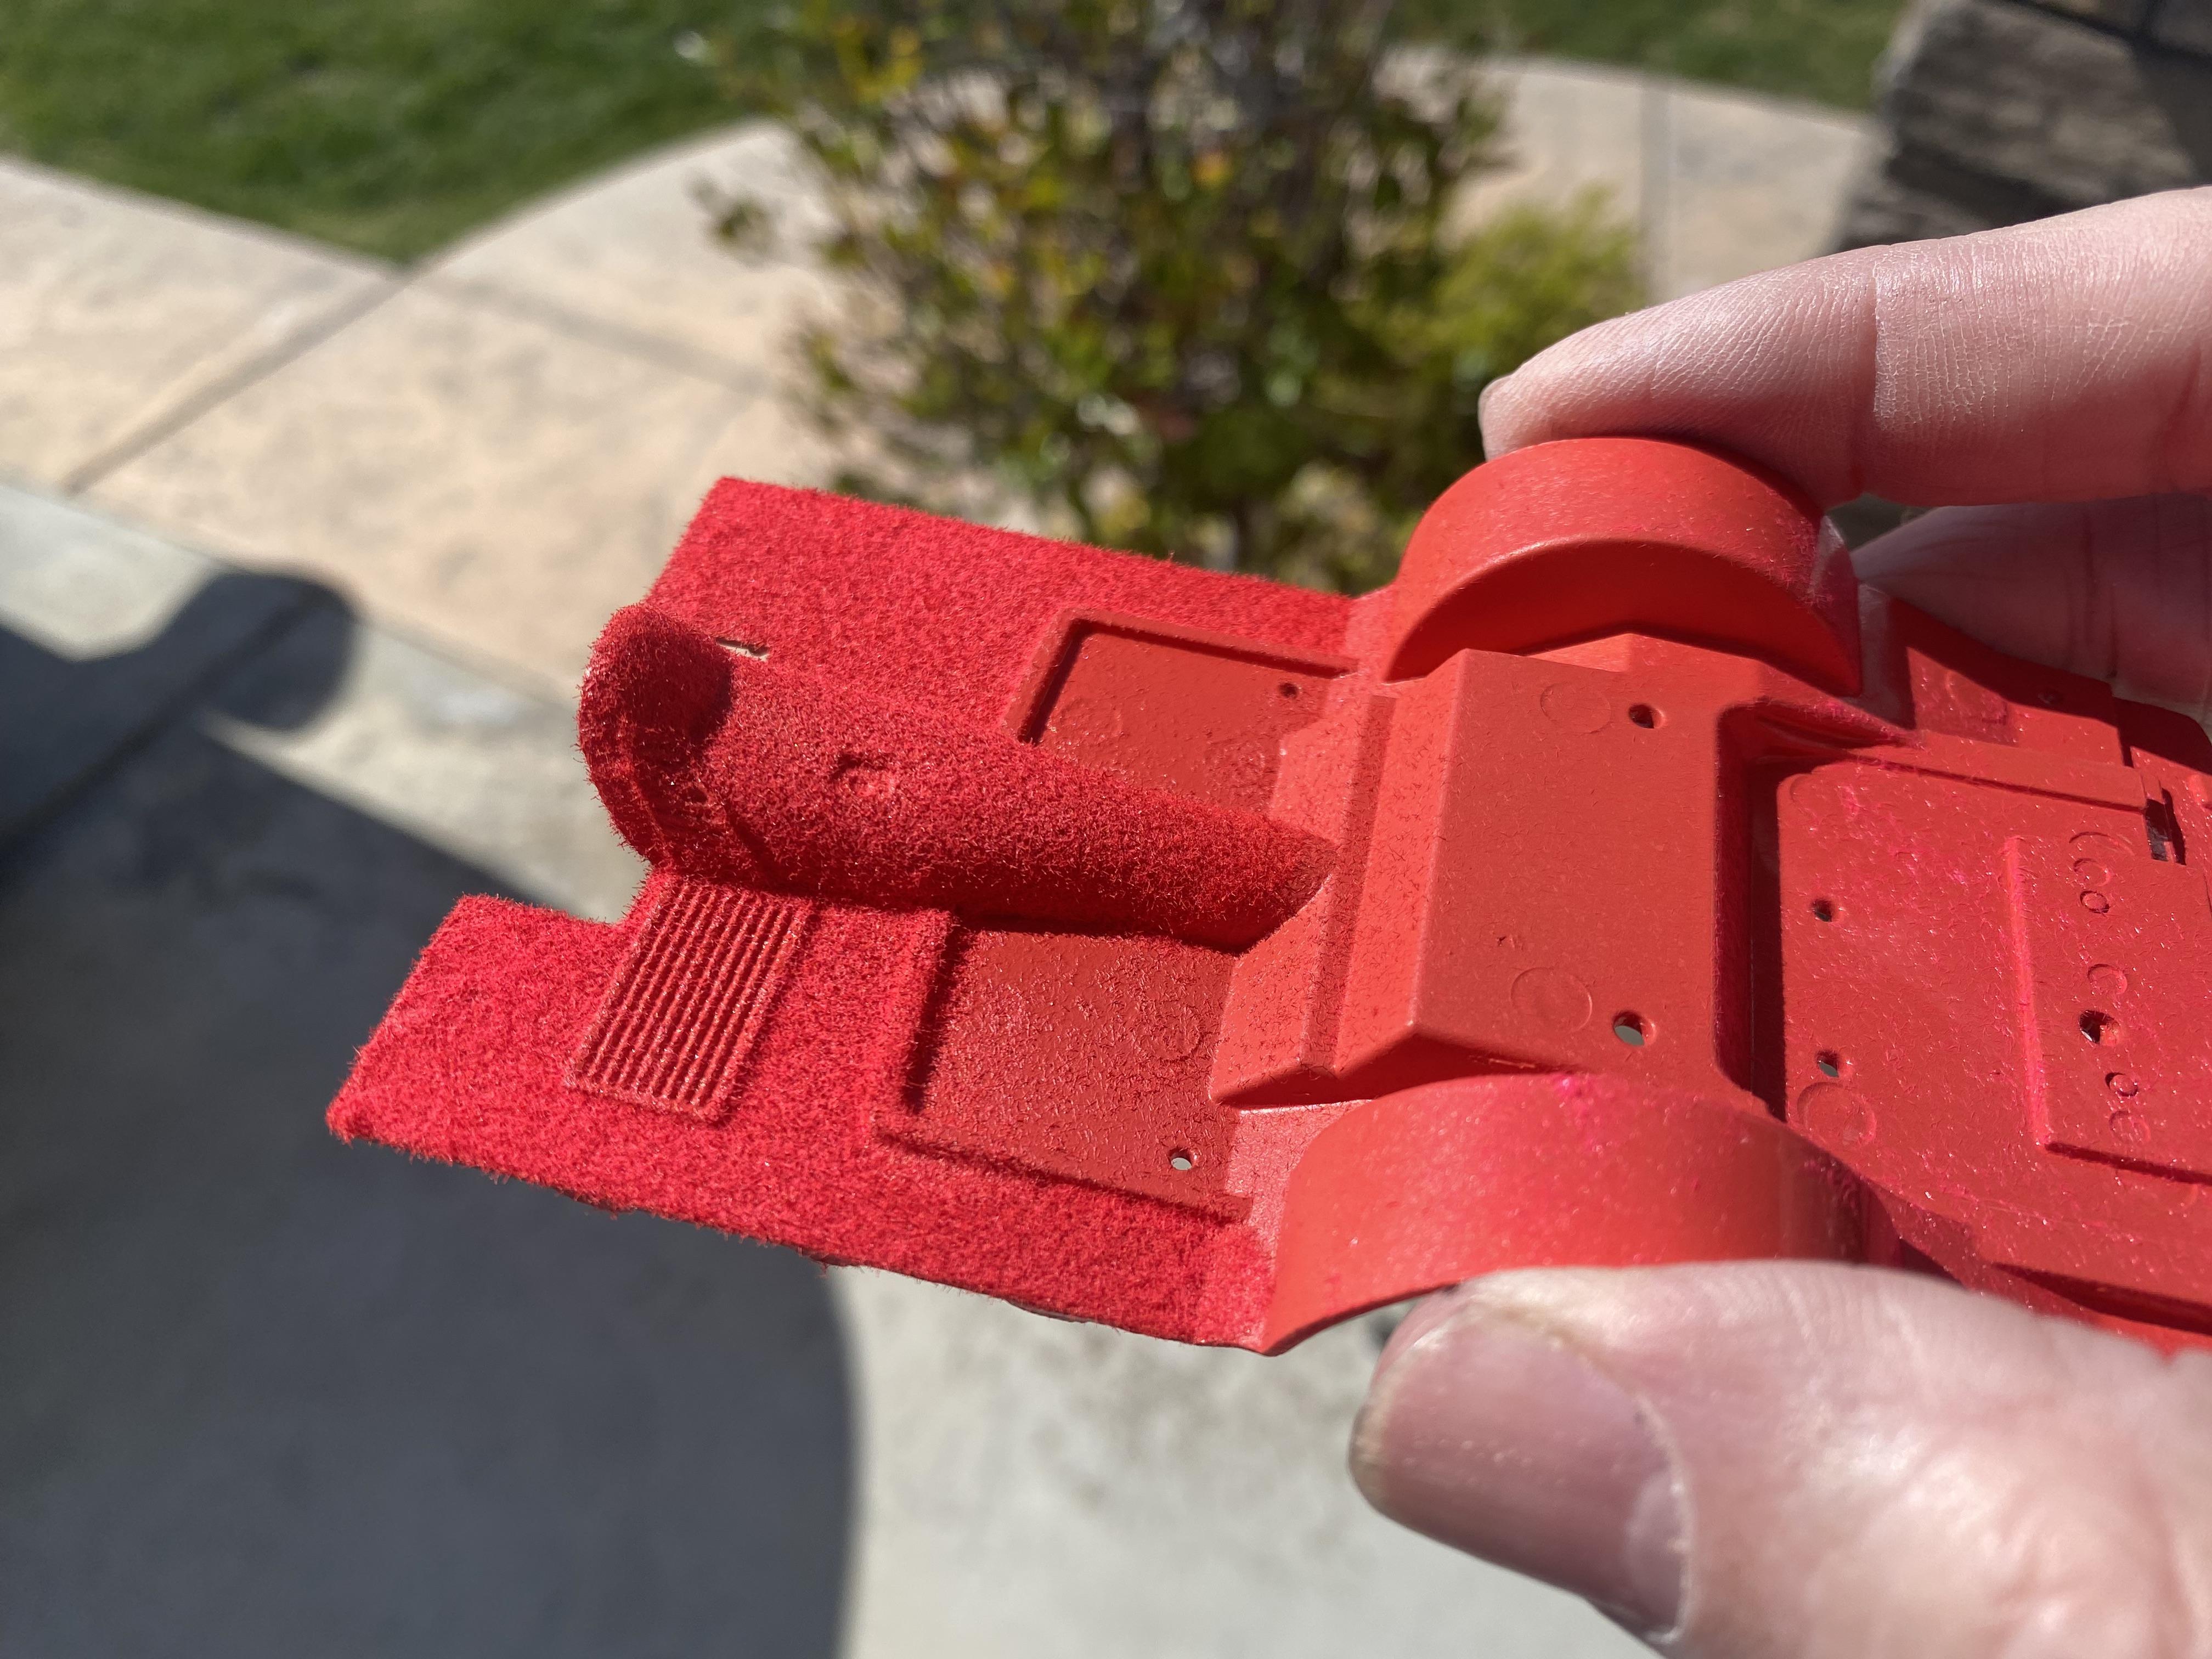
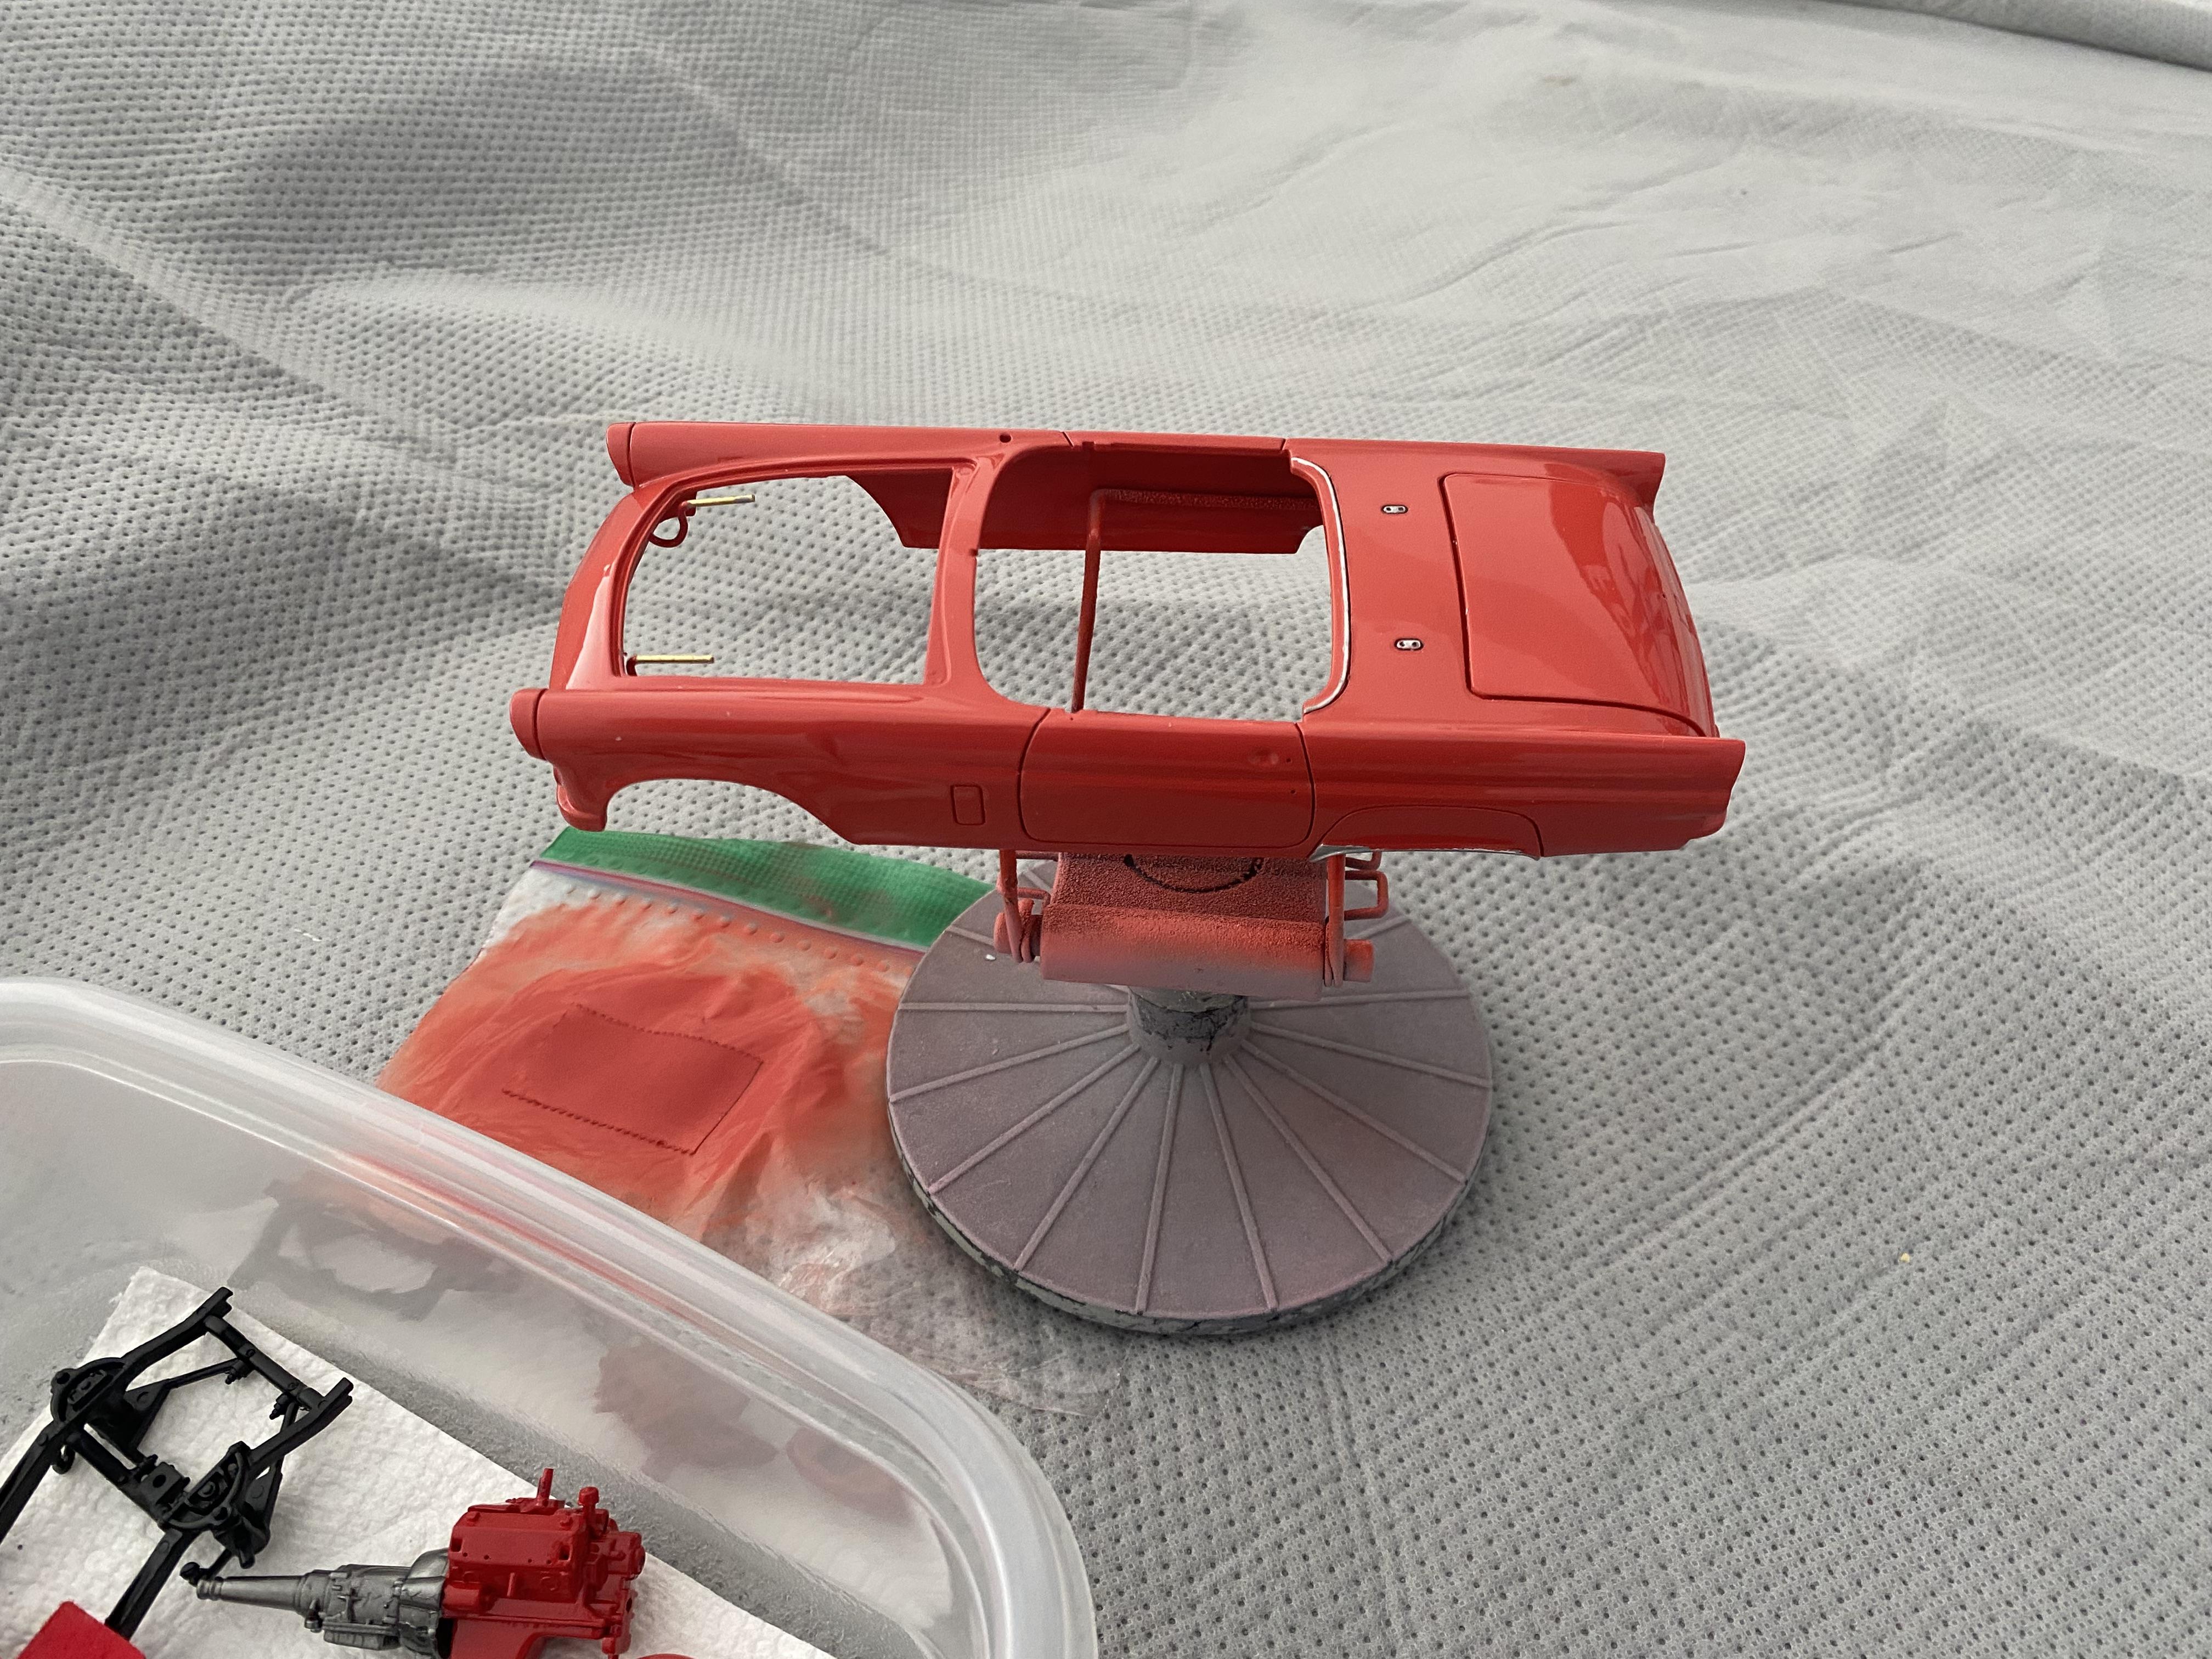
Got the last of the airbrush work done now on to detail painting. I even got the carpet flocking done and painted surgical tape that will become the seatbelt webbing. There was a problem with the hood and I ended up having to strip the top back down to the bare plastic and respray it. Lesson learned, 2k over lacquer good, lacquer over 2k VERY bad.
-
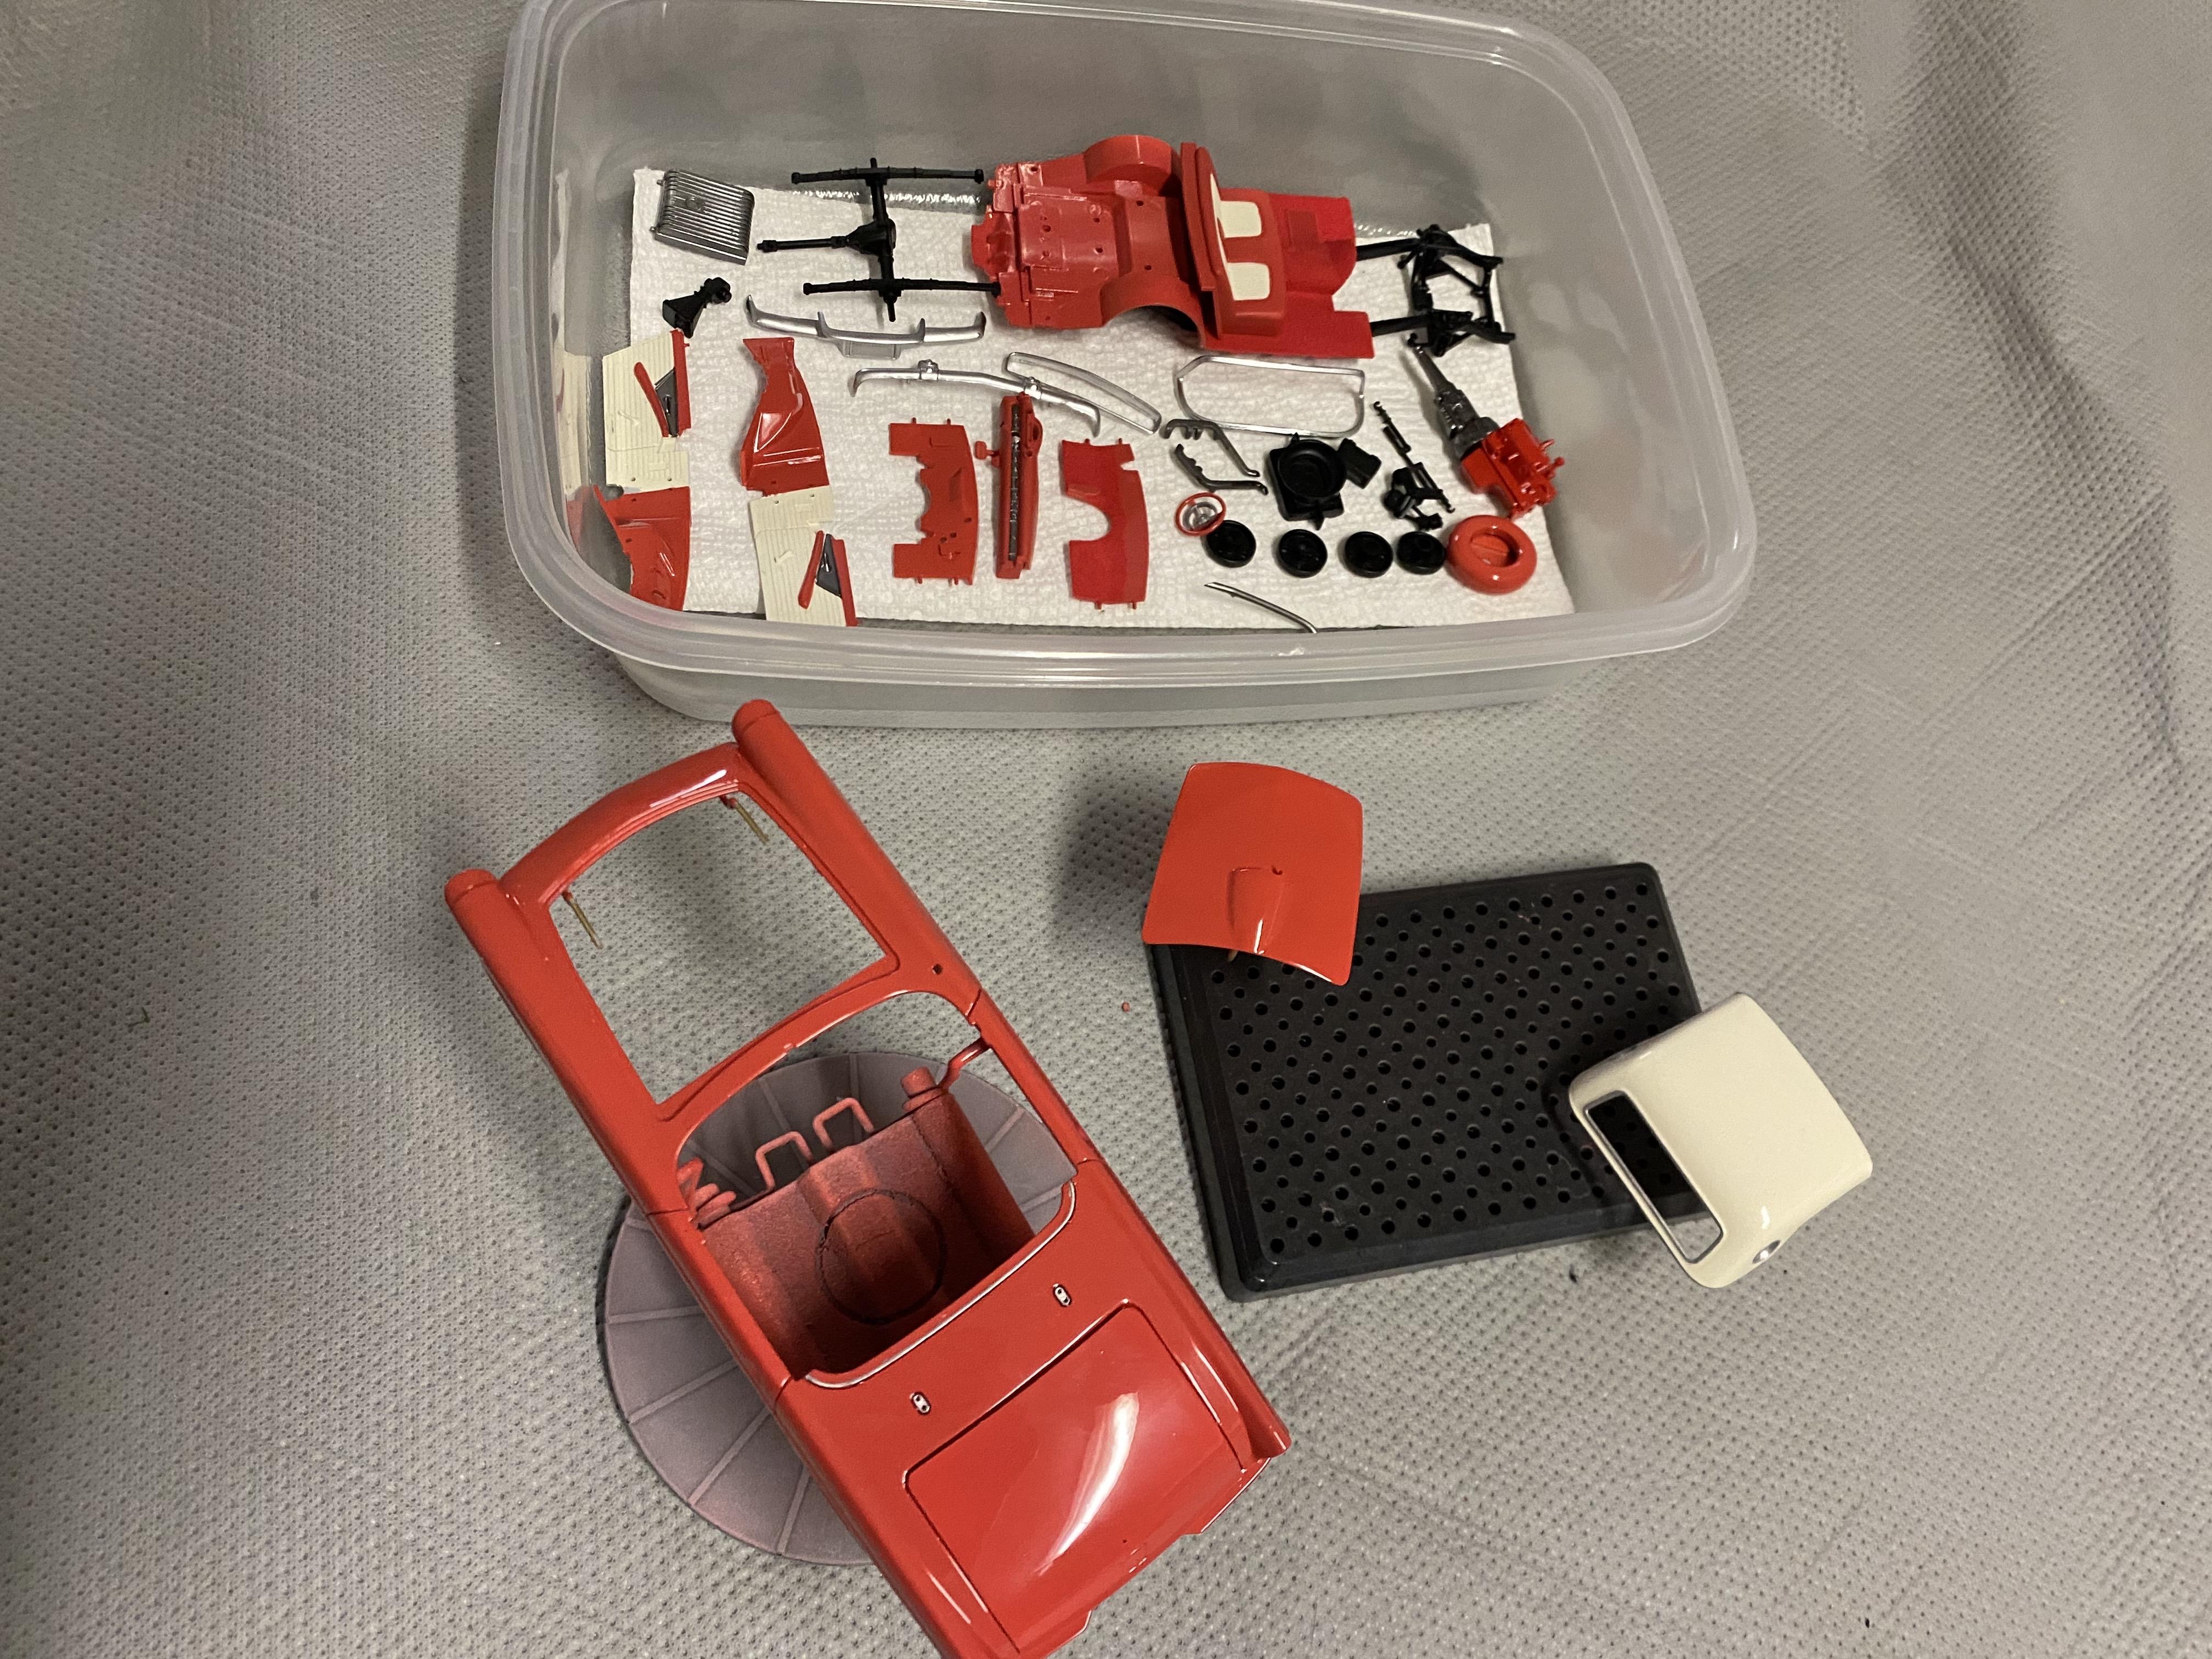
Thank You! Me too. I still need to wet sand and polish, but the body barely got any trash in it. The roof sadly will take a bit more wet sanding, but it isn't that bad either. Now just have to wait a few days for the 2k to cure.
-
Thank you!
-
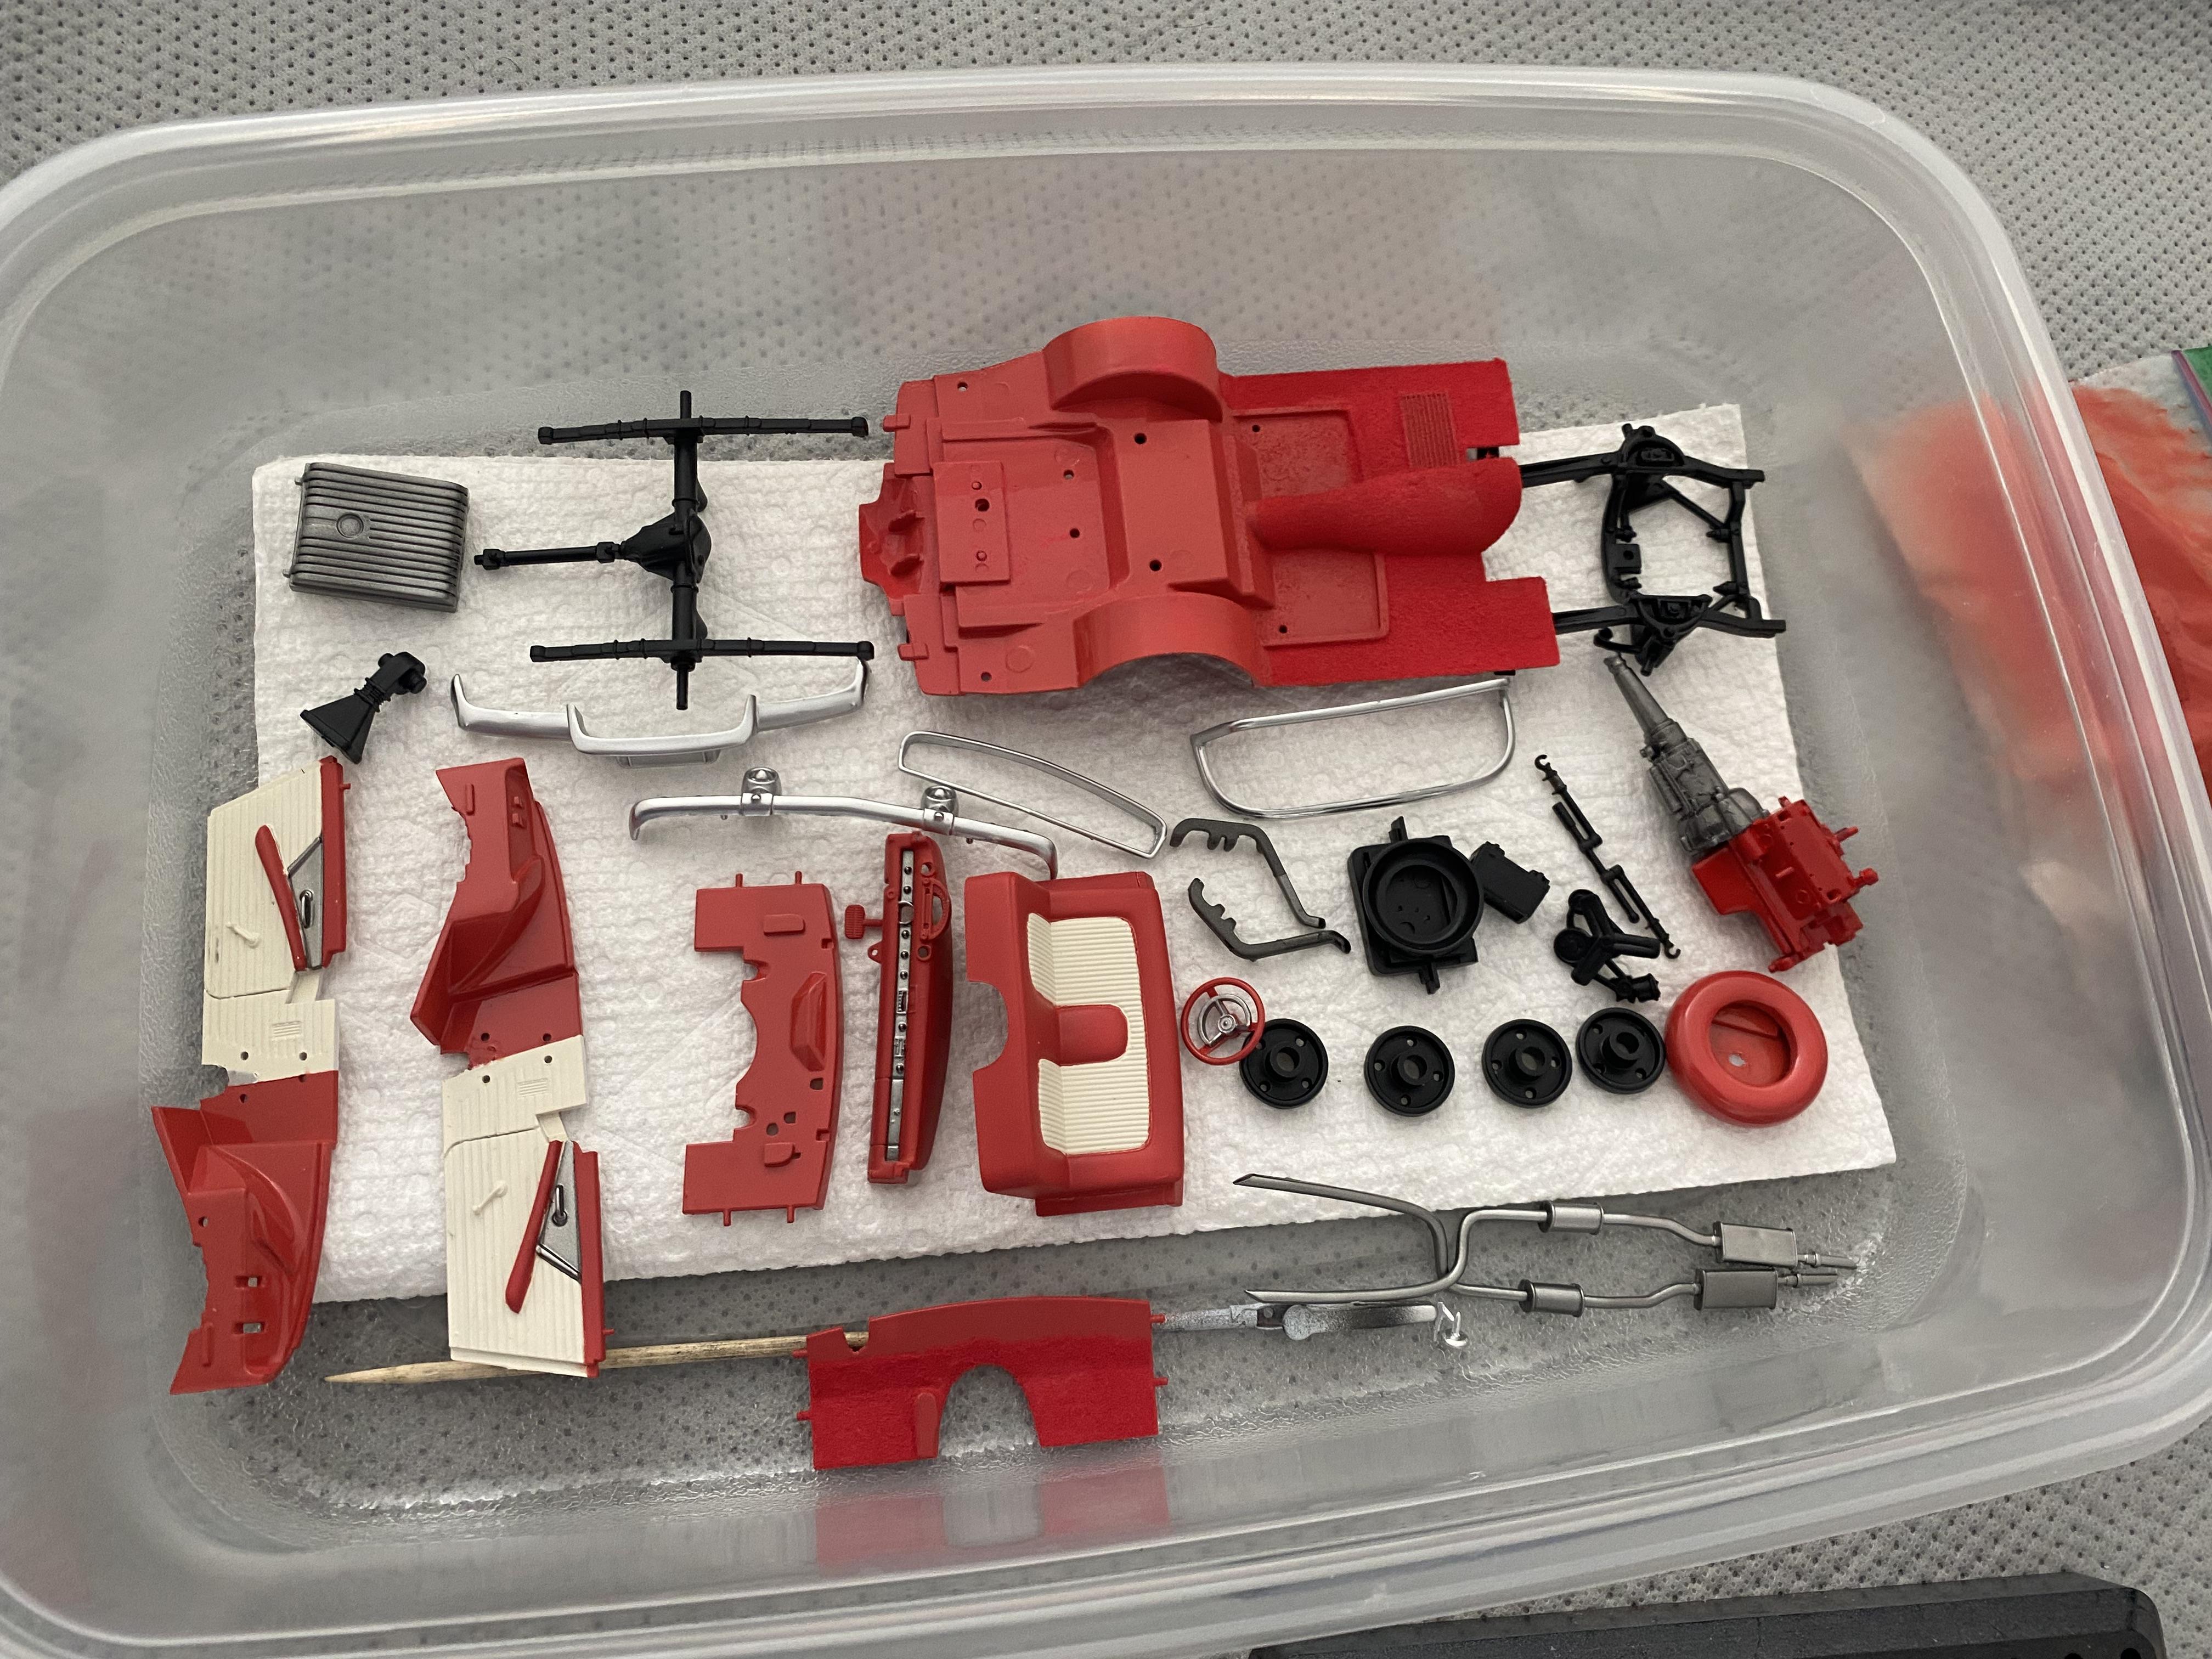
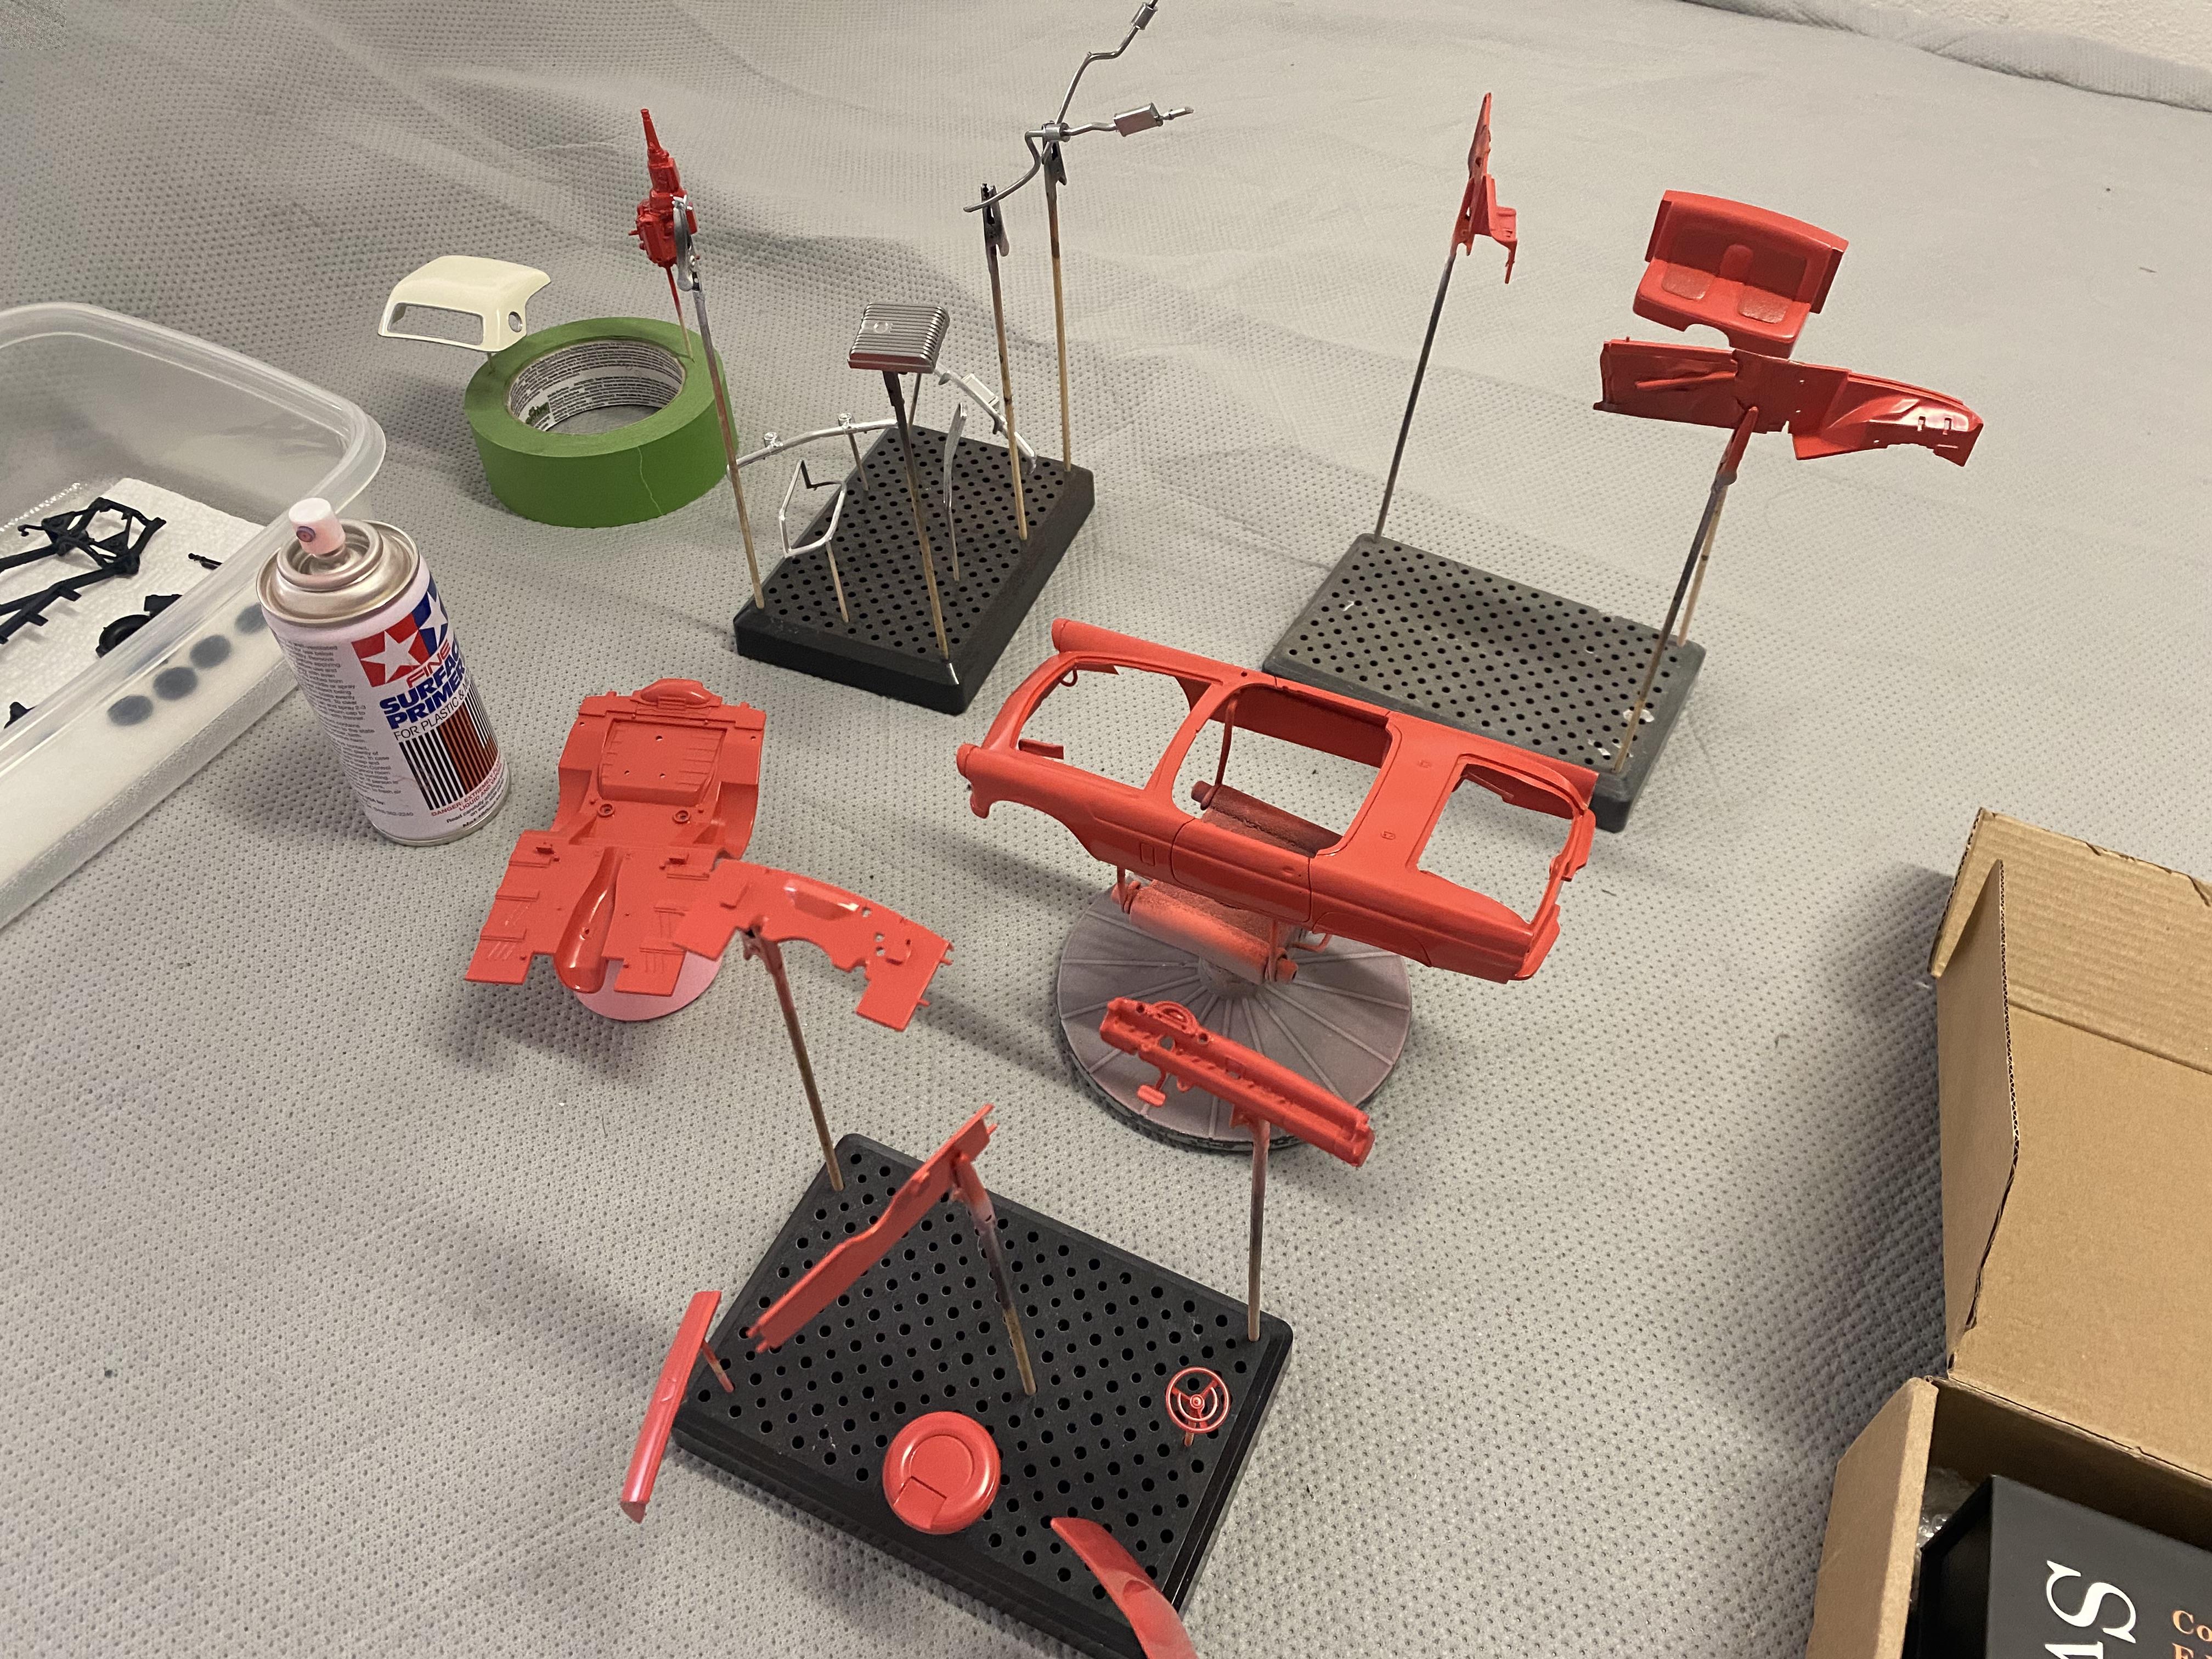
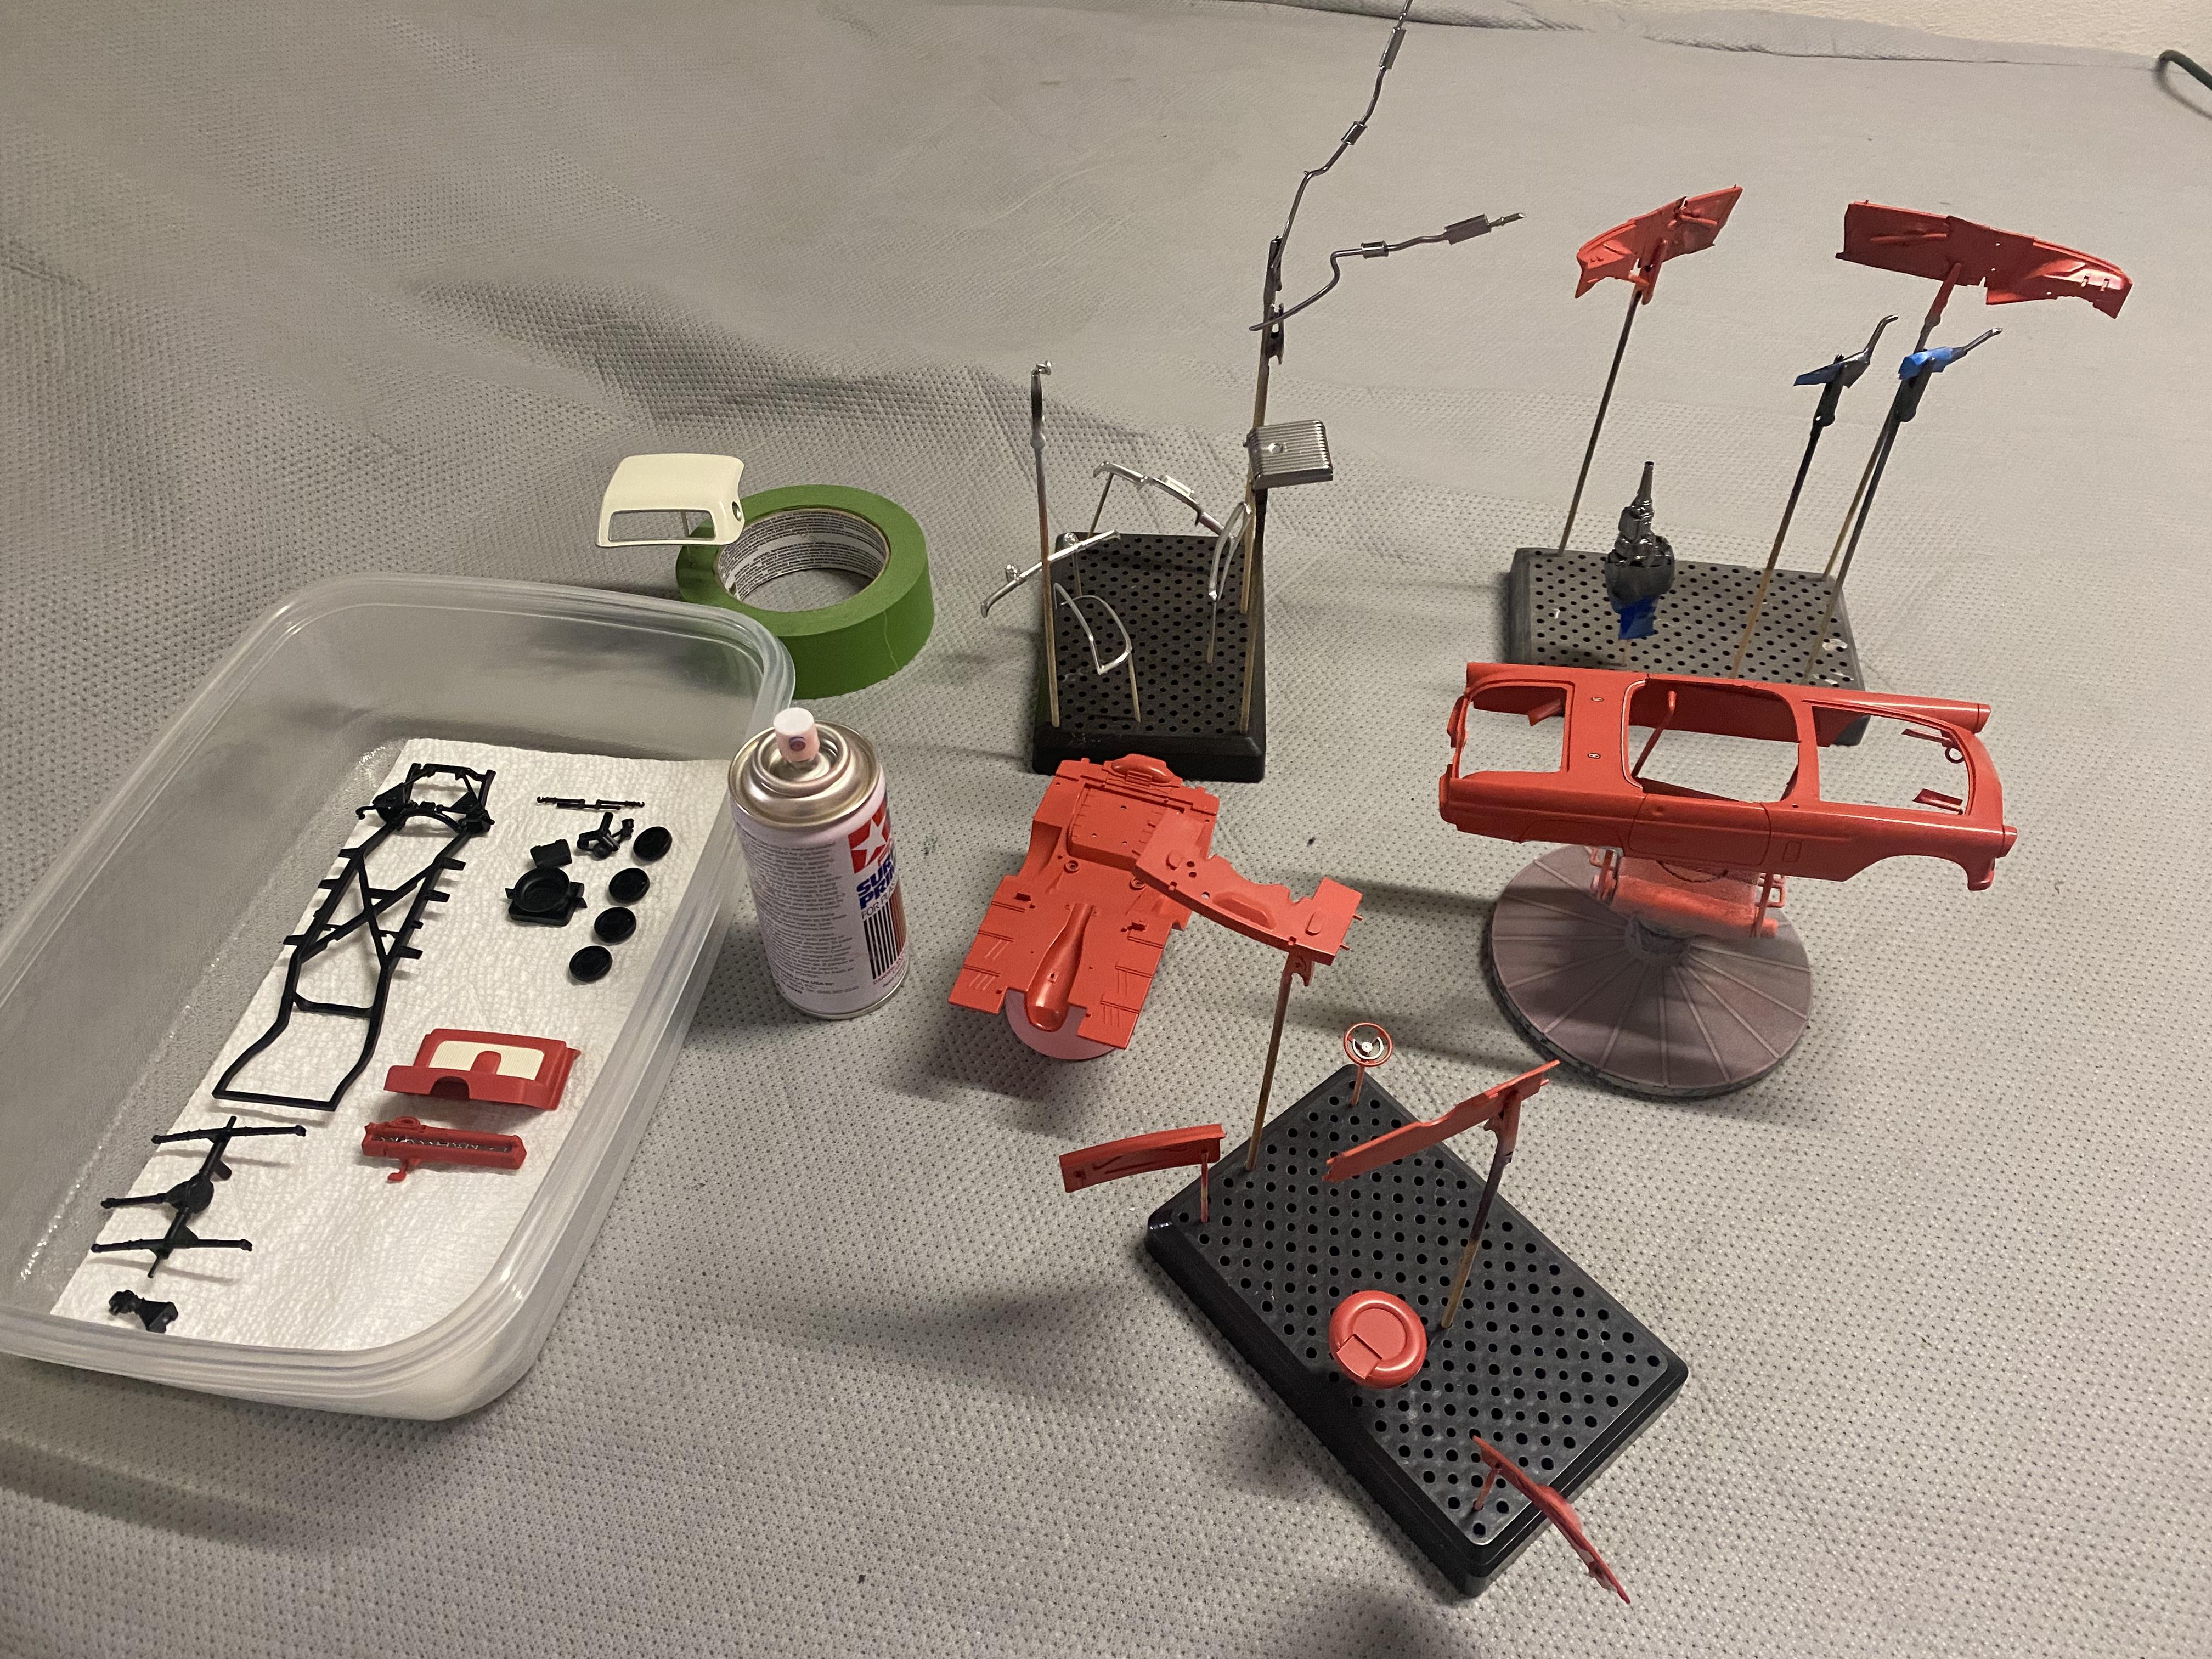
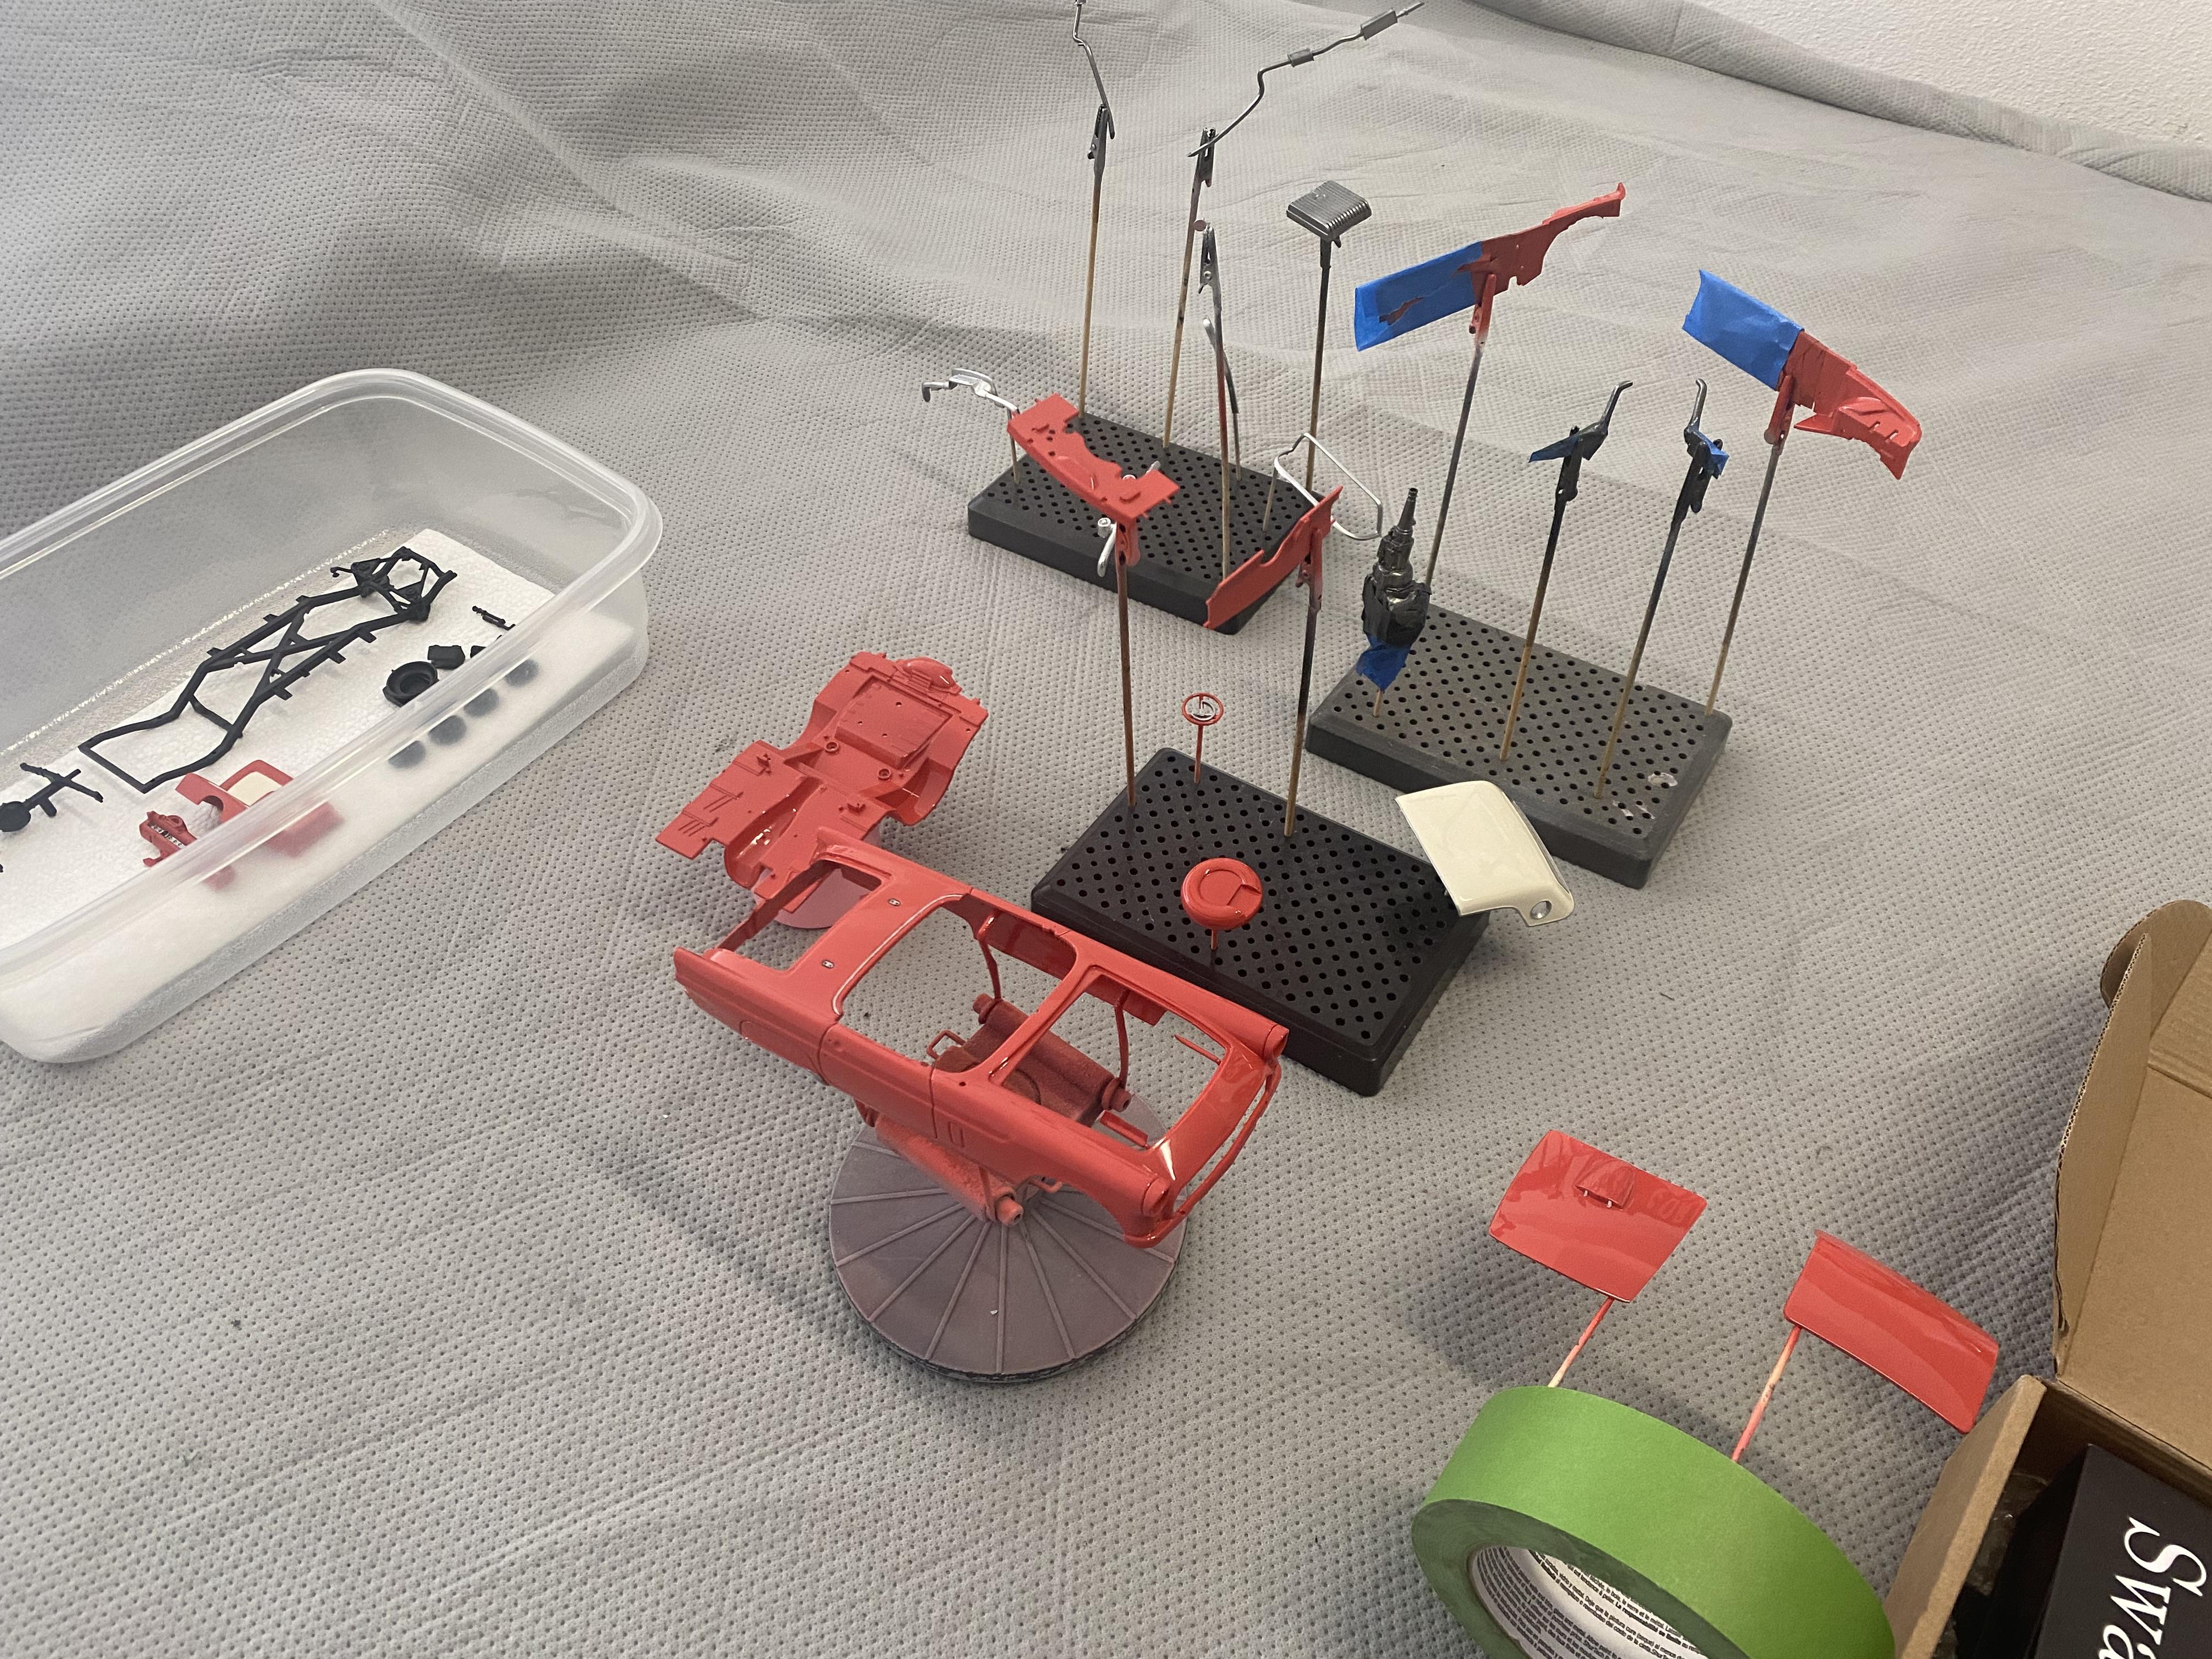
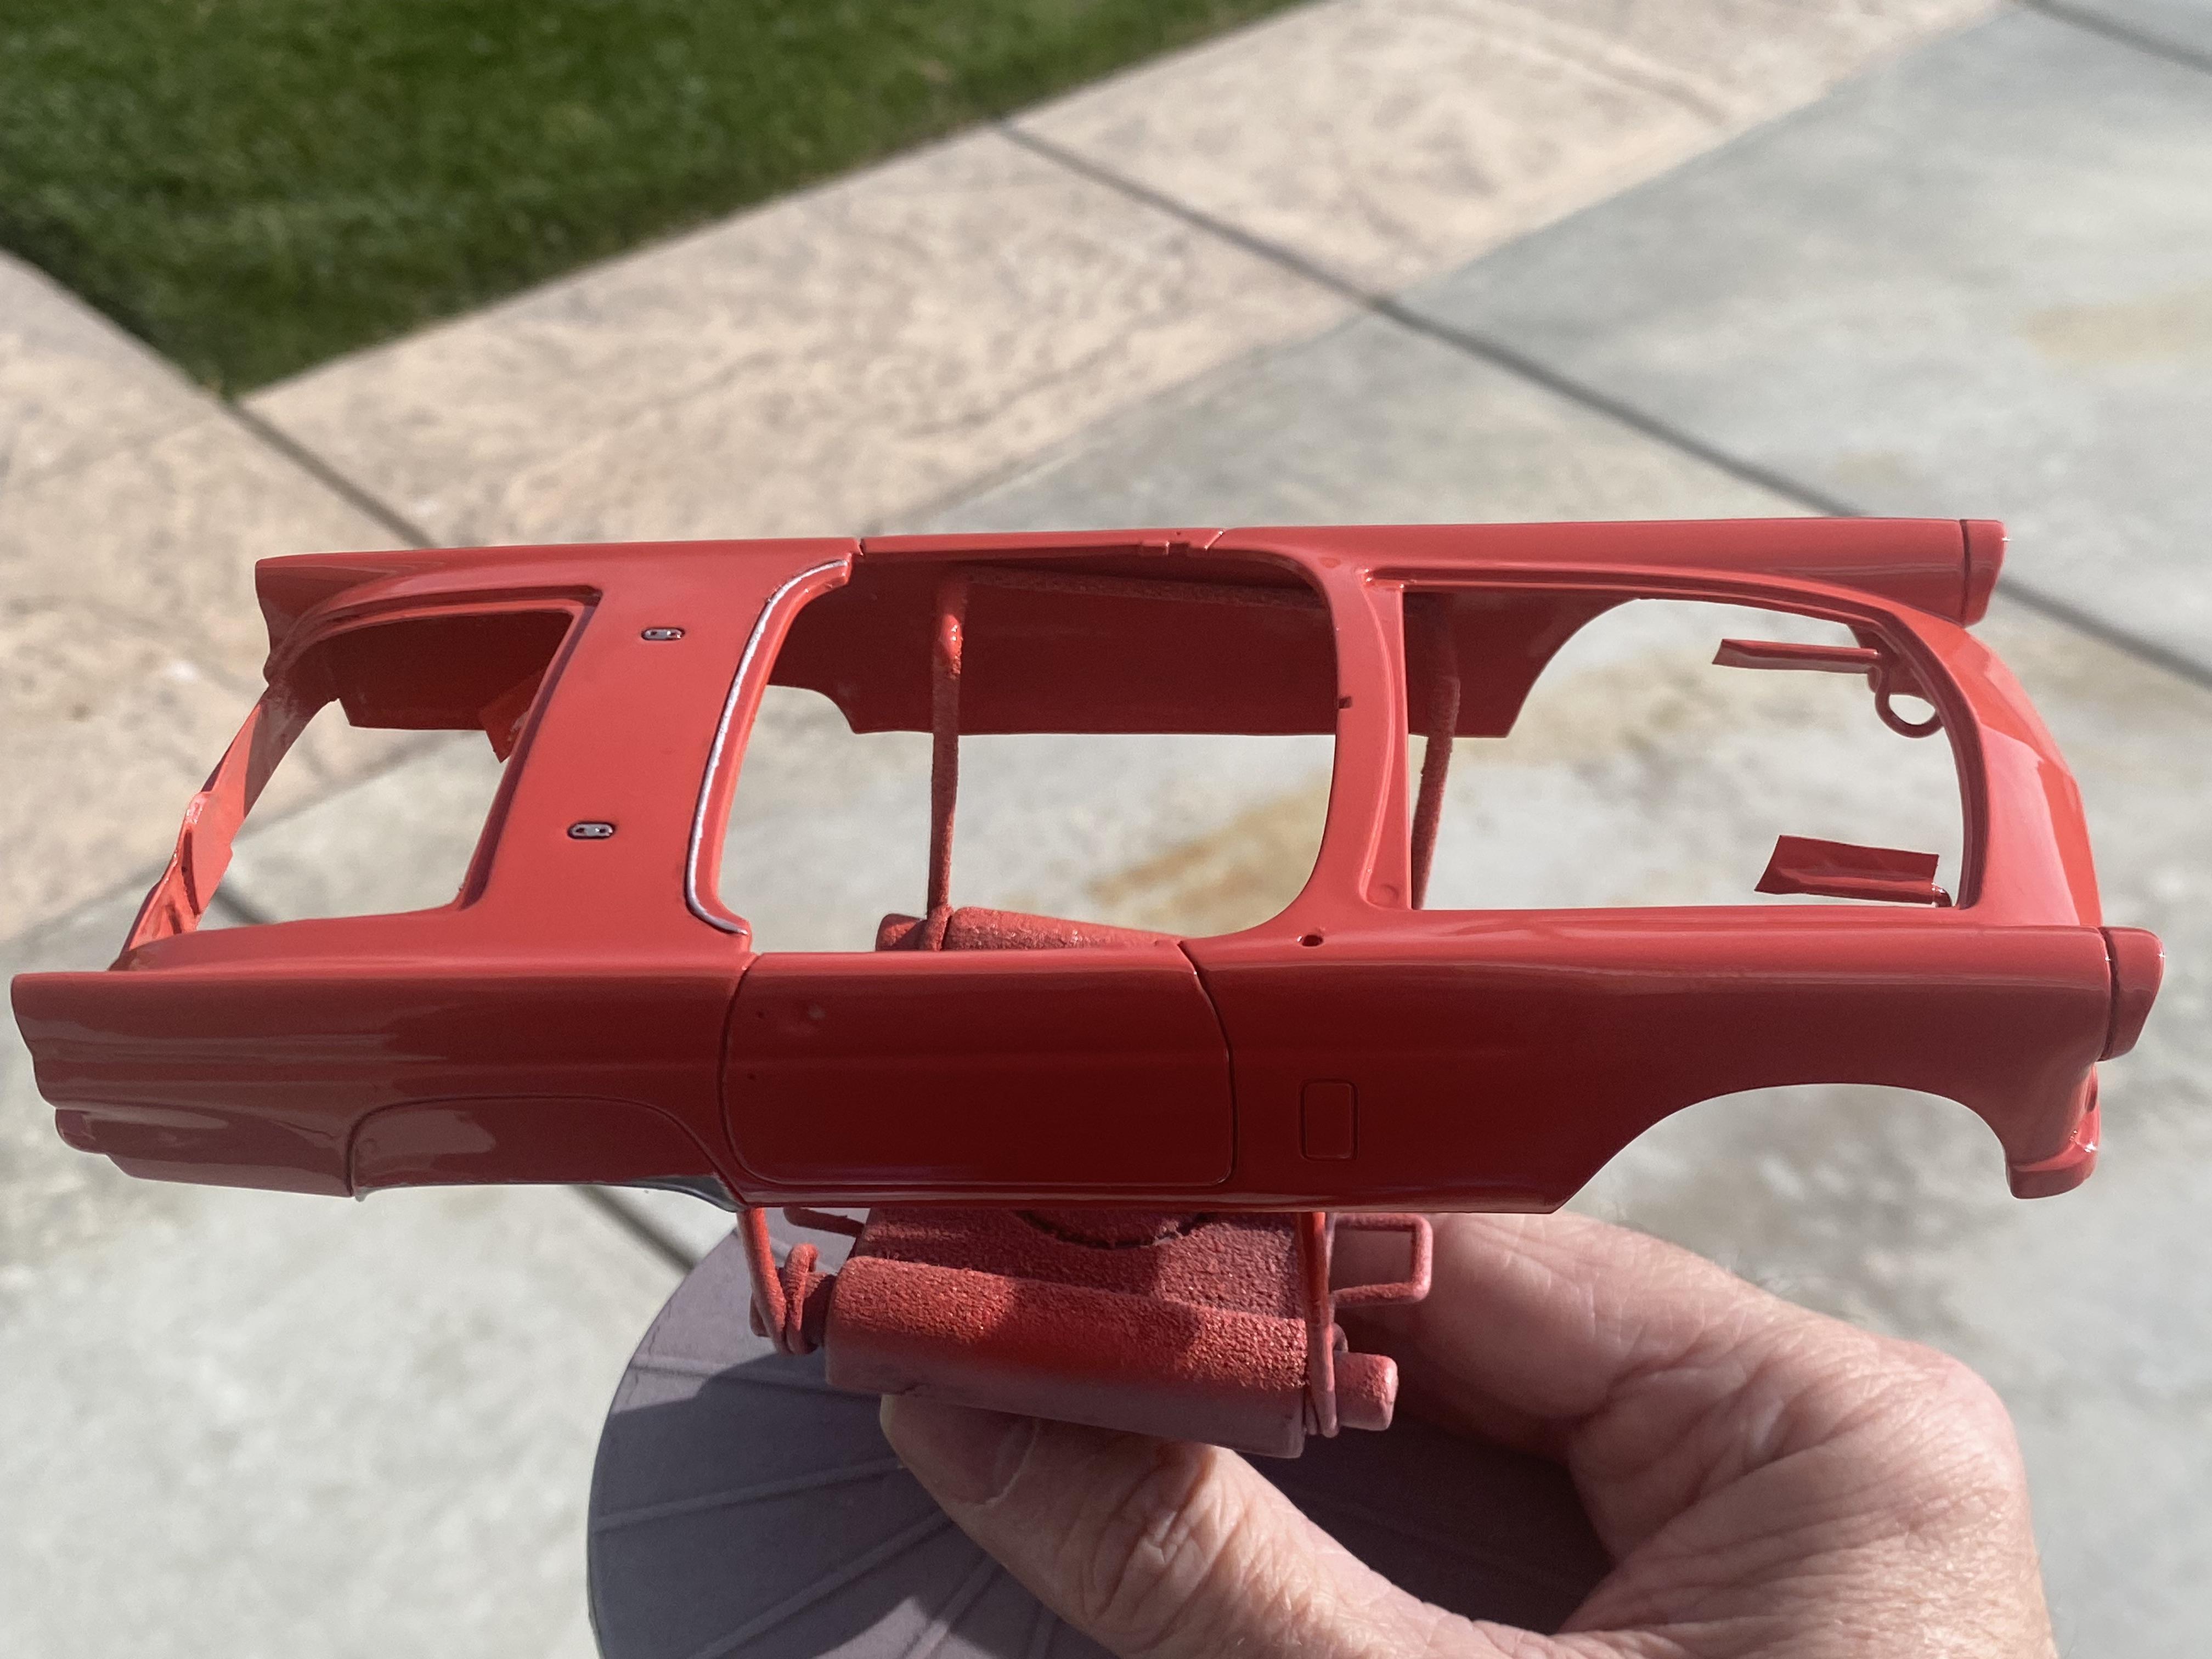
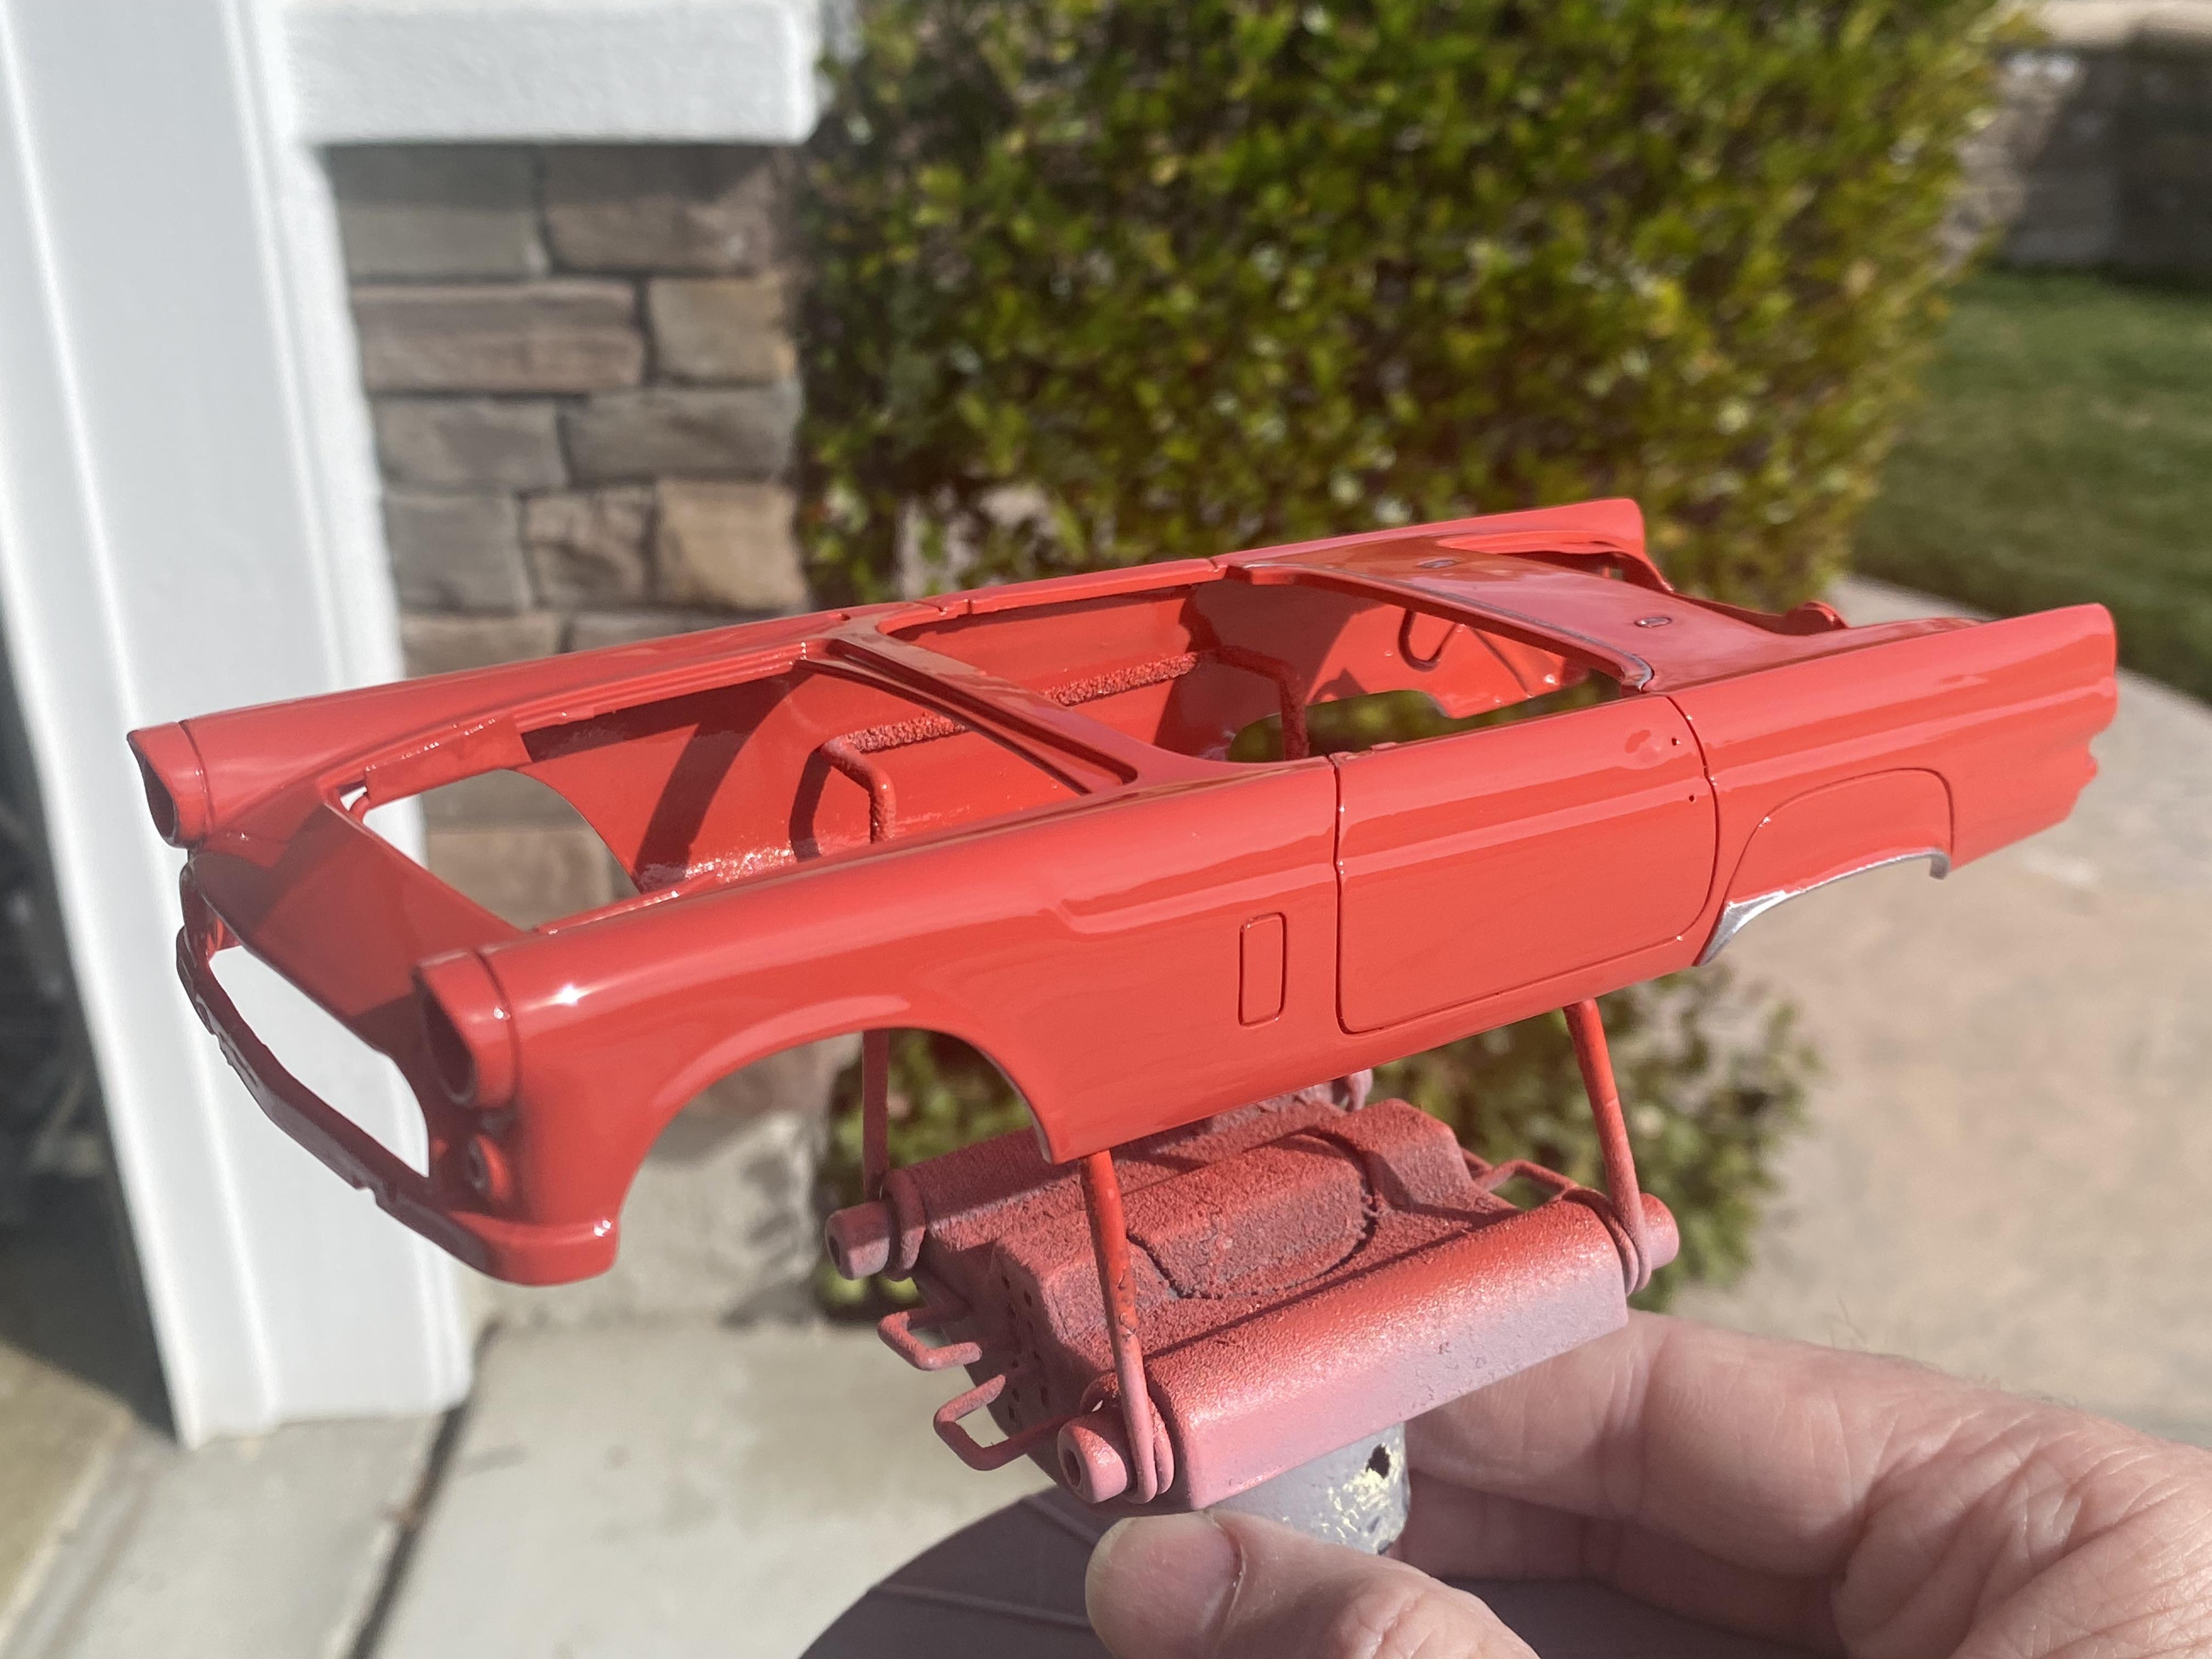
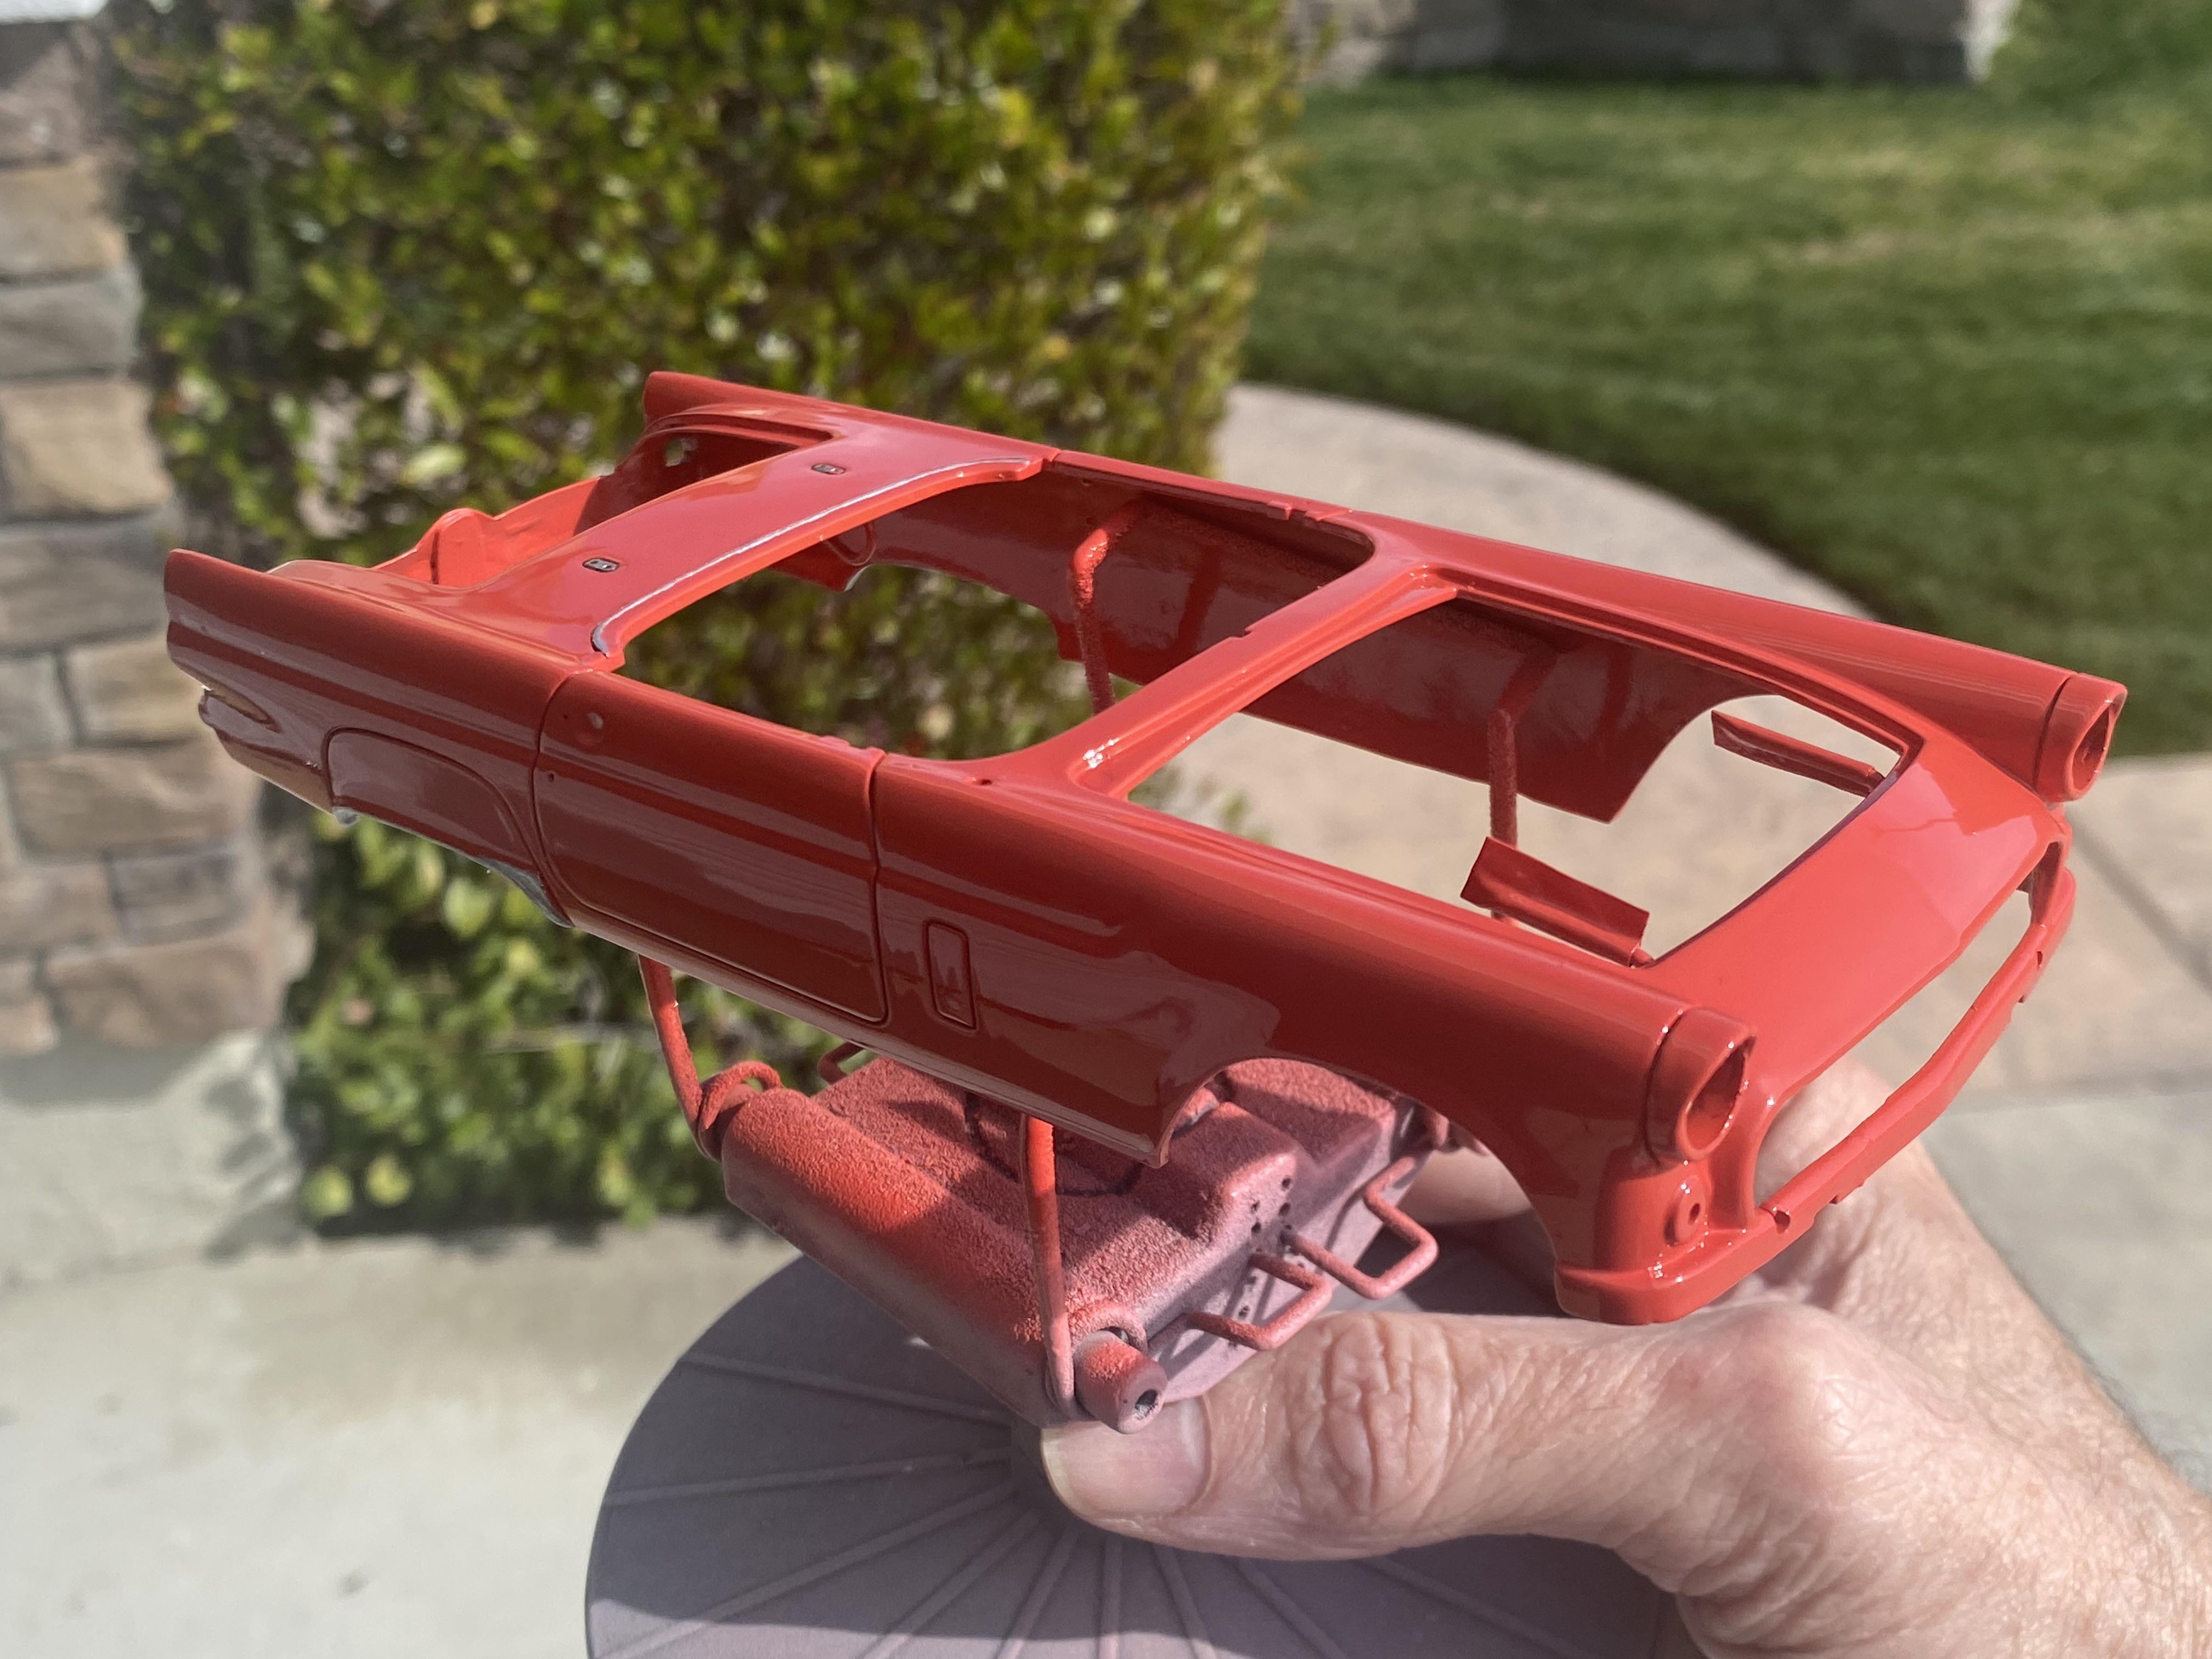
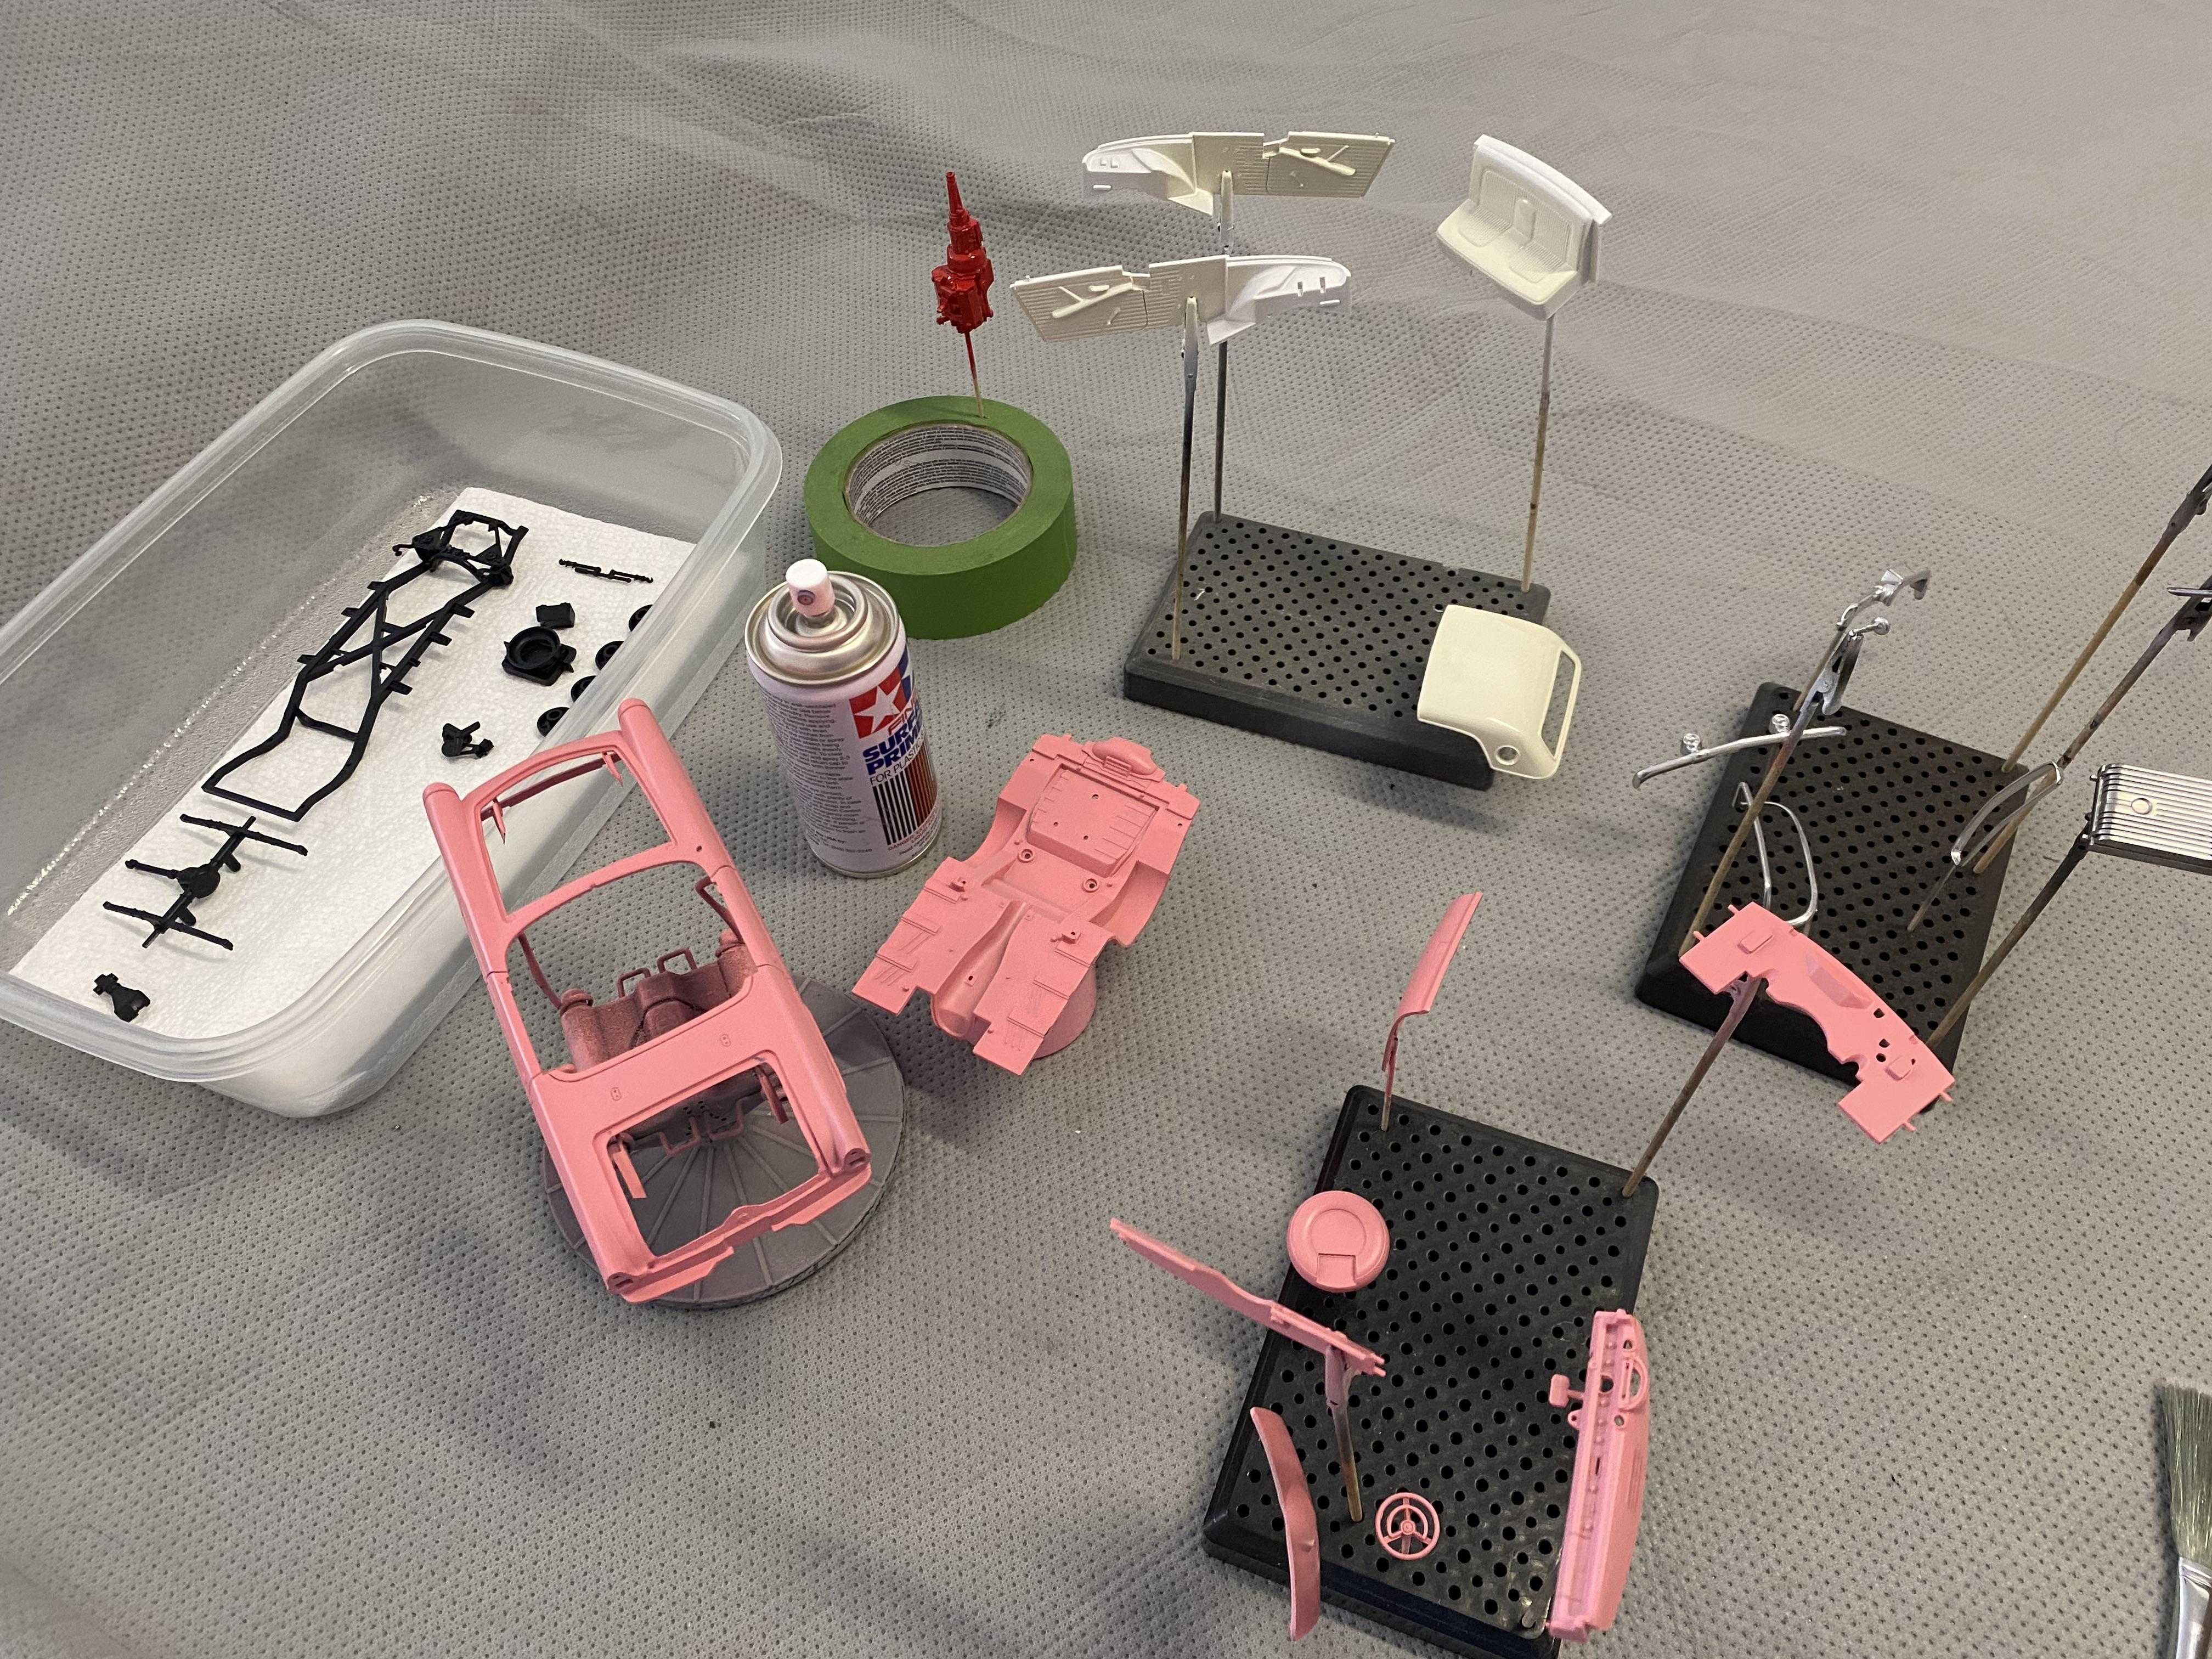
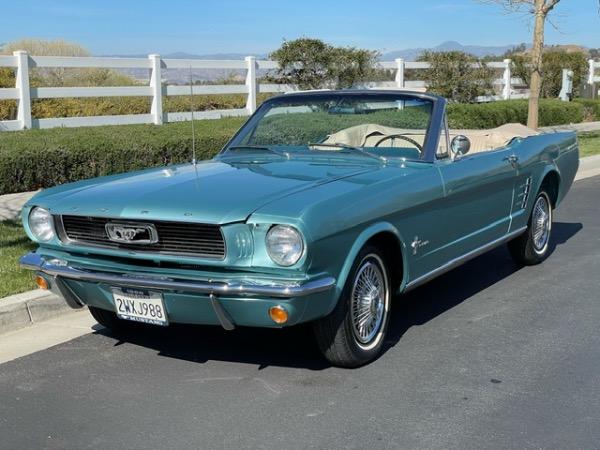
I did get Fiesta Red sprayed on everything that is supposed to be that color and today sprayed 2K clear on sooo many parts including the chromed parts. The body came out well with the clear and little to no trash. Sadly the white top does have a little trash in it but it should come out in the wet sand and polish stage. the chrome does lose a little shine when sprayed with 2K clear, but not bad. There is a new Chrome out that requires over 2K black and 2k topcoat I am going to try out soon.
-
Thank you! Sadly, it sticks out on the 1967 Body as well, as you can see in my 1967 Mustang Convertible build WIP thread. If you decide to do a 1967 Build, there are just couple issues you will need to deal with, this and the headlights are far too small. Otherwise, the 1967 Kit is great.
-
I have purchased a bunch of AMT 1967 Fastback kits just for building any early Mustang. They are a great kit for this. As mentioned, the one issue when body swapping is the front suspension sits out too far and you need to bring in. Btw, it is actually pretty easy to make the front suspension poseable. On the 1966 Coupe I did cut out the floor of the tub instead of the floor on the 1967 Kit. Even converted one into a 1967 Convertible.
-
 I have already picked up another 57 kit from Hobby lobby just for the body to do this very build.
- 39,097 replies
-
- 2
-

-
- johan
- glue bombs
- (and 1 more)
-
Thank You! Yes, I usually wait 1 week and 2k clear. Have to do very light coats first to seal. If I am not extra careful it can lose some shine, but it usually still comes out ok. Thank you!
-
I spray molotow from a refill through my airbrush.
-
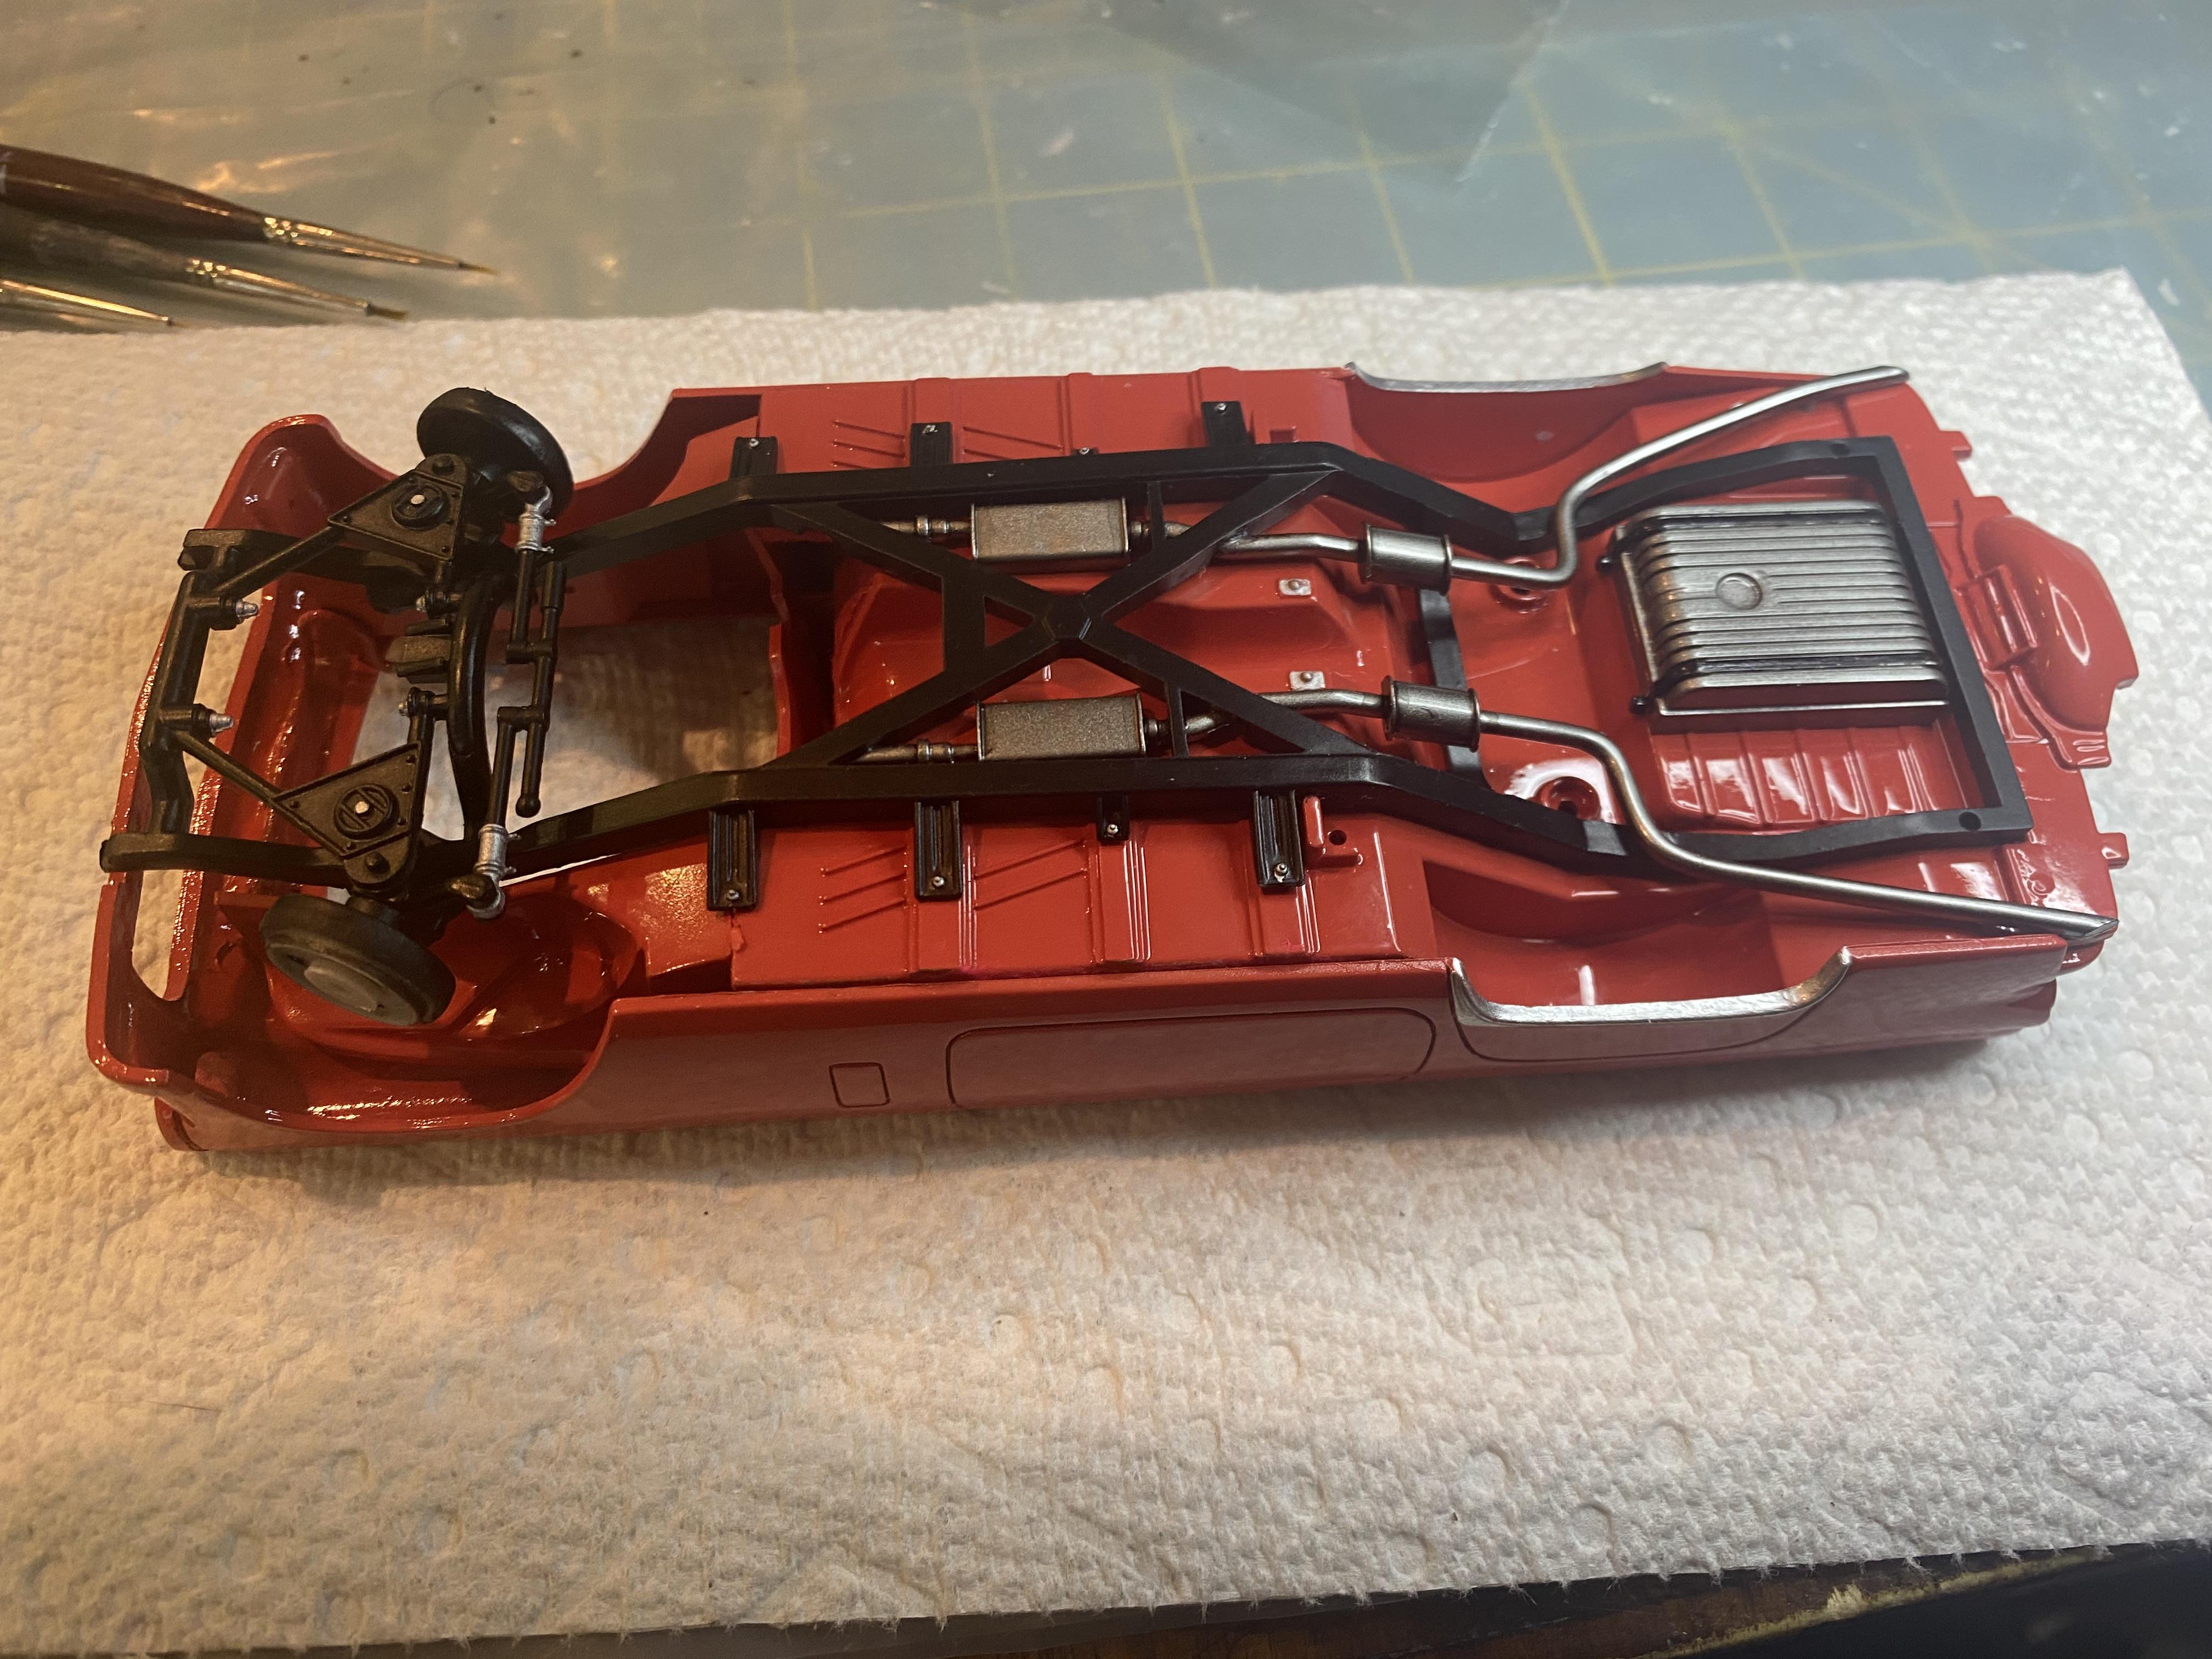
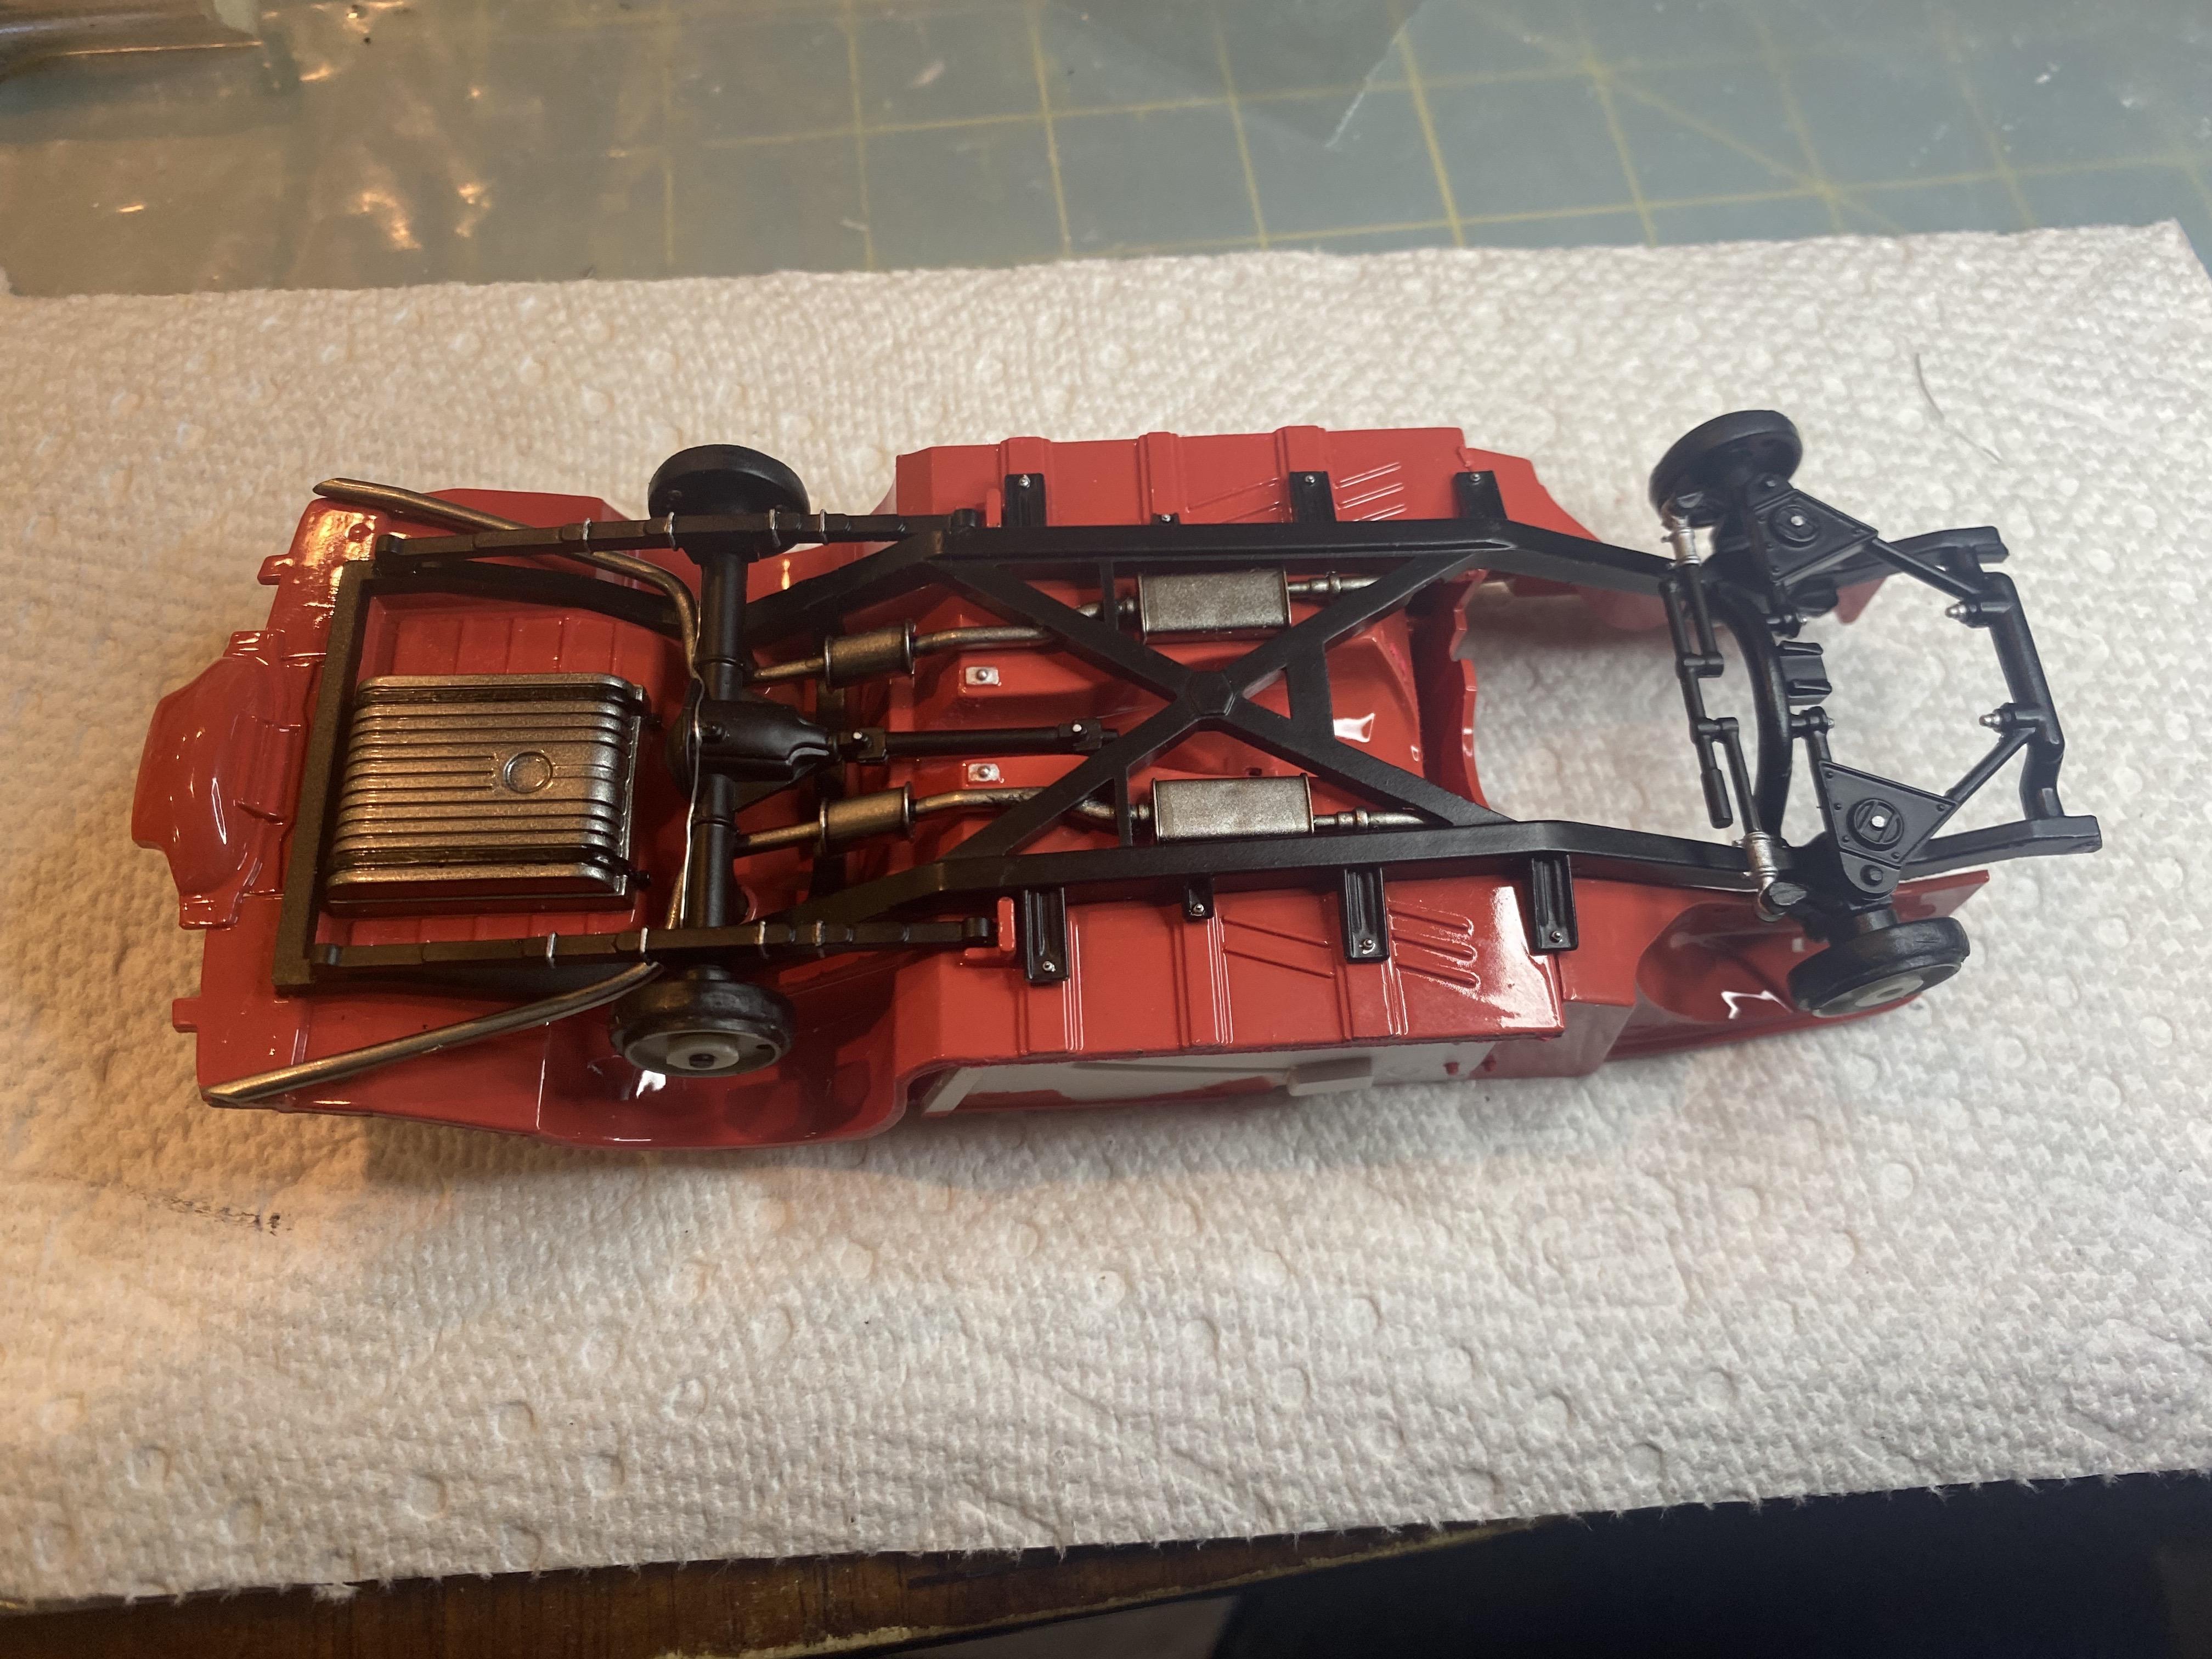
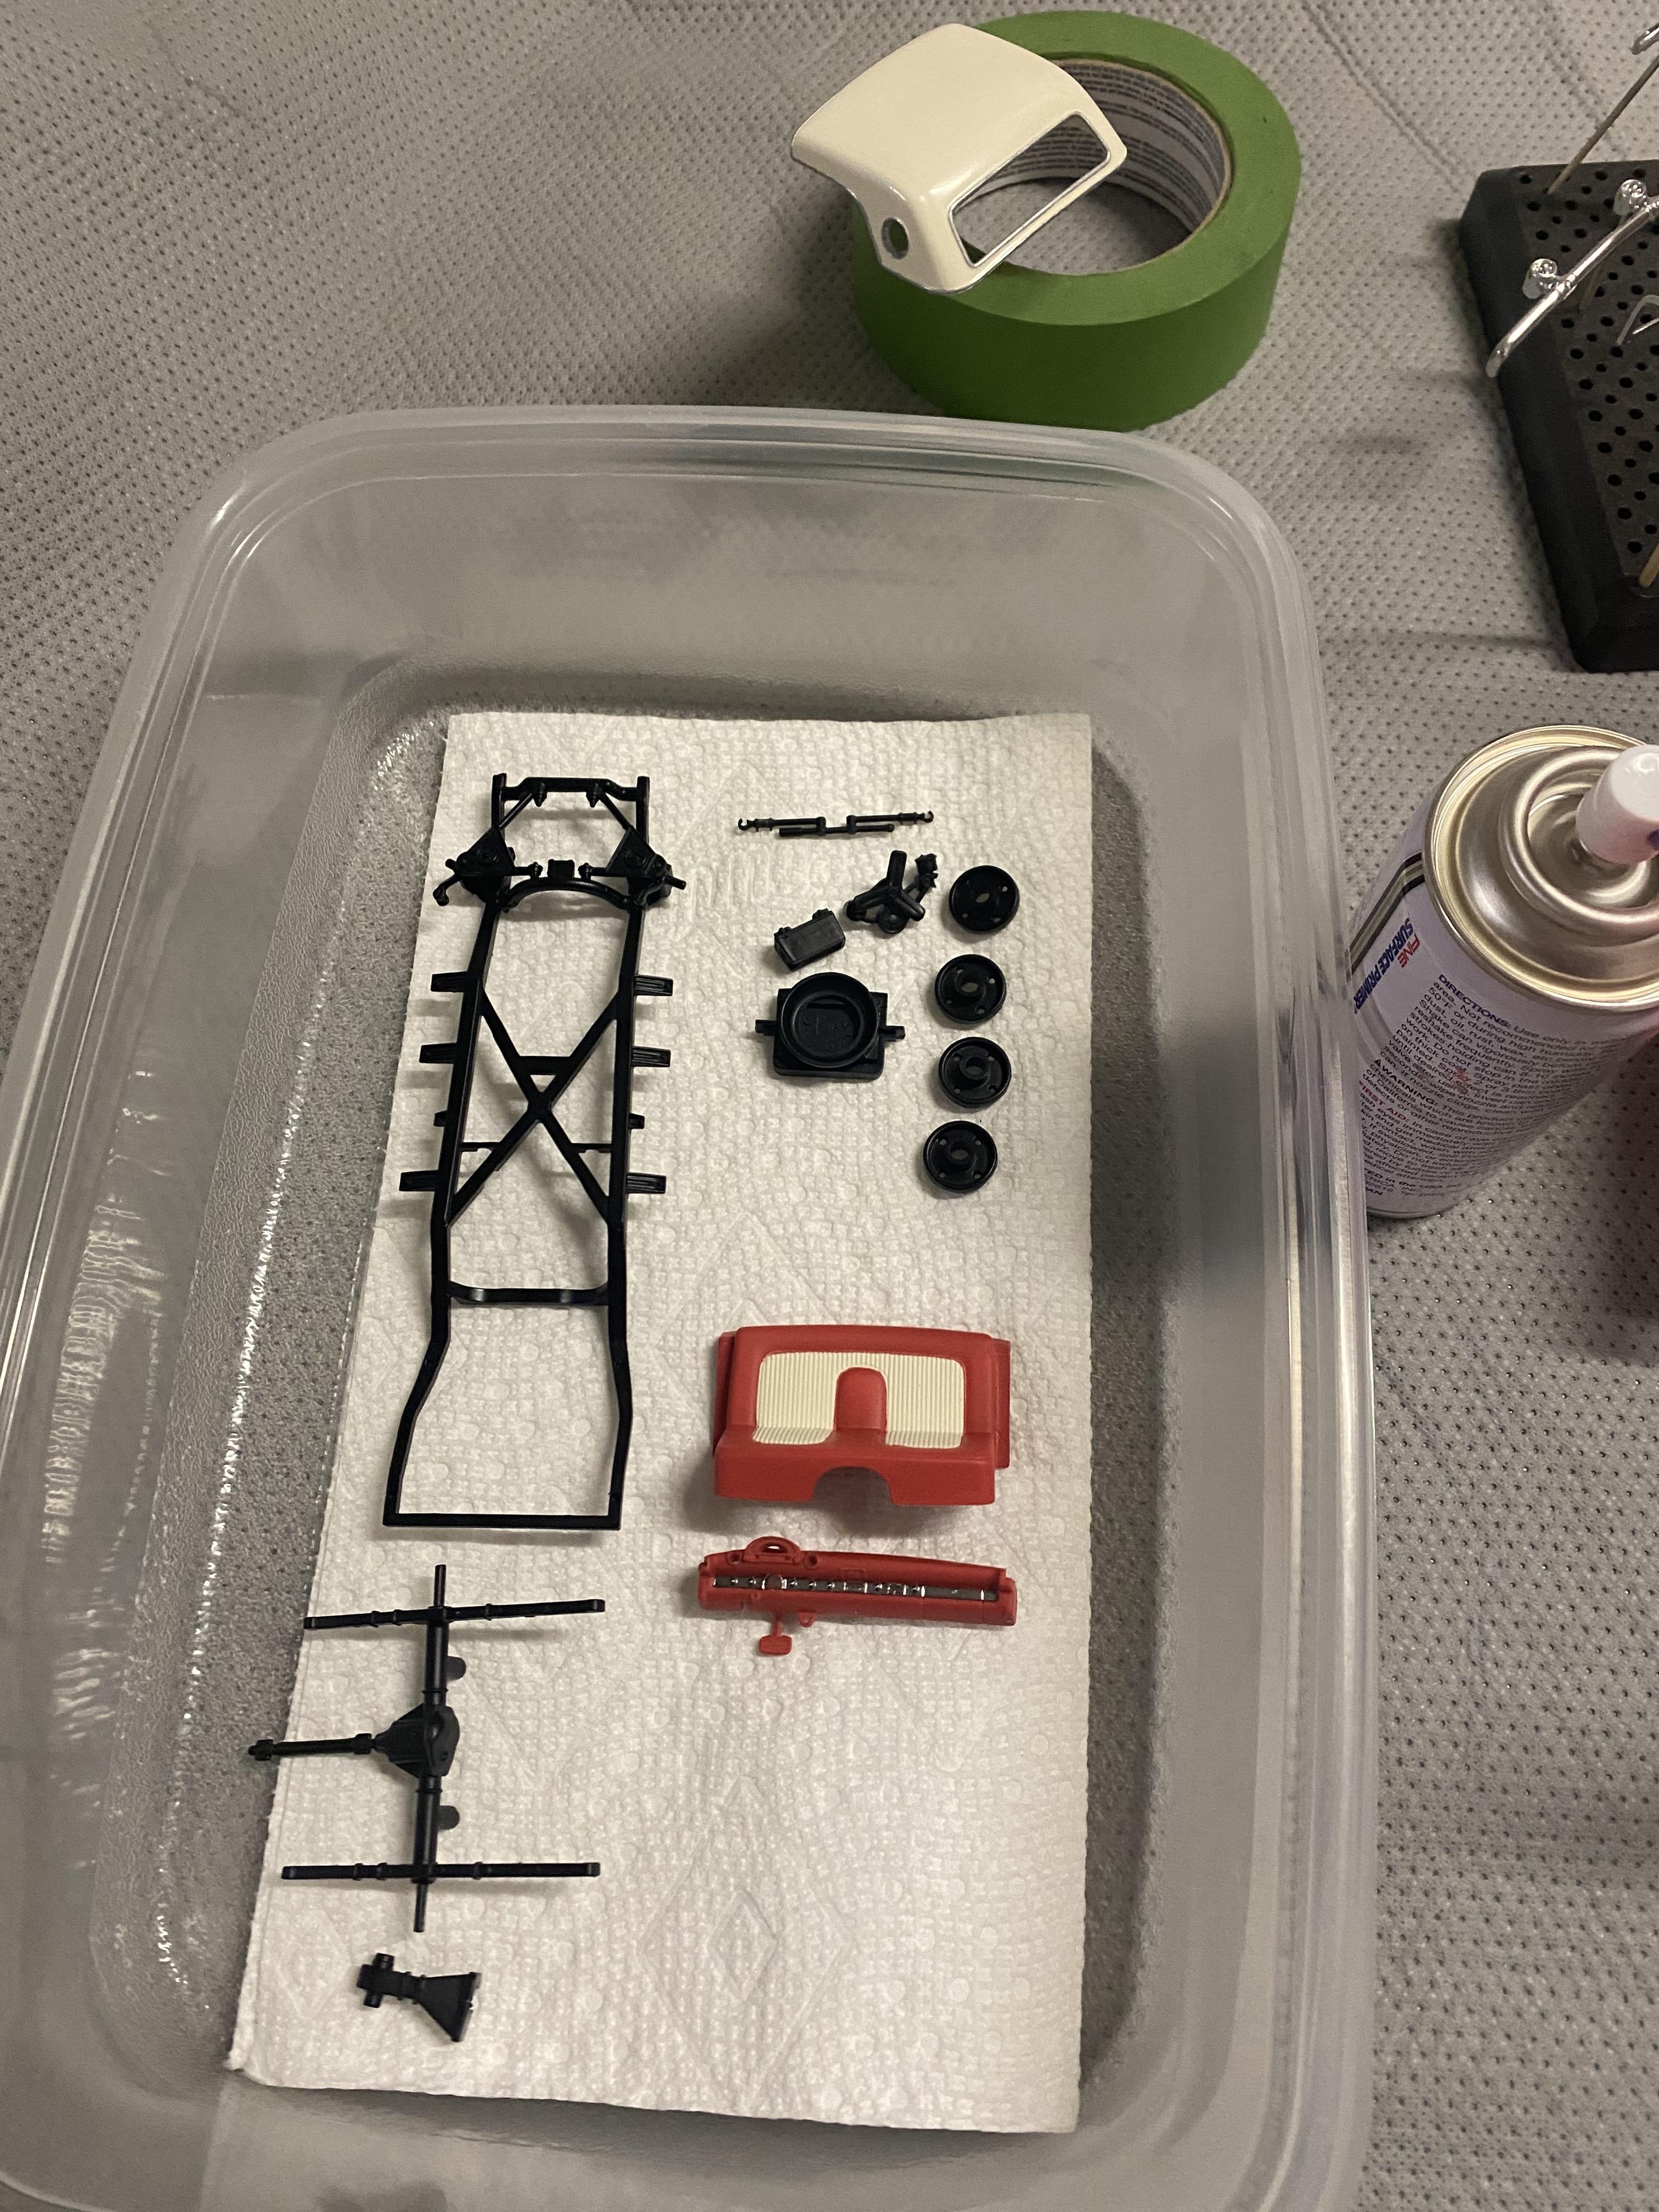
Painting has begun. NO, it will NOT be pink. that is just the primer before the Fiesta Red base coat I am waiting to spray after I can mask the seat and door inserts I painted Colonial White. Chromed the bumpers, rear view mirror and grill surround. Alclad Airframe aluminum on the exhaust and gas tank.
-
I did end up needing to strip the chrome from the bumpers and remove some mold lines and bad sprue placement issues. Also the openings for the exhaust were basically nonexistent.
-
I was able to get it to work by logging out and back in. Odd.
-
Just a small update and about ready to go to paint if the weather would cooperate. Wildfires in SoCal currently. I made a headliner for the top from a lesson learned on Dan D's YouTube channel that the lower rider builders use a lot to create their custom interiors. You can learn a lot from about anywhere.
-
I am getting this error every time I try to post to an existing WIP thread of mine. Any ideas?
-
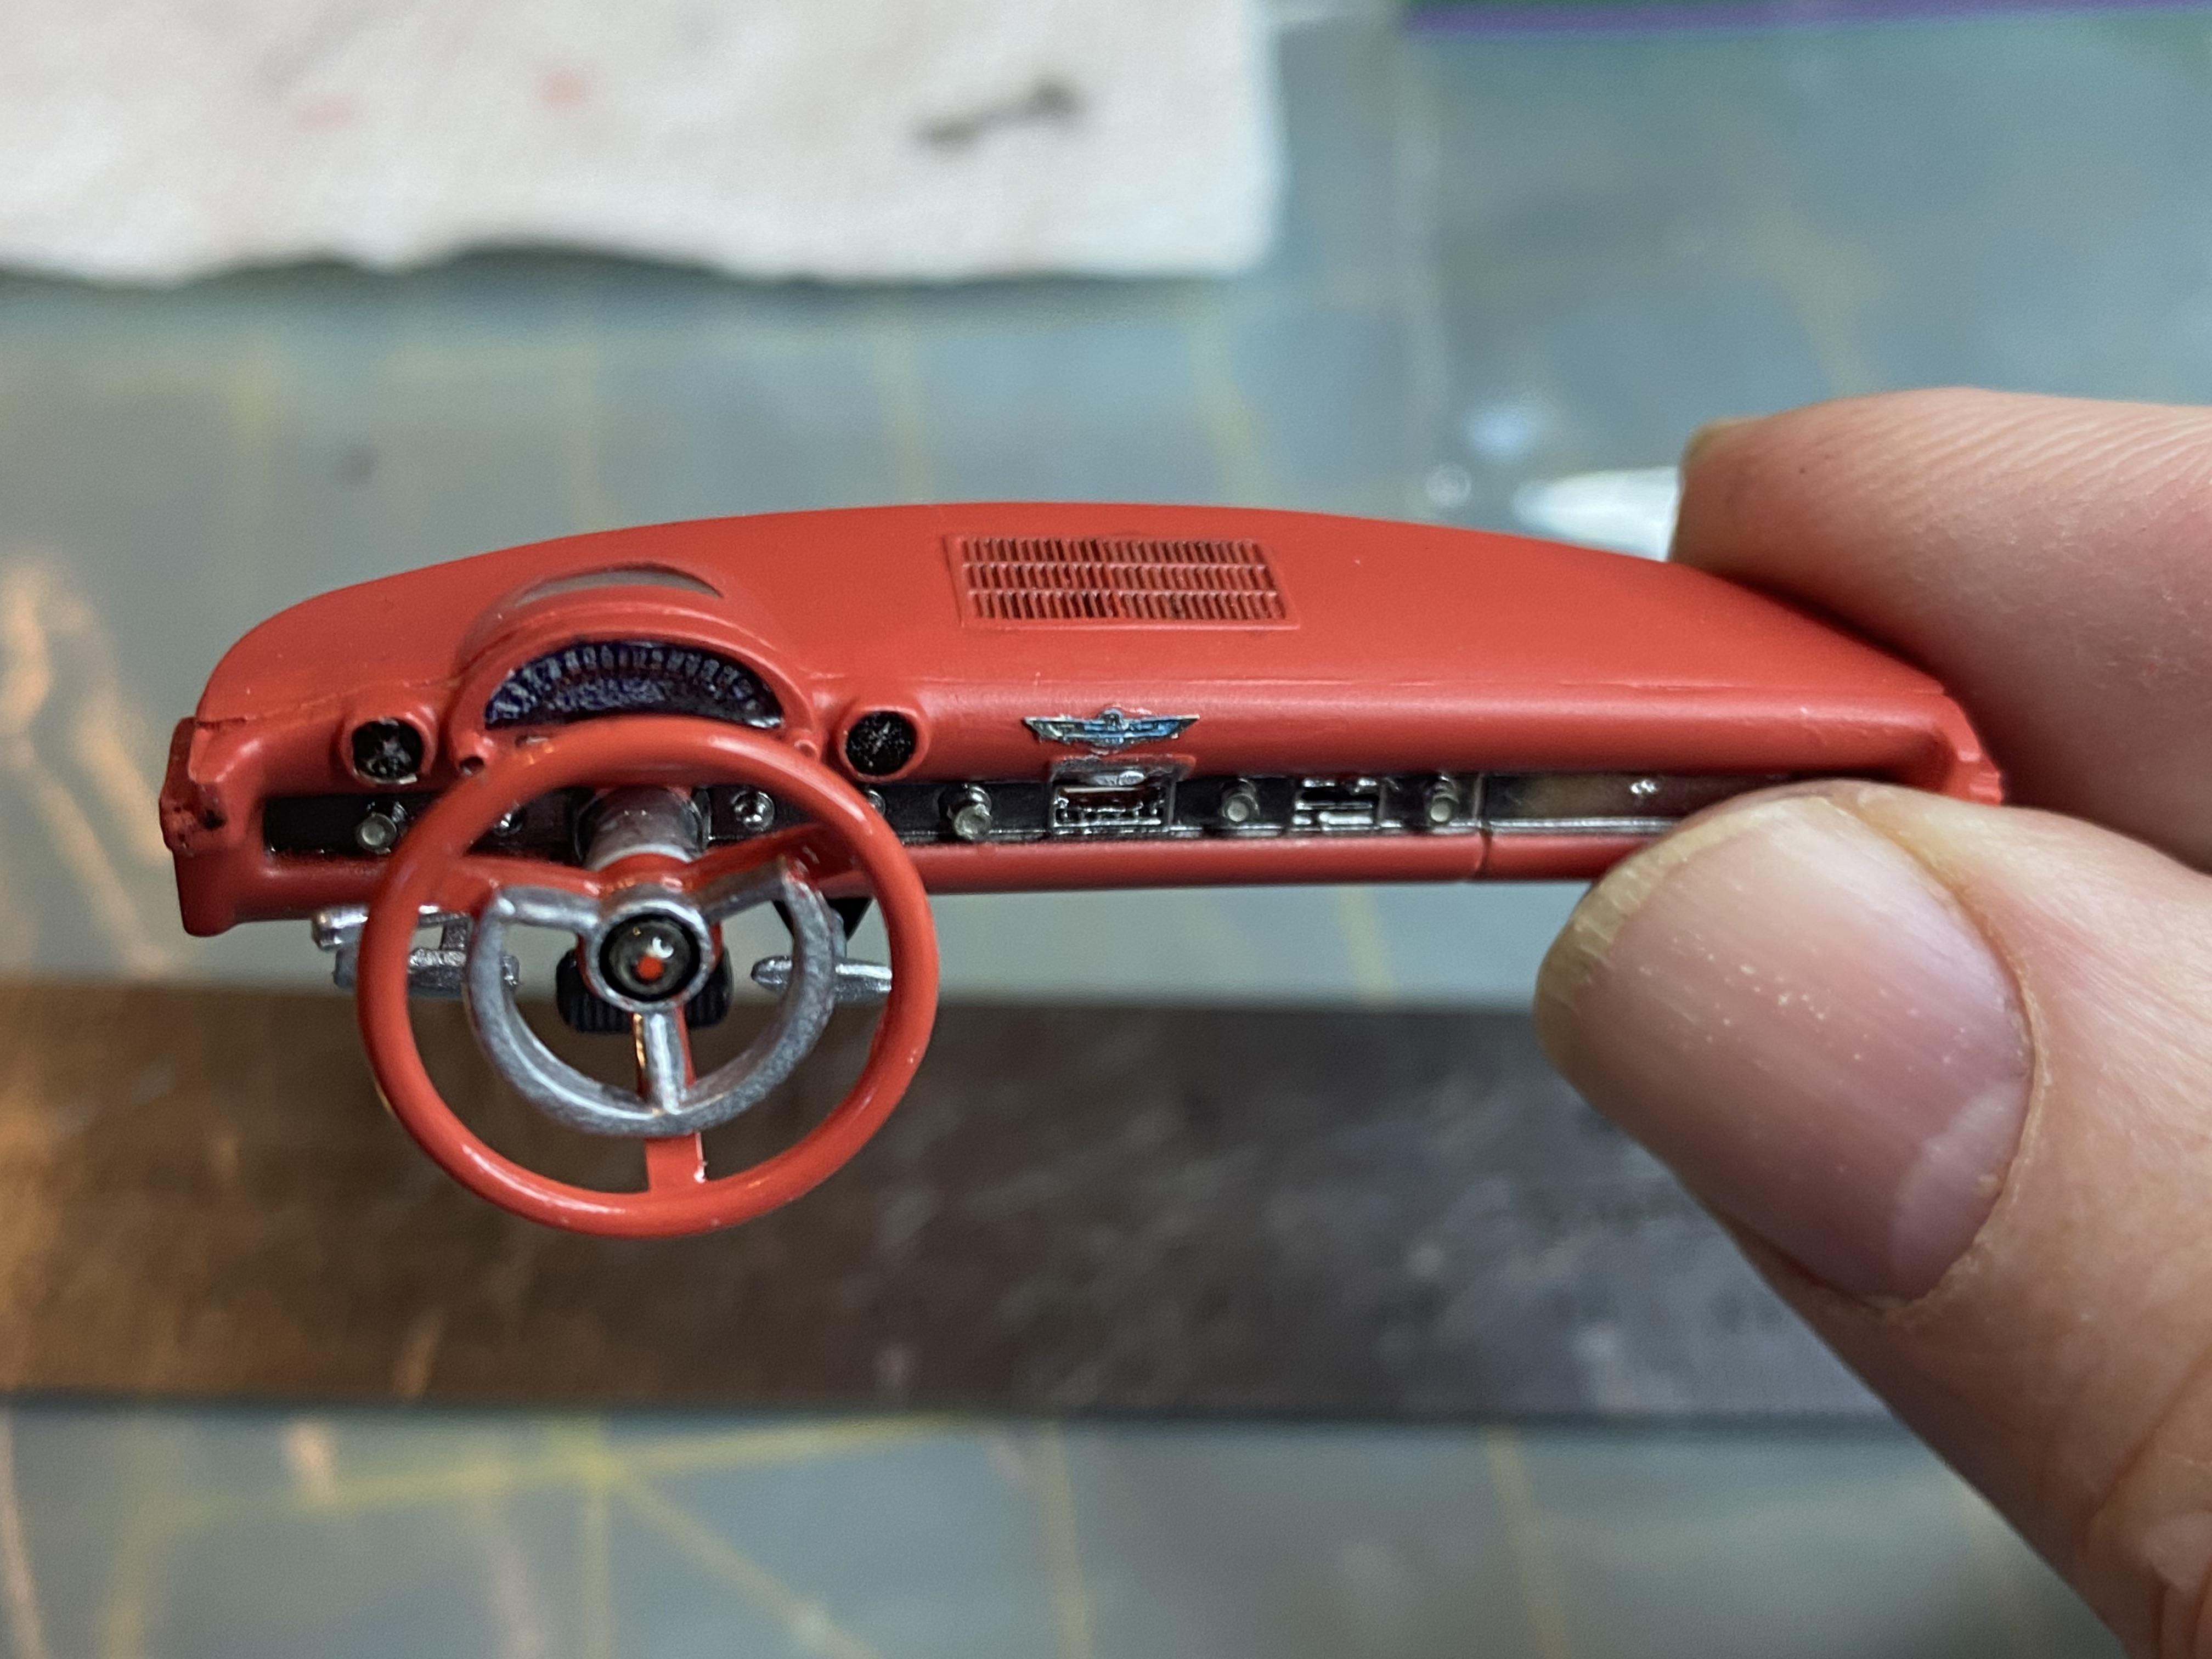
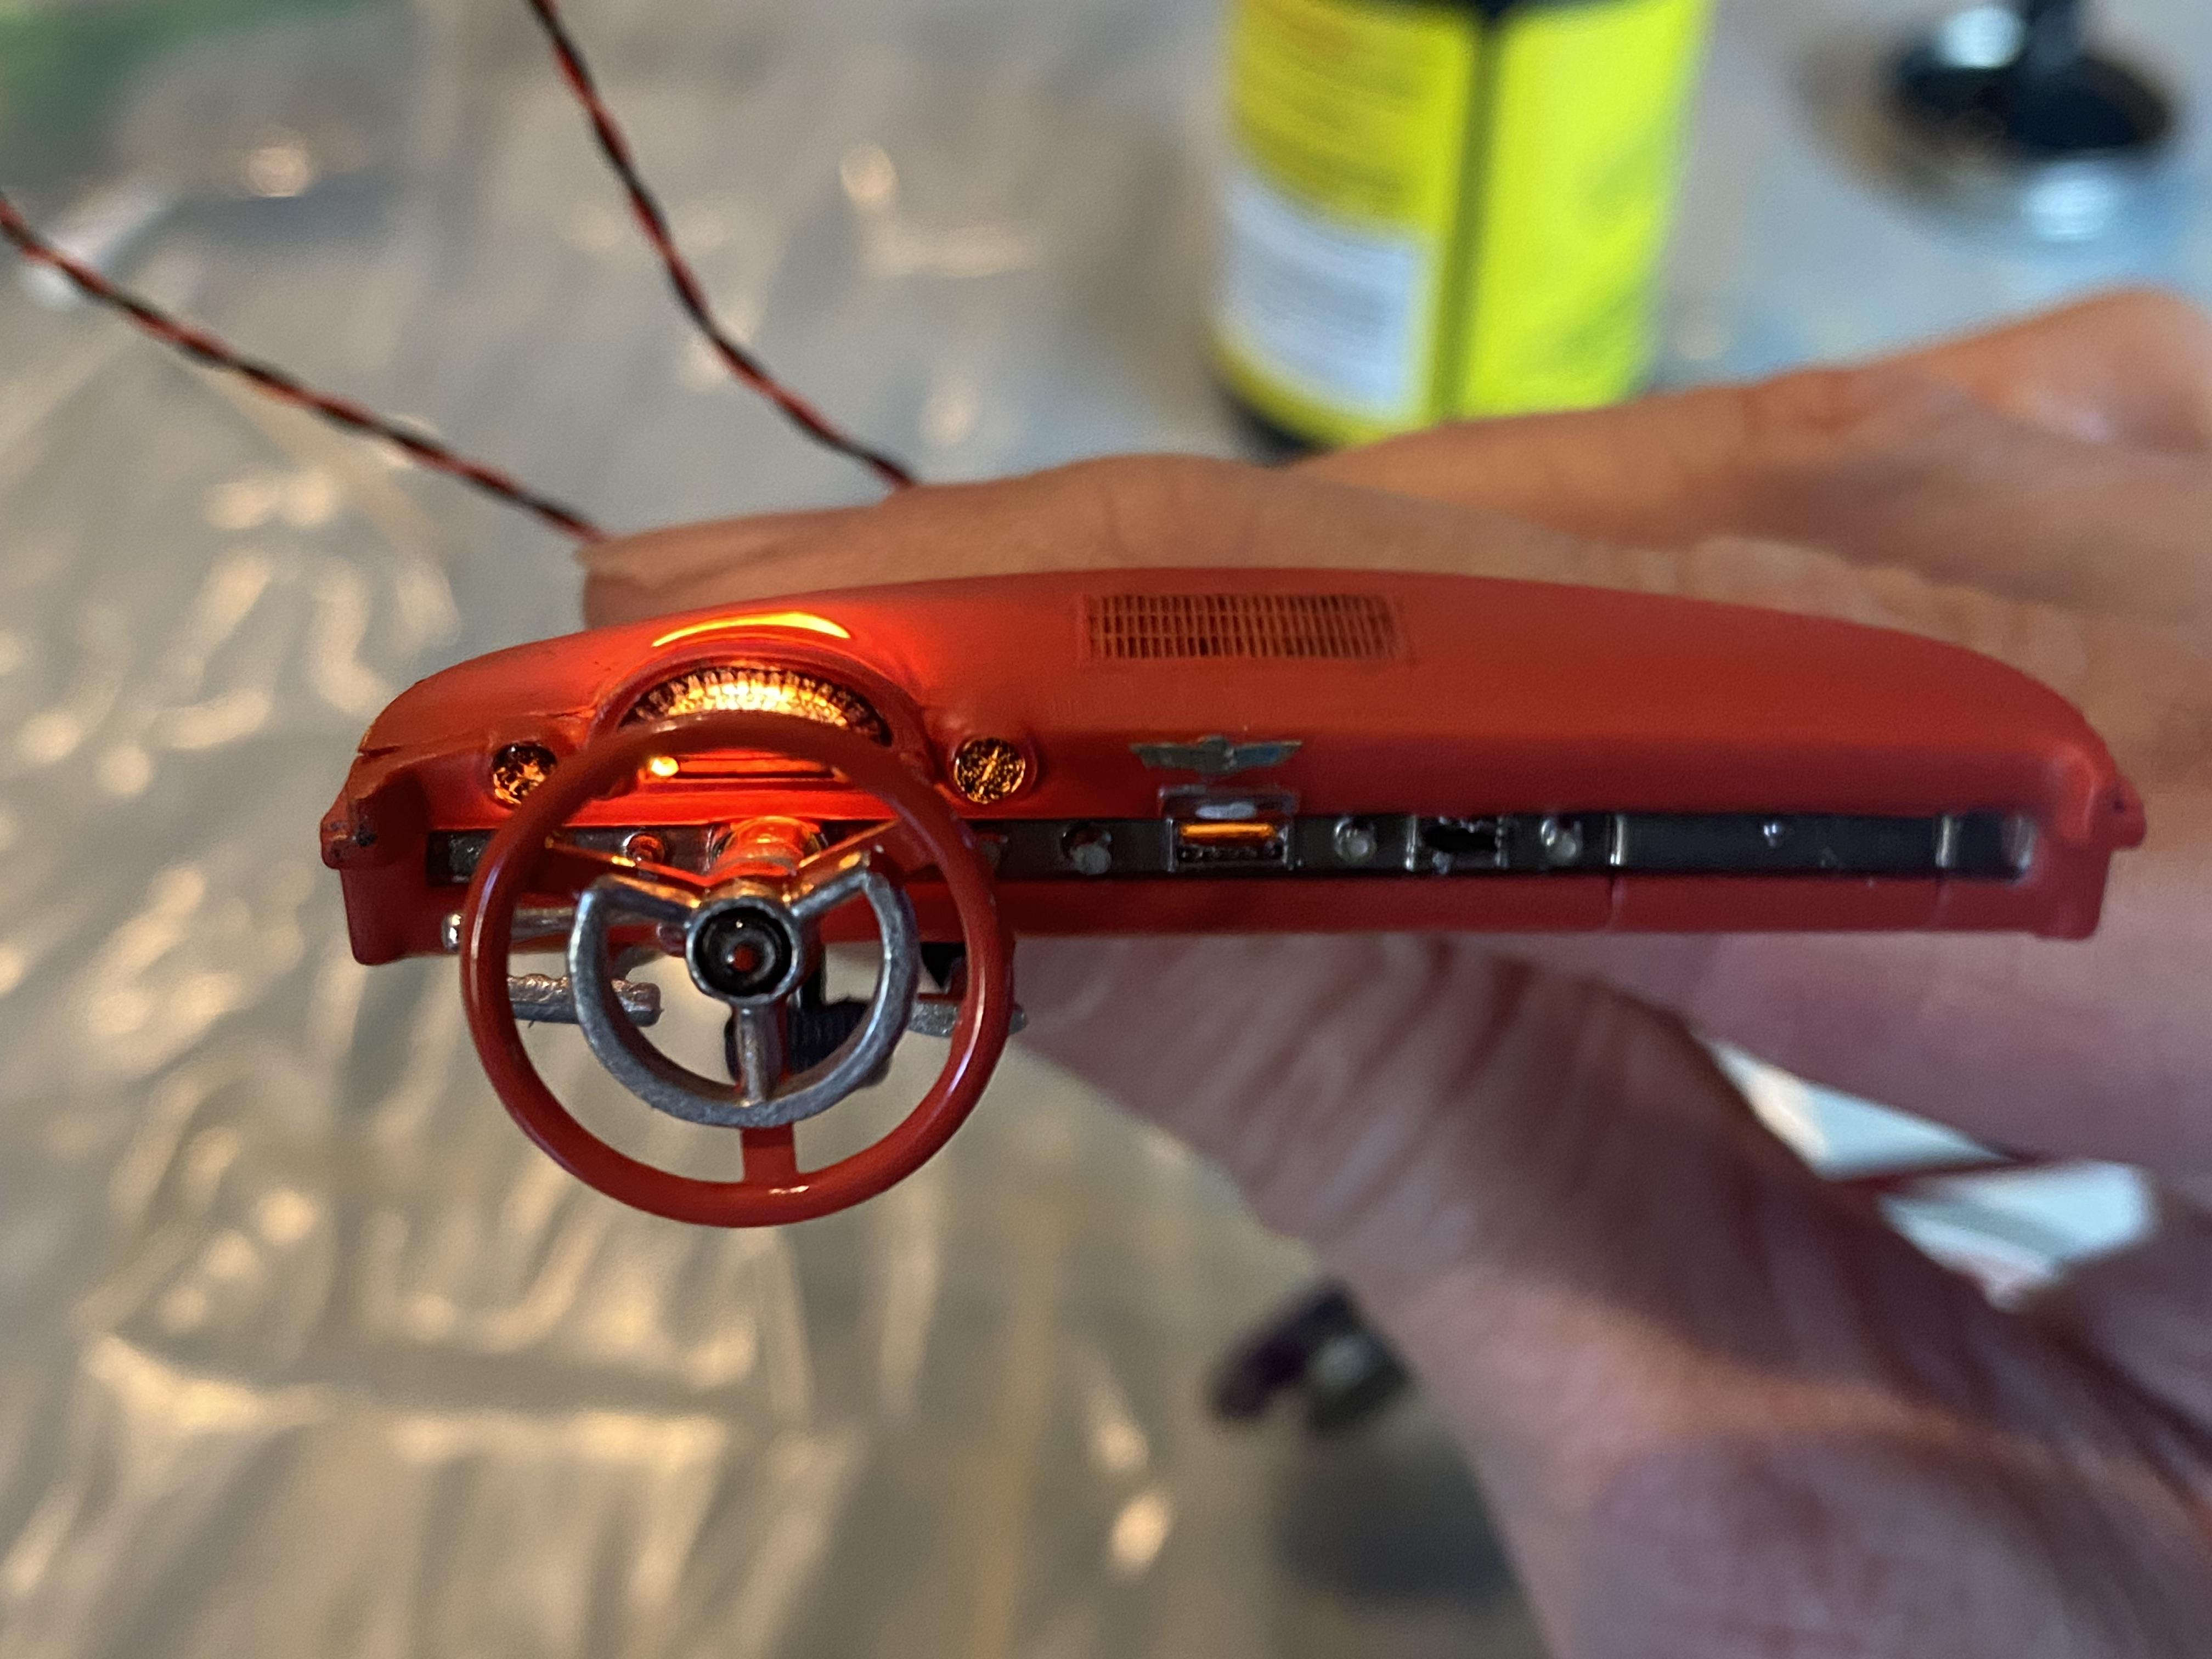
I use printer gauge decals on white decal paper and UV clear resin with a styrene scratch built light enclosure for the gauges so it doesn’t light up anywhere else. The white glue idea is pretty cool though.
-
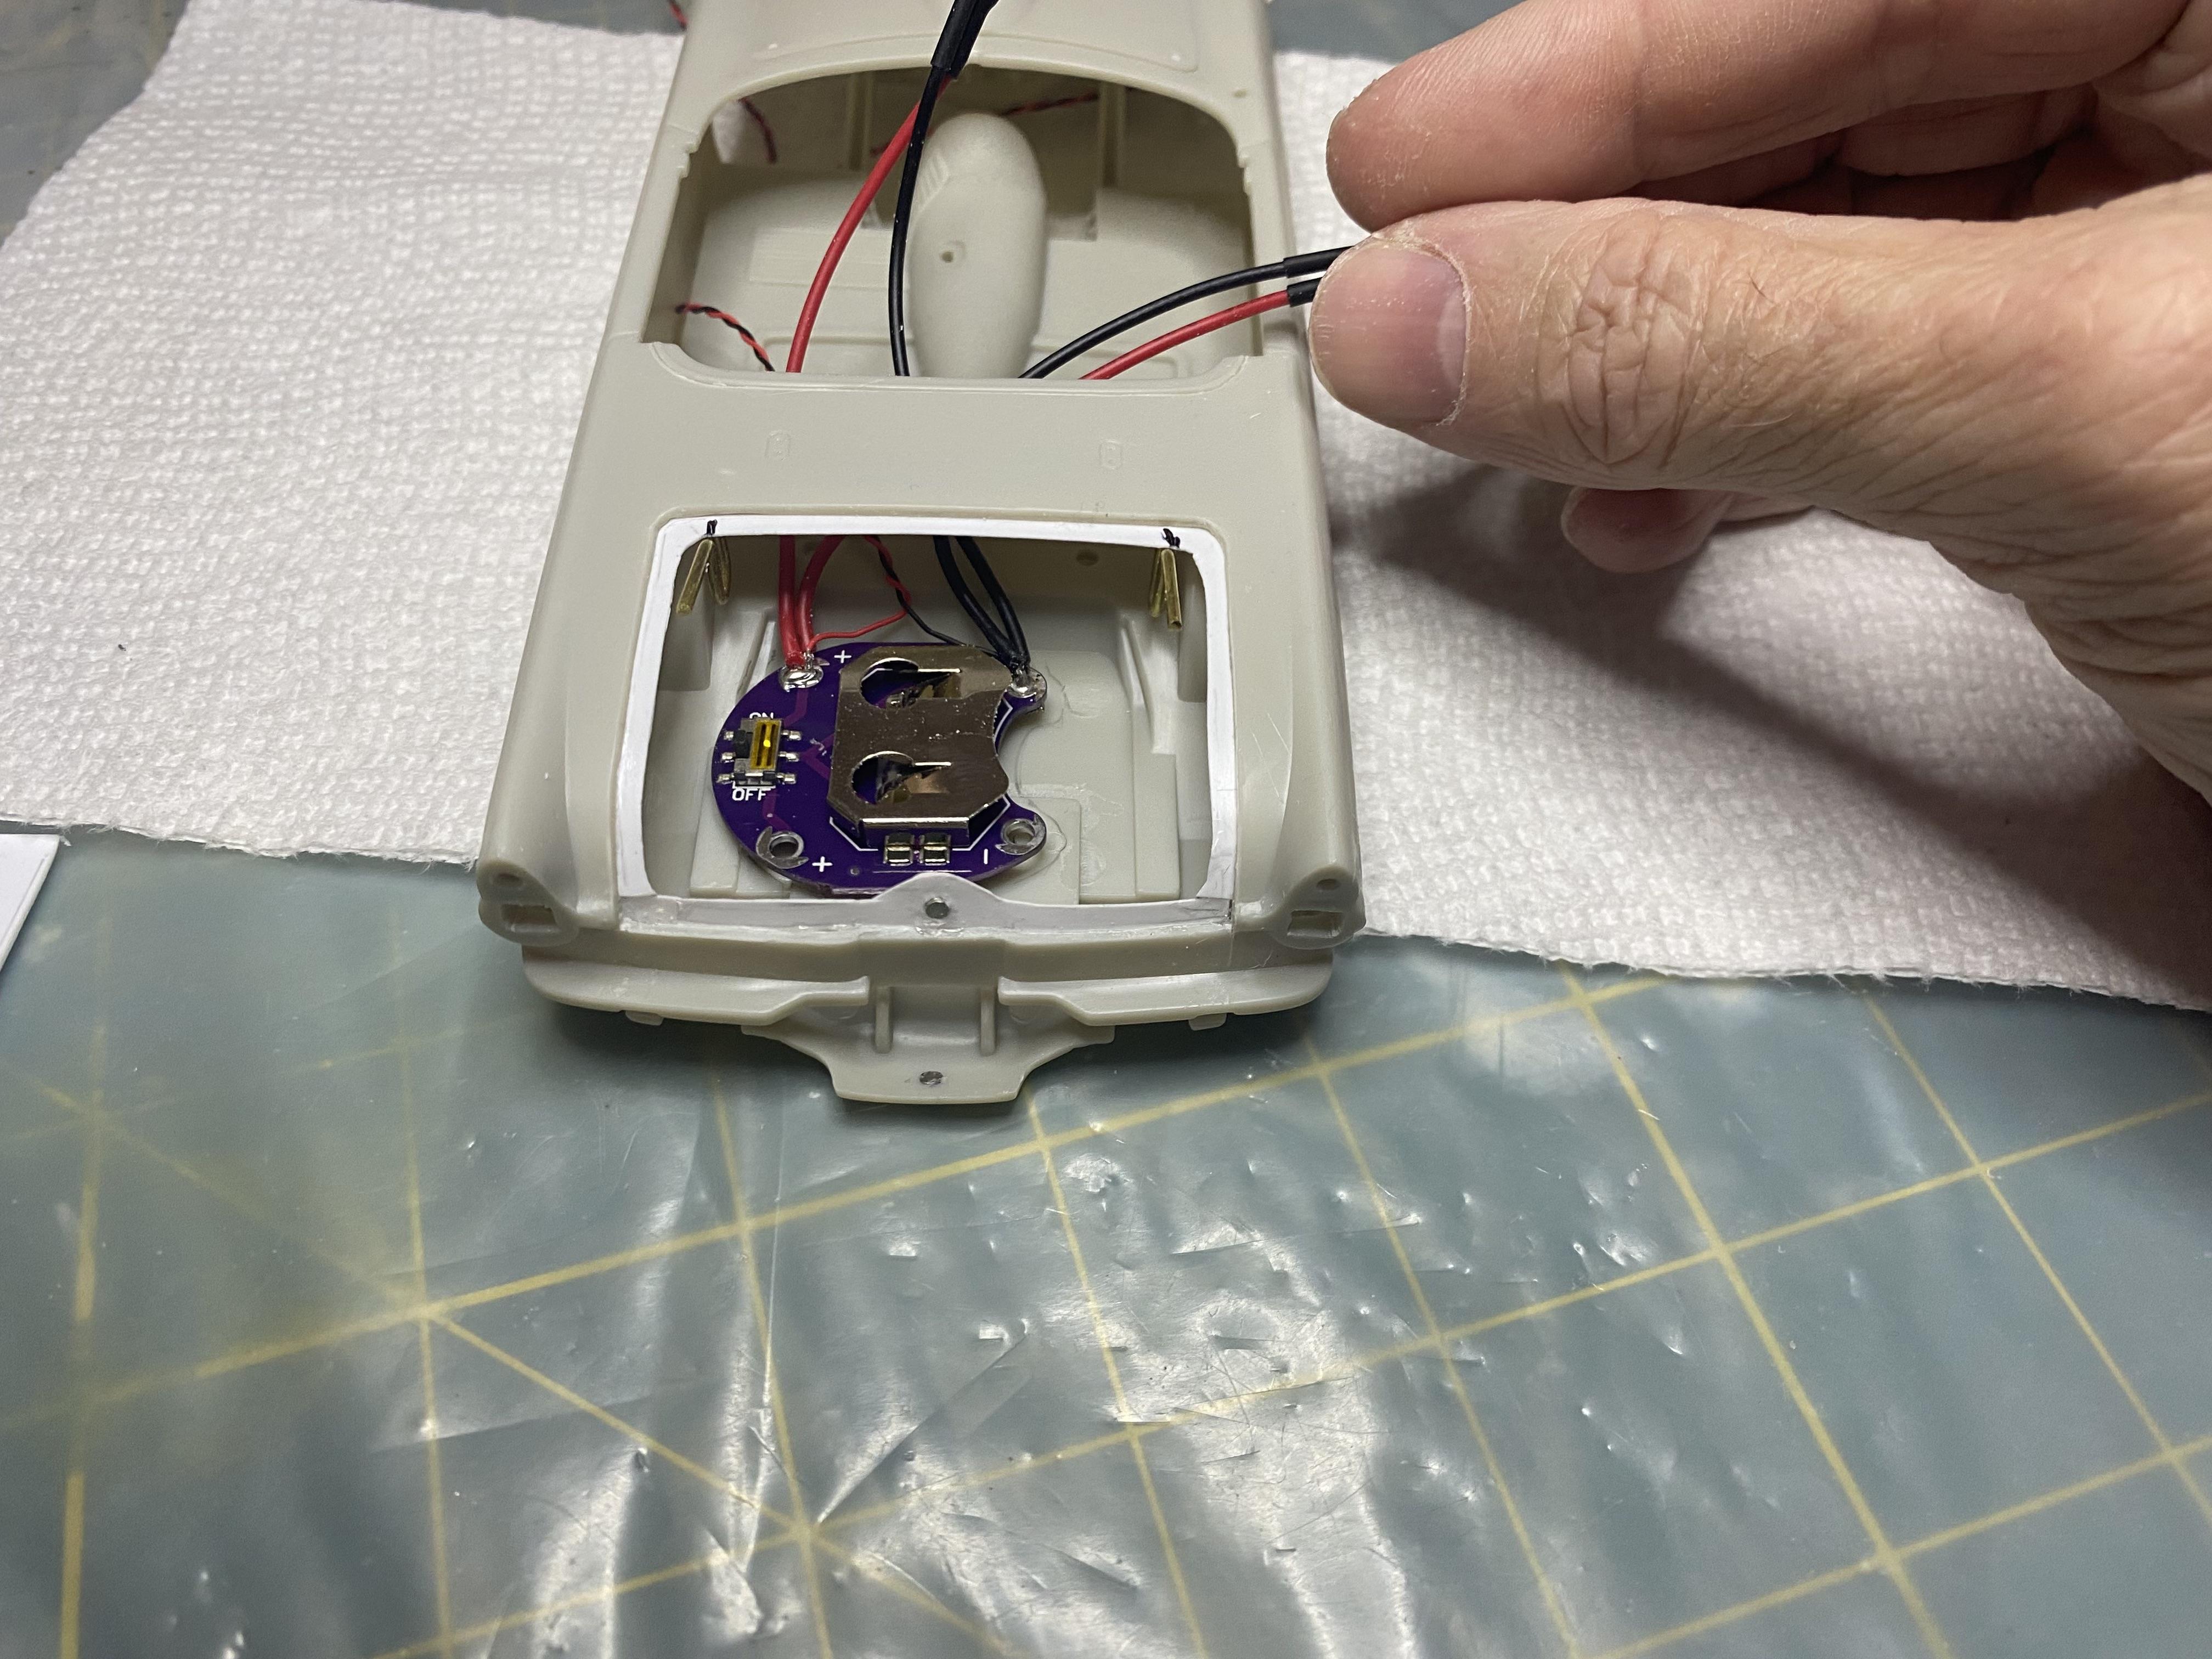
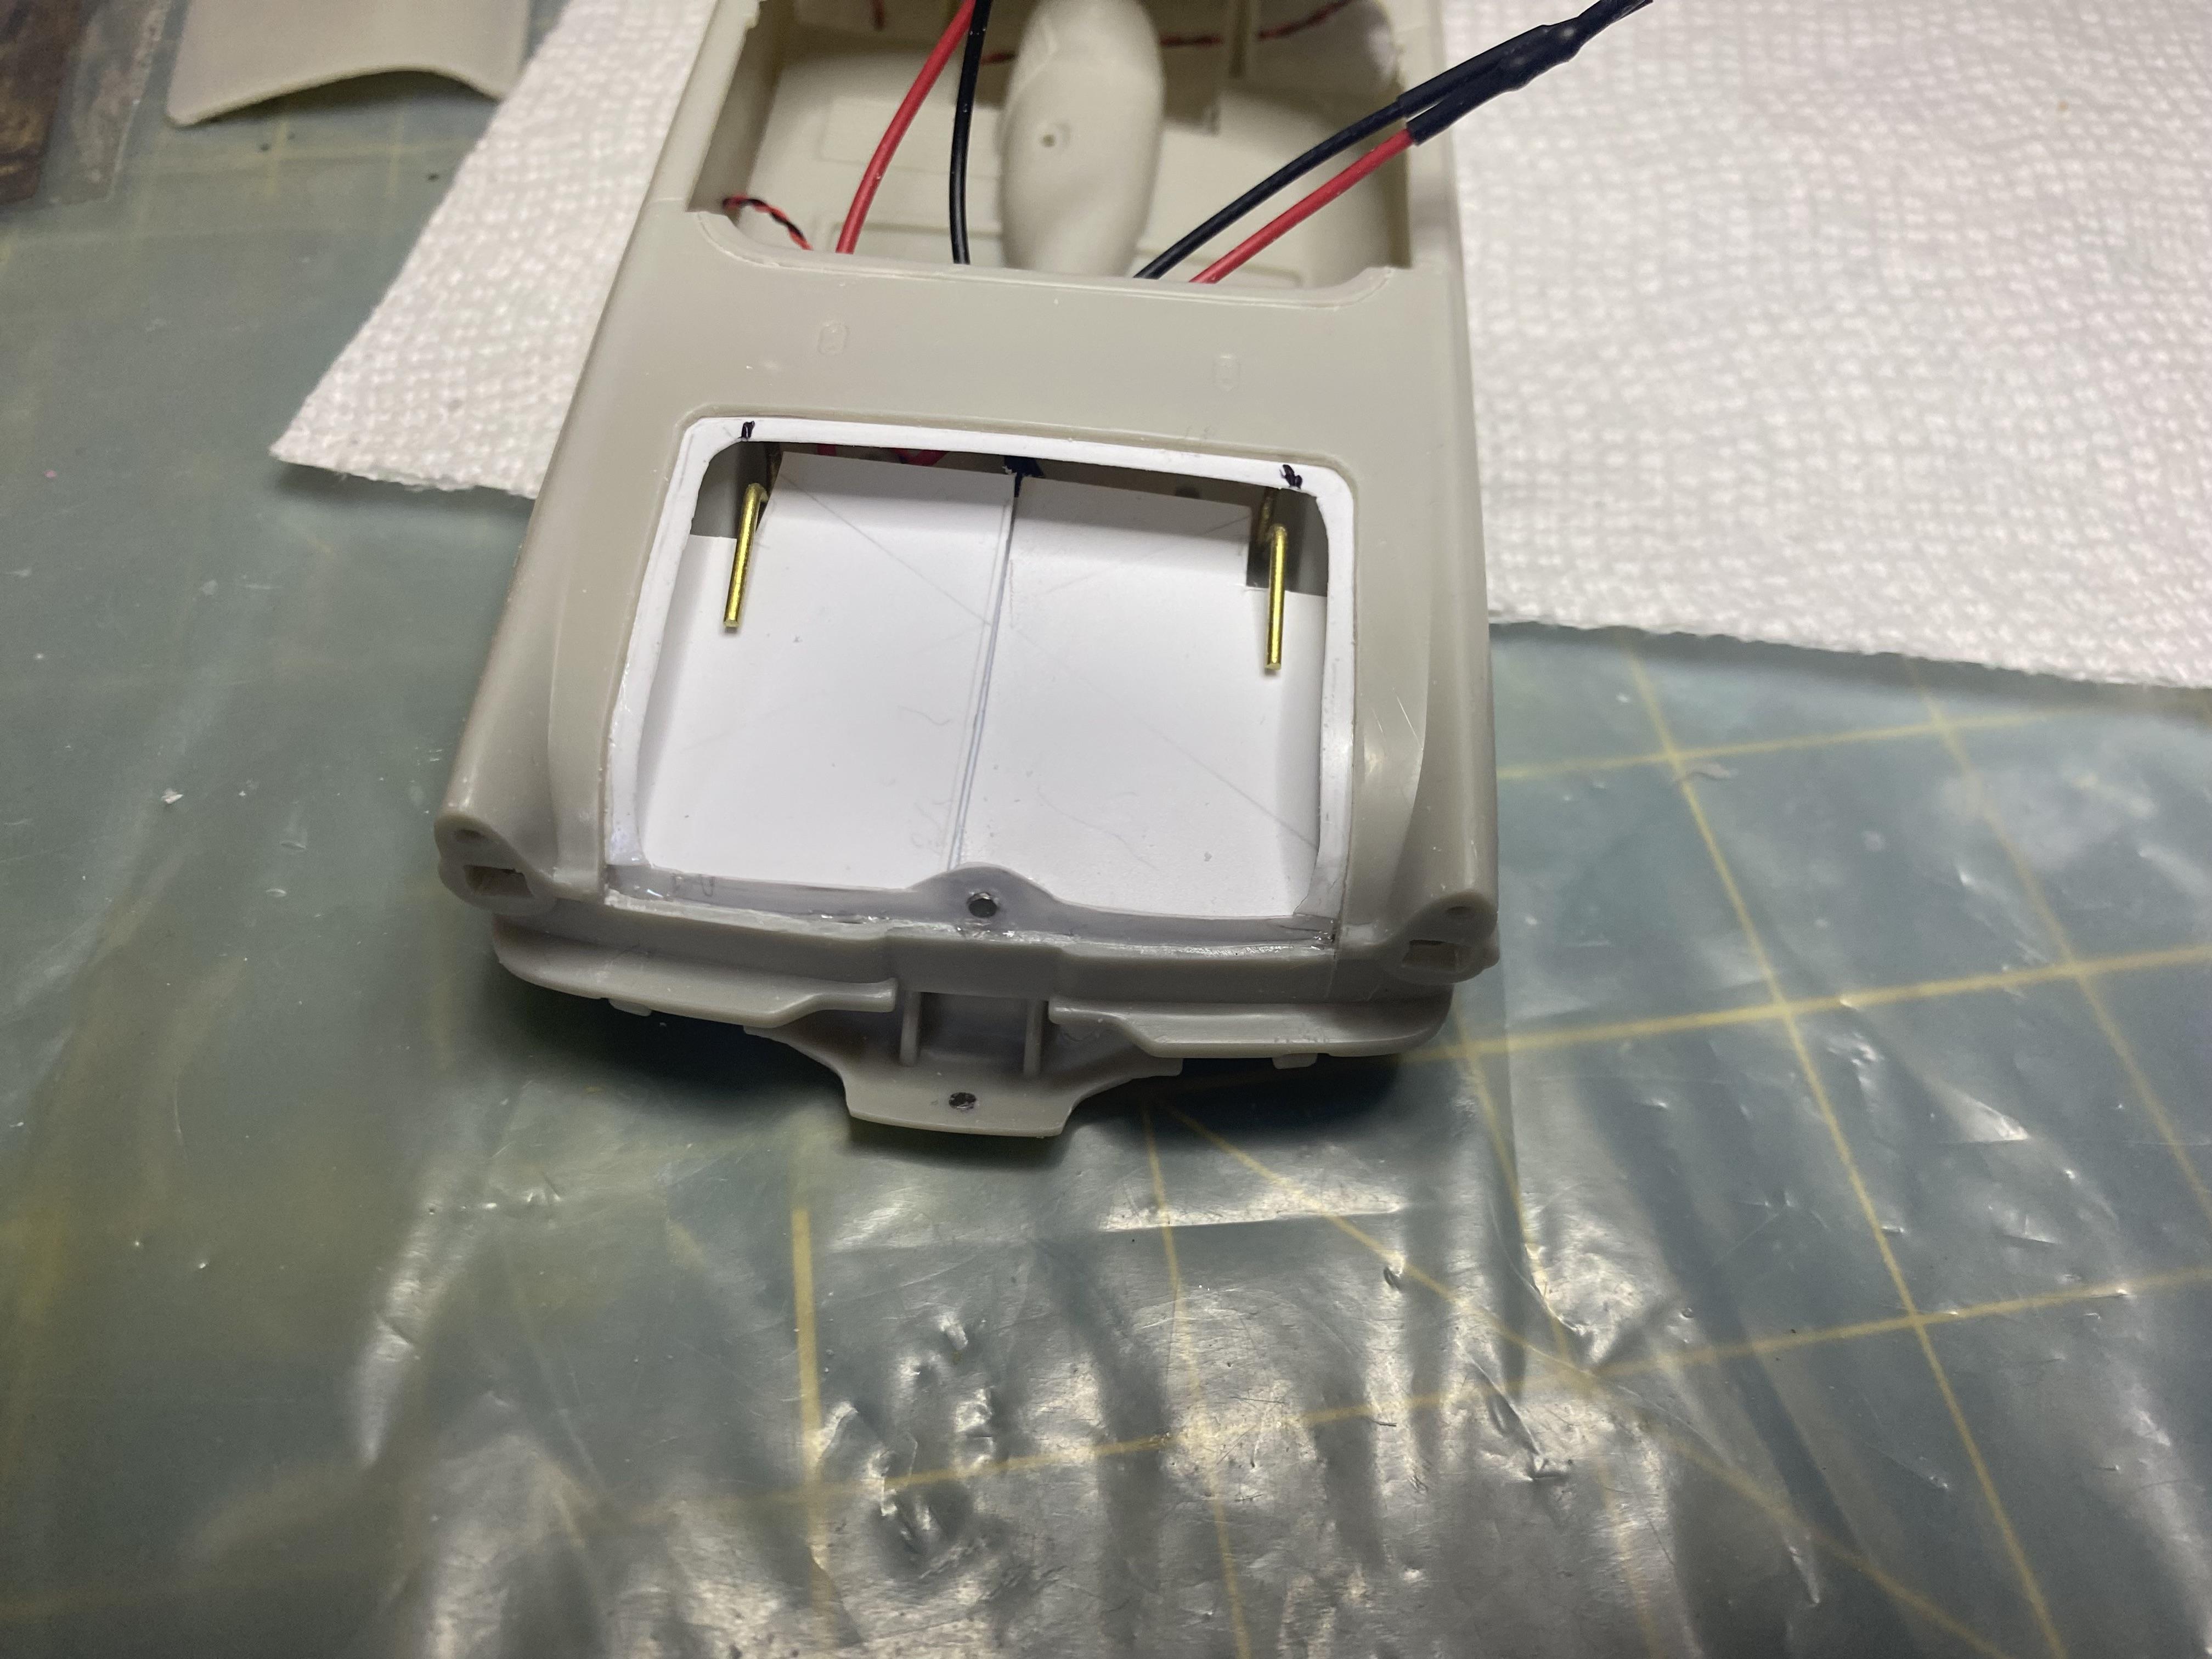
I may do another 57 build using the 56 chassis now that they rereleased the 56 kit and prices came down. I did have to scratch build everything else necessary for my 57 build. Only if you look at the underside does it not live up to the 56 kit. I don’t know about the older 57 kit tops, but the newer ones are way wrong. I ended up getting a nice resin version from drag city customs. This build is not the American Graffiti version, but same kit really, just different box art. I do use resistors for the red taillight LEDs, but not the warm white headlights. The gauge light needs to light up the entire dash area and is not directly pointed, this is as desired by me.
-
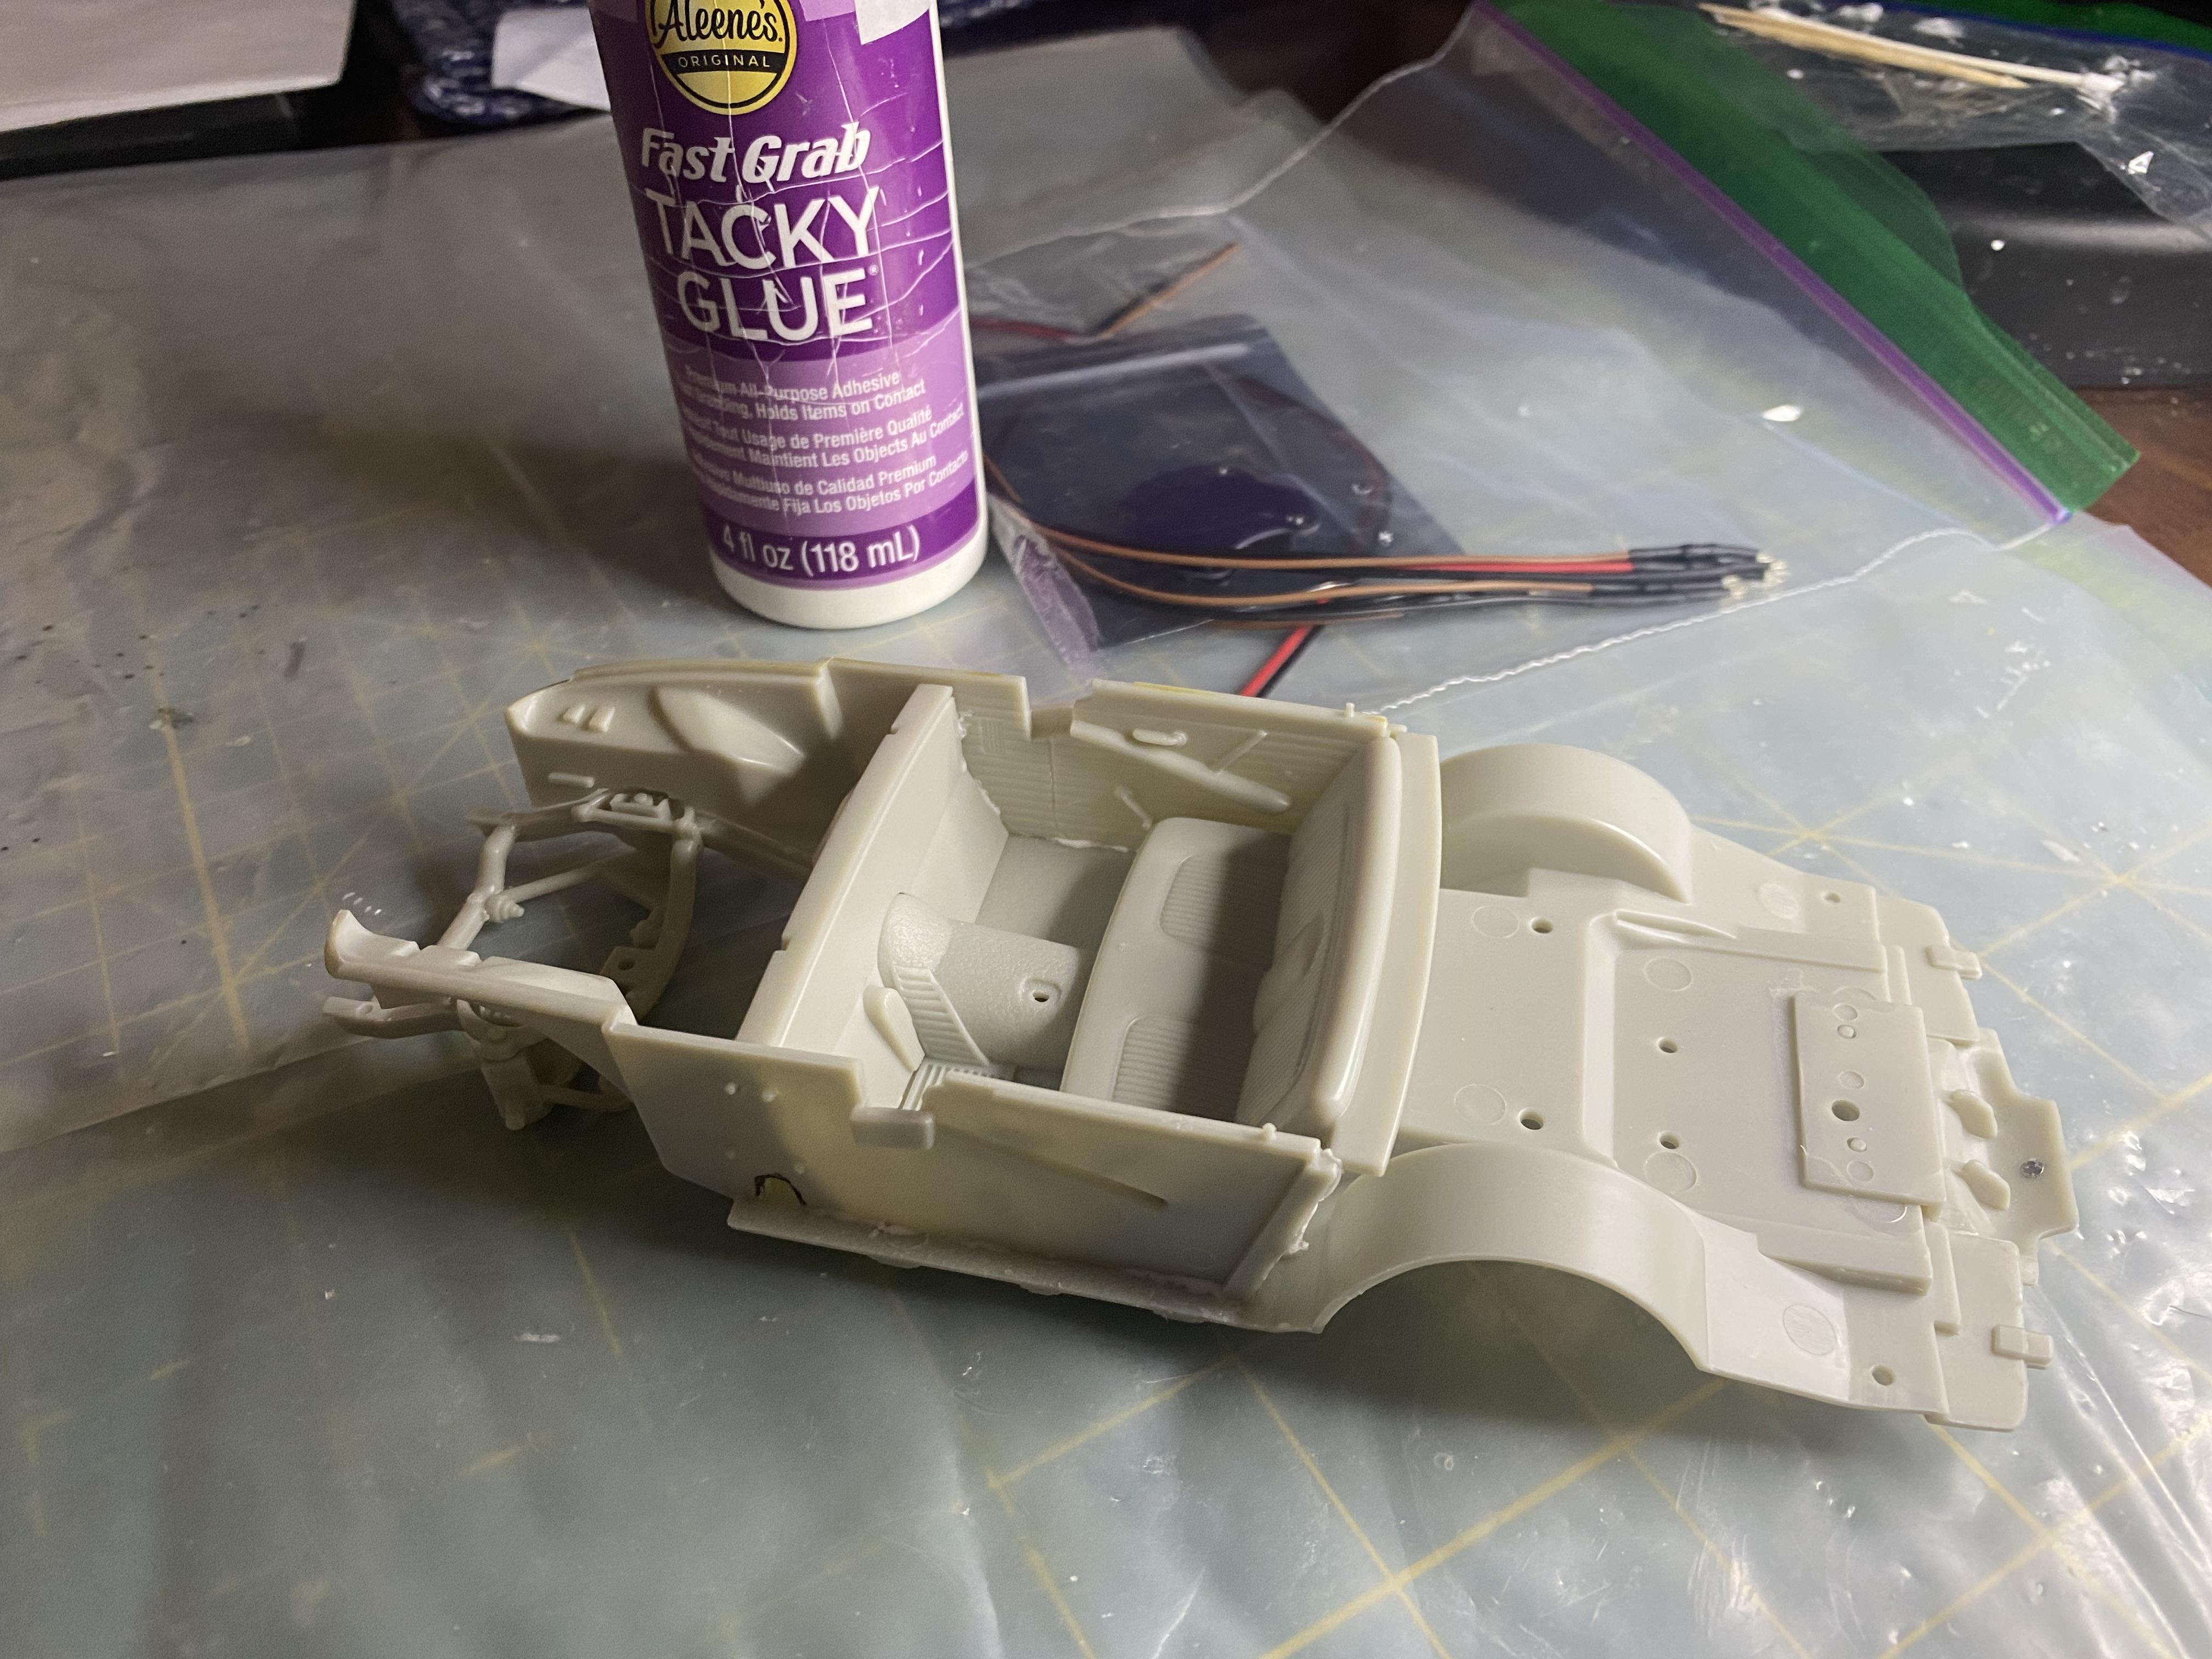
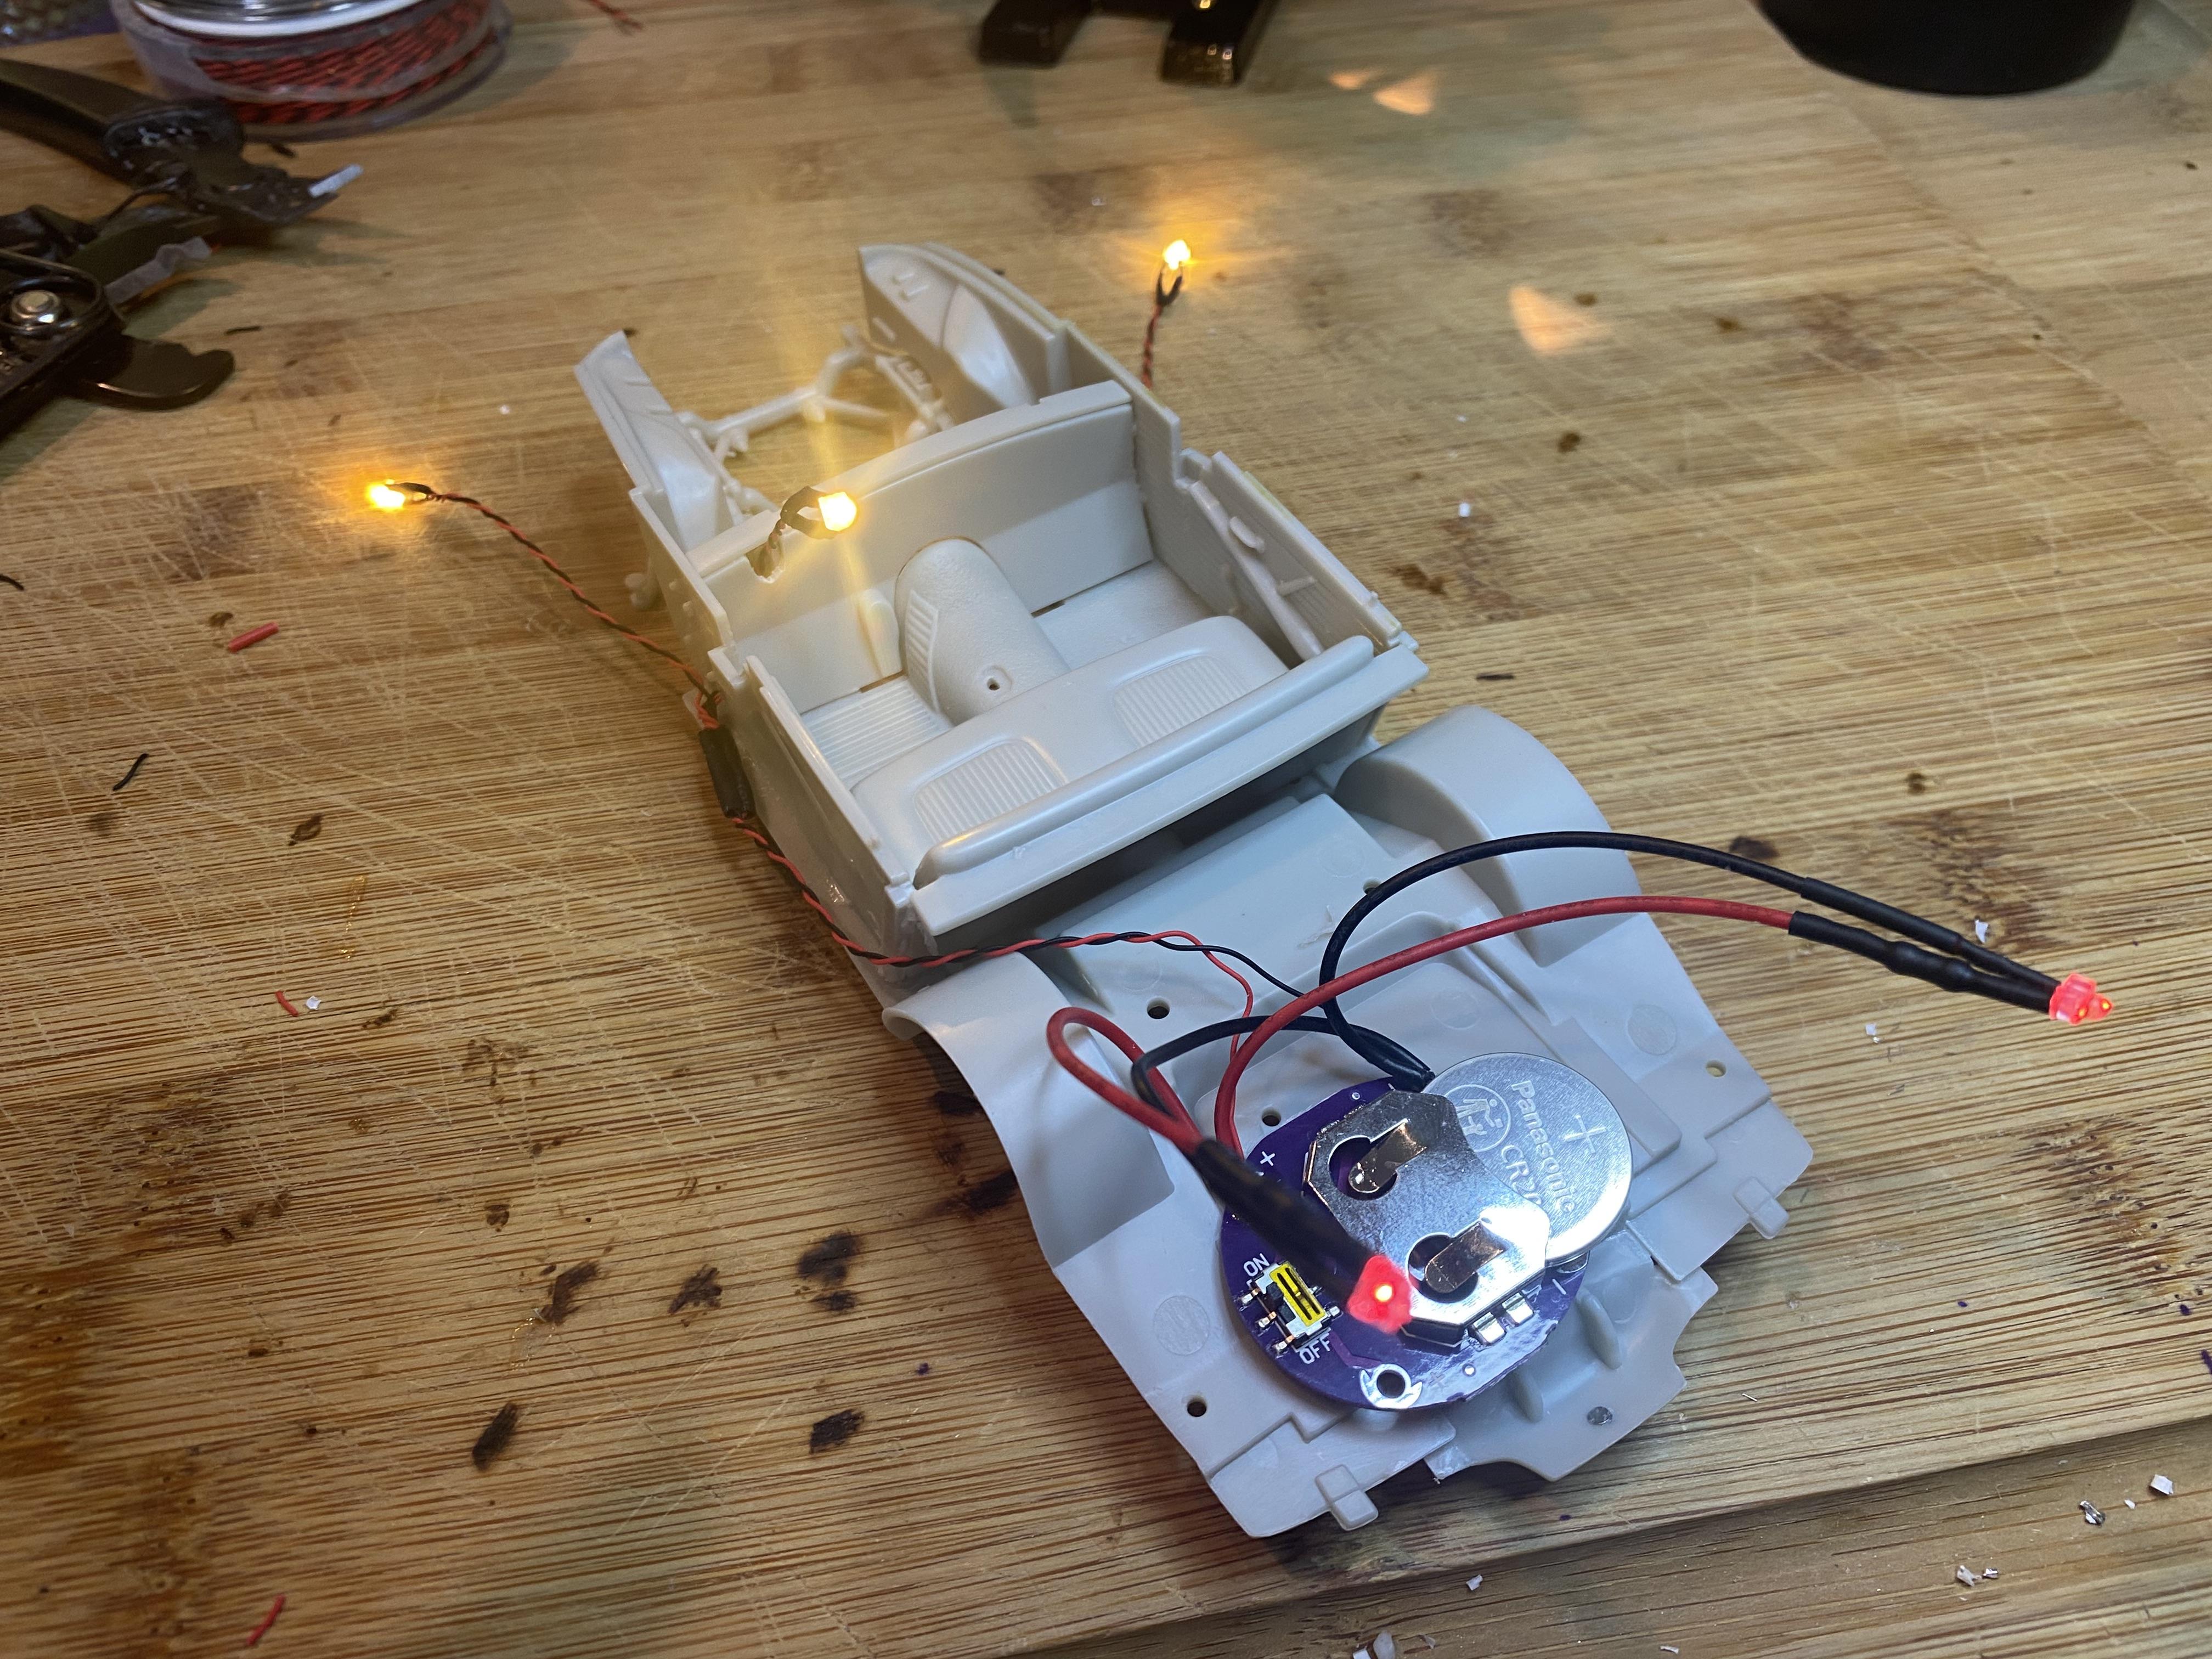
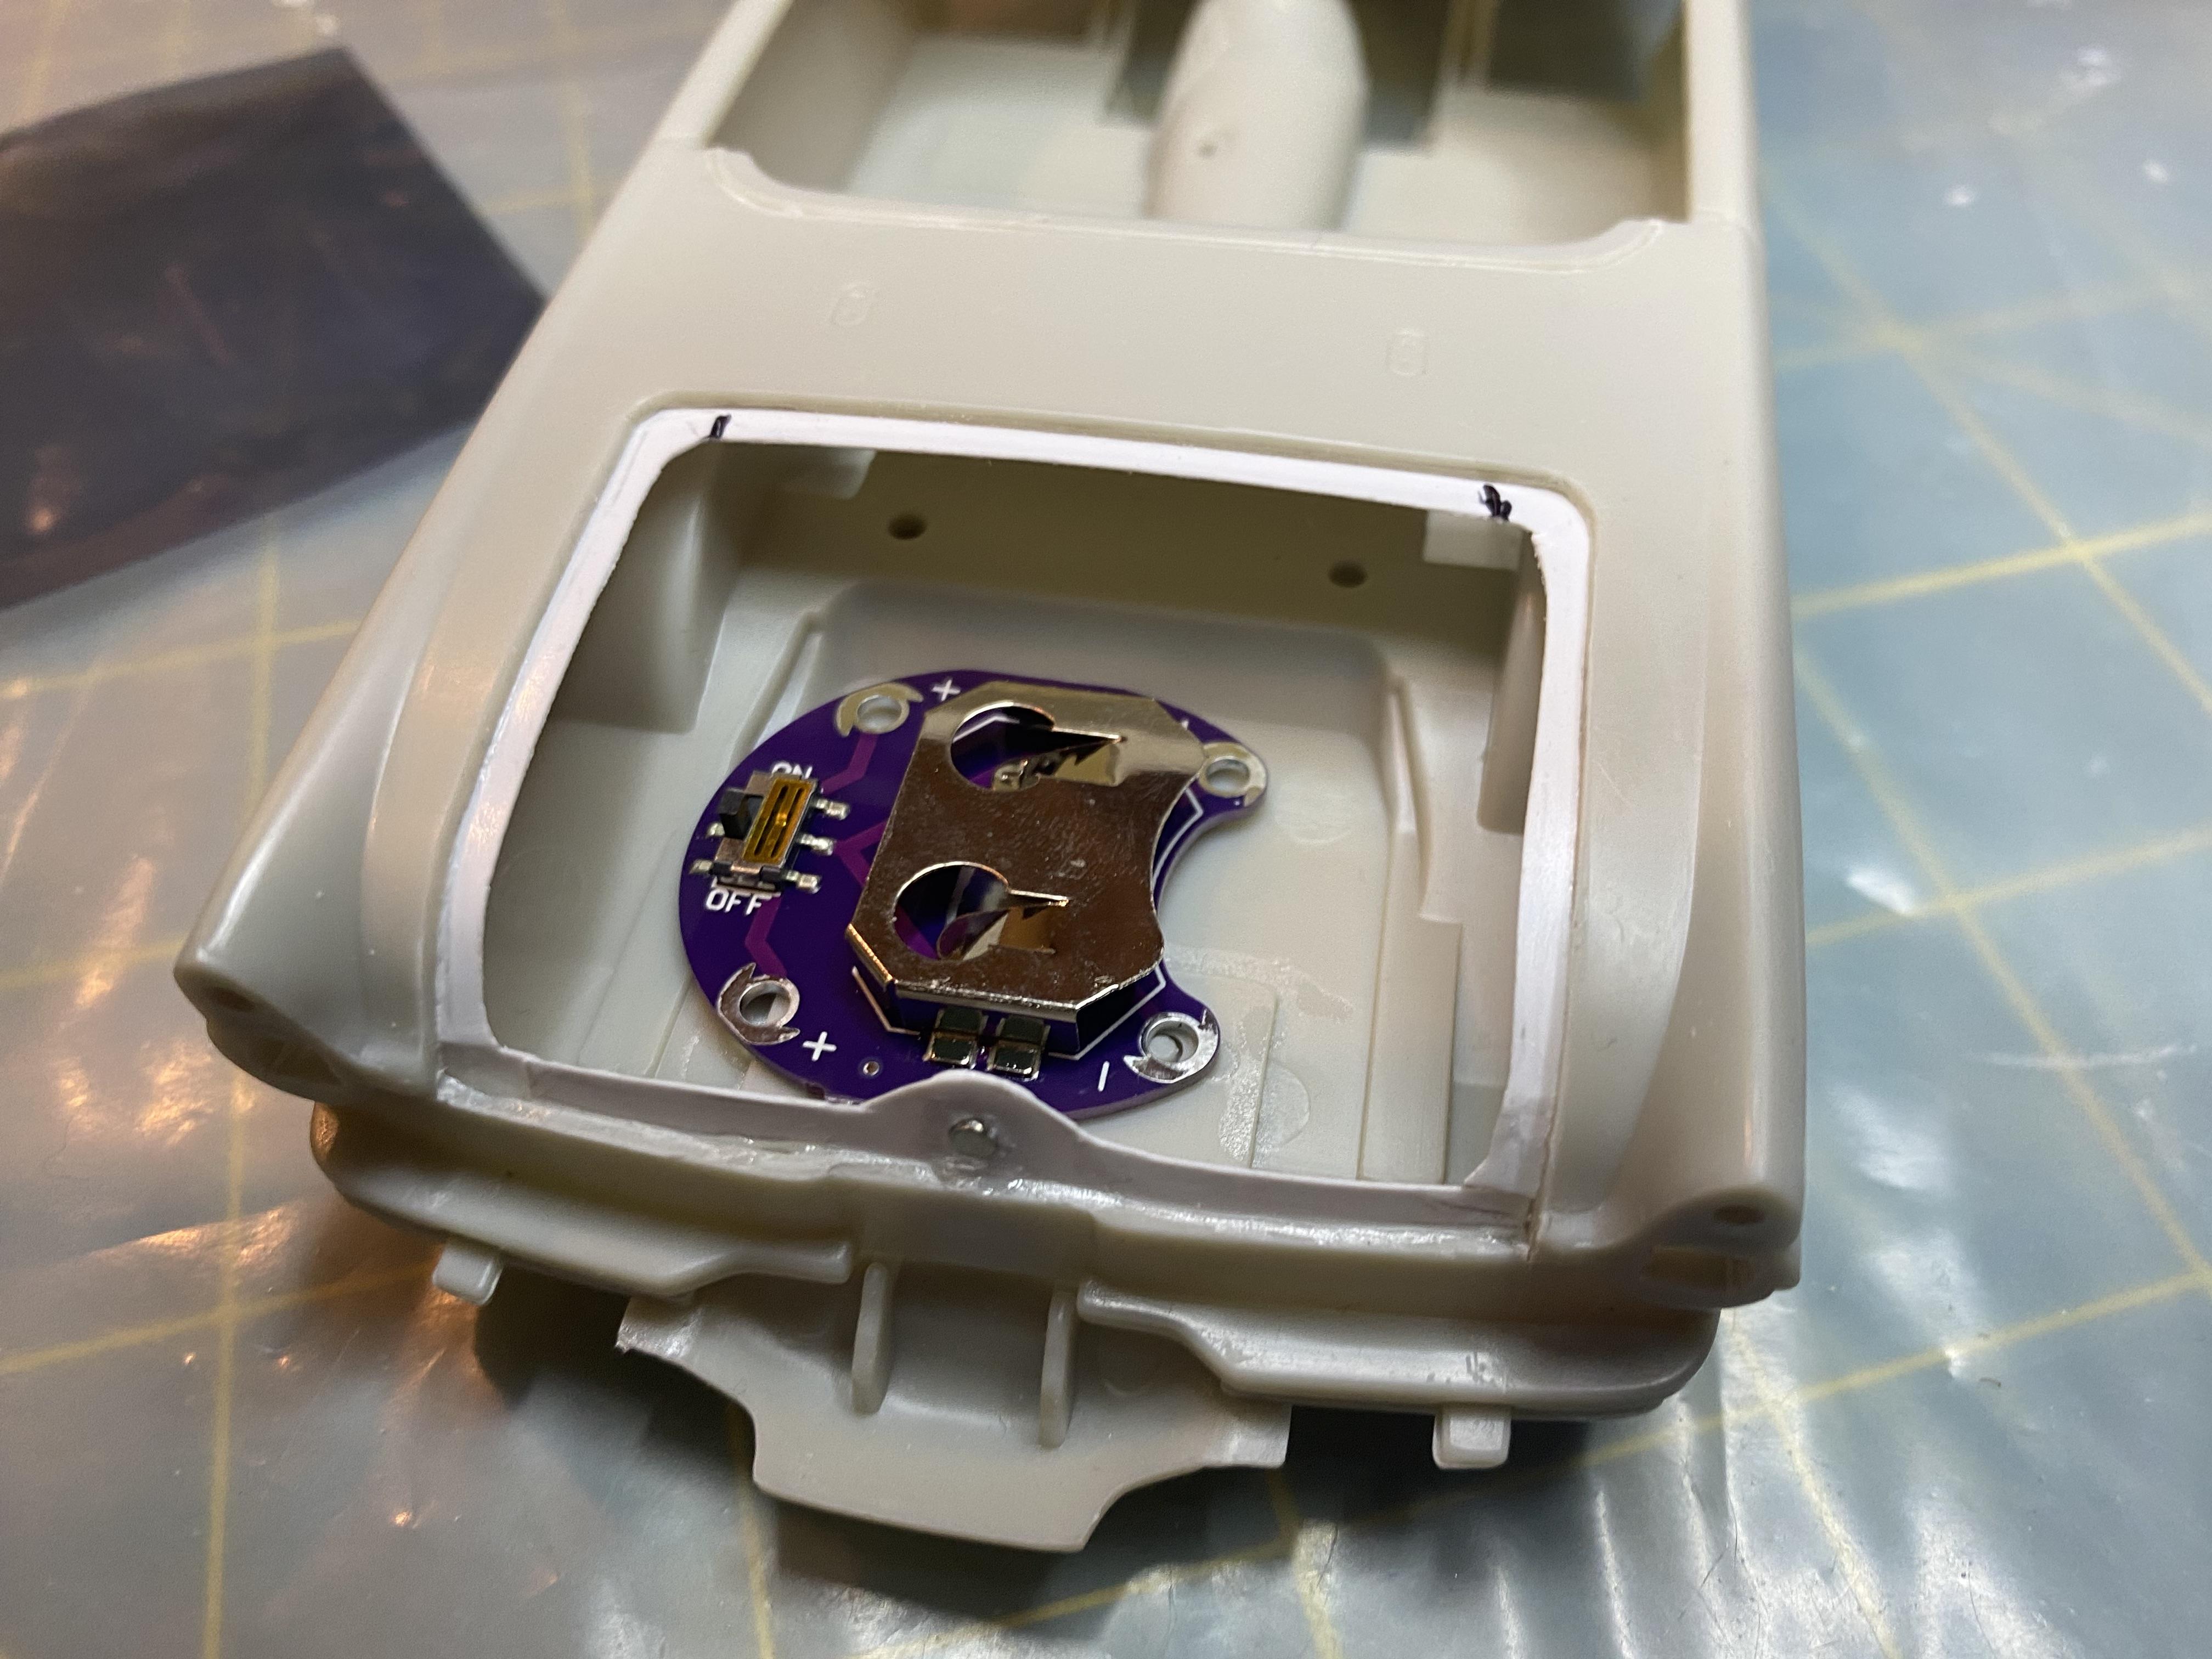
Today I white glue mocked up the chassis and interior parts to create the LED wiring harness. fit the battery and created a cover that will look like the trunk floor. The trunk will look a little shallow, but that is the best I can do to hide it.
-
You won’t regret it. It is really seeming to be a very nice kit. Moving along a lot faster than normal.
-
Thank You! Just a little more to do and into paint. Next will be the LED wiring harness. Thank You! Interesting, I didn’t know that. It was a Toss up between Fiesta Red and Peacock Blue. I have decided I am going to convert one of these into a 1955 so I have a set of all three baby birds. That one is going to be 1955 Thunderbird blue.
-
Thank You!
-
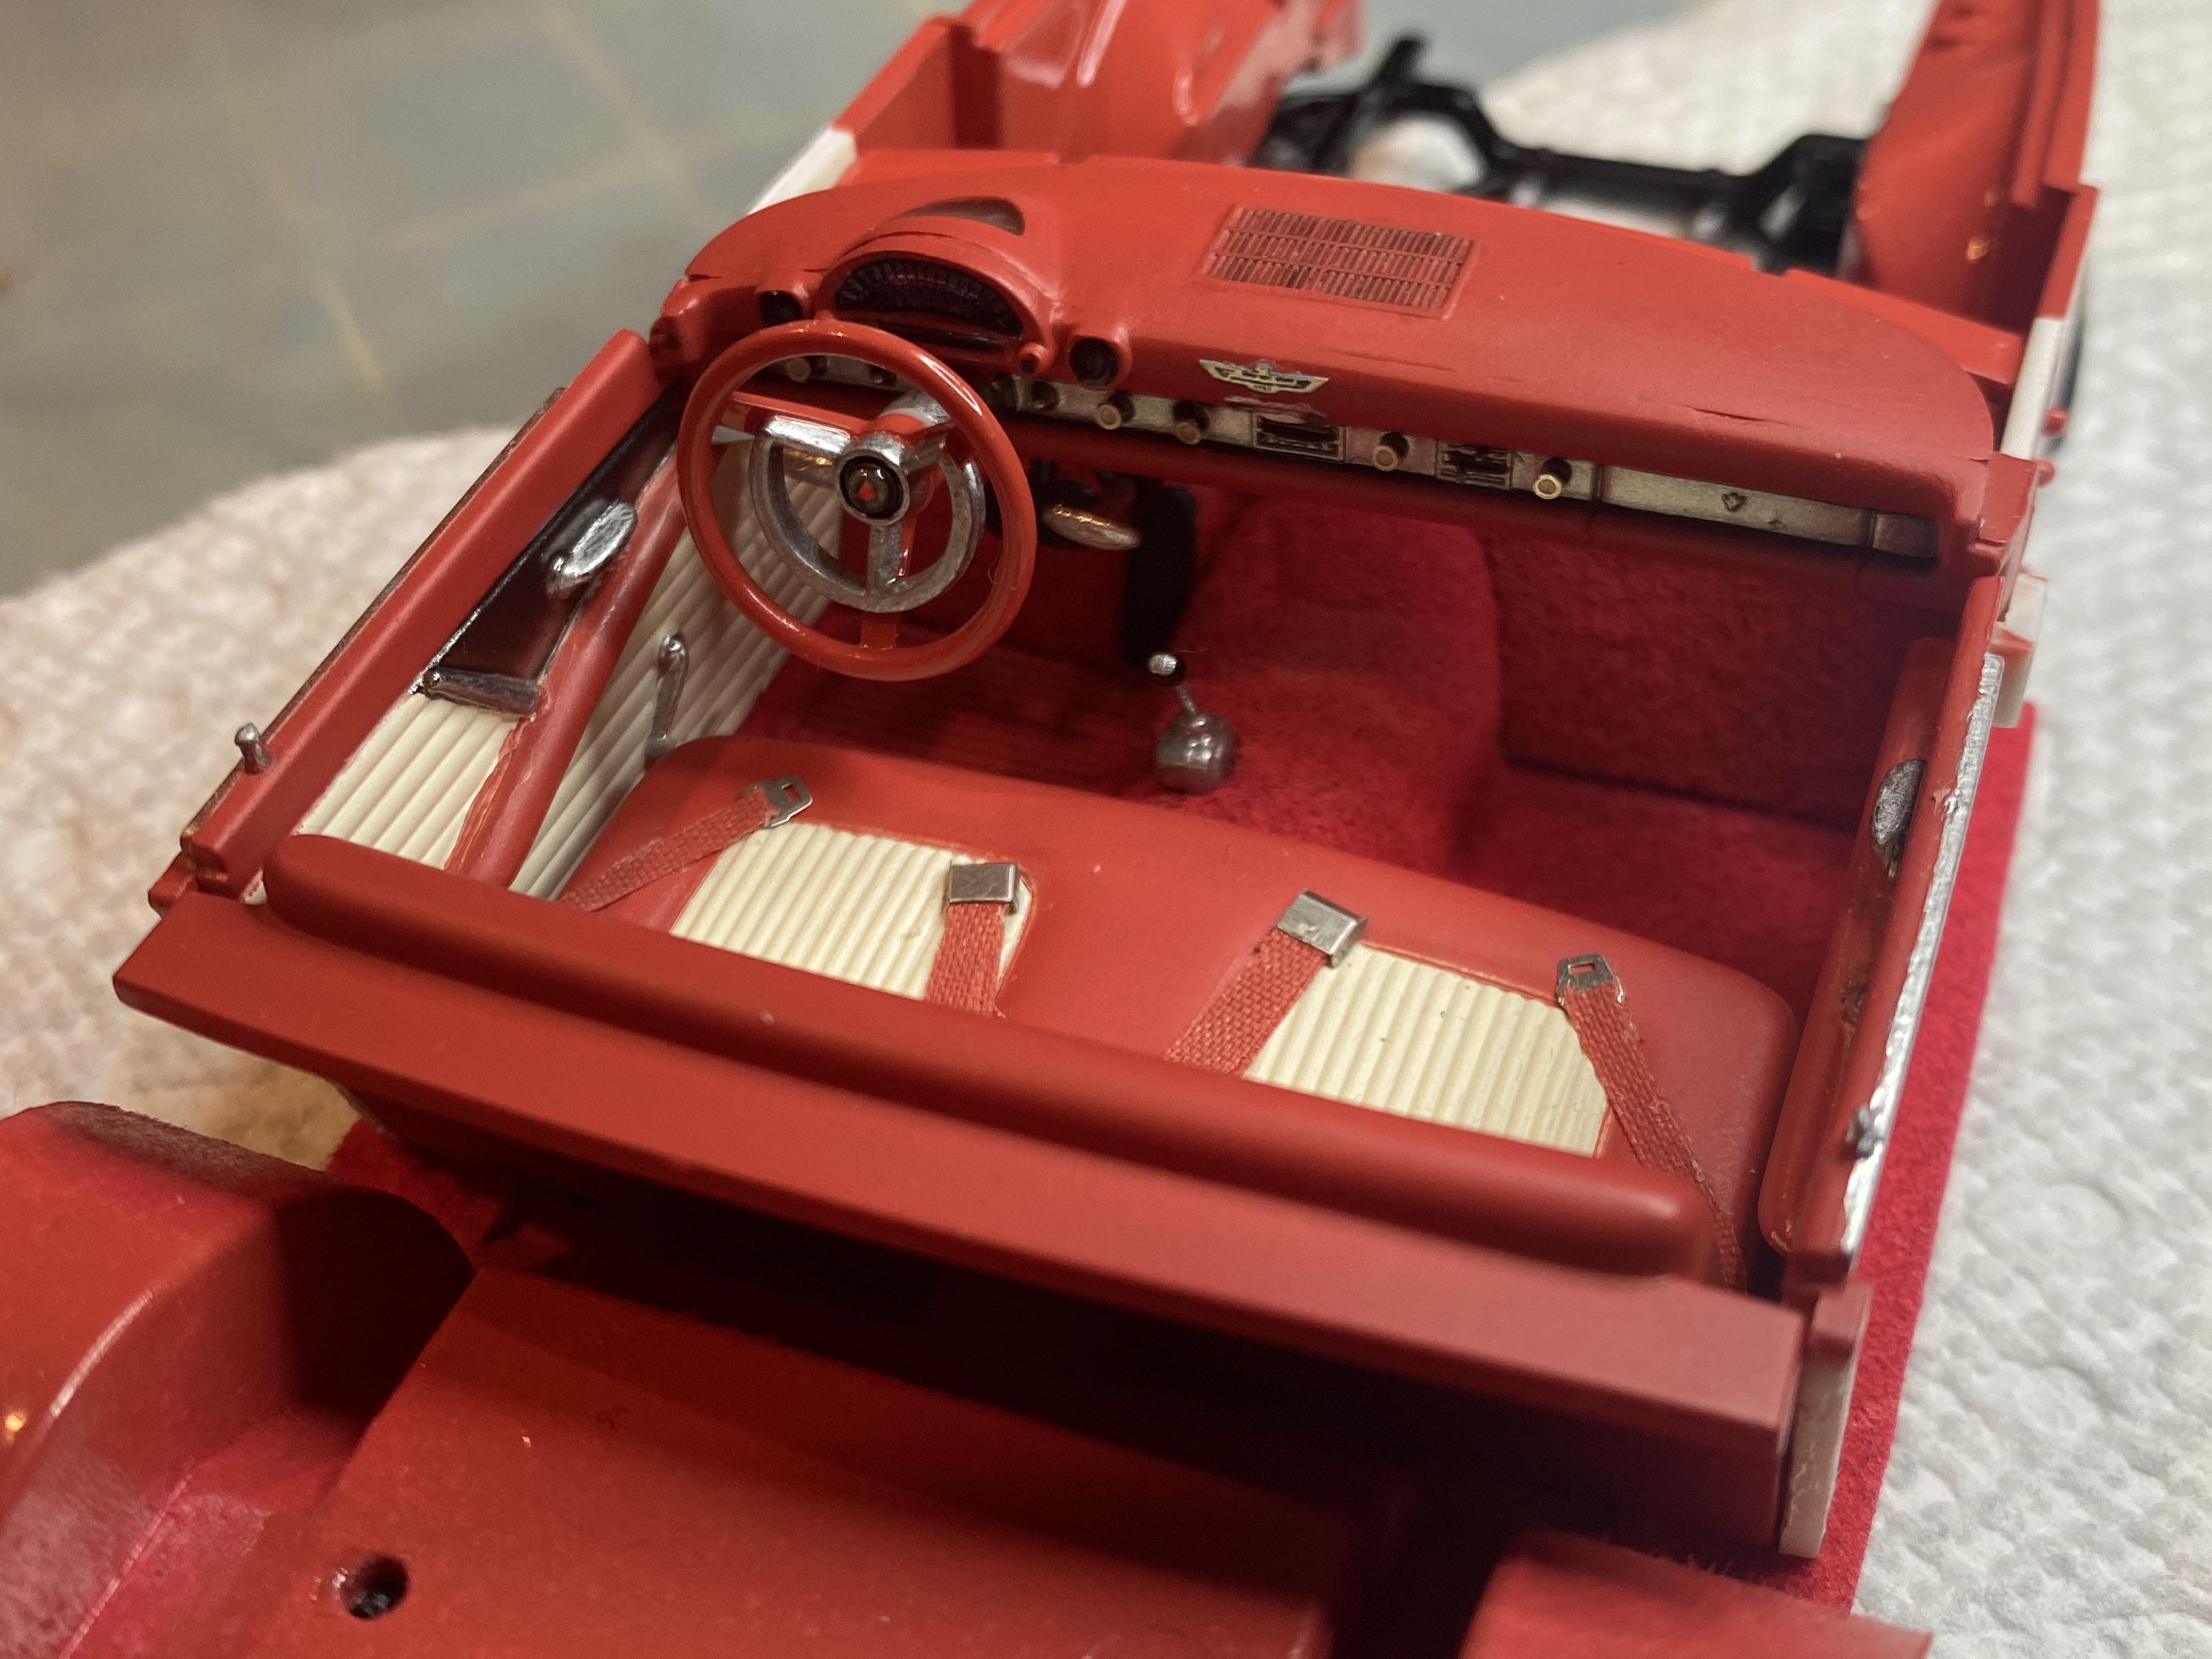
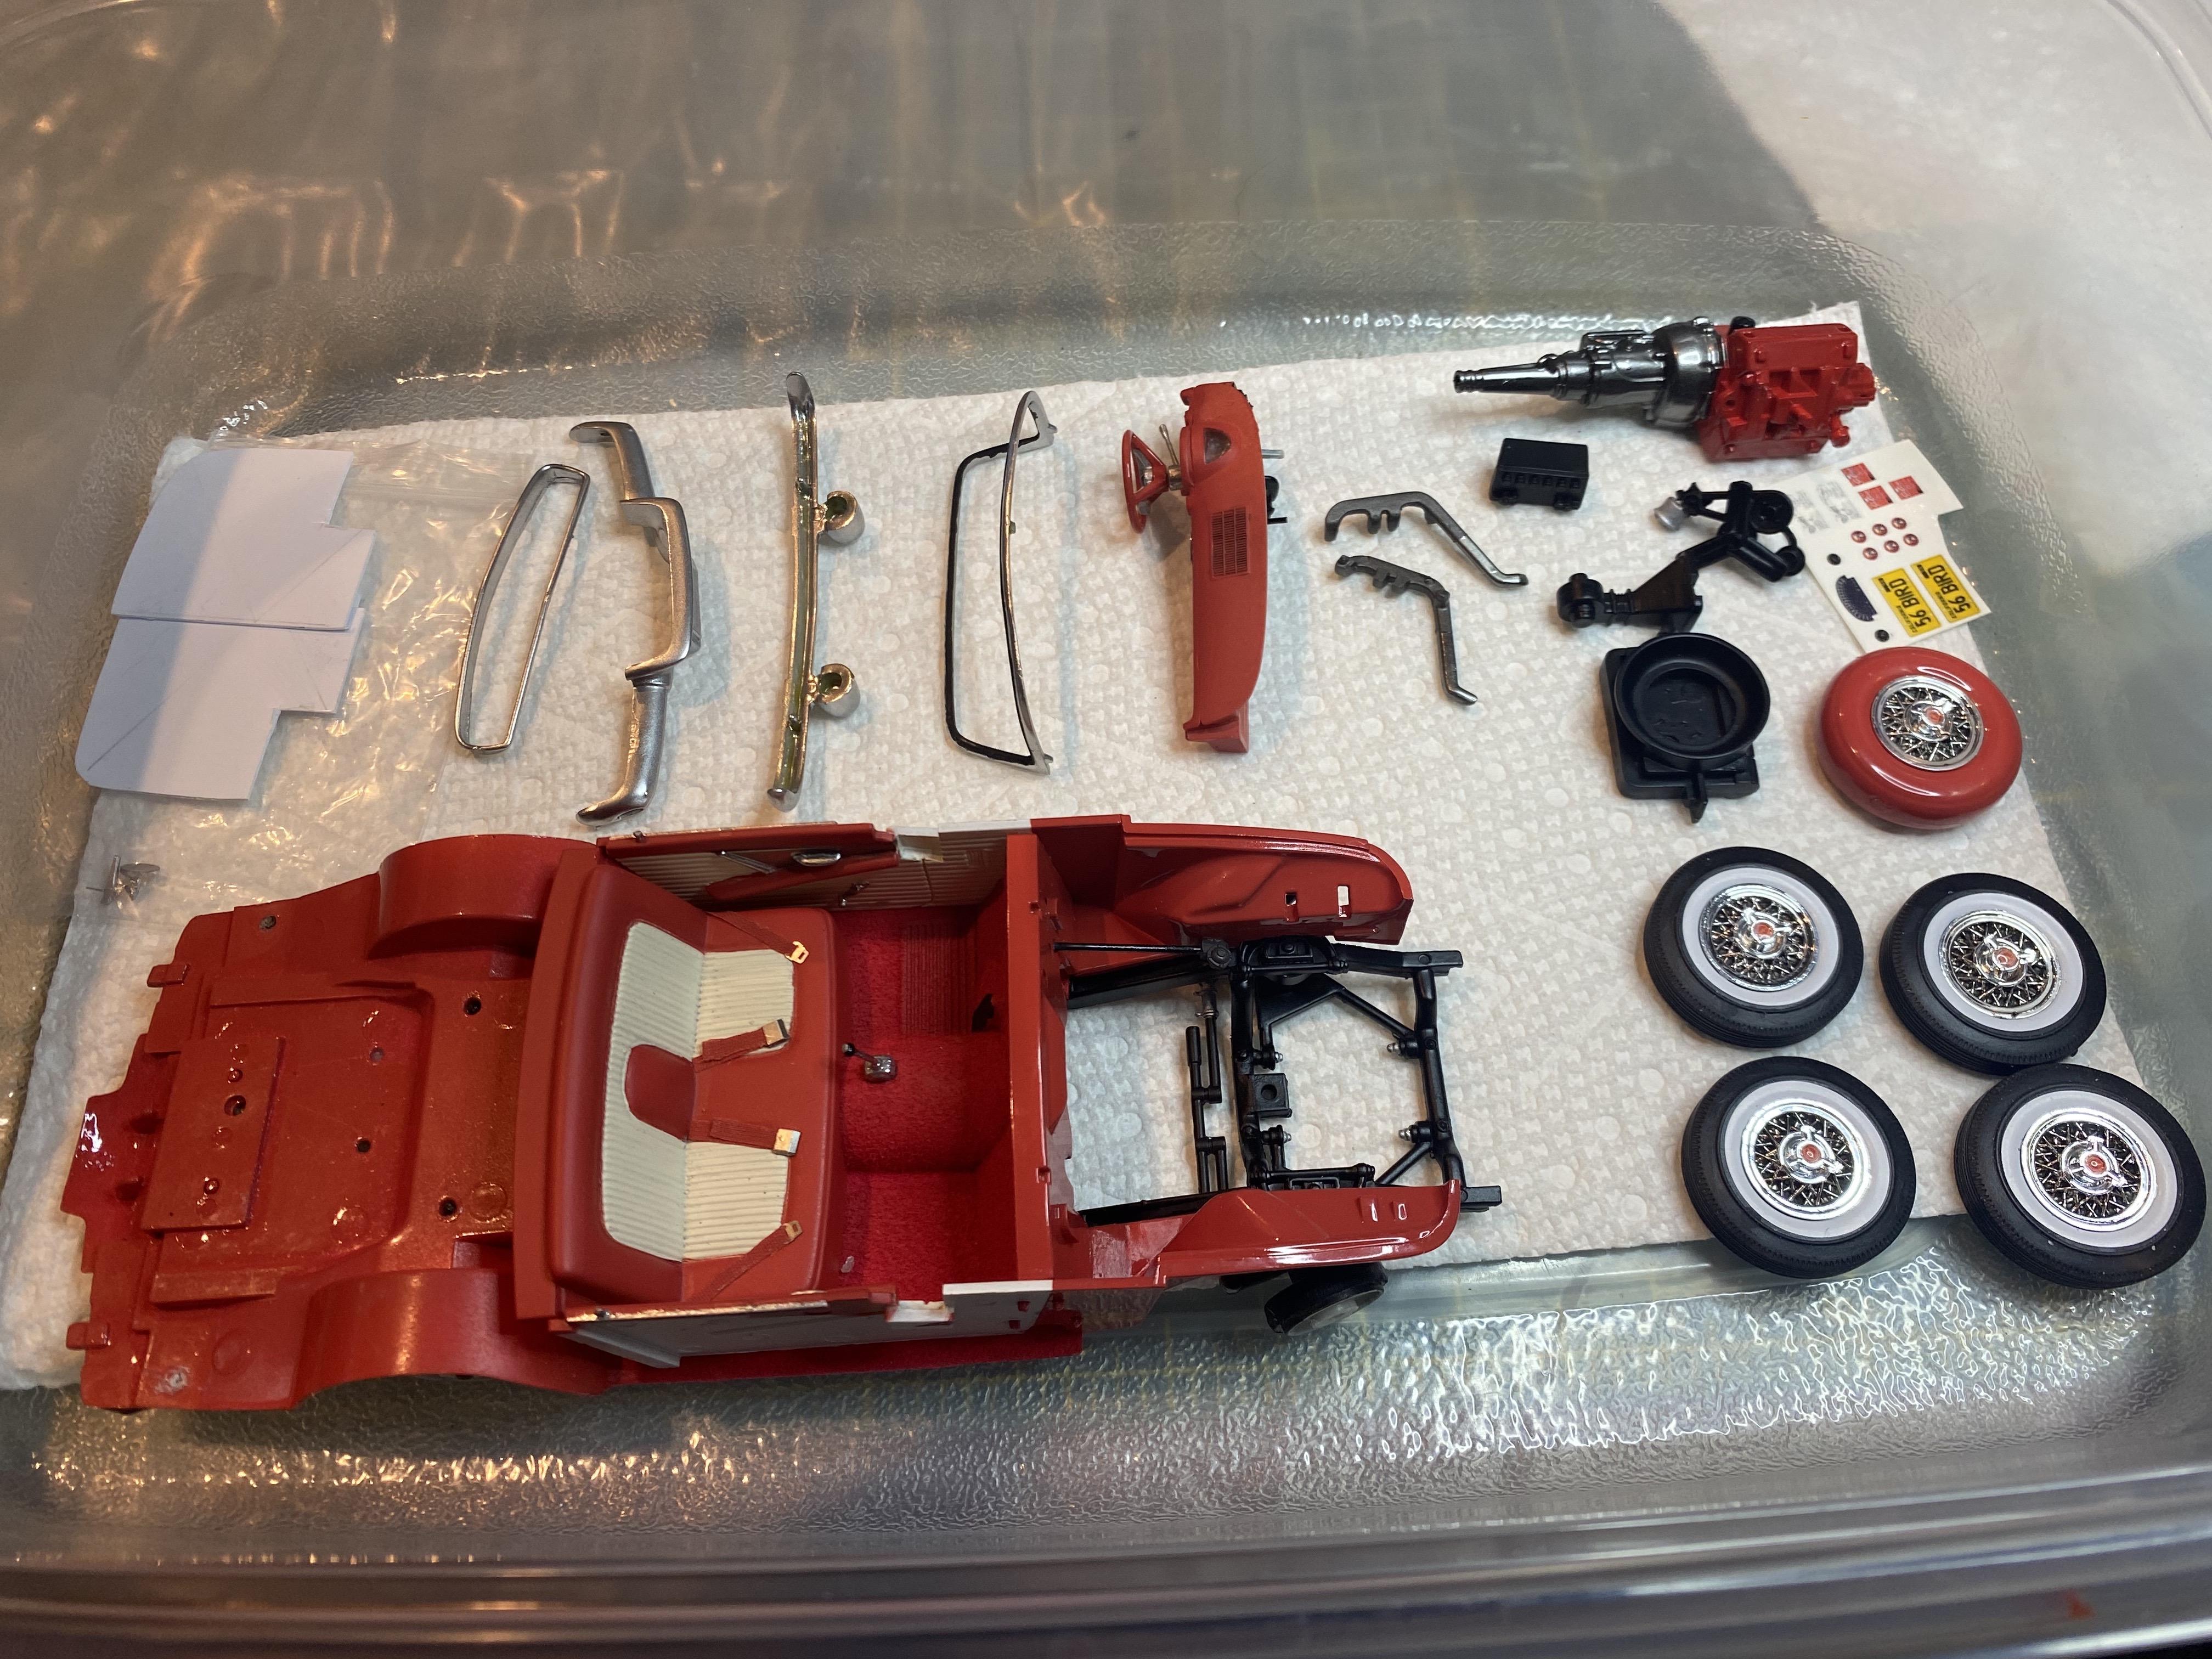
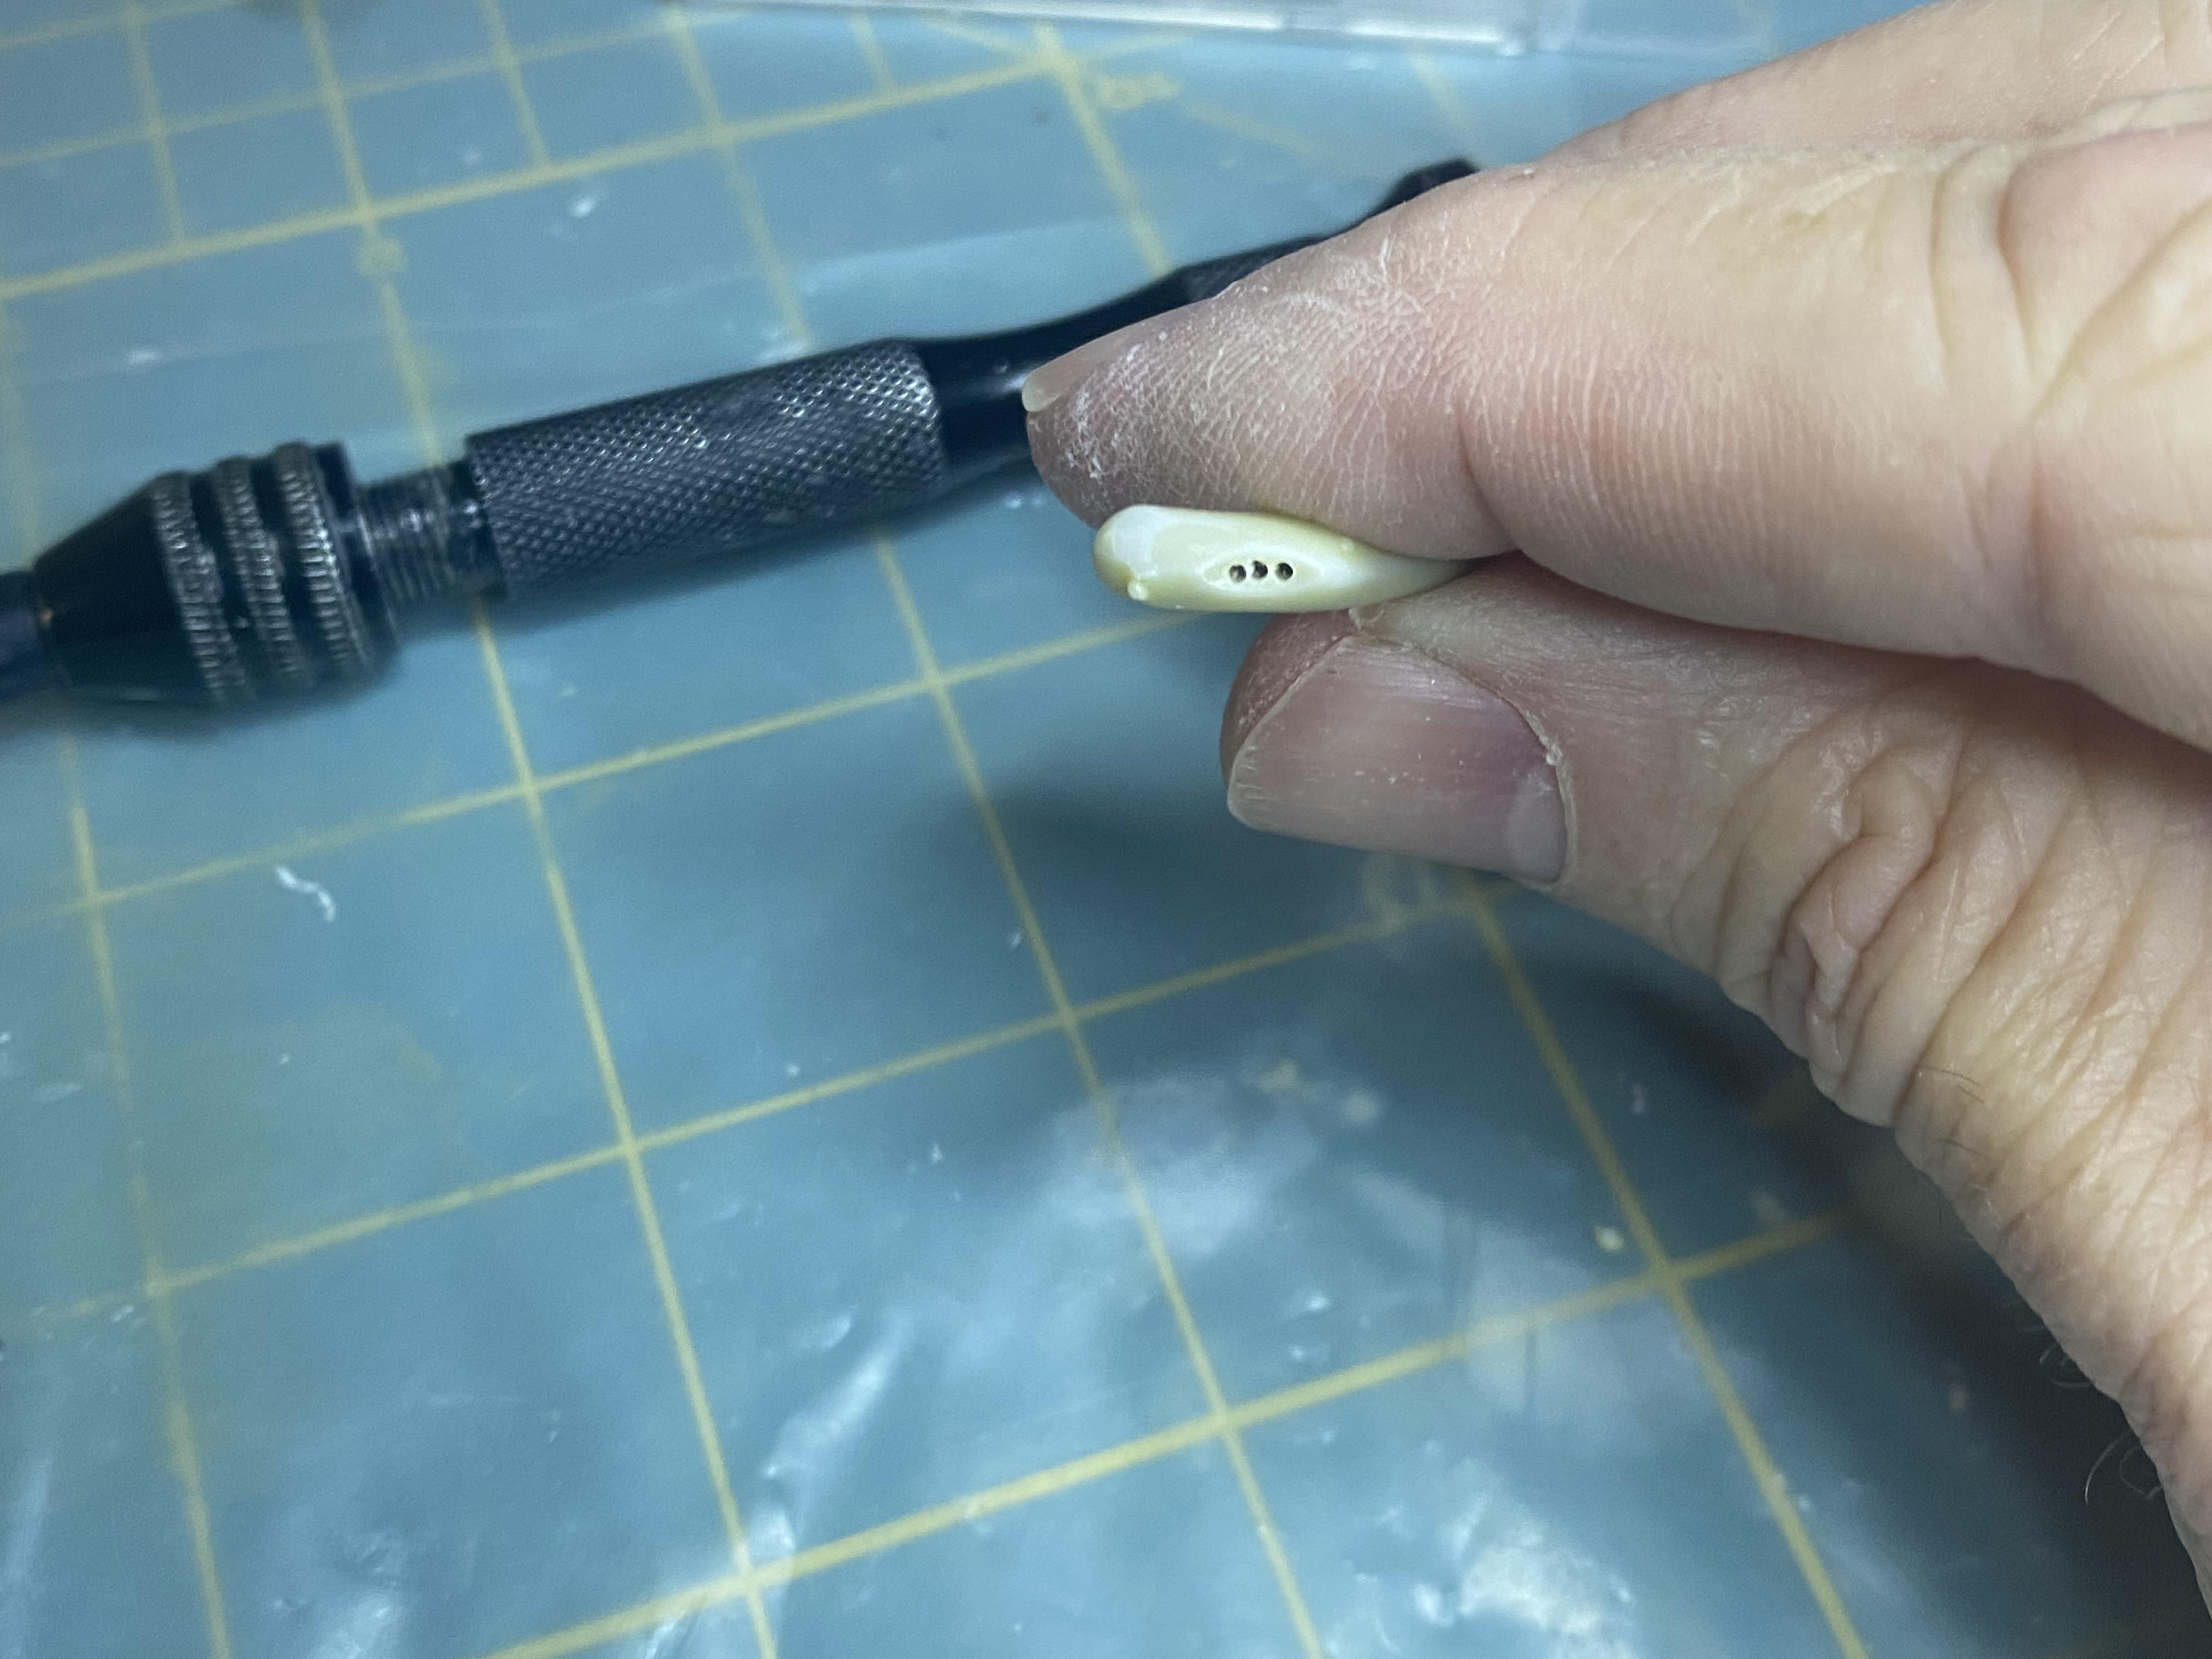
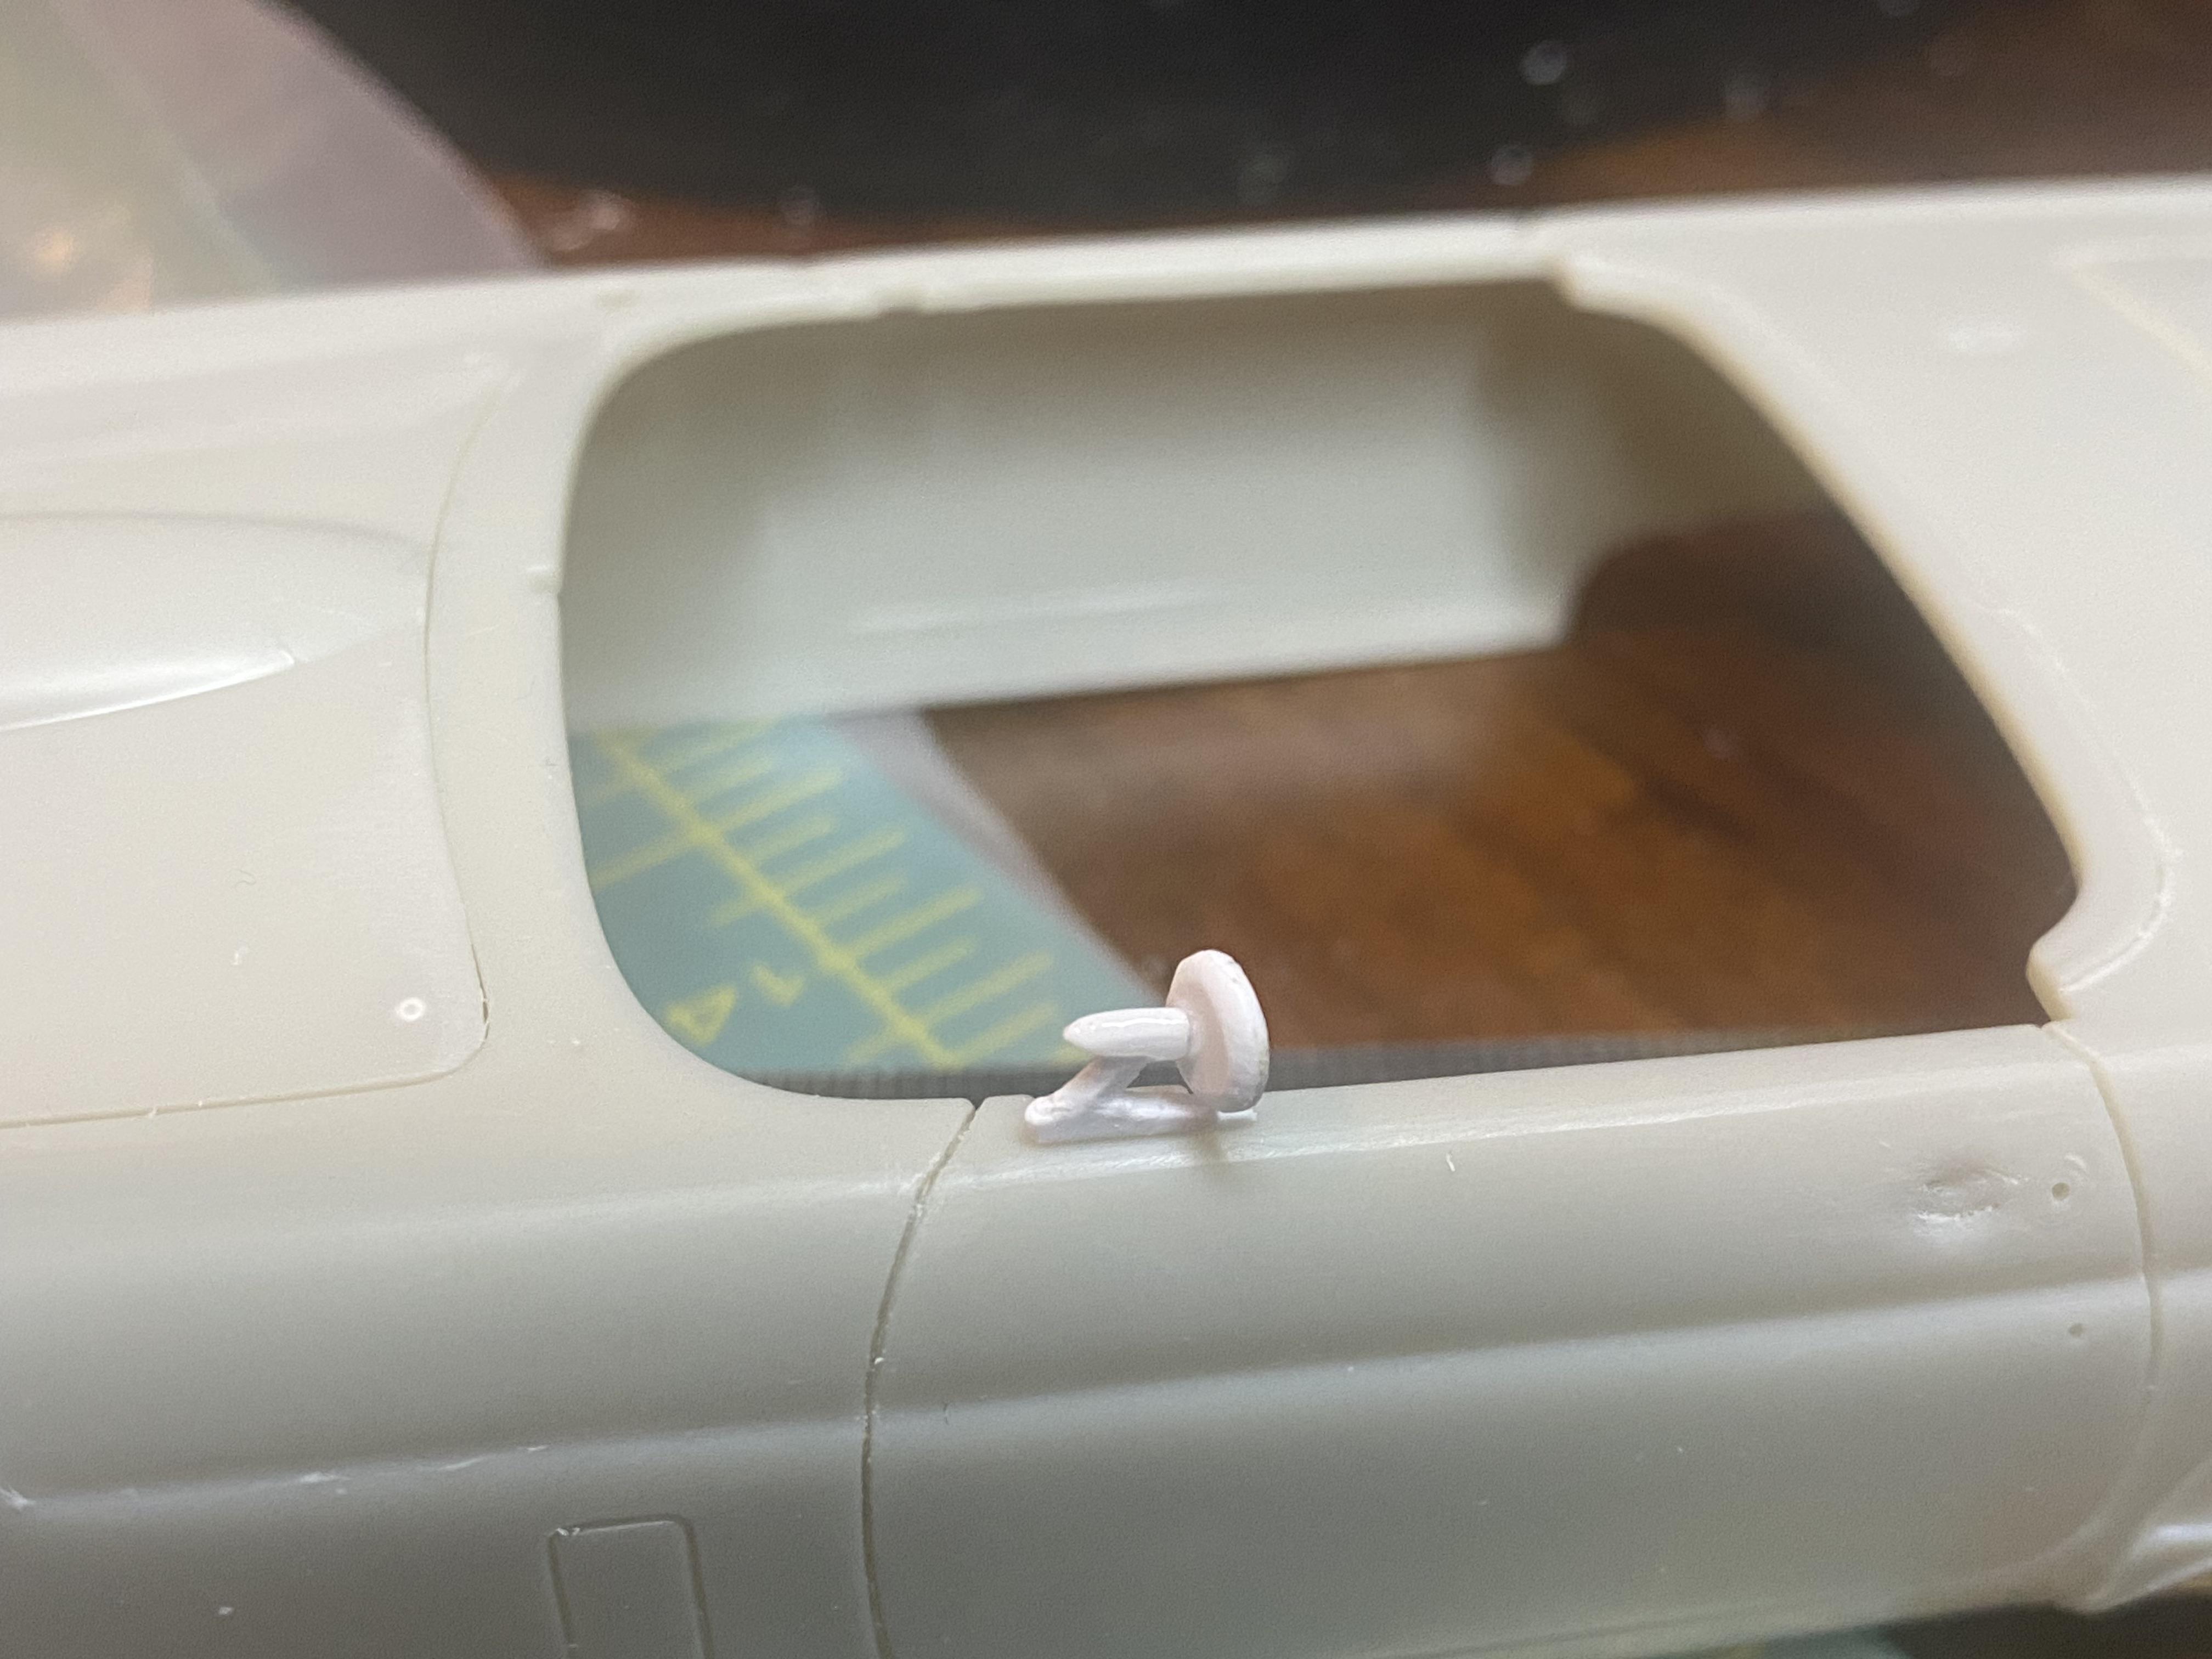
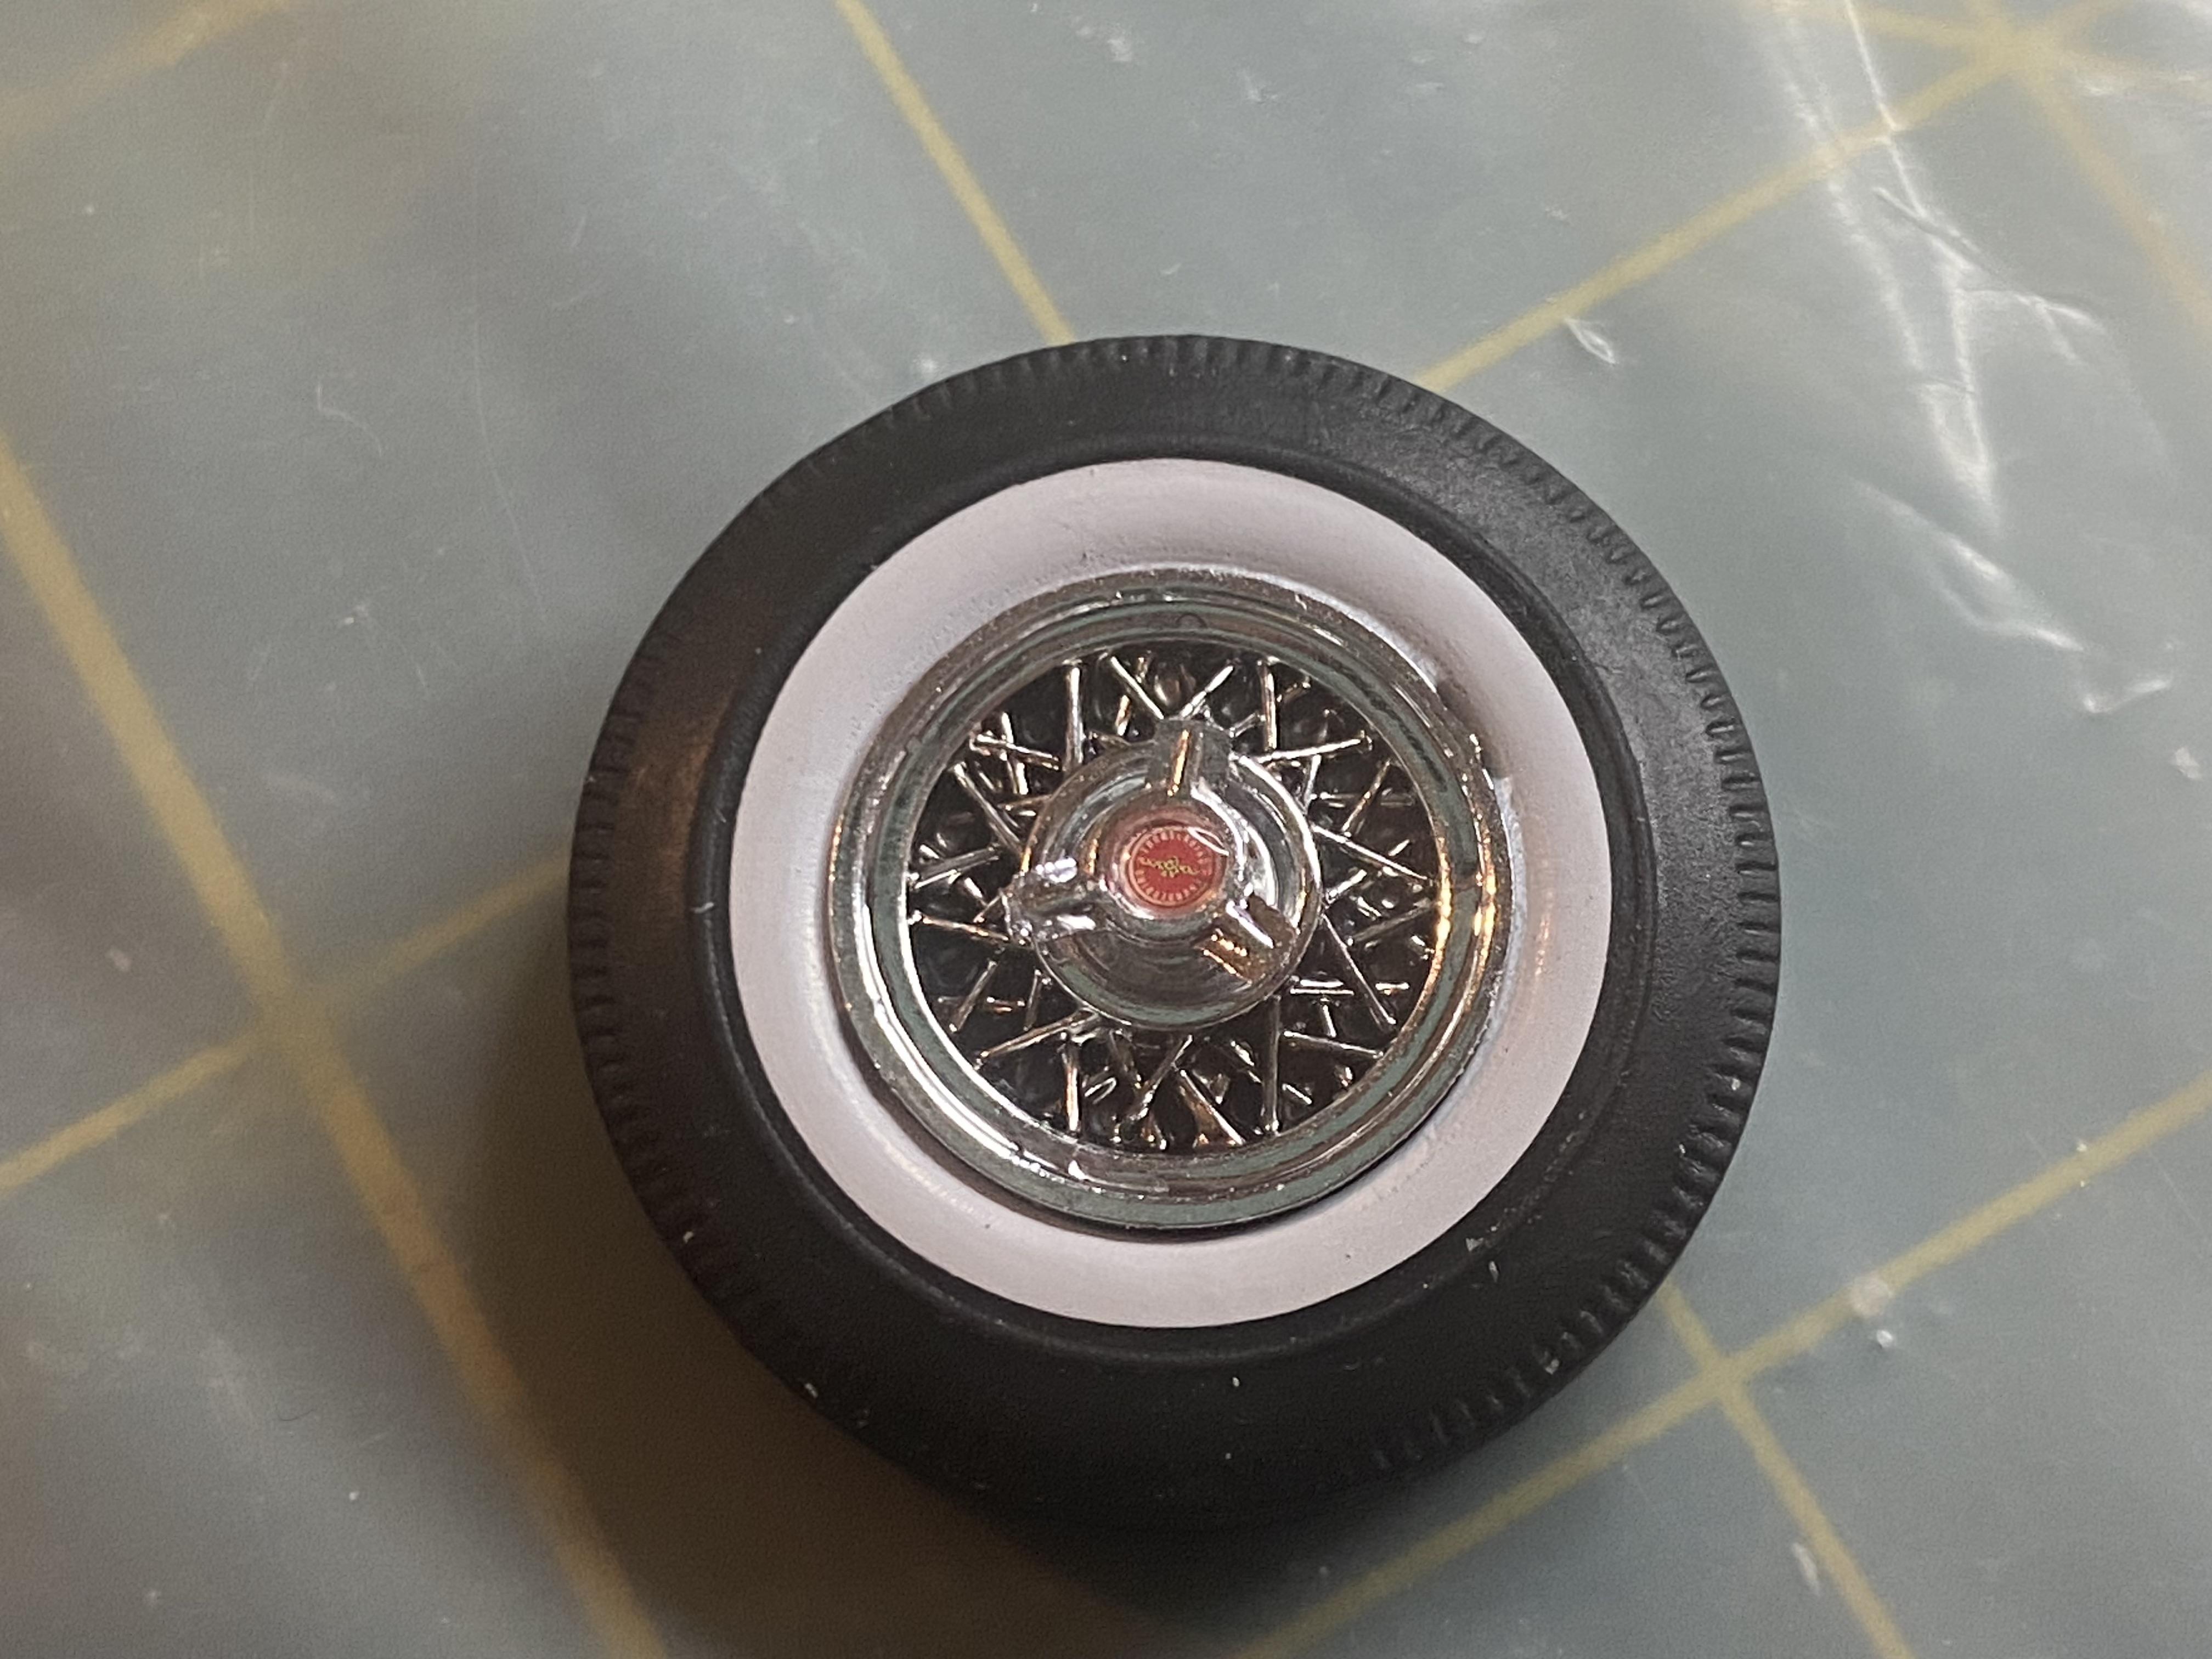
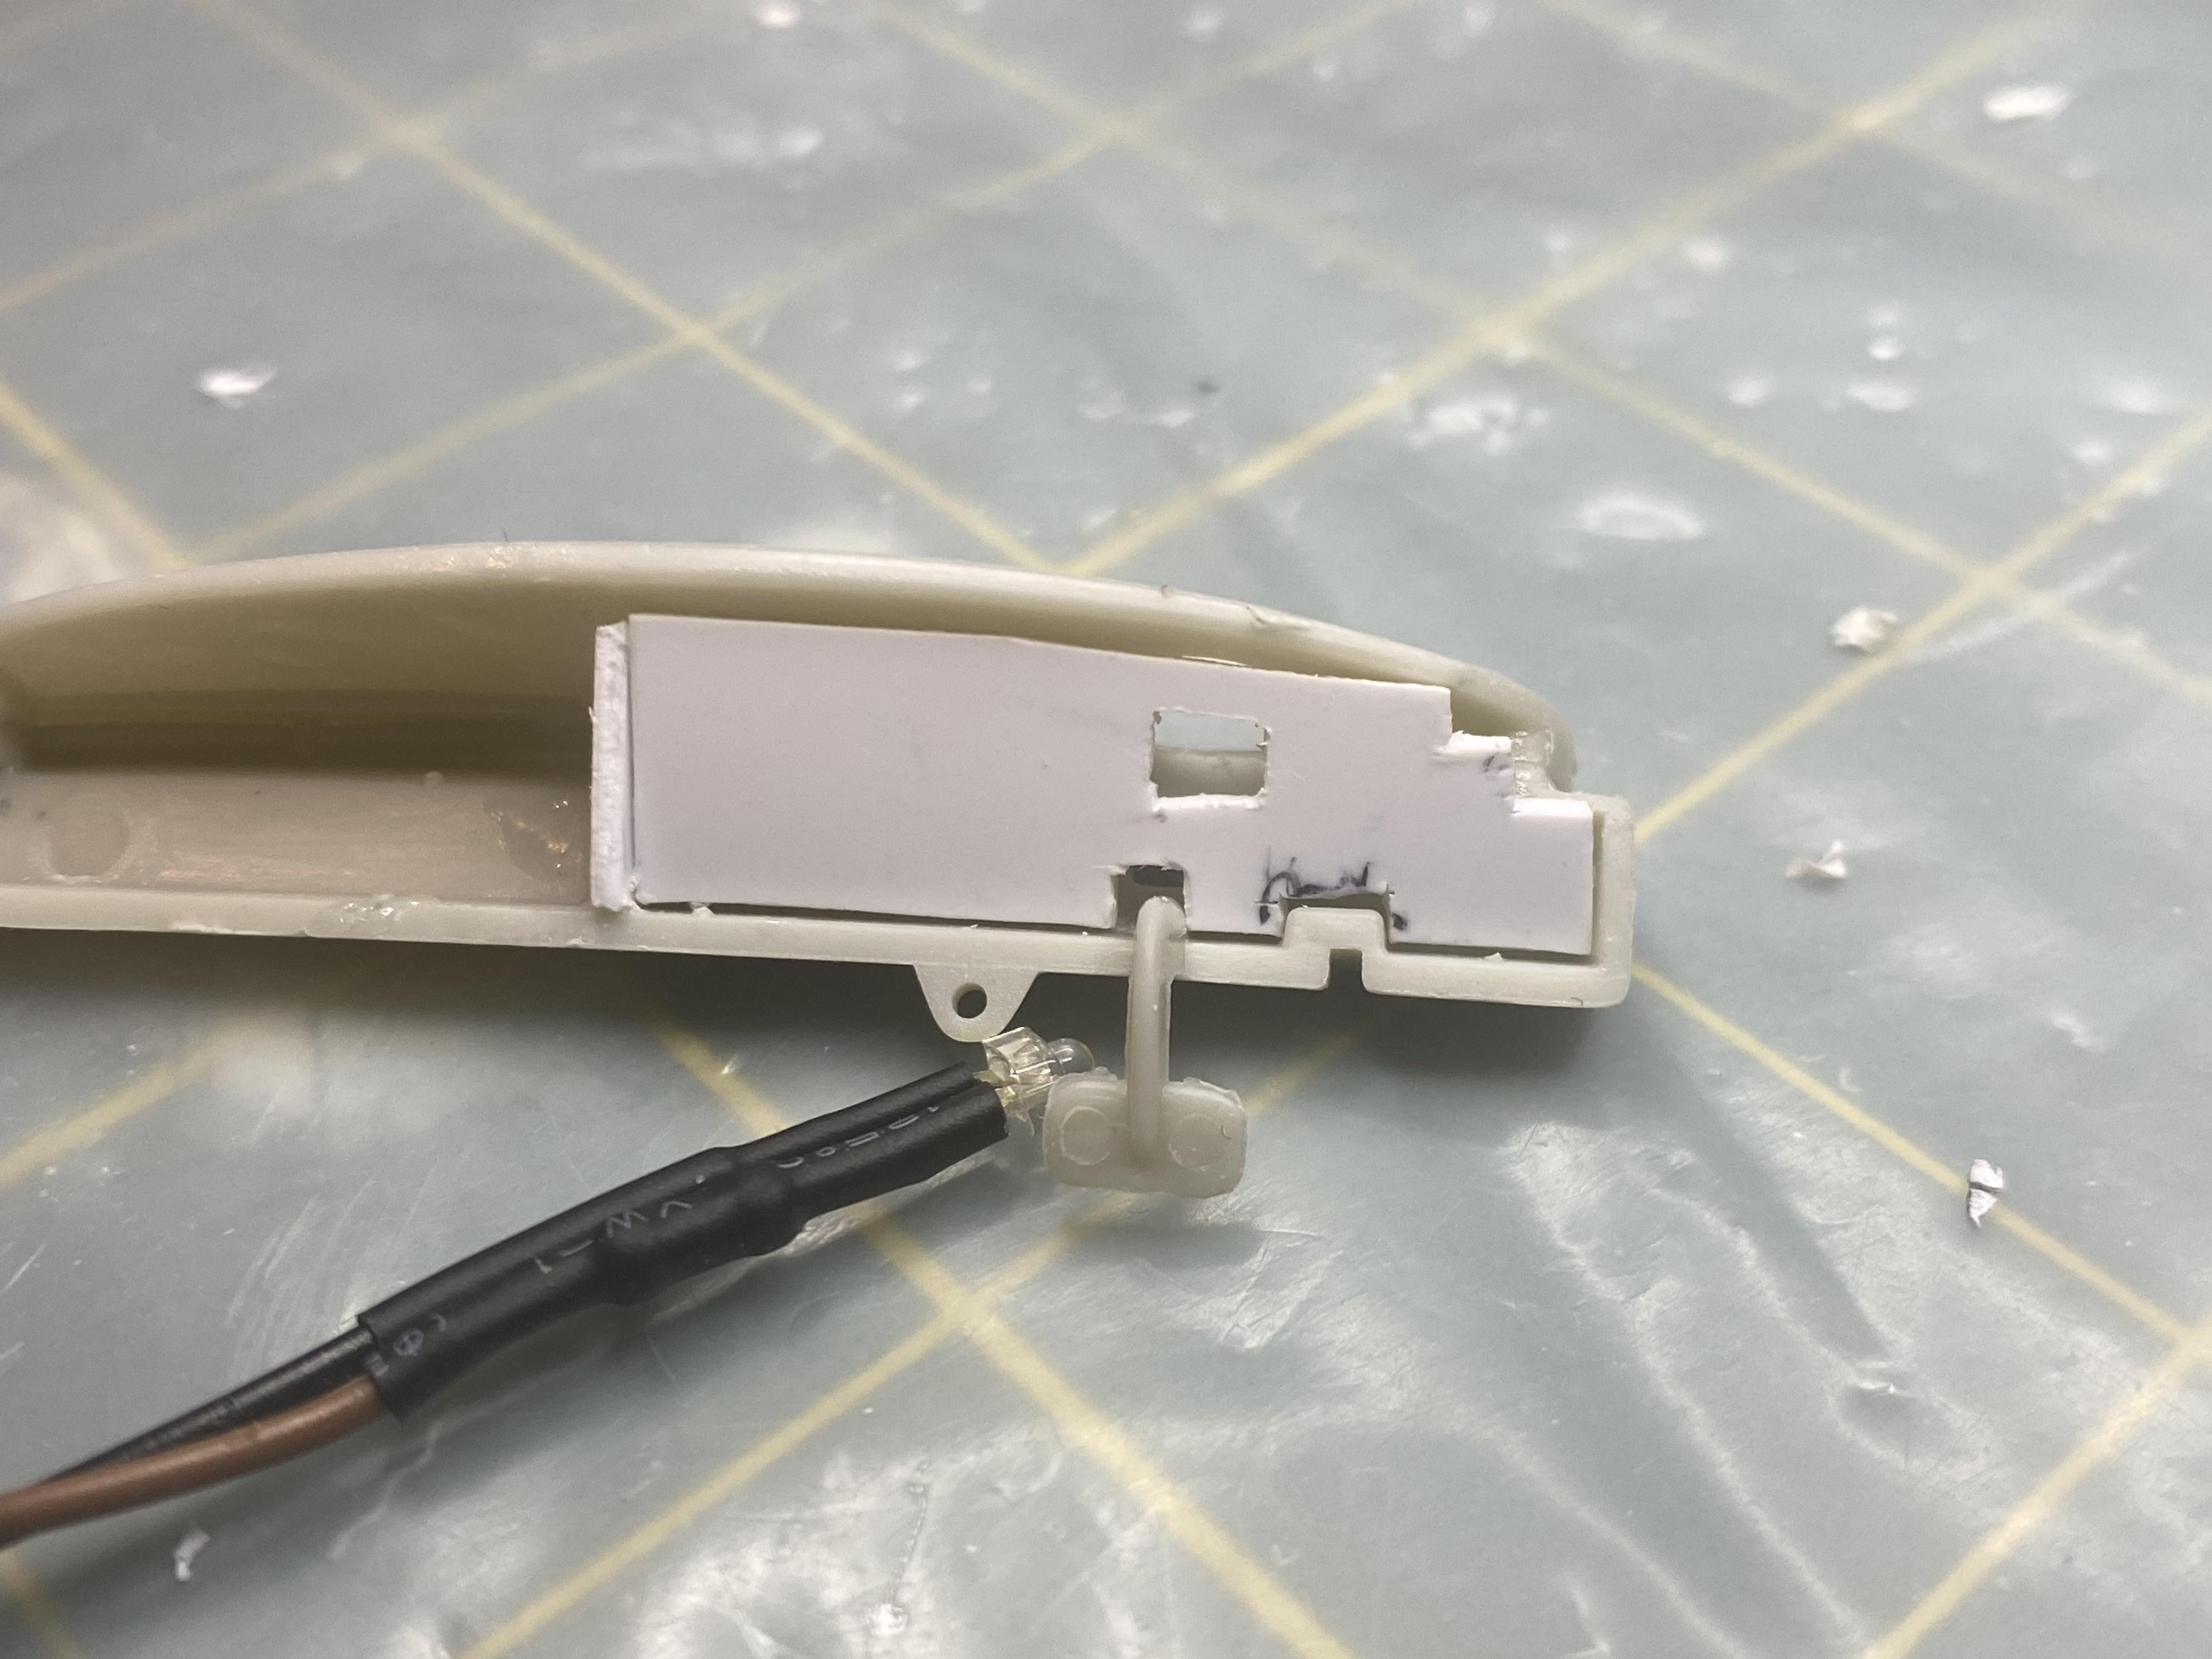
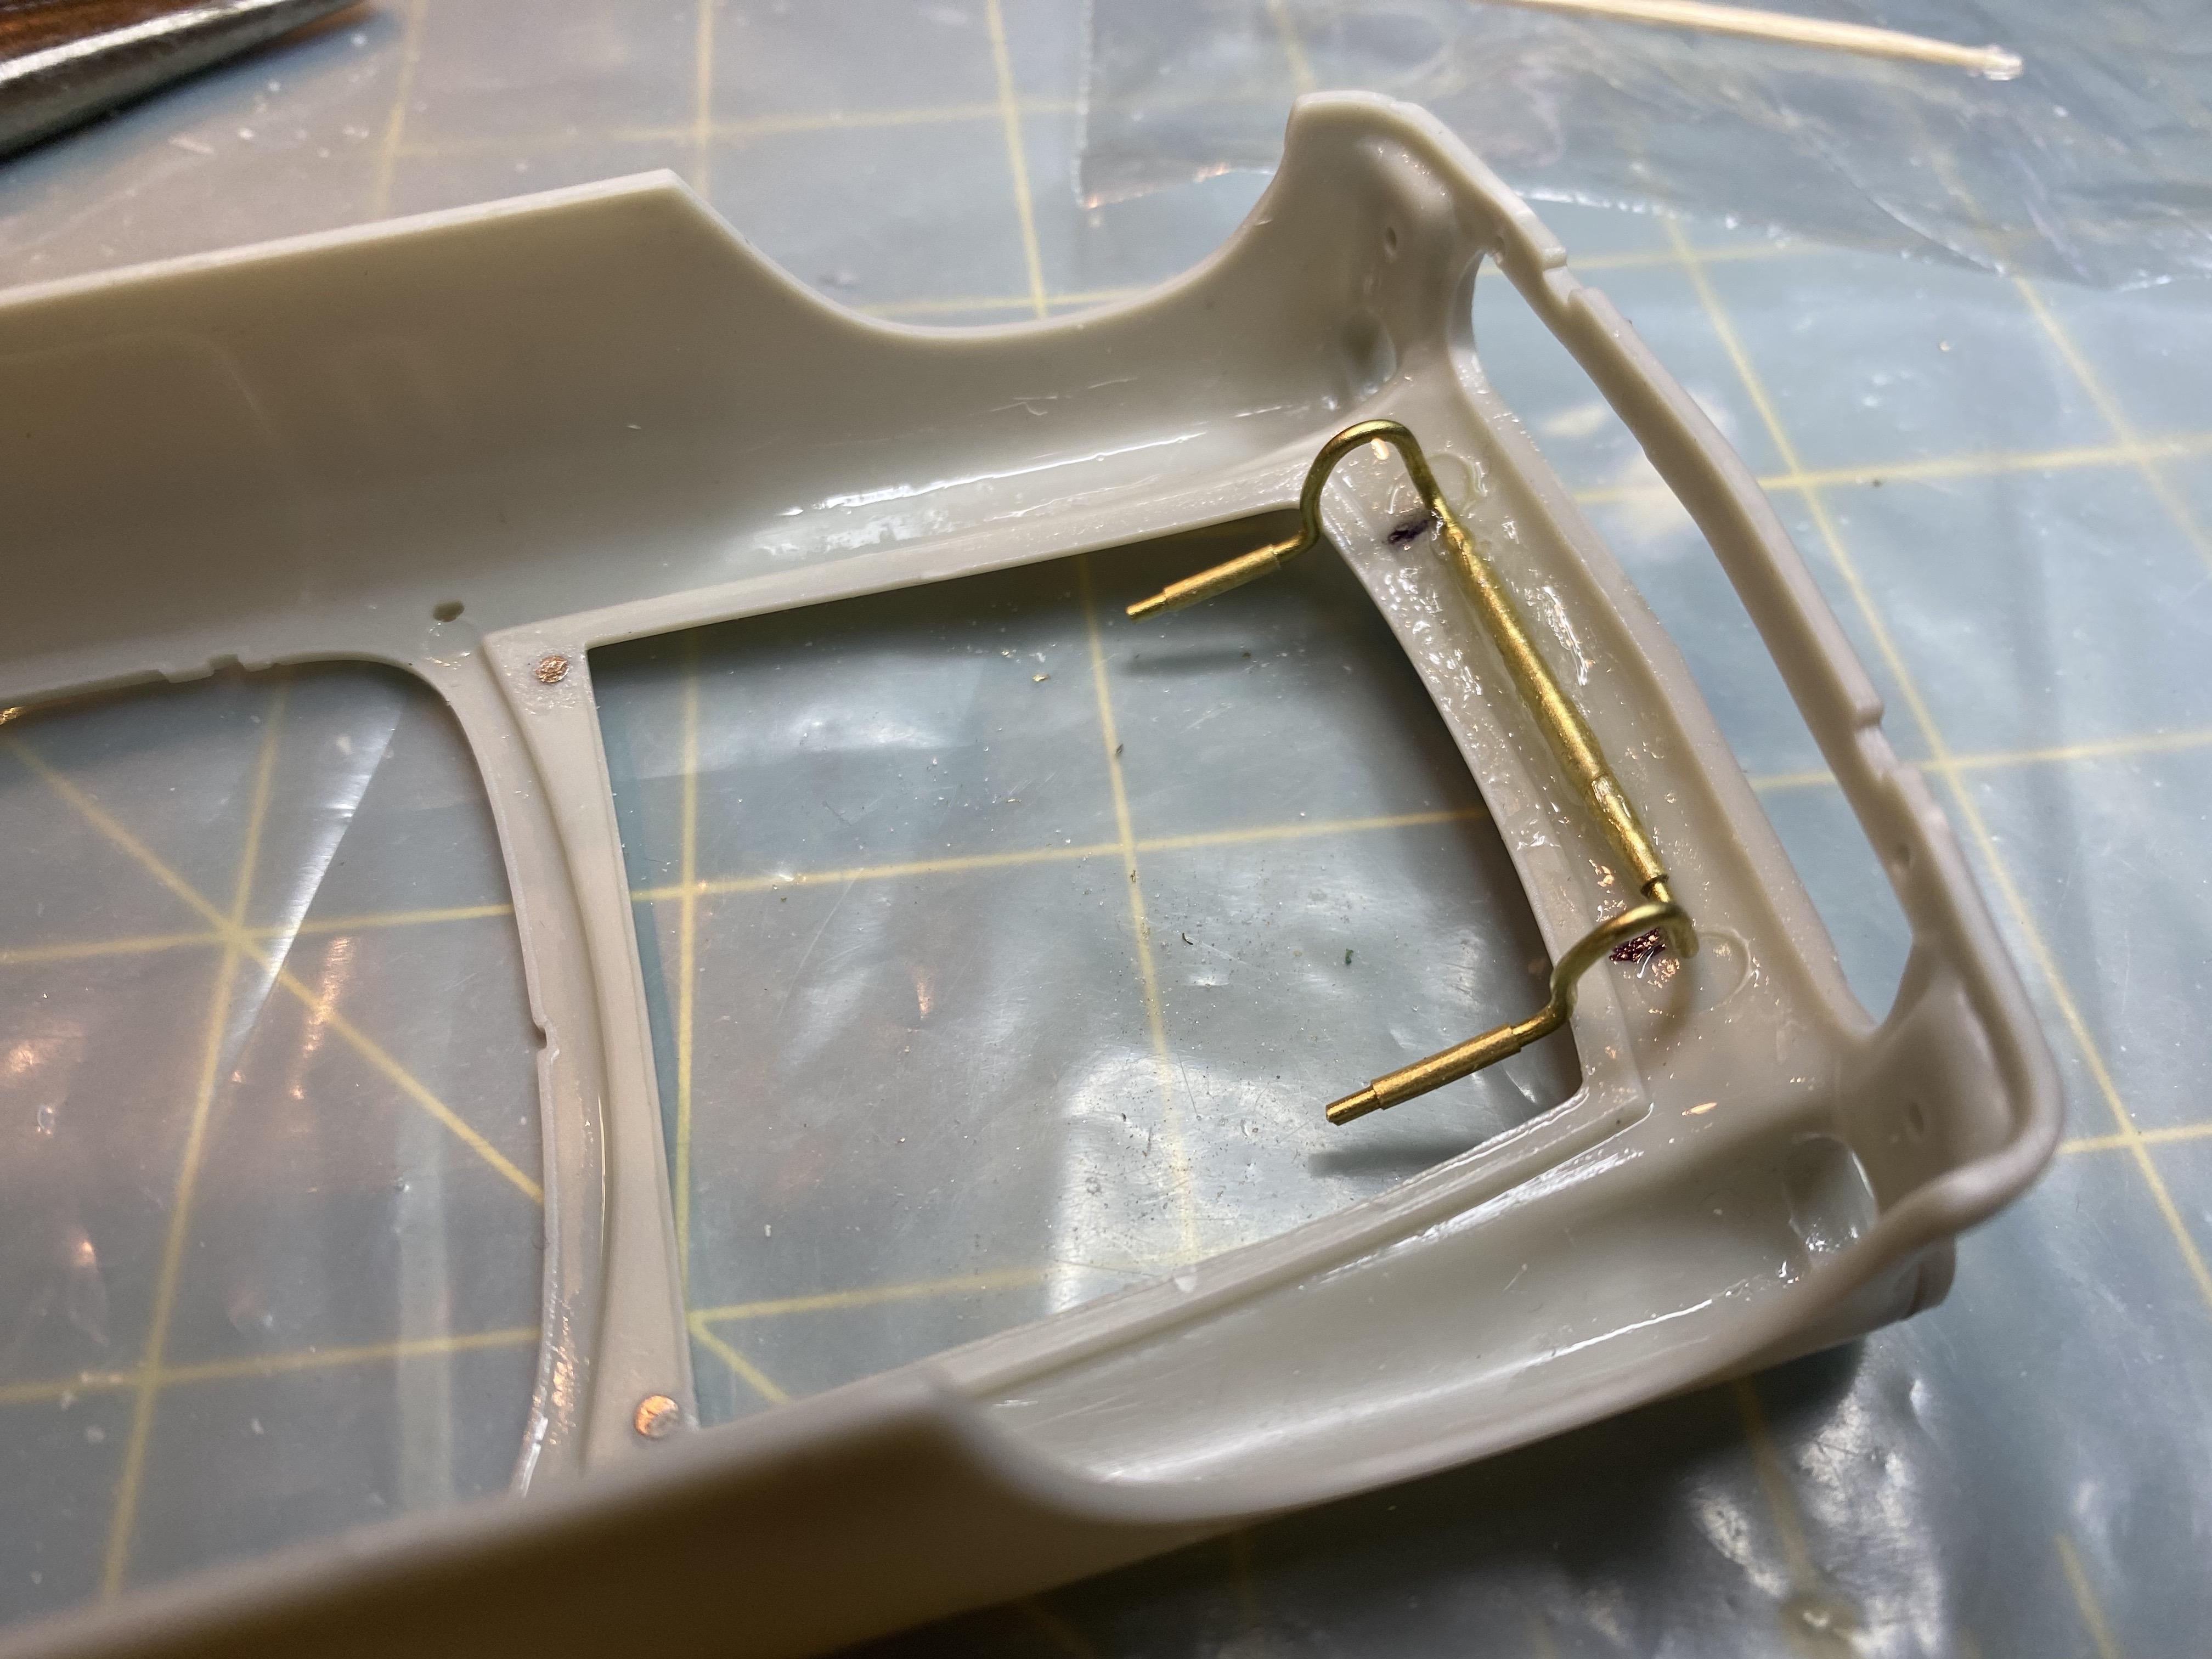
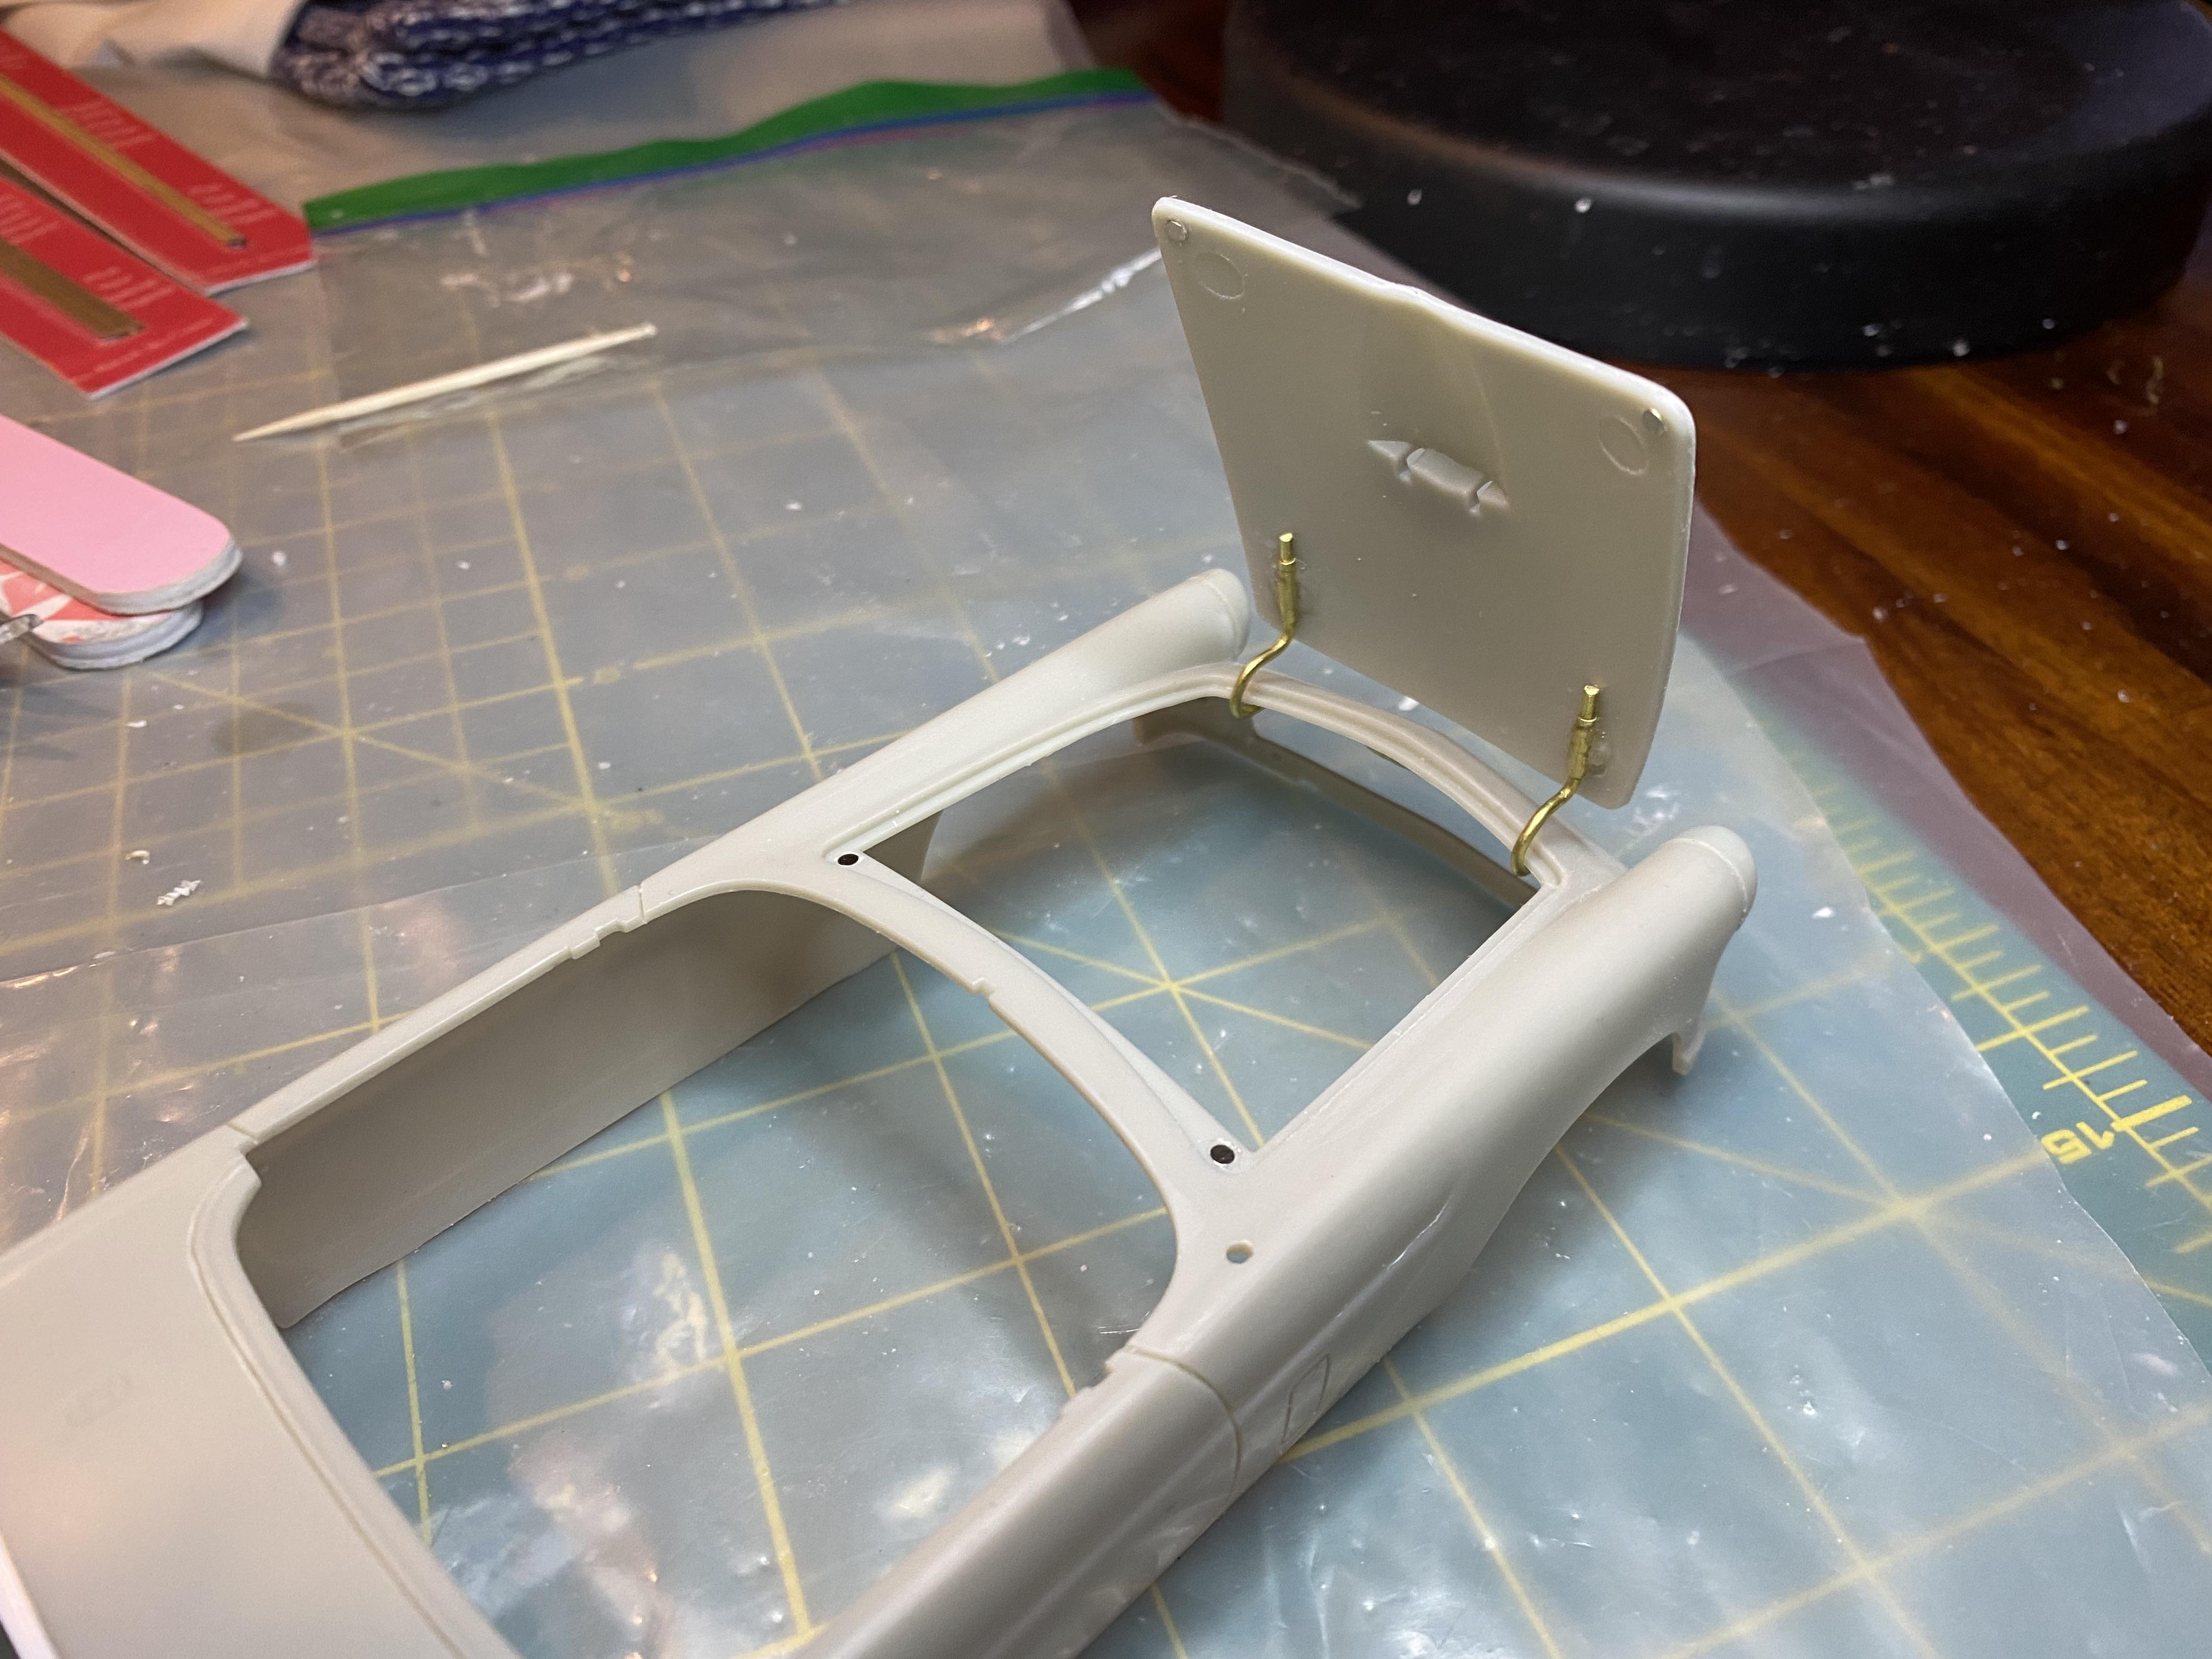
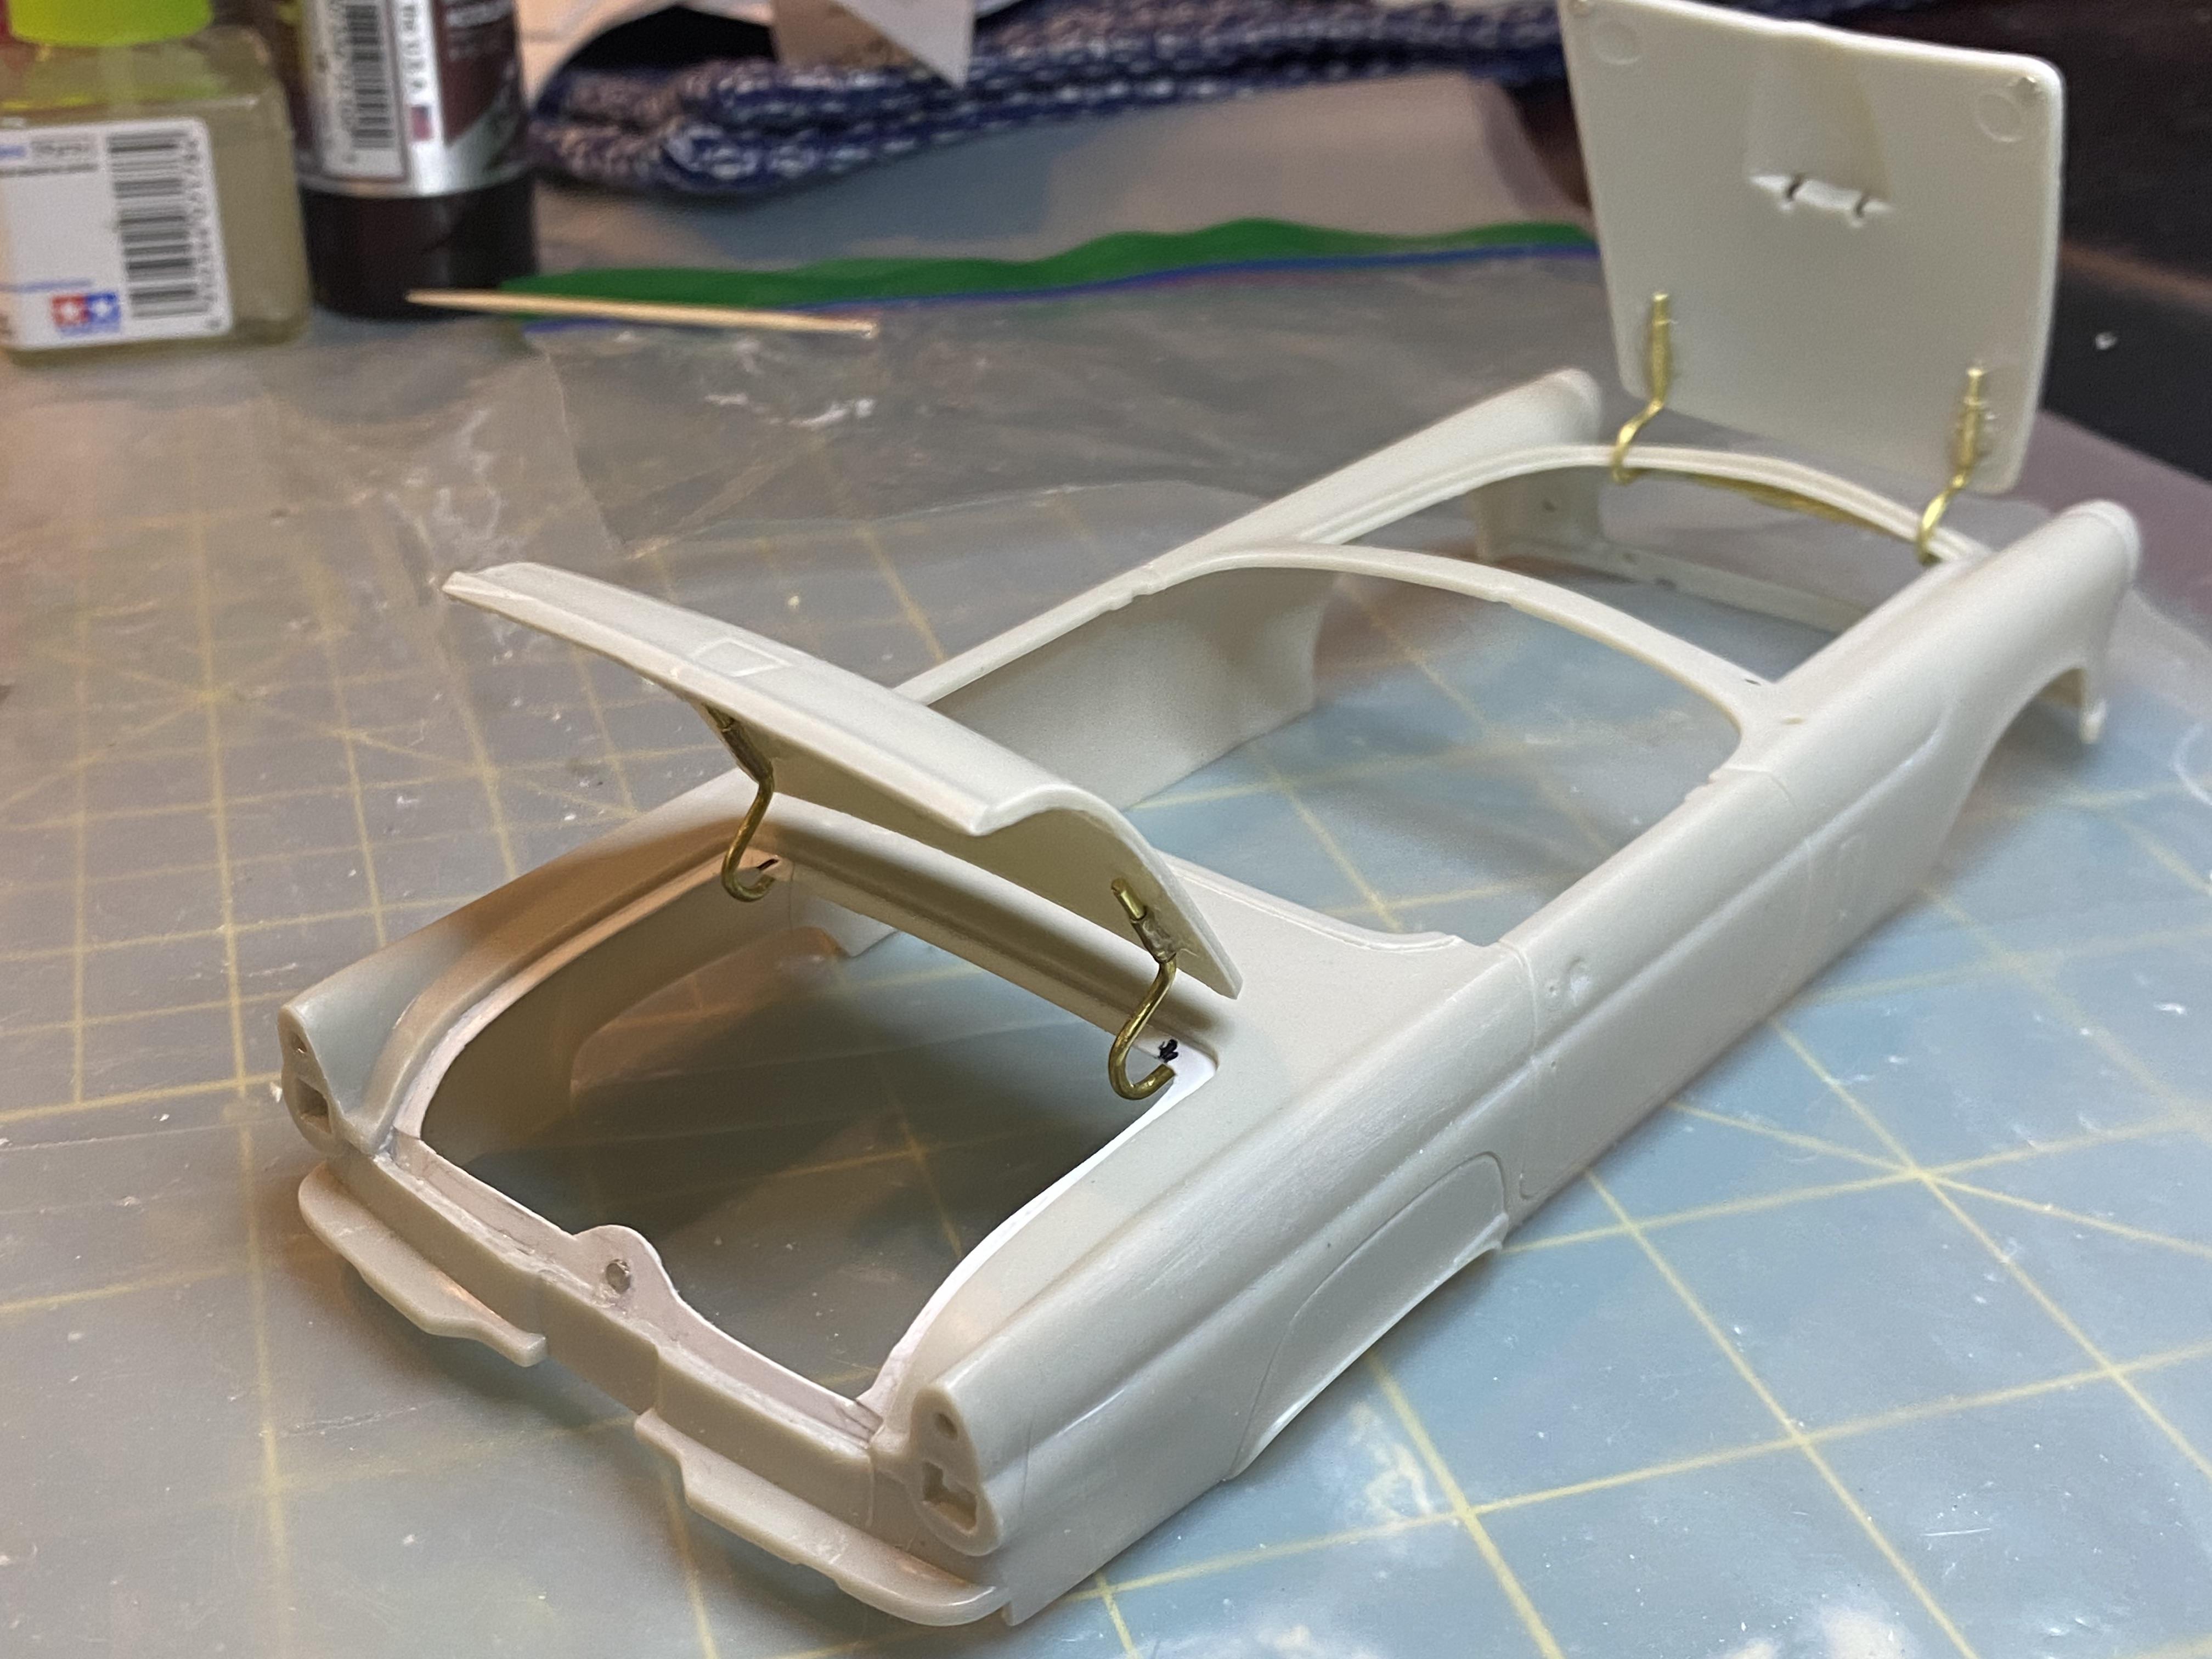
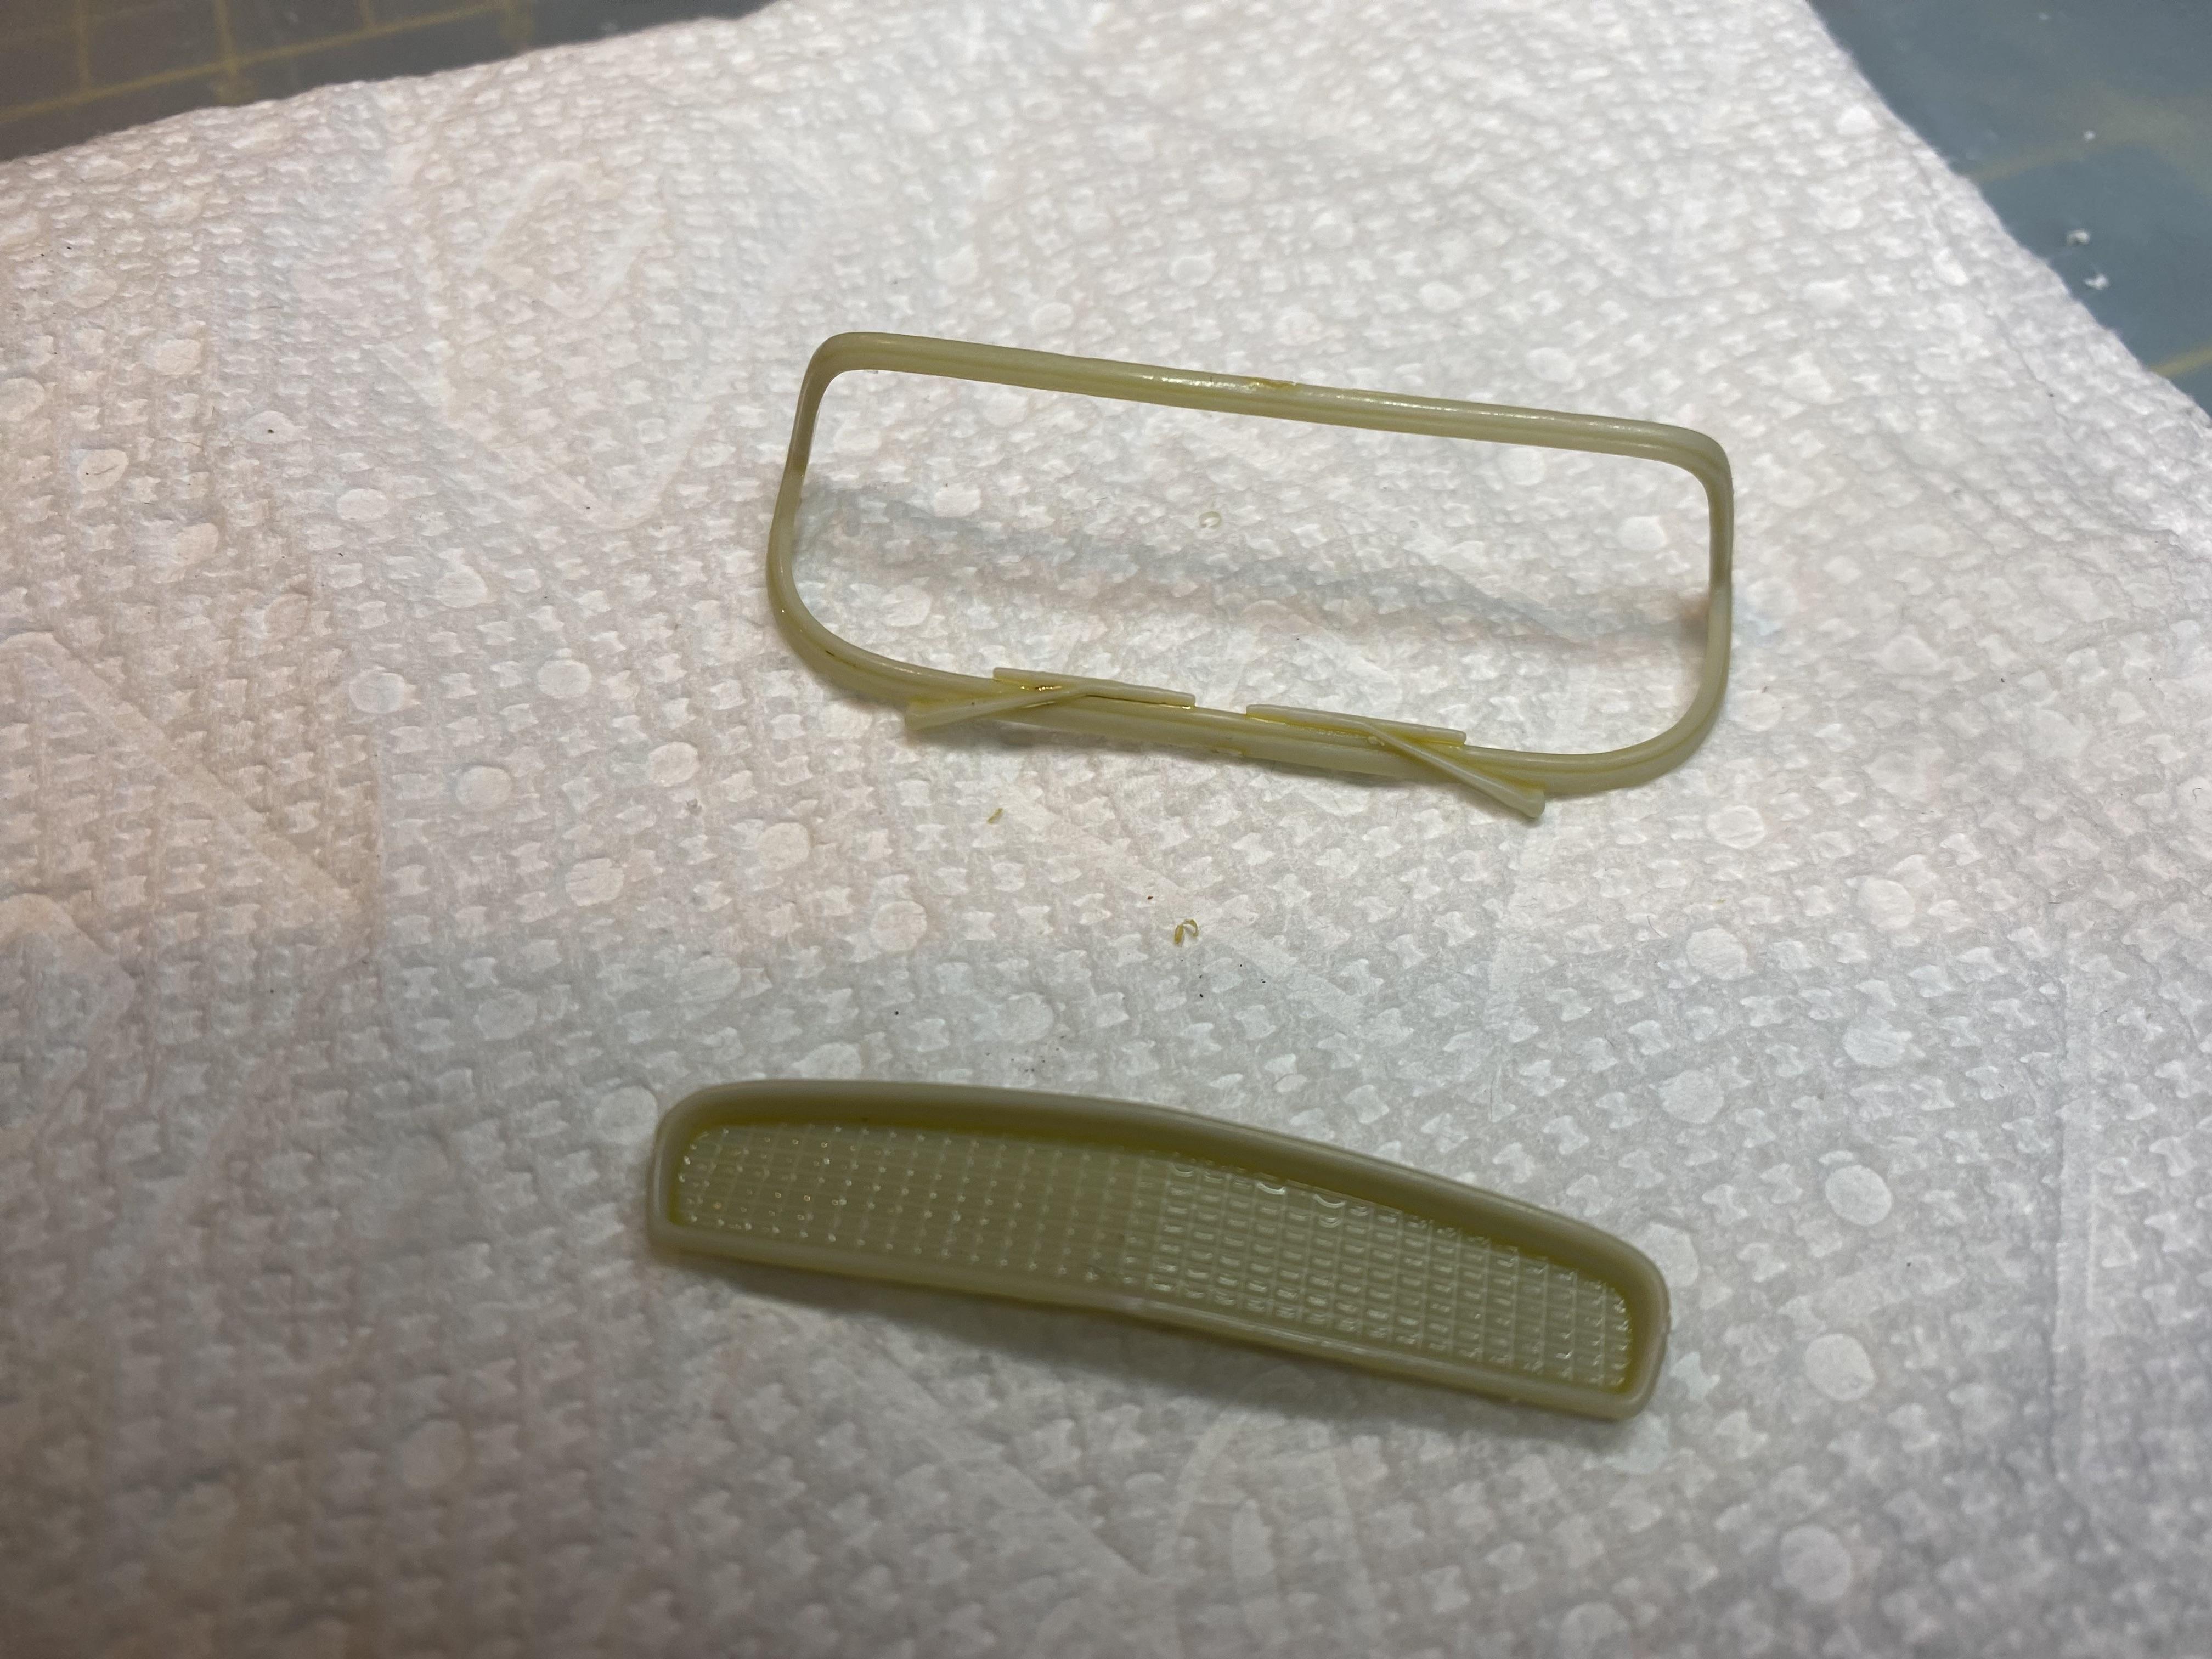
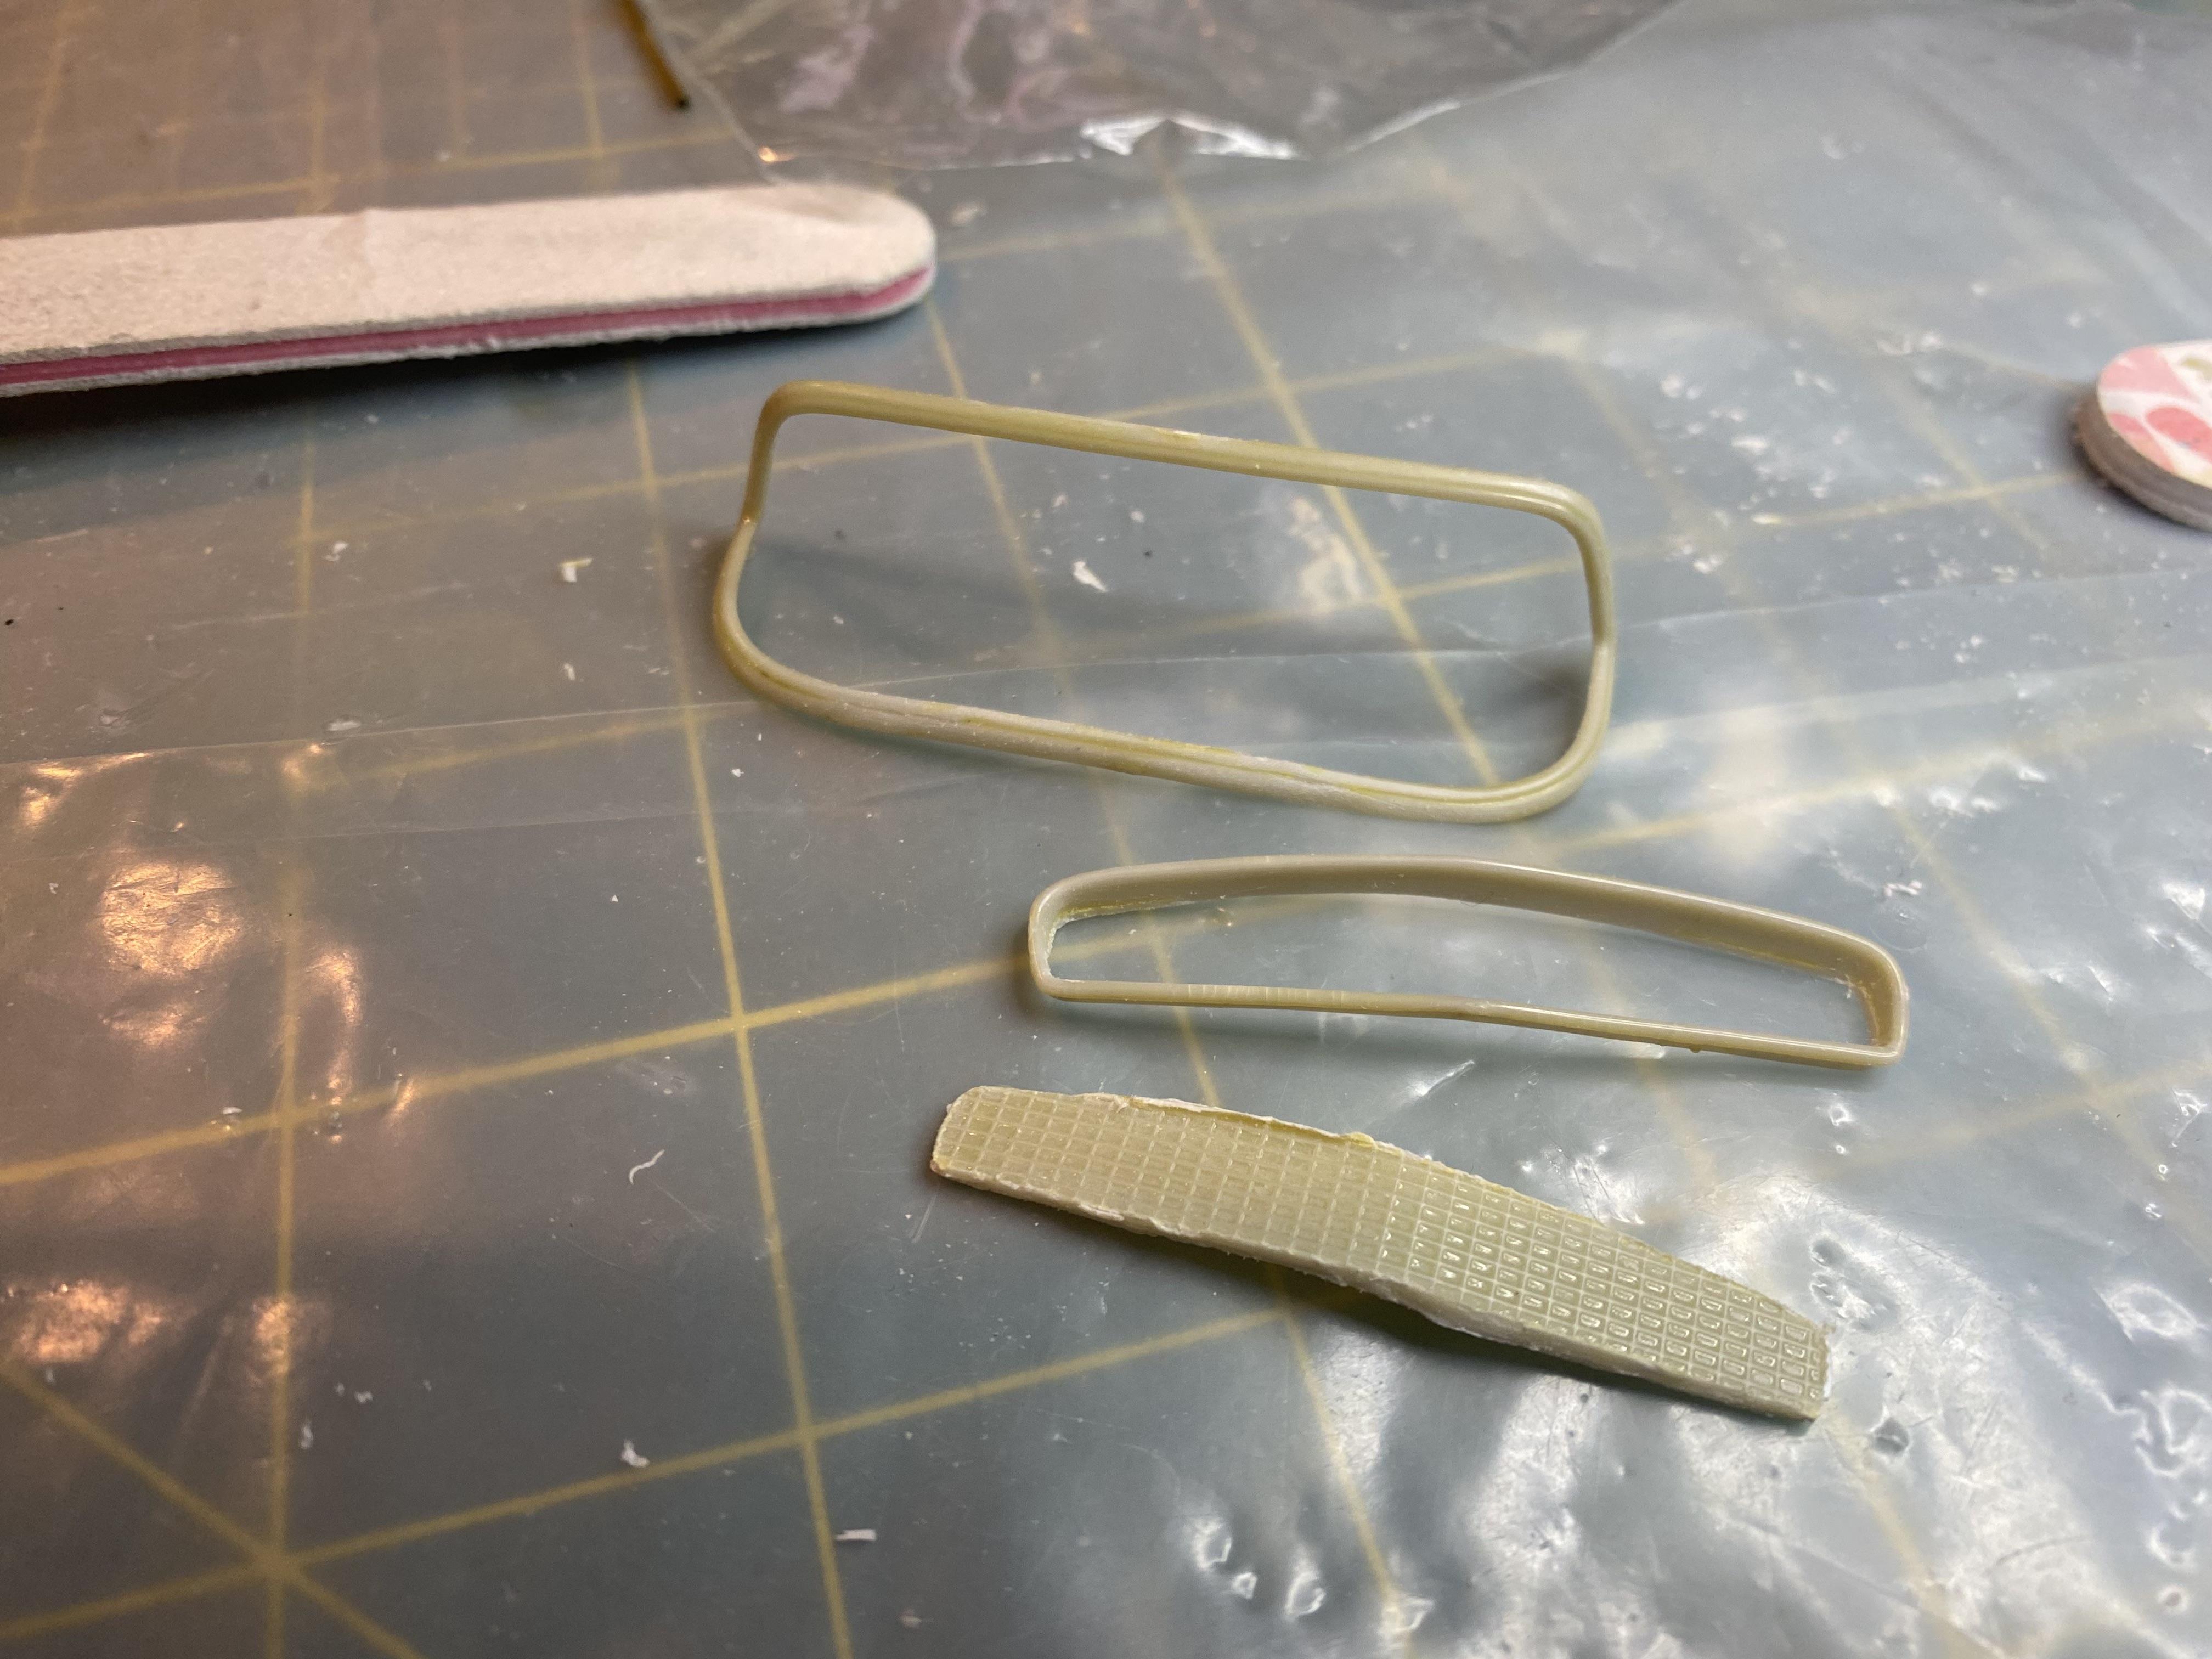
A little more work done today. Created an outside rear view mirror, added framing to the hood and trunk lid. Added magnets to hold the spare tire in place so it can be moved to open the trunk. assembled then wheels with spinners, decals and UV clear resin the the spinner decals to give them the depth. drilled out the dash for LED lenses, created the light enclosure.
-
Thank You! Long ways to go but this should go well, it is a nice kit IMHO.
-
You should go for it, they have recently rereleased this kit. I am pleasantly surprised how nice a kit it is, especially compared to the AMT 1957 kit, and even more so my last build. The worst kit I have ever built, Revell Porsche Speedster. I had to pretty much reconstruct and modify every part of it.
-
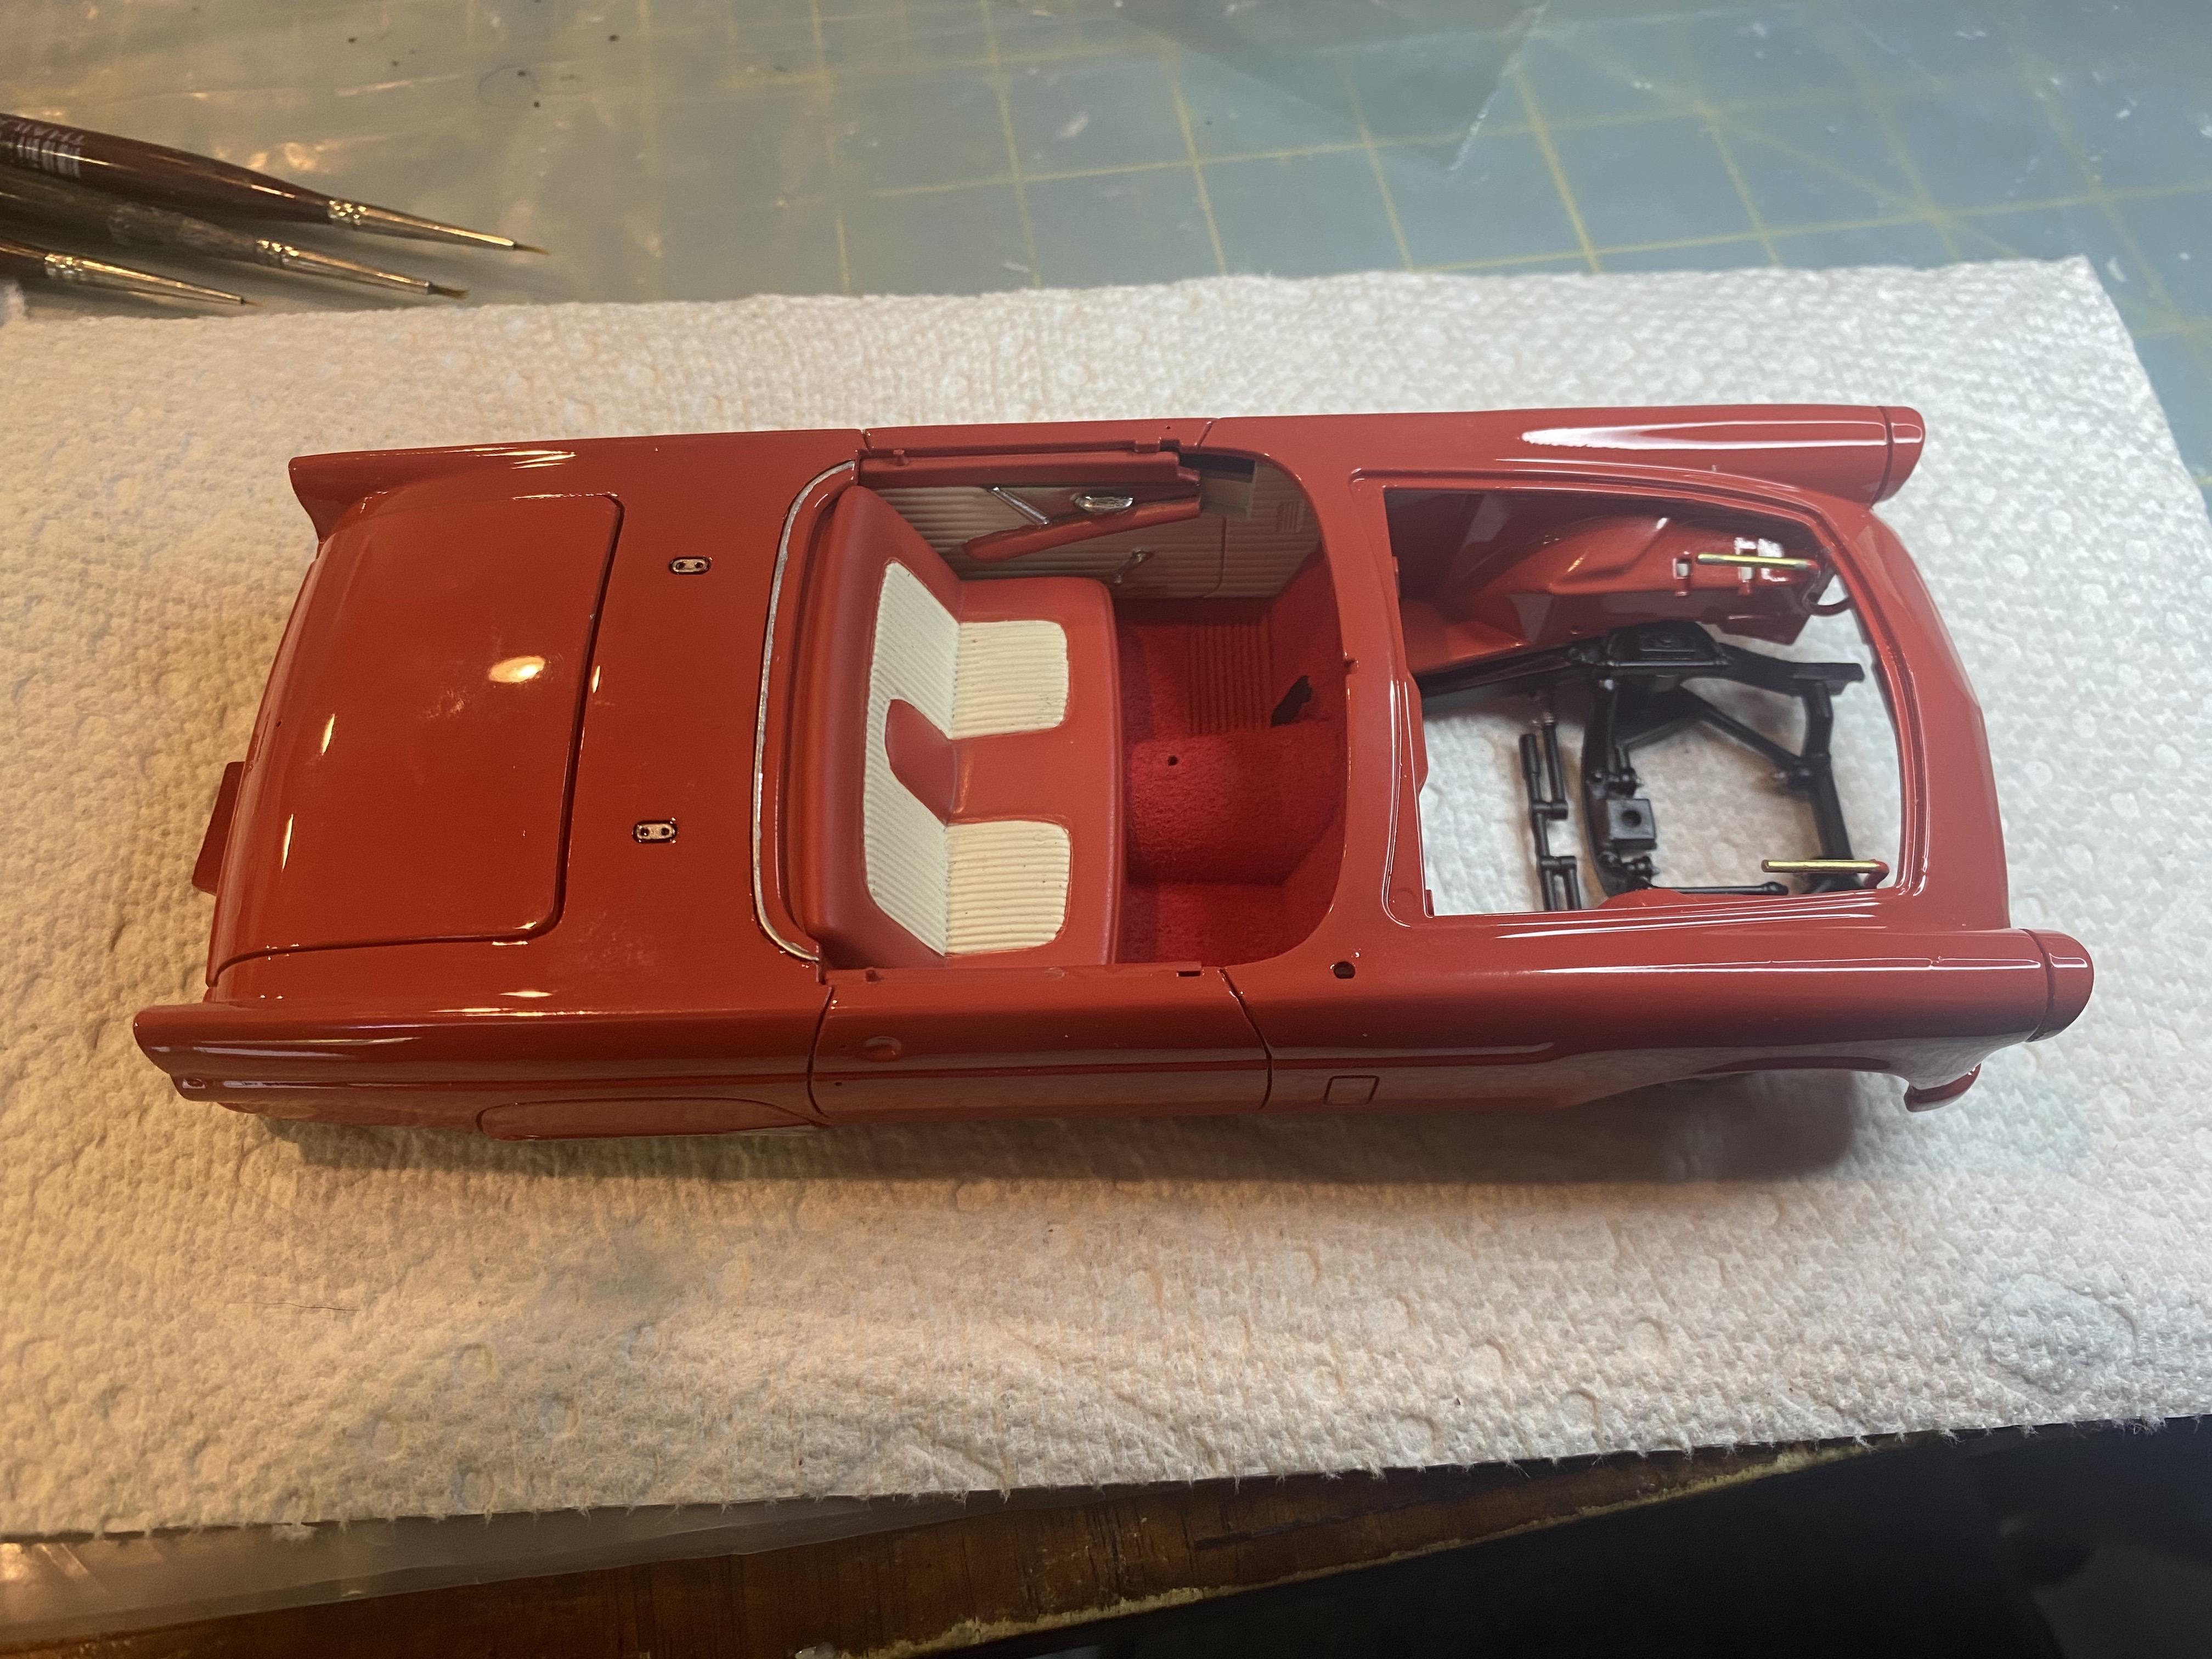
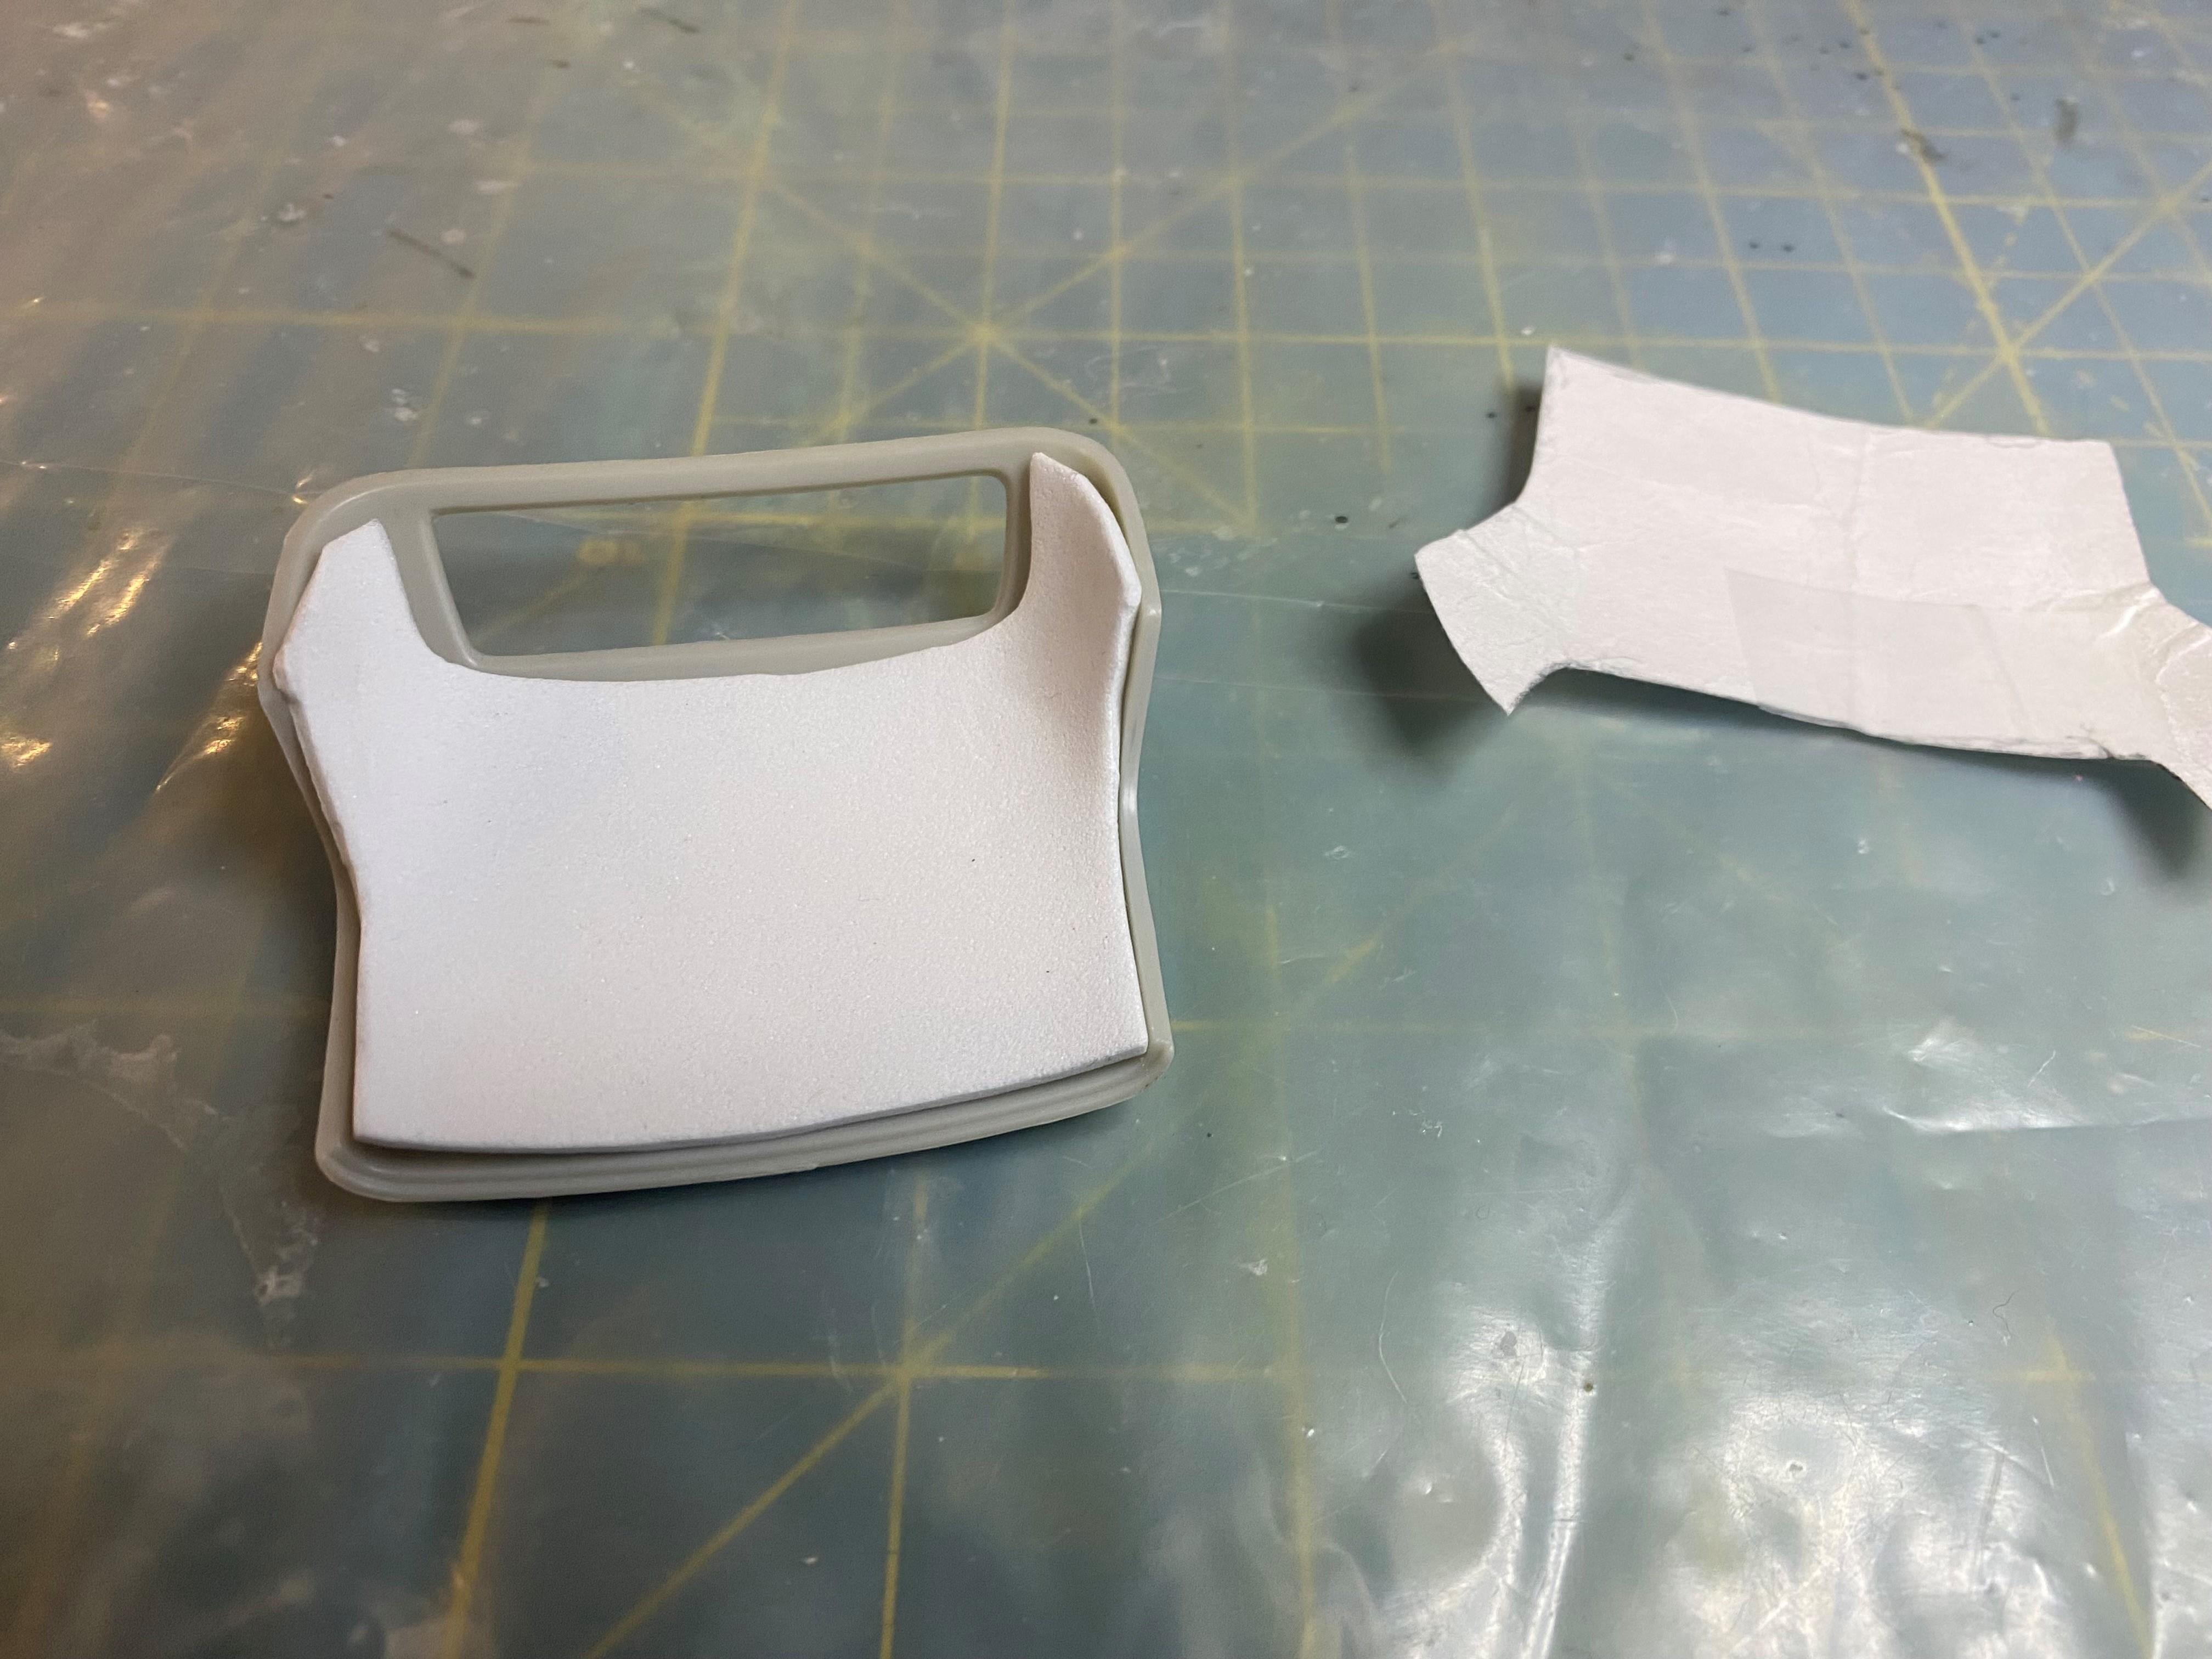
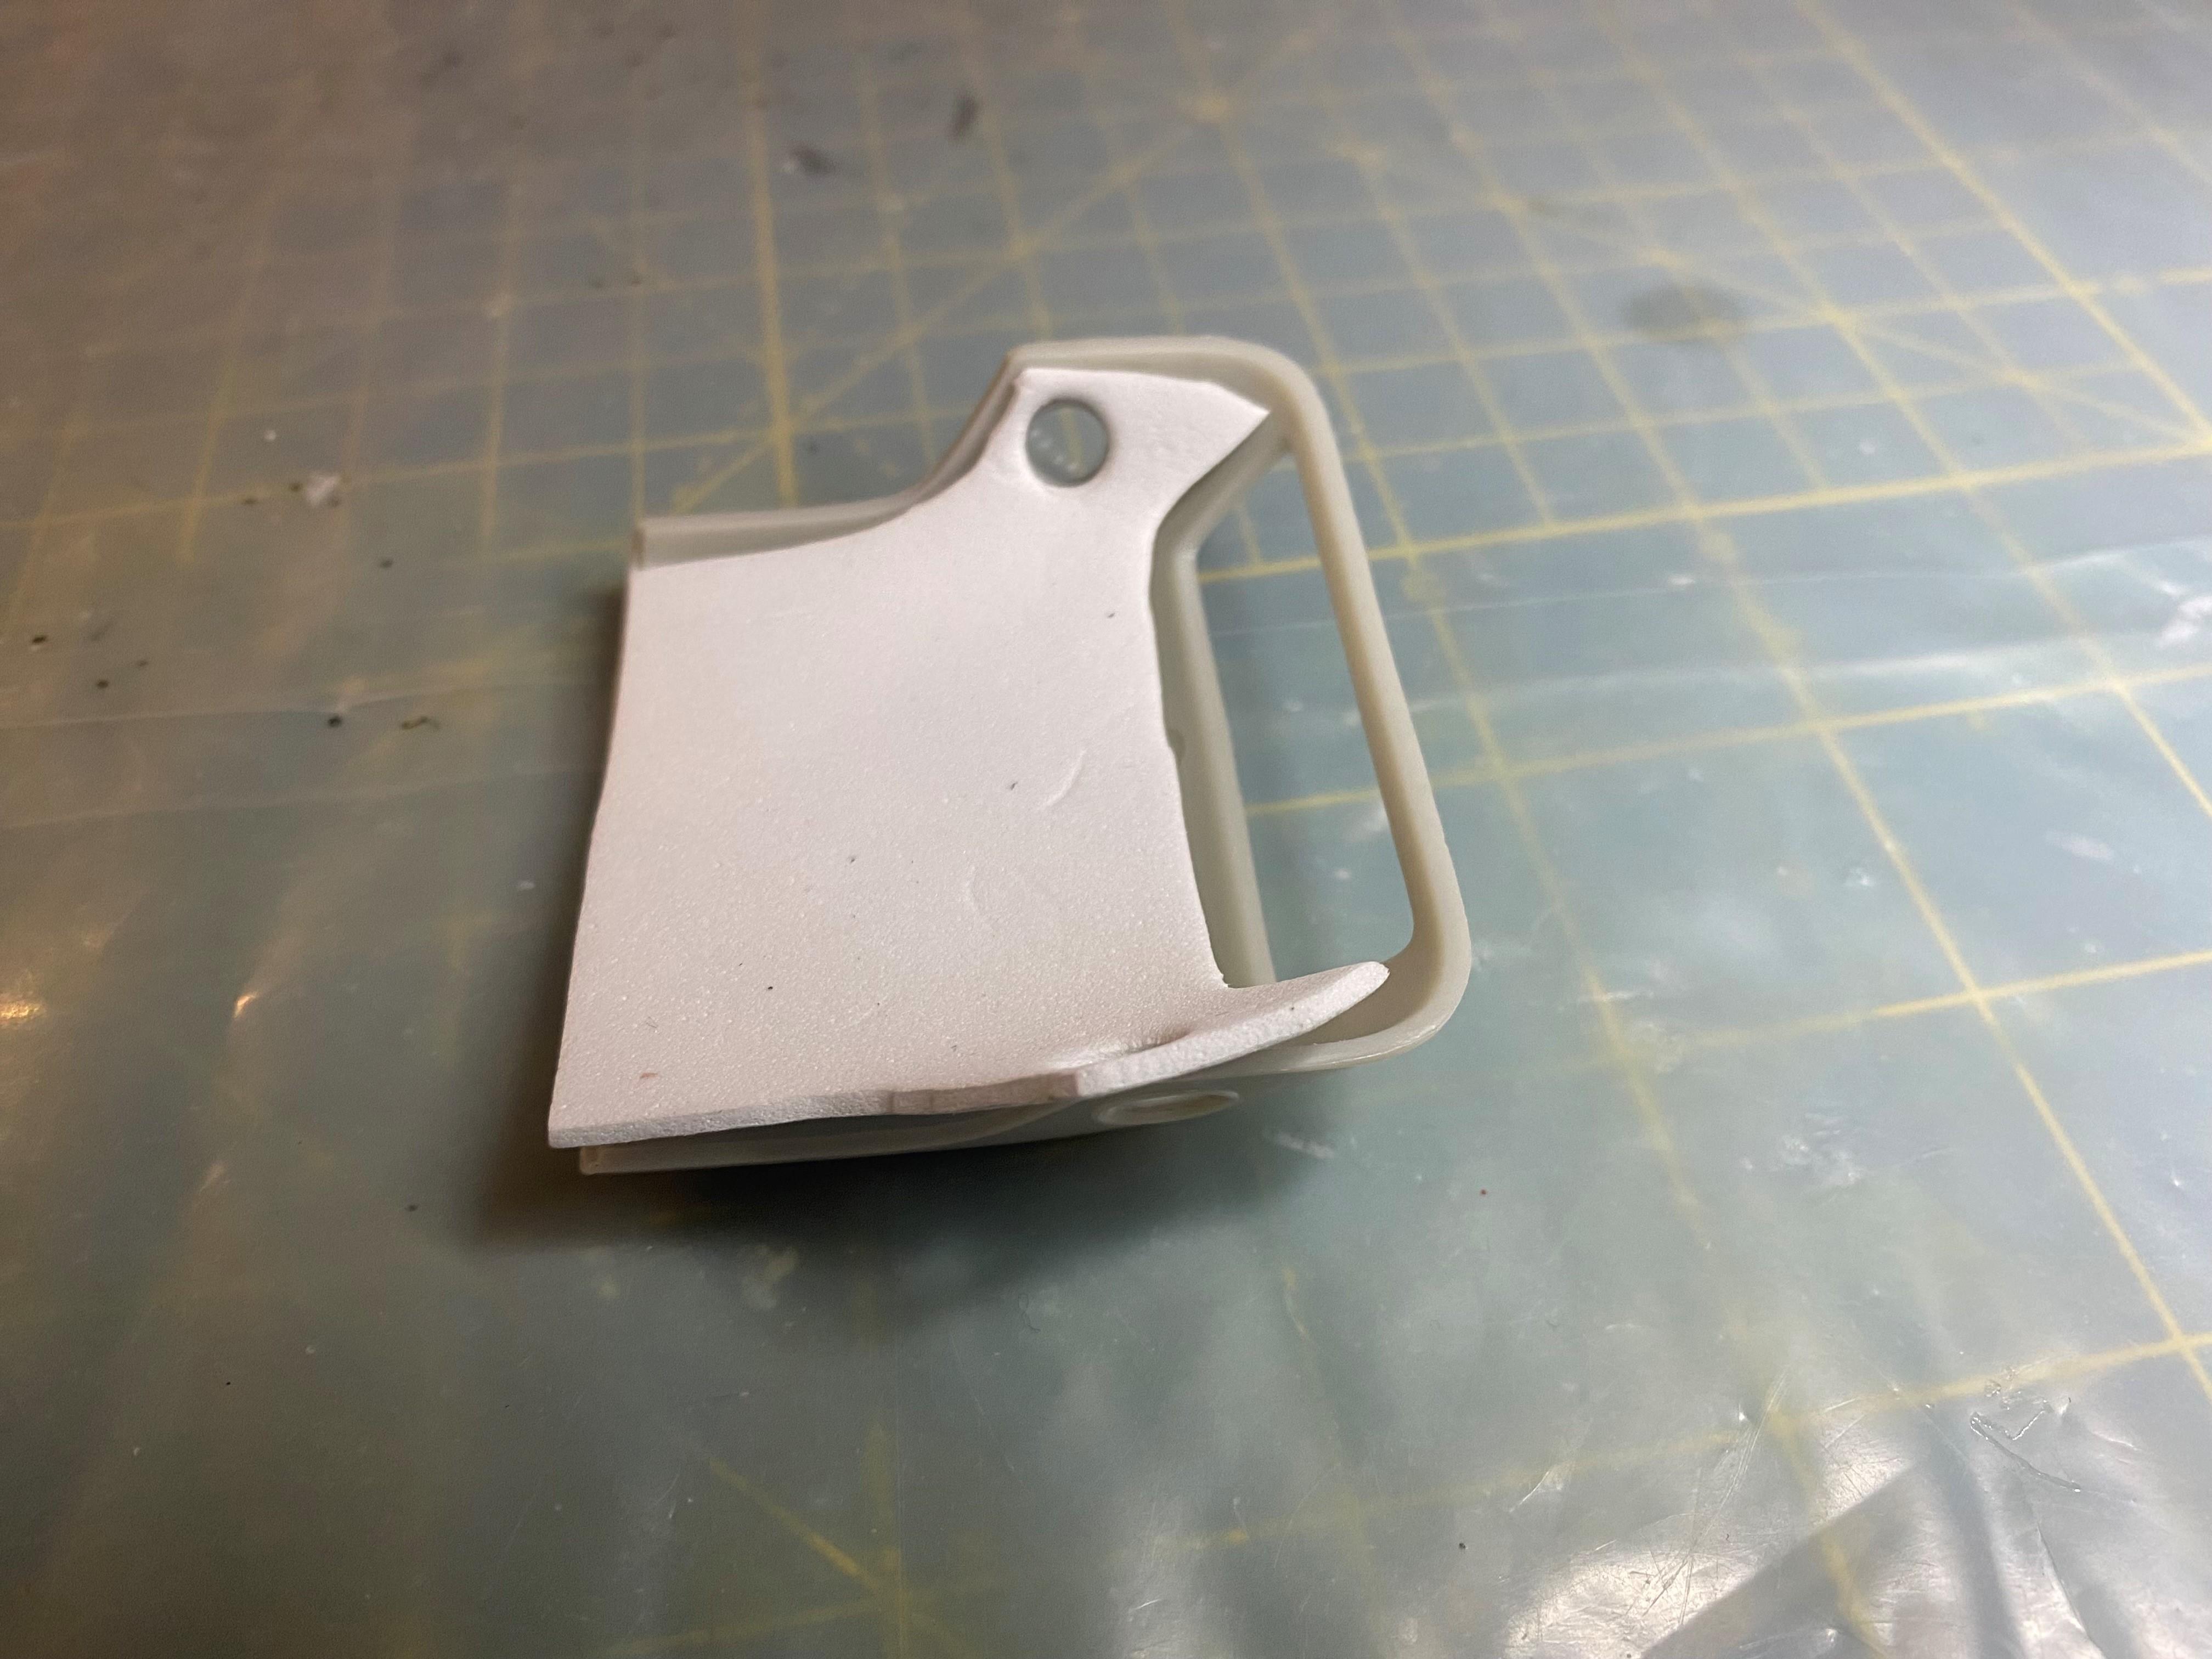
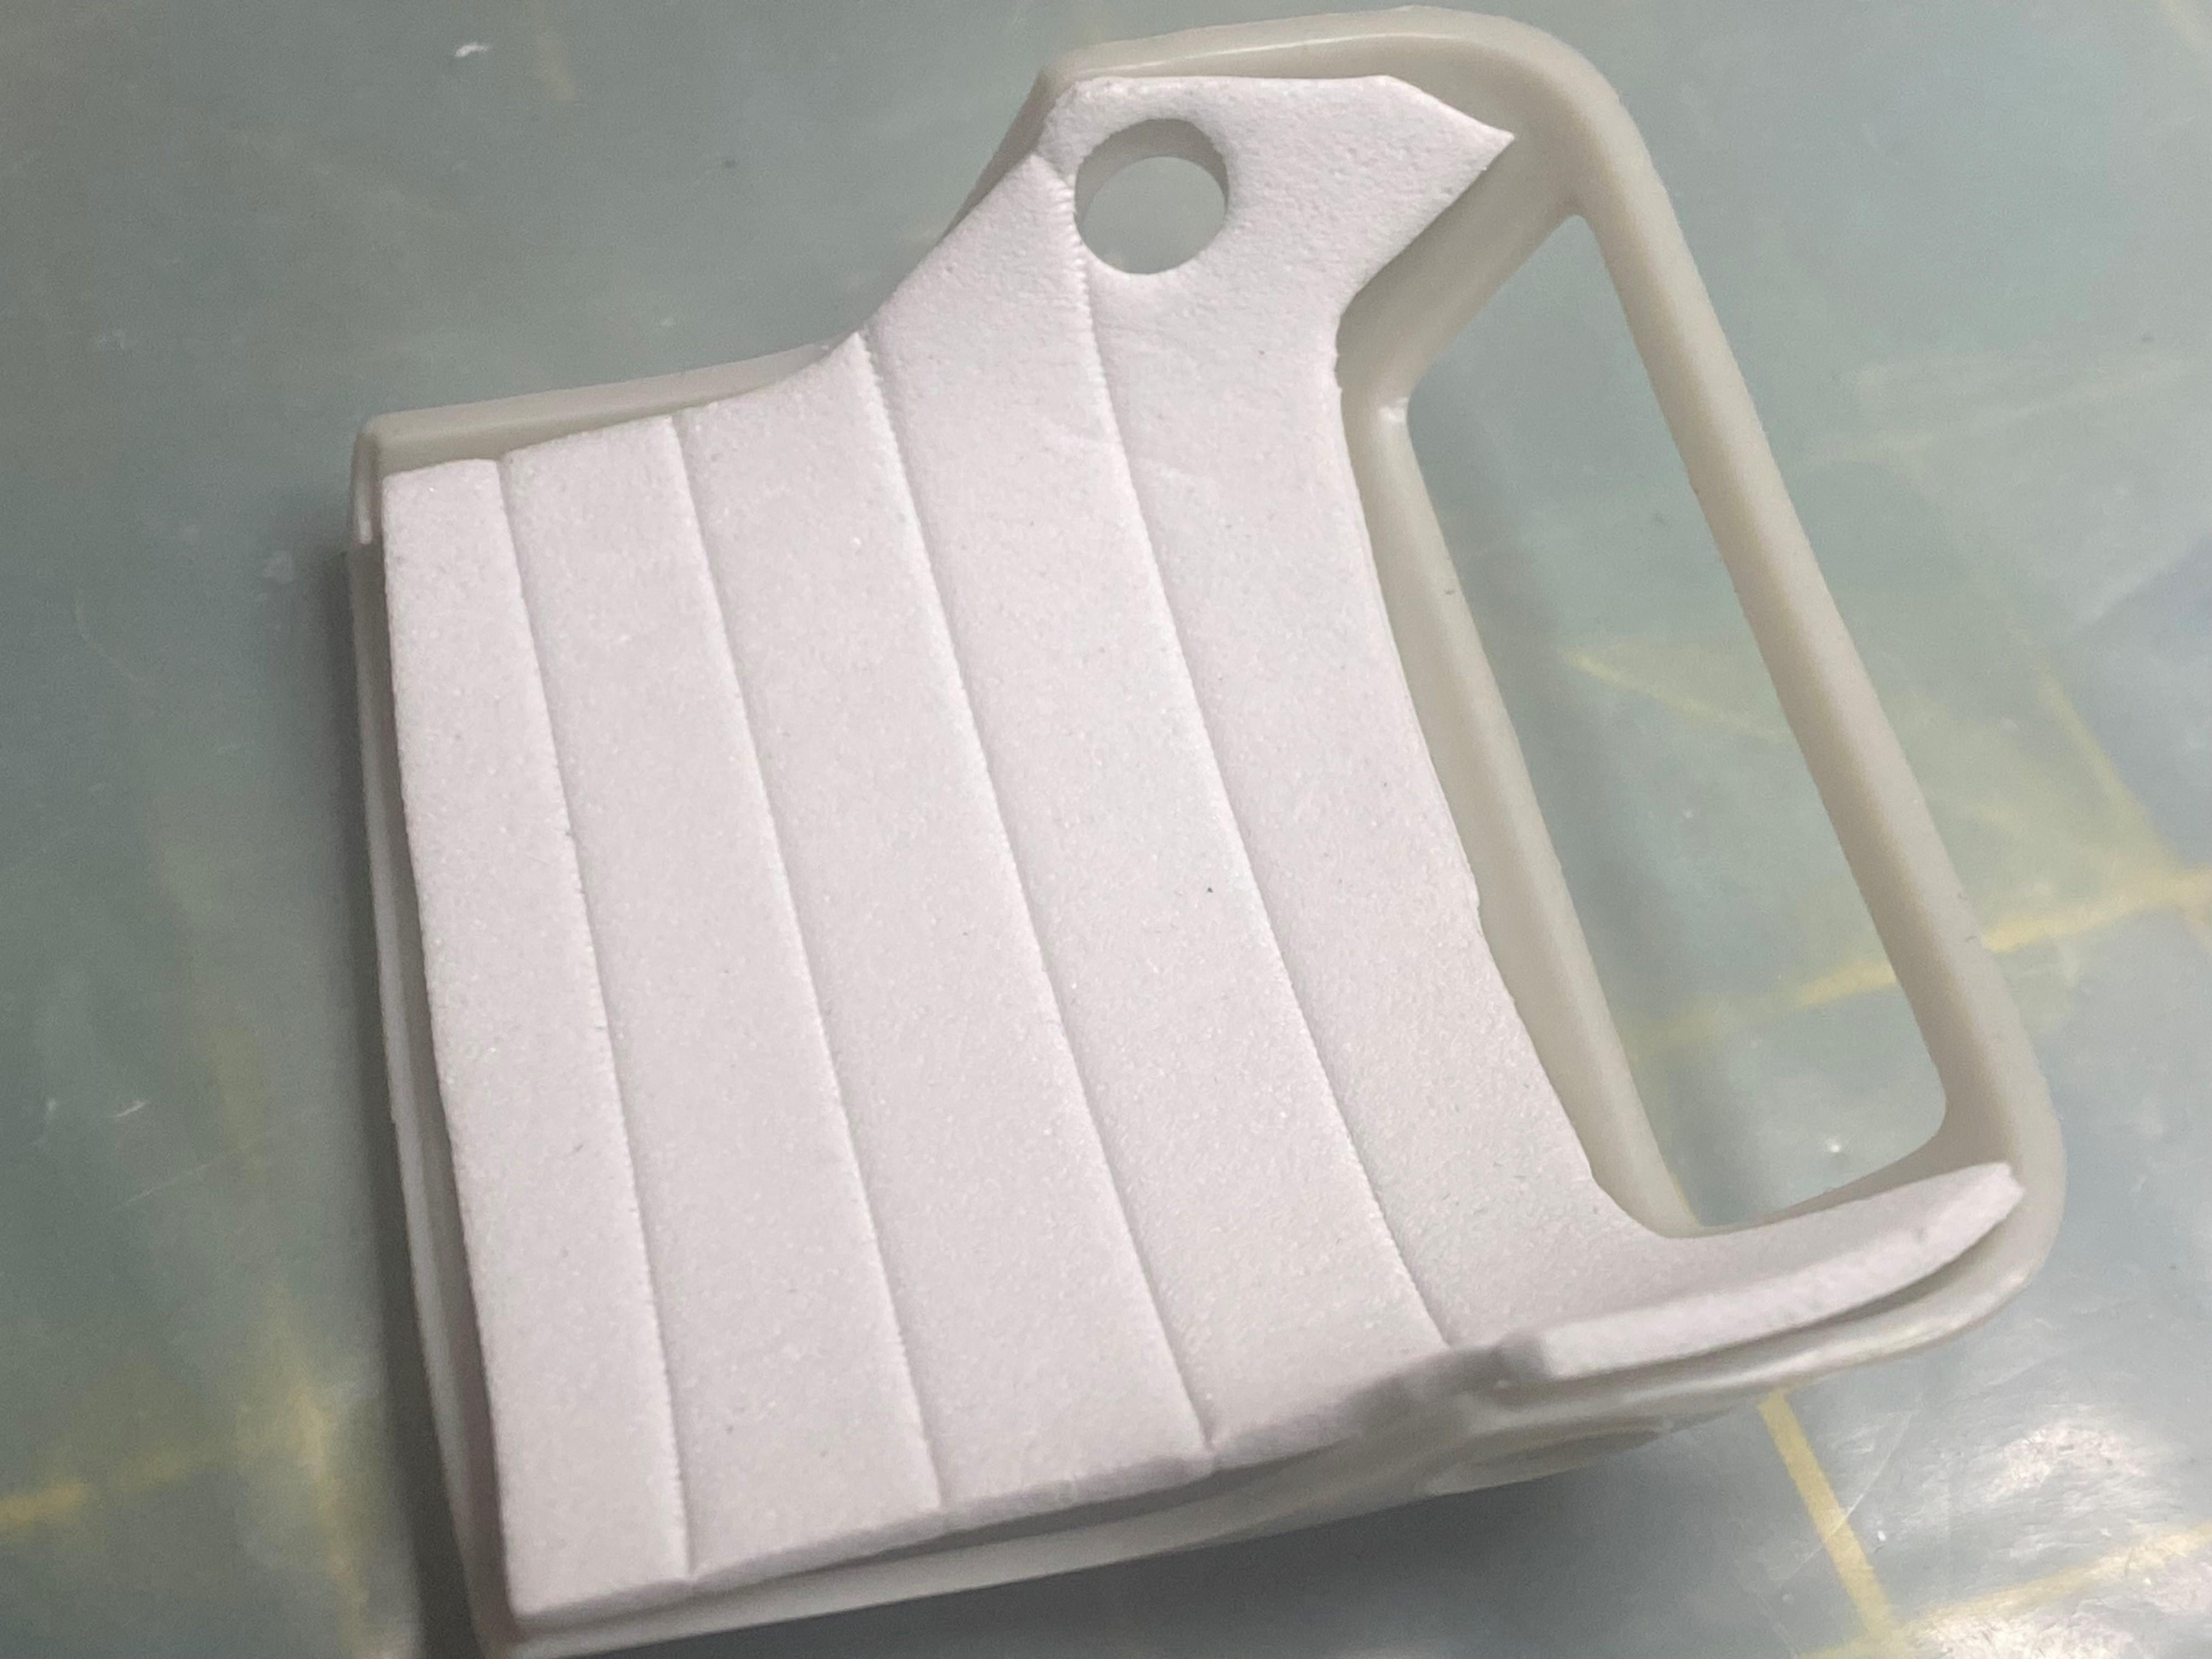
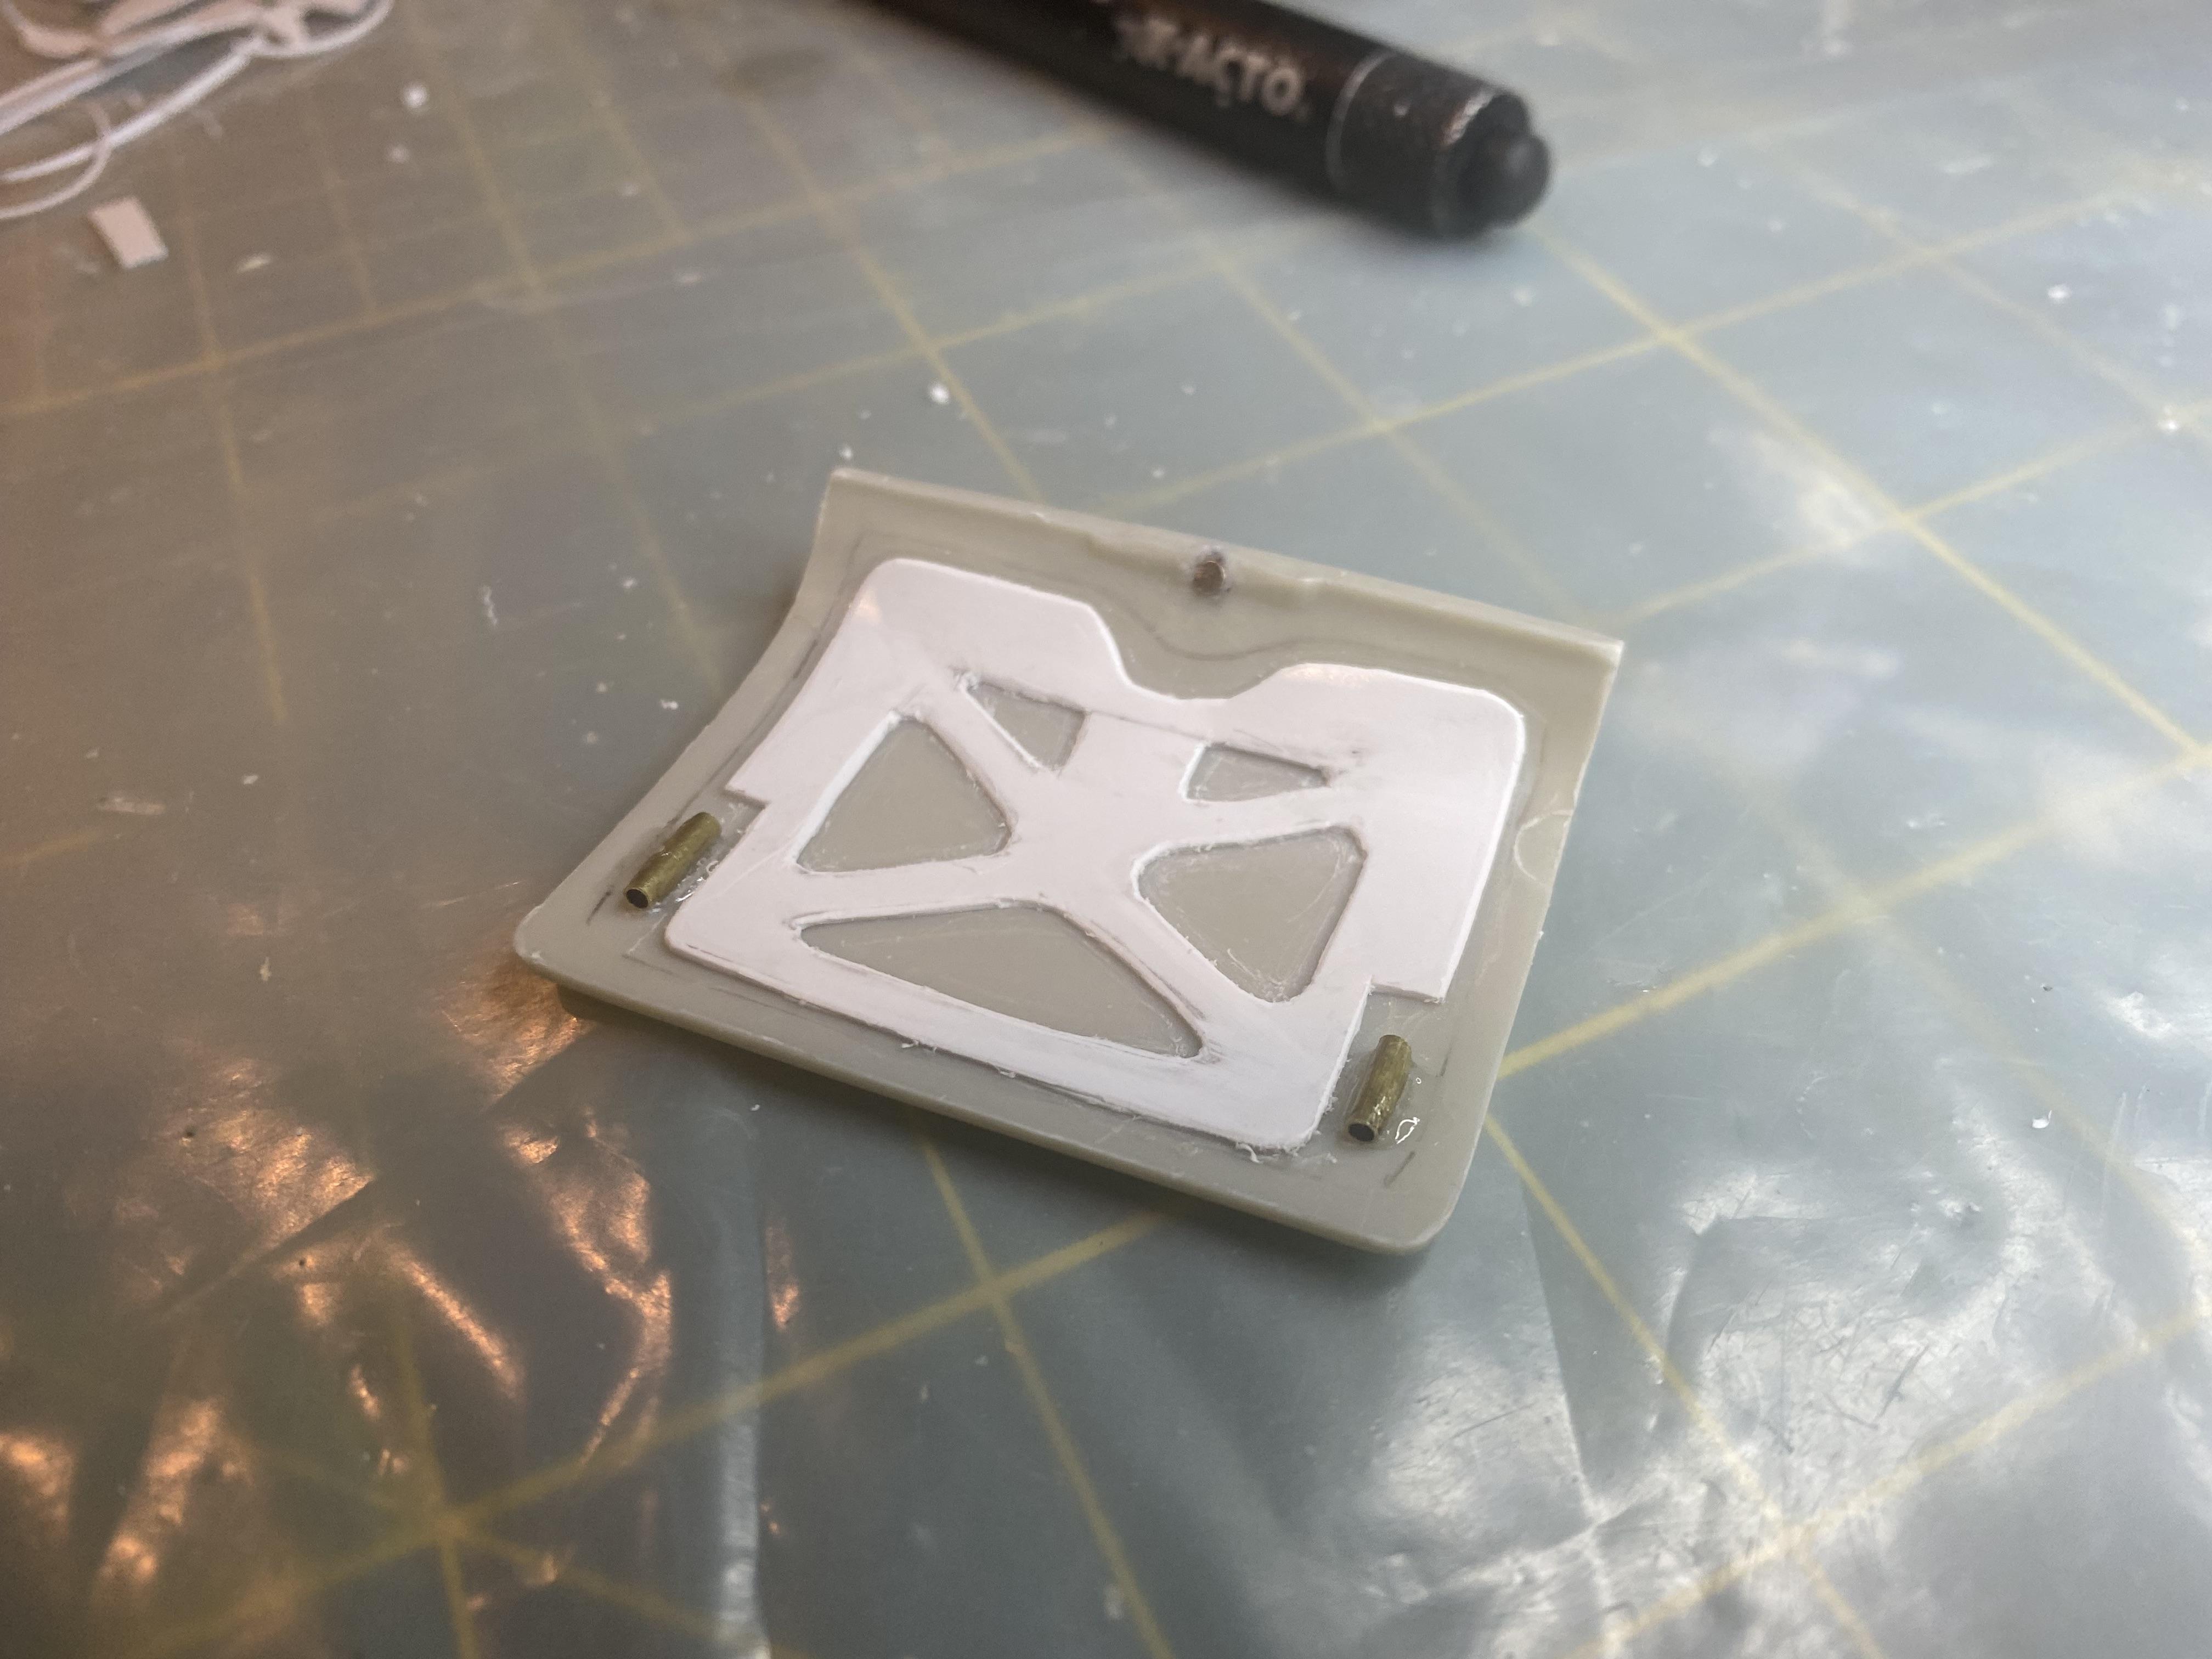
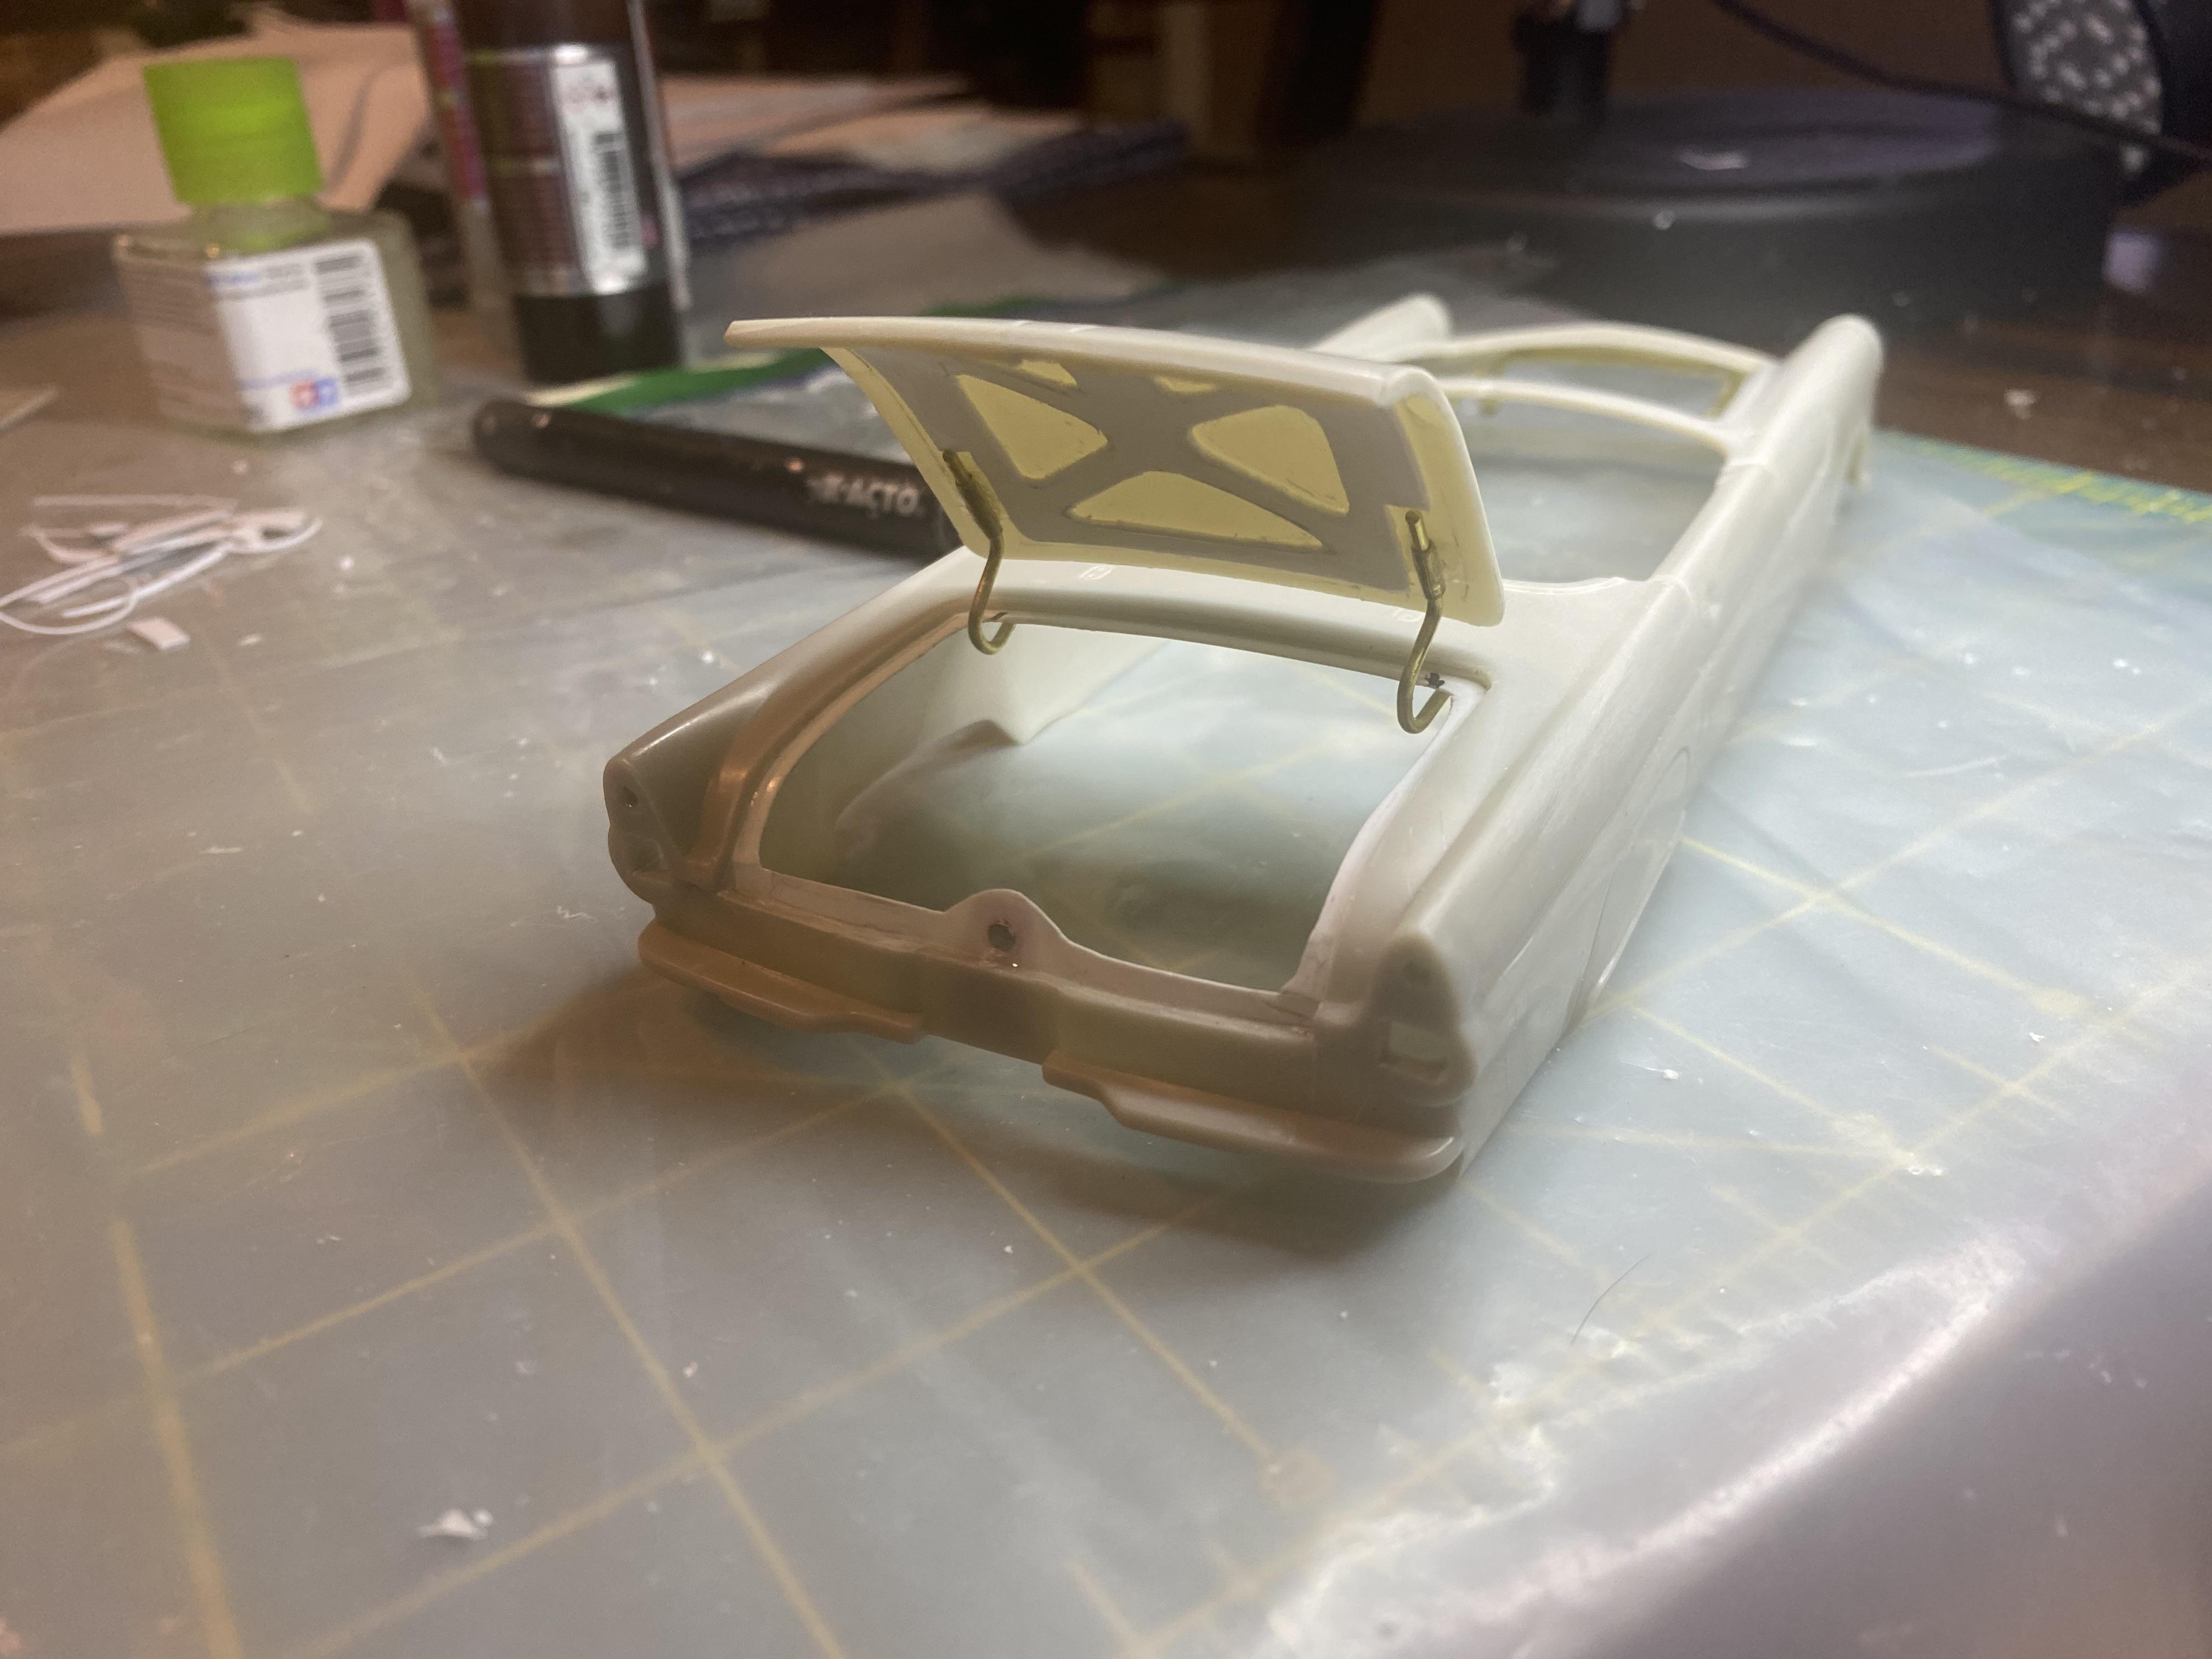
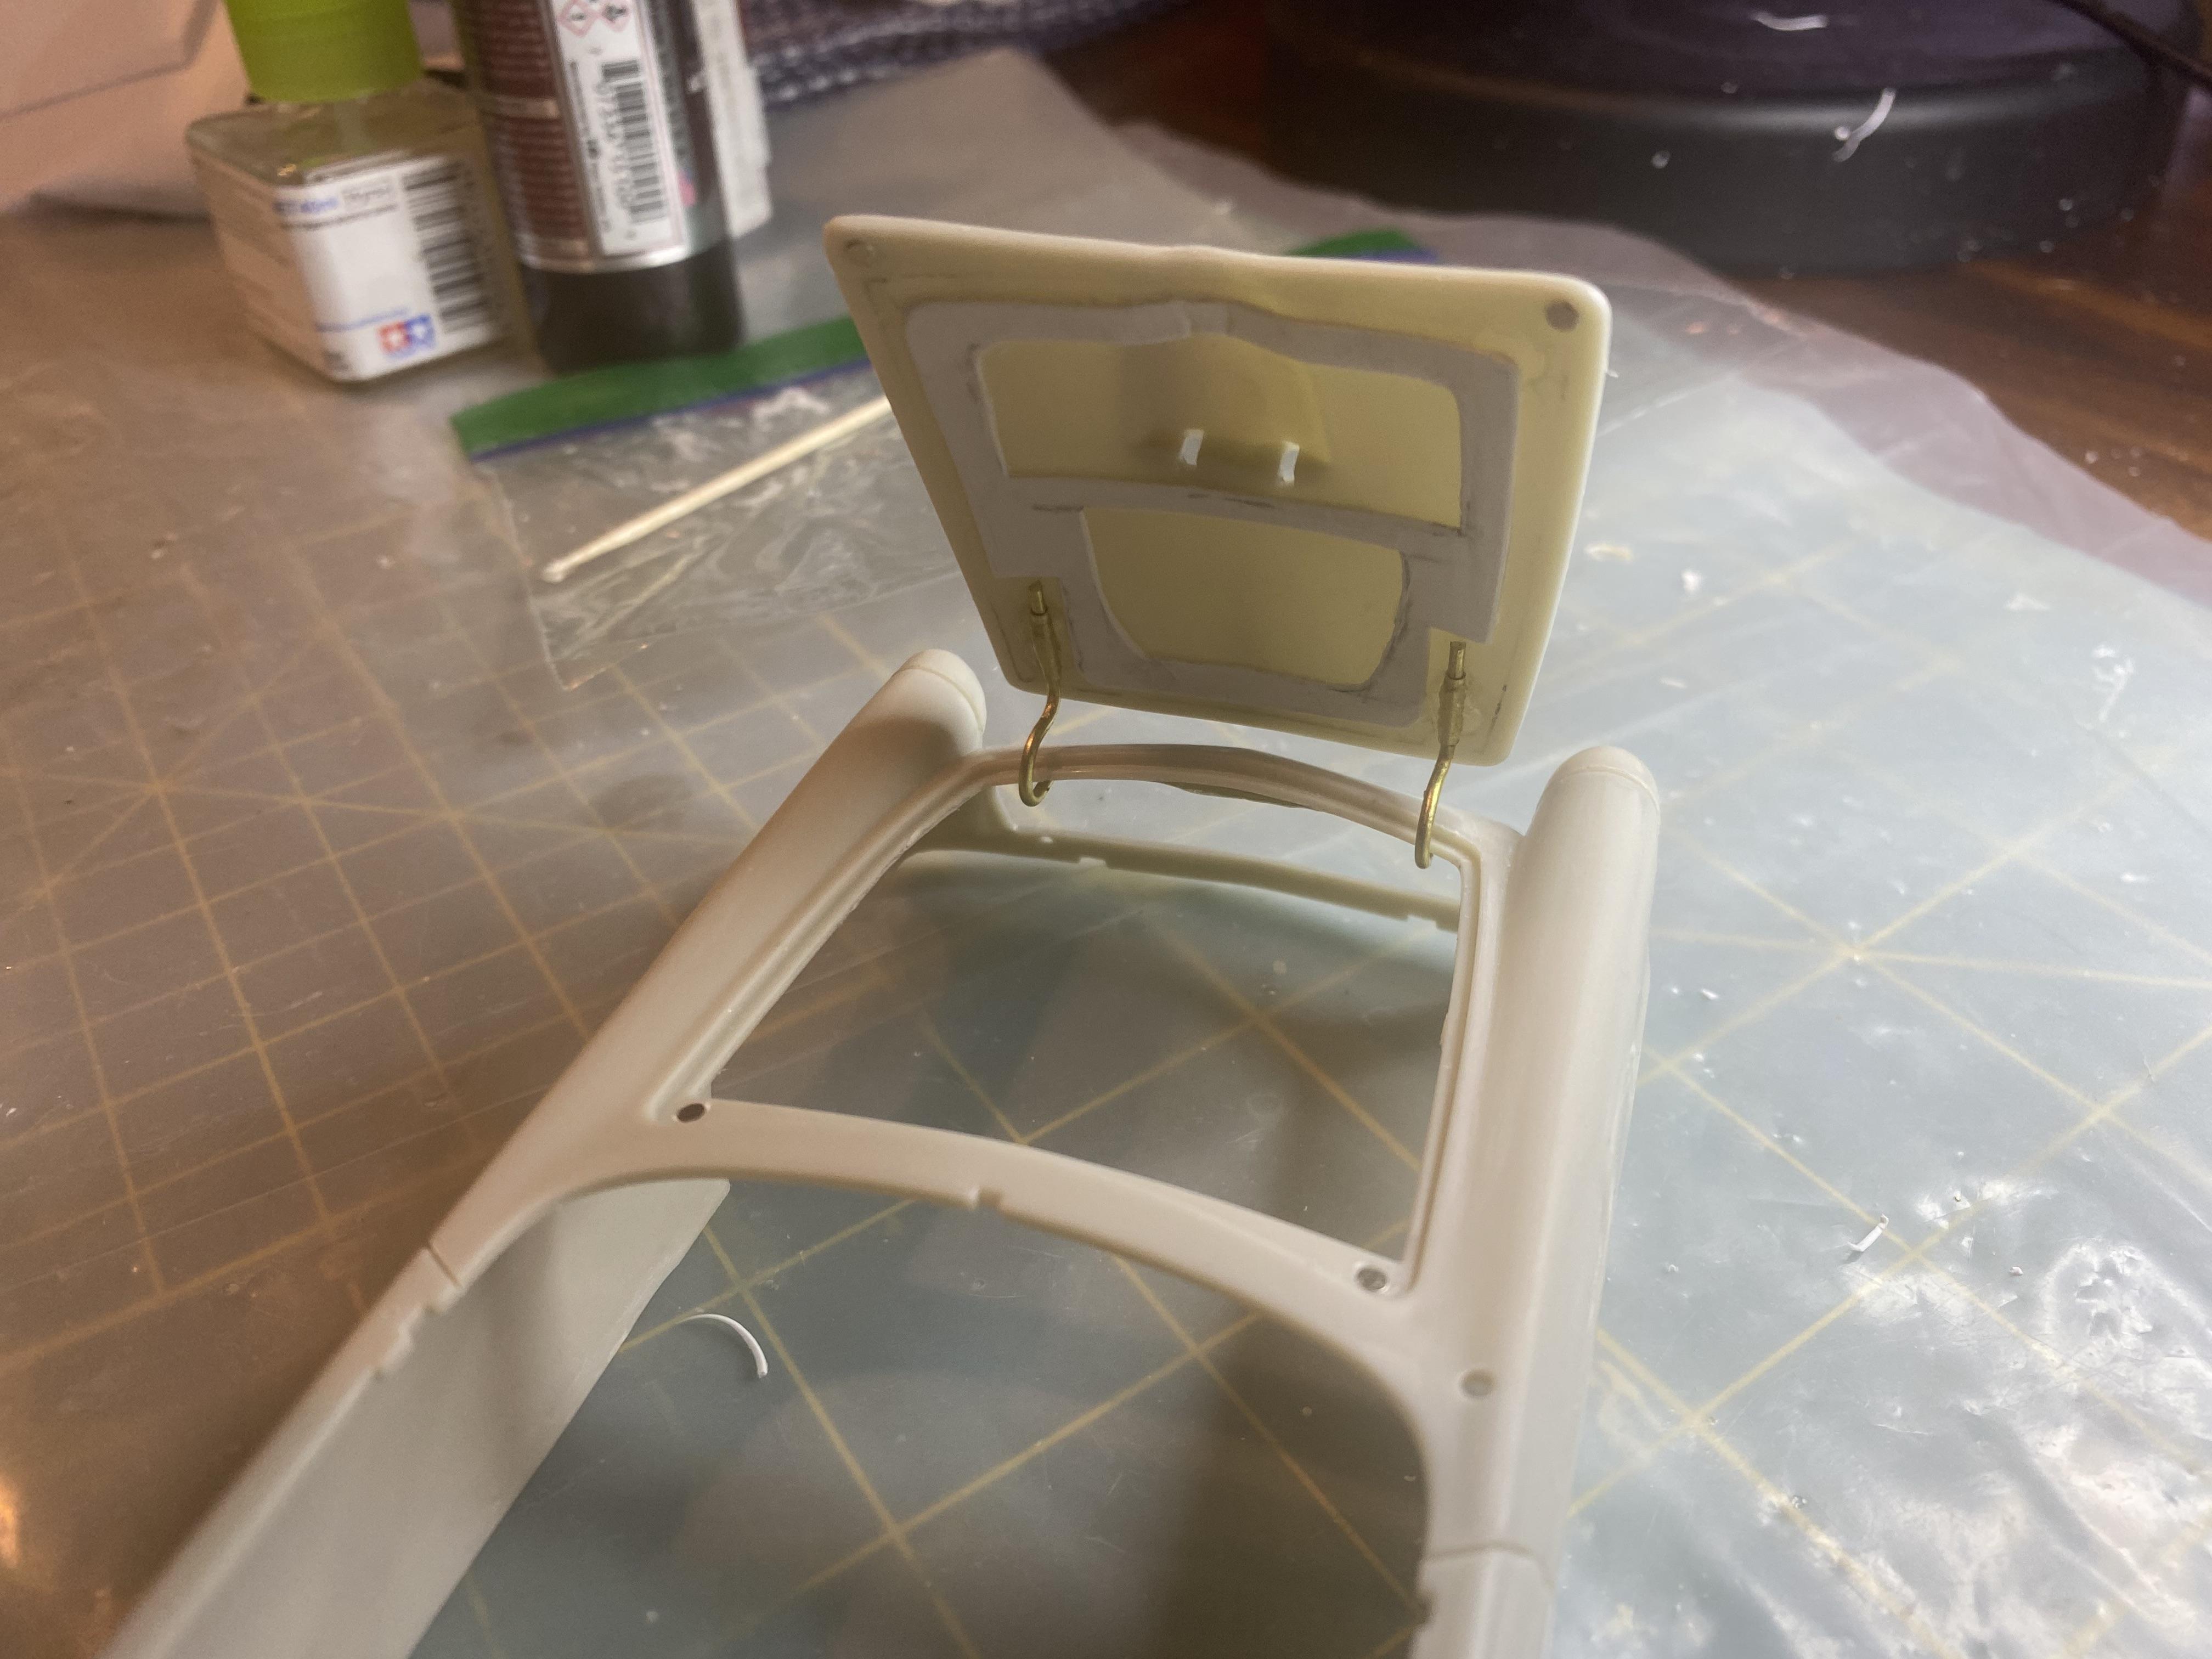
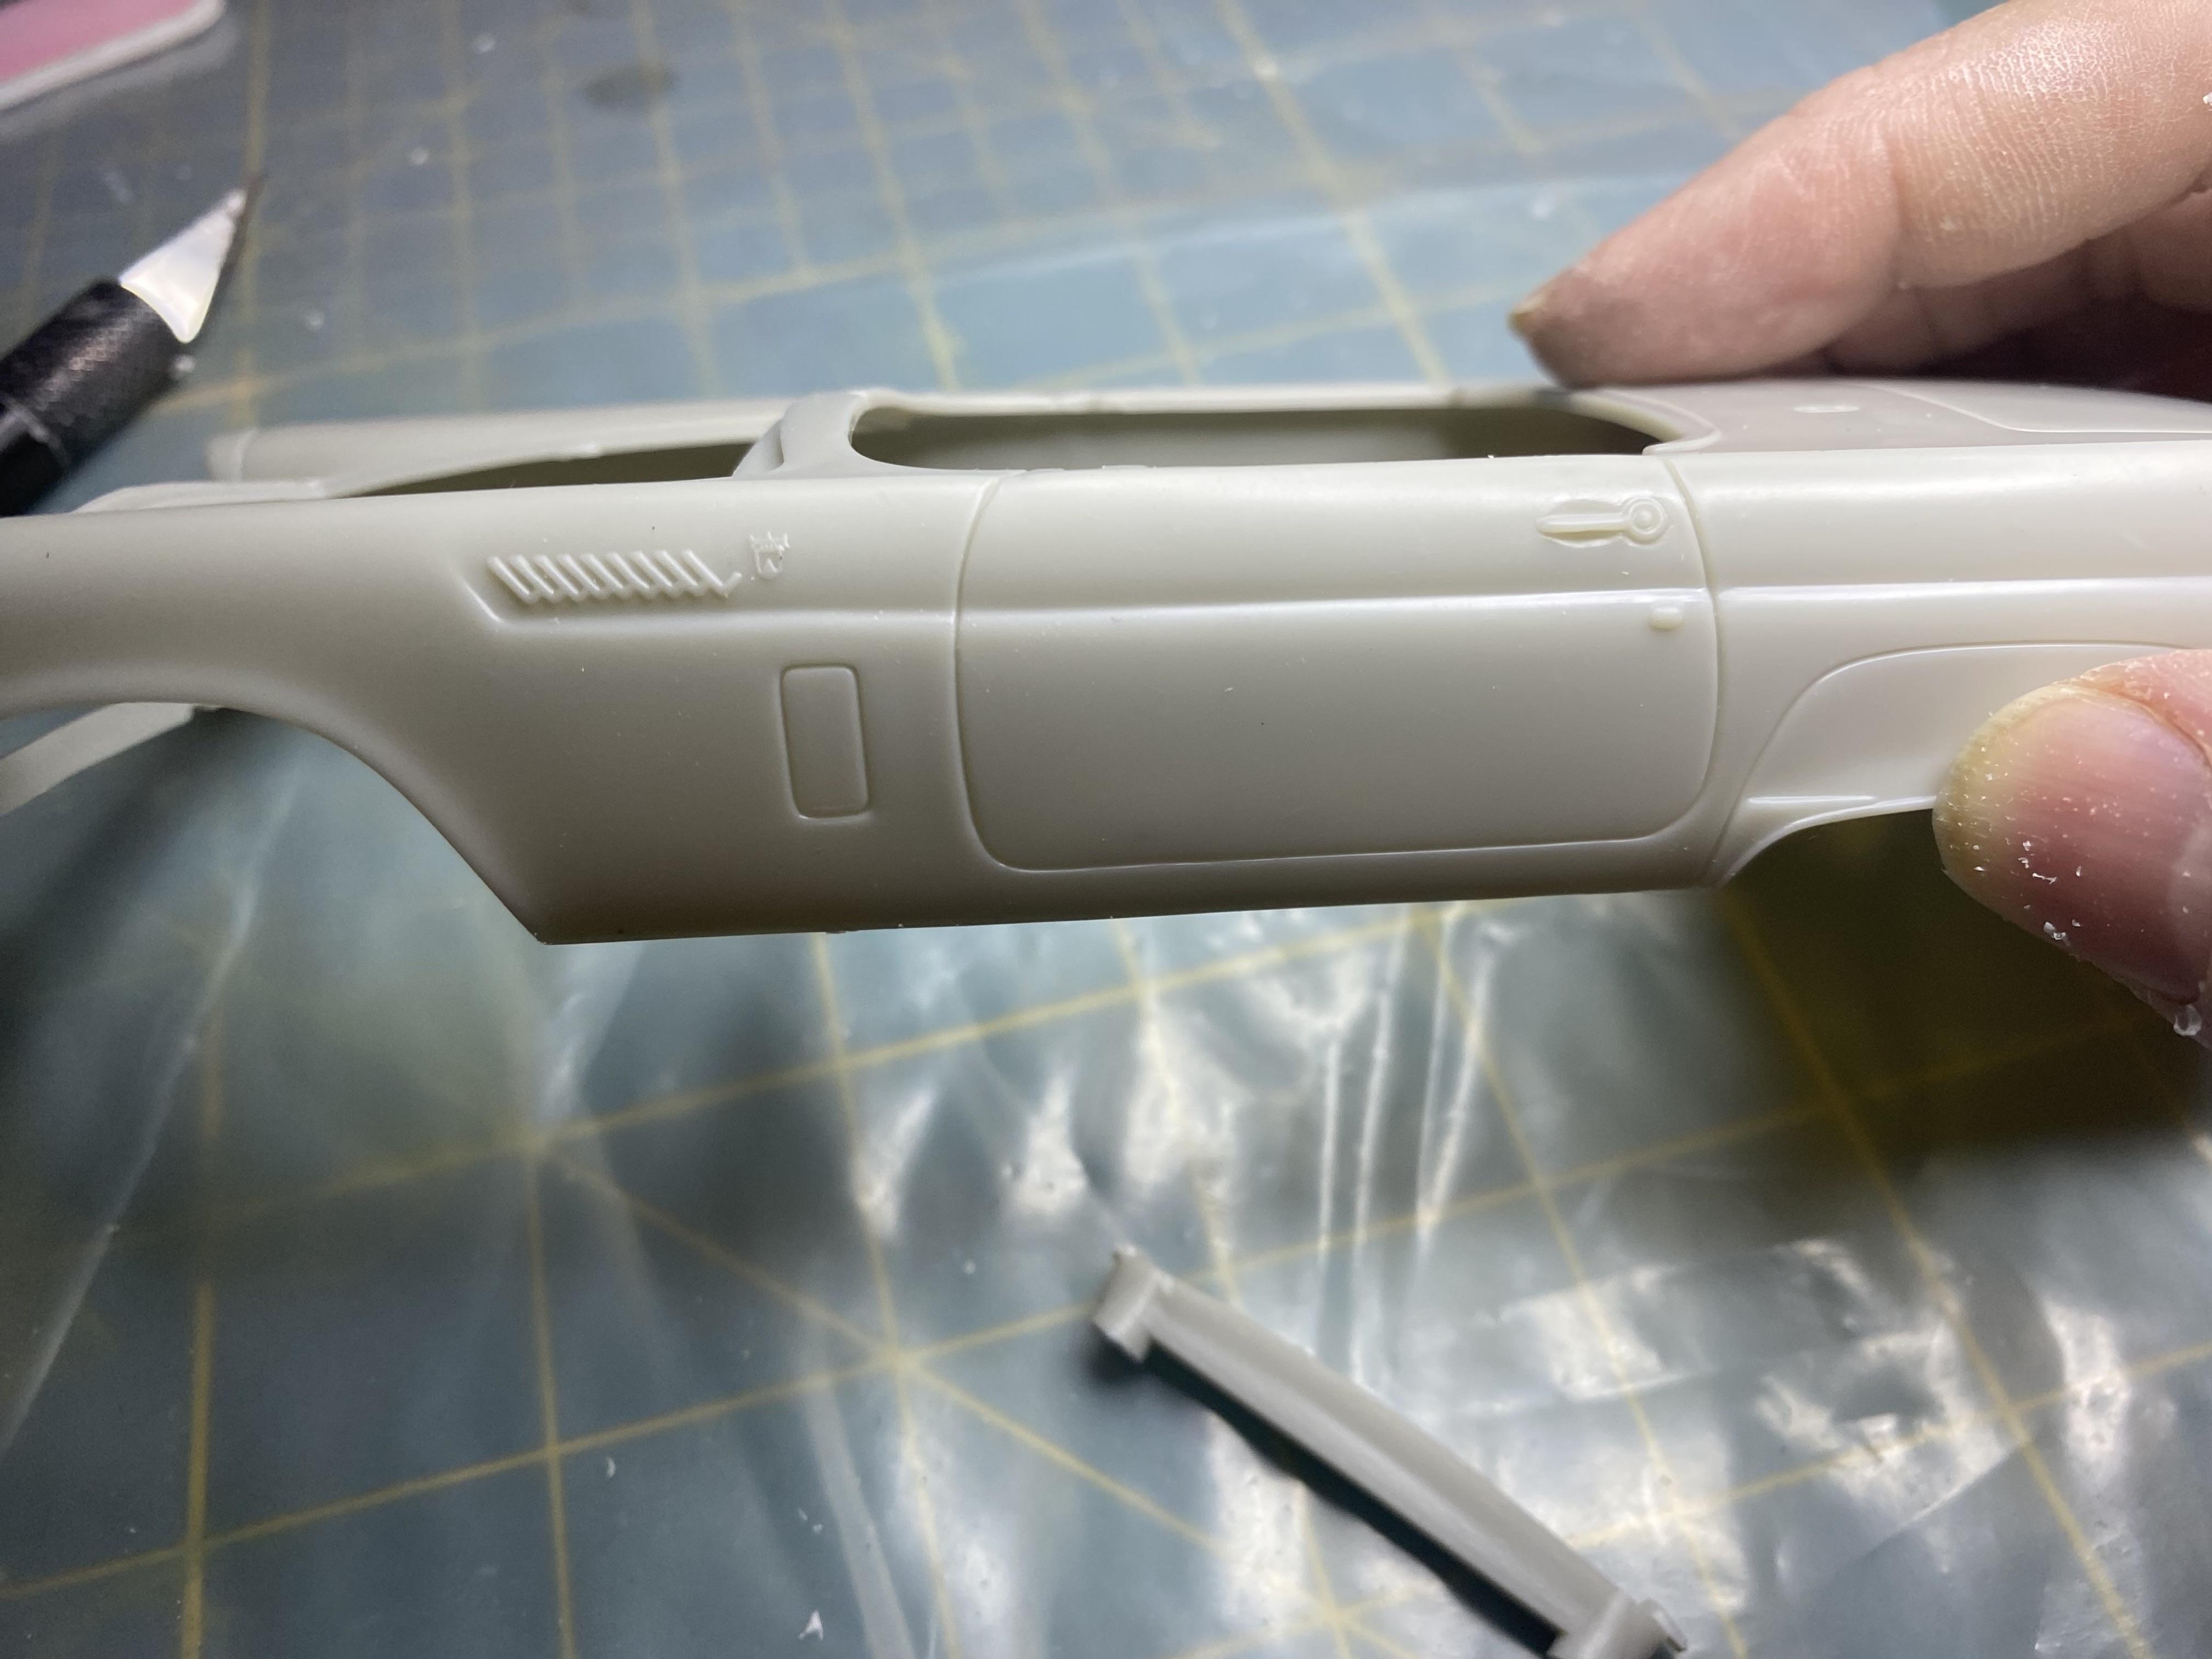
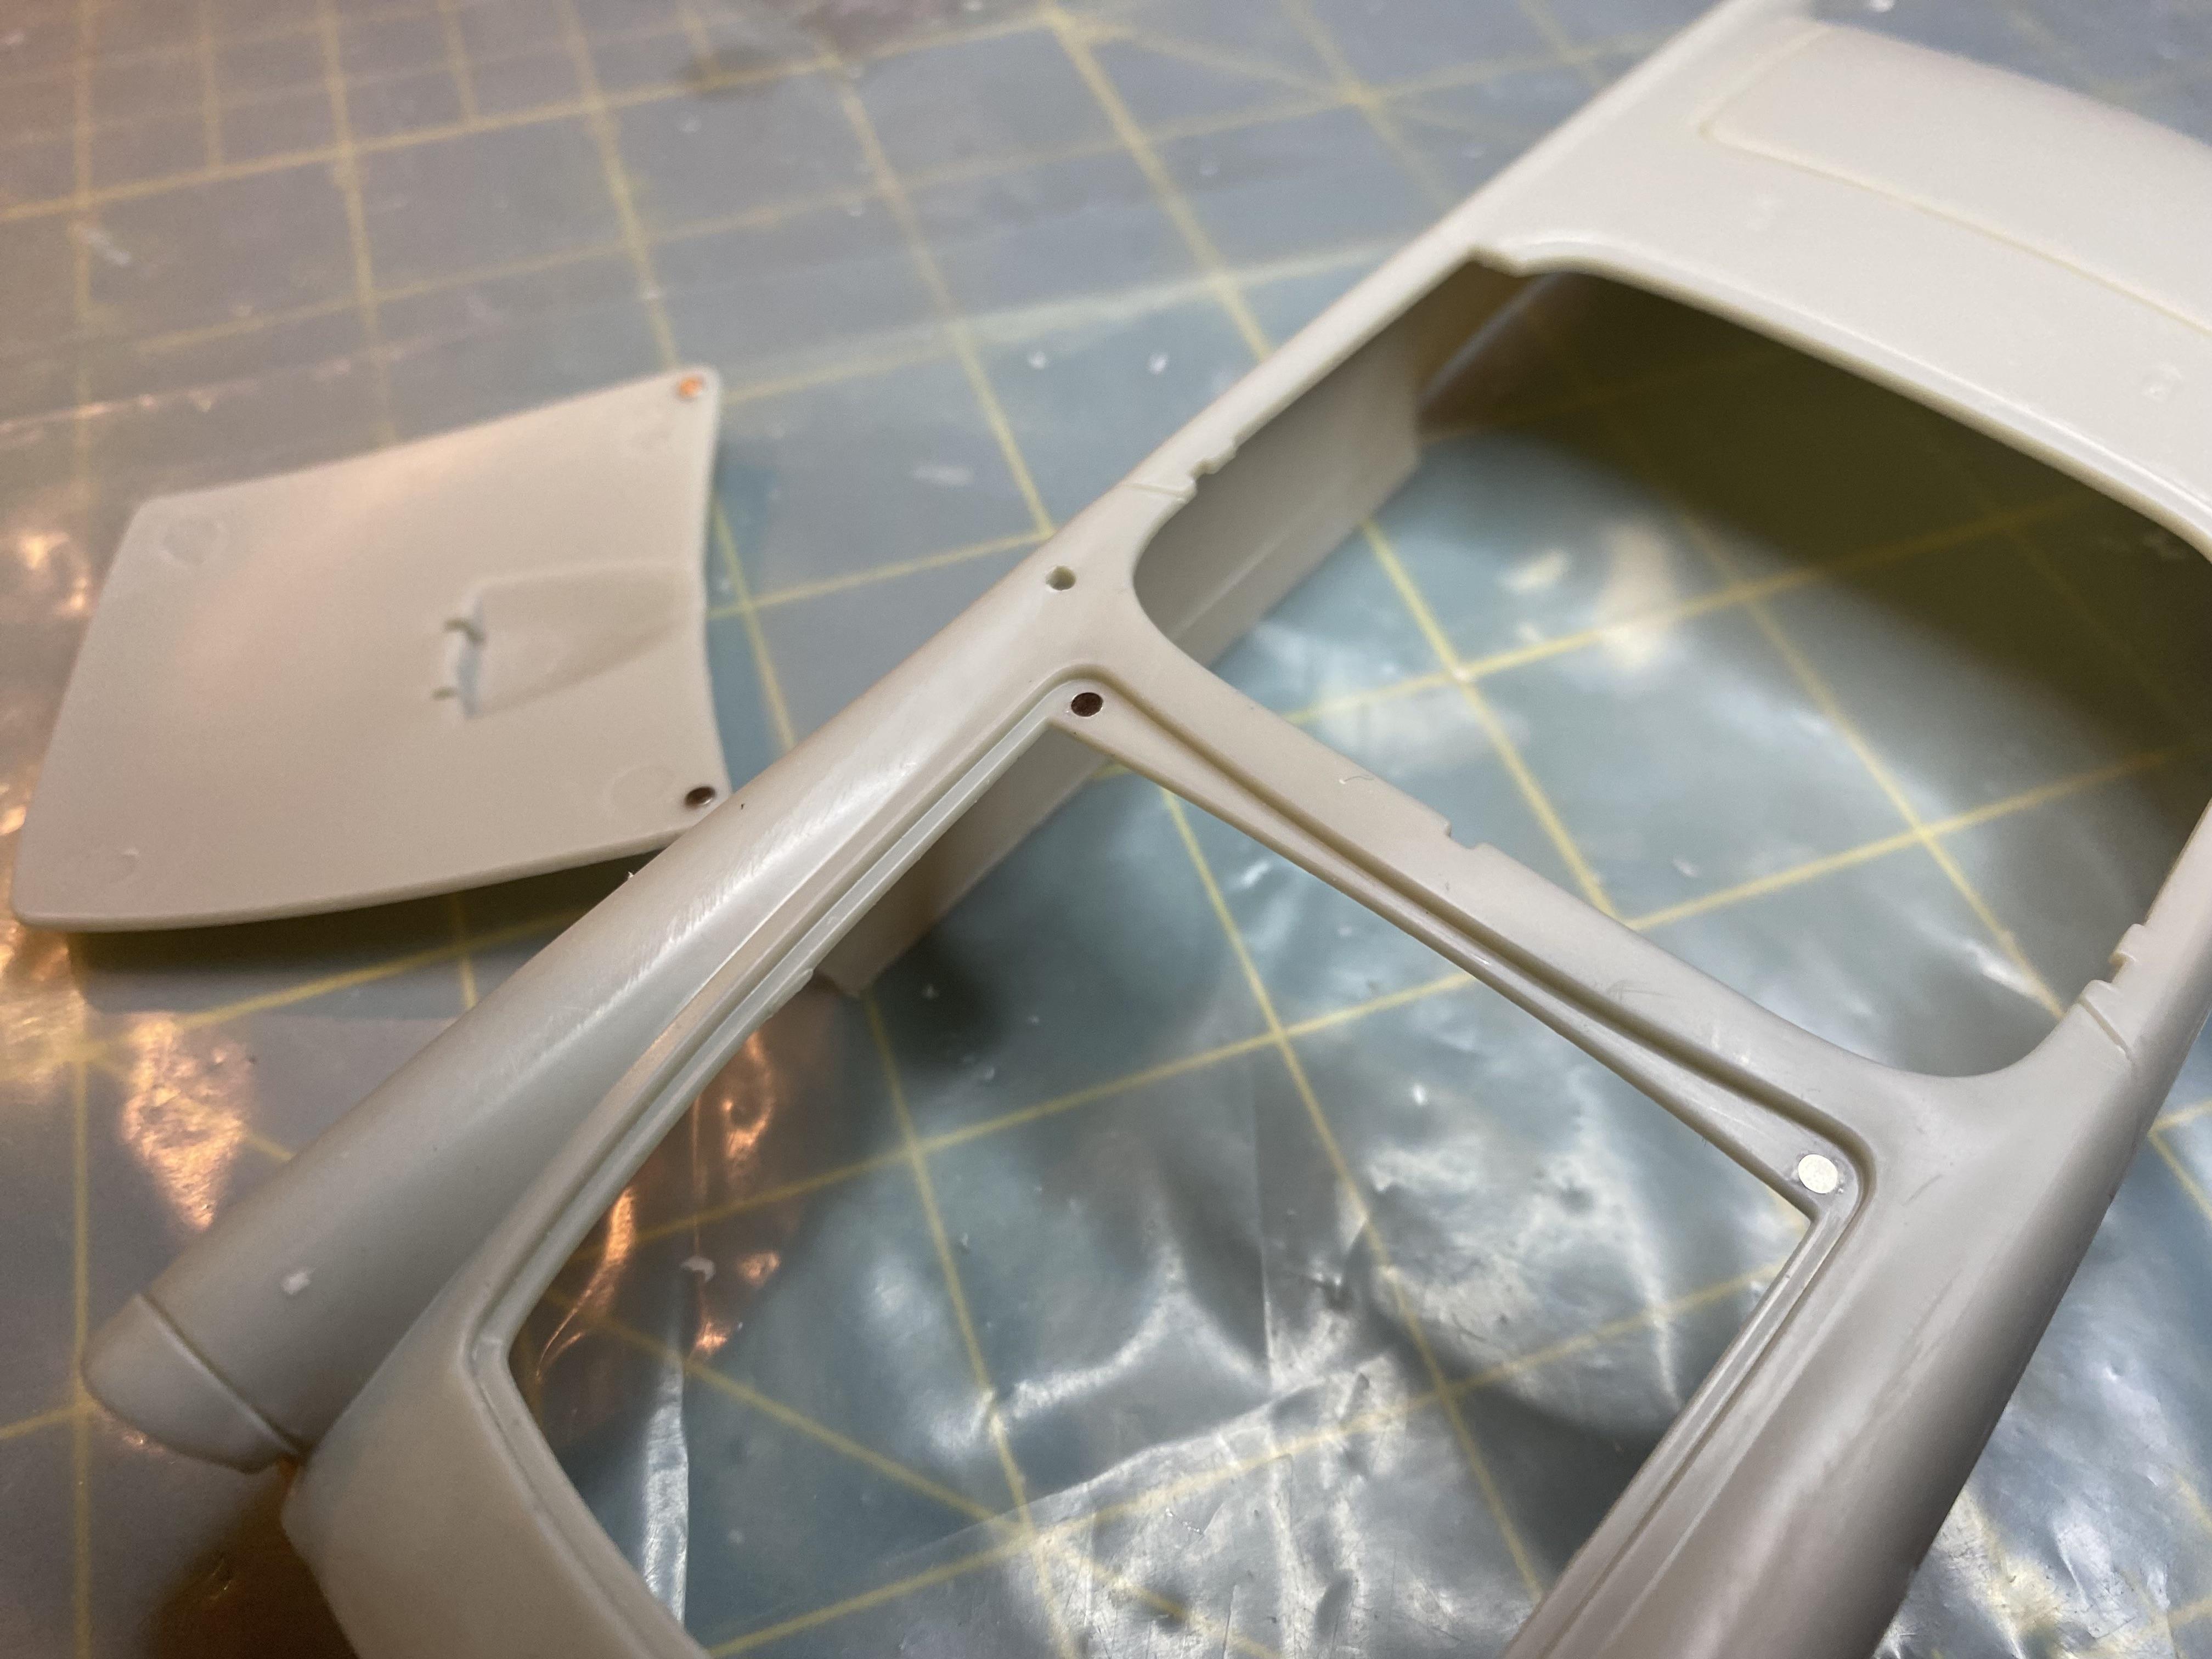
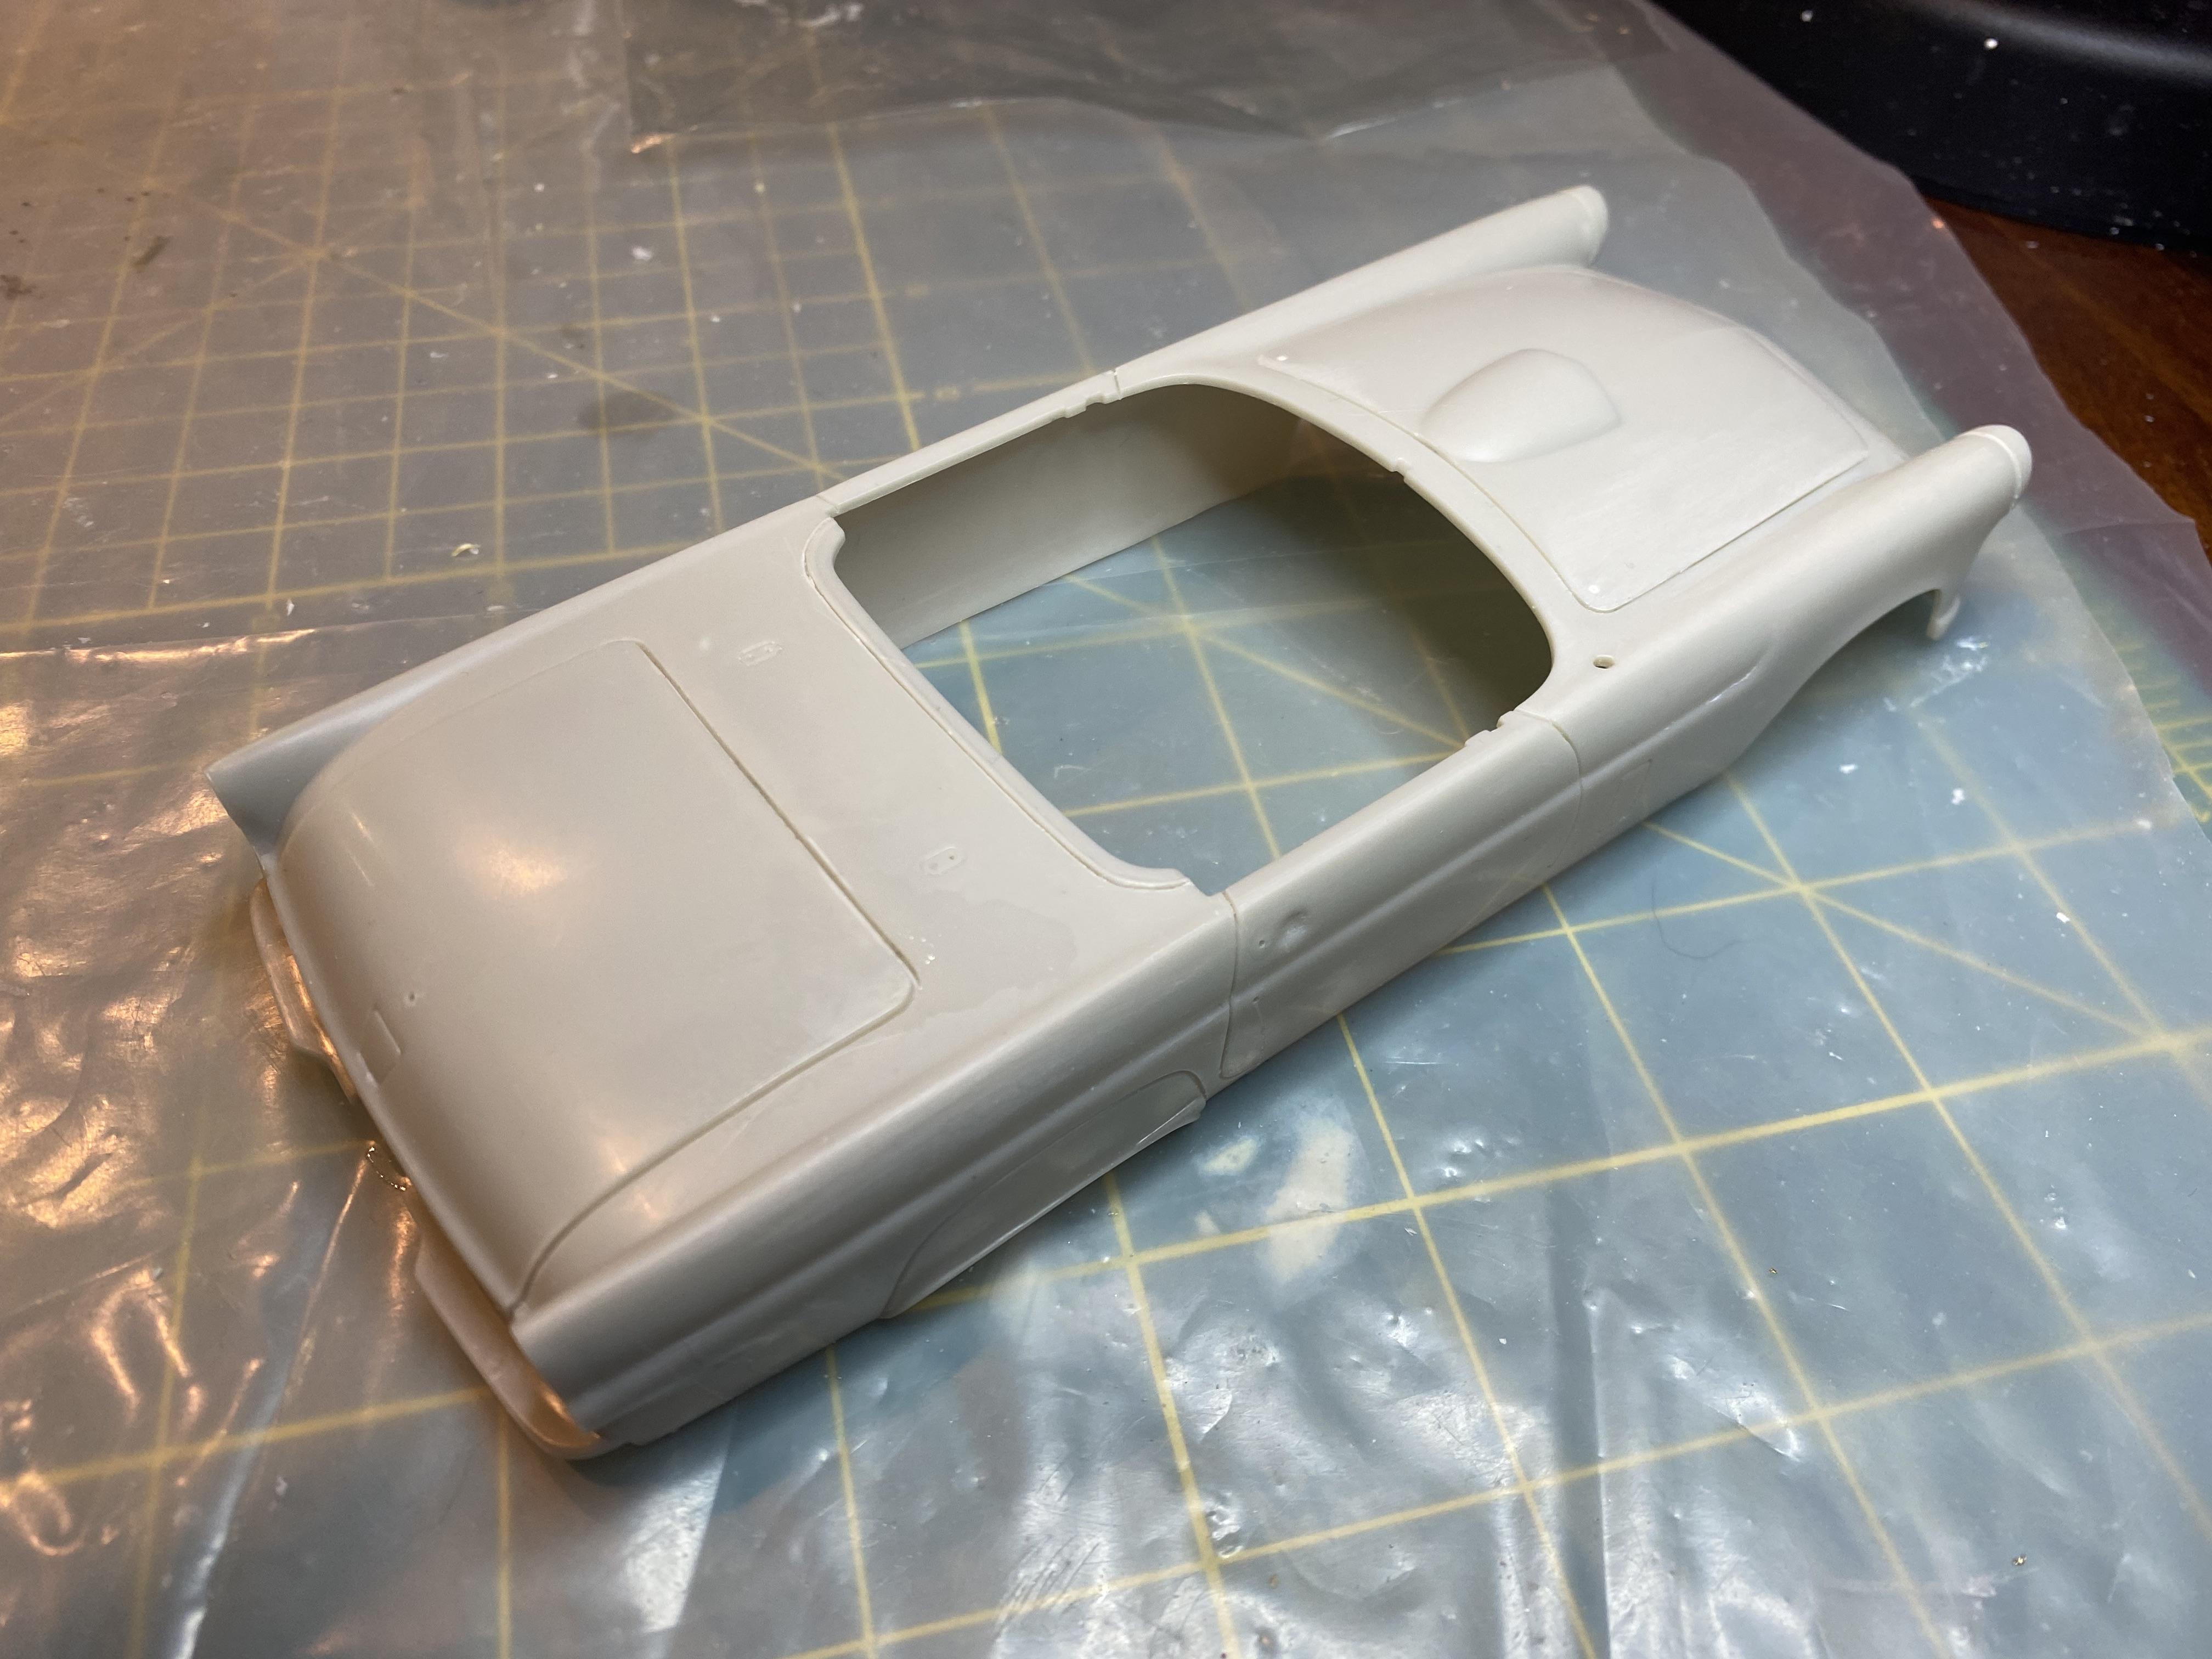
Today I did get a lot of work done on the body. This is such a better kit then the 1957 AMT Thunderbird kit. I removed all of the emblems and etched the door, side skirts, etc. the gaps weren’t bad, but I wanted them deeper to look better. I cut out the headlight buckets and taillights for LEDs. I cut open the trunk lid, added a trunk lip and magnets to hold closed. I added magnets for the hood as well. I then created hinges for both the hood and trunk lid. I tested where the battery will go. It will need to be hidden, somehow. It doesn’t make sense to look like a spare like I usually do. I stripped the chrome from the windshield trim and grill. Then removed the wipers and grill from the surround that will be replaced with photo-etch grill and wipers. I did get a lot done today on the body but more to do. I will be created hood and trunk lid frames even.