TheBEAUMONTGURU
-
Posts
277 -
Joined
-
Last visited
Content Type
Profiles
Forums
Events
Gallery
Everything posted by TheBEAUMONTGURU
-
 The revell 66 chevy truck grill is crappy as everyone knows. is there a source for a better 64-66 grill that fits in the revell body? Also, the MPC 1978 dodge truck kit, does anyone make an earlier mid 70's grill? If not, im sure there would be a market to sell them on here.
 -
Body Holder for Painting
TheBEAUMONTGURU replied to bill-e-boy's topic in Tips, Tricks, and Tutorials
Ha! ya im using the same one as you steve, made up about 4 of them over 30 years ago, i wonder if that was from a low buck tech tips scale auto magazine article in the 90's? -
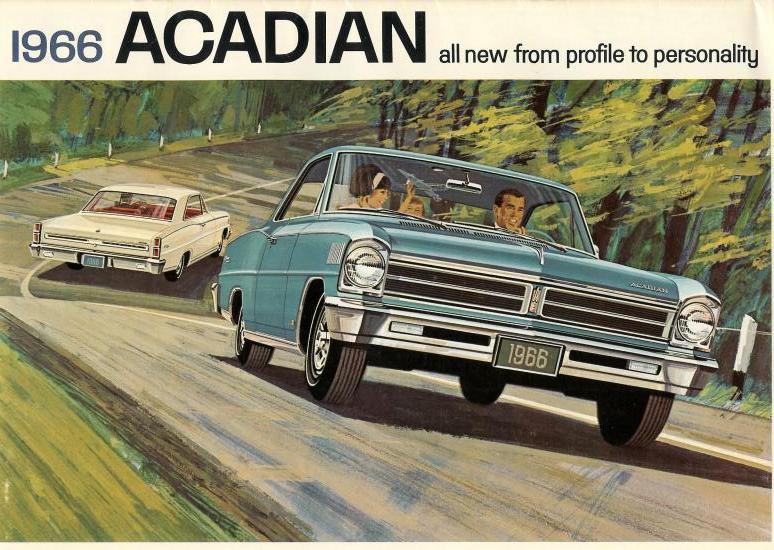
1966 ACADIAN CANSO Sport Deluxe
TheBEAUMONTGURU replied to TheBEAUMONTGURU's topic in WIP: Model Cars
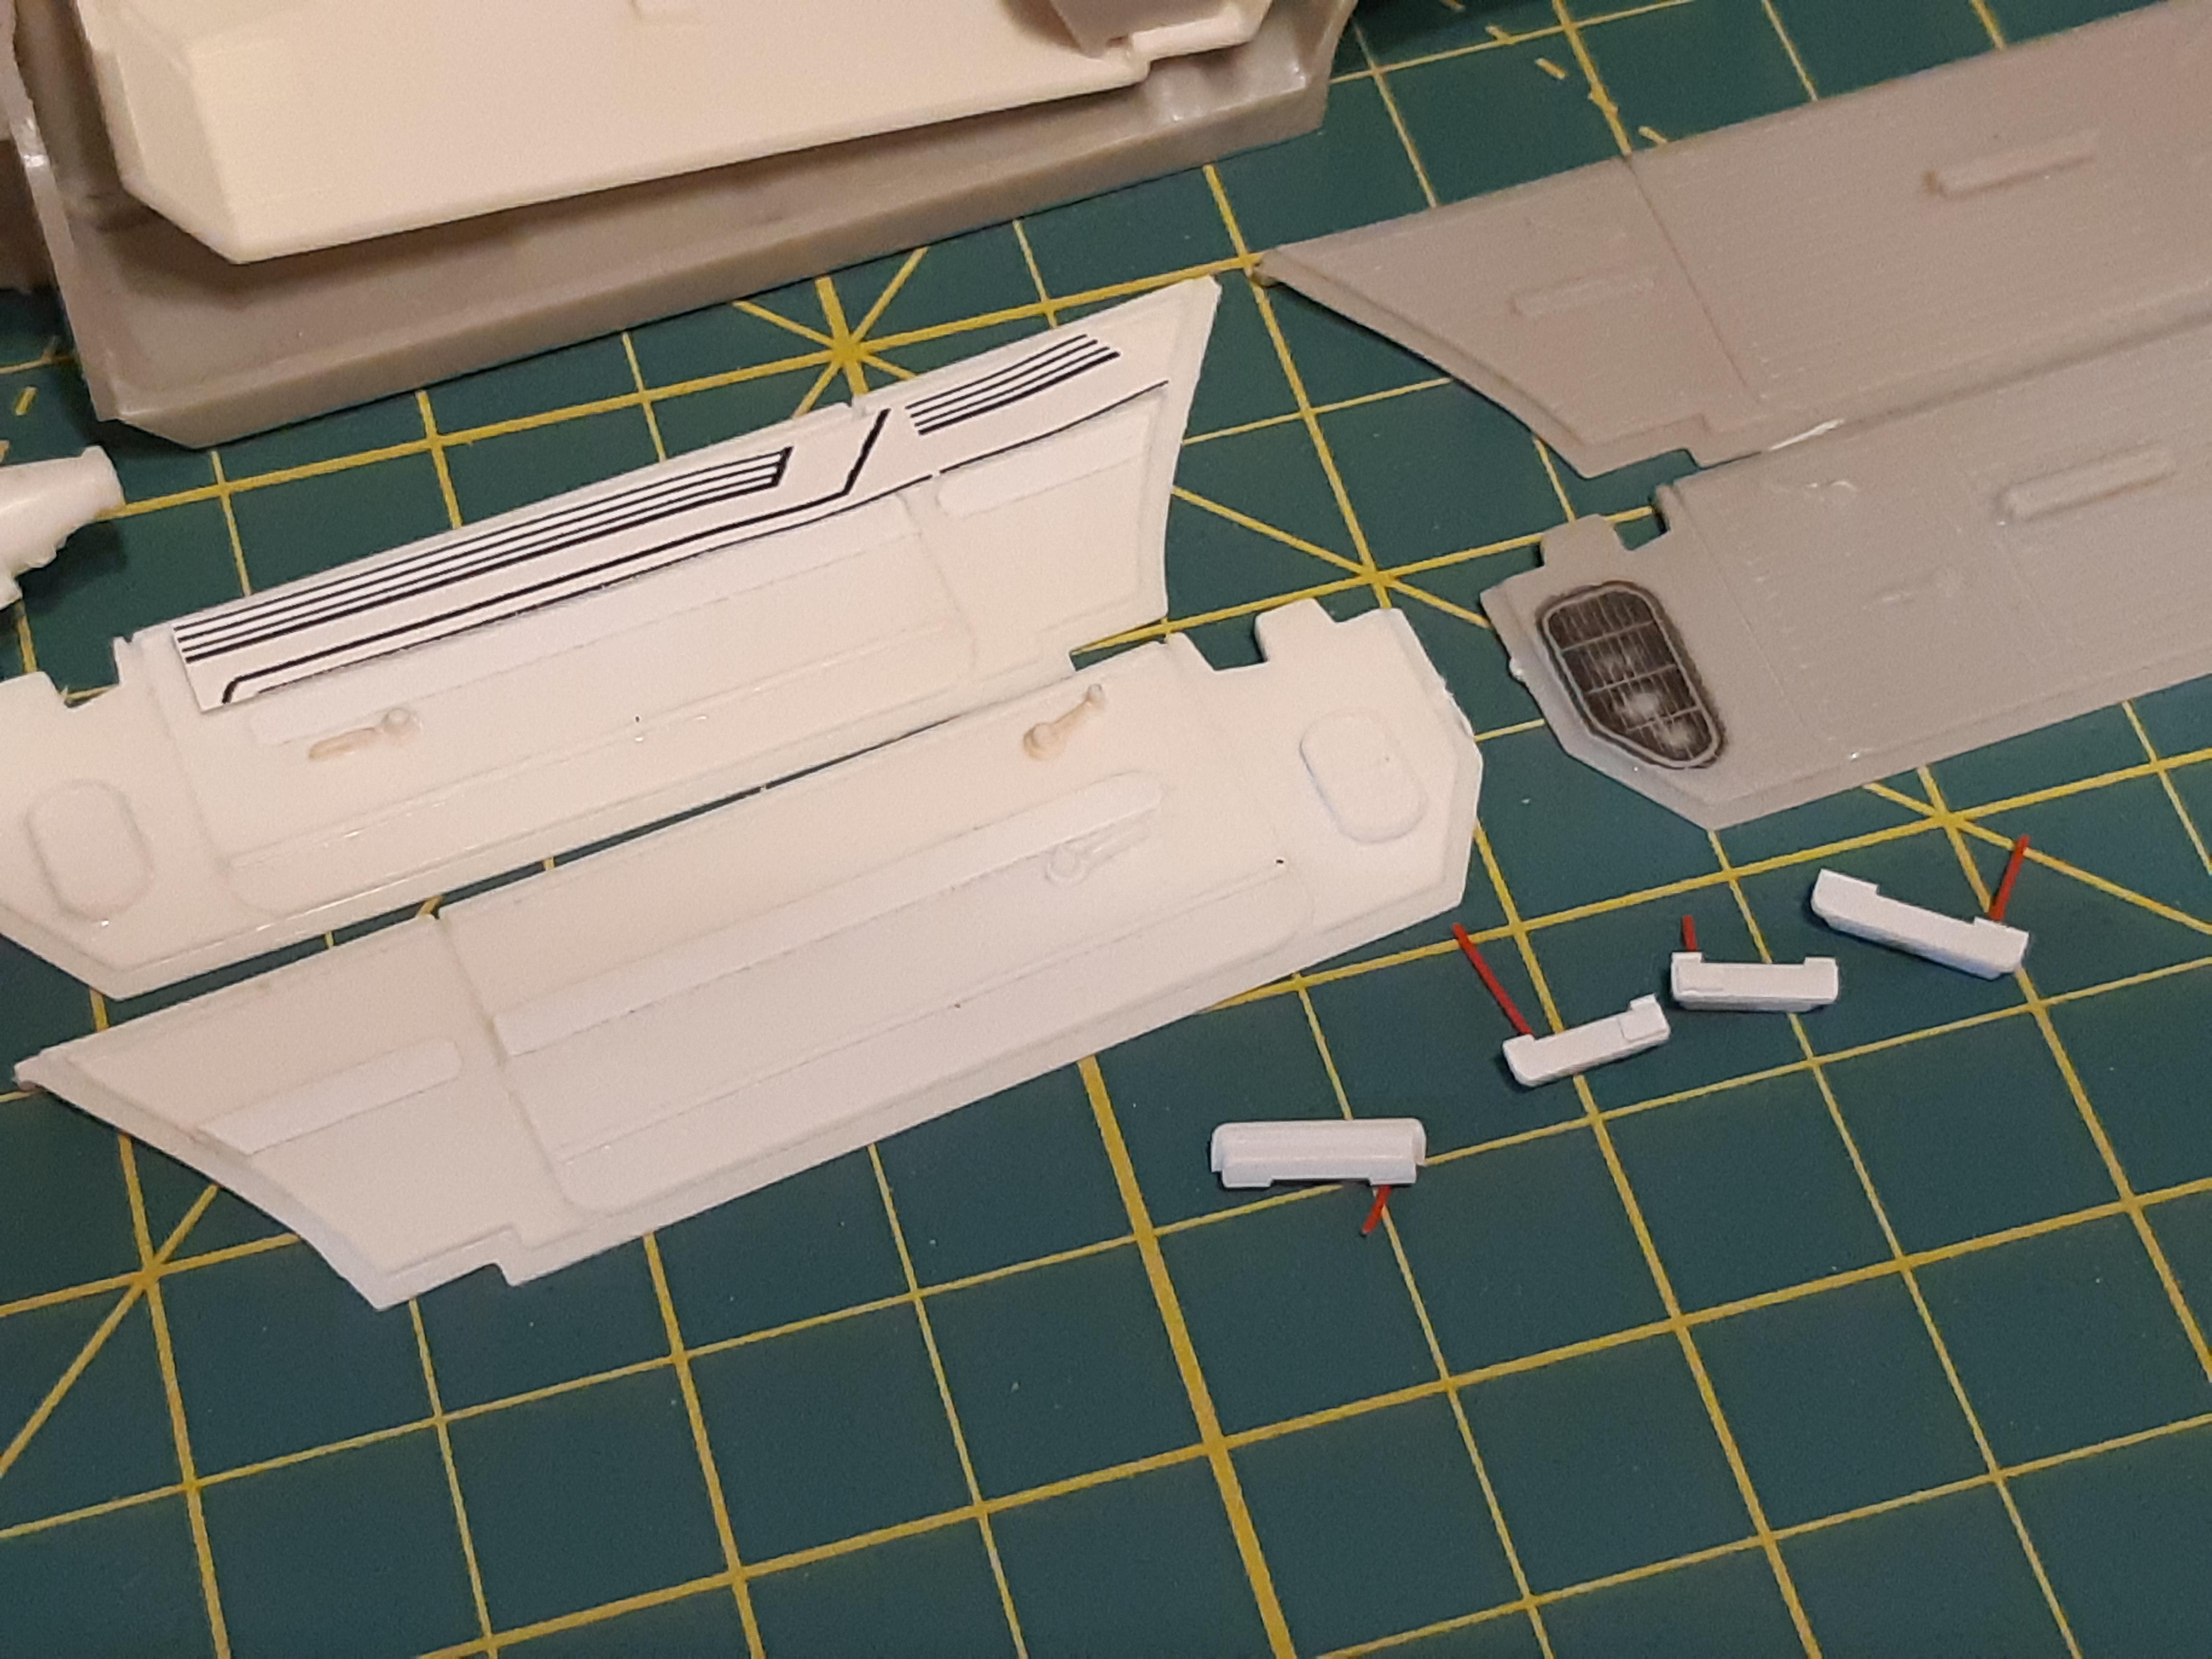
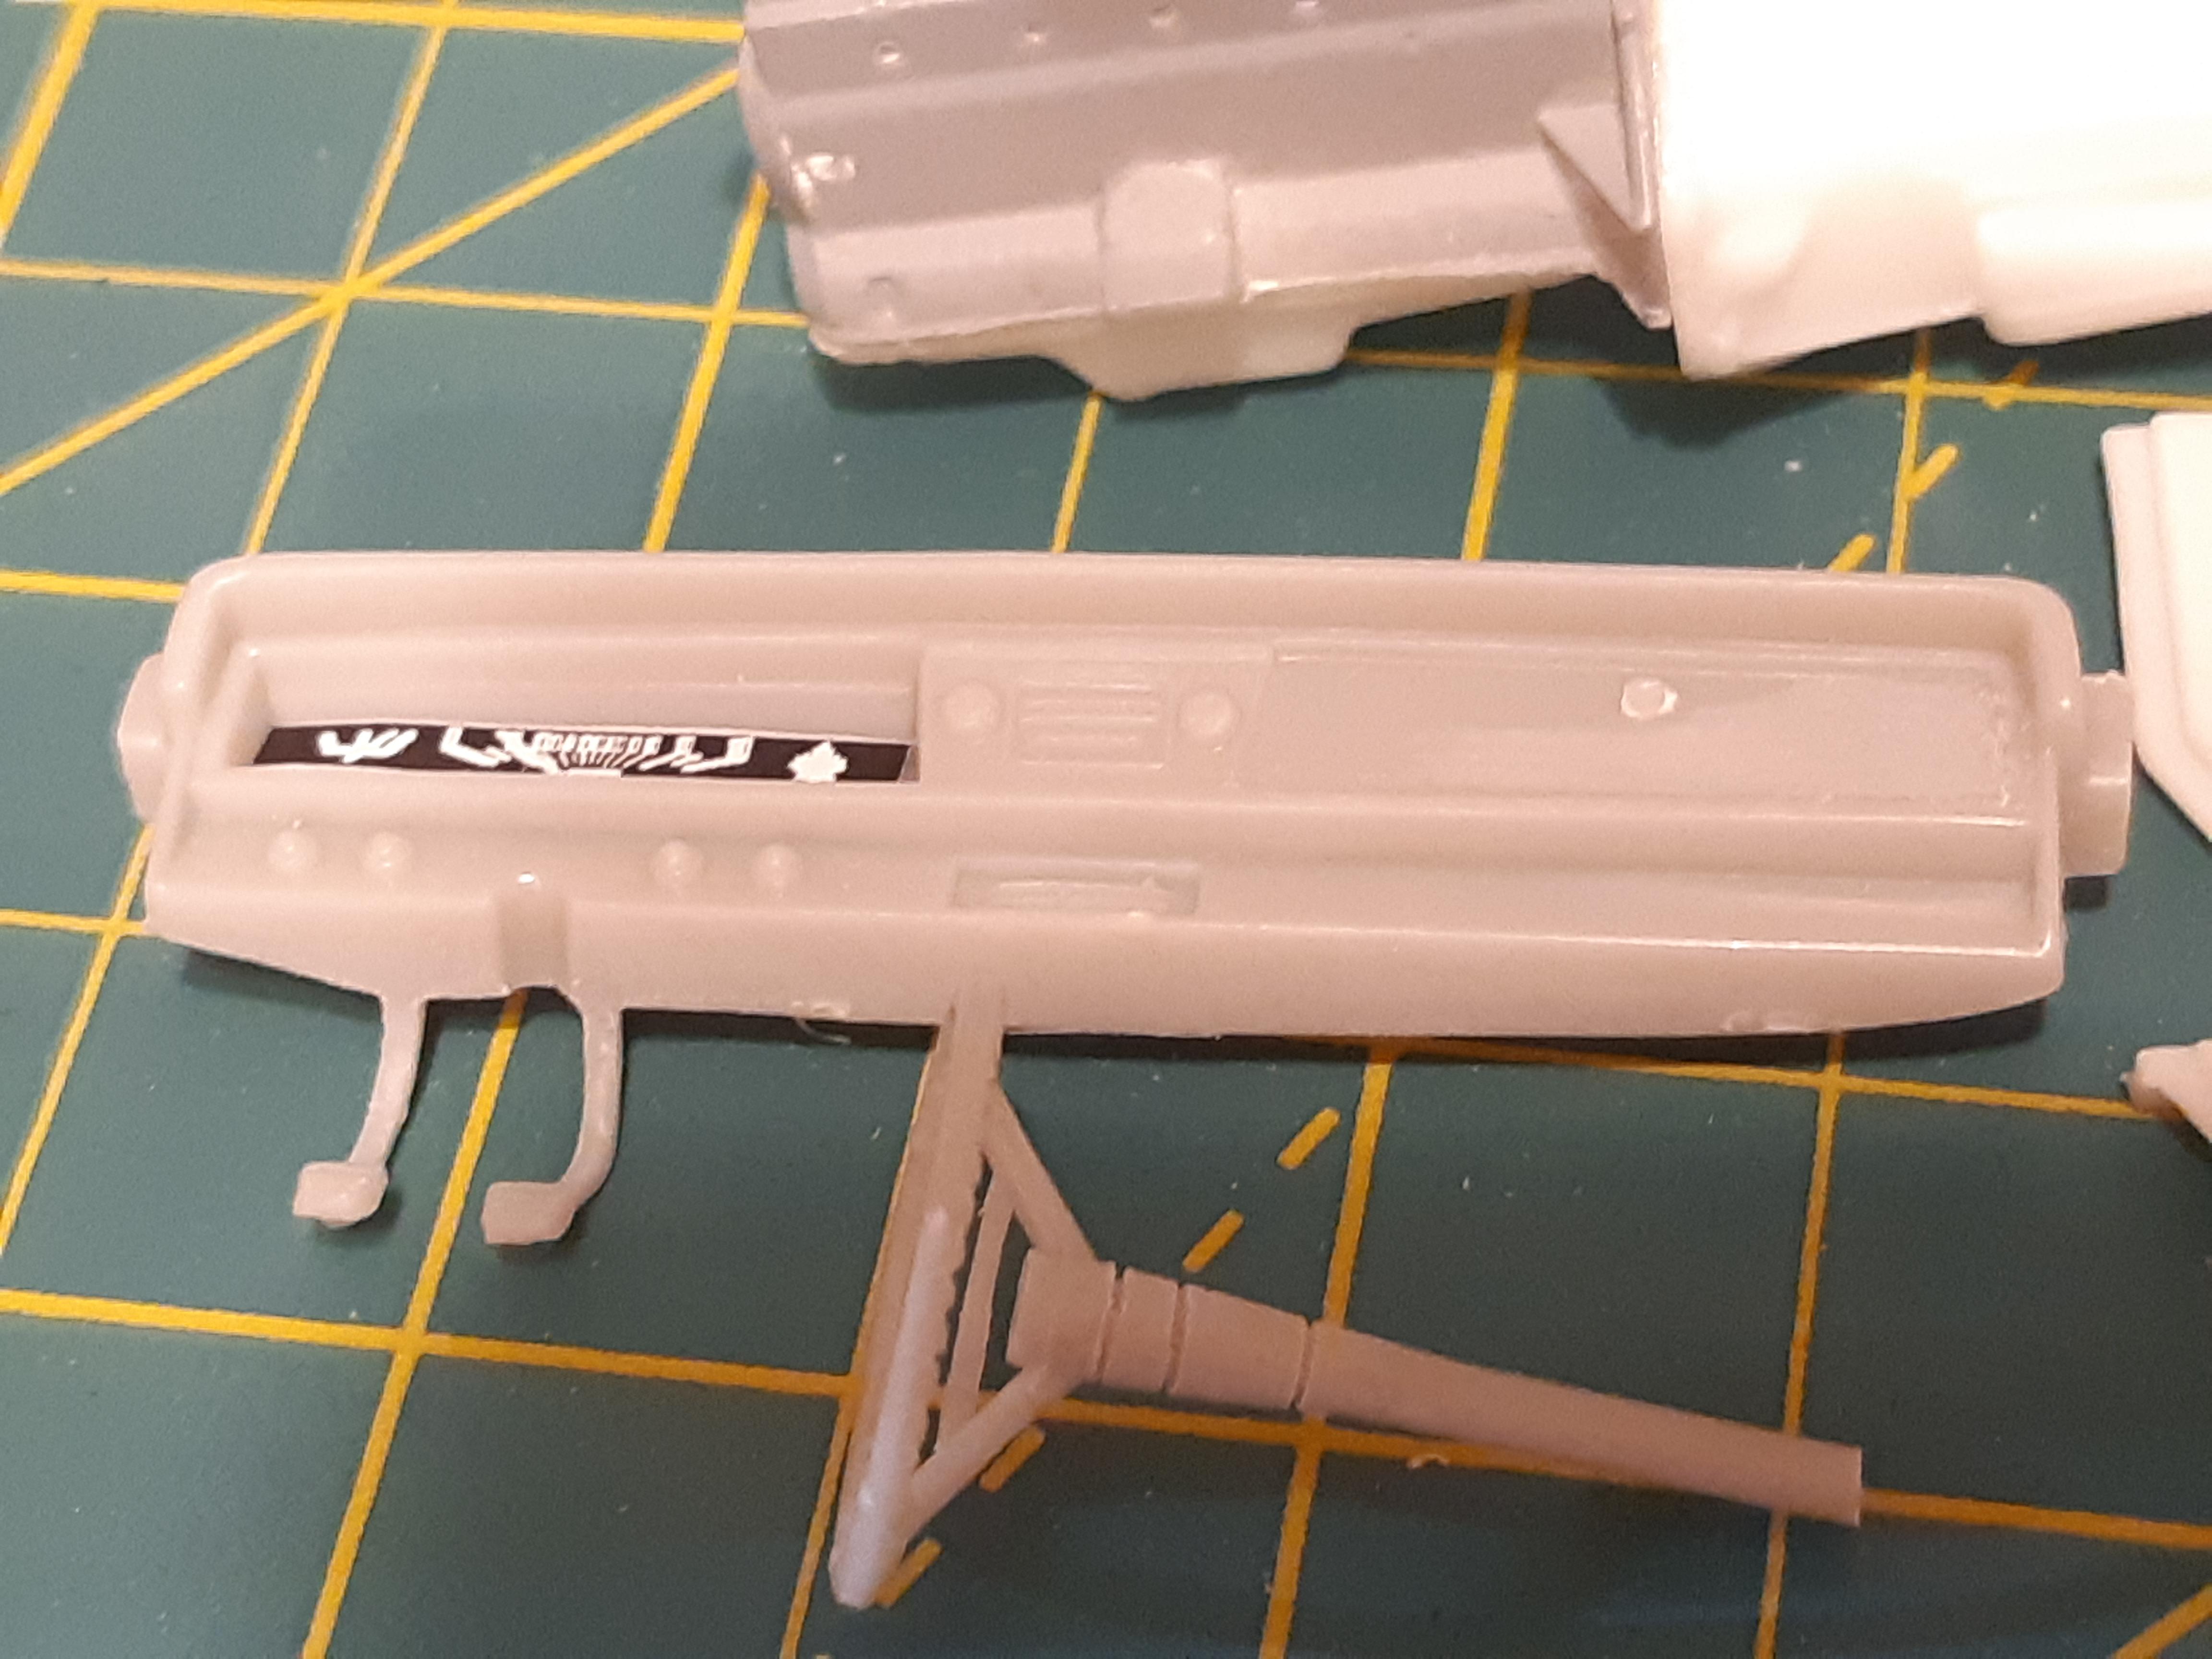
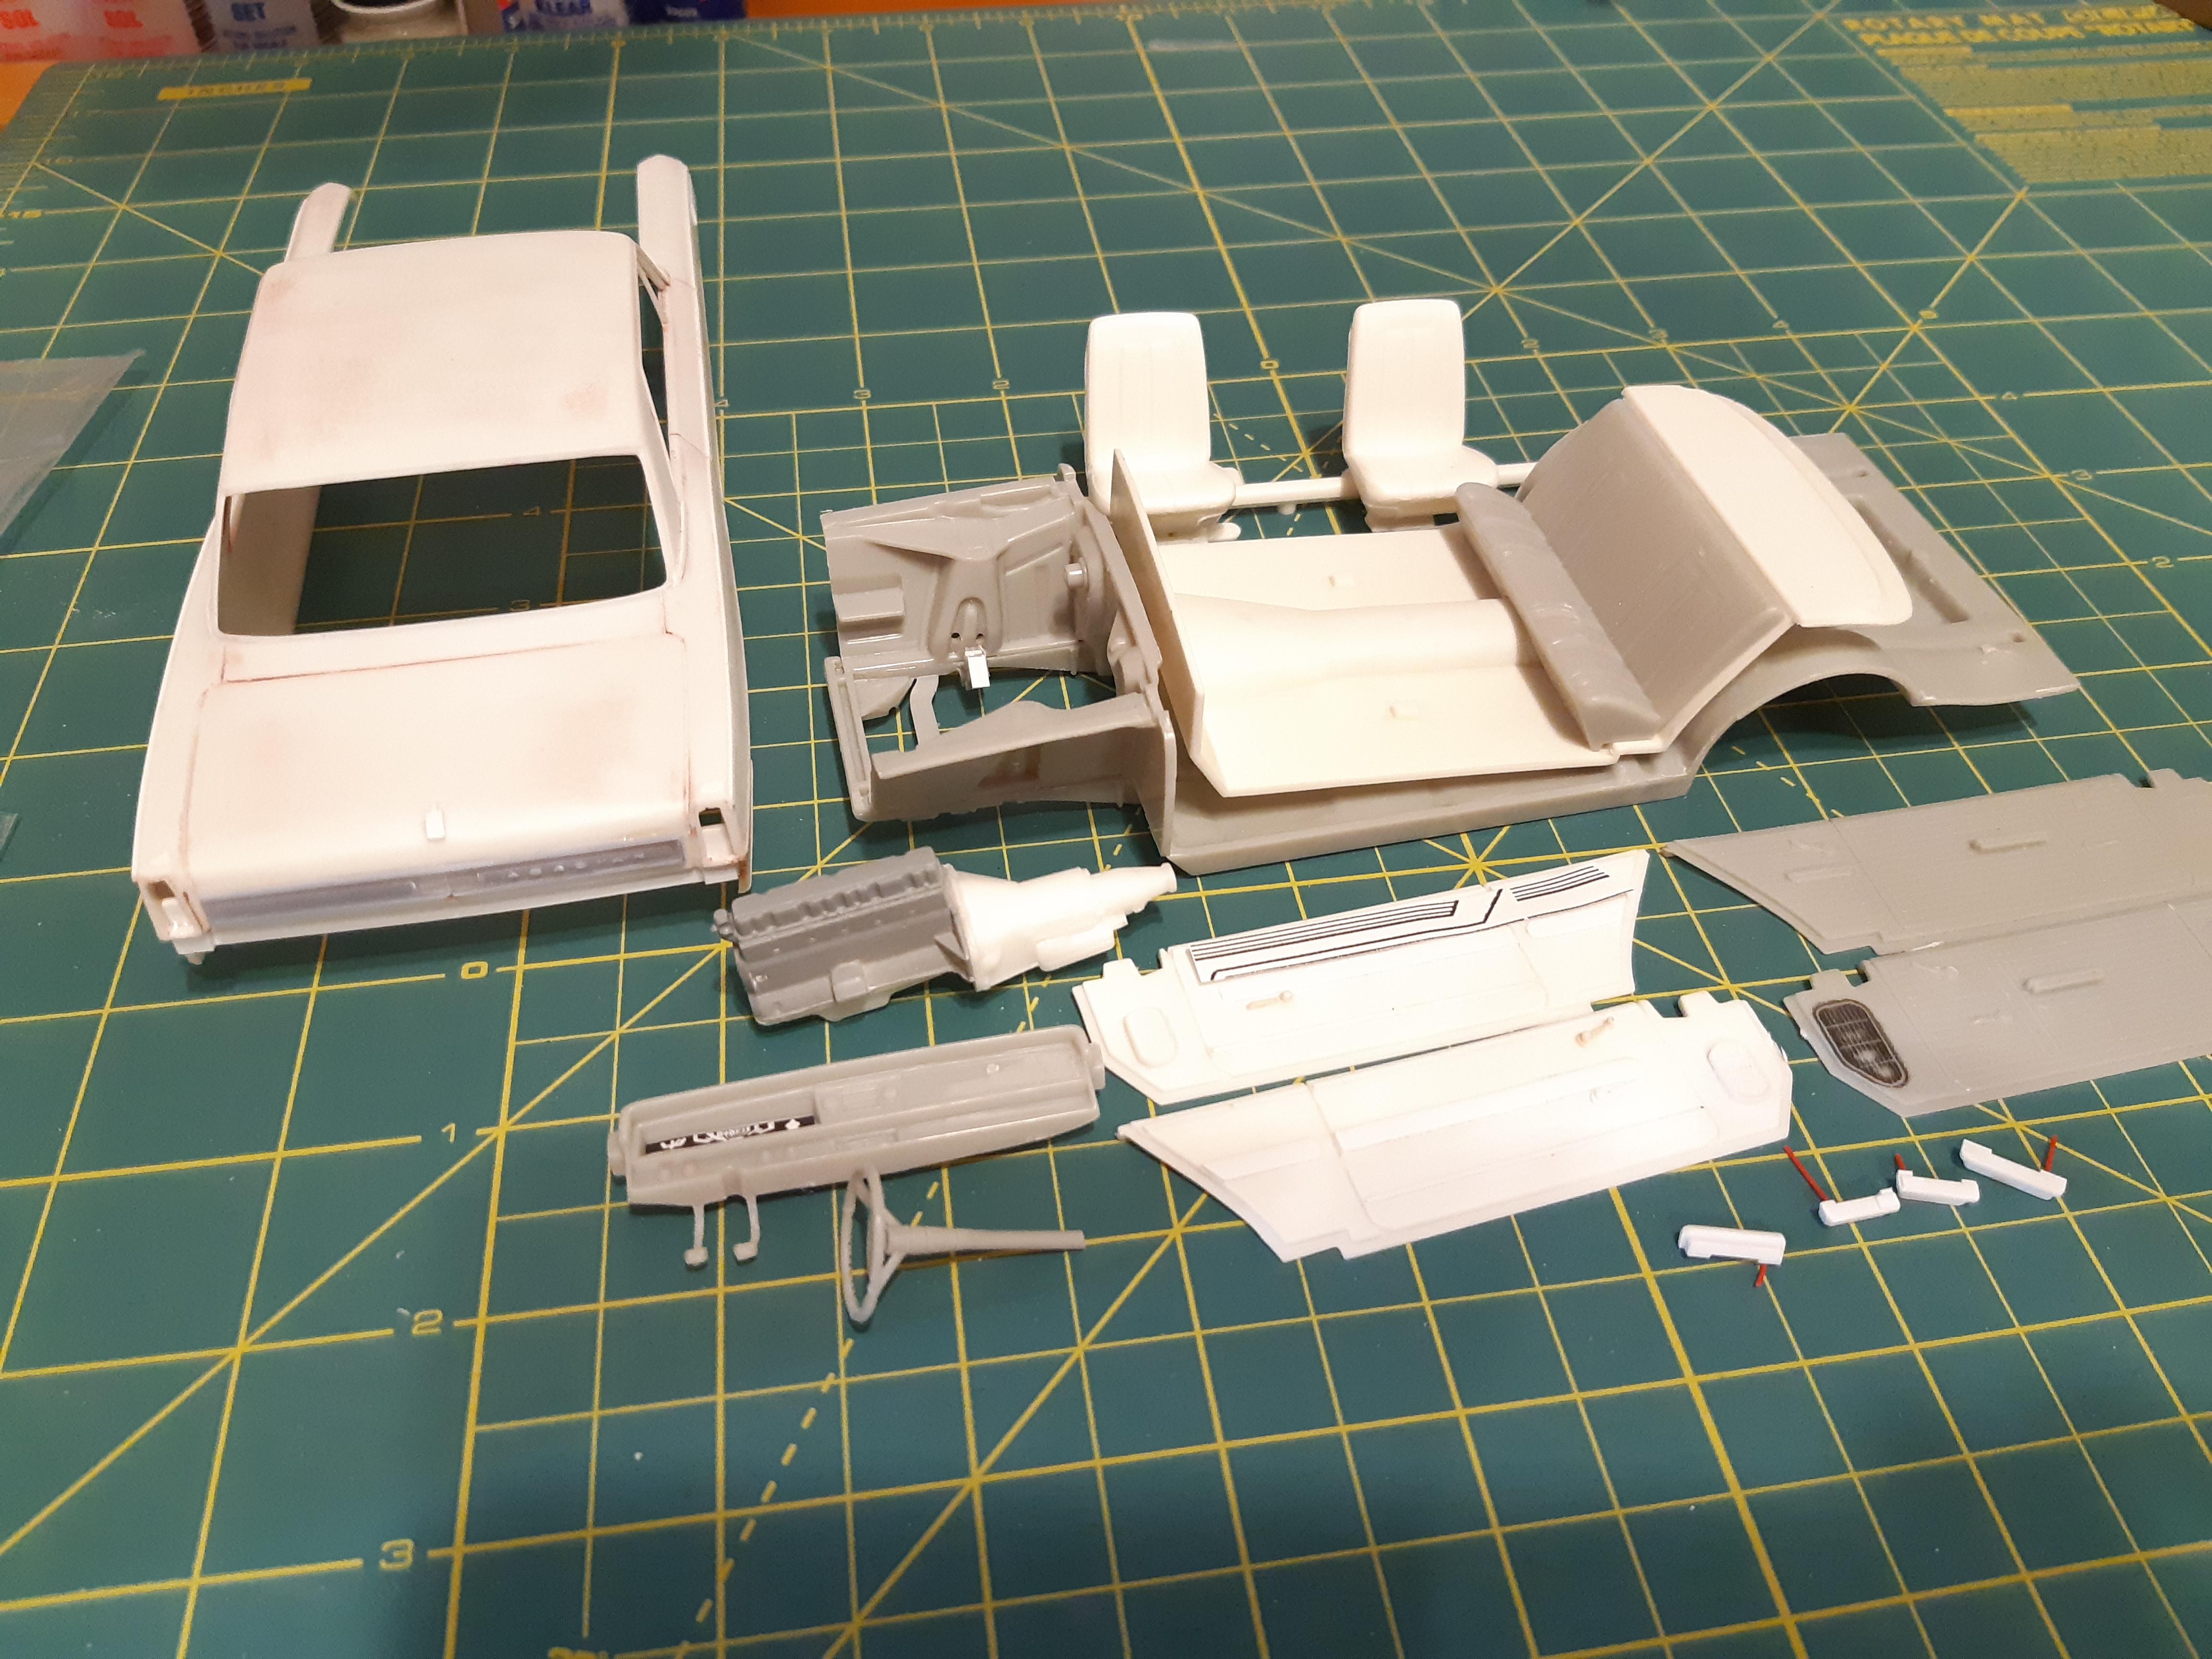
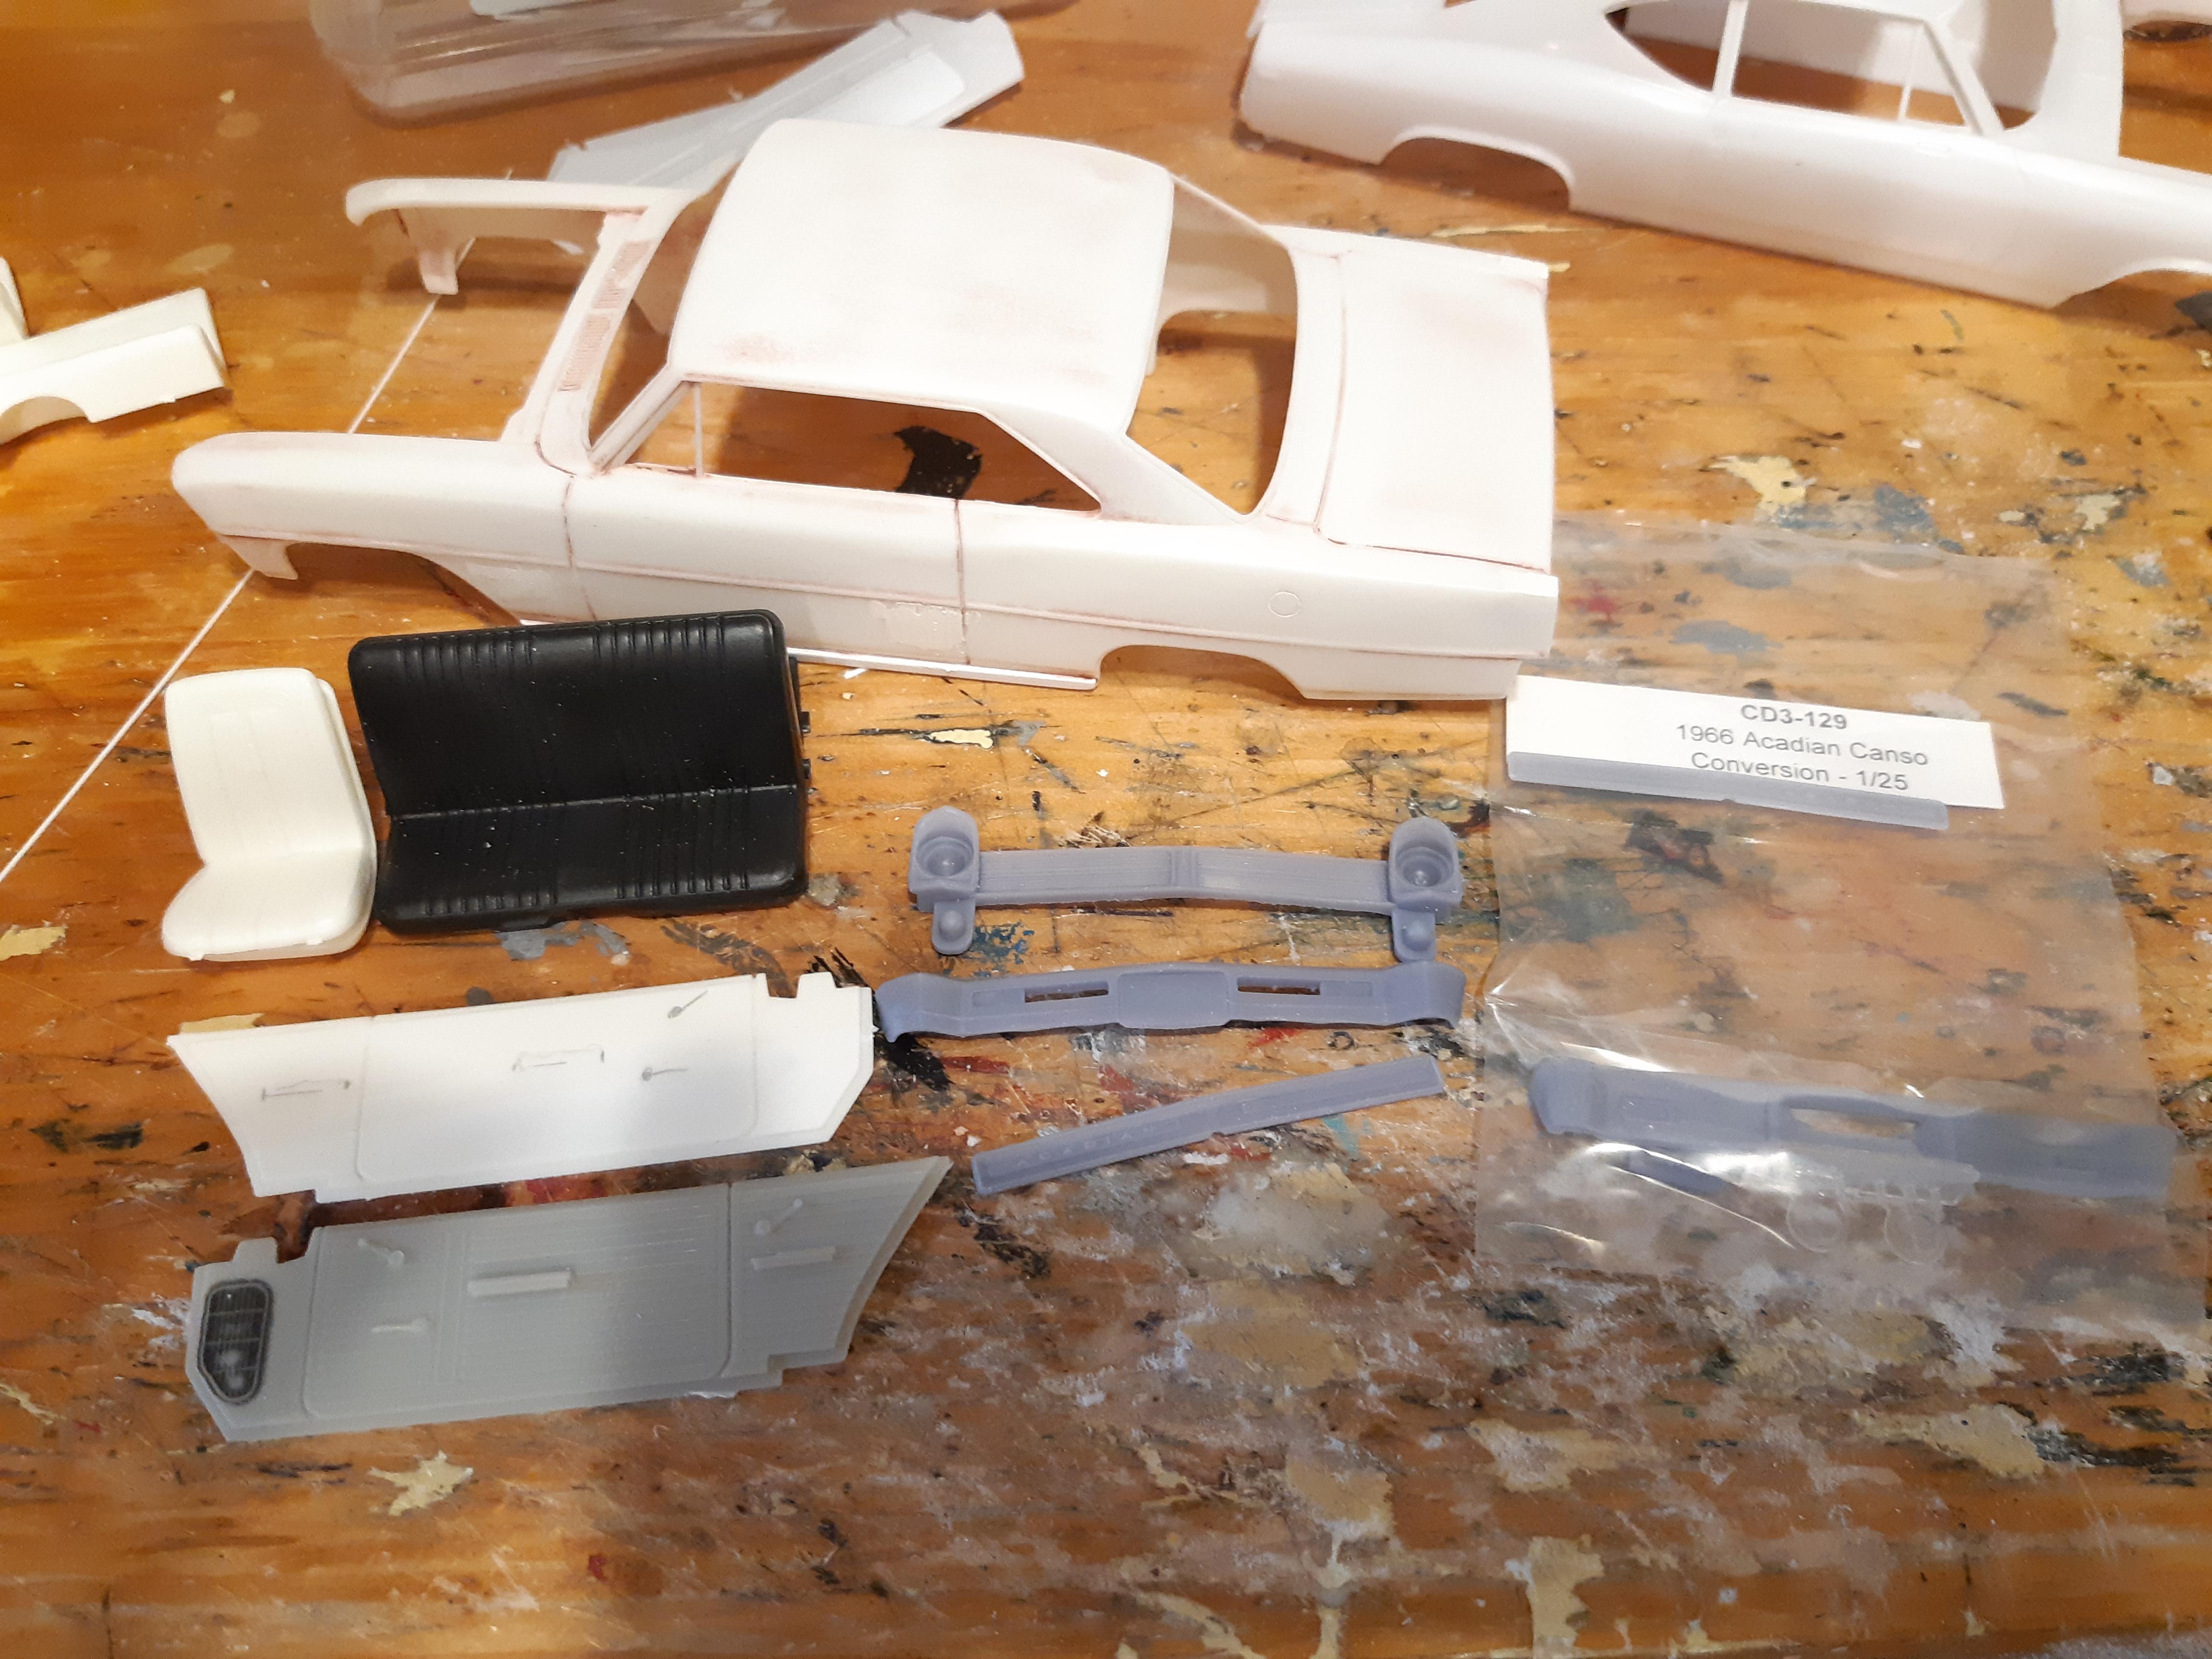
Here we see my Canso pattern door panels coming along, scratch built armrests and some window cranks and handles swapped over from some parts bin stuff. I will use a decal for the heat-pressed patterning in the panels. I also made a decal for the insturment cluster, complete with the correct clock delete panel with Acadian mapleleaf. steering wheel got finger grooves carved into it and the colunm got some better detail by carving a few grooves in the right places.
-
1966 ACADIAN CANSO Sport Deluxe
TheBEAUMONTGURU replied to TheBEAUMONTGURU's topic in WIP: Model Cars
Lots of things going on in this build. To answer the L79 question: nope. This ones getting a 6 cyl with a 3-on-the-tree hence a console delete with buckets(wierd but available new). Hey why not, us thrifty canadians were notorious for ordering top line cars with ZERO options! The trumpeter nova 6 cyl is resin cast, and mated to a Revell 64 impala Powerglide, but i will replace it with a 3 speed.
-
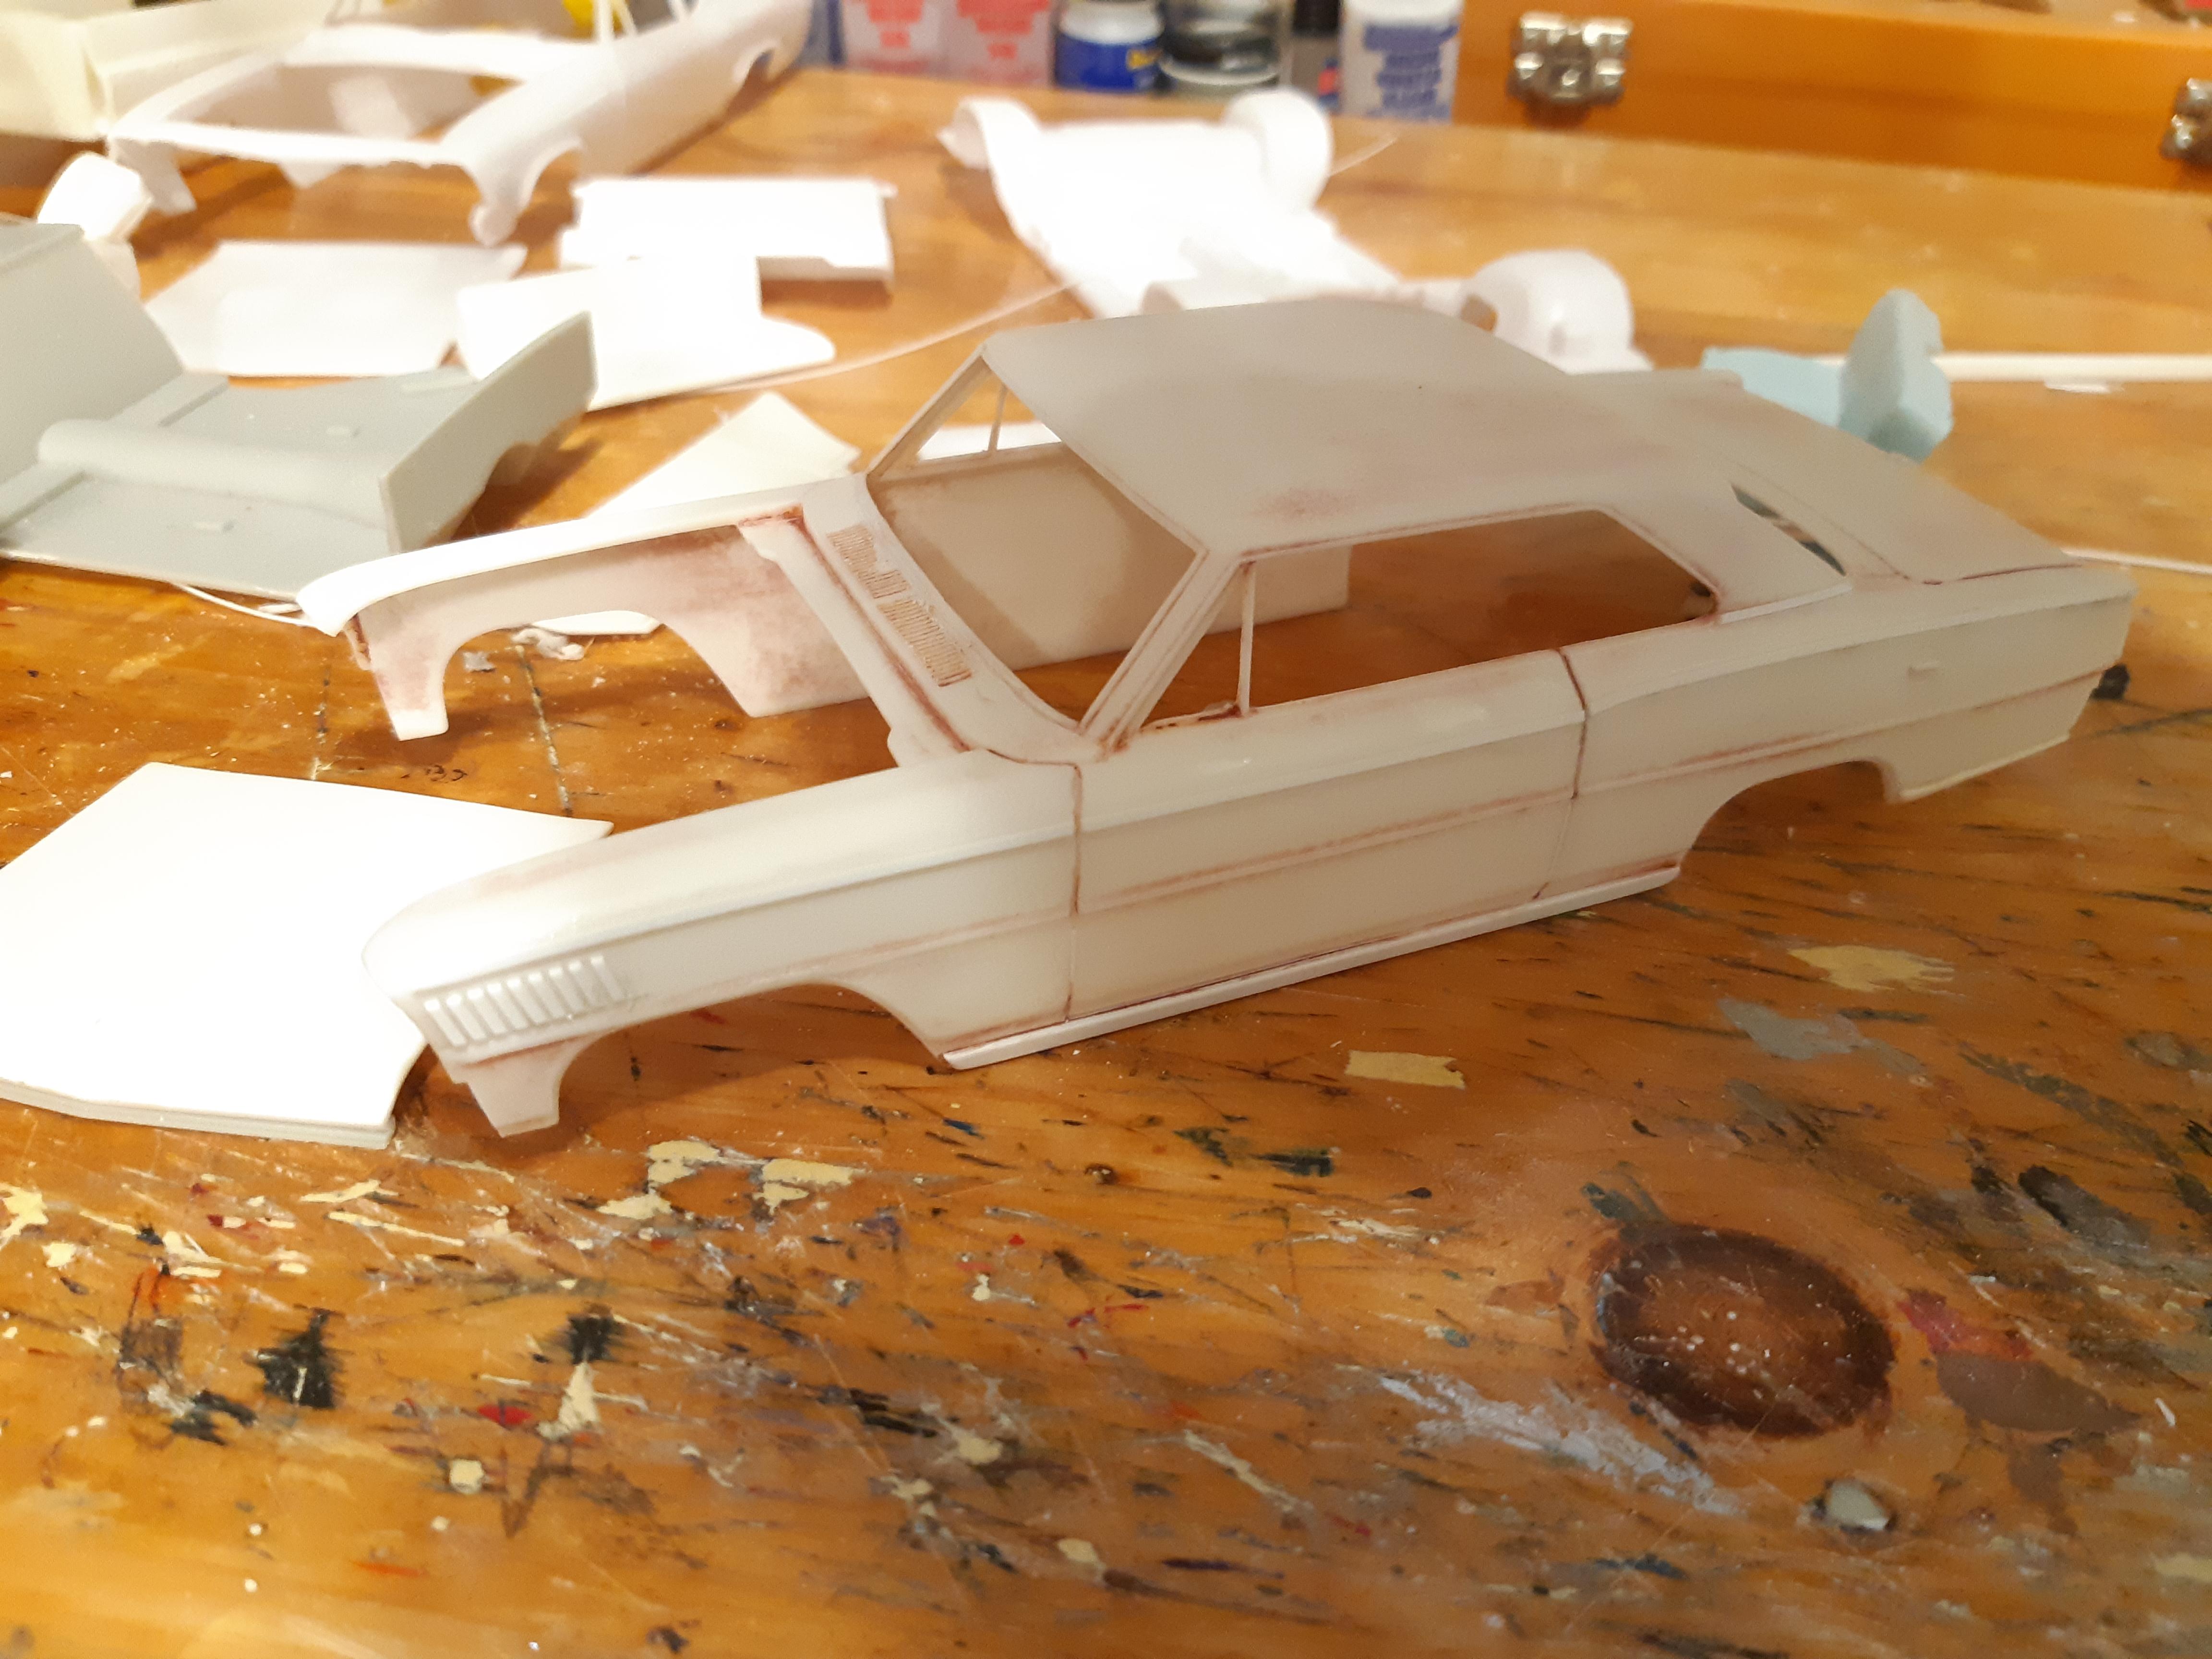
Moving on to the interior complete redo. Here are my newly built door panels. All to match the 300 Deluxe pattern(beaumont SD396 that is) i made some cranks from round stock and small strips, had to add the extra crank for the vent windows on the 2dr post. original armrests glued back on. the steering column is made from scratch, i had to make a shift handle and shift indicator, because this guy is going to be a 396/325 HP with TH400 Automatic. Made a new wider brake pedal too. And i had to add the round steering wheel emblem for the Mapleleaf. Also note the Astrovents on the GTO/beaumont dash, those need to be filled in, because the sedan should not have astroventilation, its got wing windows!!
-
The rearend 3D printed part fits good, i used CA bob smith glue(i hope thats OK?) never really worked with 3D stuff to this extent. A bit of filing and fitting, but its nice!!!
-
getting a little further along. i never like to use big chunks of 3D printed material mated up to styrene, and i didnt really like the fit of the 3d printed part to my hood, so i ended up spending about 5 hours making a new frontend out of evergreen and getting the 2 grill sections to fit in my homemade frontend. The grille detail on the Canuck parts is totally awesome!! and the grills are already opened up, incredible detail.
-
This is awesome!!! i just went and made a lifetime supply. Only thing was i didnt have 030 halfround so i used 040, and my 080 round is a bit bigger, so my caps are a bit on the larger size. gotta find some smaller stuff, but everyone seems to be out of stock of plastruct and evergreen these days.
-
The door panels are another story, cant use the Malibu ones, so i sanded it all off and made the 300-deluxe version, nothing too fancy, but it gets the job done
-
The interior will be a bench seat, and should have a base-model interior pattern (like a chevelle 300 deluxe). Ive taken a Mobius 61 pontiac bench, sanded it down, narrowed the sides, and added thin strips to make the correct pattern, the stock rear seat was also sanded smooth and rebuilt. I needed to replicate the headrests so i glued up some scrap strips and carved out the shape from a square block.
-
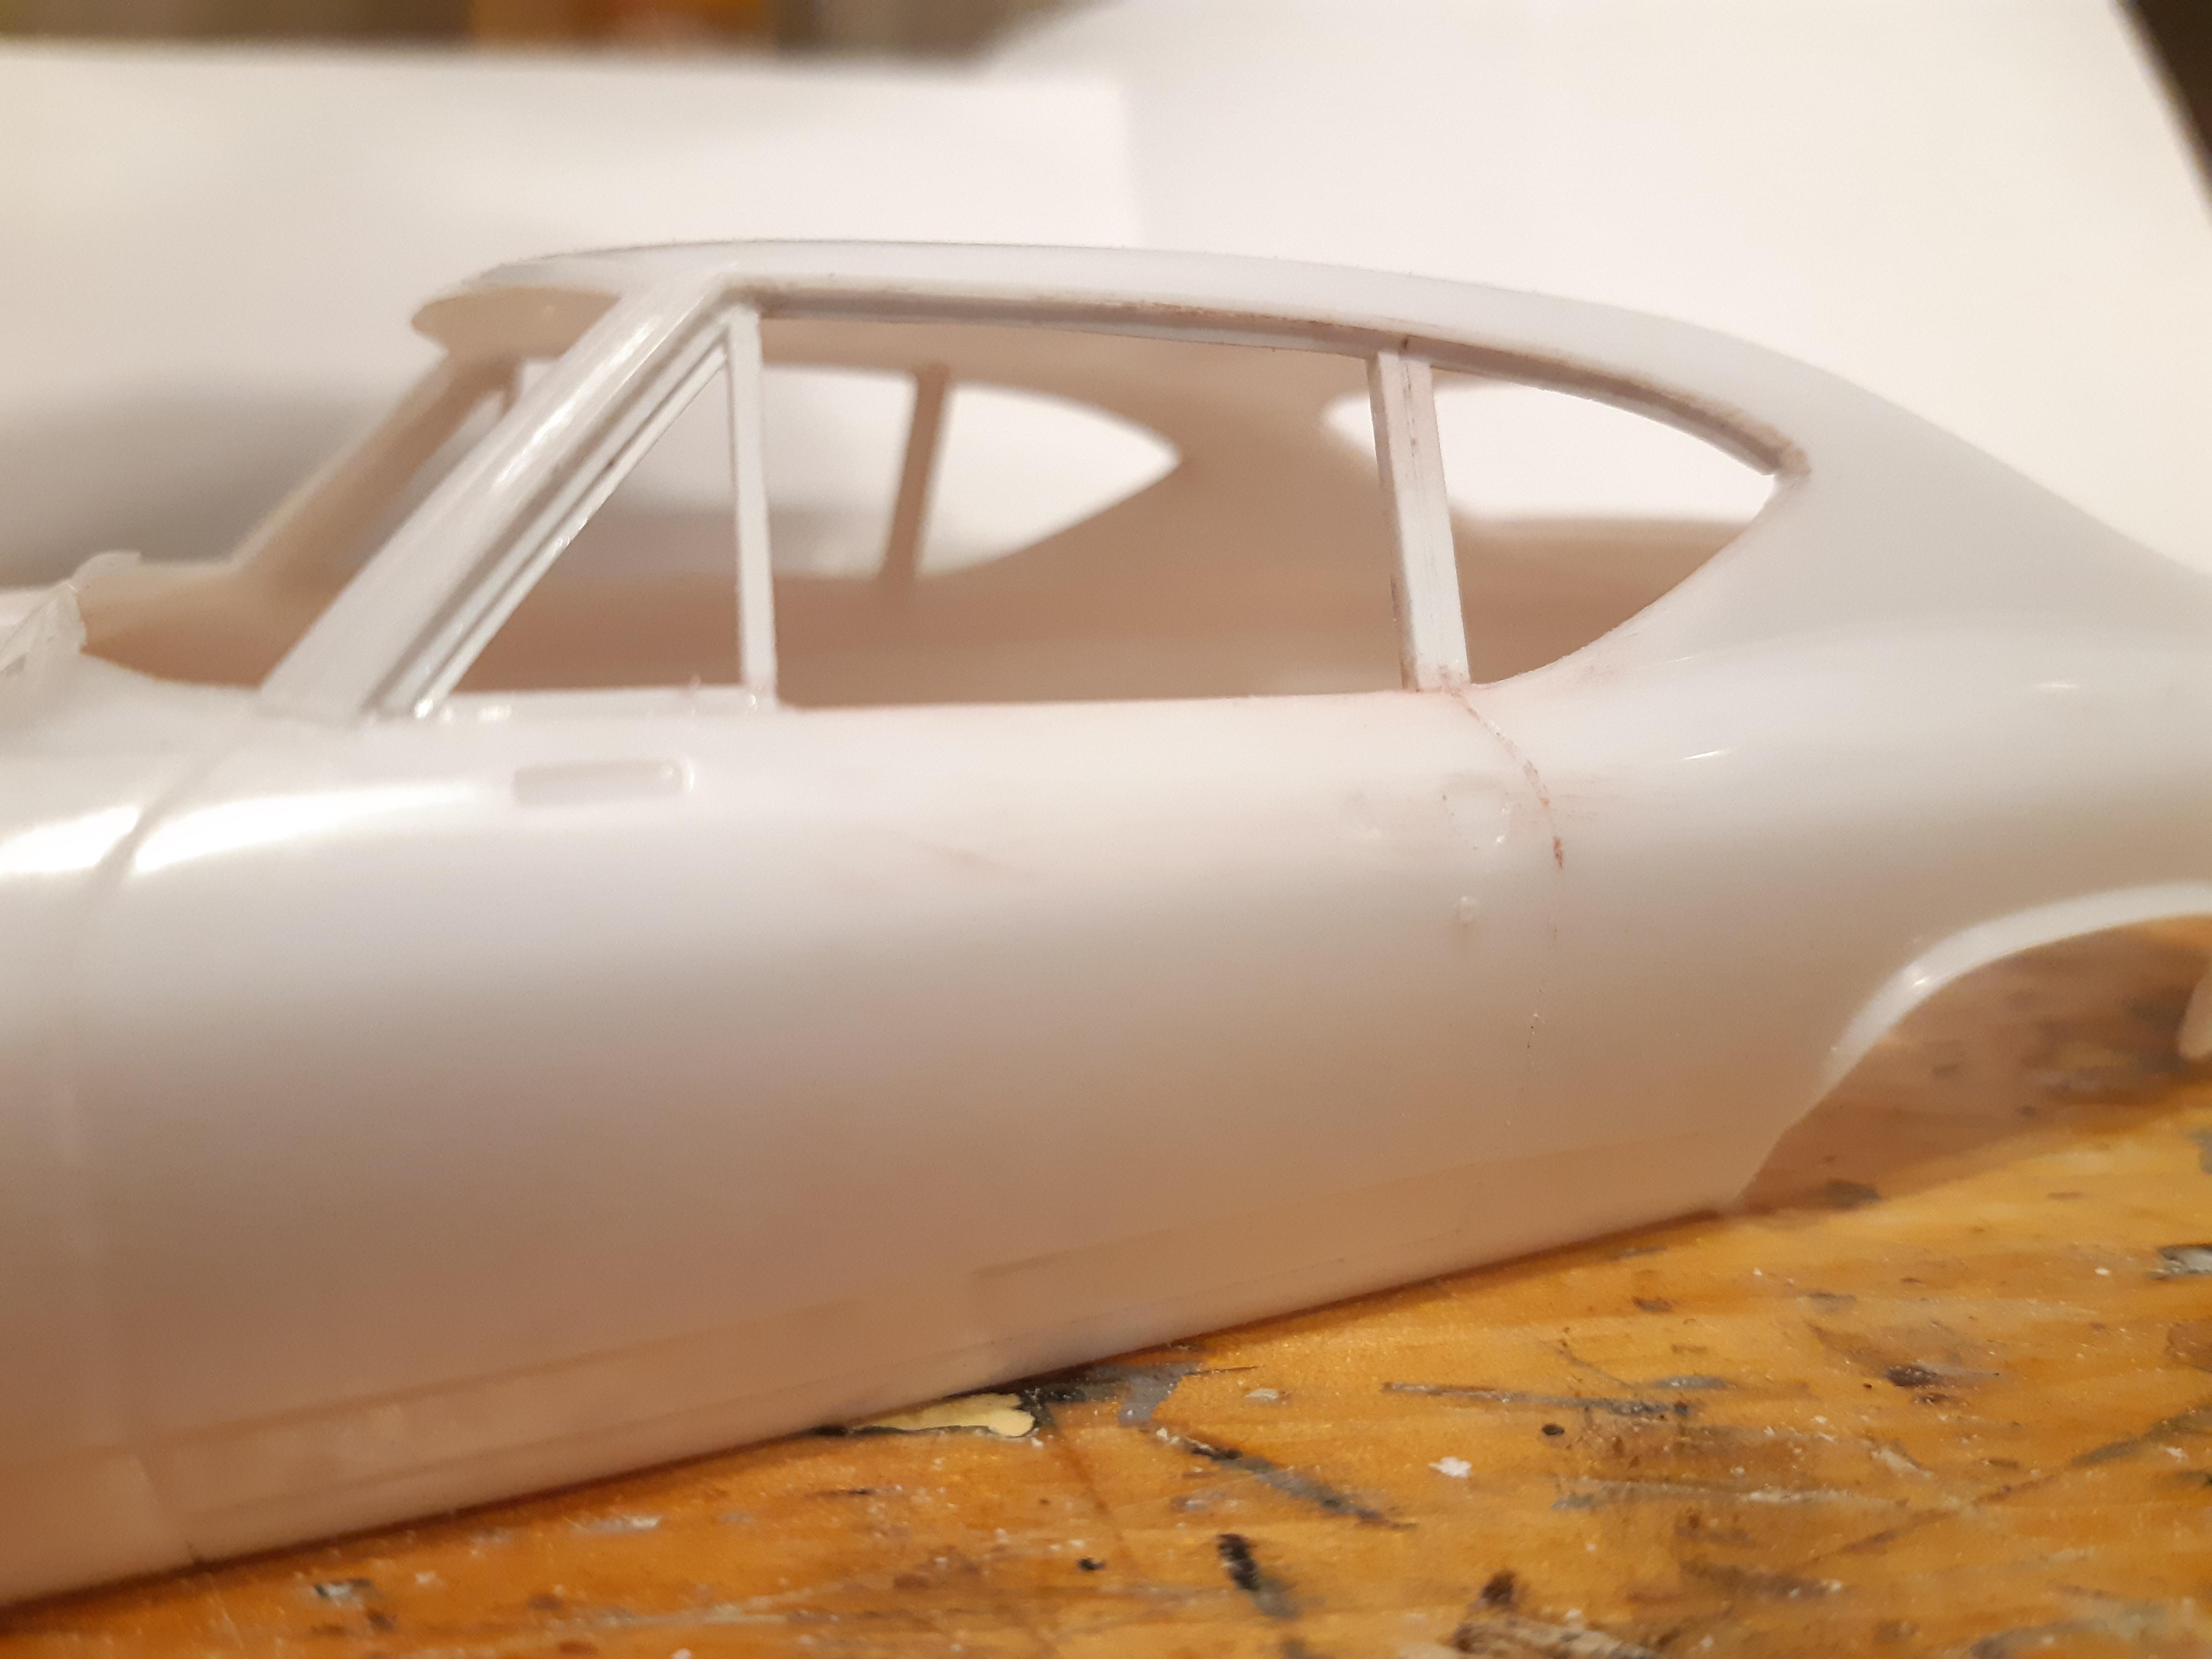
In anticipation of recieving my new Canuck3D 1969 beaumont conversion kit. Im starting on a replica of a 1969 Beaumont SD-396 thin pillar coupe(2dr post). you have to really know beaumonts to realize the significance of a 1969 SD-396, but in a nutshell, its a special option package added onto a base model Beaumont and only came in a 2dr HT or Thin pillar(post) NO CONVERTIBLES ever made in 1969. It would be a sister to a 69 chevelle 300, with a SS-396 package. So to be different, and for a challenge, im making mine a 2dr Post. So far i've got all the door frames and the front vent windows made out of Evergreen strip.
-
1966 ACADIAN CANSO Sport Deluxe
TheBEAUMONTGURU replied to TheBEAUMONTGURU's topic in WIP: Model Cars
Got a bit of the Acadian trim done on the body. I added the upper beltline trim, front louvers(9 per side), and the trunk emblem. The front of the hood has been reshaped because the kit one sucks. I also removed the molded in wipers. I made my own rocker moldings too. and shaved the door handles for some to-be-added fireball ones
- 24 replies
-
- 13
-

-
Got my conversion kit for the 1966 Acadian from Wylde and Canuck3D. so i figured i better start on a nova-to-acadian conversion. Starting with an old built up that i stripped. trying to get some better definition to the panel lines, and especially the non existent rear window trim. The canuck grill fits great, and the tail panel was easy to sand a bit thinner(just my preference). Ignore the bench seat, im doing mine as a Sport deluxe so the nova buckets and the pattern are the same as the acadian. But i will have to modify the door panels. I started with the door panels from the Prostreet version because they are smooth and i can make what i want.
-
Is anyone 3D printing the 71-76 era dodge truck grills to be used on the 1978 AMT kits?
-
Looking good Dennis. Not sure how i missed seeing this build until now. Wow, thats lots of cutting!
-
Thanks guys, i will have to compare them side by side, but they both are looking pretty close.
-
Has anyone found a good Blue for this car? In a spray or maybe a tamiya color? Its not nessesarily a metallic, but im sure a fine metallic would look ok too.
-
My year in styrene: still having fun at the bench!
TheBEAUMONTGURU replied to Claude Thibodeau's topic in Model Cars
Incredible collection. man that's a lot of bodywork. Well done! -
Thanks Smitty, the 327 aircleaner decal i made myself in photoshop. as well as all the rest of decals on the outside of the body and engine bay.
-
Build a Better Kelly Chadwick Vega F/C
TheBEAUMONTGURU replied to TheBEAUMONTGURU's topic in WIP: Drag Racing Models
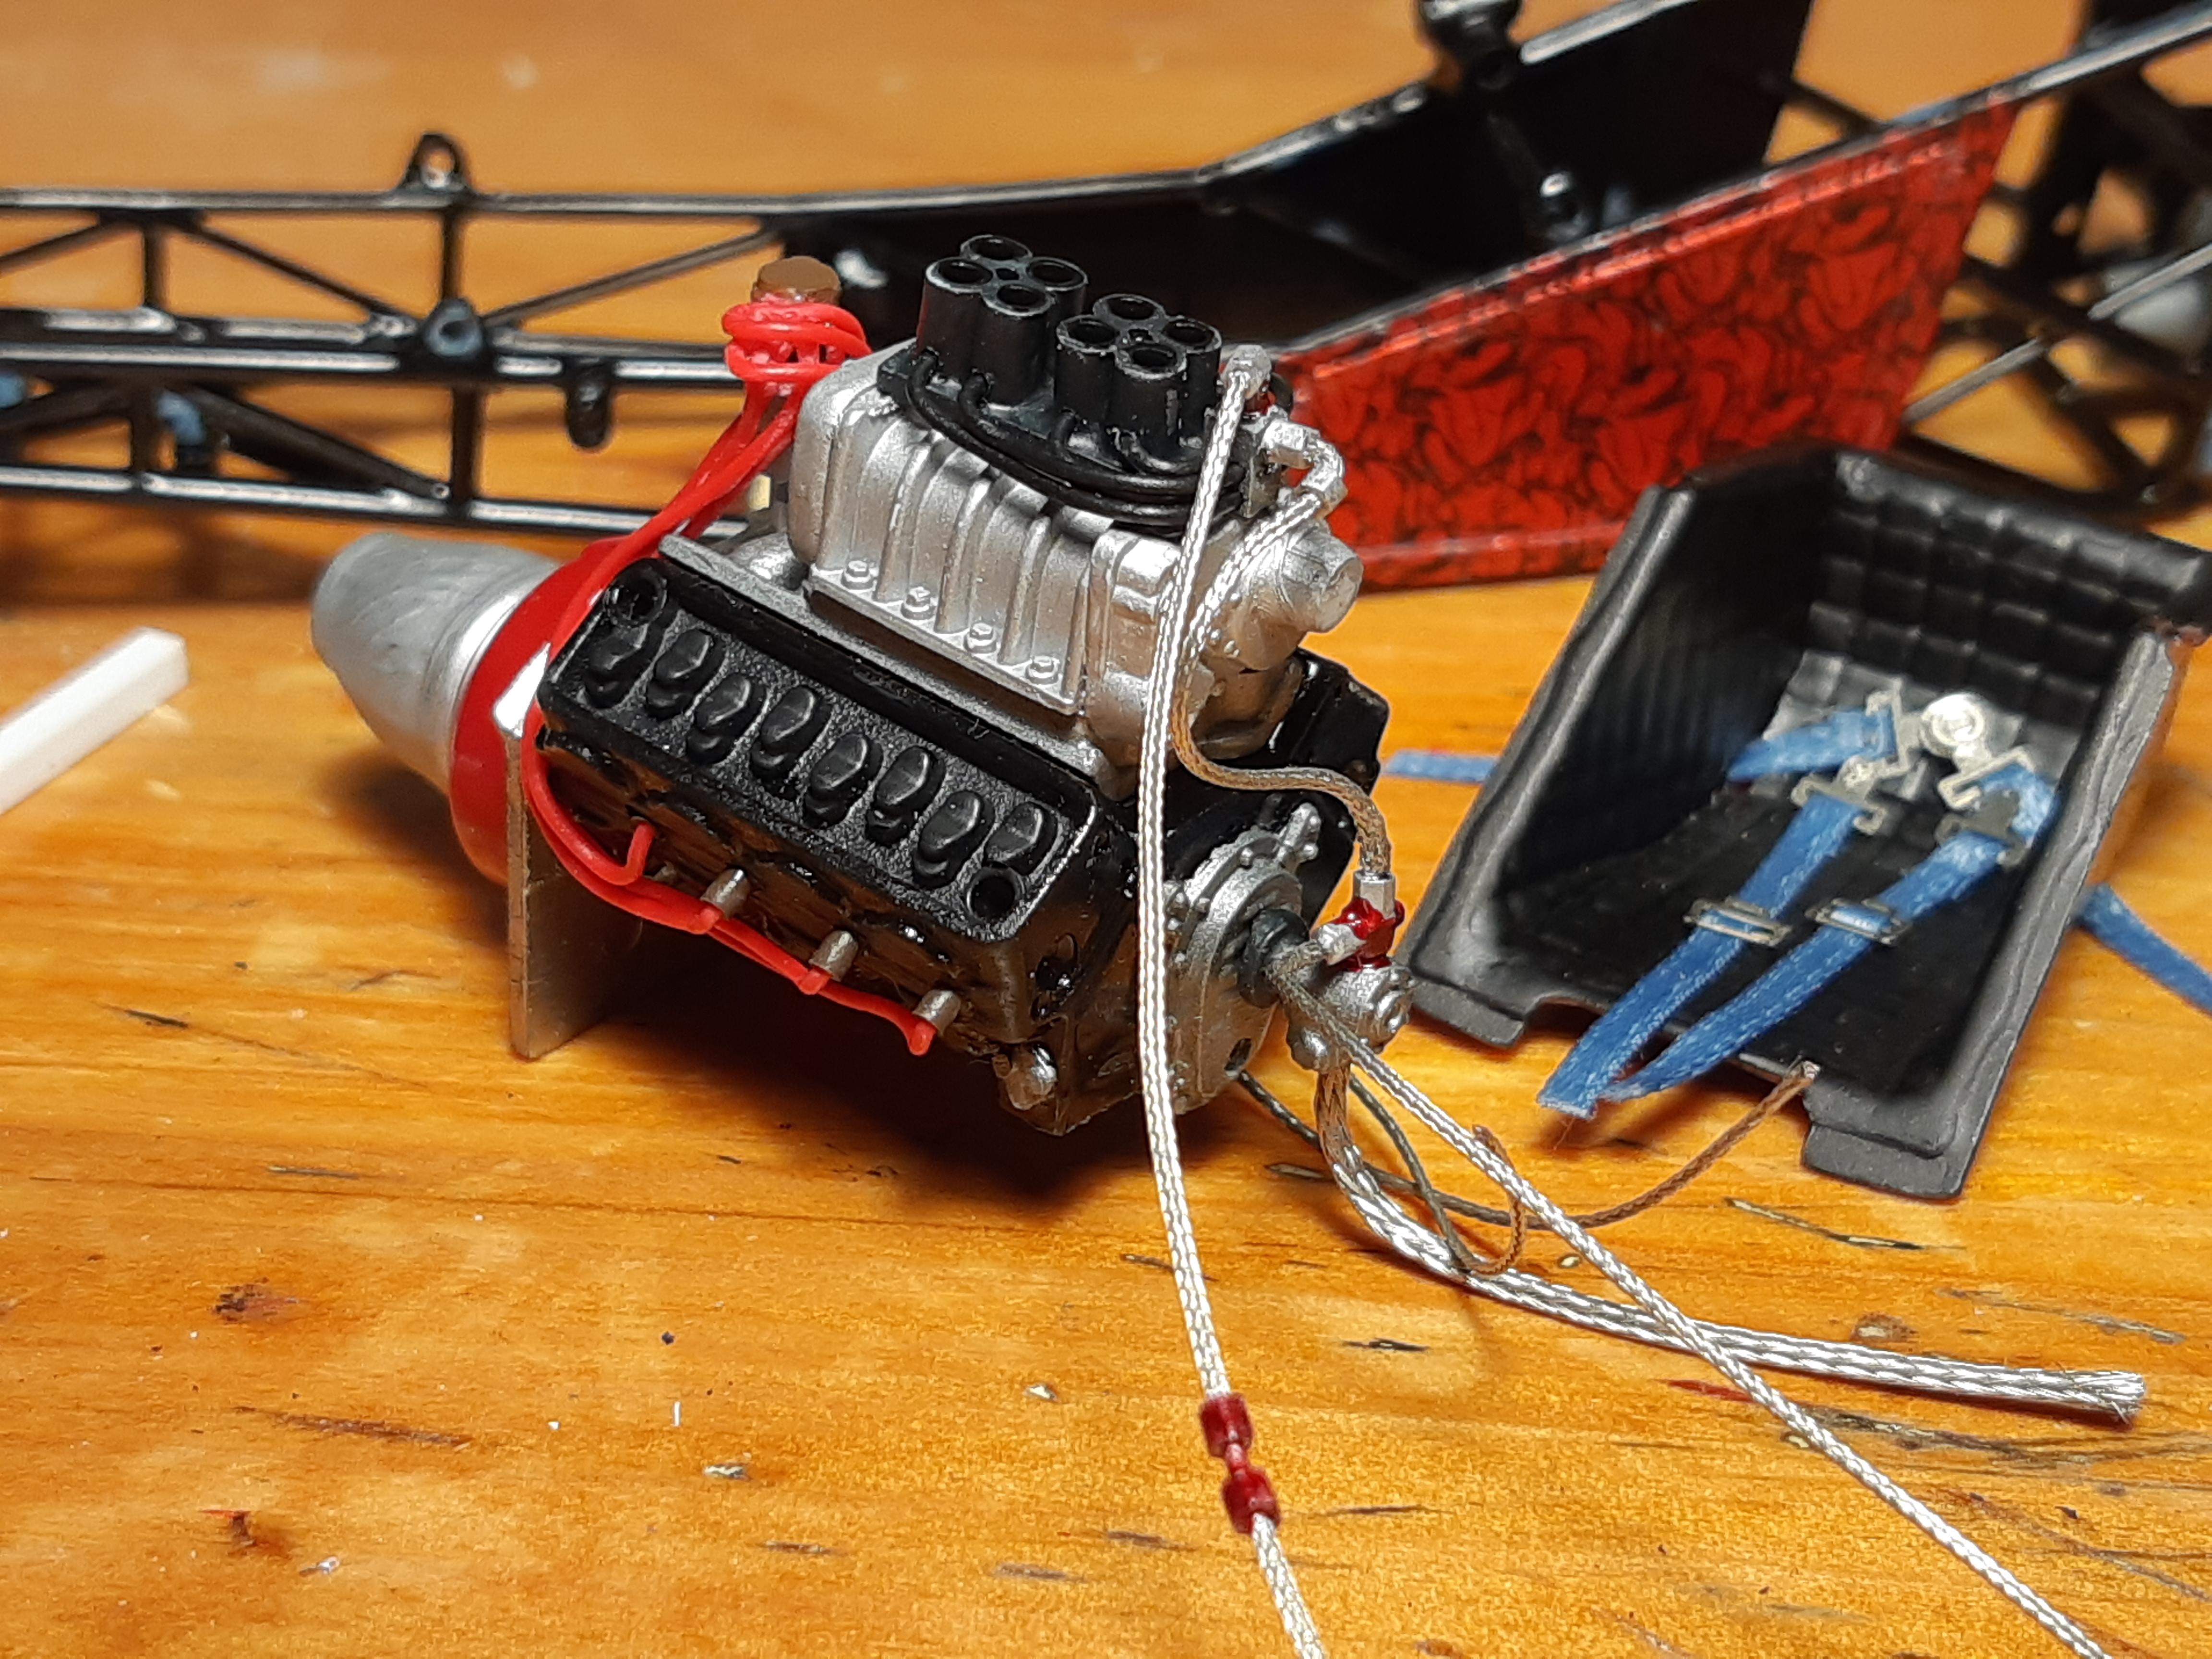
Thanks guys. Im getting a little further along with some of the engine detailing, i keep forgetting to take pics. I scratchbuit a hilborn thats a bit better than the kit part. I also made a Magneto from plastruct round, but its already installed in these pics. its a hodgepodge of parts and bits from the parts bins. Lots of wiring and plumbing too!
-
71 Olds 442 W30, (replica for my brother in law)
TheBEAUMONTGURU replied to Steve H's topic in Model Cars
Yup, thats a beauty alright. you should be proud of that one and im sure your brother in law is too. -
Build a Better Kelly Chadwick Vega F/C
TheBEAUMONTGURU replied to TheBEAUMONTGURU's topic in WIP: Drag Racing Models
I tackled the decals for the body and they came out really well, but what a job! hours upon hours of applying decal setting solution. The red panels are all smoked anodizing on the real car, i was trying to find a way to replicate, so i printed some smoke pattern decals, painted all the parts with a silver, then the decal smoke, and topped it off with some tamiya clear red. The results are pretty good i think.
-
Build a Better Kelly Chadwick Vega F/C
TheBEAUMONTGURU replied to TheBEAUMONTGURU's topic in WIP: Drag Racing Models
Thanks, Yes i gave them a good dose of Microscale clear. So far so good. lots of setting solution to get them to lay down, but no cracking of those big yellow panels!!! -
Looking good Greg. so many modifications. The engine choice is going to make this one really stand out!
-
Thanks guys. Yes the paint is PPG omni Butternut yellow. paint code Y