
sak
-
Posts
677 -
Joined
-
Last visited
Content Type
Profiles
Forums
Events
Gallery
Everything posted by sak
-
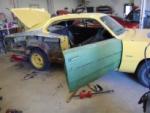
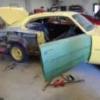
My 1:1. 318, 2 barrel. 46,000 original miles. Hopefully, next year I can afford a full repaint. Also planned is a 8 3/4 rear axle. Looks silly as is, front wheels have a wider wheelbase than the back with a 7 1/4 axle. Not sure why Chrysler did this rediculous thing but it was not noticeable until I had wider tires and wheels put on.
-
Where did you find the gigantic penny?
-
'69 GTO Headlight Buckets Source?
sak replied to Casey's topic in General Automotive Talk (Trucks and Cars)
It is a amt 1966 442 kit. The catch is I don't have the headlight lenses. -
'69 GTO Headlight Buckets Source?
sak replied to Casey's topic in General Automotive Talk (Trucks and Cars)
I think i have those headlamps buckets from the 442 kit if you need. -
How Do I Achieve this Paint Job?
sak replied to hungry4knowhow's topic in Tips, Tricks, and Tutorials
The car in the first photo looks like it was painted first in a burgundy, then was placed some chicken wire on top, then sprayed in a lighter shade, then cleared. As for getting the effect of the second car, you would probly need to create decals. Perhaps print a pattern on decal paper and apply one panel at a time. -
Outstanding bro !. Excellent work you did. In particular, the bare metal foil on the side vent windows I am most amazed by, I seen this kit at a local flea market but I am too intimidated by all the stainless trim. Jeff
-
Very cool bro. I wish that there was a thread in these forums for non-automobile related projects. I bought a P-47 thunderbolt at church flea market for 50 cents that I am working on on and off. Nice to not have to worry bout perfect finish for once since the paints required are either flat or semi-gloss. If anything, small imperfections in paint actually add to the model. Again, nice stuff. Jeff
-
Wow, although I am not a fan of modern muscle cars, that thing is KILLER, and I would be proud to have that one in my display case. If I were you, I would not be concerned will learning, you look like you already got what it takes, if fact you gotta teach me how you keep that photoetch stuff so straight. I can't seem to even get it from the sprue without warping it, let alone filing down the edges. I would love to see some shots under the hood and chassis. jeff
-
Would anybody happen to know who produces these if any. And if not anybody know any good techniques for using elastic bands. I figure that I might have to cut them to shorten them and glue the ends to a hidden part of the crankshaft pully, but this could get messy. Thanks
-
I am aghast !! Never seen anything like it. Unbeleivable. But damcranky, if you don't mind me asking. What is the purpose of the first black basecoat?
-
I would like to see a two-tone. I know testors inca gold is not original, but combined with a off white, like a wimbledon would look off the scale. With perhaps a green or red pinstripe seperating the two colors. Just a thought.
-
I agree with you juergen. The alcad looks just right if its done right. A lot of people make the mistake of adding too many coats causing it to just look silver. And I find lots of imperfections on the chrome like bad mold lines and pieces of dust trapped under the chrome. Yours will look amazing I know already.
-
What kind of aluminum? Polished or unpolished? If you are painting a large area, I would recommend biting the bullet and get some alclad polished aluminum. Princess auto sells a badger 150 knock off for under 40 dollars. If unpolished is what you want, I think humbrol aluminum is my favorite.
-
New to hobby. I need painting advice
sak replied to cinifiend's topic in Tips, Tricks, and Tutorials
Bluesman mark hit the nail on the head. Might I add to that cinifriend. You would almost certainly need an airbrush to get a smooth finish. You can find a good one on ebay for under a hundred and they can be used for many things. Or from a rattlecan. Also try thinning the tamiya paints with methyl hydrate instead of water. Also use primer for sure. And wet sand the primer before color coats. I use plastikote myself. Get a few cans, white and black. -
It really seams to help if you have kits that have seperate peices for the door panels as most nowadays are. But of course alot of kits still have these one piece tubs. Just get some thin tamiya masking tape and practice masking off areas. If you are doing an older style two tone interior, usually they have some sort of embossed chrome trim in between. Bare metal foil this trim first before any painting, then mask off the different parts, paint them then gently rub the paint off the raised parts with the bare metal foil. And also use semi-gloss paint in its intended to be a vinyl interior or flat and use semi-gloss clearcoat over it.
-
alclad will rub away but that should not effect most peices like valve covers . The bumpers you have to worry about, but you should not be picking model cars up by the bumpers anyhow. I pick them up by the roof usually as I use bare metal foil for that chrome trim piece and it wont rub off.
-
I been mostly using acrylics with mine and I take it apart and clean it well after every use. Especially createx, it starts to dry in the cup almost instantly and gums up the needle tip if you dont thin it. Even the ready to use stuff needs to be thinned a little I find. If you use acrylics, and you are not doing a large area, just put in a drop or two of paint in at a time and spray water through it immediatly after its empty. Enamels take longer to dry so that should be alot easier to clean up. What I recommend is spray enamel thinner after you are done until its clean, then take a q-tip and scrub the cup clean. I dont take the needle out but I remove the head and wipe the tip of the needle clean. Then run warm soapy water through it. If theres something in the nozzle, let it sit in thinner for awhile. Lacqours, I dont have much experience with except for alclad, but I would do the same way but use lacqour thinner instead.
-
Thanks Bredan, but I will have to try your method when I install a new bearing as I have already removed the old one. one. It came out in 2 peices but I am not sure if thats from pushing it out. Either way, it looks very thin at one end. So I removed the bearing, air valve and everything that can be removed. Now everything is closed today for tanksgiving day. Until I can get a new bearing, I was thinking about letting it soak in something. I am not sure what kinda of paint this brush was used for but testors airbrush cleaner seems to take it off with scrubbing. Is it safe to used CSC on it, I would assume degreaser would be safe on real platd parts, and will CSC remove caked on acrylic paint?
-
Thanks evryone, help is appreciated. I will try to change that needle bearing mr. obsessive. BIg Garry, I am using a 3 gallon compressor, as for the tip, it is not clogged, it was a brand new tip and needle and I was testing with water. So if the tip isnt clogged are there any other places for air to get blocked, I ran the airbrush without the head and air flowed thru that little hole real smooth and still smooth even with the head on.
-
Just bought a used badger 150 airbrush. Air flows through nozzle smoothly. But when paint is applied the pattern pulsates. Higher the pressure, the worse it gets. When I got it, I noticed the needle was bent at the very end and it did not seem to fit the nozzle very well so I replaced both with a medium nozzle and medium needle, as well as replaced the head o-ring. I googled this problem and it seems pretty common. In another forum Ken badger says that the spray regulator might not match the new medium nozzle or that the internal needle bearing is defective. Does anybody know how I go about removing this bearing? I notice also large amounts of air bubbles in the paint cup when I apply air and paint. Which I would think would indicate a blockage of the air but the nozzle is clean. I will replace the entire head if I have to, but I have heard also of people replacing all these parts and still having this problem. But I would only like to replace what needs to be replaced. Ken Badger also says to keep pressure at about 18 psi. Which might explain why it worked better under lower pressures but is this normal for badger airbrush? Thanks JJ
-
Have you try mebbe to take popsicle sticks and apply a one-step wood stain. Mebbe not practical for interior but I know it looks good for the bed of a truck.
-
I suppose it depends on how much of a perfectinist you are. Ive been testing the alclad and I have found that polishing the black enamel isnt crucial, as long as it is fairly smooth, as it will be still be smoother than most sheets of bare metal foil which seem to always have a shimmy to them,even if they look smooth in a certain light angle. After you mask off the trim you are going to paint, brush on a thin coat of future floor polish, then black enamel then the alclad. I am testing it with a 56 chevy belair and the side trim is more complex than later cars so it will be a challenge. The alclad will rub off easy but realistically, if you are happy with the finished product, if won't be something that will be handled very often, if at all. But try a good sheet of bare metal foil first. It shouldnt take long to get good at the window moldings. Or only use the alclad around the more complex parts like the front vent windows.
-
I think depends on the type of trim. What I do is bare metal foil all the raise trim like the eblems and the trim above the side windows first, primer and paint over them and rub the paint off these high areas after. But for trim that sits more flush with metal parts like the trim around front and back windshields, I use bare metal foil on these areas last.
-
Nice job, and what a wicked color.
-
I think that for as much bare metal foil that most use, I don't see why not use it. I tired recently the tin foil method and I will admit that the final results look just as good as bare metal foil. I actually found it was easier to get smooth and becuase it is a little thicker than bare metal foil, it hides more slight imperfections that bare metal foil does not. Some drawbacks I think. I have not found an efficient way of glueing it to the plastic. On my test I used elmers spray adhesive and found it worked fine but much extra tedious work was required to mask the areas around the trim so avoid adhesive going where I don't want it. Another drawback is this tin foil makes blades dull after only a minute. I know that most use some sort of metal foil glue but I have not tried this. My biggest worry is that while easier to use, the process of burnishing and rubbing the tin foil, might cause the glue to ooze evrwhere underneath including under the part of tinfoil that will be cut away. But practice might solve that. Until only recently, I built late 60's and 70's model kits so only chrome trim was around front and back winshields and small trim above side windows and sometimes around wheel openings. But now I have a 57 chevy and 56 chevy kits, which have more elaborate tim and in more places, like the side panels and on tops of fenders. So one technique I am testing is painting the chrome trim on with alclad chrome. I have tested with 67 coronet kit and so far,the results were good, especially on the triangle vented windows, which I could never do with bare metal foil, as it would buckle in the corners and look terrible. I think with carefull masking, this method could be more consitent results to bare metal foil. But this is not cheaper method, so better option is still to use bare metal foil or tinfoil for areas such as windshields trim and other simple shaped areas. W hen I resume airbrushing in summer I will do one more test and take digital pictures and post.