OldNYJim
-
Posts
249 -
Joined
-
Last visited
Content Type
Profiles
Forums
Events
Gallery
Everything posted by OldNYJim
-

What defines “skinny” front tires?
OldNYJim replied to dusty_shelf's topic in Model Building Questions and Answers
Vallejo rubber black is a good one too - slightly lighter -
Have you got any pics of anything you shot with that Duplicolor clear? I love the high gloss look you get with an enamel…
-
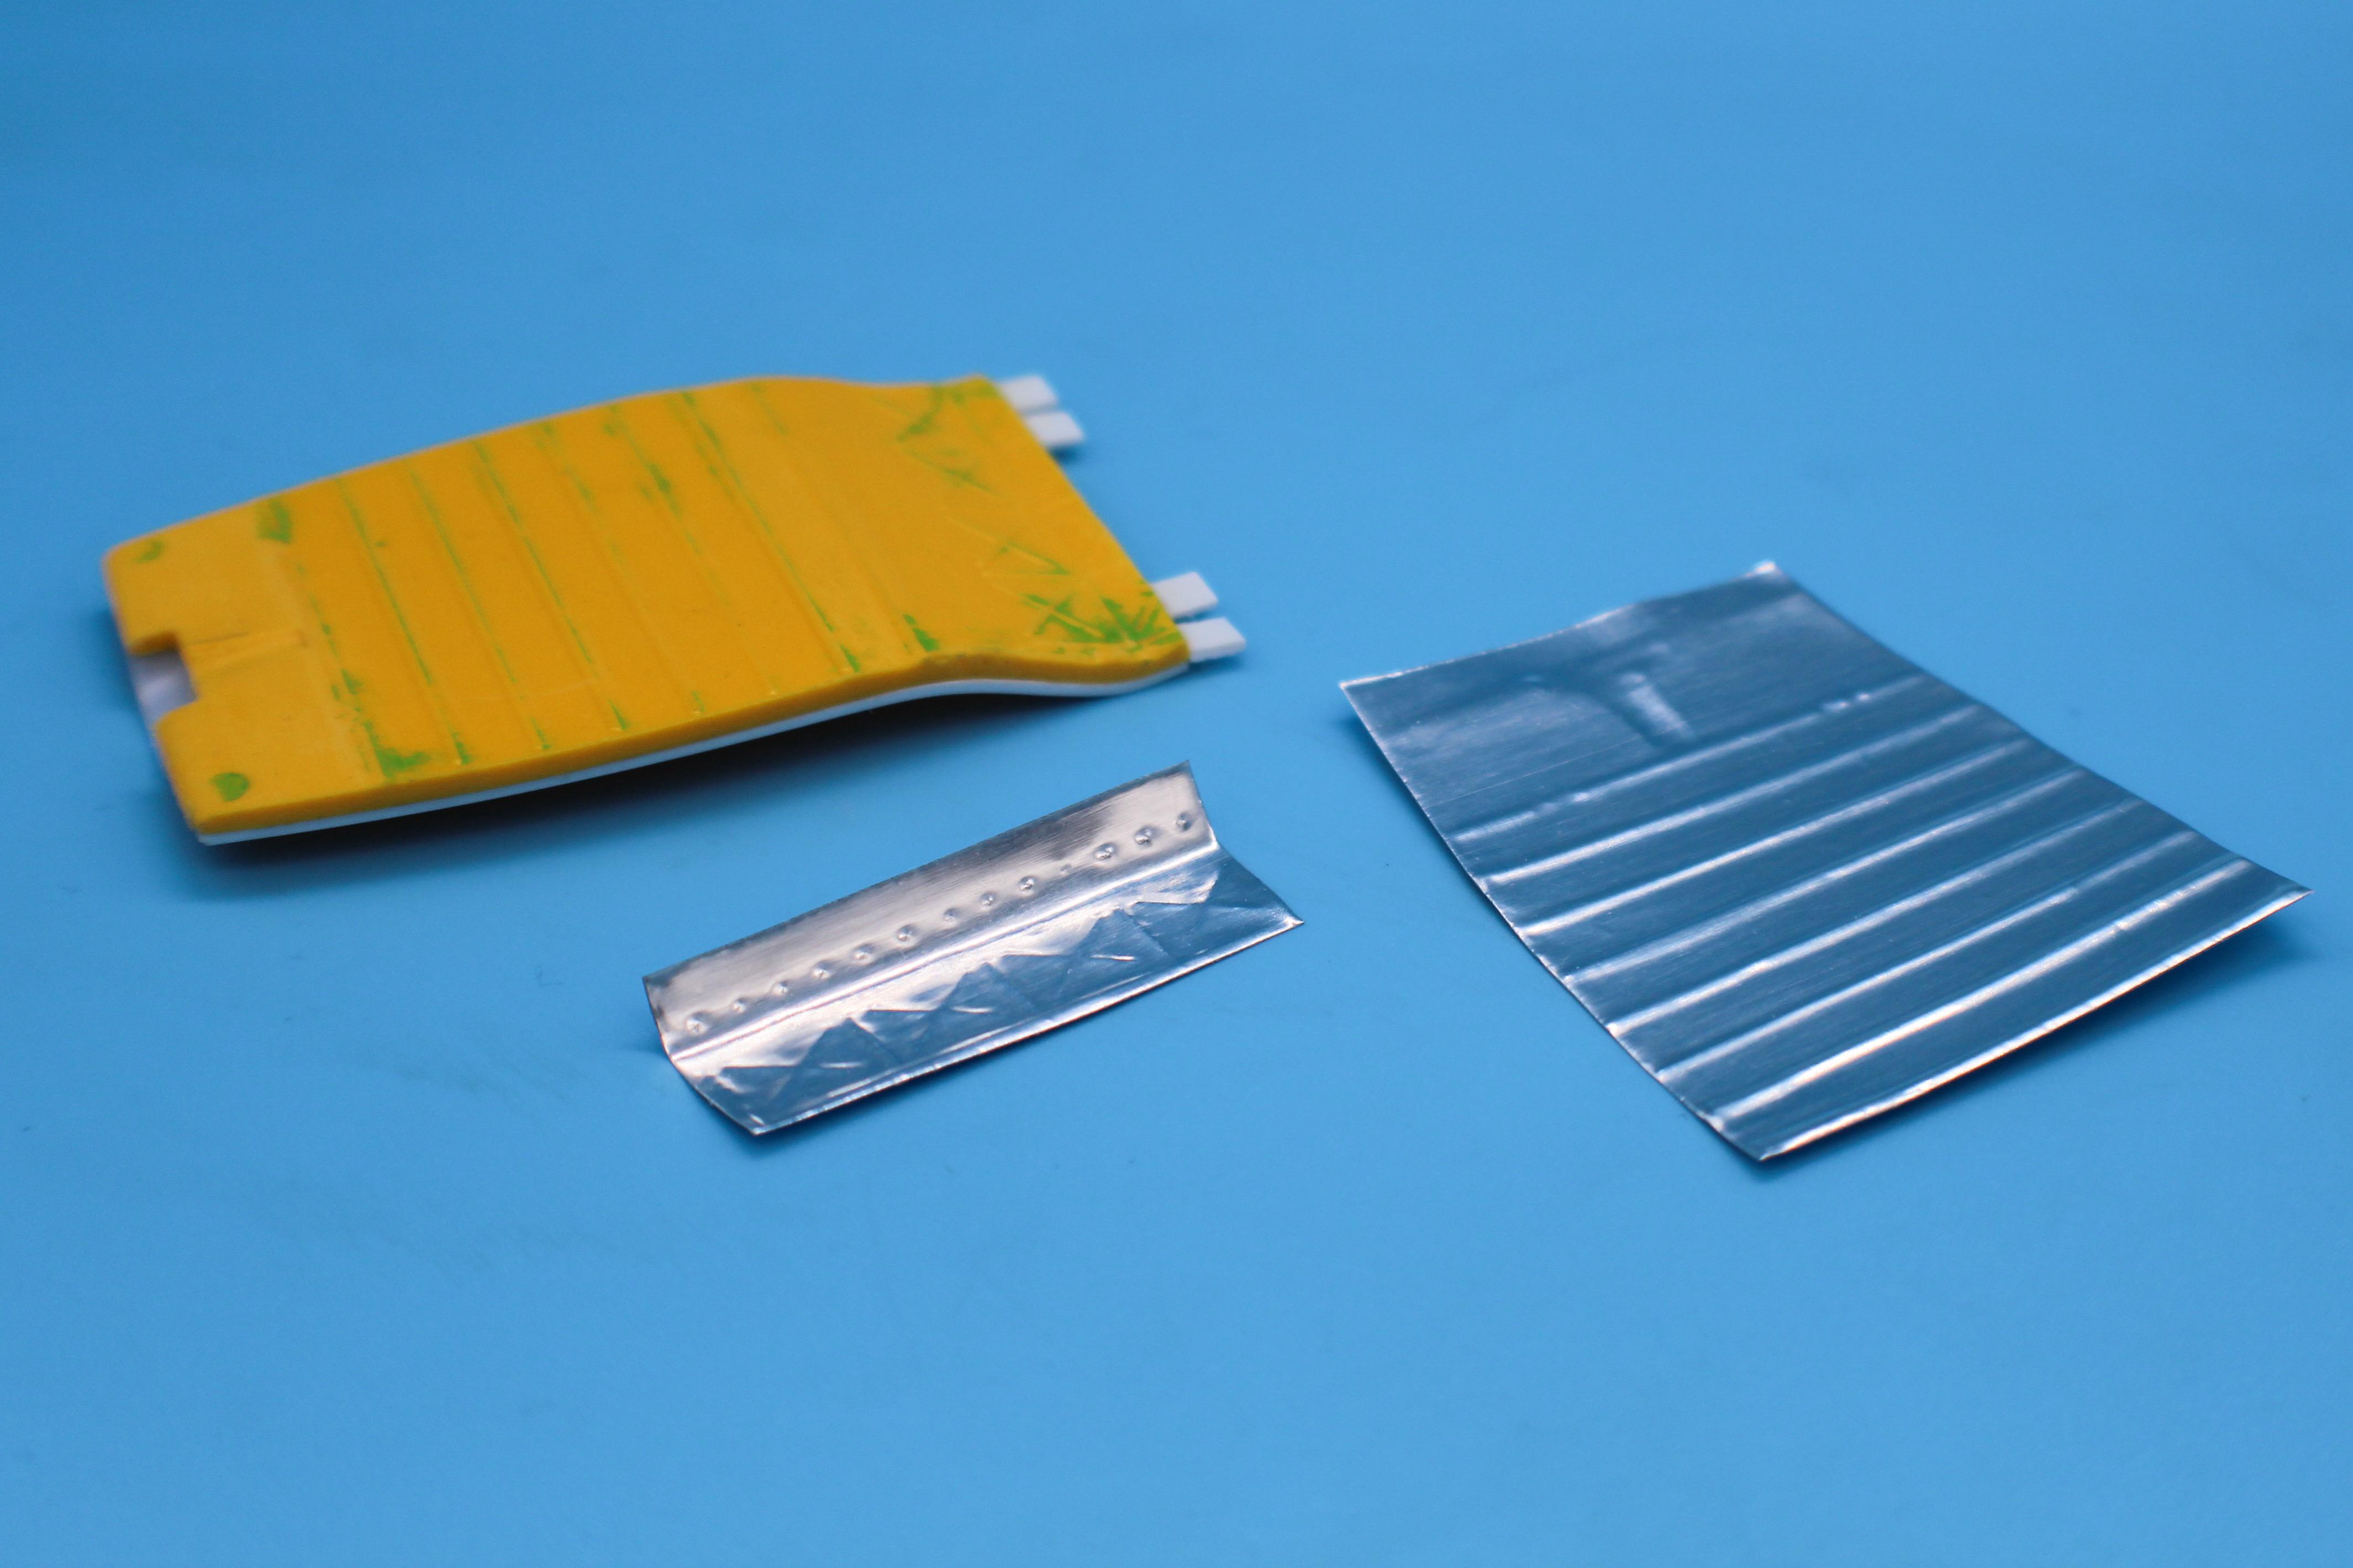
Thanks fellas! Some of my favorite builders of hot rod stuff on here are @Dennis Lacy, @Kit Karson and @Rocking Rodney Rat, along with @tim boyd - lots of inspiration if you go through their old threads! They’re all a LOT more knowledgable than me on early hot rod stuff, but I’m going to try my best anyway… Juan’s a cool guy! I didn’t see that particular frame, I’ll take a look! Someone makes a pre-zee’d frame that allows you to use all the Revell kit parts without any modifications - I’d like to try one of those at some point too… I saw your post today with the framework - I’d been thinking of adding a ‘40 crossmember to this one too… Meanwhile, had a quick hour at the bench tonight - stripped the chrome off the tube axle from the current Revell 32 Roadster kit, and dug around my parts boxes for something interesting to compare it to while I was waiting. I would LIKE to use this old Revell Parts Pack axle (front)… …but I do prefer the look of the tube axle so I think that’ll win out… Also pondering linkages - hairpins or the split wishbones from the current 29/30 Model A kit? The wishbones would match the rear nicely, but the hairpins are a little less beefy and chunky looking…any opinions, anyone? Also had the printer fired up this evening - printed a stock(ish) firewall to replace the standard Revell piece. I’ll need to figure out how much room the motor and trans will need and then modify the file accordingly, but I like how my test piece looks anyway… And, finally, I ordered a roll of embossing aluminum to play with - I wanted to try using it to easily reproduce stuff like stamped floorboards…did a quick ‘rubbing’ of a floor from the old Monogram 32 to see if I might be able to make some pieces I could lay down on the underside of the frame…haven’t mastered the technique yet but it has potential! Just a little update…thanks for looking!

-
Pity - this was a great build, from what we saw!
-
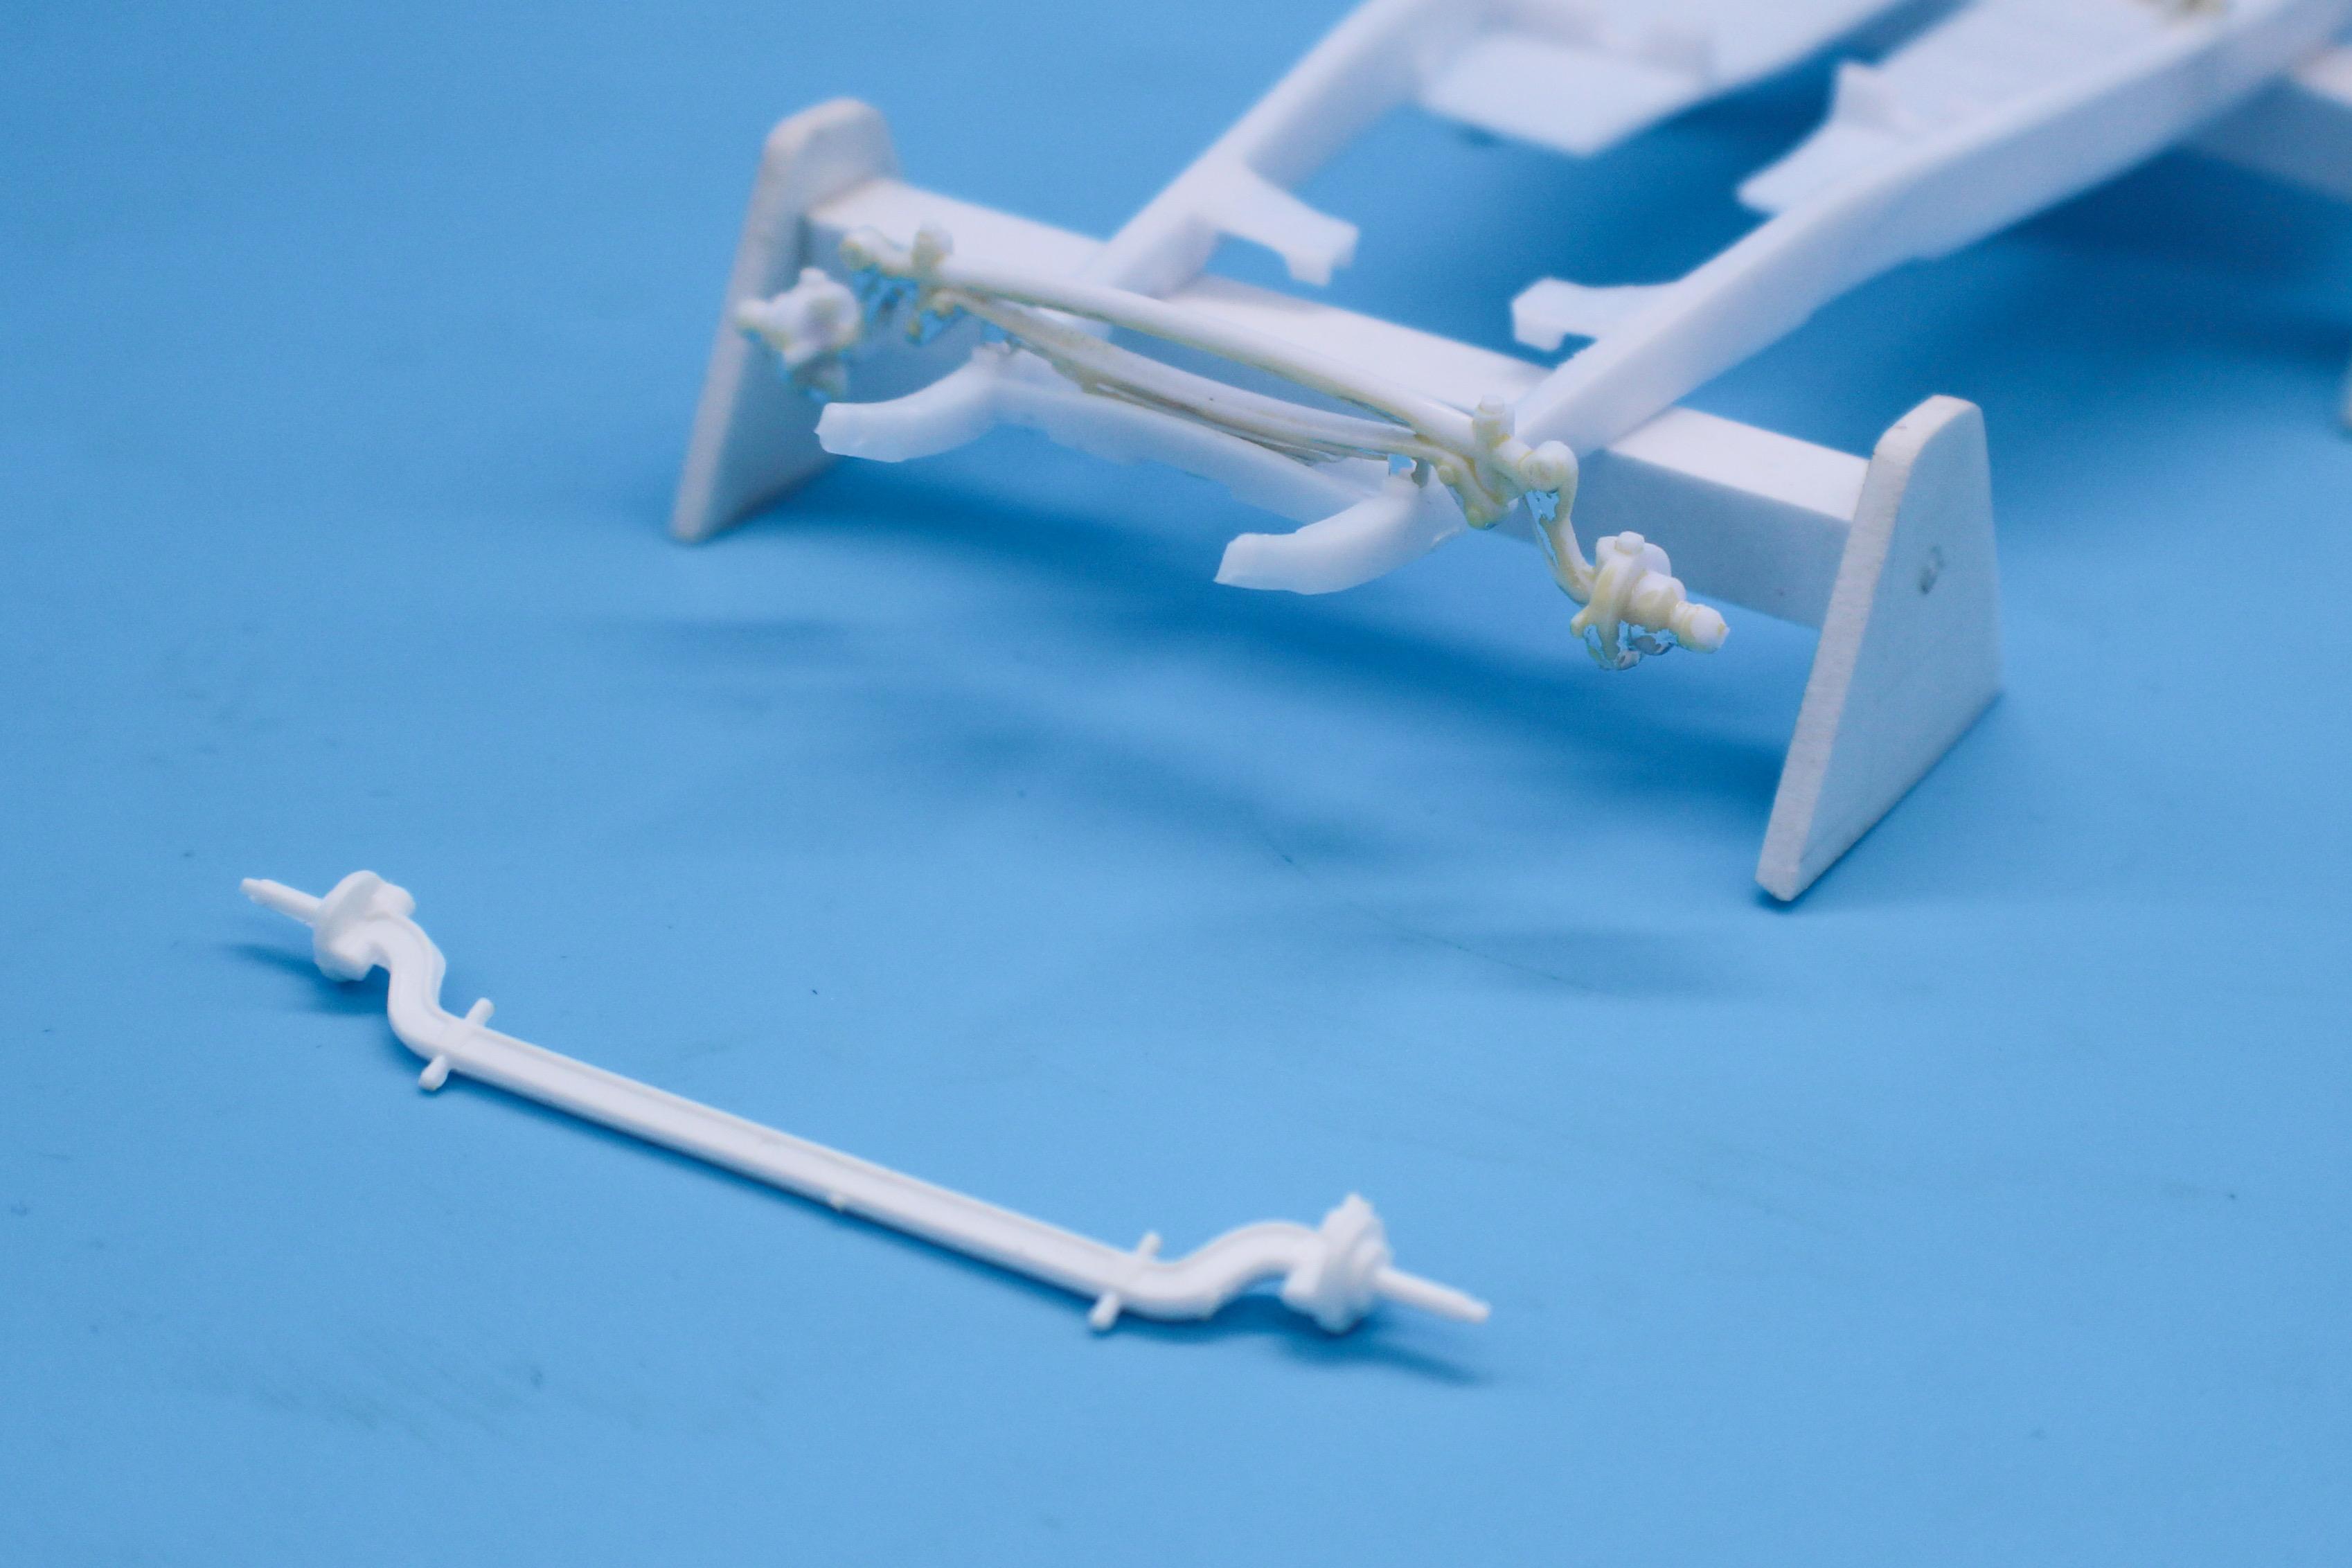
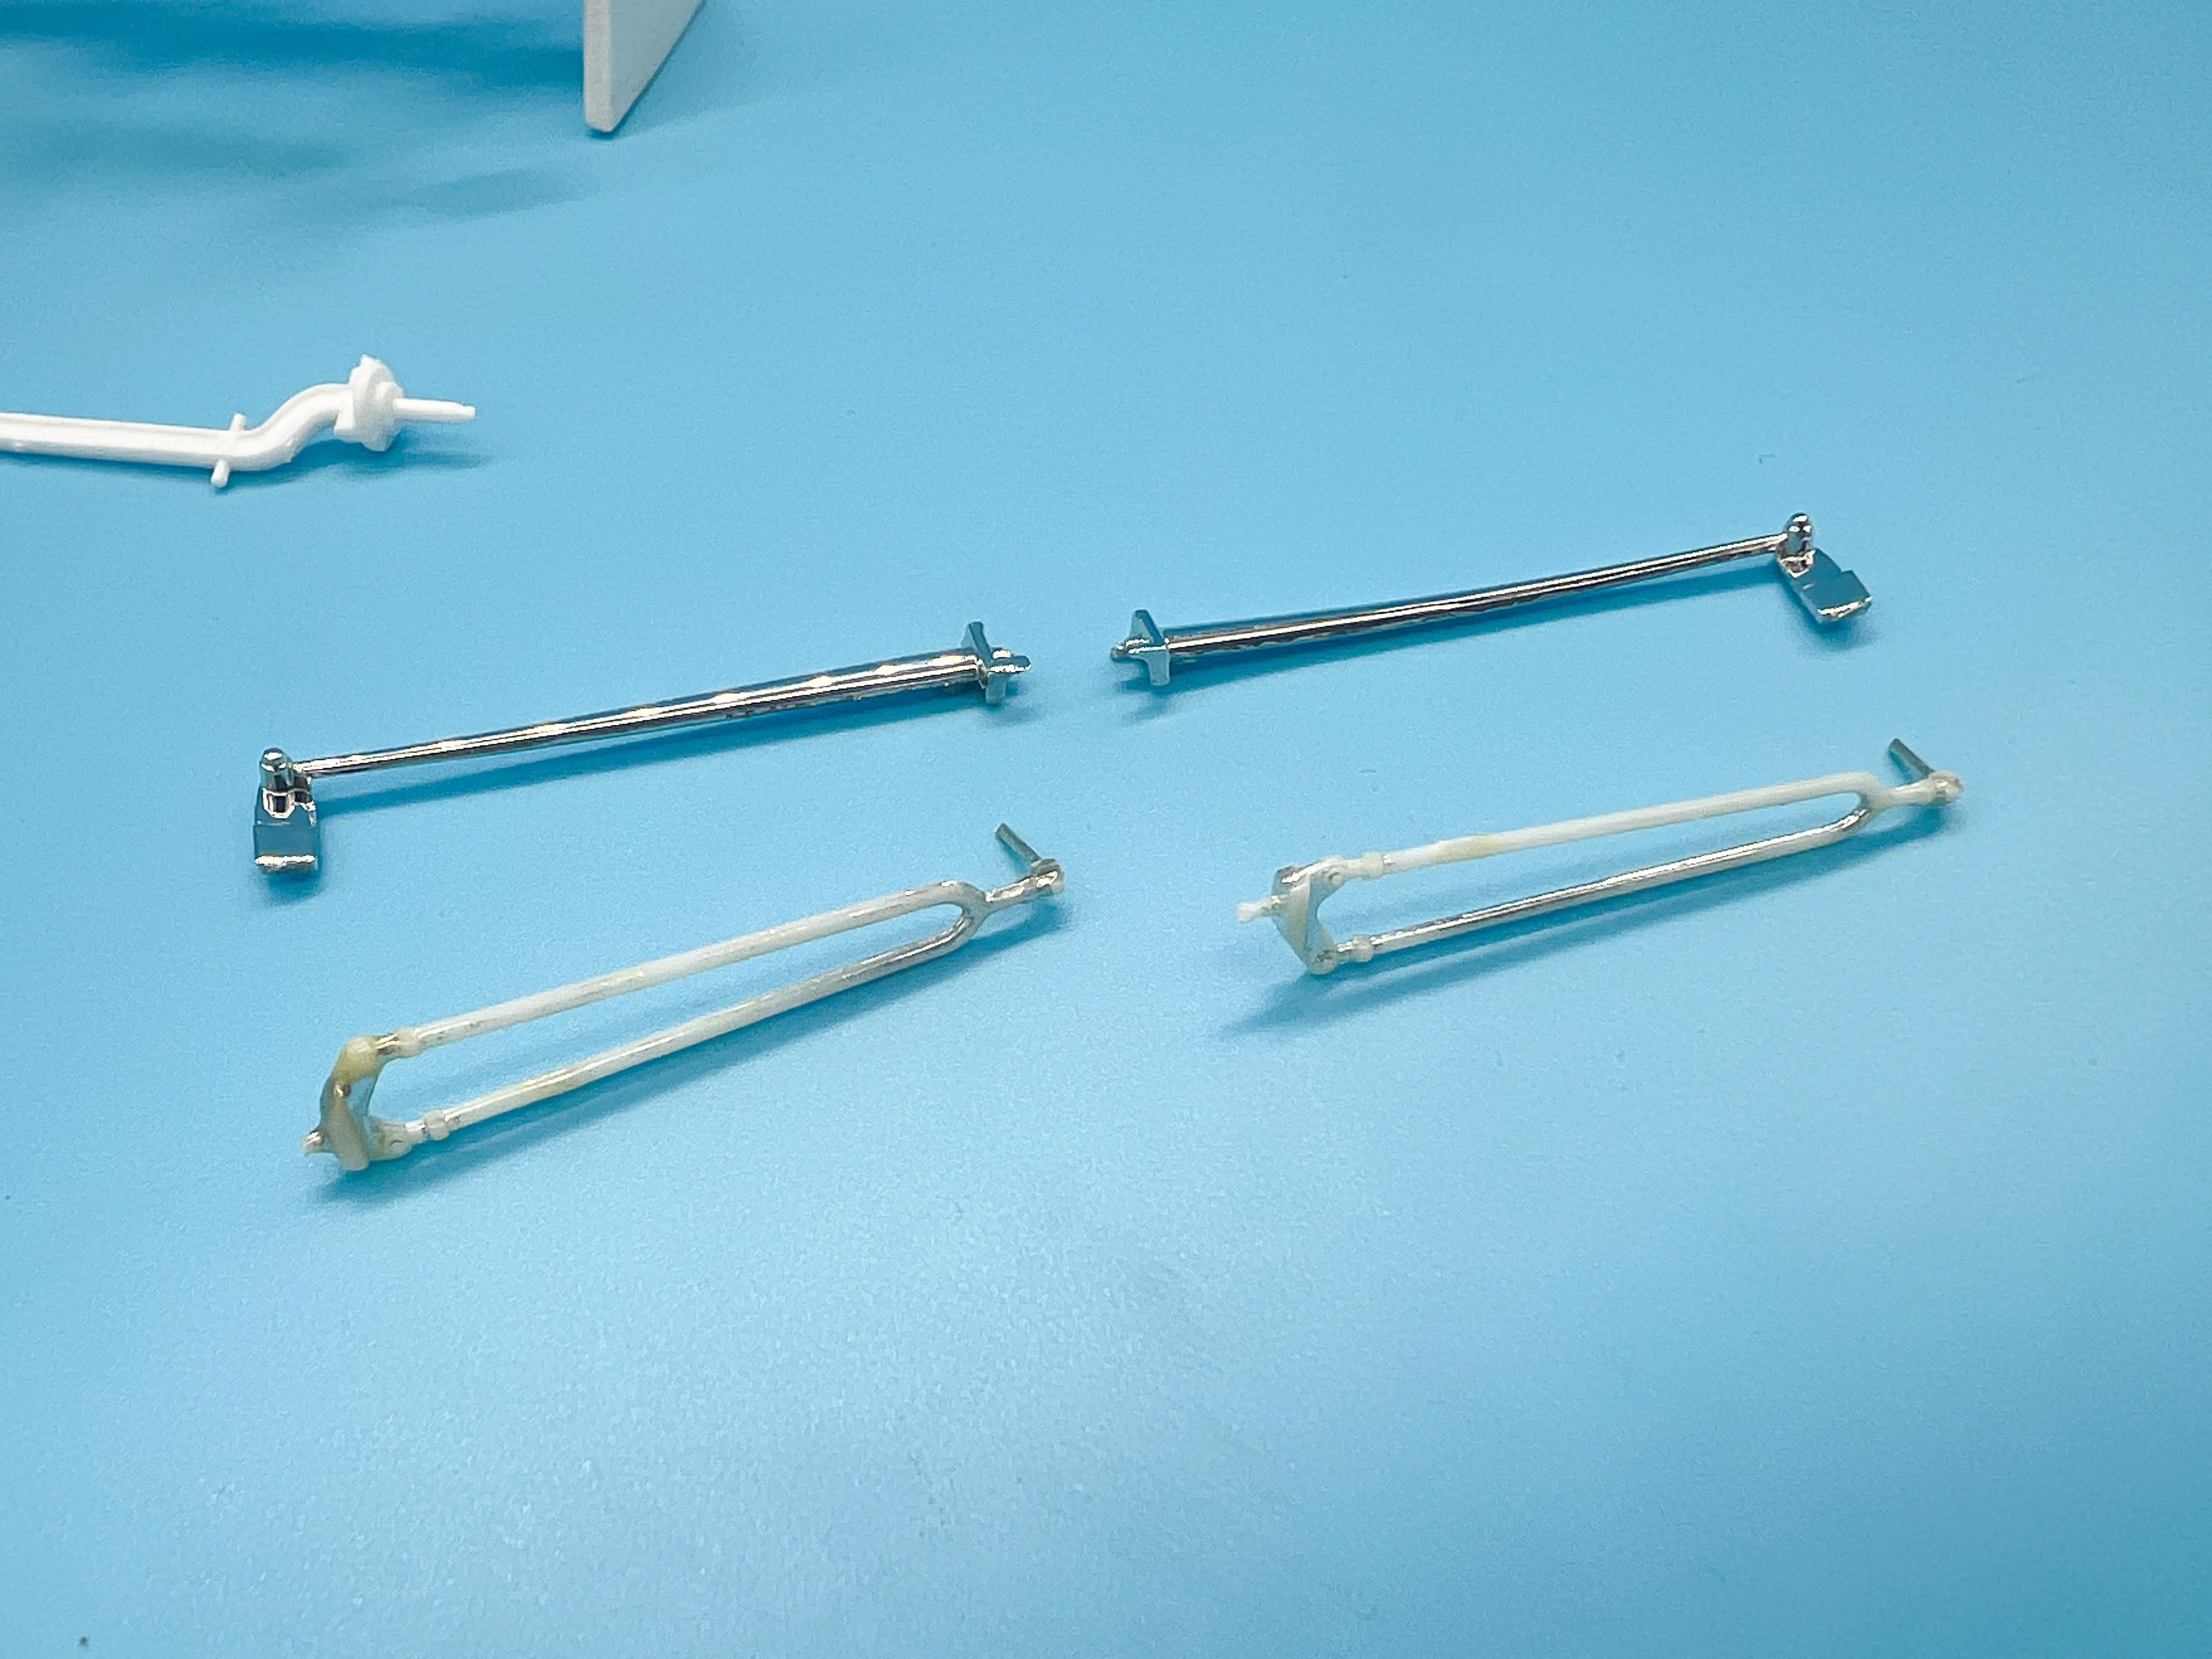
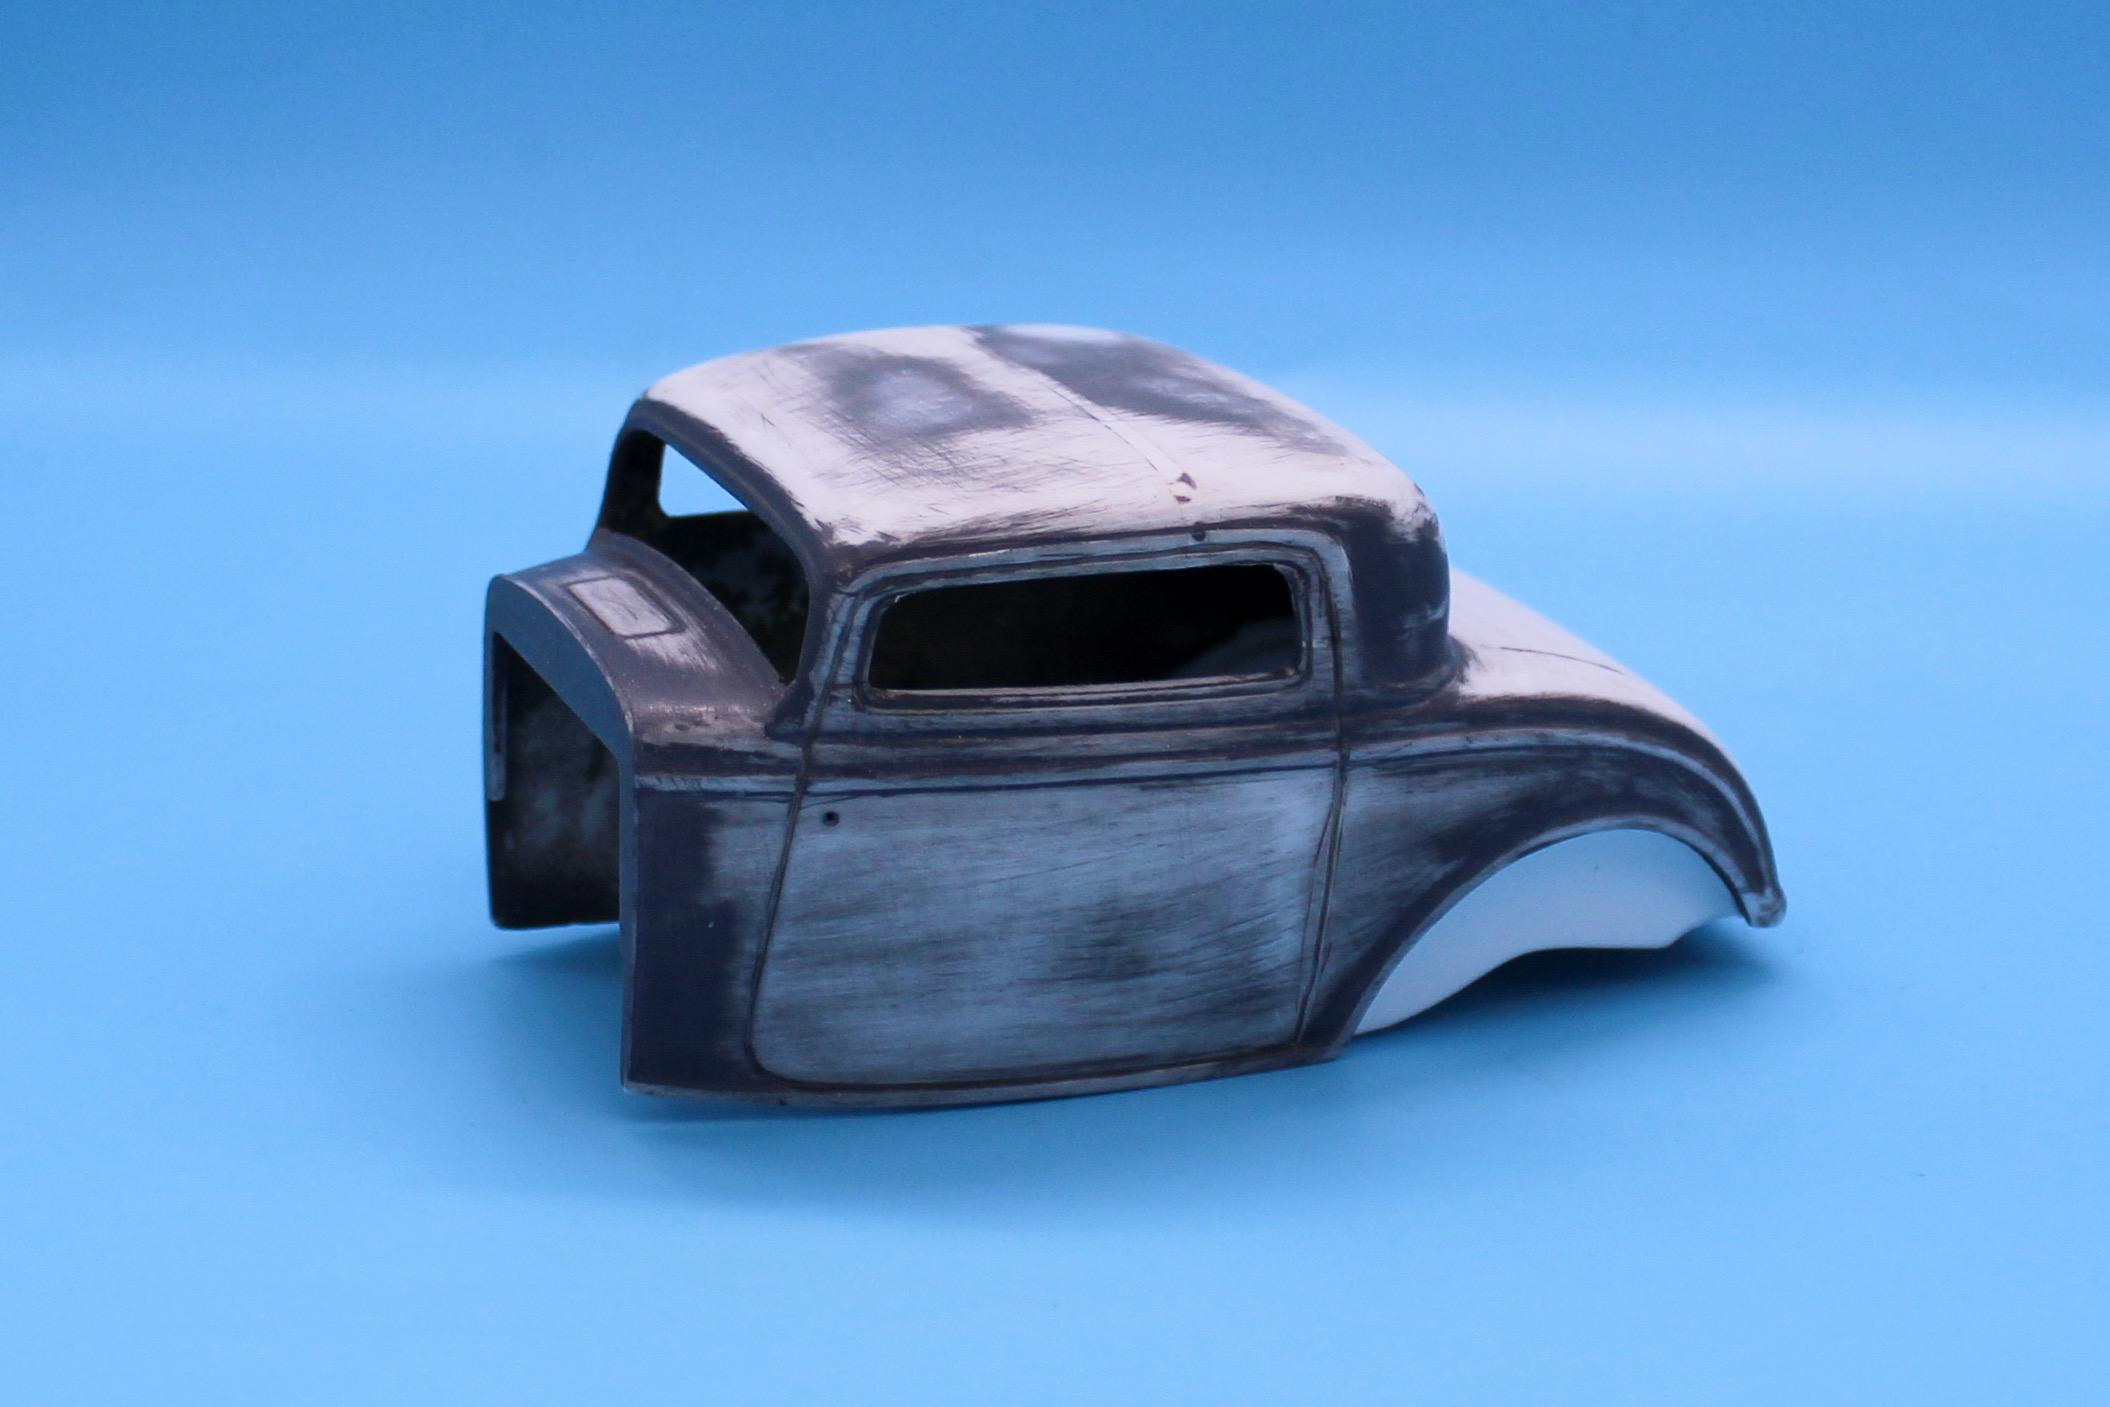
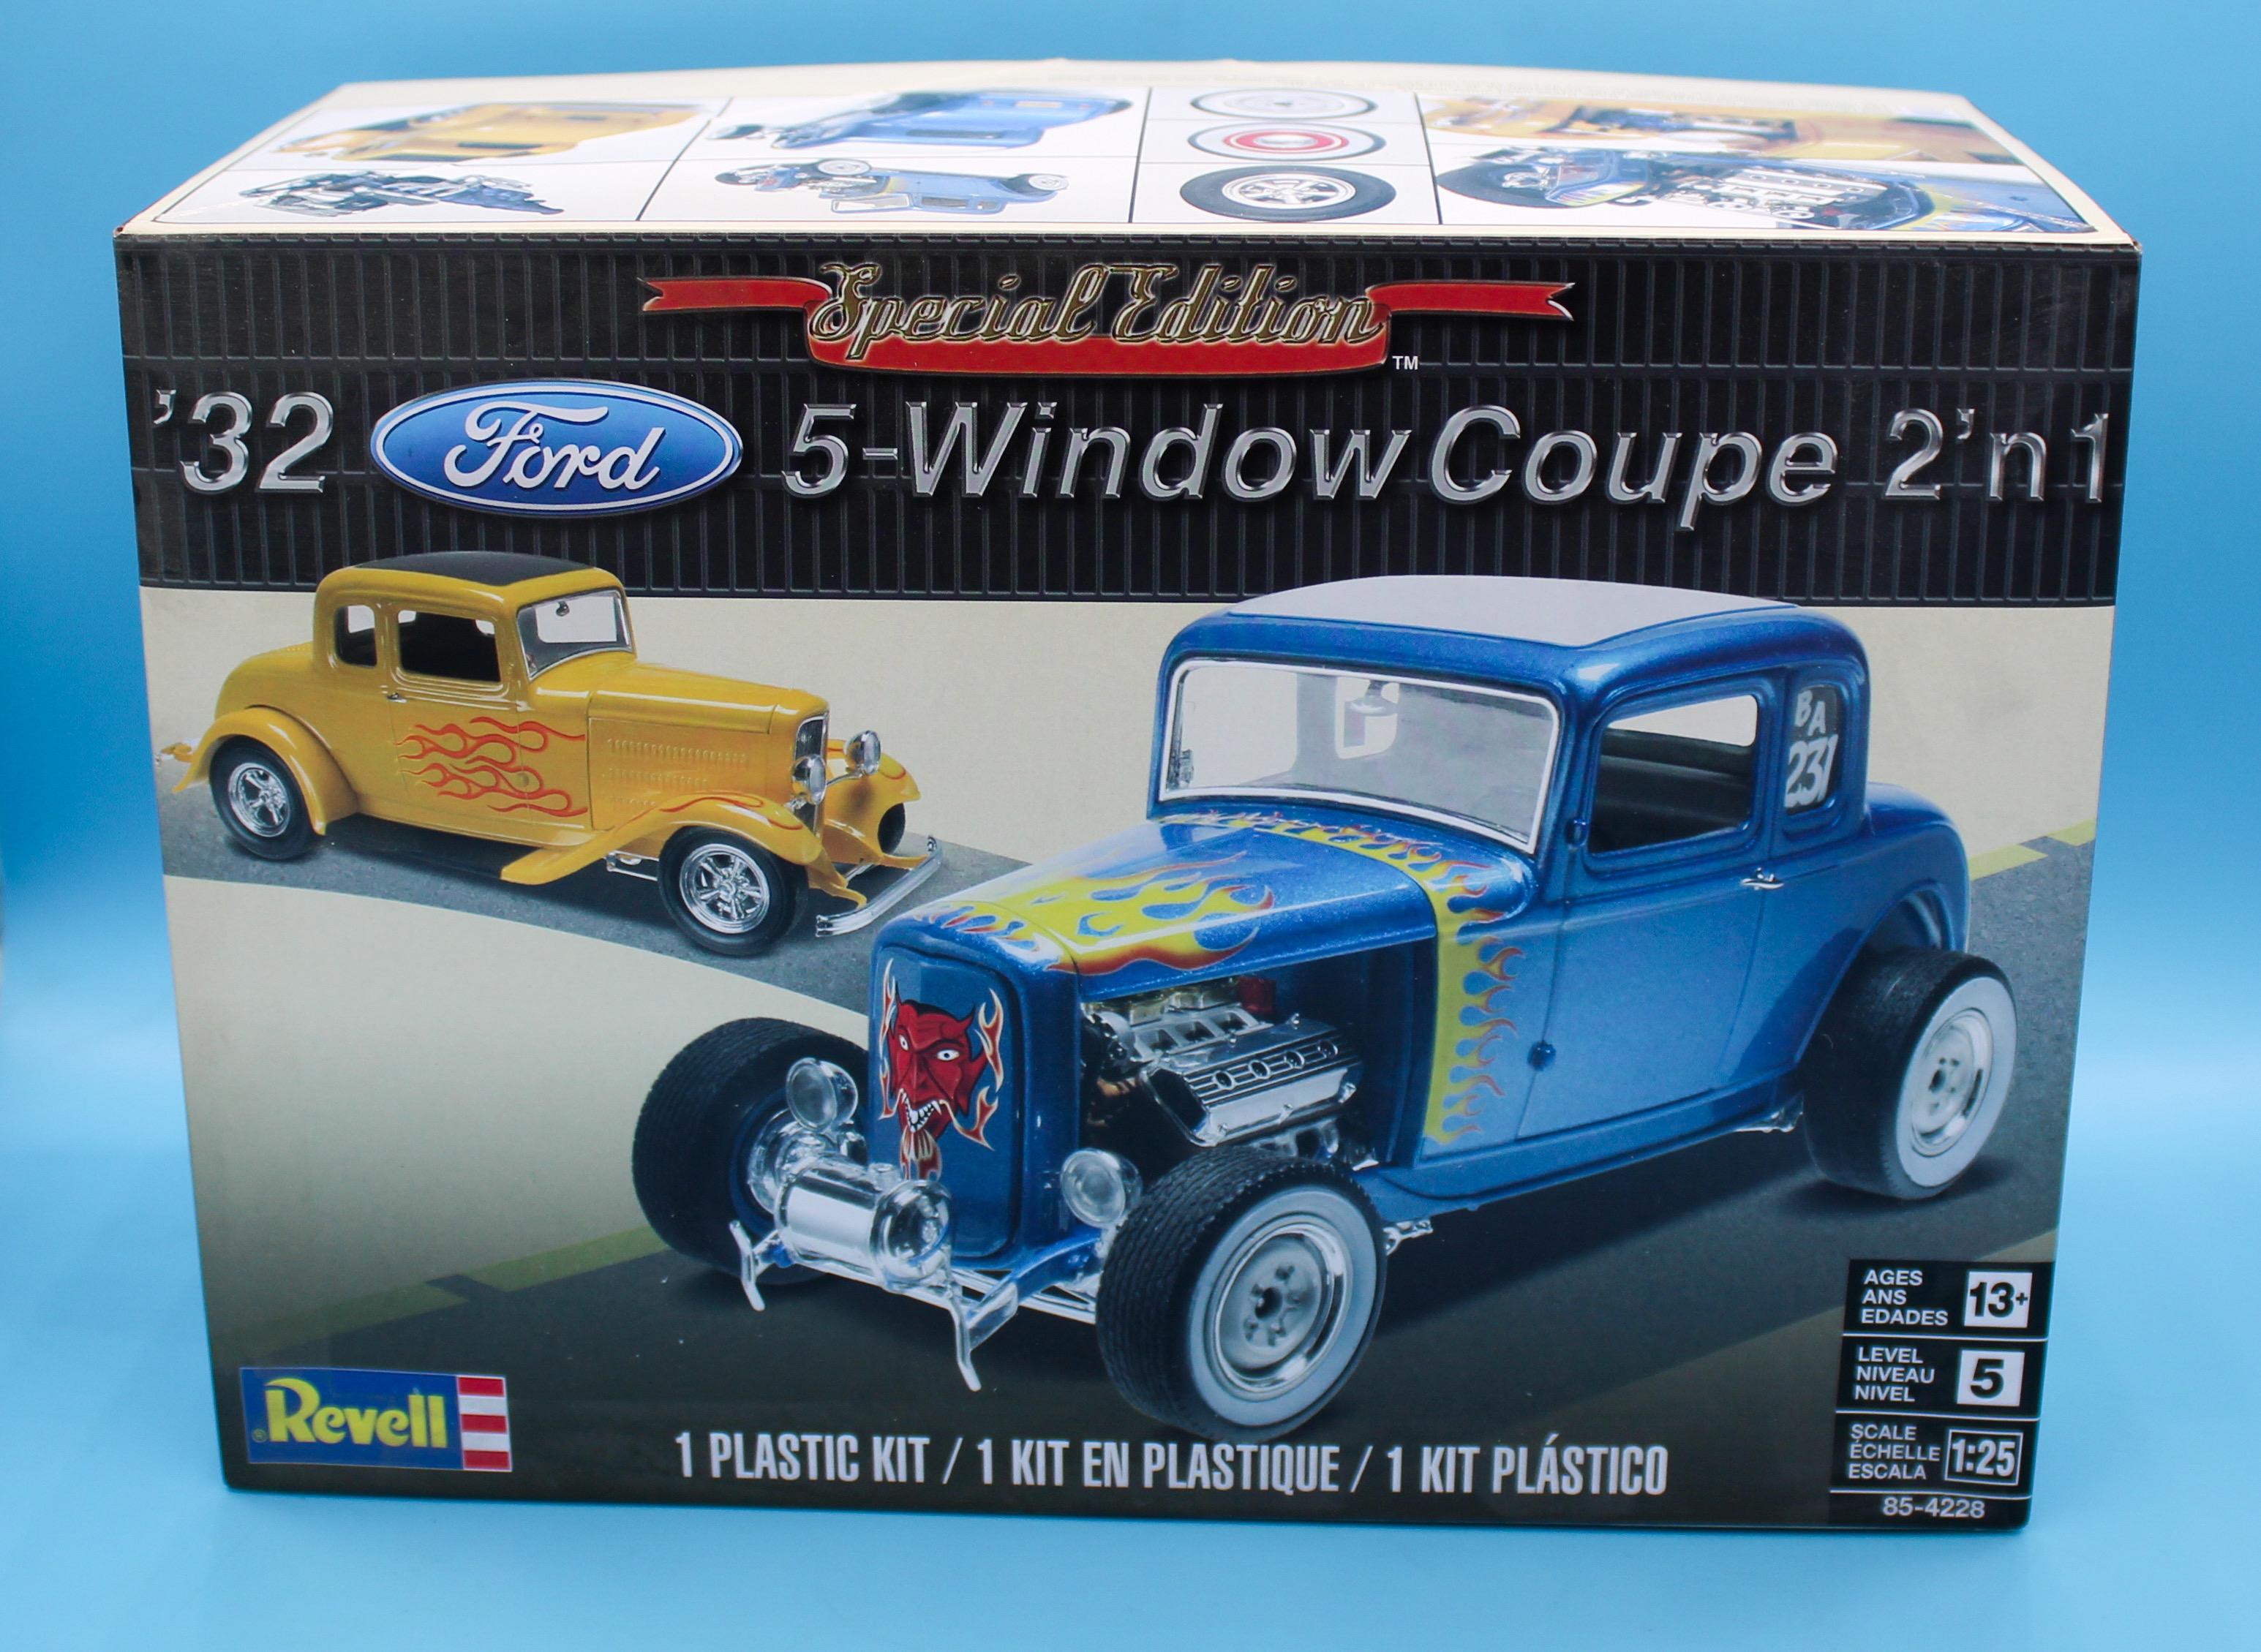
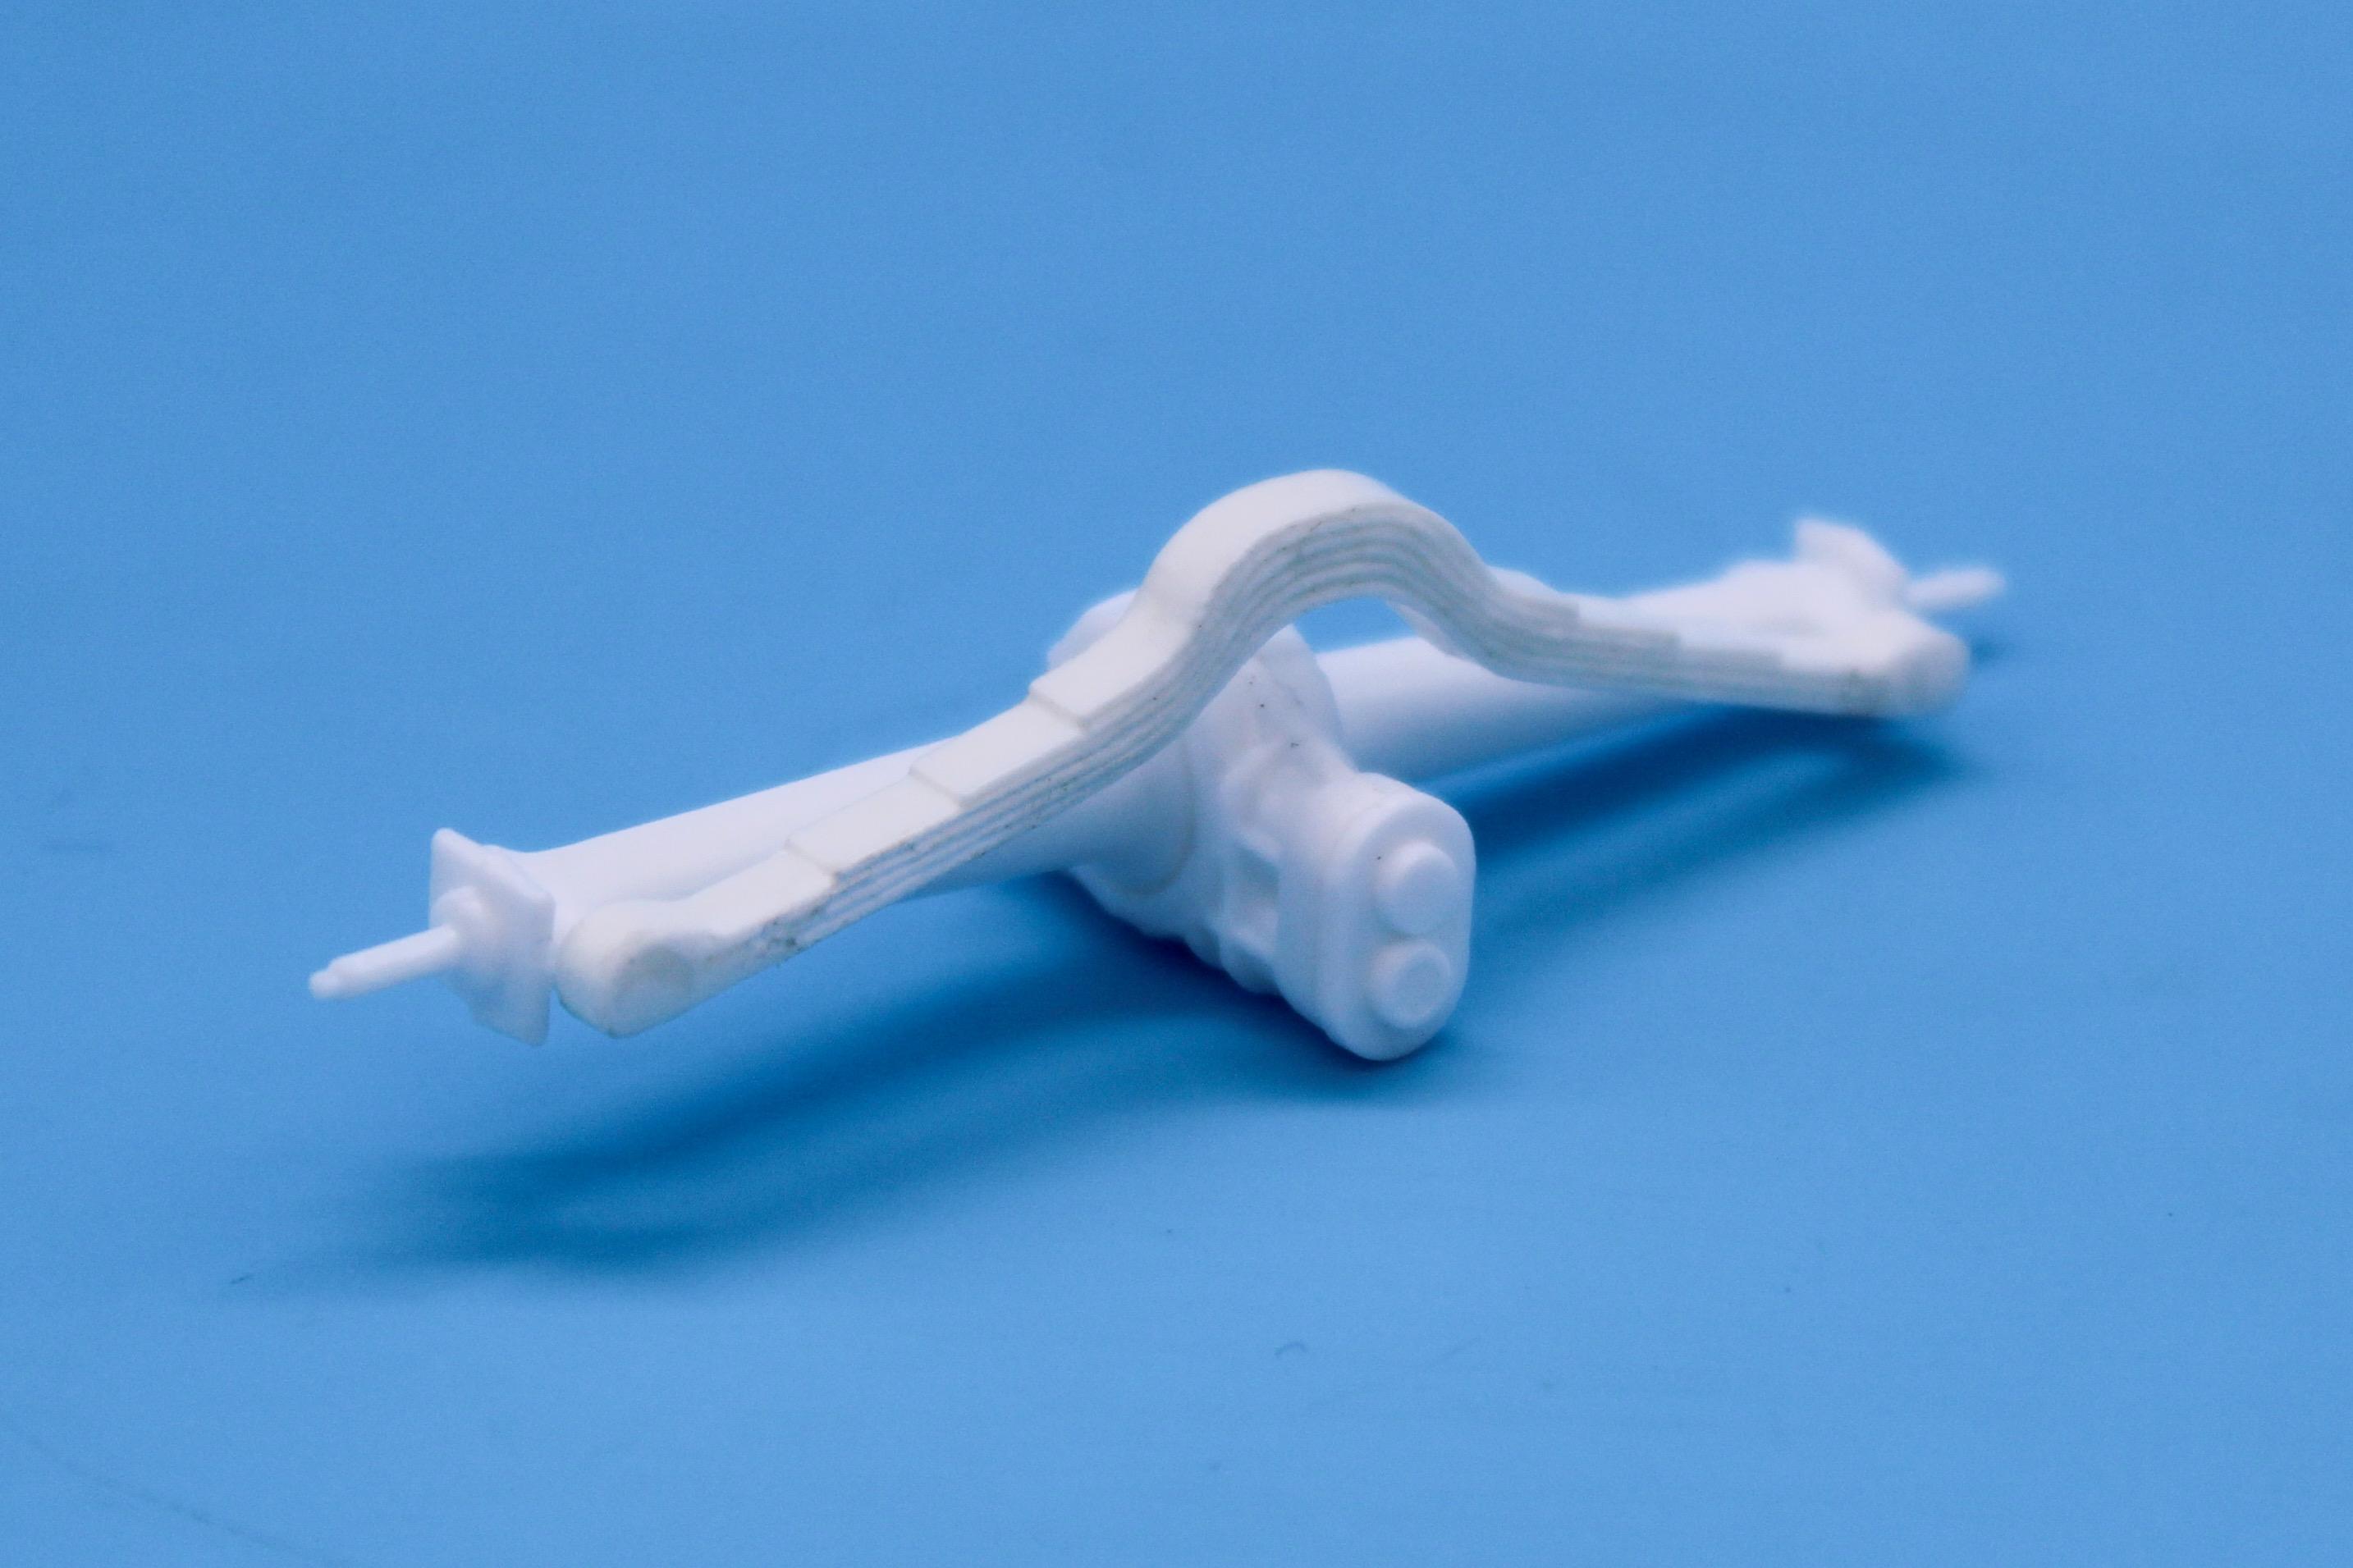
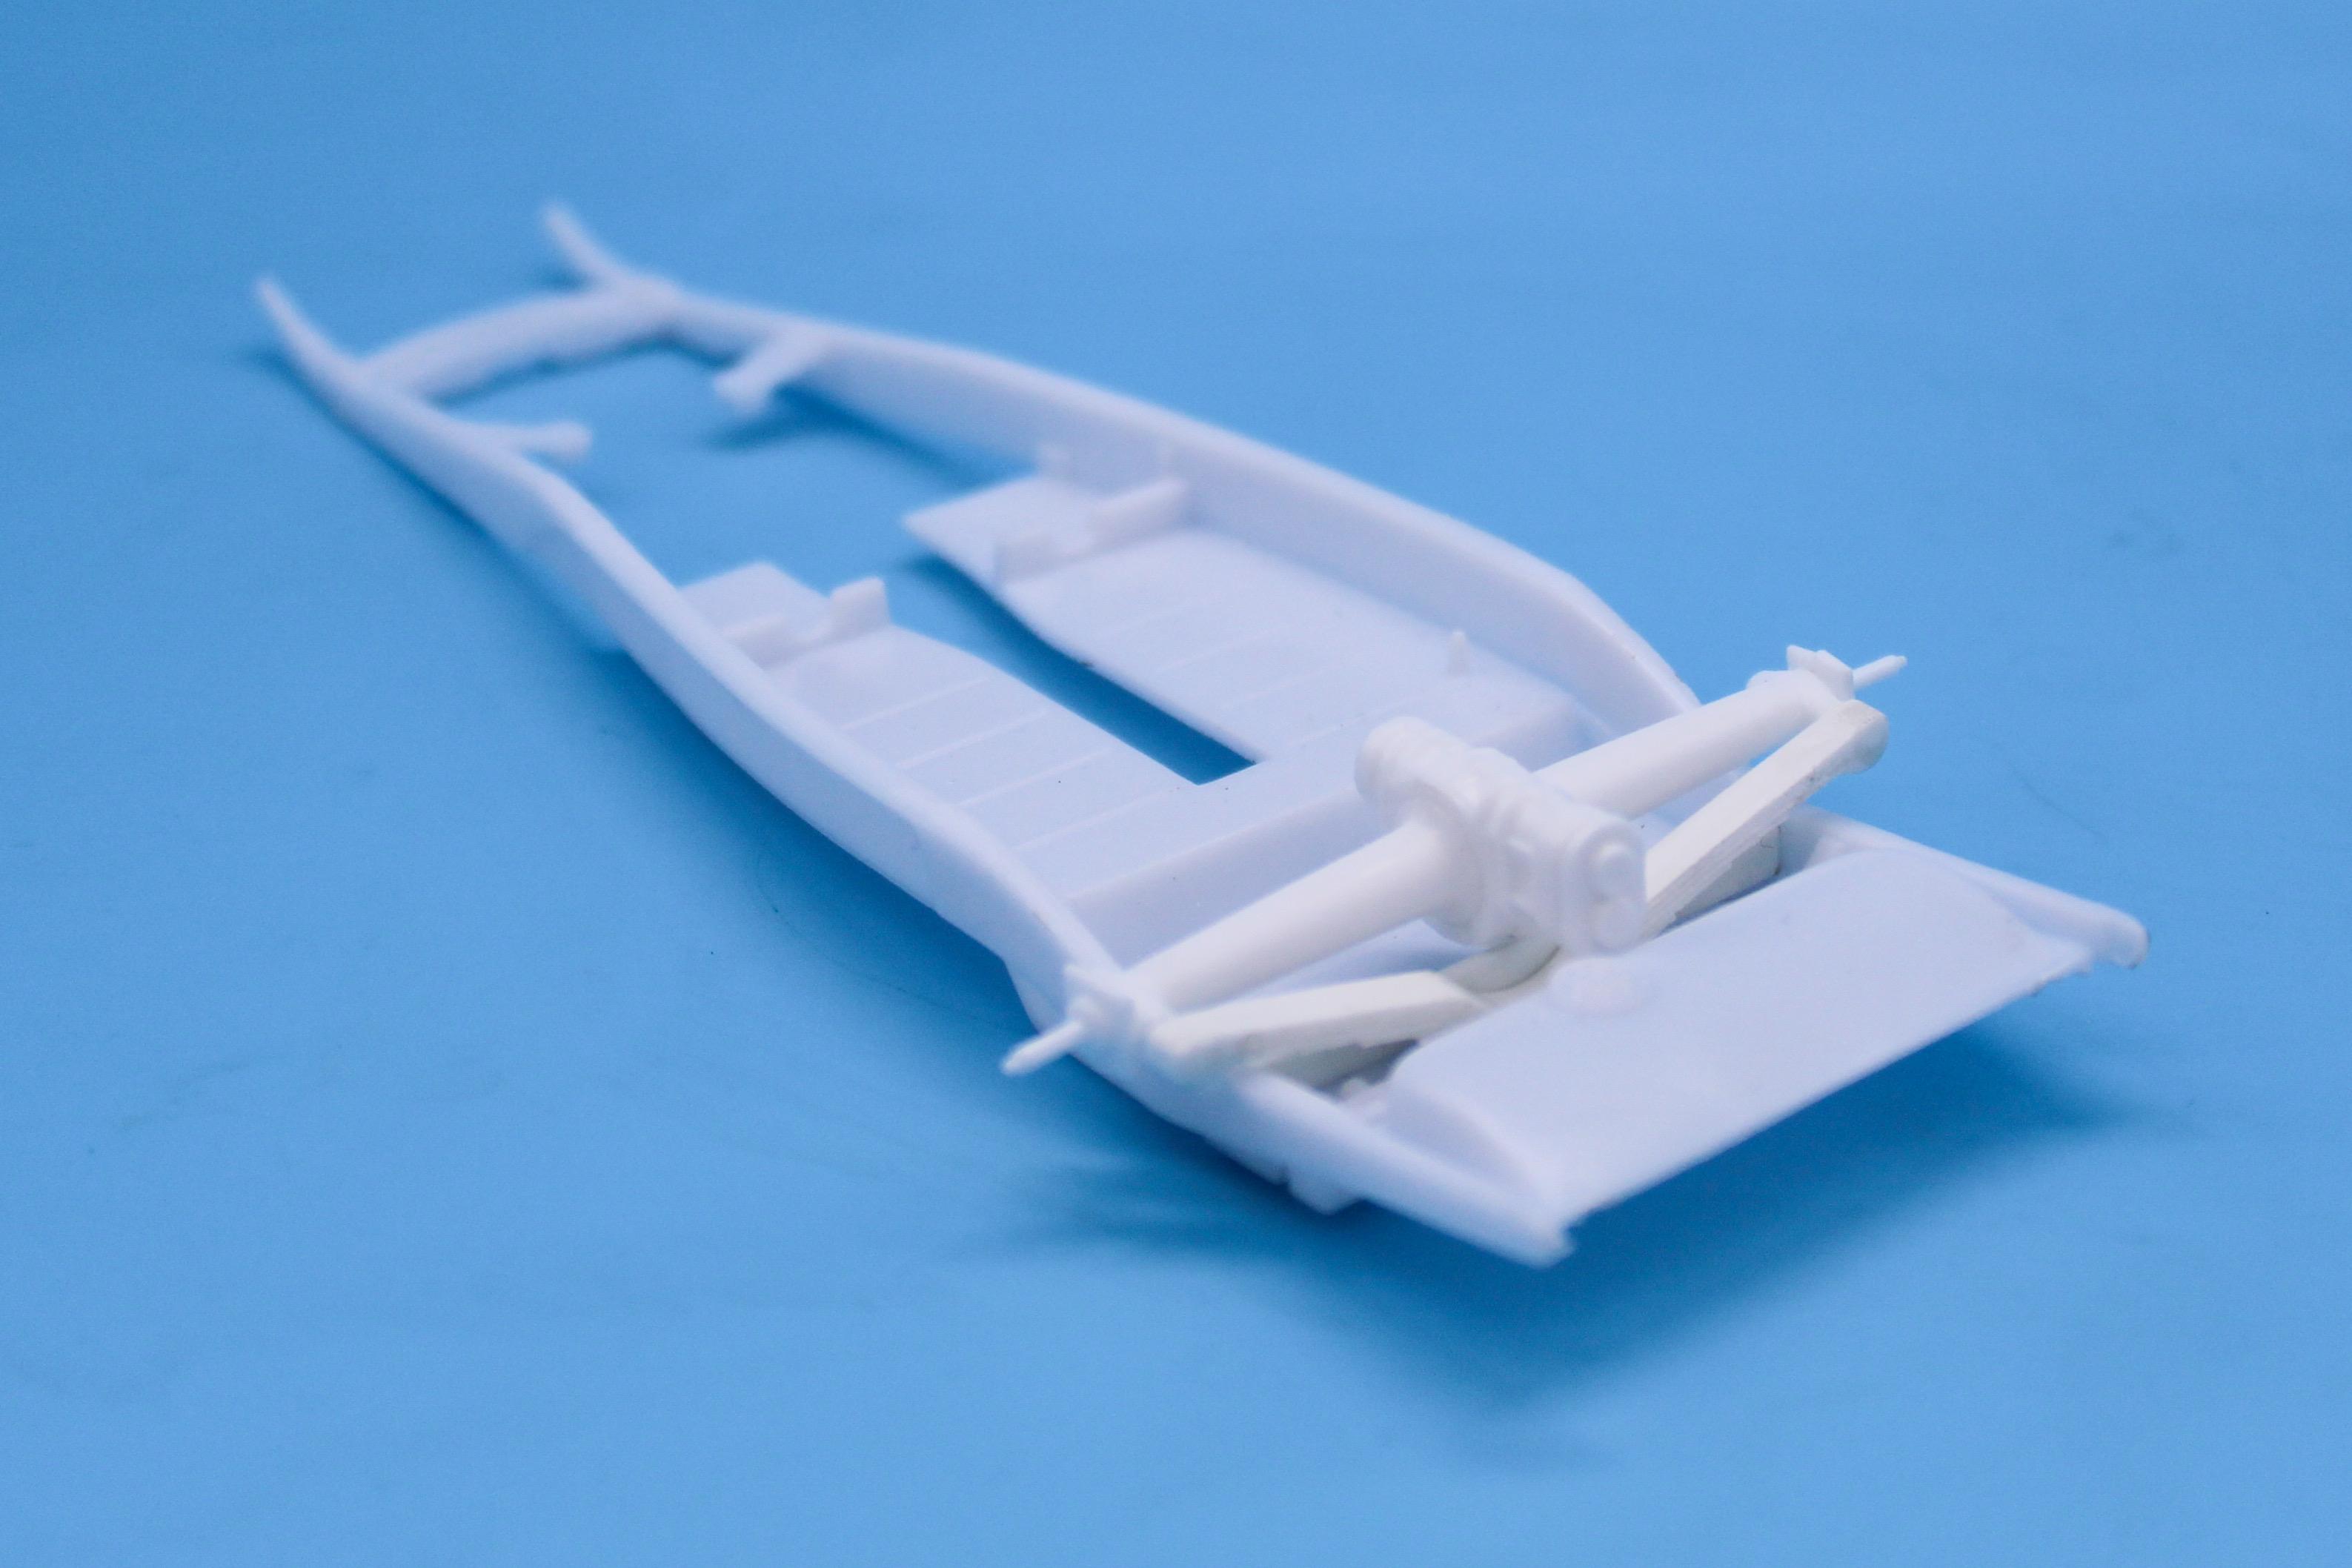
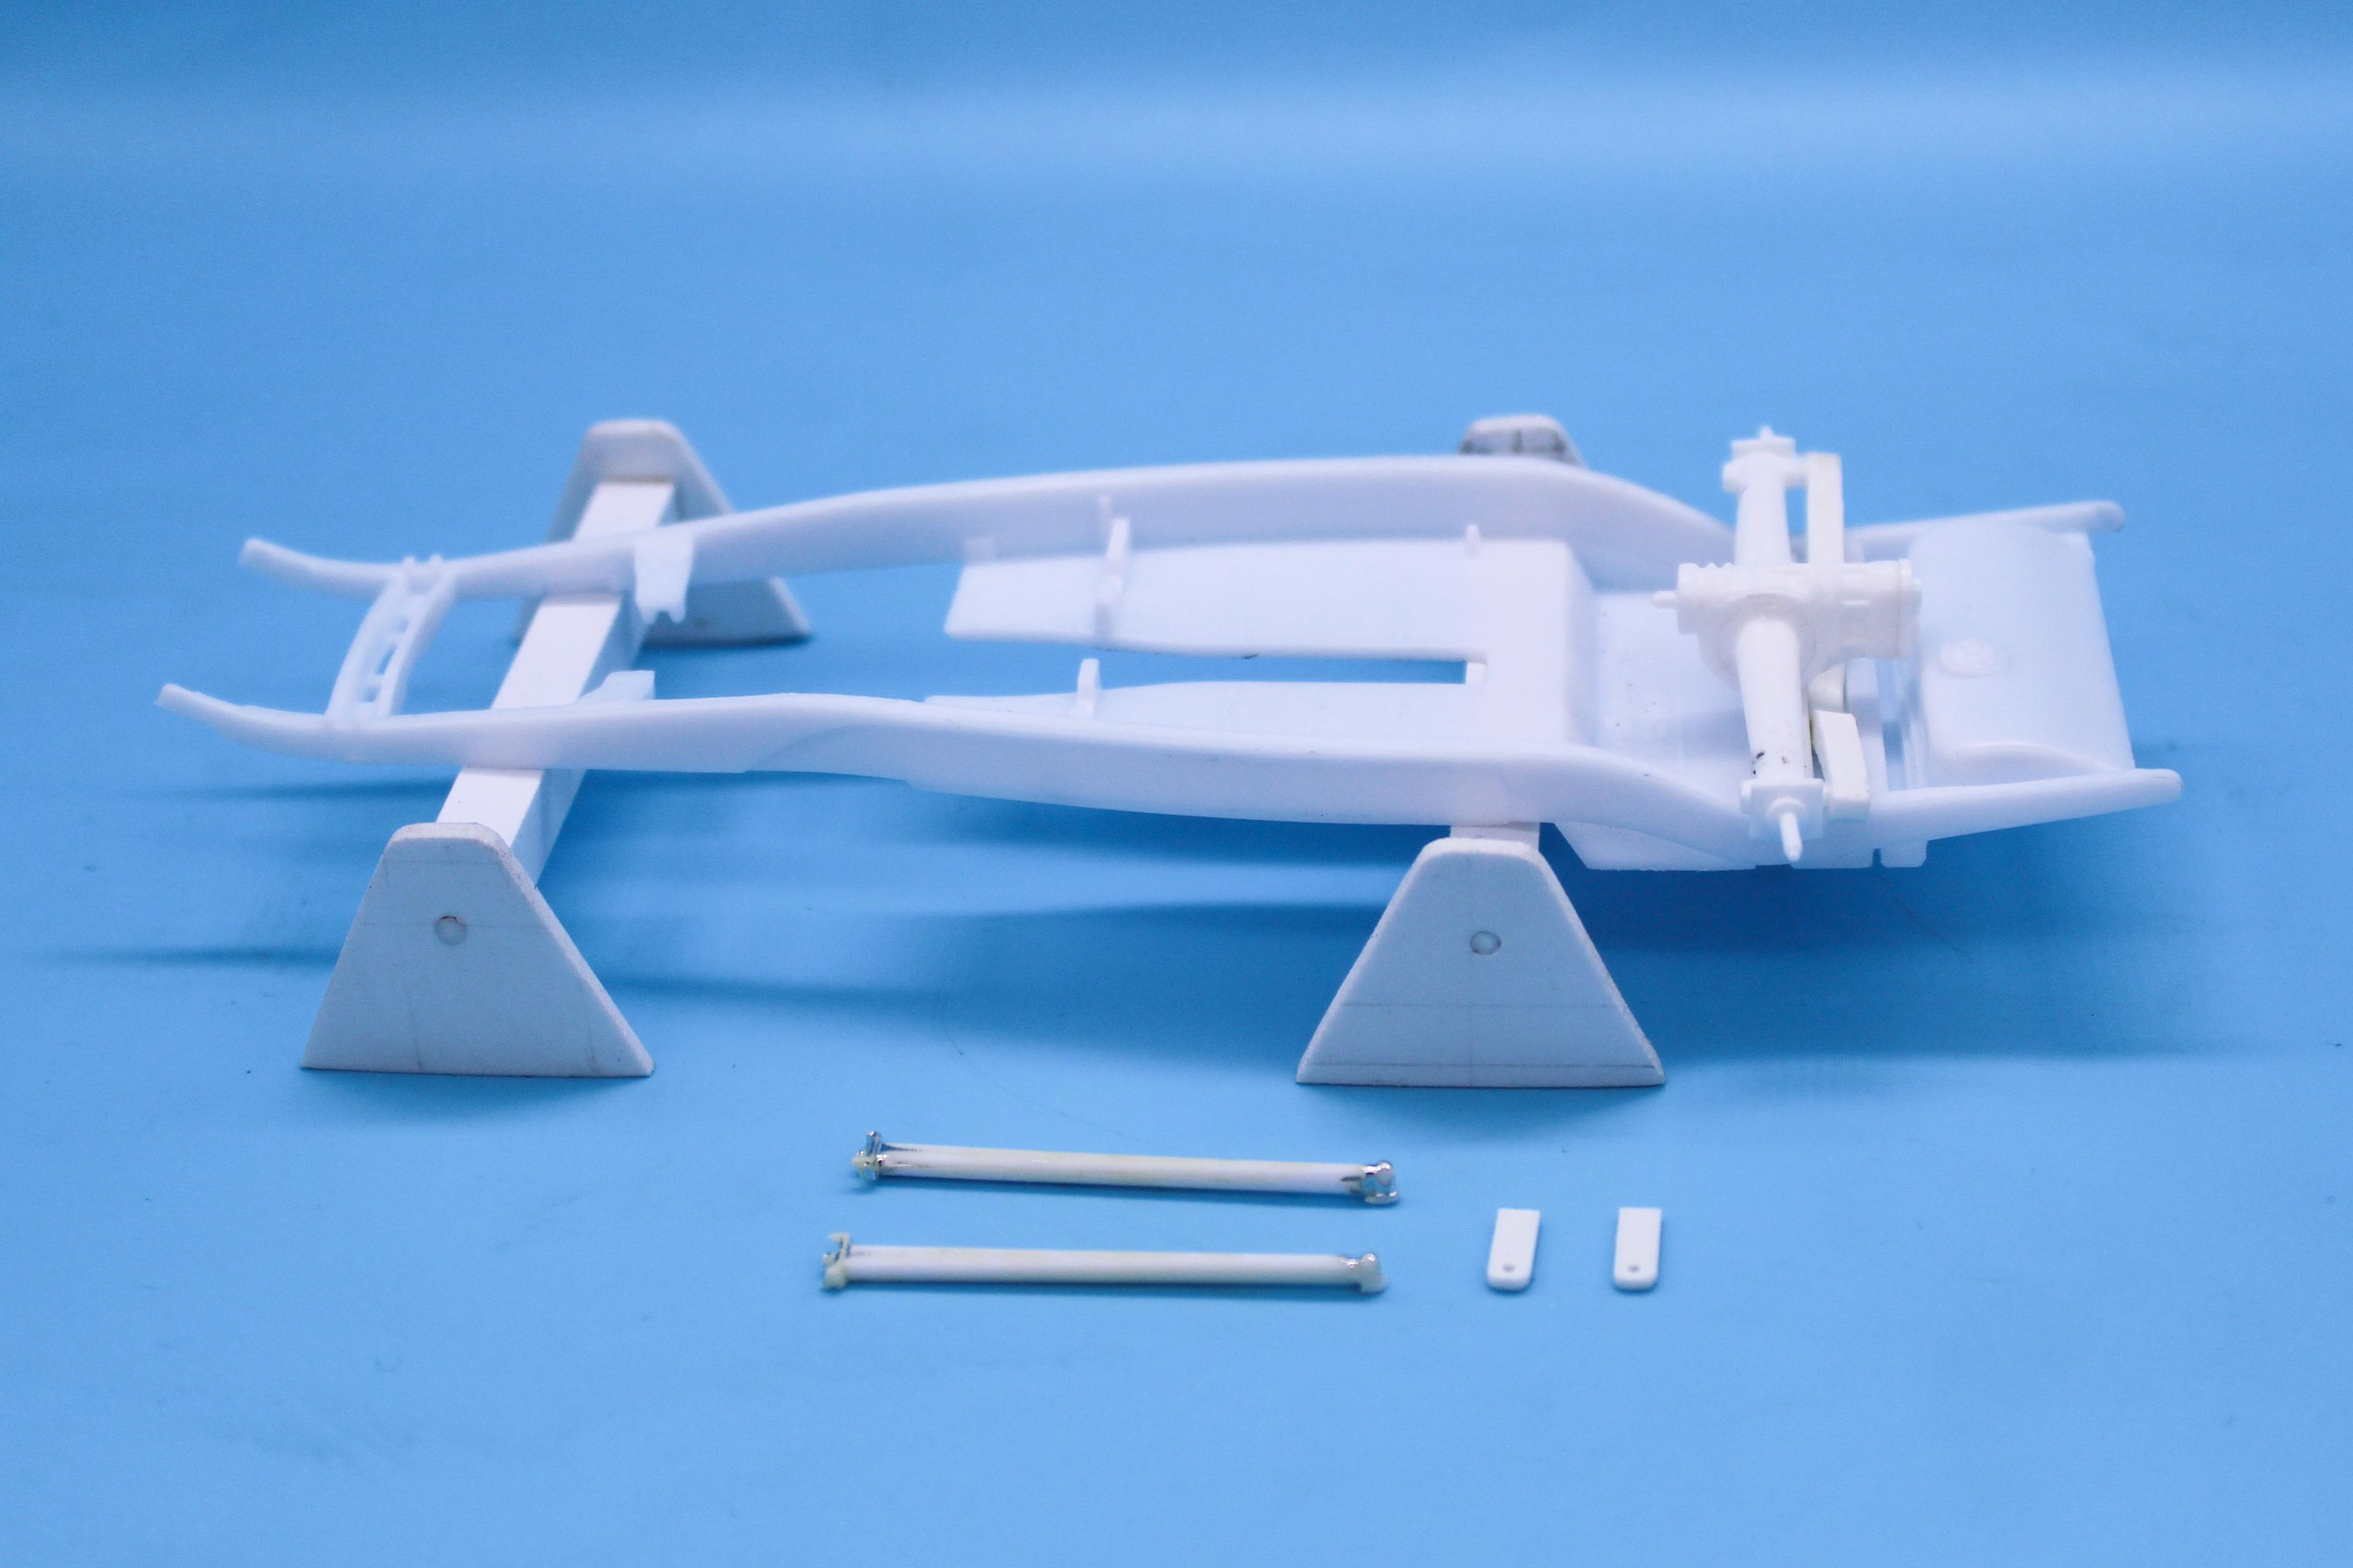
32s are probably my all-time favorite car, but I haven’t built one for a while…time to change that…I’m thinking a chopped, fenderless 3-window with a nice raked stance and a big ol’ Hemi out front, and a bunch of cool traditional parts. I chopped this spare body a while back, just for practice, then used it for paint practice, then felt sorry for it and stripped it and started body working it to get it a little straighter… And I’ve got one of these on the shelf, so it should be a piece of cake, right? Just switch out the body and call it good: I’m glad these Revell Deuce kits are available, but there’s a lot I don’t like about them, plus there have been so many built by this point they usually look like another Revell Deuce with it’s airbag suspension and 4-links and the 9” axle and the standard tuck n roll interior and so on. So, I’m going to use this as a starting point but likely not use too much of it aside from the frame. First up, I want to rid this thing of its airbagged rear axle, and swap in a Quickchange. @Mr. Metallic has got a Deuce WIP right now with a really nice clean rear end install going on, and I’m shamelessly borrowing what he did as my inspiration… Axle is a Parts Pack Quickchange, with an AMT Model T spring, which fits almost perfect without much work at all: Recessed a pocket in the frame for the spring, measured a bunch of times to make sure it’ll sit where the old one did, and pretty quickly we’ve fixed the first thing I wanted to fix: Next up, need some linkages, so I modified the nice pieces from the Revell Model A kits and made some mounting tabs: Fits something like this: Next up, hiding some shocks in front of the axle, so that it doesn’t spoil the nice view you’ll get underneath of the spring and the QC…these shocks are Revell Parts Pack too - they’re a little long but I really wanted to use them so I made them work - just added some bolt detail to one end and made a mount for them from square tube: Next up, making a Panhard bar, after Mr Ace Garage kindly gave me a lesson on them today…scratchbuilt a little mount to attach it to the axle and a mounting bracket hidden on the inside of the frame: And after all that we’ve got a nice rearend setup that could possibly work in real life (although I’m almost CERTAIN it wouldn’t be optimal…but it COULD work I think?) and a nice clean view from the rear of the car of that nice arched spring and the vintage Quickchange: And…that’s about all I accomplished this year so far ?. Next adventure will be the front suspension, then everything in between it and above it - more soon, soon as I’ve done more!
-
Perfect explanation - thanks for taking the time to share your knowledge Bill!
-
What DOES the Panhard bar do that is essential, in this case? And would you need one if there was a single leaf spring outback instead of the coils? Inquiring minds want to learn! Great build @modelfink! Looking forward to more progress on this one!
-
Absolutely! A balanced diet is important! M&M's are cool, but so is steak and bourbon! That's a cool project - nice work so far!
-
Why is my clear coat coming out textured?
OldNYJim replied to Milo's topic in Model Building Questions and Answers
I agree on the Rustoleum comments (I’ve had so many bad cans of their primer that I could’ve painted a battleship…if they hadn’t clogged) BUT I’ve found their High Lustre Lacquer clear (with a black chair on the can) is a GREAT product. The cans I’ve received and used recently have a new, larger, cap which I’ve found lays down a really nice wet coat of clear, and with careful application (couple of mist coats to start, heavier coats followed by a wet sand and then a gloss coat) I can get a nice finish right out of the can. I’m glad I tried it - it’s my go-to clear now for about everything that needs to be shiny, it isn’t expensive and it’s about the only product of theirs I still use -
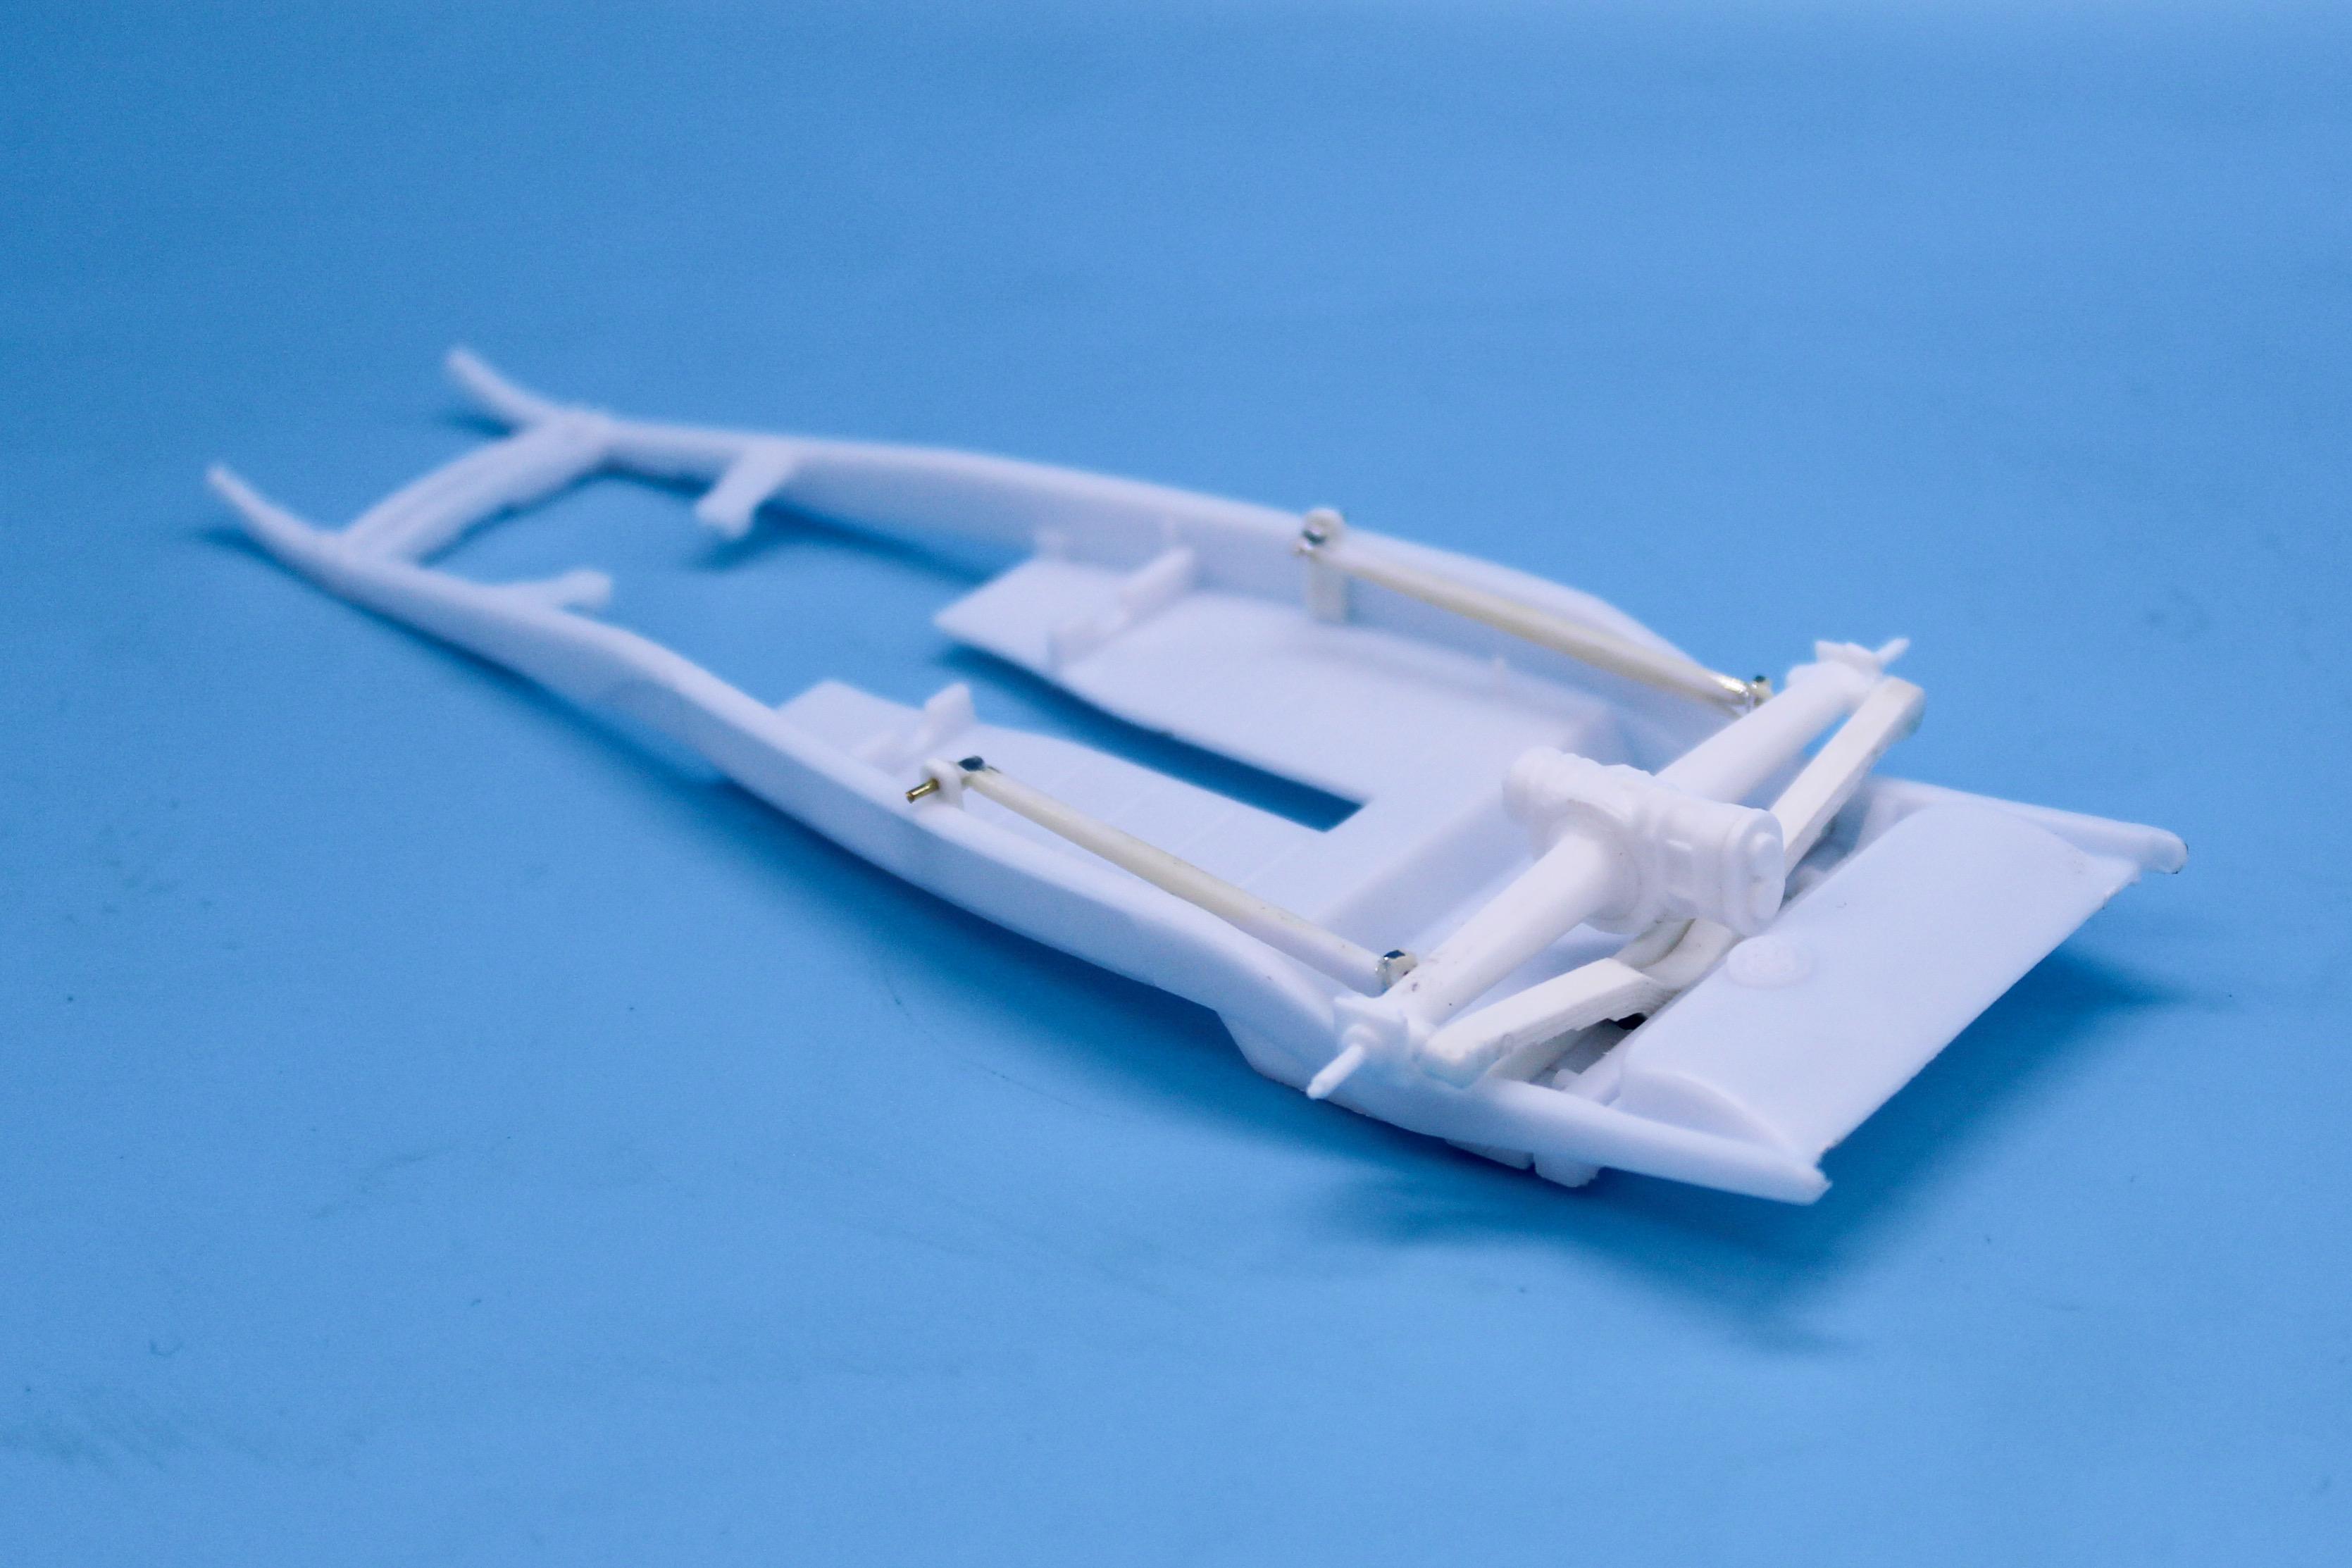
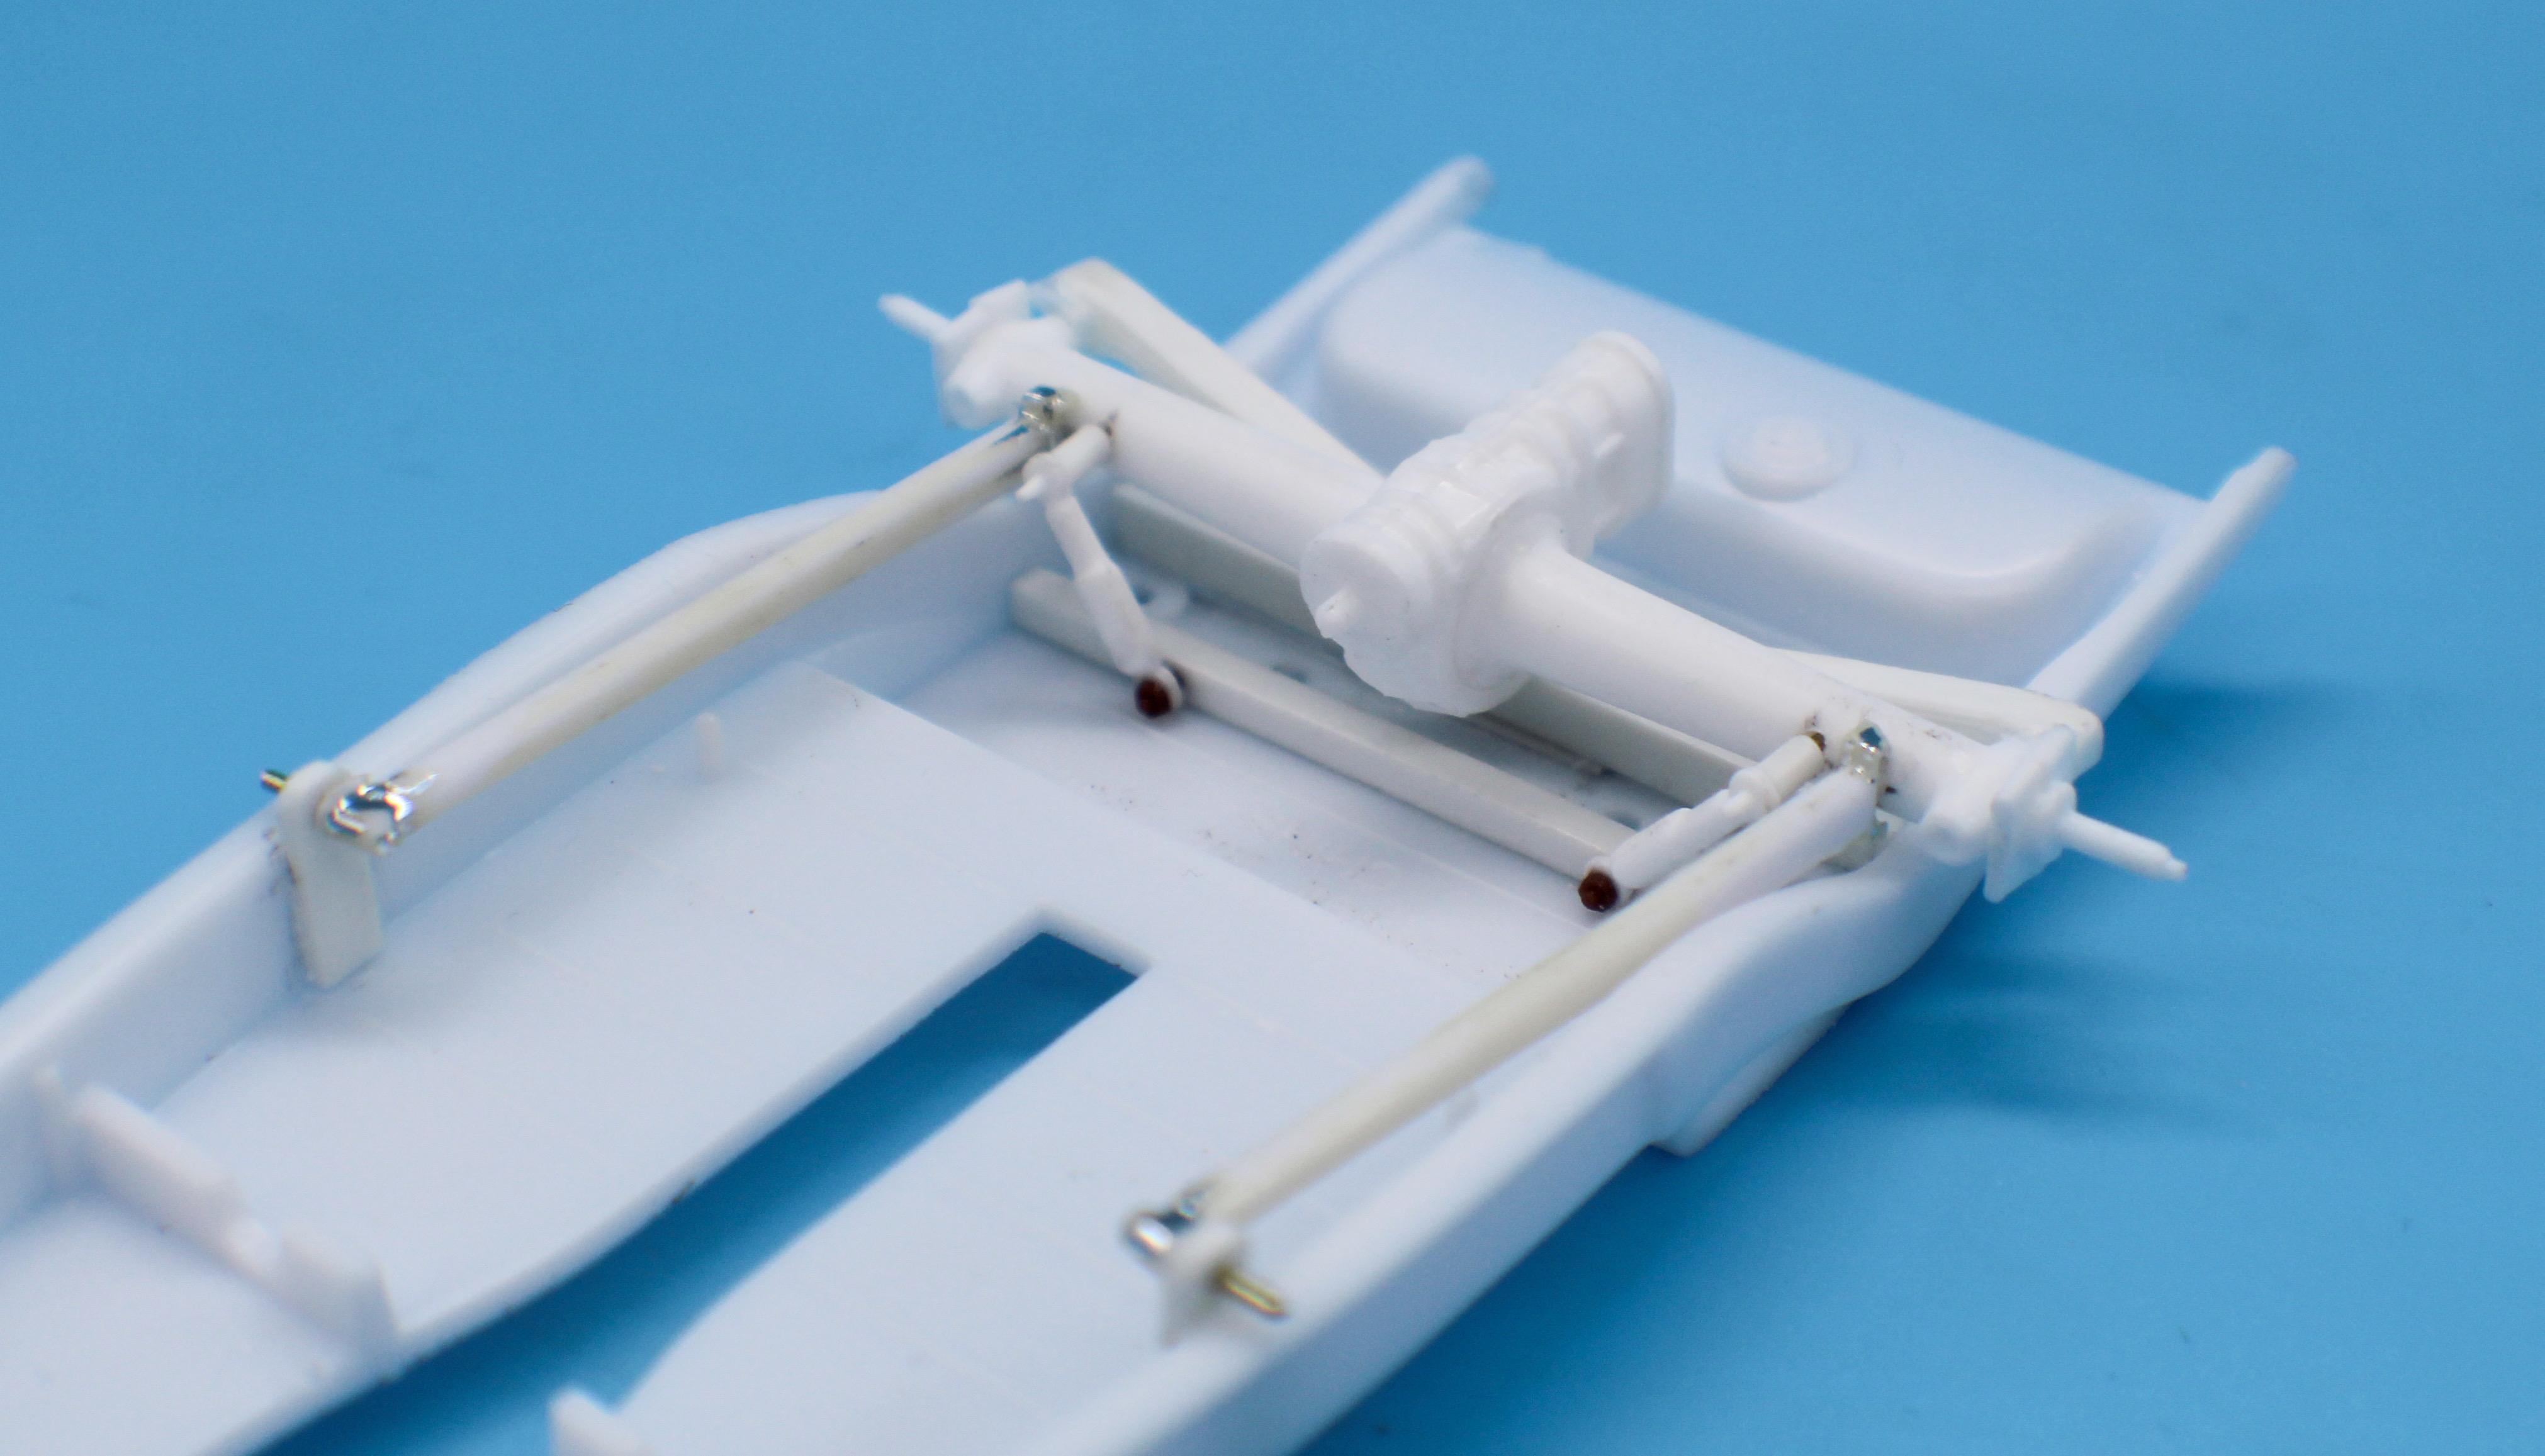
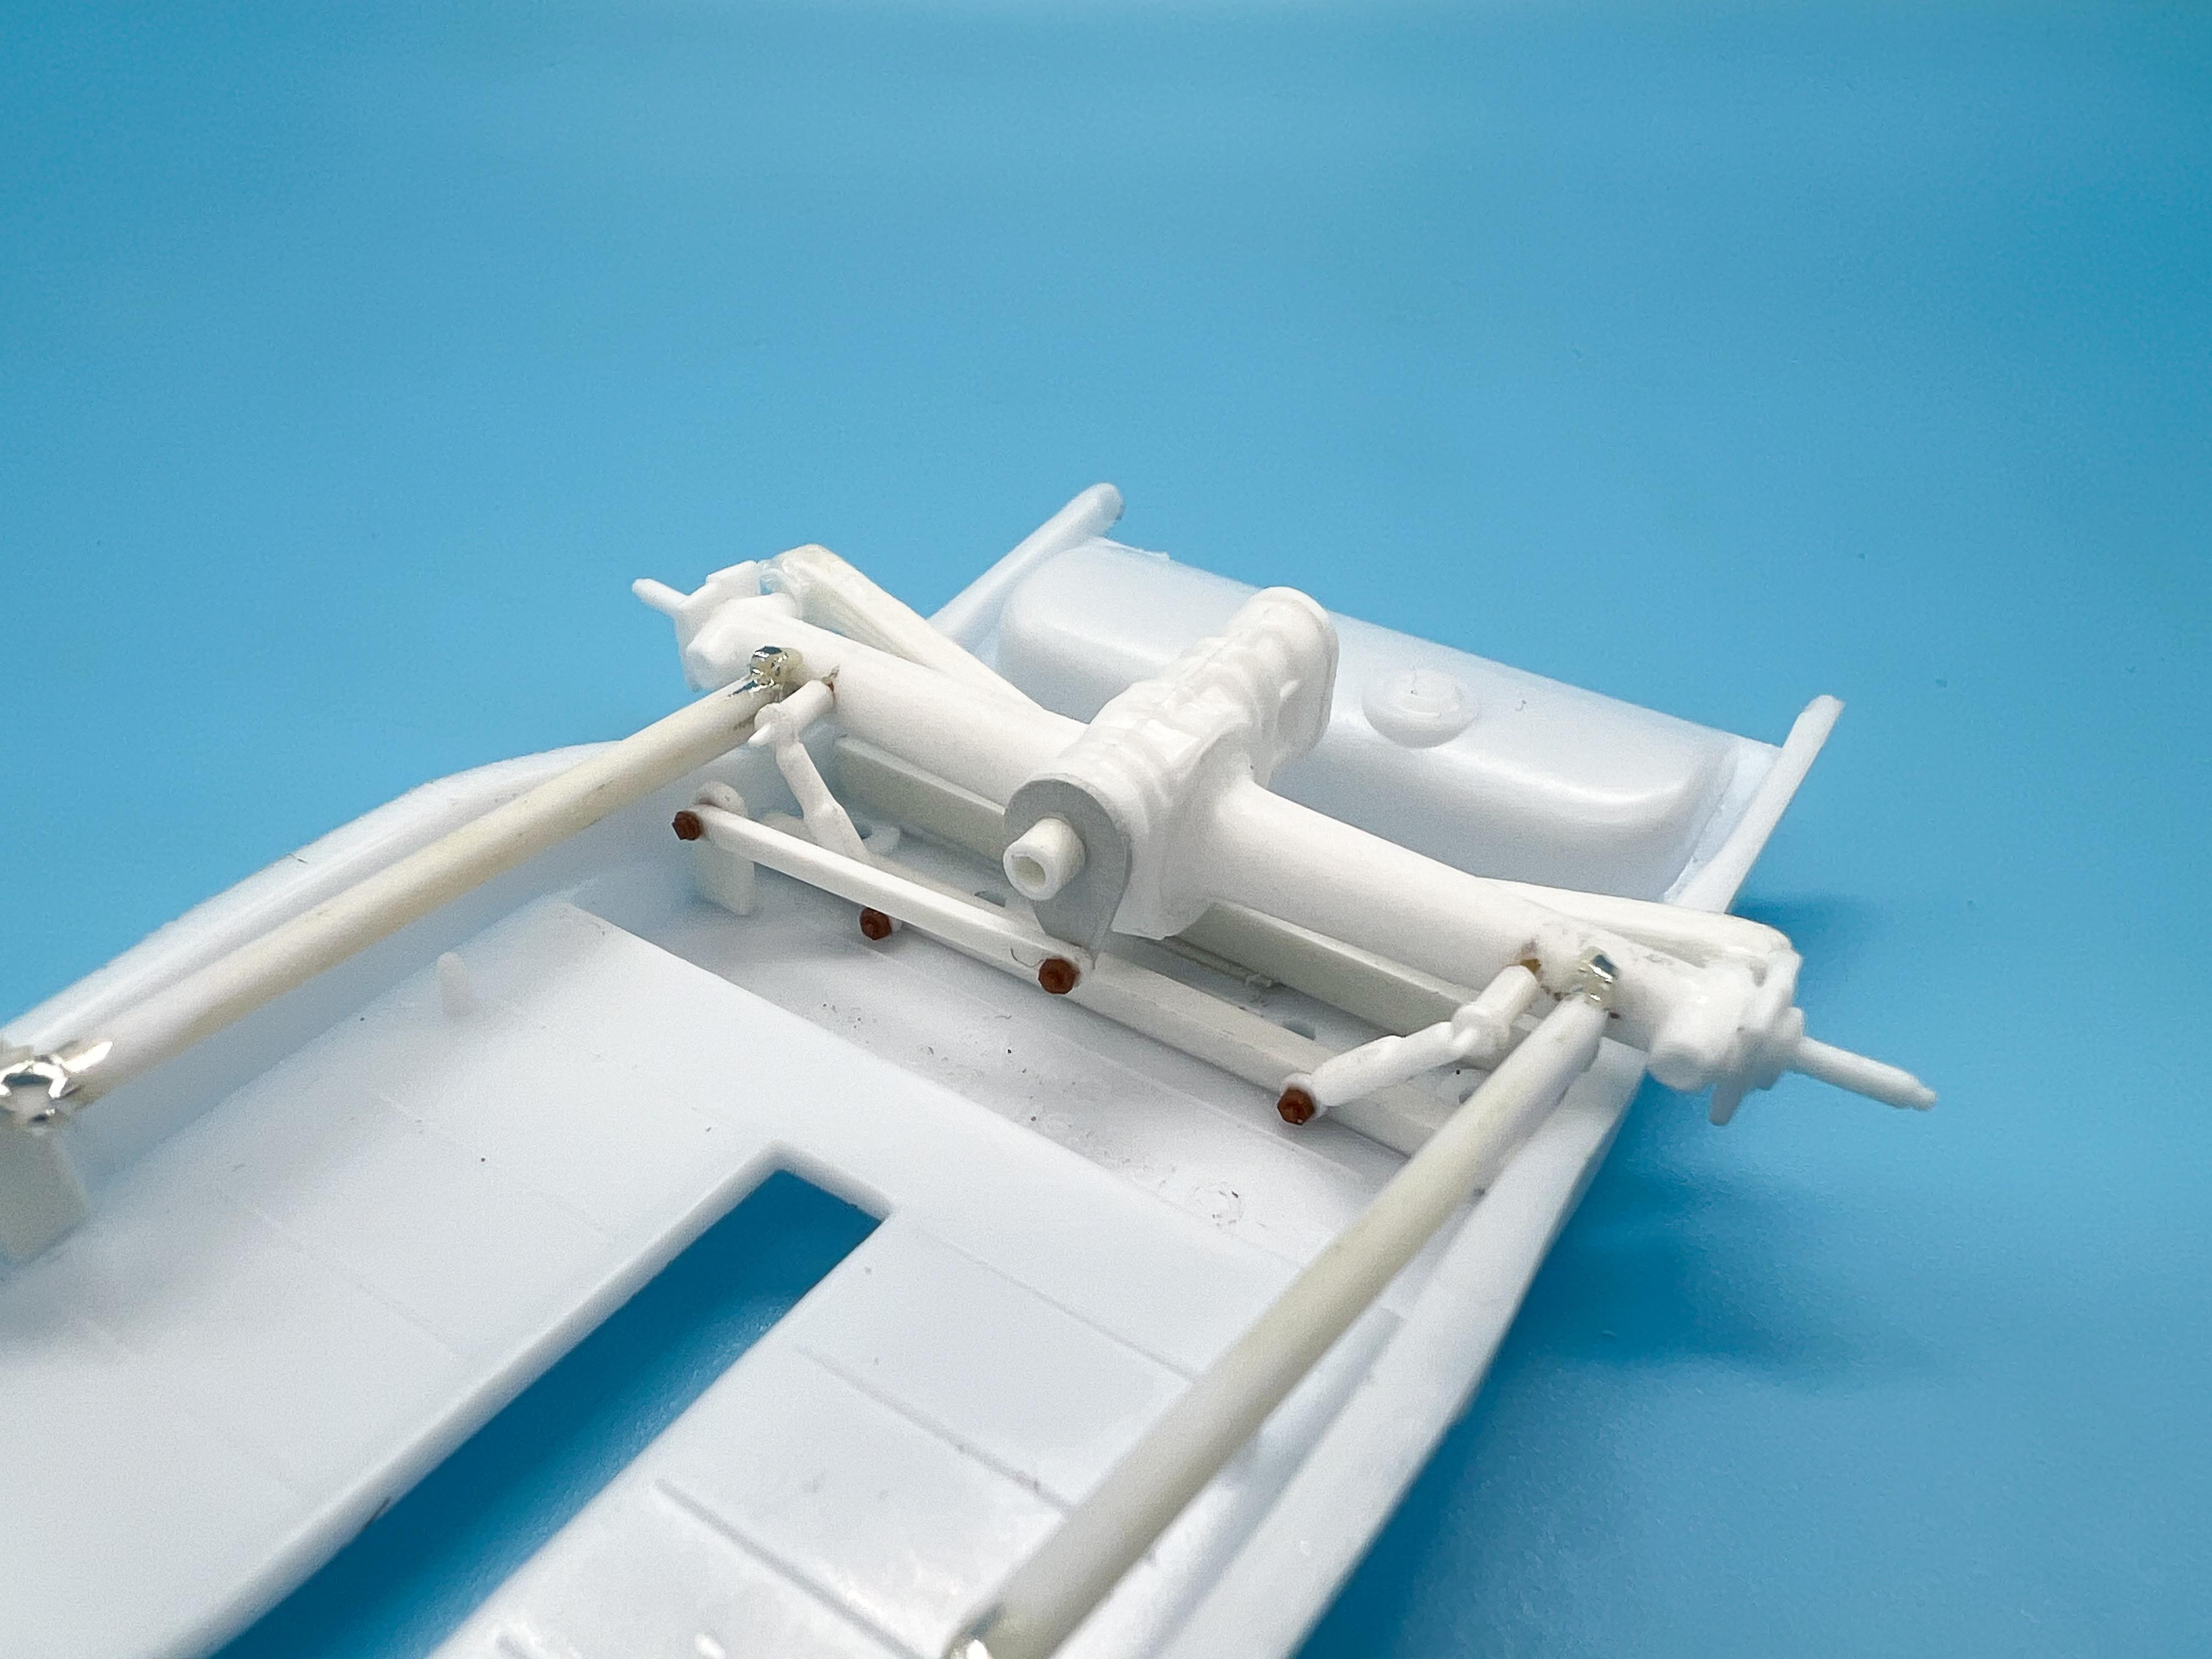
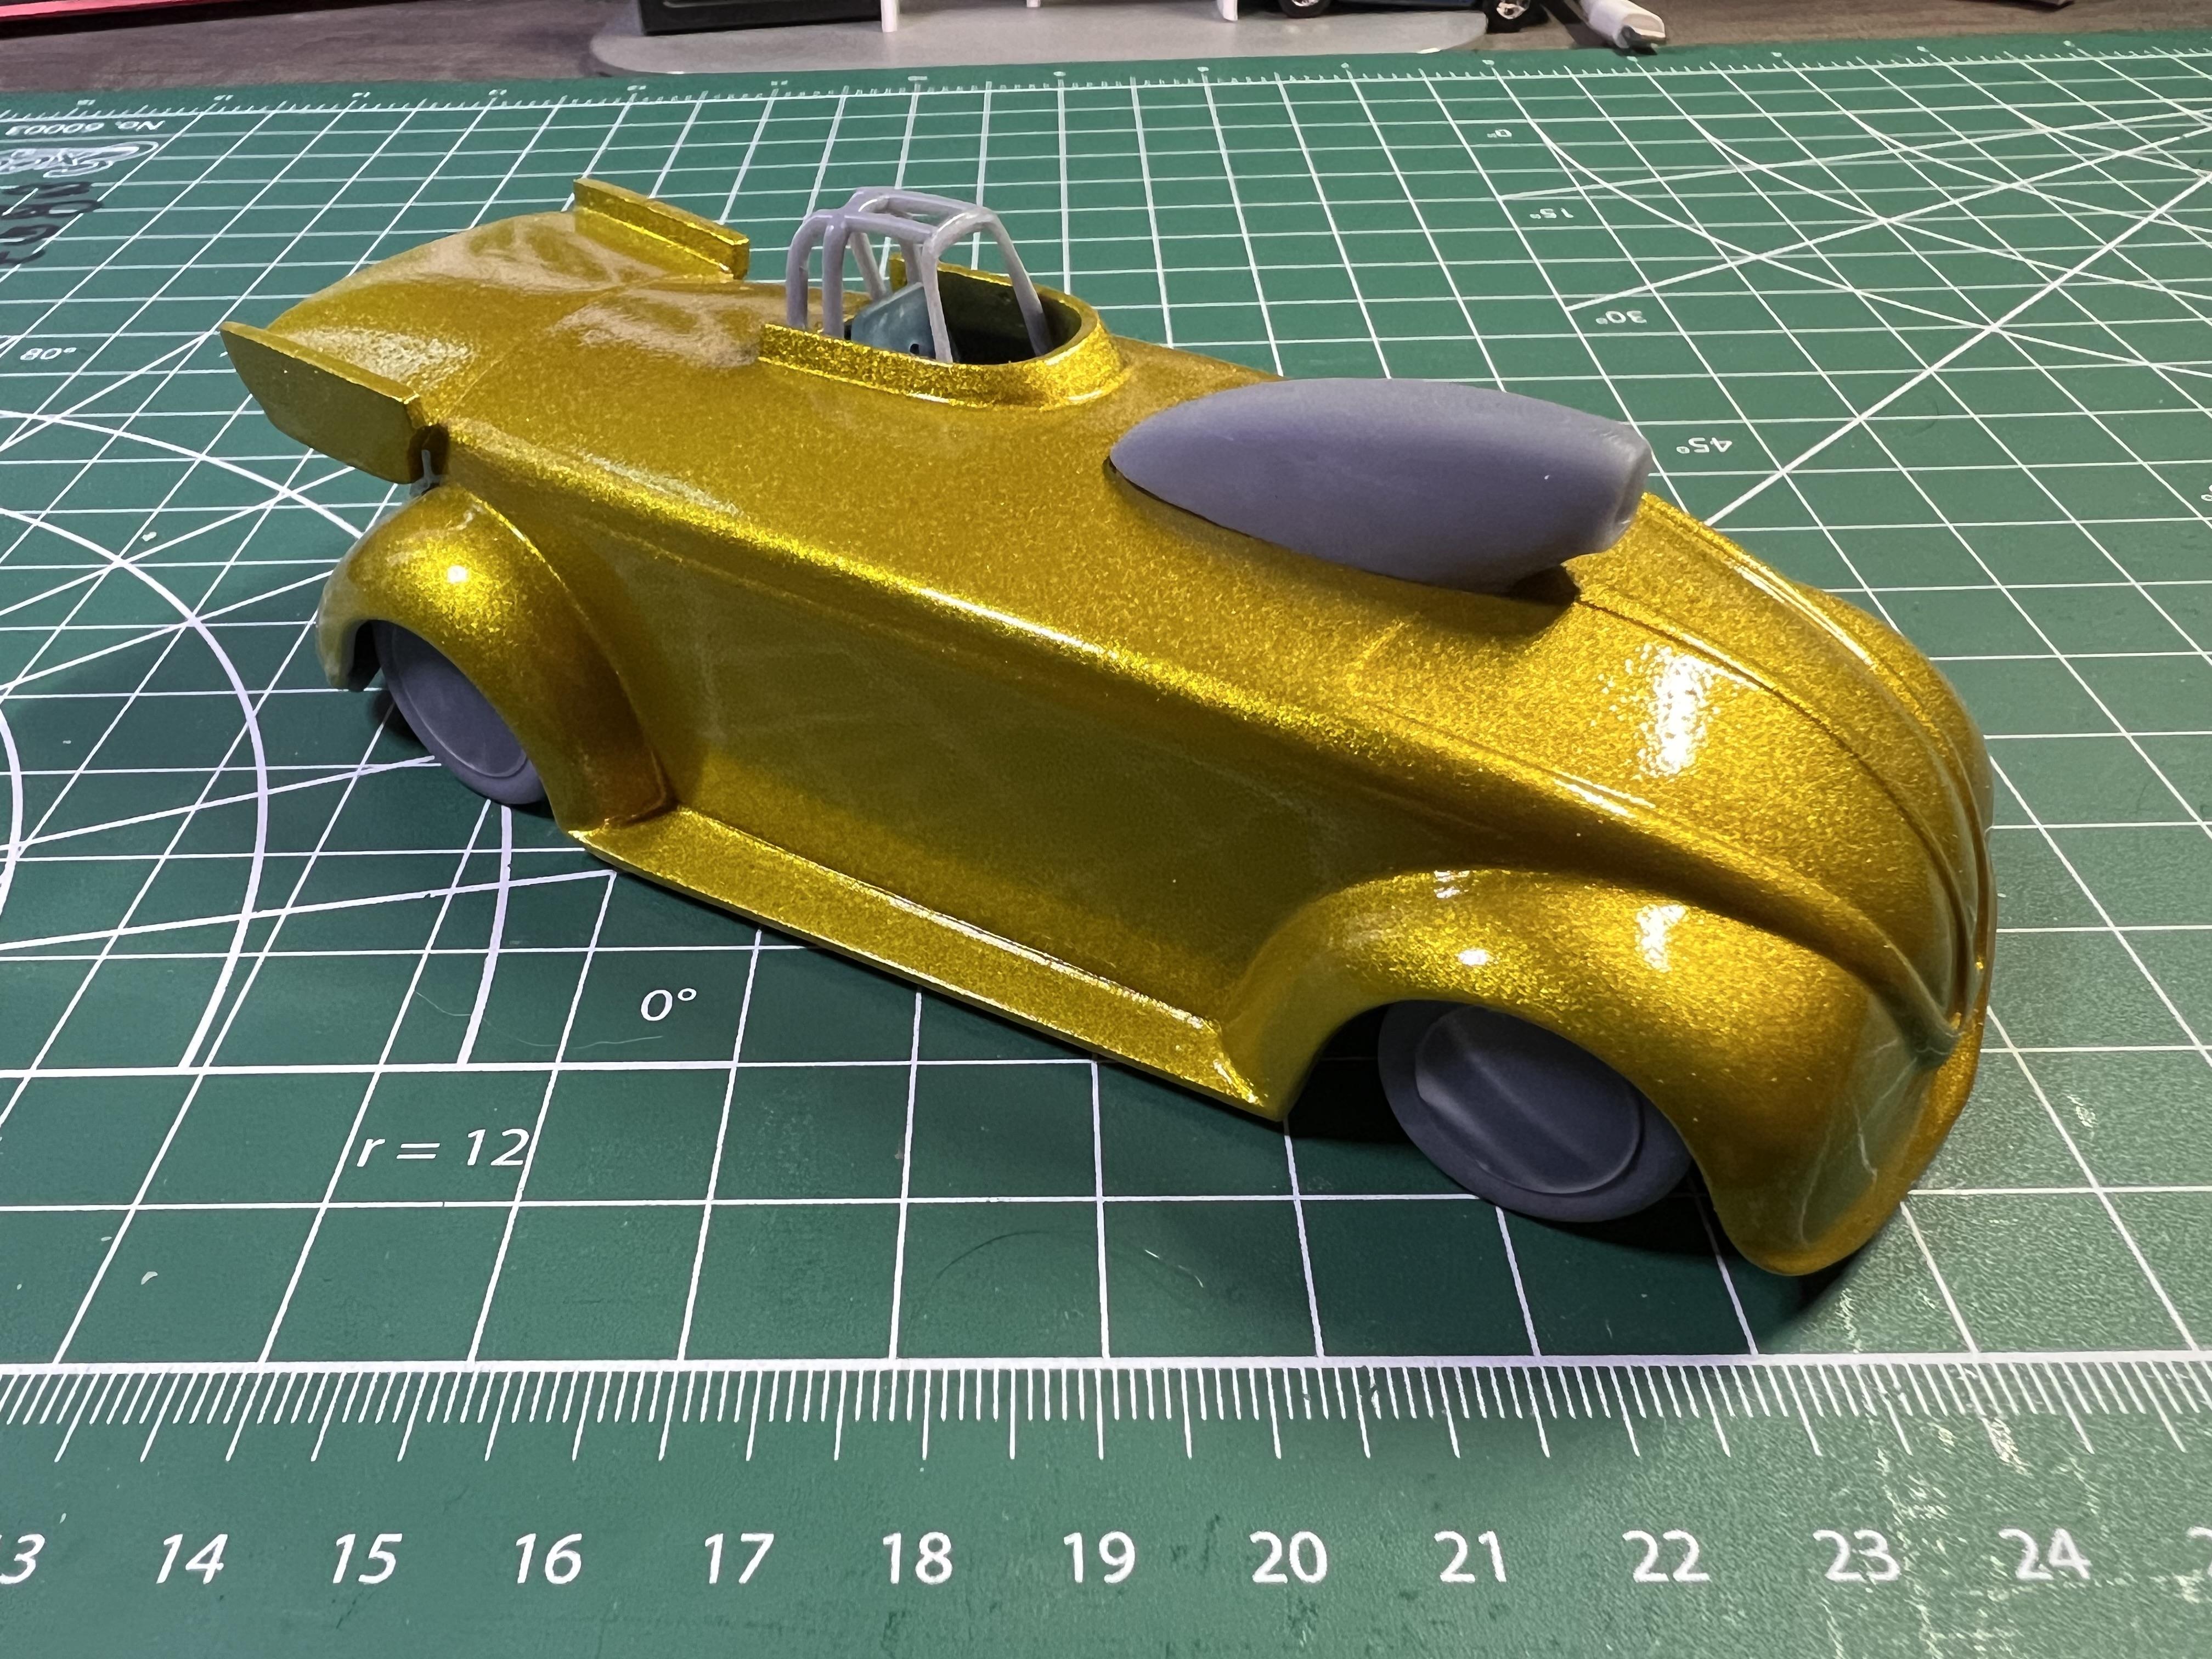
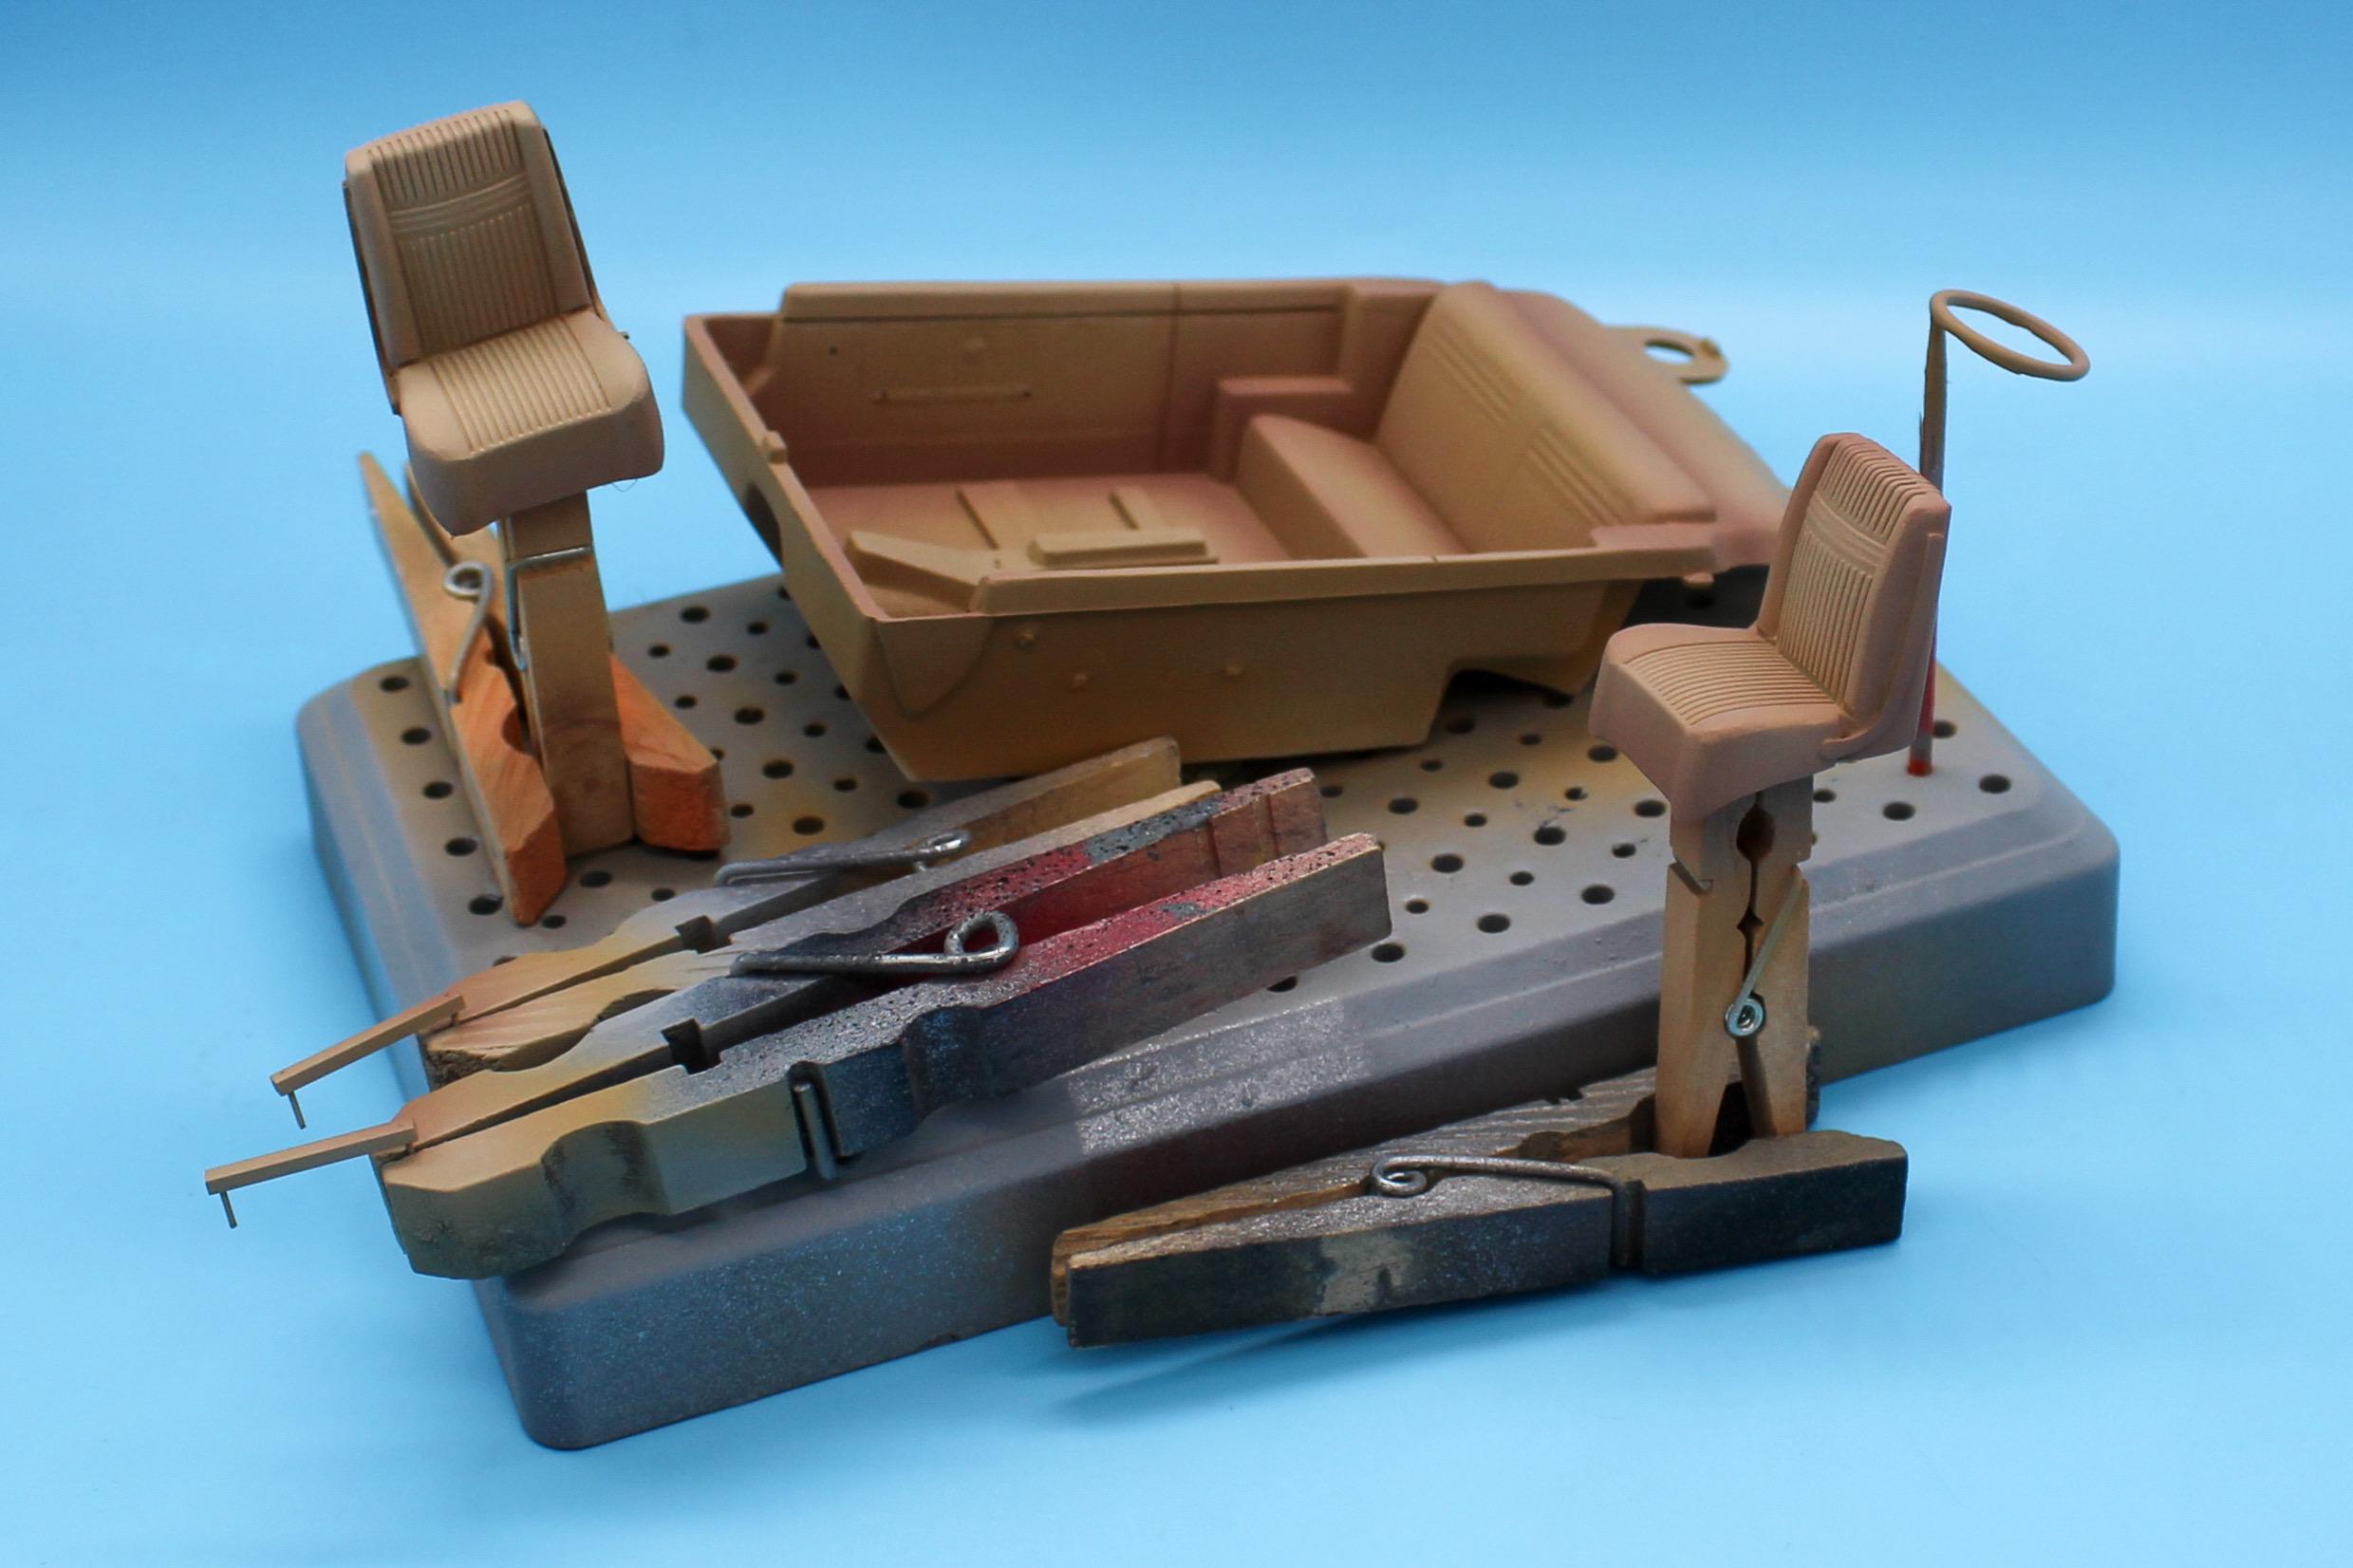
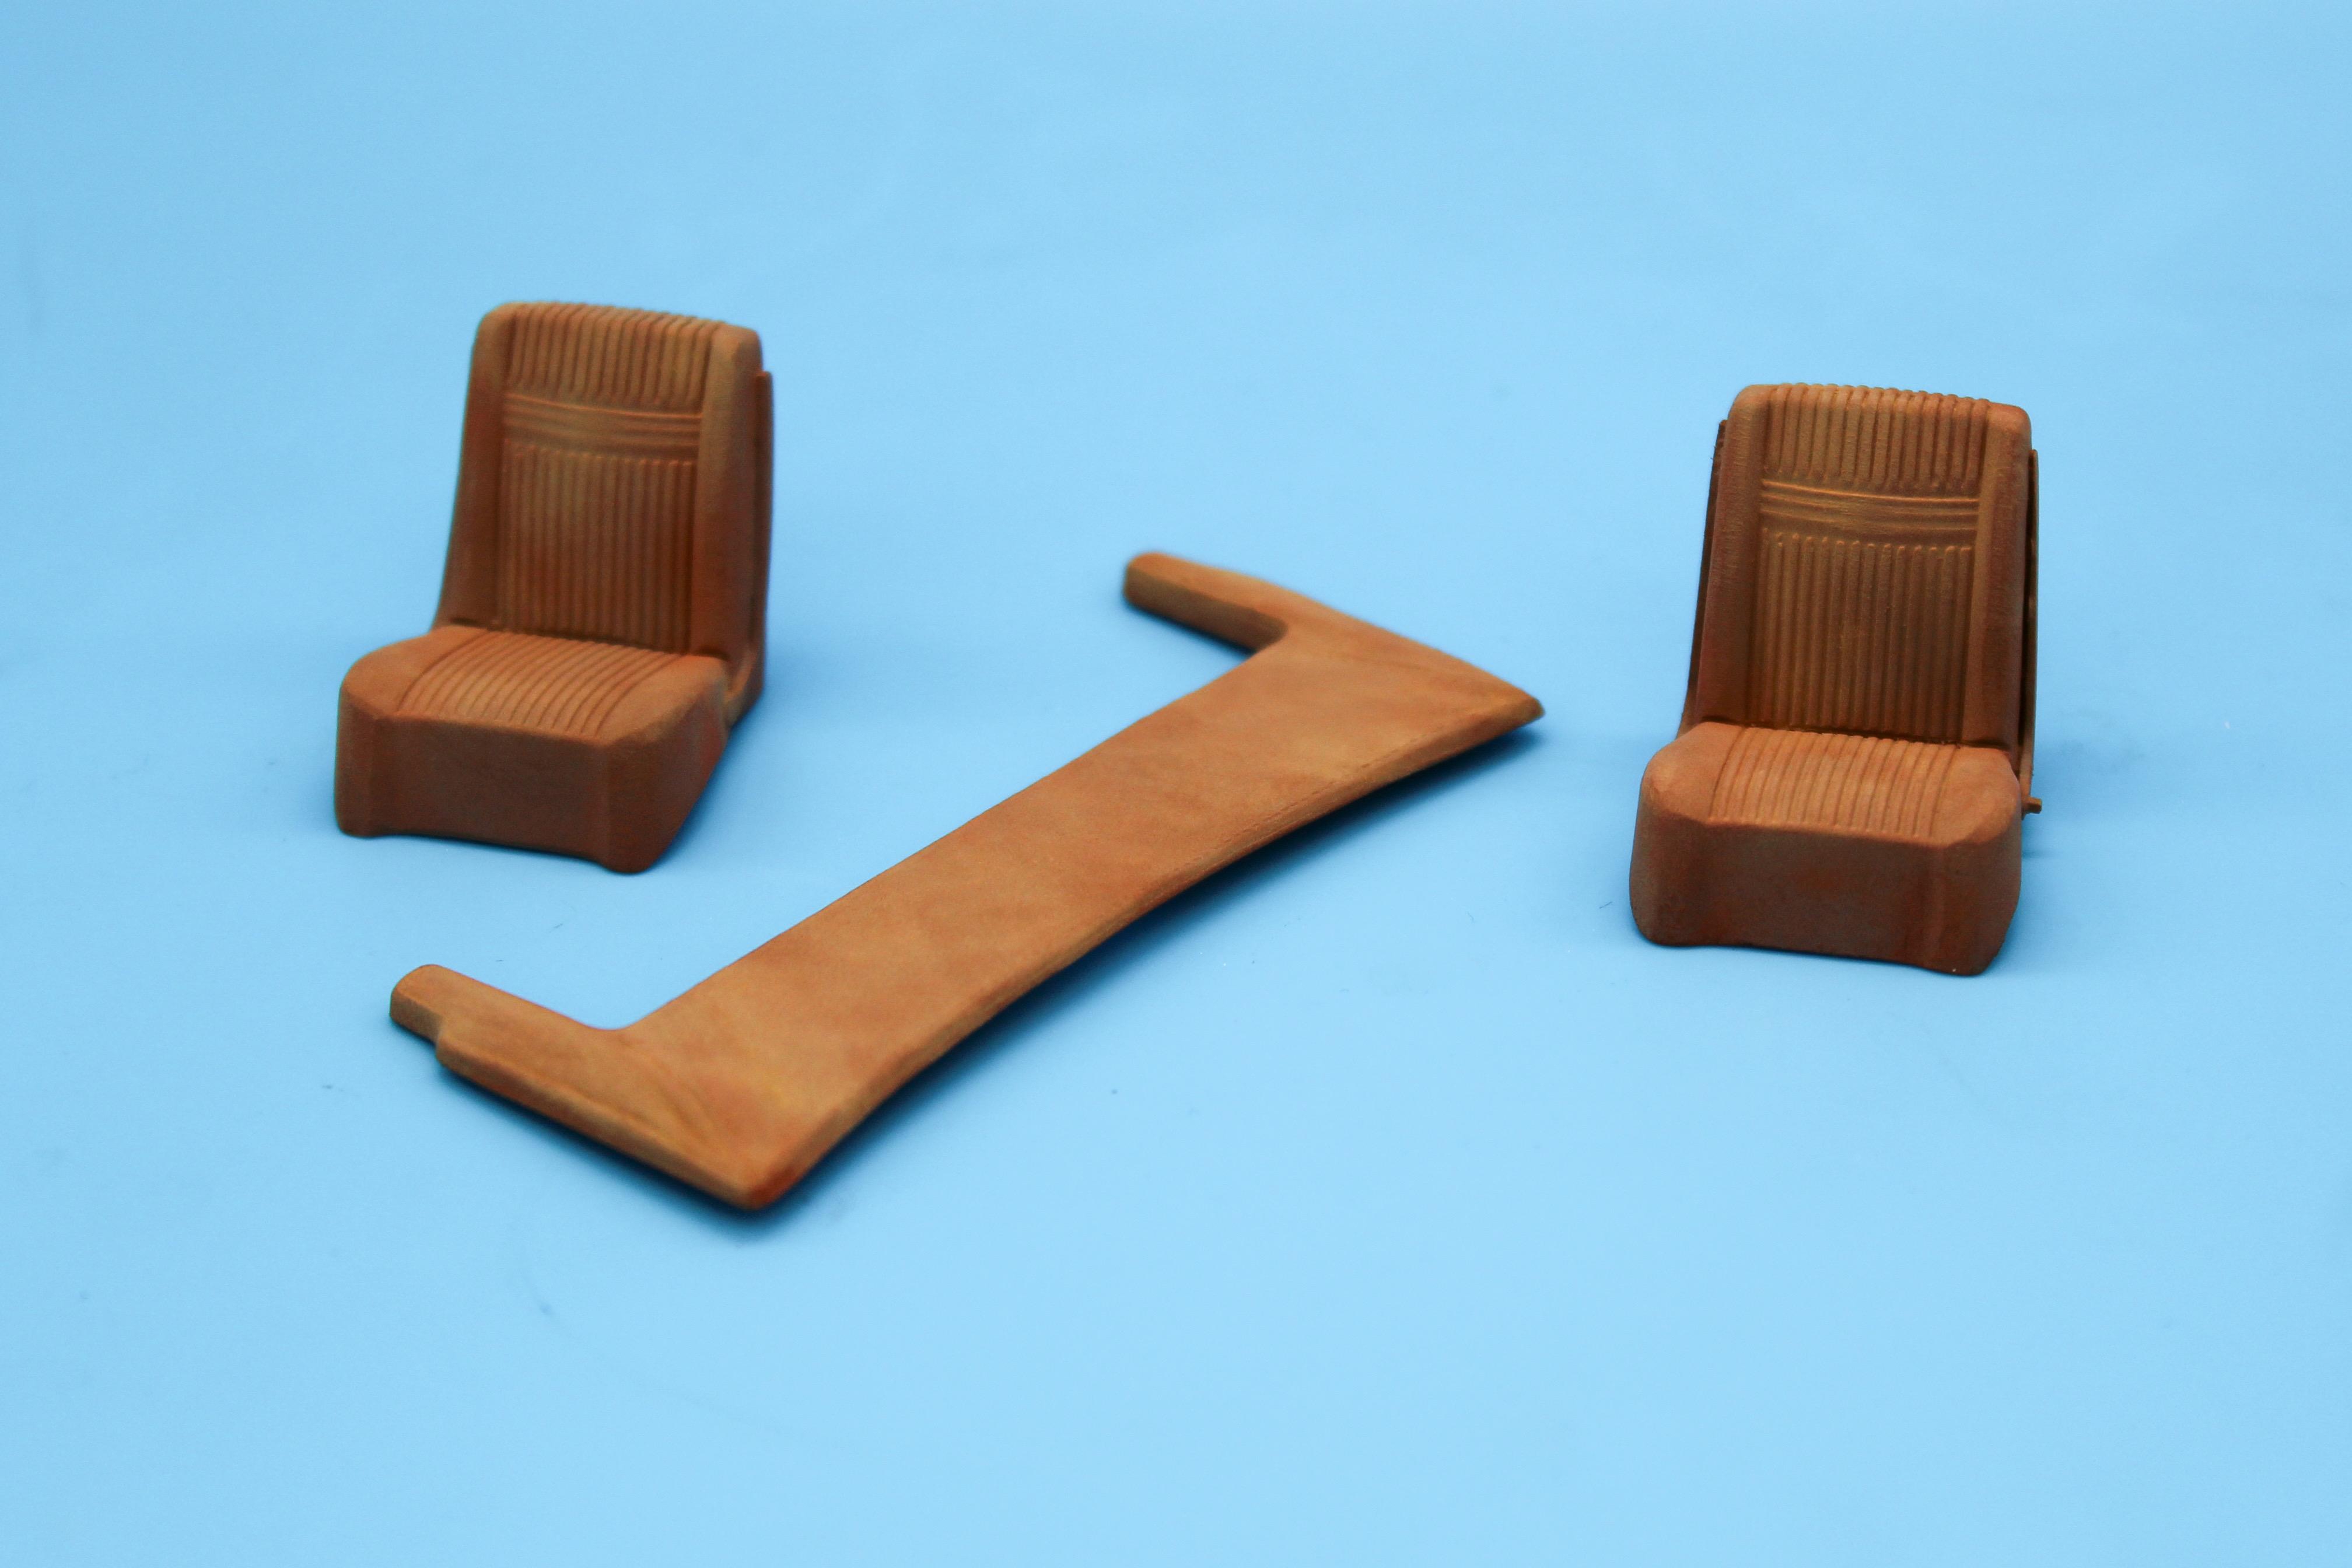
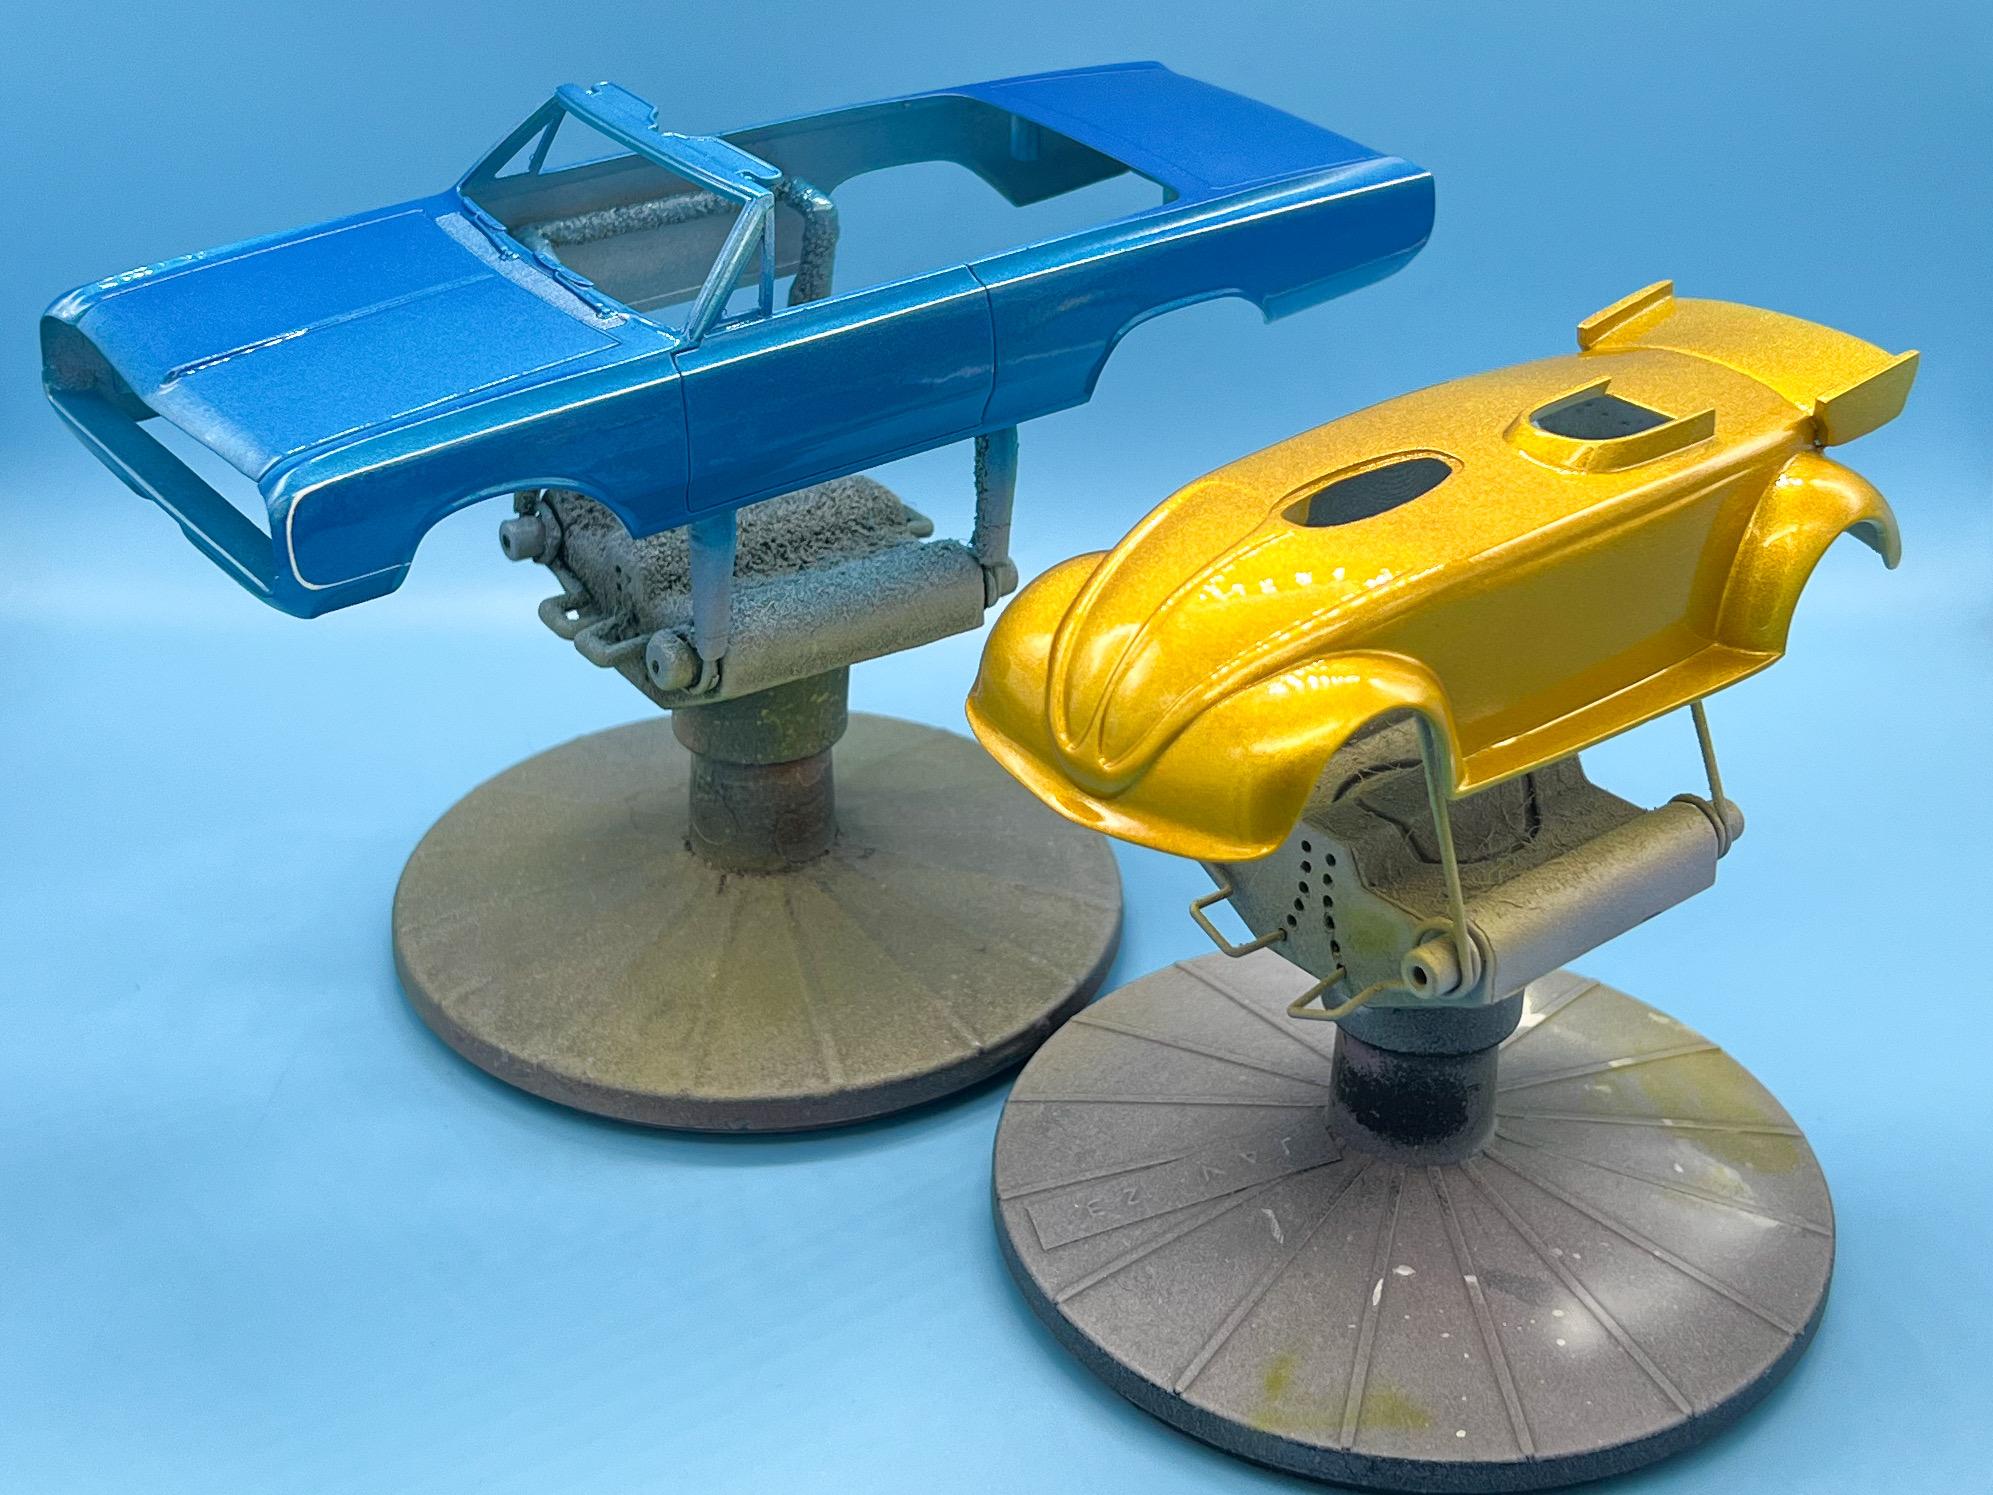
Messing with this curbside 3D printed Beetle salt flats car…modified a seat I had printed previously to fit, and figuring out what little interior stuff will be visible when it’s done…
-
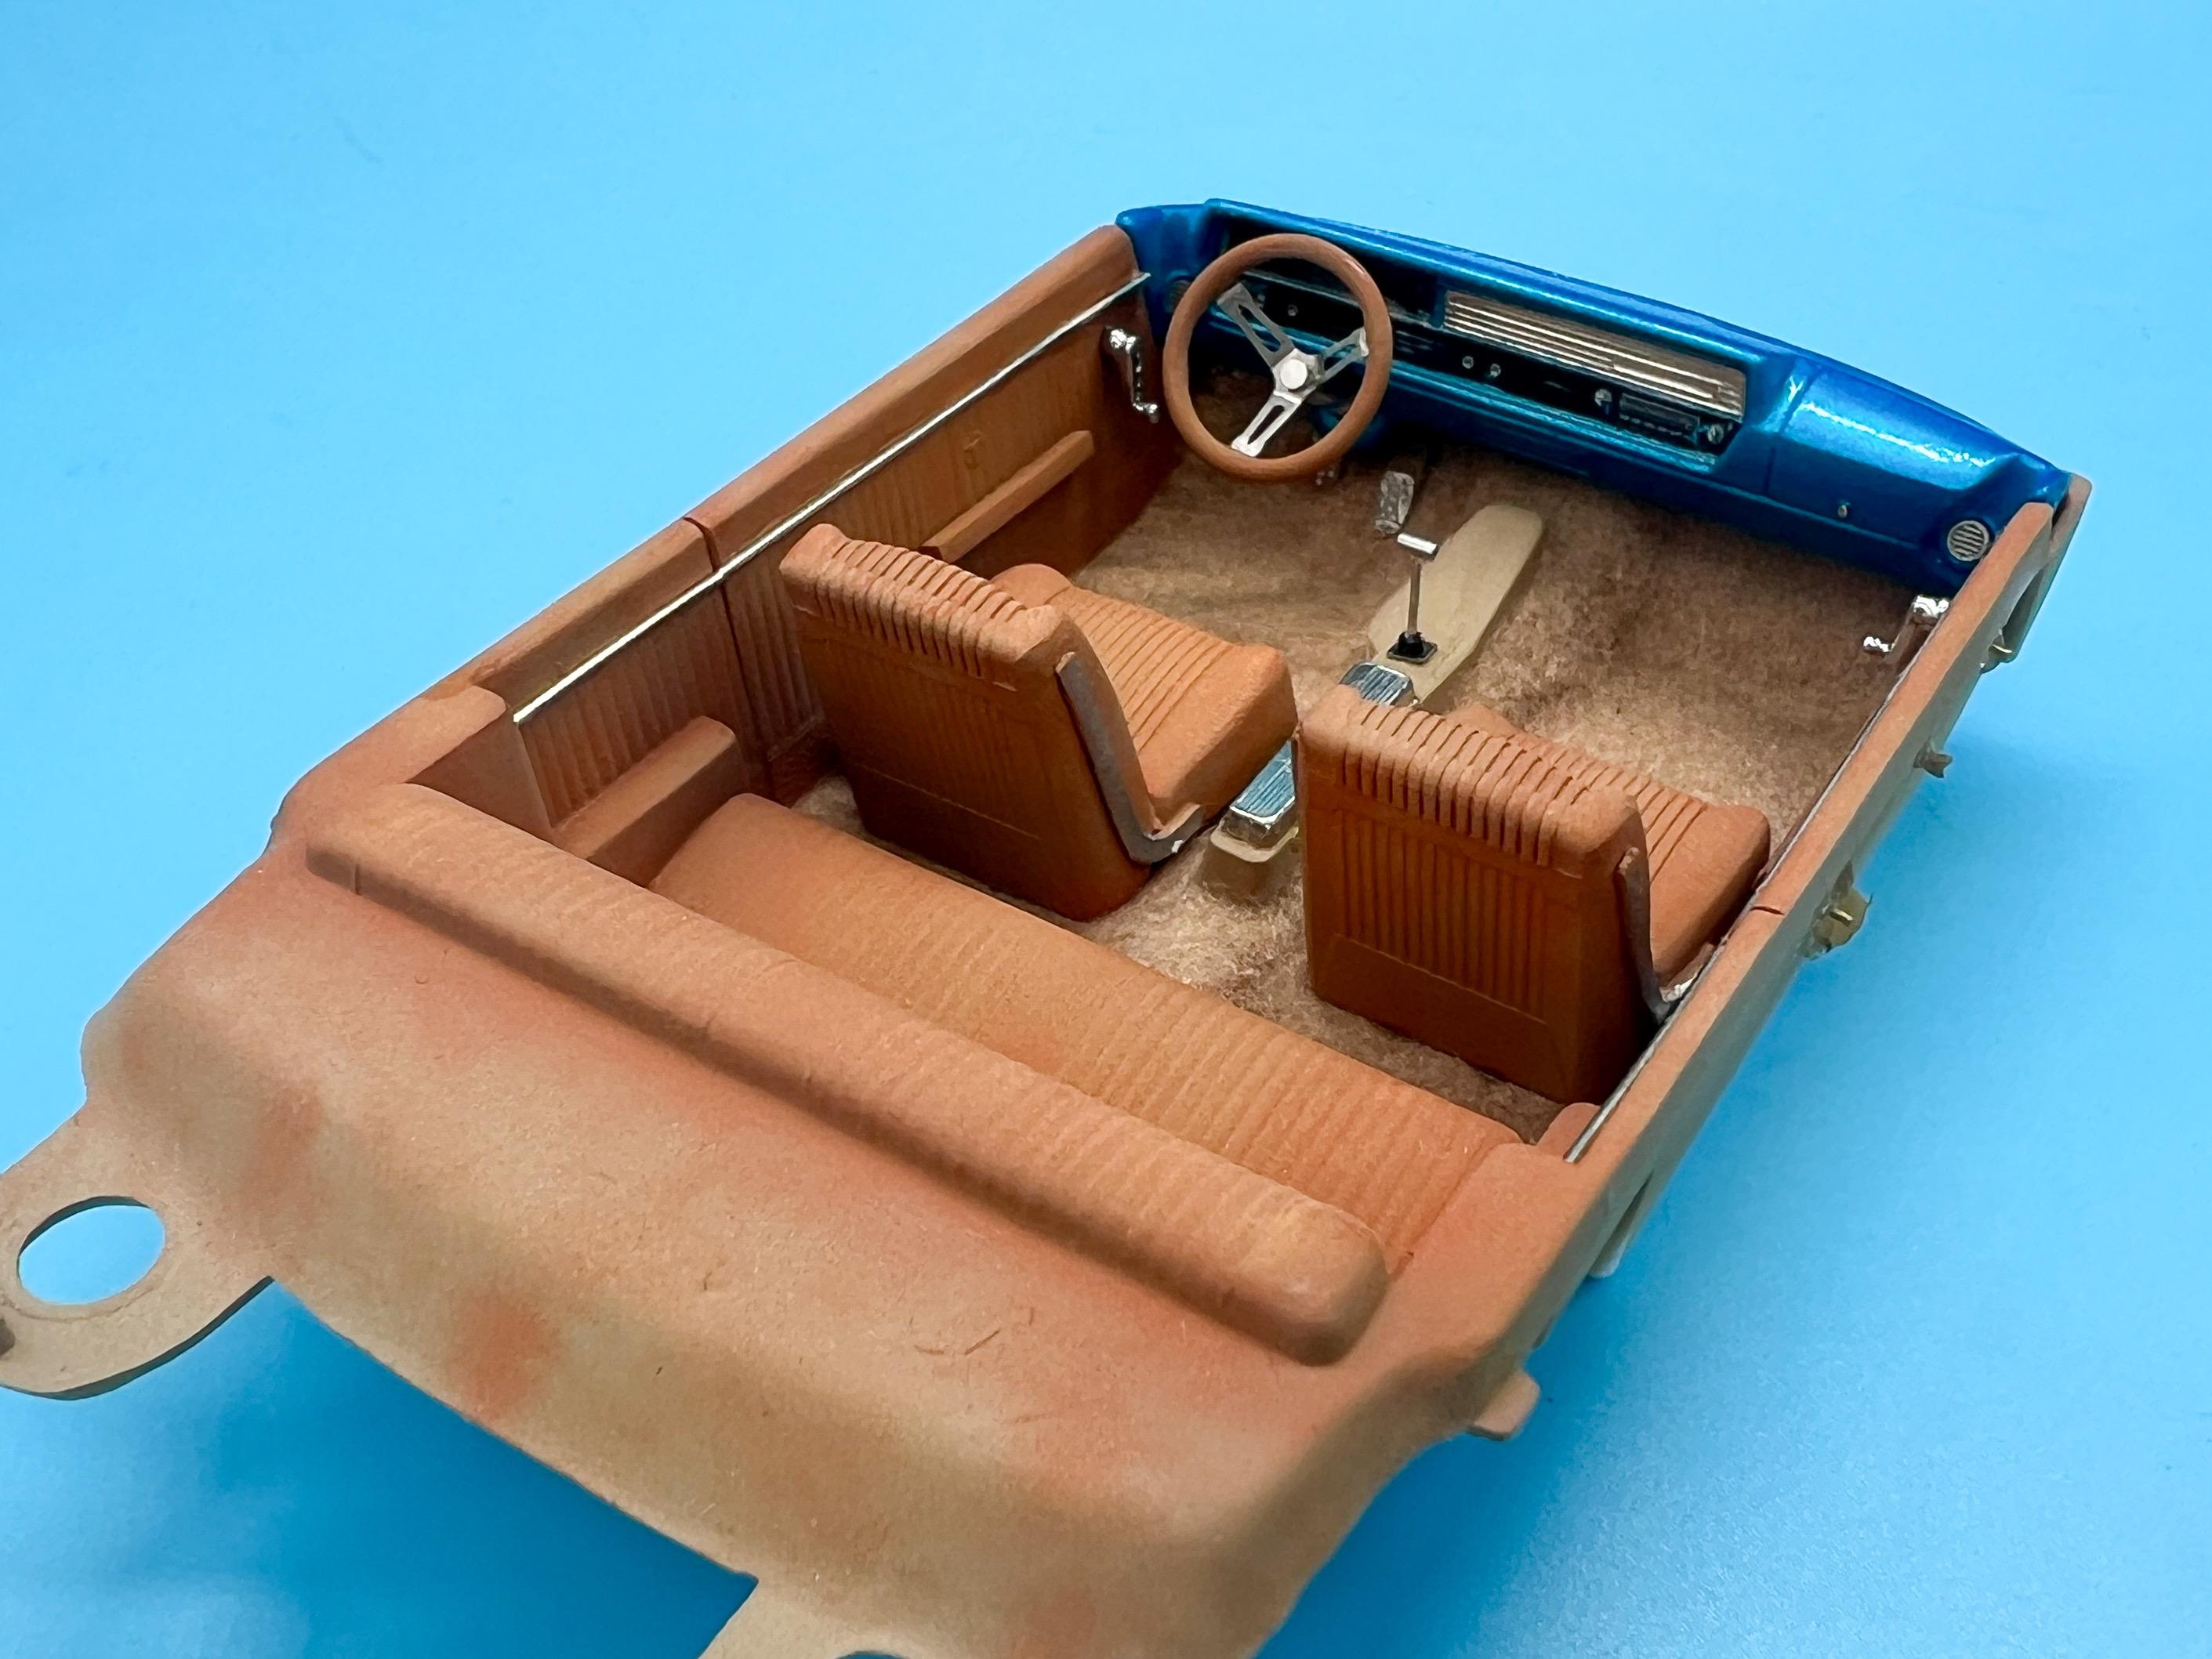
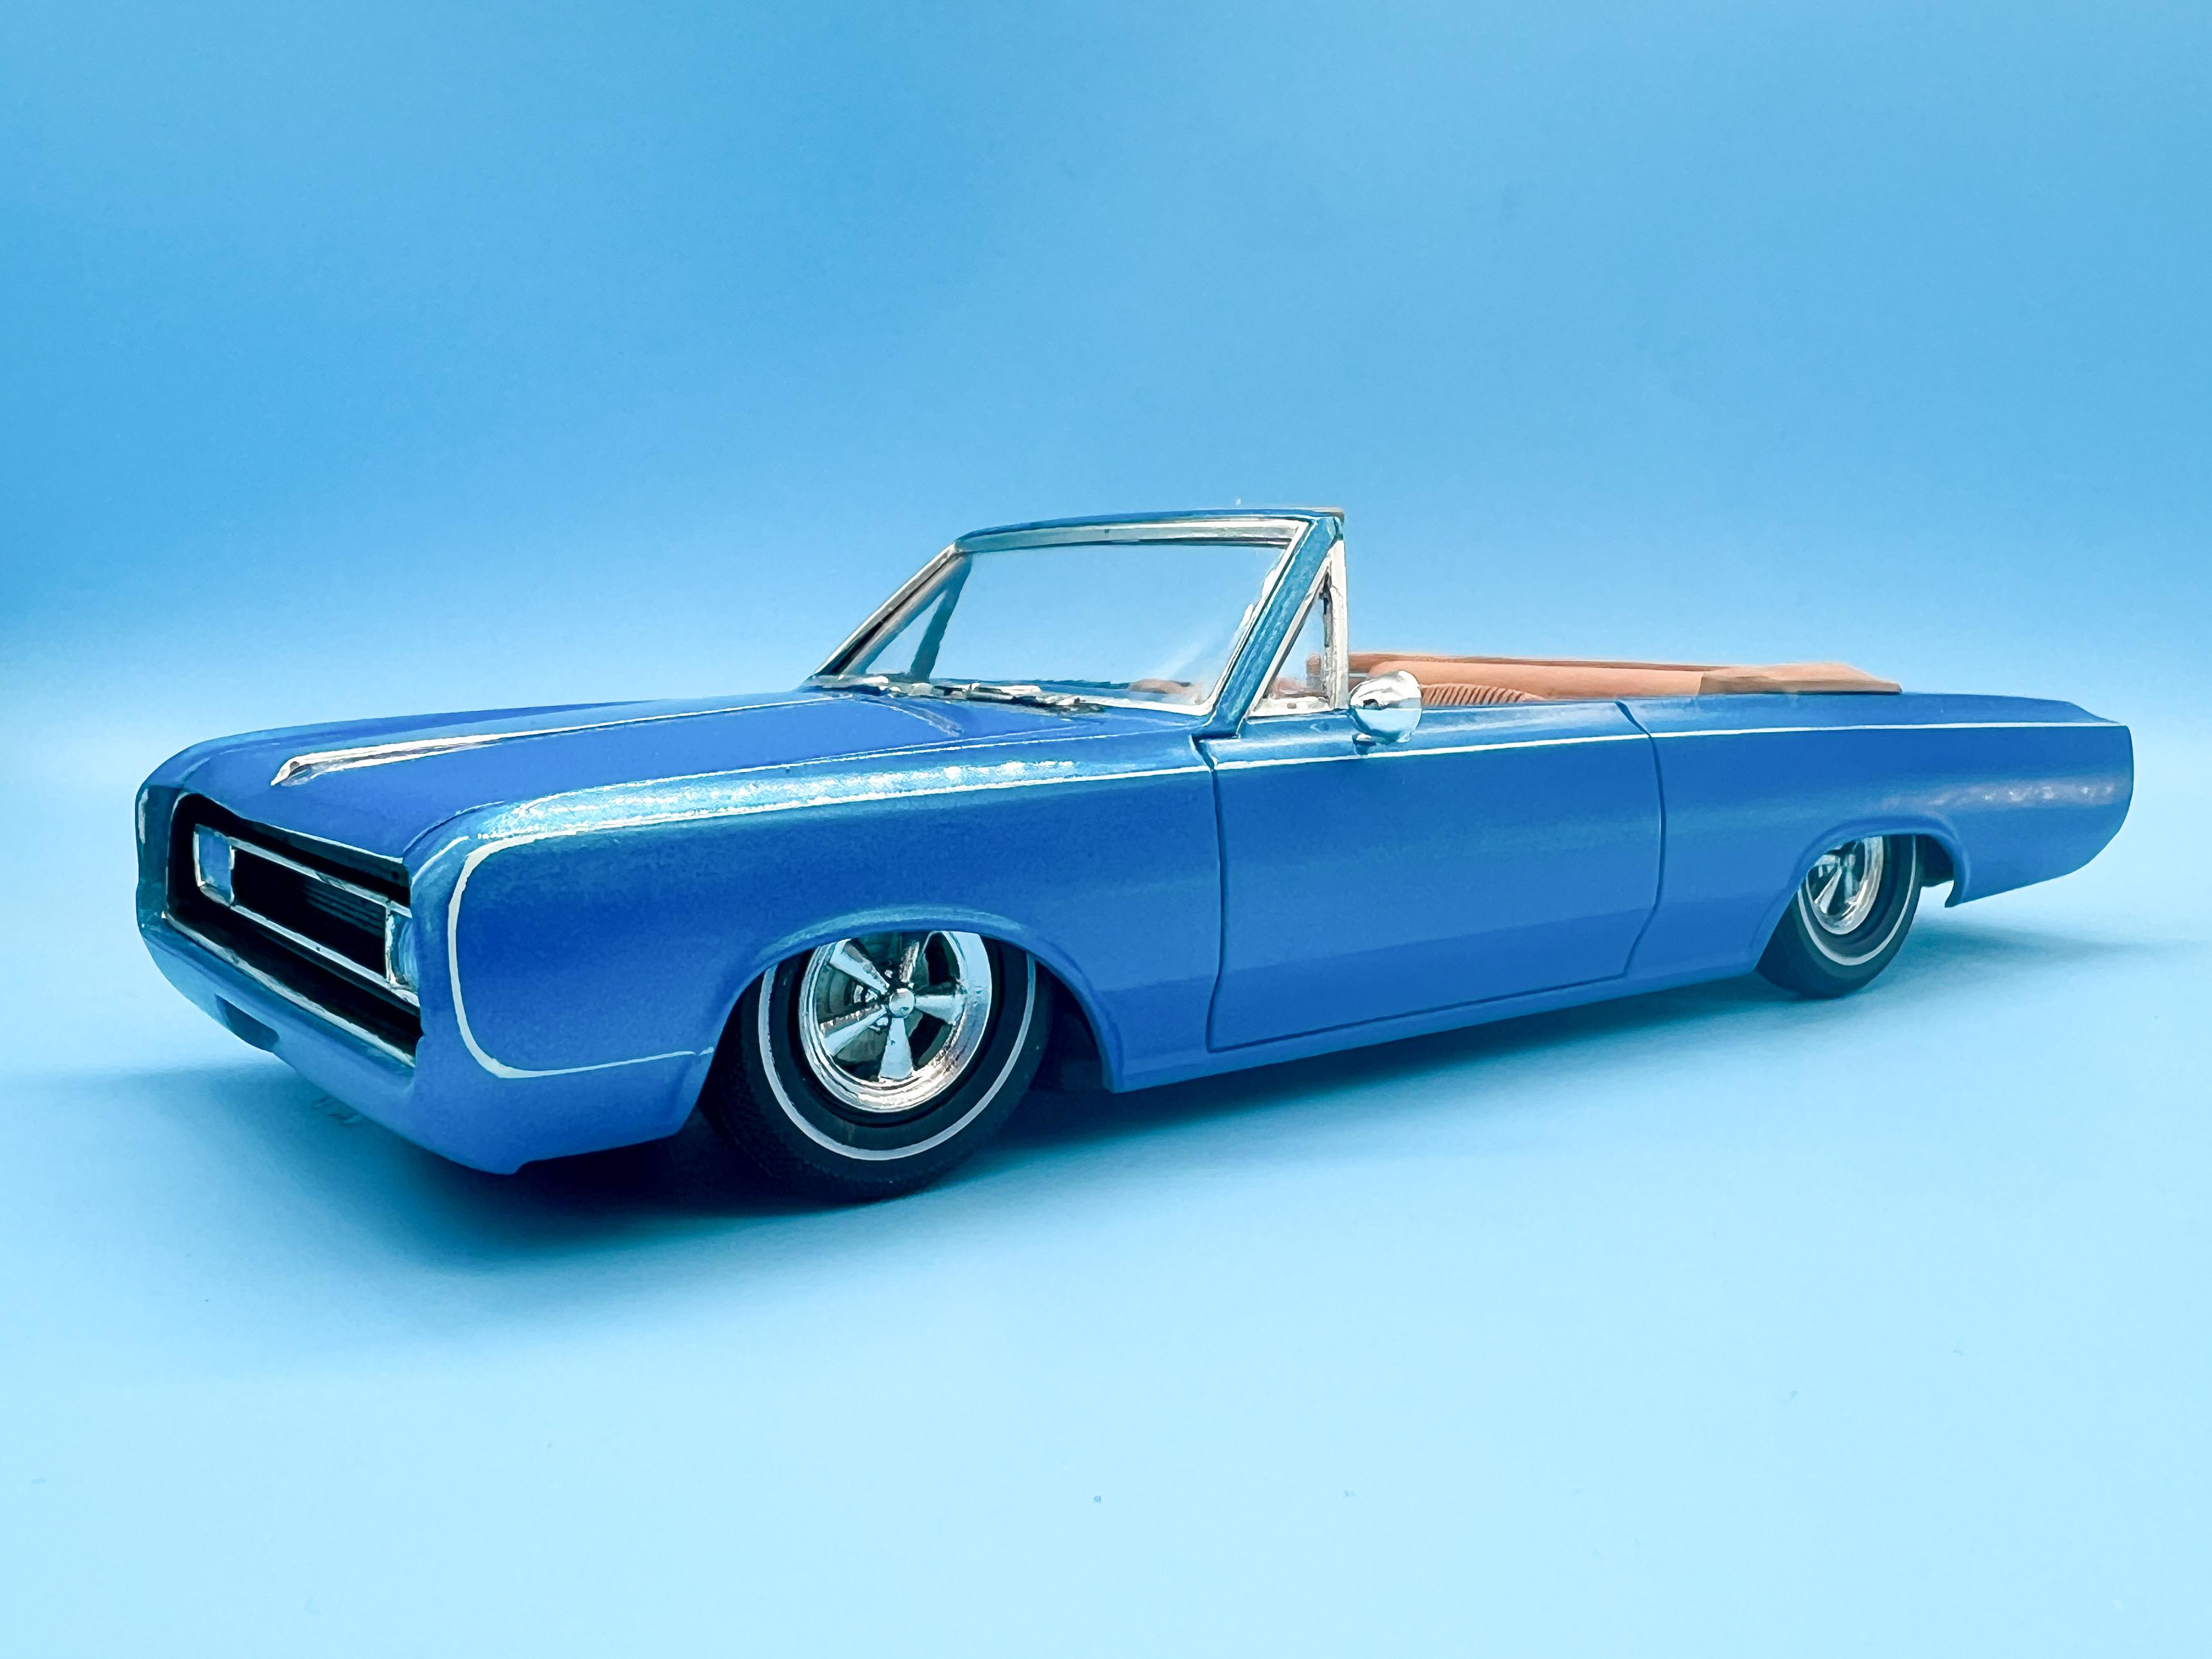
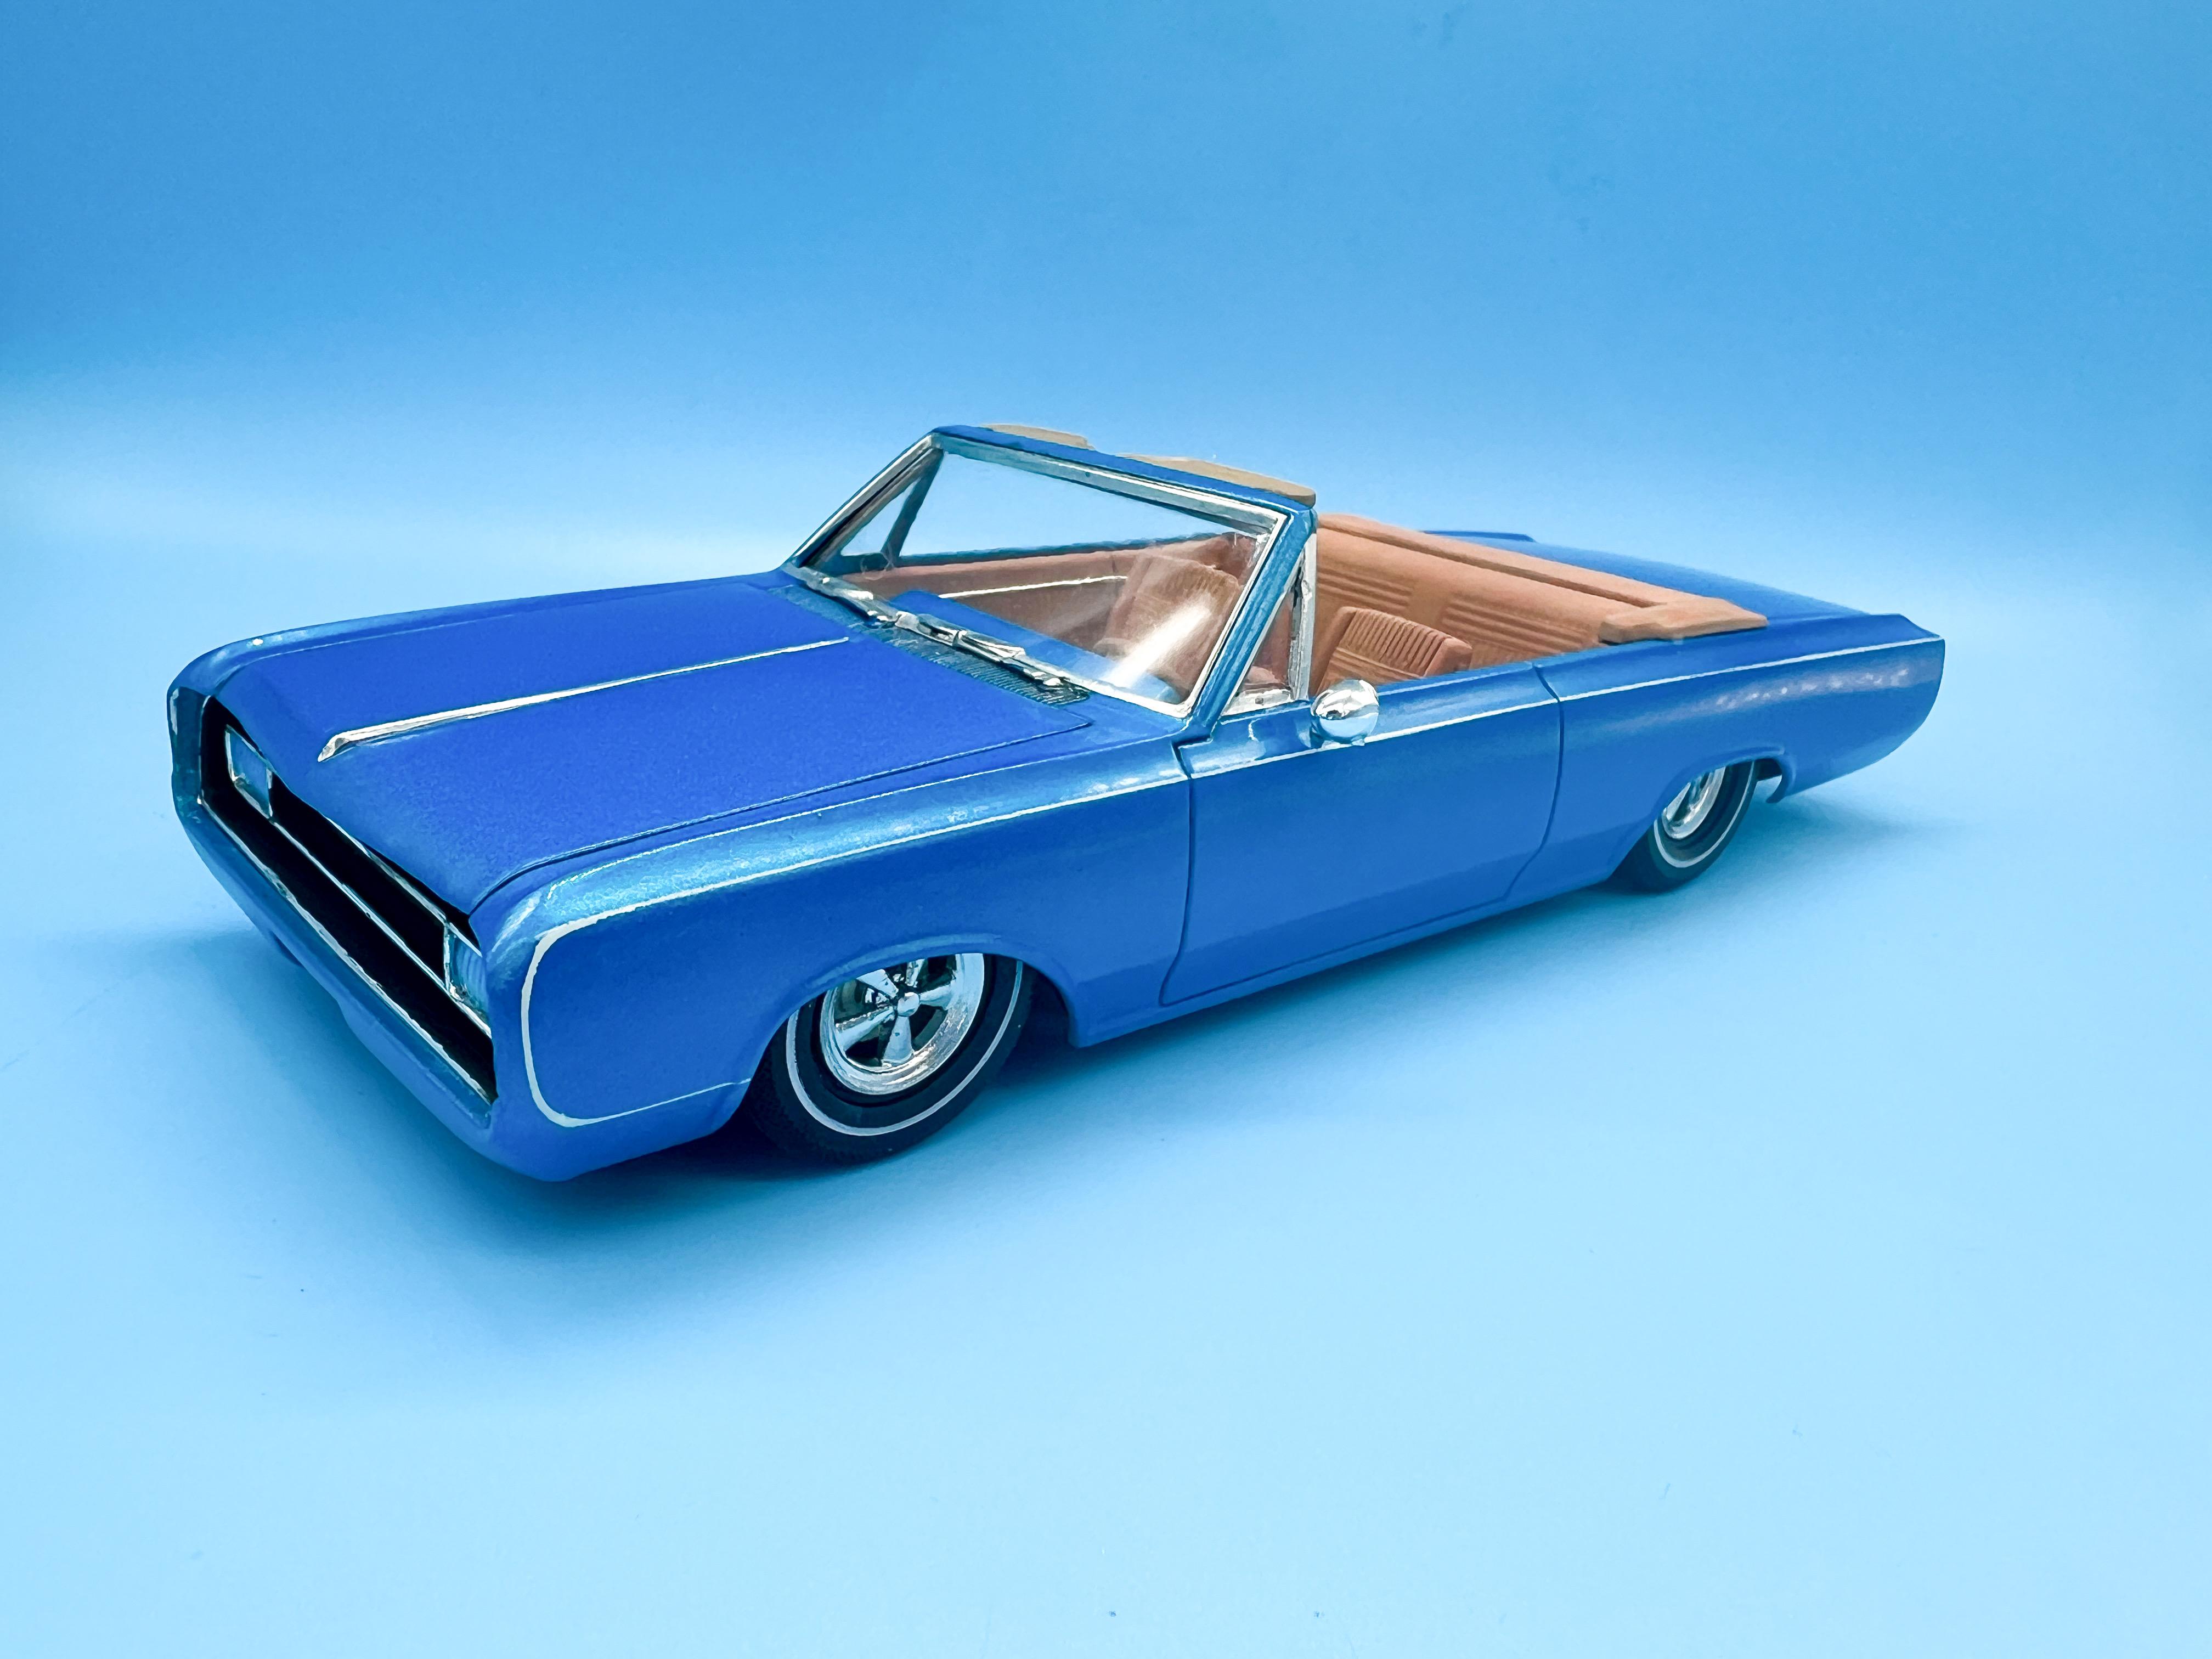
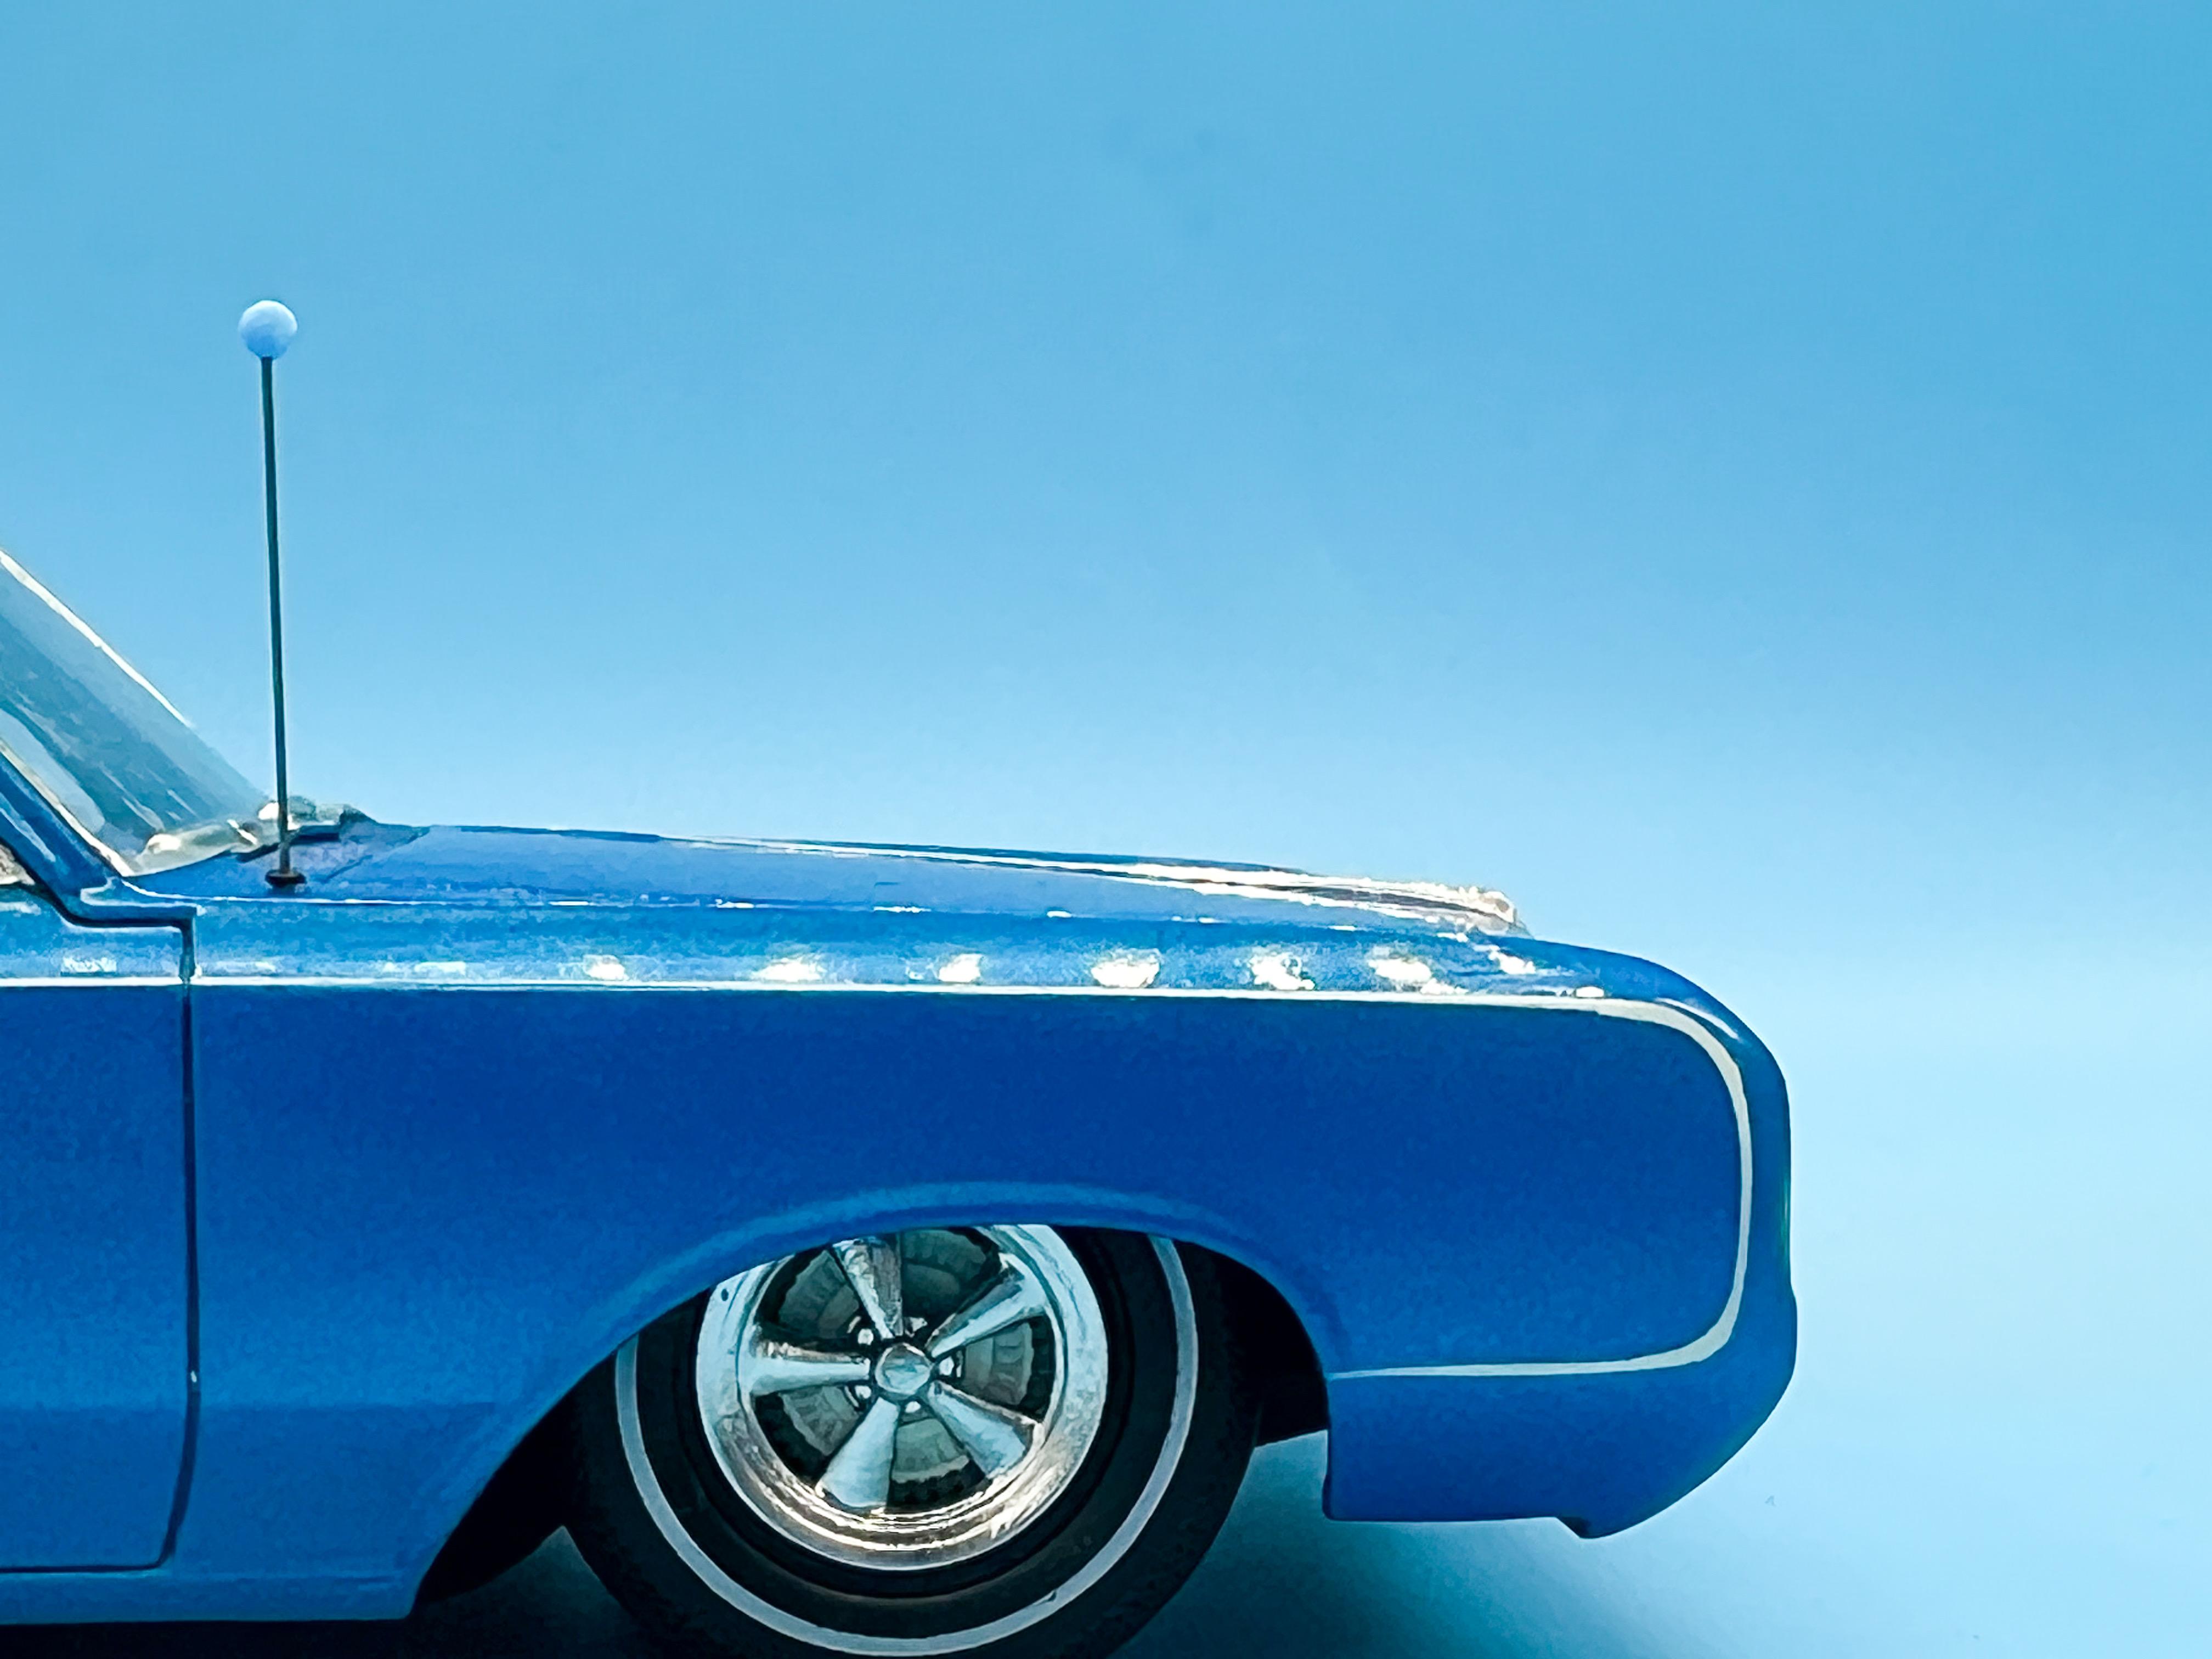
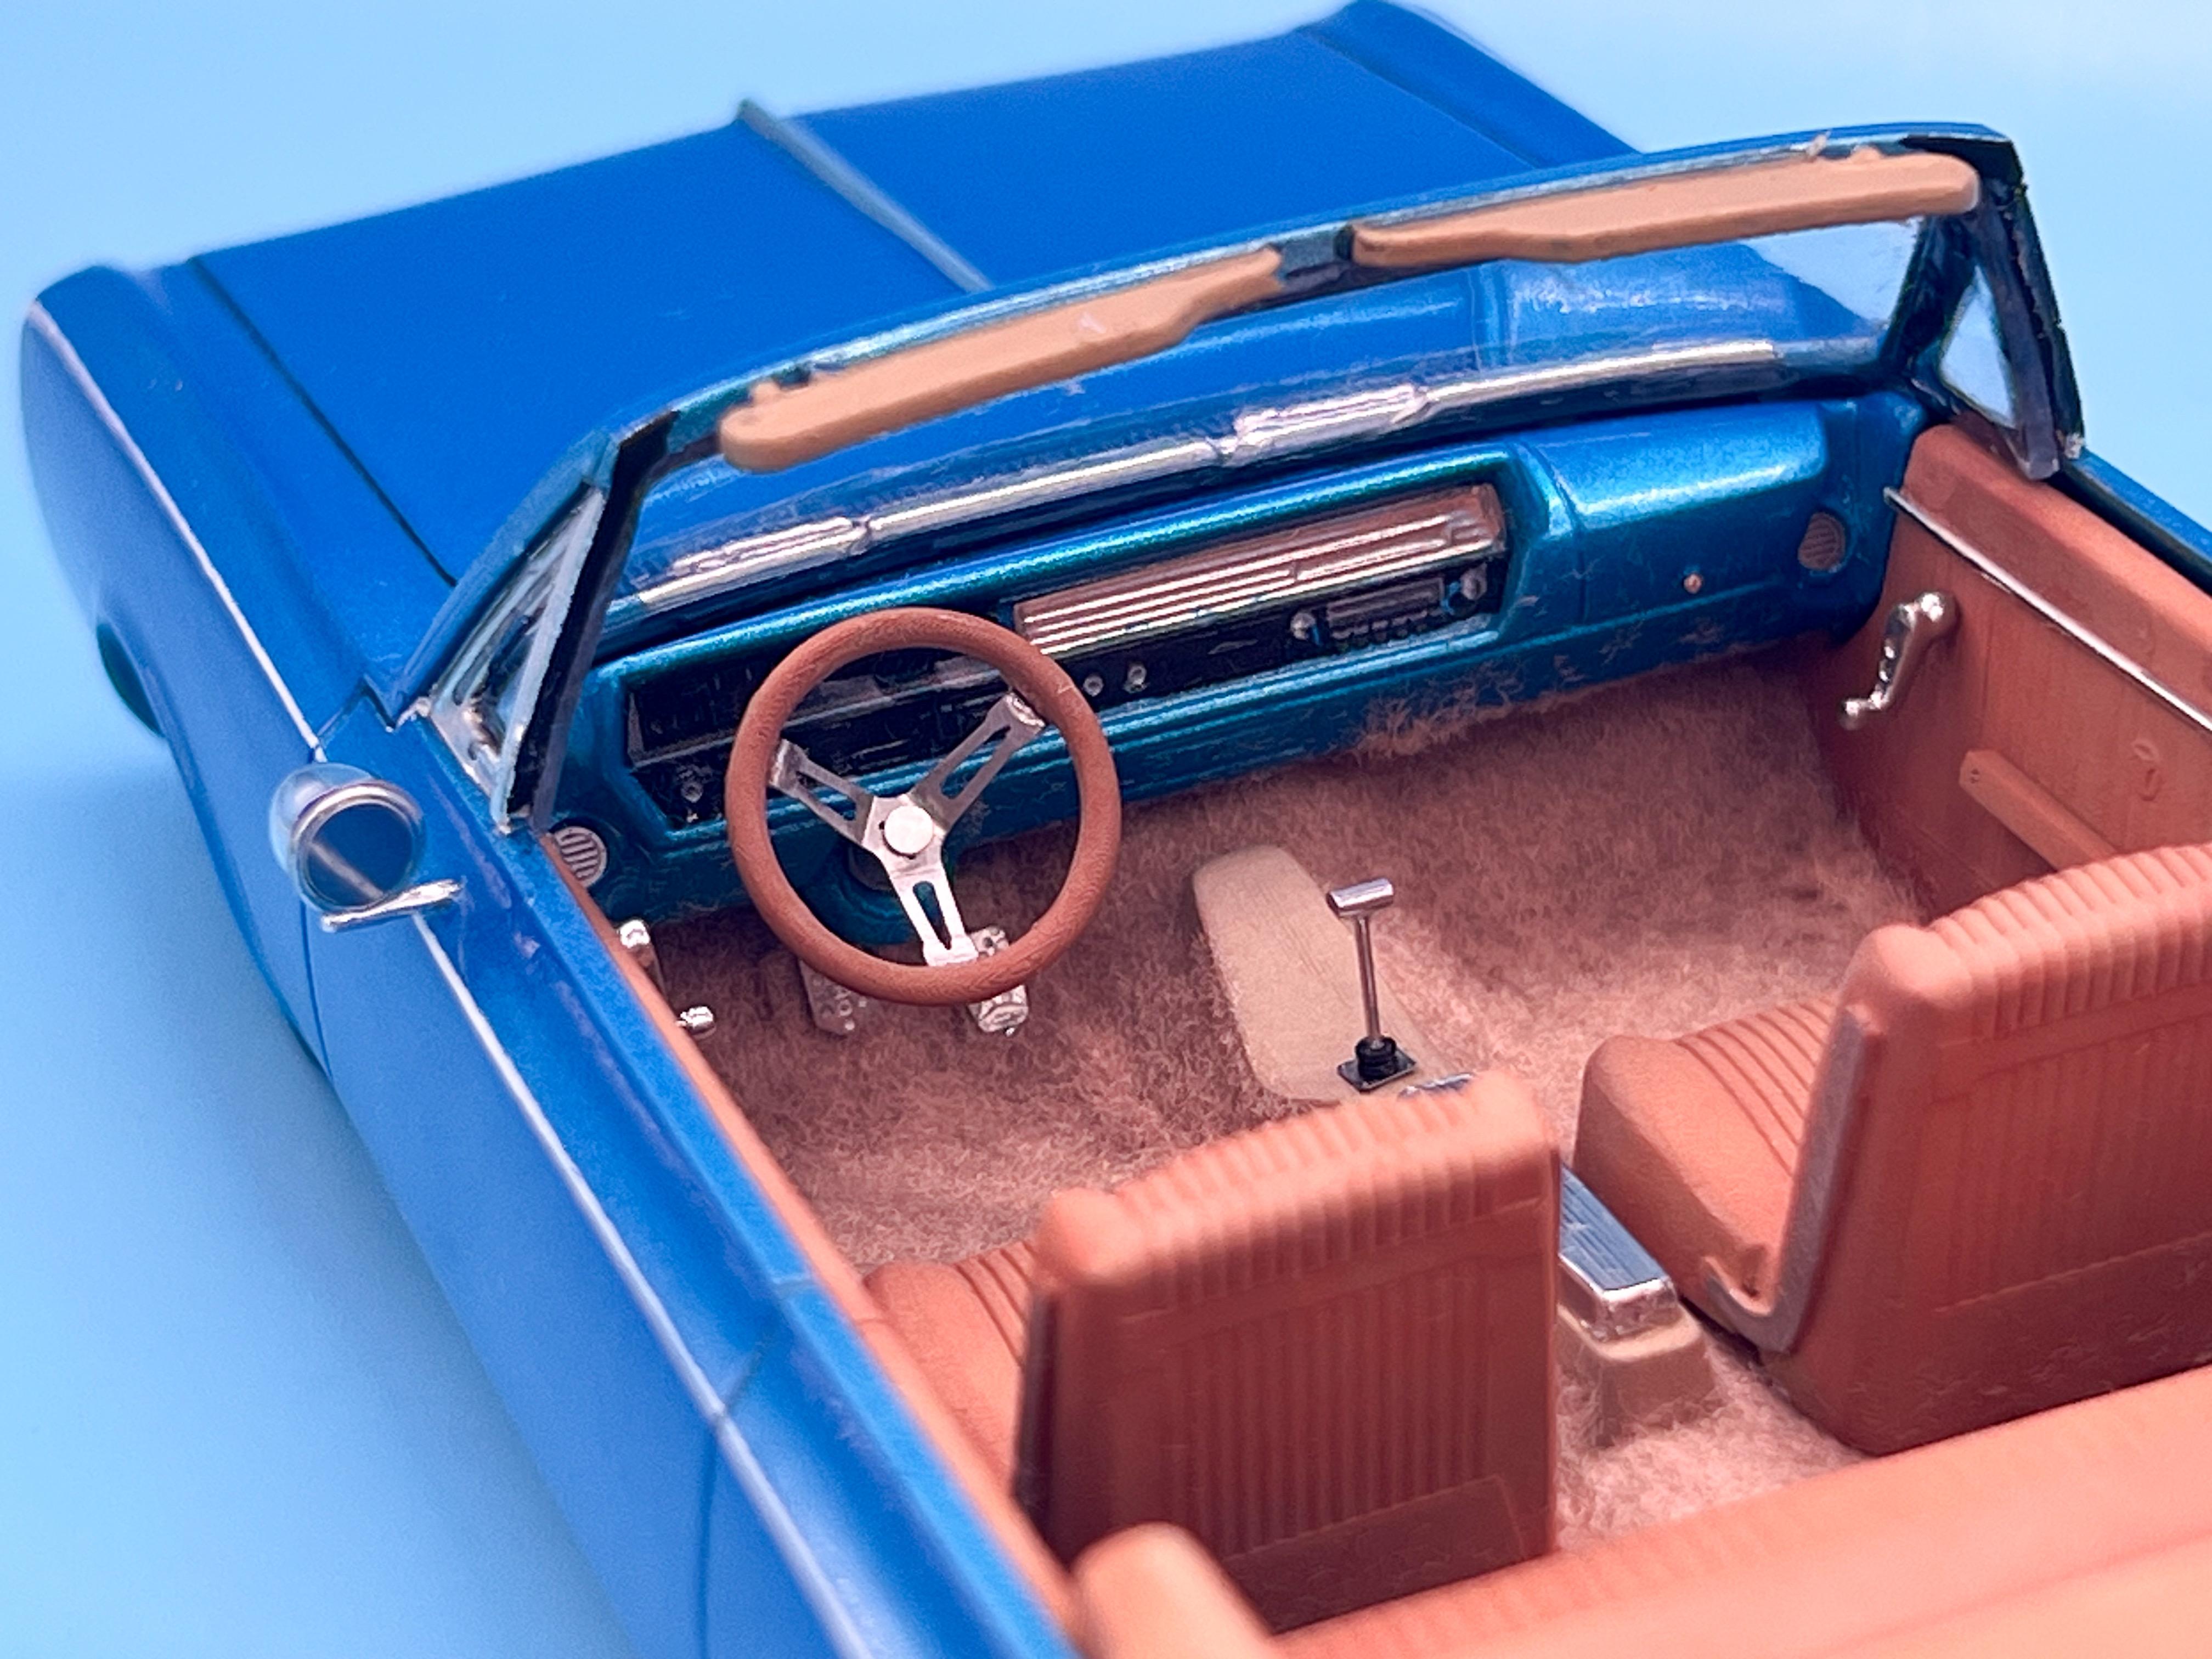
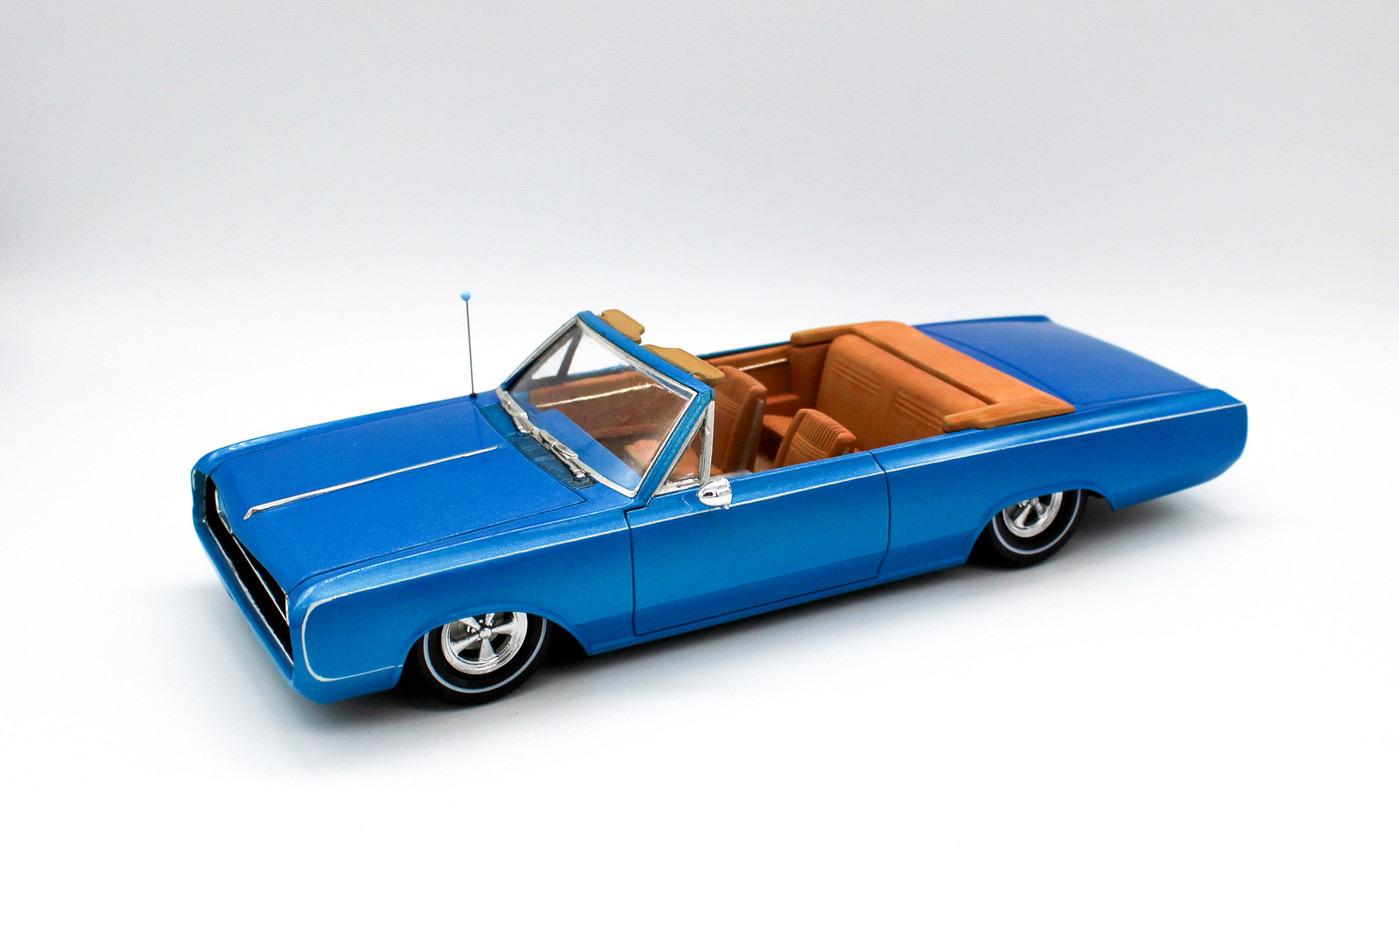
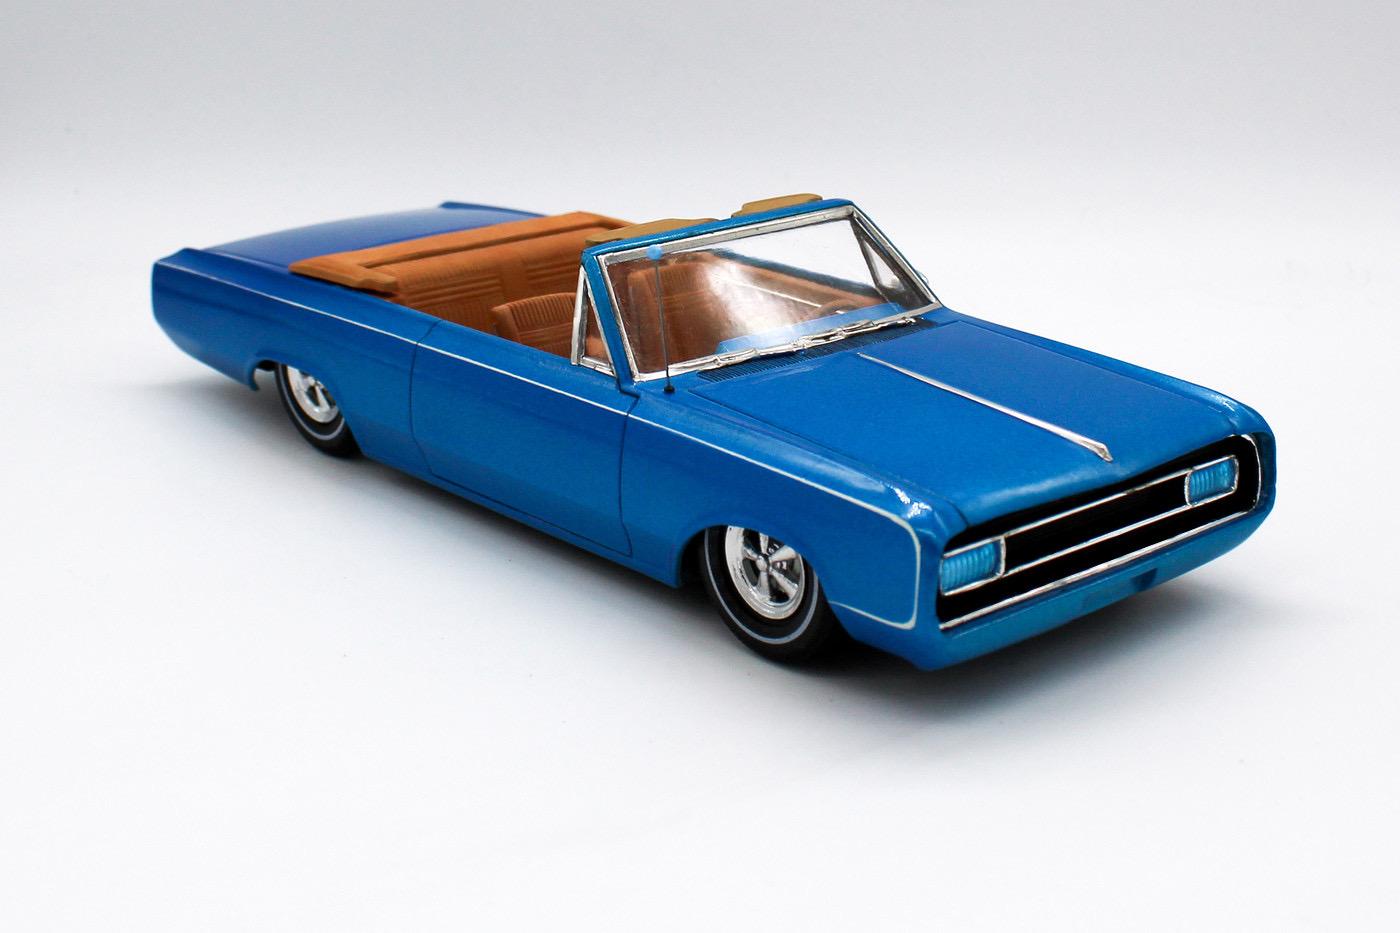
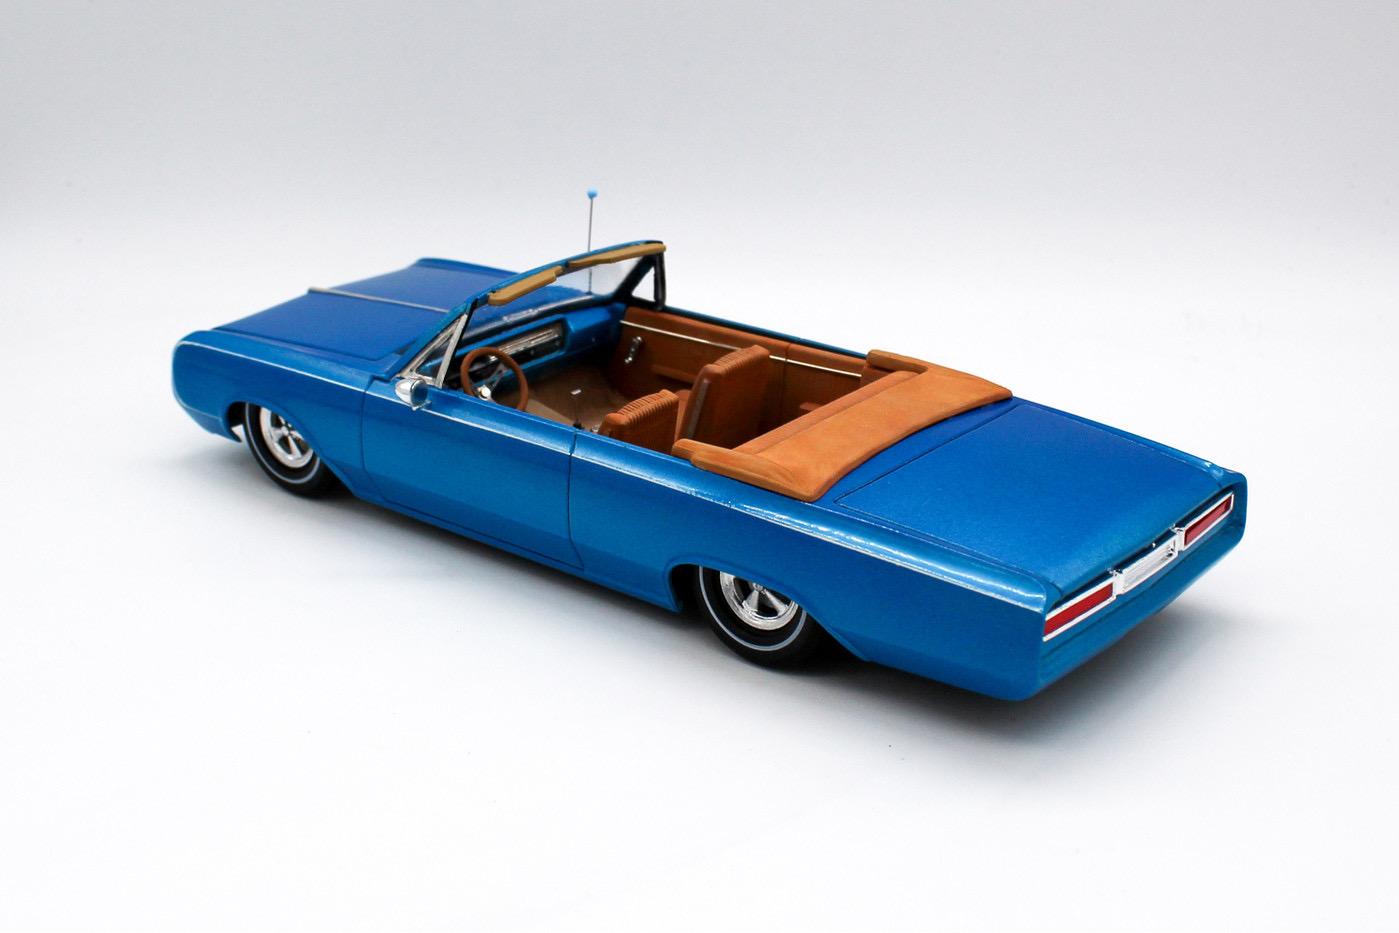
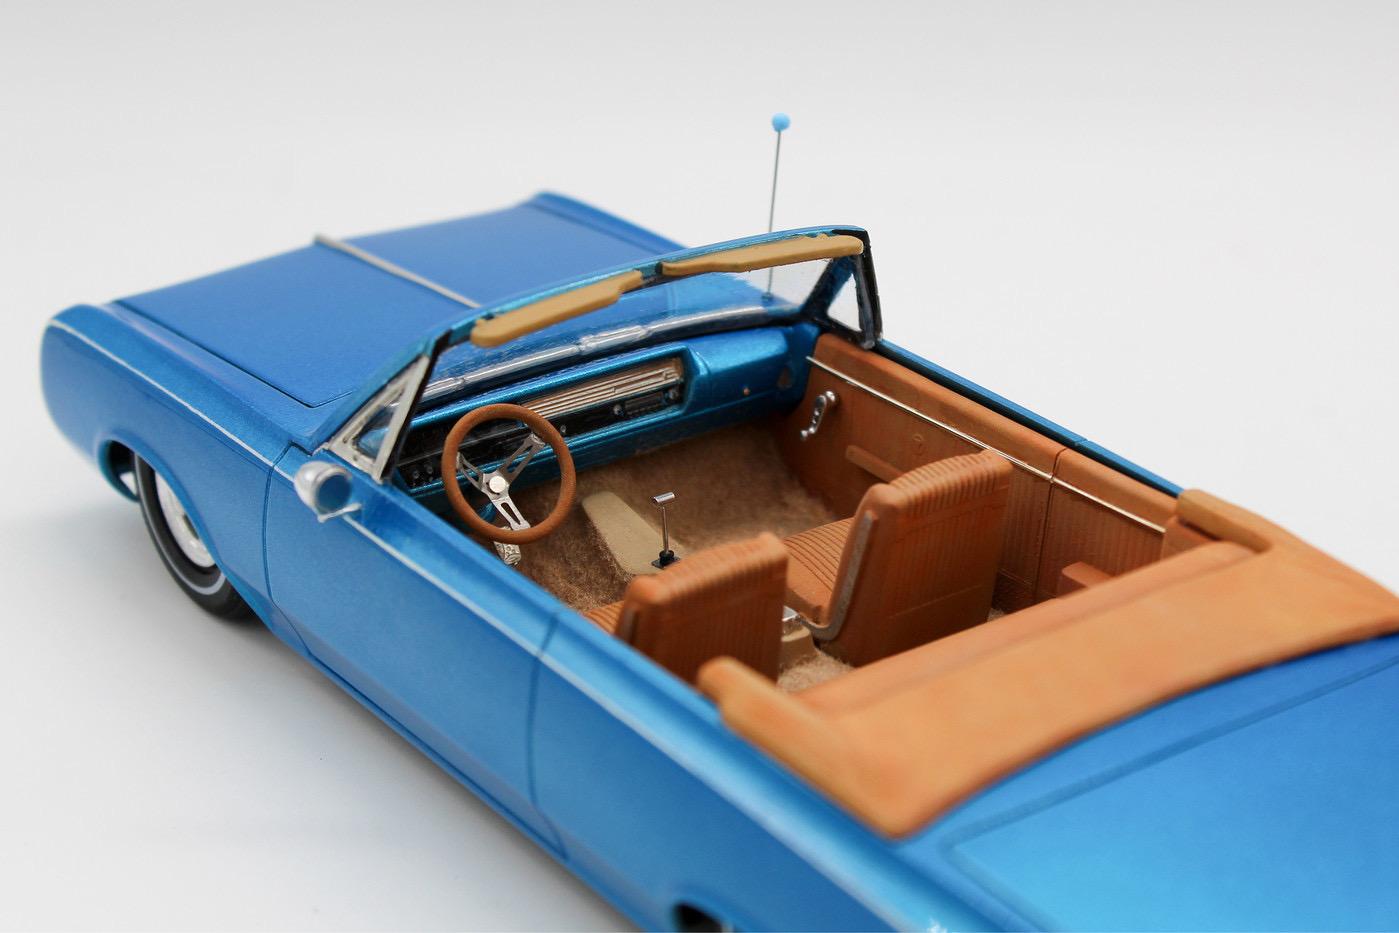
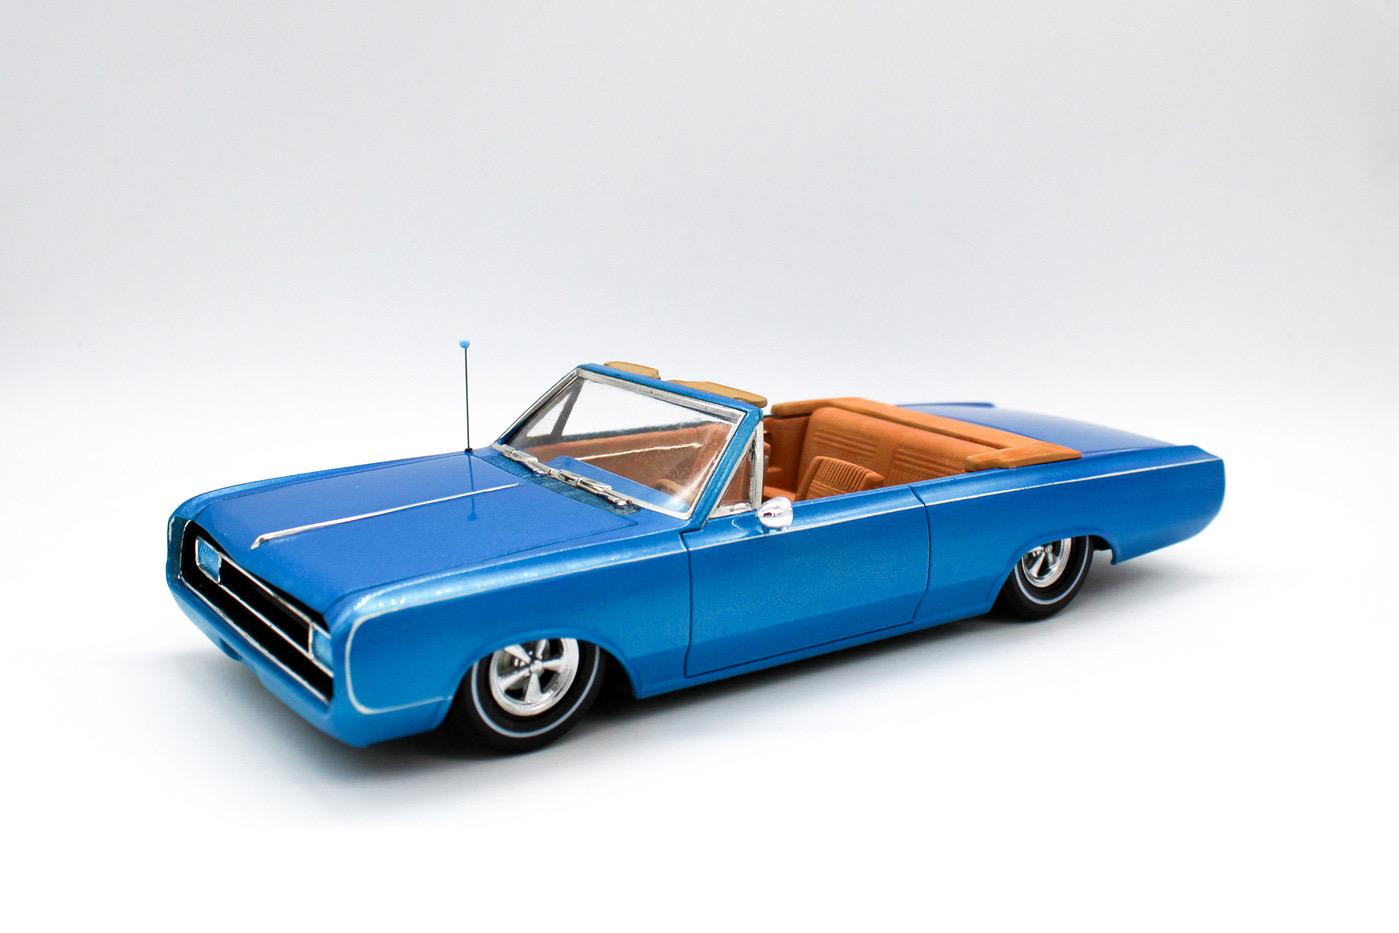
Thanks fellas! Got a little time to wrap this one up this past weekend… Assembled the interior and got it ready to mate to the body: Painted the brake drums pearl white (a somewhat popular trend in the 60s/early 70s, apparently), assembled the wheels and got this thing on it’s feet: Added a parts-box mirror: I polished a photoetched doodad because it didn’t have a ‘glass’: And added an antenna, with color-coded antenna ball: And that’s about a wrap on this one…not a super complex build - just something I wanted to have on my shelf! Some finished pics below: Thanks for looking!
-
That interior color is PERFECT! I bet if I saw a jar of that color somewhere I’d think “urgh”…but it’s a great compliment to the body color! Enjoying this build!
-
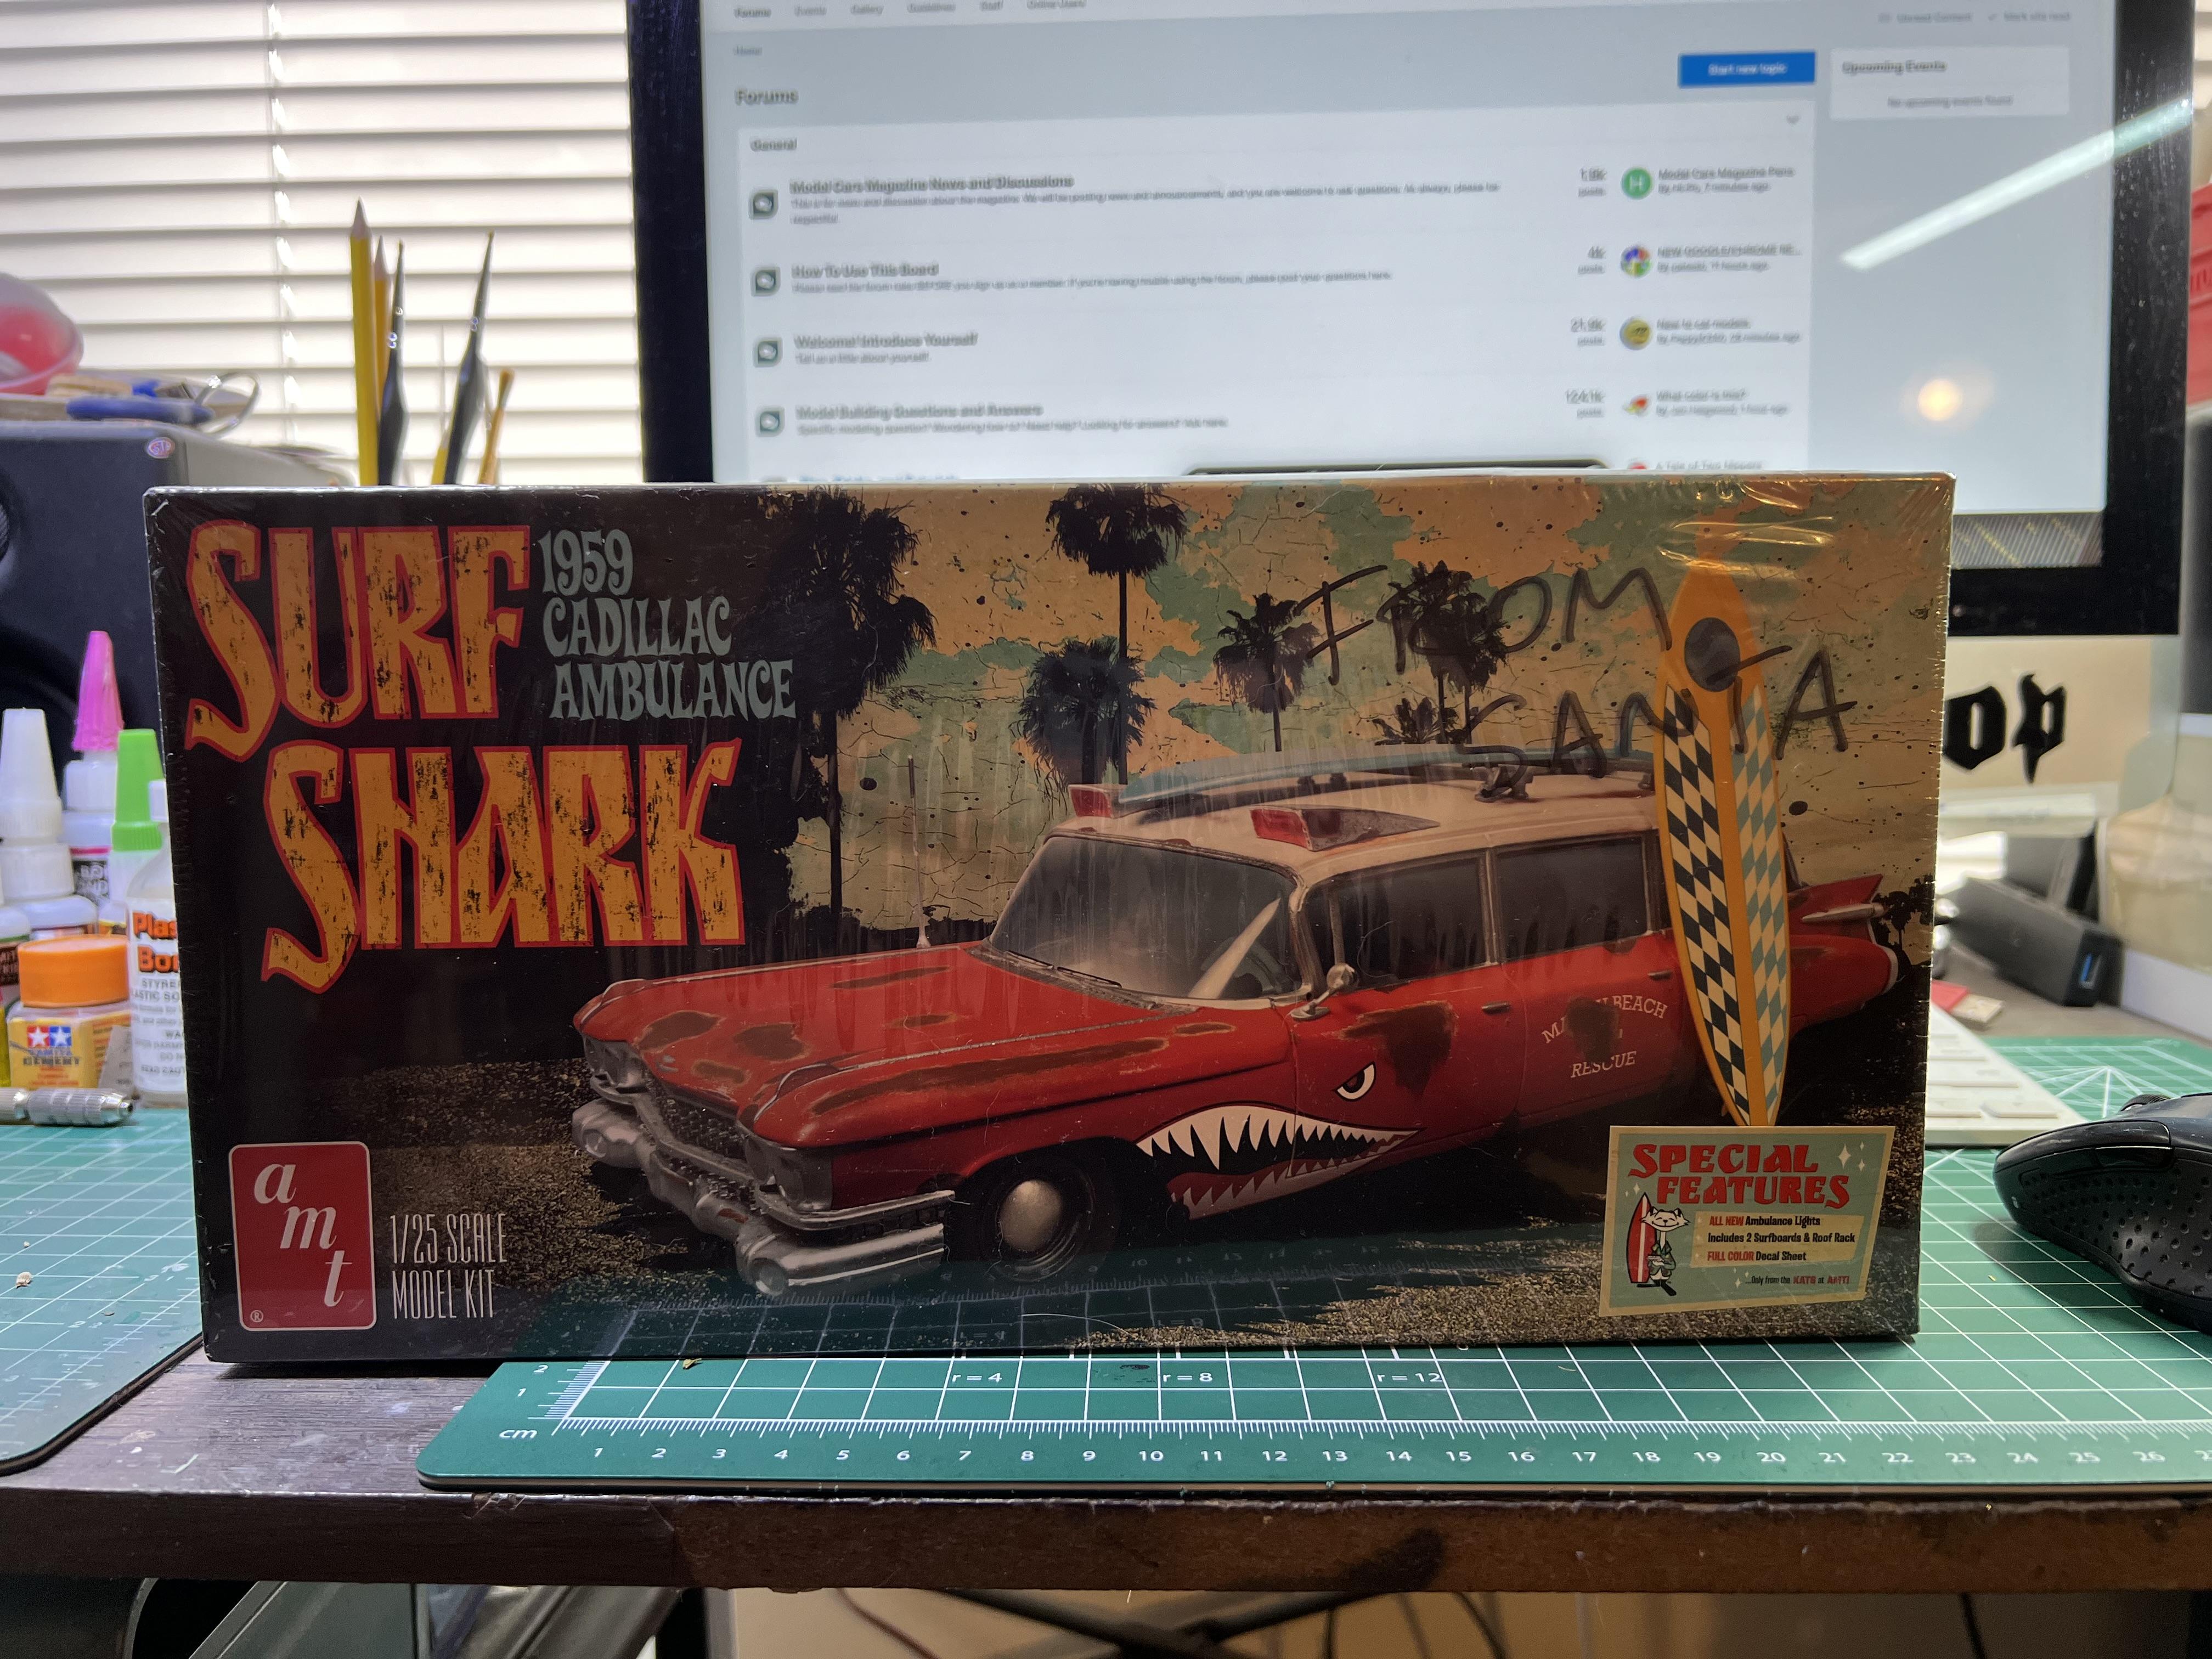
You ever see this meme posted online? Well, this clearly says “From Santa” ?♂️
- 38,867 replies
-
- 5
-

-

-
- johan
- glue bombs
- (and 1 more)
-
Always enjoy seeing one of your projects come together - nice work so far!
-
Beautiful, inspiring work. You’re a real craftsman!
-
The Official EBay Discussion Thread
OldNYJim replied to iamsuperdan's topic in General Automotive Talk (Trucks and Cars)
Yes I have, and no they weren’t Seems like he DOES use an ALPs printer (the kind designed for decals, that can print white) but the quality was poor and what I got didn’t match exactly what he showed on his listing -
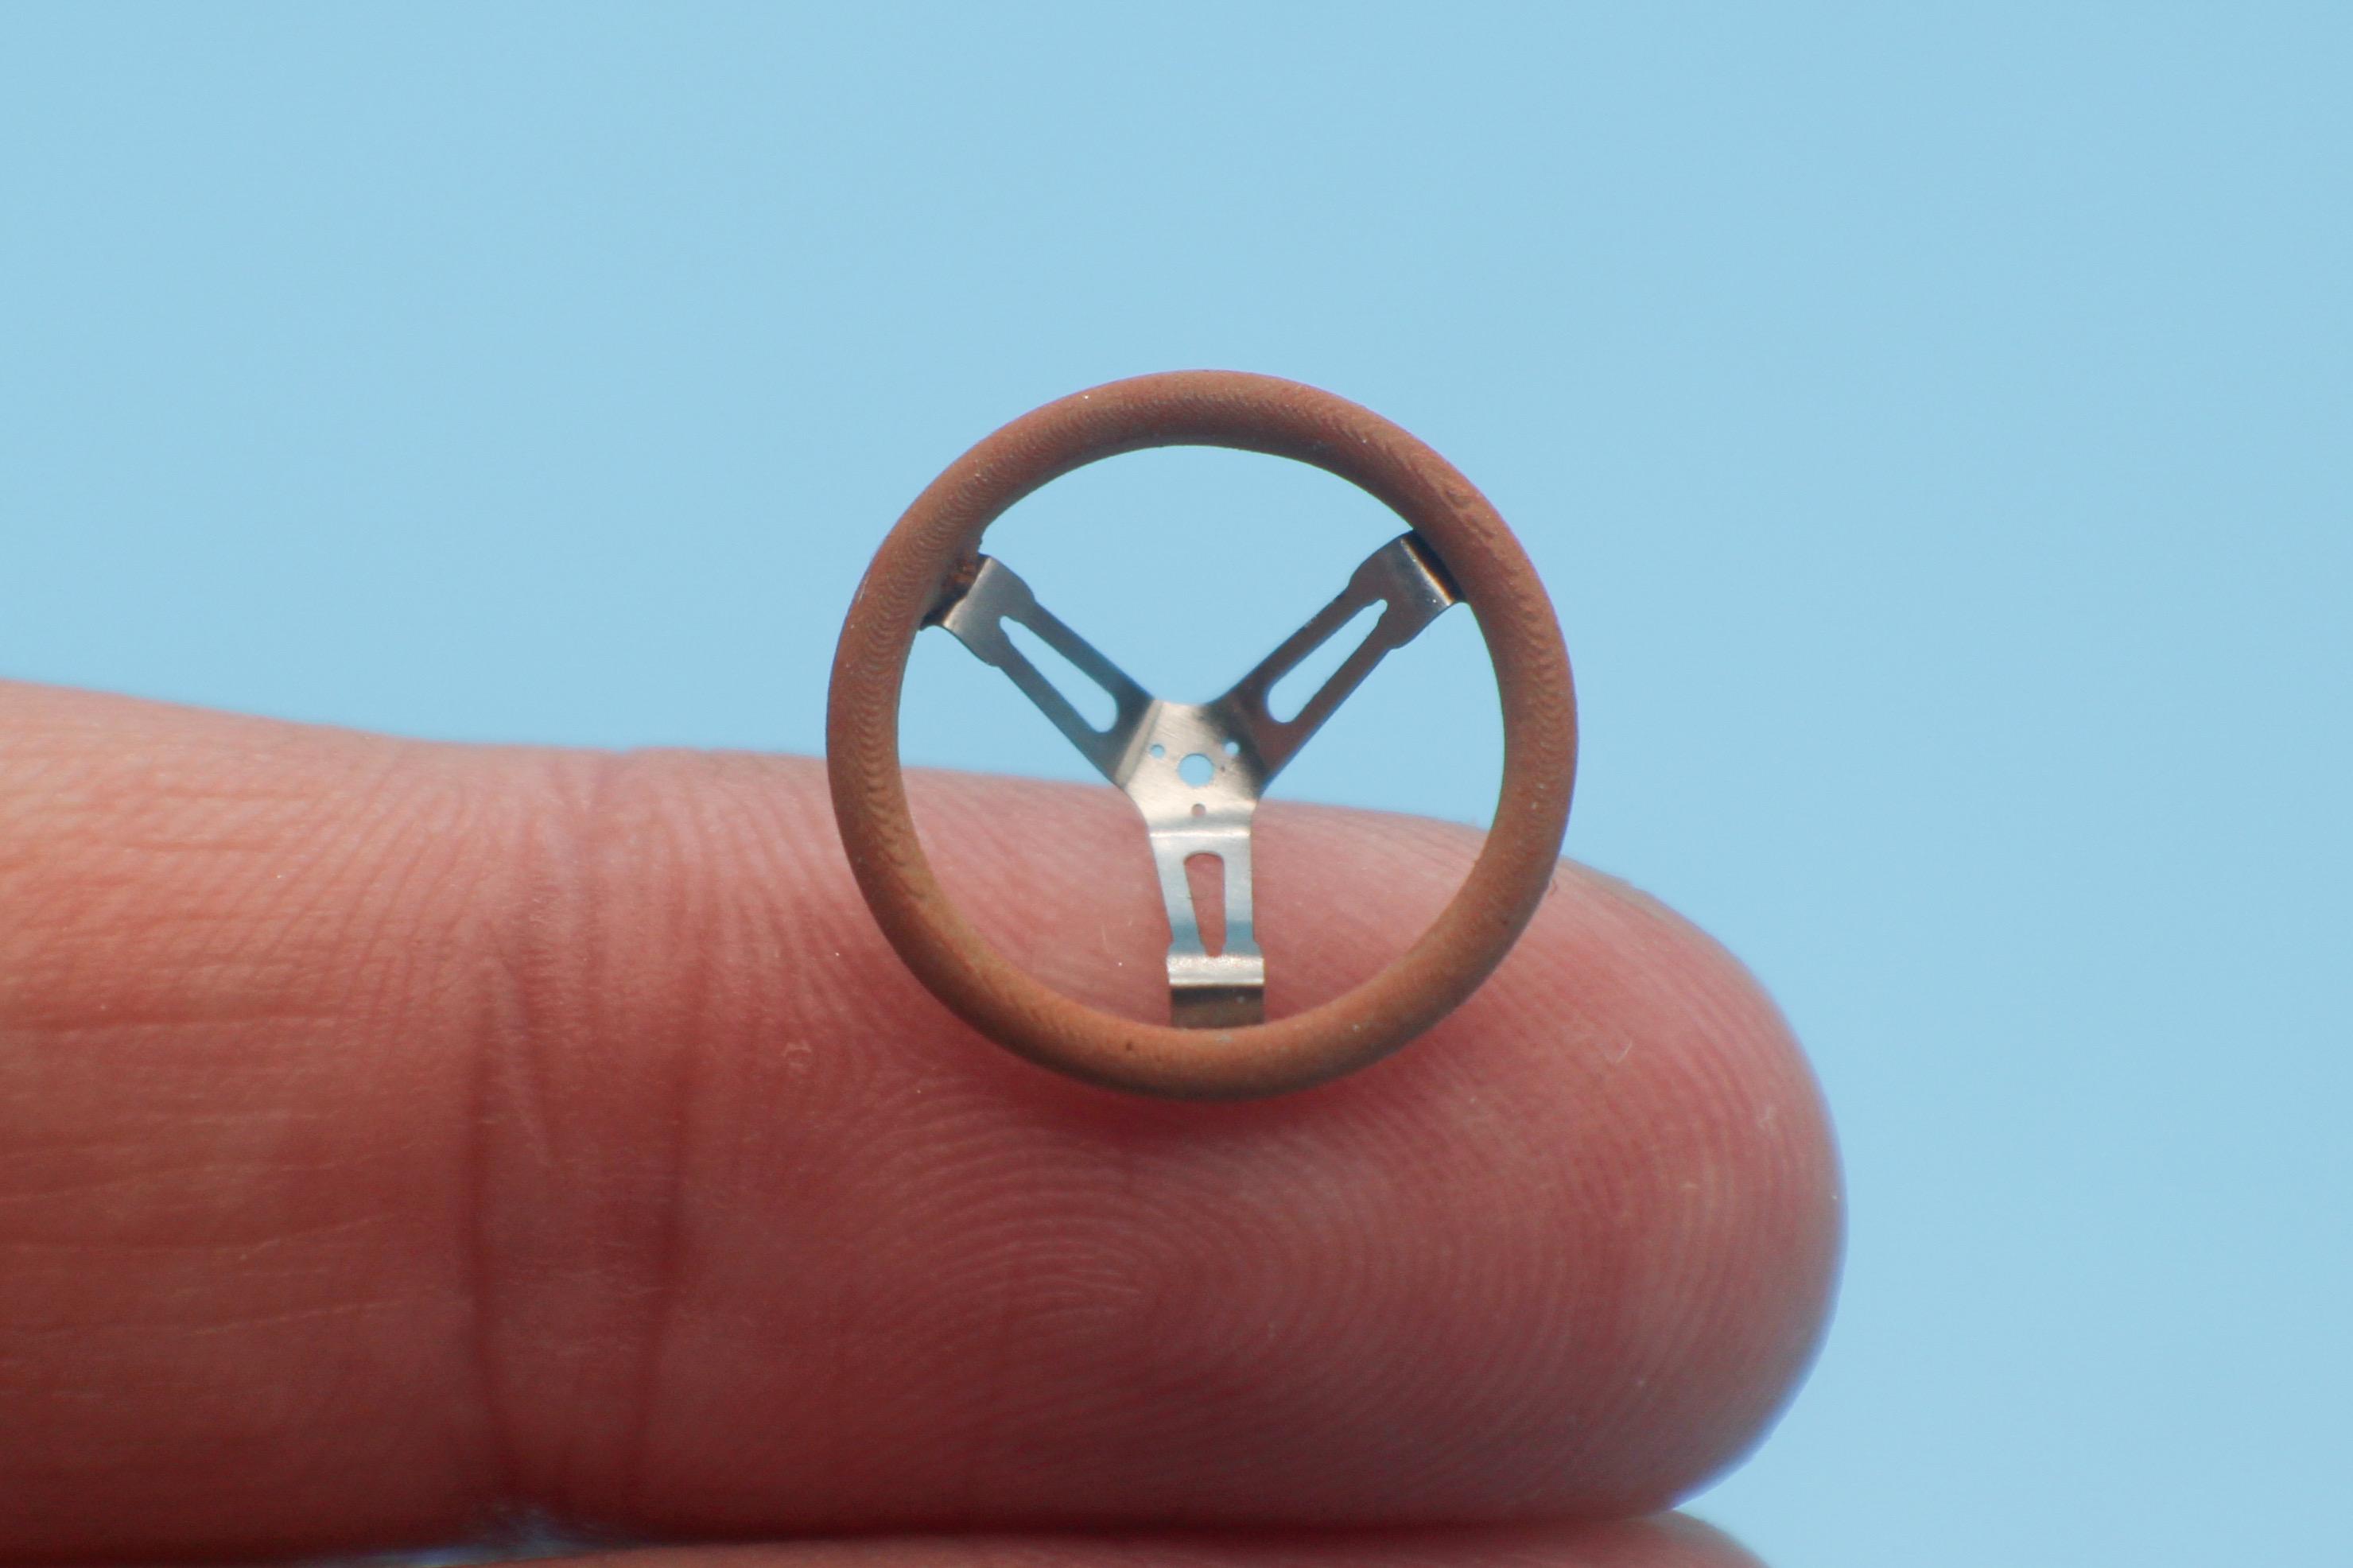
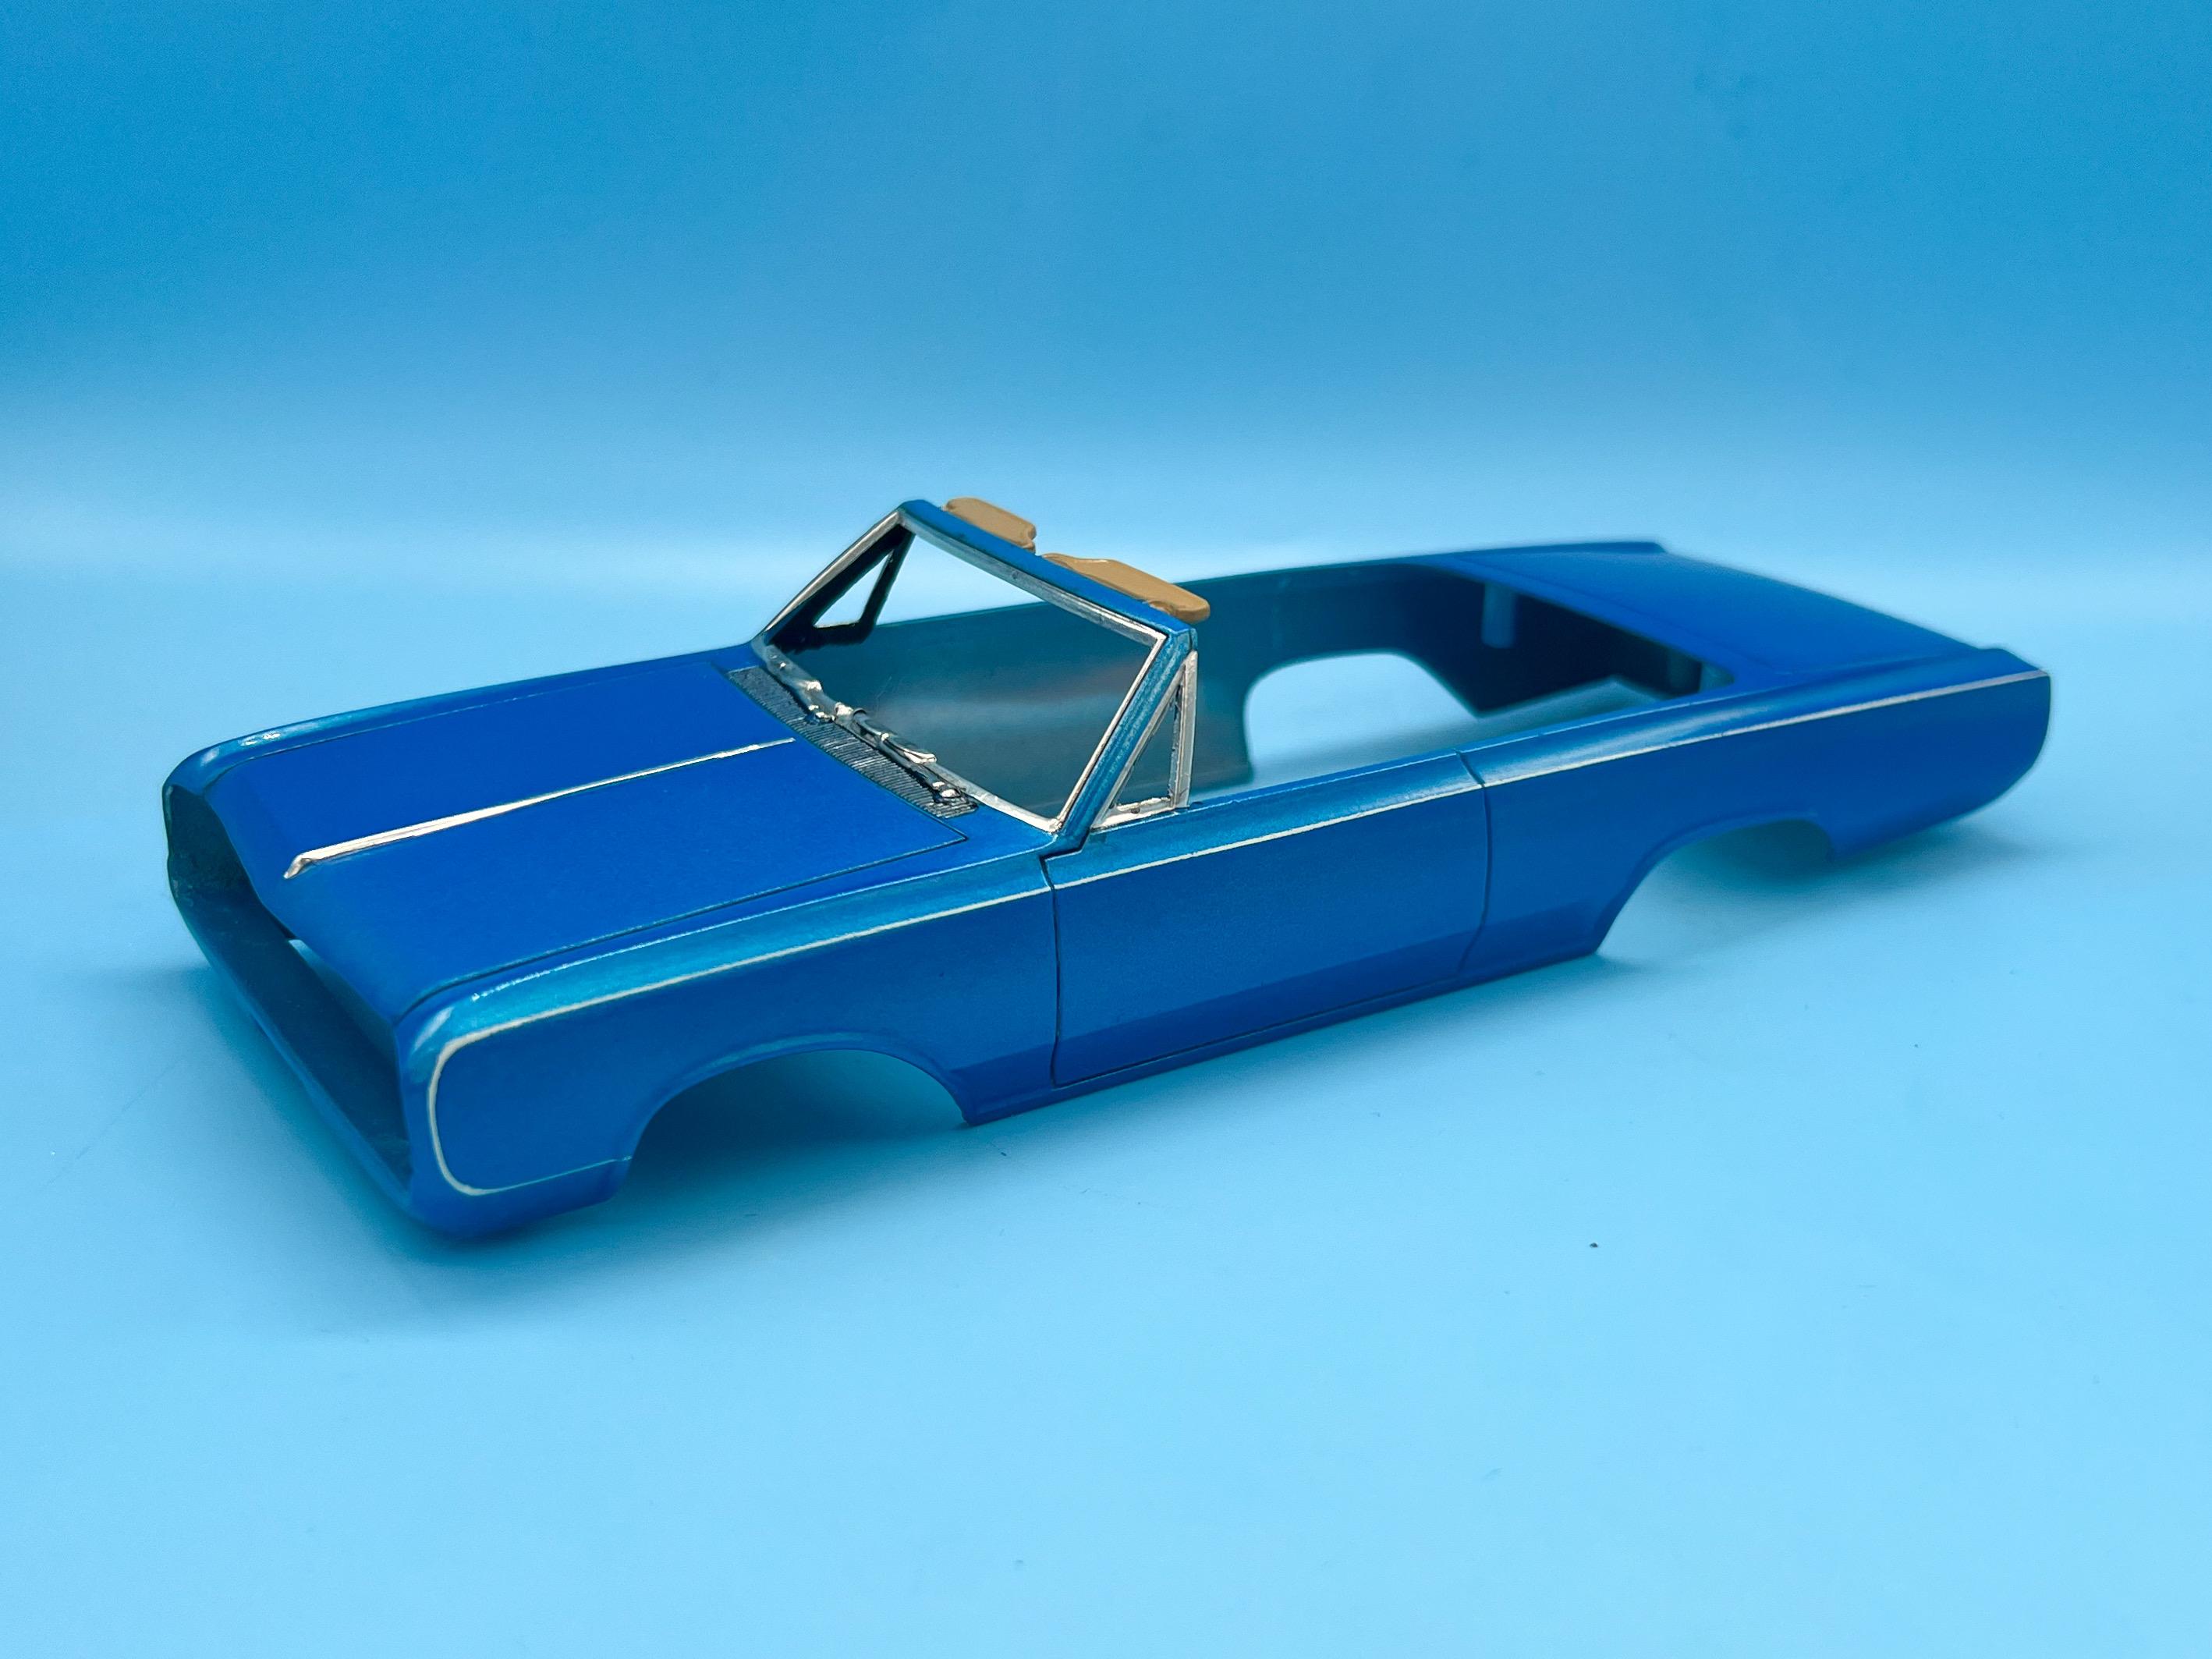
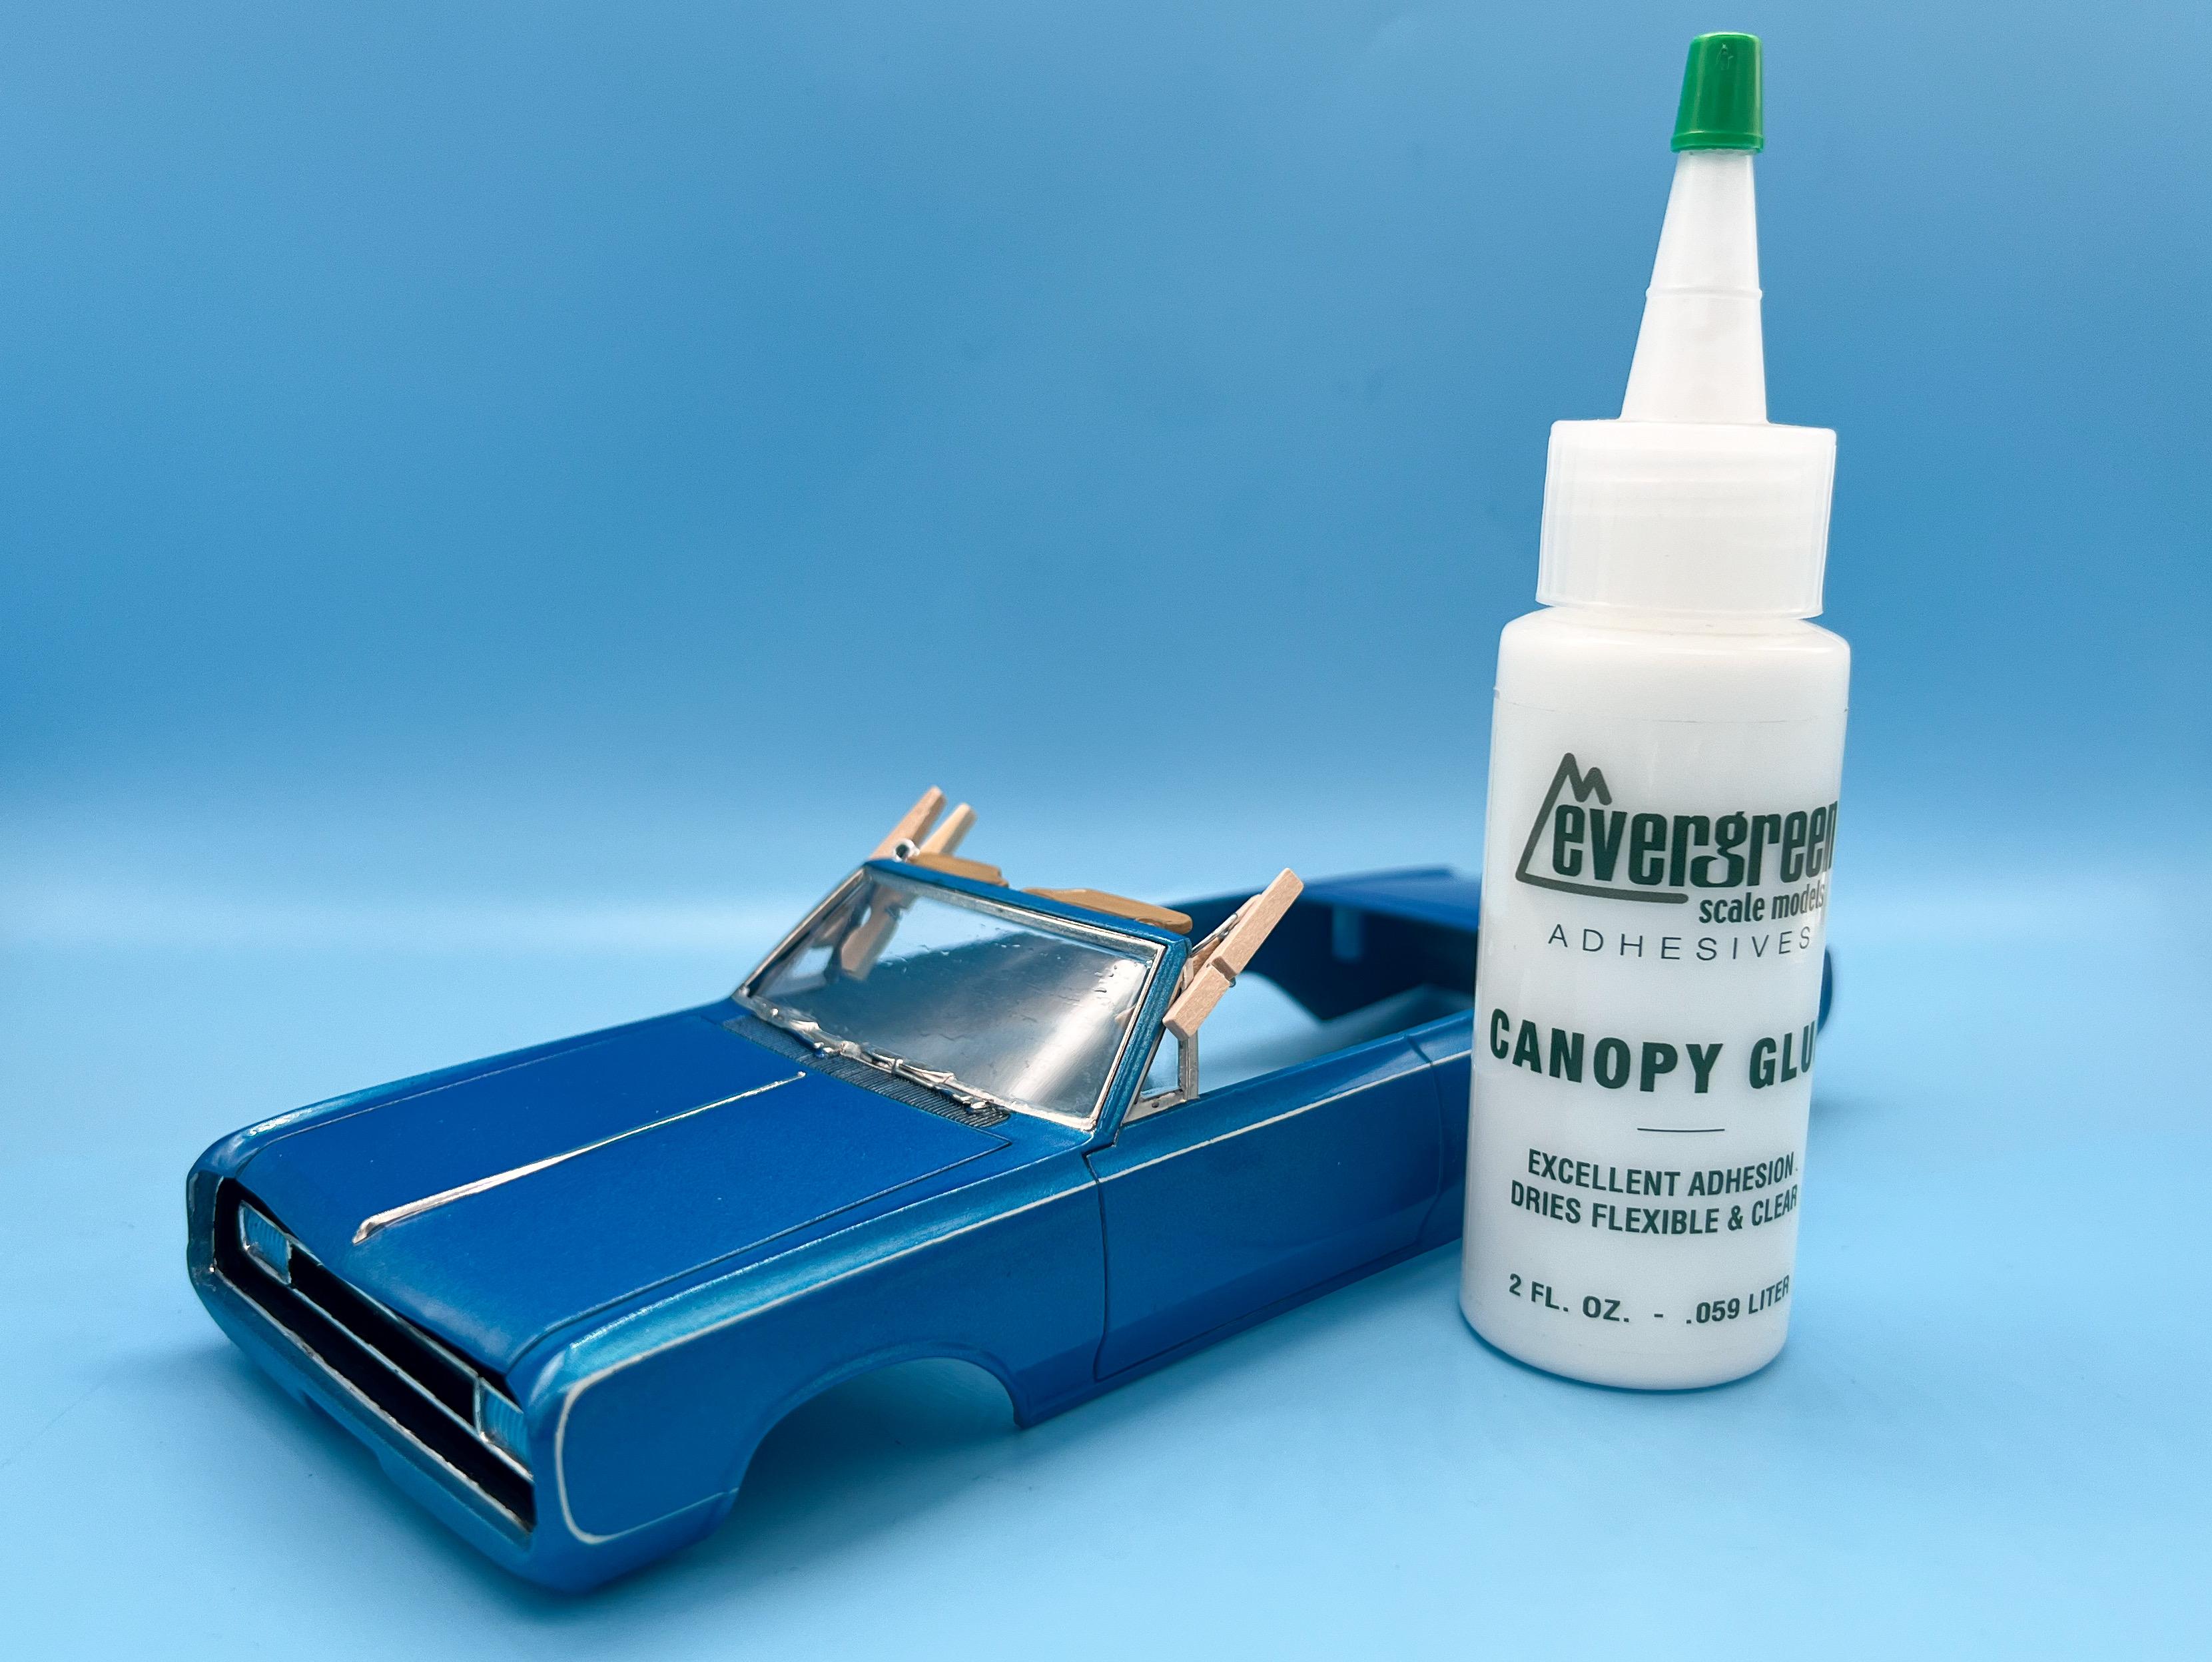
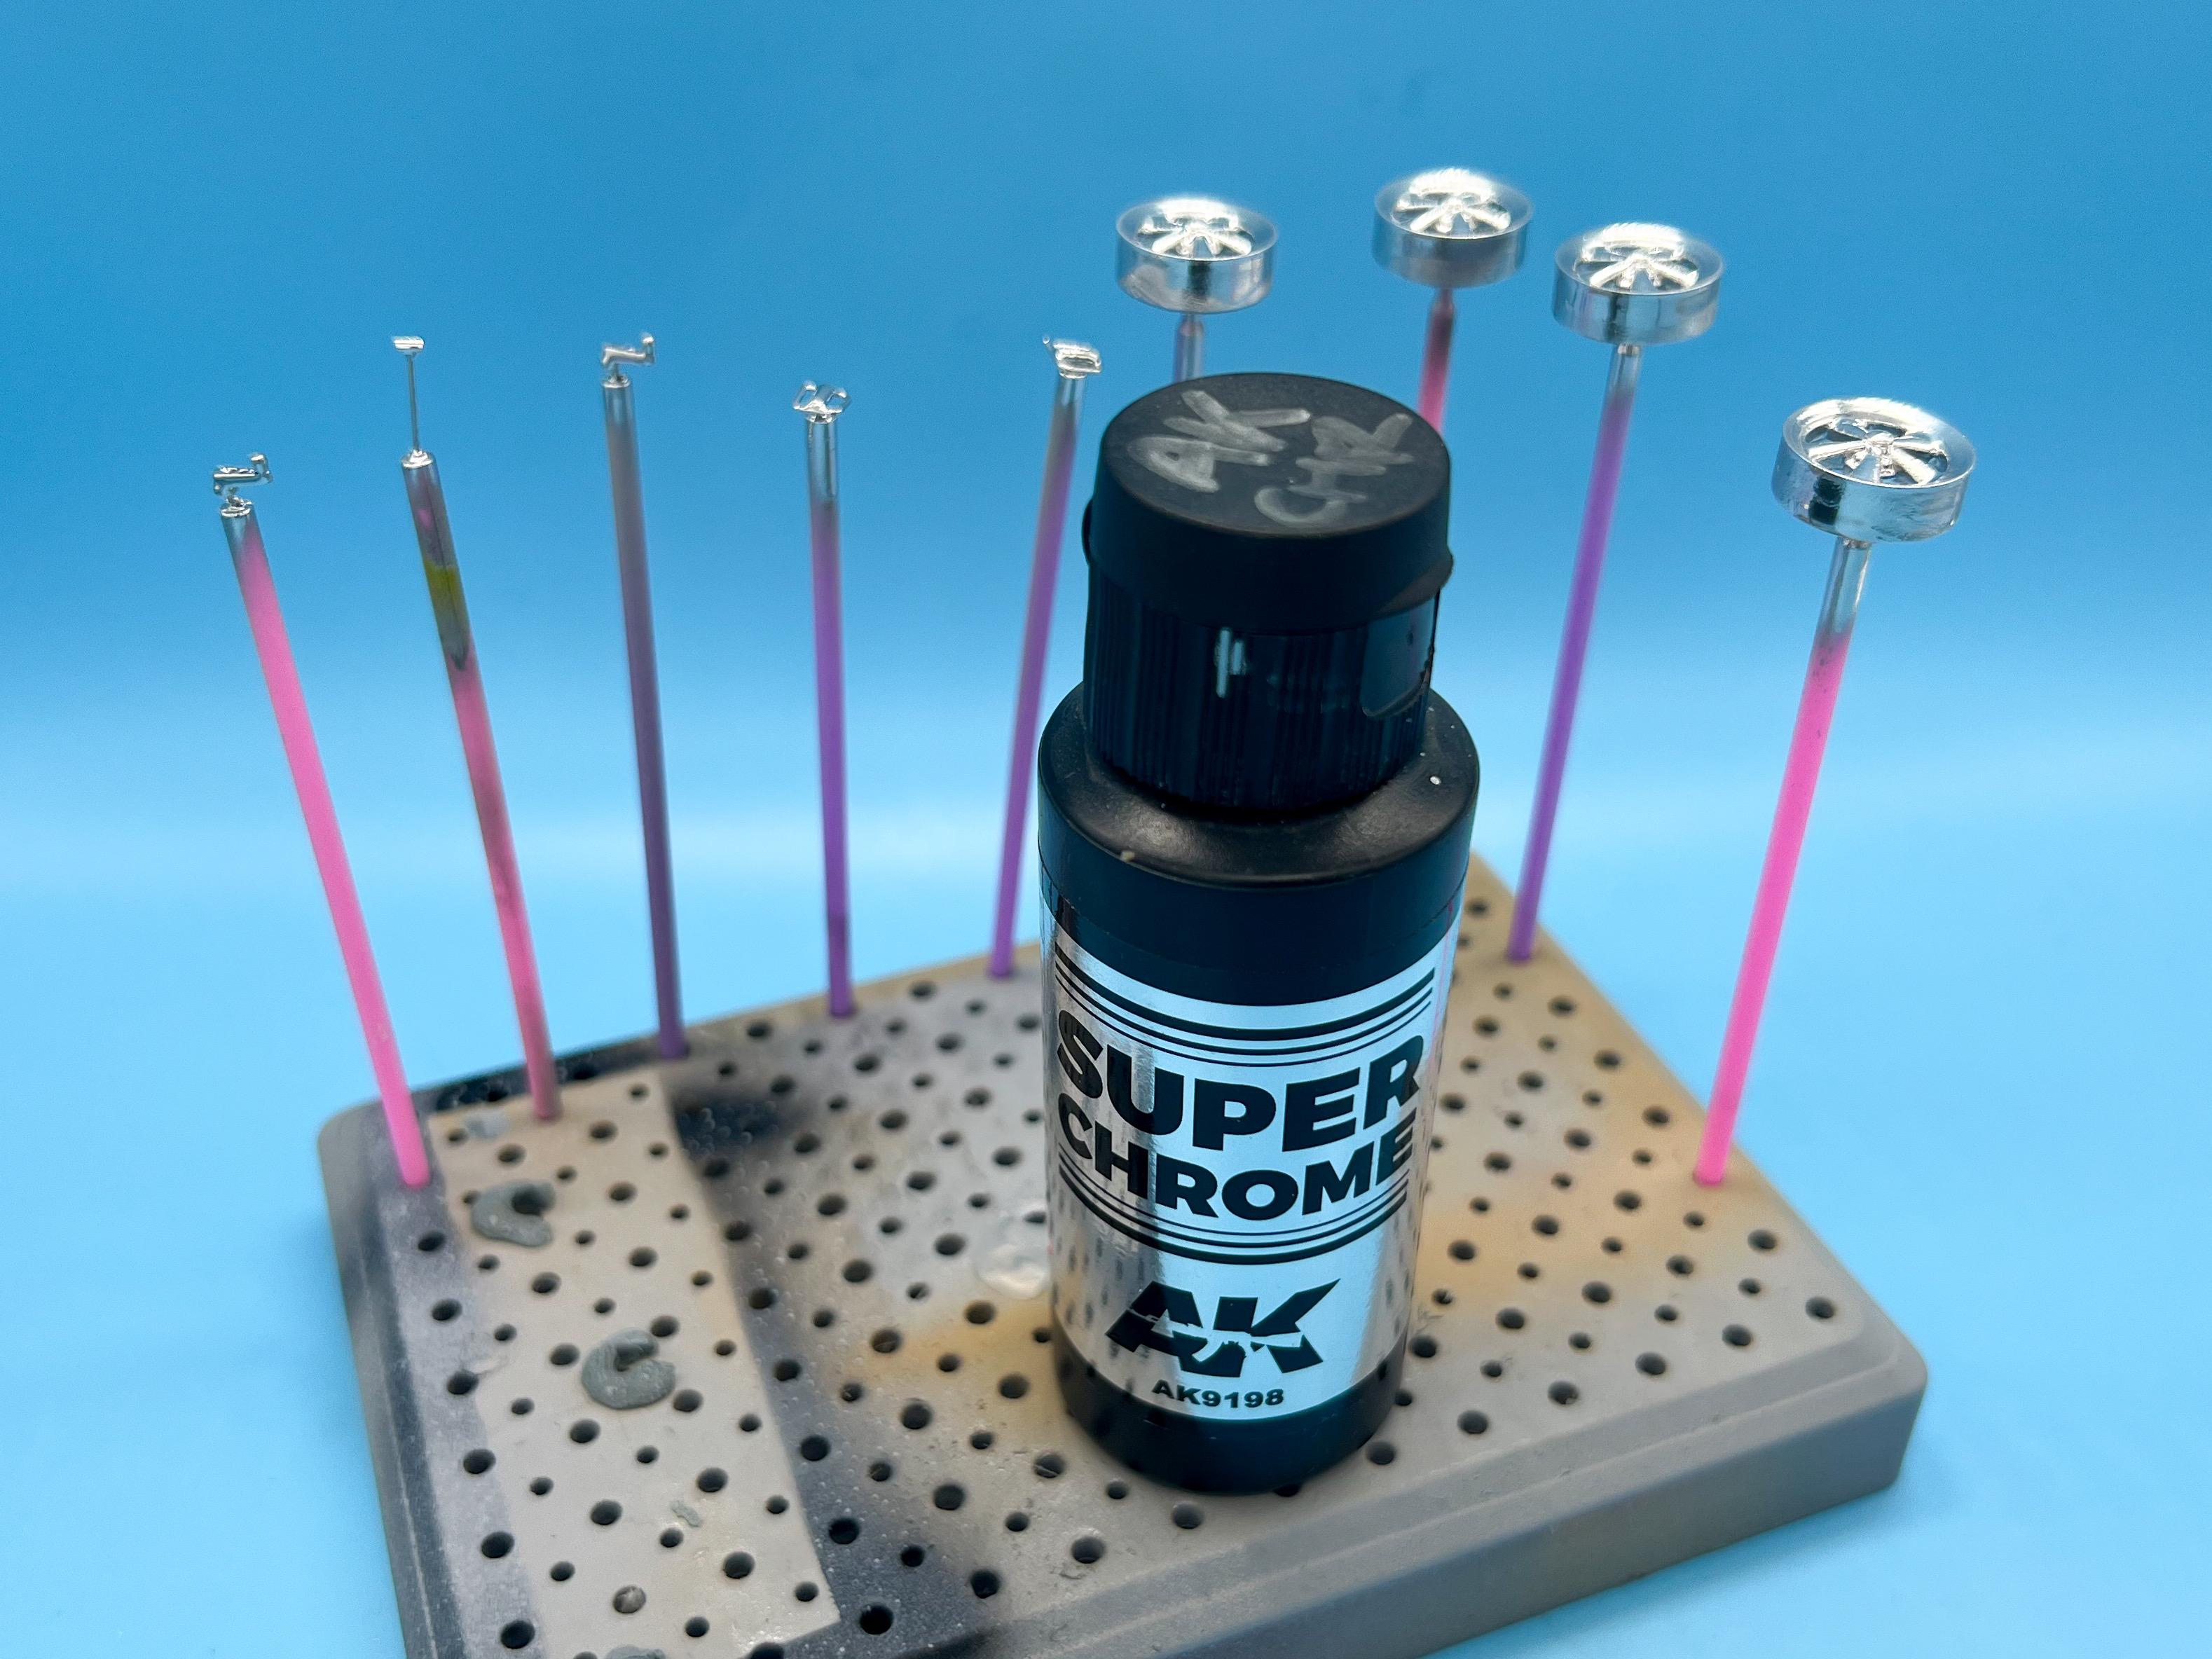
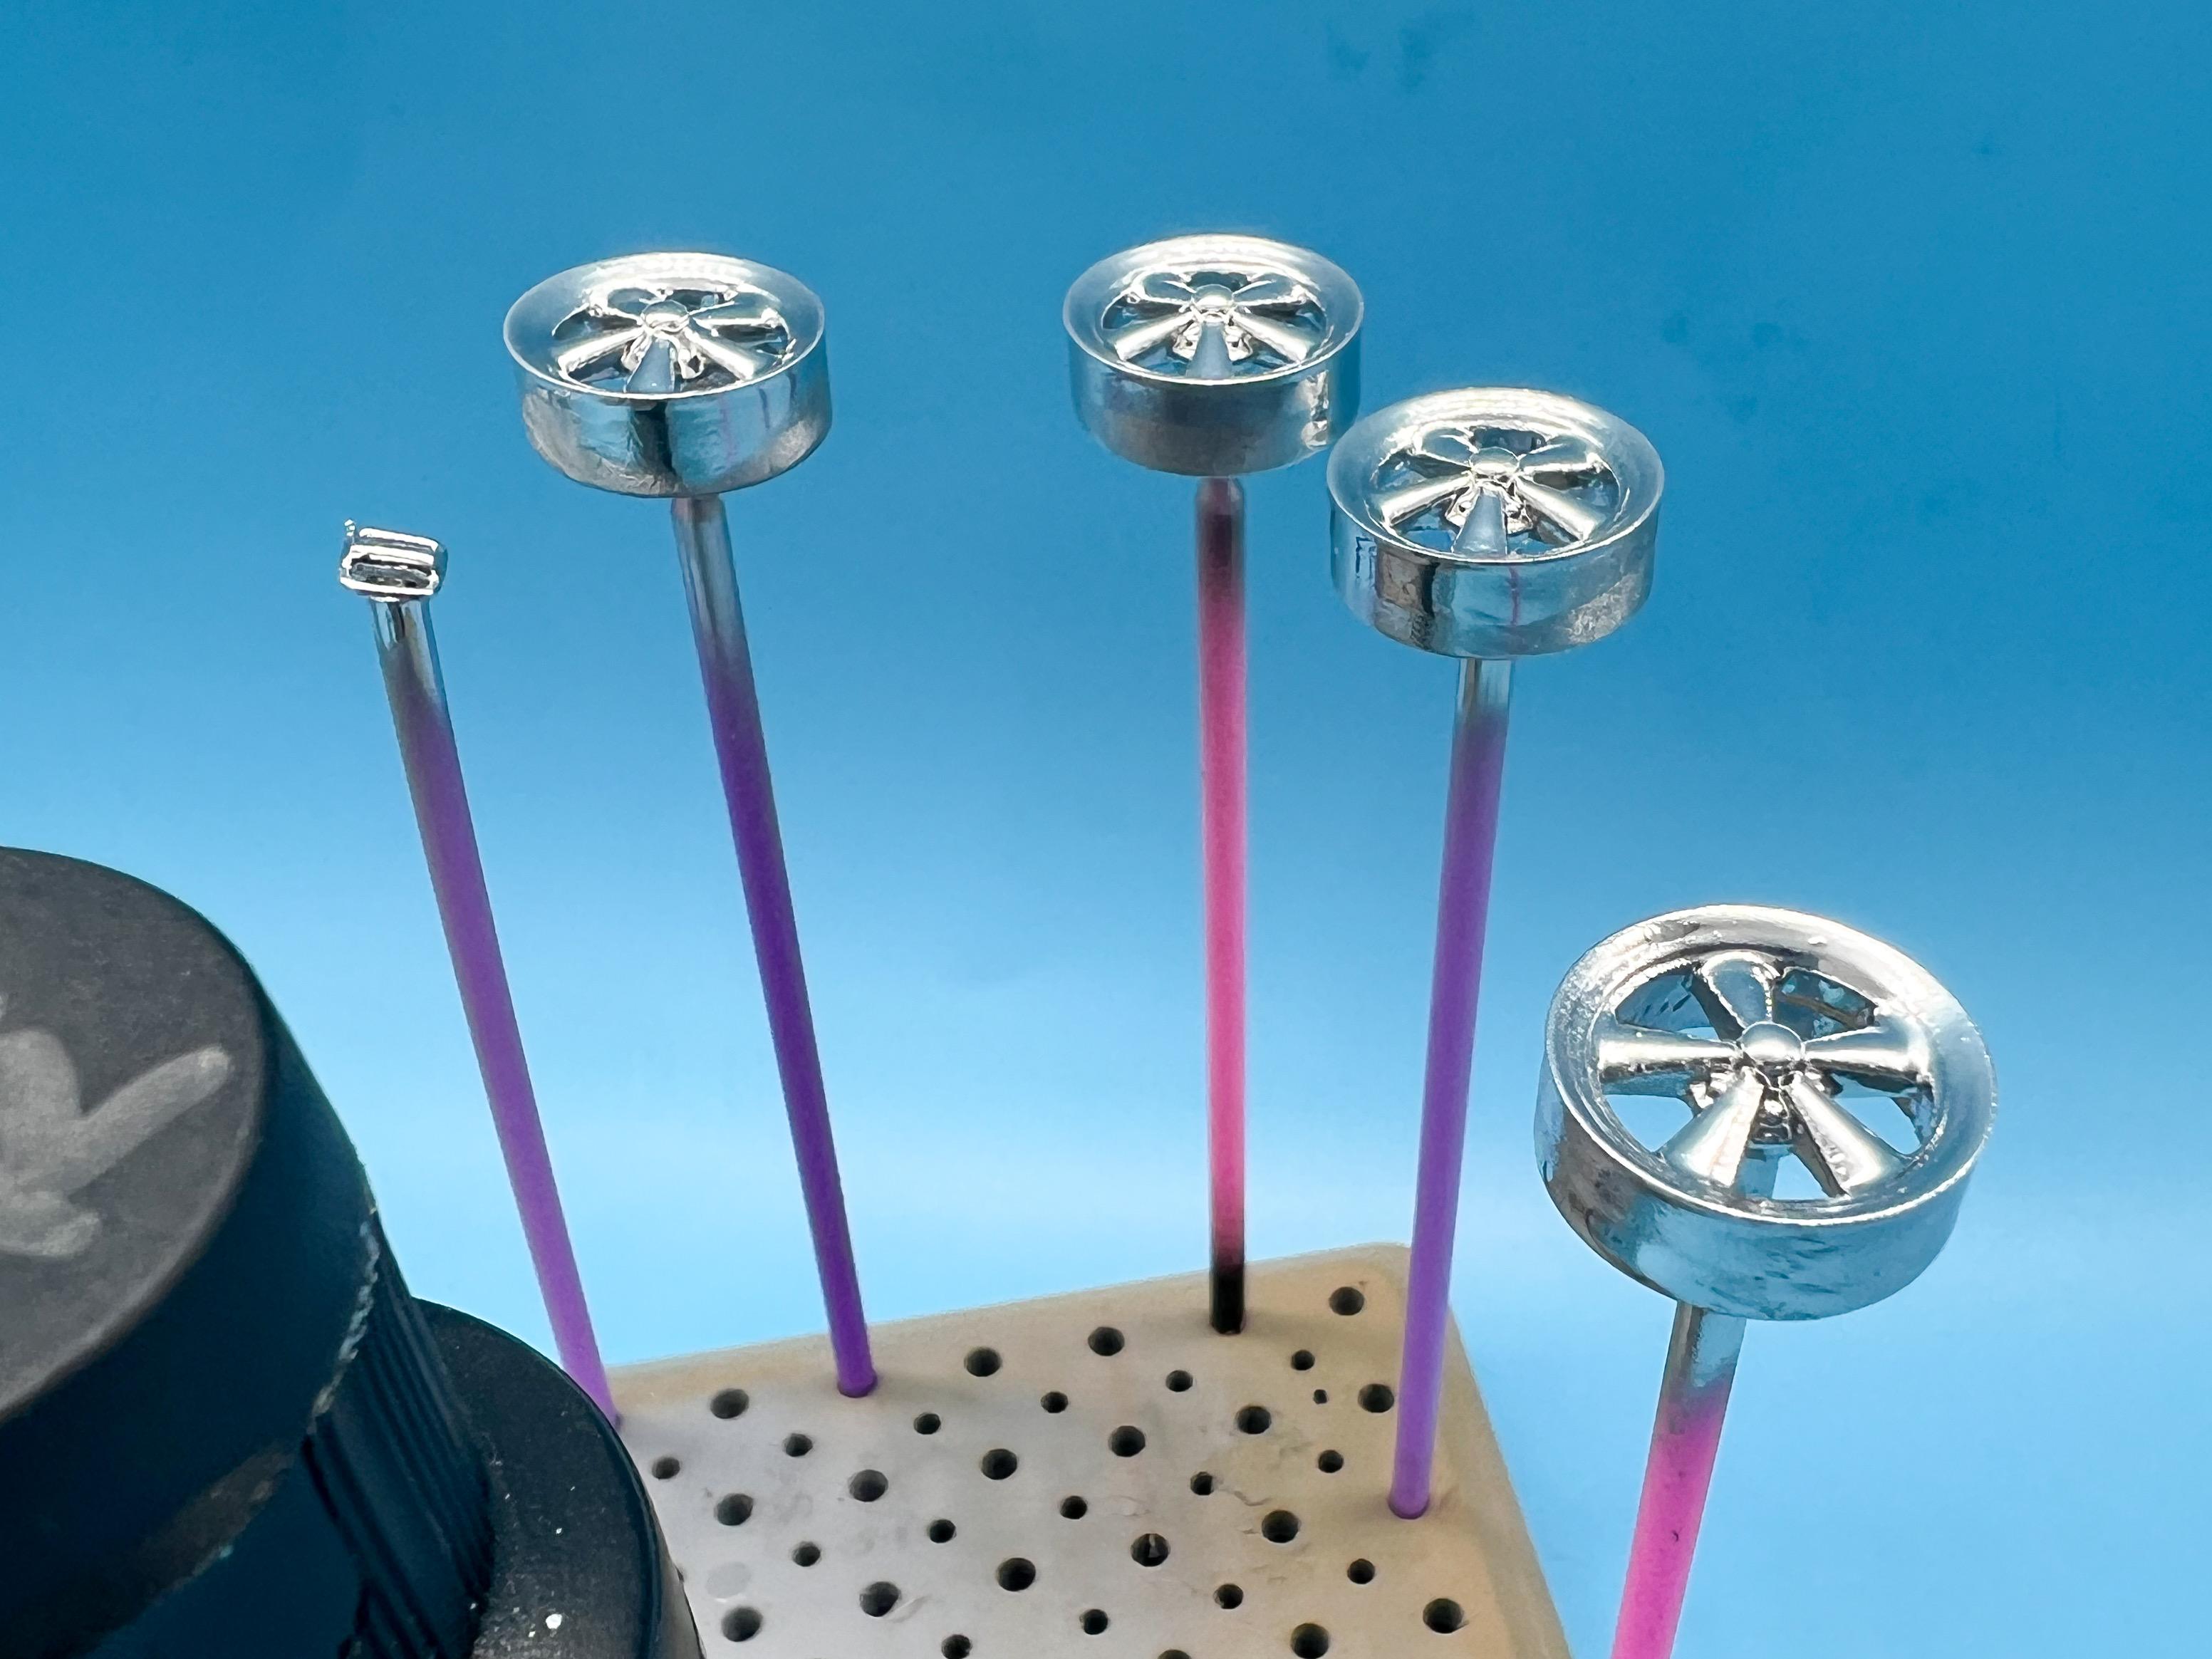
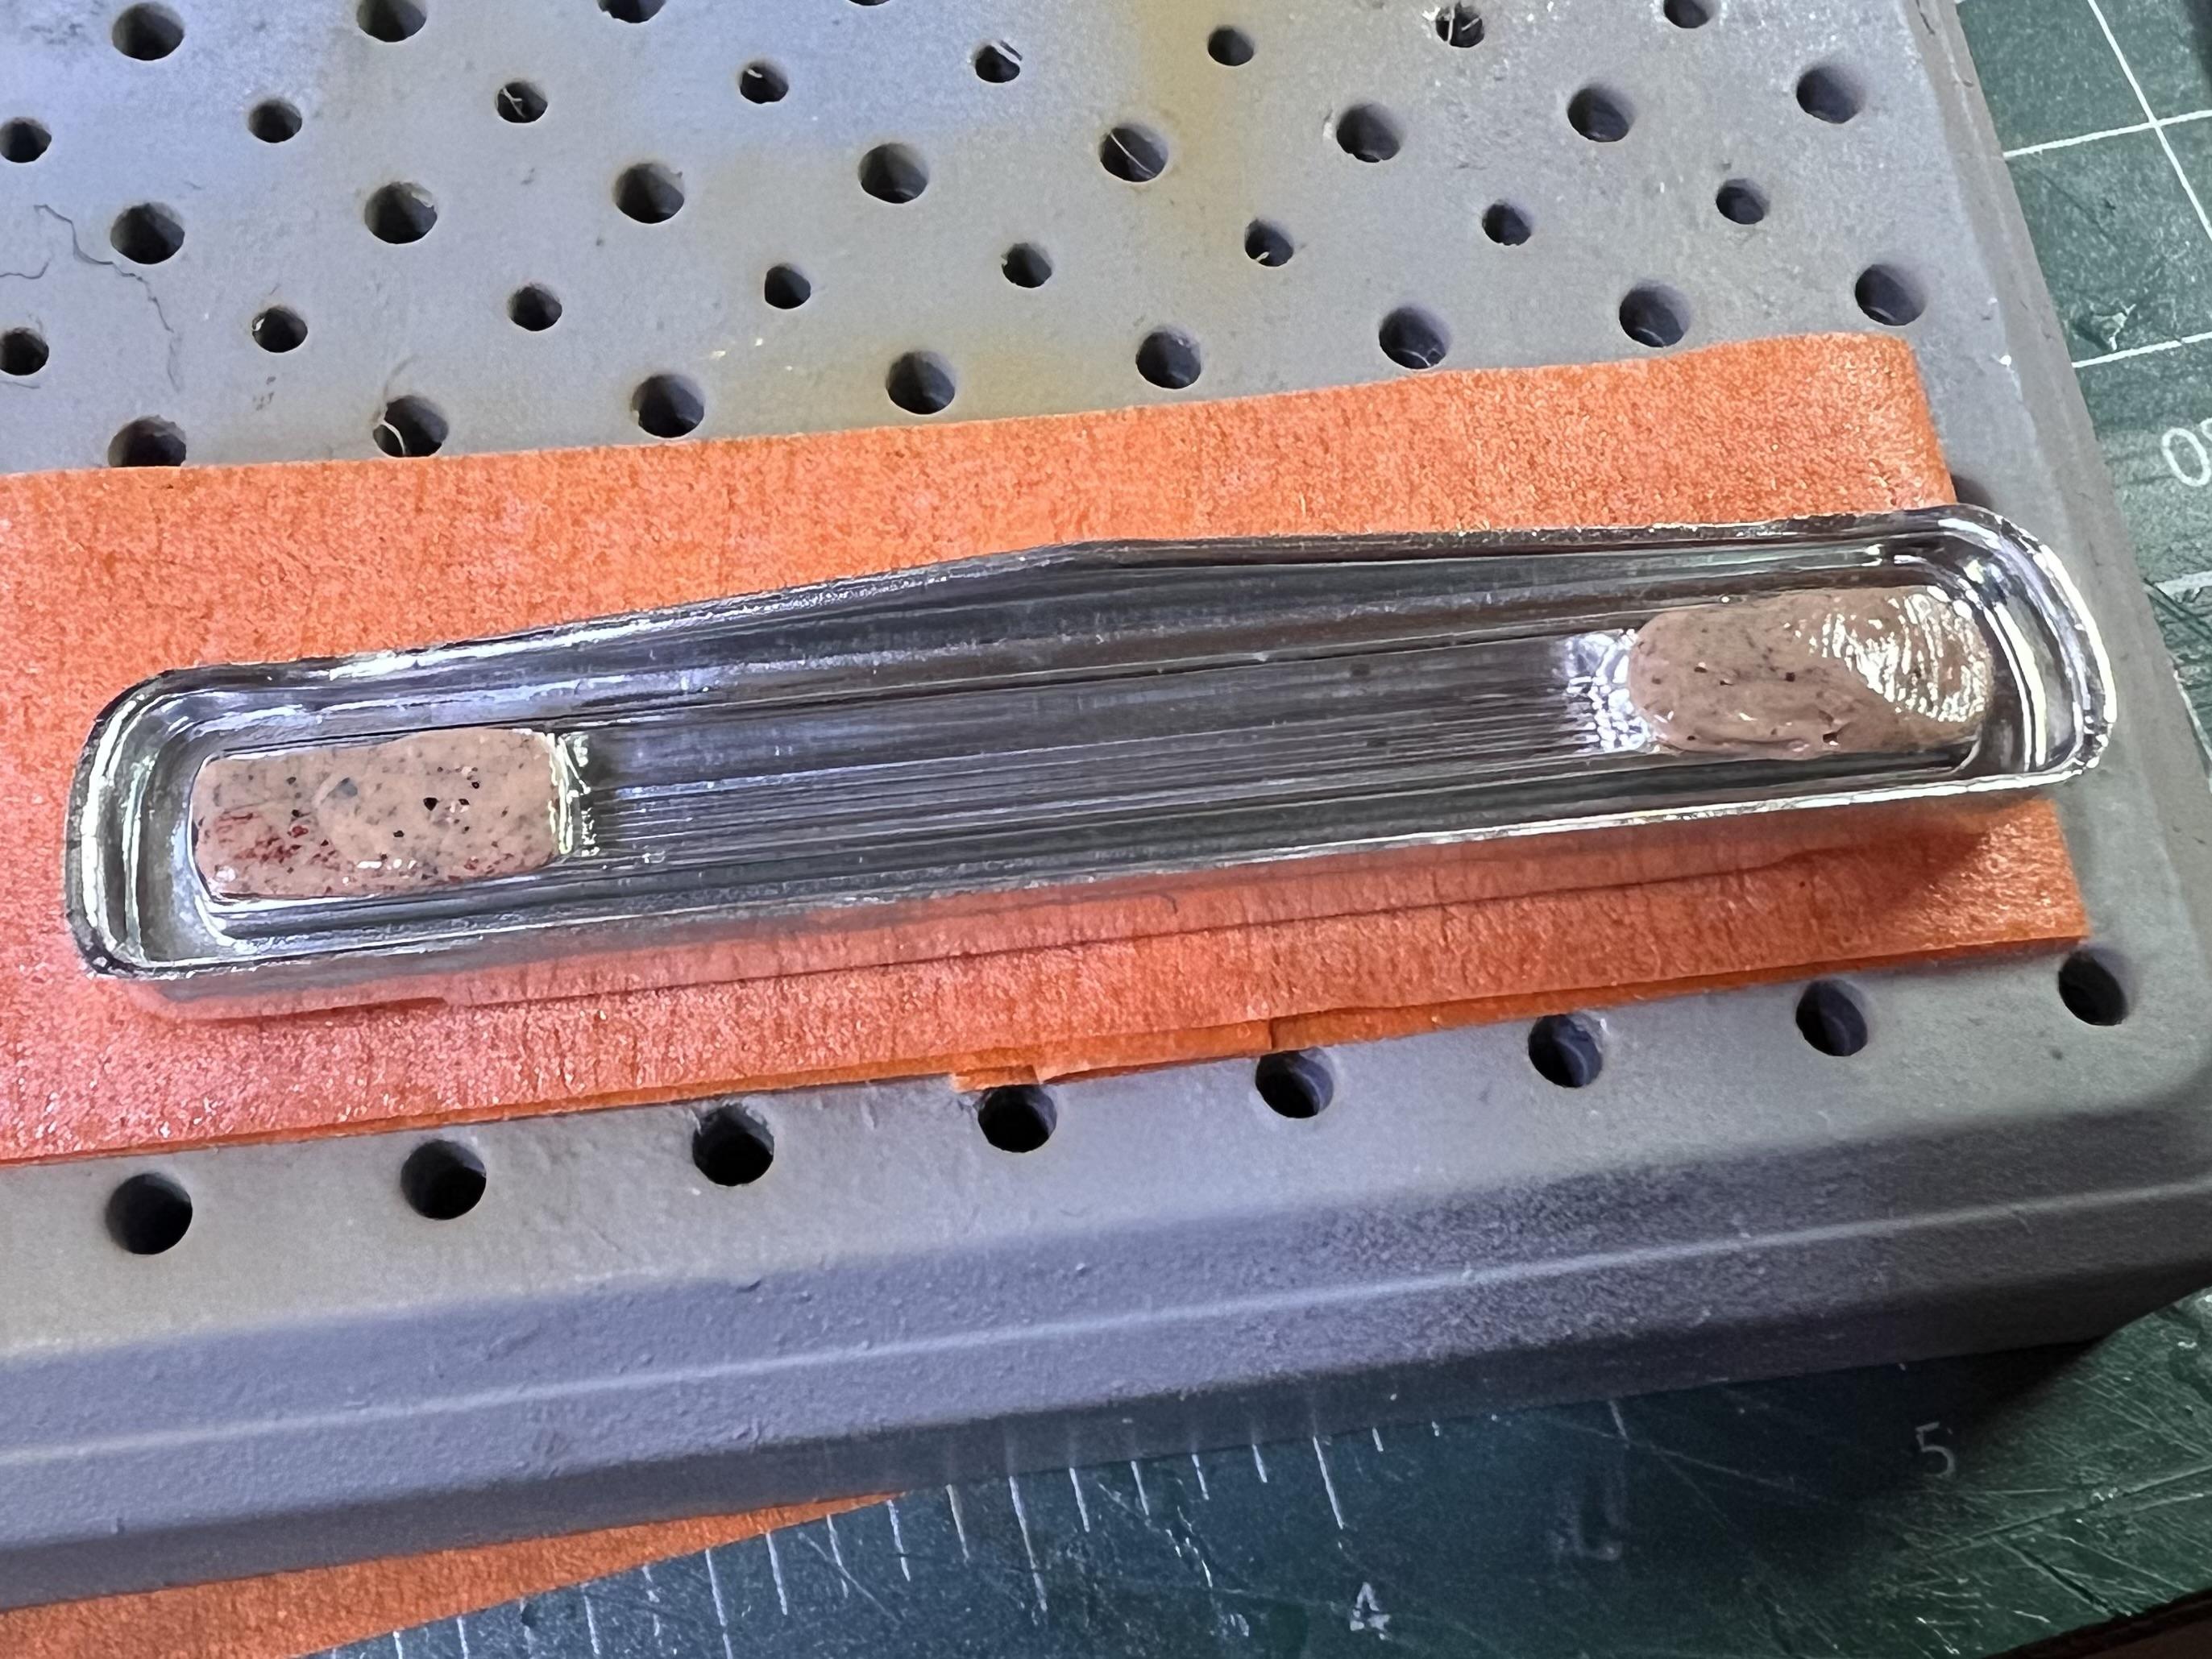
Thanks fellas! A little more progress this last week… Gave the headlamps a little blue tint: Added some photoetch to the kit steering wheel rim: Added the chrome trim to the door cards, and decalled the dash: Polished out the body, first with sanding sponges and then Tamiya polishing compounds: Still needs a final buff and some wax, but handled the foil first, plus a little detail painting: Next up, get that distinctive grill in place… And this evening’s project was polishing out the glass and getting some Canopy Cement on there so it can set up overnight: Oh, and I shot some chrome but that needs to set up for a couple of days before I can mess with it more… Thanks for looking - happy holidays y’all! More soon!
-
The "Illusion" by Rick Dore.......on the Bench 12/9/23
OldNYJim replied to John Teresi's topic in WIP: Model Cars
This is coming along great John! Cool to see the mix of 3D printed stuff and more traditional scratchbuilding techniques! -
Great start, and awesome back story behind it! What scale is the die cast? I’ll be watching!
-
Doesn’t look like you’re building it factory stock, so I think you’re off the hook ? Cool project - got an idea in mind for paint?
-
LOVE that mock-up with the bigger wheels - looks killer!
-
Love that diamond flake! Looks amazing!
-
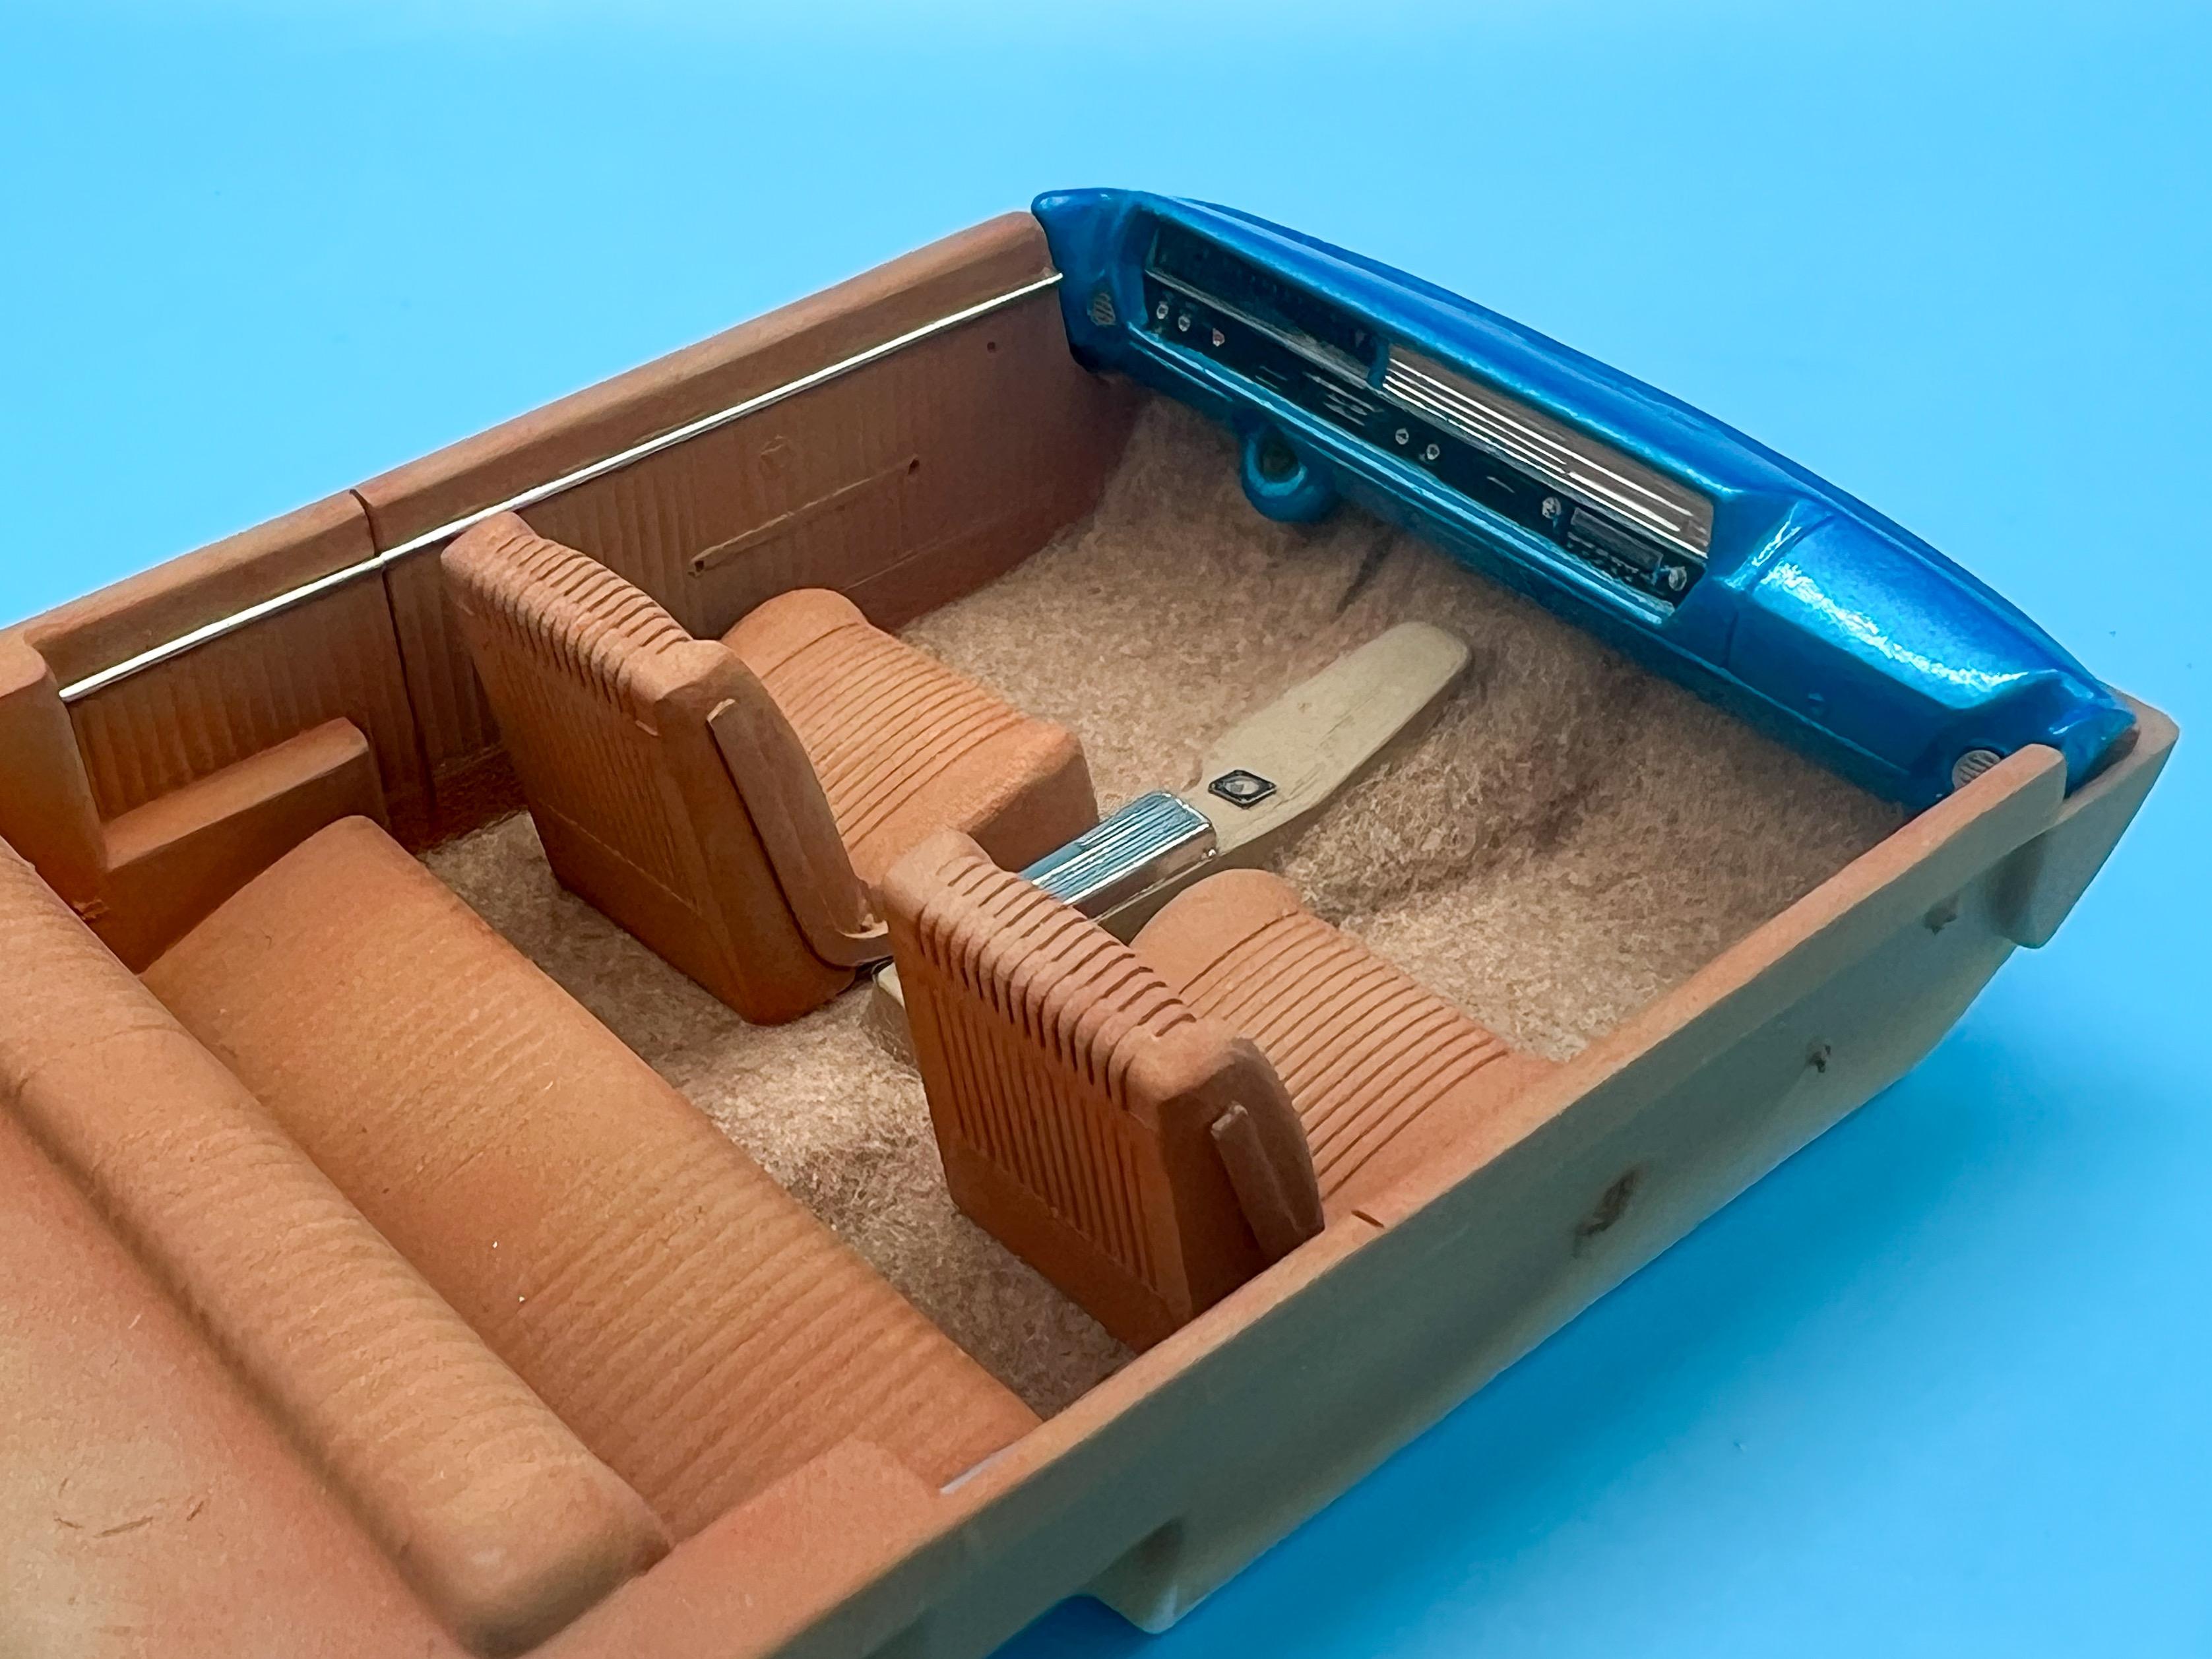
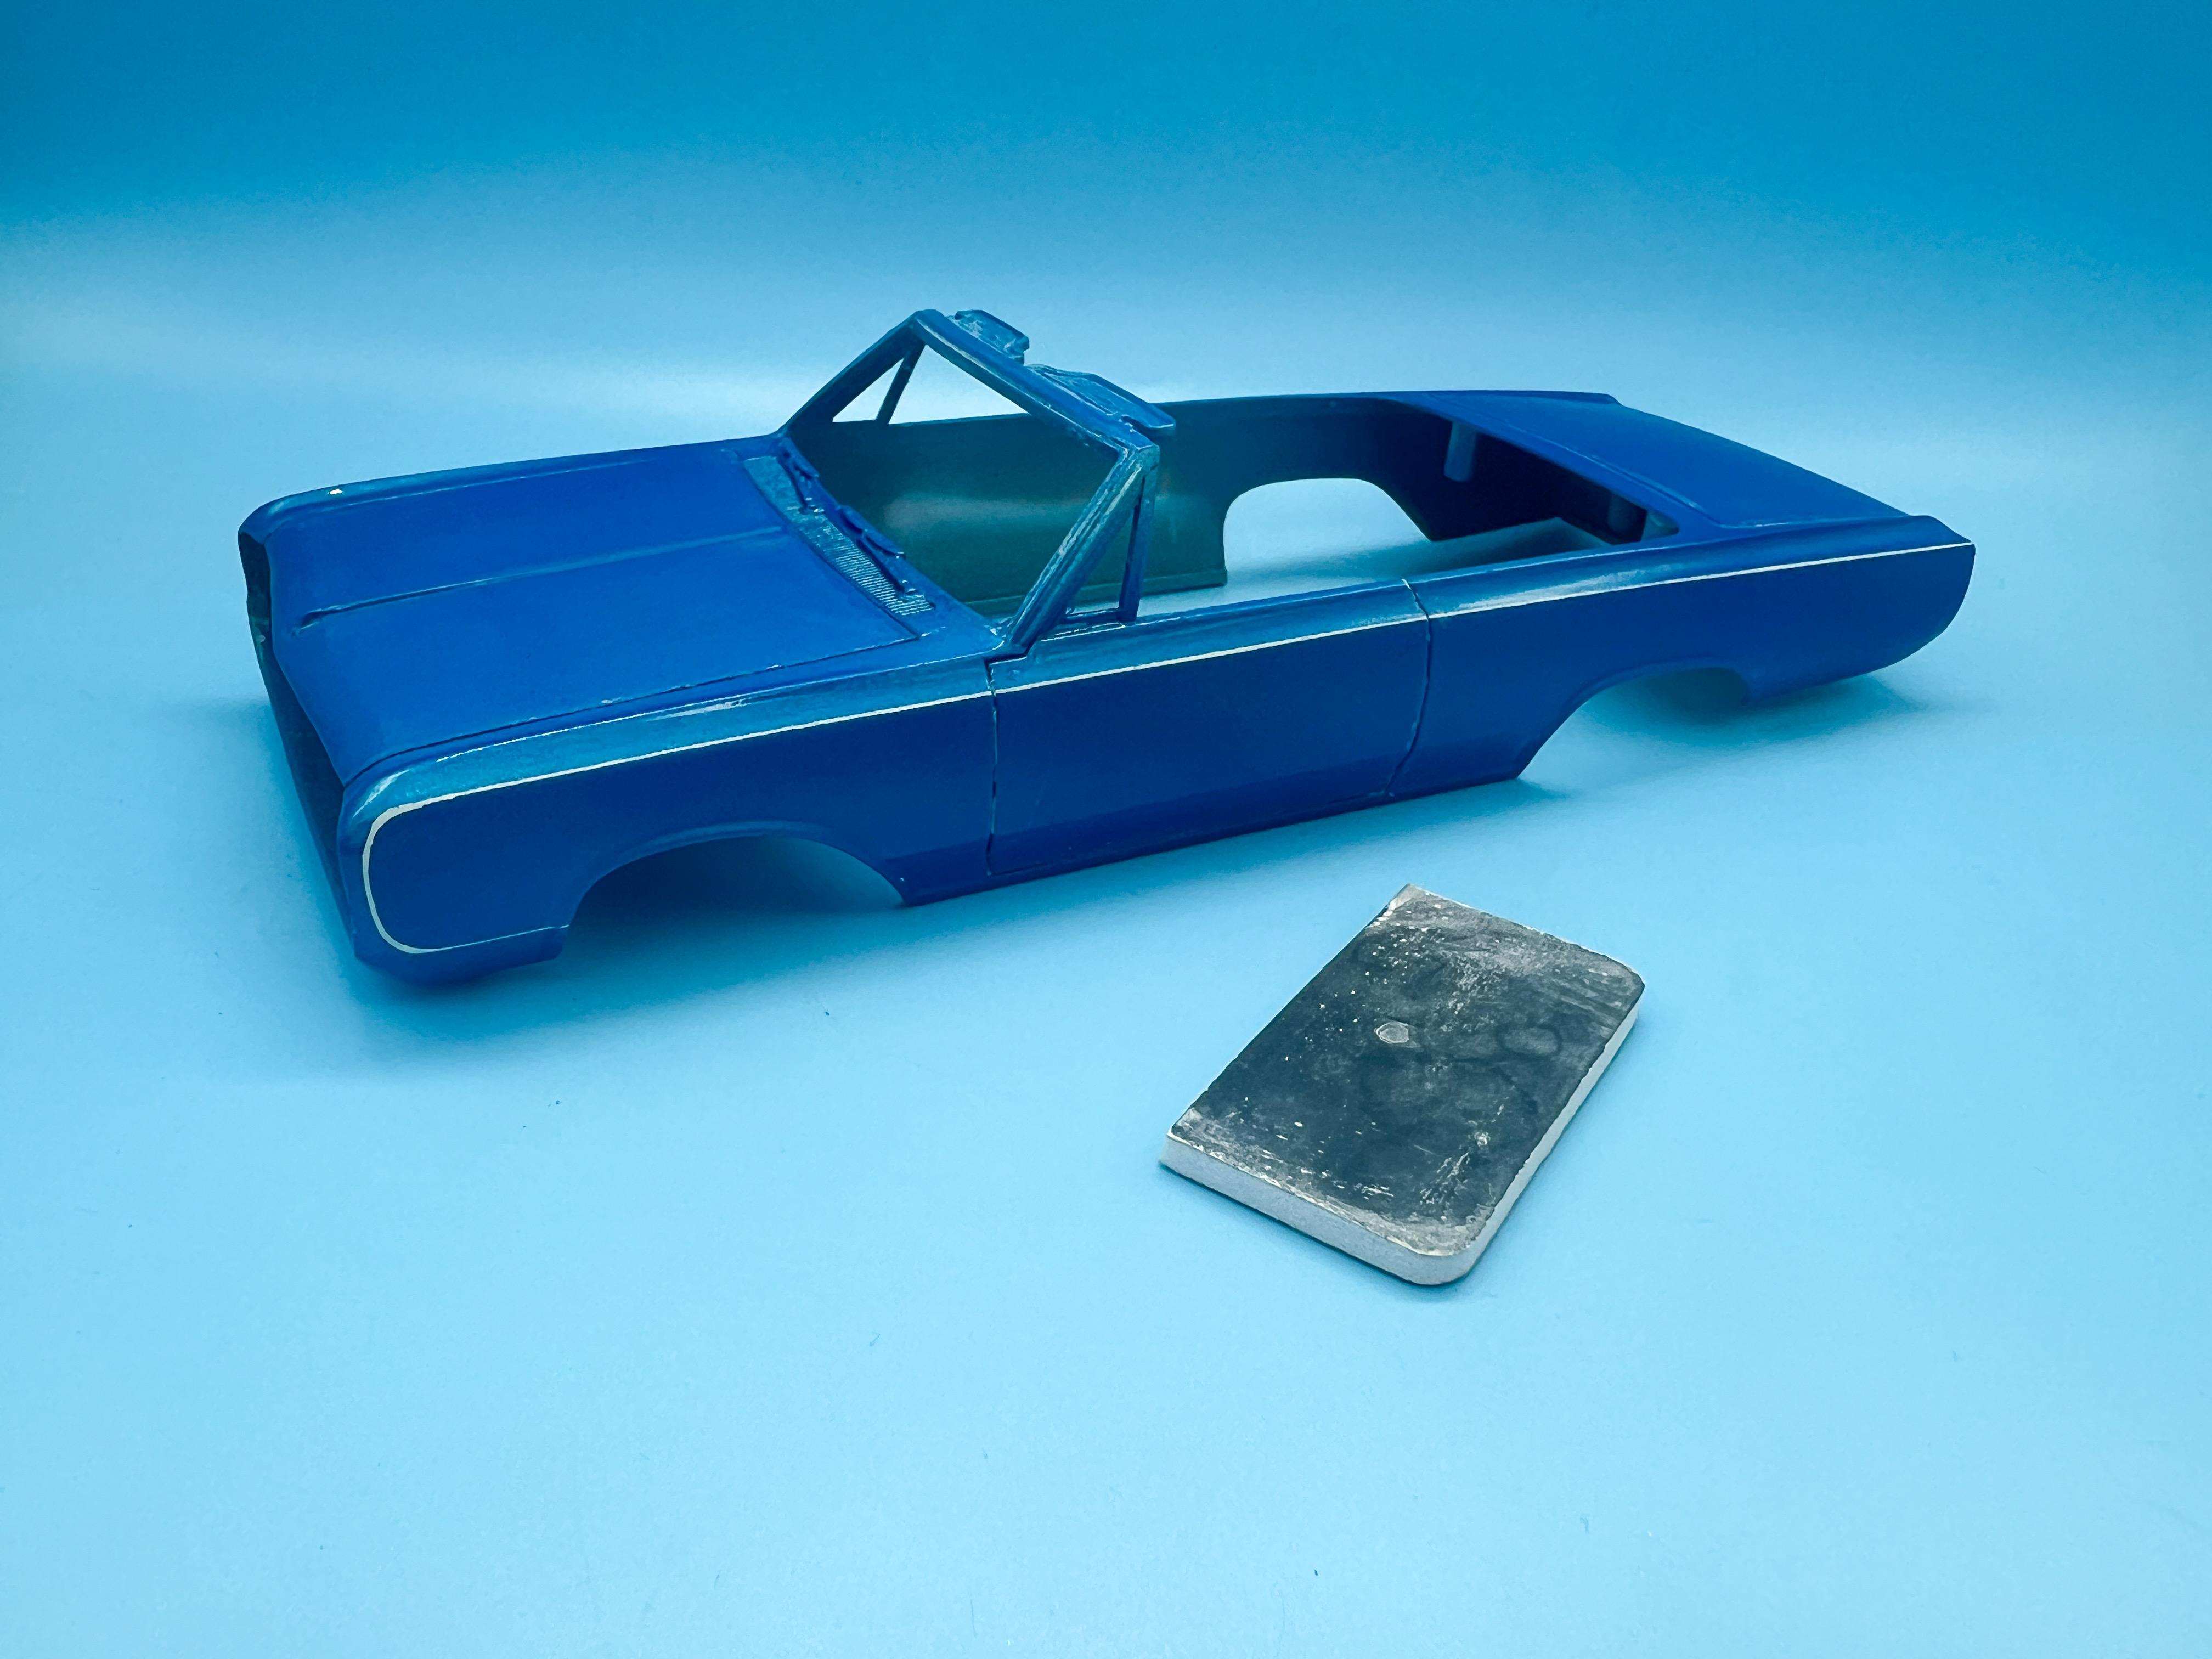
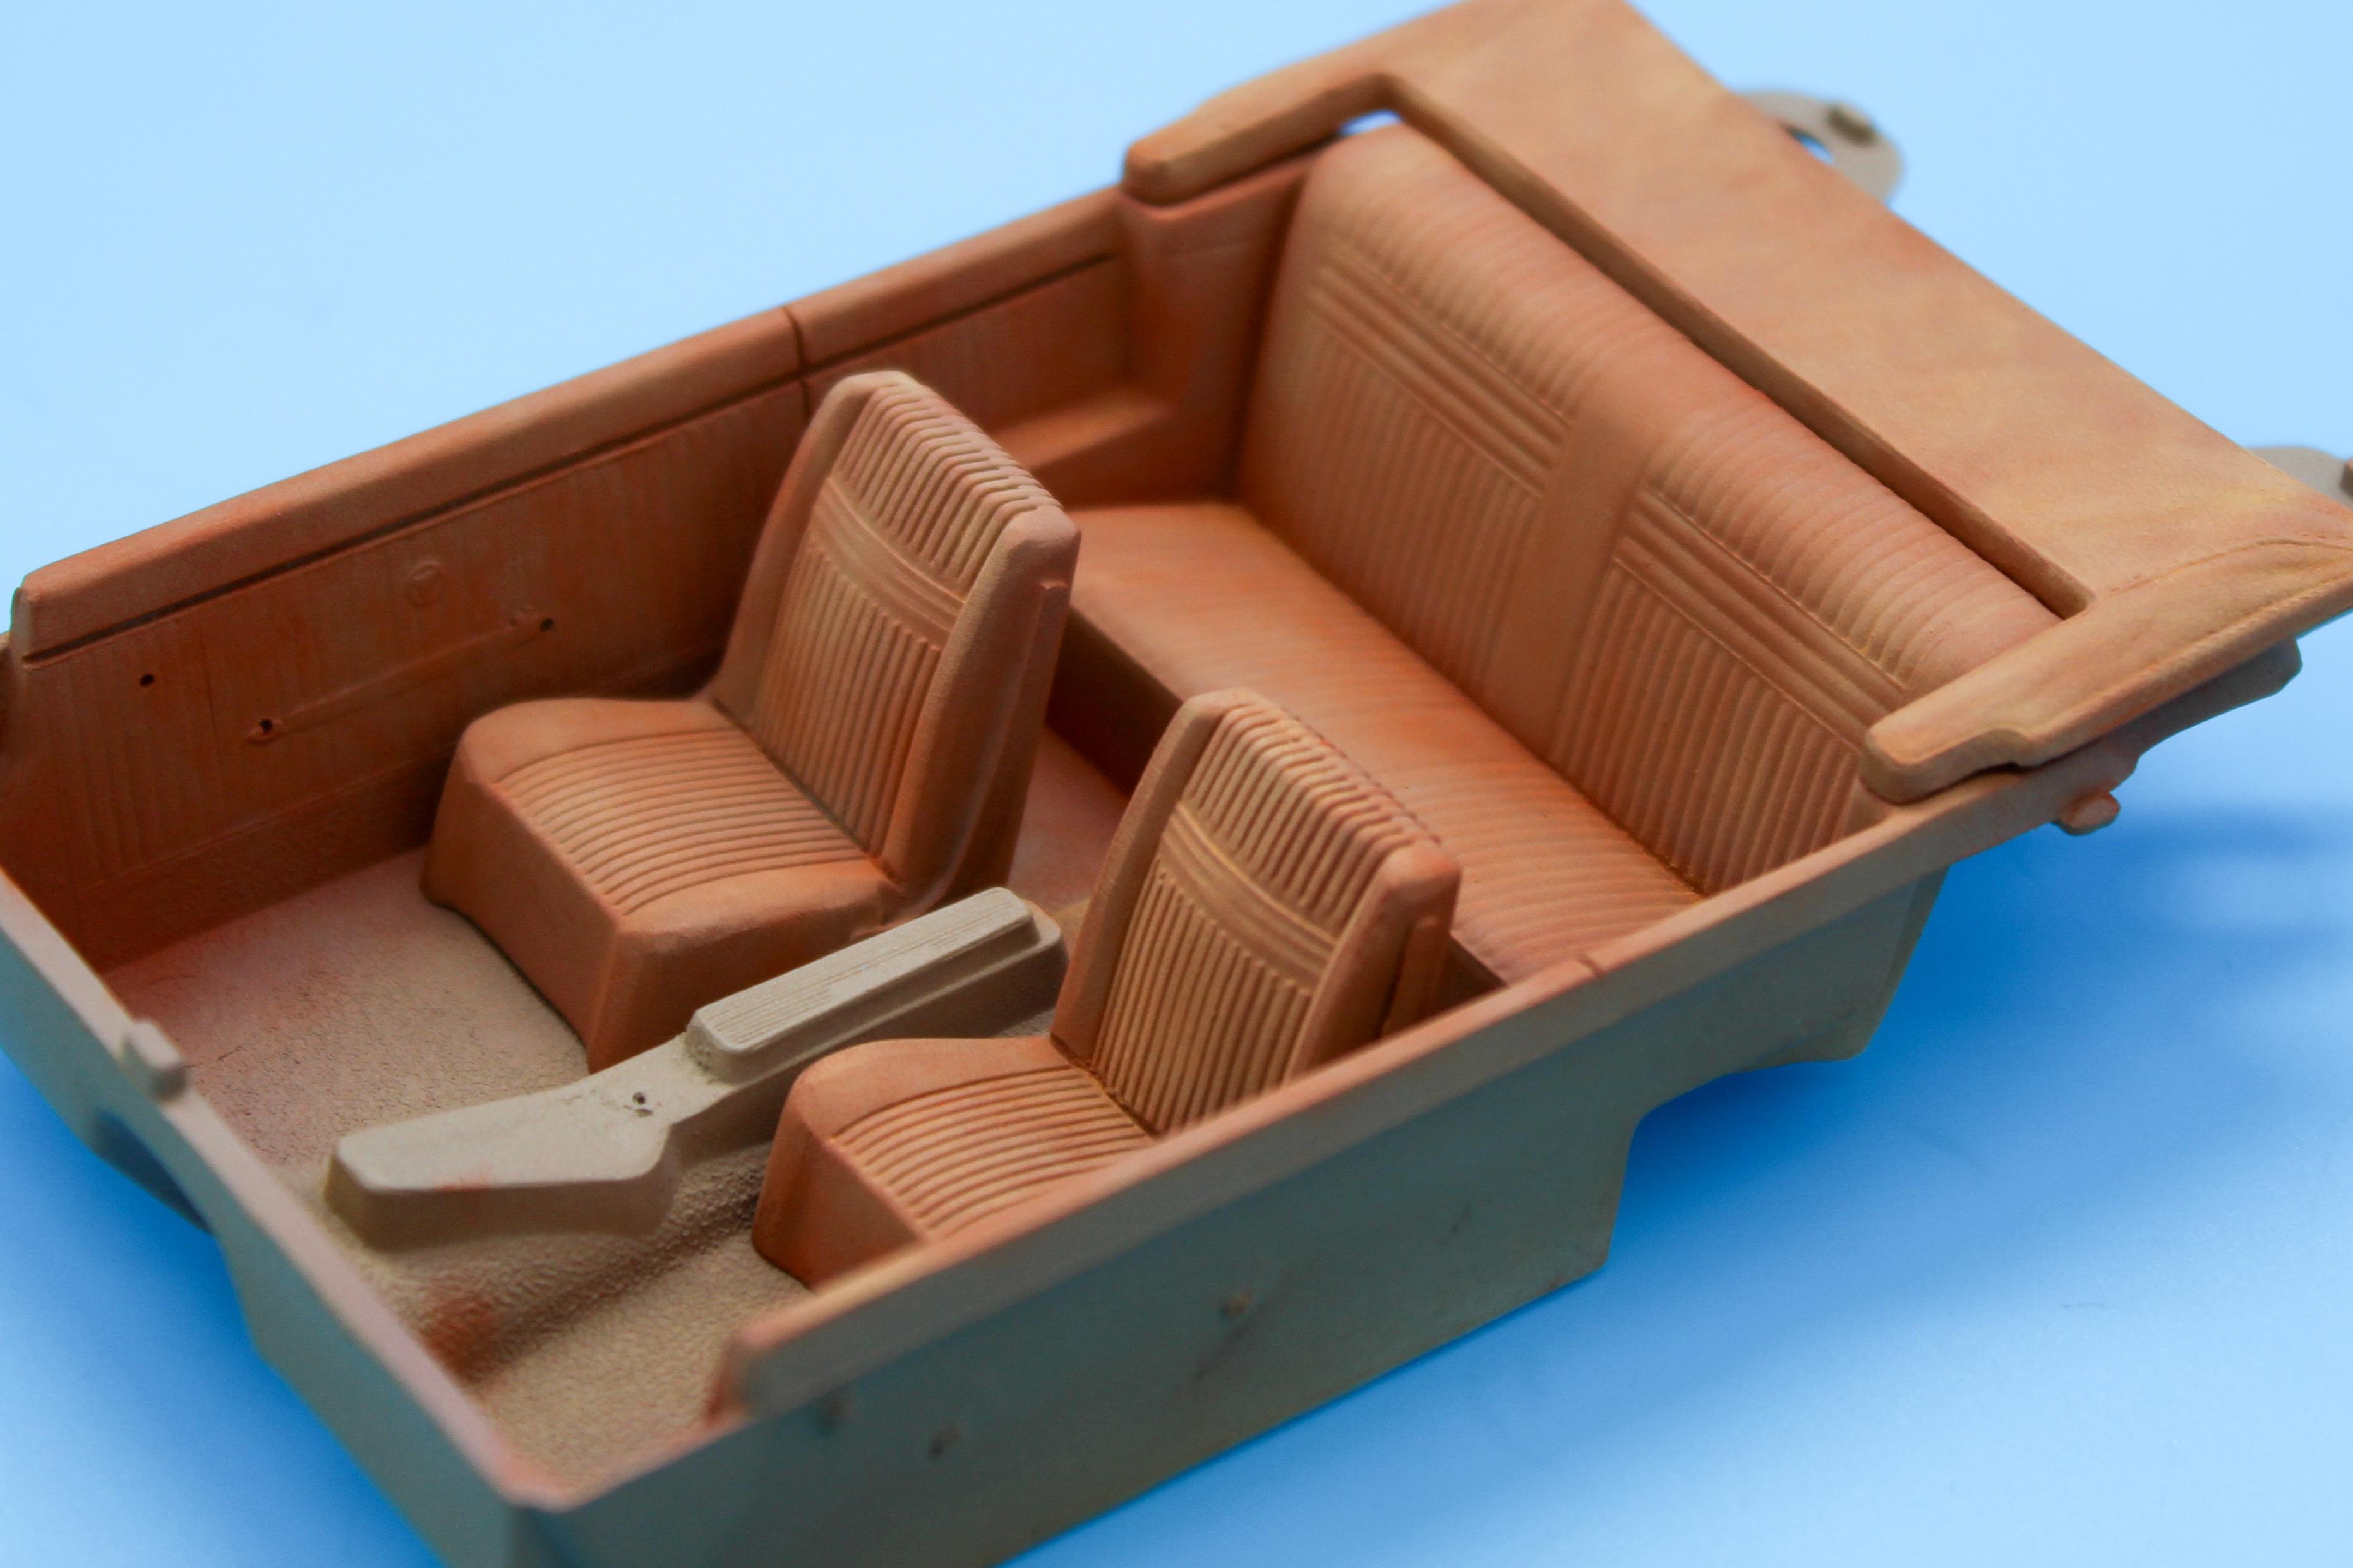
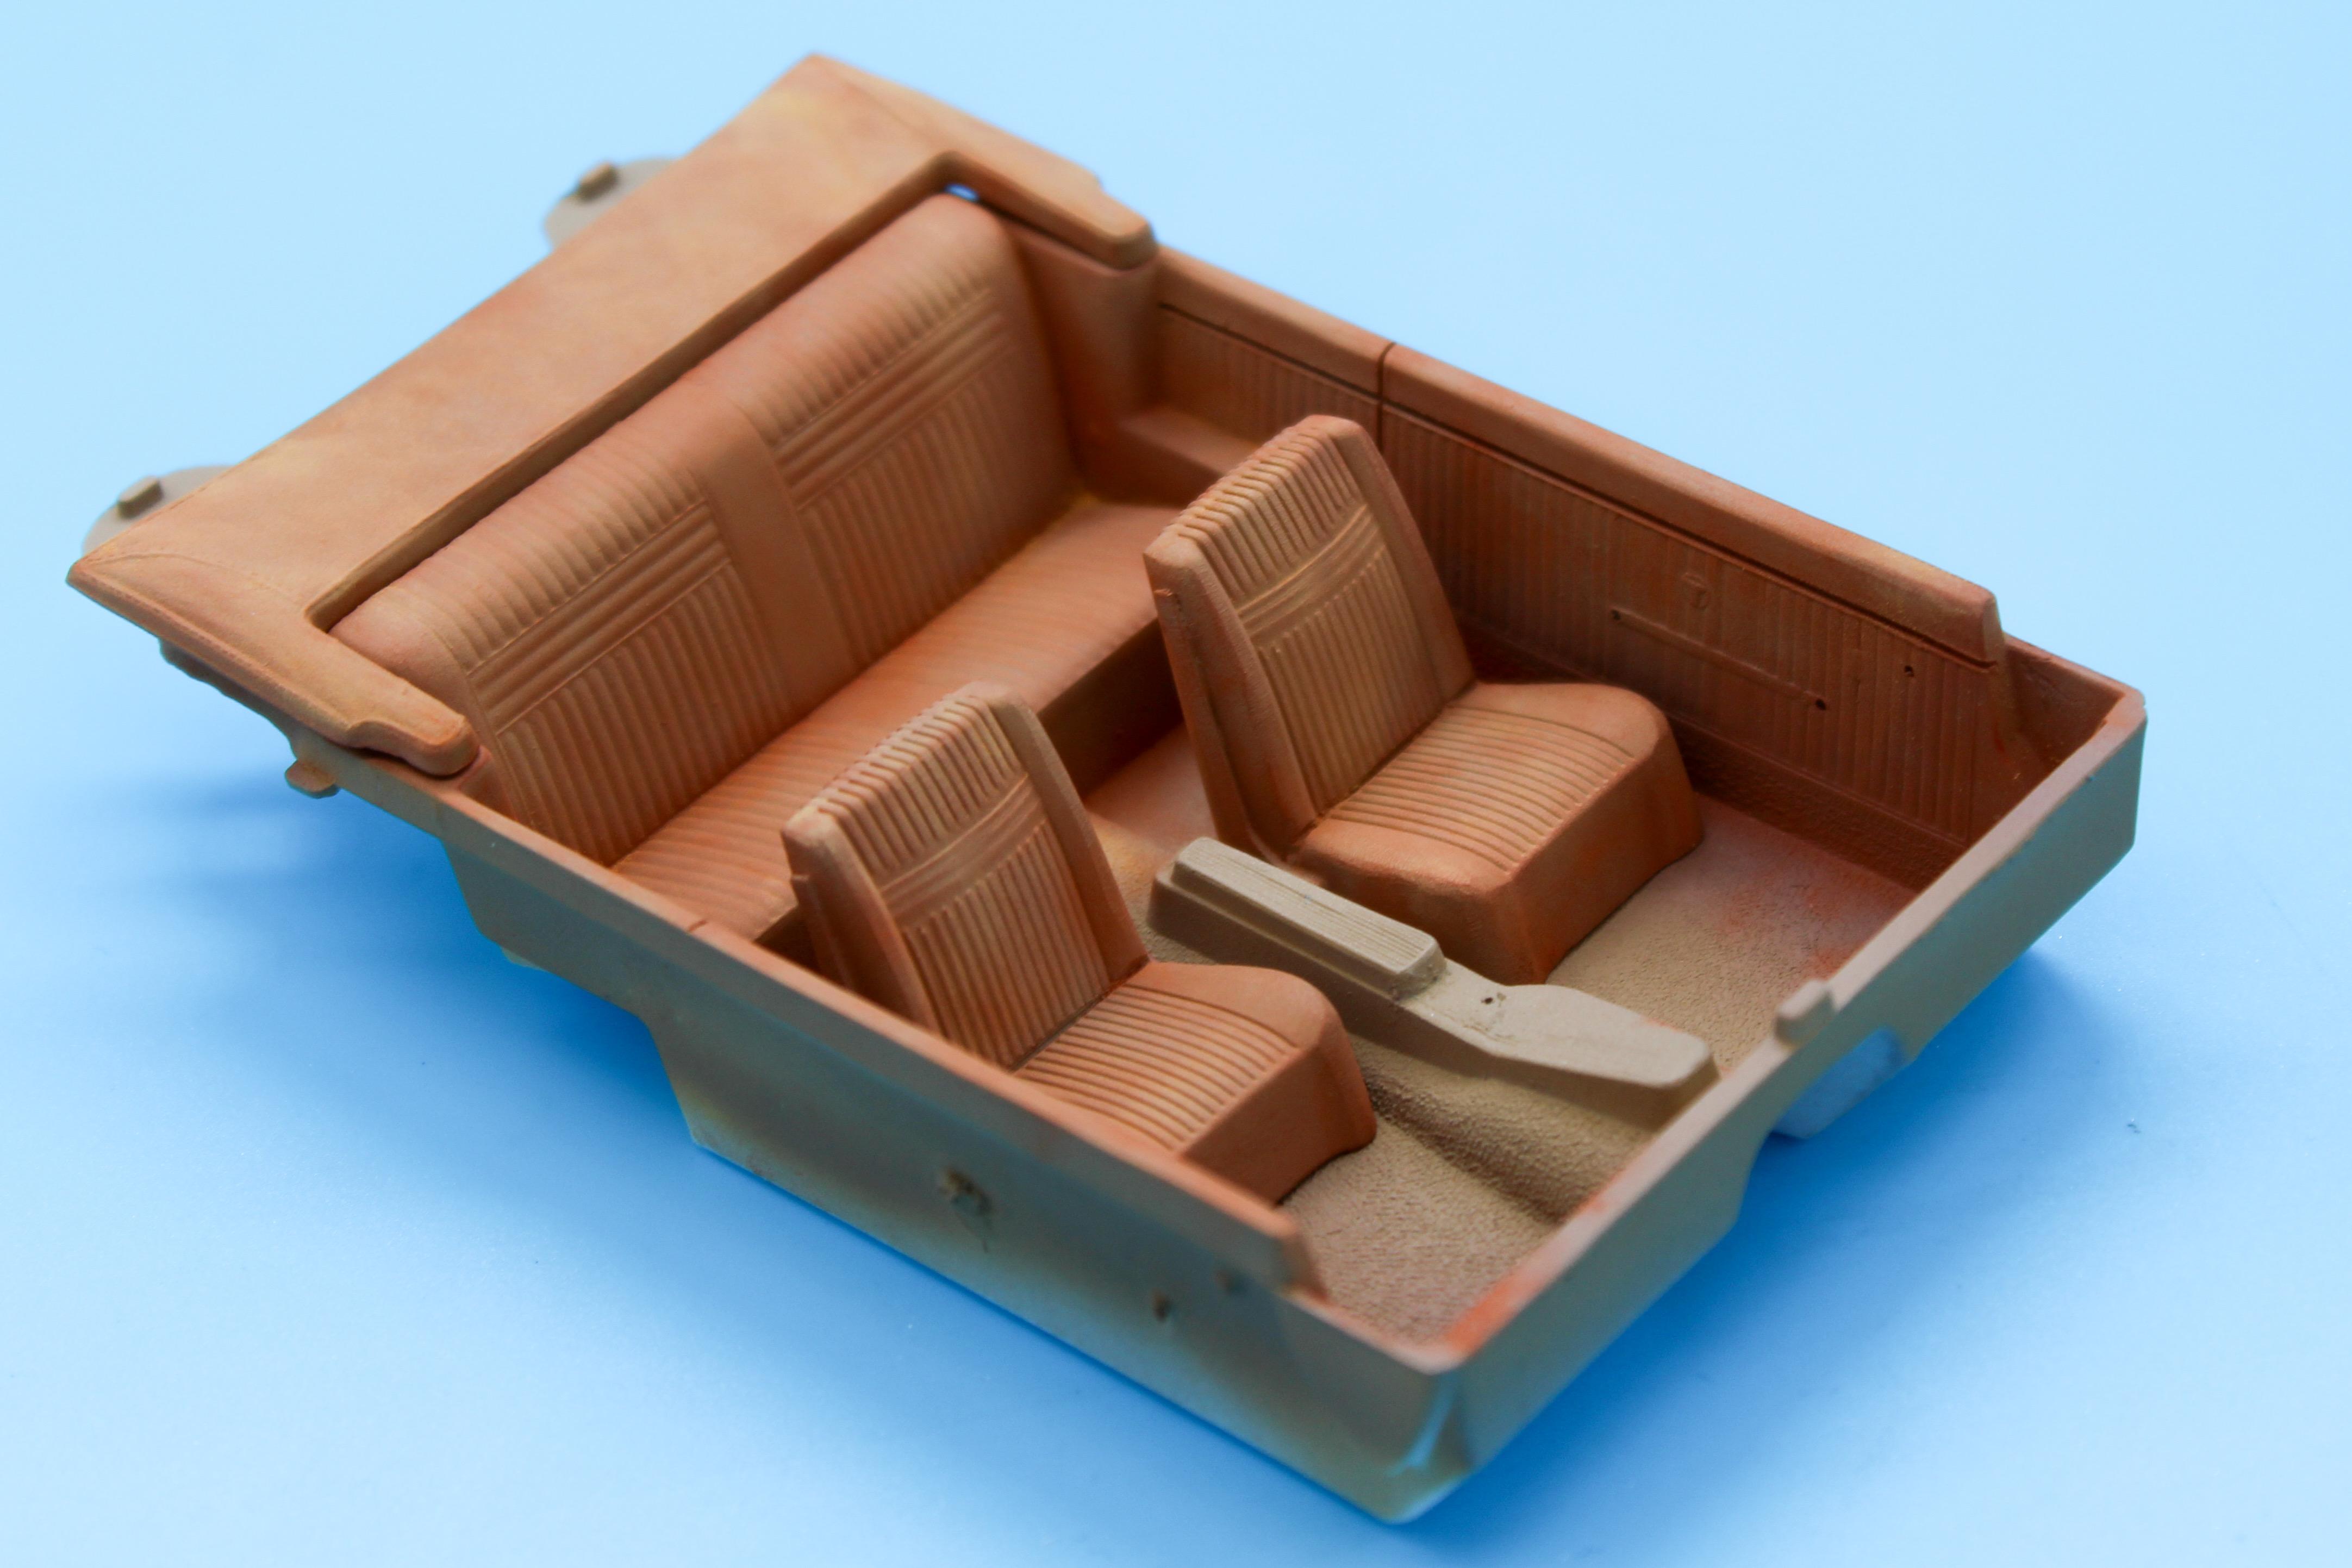
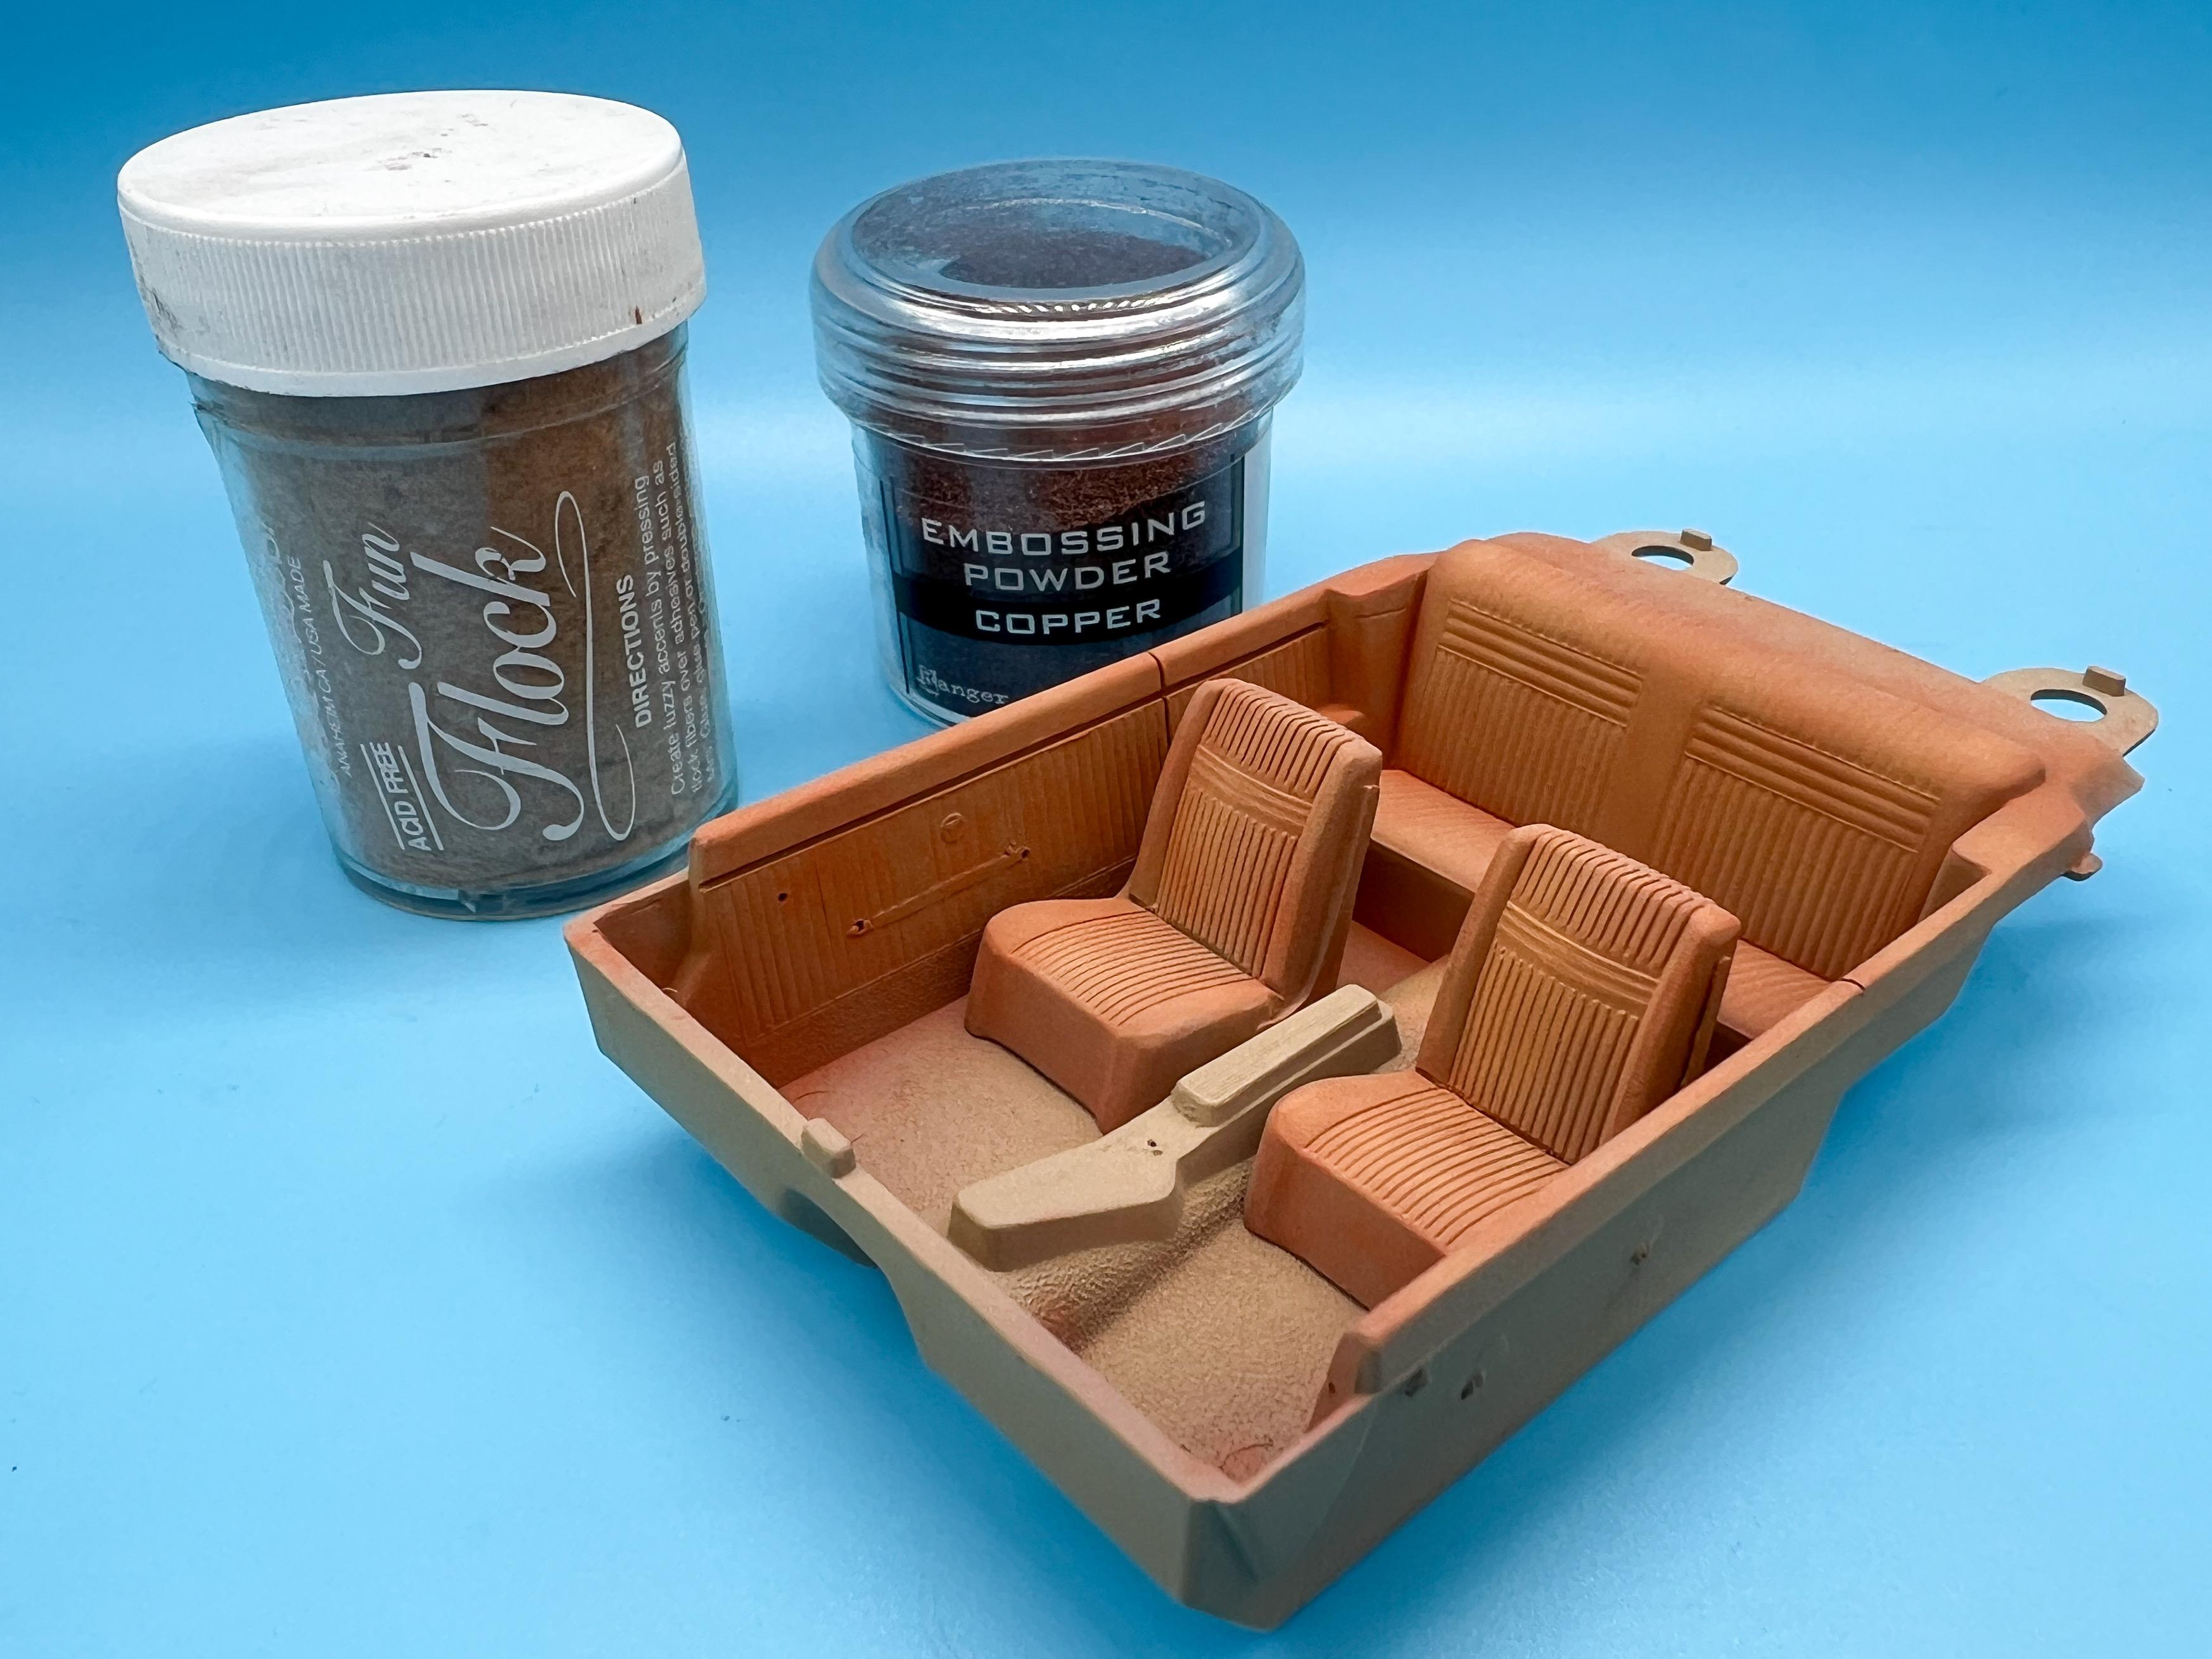
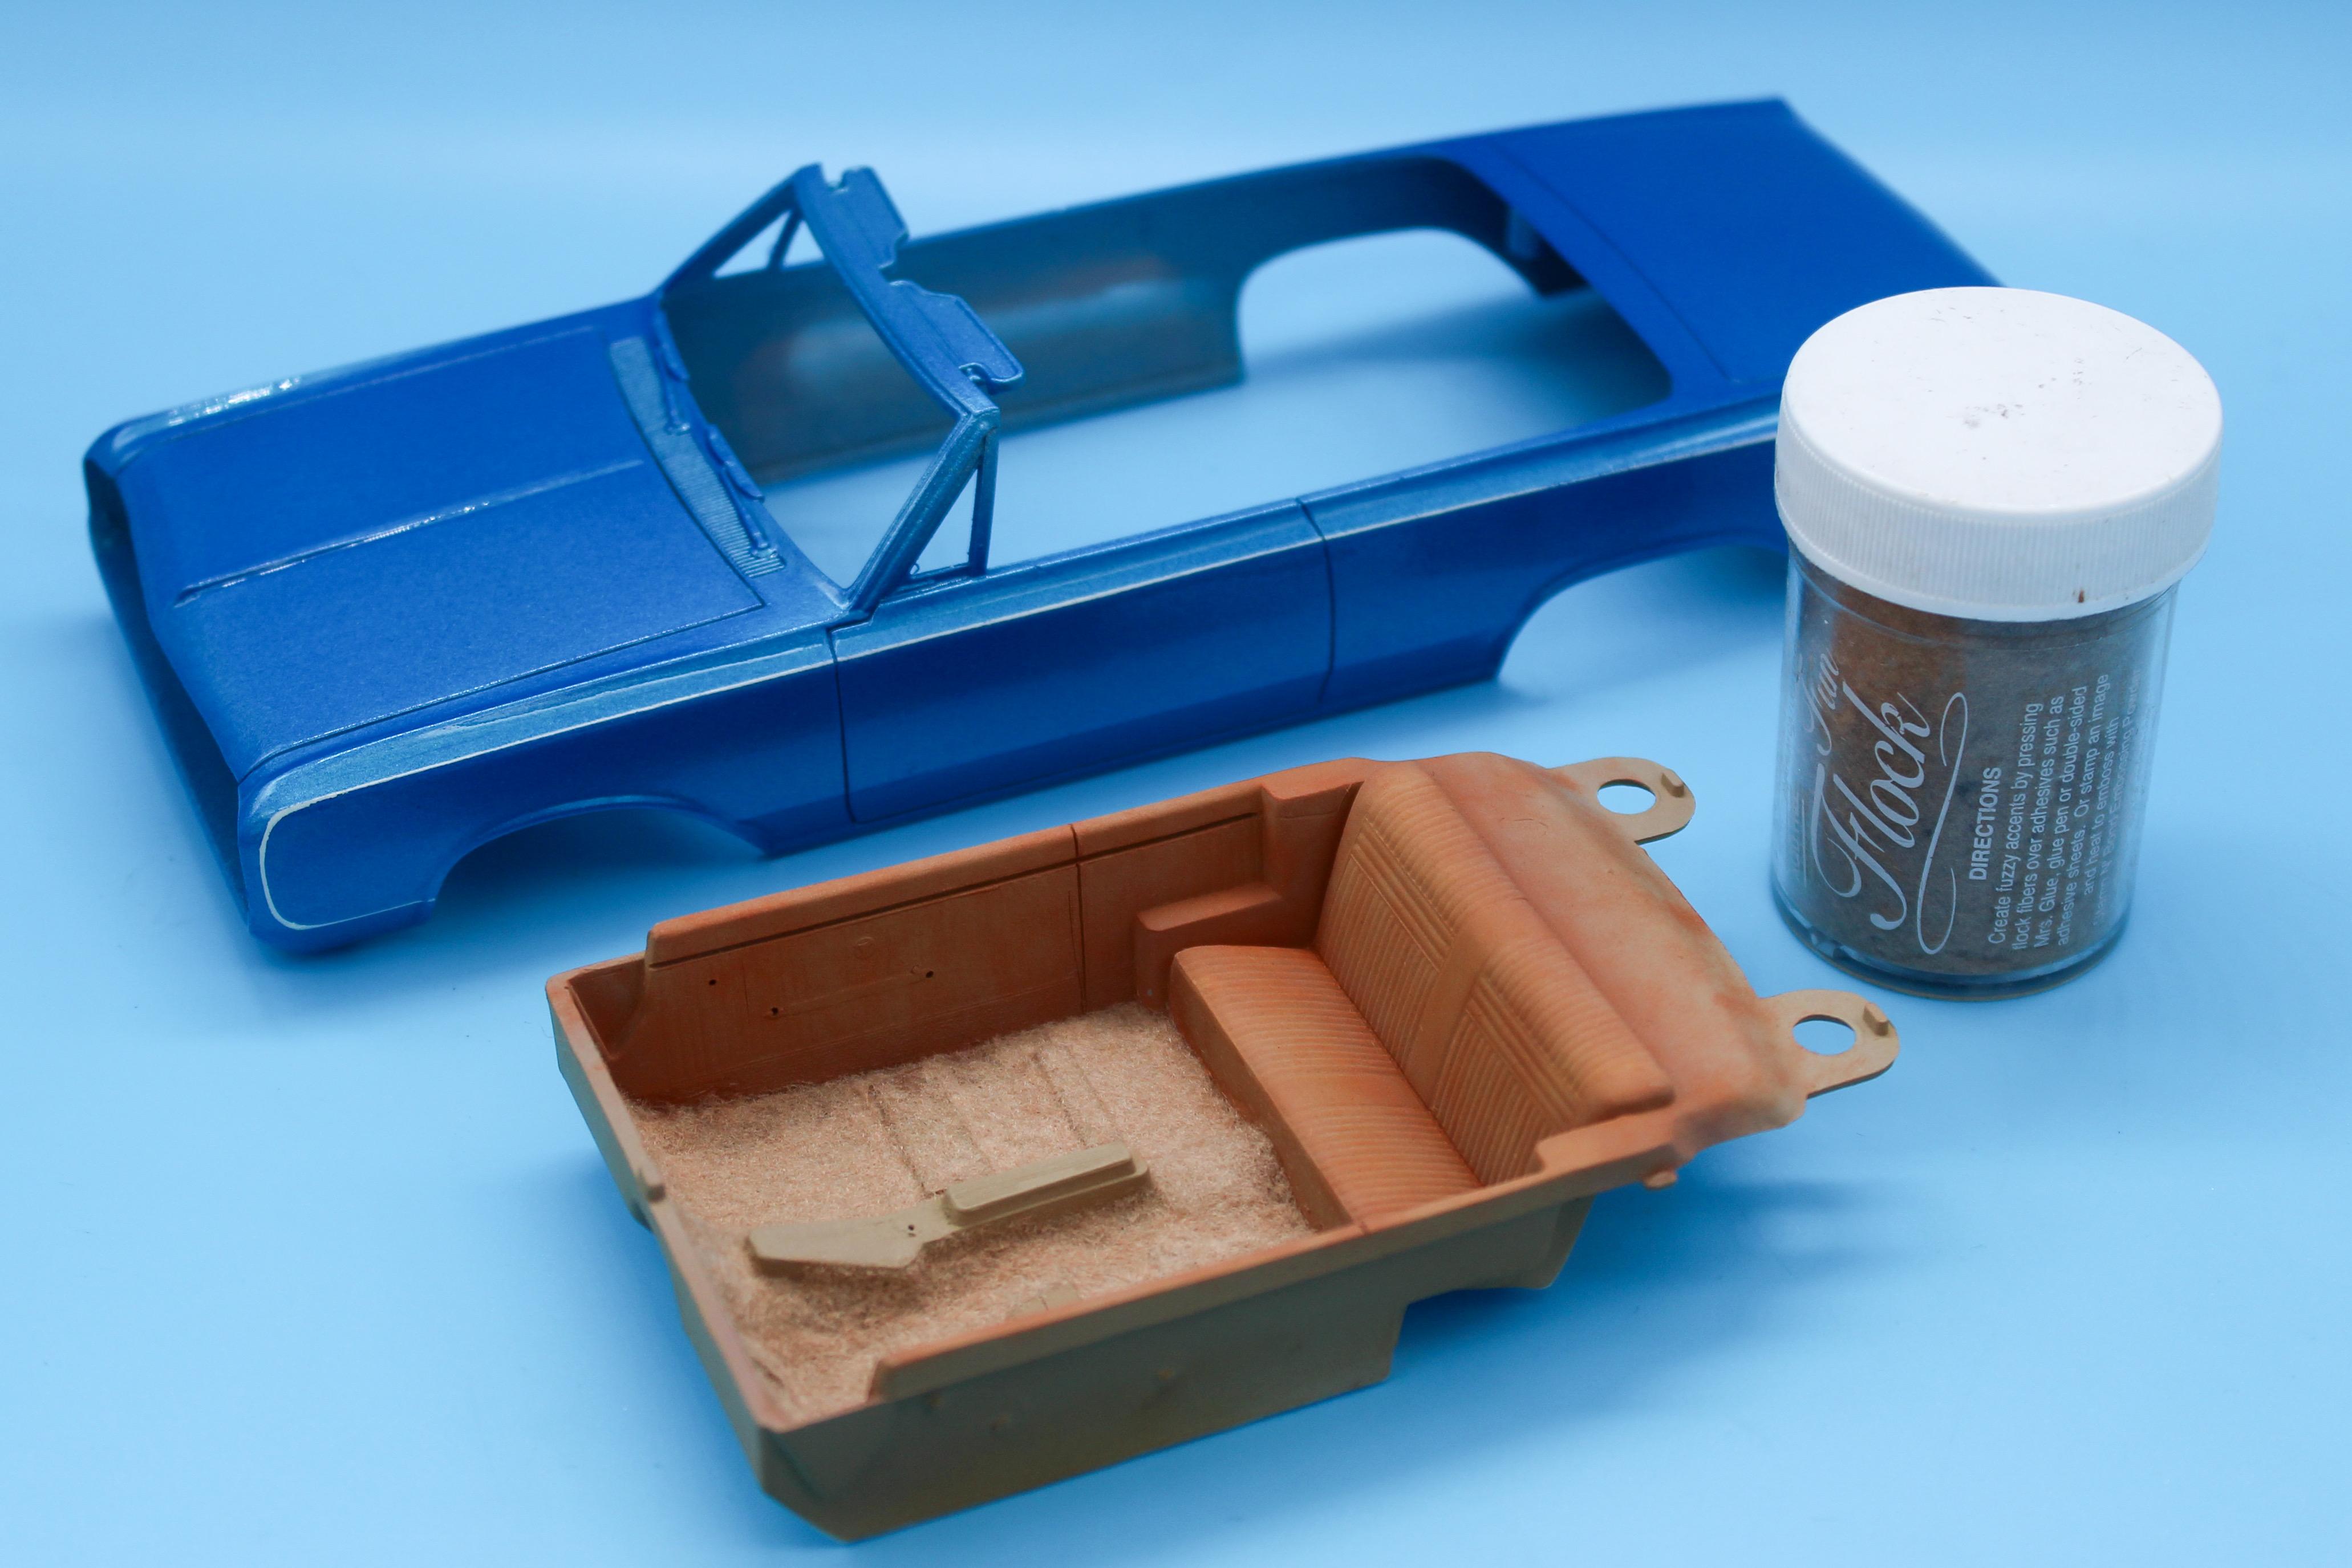
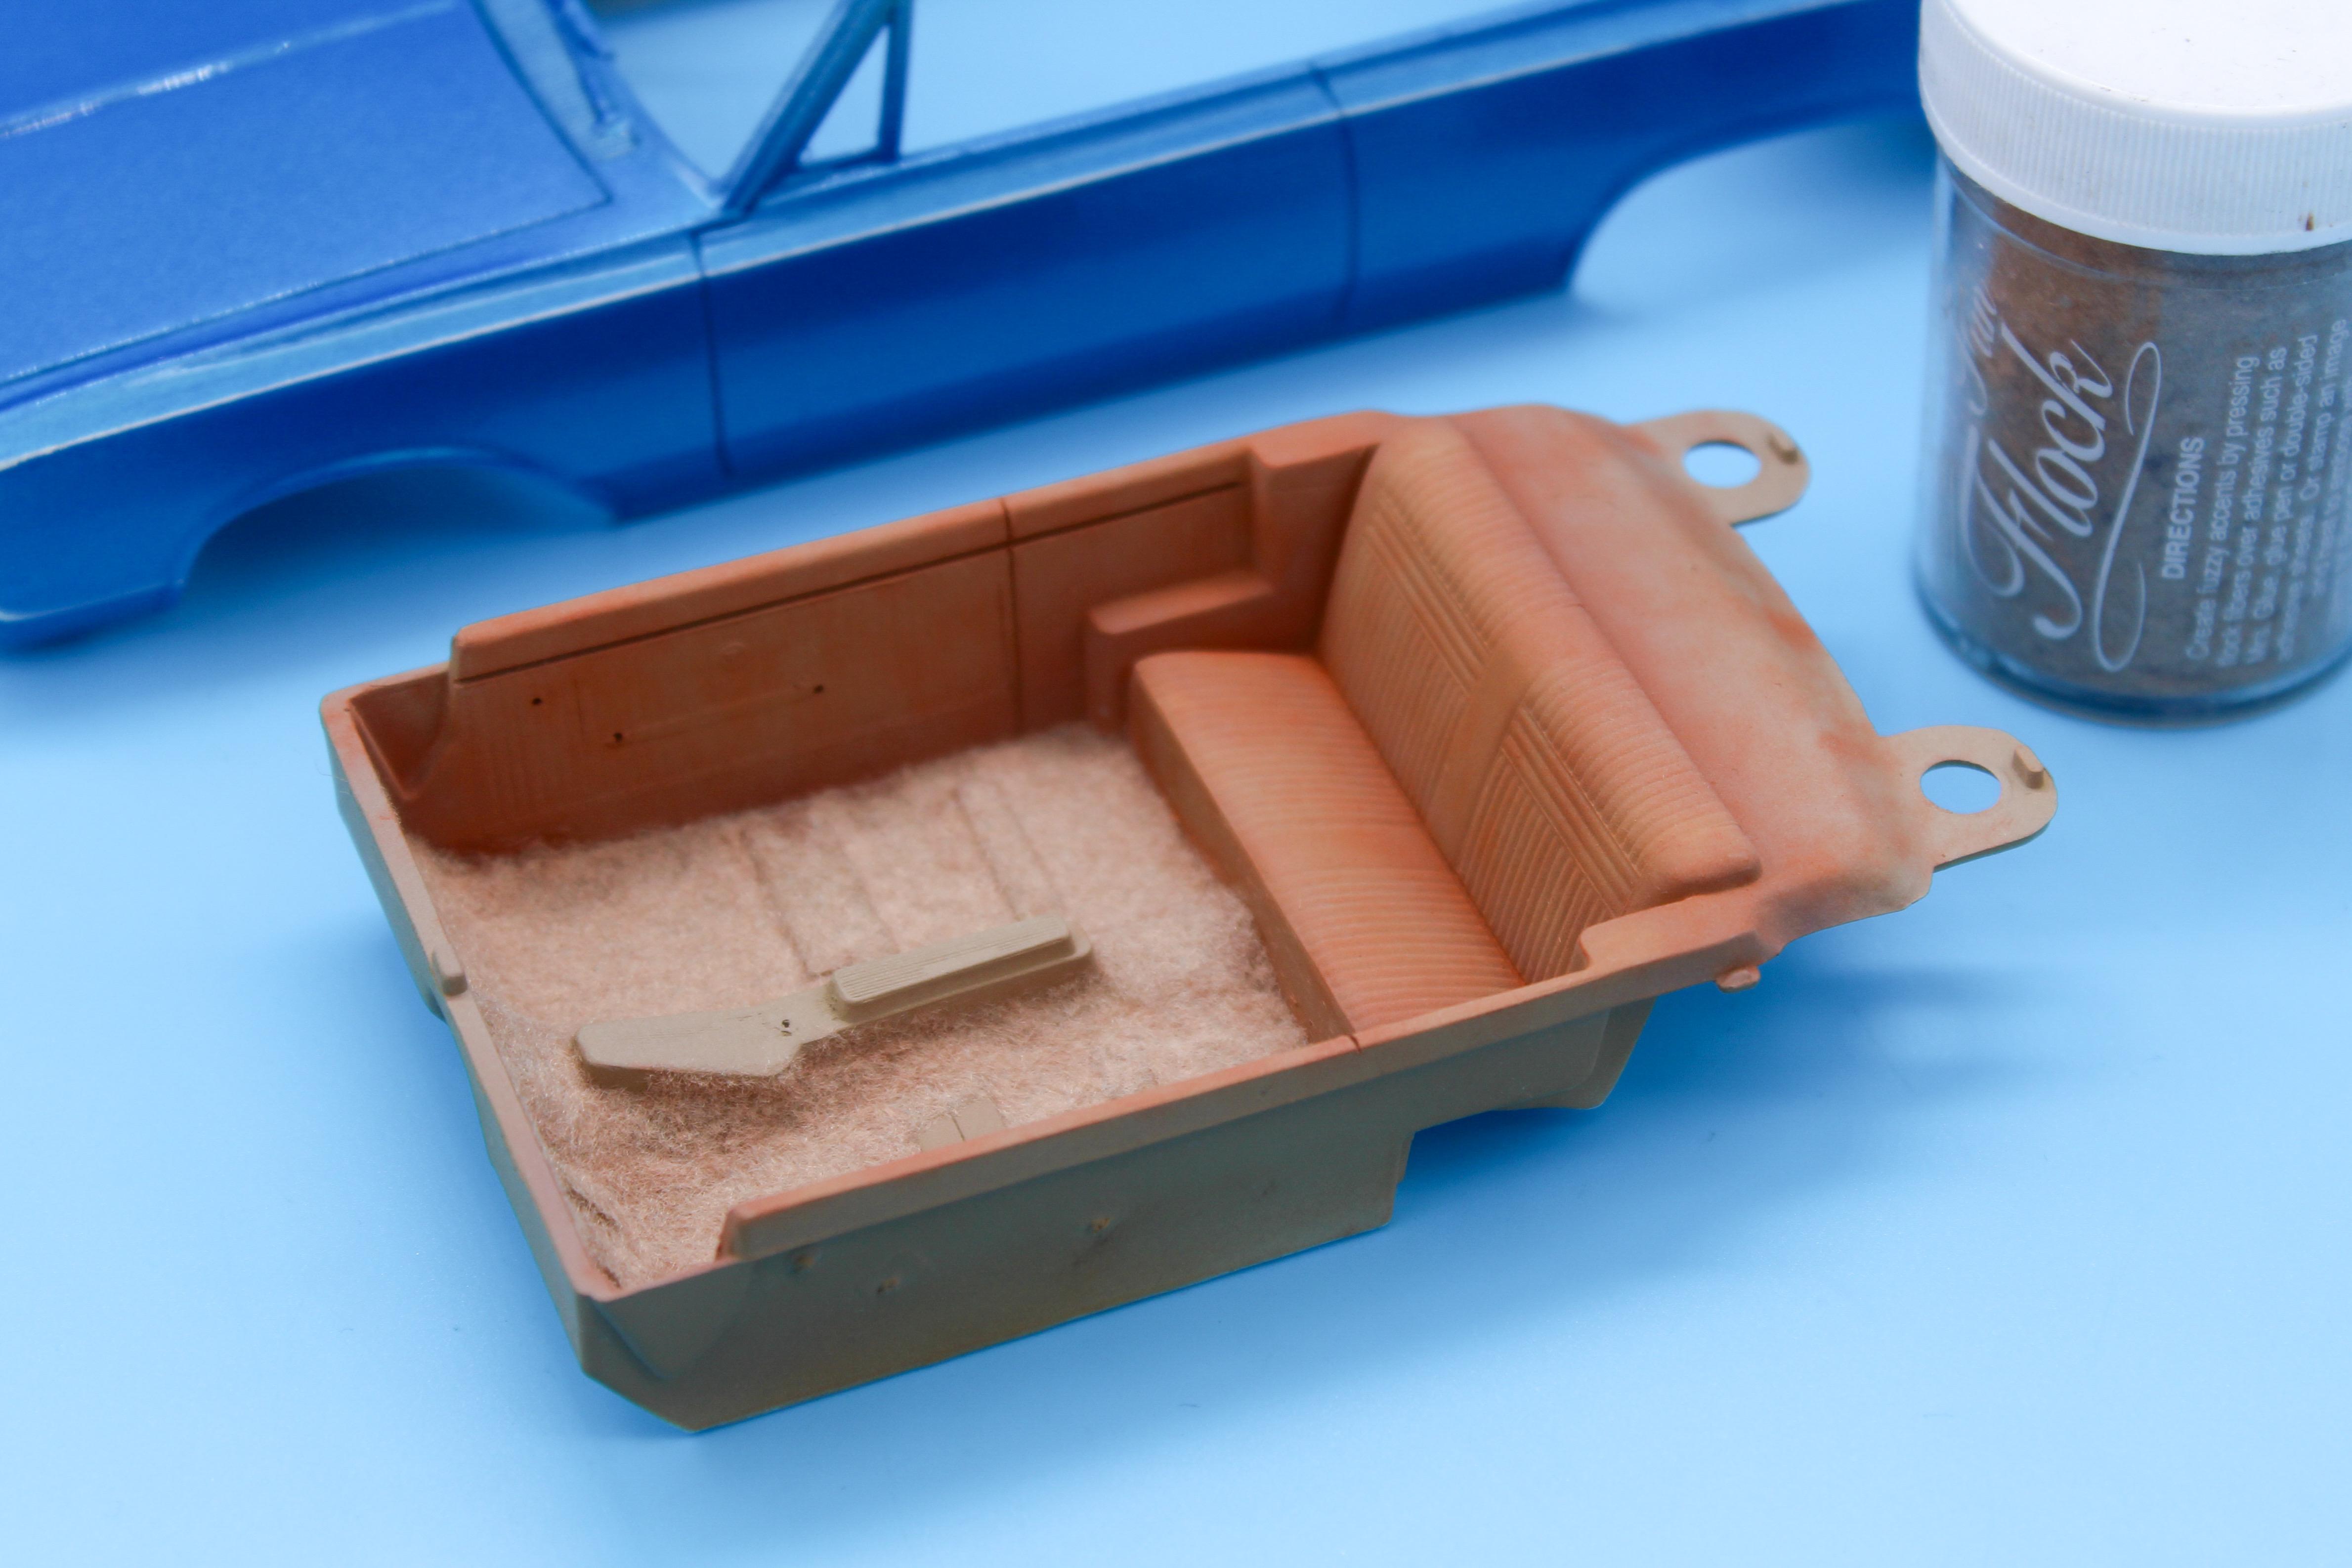
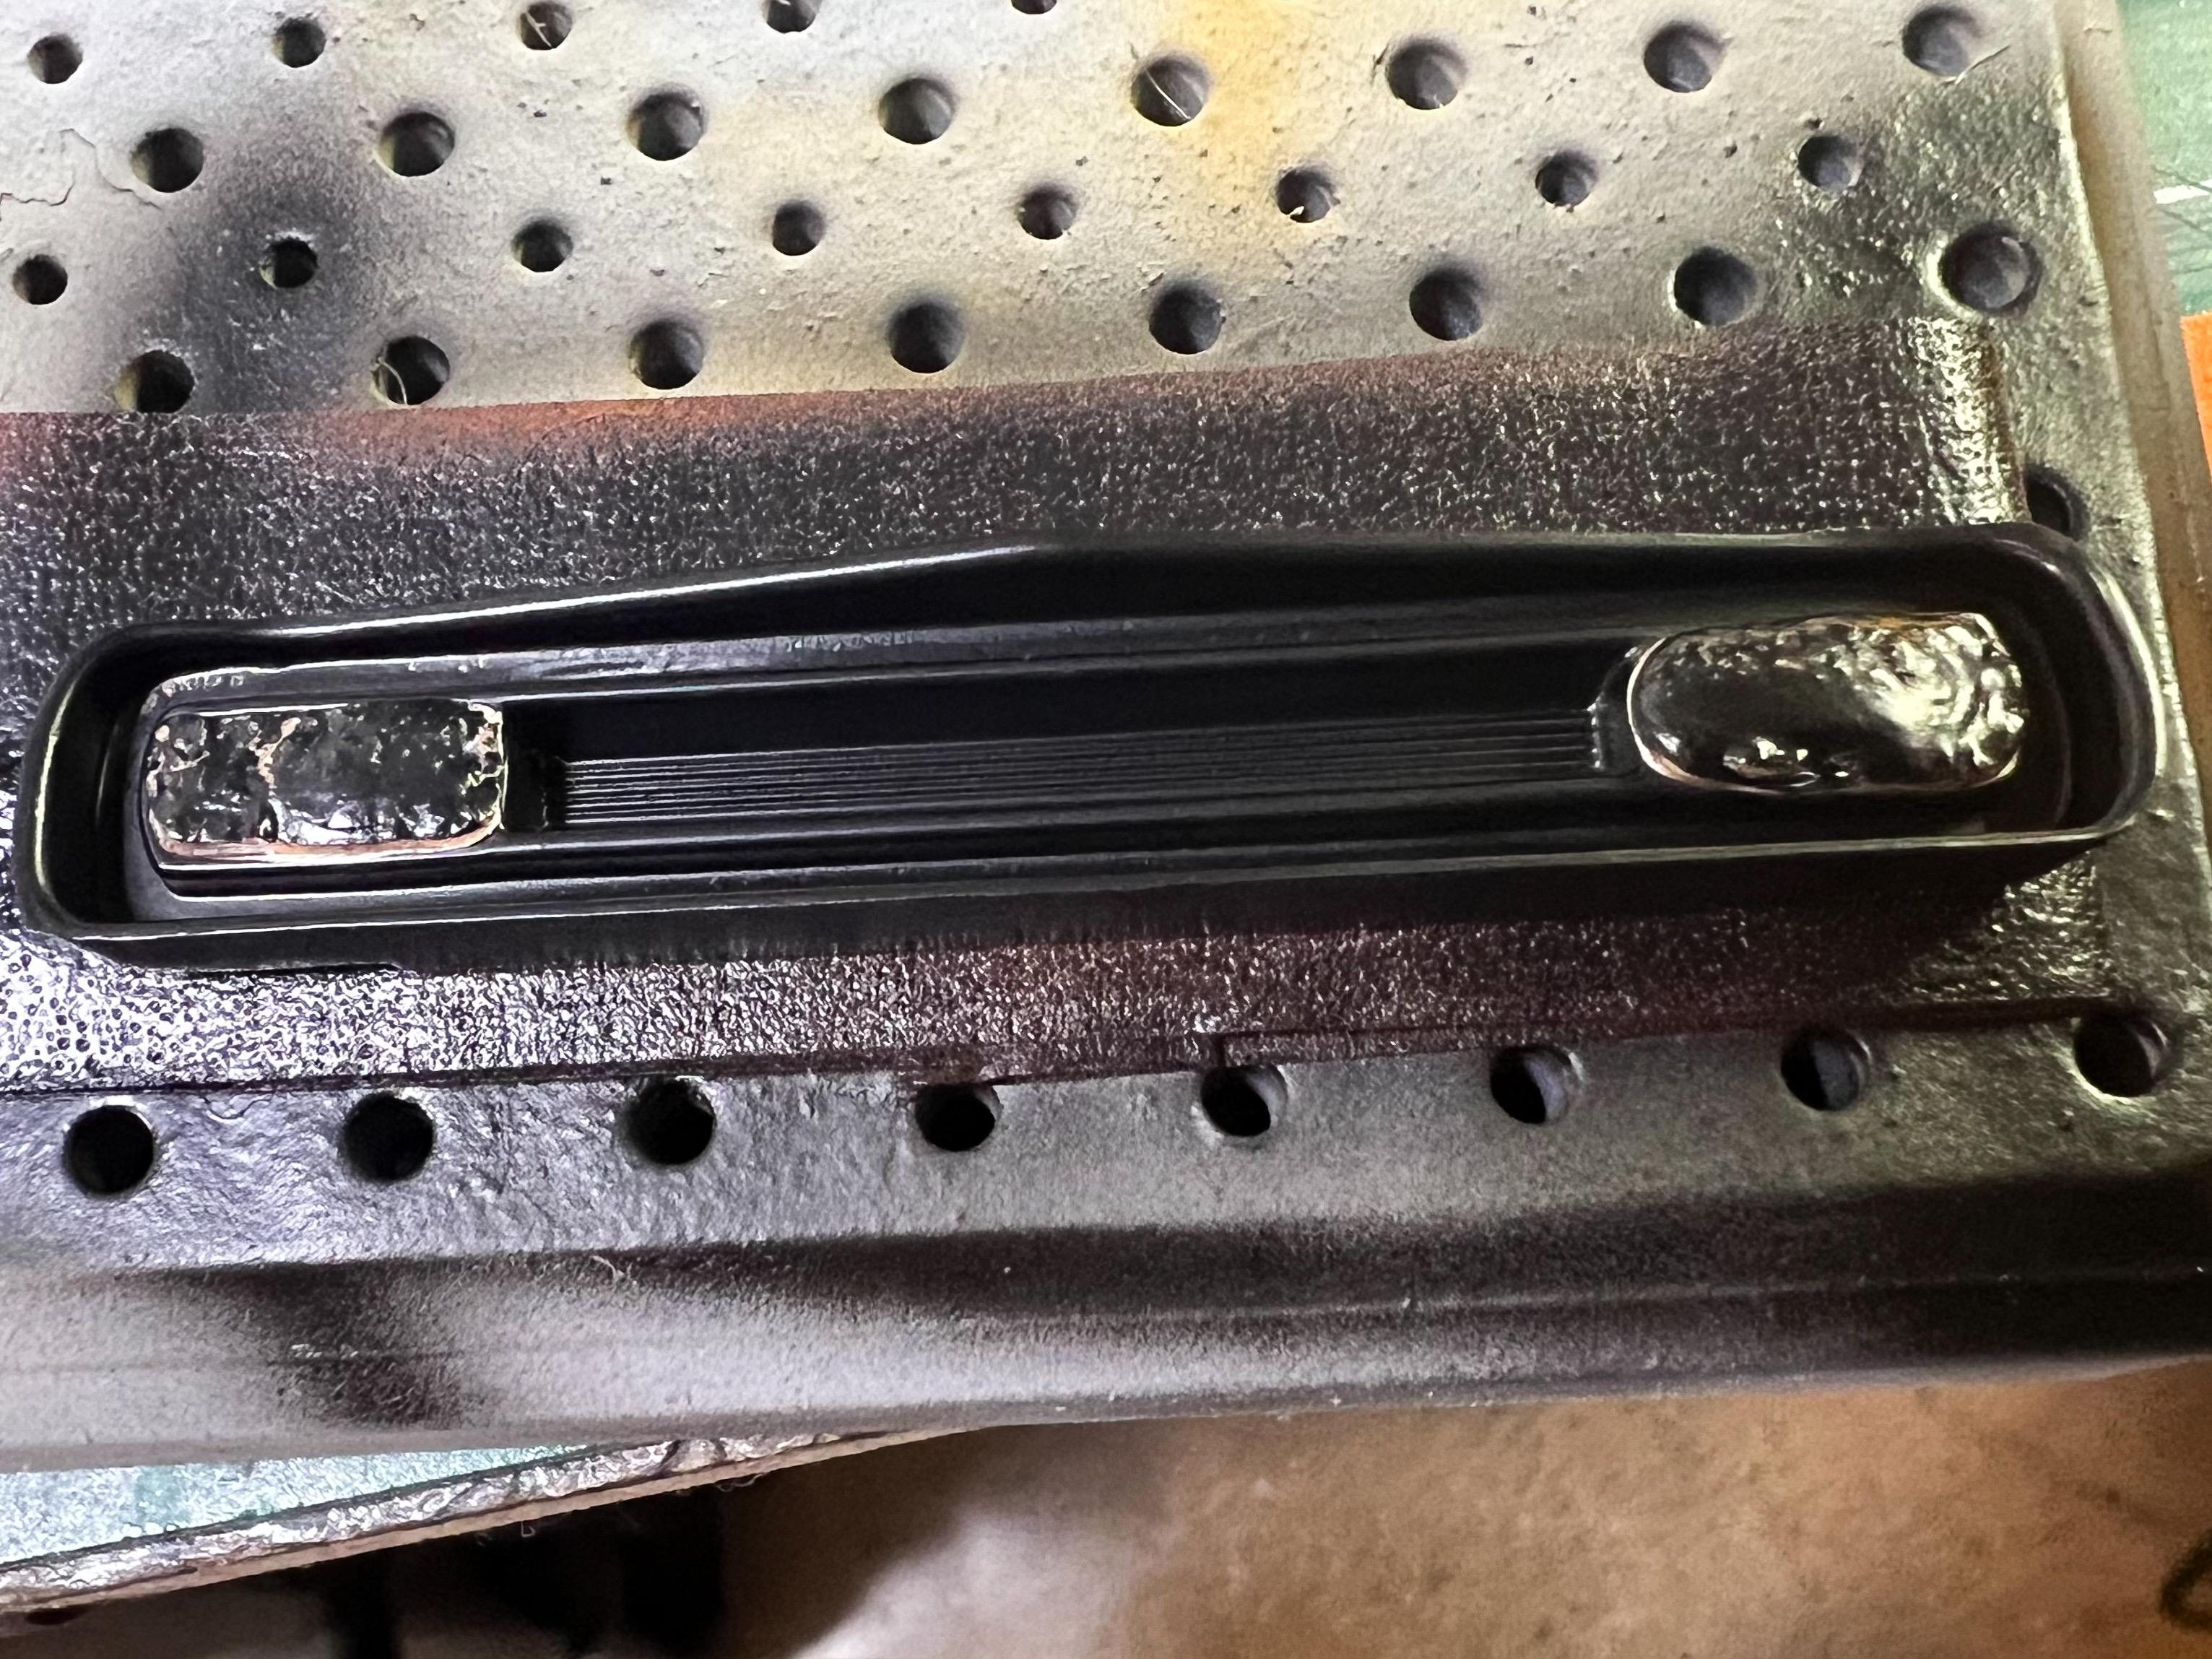
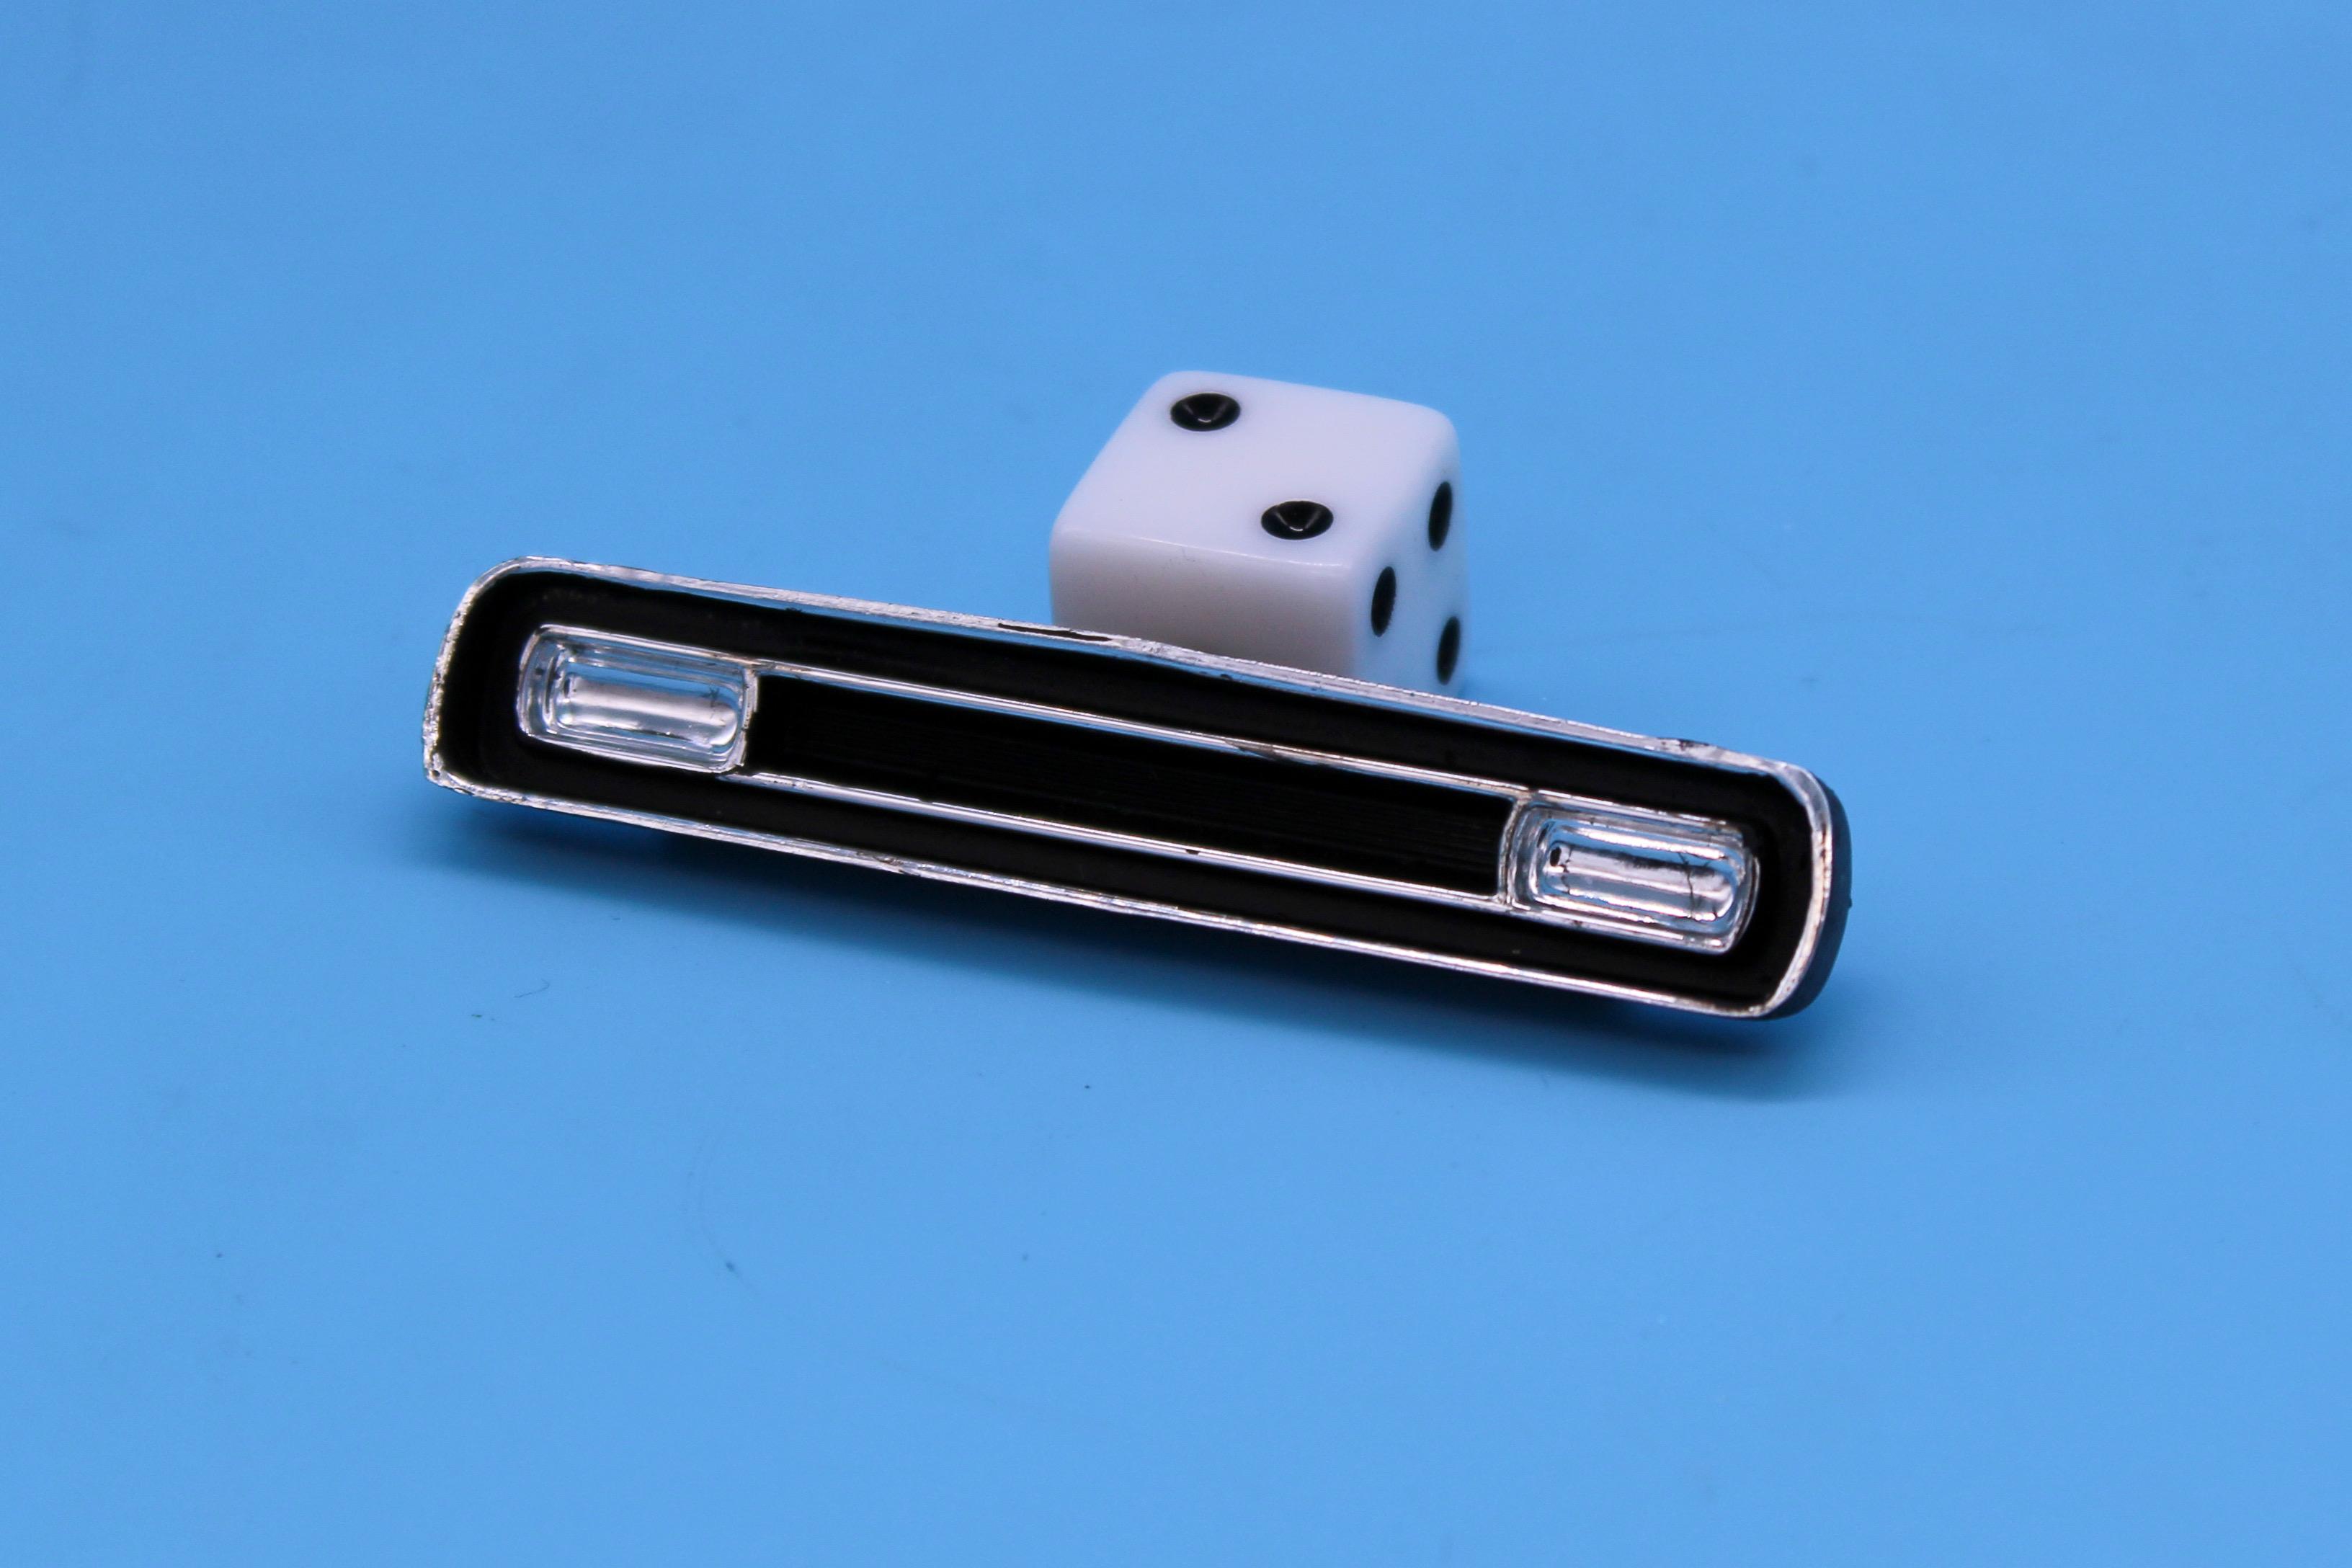
Thanks fellas! A little more work on this the past few days… Got the interior started…shot some primer, then Tamiya acrylic tan, followed by some shading with some lighter and darker Vallejo colors to add a little depth: Then, sealed those layers in with some Createx matte clear, and added some pastels - was going for a kinda mottled satin leathery-kinda look: Looks something like this, all together: Really wanted to do something other than just plain old black - I like how this looks I think… Next up, a complimentary carpet color…couldn’t decide between a light tan and copper: Ended up going with ‘Teddy Bear Tan’ - the lighter shade was my first instinct, so I went with it… Needs some cleanup but nothing too major… I’ll blast it (gently) with some air once the glue is good and dried and then hit it with a mist of hairspray to lock it in place nicely… Meanwhile, started playing the some of the stuff that will attach to the body - I needed to dark-out the recessed areas of the grille and leave the chrome, so I masked the headlamps with some Silly Putty: Shot the whole thing black: And buffed back through the black acrylic to reveal the chrome where I wanted it: Still plenty to do on this - next major project will be adding the last couple of coats of clear and then polishing out the body - here it is sheltering from dust in my booth with another current project: And that’s the state of play right now - thanks for looking…more soon!
-
My local Walmart has kits again this year, apparently, but I didn’t stop in there yet. Did yours have a decent selection?
-
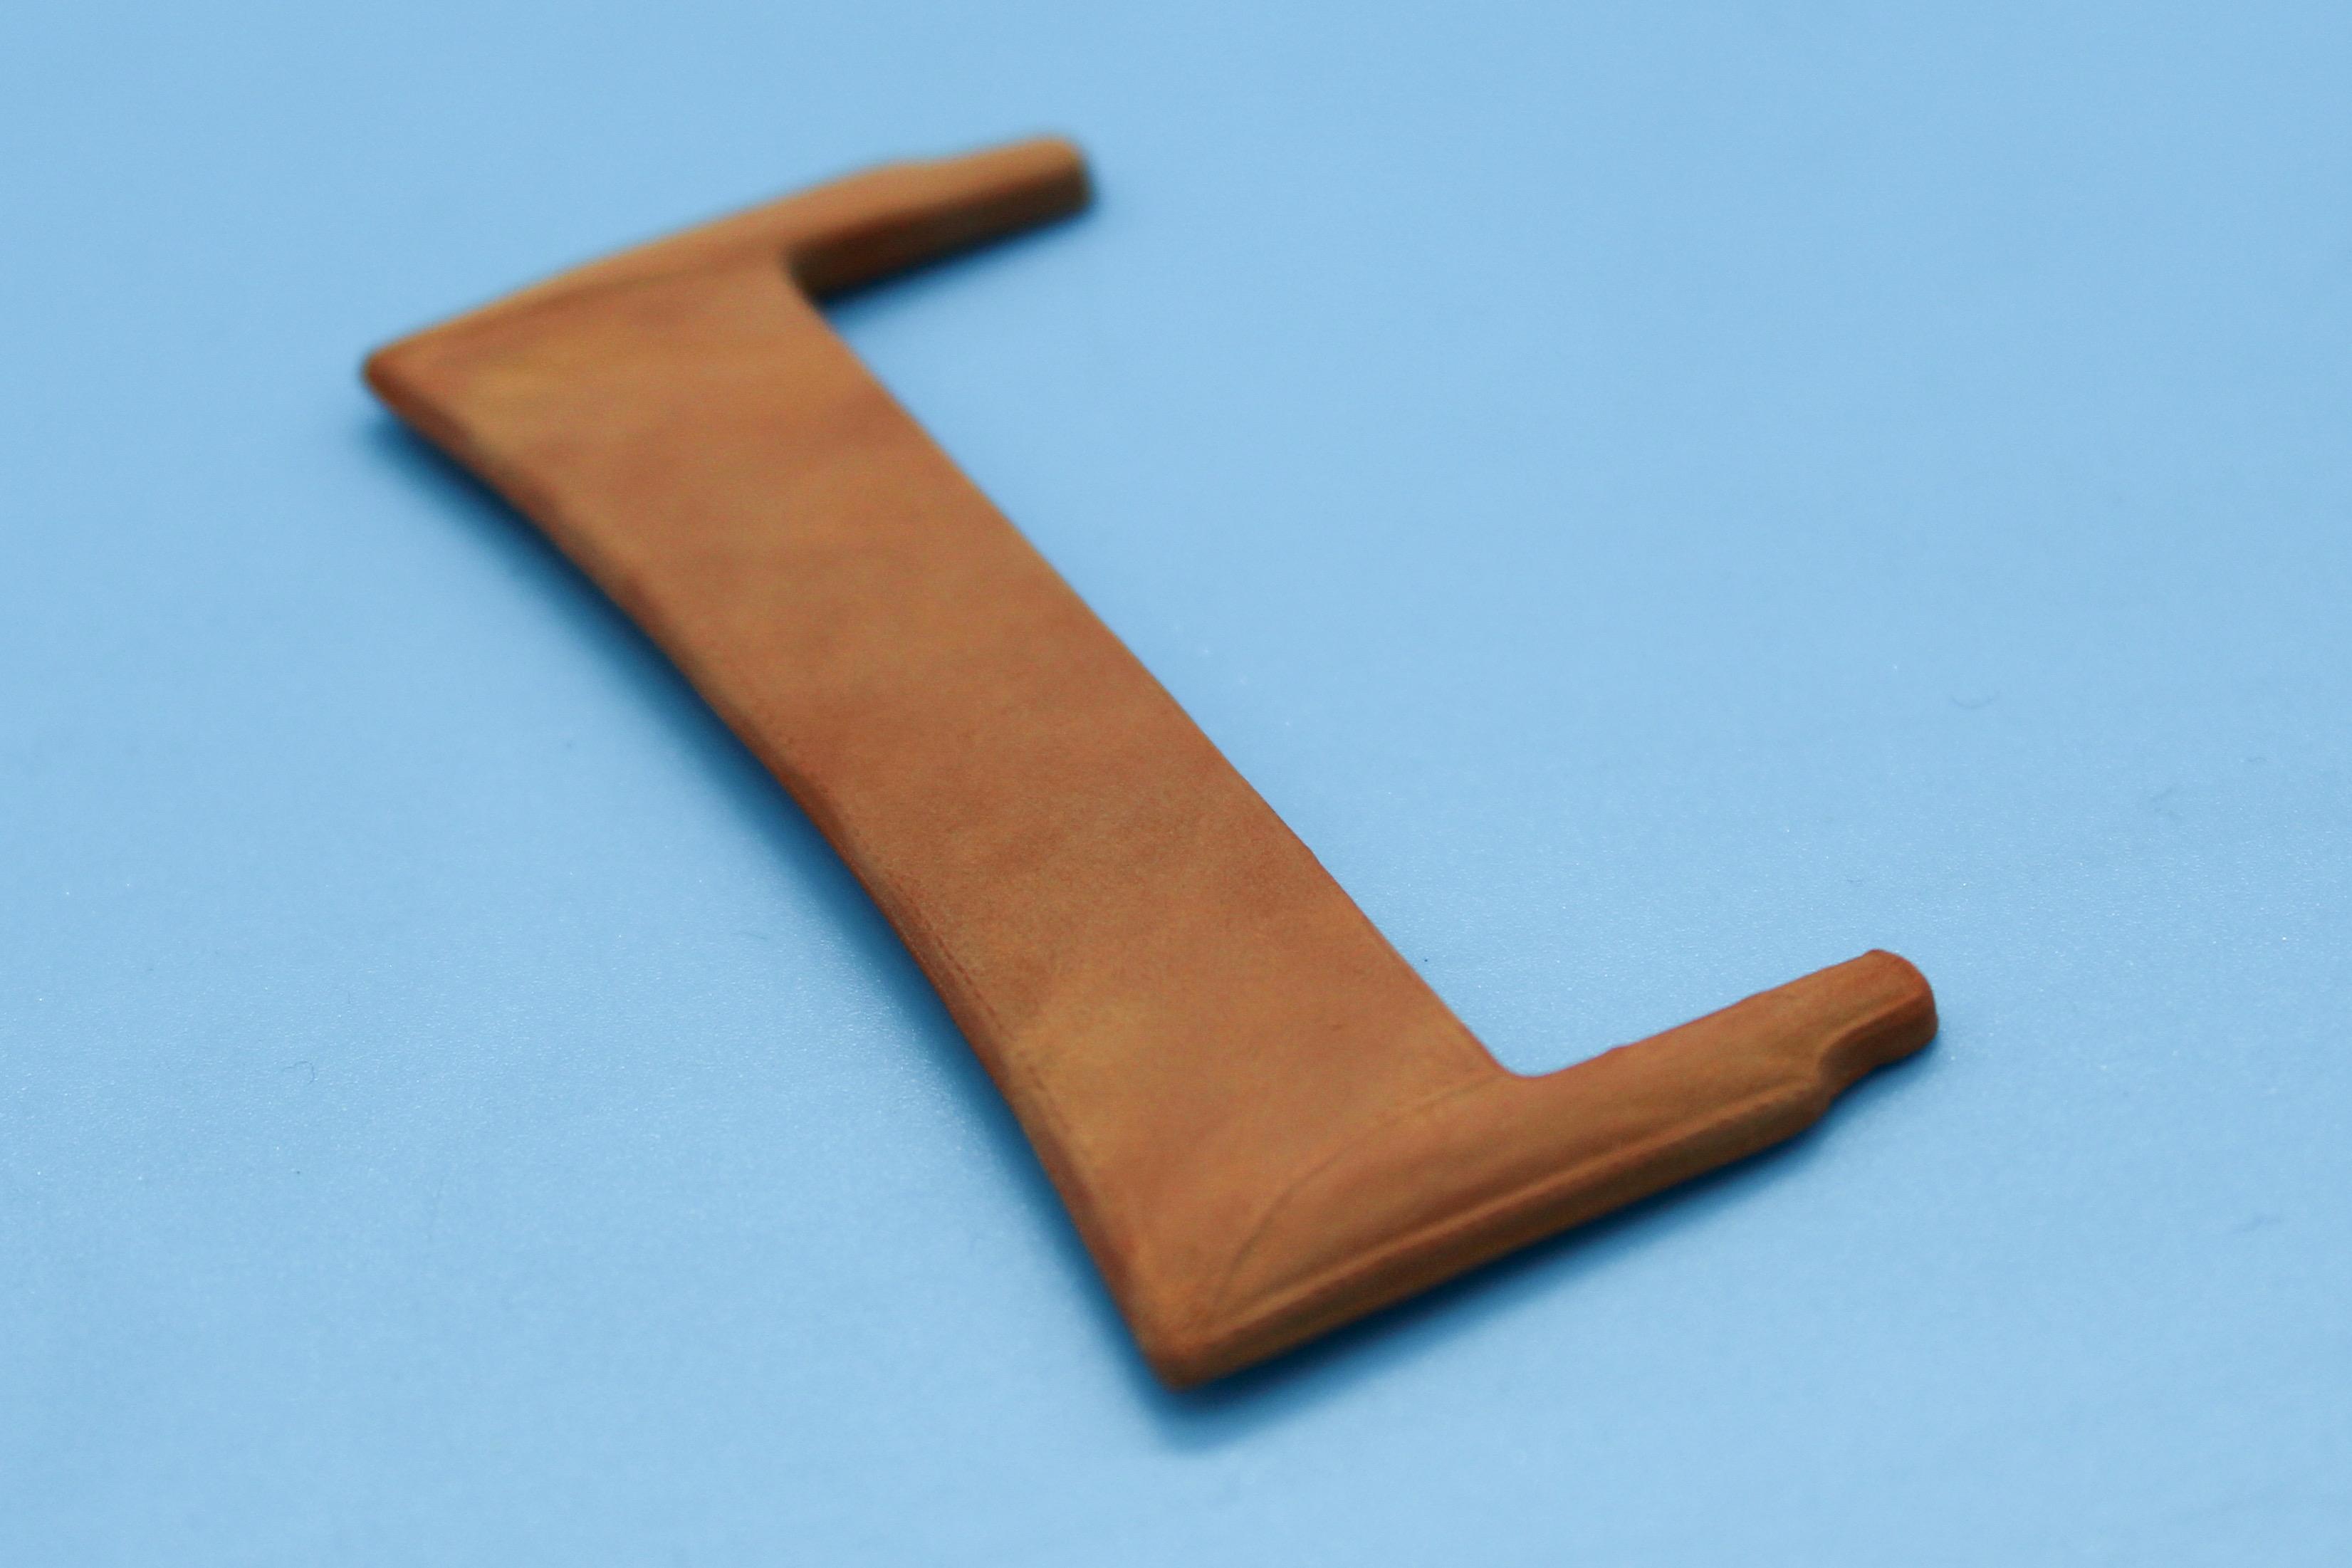
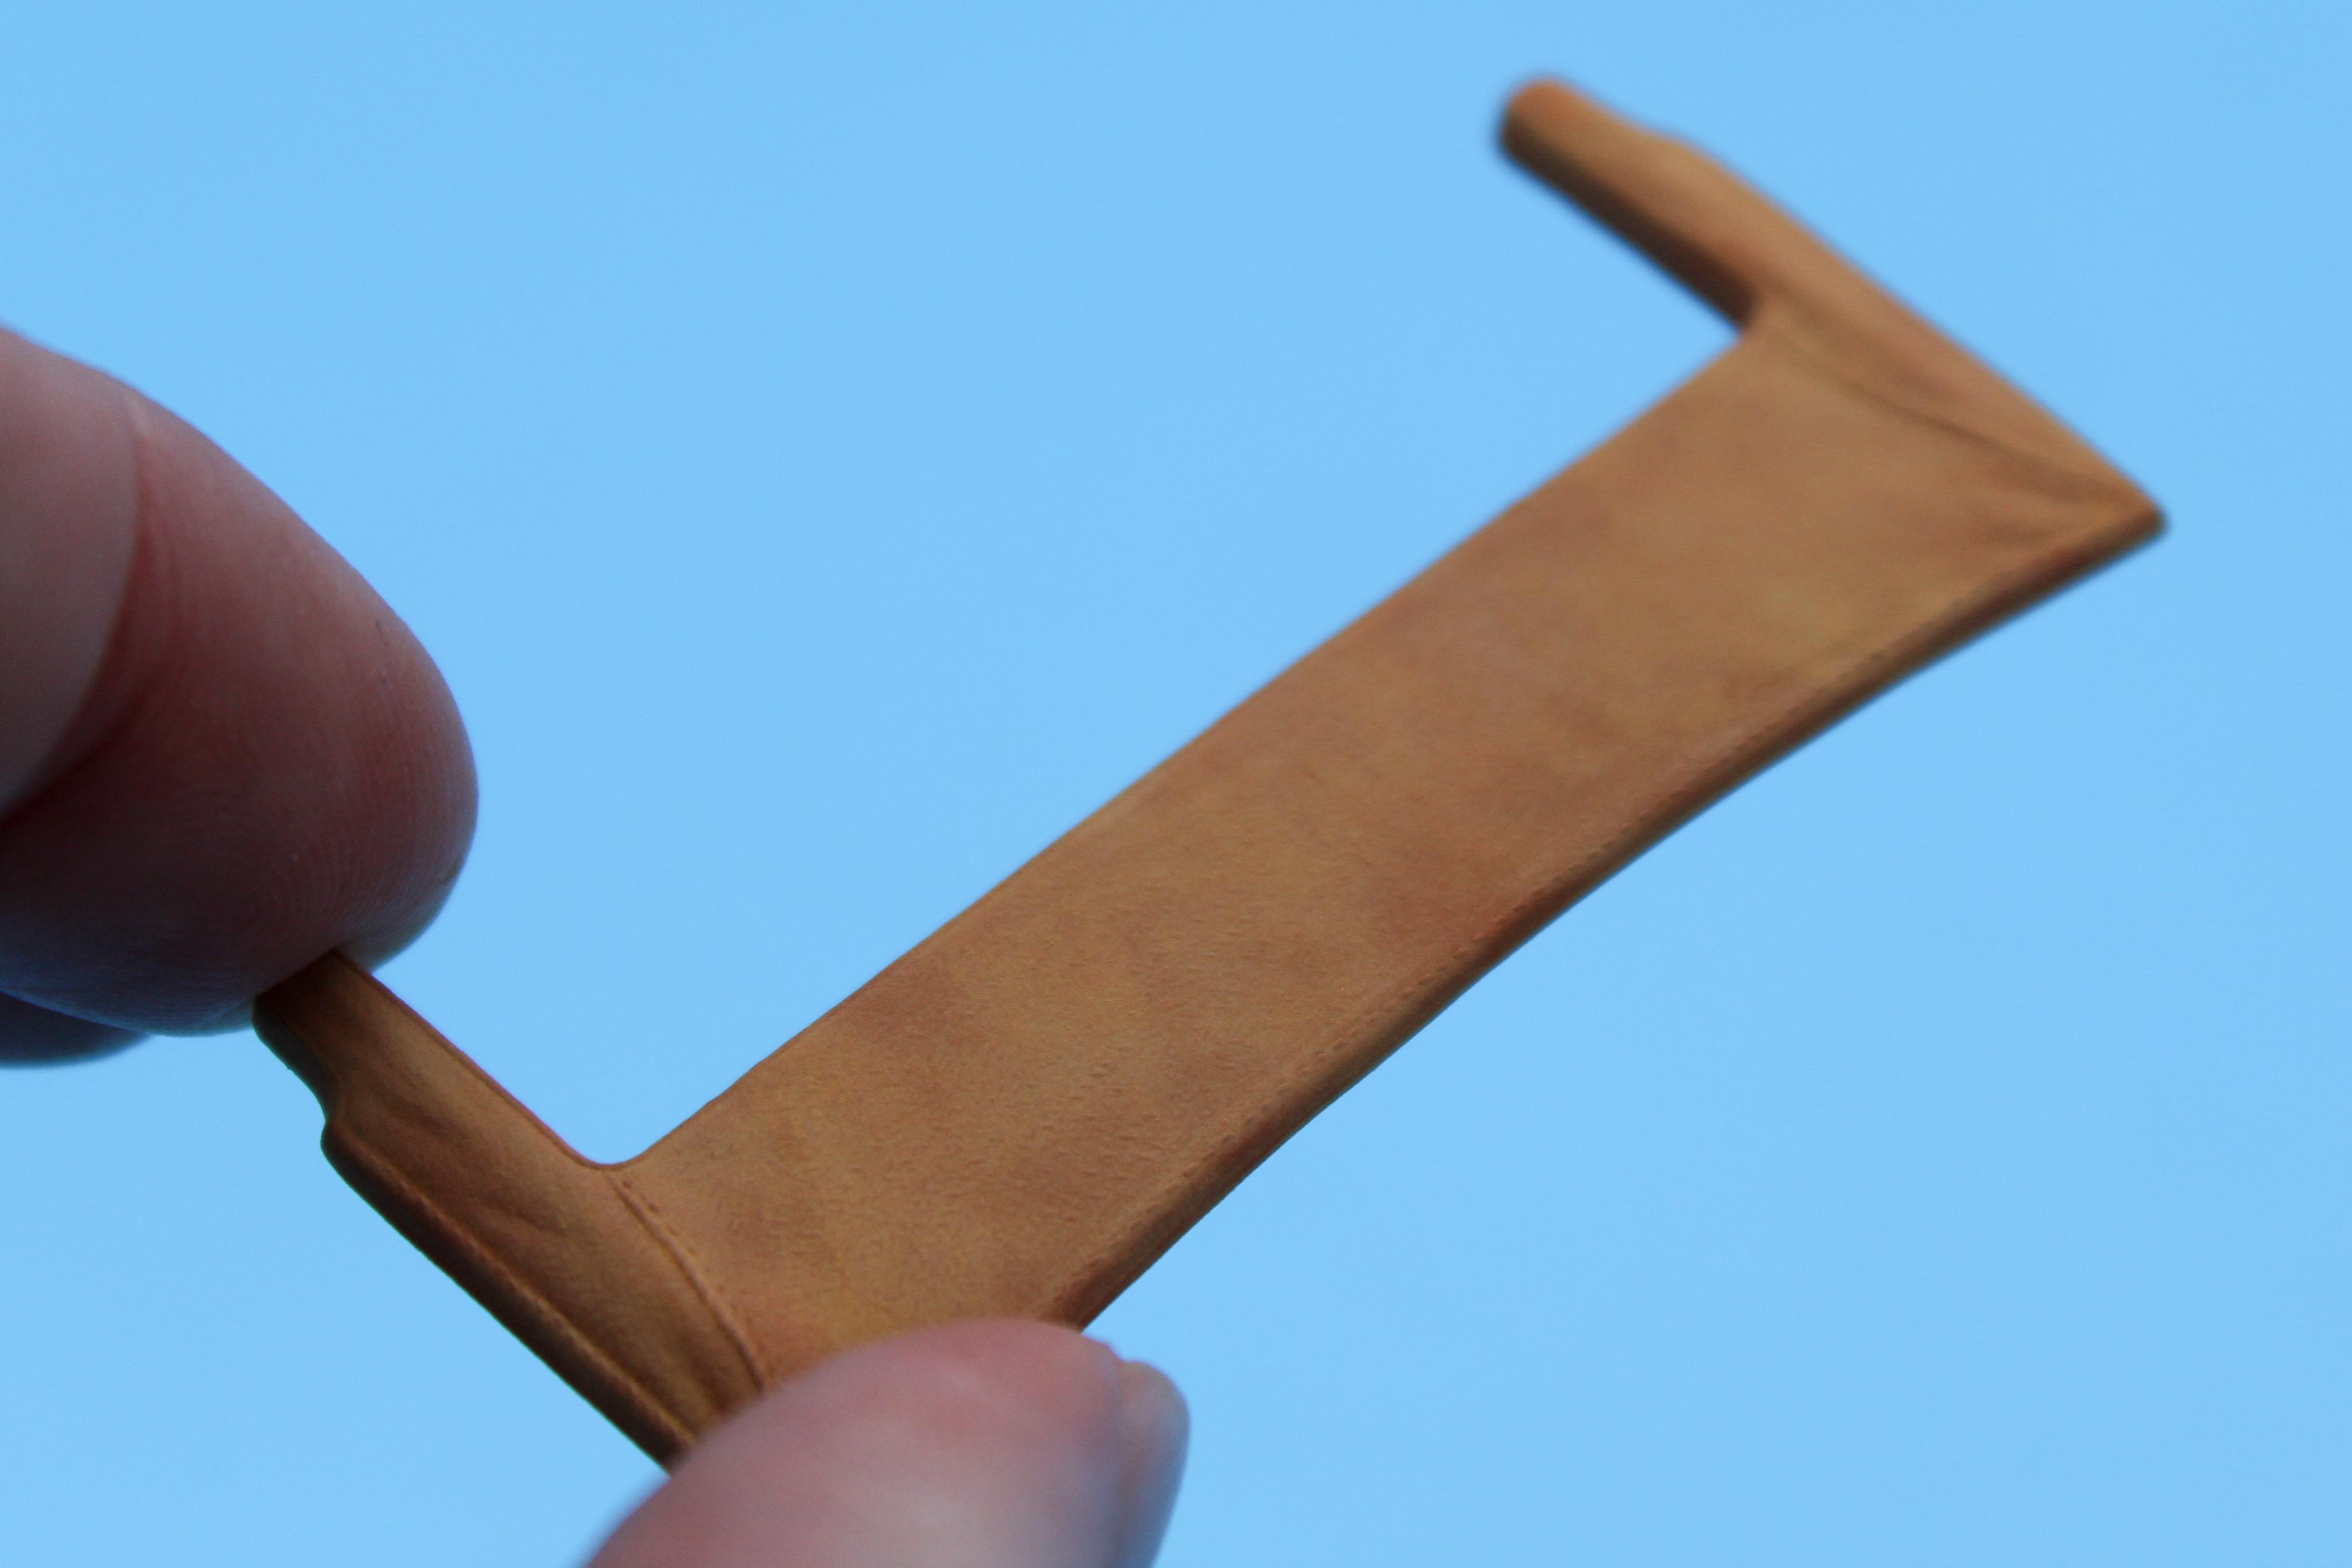
Thank you!! I need to figure out an ‘interior’ - this is curbside 3D printed body so there’s not a LOT that is visible anyway, but it needs a seat, dash and steering wheel at least…