
crazyjim
-
Posts
22,154 -
Joined
-
Last visited
Content Type
Profiles
Forums
Events
Gallery
Everything posted by crazyjim
-
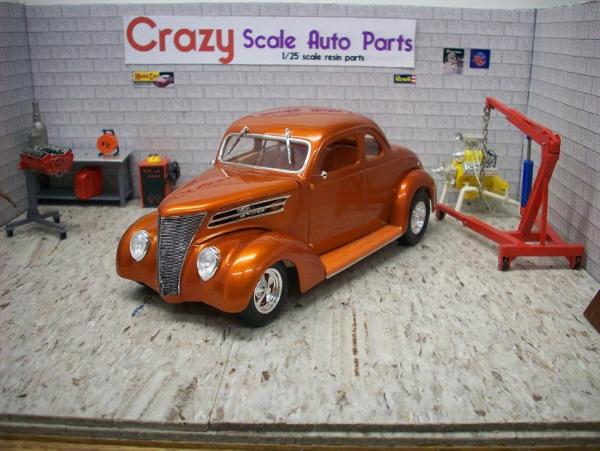
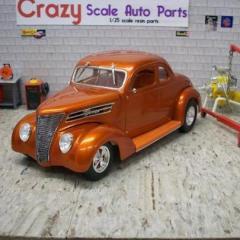
Been raining most of the day so I was able to complete my '49 Ford that's rattle can Testor's Deja Blue with 2 coats of Model Car Wax. Headlights & taillights frenched; rolled pans front & rear; Chrysler grill insert; wheels/tires from some other kit; BMF; flocked interior w/ bucket seats and console from the parts bin, polished aluminum steering column w/turn signal lever; kit engine w/tri-power, fishing line used for fuel lines; center windshield post removed.
-
No, never tried mixing different flocking colors together. I suppose it would work, but how would you how much to mix and not waste a bunch?
-
Okay Dave - here's the engine bay and chassis shots. That's a 427 Ford from a Revell Parts Pack. Had to make some engine mounts. I've been using telephone wire coating for spark plug boots but have started using the coating for fuel line connections. Not as fancy as the aluminum pieces available, but cheaper.
-
Thanks Bud. You ever go to that hot dog place in town where Klinger used to go?
-
Here's some pics of the '40 Ford I finished yesterday. It has a parts pack 427 Ford engine that's been wired & plumbed; Chevy Rally wheels, flocked interior, BMF, tunneled taillights, polished aluminum exhaust. I used Testors ratlle can green with a coat of Tamiya clear and finished with a coat of Model Car Wax.
-
Charlie, I can provide you with an actual color chart if you want. just send me a large SASE - one the size that an 8 1/2 x 11 sheet of paper will fit without folding it. Same for anybody that might want one. I print on photo paper and glue a little of each flocking color sample to the sheet.
-
Charlie, Don't know if this'll help. It's an actual color chart of the Ken's Fuzzi Fur.
-
Update on Clay
crazyjim replied to marinewifejones's topic in General Automotive Talk (Trucks and Cars)
SEMPER FI, Brother. Do your job and come home safe. -
Now we have proof it was Ledsledmerc. How come we don't hear from him?
-
Got the chrome tape from MegaHobby. I believe they had different colors too! Line-o-tape is what it's called.
-
I get flocking from Rick at Scale Dreams. There's about 40 colors to choosed from. I paint the area to be flocked after it dries I brush on Elmers glue (the white stuff) over the area. While the glue is still wet, I sprinkle on the flocking. I put the flocking in a strainer and push it through with a finger. Seems to work better that way. After a coat is down, I tamp it lightly with a finger. Let it dry. Oh yeah - put whatever you're going to flock on a clean sheet of paper. After drying, shake the excess onto the paper, kinda fold the paper to make a chute and put the excess back into the container. Rick (Scale Dreams) sells Ken's Fuzzi Fur. It comes in small plastic containers (tubes). I like that better than Model Car Garage that sells it in little baggies. Search for flocking on this forum. I'm sure somebody has done something with pictures. Auto World used to sell the chrome tape as well as other colors. I found some somewhere recently, but usually use Bare Metal Foil (BMF). There's probably a post somewhere here about BMF too. I'll get the source for the tape when I go out to the shop Later.
-
The Bluesman Mark post about the old lady in the supermarket parking lot got me to thinking. There was a post a while back that some body paid the grocery bill for a lady and then was meeting her for lunch. She was a keeper as I recall. Anybody know what happened? Just curious.
-
Starting some models for 1 cent on ebay
crazyjim replied to Lyn's topic in General Automotive Talk (Trucks and Cars)
Now I've got to go check ebay. I told myself don't buy anymore models until I ccomplete some of the ones I have. -
I remember Fred Lorensen's Ford as being white with blue numbers. We used to ride our bikes over to his shop in Elmhurst, Illinois to watch him work on the car.
-
New Resin From ScaleDreams
crazyjim replied to Ricks's topic in Car Aftermarket / Resin / 3D Printed
Well nuts, Rick. I'll have to another pair of the RnD seats and then at least 2 pairs of each of your new seats. And then probably some ignition wire, and other stuff. I'll be at your website soon. -
New Resin From ScaleDreams
crazyjim replied to Ricks's topic in Car Aftermarket / Resin / 3D Printed
Rick, These are new from you? I thought I bought a pair of Recaro seats from you a couple of months ago? This the same seat? I need to order several pairs of each seat from you soon. -
That's one gorgeous model. Love the wheels and details.
-
Those are pretty neat Ed. Going to put them in a diorama of yours?
-
The mailman brought me a '41 Ford Woodie and a '56 Ford pick up from Matt Leblanc. Thanks again Matt.
-
Great looking vehicles! Love the gate idea you came up with.
-
DMCC (Dearborn) Meeting pics
crazyjim replied to PatRedmond's topic in Model Club News and Announcements
There's a club fairly close that's part of a nationwide or worldwide organization. They do all knids of models but only a few cars. That's the only reason I haven't gone to a meeting. -
Where are the Model Trucks?
crazyjim replied to The Red Ranger's topic in General Automotive Talk (Trucks and Cars)
Put me in for a Tundra and Tacoma, but only if they're the extended cab versions. I don't like them with the big doord front & rear. Might as well throw in a Nissan Frontier King Cab too. Can't hurt to ask. -
Anyone want to come help my model storage?
crazyjim replied to Lyn's topic in General Automotive Talk (Trucks and Cars)
Lyn, This is going to be fun. I'll bring my digital camera to take pics, some water & pop, and my 10 x 10 canopy to keep the sun off the kits and maybe the rain too. The weather last night said some tropical depression is going to stay way east so a hurricane shouldn't bother us. Think Shane and matt will get jealous with your supply of kits? -
The mailperson was good today. She dropped off a '37 Ford Tudor, '69 Yenko Camaro, a Waverider S10, and AMT Parts Pack. Got it all from Lyn (turtle_rancher) through Ebay. My supply keeps going up and I'm having a hard time trying to keep up, and there's more coming. Display area is an issue that I need to address in the near future.
-
I like the color and the wheels. It all looks good together. I might have to try more Tamiya paints instead of just the clear TS13 and clear pearl TS65. I noticed your envelope of BMF in the back. I think you're supposed to store it in the refrigerator.