
customsrus
-
Posts
927 -
Joined
-
Last visited
Content Type
Profiles
Forums
Events
Gallery
Everything posted by customsrus
-
I am hoping that I get there this year, I did not enter anything last year. Hope to see you there.
-
last ones. This is the exhaust. I cut off the original in front of the converter and added tubing. I found an exhaust out of my parts parts box that matched up to the exhaust manifolds on the engine, cut to size then inserted then into the tubing.
-
More,
-
Well its been a couple weeks since I last posted any updates, been working a lot of hours. Anyway I did some work to the chassis. I made some front and rear coil springs out of wire, made some rear shocks out of tubing, front shocks are made from brass tubing, still need to add mounting points to the shocks. added rear spring pockets to the chassis. Modified front and rear suspension for the springs. Had to also modify exhaust. Also been working on the radiator. I added fans to the back of it. Will have to add mounting point to the fans also.
-
Has anyone here try the alclad II spray paint. I know it is made for lexan bodies.
-
If you have a model of this Pm me with the answer so I can get one right LOL just kidding. Sorry Harry I just could not resist.
-

HELLO, MY NAME IS DOCTOR CRANKY and I AM A MERC-A-HOLIC
customsrus replied to Dr. Cranky's topic in Model Cars
I am sorry that you are a MERC-A-HOLIC. you know they have meds for this condition. But for some reason the doctors that I have been to say they is no cure what I have, CORVETTE FEVER. By the way both of these mercs look awesome. I really like what you have done to the LUFTWAFFE 49 MERC. Keep up the good work. -
And a couple of more pictures.
-
I finally got to do a little work on this over the last few days. I drilled the gauges out of the dash I will put some decals on a backing plate once I get it painted. I also scribed all the dash lines a little deeper so they would not get buried with paint. did some work on these horrible excuses for door panels. I added material to the rear panels so they would be the same depth as the front. I cut the centers out and added a design similar to the fronts. I cut out some door grabs, and made a pocket for the inside door handle. I made the door handle from a flattened safety pin. Next I will start working on the chassis.
-
Real or Model #210 FINISHED!
customsrus replied to Harry P.'s topic in Real or Model? / Auto ID Quiz
looks like a real model or maybe a model of a real car, I dont know I am so confused, Just kidding I will have to go with real on this one. -
More Pictures. I also started on the headlghts, being that this a newer concept, i decided to try to make some projector headlight for this build.I used some round tube and the lights out of a newer corvette.
-
Still working on the engine bay area, I decided to cut out the section above the radiator. I then glued a piece of plastic in the same place,this will keep the section in place after it is finished. I also added a hole for the wiring to pass through and also holes for the heater hoses. I then drilled two holes in the section that I cut out made two caps, these will be the radiator and windshield washer fluid caps. Then I made a brake fluid fill and cap.
-
Its not what you think, Its just a regular dremel that I chuck a piece of plasic in and shape with files and sand paper. Here is a couple of pictures when I was making tail lights for another build.
-
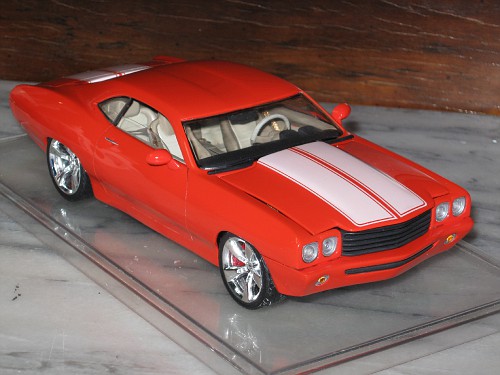
Last but not least I had to lay the decals on this to see what it looked like. I dont know if I will use these black decals or go with the white depends on what color I use onthis build. I may even paint the stripes!!!!
-
I also work on the the inner hood/engine bay area. I cut out strut area and replaced it with sheet plastic bondoed and sanded. I also added some material to the bottom I am trying to make this area free of any clutter since this is a concept.
-
Thanks Mike
-
I have finished the motor except for some wiring and hoses.All brackets and pullies are scratchbuilt
-
your scratchbuilding skills truly are amazing, I have never seen anyone scratchbuild a complete car. This is very inspiring, keep up the GREAT work.
-
Nice looking build, like the colors of the interior
-
'40 Ford Coupe..Cadillac engine and Brass Double-Core Radiator
customsrus replied to traditional's topic in WIP: Model Cars
very nice work on that radiator. like the details on your engine. paint looks awesome, what color is it. -
Turning a Plymouth Prowler into a much better Roadster W.I.P.
customsrus replied to Kennyboy's topic in WIP: Model Cars
looks better already Keep up the good work -
I make my belts from masking tape, I am in the process of making the belts for this motor will post pictures as soon as I finish
-
PEGASUS! Flying Mustang A/G Racer...WIP 3-29-13
customsrus replied to Ira's topic in WIP: Model Cars
looking great Ira, keep up the good work. -
More.
-
Ok now I have paint on this here engine. I went with chevrolet engine orange for the block to make it look more like the original. I painted the intake pleunum with testors aluminum plate metalizer. The exhaust manifolds, coil covers ,the alternator and power steering pump brackets with stainless steel metalizer. Pullies are just everday flat black. I added spark plug wires and boots. I still have to add the fan belt and some wiring to complete..