

Modlbldr
-
Posts
6,885 -
Joined
-
Last visited
Content Type
Profiles
Forums
Events
Gallery
Posts posted by Modlbldr
-
-
26 minutes ago, Zippi said:
I got one side finished on the rear fenders and I think it came out pretty good. I'll complete the other side but wait on the front fenders as I'm still doing body work on the cab.

That looks good. Just what I had in mind. You can also run a flat file or sanding stick over the top of the strips either before or once they are in place if you want to take down a bit of the roundness and make them just a bit more flat.
That Sky and Gun Metal combo will look great!
Later-
-
On 10/3/2023 at 10:26 AM, Chuckyg1 said:
This is interesting, I'm following along. I think the rear window would look better as a half oval to mimic the rear of the cab.
Thanks for the comment and following along.
I agree completely. My plans were to change the shape in upcoming sessions once I figure out the bed layout so as not to make some thing that may need to be revised.
One thing I had contemplated was raising the bed height to the level of the highest point on the bed currently. Then adding an arched wall that would mimic the rear of the cab, but lower in height for the tonneau cover to attach to. If I do that a rear window may not be in the cards.
Later-
-
On 10/1/2023 at 5:41 PM, Yeah Nah said:
Excellent detail work on this. Your 'woodwork' is very convincing!
X2. Looks great!
Later-
-
Simply beautiful work! I love seeing more of these customized 41 Plymouths. Gives people an idea that this ol' girl is worthy of a custom effort.
Later-
-
 1
1
-
-
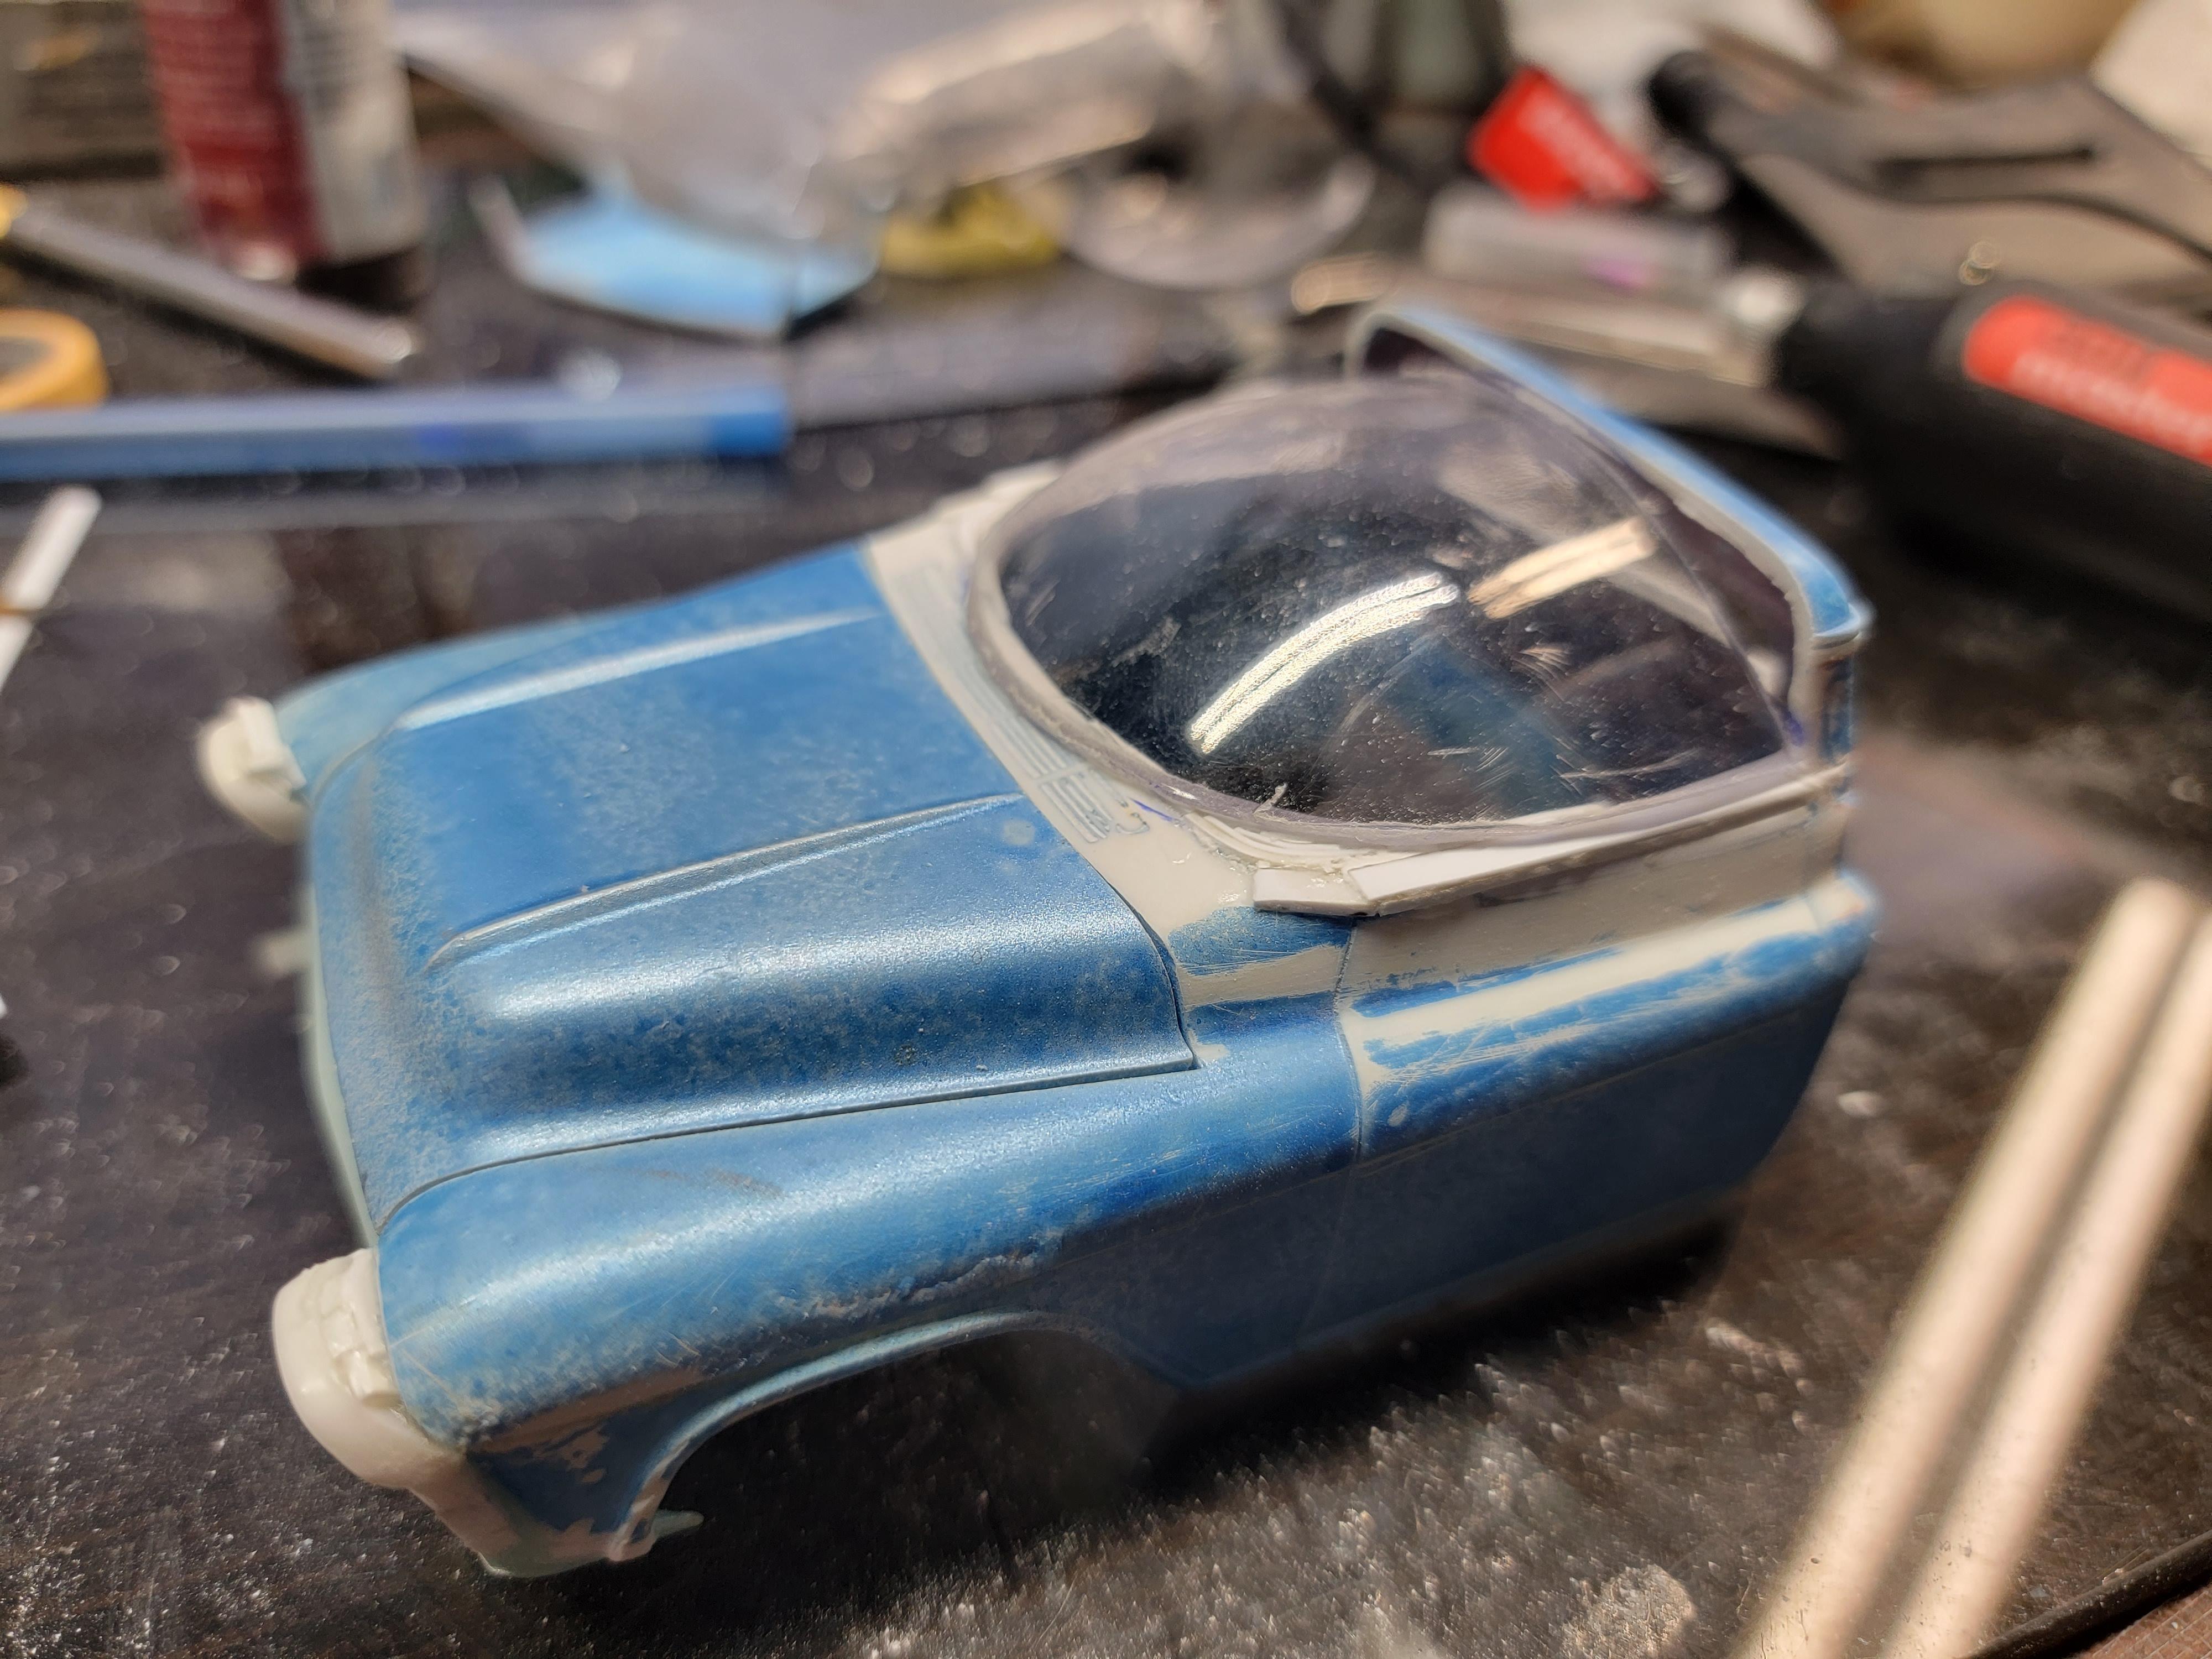
Well, not sure if the direction I'm headed in is a good one but I'm pressing forward. Worked on the rear of the cab but not sure I like it or not. I was looking for something different for a bed than just trying to modify the kit bed. I had this old rear half of an Avanti body and thought it might do for starters.
I liked the shape of the wheel well so I added strip styrene to the front wheel wells to do a reverse image. Got the driver's side roughed in.
I am also taking a sugestion from SamIAm and making a tonneau cover to mimic the bubble top. It will be painted rather than clear however.
That's it for tonight.
Later-
-
This site has the 50 Chevy wheel skirts.
https://www.lowridermodelcarparts.com/
This site has a Photo etch sheet for the 50 Chevy.
https://www.junkees.net/search-results?q=68-72+chevy+photo+etch
Hope these help.
Later-
-
5 minutes ago, Zippi said:
Thanks. Don't know If the styrene strips would bend around the radius on the fenders.
Sure they will. Just takes a bit of rubbing them on the edge of the desk to work a slight bend in them. Go slow and they shouldn't break. They won't get as tight as you need them by doing that but in combo with a small bit of super glue and pressure they will conform and stick. Otherwise use brass and it will definitely work.
Later-
-
Here is a bit of what I was rambling on about on my last post.
Later-

-
 1
1
-
-
1 hour ago, espo said:
When you mentioned "glass's" I was thinking you wanted to see better. We have some of these we use on the patio in the evening. Great idea, maybe cut the bubble just a little higher to make it better cover the width of the cab?
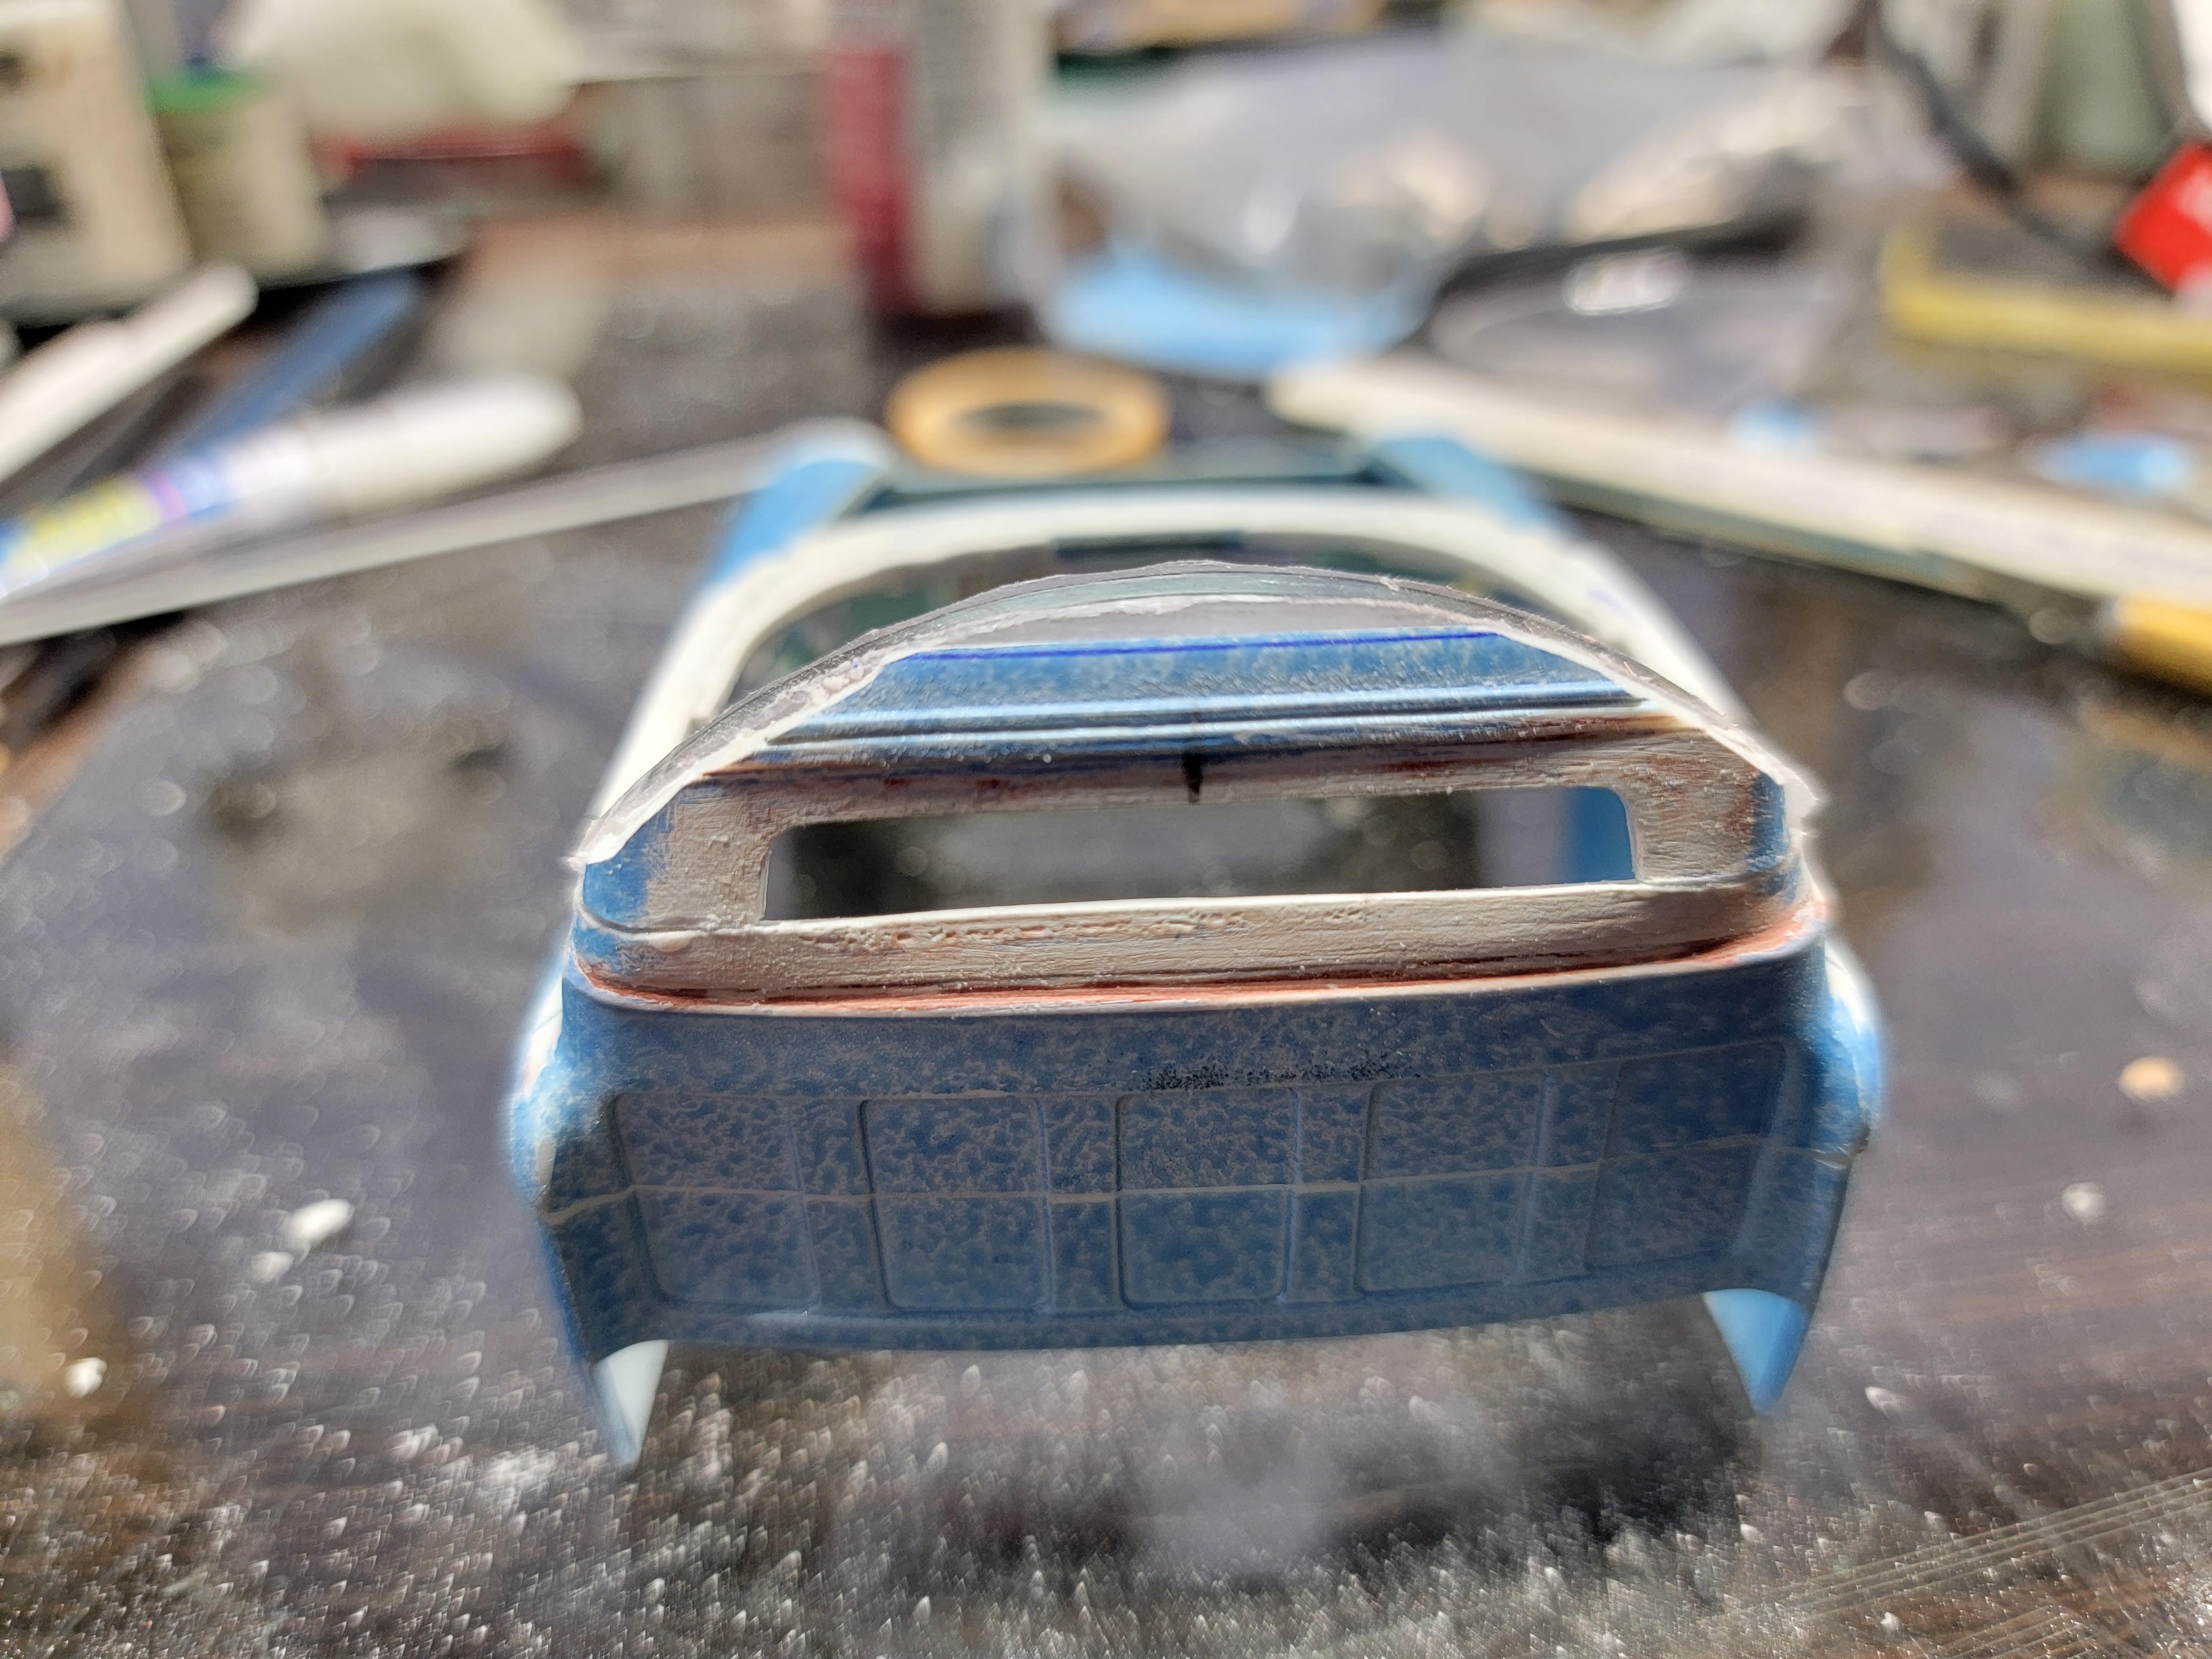
Thanks. The glass fits pretty well to the edges of the cab. I was thinking of adding strip styrene around the window edge to clean it up and define it a bit. I had cut it a bit long at first and had to cut a strip off of the rear of the glass to move it back and keep it from hanging over the edge of the hood. Last night it came to me to use that strip to define the line for shaping the rear cab wall. I k ow that sounds confusing but I will show with pictures what I'm talking about in my next bench session.
Later-
-
Ooh! That's going to be NICE! Great wheel choice. I love the paint colors. You may be able to use the chrome strips from a Galaxie 46-48 Chevy kit but I think if it were just me I would use styrene strip and chrome foil them after painting the body. They look easy enough to make.
Later-
-
I have had an idea to use this butchered 57 Chevy cab as an experiment for making a bubbletop pickup. I had not intended to start it as I have a few other projects in the works, however, today I received a message from a guy I really don't know but had messaged back and forth with him a while back about airbrushing tips. He messaged me out of the blue and asked if I had ever built a bubbletop vehicle as he has plans to. I told him about my thoughts to build one using this mess and next thing I know I am energized to dive in.
I had bought some plastic glasses at the dollar store to use as a top and after a few hours of cutting and gluing this is the start I have.
Not sure where I will progress from here or how fast but I'm all in.
Later-
-
4
-
-
Excellent work on this! Just found it and read through every post. Love the mods you did. I have a 64 TBird body that is busted up. Big chunk of the roof missing. Your work has inspired me to give it a try and customize it. Wha box is my junk 70 Impala body in?
Later-
-
5 hours ago, espo said:
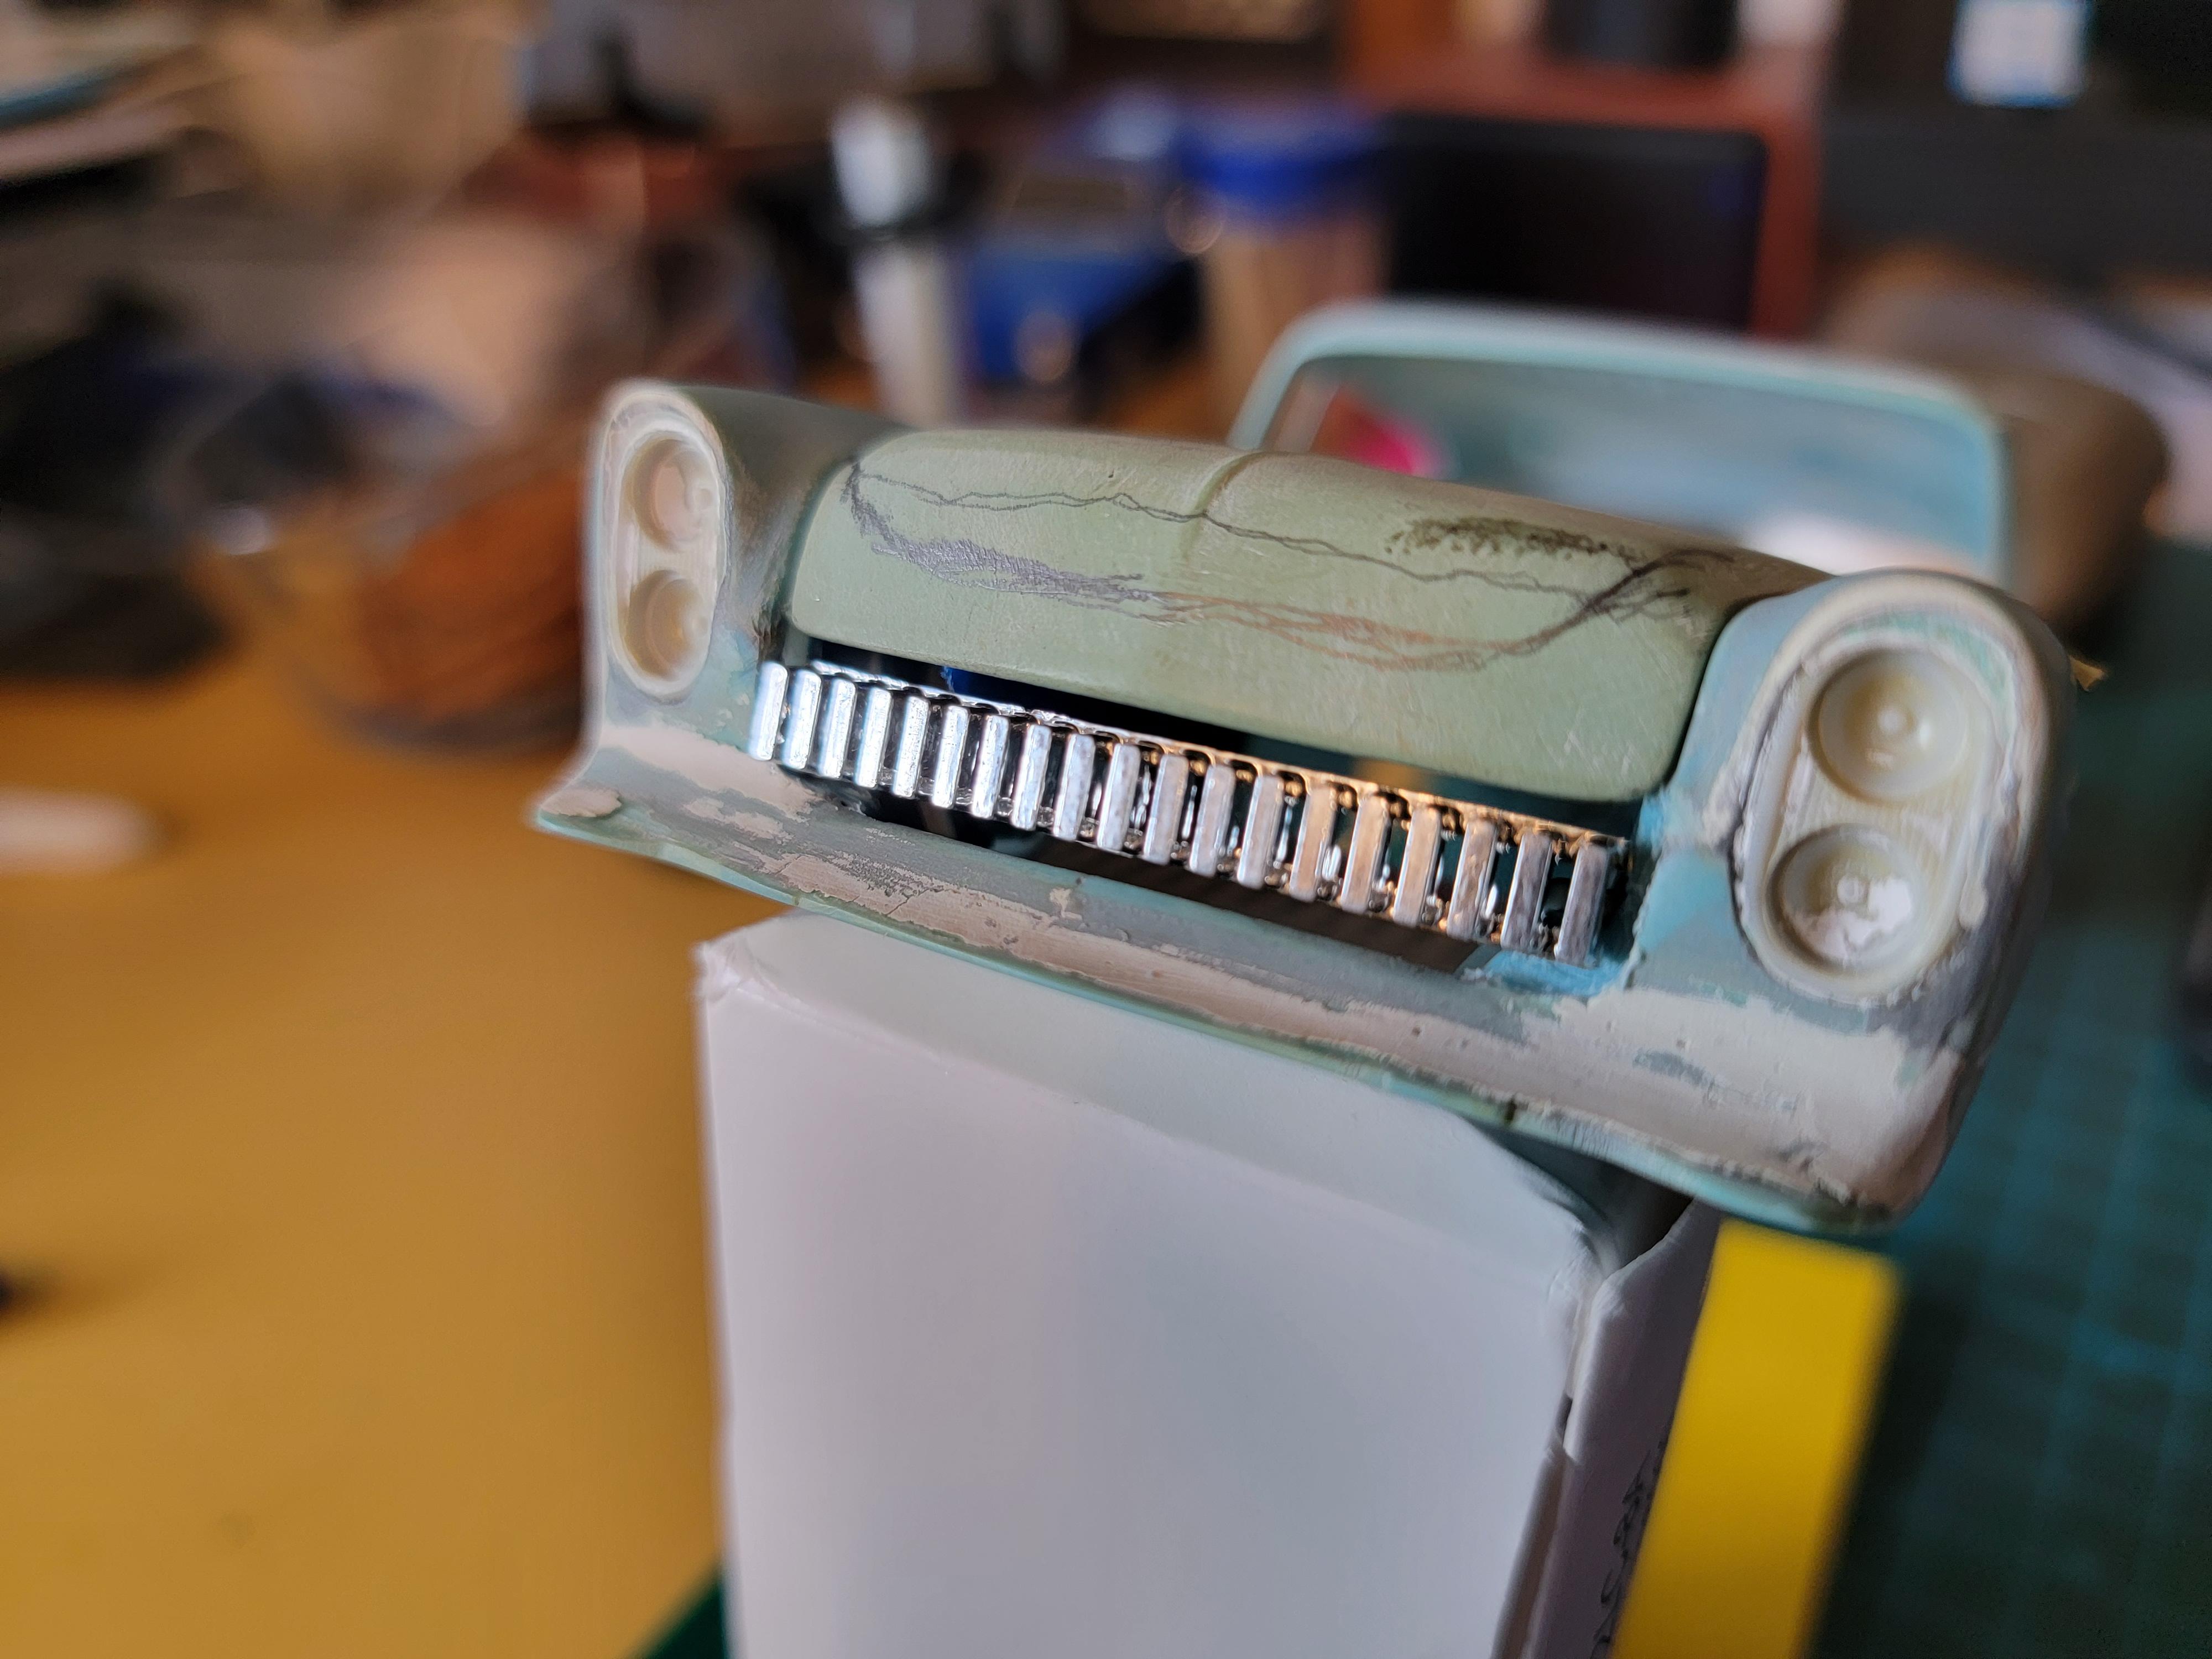
Like that you're going to save this Kustom. The quad headlight styling started after Detroit started putting quad headlights on cars in late '57 and mainly on the '58-year models. The headlights here remined me of what you would find on a '59 Chevrolet. This is based on the details running between the headlight openings that look just like the '59 Chevrolet. The taillights look like the '56 Packard lights that were popular with many customizers. The grill looks like some of the generic custom parts that AMT put in a lot of the early annual 3 in 1's. The pencil lines on the hood look as if he may have been playing with the idea to "pancake" the hood. Did the half roof come out of the AMT '50 Ford Convertible kit? That kit and the '49 coupe had a bunch of custom body options.
Thanks!
The pencil lines on the hood were my addition when I was trying another grille. I doubt that I will be pancaking the hood now. I also thought the headlights looked like 59 Chevy. The half eoof did come from the 50 Ford kit. Lots of custom parts in it.
The mag that I have been looking at for ideas is from 59 so that is the idea I am going with. A 56 customized in 59. Still a long ways to go on this one. Thinking of trying to add some small strategically placed scoops (hood or rear fenders?) I also have a couple of antennas to add to the rear fenders.
Later-
-
1
-
-
3 hours ago, larrymoo said:
Do you have any idea where the taillights came from (what kit)
No. I believe they are custom made from resin.
Later-
-
50 minutes ago, MeatMan said:
Interesting old schoolish project!
I like the half top but IMHO it needs t be sectioned or cut down at the base. It looks a bit too tall.Thanks for your input. I actually raised it a bit bexause I wanted it to sit a bit above the windsheild frame. Now I'm not so sure of that decision. I may need to remove my strip I added.
1 hour ago, dino246gt said:Cool idea to save another builders custom, but to have it ready to show in less than 2 weeks!
Sounds like a TV show, LOL
Better get it ready for paint, in a period correct color, of course!
Could be a real show stopper!
Thanks! Gonna be a tight schedule but I'll take it to the show no matter what stage it's at.
13 minutes ago, Can-Con said:That's gonna be cool, Tom.
The custom grille is from the AMT '62 Buick.
Your friend did a great job on those tail lights.
Thanks! I struggled a bit with finding a good grille. When I tried this piece I thought it had a simple but era correct look.
Later-
-
I received this from a friend as a started project. He had installed the quad headlights and side pipe shrouds. He also had made the custom taillight lenses. It had been painted but the paint needed a lot of work. I liked what he had started and decided to finish it.
I found when doing the reseach for ideas that there are not many examples of 56 Chevys with quad lights. I dug out a couple of "Little Pages" I have for some ideas. Last night I dove in!
I decided on a half top roof so out came the saw and off came the roof. The problem is that the kit is 1/24 and the half top is 1/25. No peoblem that a 3/16 inch strip wouldn't fix.
Also, for a little custom touch, I removed the top half of the body chrome.
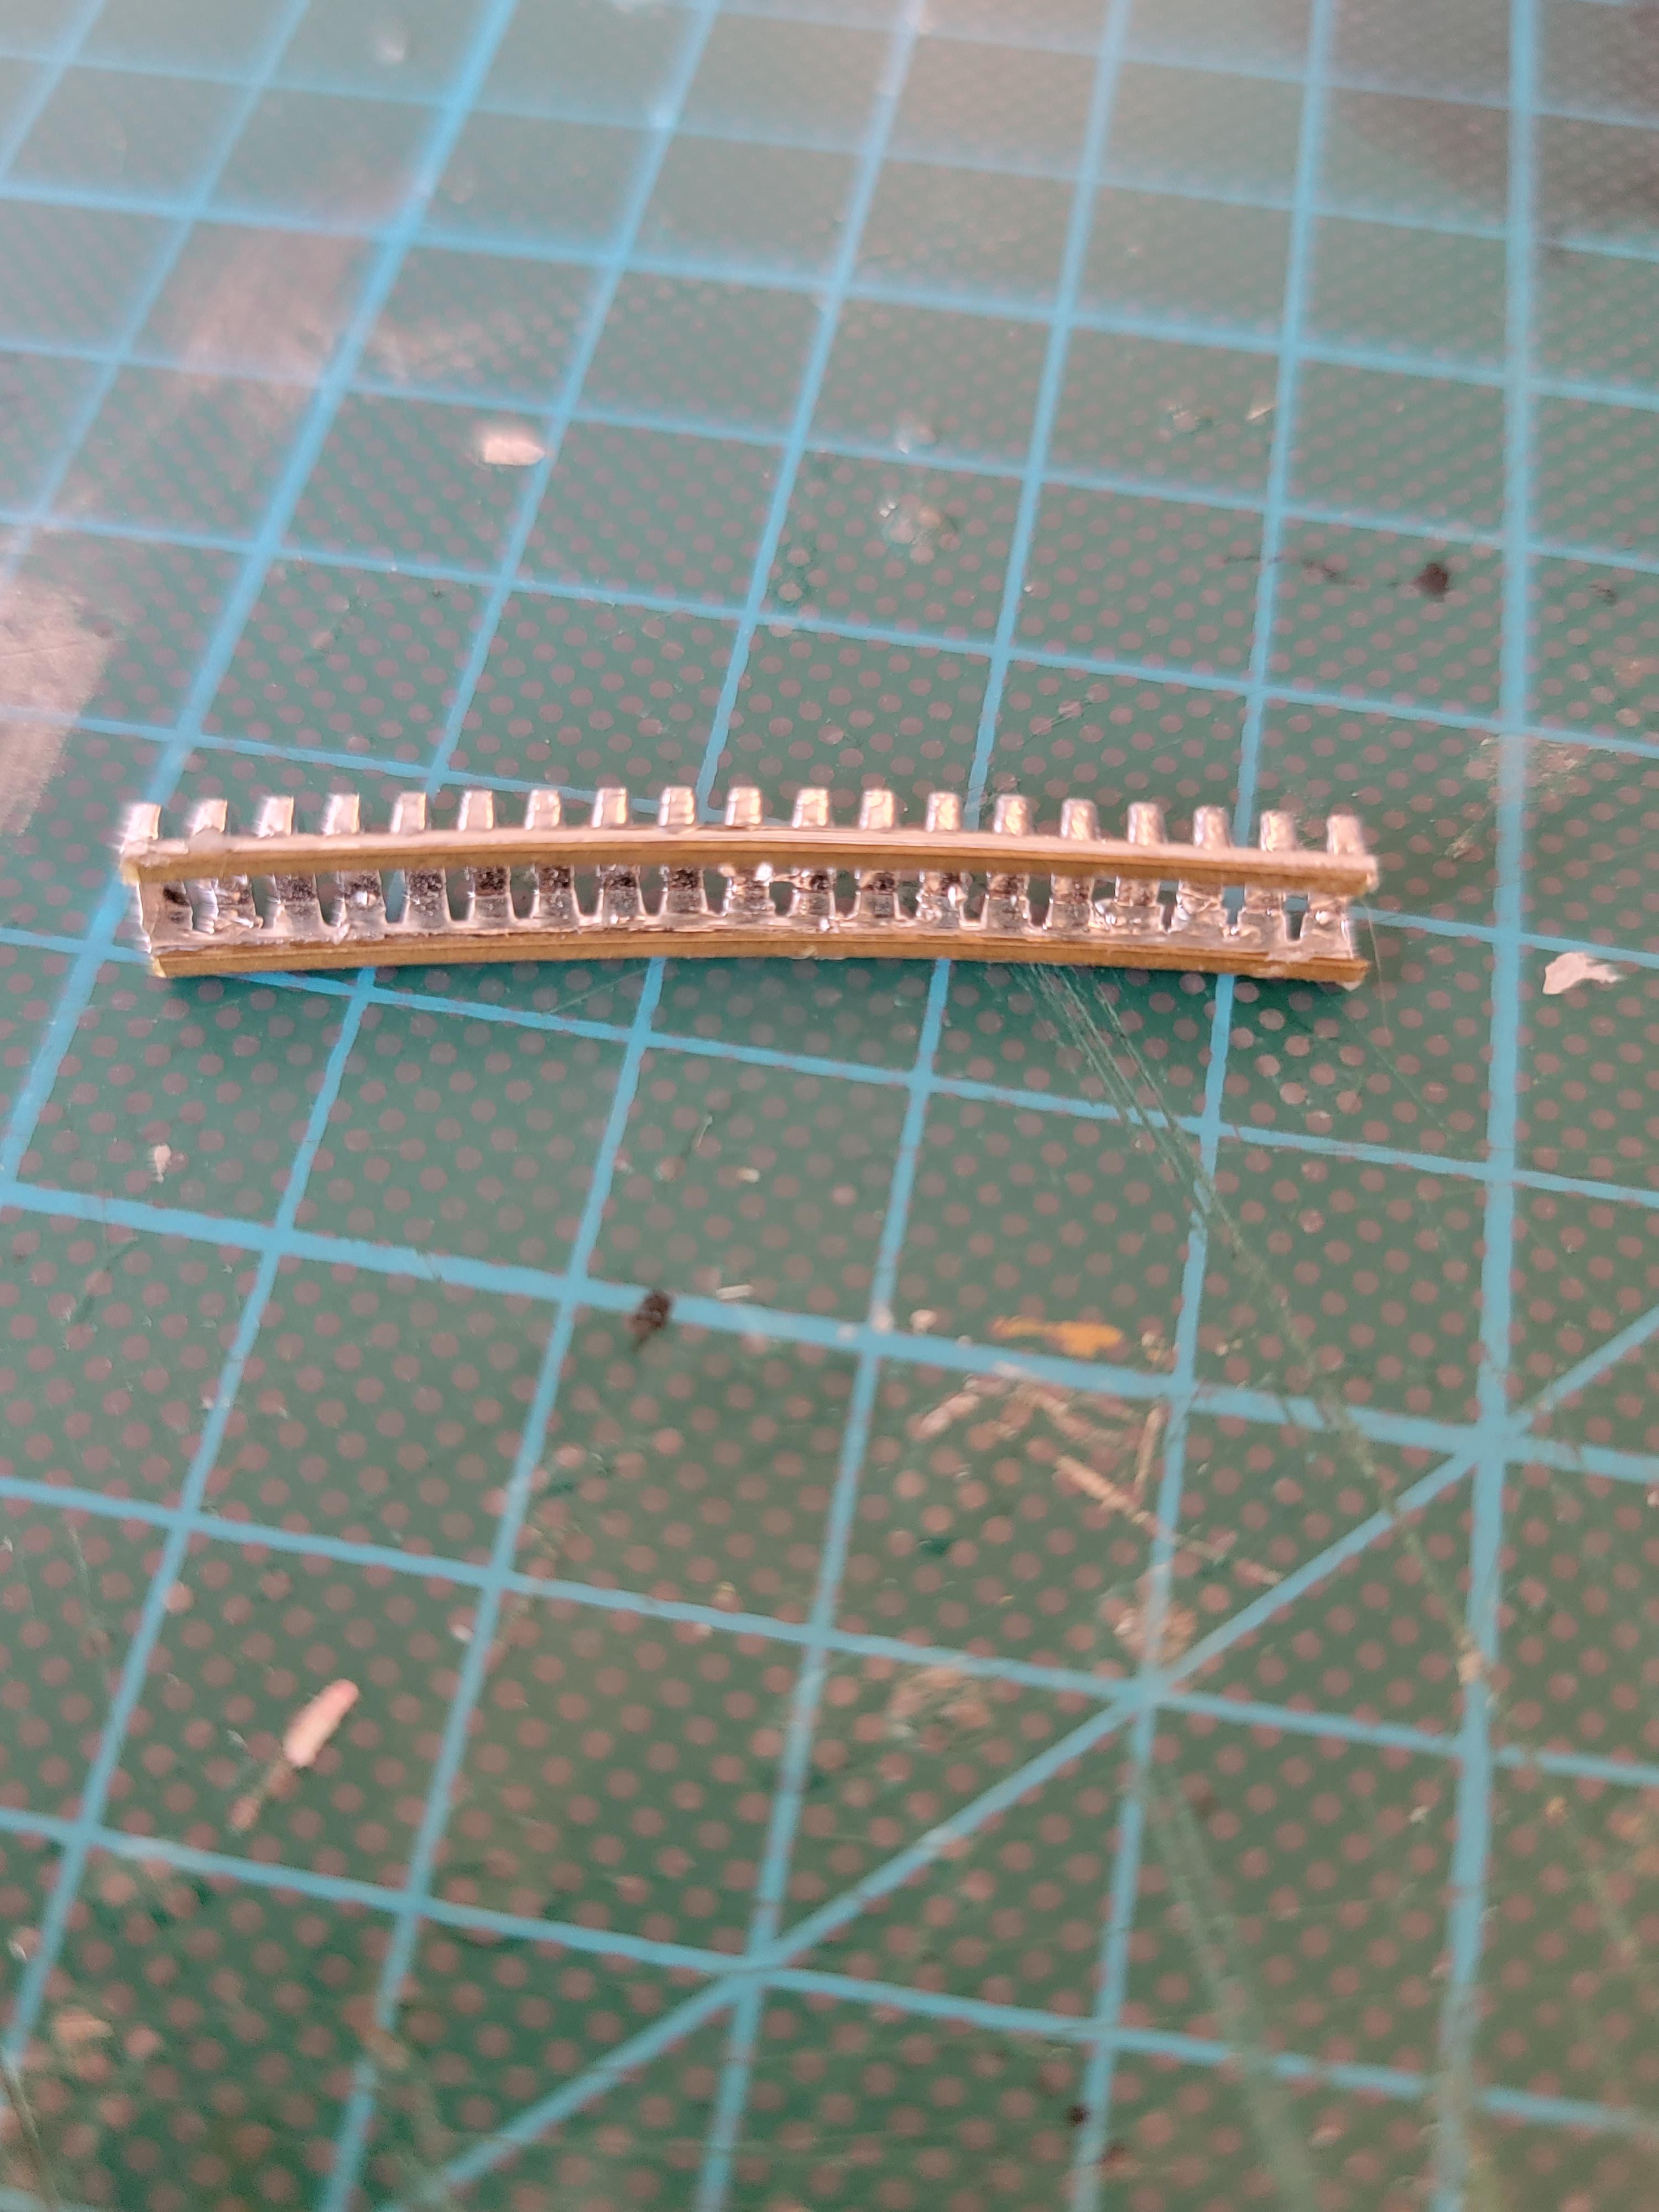
The grille is a chrome piece that was about 2 inches long and flat. No idea where it came from. I cut it to length to fit inside the opening. Then I glued two bent strips of brass to the back of it to give it a slight curve. I thought it looked like what a homemade custom grille would have looked like on a late 50's custom. I also modified the rear bumper with an overrider that I've had kicking around in the parts box for years.
That's where I'm at so far. Still a long ways to go.
Did I memtion that I'm trying to have this one completed by Oct 7 for a show? No pressure.....
Later-
-
1
-
-
13 hours ago, Chuck Most said:
I like your rendition better than the actual T300 based Ramcharger built for the Mexican market. That one had a Caravan lift gate and was overall just kind of janky looking. ?
I'd heard they actually had a Ramcharger out back then but it was nothing like my idea. Not liking the look of it much. Definitely needed a removable top.
Later-
-
Beautiful build and a great color on it. I'd be proud of it!
Later-
-
42 minutes ago, ncbuckeye67 said:
Excellent conversion! I always wondered why Dodge never made a blazer/suburban. Chevy was still making a two-door Blazer in the mid-nineties.
Would have been nice to see them do it.
Later-
-
Got some nice old decals and a very dirty old Caddy ambulance in the mail today. Box lid was so rotted I threw it out. Caddy is going straight into the sink to wash.
Later-
-
2
-
-
Beautifully built Porsche. The Silver body and red interior are a perfect pairing and your skills show on this build. Nice work!
Lter-
-
1
-
-
Wow!! What amazing detail you added to this build! I see something new each time. The entire thing is a work of art. I have a couple of these to build and I will be taking notes from your example. Thank you for sharing!
Later-
-
1
-
-
Thank you guys.
51 minutes ago, Zippi said:I'm liking all the mods you did. Great looking wheels and the two tone color looks pretty kewl.
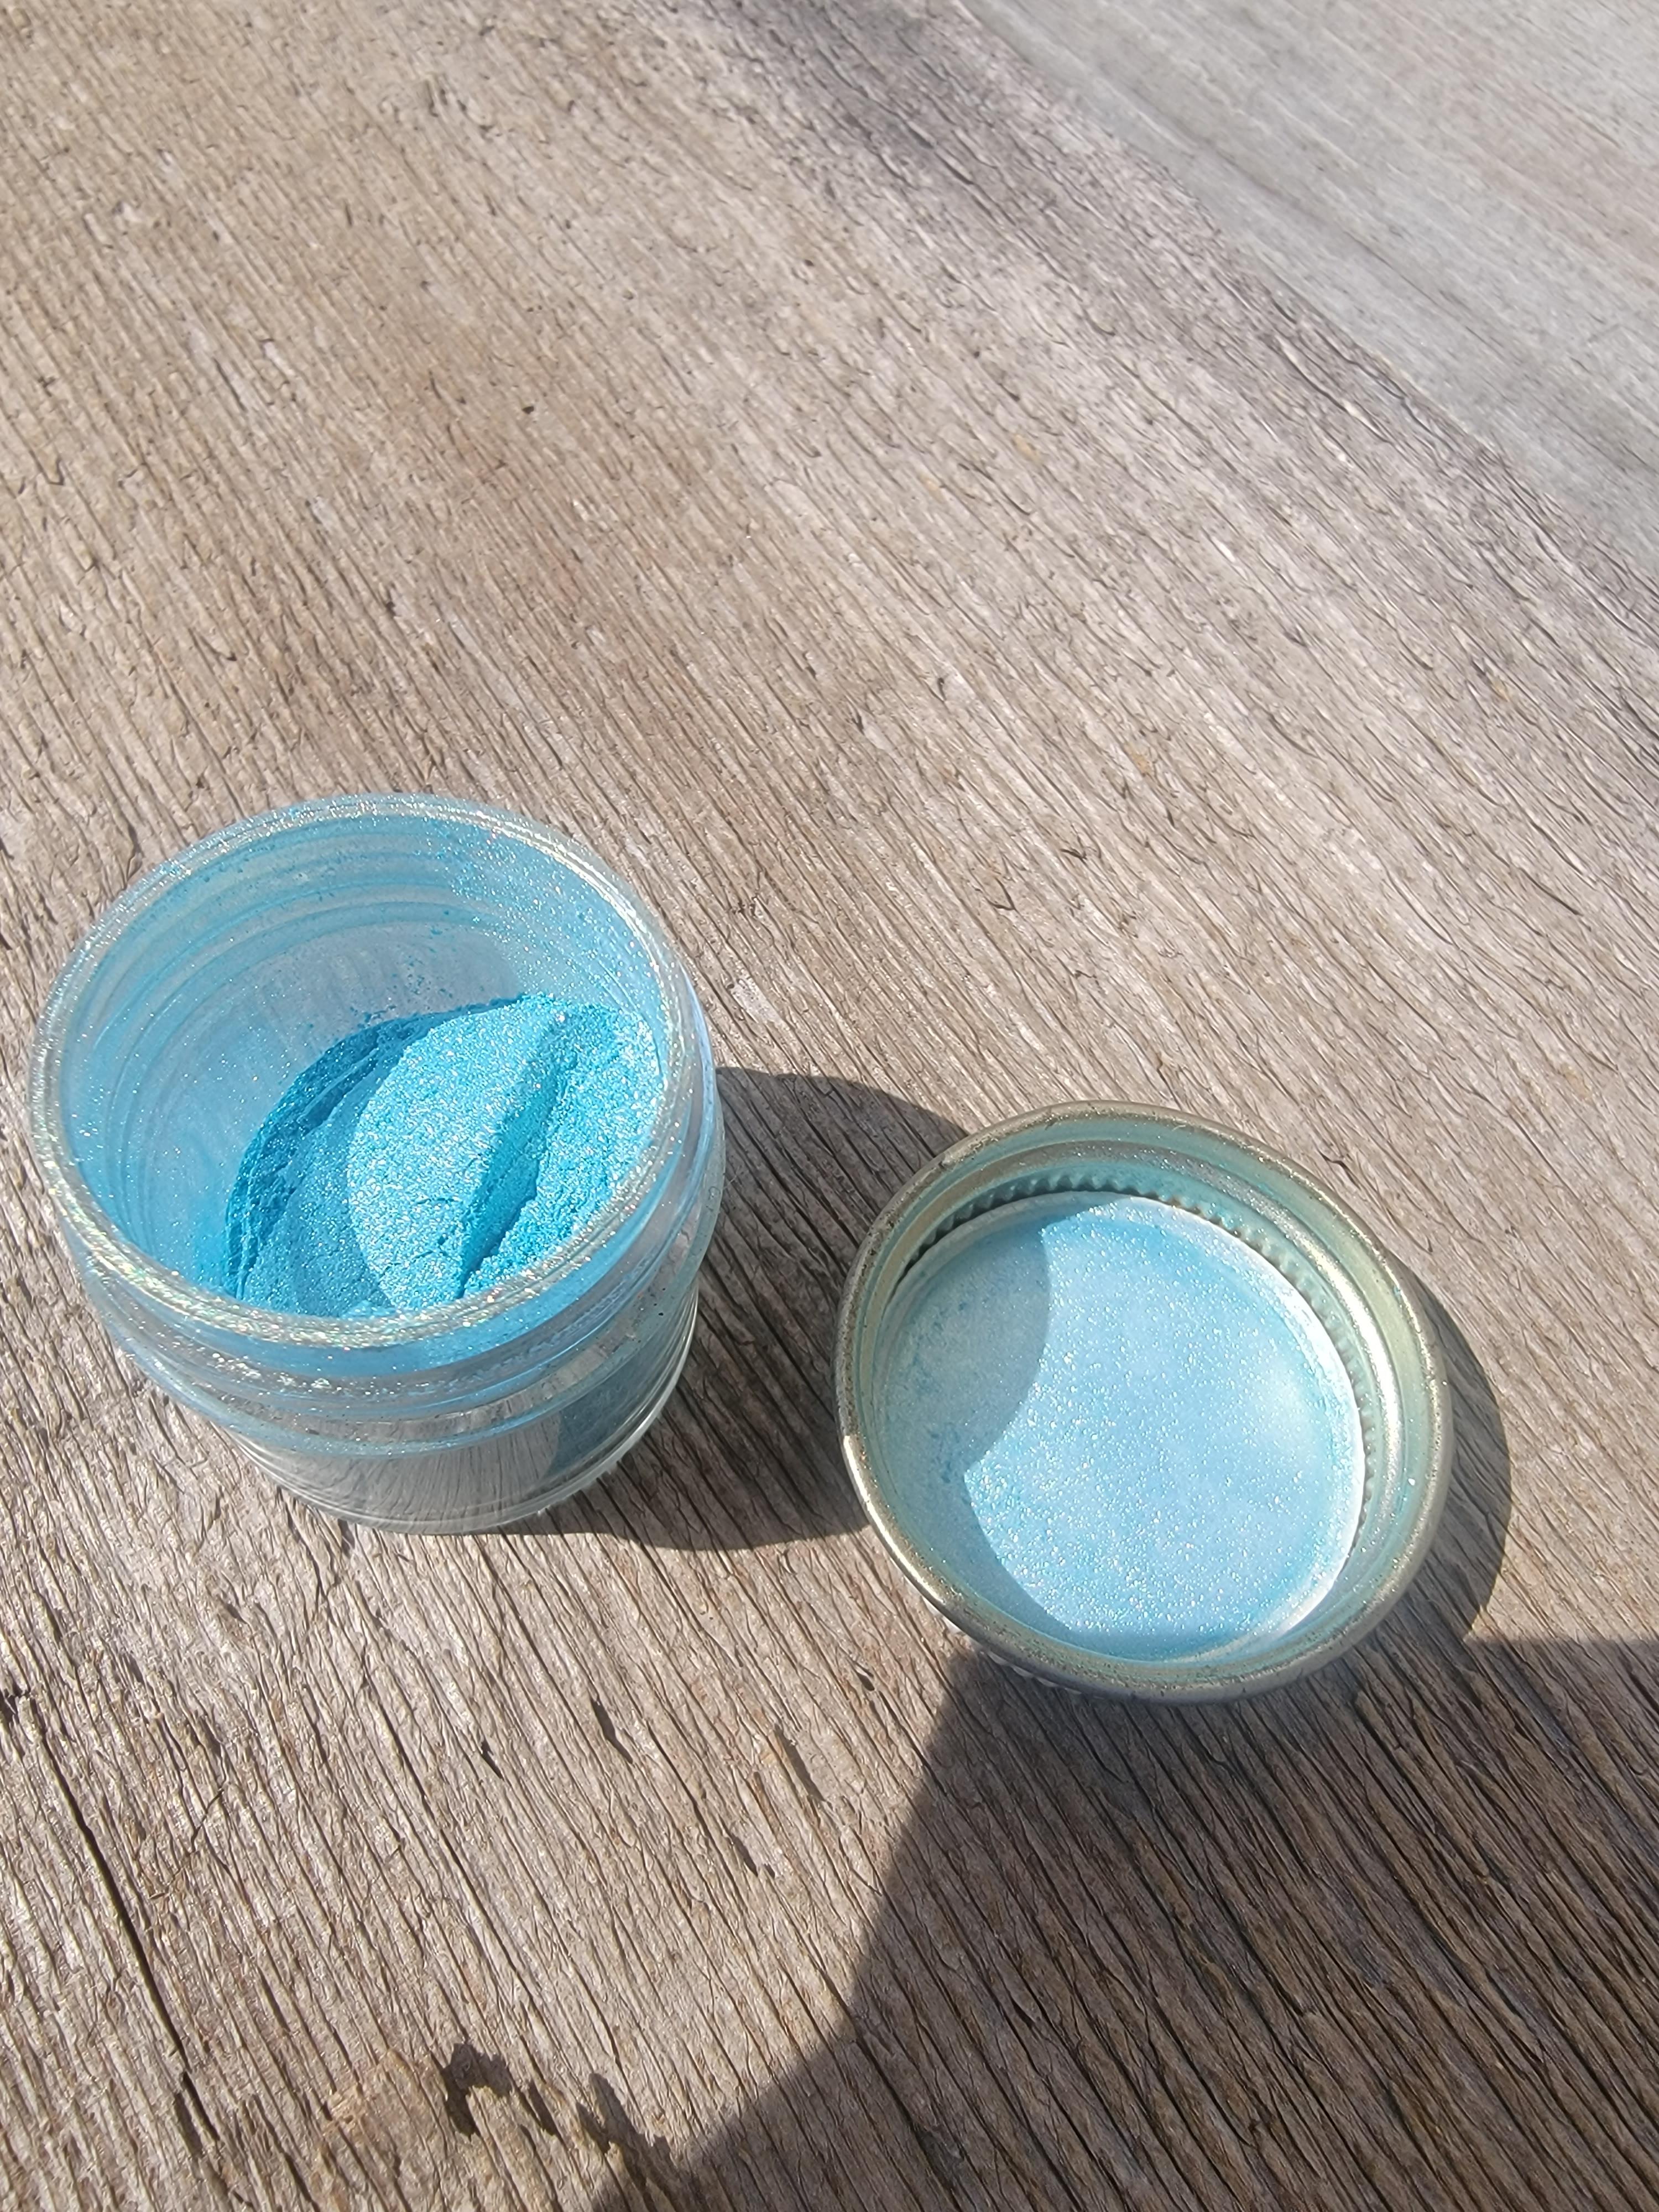
I was kind of on the fence bout the color of the body until I sprayed the clear mixed with the microflakes. They gave it a bit of a greenish gold sparkle in the sun.
Later-
-
9 hours ago, NOBLNG said:
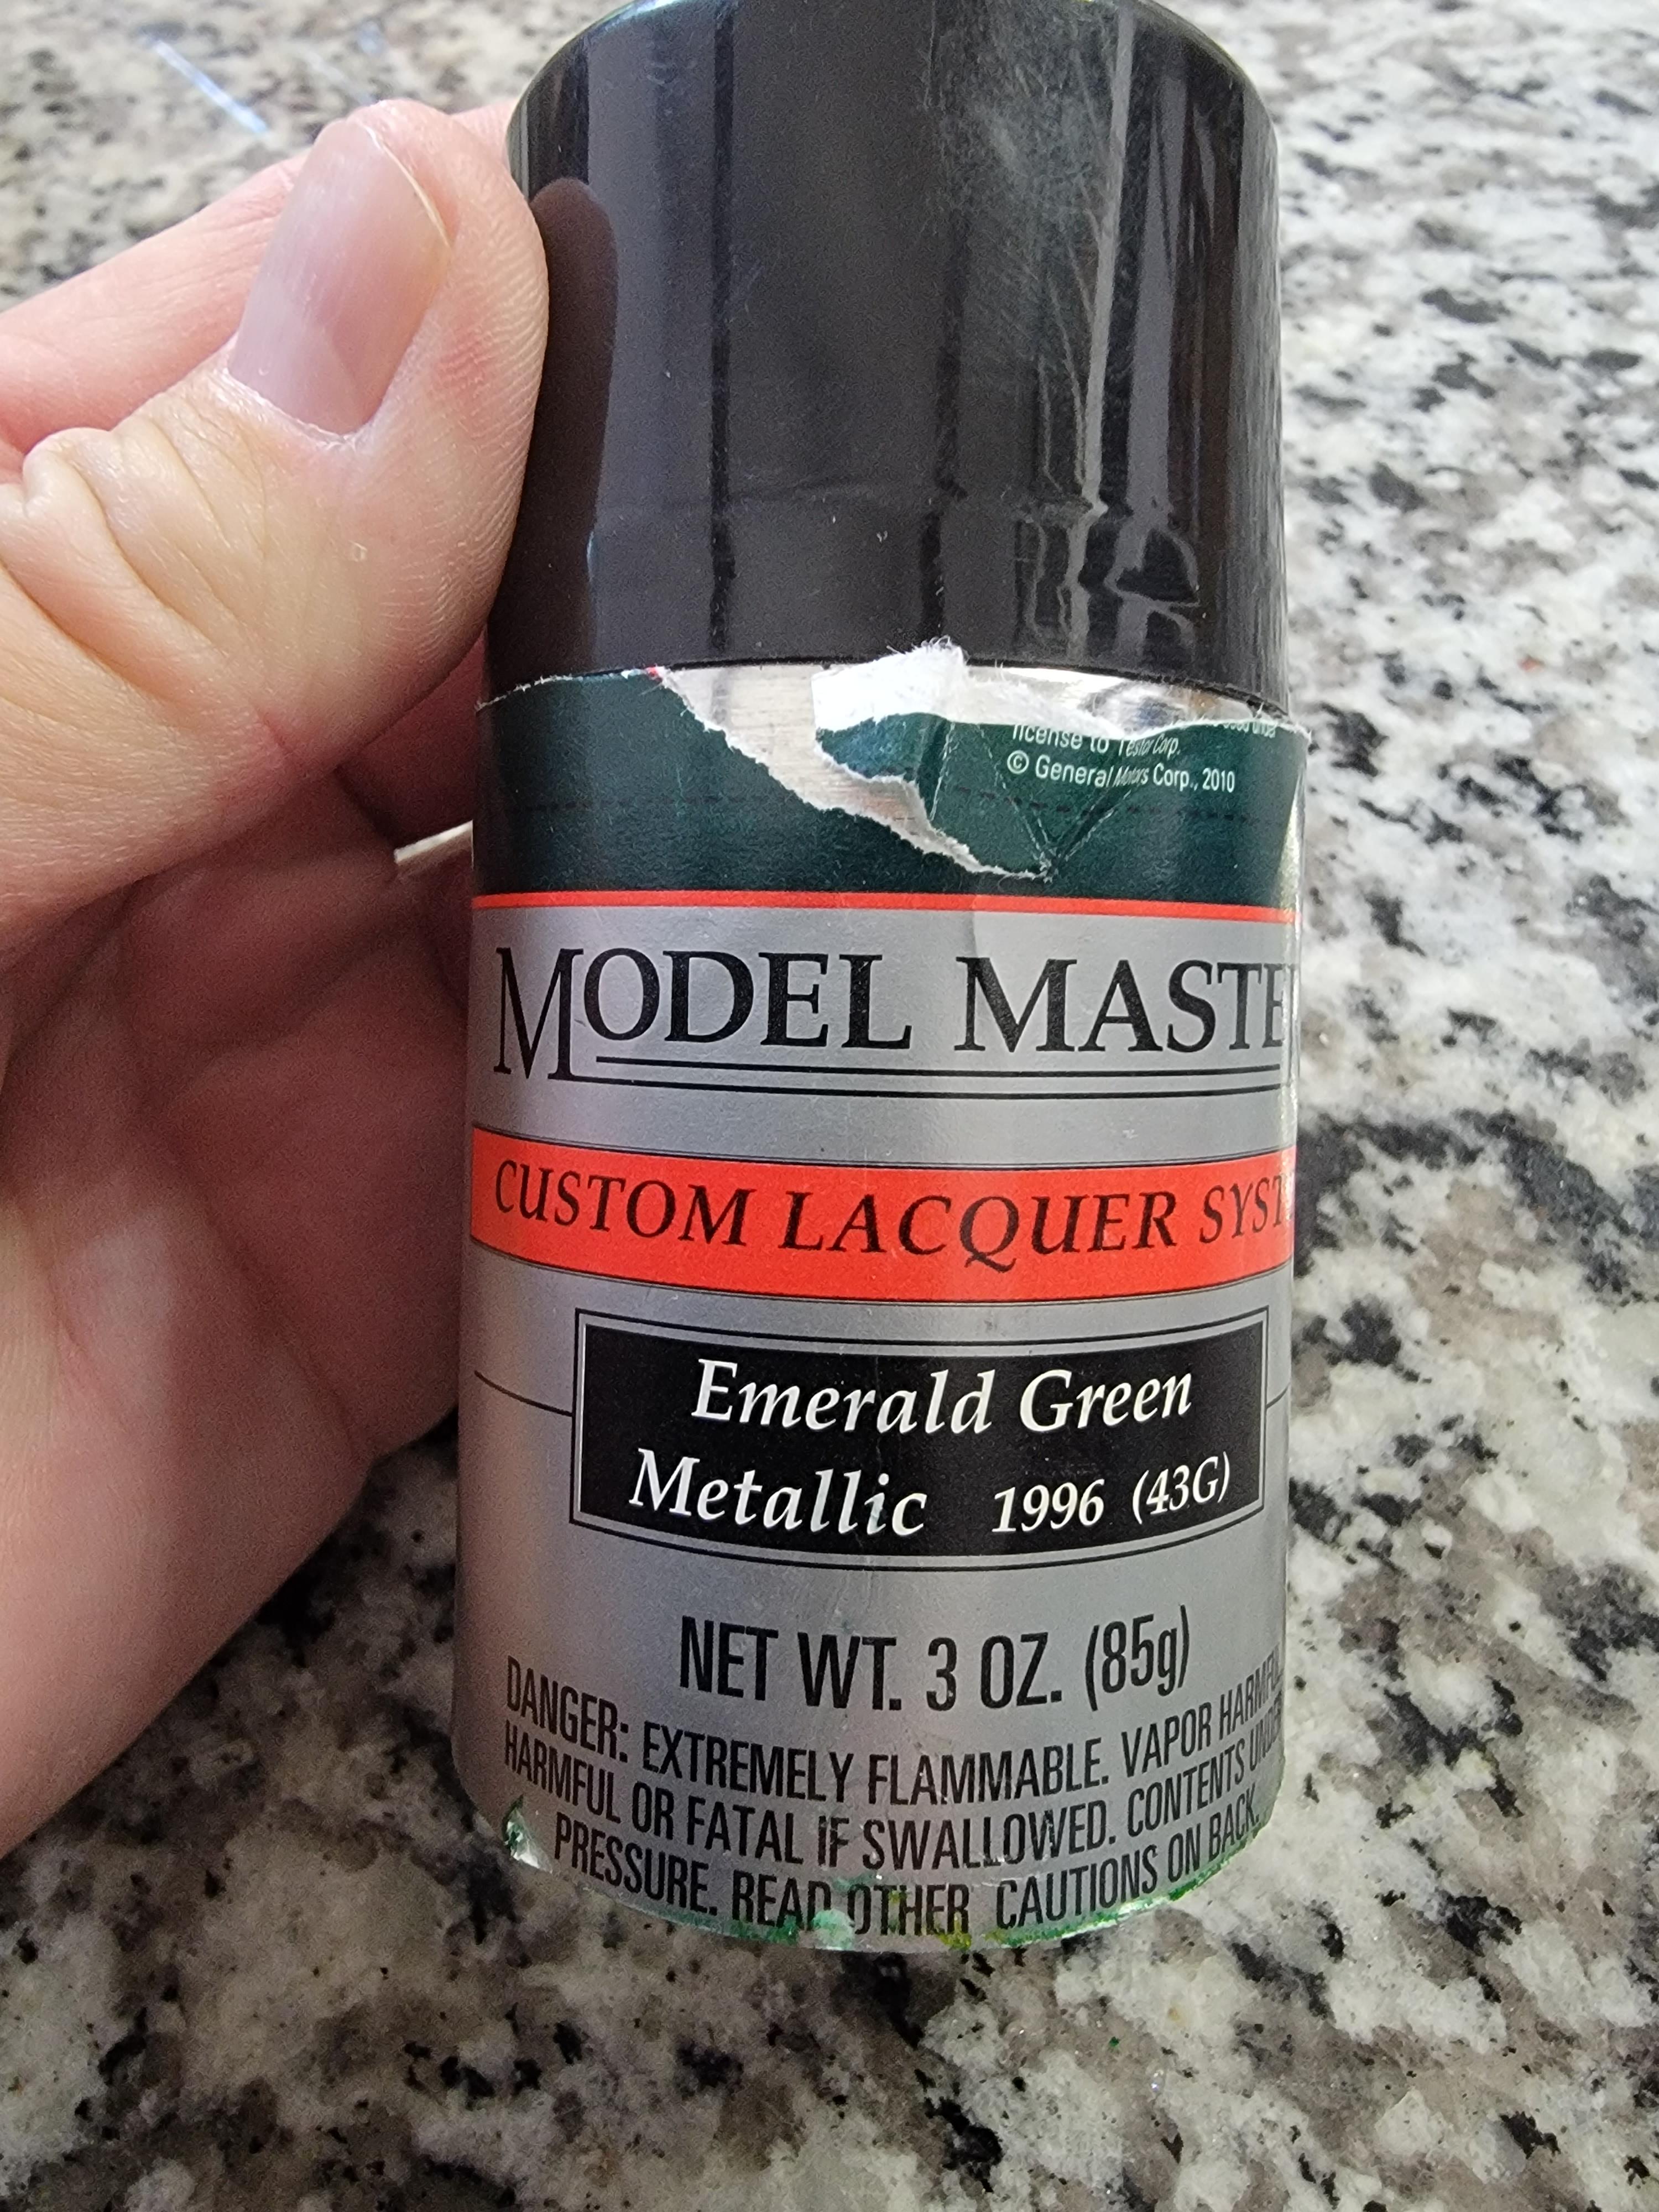
Nice conversion there Tom!? The paint looks good from here…what did you use?
I used a Testors Model Masters Emerald Green and Model Masters Bright Titanium Silver.
Later-


What did you get today? (Model Car Related Items)
in General Automotive Talk (Trucks and Cars)
Posted
Just got back from my club's model show and swap meet. This is what I ended up with. The decals are STS (vending at the show). Two types of Lace decals and a sheet of pin stripes. Also a set of 65 Chevelle decals from The Last Detail.
Later-