Rigzndiesel
-
Posts
162 -
Joined
-
Last visited
Content Type
Profiles
Forums
Events
Gallery
Everything posted by Rigzndiesel
-
all Peterbilt Conventionals here
Rigzndiesel replied to Ken Gilkeson's topic in Model Trucks: Big Rigs and Heavy Equipment
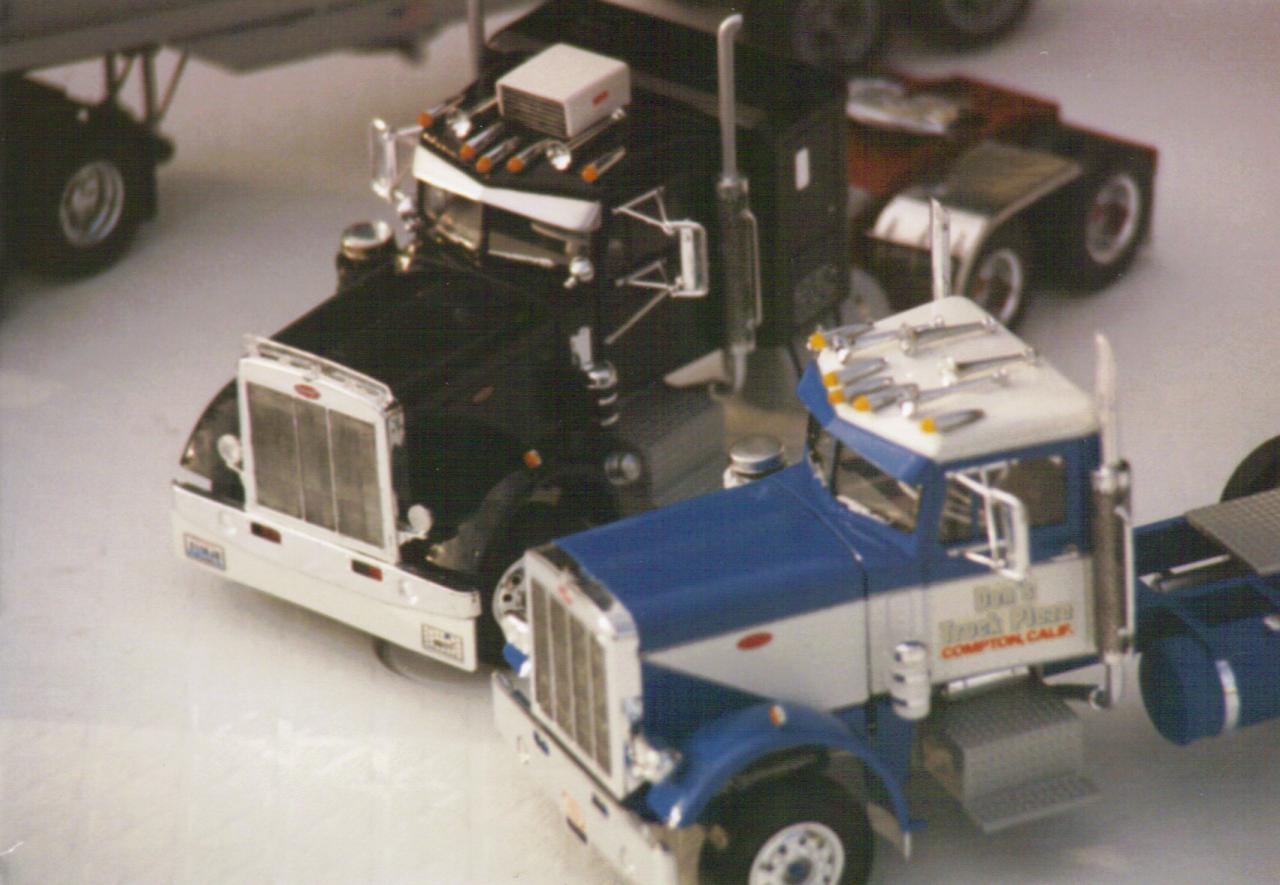
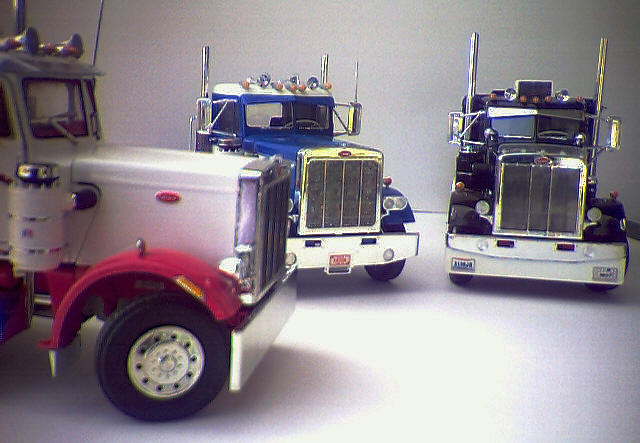
Here's a pair of little window Petes that I built in the late 90's when I discovered Ebay. Prices weren't too outta this world at that time. My first Revell Pete I built for my daughter. I remember thinking this was a great kit and where the heck was I when these kits were on the shelves???? Musta been around the time I ditched my BMX bike for my first car... All got destroyed during moves, the black one got rebuilt the same and the other T-500 got built as a 358 wrecker. The Revell kit is/has been a work in progress. Jeff
-
Beautiful build Sean! Your paint work is Outstanding! Please show us the mudflaps! Jeff
-
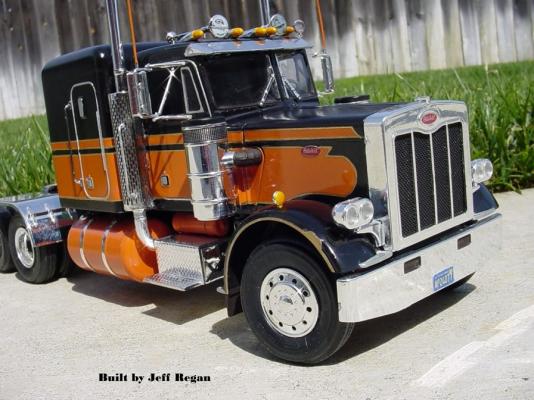
Pete 352 Restart
Rigzndiesel replied to Rigzndiesel's topic in WIP: Model Trucks: Big Rigs and Heavy Equipment
Worked a little on the fifth wheel. Made a release handle and a air lock coil and sanded down that big clunky base plate and added angle styrene to it. Interior in place. Made some mud flaps and hangers from wire. Once the paint dries I'll find a decal for the flaps. No chunky mud flap girls for this Pete! Thanks for the comments everyone! Jeff
-
Pete 352 Restart
Rigzndiesel replied to Rigzndiesel's topic in WIP: Model Trucks: Big Rigs and Heavy Equipment
Hey Randy, I have only built this kit once before in my younger days (in 1976 age 9). As memory serves me - I remember painting this truck green and gold with a paint brush. Those were the only colors at my disposal (it was a sick looking truck; green cab gold doors. This time around I want to do a better job for this 352. Anyways, I'm not gonna use the kit mirrors as they are the same for the 359 and they want you to omit the triangular brackets and only use the outer frame and mirror. They should actually be using the same mirrors that come in the KW K123 kits. But I think the KW mirrors are scaled too big to use on the 352. I will probably make mine using angle styrene (for the base that is attached to the door) to glue my outer mirror frame to. As far as the other chrome goes, I used longer grab handles from the snap Pete 359 on this build. I used a pin vise and drilled holes and pushed the grab handles into the cab and glued them from the inside once they were pushed thru. Scrape the chrome plating off the surfaces to be glued with a sharp Xacto and use tweezers to place the parts onto the cab. Just lay the cab on one side and take your time and be patient as your putting parts on. I think the biggest problem can be handling the model too soon as we all want to mock up the model to see how it looks with the new parts on. I am guilty of this...lol. Thanks for the comments! Jeff -
Pete 352 Restart
Rigzndiesel replied to Rigzndiesel's topic in WIP: Model Trucks: Big Rigs and Heavy Equipment
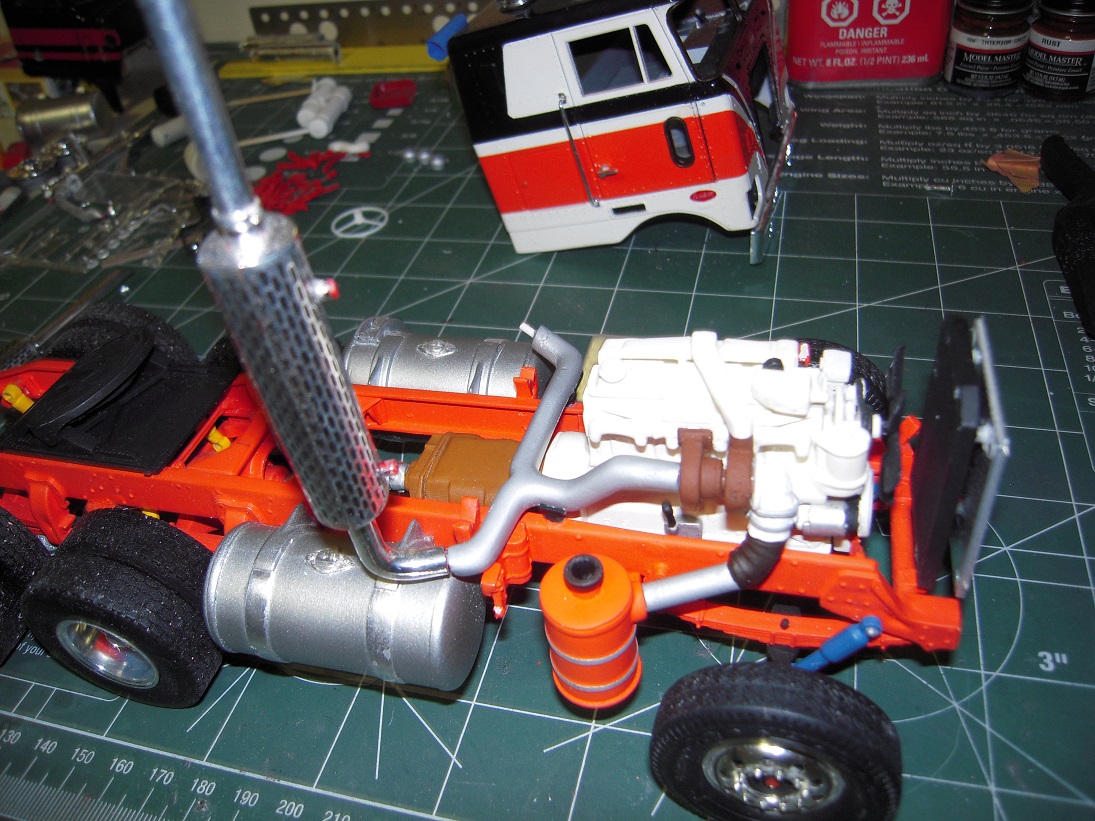
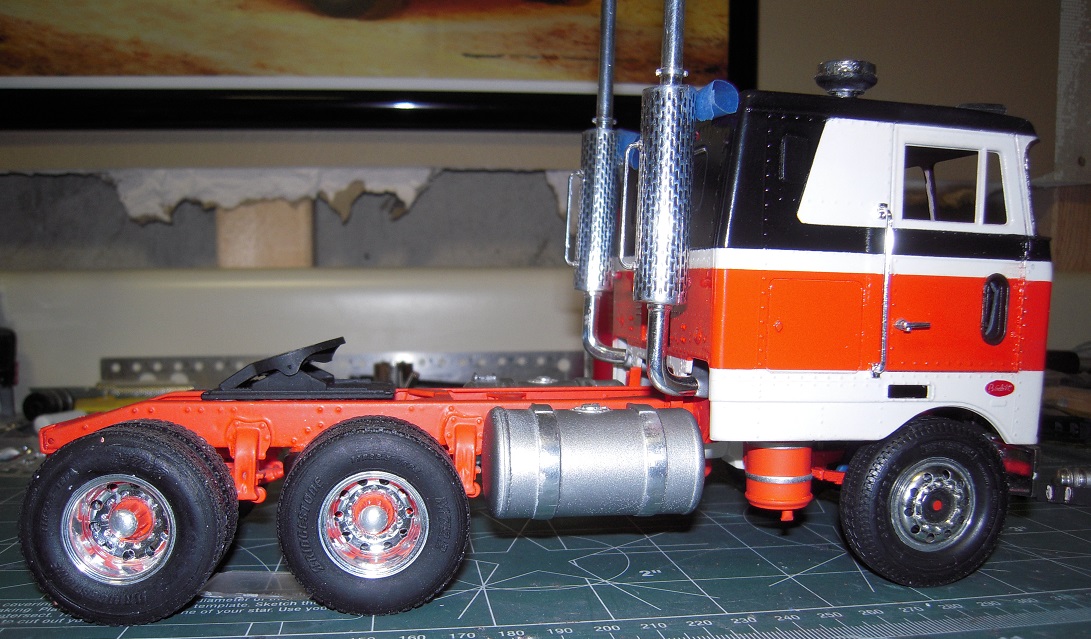
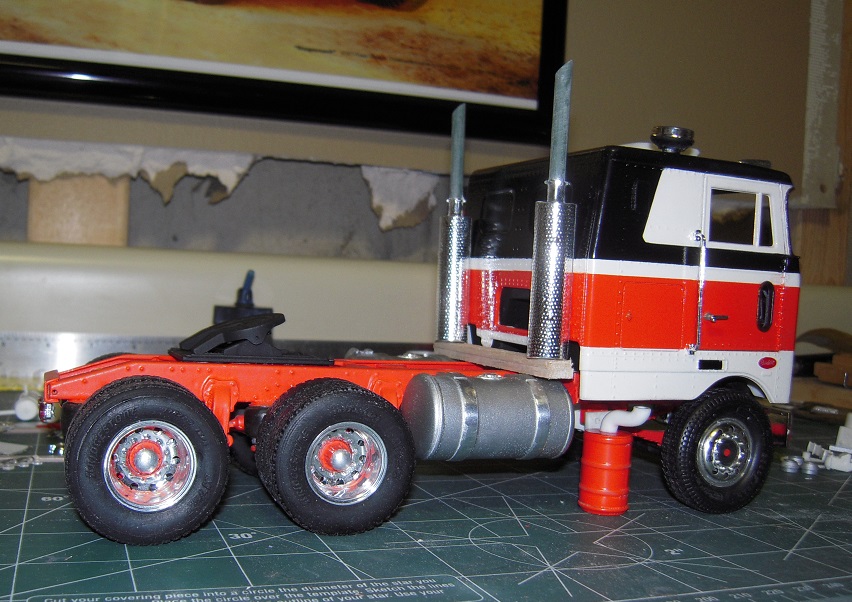
A small update: Worked on the air cleaner piping and mount. Also mounted the air tanks under the battery box and changed my exhaust pipes. I wanted to have the stacks mounted on the frame but the resin site I usually buy from is all sold out of the mounts. I will mount them on the cab now.
-
Pete 352 Restart
Rigzndiesel replied to Rigzndiesel's topic in WIP: Model Trucks: Big Rigs and Heavy Equipment
Tim, Andre, Casey thank you for the comments. Here, I'm trying out if these stacks will look good. Interior painted and fitted in cab. I had to trim a 8mm X 8mm chunk out of the passenger side dog house for the tub to fit with the inline 6. It fits, now I can continue with the seats. This truck is actually the "Turnpiker" kit. I Think I will use the low backed seats since this paint scheme is looking more like a company truck than a O/O. Jeff
-
55 ton 3-axle lowboy
Rigzndiesel replied to KJ790's topic in WIP: Model Trucks: Big Rigs and Heavy Equipment
Wow, really nice work! We have one of these trailers at work (looks identical). I'm in for a three axle when ready! Jeff -
A thousand gold stars for YOU! This model combo is gorgeous!!! I am digging the aluminum foil trick you did on the trailer...so cool! Nice details on the truck and trailer. She is truly a good looking pair! Jeff
-
Wow, very nicely done on both the truck and car! You are obviously not a novice to building models. Please start building more trucks...and cars! Jeff
-
You do nice work. This looks really cool so far, I can't wait to see the rest. Jeff
-
Dodge 9 Car Transporter
Rigzndiesel replied to Mopar - D's topic in WIP: Model Trucks: Big Rigs and Heavy Equipment
Dan, This is so awesome! That stinger for the fifth wheel is done up so nicely. I enjoy popping in for an update! Can't wait to see what's next! Jeff -
This is a very nice truck. The color is suh-weet and the KW sleeper looks great on this truck. I can't wait to see the Alclad parts put on this beauty! I like the tip on using white glue to mock things up! Thanks Sean! Jeff
-
Pete 352 Restart
Rigzndiesel replied to Rigzndiesel's topic in WIP: Model Trucks: Big Rigs and Heavy Equipment
Thank you! Your DC 352 has been an inspiration to me. I can only hope mine turns out half as nice as yours! Jeff -
Pete 352 Restart
Rigzndiesel replied to Rigzndiesel's topic in WIP: Model Trucks: Big Rigs and Heavy Equipment
Thanks Dan! -
Pete 352 Restart
Rigzndiesel replied to Rigzndiesel's topic in WIP: Model Trucks: Big Rigs and Heavy Equipment
Thanks Gordon! I credit my air brush for giving me better control of the paint flow. I just need to be a little more patient on handling the cab after paint and take more time in prep. I appreciate the kind words! Jeff -
Pete 352 Restart
Rigzndiesel replied to Rigzndiesel's topic in WIP: Model Trucks: Big Rigs and Heavy Equipment
Sam, they are from Class A Resin as Clayton pointed out. They are Bridgestone M722 tires in 11R22.5 size. I'd like to have several more of these but Class A resin has them listed "Out Of Stock". I hope to get some steer tires from Dble Take Replicas in the future. Jeff -
Pete 352 Restart
Rigzndiesel replied to Rigzndiesel's topic in WIP: Model Trucks: Big Rigs and Heavy Equipment
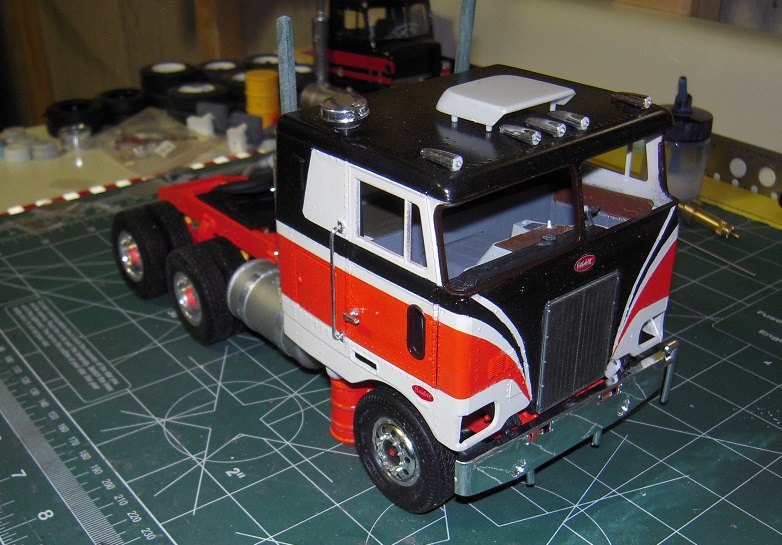
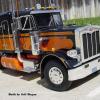
I broke out the real rubber tires since I robbed tires off this truck over the years. No sense in keeping the good stuff tucked away for later. I figured I paid good money for it - use it! I'm thinking of acquiring some steer tires for it now. I never did like the AMT Pete hubs. I don't know why AMT never gave the stock hub or baby moons option like the KW kits. Here is my cheap version of baby moons.
-
Pete 352 Restart
Rigzndiesel replied to Rigzndiesel's topic in WIP: Model Trucks: Big Rigs and Heavy Equipment
Thanks Sam! Thanks Lucas for the kind comments! Jeff -
Pete 352 Restart
Rigzndiesel replied to Rigzndiesel's topic in WIP: Model Trucks: Big Rigs and Heavy Equipment
Hey Sean, I finally figured how to use the "Quote" tool. I switched to Google Chrome and now the tool is enabled. Thanks for the comments. -
Pete 352 Restart
Rigzndiesel replied to Rigzndiesel's topic in WIP: Model Trucks: Big Rigs and Heavy Equipment
Thank you Earl. I will try the wet sanding technique in between coats. I'm almost positive the sand paper I have in the home is too coarse. I'll look at my LHS for some some model sand paper. Thanks for the tip! Jeff -
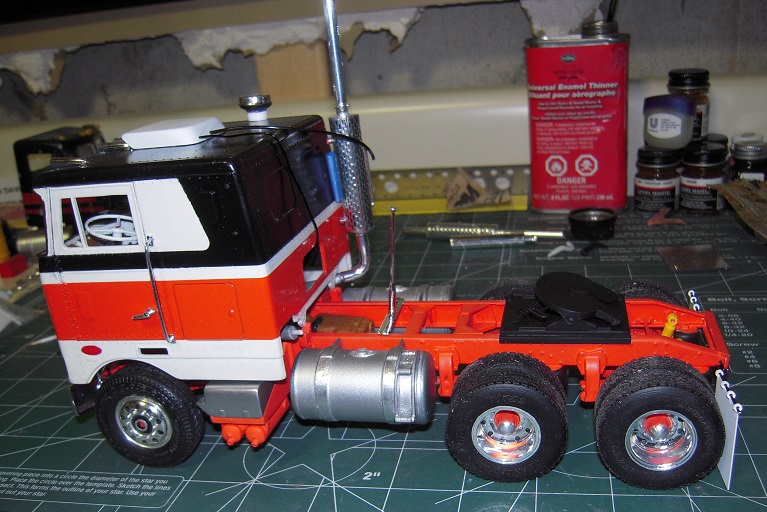
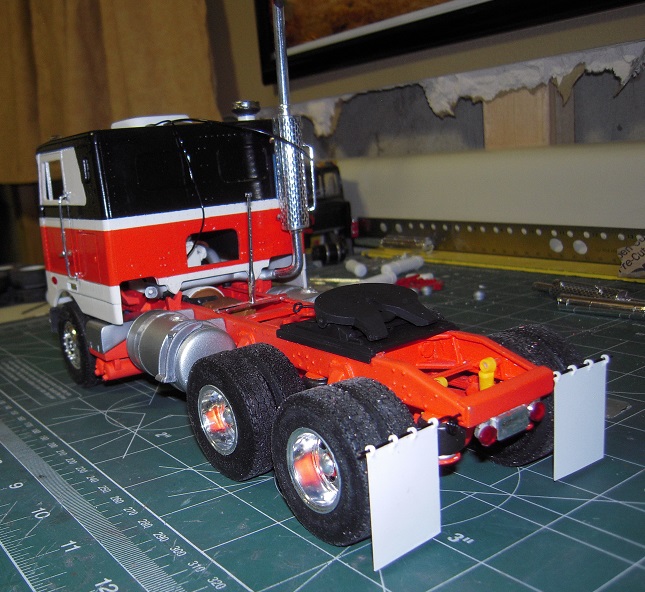
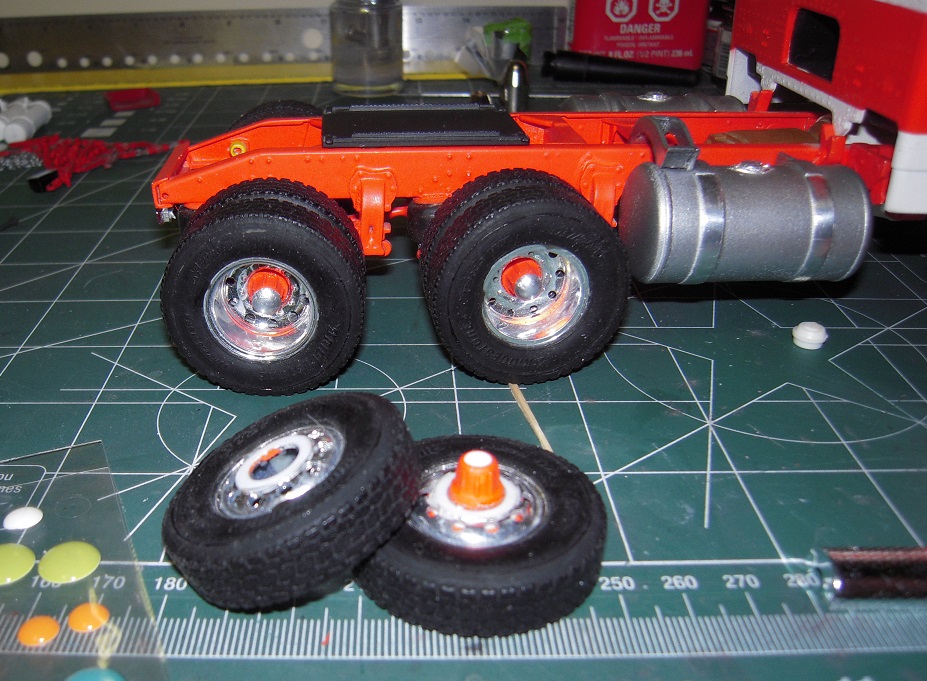
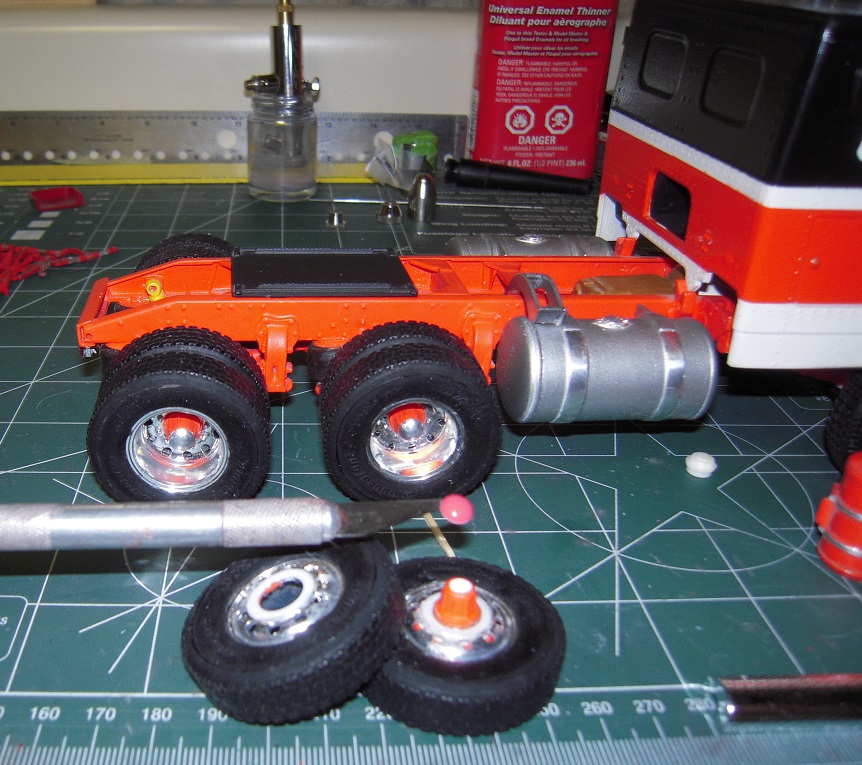
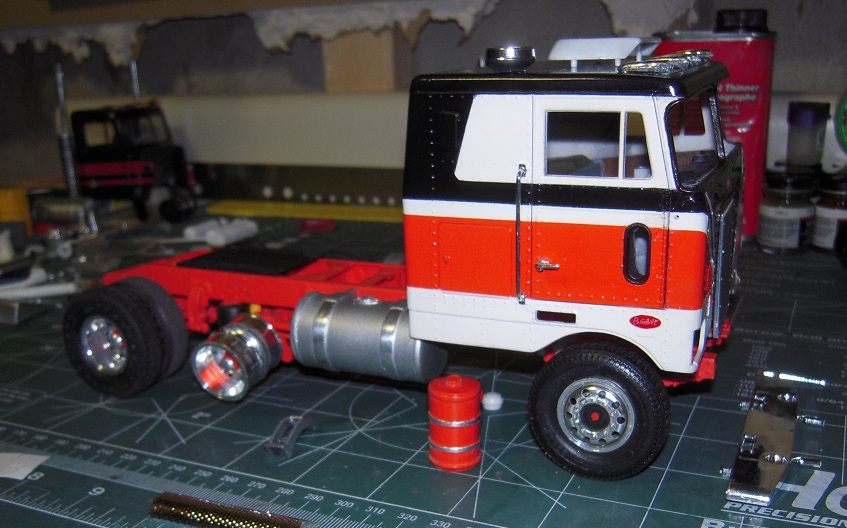
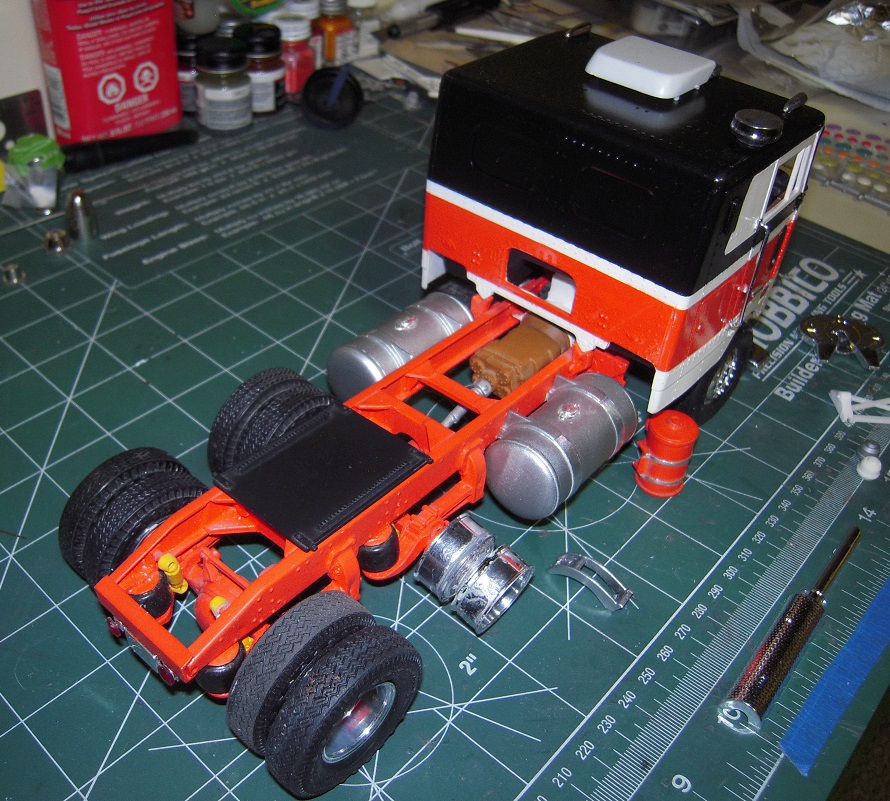
Started a new build. This time I went with a COE, It's been awhile since I built one. The truck has been collecting dust unfinished for about 5yrs on the top shelf. It has a Cummins engine and the newer airbag suspension. Having a few set backs with the paint due to using my airbrush. Mostly re-educating myself with using it and cleaning it. My prep work is terrible but I am learning as I go. Some parts are placed on for mock up. Missing/mismatched tires. I was thinking of building the horrid AMT tanker (unplated) to go behind it. Here it is... Jeff
-
Hey JT, Just checking in on progress. Looking GOOD! Very organized display, neat how the family looks like their checking it out too. I'm amazed at how you can cut and work with sheet plastic so quickly. ME not so good... The bed looks nice! I like the orange color on this truck as well! Jeff
-
Another Pete Wrecker
Rigzndiesel replied to Rigzndiesel's topic in WIP: Model Trucks: Big Rigs and Heavy Equipment
Calling this one done and put on shelf. Not sure how to delete this thread and move it to the completed section. I'm using IE and I think it's limited my editing capabilities. Any pointers welcome... Jeff
-
KW C500 prime mover
Rigzndiesel replied to Tesla's topic in Model Trucks: Big Rigs and Heavy Equipment
Man this thing is SUH-WEEEET! Any plans for a trailer? Really, really nice...!!! -
Wow, that interior is gorgeous! Very nice subtle details, I like the valve stems too! This is a fun build to watch! Thanks for sharing! Jeff