

Chillyb1
-
Posts
895 -
Joined
-
Last visited
Content Type
Profiles
Forums
Events
Gallery
Everything posted by Chillyb1
-
Well, I'm not usually one to complain, but...
-
I'm curious about the finish. Did you clear over the decals? If so, using what clear?
-
Good to hear it. That's exactly what I was thinking you could do. I like to try my hand at weathering and I make clumsy mistakes with sharp modeler's tools; so, to try to hide damage I usually plan my weathering around it. Can't wait to see more.
-
I will never, ever build this kit. However, I love to see the work you adventurous modelers are doing. I also thought we'd see more of these in WIPs here and elsewhere. I love the cars and am always happy to visit and watch while one gets built. The color you've chosen is gorgeous on that body. And the BMF/gray primer/dullcote is a neat trick I'll have to try out someday. One nit to pick: is that a scratch or something on the right side bottom of the rear grille?
-
How many BUILT models do you own?
Chillyb1 replied to Jeff Sauber's topic in General Automotive Talk (Trucks and Cars)
I have precisely zero built models. I sell everything I build. When I started building as an adult, only about five years or so ago, I soon realized how quickly built models accumulate. I'm no prolific builder, but before long I had a couple dozen cars that I had to find places for around the house. So I decided to auction them off on eBay. Now that's what I do whenever I finish one; first, I take some photos to document the build then off to the block it goes. -
Budget spray gun kit???
Chillyb1 replied to cazxr2's topic in General Automotive Talk (Trucks and Cars)
I bought an airbrush shortly after I started building models again and it is the single best modeling-related purchase I've ever made. Stay away from "budget" models and stay away from aircans. Wait until you can afford a good quality airbrush and compressor setup before you buy. It will be worth it in the results you get. You can get perfectly good paint jobs from spray cans if that is what you want to stick with. However, an airbrush allows for all sorts of things you can do with cans: you can mix your own colors, you can economize on paint, you can shoot Alclad II's outstanding paints, and you can detail and highlight in a way that cans simply cannot (bad pun intended). Best of luck. -
I've gotten the best results using Alclad's own base coat and highly recommend that you get some. While I've heard of other modelers using Tamiya's gloss black lacquer, I've not tried it myself. Gloss black enamels by Testors/Model Master have yielded good results for me but, again, the Alclad base works perfectly every time.
-
1/12 Ferrari 156/85_1985 Canadian GP Winner
Chillyb1 replied to curt raitz's topic in WIP: Model Cars
Curt, this is going to be a wonderful thread to watch. I can't wait to see your progress. I live (or model) vicariously through builds like this, so thanks for doing it for me! -
Go here: http://www.sisweb.com/micromesh/conversion.htm
-
I recently picked up a new weathering product and I'm wondering whether any of you, my modeling colleagues, have tried using this stuff. If so, any tips, hints, suggestions for those of us who are new to the product? If not, my limited experiments with it suggest a very nice addition to the weathering arsenal. In my searching on the Web I've found very little about using this stuff. Seems to have been intended for railroaders, but military and dirty car enthusiasts have also been using it. Any comments from anyone with experience using this stuff would be greatly appreciated. The Weather System information can be found here: http://www.bragdonent.com/weather.htm
-
AMT 1965 Pontiac Grand Prix
Chillyb1 replied to Chillyb1's topic in Model Building Questions and Answers
Thank you both so much. You've answered all my questions. Mark, I'm glad those instructions are readily available because I'll sure need them. Ed, if you want that box I'll be happy to send it to you. And that color, Evening Orchid, is one I'm considering for this build. There is also a cool gold color that I associate with mid-1960s Pontiacs that I might use. Still haven't decided. Everything is now soaking to remove paint and chrome, then I'm going to get started on it. Thanks again. -
A friend of mine sent me this kit and I'm wondering when it was originally issued. Anyone know? I don't know anything about how to date such things and there are no identifying indicators on the box or the body. I'd also like to see some instructions for it because it didn't come with any. And I'm not like some of you guys who can slap a kit together without any guidance. I appreciate any information you kind folks can provide.
-
A friend of mine picked this up at a thrift store and sent it to me to build: Not really my usual cup of tea but should be fun to try to resurrect it.
-
MikeMc covered most of your questions. One thing I'll add is that you have to spray several coats to get proper coverage. Unlike enamels and lacquers that can do some jobs in one coat, Tamiya acrylics need to be built up. If you try to lay down lot of paint on the first go 'round you'll just get a runny mess. At least that was my experience! It doesn't take very long to get the job done and you can spray successive coats relatively quickly.
-
Clear over clear plastic
Chillyb1 replied to beefheart22's topic in General Automotive Talk (Trucks and Cars)
Don't do it! I just went through this with a Tamiya Porsche 962C. On this model the clear parts a molded in place and because some decals go over part of the clear I could leave the window masks in place and get the decals in place. So I figured I could clear over the whole thing and I wouldn't have to worry about the clear parts. Wrong. Took a lot of sanding to get back to the window plastic and a lot more to get it transparent. Anyway, find an alternative solution. -
Thanks for your comments and compliments, everybody. I really enjoyed the build and am happy with the result. I won't rush into another one of these anytime soon, but I may shoot for the Paris-Dakar rally version. 'Monty' Was it shot over a dark or light colored primer? I shot this over Tamiya's white primer. It is a super dark color so I'm not sure it would appear any different on top of gray primer. 'Billy Kingsley' Looks good to me! I have one of them I've had in progress for about 5 years now, I really should finish it one of these days. Yes, by all means, get cracking on it and finish it up. It is a really cool Porsche among a large field of very cool Porsches. 'Bluesman Mark' I'd love to see this build with a set of darker rims, perhaps body color or gunmetal, with a poilished aluminum looking edge. Still, this is a great looking model! Wheel color is one thing that I debated with myself before deciding on this fairly standard glossy aluminum. I could see several kinds of dark metal shades looking good with this color.
-
I finished this one today (26 April 2010) after just a couple of weeks. I wanted to try to build a model quickly without getting hung up on minor things but still to have it come out looking pretty clean. I chose this kit because it has a fairly low parts count and I figured I wouldn't have to bother adding any detail. I added photoetch brake disks, a couple of hose clamps, and that's it. Paint is Tamiya maroon (TS-11) with rubber black (TS-82) window trim, several varieties of black for the interior, and Alclad chrome in the headlight buckets. Not much else to say. Almost ruined the paint job trying to accent the panel lines, which would have set the project back, but I was able to overcome that problem by adding more paint! Comments, criticisms, helpful suggestions are all welcomed.
-
Hobby Shop in Phoenix/Tempe?
Chillyb1 replied to Chillyb1's topic in General Automotive Talk (Trucks and Cars)
Marty, excellent call on the hobby shop recommendation! I met some nice modelers and bought some cool stuff. Special thanks to the owner who gave me a out-of-town-visitors's discount, which made it easier to spend money there. Anybody visiting the Phoenix area should drop in and drop some cash at the Hobby Depot. -
I hope you will make room for one more category (as yet unnamed). I sell all my builds on eBay because: 1) I don't wish to harbor a collection, 2) I enjoy the building not the owning, 3) I'm not sentimental about them, and 4) I can use the money to purchase kits and supplies to keep this perpetual-motion machine going. I do not consider myself a pro nor should others; this is an avocation and, regardless of the fact that I get money for a good (and maybe a service, too), it is not a way to make a living. I do not bill myself as a pro builder in my auction listings but I do highlight recognition of my work by contest judges and magazine editors (meager as those accolades may be). And while I do not make the kind of money Paul Hettick and a few others do, I make enough to satisfy my modeling needs. Would I like to get more from my auctions? Of course. Am I jealous of Paul? A little. But I hope you'll agree that these are not "crudely built...models that cannot stand up to close scrutiny."
-
DO NOT remove the primer unless you absolutely have to; it's a pain and more work for no good reason. First, paint a plastic sample (spare body, parts, spoon, anything) with both gray primer and with white primer. Paint them with the Hemi Orange and see how different they are, and then decide which you like better. If you decide a white base is better, then you can paint white primer over the gray already on the body.
-
Thanks for the comments. I was able to referjigulate (that's a technical term, by the way) some stuff in the engine bay in order to get the engine cover to sit more correctly. Still not perfect, but it is as close as I'm going to get. Took a couple more photos that show some details better. You can see the gap between the engine cover and rear of the chassis is much less pronounced now. Bill, the finish on the wheels is Model Master magnesium metalizer with a very light dry brushing of aluminum, or maybe it was gun metal. They do look pretty good. Thanks for noticing!
-
I just finished this one. This is Tamiya's Ferrari F40 in Monte Shell livery. This is the recently reissued kit with Cartograf decals and includes the Tamiya photoetch set. Paint is Tamiya pure white (TS-26), bright red (TS-49), and chrome yellow (TS-47). I didn't use the decals for the red part because I knew I'd mess them up. There are some carbon fiber accents in the headlight surrounds and carbon kevlar on some spots inside. I added some logos from E.Jan and a photoetched wiper, some grille material, photoetched harness bits, and maybe some other stuff. I'm not enough of a modeler to correct the problem with the engine cover/chassis warpage. By no means a masterpiece, it did come out looking all right. A satisfying build overall. More photos, if you are interested, can be seen here: http://smg.photobucket.com/albums/v230/ChillyB1/Tamiya%20Ferrari%20F40/
-
Hobby Shop in Phoenix/Tempe?
Chillyb1 replied to Chillyb1's topic in General Automotive Talk (Trucks and Cars)
Thanks a lot, Marty. I just checked a map and find that it would be super easy to get to (down Priest and across Southern). I'll check it out. -
I'm going to be in the Phoenix area for a conference this coming weekend (9-11 April) and am wondering if there are any easy-to-get-to hobby shops that are worth seeking out. I'll be staying near Sky Harbor Airport and the conference is being held at something called the Fiesta Resort located at 2100 South Priest in Tempe. Any suggestions?
-
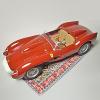
You GOTTA see this model
Chillyb1 replied to Tijuanataxi's topic in General Automotive Talk (Trucks and Cars)
Just think about how much joy that build brought to the kid who worked on it. Someone obviously had a lot of fun with it.