Farmboy
-
Posts
518 -
Joined
-
Last visited
Content Type
Profiles
Forums
Events
Gallery
Everything posted by Farmboy
-
Well, better late than never. My apologies for the delay in this build but sometimes life gets in the way..... For anyone that may have been following, I'll try to get this completed in a timely manner from here, so here's where the build is at.... In this mockup, I've narrowed both the rear frame assembly and transaxle to allow tubbing of the tires. Note I added gussets to help with the integrity of the glue joint. I again modified the front end to clean it up a bit. I substituted a new spring/axle assembly so it won't sit so nose-high. Note the front spring extensions to keep the springs relatively horizontal. I also added a couple of 'lobes' for the rear of the springs to attach to. Here's a better view of the front end. Tires are from the kit but the rims are from the parts box. and here is how the floor assembly sits on it. I tubbed the wheel wells and gave them an aluminum skin made from an aluminum beer can. The decking is made from stir sticks from a coffee shop just to add some texture to the build. Rest of the floor will be done in a dark green. Gasser regulations were (are?) that there have to be 2 seats up front. I'm having one. I'll explain why in a future post. more later.
-

Torino - Updated RestoMod Starsky Hutch new ride
Farmboy replied to RestoModGuy's topic in Model Cars
A simply stunning piece of work. Beautiful! -
Here are a couple of mockup views of the front suspension with scratch built springs and hangers in the body/frame assembly. Details like spring straps and rear spring anchors ar yet to be added. Upside down but you do what you can To make it a bit clearer, here's the same assembly by it's lonesome. You'll notice (or not) that I had to add a couple of filler blocks for the springs to rest on. These will be refined before painting. ....and how it compares to the kit piece. This will lower the ride front considerably Comments and observations welcome

-
I've decided to rethink my axle.... The straight one just wasn't doing it for me....so to reduce the vehicle's nose-in-the-air stance a bit, I made a dropped axle from a length of tubing. Left to right is the kit part, the previous aluminum straight axle and the new dropped axle. It's painted flat black to get a better look at how even the symmetry was and mocked it up with the in progress knuckles. Comments and observations welcome.
-
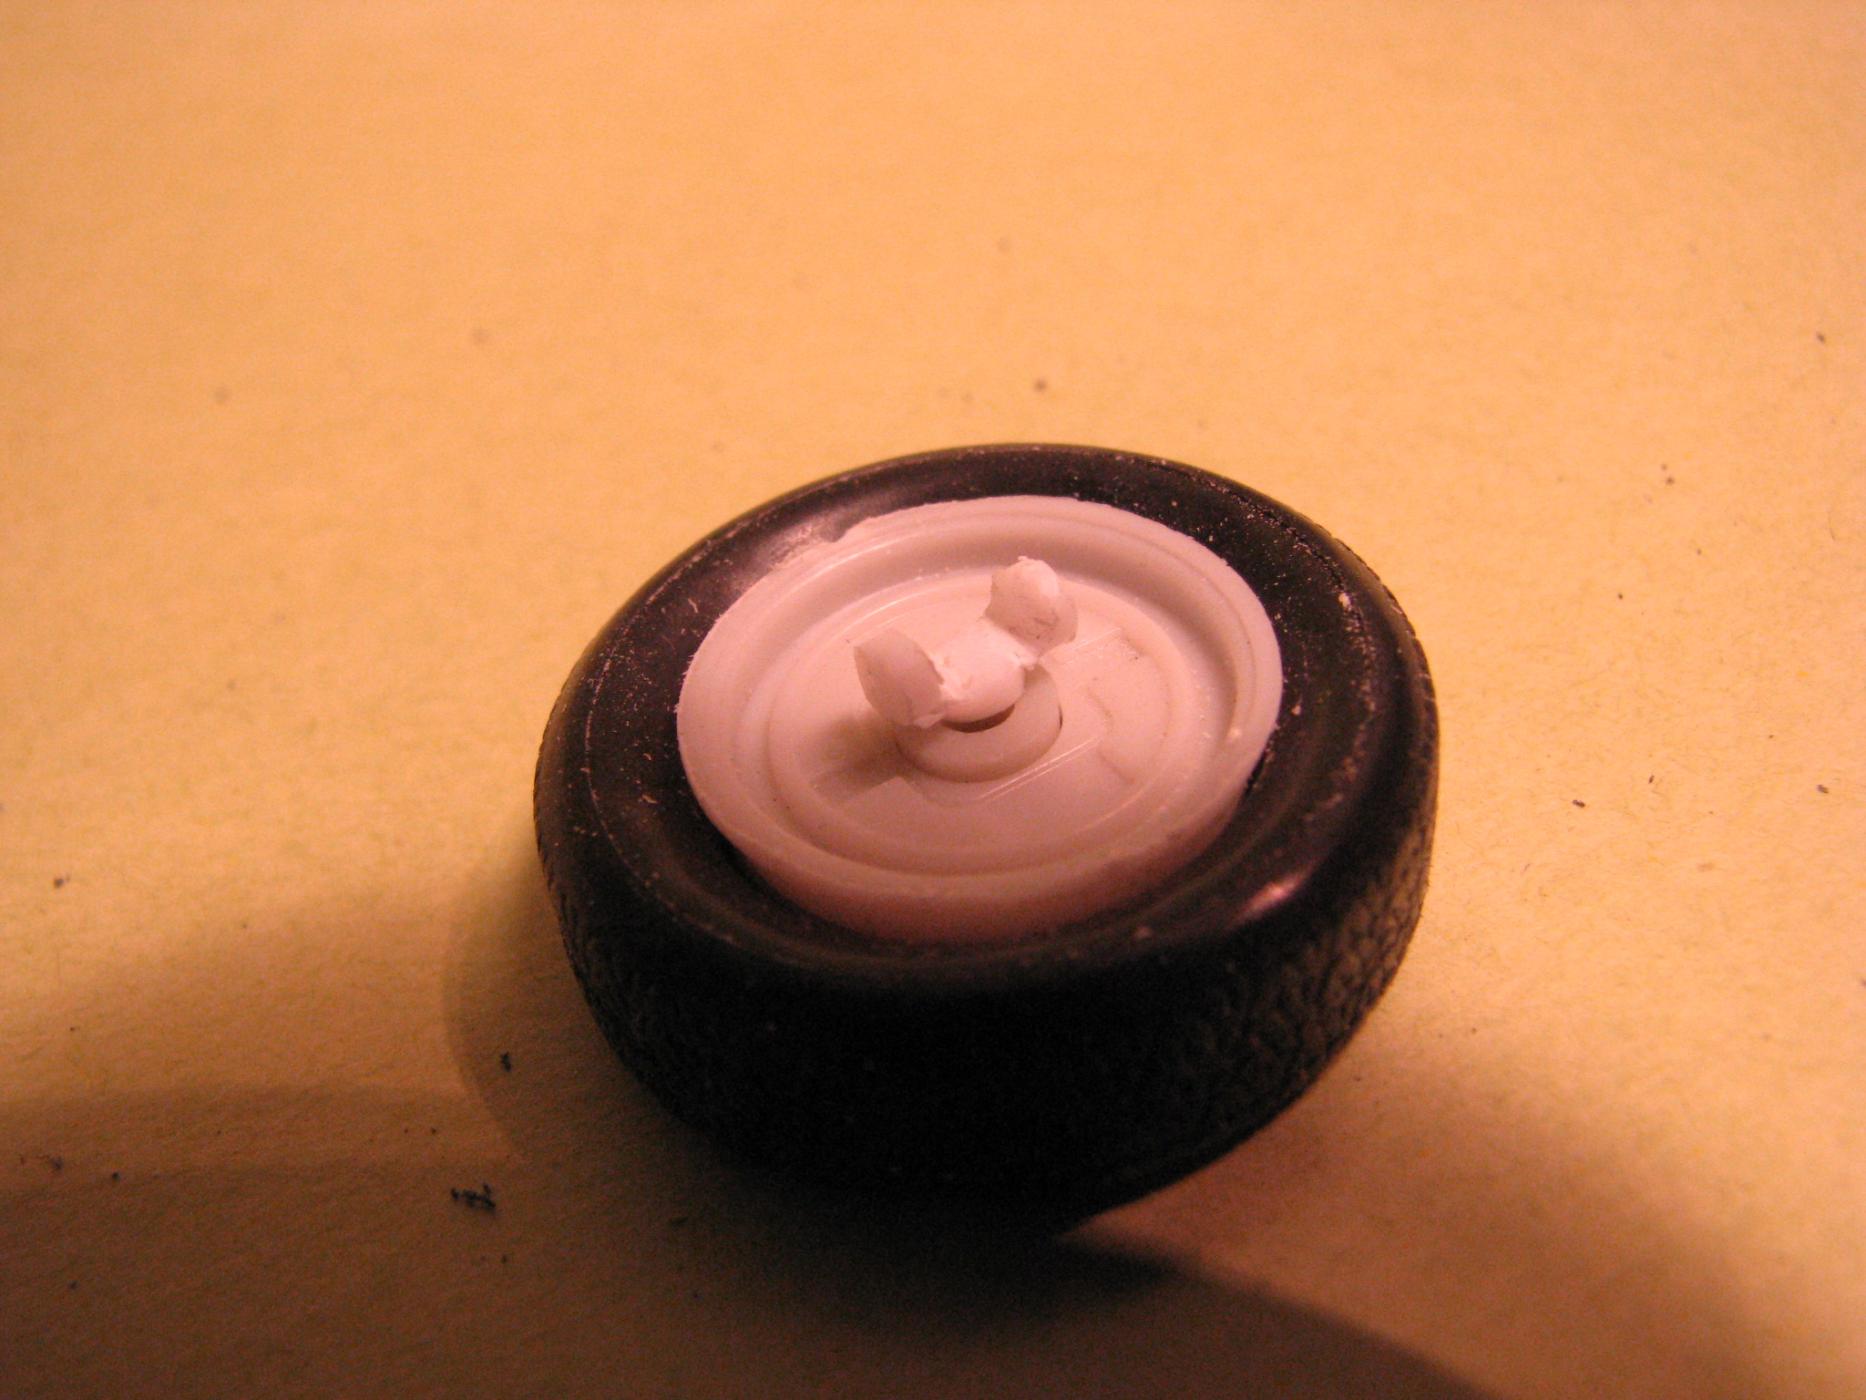
I made the axle from aluminum tube and half round styrene. When ready it will be shot with Alclad. I keep the original for measurement purposes. The pic shows the knuckle joint before and after. I made it from a T section of sprue....and almost limitless supply! I simply carved and filed away to fit the end pieces on the axle. You can see how it fits on the end (this is before final finishing). Pardon the dust, it's on the actual glass lens protector but obviously shows up on super macro. and here's how it sits on the back of the wheel. These are the wheel backing plates I got from the parts box, and they sit in the tire better lol. ...and here's an idea I'm working on for the knuckle horn(s) as they will fit on the knuckle. Made from small diameter solder, I simply flattened the ends and put a bend to suit. It looks worse at high mag than normal size, but it's my first one and hasn't been smoothed yet. There will be an upper and a lower on the passenger side wheel for the control arm off the pitman (upper) and drag link (lower). The driver's side will have a lower only for the drag link. Thanks for checkin' in. Comments and observations welcome.
-
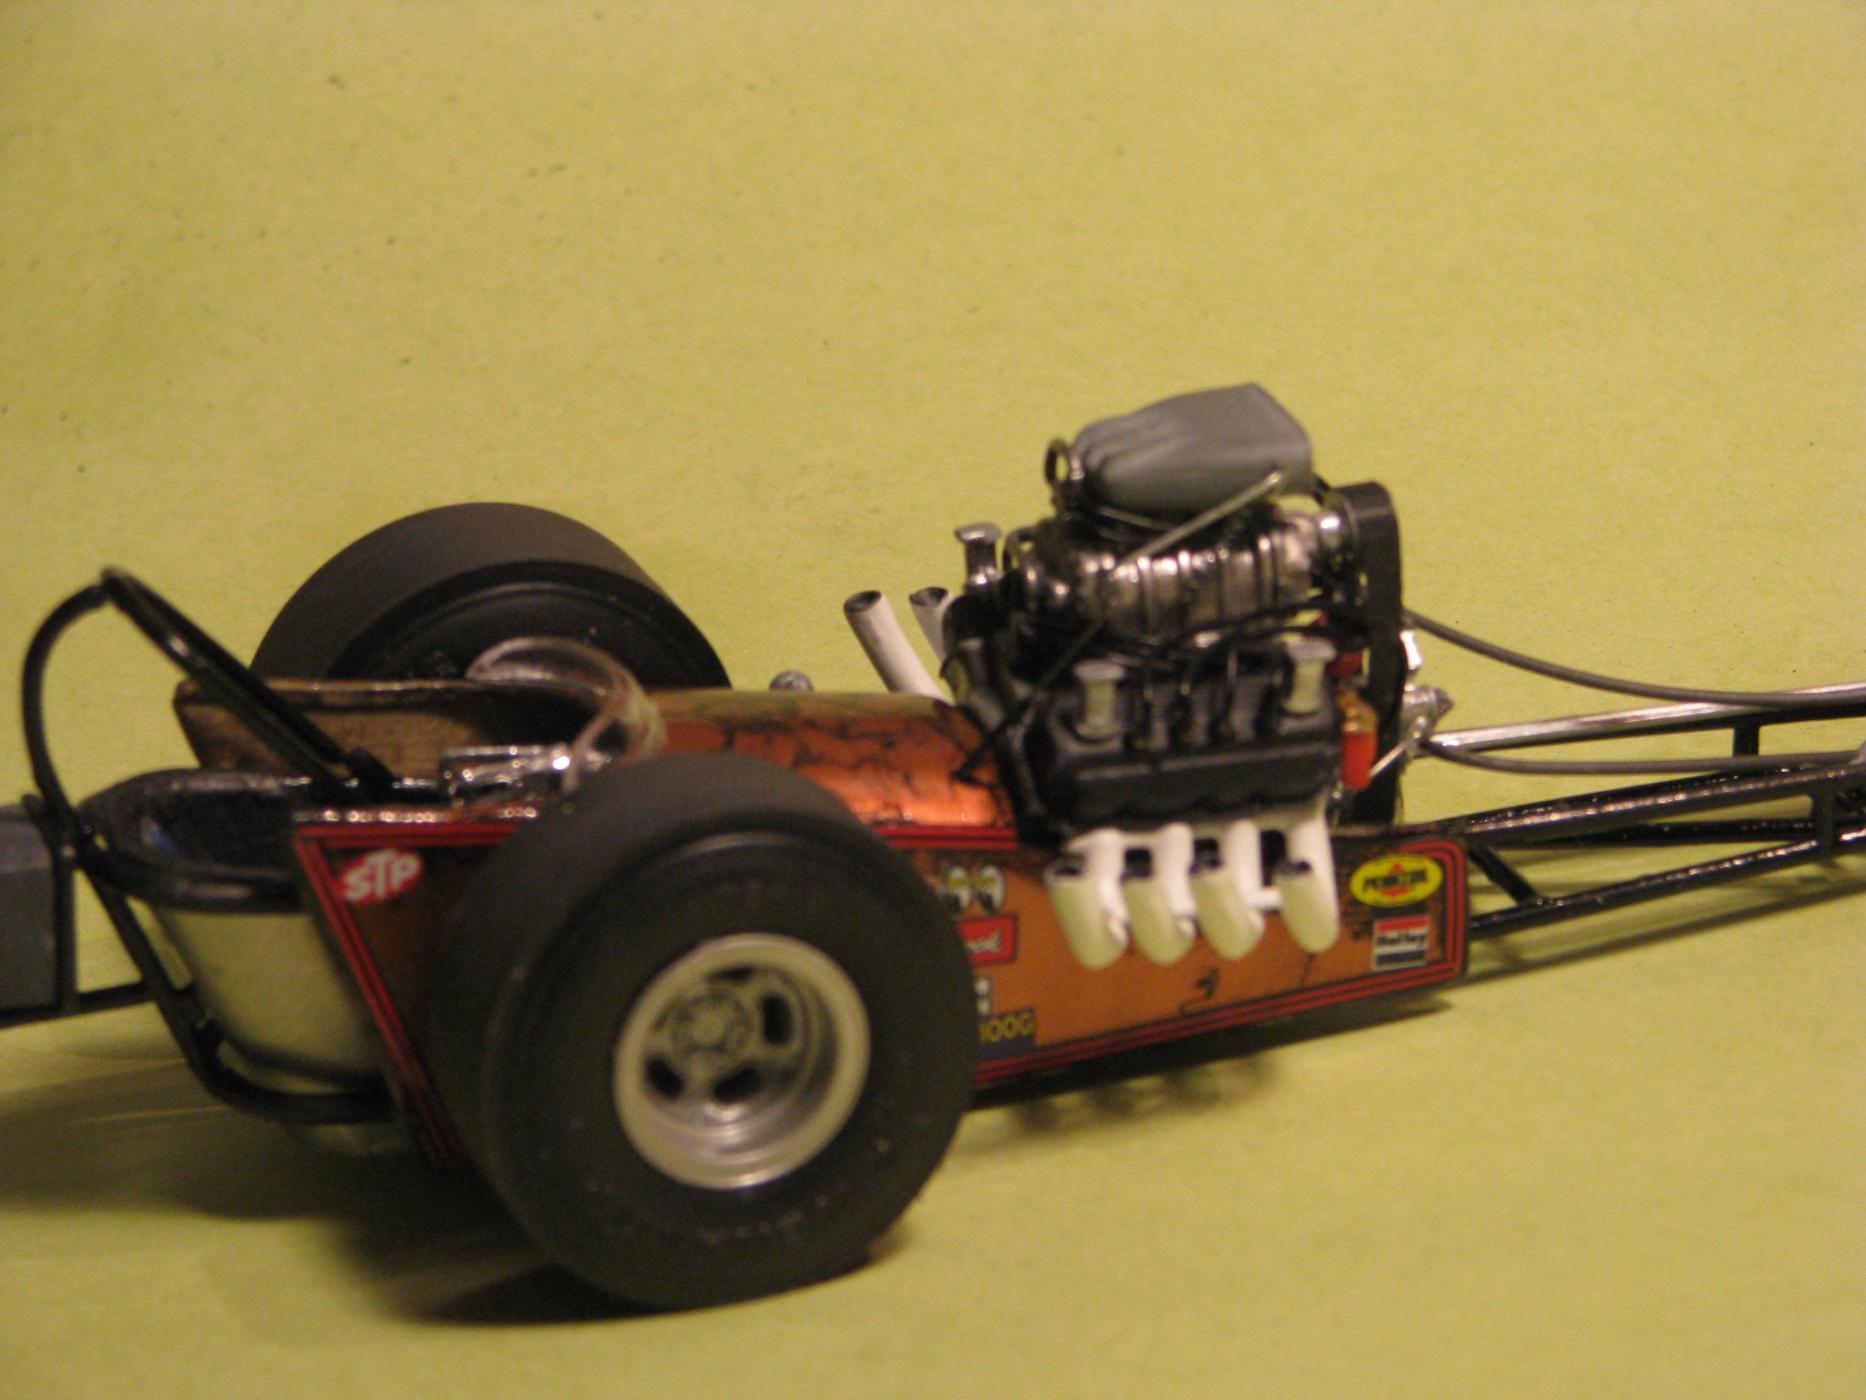
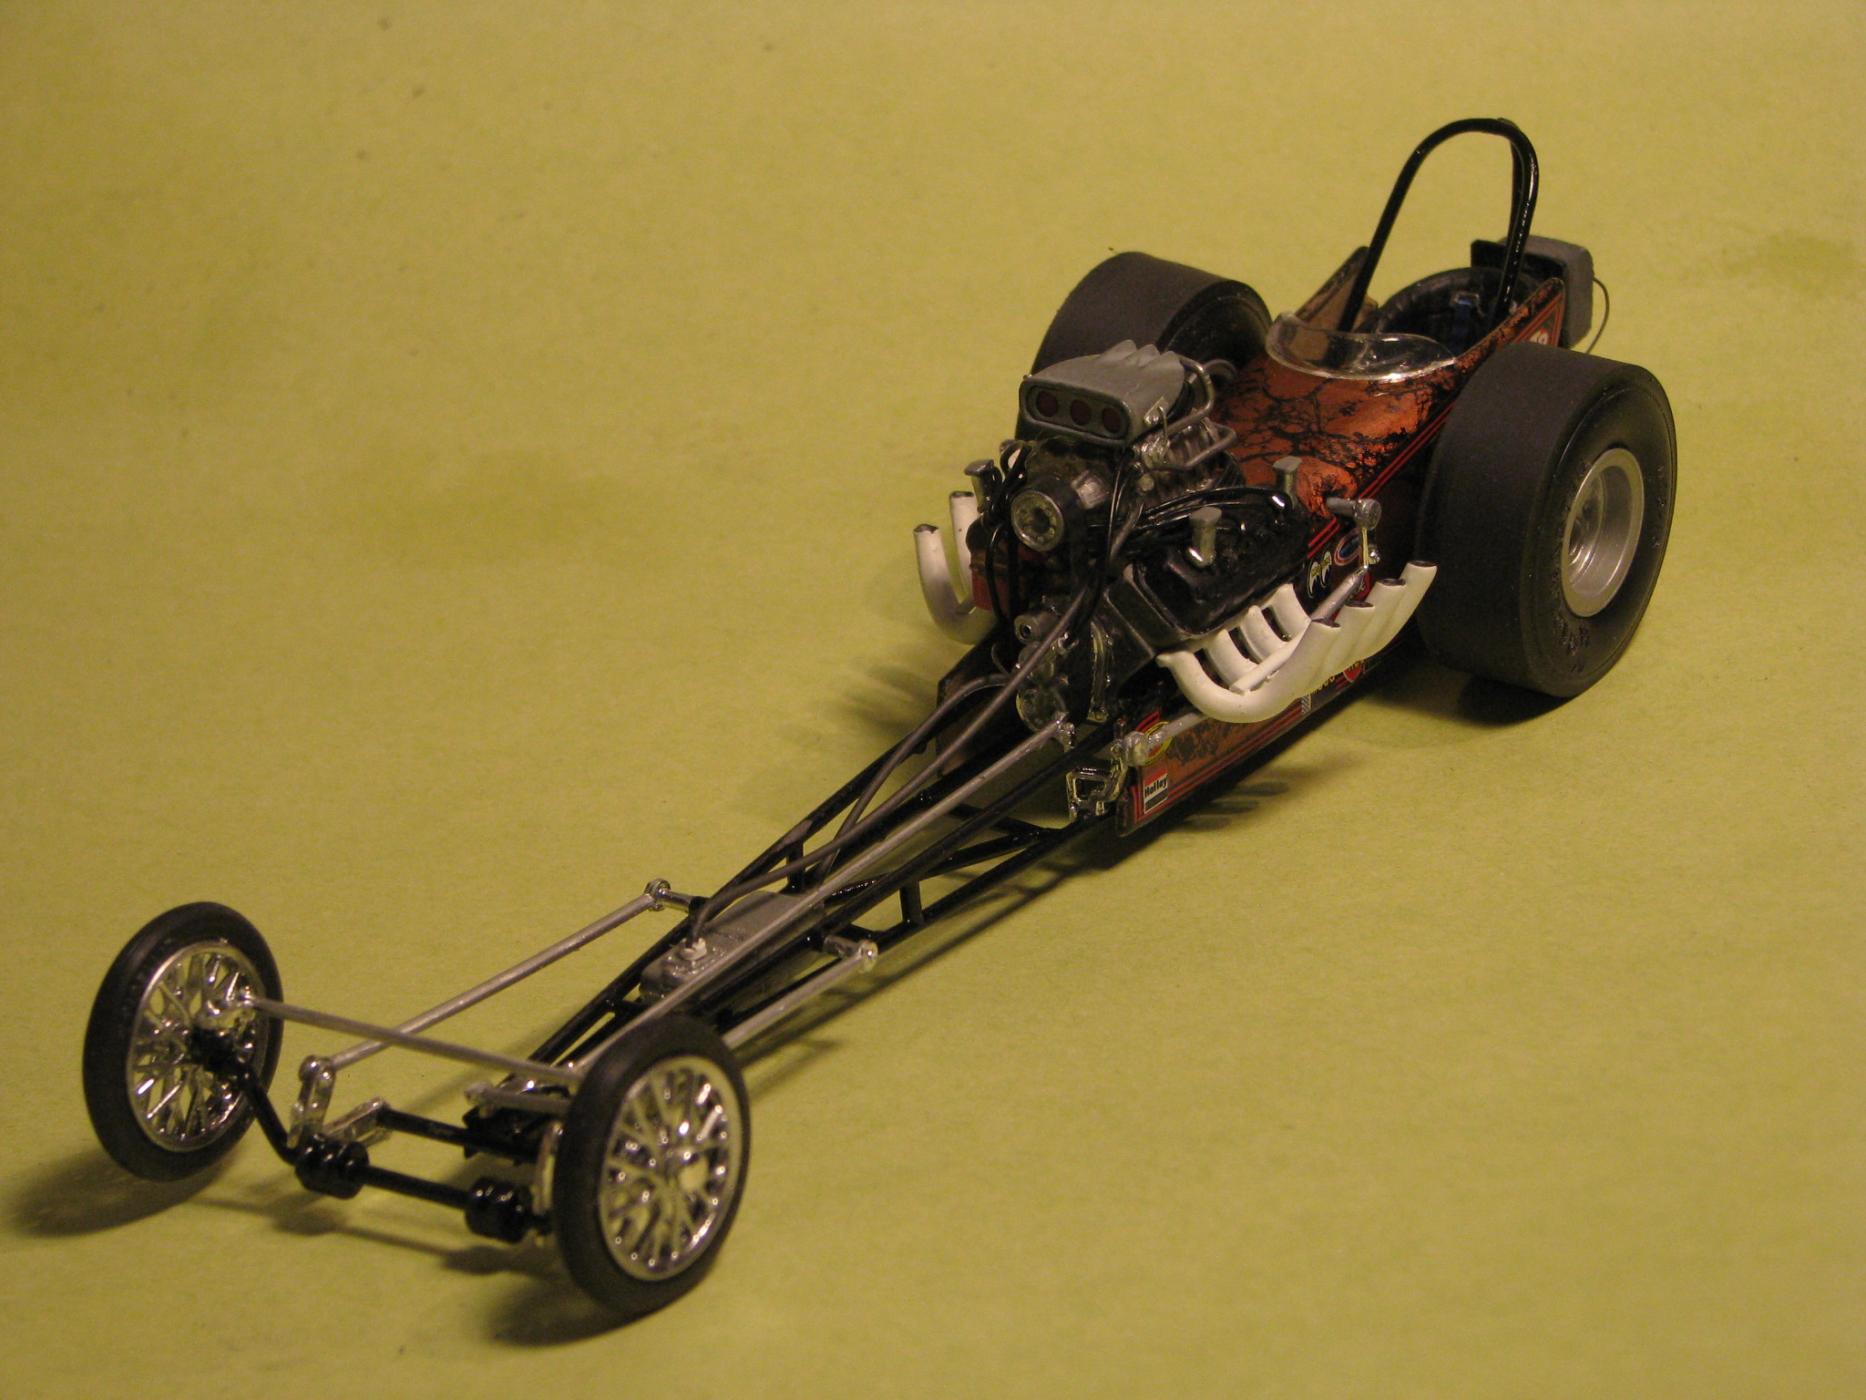
This kit started out as the Ramchargers dragster with full bodywork. Added home made belts, modified the bodywork, wired/plumbed everything else.
-
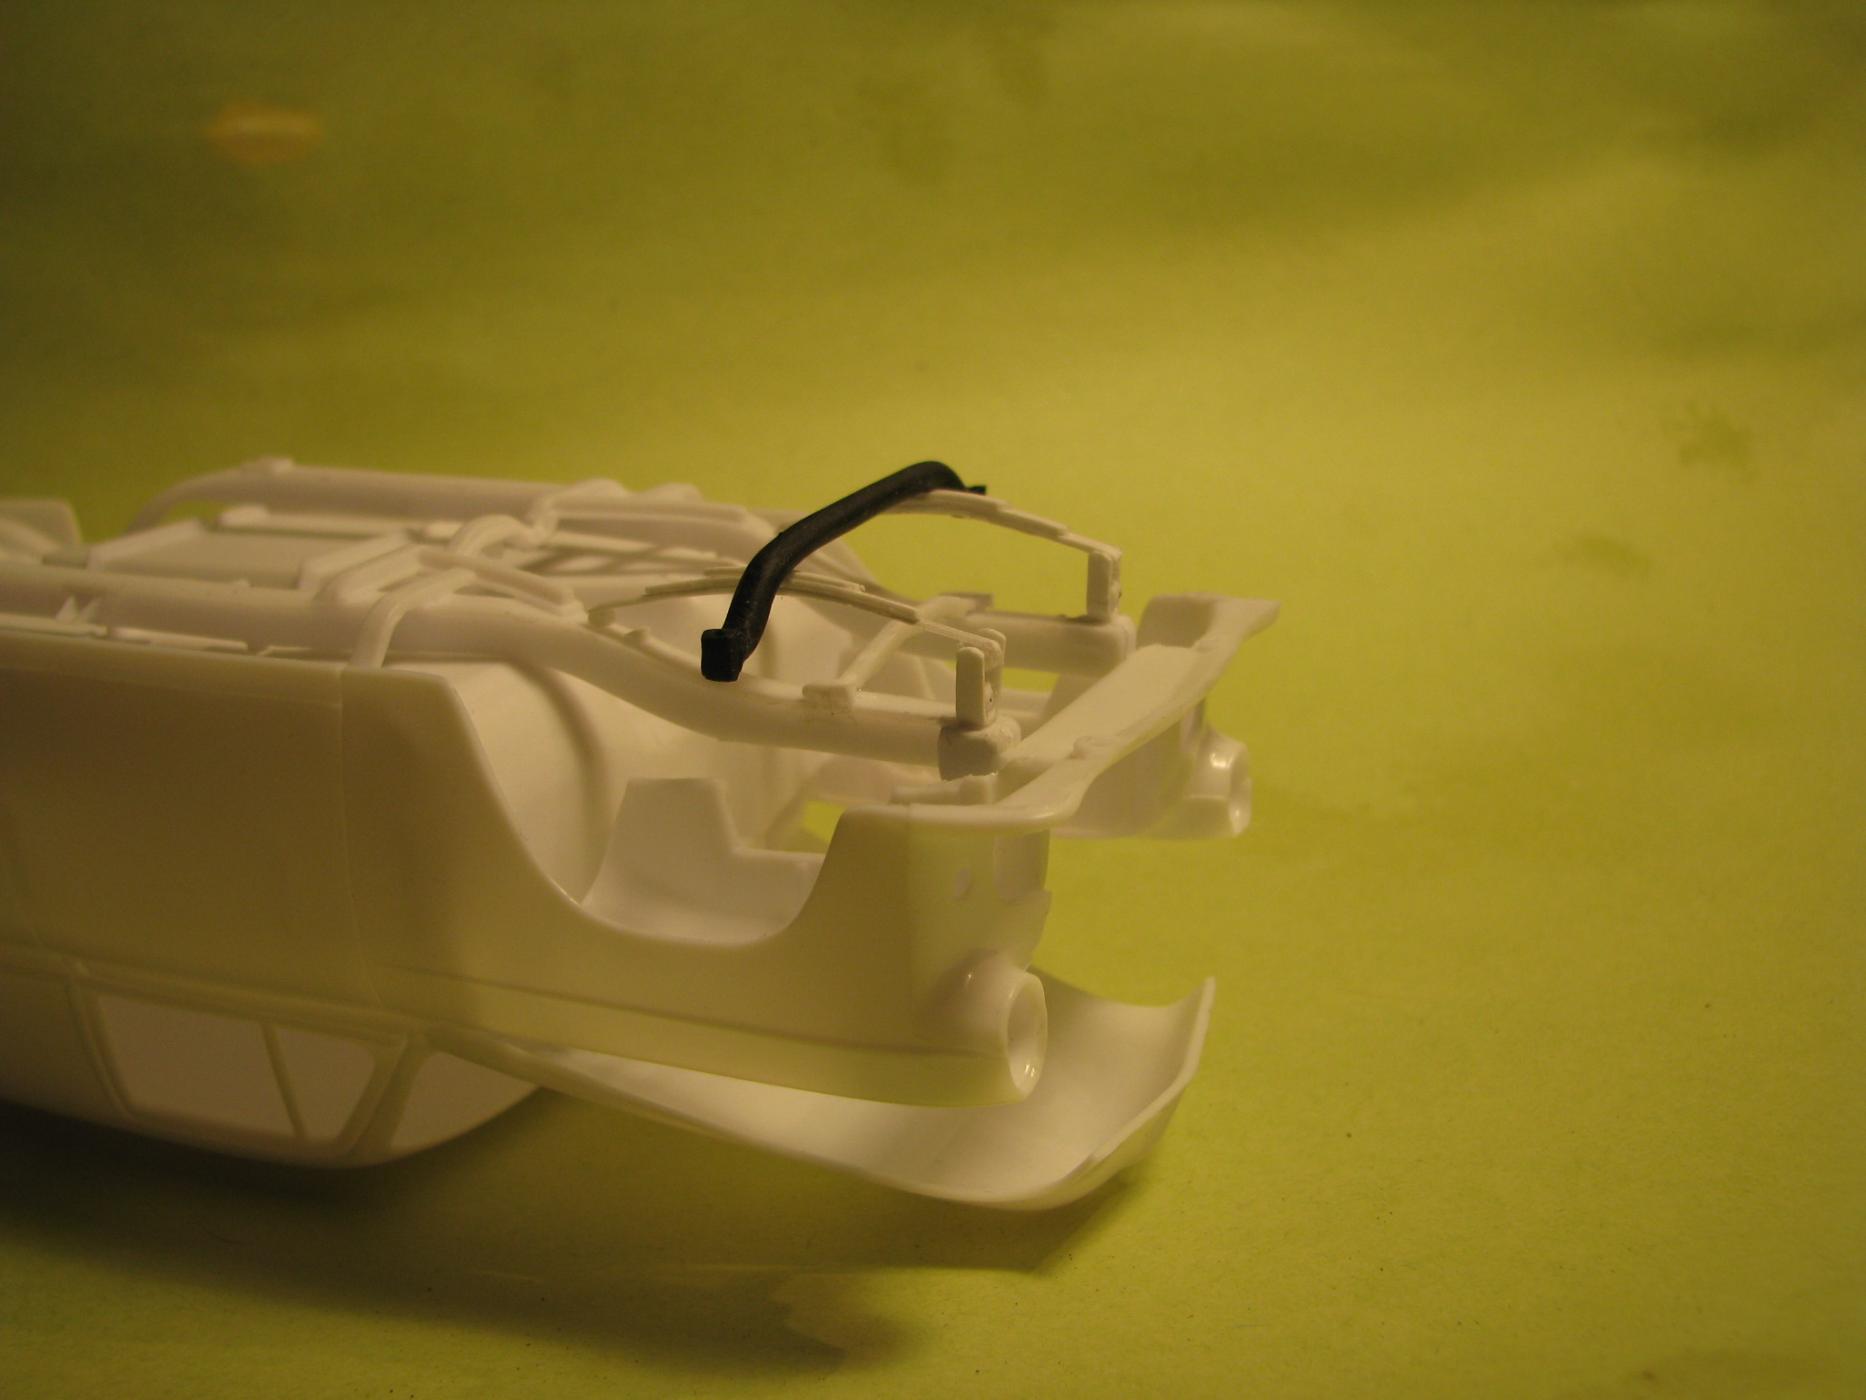
I'm about to begin building the Revell '53 Chev panel gasser. I'm sure this kit has been around for a number of years, seems I've seen it in a red/white/blue boxtop livery and maybe even some other configuration, however, memory fails as one gets older.... Anyway, this kit is very simply, a very simple kit. Some parts are unrecognizable, so much so that I thought it could use slight massaging in just about every step of it's construction. So, using my limited skills I thought I would give it a go and post mods/updates as I got them done. Release the Kraken! A number of pieces in this shot. The frame at the top has already had it's gas tank removed. I'm going with a moon type tank on the front of the car. The frame takes a lot of cleanup to make it sit flat against the floor pan. My specimen had lots of flash sticking up from the mold release dots, flash on the outside of the frame....take your time and clean it up. I'll also be removing the front bumper mounts (the antennae on the front frame members). Moving clockwise is the axle/spring assembly...or, it looks roughly like one. Fit is very sloppy with no detail. By the way, this is a one piece item. I plan to do my own axle and try building my own springs and mounts. As it 'hangs out there' in full view, I found 4 wheel backing plates with embossed detail in my parts box. The axle is my first plan of attack. Next to this is the engine support brace (Step 2). I've already modified this by removing two little nubby things. My guess is they were supposed to be shocks? Anyway, I'm already removed them and will install other shocks, either parts box or scratch built. The last piece is I guess the tie rod (control arm?). I would think it's for a power steering unit maybe, otherwise than that I don't recognize it. I will make my own tie rod/control arm from aluminum tube. The floor pan This is the underside the floorpan. That curved raised piece is the spare tire well, a separate part. There is some embossing on the inside guiding you where to cut out the rectangle so it will fit, but the part isn't even listed in the instructions! I installed it anyway just to add some variety. If you do this, hold the frame in position so it will fit correctly later. Next post I'll show what I have done on the axle so far. Hope you enjoy.
-
Oops, my error. 3 (it's been a while). I recall having to use a section of the floor from a 2nd regular catalina. Honest error...out of sight out of mind. The two additional doors and a scratchbuilt section make up the passenger side.
-
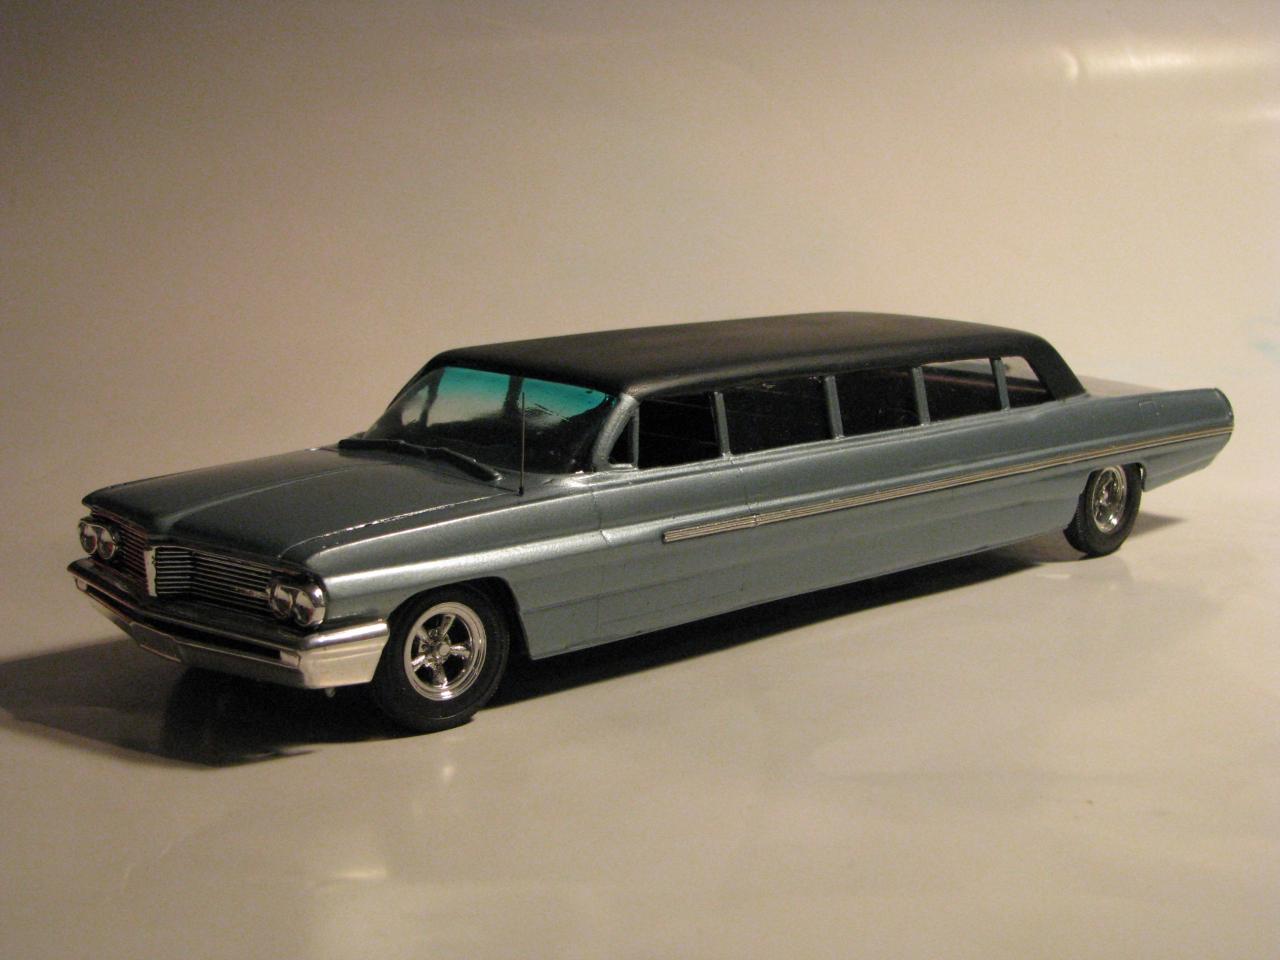
That's the limo look I was going for DumpyDan. I used two kits for the car, one the amt standard 62 Catalina, the other one a 'custom' version amt issued as a pink lowrider, but it's the same kit with a different set of wheels and a tufted leather bench seat. I needed it for the two doors, roof and frame extensions.
-
Thanx much everybody. The truly hard part to the build (besides making the first cut) was the side spear. It's not really noticeable but it runs up hill from the rear.
-
I had started this build a long time ago, actually posting in progress here on the site. Life gets in the way sometimes.... anyway, finished, thought you might like to see how it turned out. Note 4 doors on the curb side, 1 on the driver's side. Still to add are curb feelers,.. Comments and observations welcome
-
This is the opening door feature. These door skins fit inside the actual door body. Having glued the doors shut, they had to be installed later. In order to do that the doors skins have to be made the same width as the interior insert, easily accomplished with a razor saw. Here you can see the before and after mod. ...and here is one door glued along the floor pan held to proper width by masking tape till it dries. The drivers door was done after this pic was taken. The complete assembly is inside the body at the moment to ensure the door skins sit flush at the door window sills.
-
Hi Mark. Thanx for the nice words. Yes, the AMT kit has the opening doors. I glued them shut and left the separate interior door 'skins' off tll later. The opening door feature leaves ugly gaps around the door, so when I glued them shut my priority was to make sure the side spear lined up between door/body. When everything dried, I used a Future/talcum powder paste mix to fill the gap around the door (especially the door sills) by pressing it in and smoothing it with my finger. I did that a couple of times letting dry between coats until it looked right to me. I then gave it a shot of primer to seal it before painting. Hope that helps.
-
Nice build Dave. Wish half my builds came out that clean!
-
Sorry 'bout that. It's the AMT kit, the 58 Impala Coupe. Thanx for the comments everybody!
-
Took a gamble on trying to recreate this car. Research on the actual car shows chrome removed, some detail shaved and basic street customizing cues like a blacked out grille. Just finished the red. Close inspection of movie footage and actual photos show the red to be a fog, not a solid color so I dialed down the pressure and thinned the paint. I could haved used a smaller tip on the airbrush but I'm happy with the results. The BMF really sets it off in person. Tailights will come from custom parts in AMT's merc. I have 6 caddy lights per the real car. Anyway, here's the body, the tuck and roll interior is next. Comments and observations welcome.
-
It's been a while but I'm finally able to pick up where I left off. I had originally planned to put a spa in the middle of this stretch Catalina but the more I worked at it, the more it became obvious to me that the spa would have to be in the rear trunk area. Maybe on another build. This shot shows the door posts. I put 4 posts on each side, however only the passenger side has 4 doors, the driver's side only has the driver's door but still keeps the 4posts theme. This was how the Oldsmobile limo I saw at a car show was done and I liked the look. The posts are made from two lengths of half round styrene glued to a thin styrene backing. I think they carry the angular look of the Pontiac rather well. Roof drip rail trim was made from half round stock also, with the addition of smaller diameter styrene rod to make the roof transition The side spears were the hardest part, at least on the passenger side. The drivers side was relatively easy with straight sections of sheet styrene mated to the rear edge of the door to the front edge of the hip section. The spears will have chromed inserts. The passenger side was lot more work due to the door spear sections not readily lining up as it slopes from nose to tail. It was more 'convenient' to tilt the doors, rebuild the rockers and window edges and rescribe new door lines. Sorry for the delay in continuing the build. Comments and critiques welcome.
-
I forgot to mention about the raised section on the passenger side. This will have a grille or slats in it to represent a fresh air intake/moisture exhaust unit.
-
and a couple more comments and observations welcome
-
Got some more bench time. Here's the frame for the roof. I was out of primer so its simply shot with flat black and with the 'glass' for the mockup
-
Holy Ponchomobile Batman!
-
Comments and observations welcome. I say it, I mean it. No slight taken in the least. Thanks for the input.
-
Jantrix, the front bench seat fits exactly where it's supposed to go with the deck butting right up against the rear of it. I ran in to this very concern when I opted to change out the xtra seats for the tub idea. Nice catch, thanx.
-
and here's the mockup of it fitting in the roof opening to make sure everything fits. comments and observations welcome
-
Here I've sectioned the piece I"m using for the skylight. I removed the 'lip' with razor saw, sectioned the piece the thickness of the roof and trim and glued it back together. I had it covered in Glad Press n' Seal to protect it during handling before I remembered to shoot it but the size is visible.