Farmboy
-
Posts
518 -
Joined
-
Last visited
Content Type
Profiles
Forums
Events
Gallery
Everything posted by Farmboy
-
That is probably the cleanest dash I've ever seen on a 1/25. Well, well done.
-
Good eye Boyo lol! iBorg, it's my first chop on a difficult beast like this. My object was to keep the original windshield angle and move everything forward to accentuate that wonderful trunk hump found in a lot of older English cars. For a bug if you follow that path, you'll need to saw thru your roof to keep the rear slope. No biggie, and remember that you should remove the rear window and upper rear section as one piece. I'm sure there are plenty of vw chops to be found. Thanks for the look in.
-
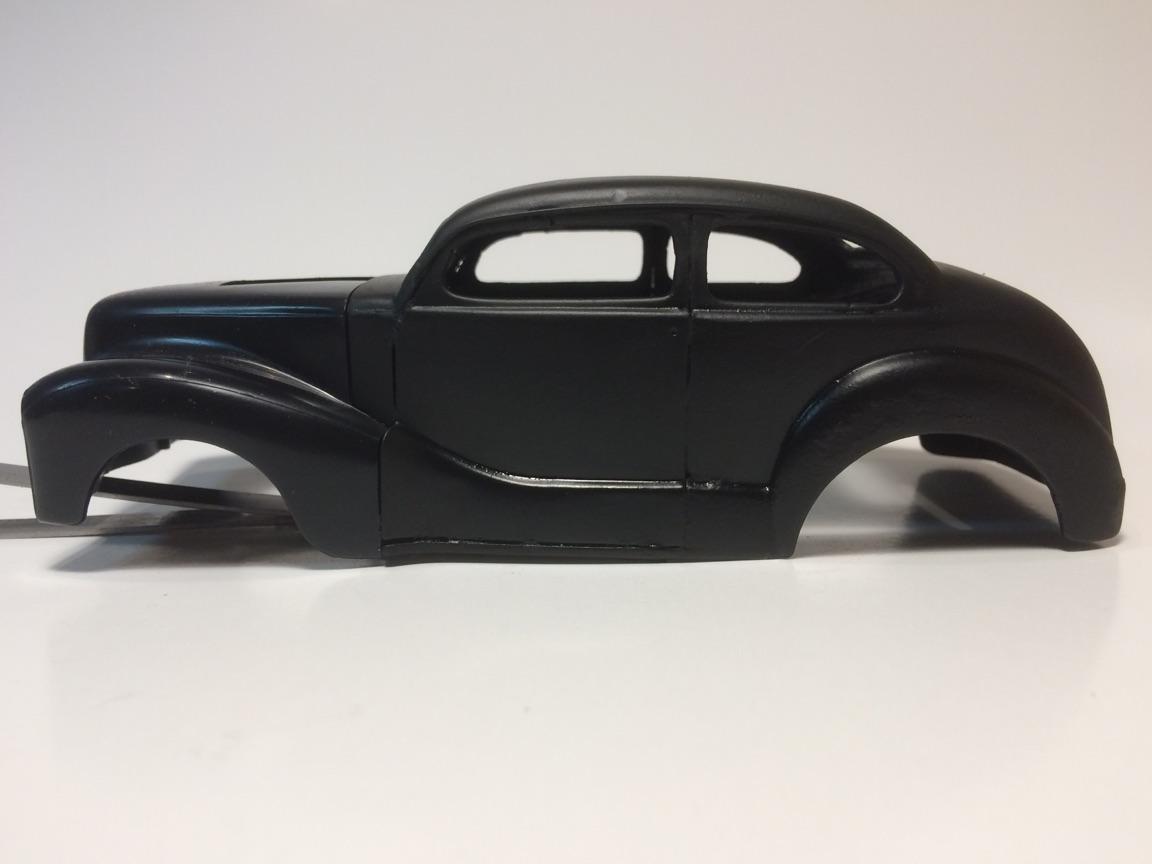
just a couple of shots of a more complete -- but not finished -- chop. Just got it primered after making and installing the drip rails but as you can see, still has a substantial bit of finish sanding and spots that need a bit more filler attention. the bumps on the rear fender are from where I've been holding it and the primer not fully cured at the time. More sanding...... Comments and observation welcome

-
Thanx for the nice words everybody! I'll probably do a separate post sometime in the future on the rest of the car which will be tubbed, have an aluminum interior and sporting a blown, streetable flathead.
-
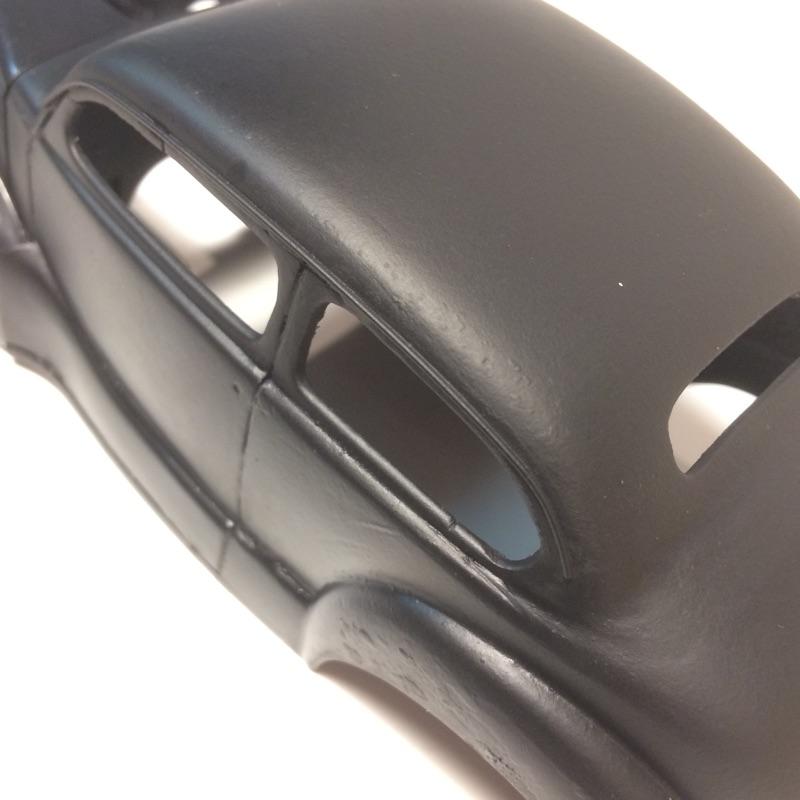
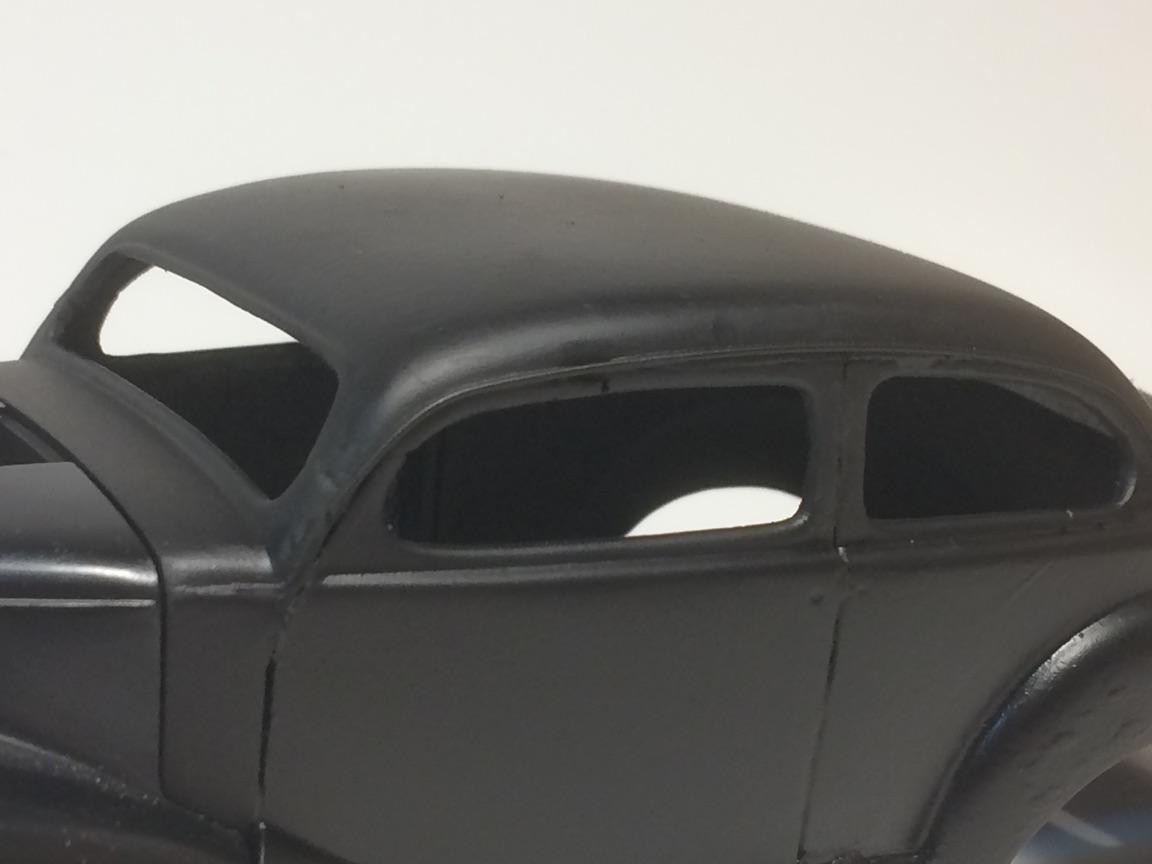
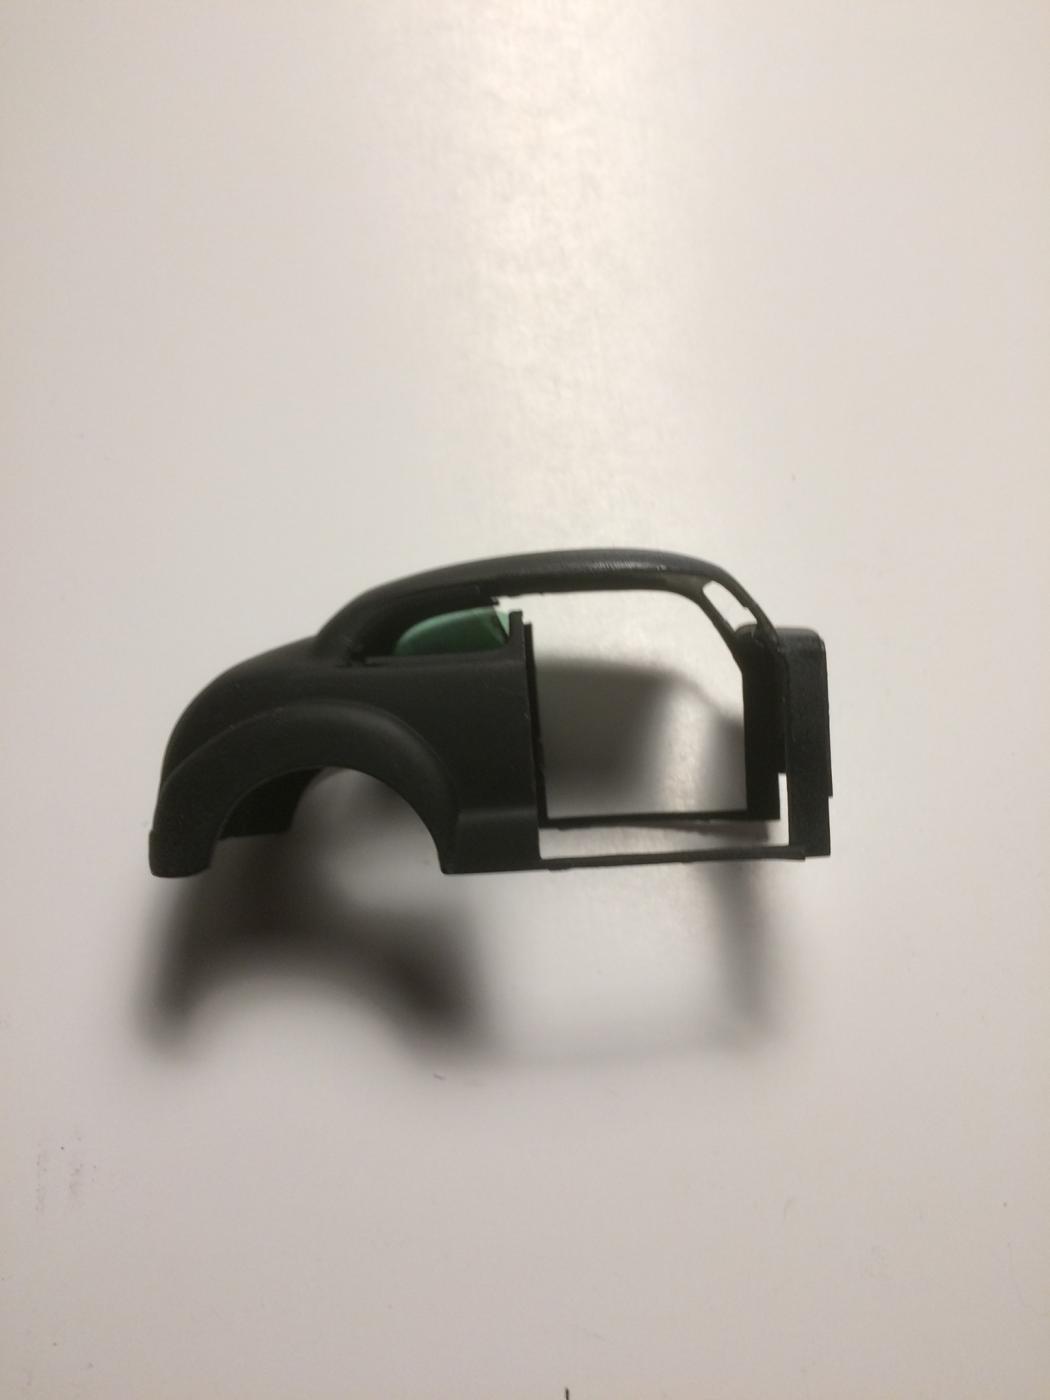
This will just about wrap up the chop, so here we go... I showed you this earlier, the two parts I kept from the side windows. The worst part of a chop --at least for me -- is the successful merge of the rounded part of the window should the body have any. What I've done is kept them, and will hopefully easily mate them to the cut areas and with a bit of luck have a factory rounded inside radius on the window frames... the two pieces for each side... and where they will fit... so to review, there's the original body ...the chop the difference in the height with a stock door. The window frames will easily be shortened in width and height to fit the openings and the finished chop with the extended trunk line. The big work is done bodywise, the window frames will be an easier fit. That's it. Thanks for lookin' in. Comments and observations welcome.
-
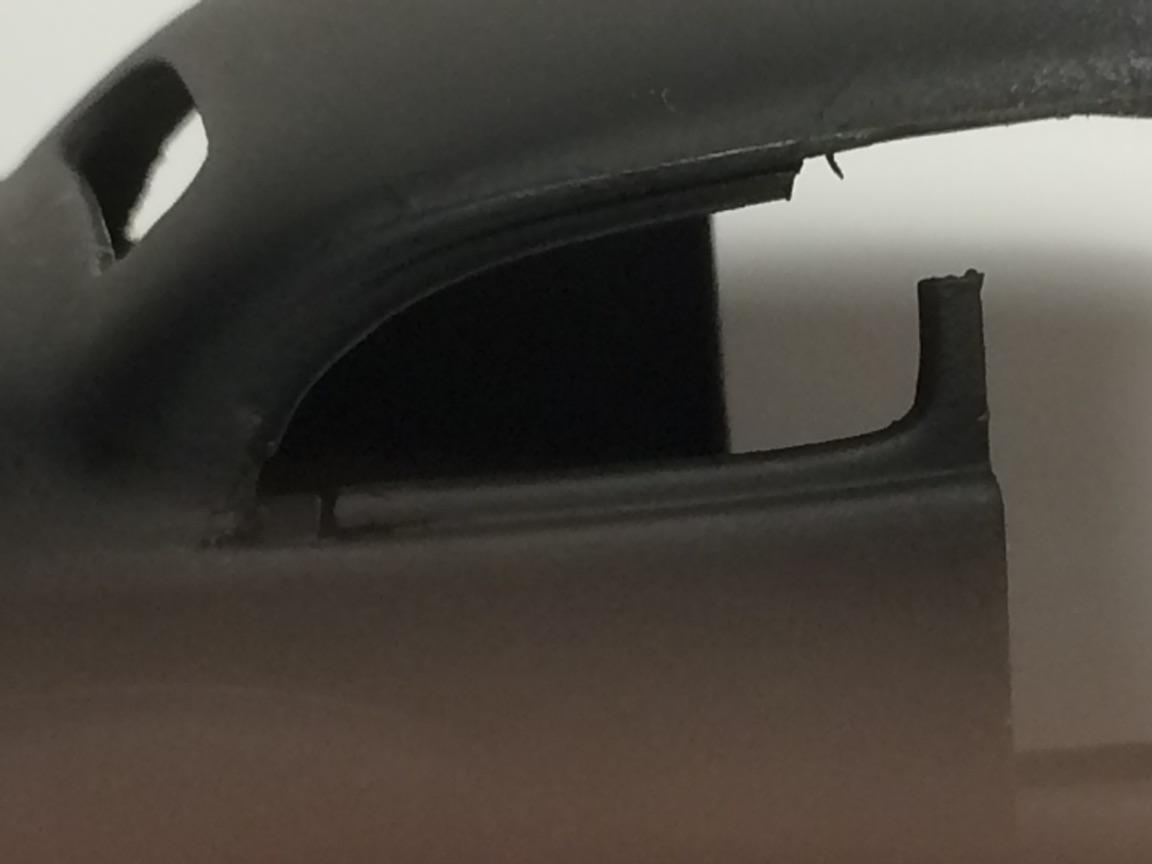
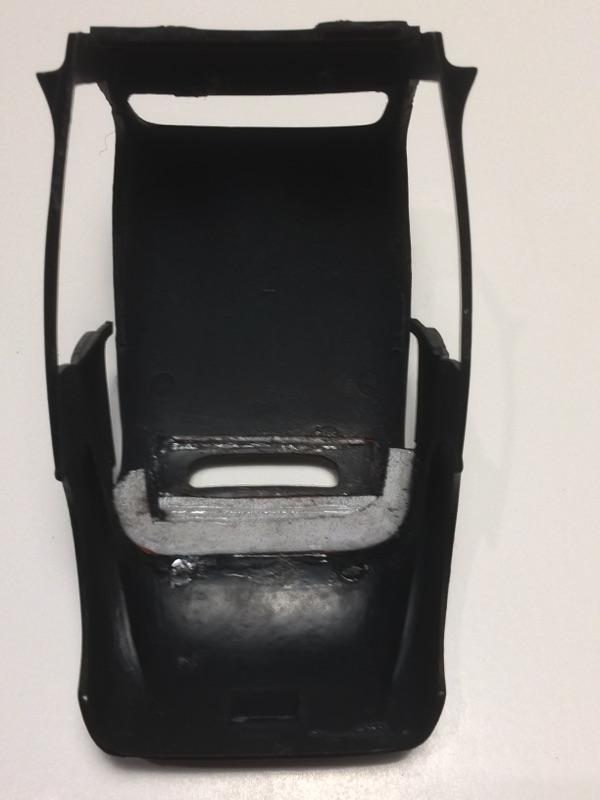
this is a look at the underside of the chop. The white portion is just some styrene cut for the rear C posts to rest on as they are narrower now due to their being cut. This will be covered with a package tray of some sort or cut back altogether. There is a strip above the rear window, that's another small slit of styrene to fill the gap caused by my crooked cut
-
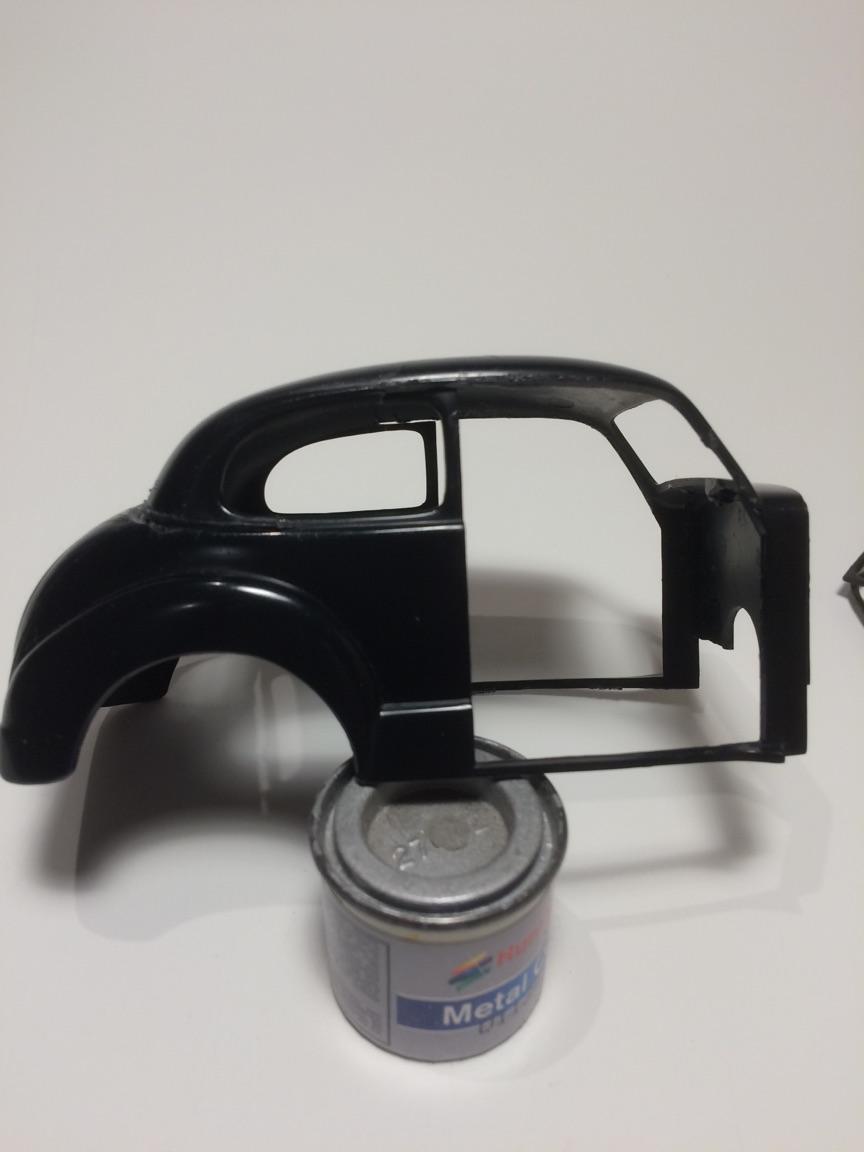
I've been wanting to chop this kit for awhile and decided to finally dive in. It's based on keeping the original lean of the A pillars. That means everything else will move forward. First, here's the Revell '50 Austin Coupe in original form. I did the actual cut by following the belt line where the rear C pillars join the body with the back of an XActo knife till it wore thru. I also did this to the tops of the B pillars for a short distance, and simply cut the windshield A pillars where they were of the same profile. The B pillars will be cut to make them fit the chop after the roof is reattached Note that the bottom curve for the C pillar is still attached. This will be removed by following the curve with an XActo blade for a short distance and reinstalling it as well after the top is reattached. Here are the pieces after removal, waiting to be reinstalled; The top and bottom left are for the passenger side, the top and bottom right for the driver's side. Now the odd(er?) part. The rear window is as narrow as I want it to be. To get around modifying it, I simply cut the section out (yes, the cut is crooked but it's not a big deal). I then deepened the section up into the roof and reinstalled it. I'll get more on it done today and post later. Comments and observations welcome.
-
Geetee, I assure you the Windex mix is the 'I give up' part of the mix chain. I tried alcohol, (rubbing and denatured), olive oil, water and dishwashing liquid.... I read and tried just about everything I read of how the 'best' way was to spray craft paint. One day, cleaning my airbrush with Windex after a Future session with food coloring, I thought...why not? So far, it's the best I've found. Doesn't clog (so far)/ sprays predictably and evenly and cleans up nice. Works for me.
-
Ace, the manifold in particular came from an old Revell '50 Austin coupe. I added linkage and fuel lines to complete it.
-
Thanx much. it was an....educational... build. lol
-
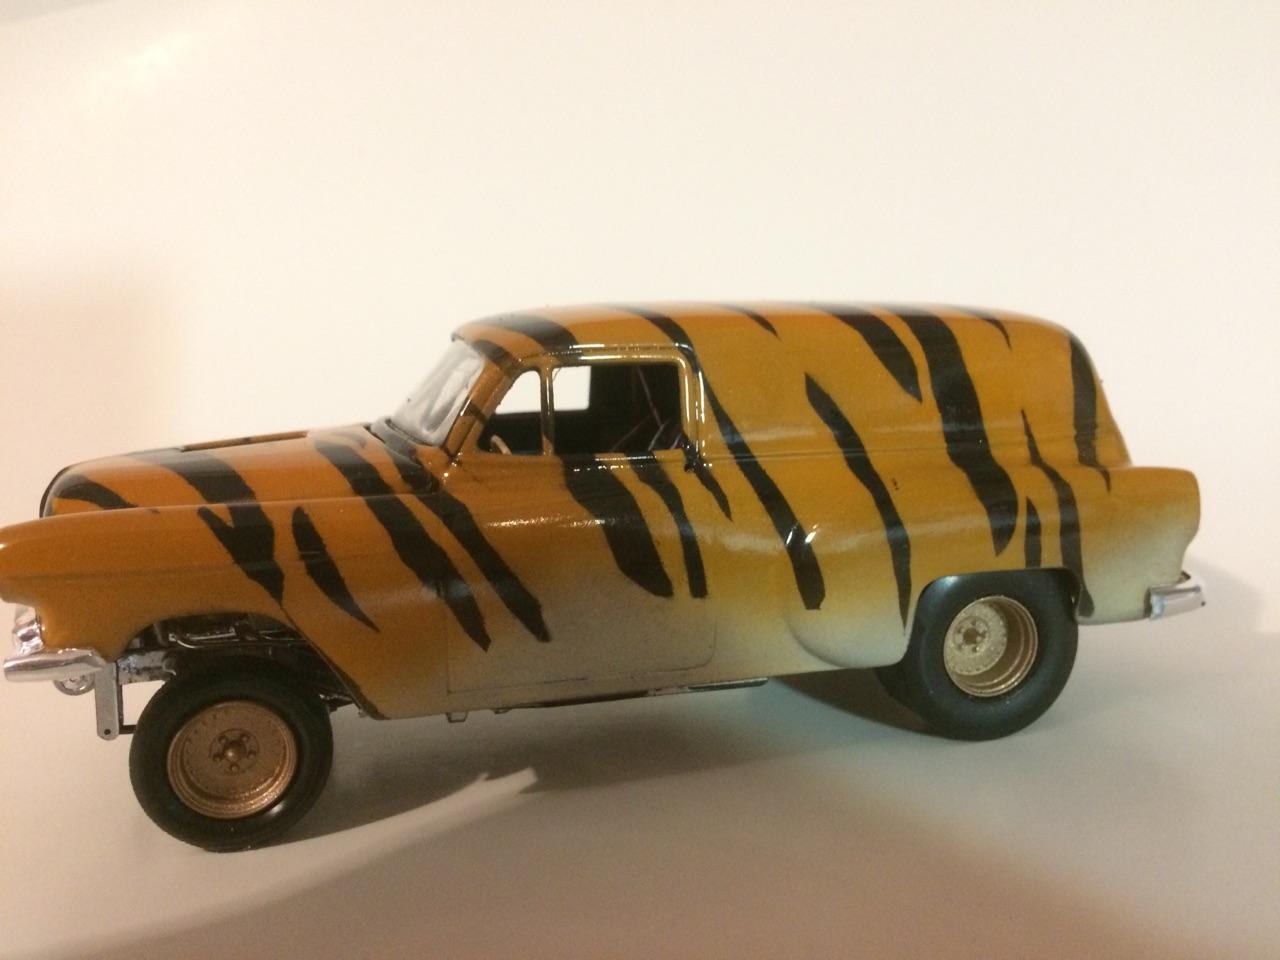
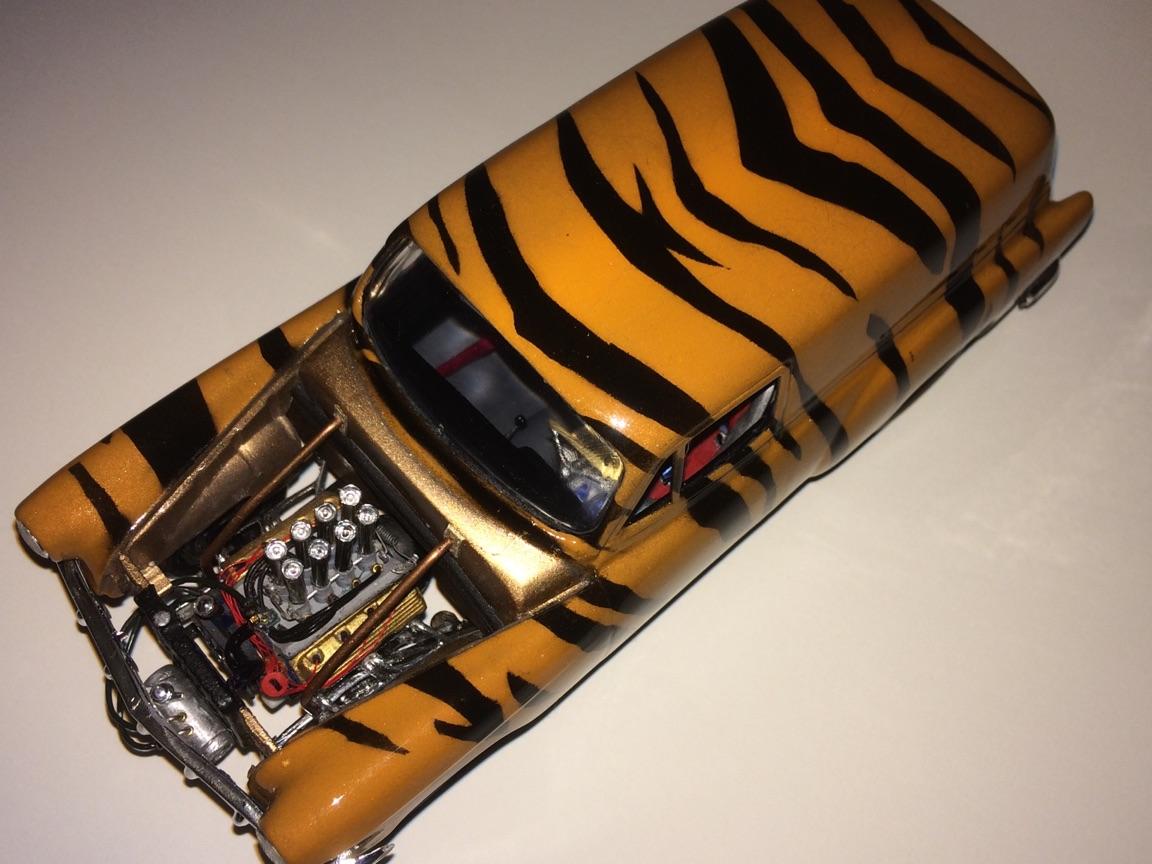
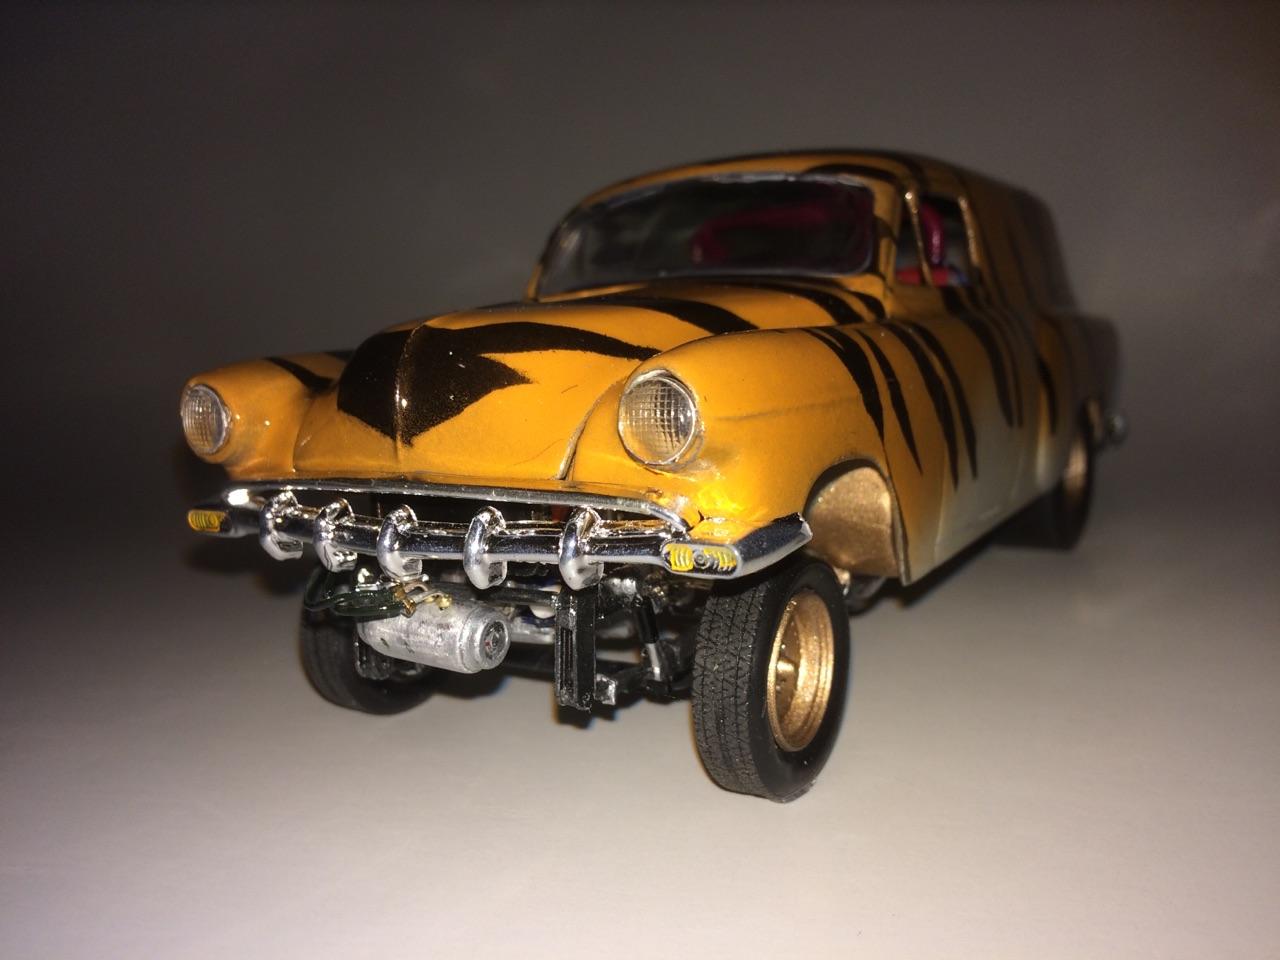
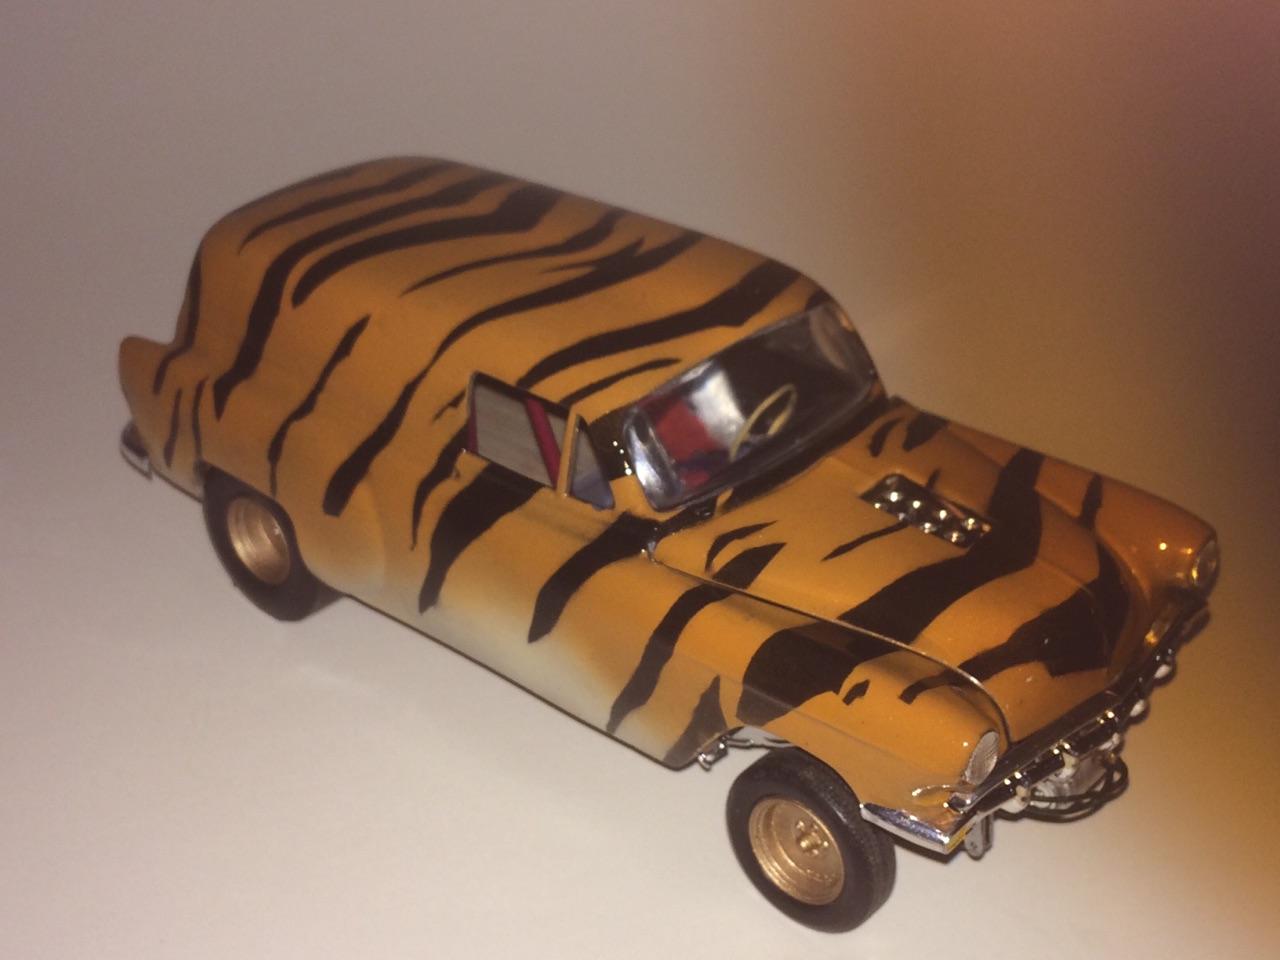
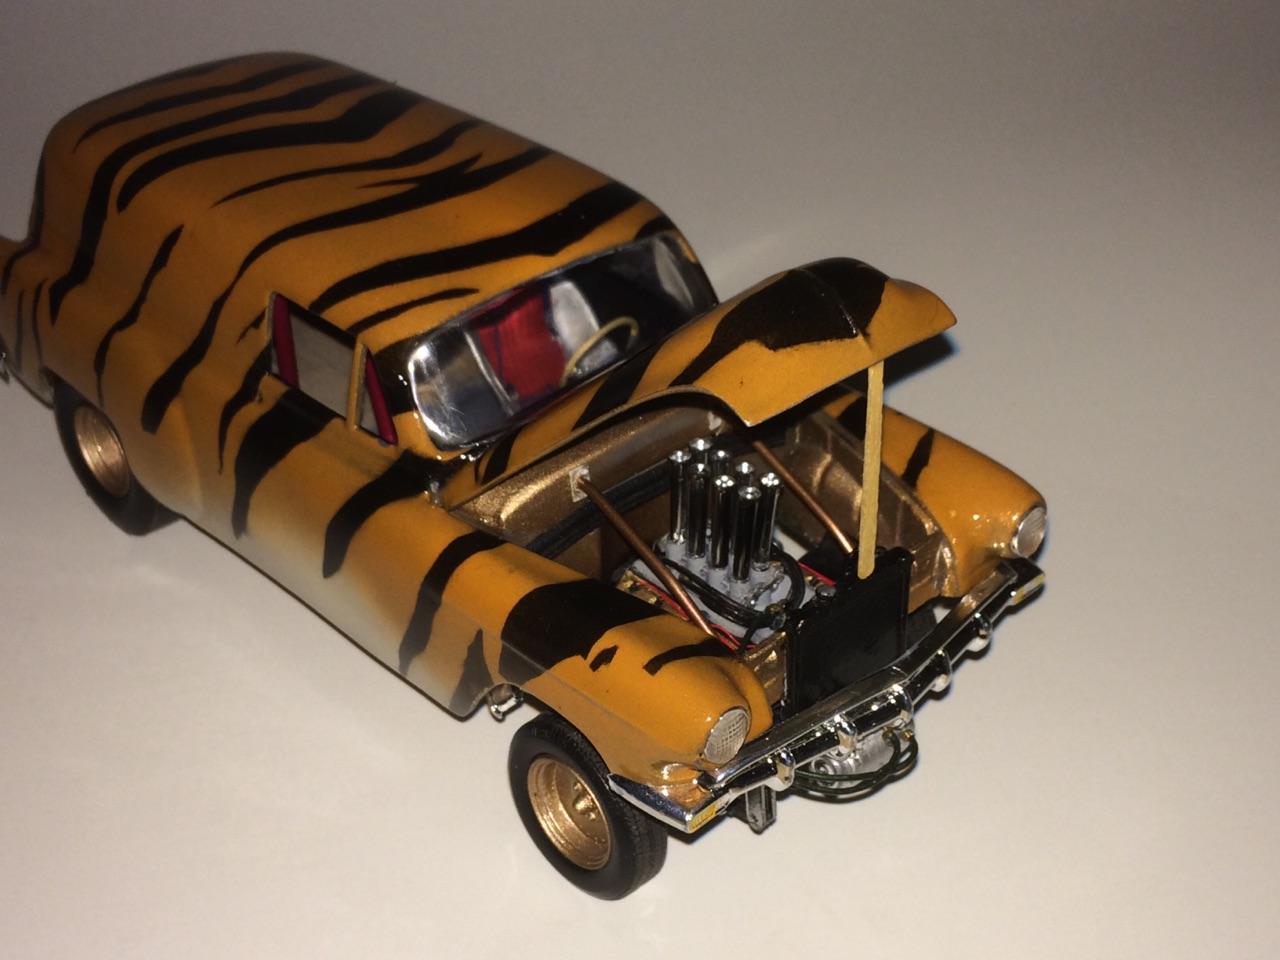
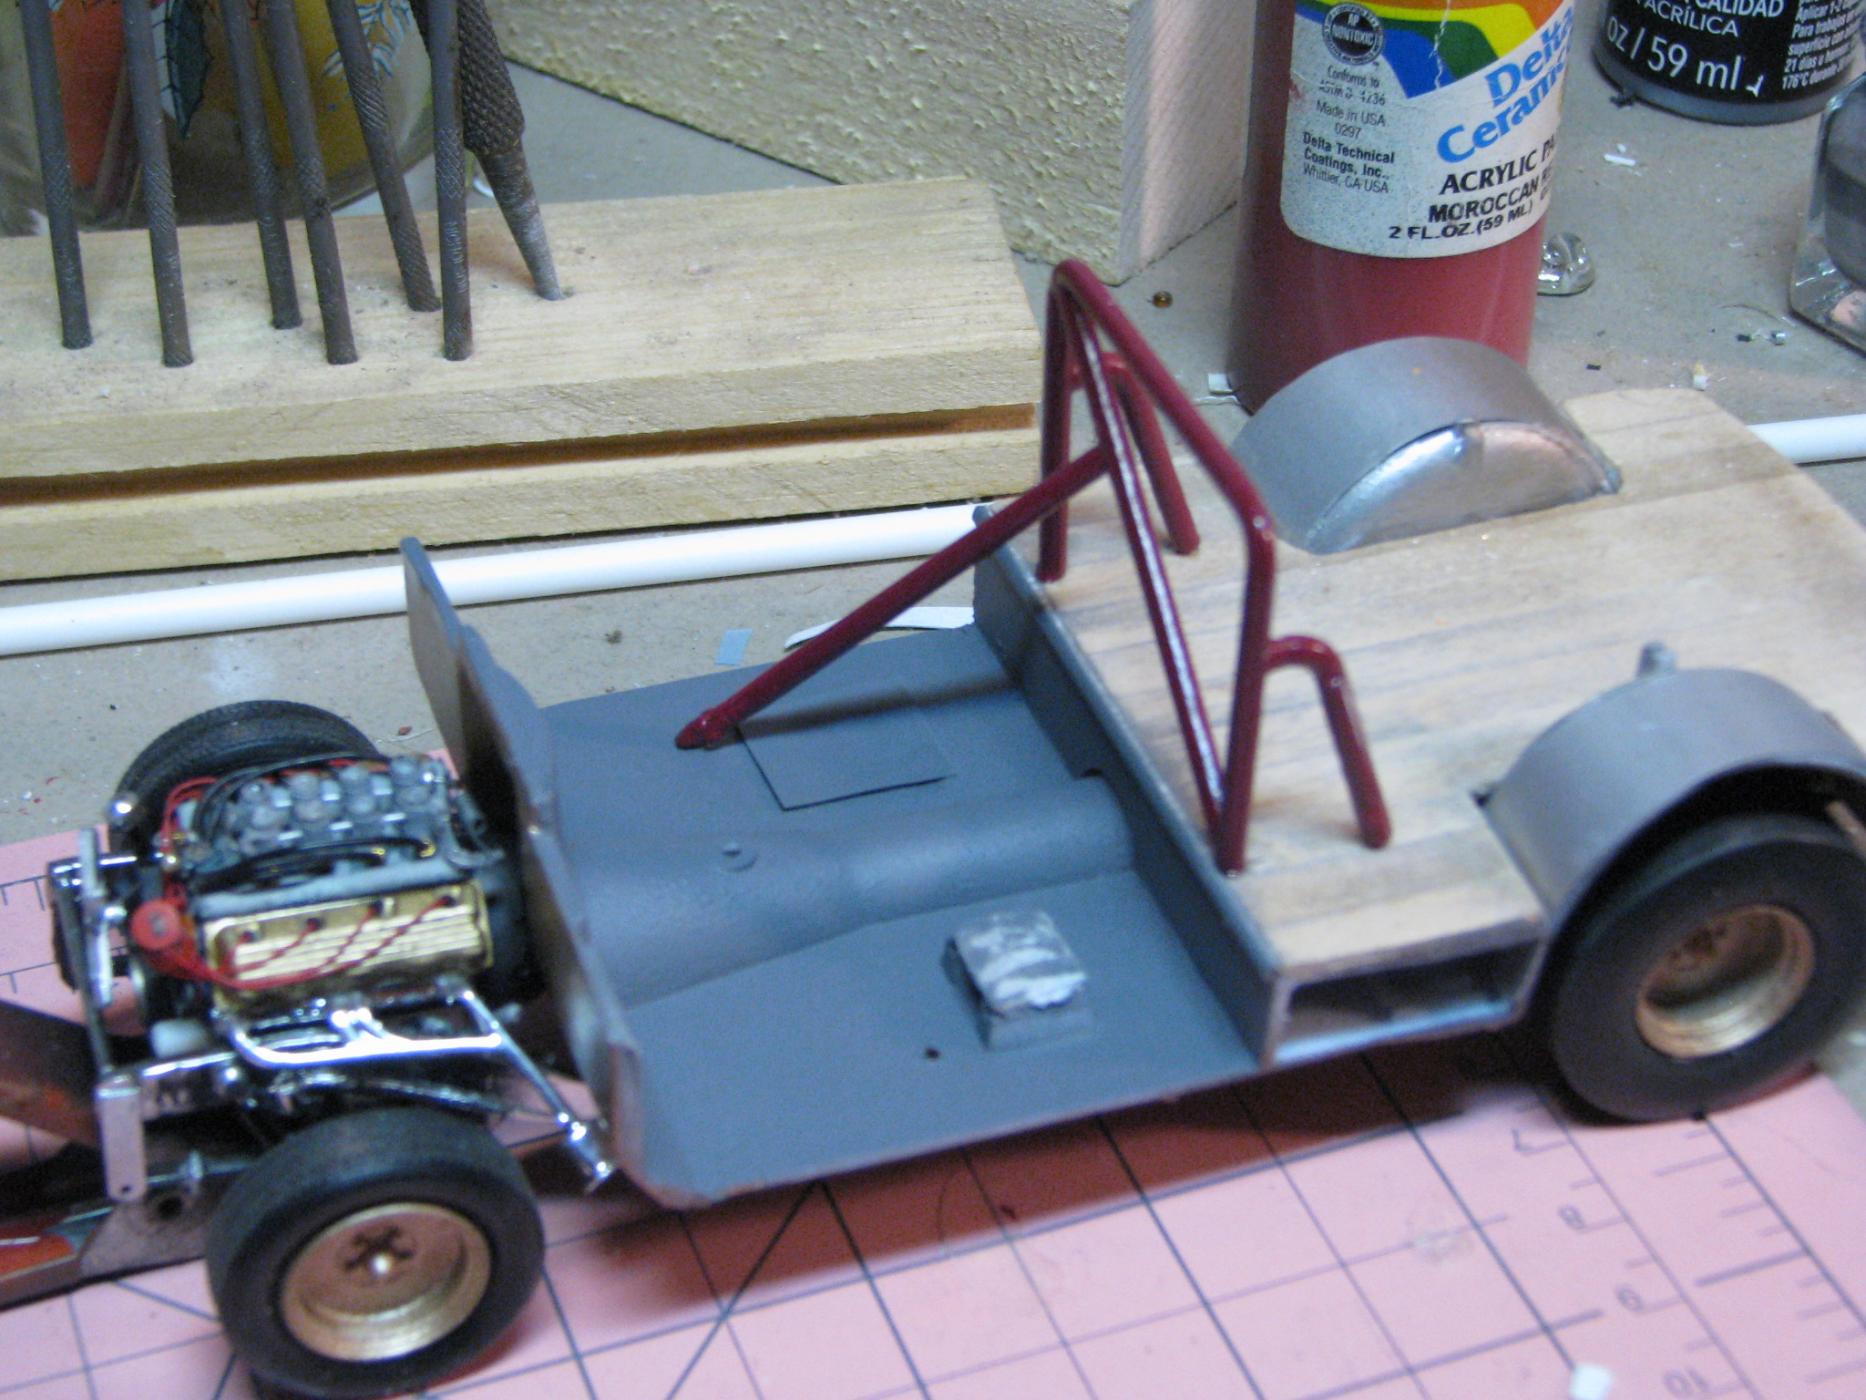
Finally got her done. Learned a few 'do not's ' and tried a few different things. The paint is $1.00 craft paint airbrushed by mixing with windex. I mixed a few shades of orange and a couple of grey/white. The black was masked and done with 2 or 3 light coats of black to prevent running. The interior has belt guides on the racing seat made from wire, a wood strip floor in the rear and a roll bar added from a Nova kit. The wheels were tubbed, the front lower part of the body removed, the moon tank scratch built, front suspension rebuilt to lower the front end stance, and wheels from the parts box. Front frame stiffners were scratch built, 429 was from another kit, and the headlights have a chrome ring added using chrome furnace tape. Comments and observations welcome
-
Done!...well, almost. Just a couple of incidentals to add like rad hoses and battery cables but for all intents and purposes, finished. I'll post it with more views in the appropriate forum later when it is completely finished. Comments and observations welcome.
-
....and the seat. I made the seatbelt guides out of wire, while the strap adjusters came from a piece of black plastic screening. The belt is gift ribbon cut to width and the buckles are flattened and shaped solder. This is relatively high mag. In real view the seat finish doesn't look that bad. lol comments and observations welcome.
-
I also managed to build a tank. The two metal lines at the top are a return and vent line, the one on the bottom - not visible in this shot -- is the fuel feed line
-
I finally got around to getting more done. I did decide in the end to re-do the paint. I enlarged the stripe pattern so it came down the sides a bit more, and enhanced some of the white and added a bit more orange shading. All of the paint is the $1 craft paint from the dollar store. Goes on fine for me.
-
....and here's the end result of the paint, though I may re-do it.
-
and here's the stripe pattern I'll be attempting. I downloaded this a couple of years ago online. It's a repeating pattern. Anyway, the plan is to cover this page with a sheet of press 'n seal plastic kitchen wrap, cut the stripes out, lay the press n' seal over the body sealing it well and shooting it with a couple of very dry coats of flat black from a spray can. I opt for flat black because it dries super fast, and can be misted on with much more control and less fear of runs than gloss black from a can. A coat of clear gloss and you're done. The paint so far are the $1.00 bottles of craft paint with 1 coat of Krylon clear. comments and observations welcome
-
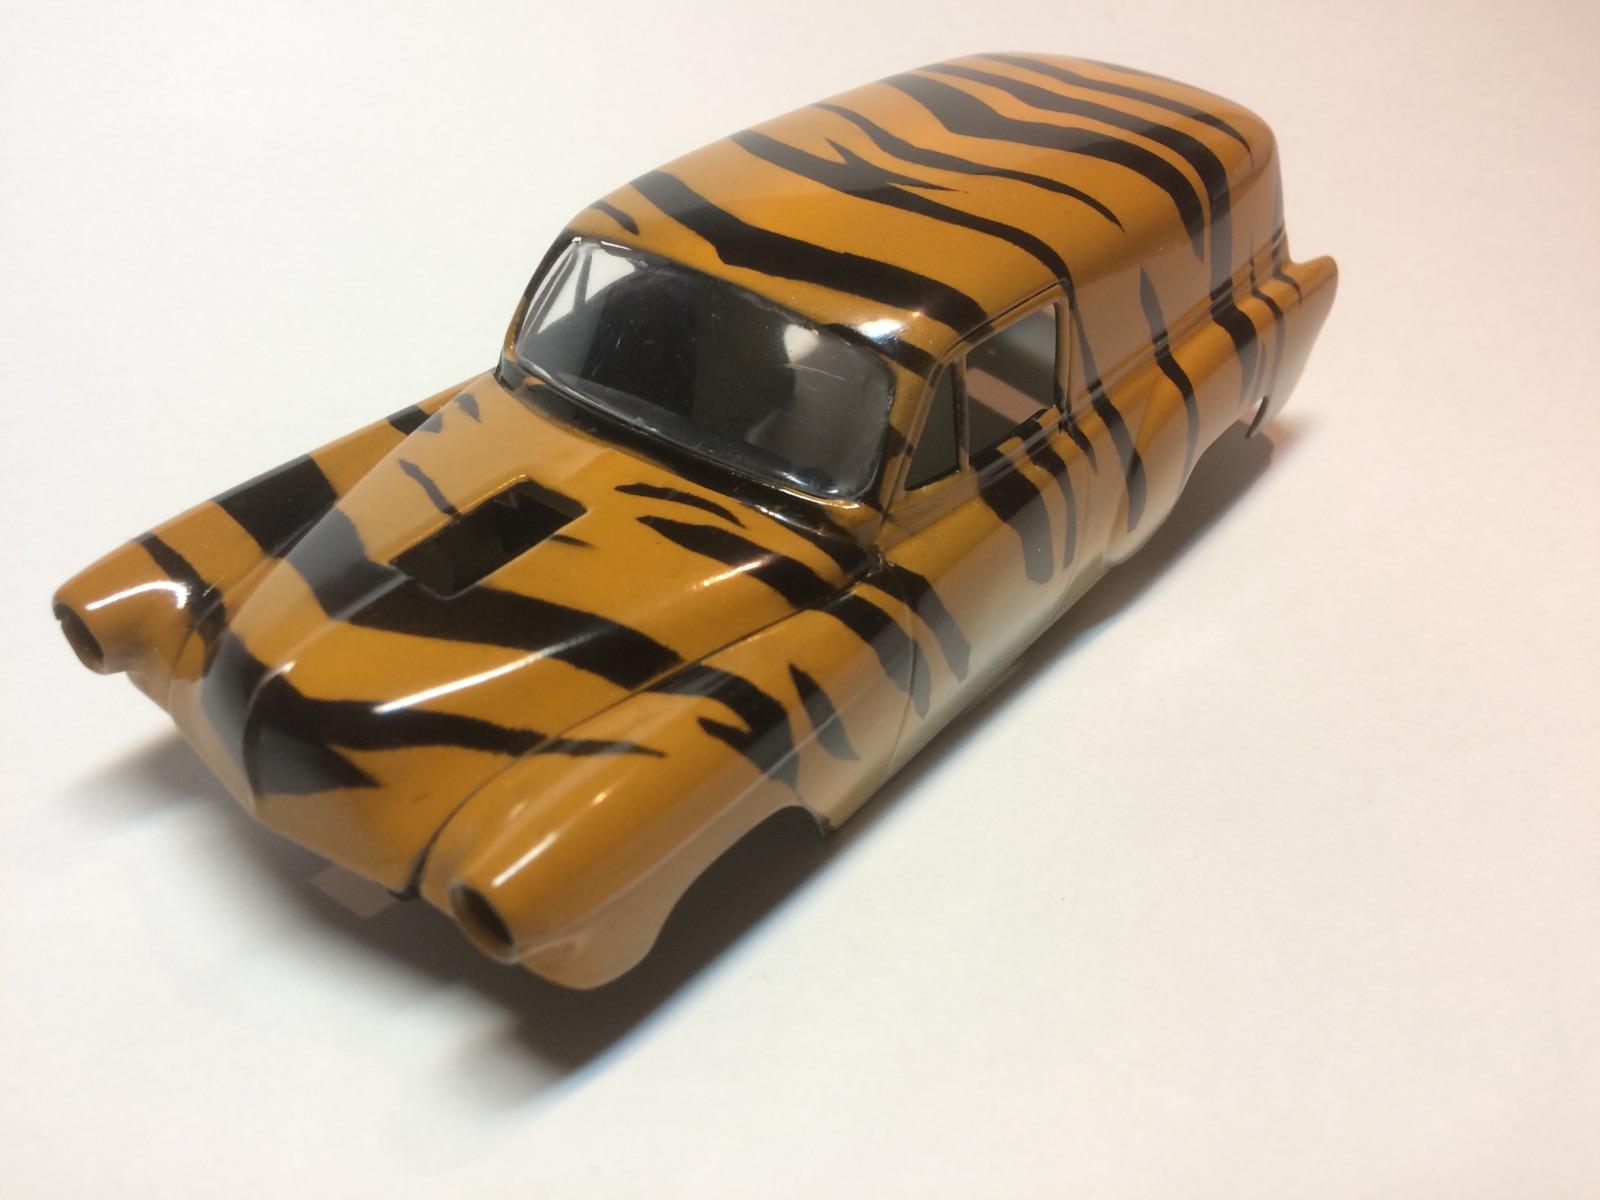
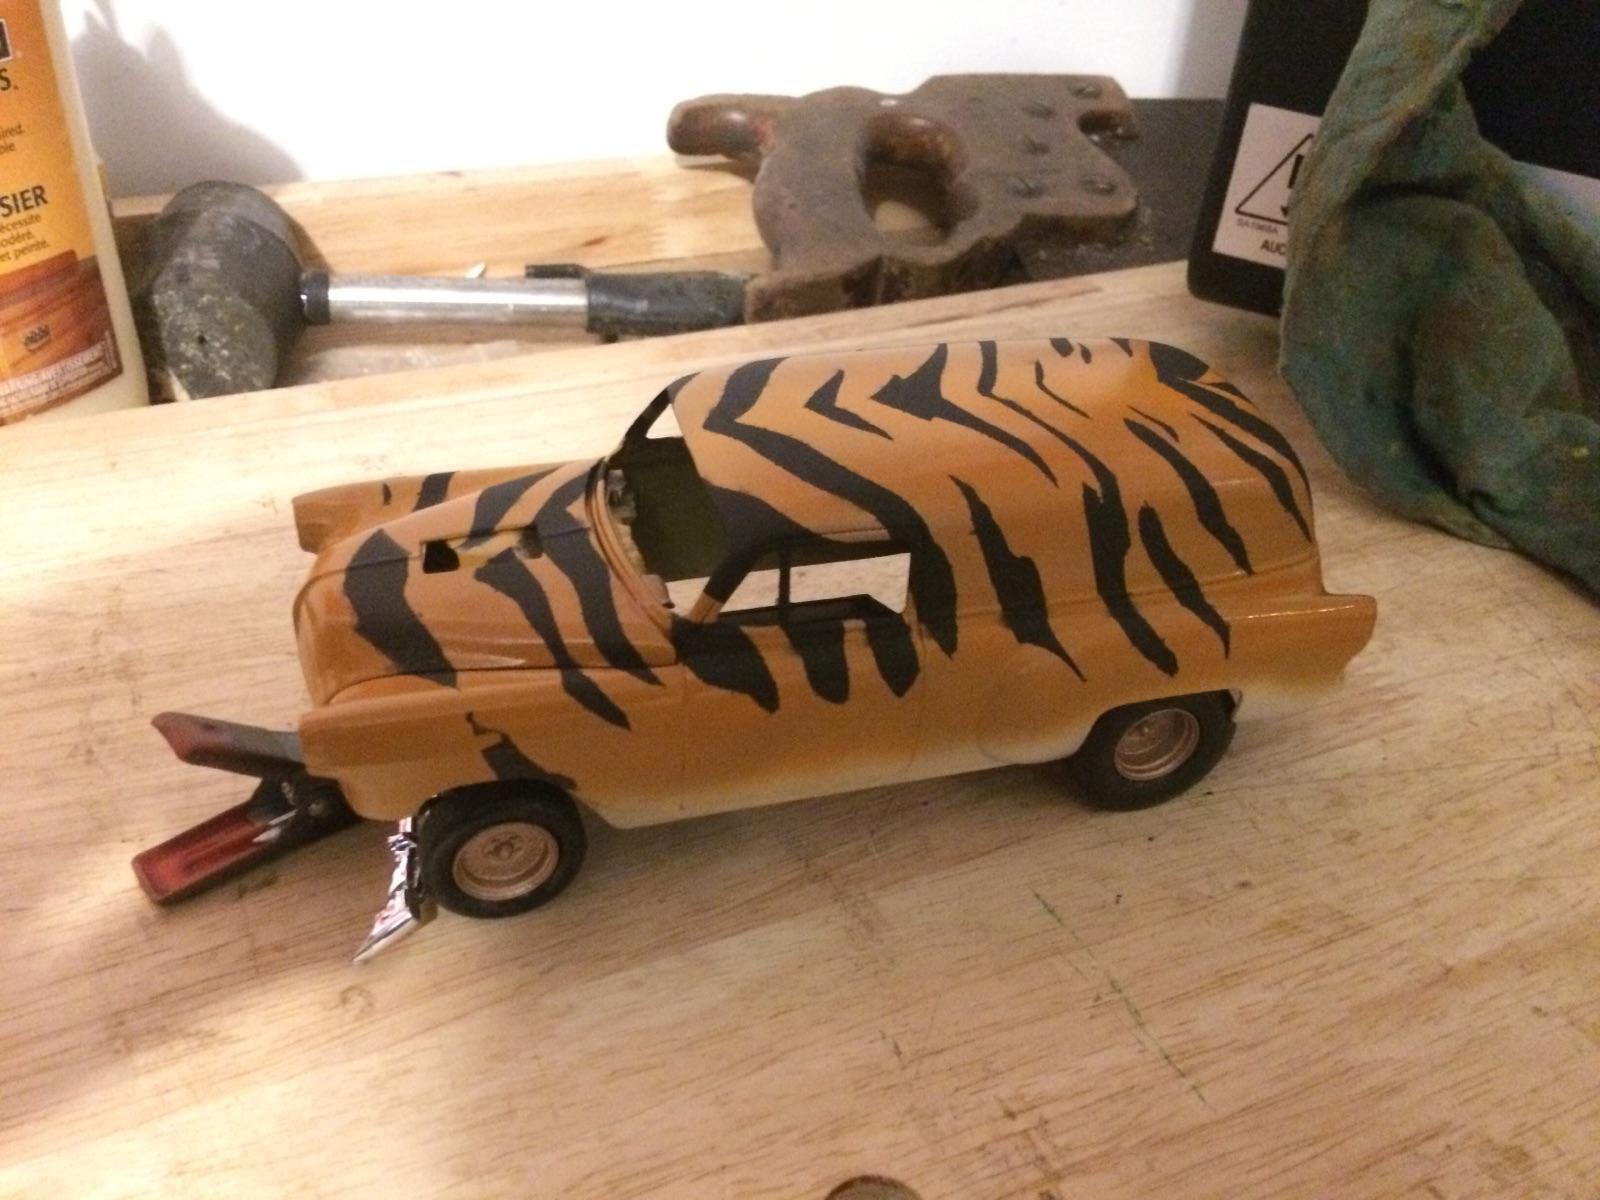
For whatever reason, this photo is quite different from what it actually is. I airbrushed this body with two shades of orange with white under accents for a random tiger pelt look. Whether it 's the green from my desk light (fluorescent), or the yellow caste from the spotlight (incandescent) or a combination of the two, it came out a mustard (?) color in the pic. Its orange. Really. Orange.
-
I sourced a roll bar from an old amt The Ol' Pro nova kit. It fits. I'm deciding on a seat yet. The dash will go a dark green, the door panels will also echo that color
-
....and a hole in the hood to make room for the velocity stacks from the 429 ford going in there. I was going to install a flathead, but this engine didn't have a home so... ....and here's the frame/engine assembly.. ....and how it will look with the bottom piece attached.. that's all I have for now. comments and observations welcome
-
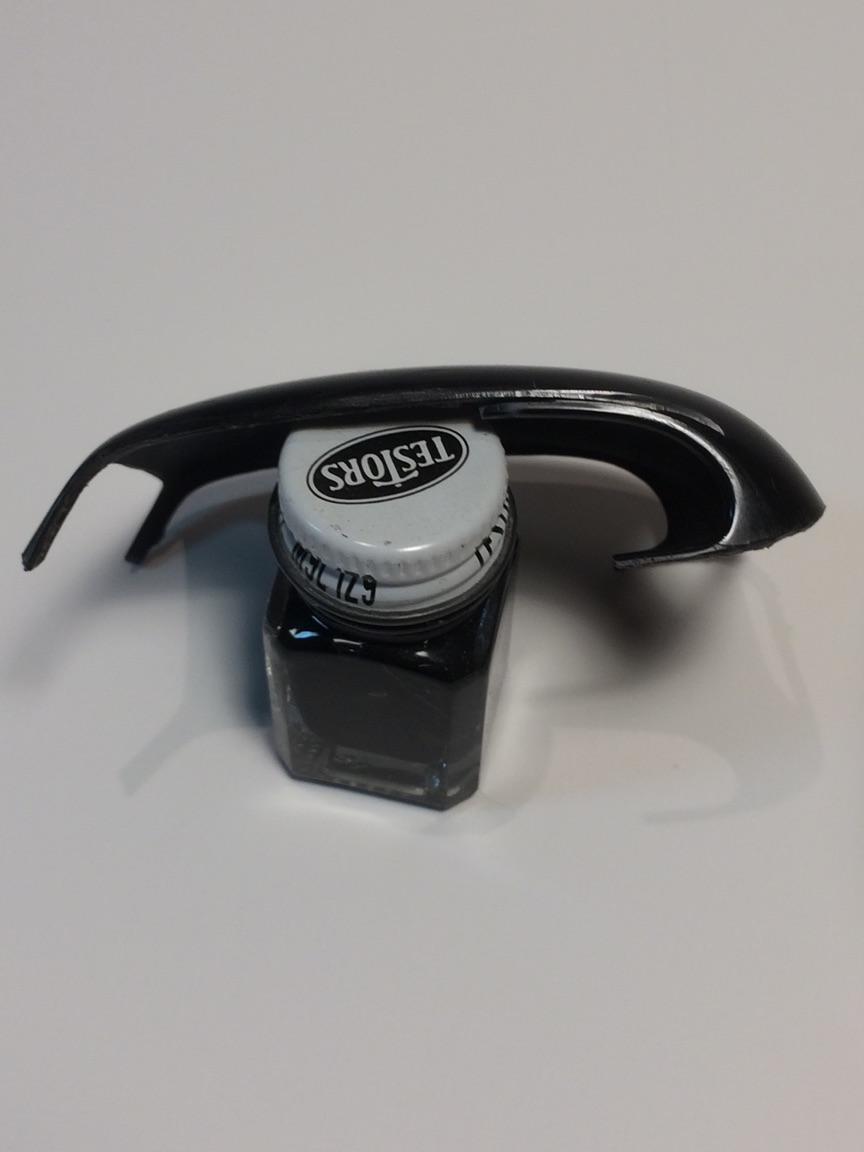
When it came to joining the bottom part of the firewall to the body, there's an ugly gash across the front. I made a piece to cover this from two different sizes of plastic rod. The top piece the larger one, and the two pieces under it both a smaller size. I'm going for a rubber seal kind of look. seems ok so far....
-
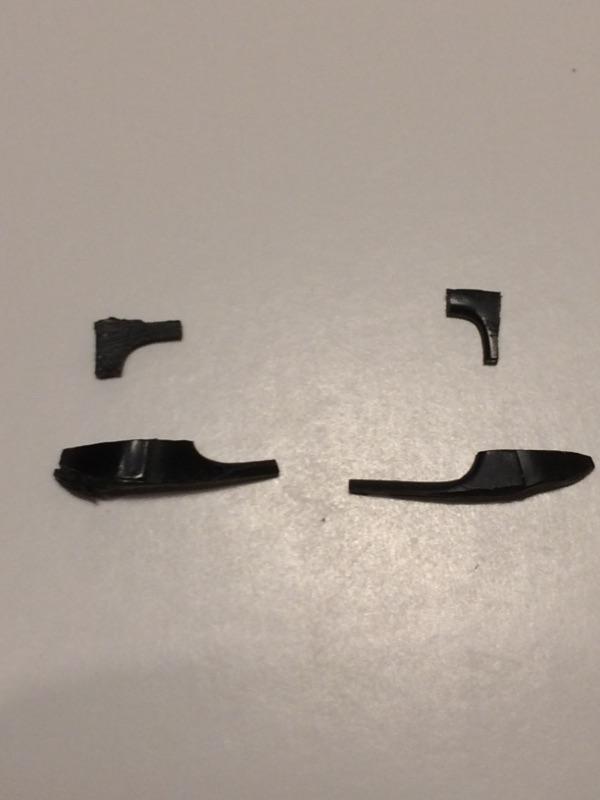
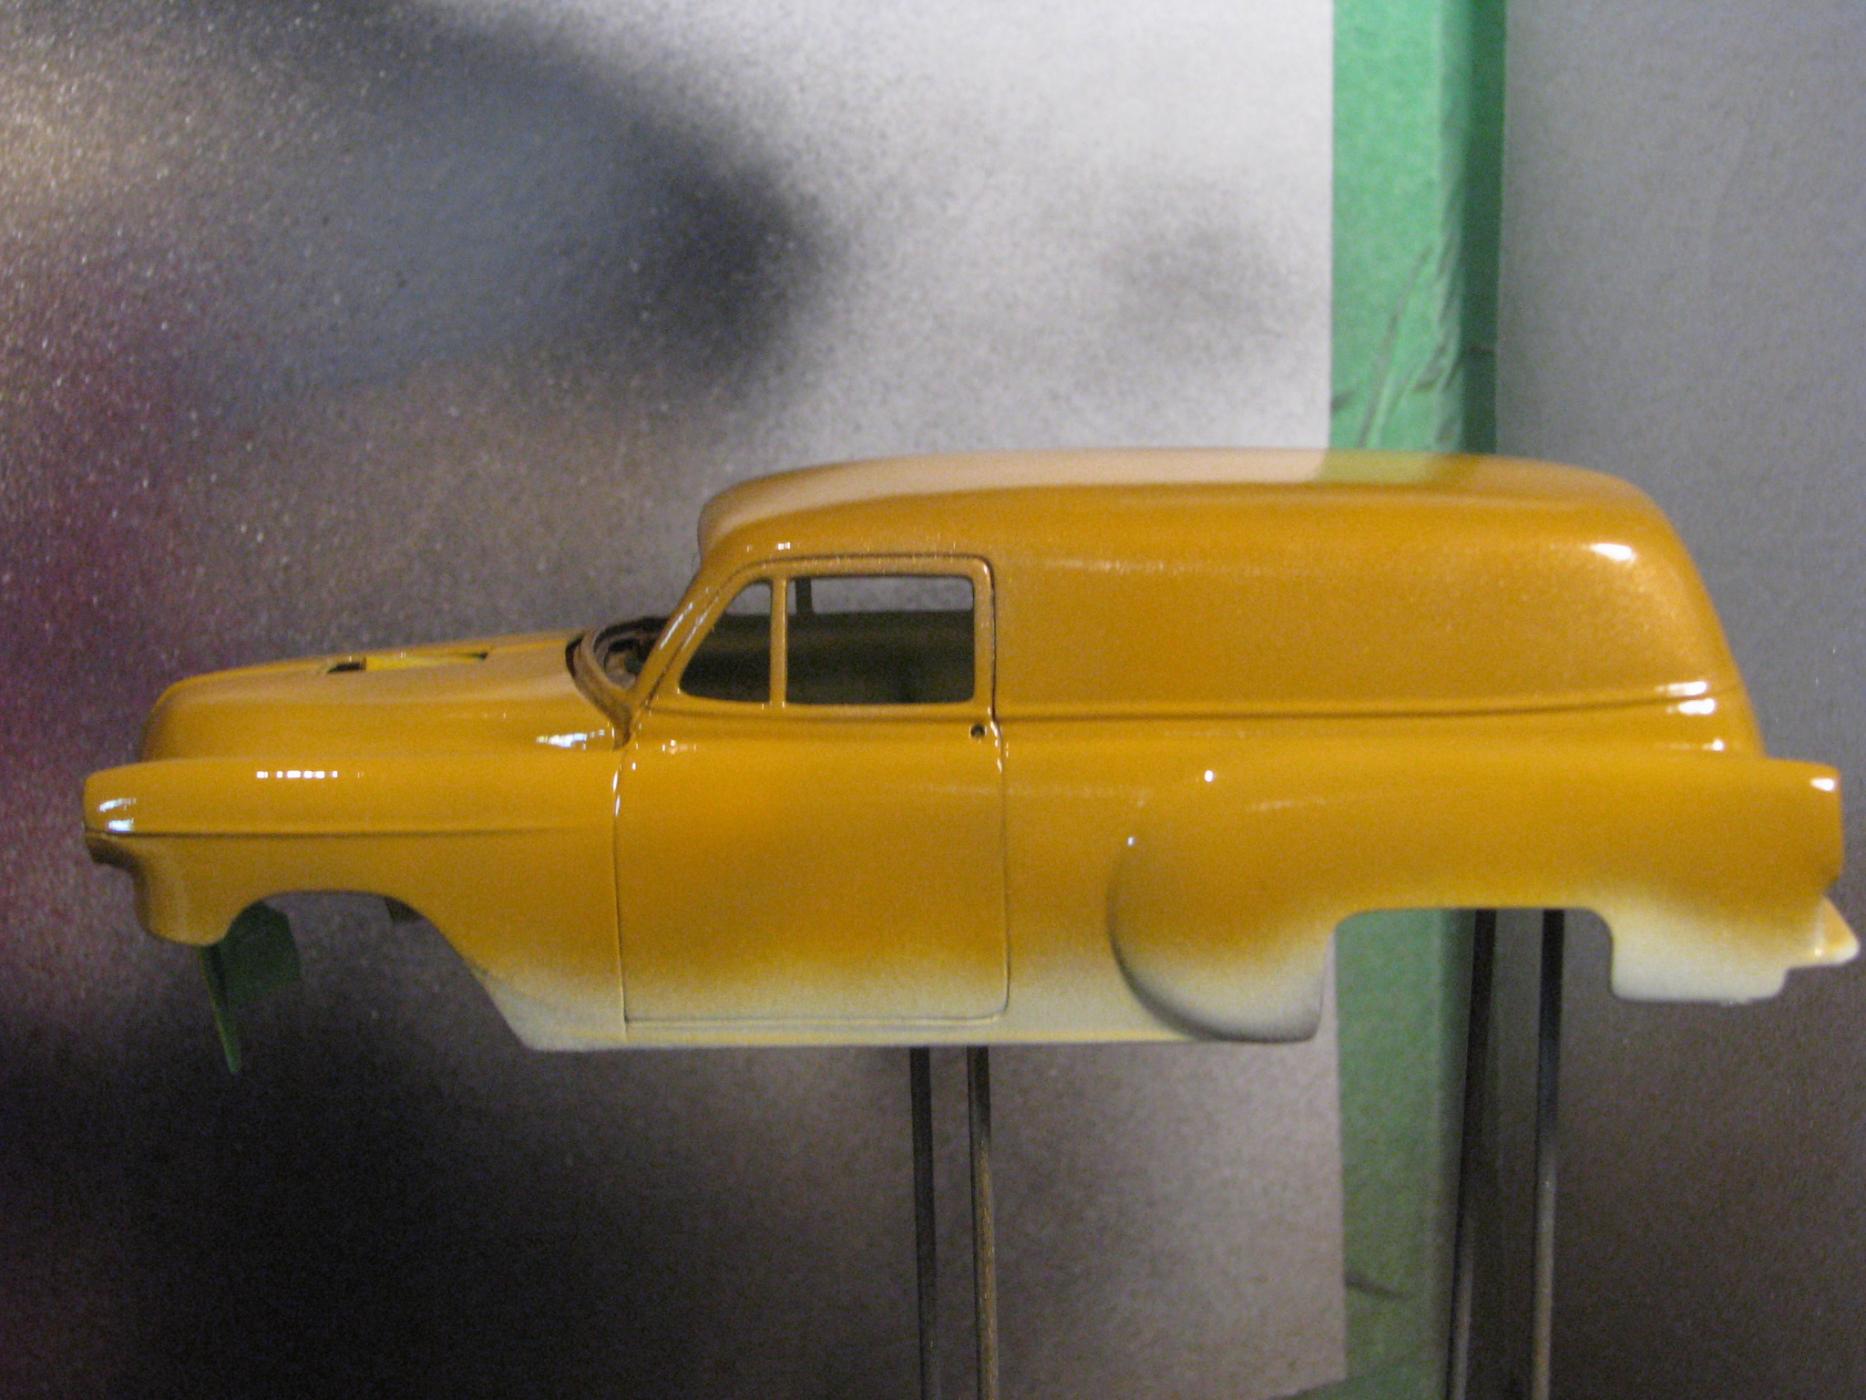
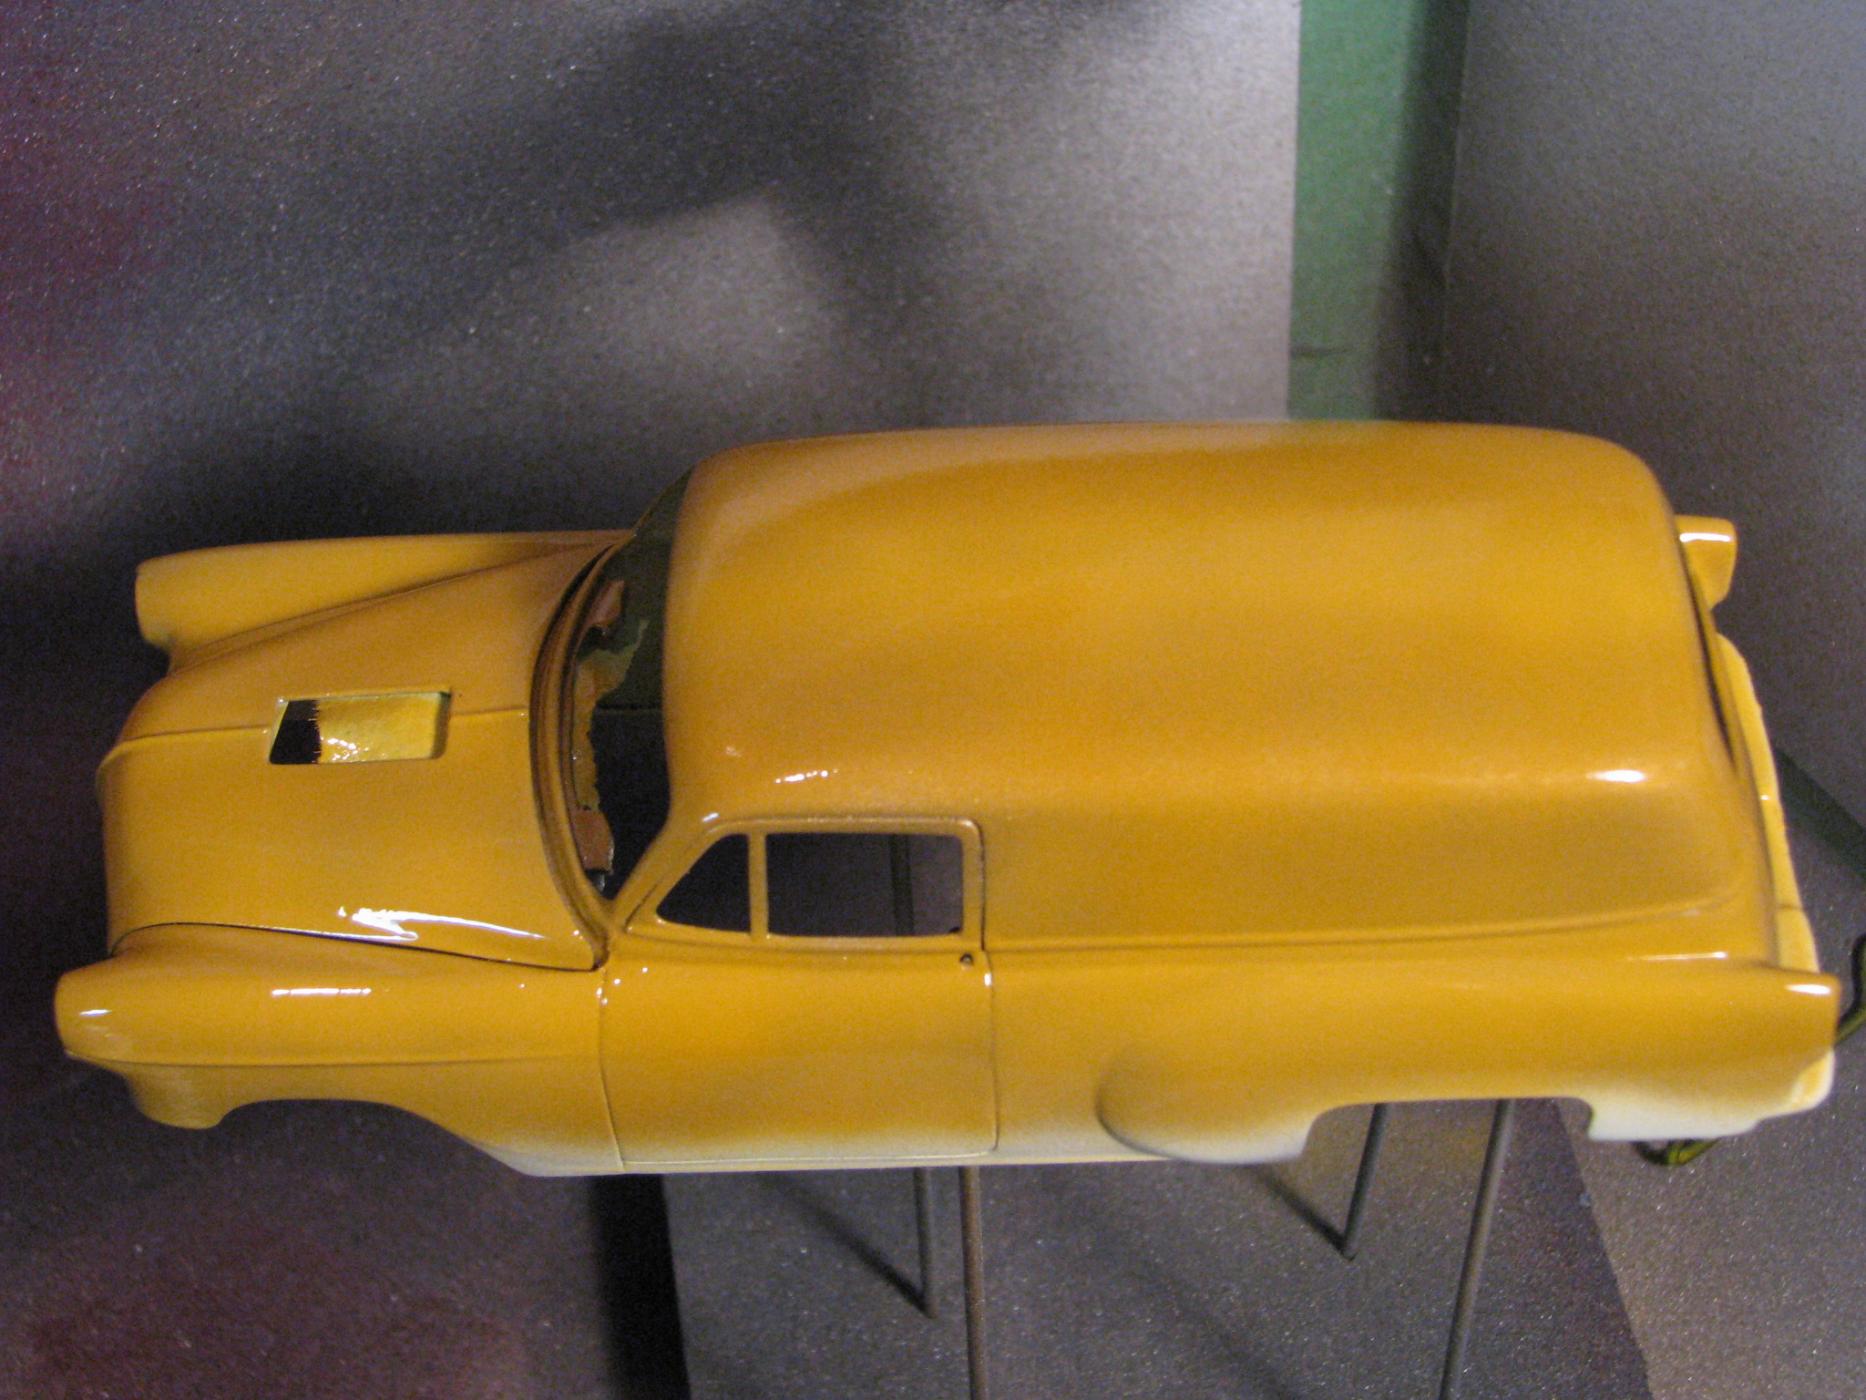
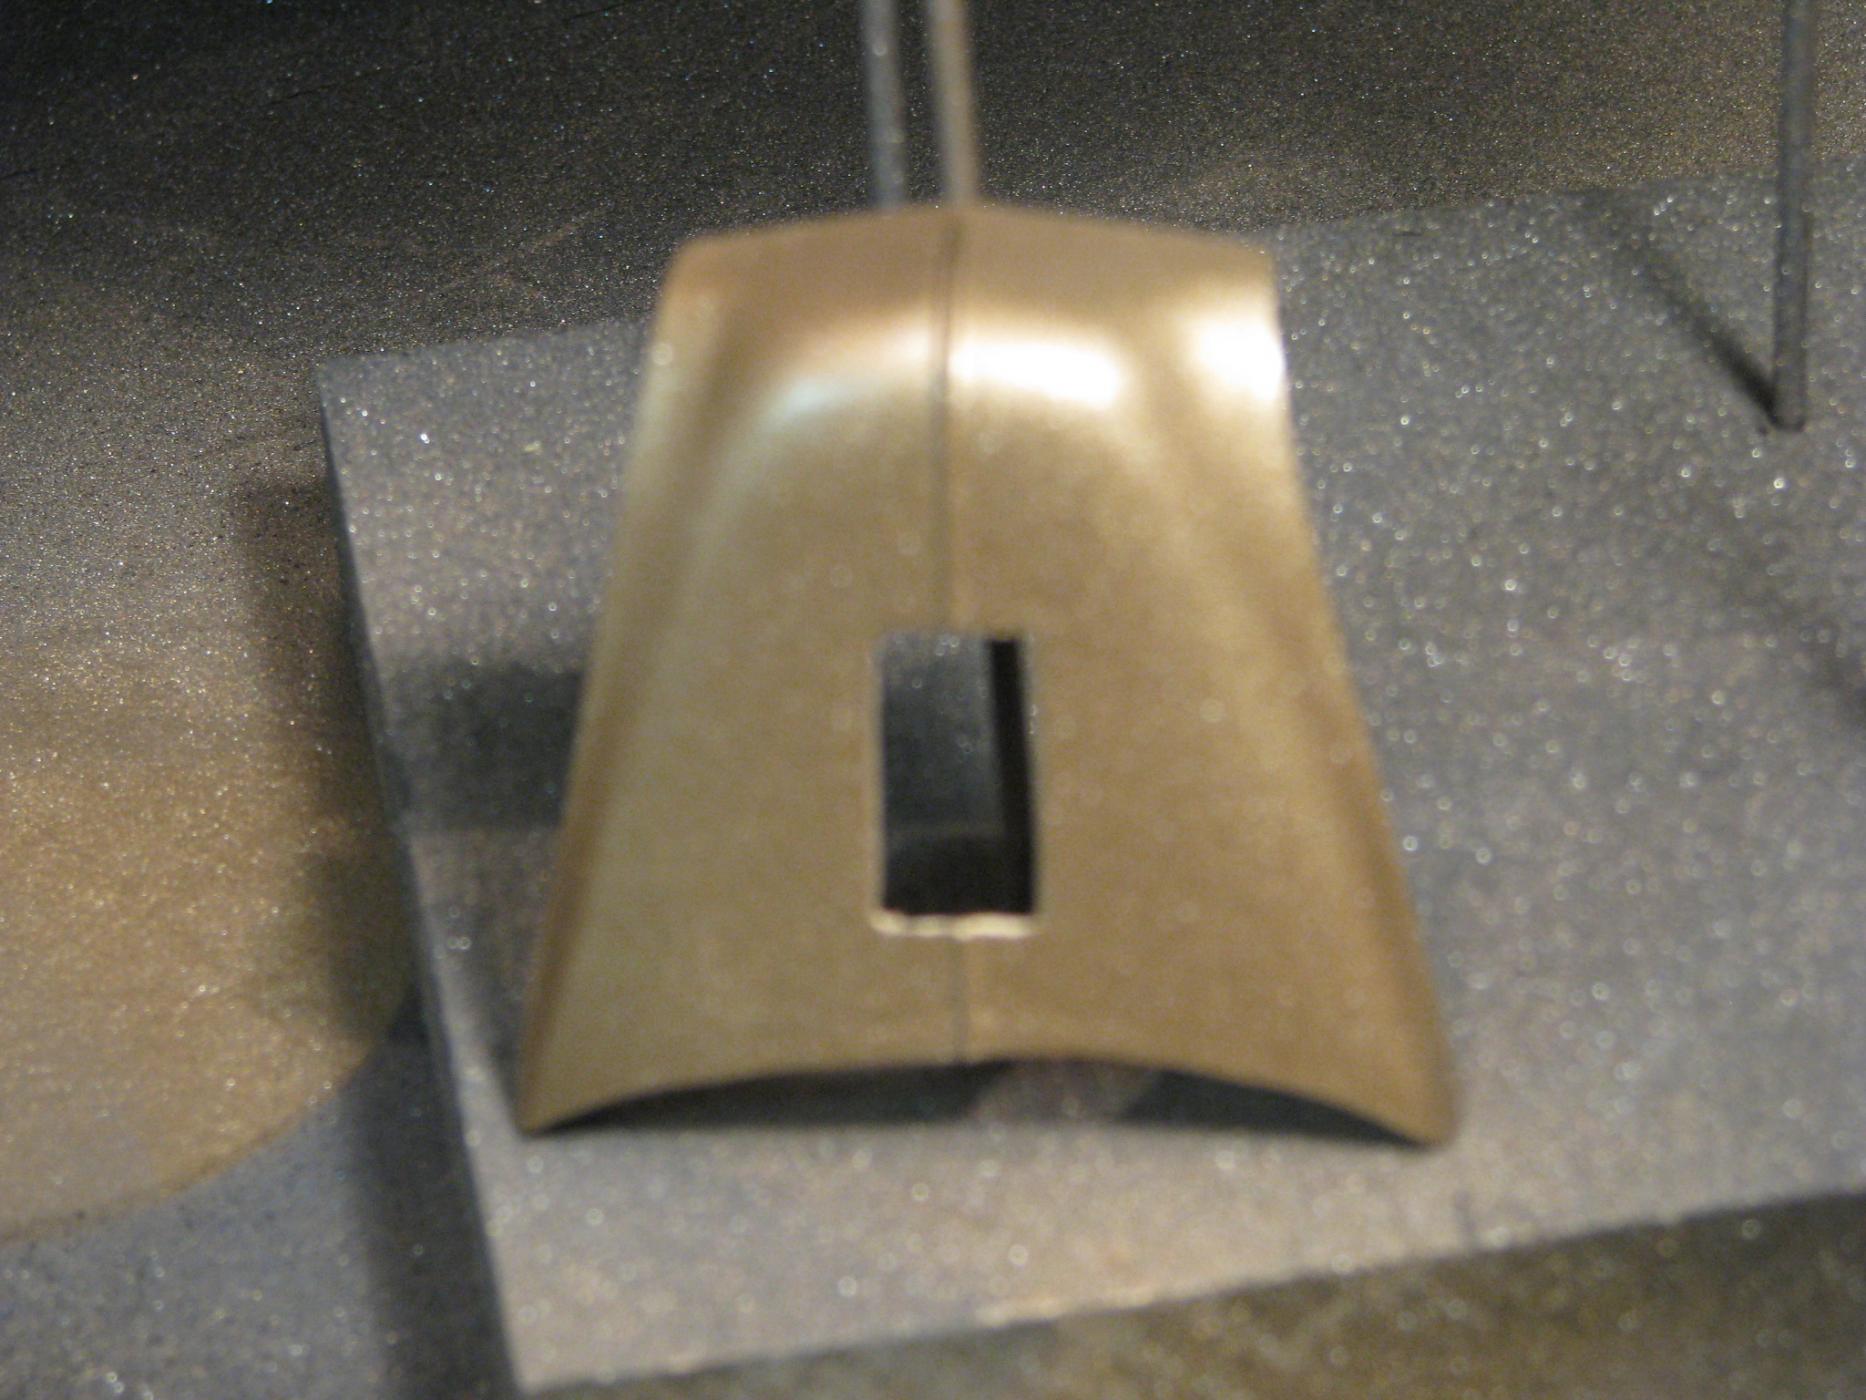
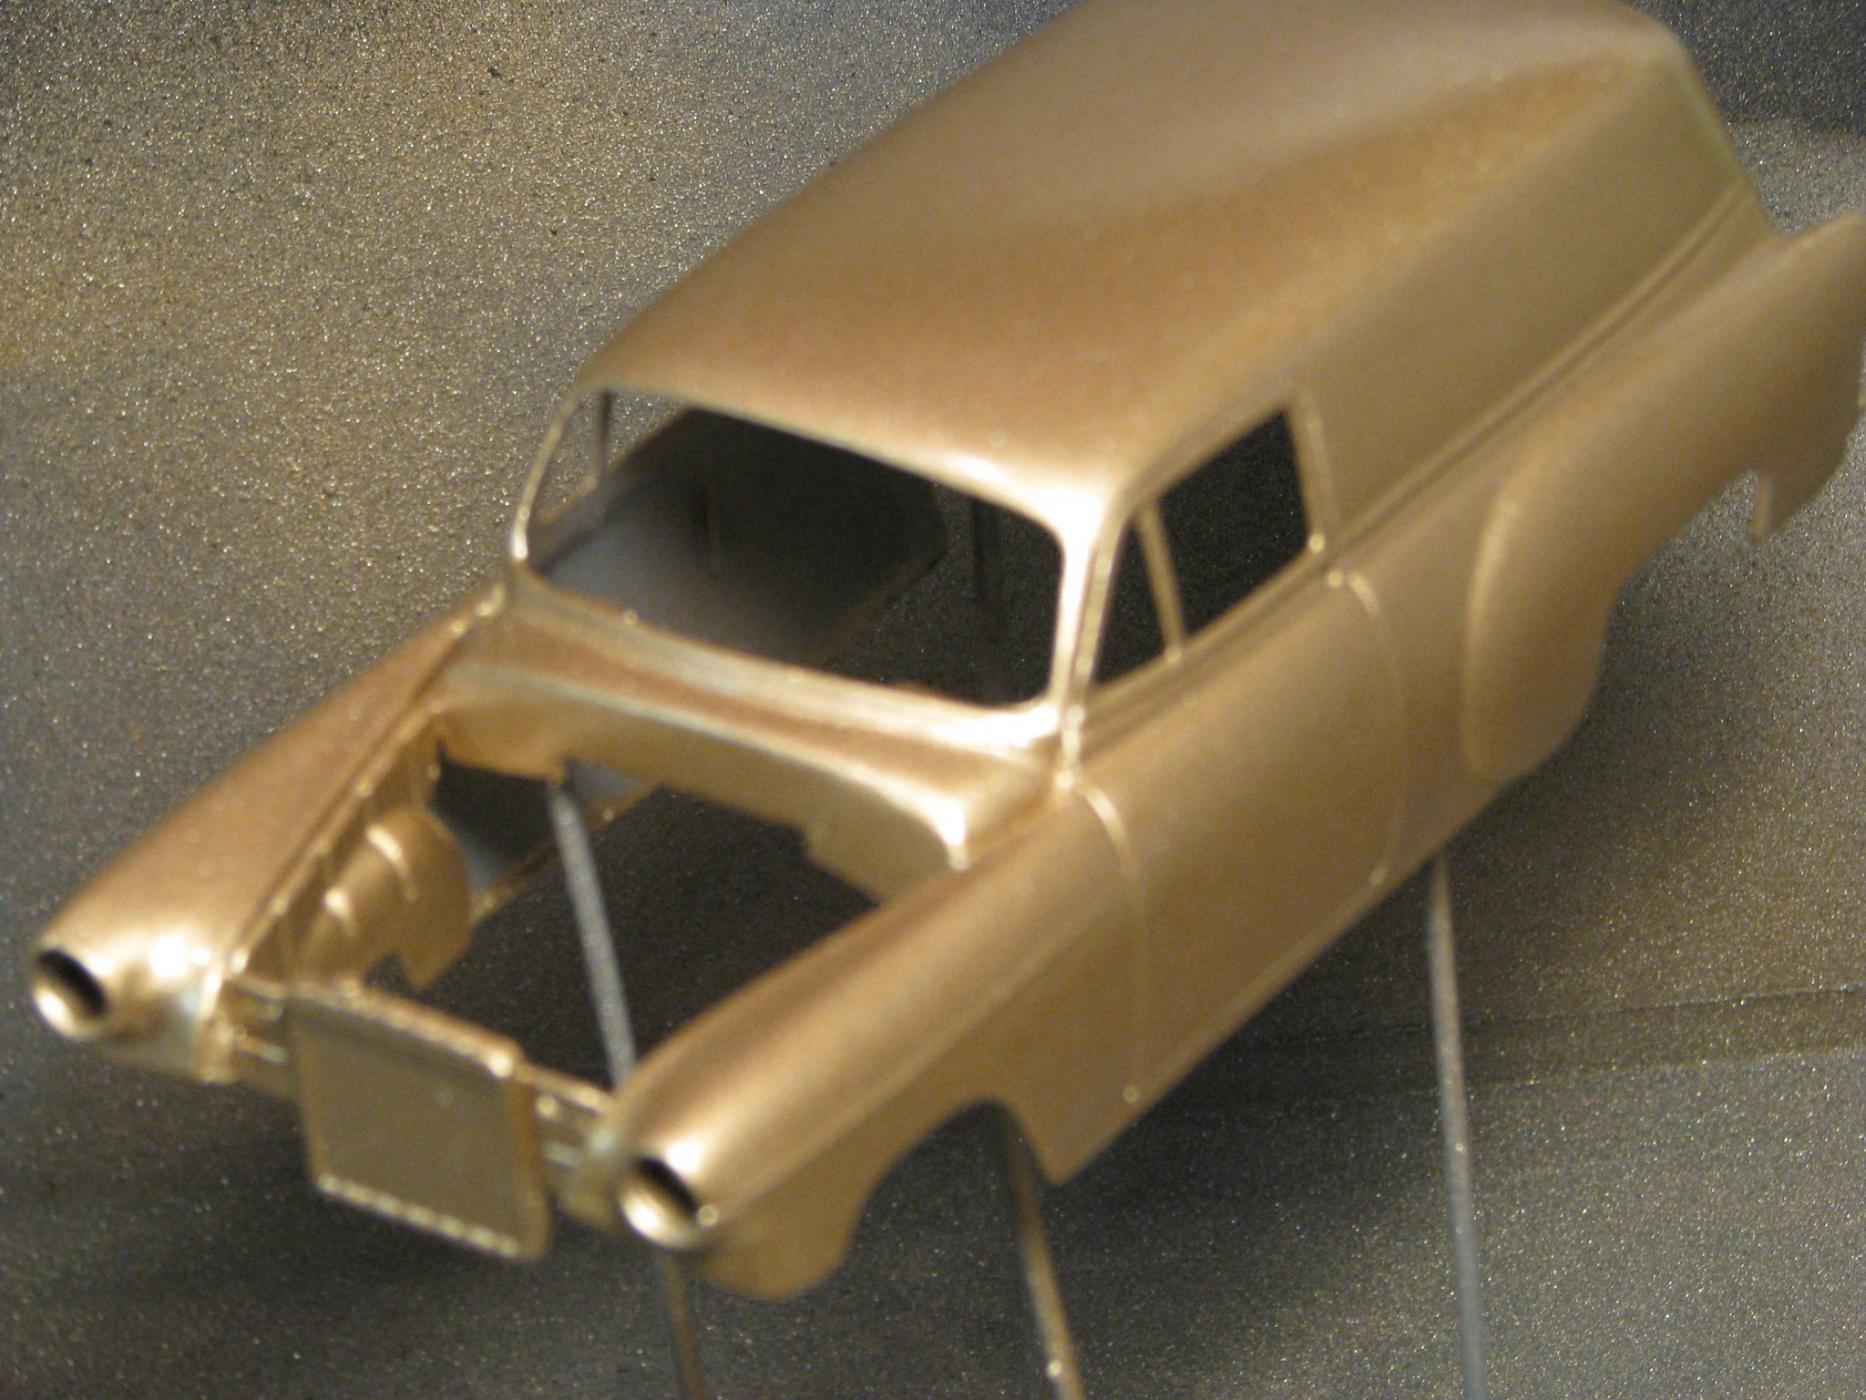
This shows the front part of the engine bay where the openings have been filled. One of them actually cut a piece out of the bottom of the windshield trim. Incidentally, I'm using gold as my base coat, it's not the finished color for this build.
-
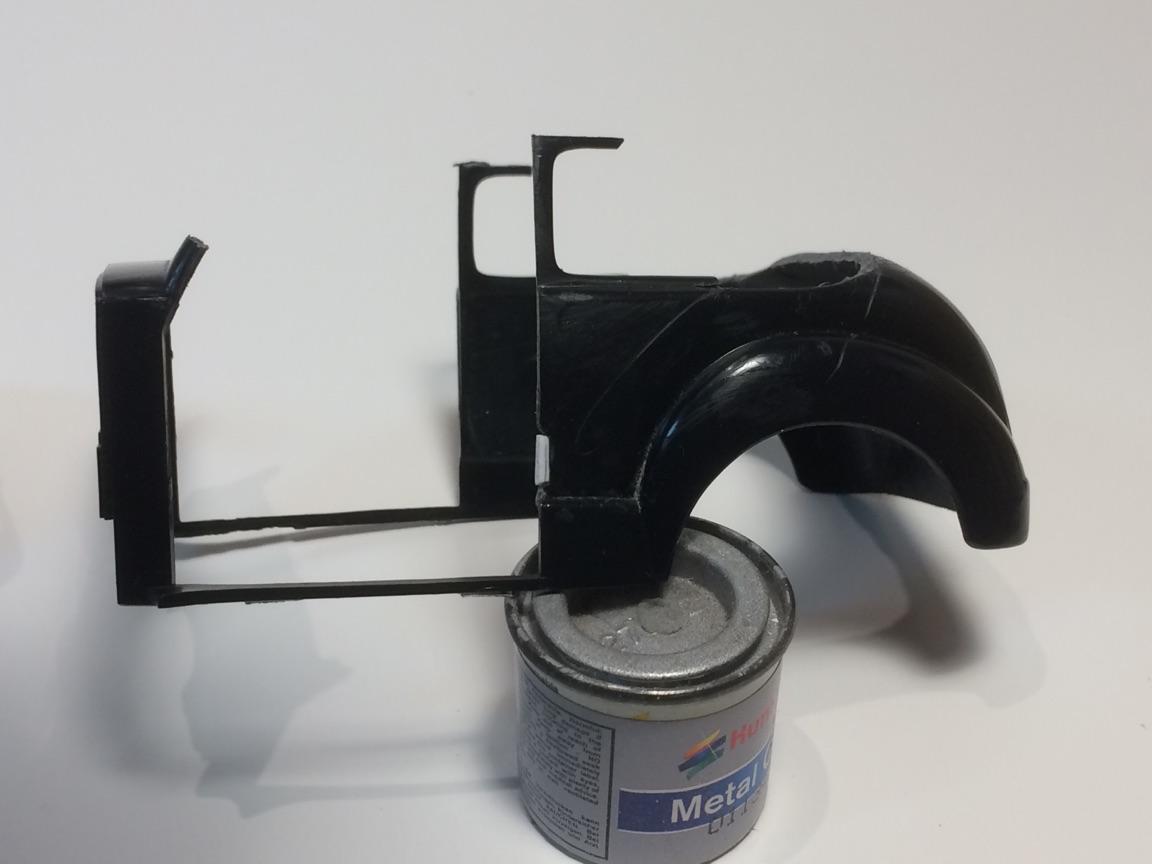
The body is done to my satisfaction. I went with only one side door as I'm building this as a custom/gasser
-
Didn't get a whole lot done, but the ride height is established. Still pure gasser, but not to the outrageous tilt the stock build had. The wheel wells haven't been touched. ...so now it's on to finishing up the body. Most of the work I'm doing is done, now to fill in those huge open holes up front. I've removed the 'arms' from the hood and now the body holes are being first filled with sheet plastic then smoothed with minimal body fill. Note, I've only ever used body fill once. My filler of choice is automotive scratch filler used in bodywork. Goes on thin and sands great! Anyway, here's the under hood front part before any smoothing.. A touch blurry, didn't think about macro at the time but you get the idea. Comments and observations welcome. Thanx for looking
-
While I was doing some research on gassers, came across a photo that looks like it could have been the inspiration for the actual box top art. What do you think? .....anyway..... The body was a pretty poor casting, at least in my kit. It took quite a bit of sanding, filing, and patience to bring it up to an acceptable level. I mentioned earlier that only one seat will be installed, and that`s because the passenger door was poorly done. I took it a step further and did a little body work, specifically deleting the door entirely. Inside, a roll bar support will anchor in the place of what would have been the passenger seat. The driver's side turned out ok... € ....and the passenger side is in the final finishing stage. Took lots 'o shaping to get it this far. My Primer Queen. First off, the stance is not this drastic it's simply a mockup. When I first got the kit I guess my mind's eye dismissed the black colored grille in that I thought the whole lower front end was open....and I liked it! Off came the lower part of the front. I'll scratch a moon tank if I can't find one and maybe put some sort of aluminum air deflector below it. I'm also cobbling together a flathead with triple carbs just to be different. Comments and observations welcome.