foghorn62
-
Posts
376 -
Joined
-
Last visited
Content Type
Profiles
Forums
Events
Gallery
Everything posted by foghorn62
-
truck, boat, and trailer
foghorn62 replied to Paul Payne's topic in WIP: Model Trucks: Pickups, Vans, SUVs, Light Commercial
Thank you Paul! Yes definitely the engines (2) will be visible. You can see in the first pic above where I have hacked out some of the braces behind the pilot seat. The ones that I removed were part of the Dumas kit and weren’t at all accurate for the original Chris Craft. Of course, the kit didn’t have any engines at all, so I am going to use my own artistic license and install two Chevy LS3 V12s. I’m still working on a design for the mounting structure. I’m also planing to but in a cooling system that should look pretty cool, kind of like the ones that I posted earlier in your thread.
-
truck, boat, and trailer
foghorn62 replied to Paul Payne's topic in WIP: Model Trucks: Pickups, Vans, SUVs, Light Commercial
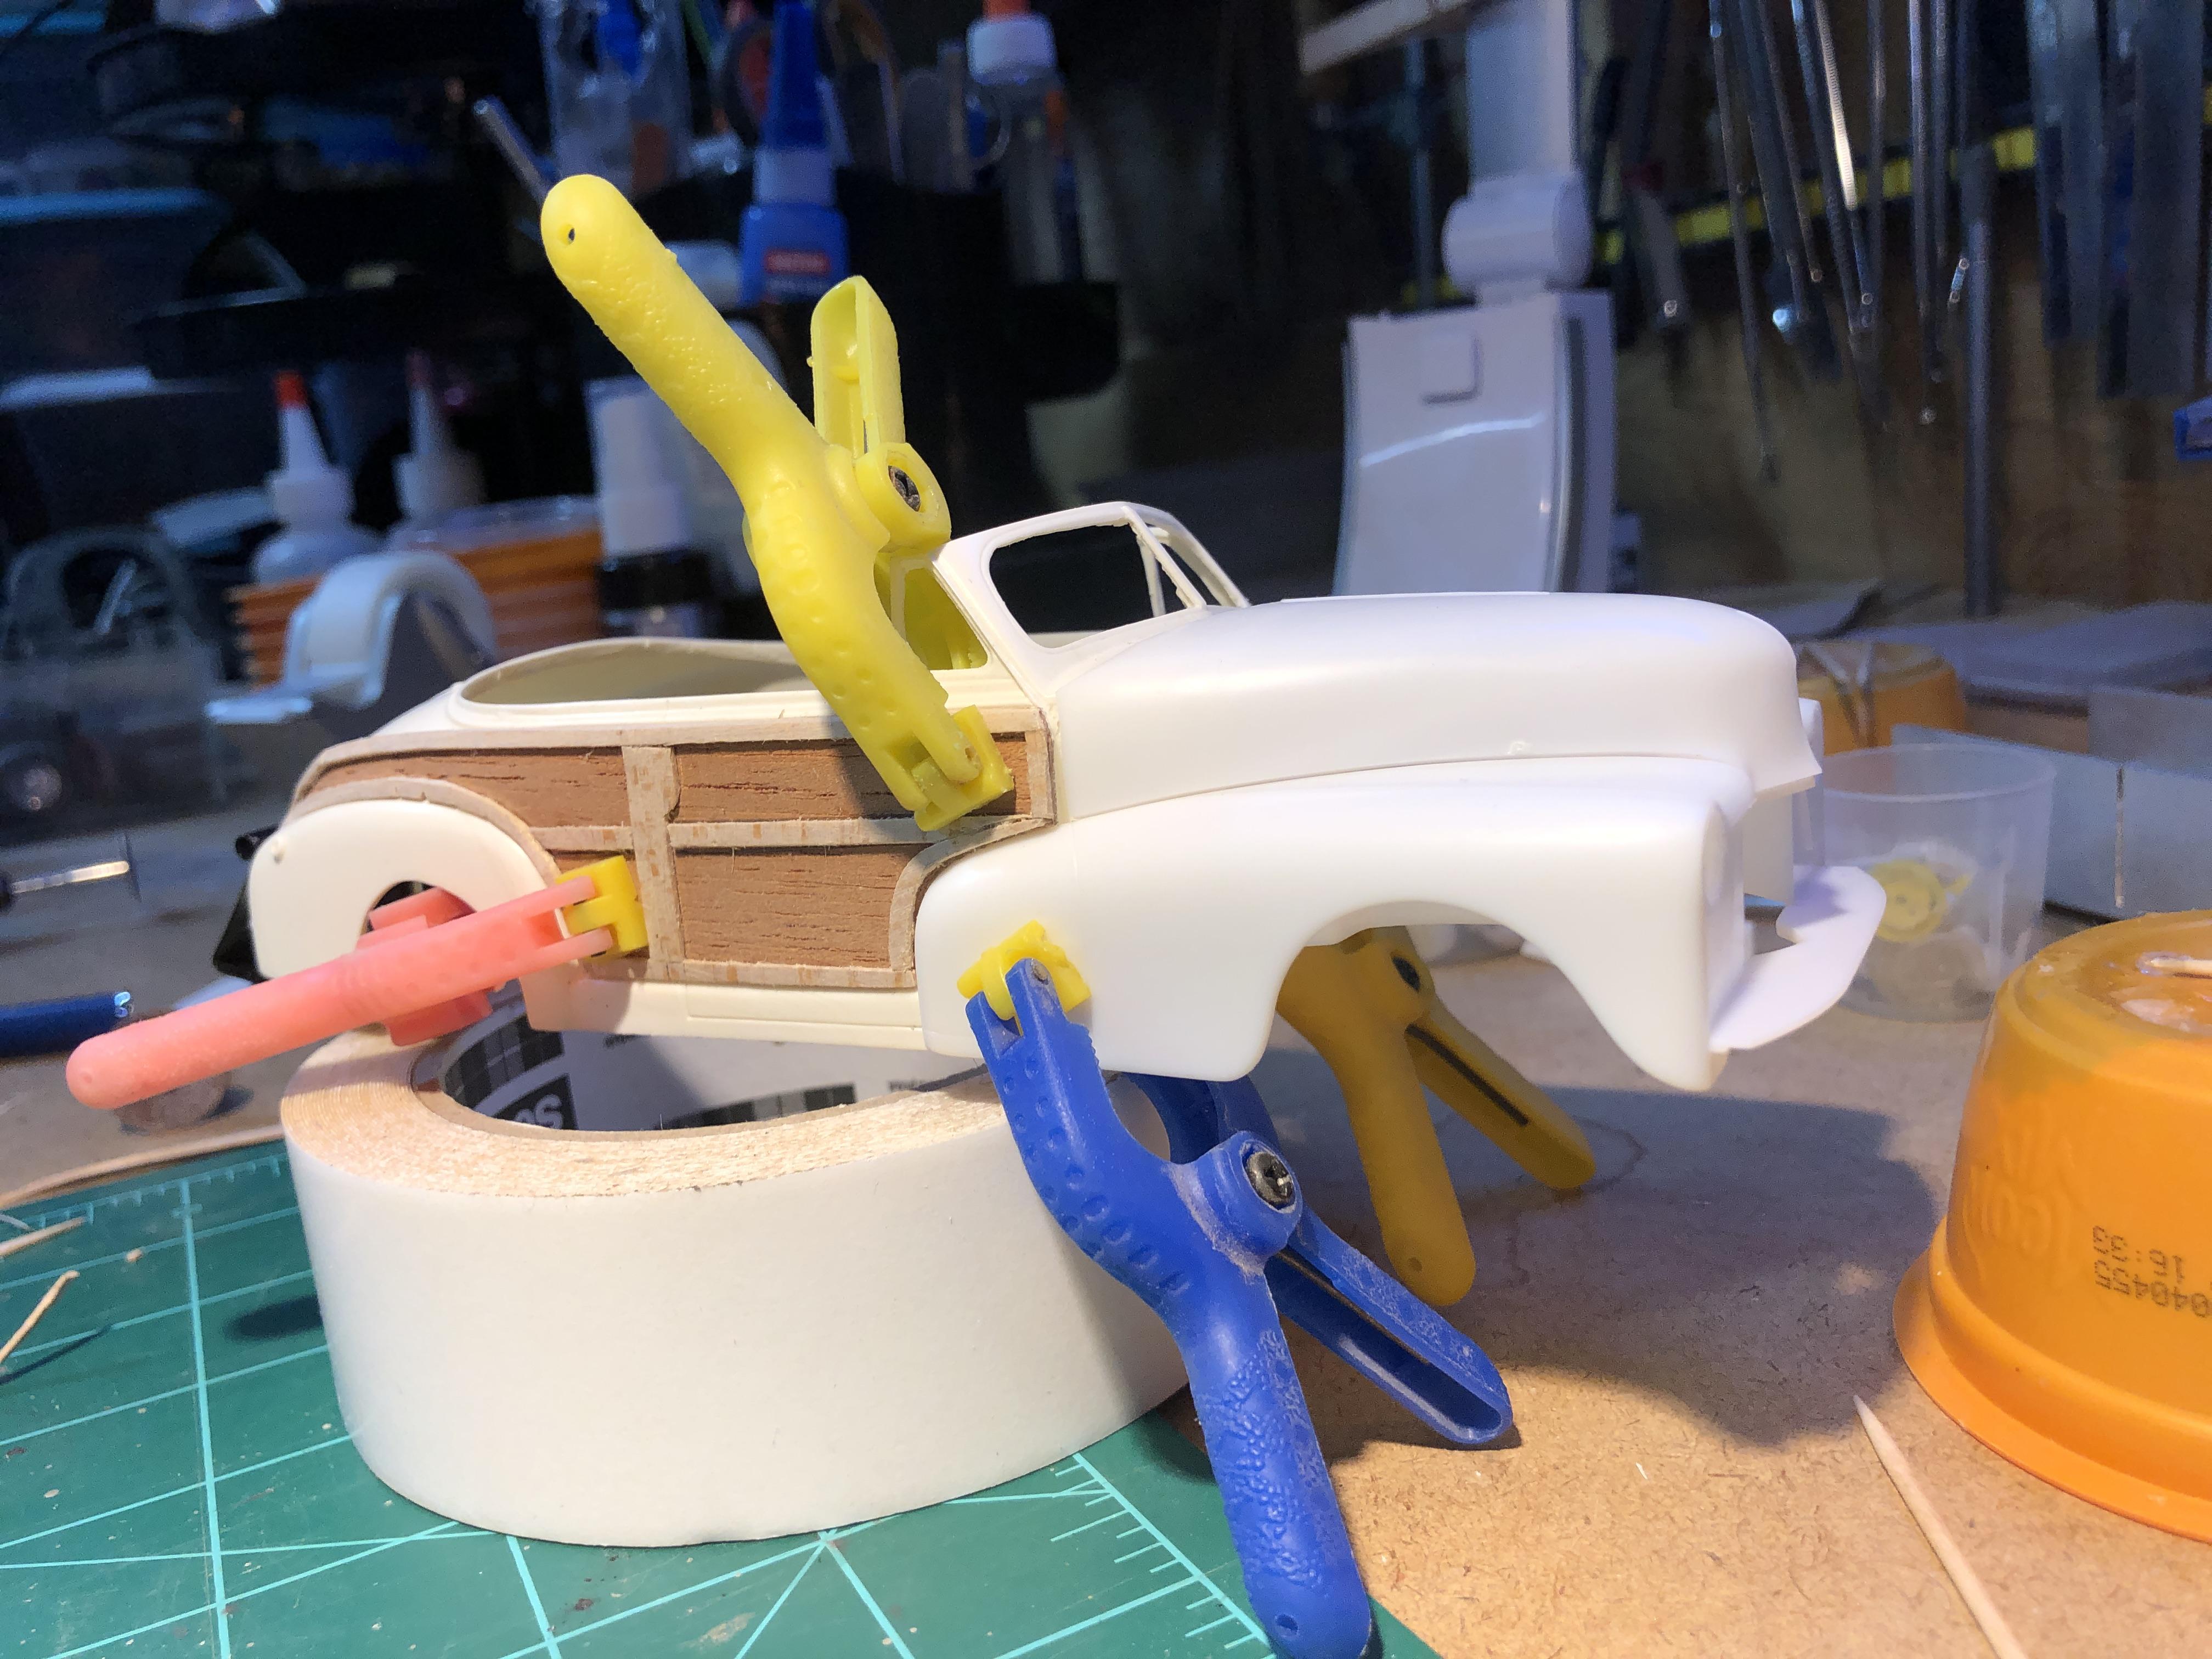
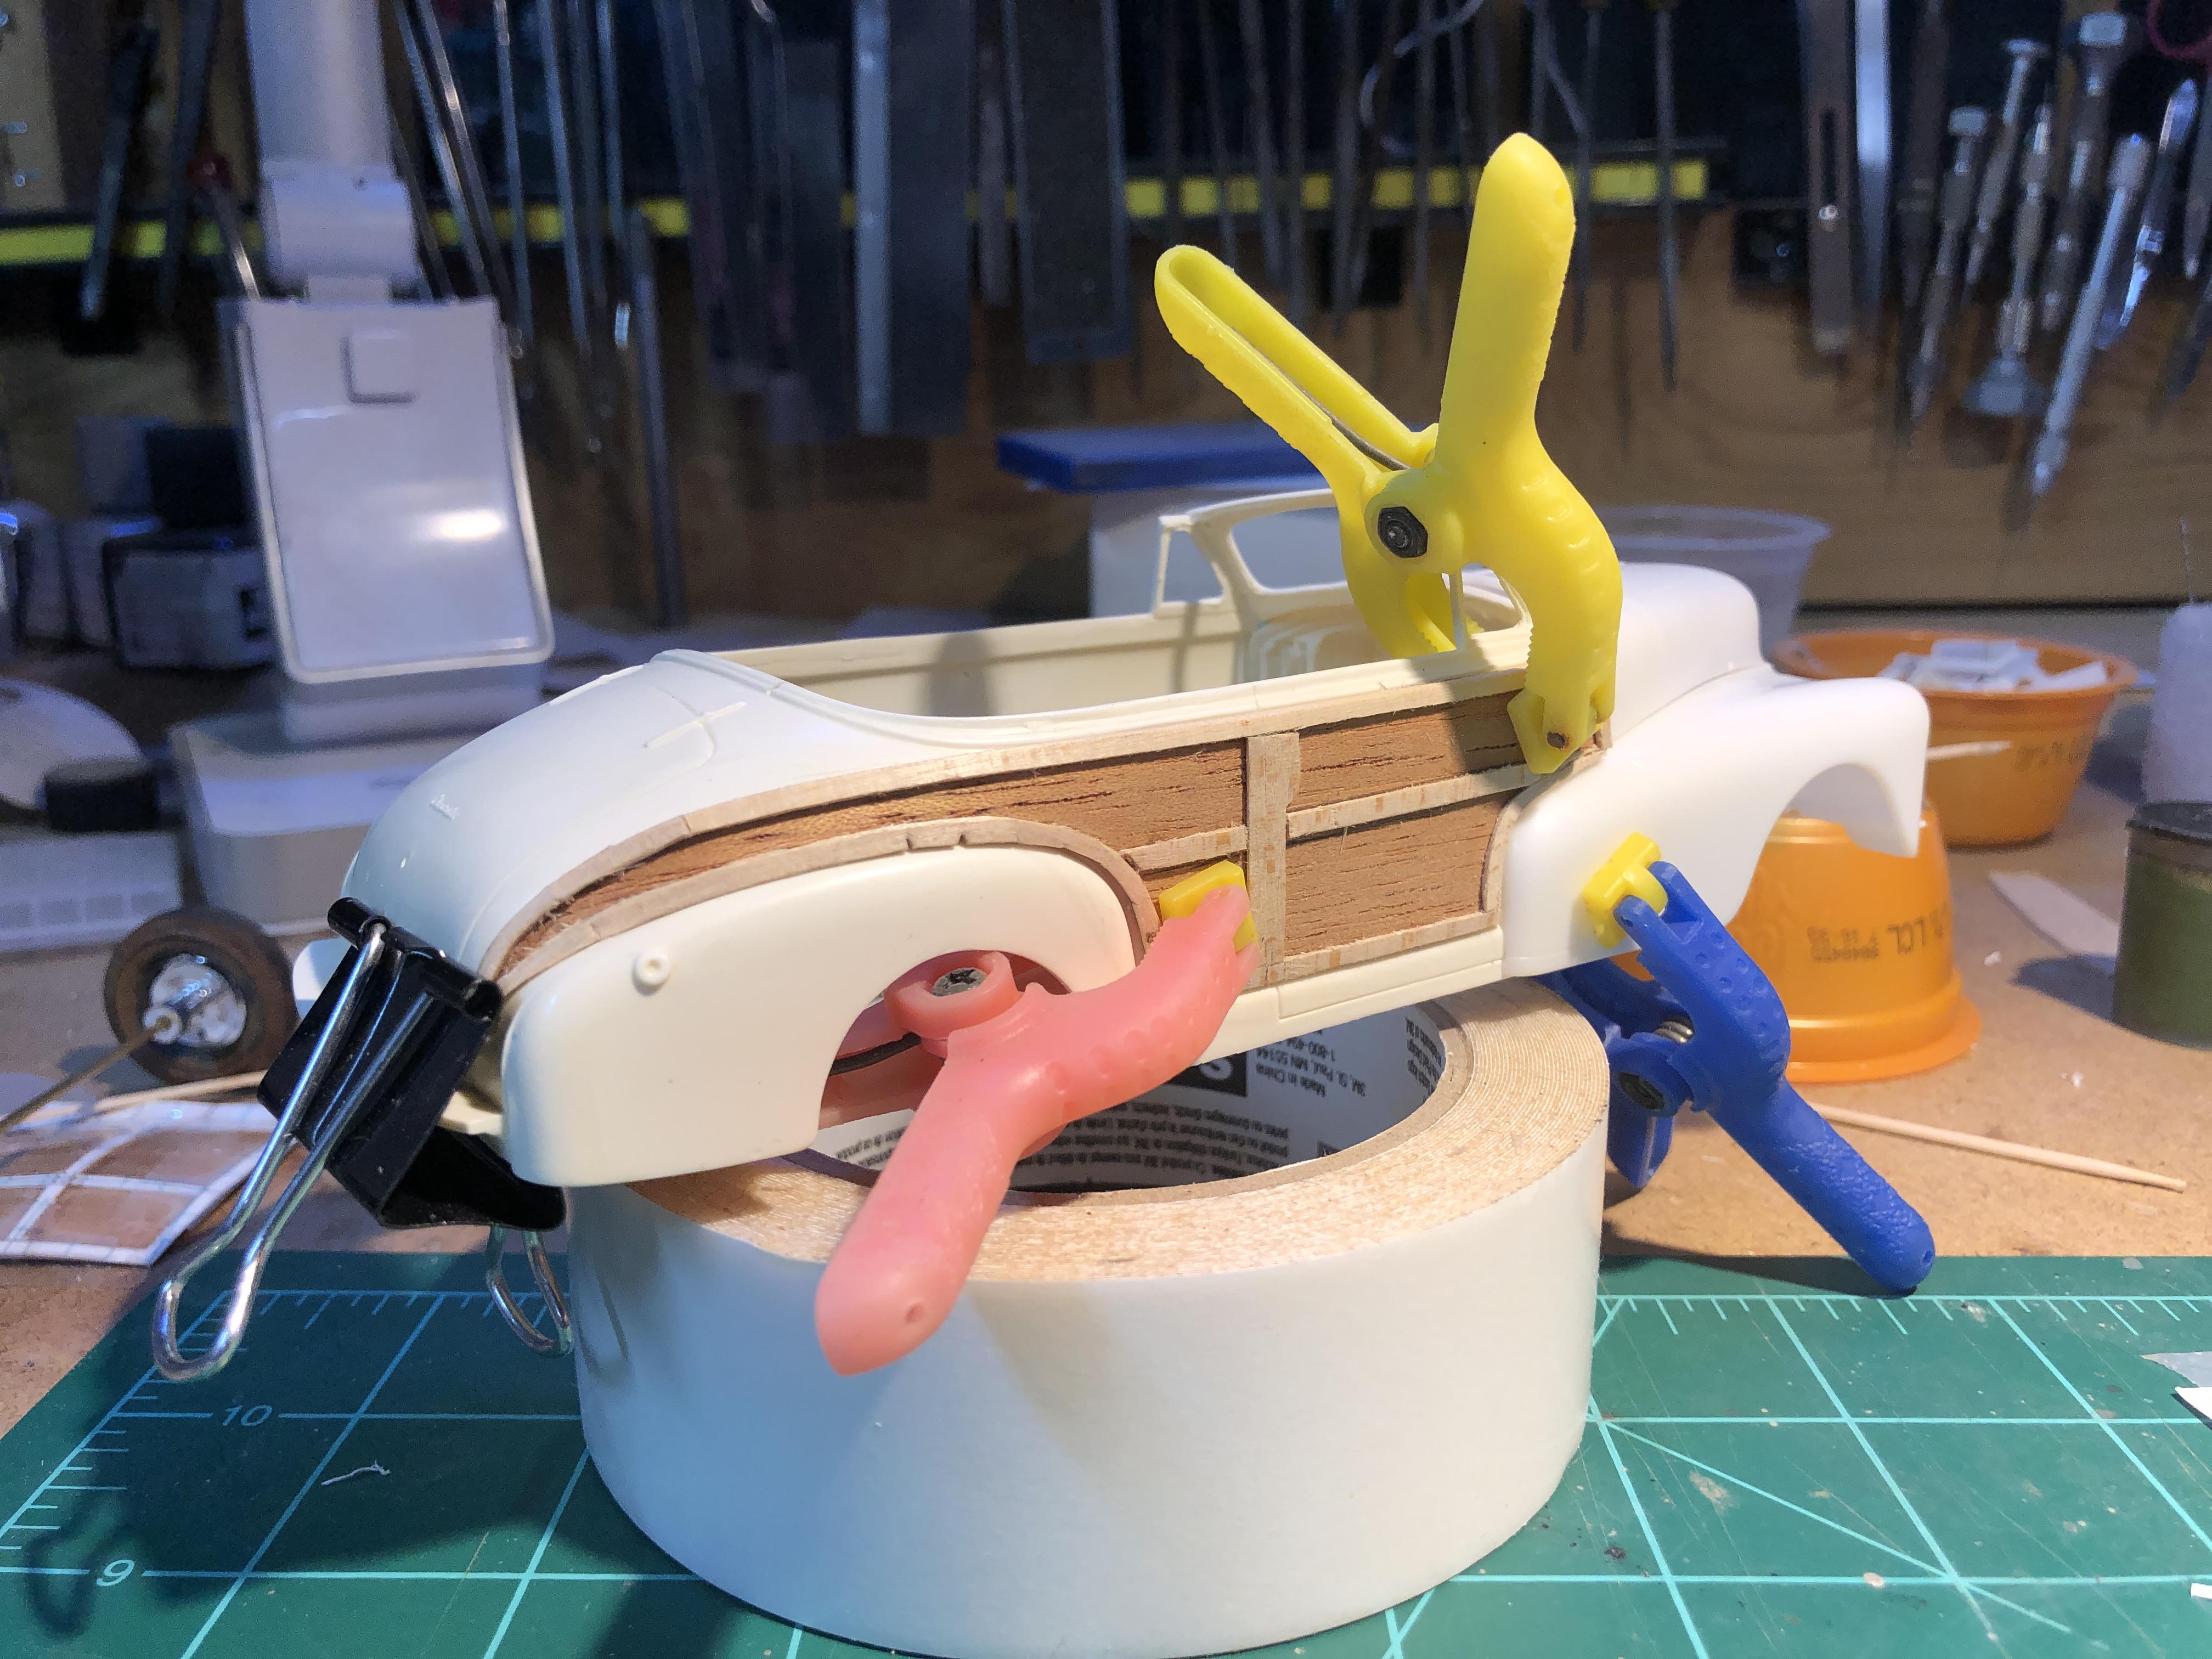
Figured I’d better post a couple of pics just to show that I haven’t gone totally to sleep. Lately I’ve been working on the wood for the 47 Chevy. I got one side pretty well done, and I’m pretty happy with how it’s going. I briefly considered just using the overlays that come with the Galaxie kit, but decided to do the full sportsman treatment instead. Paul, I want to thank you for turning me on to cigar wrap cedar! I have never worked with it before, but I went and got some, and it is pretty amazing the way it can be contoured and molded with just a little soak.
-
truck, boat, and trailer
foghorn62 replied to Paul Payne's topic in WIP: Model Trucks: Pickups, Vans, SUVs, Light Commercial
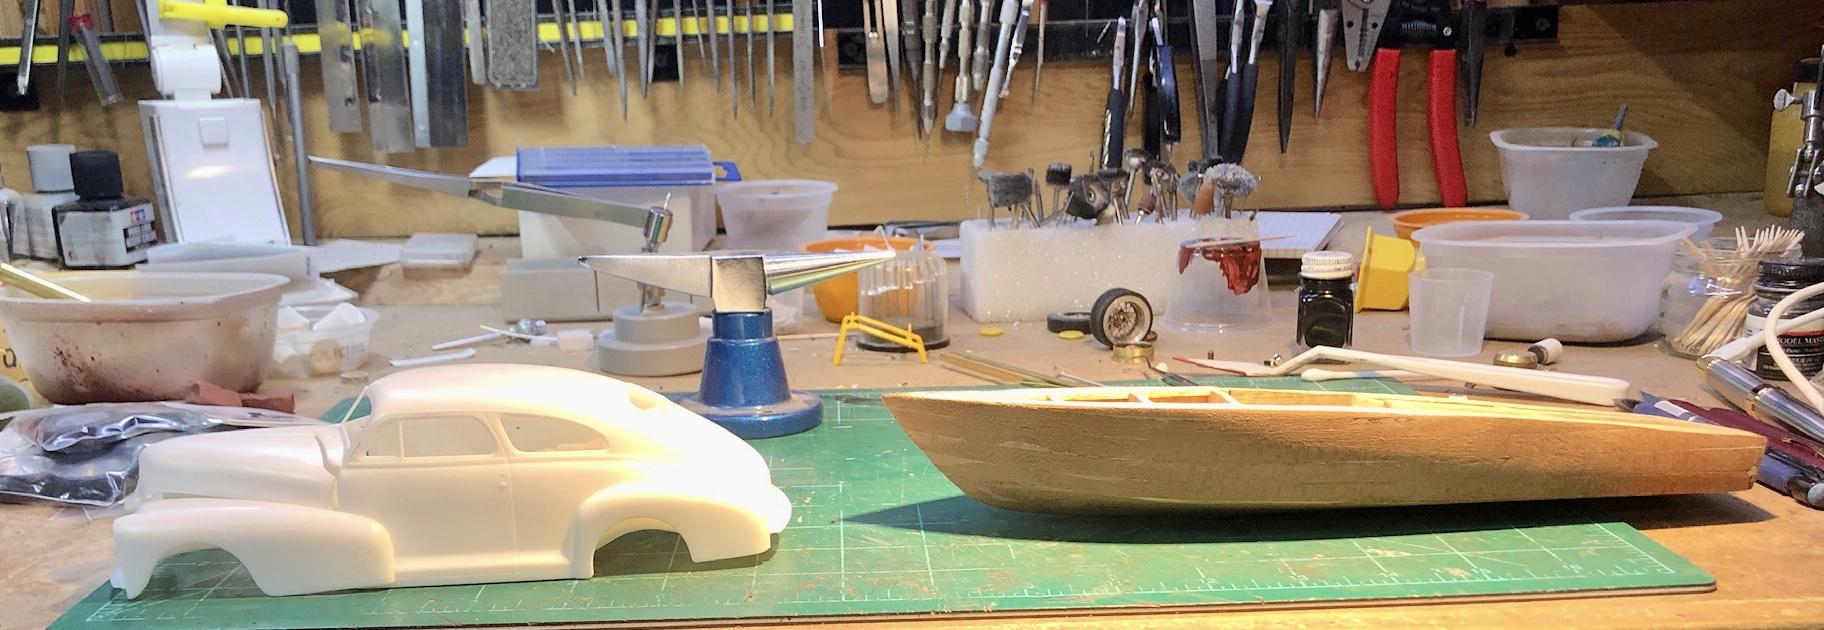
The planking looks awesome Paul! It’s really coming together! Here is a mock up of mine so far. I got the convertible kit for the 47 Chevy from Jimmy Flintstone, and I’m working on paper patterns for the Sportsman style woodie overlays. TS
-
truck, boat, and trailer
foghorn62 replied to Paul Payne's topic in WIP: Model Trucks: Pickups, Vans, SUVs, Light Commercial
This is looking awesome Paul! I’m really jealous of the progress that you are making, and that engine is a beast! These pics really give a good idea of how large this boat is. Have you calculated the overall length in scale? Loving this build, Tim S -
Hi Tom, I see that this post is from last year, but I also see that you are still active, so I have a question for you about this Sportsman build. If I understand correctly, to create the woodie, you just took the original convertible body, and cut out the areas that would be the dark panels, and finished what was left of the body as light wood. To make the dark panels, you glued in pieces under what was left of the original body and finished them as dark wood. Is this correct, or did you add additional pieces on top of the original body to replicate the light wood? BTW, it looks great! Tim Slesak
-
truck, boat, and trailer
foghorn62 replied to Paul Payne's topic in WIP: Model Trucks: Pickups, Vans, SUVs, Light Commercial
Looking good Paul! The ribs look great, and that engine is going to be a beast! You’re making great progress! TS -
Man, that truck is gonna be nice!
-
Definitely!
-
truck, boat, and trailer
foghorn62 replied to Paul Payne's topic in WIP: Model Trucks: Pickups, Vans, SUVs, Light Commercial
Some great stuff here Paul! The cooling system may seem daunting, but it’s really not that bad. Your third and fourth pics with the blue engine show really clear pics of the trans, shaft coupling, and mounts. On the blue engine, that little cylinder tank on top toward the front of the engine is the heat exchanger. Other than that, most of a marine cooling system would be hoses. As you pointed out, the engine appears to be mounded to a beefy cradle which is mounted to the hull. Our friend Tim Boyd has built quite a few boat models, and has an extensive Fotki file of pics. If you want to spend a little time studying them, you may find some helpful hints. About half way through the first page, you will find several pics taken during the builds. https://public.fotki.com/funman1712/tim-boyds-124th--12/boyd-model-boats/boyd-boats-/ This is getting fun! TS -
truck, boat, and trailer
foghorn62 replied to Paul Payne's topic in WIP: Model Trucks: Pickups, Vans, SUVs, Light Commercial
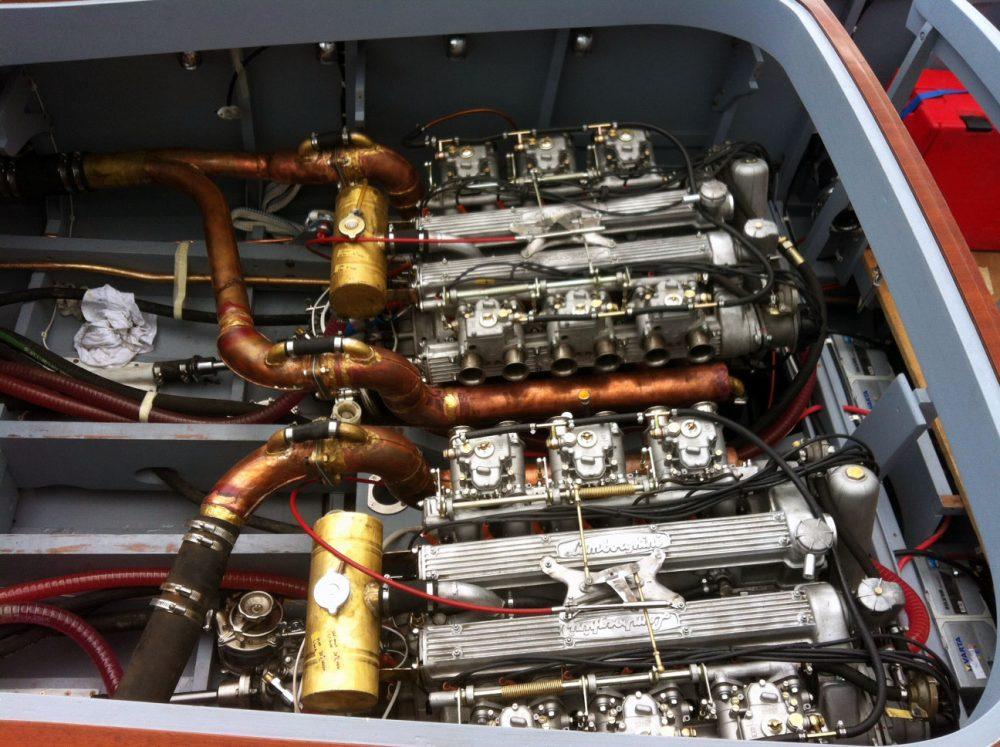
Hi Paul, I’ve been searching around for information on how to set up plumbing for a marine cooling system, and came upon this diagram, that helped me understand how the sea water pickup feeds a pump, which circulates sea water through a heat exchanger, and then dumps the sea water through the exhaust system. The water pump on the engine receives the cooled water from the heat exchanger and pumps it through the engine block, then out through the exhaust manifolds, and back through the heat exchanger in a closed loop. I’m also including a pic of the Lamborghini engines in the Riva in early stages of installation so you can see what such a system looks like. Hope this helps. TS
-
truck, boat, and trailer
foghorn62 replied to Paul Payne's topic in WIP: Model Trucks: Pickups, Vans, SUVs, Light Commercial
That will be fine Paul! If you just post here, others will have the benefit of the information as well. I’m all for sharing information whenever I think I have something that others may find useful. I’ve done a lot of searching already. I’ve found a few things related to marine cooling systems that I’ll post soon. TS -
truck, boat, and trailer
foghorn62 replied to Paul Payne's topic in WIP: Model Trucks: Pickups, Vans, SUVs, Light Commercial
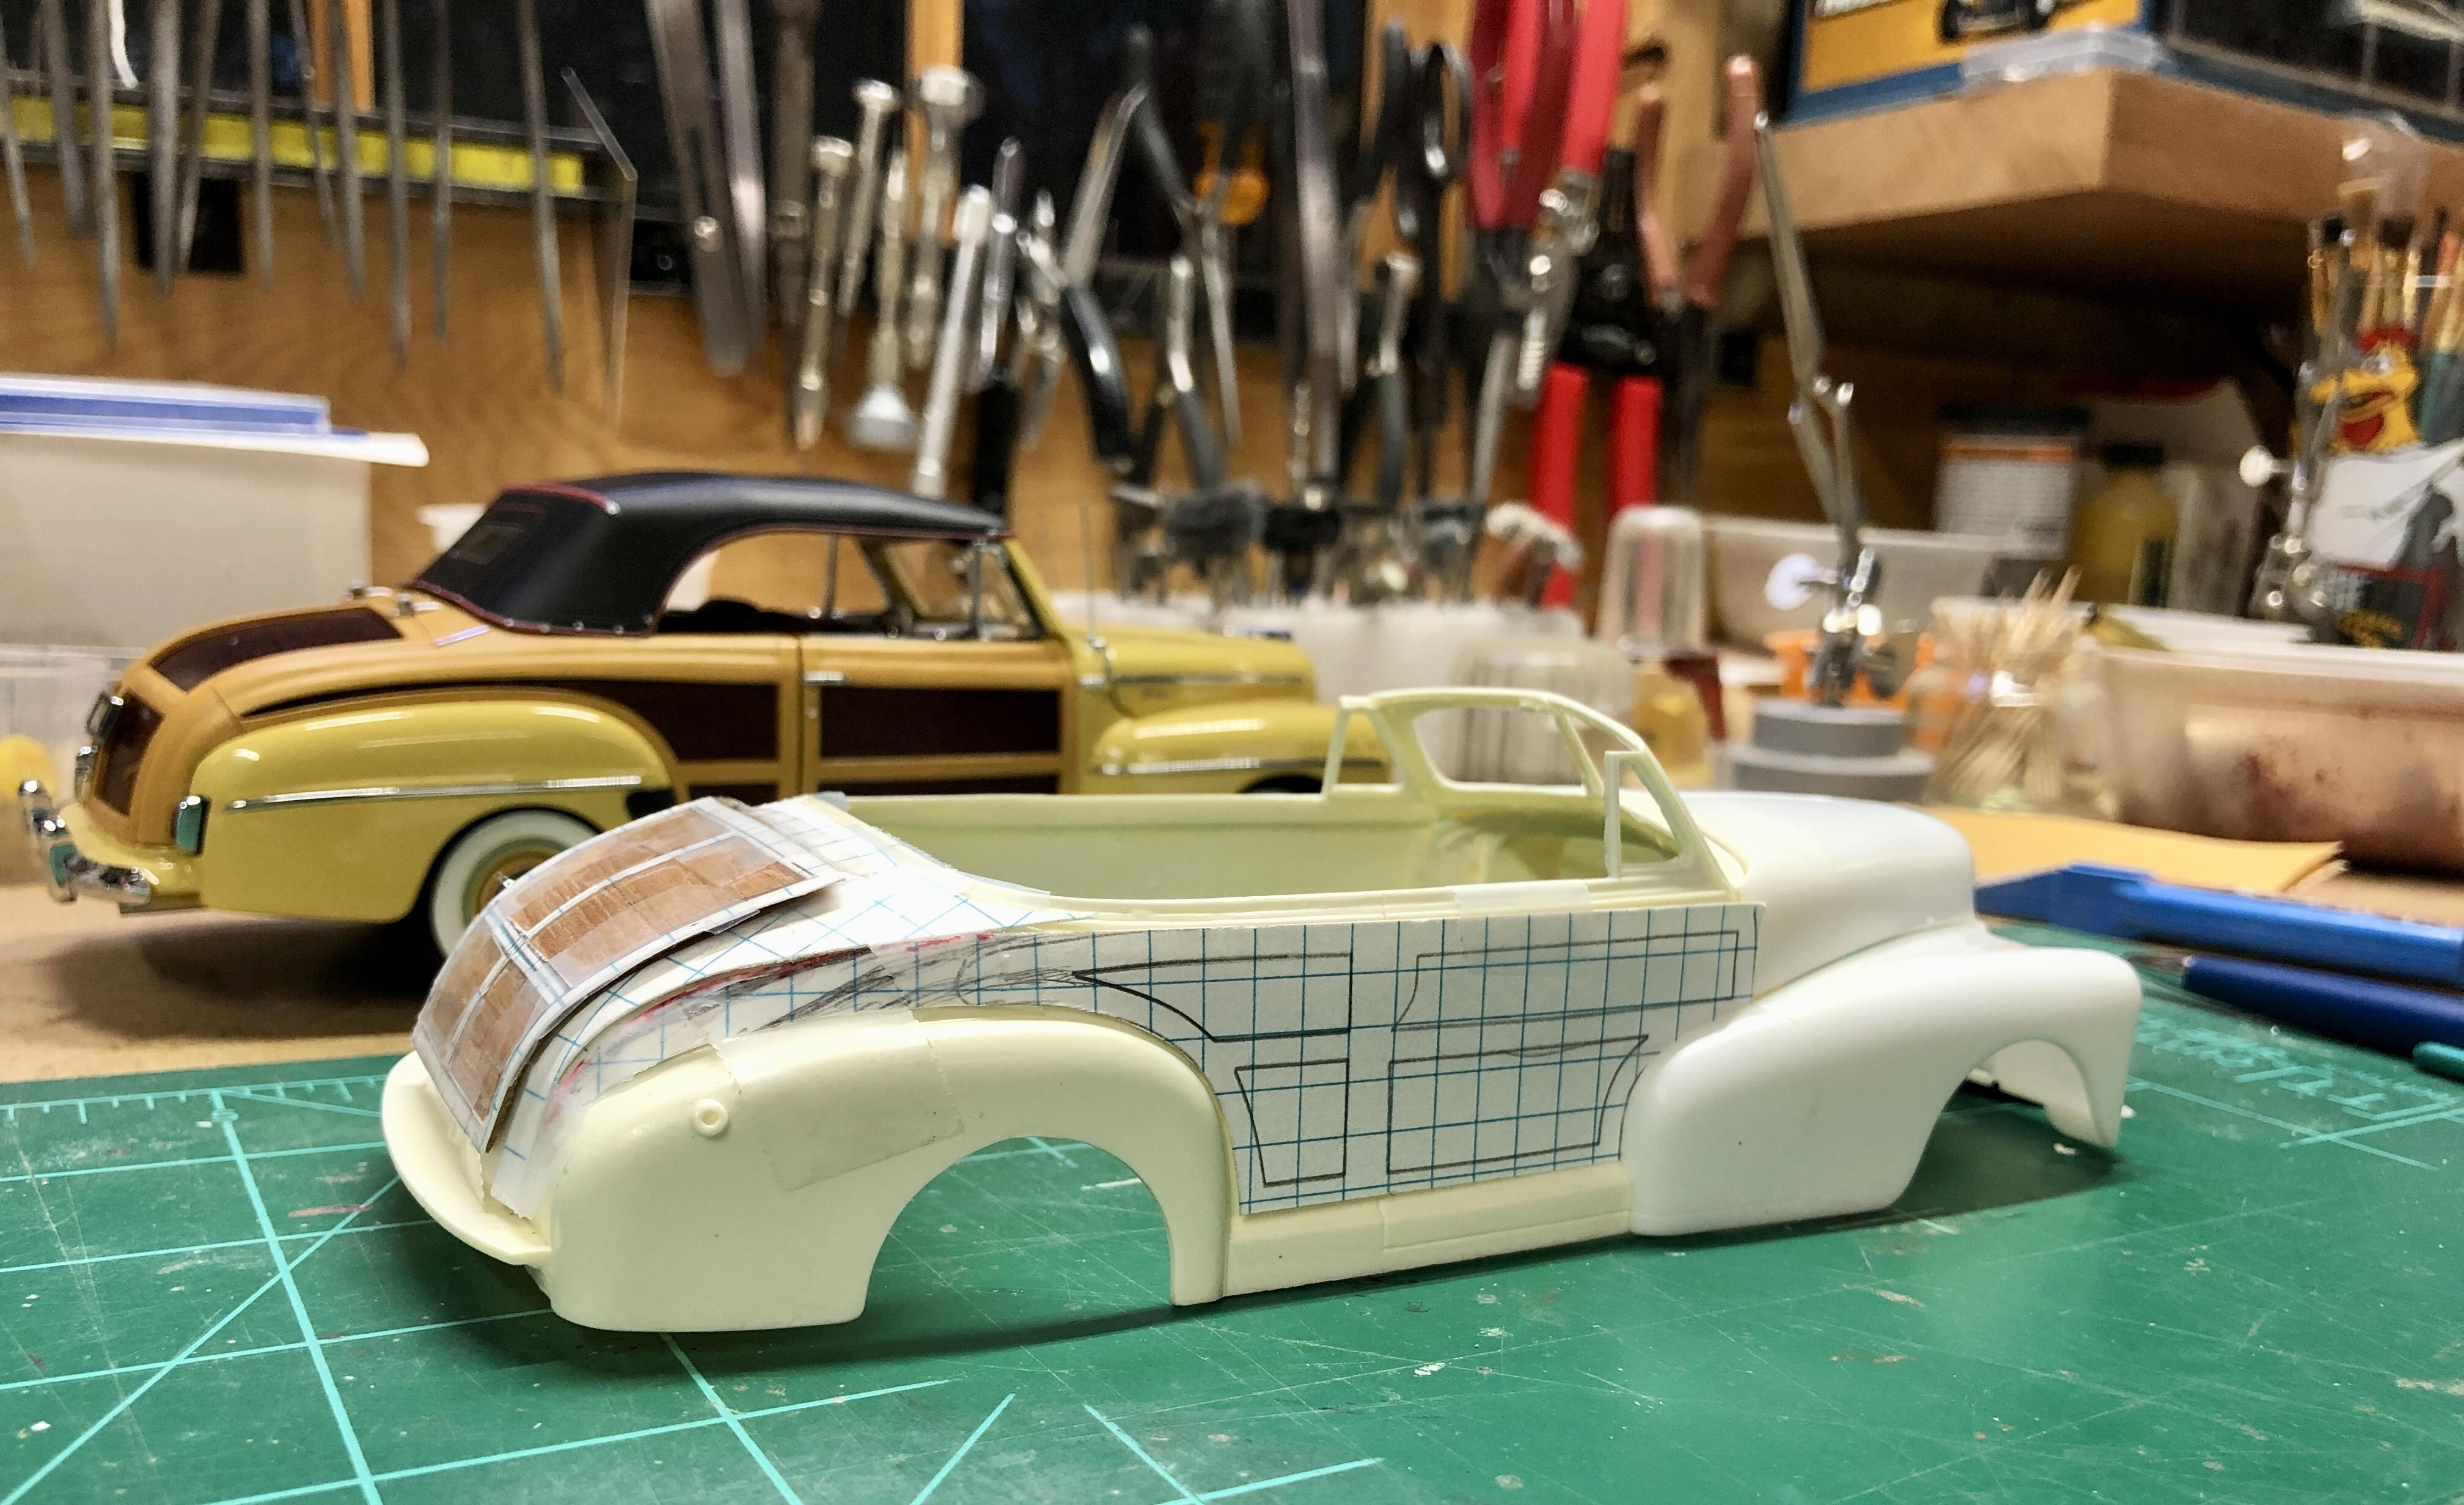
Hi Paul, first of all, let me say that I am excited to see your project, and I look forward to following your progress! I think your approach, using an old PT boat hull has a lot of potential, and the selection of a power wagon for a tow vehicle is a great choice! I am most interested to see how you go about setting up the engine for the boat. I have very little experience with boat models, and am forced to follow whatever I can find in pictures on the web. I believe I am probably the guy Tim Boyd was referring to who has just embarked on a boat/trailer/tow project, although I am not too sure about his “top end” reference. I have purchased the Dumas Chris Craft Cobra kit (which I found extremely over priced for a box of sticks and a set of plans, but I digress). I have assembled the hull, and stopped until I decide how I want to proceed. What I have in mind, is sort of an Americanized version of the Riva Aqurama Lamborghini. I have in my possession, three 3D printed Chevy LS3 V-12s. I am planning to use two in the boat, and one in the tow vehicle. For that, I have chosen one of the 47 Chevy kits from Galaxie Limited, but I have ordered a convertible conversion kit for it from Jimmy Flinstone, and I am planning to install wood on the sides and deck on the order of a 48 Ford Sportsman. I haven’t given much thought to the trailer yet, but I imagine I’ll make something out of brass tubing, as I am comfortable working with that material, and it should be quite strong. I’m just in very early stages of this project, still trying to figure out how to mount the engines in the boat, with marine cooling, water intake, exhaust, what the power output to the propeller shaft looks like…. I’d be very interested in seeing what you are planning along those lines. I’m adding two pics of my current project status, and also one of the Riva Aqurama Lambo engines installed. TS
-
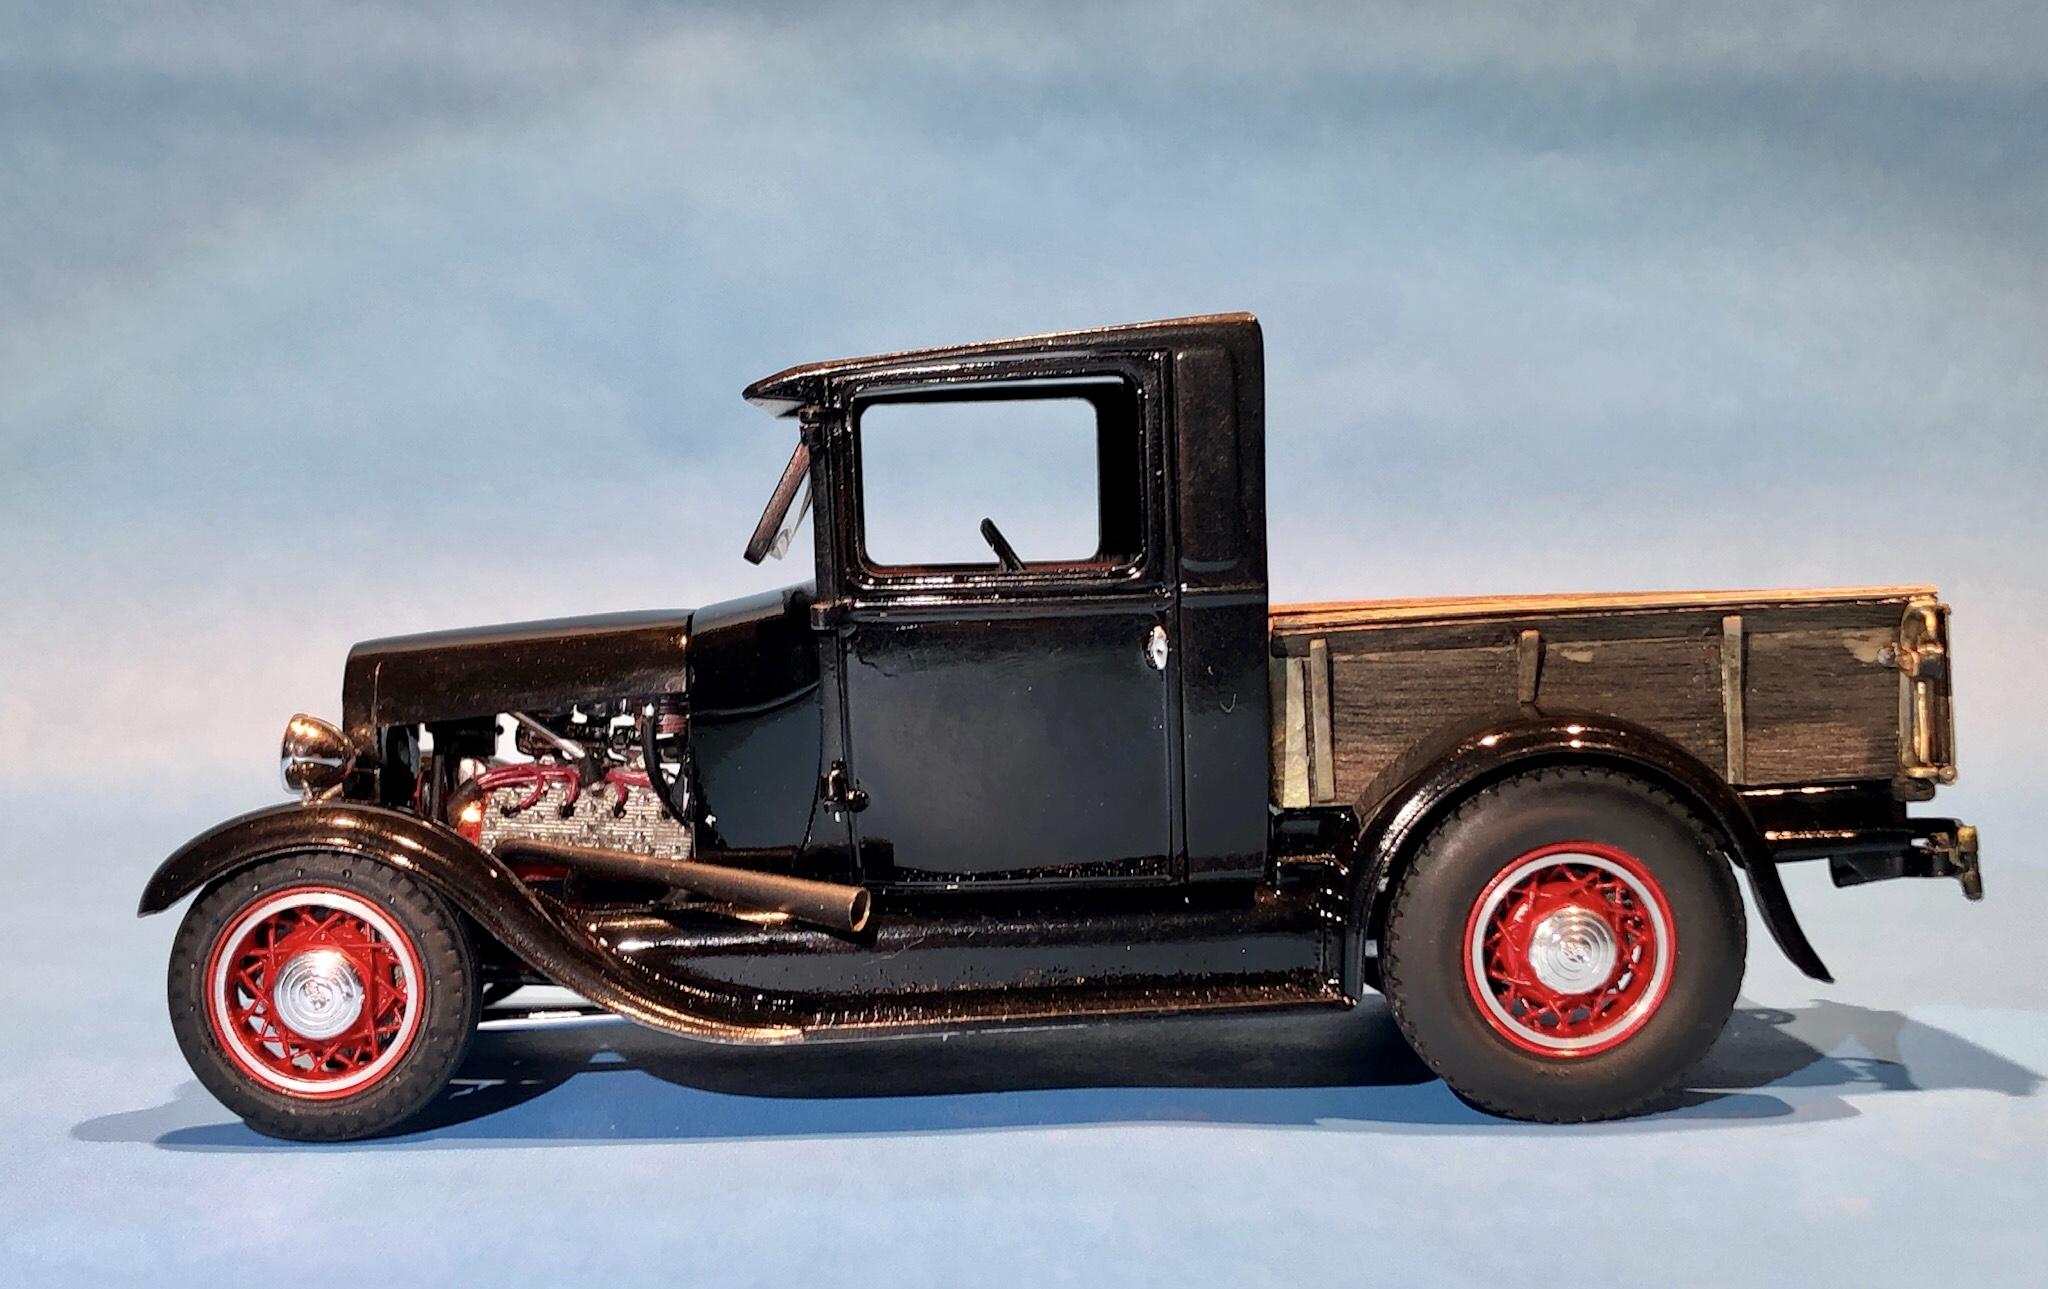
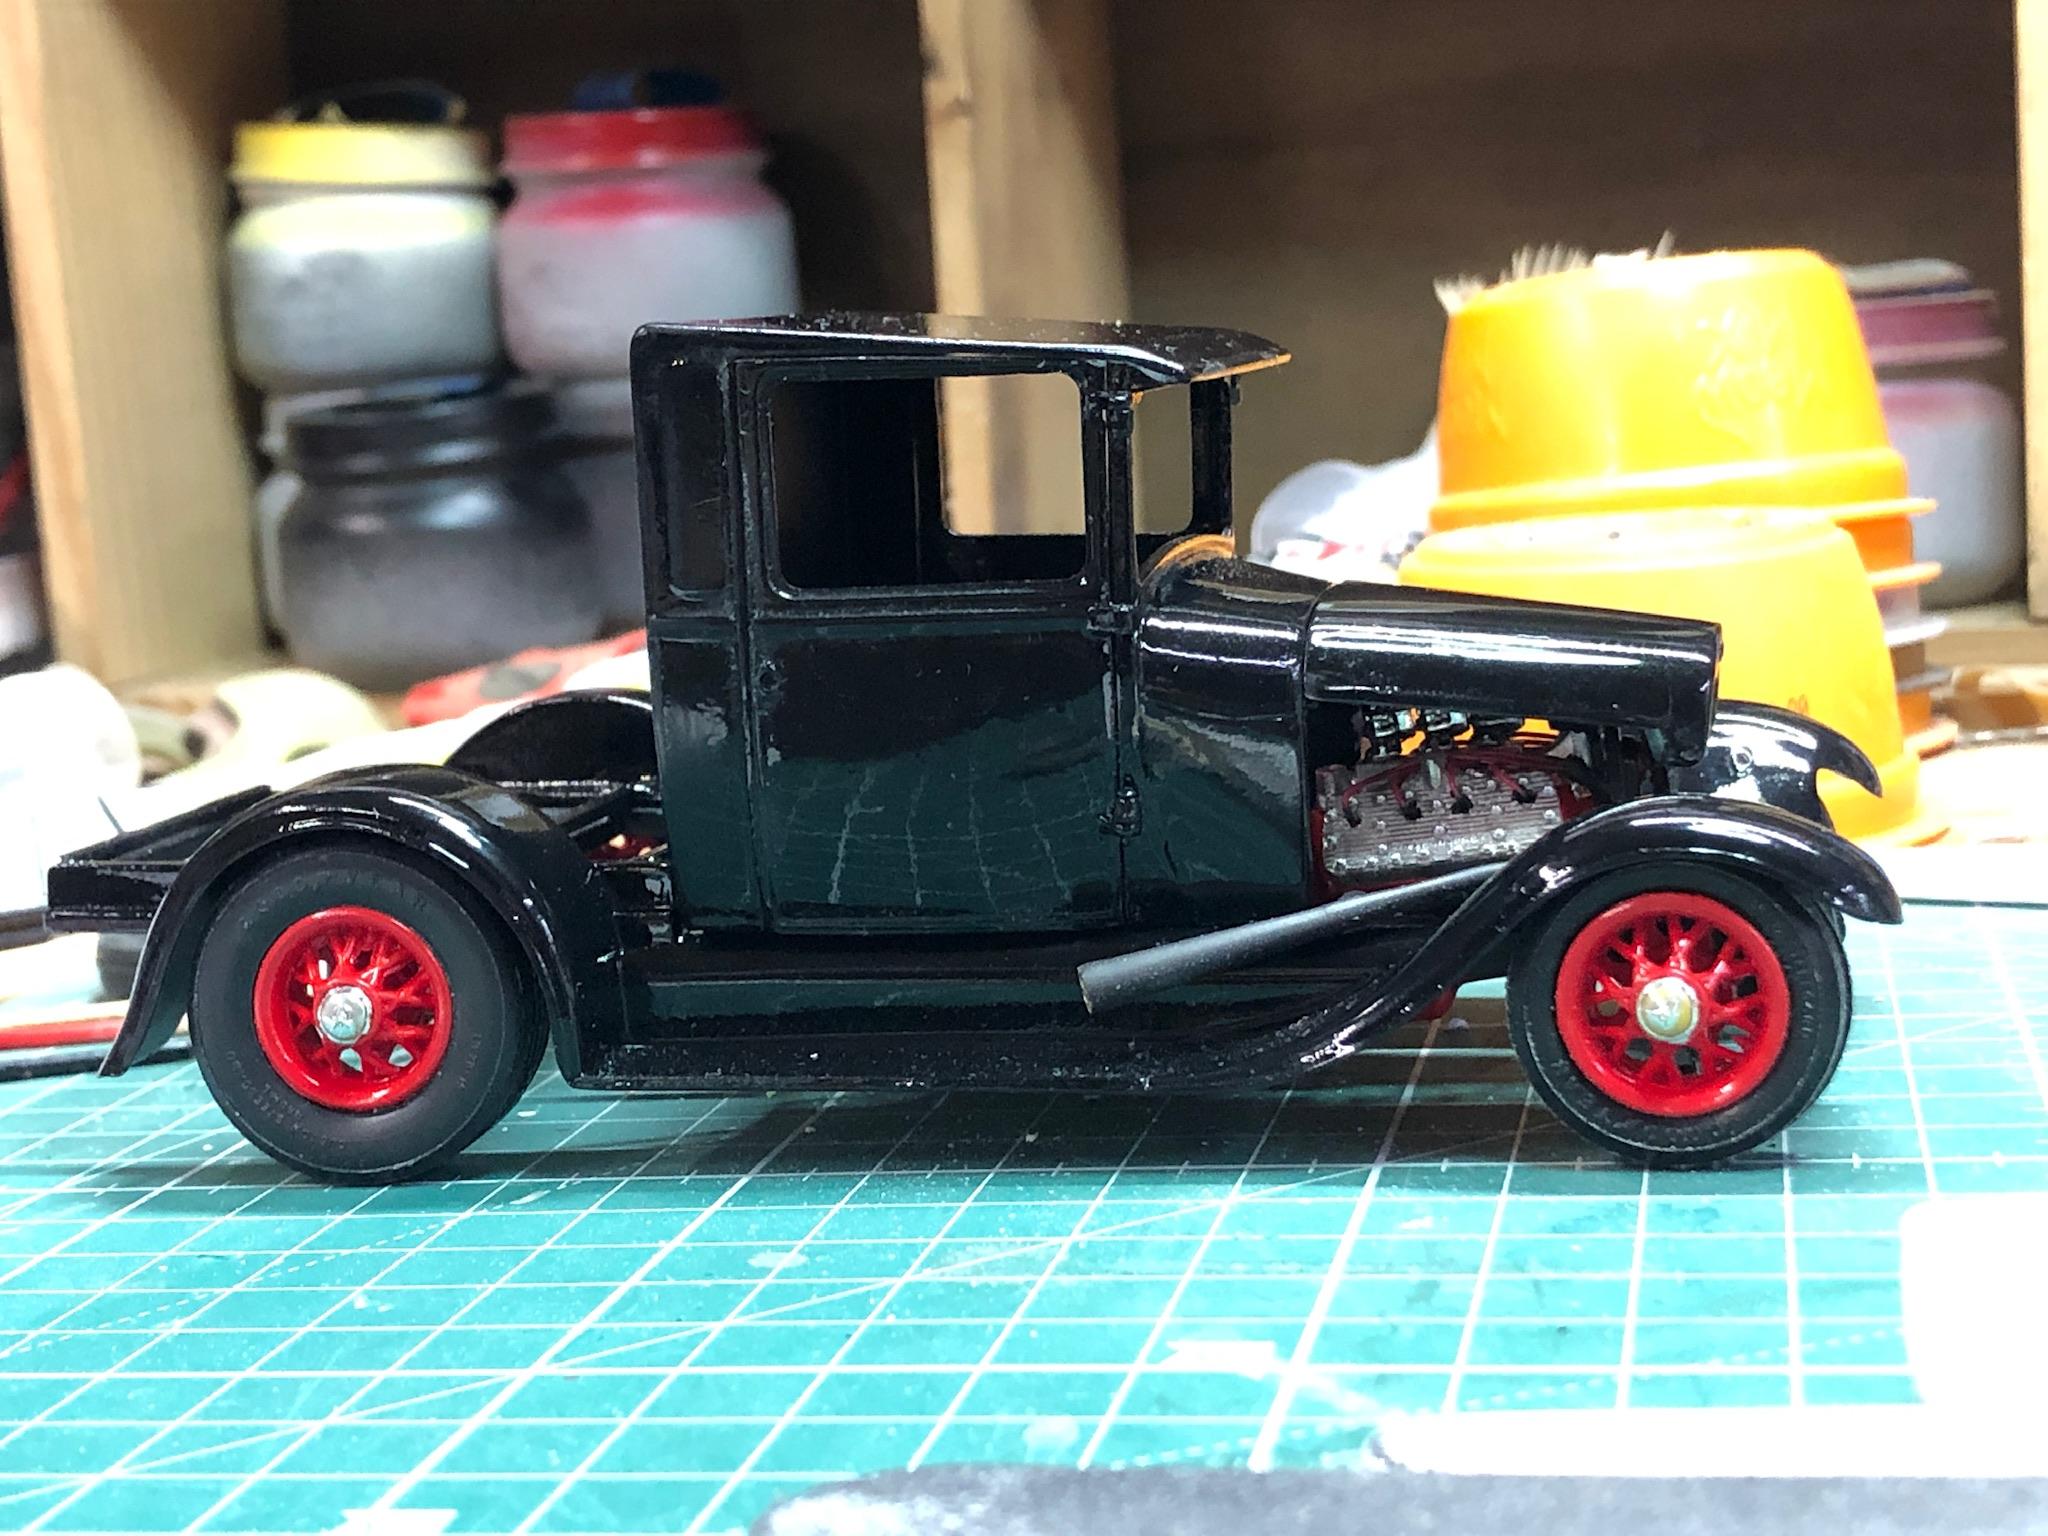
Well guys, I guess I’m calling this one done. Despite some challenges along the way with the gloss black paint, and other fairly minor frustrations, all in all I can say that I’m pretty happy with it. I’ve always said that if I can place my builds on the table near those of the many great builders that I have become acquainted with over the years, then I am proud to do so. So here on this virtual table that Dennis started so long ago, with so many really awesome builds, I am setting mine. There is still plenty of room for more. Thanks, TS
-
Very cool little hot rod Tim! I need to set aside some time to take a deep dive into your Fotki files and reacquaint myself with all of the waaaay cool rods and other builds you have done. I know many of them will be familiar, and some like this one will be new to me. (Remember, there was a dark period for me of about thirty years or so when I got away from the hobby) I love the finned flatheads! Where do you get your beehive oil filters! I’ve noticed them on other rods of yours. Are they the R&M ones? Thanks for your very gracious comments about my wheels. They’re really fairly simple with a jig. 30,000 views doesn’t sound like a lot to me. Heck, just get 29 other guys like me, good for a thousand looks a piece and we’re there. TS
-
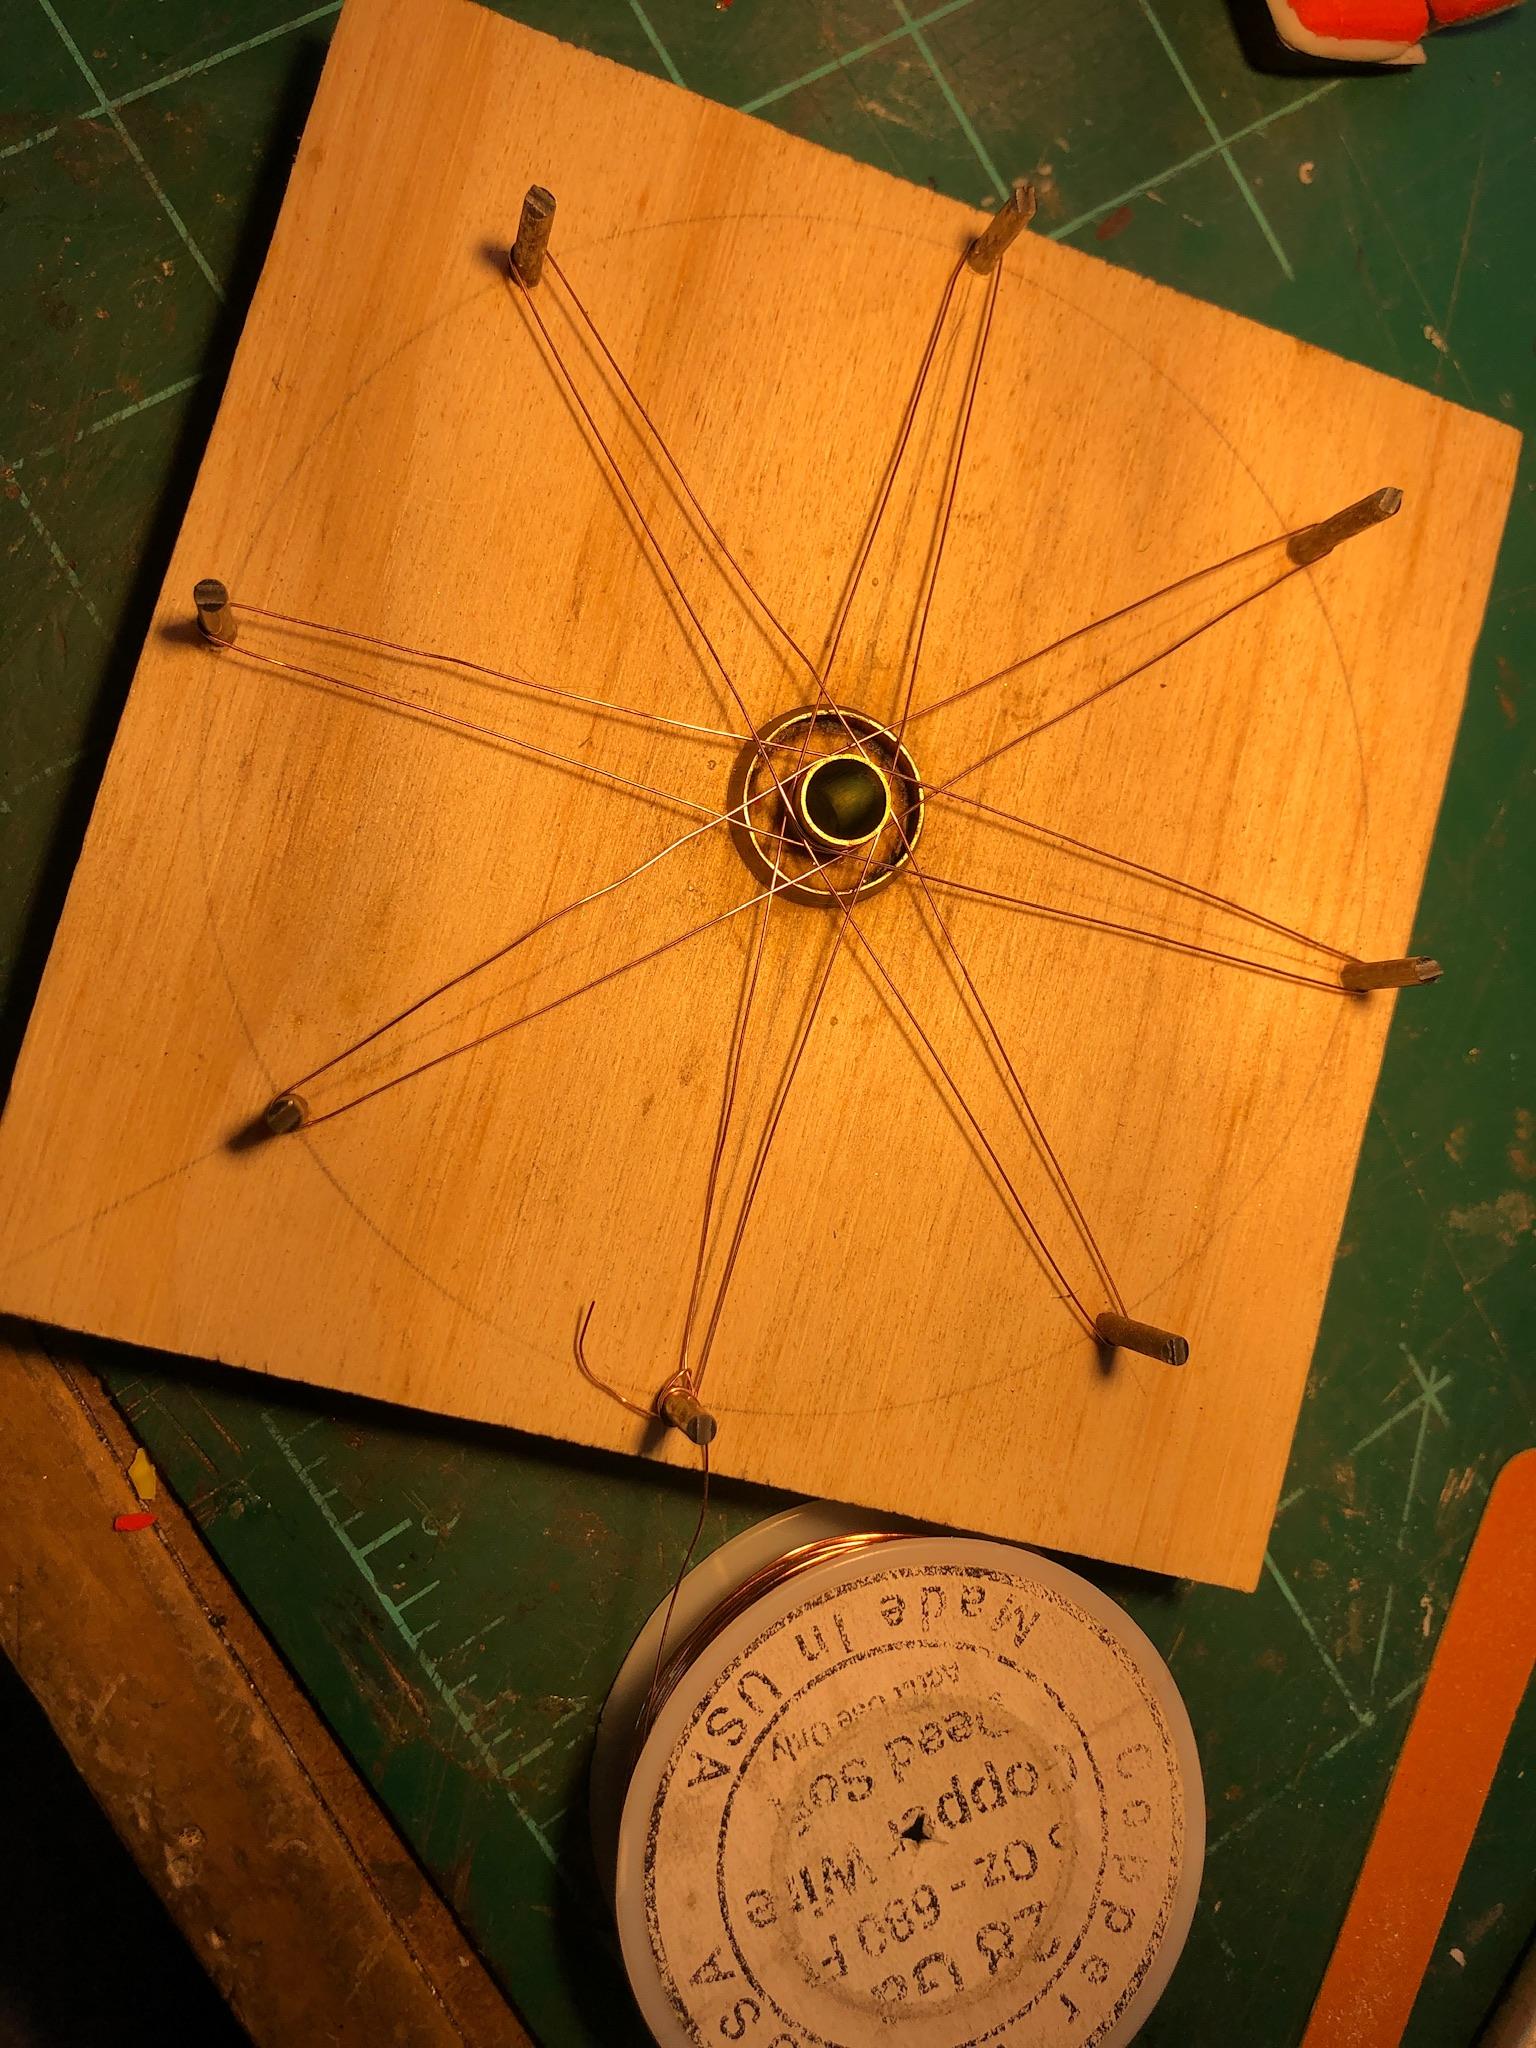
Yes, I usually do, although not always. The wire is so thin, I can usually fill any gap between the rim halves with solder. It really is cleaner though if you use a little triangular needle file and put a little notch where the wires will be. In that case, I would set up the rim with the wires like you see in the pic, mark the rim with a sharpie where each wire will touch, then disassemble it, remove the rim from the jig, and use the file to notch where the marks are. Then reassemble the whole thing and solder everything up.
-
Thanks Paul! Some folks use fishing line and super glue, which is fine I guess as long as you’re going to paint them, but i prefer 28 Ga bare copper wire and solder instead of glue. That’s my personal preference because I work with brass quite a bit, and am used to soldering. Just my personal preference, whatever you are comfortable with.
-
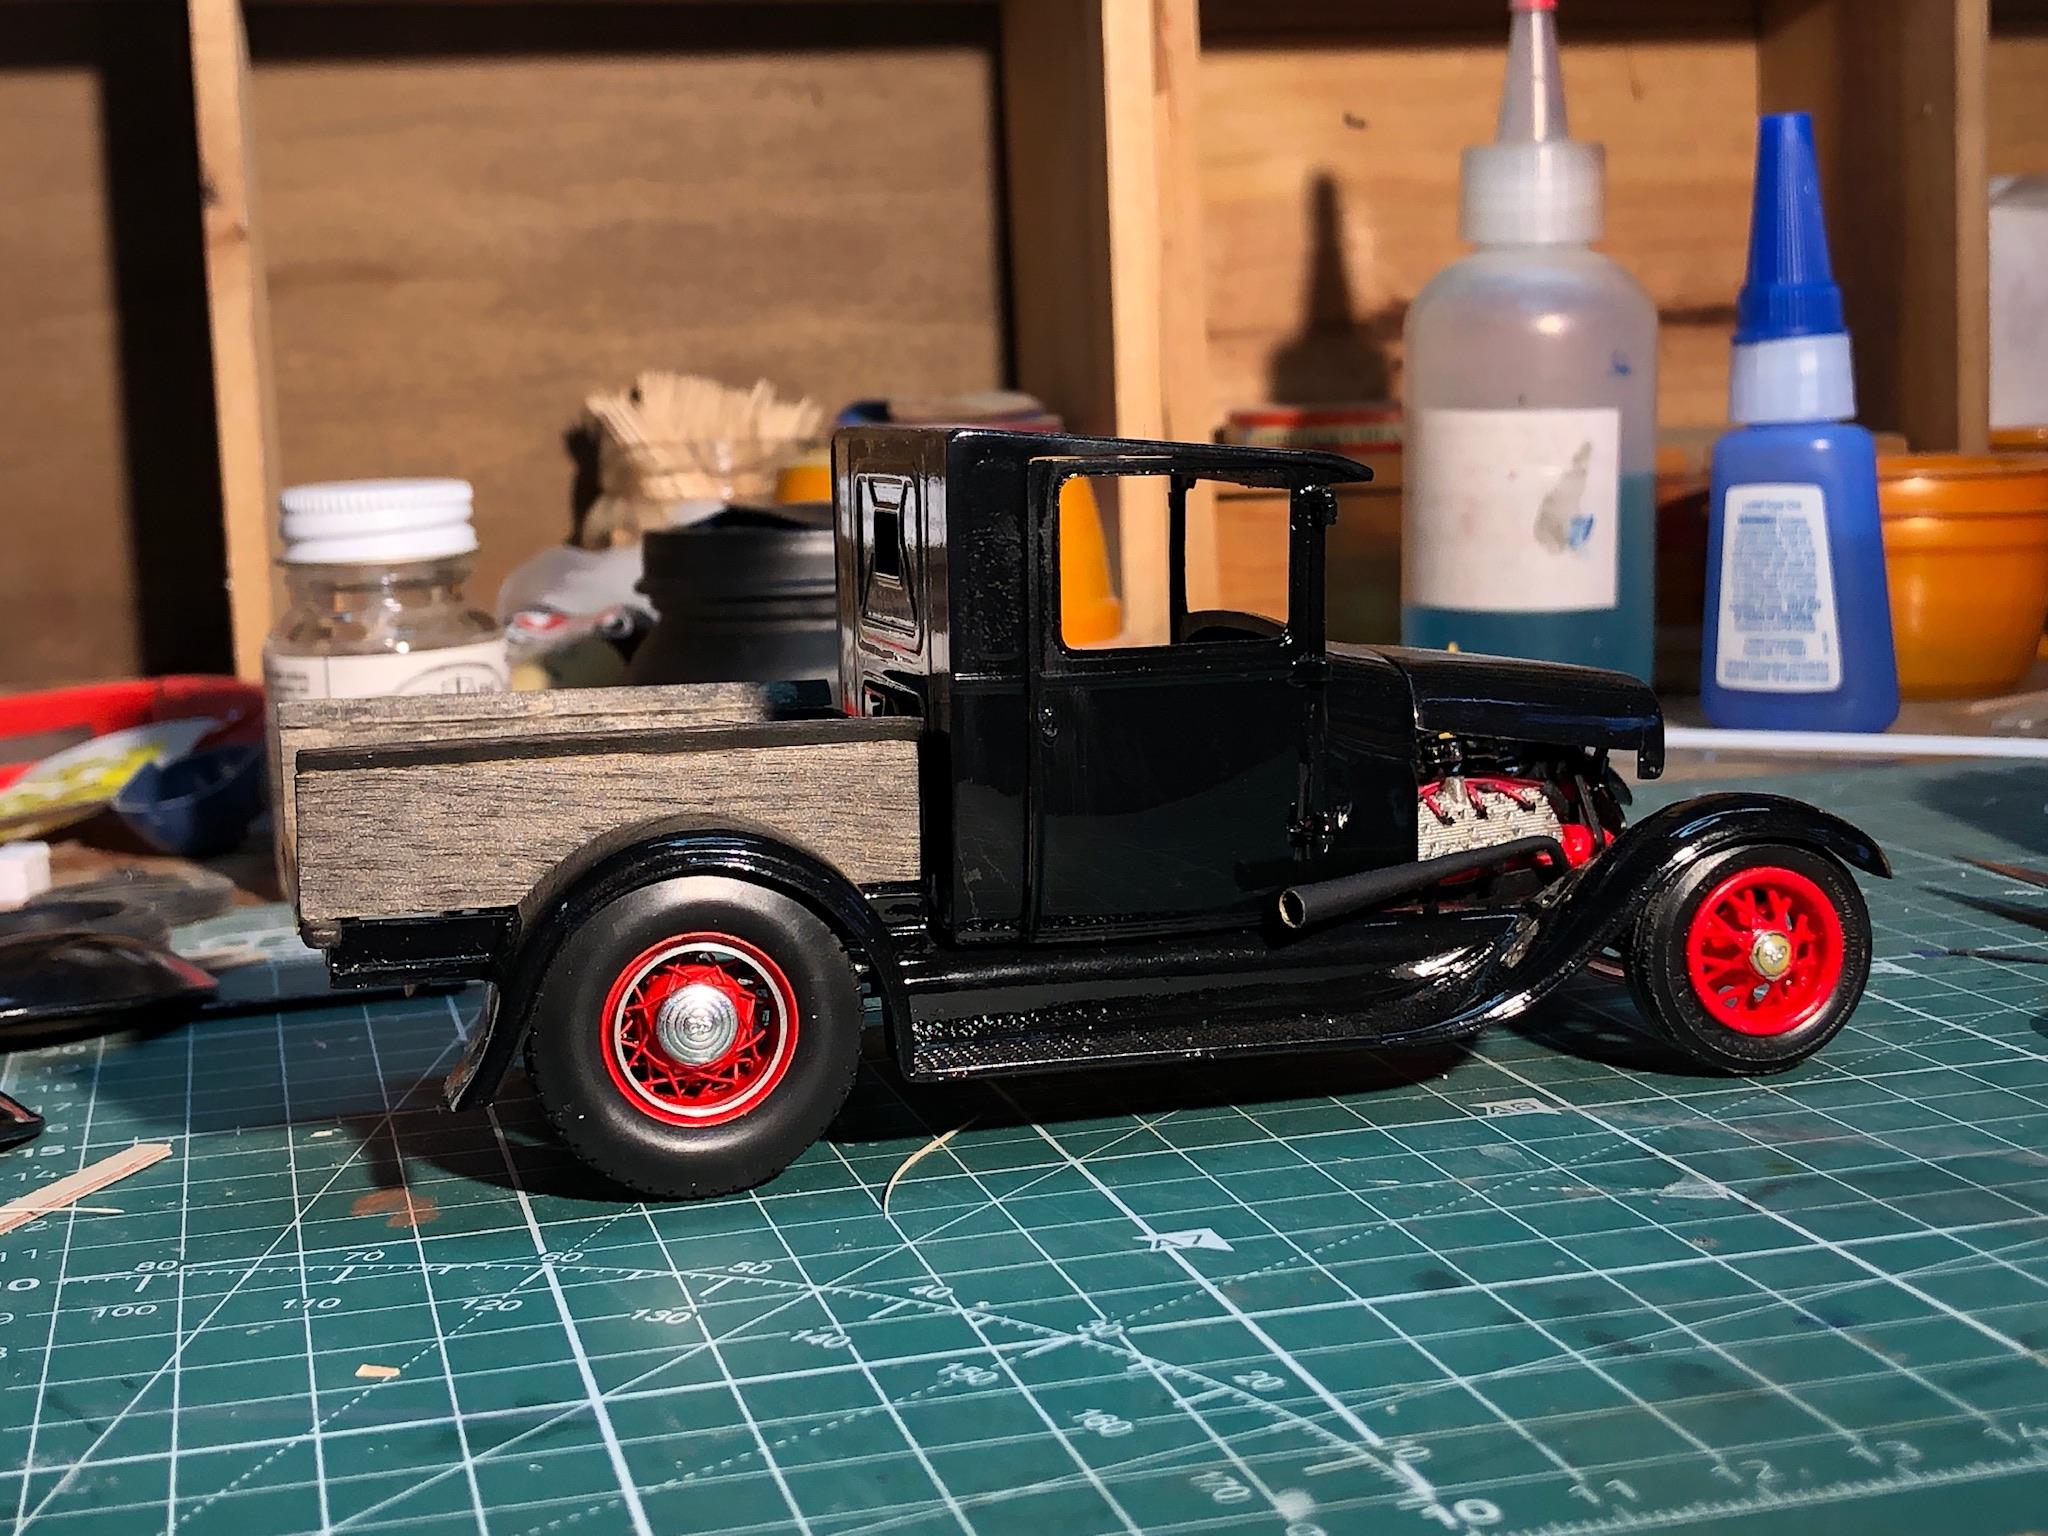
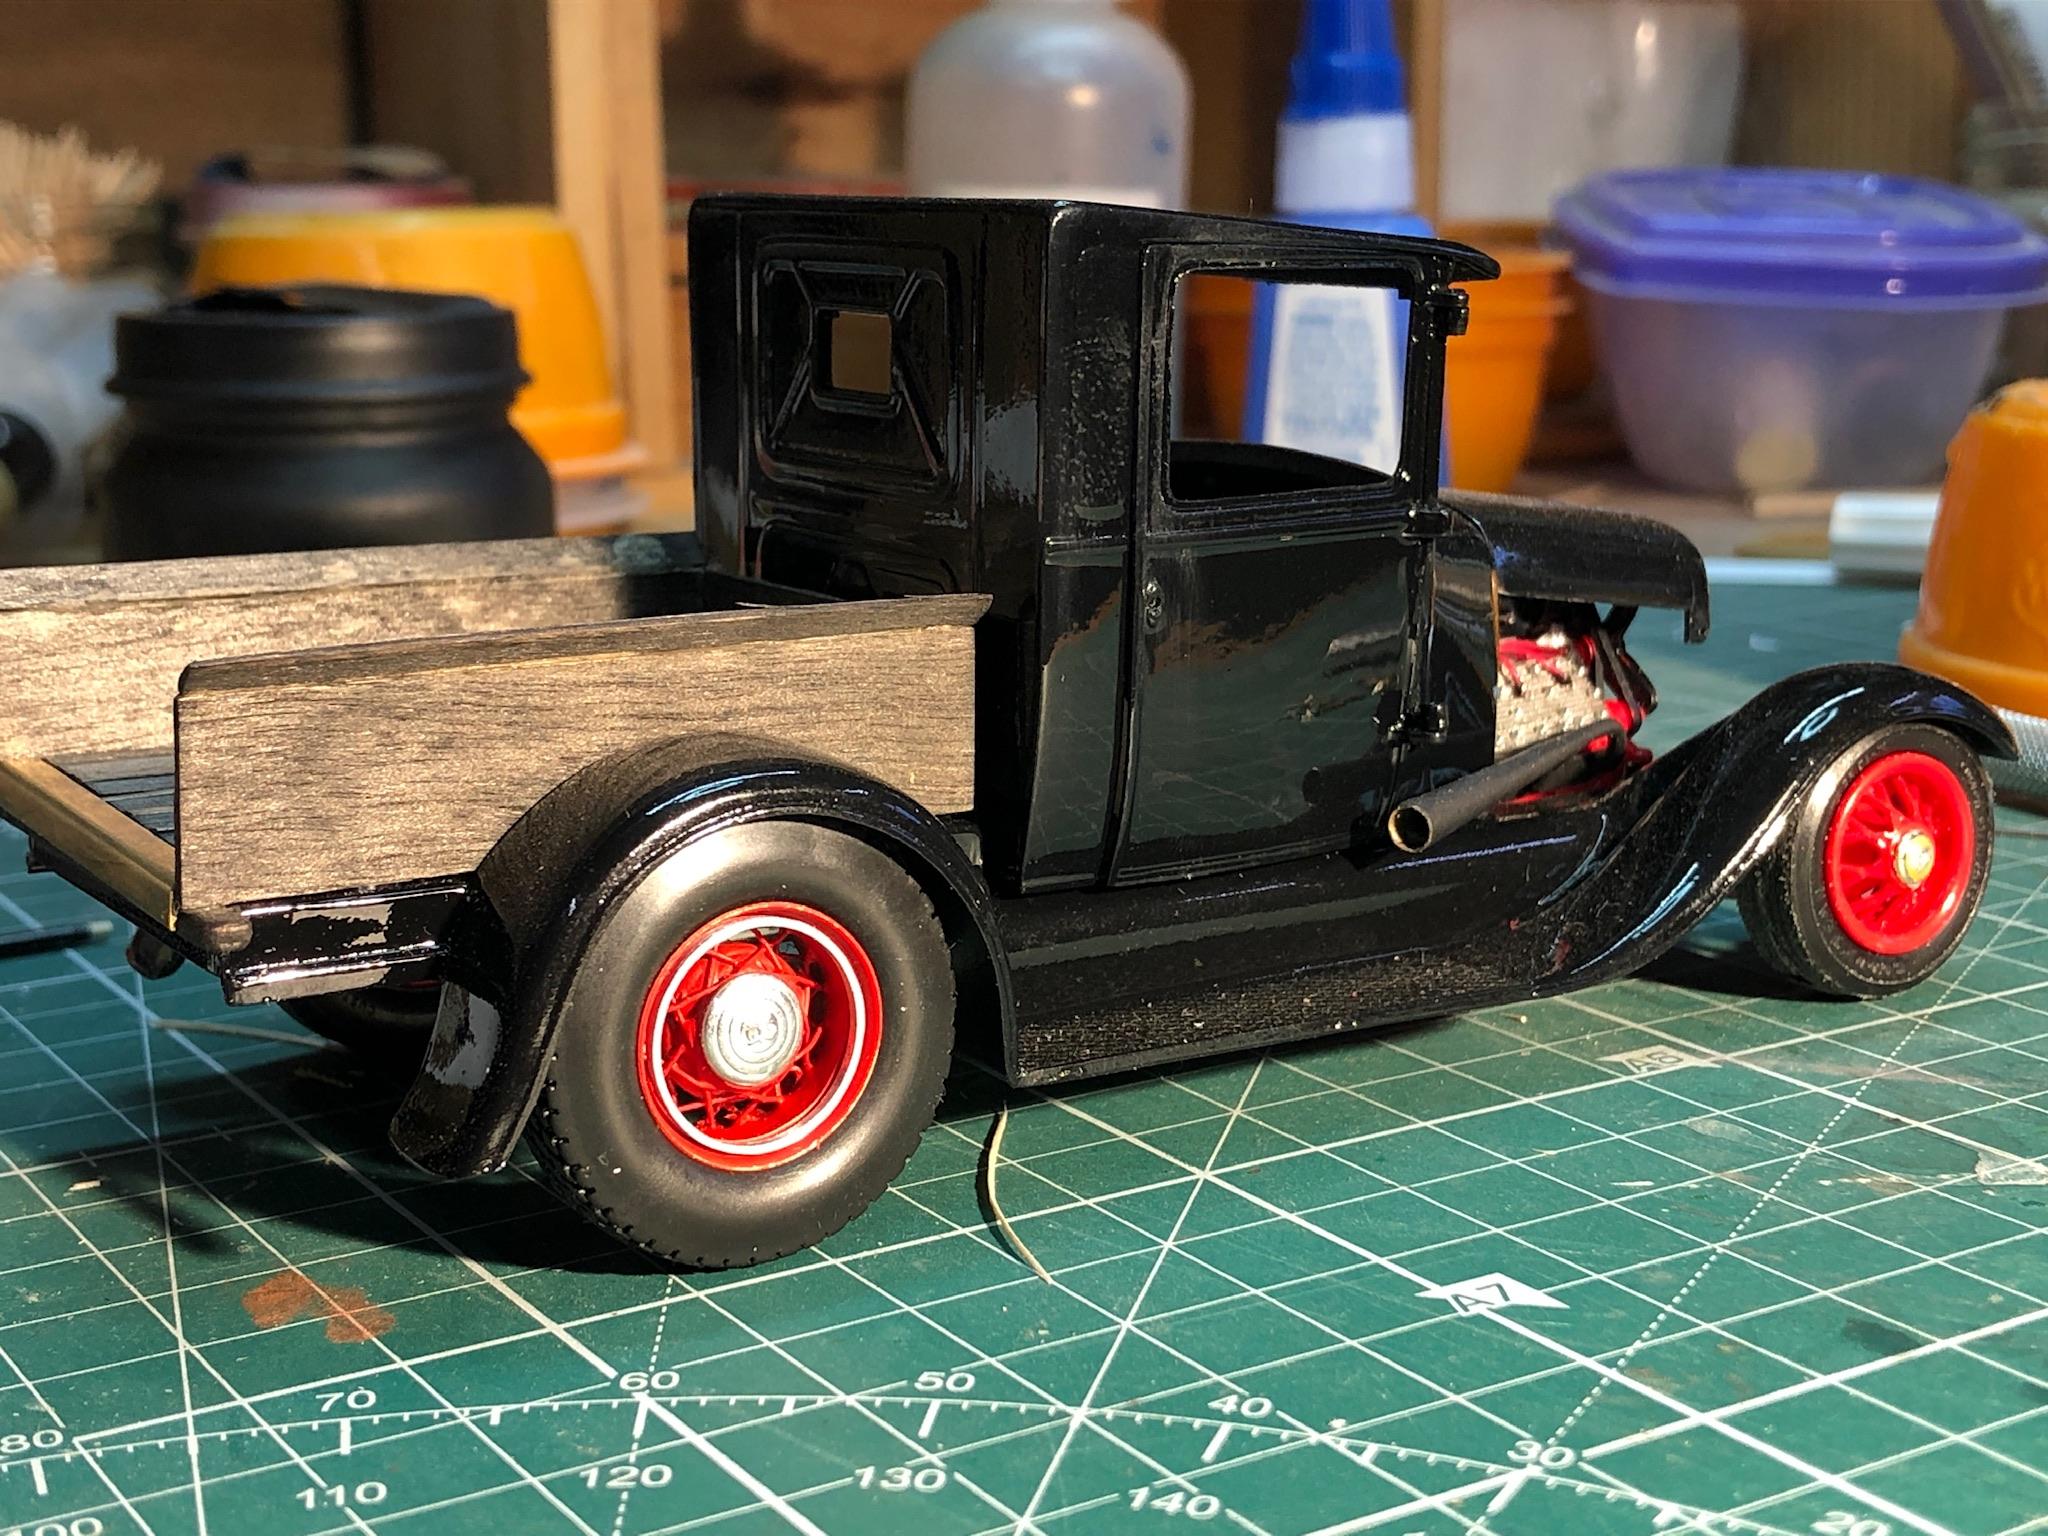
They are laced with copper wire in a jig, with brass tubing for the outer rims. Thanks for asking! TS Thanks Bill! TS Thanks Tim, It’s getting there. Finished the bed today. TS
-
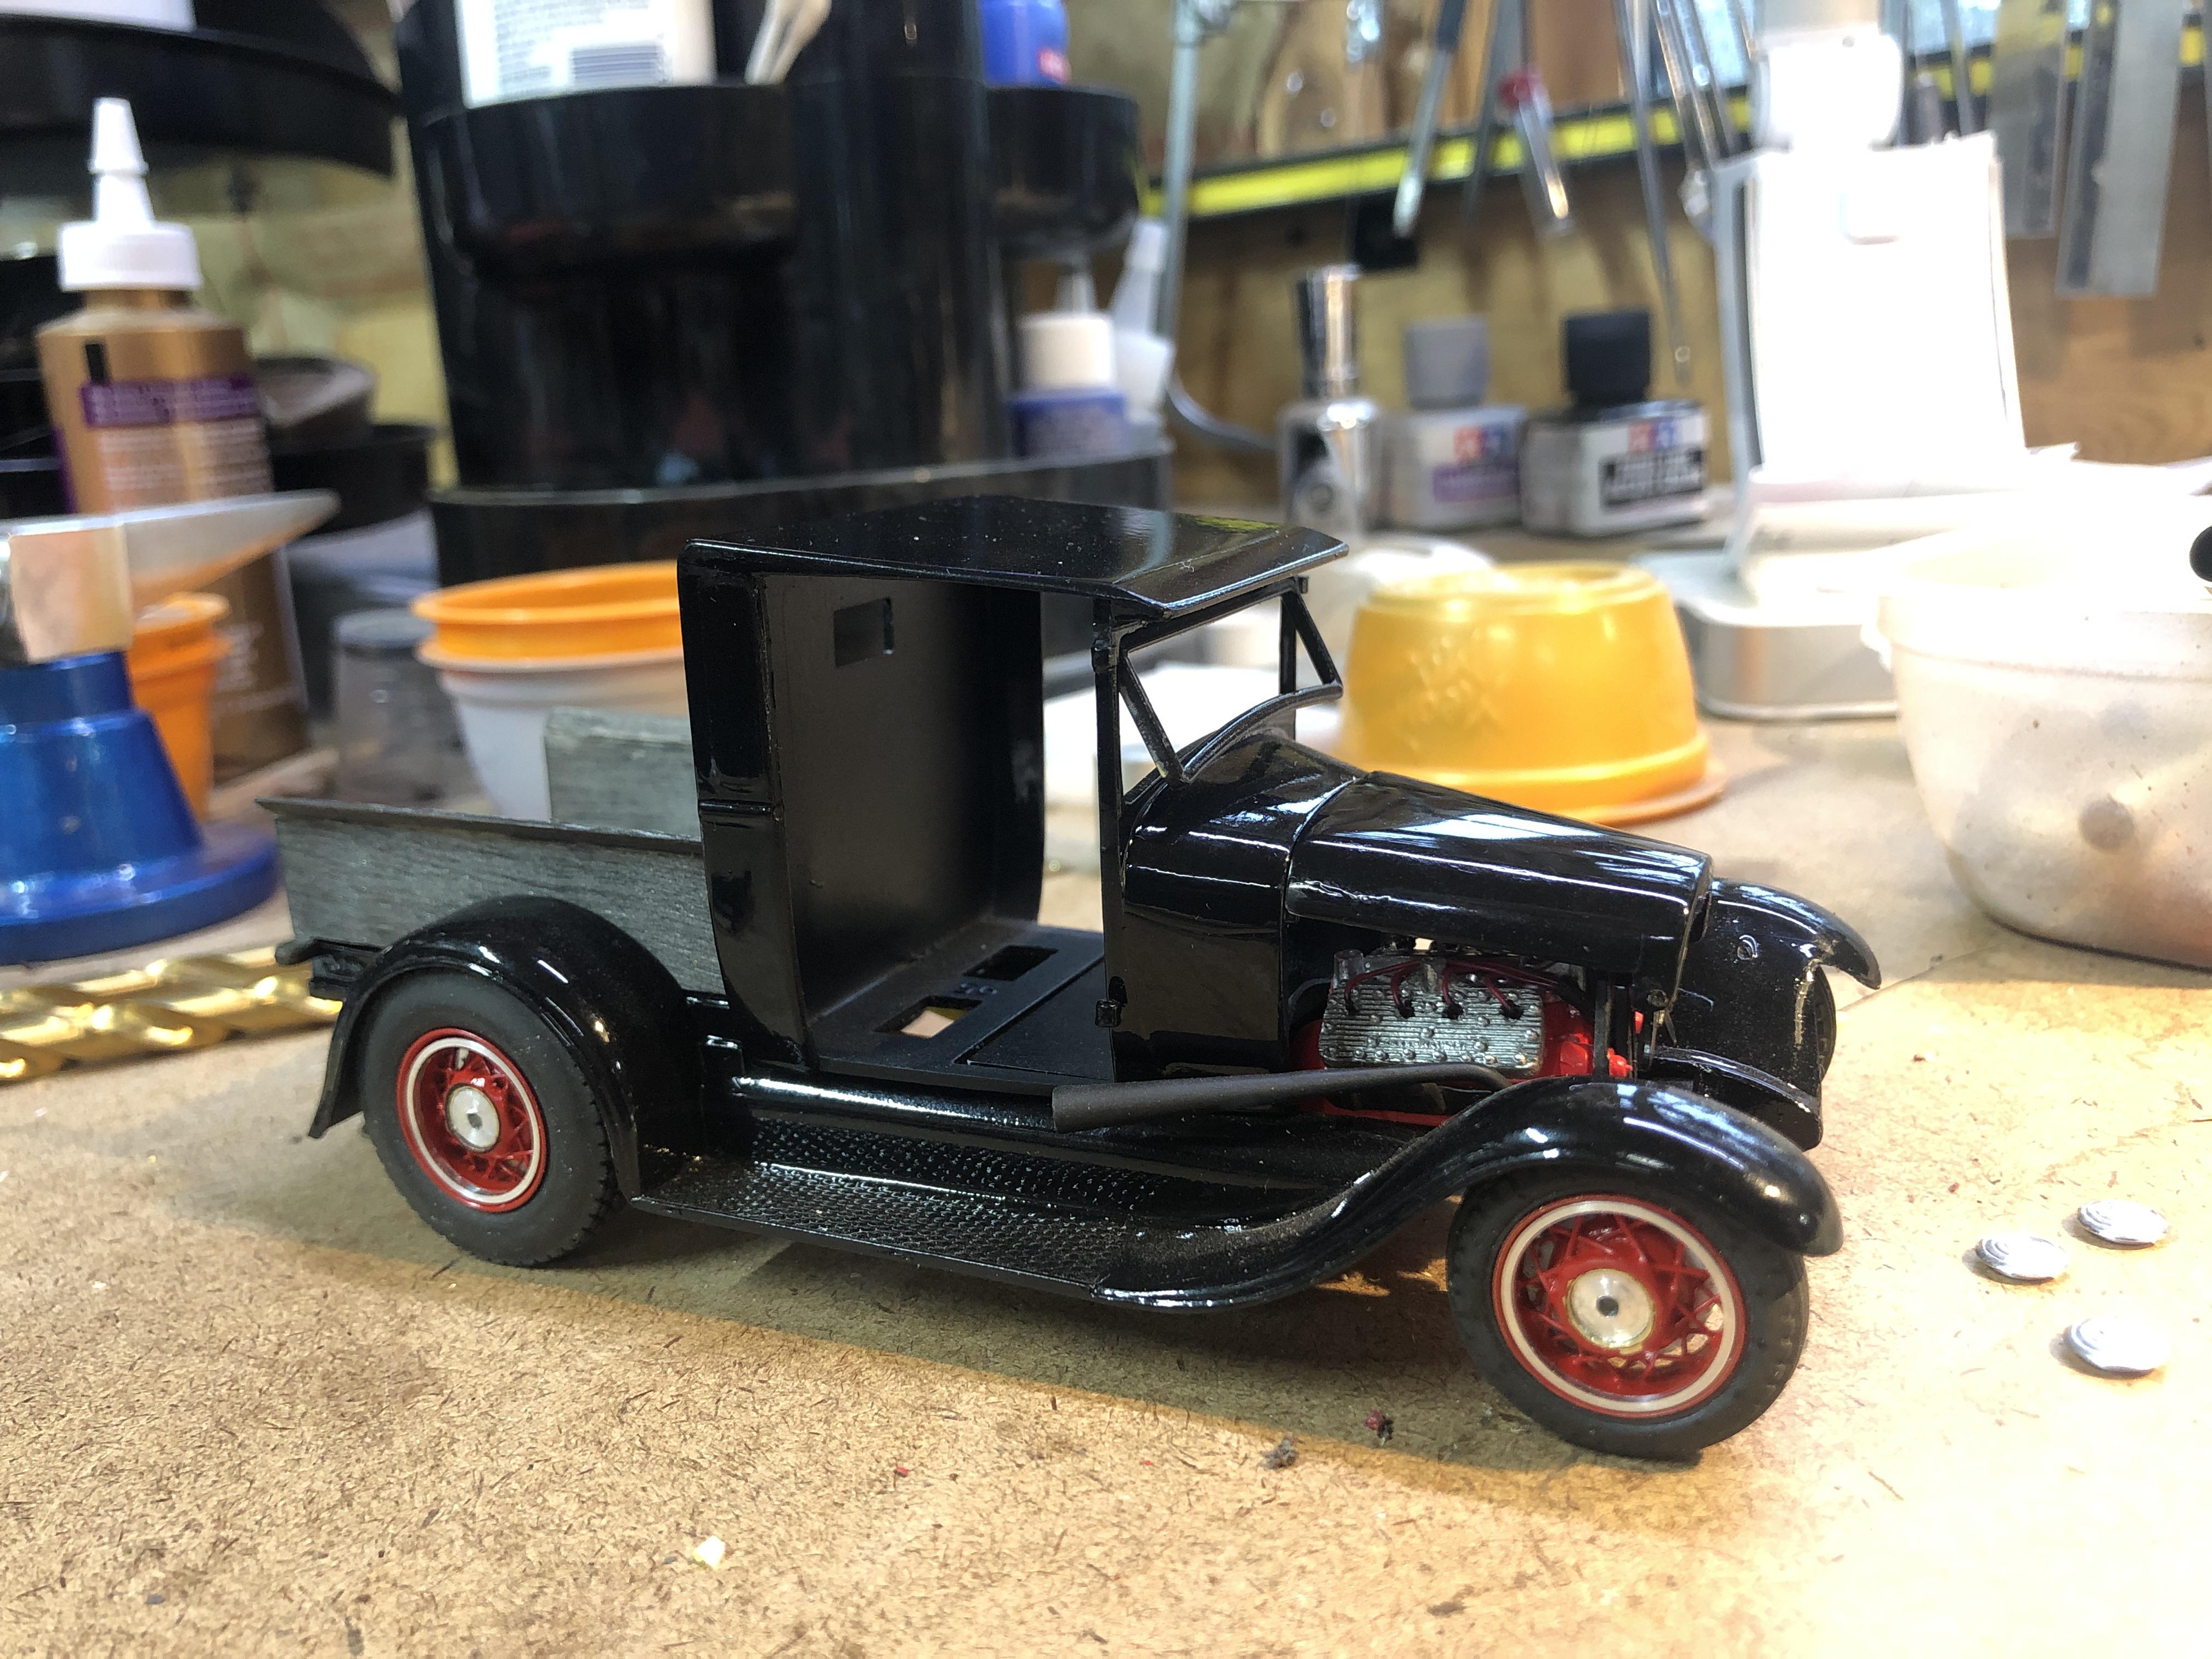
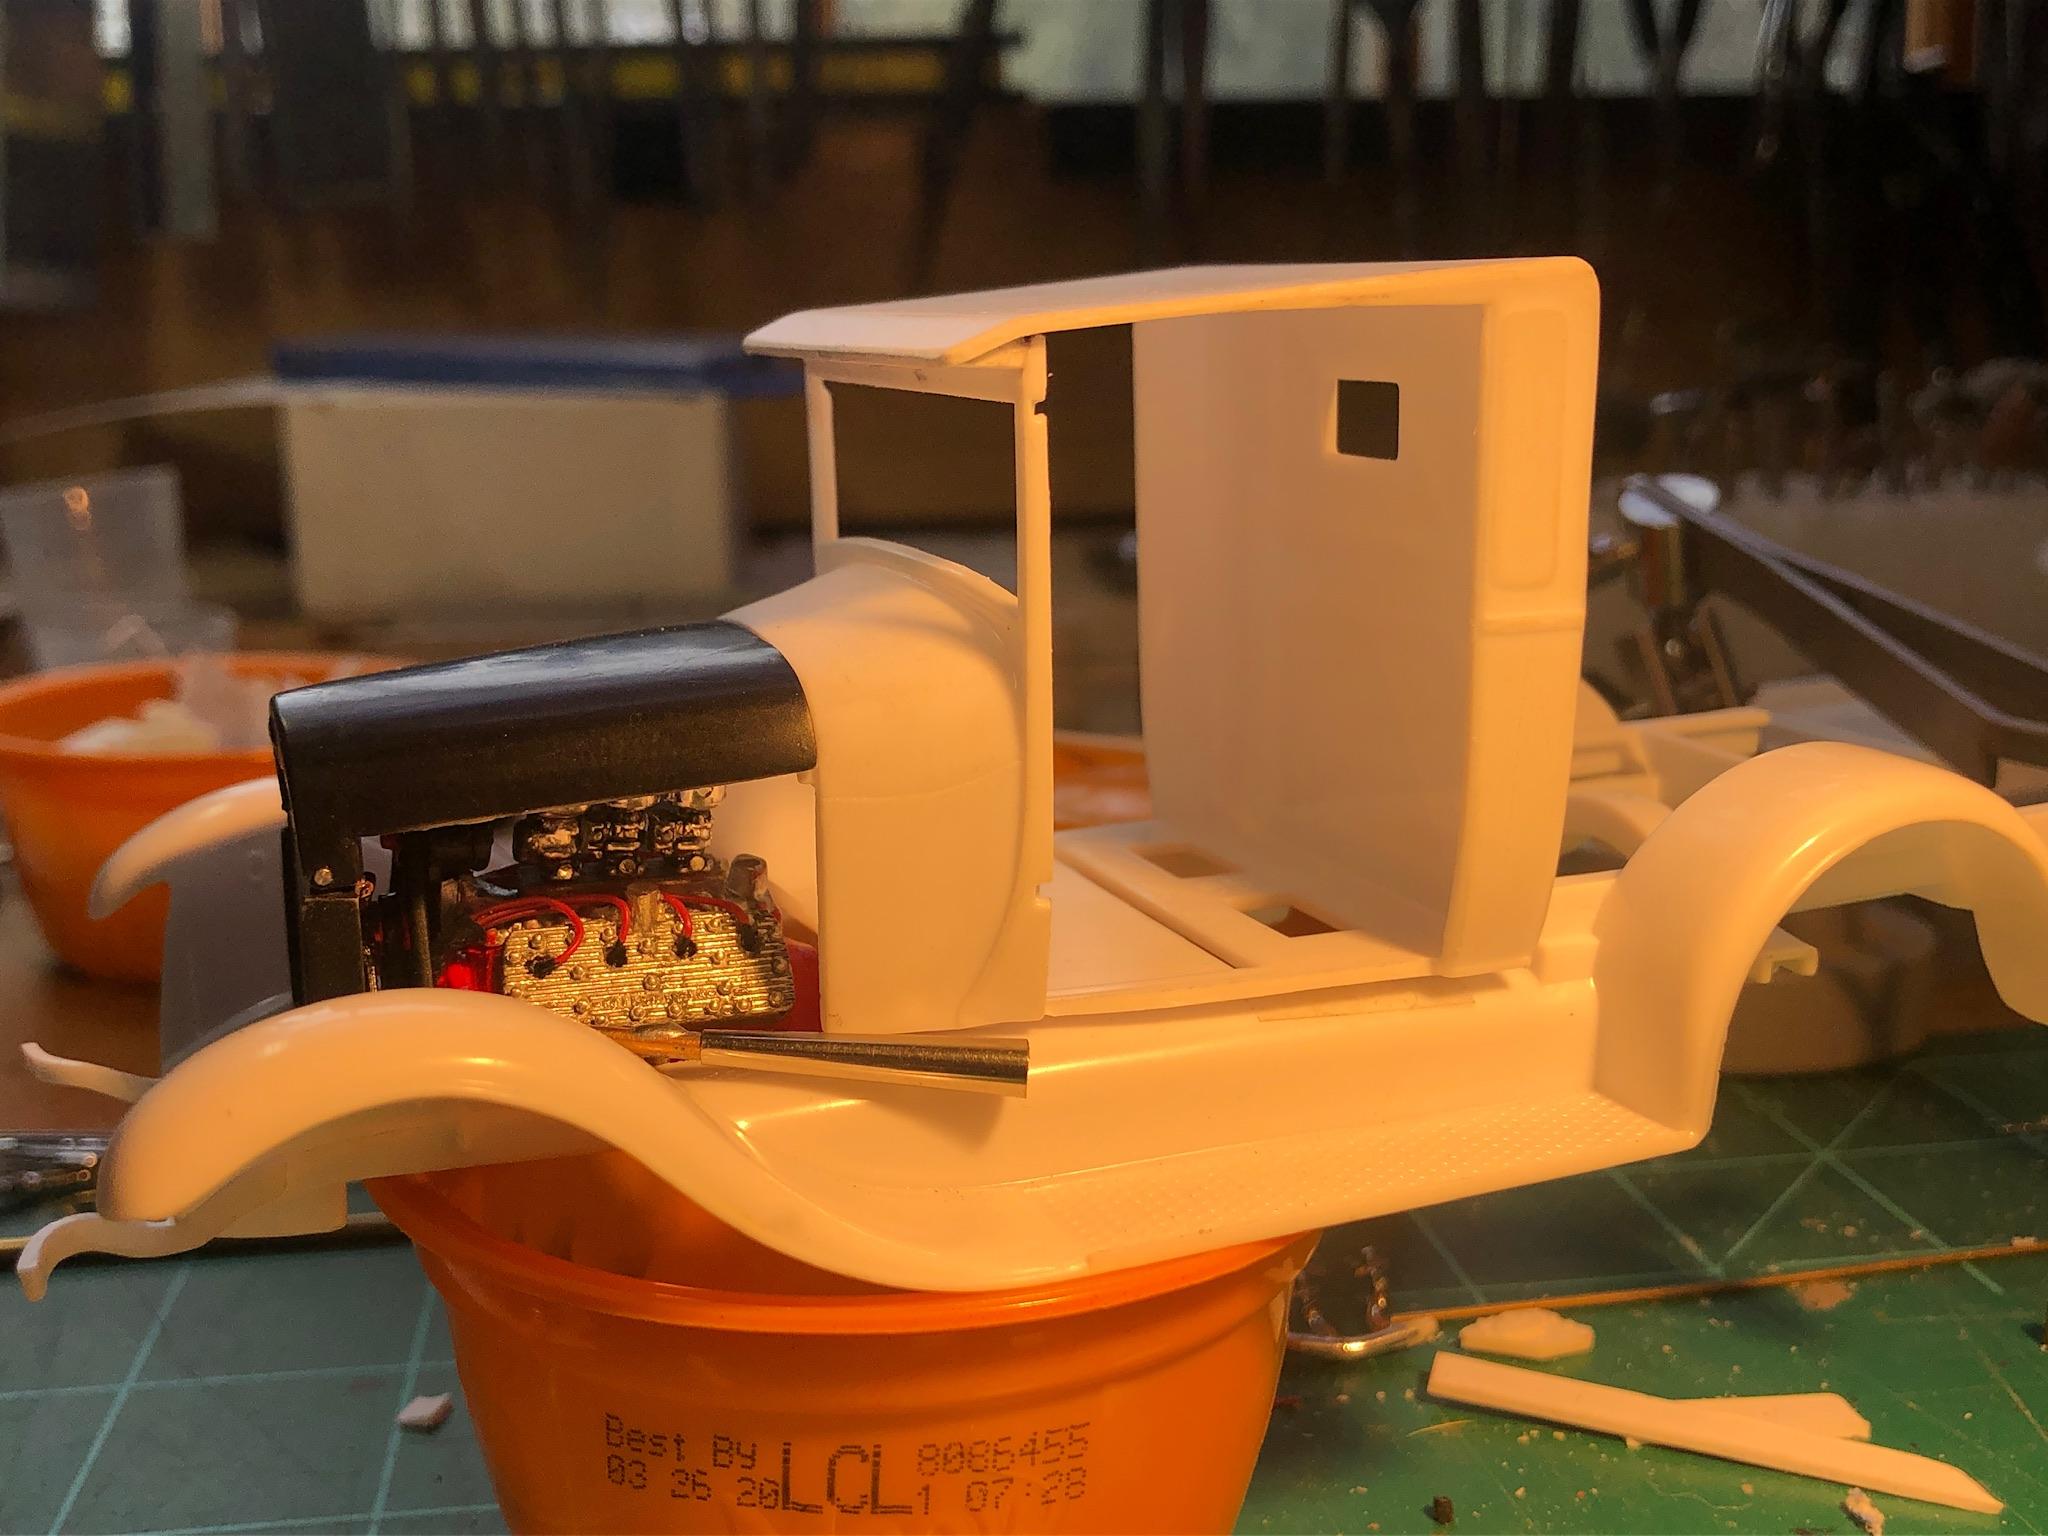
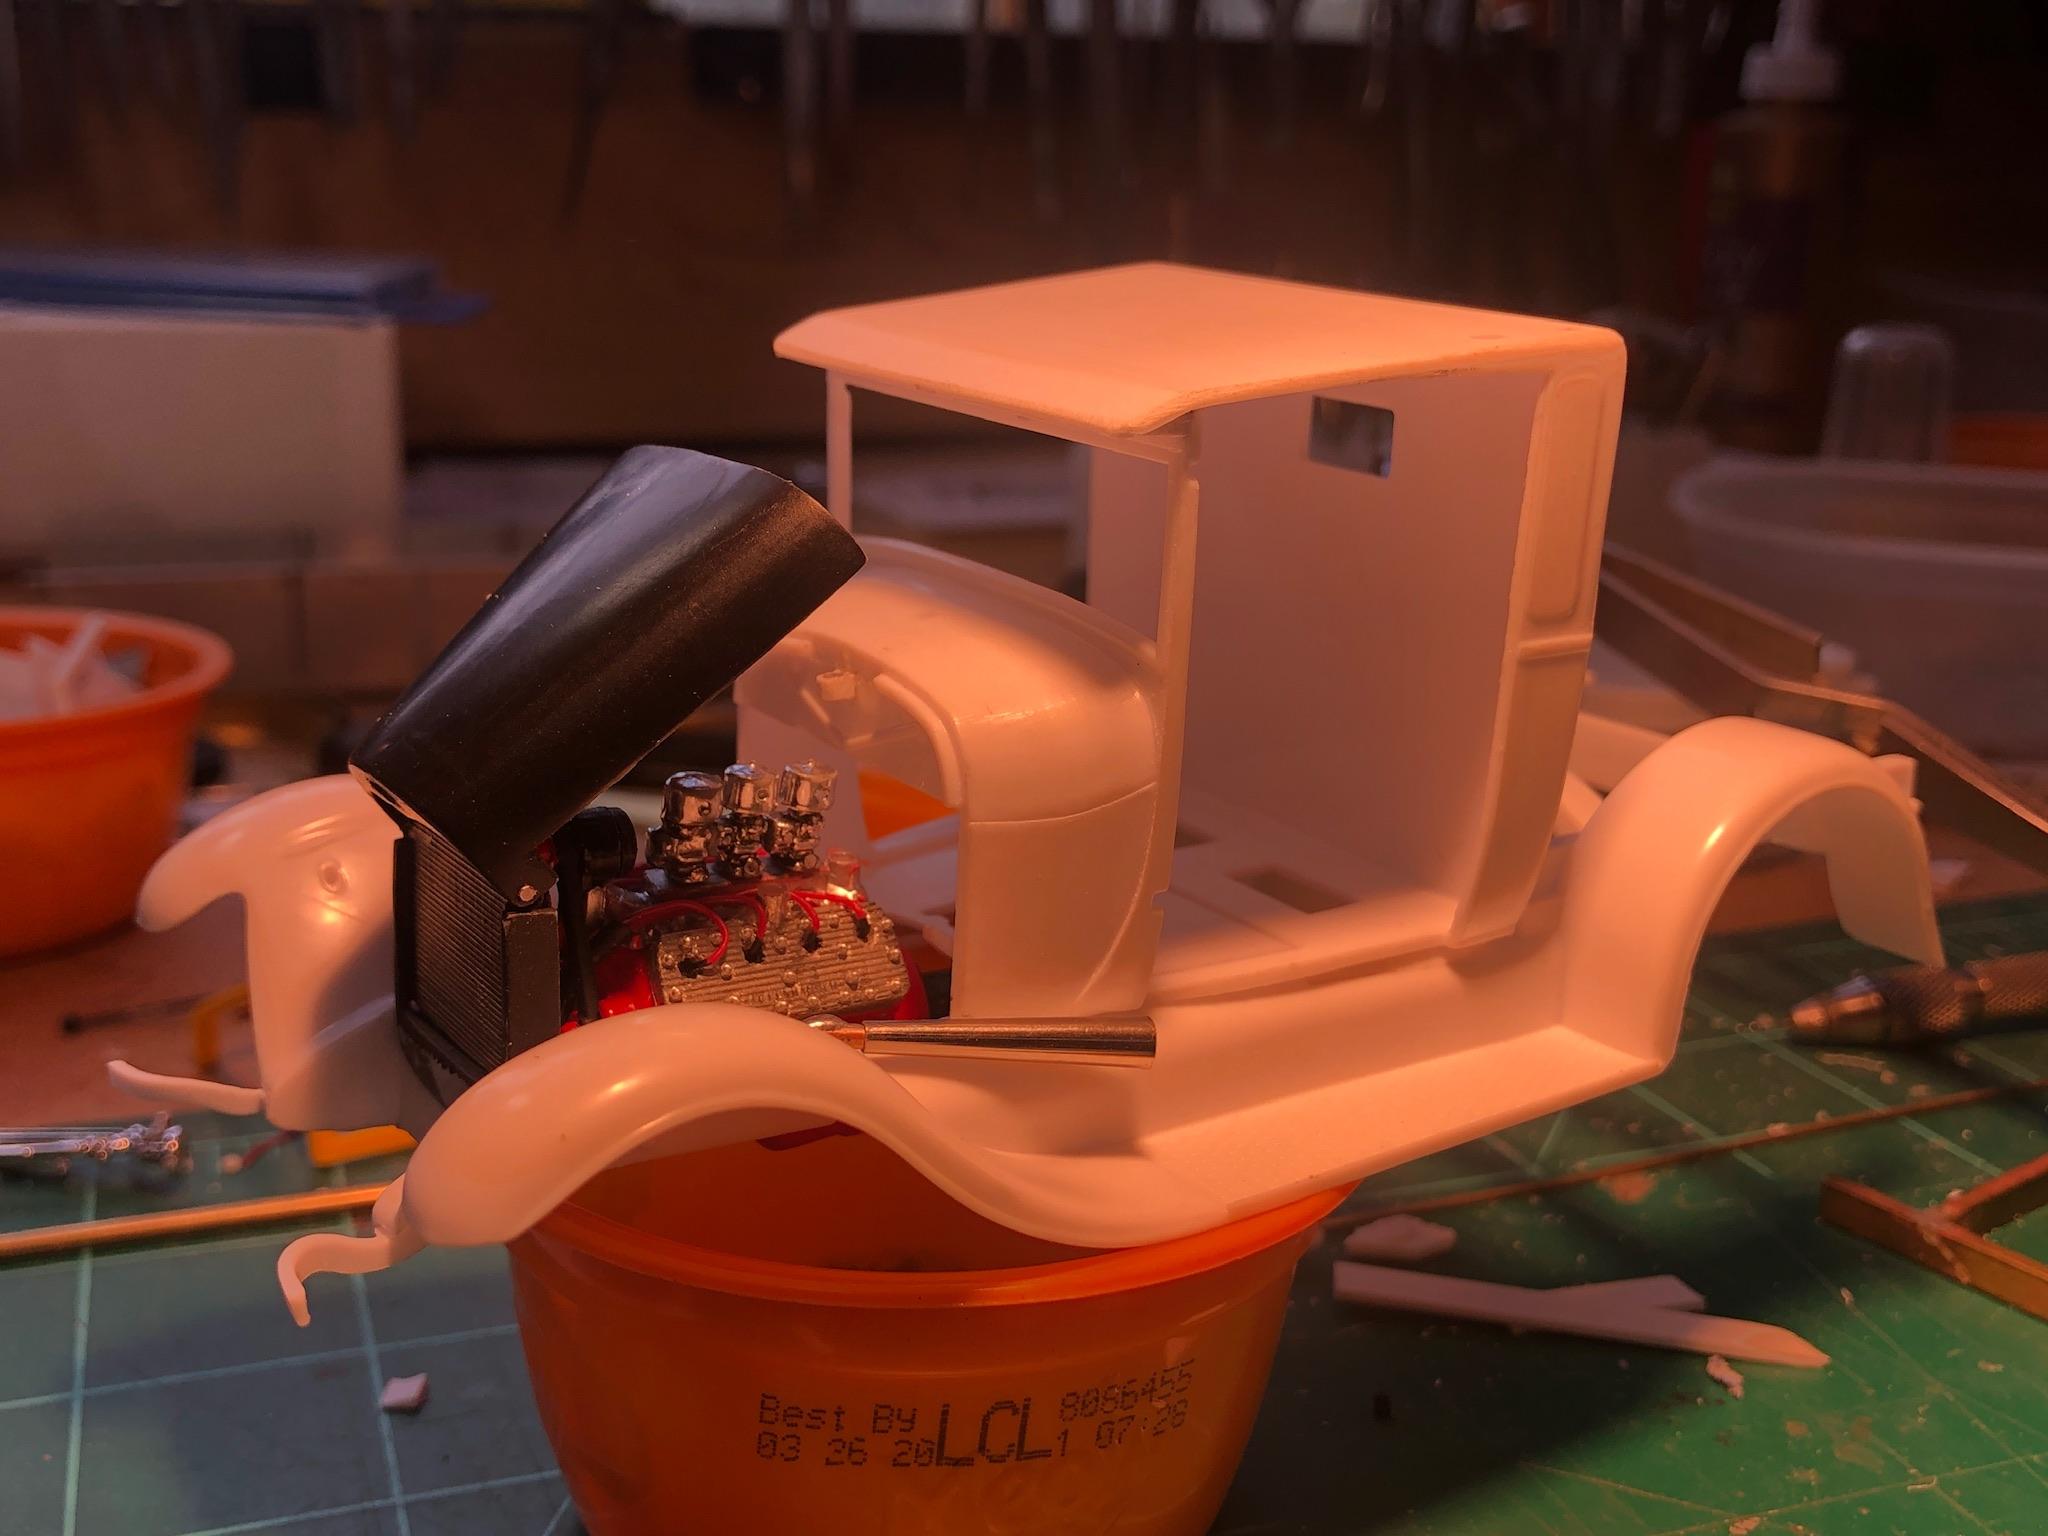
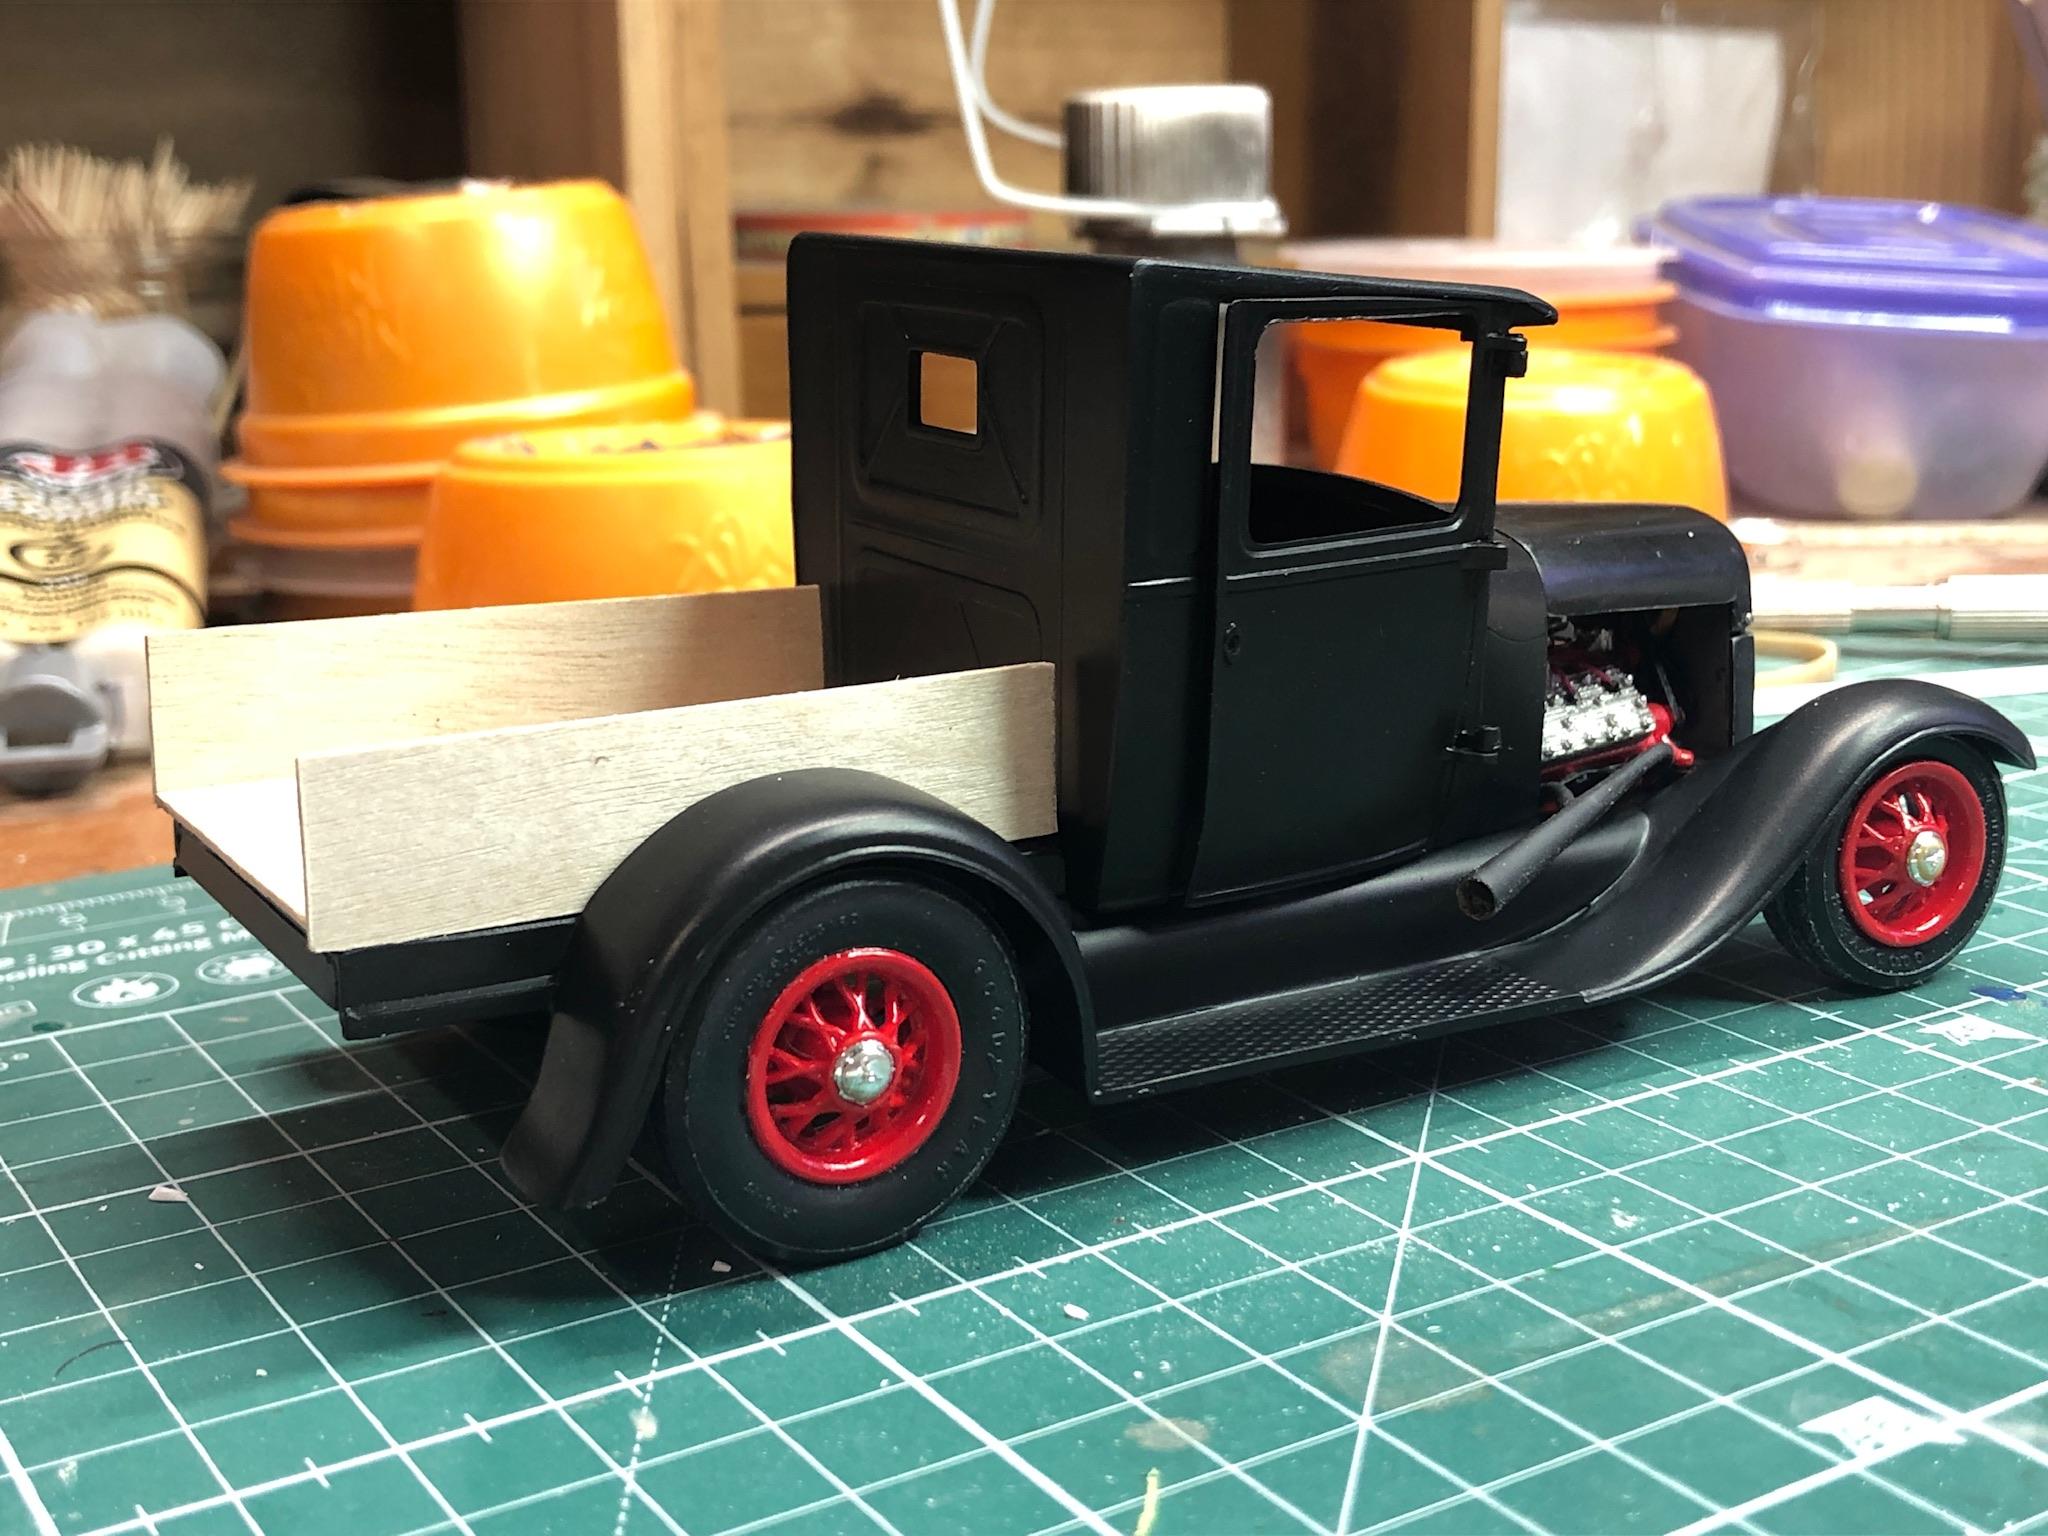
Ok guys, I’m stoked with the awesome work going on on these trucks! I just have to show mine. Made a little progress recently. Wheels are done, and the windshield frame is a success. It’s coming together!
-
That’s going to be really cool Alan! The addition of the trailer and pedal car/go cart will really enhance your already exceptional build! I love it when details like this are added that create strong visual appeal! BTW, I have not yet commented in your completes truck build, but it is absolutely beautiful! The extended cab, V6 Ford, IRS, all just ooze cool! Well done! TS
-
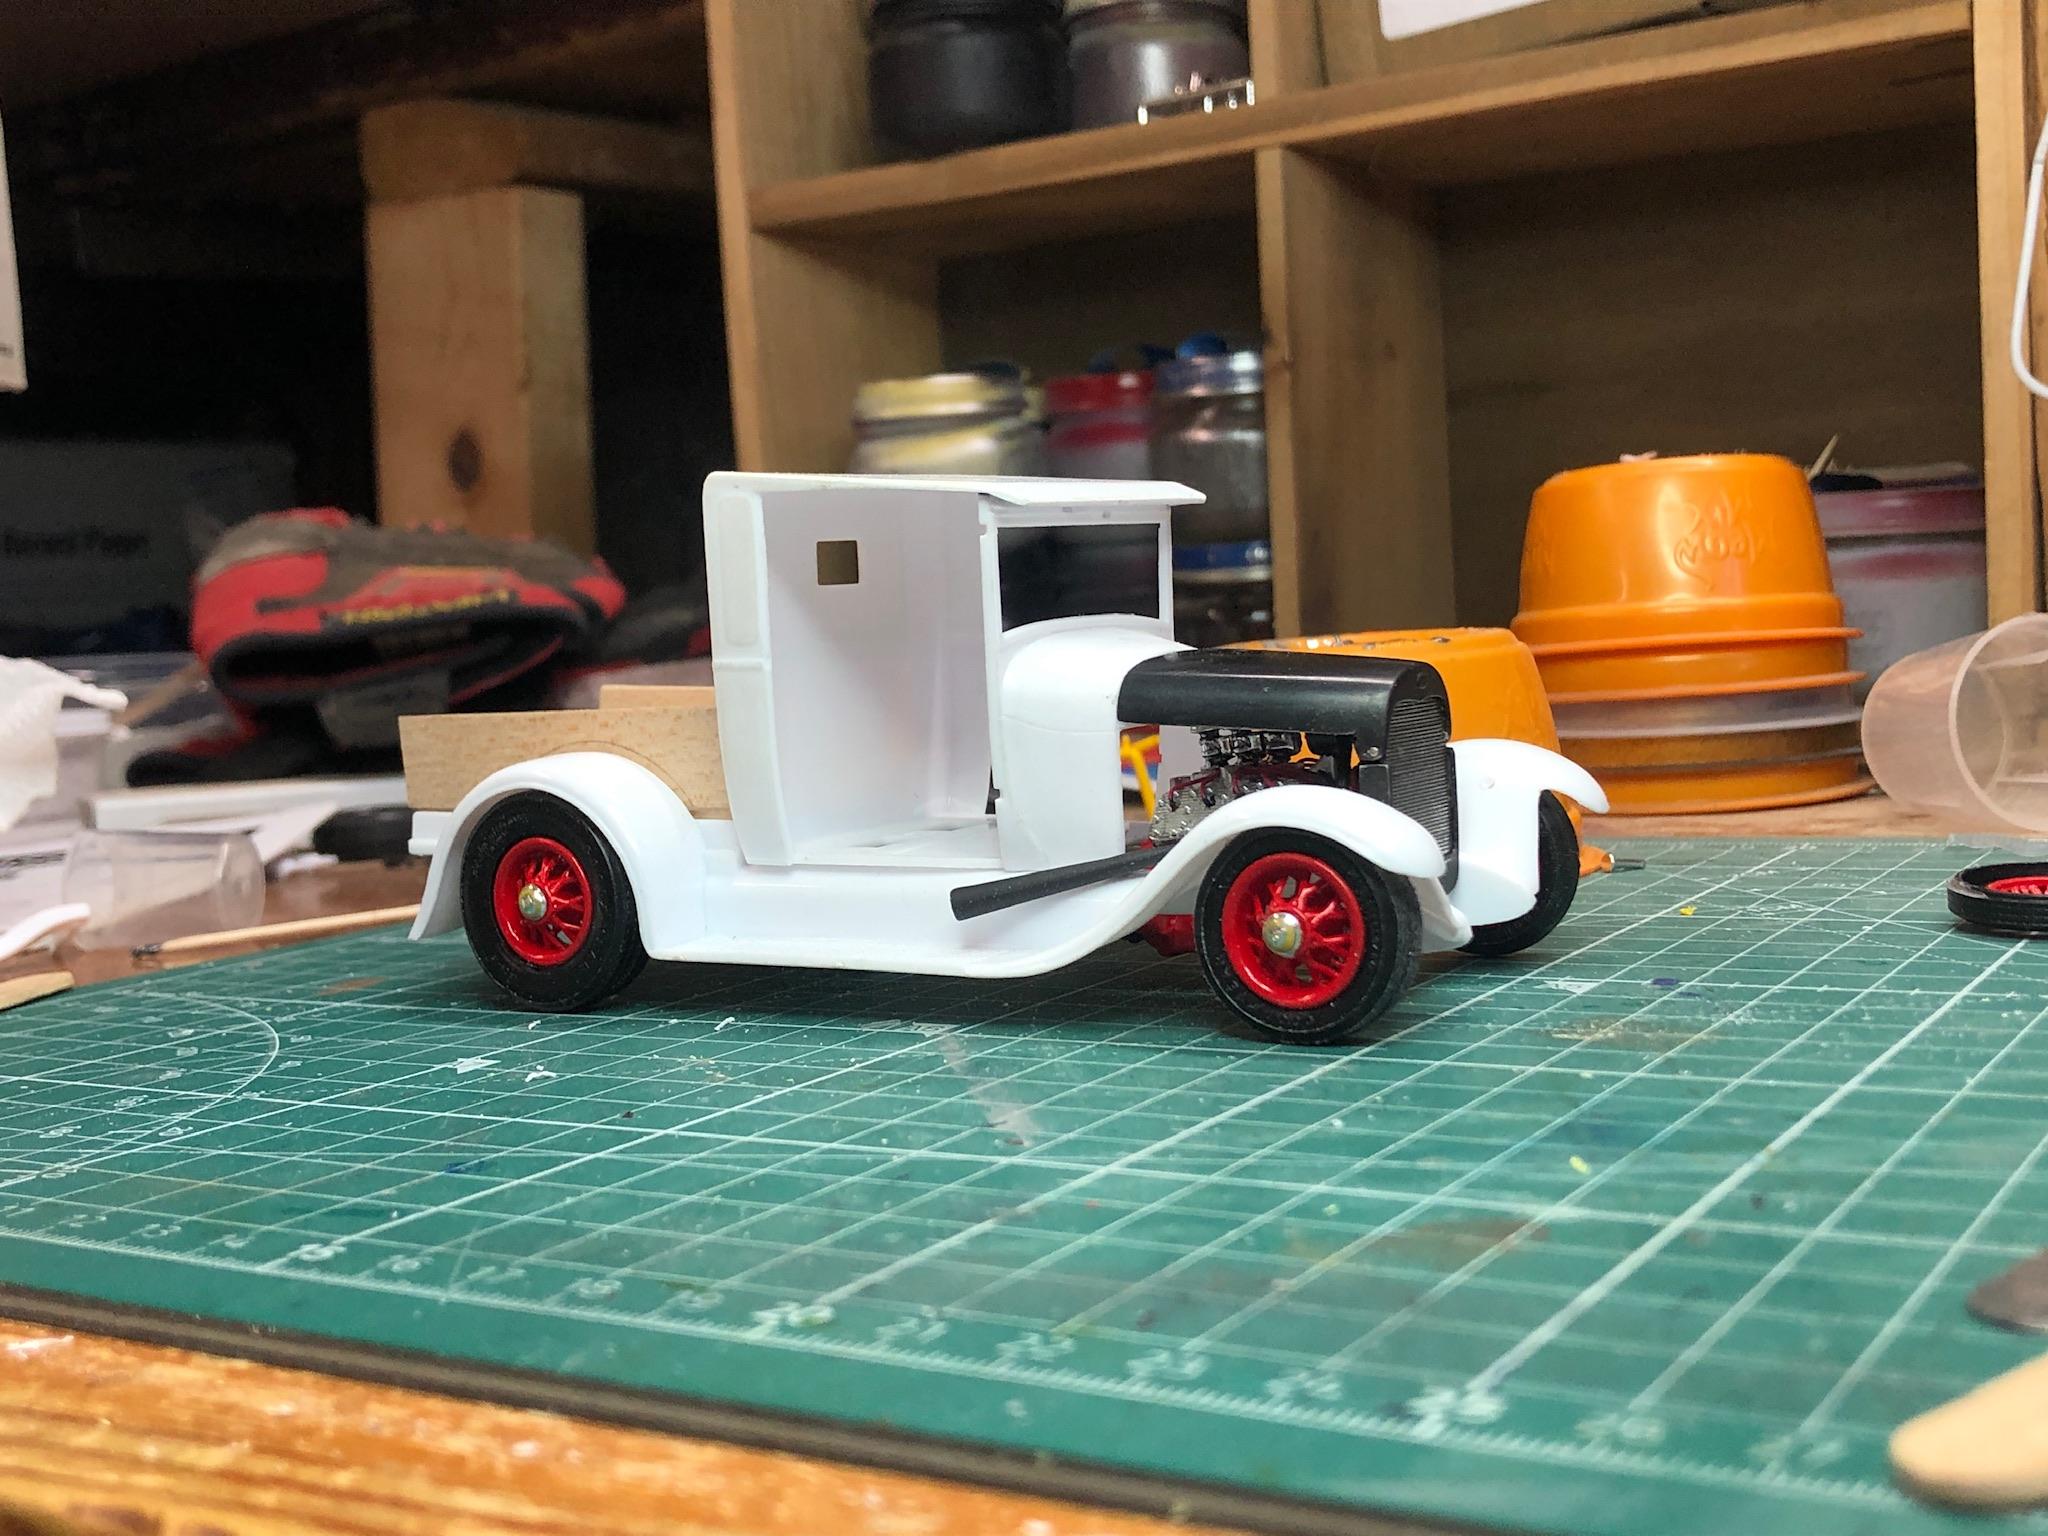
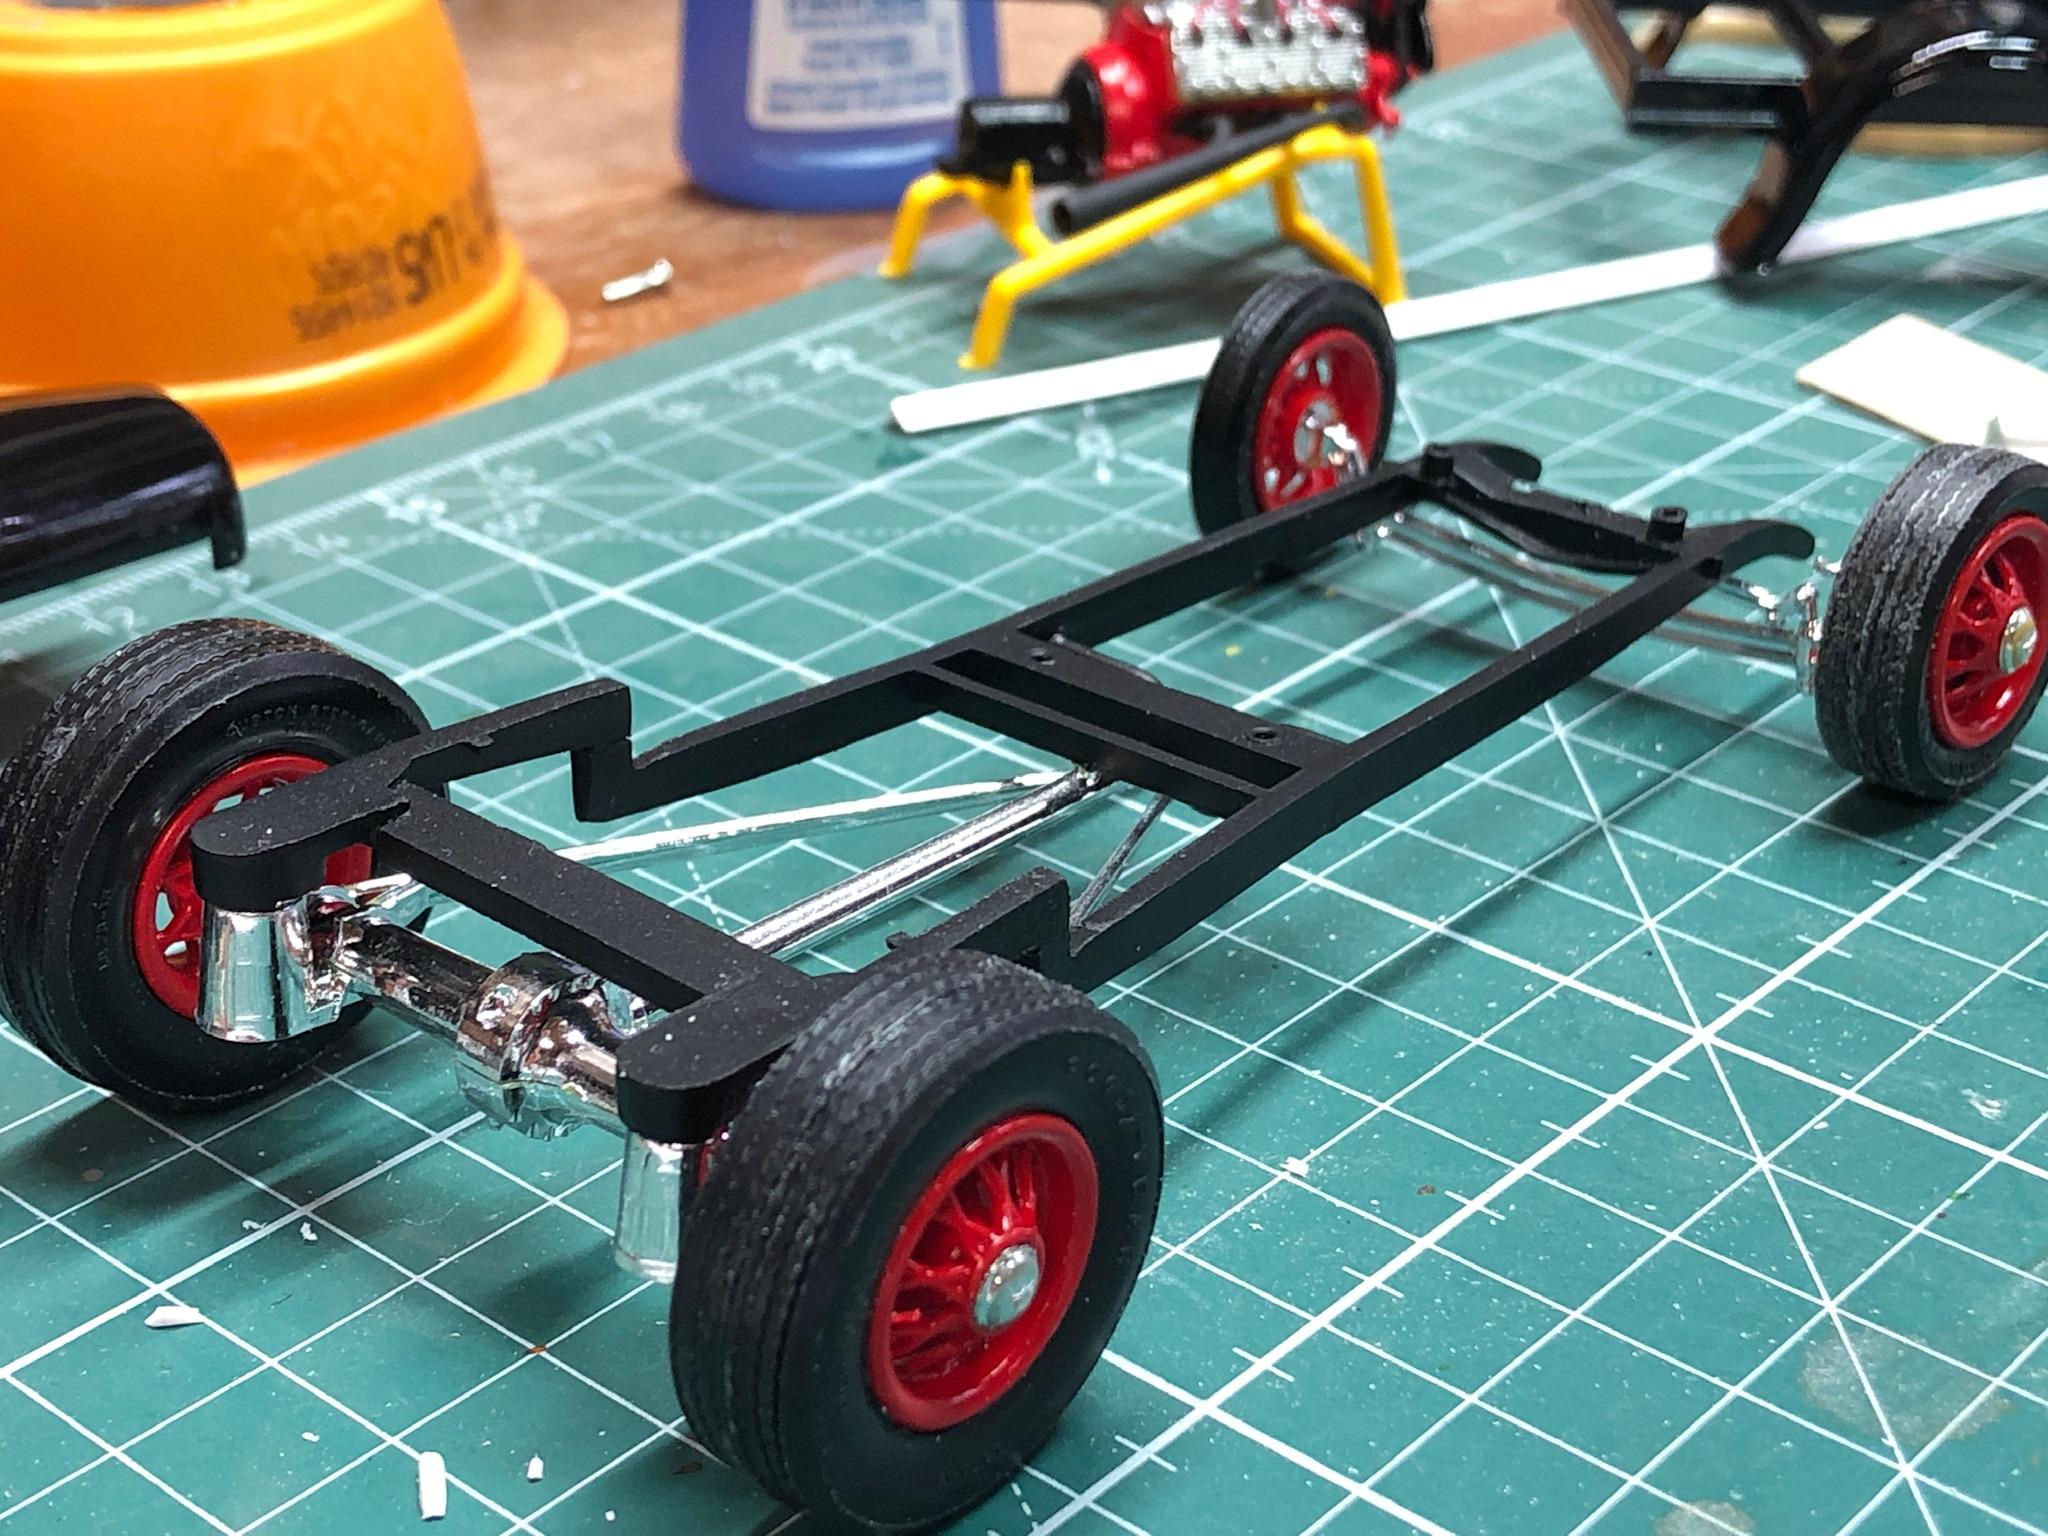
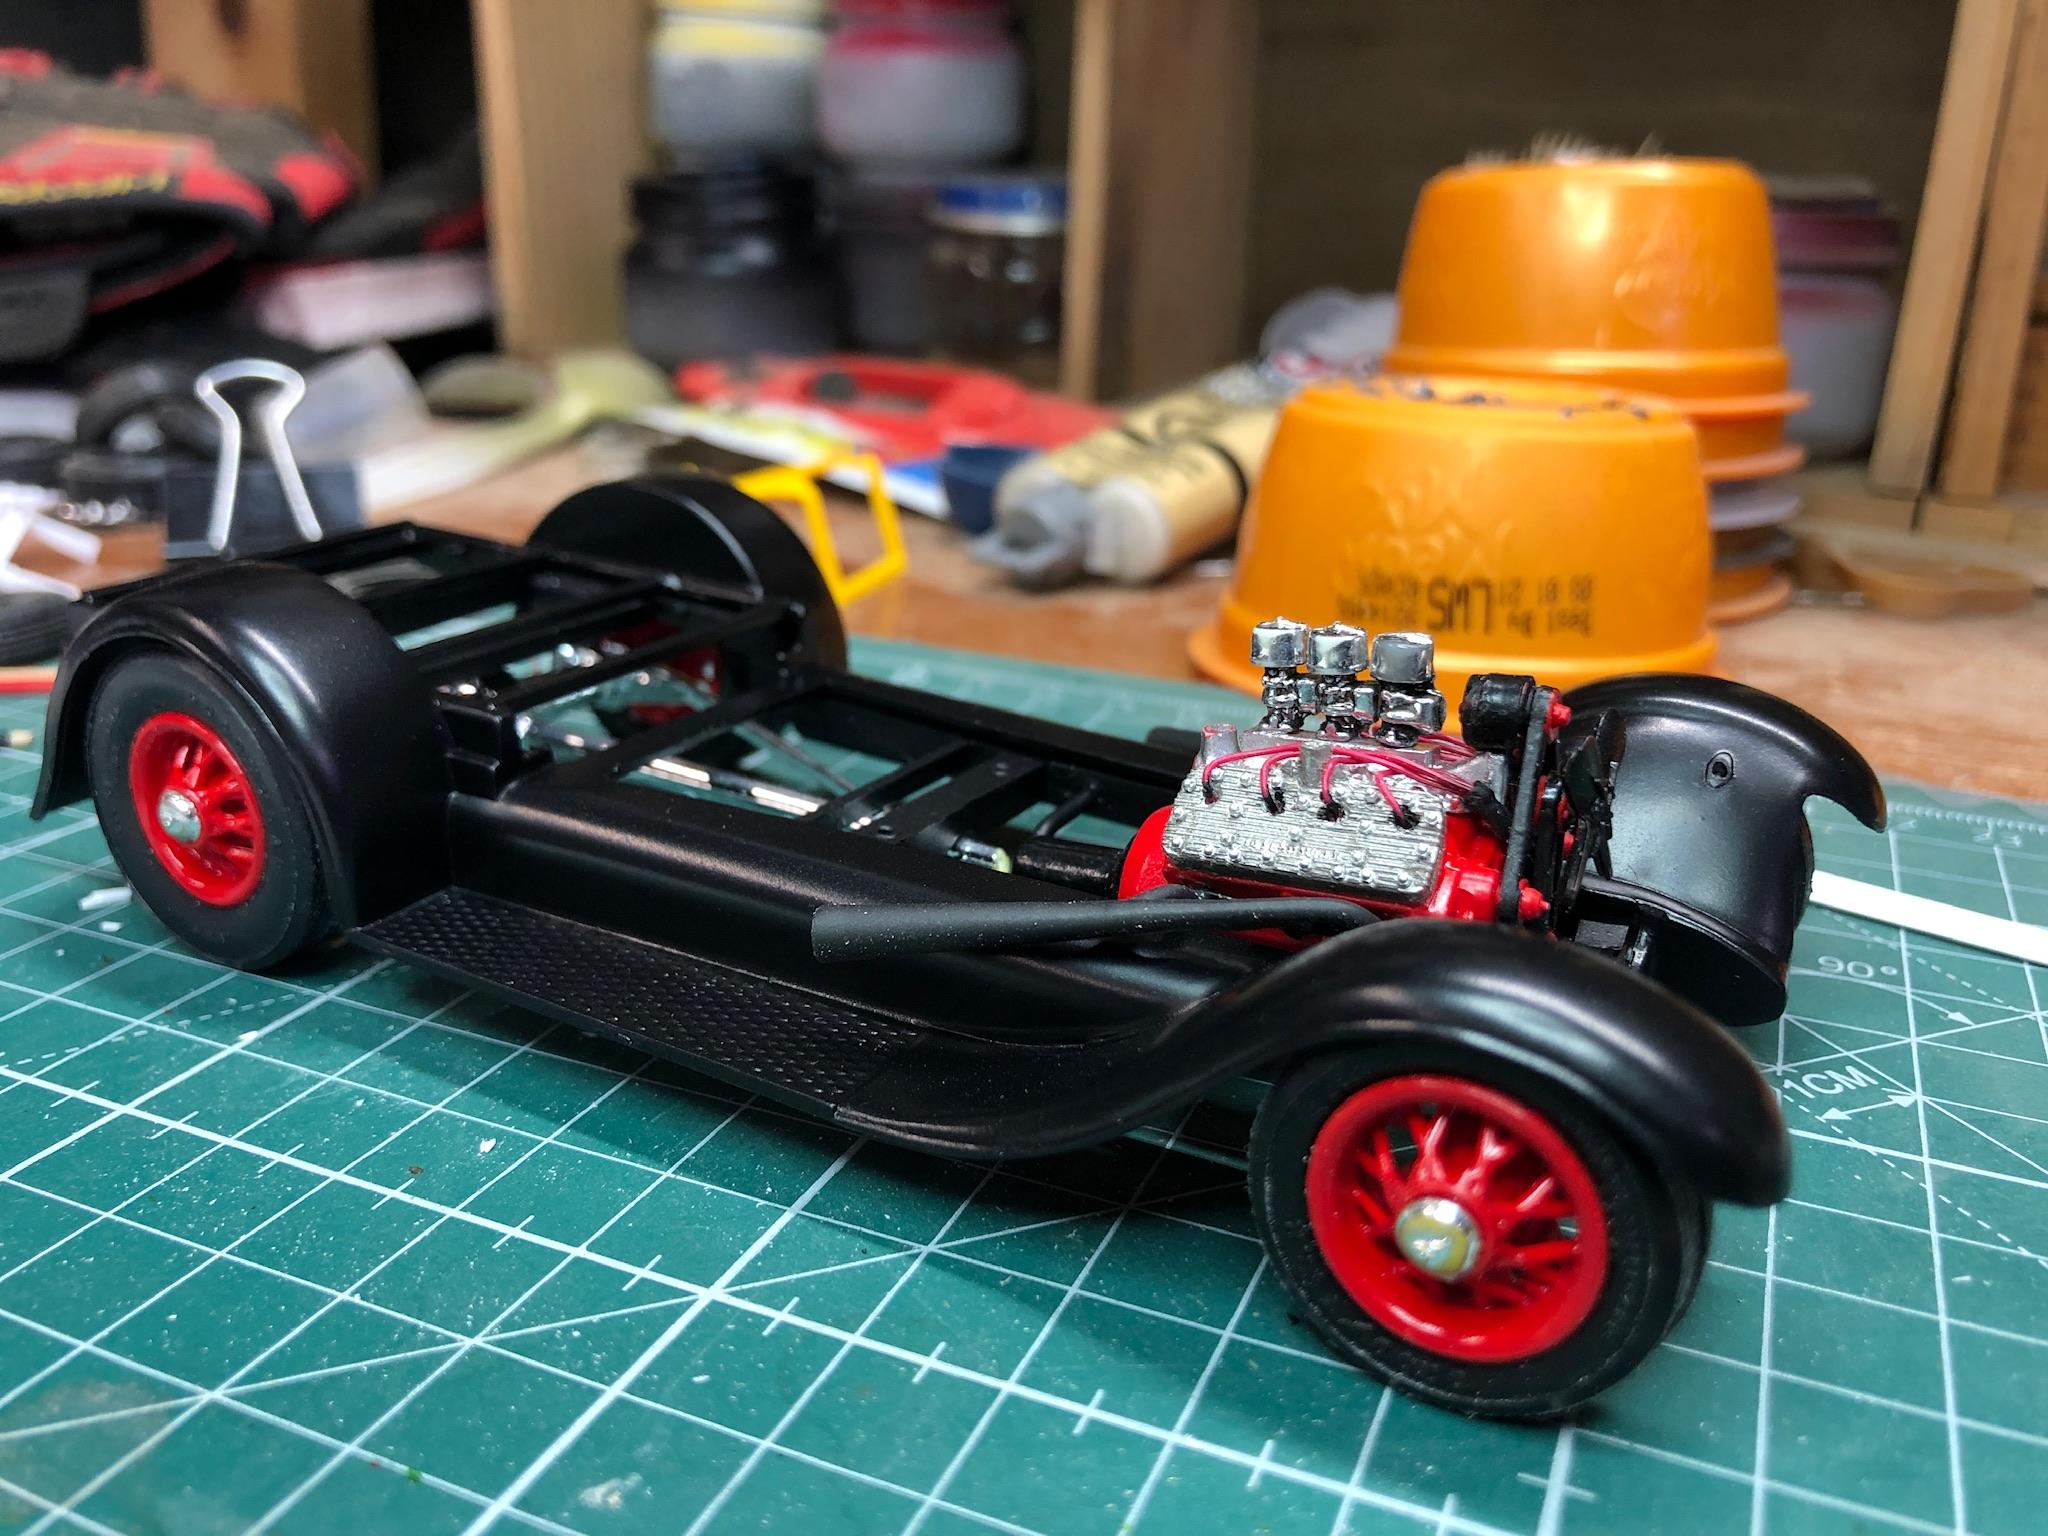
I’d be happy to get in on that myself. I’ve known Tim Boyd since the early 70s, and he has been a good friend and great inspiration to me ever since. We drifted apart in the 80s until recently, but I definitely still consider him to be my friend. As for these builds, mine is coming along despite a few setbacks, and hopefully will be done soon. Recently, I have been working on a barn wood bed for the back, and I still have a bunch of the hardware to finish up. Today, I spent most of the day stringing a real wire wheel to replace the plastic kit ones that are found in many places. The first one was pretty easy. Now I have to make three more like it, which is always the challenge. In the attached pics, the new one is on the back, while the plastic ones that I am getting rid of are on the other three positions.
-
Warts Tim? You? Come on! I thought I was the only one that considered a build done despite a few warts. But then, my builds don’t go any further than a display cabinet in a corner of my basement, and some photos online. Yours go on display for thousands to see! Amazing what you learn about people you thought you knew ?. As for Alan, you can do this man. I cringe when I see this, especially since I have drastically reduced the thickness of the same pillars on my build in order to accommodate a flip out windshield frame, and as I write this, my cab is soaking in the Purple Power soup after a failed paint attempt. If it comes out with those pillars in tact, it will only be by divine intervention. Sigh, If it was easy, everyone would be doing it. Right? TS
-
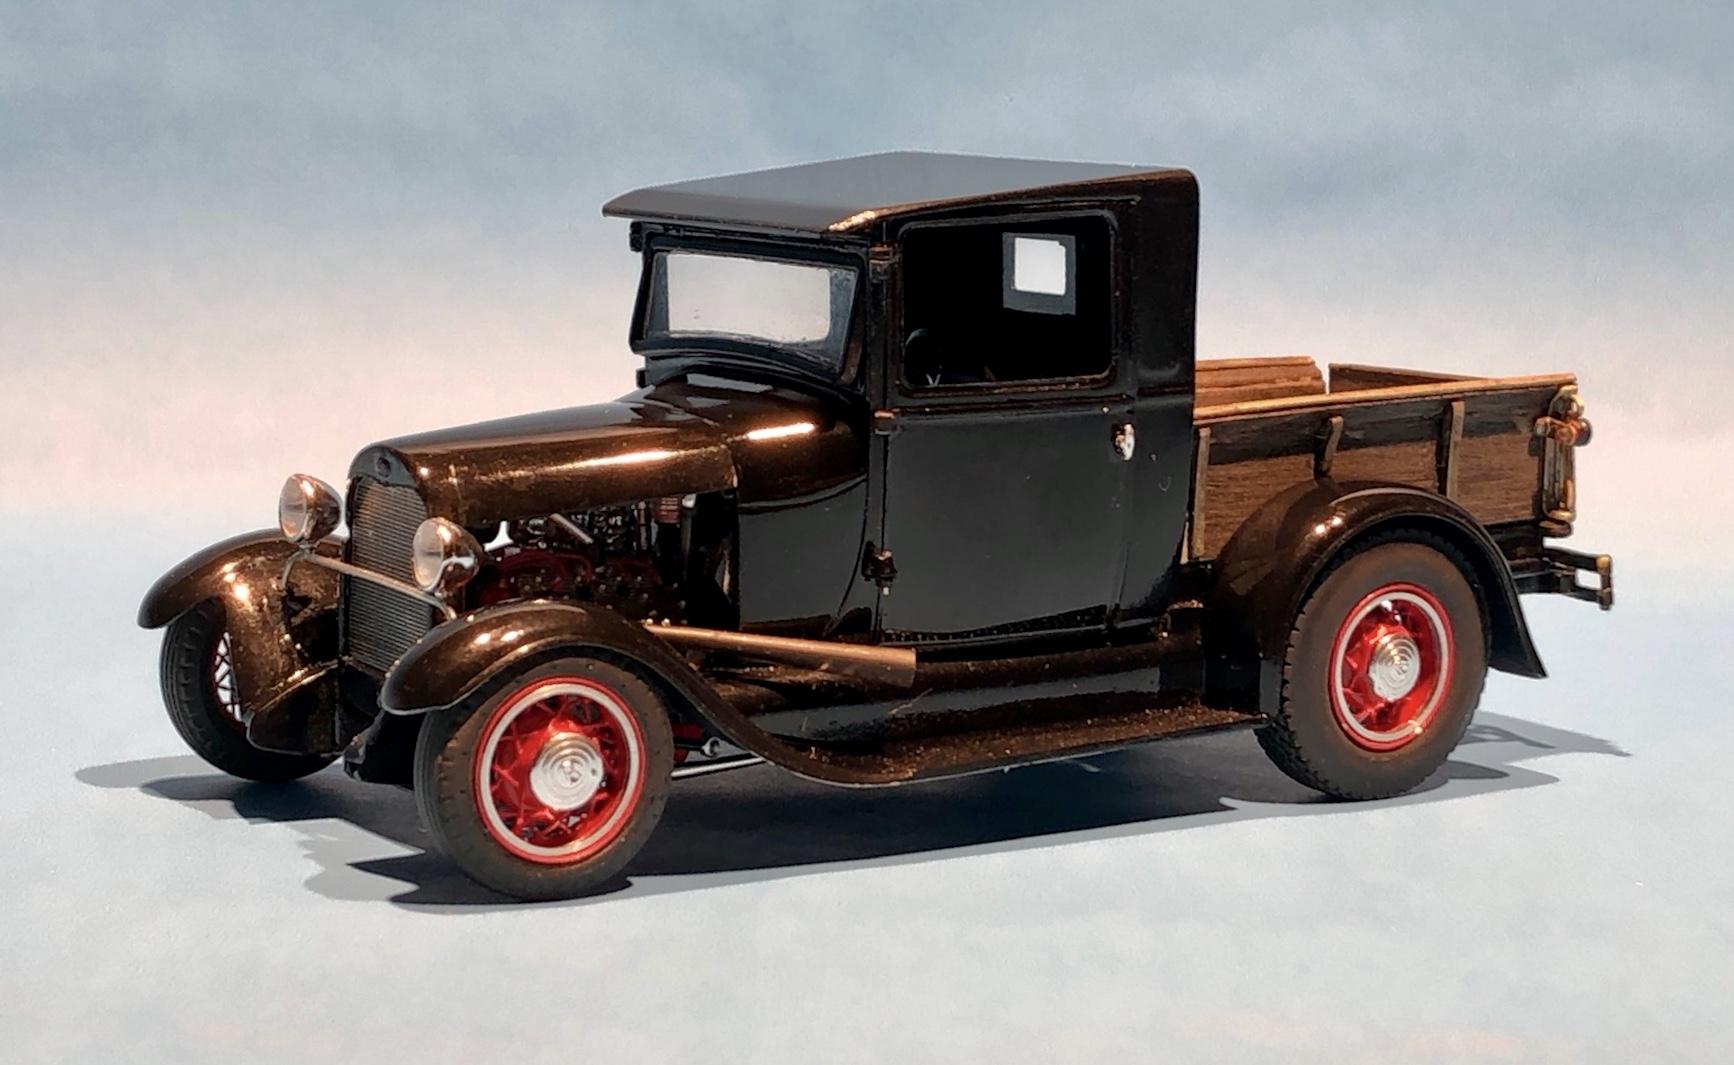
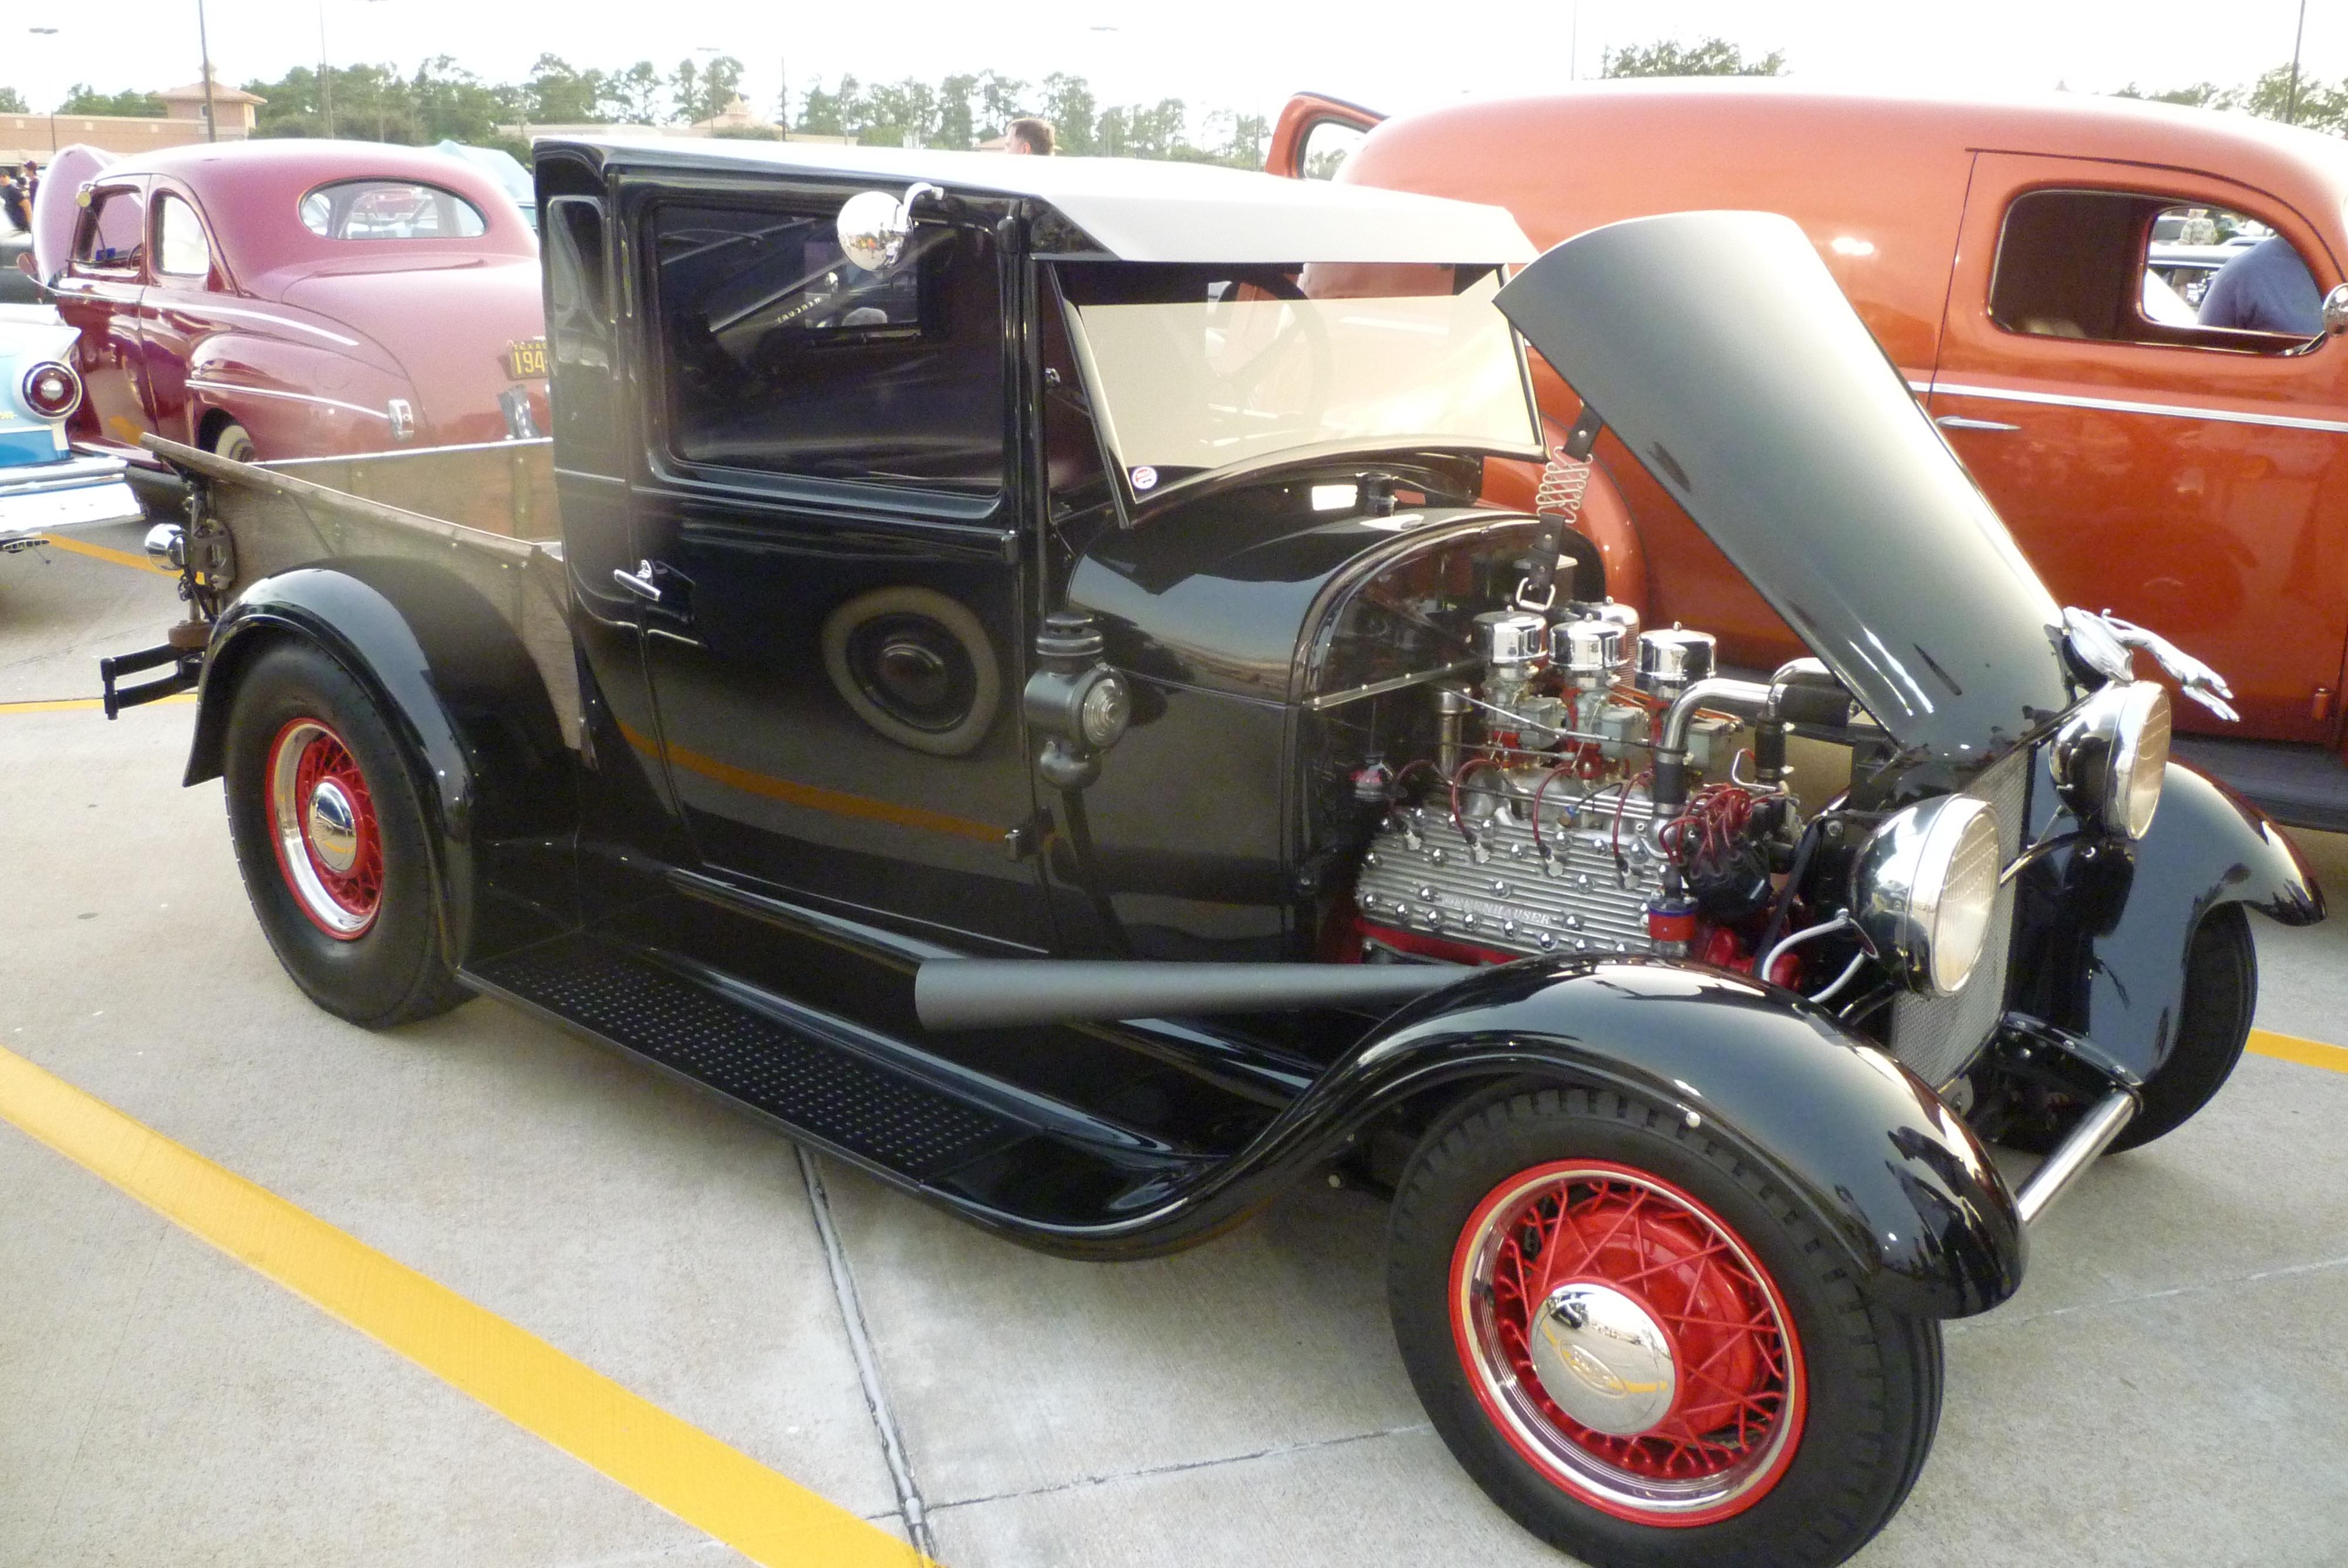
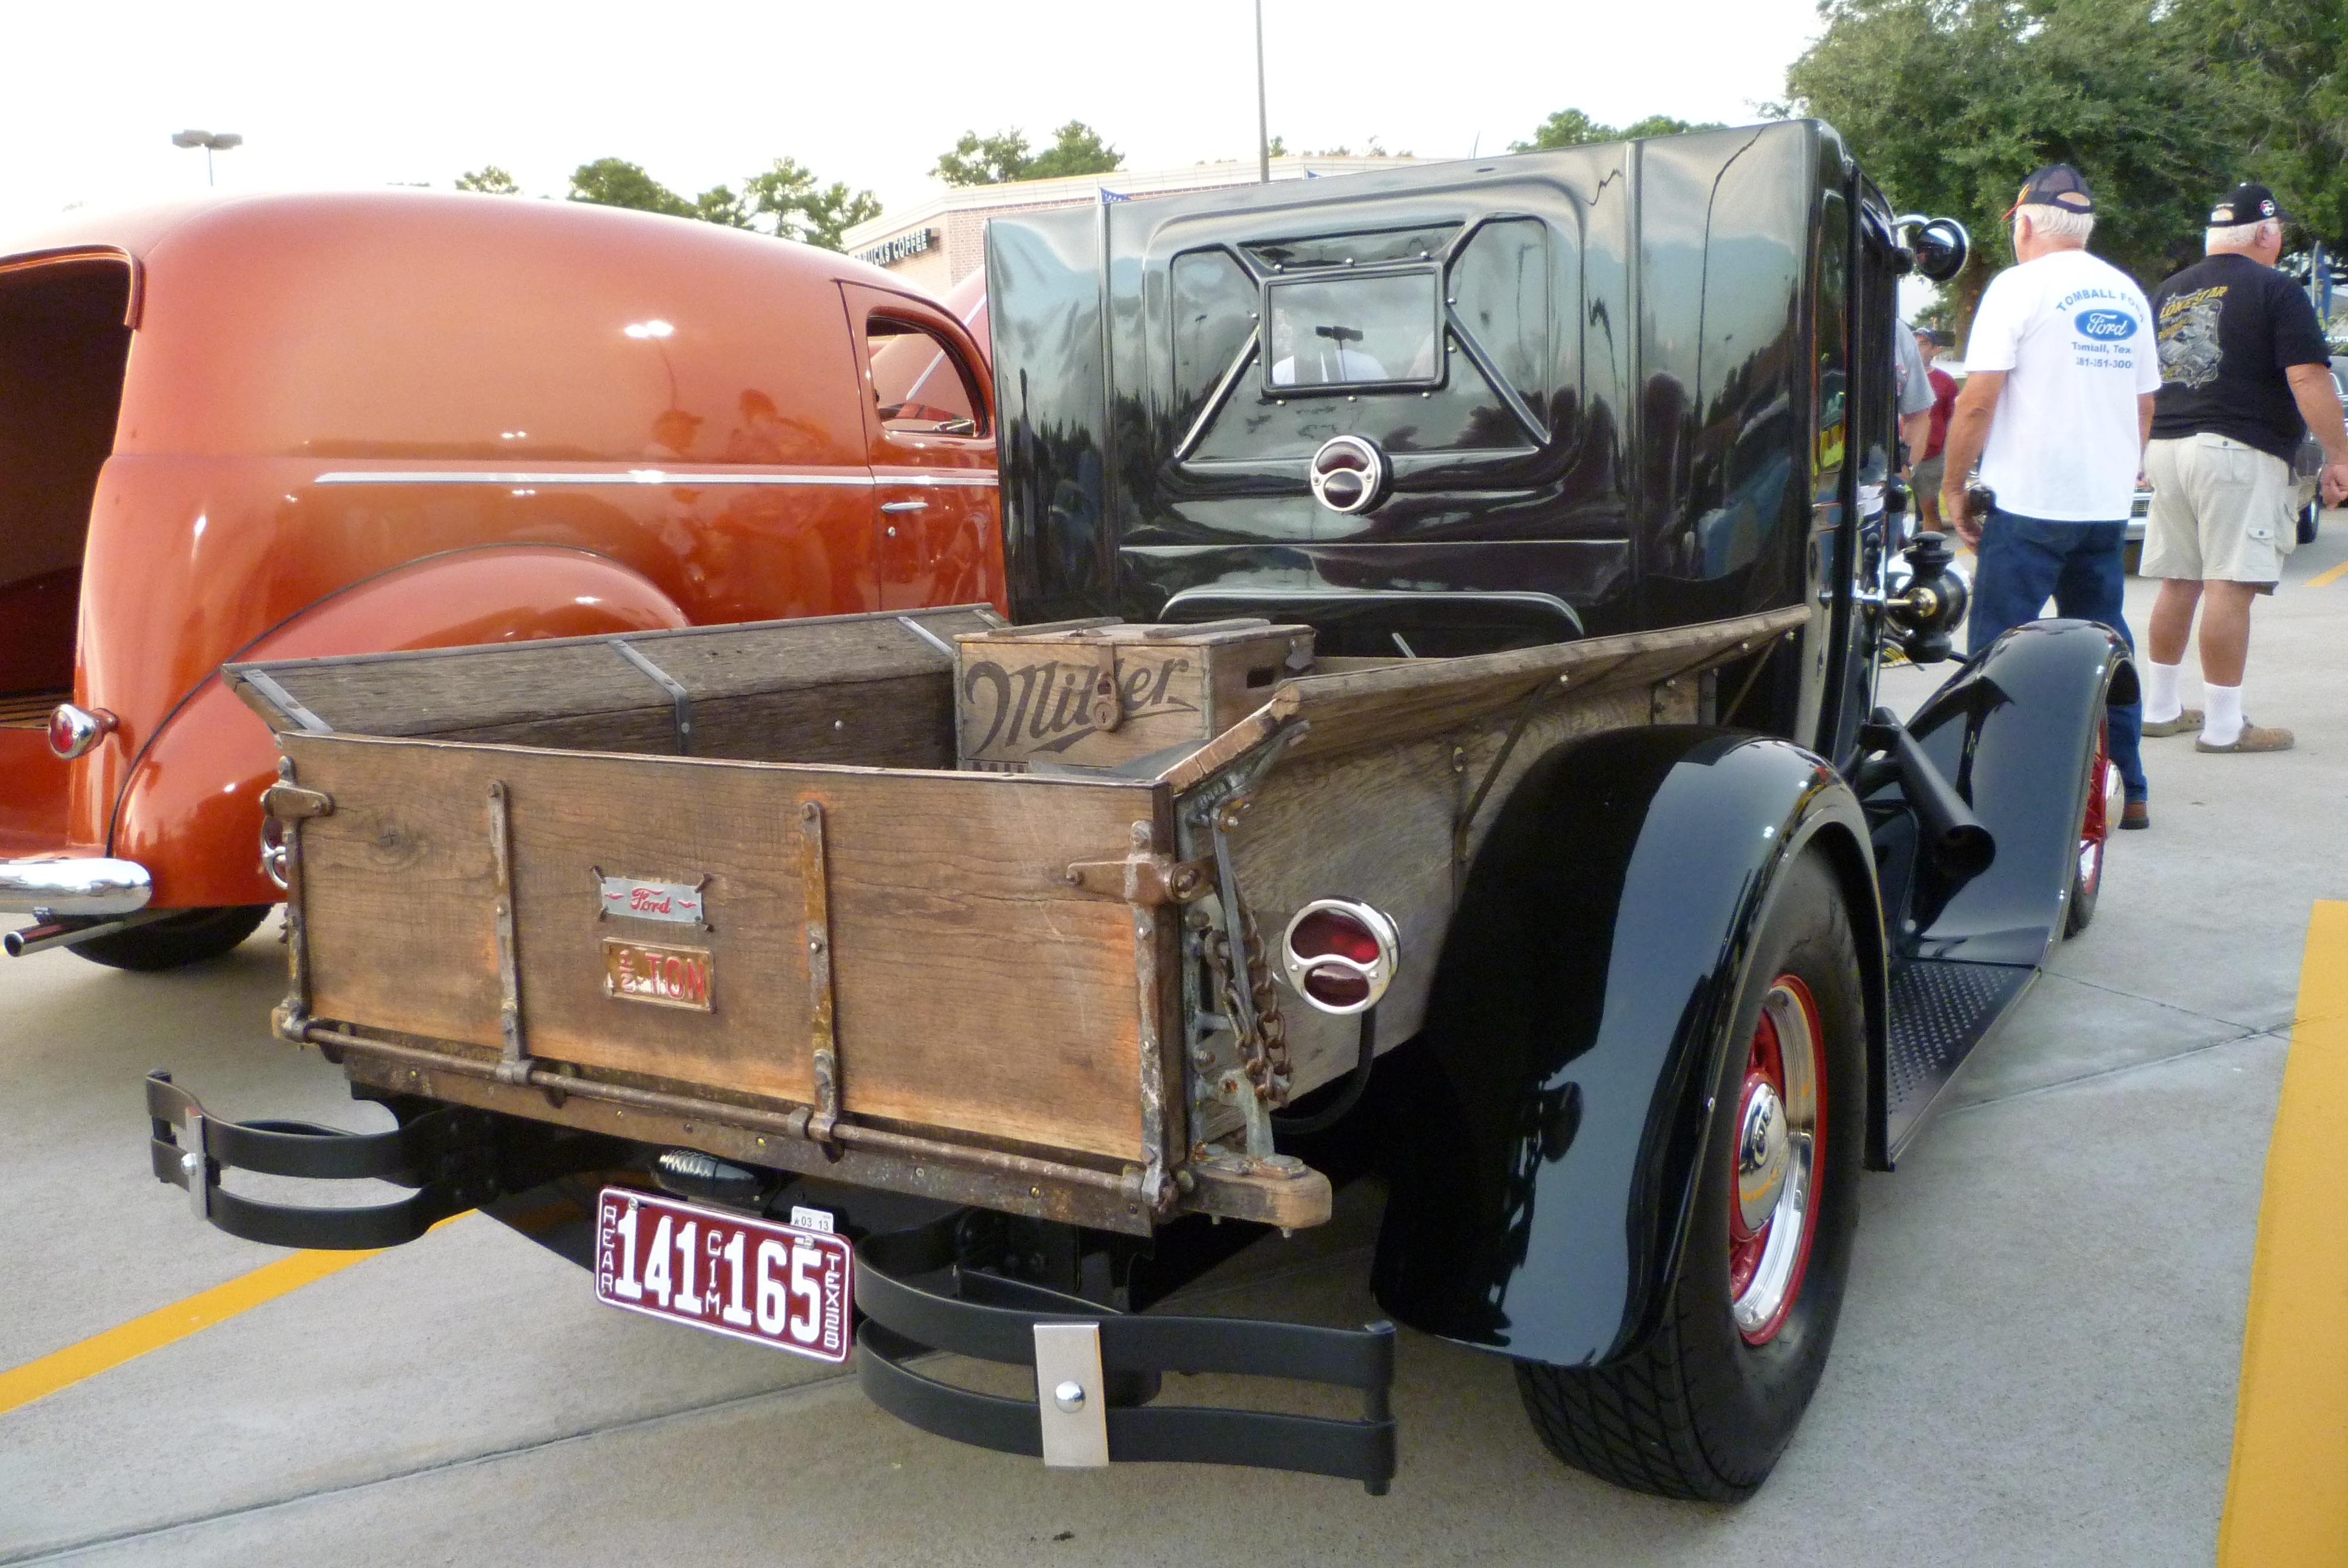
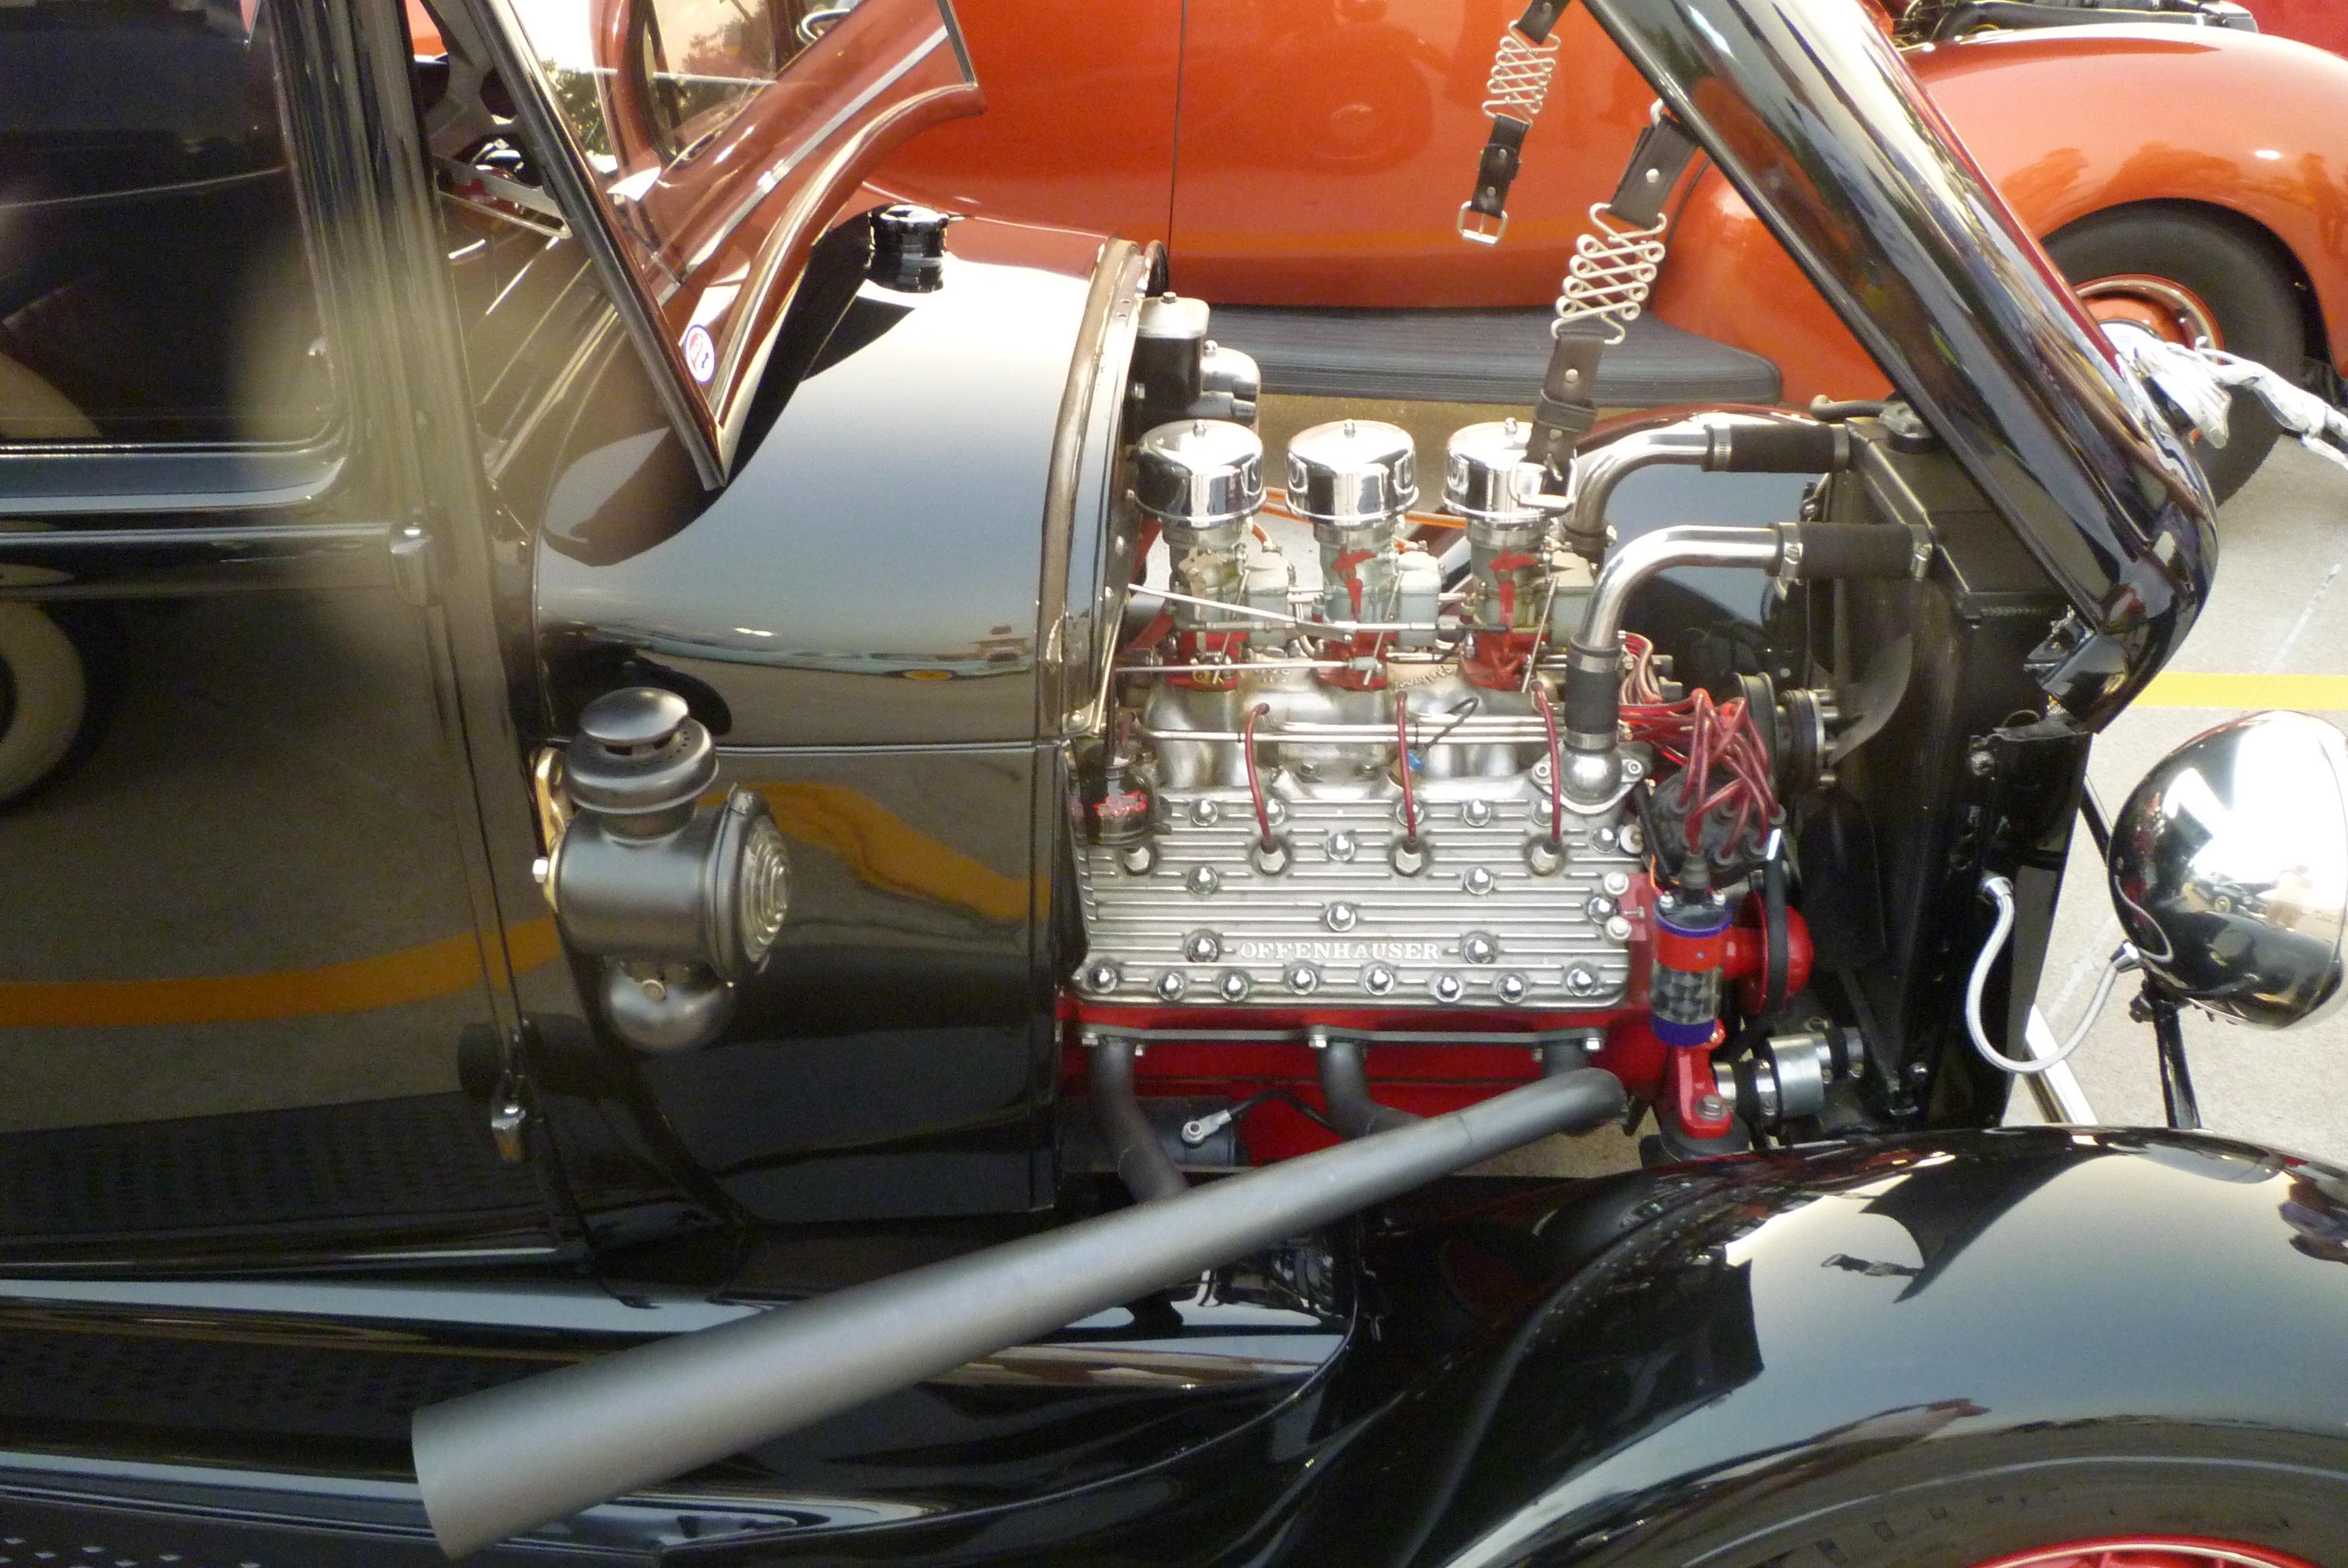
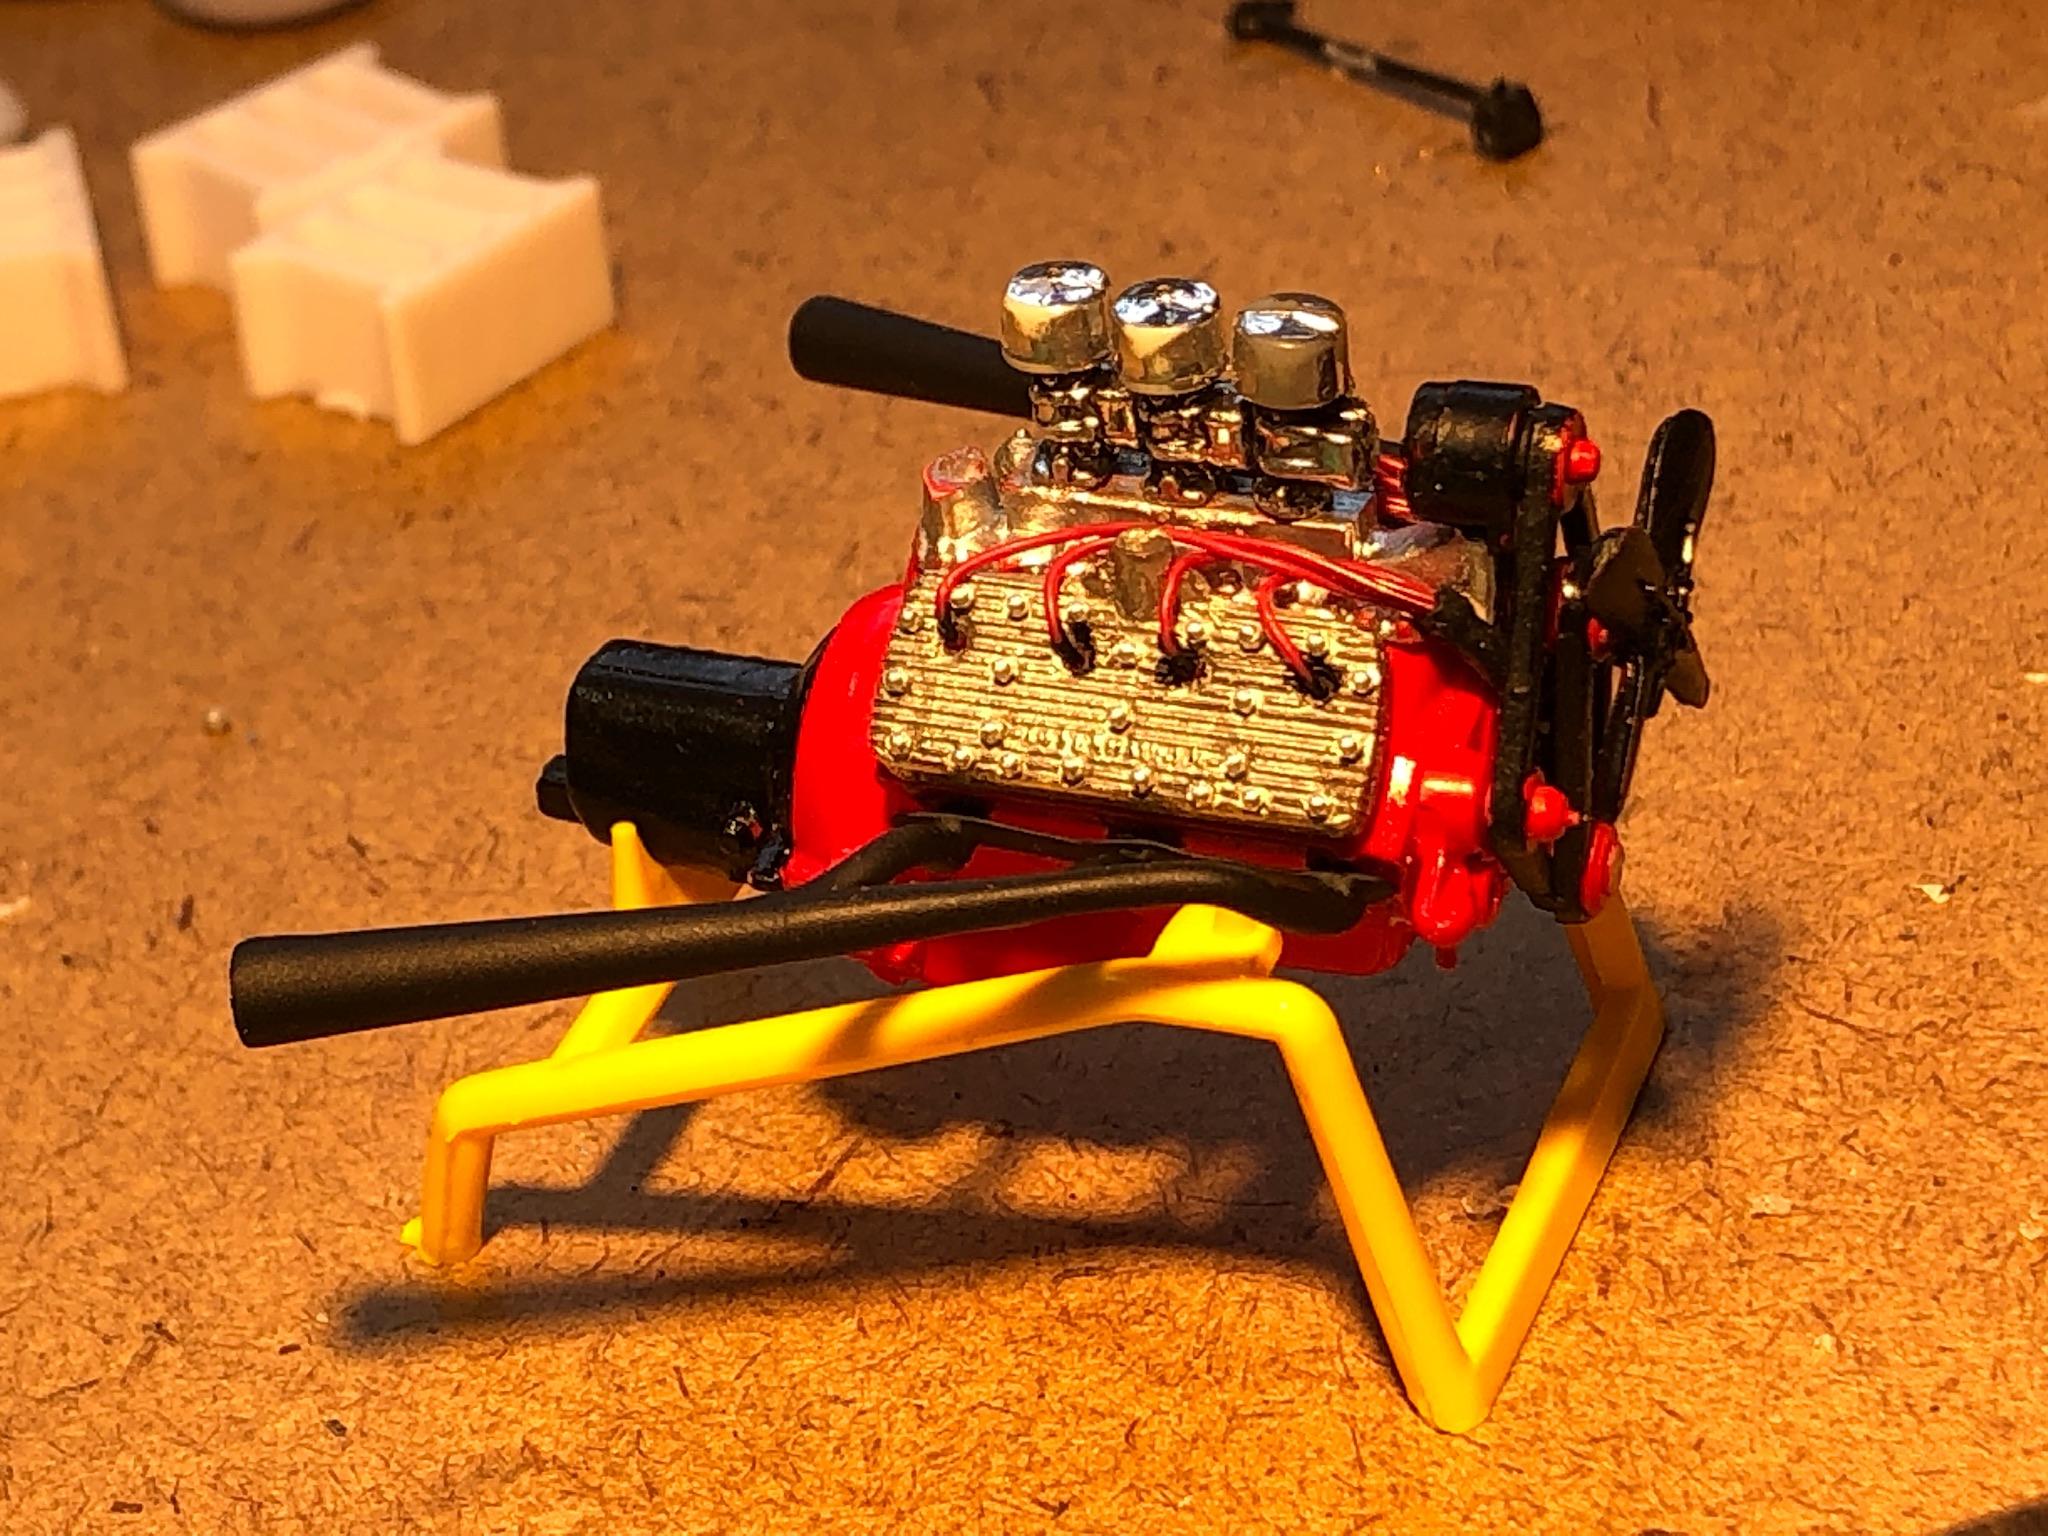
I’ve been following this thread for quite some time, with great respect and admiration for all of your amazing talents and abilities. The subject line first caught my eye because of my long time admiration and friendship with the legendary Tim Boyd, and I have been fascinated with the various ways all of you have approached the challenges of this build. Fast forward to about a month ago when I agreed to a build challenge in another group and decided to select this kit. I have been wanting to build one based on a 1/1 that I often saw at a local weekly Saturday evening rod run while I was still living in outside of Houston Texas. I always loved this simple little black with red 29A with flathead power, and barn wood bed. I started by shaving a tiny bit off of the top of the windshield frame, and door tops, and installing a piece of smooth styrene to mimic the slight rake and smooth top, and small visor on the subject version. I then built a flathead for the truck, and scratch built a set of headers out of brass, using paint brush cones for the outlets. All twenty four of the bolt holes were drilled out on each head, and replaced with scale 9/16” acorn nuts from RB Motion. I glued the hood halves together, cut the radiator shell and glued the top portion to the hood. Then I pinned the top to the radiator to enable the hood to open like the one on the subject example. Turning to the frame, I Zd it using the back half with coil spring perches from the AMT Mod Rod kit. I shaved one leaf off of the top of the dropped front axle assembly, in order to get the desired stance. Starting to get a little paint on the body, I then turned my attention to mocking up the barn wood bed. I’m looking forward to scratching up all of the various metal brackets out of weathered brass which will be used to hold the bed together. I haven’t totally decided on what tires to use yet. These from one of the Revell 34 Ford kits are about the right size, but i hate the two piece configuration. I can’t seem to find a glue that will hold them together. Anyone got any ideas? I’ve been struggling with fisheyes in the Wicked Black water base paint, but I think I’ve finally found a solution using Future for clear. That stuff is amazing! Coming along, but still a WIP. Thanks, Tim Slesak
-
64 Dodge D100 Pickup Pro Street
foghorn62 replied to AmericanMuscleFan's topic in WIP: Drag Racing Models
Honestly Francis, if I didn’t know what color you had chosen to paint your truck, I wouldn’t be able to tell which pictures were if your model, and which was the 1/1. I’ve said it many times before, your precision machining and attention to detail is truly awe inspiring! TCOTT -
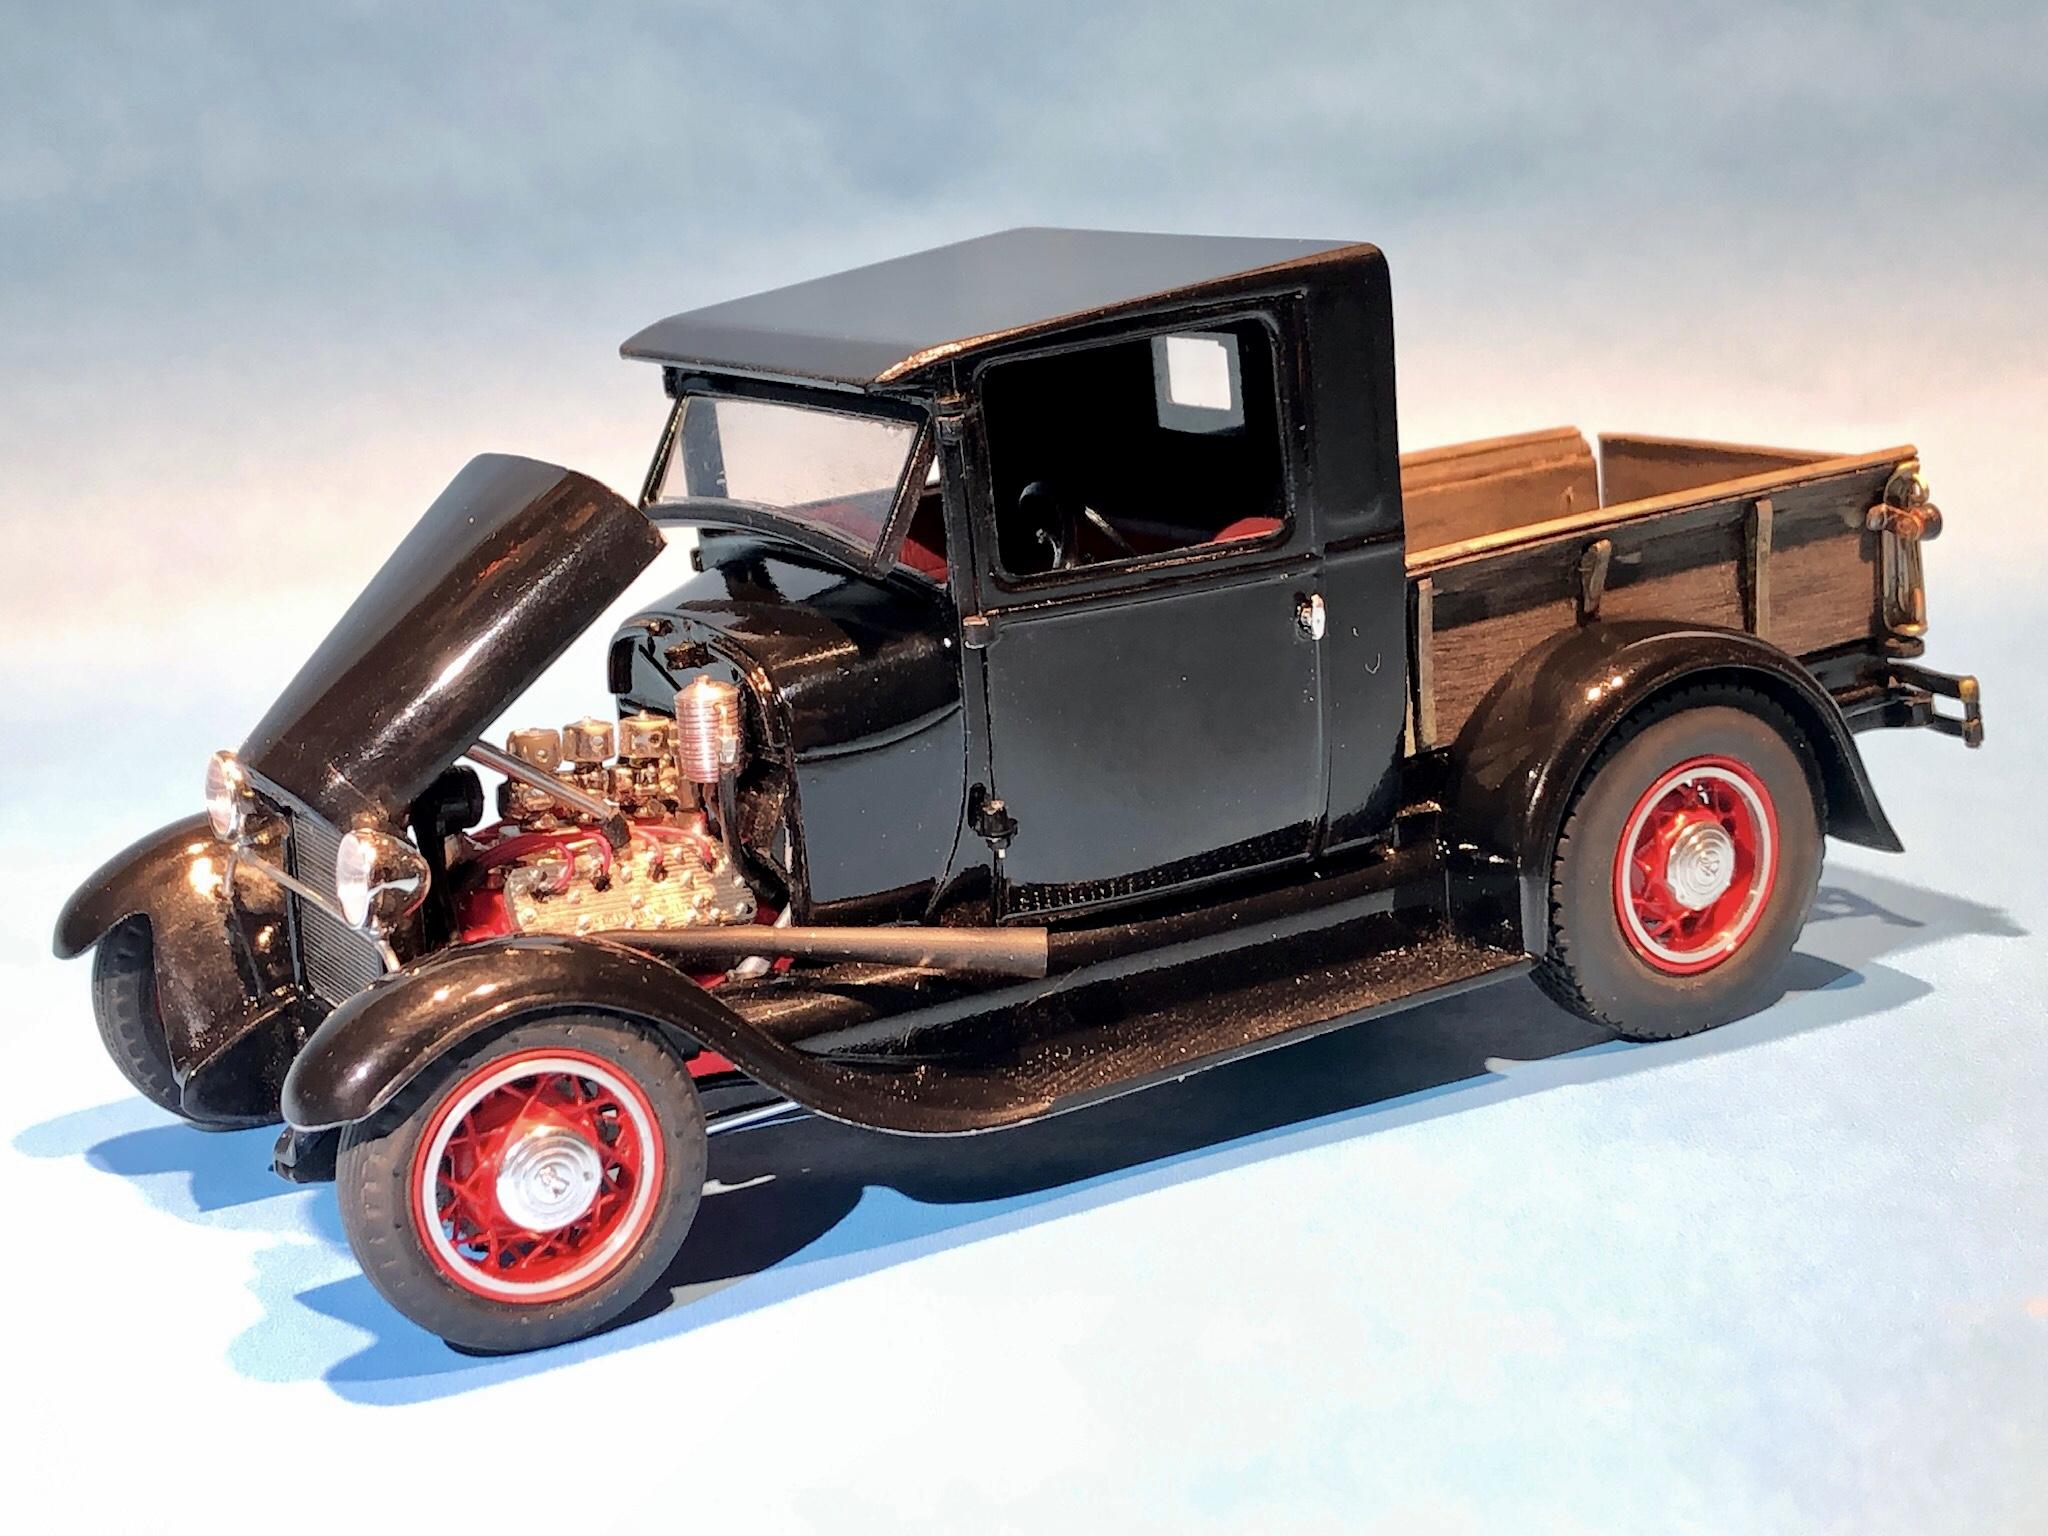
Thanks for your interest Al. I hate to admit it, but under hood detailing is really not my thing, and there is still some things missing, like hoses, battery…. I have one pic that I took of the open hood, and I’ll share it now. Maybe someday I’ll go back and add the missing things under the hood, but at least for now, this build isn’t likely to ever go any further than my display cabinet in my basement.
-
Thank you very Much Francis! I bought this kit when it first came out in 1969. The original price on the box is $2.00. I started to build it at the time, but my skill level back then was severely lacking, to say the least. I had assembled the engine, and used sewing thread for wires. A few years later, while I was still living in my parent’s home in Michigan, Tim Boyd stopped by one day. We were looking at my fairly meager kit collection, and he selected this kit, along with the hardtop version from the same year, to look at. I was extremely embarrassed for him to see how badly I had butchered both kits. Years later, I decided to do something about that. The hardtop is beyond repair, but offered several unused parts that along with the Chevelle, and the 442, combined to allow me to complete this version in a manner that I find a little less embarrassing. I agree with you Francis. This particular body style, along with the 66-67 are my favorite GTOs, although I am a big fan of all GM A-bodies of the 66-82 era. TCOTT