foghorn62
-
Posts
376 -
Joined
-
Last visited
Content Type
Profiles
Forums
Events
Gallery
Everything posted by foghorn62
-
64 Dodge D100 Pickup Pro Street
foghorn62 replied to AmericanMuscleFan's topic in WIP: Drag Racing Models
I totally agree with Joe’s comments. The word “precision” comes to mind in every aspect of this model. I have to believe there is not more than a couple thousandths tolerance anywhere in this build. BTW, those bolts are called “carriage bolts). TCOTTC -
Vintage Top Fuel FEDs, 1:16 brass chassis
foghorn62 replied to Mike Williams's topic in WIP: Drag Racing Models
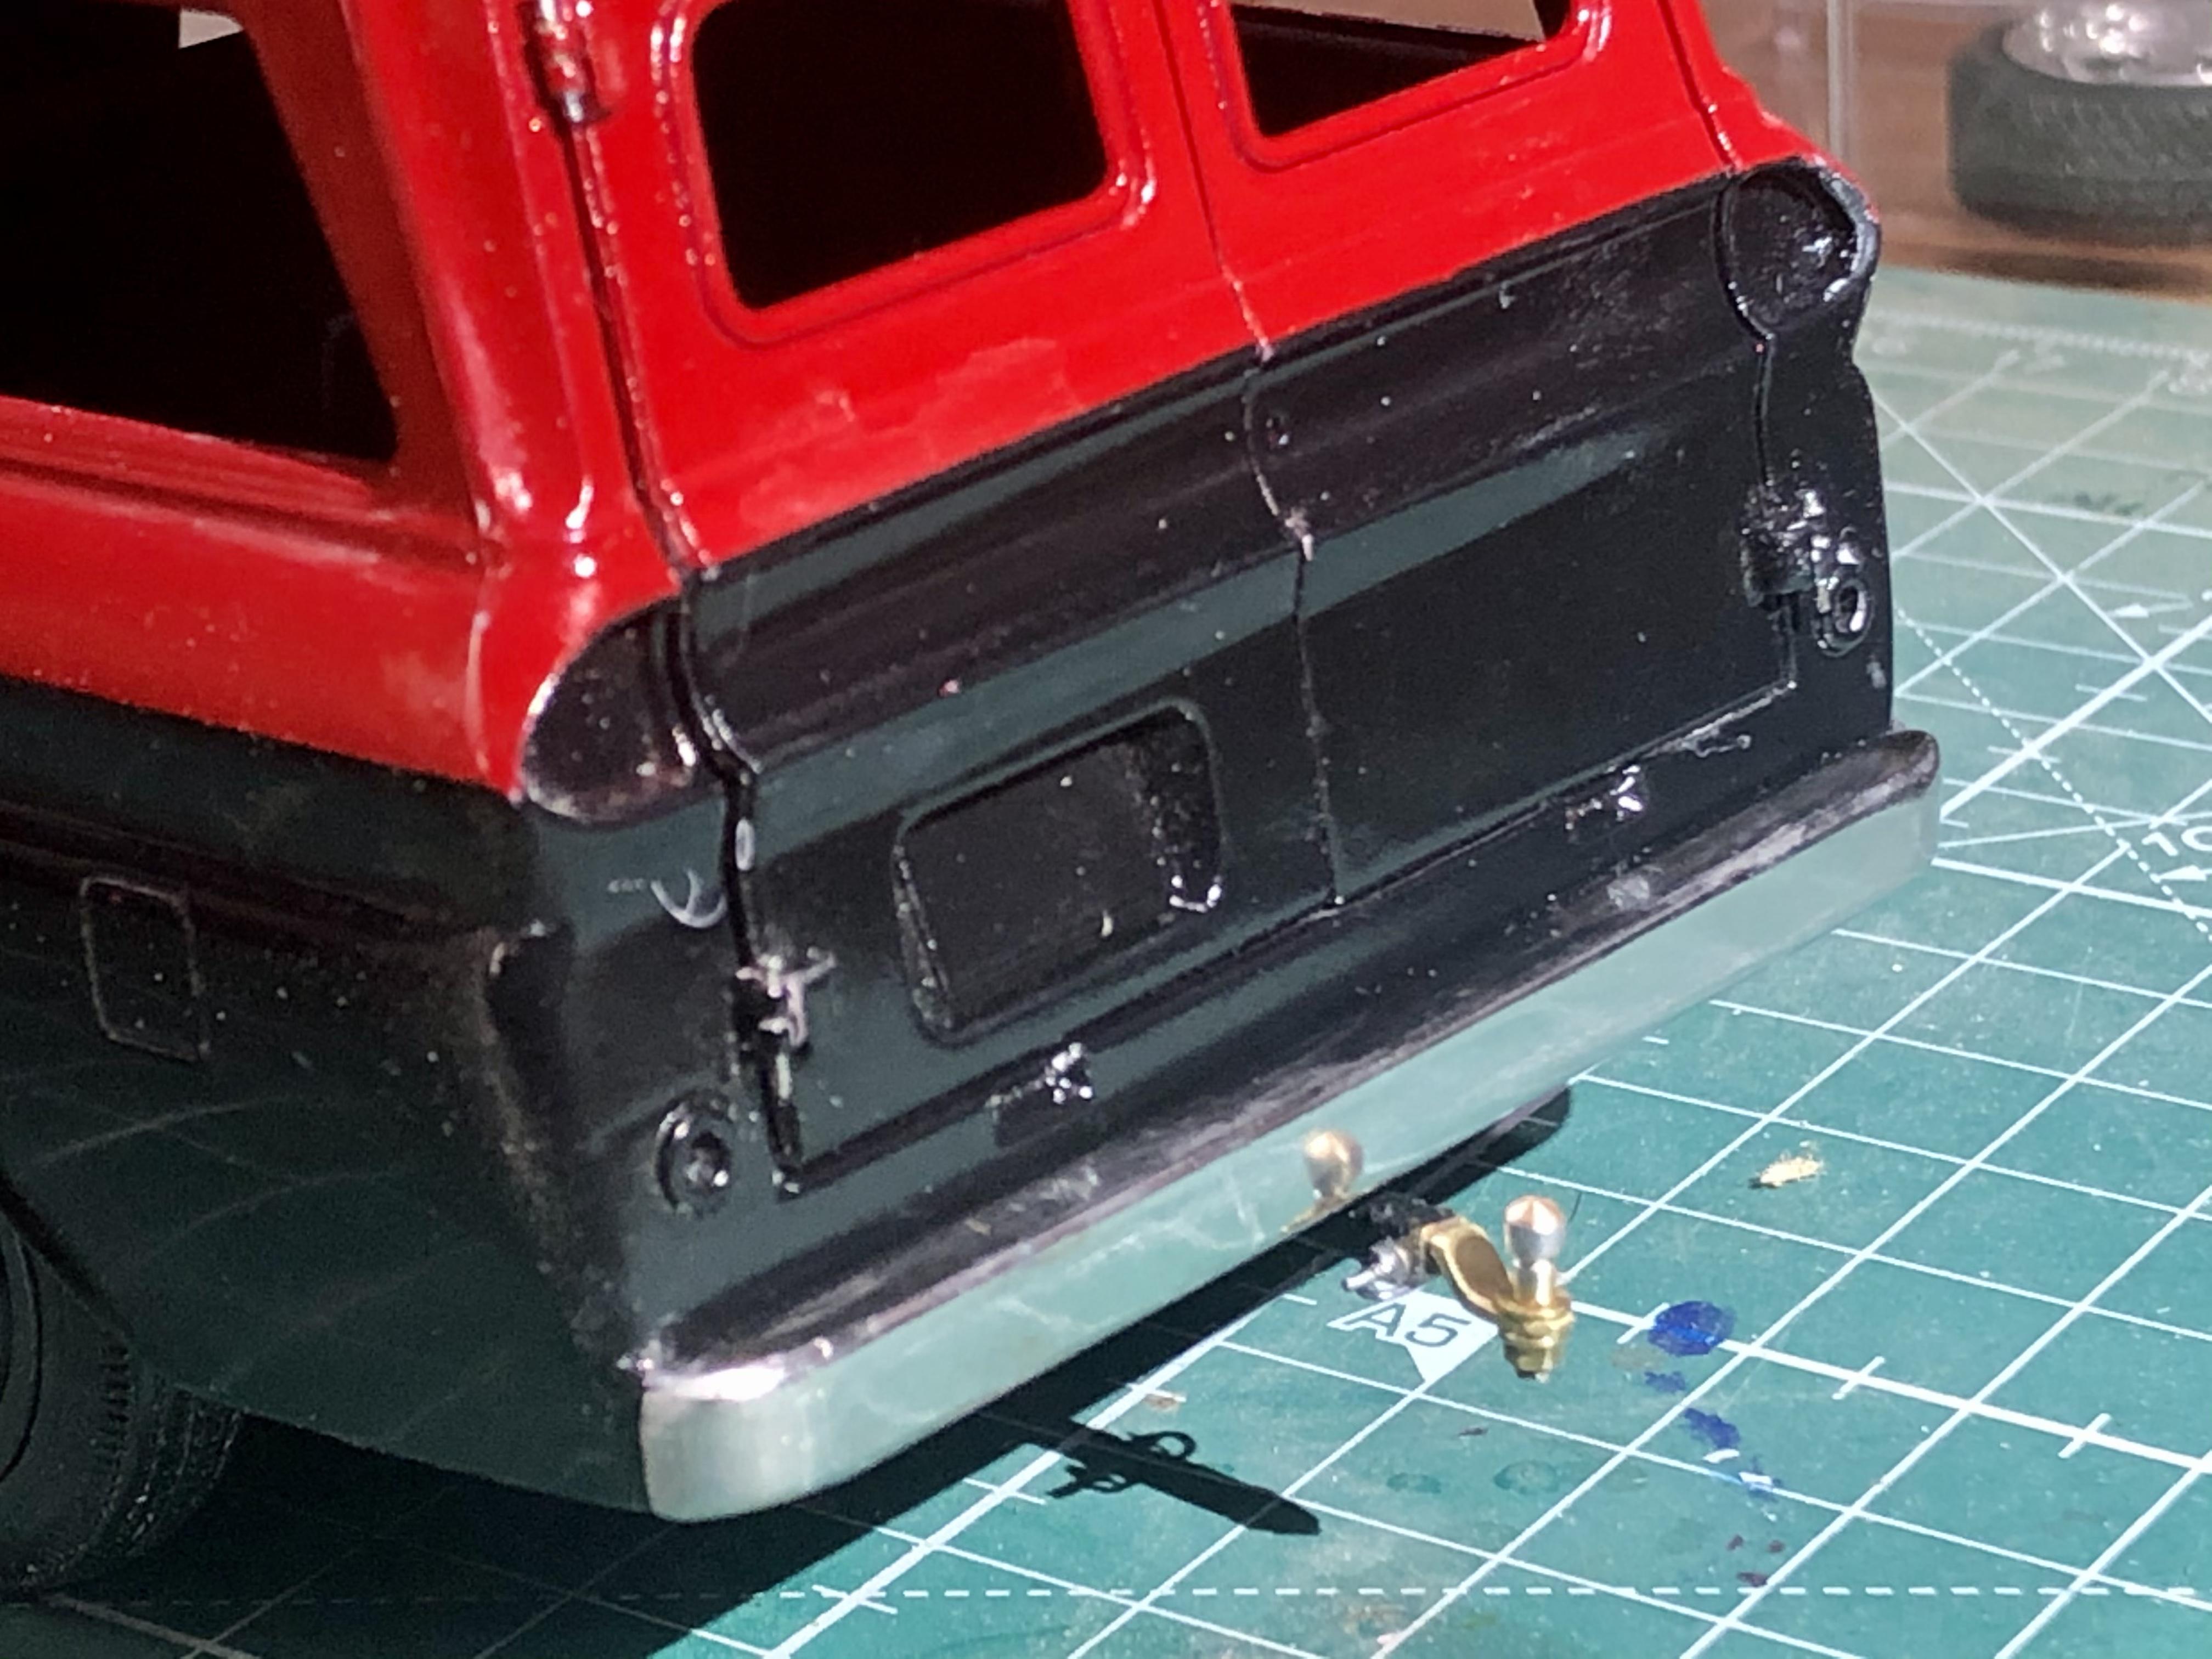
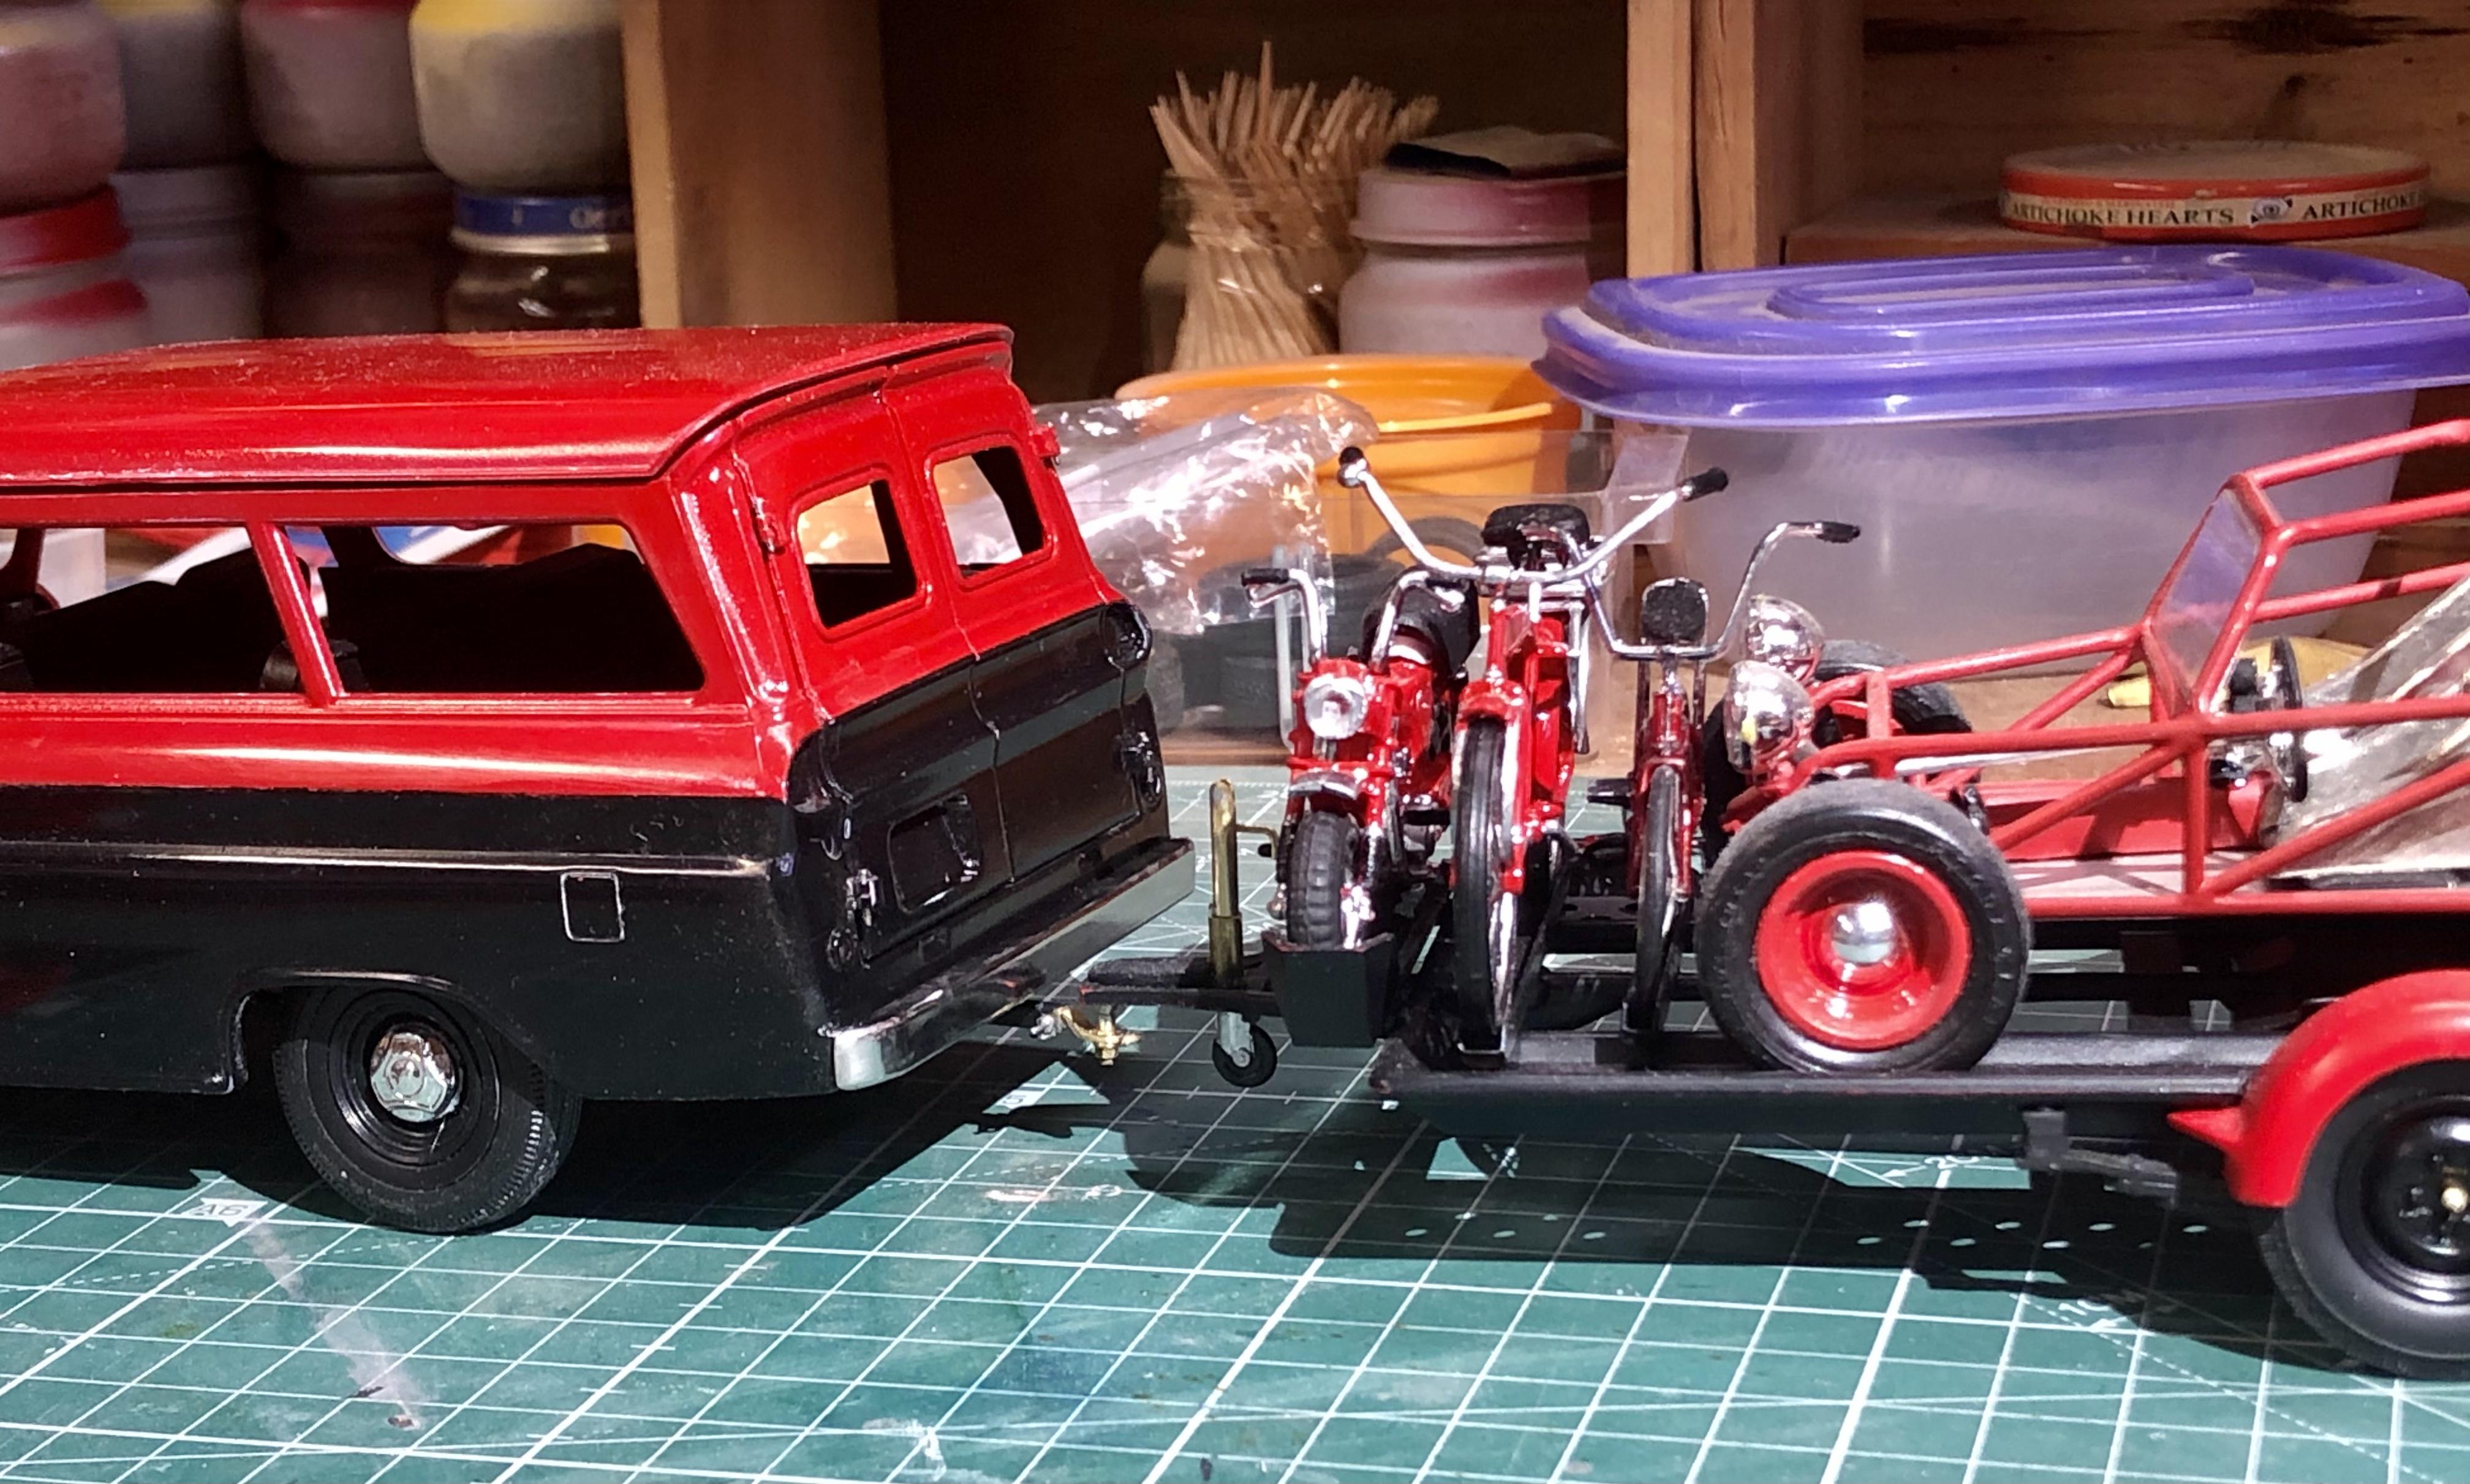
Ok guys, I’ve tried to resist putting in my $.02 worth, but I can no longer. Some of you are aware that I’ve taken a little break from my more in depth projects, to build a kit or two. One of which is the Revell 66 Chevy Suburban, which is to become a family truckster toy hauler to take the family out to the islands for Spring Break. Somewhere along the way, I managed to loose the rear bumper for the Suburban, so I made one out of brass C-channel stock. I was going to chrome paint it with Alclad II, but for Christmas my wife gave me one of those Caswell Copy Chrome Plug and Plate kits, so I decided to try that first. I’d had very poor results on my first couple of experiments with this stuff as a dip, so I really had my doubts. This time however I decided to read and follow the instructions, use the wand supplied with the kit, and brush the plating on instead of dipping the part. Who’d a thunk that reading instructions would make that big of a difference? The secret is to have your part spotless and shiny prior to the process. What do you think? Notice in the closeup pic, the reflection of the hitch ball in the bumper.
-
Thank you very much for your kind words Bernard! It thrills me to know that you find some of my work inspirational. If you do choose to follow that inspiration in styrene, or any other medium for that matter, I hope you’ll post it here where we all can see it. I get much of my inspiration from other modelers such as yourself, and I am always looking for ideas. Thank you very much Bob! Thank you very much Michael! That’s where I got started working with brass, soooo many years ago. My friends and I would race 1:24 scale slot cars at out local hobby shop where we rented lane time by the hour. We built sour side winders, angle winders, and straight liners chassis, out of brazing rod, using a propane torch. It wasn’t until I learned about flux that I discovered it can be done with a simple soldering iron. Much easier to control the heat. Thank you for the kind words Sonny! If you’ve started, don’t stop. The more you work with brass, the more you’ll like it. Thank you very much Harry! I don’t know that I have mastered it yet either. There are times when I have to start over.
-
64 Dodge D100 Pickup Pro Street
foghorn62 replied to AmericanMuscleFan's topic in WIP: Drag Racing Models
Just WOW Francis! Assembly is always nerve wracking for me. Somehow, I have to believe you’ve got this covered. -
Vintage Top Fuel FEDs, 1:16 brass chassis
foghorn62 replied to Mike Williams's topic in WIP: Drag Racing Models
The wheels are beautiful Mike! So much better than the plastic ones. I’m really anxious to see how they come out after they are chrome painted. I really wish I could find a way to have my small parts chrome plated, without sending them across country and waiting for them to come back. The gaps are a bit of a surprise. The process that you came up with certainly didn’t sound like that would happen. Since you are painting the wheels, you can fill the gaps and they will look fine. I don’t usually do bicycle wheels, so I am able to turn outer and inner rims with a little flange inside for the wire rim to sit, where you wouldn’t see the gaps if they are there. I can’t imagine doing that on such a skinny wheel though. Especially in the 1/25 scale that I usually work in. -
Awe come on Tim. It’s just crying for a flatty. TS
-
64 Dodge D100 Pickup Pro Street
foghorn62 replied to AmericanMuscleFan's topic in WIP: Drag Racing Models
So what is it about your work that makes it a cut above everybody else’s Francis? There are lots of people that do awesome detail, but there is something about your work that makes it so very interesting. It’s the fit and precision with which everything you do is executed. It is just a marvel to behold. Gluing in the floorboard seems like a relatively simple task, but it is one that many struggle with, yet you have spent so much time and effort to make it right in advance, that yours fits perfectly. Well done! TCOTTC -
Hi Mike, I guess I need to check back on my posts more often, because I am just now noticing your comments and questions. I’ve actually been a member of this forum for years, but I only recently started to get active, due to the presence of a few friends, and I need to get used to the way it works. Quite a bit different from the FB groups that we are used to. Thanks for your comments on my 41 GMC, AKA “The General”. It does not currently run, although it wouldn’t take much to get it there. It has a brand new Chevy 292 Inline out of a crate. It has never run. The engine is coupled to a Chevy 700 r4 automatic overdrive trans, and a Currie 9” rear end. The frame has been boxed, it has a TCI Mustang II type independent front suspension, and four wheel disk brakes. There are a lot of other goodies that I have added as well, but just as I was getting it all together, my wife and I decided to up and move from Texas to Vermont. The General has been sitting in the garage since it got here, which is going on four years now. One of these days...
-
64 Dodge D100 Pickup Pro Street
foghorn62 replied to AmericanMuscleFan's topic in WIP: Drag Racing Models
I am at a loss for words Francis, I have completely run out of superlatives to describe your work! Every post gets better than the last. I’ll just get back on my tricycle and hand out some more candy. TCOTTC -
68 Charger rear-engined late Hemi Pro-Touring Concept
foghorn62 replied to Claude Thibodeau's topic in Model Cars
Wow Claude, you are rapidly becoming one of my favorite builders! The variety of subjects in your catalog is refreshing indeed! How do you go from a 56 Ford Pizza Delivery (which I absolutely love), to a multi engine sedan “Pole Delivery”, to a super sexy slippery slice of awesomeness like this? As Mr. Boyd eluded to already, we used to give high marks, and offer special awards in the old MPC series, for originality, because the sponsors were looking for ideas for new kits. Your creativity is inspiring indeed! -
Mid Engine Transaxle for LS Engine
foghorn62 replied to Erik Smith's topic in Model Building Questions and Answers
I believe someone already mentioned the 3D printed one that Ron Olsen has on Shapeways. If you’re interested, here is a picture of one of those, mated to a LS3 also from him.
-
64 Dodge D100 Pickup Pro Street
foghorn62 replied to AmericanMuscleFan's topic in WIP: Drag Racing Models
Ok, now I am officially jealous, as if I wasn’t before. You are a man of many talents my friend! You mean everyone should have access to an AGFAimagesetter? TCOTTC -
64 Dodge D100 Pickup Pro Street
foghorn62 replied to AmericanMuscleFan's topic in WIP: Drag Racing Models
You have a classic case of “Model Builder’s Bench. I have four 2’x8’ work tables in my build area, and I wind up doing the majority of my work in about a 6”x6” space. tcottc -
64 Dodge D100 Pickup Pro Street
foghorn62 replied to AmericanMuscleFan's topic in WIP: Drag Racing Models
Ah, good point. .07 would be a tad on the small size. Of course to my eyes, .7 are tiny enough. So you are using basically .5 unthreaded studs? Do you get those from RB Motion, or do you have another source? .5mm works out pretty close to .5” in scale. I don’t think you would want anything smaller than that for this application, would you? -
64 Dodge D100 Pickup Pro Street
foghorn62 replied to AmericanMuscleFan's topic in WIP: Drag Racing Models
Sweet! Are you using the .07MM nuts and bolts Francis? TCOTTC ? -
Yeah, I had that same thought when I saw your Alan. But using the AMT kit, my boat is only a scale 18’ long, and I want to try to place the engine as close to mid ship as possible. I don’t know a thing about boat design, but I’m guessing that a boat will plane out better if most of the weight is not all the way in back. It’s only a model, I know, but these are the things that I think of. As it is, the windshield will wind up being about 1’ further back than the one in the kit.
-
Alan, I really like what you’ve done with this so far. I started a similar project probably about the same time you started yours, using an AMT 62 Tbird, on an AMT 3 in 1 Boat Kit hull. Like yours, it’s been an on and off, (more off than on) project ever since. I really like that you extended the bow further and set the cockpit further back. It gives it more of an offshore racer look, while mine is more of a runabout. I’ll be following your build intently. Maybe it’ll inspire me to finish mine.
-
64 Dodge D100 Pickup Pro Street
foghorn62 replied to AmericanMuscleFan's topic in WIP: Drag Racing Models
You can’t turn your back for a minute without people talking about you Francis. It’s all good though, you are still master of the bar. your friend, The clown on the tricycle.? -
Vintage Top Fuel FEDs, 1:16 brass chassis
foghorn62 replied to Mike Williams's topic in WIP: Drag Racing Models
Mike, every time I look at your work I learn something new. I’m with Francis. A steel plate covered with graph paper, or a printed plan, and magnets to hold pieces in place sounds like a brilliant idea! I’m still using a good flat piece of plywood, with my plans on top, and heavy pins, finish nails, or masking tape to hold the parts. Your way sounds much better. I don’t remember who it was in one of the earlier comments, but he asked if you use a torch. I’m not sure if you answered his question, but I’ll jump in and say that a torch is way overkill for this type of work. A cheap soldering iron is all that is necessary, or for a few more bucks, a variable temp unit is helpful. Of course, one could spend more and get a resistance unit like Francis. I’m still trying to decide they are of major benefit. TS -
I beg your pardon!
-
Delete
-
No, that’s a diecast piece. I have on my list of projects a scratch built metal teardrop, but it’s not high on the priorities, so we’ll see if it ever gets done. My wife bought me that one for Christmas a couple of years ago, so it fits the need for now. The story on that truck, is I built it about fifteen years ago as a styling buck for my 1:1 41 GMC, to try out paint colors, and wheel combos. I was living in Texas at the time, with plans to retire to Vermont to where my wife had already moved. I had planned to build or acquire a teardrop, finish the GMC, sell whatever we had left in Texas, say adios to my coworkers, take the dog, and spend a summer traveling around the country, and arrive in Vermont in time for the leaves to change. Unfortunately, health issues got in the way, and those plans didn’t all work out, but we did ultimately retire and move to Vermont, and I still have the GMC, albeit still not finished, and I never got the teardrop. Here is a pic of my 1:1.
-
Never too late to start. You might find it to be a lot of fun!
-
Thanks Kerry!
-
Yup, that was #30. It was only the second (and last) NNL that I was able to attend, and I was only there as a spectator. I was living in Texas at the time, and happened to be visiting in the Detroit area that weekend. I had gotten ahold of Tim Boyd, and he suggested I try to get down to the NNL, which I did. You can tell by our facial expressions that we were all having a great time!