

Cato
-
Posts
2,674 -
Joined
-
Last visited
Content Type
Profiles
Forums
Events
Gallery
Everything posted by Cato
-
Beautiful detailing Harry.
-
Glad you followed through Bo. Welcome and thanks for sharing. Your workmanship is beautiful and you obviously know the hardest part of Pocher building; problem solving.
-
With that attitude, it won't be crowded at your wake Scott....
-
I'm waiting for a masterpiece too Skip; wish someone would build one for me... Don't have any 'glamorous' stuff to show but work has gone on. With the car in the state of the last picture, I've been trying to engineer the boring stuff; the fasteners that join major assemblies together. The car has so many changes from Pocher 'stock', that simple Pocher screws don't work or locations are in different places than where originally designed. The fenders are rotated and the trunk has new inner structure needed when it was all cut up. Can't just drill a hole somewhere without knowing what you're going into. In particular, the rear fenders have to be screwed to the trunk (they already are to the main body) or the chassis to pin them flush to the panels. The trunk has to attach solidly to the back of the main body and chassis too. And the body lower front fastener bolts will be in a new location since the body was moved rearward 5mm. Of course, this all has to be removable for final finish. So I'm noodling around with brackets and trying to find locations for studs or bolts. Not fun, exciting work. I AM about to lay-out and fabricate the brass side window frames so they fit the door's new contours. At the same time, the internal door latch and handle mechanism needs figuring too. I have Marvin's beautiful outer door handles and they go in nothing like the Pocher parts. Everything takes figuring and testing from here on out. Sometimes I really miss the simple assembly of parts like chassis and engine where you get visible results and a little gratification very quickly. Photos and progress soon.
-

Problems with Tamiya primer and color.
Cato replied to Zoom's topic in Model Building Questions and Answers
Excellent Bo. Look forward to more Pocher builders here! -
Problems with Tamiya primer and color.
Cato replied to Zoom's topic in Model Building Questions and Answers
Bo, Not sure why you are shooting white on the firewall unless it's a base for an aluminum finish. You may simply have not applied enough paint to even off the finish. It looks rather well as it is because it adds depth and three dimensionality to the raised parts. I would not be too concerned as when in place with parts on it and the engine in front of it, very little will be noticed. I invite you to post a work-in-progress of your build in the Big Boyz section. We have three Pochers in the works there with several others to come on board soon. Pochers are always welcomed here. -
VHT makes a 1:1 car header paint which I like very much. Goes on thin with great coverage and dries very quickly. The finish is hard and fairly flat but buffing a bit will get a slight sheen. EDIT: Does not harm bare styrene either...
-
Ahhh-forgot that detail. That's right; you used the cowl and fenders only. You're smarter than me....
-
Thanks and stay along Mike. And post your big scale builds soon; can't have enough.
-
Thank you Scotty, glad you likee. How not Pocher's fault Harry? You mean warps? My Rolls body had real dimensional differences between the two body halves and the doors also different sizes. Despite being injection molded in place in their body openings. And two completely different rear fender arches....
-
Sorry the pics are out of sequence. I'm having no fun with WYSIWYG. As you know Harry, you take nothing for granted in Pocherland. I hope this applies to the other classics but certainly the principle of checking is vital.
-
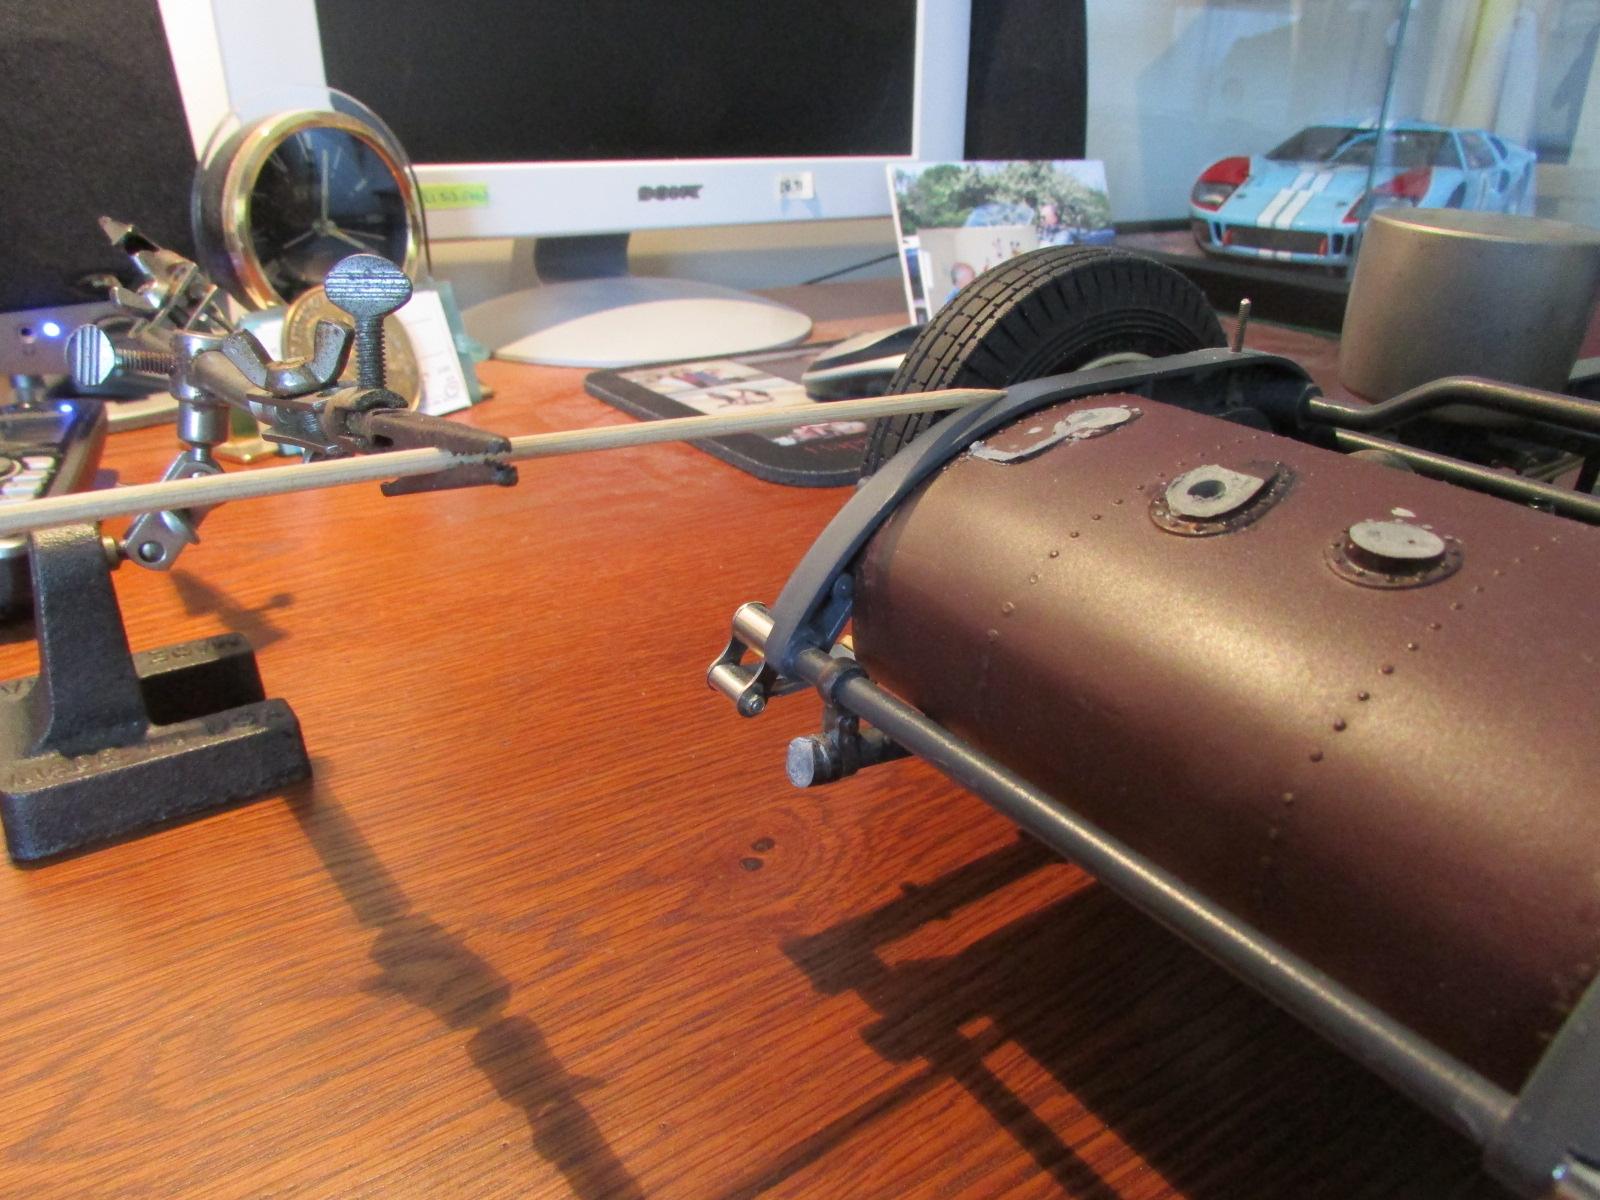
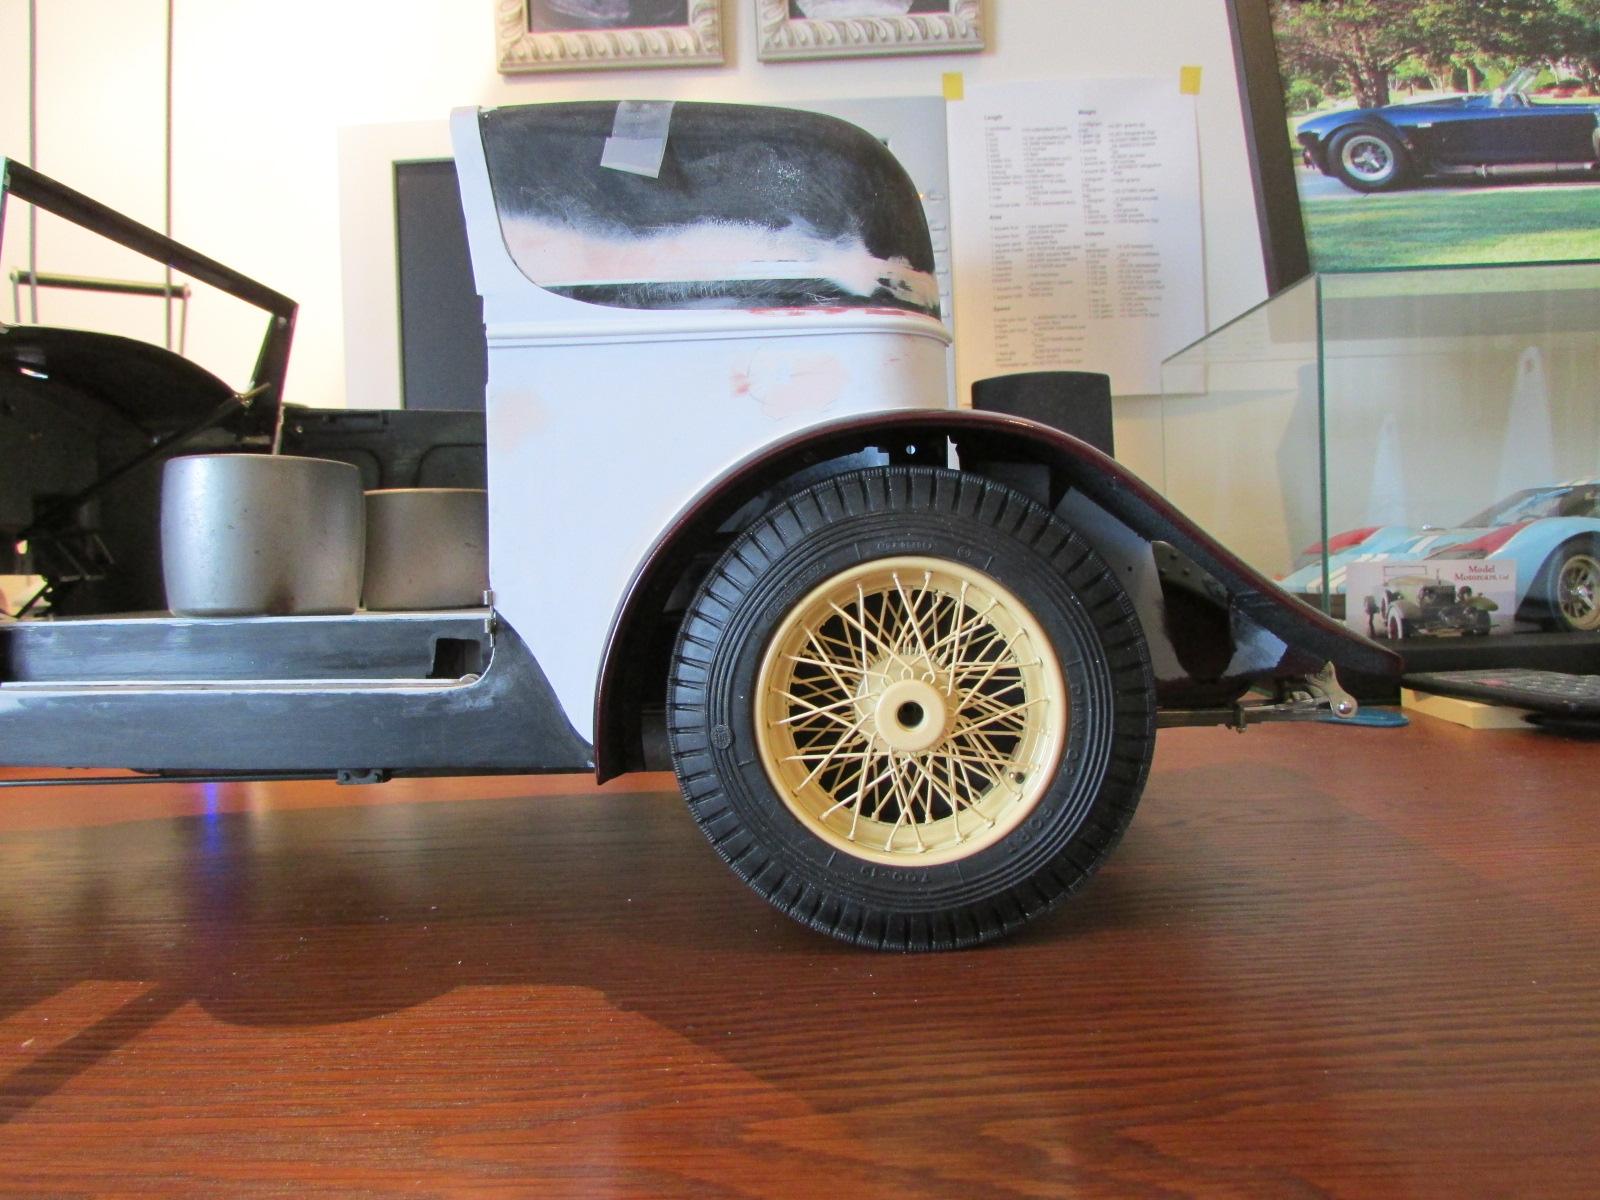
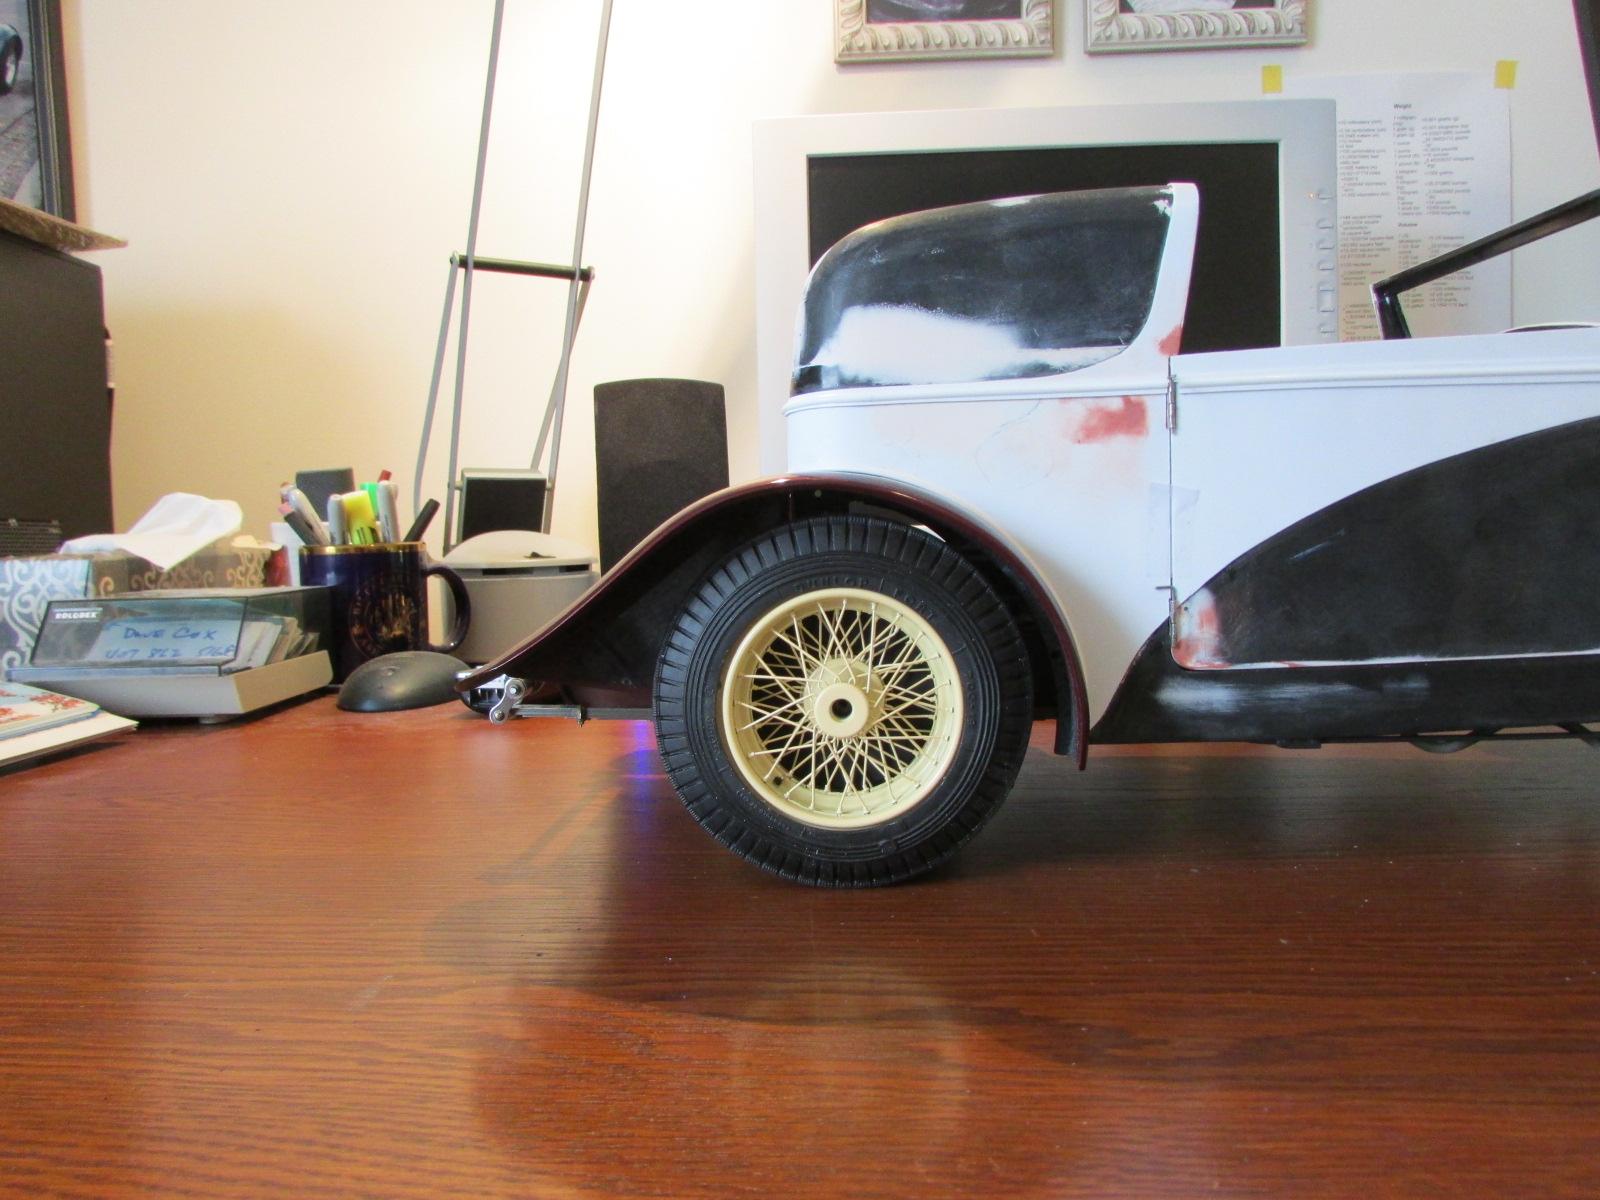
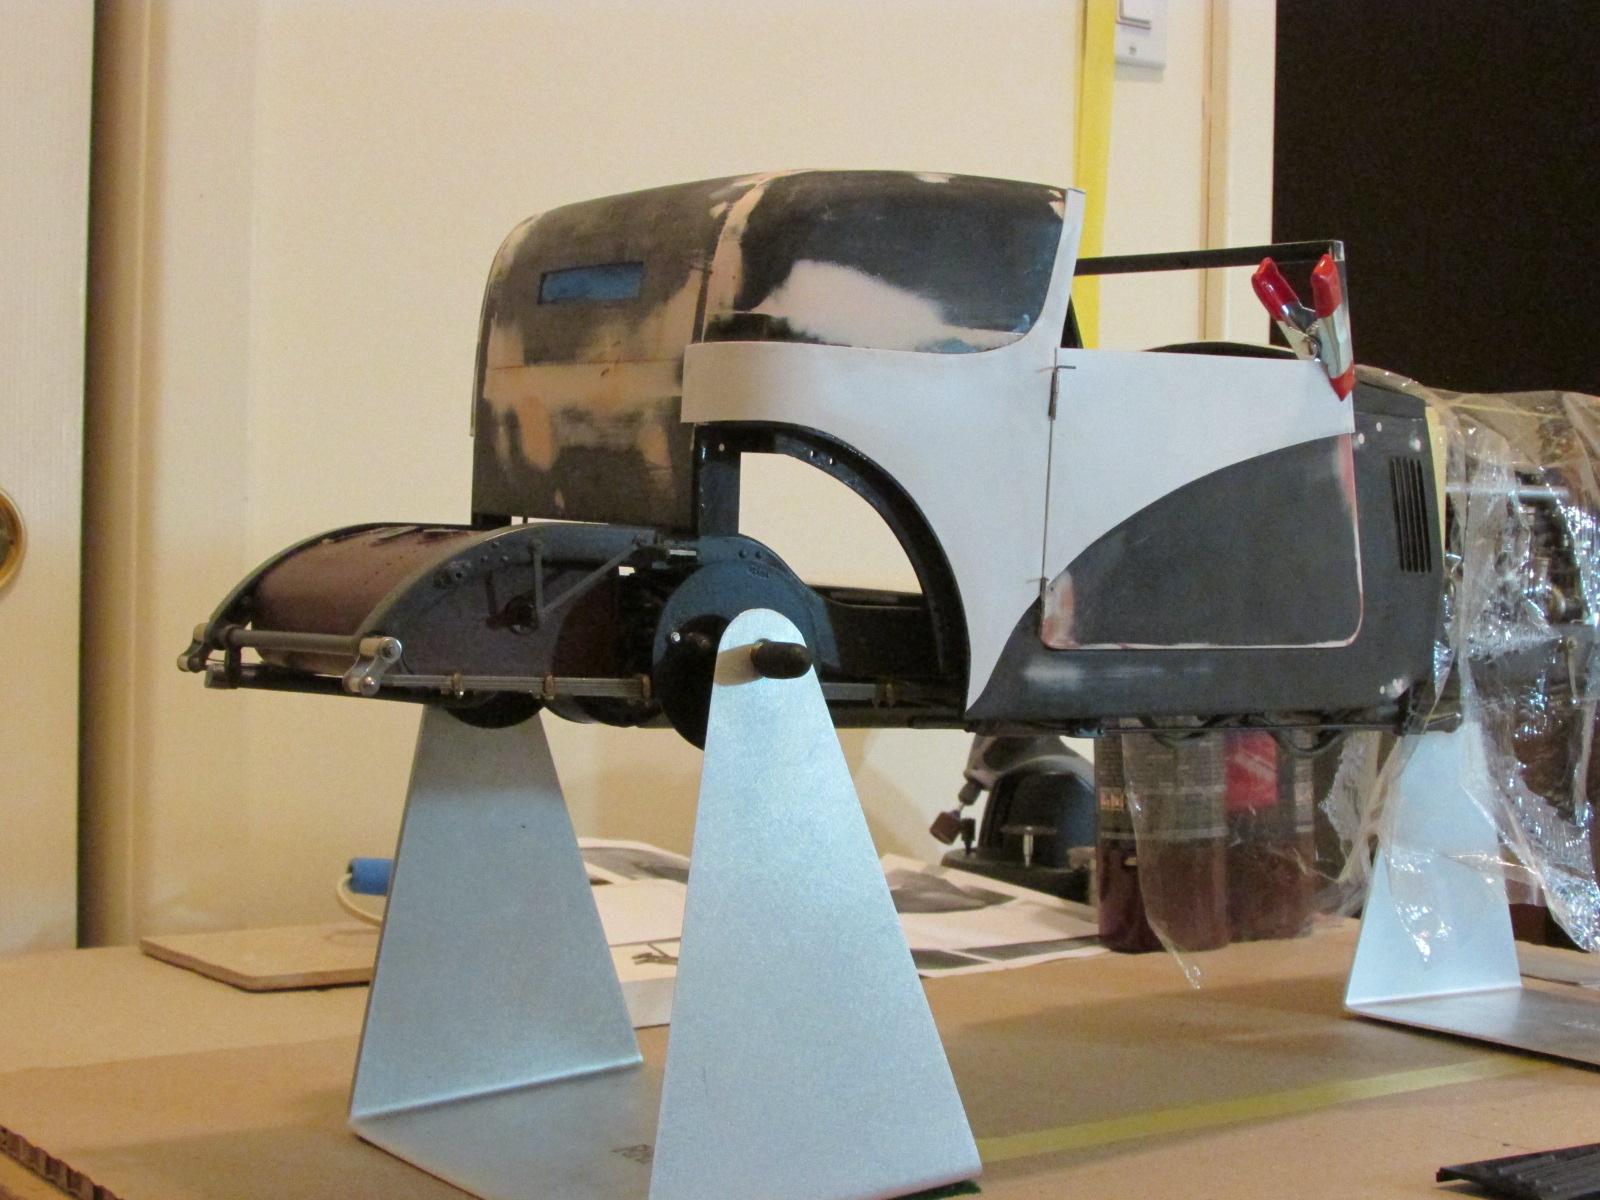
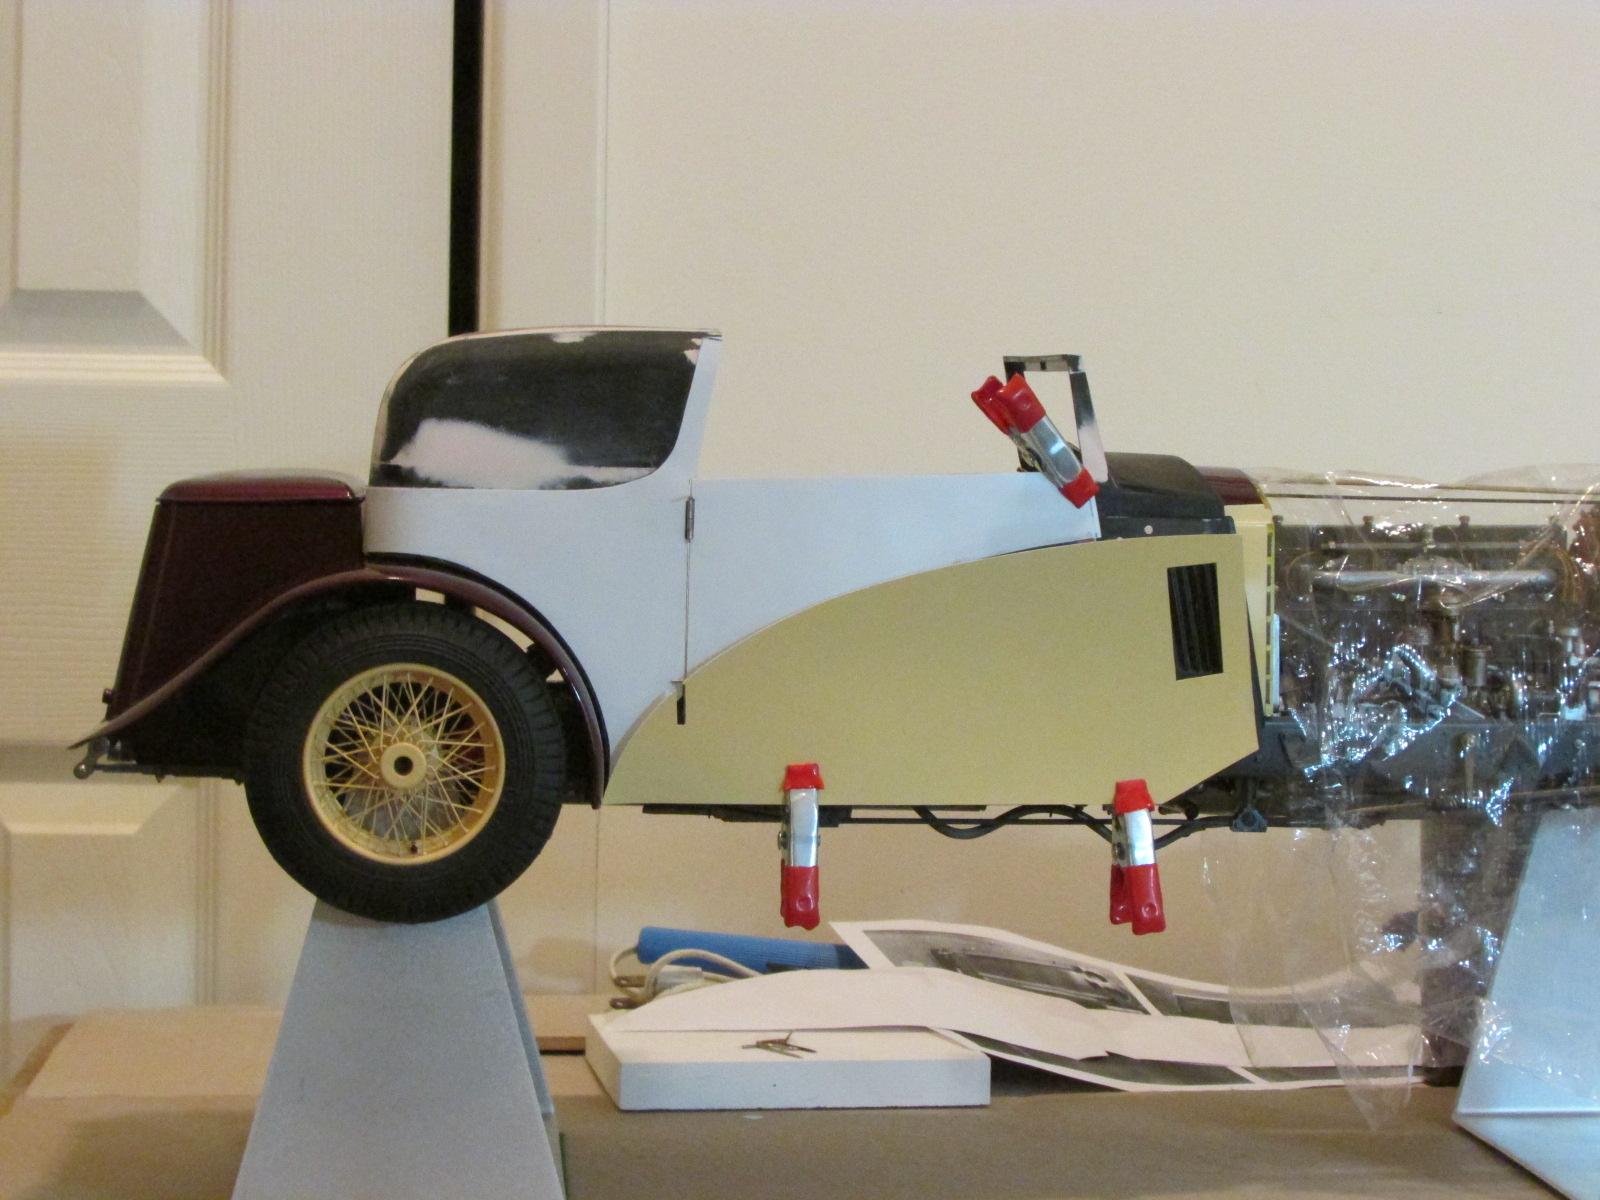
A REALLY important tip... This applies to Pocher Rolls' but other Pochers would benefit from the principle. Even smaller 'big scale' builds too. You can't see both sides at once but for the truly anal (who me?) you will get a model that stands the highest scrutiny. Plus it's something that makes viewers feel it's an accurate replica but they don't know why. It's taken for granted that cars sit even and level. Throughout all the mock-ups and test fits over time, one thing has consistently bothered me. The tire to fender gap in the rear has never been even side-to-side. I checked warps, mounting locations and dozens of other parameters. The solution came to me today. And it's simple as pie for anyone to check and correct. First mount the wheels in place and place model on a relatively level surface. I added 2, 1 pound weights for checking purposes to settle everything where it will be when bolted together and the full interior and body are on. A simple pointer (pointed bamboo skewer) clamped in an 'extra hands' soldering jig makes an excellent reference jig. Pick a location on the chassis and just touch the pointer to the surface. Repeat on the other side and note any difference. I then fabricated 2, 1/8 x 1/4 styrene beams and placed them between the axle top and a bracket on the chassis. I kept adjusting the length of the spacer until the low side matched the 'correct' side. EACH SPACER WILL BE A DIFFERENT LENGTH. I made a circular notch in the spacer to go around the the tubular location on the axle and made the flat top fit snugly into the chassis bracket. When all checks and adjustments were done and both sides equal, a coat of flat black and two dabs of Gel CA completed the installation. But not before full-dress with rear fenders on and comparing each tire gap. The reason for the disparity on the Rolls is the complex brake bracketry which locates the axle to the chassis by small screws and uneven friction at each joint. CA on those joins would not last under the model's weight.One side will flex more than another. Having a now-invisible prop of the proper dimension assures that a very visible area of the car looks correct. Seen in the last shot in near-full dress, all the proportions and lines are evident. I darkened the roof filler to make viewing a bit easier. I may, when I get to the 'fine-tuning' stage, remove the .062 shim in the front springs to get that fender back closer to the tires. For now, a full 'undressing' and perfecting all the panels for primer.

-
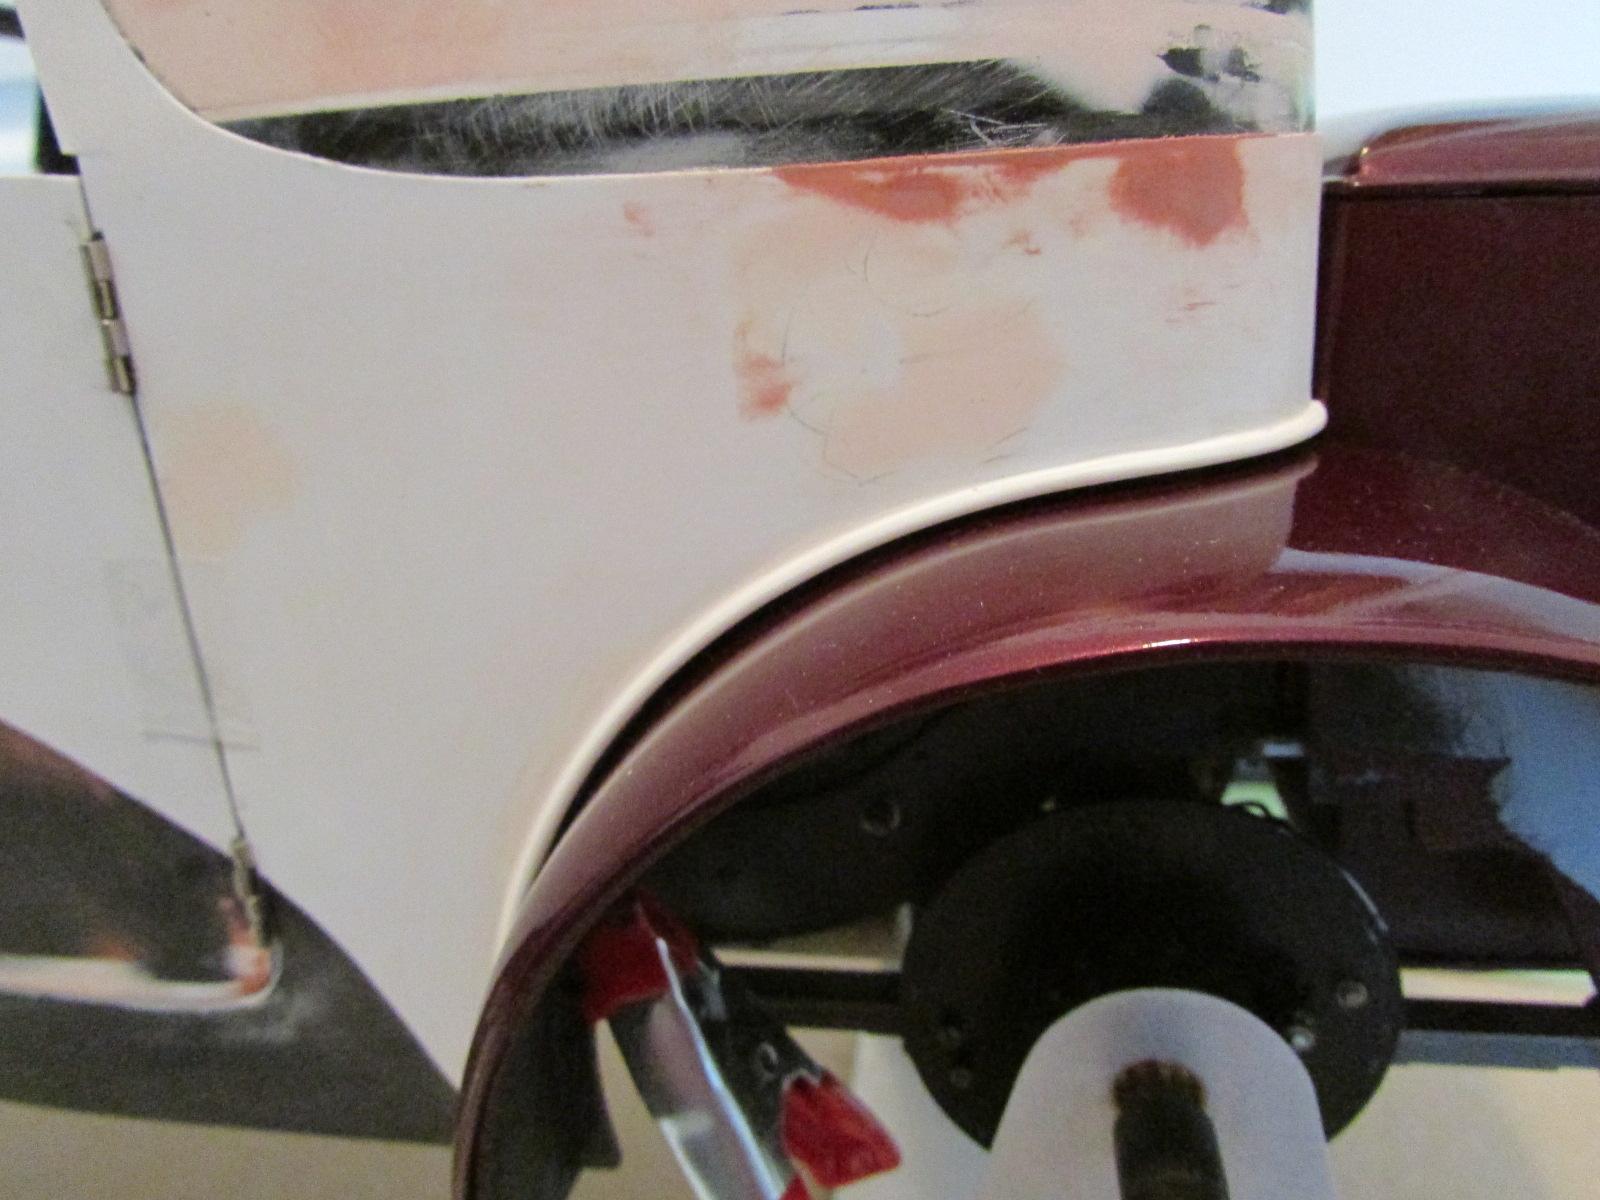
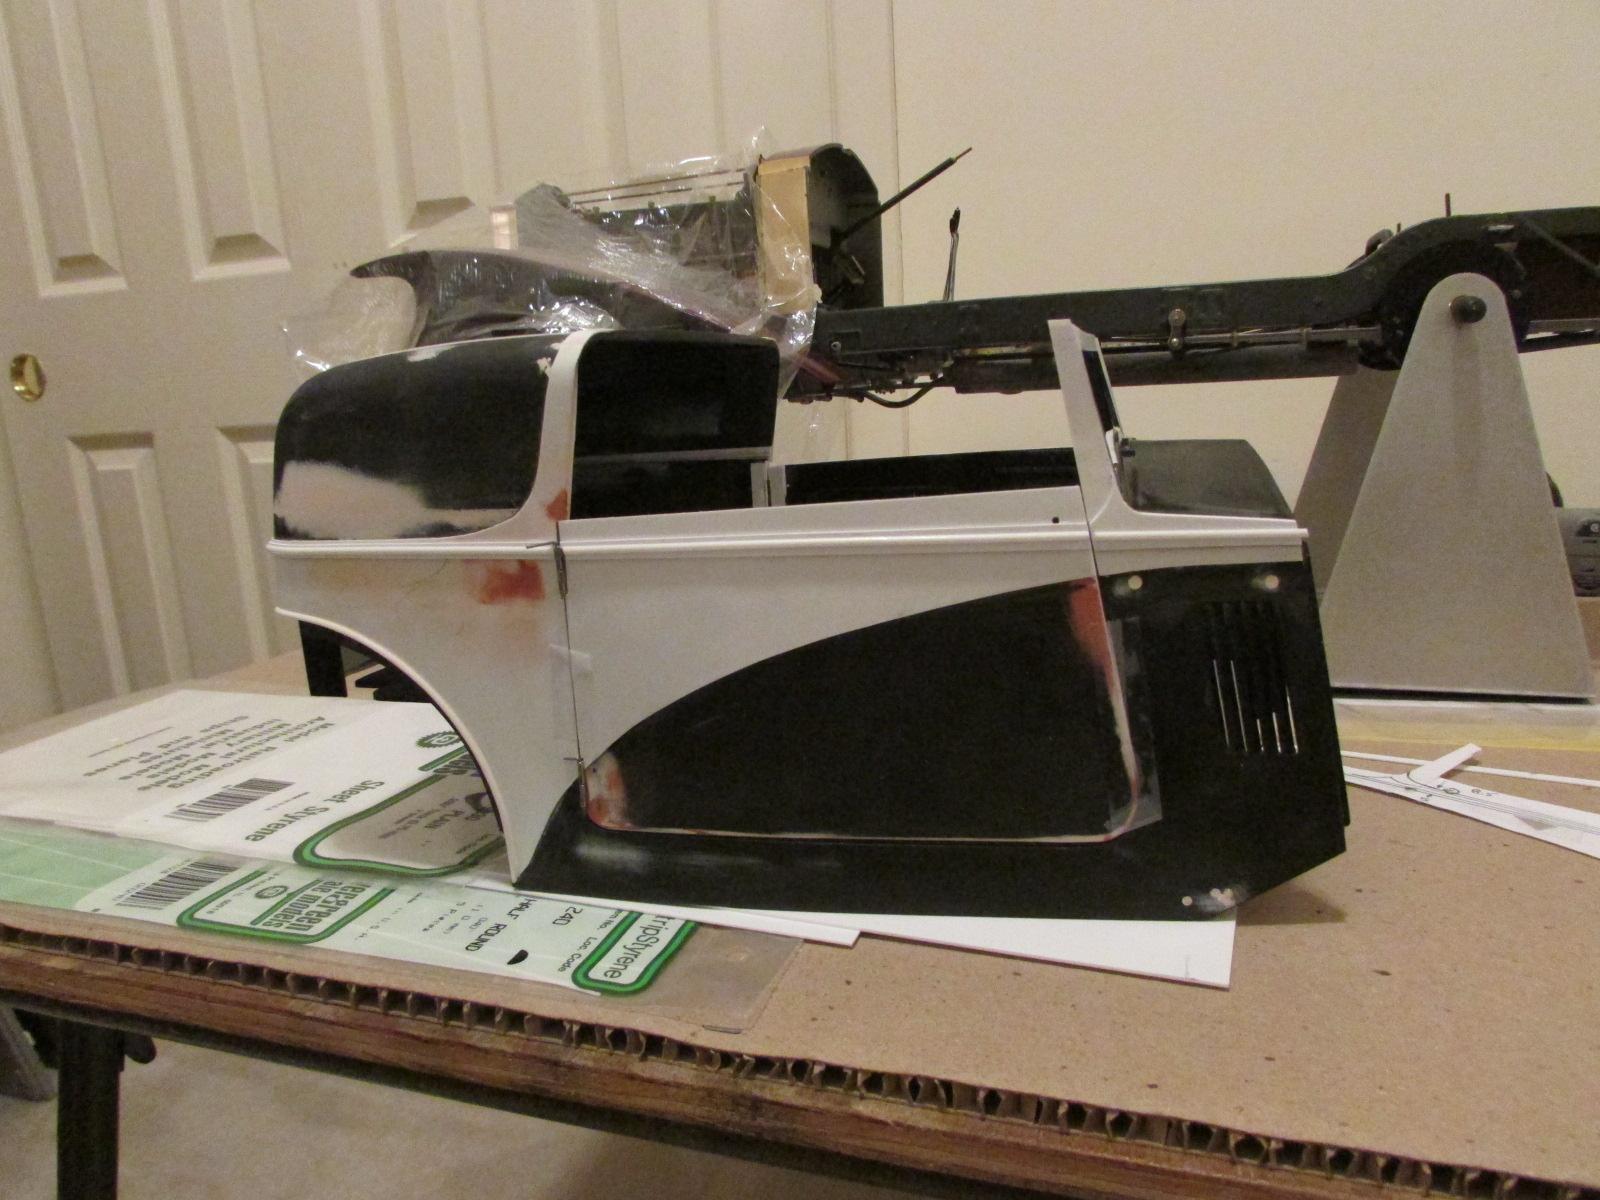
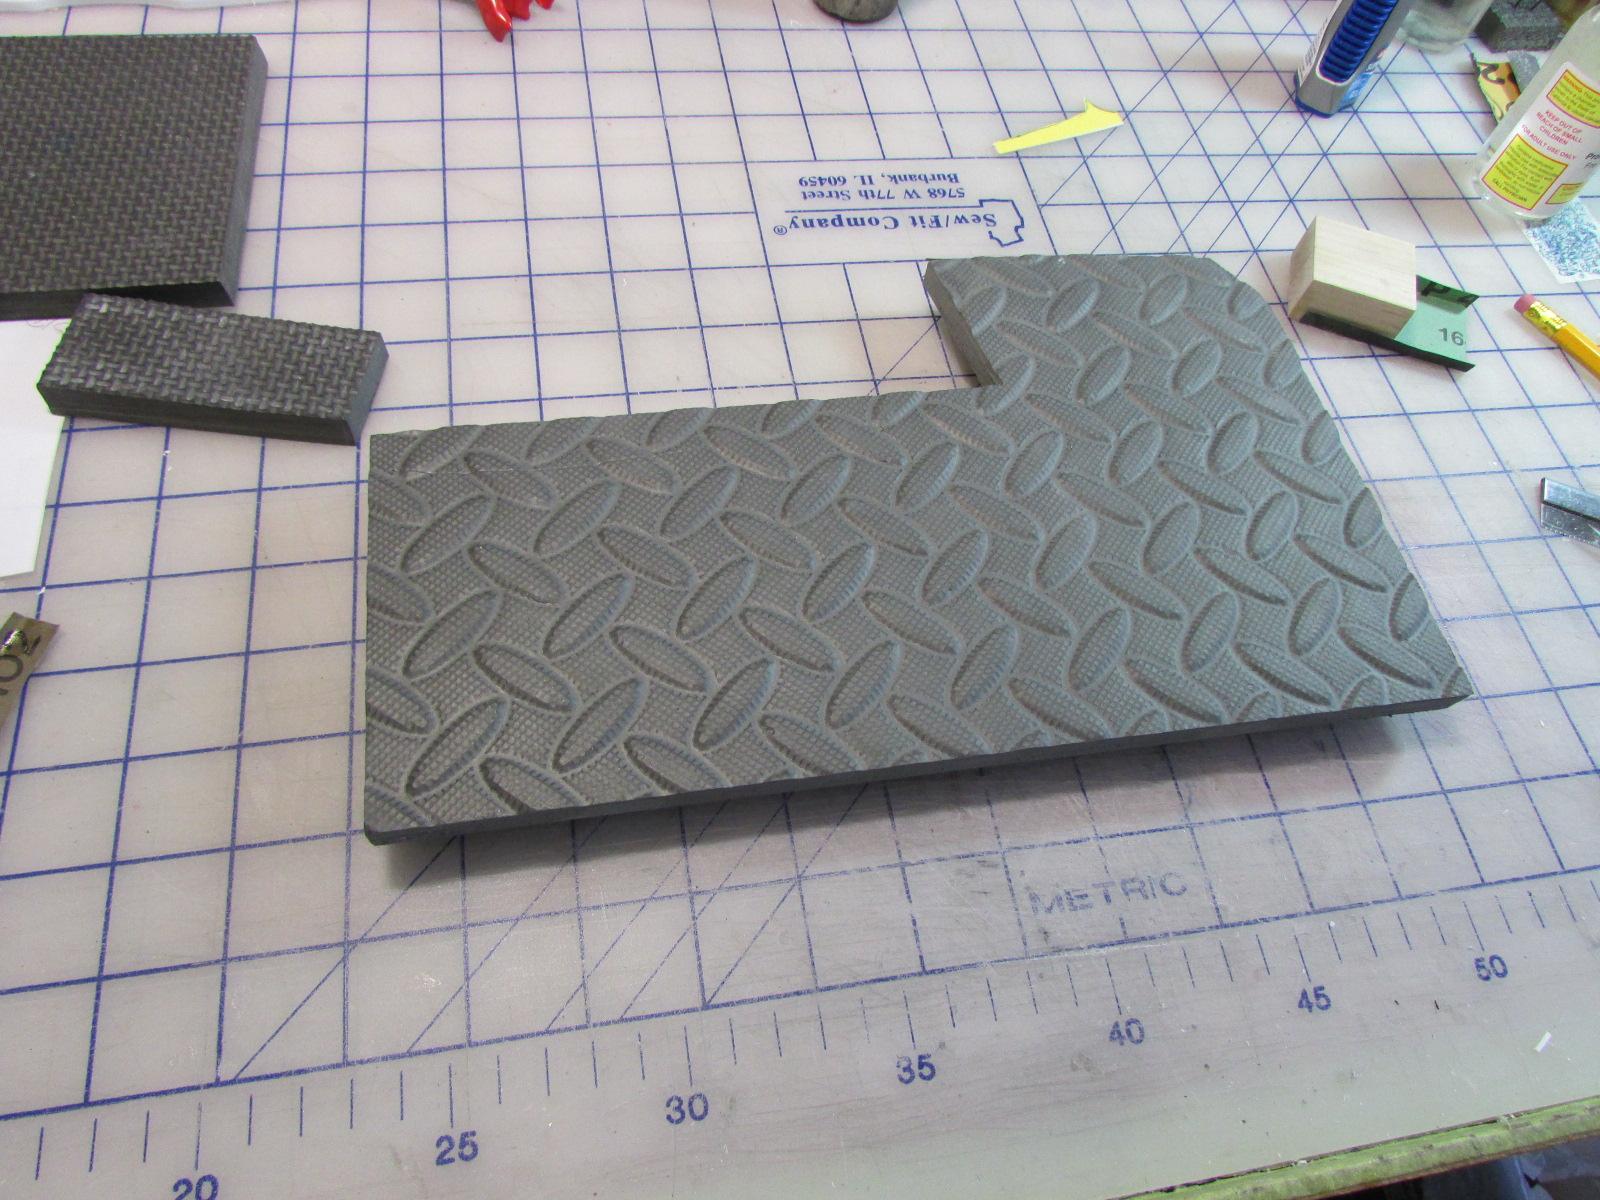
Coming together... With the look finalized, here is the first complete side with sweep and beltline. This cleans up the Pocher dip and hopefully adds to the swept-back look of speed. Some tips for those working in large scale: The belt consists of .030 strip cut 6.5mm wide at the door front to 3mm wide at the back edge. Atop that is .080 half round as a center accent strip. When attaching I used one full-length strip of 3M striping tape for a guide to get perfectly straight. Then using a tiny DROP of Gel CA at the front and rear edge of each strip, place in proper location. Double check for arrow-straightness. If misalignment is detected, it's very easy to slide a scalpel between the parts to break the bond, correct the alignment and reapply CA Gel. Then wick VERY THIN plastic weld cement to the top and bottom edges, pressing as you go. DO NOT SMEAR CEMENT on finished face. The .080 is applied the same way. I heated the rear edge of both joined pieces on a candle to pre-curve it around the body rear corner.. Then tiny Gel drops to anchor the strip around the curve. With cement and Gel, less is more. When doing large body work, especially in the finish stages, it's often easiest to work with the large body on its side or back. To prevent scuffing on the work surface (I sand to 600 grit just before primer) I made these foam surfaces cut to rough body shape. They are the 24" square work mats sold at the home supply stores and are inexpensive. I cut them into sanding blocks too for various areas where I don't want a hard wooden sanding block.
-
Cato, it's been a while since I posted here, but without a dout, that is just simply STUNNING! My hat's off to you sir and can't wait to see your future posts as you progress on this build. A fan. Cheers, Tim Thanks Tim and glad to have you along. I have been steadily working on the cladding installed above. It is important to get every join and line to flow smoothly around the form and that's what I've been doing. The body parts are so large, any flaw shows easily. Much time spent with 3M filler and constant sanding. It's just like 1:1 bodywork. Preparing to install the beltline so some pictures soon.
-
Thanks again Ben.
-
Ben, Thanks for posting. Is the shaft accurate, meaning no wobble? Or is the replacement bearing you mentioned better for accuracy?
-
Reinforcing soft rubber tires
Cato replied to sjordan2's topic in Model Building Questions and Answers
The cotton I advised Skip about, which is in my GT-40 tires has not depressed in 5 years. Nor my 935 after 26 years. Has it happened to you?
-
Yes, I think structurally on a 1:1 Rolls a crease on those big flat panels would strengthen the panels. But on the model, I did it because I like the raised edge which makes it 'sensible' to have a color break there. The shadow of the line appeals to me. I think the crease on the Bug is very attractive. Adds a nice visual element, flows into the fenders and again, a good reason for a color break. Will you one-color the whole car or do the sweep by just masking?
-
No more paper templates... Color sweep cladding now permanent on this side. Other side, cowl and rear panel tomorrow. Yellow just tacked on for viewing. Will be painted not cladding.
-
Reinforcing soft rubber tires
Cato replied to sjordan2's topic in Model Building Questions and Answers
Pack them with cotton balls. -
I just updated Firefox today and ever since, the homepage has a totally different look and operates much differently when selecting forum categories or threads. Before that it was fine. Not liking at all...
-
Then that action also instigated the depletion of your bank account which of course, you placed blame on me to your wife. I am already hated by enough women in THIS country, thank you...
-
I see Harry; you use the link symbol with image info between text. I've been using the 'drag files / choose files' link. Only loads the files below all the text body.
-
I figured your relative absence was the old adage; 'if you can't say anything nice...' Yep Scott, my work doesn't inspire like Harry's. Mine DISCOURAGES...
-
No Scott, the beltline is a raised stamping or molding used by coachbuilders to conceal or finish off an edge of joined panels or seams. Many like mine were doubled or had a chromed or pinstriped spear within. The raised element adds interest and breaks up slab-sided areas. It was often used as a break area for two-tones. Courtesy Koo, below are examples. Yeah, I see that changing the WYSIWYG is a dead horse now. The old way made it much simpler to make understandable posts for viewers who may not be familiar with what you're trying to show. And there's NO slowing down Harry, even with chained arms and legs. The only one who can alter his building pace is obviously his better half...


.JPG.cf8480a3e952e529e2e37df149ee6cc2.JPG)

.jpg.0347899e2d8bc4666da66e065c5cf6e9.jpg)
.jpg.733ca6468c3468c6343fd43bc041724e.jpg)