mrmike
-
Posts
5,324 -
Joined
-
Last visited
Content Type
Profiles
Forums
Events
Gallery
Everything posted by mrmike
-
That would help a lot,, but I just lay my piece of 1 1/2 inch masking tape down the center of the chassis and lightly spray my body color from overhead. This is a lot easier then if I attach the chassis to the body and spray paint it as one unit, and then take it apart to insert the interior, windows and any trim and then add any Bare Metal Foil afterwards.
-
Thanks Peter, Gareth, Stephen and Charlie! On larger flat surfaces, I take either a black Sharpie or a fine tipped brush and some black paint and add little dots in a irregular pattern to represent the wood better.
-
David aka Fury3 passed away in February 2019 at the age of 62. He was a member here on MCM, but he didn't like the atmosphere. https://www.legacy.com/obituaries/ohio/obituary.aspx?n=david-l-griebling&pid=191697429&fhid=4513
-
Just imagine a 1:1 Chrysler being assembled on the production line. The body assembly is quite different from what we get in the form of a model kit. When the body is painted, the chassis is part of the body assembly and the chassis is painted along the edges as the body gets painted. I have seen some models with the entire chassis (bottom of the entire body assembly) painted in one color and either the modeler doesn't care or they don't know how the body and chassis is painted. I have learned a lot from the late Fury3 aka Dave Greibling who once worked for Chrysler Corporation.
-
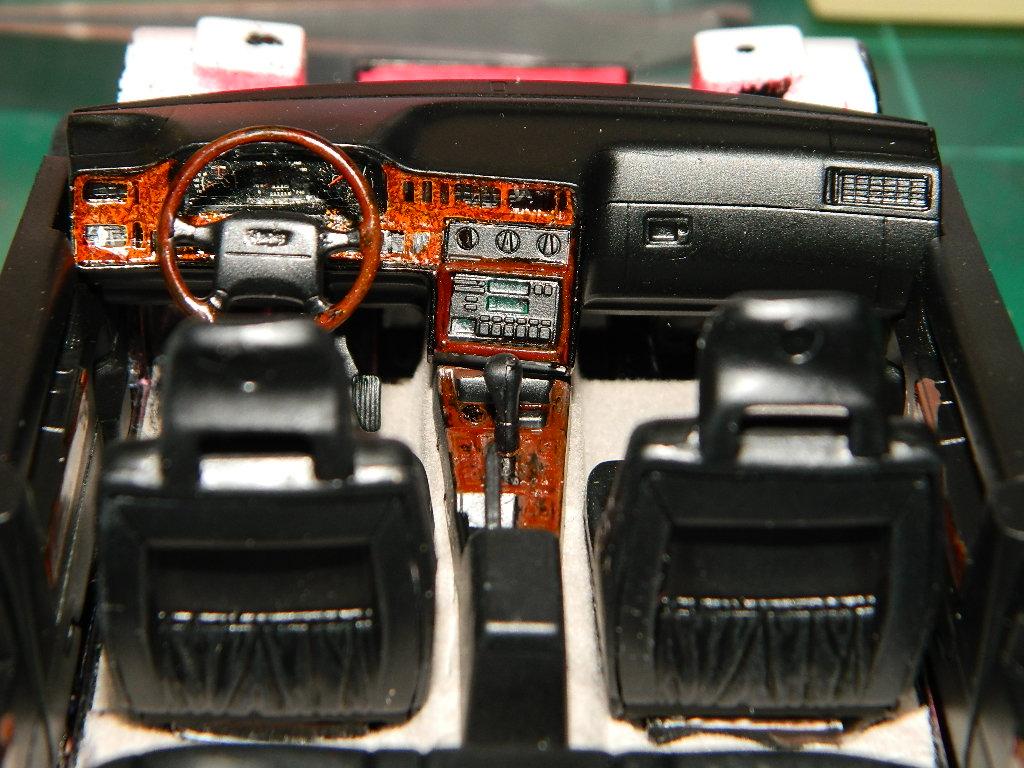
Thanks David and Carl! I had painted the lower interior panels with what I thought would be a matching color to the carpet, but when the paint dried, it had changed hue. I masked off the lowers and repainted them with Tamiya TS-29 Semi Gloss Black. I went and painted the steering wheel rim a woodgrain color and assembled the rest of the interior. More Volvo to come...

-
Thanks Dann! I applied the decals to the dash and I handpainted around the lower stack with Tamiya XF-10 Flat Brown and topped with Tamiya X-26 Clear Orange. I did the same on the side panels and used a fine point nail dipped in Tamiya X-18 Semi Gloss Black and dotted the painted area to replicate the burled wood. I added the decal to the steering wheel and man, this decal is tiny. I almost lost it! I almost painted the steering wheel hub to replicate some wood grain, but I changed my mind at the last minute. More Volvo to come...
-

Jeep Wrangler Rubicon
mrmike replied to mrmike's topic in Model Trucks: Pickups, Vans, SUVs, Light Commercial
Thank you Jeff! -
Thanks Guido, Carl and Jeff! Apparently, I have fallen into the "Squirrel" gambit where I would, oh look a flower! Sorry! LOL I had set this on the back of the bench when I decided I had to work on something else that seemed to have had priority at the time.
-
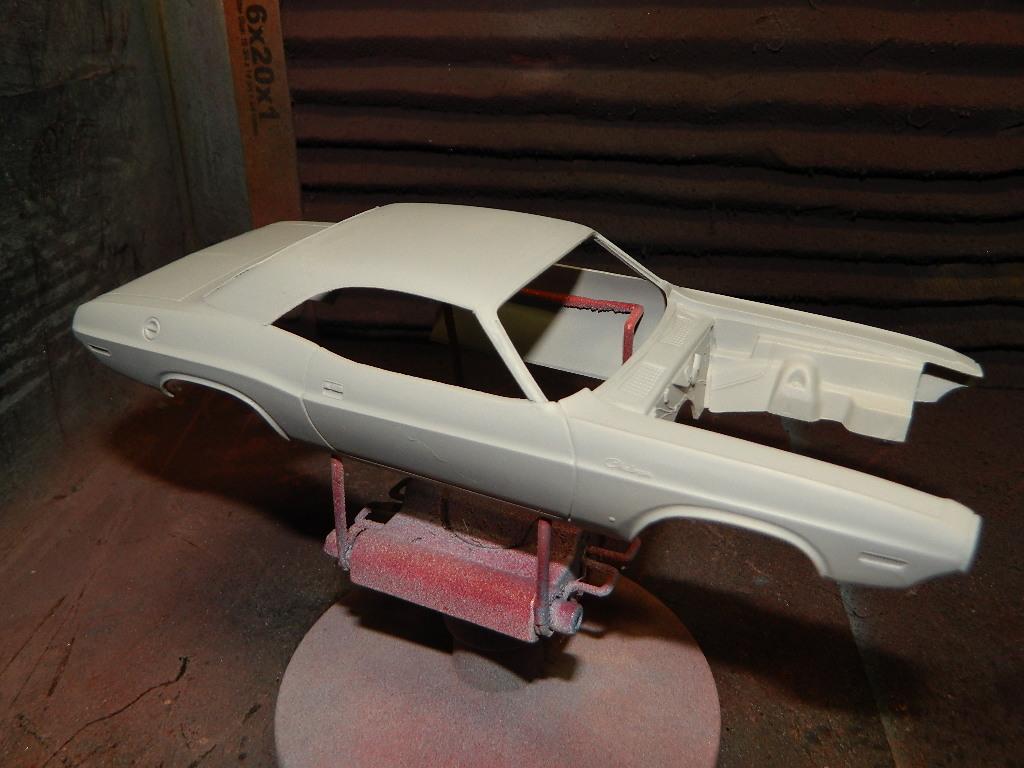
Been working on the C pillars of the Challenger roof today. Still needs more work. I also primered the hood and front valance. More NCIS to come...
-
Thanks Dann! I painted the interior with Tamiya TS-29 Semi Gloss Black. I started detailing the interior pieces by adding a woodgrain to the center console. I may add some woodgrain to the interior panels just below the armrests. More Volvo to come...
-
Jeep Wrangler Rubicon
mrmike replied to mrmike's topic in Model Trucks: Pickups, Vans, SUVs, Light Commercial
Thank you Chris! -
Jeep Wrangler Rubicon
mrmike replied to mrmike's topic in Model Trucks: Pickups, Vans, SUVs, Light Commercial
Thank you Pete! -
Thanks Patrick, curtis and Peter! I have lightly sanded the front rub strip and I will remask and repaint the bumper. I need to get to the LHS for more Tamiya TS-86 Pure Red as I have run out.
-
I painted the door rub strips with Model Master Acryl Gunship Grey. I'm not 100% sure how to fix the front rub strip where the tape was removed before the paint was dried. I touched up the body with Tamiya TS-86 Pure Red after the pictures were taken. More Volvo to come...
-
Jeep Wrangler Rubicon
mrmike replied to mrmike's topic in Model Trucks: Pickups, Vans, SUVs, Light Commercial
Thank you Tony and Christopher! -
Jeep Wrangler Rubicon
mrmike replied to mrmike's topic in Model Trucks: Pickups, Vans, SUVs, Light Commercial
Thank you Jim and Tom! I was enthused by a modeler in my Club that is building the recent stock reissue of this kit. I wanted the roll bar to be able to protect the back seat passengers and what is a Jeep grille guard and winch without multiple lights for shining in the night? -
Thanks Atin!
-
Thanks Nigel and Charlie! I bought this one via private sale last year and I got it for a fair price. Unfortunately, there are many price gougers out there asking rediculous prices for out of production model kits!
-
I detailed the wheels with some black Tamiya Panel Line Accent Color around the lug nuts and on the ends of the spokes by the rim. I added the suspension and the exhaust system and finally the wheels followed by the carpeting. More Volvo to come...
-
Jeep Wrangler Rubicon
mrmike replied to mrmike's topic in Model Trucks: Pickups, Vans, SUVs, Light Commercial
Thank you guys! This Jeep turned out better than I had hoped for! -
Thanks guys! I would love to see Tamiya do a late 60's Volvo P1800 in full detail. I bet that would be a good seller! I painted the 850 Turbo Estate this afternoon with Tamiya TS-86 Pure Red. When this has dried sufficiently, I'll clearcoat it with Tamiya Pearl Clear. More Volvo to come...
-
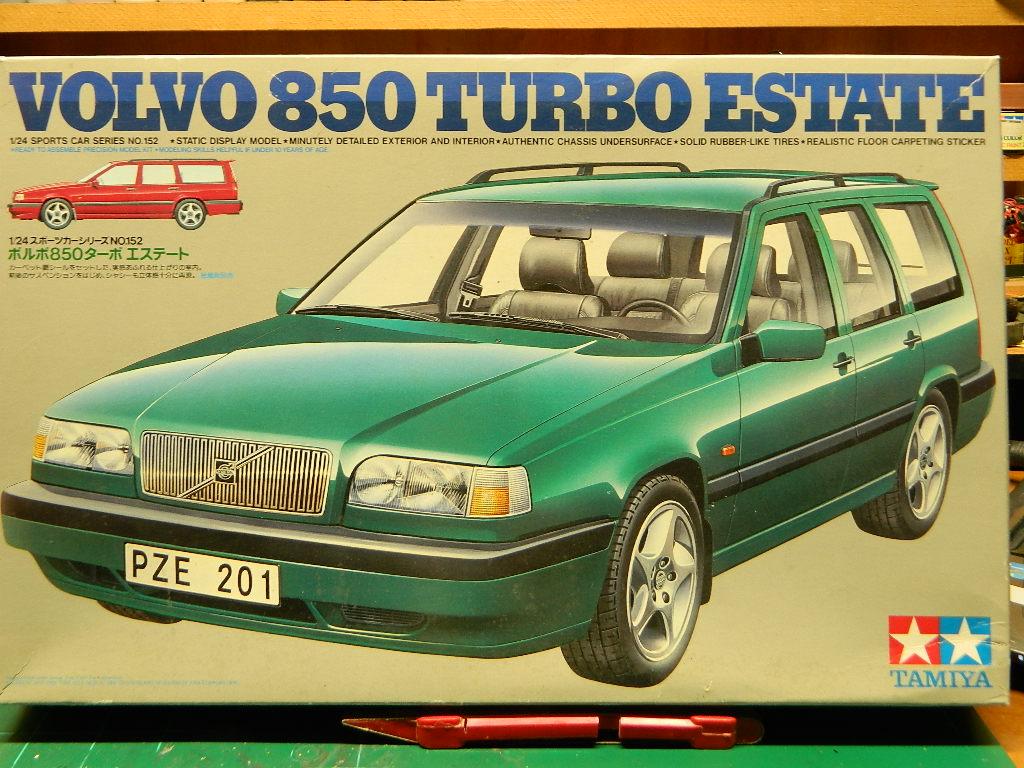
My new project is the Volvo 850 Turbo Estate also know as a station wagon. Volvo engineers created this as a racecar for the British Touring Car Championship and they were very successful with it. Here's a video of the car at Goodwood Festival of Speed several years ago. https://www.youtube.com/watch?v=NJ8c8a8oEUs My plan is to build this as a everyday hauler in red with a pearl clearcoat with a black interior. Right now, I don't plan on adding anything extra to this build. More Volvo to come...
-
Jeep Wrangler Rubicon
mrmike replied to mrmike's topic in WIP: Model Trucks: Pickups, Vans, SUVs, Light Commercial
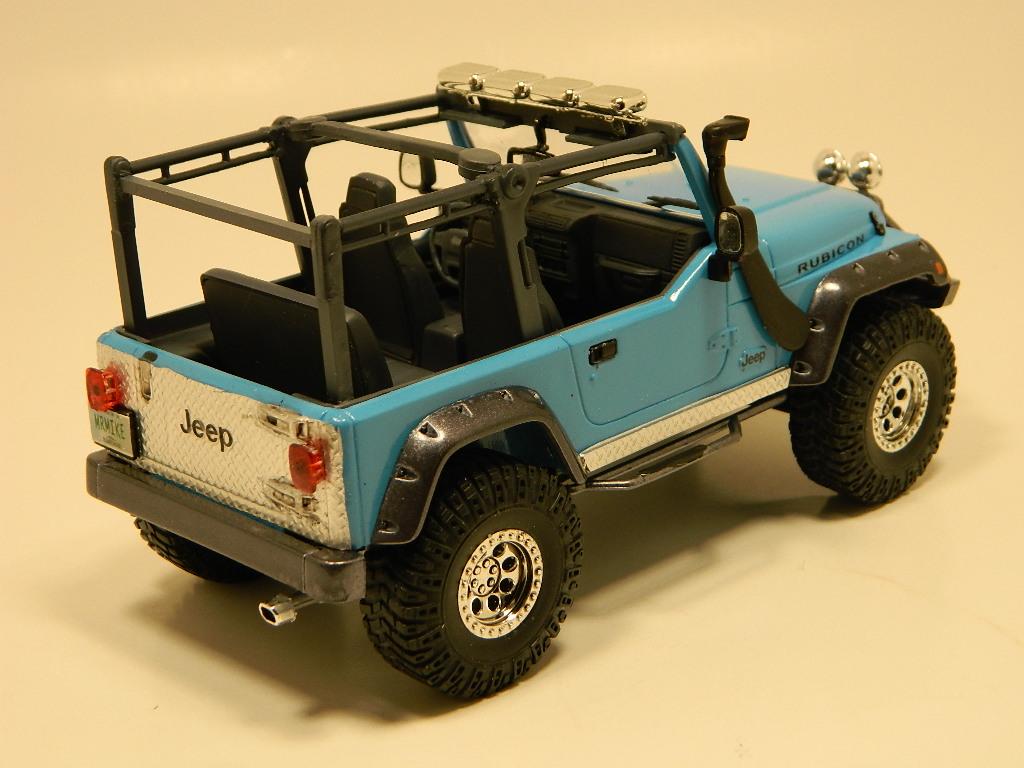
I use makeup applicators, Q-tips or a soft straight edge on a bumpy surface with BMF. I have finished my Jeep Wrangler Rubicon and it is posted in Under Glass. I would plike to thanks all those of have viewed and commented on my WIP. -
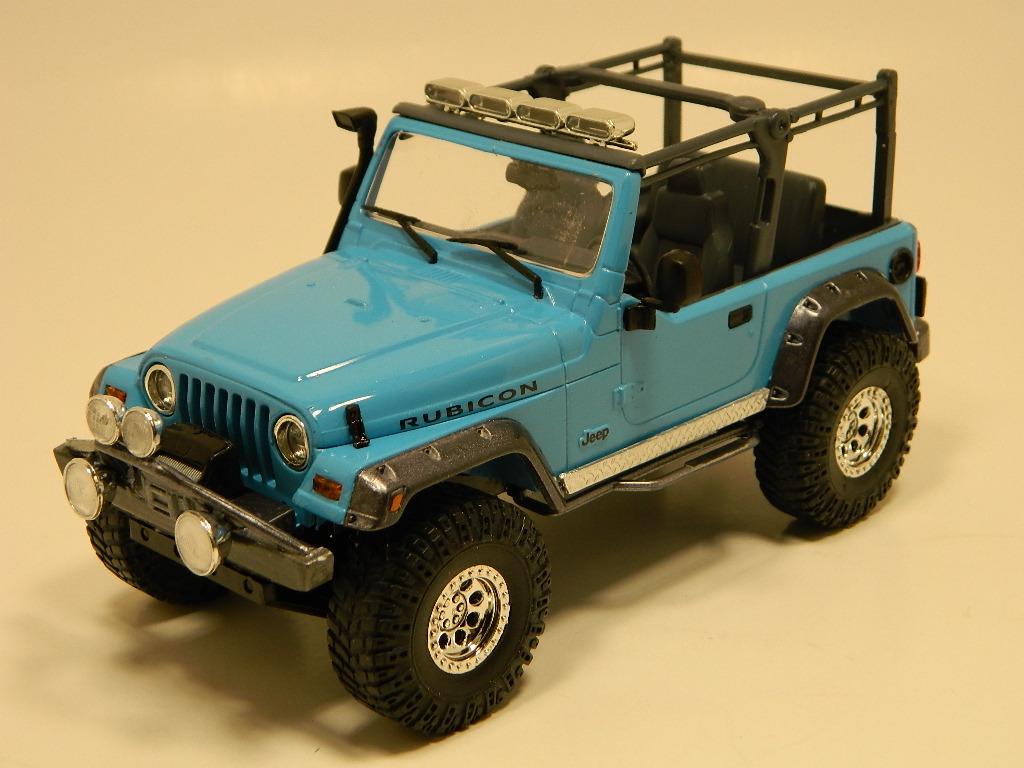
This is my Jeep Wrangler Rubicon painted with Model Master Big Bad Blue Lacquer with a Tamiya TS-48 Gunship Grey interior, modified rear roll cage and extra lights on the front grille guard.
-
Jeep Wrangler Rubicon
mrmike replied to mrmike's topic in WIP: Model Trucks: Pickups, Vans, SUVs, Light Commercial
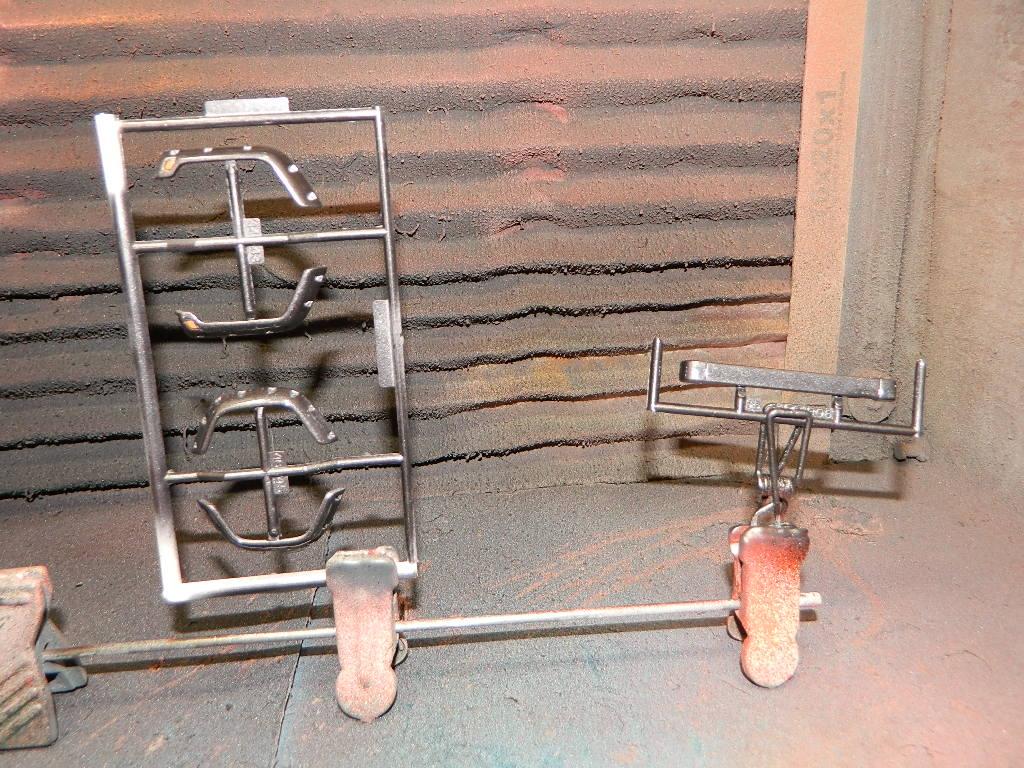
Happiness is clearcoating with NO problems! The body, rear bumper and fender flares have been clearcoated and will be assembled shortly. These parts were painted with Tamiya TS-29 Semi Gloss Black and will be ready for assembly soon. More Wrangler to come...