mrmike
-
Posts
5,326 -
Joined
-
Last visited
Content Type
Profiles
Forums
Events
Gallery
Everything posted by mrmike
-
Thank you guys! It's been a while since I built an AMT kit with the last one being the '56 Ford Victoria.
-
Thanks Keith! The parts are drying as we speak. Maybe primer later today followed by paint late today or tomorrow.
-
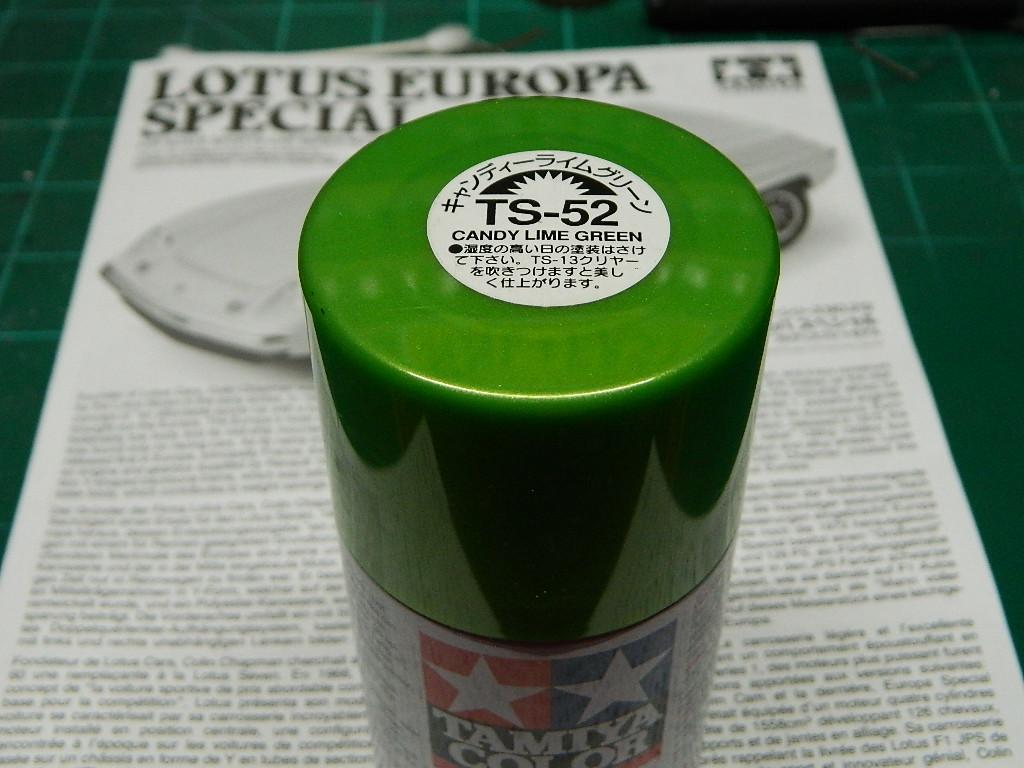
So very true! Linda Thorson was a decent actress, but she wasn't Diana Rigg! I have changed my mind on the paint color. I will use Tamiya TS-52 Candy Lime Green instead of Model Master Citrus Green Metallic. The parts are heading for a bath tomorrow morning. More Lotus to come...

-
Thanks guys! John Steed drove an assortment of Blower Bentleys and Rolls Royces. Tara King drove the Lotus Europa. Emma Peal drove a Lotus Elan. McNally worked overseas in the UK once for his attorney-friend Charlotte "Charlie" Rothmann. The car involved was the Jaguar Mk II.
-
I have been told that a few times...
-
Sorry Dan. No story with this one. Maybe after I finish the McNally Charger Super Bee story, I can do another build with a story attached to it for you.
-
The Story McNally goes back into the house and into his office to look at the file again. He remembers when he had stopped at Paul Dundy’s house to question him about the old farmhouse. He remembers seeing a business card on the kitchen table from a gun shop that had silhouettes of a rifle and a handgun on it. What gun shop? He sits back in his chair and thinks. It was a gun shop near Boston. Bell something or was it Bull? No, Bulverde Guns and Firing Range! He looks up the number and the address for the gun shop and writes it down. The computer lists a website and that the business had closed over 30 minutes ago at 7 PM. He’ll stop and pay them a visit in the morning. For now, he will peruse the website which really didn’t do anything for him for a few minutes. The Build This has been something I have been comtemplating for a few days. This afternoon, I got brave and took out my cordless Dremel and small round grinding but and removed the backing for the lower grille and brake ducts. I think it came out pretty good! I still have more of the P/E mesh from the grille to use. More Charger to come...
-
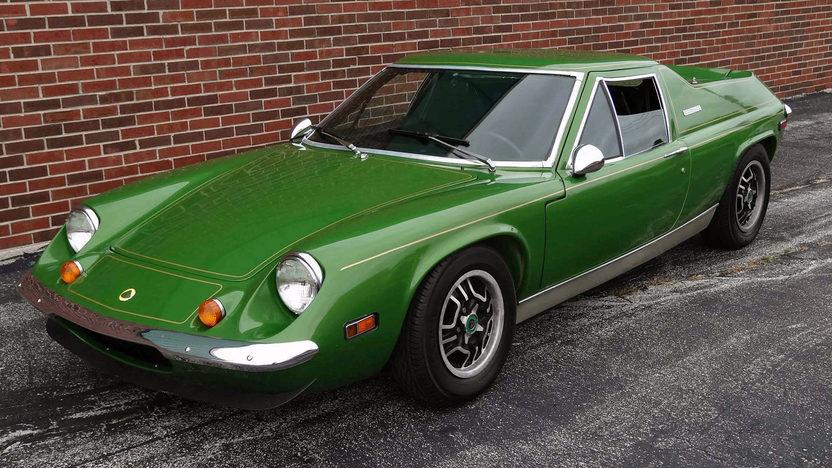
I had seen this open, but sealed inside kit sitting in the pile of kits for my Club's raffle and I looked at it, inside and out. Nice kit! I have taken to appreciate Tamiya's kits, even more so over the last couple of years. Easy to build with positive mountings and accurate moldings. Raffle time came and I didn't win anything, but my friend Paul had won a drawing and he selected this kit and he gave it to me. Thank you Paul! He knows about my appreciation of British sports cars and saloons and I didn't even ask for this kit. Since Google Images is my friend, I looked at the many images of Lotus (or is that Loti) Europas and one color stood out...a green that is very simular to the color I choose. Model Master Citrus Green Metallic. I really like how Tamiya packages their kits with everything being bagged and nothing loose in the box. I have yet to see a kit that is not molded correctly by Tamiya. More Lotus to come...
-
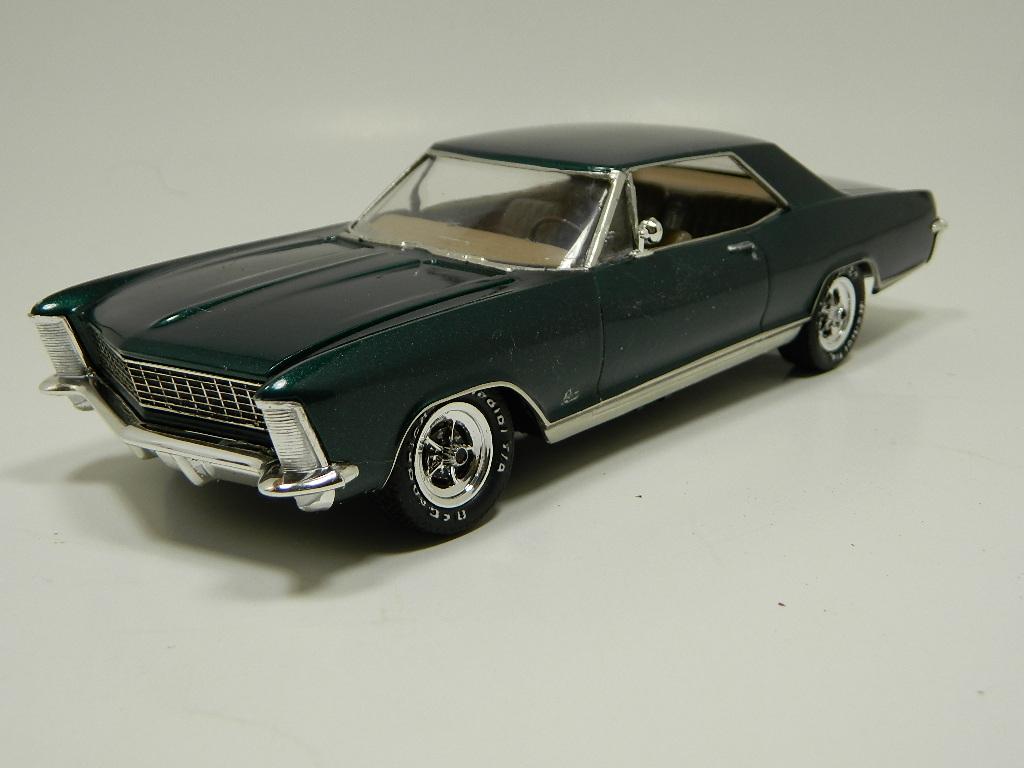
I have finished my '65 Riviera and it is posted in Under Glass. I would like to thank all those who have viewed and commented on my WIP.
-
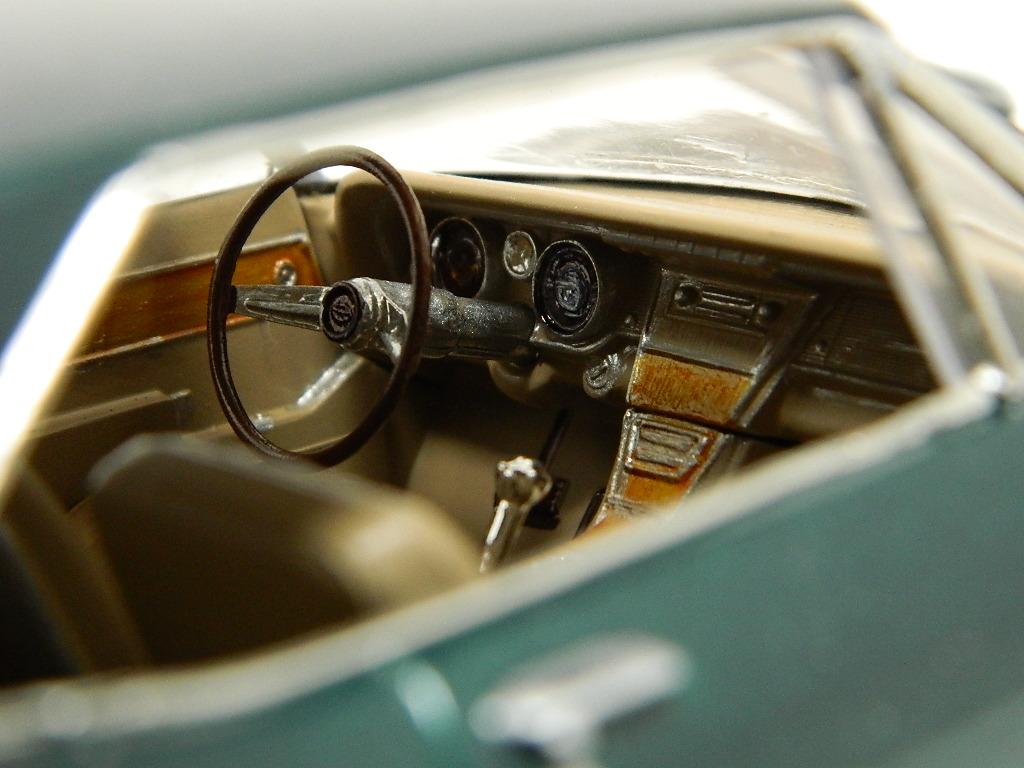
This is my '65 Buick Riviera painted with Dupli-Color Emerald Green Metallic with a Tamiya Tan interior, wheels from the AMT '67 Buick Riviera, wired engine and BF Goodrich white lettered tires.
-
The Story McNally finishes installing the plates on his new Charger Super Bee. He goes inside the house to start his supper and he sits down at the kitchen table to eat. Part way his meal and the door bell rings and when he opens the front door, Lt. Det. Adam Troy is standing there. "Got a beer?" He invites Adam in and he grabs a Sam Adams Light from the fridge for Adam. McNally pulls the bottle cap off and hands the beer to Adam who says, "Trade ya!" Adam hands him the Forensics report to McNally who sits at the table and reads it. The bullet and casing are a match to being fired from the same type of gun...an assault rifle possibly a Colt AR 15, 7.62X15 147 grain copper jacketed bullet and the casing is the same type. Adam takes big sips of the beer as McNally is reading the report and he says, "I'm happy to get you these Forensic reports and such, but I can't do this all the time. Don't make a habit out of it." McNally replies, "Thank you Adam, I really appreciate this!" The Build I decided to go a different route on lowering the rear suspension by sanding the bottom of the rear differential and opening the mounting holes wider. This brought the rear suspension down about 1/16th inch. I have to watch how low I go with this so I don't bottom out the tire on the wheel well. I am using a piece of photoetch for the grille, so I spaced out the grille with some pieces of sheet styrene to make up for the thickness of the kit grille insert. My photoetch grille insert is painted with Testors Flat Black Lacquer and shaped to fit the grille cover. McNally will return...
-
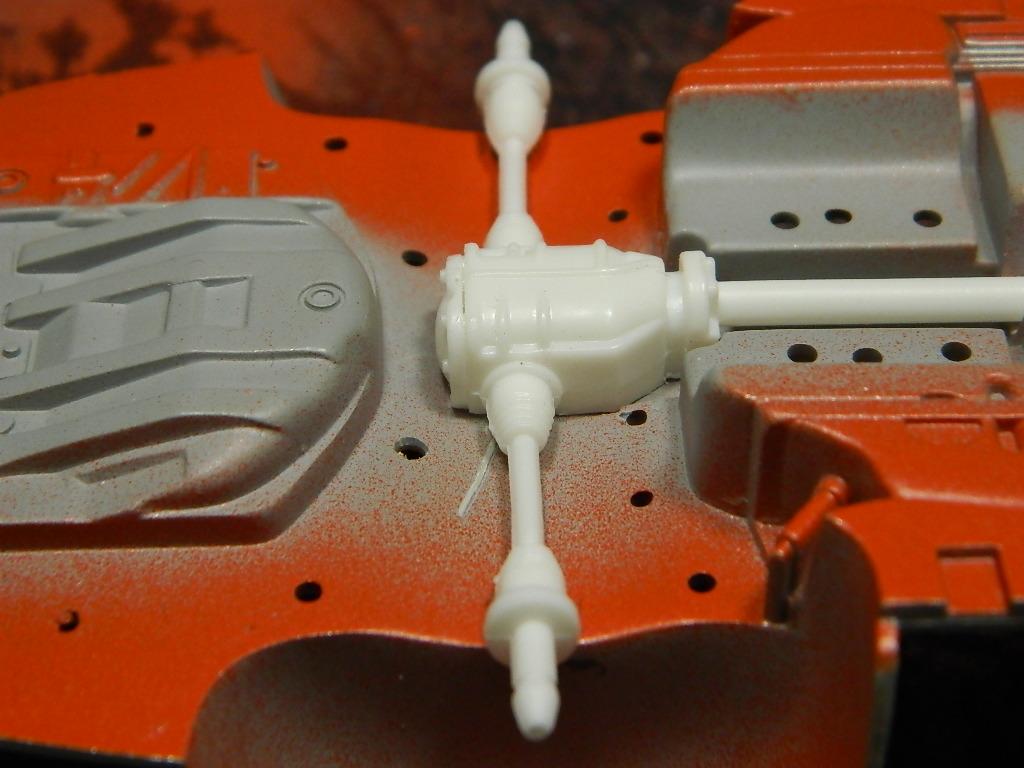
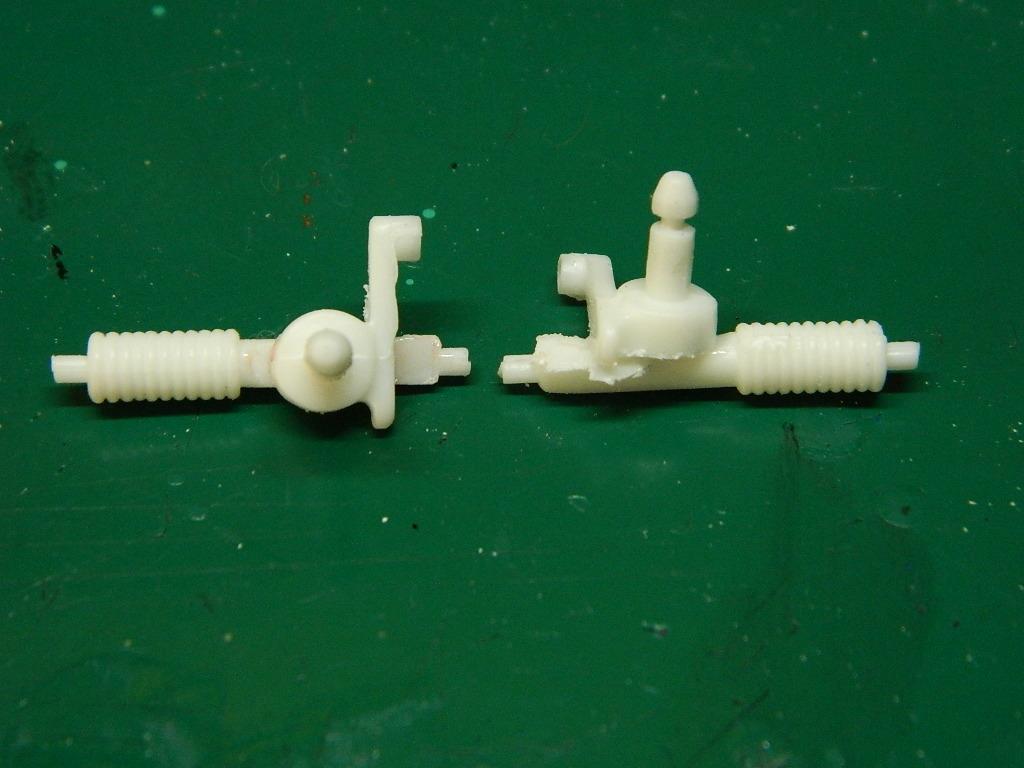
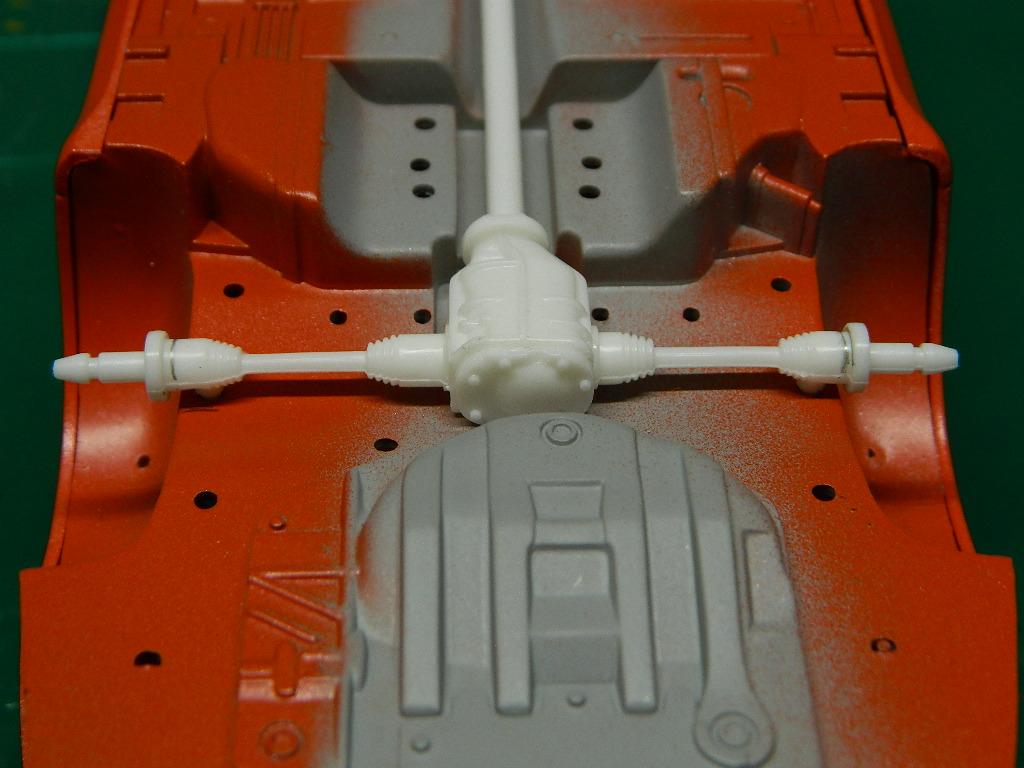
The Story McNally and Vic conclude their business and walk out to the back of his shop to look at the Challenger. They pull the tarp off the car and Vic just shakes his head at the damage caused by the automatic gunfire. Three tires flat and everything else just plain shot up. "Let's keep this as is until the insurance adjuster looks at it," says McNally. Vic agrees as McNally prys open the trunk to get his equipment bag out. At least this wasn't shot up from sitting towards the back of the trunk under the rear deck where the extra metal helped to deflect the bullets. They cover up the Challenger and walk back to service bay to the Super Bee. McNally places his equipment bag up between the wheels wells and closes the trunk. "Bring the dealer plate back after you get the car registered. I'll throw on the inspection sticker afterwards." McNally agrees as he gets into the Super Bee, starts it and drives out of the garage and off to the Registry. The Build Modifying the front suspension was easy. I cut the spindles off and raised them 1/8th inch up on the struts. The rear suspension will be much more difficult. The diffential is mount directly to the floor pan and there is no real way to lower the suspension. My solution is to cut the axle pins off the rear axle and glue the pins to the floor pan. I drew out the cuts in pencil. I marked the tip of the axle pin with a pencil and where I would mount the pin after the cut. For now, this is my plan for the rear suspension, but I will keep investigating for a better way to do this. McNally will return...
-
Thanks for the heads up, John! This is my third Charger and I don't recall having those issues when I built mine. I will keep an eye out for it. I usually crack the windshield since it isn't as curved as the windshield header.
-
I'll be watching this, too! I have the Revell Mr. Norm's '68 Dodge Dart 440 in the stash and I want to see what you do with yours.
-
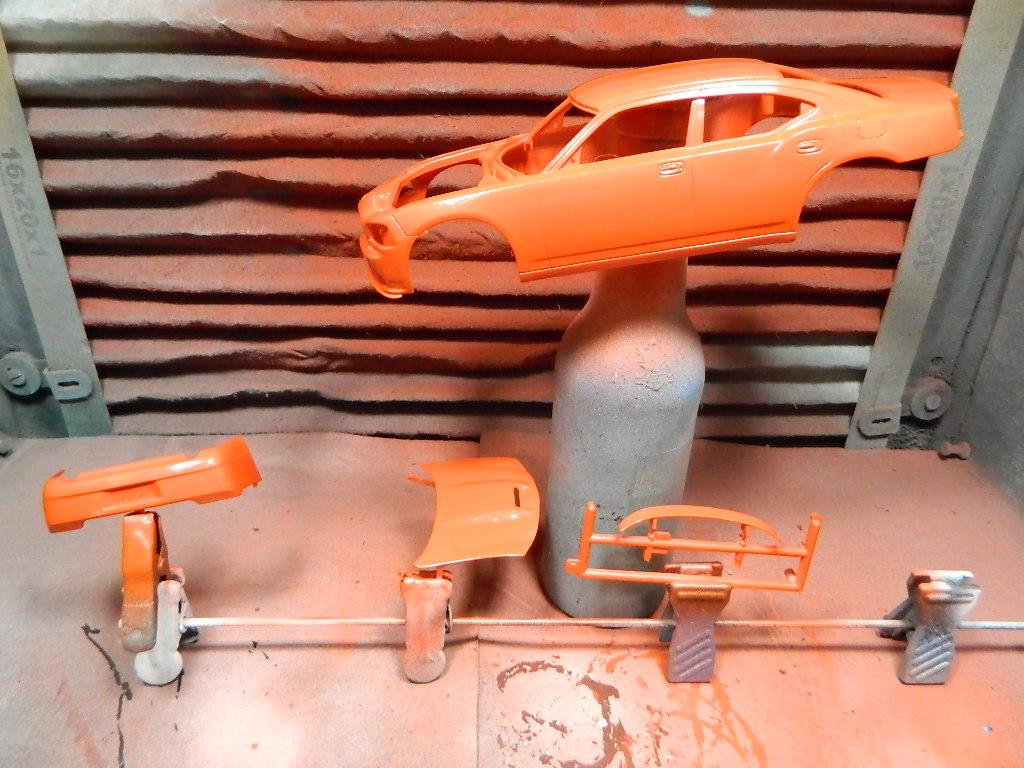
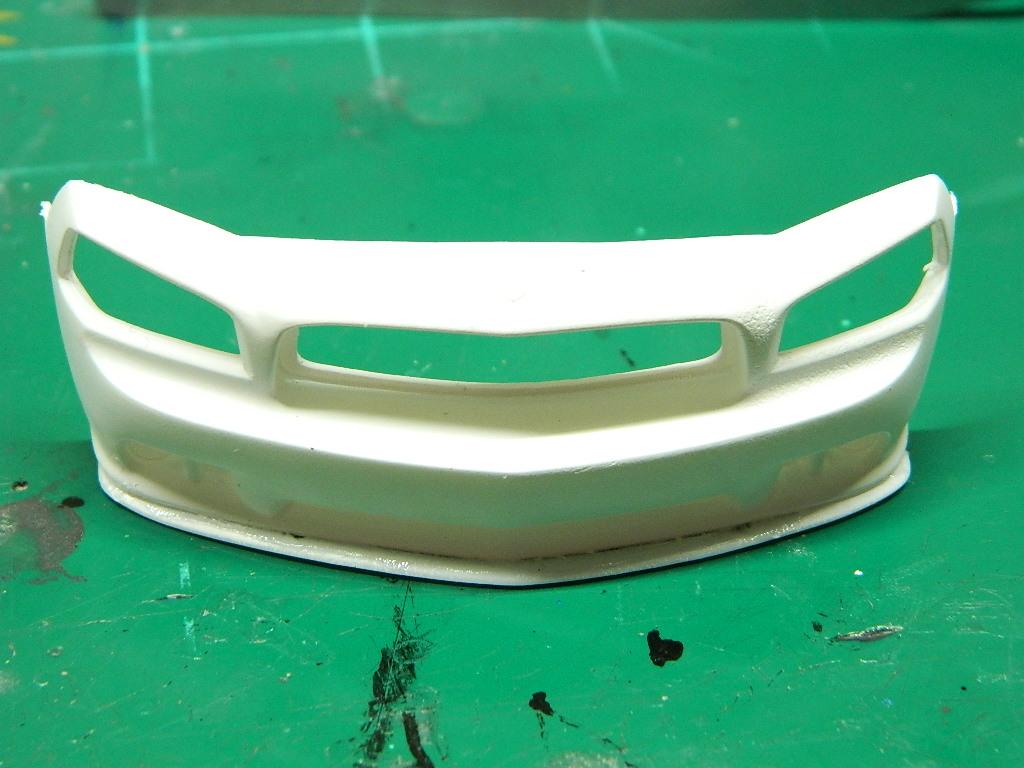
David, the front splitter/spoiler will be body colored. The Story That following afternoon, McNally arrives at Vic's Sales & Service in his father's '57 Ford 300 aka Spearmint. He and Vic walk down to the garage to check out the Charger Super Bee that is parked in one of the service bays. Hemi Orange with black graphics, black interior with a Hemi engine, full power, A/C, and an automatic transmission. This car has only 62,000 miles on the clock and it looks brand new. "A little bright for sleuthing, don't ya think," says McNally with a smile on his face. Vic smiles and he says, "It should be faster than a speeding bullet." Vic slaps a magnetic dealer plate on the car and McNally takes it out for a spin. Acceleration is simular to the Challenger even though its a larger car and stopping and handling is very good. He drives the Charger Super Bee back to Vic's and he parks it in the same service bay. "I'll take it," he tells Vic and they both go p to Vic's office to discuss terms. The Build I painted the Charger Super Bee this afternoon with Model Master Hemi Orange Lacquer. Thank you Rust-oleum for the three cans you sent when I ask for one! McNally will return...
-
Thanks Charlie!
-
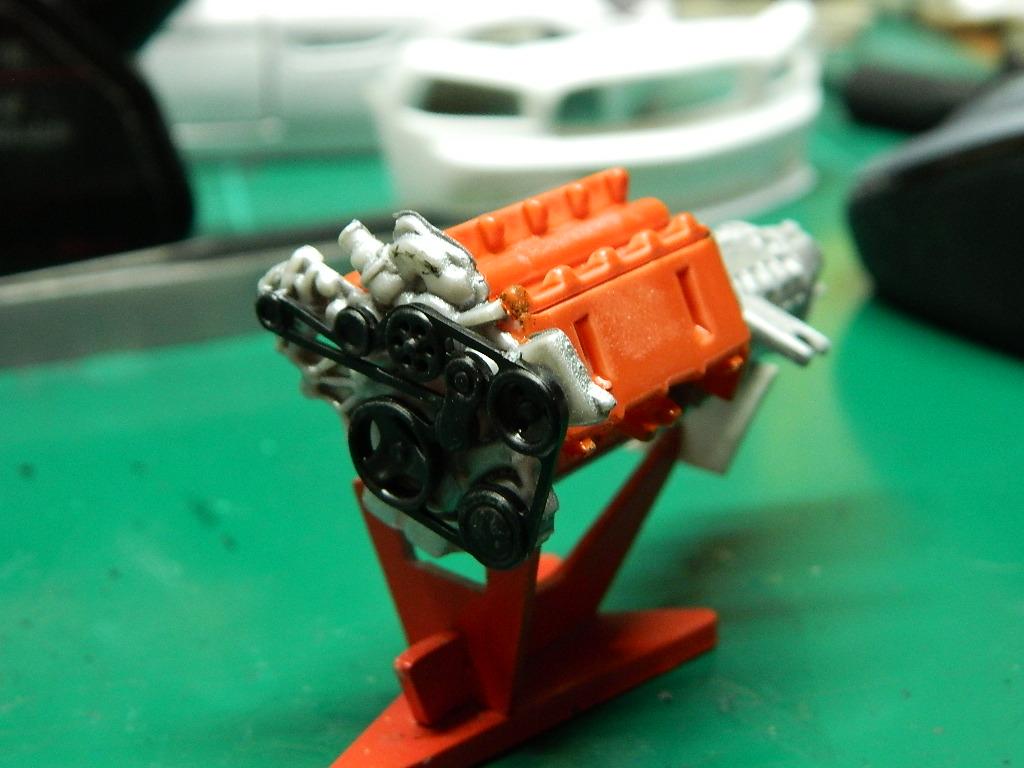
Thanks Jeremy! The Story McNally leaves BPD Headquarters and heads for the T Bus Stop. He takes the bus to Vic's Sales & Service to see if Vic has another ride for him. He tells Vic about his Challenger getting shot up and that the car is undriveable and probably junk. After looking through his computer inventory, all he has are small and medium size sedan econoboxes. He will look through the New England area for another car for his friend. McNally returns home to get his Father's '57 Ford Custom 300 out of the garage and his cellphone rings. It's Vic saying that he found a 2010 Dodge Charger SRT8 Super Bee and does McNally want to see it. He says yes and when can he see the car. Vic says the car will be at the dealership early tomorrow afternoon as it is currently in Hyannis, Ma. McNally will see Vic tomorrow at 2:00 PM. The Build I got the Hemi completed with the exception of touchups and decals. The Hemi in the chassis. What are these two little things? These were X'd out on the instruction sheet. They are Super Bees for the front fenders! I chromed them and will try to paint them yellow and black when they are dry. How did Lindberg miss these? McNally will return...
-
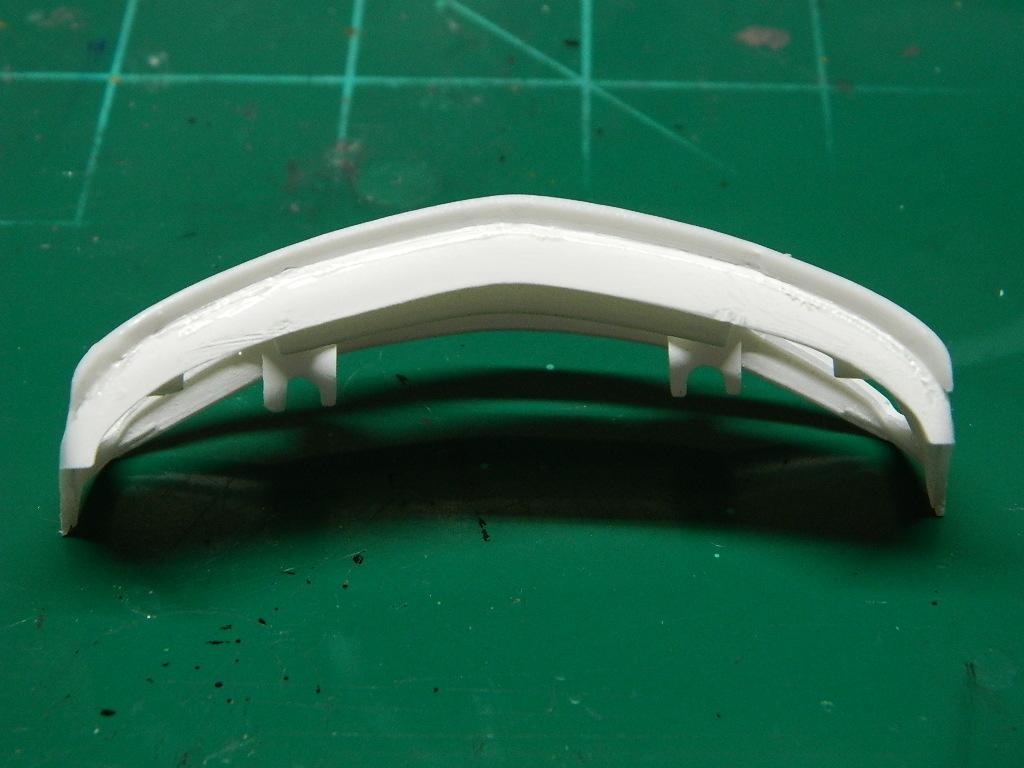
The Story Upon his return to Boston, McNally stops at the BPD Forensics Lab and talks to Technician Robert Parken. He asks if Bob can look for prints and anything else about the bullet and the shell casing that he has brought in. Bob asks if these pieces are connected to a current BPD case and McNally tells him that they are not. Looking at McNally in the eye, Bob asks, "What's in it for me?" "My gracing the hallowed Halls of Forensics is not enough?" Bob replies, "Nope! I'll look at it when I get a chance. Right now, I'm very busy." McNally goes upstairs to talk with his friend Lt. Det. Adam Troy. He tells Adam about the pieces he has in Forensics and if Adam could influence the techs to take a quick look at them. Adam replies that they are rather busy and it could take a while before they can be looked at. Boston Police Dept. cases come first and he will talk to the techs. The Build There is a splitter/spoiler that is not used on this kit. I decided to add it to the front fasca. The Hemi engine is coming along. I've got a lot of parts painted and drying. McNally will return...
-
Yep! Ouch is right! Now to foil, assemble and finsh this model.
-

Lowering A Stock Late Model Mustang Tutorial
mrmike replied to mrmike's topic in Tips, Tricks, and Tutorials
Easier said than done. You run into the problem of the rear differential not being lowered enough unless you do some major whacking. I offer a way to lower the suspension without the major whacking and reconstruction of the suspension. This can be applied to any Revell 2006 and up Mustang kit. The picture below shows my Shelby GT500 lowered and with Pegasus 205/50-16s low profile tires. I find that the kit tires look like truck tires with their huge sidewalls and chunky tread pattern.
-
I do thank you for the infromation, Steve! It's definitely good to know, but I will be sticking with the black as it does look better to my eye. Well, it was bound to happen soon or later. I reach over the Riviera to reach a tube of superglue and when I had lifted the tube by the cap, the cap came off and the tube spilled onto the Riviera's left front fender. My heart just sank! I sanded the fender and got it as smooth as I could, reprimered, repainted and reglossed the fender. The fender is now slightly darker than the rest of the body. I'll have to refoil the trim that I had to remove and polish the paint. Lesson learned...tightly recap a bottle or tube of whatever I had used! More Buick to come...
-
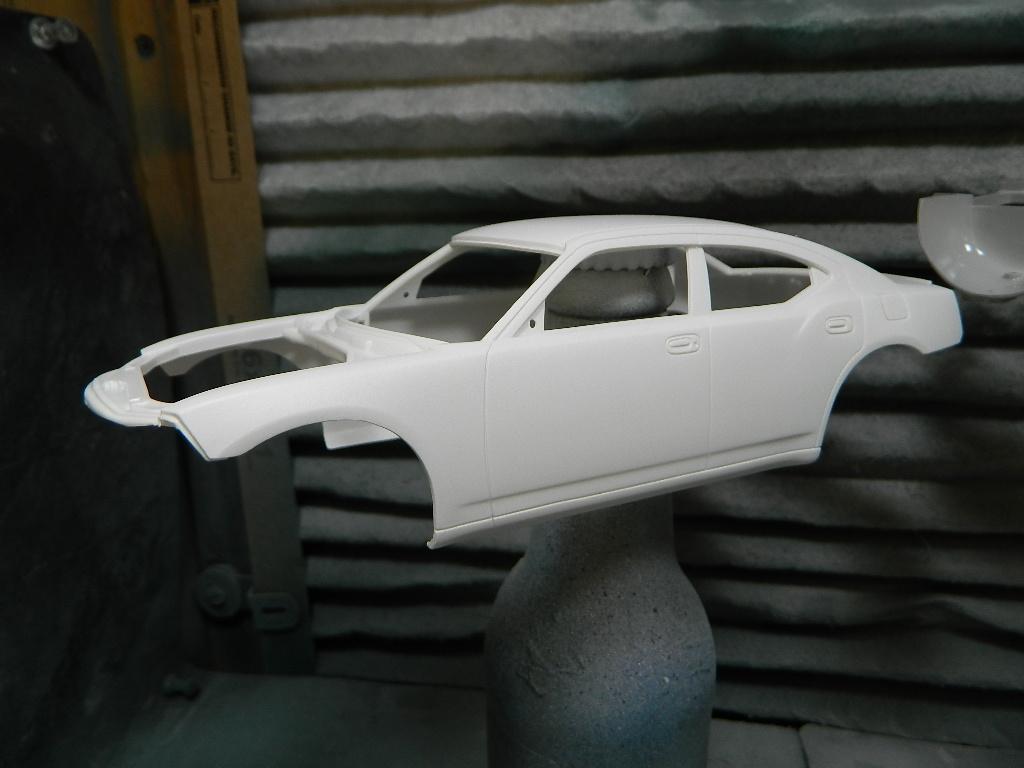
The Story The Police Chief of Whelton was neither forthcoming or holding back on any information the McNally was looking for. After finishing his breakfast and drinking the last of his coffee, the Chief offers to take McNally back out to the farmstead to look at his Challenger. The Chief squeezes himself out of the booth and they walk out to his cruiser and drive out to the farmstead. He goes across the street and up a small hill looking for the gunner's nest and he finds it. He sifts through the leaves and pine needles and he finds a rifle shell. Using a pen, he picks it up and sticks into his jacket pocket and then he walks down the hill back to the farmhouse. The Chief asks if he found anything and McNally replies that he didn't since his gut tells him not to trust the Chief. He will ask BPD Forensics to check the shell casing. The Chief had called for a flatbed wrecker to pick up McNally's Challenger and take it back to town and to make arrangements to tow it back to Boston. While the Chief was talking to the driver of the wrecker, McNally digs a bullet out of the door frame with his pocket knife and he places that into his pocket for Forensics to examine. The Chief nor the wrecker driver saw him do this. He goes into the farmhouse and makes note of the empty farmhouse for his files and walks back outside to the Chief and the wrecker driver and wrecker. The wrecker driver will give him a lift back to Boston when he takes the Challenger back with him. The Build I got the Charger into a good coat of Testors White Lacquer Primer. Some sanding and then a coat of Model Master Hemi Orange.
-
Looks like a great rescue of a long neglected model! I think you did a great job on this Cyclone! I wish that this kit would be reissued or maybe a new tool from Revell using the Torino chassis.
-
This tutorial is to show how I lower the front suspension of a Revell late model Ford Mustang. This tutorial can be adopted to any other Revell kit with a high stock front suspension built out of the box. The parts that I am using may not be for a Mustang, but they are close for this demonstration. First I start with the front disc brakes. I mark the section to be removed so that the brake disc can be mounted higher on the upright. Use a bunch of business cards under the chassis with the wheel against the suspension of the model to determine the ride height you want. I removed the plastic material so that the edge is level with the space molded in the brake disc. This will allow the brake disc to be mounted flat against the upright This is the brake disc in the stock position. This is the brake disc higher up on the upright. You may have to drill a new hole for the wheel pin on the wheels. Moving the brake disc higher on the upright lowers the front suspension. Depending upon my mood, I may use the metal pin from the kit or make new ones from a piece of styrene rod. Since I don't like my models to roll, I glue the wheels to the suspension to prevent the model from rolling off the shelf. The rear suspension can be lowered by using lowering blocks between the rear axle and the leaf springs or by rearching the springs or cutting a coil from the coil springs.
-
Steve, this is the first time I have seen a grey painted Road wheel on the '65 Riviera. All the pictures I have seen show the wheel with black highlights, not grey. Grey painted Road wheels may have been an option (grey or black) or was color keyed to the exterior color. I will never know. My Riviera will be factory stock...more or less. It will have white lettered BF Goodrich tires which was not factory stock, but more of a "Day 2" appearance. Thanks for showing me the grey painted wheels, Steve.