

Duntov
-
Posts
1,318 -
Joined
-
Last visited
Content Type
Profiles
Forums
Events
Gallery
Everything posted by Duntov
-
Revell Kit Tire Issues
Duntov replied to Duntov's topic in General Automotive Talk (Trucks and Cars)
See my update at the end of the original post..... Bill -
Lindberg Dodge A-100 Pick-up Coca Cola Truck
Duntov replied to Duntov's topic in Truck Kit News & Reviews
To Casey's point .... I neglected to mention that the usual embossed license information is not "Lindberg"..... it is the Coca Cola company - very clearly visible on the underside of the bed insert......still it's an intersting kit........ Regards Bill (Duntov) -
Lindberg Dodge A-100 Pick-up Coca Cola Truck
Duntov replied to Duntov's topic in Truck Kit News & Reviews
Hey Bill.....thanks!!! that would get the engine more into alignment with the scale for sure..... Bill -
Hi there: I picked this kit up at the local Hobby Lobby for just under $15. This kit is not new and has been around for some time appearing to have its origins in the old "Little-Red Wagon" of 1960's fame. I bought that kit when it first came out and I always liked it. I have been eyeing this thing for some time now and today seemed like a good day so here we go... The box art reflects the contents, an A-100 Dodge COE pick-up in Coca Cola livery. The box contains that truck but also all of the parts needed for the drag version of Little Red Wagon (no LRW decals though). The body is reasonably well done and captures the look of the real truck. If you are a fan of this genre you may want to check the dimensions and overall casting accuracy more closely but it looks good to me. The body is also equipped with opening doors and hinges that are bit large looking. However, I suspect most reasonably skilled modelers will change those out for better looking scratch built items. The glass is clear and smooth and reasonably thin. The decal sheet provides the various Coca Cola scripts and that's it. Nothing else. The frame and bed insert are well done but rudimentary. My only complaint here is that the bed insert has very deep grooves for cutting the engine bay for the Little Red Wagon and time has taken its toll. The groves are so deep in spots that there are holes into the bed area. You can see this clearly in the picture below. The wheels and tires are a set of vinyl no name items (five of them - so you have a real spare!!!) a set of huge Goodyear slicks with brand names and a well done set of period mags in chrome. You also get dog dish hubcaps and a set of steelie wheels!!! That is really nice..I think so any way!!! The chrome tree is well done and has a ton of neat parts on it for the engine and exterior. The engines (there are TWO in this kit) are nicely done multi-piece affairs. The stock engine is about 17 pieces. The custom engine is greatly simplified but has about 25 pieces and an automatic transmission. The higher parts count for the custom engine is a result of eight velocity stacks and eight plugs. Both have separate oil pans so no seams here! The only problem I see with the engines is that they look to be on the small side. This is a 1/24 th scale kit. This is primarily based on looking at the chrome vale covers, base and Hemi. They just look too small. If you cmpare them to the fuel tank parts on the same tree you can see that they appear to be too small and the tank way too large. Overall, this is small potatoes but you can decide on that one. It's not the first kit to have an out of scale engine. The frame and running gear / suspension are all simplified separate pieces that are well done. The steering wheels can be built poseable but you will want to either glue them in permanently or rework the snap in spindles and axle to be more accurate / substantial. The extra frame box for the Little Red Wagon is present too. The rear end is "FULLY CAST" (yippee!!!). The interior reflects a stock truck and is basic but well done. It includes a dash, seat belts, two part seats, a nice steering wheel, steeering column and shift lever turn signal combo and door panels with cast on details. You also get a push button automatic option as well. THAT is going in my build up for sure!!!! Only the gas pedal from the LRW is included so you will need to add parts here especially since the doors can be opened. Again the drag accessories are included i.e. a full roll bar set up. Overall this is an interesting kit of a really different subject. The simplicity (and age) is clearly reflected in the price. You can easily build up a stock truck with dog dish hubcaps or the Little Red Wagon or some other over the top variant and I am sure many of you already have some wild ideas about where to take this. (I am thinking about a mild custom lowered tow vehicle for the old Revell midget trailer in my junked kits stash.) Go get this kit…the price is right, there are plenty of extra parts and only your imagination and your parts box content will hold you back on this one. Have fun! Regards Bill (Duntov)
-
Thanks for posting ths review Brendan....very well done.....the car looks really neat.....I might have to get one!!! The box art is .....how would you say...."interesting" ) Regards Bill (Duntov)
-
Wow Chuck.....I really likethe engine in this one.....something very different and it really fits the build..... NICE WORK!!! Regards Bill (Duntov)
-
Wow....very cool!!! I like it!!! Regards Bill (Duntov)
-
HI: Here is a short tutorial on making clear gear shift knobs. You will need various grits of sanding sticks (including polishing grade), some clear sprue and some chrome bead wire in either 22 or 18 gauge size. Your first step is to cut the sprue end off square and flat. I use an exacto saw blade for this. See the next two pictures….. Here is the chrome bead wire I used and the first cut to square off the clear sprue. Next you will need to drill a hole in the end of the sprue to a depth of no more than 2mm. This is done easily if you made the cut on the sprue flat and square with the sides. Use a drill bit for the wire that you select. Generally bits in the range of .025 to .028 work well for 22 gauge wire. The next step is to use a 150 grit sanding stick to shape the end of the sprue as close to round as you can get it. Use progressively fine sanding sticks to polish the sprue end. Make sure this is very shinny. Next “PRESS FIT†the 18 or 22 gauge chrome wire into the hole you drilled earlier. DO NOT GLUE this in yet. You may scratch the chrome on the shaft at some point and you will need to replace it. Next, cut the sprue off about 3mm above the depth of the shaft hole as seen below. Again, use your sanding stick to shape the knob (as round as you can get it). Note the scratches on the shaft....this is why you don't want to glue it place....this will be replaced later. Now use your fine and polish grade sanding sticks to polish the knob to a very clear and smooth surface. You may need to replace the bead wire if you scratched it during the final polishing stage. The top shifter uses a larger wire (18 gauge) vs the other two that use 22 gauge. The 22 gauge is about right for 1:25 scale. See below. The finished product looks quite good…..the knob is very realistic and if you work slowly and carefully you can perfect the method. Use a short piece of wire insulation to form a boot. I also made shift frame from wine bottle tin and embossed it with rivets from below. The whole shift knob build up takes about 30 minutes to do one shifter. Have a good time….. Regards Bill (Duntov)
-
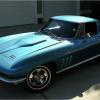
Very nice wrk....good to see a racing Corvette done up so well..... reminds me of my stock '68 1:1 car..... Yours would be "FASTER" though!!!! Regards Bill (Duntov)
-
Now this is some really nice clean work....... a real classic piece of workmanship....very well done!! Regards Bill (Duntov)
-
Stinkin' Stepside Chevy...
Duntov replied to Mr.Zombie's topic in Model Trucks: Pickups, Vans, SUVs, Light Commercial
SO Michael....did your wife just "open the door" for you to get a "REAL" one??????? Regards Bill (Duntov) -
Very nice work!!!! Regards Bill (Duntov)
-
I like this a lot.....very clean....excellent work!!! Regards Bill (Duntov)
-
Very nice indeed!!! Regards Bill (Duntov)
-
Tom: Very nice work!!! Thanks for posting this great piece of craftsmanship!!! Regards Bill (Duntov)
-
Ron: This is an excellent build of this car. I hope at some point the model companies release a 50 Olds .... in the same style as the Galaxie Chevy kits. Also noted that you appear to have a 1:1 version of the car as well. My brother had one for many years....they are great cars..... thanks for posting pics of your model too!!! I have done two from the Ertl bank.....a black / grey stock version for my brother and a mild red hot rod version for myself....these are great items to work on and your version shows some great attention to detail and crafstmanship~!!!!! Regards Bill (Duntov)
-
Revell Kit Tire Issues
Duntov replied to Duntov's topic in General Automotive Talk (Trucks and Cars)
My math corrected..... Casey: Thanks for the reply and I agree. In measuring the Olds optional wheels they measure 20MM in diameter or about .78 inches...if my math is correct that scales out to 20" in 1:25 scale. There is no way that size of wheel would ever fit the old 1/24 scale Goodyear GT radial. Additionally, one of my kit tires has a shadow of the original Goodyear logo just barely visible on it. It's a messy deal for sure...... I do hope they come up with a better solution. I do agree that the snap tires are too narrow for most applications but they syre are nice looking. Regards Bill (Duntov) -
HI: (Added Comment on intent....Note: This problem is apparent in two kits that I know of....my concern here is that if it proliferates to other offerings it could generate more severe problems in the future......Bill) This is not a kit review per se but rather an extension to one or more reviews already done here and elsewhere (both magazines). Before I go any further PLEASE be aware this post is NOT intended to re-open the hashed over discussion regarding the no-name tire issues that plague the model companies. While this is related to that subject it involves the problems in addressing that issue with replacement tires in the kits. So here we go…. Two of the more recent kit purchases that I have made have been the Revell Snap Kit '69 Camaro and the '72 Olds Cutlass Supreme kits. Both are excellent kits. I built the '69 Camaro and posted it in "under glass" some time ago and I am in the process of building the Olds as I write this. The issue here deals with the tires in both kits. Obviously, the tires were replaced with no-name items to address the aforementioned licensing issues. The problem is that the tires offered as replacements will simply not fit the original wheels that come with the kits. In the case of the Camaro the kit is rendered "un-buildable" if you attempt to use only the enclosed wheels and tires. The excellent ralley wheels will not slip into the tires despite any amount of re-milling or surgery. I did not take pictures of these wheels. In any event I had intended to use steelies and dog dish hub caps any way and I did so. But the fact remains a younger modeler without the parts stash of a veteran will not be able to finish the kit. This is unfortunate given the intent of the kit (i.e. younger modelers). The Olds suffers from the same problem only on a lesser scale. The stock no-name tires will fit the ralley wheels just fine and you can build the kit that way. However, the set of really beautiful chrome 23-24 inch mag wheels will not fit the tires that come with the kit. Again, no amount of rework will solve this issue. The mags measure about 20 millimeters in diameter across the "finished" area of the rims while the tires are about 16.5 millimeters across. See the photos below: The parts as they are provided in the Olds kit: The measurements of the parts: The no-fit issue: If you are still set on building the kit with the 23-24 inch mags you can substitute the excellent set from Revells '63 Corvette roadster snap kit…..they are a bit skinny but they actually are a nicer set of wheels than the ones in the Olds…and the tires are very nice….. see the pic below…. This is just a much better looking and cleaner cast wheel (espcially in the lug area): Additionally, the set of tires I have in the Olds kit are a "sanitized" version of the tires that have come in many previous kits. Specifically, they appear to be four of the rear tires from the 32 Ford highboy kit. Again...see the pictures above and you will recognize this tire. They are "OK" and fine for some applications. I have to sympathize with Revell and the other companies with respect to this licensing problem. It is however, unfortunate that someone has dropped the ball with respect to the quality control issues surrounding the replacement tires. I don't know if the factory simply ran out of tires and threw "something" in the box or hoped no one would notice the lack of fit with the mags and just build the car with the stock items. It's anyone's guess. I will finish the Olds, no problem there. I have wheel and tire sets that can be substituted. But the problem remains that somewhere along the line the replacement tire issue needs more attention. Finally, I am NOT bashing Revell here. They make excellent products. There just seems to be a quality control issue that needs to be addressed. I have attempted to contact them regarding this so let's see where that goes. If you have had this problem you may want to do the same. You can contact them through their web site in the replacement parts section. Here is the link…. http://www.revell.com/support/parts.html Regards Bill (Duntov) UPDATE ON THE TIRE ISSUE: I contacted Revell just aobut the time I postd this abd they promptly forwarded a set of the required tires to me by surface mail. Good response by Revell to problem. The resulting bilt up wheels and tires are quite nice. Thanks to Revell for making good on an already excellent product. Regards Bill (Duntov)
-
Stinkin' Stepside Chevy...
Duntov replied to Mr.Zombie's topic in Model Trucks: Pickups, Vans, SUVs, Light Commercial
Very Nice indeed!!! Here in Atlanta a truck like that would last about 10 minutes with a for sale sign on it........ most other places as well for that matter!!!!!!!!!!!! Thanks for sharing.... Regards Bill (Duntov) -
Terry: This project is moving along very well indeed!!! Keep it going.....you have resurected a real classic here and your crafstmanship is excellent....... You should consider an article about this one...... perhaps a two part one??? It would make for a great read.......keep going!!! Regards Bill (Duntov)
-
Don: Thanks for reviewing this kit. I always wondered what was inside and this tells me the kit is worth it....... the price point (compared too other things on the market) pretty much seals the deal. The subject is pretty interesting. I suspect I would do a very mild flat motor powered 50's hot rod with this......will be interested to see where you take yours....please keep us informed on what you do here!!! Regards Bill (Duntov)
-
Antonion.....very nice work....AND I totally agree with you it would be neat to have a 1:1 version of this truck.......a friend up in Portland did one (1:1) similar to this....straigh forward conversion and very simple elegance to be sure and very driveable too!!! Regards Bill (Duntov)
-
Very nice build.....I really like the cars that look like they would actually be driveable on the road.....you nailed this one!!! Regards Bill (Duntov)
-
Nice work Bob this is a real piece of fine workmanship....!!!! Regards Bill (Duntov)
-
This is some very nice work......thanks for sharing your work here......well done!!! Regards Bill (Duntov)