Matt Bacon
Members-
Posts
3,191 -
Joined
-
Last visited
Matt Bacon's Achievements

MCM Ohana (6/6)
-
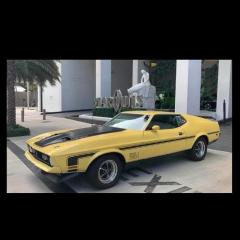
Hi, folks.... I know VERY little about these cars (a long time ago in a different country), but I'd like to build one of these: https://www.ringbrothers.com/gallery/invadr/3777 ...and it sure looks to me like this: is very similar. I know there IS a Monogram Grand National in 1/24 which would be the more accurate starting point, but I can't find one of those available. The above is affordable and available on eBay UK today. Are they basically the same car? It certainly looks like it... best, M.
-
You mean before 1967 ;-P? When has Rolling Stone ever not had opinions or been afraid to voice them? If you mean “Before I got old and stopped agreeing with them…” then we’ve all been there, some time, with some folks we used to believe in/idolise/trust… best, M.
-
@peteski I exchanged a few messages with Jason in early August about getting some custom wheels designed and printed. We agreed on the reference and dimensions and his last message said he’d be in touch to sign off the designs and I could then pay for the wheels. I haven’t heard anything since then, and I’ve a had no reply to my later messages asking if there’s any update. I’m not trying to hurry him up (there’s plenty in the stash to build!) but I’ve been met with radio silence for the last couple of months…I’m starting to worry about him. best, M.
-
Looks great… I must try one of these. The later designs don’t do anything for me, but that’s a stunner, especially in Yenko yellow! best, M.
-
Vintage white metal kit that originated with Auto Kits 50+ years ago, and then joined the SE Finecast range where it can still be found. I was originally going to do this one with a Tazio Nuvolari driver figure, but my stocks of seated period drivers are depleted, and a replacement proved hard to find. Probably doesn't matter too much because there's not a lot of space between the driver's seat and wheel, and you'd pretty much have to build the car around the figure, if you wanted to use one. So I thought it was time just to get this finished in time for Scale Model World next month. Pretty much out of the box. The only exception is that I wired the spokes of the wheels slightly differently from the instructions. The instructions use thicker wire wound back and forth over the hub so that only one length of wire goes through each slot on the rim and you move round one pair of slots at a time. I thought that left the wheels looking a bit sparse, so I used thinner wire and moved round the rim one slot at a time but came back to the slot I started from before moving round, effectively giving me twice the number of thinner spokes on both sides of the wheel. I think it's more convincing. The K3 Magnette is a chunkier and more purposeful car than I thought having only built the 1/32 Airfix one, and I think the kit captures its lines perfectly. It's also quite a heavy little beastie with all that white metal... best, M.
- 9 replies
-
- 10
-

-
I think the Veyron is in a league of its own. Personally, I think, if anyone was saying “LOOKIT ME” it was Ferdinand Piech. A lot of the modern hypercars are design statements for rich kids in the Gulf states, Knightsbridge, Gangnam and Shenzhen. But the Veyron is actually an engineer’s car, simply the ultimate expression of what every discipline that goes into a four-wheeled internal combustion engine powered vehicle is. It’s literally a “Masterpiece” for VW. It’s a Teutonic McLaren F1. That’s why Mate Rimac is making a 16 cylinder petrol successor in the Tourbillon. They are meant to be the last word. Some people, for sure, will buy them as trophies; some will buy them as investments, but the POINT of them is the engineering, executed without compromise (or realism, Piech’s critics said). I saw one in London a few years ago. They’re not very big or dramatic in the flesh… think an Audi TT that’s spent a lot of time at the gym. Certainly very restrained compared to a gold-wrapped Aventador or a McLaren Senna. Yes, an oil change or a set of boots are expensive. Two things: first, they ARE investments, anyone who bought one is making plenty every year, and a “full service history” is a pretty key part of it; secondly, and more importantly, even if you never do, you have to be able to plug in your special key, put your foot down and drive it to 267 mph, where the tire tread is pulling the sidewalls apart at 400g. Not everyone is Andy Wallace, but for pride and public liability reasons, VW Group needs to assume they might be… best, M.
-
AC 289 Sports MkIII, aka an Englishman's Cobra
Matt Bacon replied to Matt Bacon's topic in Model Cars
That’s brilliant, @Cobra Ned. You are a very lucky man! I love it (the model is the only way I could fulfil my desire for one in my life 😜 best, M. -
I can’t see the pictures from the UK so I’m guessing Imgur-hosted. One thing I learned doing mine: find a decal sheet with some area of clear carrier film, and apply the metal stickers to that, then apply them like any normal decal. They are a pain to get off the sheet and into the right place on the car, and much easier to apply to a flat sheet on your workbench. I suspect the older these kits get, the more temperamental the glue on those metal stickers will become, too. best, M.
-
Autoquiz #654 - Finished
Matt Bacon replied to carsntrucks4you's topic in Real or Model? / Auto ID Quiz
There’s something weird about the bumper/“spoiler” on that one. “The styling was everything the TR7 should have been” is just not true with those awful impact bumpers, which can only have been for the US market. I wonder it there’s a thriving aftermarket in parts to make it look as Harris Mann intended… beat, M. -
Fujimi Over Fender Set
Matt Bacon replied to martsky's topic in Car Aftermarket / Resin / 3D Printed
I think they were all originally tooled up as “tuner parts” in specific boxings of JDM kits. There are some that are pretty extreme, and others that can be more easily adapted. I’m glad I have them as a starting point, but whenever I’ve gone to think about using them, it’s felt like it would be a lot of work for the mods I have in mind… beat, M. -
Inspired by another recent build, I remembered I'd got one of these in the stash. Revell's older Alpina Roadster kit is based on the BMW Z8 that has recently been re-issued in James Bond form, but it comes with the bespoke Alpina wheels and a hard top rather than the raised hood in the base kit. When I searched online for Alpina Roadsters, I found one in a very distinctive BMW "Hellrot" that had been sold by Sotheby's from a Dubai collection that got me thinking.... (If you want one, there are also plenty on "Bring a Trailer" for s lot less than the half million dollars the Dubai car sold for...) For a kit that's a couple of decades old, Revell's offering is pretty impressive. There's very little engine detail, but that's no bad thing given that the Alpina engine is completely different from the original Z8 version, optimised for a relaxed GT rather than a sports car. The visible changes for a curbside are in the kit (roof, steering wheel, wheels) and the fit is excellent. It's a bit nerve-wracking getting the inside into the body, which wraps around and tucks under it. I'd highly recommend fitting the cockpit tub into the body first and letting it set in place, and then adding the chassis underside separately. Leave off the exhaust and rear suspension until you've got the chassis in place, and add the rear valance with exhausts last. This is the look I was going for: I'm pretty impressed by how well Revell nailed it... best, M.
- 7 replies
-
- 12
-


