astroracer
-
Posts
451 -
Joined
-
Last visited
Content Type
Profiles
Forums
Events
Gallery
Everything posted by astroracer
-
 Love the Astro's as well! Nice job on yours! I am building a full size '88 basically, from scratch. Full frame, tubbed at both ends, big block Chevy and a very low attitude... This "full size" kit has kept me away from the modeling bench for a while... Mark
-
A 1:1 20" wheel (just as an example) will be 3.33 " in diameter in 1/6th scale. That is just the wheel, no tire. Very expensive to 3D print. Do you have a style in mind? A simple salt flat style disc would be easy enough to hand form out of aluminum sheet over a bowling ball or other large diameter object. If you have any woodworker friends with a lathe they may be able to turn some rims out of hardwood. Fill and prime to get a smooth surface for paint. Same thing for tires, turn out of hardwood or black Delrin plastic. For the engine you can scratch build anything you want. Use a kit engine and photos as reference. Mark
-
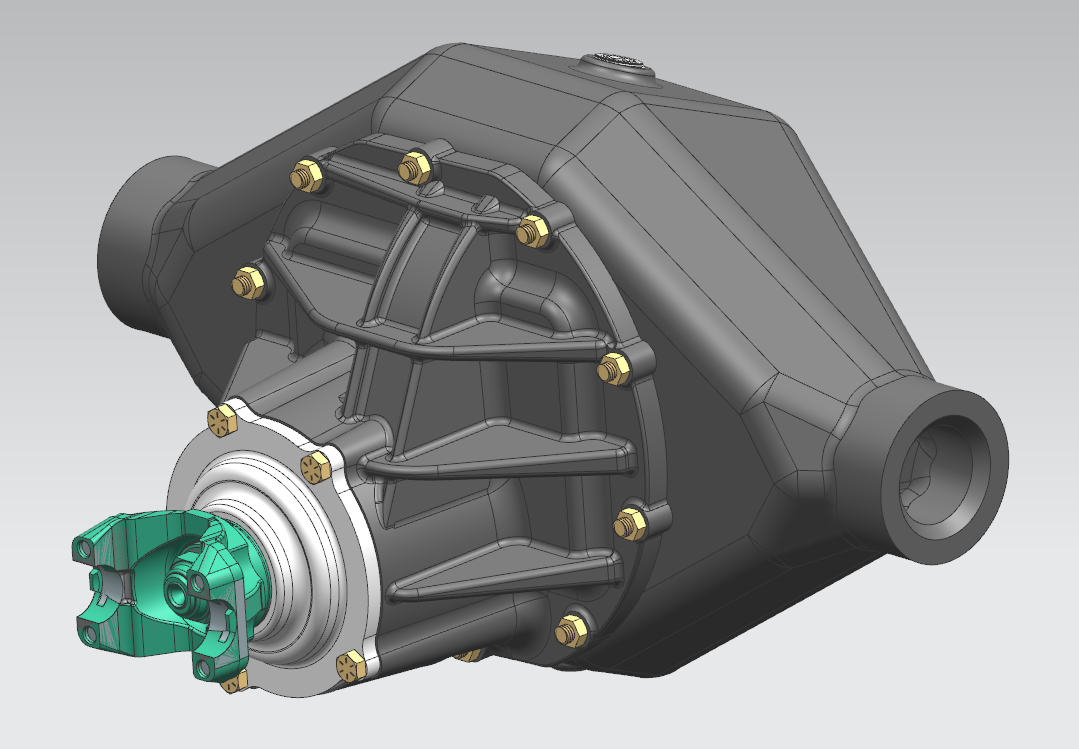
Just a tease for some more stuff I have been working on... I modeled the rear end up and sent it to Shapeways Monday. It will take a week or so to get it back but I'll get pics when it comes in…. The housing is modeled along the lines of Curries Fab 9 fabricated sheet metal housing. I also included some drive shaft yokes to build a shaft. I will make the drive shaft and axle tubes out of aluminum tubing. The first pic is of the housing assembled. the last two are as I sent them to Shapeways for printing.
-
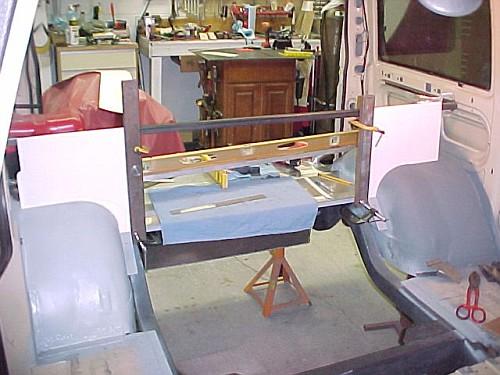
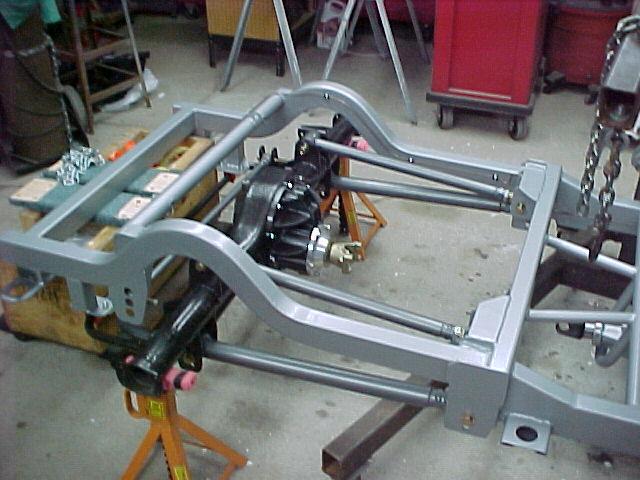
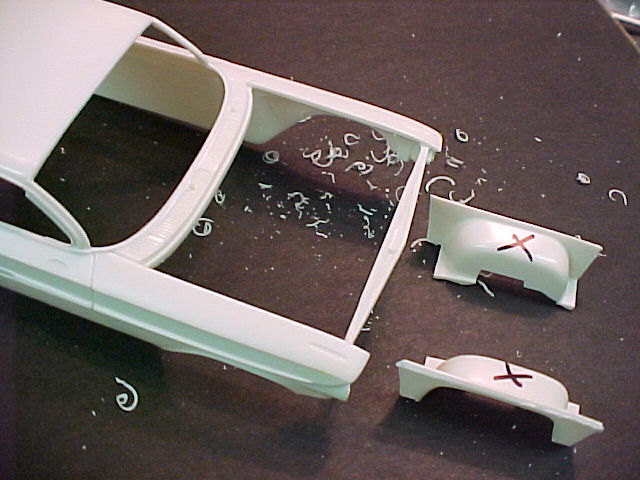
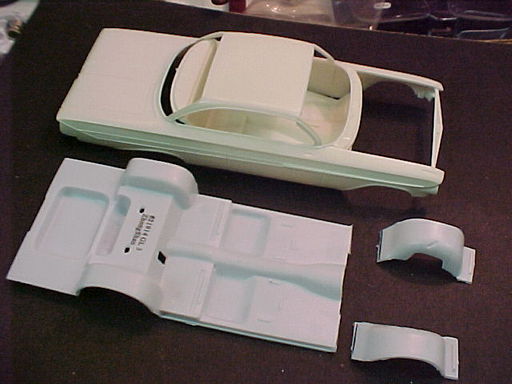
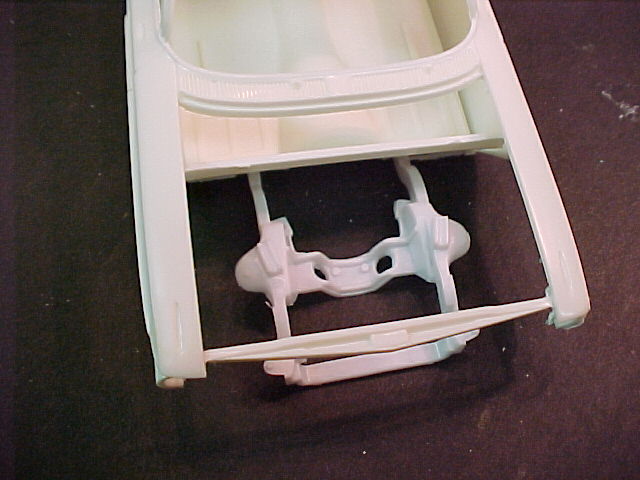
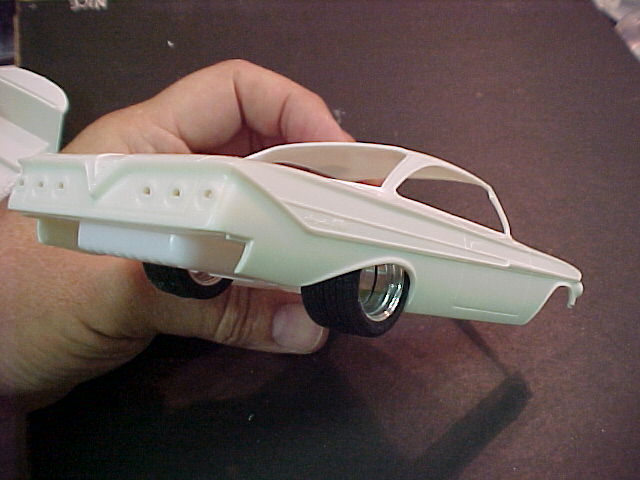
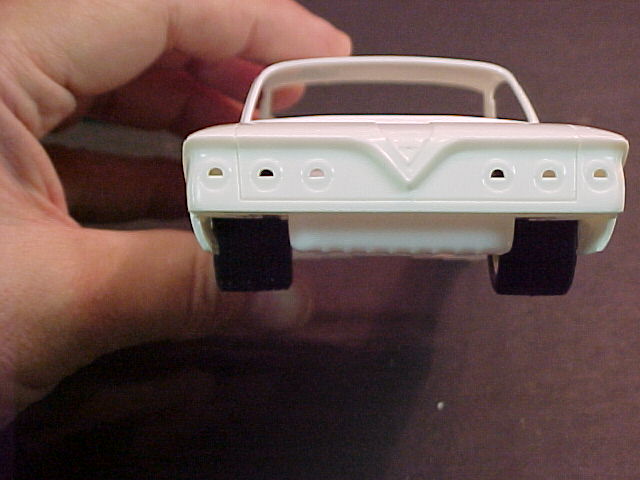
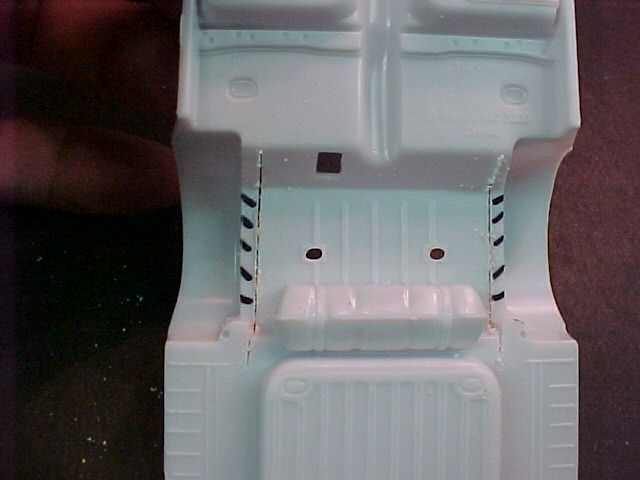
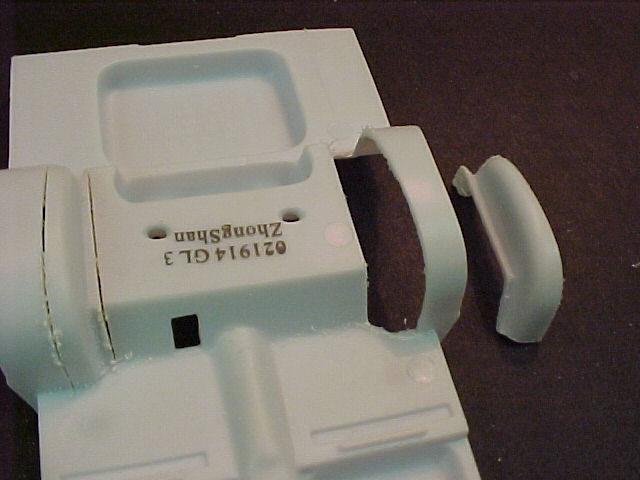
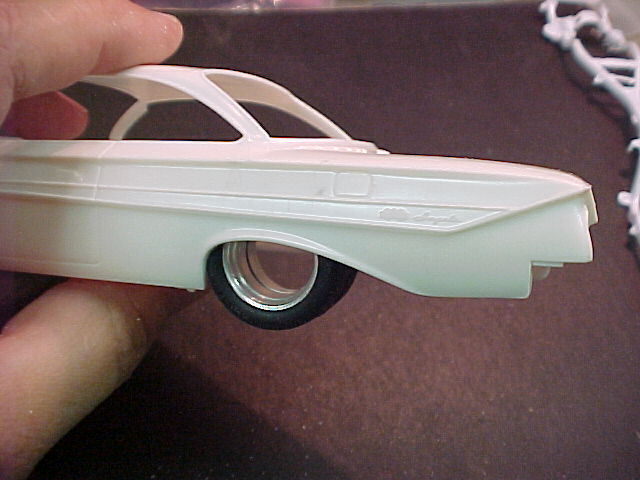
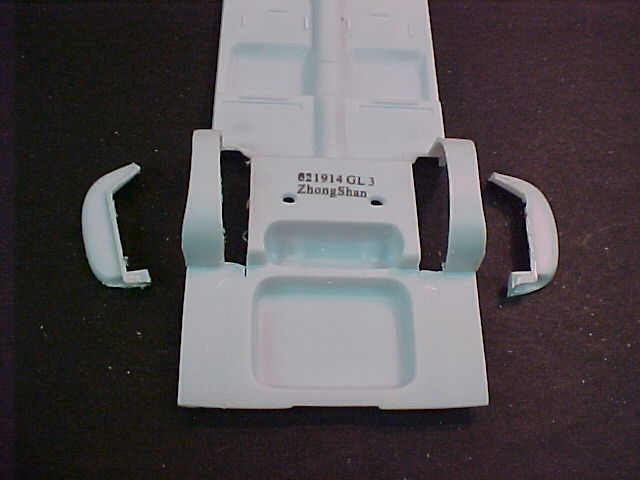
I took some time to do some chassis prep on the Pro Touring build. I am starting with a Lindeberg '61 Impala. I am kit bashing the chassis out of Revell's '64 Impala to get the separate chassis/pan. I trimmed out the Lindeberg front inner wheel wells from the body and cut off the inners from the '64 chassis pan. This will give me plenty of room to route turbos and plumbing. I will replace the missing panels with aluminum pieces. I also made some mods to the rear inner wheel wells so I can get some bigger tires in there. Doing a "Mini-Tub" using the stock inners, cut out, trimmed and then glued back in. The gap will be filled with sheet plastic. Thanks for looking Mark
-
I started this thread over in the Aftermarket/Resin Section. I wasn't planning for it to become a build thread but that is the way it is heading. It was suggested I move it over to the "on the workbench" section, so, here it is. I modeled these in 3D CAD and had Shapeways print them. Need a nice pair of turbos for a Pro Touring project I am bubbling up. I did a set "mirror image" so I can build them symmetrically in the engine compartment. I also made them three pieces so the inlets and outlets can be clocked for easier orientation. to get the pipes pointed in the right directions. When I model parts I am going to print for model building I model them full size, 1:1. I can then scale them down to whatever size I want. 1/25th, 1/16th, even 1/12th or 1/8th. The detail starts to go away at the smaller scales but the bigger ones, 1/16th and above will show everything. Any comments or suggestions are welcome. Mark
-
3D printed Turbo chargers
astroracer replied to astroracer's topic in Car Aftermarket / Resin / 3D Printed
Thanks guys, I should probably move this stuff over to the "on the bench" forum. I didn't think it would turn into a build thread but I guess that is the direction it is taking. And thanks for the comments. I have been doing 3D CAD Design for over 30 years so this stuff is very easy for me to do. As far as selling? We'll see, I want to get something built with the parts to see how they look before that happens. Having ran Machined Aluminum Specialties for 15 years I know how to market and sell the product. I also know the price points as I have this stuff printed and most modelers aren't going to want to pay the price... Mark -
3D printed Turbo chargers
astroracer replied to astroracer's topic in Car Aftermarket / Resin / 3D Printed
Can anyone other then myself see this thread? Just curious because I would think there would be a few questions or comments about what I am doing and how I am doing it... If no one can see it I'll stop posting to it... Just a tease for some more stuff I have been working on... -
Yea, they do, at least in the Flint Miller Rd. store. The model aisle has gone from a full length aisle to about a 1/4 of one though with pretty slim pickings.
-
Johan Pro Street Rambler kit question
astroracer replied to USAC_1957's topic in Car Kit News & Reviews
I actually started to "Pro Street" one of these using the small rear tire from the Sprint Car kits. I'll dig it out and get some pics. The back half is real easy to narrow because the rails are so straight. Mark -
3D printed Turbo chargers
astroracer replied to astroracer's topic in Car Aftermarket / Resin / 3D Printed
Wow! No comments at all? That's surprising... Anyway, I took some time to do some chassis prep on the Pro Touring build. I am starting with a Lindeberg '61 Impala. I am kit bashing the chassis out of Revell's '64 Impala to get the separate chassis/pan. I trimmed out the Lindeberg front inner wheel wells from the body and cut off the inners from the '64 chassis pan. This will give me plenty of room to route turbos and plumbing. I will replace the missing panels with aluminum pieces. I also made some mods to the rear inner wheel wells so I can get some bigger tires in there. Doing a "Mini-Tub" using the stock inners, cut out, trimmed and then glued back in. The gap will be filled with sheet plastic. Thanks for looking Mark -
I noticed that too on the one I just got at JoAnn's. (With a 40% off coupon.)
-
3D printed Turbo chargers
astroracer replied to astroracer's topic in Car Aftermarket / Resin / 3D Printed
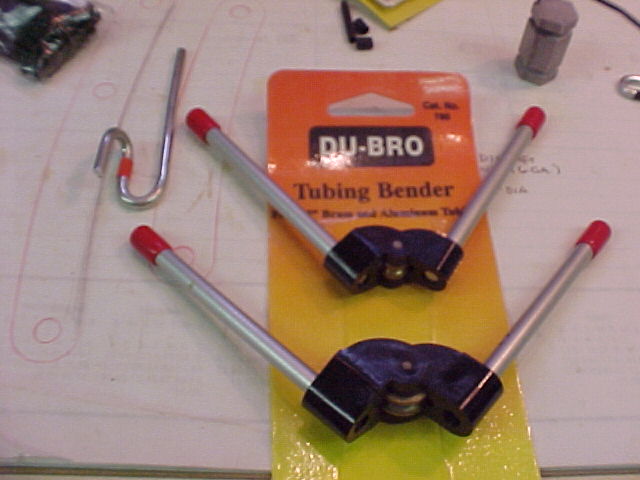
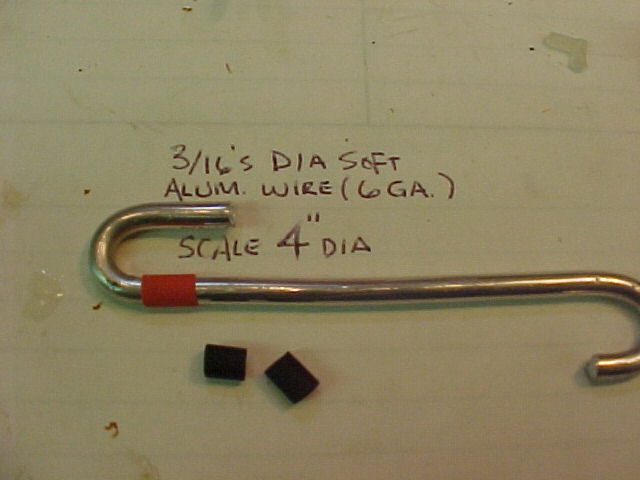
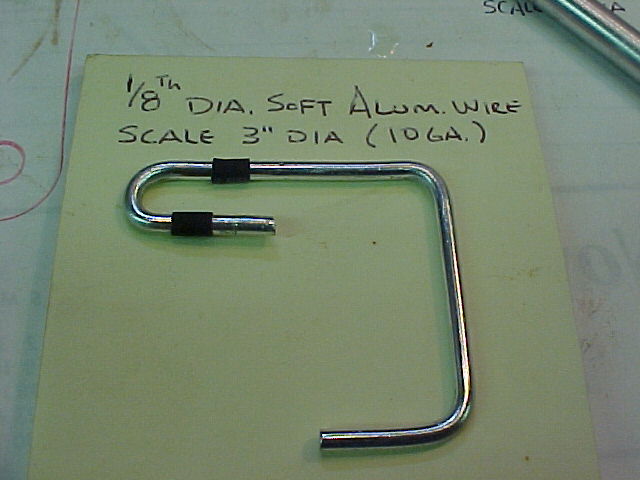
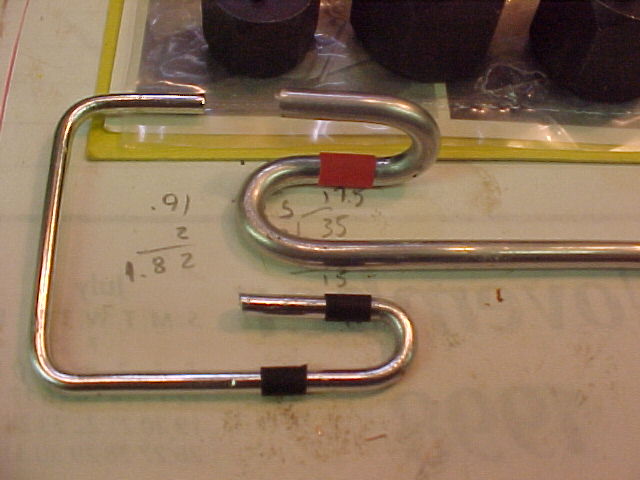
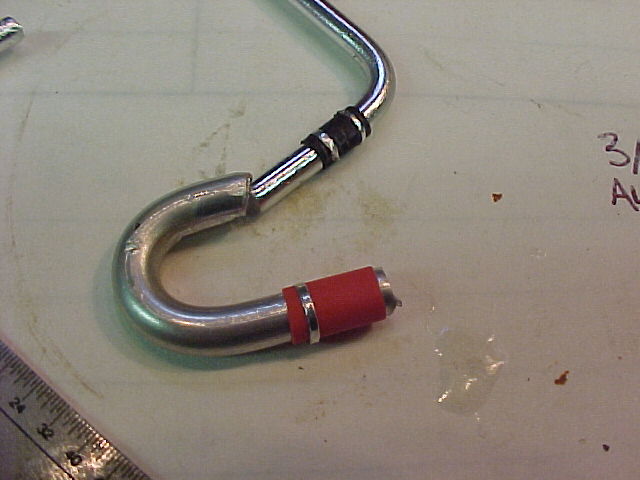
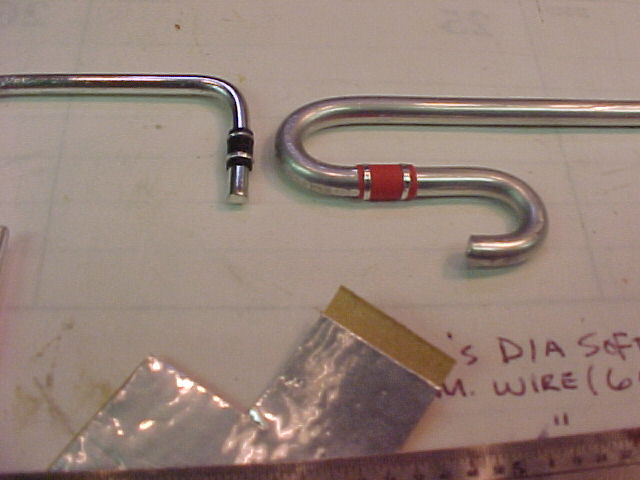
Did a little experimenting today. Working up some piping with soft aluminum wire, heat shrink tubing and some aluminum furnace tape. These are pretty rough as I did a quick and dirty proof of concept on what I though would look pretty good to model the pipes and couplers in scale. What do you think? With a little time and more careful building I think these will look great. Mark
-
3D printed Turbo chargers
astroracer replied to astroracer's topic in Car Aftermarket / Resin / 3D Printed
I'm not selling anything at this time so I don't have a "store". Sorry. -
3D printed Turbo chargers
astroracer replied to astroracer's topic in Car Aftermarket / Resin / 3D Printed
Yes Sir. Modeled from a few pics I used for reference. Took me a couple of hours from start to finish. Of course I have been using CAD programs for over 30 years. Sizes are relative based on the 3 and 4 inch pipe used to plumb the inlets and outlets. I basically just made them look correct. Mark -
I modeled these in 3D CAD and had Shapeways print them. Need a nice pair of turbos for a Pro Touring project I am bubbling up. I did a set "mirror image" so I can build them symmetrically in the engine compartment. I also made them three pieces so the inlets and outlets can be clocked for easier orientation. to get the pipes pointed in the right directions. When I model parts I am going to print for model building I model them full size, 1:1. I can then scale them down to whatever size I want. 1/25th, 1/16th, even 1/12th or 1/8th. The detail starts to go away at the smaller scales but the bigger ones, 1/16th and above will show everything. Any comments or suggestions are welcome. Mark
-
They are full scale, 1:1. They can be scaled down to whatever you want though...
-
does anyone make 1/24 or 1/25 scale...
astroracer replied to oldr-n-drt's topic in Car Aftermarket / Resin / 3D Printed
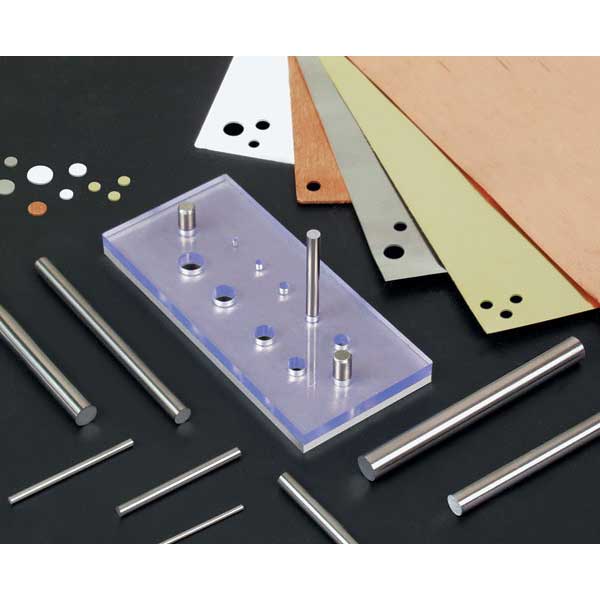
Thanks Bill, but not really. I use one of these a lot in the shop making one-off gaskets and templates for 1 to 1 cars I am building. My punch is much bigger, but the principal is the same. https://www.micromark.com/Micro-Punch-Set
-
does anyone make 1/24 or 1/25 scale...
astroracer replied to oldr-n-drt's topic in Car Aftermarket / Resin / 3D Printed
Make them. The 1/25th scale diameter of the rivet head will be 0.01 ( a #87 drill) OR .25mm's. Stack a couple of pieces of clear plastic (1/8th inch or so thick) and use the drill to drill a hole through both pieces. Lay some aluminum foil in between and punch out a circle with the back side of the drill. This will get you as many rivets as you will ever use in a couple of minutes... Mark -
Pro Touring 69 Camaro Chassis Questions?
astroracer replied to KWT's topic in Model Building Questions and Answers
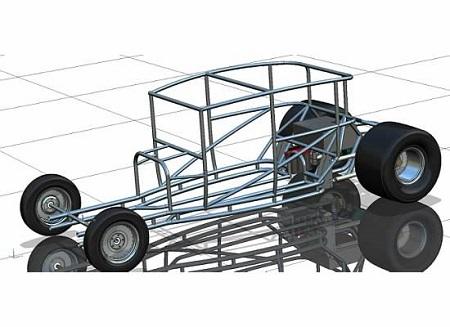
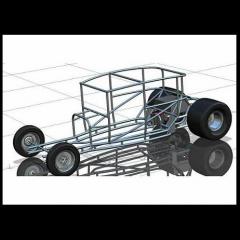
http://www.schwartzperformance.com/1970-1981-f-body-camaro-firebird-chassis-full-frame/http://www.schwartzperformance.com/1970-1981-f-body-camaro-firebird-chassis-full-frame/ http://roadstershop.com/product/full-chassis/1967-69-camaro-spec-chassis/http://roadstershop.com/product/full-chassis/1967-69-camaro-spec-chassis/ There are a number of suppliers building full frames for the F-bodies. You can build whatever you need by studying the real 1:1 photos and making your frame and suspension look the part. They don't have to be exact but getting the parts to look correct in scale is important. Mark -
Small photo-etched parts can be cleaned and painted just like the plastic. There is no need to use self-etching primer as long as the parts are sanded and cleaned along with the base plastic pieces. Self-etching is important on aluminum, especially on 1:1 (1 to 1) builds, but is not a requirement when painting stainless or nickle pieces which most P.E. parts are made from. Mark
-
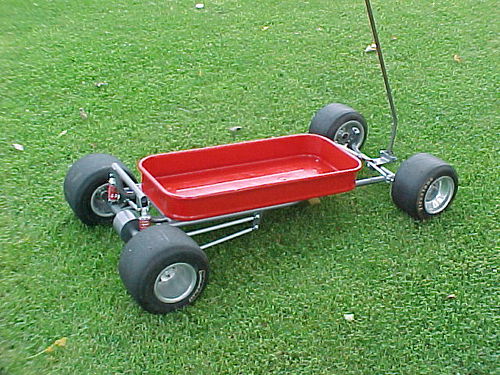
I have the tires, wheels and hubs modeled in 3D. I did them for a wagon I built a couple of years ago.
-
I have a bit of experience being an aftermarket supplier. I ran Machined Aluminum Specialties for 15 years before having to get out of it. One thing you will find very quickly is most model builders are very fickle (and cheap)... You guys let me know if I'm lying... A "what if" thread is a waste of time for what you want to do unless you can constrain the "what if's" to a narrow subject band. Develop a list of subjects and don't allow deviation from that list. Make it a poll, pick one or two off this list, kind of thing. If you don't control the input you will get requests for everything from a dome light for a '52 Rambler to window slats for a '69 Mustang. One person may buy one of each but, if it costs more then a dollar, it'll be too spendy. See where I'm going with this? Voice of experience here... 100 guys will holler "I'll buy 10 of those if you make them!" You make them and 10 guys MAY buy 1... That's just the way it is. And it's the same issue with the bodies you are doing. 3D printed pieces are too expensive for the casual modeler to consider. Resin casting brings the piece cost down but you still have to have a market to justify the upfront cost and time. It's a very niche market for the custom stuff anyway and, if there is a ton of scratch building to do the niche gets even smaller. And I am in no way trying to discourage you here. You just need to realize what you are getting into in this model car aftermarket "hobby". Keep up the good work, your models, both 3D and printed, look great. Mark
-
Good plan. My direction would be to resin cast it now. Use the resin piece to "finish" your panel lines and add additional detail. Then re-cast as the finished master. Much less cost and dinking around with buying & finishing another printed piece. How complete is the kit going to be? You will find most guys buying this will want to be able to just put it together with zero scratch building. Same issue with the Roach Coach. If it's not a complete kit you will have a few buyers where as a complete model will attract many more. Mark
-
You have to bury it primer. Then sand it to smooth out the texture and all of the "resolution transitions" you can see in the last three pics. That's the hard part, priming and sanding enough to hide the printing discrepancies but not so much you destroy the detail in the part. The 3D printed material is very soft and sands much easier compared to styrene. It is also softer then most resins so you really have to go easy with it. Mark
-
Just a comment. Your panel lines look to be very shallow. You may want to increase those a bit so they don't get buried in the primer/smoothing stage of finishing the 3D printed model. It does look pretty good though. I imagine the price point between the white, strong and flexible and the Frosted Ultra Fine Detail is pretty big. Mark


.JPG.e9716fb4f0b5d531e99d683a4d920e72.JPG)
.JPG.c7bade7a837d3309a0f98289d34bdb7e.JPG)
.JPG.894de592abf6421f329672d8d5d7a81b.JPG)