-
Posts
451 -
Joined
-
Last visited
Content Type
Profiles
Forums
Events
Gallery
Everything posted by astroracer
-
Durand, Michigan, Labor Day weekend, Saturday, September 2nd. Held in conjunction with the Durand End of Summer Cruise full size car show there will be a lot to do and see. Hundreds of show cars, a burn out contest and 50's music all day long The model car show is open to the public. 1st, 2nd & 3rd place peoples choice awards for Junior, Senior and Adult categories with a Peoples Choice "Best Of Show". This is not a judged show. Models will not be handled once they are set on the table Trophies, door prizes, etc. Flint Kustom Klassics Model Car Club is hosting with trophies and prizes donated by club members and Deans Hobby Stop. If you are local to Durand or surrounding communities please come out and support the model car hobby. Mark Smakal
-

Photo etching parts
astroracer replied to Iroc crazy's topic in Car Aftermarket / Resin / 3D Printed
"3D printed in White Strong & Flexible: White nylon plastic with a matte finish and slight grainy feel" Just be aware this is going to take a lot of work to smooth out for paint. Lots of primer surfacer and sanding... Mark -

More and more sanding (Shapeways 66 Pro mod Nova)
astroracer replied to NYLIBUD's topic in WIP: Drag Racing Models
What primer are you using? It looks like DuPont Sandable Grey? You will need to sand out ALL of the inclusions in the rear tulip and deck lid. Sanding would be a lot easier if that spoiler could be taken off... Are you using any sanding sticks, blocks or files to get into the tight corners and sculpted areas? A nice set of Riffler files would make short work of the trim areas. This is a lot of work as you are finding out.:) All of this work will be required for EVERY printed body or part you buy. That is why I don't sell my 3D printed parts. The 3d printed parts are nice as a "starting point" but I don't consider them saleable product until they are finished to a paintable stage and then resin cast. Mark -

More and more sanding (Shapeways 66 Pro mod Nova)
astroracer replied to NYLIBUD's topic in WIP: Drag Racing Models
The 3D printing process is based on resolution. Different types of printers also have an input on the quality of the final product. Lower resolution machines use less "passes" to make the part. This means there is less detail and more graininess. A high resolution printer will give finer detail and less graininess but that comes at a cost of time and higher end product price. Ron, I would stick with the 400 until you have ALL of the graininess worked out. Going to finer grits does nothing but add time to the job. Keep burying the body in primer surfacer until you are done sanding. What paints are you using/going to use for final color? Mark -
I spray as much as I can outside the shop. Get the body prepped and mounted on your stand, step outside and shoot it. Bring it back in and hang it upside down to keep dust and bits from falling on it. Most of my reasoning for spraying outside is to reduce overspray in the shop that gets on everything. If I can't spray outside, too windy, rainy, etc. I have a booth I use for these situations. It gets "most" of the overspray but not all of it. Spraying in the shop can be done if you set a box fan in a window to blow out. Step back from the fan 5 or 6' and spray toward it. The draw will pull all of the fumes and overspray away from you toward the window and out of the shop. Mark
-
Do a search, there is a TON of discussion on this subject already on the site. You can be wowed, cowed or plowed by this technology but, what you need to realize is, you have to be able to design and model the printed parts in 3D, with a 3D CAD program, in order to print them. They don't grow on sprues, if you know what I mean. Also, desk top printers in an affordable price range will NOT print to the quality you see in the above Shapeway parts. A desk top printer does not have the resolution to print with that quality. It will not be a solution, it will be a detriment. And again, without 3D parts, you will have a lump sitting on your desk. Mark
-
Any good stripper will work well. If you hit the model with some coarse ScotchBrite before applying the stripper that will open the paint up and let the stripper work better/quicker. Be very sure to wash the car afterwards to remove ALL of the stripper residue. PlastiKote Grey or DuPont's Sandable grey primer/surfacer will do you well for getting the car ready for new paint. Mark
-

1979 Firebird Formula?
astroracer replied to DrSprue's topic in General Automotive Talk (Trucks and Cars)
The front fascia change in '77 also changed the hoods at the front. The hoods became flatter, losing the curvy sections at the outer, front corners that you see in Jeff's pics. They also lost the circulation vents at the base of the windshield. You "could" use an earlier then '77 hood but you would have more work to do to get it to match the later fascia. Mark -
Copy, paste. Quick and easy.
-

cutting resin question??
astroracer replied to oldr-n-drt's topic in Car Aftermarket / Resin / 3D Printed
Use the #11 blade as suggested. It will cut the resin easily. Make a template of the door opening out of a file card. Cut it so the "door" is missing, leaving the outside shape to trace along. Start with a new blade and very lightly scribe the opening, tracing the template as you go. Once you get a decent groove going switch over to an old blade. I will break the tip off to create a sharp edge to drag through the cut. The sharp edge should peel the resin out very quickly. Once the door is cut out you can reduce the gap, which is a scale 1/2 inch now, by gluing .010 strip stock to the edge of the door and sanding it flush to the outside and inside. Also think about creating the door jamb and relieving the door so it shuts against the jamb. Mark -
I made one for a truck I was working on MANY years ago. I used the rear panel and lights from a Corvette kit. I can get pics if you like. Mark
-
If you don't have the money to buy parts you need to develop your scratch building skills... Mark
-

PE headlight grills for '53 Corvette
astroracer replied to TomZ's topic in Model Building Questions and Answers
I would be hesitant to put any heat to them if they are N/S. If they are they already fairly "soft". Good luck with the project. Shoot some pics, before and after, just to document the knowledge gained. Mark -

PE headlight grills for '53 Corvette
astroracer replied to TomZ's topic in Model Building Questions and Answers
Forming the PE parts will depend on what they are made from. I usually used 1/2 hard stainless for most of my product line and that stuff will not bend smoothly in a compound application. If it is nickel/silver you may have a chance but I don't know what you have. Trying to form those small "wires" that make up the grille will probably just buckle them as there is no place for them to "shrink" or "stretch" to as you are forming them. The other issue is, if the parts were not "designed" to be formed, you may have parts that are to small or just don't look right after they are formed. Not knowing how they were designed I am only mentioning this so you are aware of the issue. Mark -
Welcome to the forum Art! Where in Mid-Mich are you? I am west of Flint about 25 miles. Mark
- 10 replies
-
- michigan
- michigander
-
(and 1 more)
Tagged with:
-

Dumb question re. fittings
astroracer replied to landman's topic in Model Building Questions and Answers
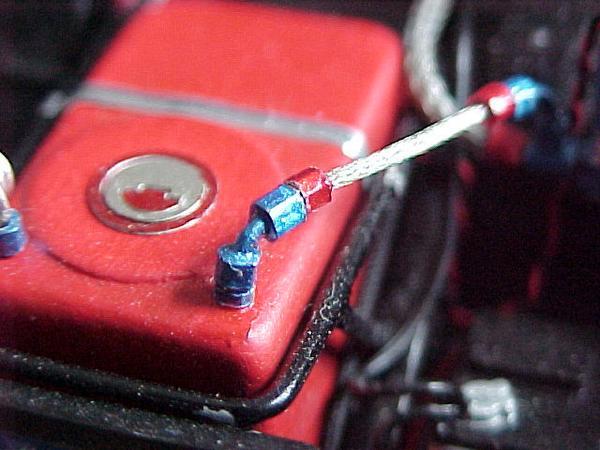
1/16th dia aluminum tubing, a file and a hex shaped pin vise. Clamp the tubing in the pin vise and file off one side. Roll the pin vise to the next flat and file that side. keep going until you have filed off all 6 sides and made the tubing hex shaped. Cut off individual pieces with a hobby knife. paint with Testor's Candy blue and stoplight red. Use soft hobby wire to make the Els. That is how I did all of these fittings for my GN in 1989... Cost me about 3 bucks for the tubing and paint. Mark -

1/16th scale question
astroracer replied to DrKerry's topic in General Automotive Talk (Trucks and Cars)
I have some 1/16th stuff out of a funny car kit you can use. PM me. Mark -

1/16th scale question
astroracer replied to DrKerry's topic in General Automotive Talk (Trucks and Cars)
Kerry, Starting with any 1/16th scale hard top, '57, '55 or the Corvette you will have to fab up your own straight axle and ladder bars. I would suggest looking at the full size aftermarket suppliers. Speedway has a few of these "gasser style" front suspensions sold as kits and, looking at the pics you should be able to whip a good looking replica in 1/16th scale. OR... use one of the 1/25th scale kits as a guide. just measure everything and scale it up accordingly Mark Check out this thread... http://www.modelcarsmag.com/forums/topic/122253-my-112-scale-57-chevy-gasser/ -
The scale part is easy. Most normal lug studs, mid-size cars are 7/16th's of an inch in diameter. That's .44 in decimal, or nearly a half inch (.50). using .50 as a starting point is okay, it will look "correct" in 1/25th scale. Divide that .50 by 25. .5 / 25 = 0.02 (or 20 thousandths). That is the required diameter for your new lug stud and nut. A #0000-160 screw is as close as you will get. Google that size. Amazon may have a source. This is one I found. And be aware these are not cheap or free... http://www.componentsupplycompany.com/product_pages/miniature-machine-screws.html There are a number of miniature hardware providers out there. Just Google Micro-miniature screws. I used to sell packs of small screws and detailing stuff when I was running Machined Aluminum Specialties. Another option would be to go Metric in your search. 0.5mm's is the same as .020. so you could use a metric screw if you can find those easier then imperial. Mark
-

Aftermarket Woes
astroracer replied to ACody9879's topic in General Automotive Talk (Trucks and Cars)
Good looking seat belts can be made with medical or athletic tape. use black for black and the white can be painted any color you desire. I included the tape in all of my seat belt kits when I was still in the business... mark -
Like Rocky said. You and the caster in question need to agree on a reimbursement that you are comfortable with. When I was doing master work for R&R we worked out numerous ways to cover my time. Cash and parts was one way and he did some one-off stuff for me as well. Just depends on what you need/want. And, like Rocky also said, if the "master" needs a lot of work the caster will be less likely to offer a lot. I fixed a lot of stuff Ray got in from other folks that was "casting ready" in their minds... Mark
-
Yes it does. if you have a shop vac handy that helps. I ended up doing all of the foam outside when I was a kid. Mom wasn't real happy and shop vacs were not an option back then.
-
Building up a foam base shouldn't be that hard. using foam and trimming it with an electric carving knife is how a lot of rock and snow formations are created on model car and train layouts. Look for the spray on "popcorn" textured ceiling paint at the big box stores. http://www.homedepot.com/p/Homax-14-oz-Ceiling-Popcorn-Easy-Patch-Spray-Texture-4094/202061372 That would make the bank look very realistic with all of the small chunks and pieces left after the plow blows it off the road. Mark


