astroracer
-
Posts
451 -
Joined
-
Last visited
Content Type
Profiles
Forums
Events
Gallery
Everything posted by astroracer
-
Wider & Longer Body... "49 Merc
astroracer replied to CountryJoe's topic in Model Building Questions and Answers
What you need to be aware of is called "Perspective". Lowering and chopping changes the perspective in one direction. Widening and lengthening adds two more directions and this is where you have to pay attention to how everything "looks" when the changes are complete. Some can be good, some can be bad. Most are bad if done excessively, throwing off the perspective and interrupting the way the body flows. If you take a few good, clear pictures of the sides, top, front and rear of the car you can cut them up and stretch and tweak to your hearts content to get the look you are after. Doing this will help to maintain the perspective and get you the look you want well before you do any cutting on the plastic. It will also guide you where to make the cuts and additions. Hope this helps. Mark -
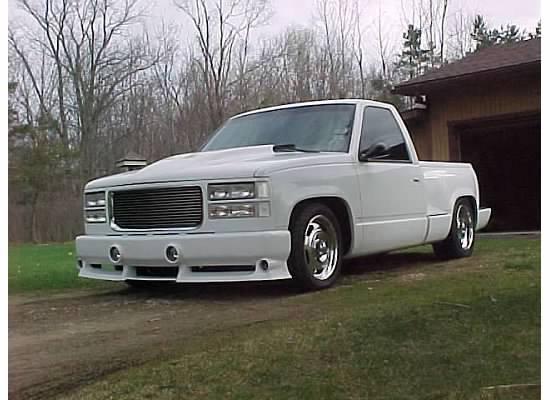
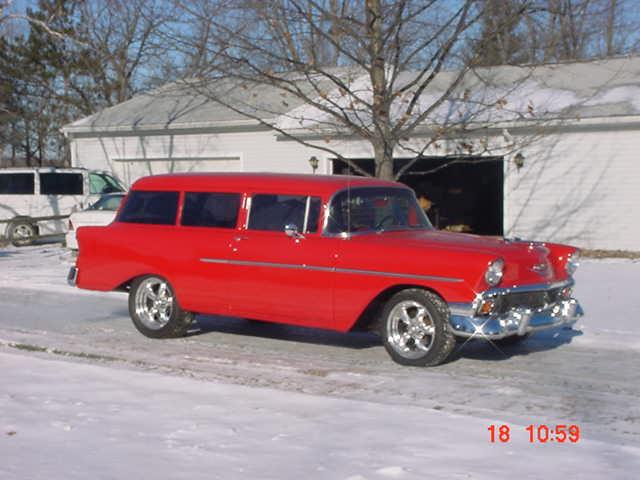
Hi Nola! Welcome to the forum! So much experience and knowledge here it can be overwhelming. We seem to have the same tastes in vehicles. I have a '95 GMC truck, a '56 Chevy wagon and am currently building an Astro Van.

-
Guys... I did read the other replies, thank you. This is not rocket science. Cut your own strips, out of a known material, and be done with it. How hard can it be? The 3M tape is designed for this and it cuts very easily... Putting it on a piece of glass makes it simple. Mark P.S. Get 3M "Fine Line" tape. Your local auto paint supply will carry it. It is not crepe and will cut cleanly with a sharp hobby knife. Try it...
-
Cut your own... It's easy. I use 3M Fine Line masking tape. 1/4" or 1/2" is easy to work with. Layout 12" or so on a sheet of glass and cut it with a sharp hobby knife and a steel straightedge. Cut three or four lines and you'll have plenty to use on a model. What you don't use, just leave it on the glass till next time. The issue with the pin striping tape is compatibility with hot solvents and formability. You know the Fine Line will work with hot solvents and it will also go around corners. It will also stay where you put it. It's all I ever use just because I know it will work with no second guessing... Mark
-
Accel Turbo-Sonic on a '70 Monte. This is the single turbo kit rather then the dual but it does get the point across.
-
Spray Paint Fogging
astroracer replied to Conway1979's topic in Model Building Questions and Answers
Try heating the rattle can paint in hot water before spraying. Heating the paint will help with the humidity AND help the paint flow after spraying. I also set up a drying box before I spray paint. Just a big cardboard box with a clamp-on trouble lite in it. Turn on the lite before you spray so the box is already warm when you put the model in. I'll leave it for a couple of hours. If you shoot lacquer it will be dry enough to wet sand or continue painting if doing multiple colors. Mark -
Nail polish, simple as that. It is lacquer based, thins easily and sprays very well. Go to the Dollar Store and pick up three bottles of polish to do one model. The colors are endless and, for 5 or 6 bucks, the price can't be beat. You will need to prime with PlastiKote or Dupli-Color light grey sandable primer. Mark
-
Just a thought about 3D printing
astroracer replied to mikemodeler's topic in Car Aftermarket / Resin / 3D Printed
As always, producing the 3D CAD geometry is the trick. ESPECIALLY when you are trying to replicate trans-kit parts. When I was doing the artwork for my photo-etched kits I HAD to have the model kit on hand to measure so the detail pieces would actually fit the model with little to no modification. The same is true for 3D Modeled components. You will have to have the target kit in your hands to make sure the new parts will fit. Otherwise you are just wasting your time. The other aspect is modeling the parts so they actually look like the original parts you are replicating. Axles, engines, grills, etc... If you can't do that with any accuracy you are wasting your time. Without pictures and measurements to use for modeling no one will buy your "kit" because it doesn't look correct or fit well. There is some prep work involved in getting a 3D Printed part ready for casting but that is easy compared to scratch building the part. Mark -
Frosted Extreme Detail. Works very well for the small details needed for model car parts. Mark
-
3D printing growing as we speak
astroracer replied to bbowser's topic in General Automotive Talk (Trucks and Cars)
As I get older it does seem to be an easier option... -
3D printing growing as we speak
astroracer replied to bbowser's topic in General Automotive Talk (Trucks and Cars)
No, not going to happen on THAT printer... It does not have the resolution or ability to print anything that fine. It would be like trying to paint a 1/24th scale instrument cluster with a 4" brush. Just can't do it. Mark -
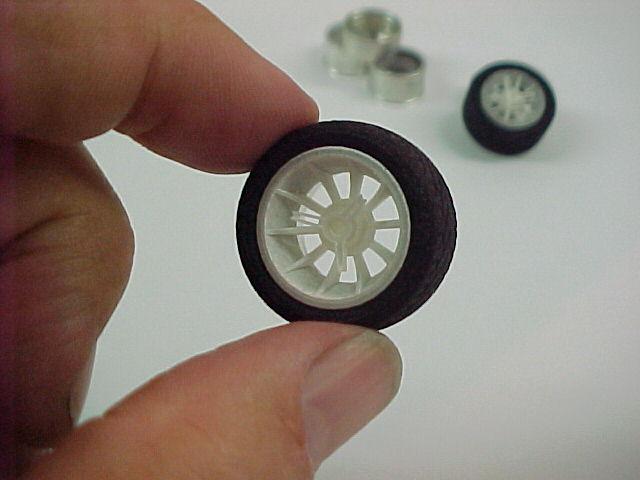
3D printing growing as we speak
astroracer replied to bbowser's topic in General Automotive Talk (Trucks and Cars)
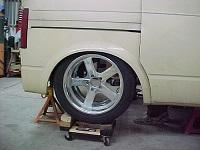
I've been doing it for years and also repeating myself time and time again.... This is where 3D CAD programs come into the mix along with the skills to model parts in 3D. Having a 3D printer does no one any good until they can model the parts they need in 3D. The printer has to have an STL file to print a 3D part... The tire and wheel in the pic were modeled in 3D, exported as STL files and sent to Shapeways to print... Mark
-
filling and sanding resin
astroracer replied to strez's topic in Model Building Questions and Answers
Spot glazing putty works fine for shallow pinholes, notice I said shallow... Just be careful to not apply it too thick. It does have a high shrink rate and will continue to shrink for a long time as it cures. That is why I recommend the 2 part for holes and such. Some of the pinholes can be pretty deep. The 2 part does not shrink so there is no danger of "sink marks" in a finished paint job after using it. Mark -
filling and sanding resin
astroracer replied to strez's topic in Model Building Questions and Answers
I know a lot of guys use Superglue to fill pinholes on resin but you have to remember the resin is MUCH softer then the superglue. You have a very good chance of sanding divots around the pile of superglue if you are not careful. I would suggest using a 2 part polyester putty to do any body work on resin. it sands just like the resin so you aren't going to create more problems then you fix with it. Mark -
Regular paint vs primer
astroracer replied to Len Colombo's topic in Model Building Questions and Answers
"Regular" paint, even if it is flat, has a different composition then "primer". Primer is meant to fill imperfections and be sandable so it has more solid material in it. A couple of coats of primer/surfacer will sand down MUCH better then a couple of coats of top coat intended paint. The primer allows you to sand it down, not only to level surfaces but to cover body work and feather-edge body worked areas. Regular paint is not intended for that purpose. Mark -
Mickey Thompson Challenger engines
astroracer replied to landman's topic in General Automotive Talk (Trucks and Cars)
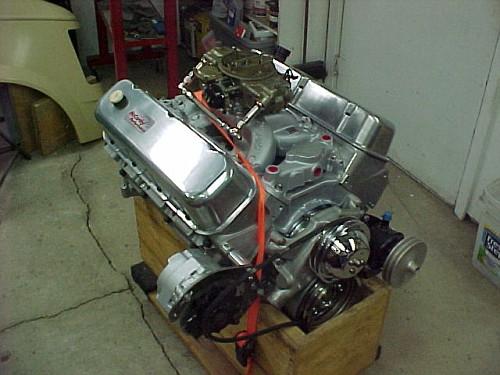
It really doesn't matter when it comes to replicating them. Any Pontiac motor will work. The blocks, cylinder heads and intake manifolds from 389 thru 455's are all physically the same size. The only real differences are internal. Mark -
Body Fillers - what do you use?
astroracer replied to BDSchindler's topic in Model Building Questions and Answers
Okay, I sent a customer question to USC right from their site... If anyone else is interested in a downsized Icing container feel free to do the same. http://uschem.com/index.cfm?page=products&catid=15&pid=1 Mark -
Body Fillers - what do you use?
astroracer replied to BDSchindler's topic in Model Building Questions and Answers
The one part putties usually shrink way to much. I have never used the Tamiya (never had call to buy any) but I know the one part spot putties will shrink a lot when applied to thick. They also have tendency to attack the plastic and don't feather out as well as the two parts do. I have always used automotive based primers and paints and find the spot putties will also raise a bit when shot with a lacquer based primer. The epoxies don't attack it like lacquer but it has been an issue in my world. And yes, Bill, you are right about the Icing getting a "bit" dry after a fashion. I use enough of it though that that isn't a problem for me. I wonder if USC would be open to suggestions to produce smaller "modeler" sized tubes... I think I will contact them and see what they say. -
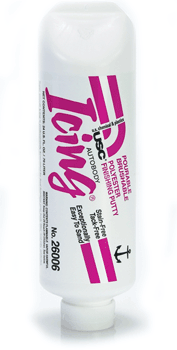
Body Fillers - what do you use?
astroracer replied to BDSchindler's topic in Model Building Questions and Answers
I use USC's Icing. 2 part polyester, no shrinkage and it can be mixed in about any quantity you need. I started using this stuff on the 1:1 paint jobs. Tried it on the plastic and have never had a reason to use anything else. It sets up quick, sands easy and never so hard that it is impossible to sand. Works very well and I will recommend it to everyone. used it on the '56 conversion with no worries of shrink back or difficult sanding. Mark
-
PHOTOGRAPHY HELP PLEASE
astroracer replied to bauercrew's topic in Model Building Questions and Answers
I use a Sony Mavica 73. It's direct to disc. 3 1/2" floppy. Being it's digital I went with this camera to shoot small parts when I was running Machined Aluminum Specialties. This camera will focus down to a 1/2". It has an optical zoom which functions much better for close work then the digital zoom cameras. I found a newer version of this camera at a thrift shop for 5 bucks. it has a digital zoom and will not focus on items closer then about 10 inches. It does have a movie function though which is why I picked it up. These pics were taken with it, in my shop, with absolutely no special lighting. Just a clean sheet of paper to set the parts on.
-
Well, this is a HUGE project... Both in size AND the skill required to reach the level of detail shown in that Delorean. Part of the problem is, you have no model or scratch building experience to help you. I would really suggest picking up a couple of regular kits and building them to get some experience. At this point you need to understand what it will take to build your grail. Starting small and working your way up is the best way to get there. Mark
-
Hey Brad, Why is 1/6th scale so important? Just asking. You could do some kit bashing and build one for cheap in 1/25th scale. Sure would be a lot easier. The '67 Impala kit already exists in that scale. Making it a notchback and a four door isn't hard to do. Check these out. http://www.spencer1984.com/my_models/supernatural-1.php Mark
-
Yes, too big! I don't know of anyone who has a printer big enough to do a 1' x 2' x 3' print... You would have to break the model out into separate body panels to do it. The chassis would also have to be broken into smaller parts. Like the others have said, 1/8th would be better. I would go 1/12th though as you have a lot of existing models to source parts from. The engine and trans could be used from any number of kits. The cost is going to skyrocket quickly. Creating molds is not going to be cheap or easy. Big parts require lots of rubber and resin... Mark
-
And pay attention to Tom Geiger's post a ways down that thread. Anyone doing this with ANY success has "good" 3D CAD skills. If you can't model the parts in 3D, you are not going to print them out... just sayin...Again... Mark
-
Black or white "athletic tape" tape works very well. It has a small weave pattern that looks correct for scale belts. Lay a length out on a piece of glass or clean metal and cut to whatever width you want/need. The white can be painted any color you want. Mark