
astroracer
-
Posts
451 -
Joined
-
Last visited
Content Type
Profiles
Forums
Events
Gallery
Everything posted by astroracer
-
And don't just look at models. In order to authentically replicate a race motor of any kind you need to know what the real motors look like. Subscribe to a few car magazines and look on parts sites like Summit and Jegs. The real key to a good model is scale. Getting the parts scaled correctly is 90% of the job. Wires, fittings, hoses and tubing sizes are some of the areas where scale is important. A full size ignition wire is 3/8ths to 1/2" inch in diameter. A model ignition wire that is any bigger then .020 in diameter is too big. I built this BBC in 1989. There is well over 100 hours into building it (just the engine) and there isn't a lot of parts that aren't to scale.

-
Start with the interior color. What are you planning for that?
-
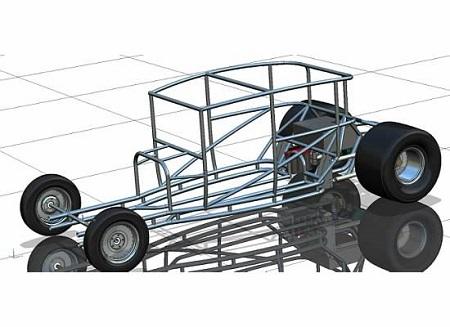
roll-cage diameter tubing, 1/25 - 1/24
astroracer replied to fiatboy's topic in Model Building Questions and Answers
Hey Chris, nice chart! If you would add a Metric column to it I think it would be even nicer. Keep in mind that an inch dimension in 1/24th or 1/25th scale is equal to the same number in Metric. Example: 1 inch in 1 /25th scale equals 1mm in metric. 1.5 inches in 1/25th scale equals 1.5mm's This works really well for chassis, engine and other "scale" dimensions for comparing metric and inch sizes for fabricating. Mark -
What scale? Just be aware you will have TON of work to do to smooth out the 3D printed panels. Very fine ribbing like that will be a pain... Think about making your own. Find a saw blade that has close to the correct spacing on the teeth. Mount it, lengthwise, to some sturdy blocks so you can push a sheet under it to scribe the panel lines. I can go into more detail if you are interested in the process. Mark
-
Tamiya White Putty.. Dry Time?
astroracer replied to Brutalform's topic in General Automotive Talk (Trucks and Cars)
I would dig it out and go with a 2 part as Tom said. I quit using the one part "model car" fillers many years ago. Too much shrinkage, even with thin applications. For very small spots I will use the automotive based spot putties (pin holes, small low spots, etc.) Anything bigger and I use a 2 part polyester filler for the fast set-up and to avoid the shrinkage. Mark -
Wire ferrules for distributors
astroracer replied to Action Jackson's topic in Model Building Questions and Answers
Chris, take a scale to the auto parts store and measure a few. A regular style distributor cap is "about" 4" in diameter. That scales down to 0.16 inches or 4mm's in 1/25th scale. ANYHTING bigger then that will be grossly out of scale. Mark -
In order to use a "hot" paint over styrene the plastic needs to be primed with an automotive type primer. DuPont's Sandable Grey and PlastiKote's Grey primers both work very well for this purpose. Wash the body in hot water with a little Dawn dish soap to cut the oils. Scrub the body with some medium ScotchBrite while washing to give the primer a "tooth" to stick to. As a side note, nail polish comes in a myriad of those flip/flop colors. As long as you are using the automotive primer the nail polish will spray over that beautifully. It is lacquer based and 2 or 3 bottles will do a model car. Find it at the dollar stores for a dollar a bottle... Mark
-
Alclad Chrome and Box Stock Classes
astroracer replied to Impalow's topic in Model Building Questions and Answers
My understanding of "box stock" is anything can be done as far as paint and body work goes. Sanding seams, filling, smoothing things out and painting. I don't know why painting the bumpers would be any different. if I am wrong or mislead I am sure I will be corrected. Mark -
Durand End Of Summer Cruise Model Car Show
astroracer replied to astroracer's topic in Contests and Shows
Bumping this up. Just a week from this Saturday. Bring out some models to support the show! -
Bleed under is hard to control, especially in small tight areas like those scoops. You really have to take your time and get your masking to lay down perfectly. THEN, before spraying any color, shoot a couple of coats of CLEAR over the masking. If there is going to any bleed under the clear will bleed and seal the leak. Now spray your color. The clear should seal up the masking and it will disappear when you put the final clear coats on. Mark
-
Found an alternative solution
astroracer replied to Iroc crazy's topic in Car Aftermarket / Resin / 3D Printed
No problem. There is a LOT of experience on this board. You are in the right spot to get all the help you need... Mark -
Found an alternative solution
astroracer replied to Iroc crazy's topic in Car Aftermarket / Resin / 3D Printed
eBay. 75 bucks... (+ shipping...) http://www.ebay.com/itm/Monogram-1-12-1967-67-CORVETTE-42eBay7-coupe-Model-Car-2801-/253047191191?epid=1000690524&hash=item3aeac9b697:g:IzsAAOSwsXVZalDO -
Found an alternative solution
astroracer replied to Iroc crazy's topic in Car Aftermarket / Resin / 3D Printed
You will not make a small block look like a big block. The valve covers and intake are too big to pull that off. You need to learn to be a kit basher if you want to do this correctly. Kit bashing is not a sin and you could always build the 'Vette with the Camaro's small block in place of the 427, There were more SBC Vettes built then there were BBC cars. You say you would like the parts to be 3D printed but you have to know there is a lot of finishing work to be done getting the 3D parts to look good. Especially in 1/12th scale. You seem to have limited experience with cars in general and using the kit engine will be much easier on the finishing and painting side. Mark -
Found an alternative solution
astroracer replied to Iroc crazy's topic in Car Aftermarket / Resin / 3D Printed
No the "1/8th scale engine will not fit in a 1/12th scale model... Unless you are building a Zinger. If I were you I would just locate the 1/12th scale 427 Vette model and use the powertrain from that. Mark -
Metal Glaze Putty Hardness
astroracer replied to RyanR0101's topic in Model Building Questions and Answers
It's a 2 part polyester glazing putty, it should not get rock hard. It should remain sandable and easy to feather out. Mark -
You are making this way to difficult. If there is no documentation to verify a detail, I.E., the engine, roll cage, rear end, etc. Simply use your best guess. If you can't see it in a photo no one can tell you it's wrong. If you make it look like it belongs then you will be good. For your body filler use a 2 part polyester filler. They do not shrink like the one part glazing putties do. I use USC's Icing but any 2 part in a tube or can will work well. The icing is very light and sands and feathers out well. For the color I see a lot of orange in there so look at Pontiacs' Carousel Red they used on the GTO's. Anything that is close will be fine. Like Snake said the whole back half of this car will be scratch built, you will not find it in a kit unless you get the resin piece.
-
K&S foil roll for PE?
astroracer replied to aurfalien's topic in Model Building Questions and Answers
Bead rolling is what race car fabricators do to strengthen thin sheet aluminum. A specialized tool is used to "roll the beads" into a flat panel to keep it from oil canning or flexing. Here are a bunch of pics of bead rolled panels. https://www.pinterest.com/grnded4life/bead-rolling/ -
K&S foil roll for PE?
astroracer replied to aurfalien's topic in Model Building Questions and Answers
Don't grab just any old roasting pan either. Look for one with as few shapes stamped into the bottom as possible. I saw some at a dollar store that were totally flat on the bottom. That's more bang for your buck with usable flat sheet. Also keep in mind this thin stock can be "bead rolled" with a fine ball point pen. I have done this on a few models for use as inner door panels. Mark -
There is only so much you can do. The reasoning I use when replicating a real car in model form, if I can't "document" a detail item, is to take my best guess. Especially if there is no data or info out there to tell me I am wrong. Make it look like it "belongs" and no one will be able to tell you different unless they have documentation to prove it. Mark
-
K&S foil roll for PE?
astroracer replied to aurfalien's topic in Model Building Questions and Answers
I would think aluminum "foil" would be to flimsy to stand up to any handling, polishing or cleaning after the model is built. I would lean more toward the aluminum sheet in .010 thickness for the shape retention and handlability the heavier material will give you. Mark -
Deepening Panel Lines
astroracer replied to Funkychiken's topic in Model Building Questions and Answers
Like most modelers I also use the back side of a broken hobby blade. What I do different is outline the door line with fine line tape. The tape will help guide the blade if you go easy. You can do one or both sides if the lines are mostly straight and do both sides if curvy, as in your case.Outline your doorlines then, like Snake said, go VERY lightly until you get a consistant groove going. If I am doing a master and moving door lines I will make a cardstock template of the door and tape that in place to use as a guide. Mark -
Convert racing kit into stock - street car
astroracer replied to Fredd's topic in Model Building Questions and Answers
If you have any questions just ask. I have done a few "conversions" so I know what you are dealing with. -
Convert racing kit into stock - street car
astroracer replied to Fredd's topic in Model Building Questions and Answers
I would approach this by carefully trimming off the racing flares. Leave as much of the original body sides as you can. I would then make filler panels to replace the flares with the stock shape wheel openings. Do one fender at a time to maintain body integrity. Building a front bumper is not that hard. You have good pics. Simply build it out of sheet plastic. A lot of the contours can be made by layering different thicknesses of sheet to get the curves you want. This will definitely sharpen up your scratch building skills. If you start this keep us in the loop, we will help as much as possible. Mark -
Birdman's twin turbo Pontiac firebird trans am
astroracer replied to Toriano's topic in WIP: Drag Racing Models
You have a good pic of it. Open the photo in paint and crop it so just the plate is visible. Resize it to a scale license plate size and print it out. Glue it to a piece of sheet plastic. Mark -
How does your family deal?
astroracer replied to Jeff31293's topic in General Automotive Talk (Trucks and Cars)
My wife and family are very supportive with all of my hobbies. Whether it's the 1:1 stuff, the model cars or any of the "crafty" things I build. They put up with a lot when I was running Machined Aluminum Specialties. What your family needs to realize is you could be doing a whole lot worse things with your money and time. Model cars will keep you off the streets and out of the bars. Have them think about that the next time an "issues" occurs... Mark
