astroracer
-
Posts
451 -
Joined
-
Last visited
Content Type
Profiles
Forums
Events
Gallery
Everything posted by astroracer
-
Go to Pro-Touring.com. Tons of cars and info there. Mark
-
Will 3d printing at home work?
astroracer replied to drummerdad's topic in General Automotive Talk (Trucks and Cars)
It seems most of you are starting to understand the issues with 3D Printing. The 1st (and most important one) is where too get the 3D model that you want to print. If you can't model the parts in 3D, you will have nothing to print. That is what most everyone forgets to think about. It's just like resin casting an obscure car part or kit. You can't cast it in resin if you don't have a master to make a mold from. if you don't have GOOD 3D model to make the STL file from, you aren't going to print it. The 2nd issue is printing QUALITY. You are not going to get a good quality printed part from a "makerbot" or cheap desktop printer. The resolution just isn't there. Sure you will get a "part" but it will look like a 23 layer cake. Just not usable without a ton of work to get it presentable. Most of the time it is quicker and easier to just scratch build the part. I do 3D CAD for a living and have the same system at home. Building the models is nearly second nature for me, I can do some intricate stuff pretty quickly. I also use Shapeways to print my parts. None better out there and cost is very fair. Especially when you take into account the money I haven't wasted on cheap desktop stuff. What this boils down to is... You HAVE to be able to model the parts you want to print. If you can't do that, and do it accurately and quickly, there is no reason to even consider a desktop printer. And saying that, when you do have a good 3D part, your money is better spent having a high resolution printer service do the work for you... Mark Smakal -
Prep and paint just like a kit plastic part. As long as it is oil and grease free it will take paint. Polishing is a different matter because the pewter generally has a lot of knit, or flow lines, in it from the casting process. It will not polish up like aluminum will as yo uwill always see the character of the material thru the polishing. Mark
-
Salvage a paint can?
astroracer replied to aurfalien's topic in Model Building Questions and Answers
Put the can in the freezer for an hour. It won't hurt the paint. If you have a scratch awl wrap a rag or paper towel around the point and use it to make a small hole in the top of the can. Any propellant left in the can will vent out the small hole and leave the paint in the bottom. When all of the propellant is gone make the hole bigger so you can pour the paint out into another jar. I've done this many times and it works well if you are careful when making the initial hole. DON'T shoot it with a pellet gun! Mark -
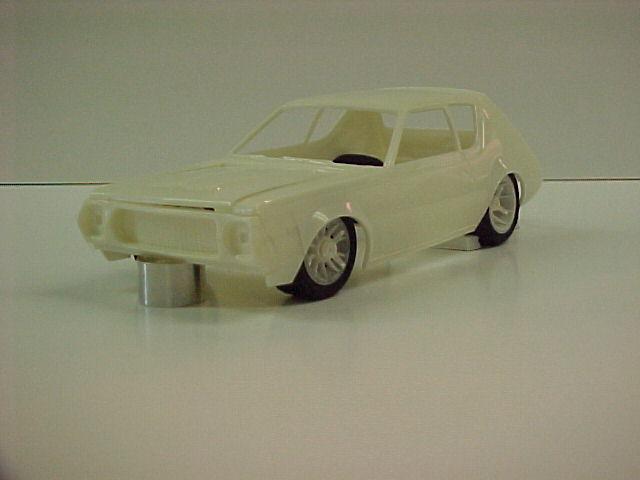
I built this one in '89-'90. It should still be pretty quick. Mark

-
I turned hundreds of those things when I owned Machined Aluminum Specialties. Even had photo-etched stands. I can spin a couple for you if want. Mark
-
Long Bodies
astroracer replied to Greg Myers's topic in 1:1 Reference Photos: Auto Shows, Personal vehicles (Cars and Trucks)
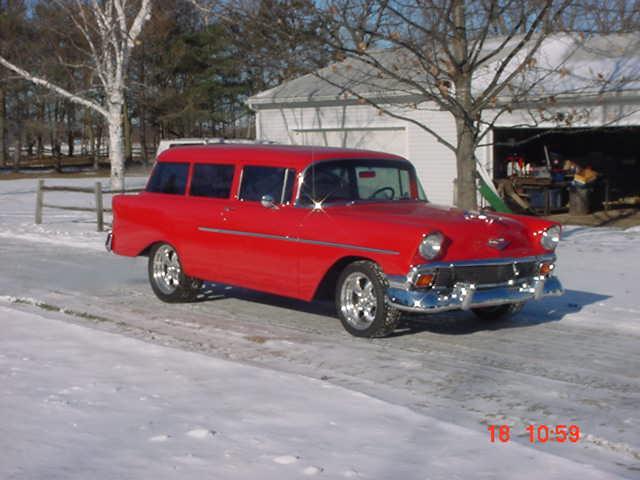
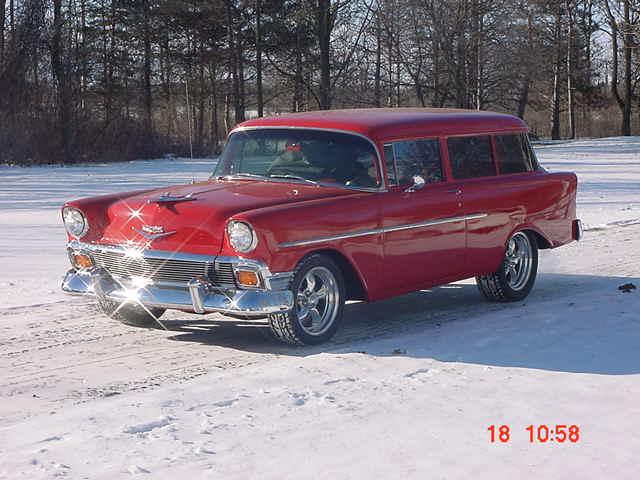
I still drive a station wagon.
-
Removing pre-decorated graphics
astroracer replied to Captain Obvious's topic in Model Building Questions and Answers
Sand it down with 600 grit wet/dry paper. Use it wet with warm water. Sand the whole car to scuff it up then prime and paint normally. Mark -
heyyy you guuuyyyyyyssss
astroracer replied to todd.clark's topic in Model Building Questions and Answers
Todd, Epoxy is a glue, it is not to be used as "clear coat" for a painted model... BUT it can be used as a "clear coat" for laminated carbon fiber or kevlar layups. This is what you may have been told... Please verify your info as to the use of the product. mark -
How do you glue plug wires?
astroracer replied to Kit Basher's topic in Model Building Questions and Answers
Pop the covers off and glue from the inside. If you put a small 90 degree bend on the wire that will lock it in place while you are gluing. Mark -
And don't forget nail polish. This is lacquer also and thins and mixes just like the automotive paint. I use it a lot. A couple of bottles will cover a 1/24th-1/25th car very well. A buck or two at the dollar stores and Big Lots... Very cheap compared to the other brands and the color selection is ENDLESS! Mark
-
soaking resin and styrene parts to clean
astroracer replied to fiatboy's topic in Car Aftermarket / Resin / 3D Printed
True, MOST of the time the ejection of the parts is left up to the design of the mold, shrinkage of the parts as they cool and the ejector pins used to push the sprues out. Sometimes you get sticky parts that don't like to pop out easily and this is where a mold release may be used. I worked at a small shop where I designed injection mold dies and one of the dies would get sticky after it ran for a couple of hours. A bit of mold release spray would help the sprue pop out during the ejection cycle. Mark -
Watch this video. They don't use chains. Ratcheting tie down straps are easy to make from athletic or medical tape.
-
Strange Boondocker Blazer on Ebay
astroracer replied to Lordmodelbuilder's topic in General Automotive Talk (Trucks and Cars)
I have a couple of the 1/25th scale Boondocker kits. They were molded in orange. Makr -
Using styrene to completely fill the openings is the better alternative. Cut and shape your filler panels to completely fill the opening then sand to level to the rest of the body. Styrene is as stable as the rest of the body so shrinking and cracking are virtually eliminated. use the 2 part filler to fill minor voids and build up low spots. I don't have a build thread on the '56 Mike, sorry. Ron Andrews has had the parts to resin cast it for quite while now. Years in fact... Holler at him to get it done! I've tried with no luck... Mark
-
Get it to a point, 800 or 1000 grit and you can clear coat the "glass" to bring the translucency back. i do this with full size head and tail lights. Sand out to 800 and then clear. The tail lights on my truck were done exactly this way when I whited out the edges to match the truck. Mark
-
Hi Jim, you are doing some good work here BUT I cringe at all of that supeglue you are using. The problem with superglue, and I am sure you are very aware of it is, it sands so much harder then the base styrene. If I could make a bit of a suggestion to replace that superglue with a 2 part polyester filler. http://www.autobodytoolmart.com/usc-icing-polyester-finishing-putty-p-10969.aspx?gclid=CK_awfqxsswCFcUmhgodw7IJng I use this stuff exclusively when doing conversions or for ANY body work that needs to be done on a kit body. I added a couple of pics of a 1/16th scale '56 post conversion I did from an AMT '55. all of the major bodywork was done with styrene sheet and the Icing. The Icing does not shrink when it cures, sands VERY easily and feathers out beautifully. If you get it and try it I think you will like it. It will cut your sanding time down by a ton. Mark
-
soaking resin and styrene parts to clean
astroracer replied to fiatboy's topic in Car Aftermarket / Resin / 3D Printed
Hi Steve, no worries on the war thing. I don't know how or why this got started, it really doesn'y matter. It's just something that has proliferated and has no basis in fact. Soaking over night does nothing different from a quick wash and scrubbing with hot water and TSP. The key ingredient here is the TSP (Trisodiumphosphate). The real issue here is, in fact, not the mold releases themselves, but the silicone rubber that the molds are made of. Removing the thin film of silicone that attaches itself to the resin during the molding process is what you need to do. TSP is a degreaser designed to remove this silicone film. House painters use it extensively when prepping vinyl and aluminum siding for paint. I use it everytime I paint a full size car to wash and scrub every surface that is getting painted to remove the road grime AND ArmorAll. Silicone... The TSP does this very well and I have no problems with fisheyes. Wesley's used to have TSP in it. The formula has been altered since Black Magic bought out Wesley's. There is no TSP in it now... I don't know how it will work for cleaning the resin. I just use TSP bought at the hardware store and mix it with hot water. As everyone knows, styrene kits are not produced in "rubber" molds so they don't have the silicone issue. Mark -
Yes, that works as well. I painted many a model on a "pop bottle" stand.
-
soaking resin and styrene parts to clean
astroracer replied to fiatboy's topic in Car Aftermarket / Resin / 3D Printed
Like a couple of the guys posted above , there is no need to "soak" the resin in anything. I have never soaked a single resin part. A simple wash with hot water and dawn, scrub with ScotchBrite and keep it clean and oil free and you are good. I usually add a bit if TSP to the hot water as this is an excellant degreaser and works well with the Dawn. The mold releases the casters use are no different then what the injection mold guys use. You never hear you have to soak styrene to get it clean. So why do you have to soak resin? There is no basis in fact on this "opinion" and it is just an old wives tale... I wish it would go away... if you do a search you will see about a dozen of these threads and I and Art Anderson trying to dispell the myth... Mark -
What you REALLY need to do is mount the body on a stand so you don't have to handle it during the painting process. A short piece of 2 x 4 with a couple pieces of "repurposed" wire clothes hanger works well. You've seen them here before. Make something like that, tape the car (on the inside) to the wire, and you are good to go. Mark
-
What you are seeing is a paint, formulated to be sprayed from a rattle can, being sprayed through an airbrush. The 1st thing I will point out is, as you decant the paint, you are immediately losing the volatiles. The ingredients that help the paint to spray smoothly AND lay down and flow a bit before setting up are probably nearly gone by the time you get it into your airbrush and actually spraying. I would suggest decanting then adding a bit of laquer thinner to get the spraying consistancy correct for the airbrush. This will take some experimenting on your part to learn what amount the "new" paint likes... And, while your are at it, experiment with the nail polish. This stuff mixes and sprays just like laquer (it is laquer) and is a lot cheaper to buy at the dollar stores or Big Lots. Mark
-
PE emblem question
astroracer replied to Perspect Scale Modelworks's topic in Model Building Questions and Answers
In order to get the correct look and good adhesion for your script you need to sand off the molded emblems during paint prep. One of the first things I do if photo-etch is in the mix. Mark -
Nice job on the paint Mike. One other thing I will suggest is to pick up some Scotch (3M) Fine Line Masking Tape: http://3mcollision.com/products/tapes/masking-tapes/scotch-performance-masking-tape-233-26343-3mm.html This tape is formulated to work with automotive paint. I use the 1/8th inch to outline flame jobs on 1:1 cars. And I will lay it out on a piece of glass to cut it narrower for model car stuff. Make sure the glass is clean so the tape doesn't pick stuff up. just tap the tape in place as straight as you can and cut with a steel ruler and sharp hobby knife. Mark