Len Carsner
-
Posts
236 -
Joined
-
Last visited
Content Type
Profiles
Forums
Events
Gallery
Everything posted by Len Carsner
-
Not sure yet, hoping to be in the main room on the far right wall.
-
I'm going, will be set up as a vendor with a friend of mine.
-

Any news of Revell do something this year !
Len Carsner replied to Mr mopar's topic in Car Kit News & Reviews
The front engine rumors came from the fact that the E-Vette (electrified corvette) has an engine/motor in the front to drive the front wheels. -
Exactly!
-
My prediction: After reading every bodied wants, wishes, dreams, and fantasies of what they think/want this announcement to be I'm predicting..... Disappointment! I have no advance knowledge, but everyone is dreaming of the moon and no matter what is announced it won't please 99% of the modeling community.
-
70-73 Firebird Formula, resin needed.
Len Carsner replied to Len Carsner's topic in Car Aftermarket / Resin / 3D Printed
Thanks for the reply, George. I've contacted him today. -
I'm looking for resin replacements for the tail lights and twin scoop hoods for two 70-73 Formula Firebirds that I'm trying to resurrect. I saw the items as part of a set at Reliable Resins, no response to two emails asking if they would sell individual items. Looking for any sources you might have, anybody have anything?
-
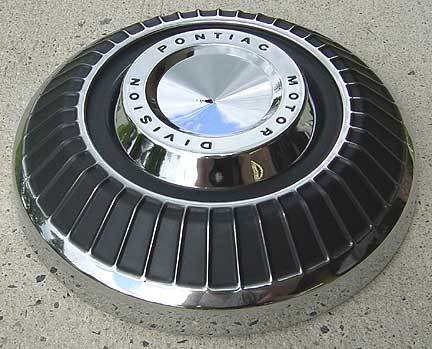
I am looking for steel wheels and caps for a Pontiac project I am working on, something close tp the picture attached. Wanting 15" or 16" steelies and the Pontiac poverty caps. Anyone have a source for these?

-
Did you paint the #2 car, and if so what color/paint did you use? I've heard both pearl white and straight white as being correct. BTW - nice builds!
-
I remember reading some place about the time Nascar tried to measure the car, only to find out it didn't match. Smokey told them go find a car i the parking lot and measure it. They found one in the front row of the parking lot, measured it and found that it matched Smokeys car, so they let him pass on and race. As it turned out the car in the parking lot was a "plant" and Smokey had modified it to match the race car. Tricked 'em again!
-
Al of them are great but I'm lovin' that Simca!
-
Building the Revell 1950 Oldsmobile - We're Finished! 10/30/12
Len Carsner replied to Len Carsner's topic in WIP: Model Cars
Hello! I didn't realize this thread was still getting comments. I didn't have any problems, but I put the engine in the chassis then put the floor section with the fender wells over it. I flexed them a bit and it all went together without fuss. Len C. -
Building the Revell 1950 Oldsmobile - We're Finished! 10/30/12
Len Carsner replied to Len Carsner's topic in WIP: Model Cars
We're submitting an article to MCM concerning further detailing for the stock car, which will include additions to the markings. Len C. -
Building the Revell 1950 Oldsmobile - We're Finished! 10/30/12
Len Carsner replied to Len Carsner's topic in WIP: Model Cars
Now lets look at a picture of the car that inspired Bills’ project: In many ways Bill chose a tougher road to go, as duplicating a race car can be difficult when there are so many people who may be familiar with the subject and may nit pick over details. Here’s Bills’ result: Here are five views of the finished, out-of-the-box build of the Revell 1950 Oldsmobile as driven by the late Buck Baker during the nineteen-race NASCAR Grand National season. This was the first year of this series using the GN moniker that was in place until the early 70’s when it changed to Winston Cup Series. The finished Buck Baker 87 NASCAR Olds model strikes a handsome pose with the hood propped open here with a short length of plain guitar string. It congers up visions of Buck and the crew in the pits at a dusty, rut and pothole infested dirt short track prepping the racecar for a day of bone-jarring beatin’ and bangin’. Like they say…”that’s just racin”. Bill Lastovich was a steady hand in product development at Revell for many years. A great friend to Bill and me was lost earlier this year. Bill's passing was actually a great loss to the whole model car building hobby. The new Revell 50 Olds kit was one of Bill's pet projects. He was really looking forward to seeing it in production. When we were asked to provide this internet build/review of this long awaited model car kit, we couldn't help but feel like we were doing this one for Bill. And indeed, we are. Well, we’ve finally come to the end of the road on this project. And while it may have been a long time between updates it was certainly not the fault of the kit as it was, as with all of Revells recent releases, an absolute pleasure to build. And now that we’re finished it’s time to sit back and watch your 1950 Olds projects as they get posted to the boards and show up at contests. We hope you will enjoy this kit as much as we did. As always we want to thank Ed Sexton and Roger Harney of Revell. Without them we would not have had this opportunity. We’d also like to thank the owners of the forums that we post to, without whom we wouldn’t have this great space to discuss and display our work. Finally we’d like to thank all of you that followed along with our build. Your comments and suggestions were very helpful and entertaining. Thanks to you all, and we’ll see you again soon with another exciting build/review! Take care, Bill Coulter and Len Carsner -
Building the Revell 1950 Oldsmobile - We're Finished! 10/30/12
Len Carsner replied to Len Carsner's topic in WIP: Model Cars
We’ve made it to the end of this build. Good thing it wasn’t a contest to see who finished first, Bill had me beaten by miles! We both started this project with specific cars we wanted to duplicate, so lets see who came closest to their goal. We’ll start with my car. What I wanted to duplicate was this basic color combo but with a different upper color. Here’s my inspiration: And here’s my result: I really like the two tone combination of maroon over creme. As you can see the overall proportions look spot-on, and give you the feeling of looking at a full size car. The engine, as well as the chassis, look period exact and will no doubt be the fuel that powers many other projects. continued.... -
Building the Revell 1950 Oldsmobile - We're Finished! 10/30/12
Len Carsner replied to Len Carsner's topic in WIP: Model Cars
Here Bill is preparing to tape the clear parts into place in preparation for attaching them permanently. The question is always what type of glue to use. We recommend using ONLY white glue since it won’t attack the clear styrene and it cleans up with a moist tissue. Bill also took note of the headliner which (though it’s not seen much once the model is assembled) looks to need a second coat of Euro Gray bottle paint. At this point, Bill used low-tac painter’s tape to temporarily hold the clear parts in place until a fine bead of white glue can be run along the edges of each piece where it touches around each interior window openings. Here are two views of Bill’s 50 Olds body in the process of having the exterior trim treated to an application of BareMetal Chrome foil. Bill says he finds cutting strips to length of BMF close to the width of the surface trim to be foiled to work best for him for this operation. Note here some of the tools and materials Bill suggests for applying kit decals like the ones seen here on the Revell 50 Olds deck lid and hood. We always recommend using Micro Set (1) first and once the decal is positioned, Micro Sol to insure a clean, smooth and level application. Also, Bill has begun attaching the plated emblems front and rear. We recommend attaching those part with Elmer’s glue to avoid damaging smears or smudges that can occur with styrene or super glues. We suggest that prior to applying any race car markings, the entire body be wiped down with a surface cleaner like Fantastik using a no-lotion facial tissue. This procedure will remove any oil and grim from handling and prepare the surface for virtual trouble free decal placement. Note here the tools and supplies recommended for applying decals properly. Bill recommends trimming out each of the required decals as close to the edge of the printed image as possible. He used a small amount of filtered water and some folks also suggest a small drop of liquid household detergent in the soaking solution. Make sure to use reference illustrations from the Revell 50 Olds kit instructions to get the markings positioned correctly. Page 11 shows the No. 87 Bill is building. Please note the direction the car number “speed streaks” are going. Both sides should be pointing to the rear for example. It can be pretty tough finding accurate references for a race car from over sixty years ago. Thank God for the internet! Searching for BUCK BAKER 1950 NASCAR Oldsmobile brought up the two reference photos shown here of what is surely the restored or cloned version of this iconic stocker. The end is rapidly approaching! Stay tuned, with any luck at all the final update will be up in just a couple of days. You won't want to miss it! Thanks for looking, Bill and Len -
Building the Revell 1950 Oldsmobile - We're Finished! 10/30/12
Len Carsner replied to Len Carsner's topic in WIP: Model Cars
Another week, another update! Bill has his car finished and is relaxing while I work feverishly to complete my car. Good thing this isn't a contest or he'd beat me again! Anyway, here's one last update before the grand finale. It's getting really close! For Lens car he chose a two tone scheme with Tamiya Maroon for the upper color and 1950 Olds Canto Creme for the lower. The creme paint came from Bob's Paint, etc. I hadn't tried his products before so i thought I'd give it a try. At this point the maroon has been sprayed, dried, and covered before airbrushing the lower color. Bob's paint went on beautifully with little to no issues. With the paint dried and the masking removed you get a real feel of the two tone effect. Time to set the body aside and get on with the chassis. To go with the two tone interior I chose contrasting tan-brown colors for the interior. While not prototypically correct, I like it and that's all that matters. Other than our choice of colors and a bit or detailing the chassis of both cars (street and race) look the same, as they should since in this era "stock cars" really were "stock". Just like the chassis both cars engines are virtually identical. The wheels are a tight fit in the tires, so I decided to assemble them first before the whitewall decals went on. I found that assembling the wheel front to the back, then pushing it in from the front and using a dental pick to pull the rear sidewall into place was the easiest method of them assembled. Don't forget to put the axle pin in place when assembling the wheels! Not the best photo, but you'll get the point. Clockwise from the upper left: Tire before inserting the wheel, wheel and tire together, whitewall decal in place, and finally the trim ring and cap. A center emblem is on the decal sheet. At this point Lens chassis is complete, waiting on the body to get its foil, lights, and ornaments. Let go back to Bills car. continued..... -
Building the Revell 1950 Oldsmobile - We're Finished! 10/30/12
Len Carsner replied to Len Carsner's topic in WIP: Model Cars
Unfortunately, life events have taken precedent over modeling for me these days. Bill has been slaving away to bring this project to its conclusion. Tonight we have a quick up date on his progress. Two views of the first test fitting of the Revell 50 Olds body over the nearly completed interior/chassis etc. We’d recommend using something thin and flat (Bill uses a metal engineer’s scale) to help coax the body down over the interior and open things up just enough to allow the chassis to be moved into place. Once the two-tone paints are thoroughly dry, the rubbing out and polishing can begin. Shown here are just some of the “tools of the trade” we use and recommend. Counter-clockwise: a small bowl of water and a well-used piece of 600 grit wet/dry automotive sand paper; Micro-Gloss white polish; three grades of sand paper, 6K, 8K and 12K; cotton swab, no-oil facial tissue and a piece of soft cotton cloth Work carefully in sequence (600, 6K, 8K, 12K and then apply the white polish) so as not to take too much material away. Better to rub some more than to go through the paint and have to re-shoot things. You could mask-off for painting areas to get a matte black finish but this for us was not one of those times. We use Testors Aircraft Interior black applied with a broad brush. Generally this paint levels out well and when thoroughly dry assumes a somewhat matte finish. Here we carefully brush painted the headliner using Testors Euro Gray to stay with the general shades of gray interior scheme. Once the paint dries we’ll move on to installation of dome lights, window glass and sun visors. Well, like I said, a small update so that everyone knows we're still at it. At this point Bill is nearly done. Me, not so much. But I'm working as hard a sI can to finish soon so we can have the big reveal. Stay with us, the best is yet to come! Thank for looking, Bill and Len -
Building the Revell 1950 Oldsmobile - We're Finished! 10/30/12
Len Carsner replied to Len Carsner's topic in WIP: Model Cars
I think we'll be seeing this engine in a lot of builders projects in the future. -
Building the Revell 1950 Oldsmobile - We're Finished! 10/30/12
Len Carsner replied to Len Carsner's topic in WIP: Model Cars
At this point, we’ve re-masked the Revell 50Olds body once again but this time to benefit the lower part of it. Again, BMF was used to mask a fine line along the horizontal trim strip that encompasses the body’s greenhouse. A combination of masking tapes were used at this point, one with a very low tack so as not to disturb the cream colored top done previously in lacquer. Once the new enamel paint begins to cure we like to begin removing the masking material, with extreme care and very gently making sure not to touch any of the freshly painted surfaces. Initially, fingers and needle nose tweezers do the job very effectively. Here we’ve managed to remove all the masking material including the BareMetal foil that has left us with a nice crisp and clean separation line. In this case, we found a sharp pointed, wooden tooth pick to be quite handy for nudging the foil up enough to grasp it with tweezers. Now the freshly painted two-tone paint treatment will be allowed to dry thoroughly and cure out to the point where some slight wet sanding with extra-fine papers and white polish will prepare for the final steps of applying BareMetal foils to all the exterior bright work and the Buck Baker No. 87 decals. Well, that was quite an update! We'll be making more progress during the week and are shooting for another update late in the week or over the weekend (we'll be in Cleveland for IHobby on Thursday so our schedule is a bit unpredictable). Things are looking pretty good, so stay tuned for our next installment! Thanks for looking, Bill and Len -
Building the Revell 1950 Oldsmobile - We're Finished! 10/30/12
Len Carsner replied to Len Carsner's topic in WIP: Model Cars
No styrene plastic kit body is free of surface imperfections especially mold lines. This new Revell 50 Olds body and hood are about as good as it gets these days. Some preparation is required along the top horizontal surface of the front fenders, around the head light openings, the horizontal surfaces along the top of the rear fenders and horizontally across the deck lid. Also, toward each rear hood corner, there are minor sink marks visible caused by the under hood locators for the hood hinges. We recommend working cautiously and taking care not to scar-up those surfaces but to gently remove any lines and get all those areas smooth and ready for primer and paint. Note the hand tools shown here and an old discarded toothbrush, which we use to do a final clean up of all the door and panel lines. We continue to recommend automotive primers like this Plastikote T-235 gray sanding primer. Years of experience, has taught us that many light coats and careful wet sanding with fine automotive papers results In a very suitable surface for just about any type of paint. The Buck Baker version will be a two-tone using Testors enamel and lacquer. We have found another good use for BareMetal foil is as a masking agent. Here the paint separation line (which runs along the trim break line on the door/window sills) has been addressed with a strip of BMF followed by thorough burnishing. From that point on a combination of masking and trim tape along with paper hand towels has this 50 Old ready for it’s first trip through the paint booth. Just as much care should be exercised in removing the masking as there was in preparation. We recommend taking your time and slowly peeling each layer of tape away by pulling it back against itself until all of it is removed. At this point, down to the foil removal, we recommend carefully lifting an edge or end of the foil strips and gently peel each away from the paint separation line with needle nose tweezers as shown here. Lacquer was applied to the top of the body. After a through cure time, the body will be re-masked in preparation for the primary enamel body color. We recommend masking the two colors (different mediums) separately to avoid any issue with compatibility. continued.... -
Building the Revell 1950 Oldsmobile - We're Finished! 10/30/12
Len Carsner replied to Len Carsner's topic in WIP: Model Cars
From this perspective, nearly all the major (and some minor) chassis/frame/floorboard components are in place. Please exercise caution when snaking the exhaust system into its proper location as shown here. Note the depressions in the right-side frame rails, front and rear, and how the tailpipe dips down to the floor pan, back up and straight out the rear of the chassis. The X frame member is shown here not as yet installed in place. There’s a definite reason for that as all of what you see assembled here must be completed before attaching the X member in place. Also note the strips of masking tape that are temporarily holding the frame/floor board together. It’s always best to go this route and make absolutely sure everything is where it should be before permanently gluing major components in place. This is what a typical straight from the box (with the exception of paint etc. of course) build of the Revell 50 Olds undercarriage should look like. Certainly quite well engineered with considerable in-depth details and attention to accuracy from what we’ve been able to confirm from references. The chrome metal exhaust tip is a nice final touch. Here are a variety of angles and views of the nearly completed interior for Bill’s Buck Baker No. 87 NASCAR 50 Oldsmobile. Note that the unpainted firewall is temporarily in place simply for the purpose of test-fitting the interior pieces before attaching everything permanently in place. There is some difference of opinion as to when etc. the GN rulebook required removal of the rear seat as well as the installation of a four-point roll bar. Obviously there was a time before and a time after exactly when that moment was…not everyone agrees on. Tom Moody my NASCAR go-to guy on questions like this agreed with me on one thing. The Revell kit obviously used the cloned/recreated Baker racecar for reference. We decided the safest bet was to build it this way. Builders have the option of installing the rear seat, not using the roll bar or going the route shown here. continued.... -
Building the Revell 1950 Oldsmobile - We're Finished! 10/30/12
Len Carsner replied to Len Carsner's topic in WIP: Model Cars
Here the 50 Olds 303 is coming together nicely with all the component parts identified and assembled into their proper locations. Found on the extensive kit decal sheet are some tiny decal labels which increase the appearance of a factory look to engine accessory items like the breather cap, generator, oil filter and valve covers. Also shown here are the battery, the right air duct, the air chamber and air cleaner, and left air duct. Here are four views of the nearly completed 50 Olds 303 V-8 engine. You can begin to see how the tedious attention to detail painting of the various parts is now paying off in the final presentation. One lesson we’ve learned as a result of using digital photography is how noticeable minute things appear at 5 to 6x their actual size. We now know that it’s a good idea to take close-up shots to make sure all the "Ts have been crossed and Is dotted". In other words, it obvious there’s some touch-up work to do that isn’t always easily visible with the (dare we say) naked eye? At this point the nearly completed power plant has been successfully test-fit into the engine bay and carefully nestled down into the front chassis rails. Please note any clearance issue and the locator pin (front of pan) and slot (front cross member) before gluing anything permanently into place. You will need to make sure the driveshaft has been inserted into the rear end snout and lined up with the incoming transmission tail shaft before doing so. continued.... -
Building the Revell 1950 Oldsmobile - We're Finished! 10/30/12
Len Carsner replied to Len Carsner's topic in WIP: Model Cars
Well, I'd planned to update you sooner on our progress with these new Oldsmobiles but I'd forgotten about this weekends events in Toledo. Hopefully tonights extra-large post will make up for it. Here I've highlighted a small raised mold line that will need to be addressed before priming. A quick swipe with a foam backed file here and along the fender edge and your done with the front of the car. At the rear of the car we have this mold line that runs side to side on the trunk lid. Again, nothing more than a quick workout with the foam backed file to clean this up. There was a question asked about the contour of the upper door frame at the windshield. This image hopefully answers that question. A quick coat of primer, then some wet sanding to smooth things out. You'll notice I opened the two holes on the hood for the ornament. They're marked on the underside of the hood so there's no guessing where they are supposed to go. Bill likes to keep his parts on the trees to paint where I like to separate them and put like-colored pieces on a paint stick wrapped with tape. This keeps them together and gives me a handy way to handle them. Here I have my Olds engine primed, waiting for paint. Since Bill is further along than I am we'll check in on his build from here. continued.... -
Revell '50 Oldsmobile Club Coupe 2'n1
Len Carsner replied to styromaniac's topic in Car Kit News & Reviews
Bill Coulter and I have started our build/review of this kit, it's posted in the "On the Workbench" forum. First post was tonight, another to be posted on Thursday. LC