kenlwest
-
Posts
277 -
Joined
-
Last visited
Content Type
Profiles
Forums
Events
Gallery
Everything posted by kenlwest
-
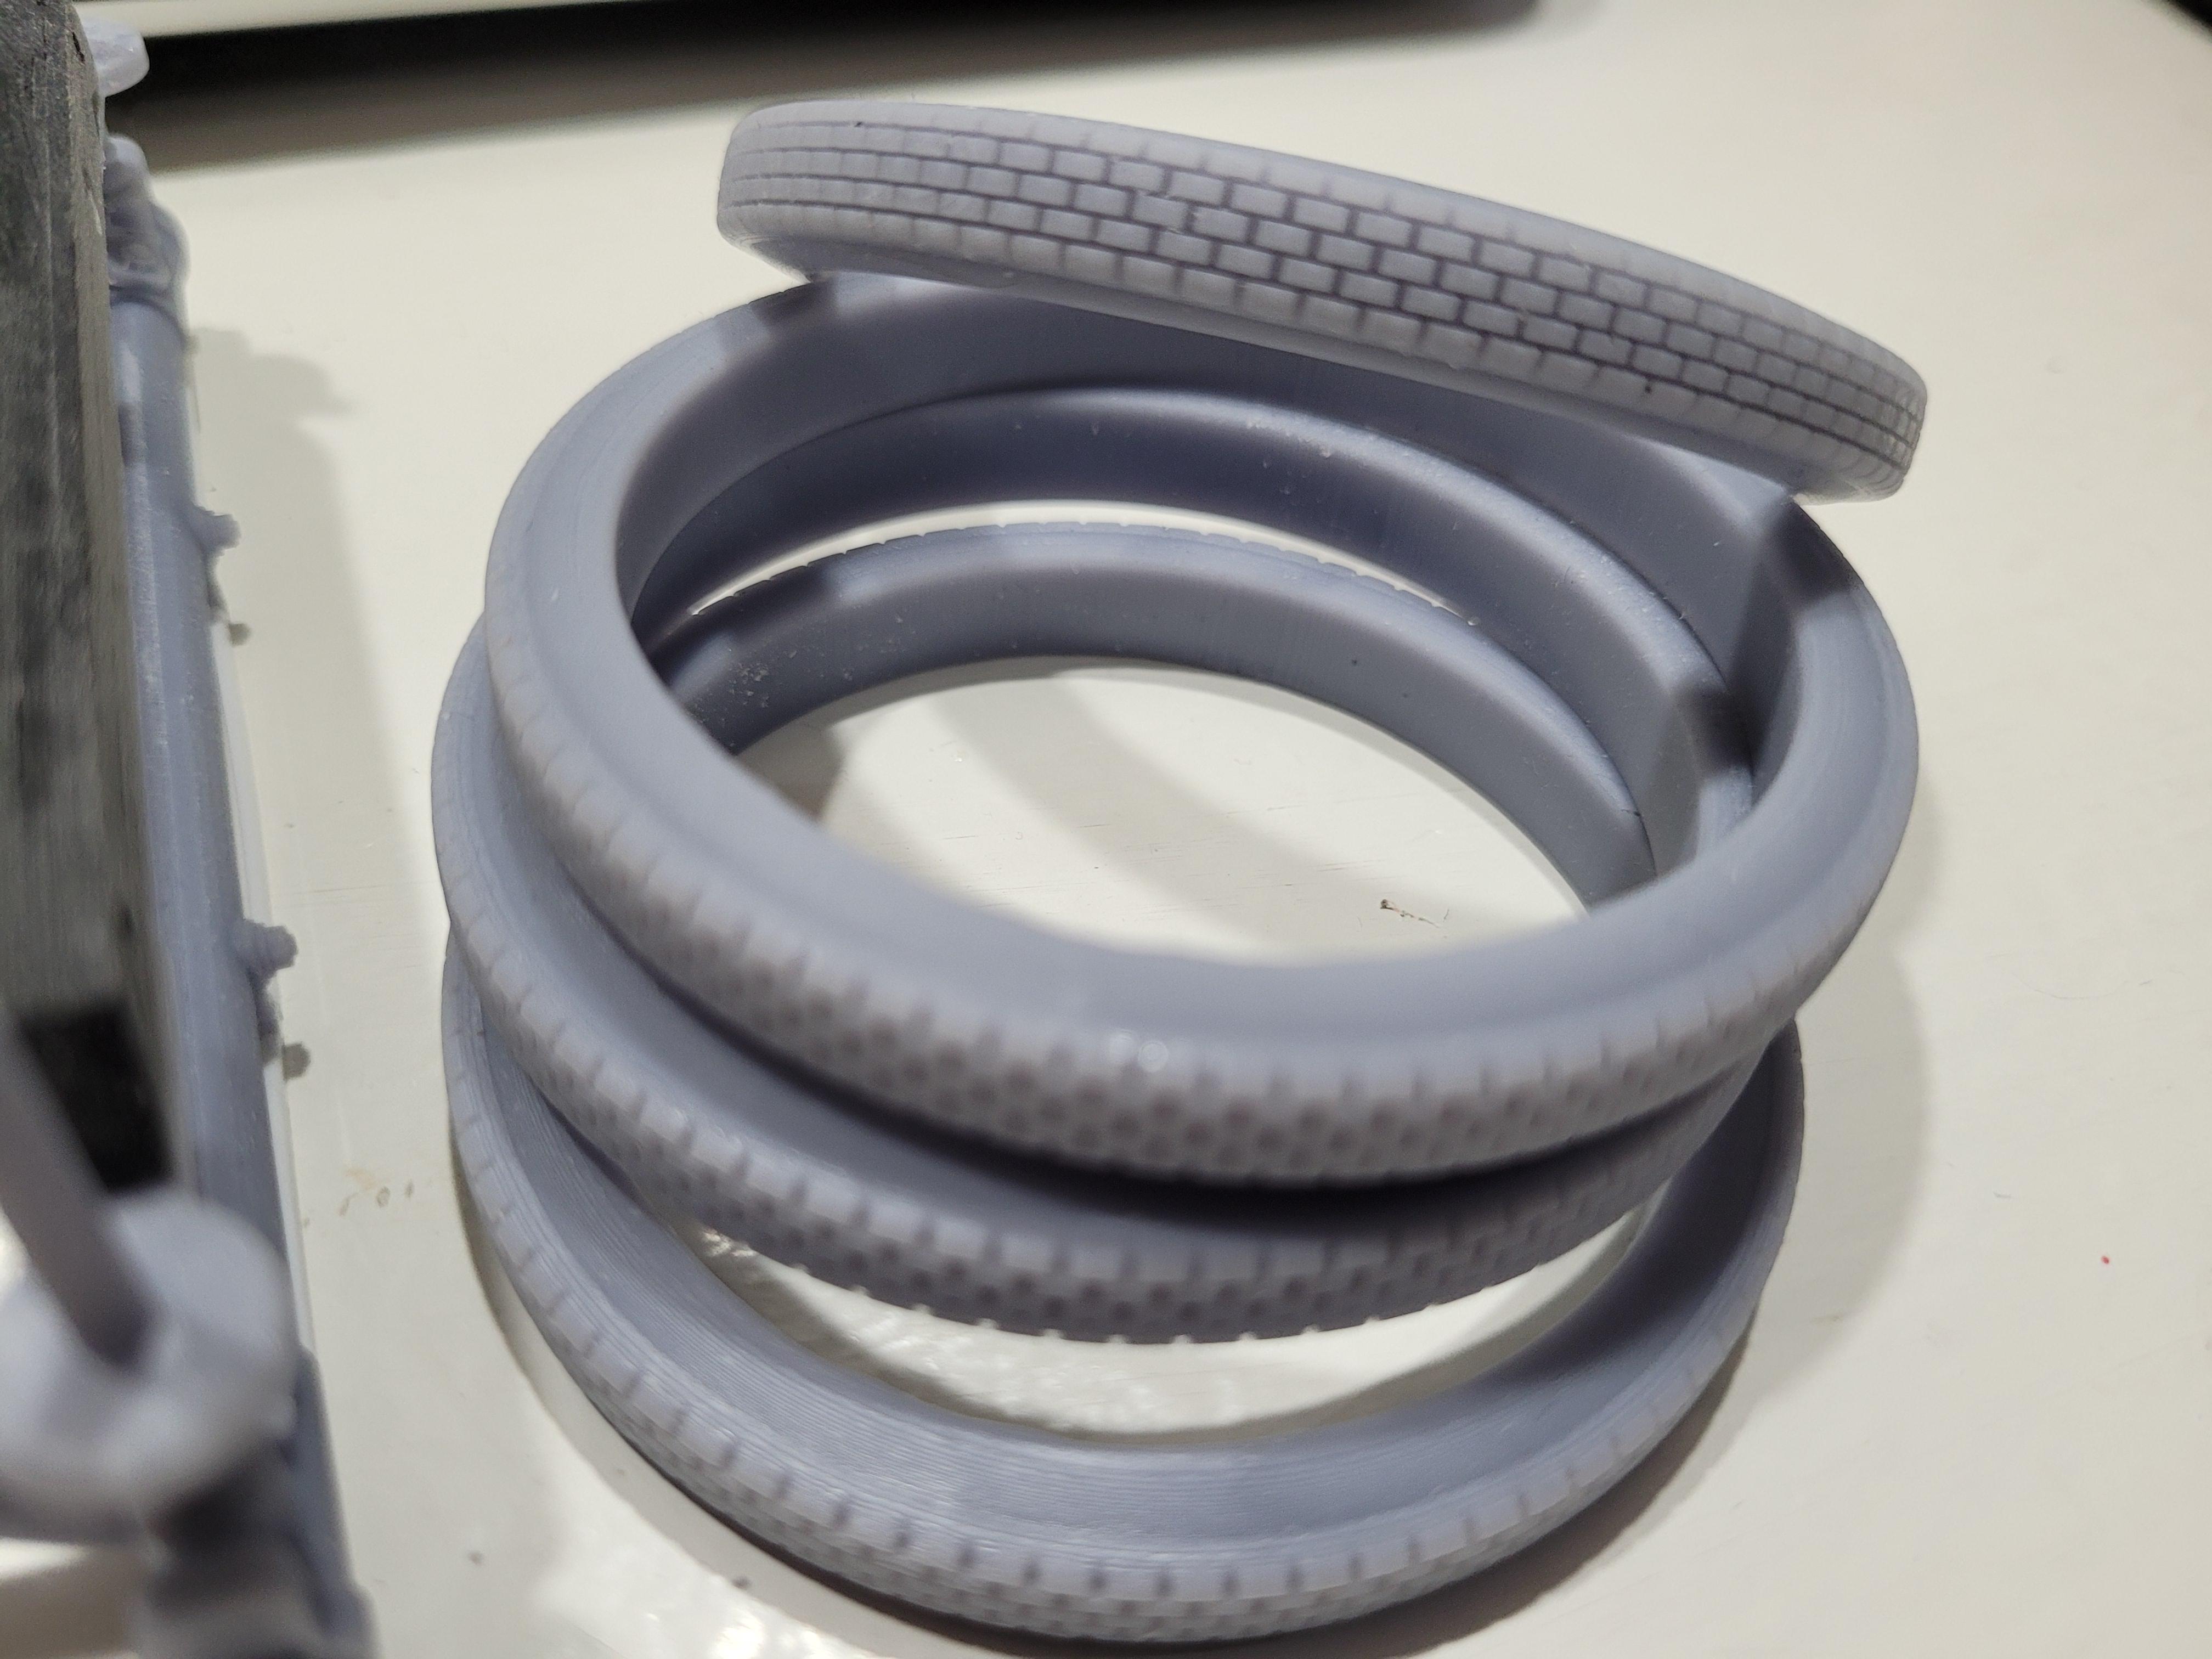
Here are the tires, typical tread pattern at the time.

-
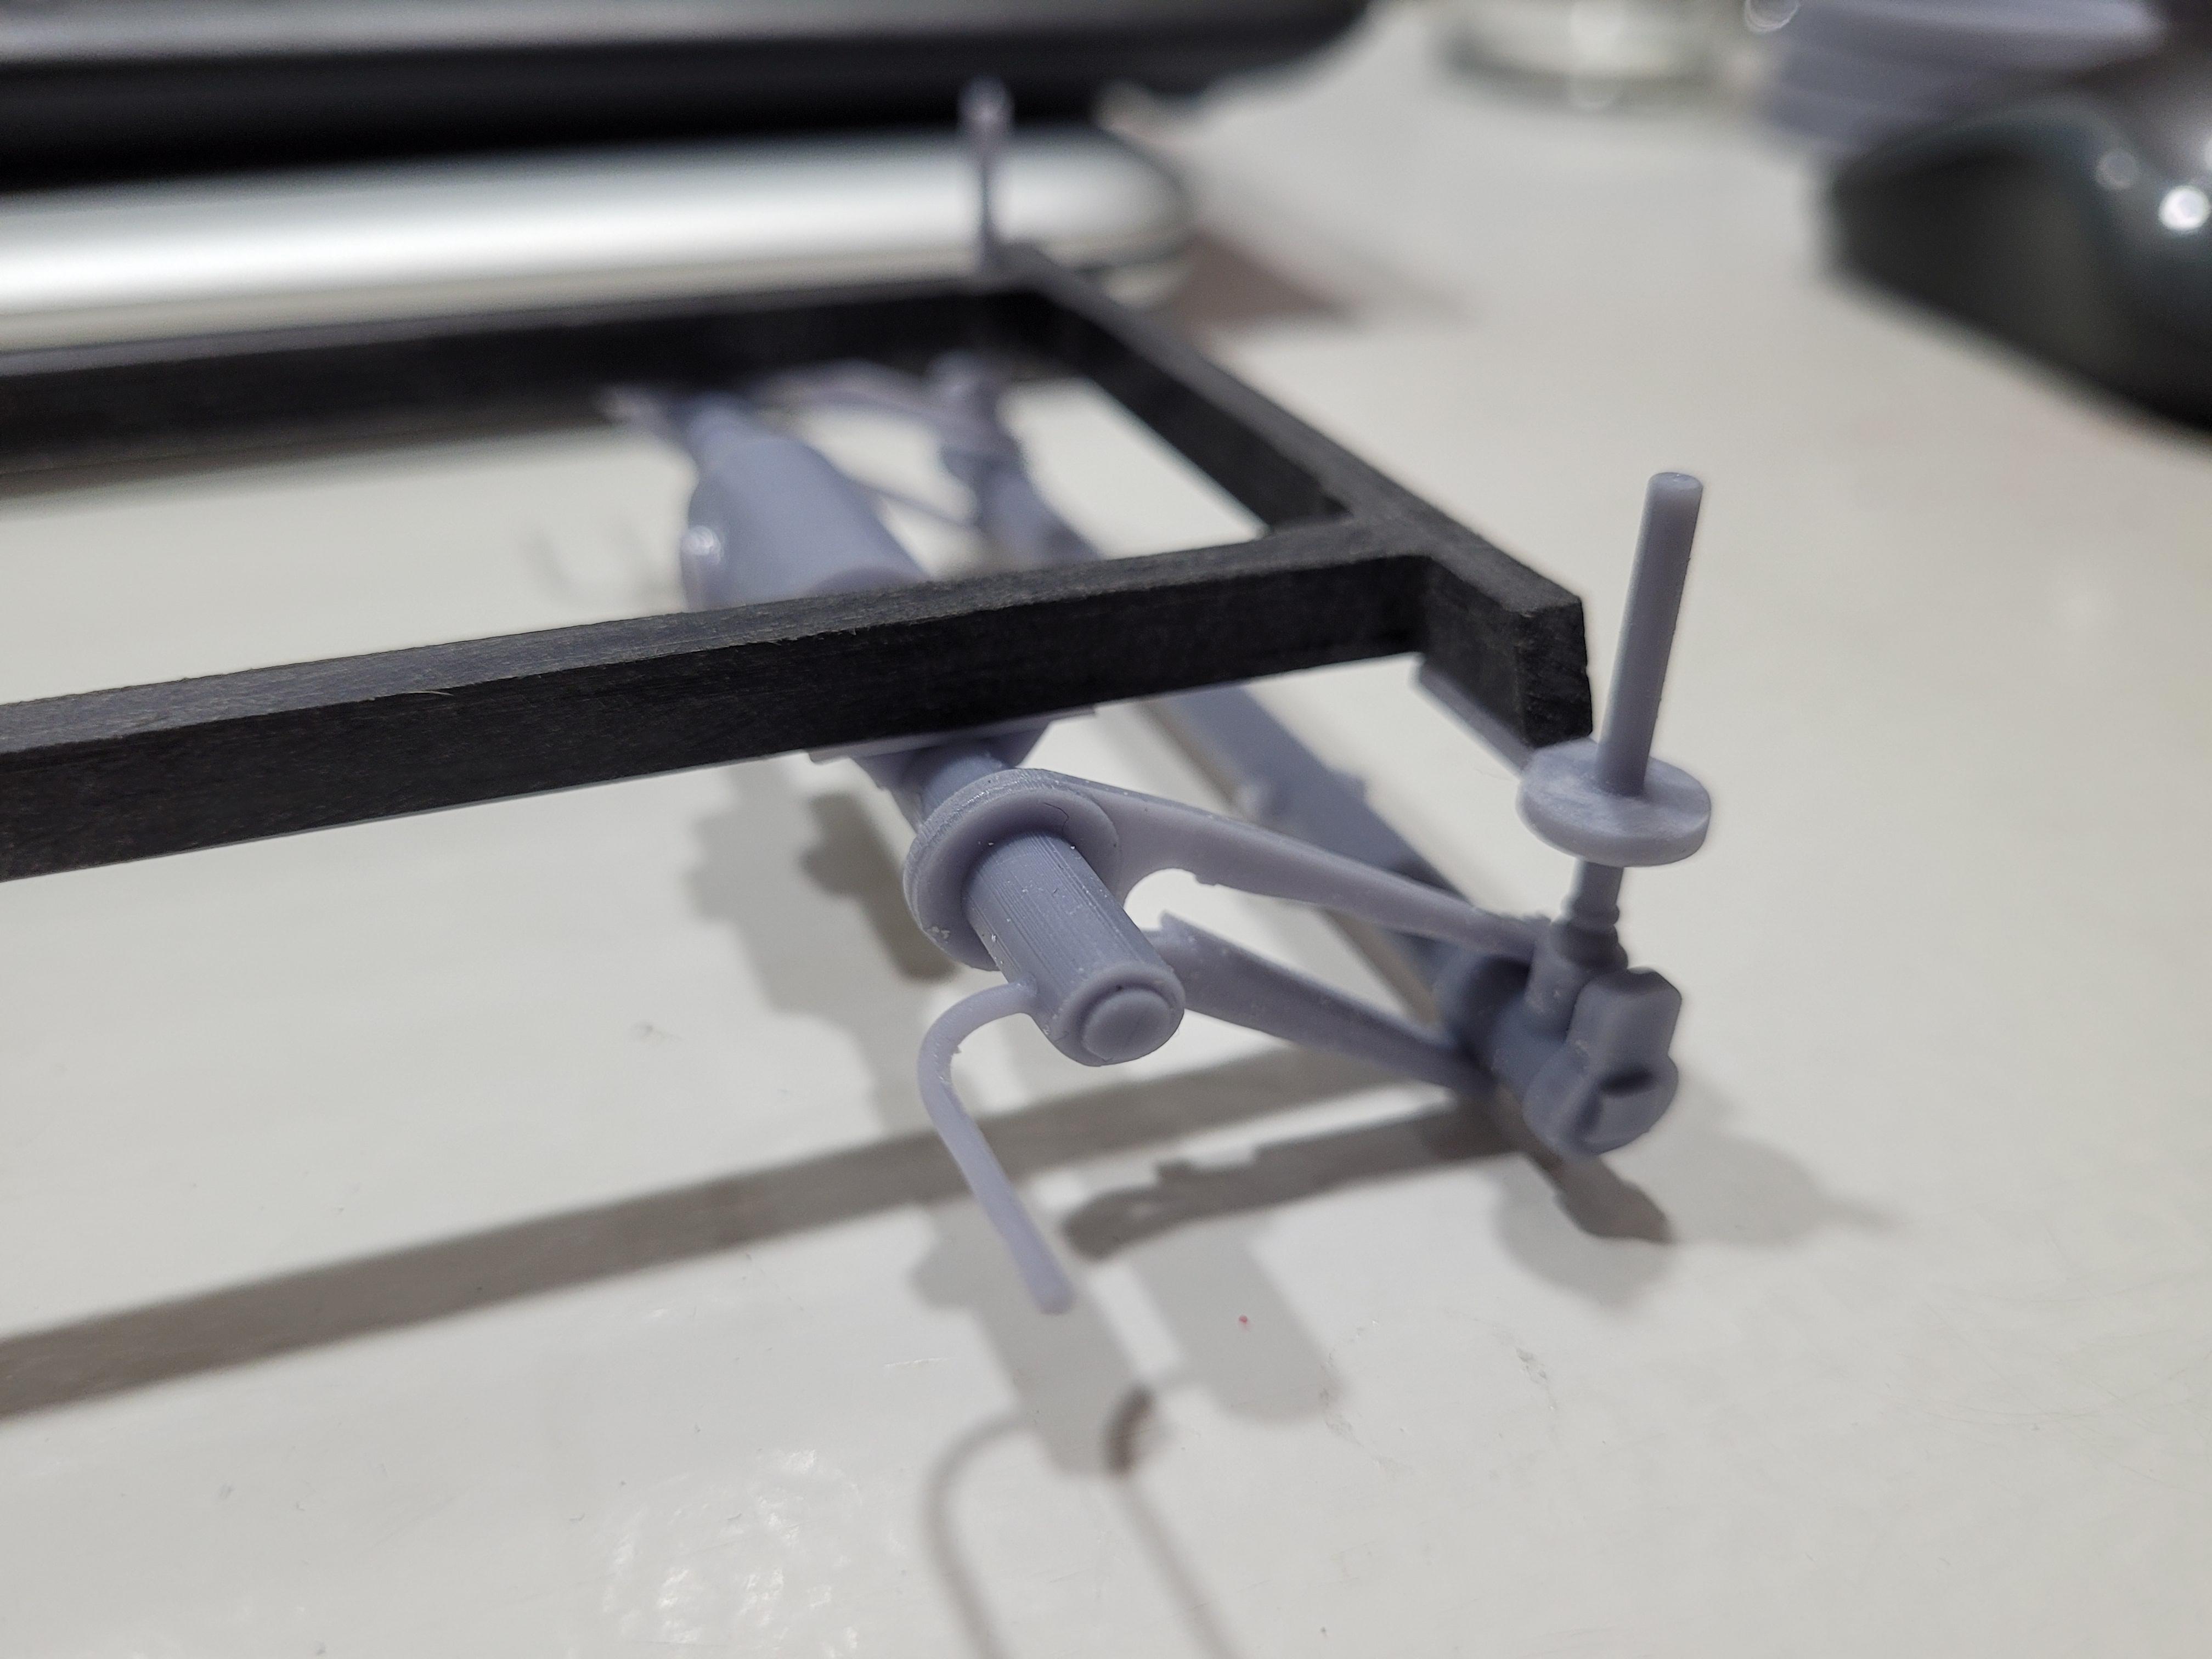
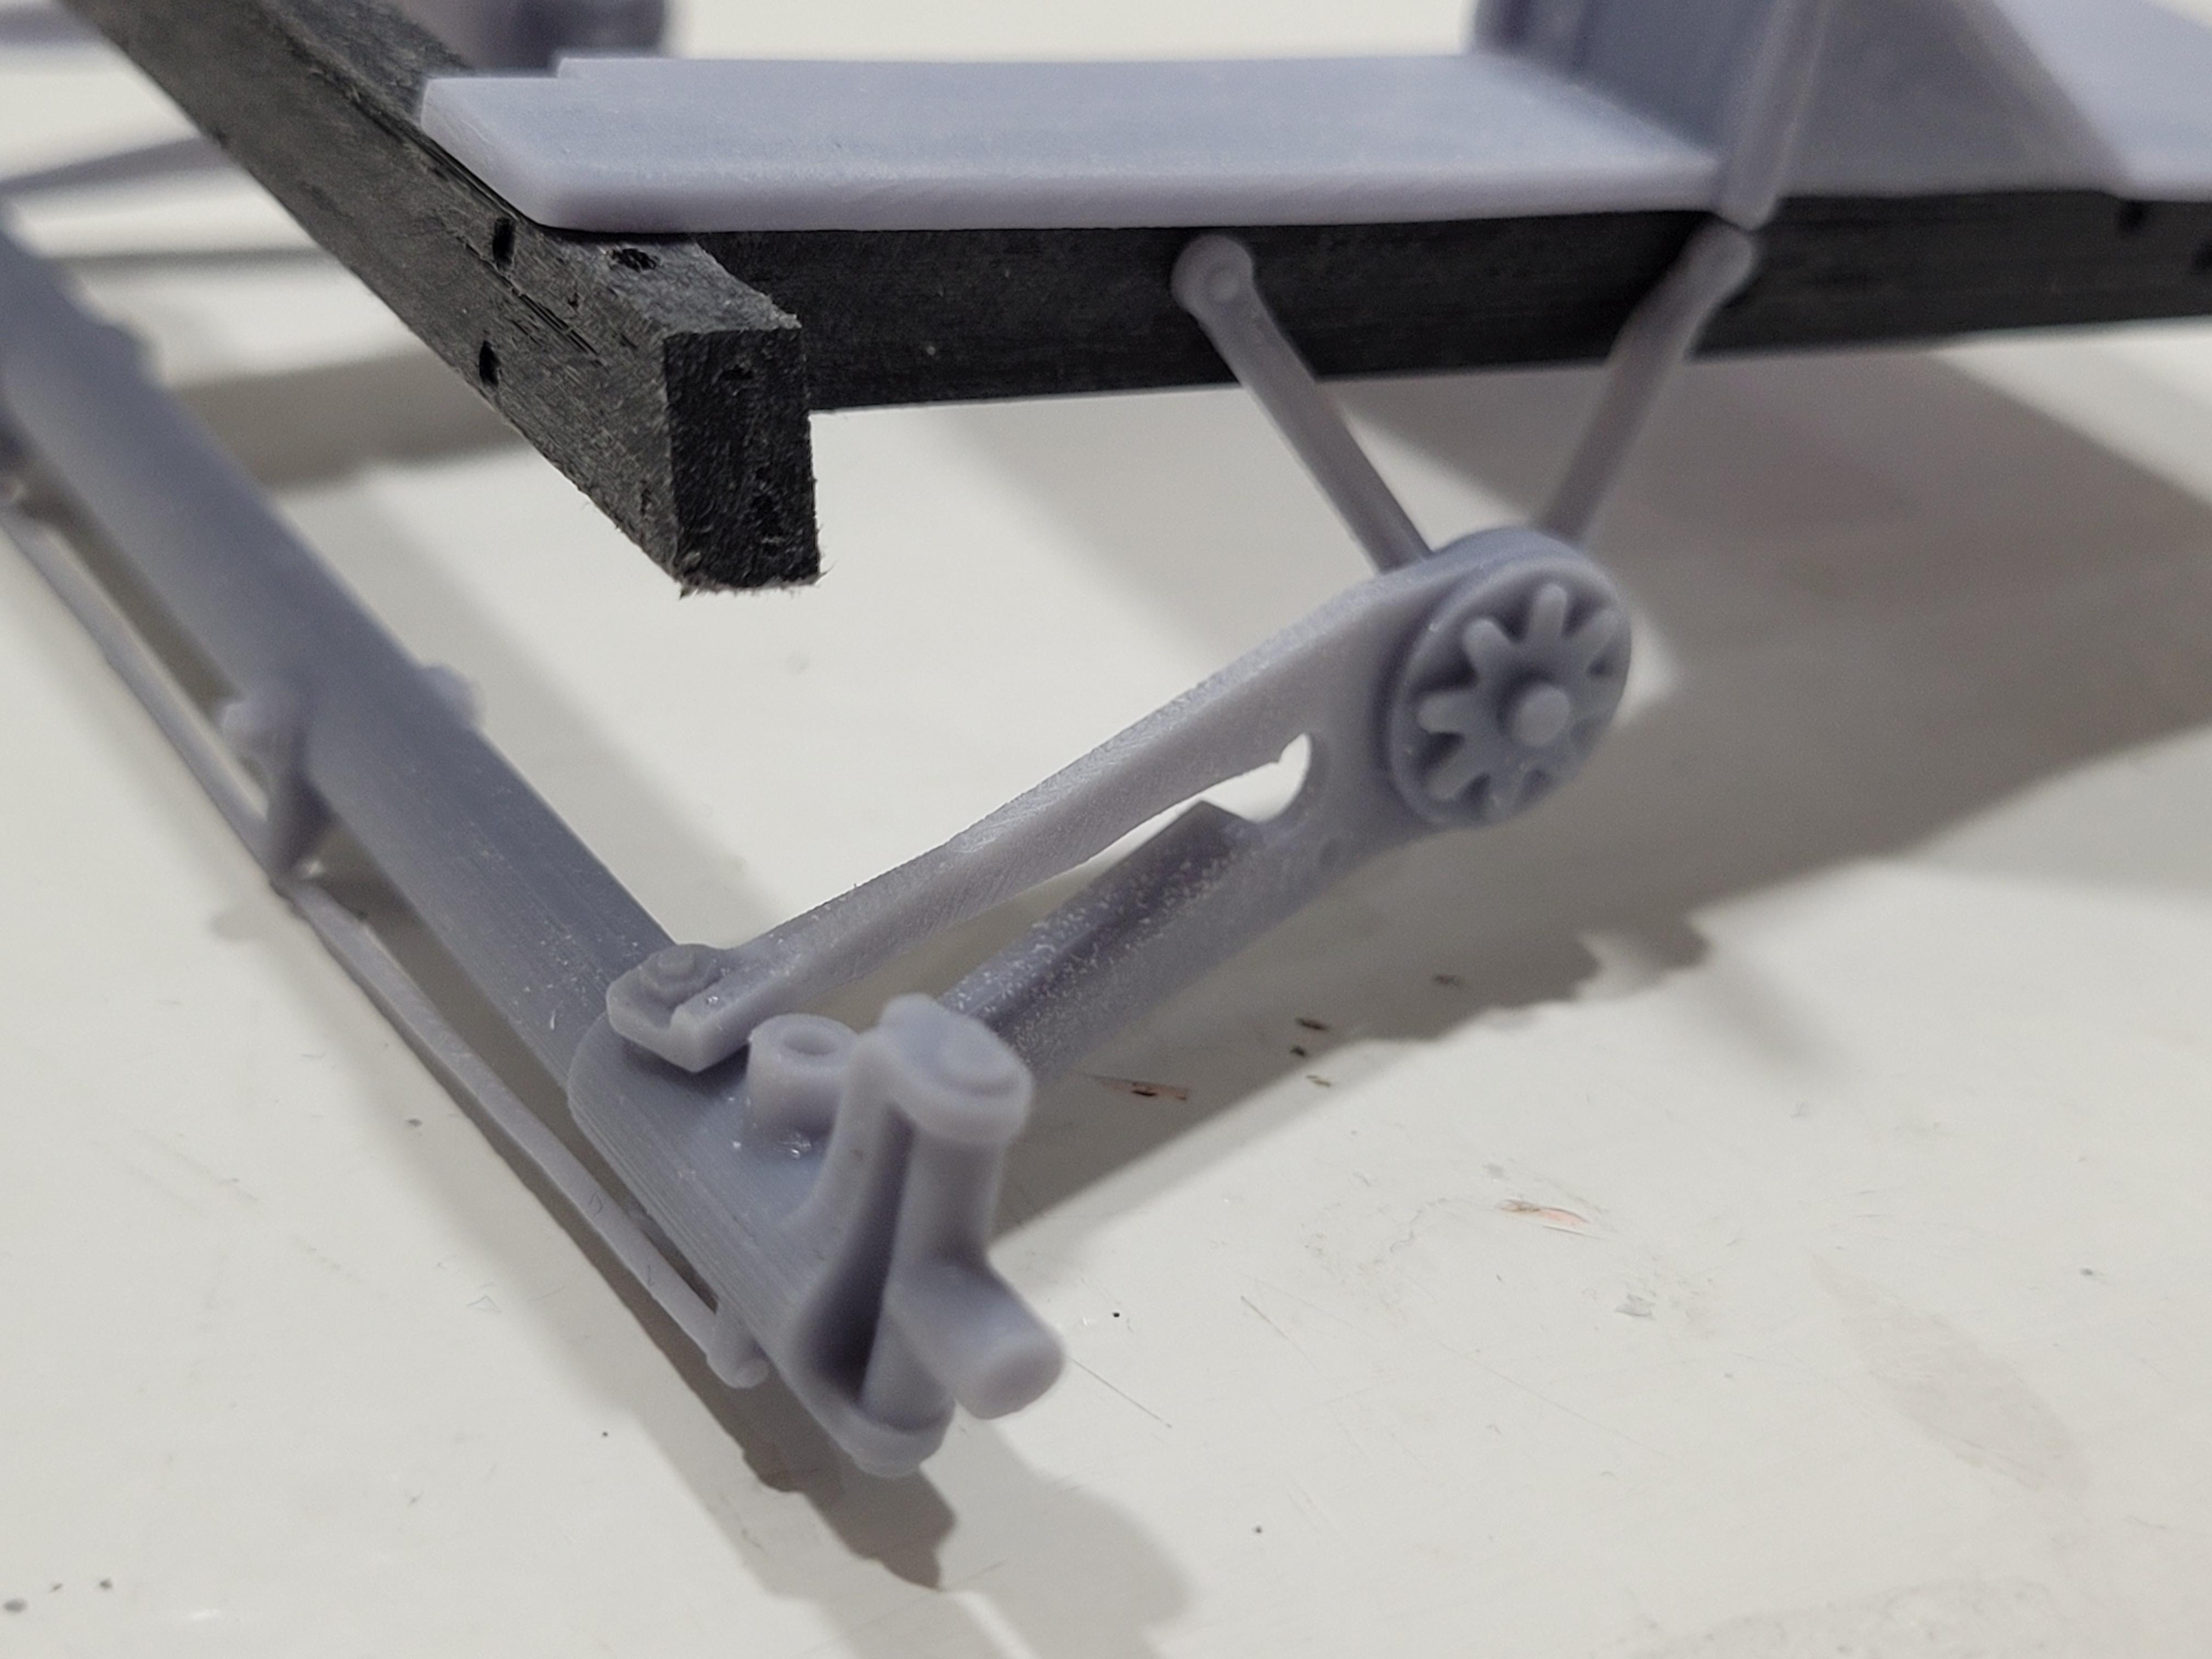
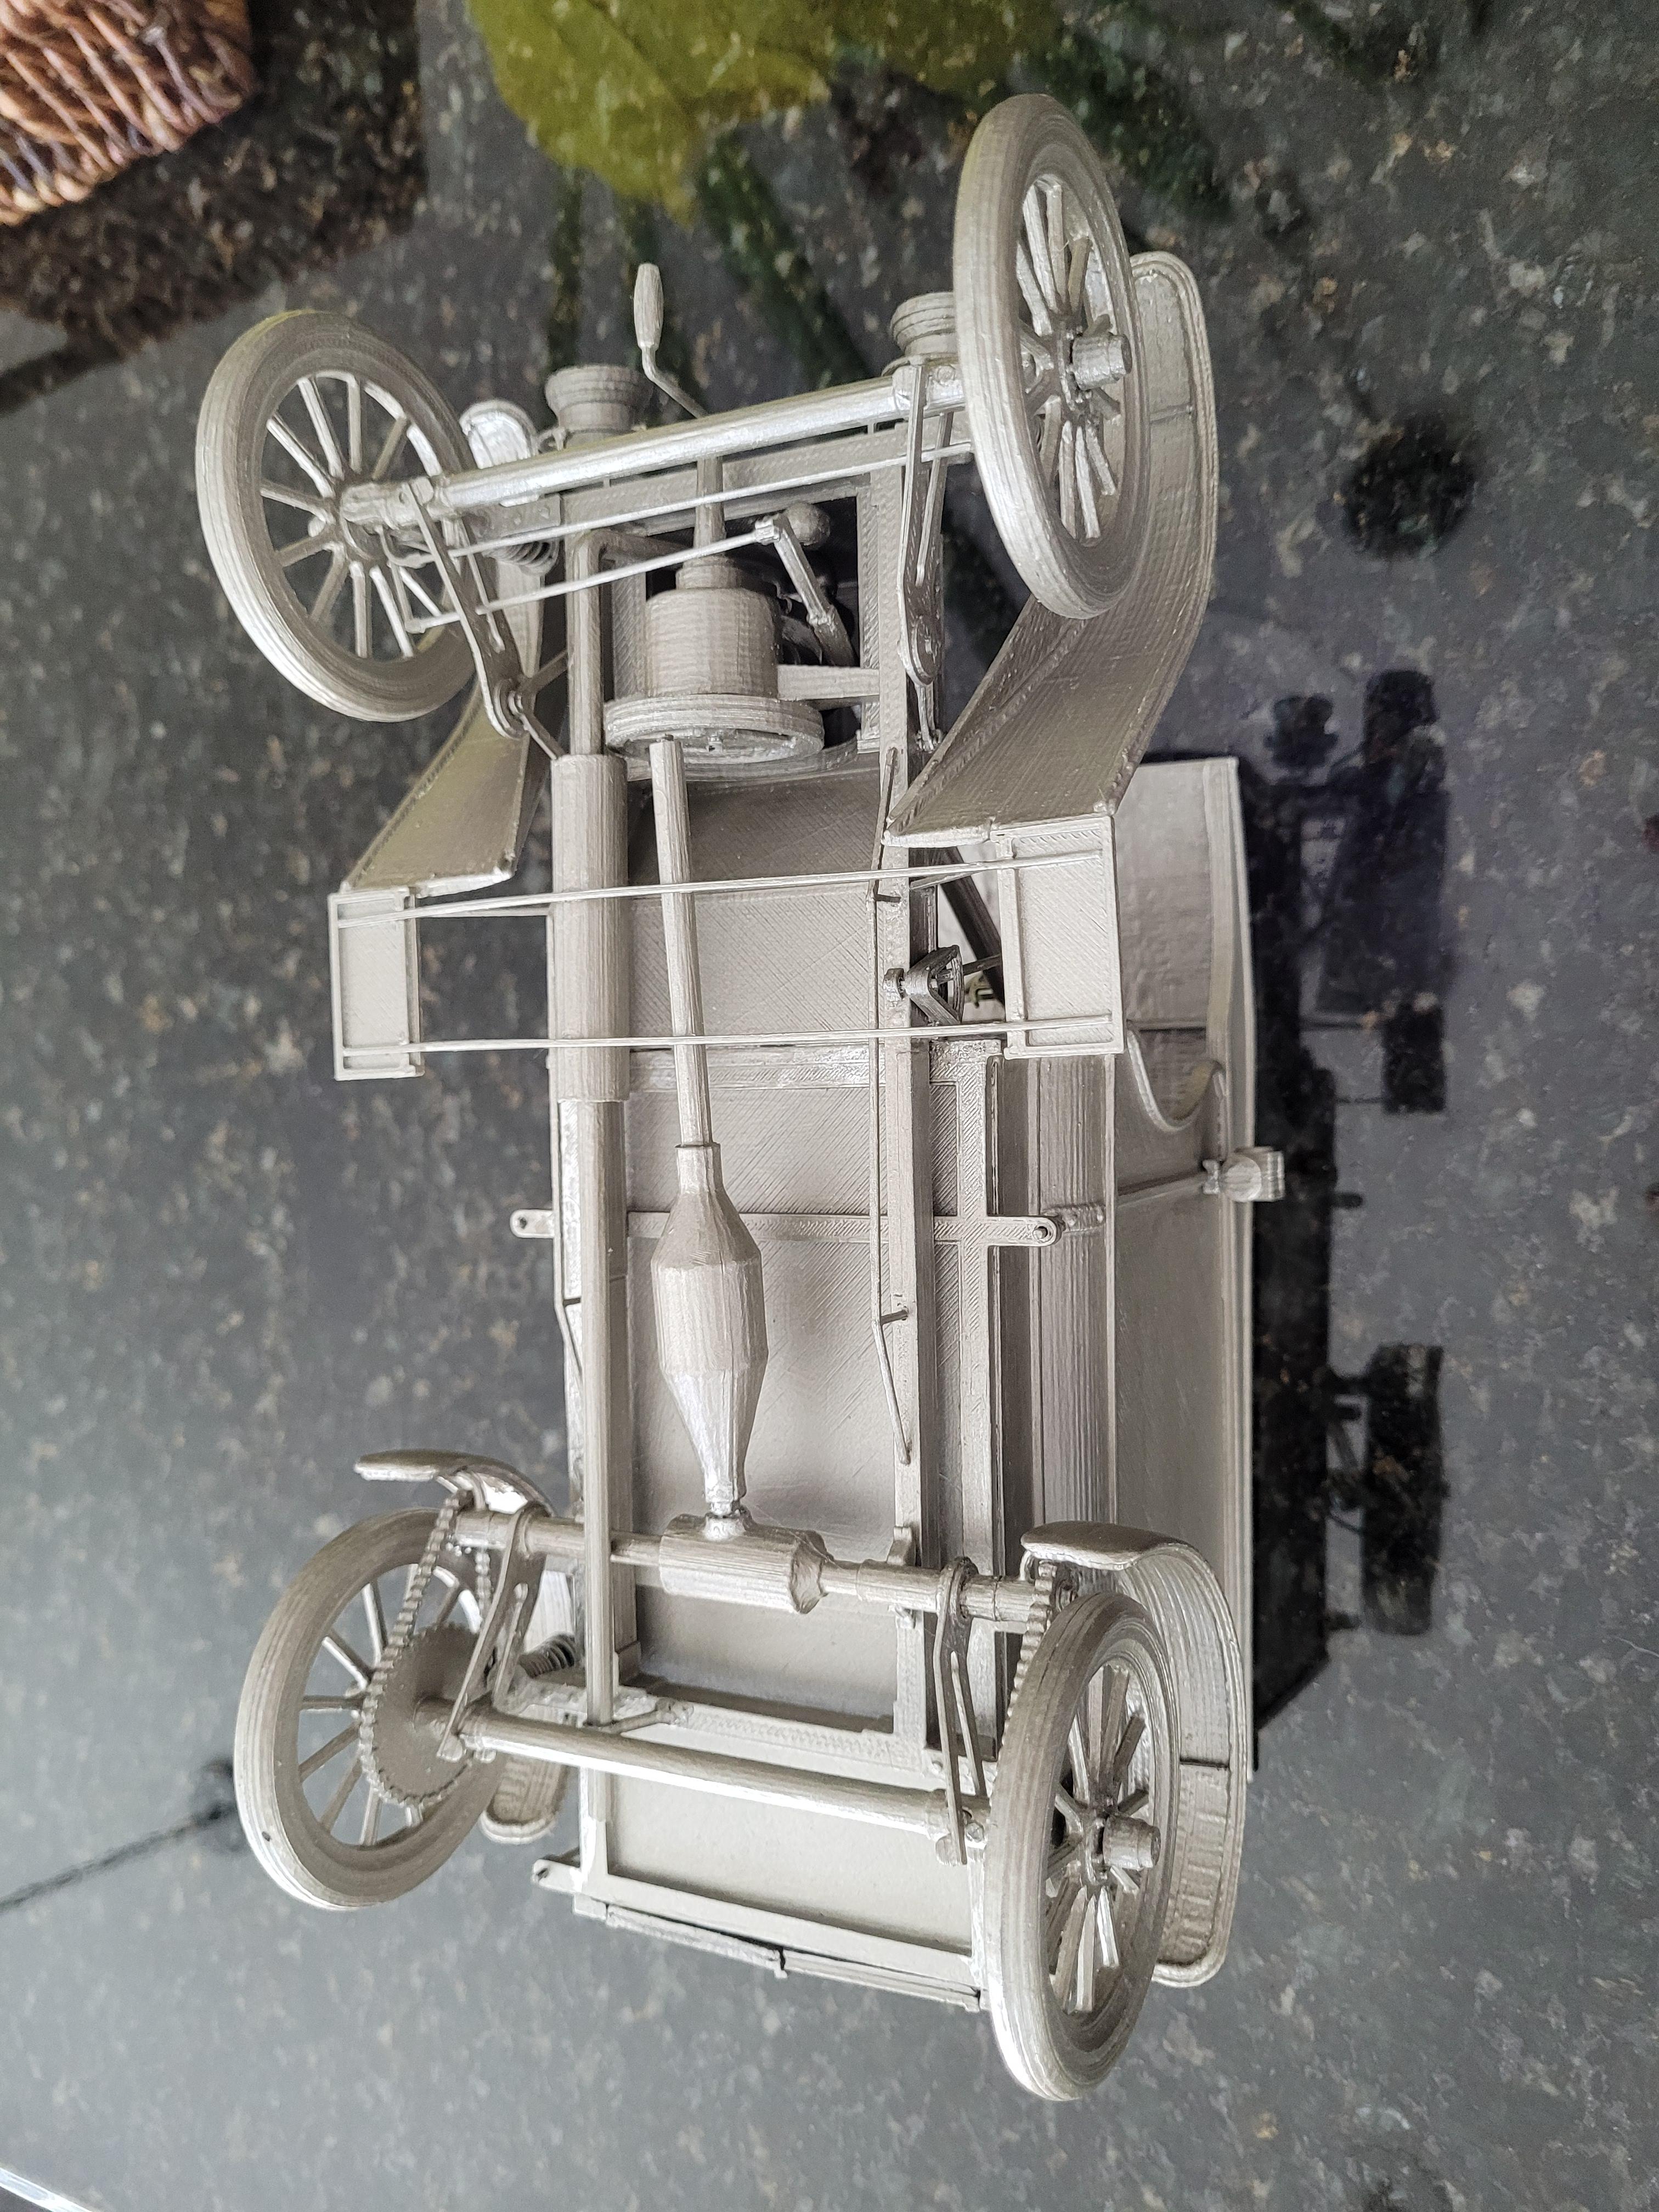
Brush vehicle suspensions were a little unique. The 4 verticle posts move up and down, through the frame brackets. Coil springs attach to the bracket at the bottom, and at the top of the post. As the axle is pushed up, the spring is extended, not compressed. This arrangement was known as underslung, at the time. The idea was to allow the body and frame to ride closer to the road. This delivery truck was derived from it's earlier siblings, the Brush cars that used the underling configuration.
-
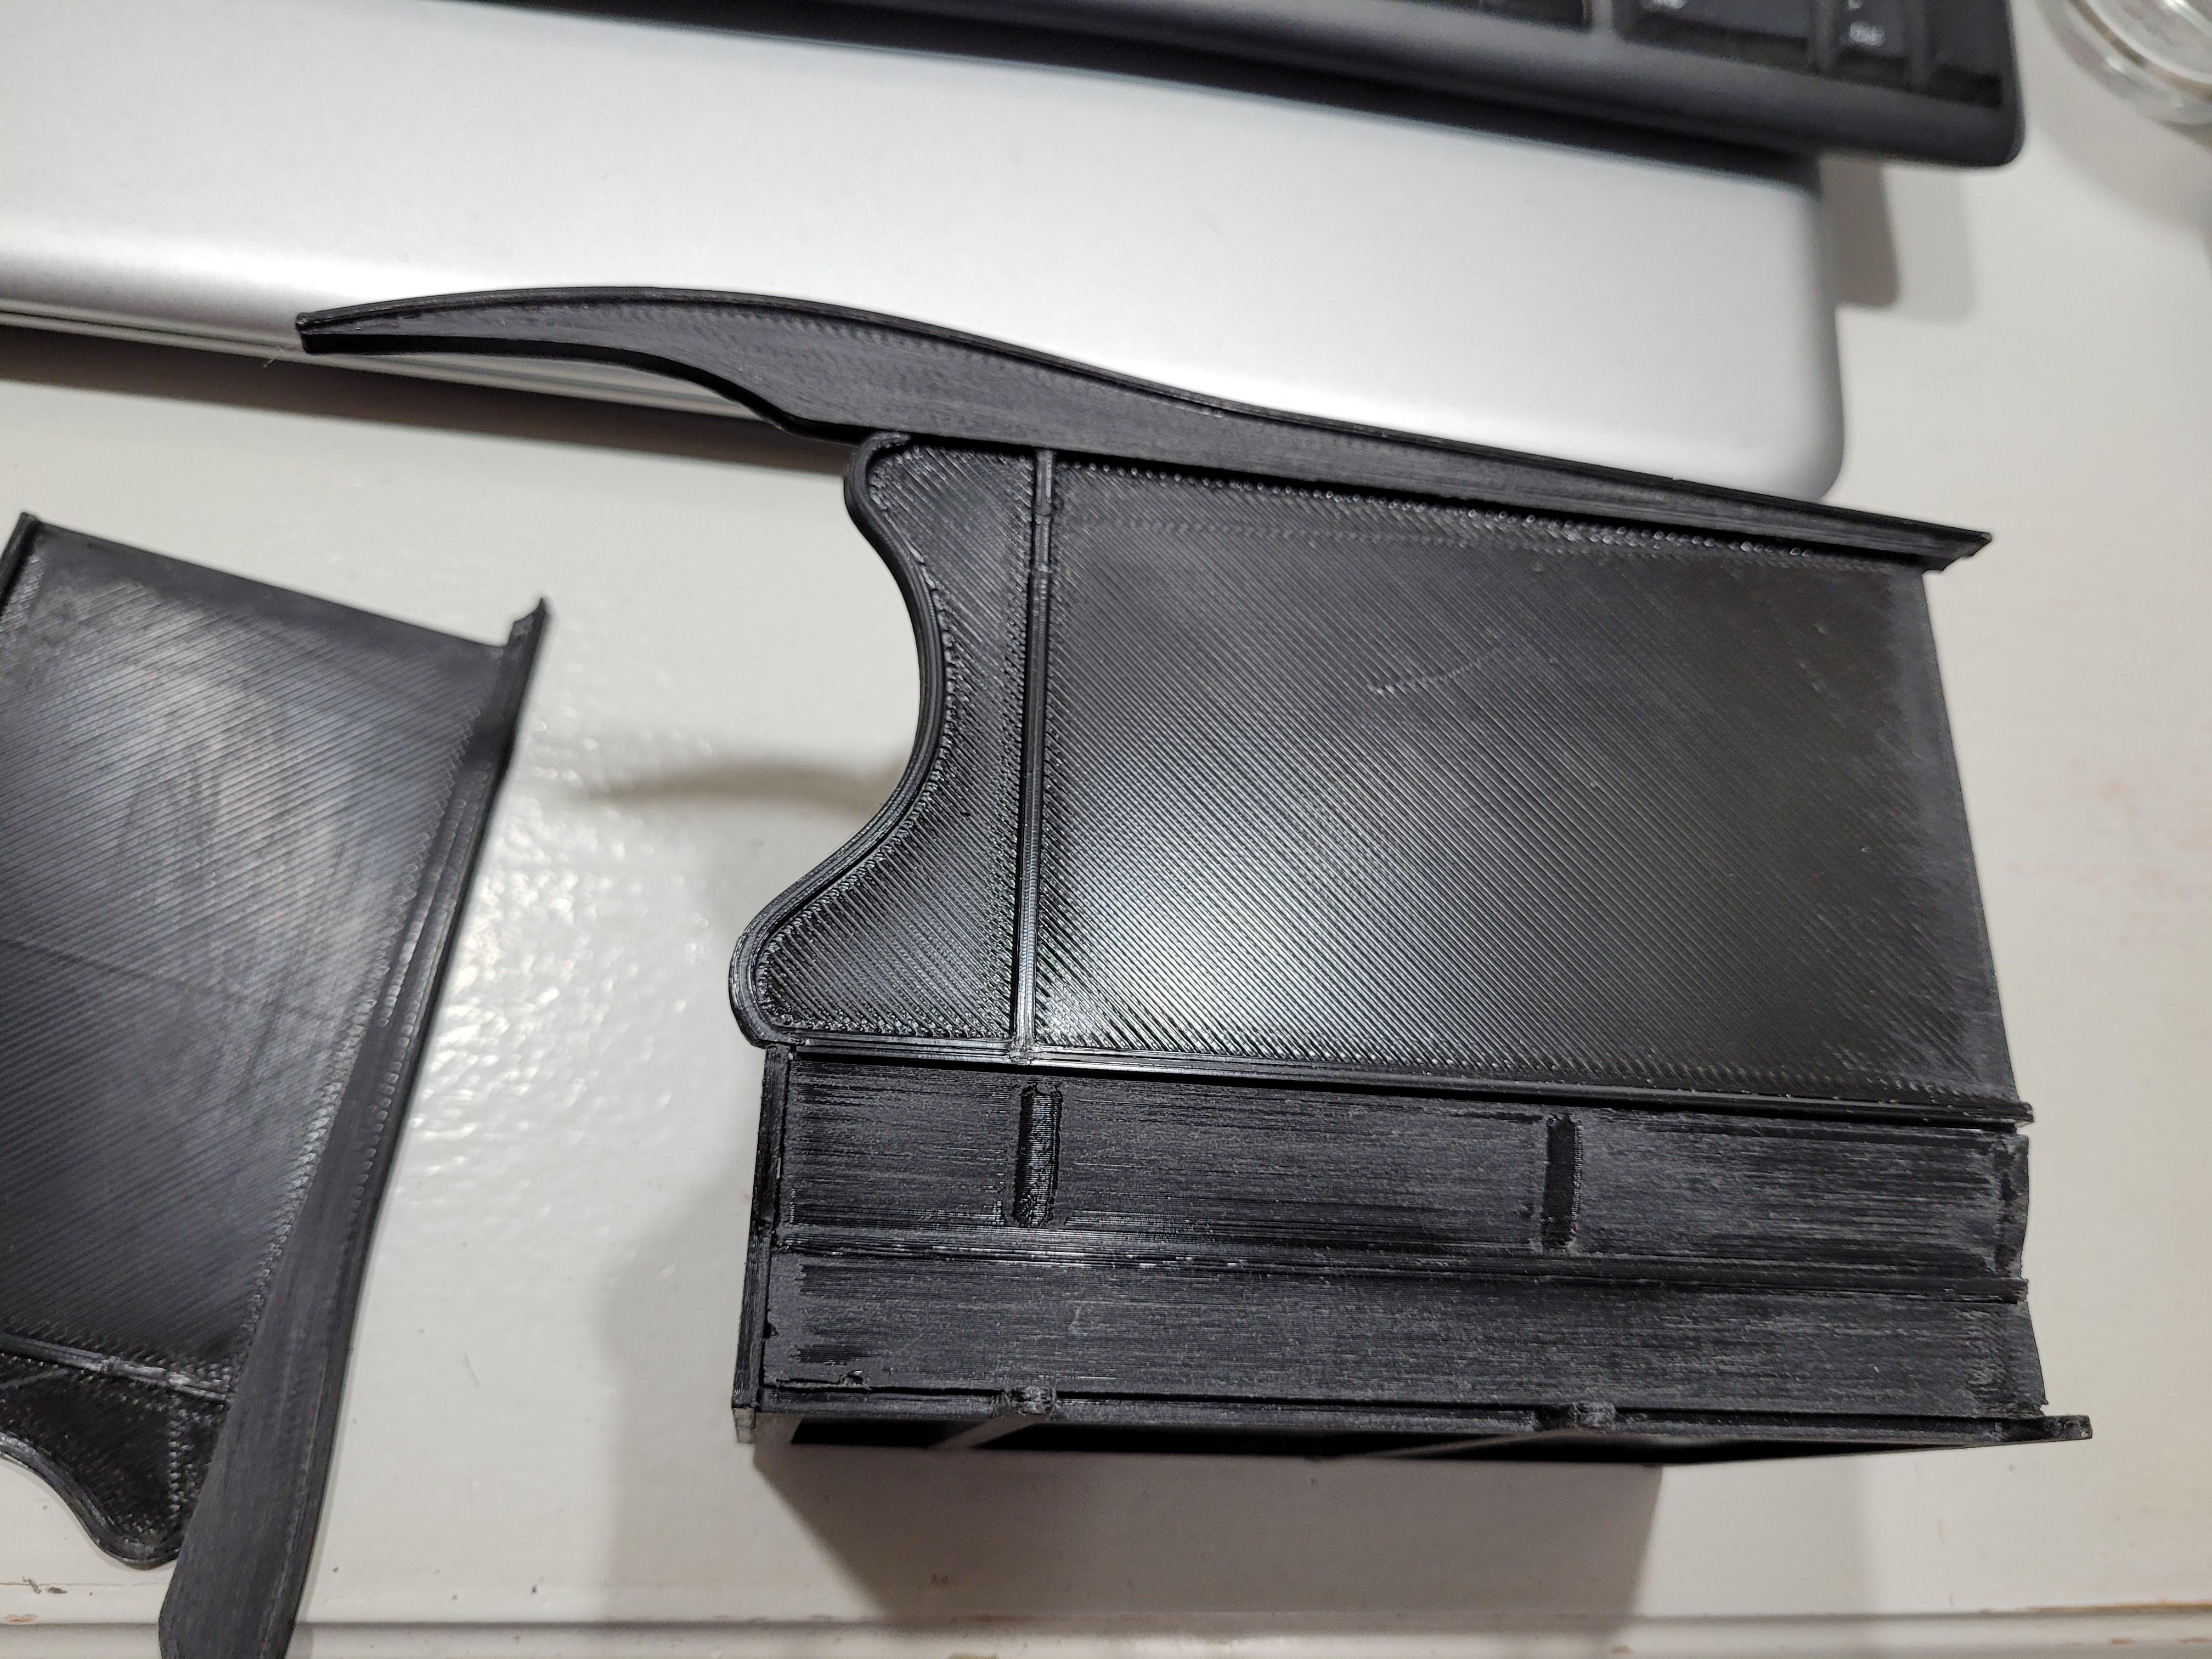
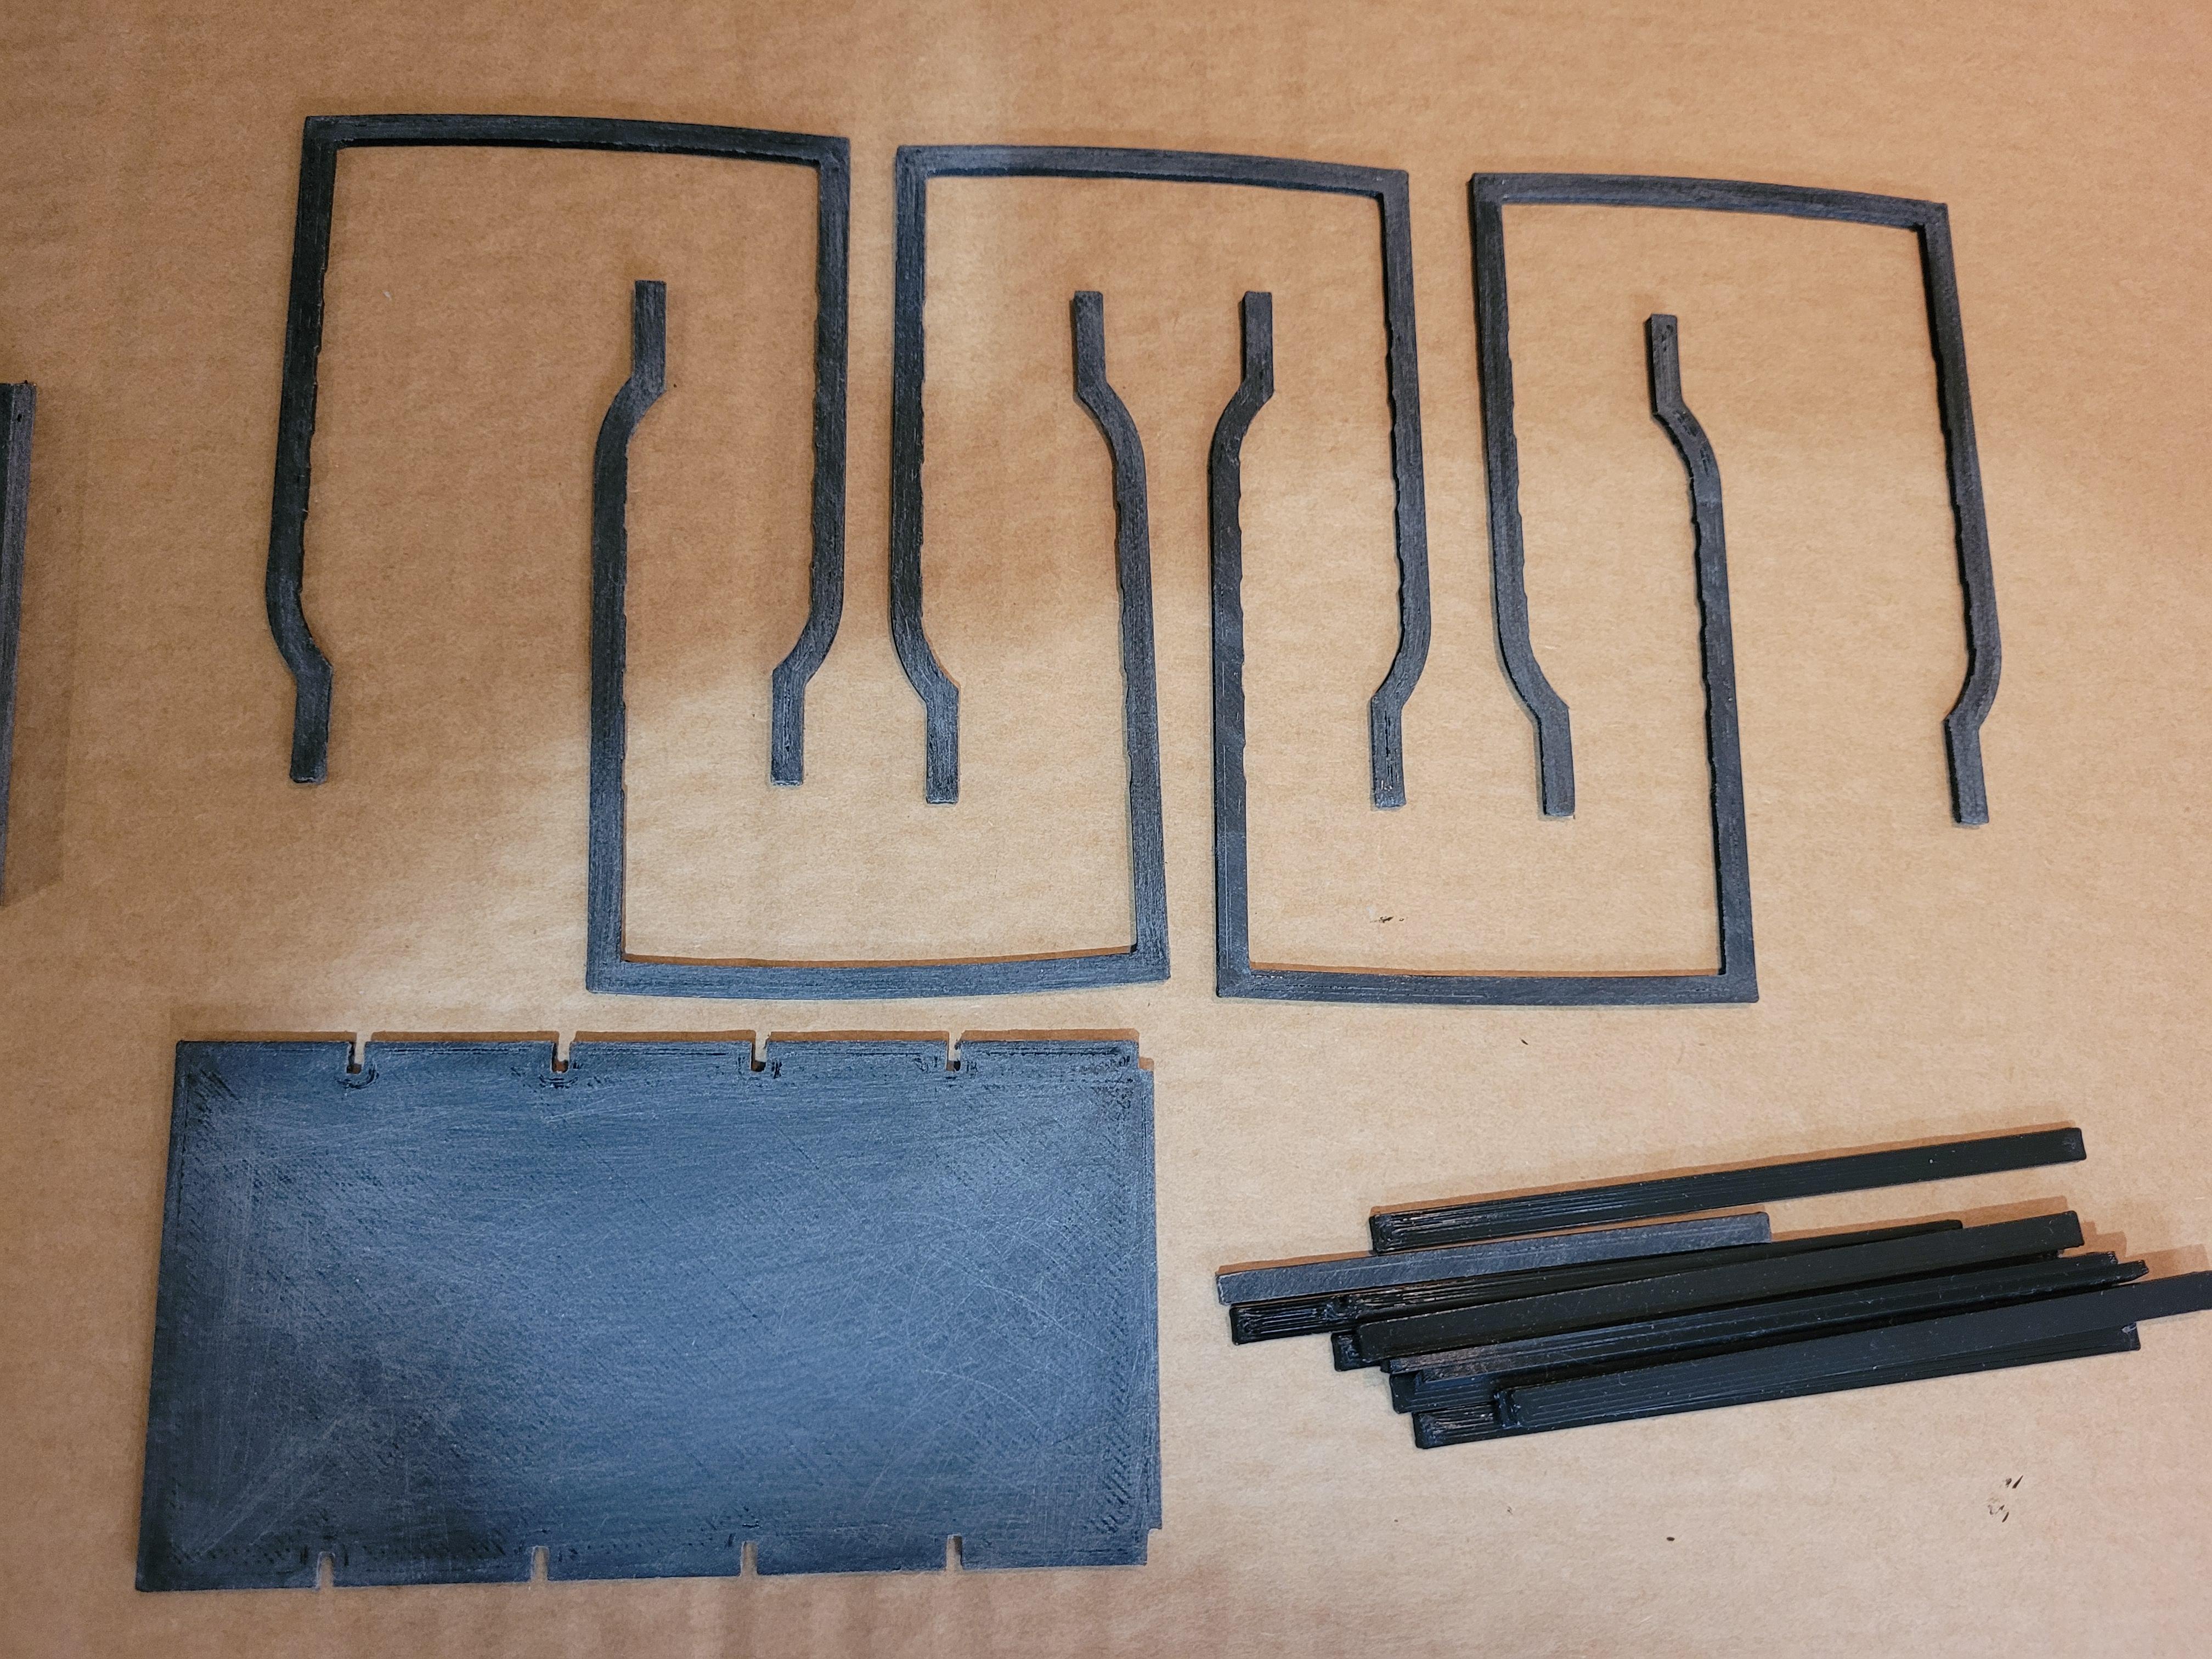
Pre- fitting the side panels before painting the inside.
-
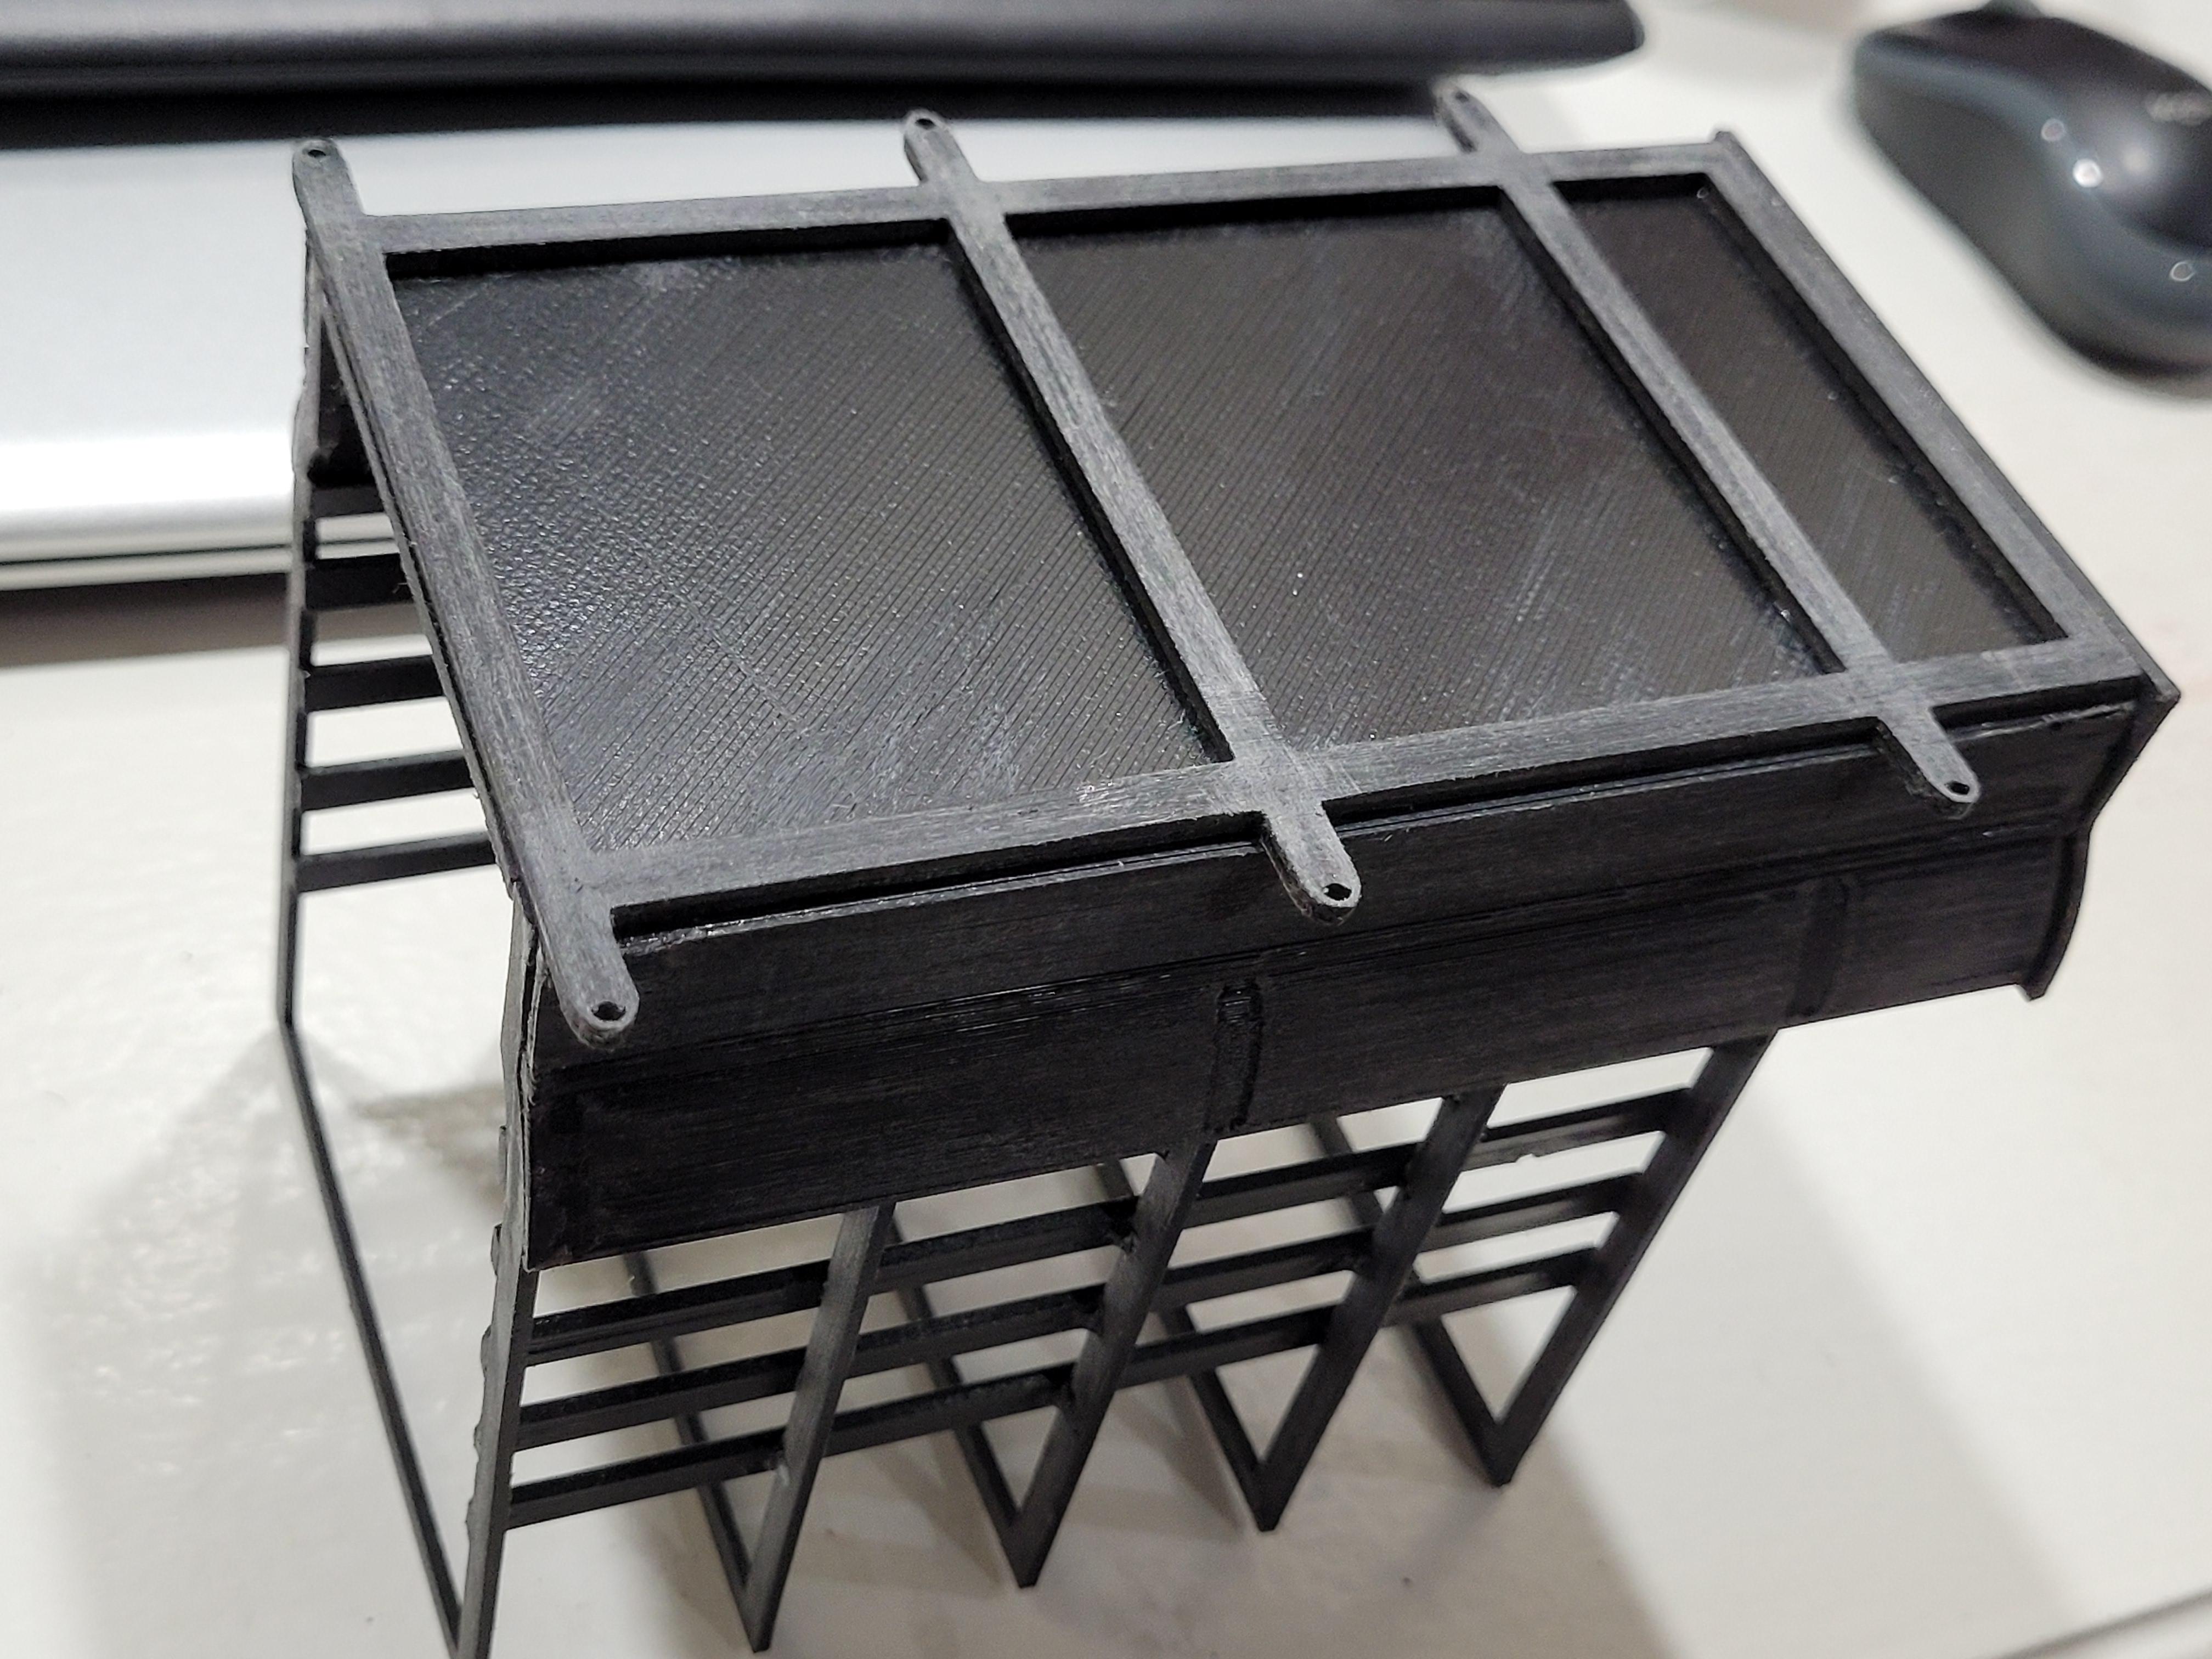
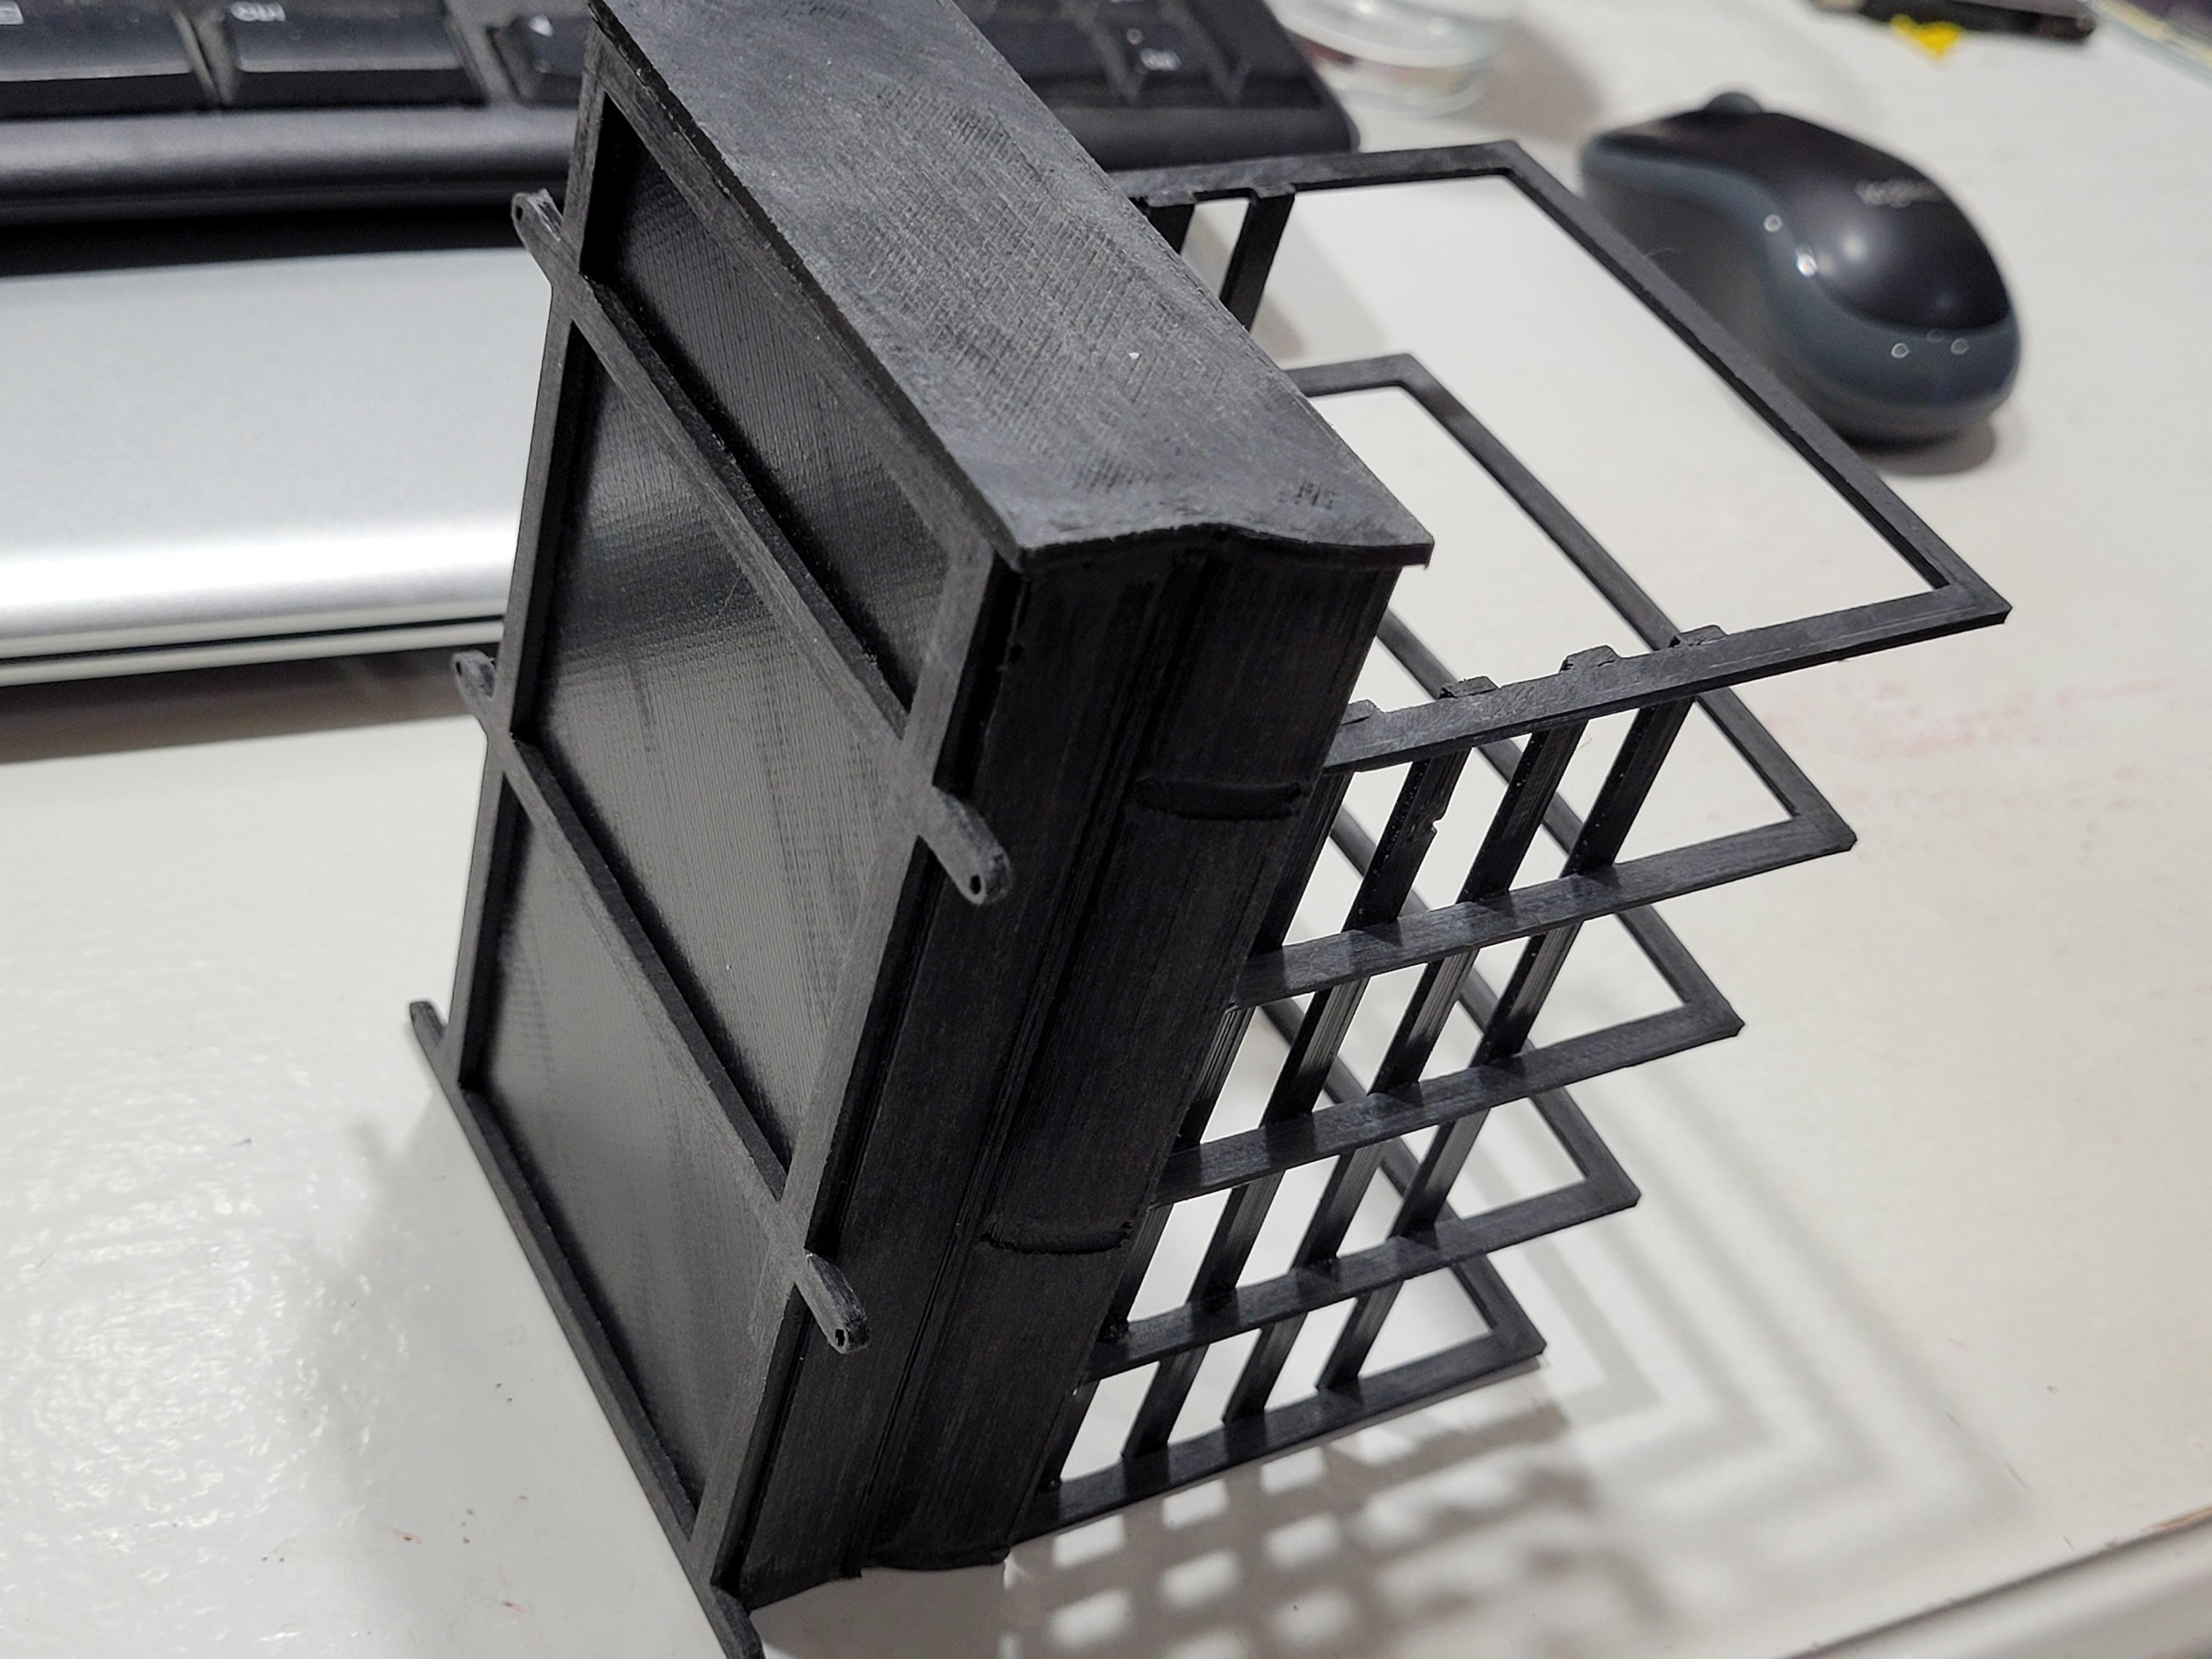
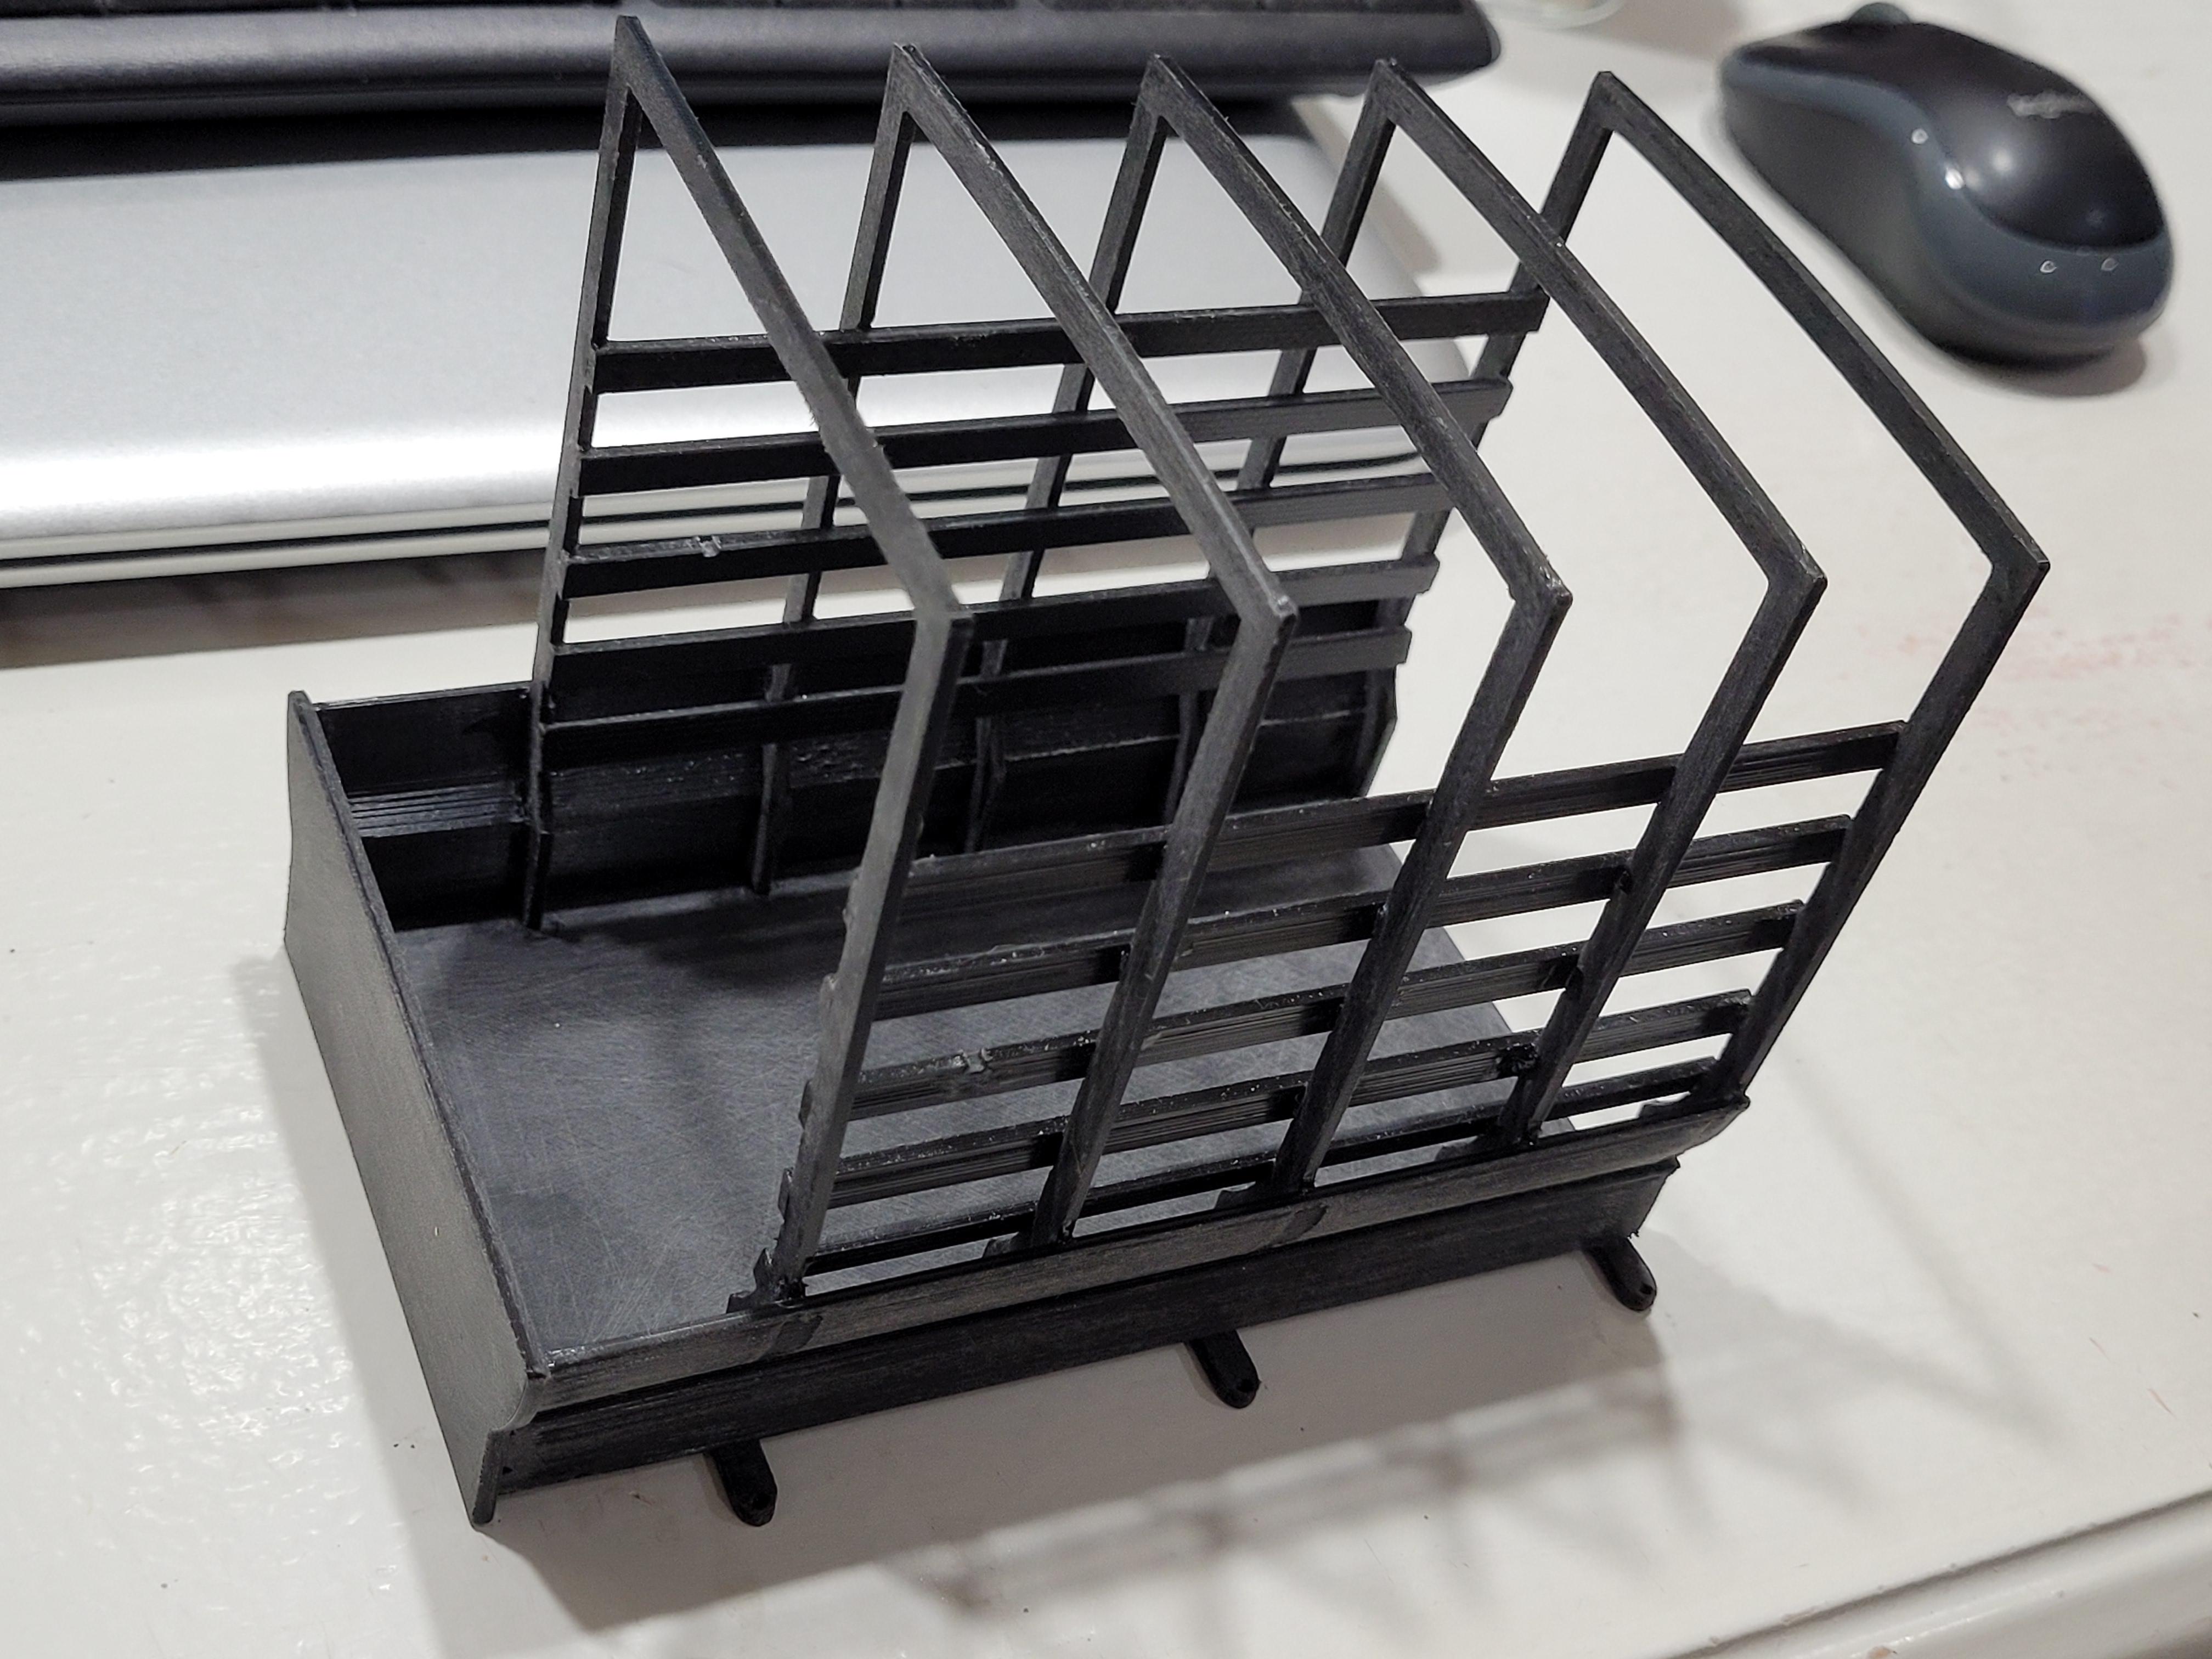
The bottom of the cargo box in place.
-
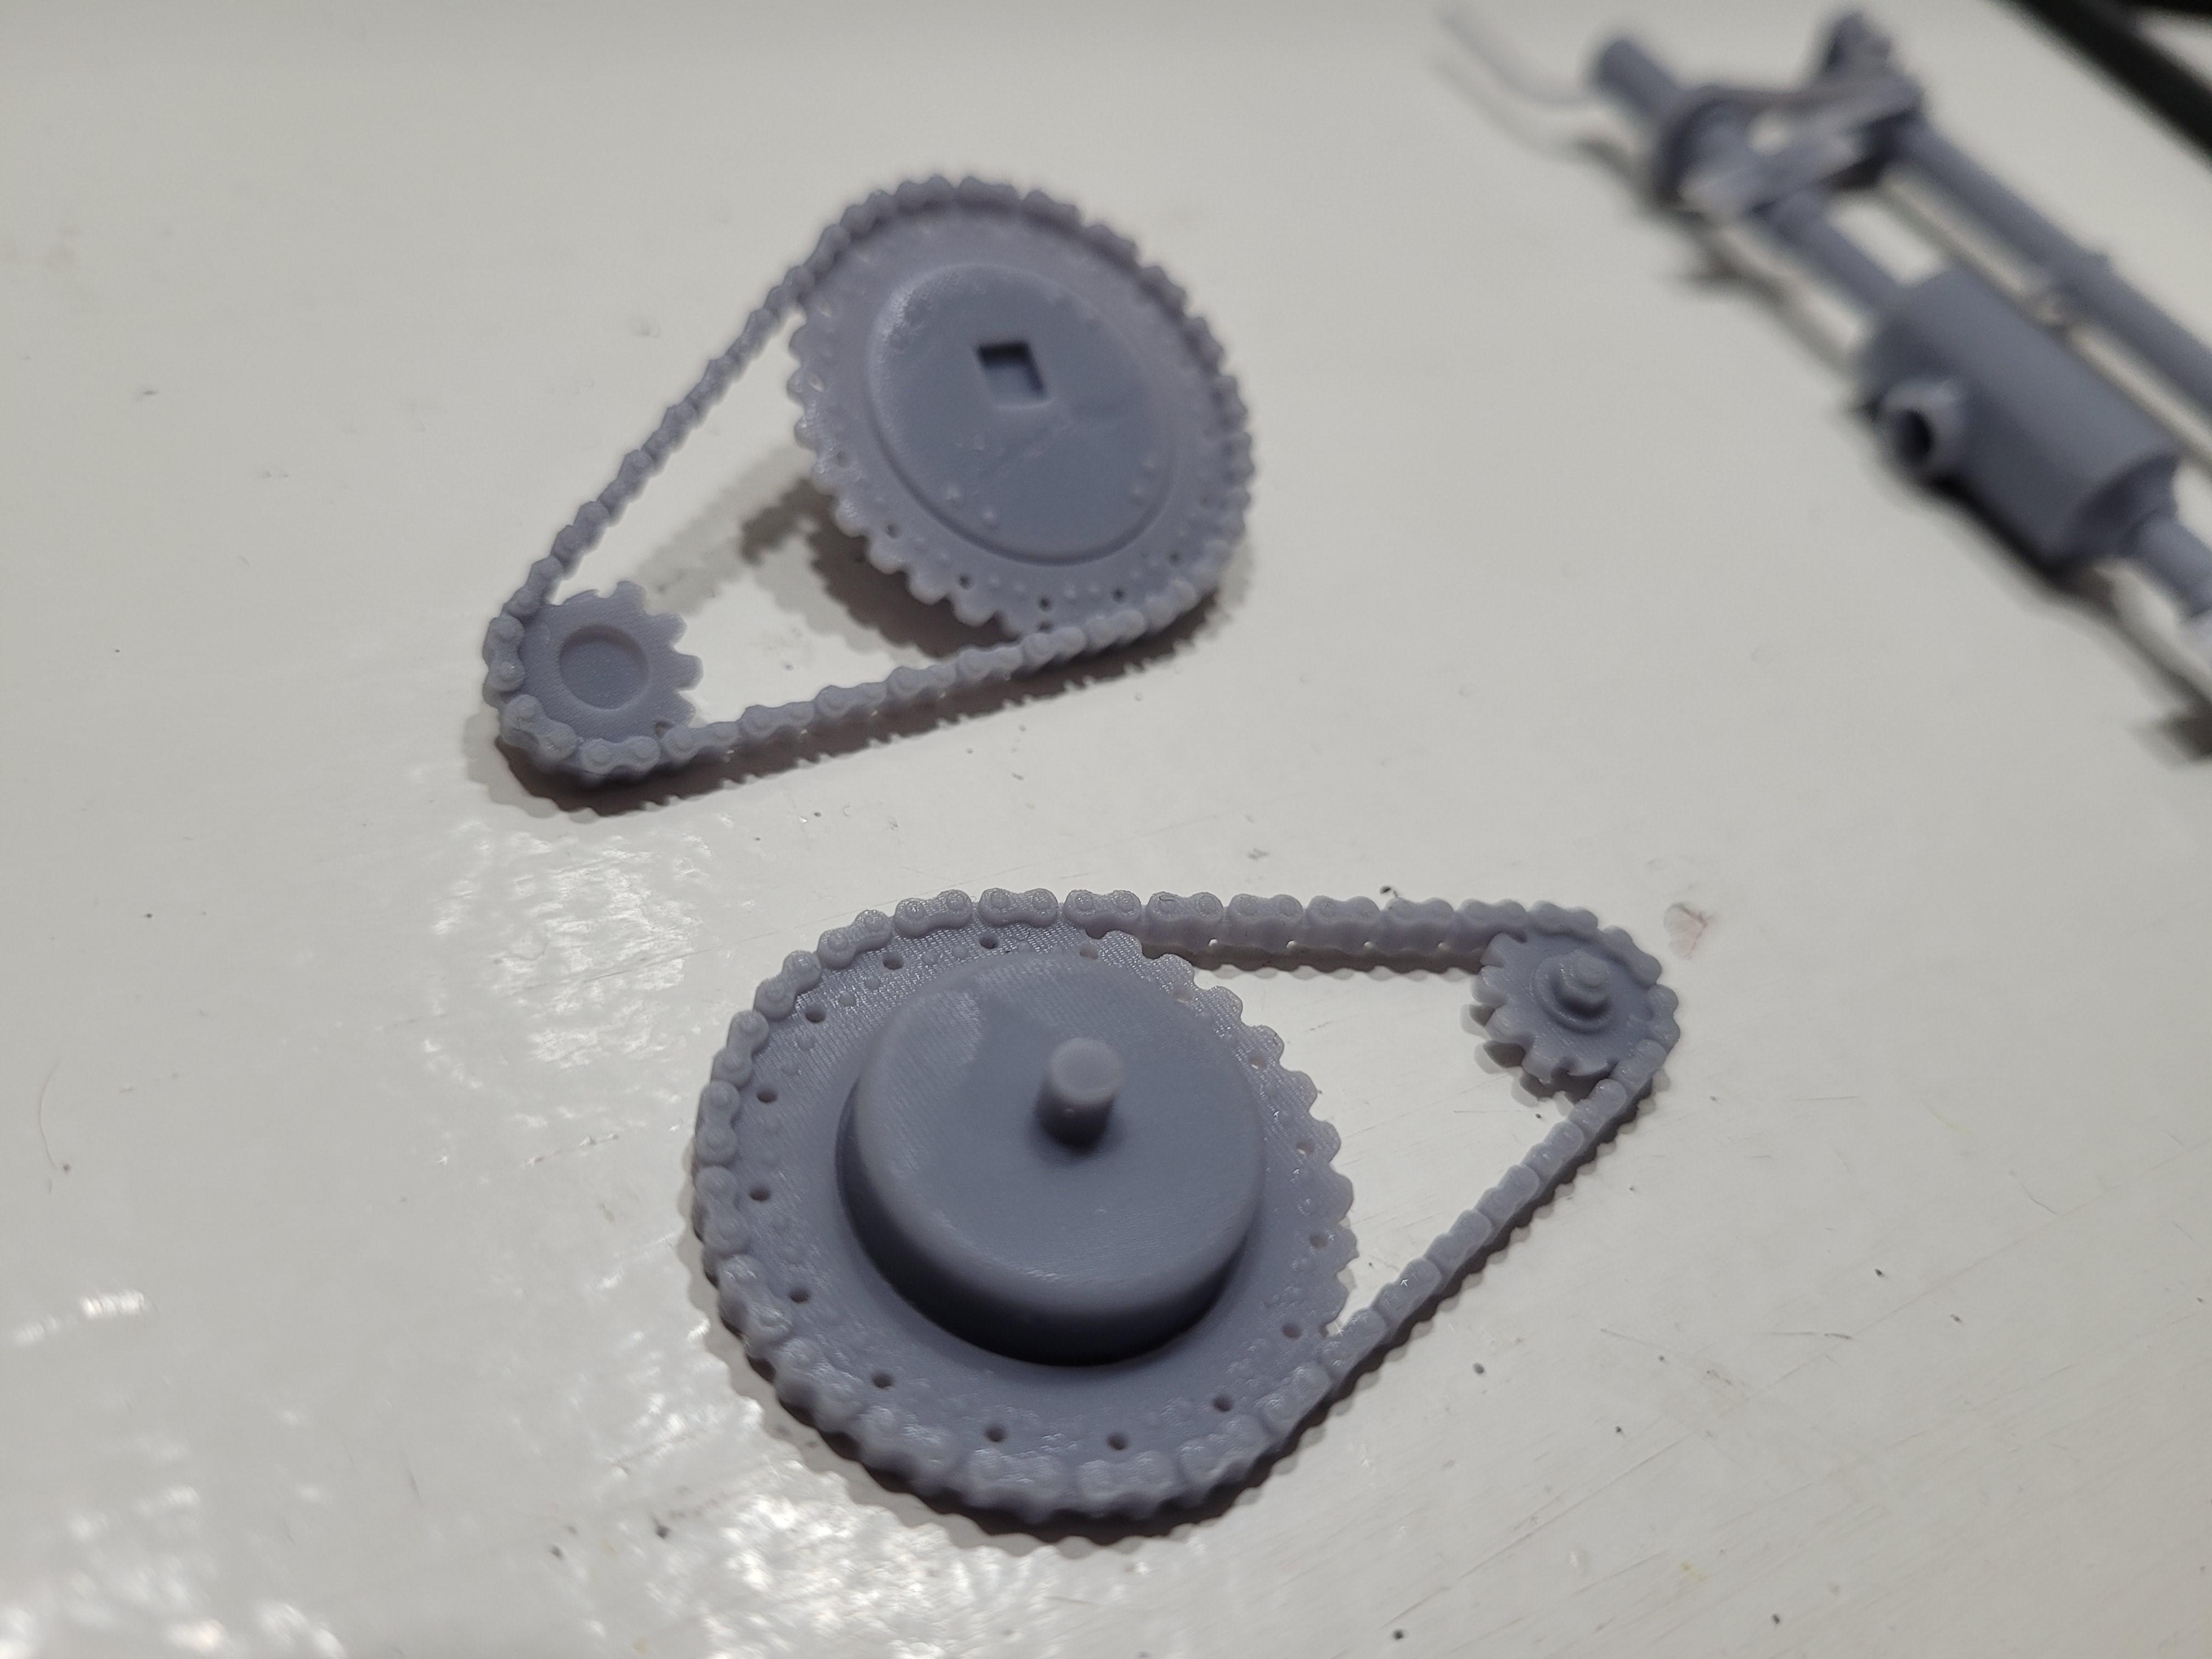
The rear suspension printed in one piece. The 2 chain sprockets are indexed and printed separately to ensure correct alignment.
-
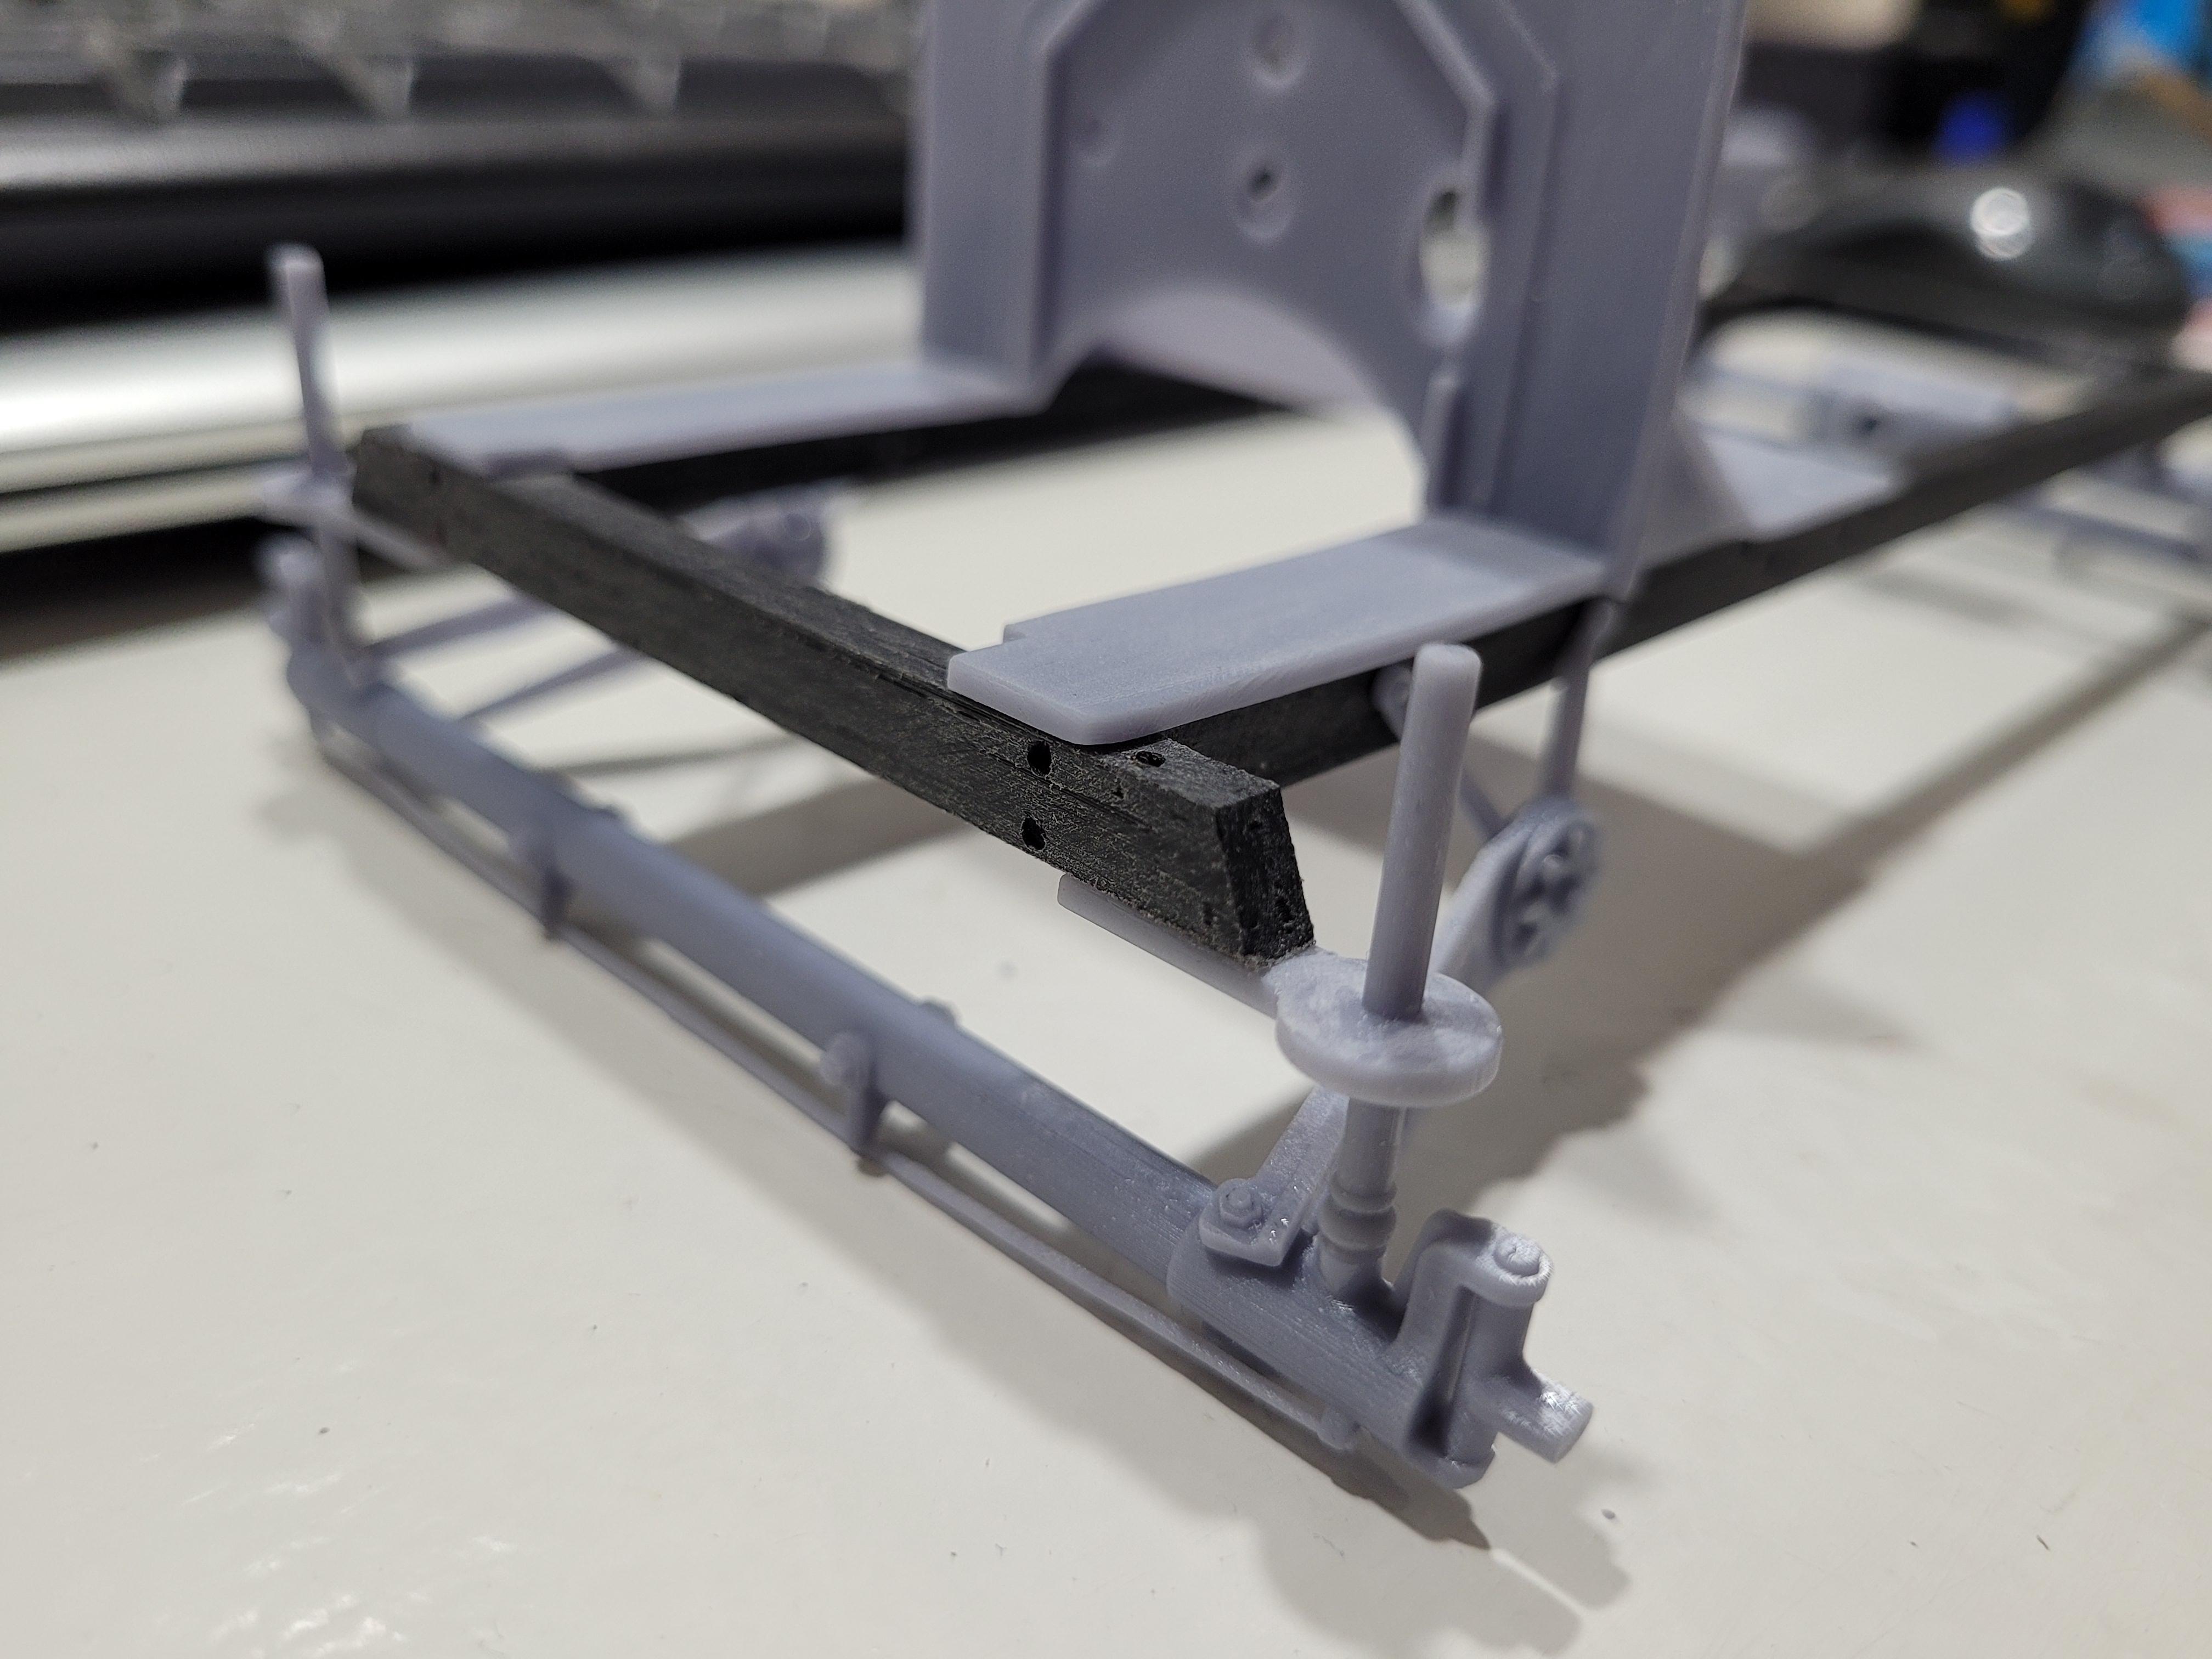
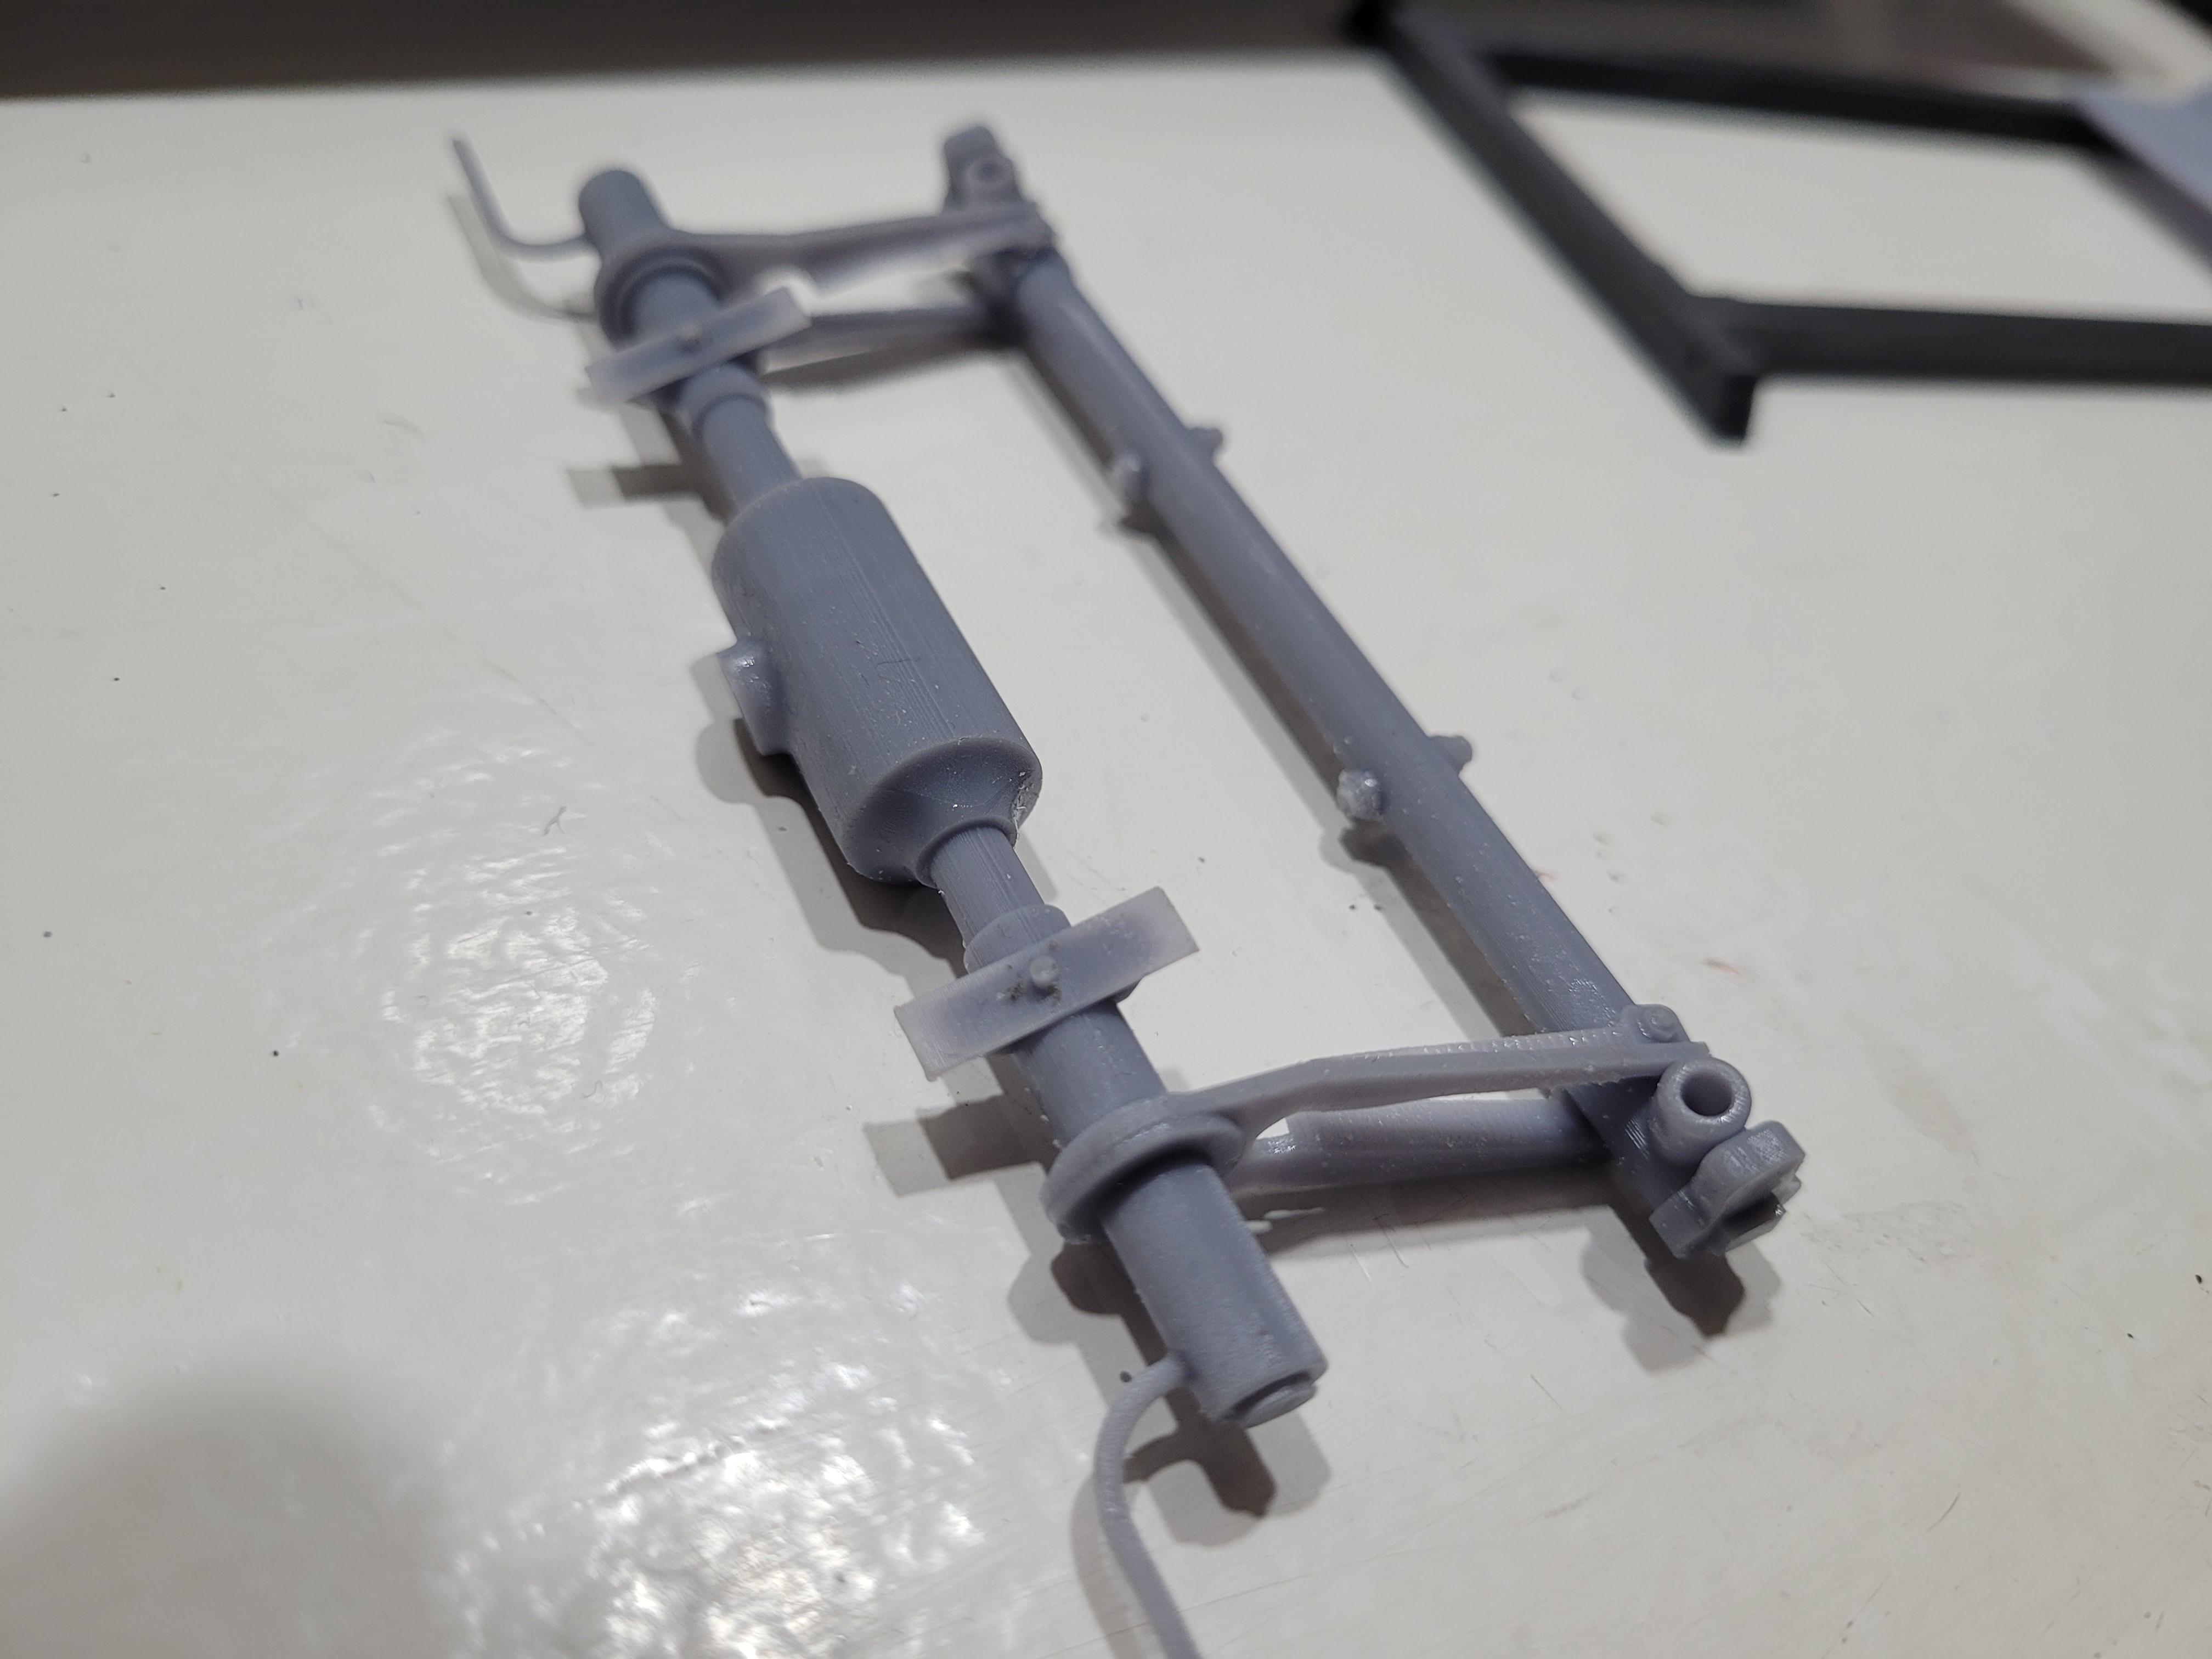
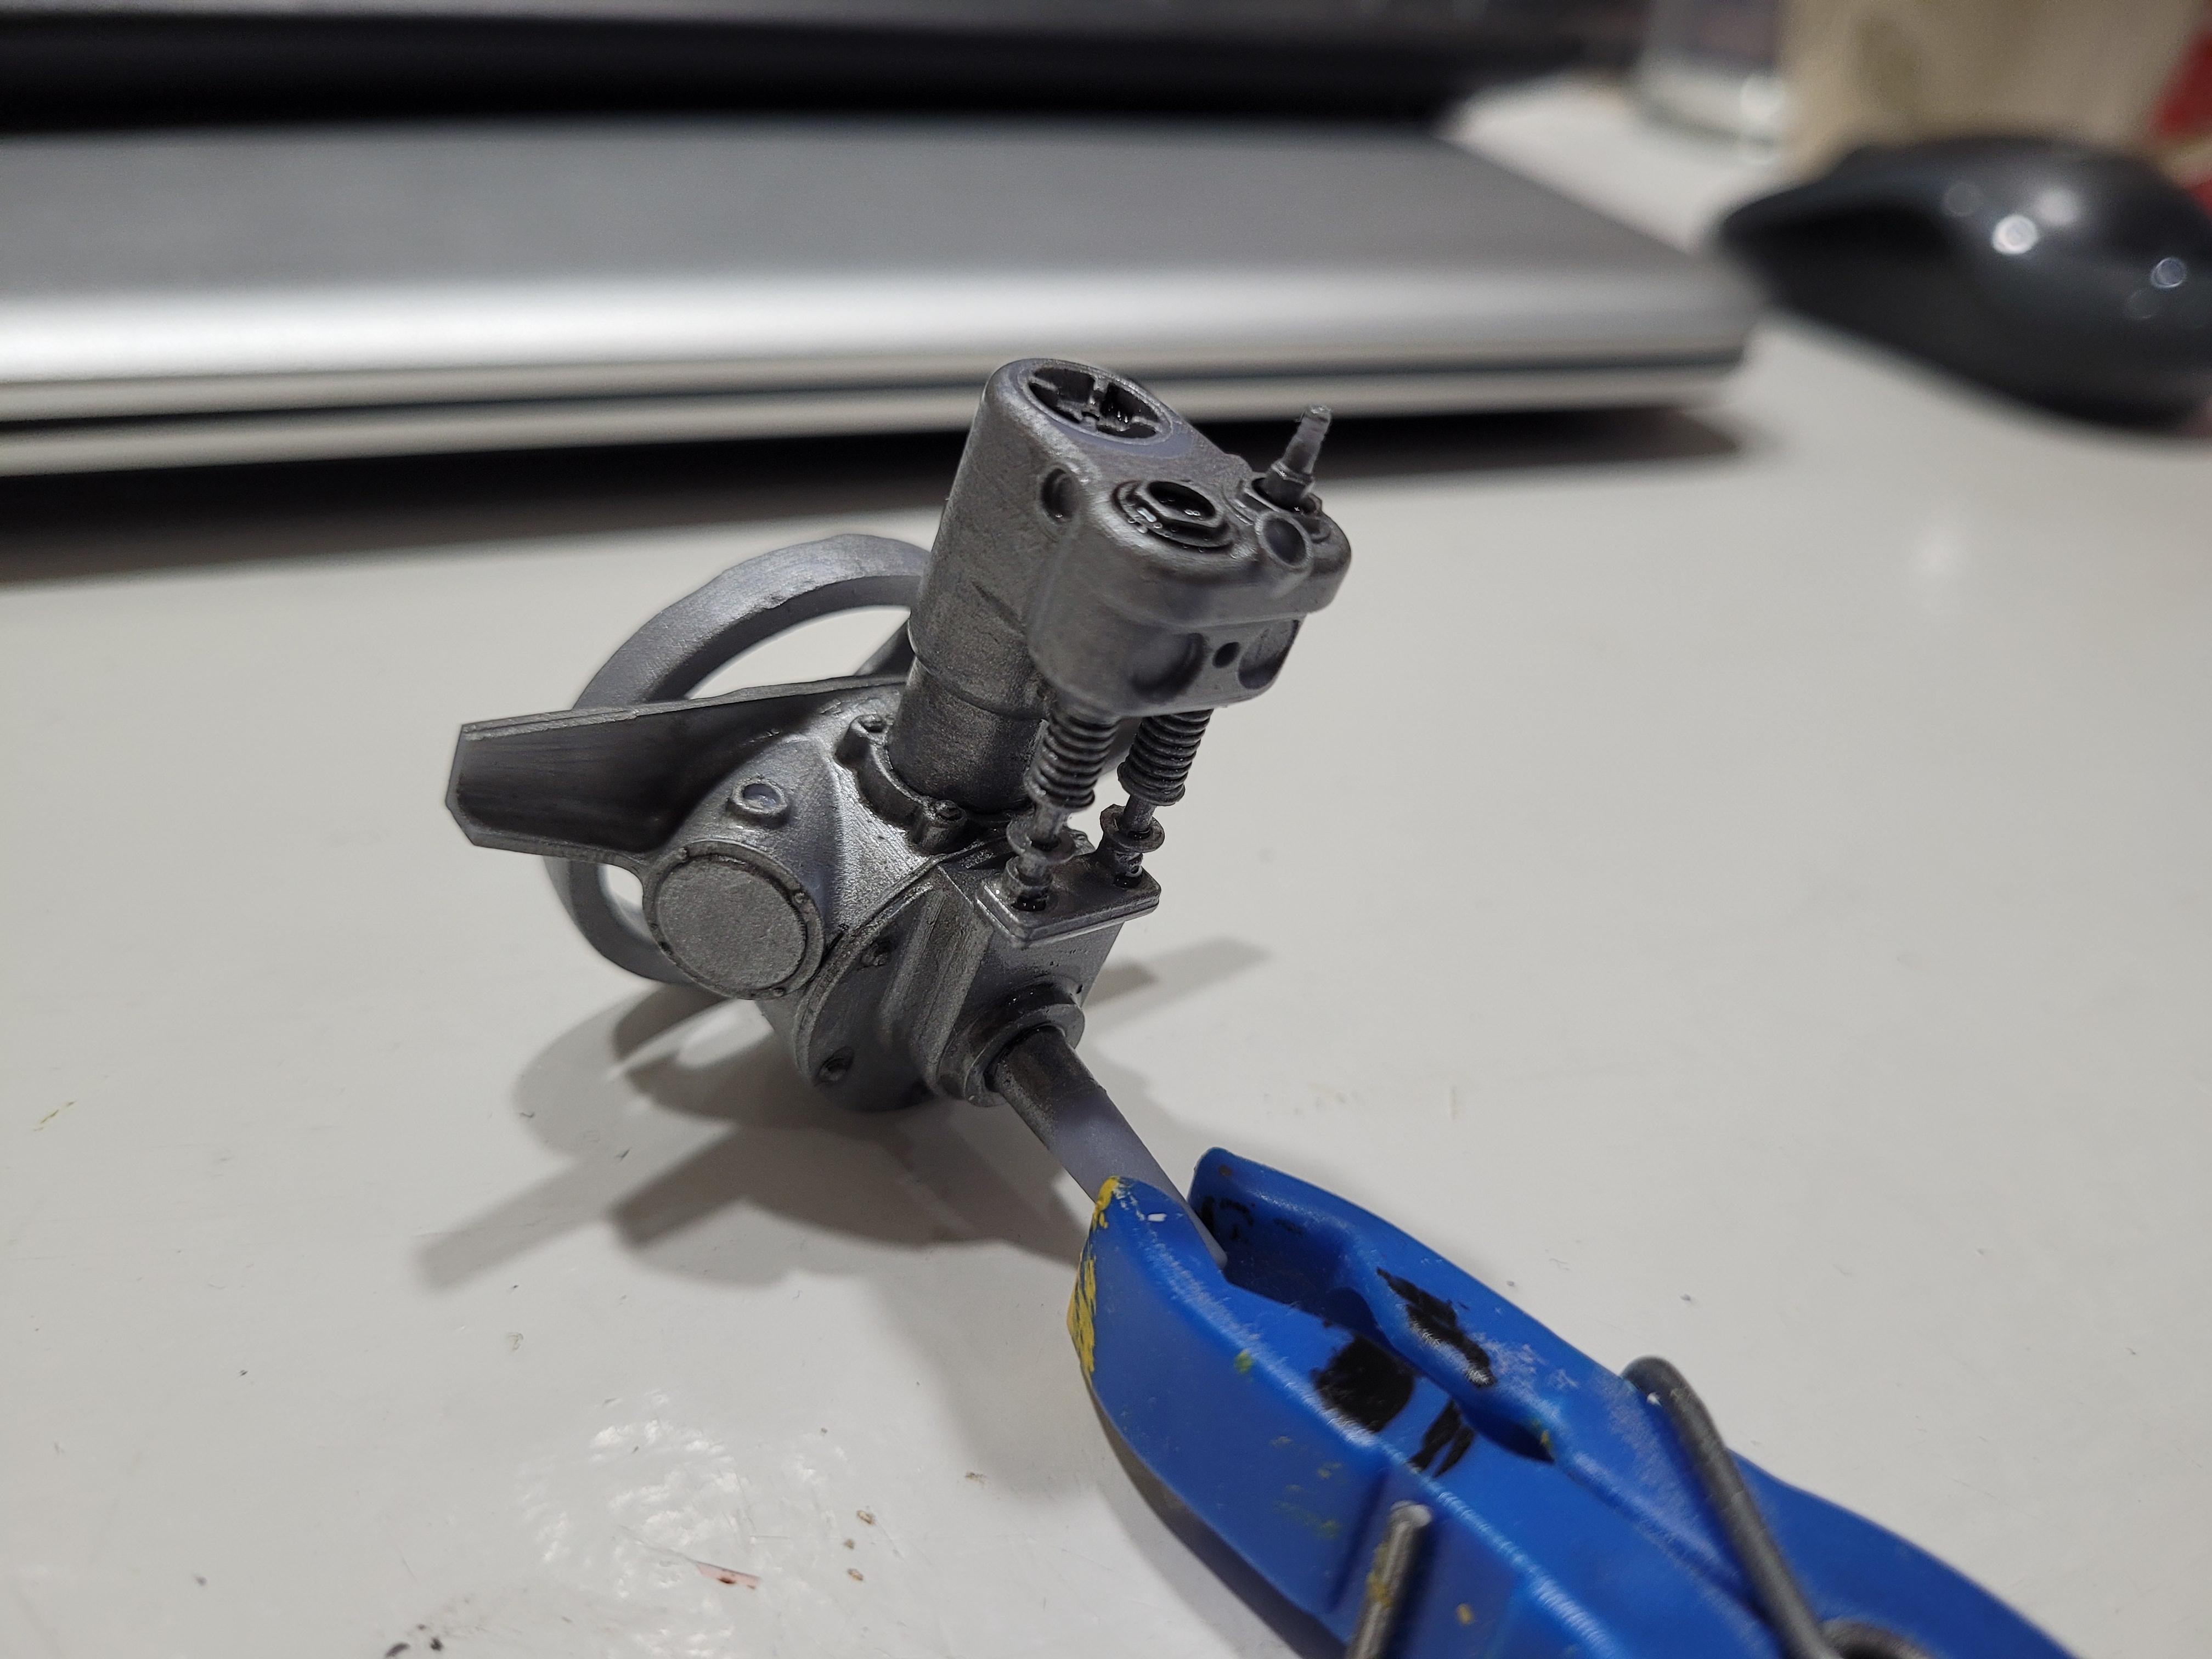
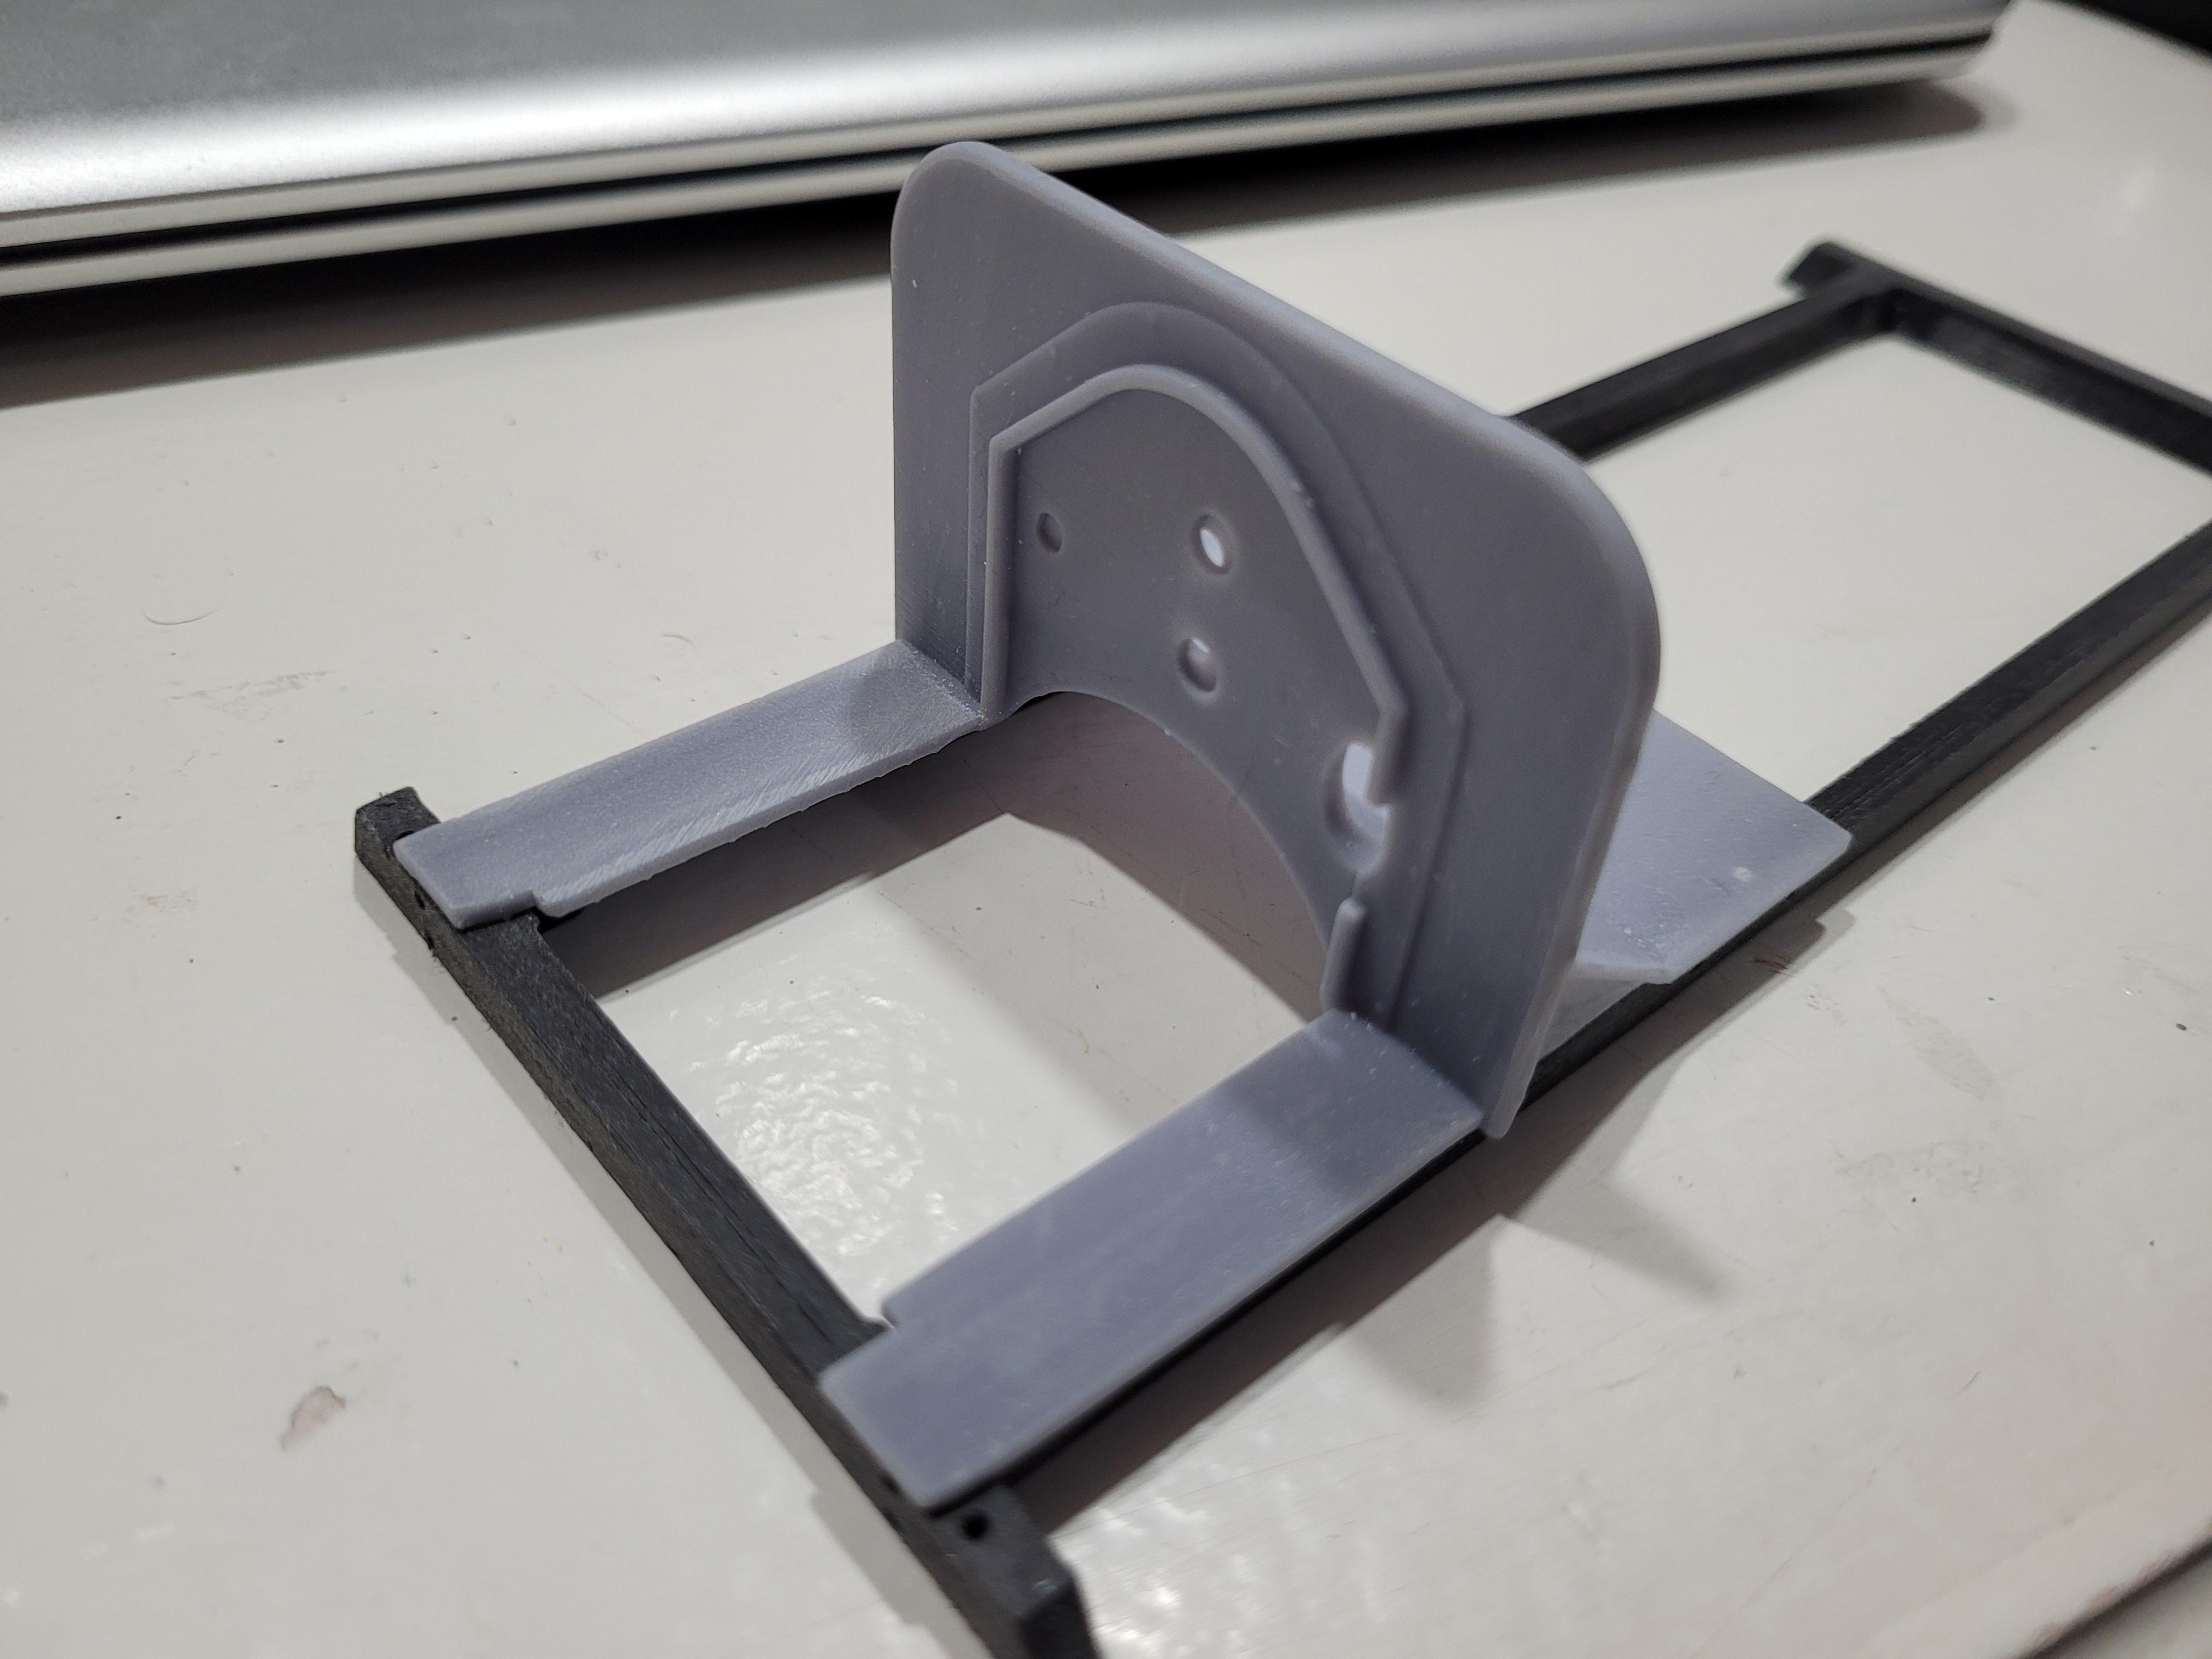
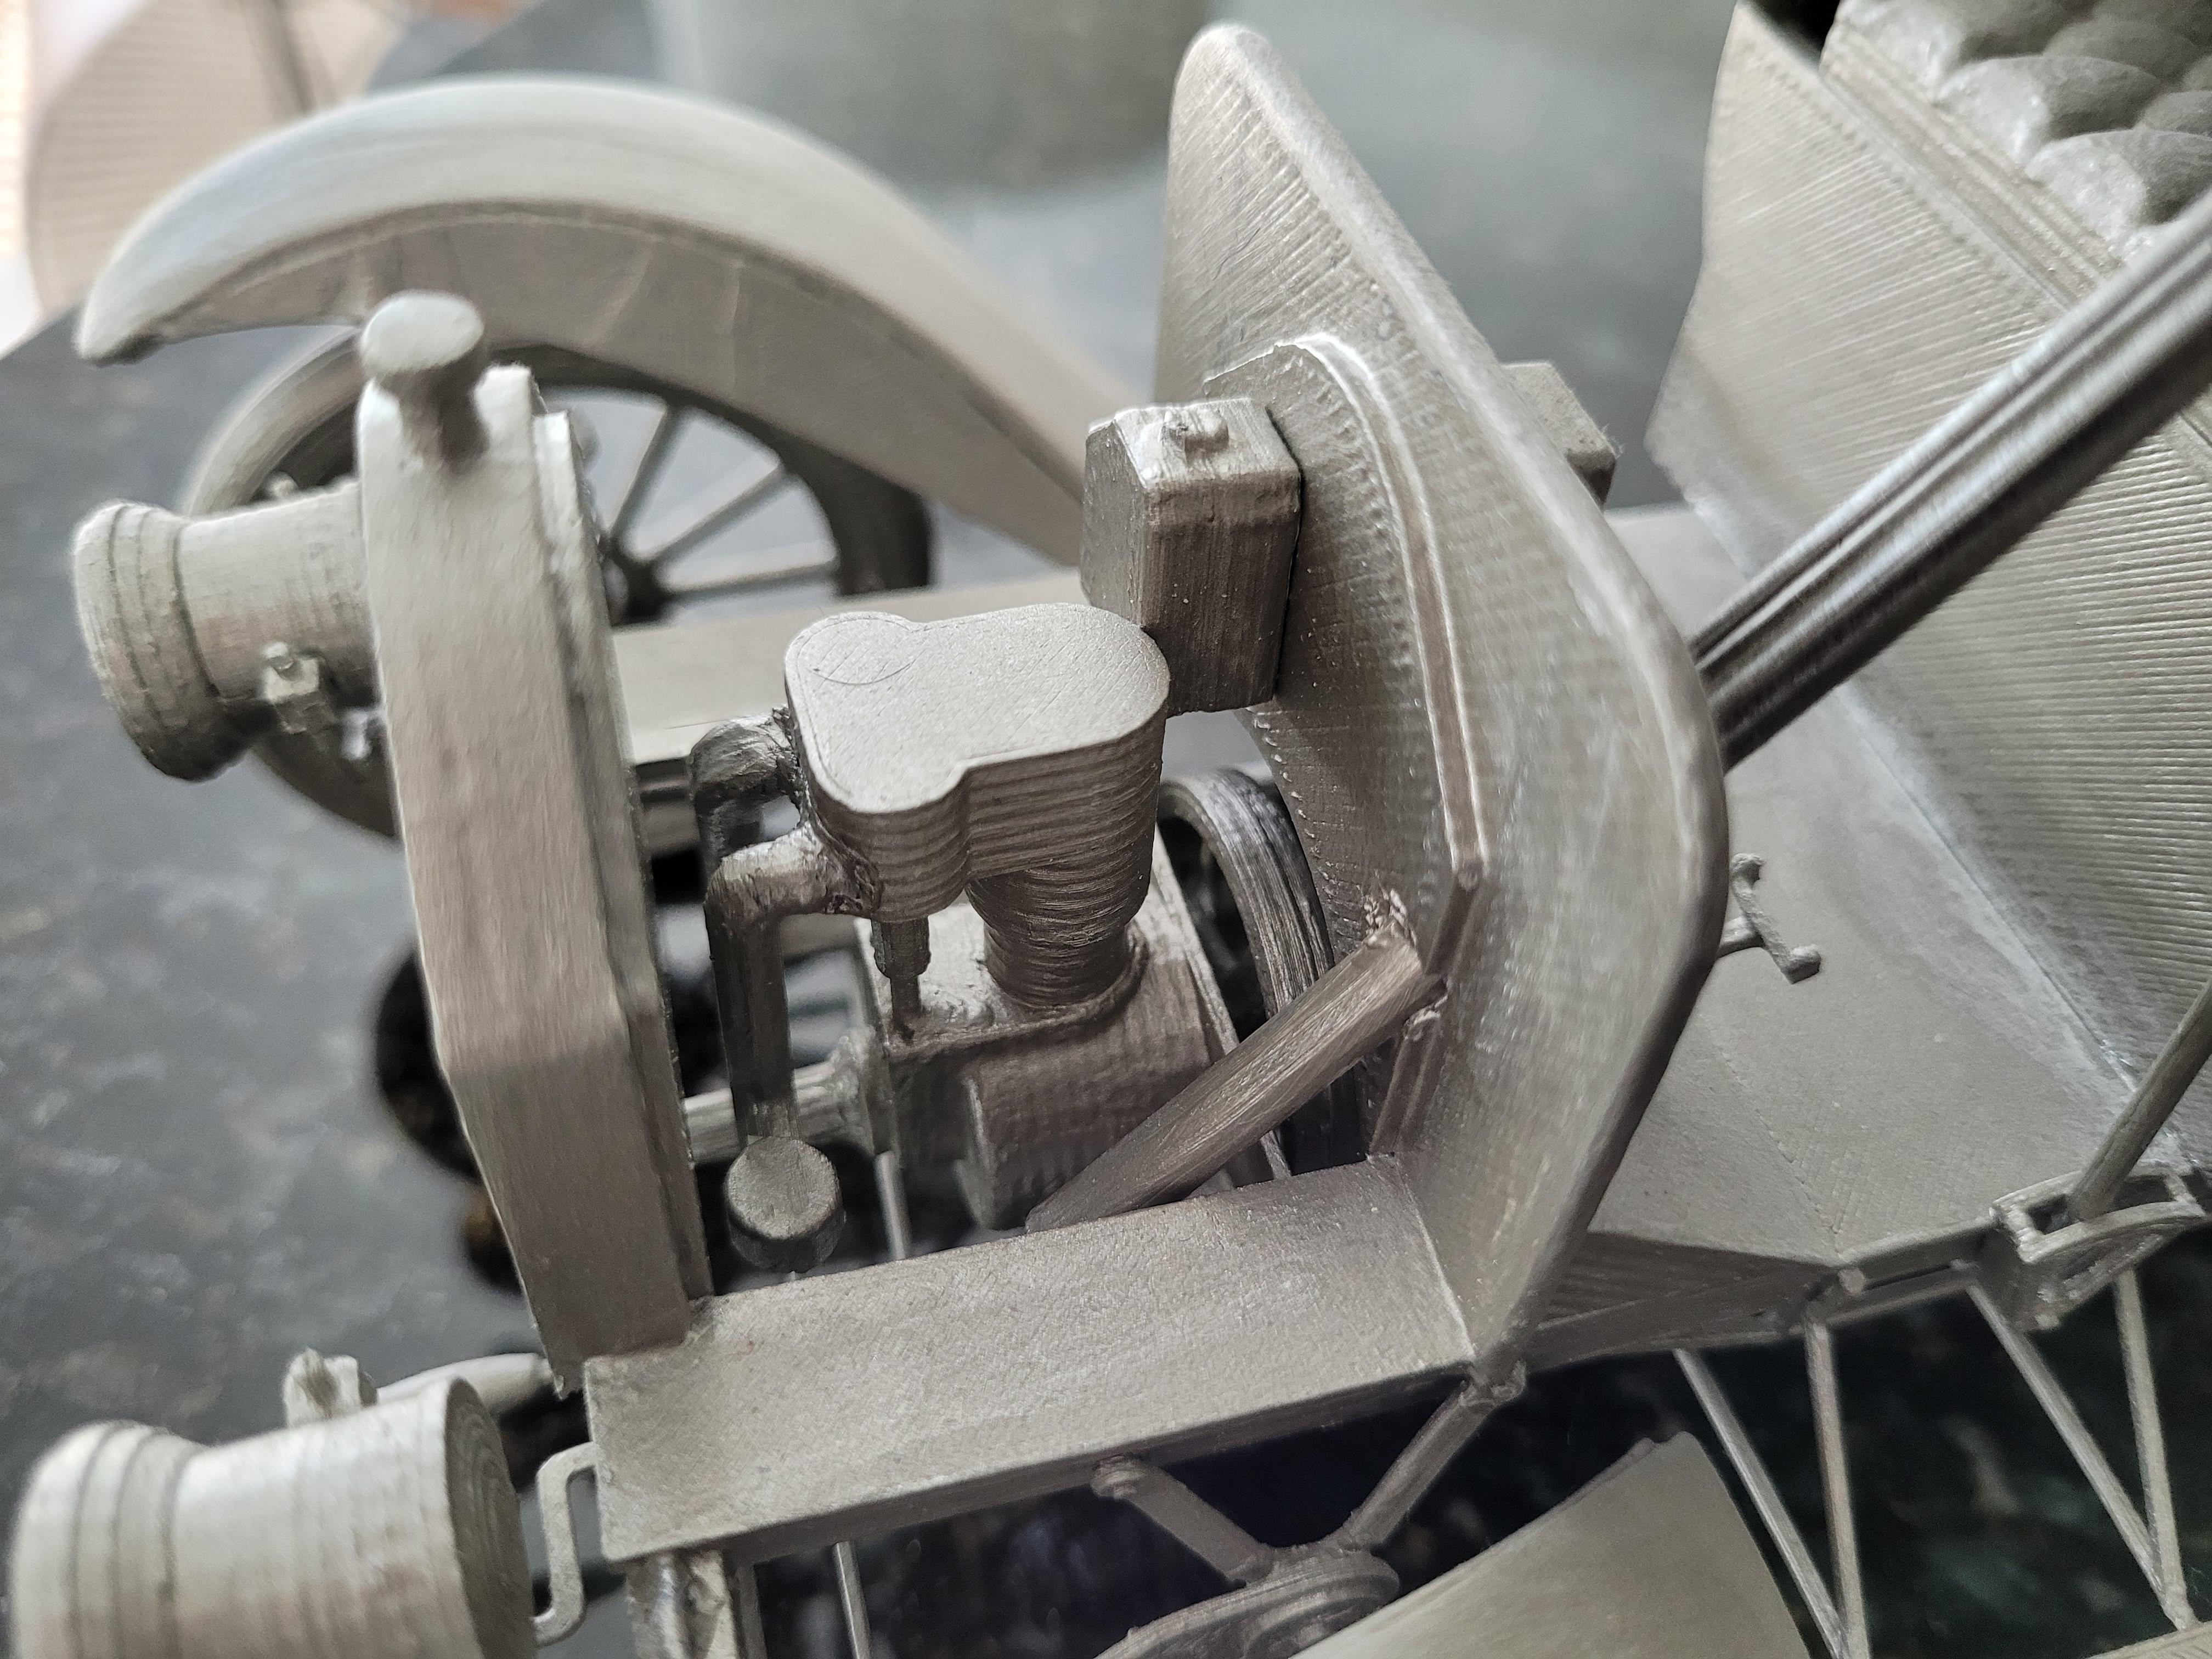
Another picture showing the front suspension temporarily pinned to the frame.
-
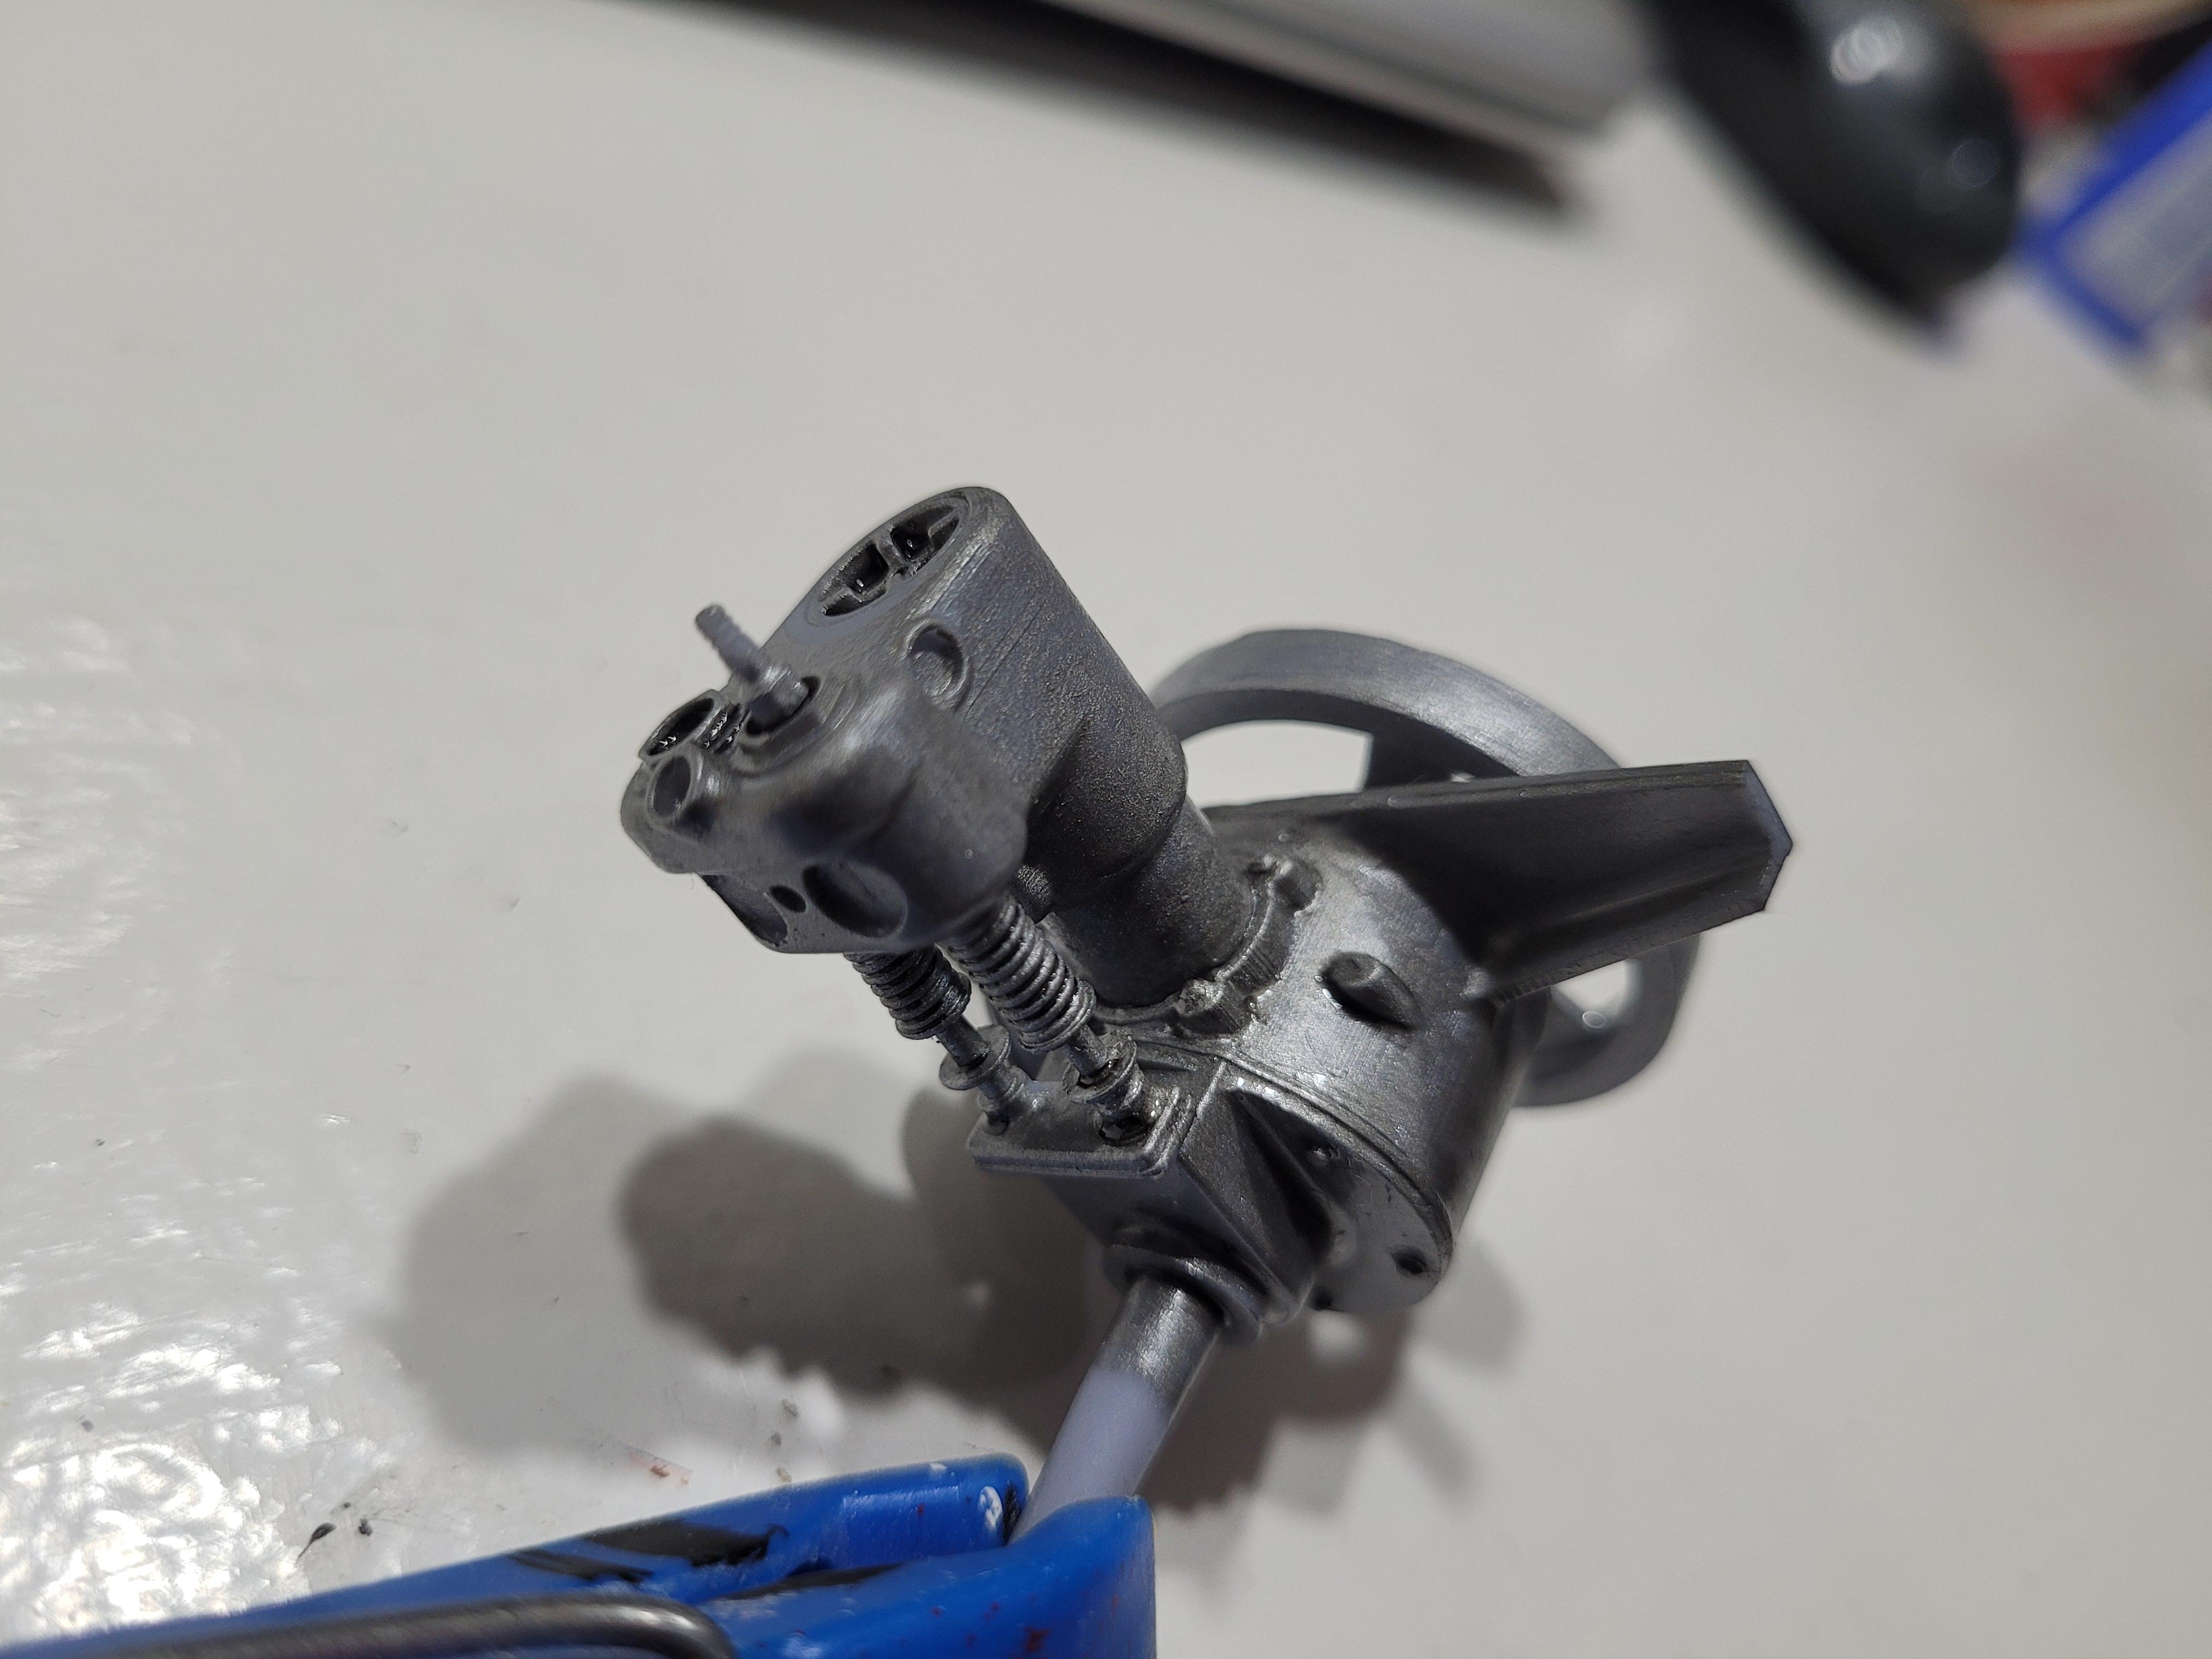
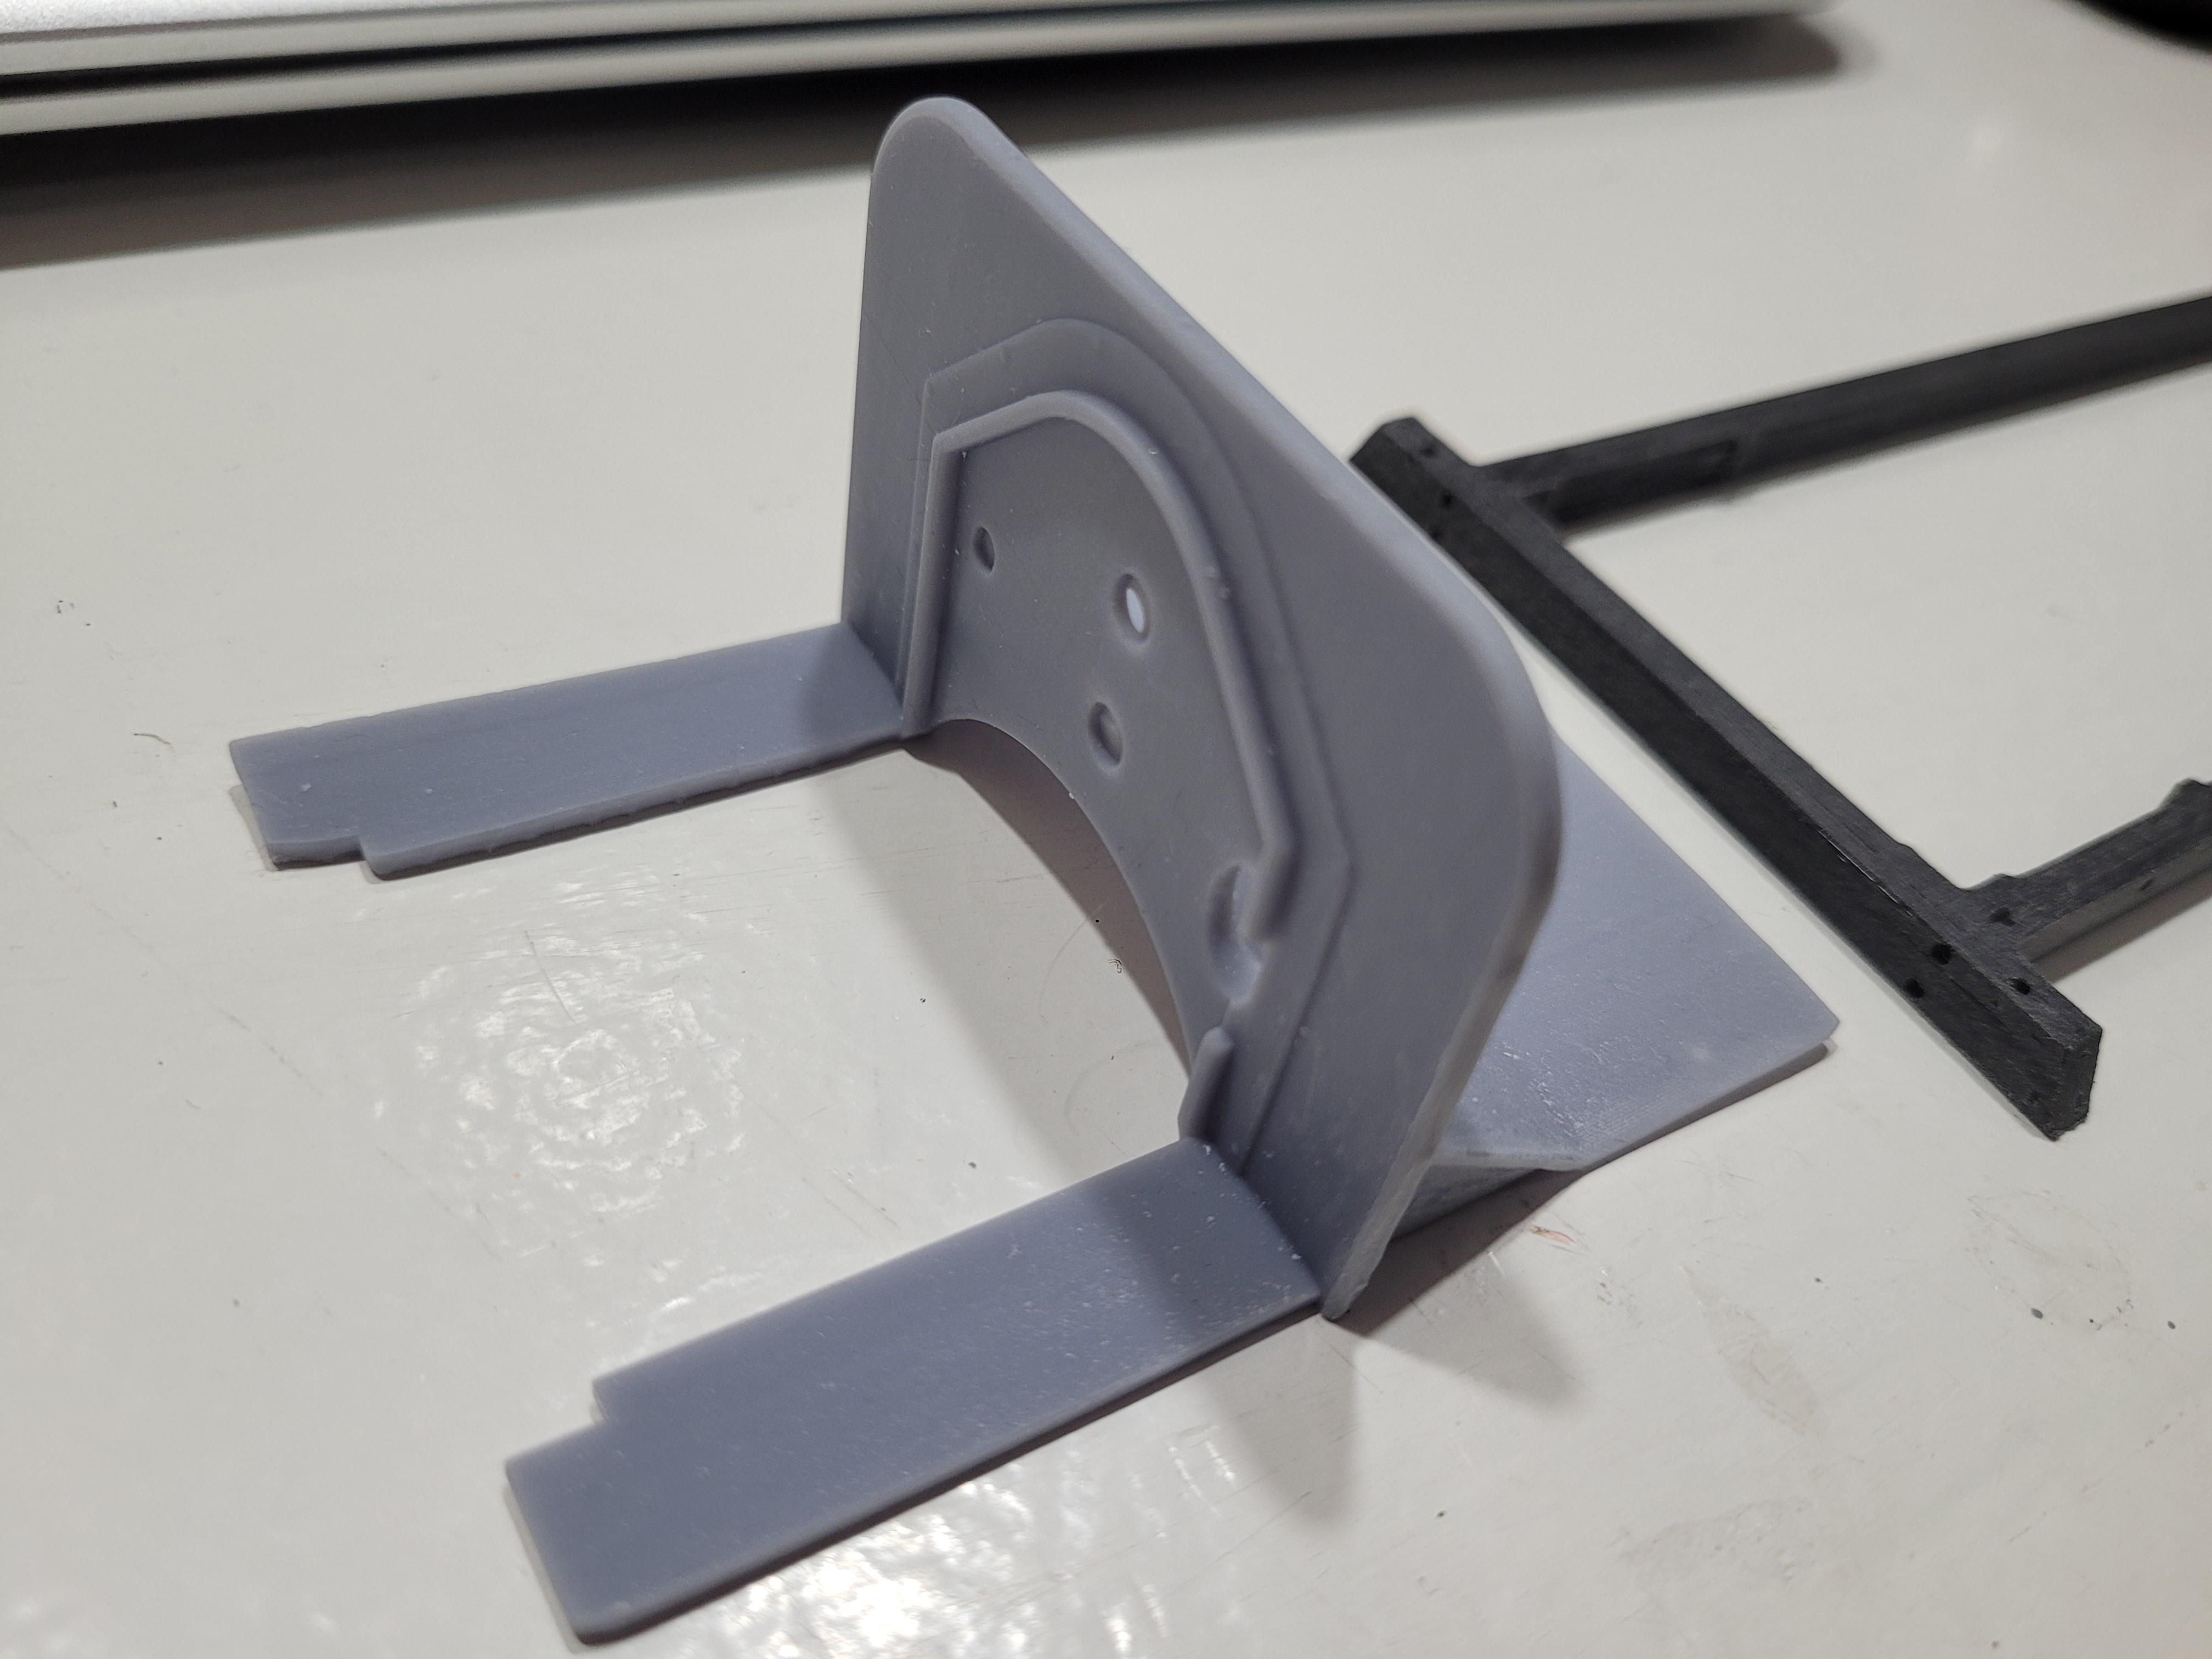
The front suspension seen here, is made up of 7 different parts. Although this can be printed and assembled together, I decided to unite them together as 1 assembly to print. The reason is to ensure dimensional integrity. The truck will sit with all 4 tires touching the shelf as a result.
-
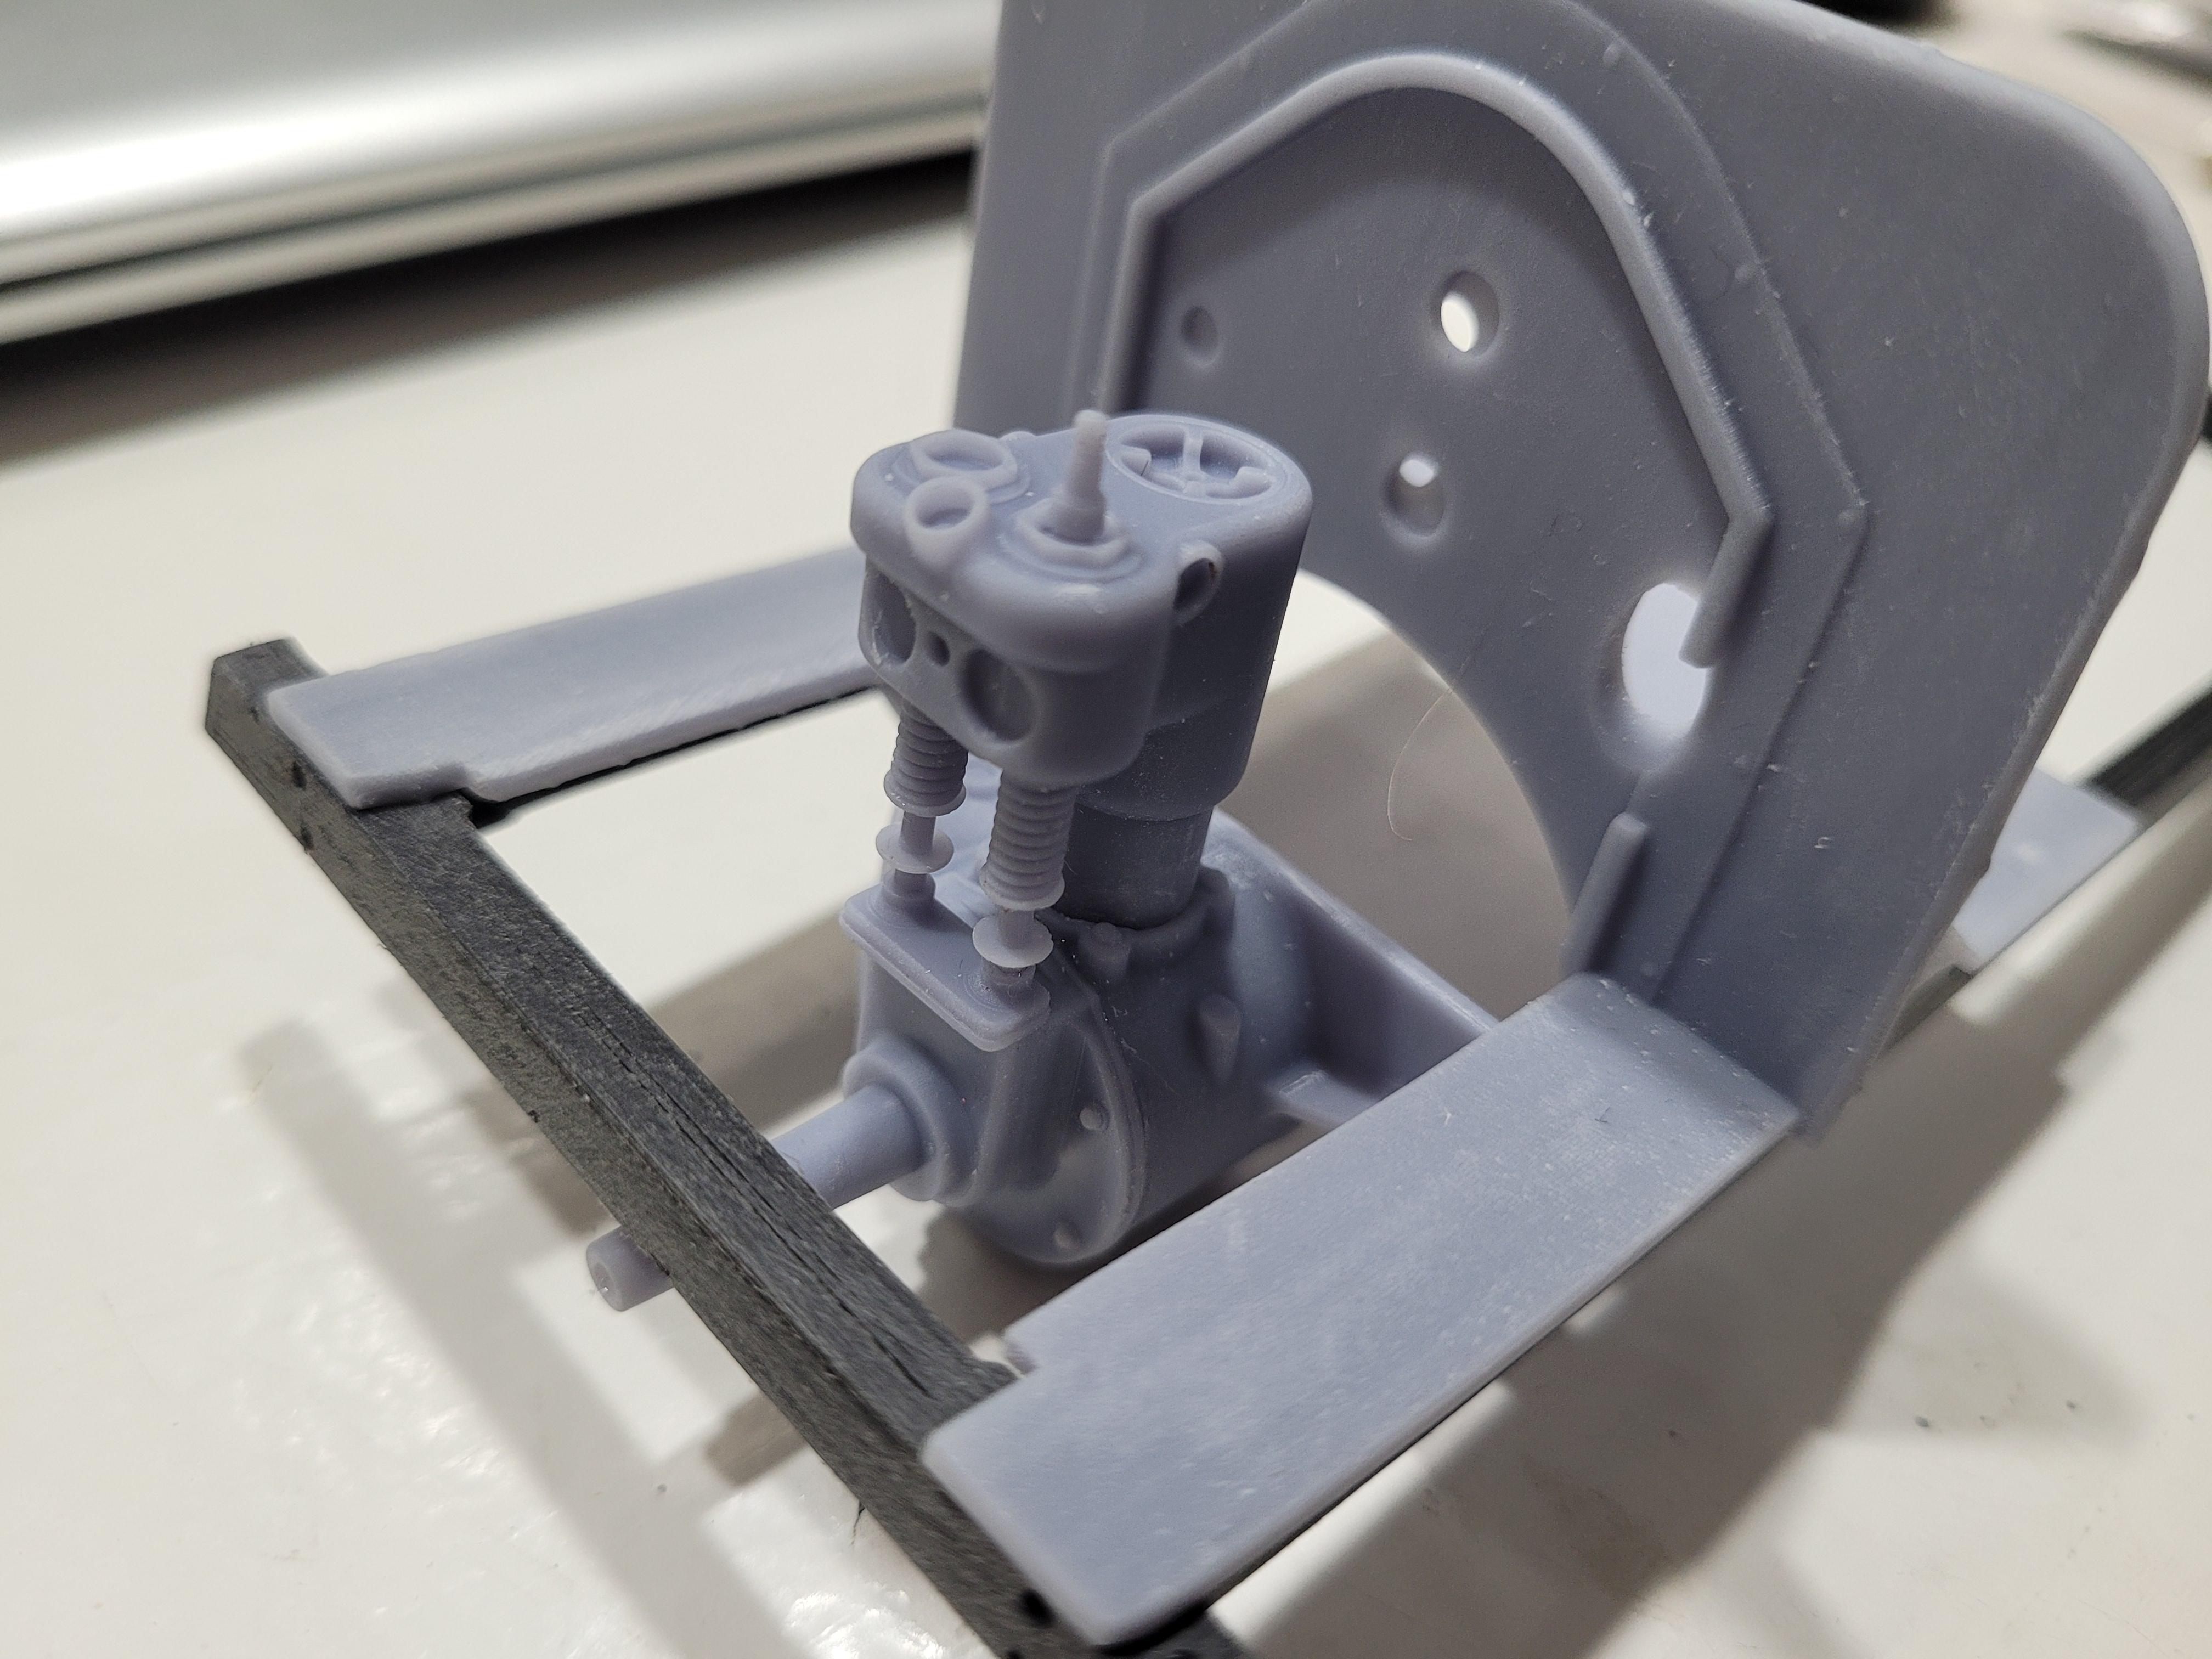
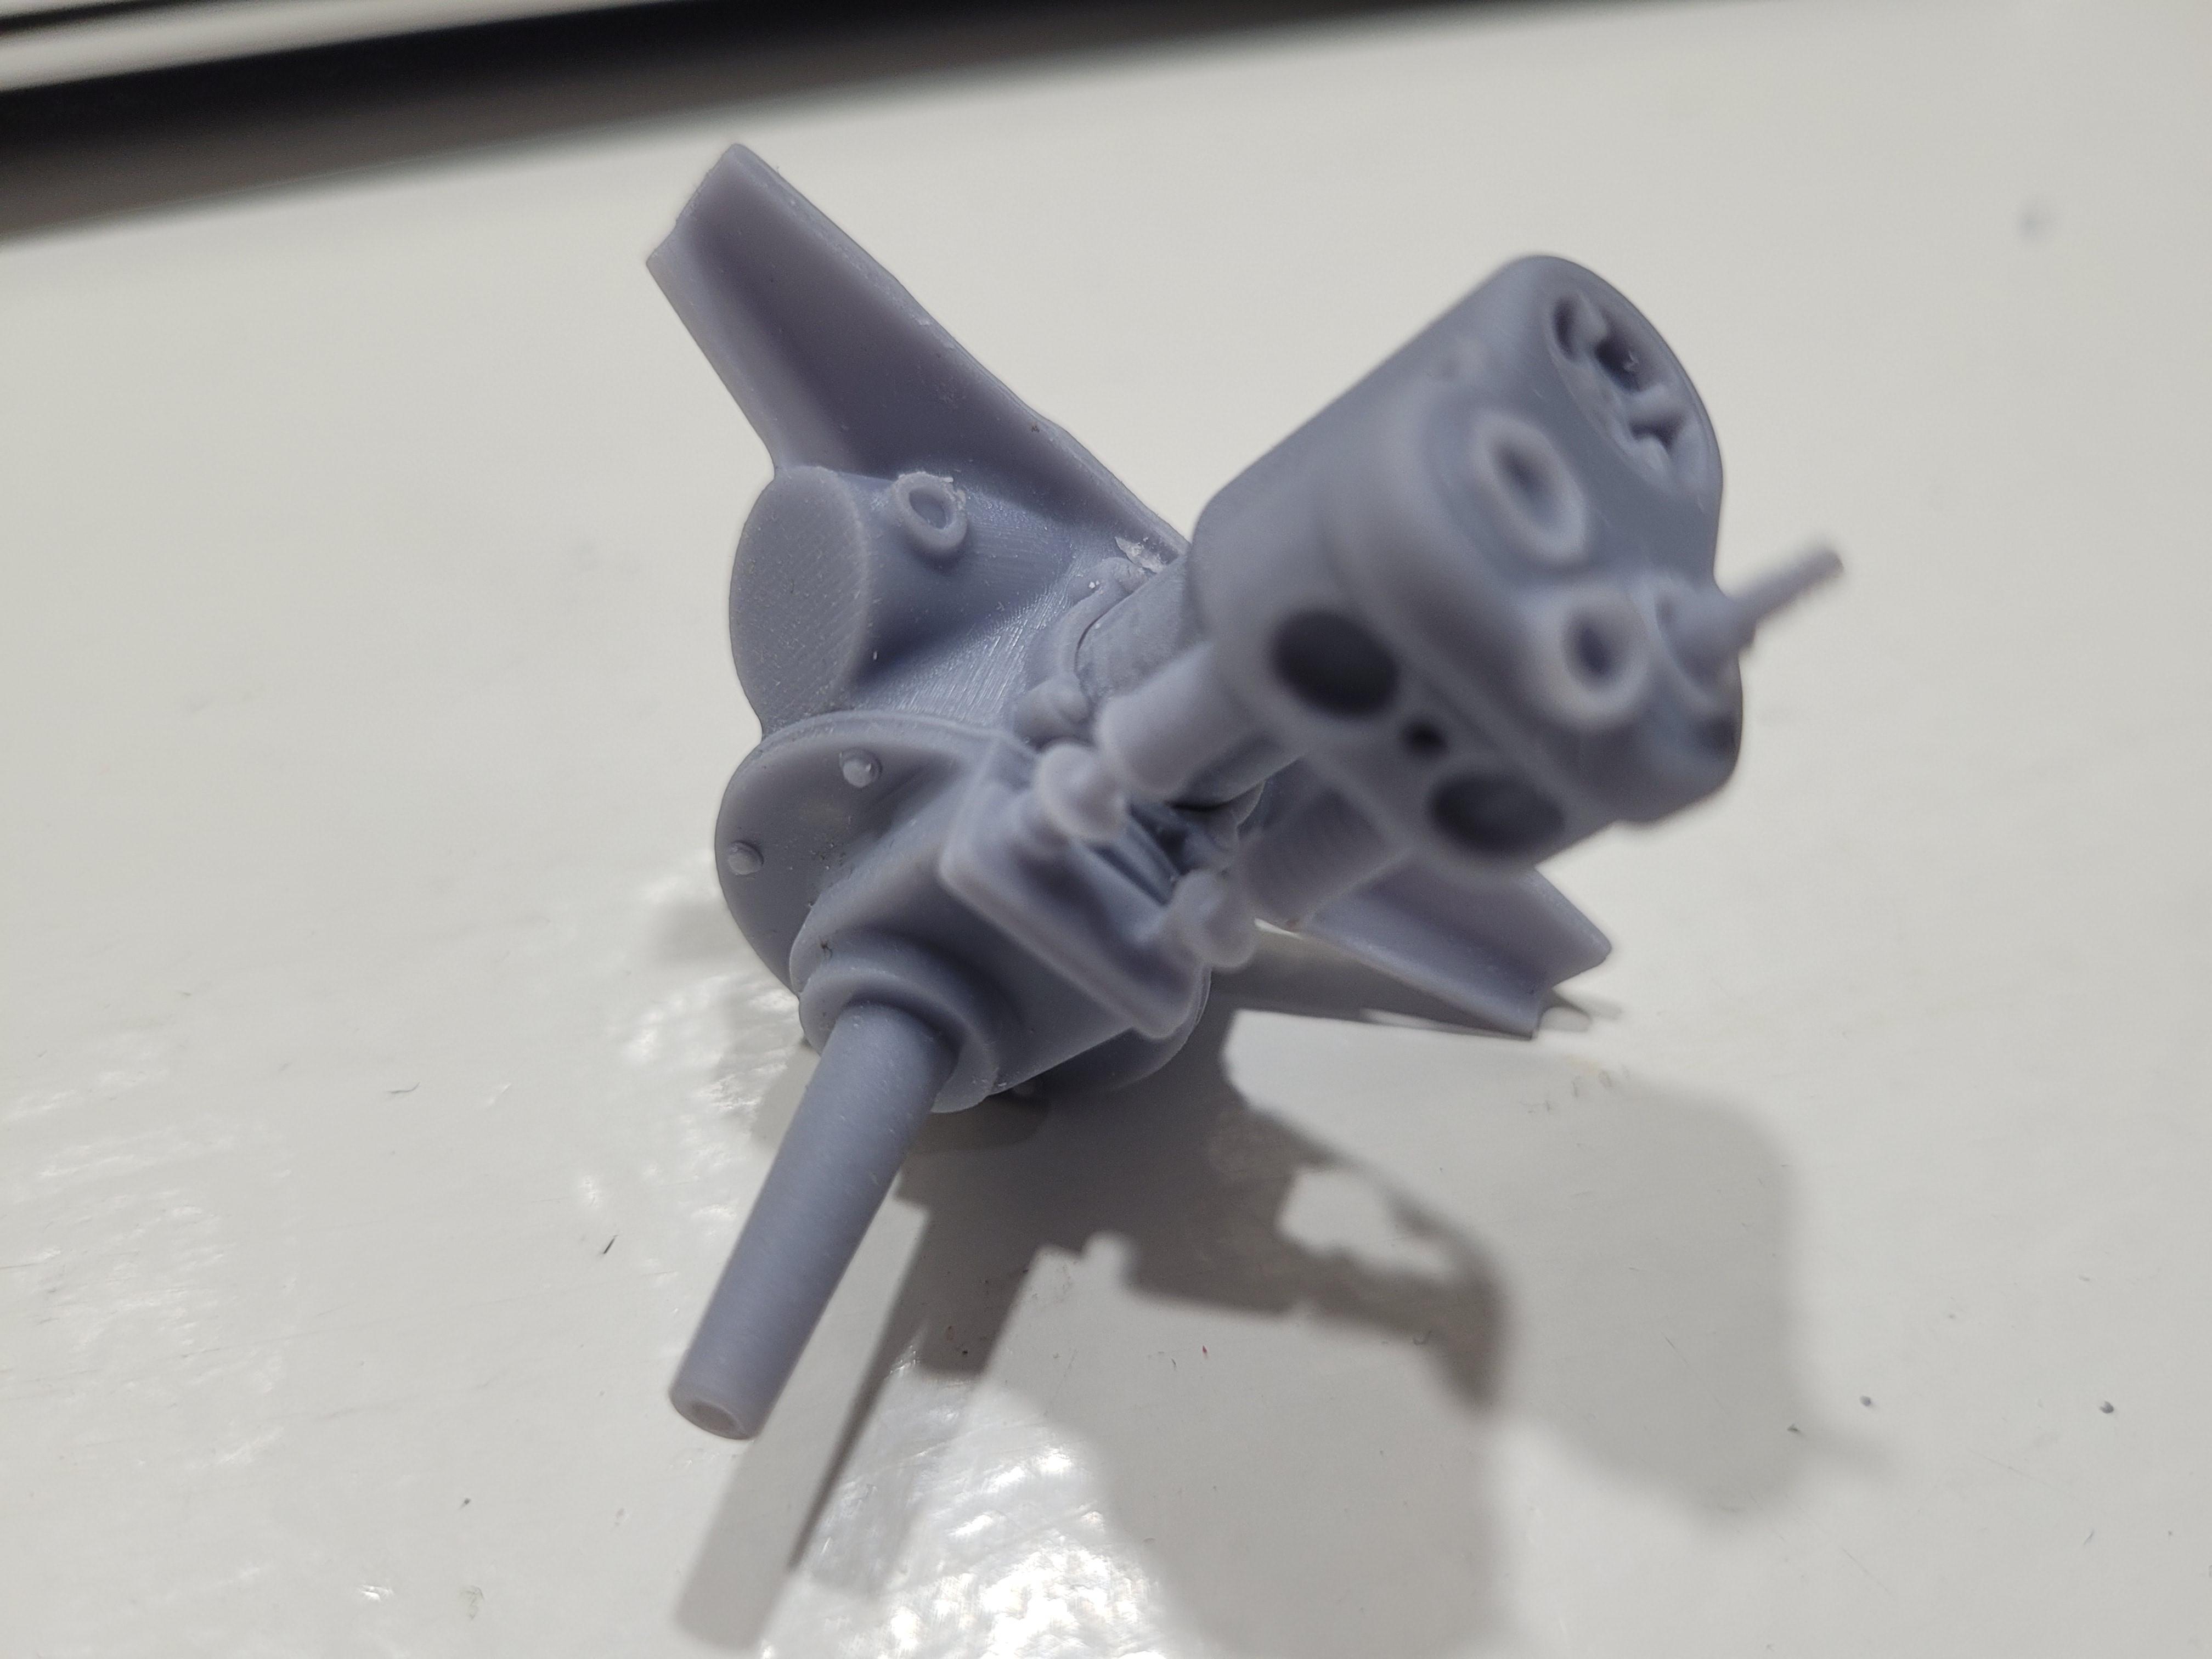
The flywheel is attached, motor painted and black washed. You can see the details better now.
-
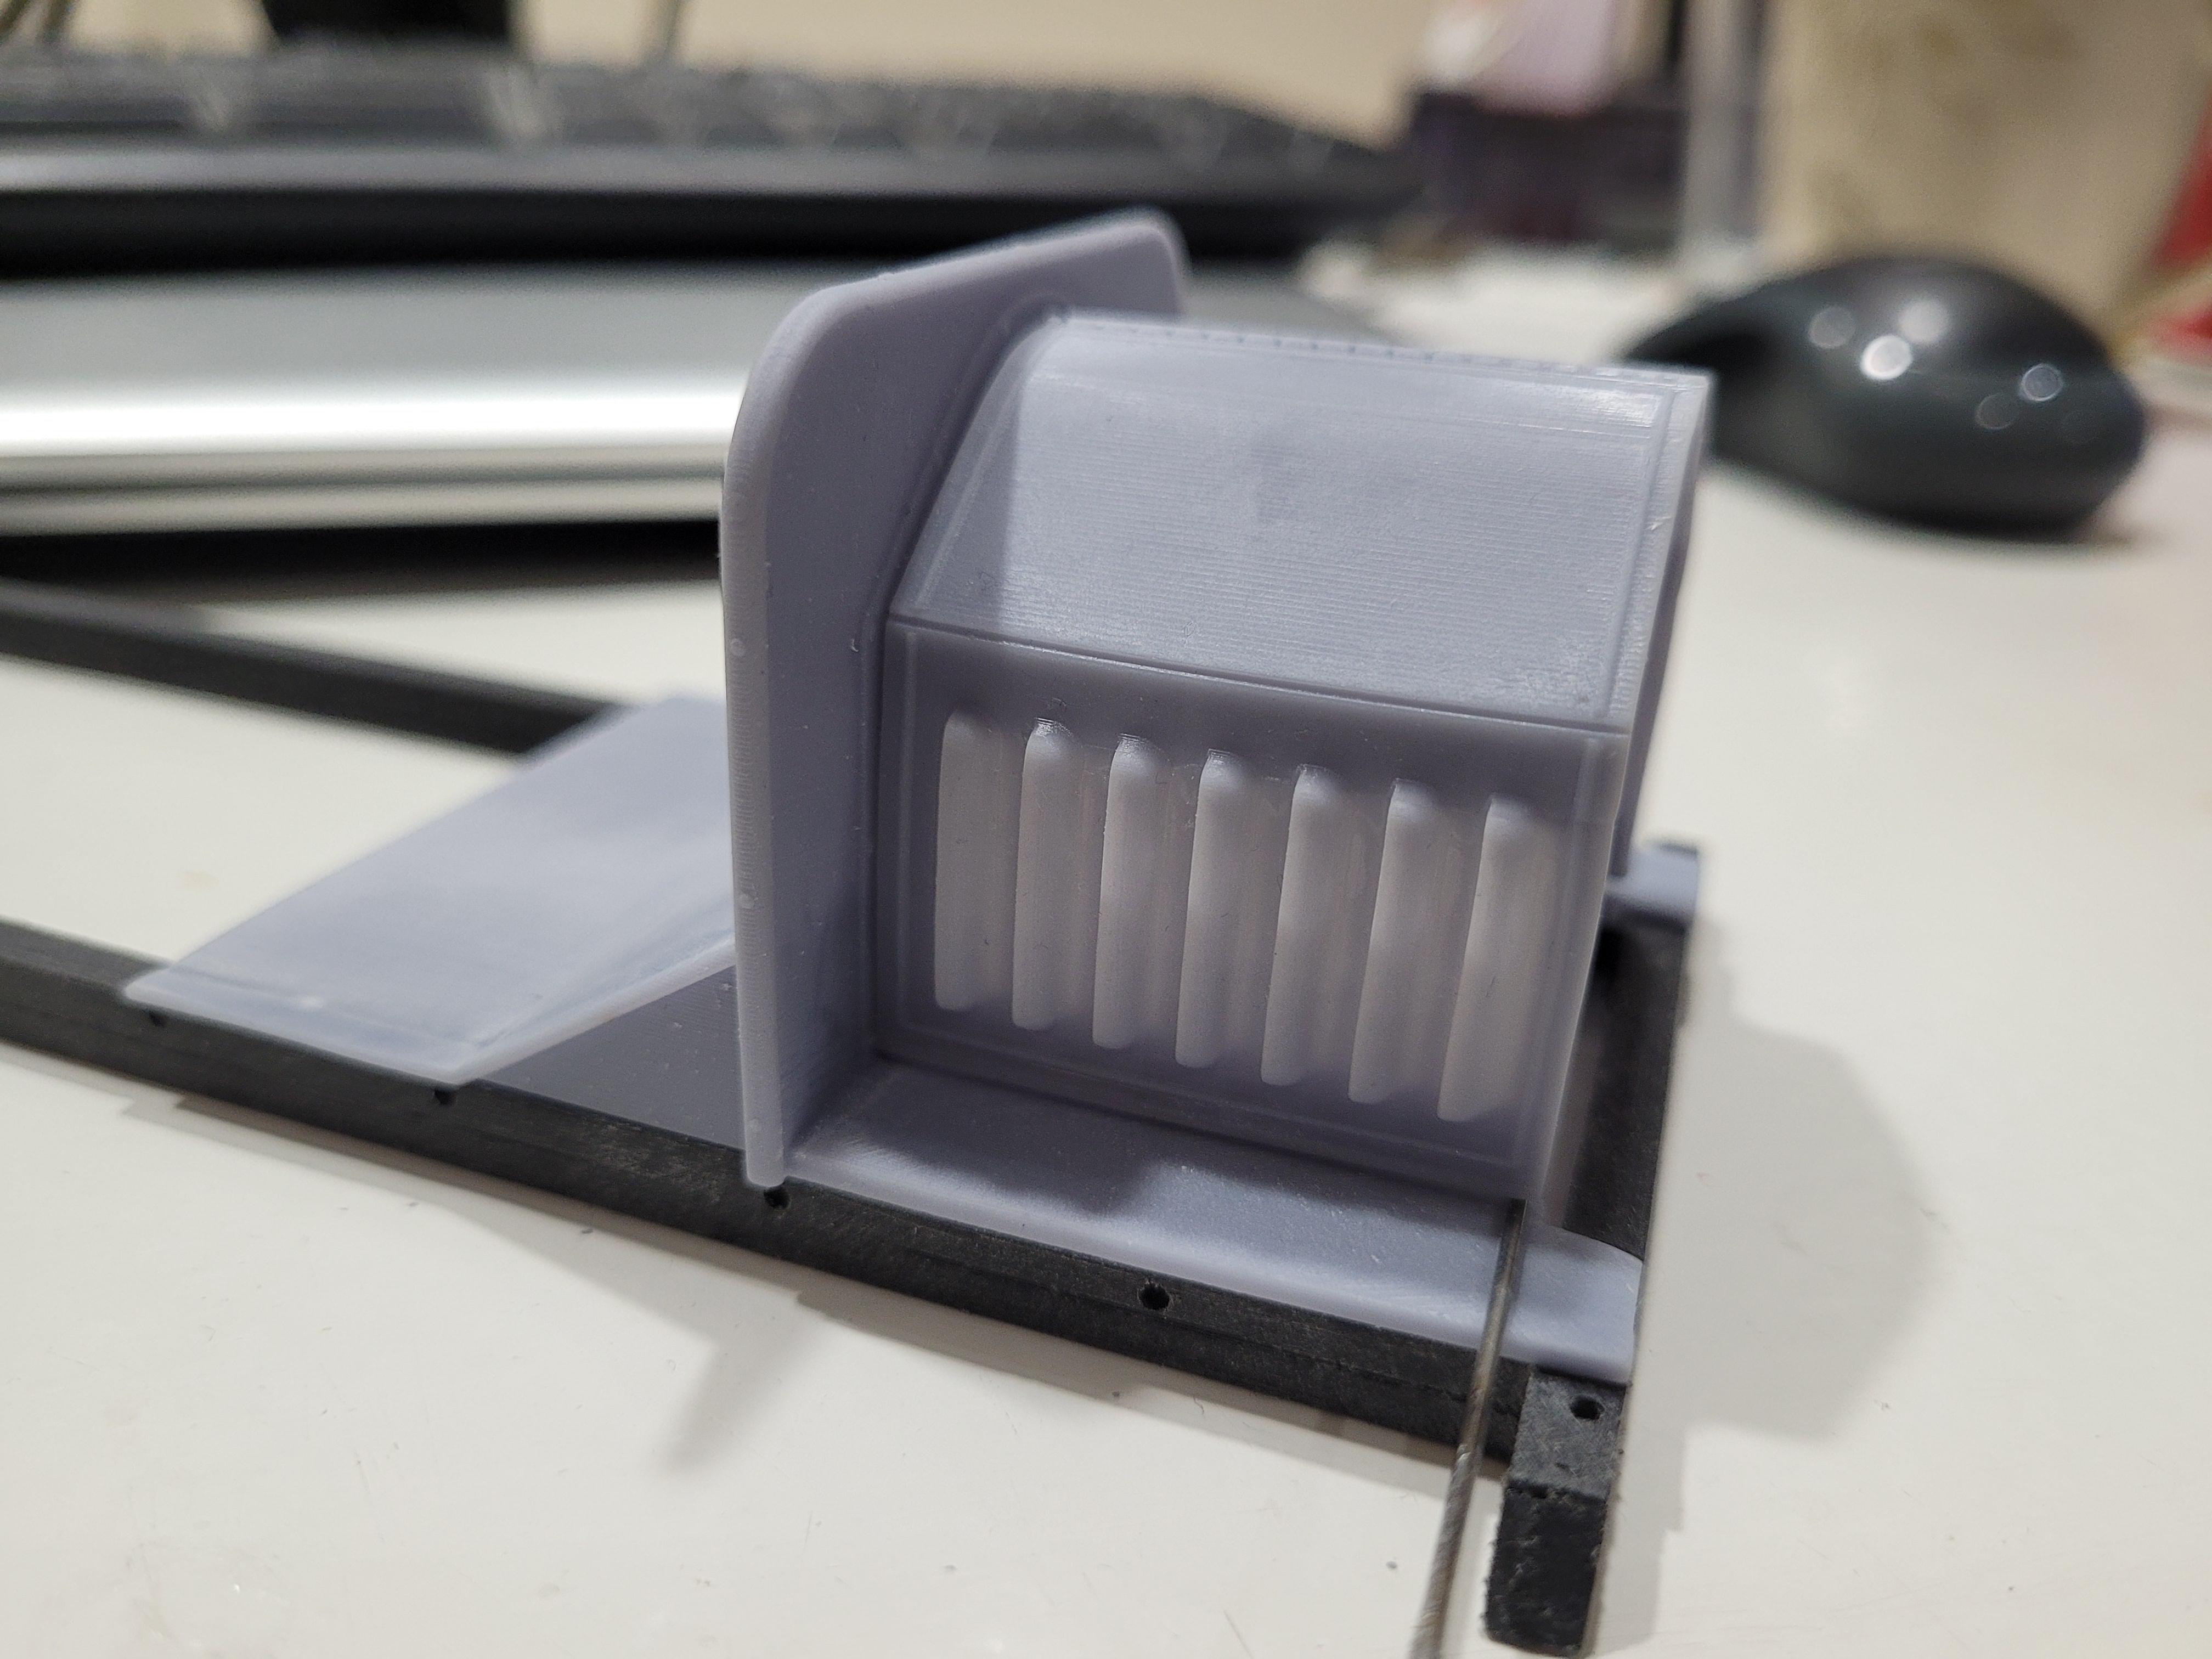
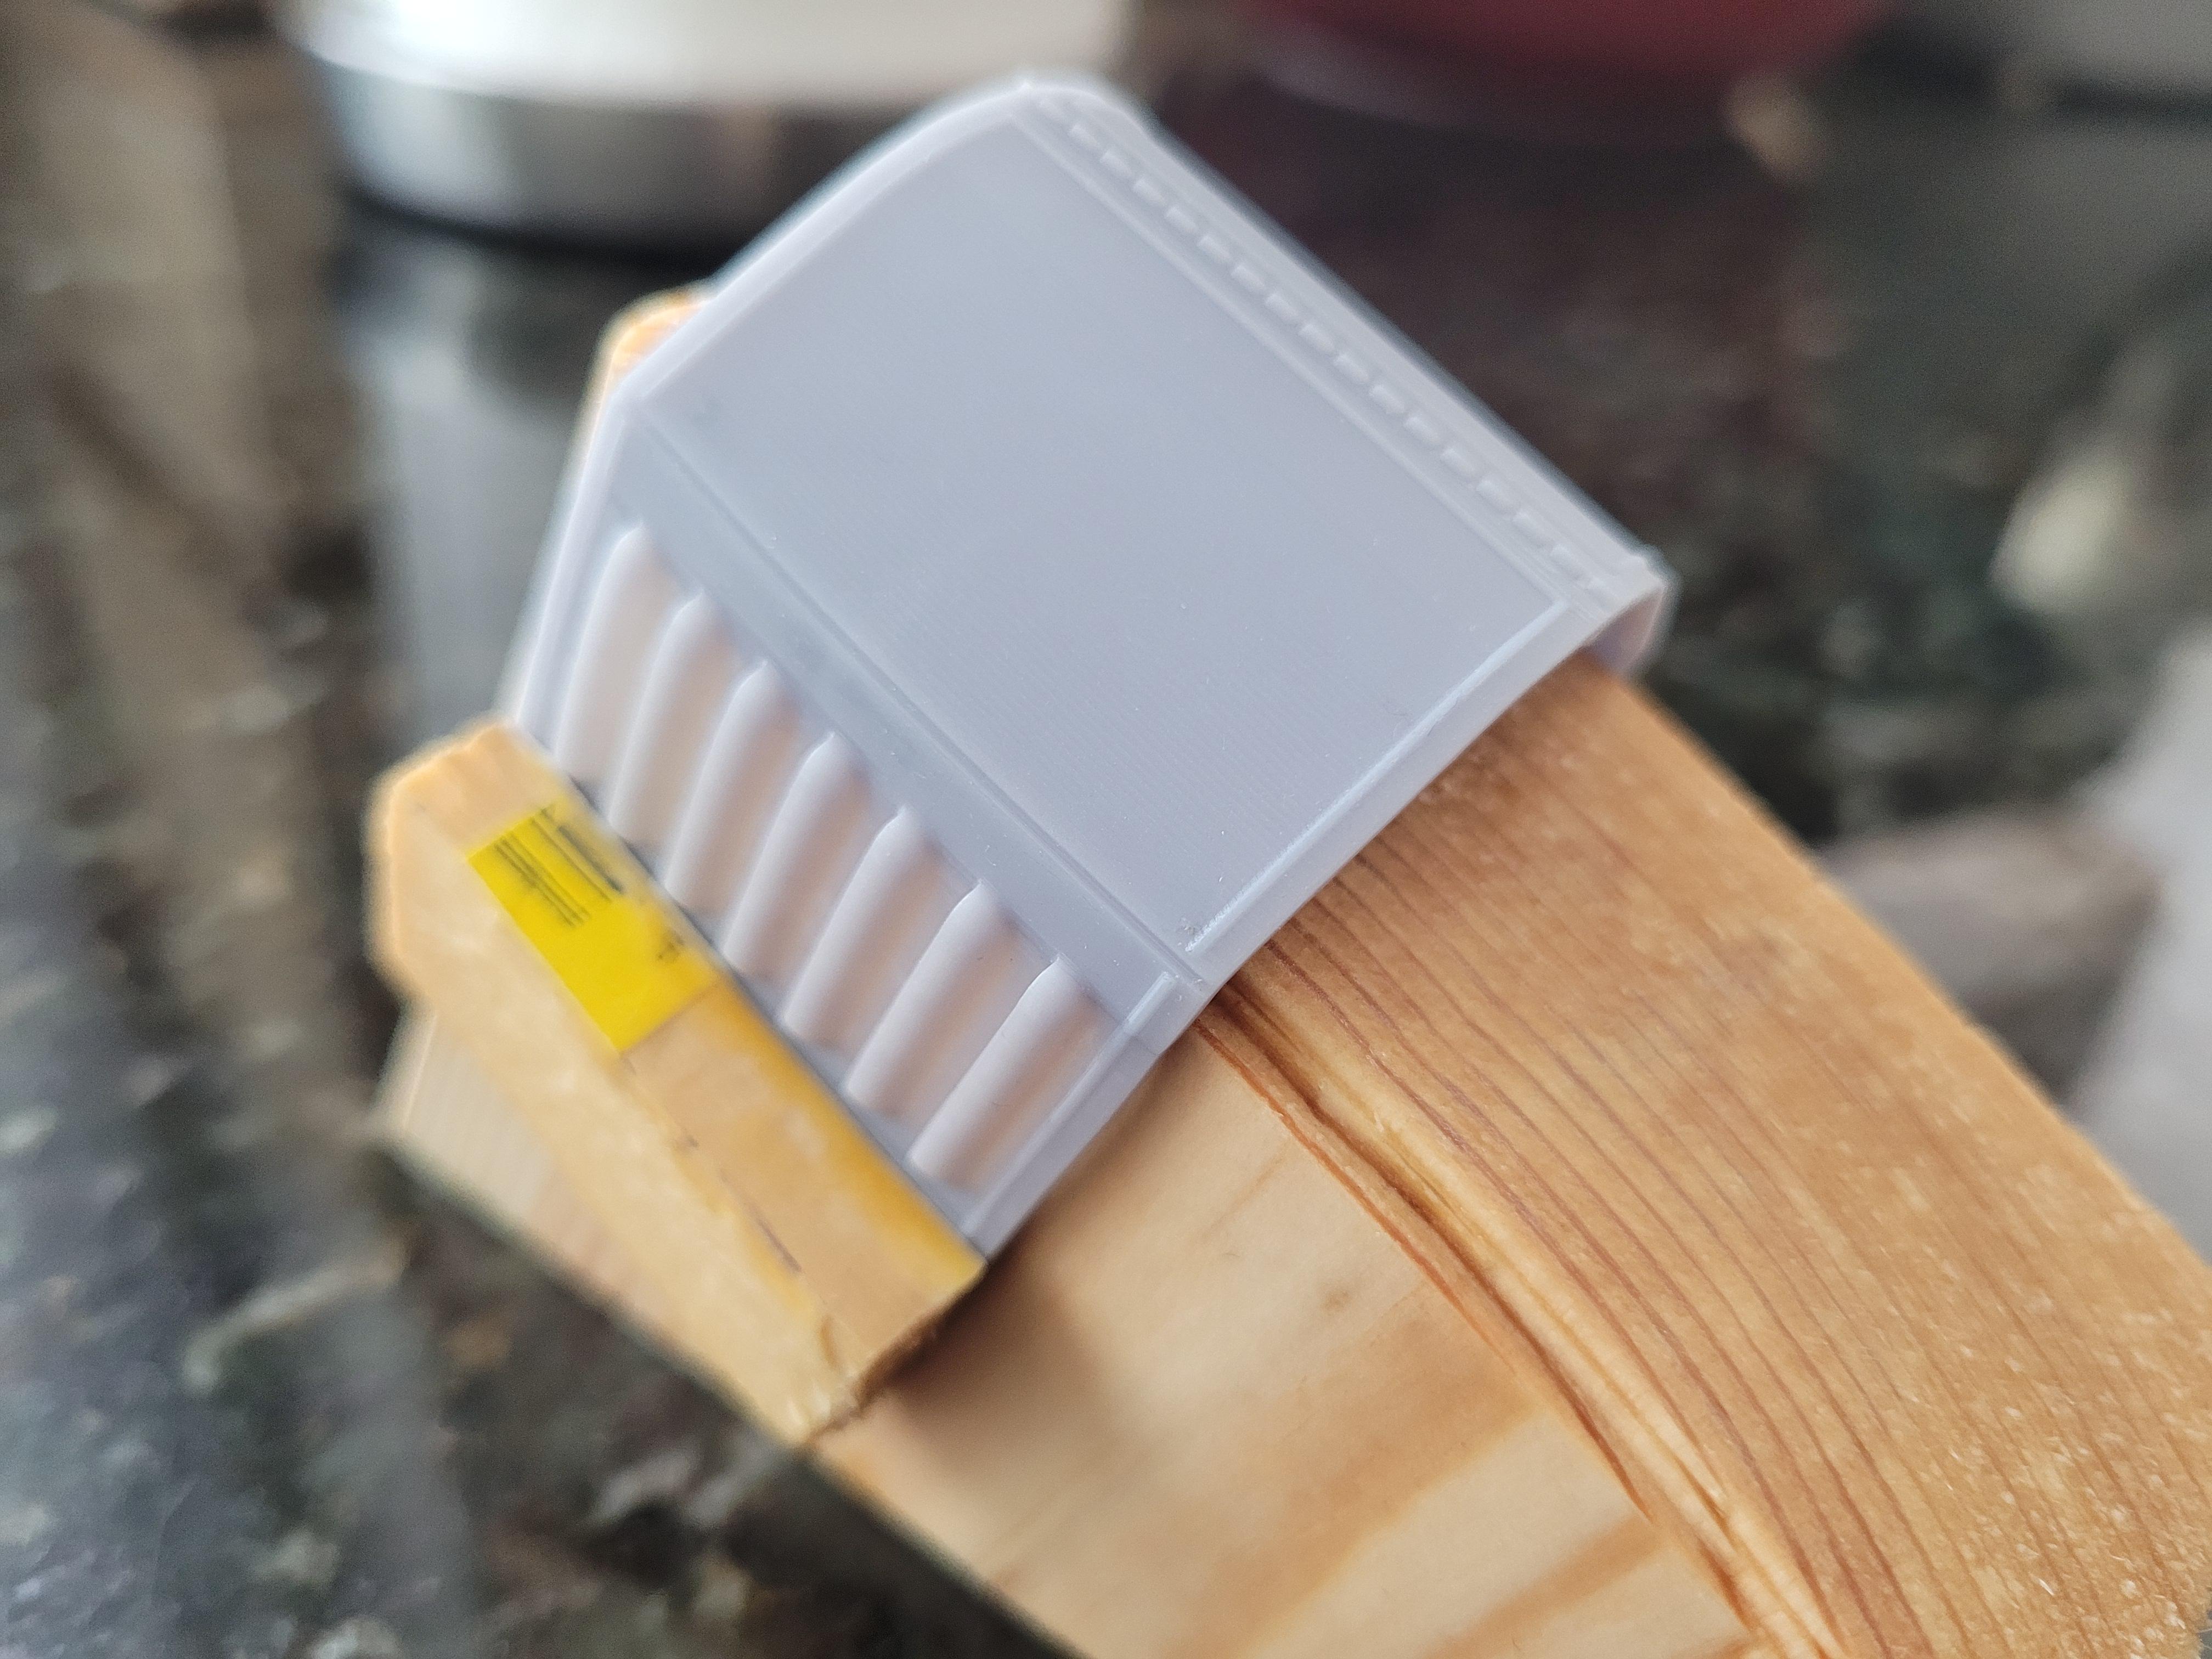
Just for fun, I placed the redesigned hood onto the old truck. Open louvers make a huge impact on realism as you can see here.
-
The hood now fits over the cowl. The wire is just to support the hood in the front. The radiator will eventually serve as the support.
-
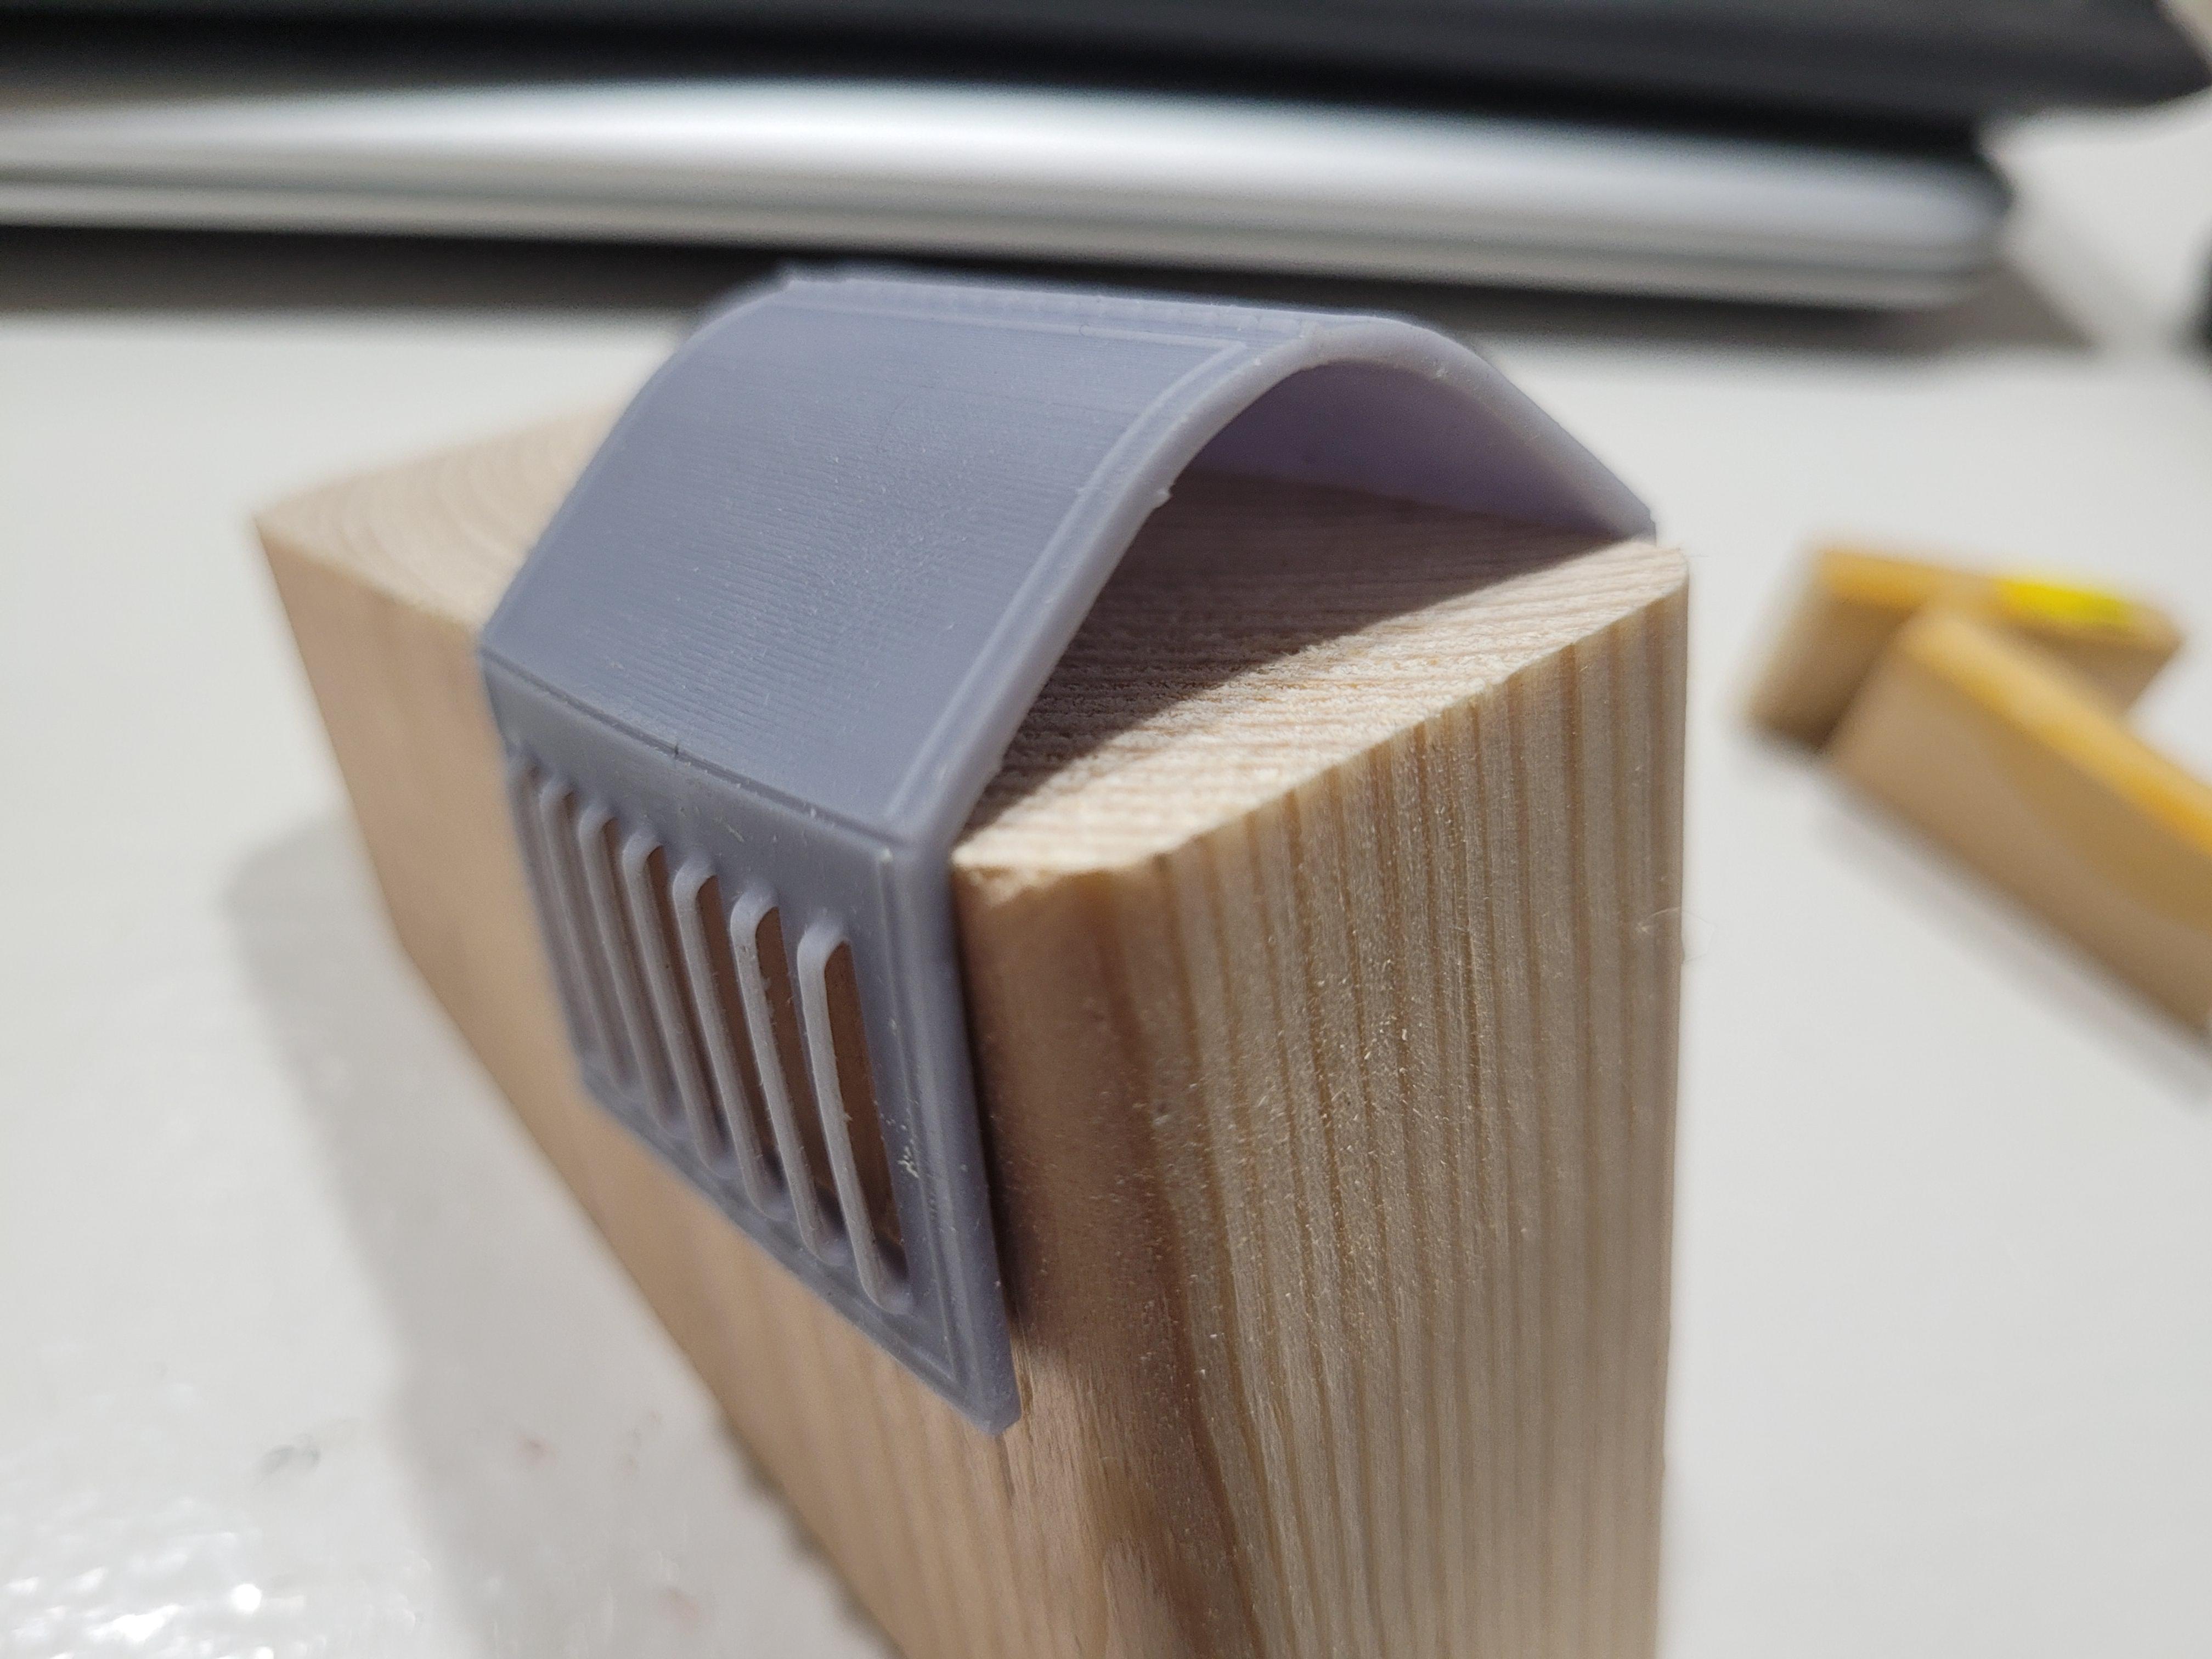
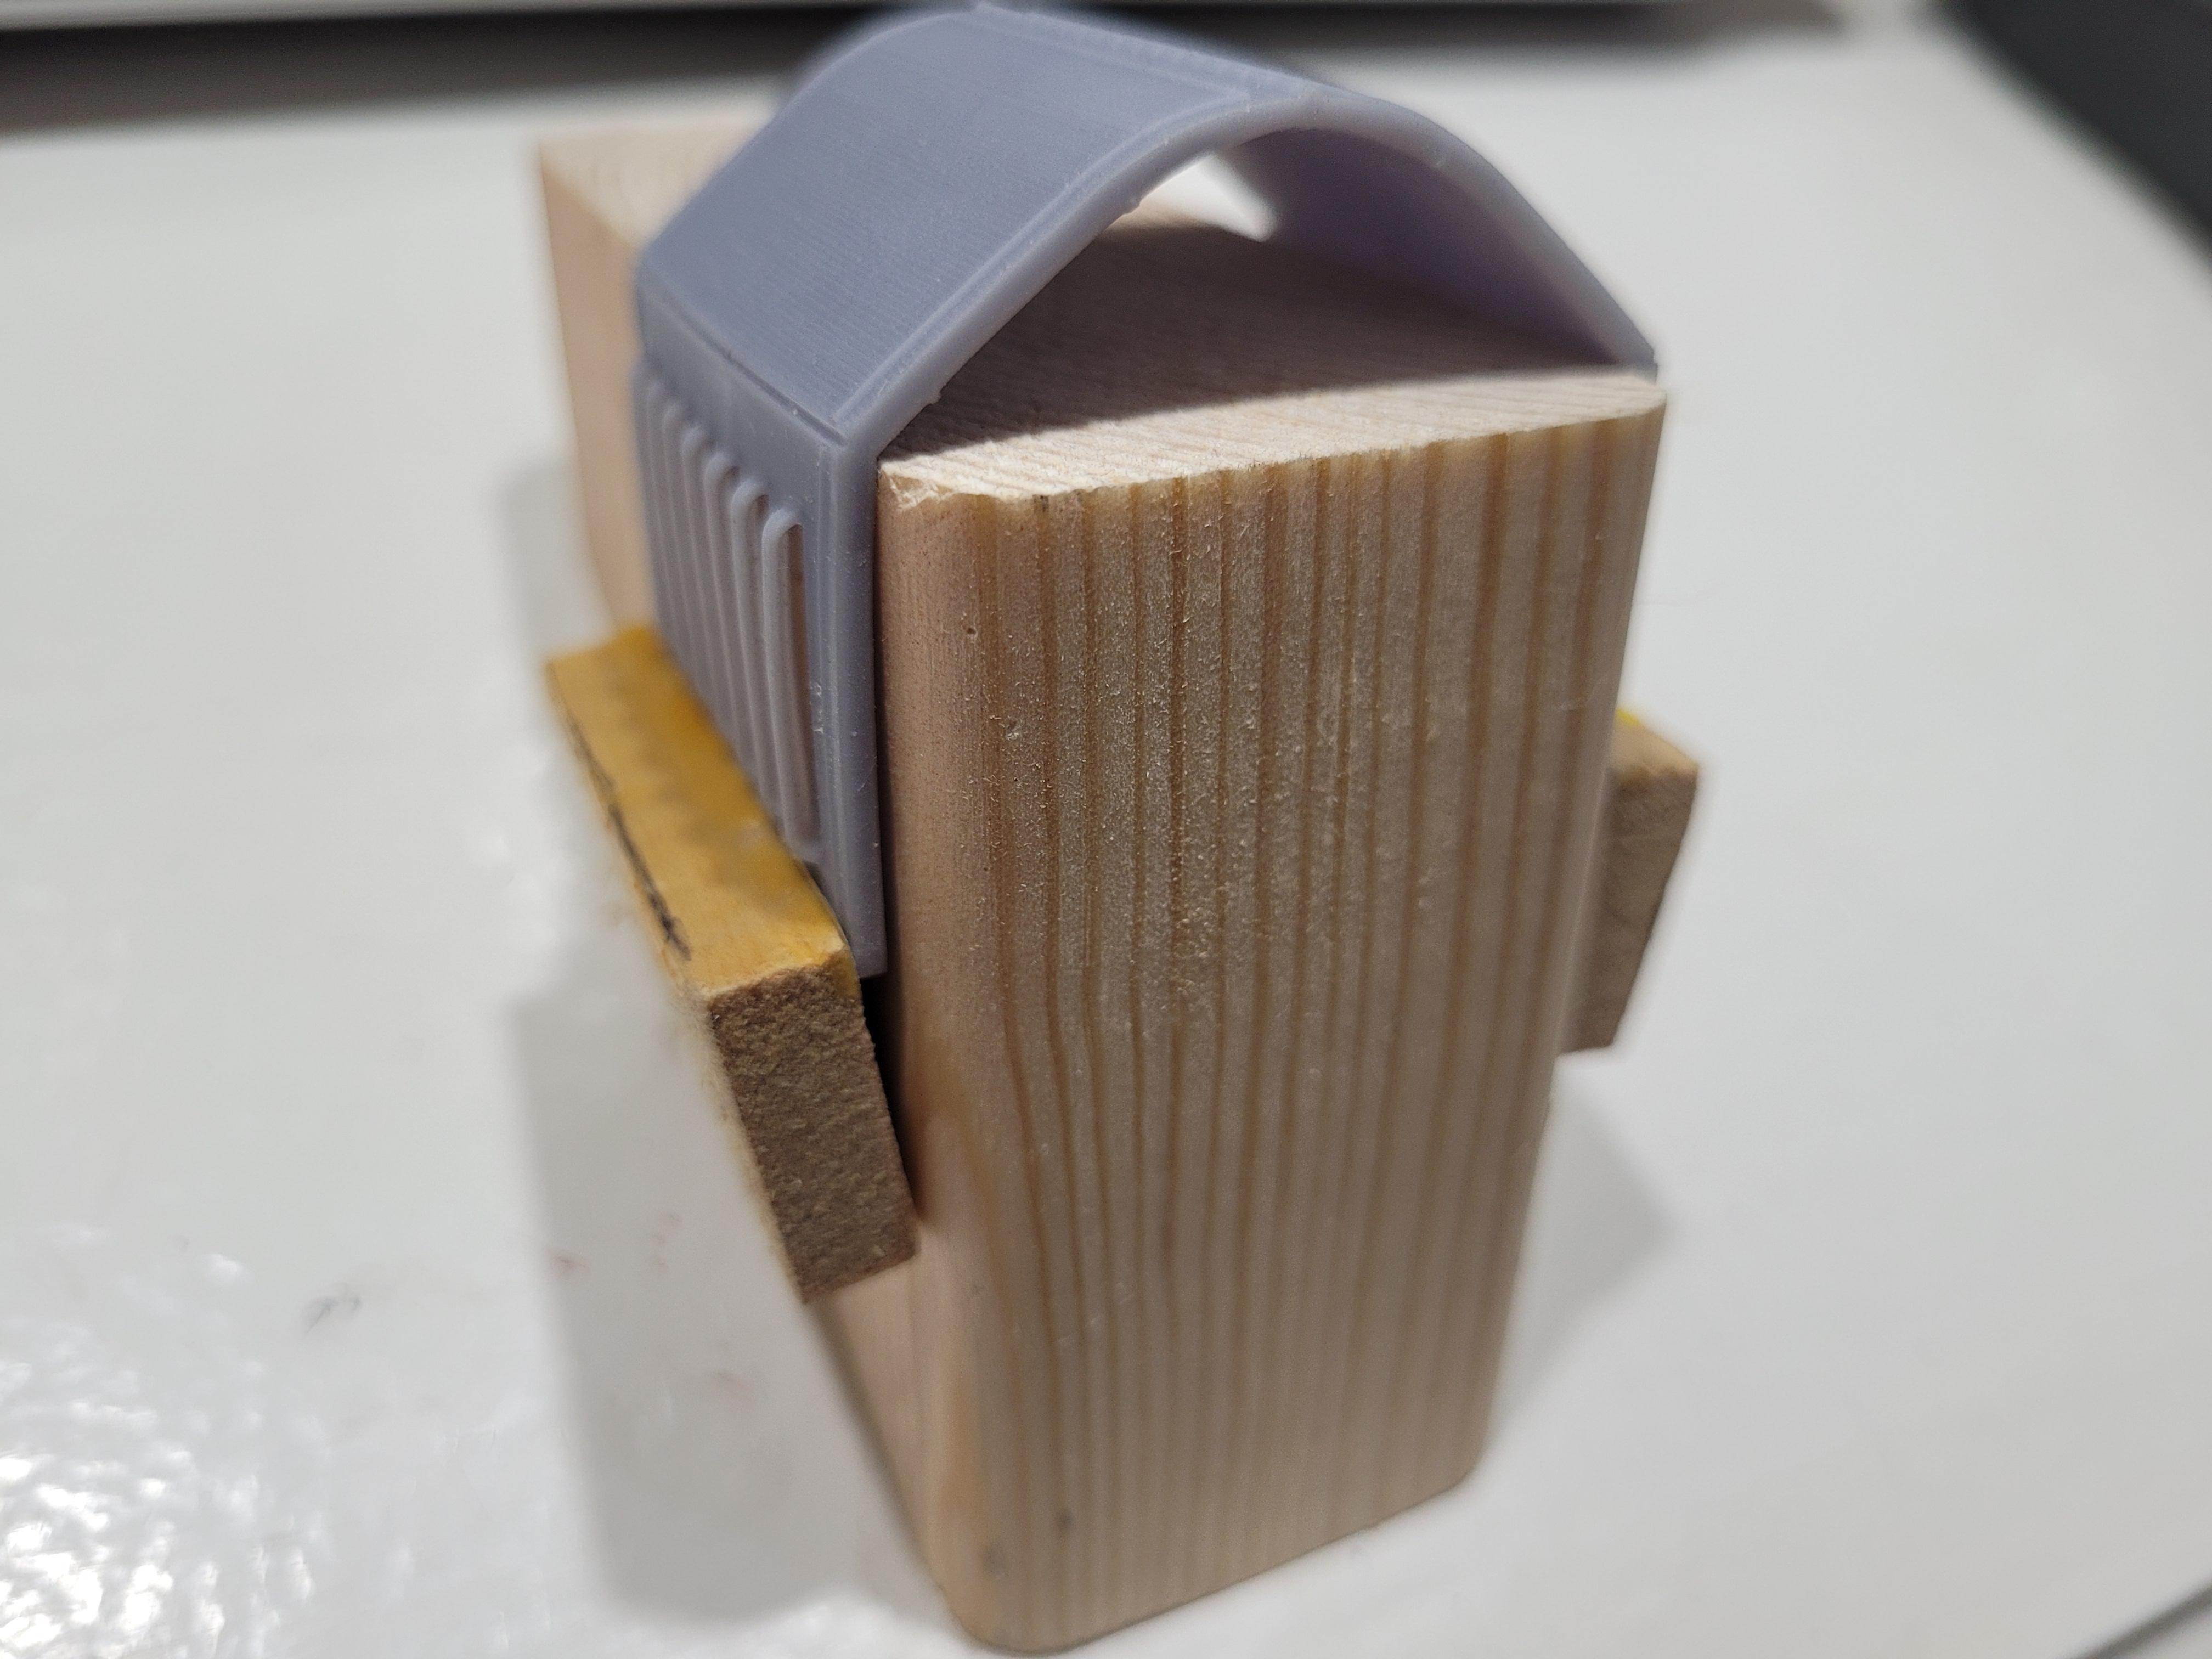
It turns out that a scrap of 2 x 4 was the perfect size to support the underside of the hood. I then constrained the sides with small pieces of wood that were glued to the block of wood. Using very hot water, I warmed the entire part, then slowly pushed the plastic into the proper shape, carefully making sure not to touch the thin louvers. The part stays clamped while the plastic settles down. Happy with the result.
-
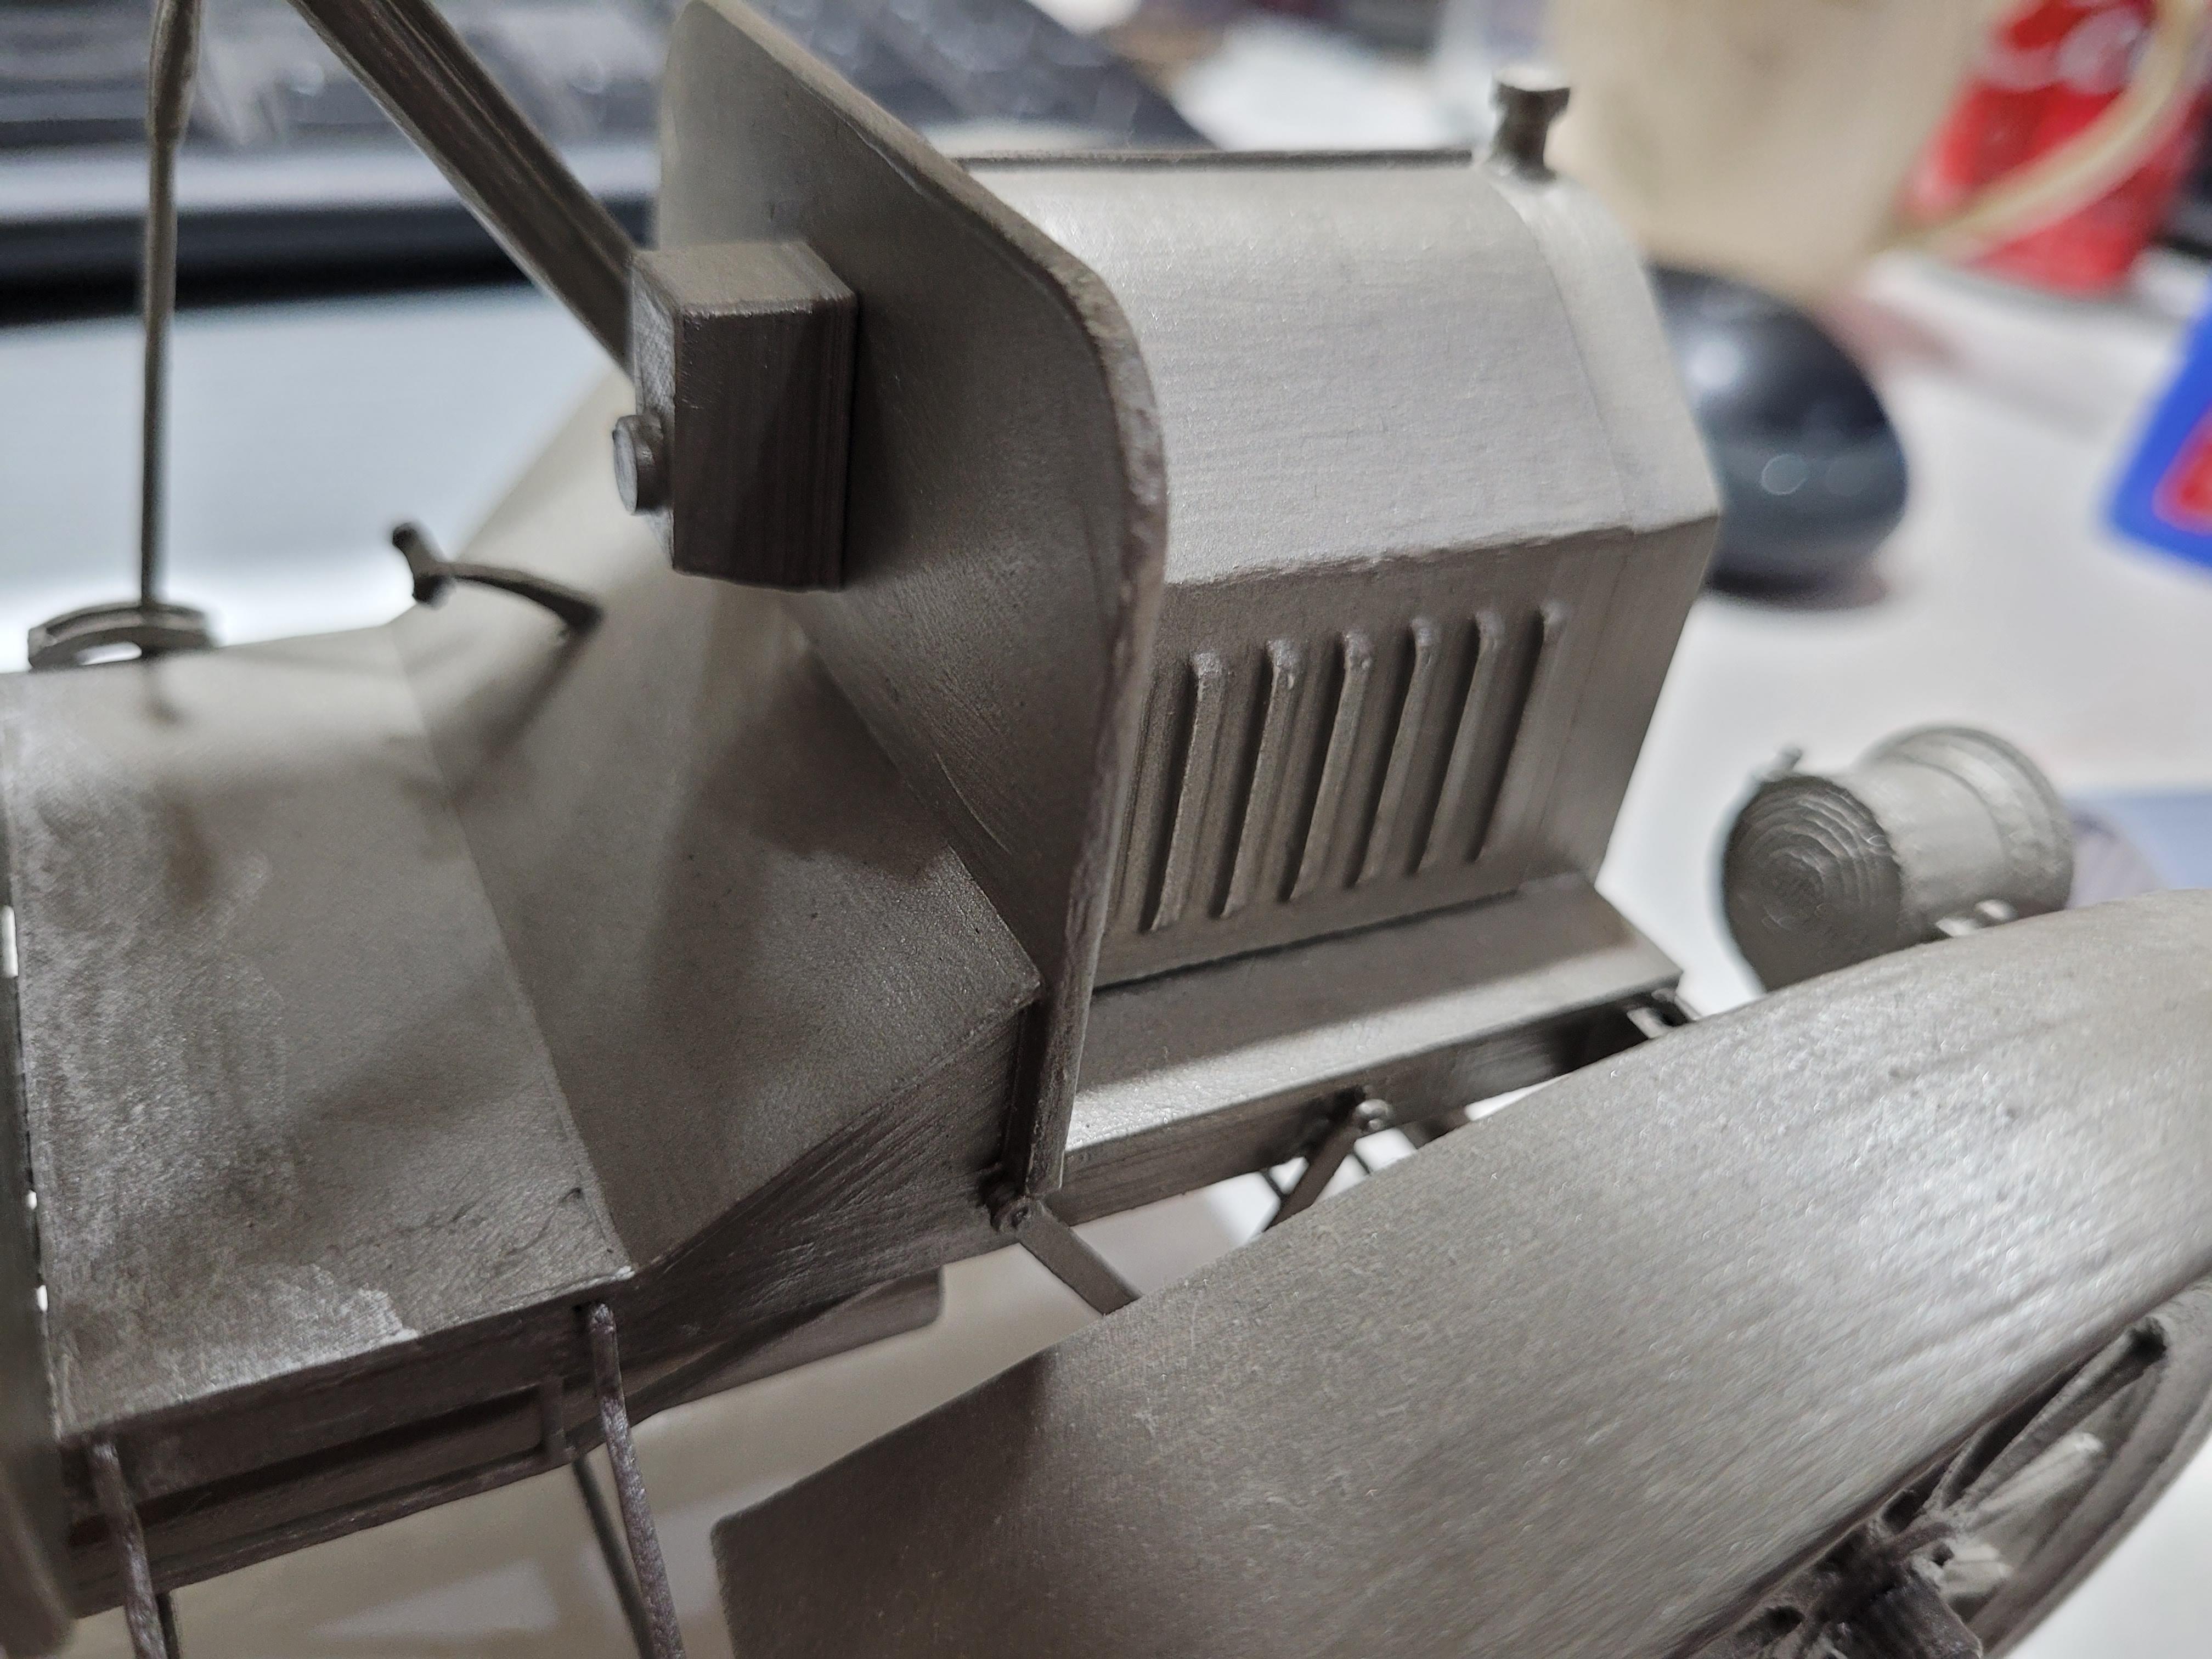
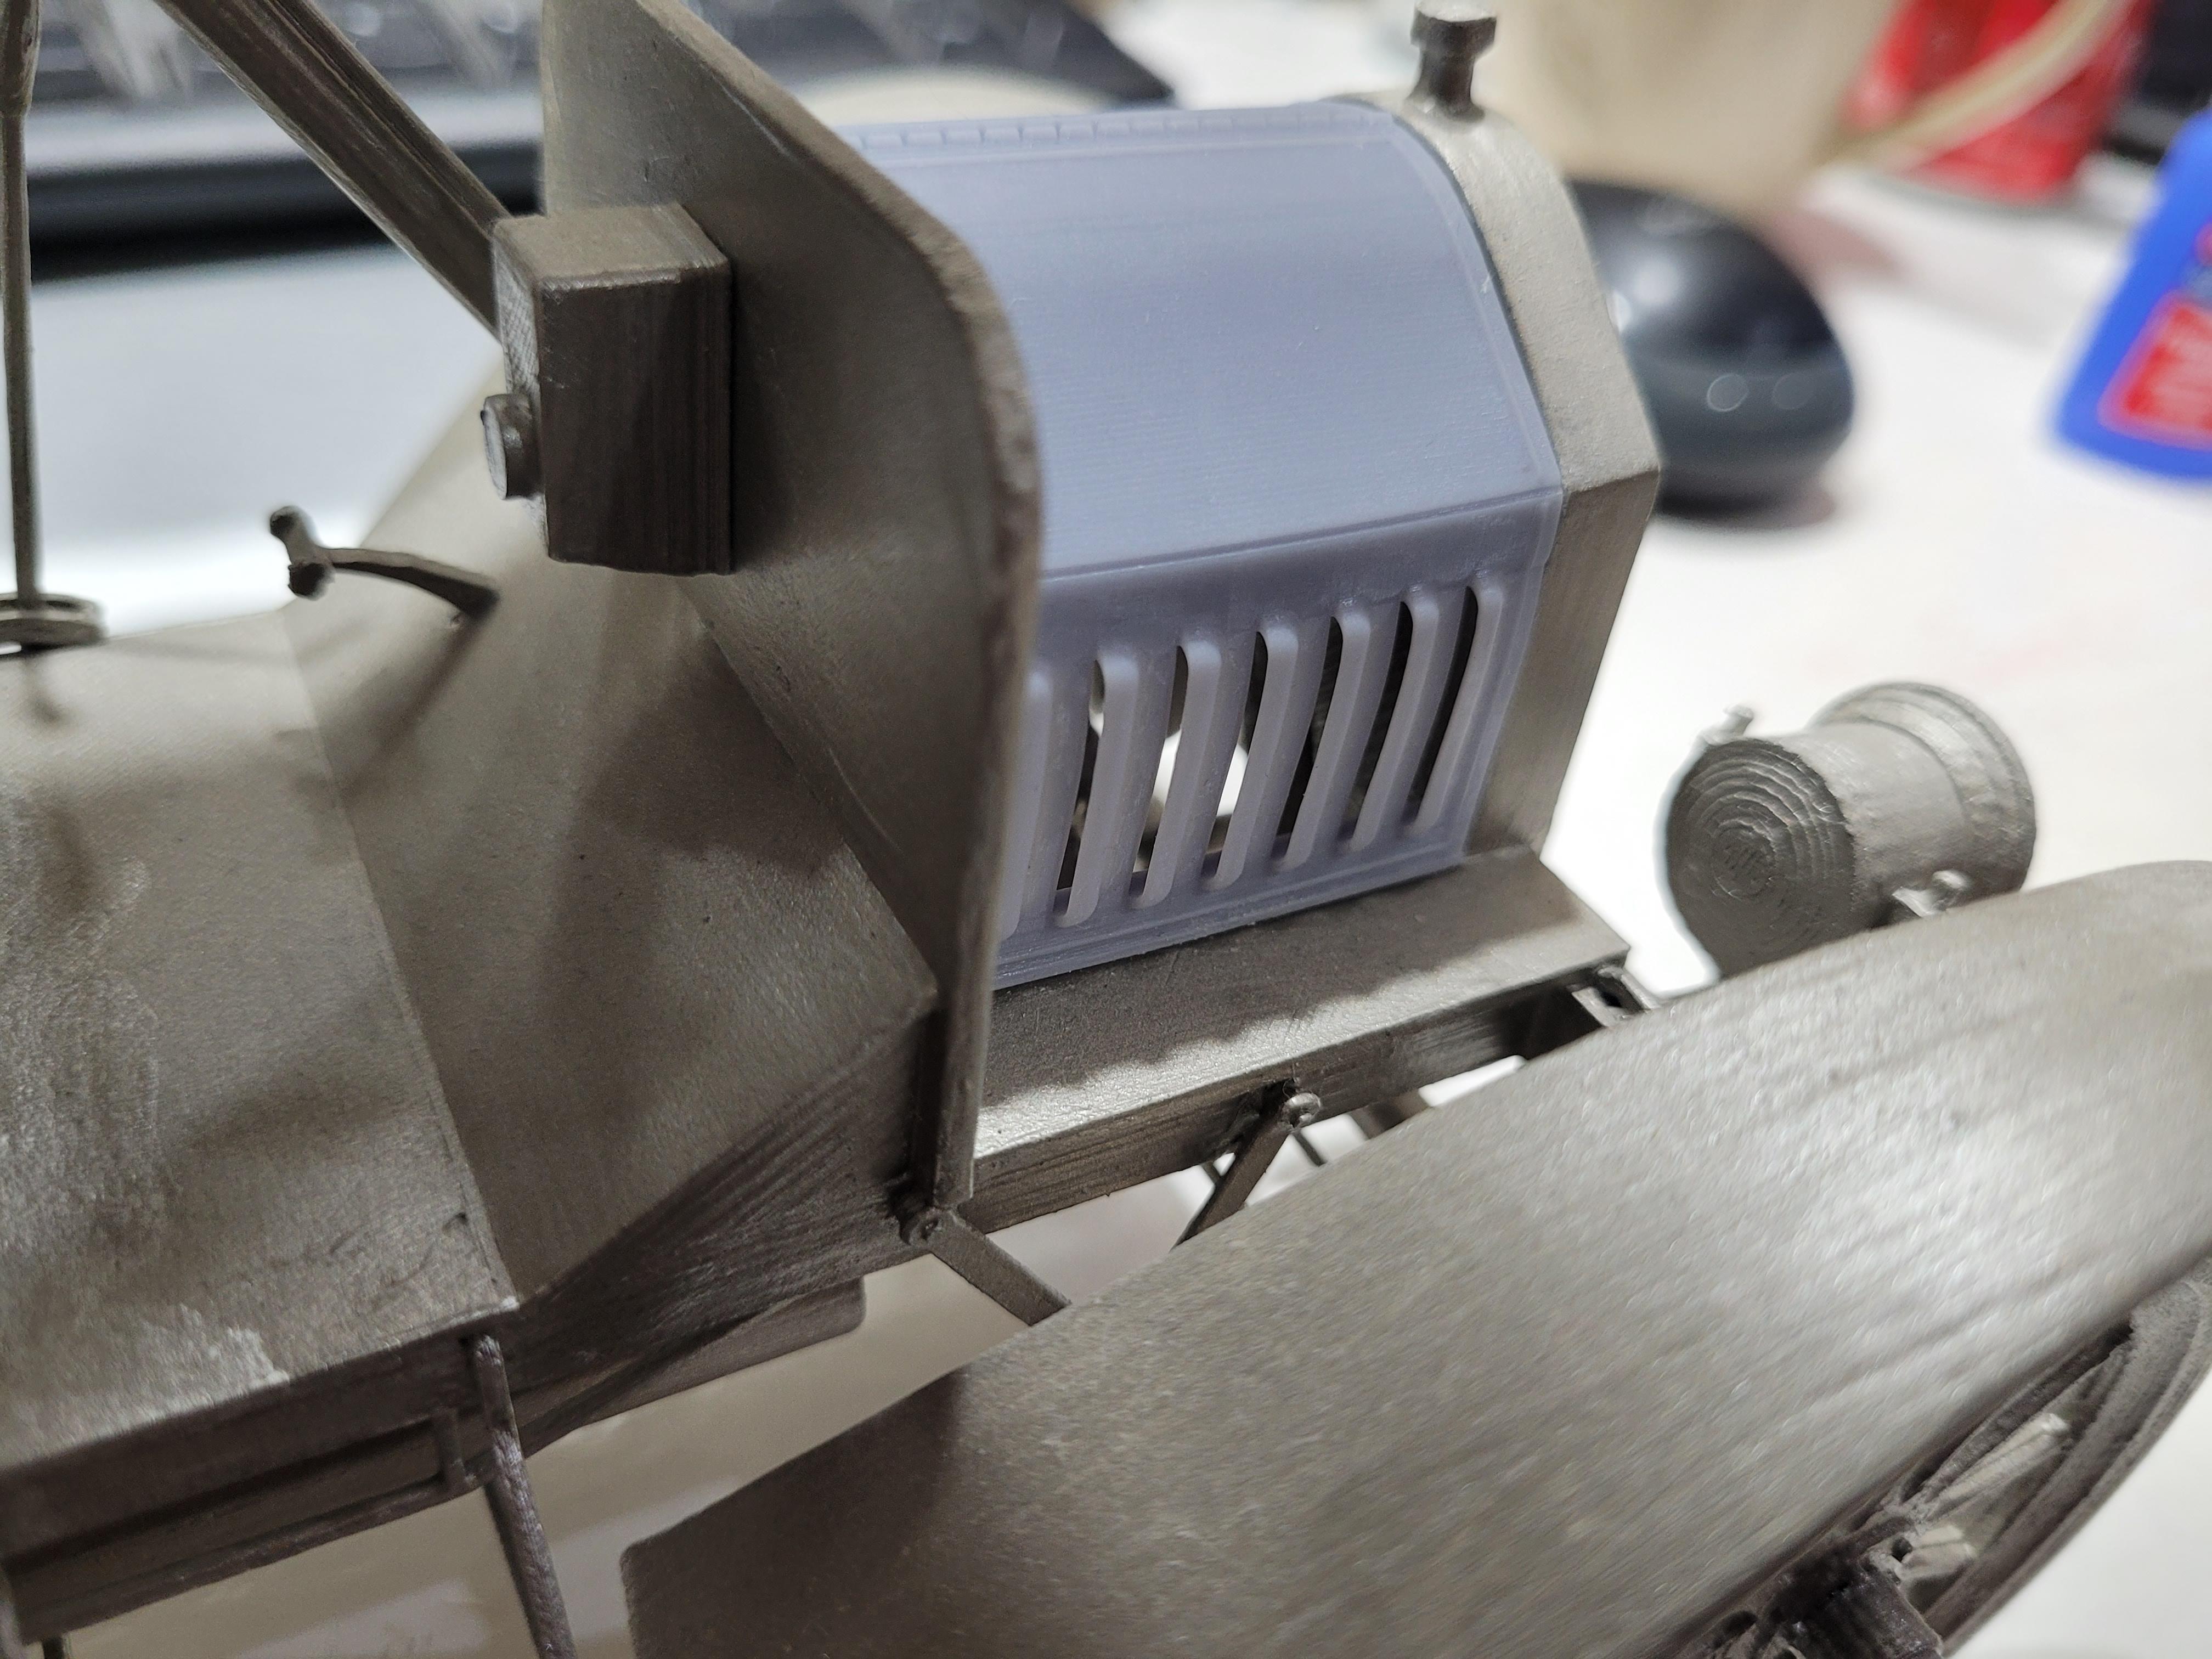
After I printed the hood, I noticed warping near the top, where the side panels attach to the top. The hood also splays out at the bottom. This is very common with resin 3d printing. I am going to attempt a rescue. If it fails, I will need to reprint it using a different support strategy that will constrain the part during the printing process.
-
Frame with floorboard and dash in place. The engine sitting forward of dash.
-
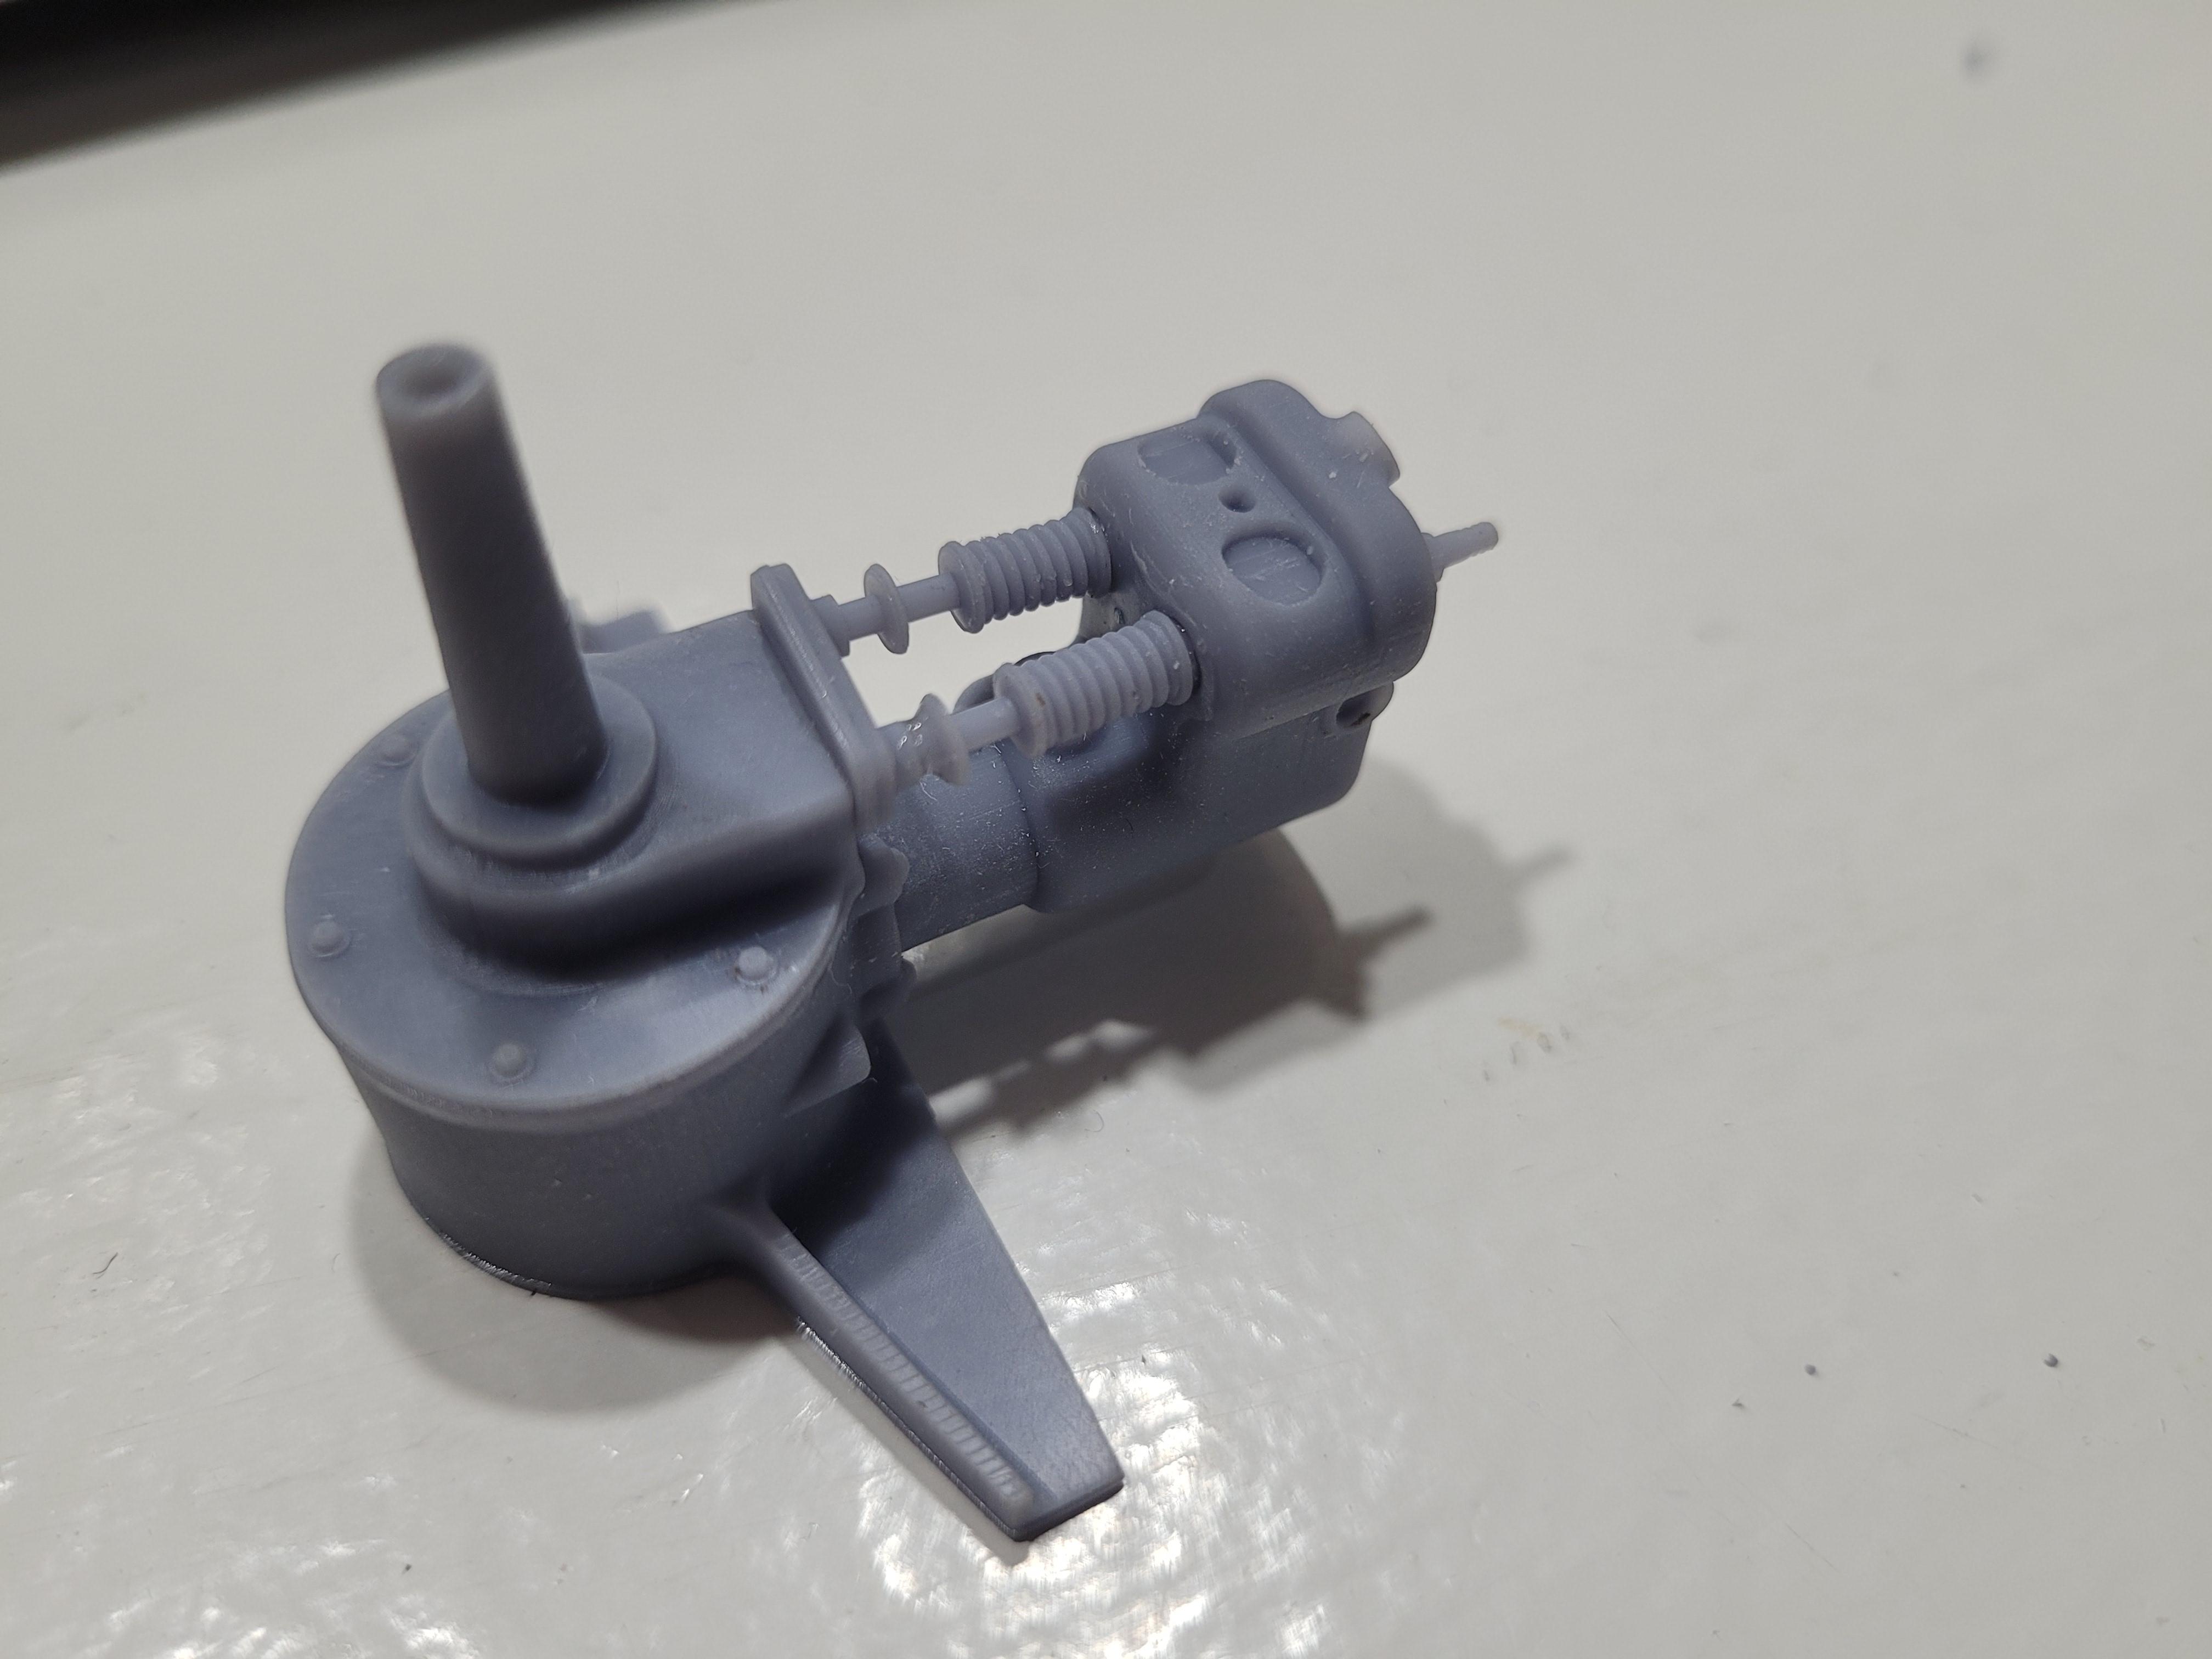
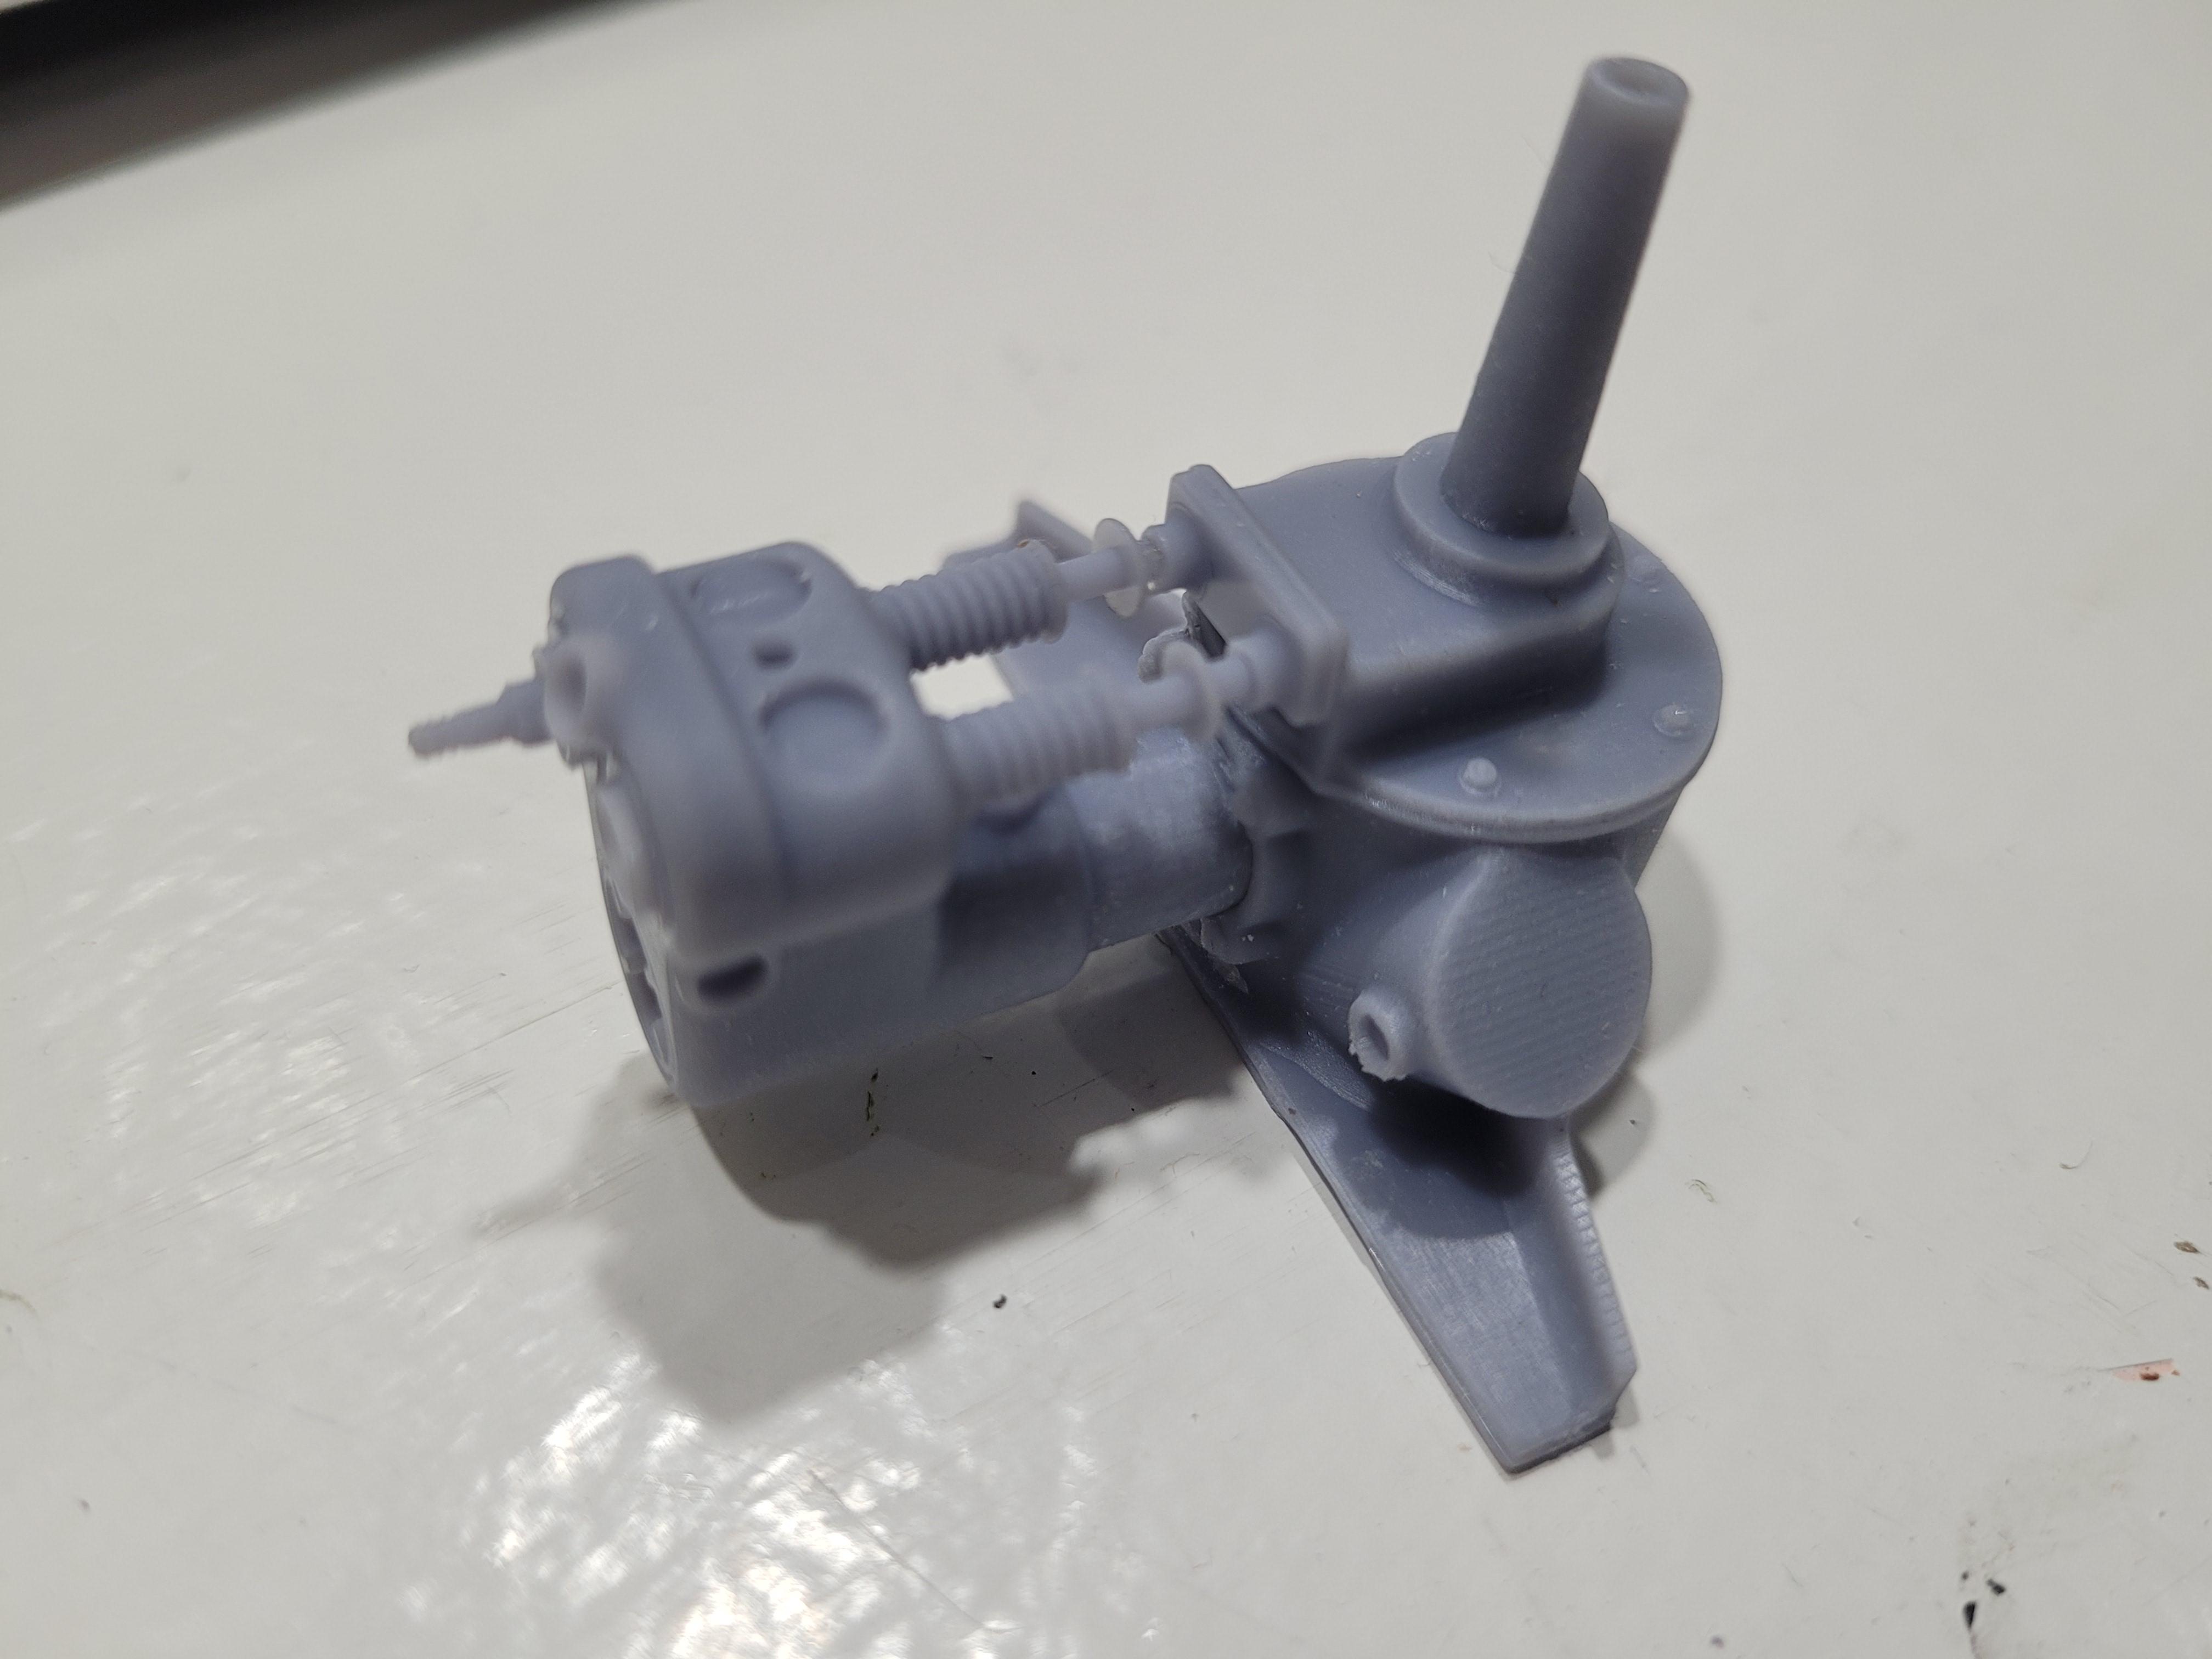
Here are the rest of the engine assembly: block cover, "T Clamp, oil filler tube, upper hose, lowe hose and intake pipe, carburetor, and flyweel.
-
Tonight, I put the engine together, minus the hoses, intake and carburetor. It may be hard to see. But the valve springs can be seen, as well as the spark plug. Until it is painted, resin parts can appear to lack detail, just like styrene parts.
-
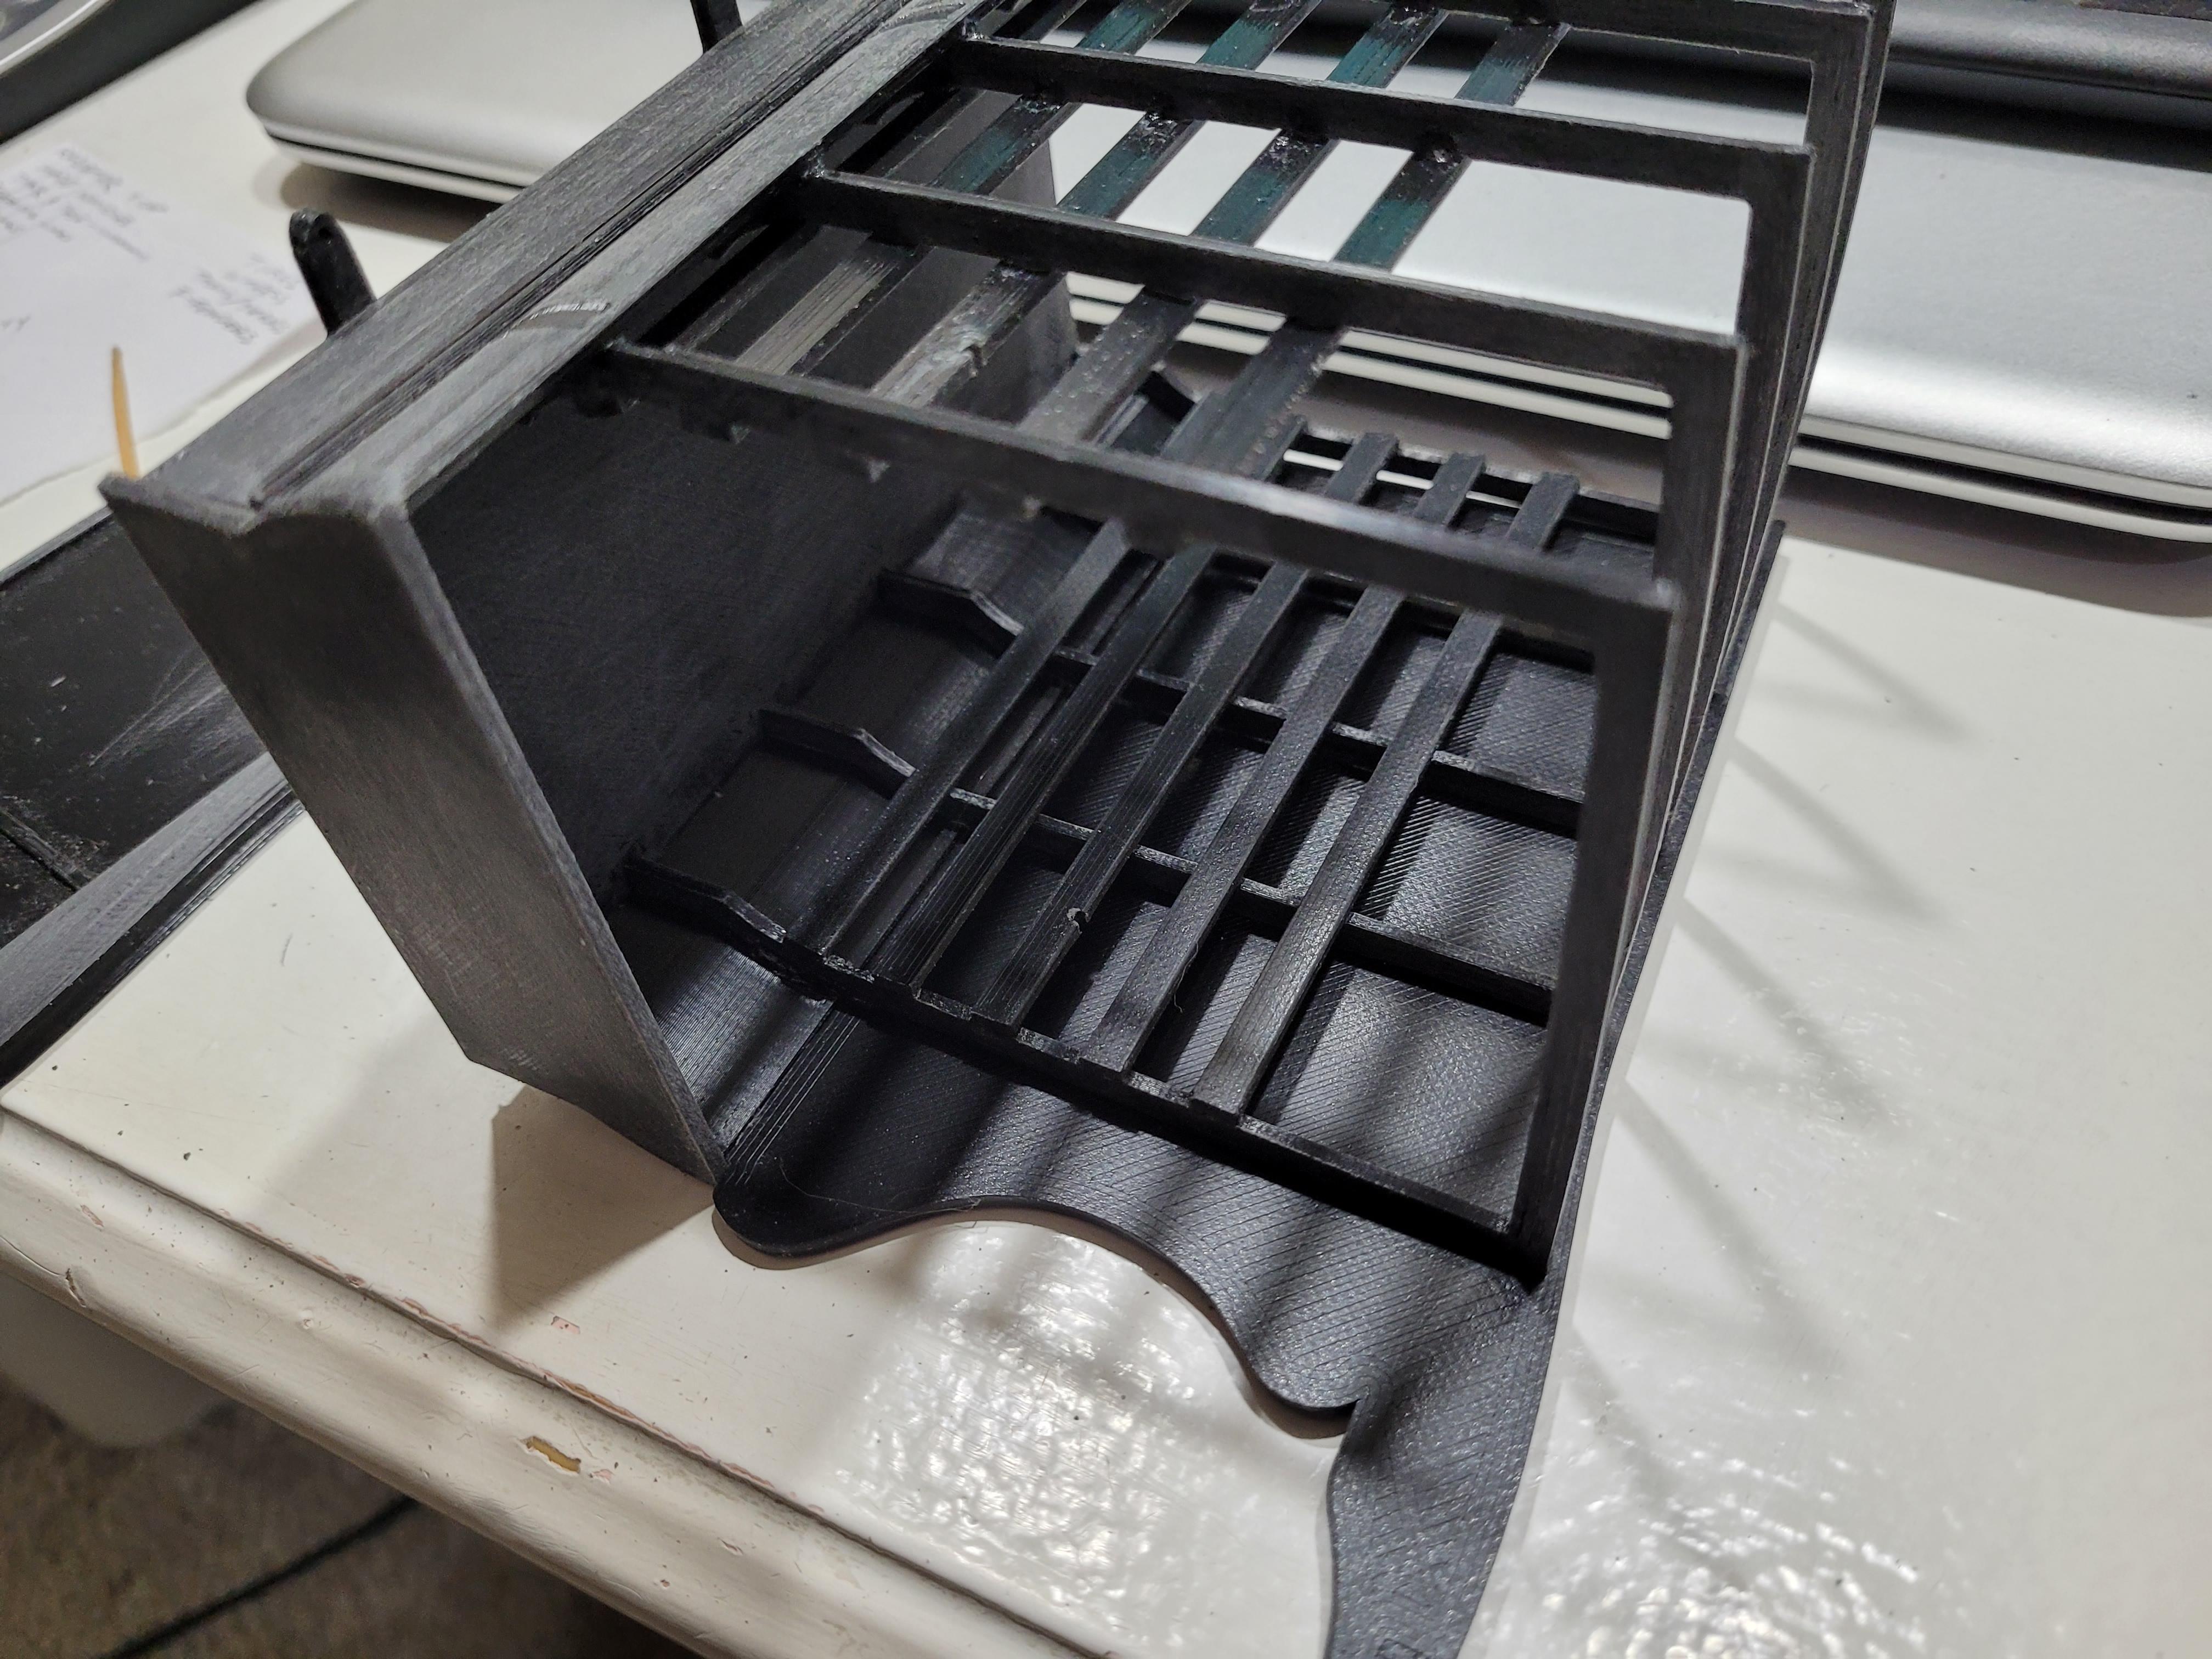
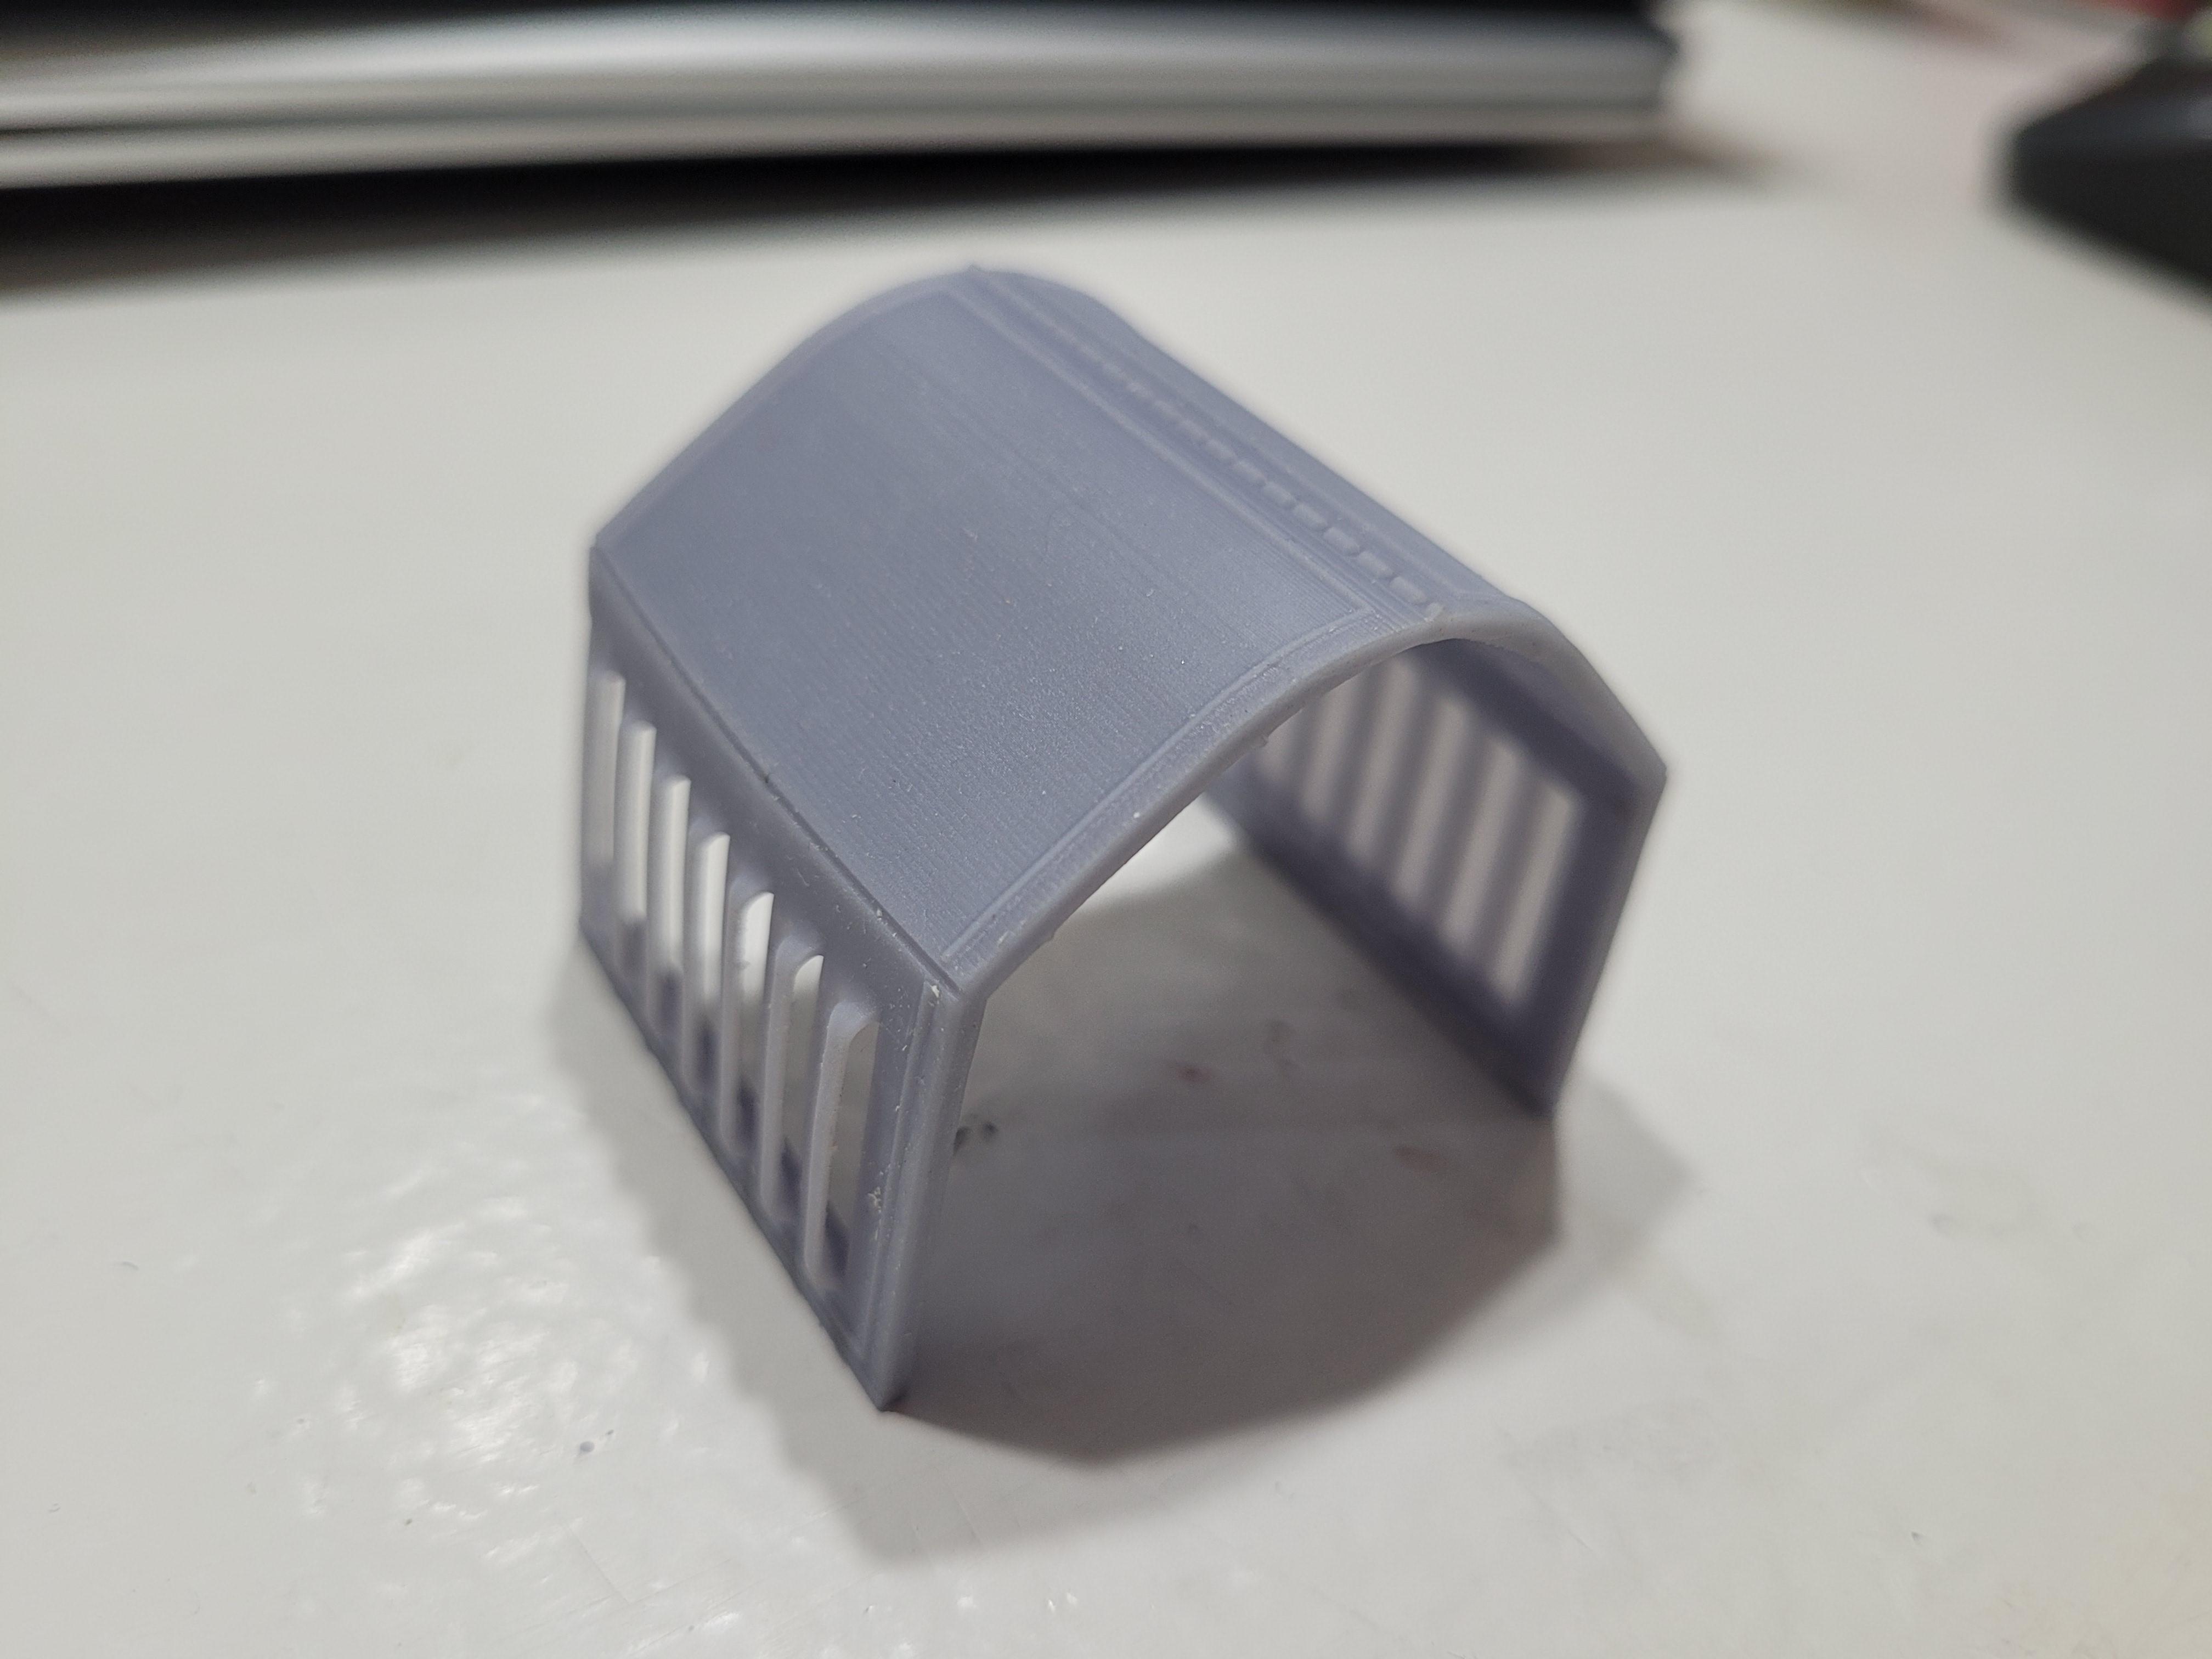
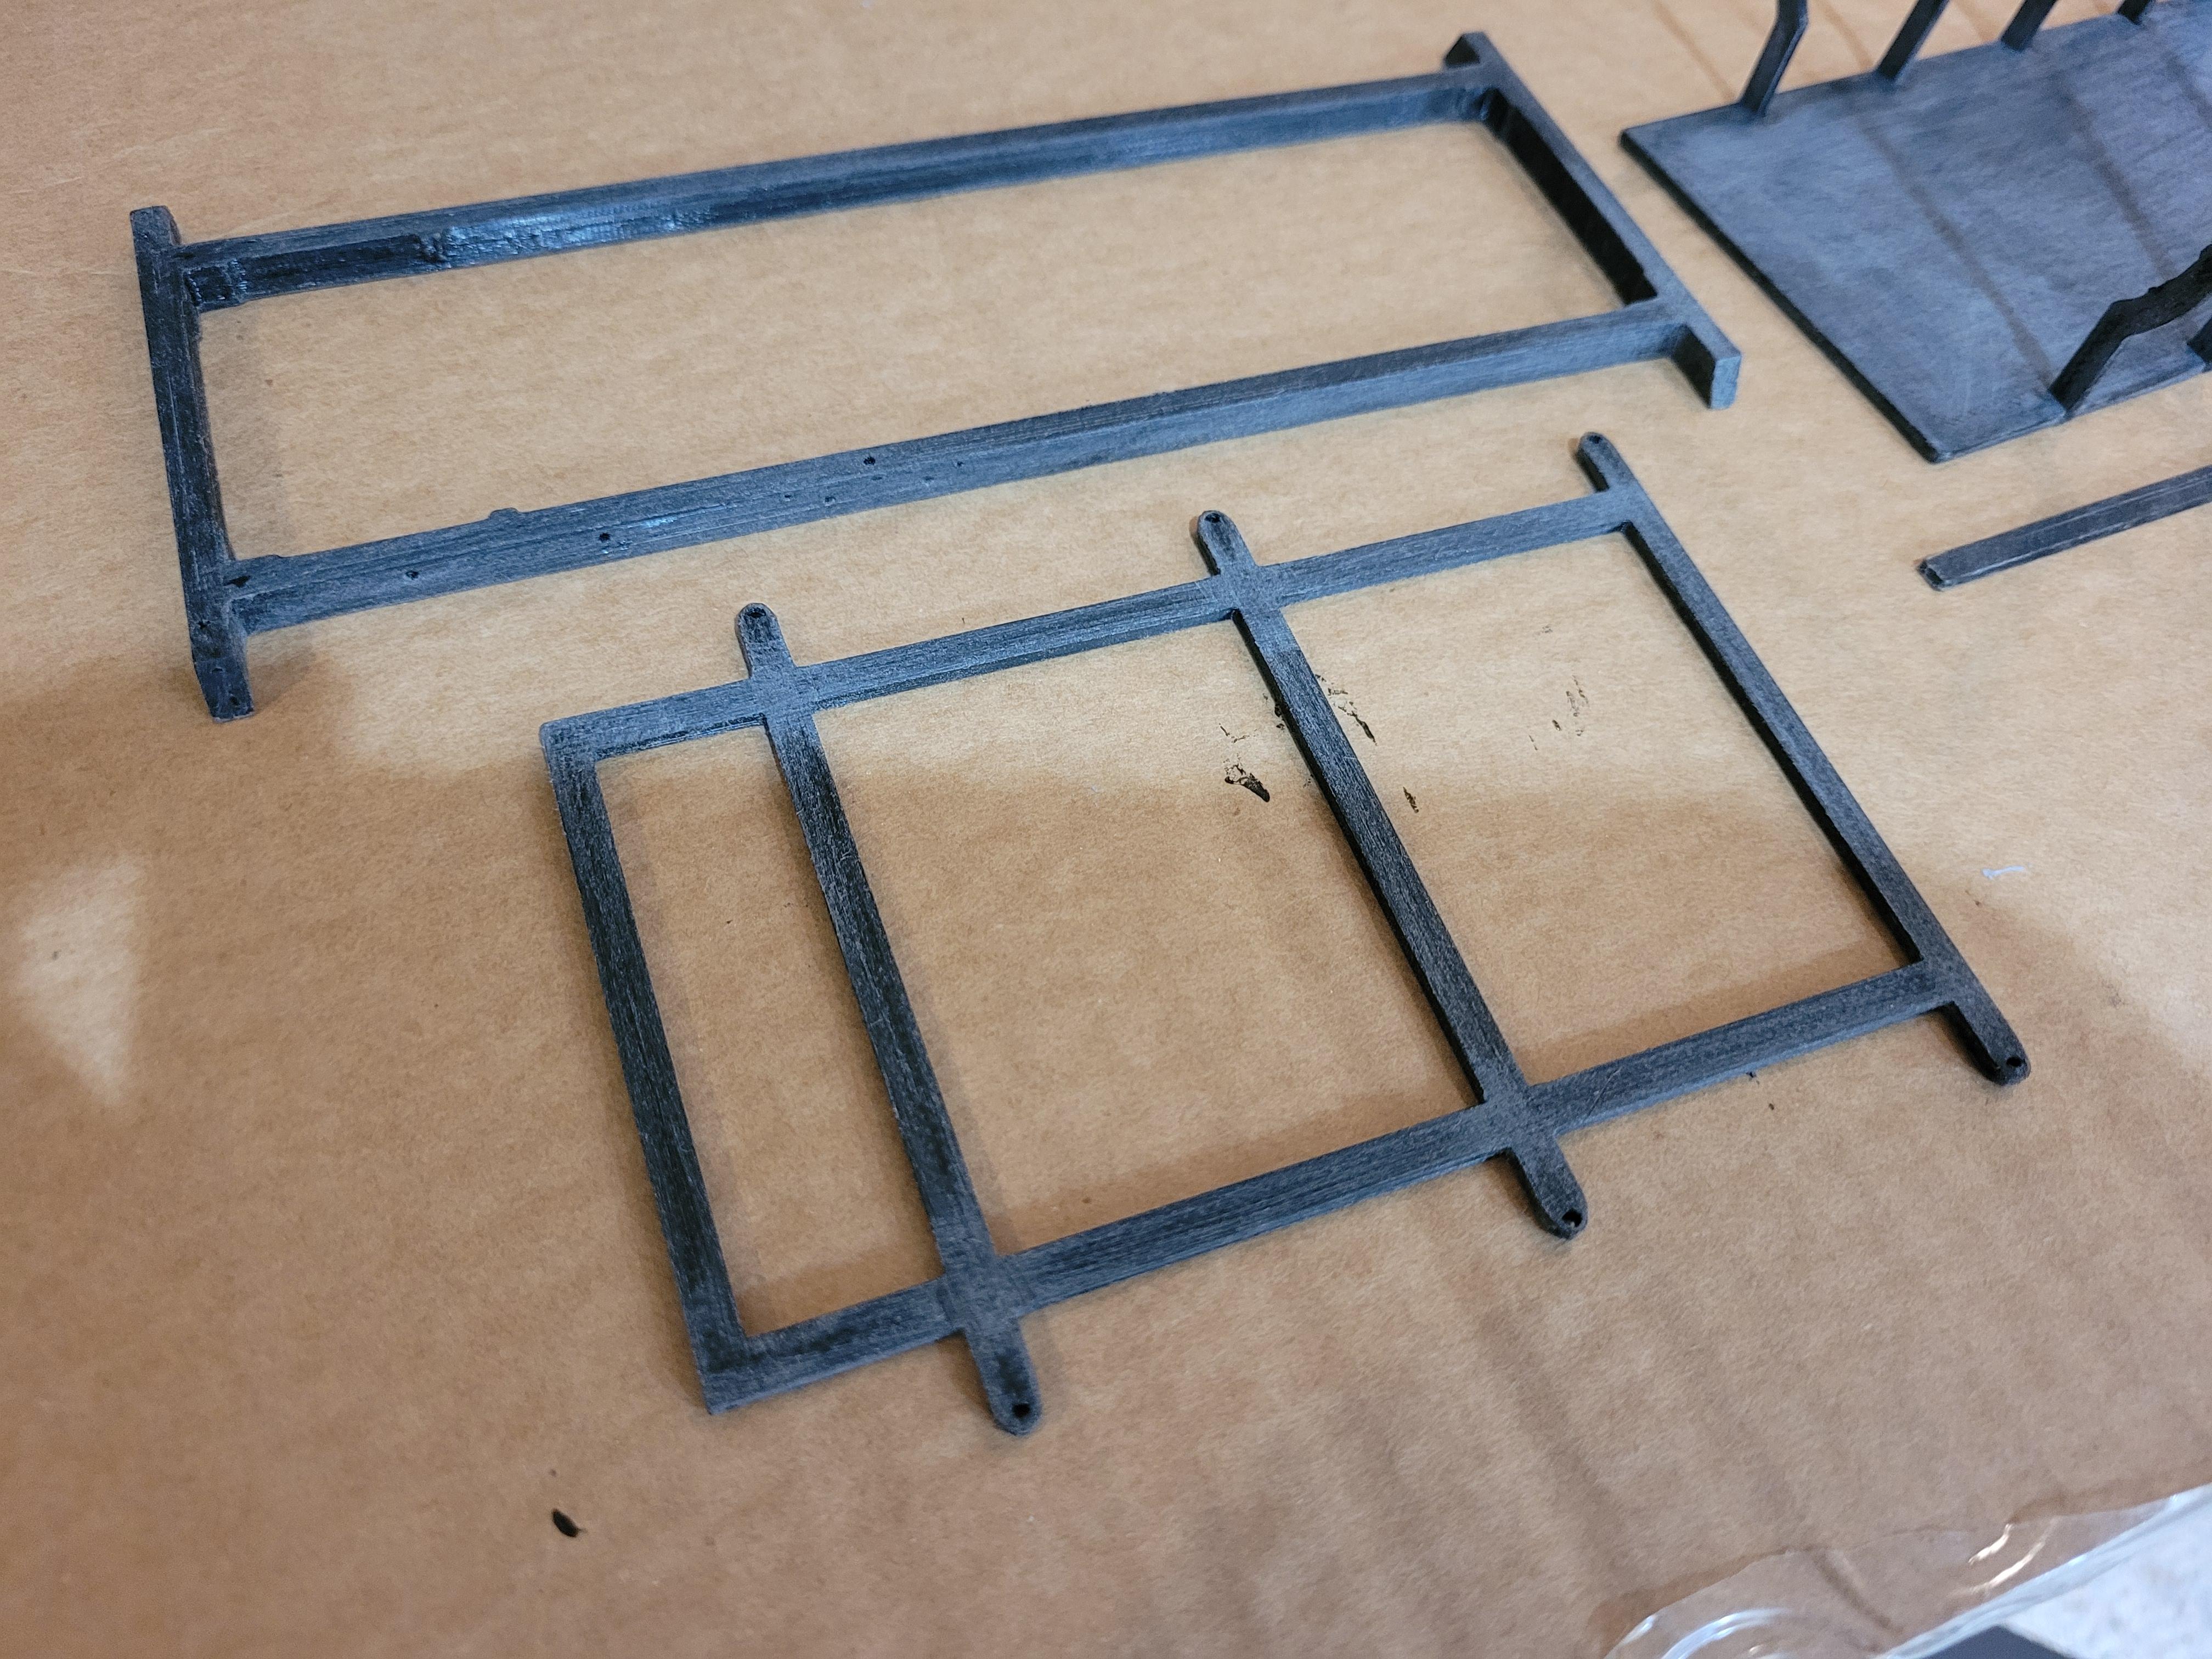
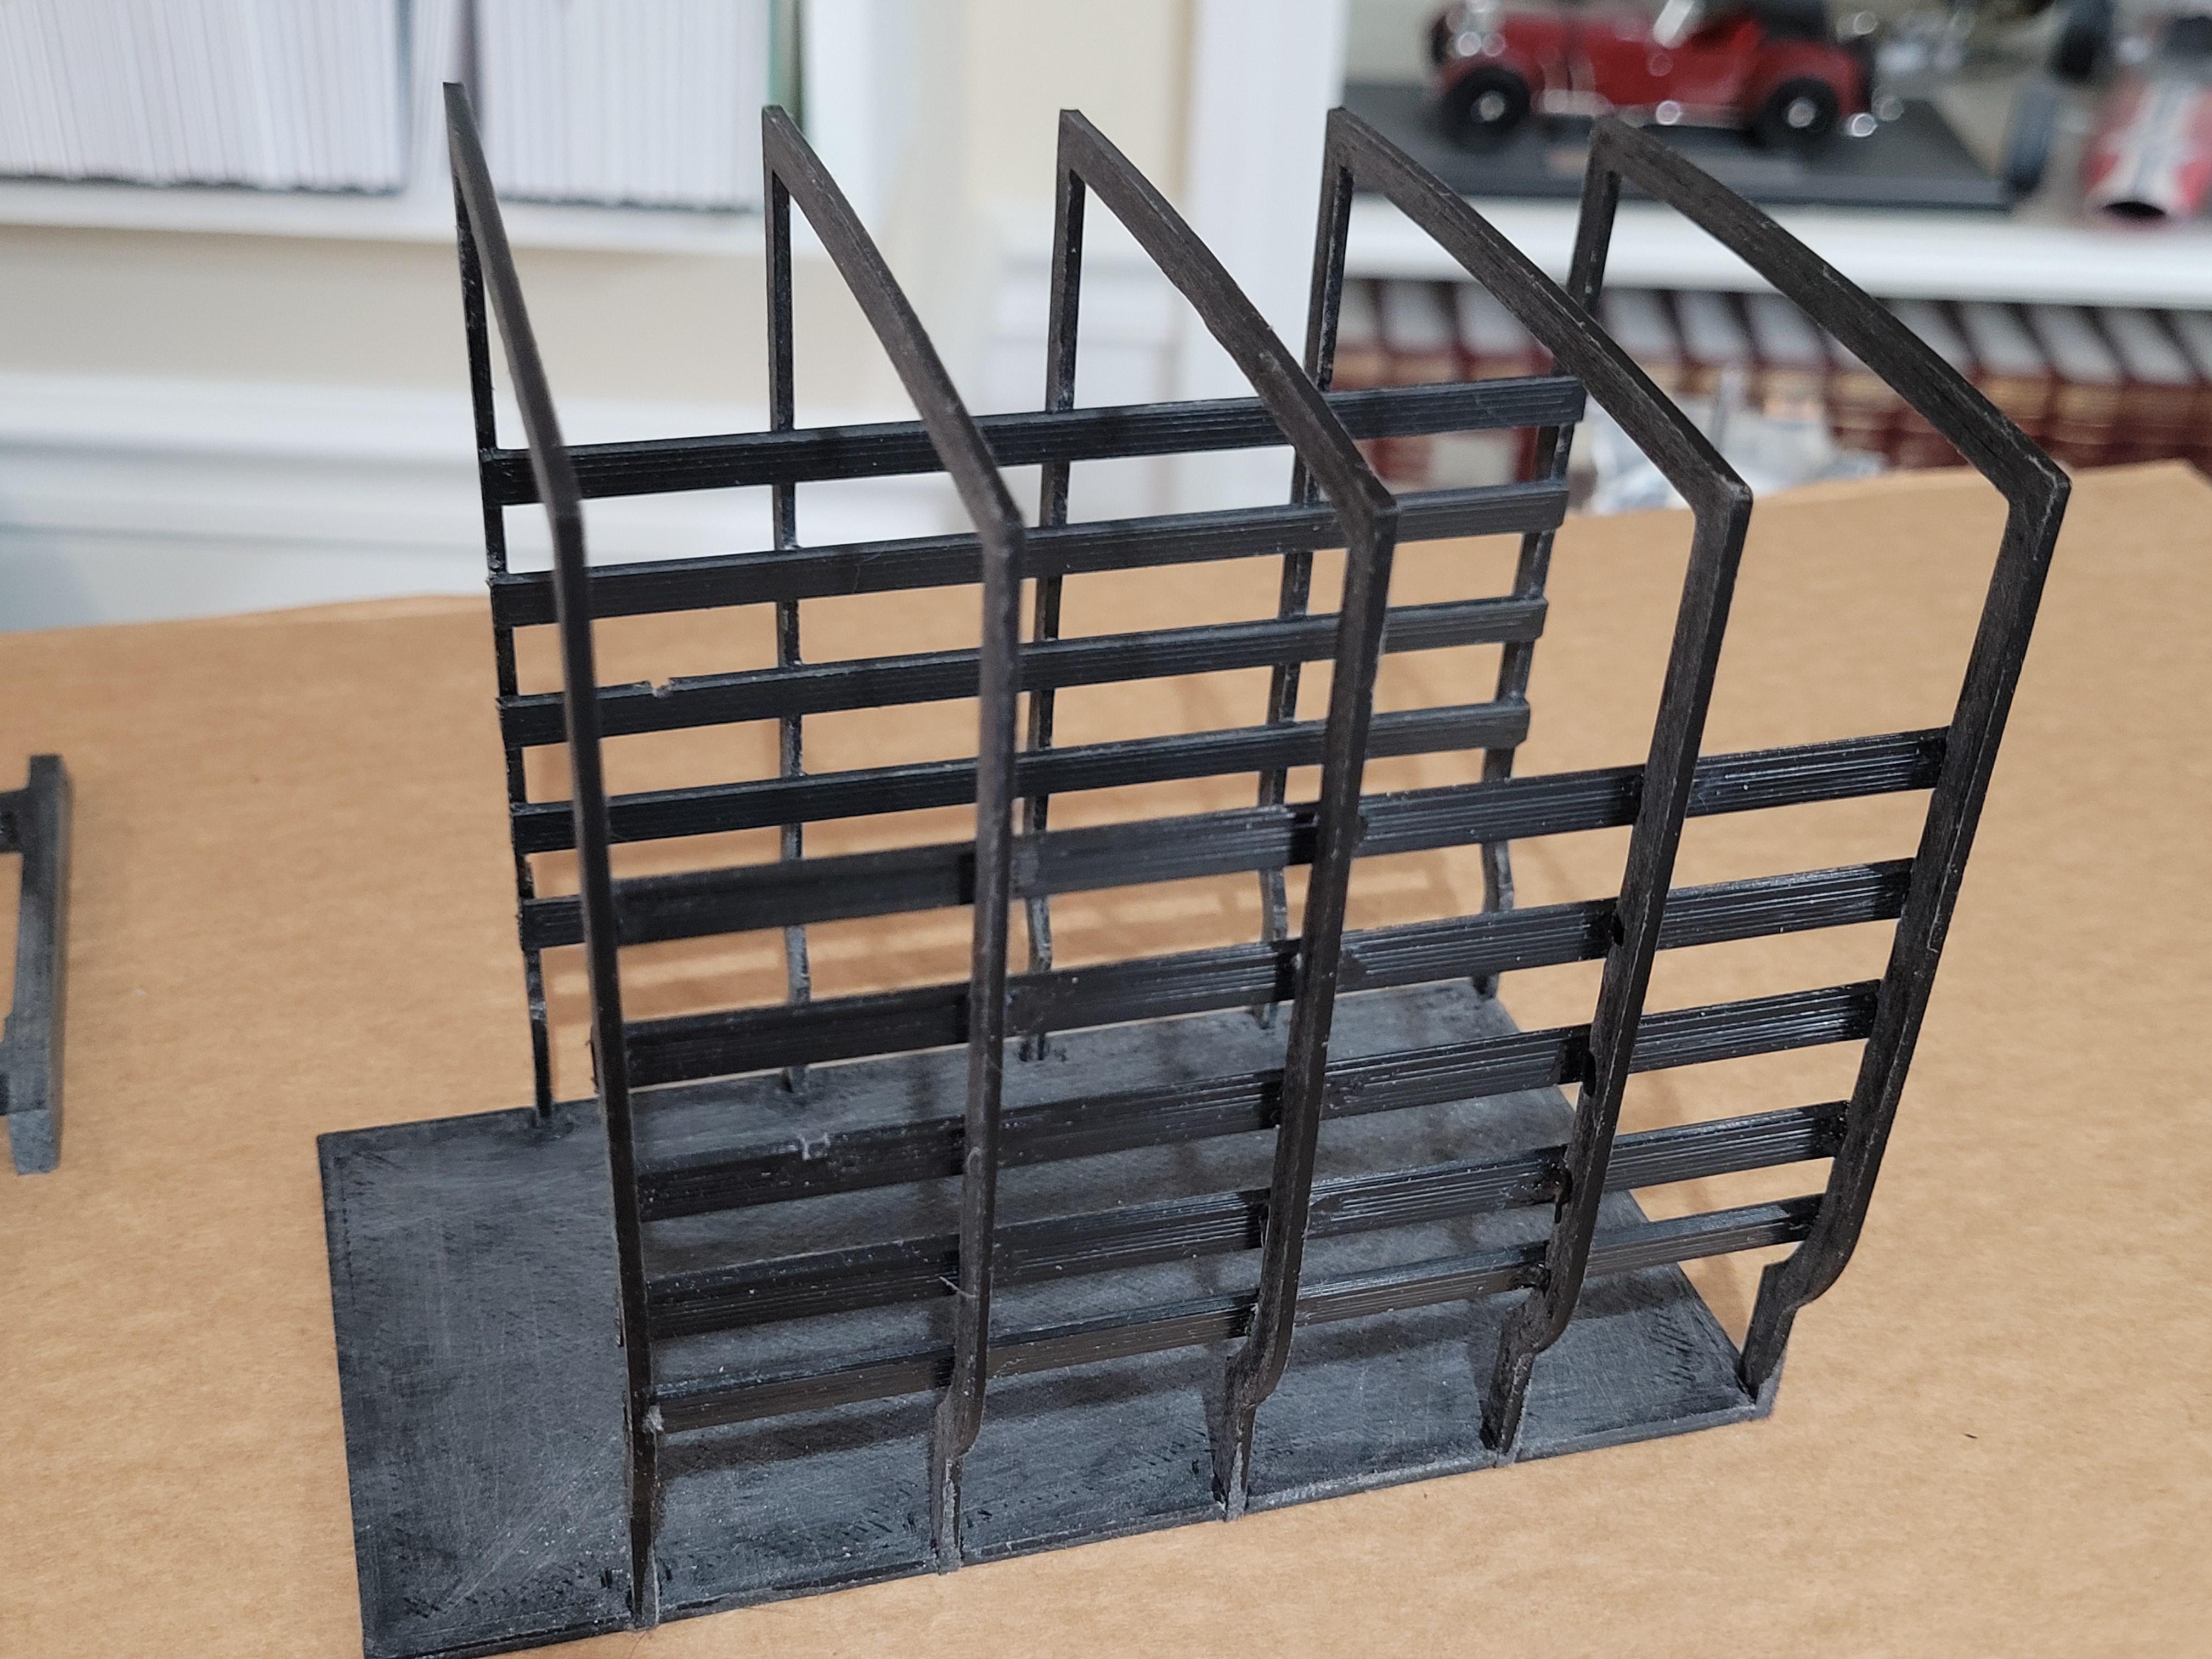
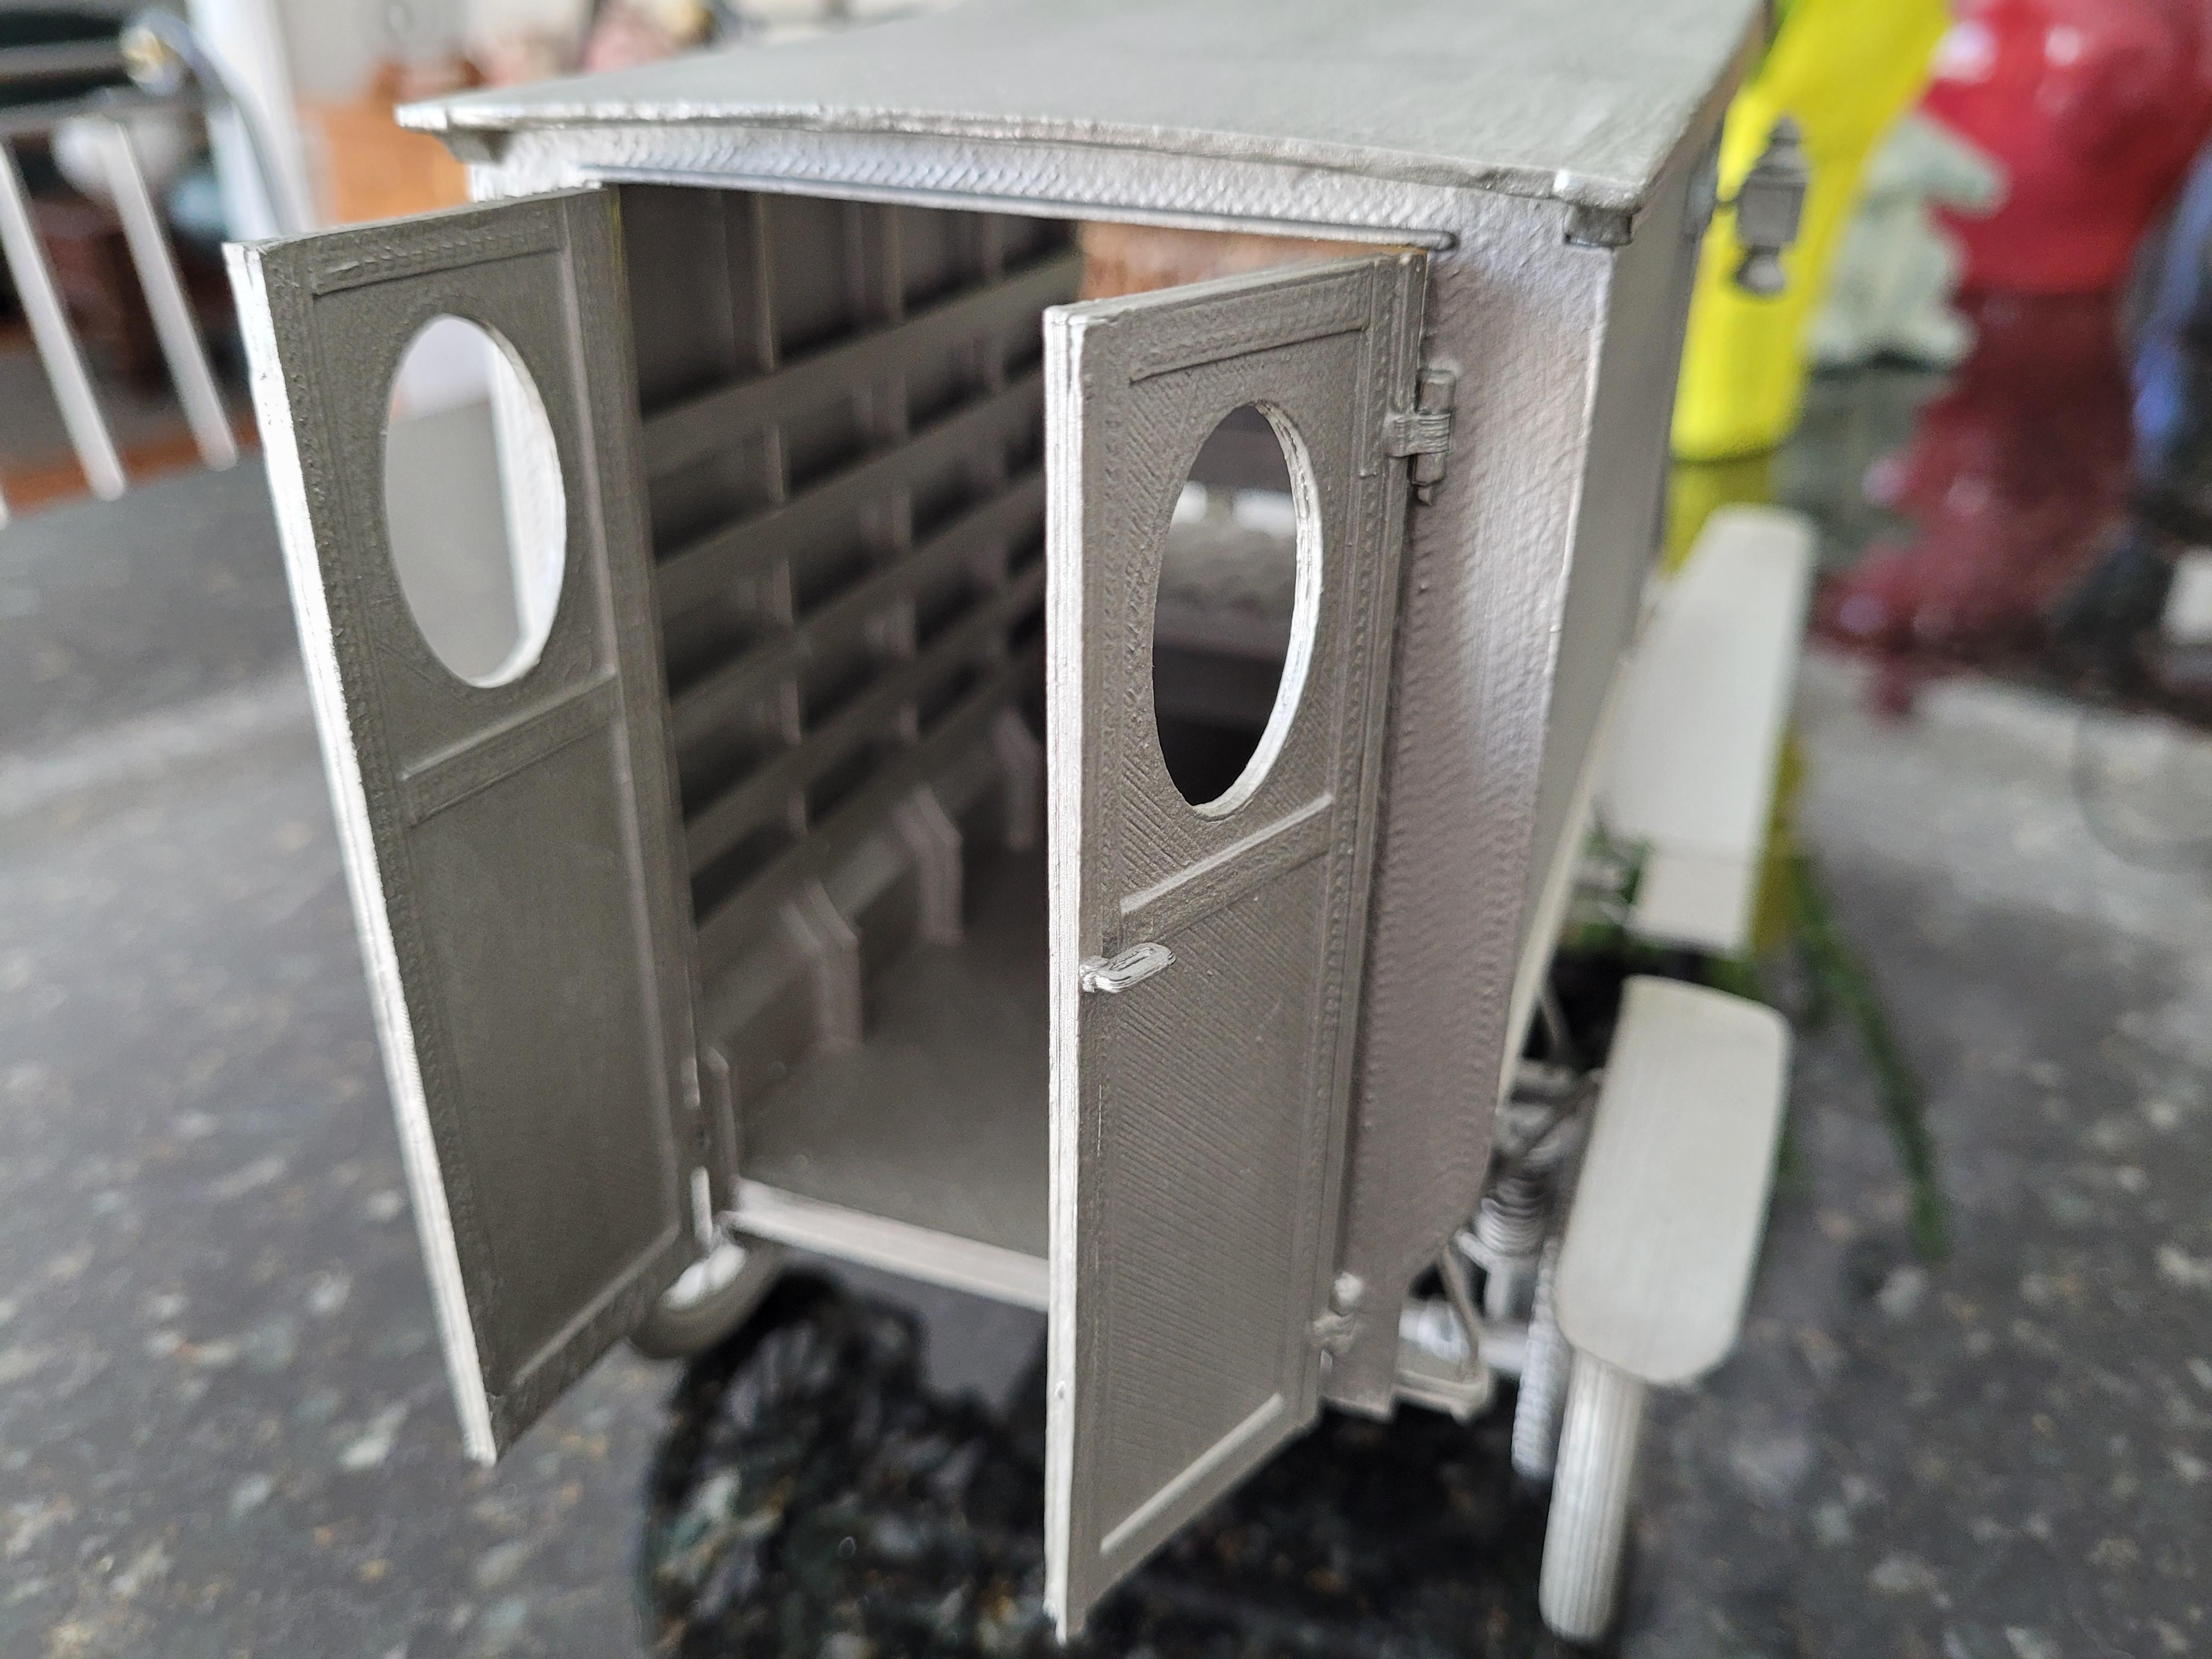
The inside of the cargo box will be visible, from both the front (past the seat, and from the rear (through the swinging doors. The inner truss system will need to be painted before the side panels are attached.
-
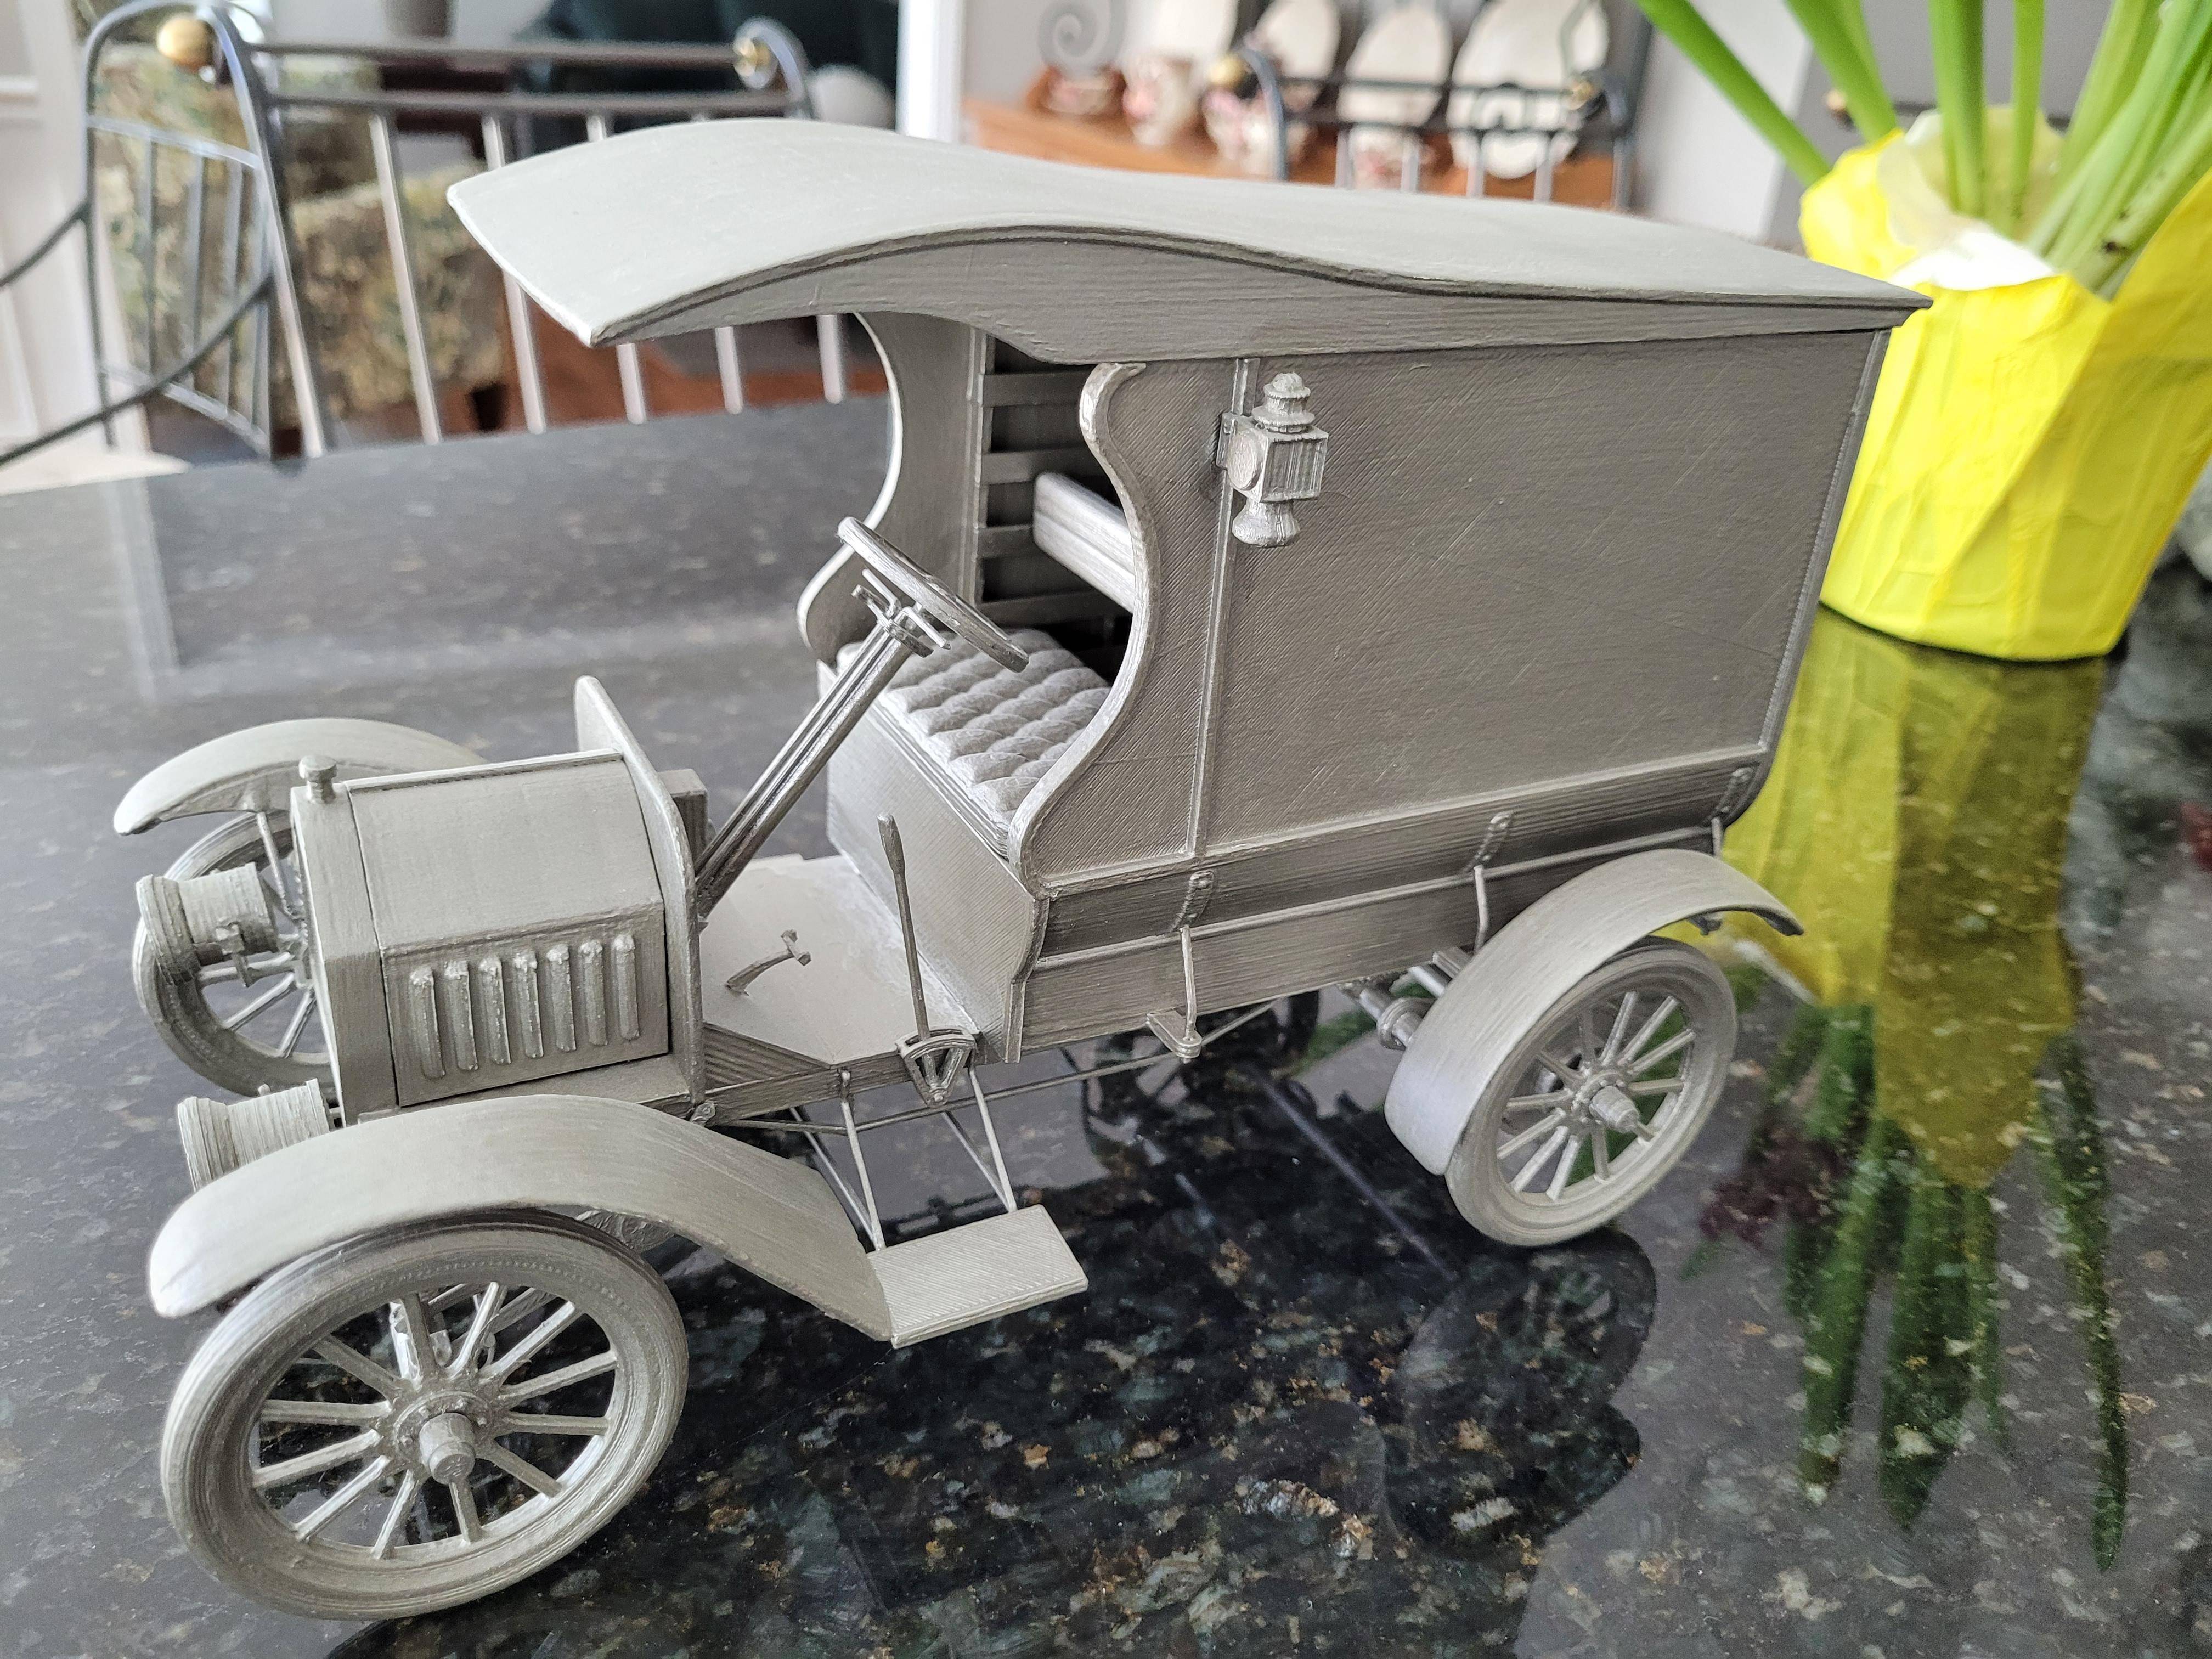
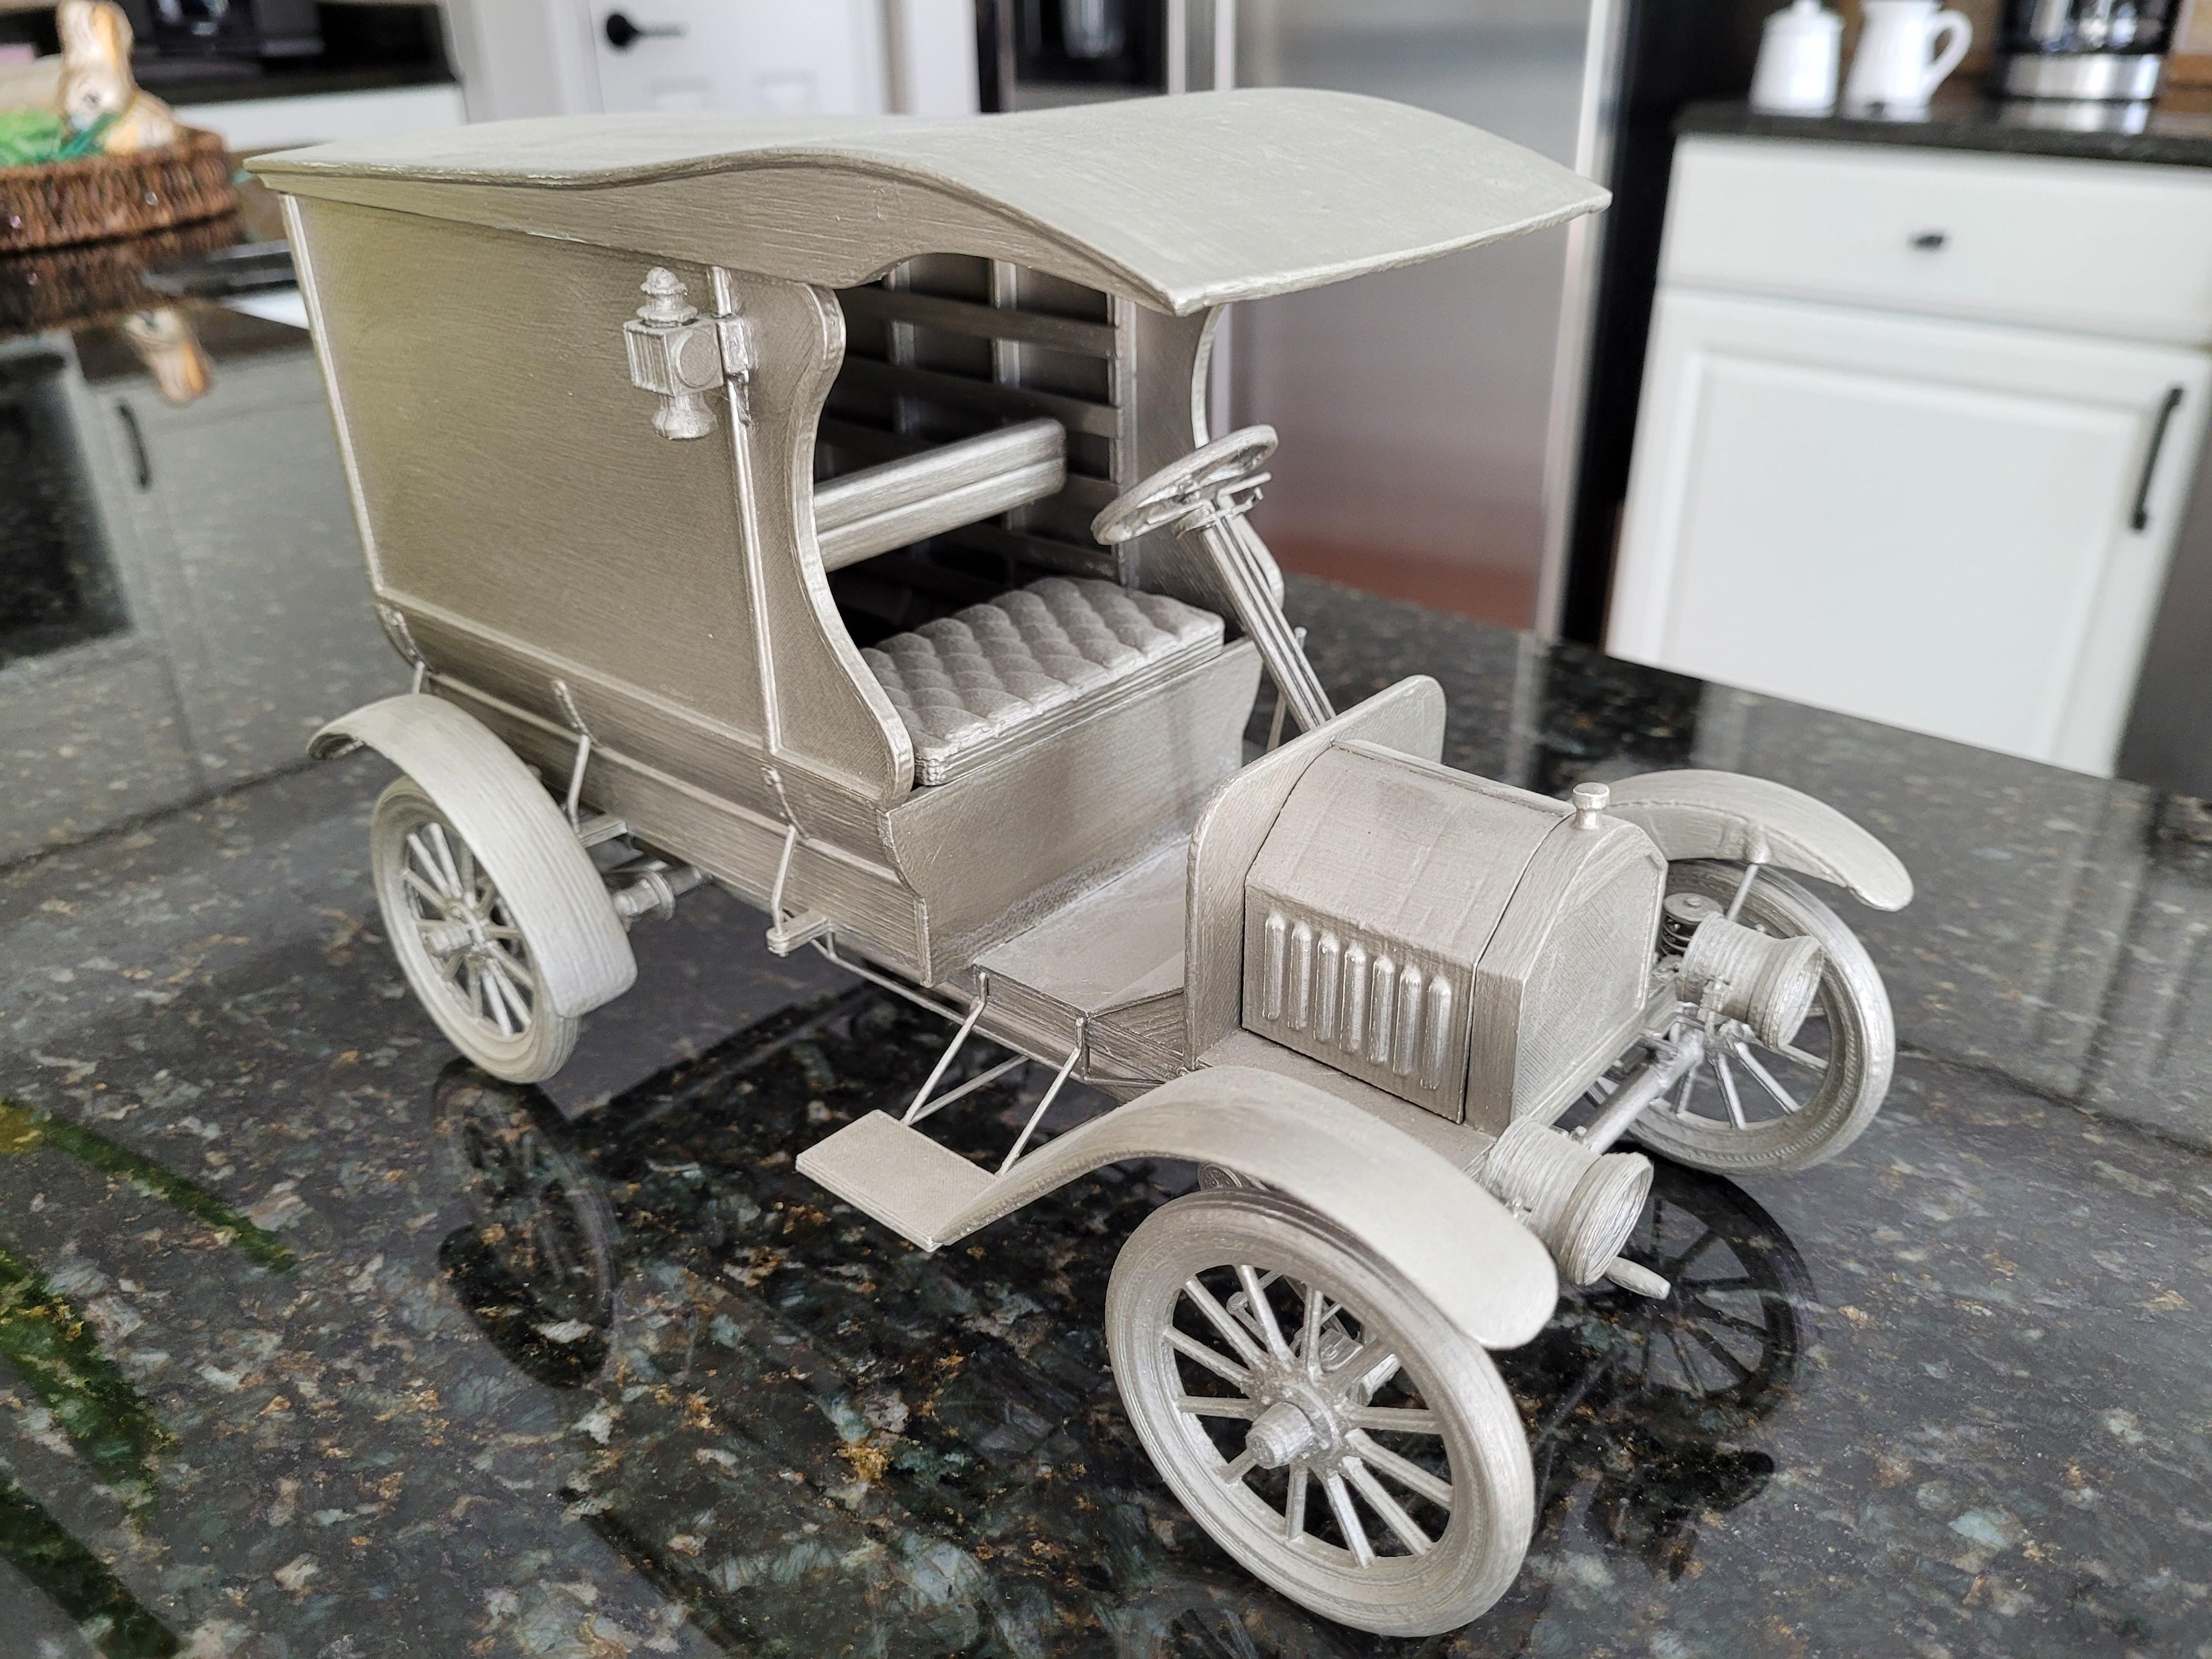
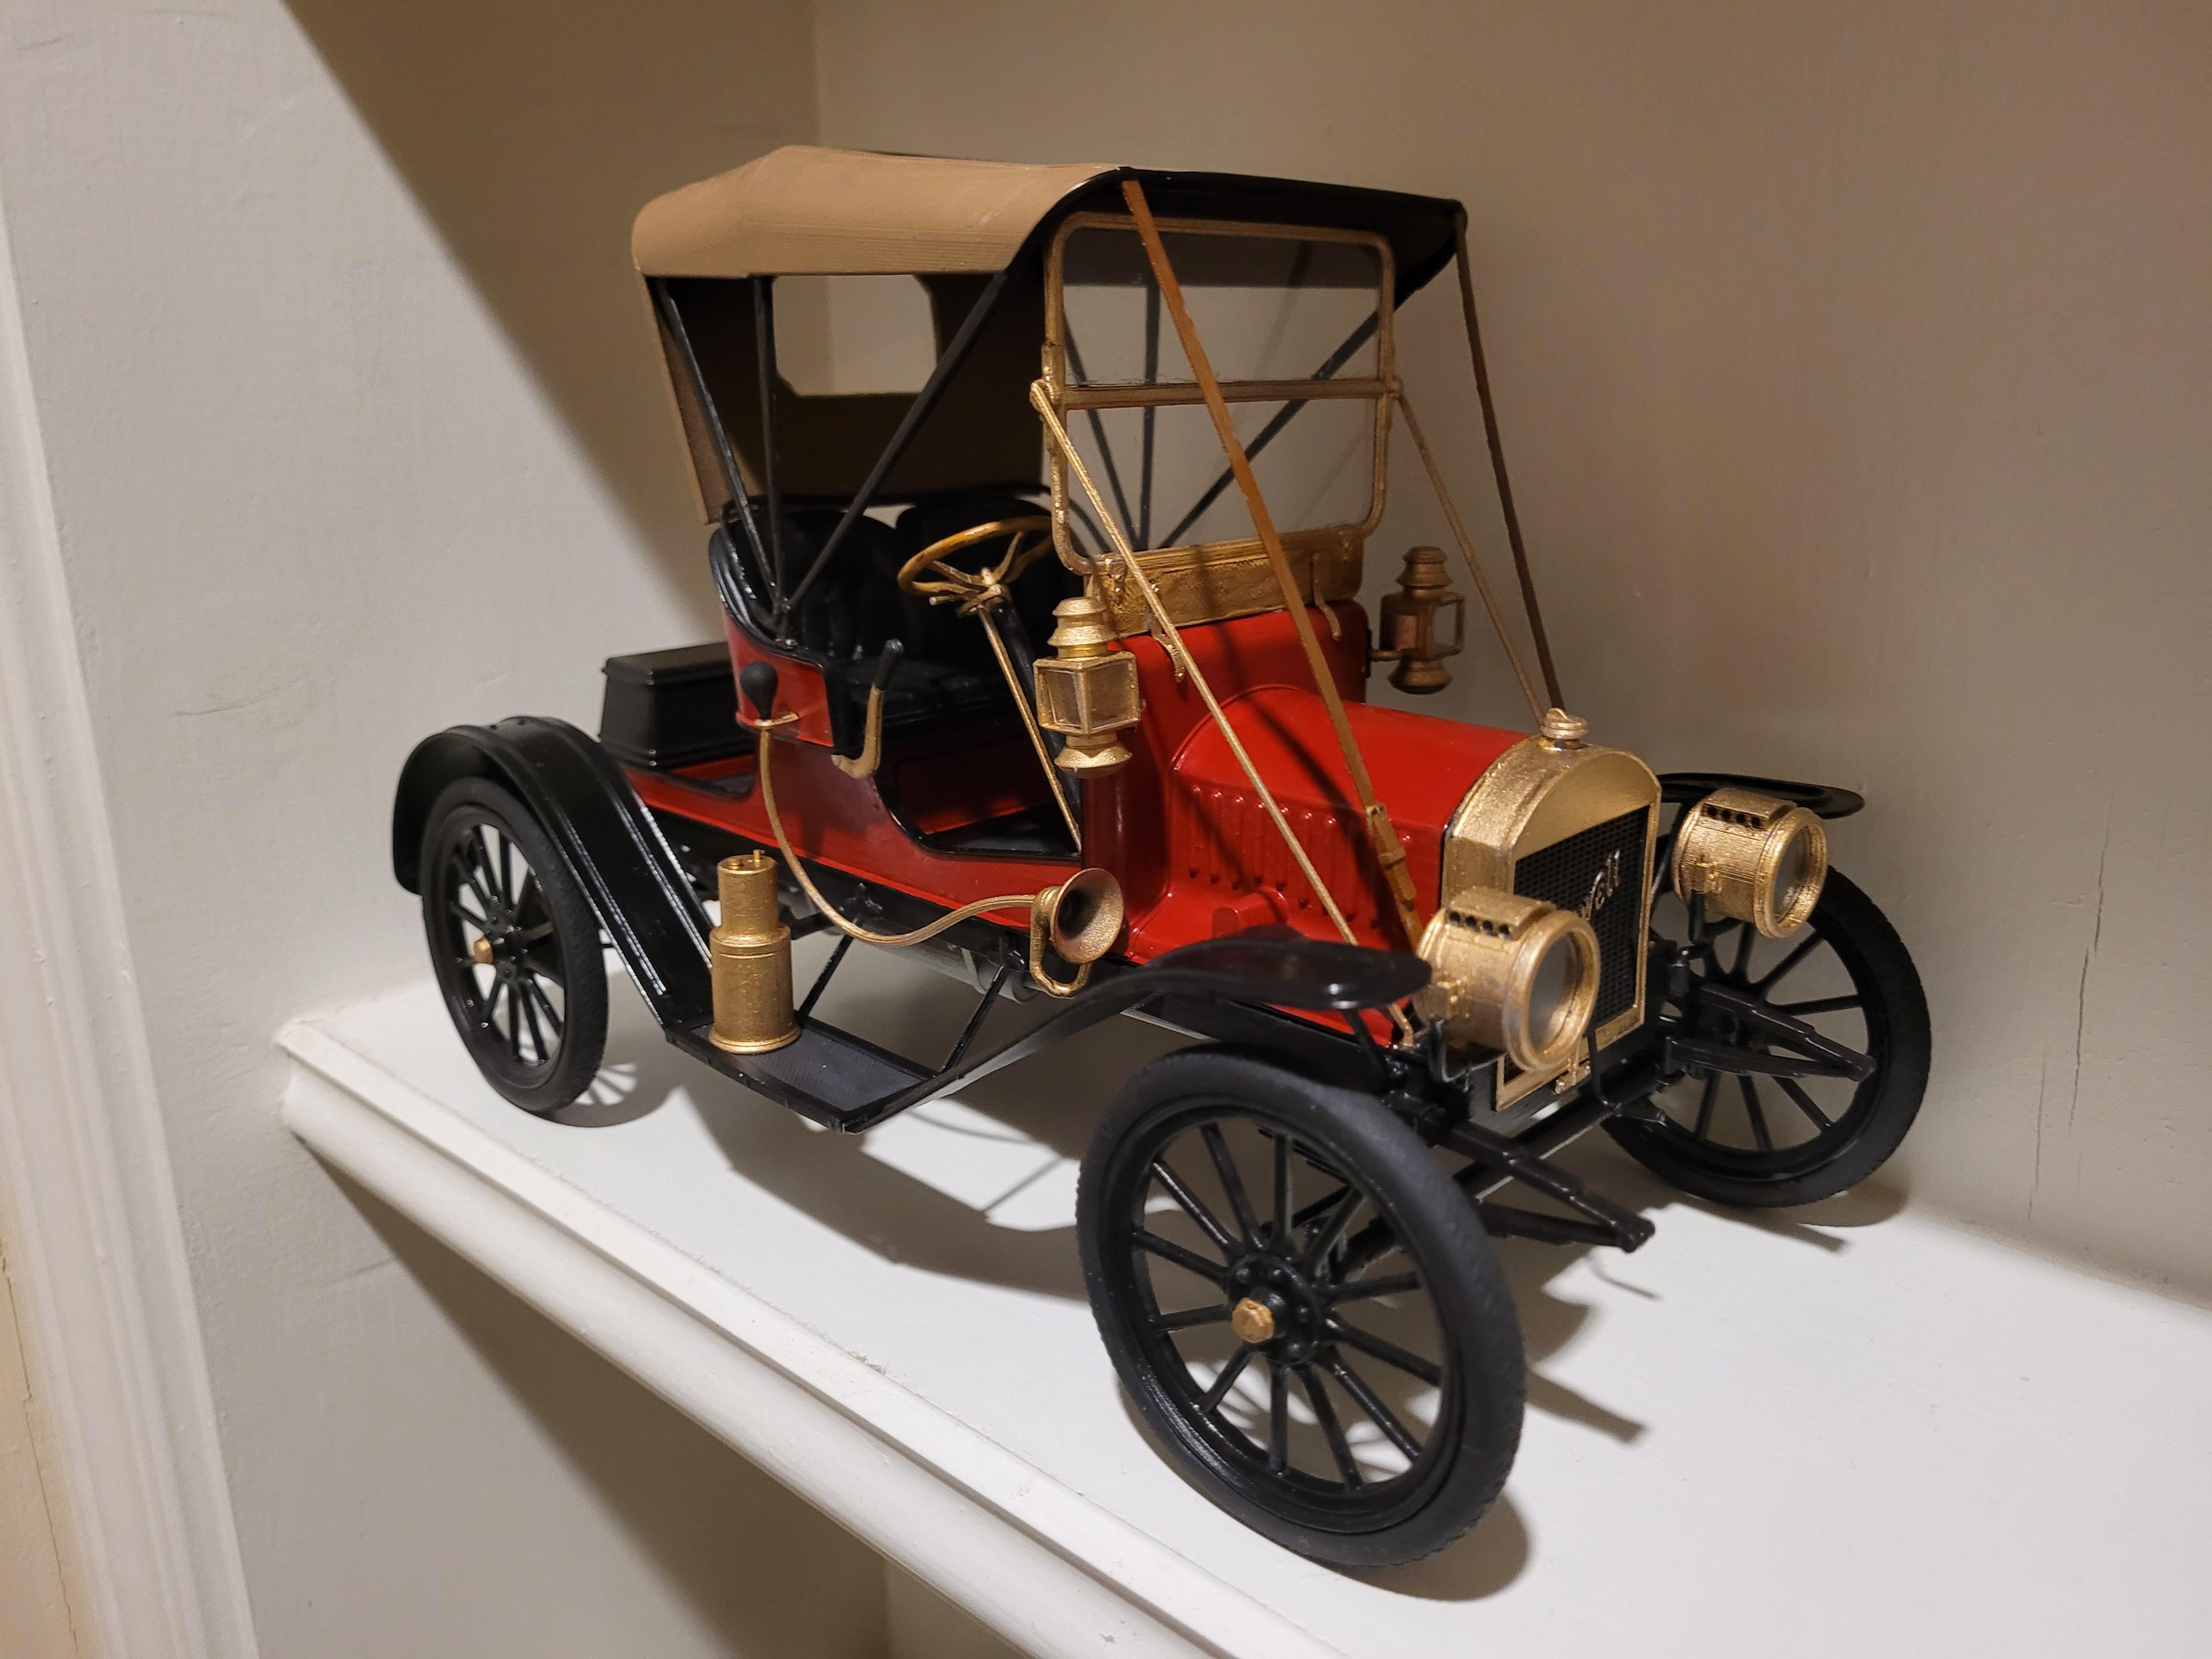
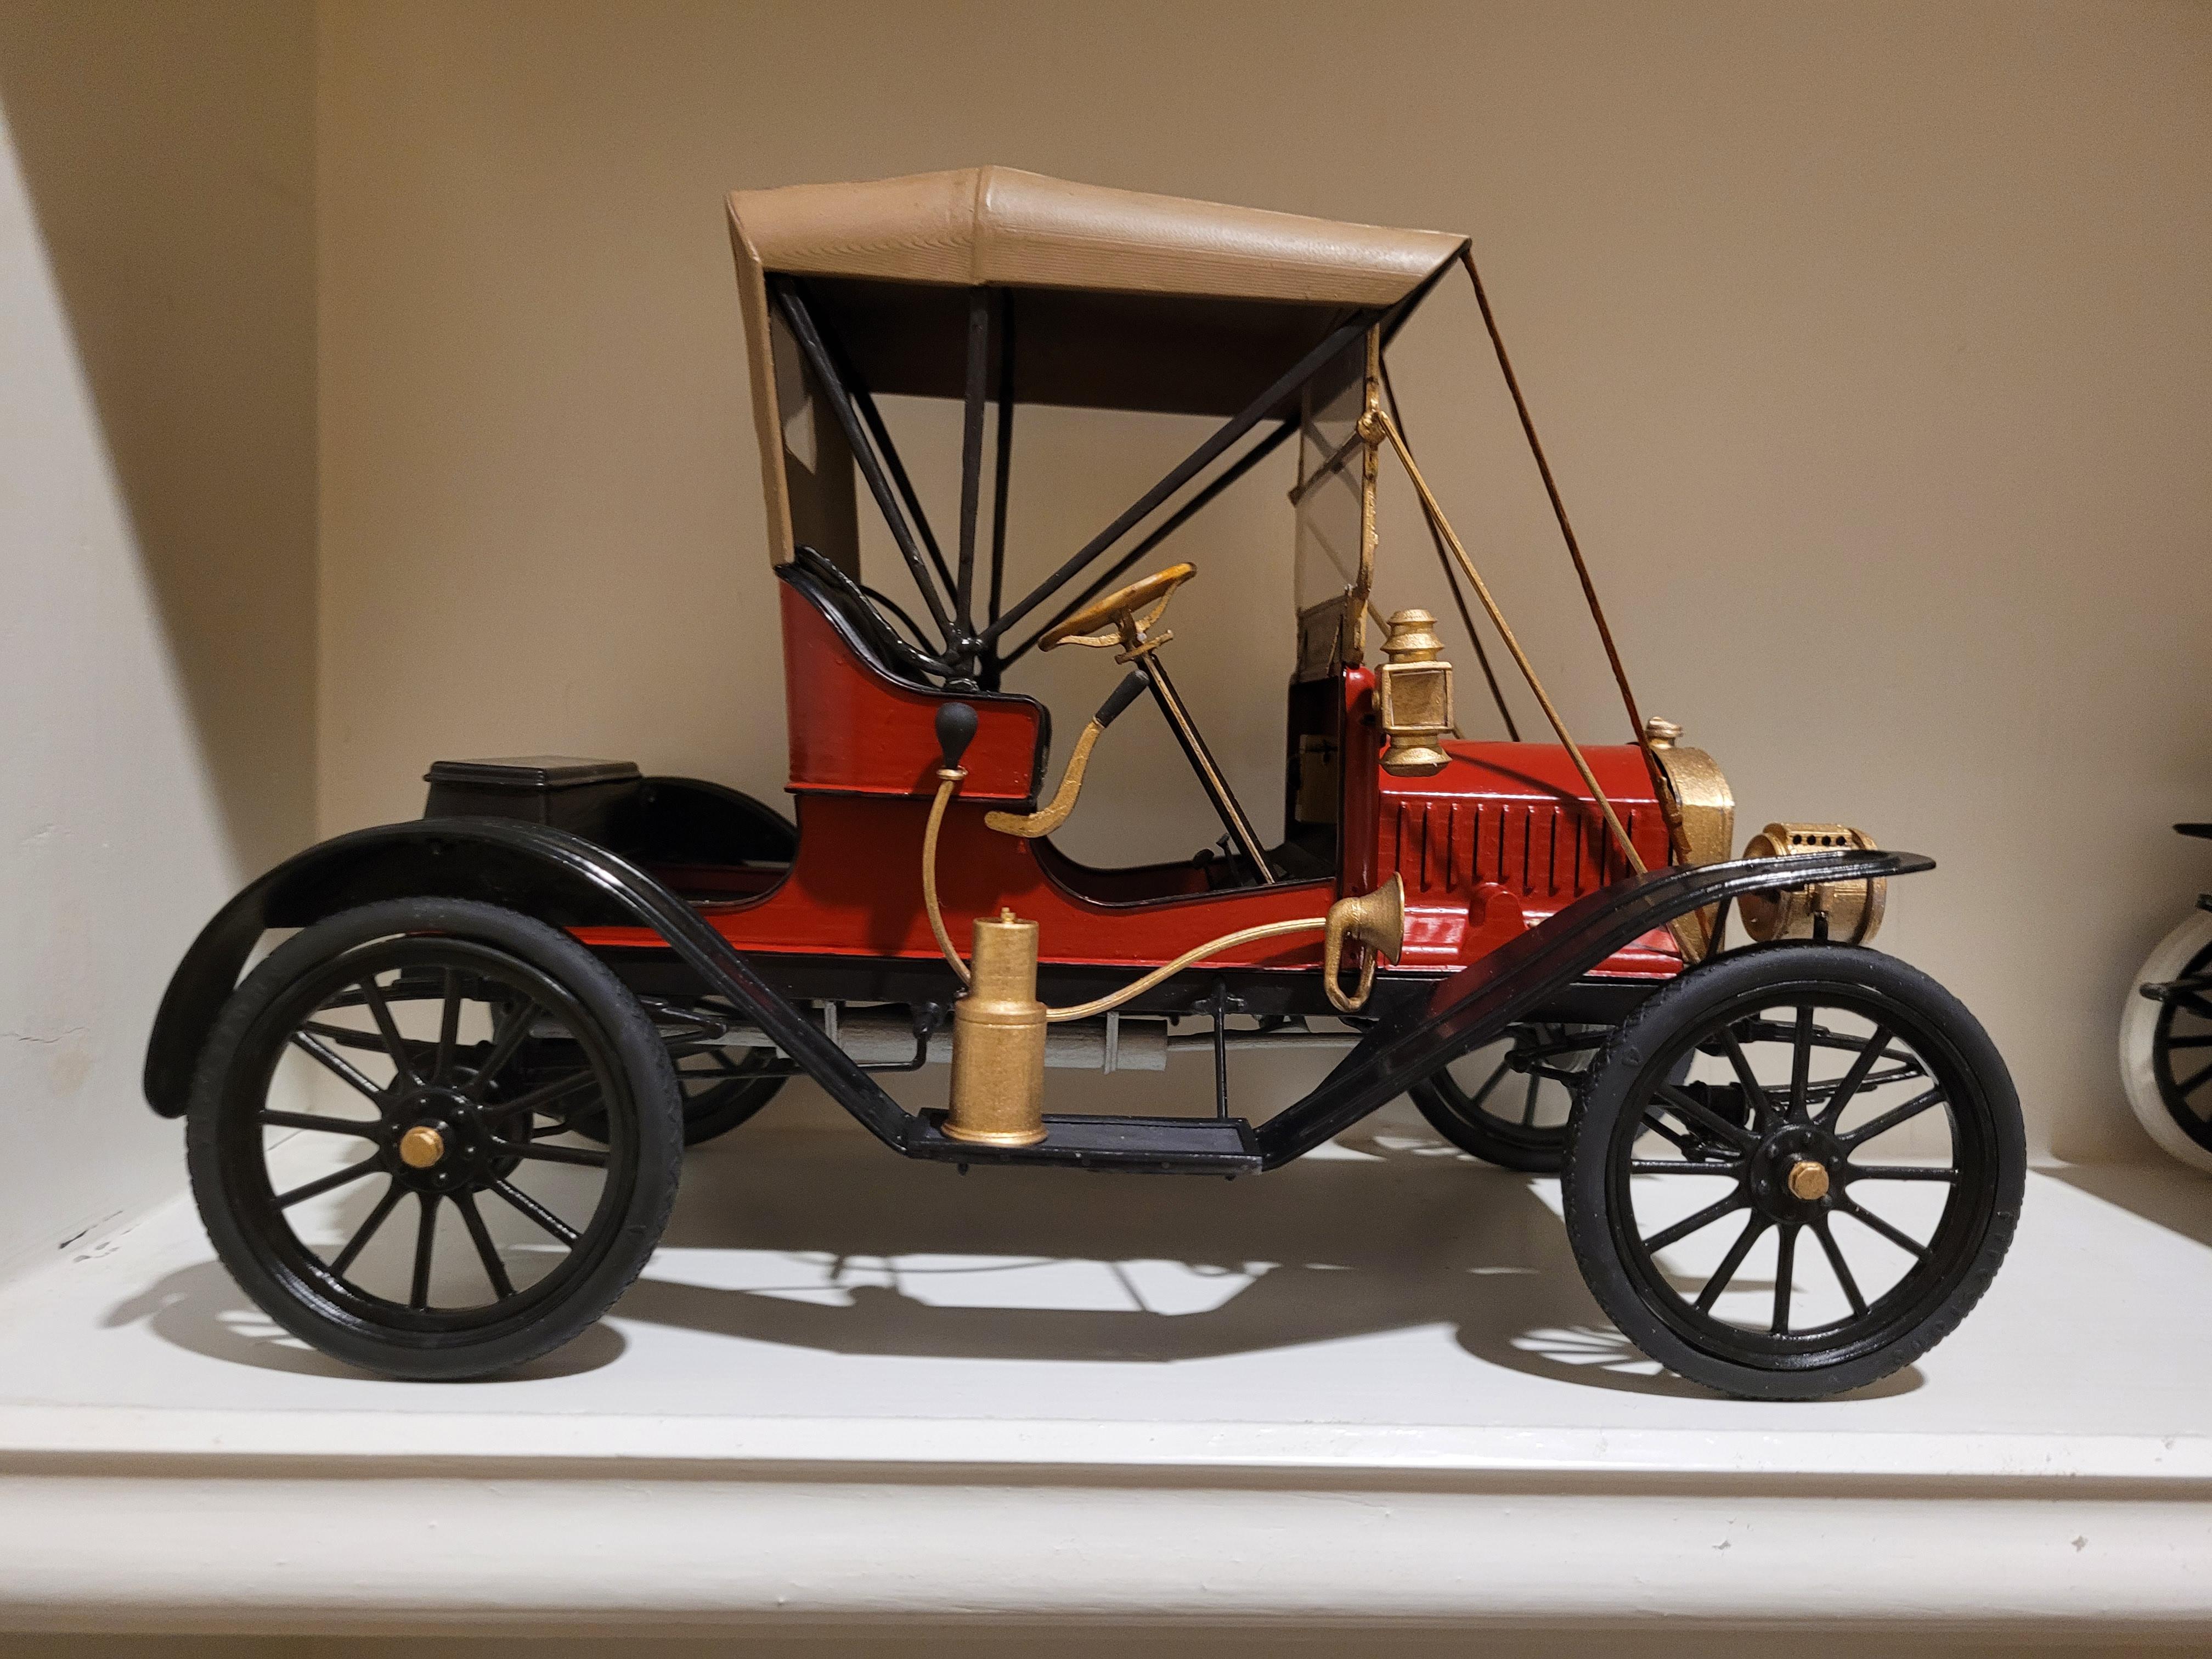
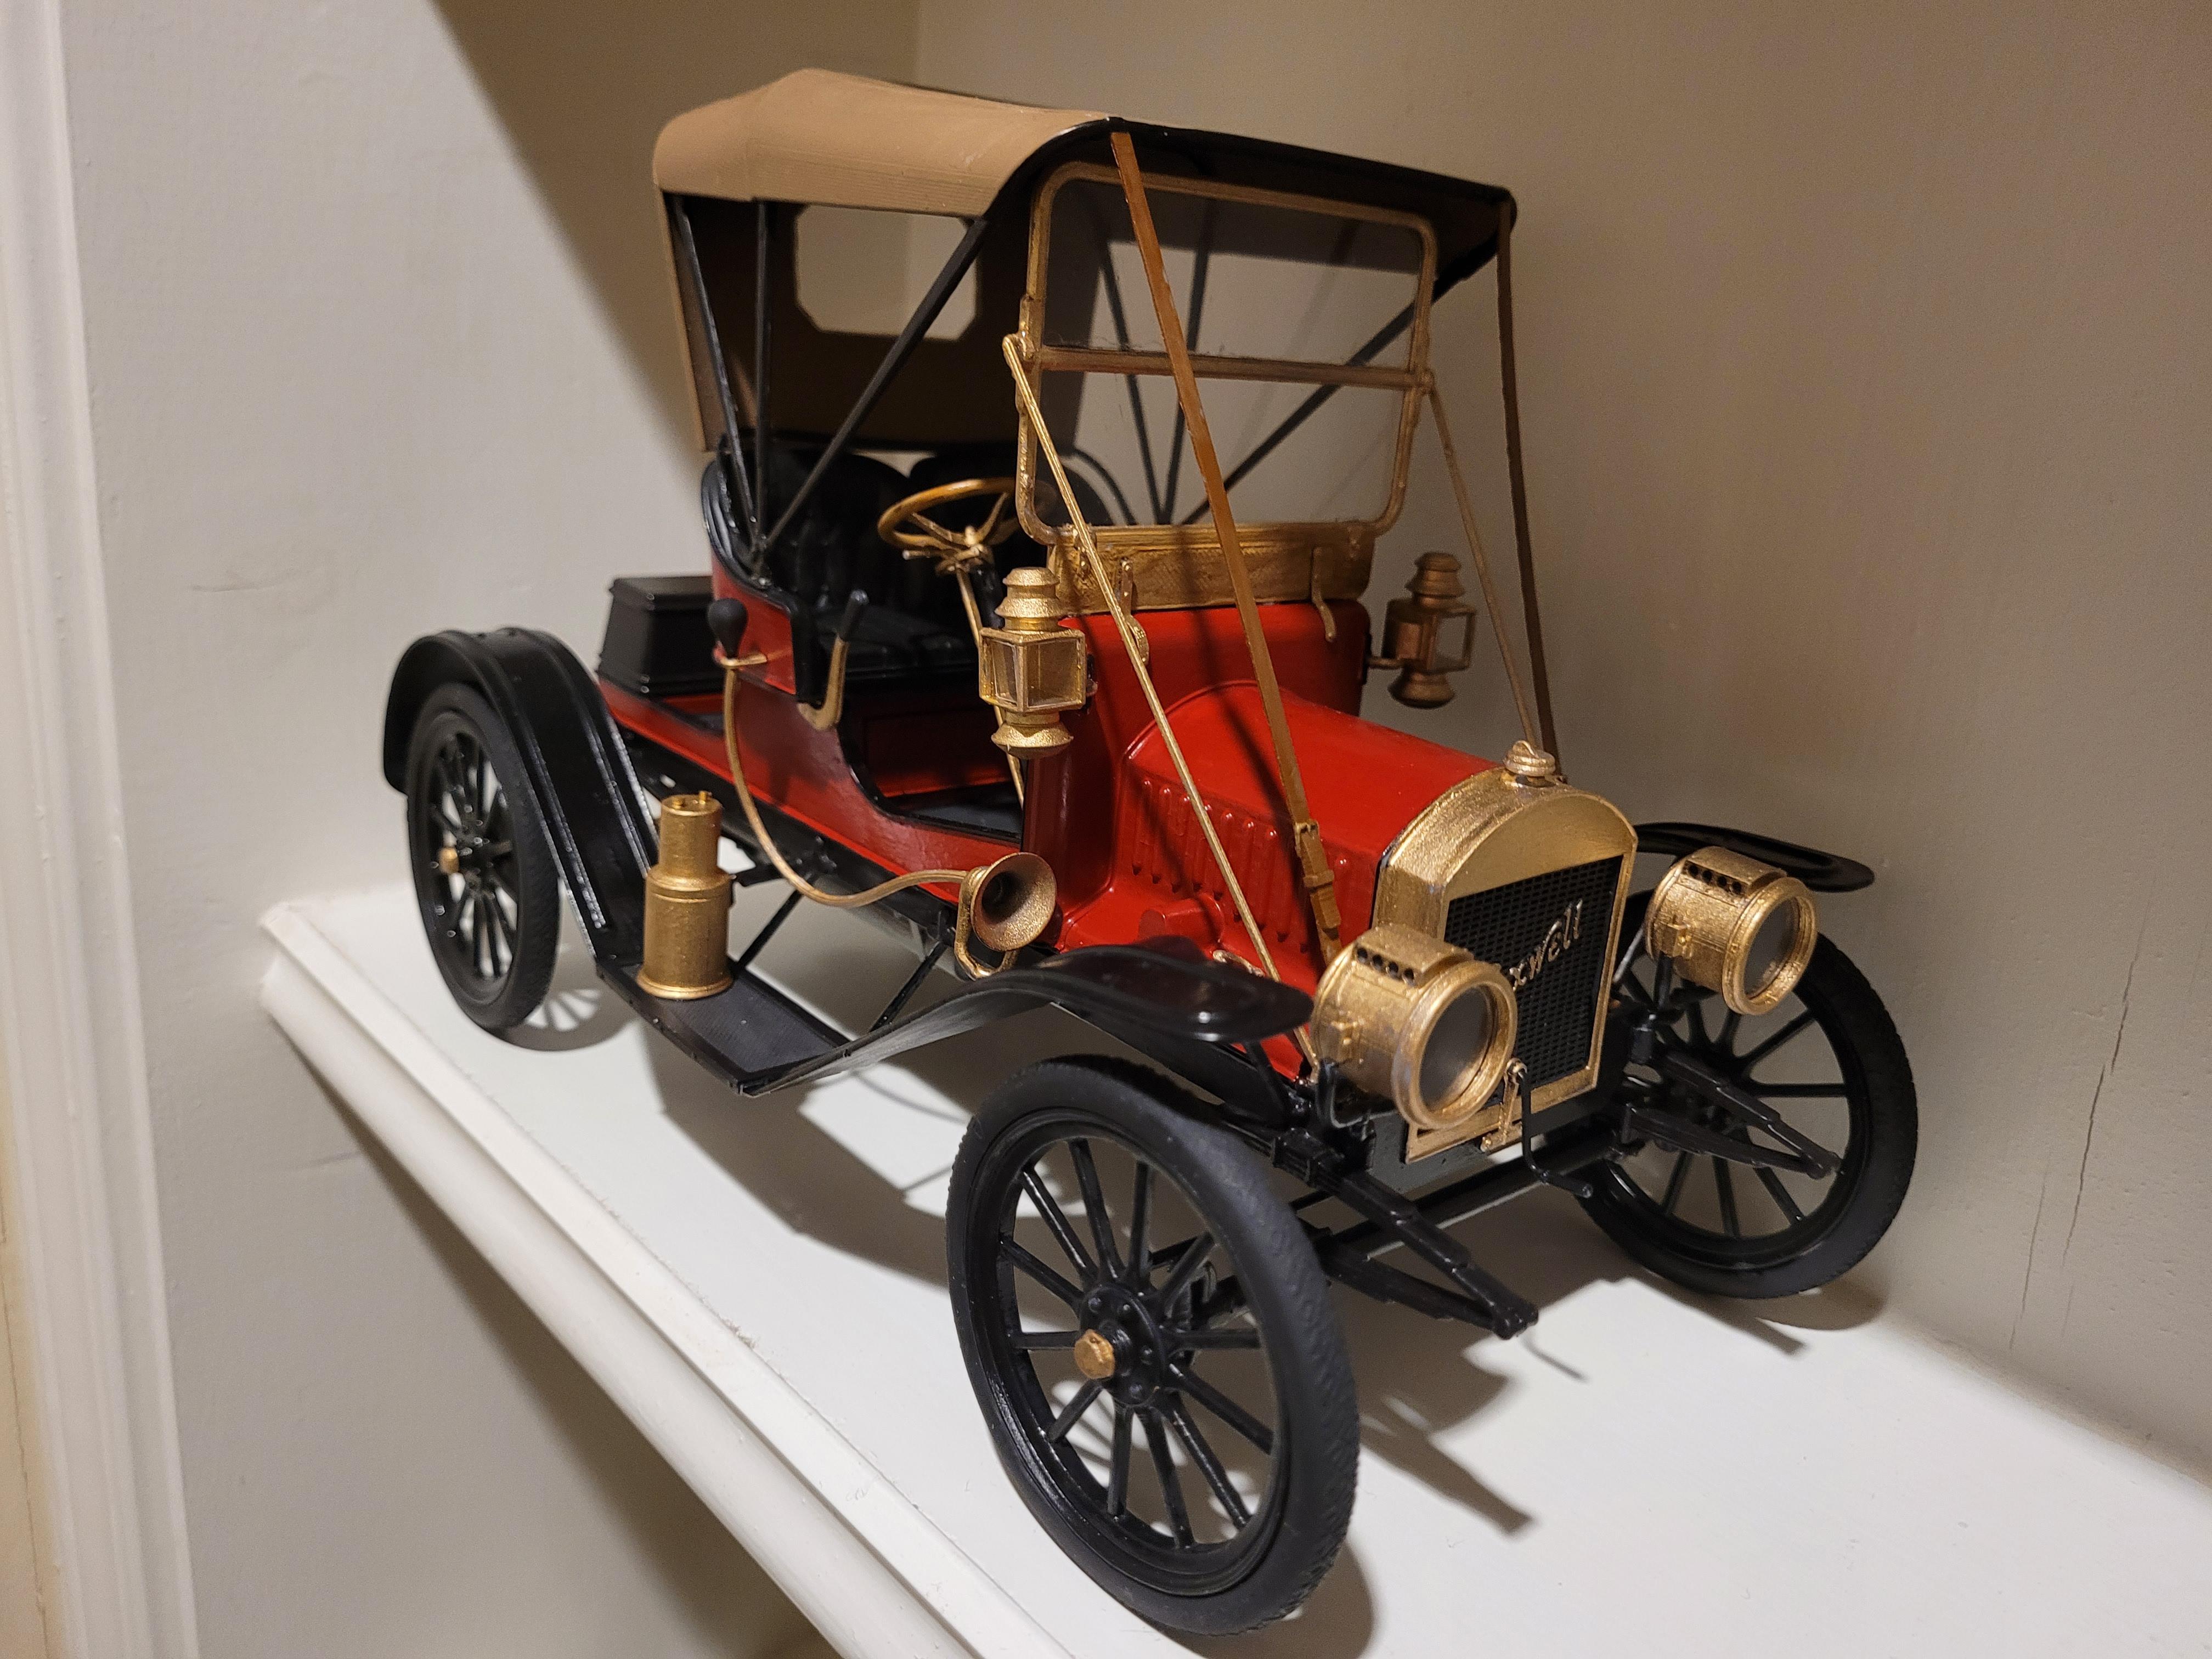
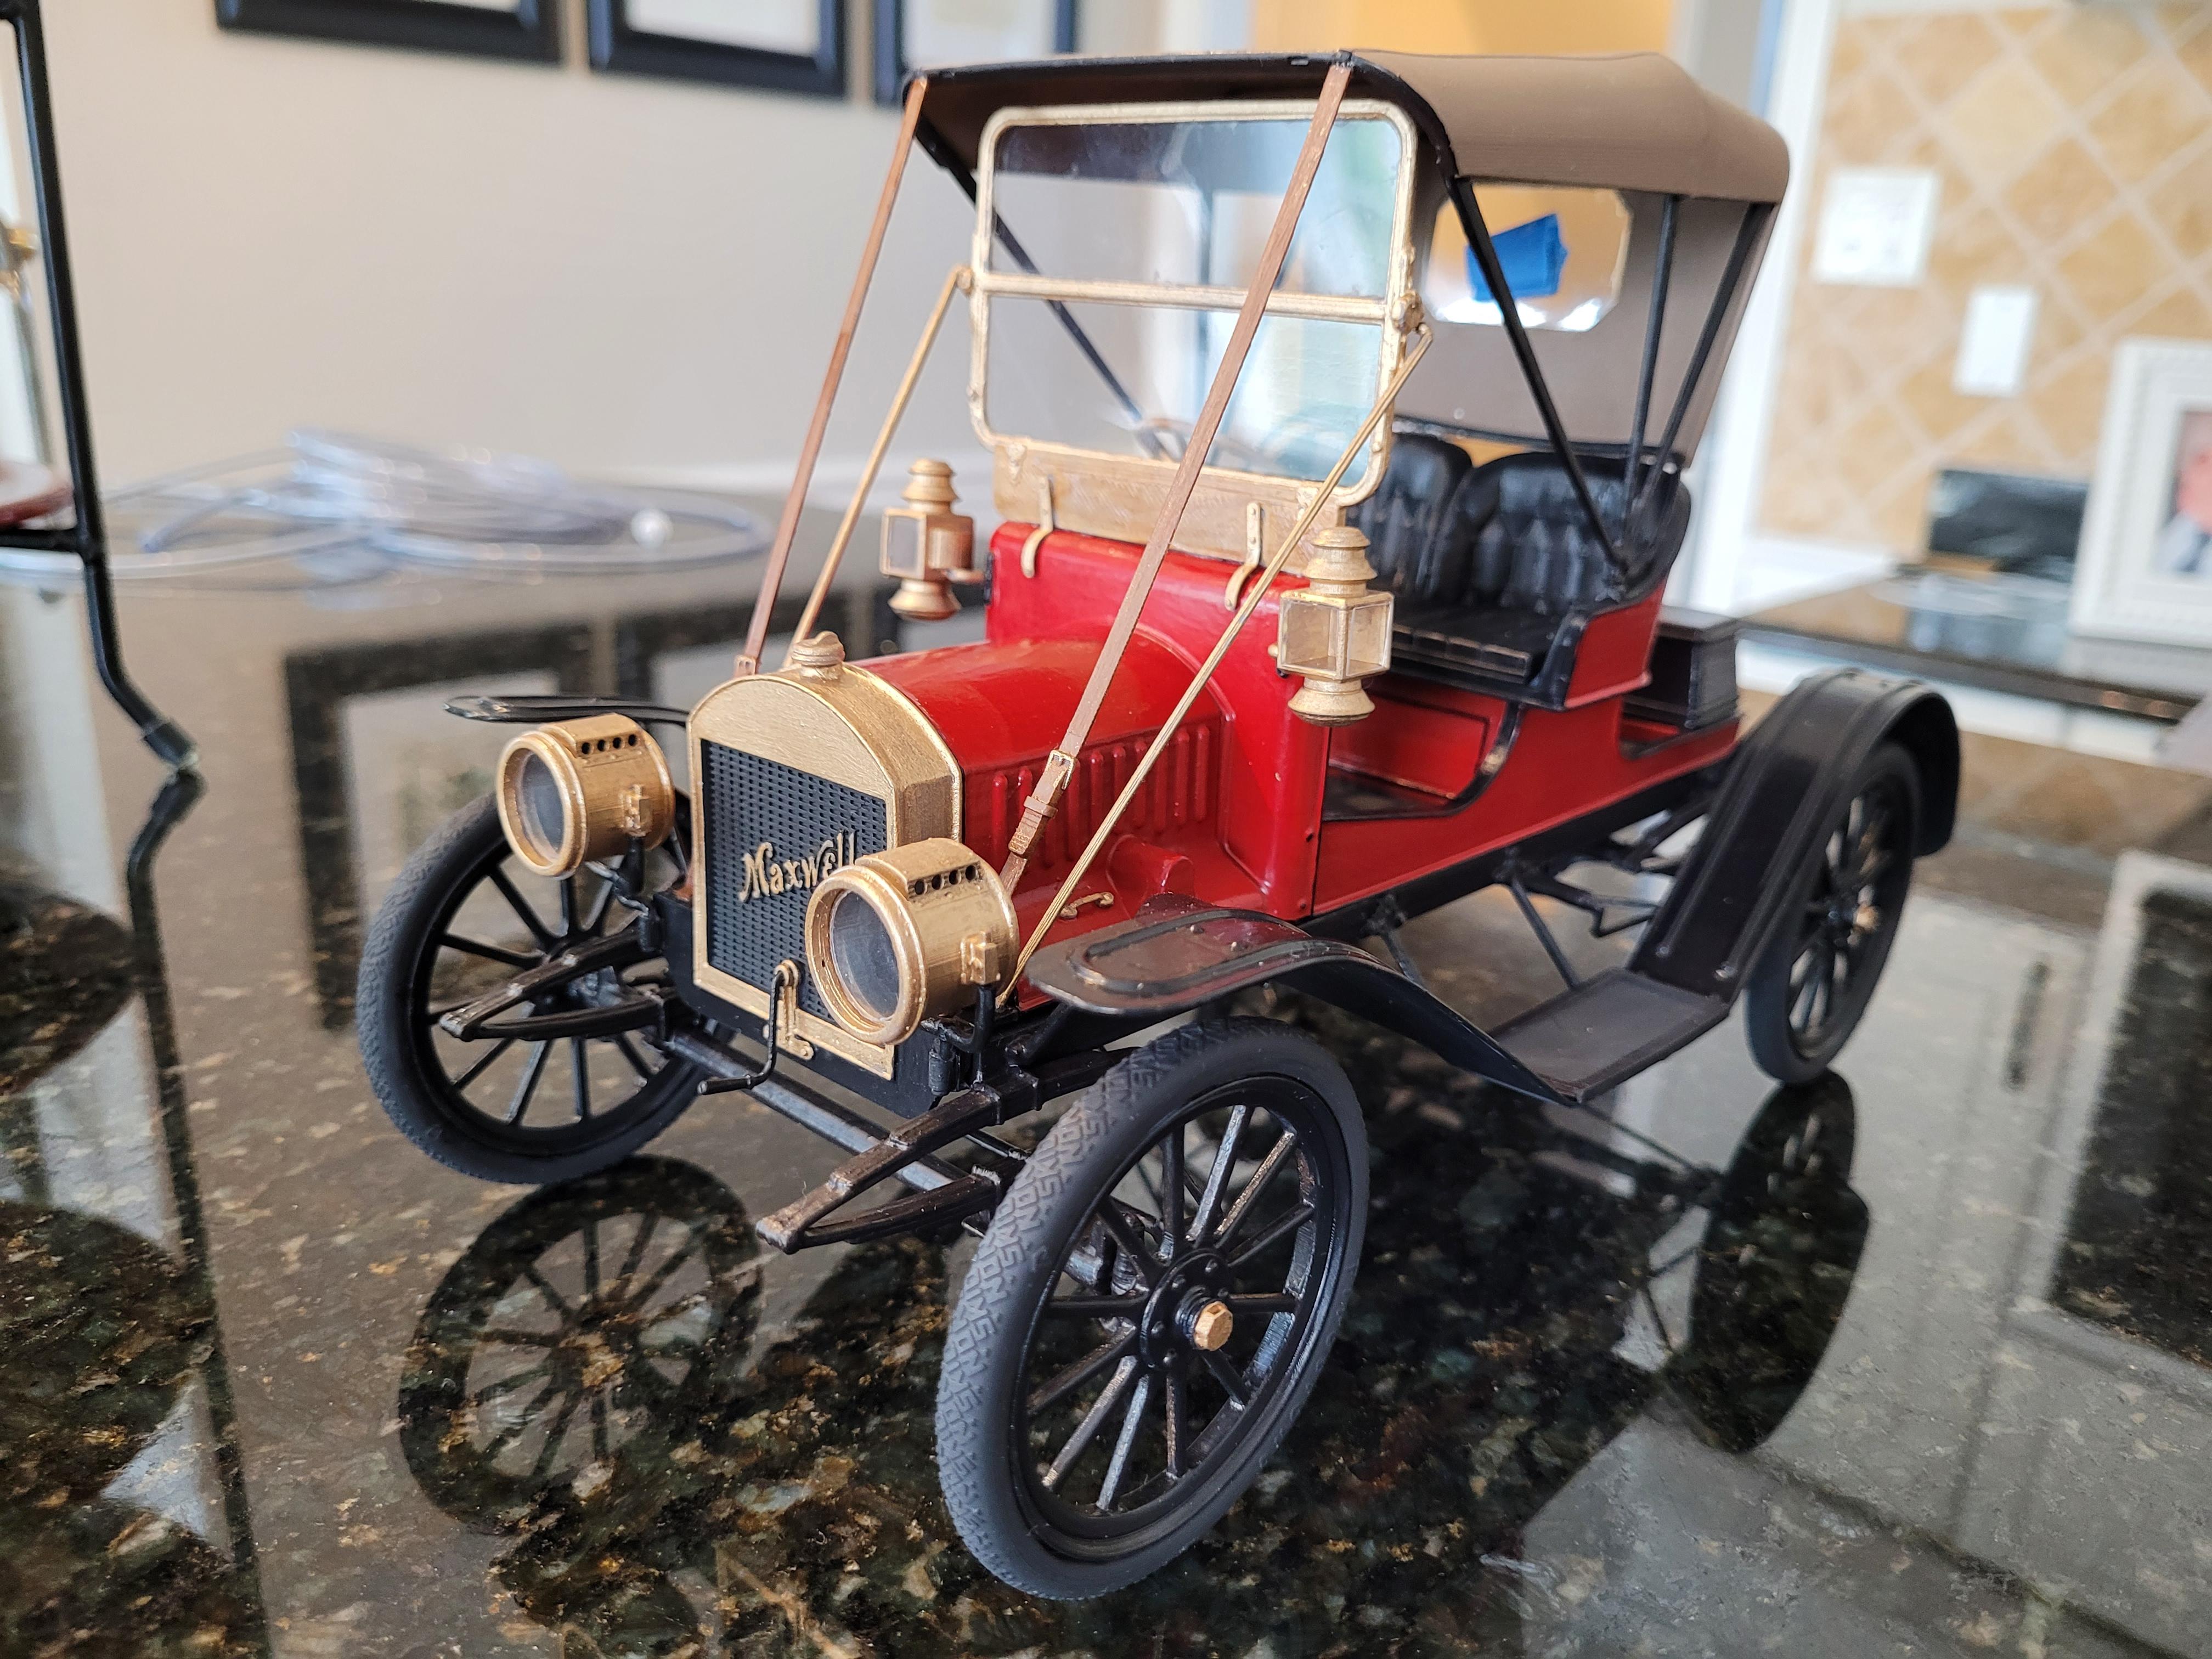
Many years ago, when 3d printing became affordable and accessible to hobbiests, I transcribed this into CAD from an old Hudson Miniatures model plan, then printed it out, assembled it, and painted it pewter color. The model depicts the general arrangement and correct dimensions, but lacks detail. This thread will document a redo of the model, but many corrections will be made, and loads of detail added. At the end, I will show a before and after. I hope you will enjoy the redesign/build process.
-
The process: I transcribed a 1/16 scale plan from a Hudson Miniature balsa model kit from 1949 in CAD. Then I scaled up to 1/12 scale. I gathered hundreds of pictures from the Internet to add details and refinement. I used 2 different types of 3d printers, filament (FDM) and liquid resin (DLP). Here is the result. It's not the typical subject matter found on this forum, but I hope you like it.
-
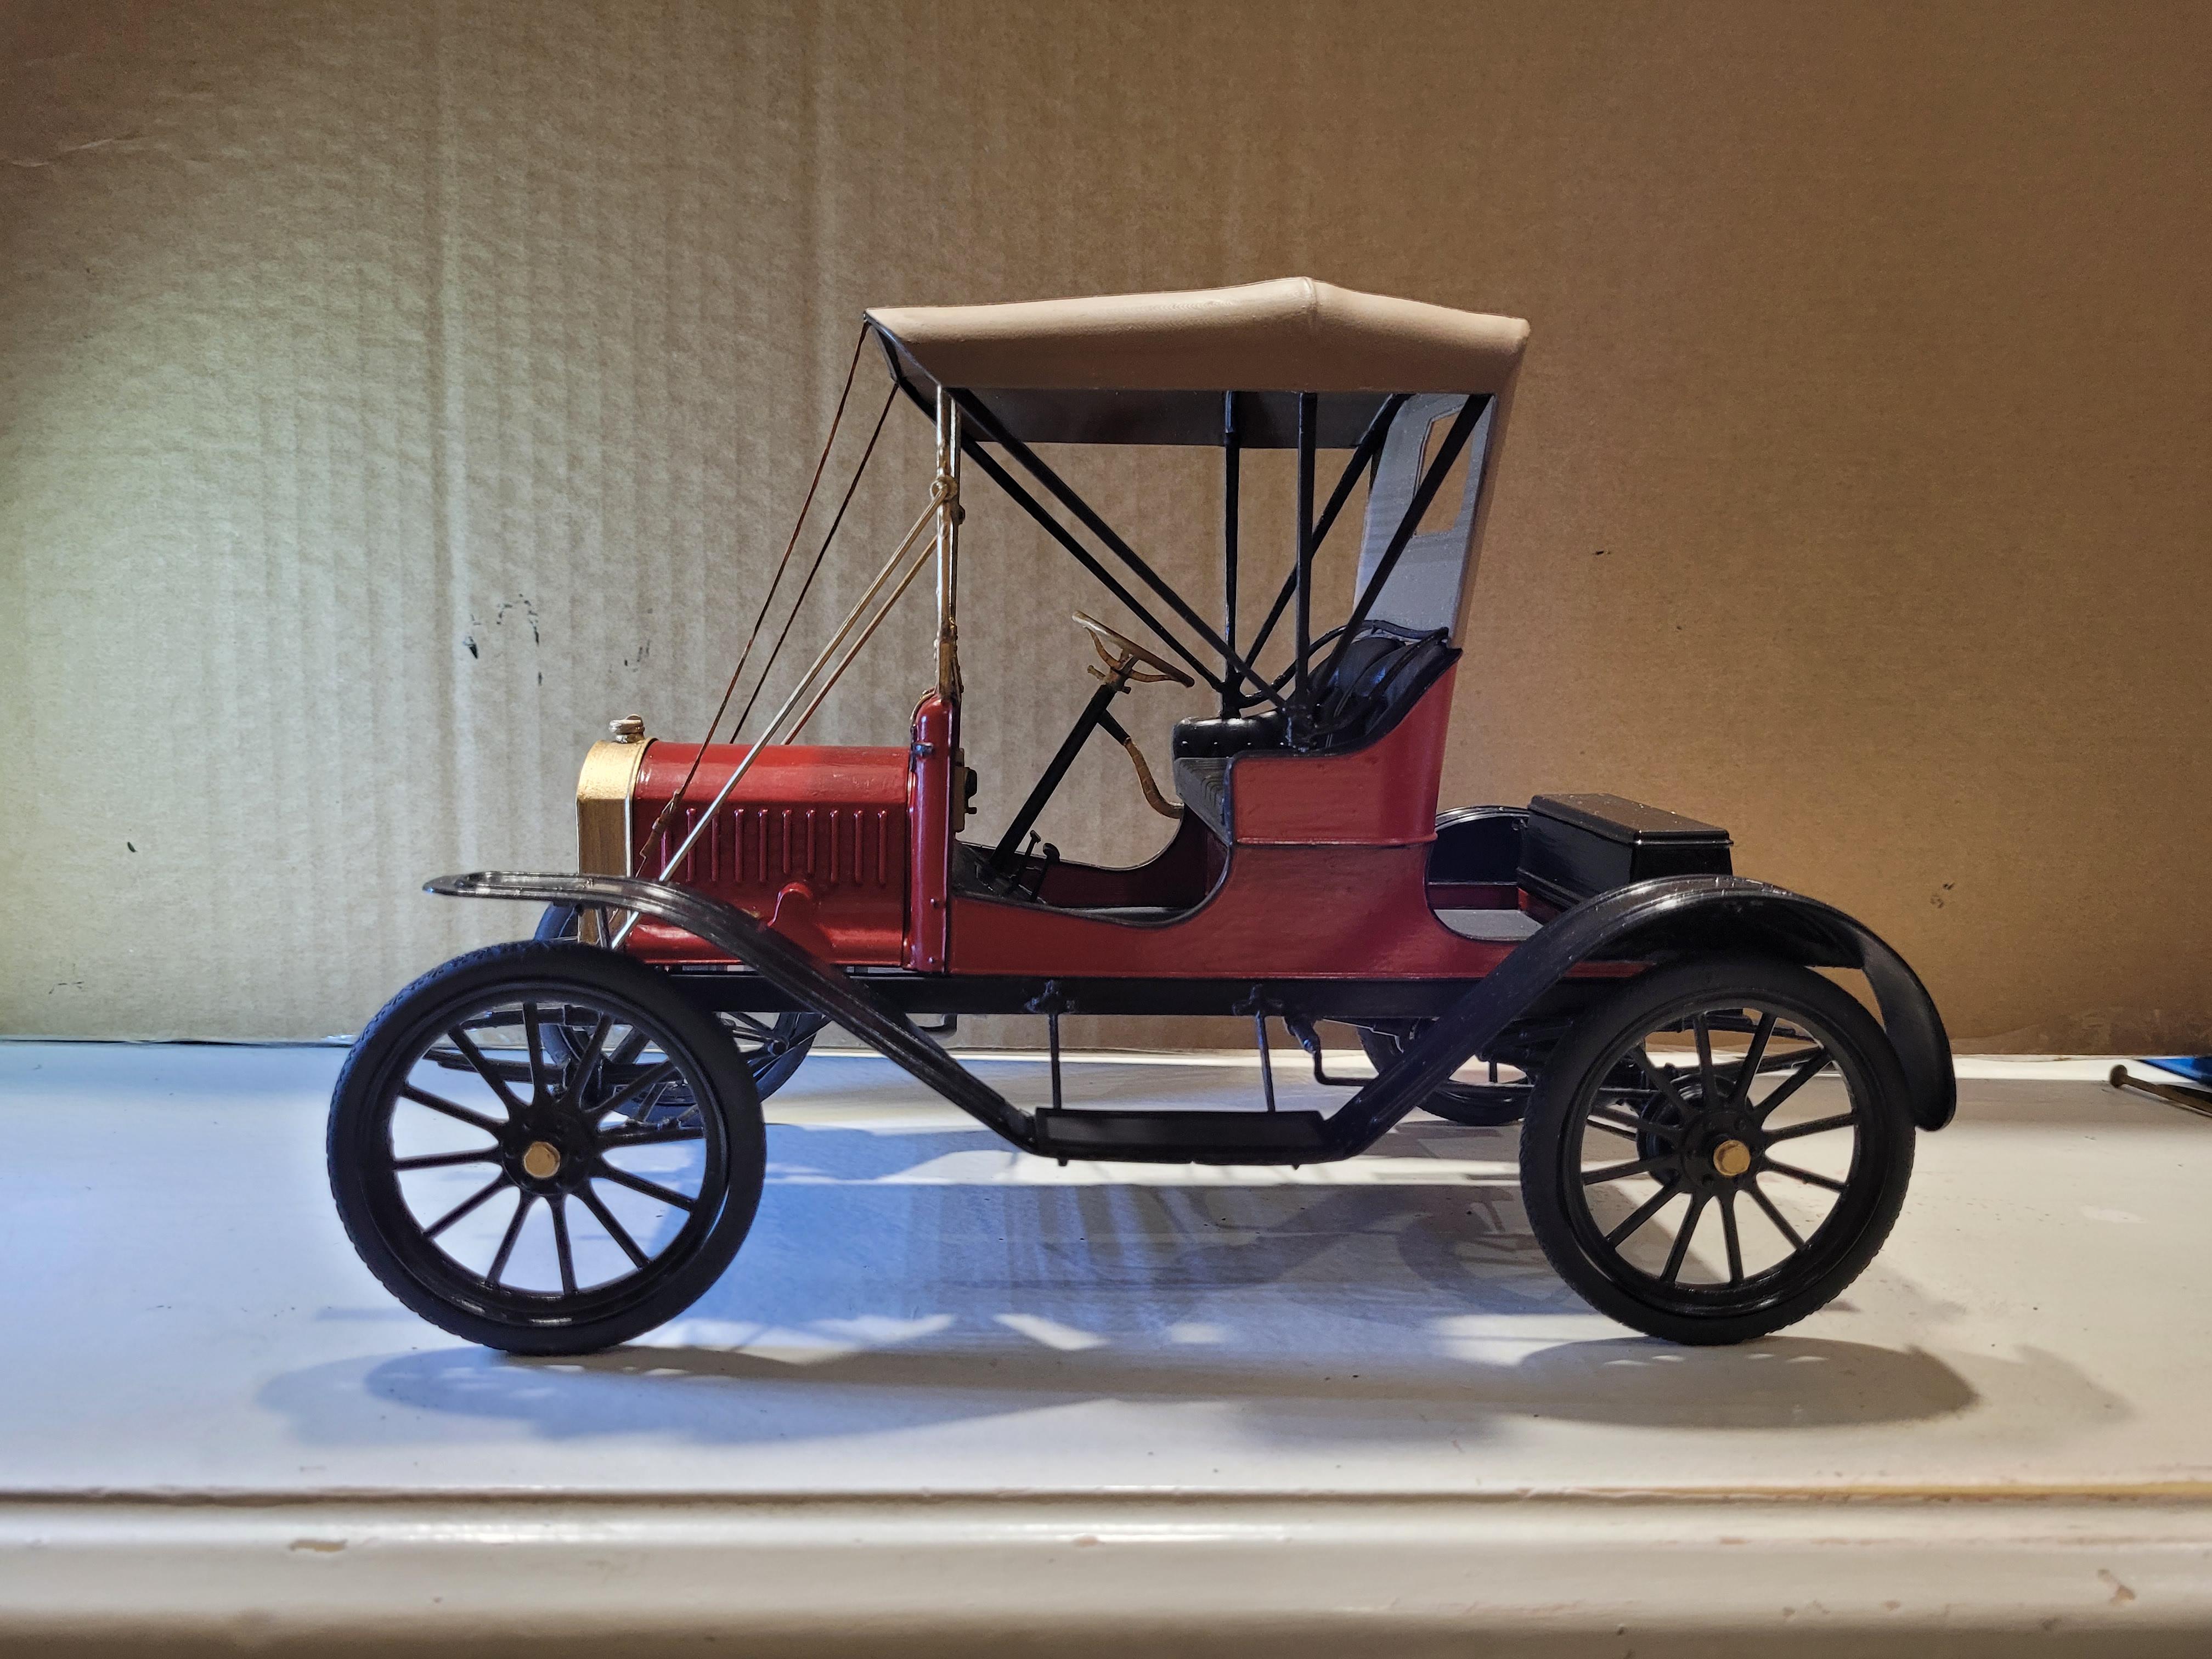
Head lamps and coach lights have been added. I used squadron clear for the windshield, back glass, and all lamps. Only the tail lamp to go, then I will post final pictures in the Under Glass section.
-
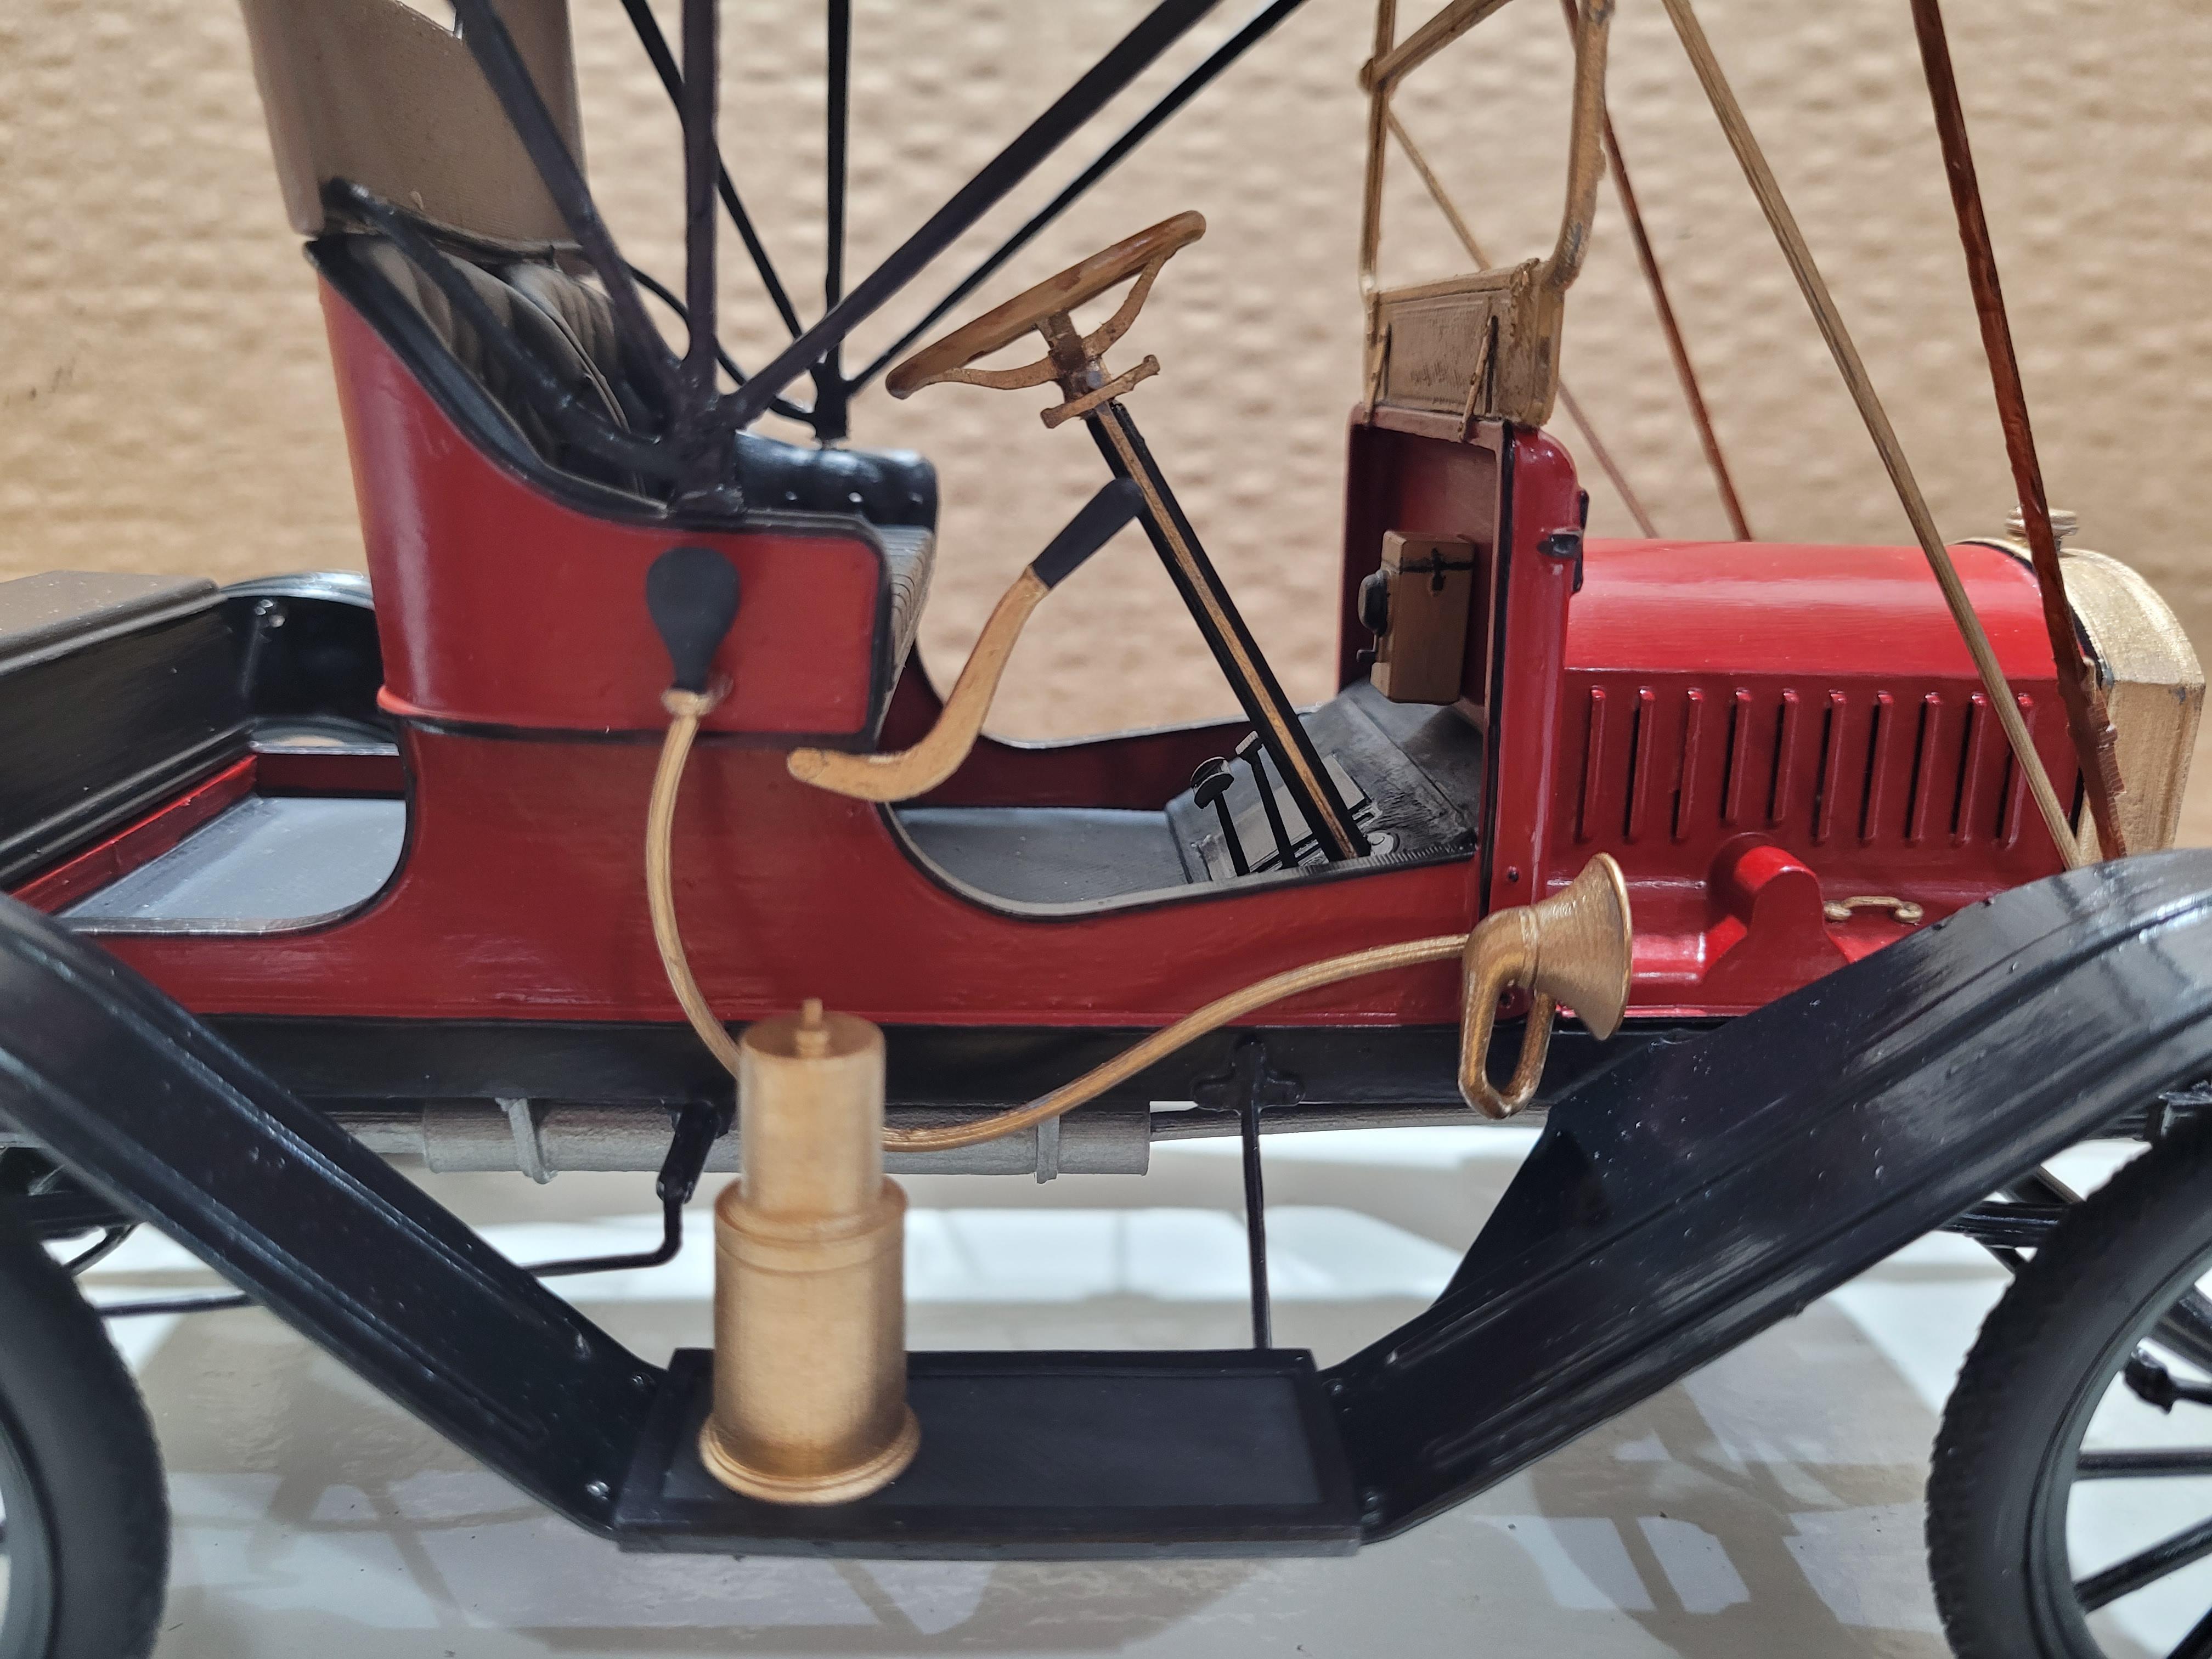
The horn is added..
-
The umbrella has been added, along with the windshield supports and leather top hold down straps. Next, the horn, lamps, and glass... then off to the shelf.
-
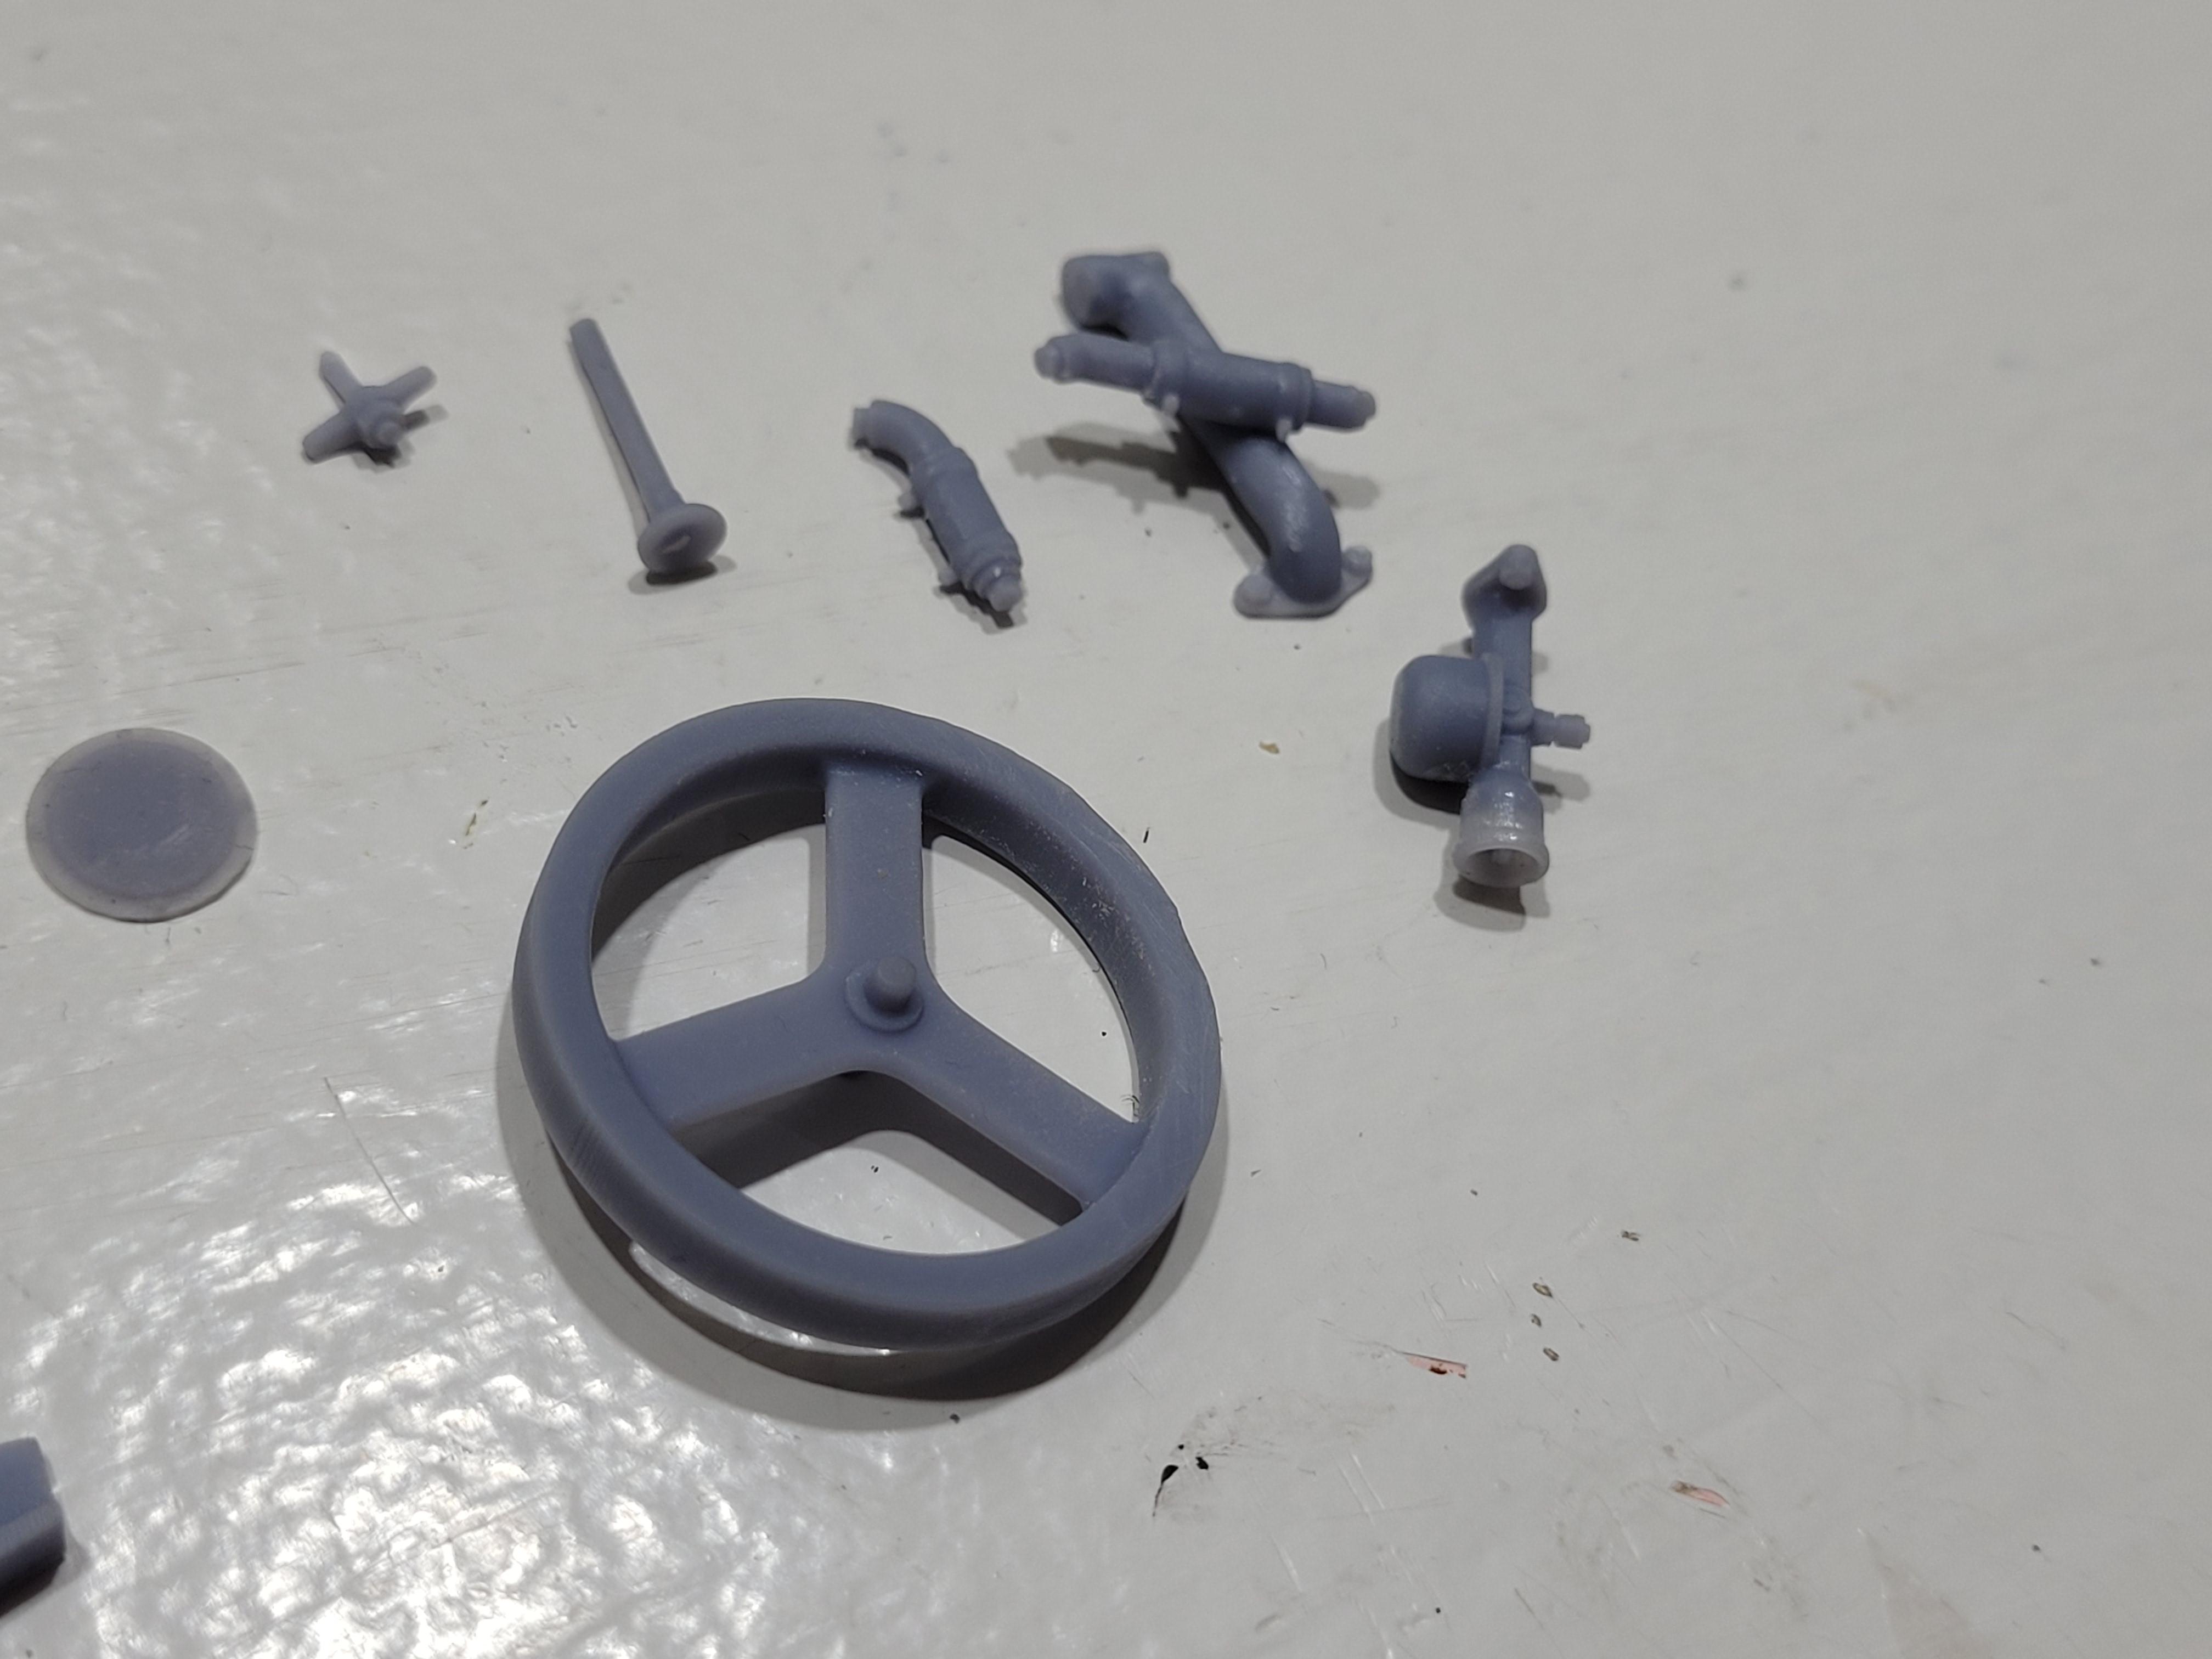
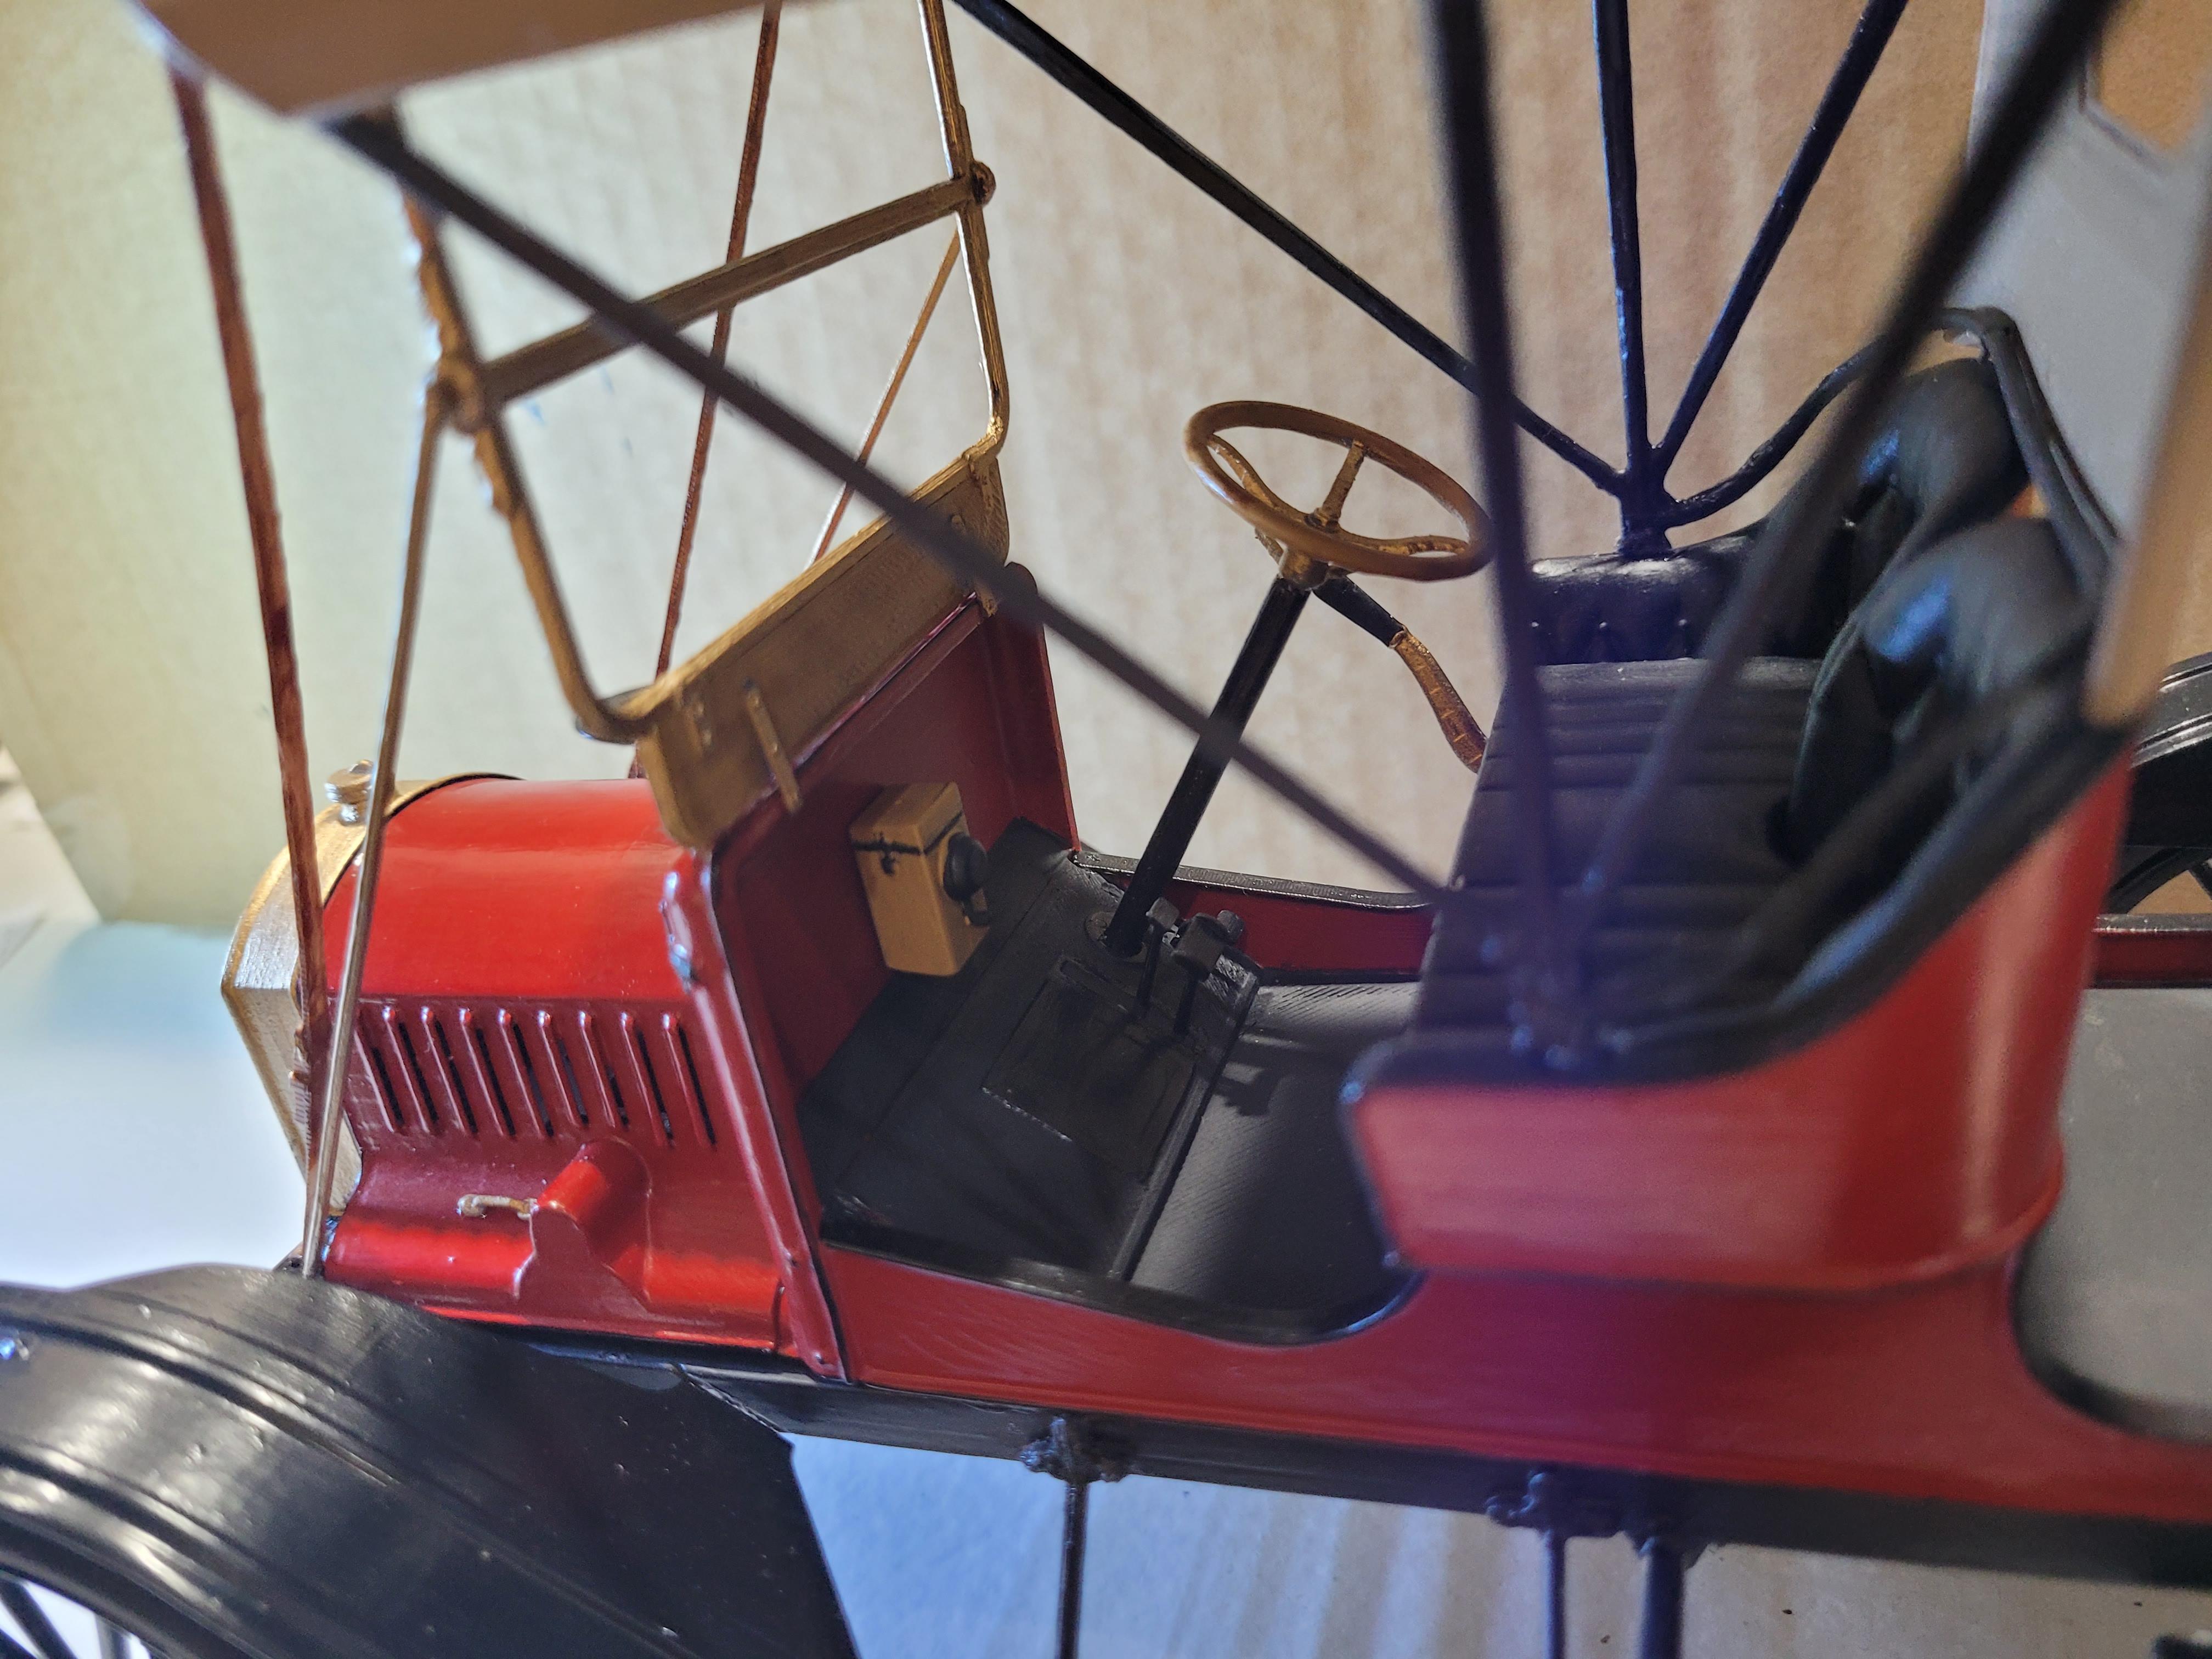
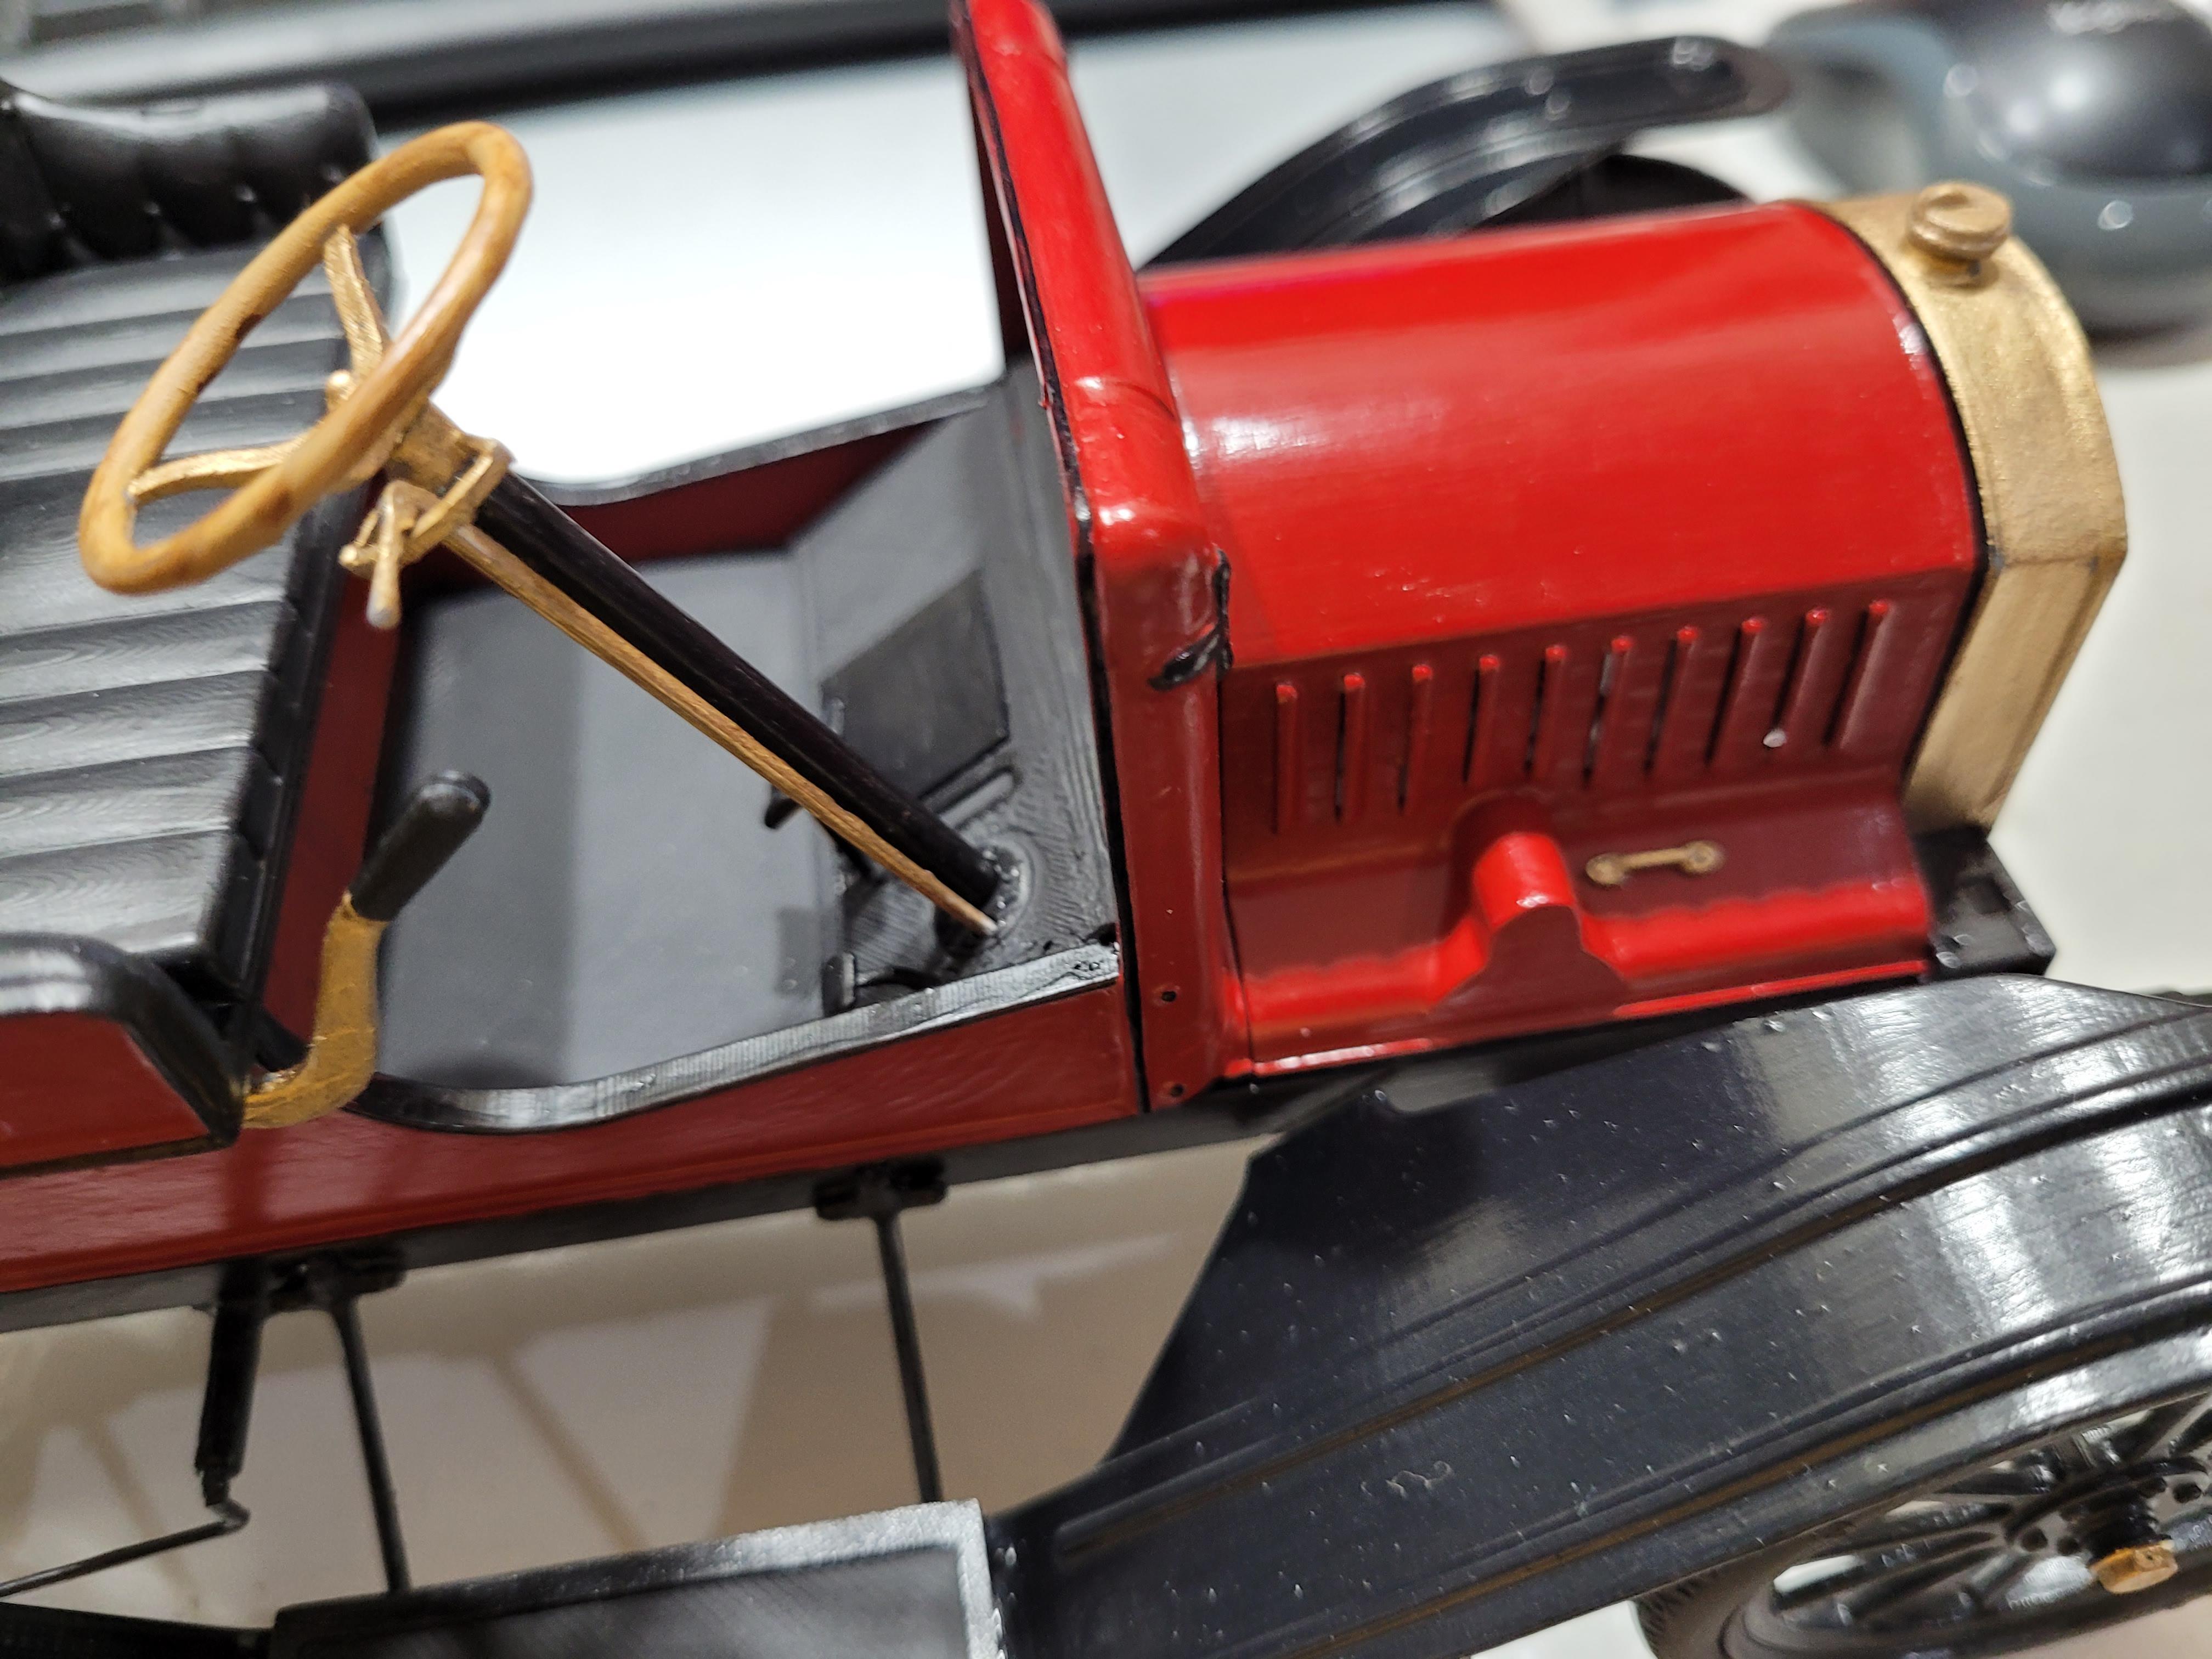
Hood handles, steering wheel, and controls added.
-
Running Boards and Starter Crank.
-
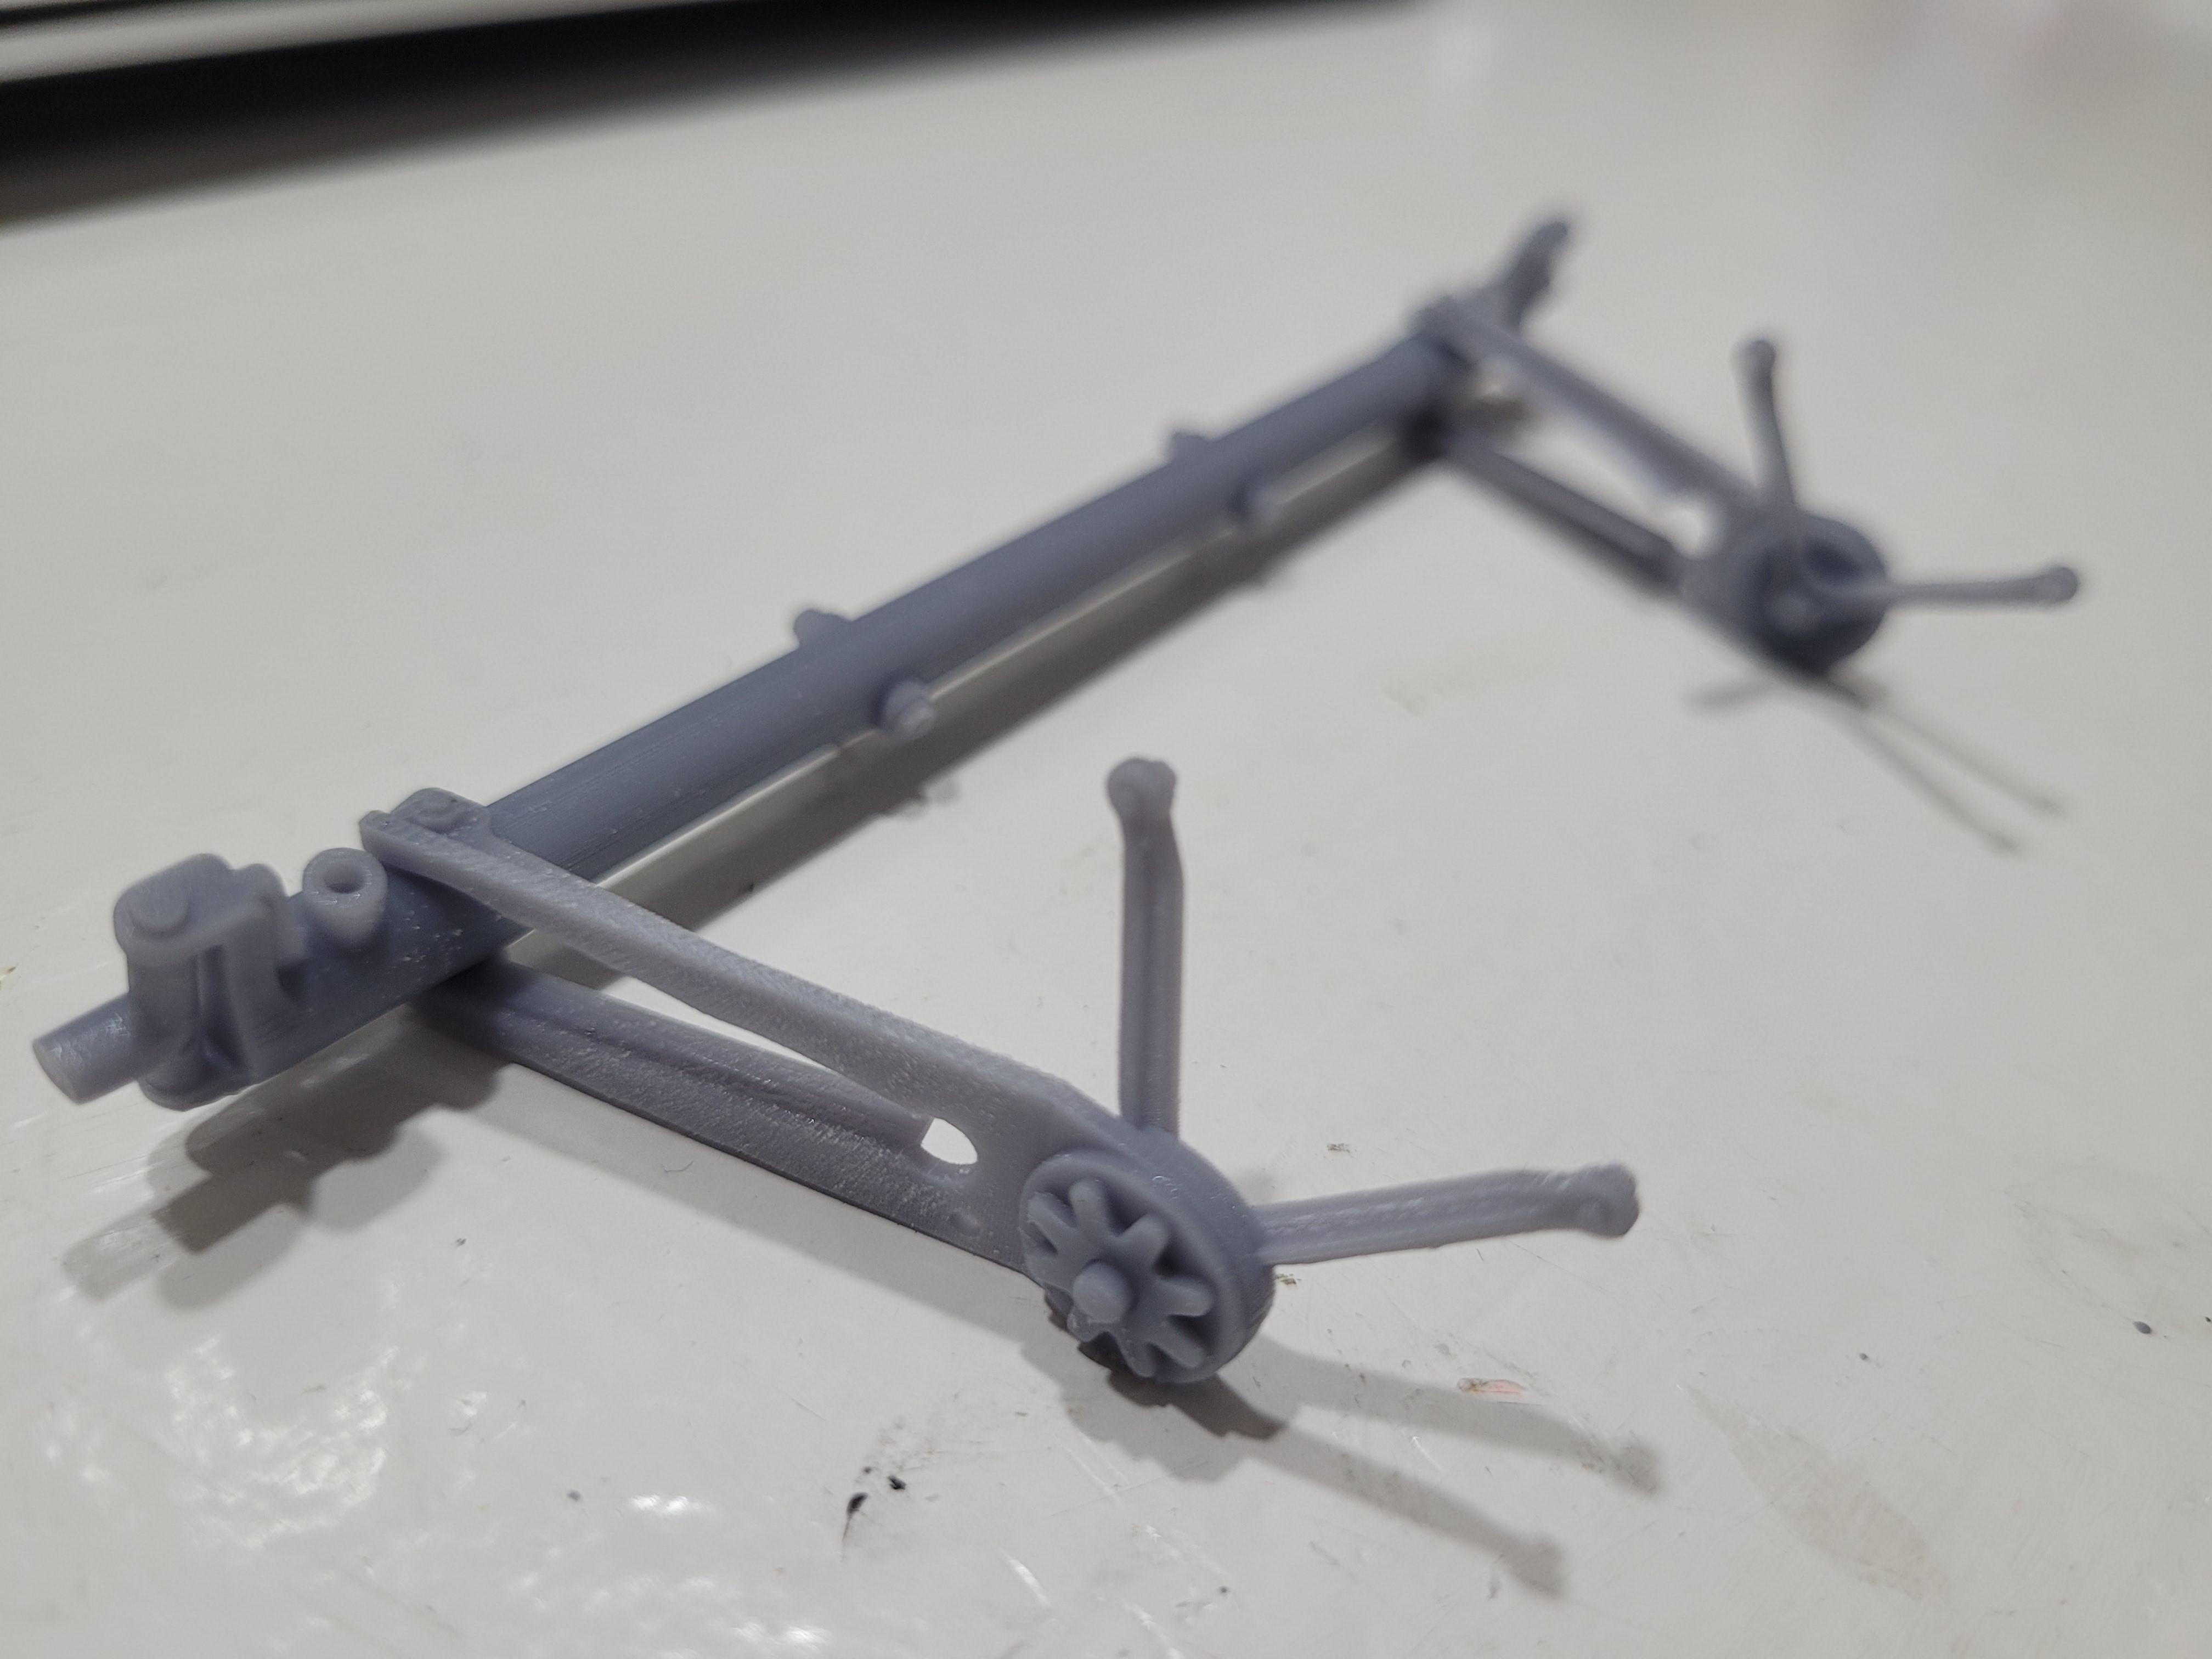
A picture of the under side, with the drag link in place.
-
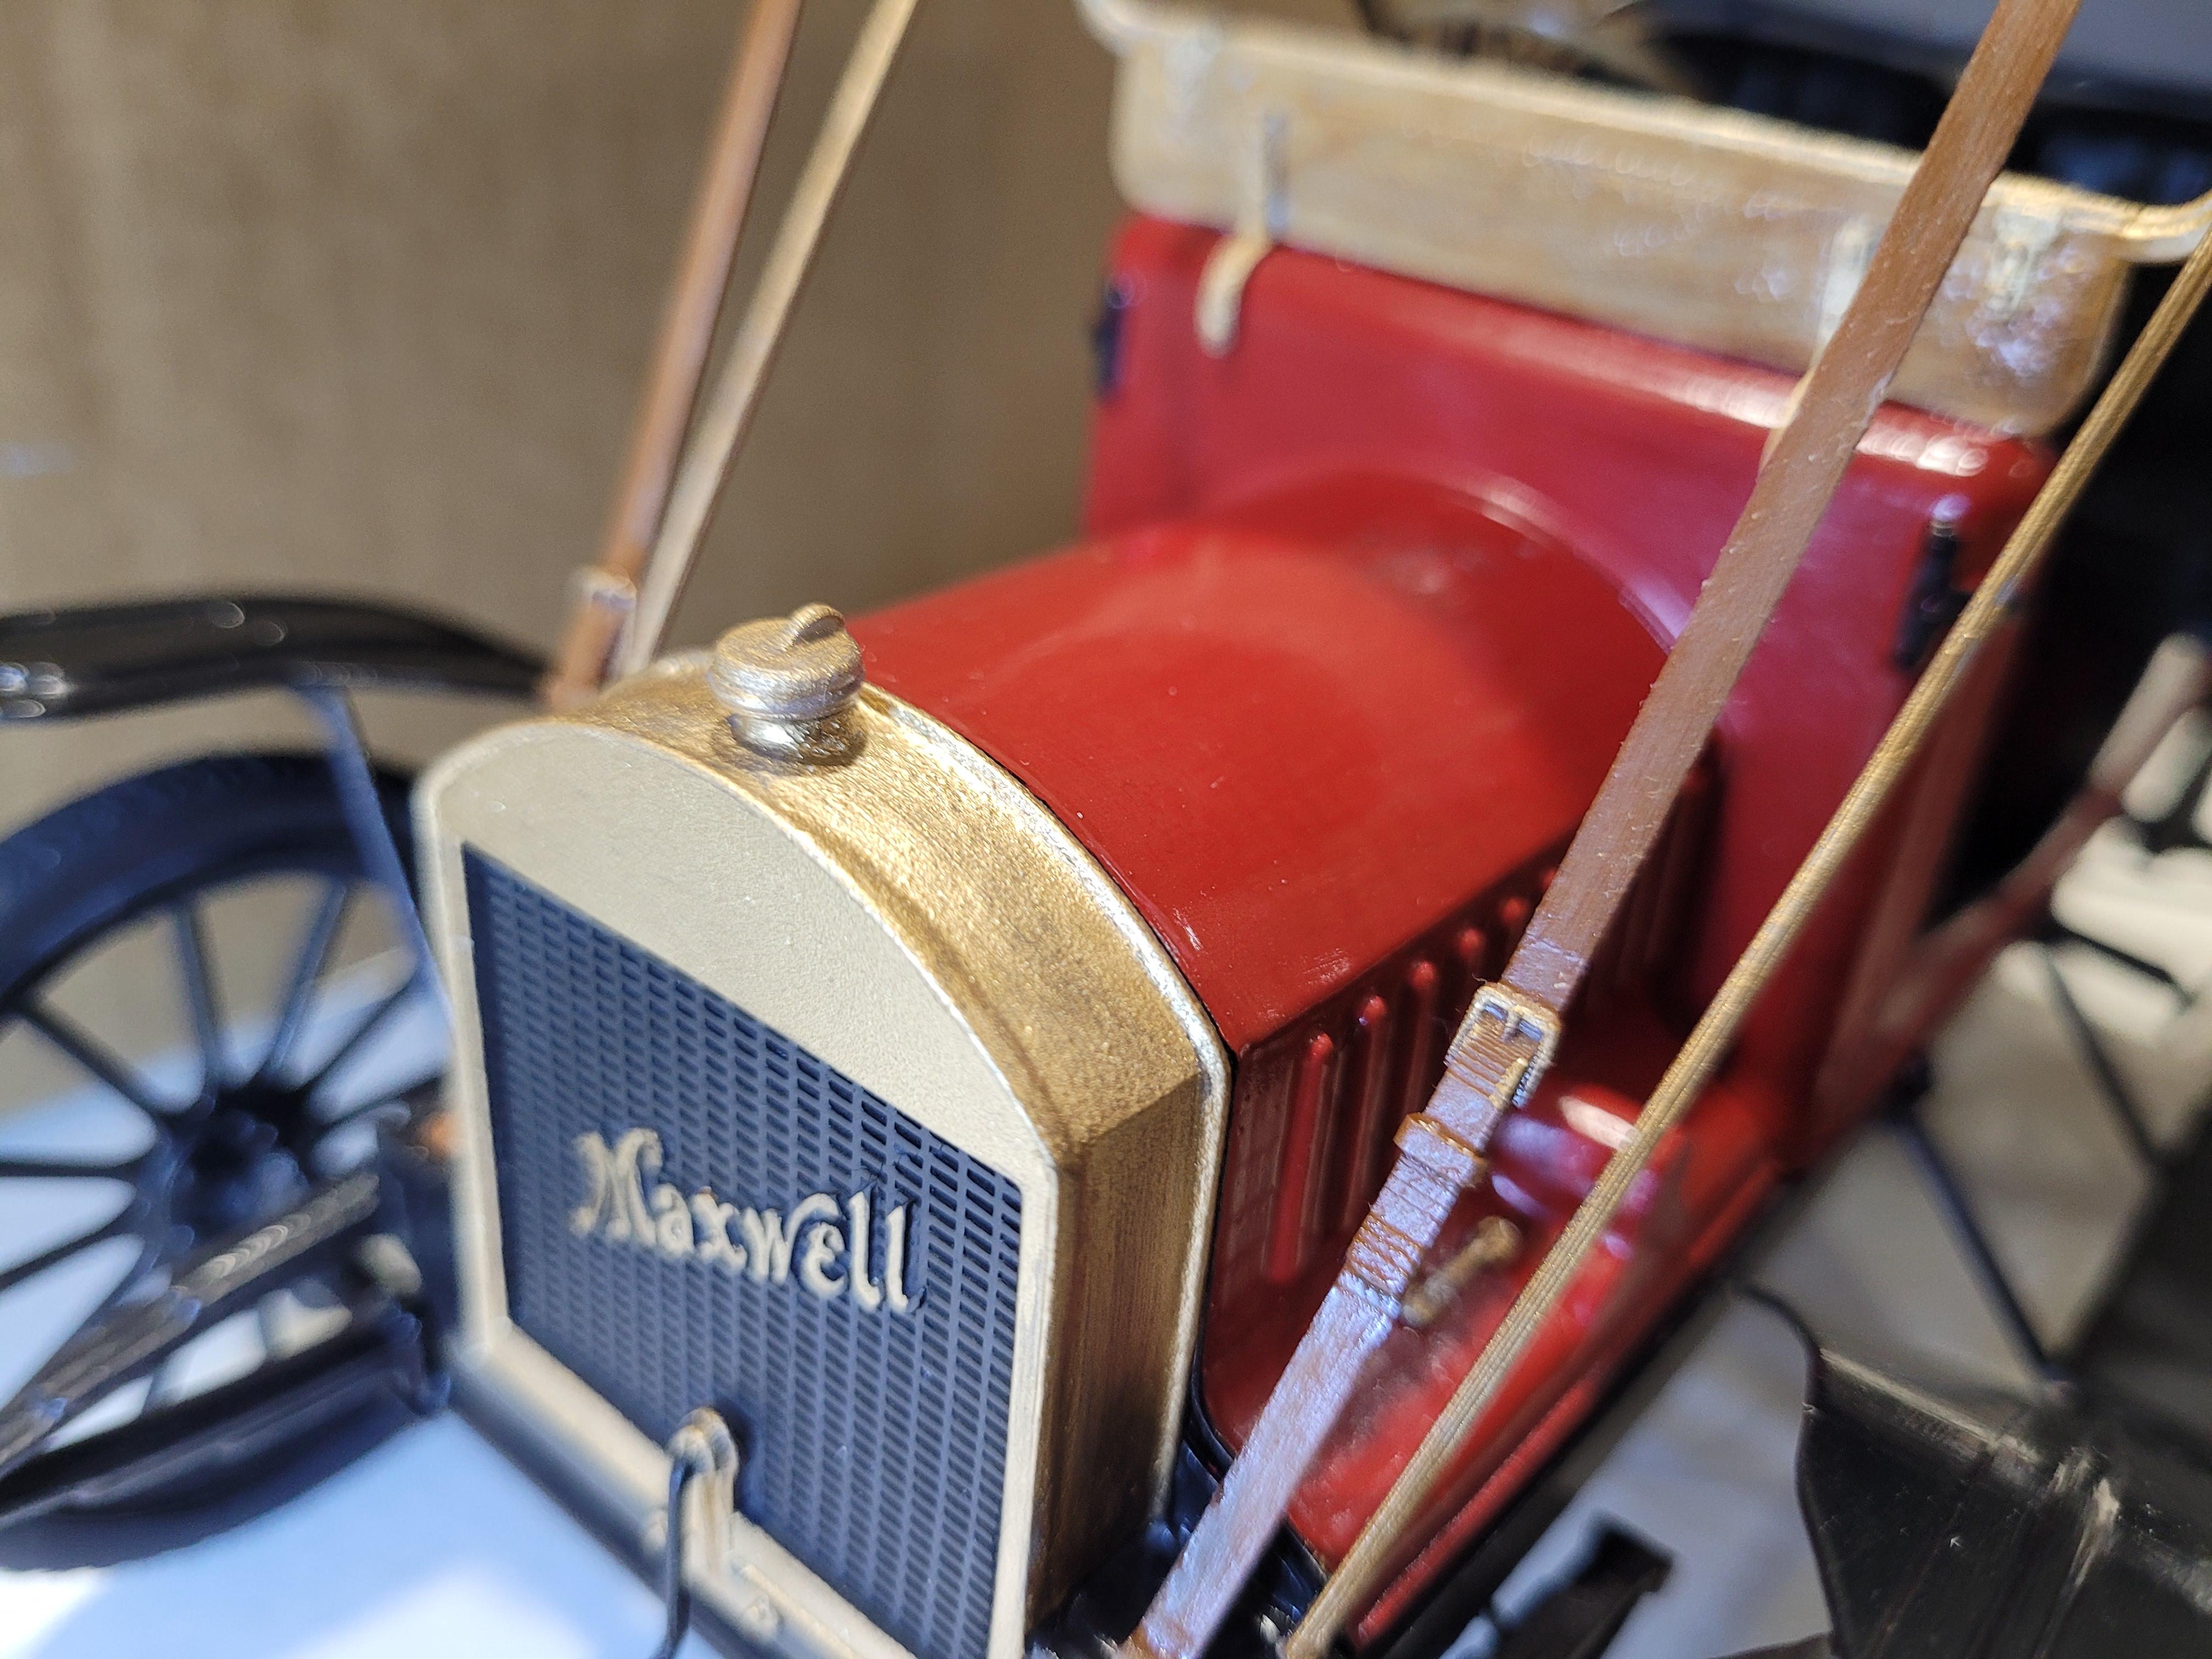
Many brass era cars display their brand/logo on the radiator. It draws your attention, and its the same for scale models like this.