kenlwest
-
Posts
277 -
Joined
-
Last visited
Content Type
Profiles
Forums
Events
Gallery
Everything posted by kenlwest
-

-
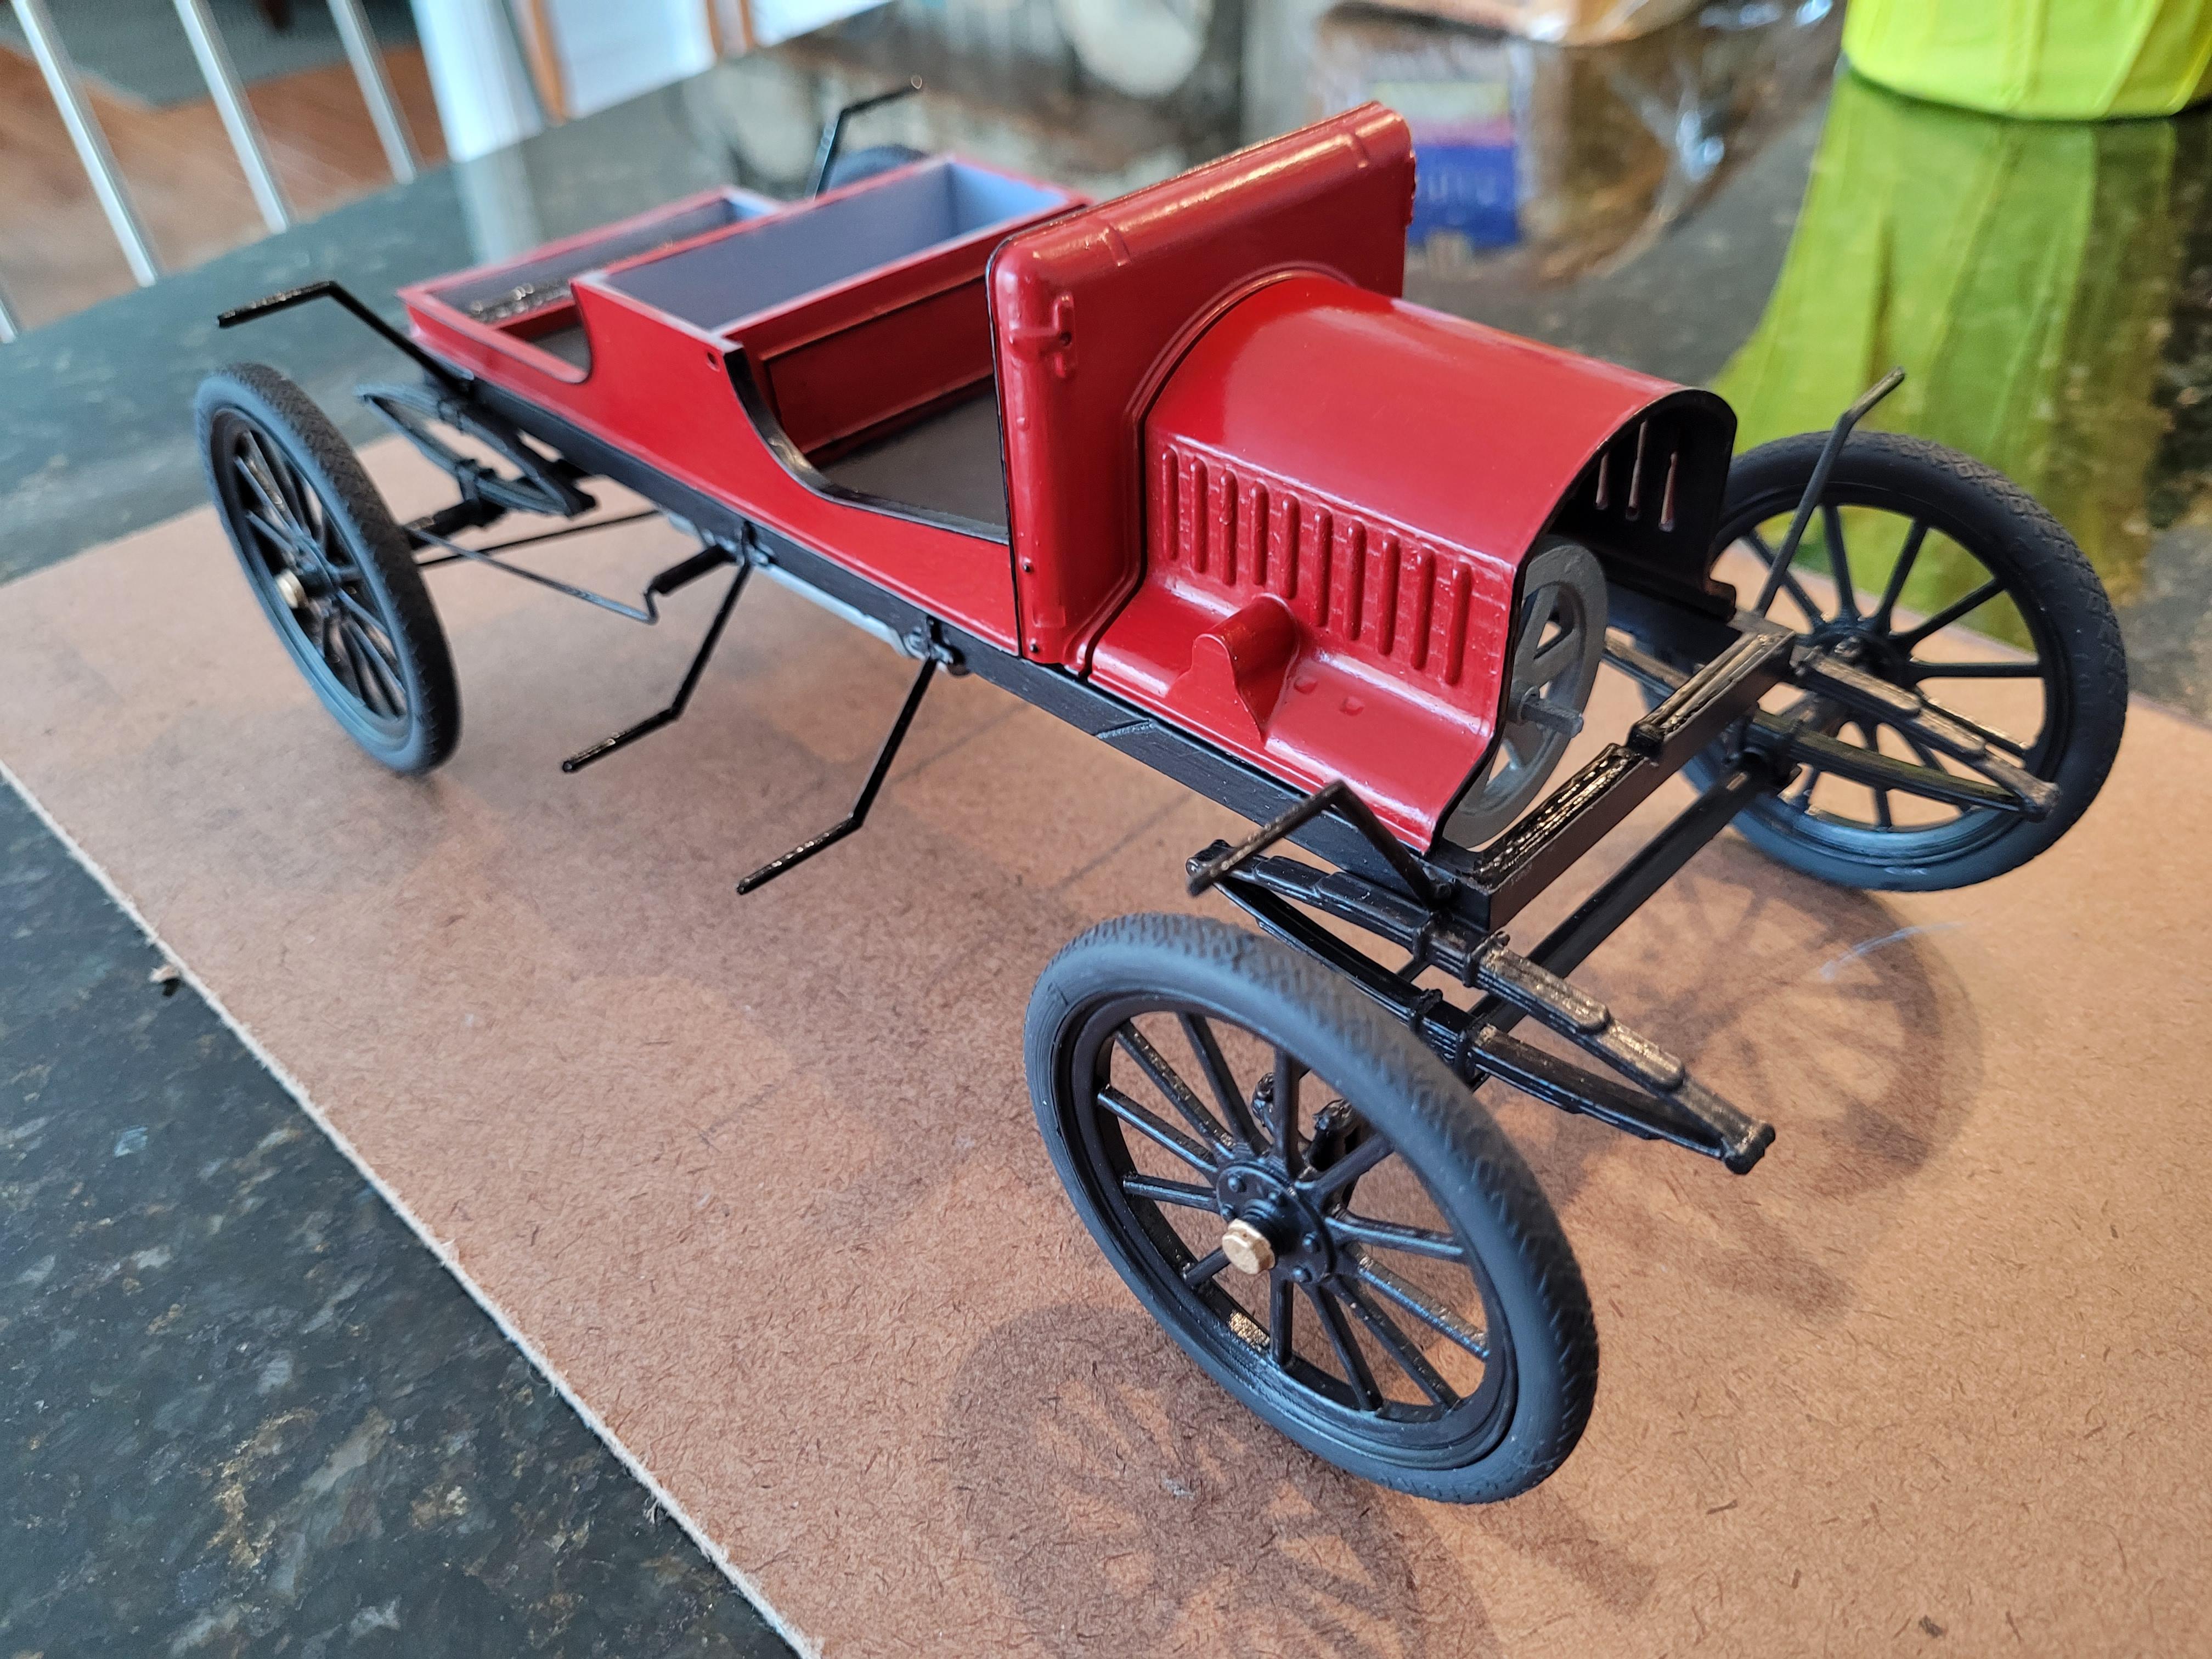
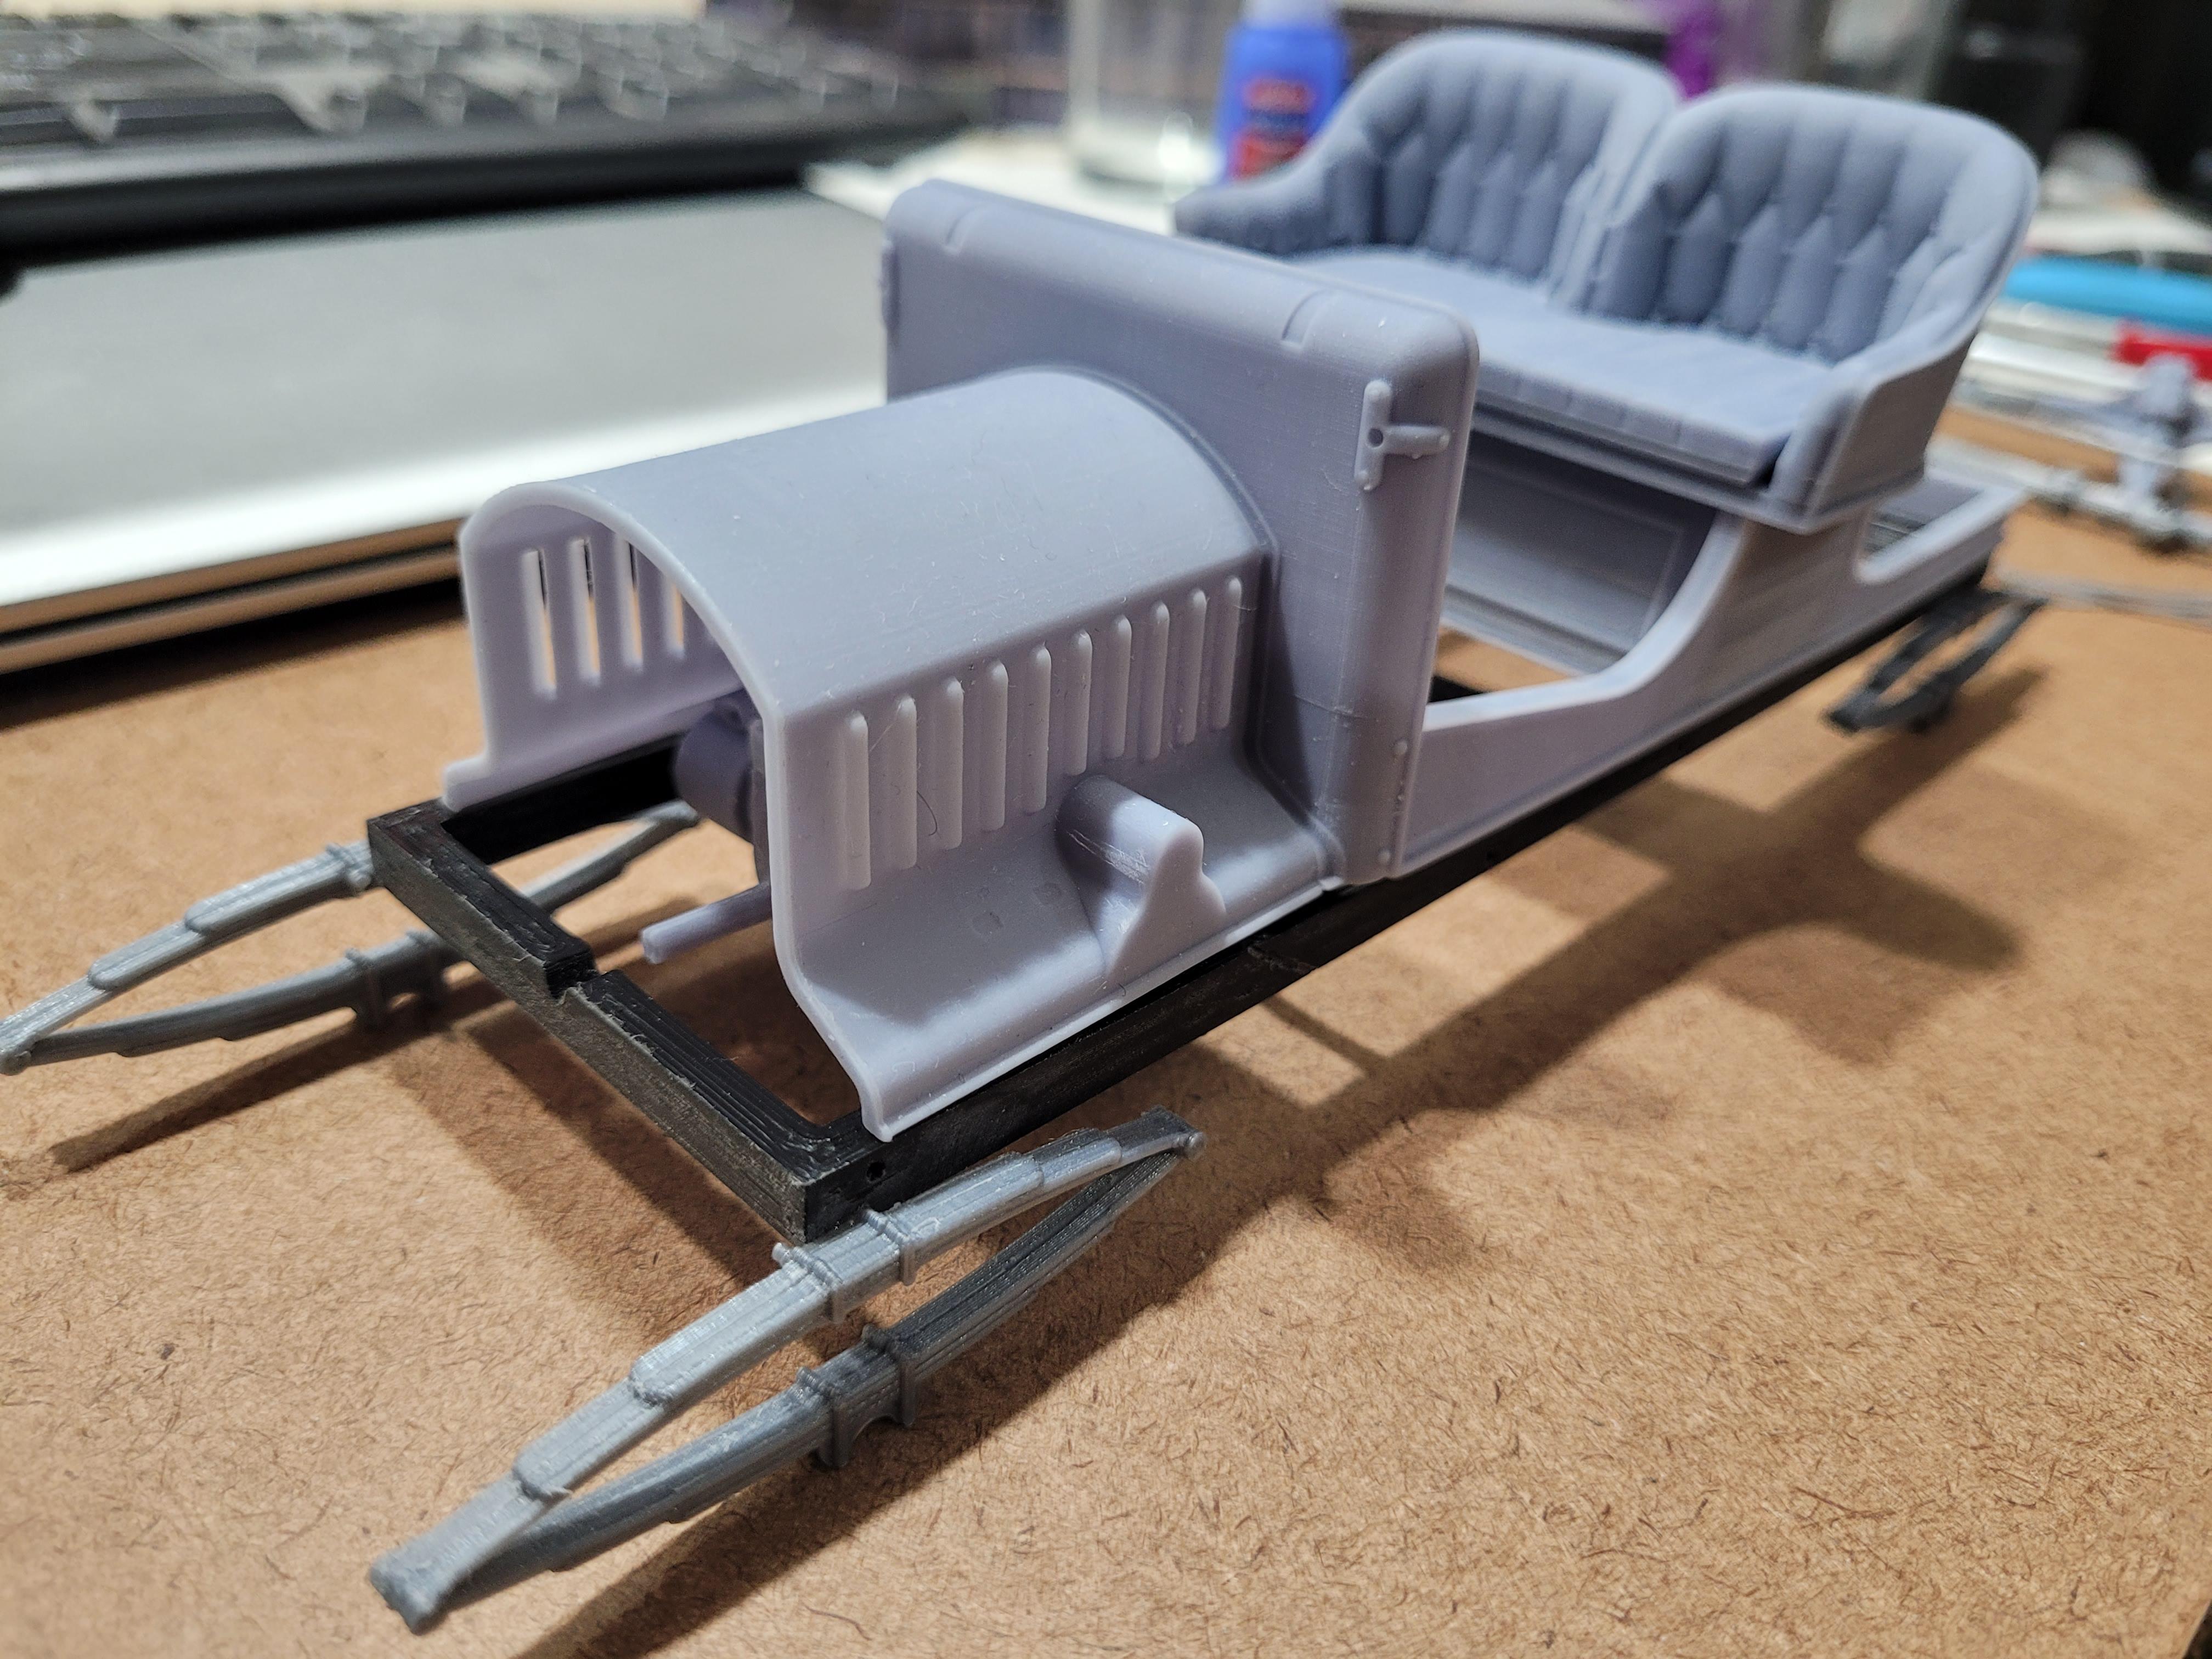
I added the fenders. The seat and trunk are sitting in place.
-
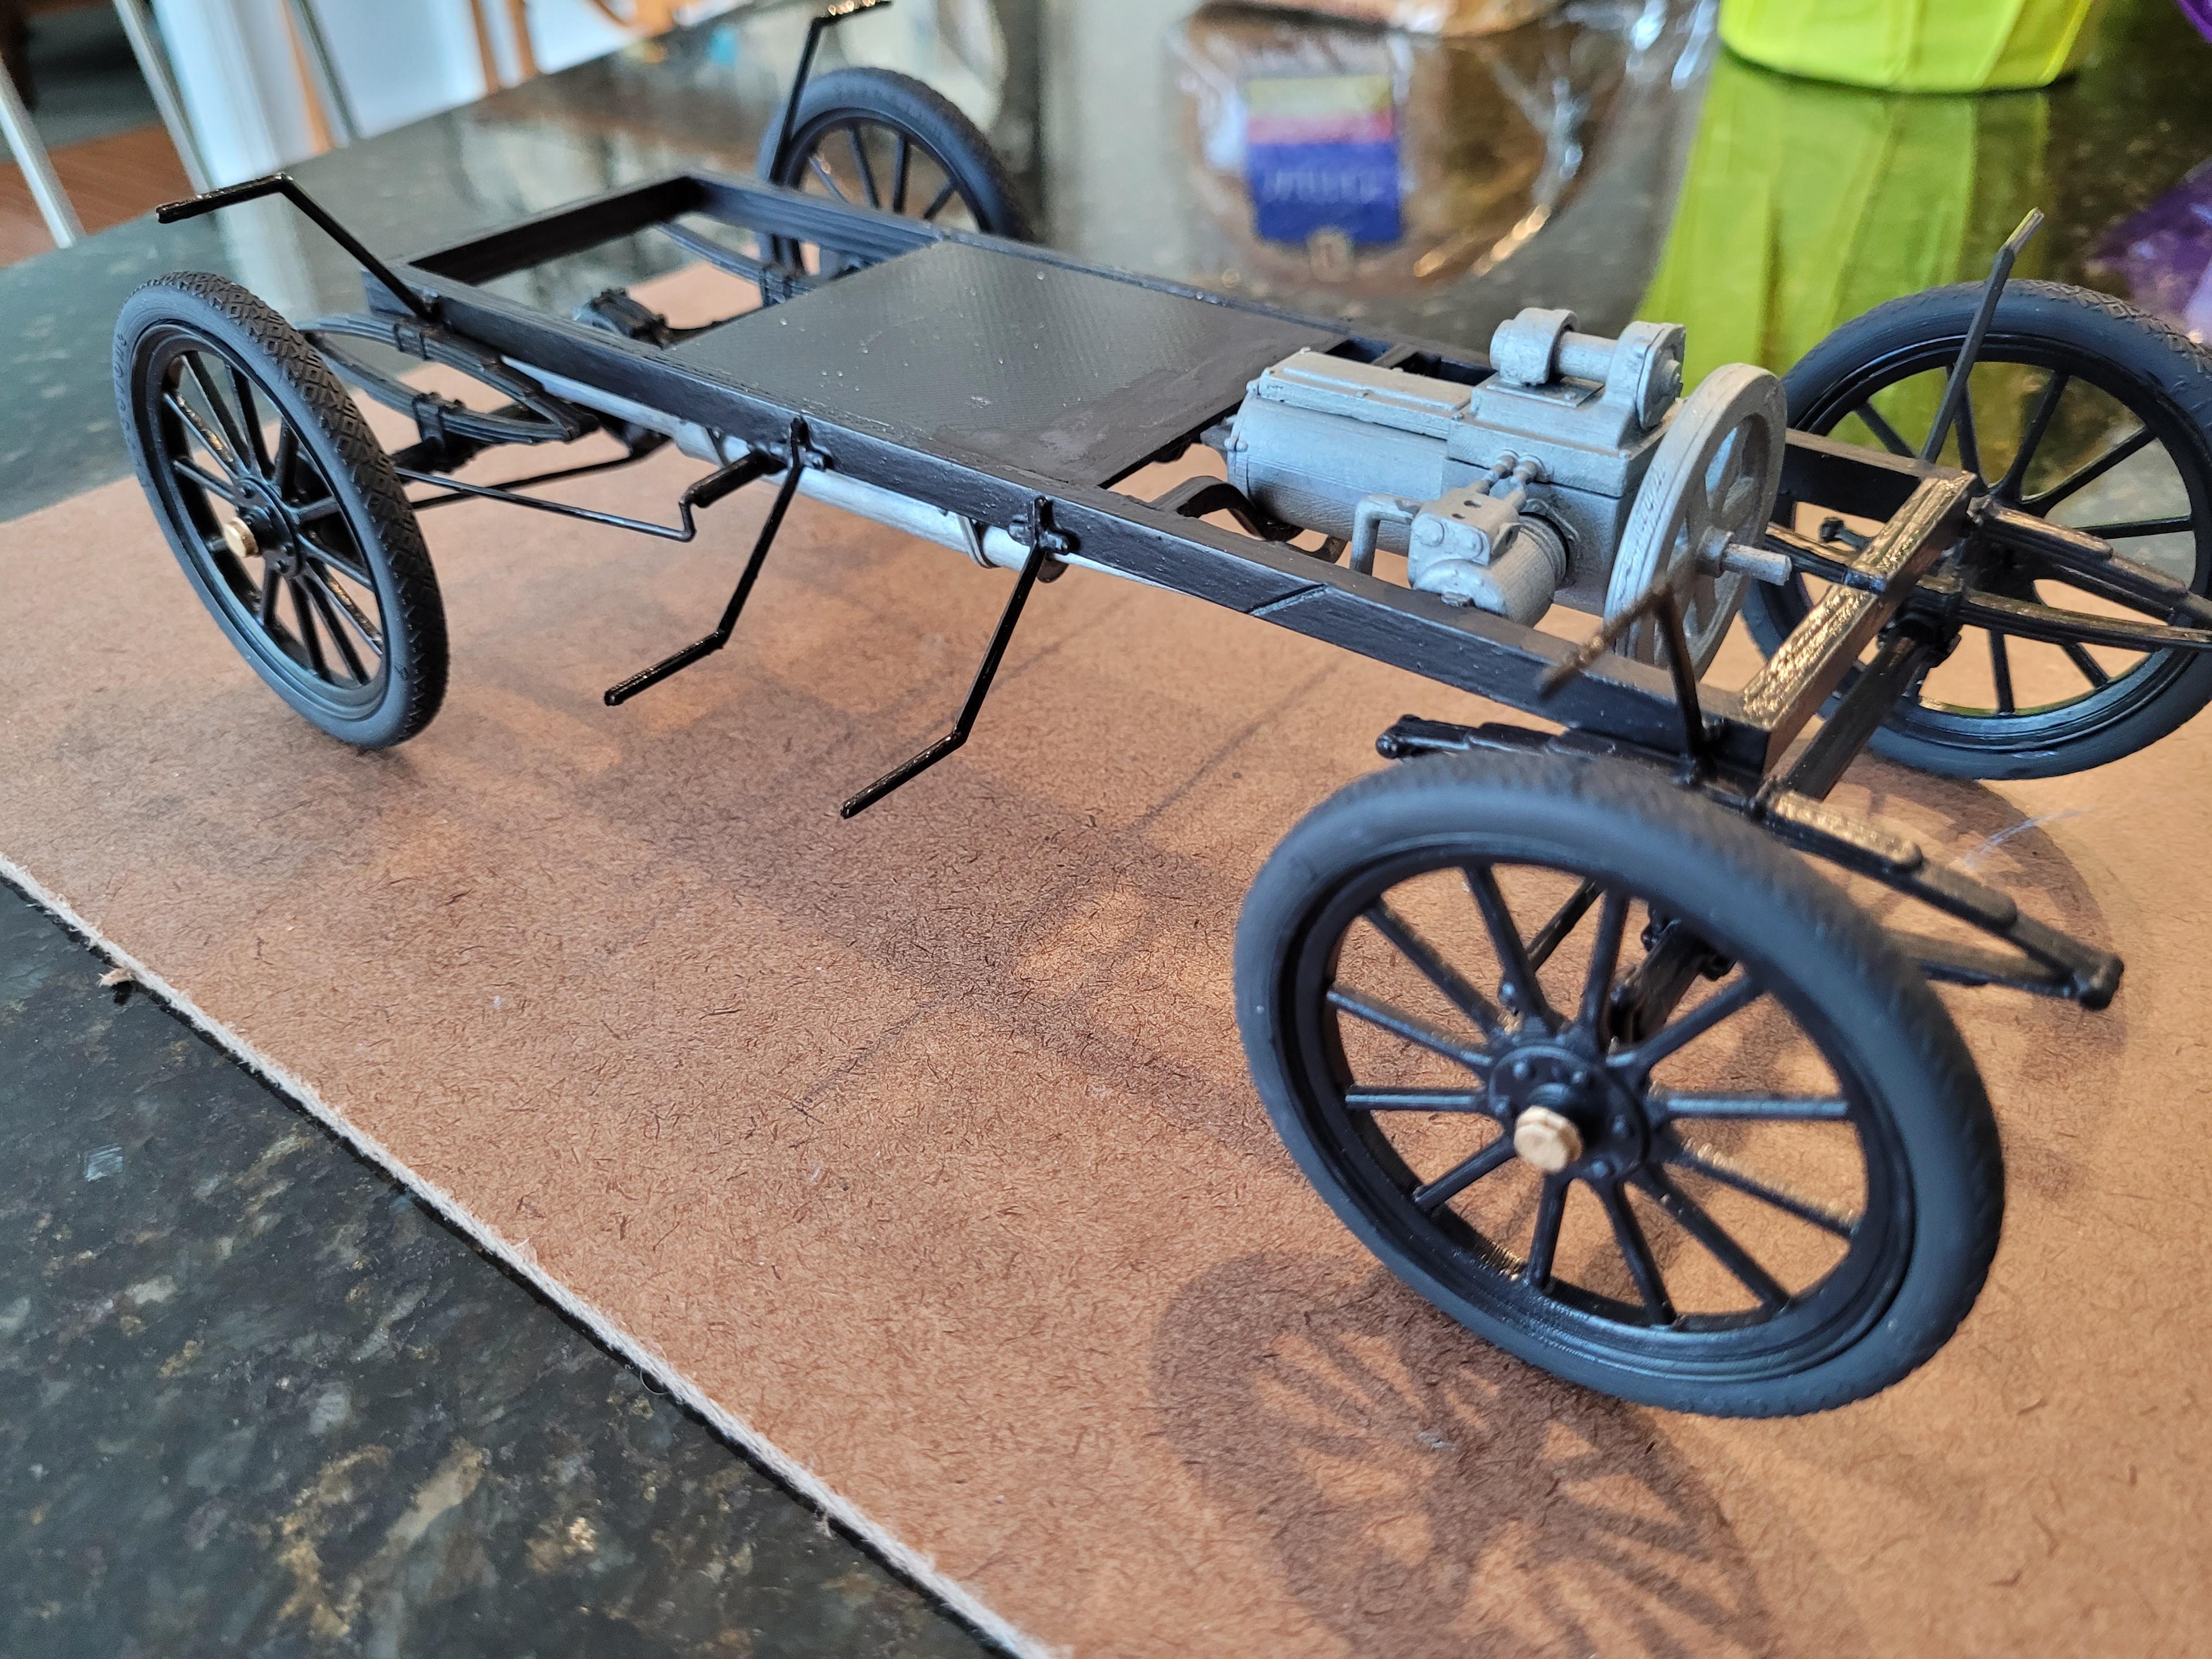
The wheels are mounted to the axles, to create a "rolling chassis" as we would call it today. I set the body and hood in place just to see how it looks/fits. Note the cooling louvers in the hood are printed open, which is possible in the larger scale, and provides a more realistic look.
-
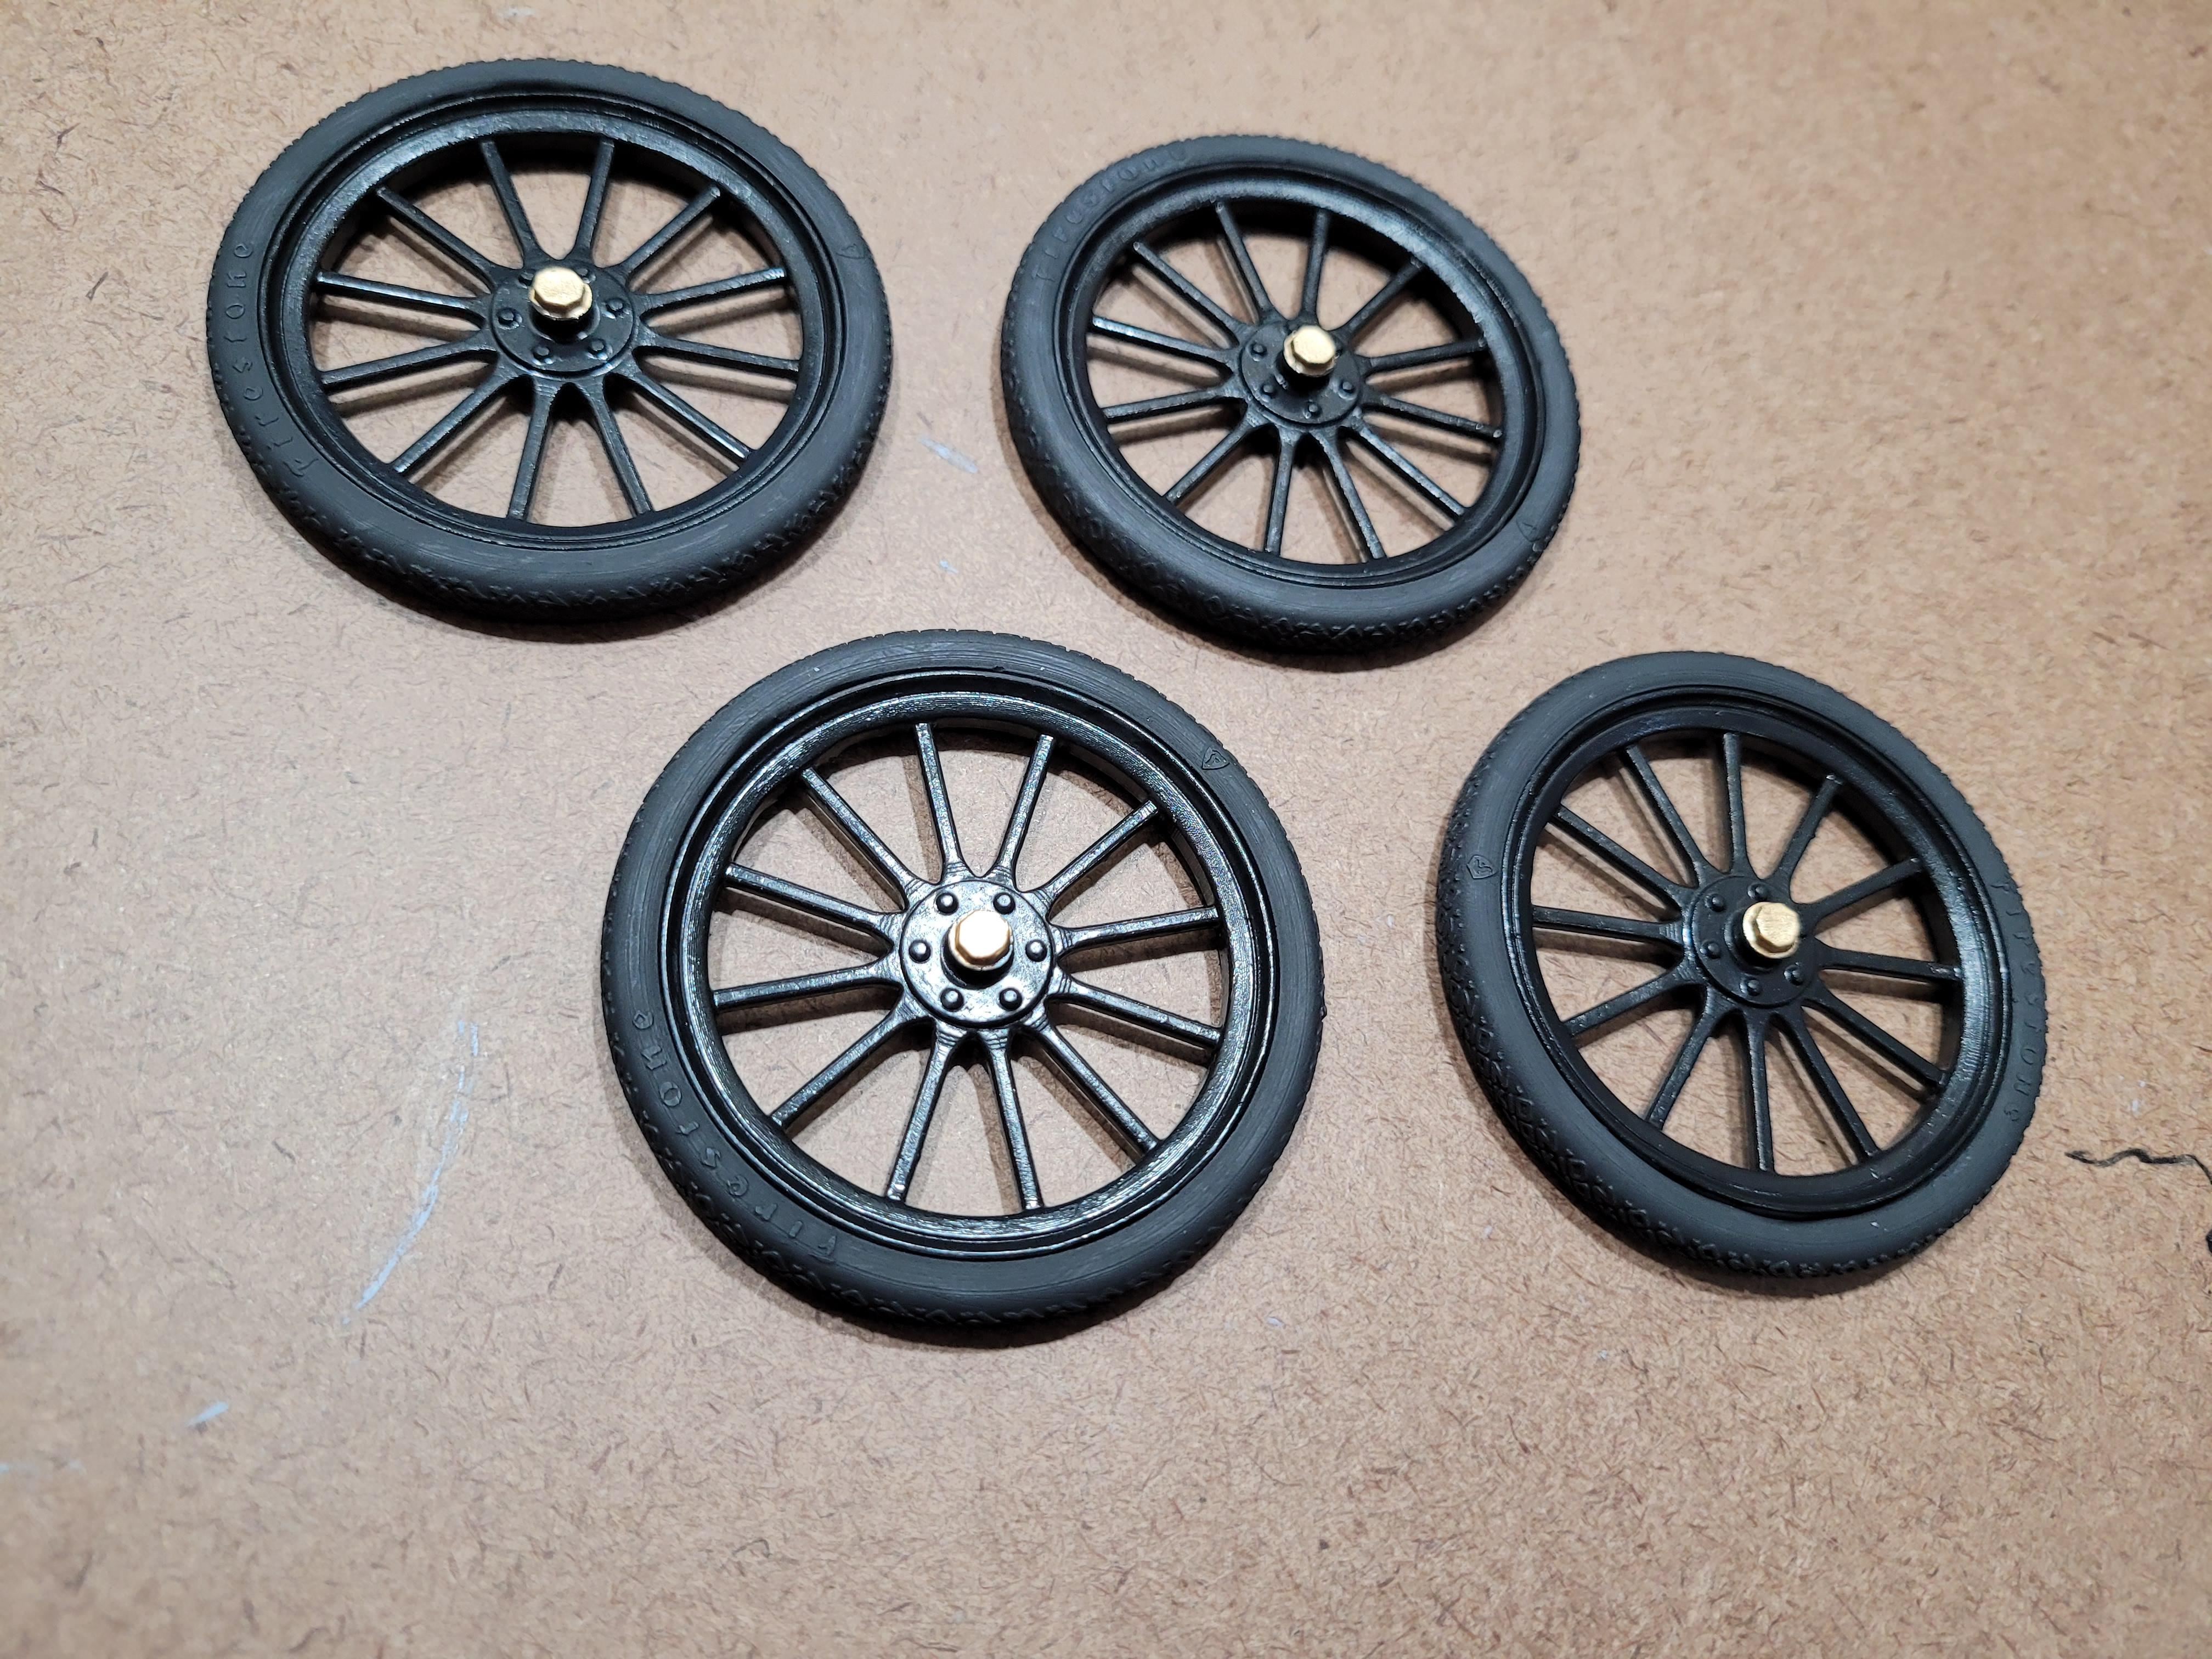
Here are the tires and wheels. I reprinted these because the earlier prints were too large, and I wasn't happy with the FDM wheels. I scaled them down, and printed them with resin. Both tires and wheels were painted in flat black automotive primer. Then the wheels were coated with one layer of semi gloss polyurethene.
-
Charlie, I modeled the parts in CAD. I started with the plans from Hudson Miniatures which was drawn in 1949 in 1/16 scale. Hudson made a number of balsa kits that are remarkably good for that time. In 1961, Aurora tooled 6 of these models in plastic, but the Maxwell was not one of them. Starting with the plans from Hudson, I rescaled to 1/12, and then added many details from hundreds of pictures off the web. One of the difficult tasks is to determine which details to use, because at that time, many parts were hand fabricated, and rarely would any two cars be produced identically. At 1/12 scale, the wheelbase is 7.3 inches.
-
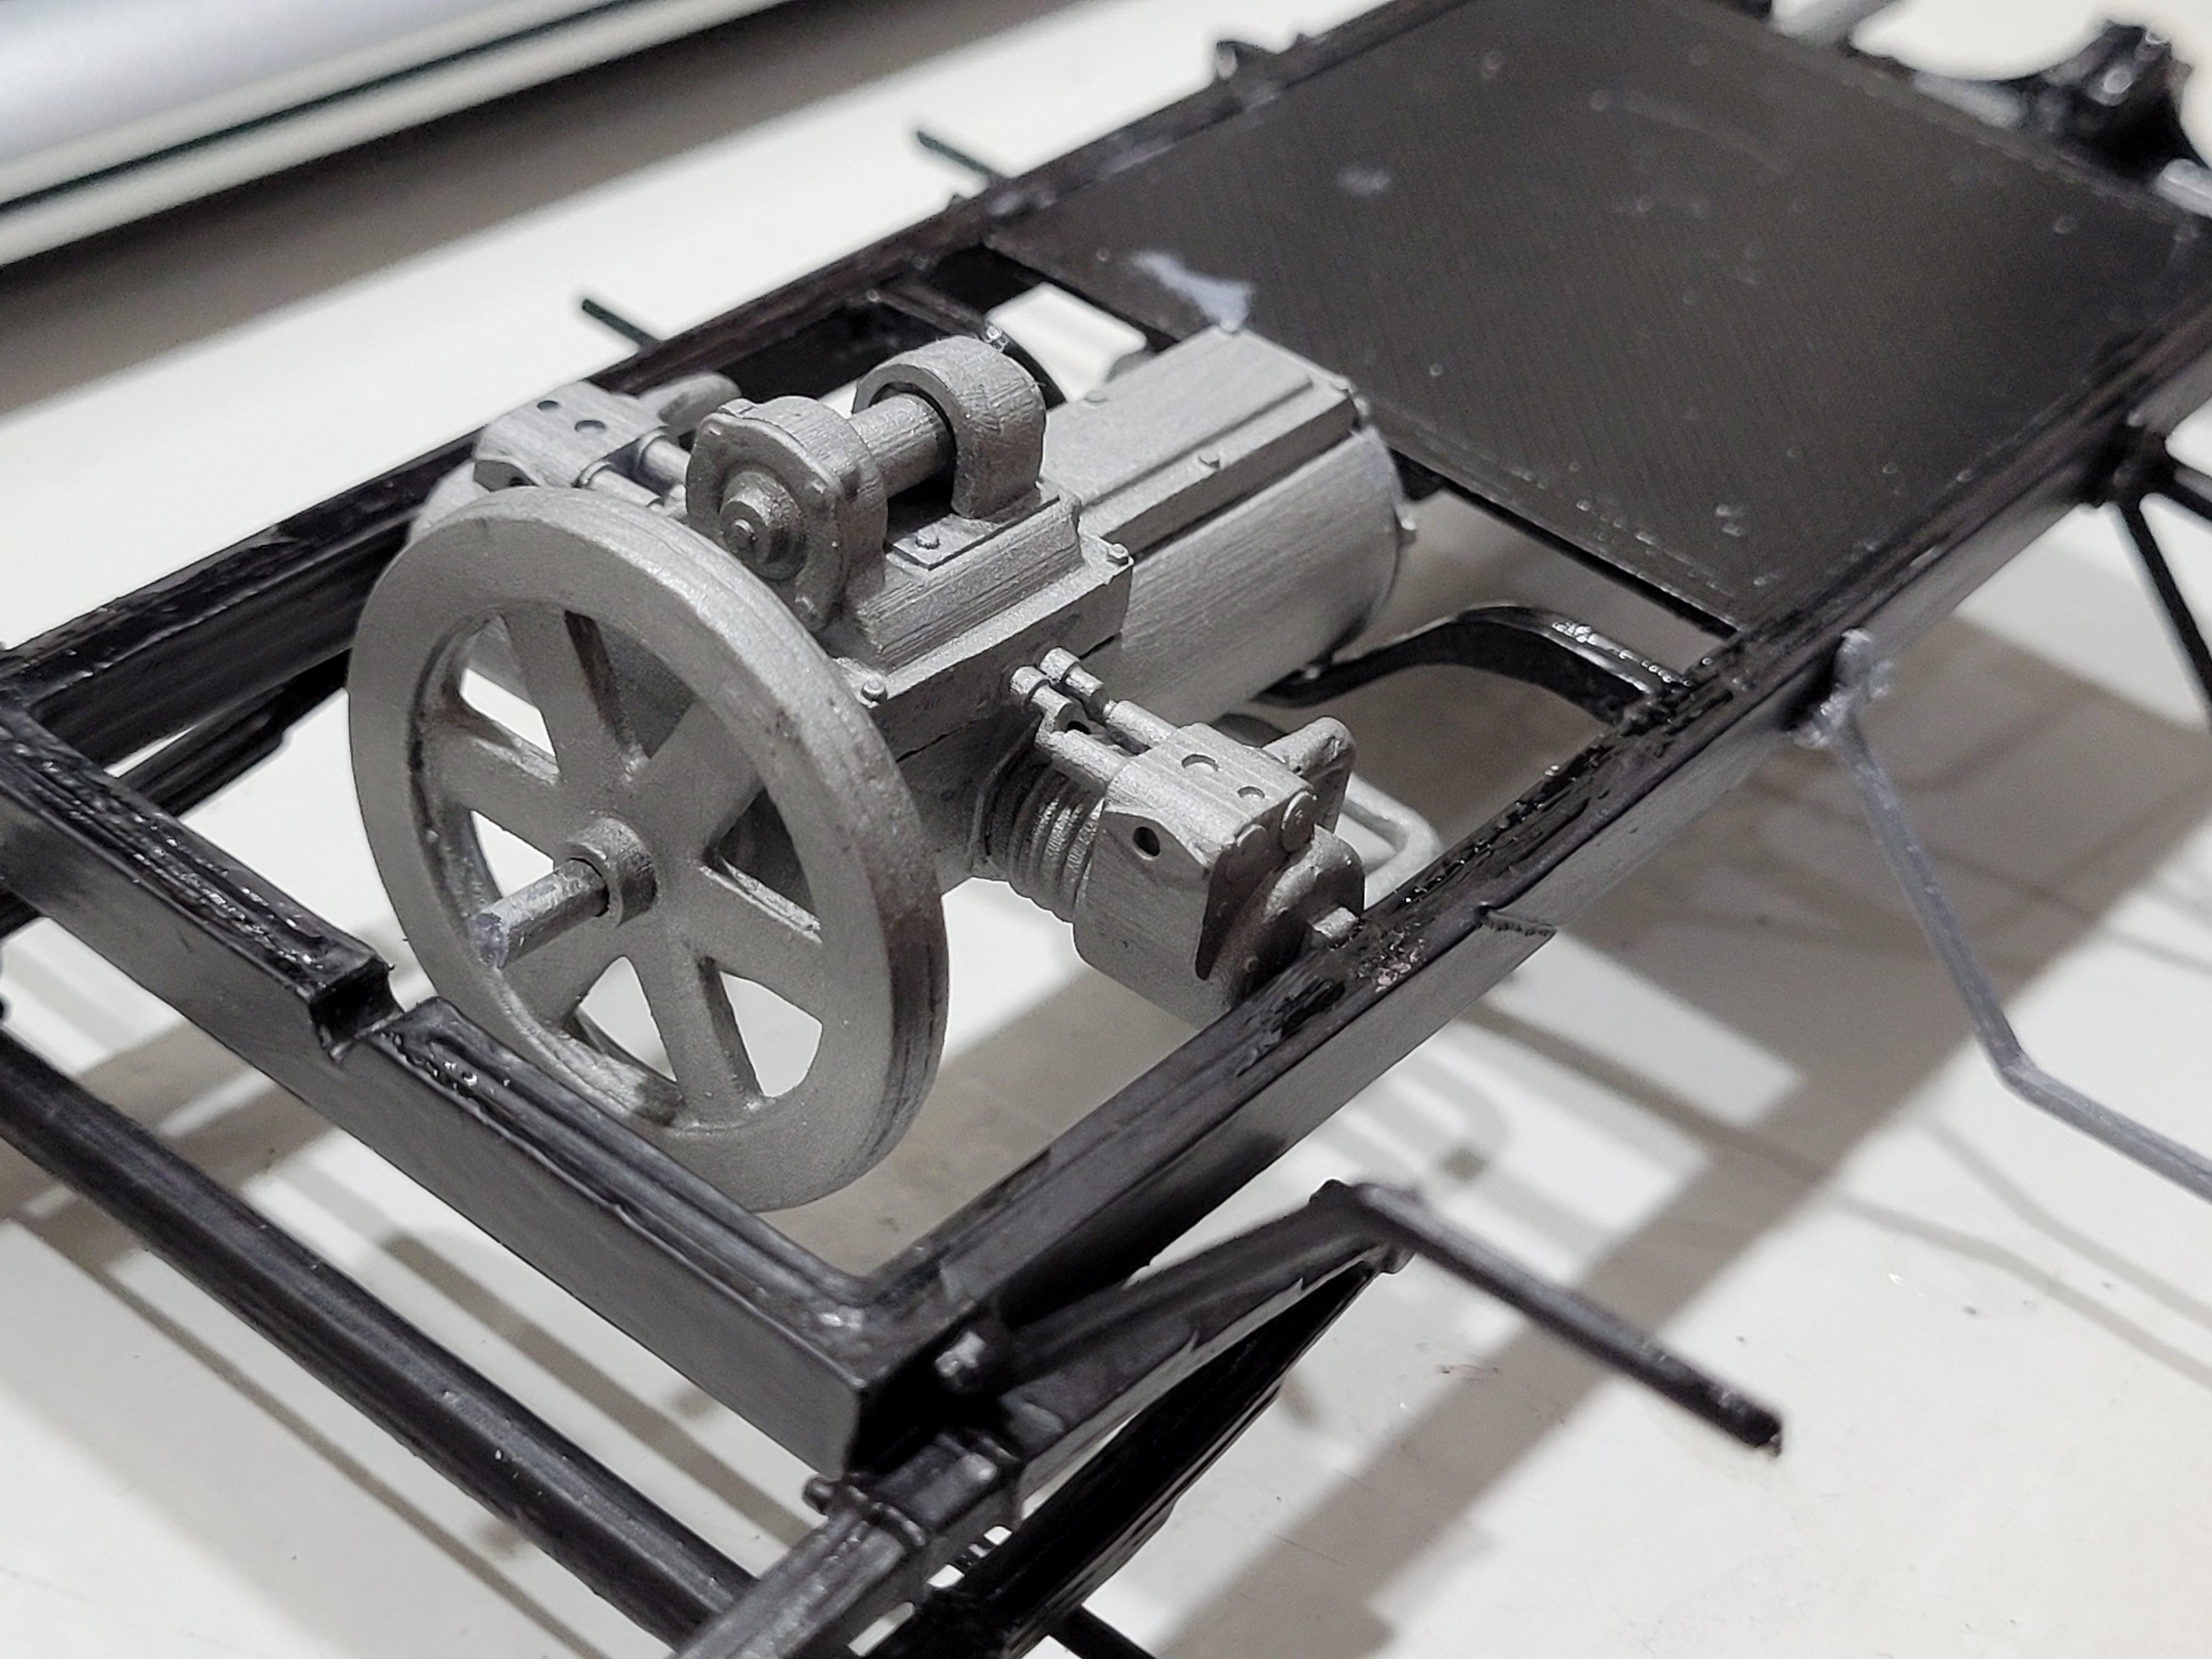
Flywheel placed on crankshaft, and engine in place between frame rails.
-
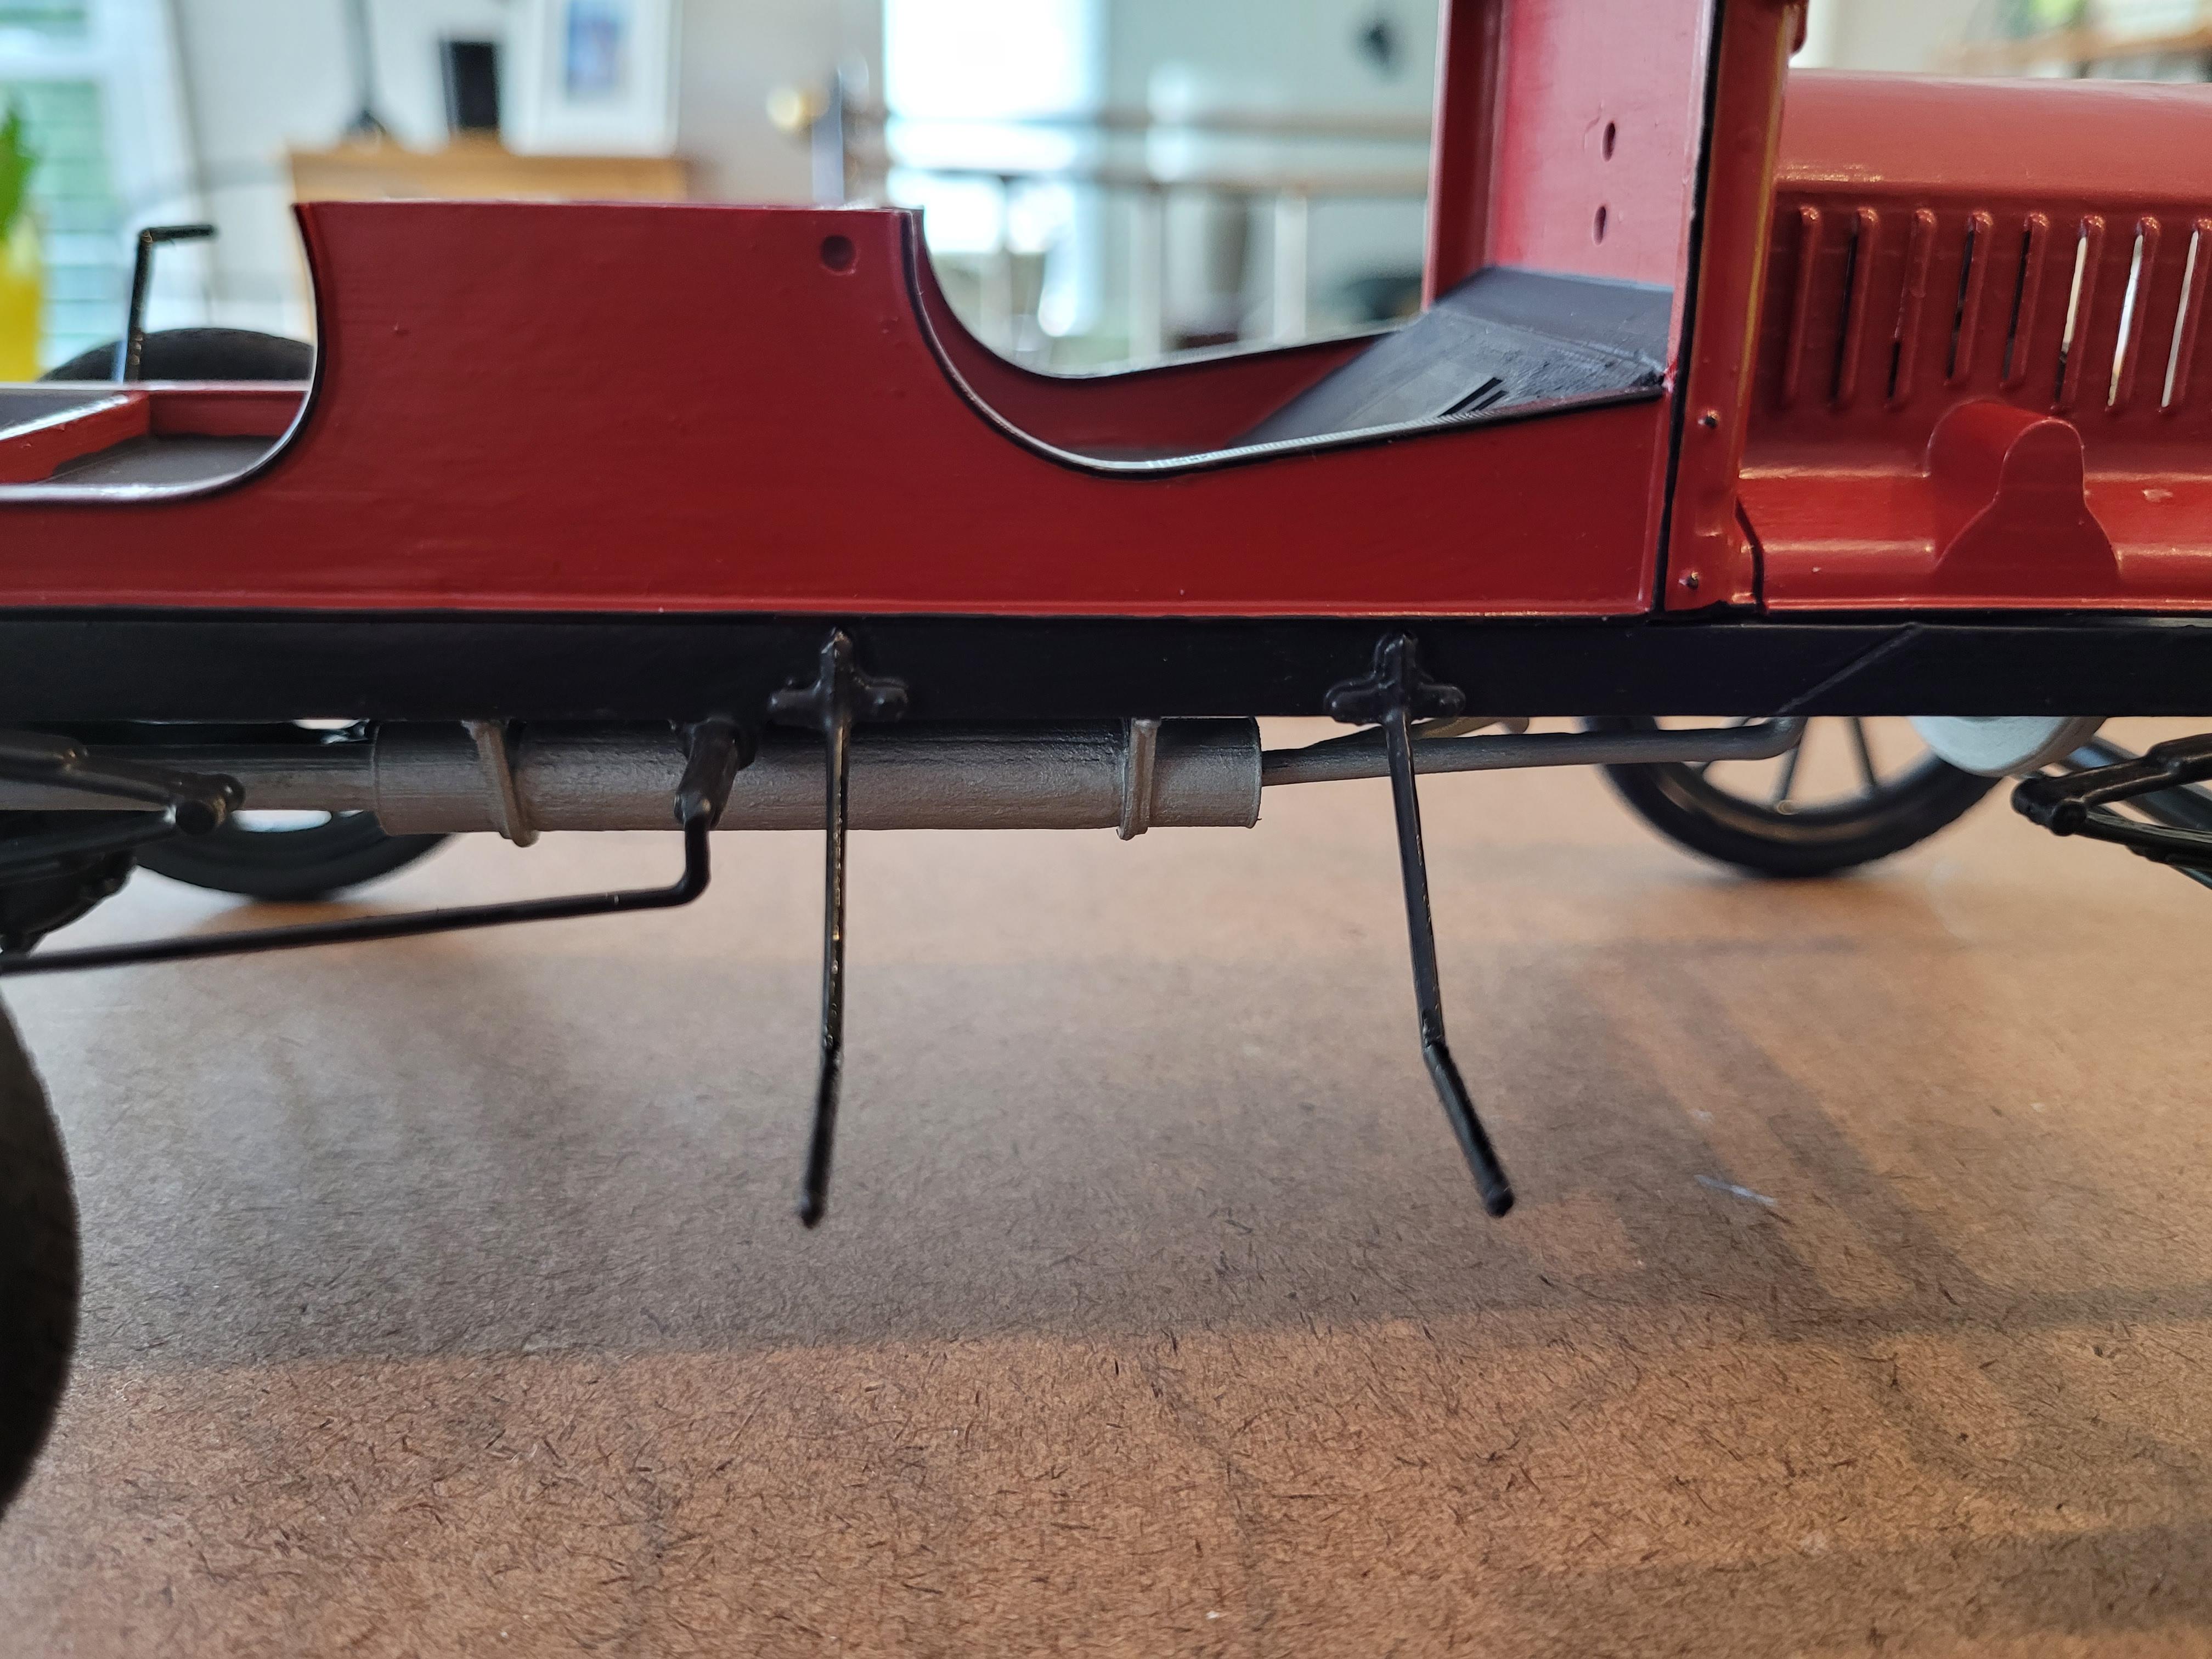
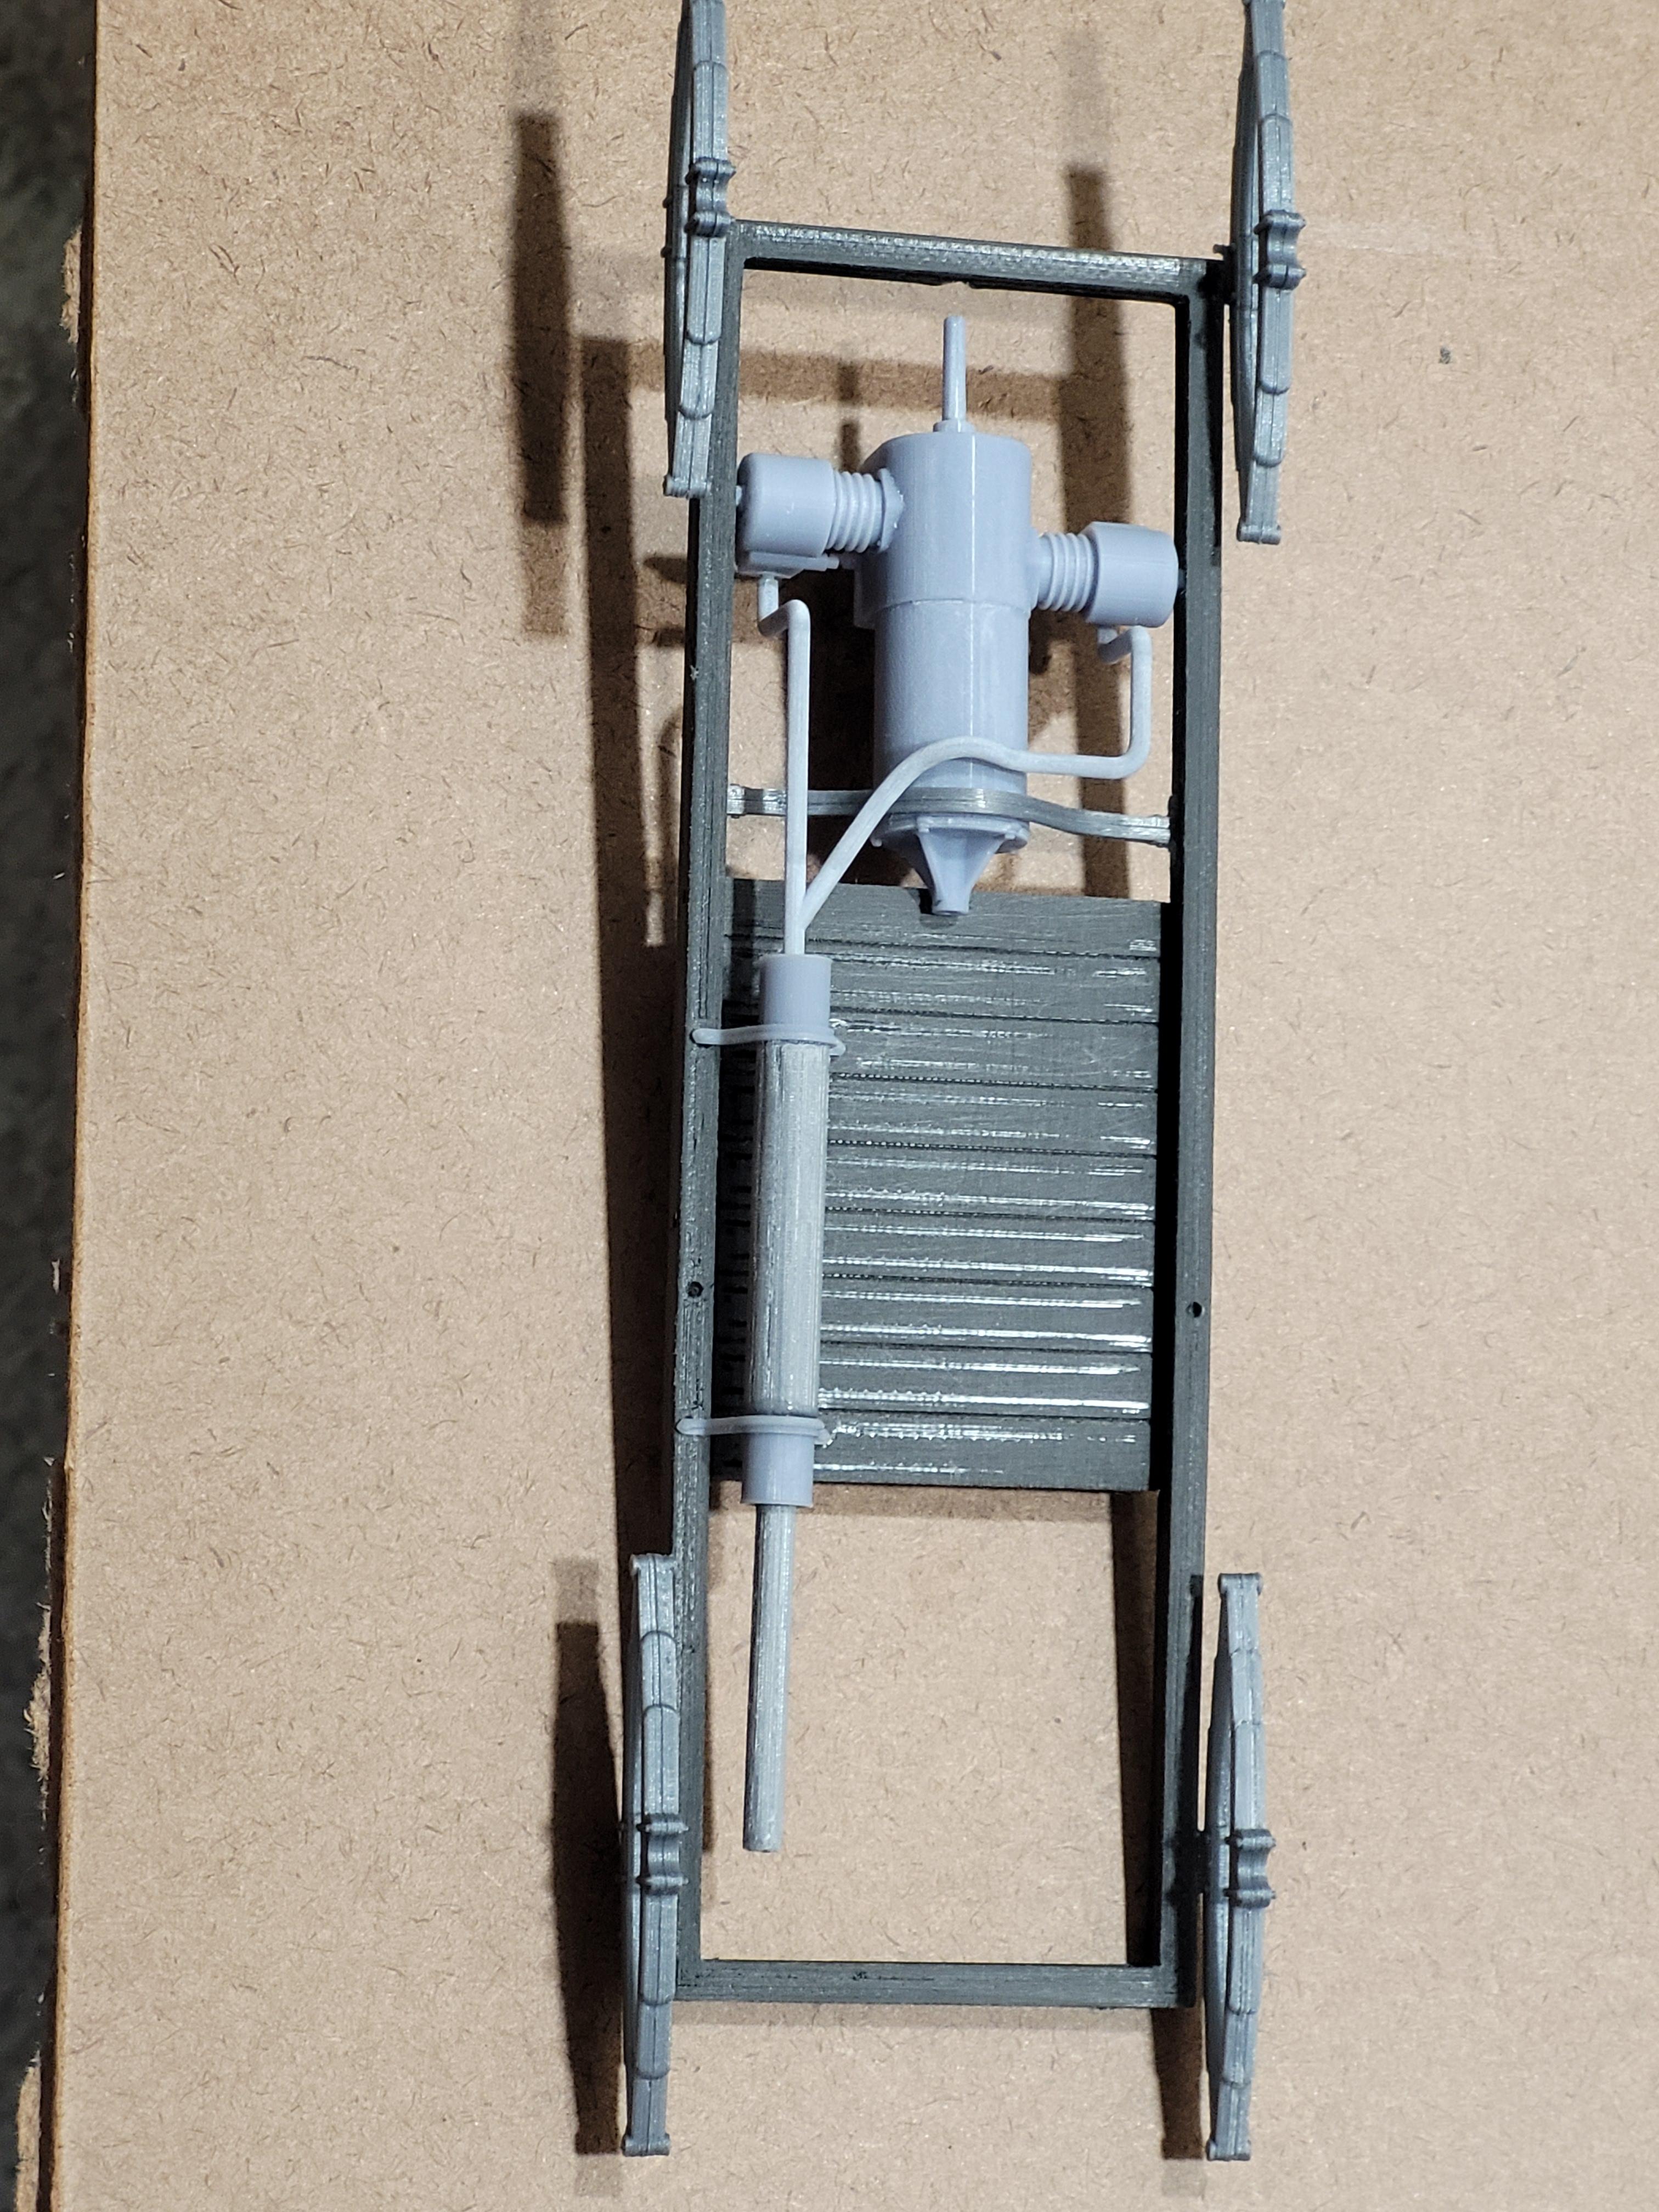
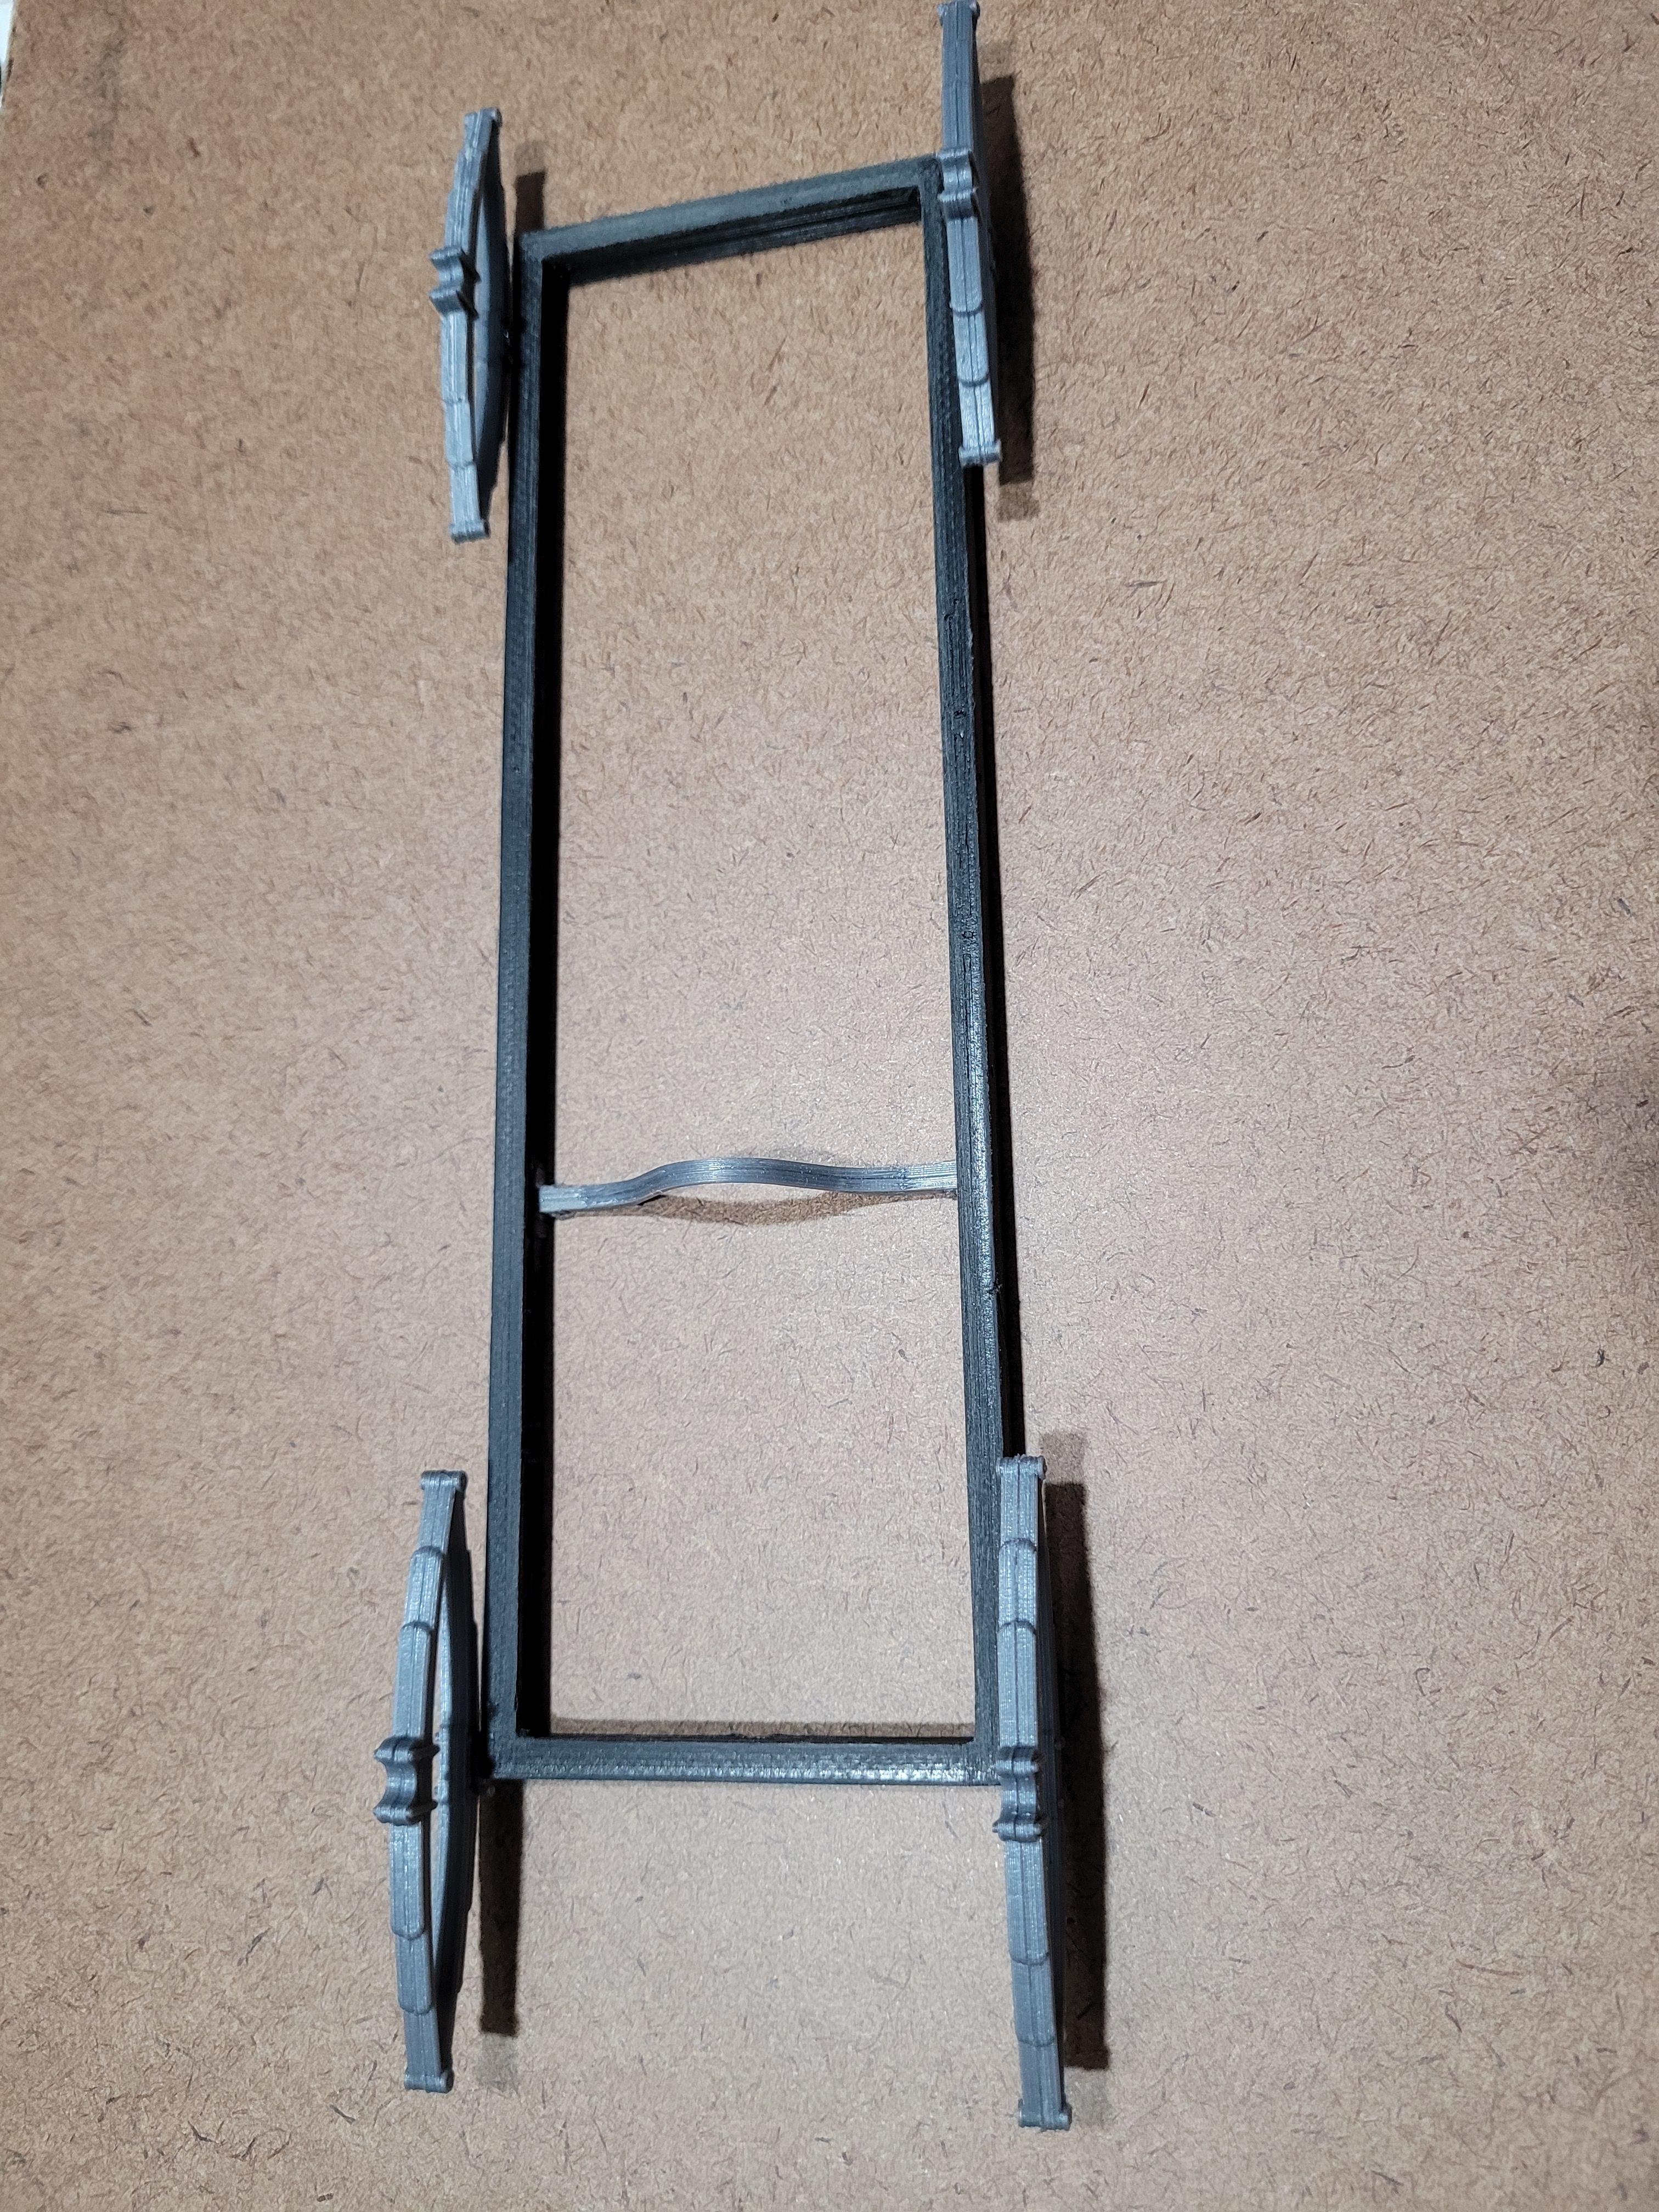
Here is a shot of the underside of the chassis.
-
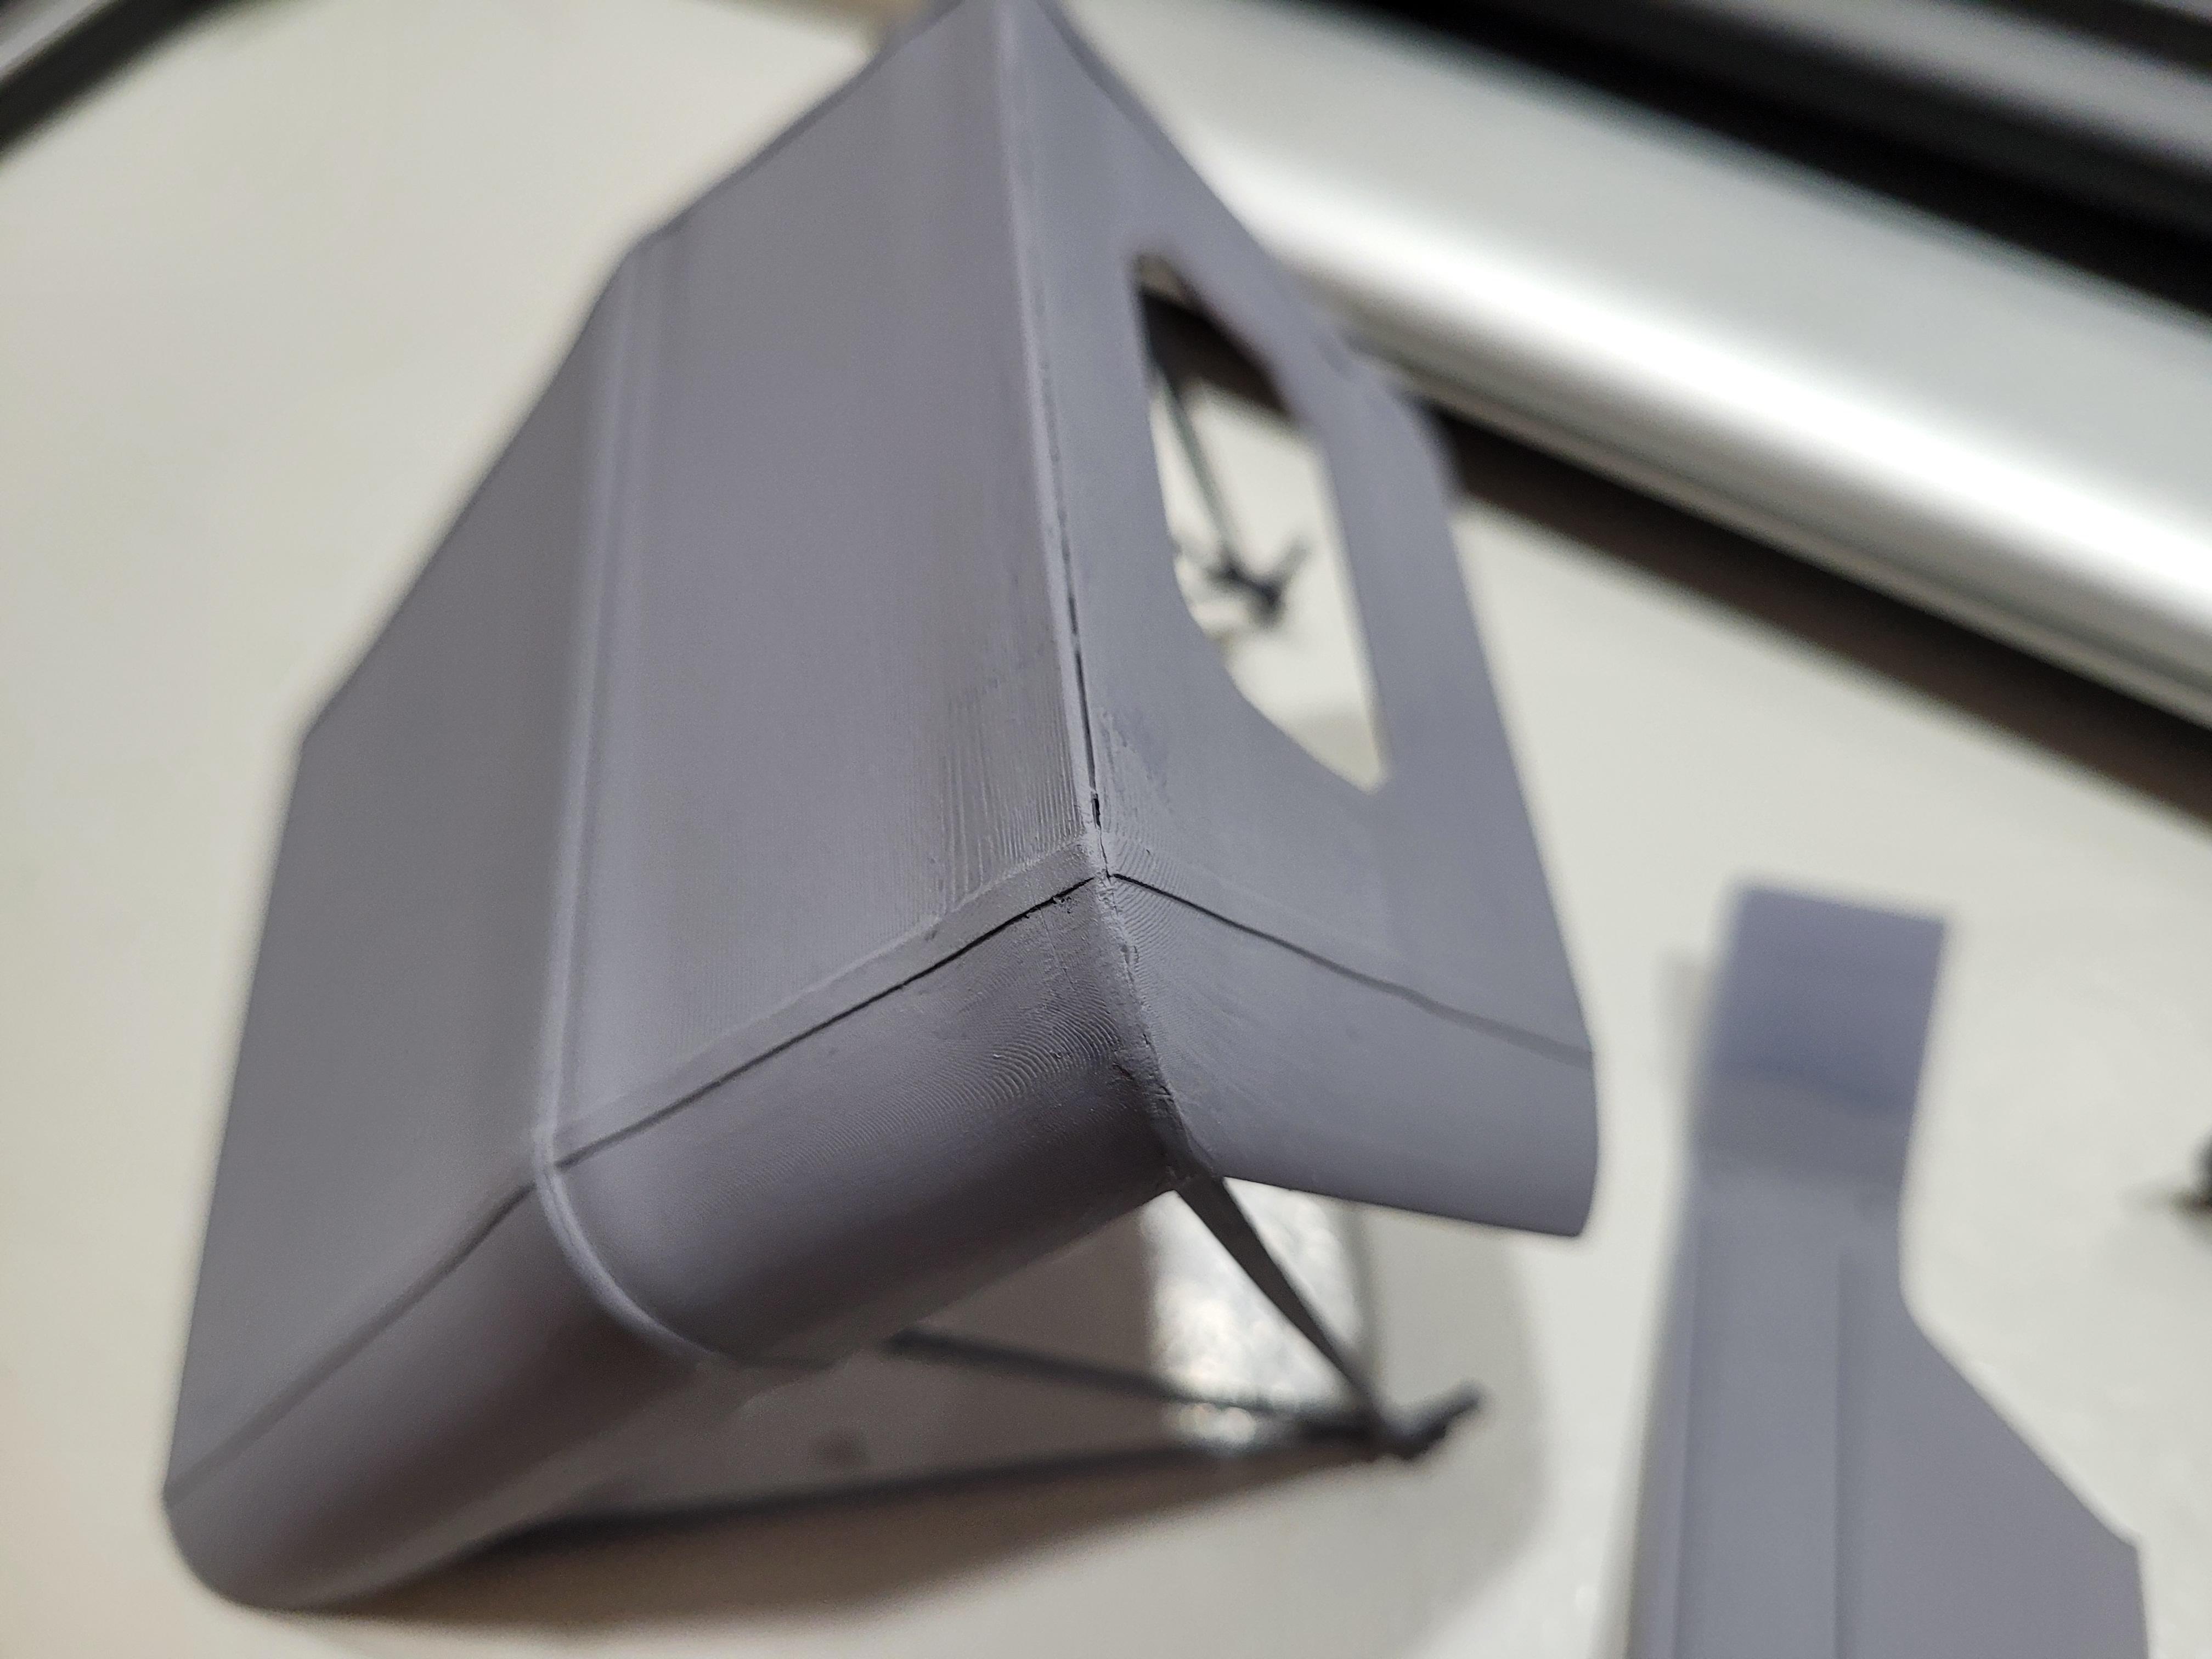
Fenders and top is printed.
-
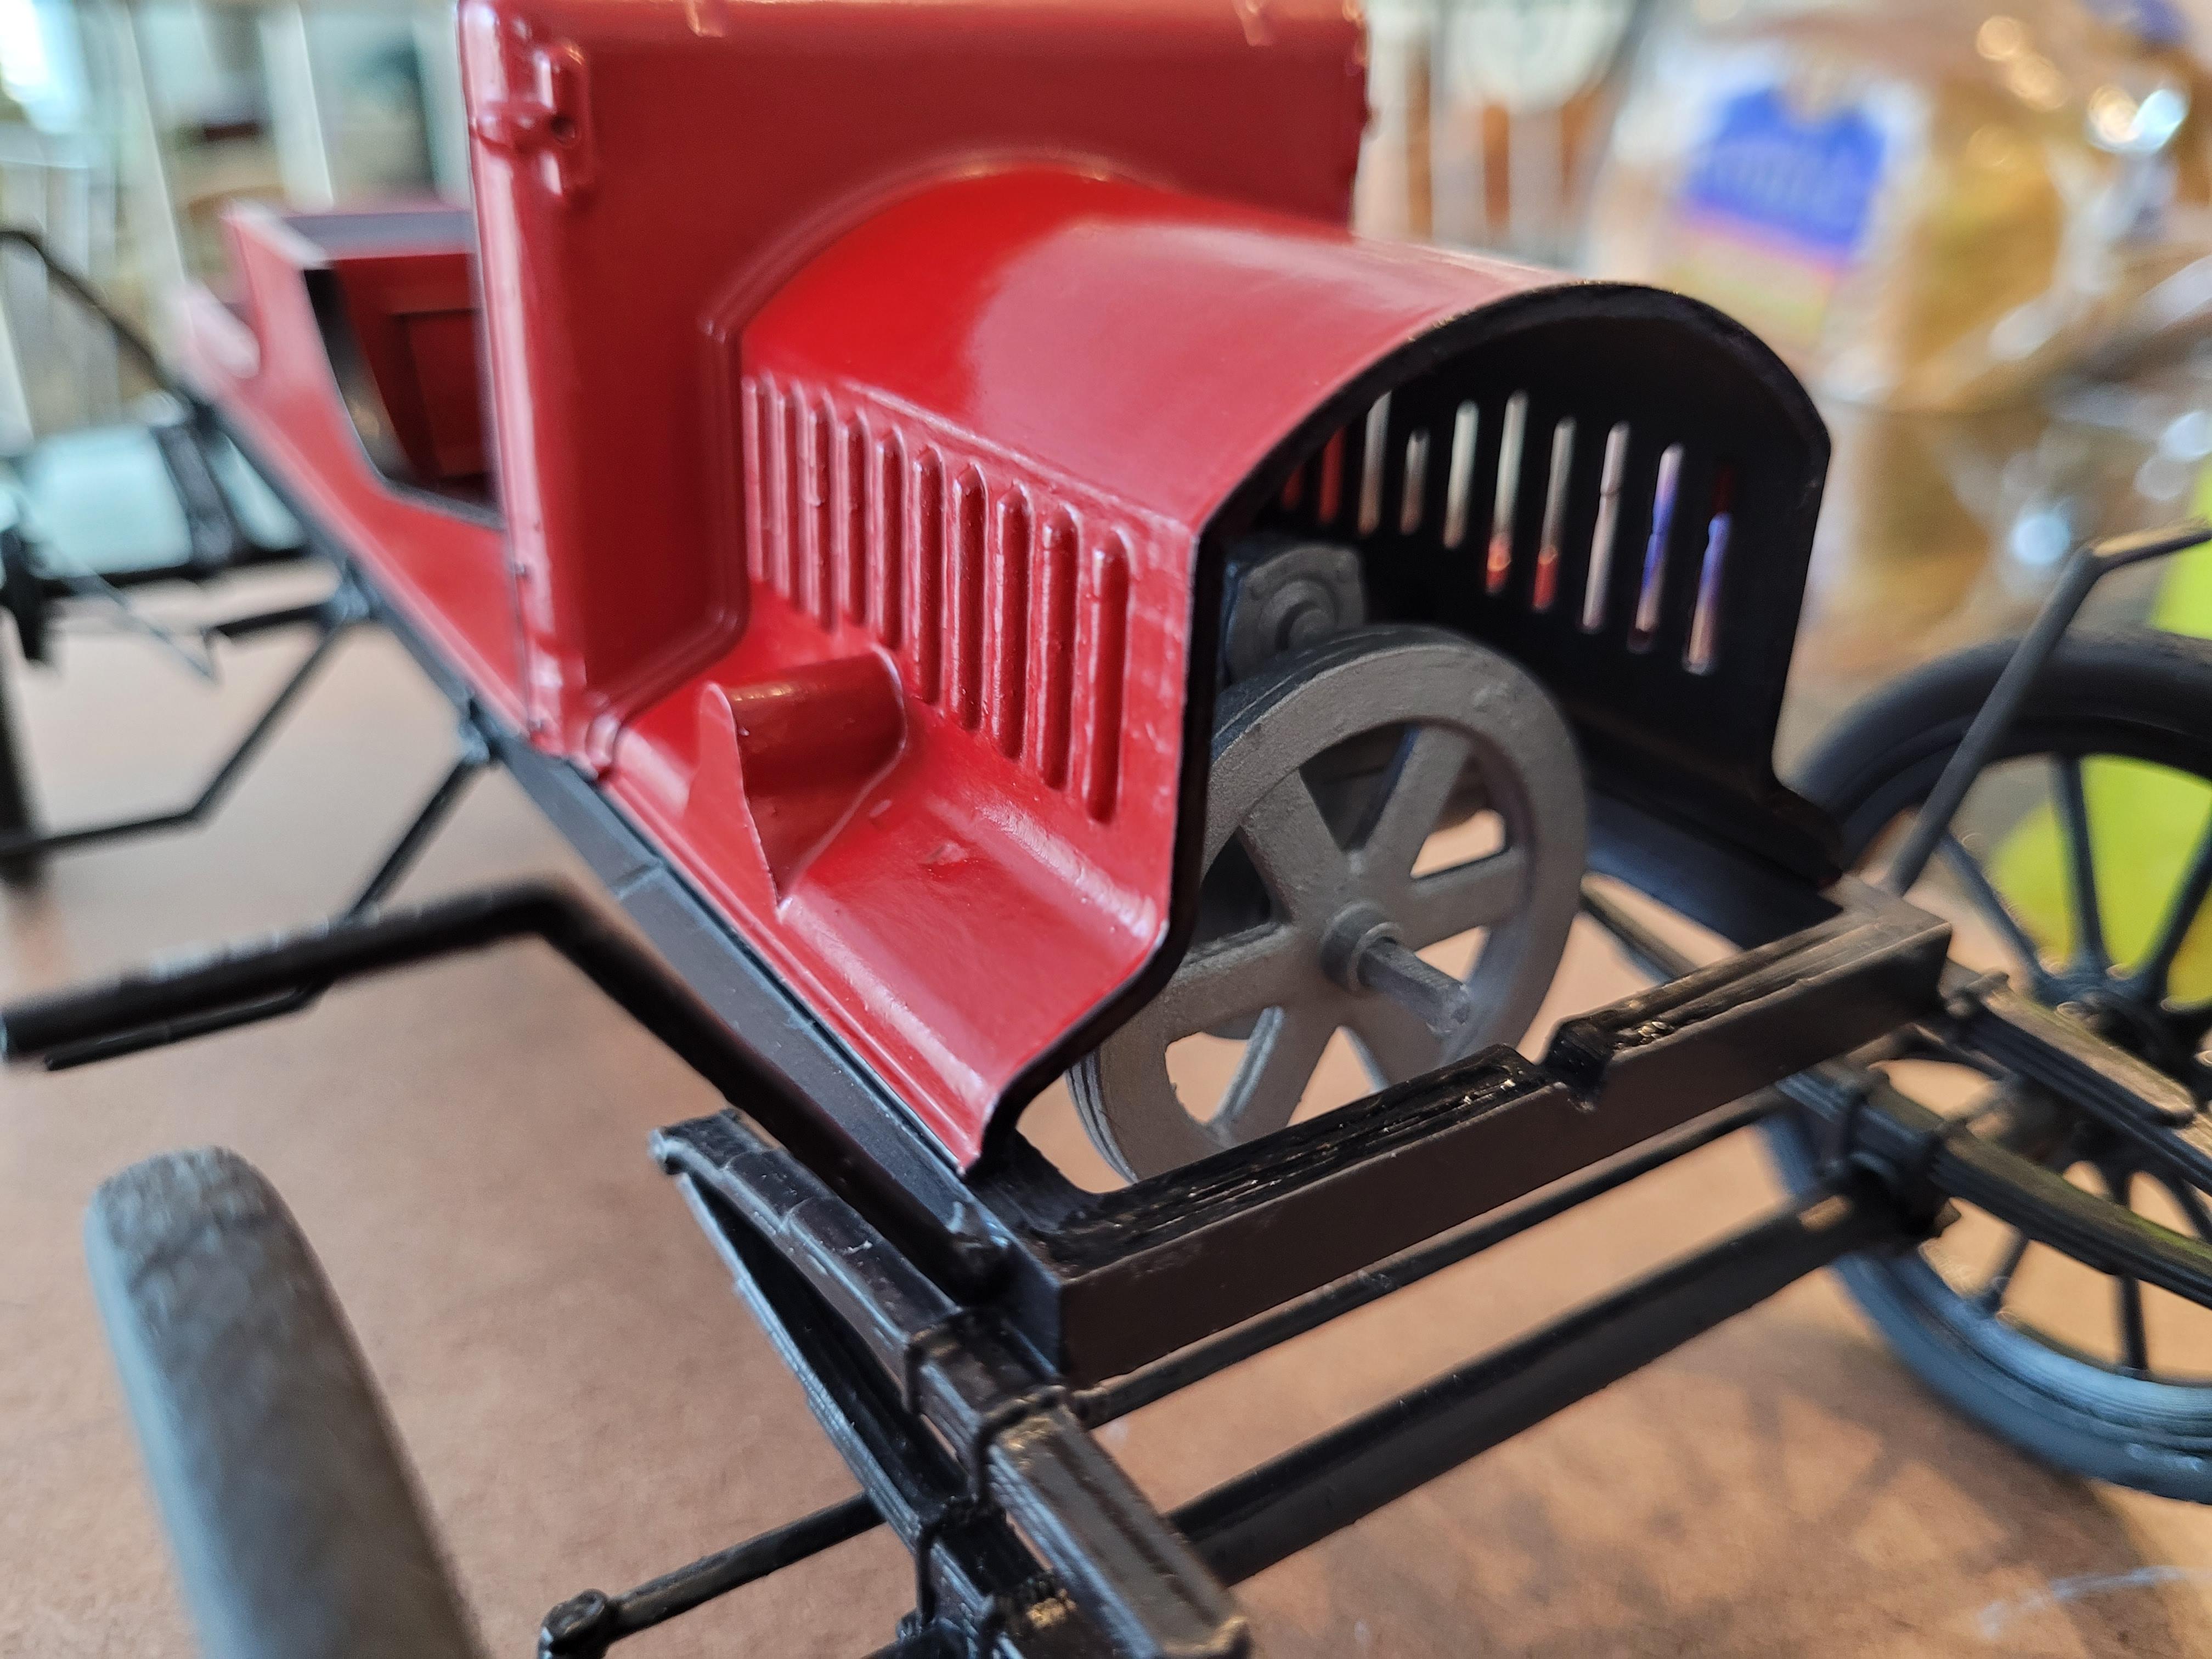
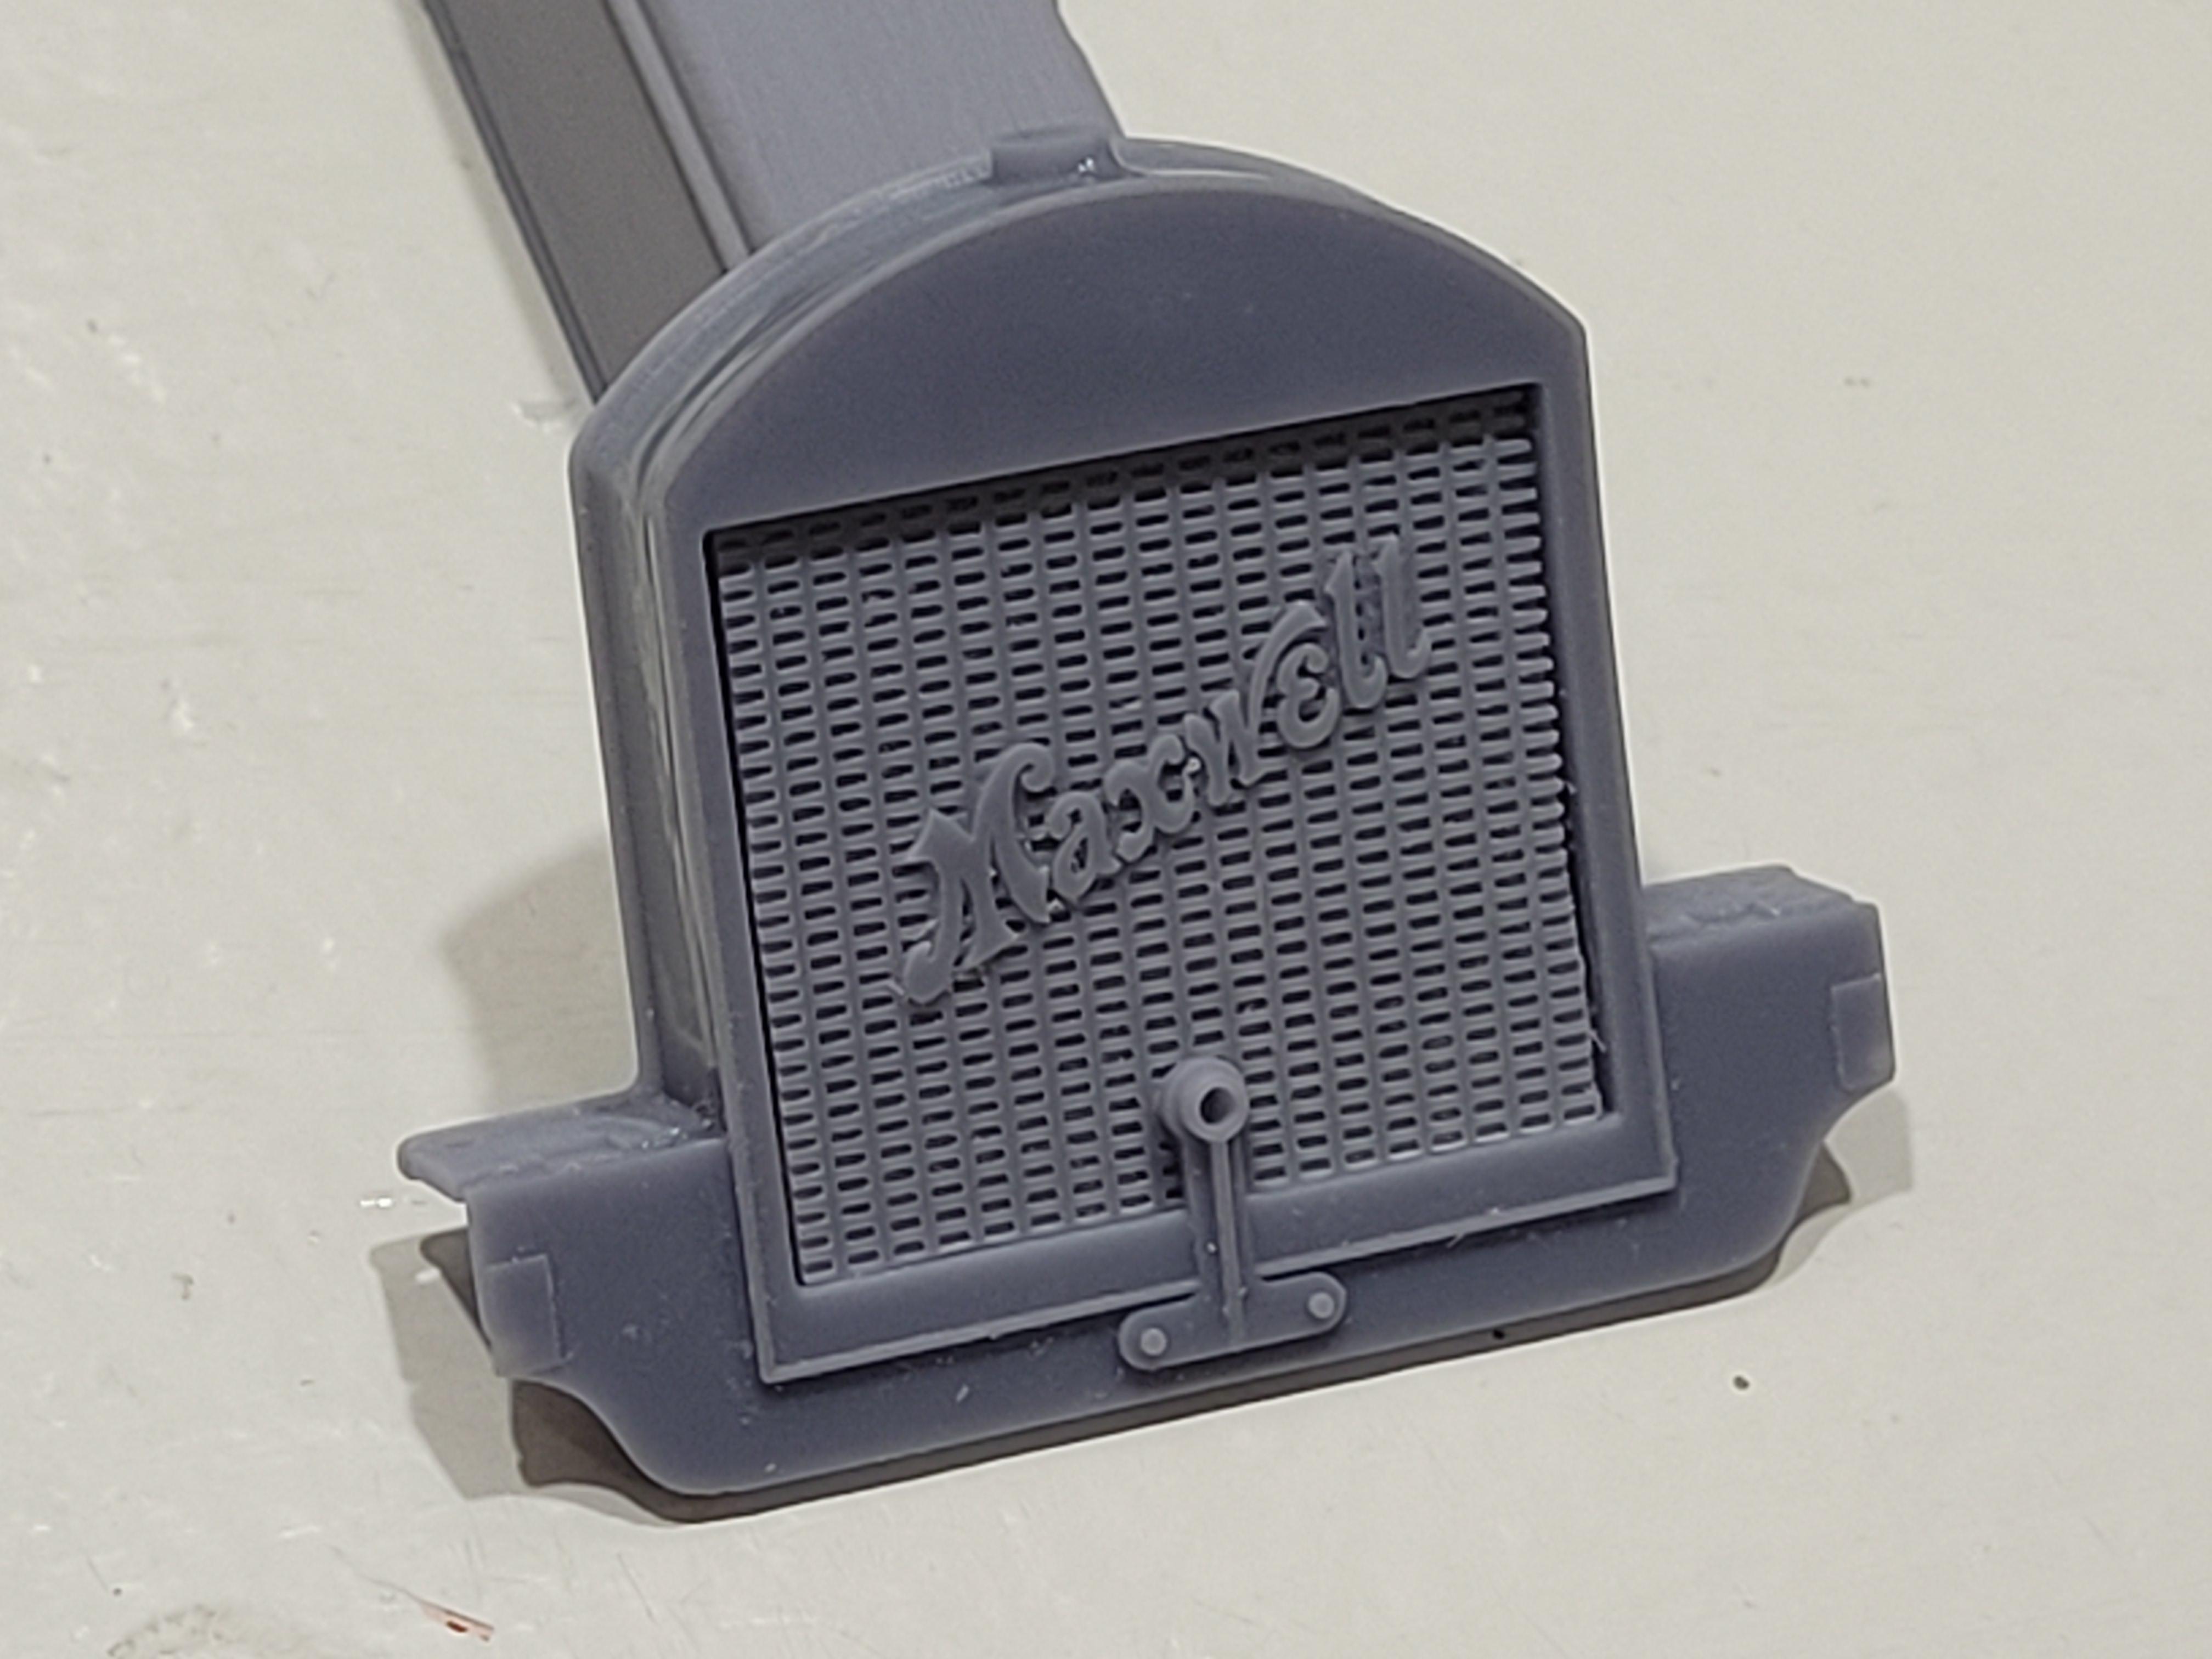
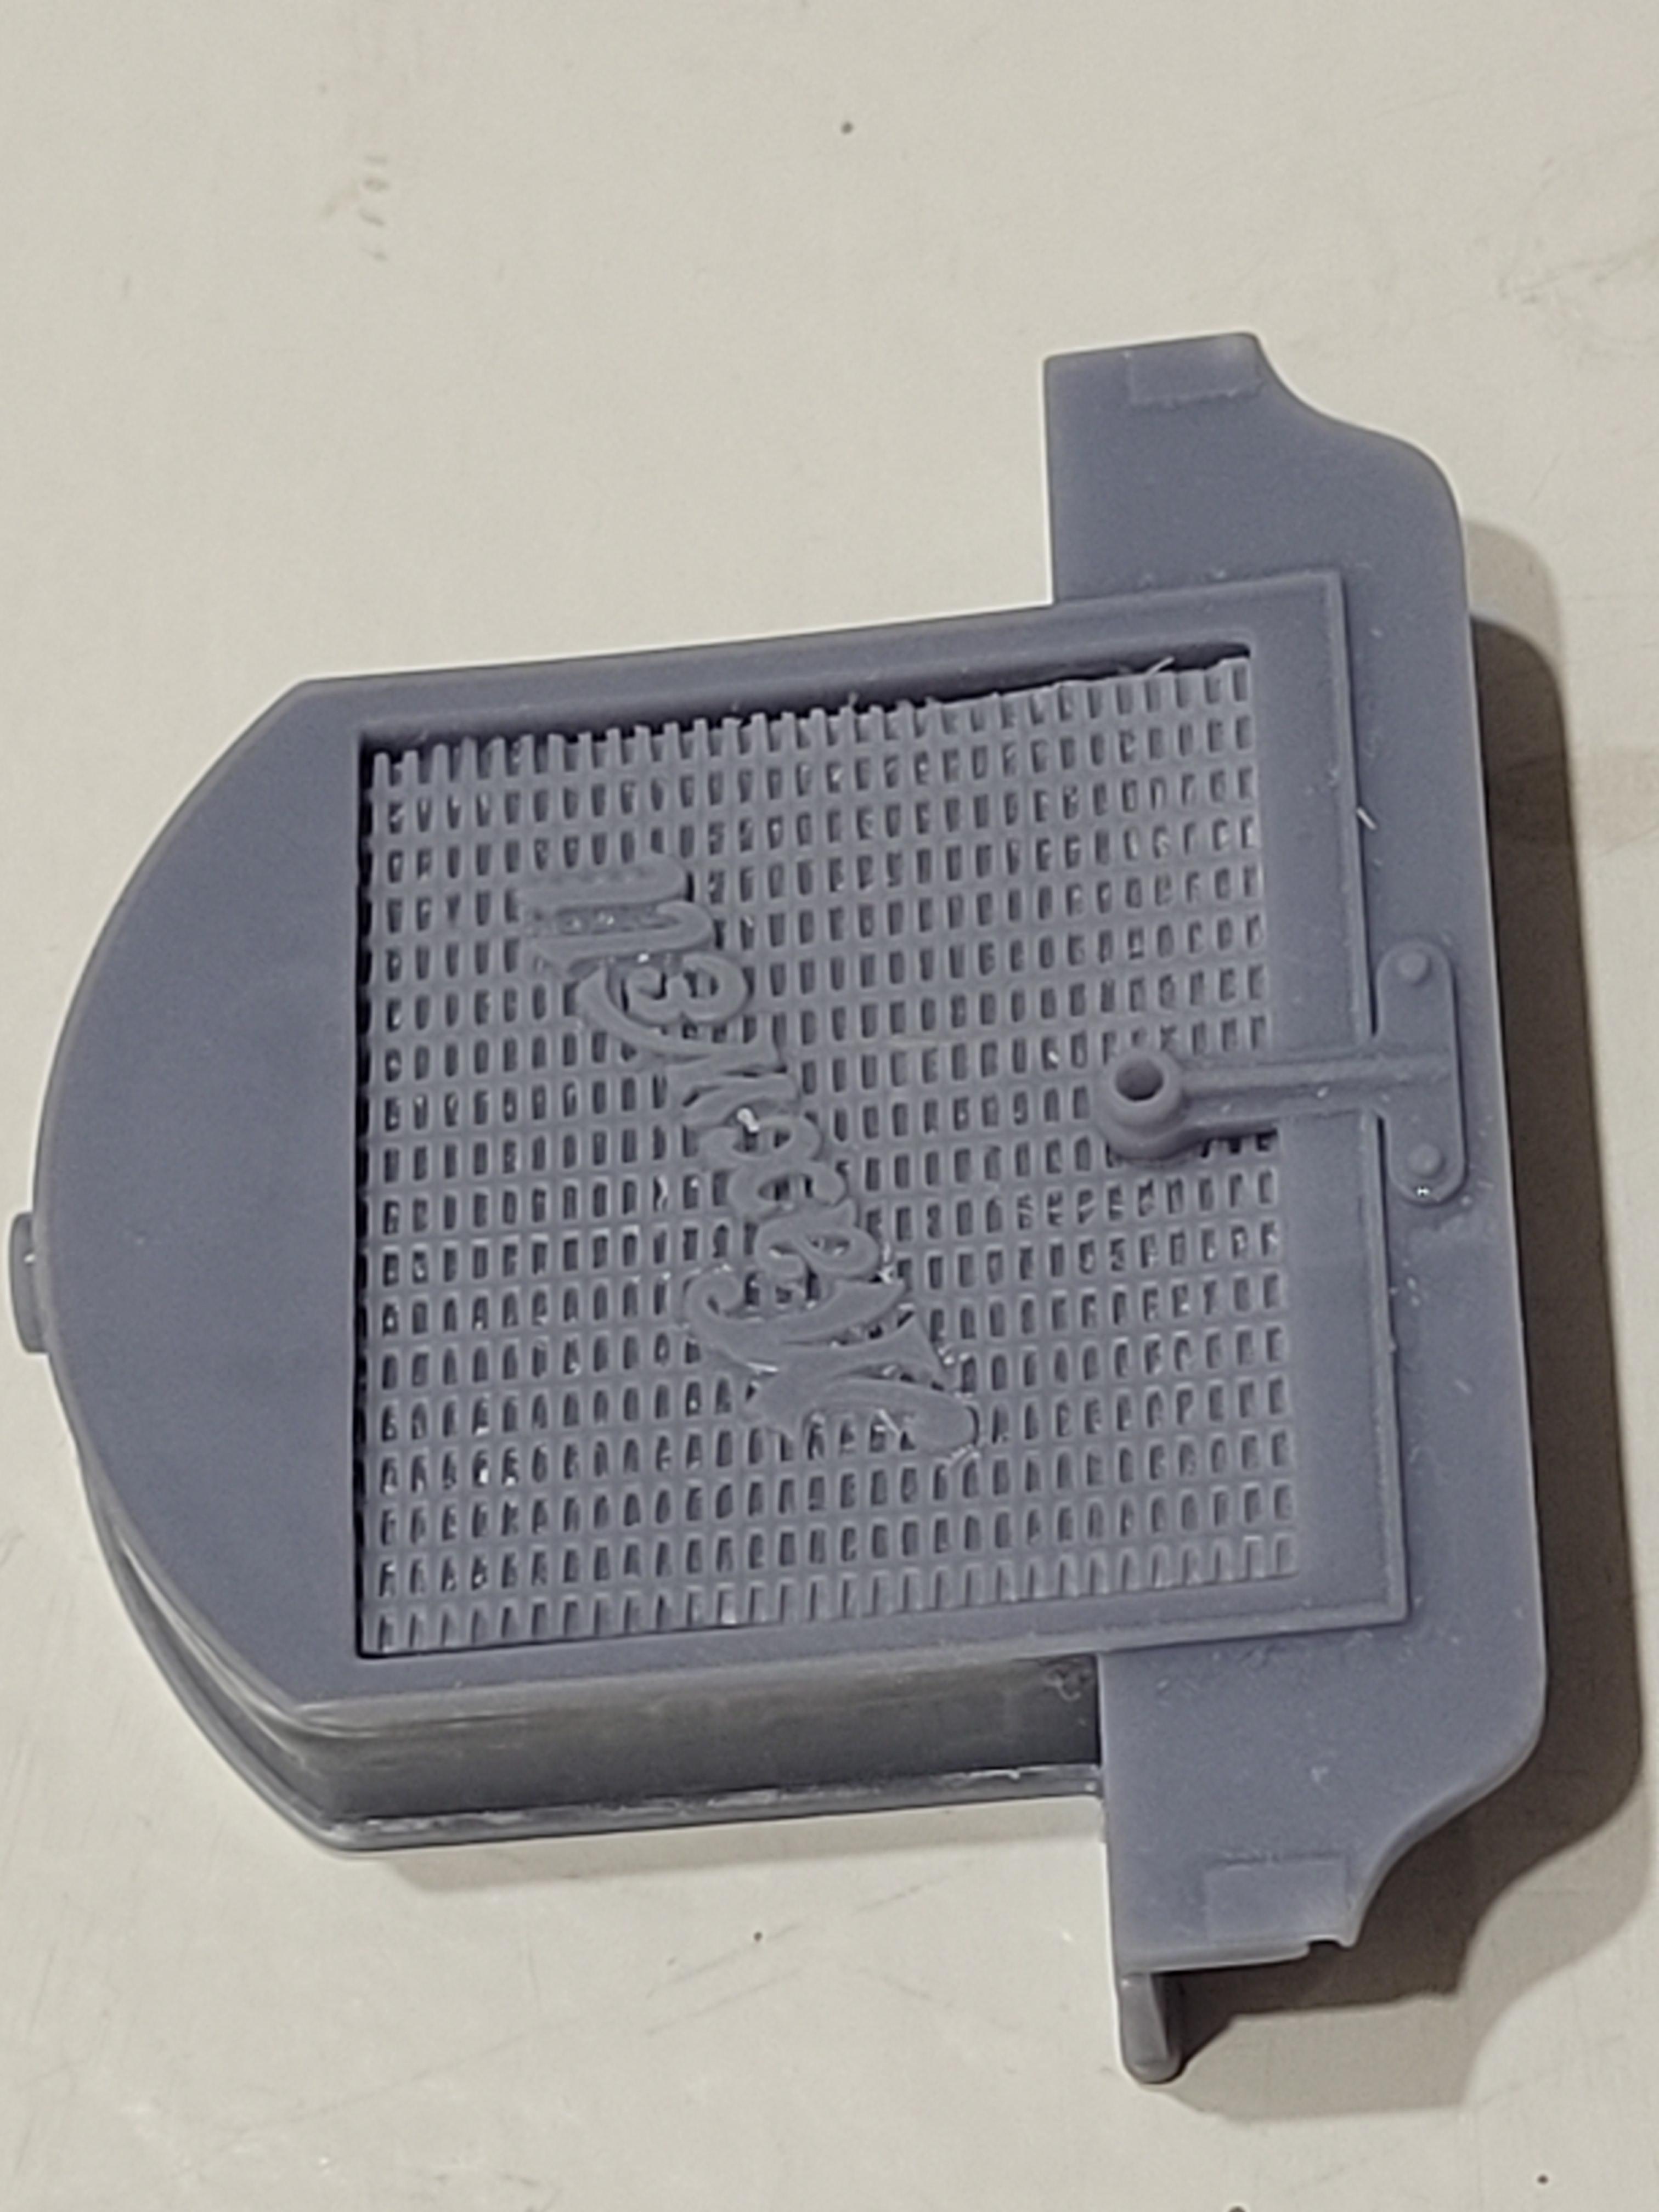
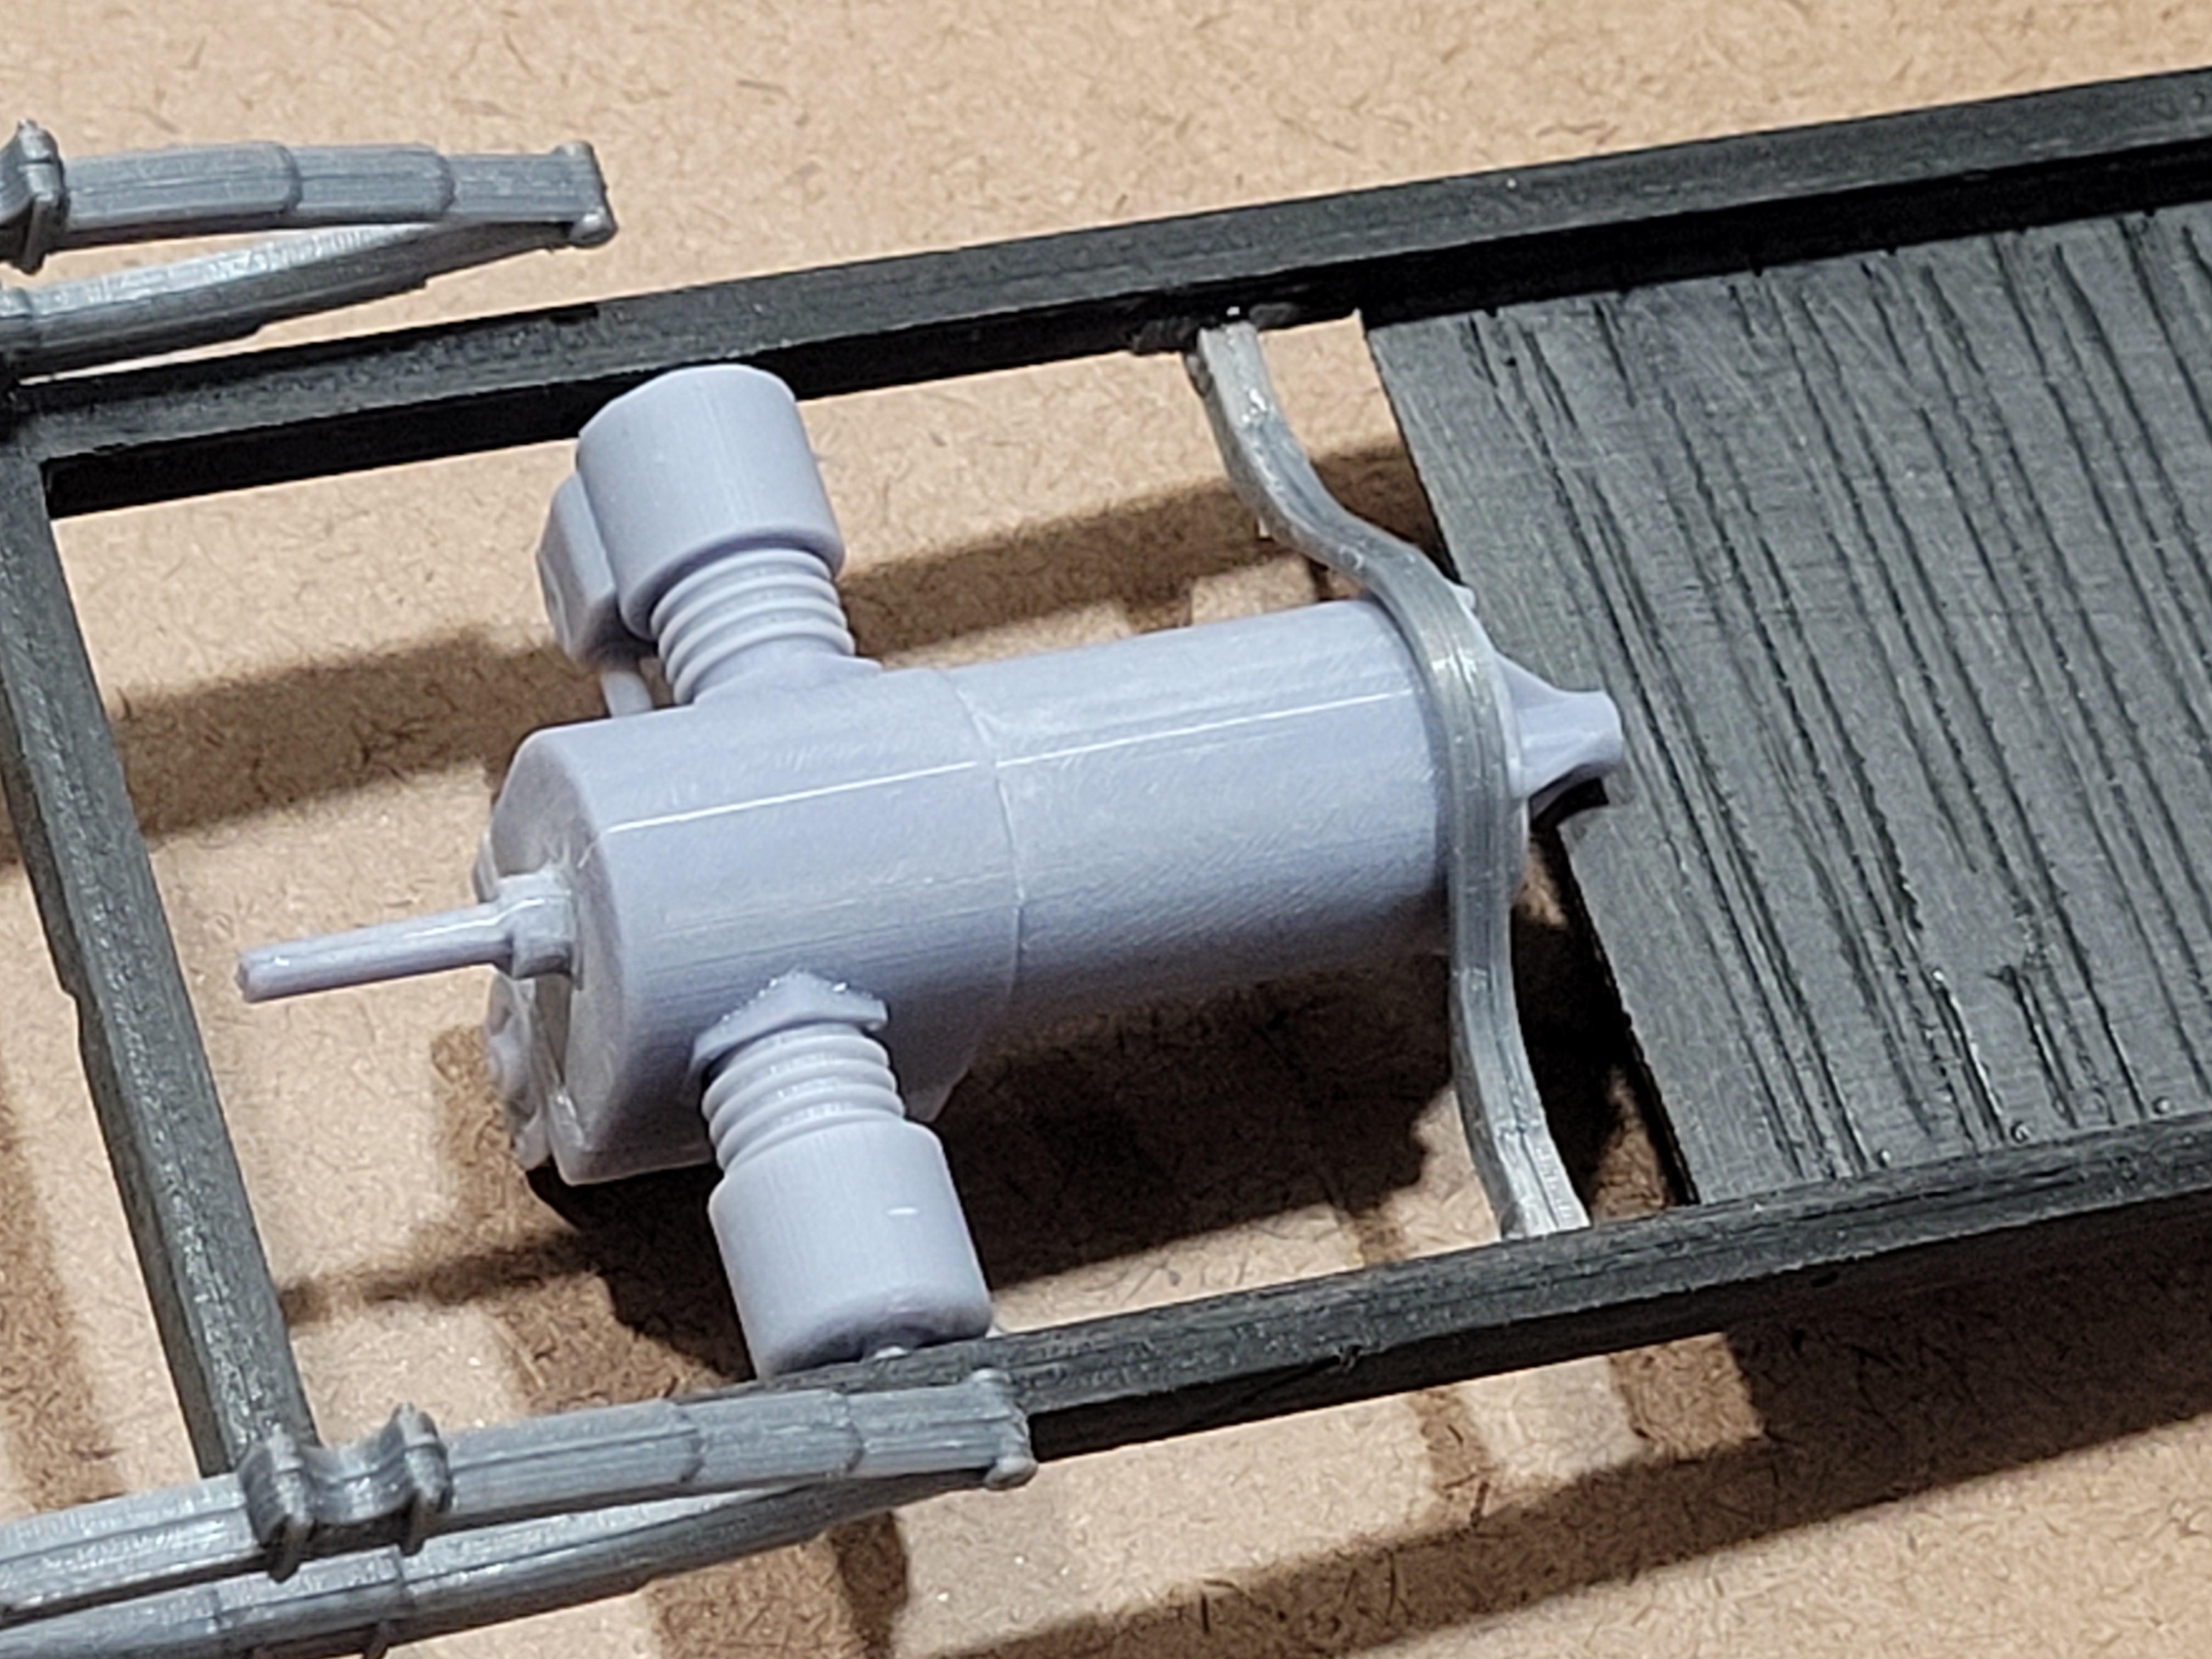
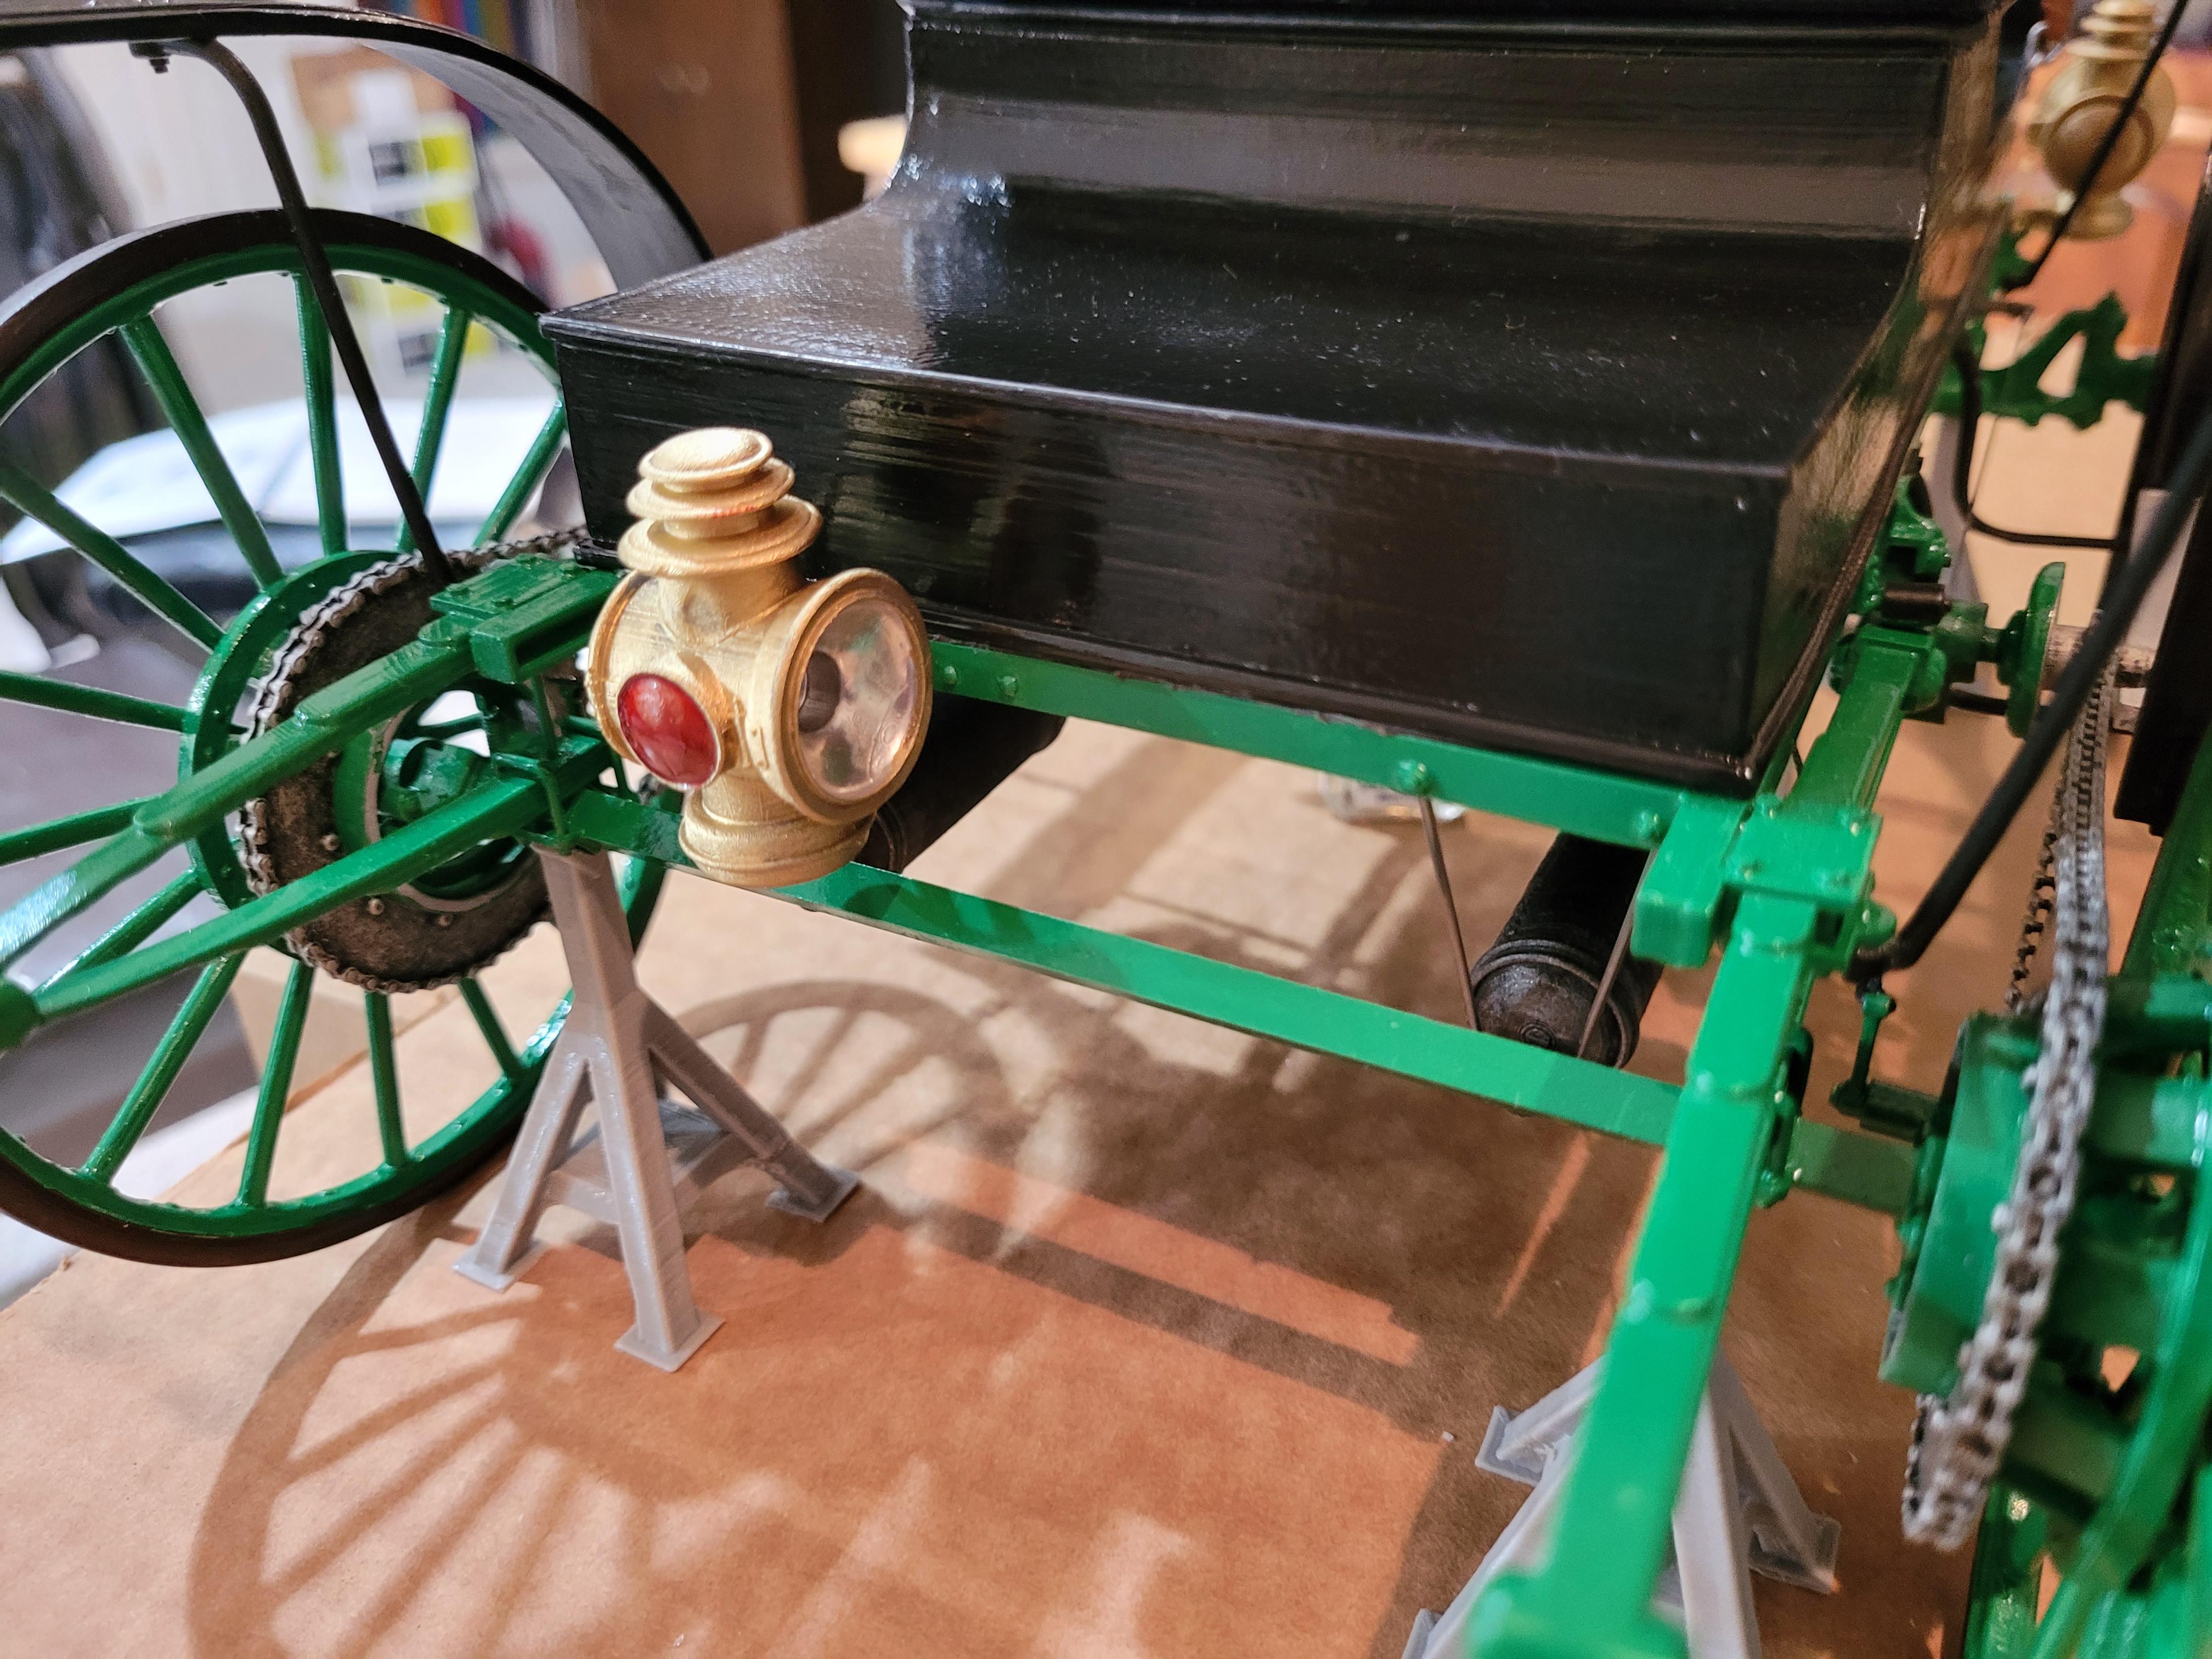
The radiator assembly is made from 4 parts. The front and back grills are sandwiched between the outer shell halves. One of the nice things about resin parts is that seams and imperfections are easily repaired with drops of resin, then files/sanded.
-
The wheels were printed in 2 halves. They are going to require quite a bit of finishing work to remove the evidence of printing.
-
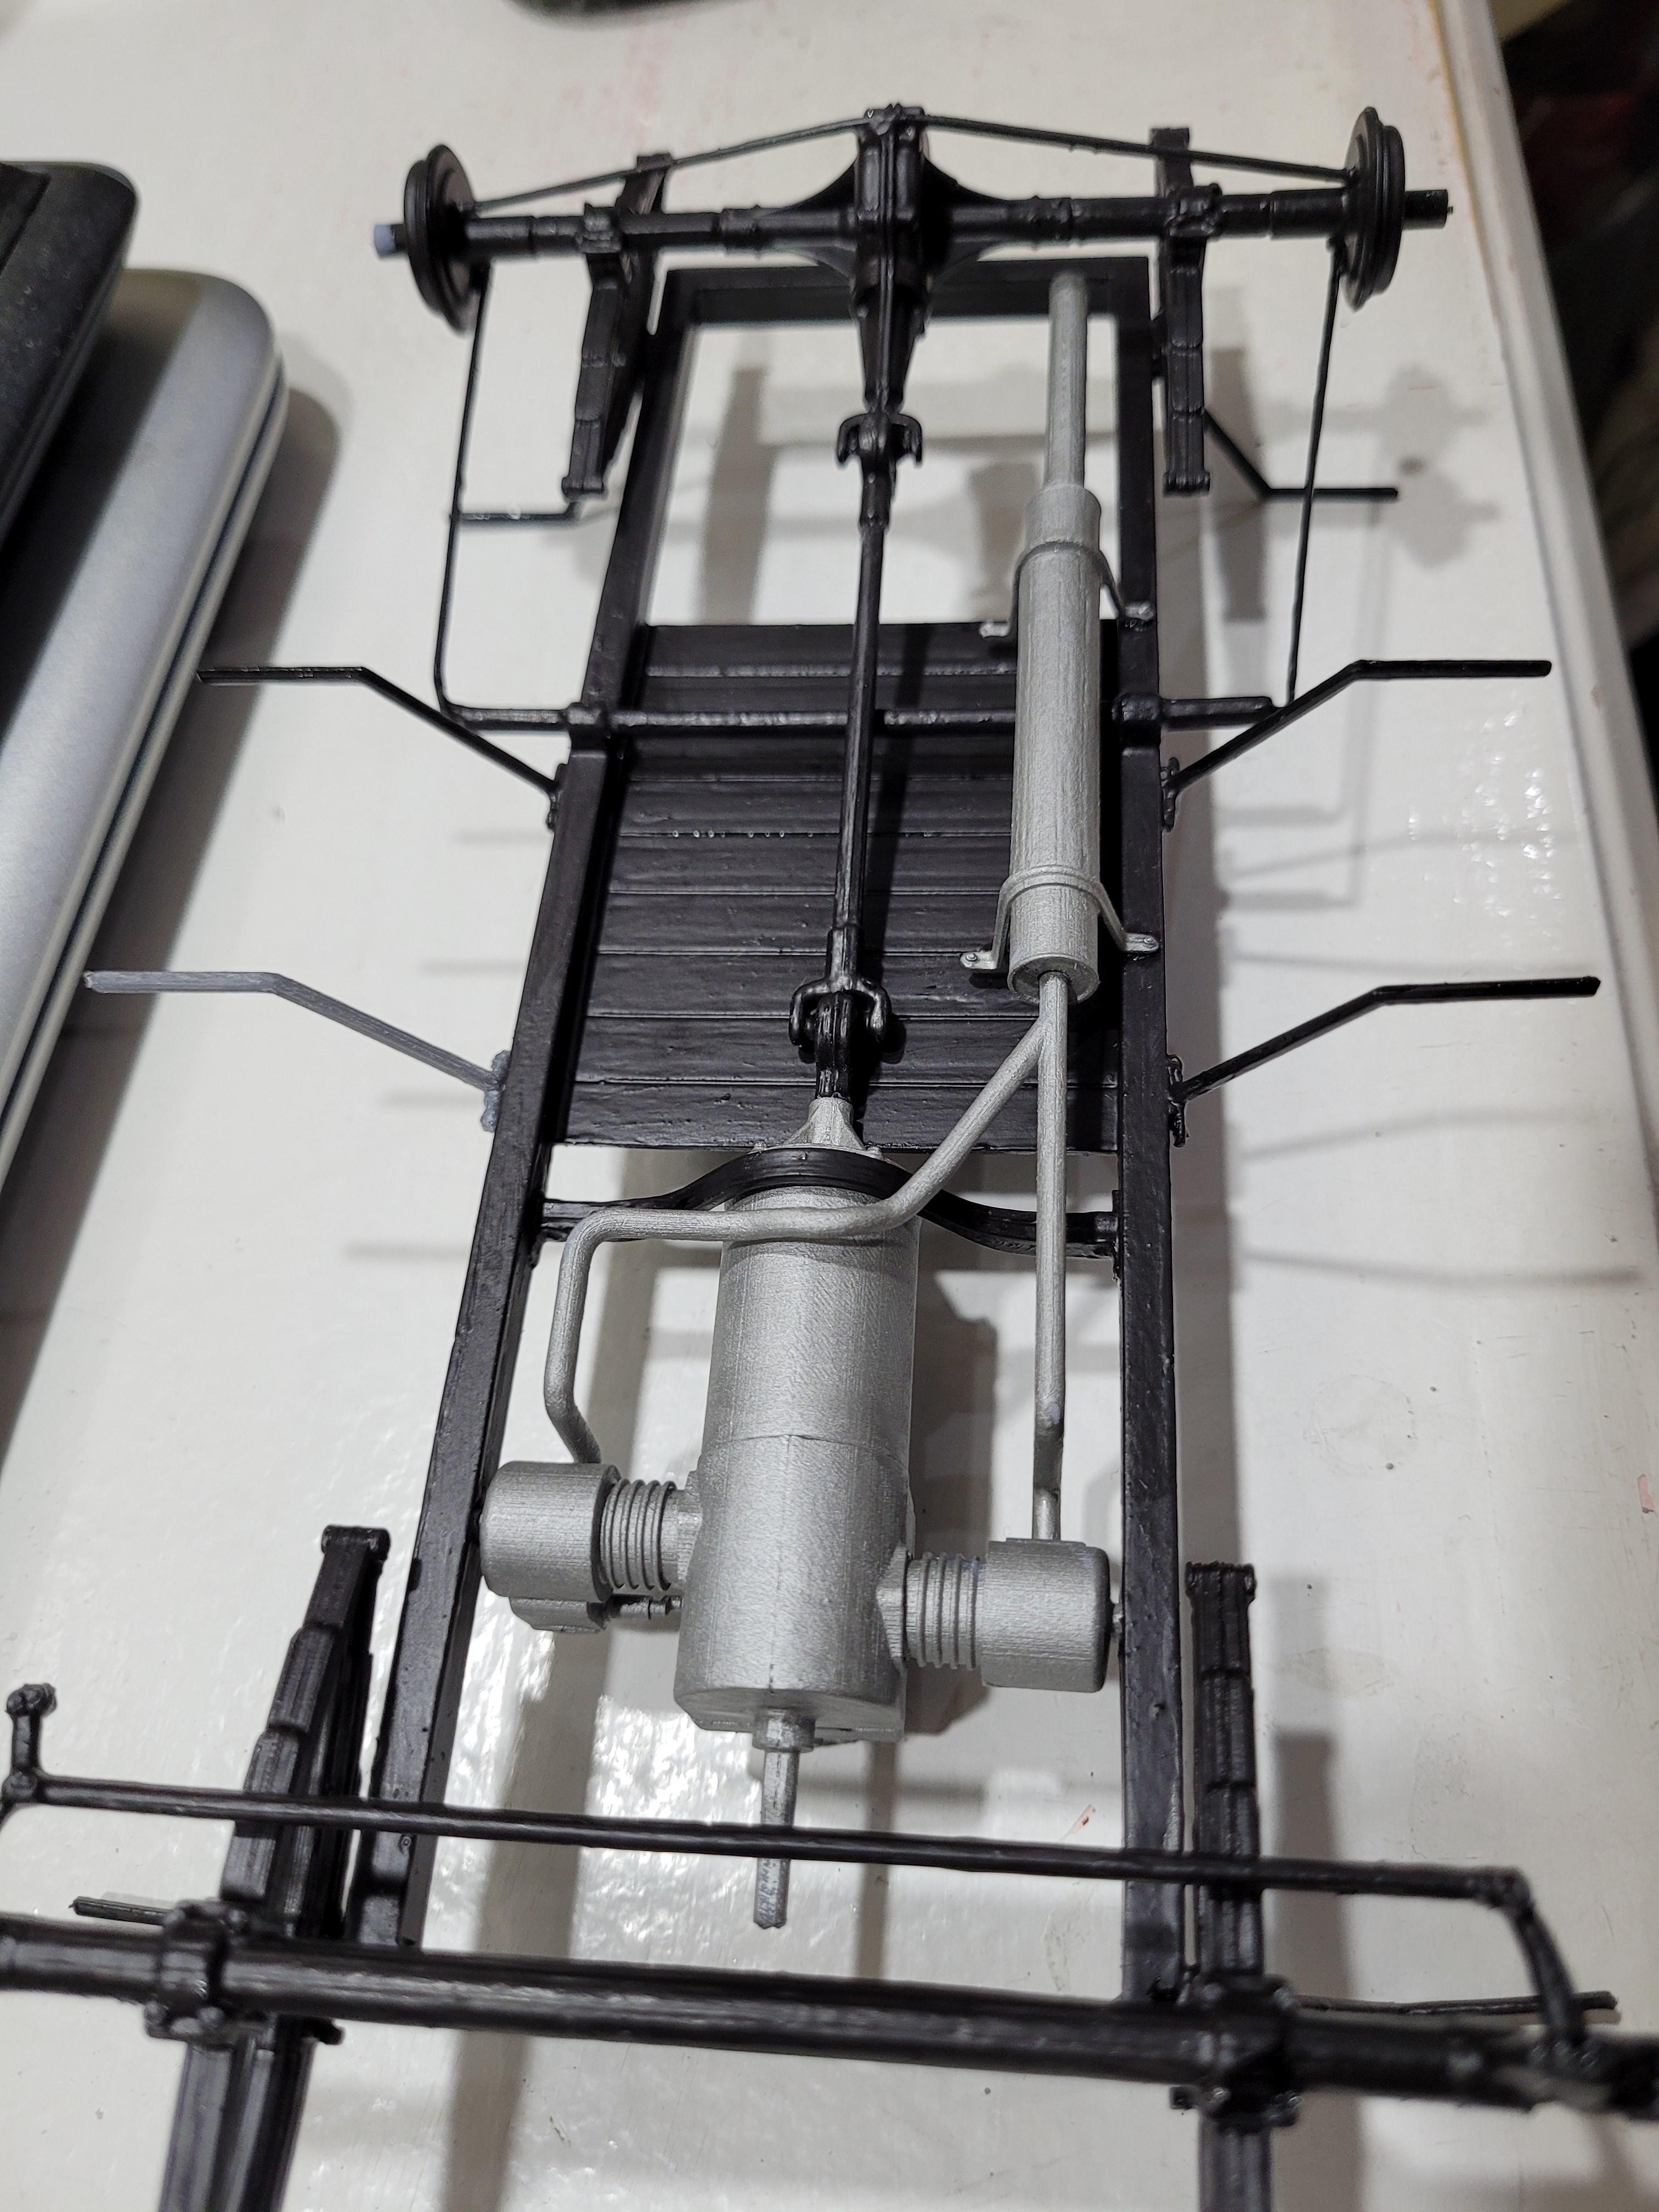
Dry fitting the exhaust system.
-
Preview of things to come...
-
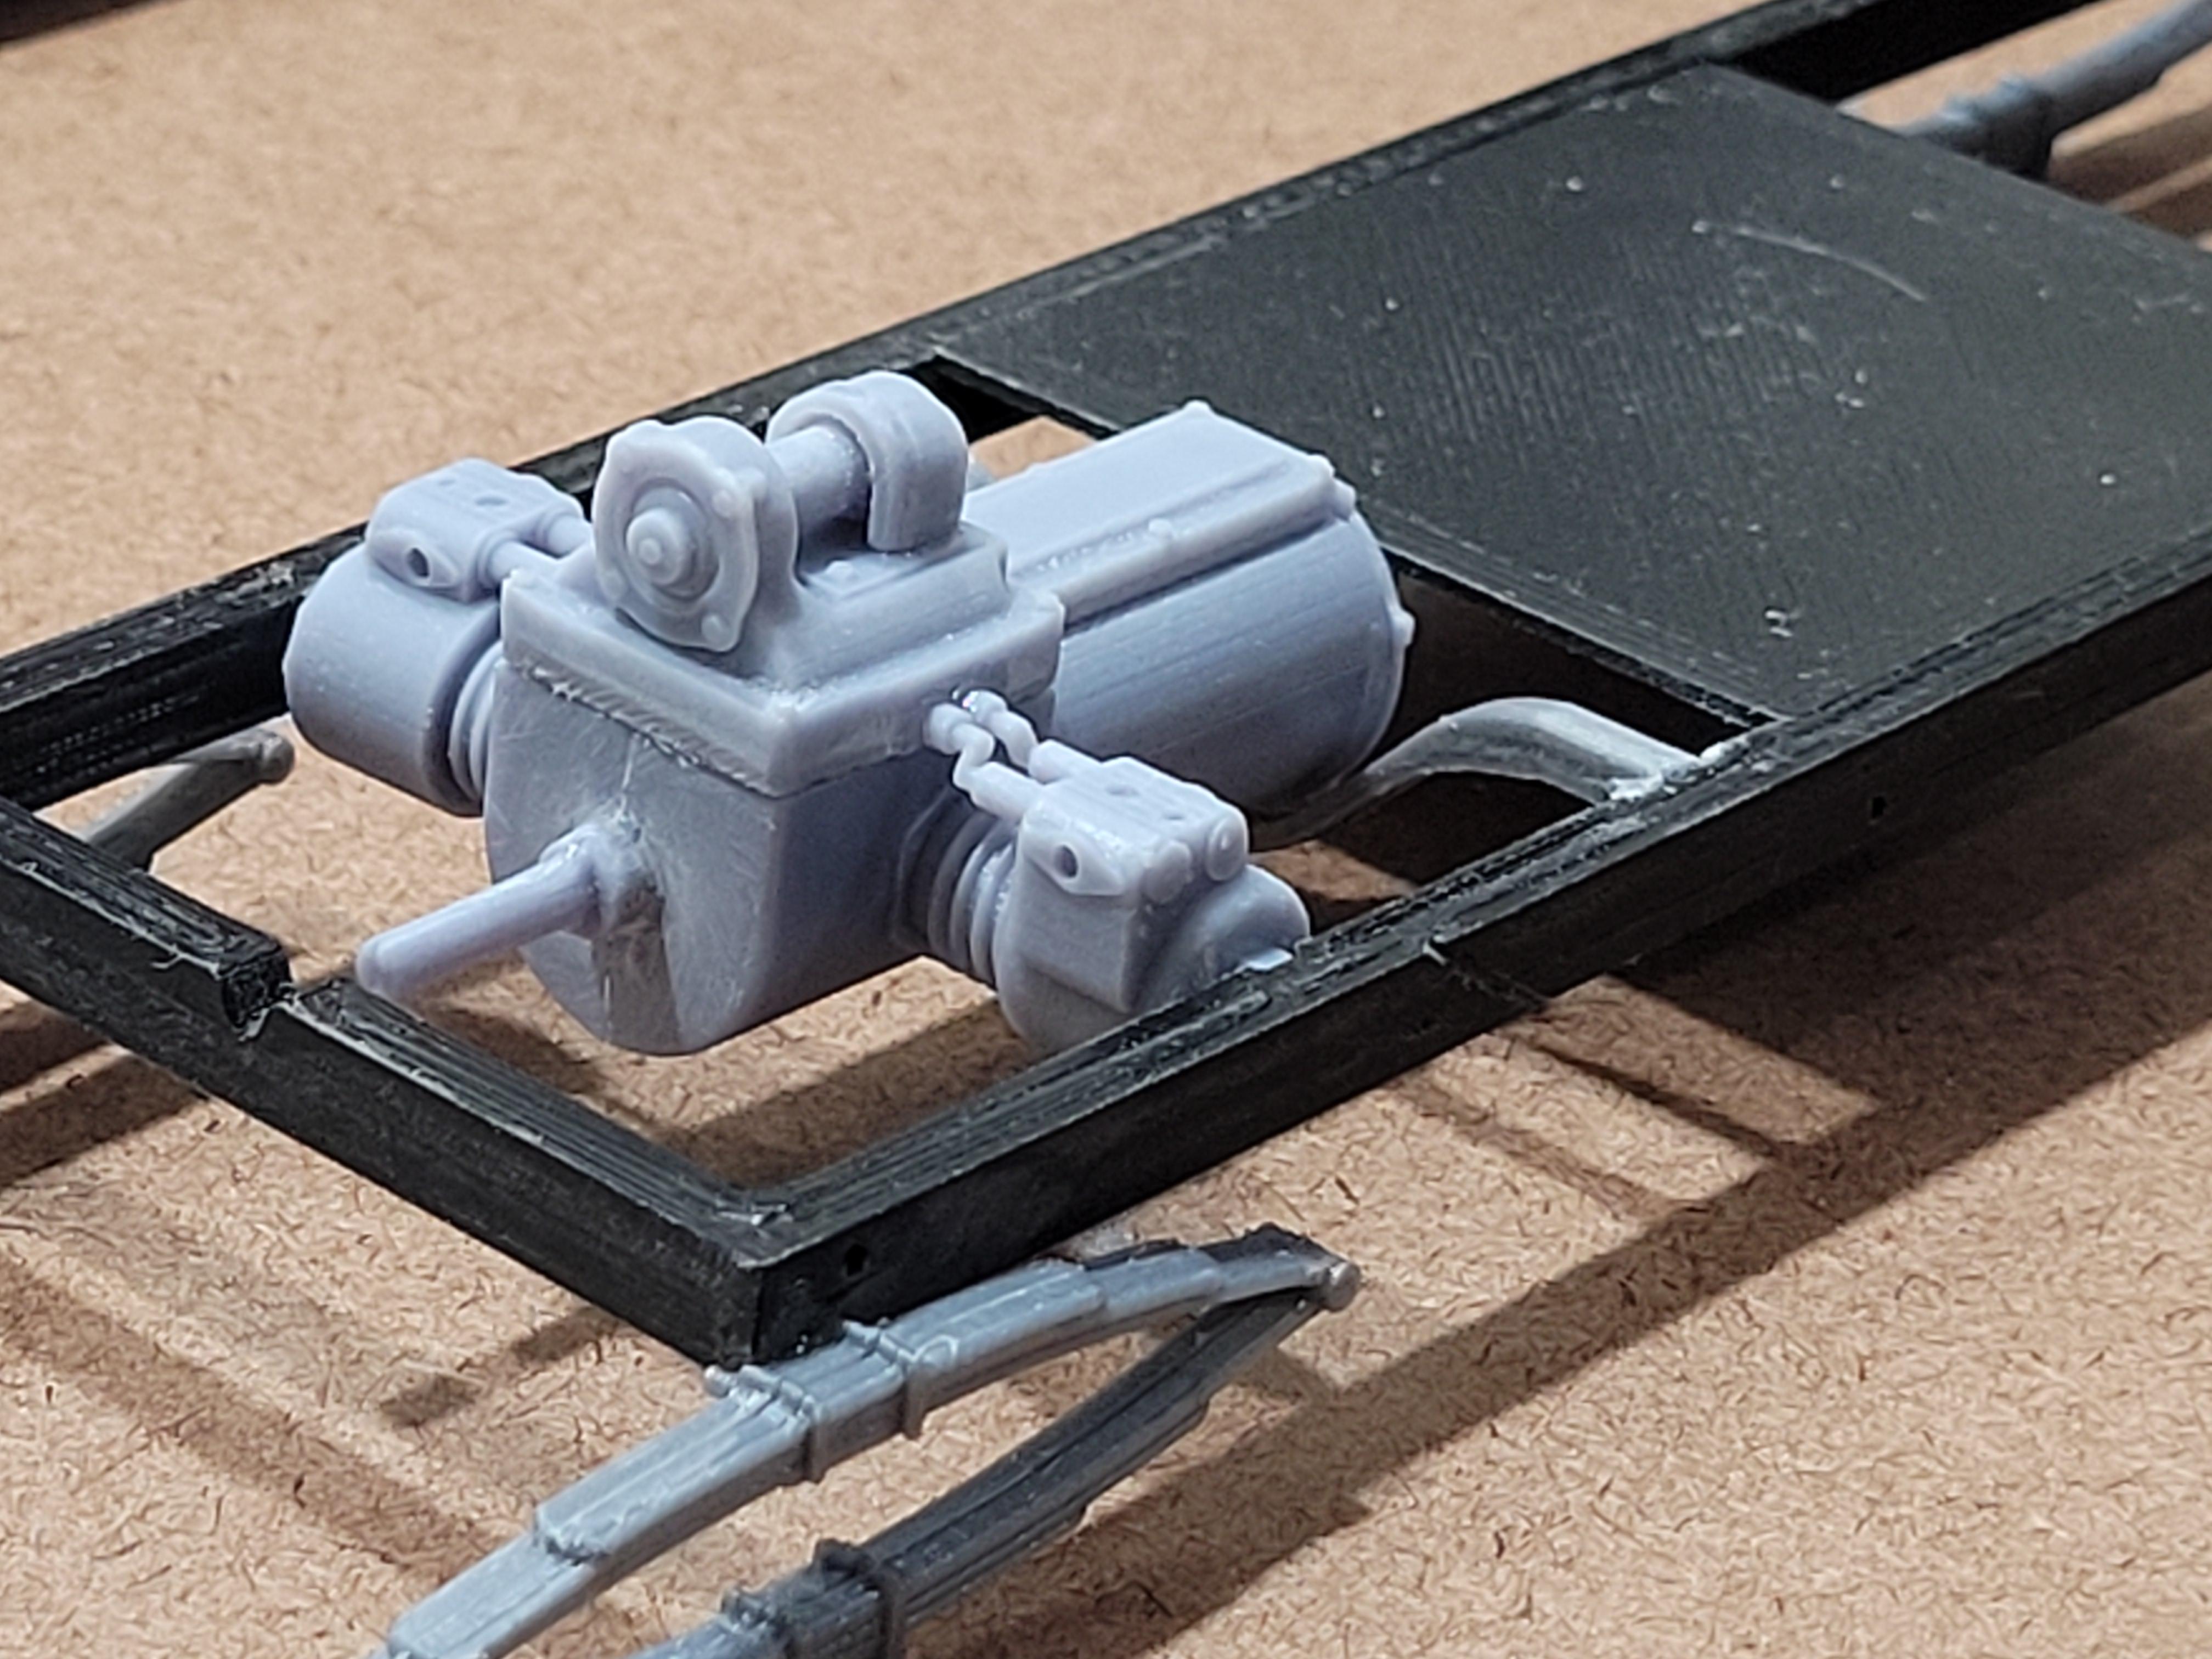
The pre-painted engine is assembled and sitting in it's position on the frame. The crank starter shaft lines up with the notch in the frame.
-
The engine is pretty simple.. 2 opposed cylinders.
-
1:16 Gunze Sangyo 1937 Rolls-Royce Phantom III Sports Saloon
kenlwest replied to Anglia105E's topic in WIP: Model Cars
Or maybe just use the originals as templates, and cut out new ones from a thin pc of clear plastic? -
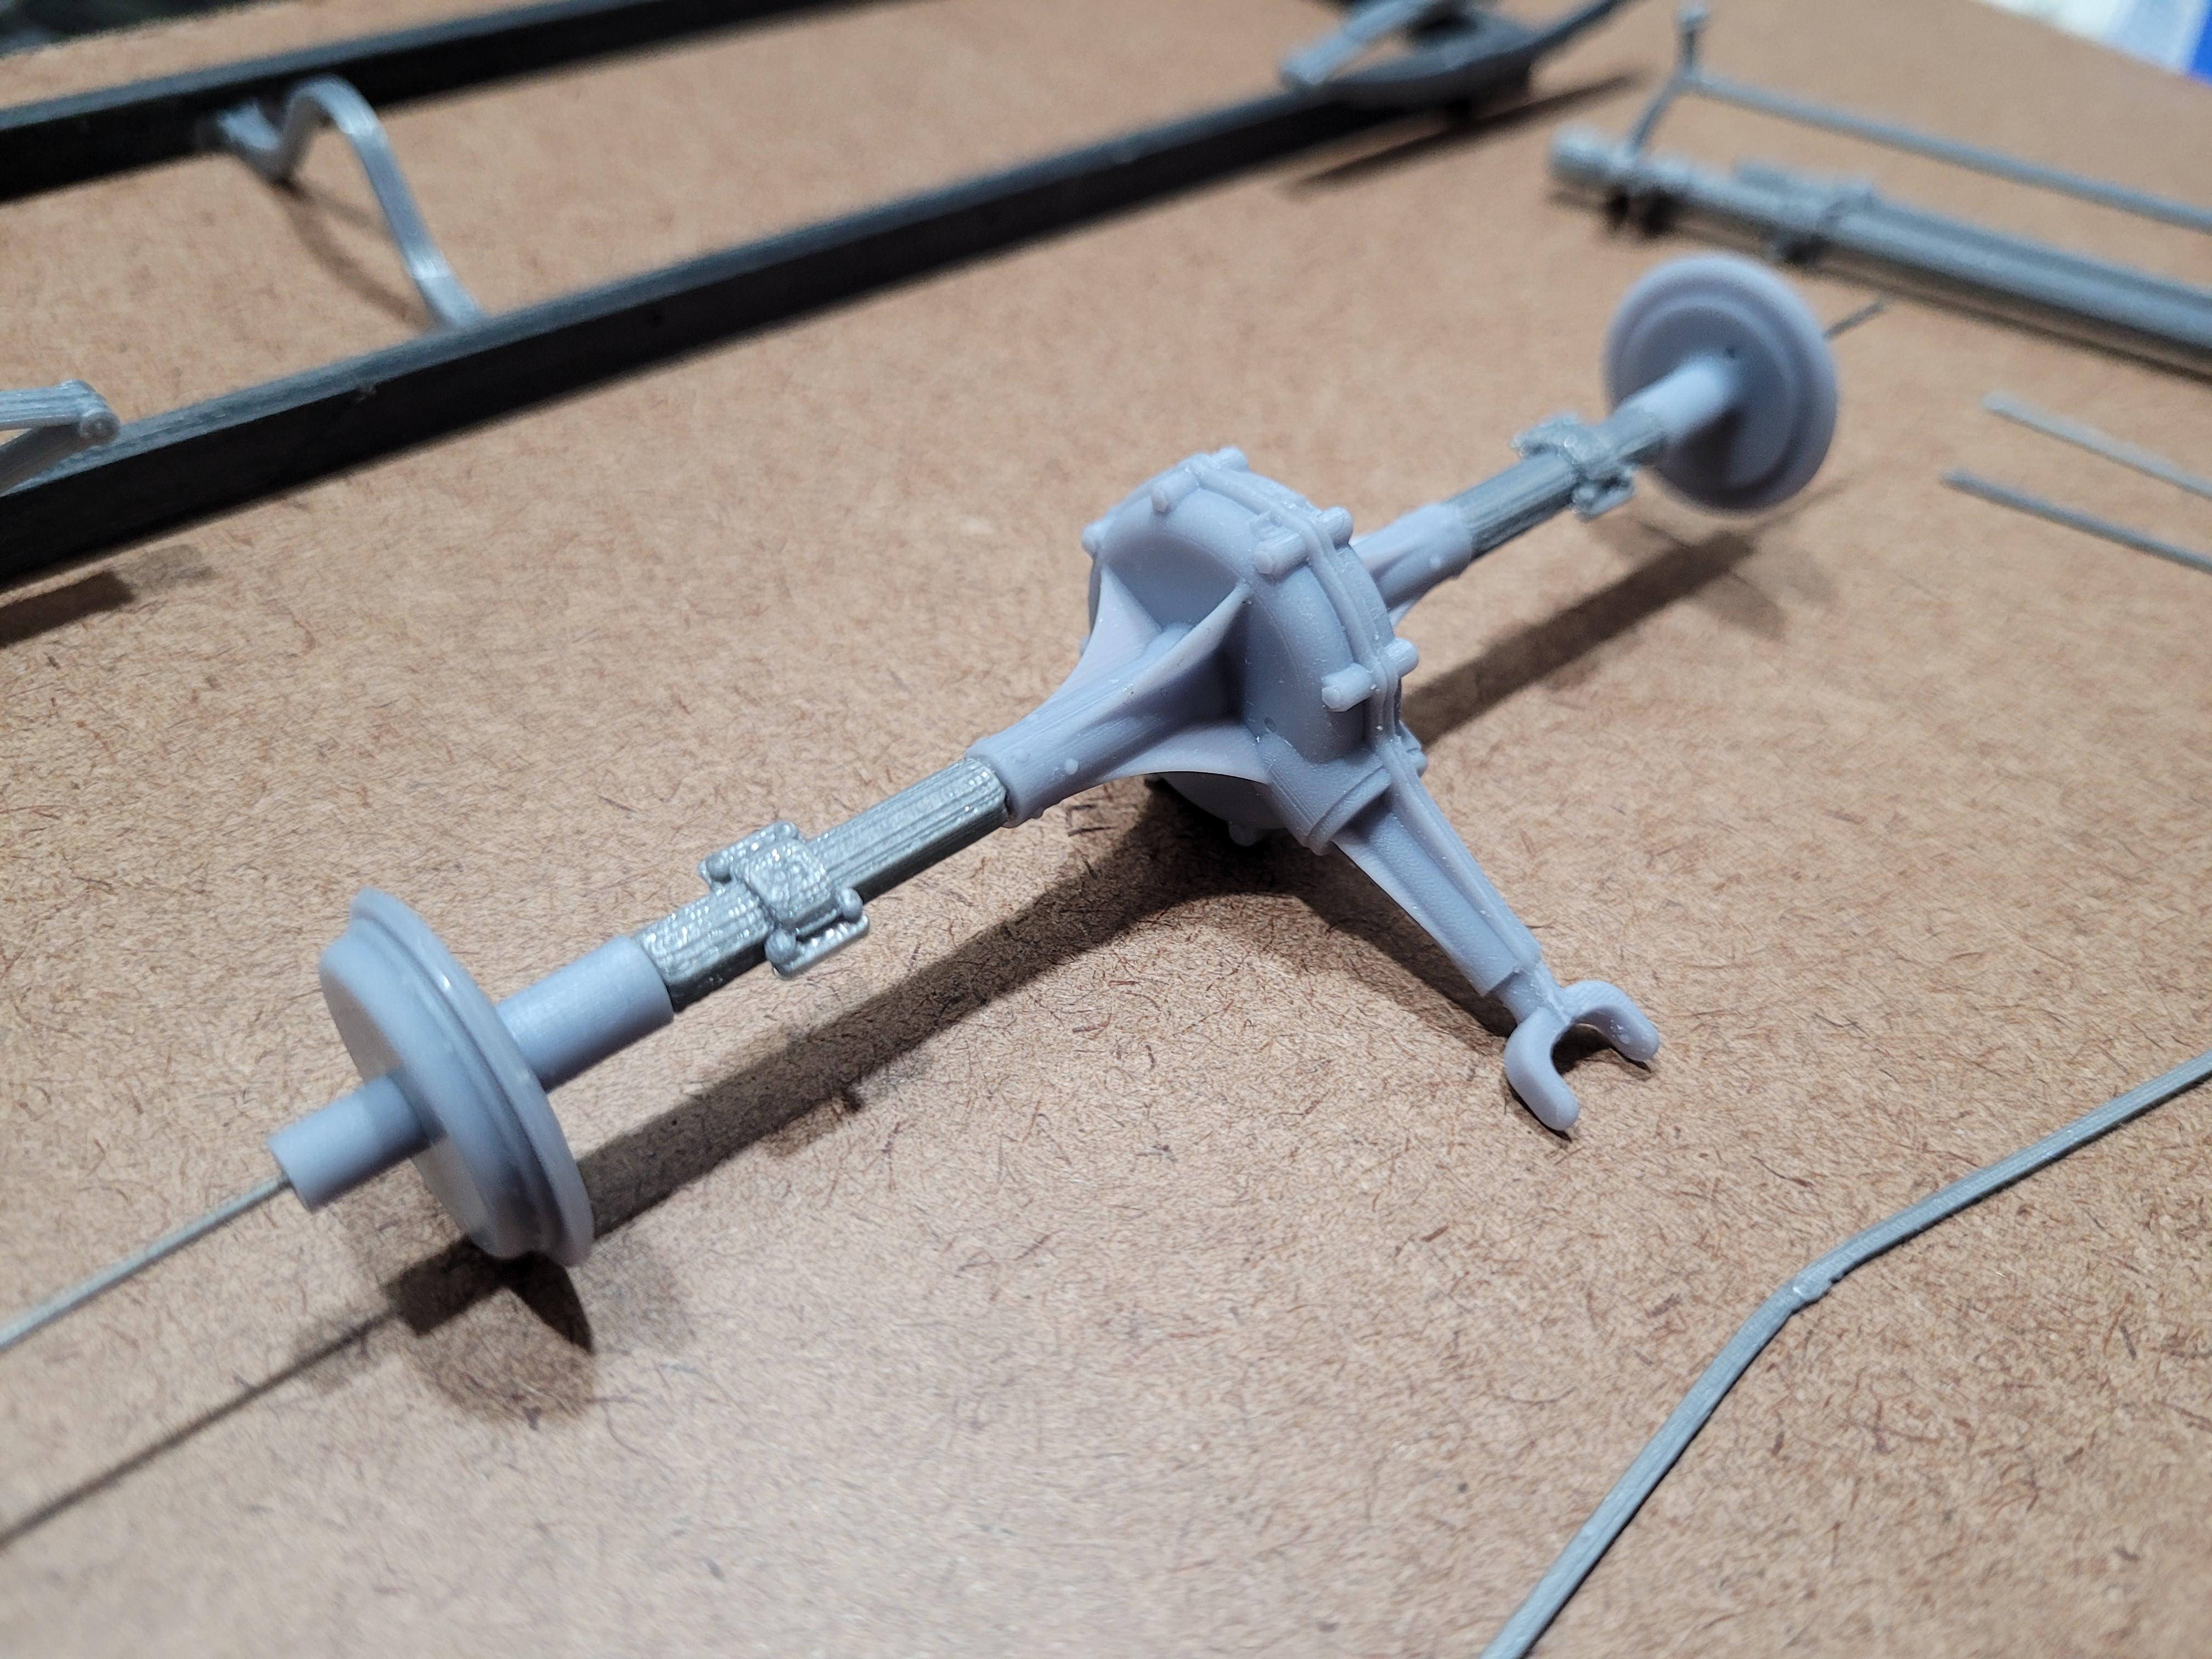
The front and rear axles are glued together. The rear axle is made from 10 parts, with a steel wire through the center for alignment and strength. I loosely placed the axles over the springs to check fitment.
-
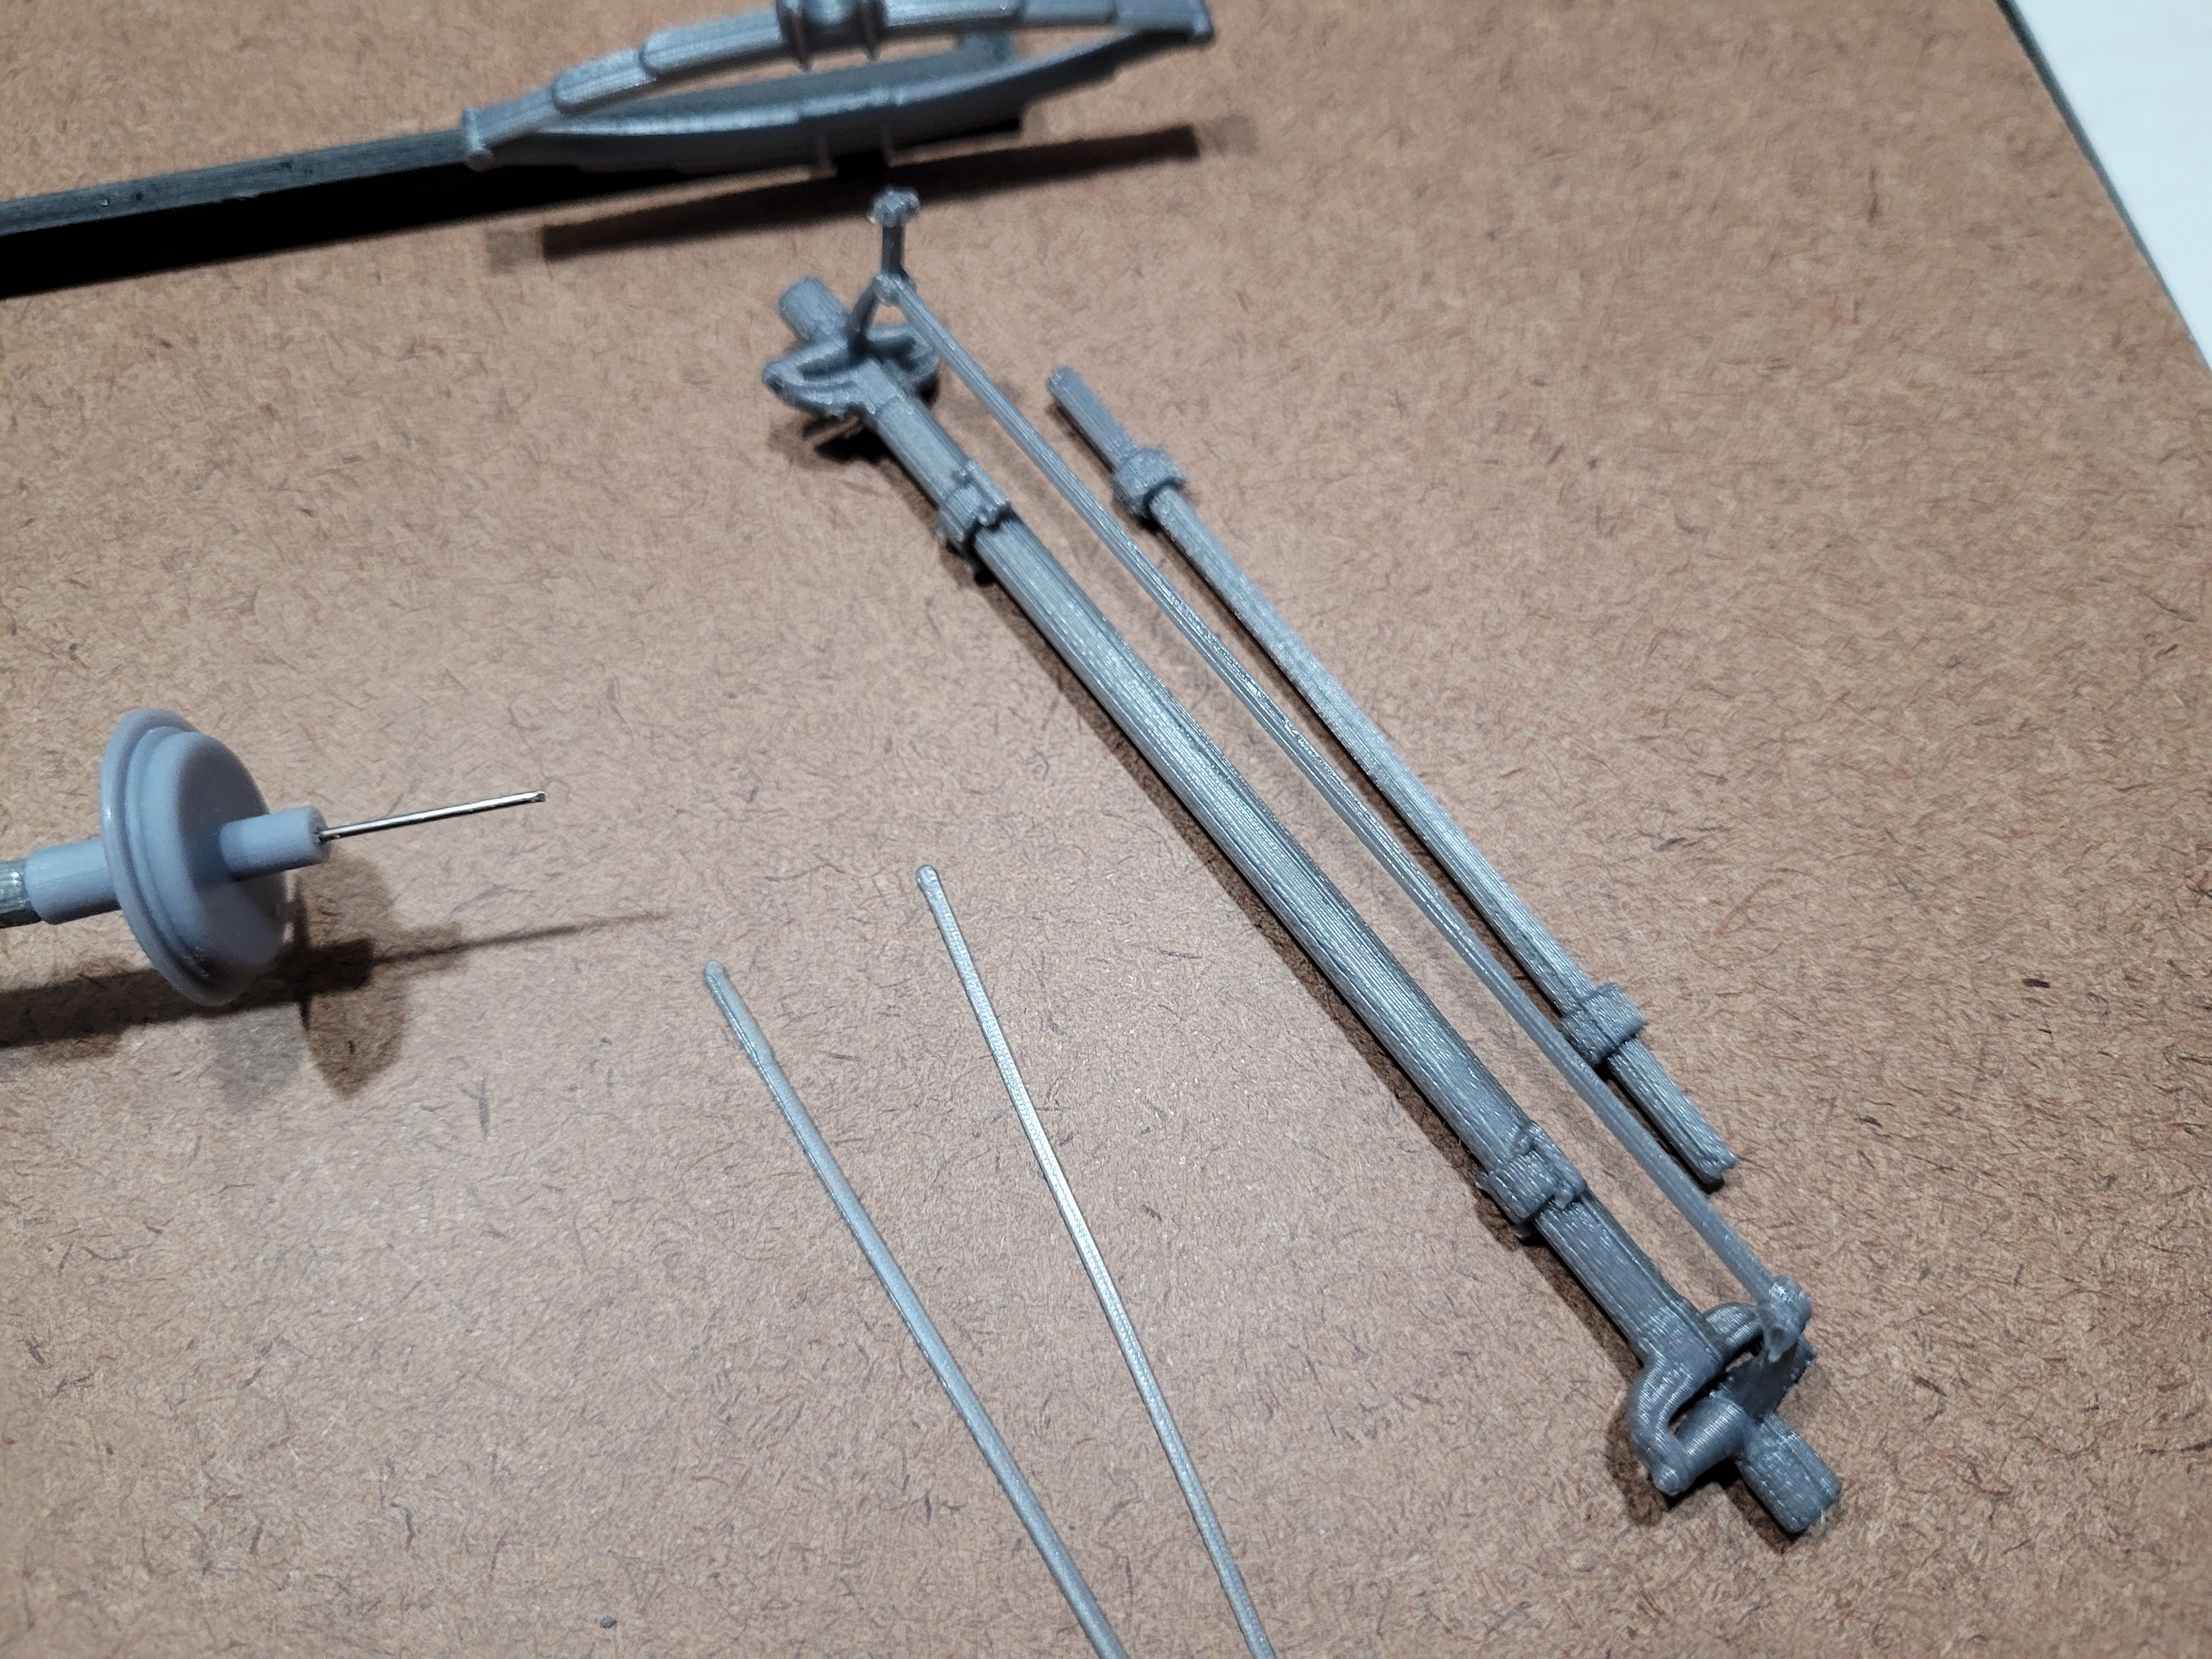
Here is the frame, crossmember and 4 leaf springs.
-
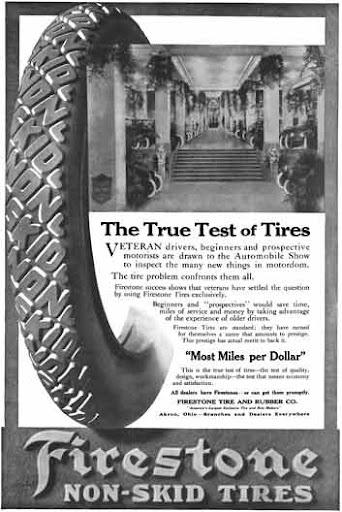
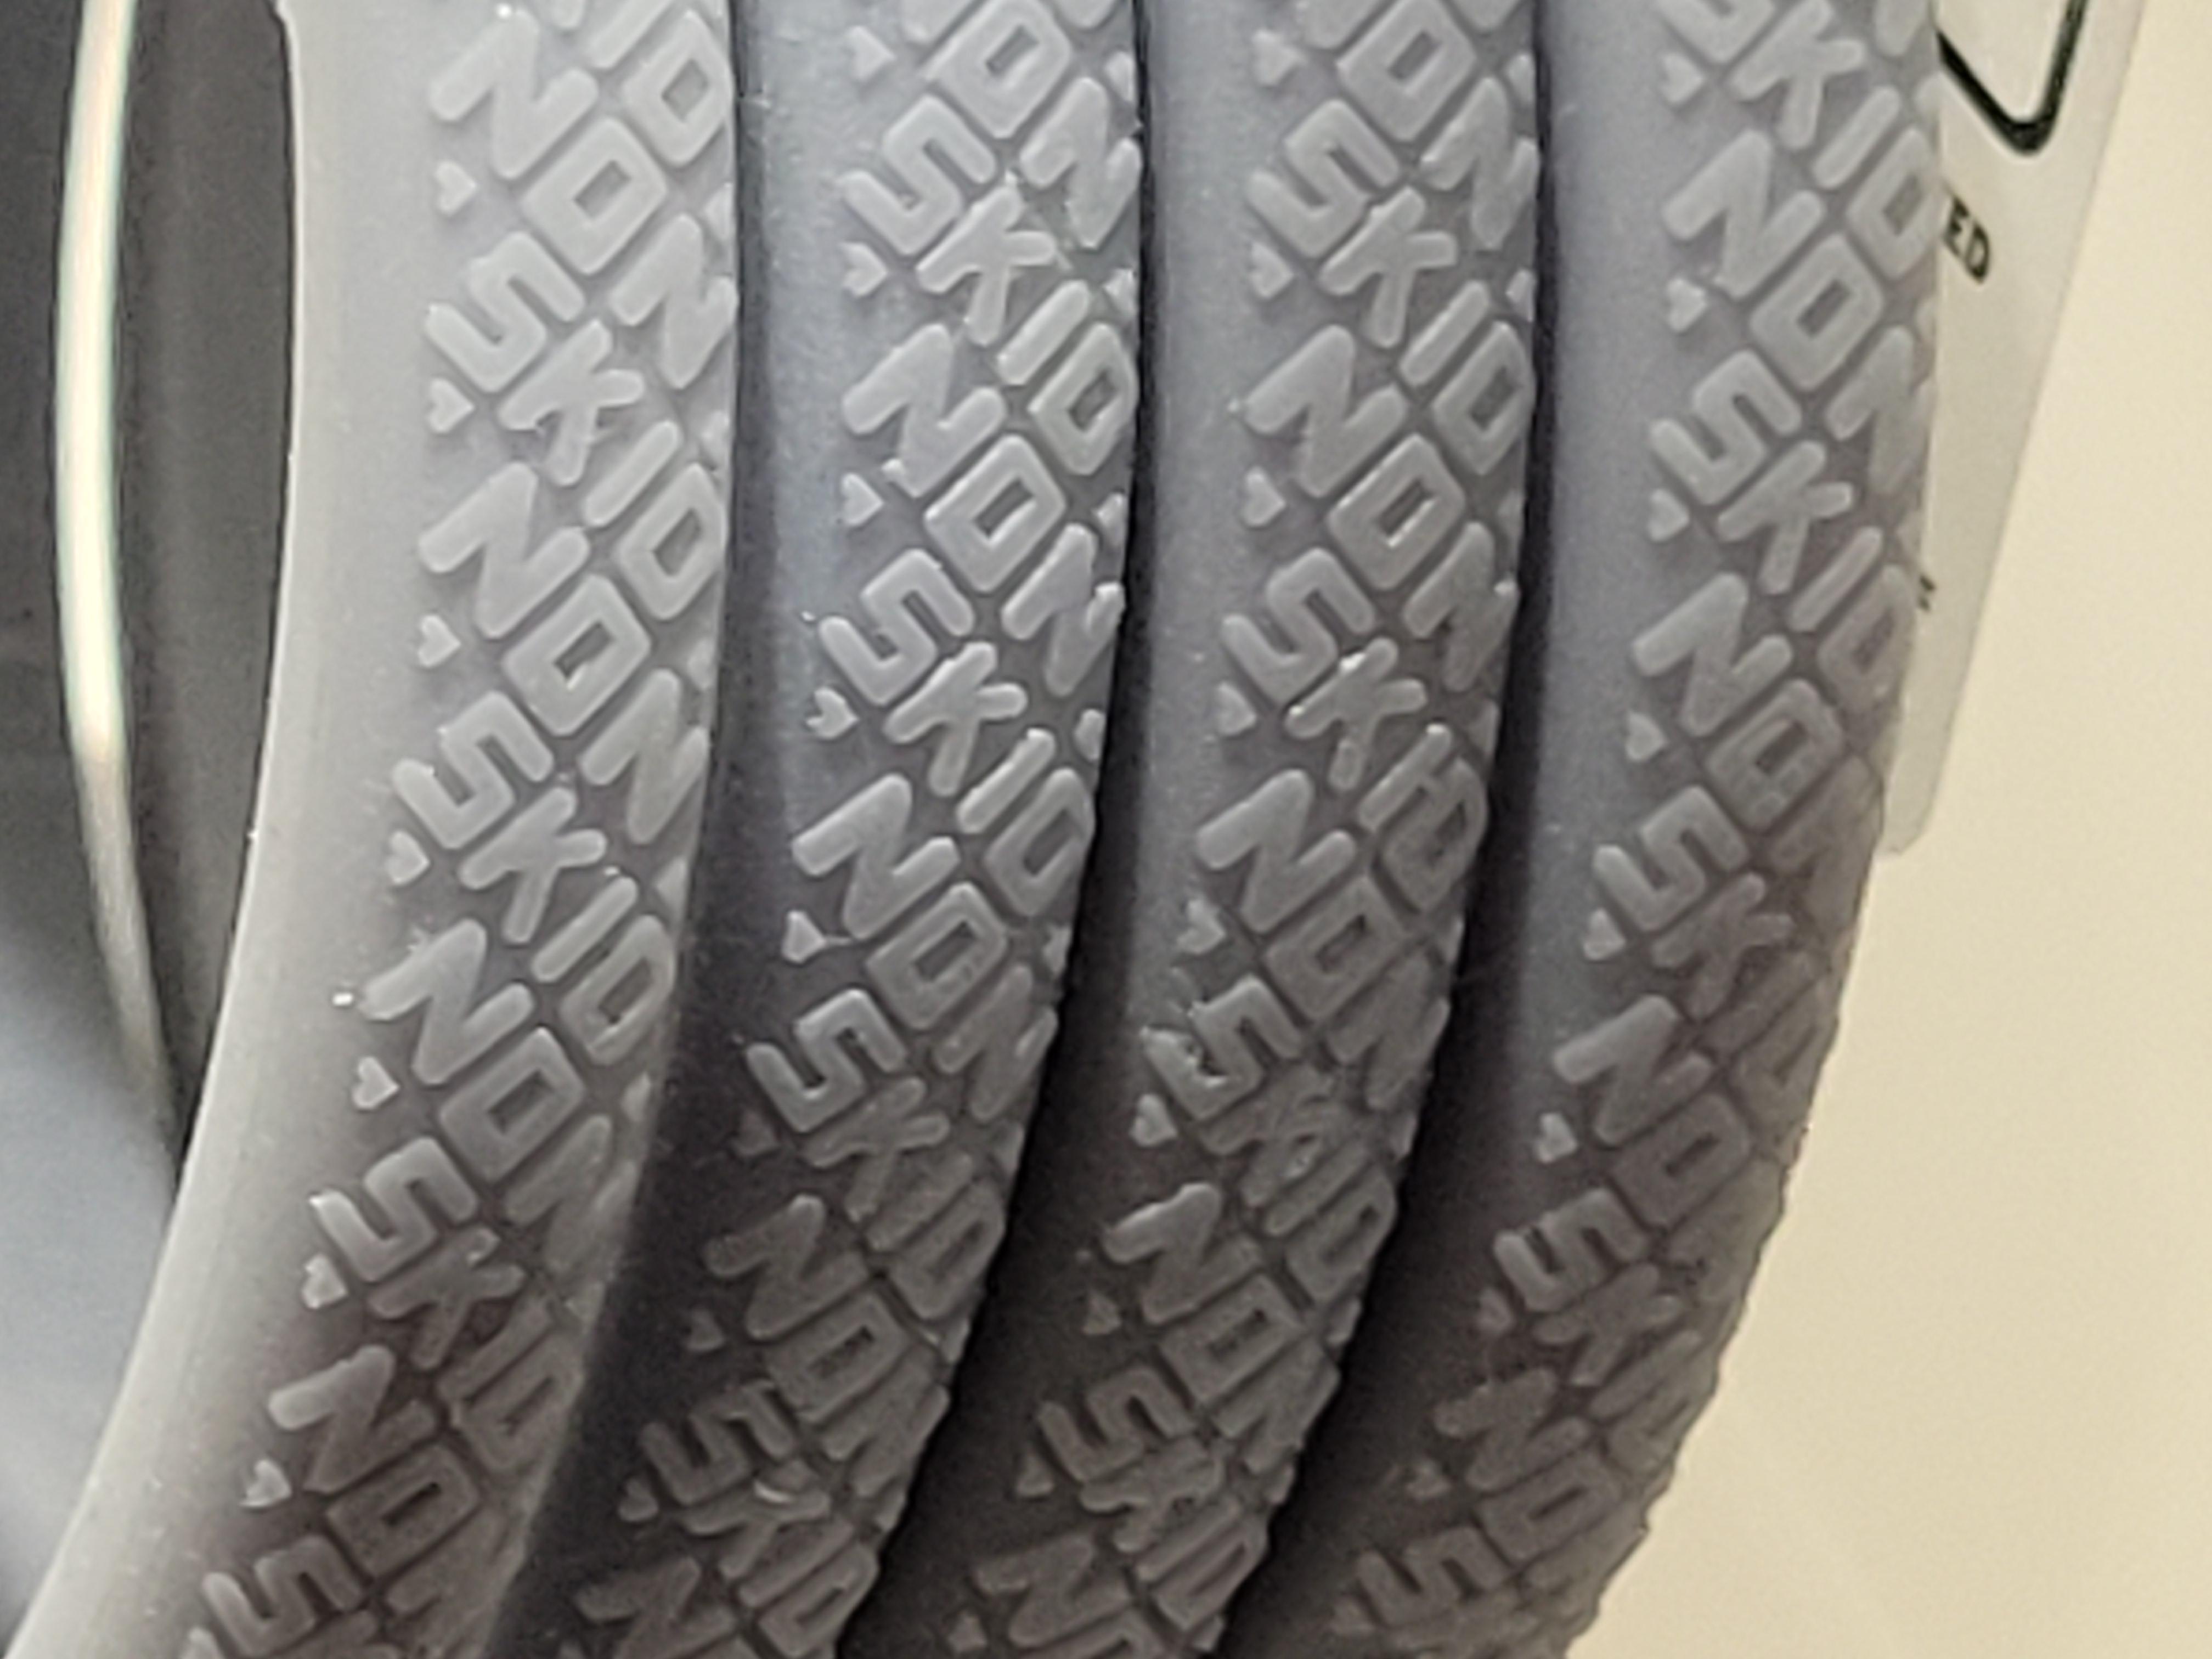
Back in the day, it was common to see Firestone Non-Skid tires on these old cars. Firestone and Coker still manufacture these tires in different sizes. Here are the resin prints showing the lettered pattern.
-
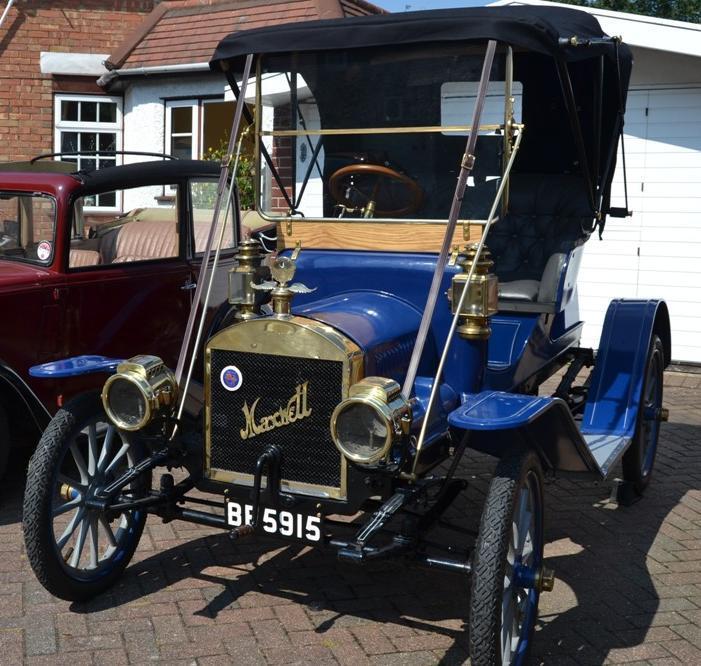
This is an online build of a 1911 Maxwell model AB in 1/12 scale. A little unusual for this forum, but something different. Early brass era cars are very difficult to pull off in smaller scale, due to the tiny and very delicate parts - hence the 1/12 scale. Here is a picture of the real car. Hope you enjoy the build!
-
http://www.modelcarsmag.com/forums/topic/183635-1910-sears-motor-buggy/ Here is the link to the WIP.
-
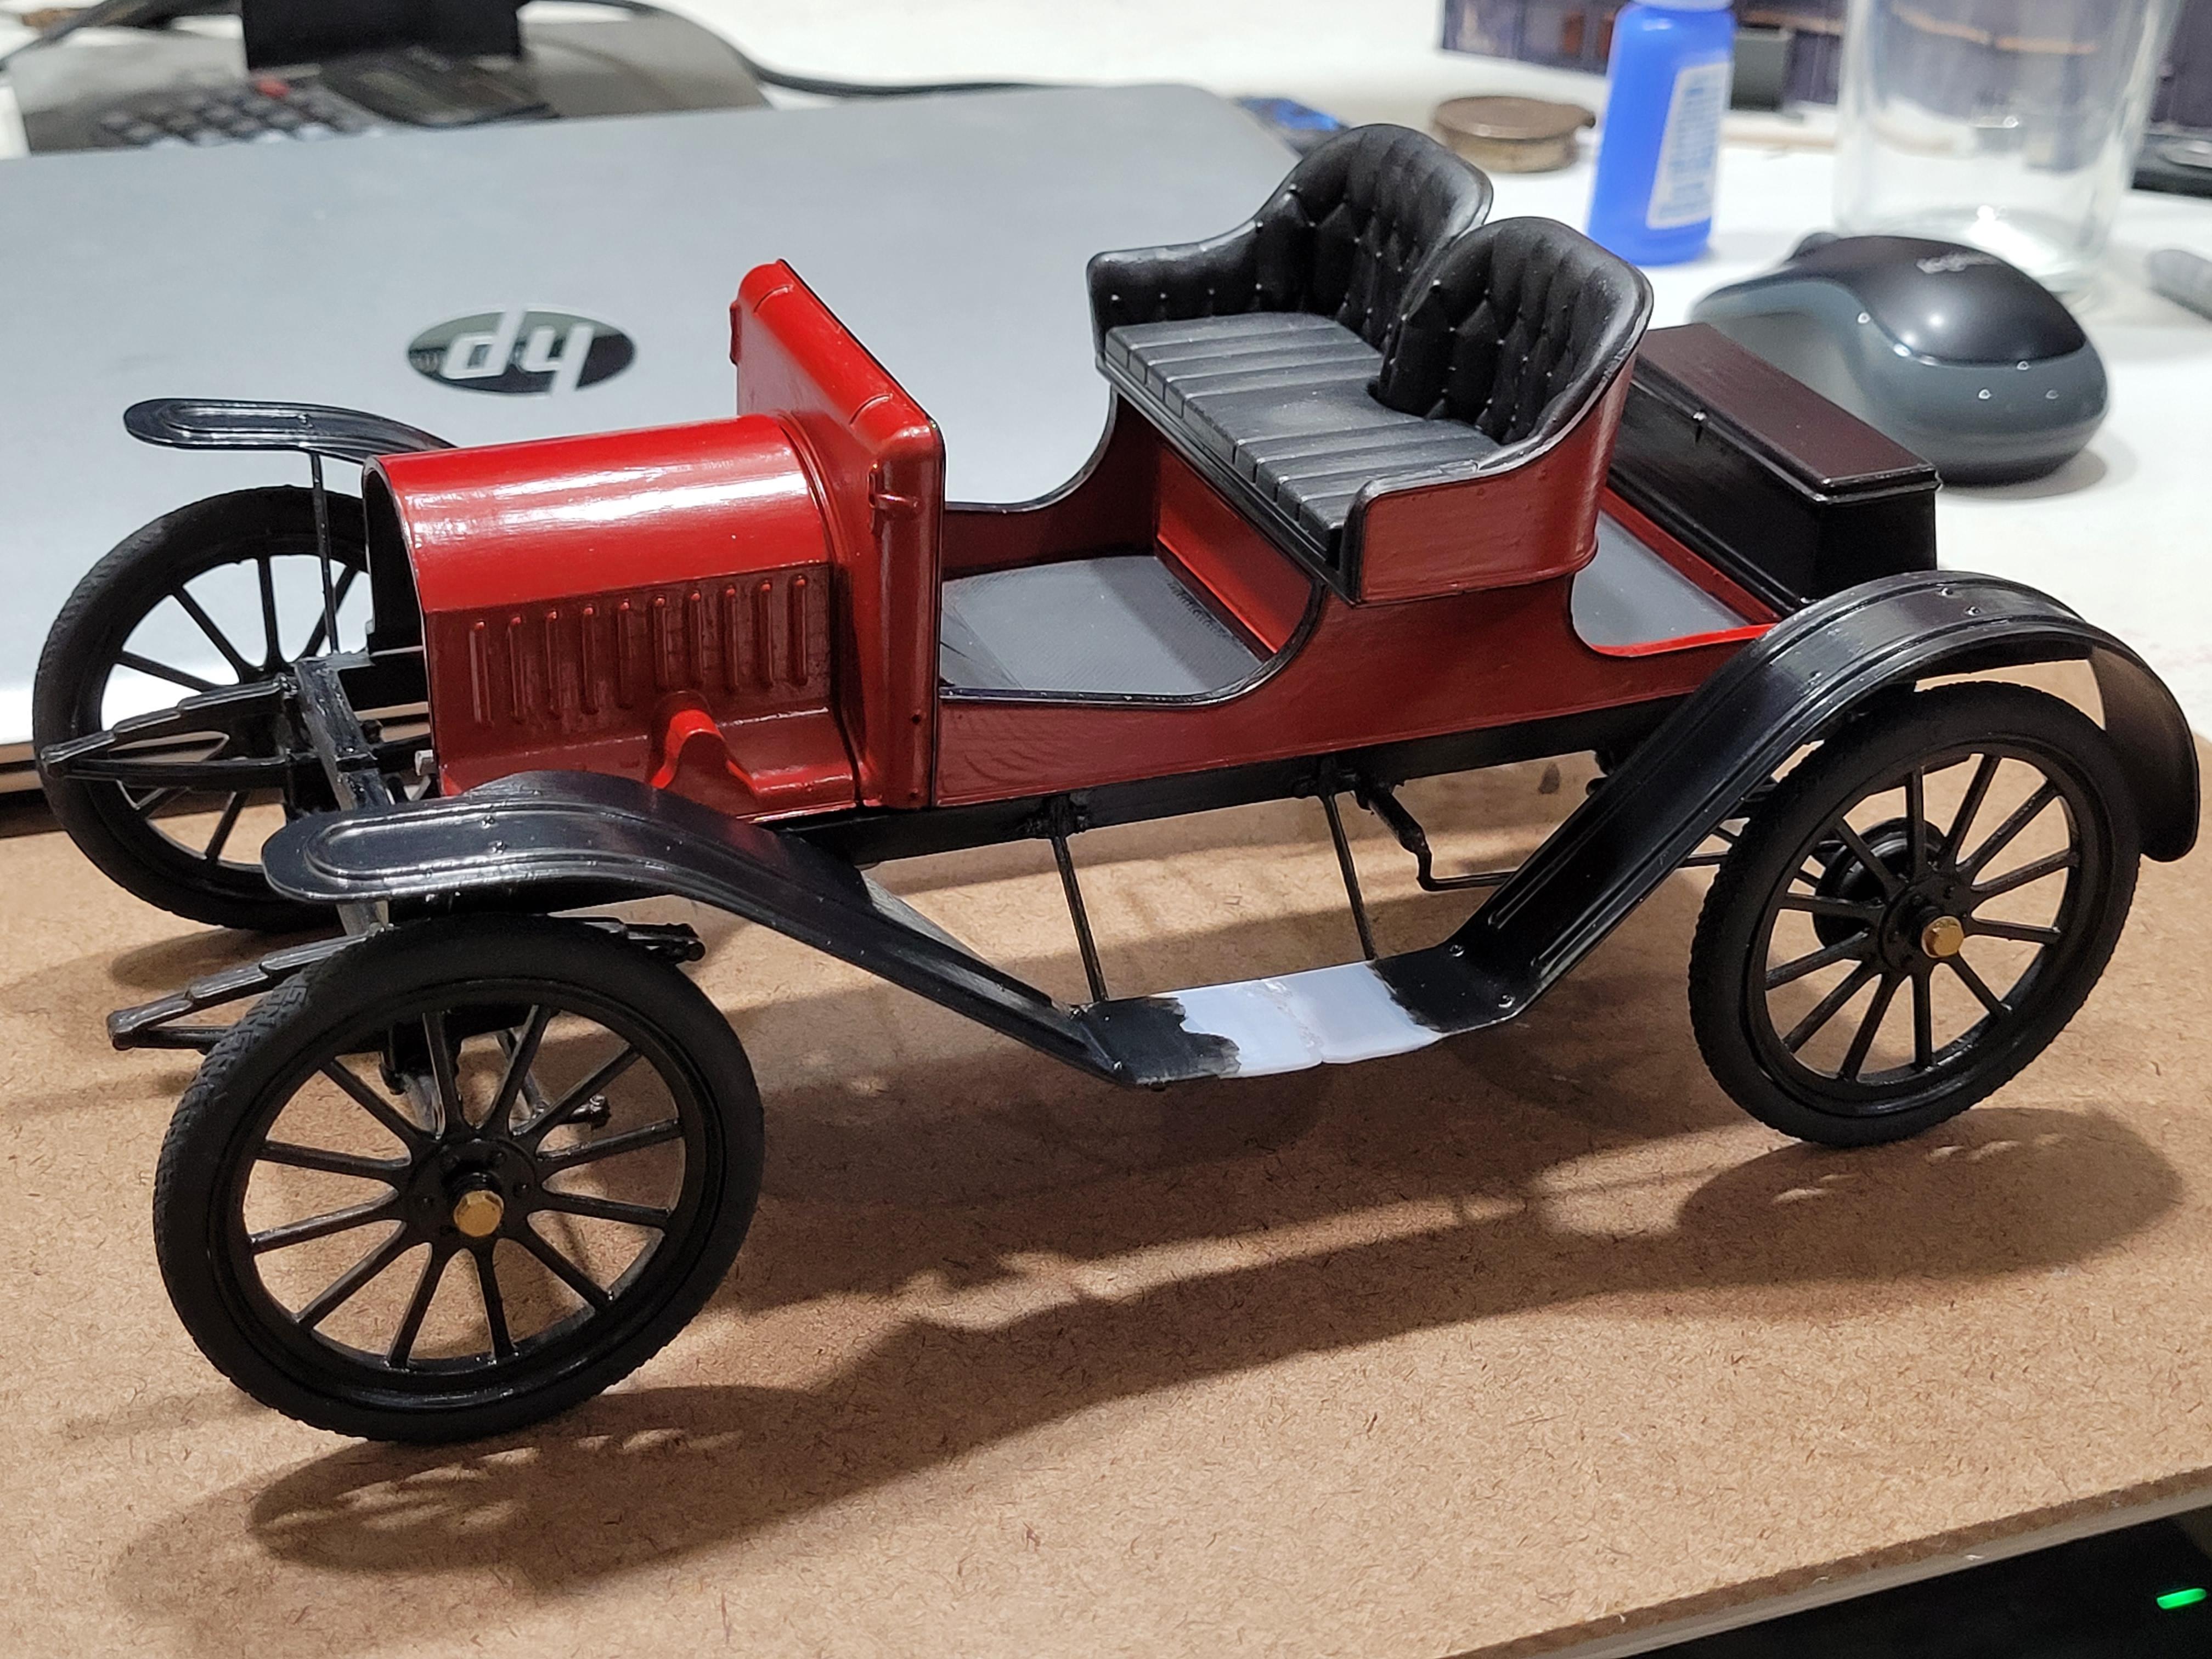
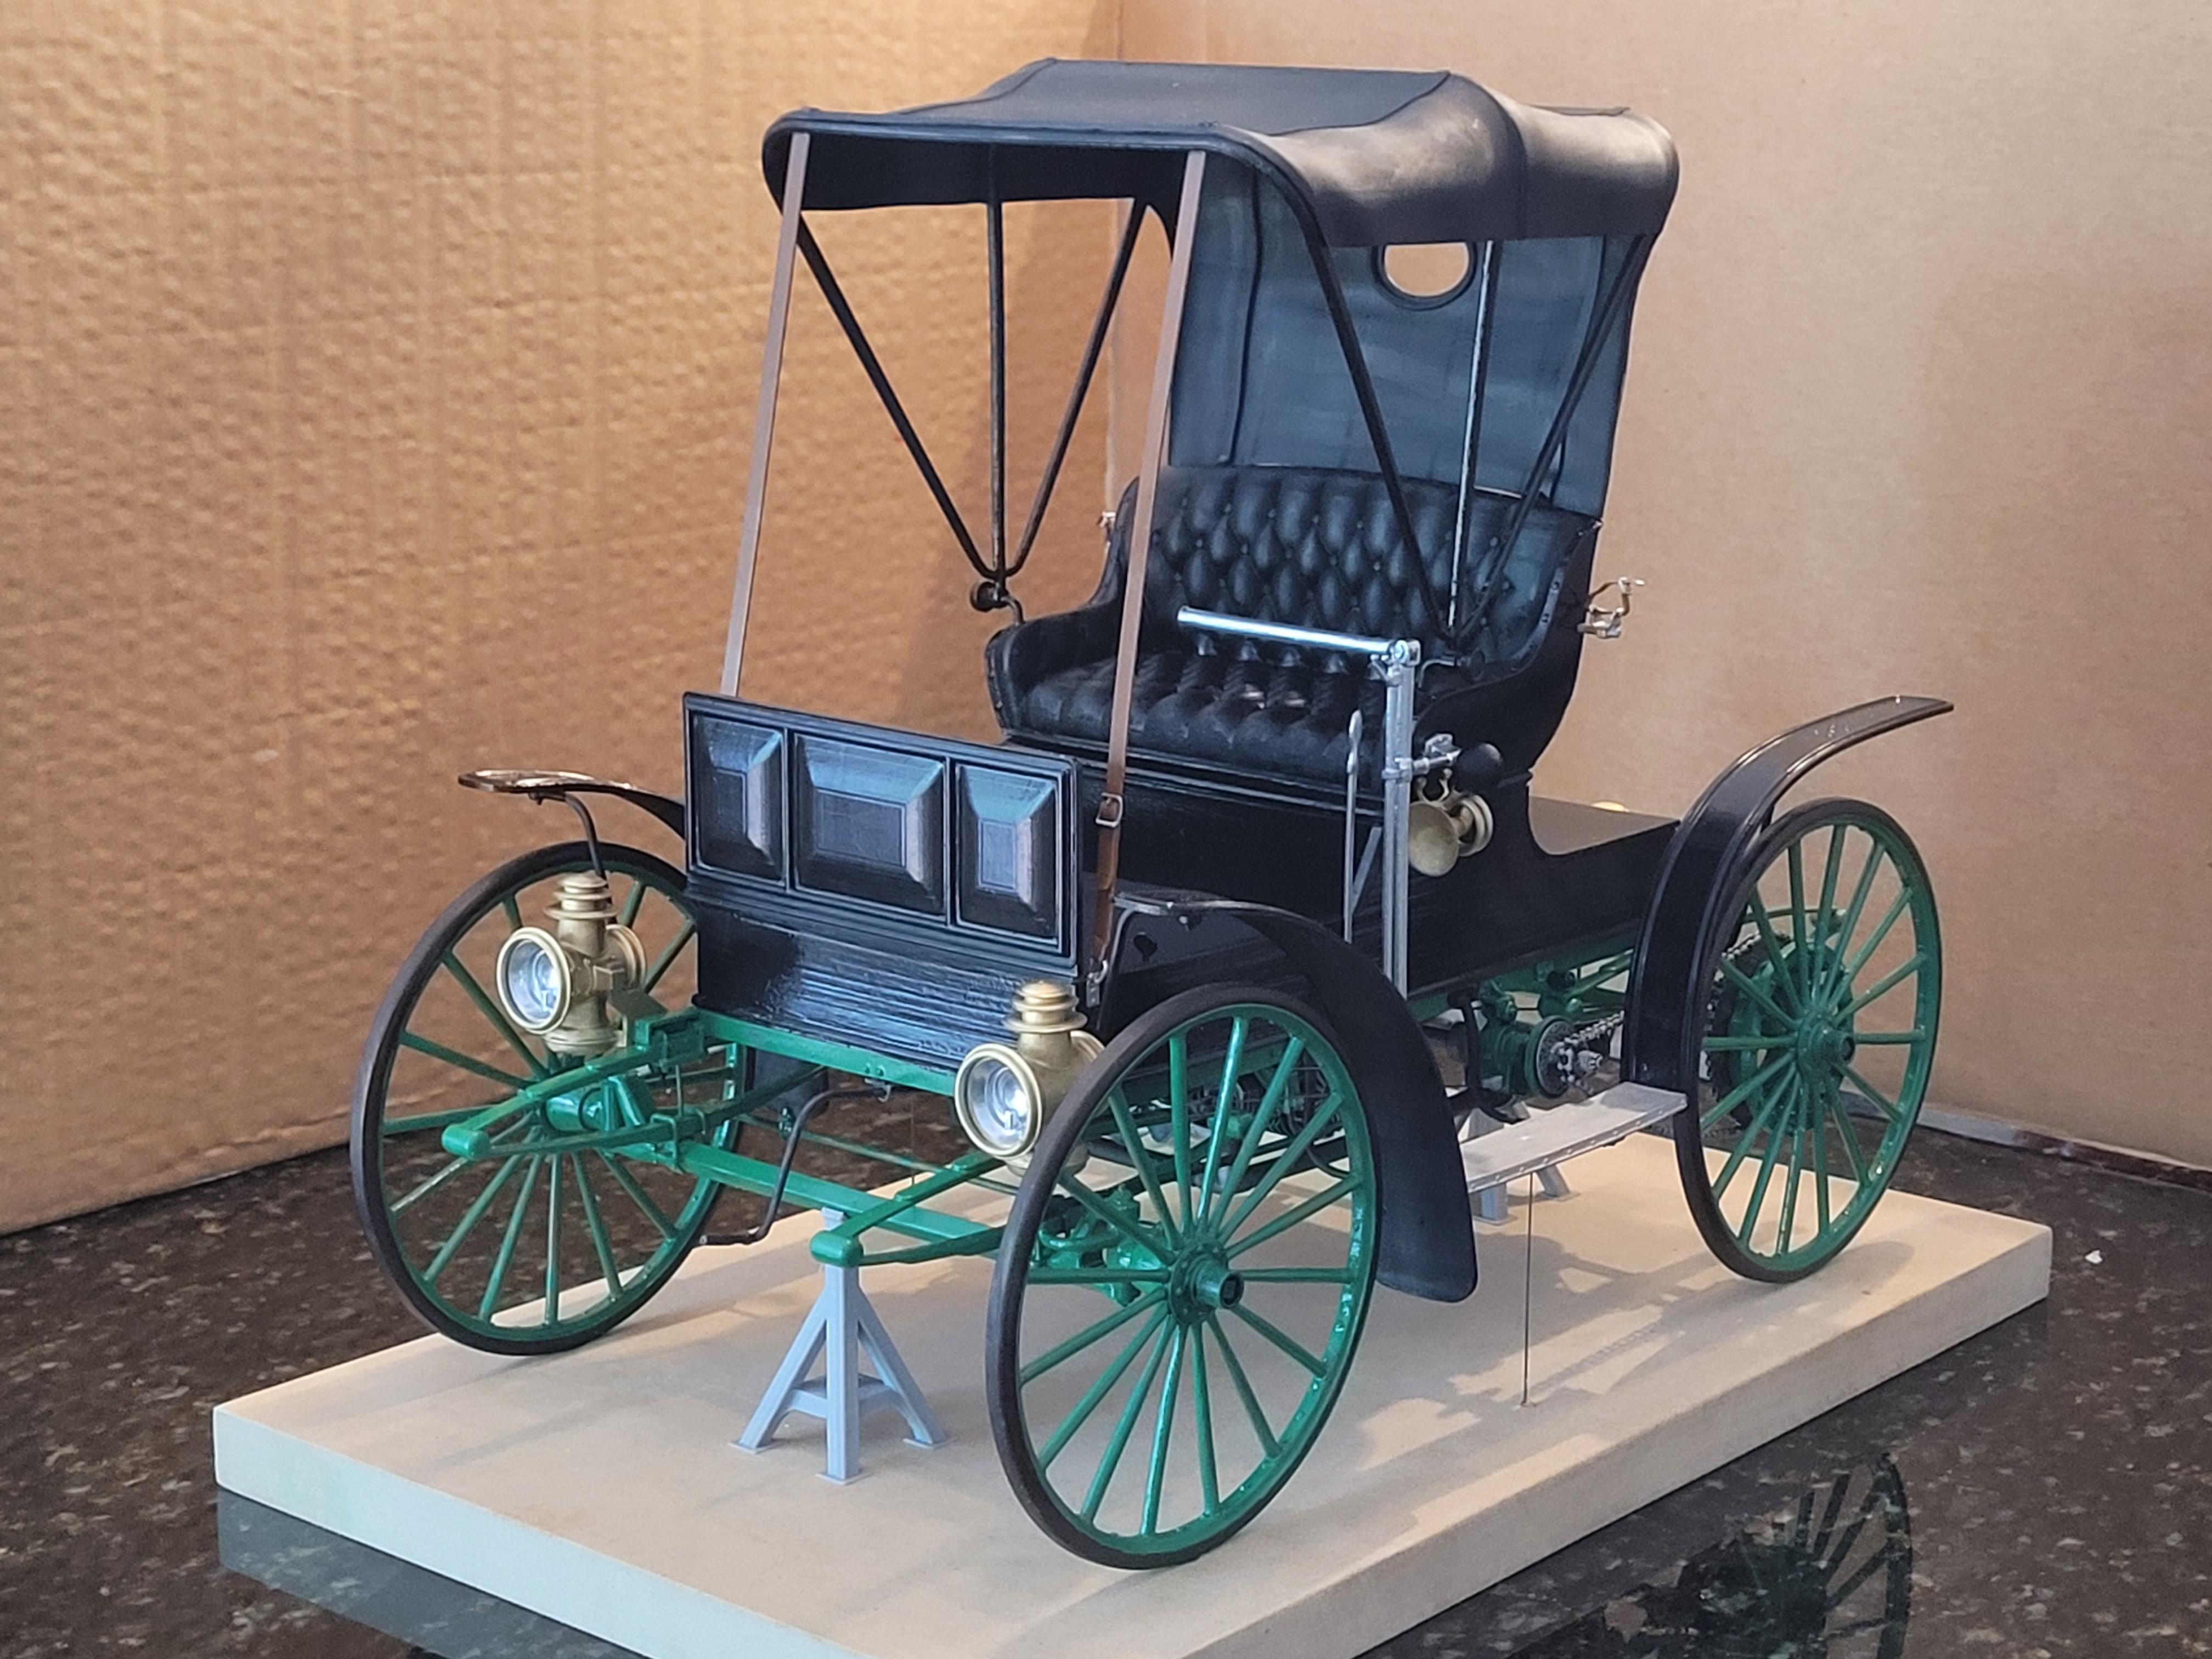
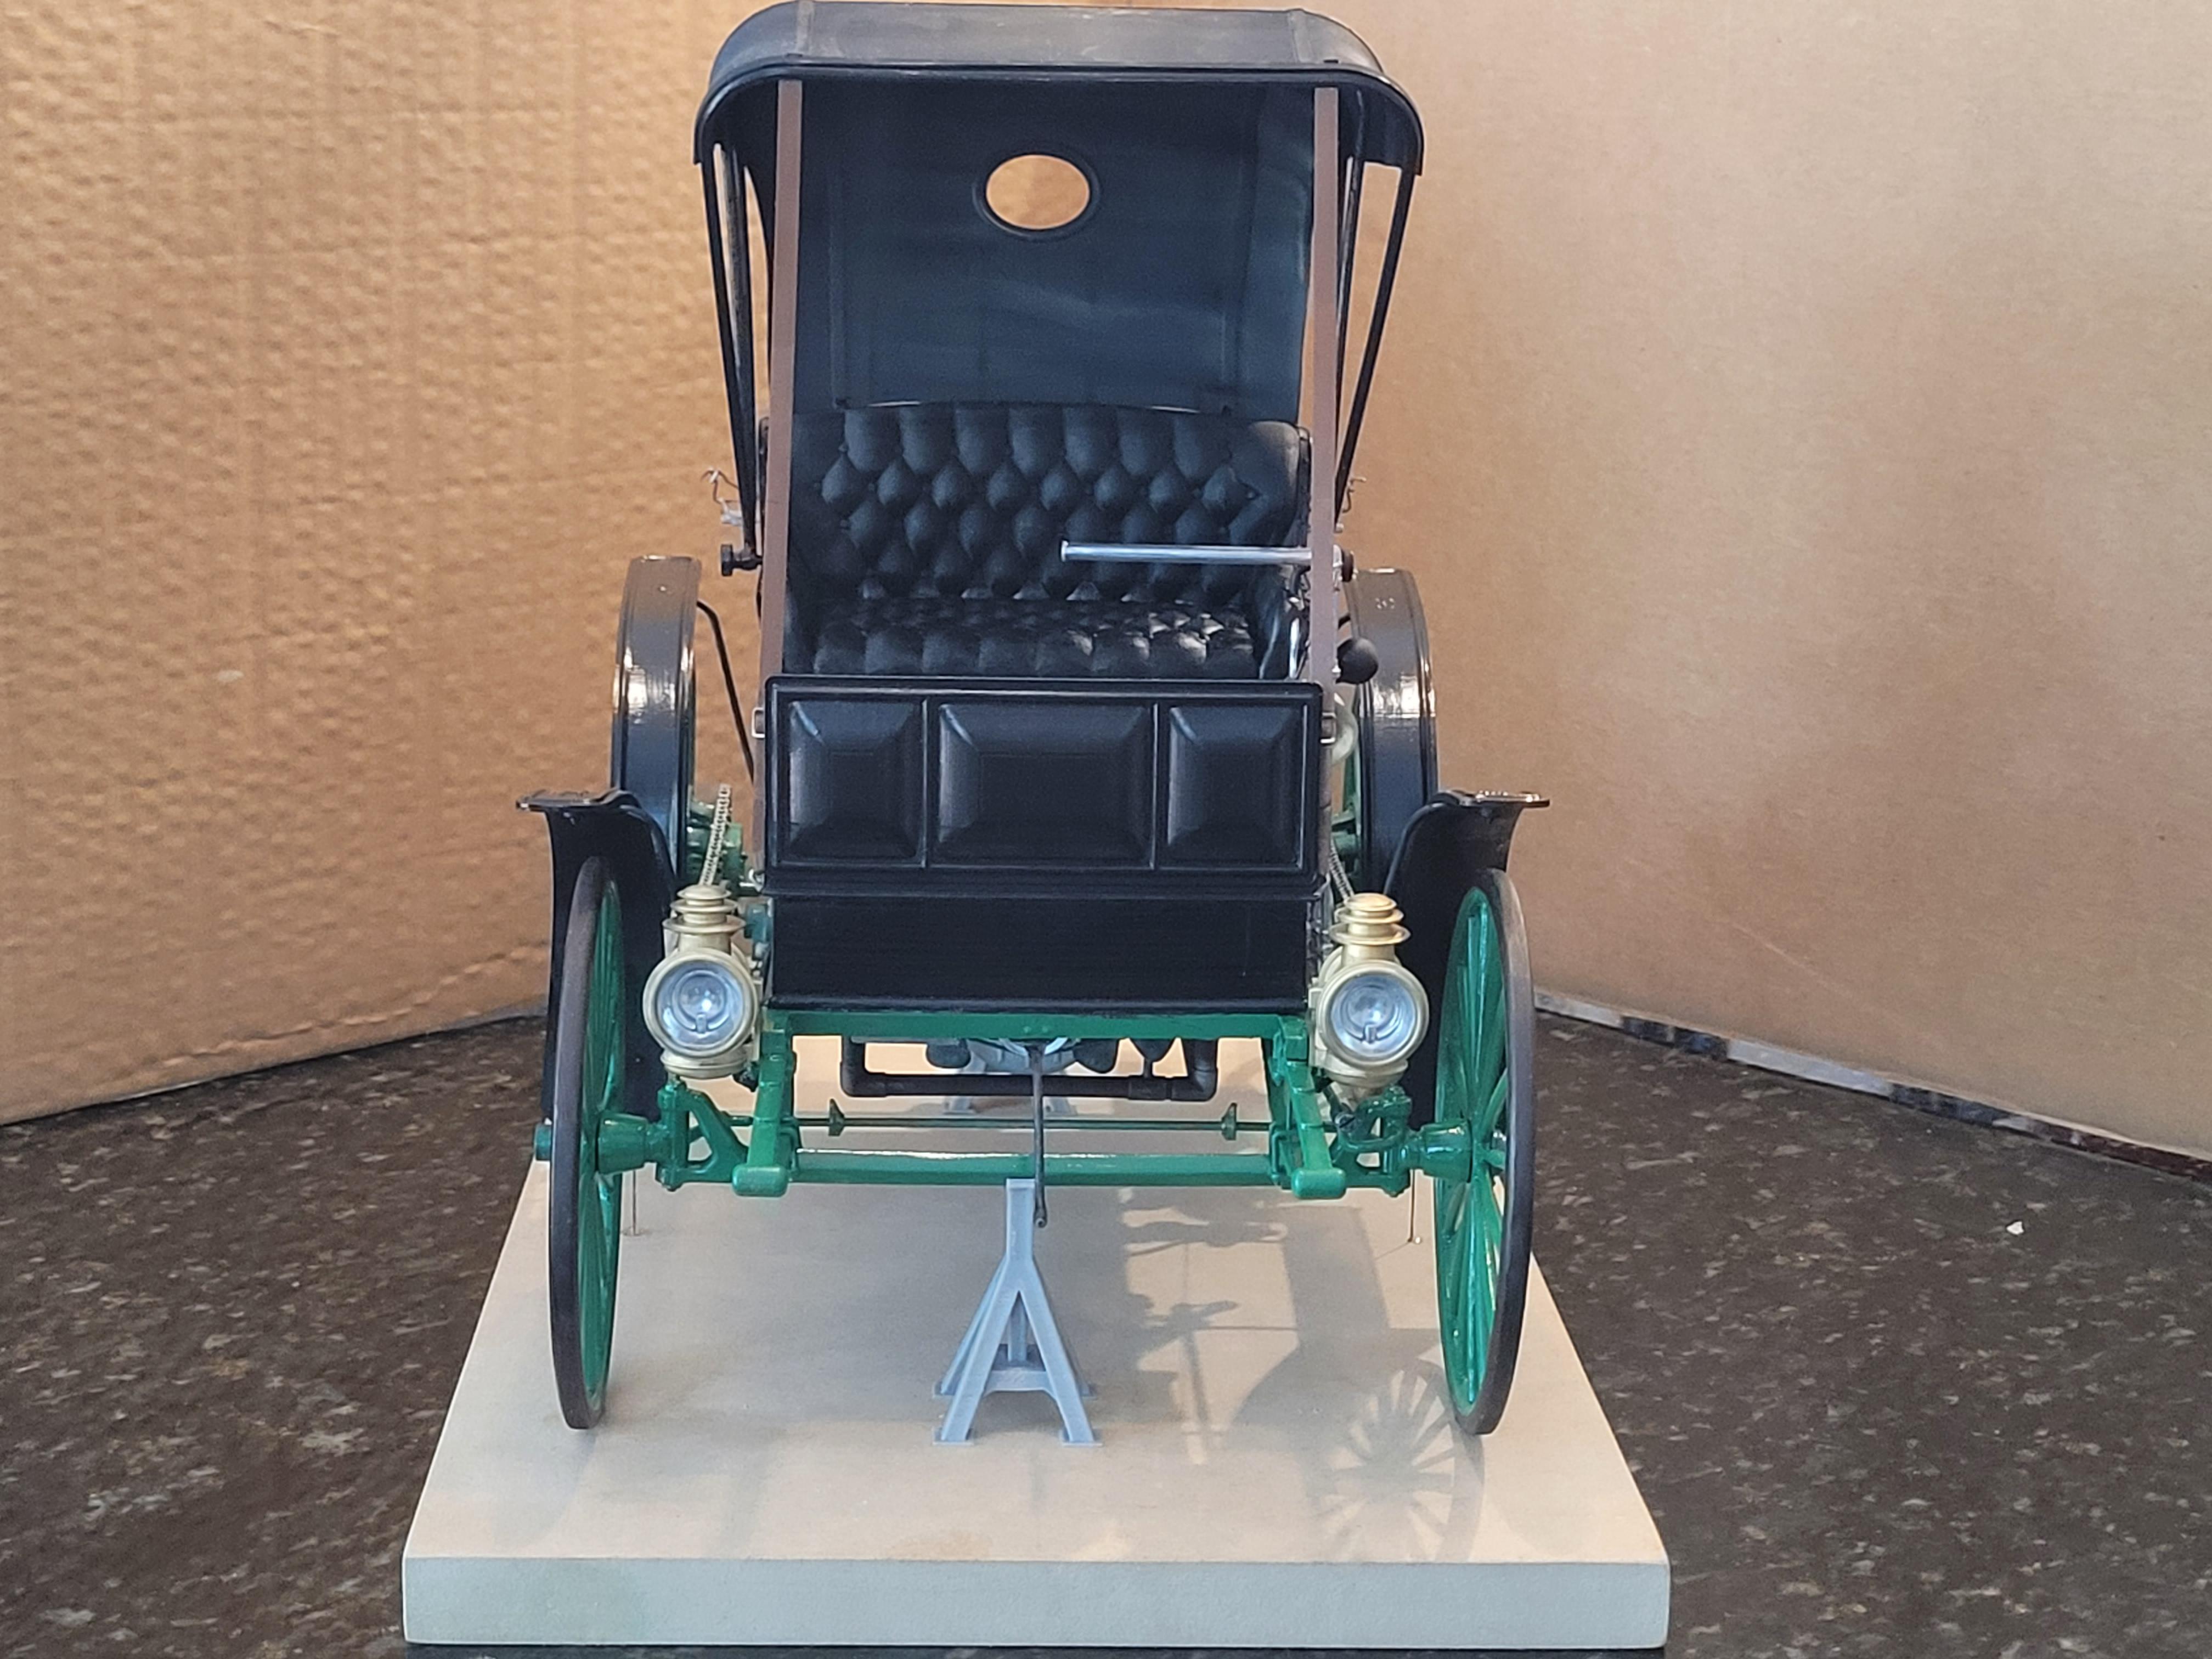
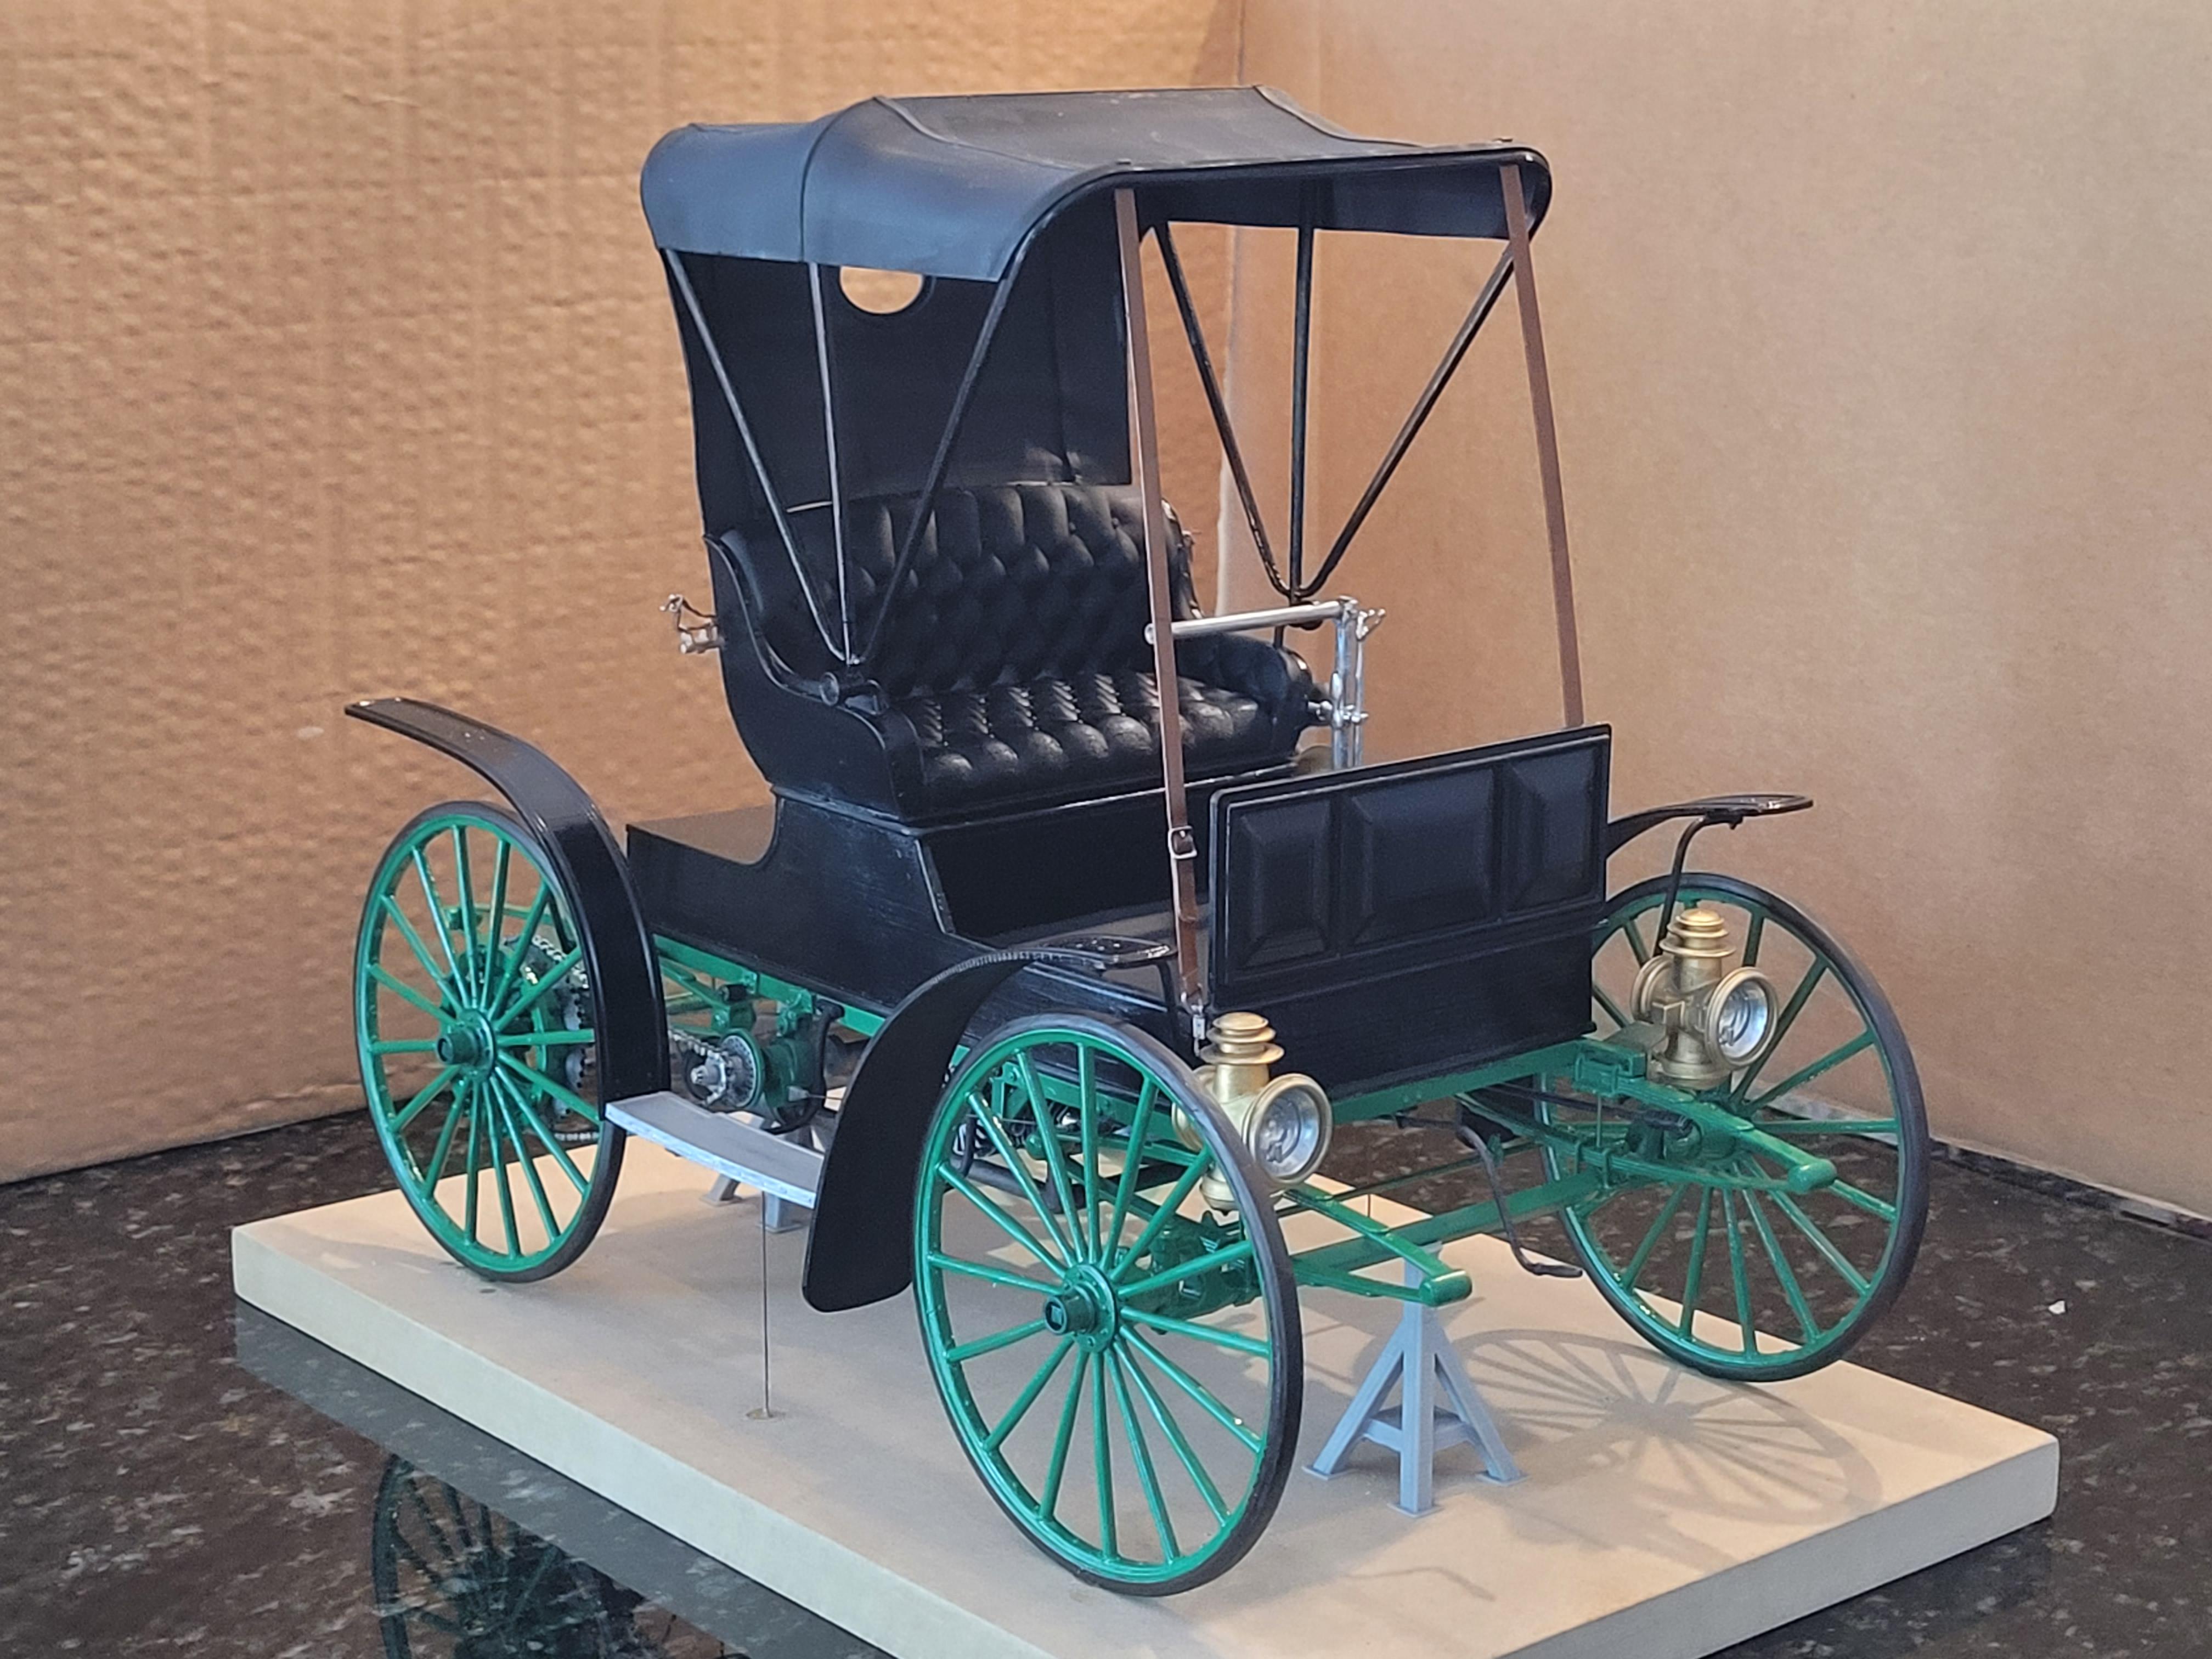
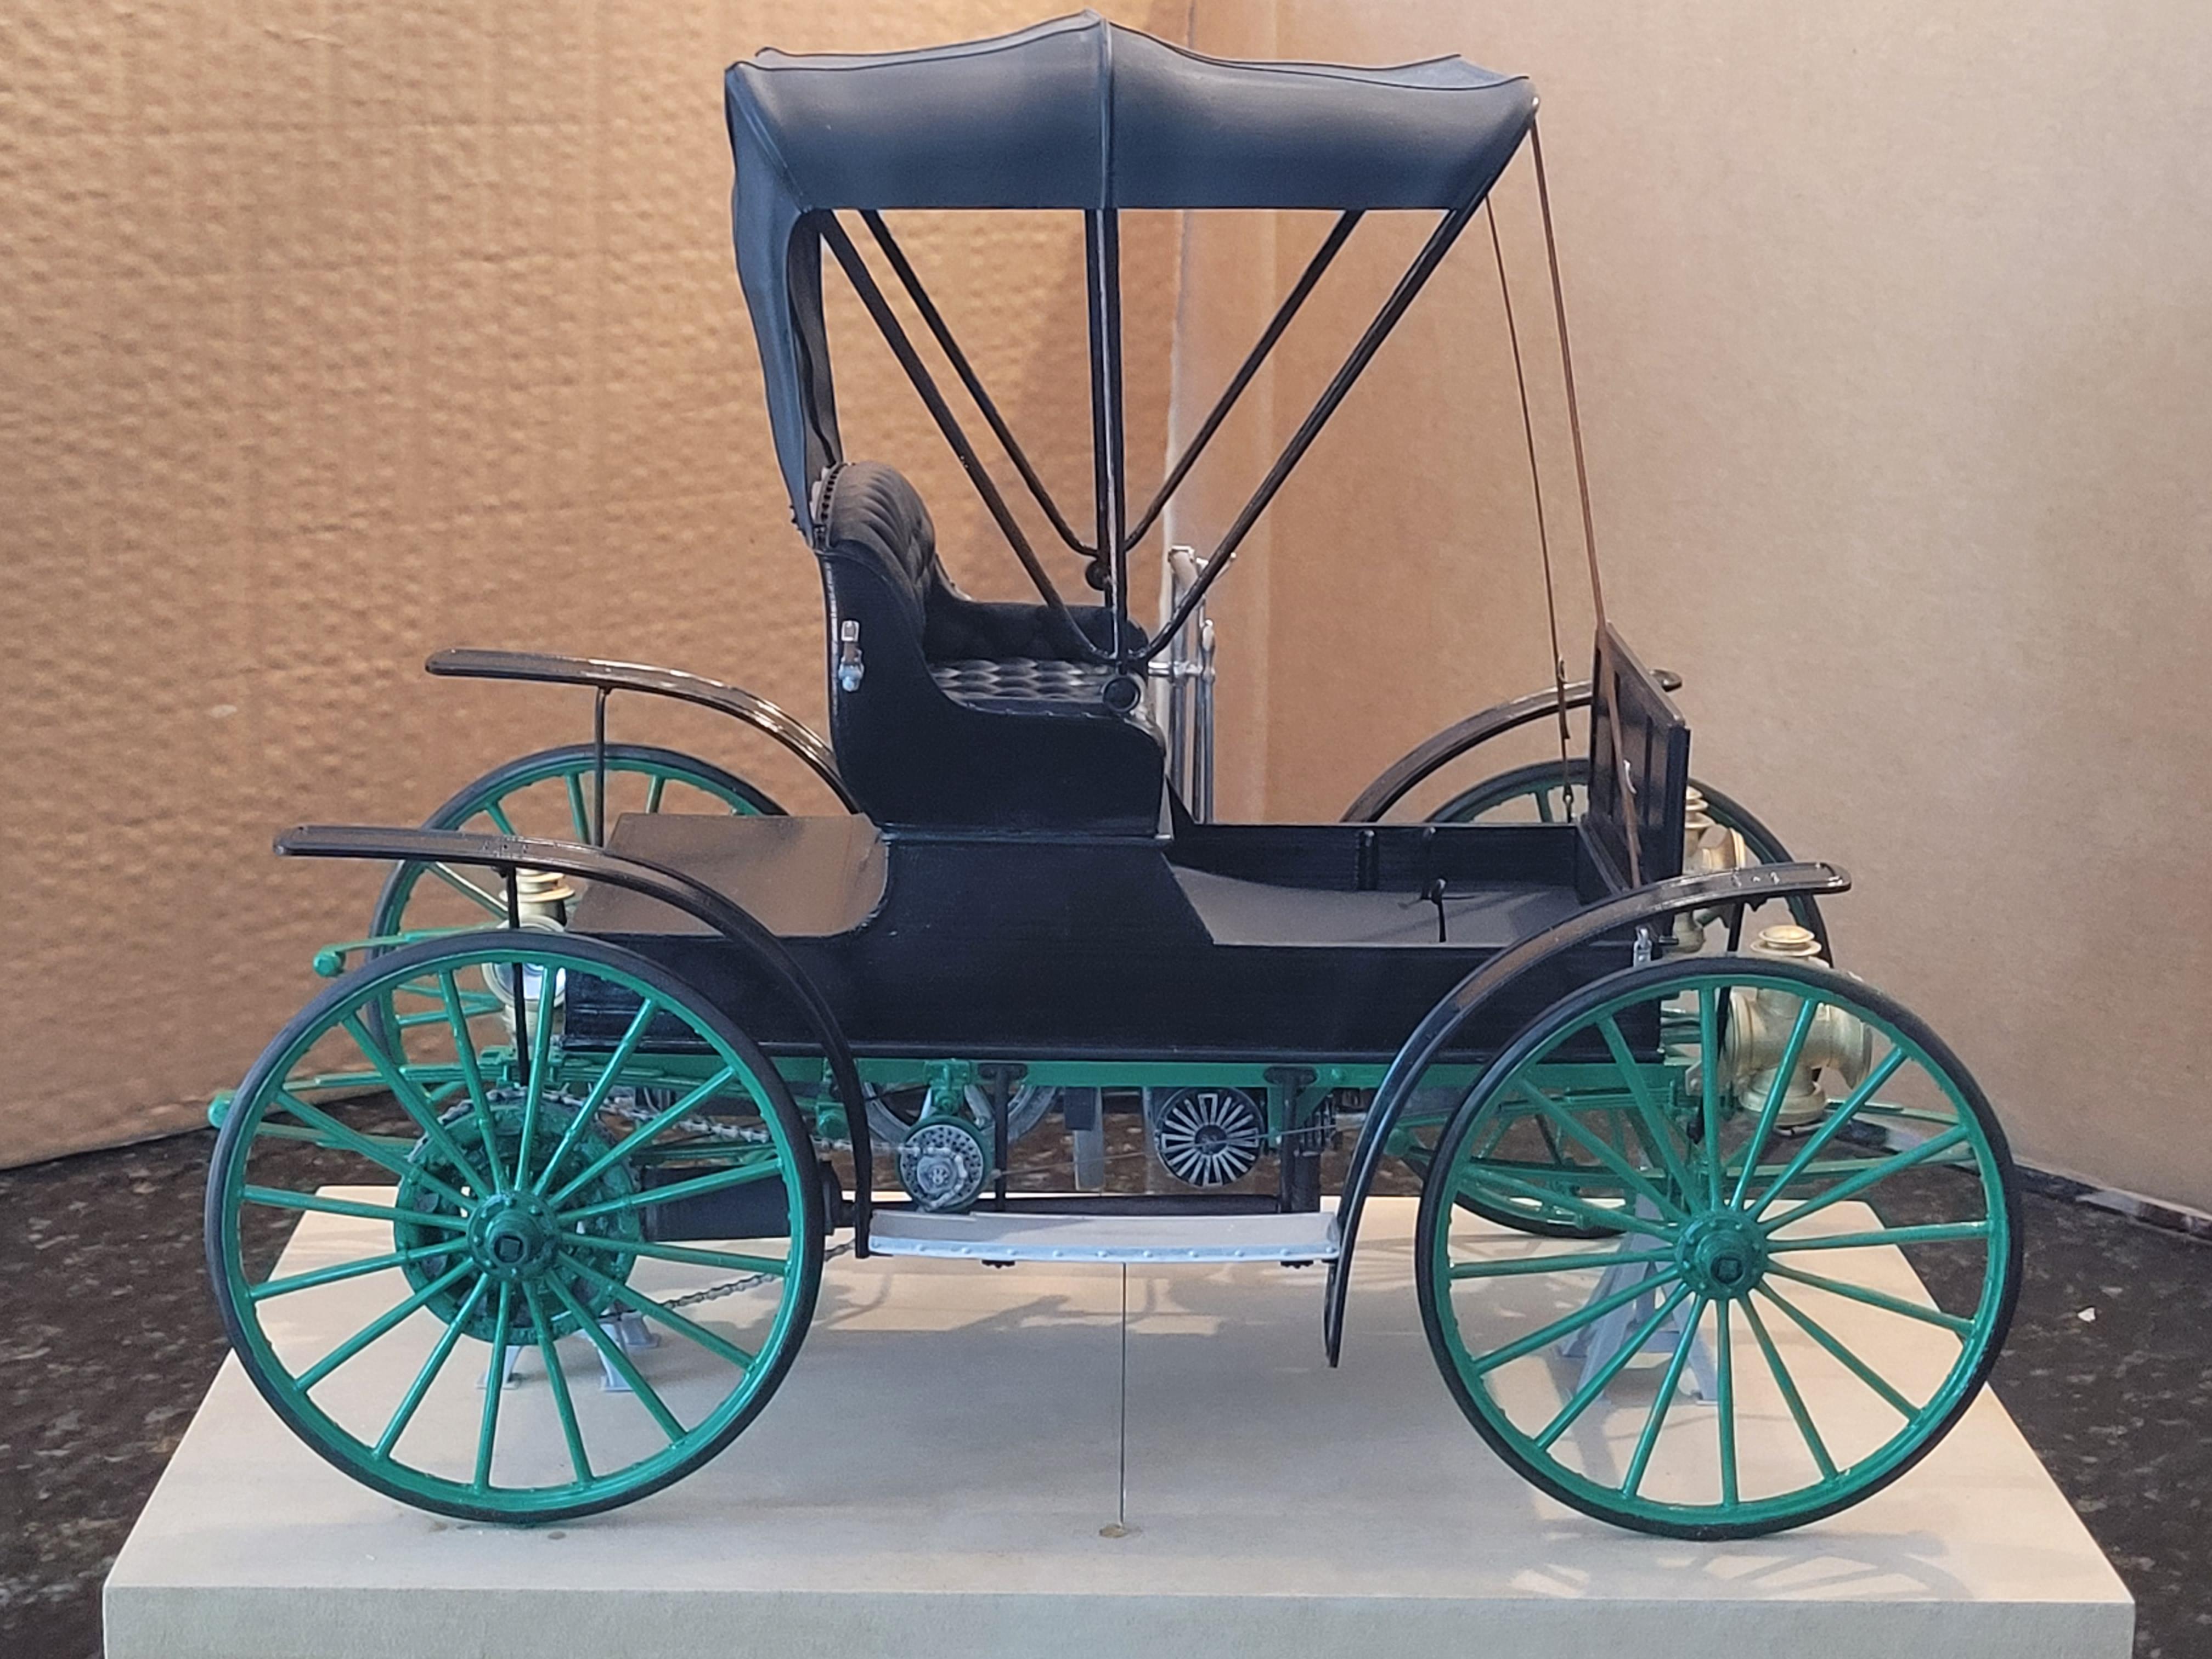
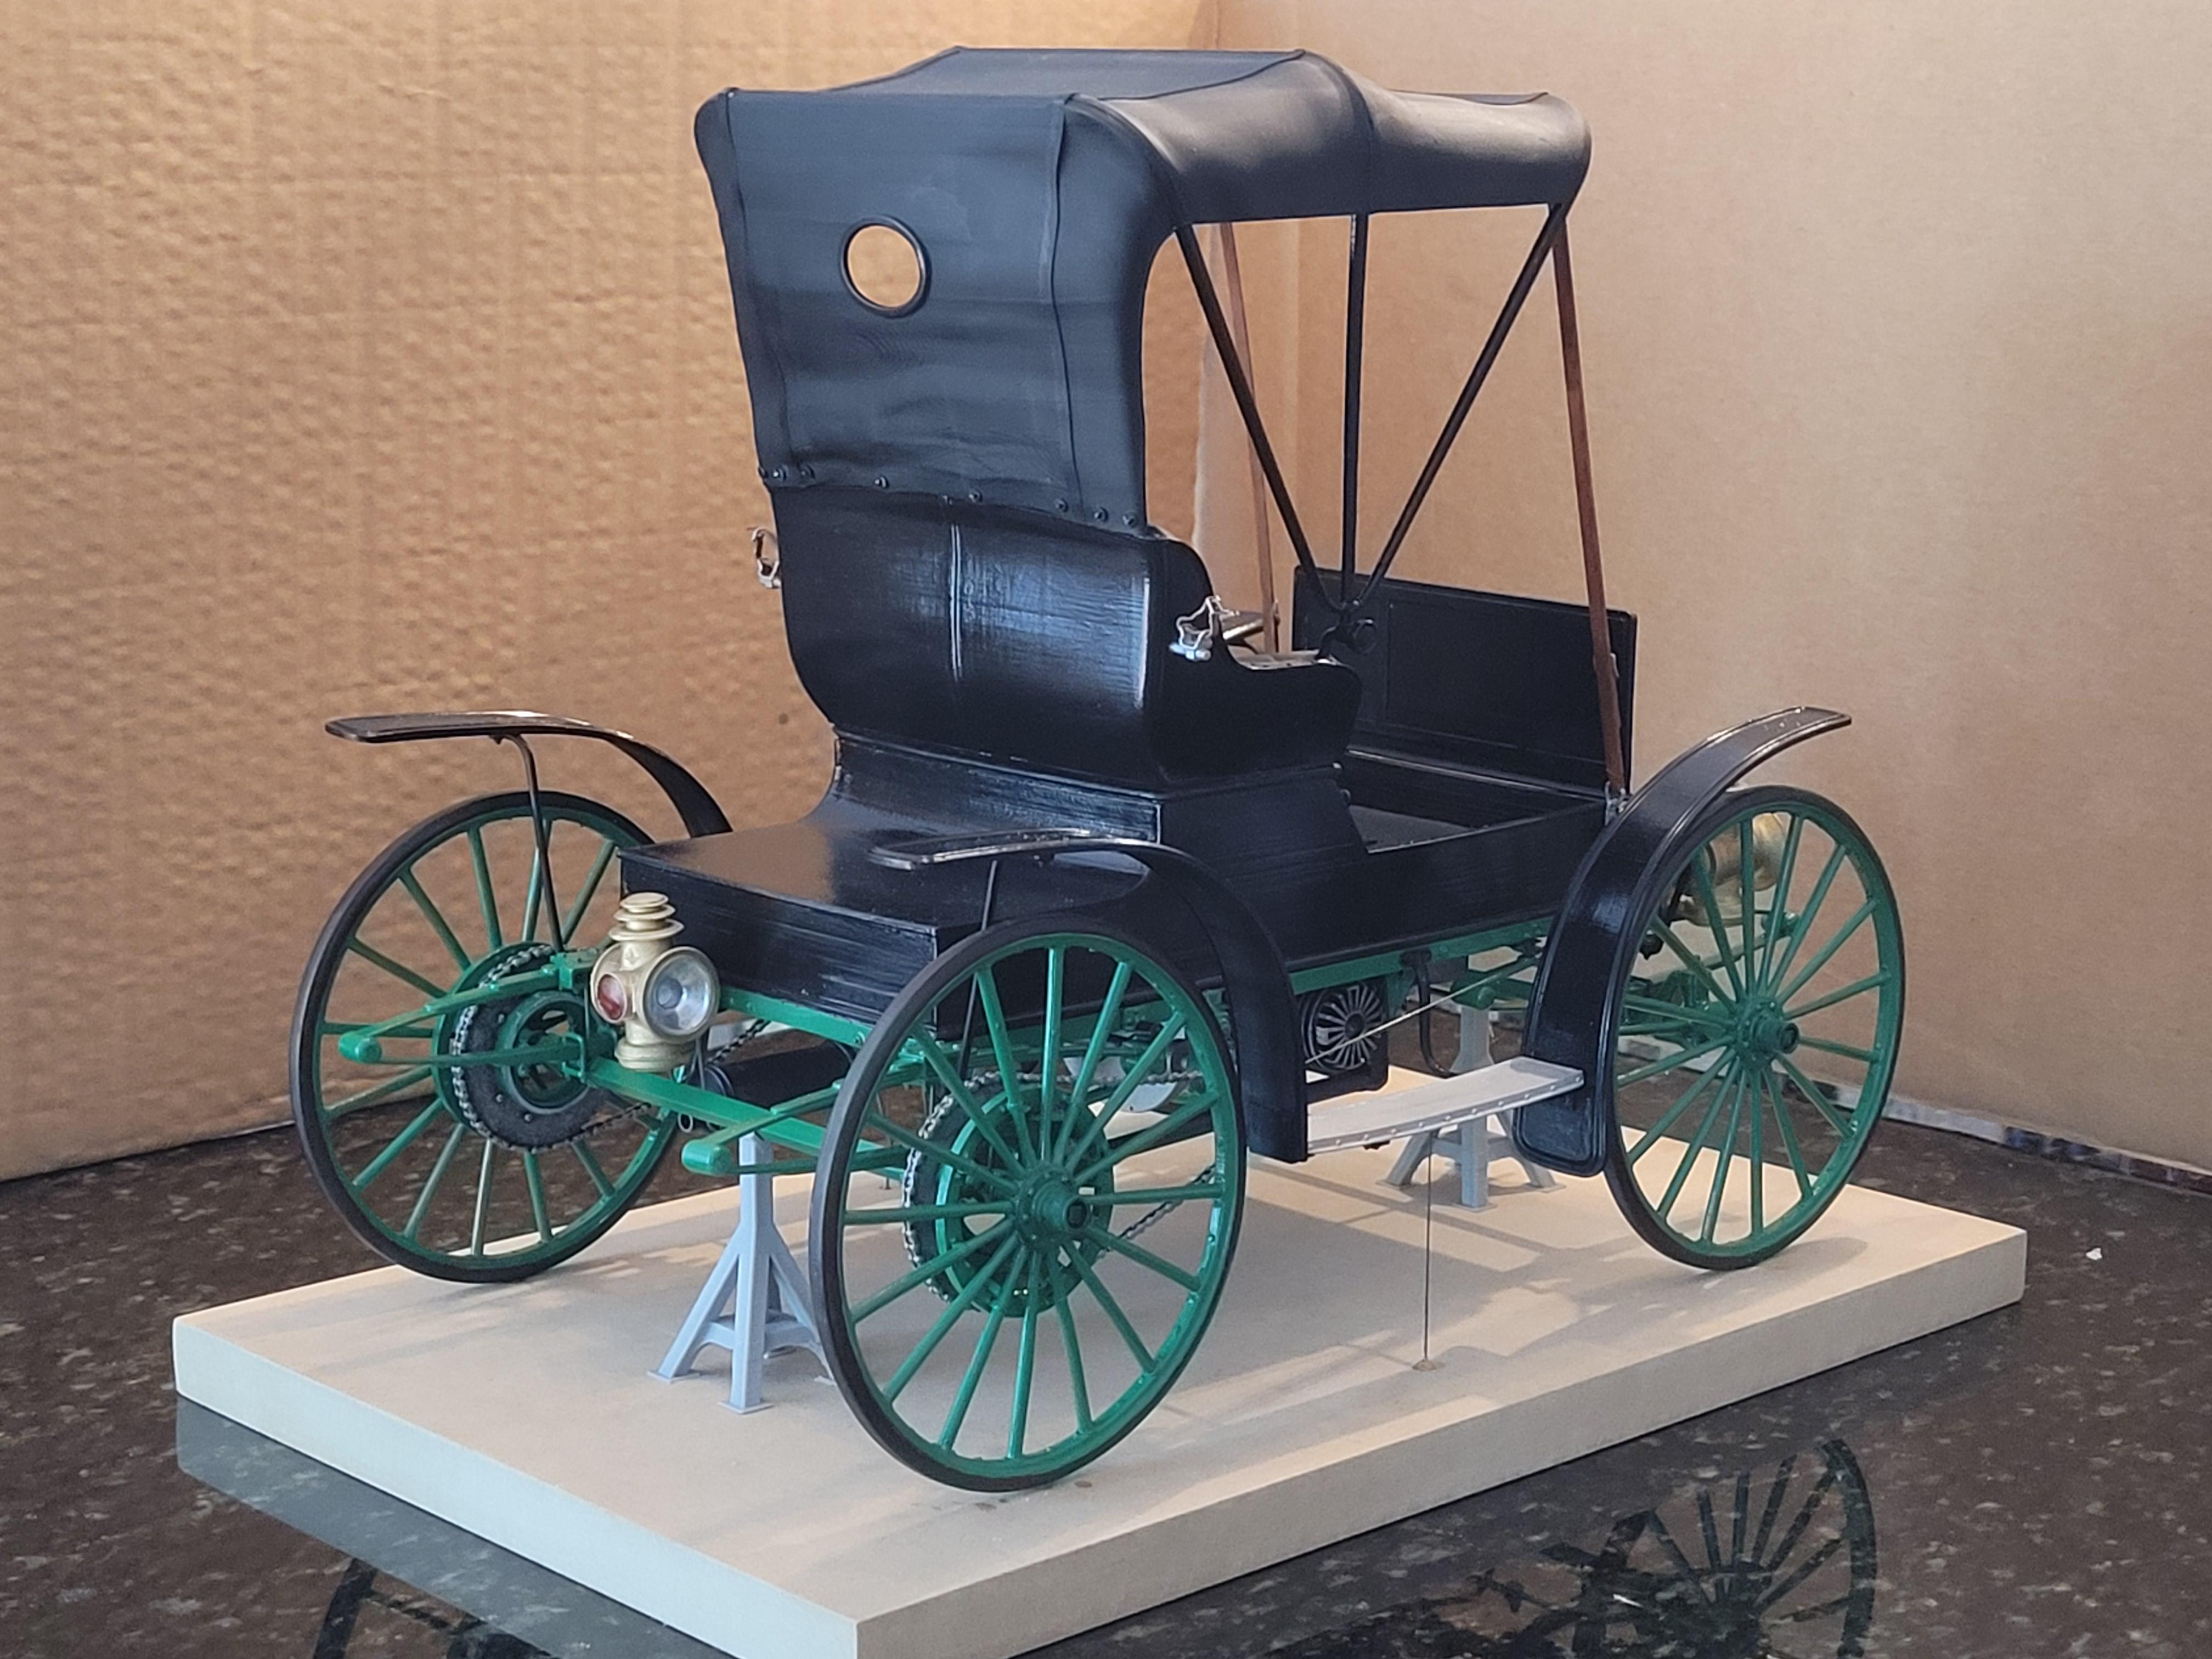
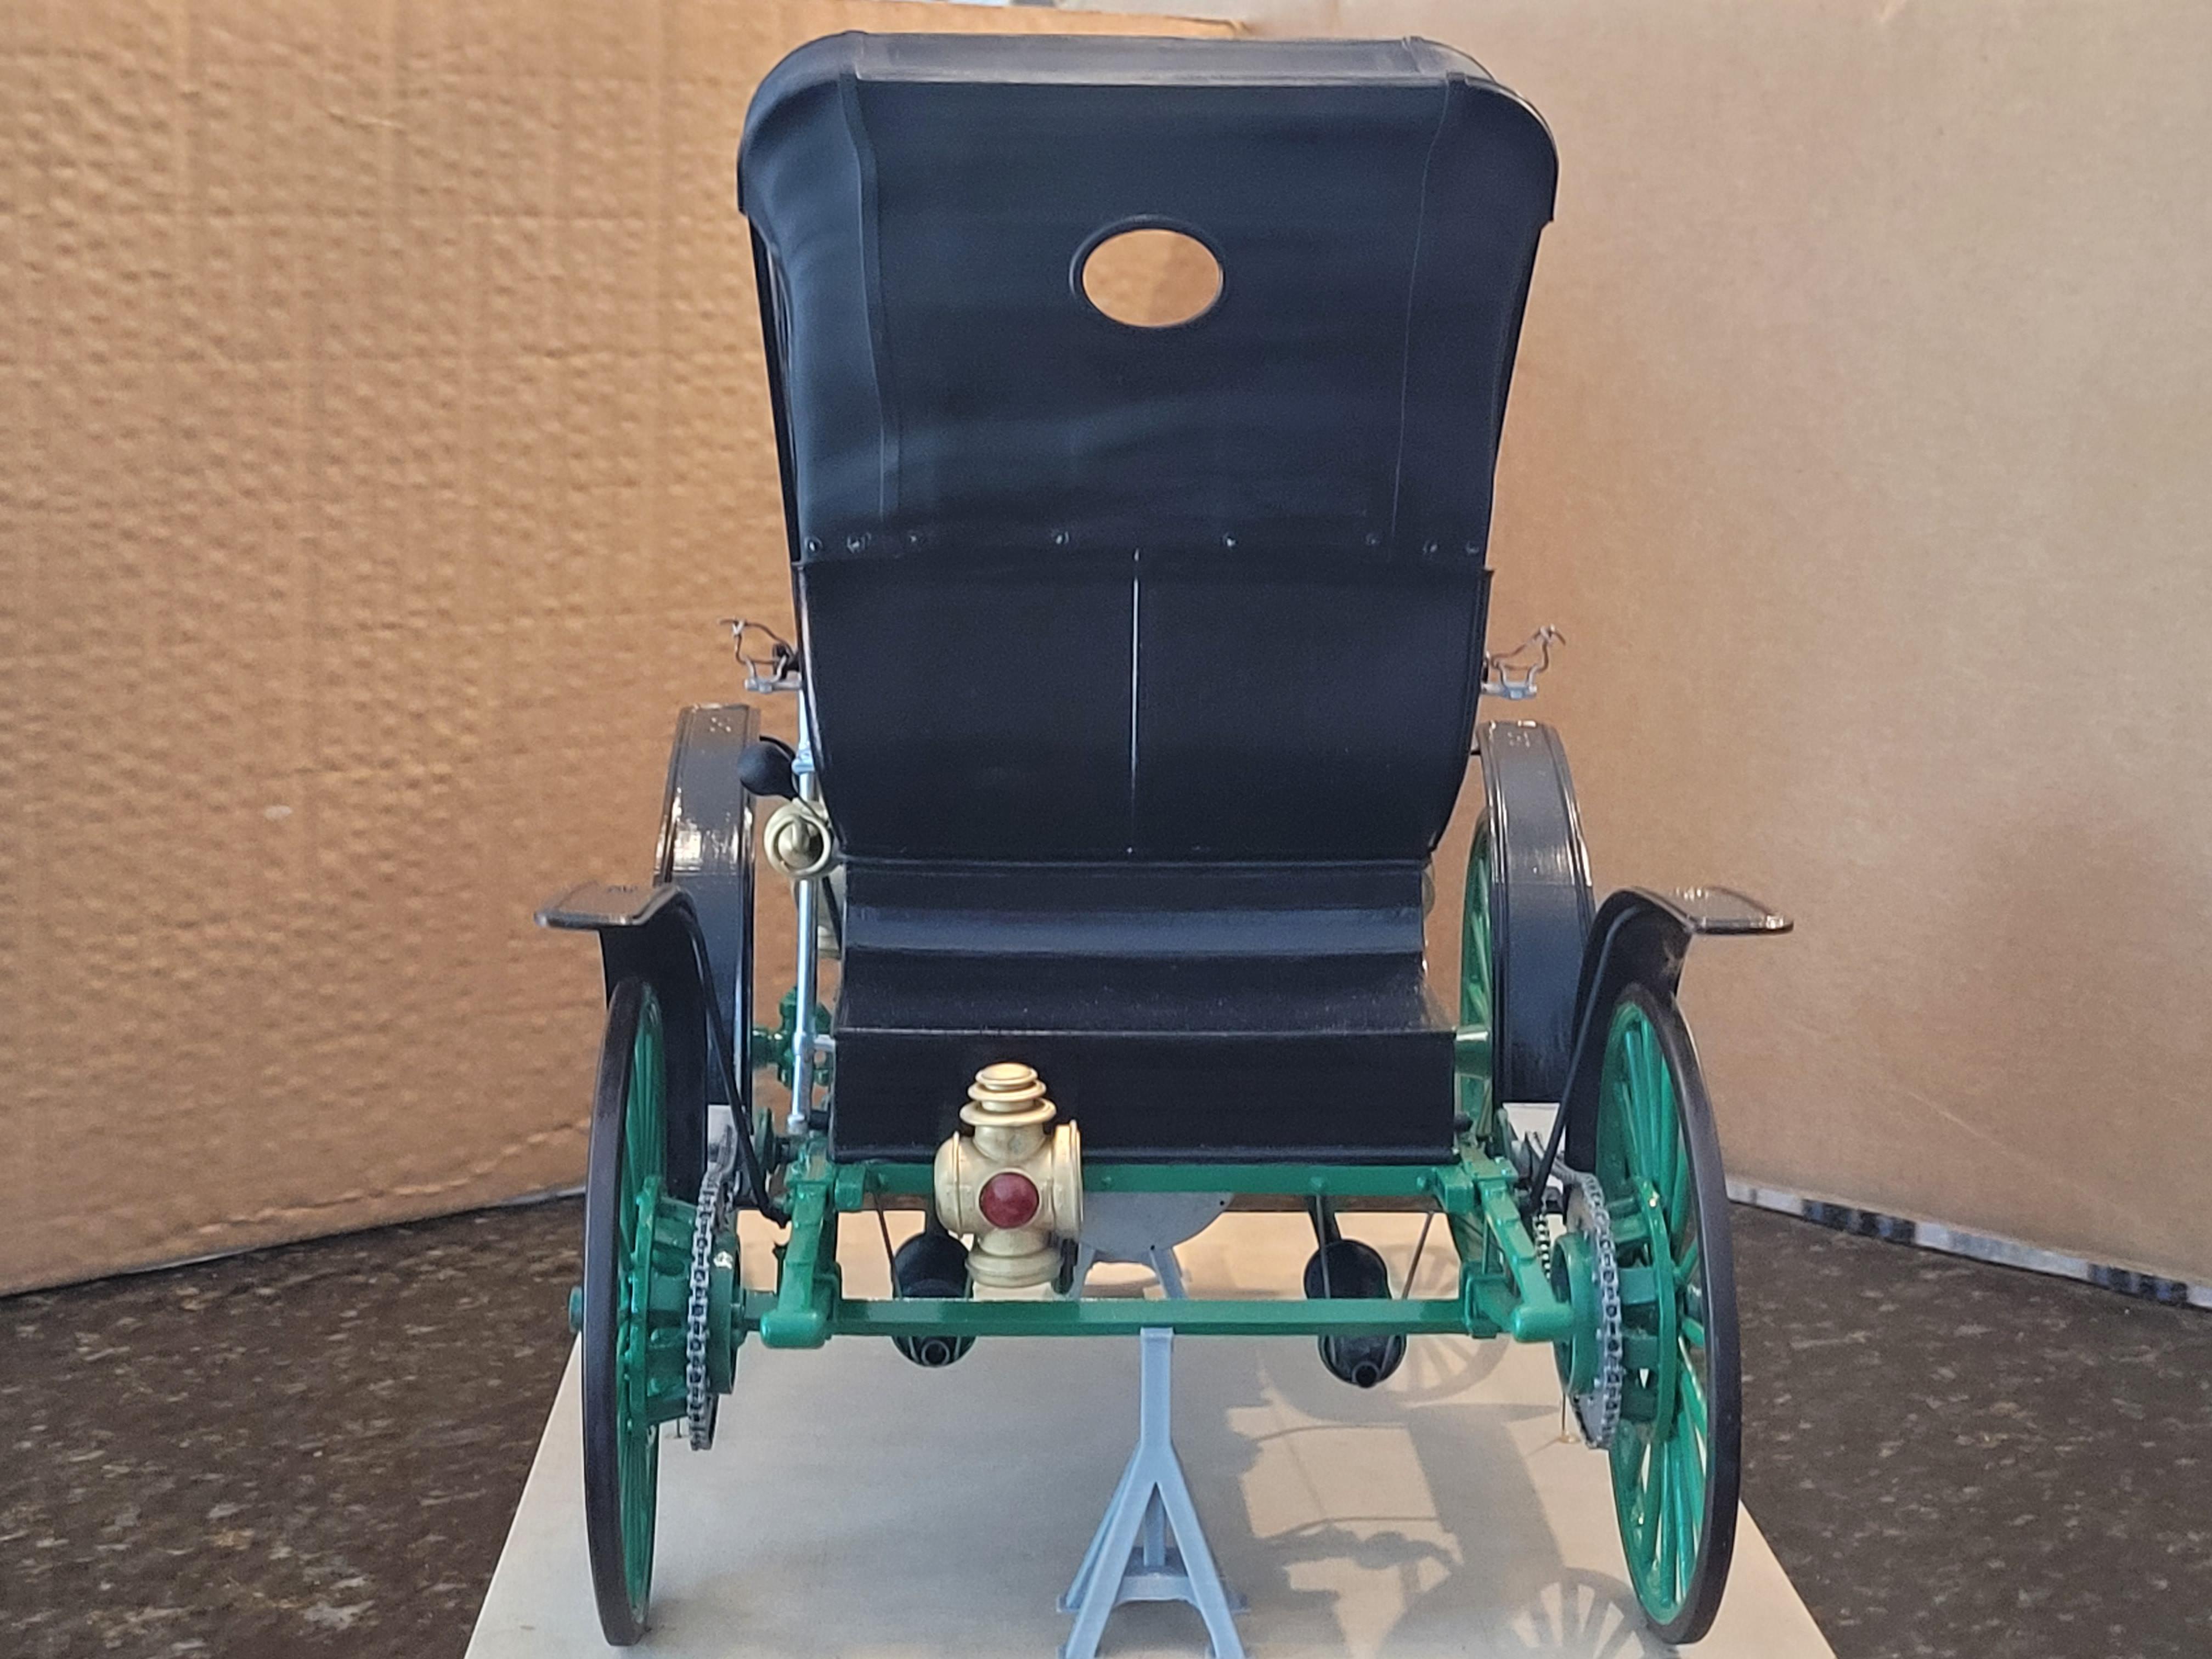
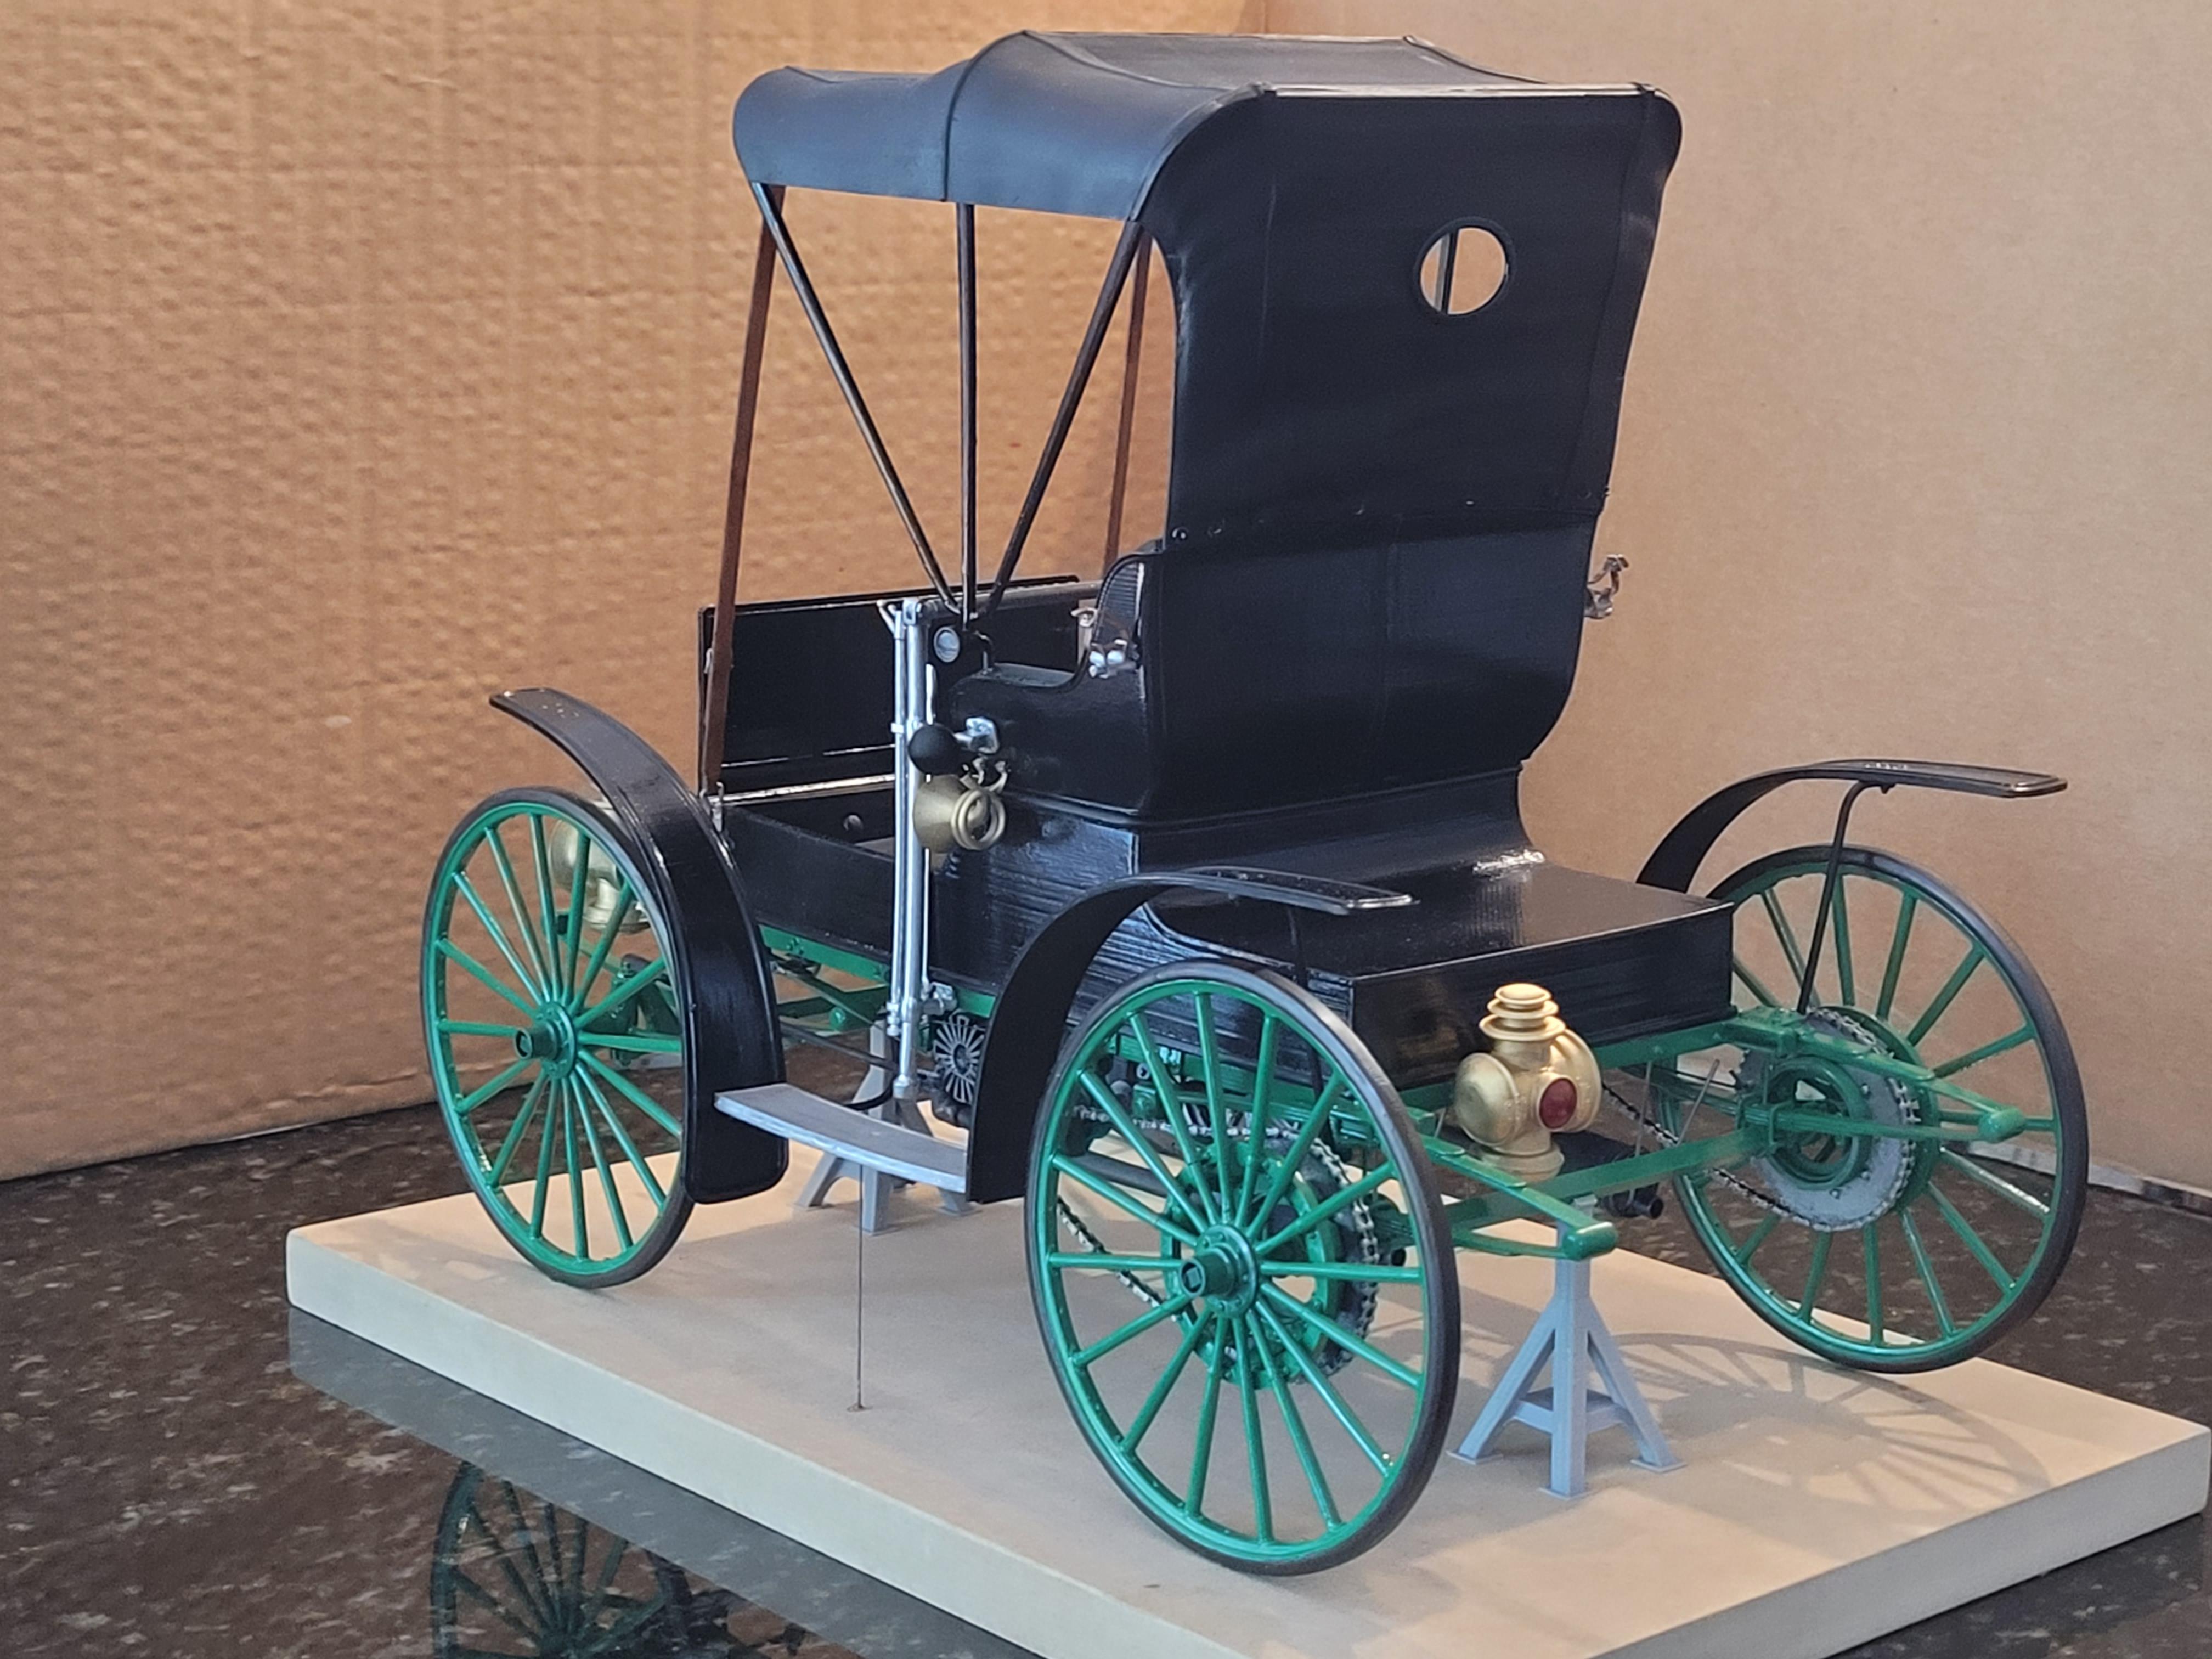
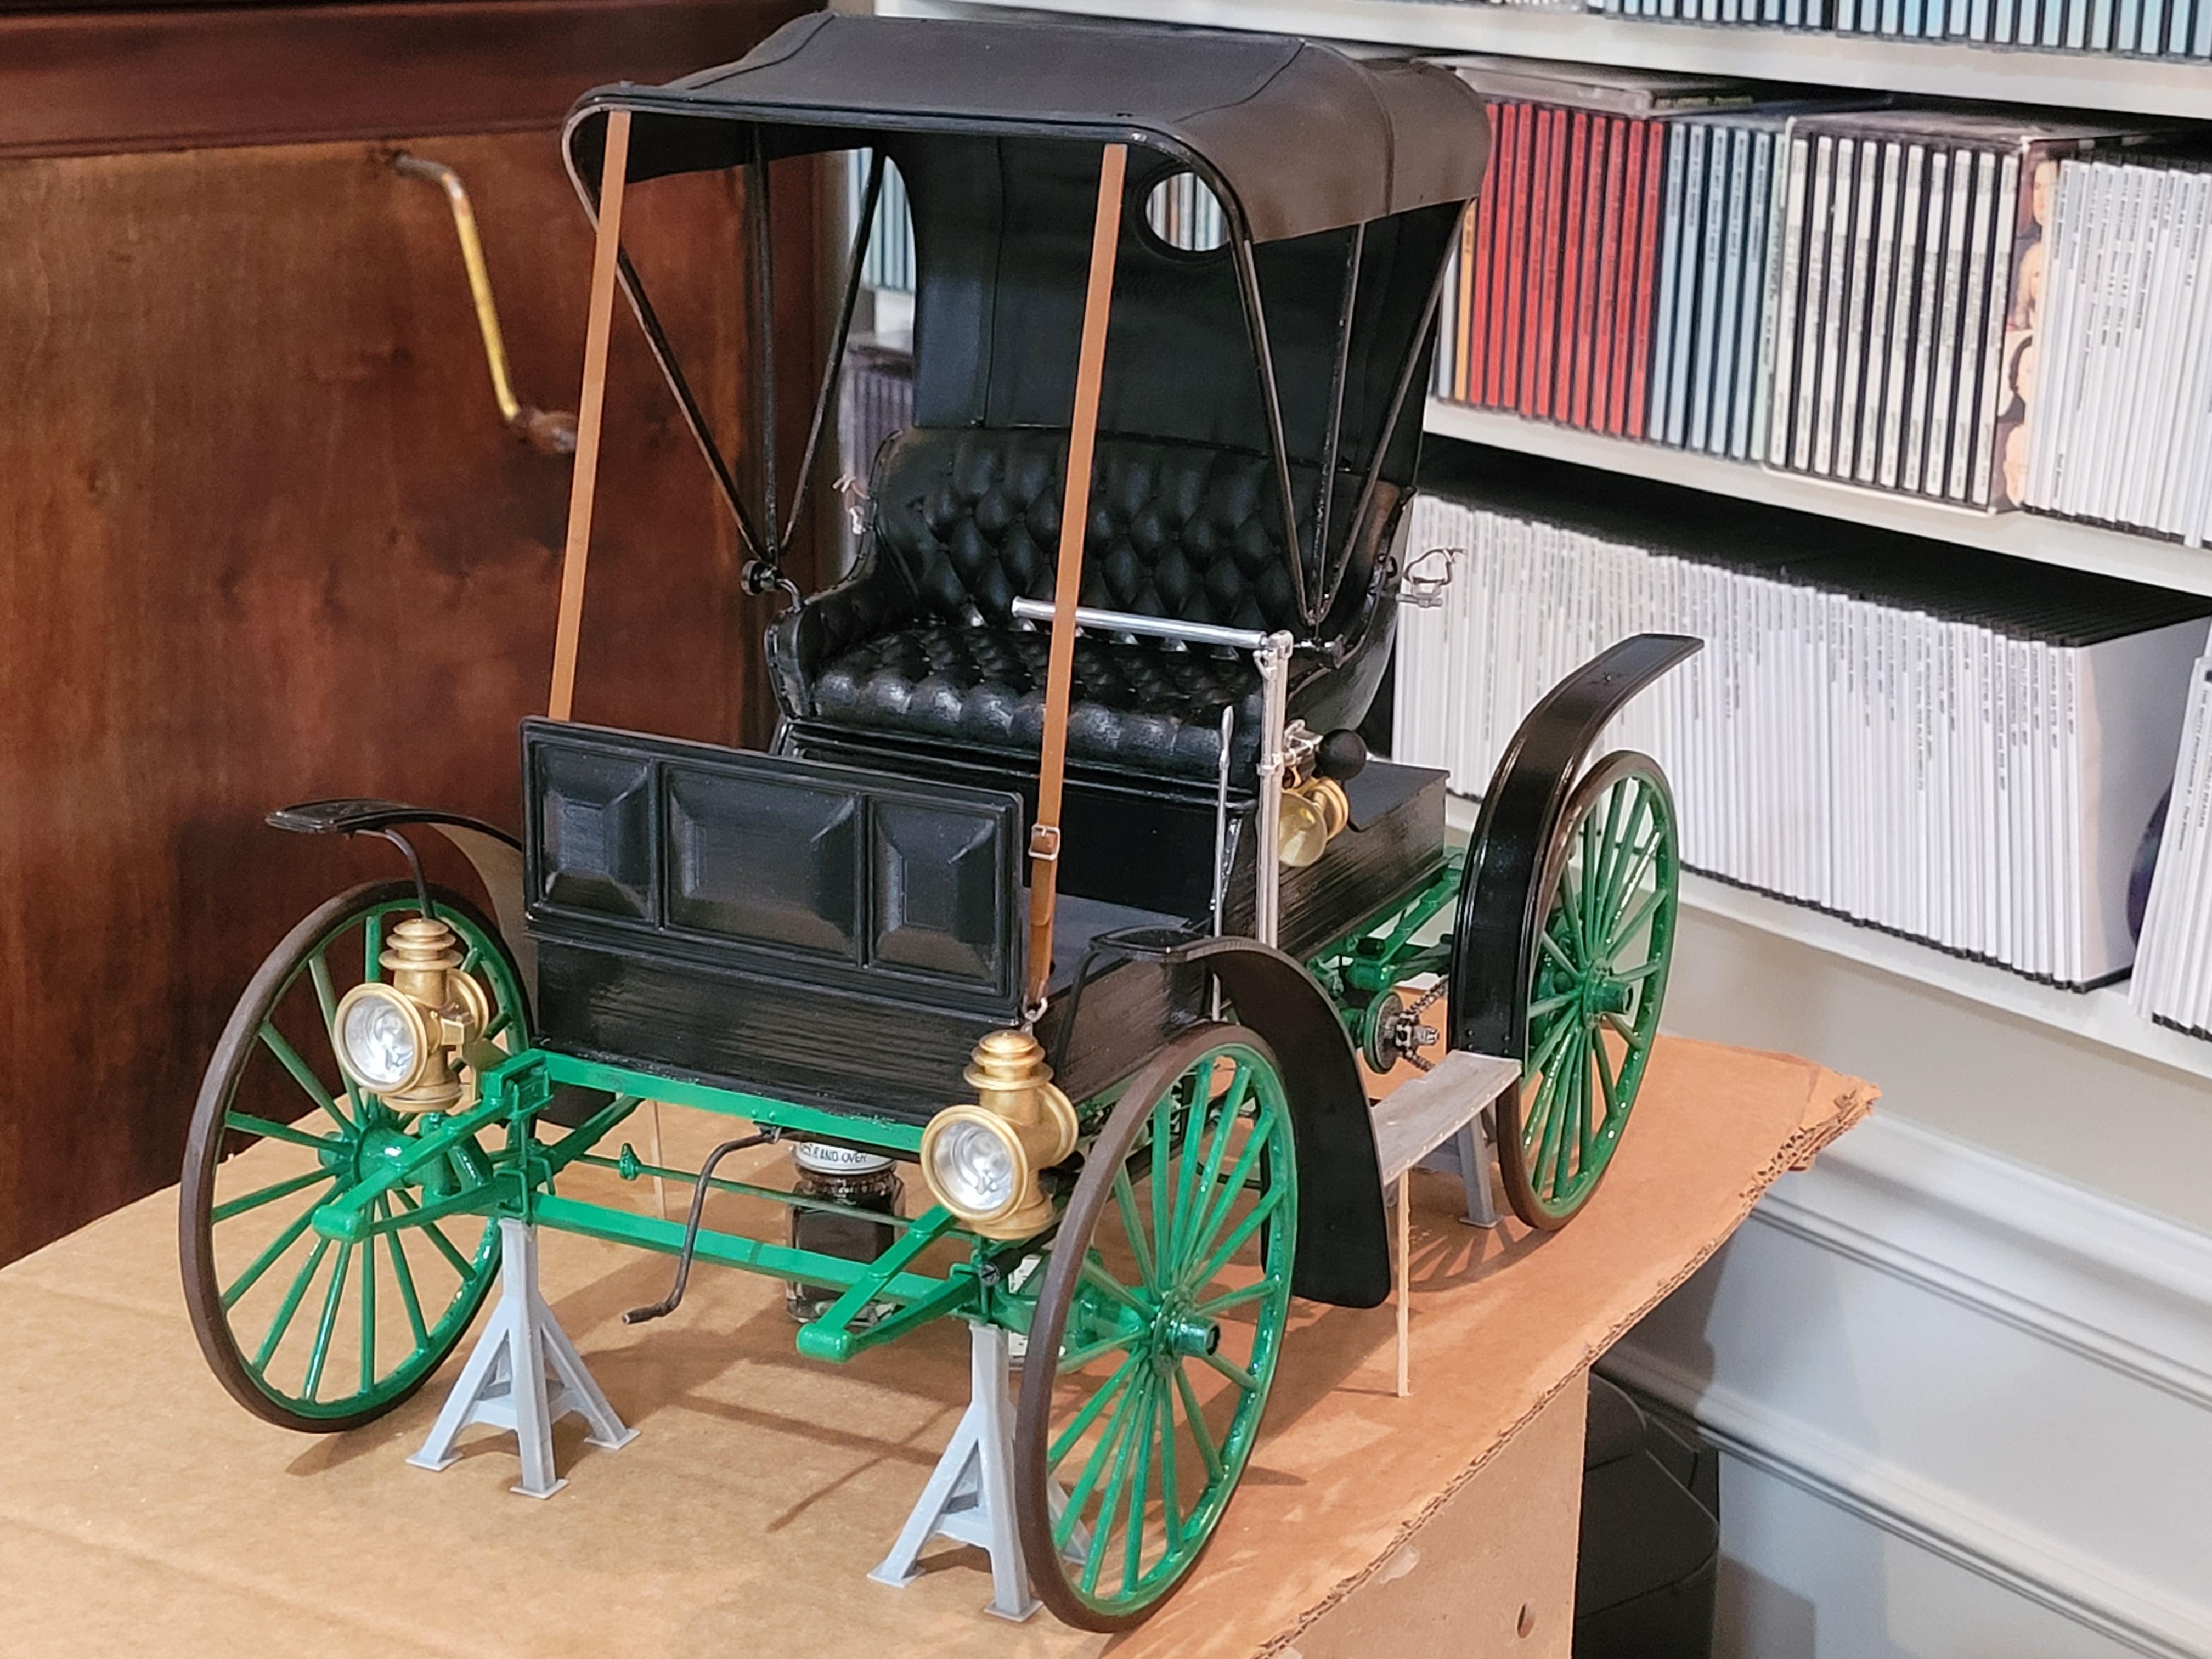
Here is the finished 1910 Sears Motor Buggy. In scale, the model is a little delicate and flimsy, so I pinned the wheels to an MDF base. The jackstands are not really necessary, but over time, sag could be an issue, so this is an insurance policy. In fact, many brass era cars in museums use jackstands to take pressure off the tires, and keep the car level. Weak springs are common. The model is not perfect by a long shot, but at 1/8 scale it looks good enough for me and the shelf. I hope you enjoyed the build in the WIP section. Thanks for watching!
-
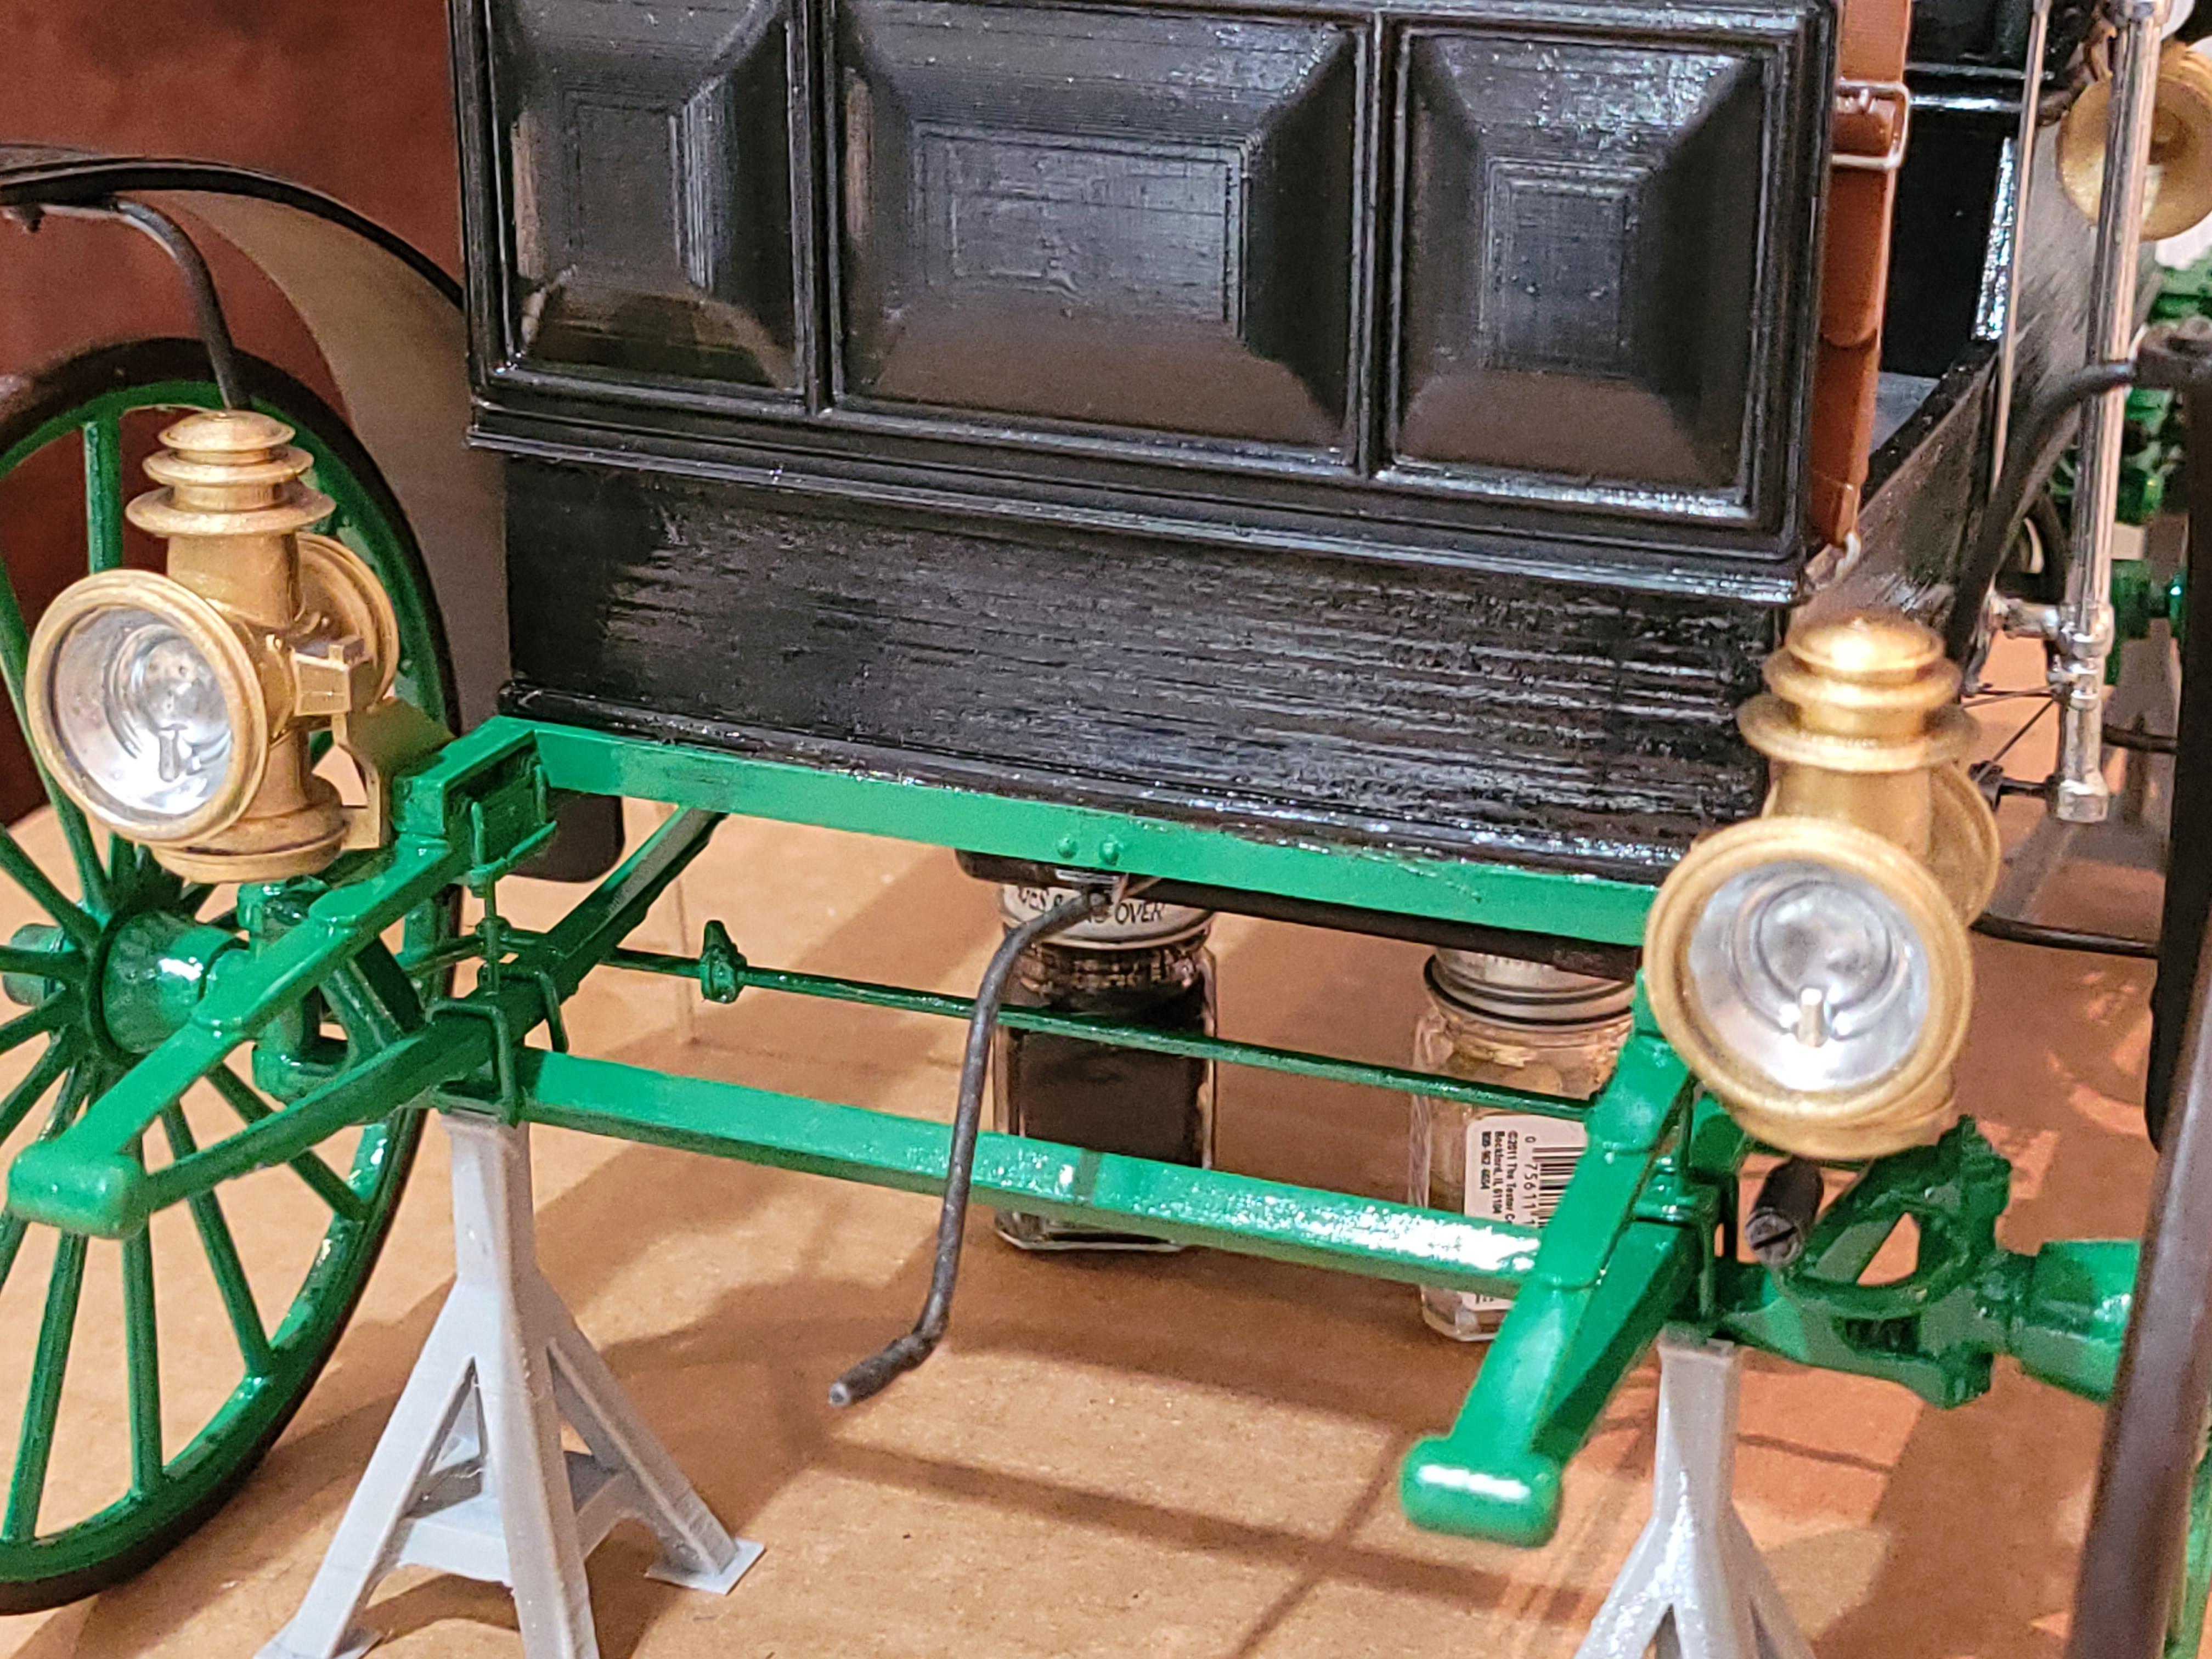
Attached the lamps, and horn. Just a little touch up, and I will post final pictures in the Under Glass. Thanks to everyone who walked along with me through this project. I am not one to respond to every kind comment or words of encouragement, but know that it is and was appreciated!
-
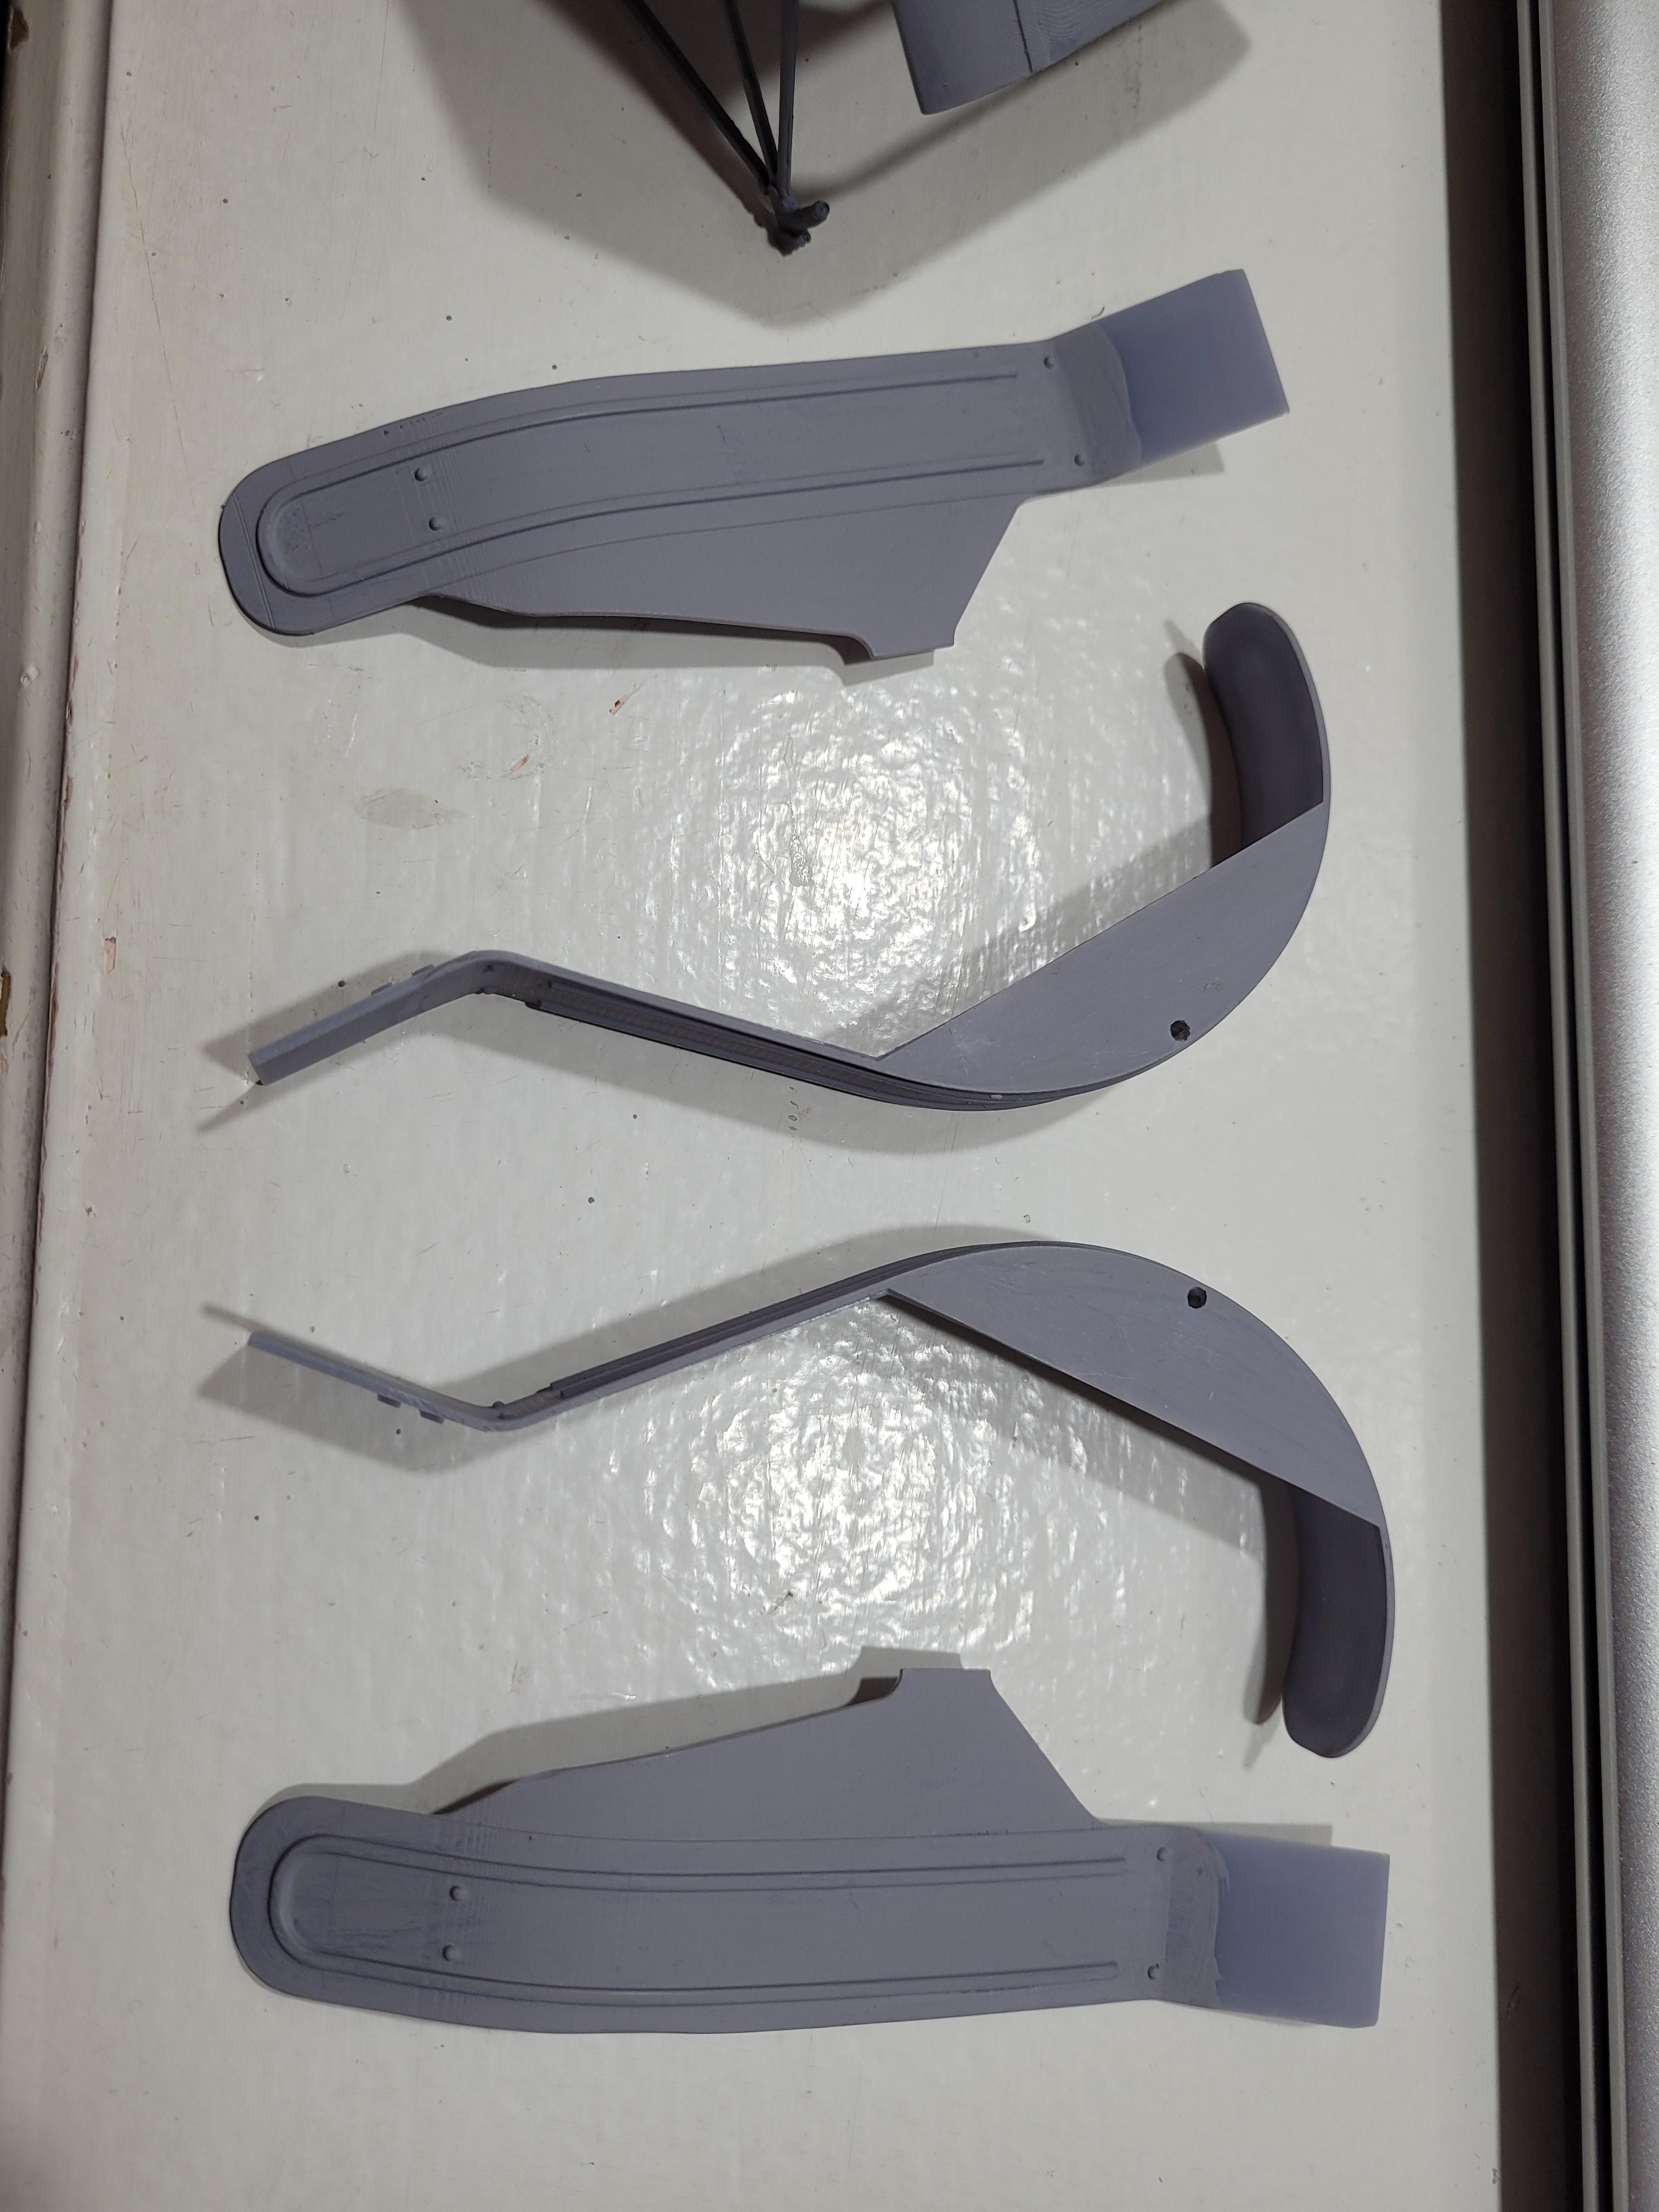
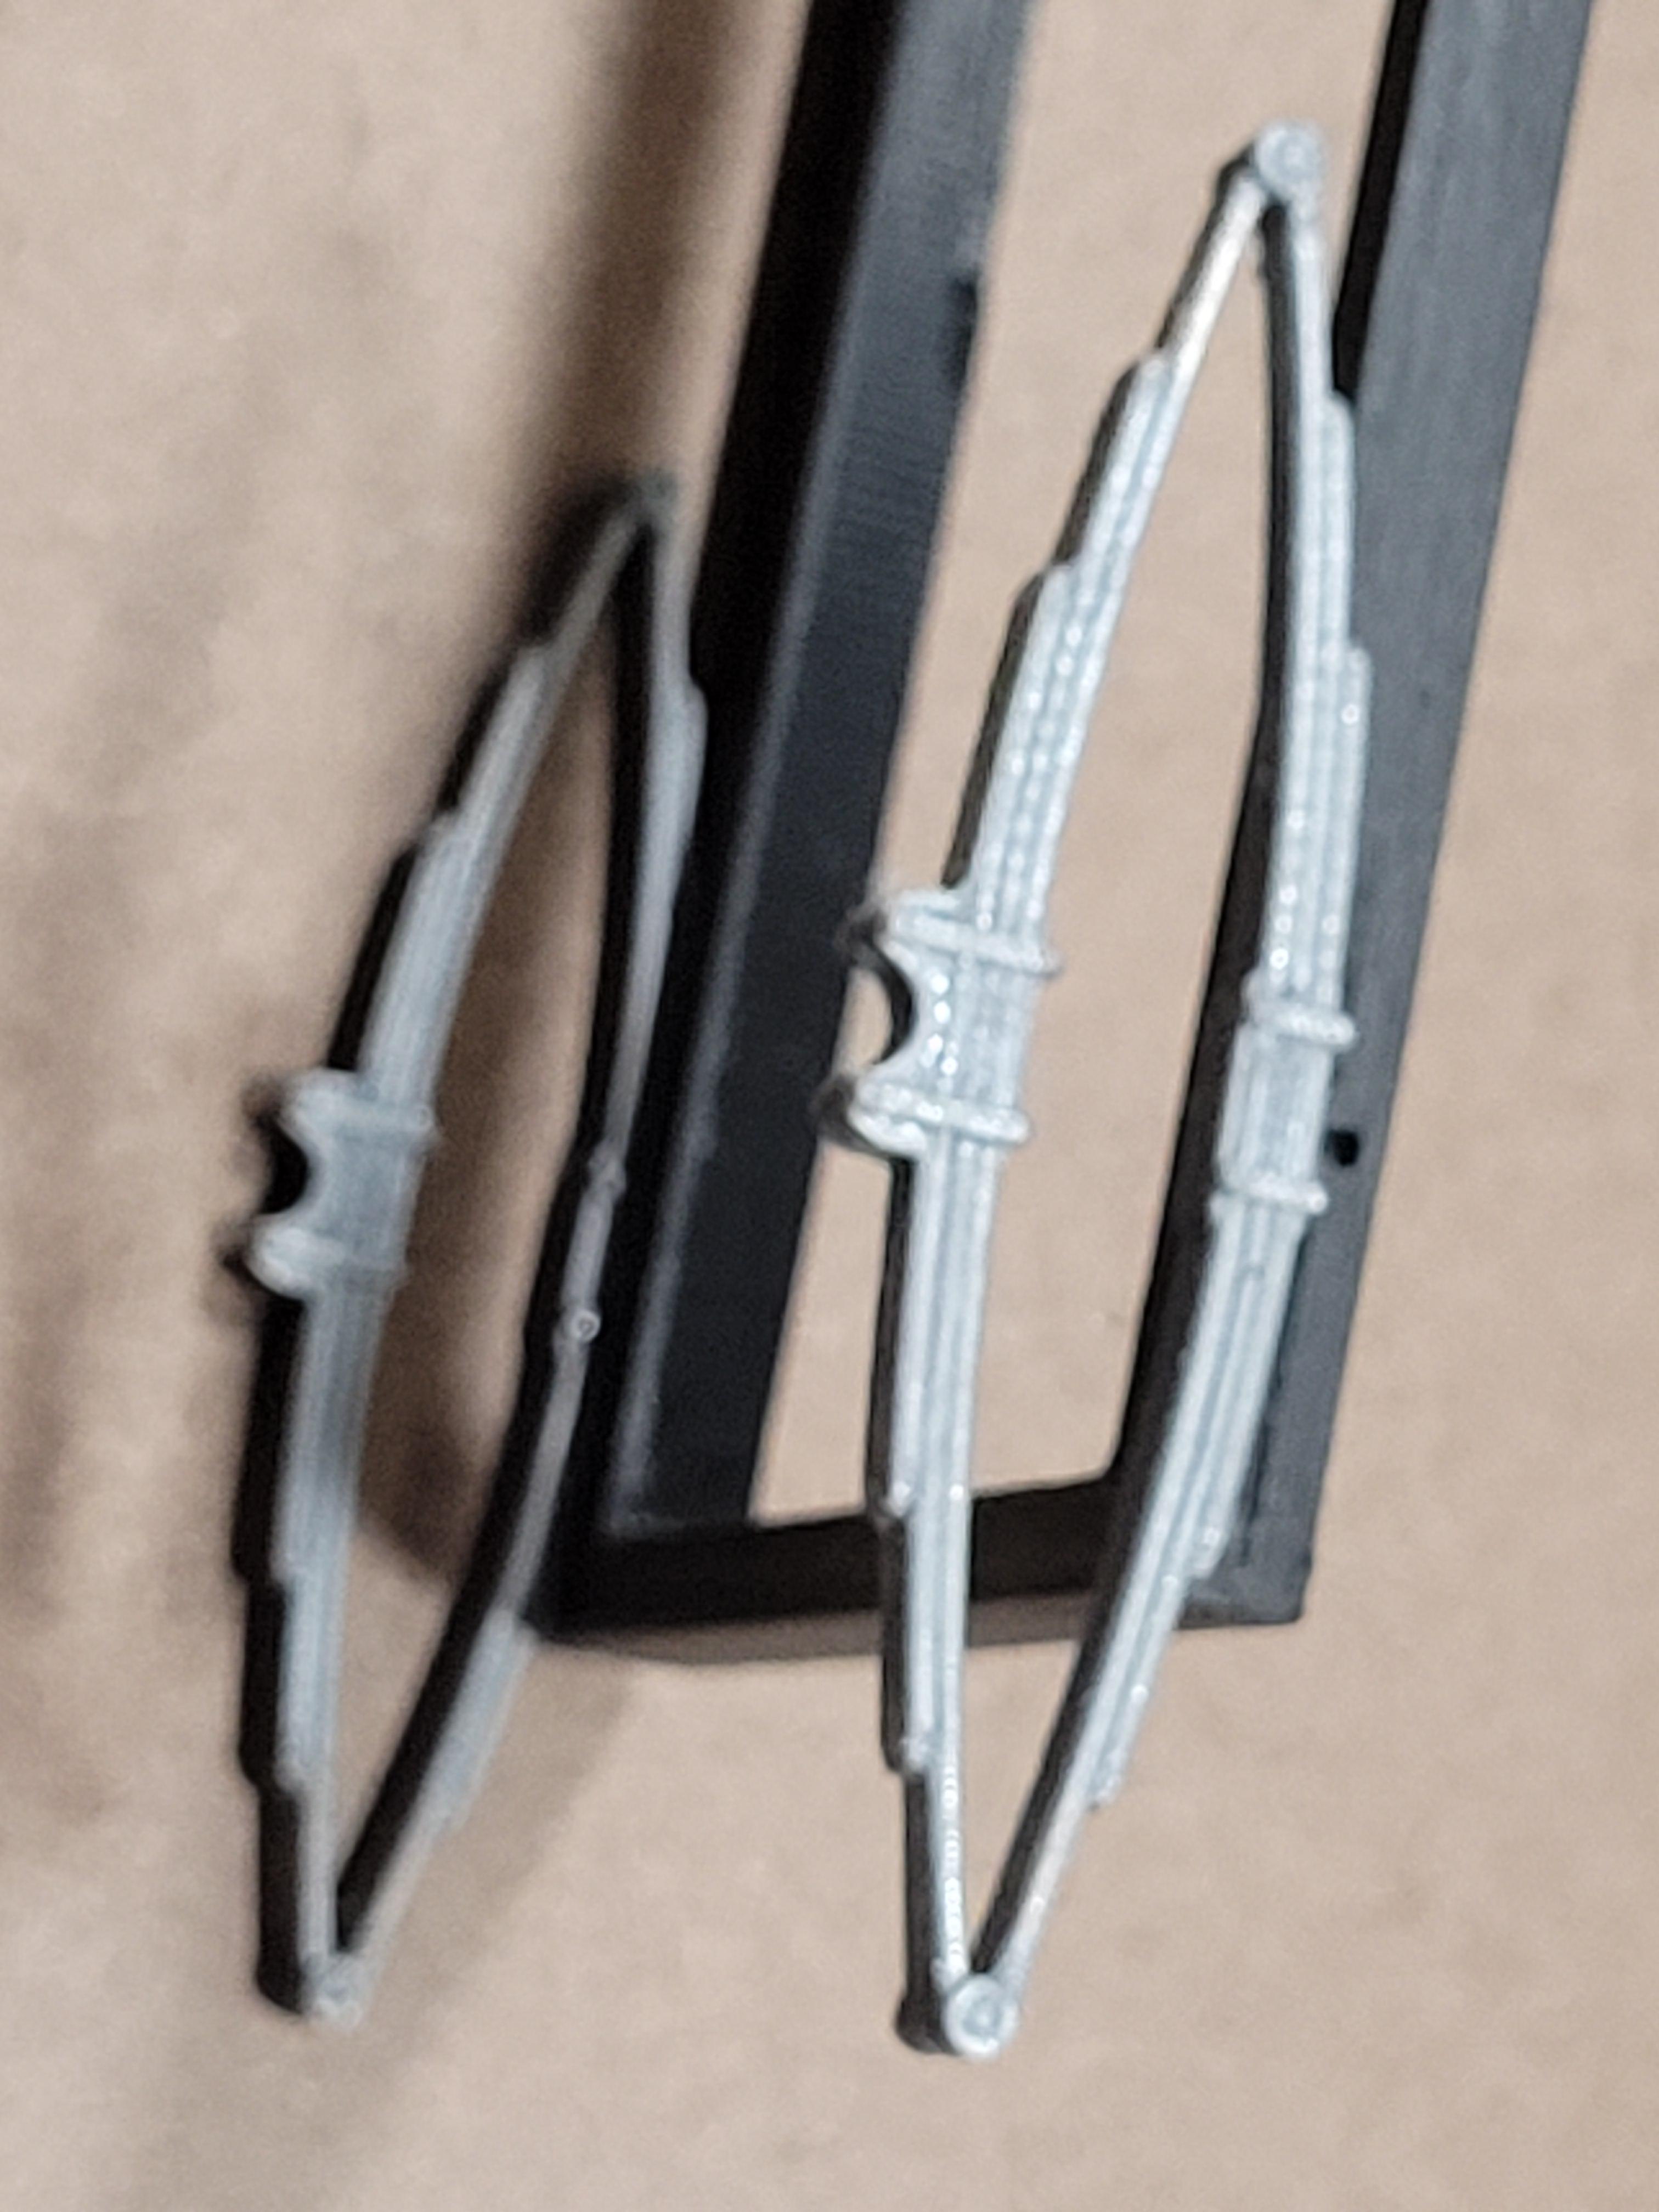
Here are the leather hold down straps and buckles. The brackets and straps on the sides of the seat are used to tie the top bows in the down position.
-
I just need to add the lights and top leather hold down straps, and she'll be ready for the display case.
-
The seat and top. One more coat of gloss black on the roof bows and seat bucket, and it's ready to be set on the body.